
cowie165
-
Posts
587 -
Joined
-
Last visited
Content Type
Profiles
Forums
Events
Gallery
Posts posted by cowie165
-
-
Sorry my post was muddled. Reading back on it now, it is pretty vague

I wish to paint a VF-1A in CF colours. Which paint colour should I use please?
-
nb. I apologise to anyone that read this thread looking to see a Hasegawa garage kit. I posted to help me vent a little eBay rage at people that BS in their ads.

Mark
-
I have Mr Color Tan, Radome and Rough Sand. They all seem pretty close but I was hoping for MWer opinion please.
maxwinamp recently completed a VF-1D using Orange and Radome - the VF-1D and CF colours are slightly different.
Any pointers would be appreciated! Thanks!
Mark
-
Hi Scott. Are you able to help with the F-14 decals please? I have the right kit (a better representation of an F-14D) but now looking for the Macross decals.
Otherwise, if anyone knows how to find one, please post here!

Mark
-
I'm considering placing a bid on this 1/71 kit, manufactured by some guys called Hasegawa in 1984.
Though the boxart does look familiar.
http://cgi.ebay.com/MACROSS-DYRL-VF-1S-Str...1QQcmdZViewItem

-
V-E had a different kit
Still looking

-
Kevin pm sent.
-
Any pointers appreciated.
Found one in HK but way too expensive.
Thanks guys!
-
Wow, thanks Dave. I am a big Yukikaze fan and have always regretting not seeing the Sylph walkthrough.
Cheers!
-
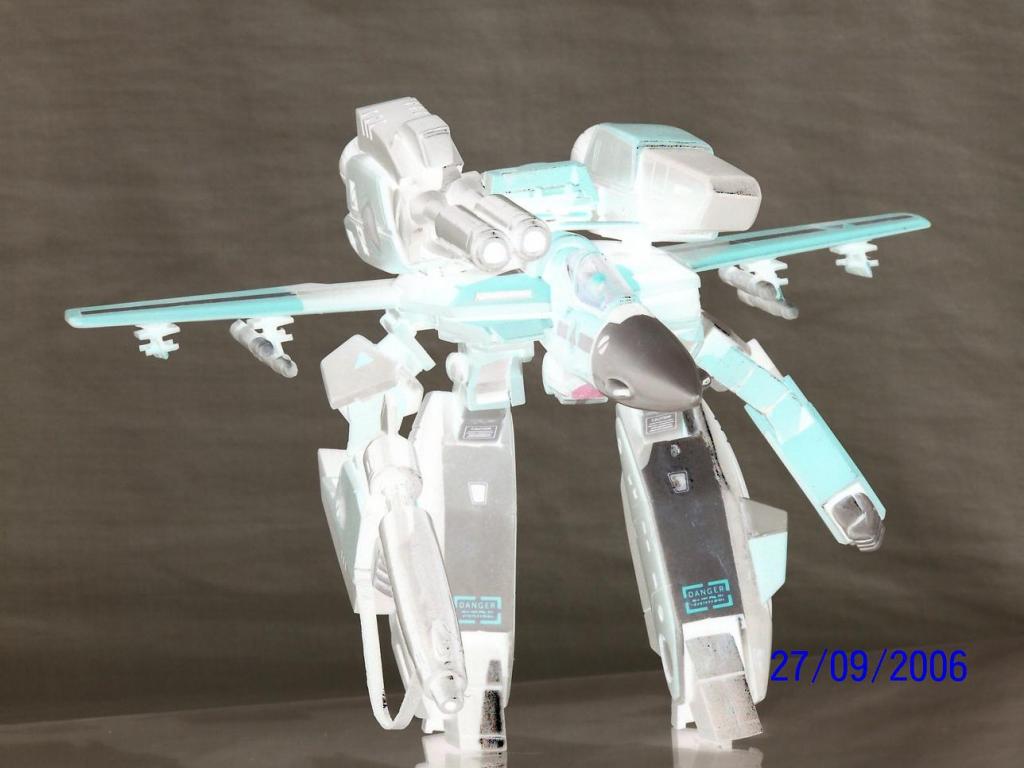
I found a few more pics that aren't too bad. I was trying out pastels for the first time. As I read later on, don't bother trying to apply over a gloss coat - matte all the way
By the way, for the guys that have this kit on the shelf, I highly recommend placing weighted legs onto your 'must do' list. The kit doesn't feel too much like a plastic model and is at absolutely no risk of toppling.
-
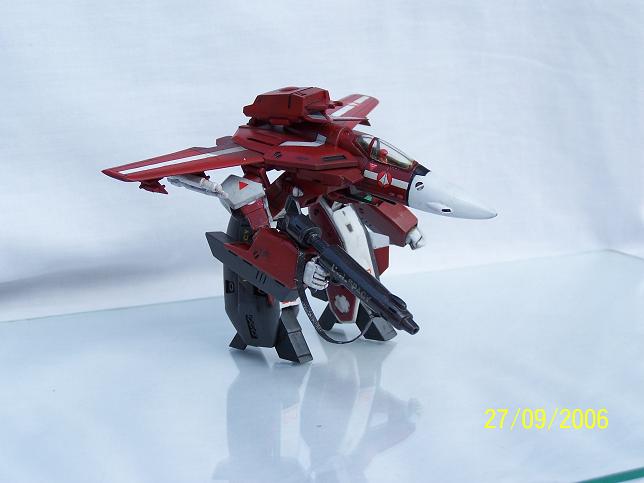
Thanks mojacko. All airbrushed
I avoid handpainting like the plague for everything except figures.The main colour is Tamiya acrylic X-7 Red over preshaded XF-63 German Grey. The colours used on the Bandai instructions seemed far too bright and would make it look very toy like. Same goes for the blue boosters and FAST pack. The boosters here are also XF-63.
The white strips are all painted (except for the cockpit side because I forgot about it...) rather than decal, with the SDF/Macross roundel cut out from the decal sheet.
You know, a matching Max gerwalk would be very cool. Cheers for the suggestion!
-
I must say, you got yourself a nice model and avatar.
ChaosWarrior
Thanks CW!
As an aside, I played GW tabletop for quite a few years!
Or is your avatar from the Hero Quest board game? -
Guys thank you all very much for the kind words. The kit looks nice on the shelf but the pics almost made me not put it on MW
I'd love to see more guys have a crack at the old Bandai kits. I'll keep practicing on them before I move onto the Hase stuff in the closet.
Berttt thanks for your post. I've seen your 1/72 work so your praise means a great deal, cheers.
Once I finish off the Nissan Silvia I'm working on, I'm planning to have a go at the Imai 1/100 VF-1D and CF fighter kits.
Mark
PS Any guesses at a good paint colour for the CF? I have H346 (Rough Sand) and it looks close, but wondering if any other paints were better suited?
-
ps: I finally have an avatar
-
Cool, my first Macross kit is in the can.
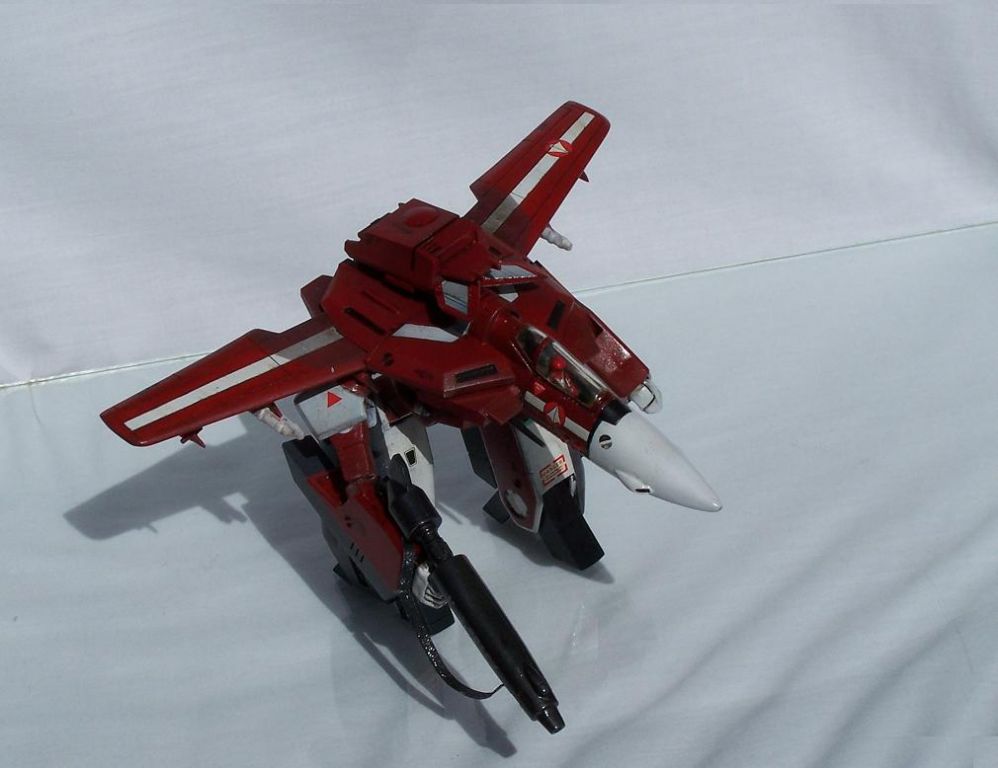
Also first time taking pics in direct sunlight - it is unforgiving (*cough* still visible seam line on left forearm *cough*)! Kinda bummed it makes the matte appear satin, I'll have to work on photography as I go. I felt the paintwork turned out alright but you can clearly make out spot like along the cockpit where the BMF masking didn't come away as nicely as hoped.
The changes were to splay the legs, rework the bicep joints, reshape right hand to grasp the weapon, fit seatbelts and rifle sling and move the ejection seat forward as mentioned earlier.
Boy o boy there is a lot of masking to do for this kit. I went a bit bezerk with weathering as I was trying chalk and other washes for the first time (I usually built 1/24 cars which are all high gloss weathering-free!). I like the end result as I tried to simulate a bit of battle damage here and there, using needle files, corrosive glues, and pastels. I like the difference between the UN SPACY rifle decal in the post near the top versus how it turned out in the end. I faded it and chipped at the decal with an exacto.
I tried to colour the cockpit a slight gold hue. In the flesh, it looks reasonable, but it isn't quite strong (dark) enough and without the coat of future it makes the plastic seem like it was made in 1982. The rifle, tip of the booster cannon, and booster exhaust flanges are still gloss. I don't know if I'll leave them that way, but I wanted to see what it looked like. I left a few missles off the rails as though it was in the middle of something, rather than on its way to fight. I assumed the outboard weapons would be fired first. *shrug*
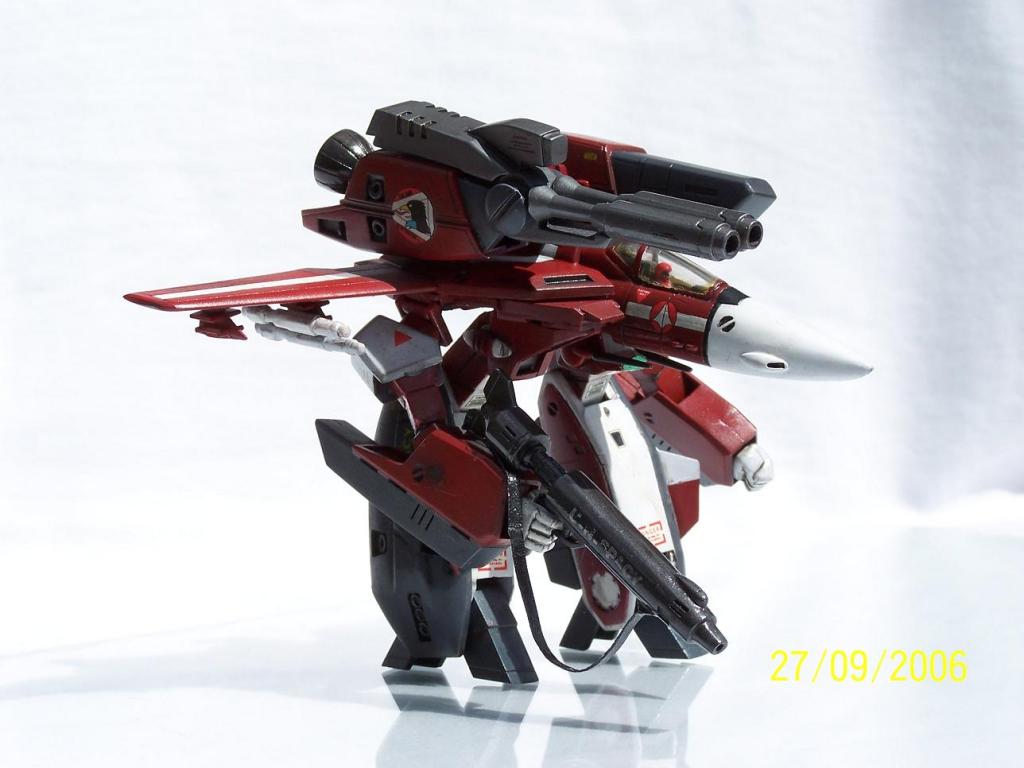
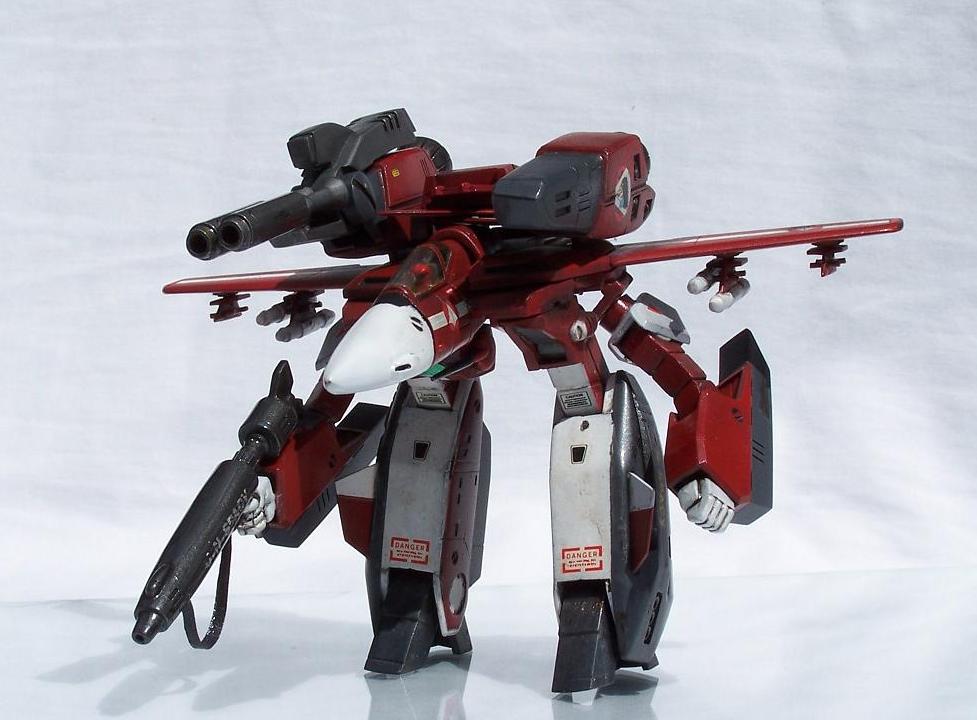
All in all, I'm pleased with the finished kit. I was able to try new techniques and finally have a Macross kit on the shelf. I'd say the kit is an intermediate level, based on the instructions being almost useless and the amount of dry-fitting and planning you have to do. I would recommend it as I like the proportions of the gerwalk but you'll need to be patient with it.

And hey thanks for taking a look, please hit me up with ways I can make it better next time. Honneamise I tried to tidy up the intake/hip joint as best I could, but ran out of patience and pressed on
I put the last pic in just because it looks neat - kinda like a CGI VF-1, but also because you can see the splayed legs a little better.Disclaimer: For the rivet counters out there, I wasn't too stressed over making it match DYRL. The Bandai decal instructions were horrible. There were decals that weren't used and others that I needed but were absent, so I kinda guessed here and there using other references. If it makes you wince, I apologise
-
You and me both bubba.
Is that from a sci-fi show or just a freehand scratchbuild?
-
Thanks Hurin!
-
My 2c are that it's the feet covers (whatever you want to call them) that puts the nail in the Gundam coffin.
But thumbsup to Hase for pressing on with Macross
-
Bump. Any info appreciated.
-
Is there anywhere this DVD is still available? Valk-exchange has gone and yesasia advises the item is out of print.
Any pointers please guys?
-
It's a replica of Boba Fetts Blaster From Empire, it's a resin casting of a 1916 Webley Flare gun, a sink tube (the original was a camera flash tube but i did not want to spend the $), and a 4x15 Walmart scope, i custom built the scope mount and added 6 plug mosely connectors for the greeblies. Still need to get a couple of other greeblies when i get a chance to make it "complete"
mike
Awesome, thanks!
-
Mike what is the weapon mounted on the wall? It looks like a revolver with a low power scope, barrel extension and detachable butt? At first glance I thought it was some kind of blowdart/airgun??
Sorry it's OT but I'm intruiged. Cheers!
-
Any updates JFG? Looks great so far.
-
Thanks mate! Sounds like a plan. I'm still envious of your VF-1 with the boosters from CA.
It looks awesome.And I'm sorry I haven't replied to your email yet. The two spares are both Quiltra-Queleual.
Hase Low Vis Decal scan needed
in Model kits
Posted
Scott thank you very much! It is appreciated!