

DrunkenMaster2
-
Posts
237 -
Joined
-
Last visited
Content Type
Profiles
Forums
Events
Gallery
Posts posted by DrunkenMaster2
-
-
I like to see a VF-17Nightmare, YF-19 Battroid, and VF-11 Thunderbolt III
-
that really turned out well, very clean! if you can, I would suggest doing something with the base, the plain wood looks a little too plain for such a dynamic model. Perhaps you can cut some styrene into squares and make a hull? or even a high-gloss black paint would look good as well. If your feeling rather ambitious you can try to recunstruct a lunar landscape, complete w/ small craters and debris.
One last suggestion would be to angle the rod. A straiht verticle rid gives no "motion" to your art, for example, in the y-wing dio I recently completed I mounted the y's on slanted acrylic rod, this gave the impression of motion, and movement, perhaps something like that could help here. The model looks great, my only cratique is the base, other than that, well done!!
Ashton
y-wing photo for reference
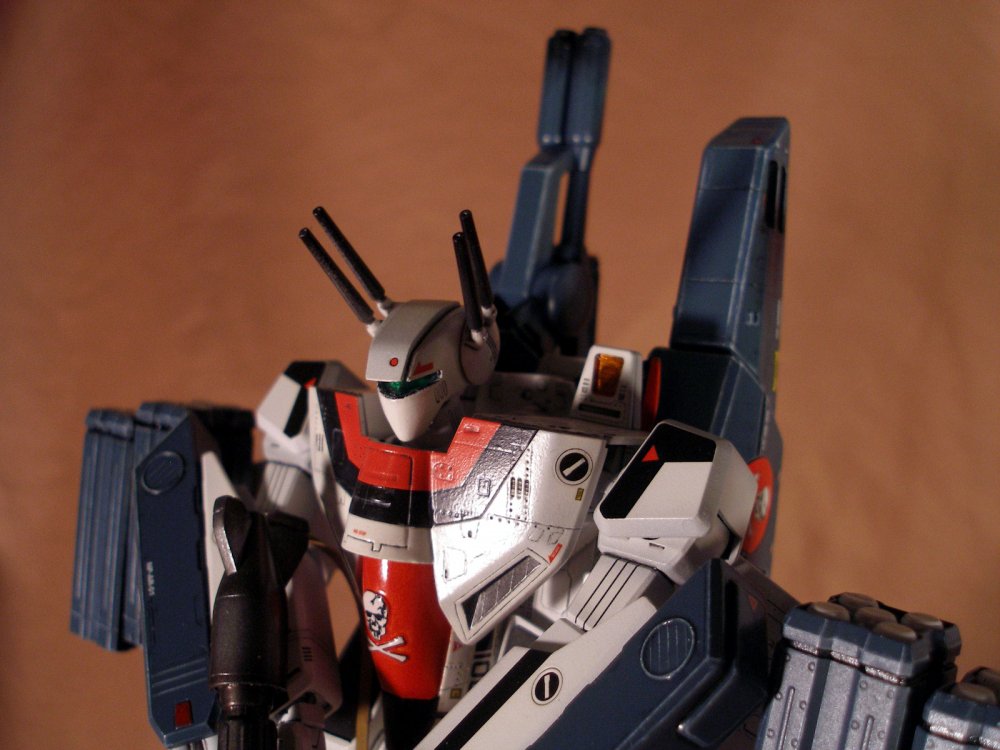
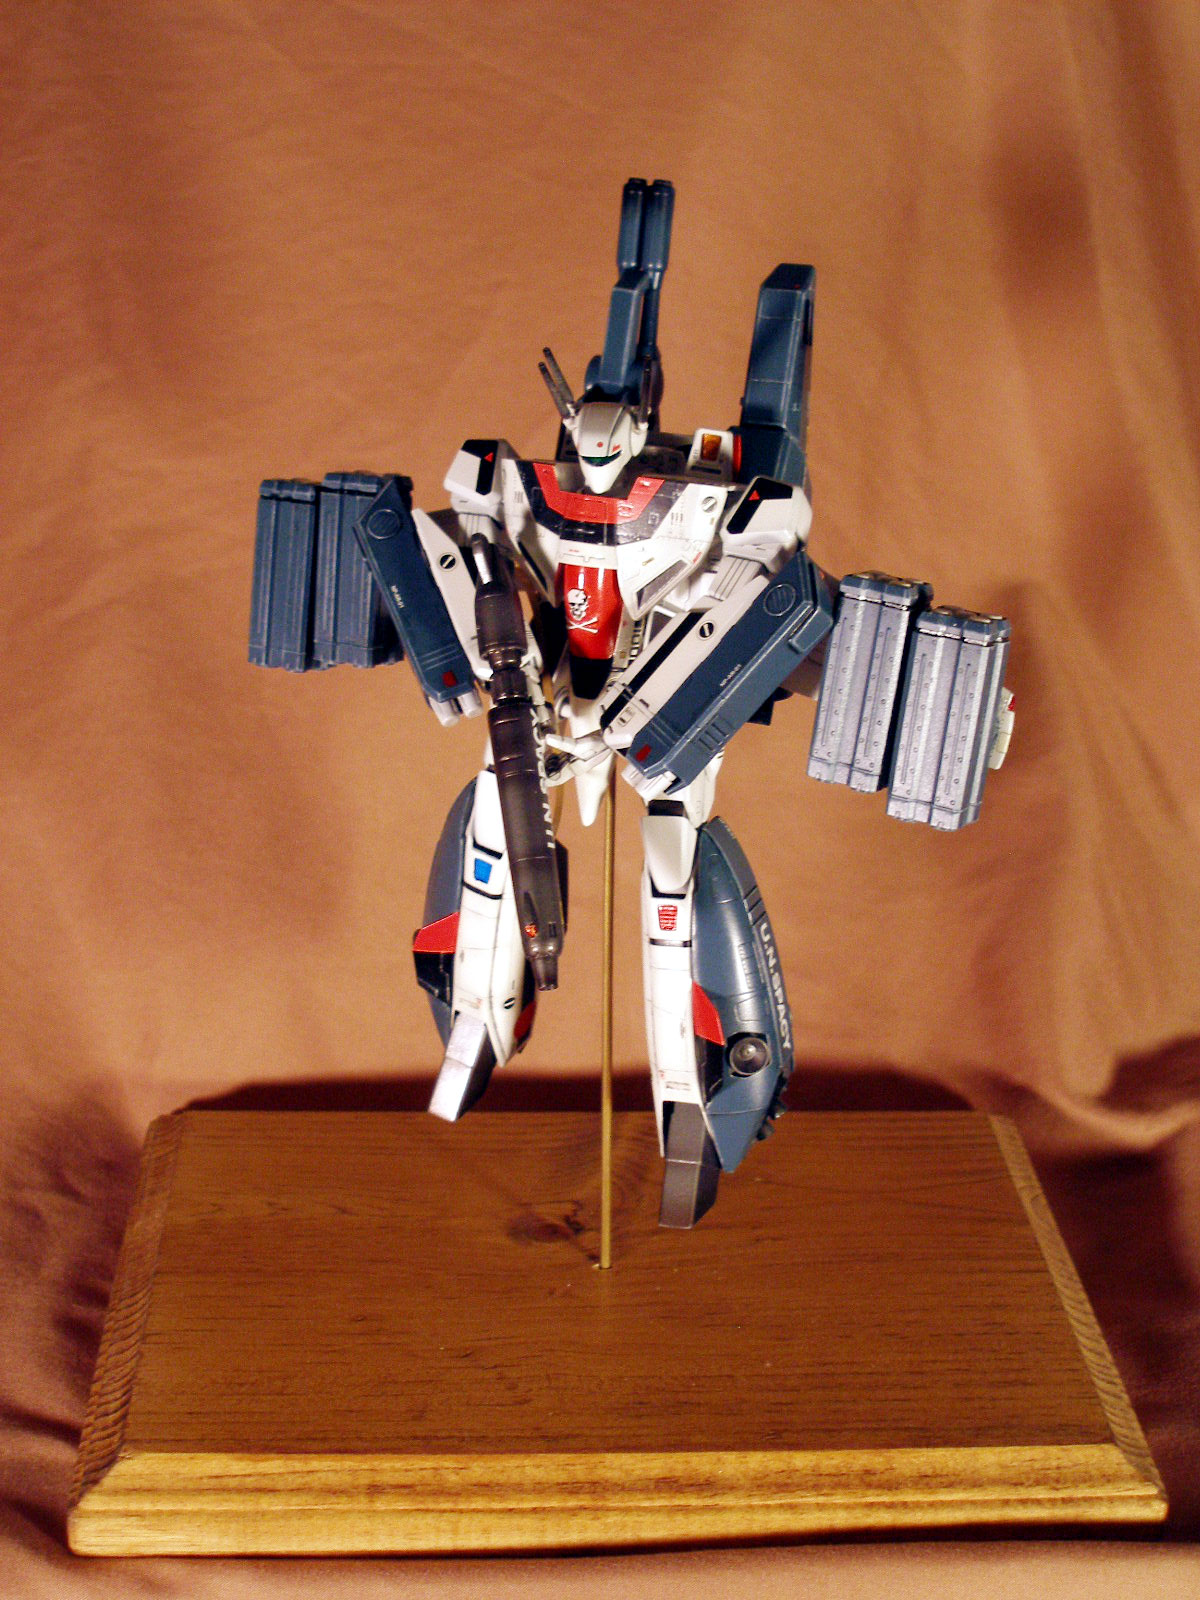
Yeah the more I look at the battroid he looks like he's floating, need to make a cool action pose. Thanks for the suggestions! I thought about painting the base black to look like space. Have to play around with ideas.
-
Here are the photos hope you enjoy the step-by-step!! Great kit to put together!!


-
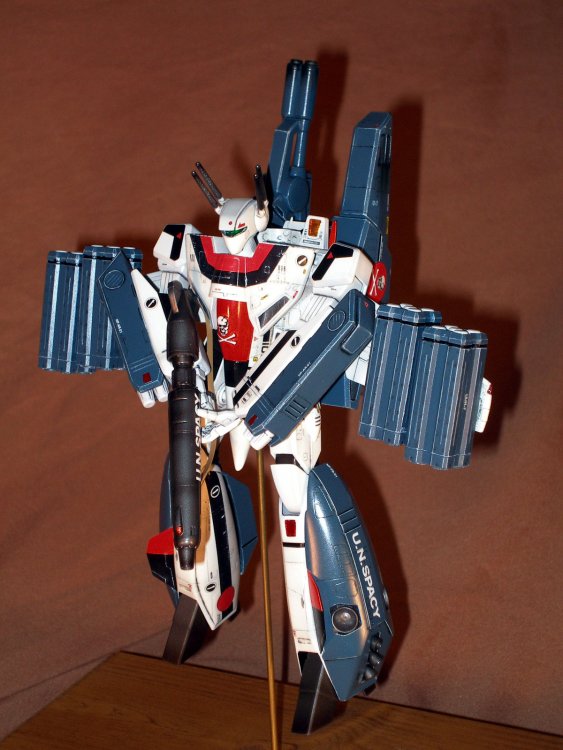
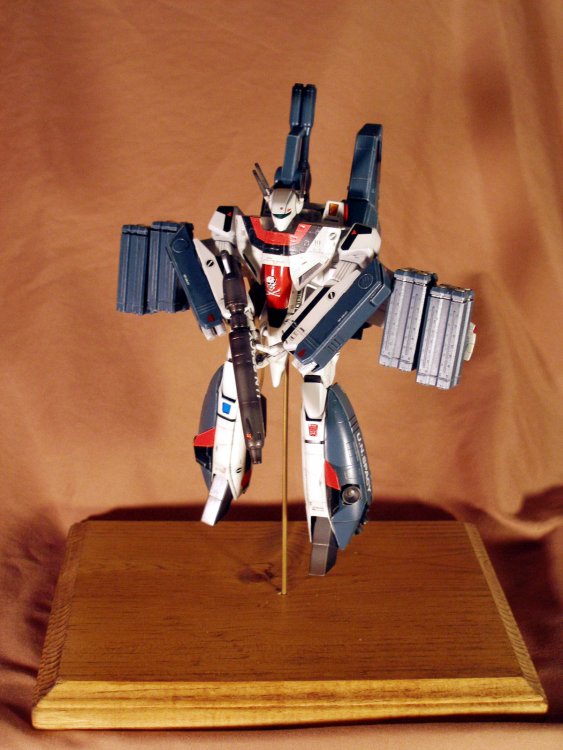
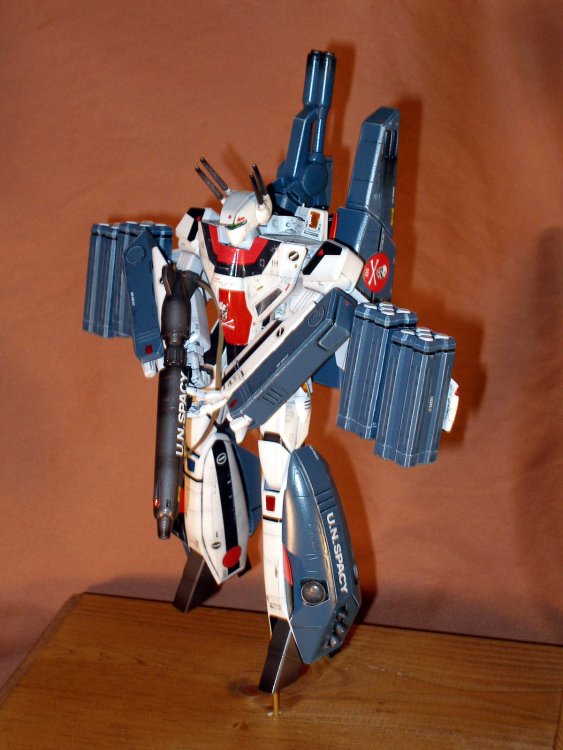
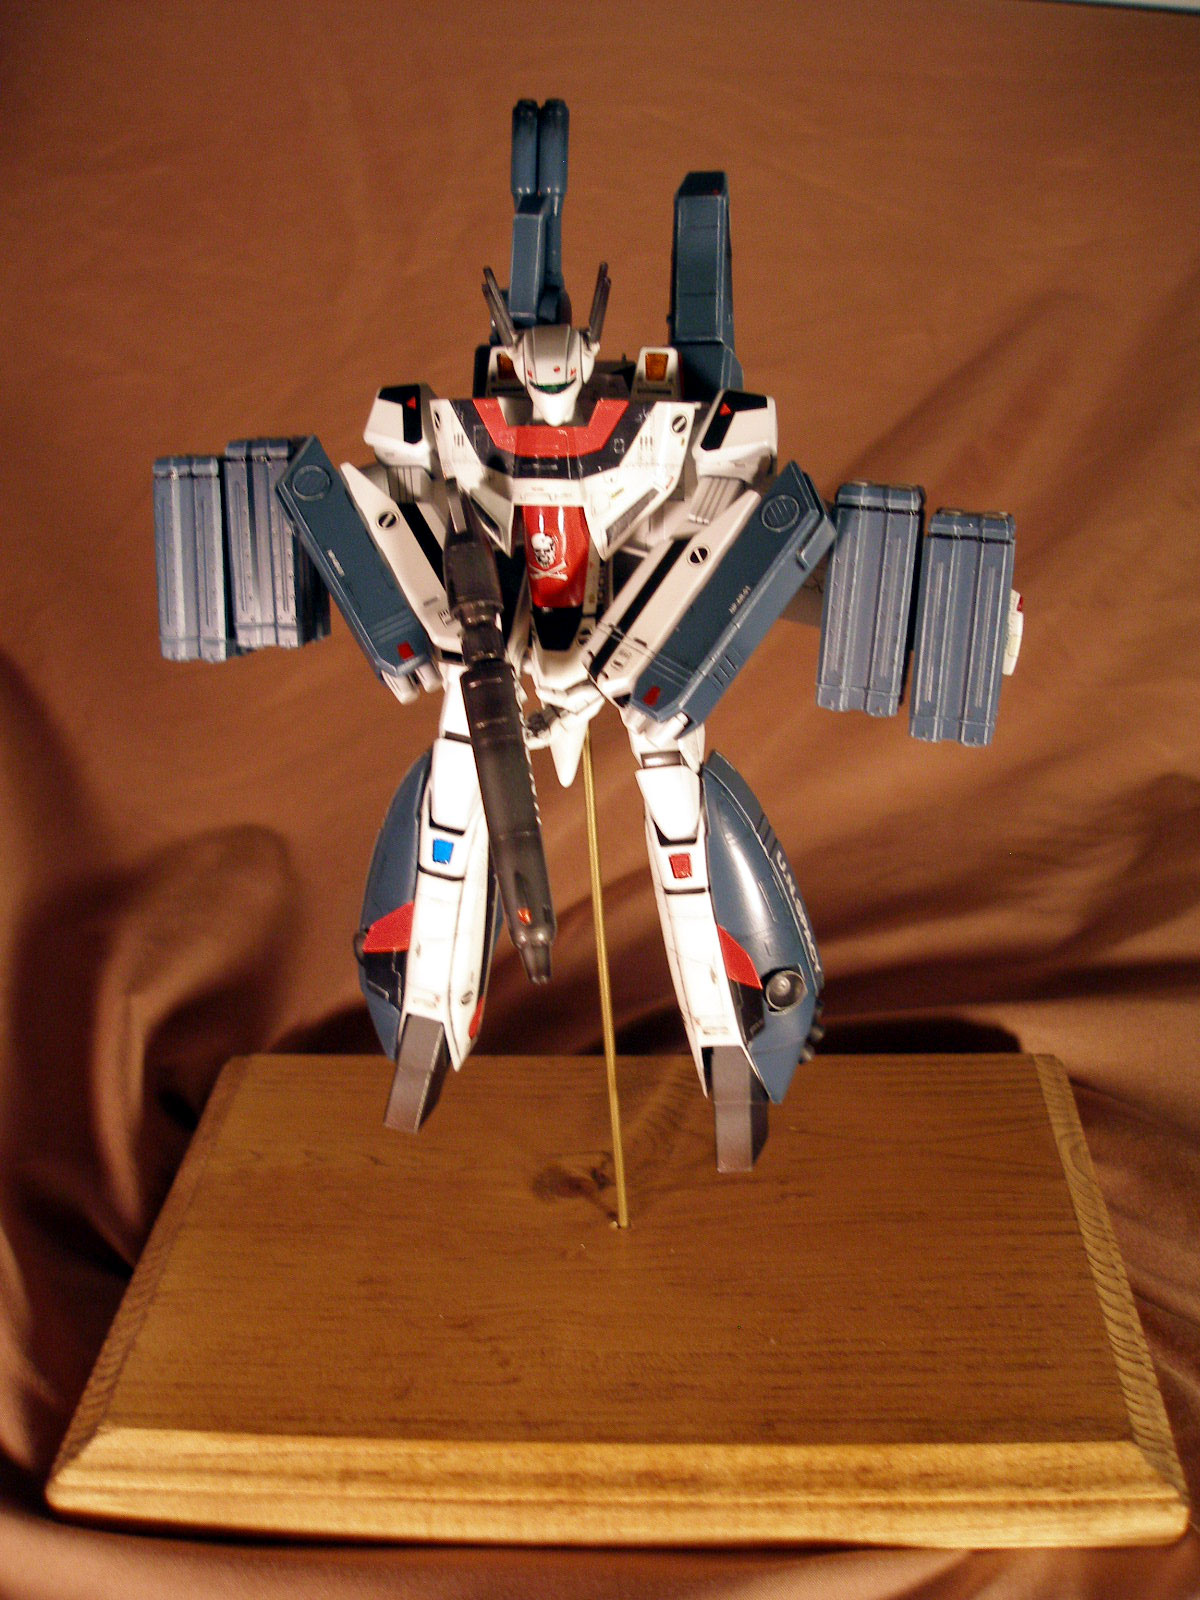
Finally Finished!!!! More pics on the way soon. Went with a square base instead circle, found one at Micheals arts and crafts store, really cheap ($1.25)!!!

-
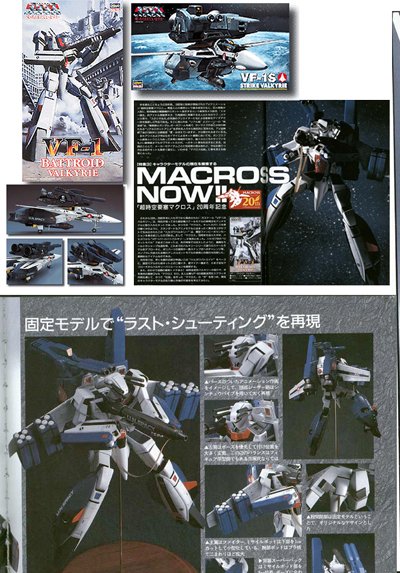
Just wondering what are the difference between Bandai and Hasegawa Macross 1/72 kits? Are those like ancient? How's the quality and poseablility?
Oh and does anyone have either for sale? Looking for mainly Strike/ super Valks (not fighter, unless transformable) and YF-21 fighter also.
Thanks
Go with the Hasegawa kits, if your going to build a YF-21 follow along with wm cheng step-by-step, he did an AWESOME job with that kit!!
YF-21: http://www.macrossworld.com/mwf/index.php?...f=23&t=1457
-
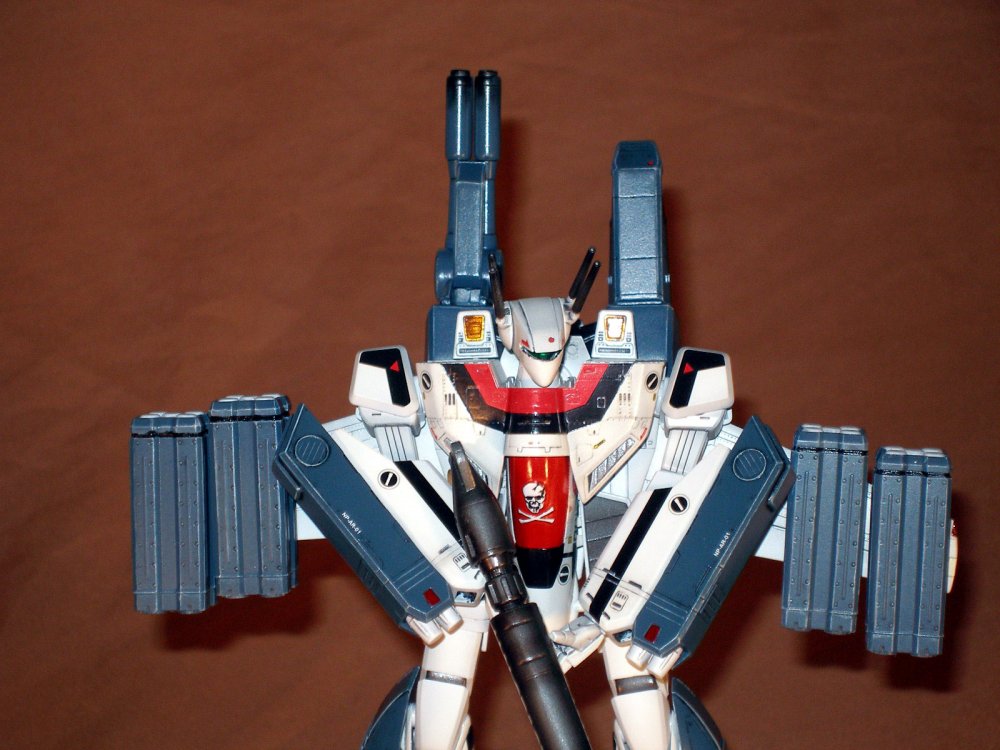
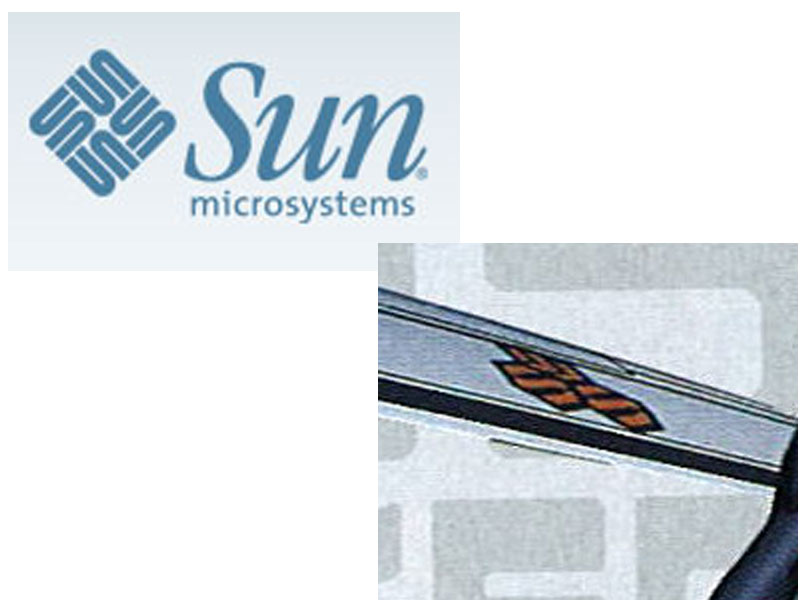
So that's what SMS means! Sun Micro Systems!
Weird sponsor for an anime.

LOL!! No that "SMS" just reminds me of that companys logo.
-
That "SMS" reminds me of this logo.

-
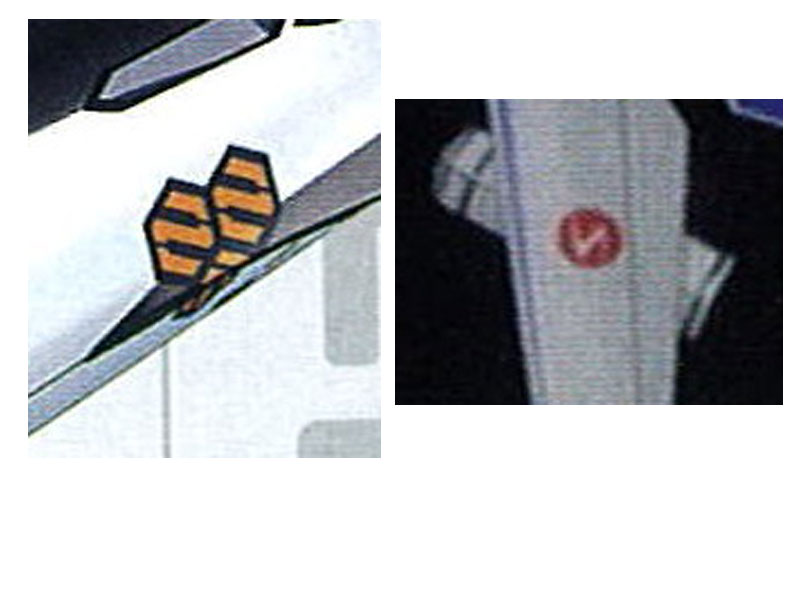
On the wing of the Hikaru DYRL colored VF-25, it looks like 'SMS-007'.
And on the wing of the grey VF-25, it looks like 'SMS-001'.
Graham
I agree it says "SMS", now what does it mean?
-
Looks like it's SWS to me.

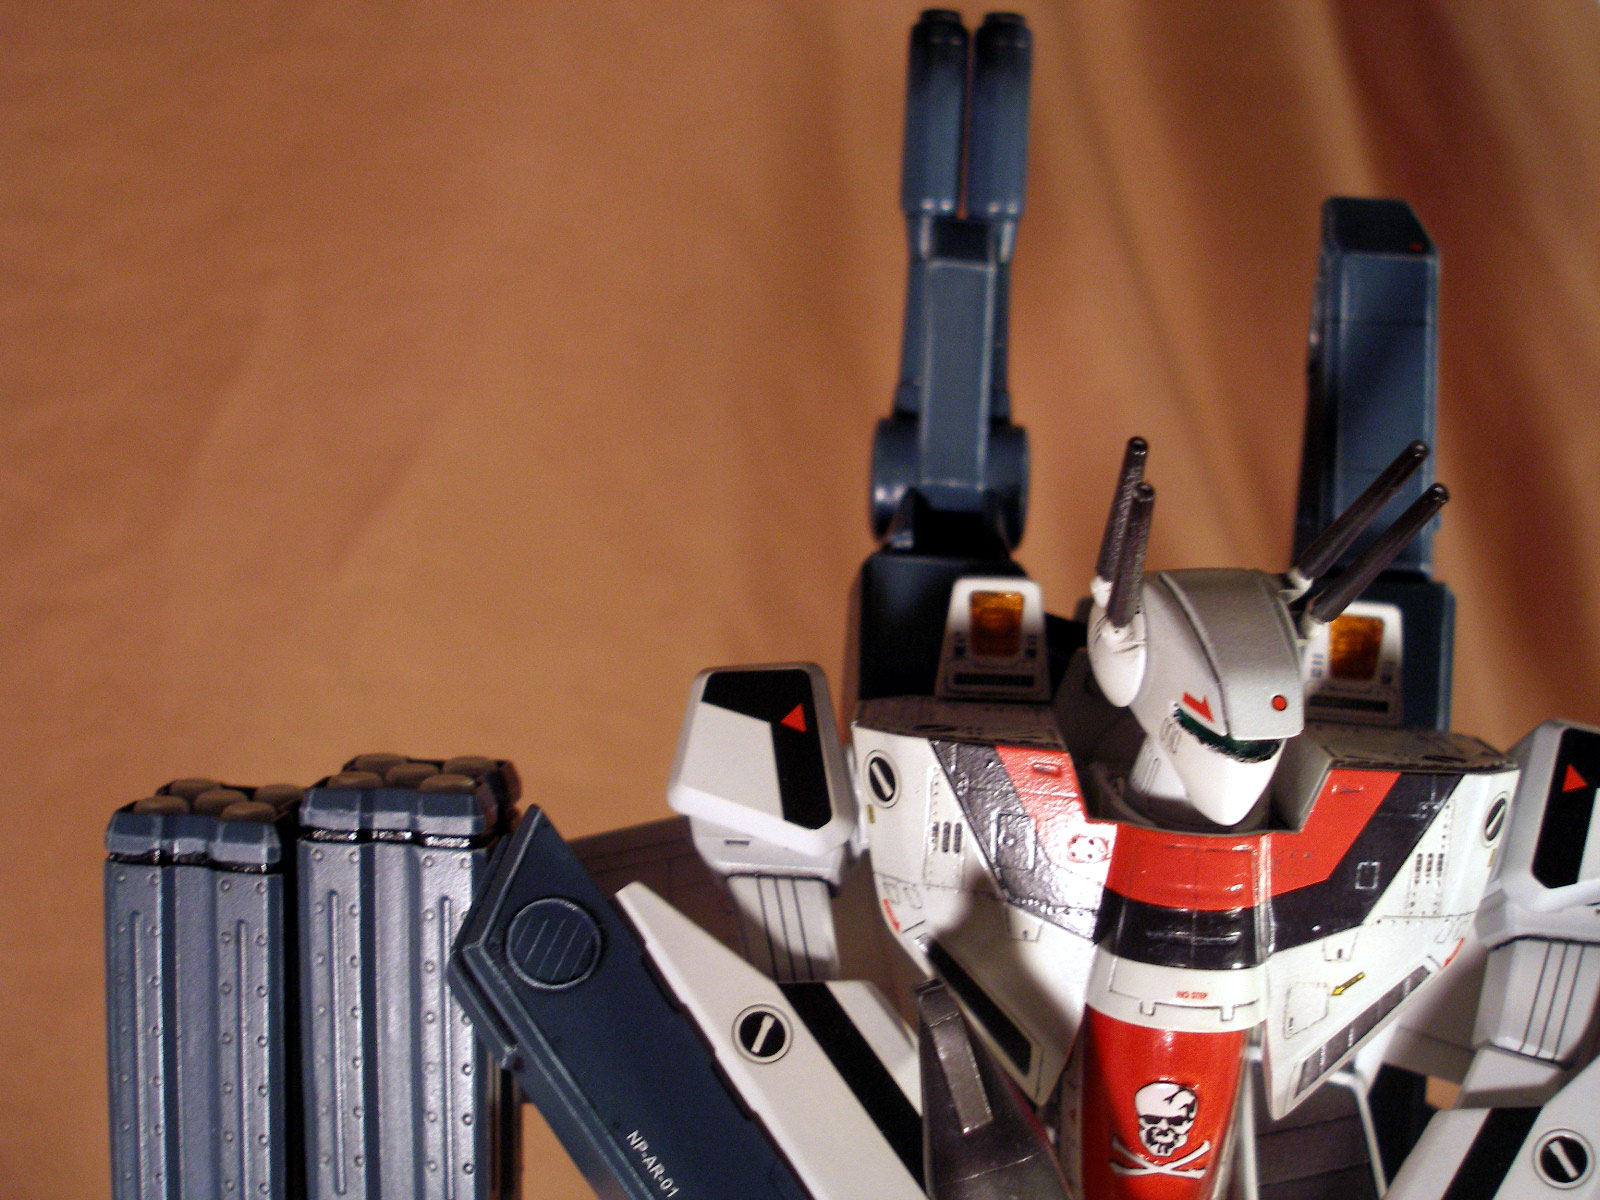
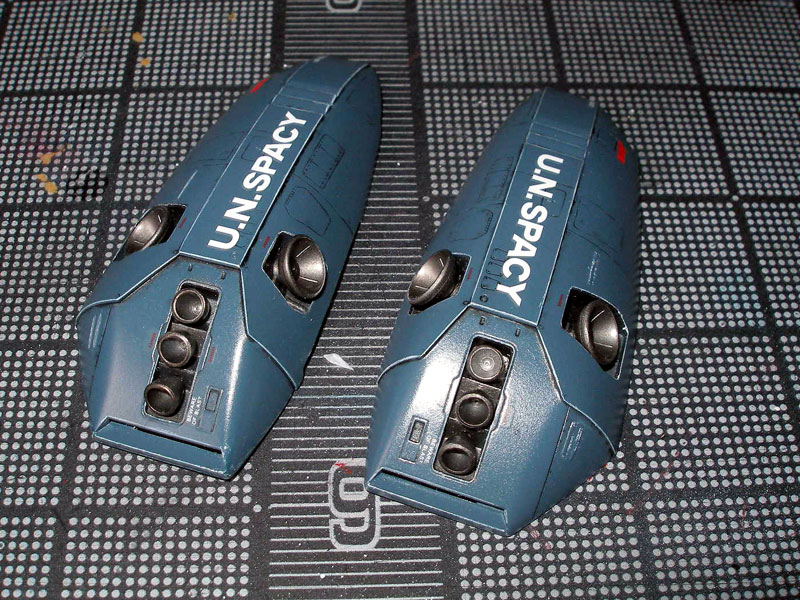
Your right I didn't see that "SMS" on the battroid. So I take it the red circle might be the new "UN SPACY" logo.
-
Then more I look at the logos, looks like there's two of them. The yellow one looks like "UN" connected to each other kind of a weird "UN". Well the red circle has a "S" so I guess that's "Spacy". So it looks like they might have change or updated there logo.

-
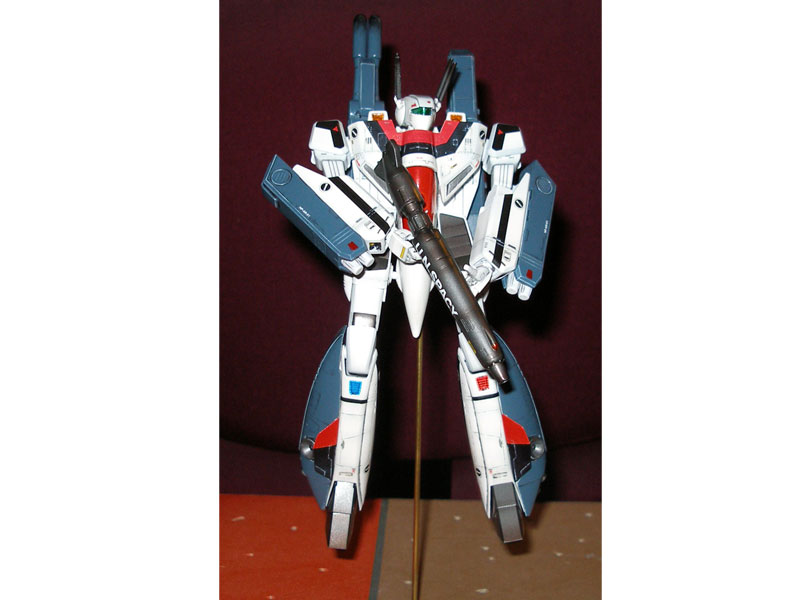
looks fantastic...wonder if you can pose it like this
I thought about making my battroid like that, but after I study it, I found that the shoulder just didn't look right. This is the picture I use to study the valkyrie.
It's still an awesome job whoever did it.
So after studying that guy valkyrie which is awesome, I decided to do this version, still a cool pose.
-
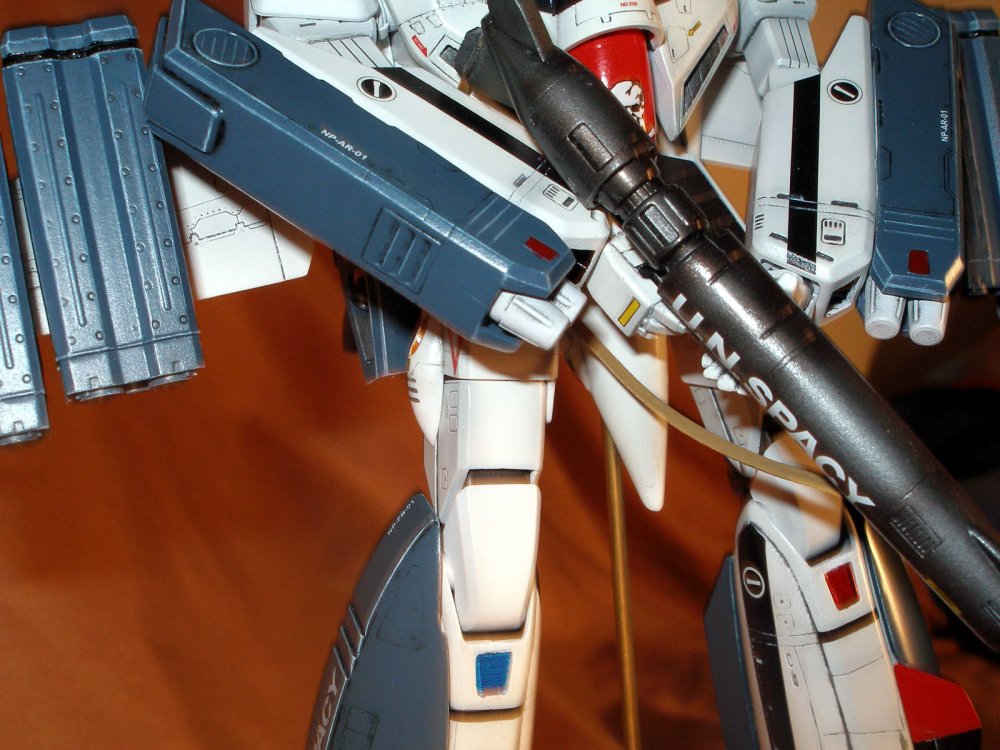
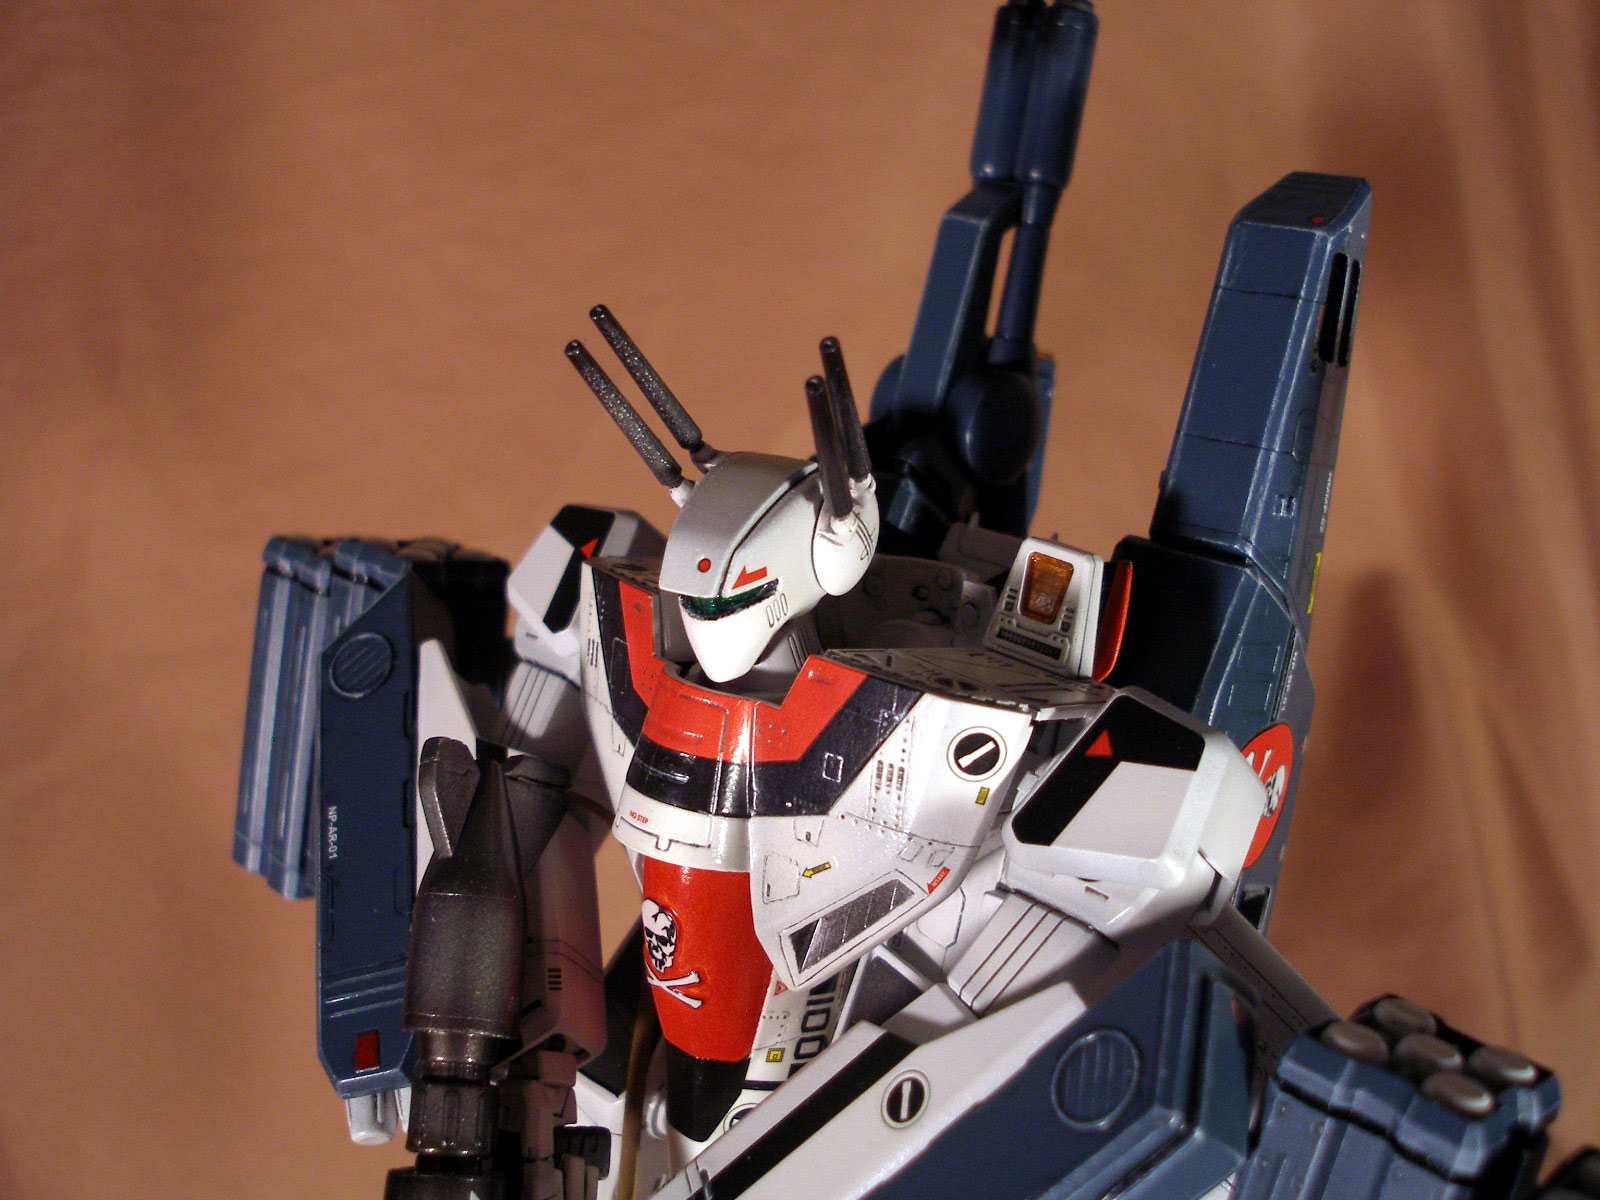
Since I cut off the support on the arm armor I had to use styrene to attach it. Now the arm looks like the movie.


I couldn't wait I put it together to see what it will look like, I haven't put on the wings or missle pods on yet. I still need to find a base, I'm looking for a wooden circle base. I like how it came out
!!!!!!
-
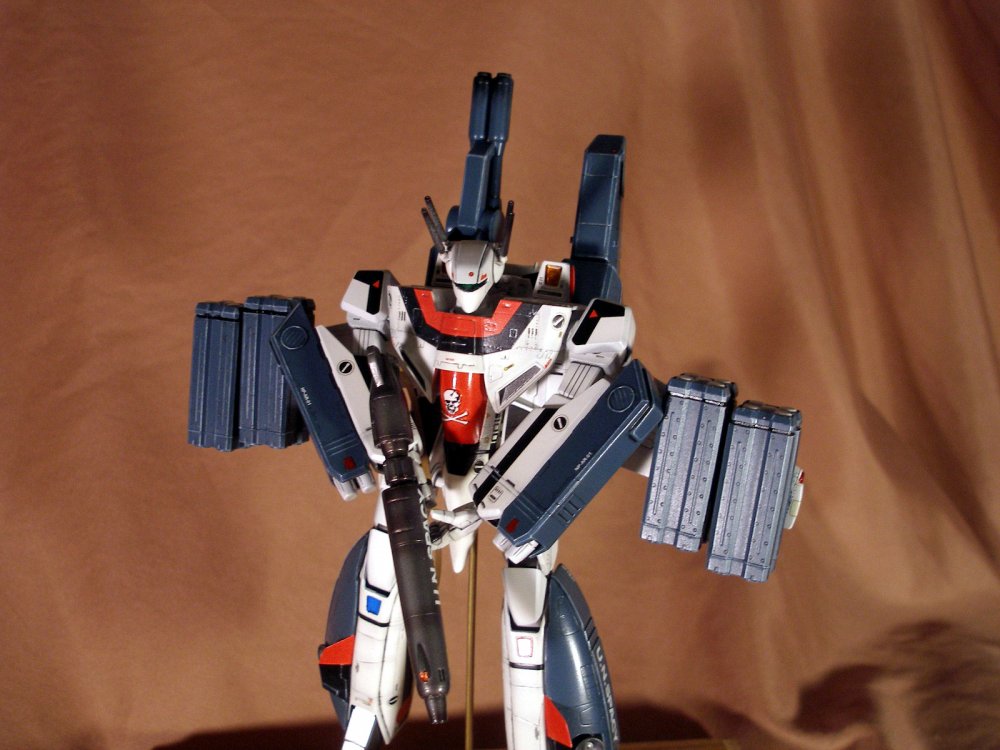
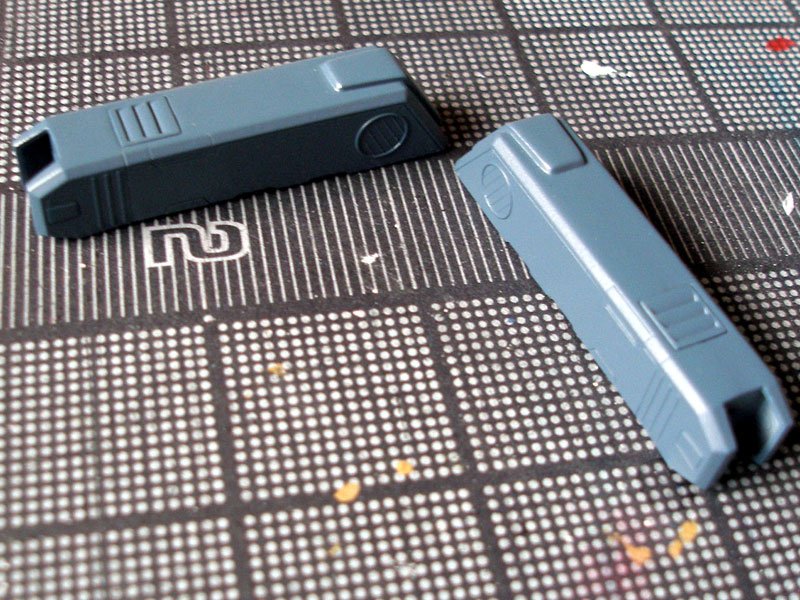
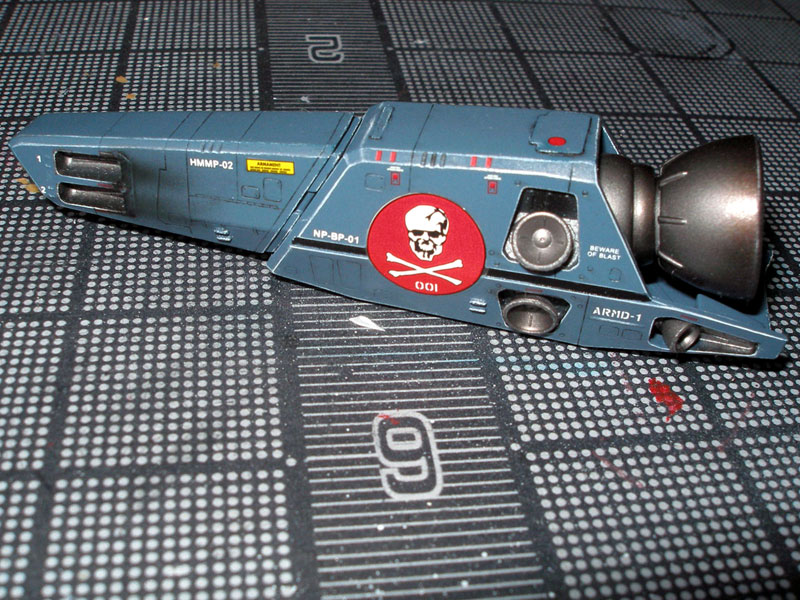
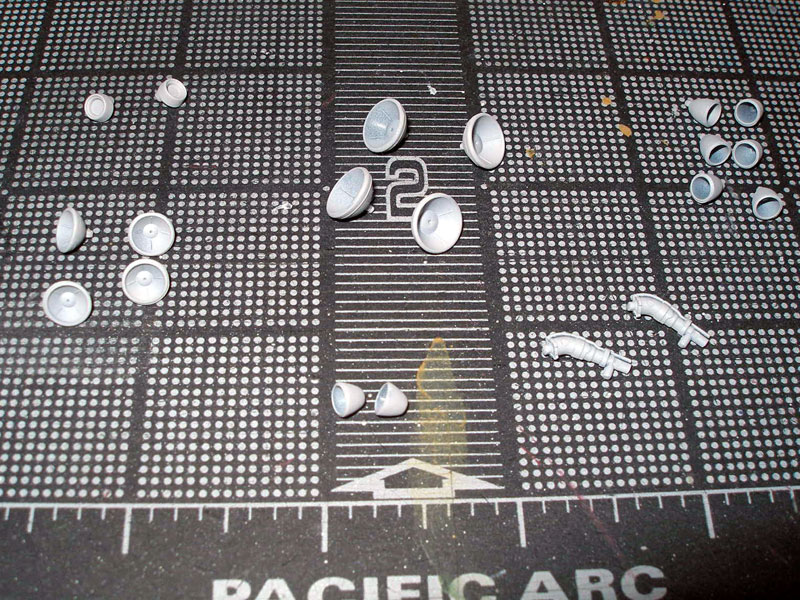
Ok finish the decals on the strike pack. All I have left is to panel the "UN Spacy" logo. Only thing I don't like the skull and white text, it's too bright, I'm thinking should I airbrush a very light coat of "smoke" over them? Any suggestion?


-
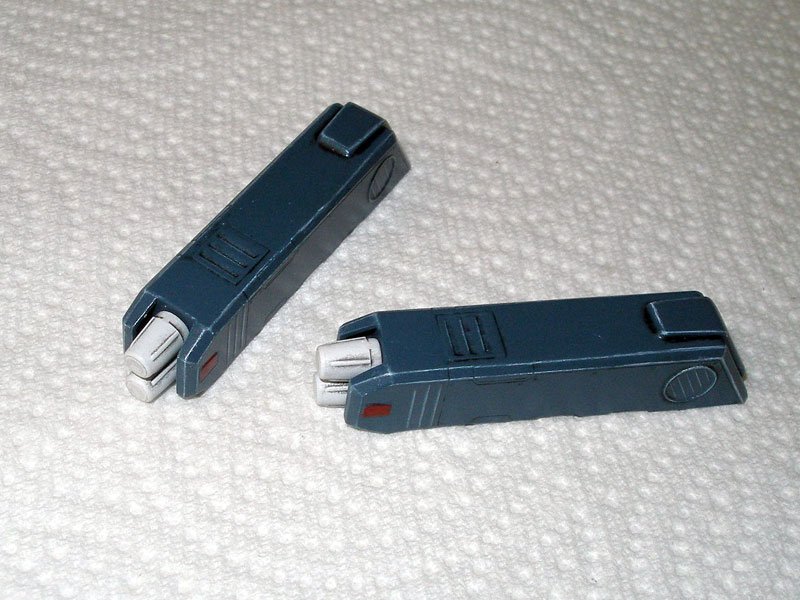
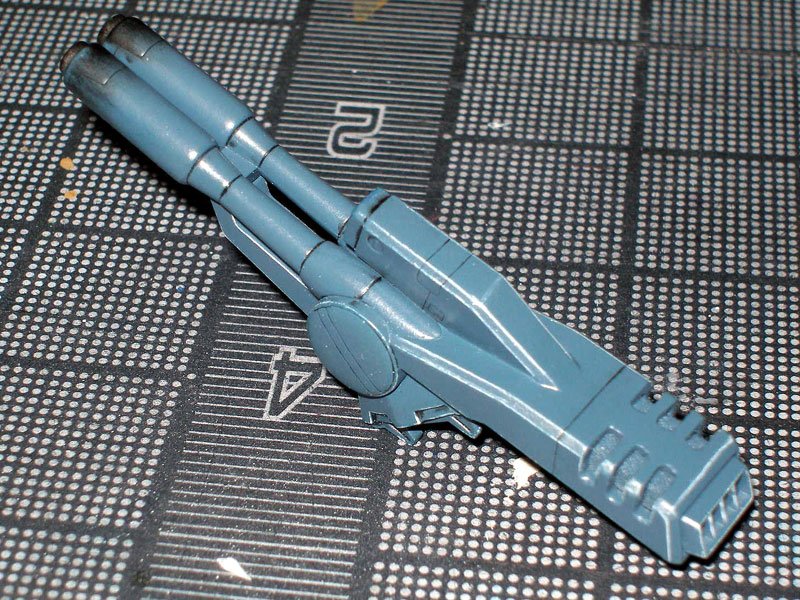
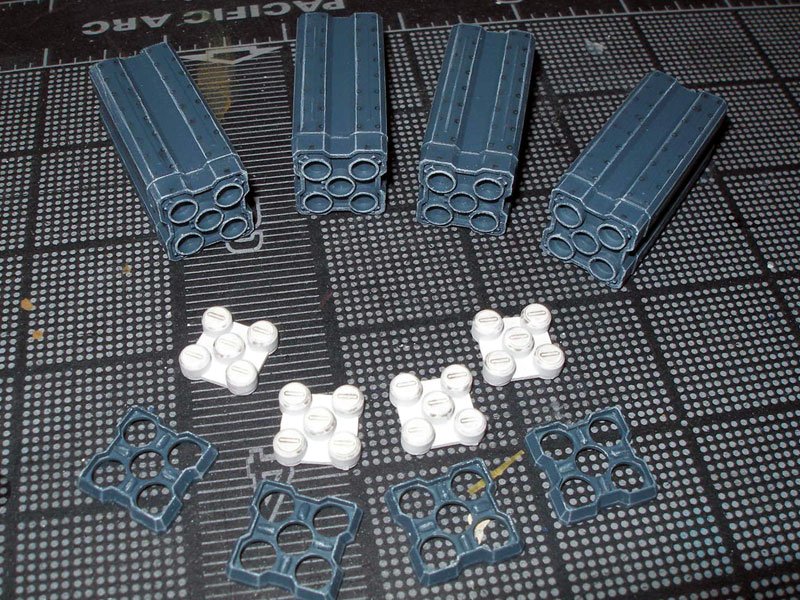
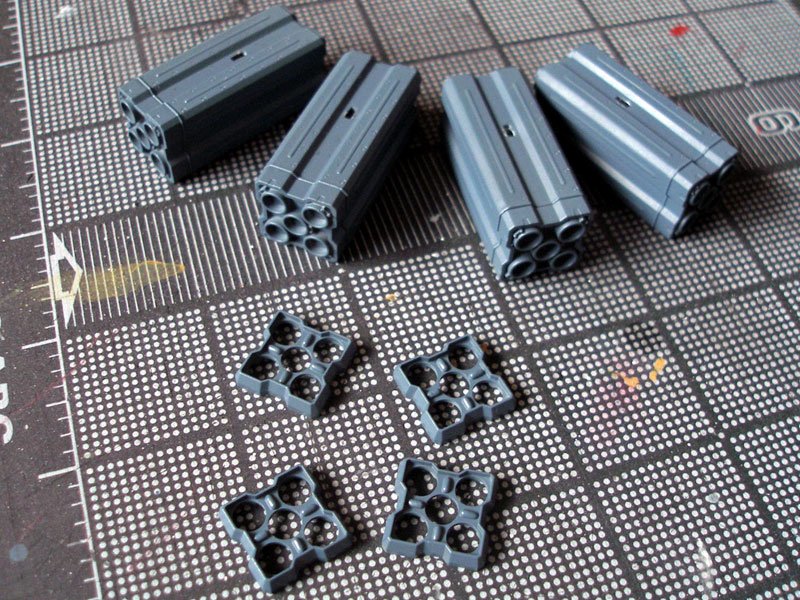
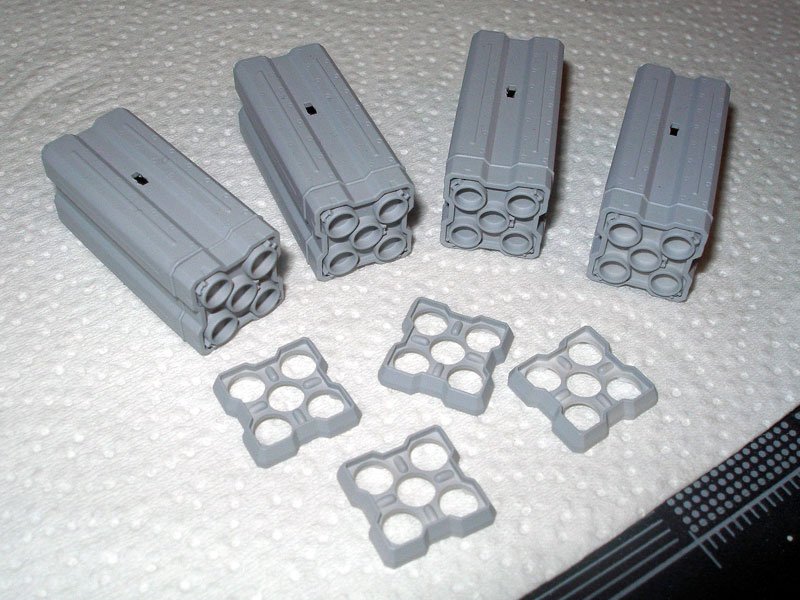
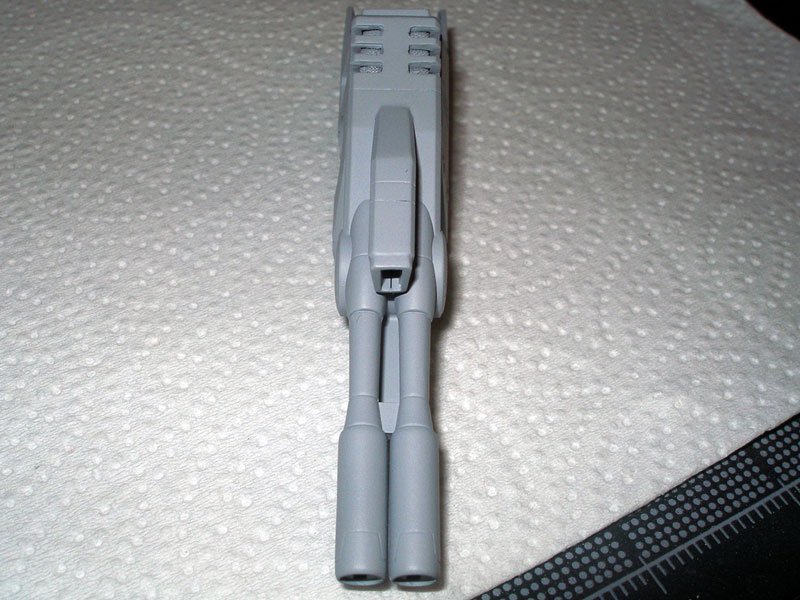
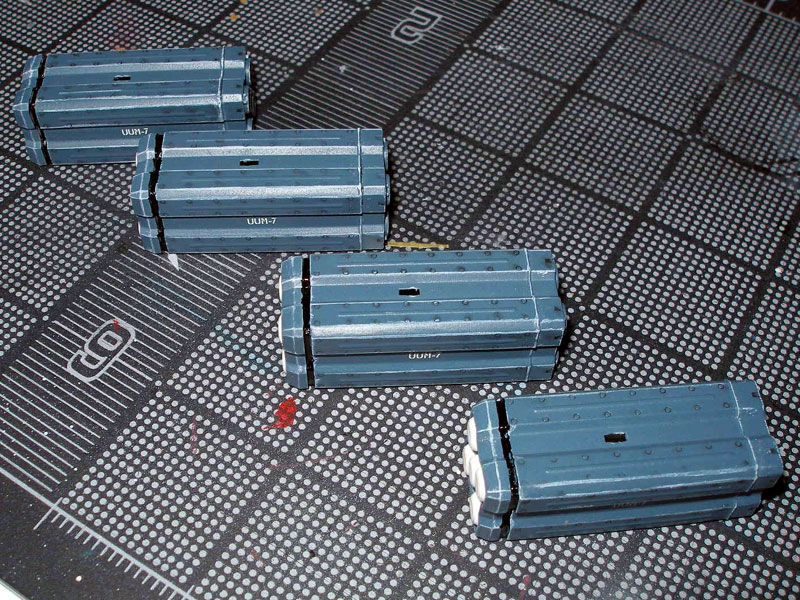
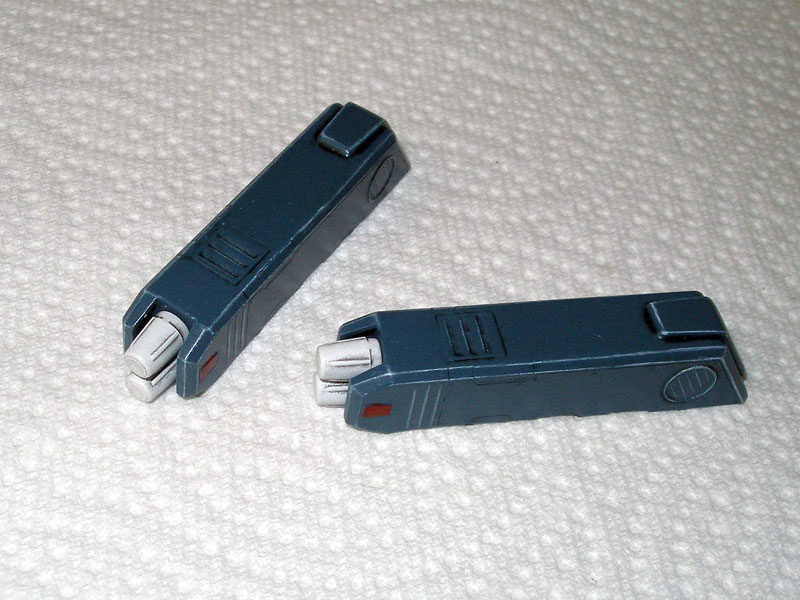
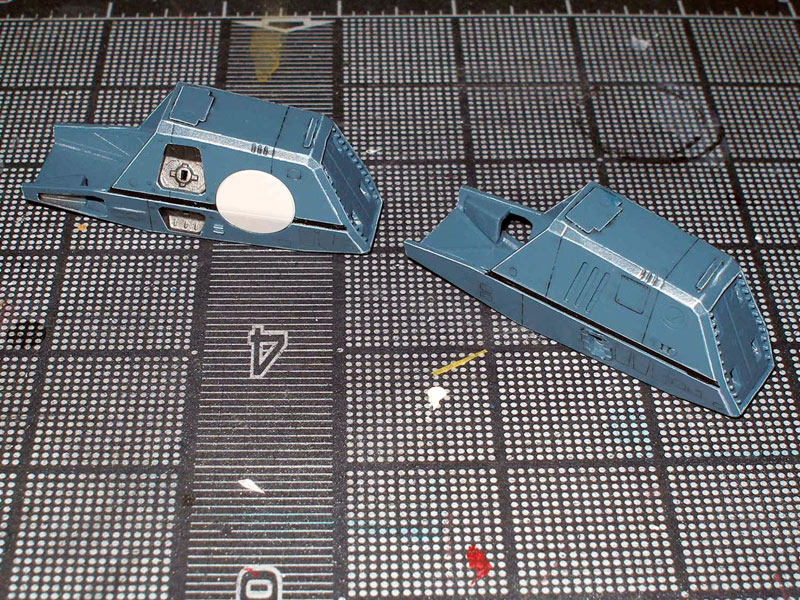
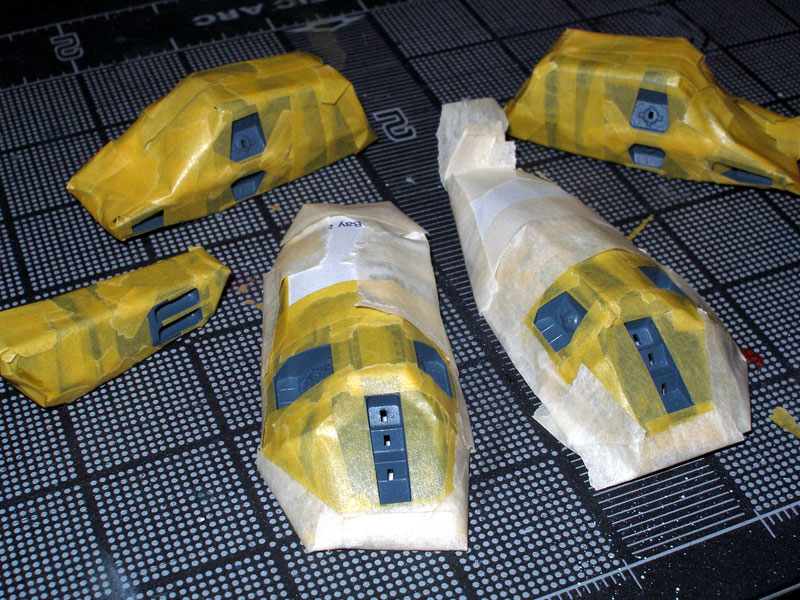
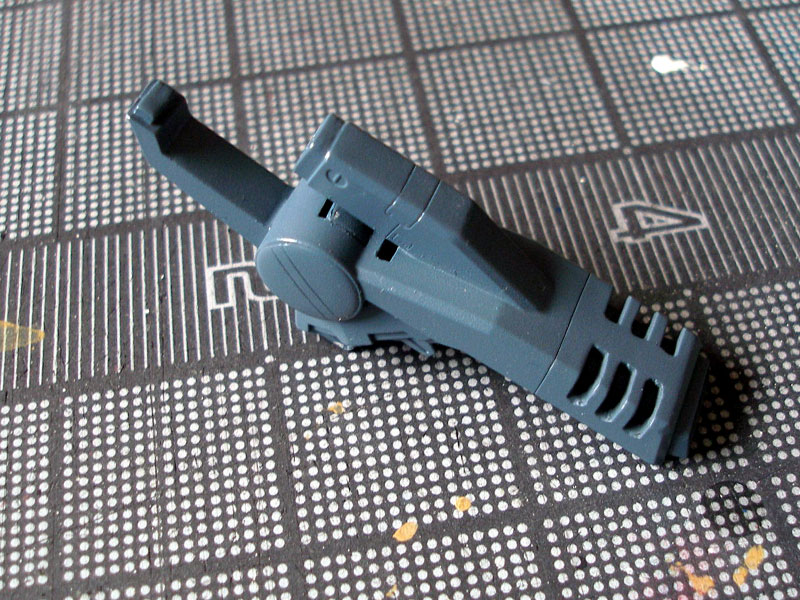
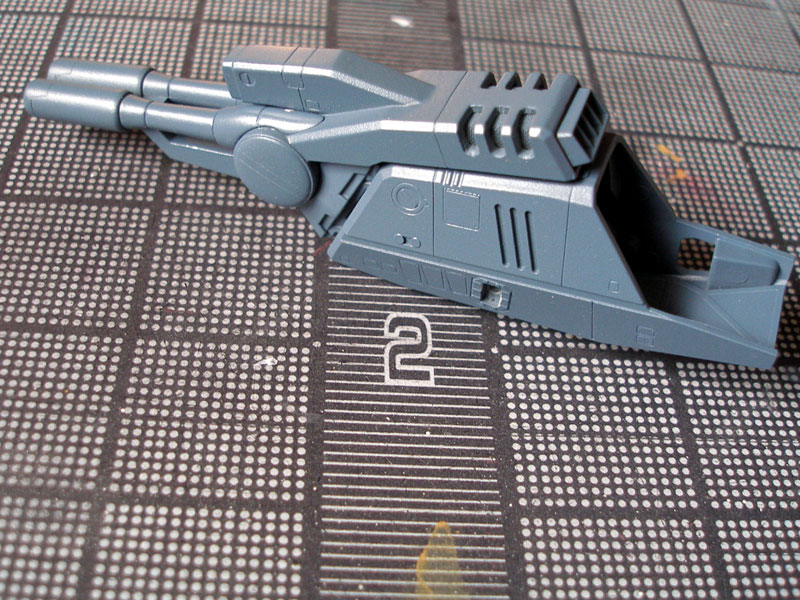
Ok here is where I'm at, as you can see I apply all the booster on the strike pack. All that's left is the decals.

-
This looks sooooo freaking AWESOME!!!!!!!!!!!!
-
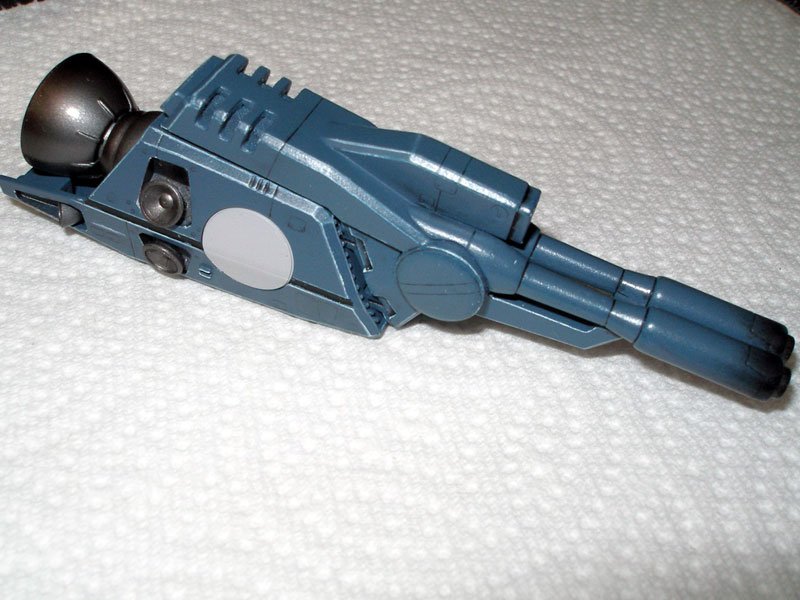
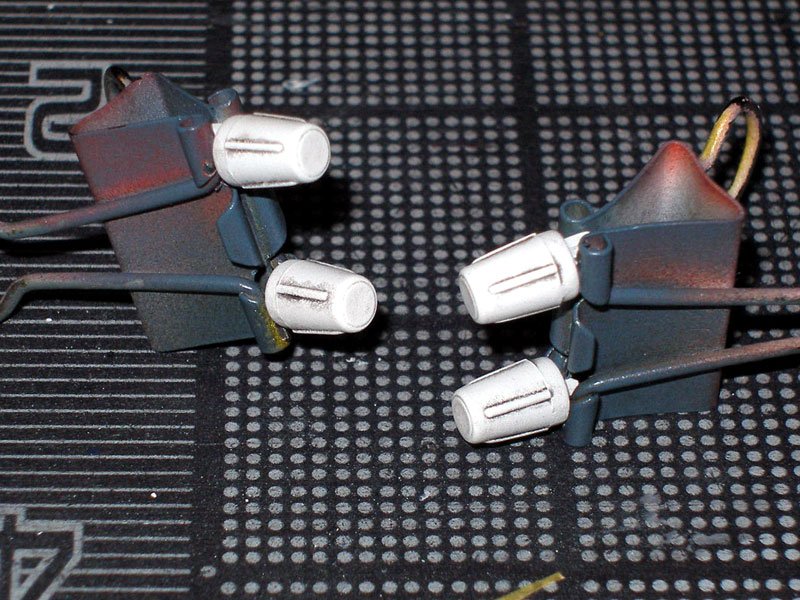
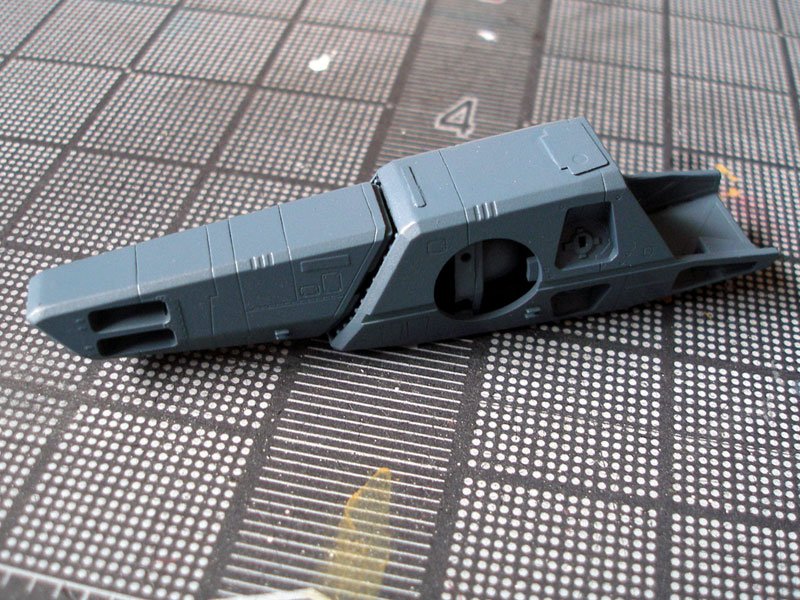
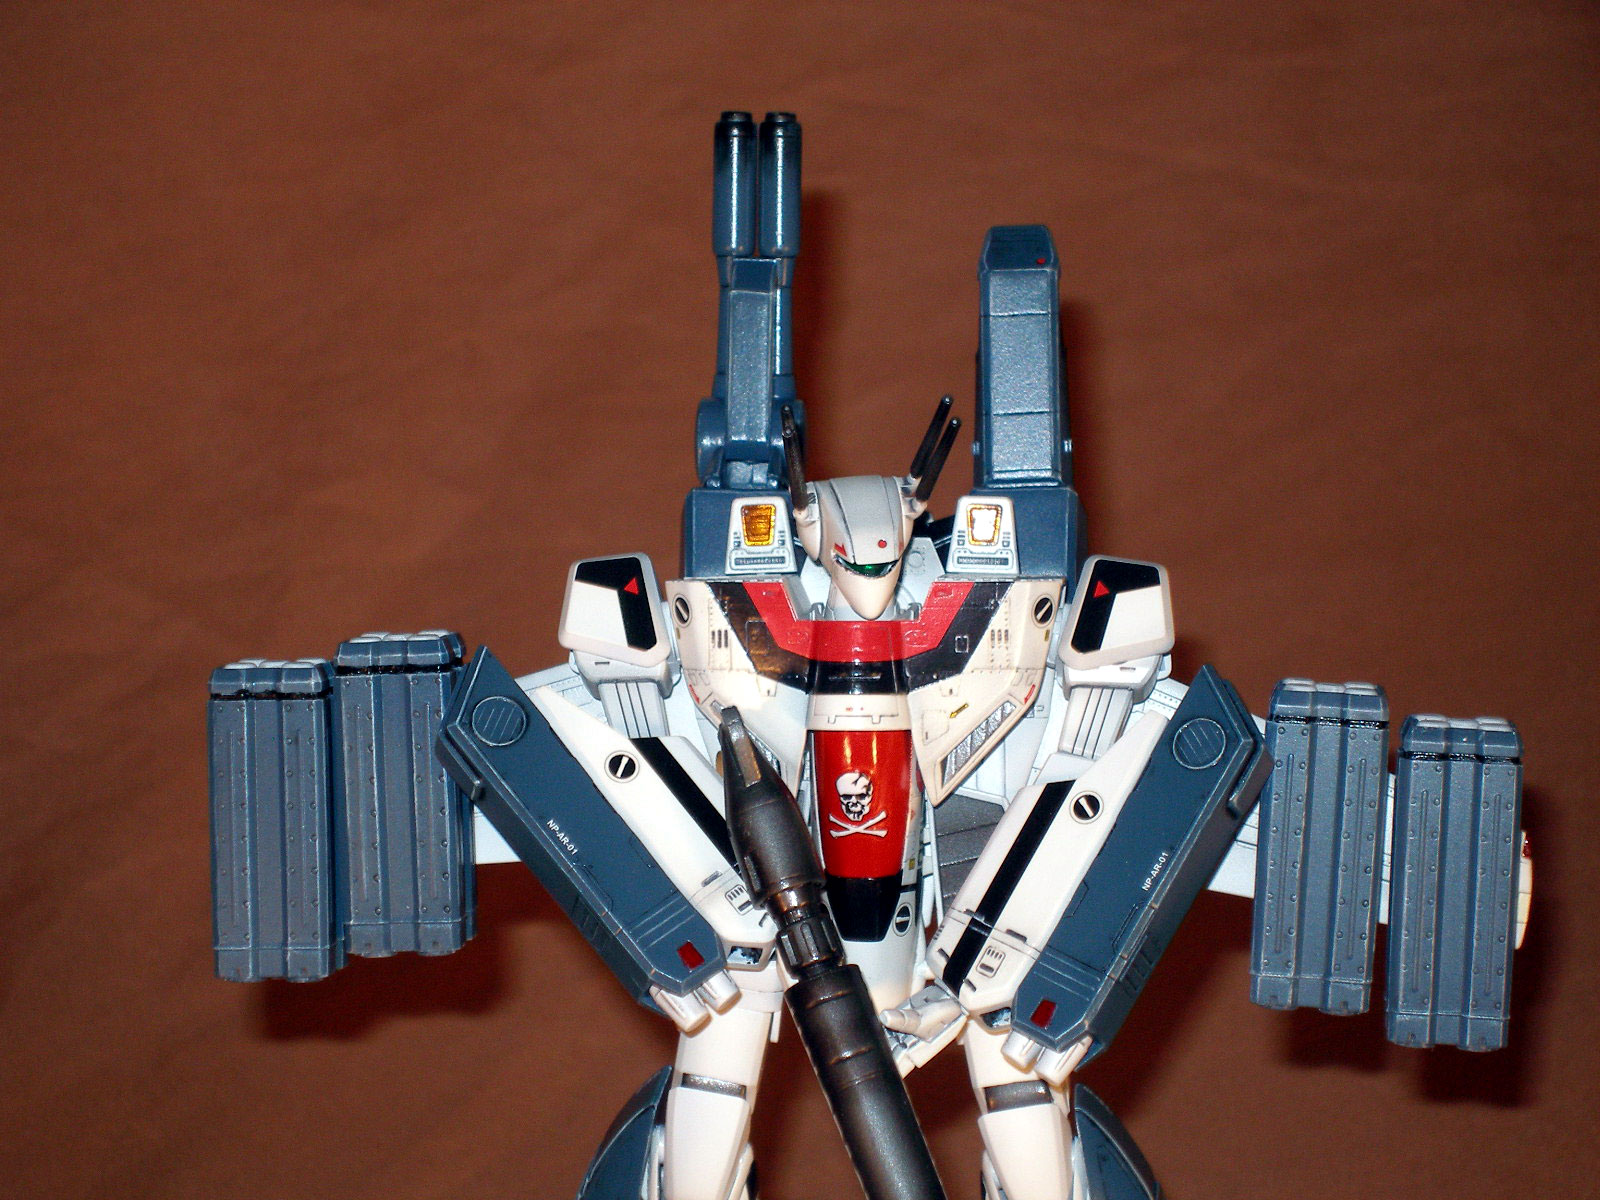
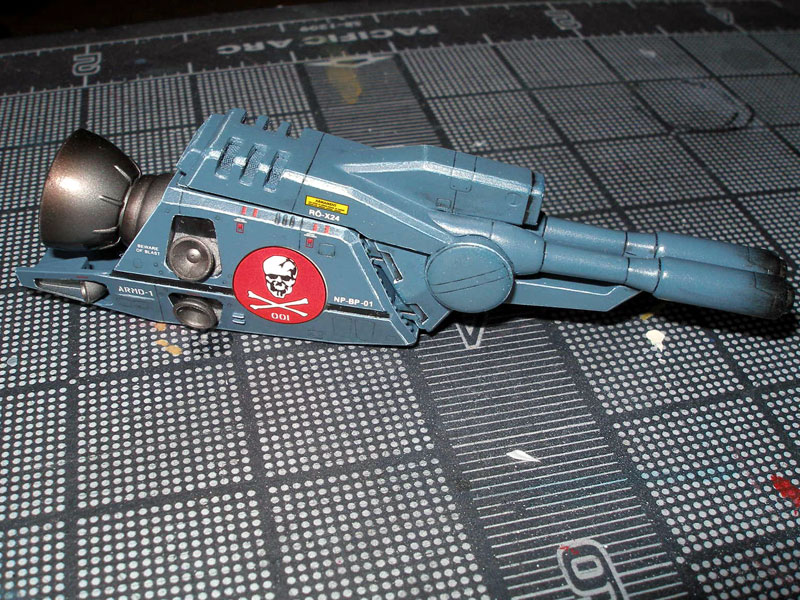
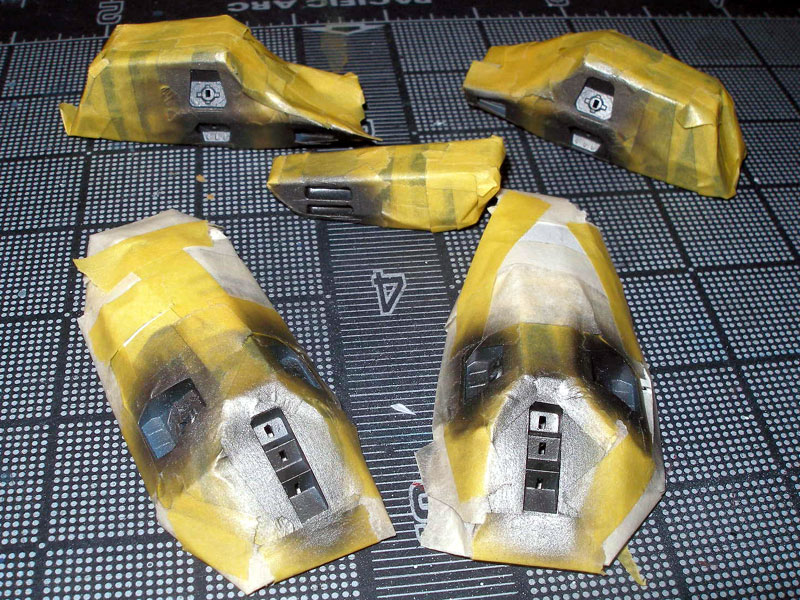
ok finish touch ups and seal everything in. Here is what I have so far. Here you can see I airbrush (Tamiya smoke X-19) burnt marks next to the missile bay on the strike pack, plus I added burnt mark by the laser on the strike pack as while. I think it came out pretty good.
Next I'll add the booster then finish up with the decals. I'm almost finish
!!!


-
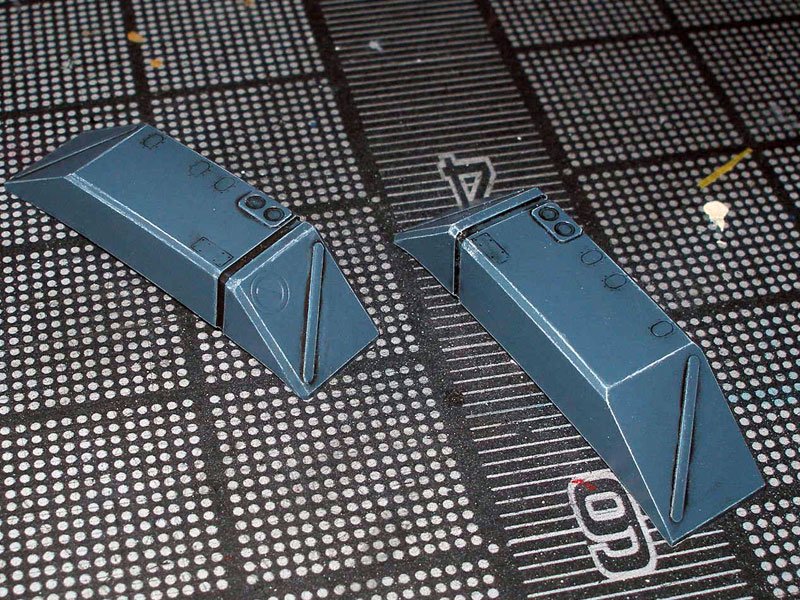
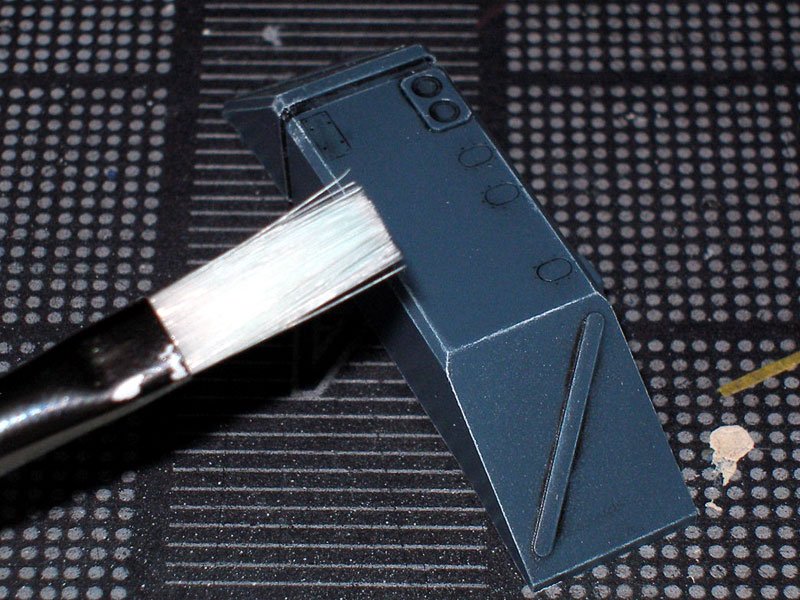
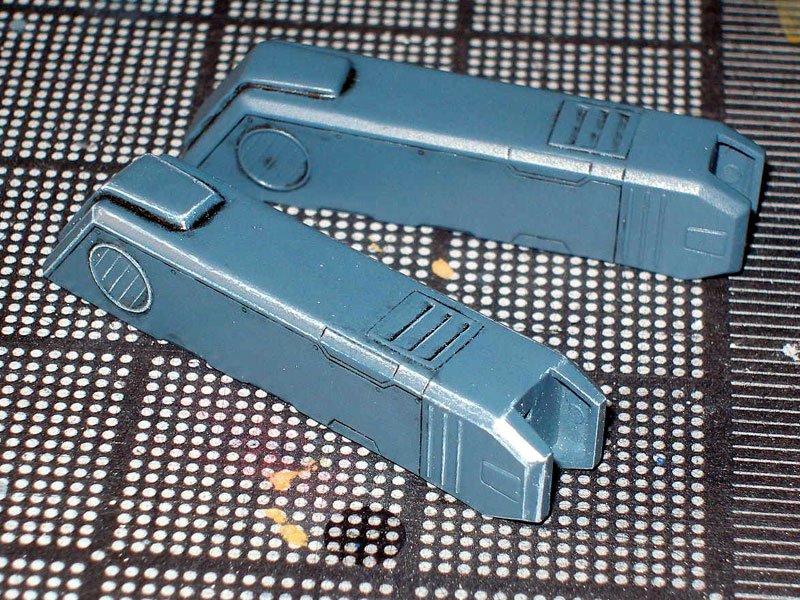
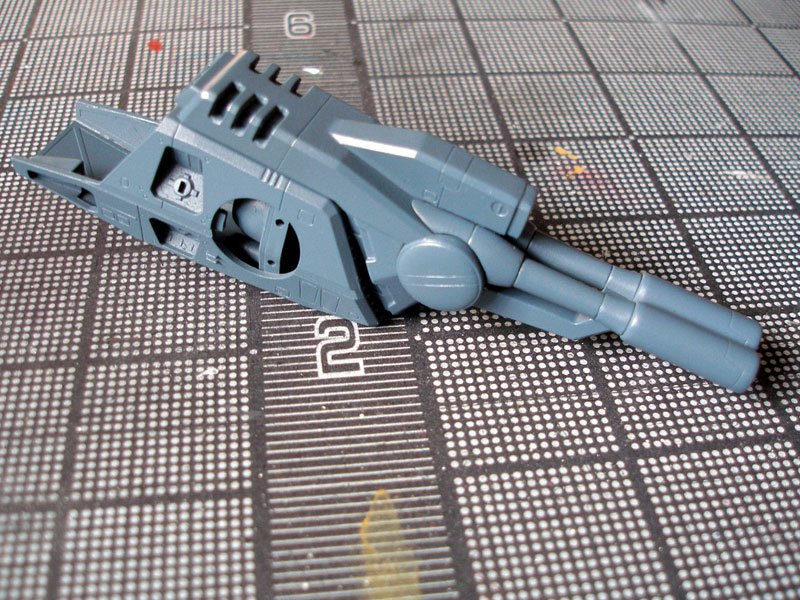
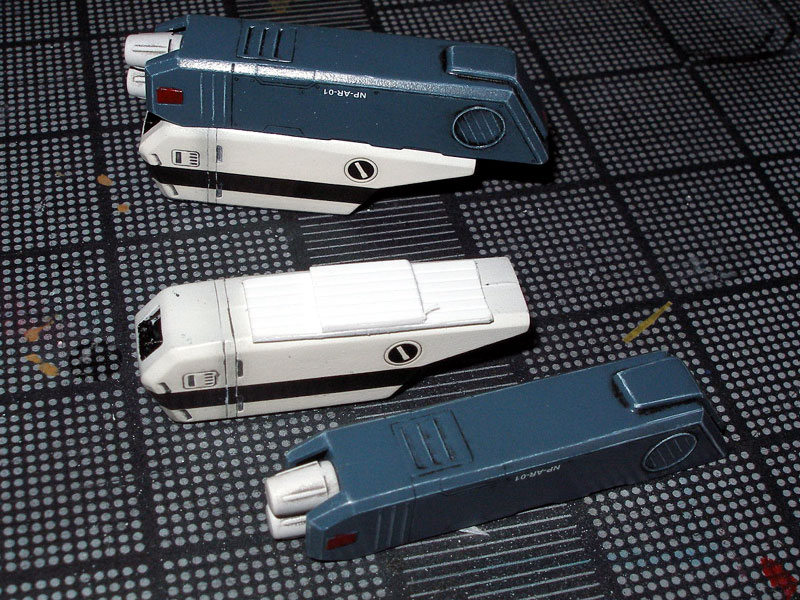
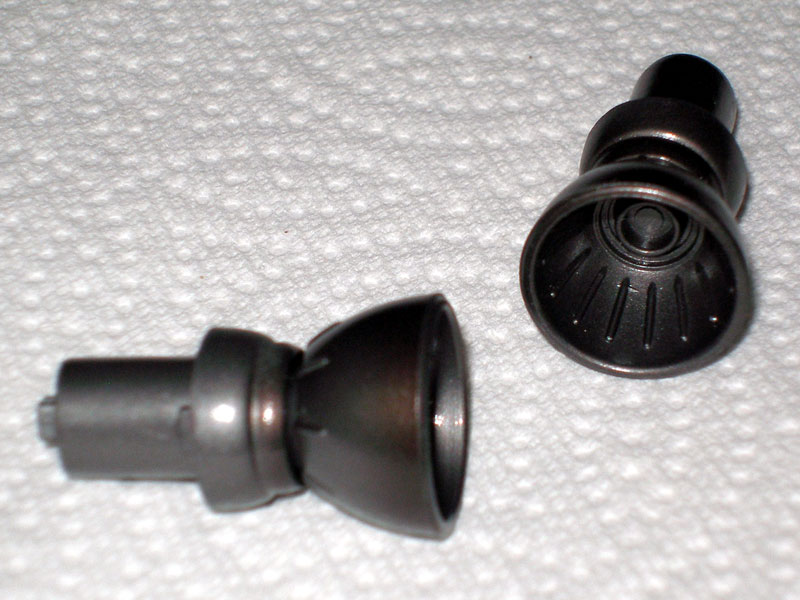
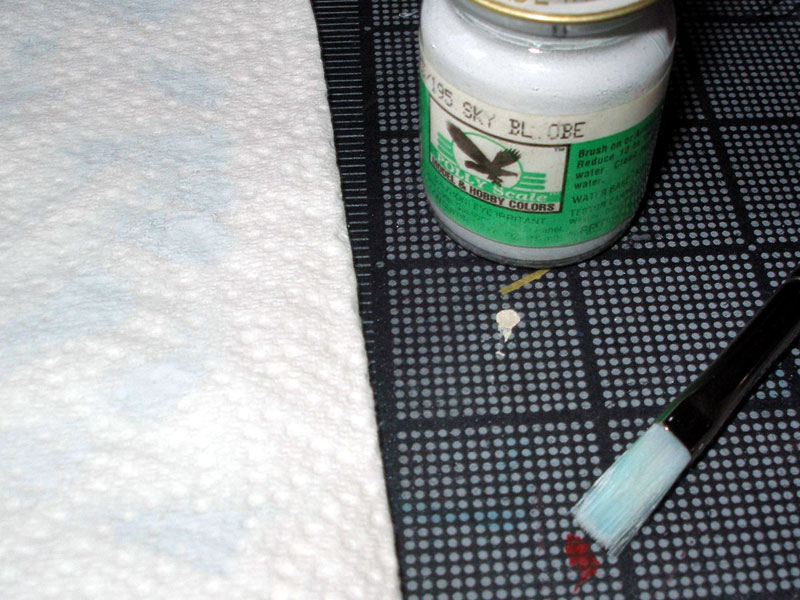
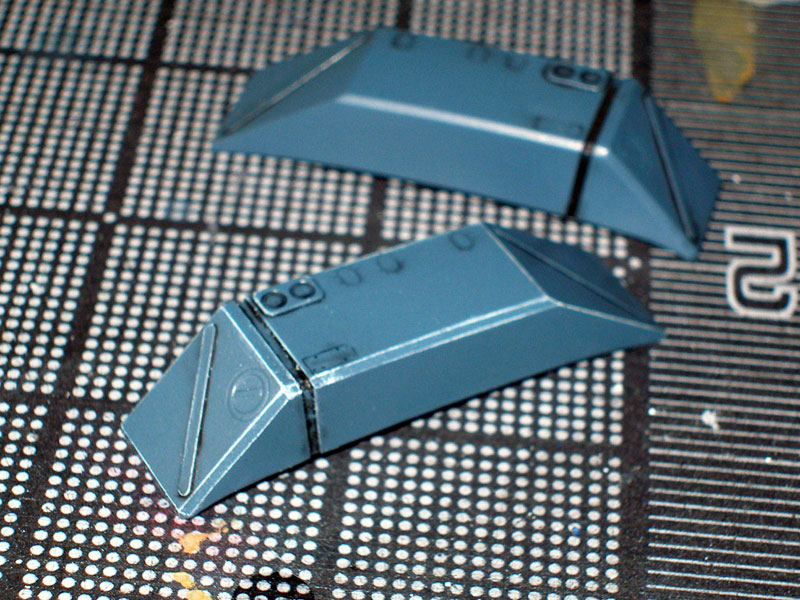
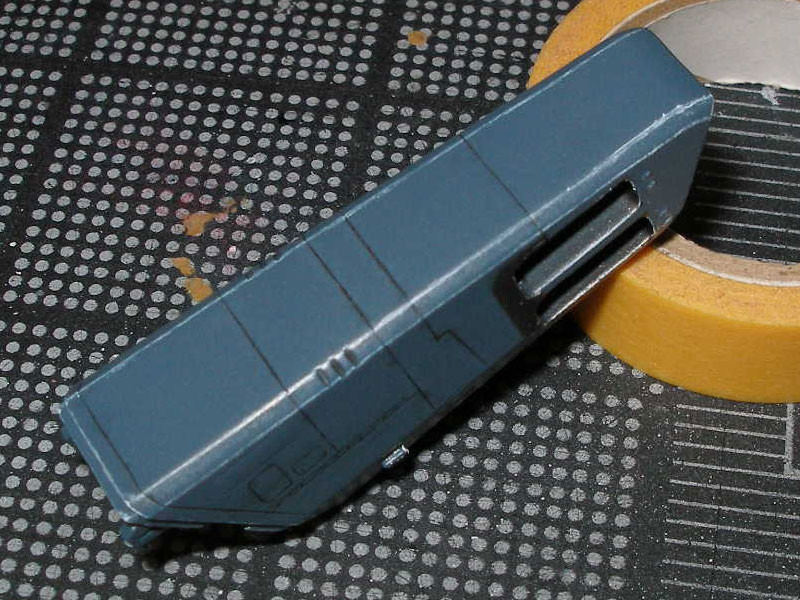
Oops forgot to add how I made the highlights. Yes I used a dry brush technique using acrylic paint. The paint I use was sky blue, I tried light grey just didn't work with the color for the boosters, but when I used sky blue everything pop out. Here I use a flat brush. First I load both side with paint then with a paper towel I take off the paint (both sides) with that done I went side to side following along the edge, by doing this the paint that's left on the brush will go on only the corners thus highlighting the parts that your painting.

-
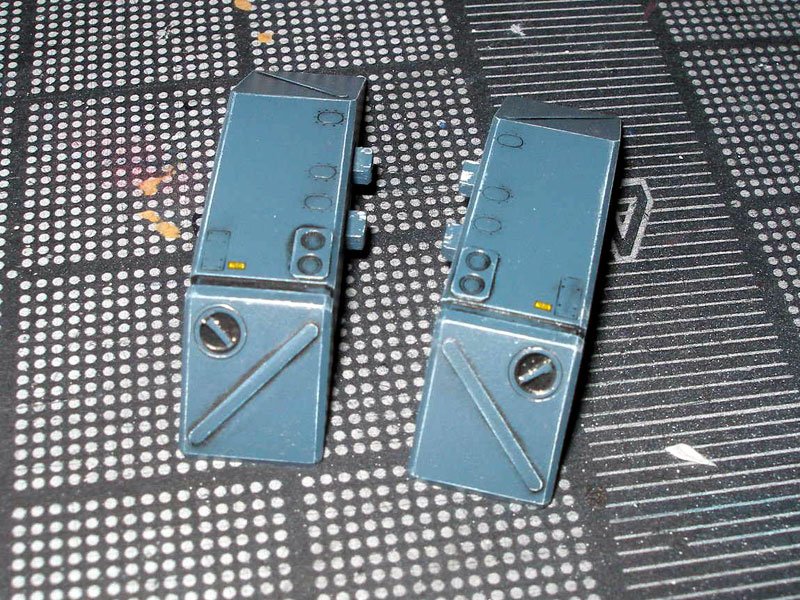
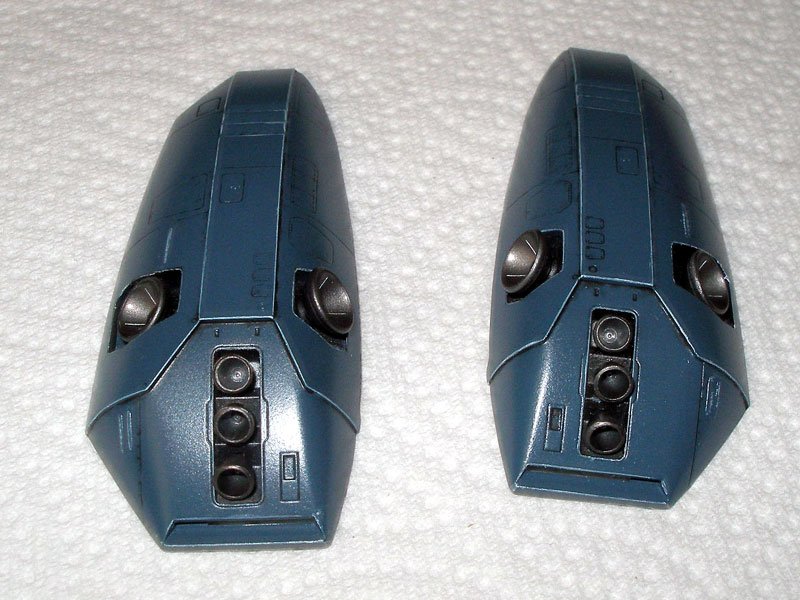
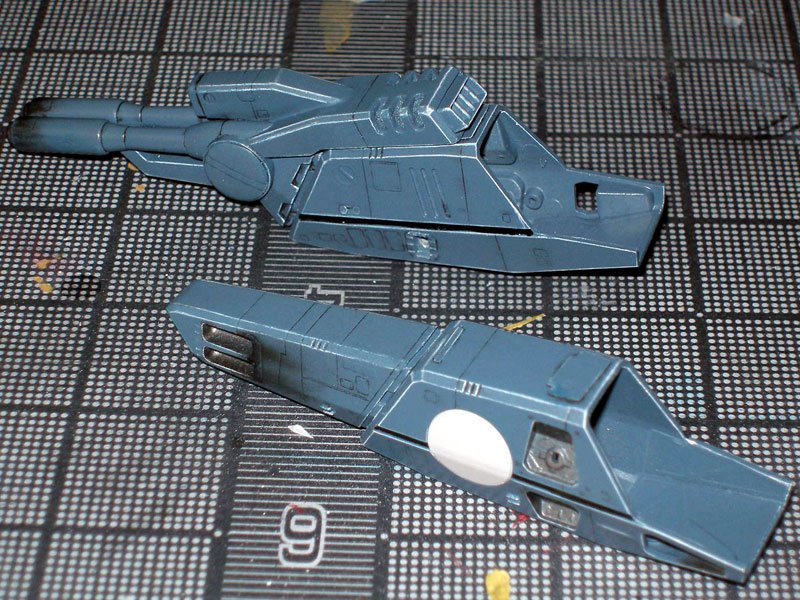
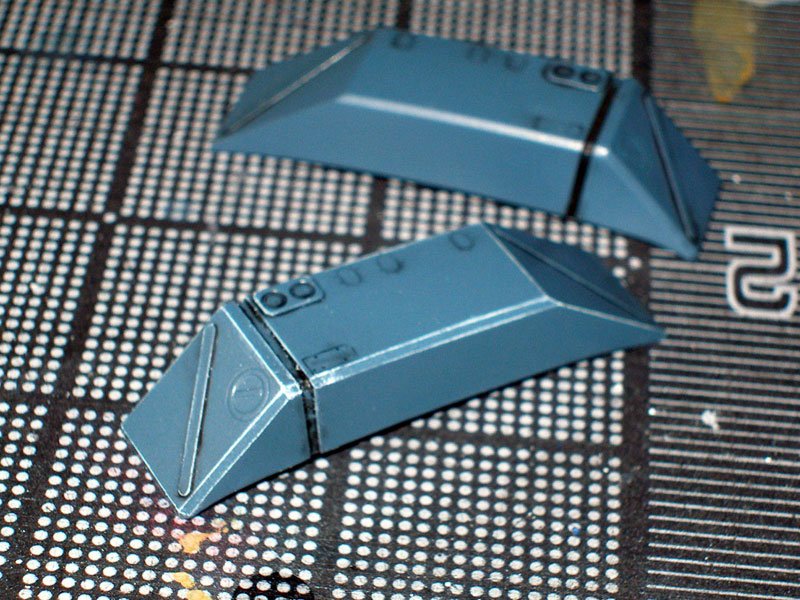
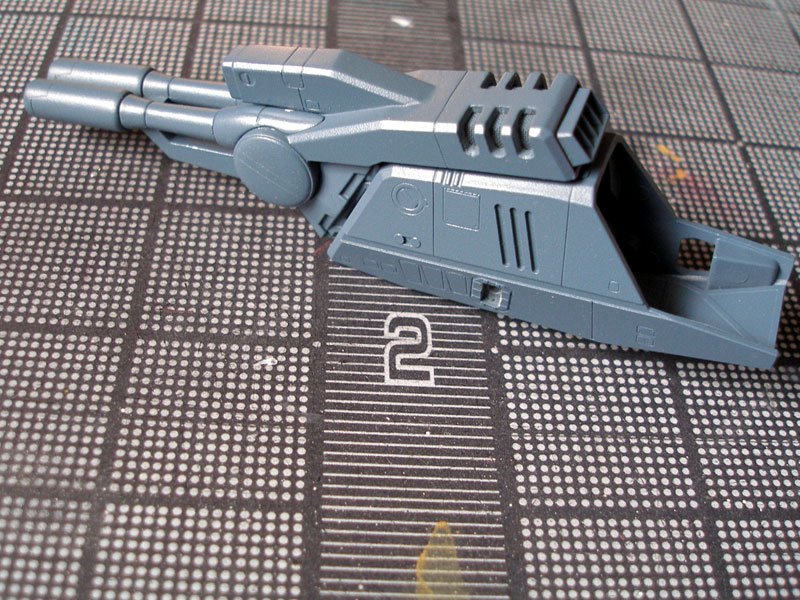
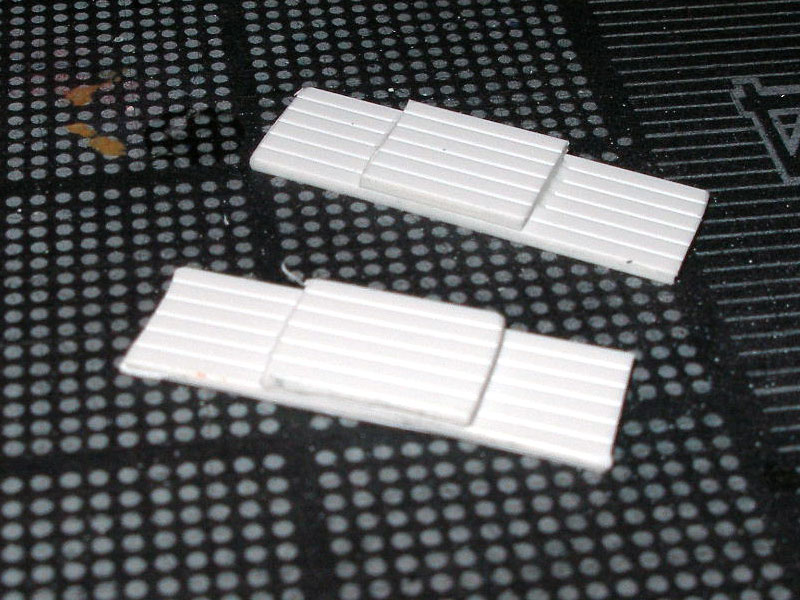
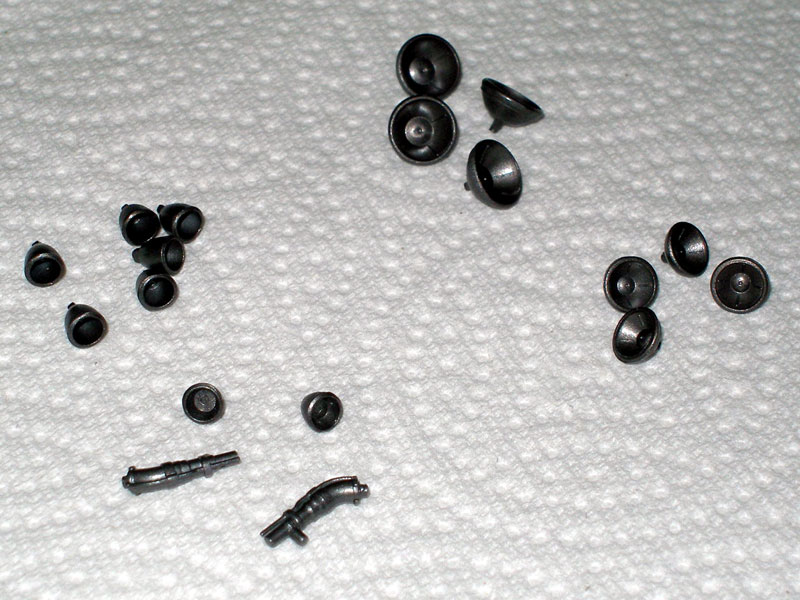
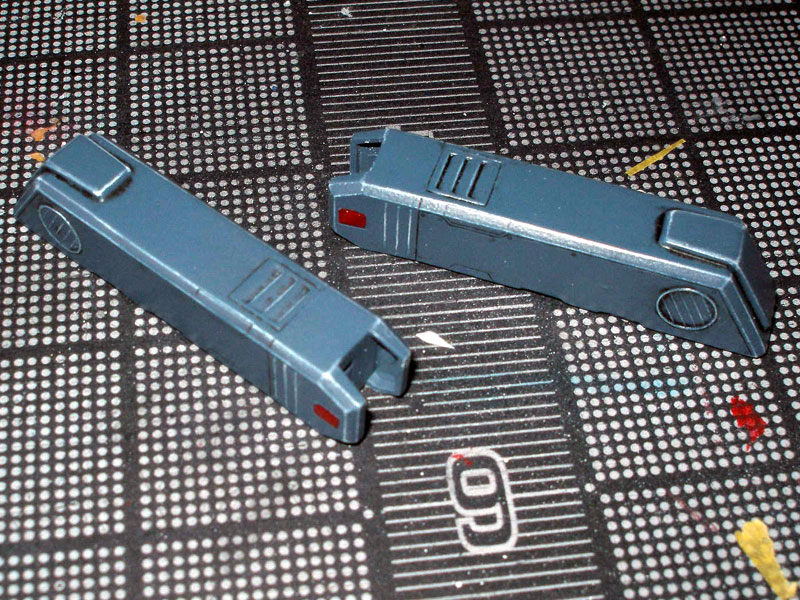
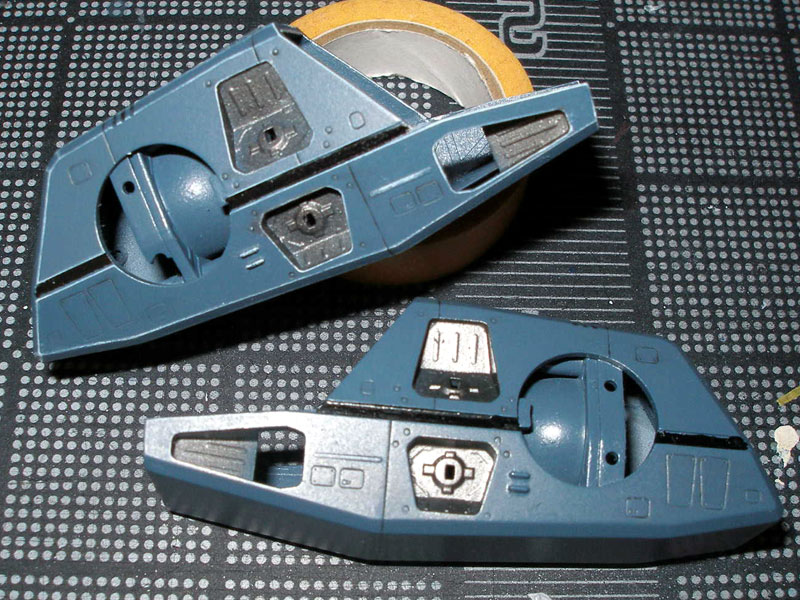
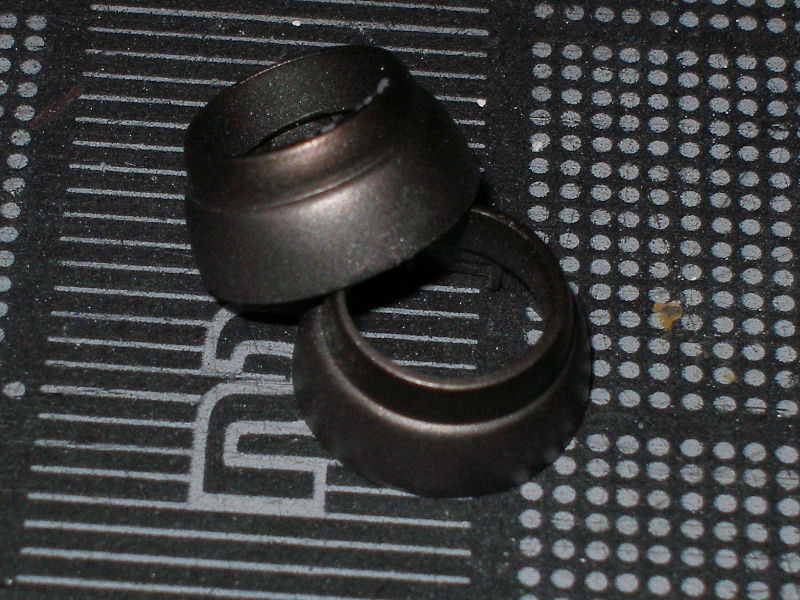
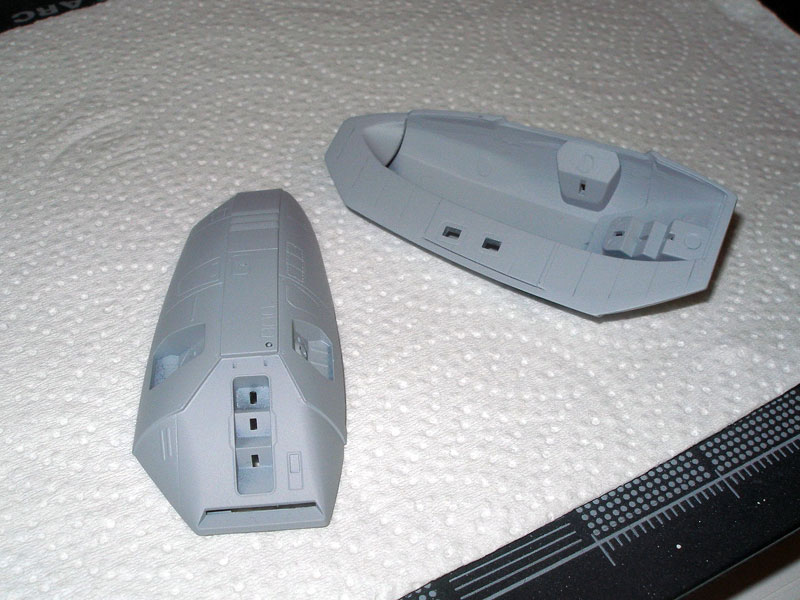
Ok I finish the panel lines with black oil wash. Next I tape off the area that I don't want to spray. I airbrush alclad steel on all the parts that needed it.
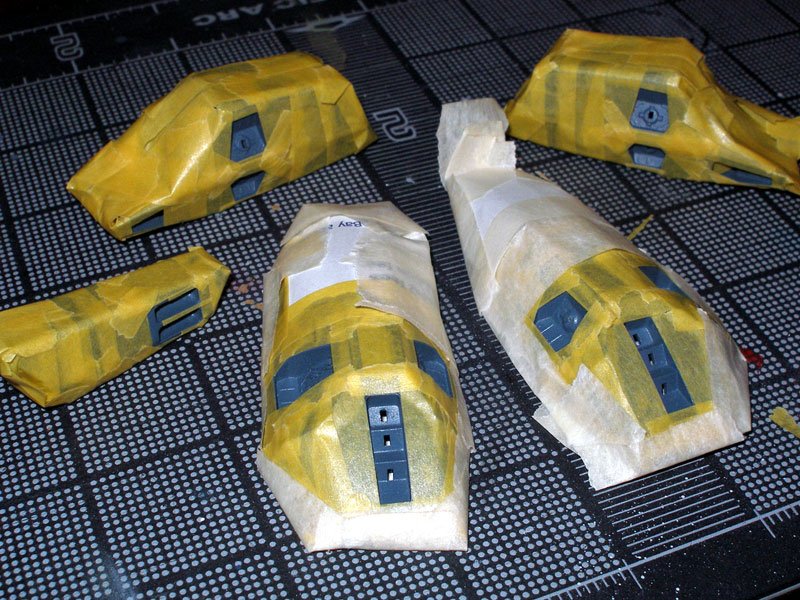

Next I highlight the edges on the boosters, as you can see, I highlight one part and left the other to show you how it will look if you had one highlight and one without highlight. Big difference if you didn't highlight the booster. I like how it came out, need to do some finish touches.


-
thanks for all the pointers.
does anyone know if the minmay dress glows green (like the usual glow in the dark stuff) or white (like in DYRL)?
It glows green, the non glow in the dark minmay top is a light pink, and the glow in the dark chase figure is all white.
-
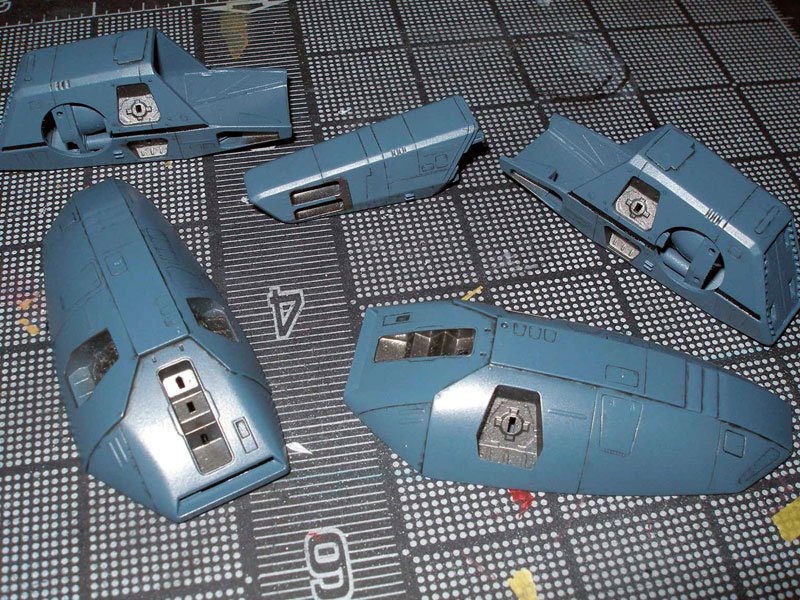
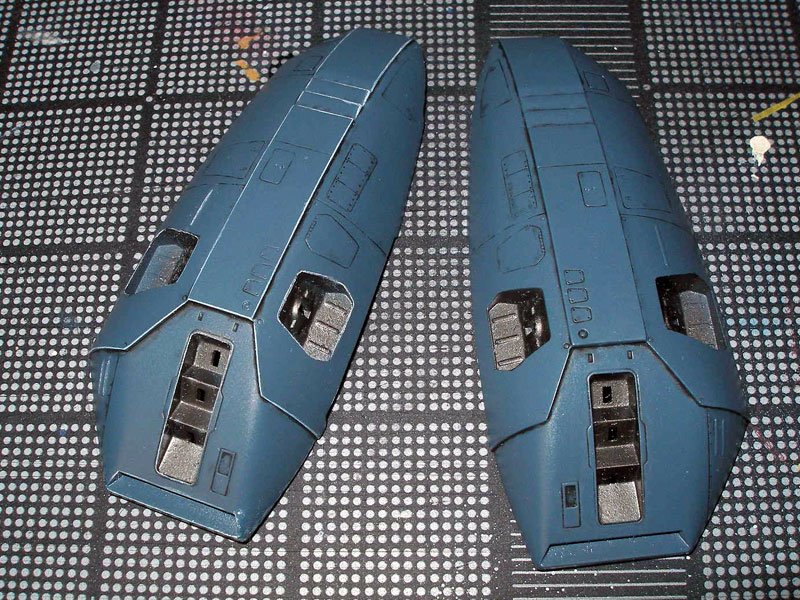
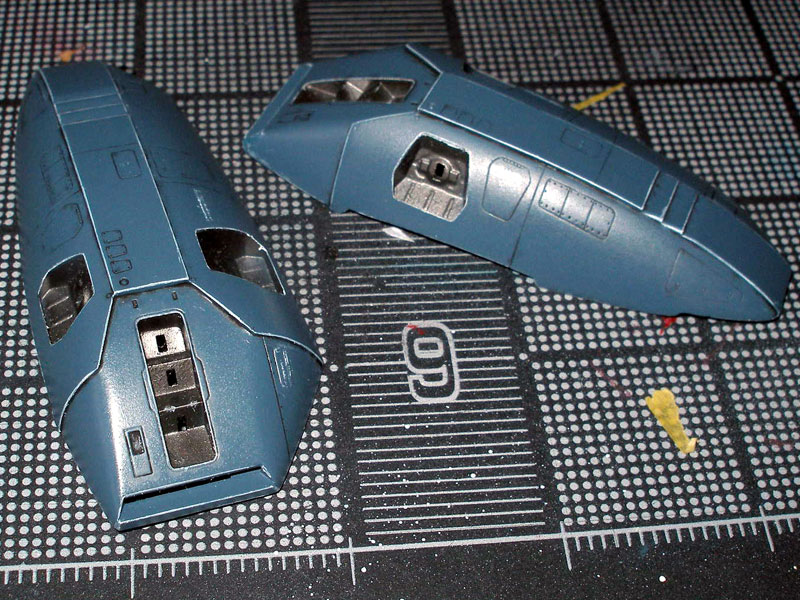
Thanks Big F, I like the color choices that you had, Tamiya Medium Blue XF-18, Tamiya Flat Blue XF-8 and a dash of Gun Metal X-10. Next I'm going to seal it then do the panel lines and add highlights on the corners. Should look good.


-
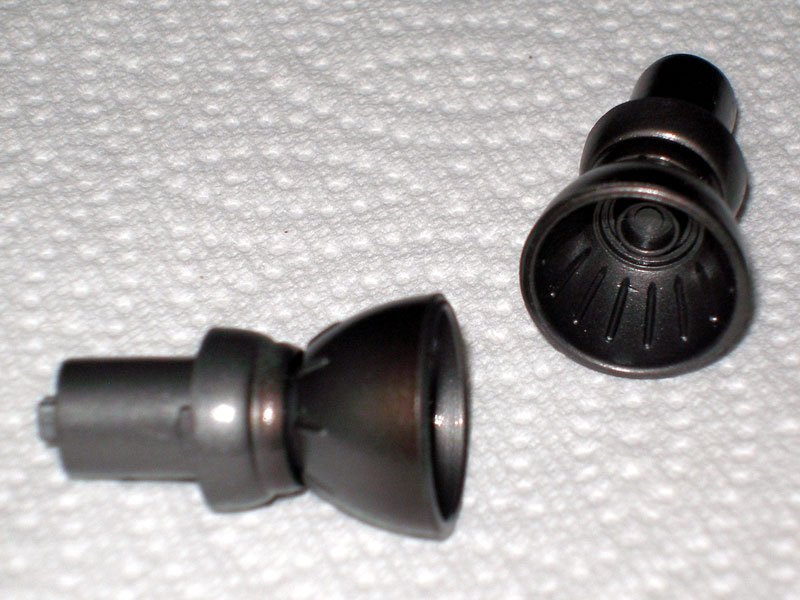
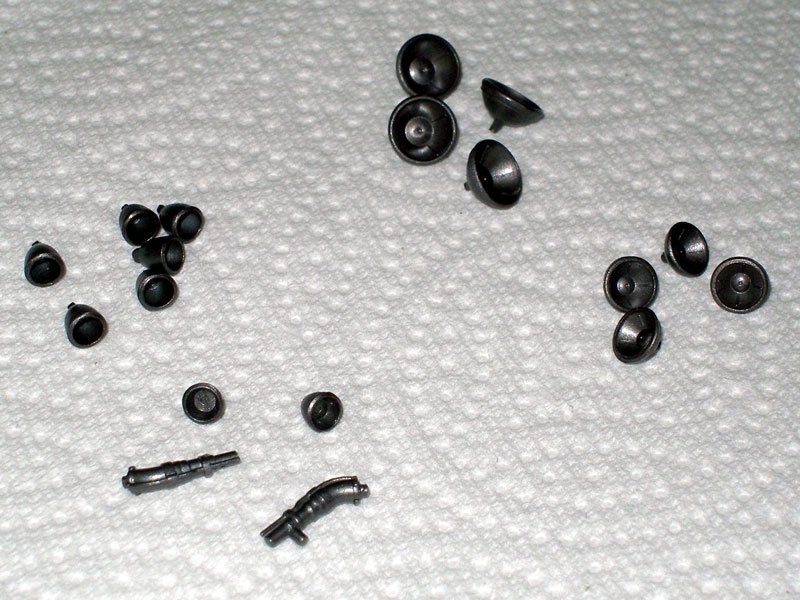
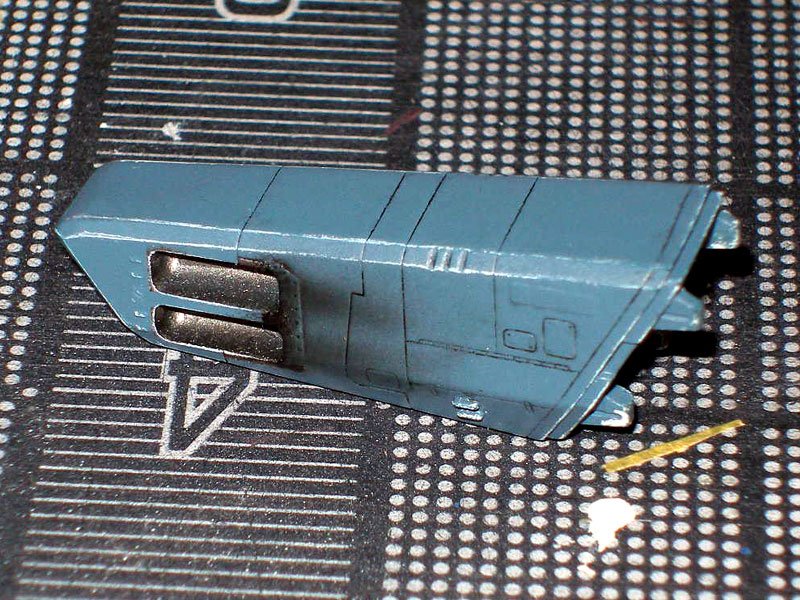
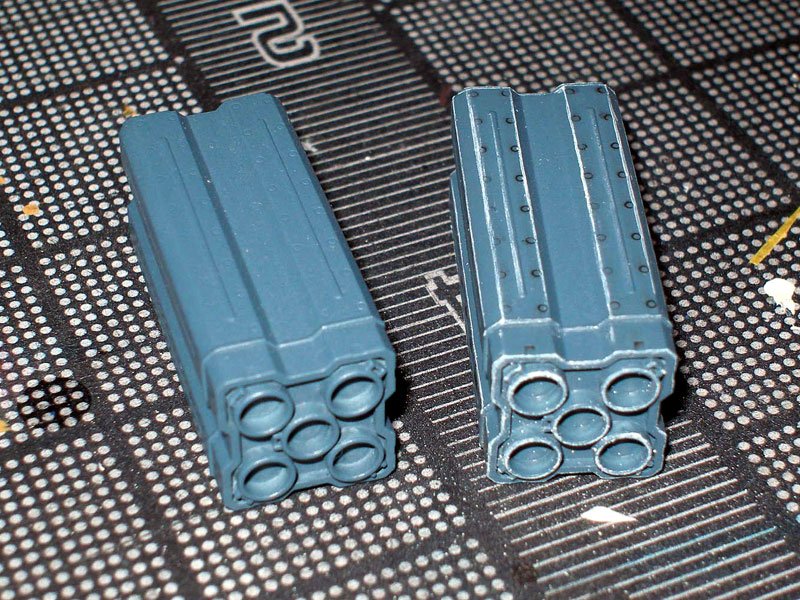
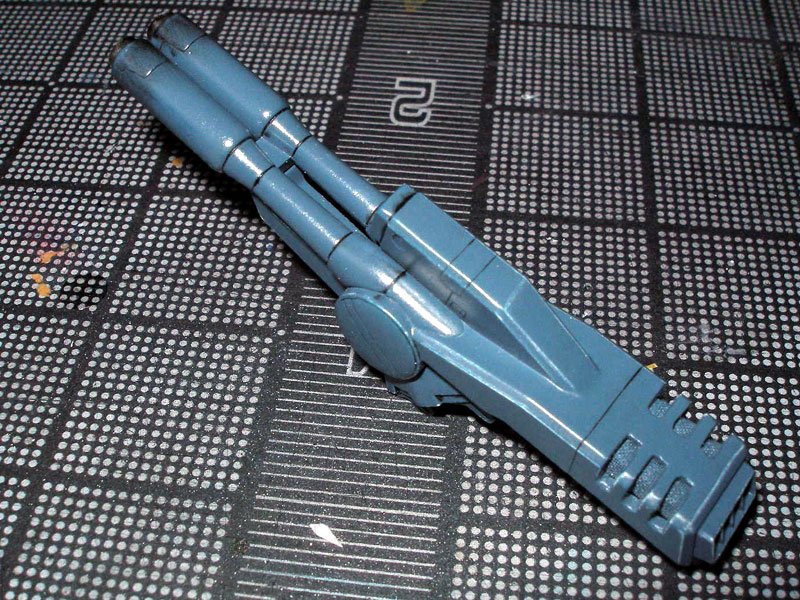
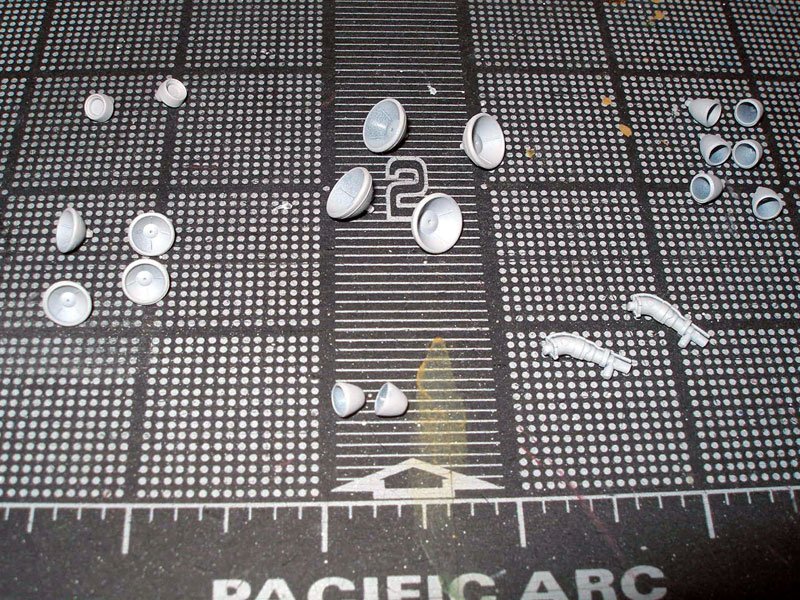
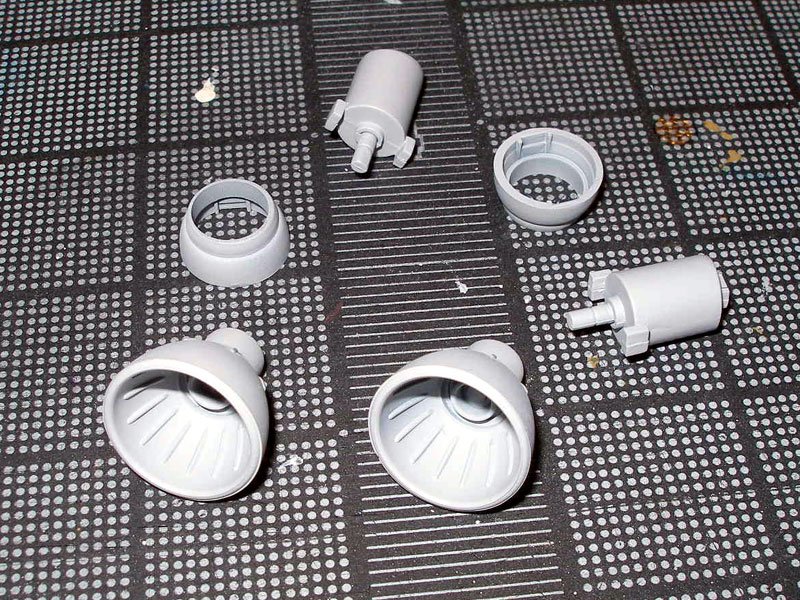
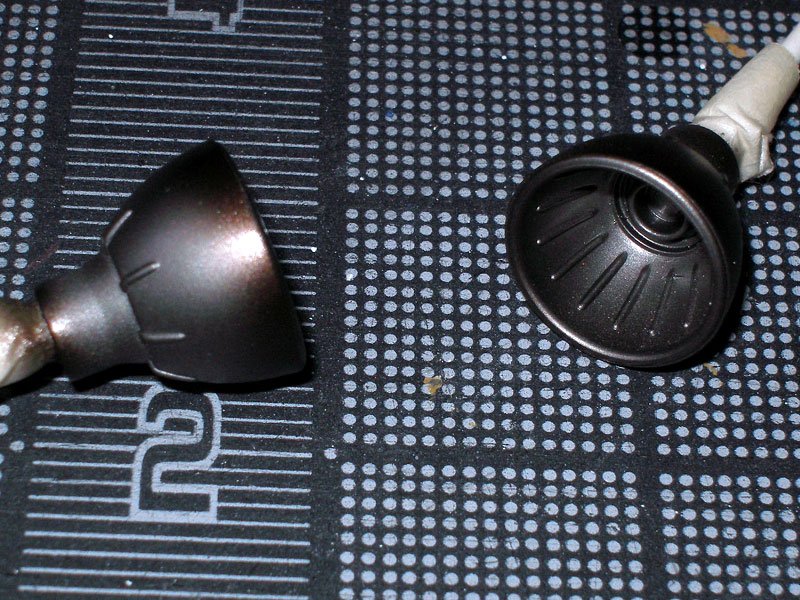
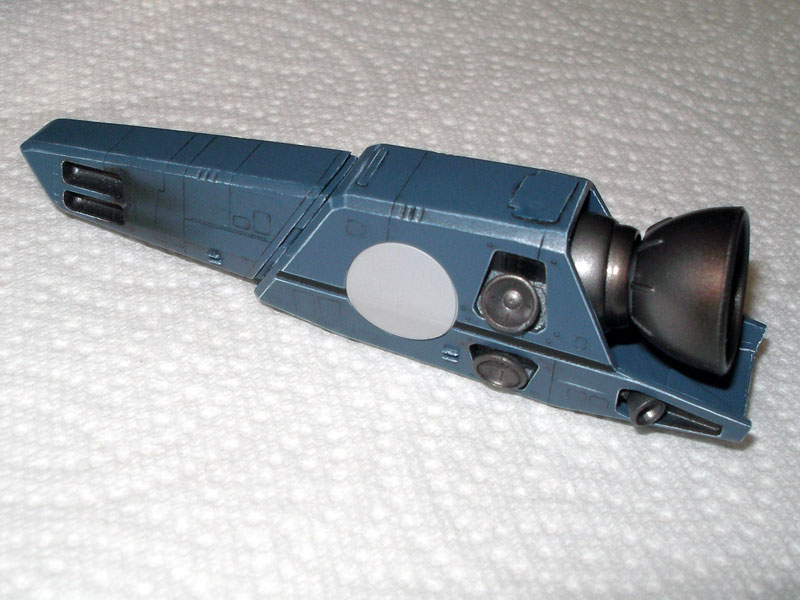
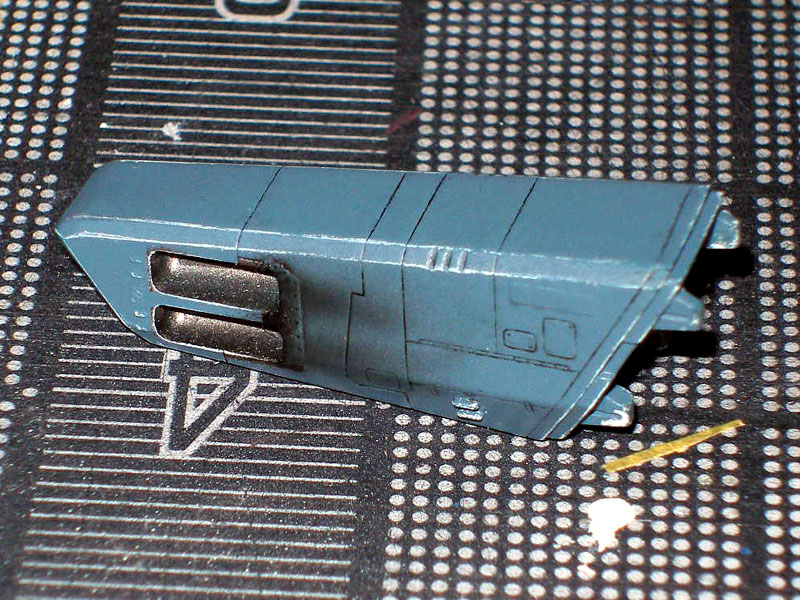
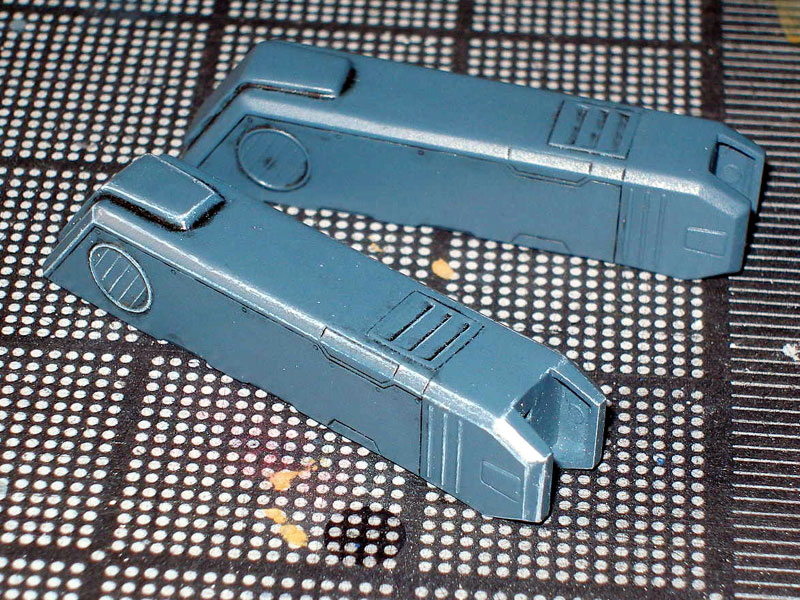
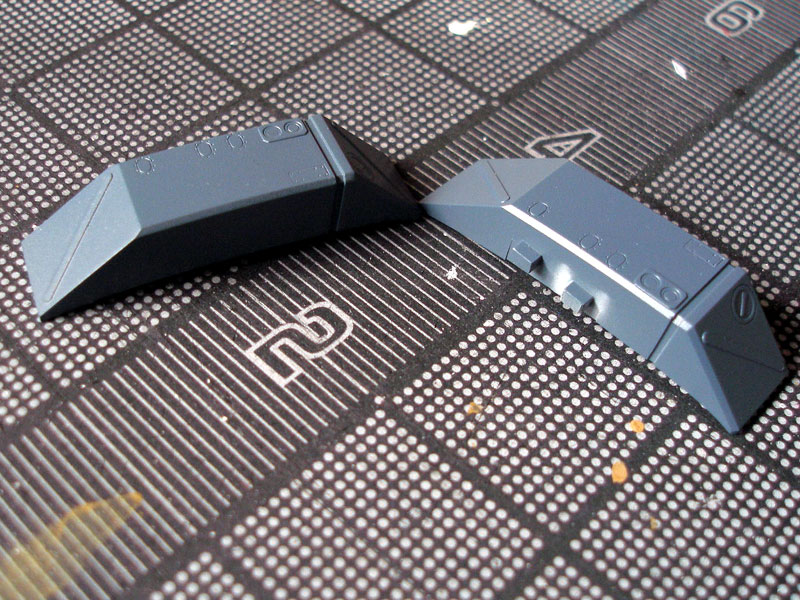
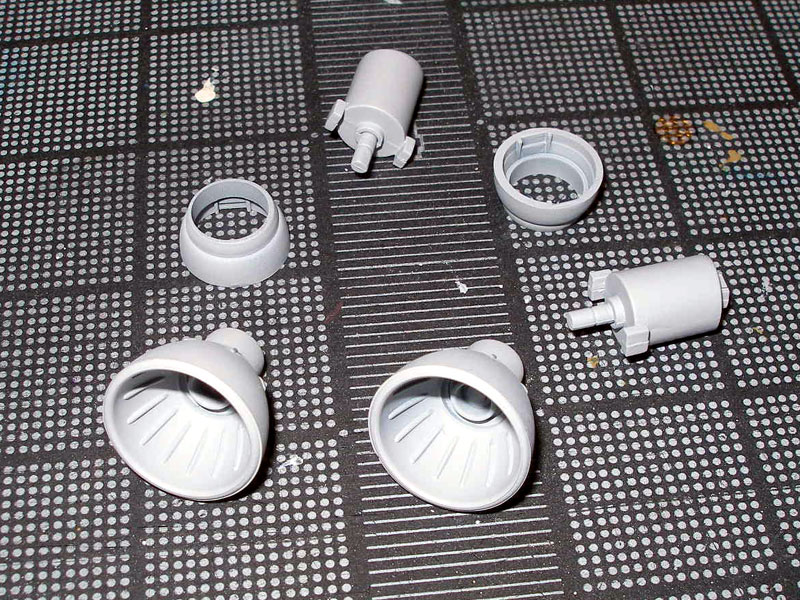
I primer and airbrush the burners with Alclad Steel, and shade with Alclad Jet Exhaust, for the strike pack.

-
Finally I was able to primer and sand. Finally ready to paint. Does anybody know what color I should use for the strike pack? I'm thinking about Tamiya Medium Blue XF-18 with a couple of drops of Tamiya Dark Grey XF-24.


-
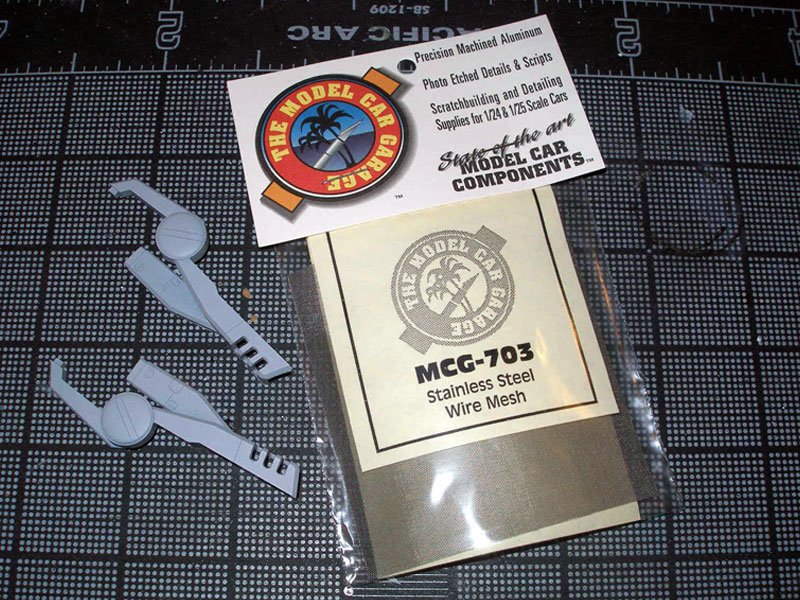
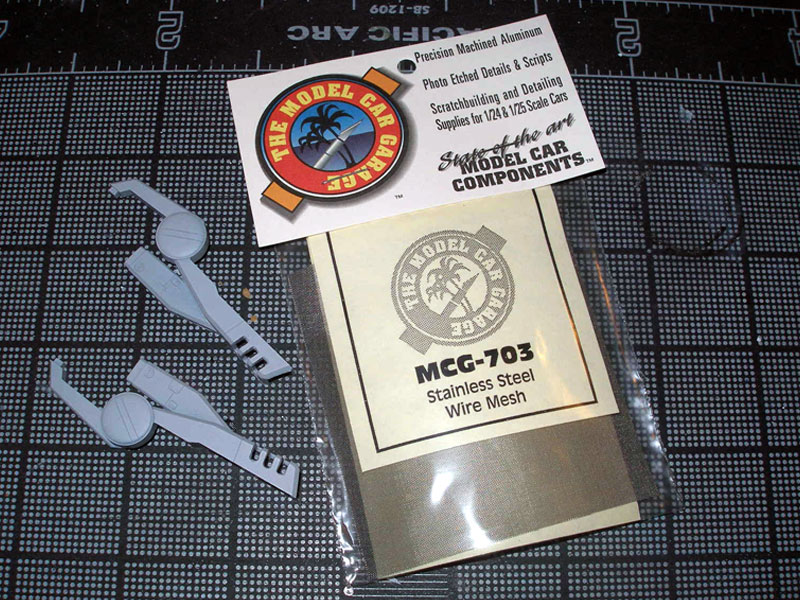
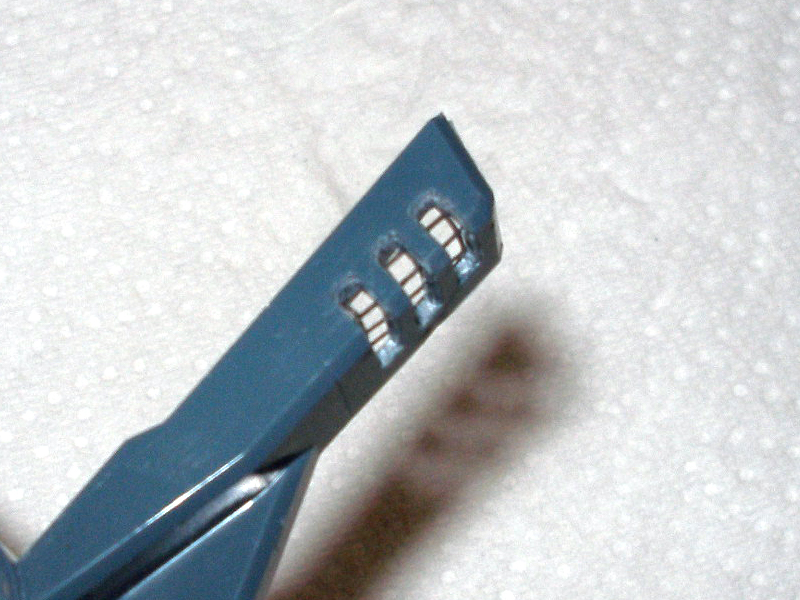
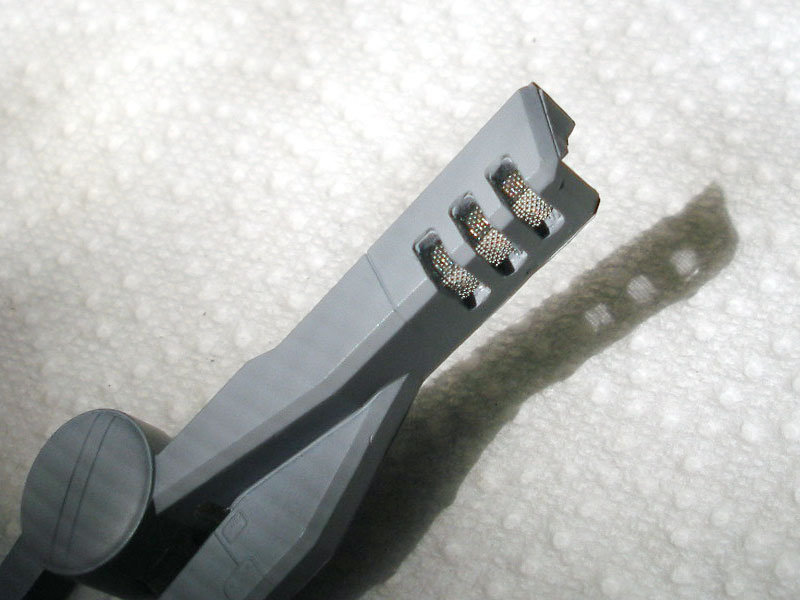
Well finally found a mesh that wm_chang uses, I like it, so much better then what I was going to use.
Here is the website where I order the mesh:
http://www.modelcargarage.com/store/pc/vie...mp;idproduct=53


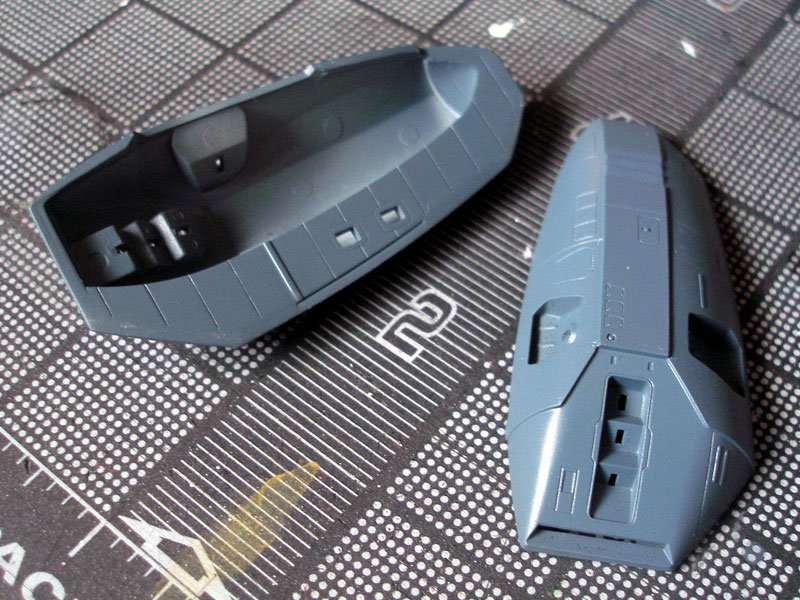
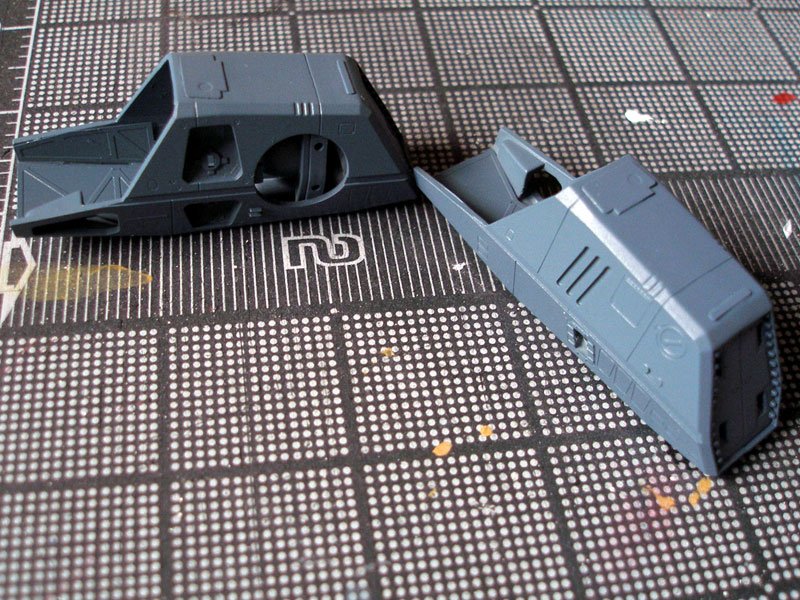
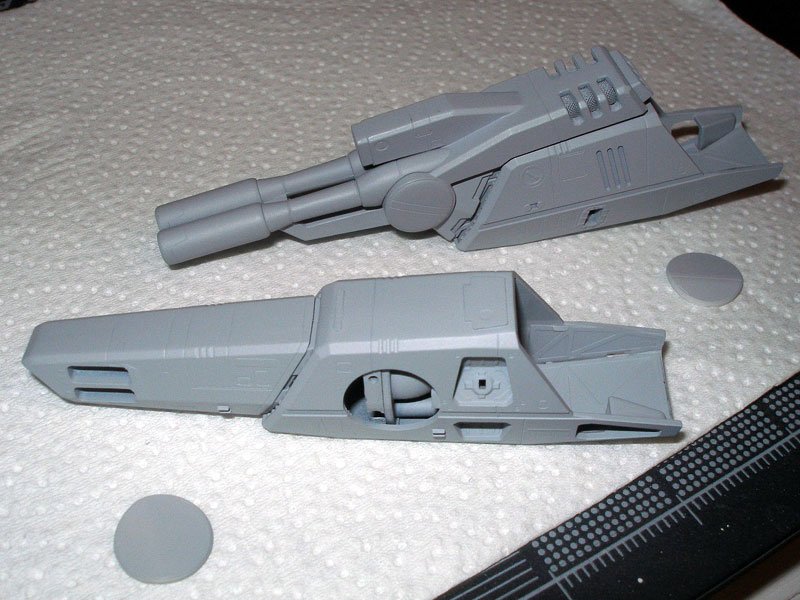
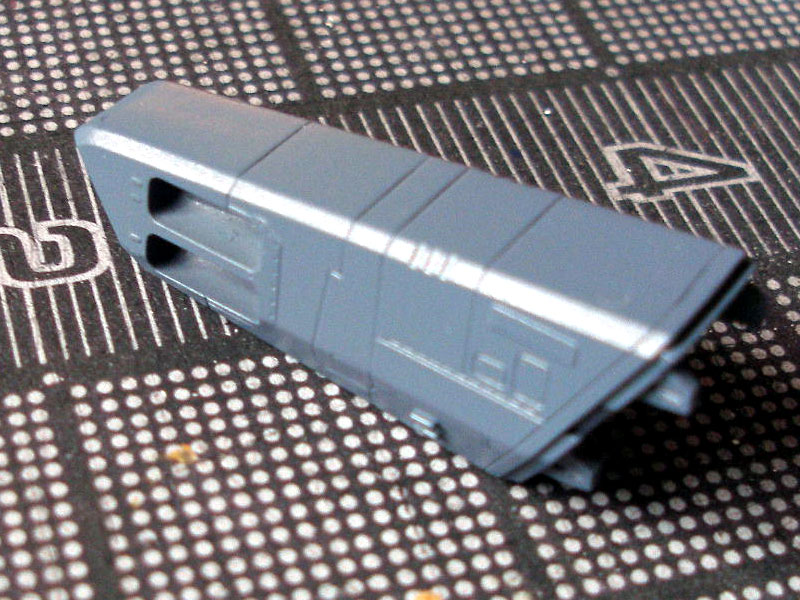
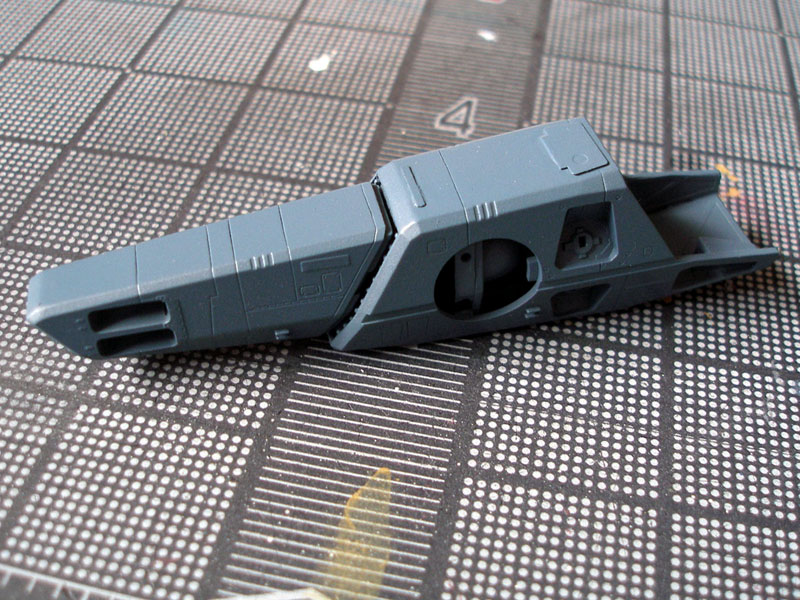
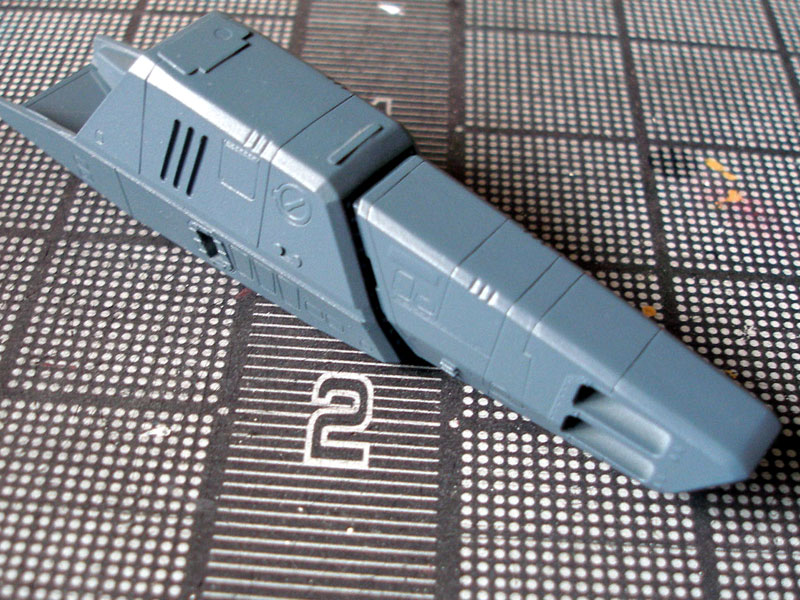
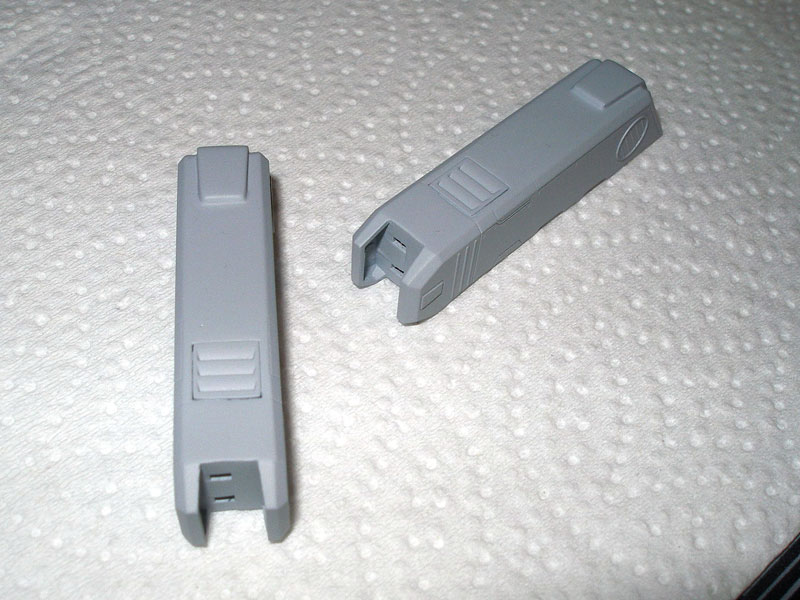
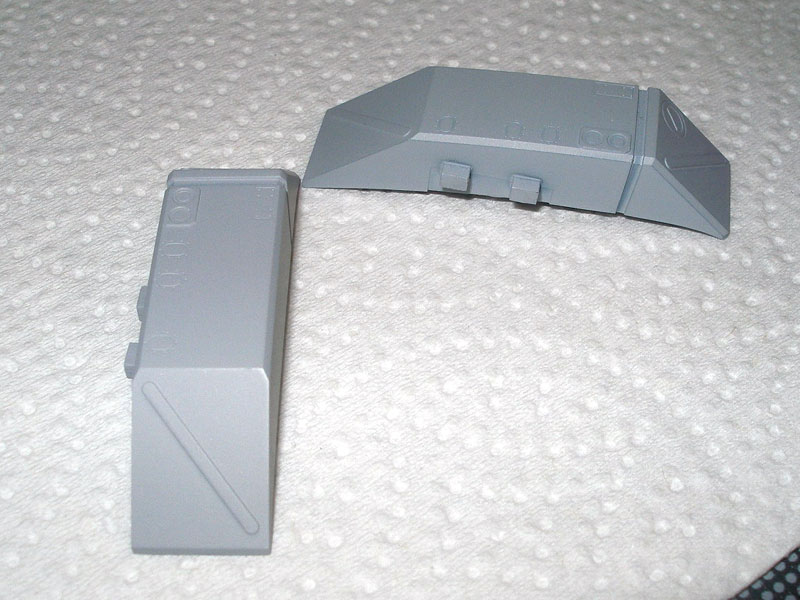
After I dry fit this part they didn't line up right, so I cut the nubs off, they fit so much better and line up great. Made it easier for me to putty and sand.

-
HOLY CRAP!!!!!
 Great job on the VF-0S!


My first Battroid Model Kit Weathering
in The Workshop!
Posted
Wow that's way too dark, unless your going for that look. If your going to pre-shade on white, you should go with light grey.