Sar
-
Posts
88 -
Joined
-
Last visited
Content Type
Profiles
Forums
Events
Gallery
Everything posted by Sar
-
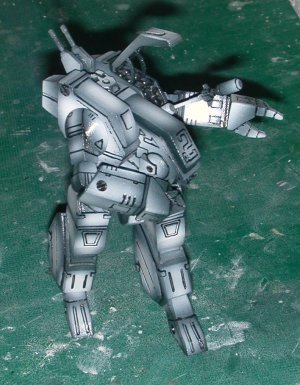
This week, I have mostly been preshading. Well, and filling and sanding and stuff, but the preshading was the most fun bit. Unfortunately I decided it would be a good idea to ink the panel lines while I was home ill from work today with a headache that stopped me concentrating on things... it turns out it stopped me concentrating on panel lining, too (suprise!) so some of them are a little on the wonky side. I figure it's probably OK since the preshading is only for hinting really anyway. I'll see how it goes... I've also played around a bit with a couple of camo schemes, since forest-green-with-lurid-red-and-clean-white-trim doesn't really do anything for me; the one below is my favourite so far - opinions would, of course, be appreciated!

-
The difference between talc+superglue and bicarb soda+superglue is like night and day, really - with talc, you have plenty of time to work it, it really is comparable to a regular tube filler-putty, but when it's cured it's the most solid thing you've ever seen - you can polish it like styrene, cut it like milliput, scribe it even, and it sticks just like superglue. If it wasn't for the fact that it still gives off a stinging vapour and sticks skin instantly (and is just as hard to get off of your tools) I'd say it was some kind of miracle-stuff. ;-)More usefully, though - I hear you can use corn-starch (or cornflour, for us brits) instead of talcum powder for the same effect. I have a big bottle of talc for use with moulds, so I've never tried that, but people over at the CoM forums swear it works just the same. But yeah, whilst I'd want to use something like that on bits like the bars 'tween the vents it's not really suitable for general hole-filling; it's too tough to sand down afterwards!
-
But it's really solid clumpy lumpy bits, right? Easily sandable, really workable? ;-) Seriously, yeah, it'll do that - I got stumped by the same problem, I was sure I remembered superglue and baking soda, didn't get anywhere... but it turns out that you're not supposed to use baking soda, you're supposed to use talcum powder, which doesn't react with the superglue at all and if anything seems to prolong the cure time of the superglue.
-
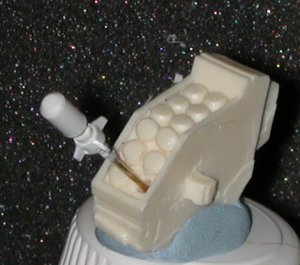
They can fold all they like, I still don't believe they're fitting in there. ;-) (But yeah, mainly 'cause I made the rear end of the missile too wide, compared to the art I could find...) Started with a bit of 3mm styrene rod, stuck it in the end of my dremel and used that as a lathe to saw the grooves and bevel the ends of the front part (after throwing away two previous attempts ;-), mounted that on brass rod, cut the fins out of sheet styrene and superglued them onto the rod, then filled in the gaps with milliput and shaped that to fit... mostly by holding a dampened sculpting tool in place and rotating the missile underneath it. I'm not going to even try and cut those little grooves in the side at this scale, I don't want to push my luck...
-
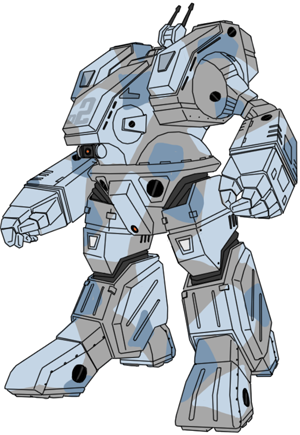
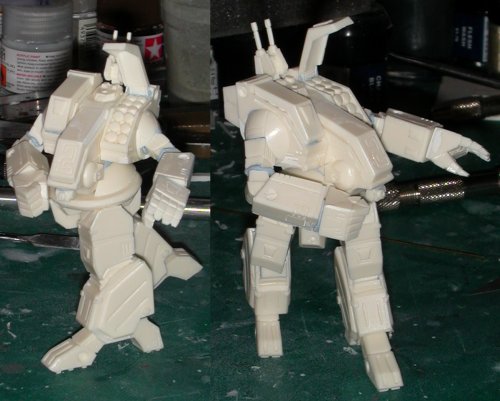
I've been putting a hour or so a night into this one in between other stuff for a couple of days - it's a filthy recast of an old Yellow Sub kit, so I've spent probably as much time sanding down and filling in ridges and gaps where the mould halves didn't line up properly and re-etching and drilling detail as I have actually posing and building the thing... I'm trying to give it a bit of a more dynamic look than default, the hemisphere at the waist has been sawn off to rotate around (I'm pretty sure I've see a Spartan do that, but if not then... eh, artistic license - blame my Battletech upbringing... ;-), the right knee joint removed and pinned in a new position, it'll need a new bendy bit sculpted. Still debating with myself as to whether the left knee needs bending at all, I'm already pretty much resigned to redoing the joints at the hips. ...and one of the missiles modelled being fired. It's not perfect for the original art, but it's close enough for me. I'll explain how the fins and that huge rear section fit inside the launcher when someone explains to me how the upper missiles fit in at that odd angle without occupying the same space as the ones just below them. I swear these things have tardis-like torsos. ;-)

-
Preferrably both, really... Just staying off-topic for a moment, it's worth noting too that it's important when you're choosing a mask that you get one that filters organic compounds, a lot of the ones I've seen on sale locally seem to be designed with dust more in mind than paint, but they look like the real deal... I believe anything designed for spraying cars should be adequate, but it's still worth making sure. (Still, on a cheerier note, thanks for these nice detailed buildups, Mr. Cheng; I think it was one of these threads linked to from elsewhere that brought me to MacrossWorld in the first place, it really is useful to see everything. ;-)
-
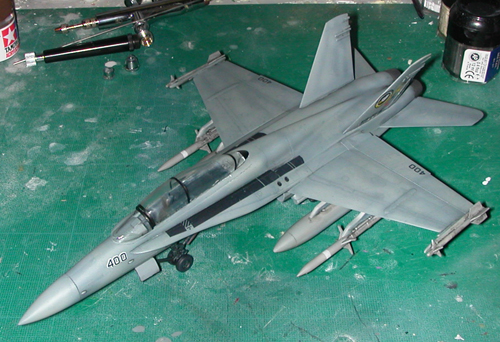
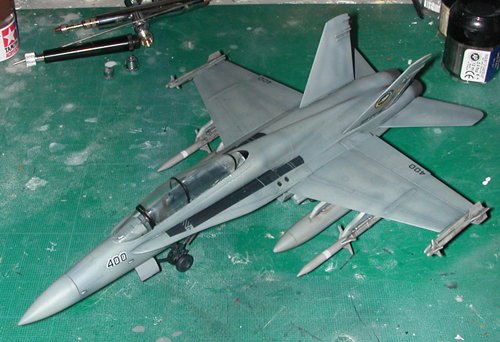
Man, it looks pretty nice from here, from what I can see. How are you finding conversion from a papercraft to plastic? It's always looked like one of those things that ought to be pretty straightforward... but I don't know how stuff like sheet styrene being thicker than paper and more resistant to curving might get in the way. Speaking of which, actually... how did you go about making the radar cover? It's the kind of shape I'd be looking for a pre-fab piece for, I can't think where I'd start on something like that... All my workbench time over the last week or so has been spent sculpting figures, but in deference to the Valkyrie I'm kind of just started building I did a practice build of a Revell Hornet to get back into aircraft modelling after years of nothing but mecha... in retrospect I think I must have been six the last time I actually finished an aircraft kit with paint and decals and everything. ;-) I don't know why, but I've always really liked the Hornet, although those boxy intakes on the Super Hornet killed the aesthetic for me. :/ The valk is my first exposure to photoetched parts so I'll still have something to mess up terribly... not to mention that I'm still not happy with the cockpit at all. I blame the poor casting! ;-)
-
Well, they all fit in at the same time, if that's what you mean... getting the pilot to hold the sticks may be a little more of a challenge... ;-)
-
It would explain the tale about Adam seeing a previous version of Eve being made in front of him and getting put off. "Man! All that sanding? How do you have the patience for that?" Seriously, though, watching the work unfold is really impressive. I'm part-way through a similar-sized figure (not macross related) using the miniatures-sculpting approach out of epoxy putty, this approach starts to look more and more appealing... ;-)
-
"Warlock Purple", last time I bought any [purple] citadel paints... but that was years ago ;-)
-
I've used it, although it's not my favourite of the resins I've used. I can't vouch for it being 'safe', but I'm not dead yet. Does that count? The outside of the bottle reads: ...so in what way was it supposed to be 'safe'? ;-) Seriously, you should always use resins in a ventilated area, they give off fairly nasty fumes while they're curing, and you should always wear gloves and avoid getting them on your skin. If you're careful and not stupid then you should be fine, but keep the stuff out of your kitchen. ;-) Alumilite is a fairly expensive resin to use, though, for what it is... it's functionally identical to any number of more generic brands and notably more expensive. Some people claim it's more prone to getting air trapped in it, too.
-
I don't have that particular airbrush, but I imagine the function is the same; on mine you adjust that dial to block the trigger. Pulling the trigger backwards pulls the needle back, opening the nozzle at the front and allowing the paint out, so pulling the trigger back different distances results in more paint (and realistically, a wider spray pattern). Adjusting that knob will prevent the trigger from being pulled all the way back, limiting the possibility of full-open spray. (On single-action airbrushes a similar knob will just set how far open the nozzle is by moving the needle forward and back)
-
Hmm... I read through this whole thread a couple of days ago and I'm fairly sure that the explanations you're after were in the posts you must have gone past to get the images... As far as I remember, the shading was done by airbrushing a dark shade (probably smoke, I guess) into the edges, the blocking in the wing gap is a bit of pretextured styrene sheet cut to fit and the magnets are for allowing the FAST packs to be detached and fitted without spoiling the look of the thing when they're not on. Off the top of my head.