
Chas
-
Posts
877 -
Joined
-
Last visited
Content Type
Profiles
Forums
Events
Gallery
Posts posted by Chas
-
-
Yes with wings opened there is some space, but not very much at all.
Evidenced by the promo pics.
If dead centre is 12 o'clock then the rotation seen in that pic is about 11:00 at best.
I think you are right with the crunch/knee mods.
As it is the only real benefit is the TV style hands, which could be added to a reissue of the weapons set along with a TV pilot.
I'd buy a bunch of those instead of this, which is an easy pass.
-
Given how trapped the top of the legs are between the bottom of the chest intakes and the wings, is there really much point to the rotating the waist gimmick? I mean at most you might get 3-4 mm in rotation.
-
11 hours ago, Big s said:
Probably, but it would take some sculpting skills. You’d probably have to redo the hand and with the helmet dead, you would have to drill out the face and make the inside of the helmet. I think the helmet wouldn’t be too tough after getting the inside removed, then you could just use some epoxy to shape some simple padding.
I was hoping that the face might be a separate piece that fits inside the helmet. If it's all one piece then that would be a no go. If the face is separate then that makes it more possible, but I guess I'll need to see what the parts actually look like to know if it's doable.
-
I wonder if Milia could be modified so that she is holding the helmet in her right hand?
-
Holy Crap! Once you build that thing what do you do with it? Take it apart, put the pieces in boxes and store them in a closet?
It's awesome, but probably one of the most impractical models I've ever seen.
-
I would think that should be a no-brainer ( but I don't have the market research to back that belief up).
-
28 minutes ago, Big s said:
Preorders are still up for the Mirya, and the Queadluun Rau isn’t too tough to find in stock and is surprisingly inexpensive for how big it is. I highly recommend the Queadluun Rau. It’s a great kit and from the promo pics the Mirya figure kit looks great as well
Thanks! Yeah HobbySearch has the Q. Rau but I missed their Milia preorder. HLJ has both available though.
-
1 hour ago, Big s said:
That’s actually the promo pic that hasegawa put out last week for the Mirya resin kit. Should be coming out soon. There’s a couple more pics in the coming soon for hasegawa section
So I might have to pic these two up now. I think they would look good with the Playmax battroids and figures.
-
That's huge!
It works realy well as an awesome display base for the little valks.(although I don't know that valks ever launched off the deck of Daedelus).
However, keeping in mind that it is difficult to tell from the quality of the photo, it looks a little too toy-like for my liking. Not enough detail.
That being said, I also realize that it may not be finished.
I saw this recently from Twitter and thought it was a solid build of both kits, but I really like it 'cus the kits actually work well together - like the figure is in scale with the mech.
-
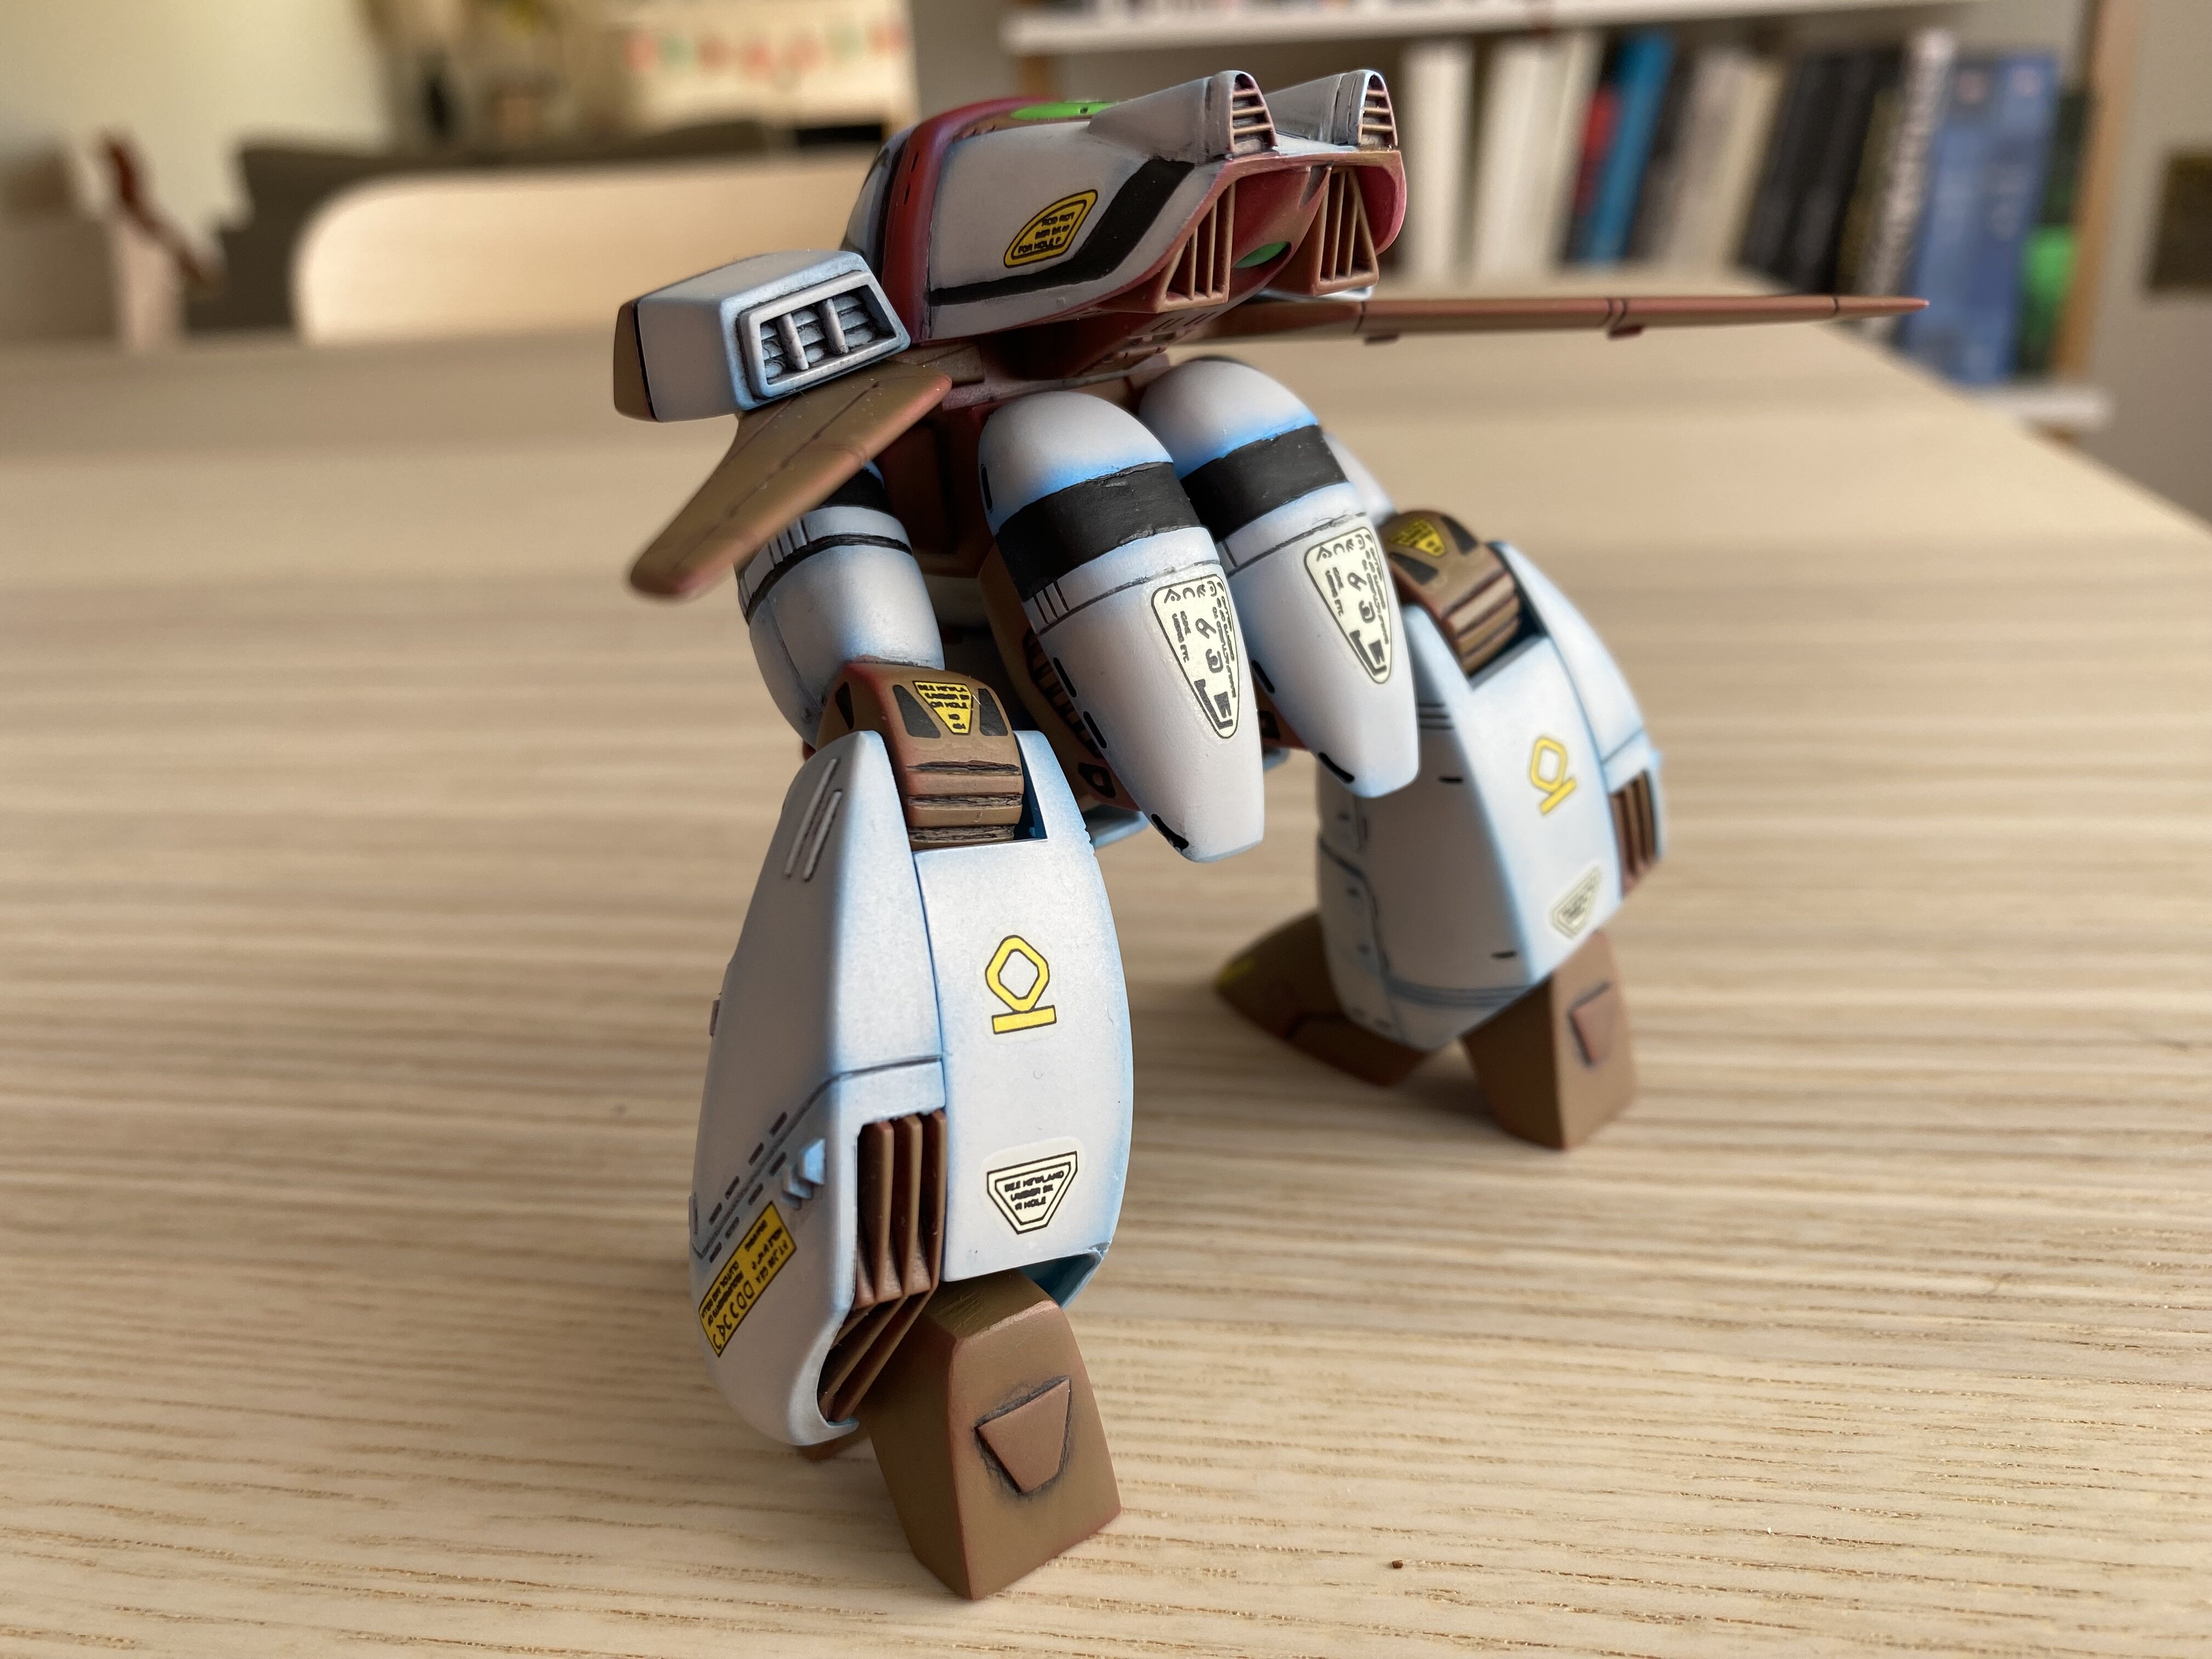
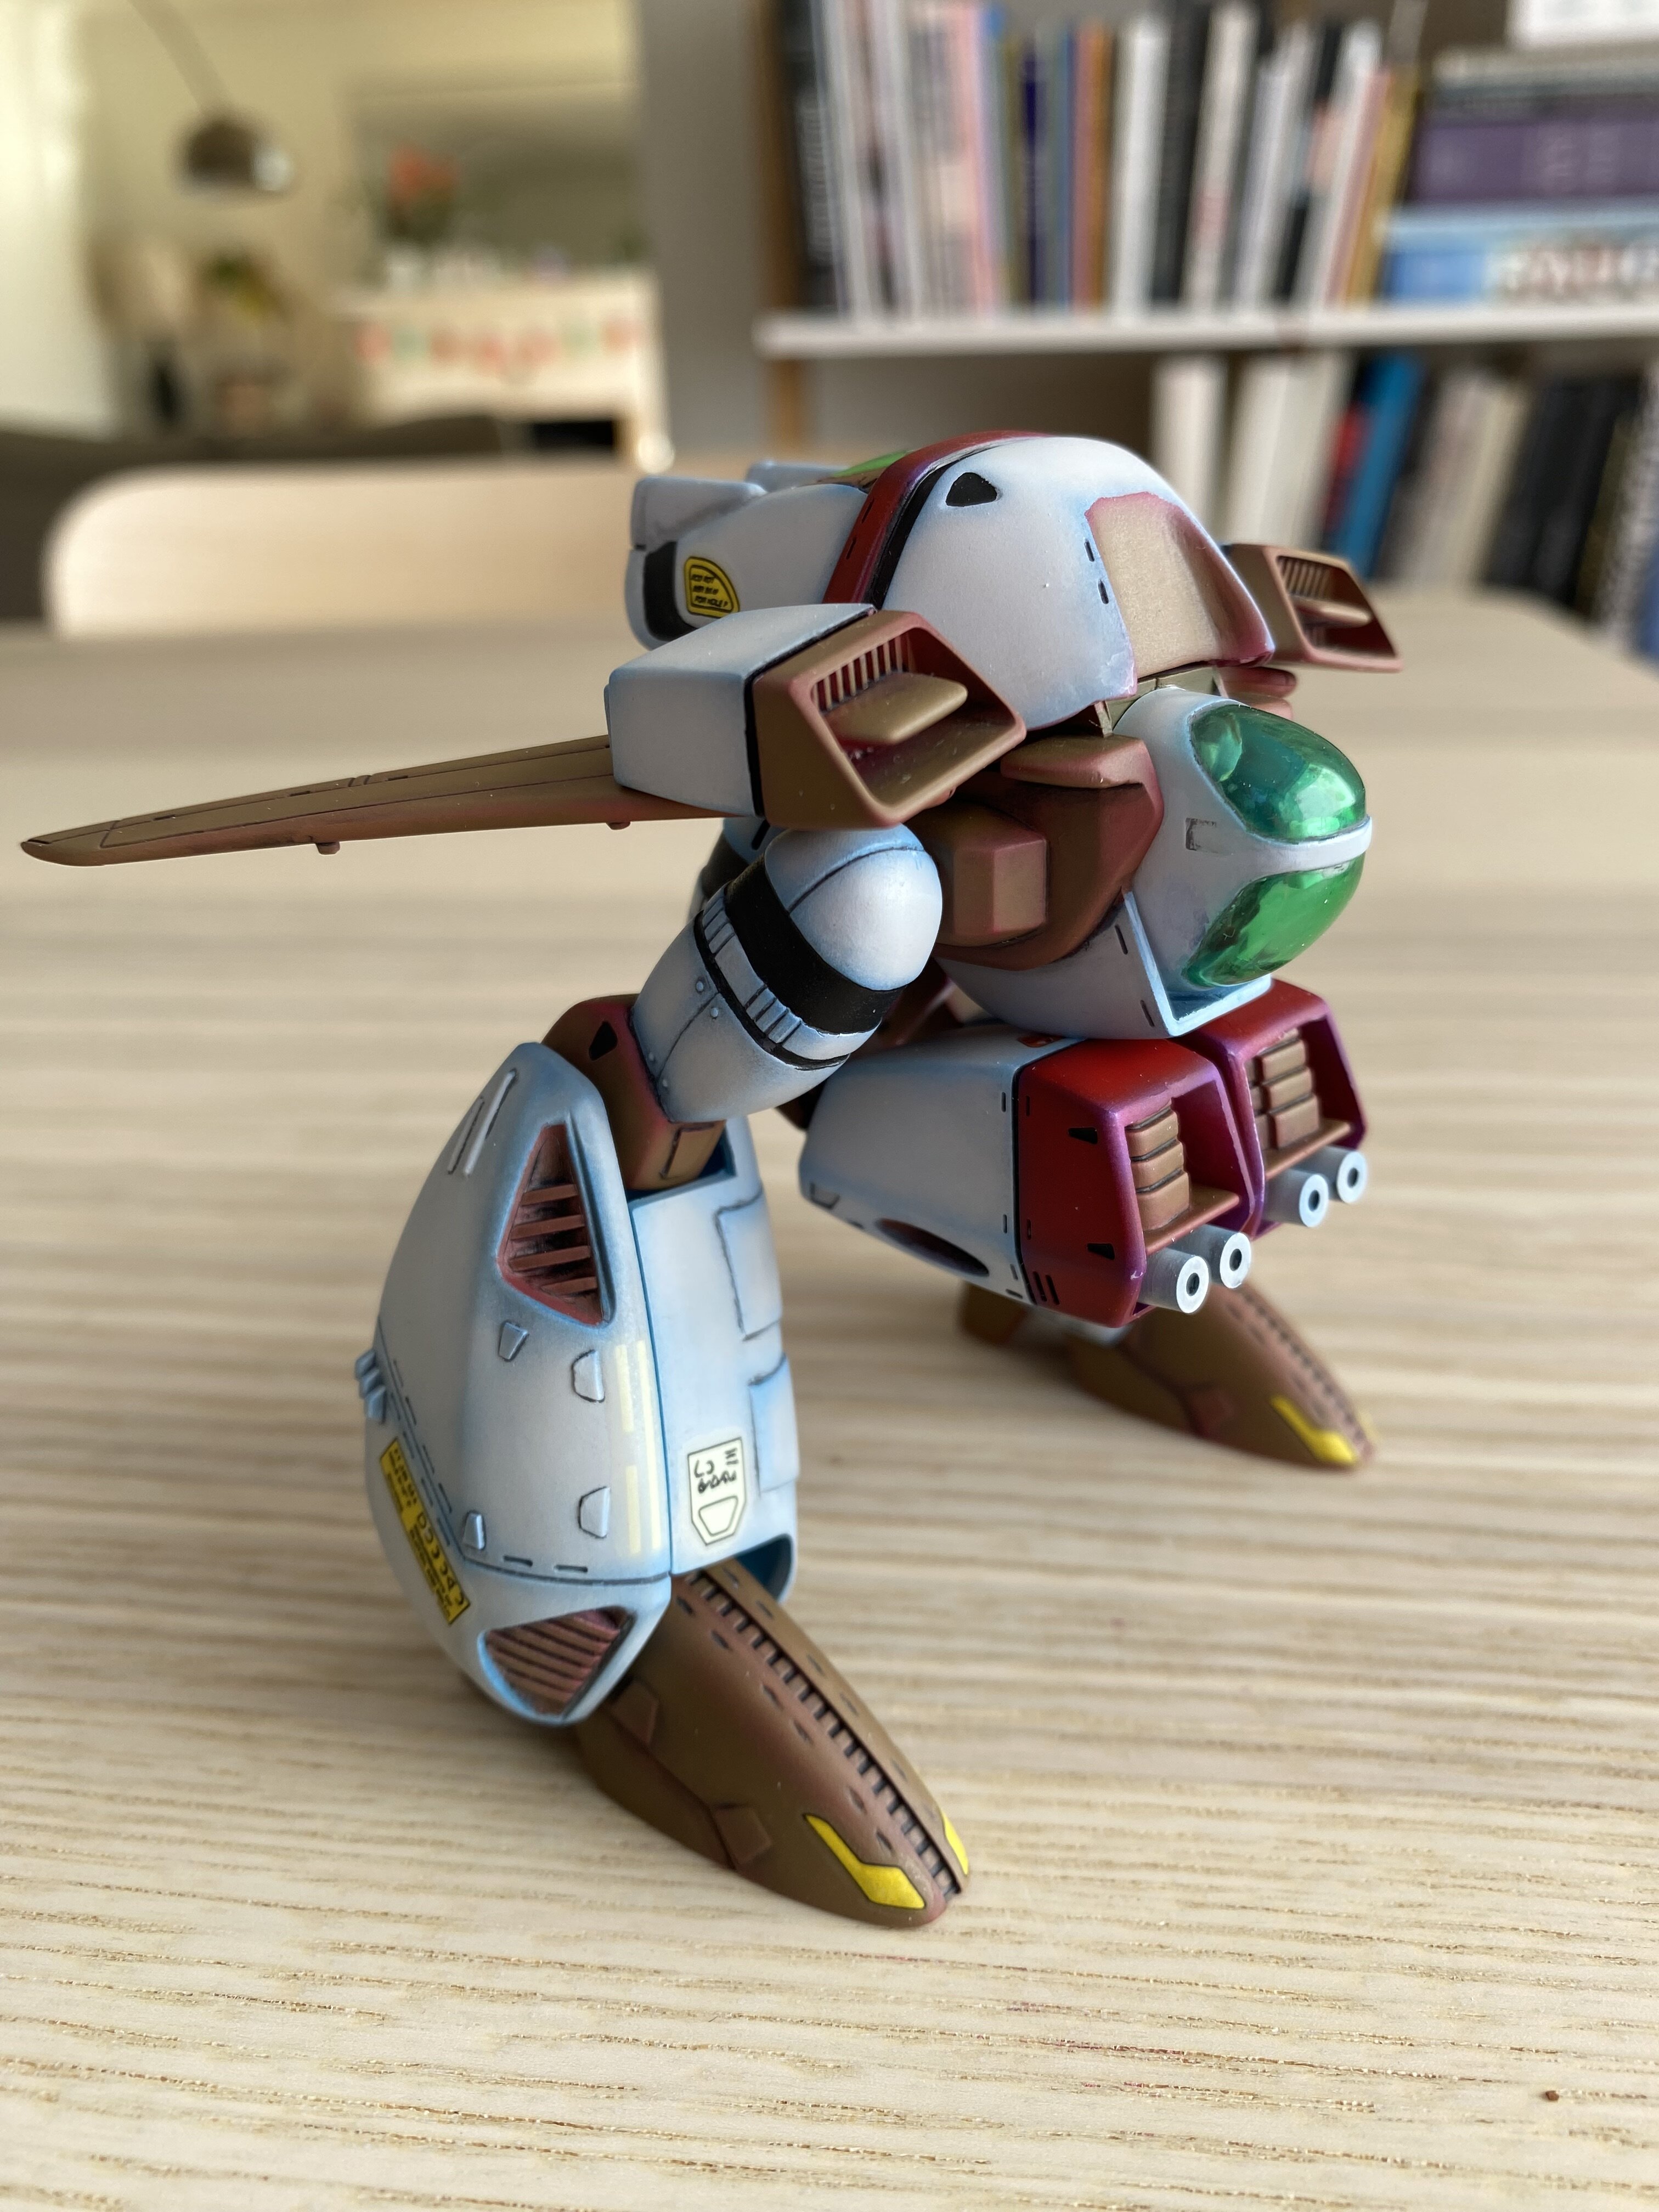
Wow! What a fabulous paint job!
Just outstanding!
-
On 5/23/2025 at 8:05 PM, Papa Rat said:
Little buddy says hi. I think it came out ok. Pretty much a straight build. I think it needs some weathering.
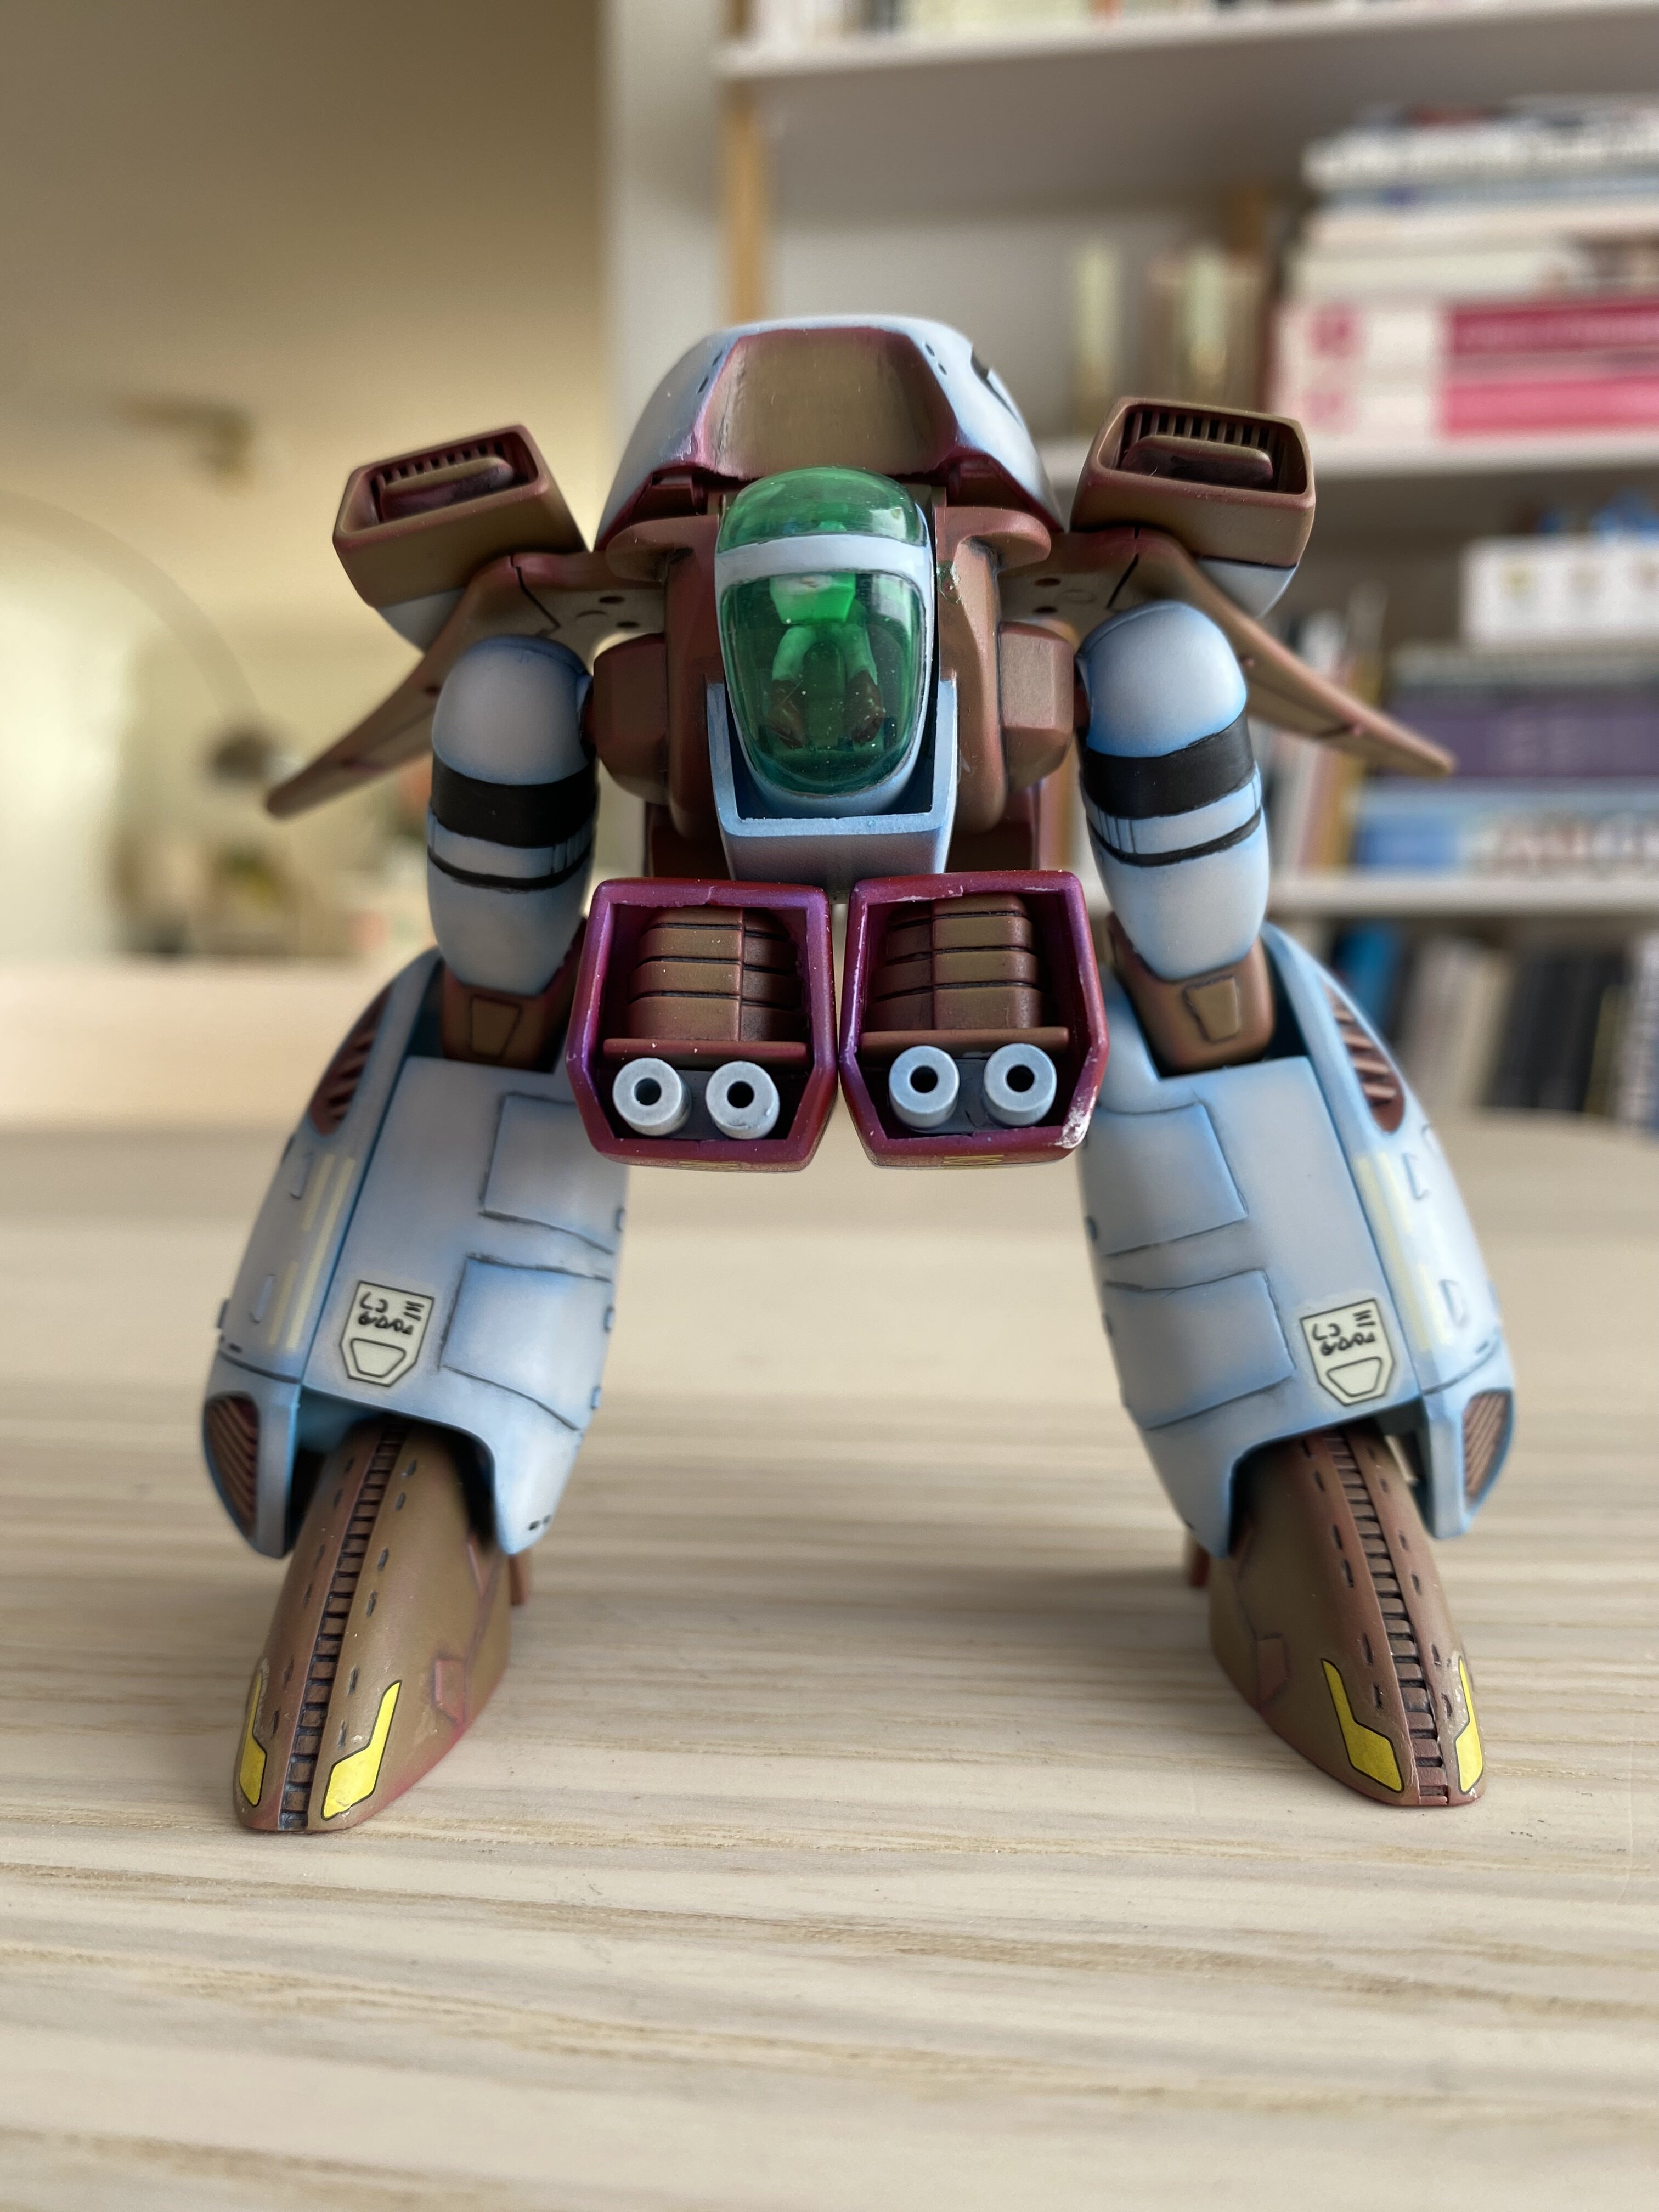
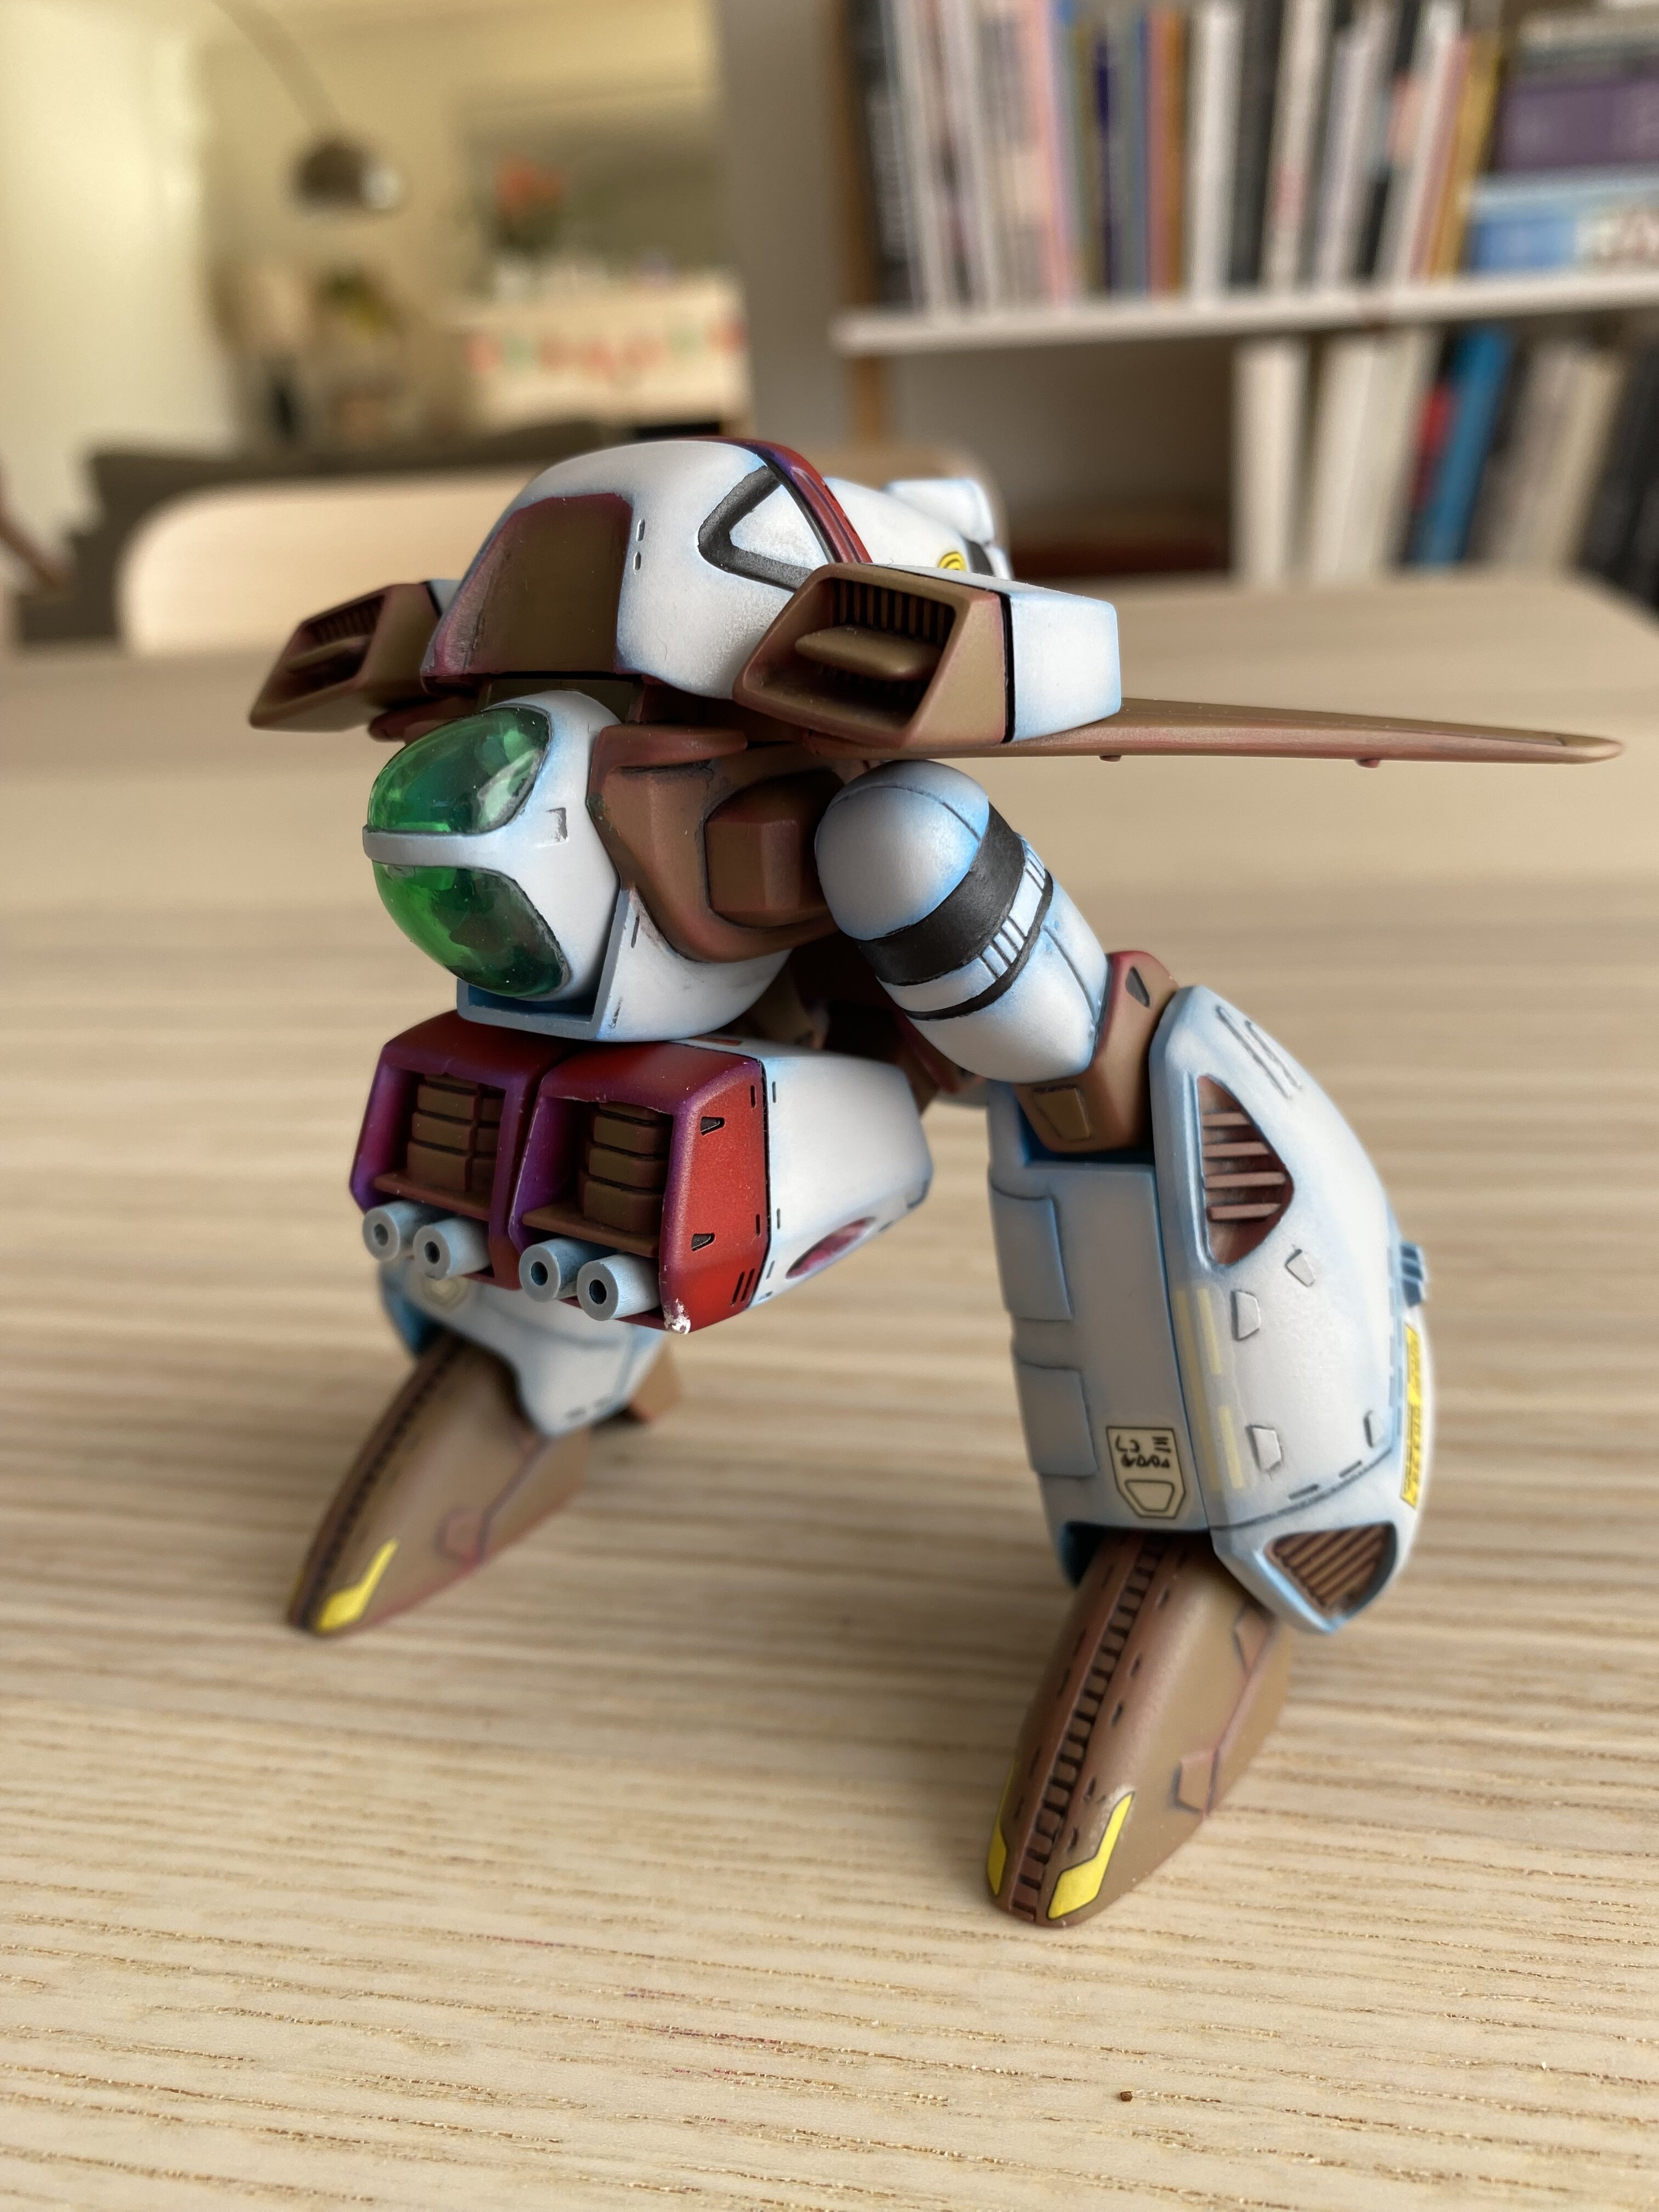
Looks good! I like the blue, nice touch.
19 hours ago, derex3592 said:AK Real Color F-15 Modern Eagle 🦅 Gray went down this morning and it's very nice paint, however nowhere near as dark as I was thinking it was going to be, so tomorrow morning I will start laying down light coats of Vallejo Medium Gunship Gray and see where we end up! Stay tuned!
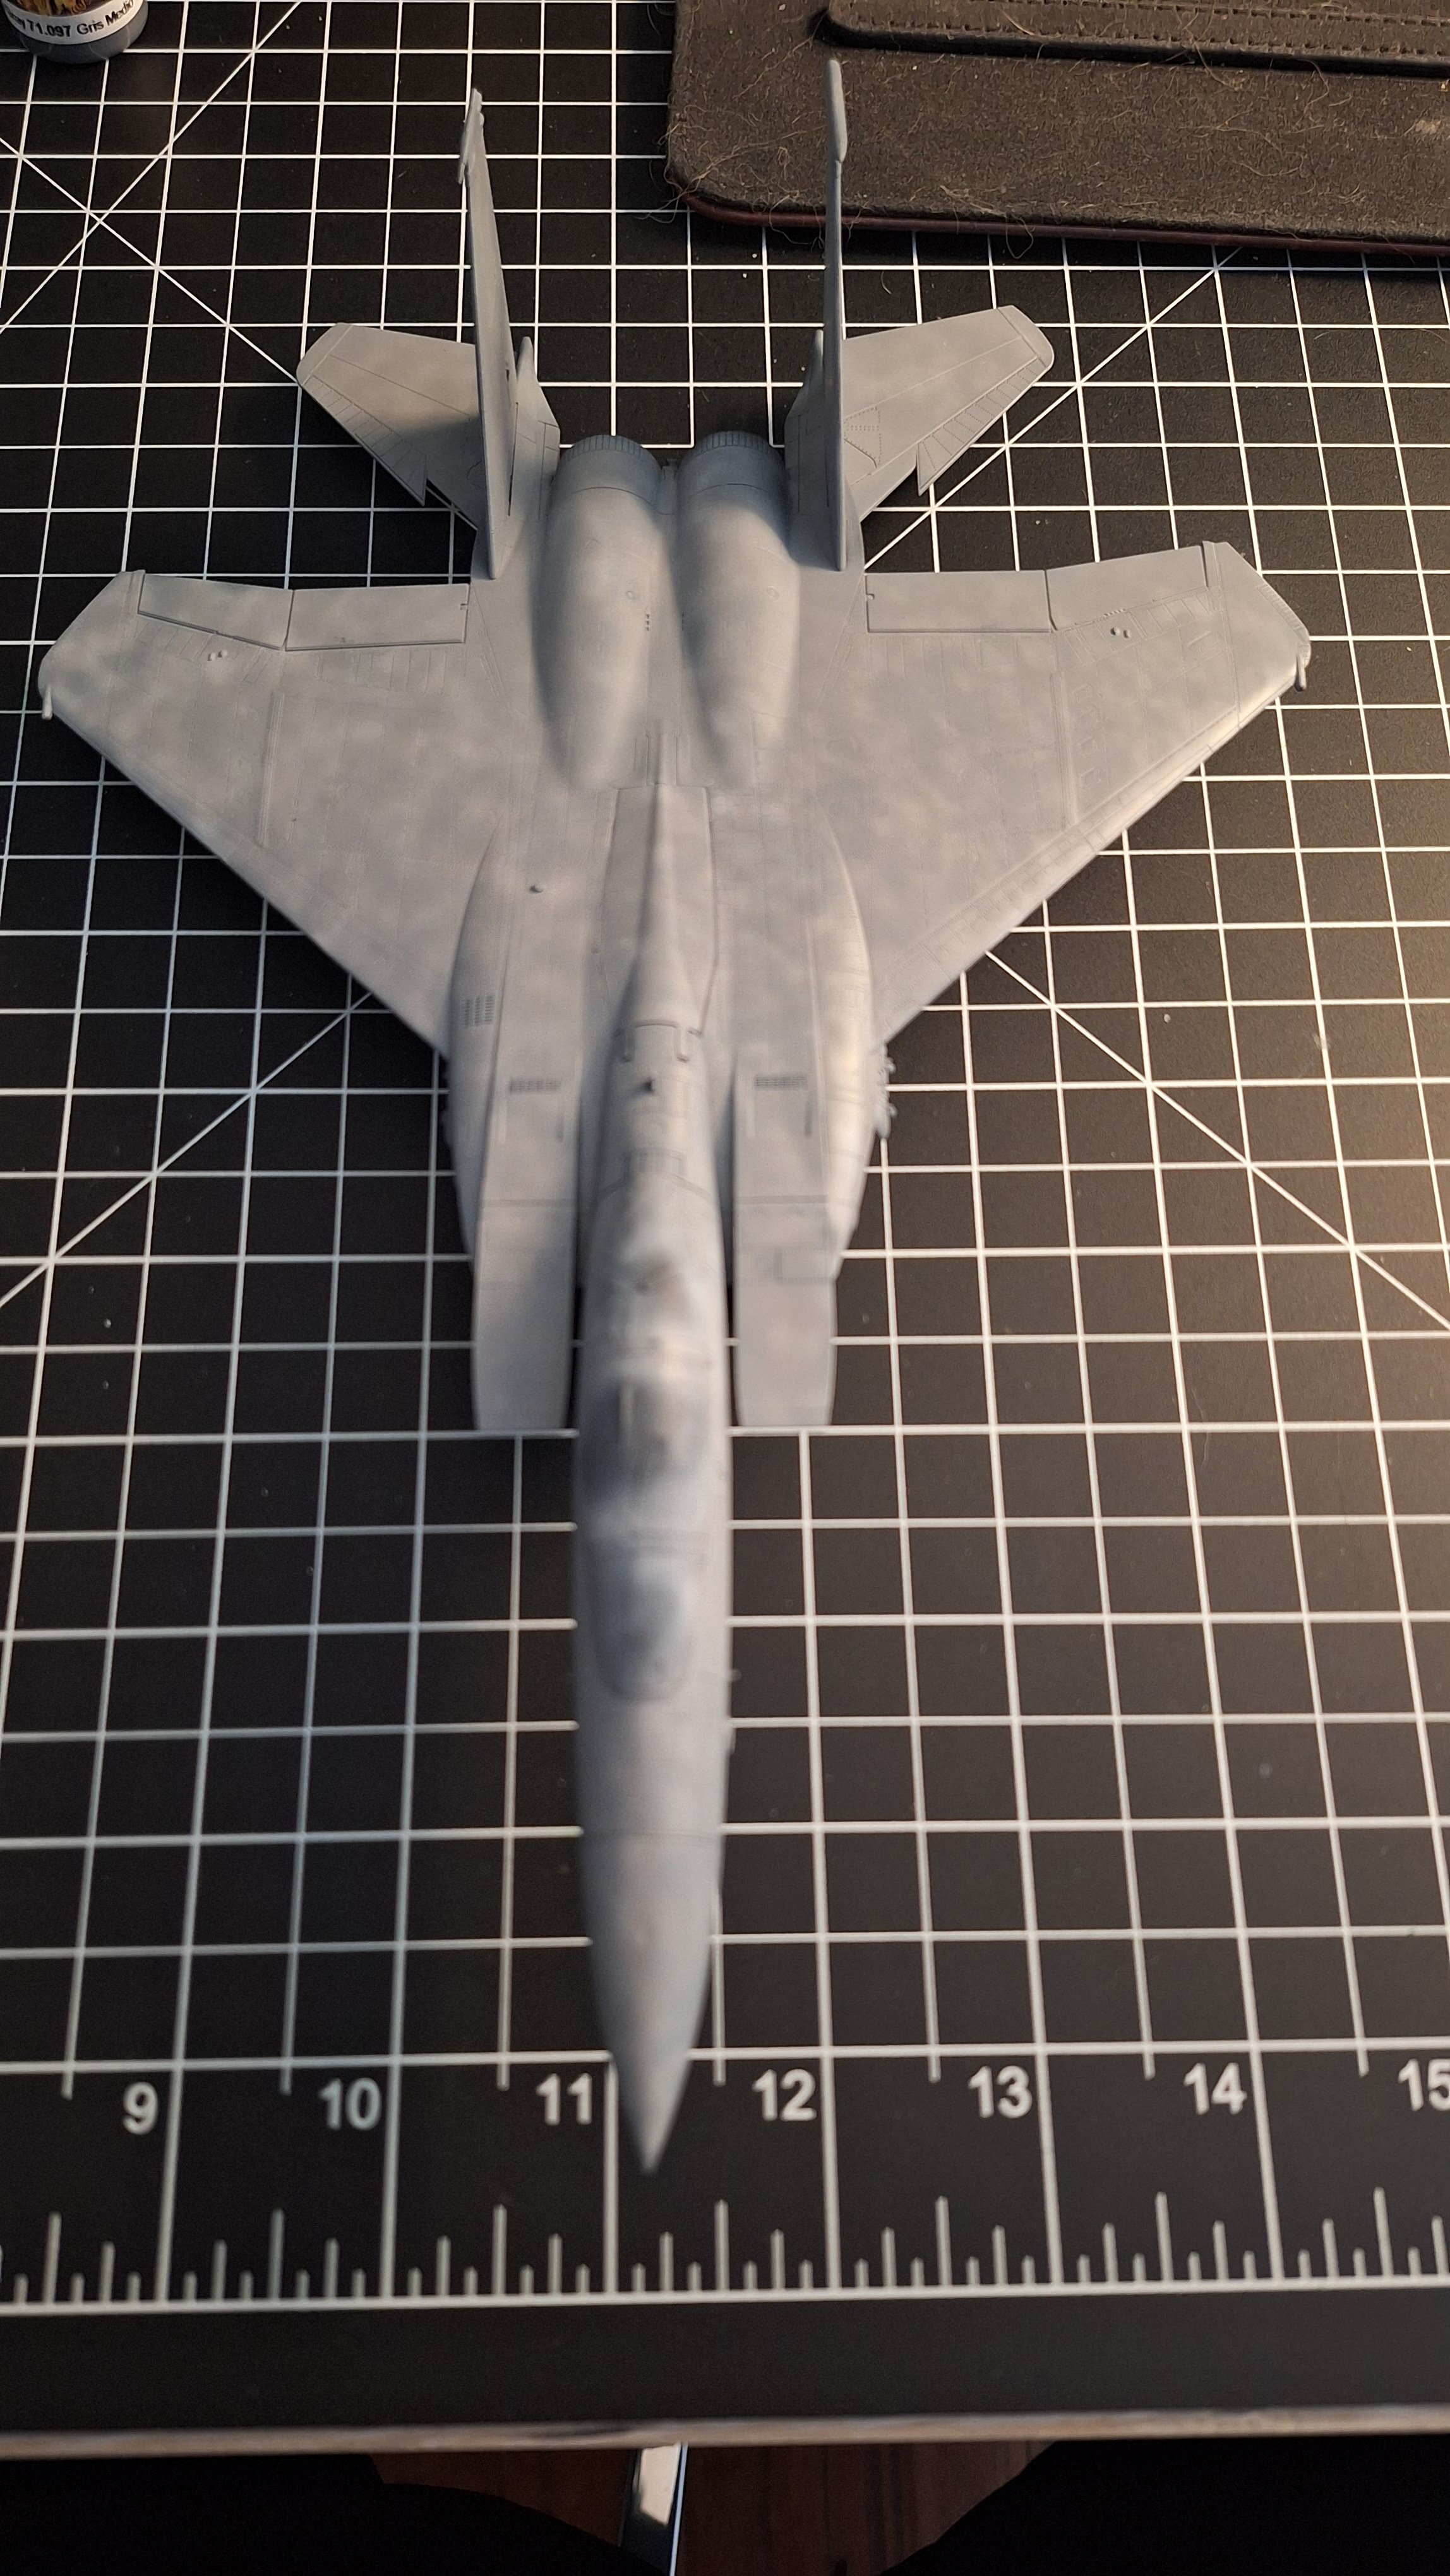
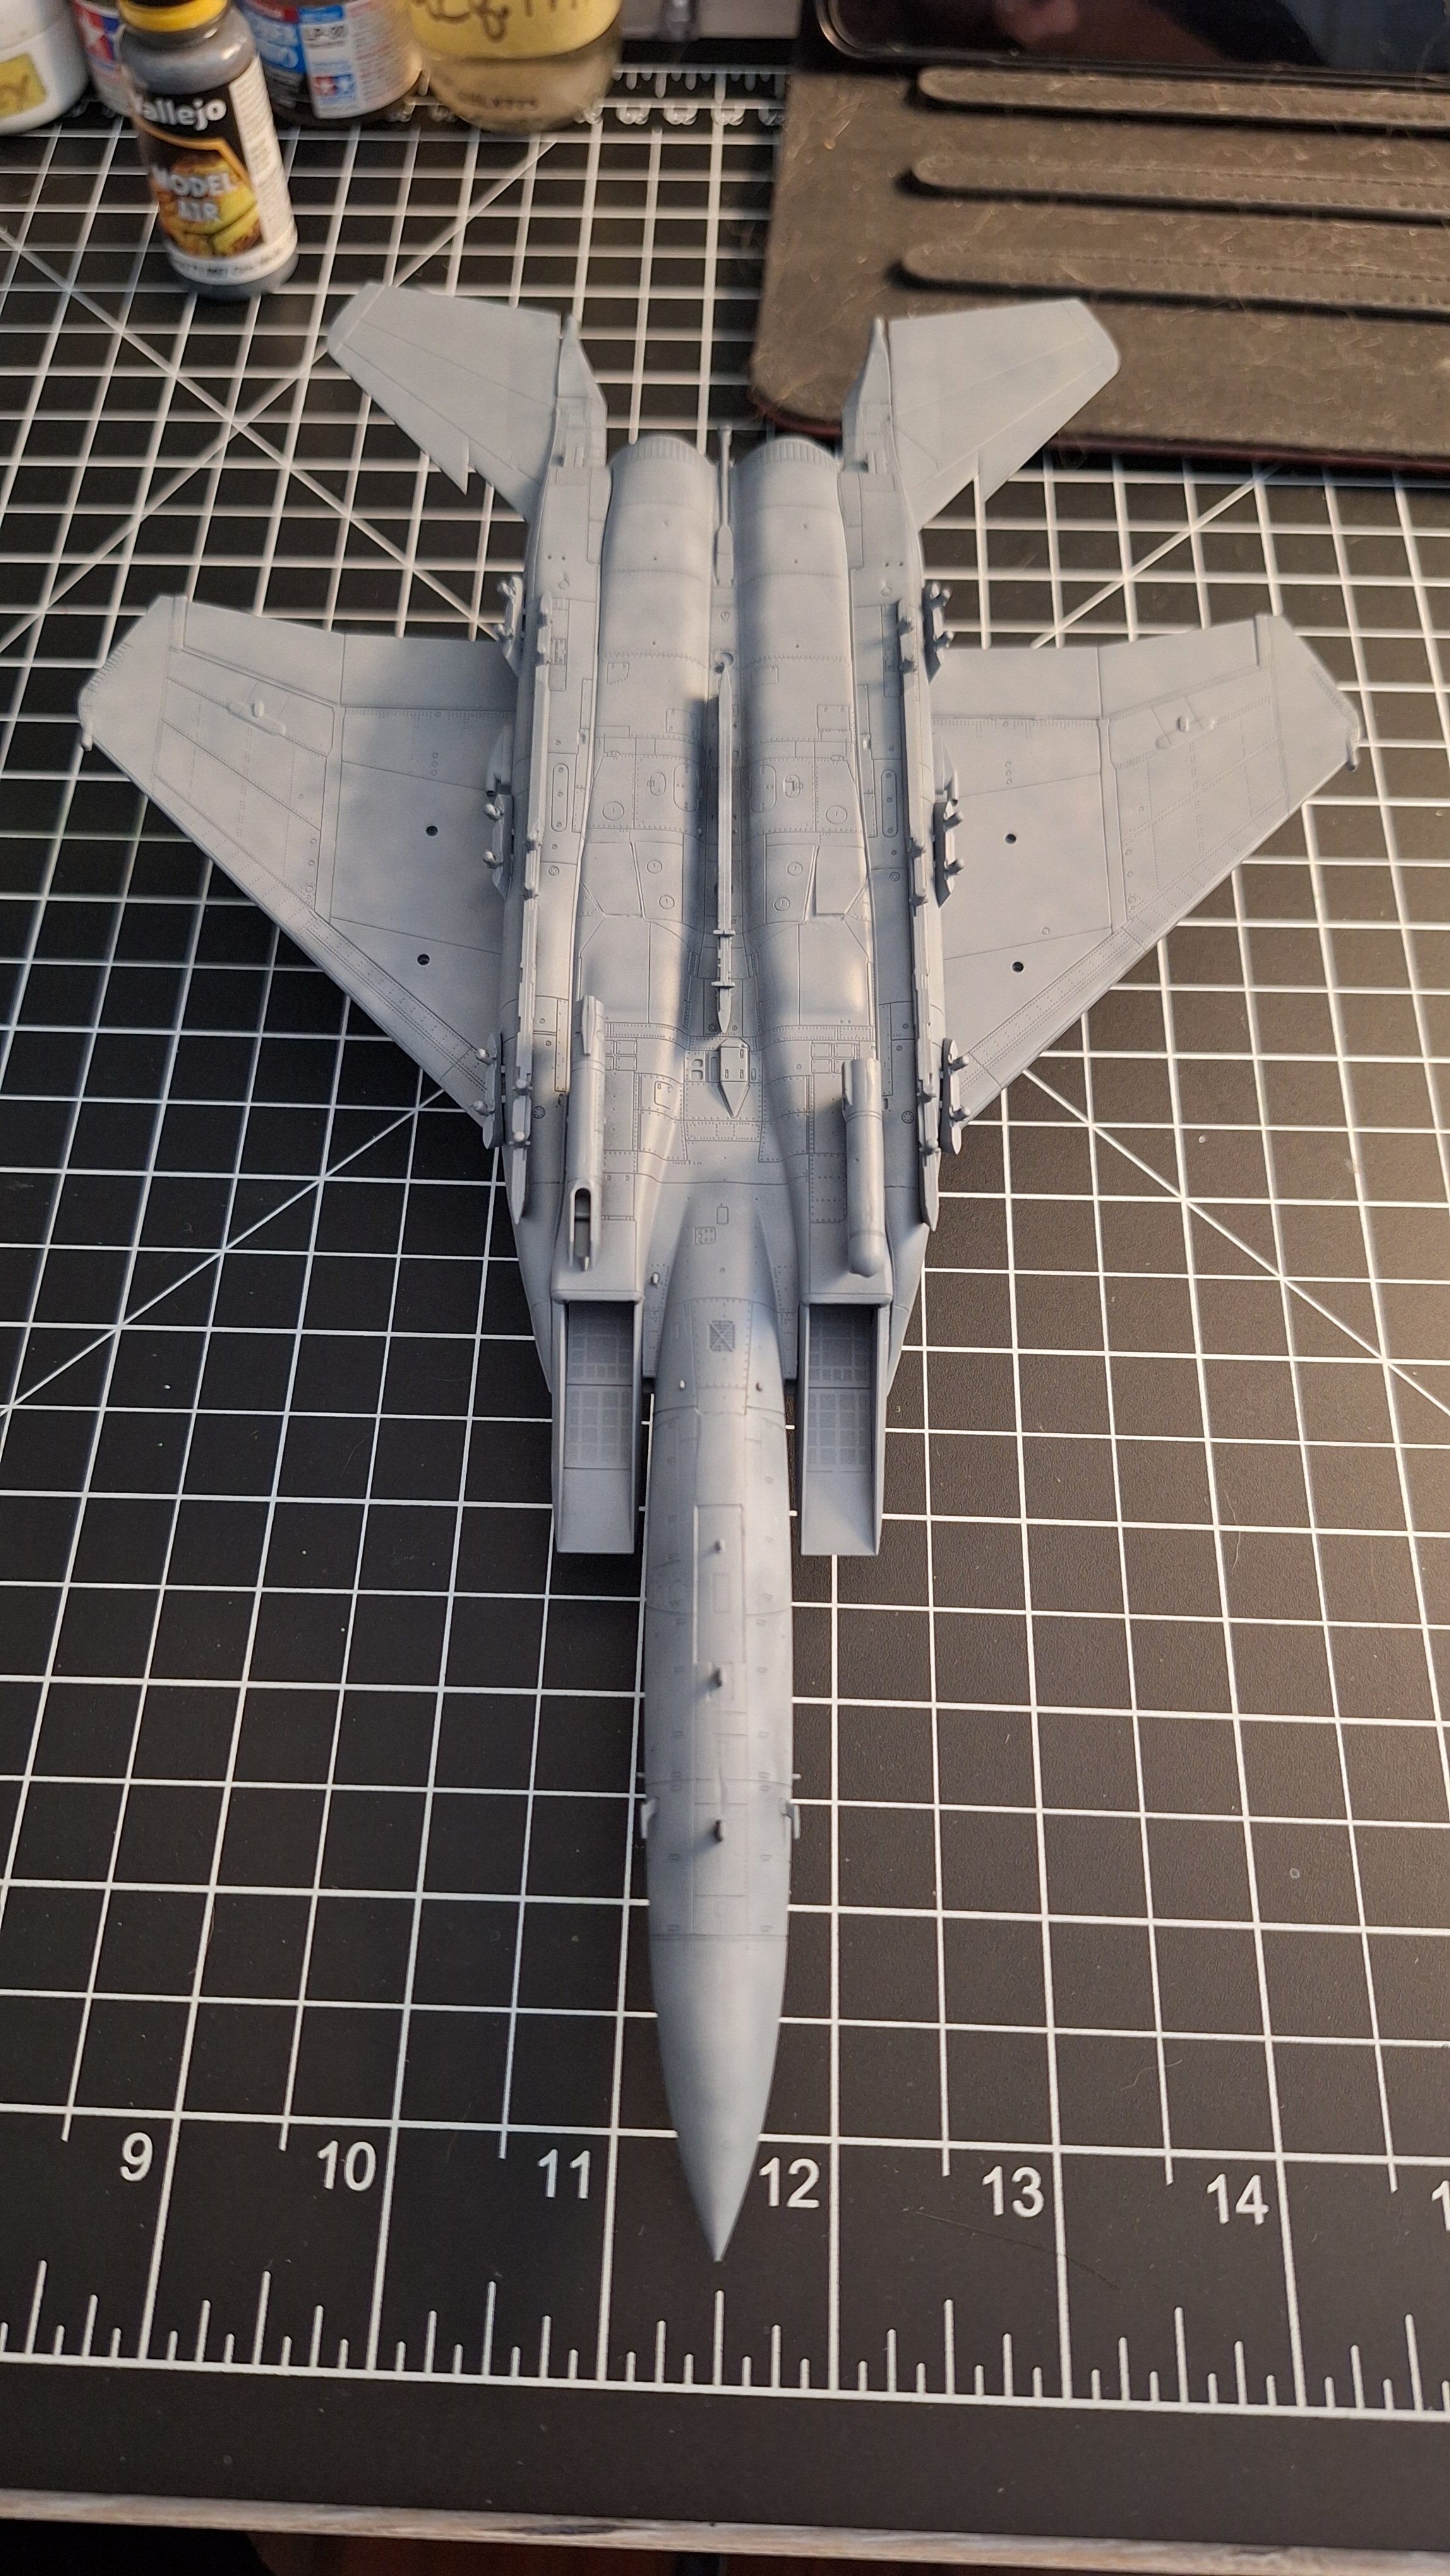
I like the overall tonal shifts you have in the paint as it is. I think hitting it with some dark panel lines would set it off well and balance it all out. Hope the darker gray works out for you.
6 hours ago, SteveTheFish said: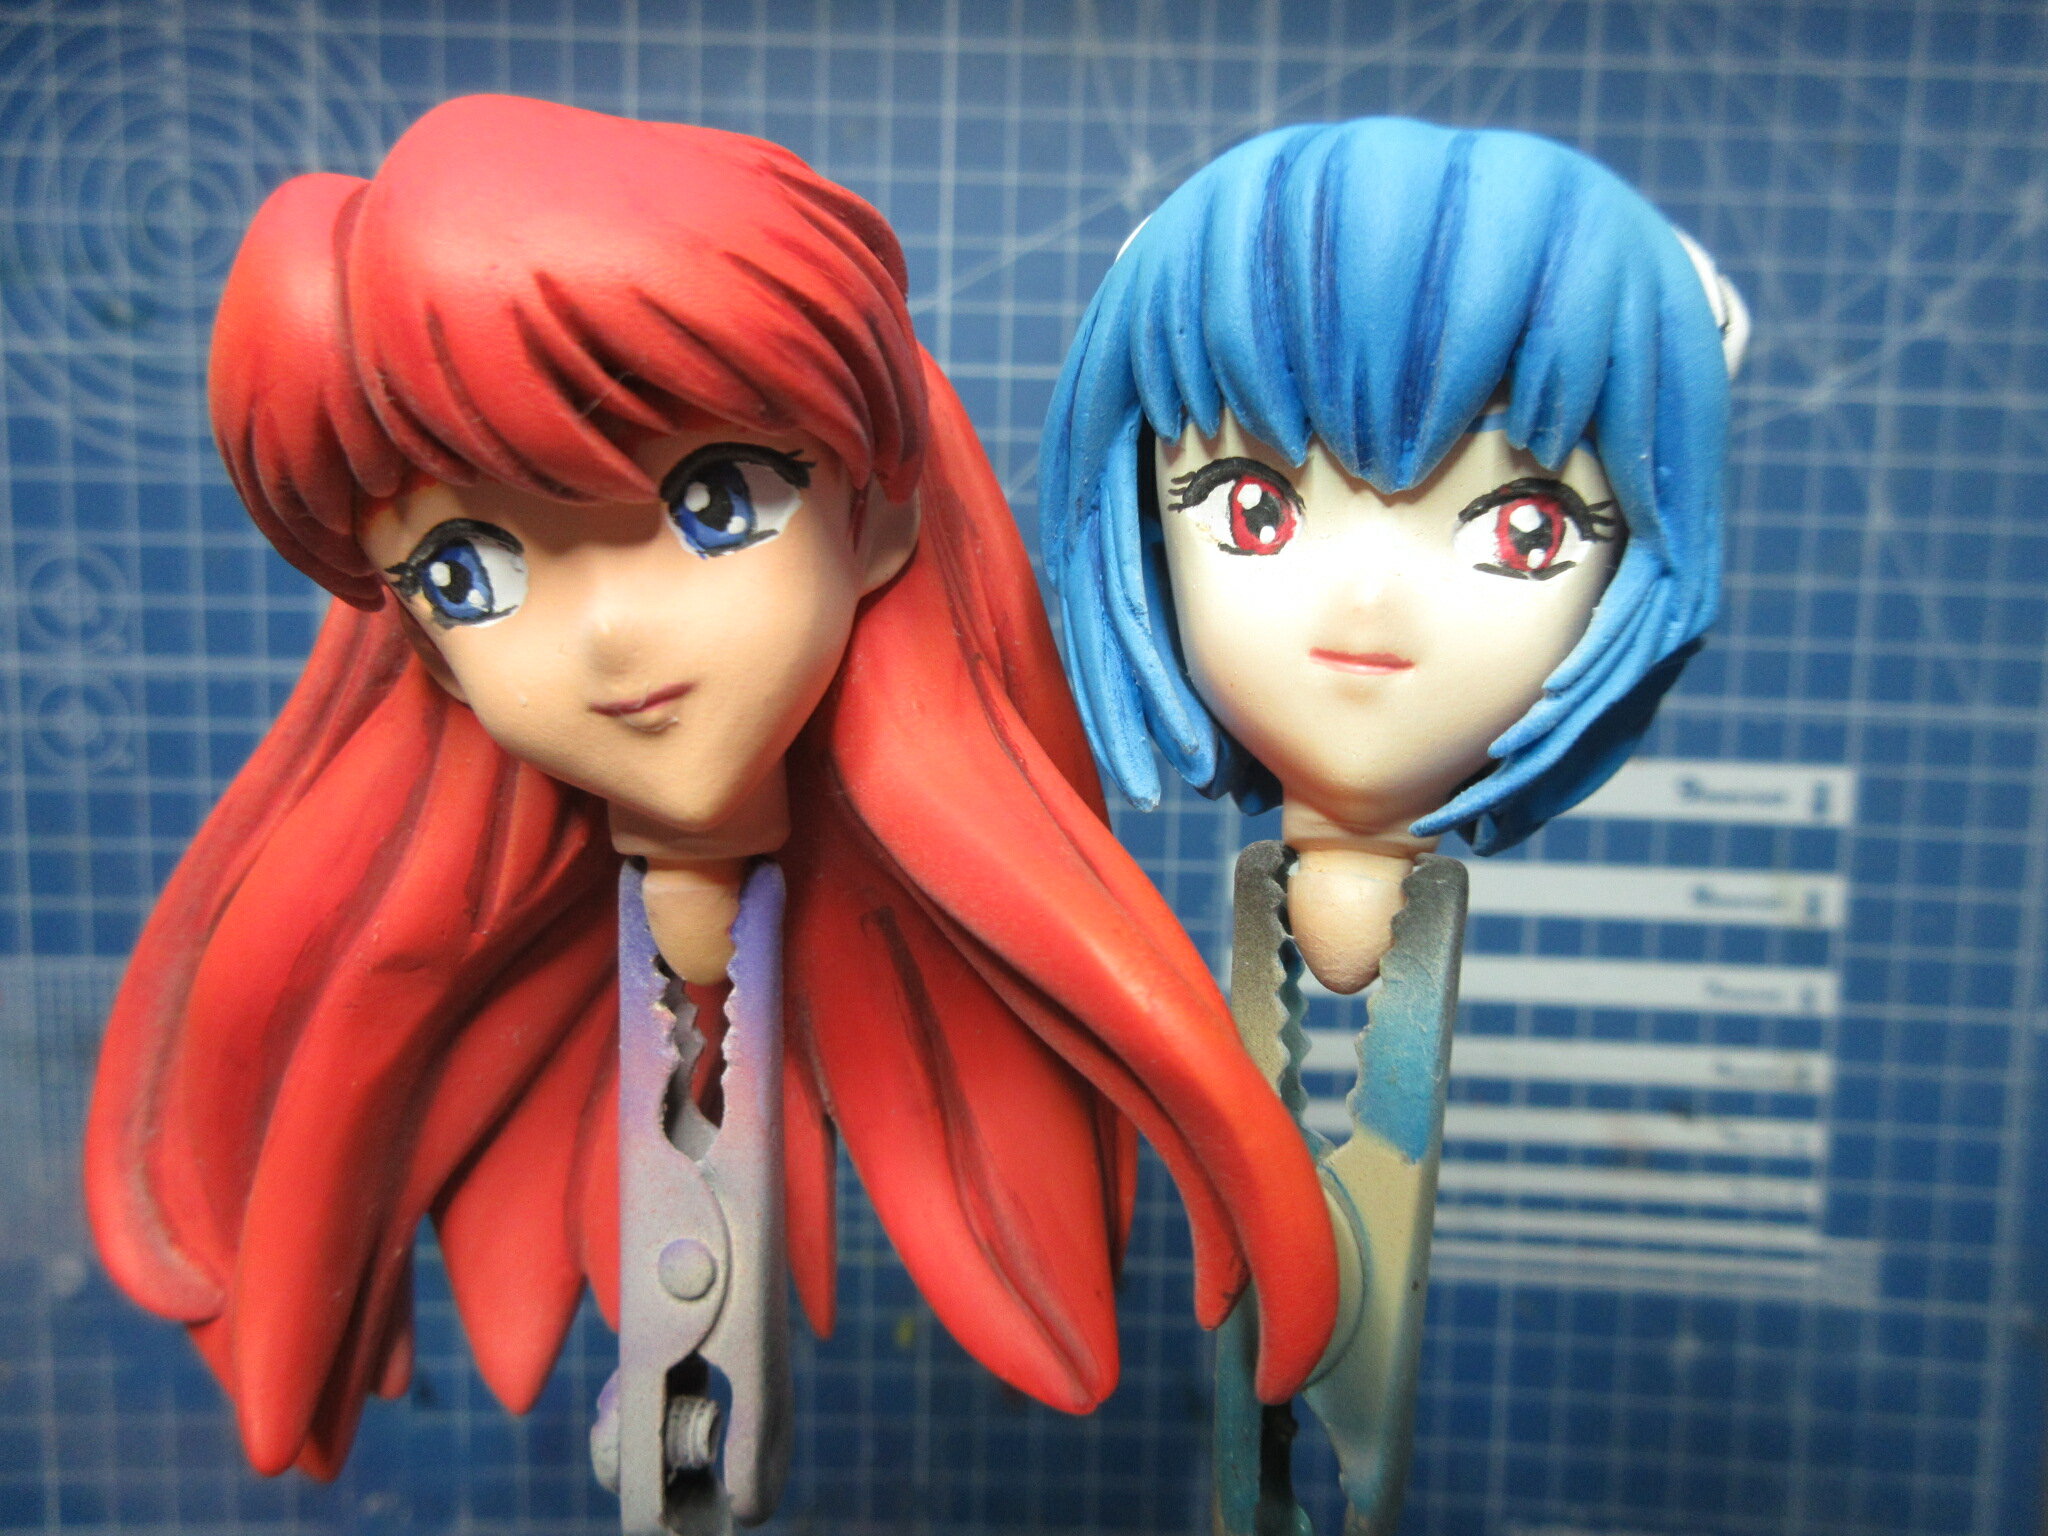
My Rei and Asuka sofubi figures are coming along. I used dark blue pastel chalk to do the recessed areas of Rei's hair and an acrylic goache mix of burnt umber and red to do Asuka's hair. Then I did a flat clear coat of V-Color to seal them in. I think I'm ready for assembly now.
As always, just love your figures Greg. Those eyes are hand painted too! Just awesome.
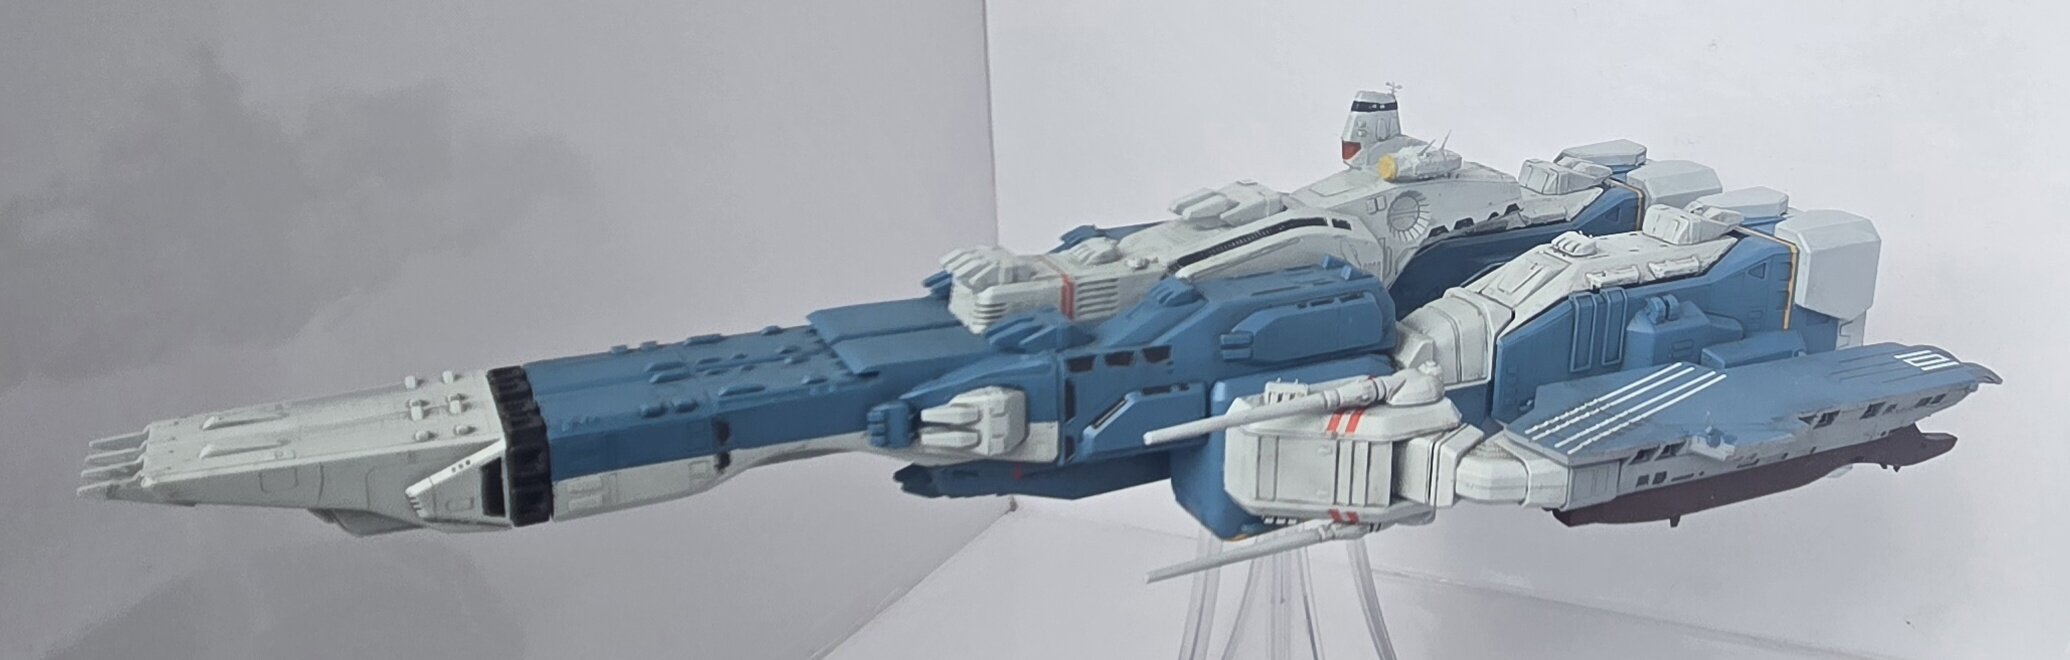
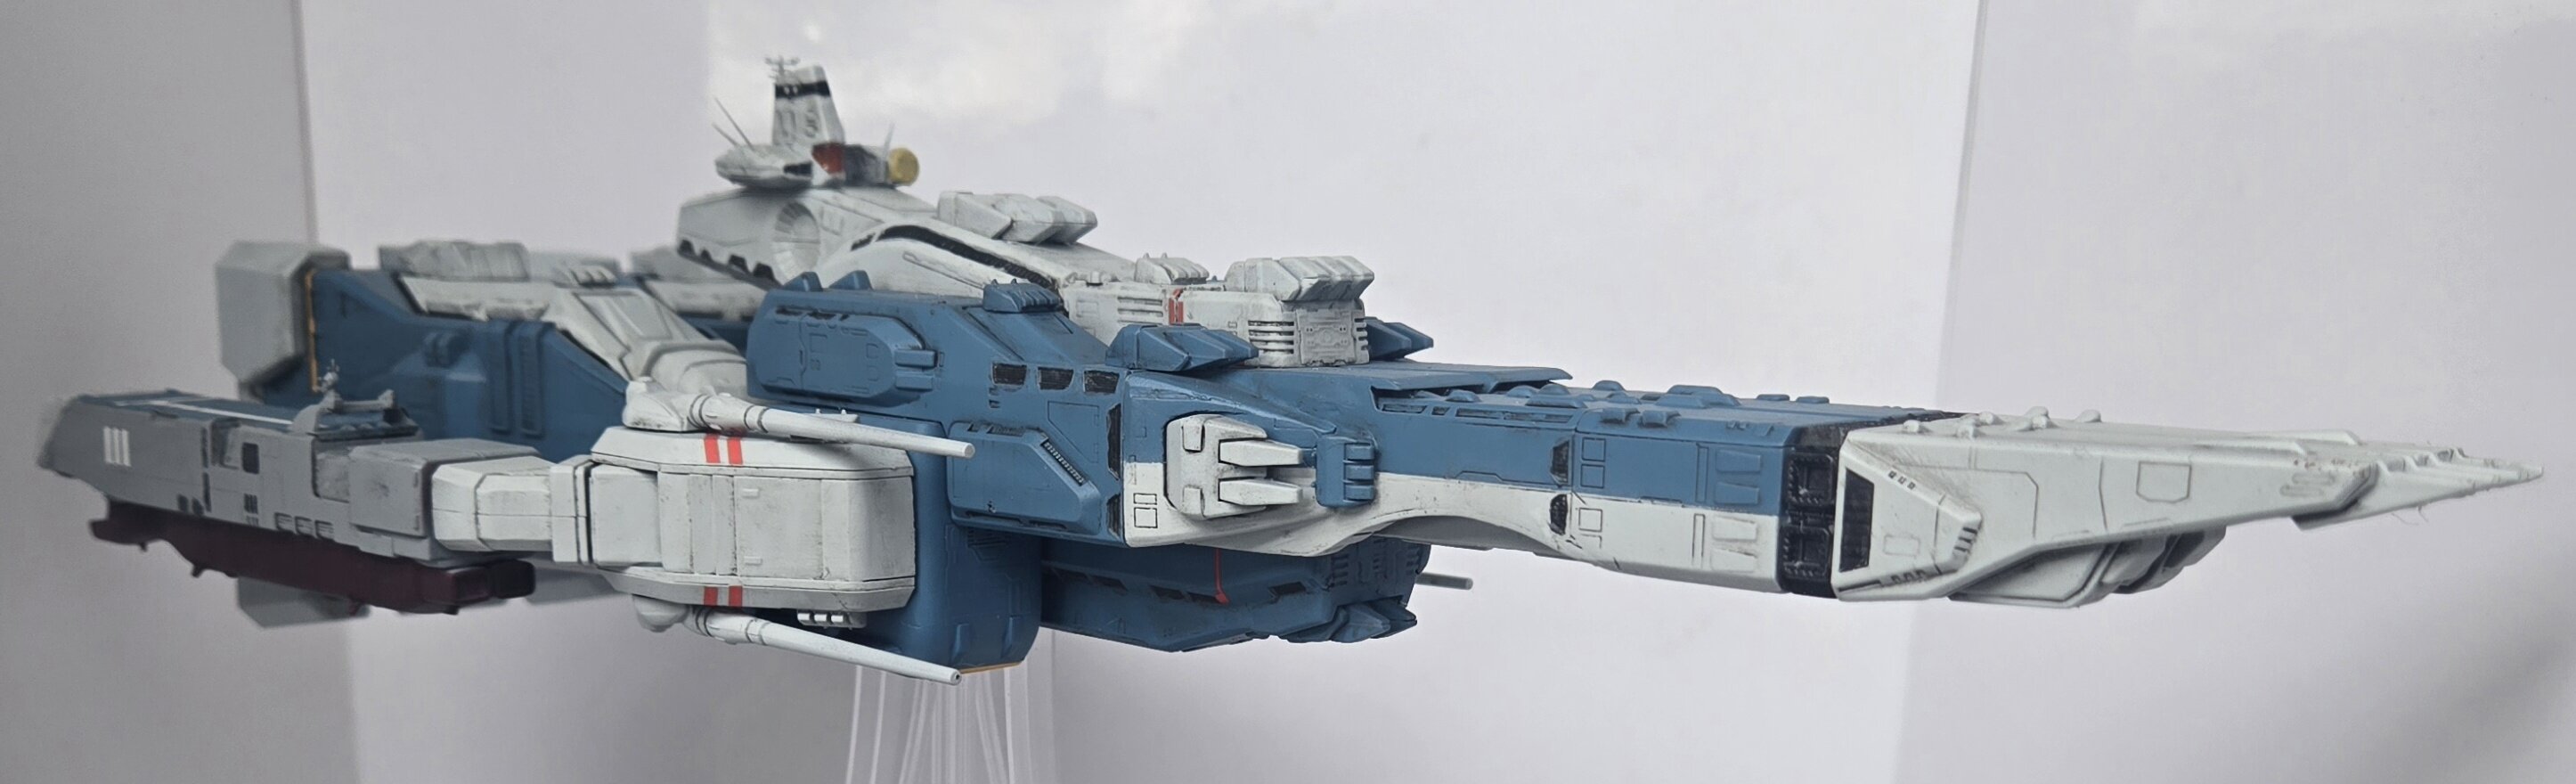
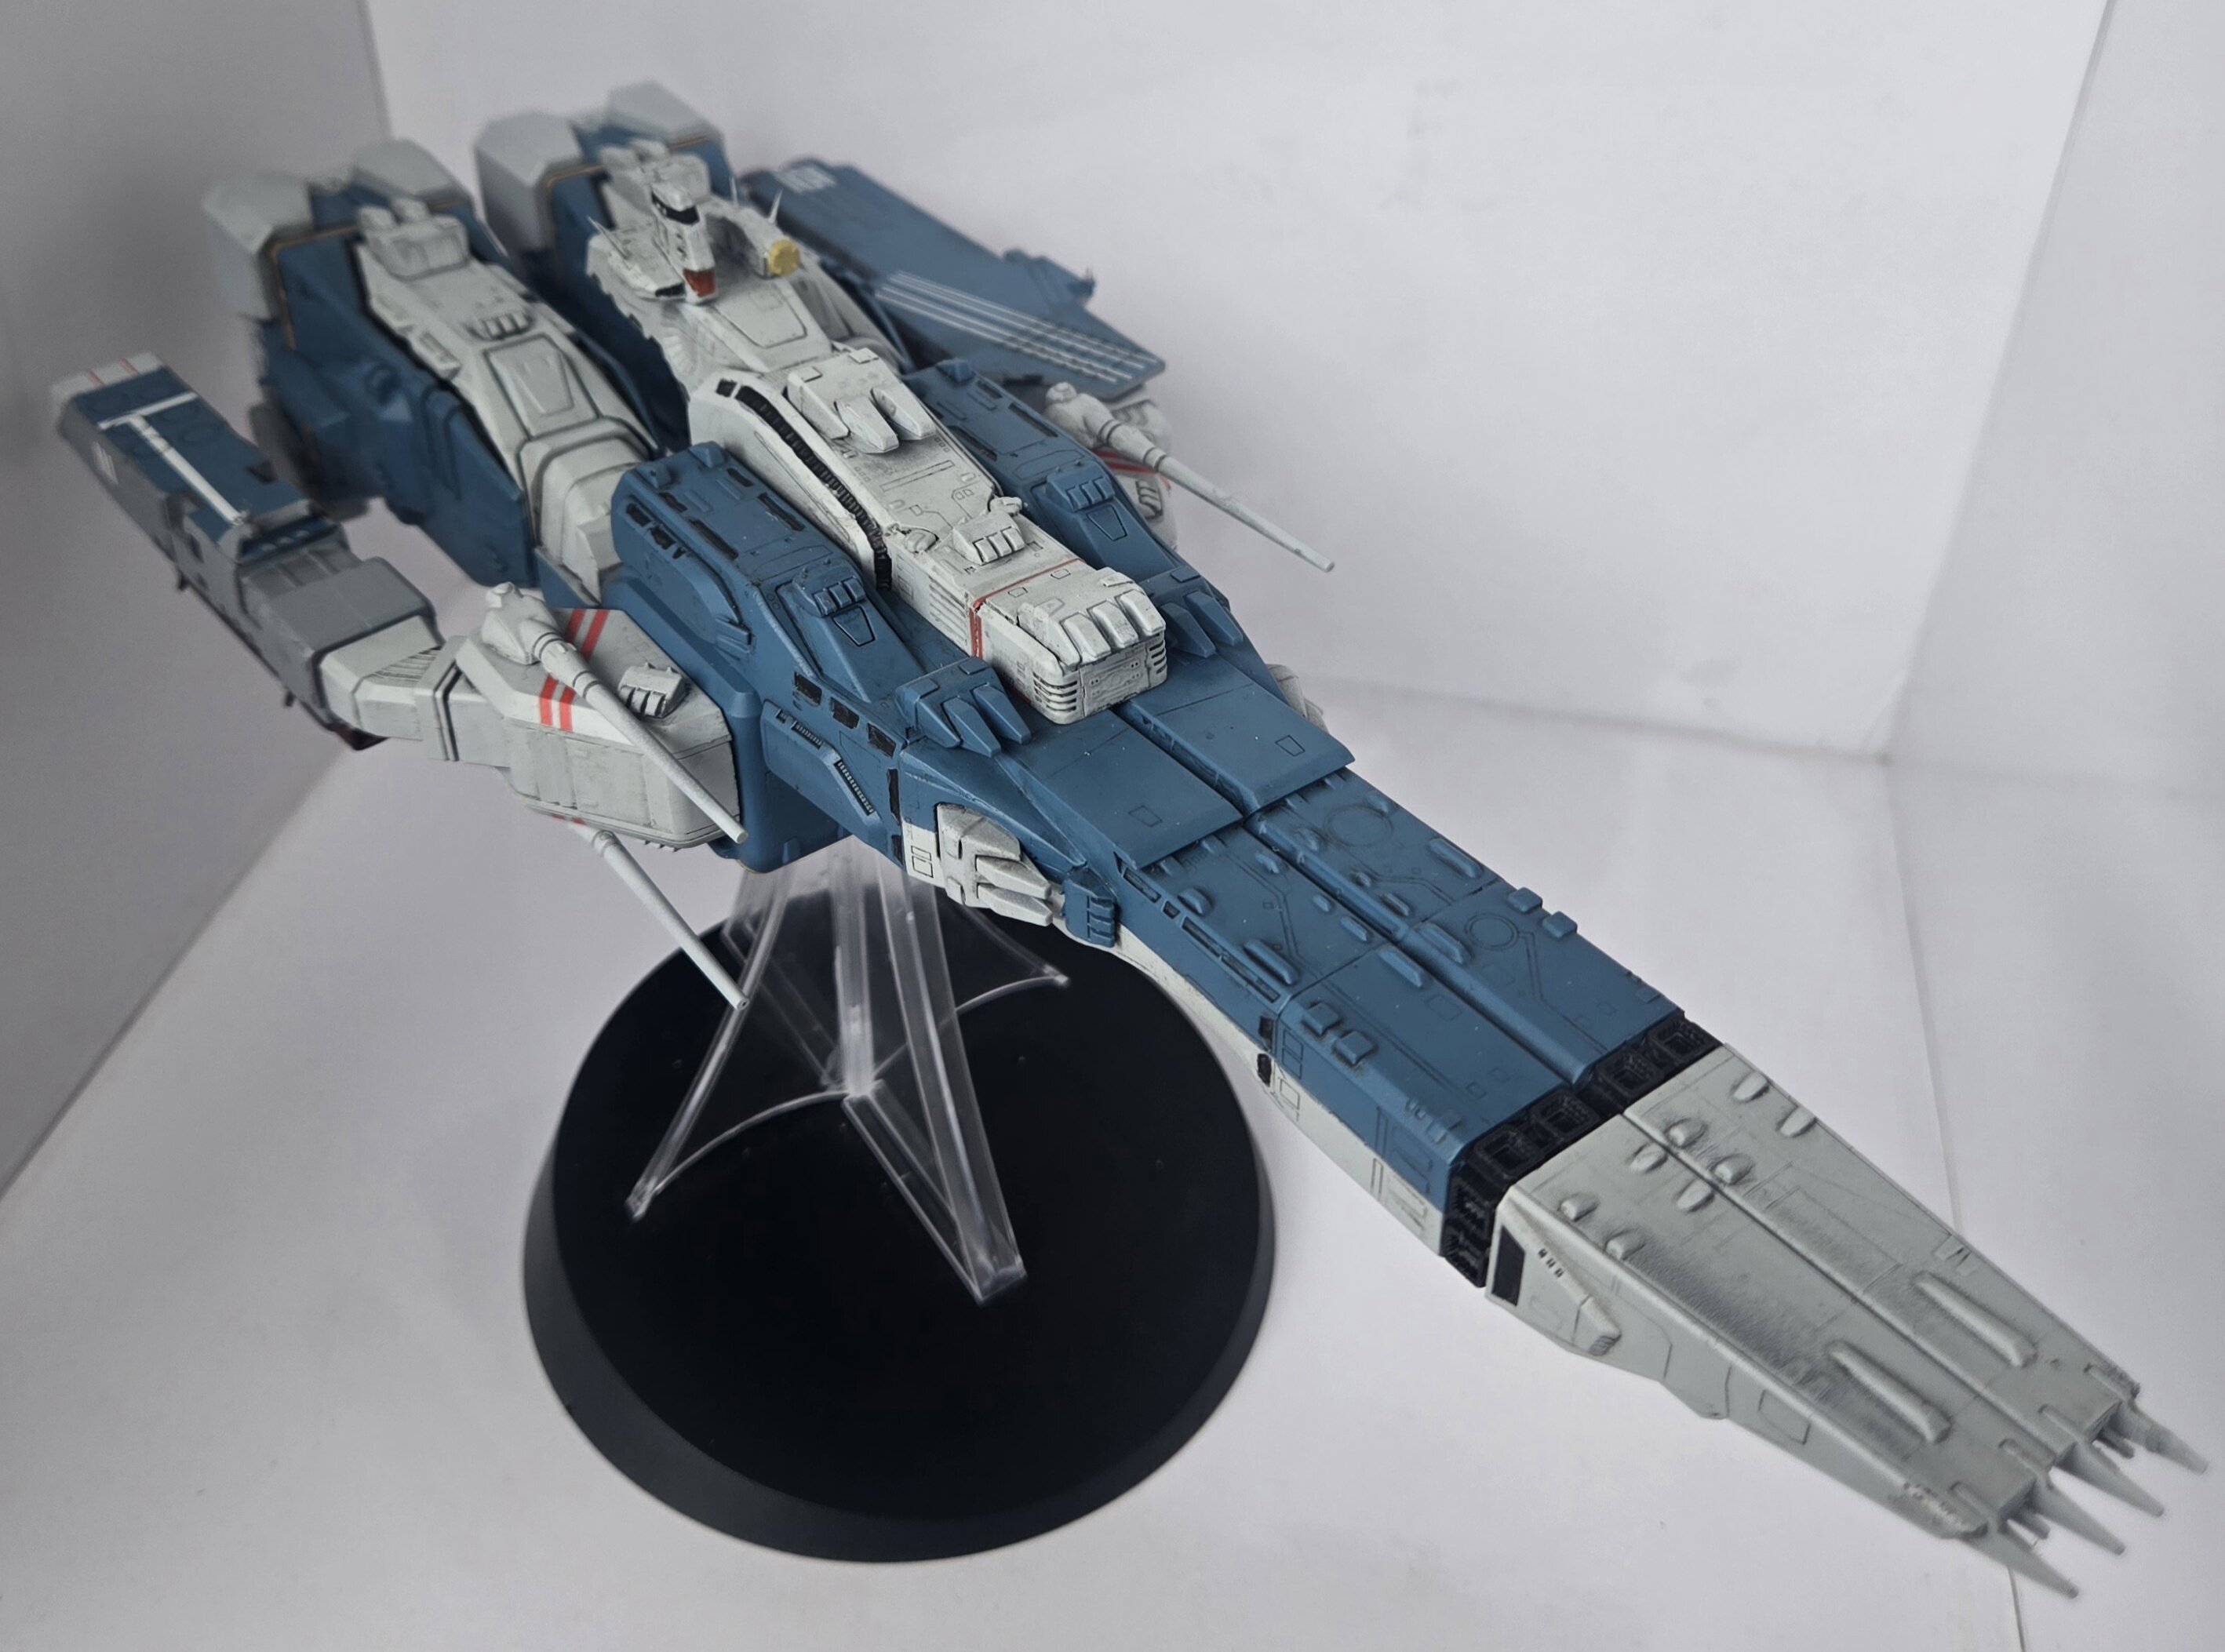
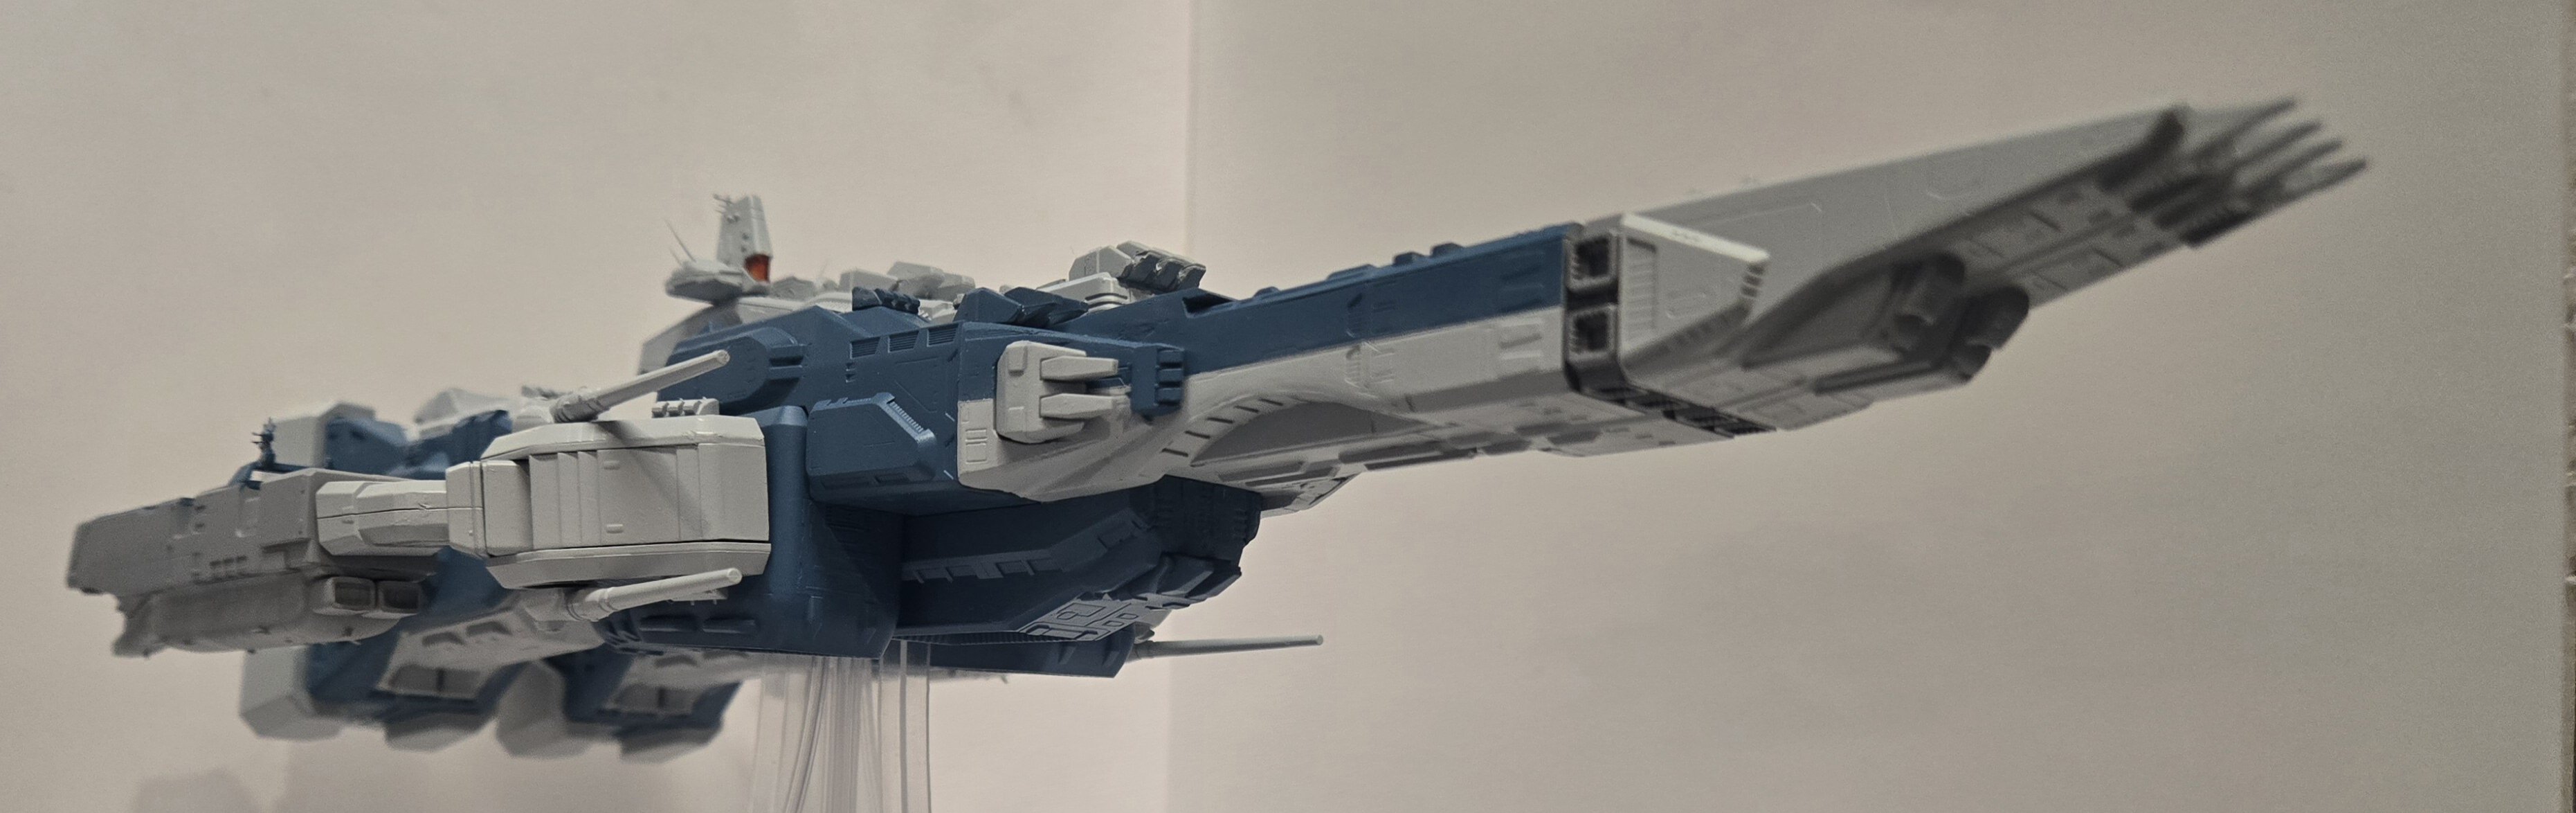
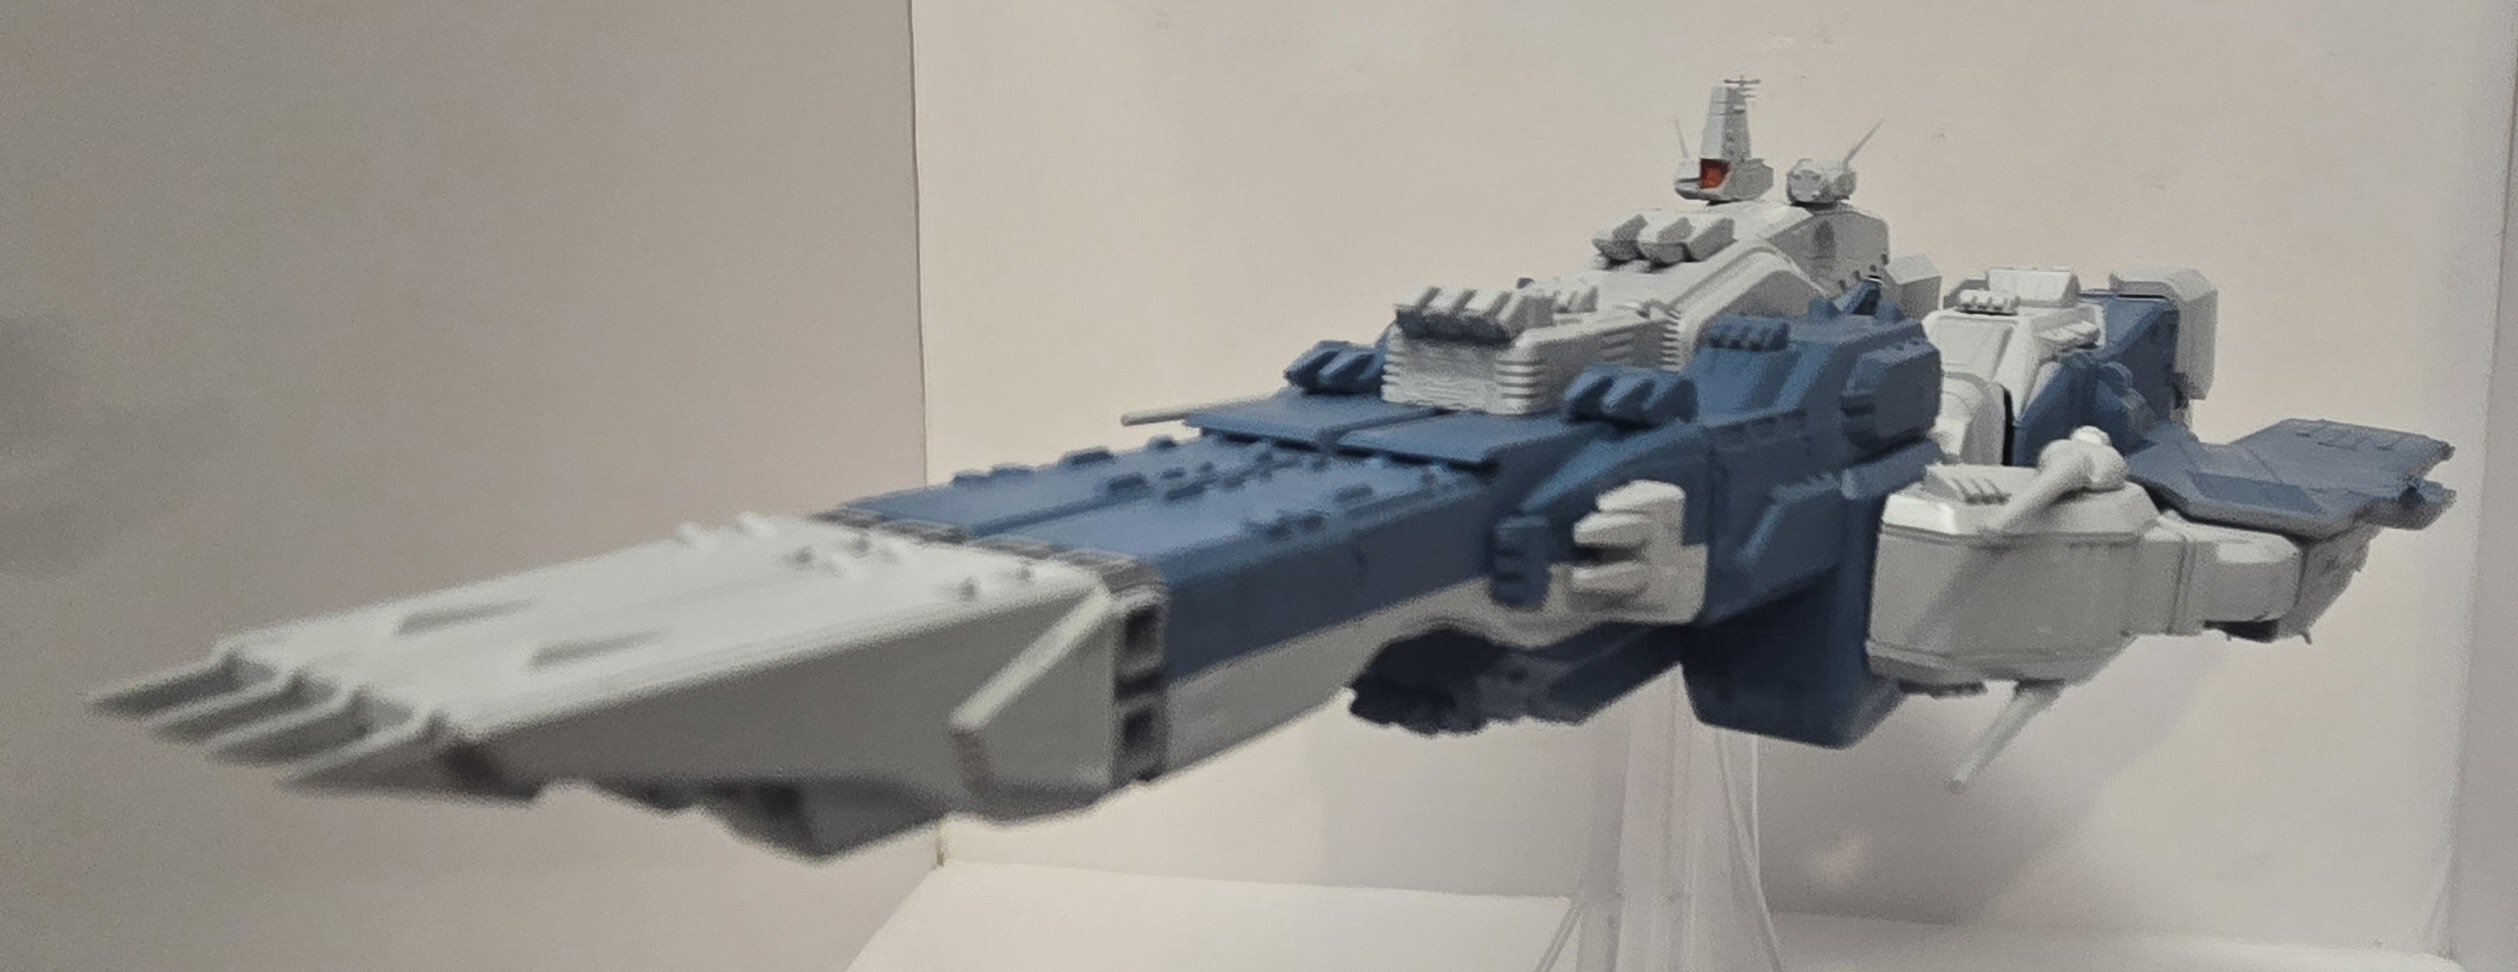
The SDF-1 is pretty much done. Had a slight mishap with the flat coat ( first try went cloudy) the remnants of which can be seen as shadowing on the left side of the very top at the front.
Still not too bad. Just gotta do up the tiny Valks and Monster and place them on it somewhere.
-
Question for everyone. I stripped down and cleaned my airbrushes again this weekend and find that the triggers are sticking a little after reassembling.
I see two lubes available Iwata and Passche. The Iwata is about $1.60/ml (comes in a 10ml tube) where the Paasche is approx 15 cents/ml (60 ml bottle).
Is there really that much of a difference in quality here? I've never used/needed lube for my airbrush before, so anyone with experience please advise.
If you use something else please chime in.
Thanks in advance.
-
Woo hoo! Cannot wait! I've been checking weekly for the release.
-
@Papa RatI think the route your taking could very likely end up being less work than trying to do it any other way.
Good work on that M. Lover by the way. Reminds me that I have a pair to finish myself. Got to the base coat on Maiee's machine then had to put it away. I should get them done.
@nightmareB4macross I continue to salivate at all of the updates on that epic 1:55 rebuild.
"We can rebuild him. We have the technology. We can make him better than he was. Better, faster, stronger."
Any way over here the base colours are on the Hase SDF-1.
-
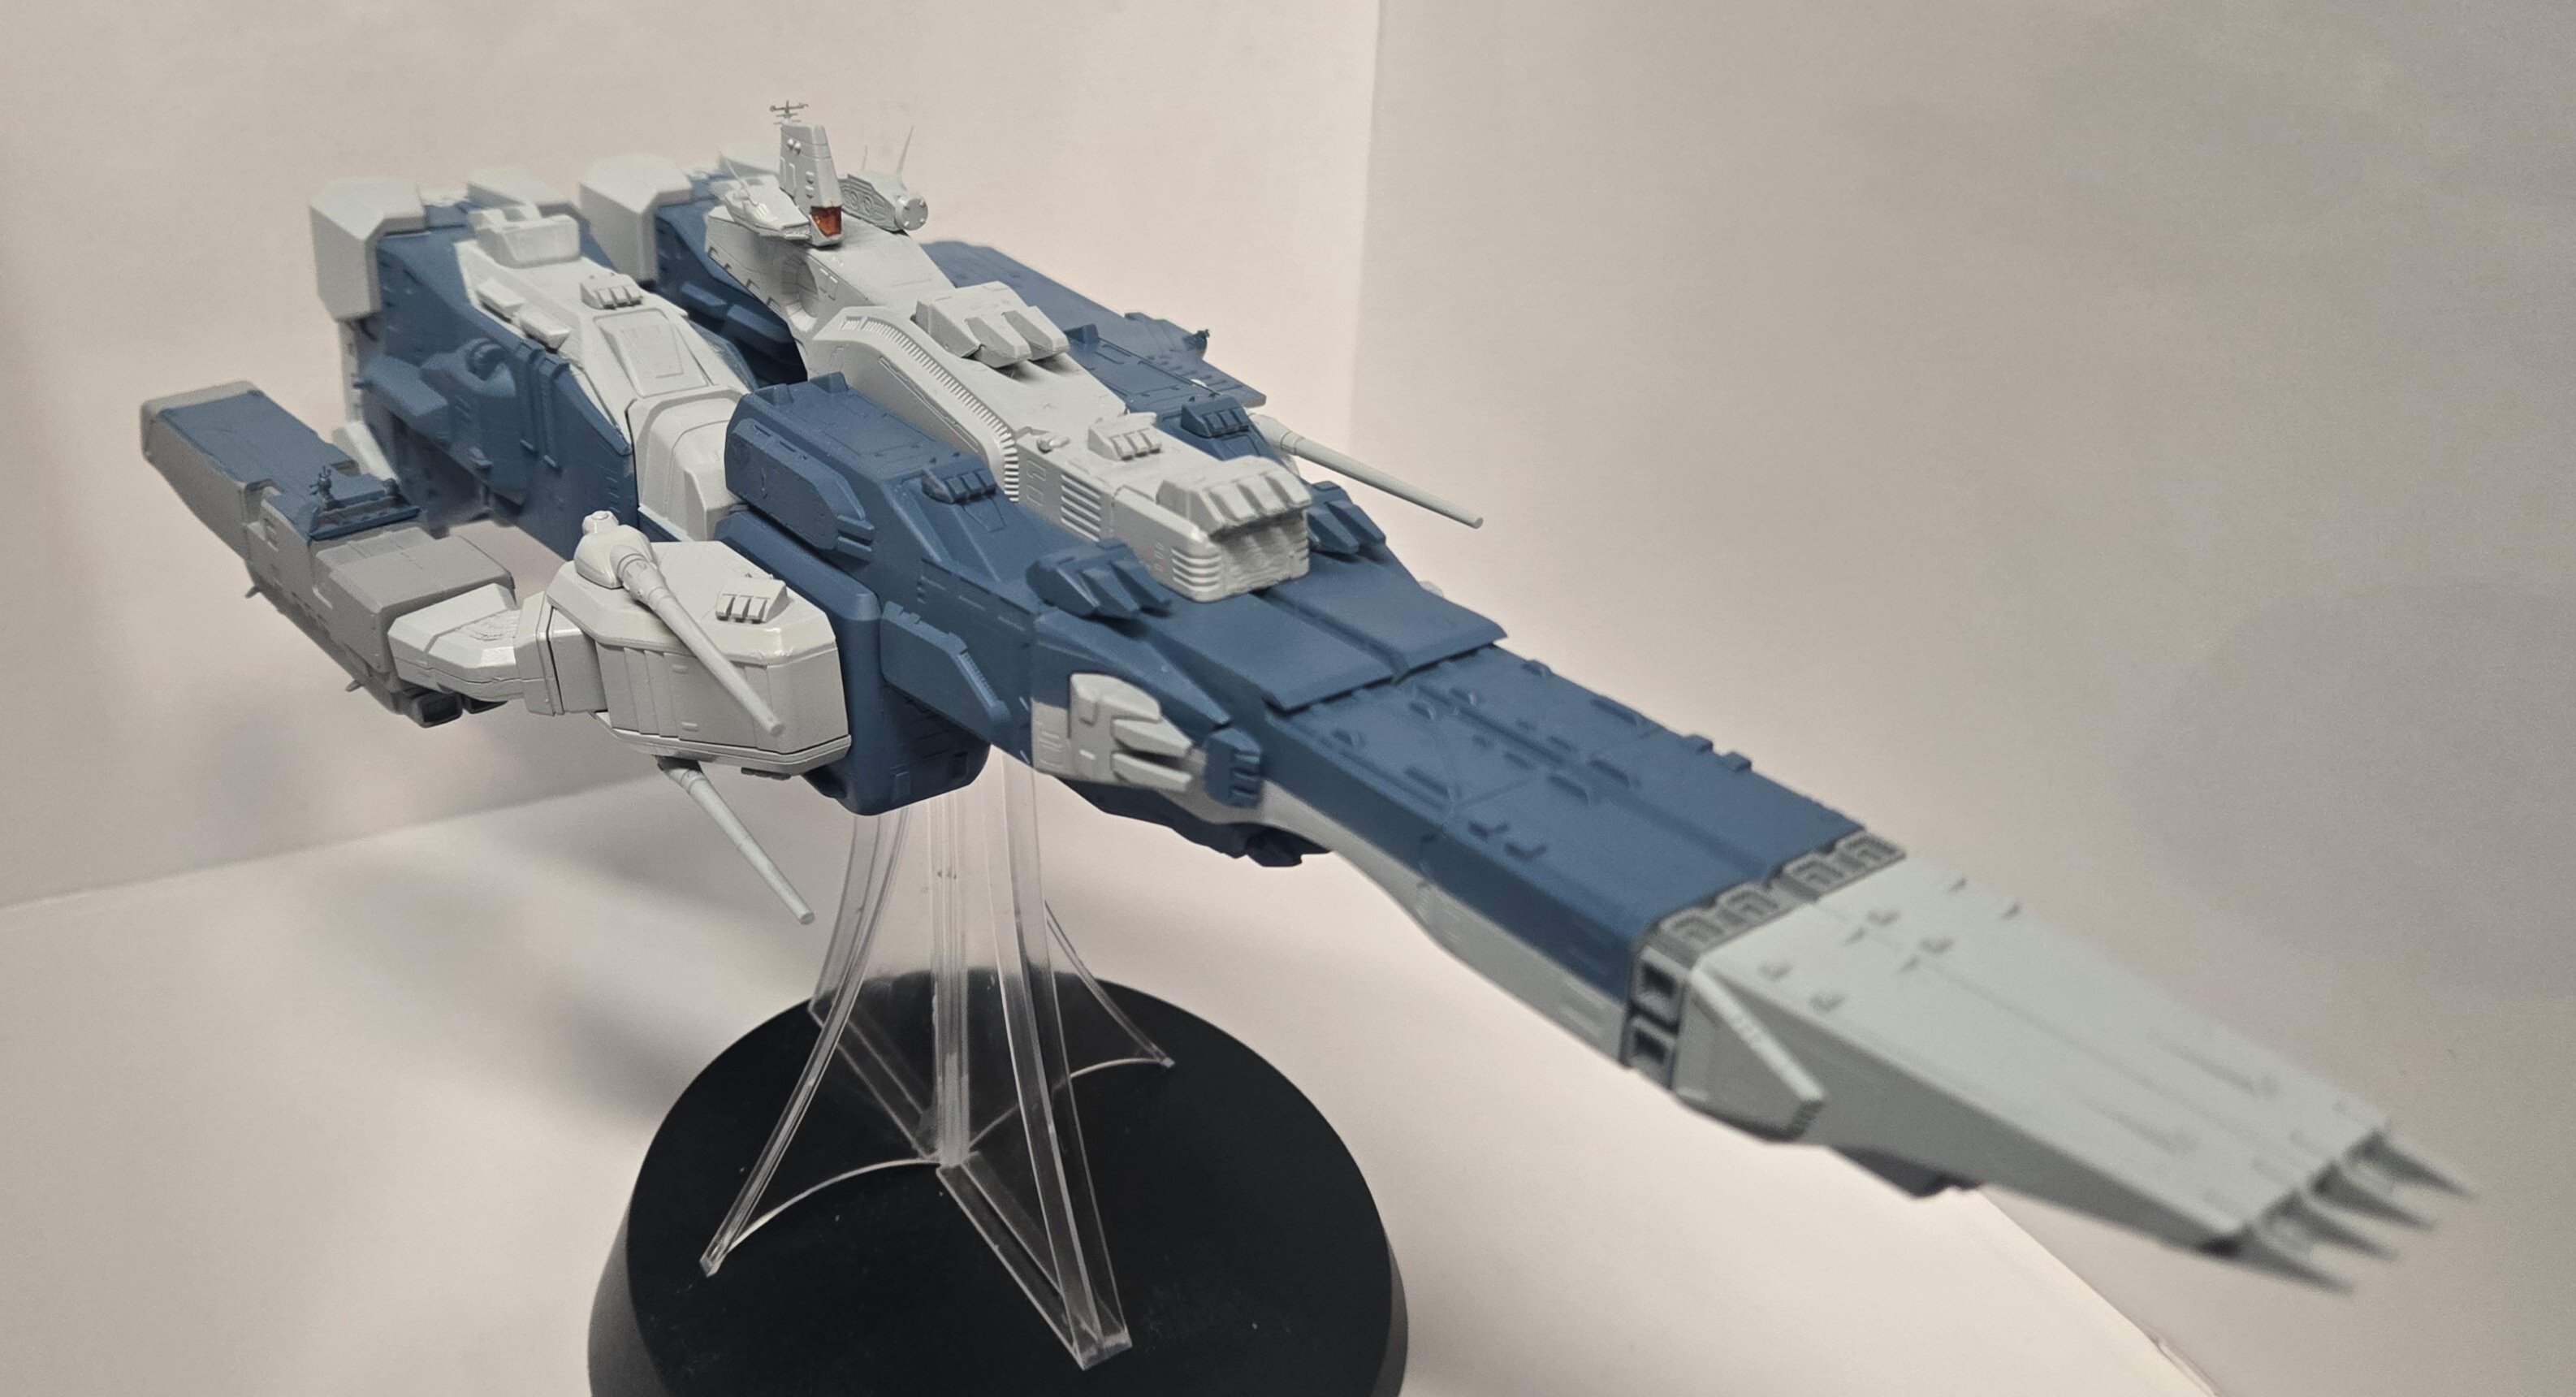
Sub-assemblies built. Just gotta get some primer on to see what needs smoothing out.

-
Wow! You made that old kit shine. Great job.
-
That's a great tip for old decals @pengbuzz and a nice job on that Bird of Prey.
@derex3592 that new space is looking better and better, but I suspect it will feel best when it's all cluttered with parts trees and pieces from your first build!
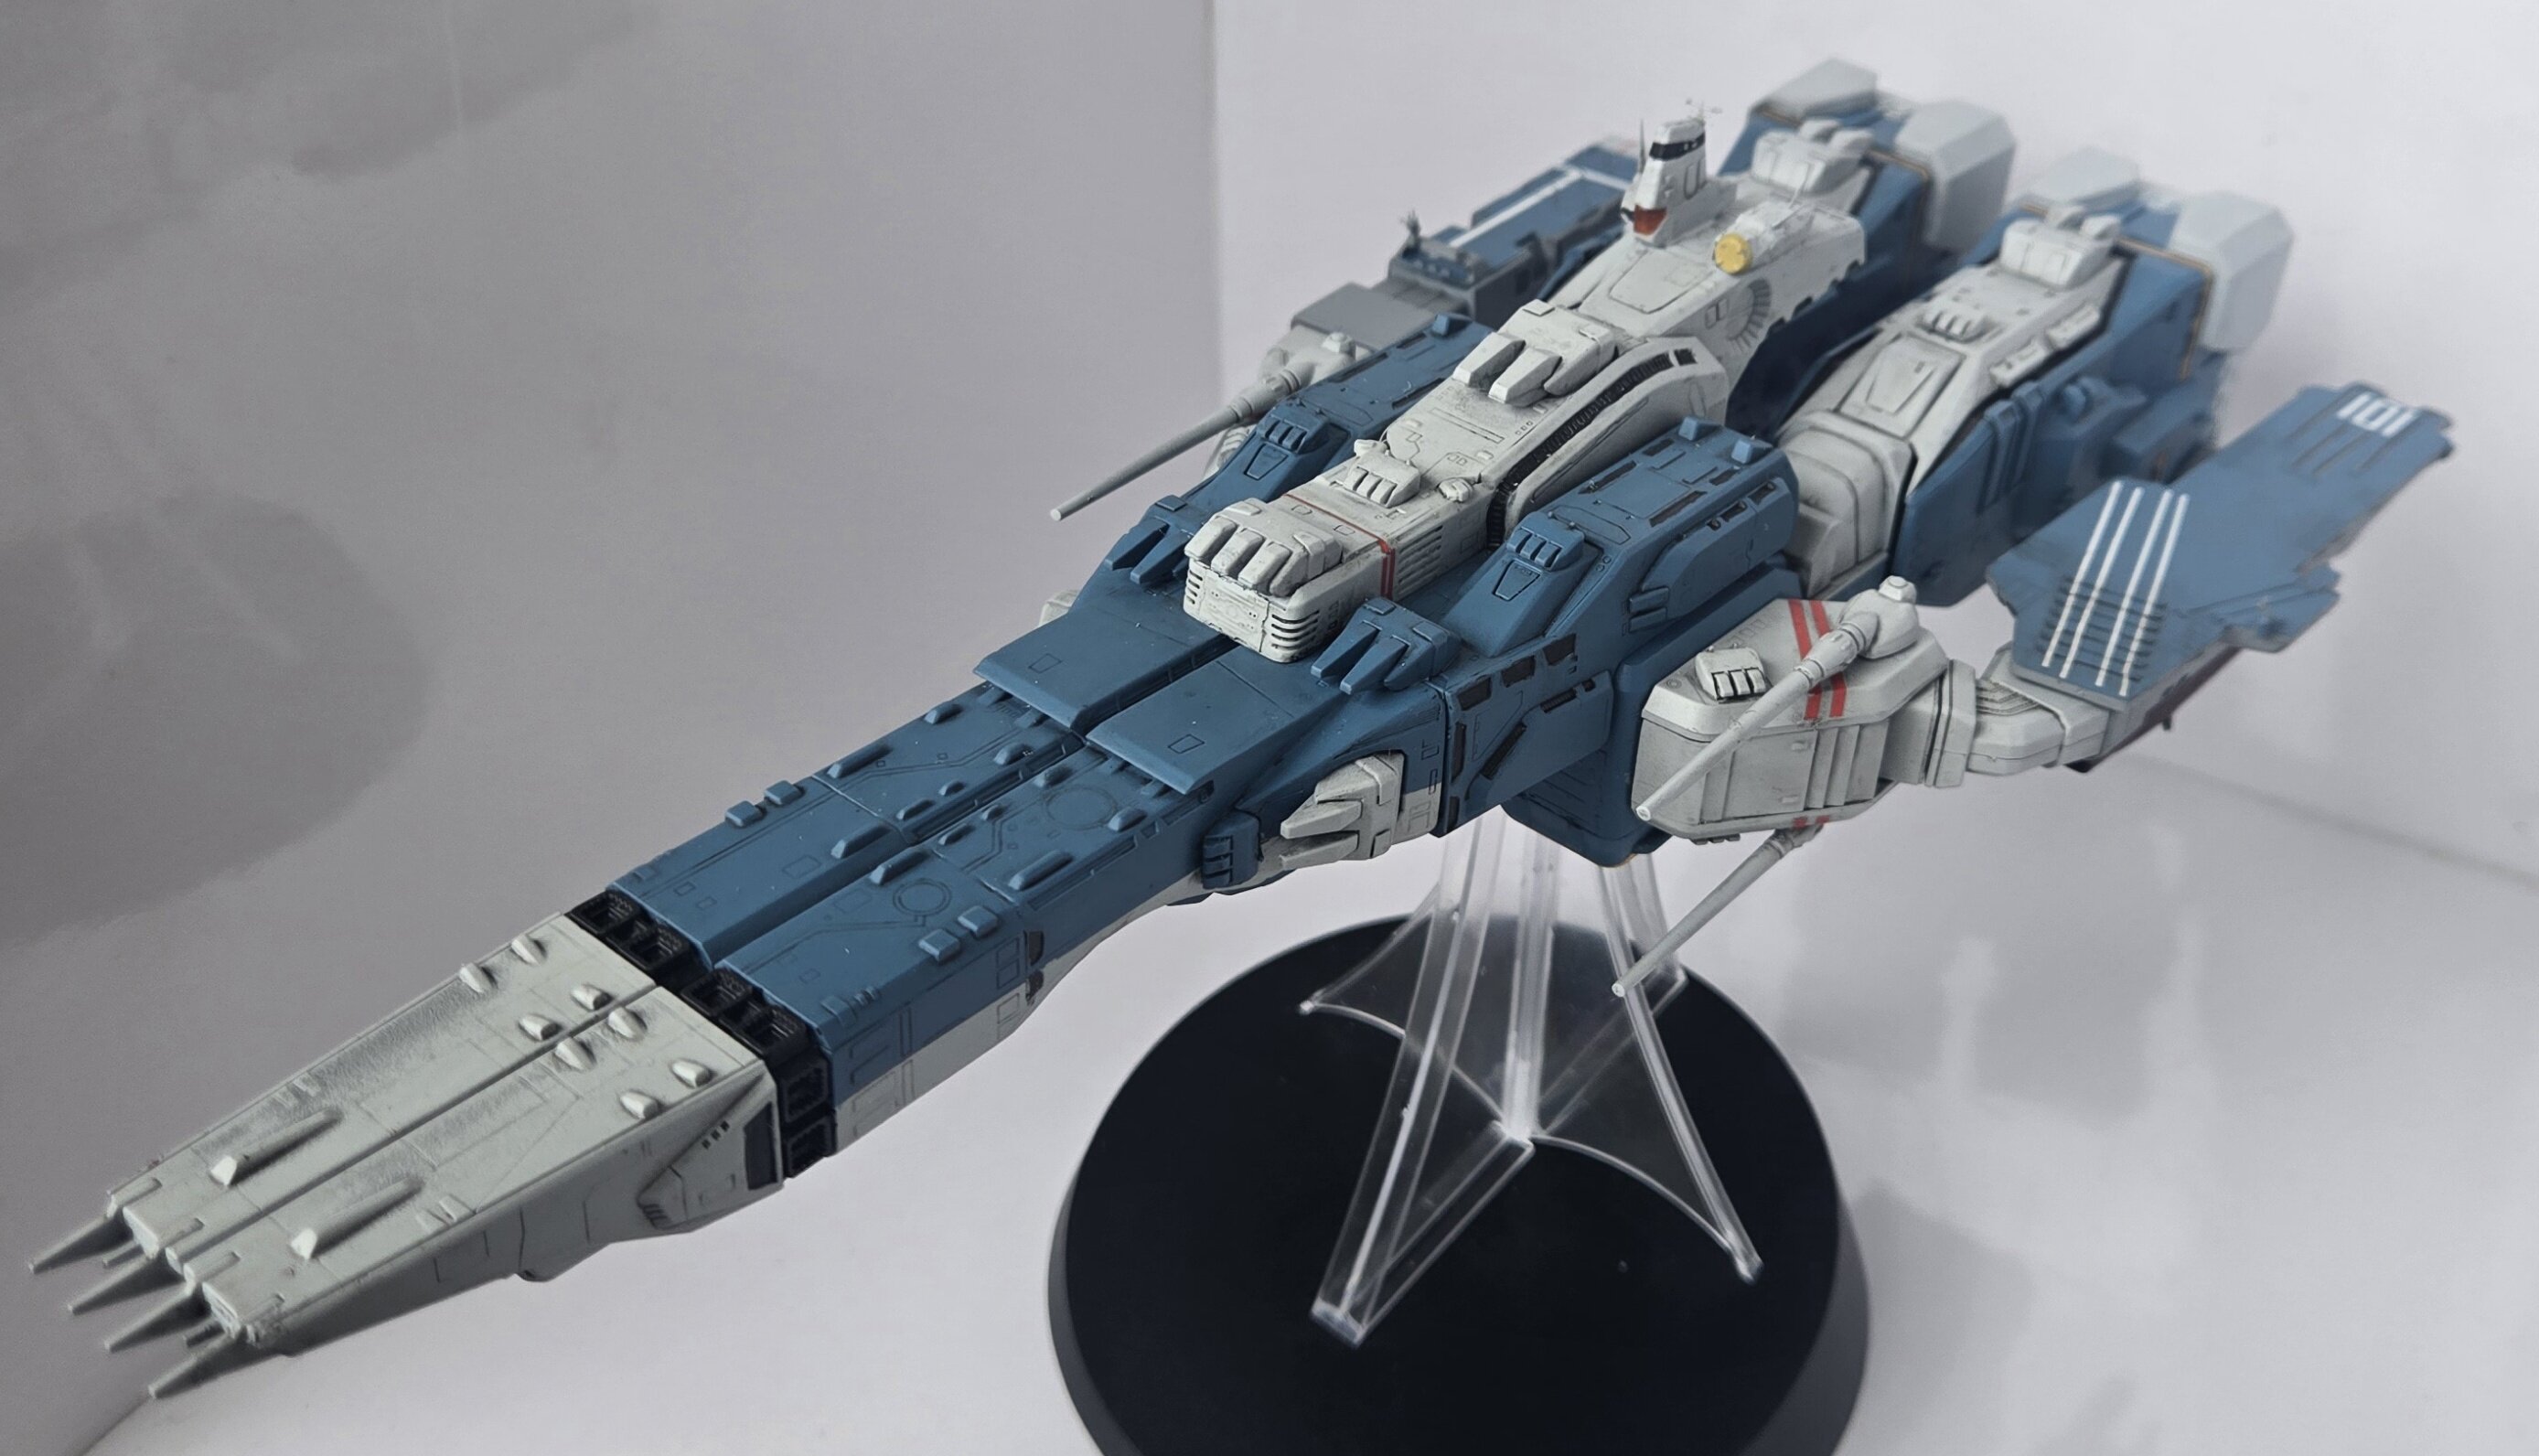
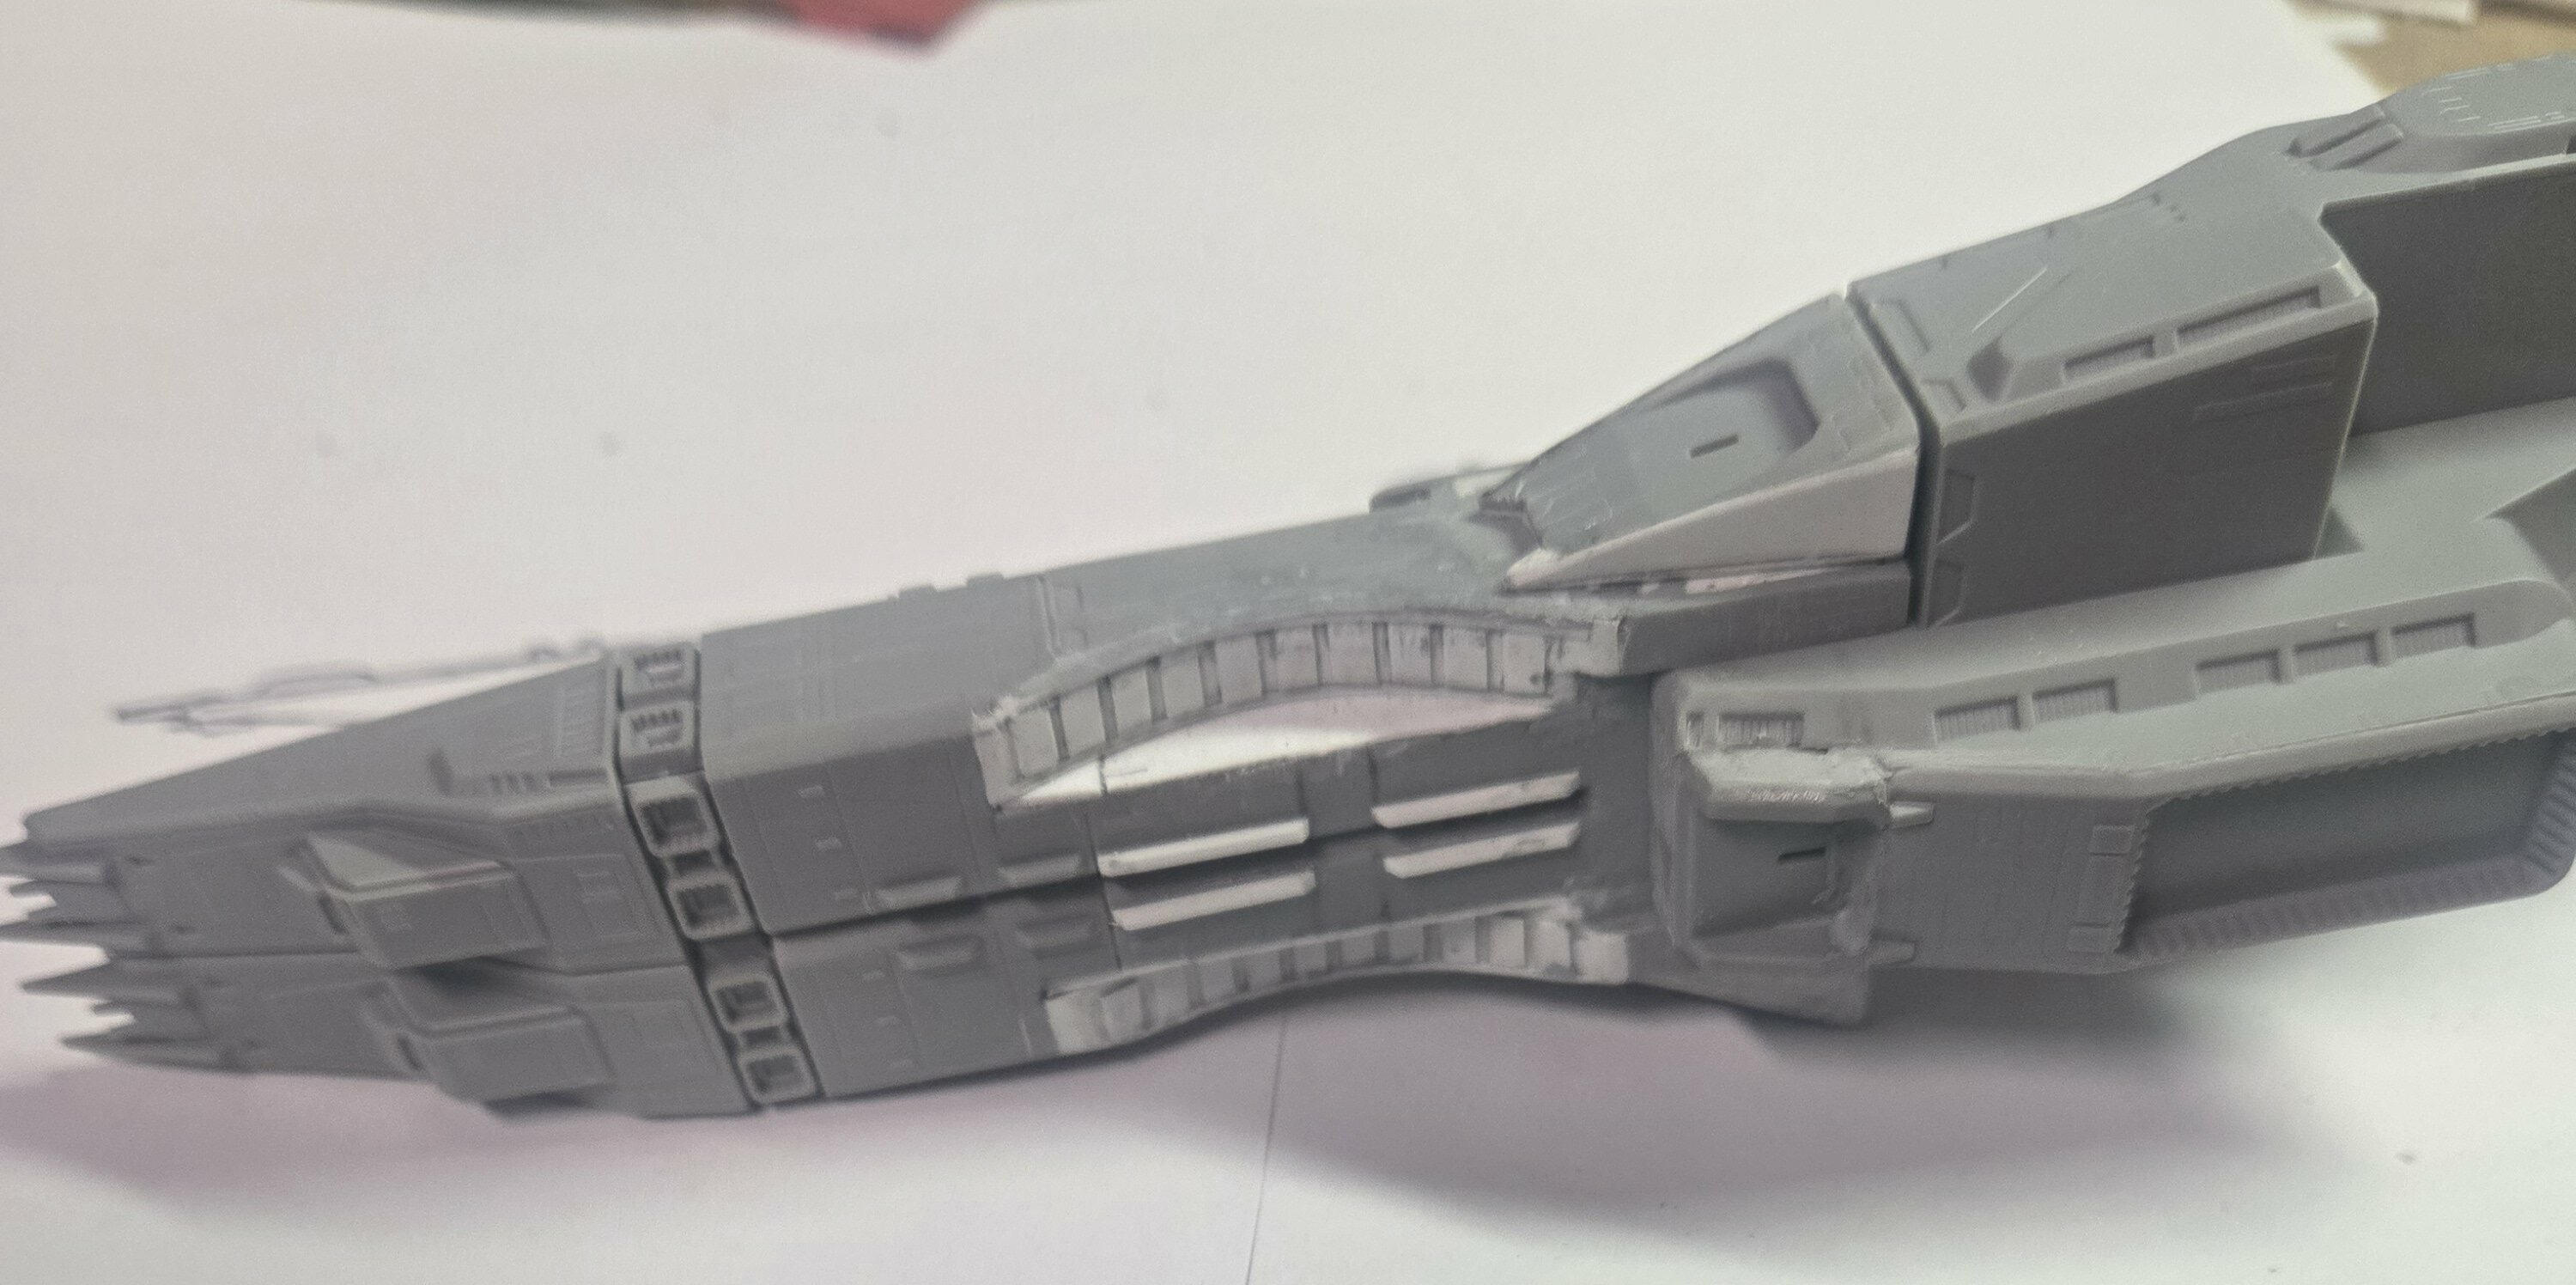
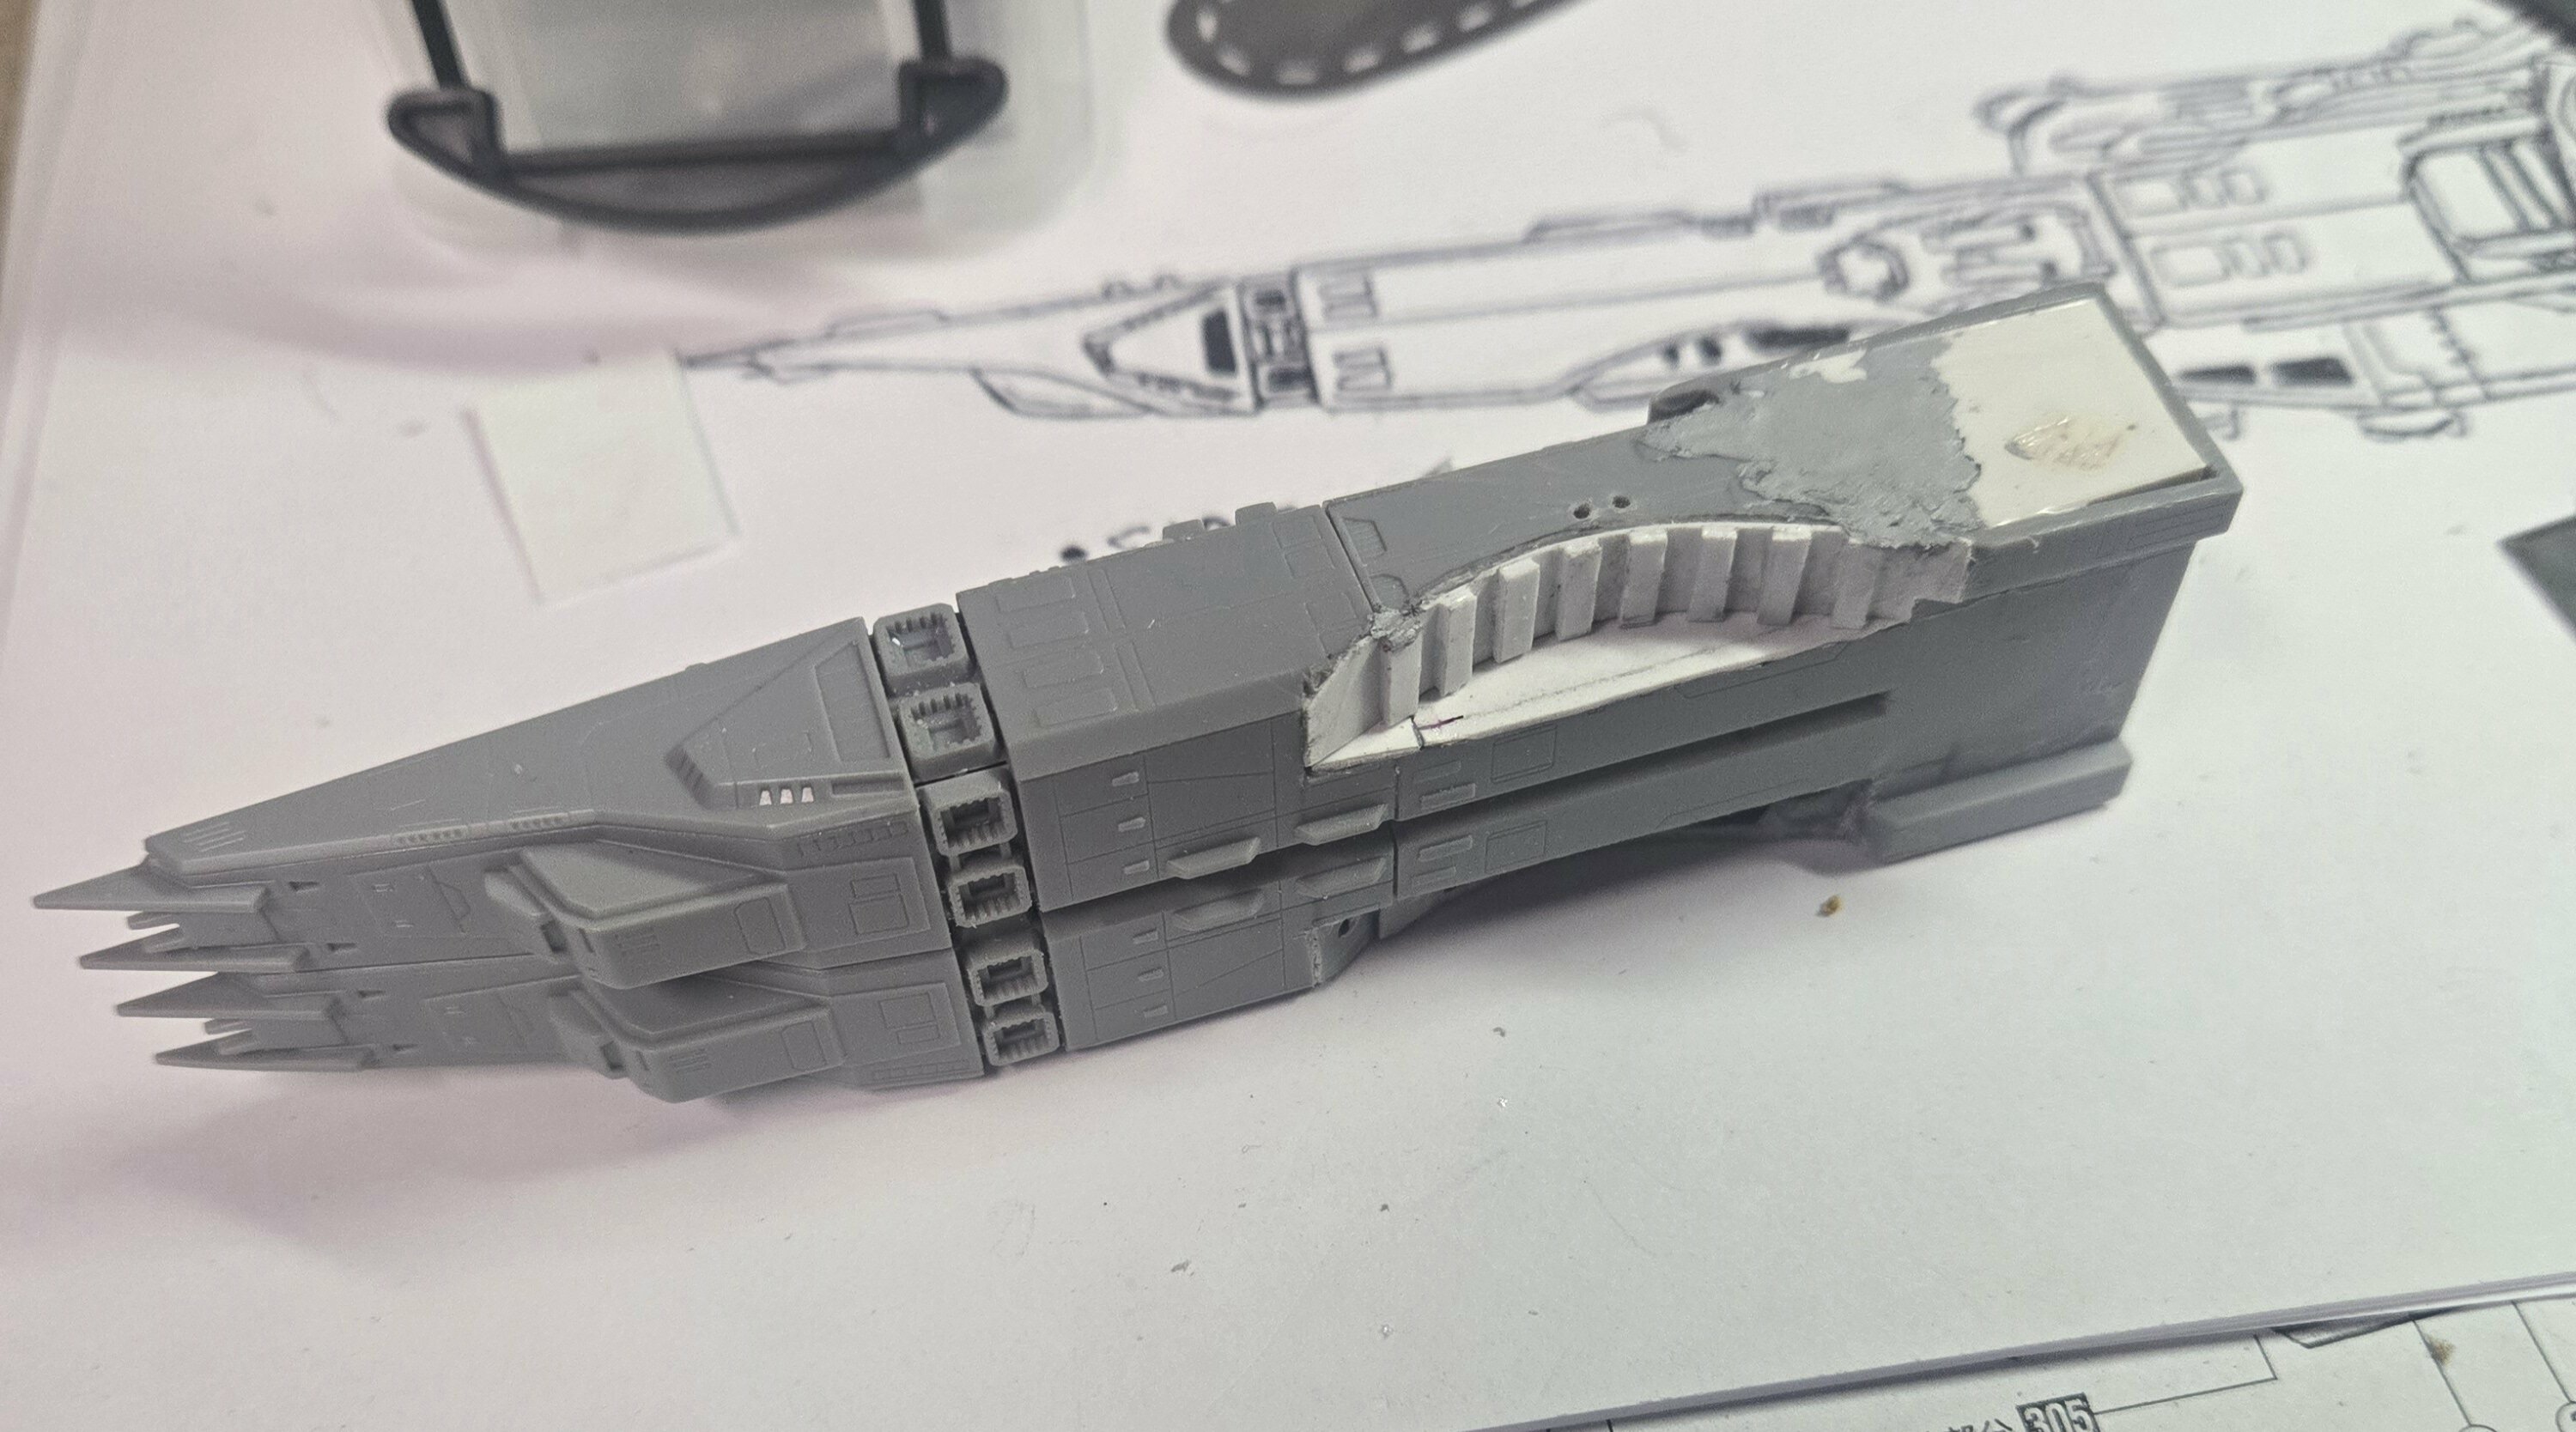
Anyway, updates on the mods to the Hase SDF-1. Just about done the build phase for the mods. Had to make some compromises with the details, but overall I'm happy with the progress.
Pics.
-
Nice job Greg!
One thing though, it doesn't look like there's any colour on her mouth which makes it kinda disappear.
Really great job on the details of her coveralls. The zippers and badges in particular.
-
It looks like it's up for re-release in the next few weeks ( initial release was a few years ago). So it should be available in stores (online) soonish. Hobby Search had a preorder up, but it's closed now.
-
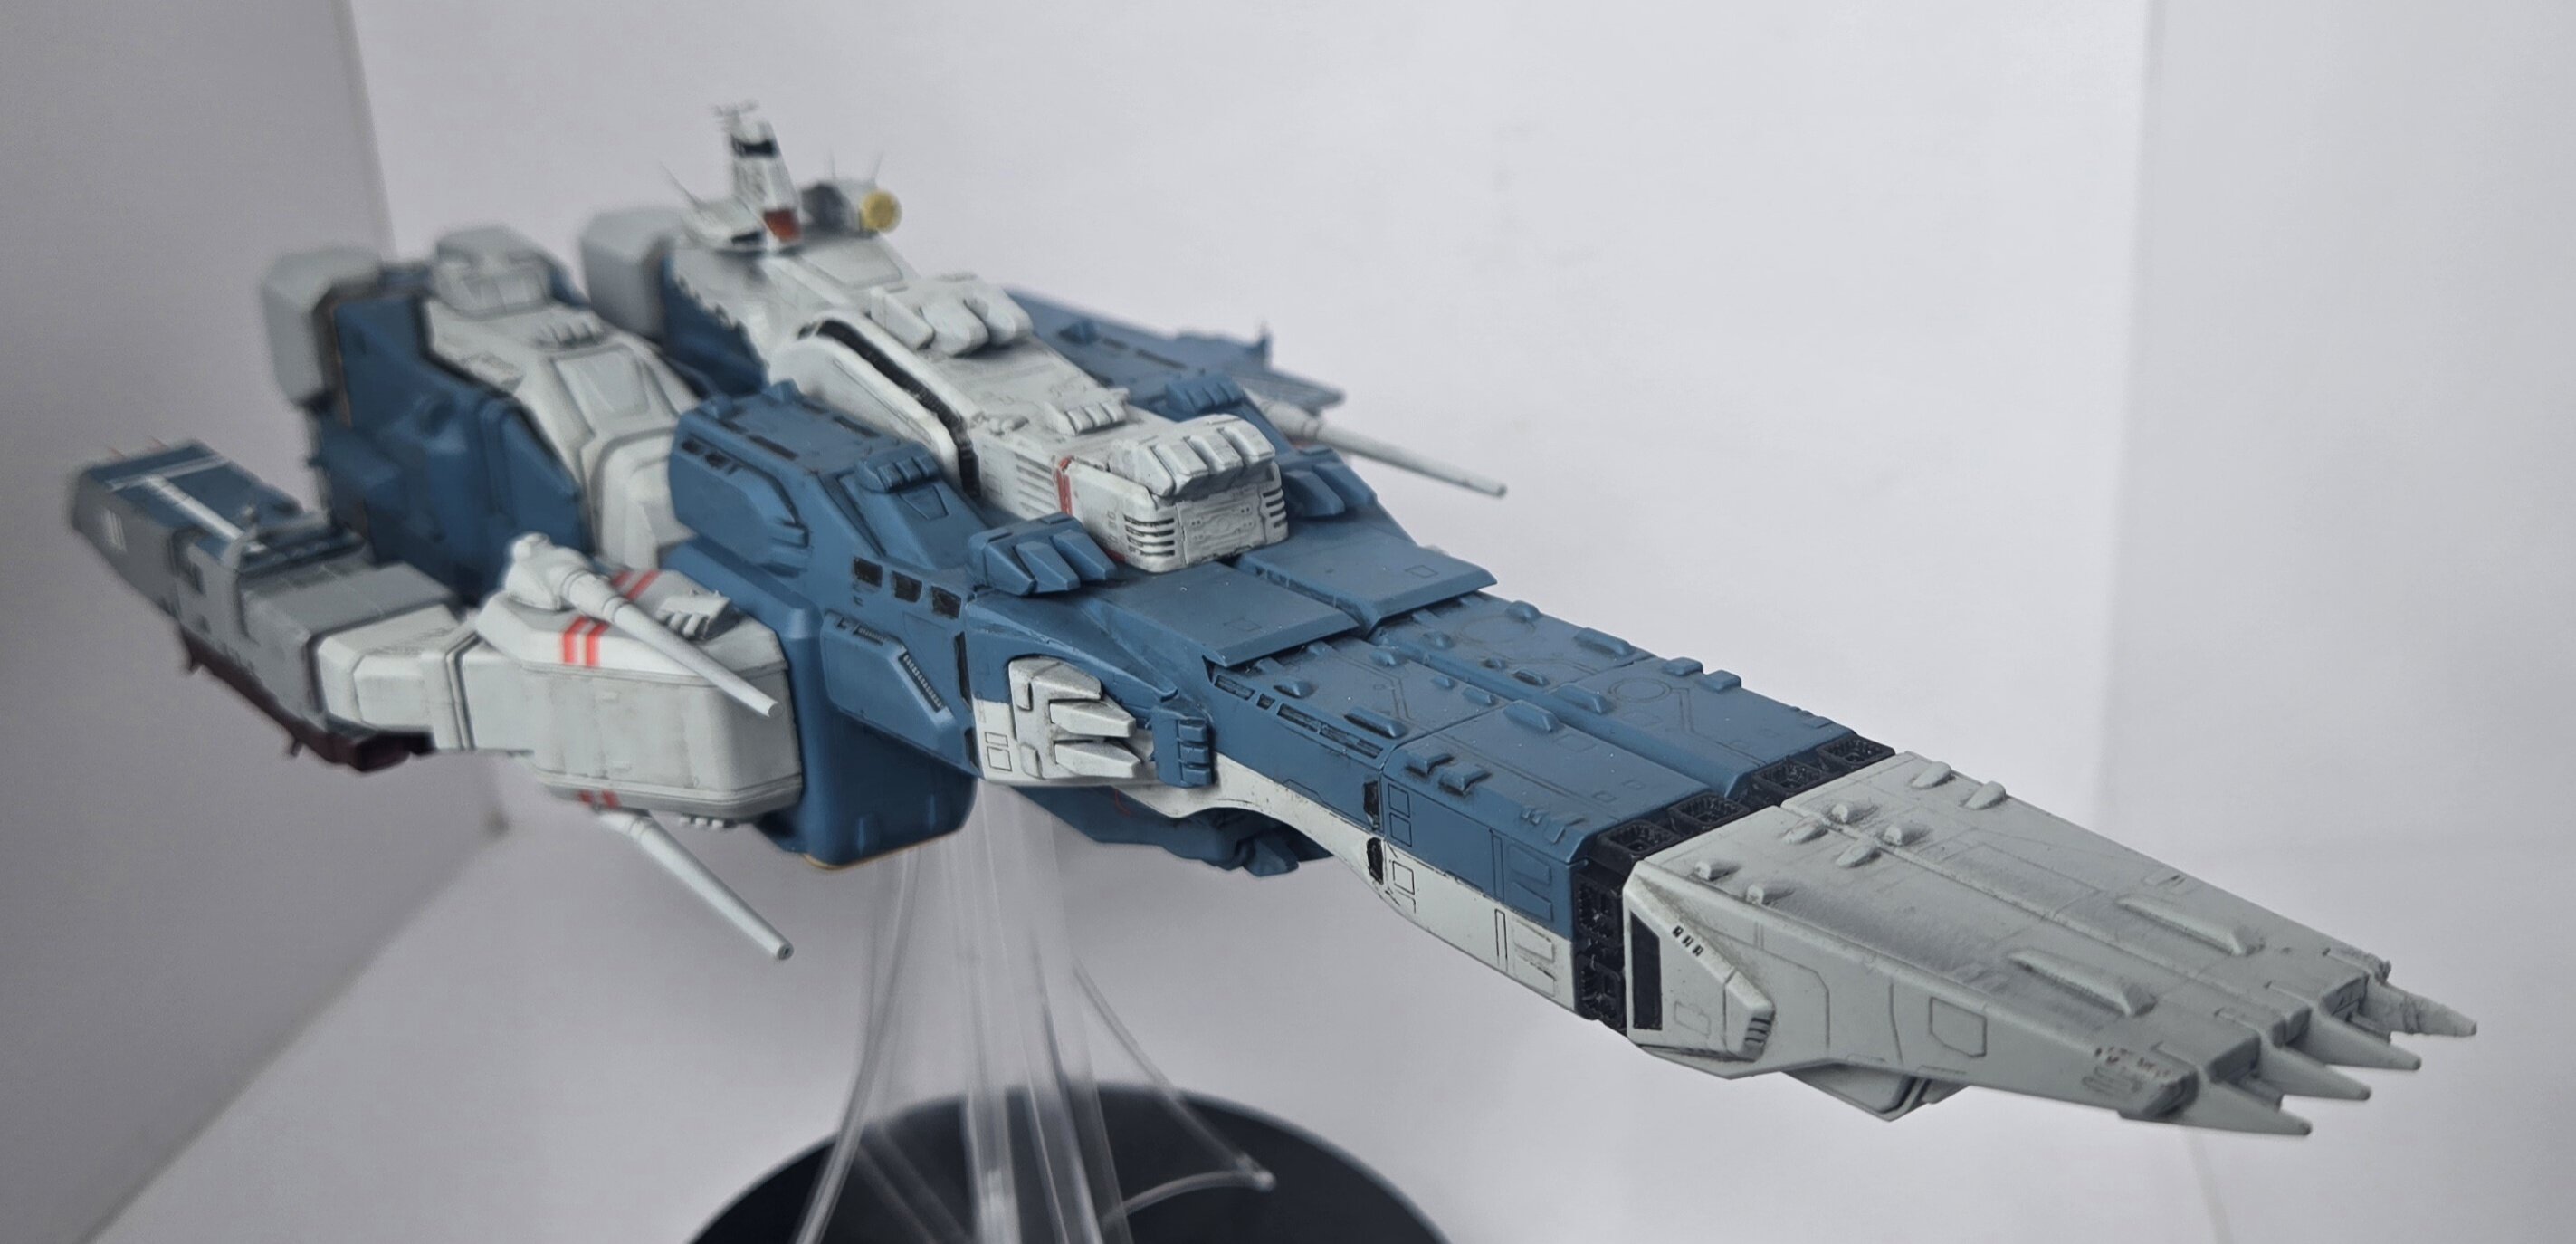
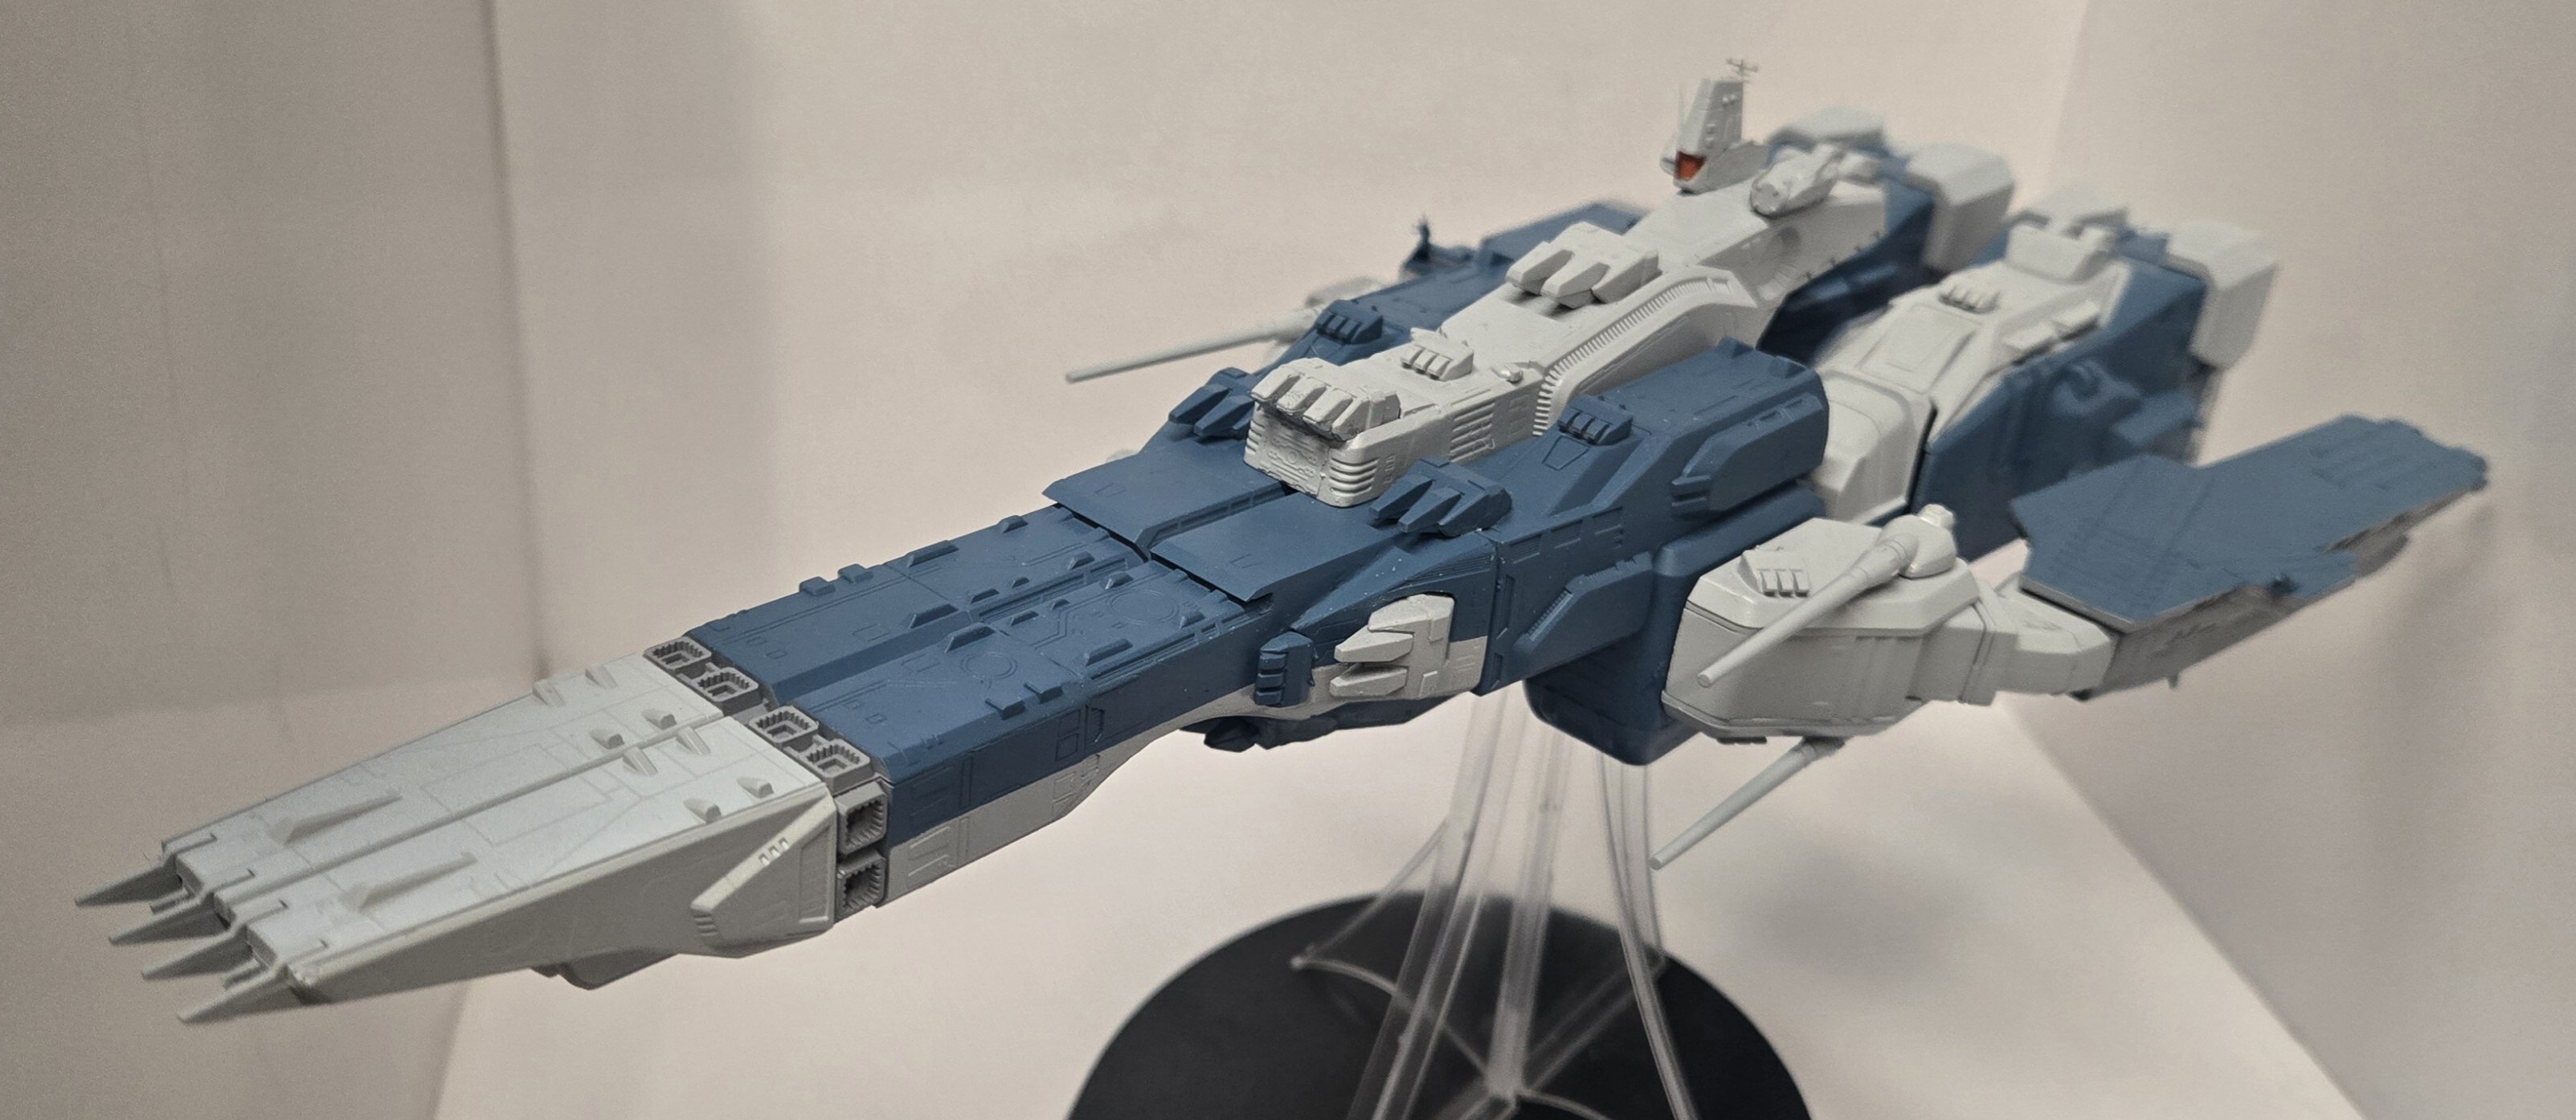
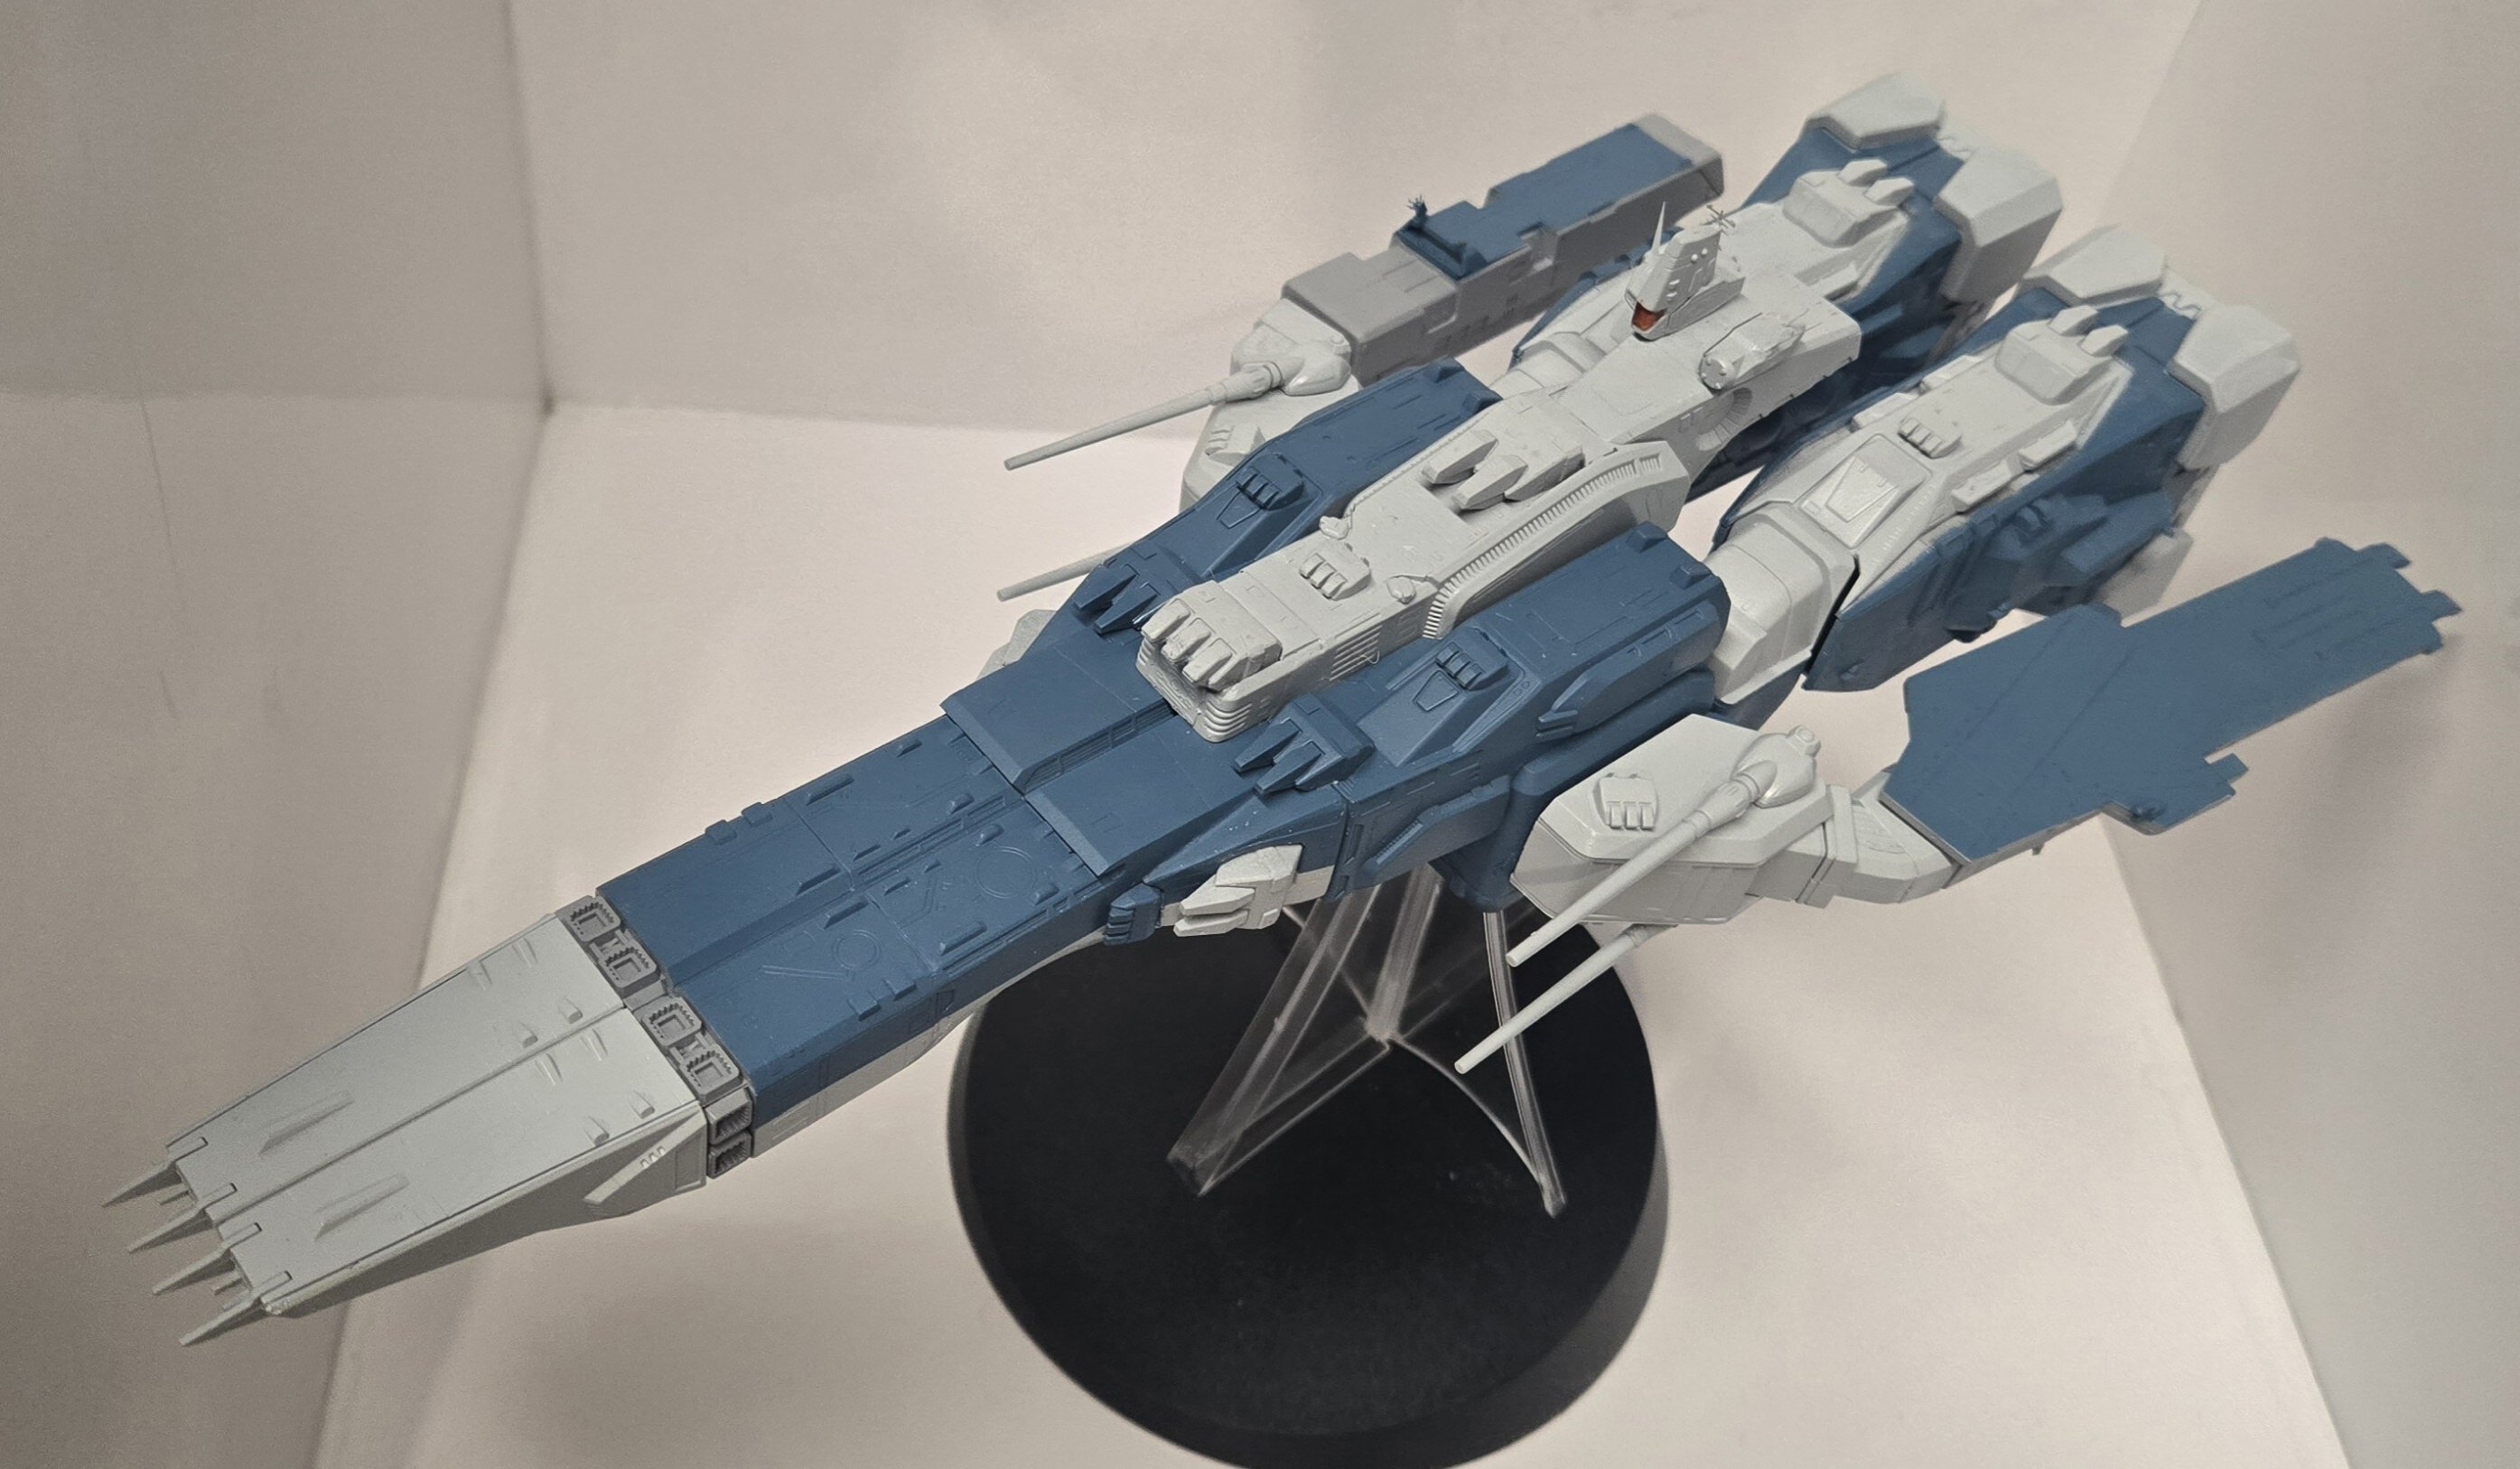
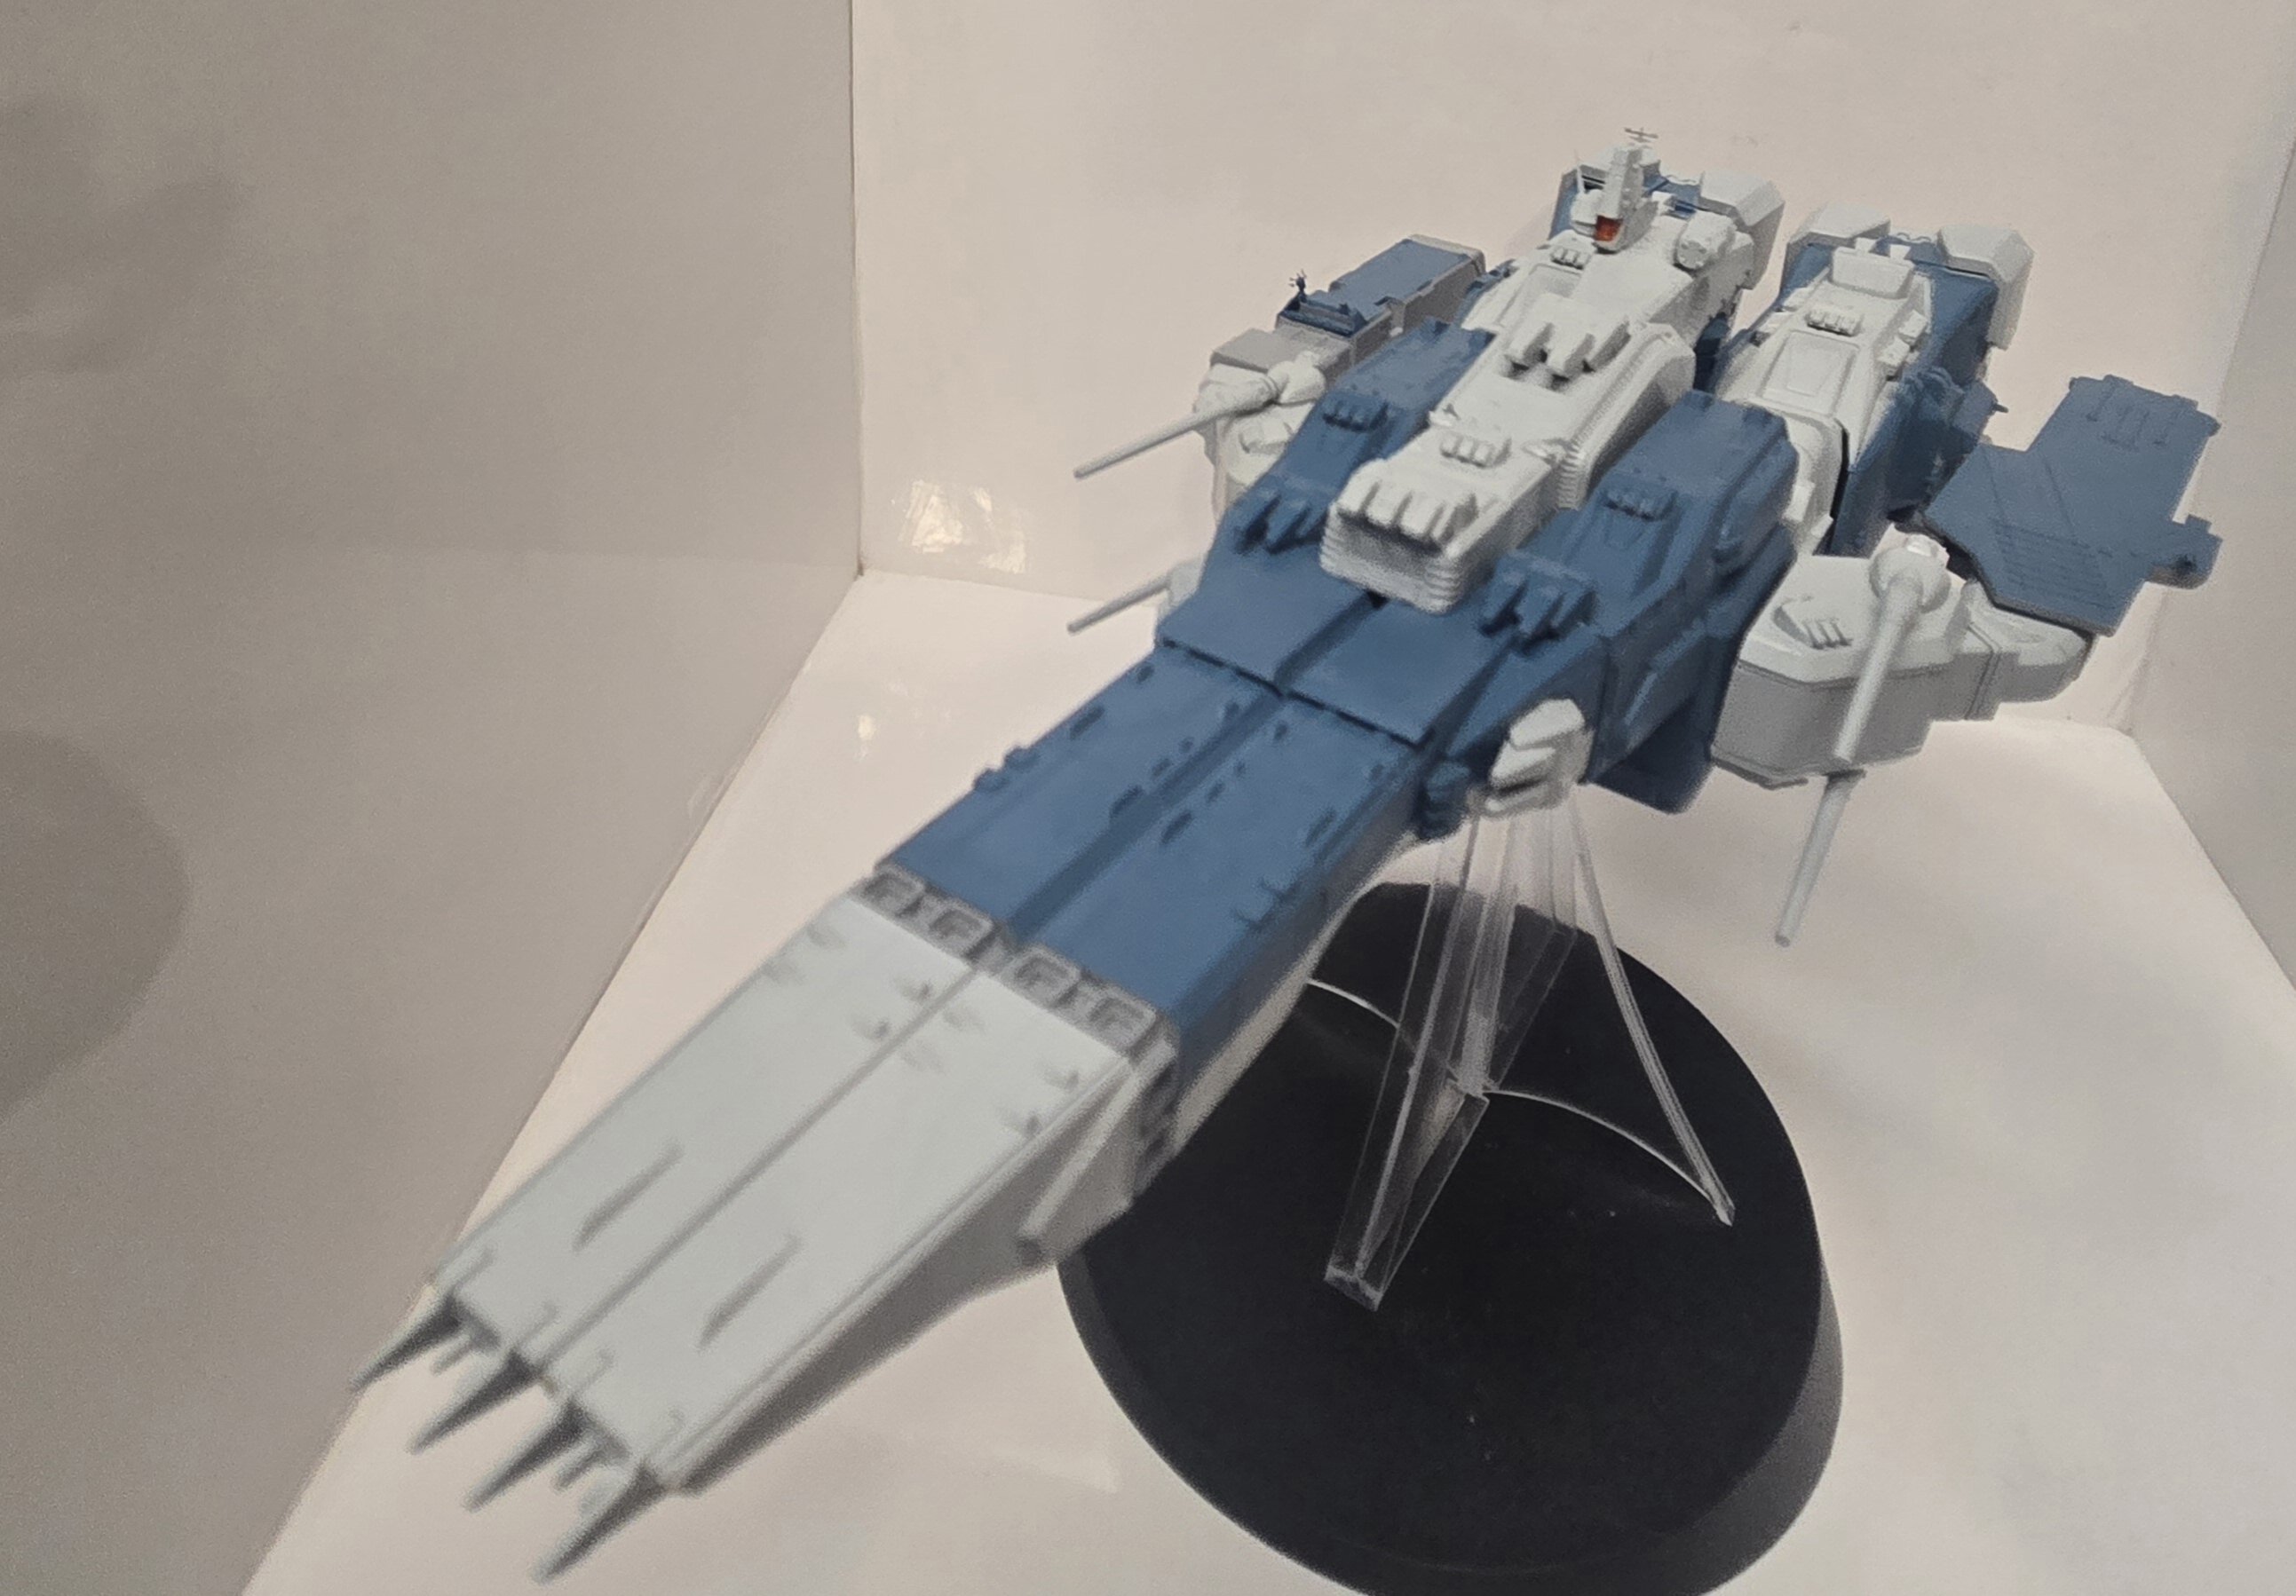
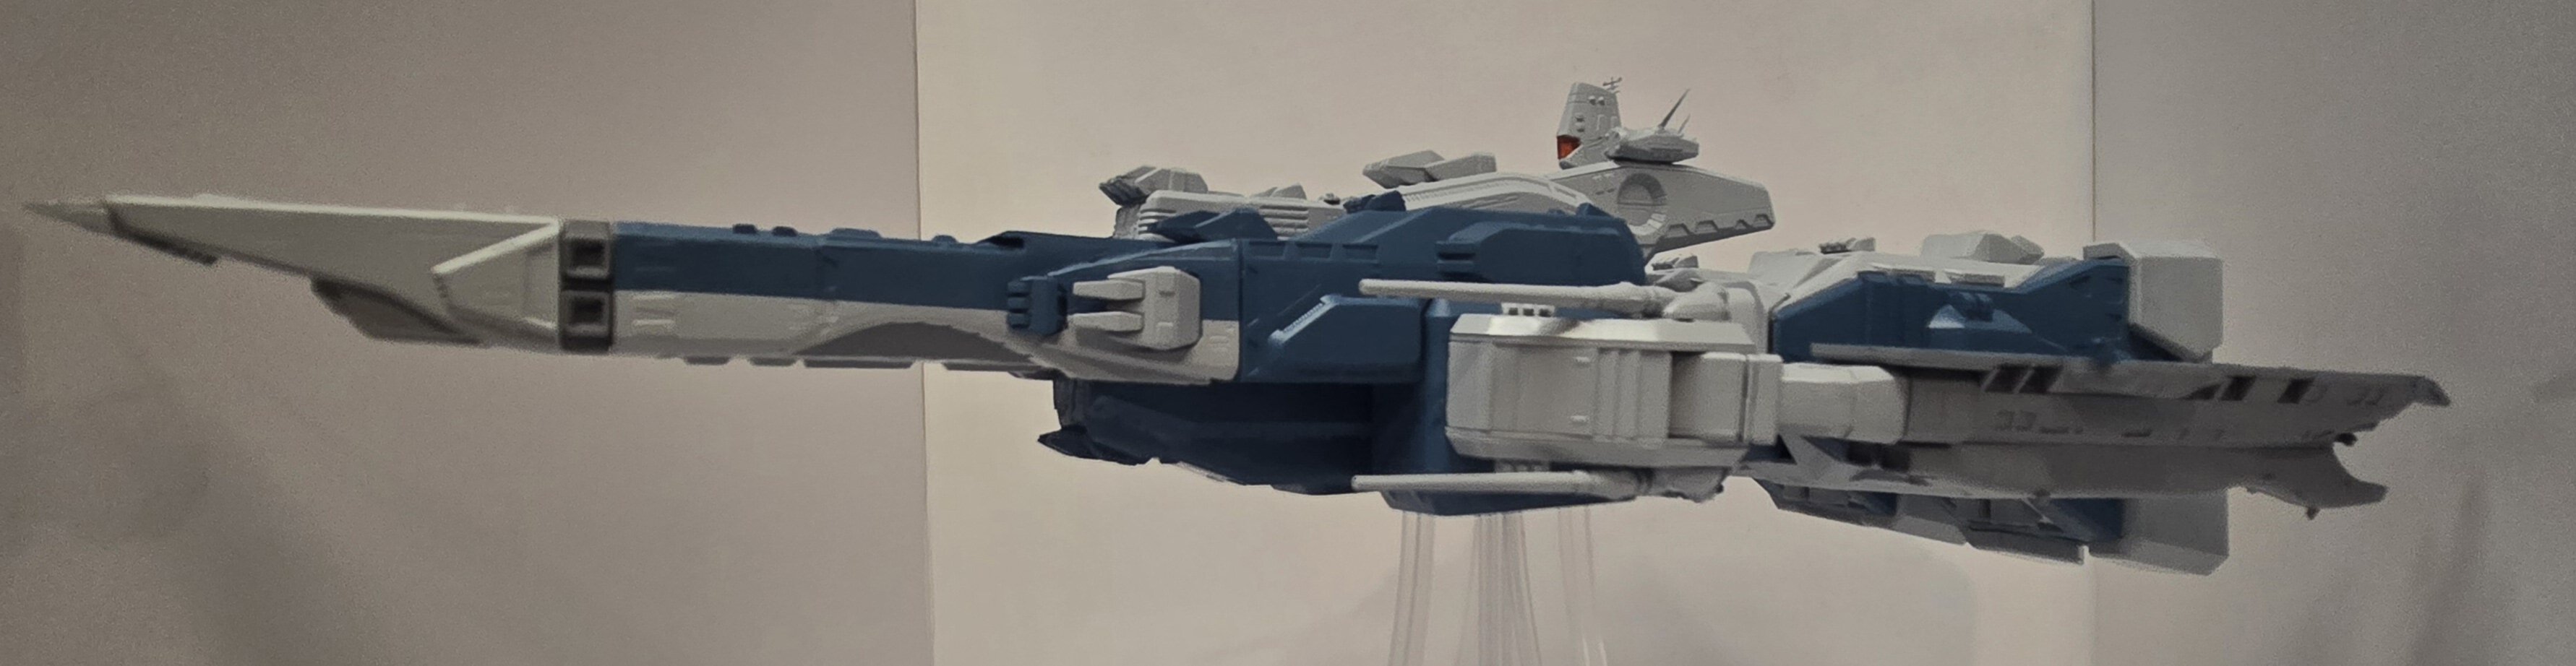
Sorry @Papa Rat I was adding text when you posted. It's the Hasegawa TV ( sort of) SDF-1.
-
Nice work Thom! It looks really good to me ( I usually get super glue all over the place whe I use PE.
So I take it you're not gonna have any pilots in there?
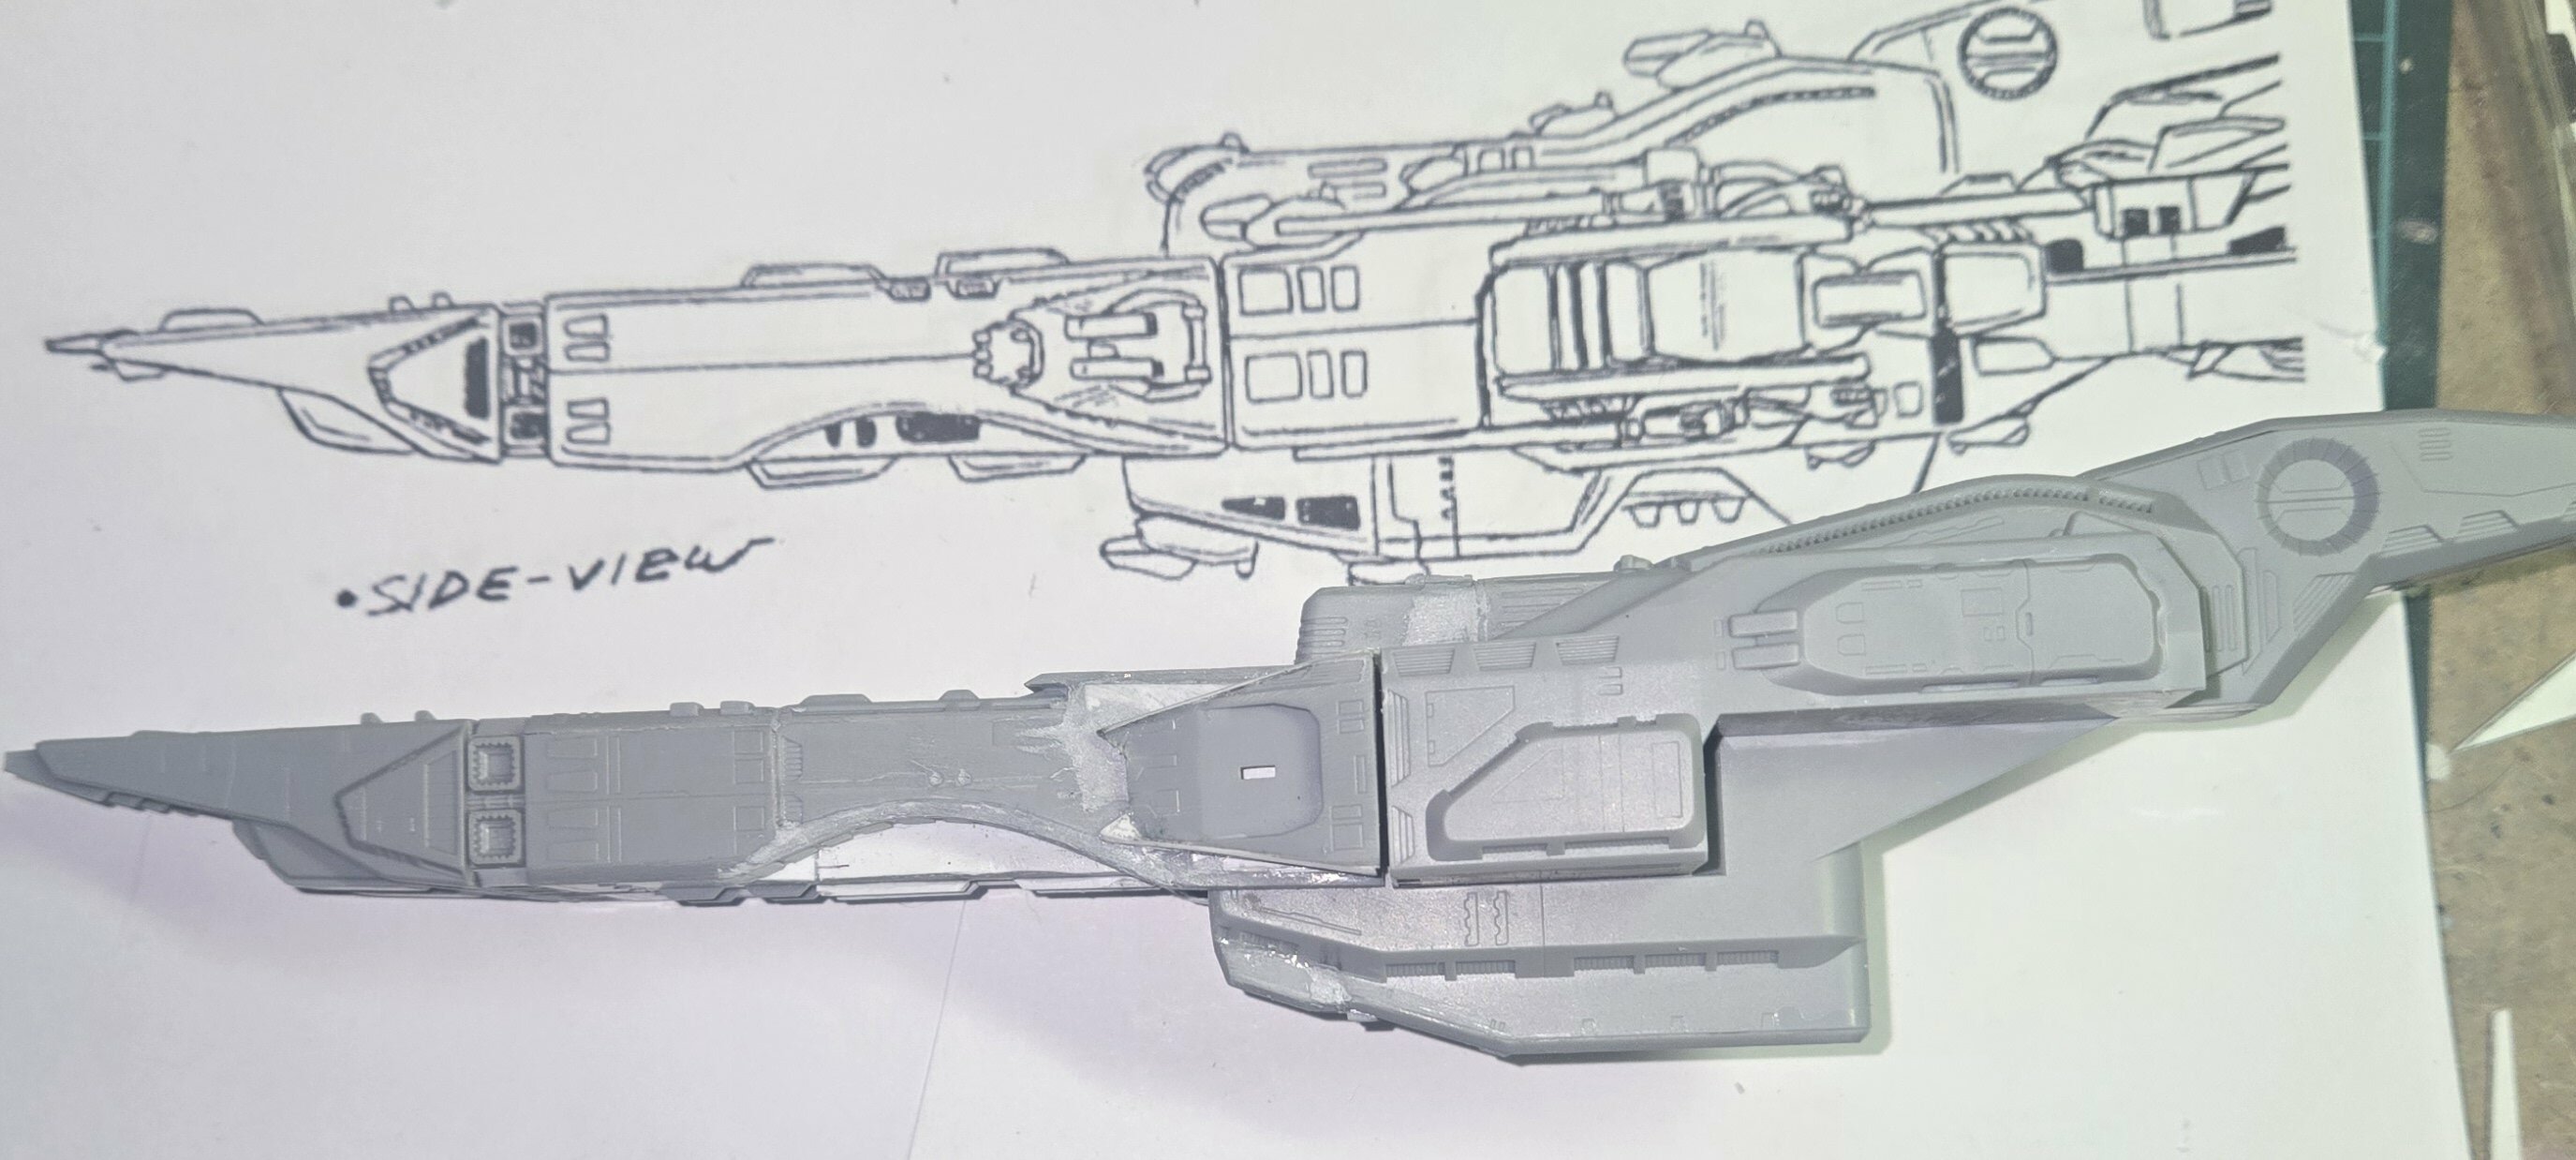
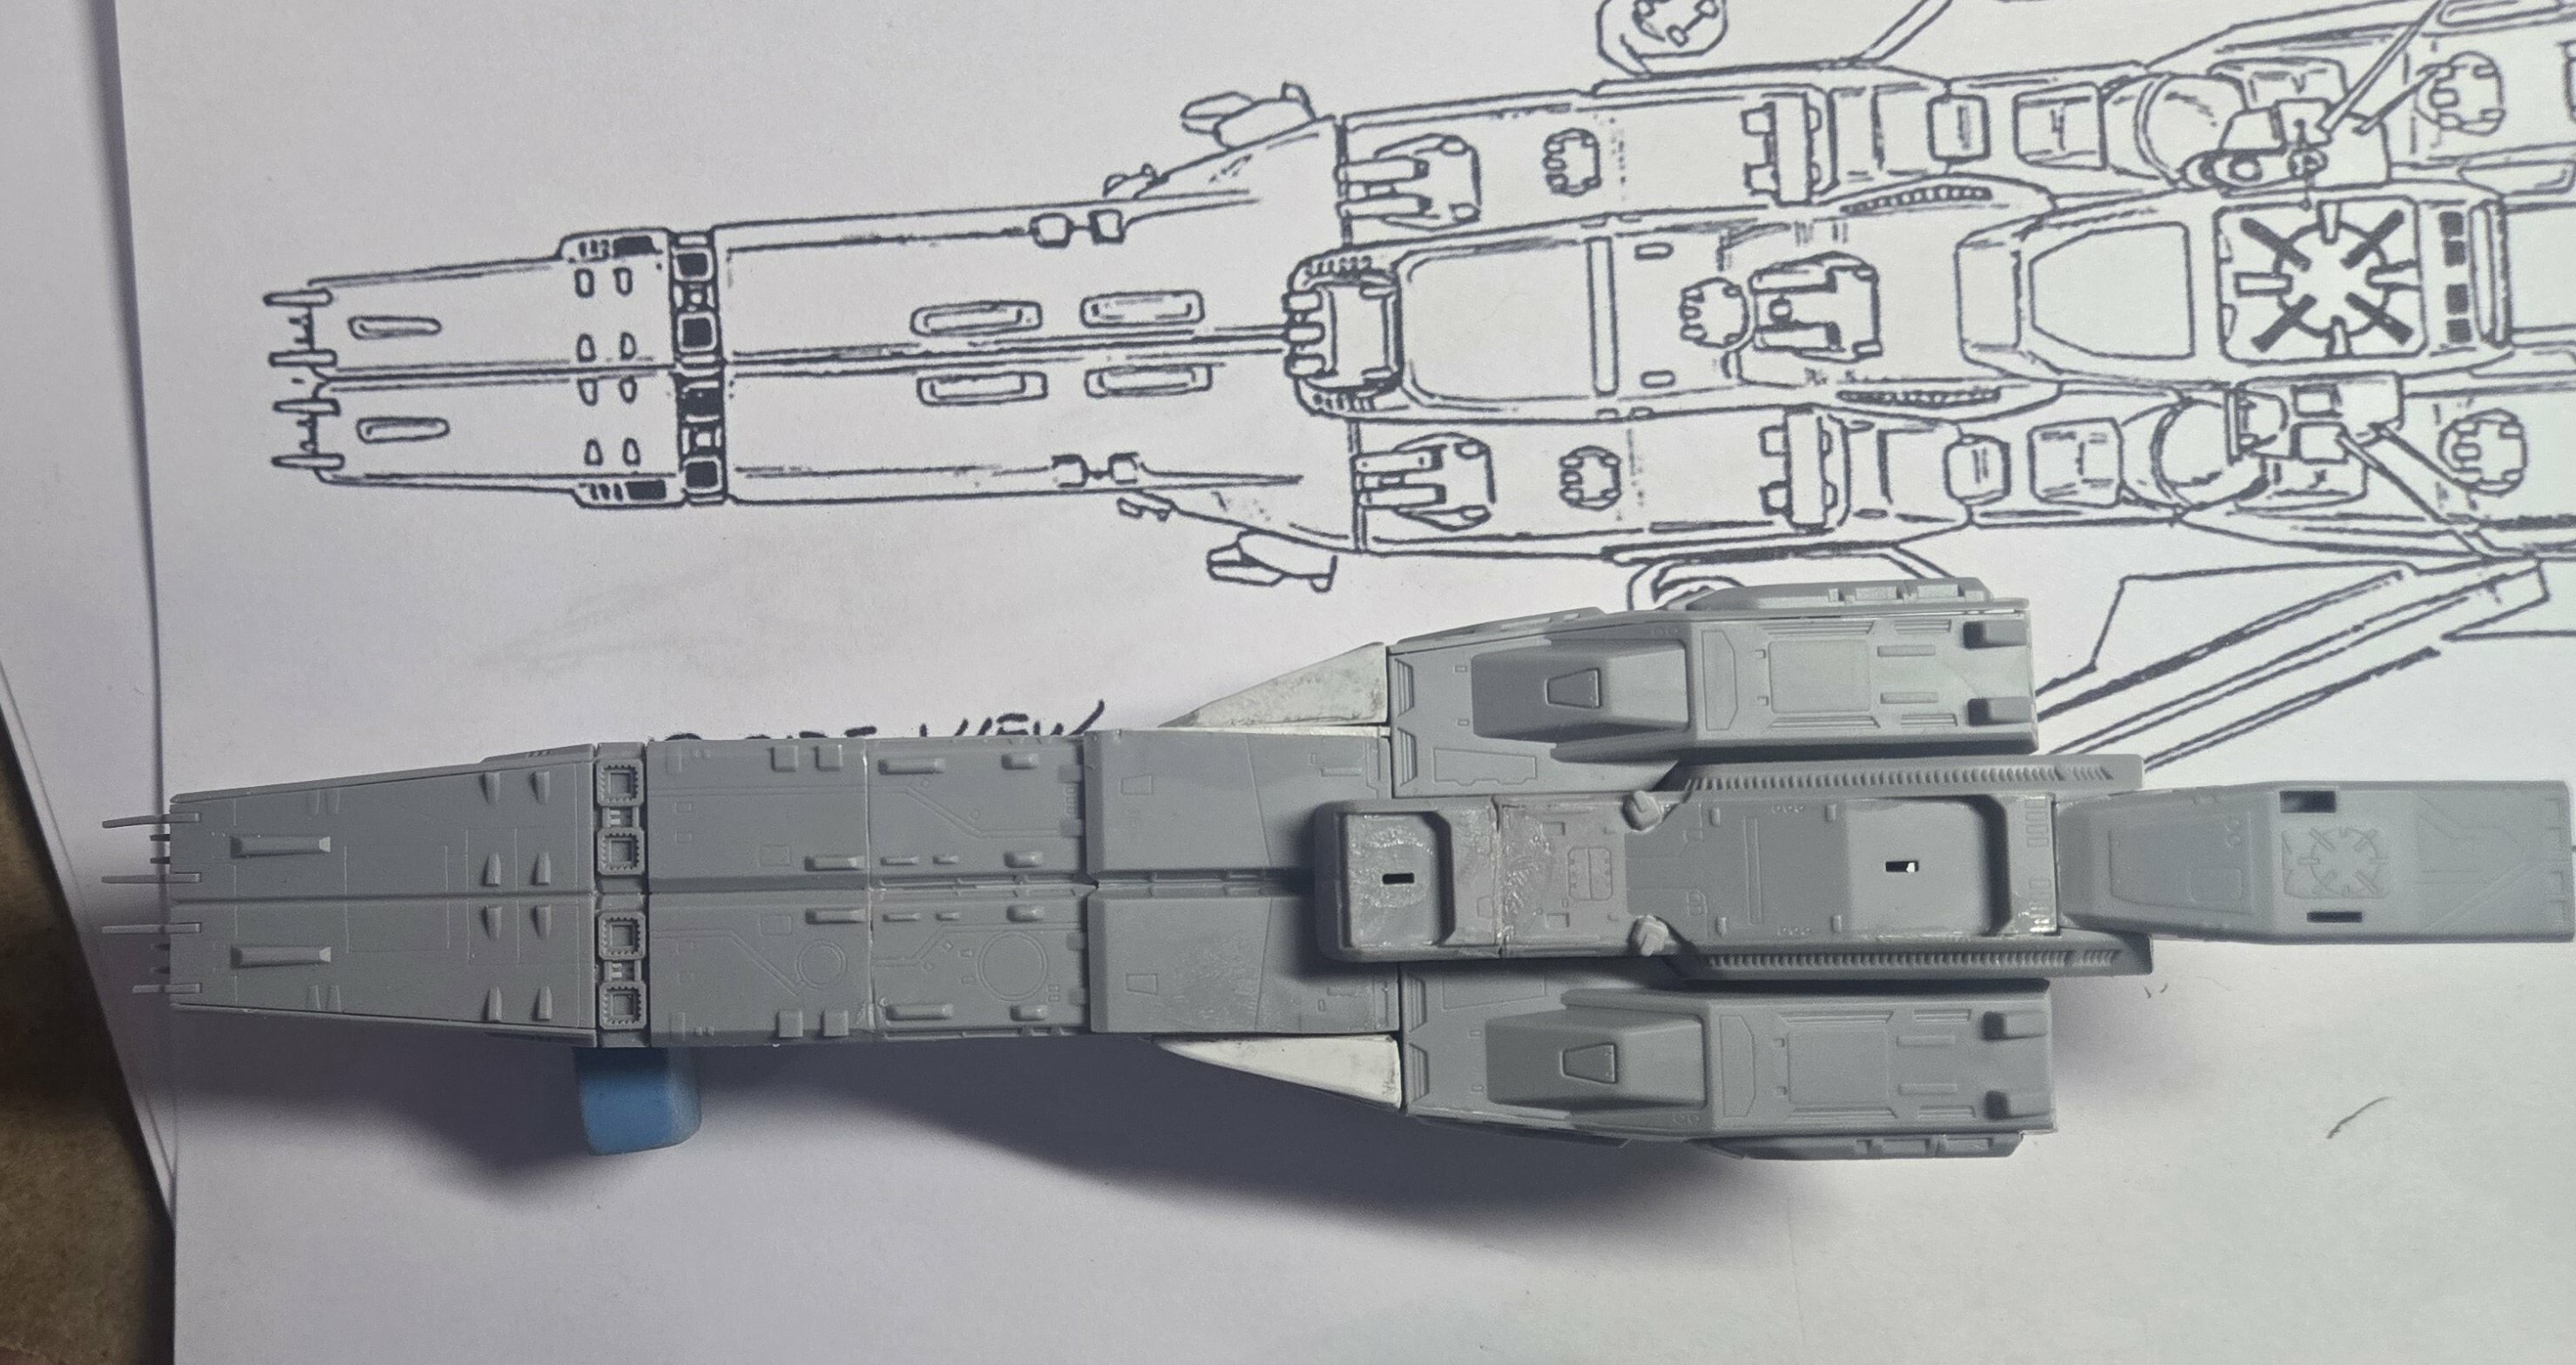
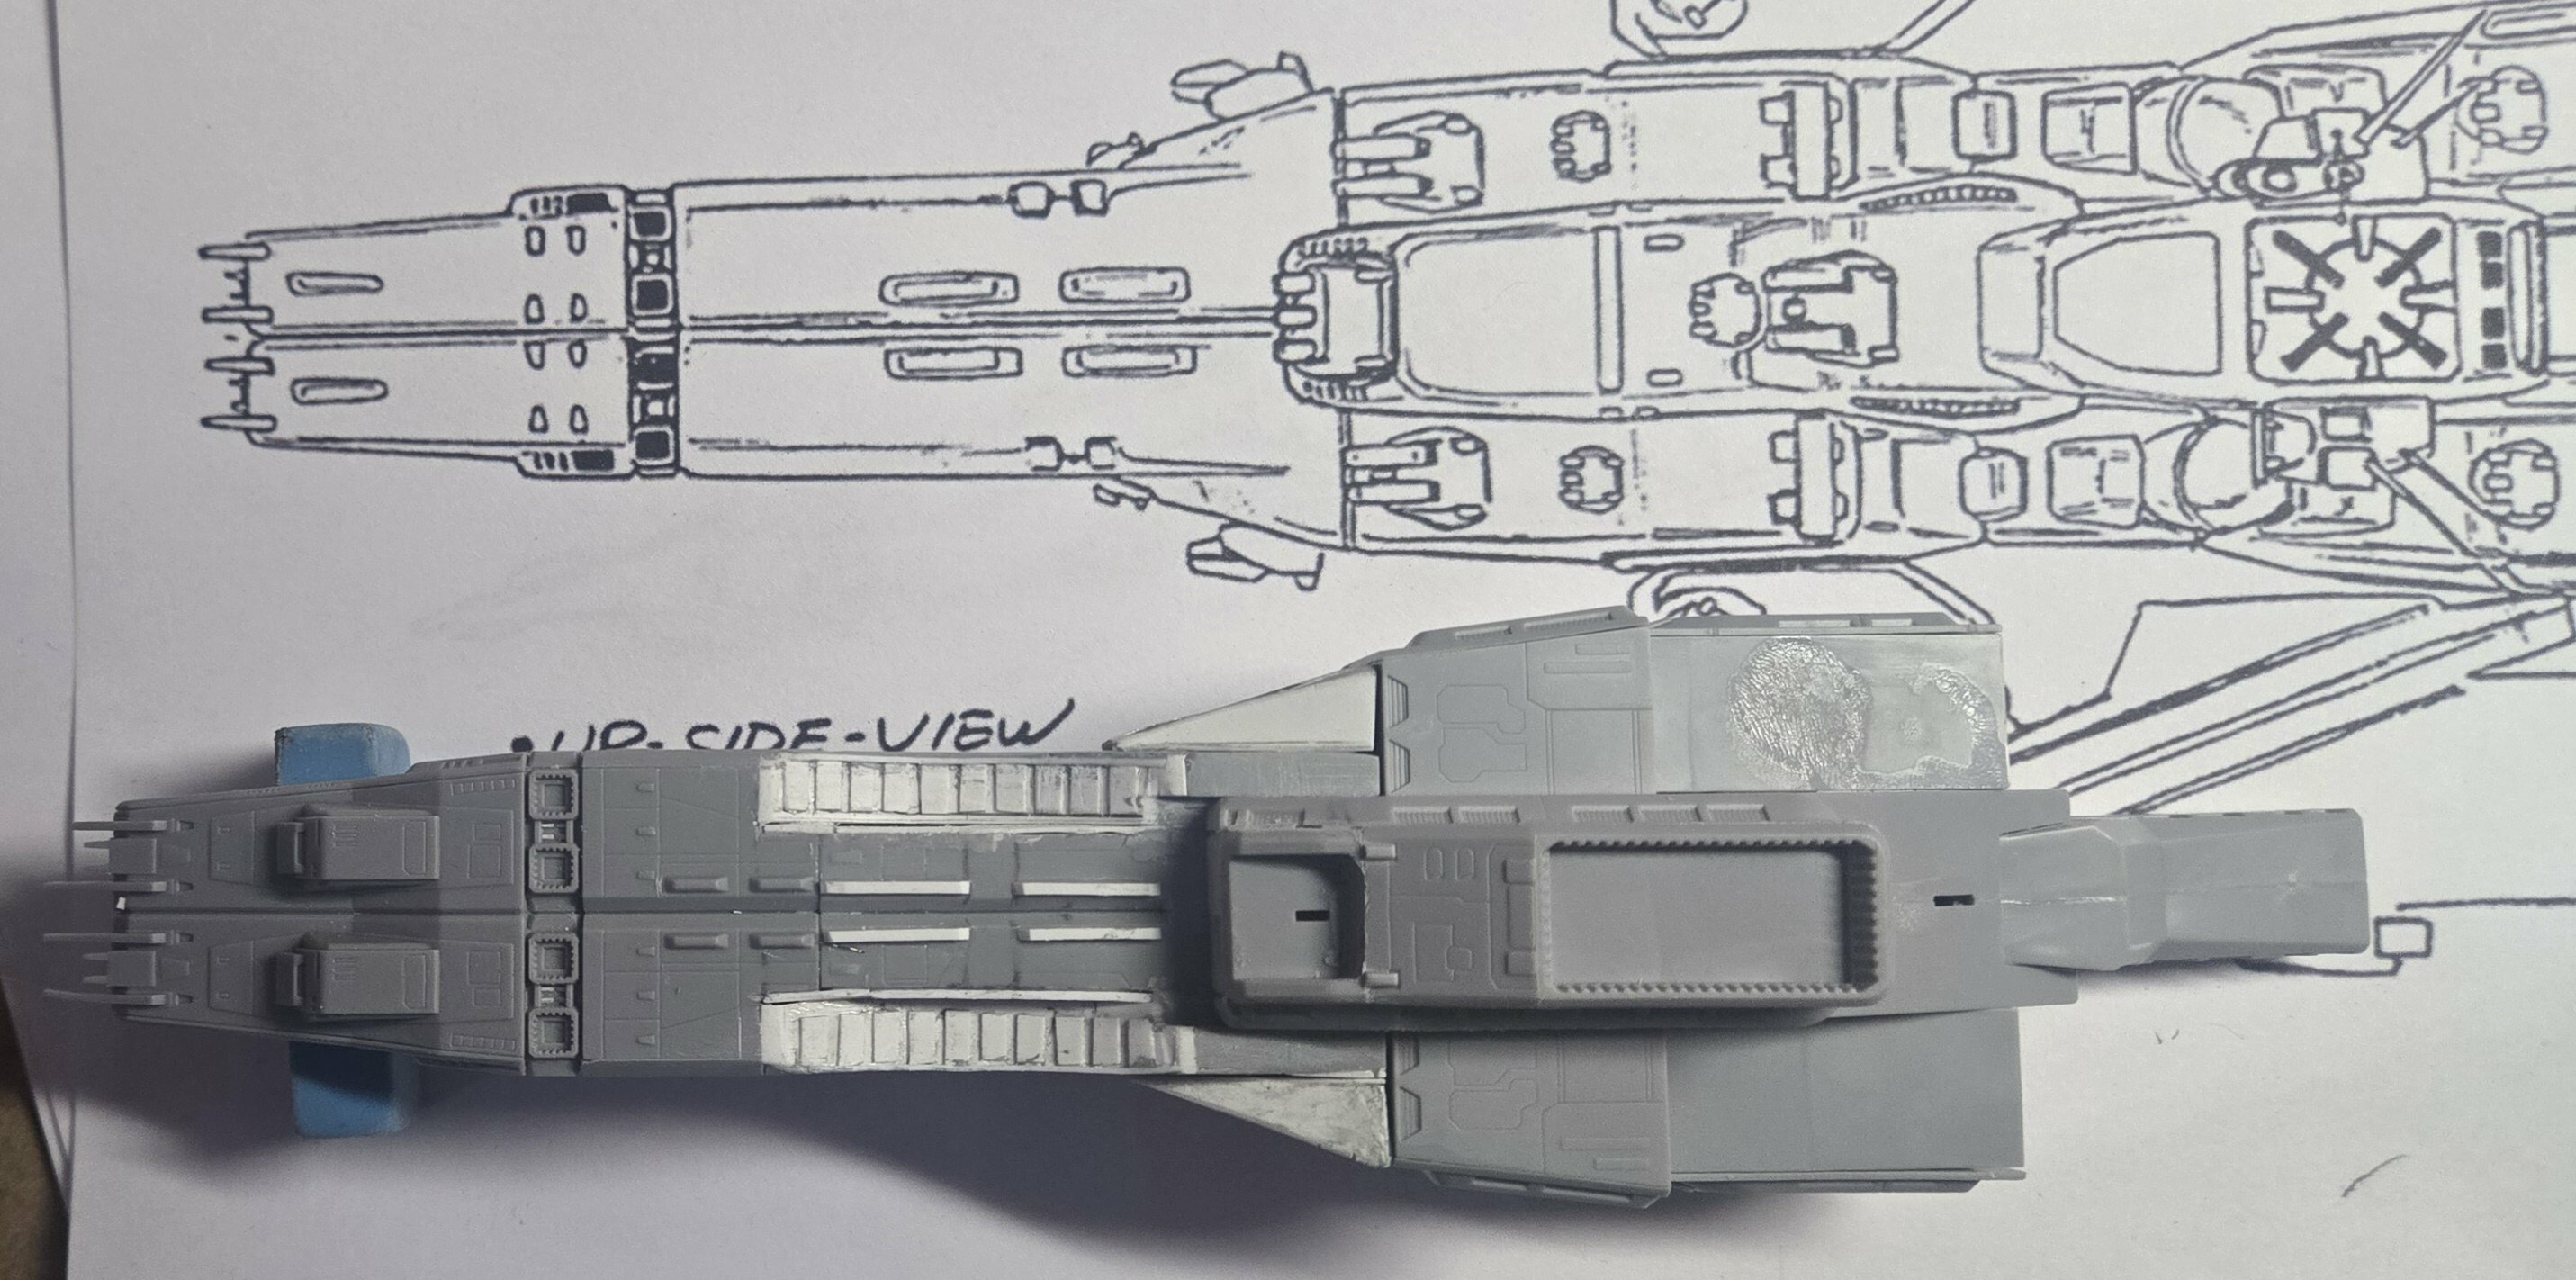
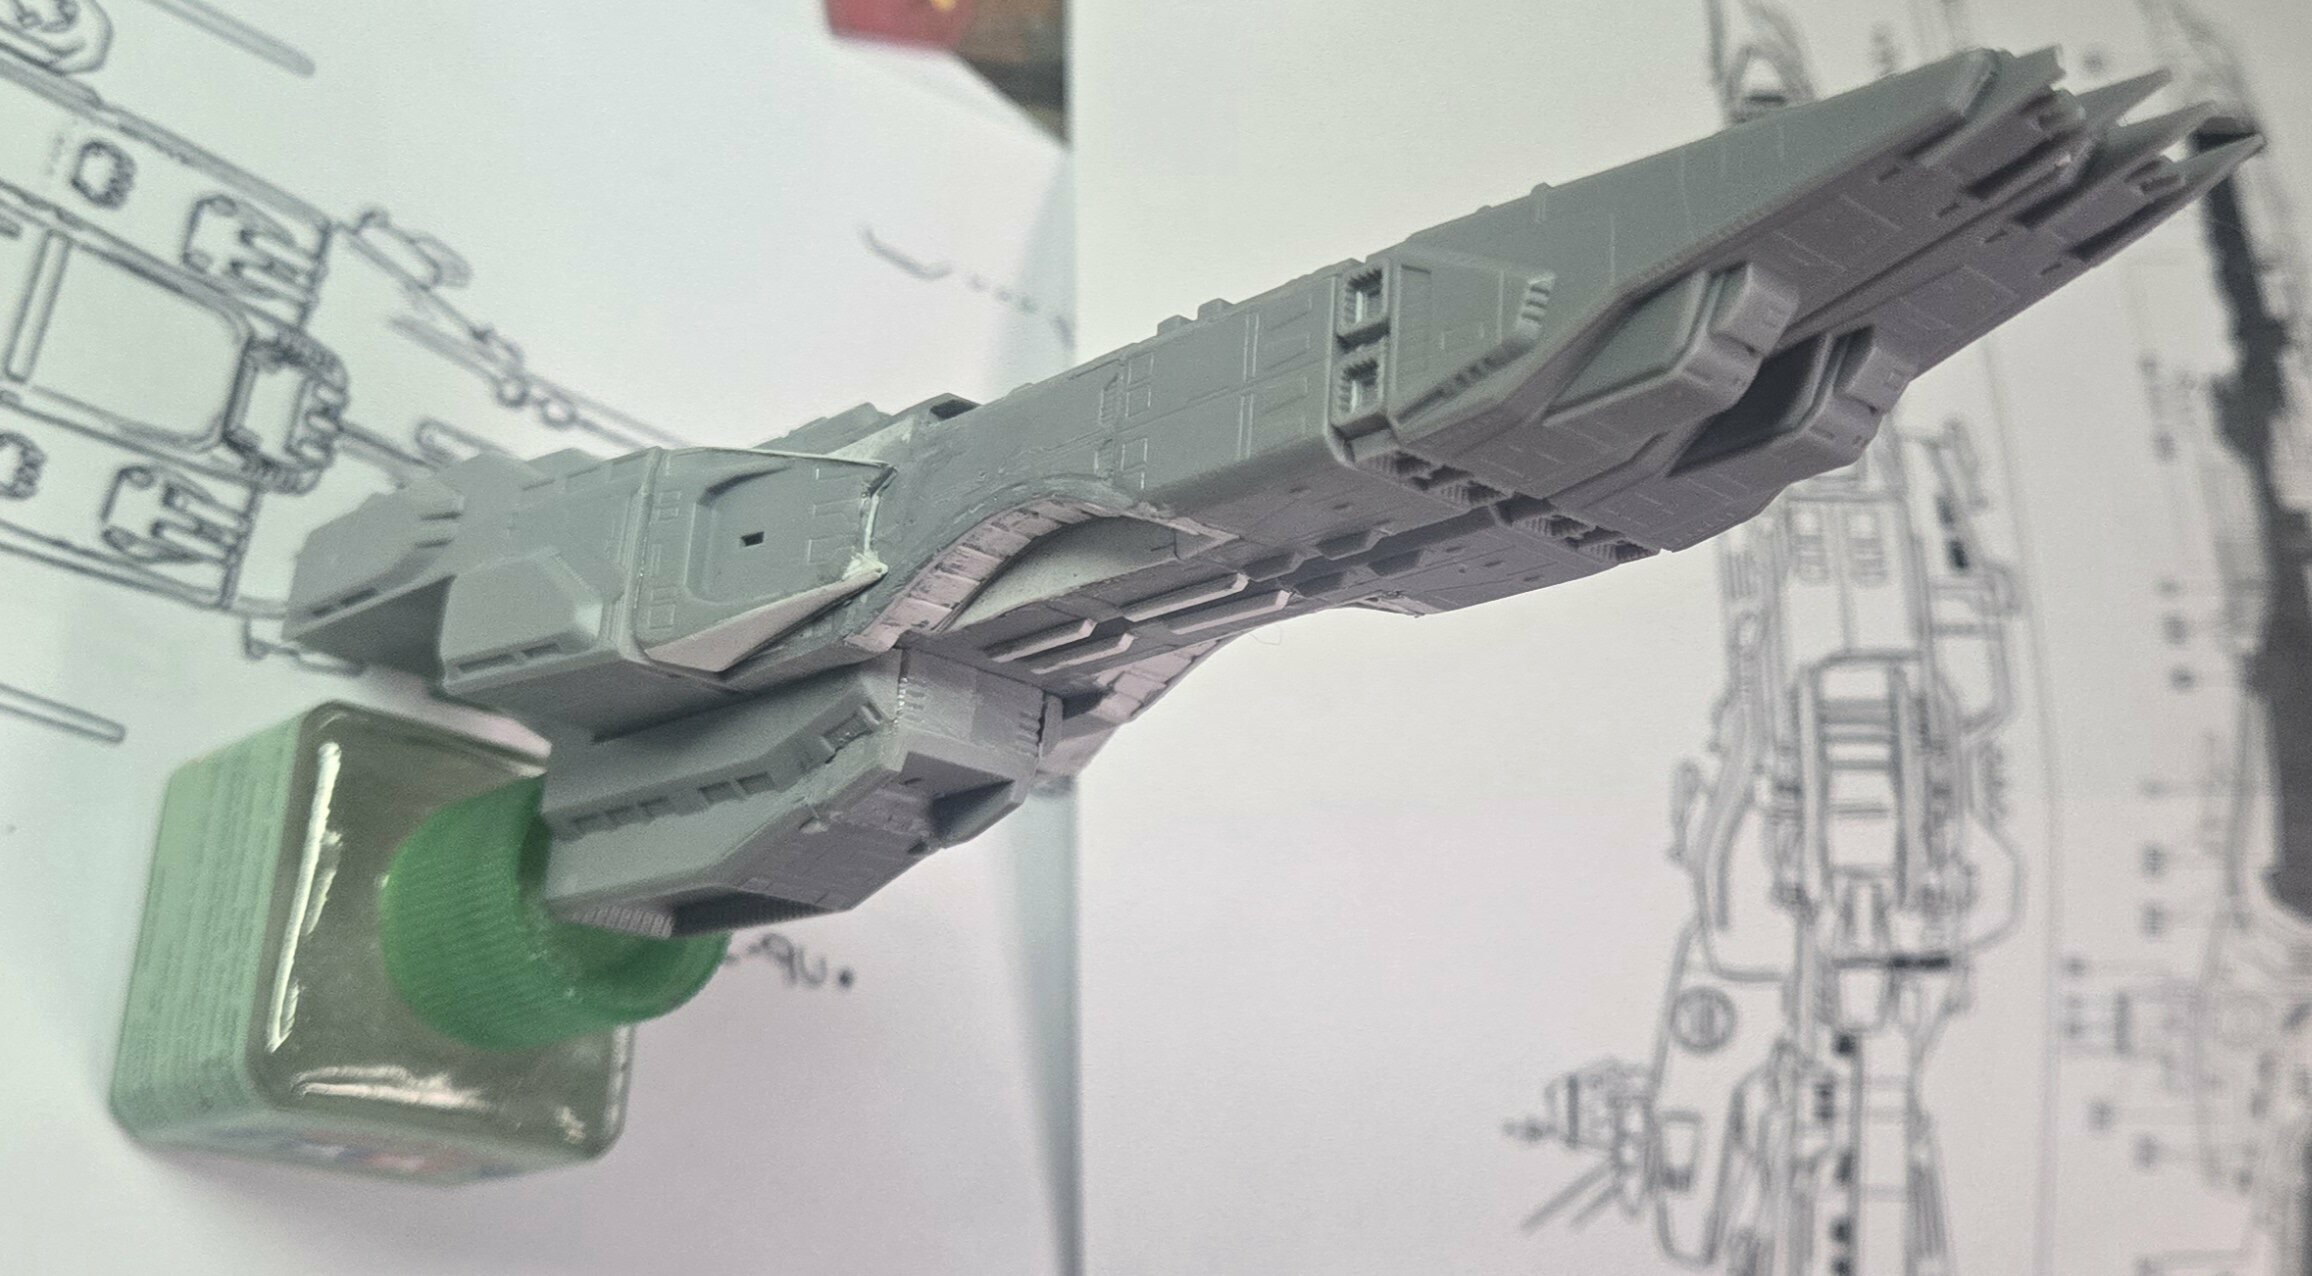
I started a project I wasn't planning to work on till summer break, but because of some recent posts in the 'Look at This Really Cool Model Build' thread I got a little itchy to start.
Pics speak for themselves.
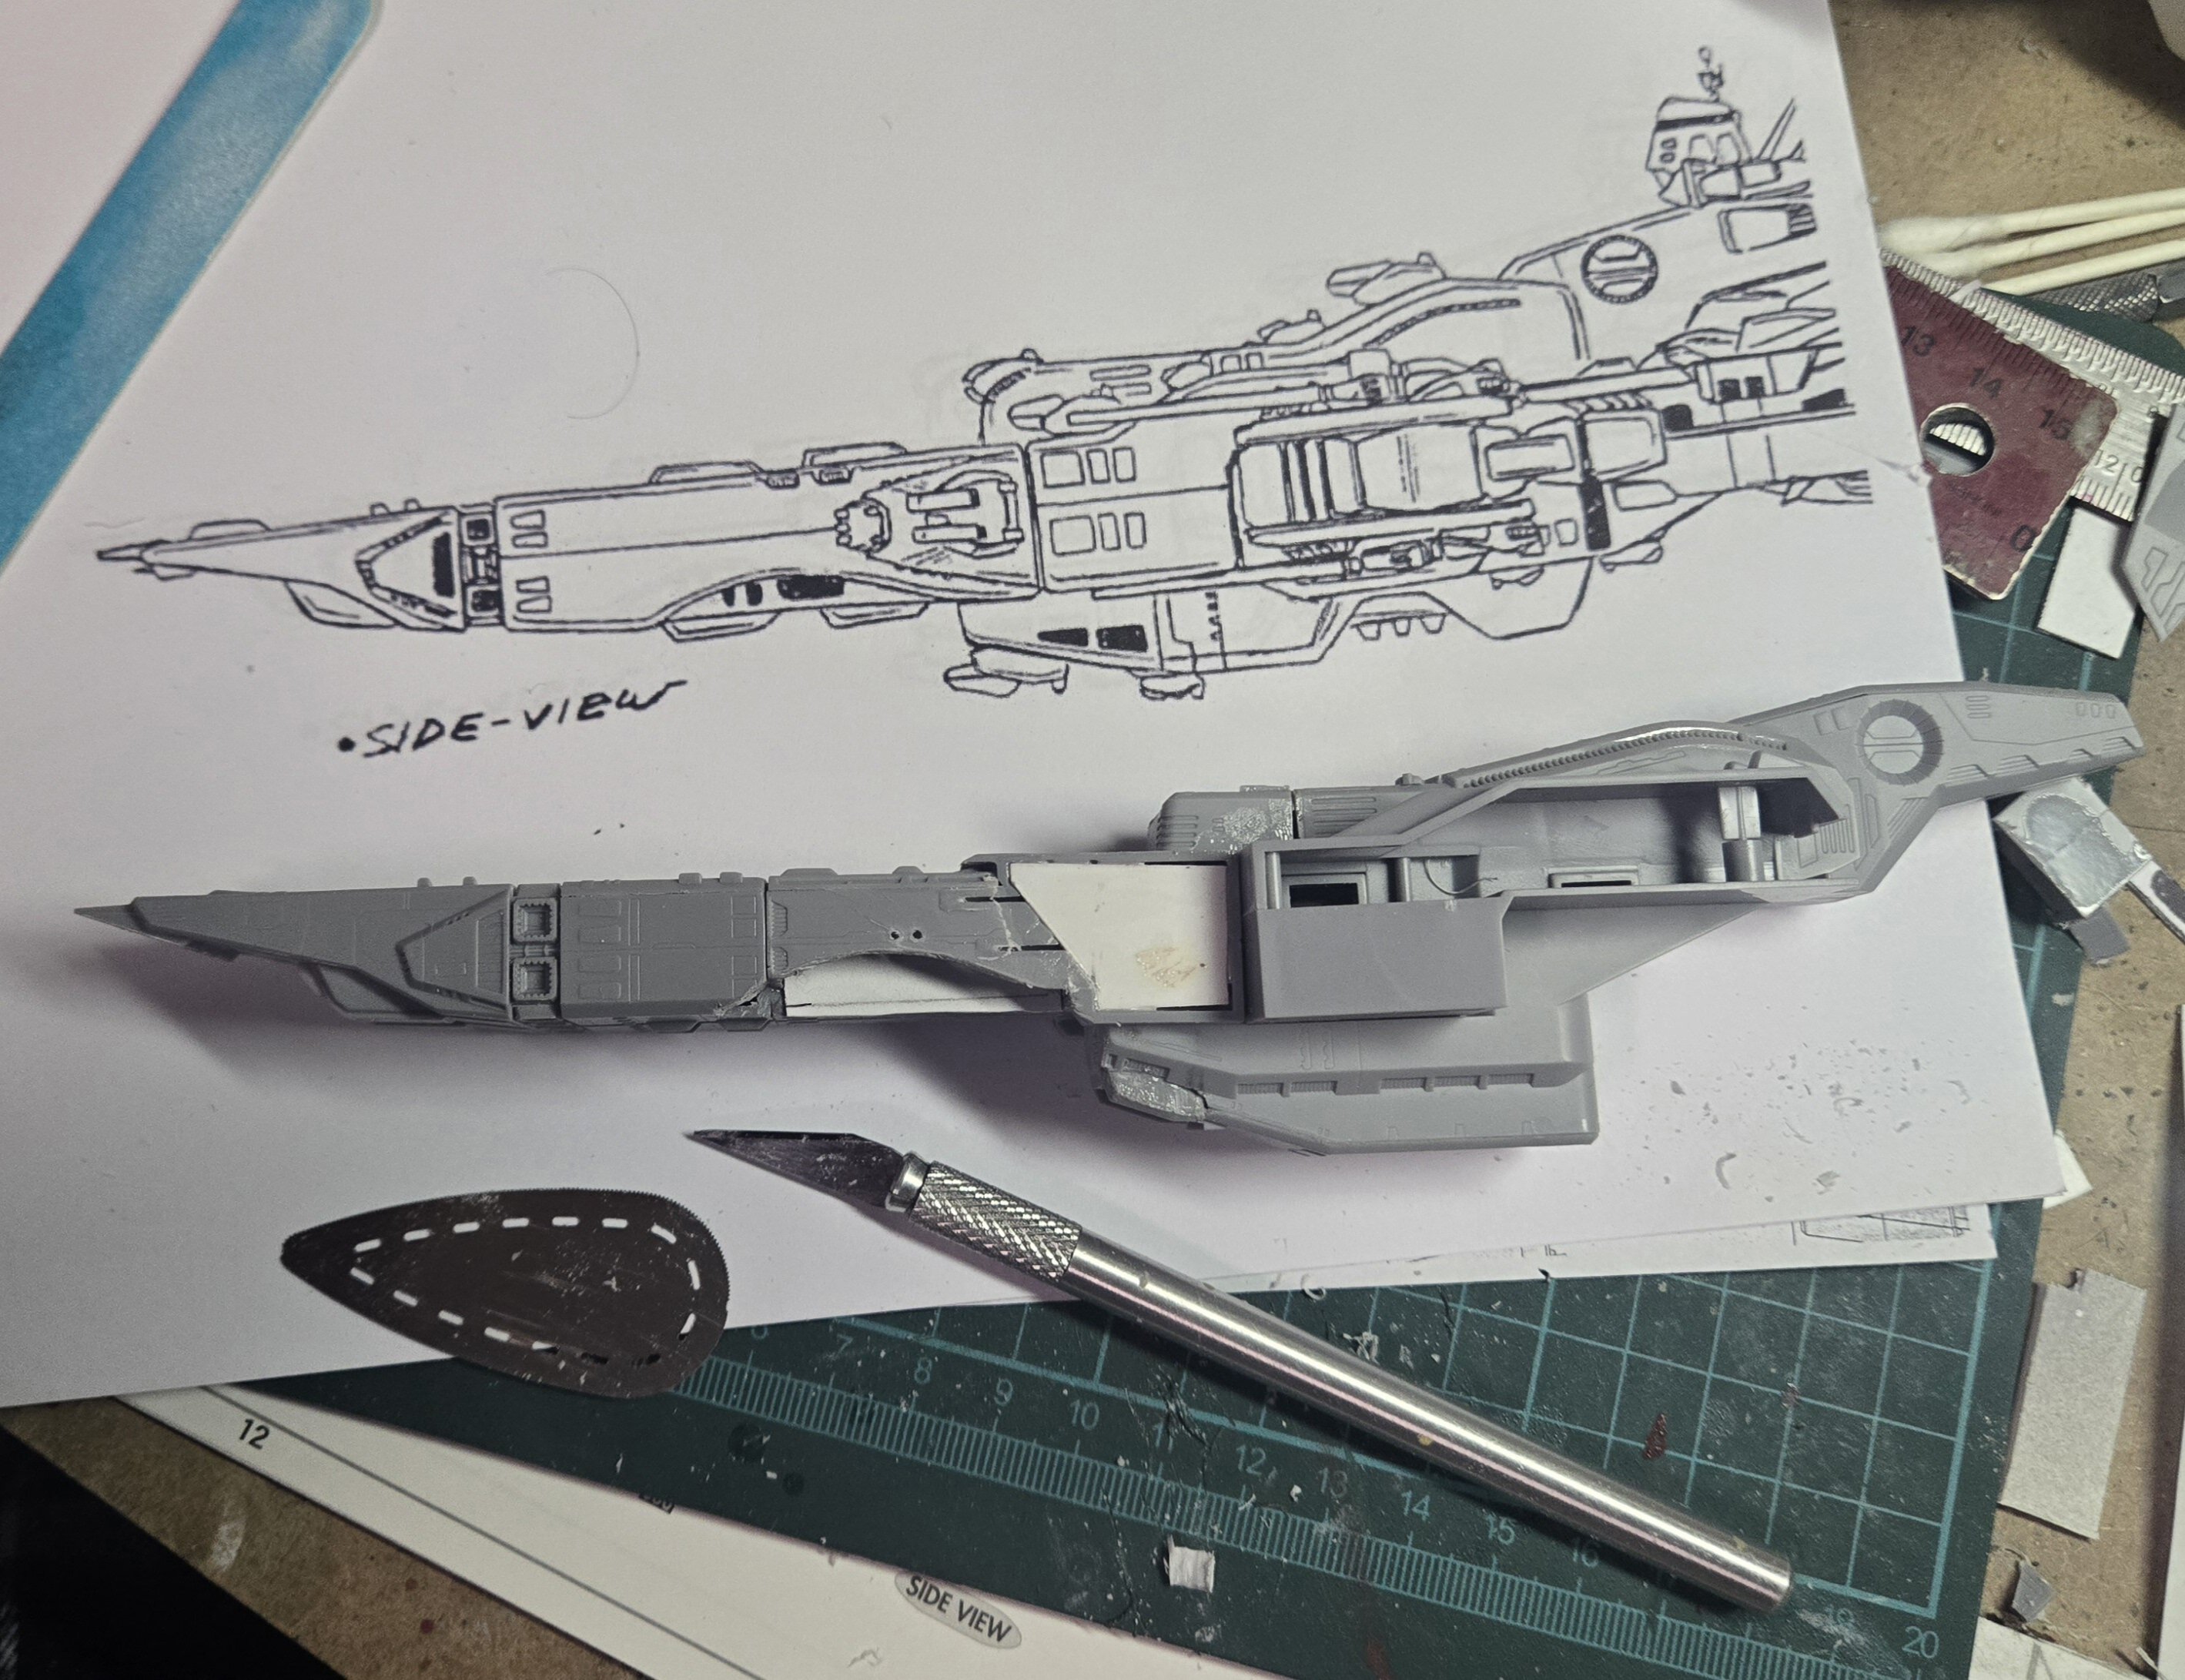
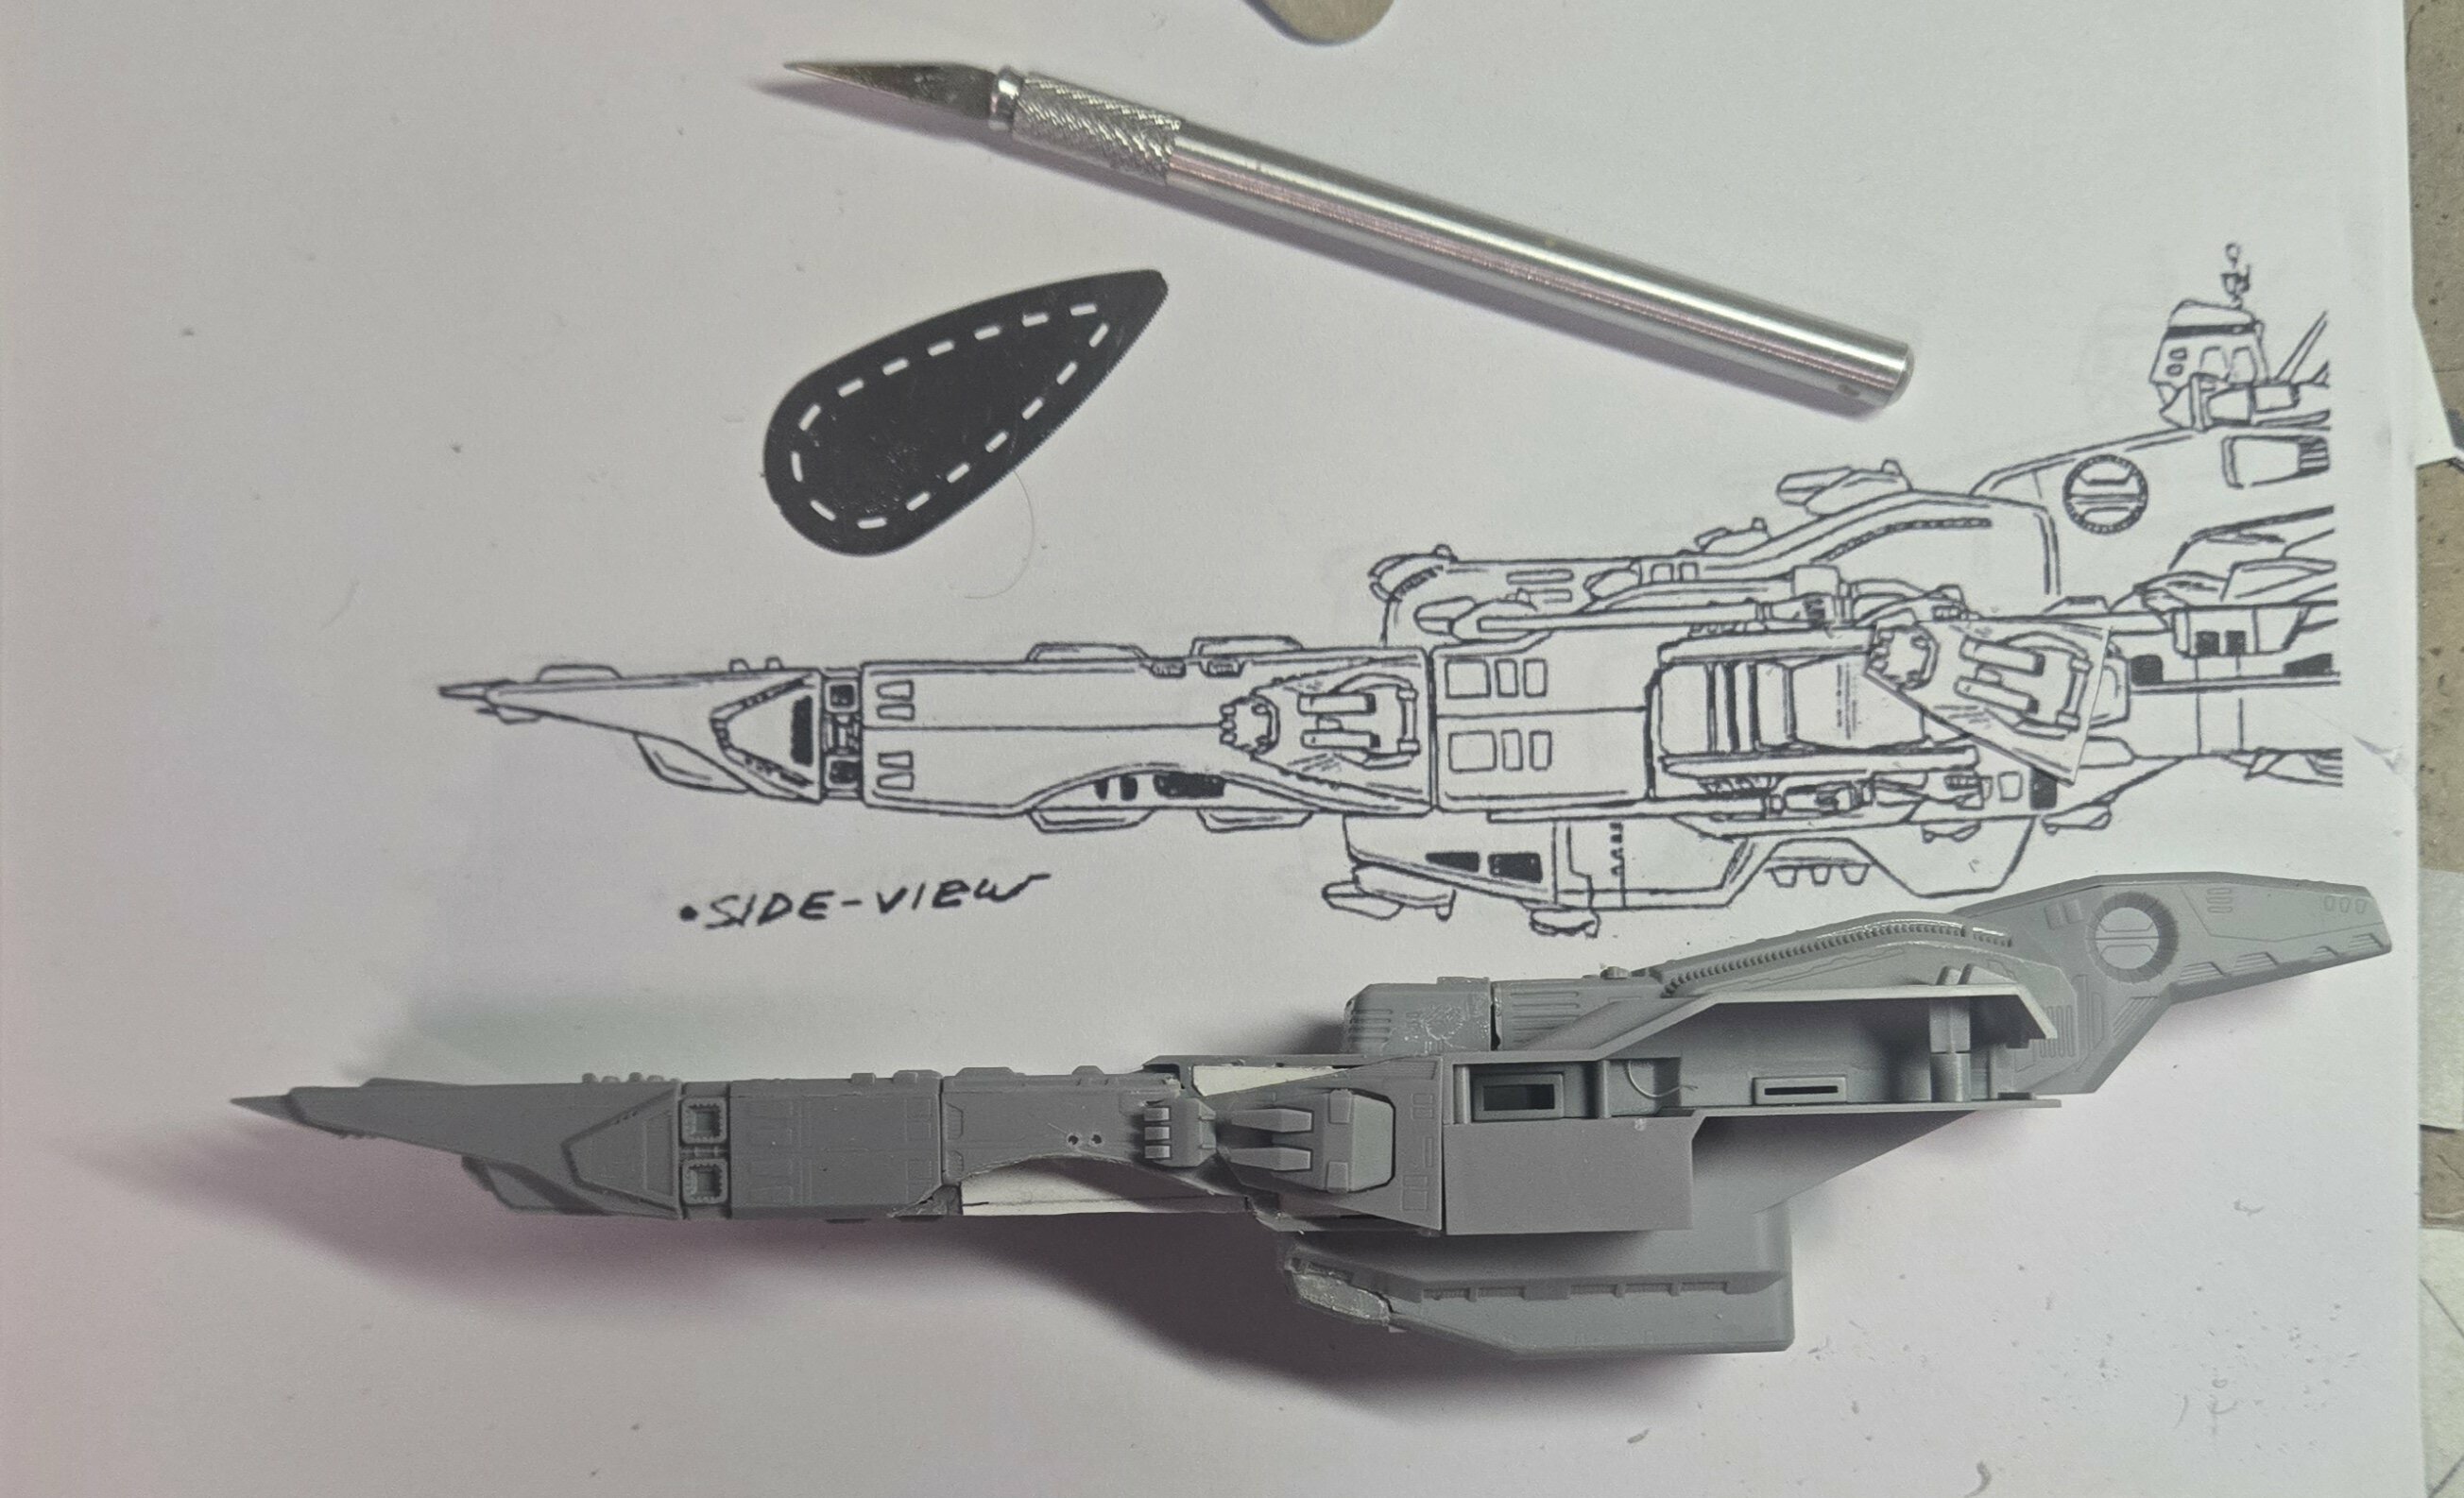
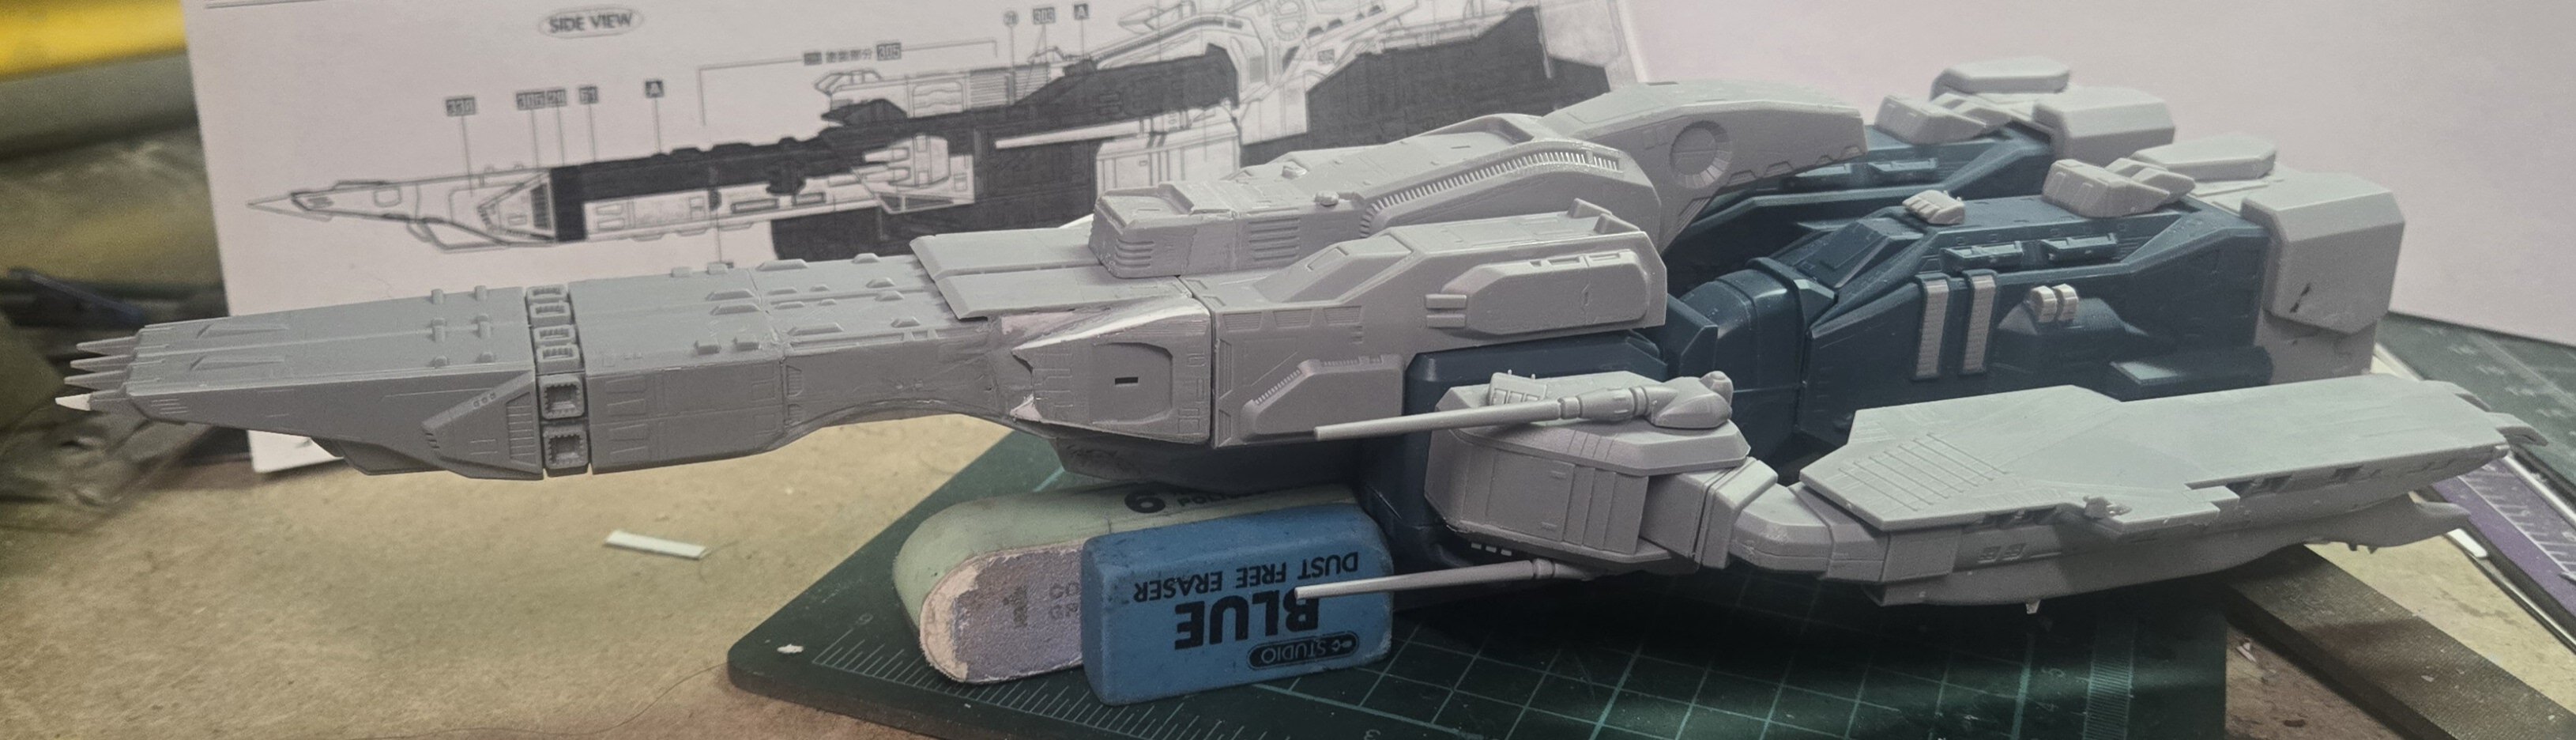
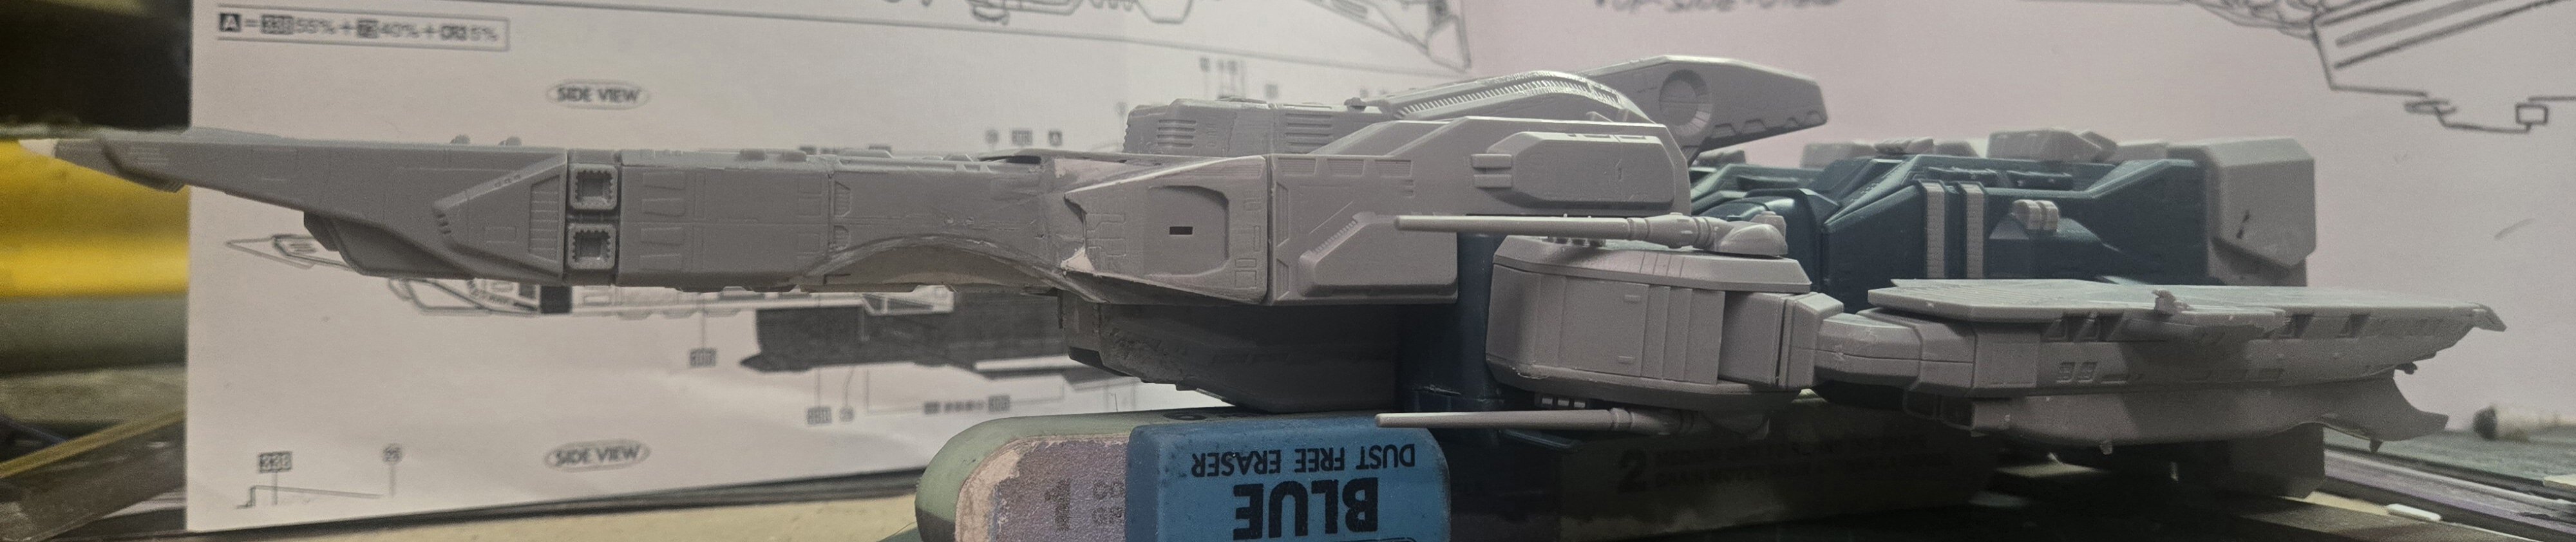
The proportions of the Hase. Kit are a little off for the TV SDF, but it's not that bad. The guns you see on the side are just placed there for figuring out placement.
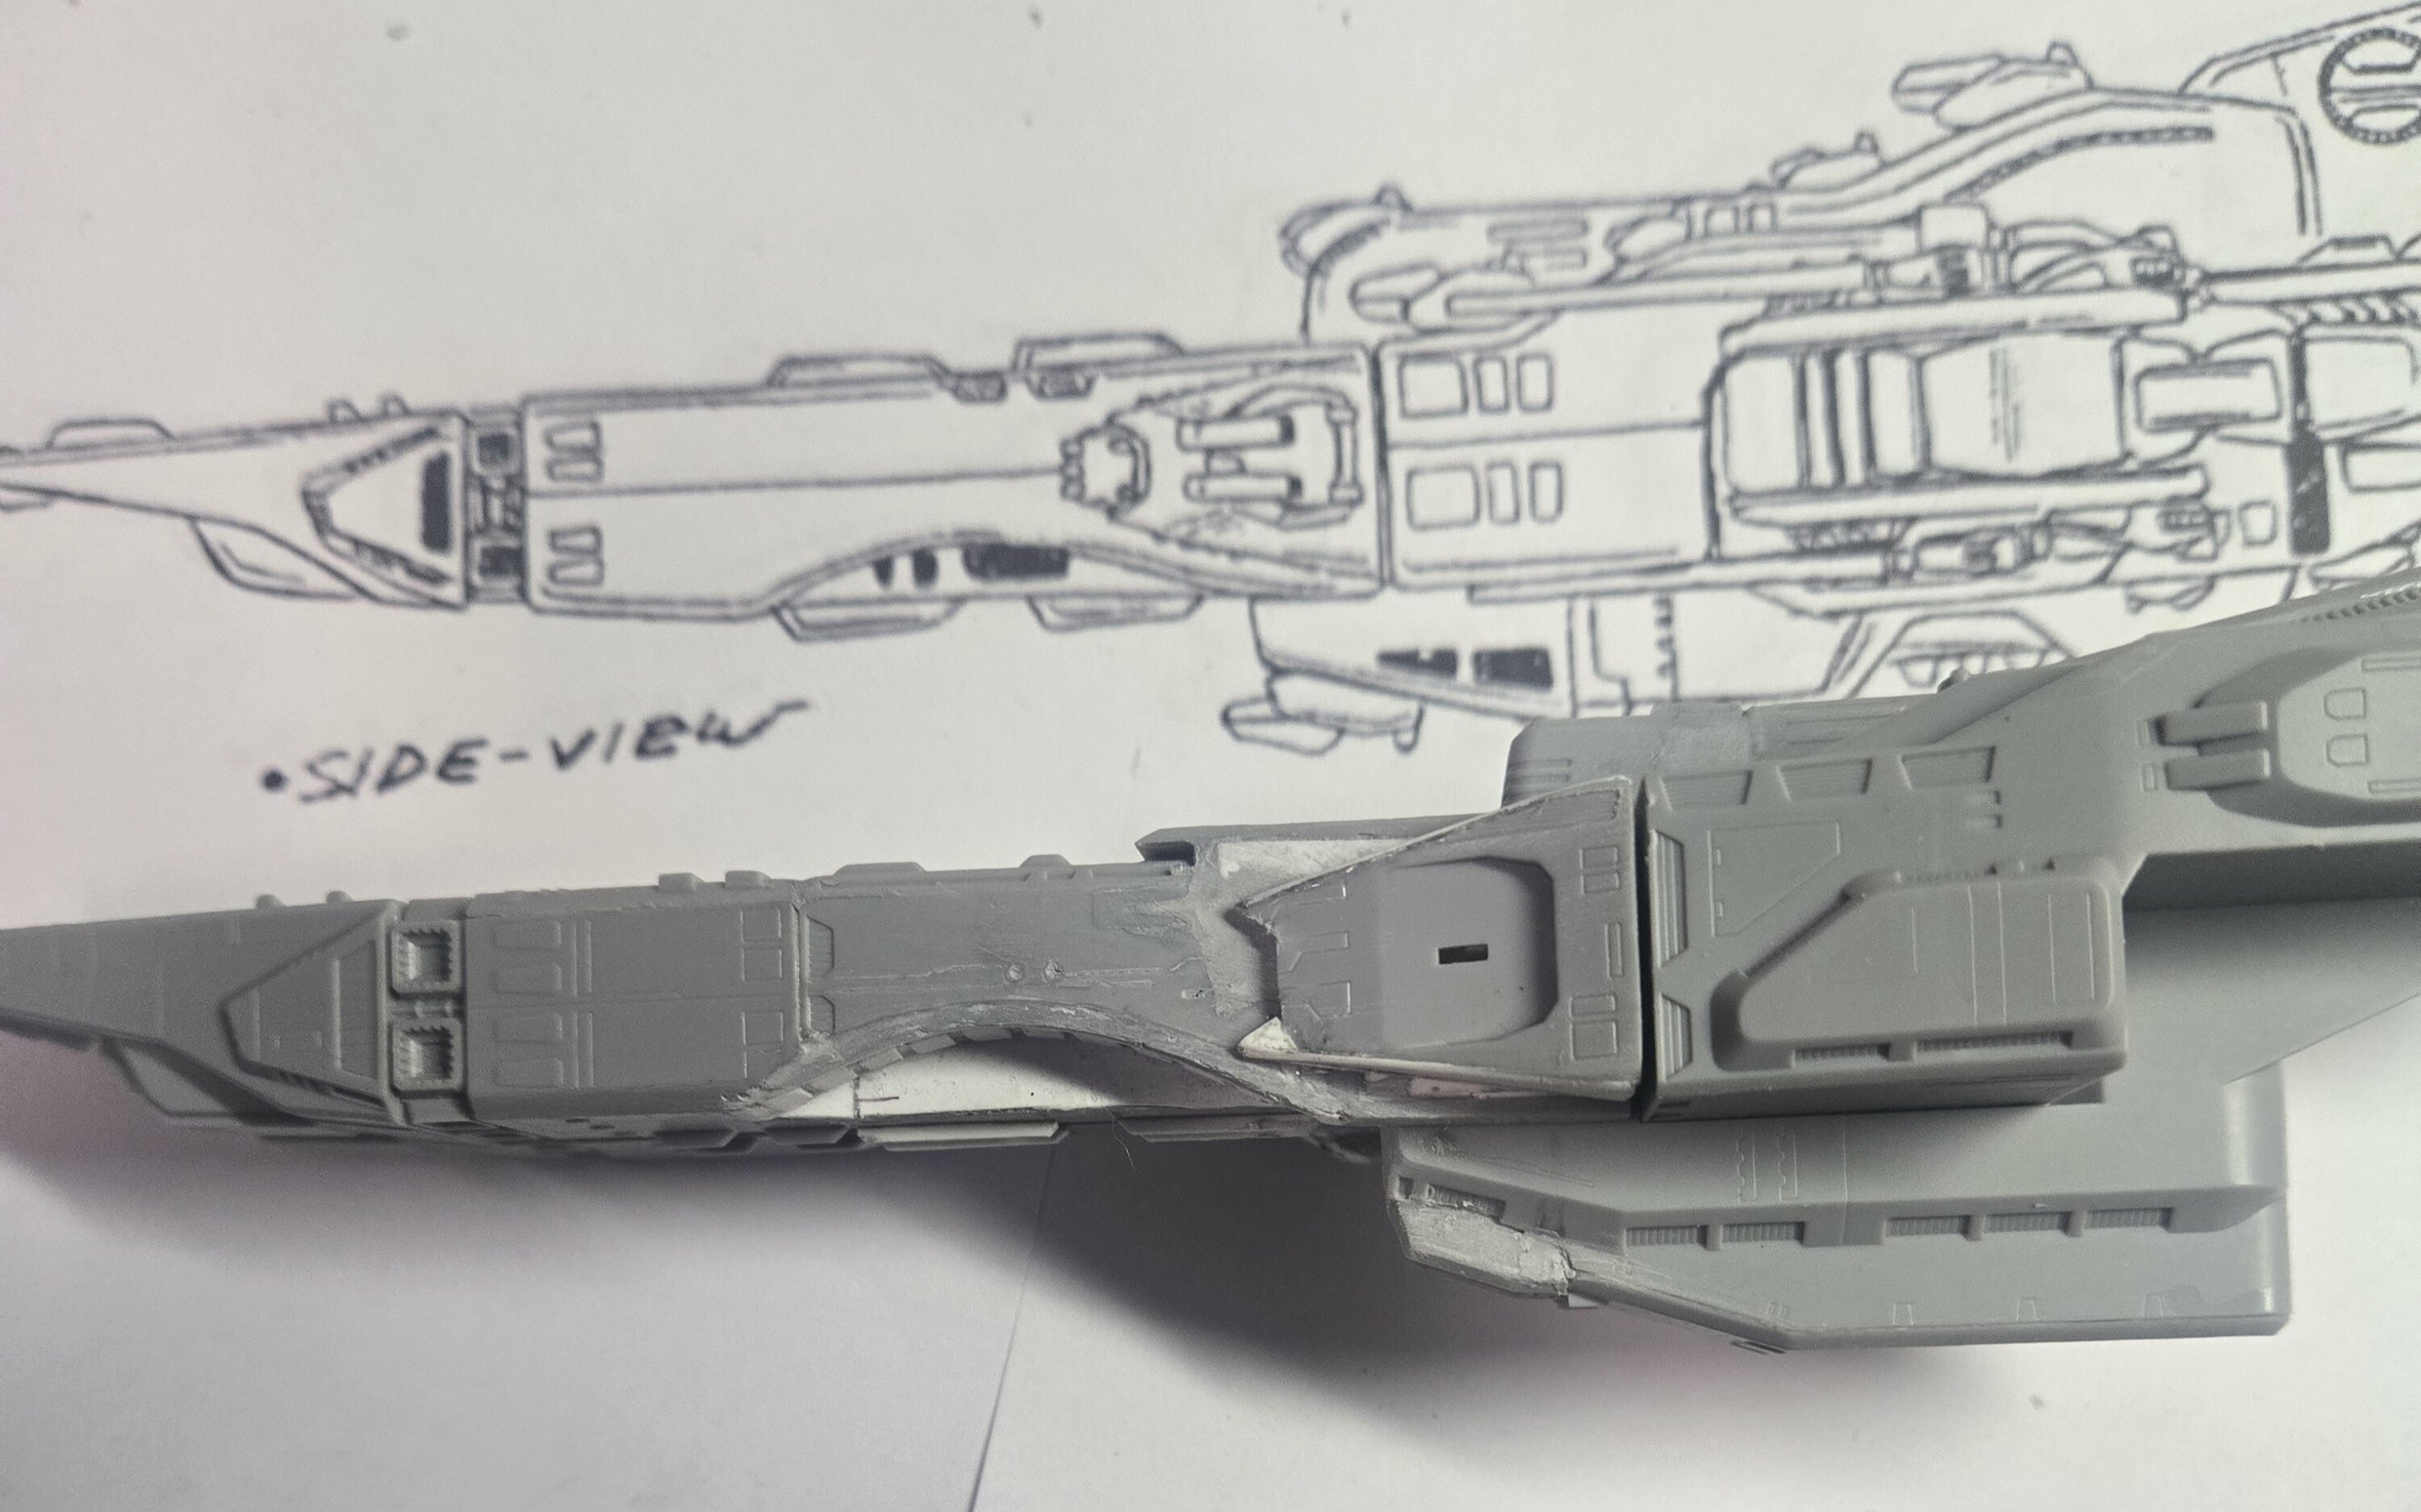
My initial detailing of the curved cut out was way out of scale so I scrapped it and tried again. 2'nd attempt is much better, but we'll see if it stays or If I try for a 3rd time.
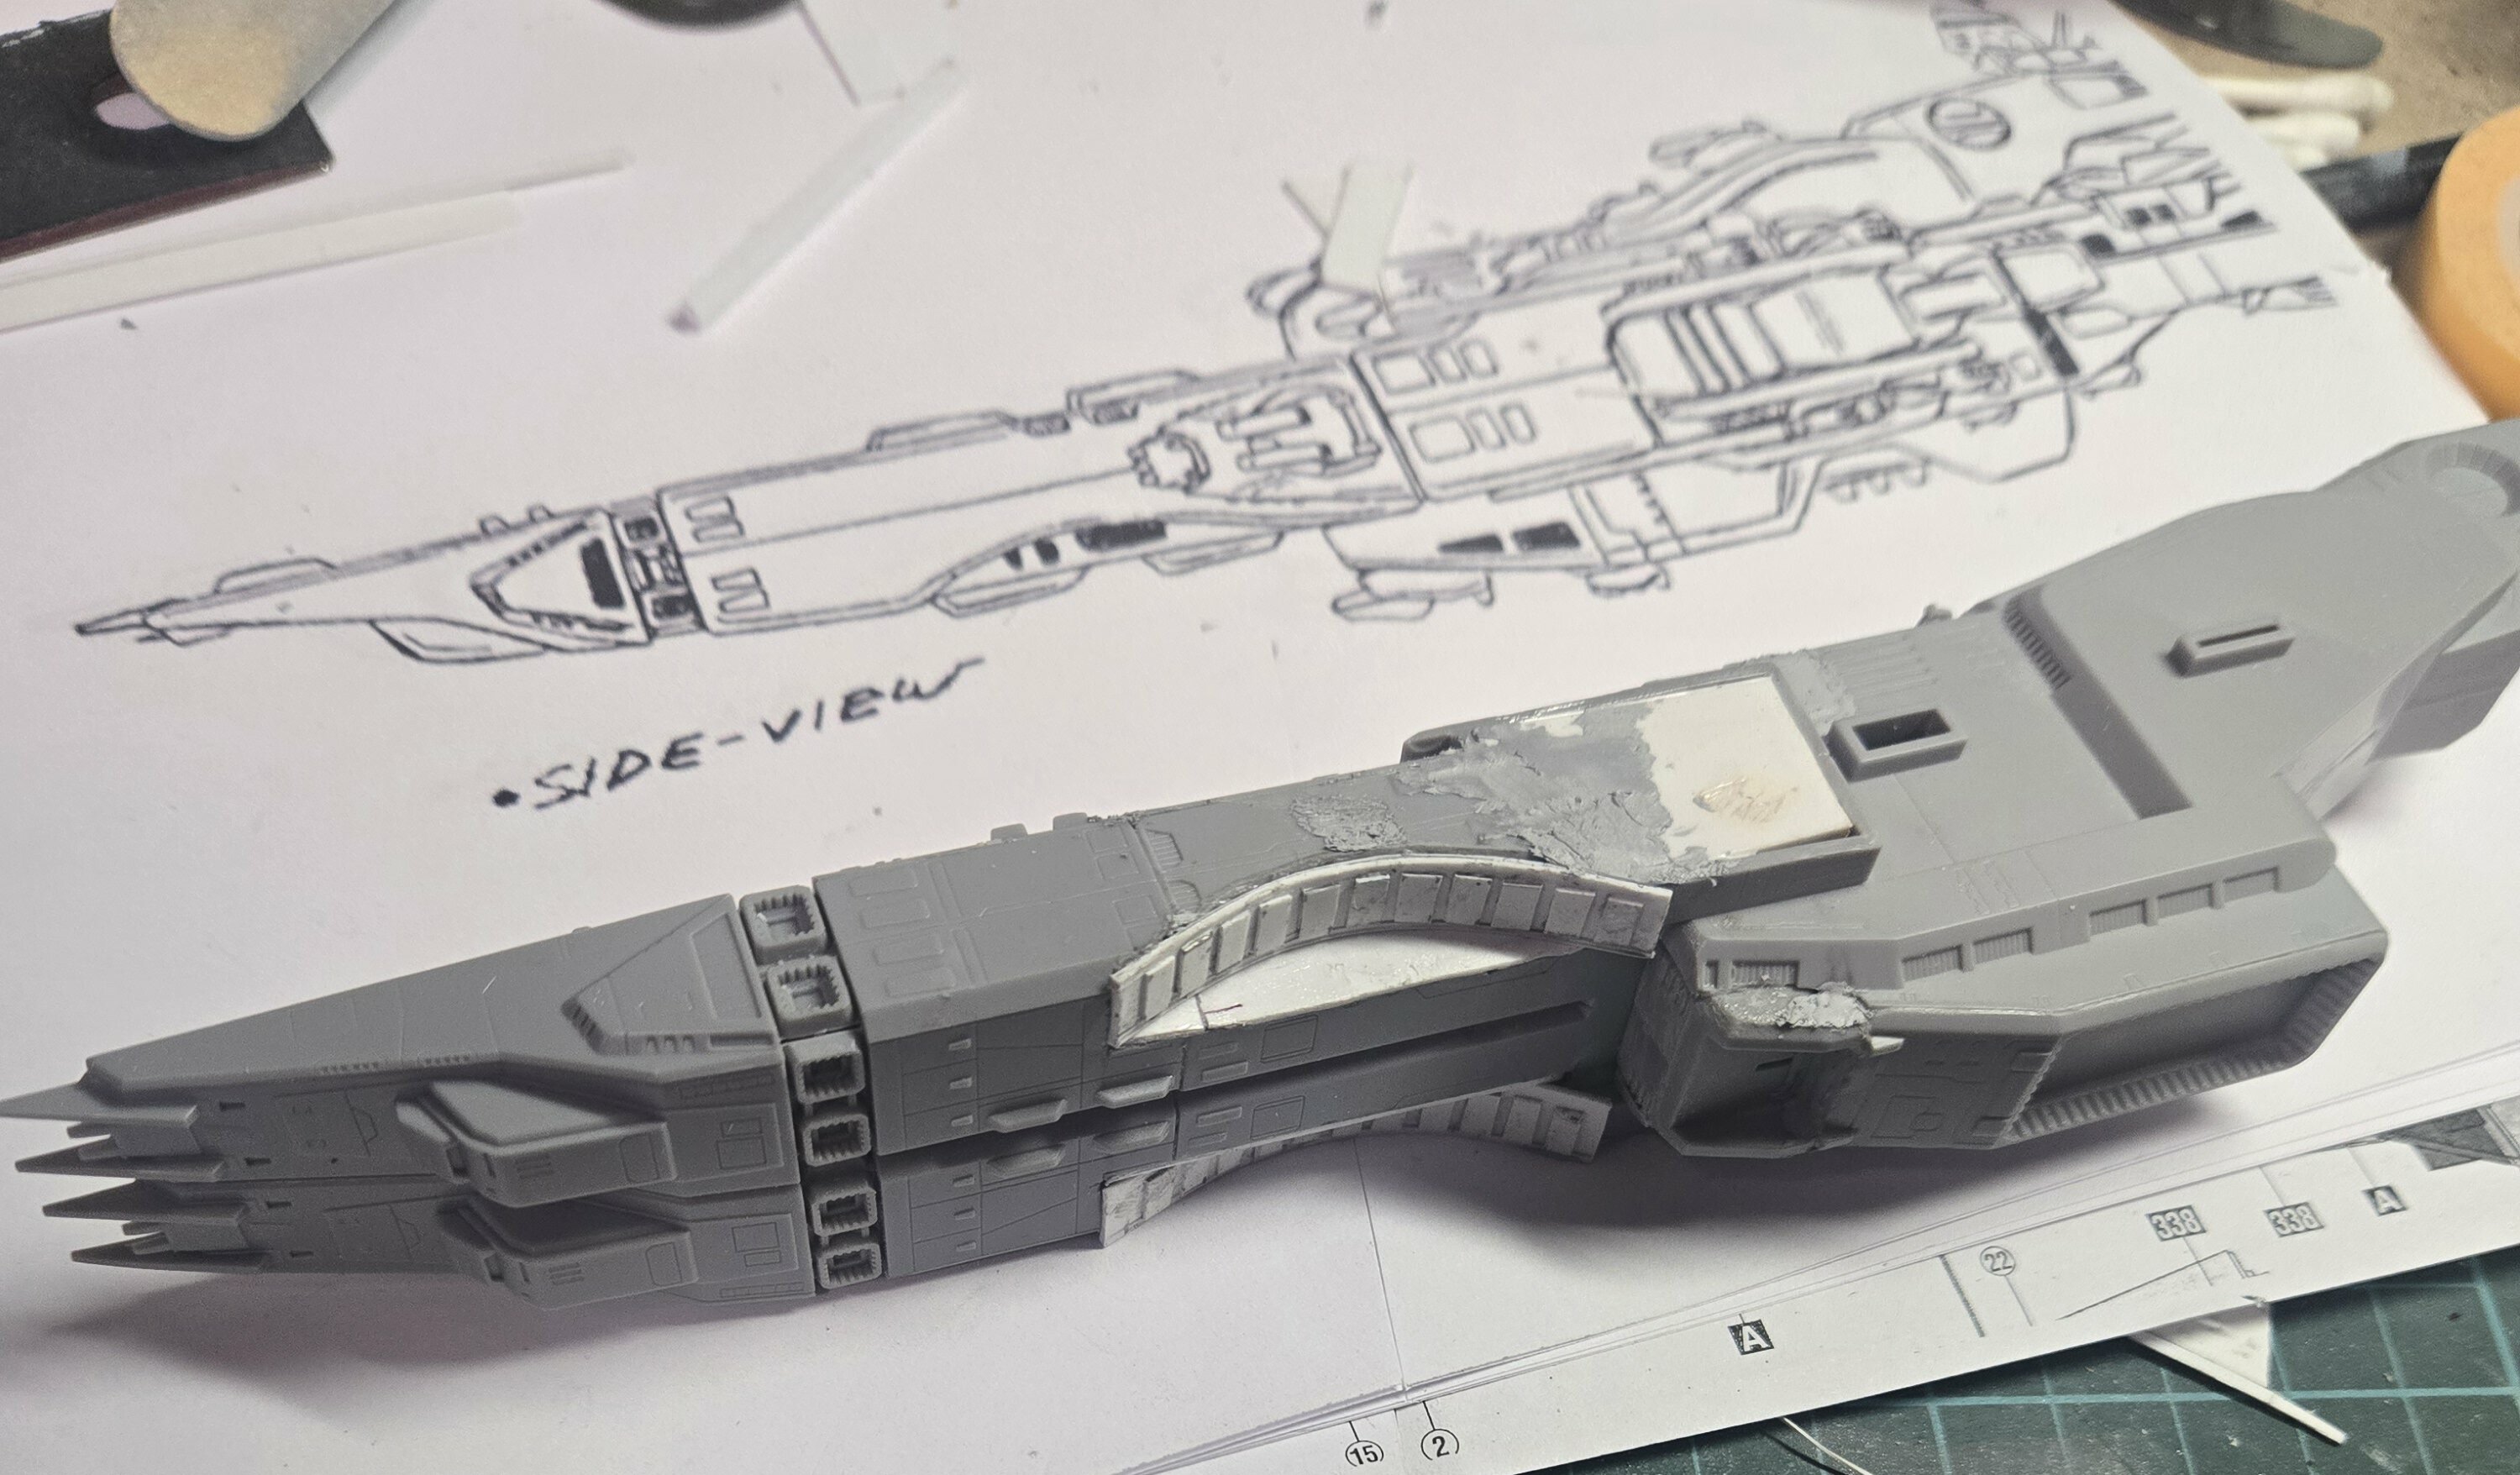
The paint guide on this has got to be wrong. The instructions say that the 'blue' is a mix of 55% light grey (fs36495) 40% Aircraft Grey ( Mr.Hobby 73) and Mr color CR3 ( primary yellow). I can't for the life of me figure out how a 95% light grey with 5% yellow is gonna blend out the the dark blue they show on the box.
Granted I've never used( or heard of) the Mr.Hobby CR line, but apparently there are 3 primary colors: magenta, Cyan and yellow, meant for adding to other colors to tint/shade and blend your own.
Regardless of that I gotta think there's a misprint somewhere 'cus grey and yellow ain't gonna turn into the dark blue they show.
So I guess I'll just have to eyeball it and come up with my own mix.
-
@nightmareB4macross so excited to see the updates to this build!
Don't know if you mentioned it earlier but what are you using for filler on this build?
Is it just bondo or a more exotic polyester putty or some other material?
-
Wow! Stunning paint job!
Outside of the painting there are some very subtle changes to the kit.
The bicep area on the kit is tapered from top to bottom, this build is square. Plus I'd be interested to see how the hand was modified.
It's funny how when using this paint technique removing panel lines and details actually improves the impact.
-
Oooo! Spiffy looking. Congrats.

What will Hasegawa do next?
in Model kits
Posted
That's awesome. Thanks for the info!