wm cheng
-
Posts
4336 -
Joined
-
Last visited
Content Type
Profiles
Forums
Events
Gallery
Everything posted by wm cheng
-
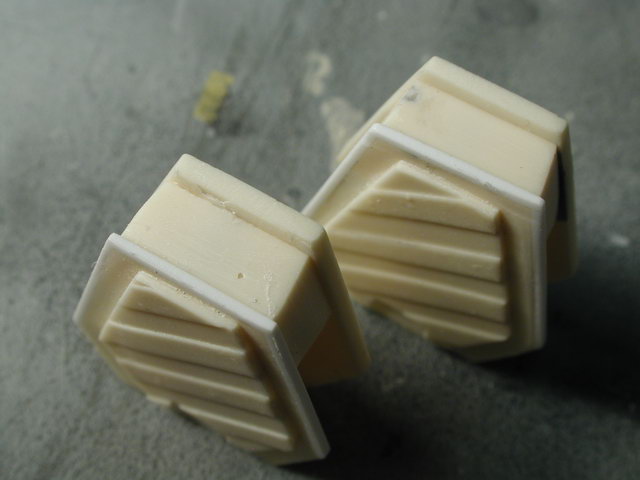
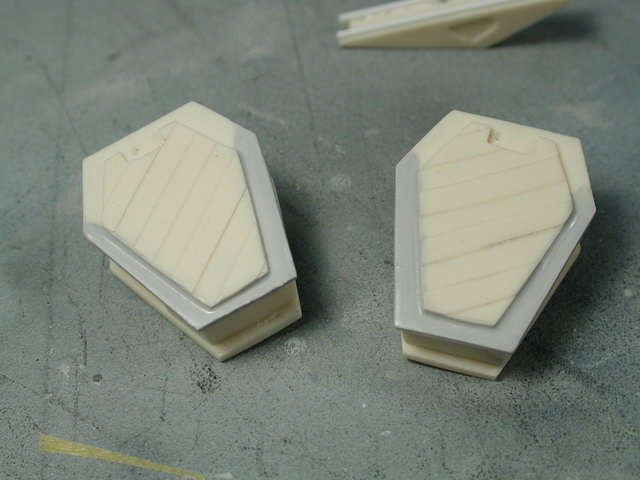
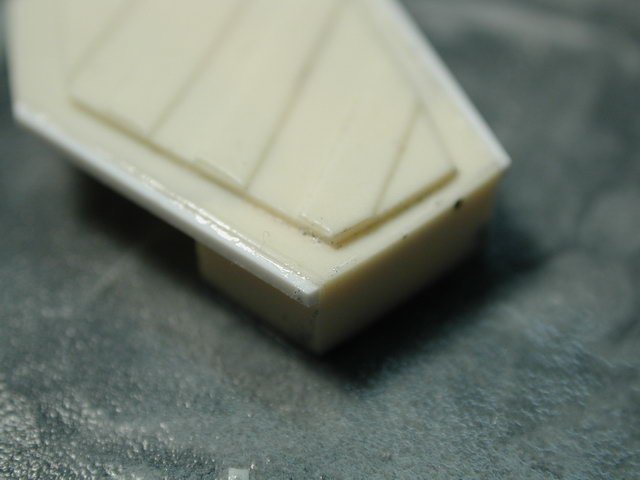
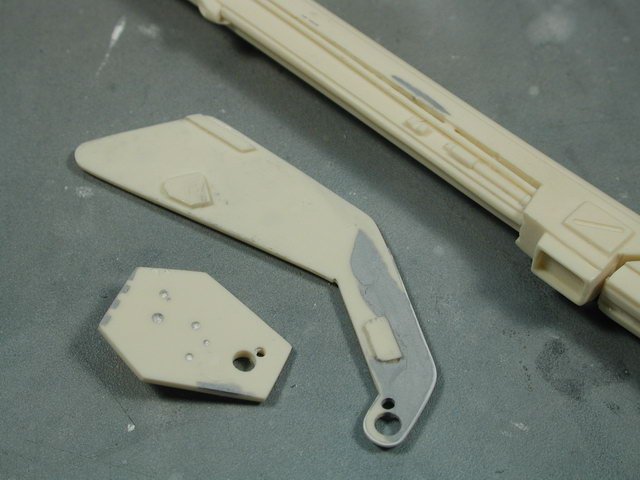
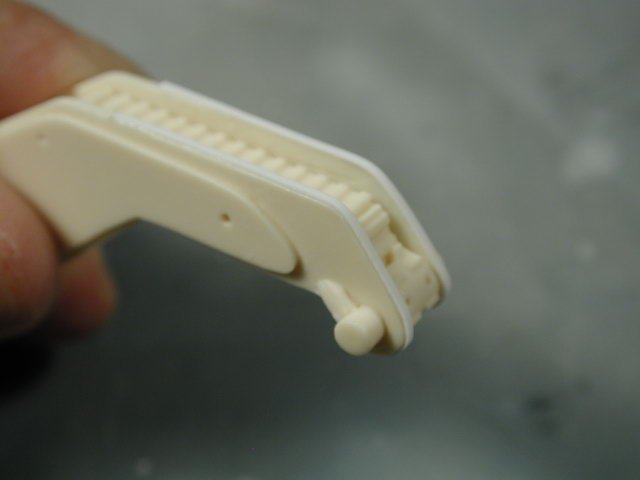
Here are the pieces finished - not too bad eh? A pretty quick fix... it only took like 20mins from start to this end point. I also sanded the front edge to make sure that the resin ended in line with the styrene strips However, if you dry fit these plates to the other half of the plates, you'd see that the solid portion of the bulkhead (near the top) actually extends beyond the inner finger plates (assuming you keep the bottom edge parallel and in line with each other). This is unfortunate - but I tried sanding the bulkhead at an angle in towards the other plate so that there will be a slight lip when attached. Its not ideal, but its the easiest fix and as long as both sides are identical, then who is to say that these bulkheads don't taper in?! I thought I'd apply a thick coat of Mr. Surfacer 500 on the front edge just to be safe and I'll sand that down tomorrow when dry. Of course, I did a test fit of the entire assembly - very cool that it all stays together on its own - snap tight! The pistons are just placed in there to get the right angles (not glued in yet).


-
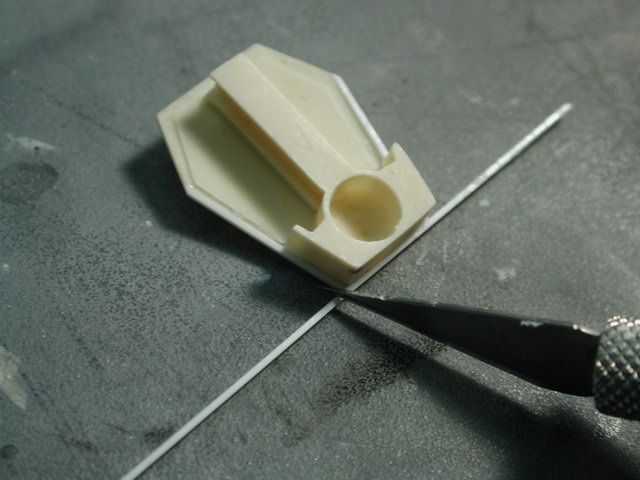
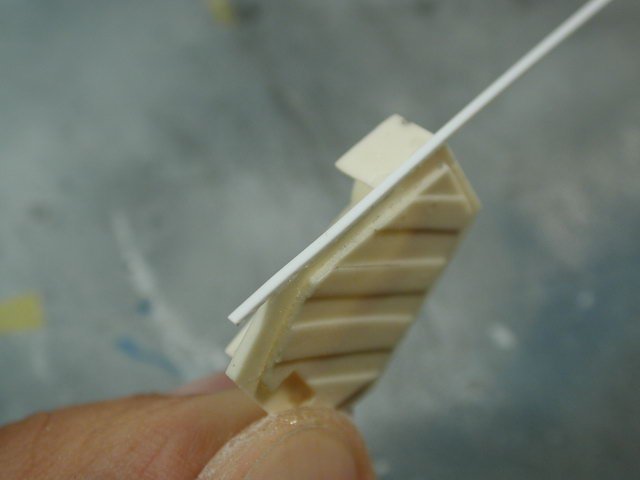
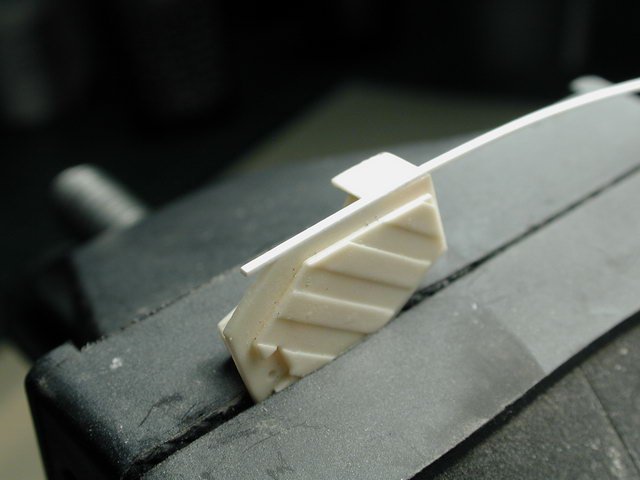
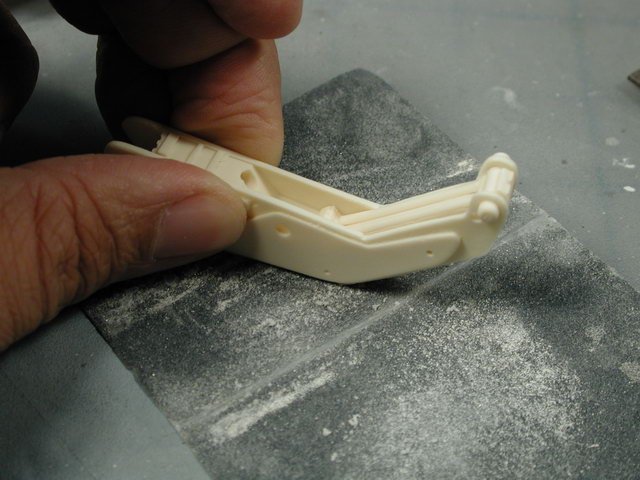
I thought I'd tackle the problem of the claw finger plate edge. I decided to sand down the top and two diagonal sides right down to the bulkhead. Then I'd use the same thin styrene strips and crazy glue them to the edges. I started with the two diagonal sides first, leaving them long so I can have something to hold onto. Trimming them down afterwards. I then sanded the edge with the sanding film flat on the table surface. I works easier to always sand in the direction of the glued piece - so you're not prying it away from the glued surface. I sanded the top flat so that I could glue a continuous top piece. I found it easier to have a vise hold the piece, then you could have both hands holding either end of the strip of styrene.


-
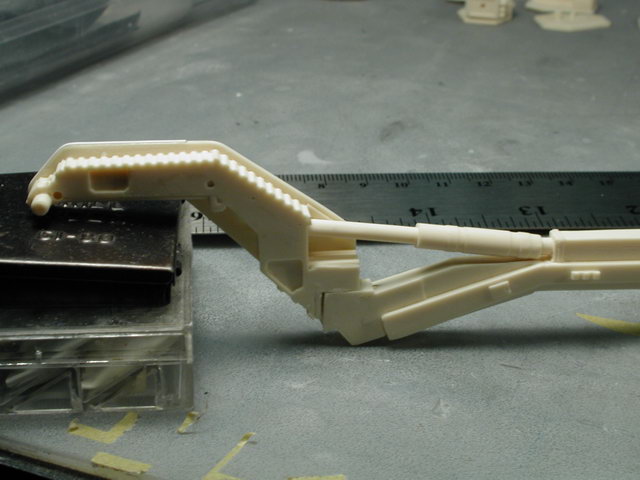
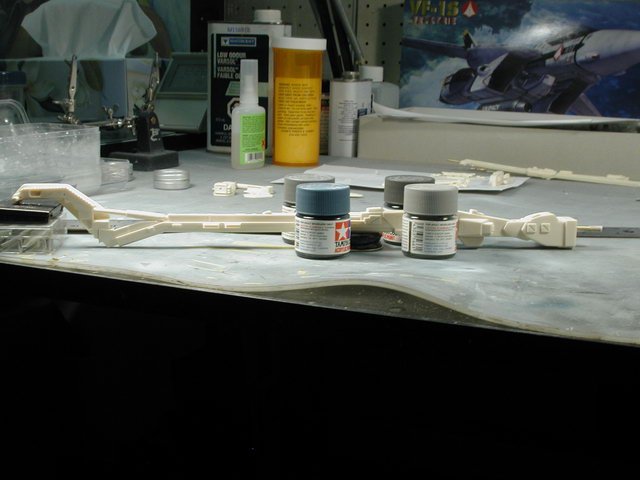
A shot of the arm after the 5min epoxy has set...

-
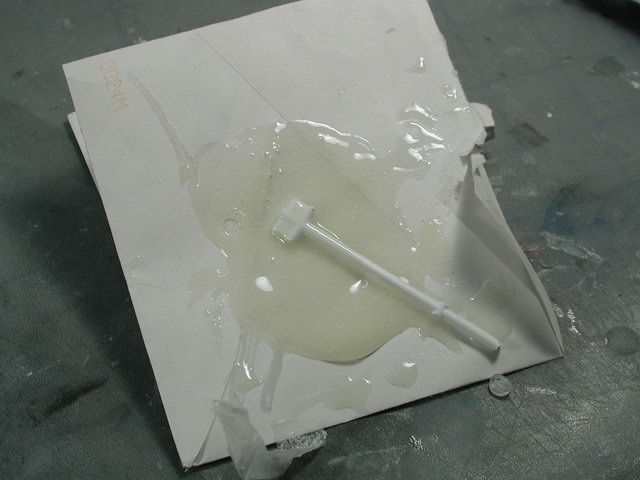
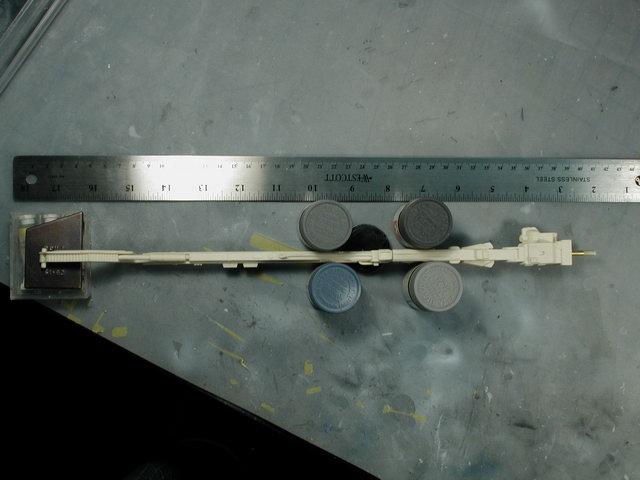
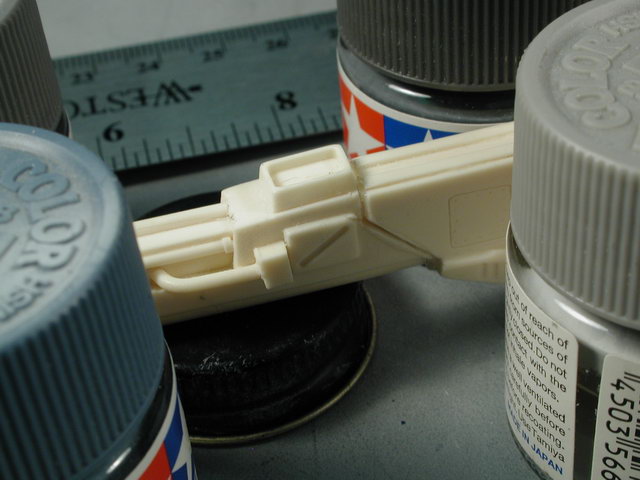
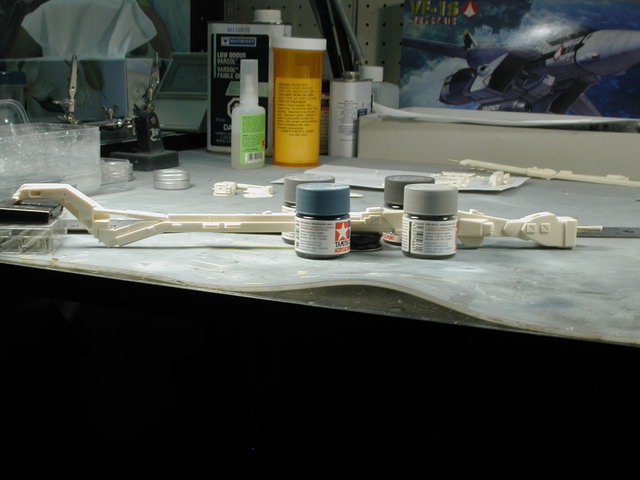
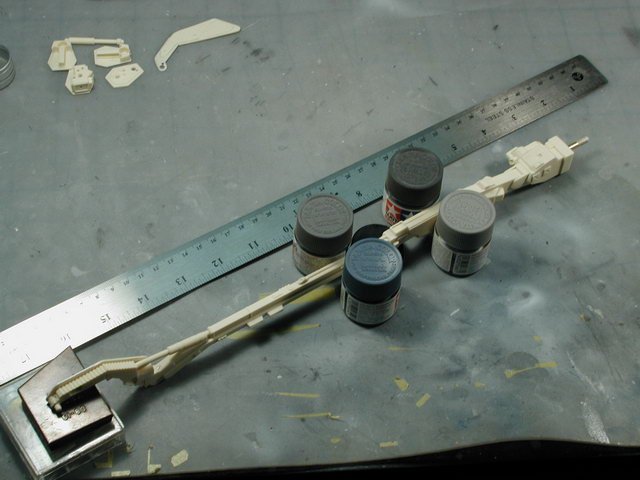
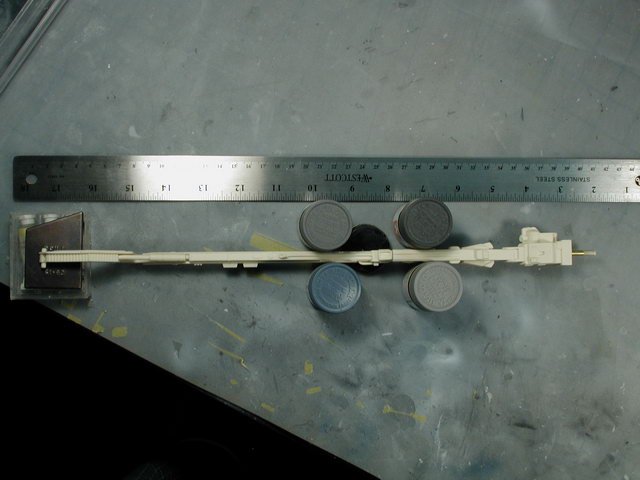
Here's the 5min epoxy - I assume most of you know how this works; you mix up equal parts resin and binder/hardner and mix for 1 min. I usually mix on a scrap of cardboard - and I cut a piece sprue out of the Hasegawa kit (using the numbering tabs as a spatula). Once you mix for 1 min, you have about 4-5 mins to play with applying it and setting up arm in the correct position. I think its quite important to get it straight in plan (top looking down on it) - but in elevation (side view) it can deviate a bit since there are angles throughout the length of the arm when viewed from the side. I first found a way of supporting the arm still with piling up various stuff from around the table. The steel straight-edge ruler is a visual guide to make sure the arm is straight when viewed from above, the four paint bottles makes sure the arm doesn't twist around the joint. The black bottle cap below supports the joint so that its attached at the right horizontal angle. Lastly, I fitted the arm piston in place (not glued) to get the right angle to the wrist piece when attached to the arm.


-
Thanks for all the comments - please keep em coming! What about posting some of your own pictures here too! Well, I found out my 5min epoxy dried out - so I had to go out and get a new set. Even in the capped syringes they still dried out - hmm, and I never used very much to begin with. Oh, well, at least its not that expensive. Below are some of the sanded pieces with the Tamiya putty (this stuff sands beautifully - like butta!) As you can see, the middle piece - you only really have to concentrate on the leading edge, and feathering it back to the resin - because once its attached in place, you really don't see much of the puttied area (reduce sanding wherever possible is my motto! )

-
Because I haven't bought the resin versions of the VF-11 and VF-4 yet!! No, seriously (the last time I finally scanned and searched out the really amazing YF-19 & 21 1/72 resin kits - Hasegawa announced their superior versions a week later! argh!) I would love to have these fighter types done by Hasegawa - I'm still holding out... You never know, Macross has been such a cash cow for them - and eventually they'll start running out of aircraft to do - I'm hoping that they just might get around to these beautiful birds!
-
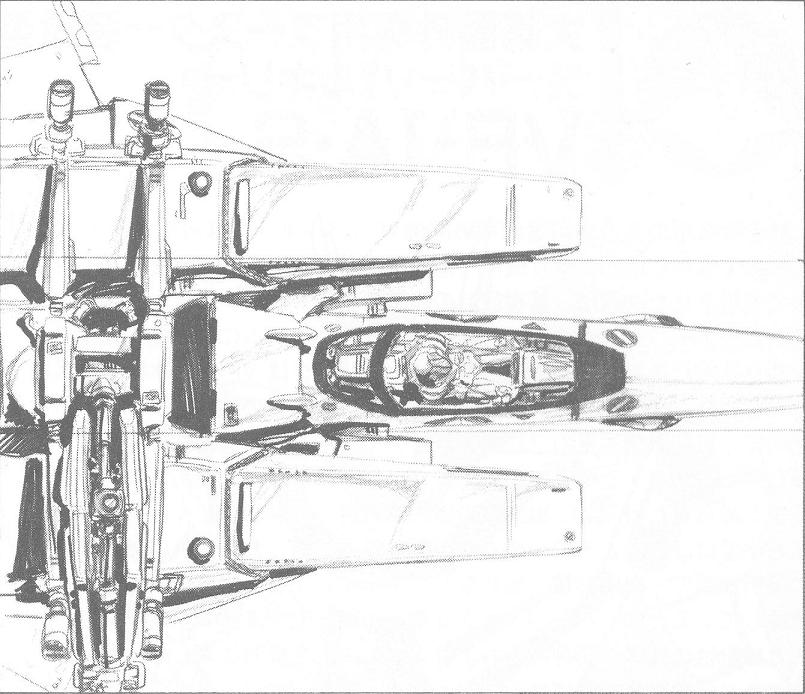
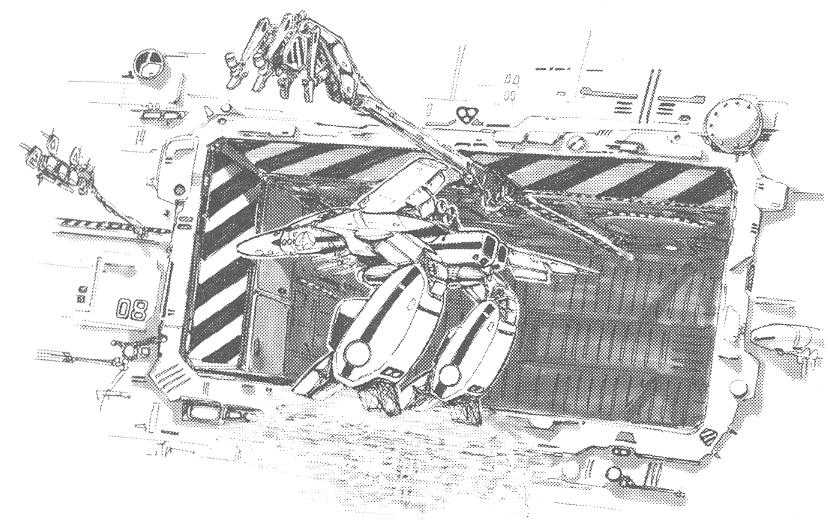
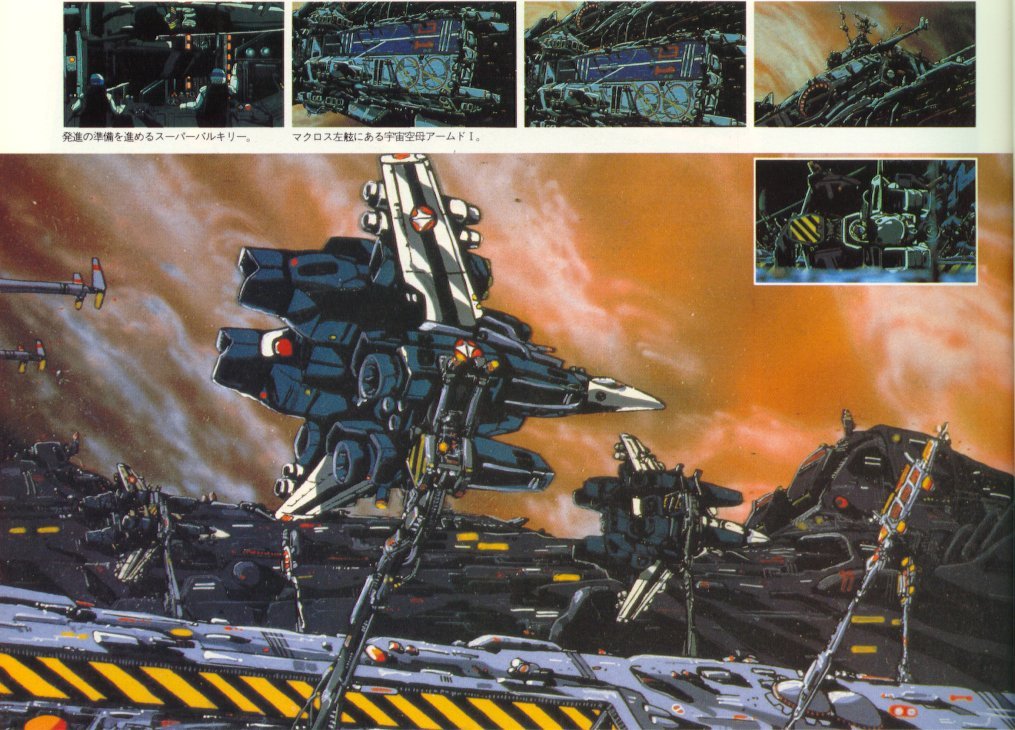
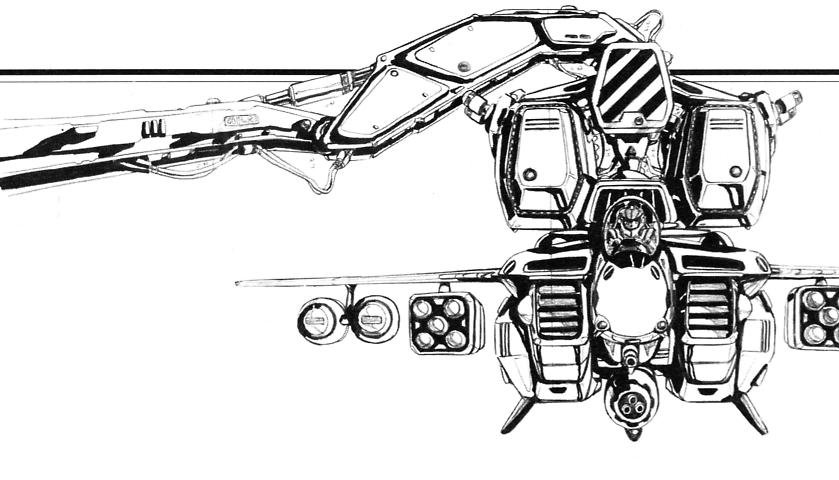
I'll put my references here (anyone with any others especially colour ones please feel free to post them here too - for my benefit! ) (P.S. Anasazi - if you're listening, I'd love it if you came up with some decals like the wierd stylized numbers or "Fire" lettering for the tiny signal arm?! - that will be a bitch to paint)


-
Remember to re-scribe any panel lines that you may of sanded away or made shallow. (I've got to let the putty dry - I just tried to sand the puttied piece only to hit fresh soft putty below the dried skin argh, I hate being impatient - now I have to re-putty and let dry properly) In the meantime, I'd welcome anyone else building theirs at the same time to post here too - I'd like to see where you're at and what you're solutions are too. Additionally if Gundamhead or Jesse has any comments or suggestions to how I'm "bastardizing" their kit I'd love to hear them here too.


-
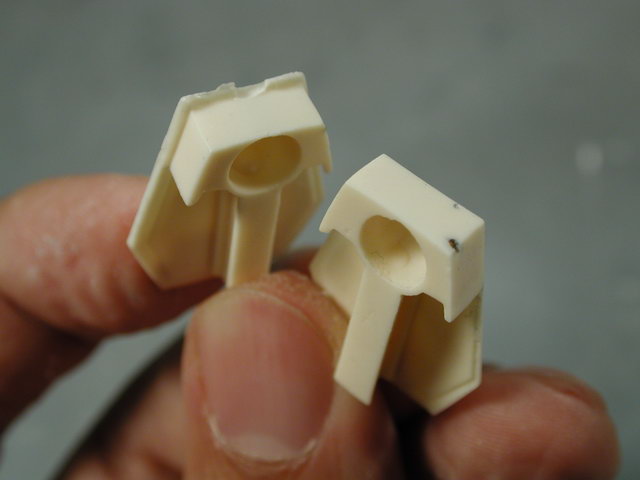
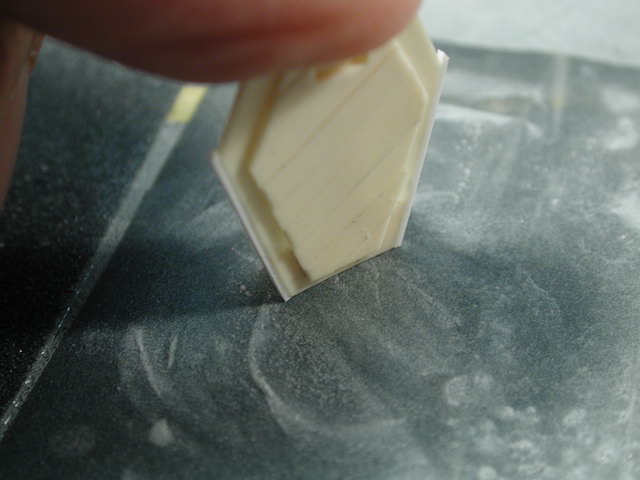
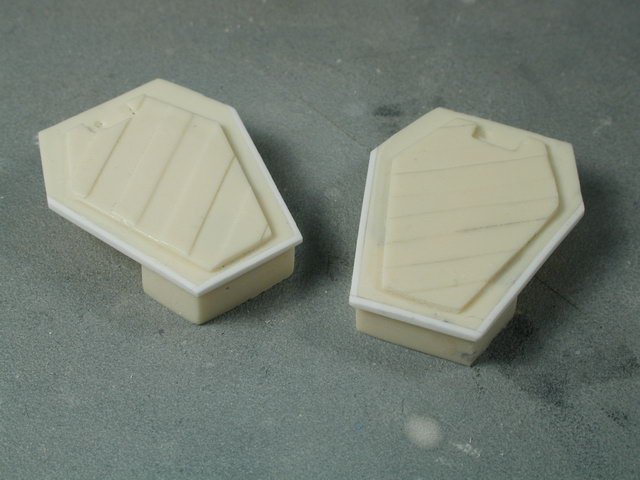
This is another problematic area - the outside finger plates are molded with an inconsistent thickness again. Its especially worst at the top of the plate. I'm not sure what to do at this point, I may re-build them out like the wrist with the styrene edged strips - but it may interfer with the claw arms later on. I wait till I get more of the arm together first in a dry fit before I determine what is the easiest way to correct this edge.

-
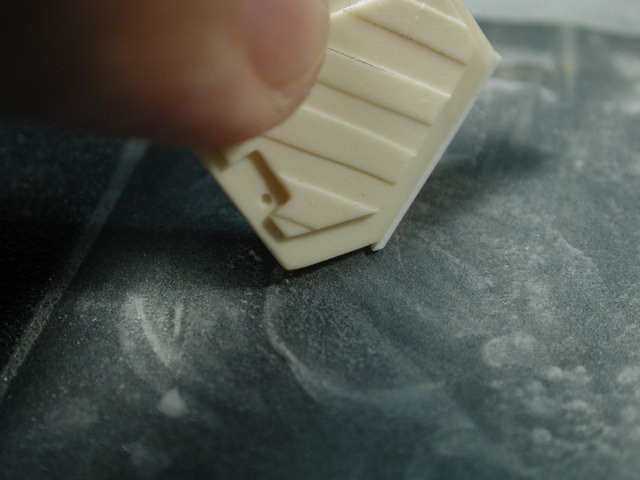
The inside finger plates can also use some sanding to bring their edges down a bit so they are more uniform with each other. On my copy, I have some chipped edges to one of my plates, so I covered them with Tamiya putty to be sanded down and re-shaped to get a sharp edge again.
-
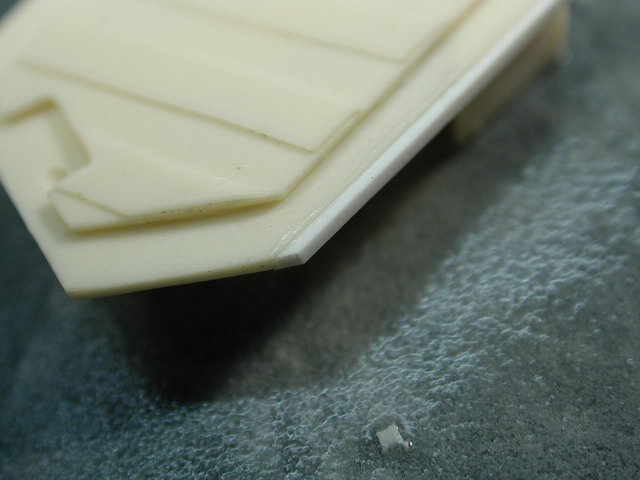
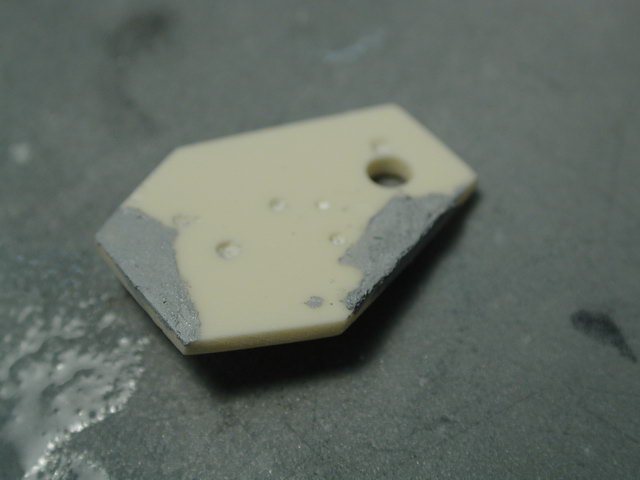
There's a bit of excess to this part on one side, so I flats sand the excessive side. I don't mind that there is more resin - as long as there isn't less! Some bubbles might appear as you sand the side down - but don't worry, since these sides will never be seen - they attach to the inside finger plates.
-
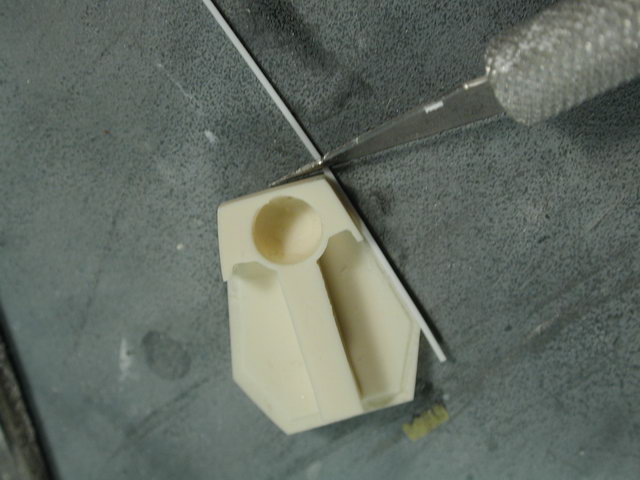
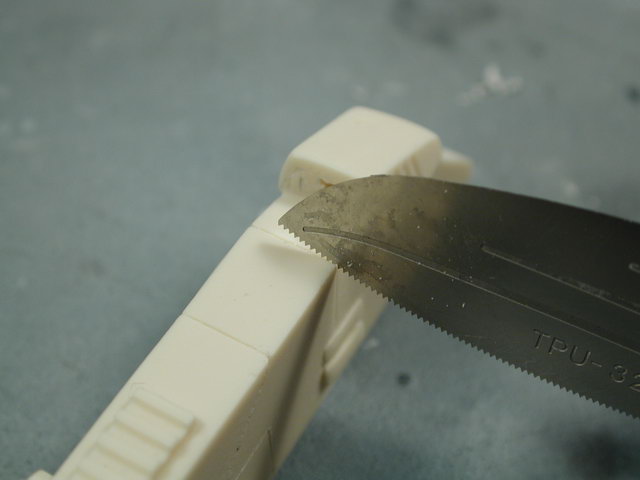
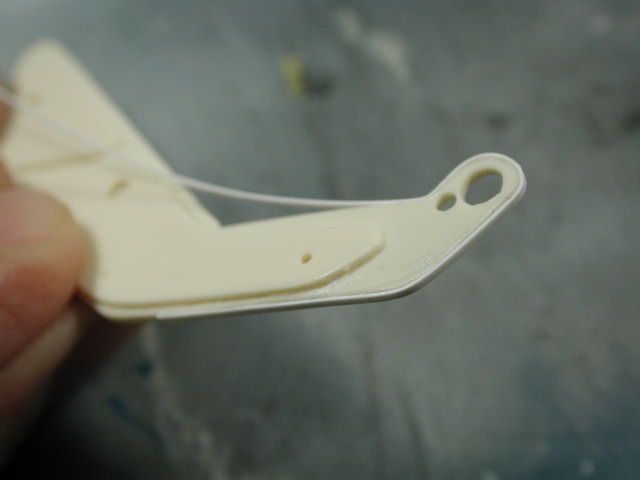
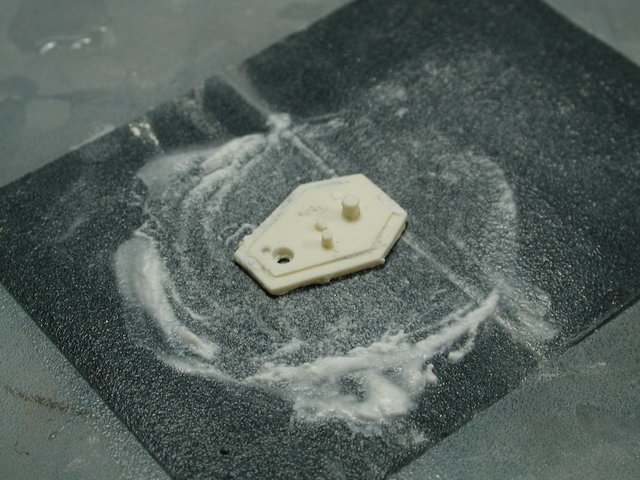
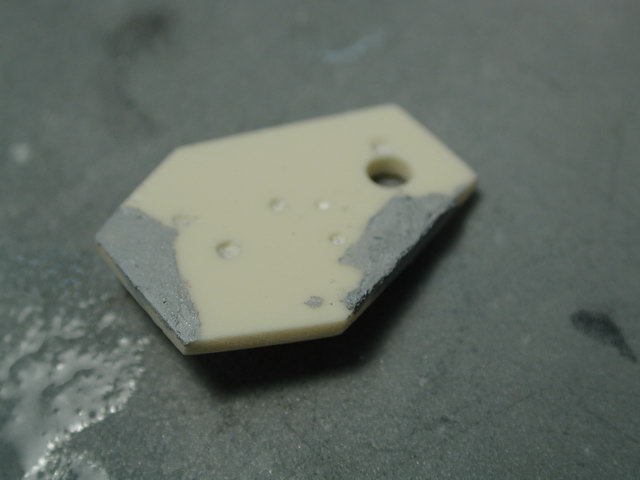
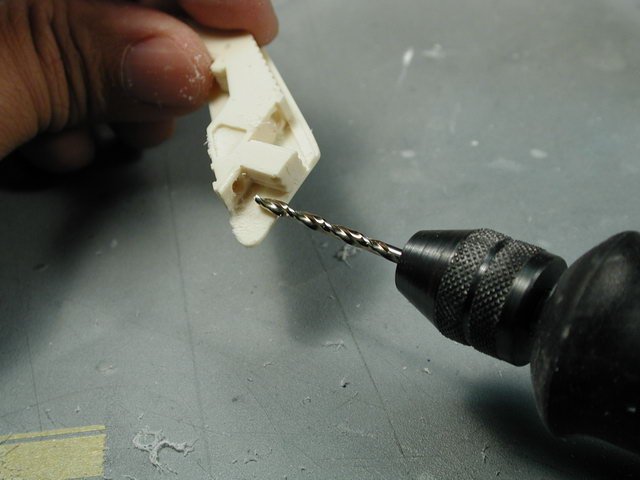
I skip all the sections that tell us to attach any of the hydraulic pistons. Its important to dry fit them to get a sense of orientation and angle, but I usually leave them off till the end because its easier to paint the actuator part in chrome silver without have to mask it. So I skip to the 4th item in the instructions, the claw sensor part. I drill out the holes as instructed to locate the other side. The 3 small ones use a 1/16" bit and the large hole uses a 3/32" bit.

-
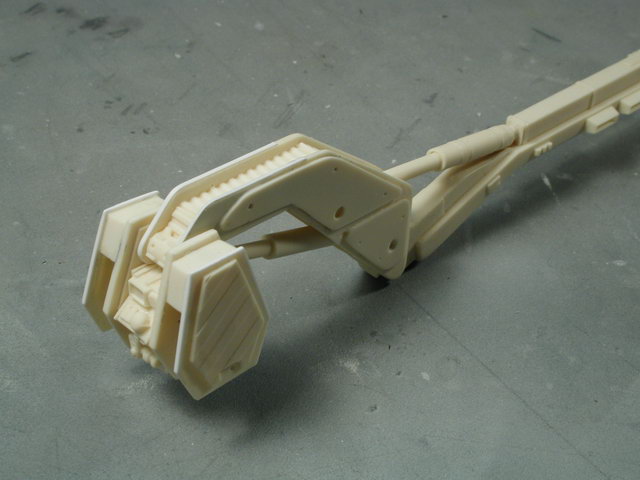
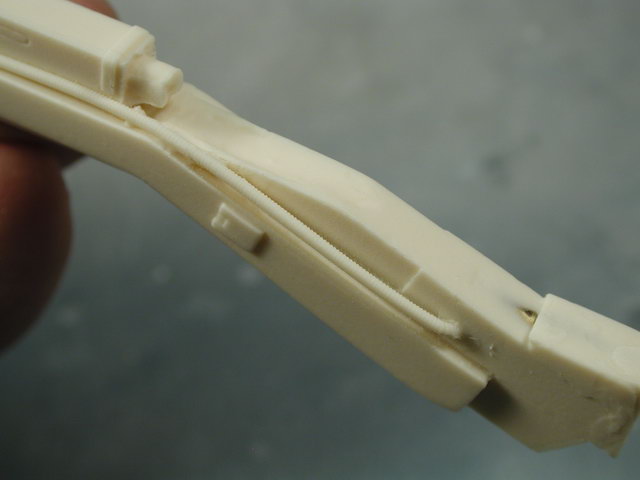
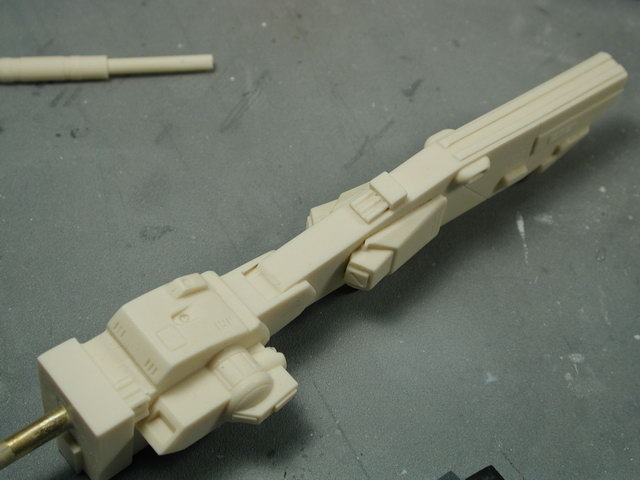
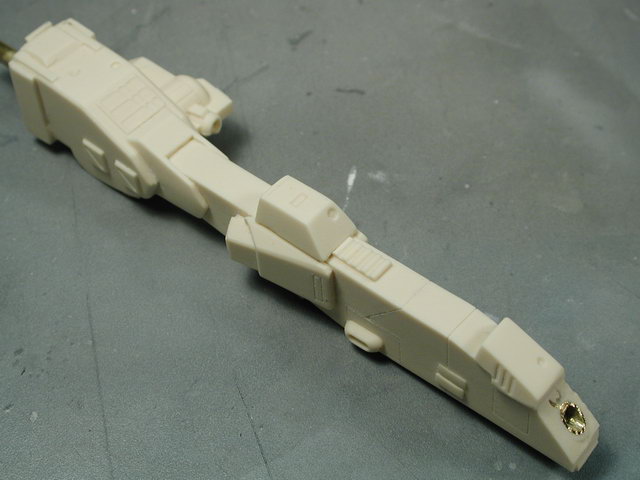
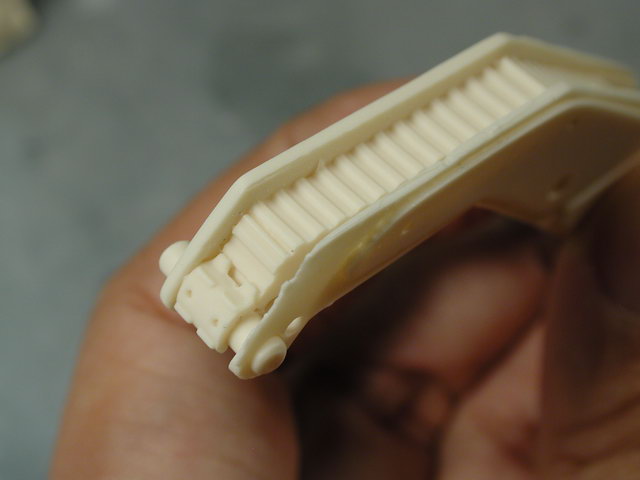
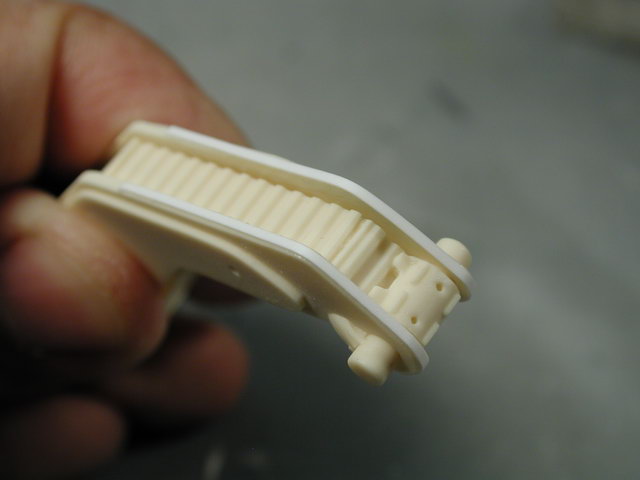
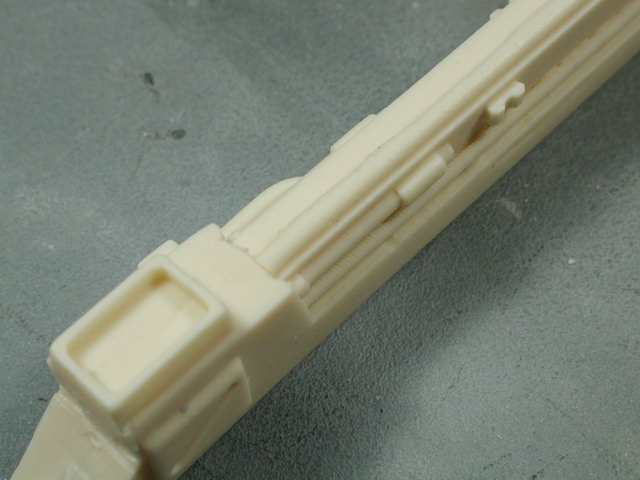
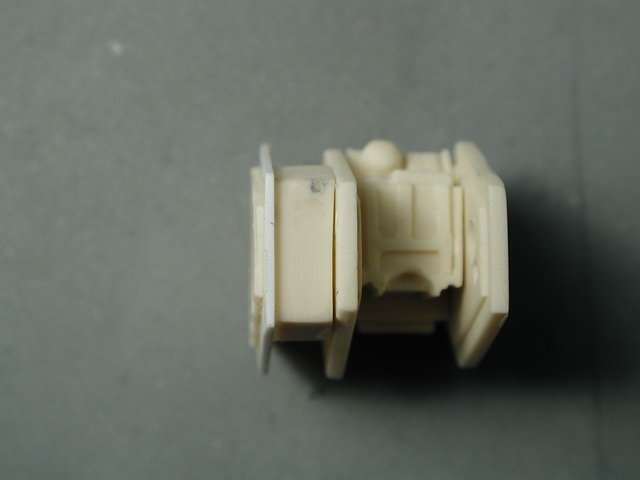
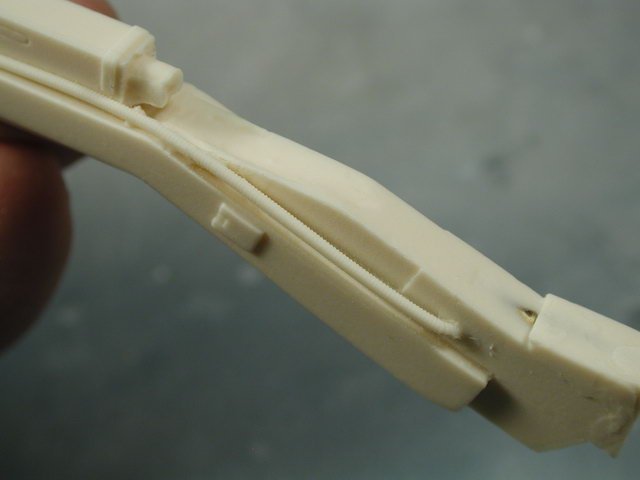
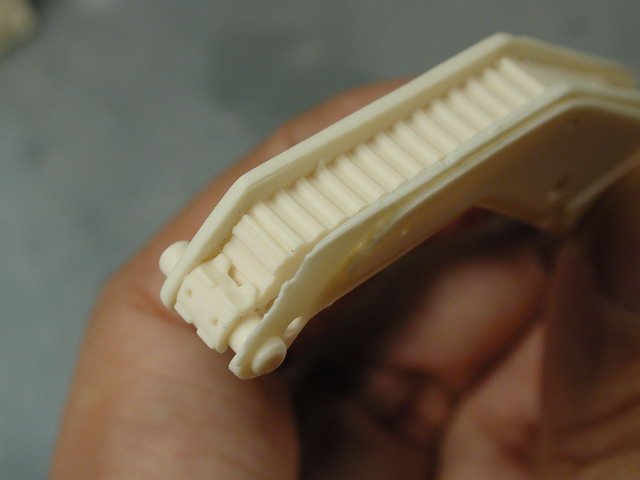
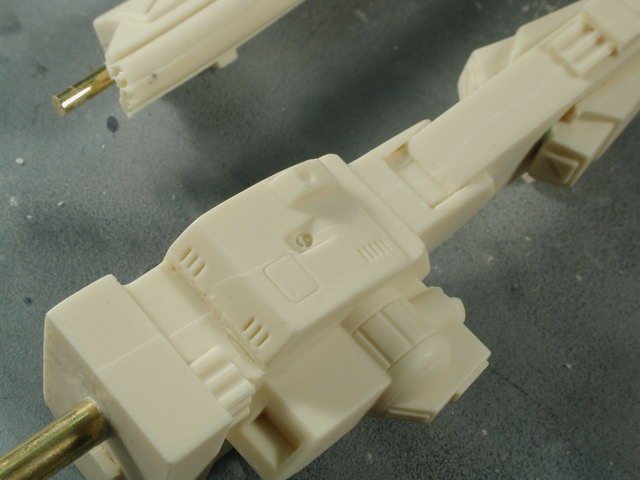
I've got to show this amazing cast! Whoever (Gundamhead or Jesse) cast this portion - its amazing!! there is a fine coruggated hose on the surface of the upper arm that is casted so that its actually free of the arm! WOW! way to go! I just had to mention it since I realize how hard this must of been. The rest of these shots just show boring old sanding. Like any other kit, I just started to sand any seams I can see. Plus there was an area with some small divits that will be filled in with some Tamiya putty.


-
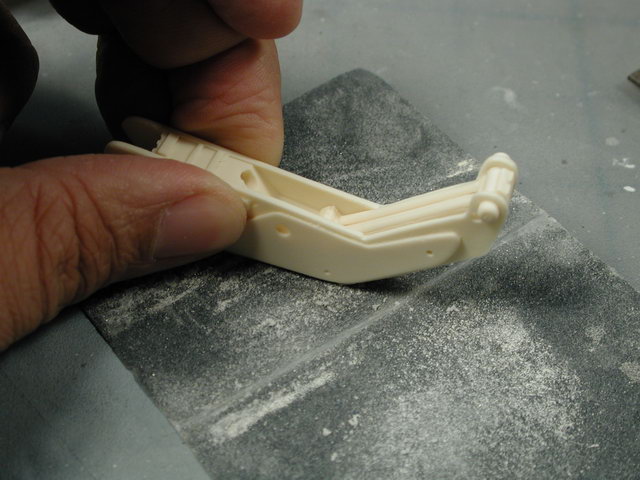
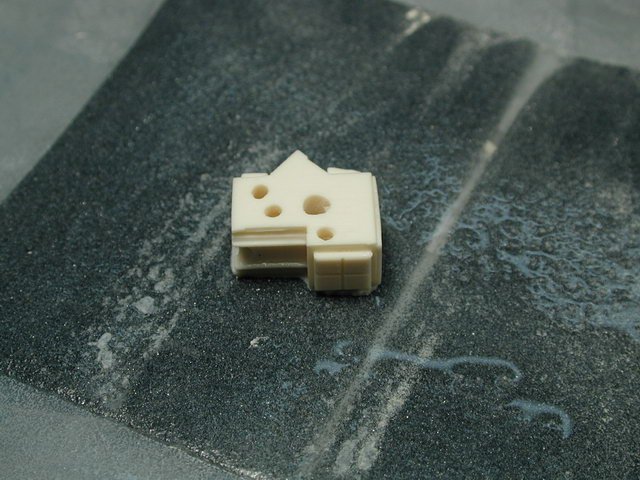
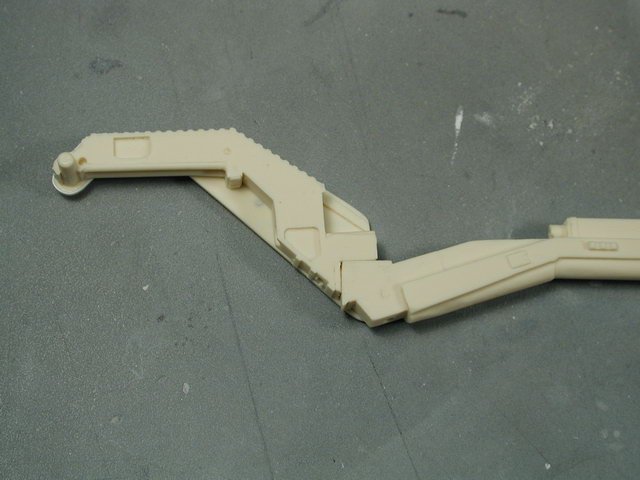
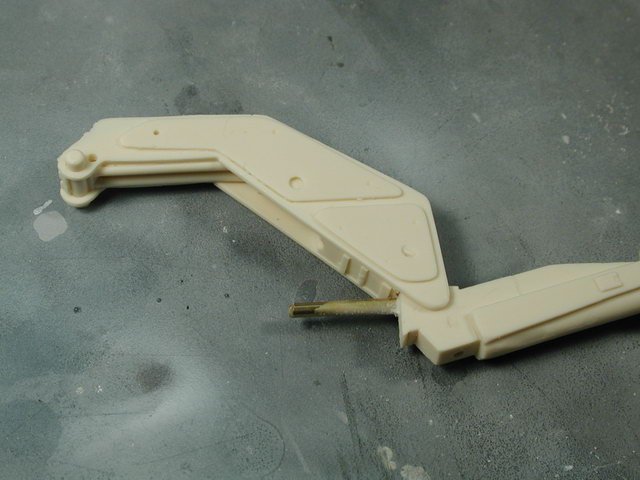
Here's a shot of the parts properly aligned.
-
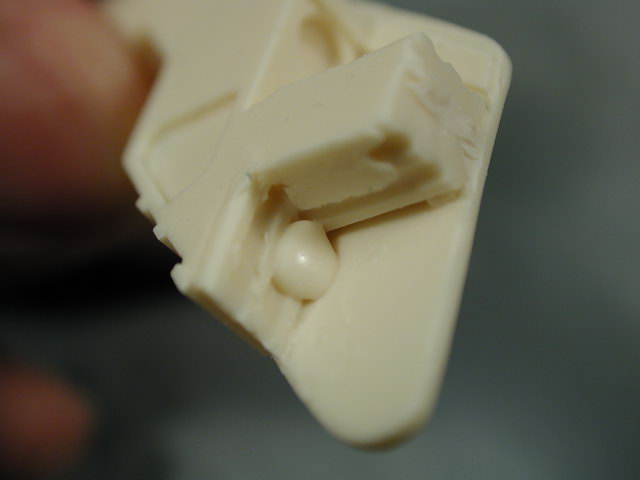
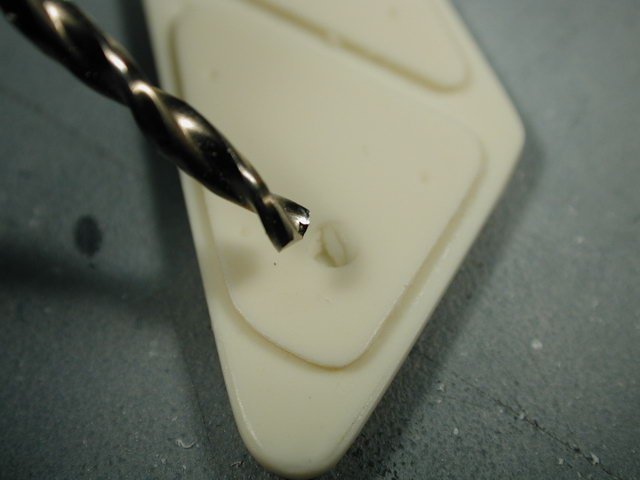
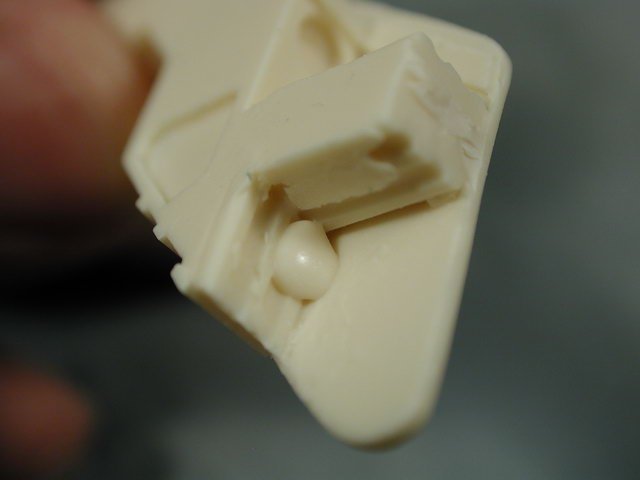
I thought I'd look at the wrist joint again. I carefully lined up the hole by pressing the end of the brass rod into the resin to make an indentation - then I used a dremel to drill the hole. Of course I drilled too far and it went out the other end - but not to worry, I'll plug it with some piece of gak later. Its wise to not use any power tools on this kit, and just use your hands, but I didn't have a pin-vise that accepted any bits as large as a 3/32" bit.

-
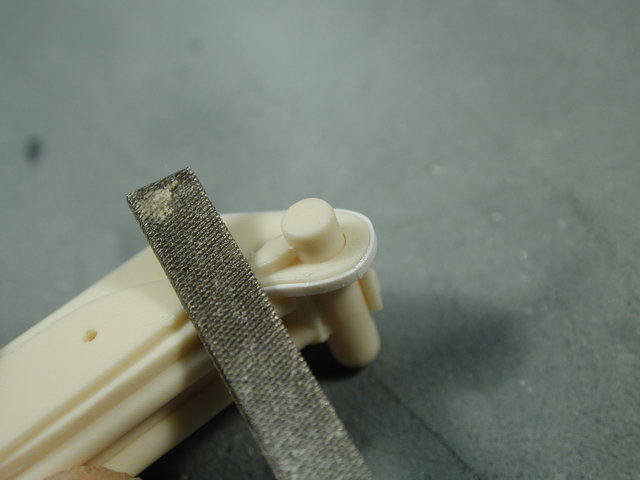
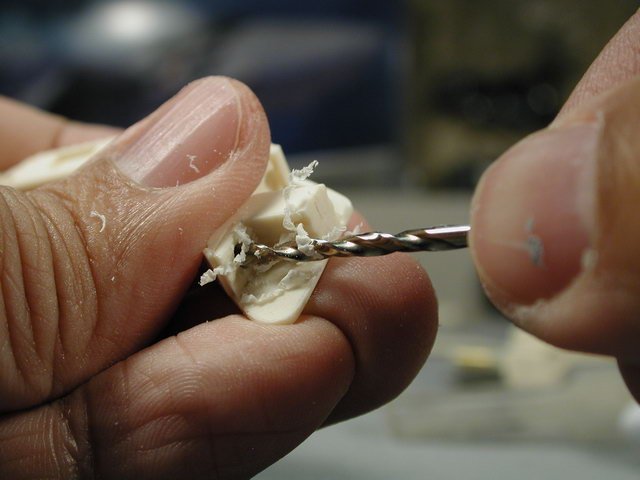
I used a 3/32" drill bit to "ream" out the circular indentations - don't attach it to the drill, just hold it in your hands and use the bit like a pin-vise.

-
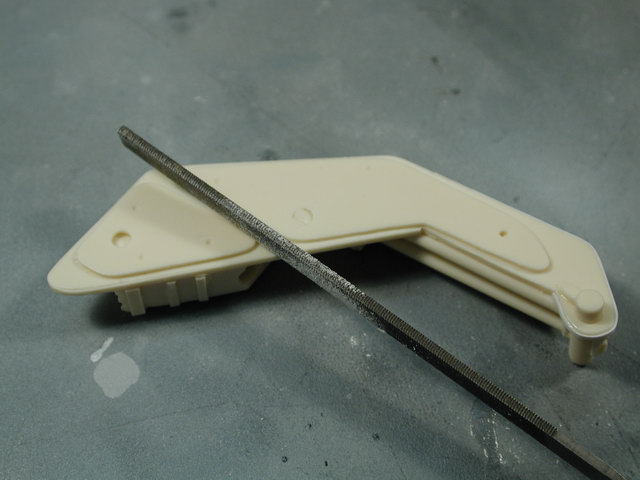
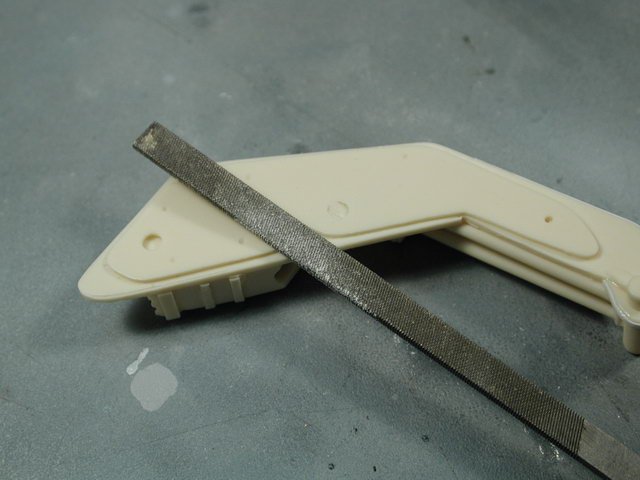
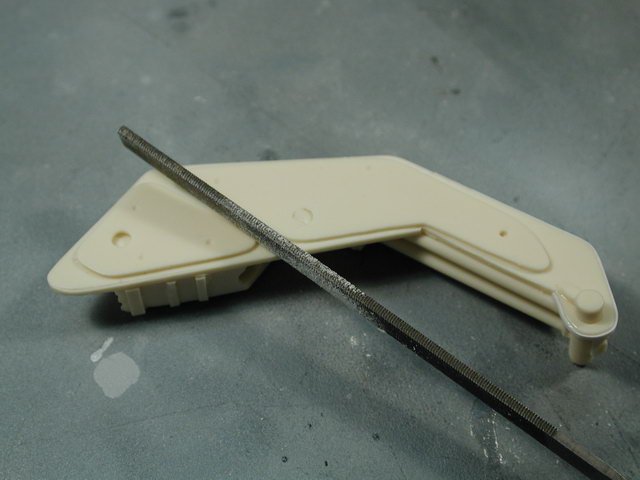
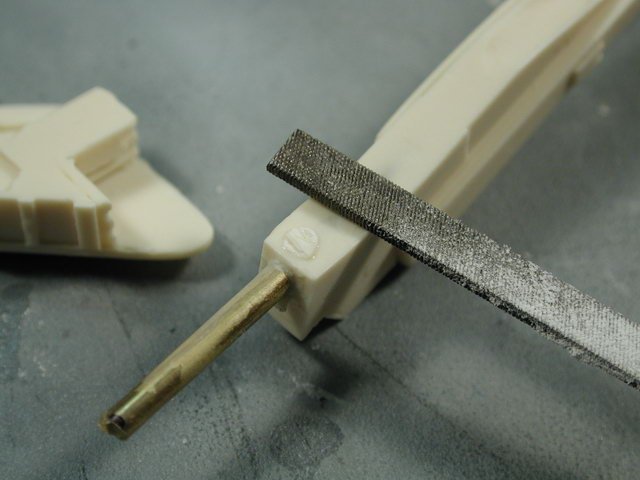
I think its pretty essential to get yourself a set of fine files - it is nice to have a variety of profiles such as a flat, square, round - they are pretty inexpensive. I decided to go around and clean up a few areas around the wrists - mostly to sharpen the details and clean up any circular indentations that did not transfer well from the mold.

-
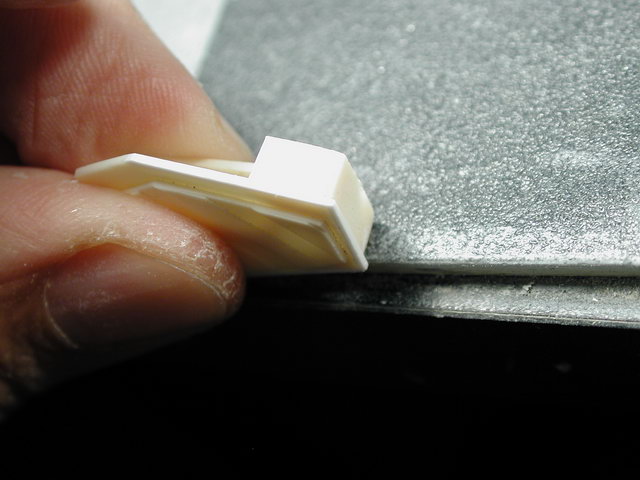
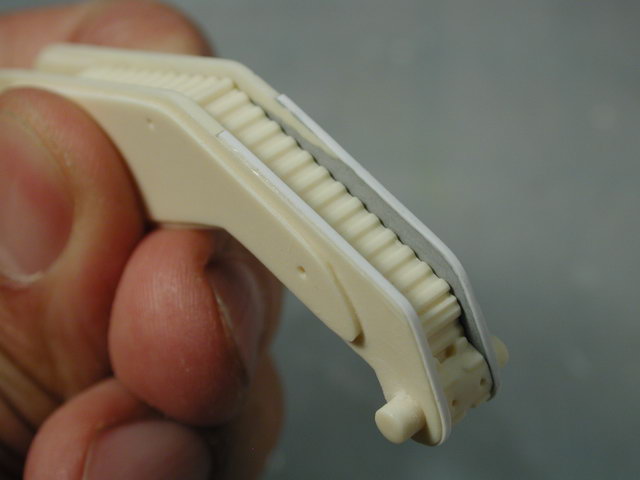
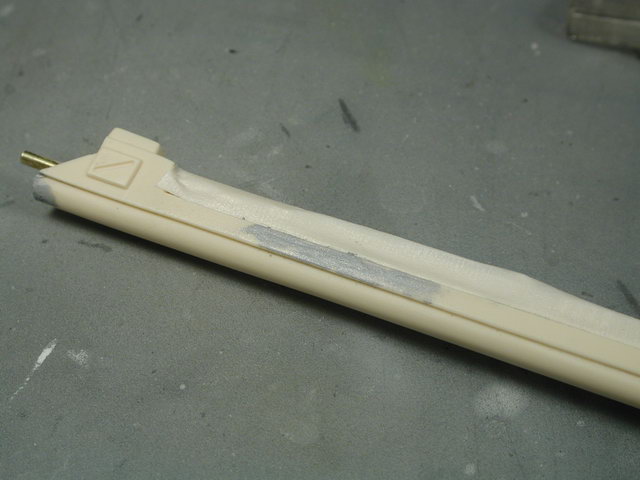
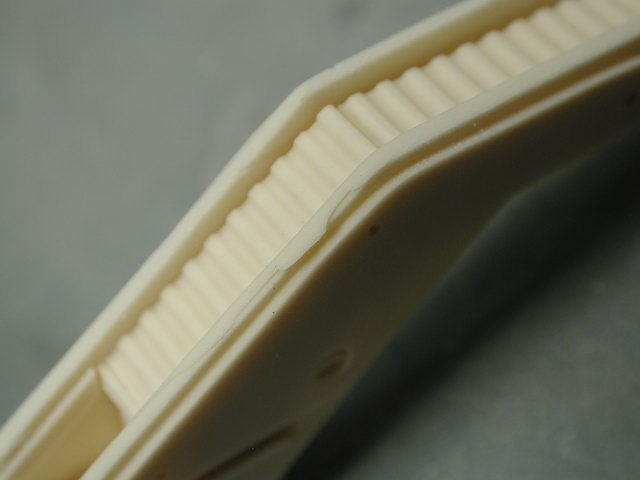
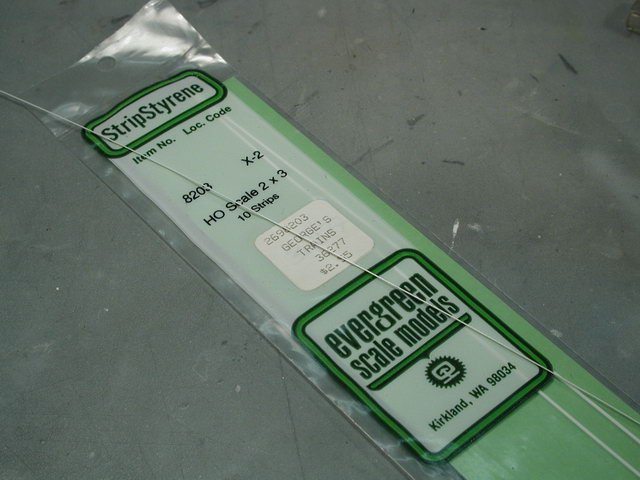
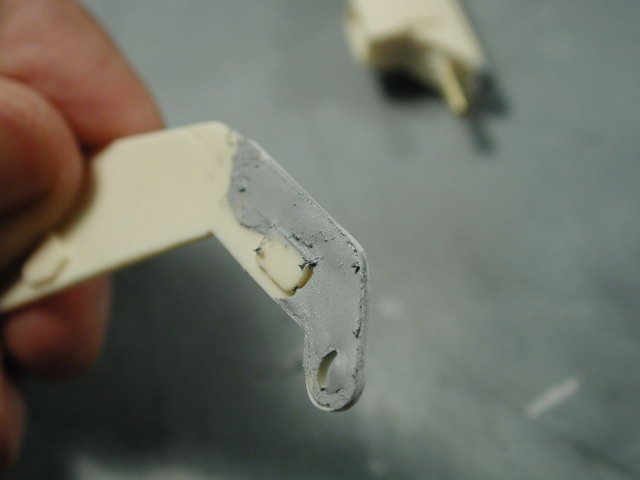
Now I'm looking at the wrist a little more closely - hmm, the first potential problem surfaces. On my copy, the other side of the wrist is molded very thinly towards the pivot end. This will cause a problem since this is a very visible part of the arm (it will be right above the Valkyrie) and there is the other side to compare too. This must be corrected. First, I dry fit the two halves together, and holding the two halves in my hands, I lightly sand the edges by putting a sanding film on the table and running the part over it - this aligns both edges so that they are parallel with each other. Then I have some extra styrene strips (you can get them at any local hobby/train store) and I'd thought I'd use these strips to create an even visible edge on both sides. So I laid down a thin film of crazy glue on the edges and ran the pre-cut thin styrene strips along each edge. (You can also just cut thin strips from a sheet of styrene too - I just happened to have some of the right width laying around). Now on the thin side, I used the styrene edge as a fence to fill some Tamiya putty up to. I will put aside and work on something else as the putty dries.


-
Just following the instructions given - I'm essentially going to do it in the order that Gundamhead and Jesse laid out in the typed instructions. I was never strong in word problems when I was a kid - I'm a visual learner, so I tend to do a lot of test fit (trail and error) to get the gist of the instructions before I commit too far. The next step is to look at joining the wrist to the upper arm. I've left the upper arm and lower arm still apart for now, since I'm thinking I'd kill two birds with one stone - when I mix up the 5min epoxy, I have 5 minutes to glue both the upper and lower arms as well as the wrist in place with the same batch of glue. Once it got the orientation of the wrist to the arm, and where the rod goes through. I look at the mating surfaces, and noticed that there are a few little bumps and extra bits of resin here and there to file down to get a nice tight fit.

-
I don't think I got a particularly flaw-free cast kit - I believe it to be typical. So of course there are going to be a few seams here and there (its not a toy after all! ) That's what separates us masochistic modellers from toy owners! Always expect seams that separate halves. Most just take some sanding, however when they run into a depression or recess - it becomes a little harder. In my case, I'll sand off all the raised bits, but when it come into the recess, I'll fill it with some scrap of plastic as detail.

-
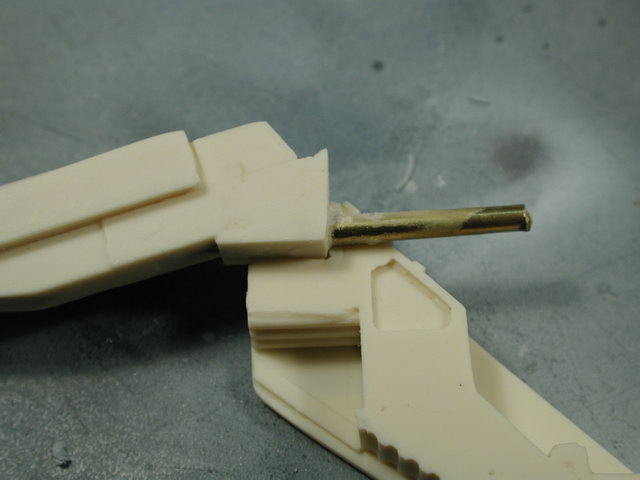
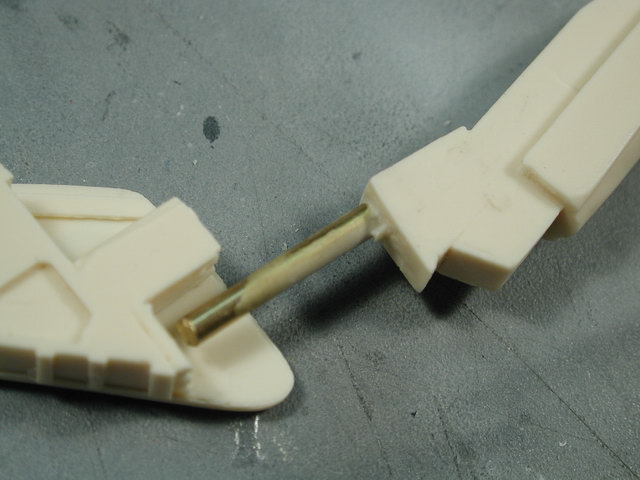
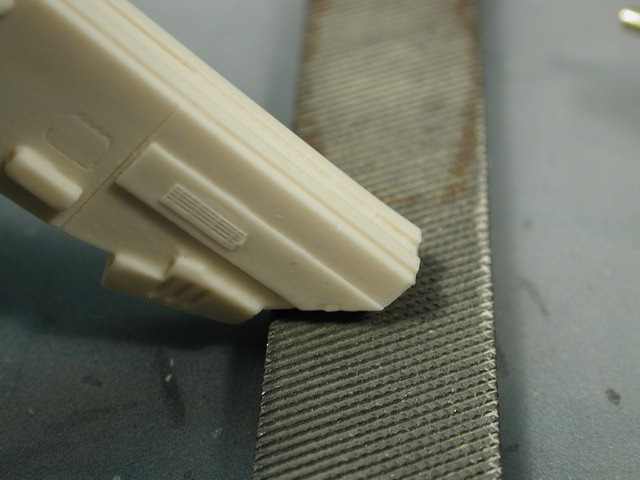
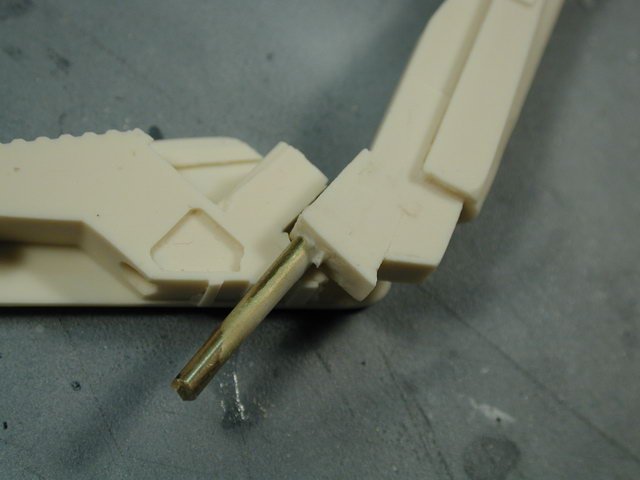
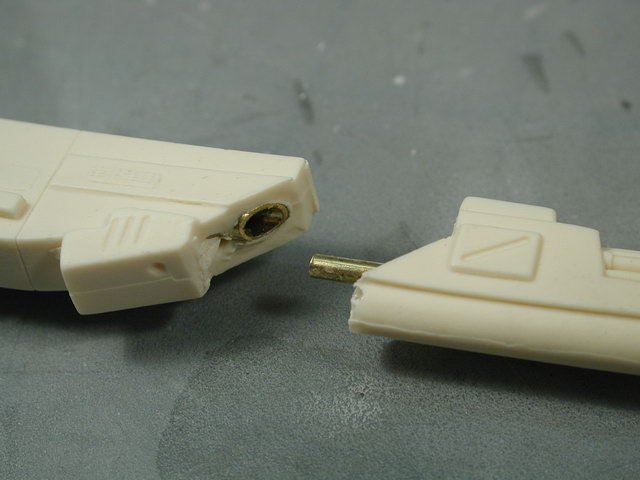
Neat tricky joint (glad that the joint isn't just a straight line, but the angle and the fact that a smaller solid brass rod goes into a hollow brass rod helps so much!) However there is a bit of clean up work here. I'd take a rough file to do this work first, since you don't care so much about the inside finished surface (in fact you'd want to rough it up a bit for the epoxy to bite) additionally, the rough file is to file down the hollow brass rod (I don't want to wreck a nice fine file on the brass). I'd just carefully draw it in one direction (towards you) on the file to work down the hollow tube. Keep test fitting the pieces all the time.


-
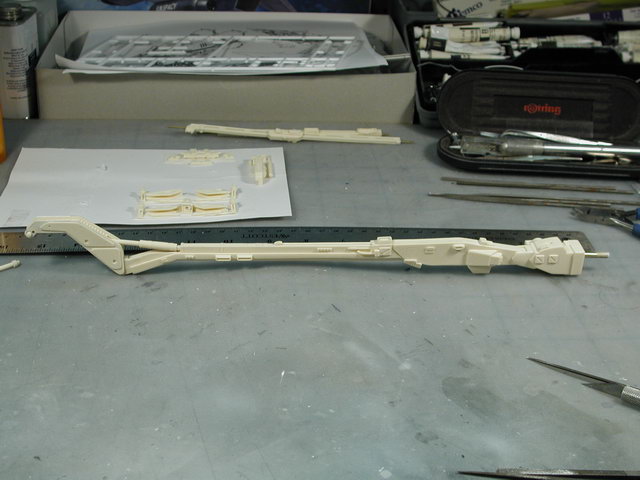
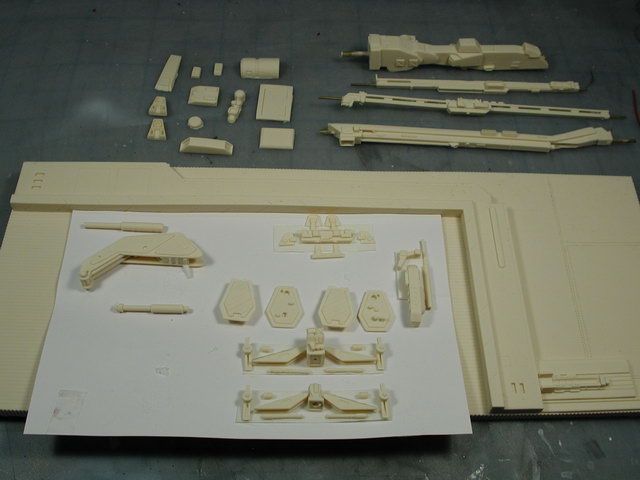
OK, I laid everything back out according to assembly and the photo of the list of parts again. This time I took some masking tape and double side taped the parts to the card that came in the box which protected the longer pieces - this way, if I sneezed or something, the little pieces are still arranged roughly according to instructions. I also put away those extra/optional pieces that Gundamhead provided (I recognize some of these Gundam parts ) this can be used to spruce up the large base in the end - but I just didn't want to confuse them with any of the essential parts of the arm itself for now.

-
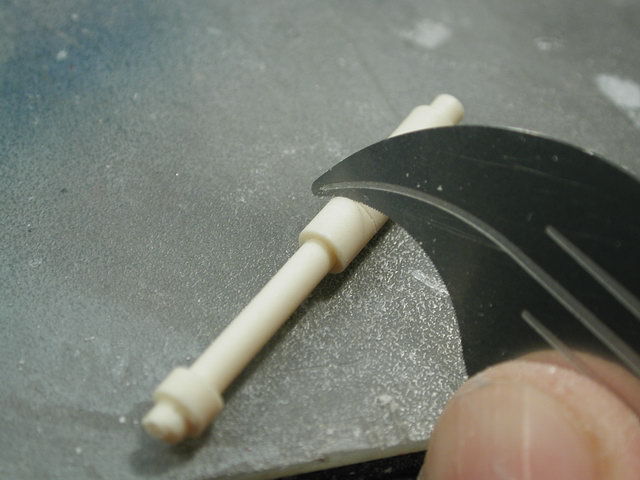
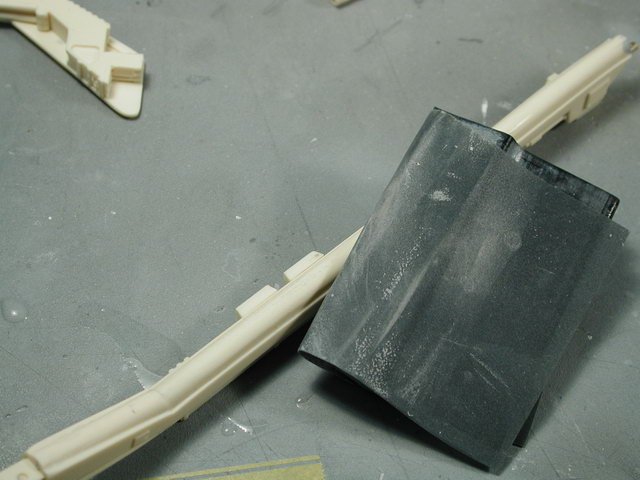
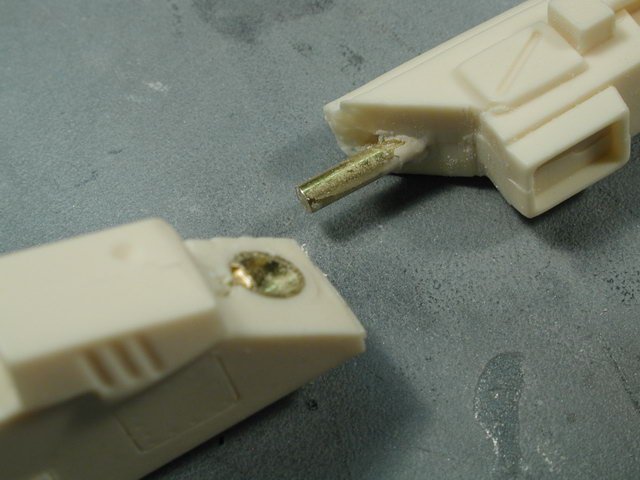
WHOA! Isn't that a bit overkill - its like killing a flea with a hammer! Firstly, lets look at where the brass rod is exposed. Its fairly linear and parallel with the lenghways of the signal stand. Additionally, if you look at the signal stand or any of the arm pieces, there are plenty of "tube-like" umblical details that also run lengthwise. Lastly, there are no "canon" line art that truely discribes each and every pipe and umblical that run along the arms - so we are allowed to interpret (as long as its within reason). I would suggest cleaning any remaining resin attached hap-hazardly onto the exposed brass rod - making it exposed properly. Use the brass rod as part of the details running up and down the signal stand. Additionally add a few pipe or wires along side of it - especially where it will connect to the next piece. I guarantee you that by the time its painted - you can't tell which one was the brass rod and which ones are the surface detail umblicals that run up and down the arm. Remember there are always alternatives to making any mistakes better it just depends on the time you have and whether its worth it to you or not.
-
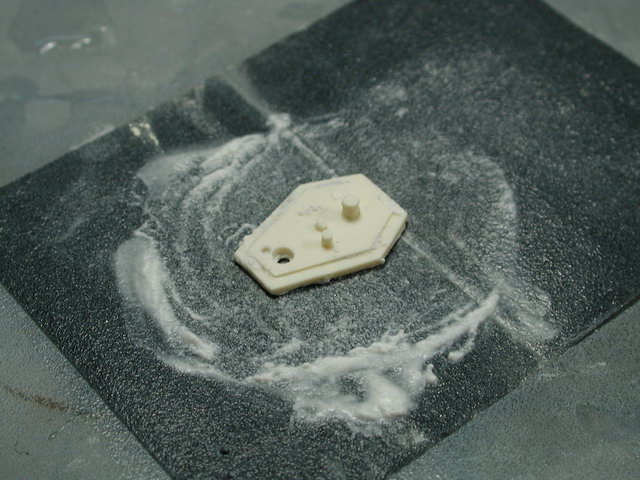
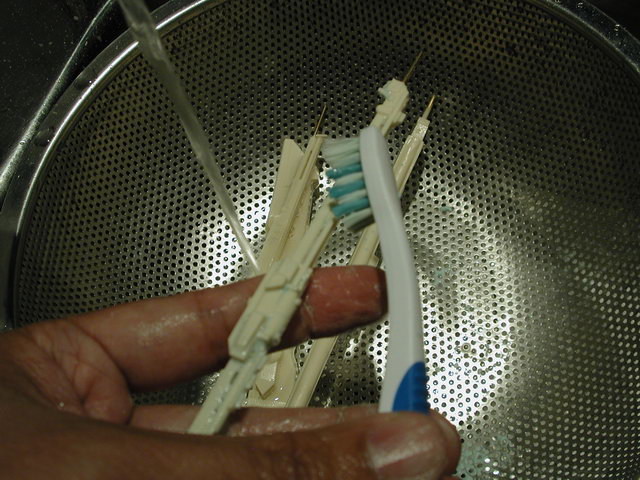
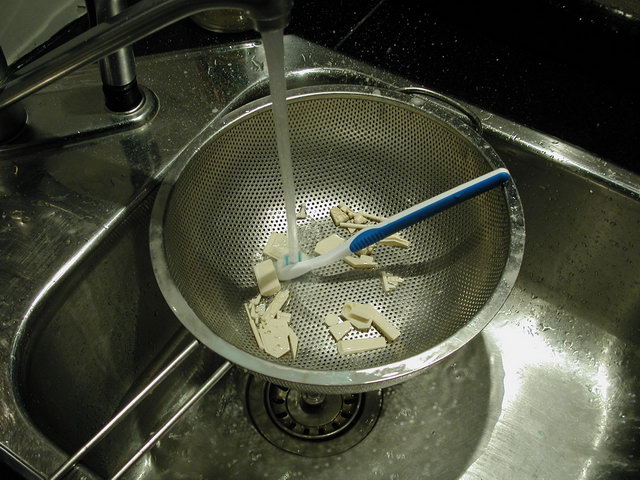
Hey Mano, sorry to see the casting flaws on your kit - with such a limited small run kit, its pretty hard to get a flawless cast (I'm always prepared to fix casting flaws - its just an unfortunate reality with resin kits ) I haven't quite inspected the quality of each components yet. However I do have a bit of pitting on the large base as well, but I don't think its a huge deal, and actually, I don't think I intend to correct them with sanding, its okay to have pitting on the large ship exterior, it could be battle damage . It's great that the resin arm pieces have brass rods embedded into it for strength, but it must of been a bitch to align in the mold as they poured the resin! The good of it, is that it probably easy to hide by adding some extra pipes or wires on either side of the exposed brass rod to hide where the resin ends and the brass rod becomes exposed - just more pipe gak! Yes, I have some seams that run through some nice detail too, I'll just have to sand them and rebuild the detail - there's nothing you can do about resin kits in this regard - its not a styrene injection kit where each mold is almost perfect. Well the next step after opening and sorting your pieces is to wash them thoroughly with comet. I scrub them with a toothbrush and comet bleach powder to get rid of the release agents used in the molding process. There were so many tiny detail pieces in the kit that I decided to wash them over a strainer just in case I drop a piece, I don't want it to go down the drain! I spent a few hours scrubbing! I'm a bit paranoid, since I had a few incidents where I was too lazy to do a thorough job and went on to building, then when the time came for painting, I'd get a patch where the paint bubbled up like water on wax paper! Its much harder to wash at that stage. I've tried a few other solutions such as dish detergent, which is good too, but you have to becareful that it doesn't contain any moisturisers for your hands (that leaves a greasy film behind). I've also tried this Polly-S mold release detergent that you're supposed to let the parts sit in overnight and it dessolves the mold release. Well, it doesn't work at all - in the end only elbow grease and scrubbing works. This step applies to all resin models.


-
Wow! fantastic photos!! - very clean...