HWR MKII
-
Posts
2644 -
Joined
-
Last visited
Content Type
Profiles
Forums
Events
Gallery
Everything posted by HWR MKII
-
Theres alot of factors to the brush work. most important are a good base, a good soft round sable and the right paint consistency. The base on this was the tamiya deck tan. It was smoth but created a good tooth for the first layer to grip and spread evenly on. It only took 2 coats to get even coverage. A round brush holds paint better and spreads it more evenly than a square or flat brush. Alot of people try to use flats and thats where the streaks really happen. The paint just has to be thinned just right. Not airbrushing thin but not straight from the bottle either. Its a matter of trial and error for that one im afraid. Let the paint dry fully between coats as well so you dont lift the underlying layer. this is where a good base comes in handy again. Also dont try to paint the etire area with the one brush. use a liner brush or a smaller round to get close to details. these normally only need one coat since its a smaller area. also once you have a good edge it gives you breathing room to get in with the larger round.
-
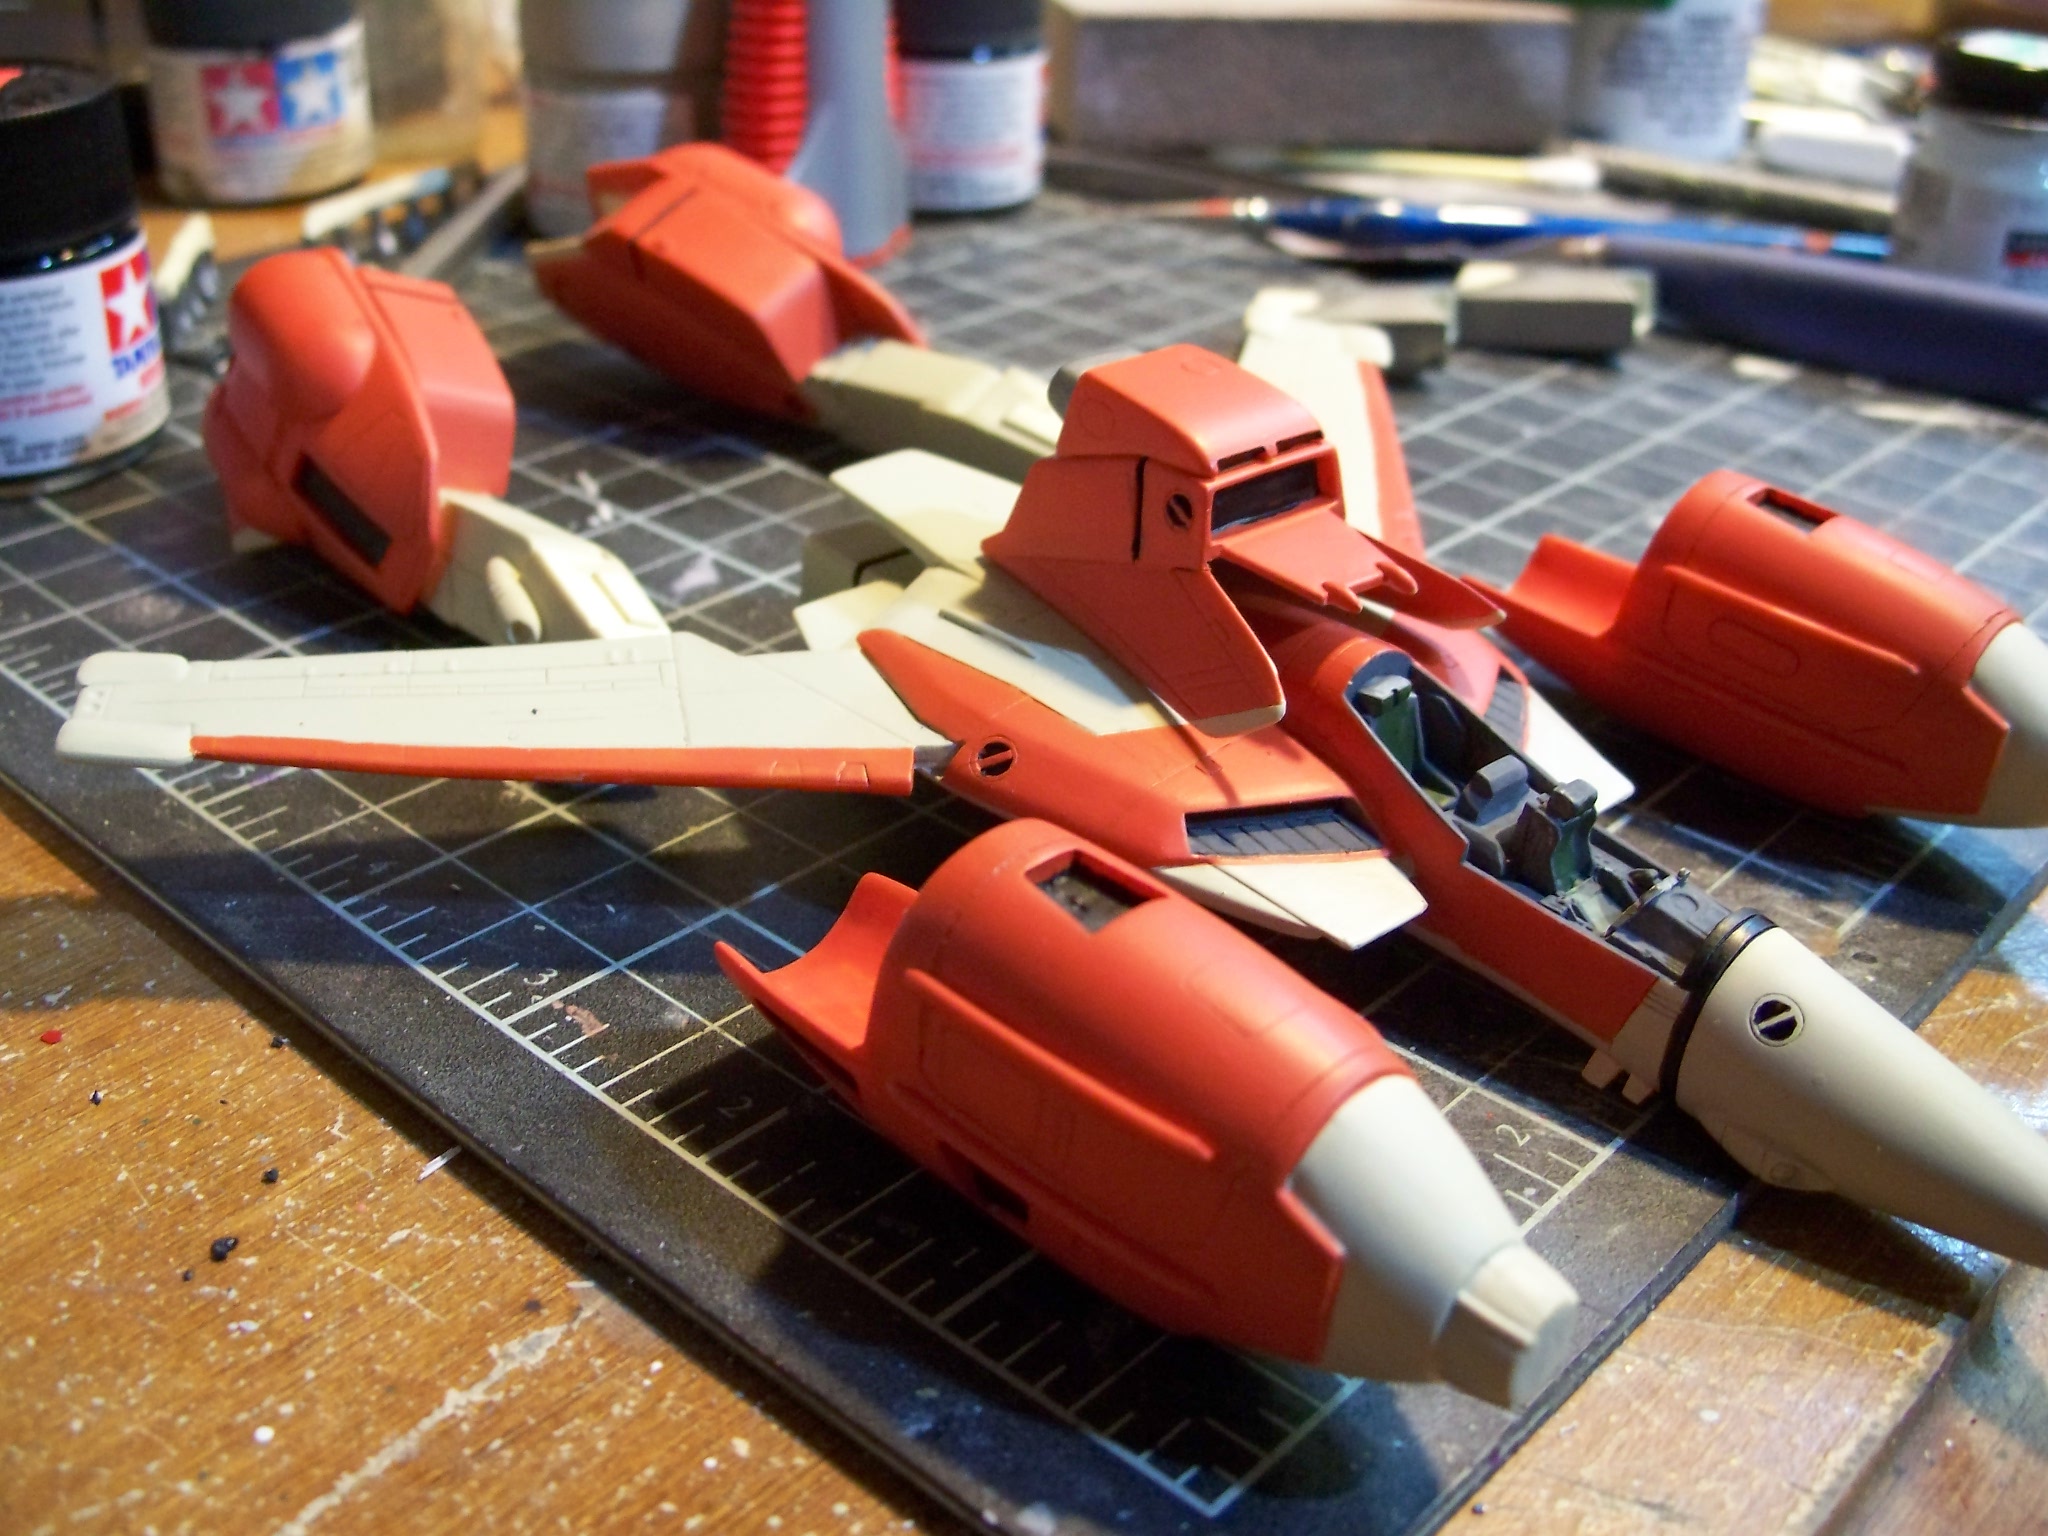
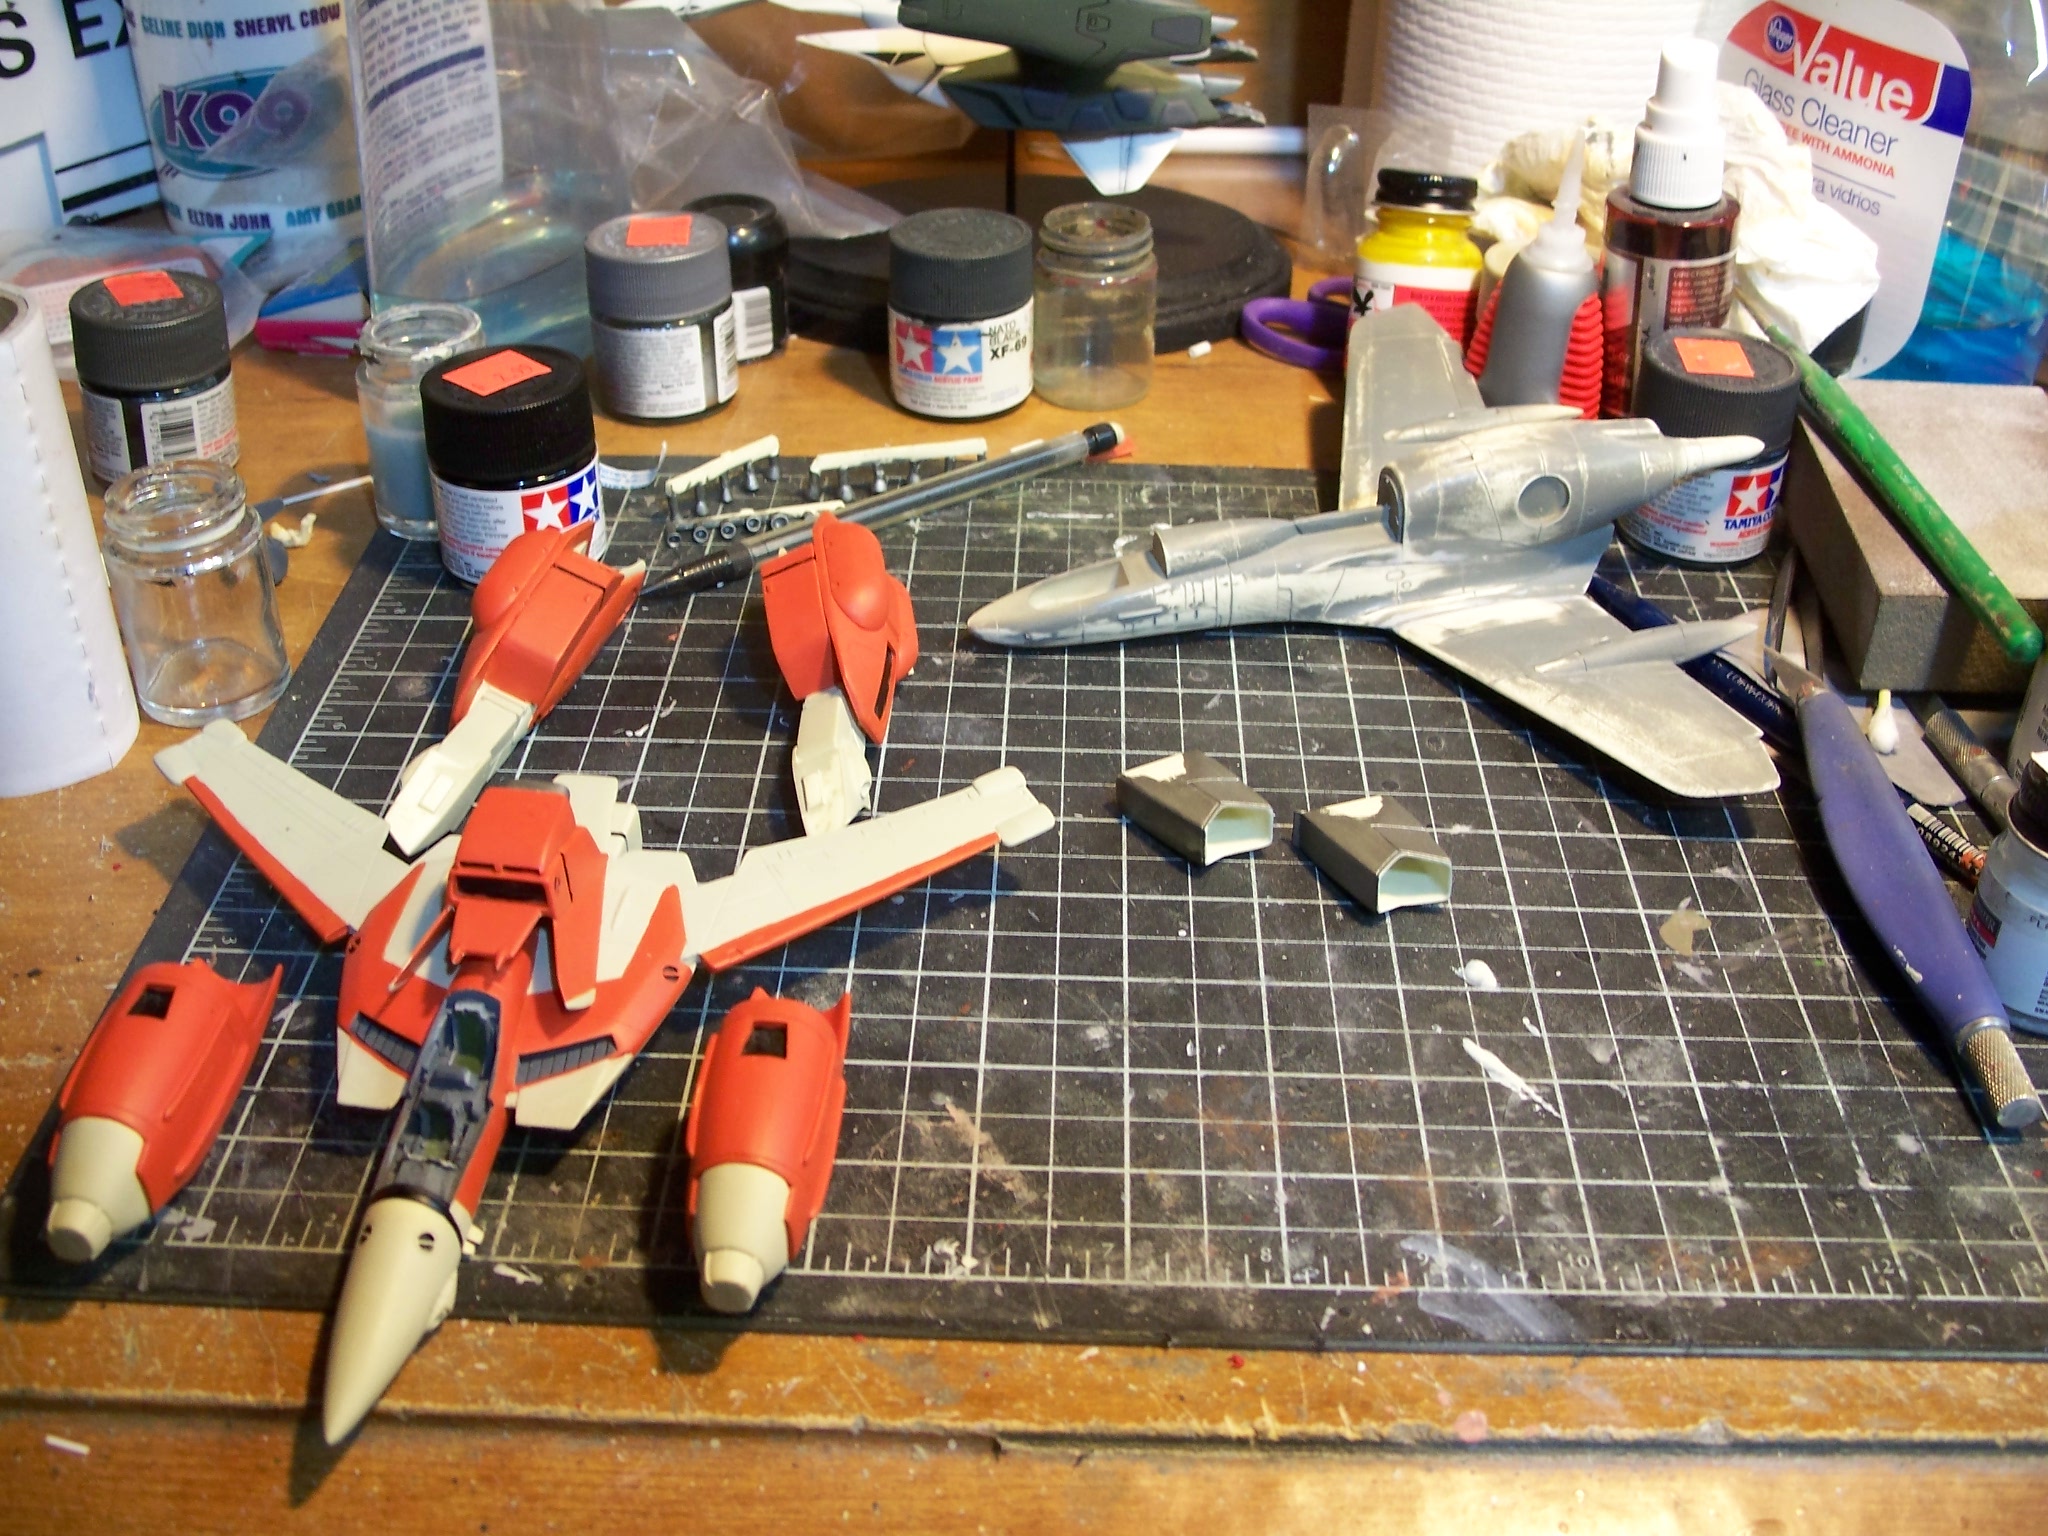
Thanks Ben It will look even sharper after a wash. All the demarcation lines for the color came scribed into the model. The black line left from the wash will tighten up alot of things
-
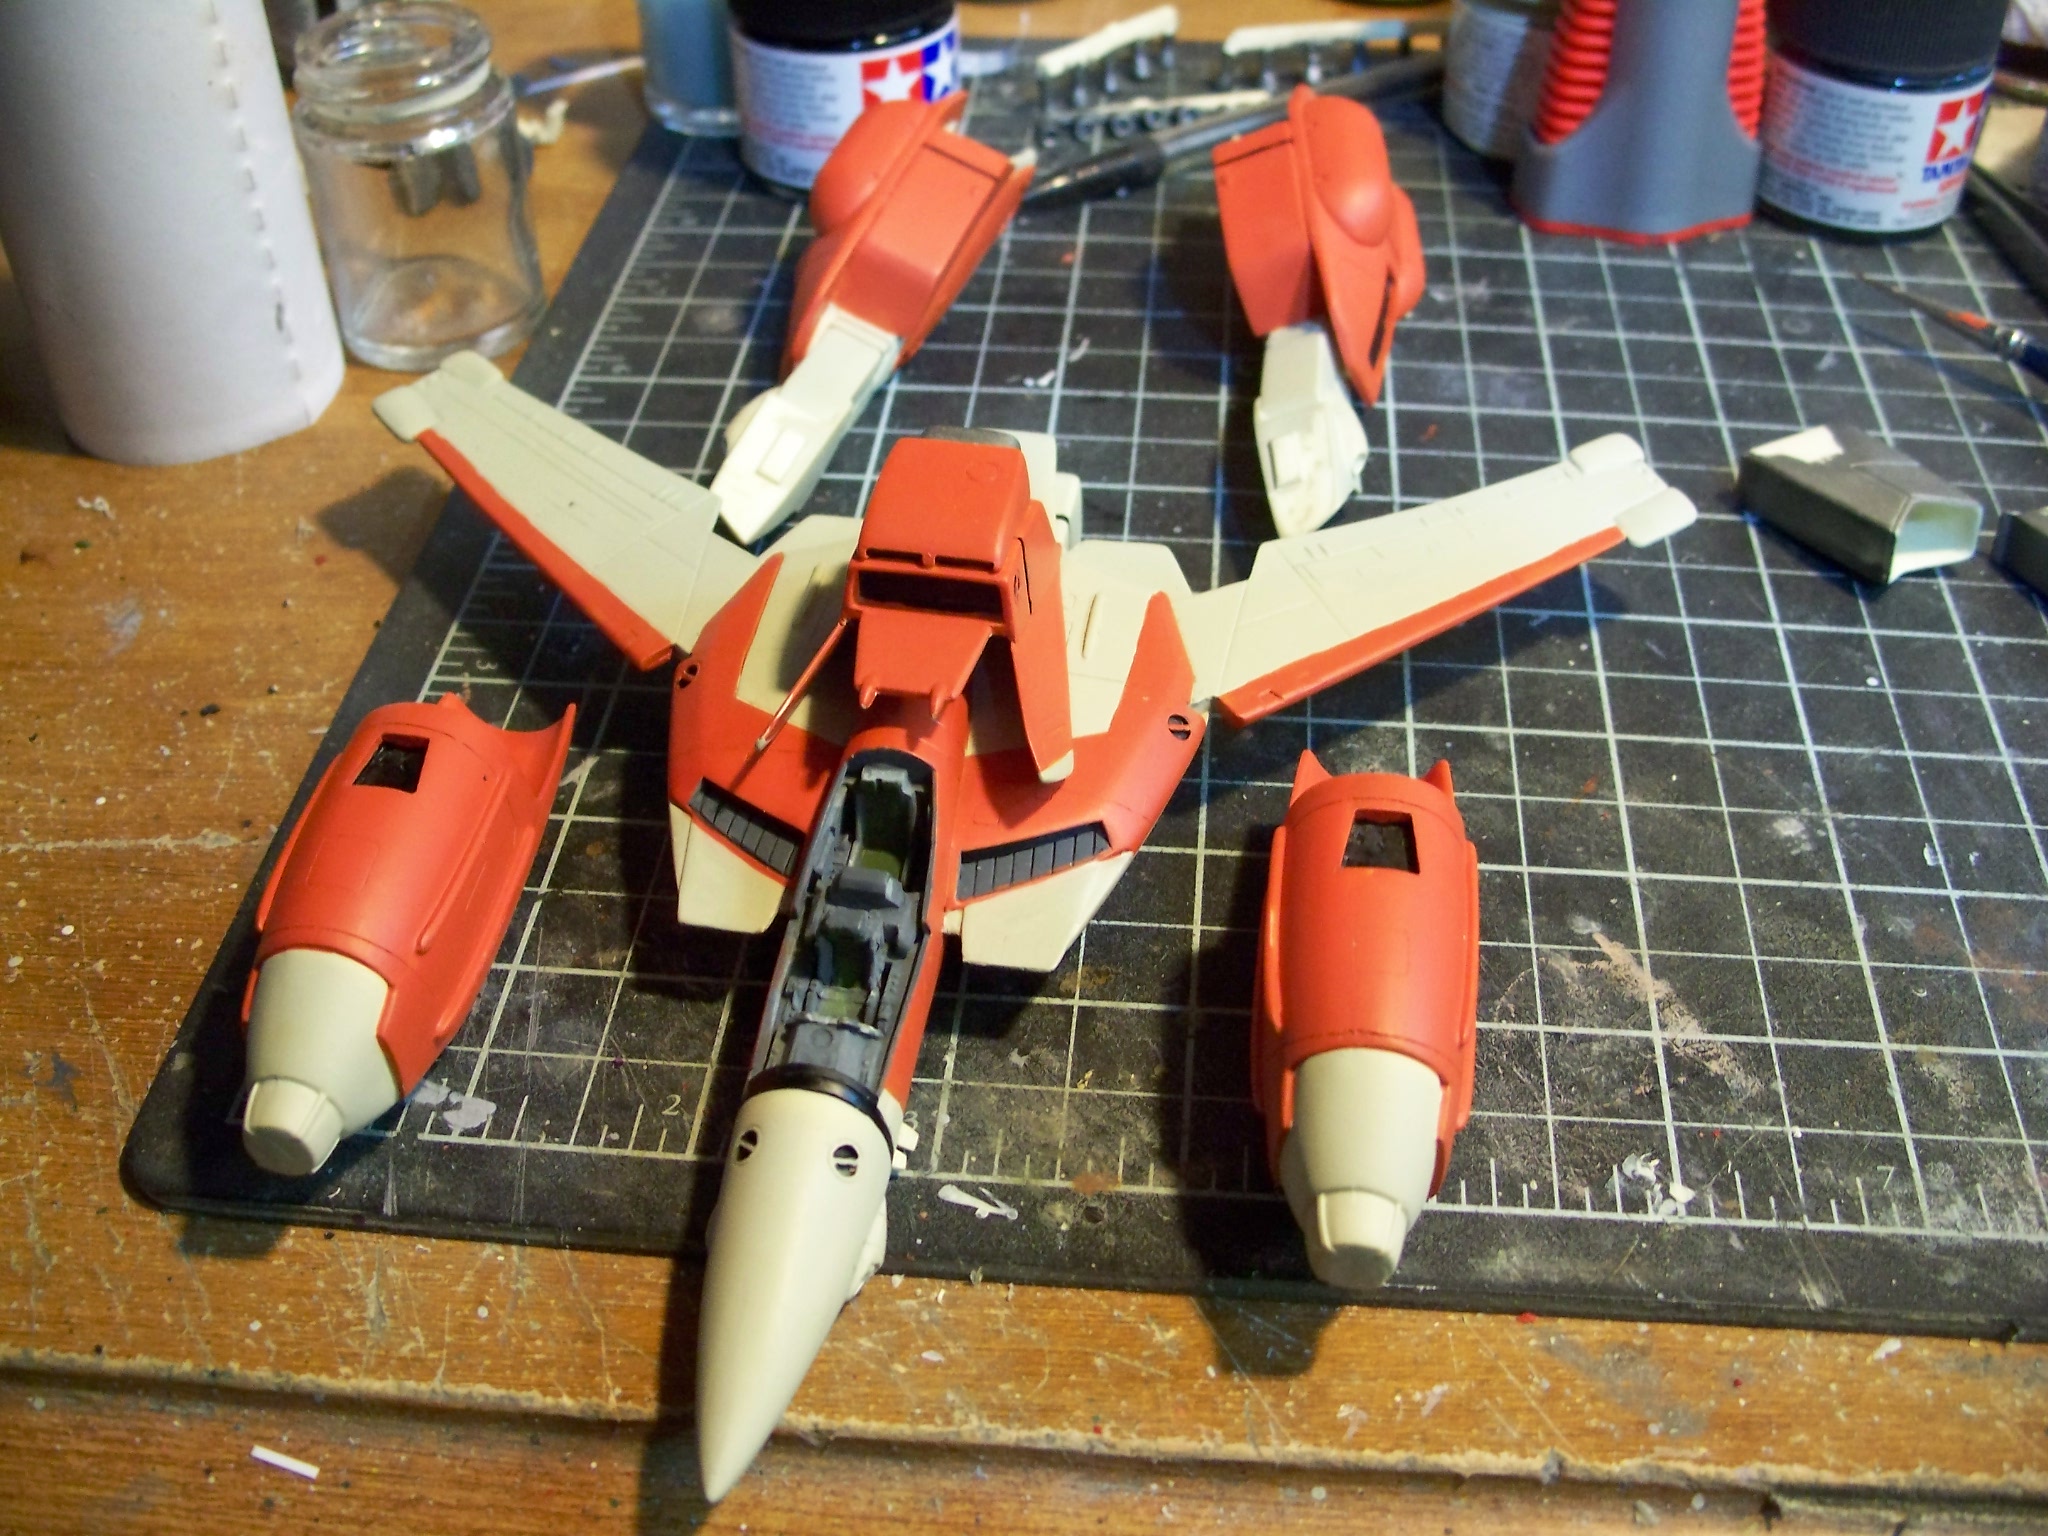
Ok no longer cranky. Things went as smooth as silk for everything else. I decided to dust off the ol brush painting skills on the orange. Saved alot of tedious masking and possible paint pull ups. I am satisfied with the resultsGood solid color and clean demarcations. That being said. Within a week i will have a sample set of some of PetarB's 1/72 pilots. These will be used to occupy the cockpit. I cant wait to get them. His sculptings are top notch. Also i am awaiting the decals from greyson 72. I cant do any of the landing lights until after the future, decals and matt coat are applied. SO the Ostrich is on hold for about a week. I dont mind though i have another Orange collection Valk to work on....and a Schira-Dow....and a VF-25. Man i really need to clean off my bench


-
Oh you will. Please see the above linked thread for further updates.
-
Petar another Misa pose to consider for future sculpting is the classic saluting pose like the poster behind Hikaru in DYRL. I also responded to your PM. My fine detail liner brush is waiting.
-
Testors has their Acryl range in the same size bottles as their enamel model master range. I dont like them . Latex based and clogs up my AB fast.
-
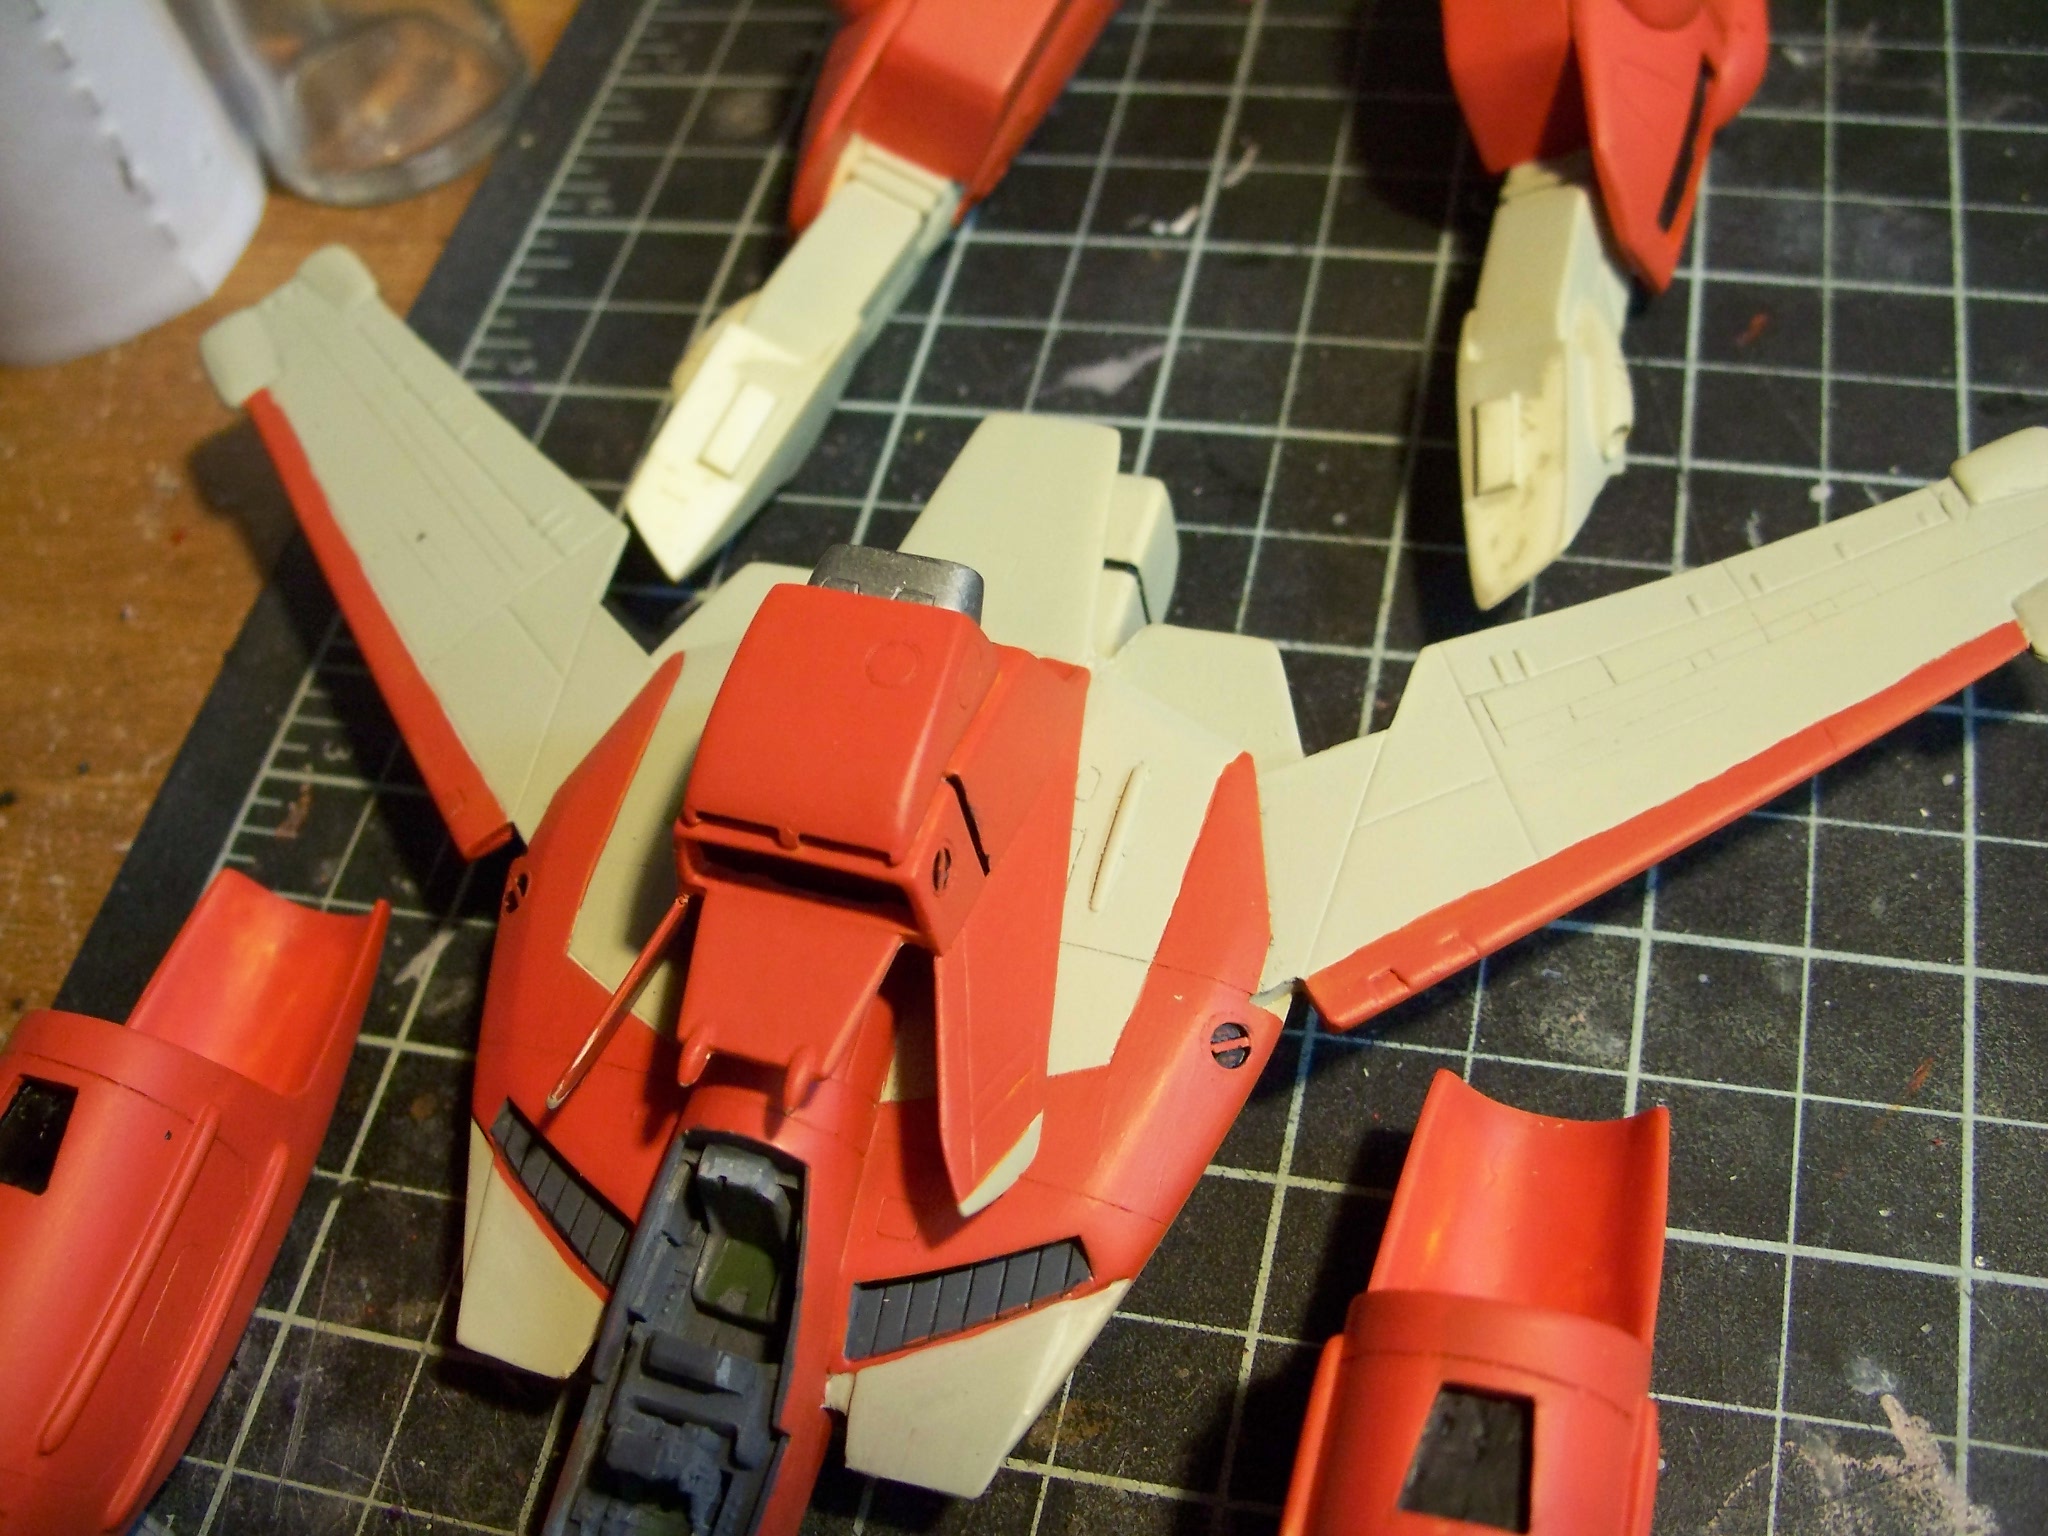
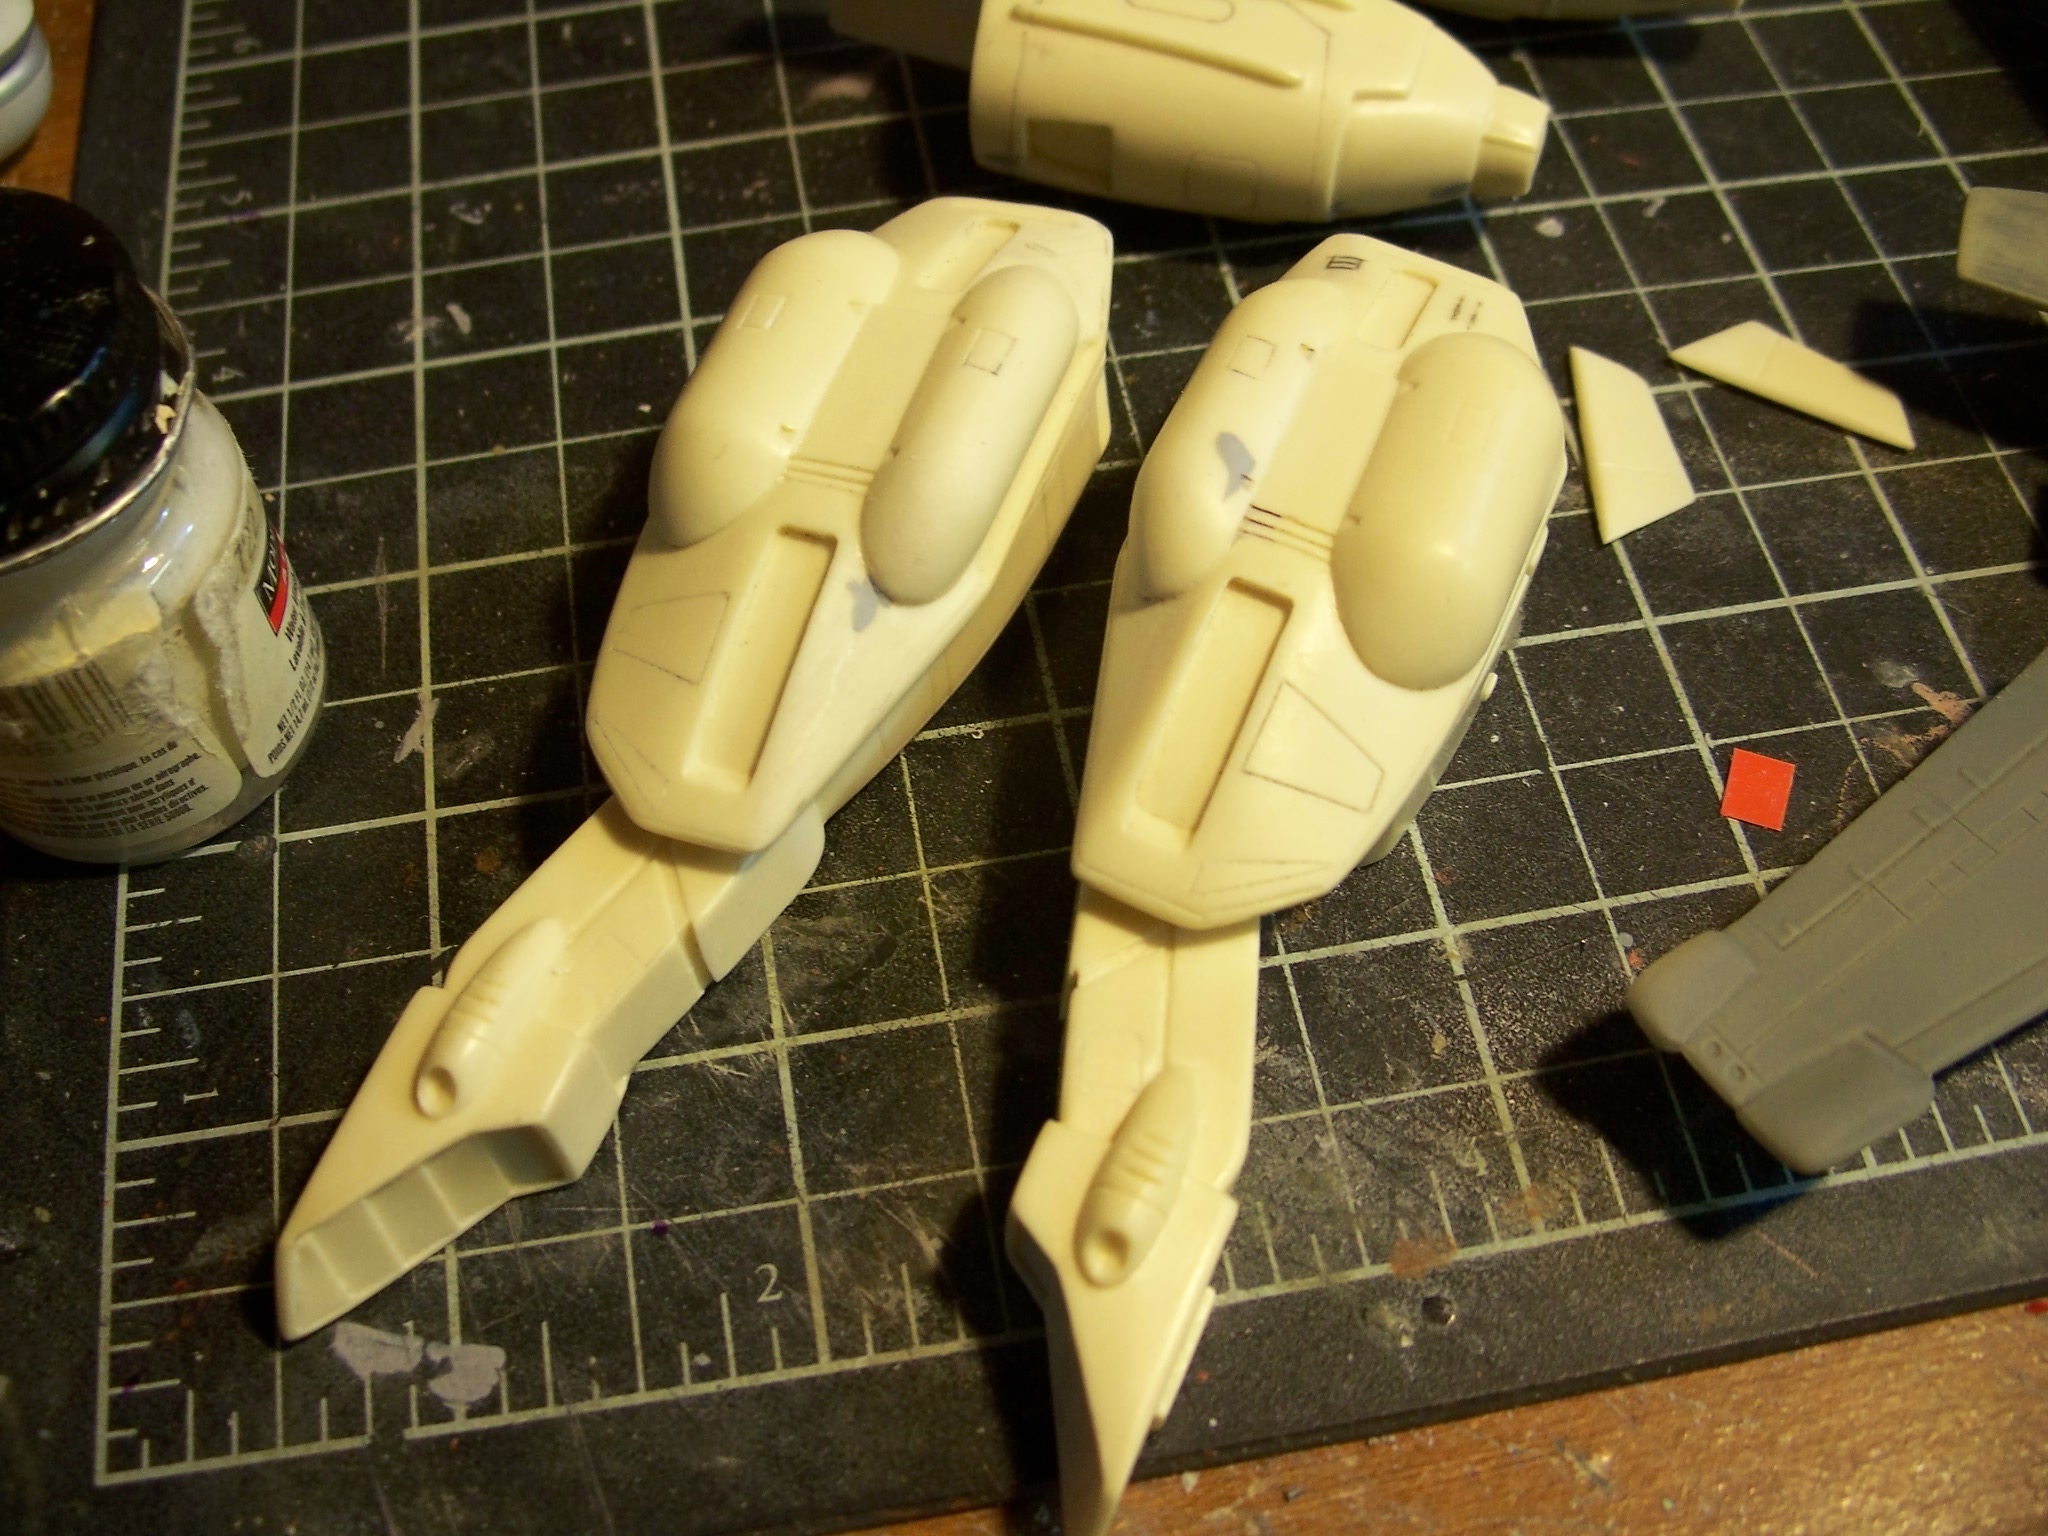
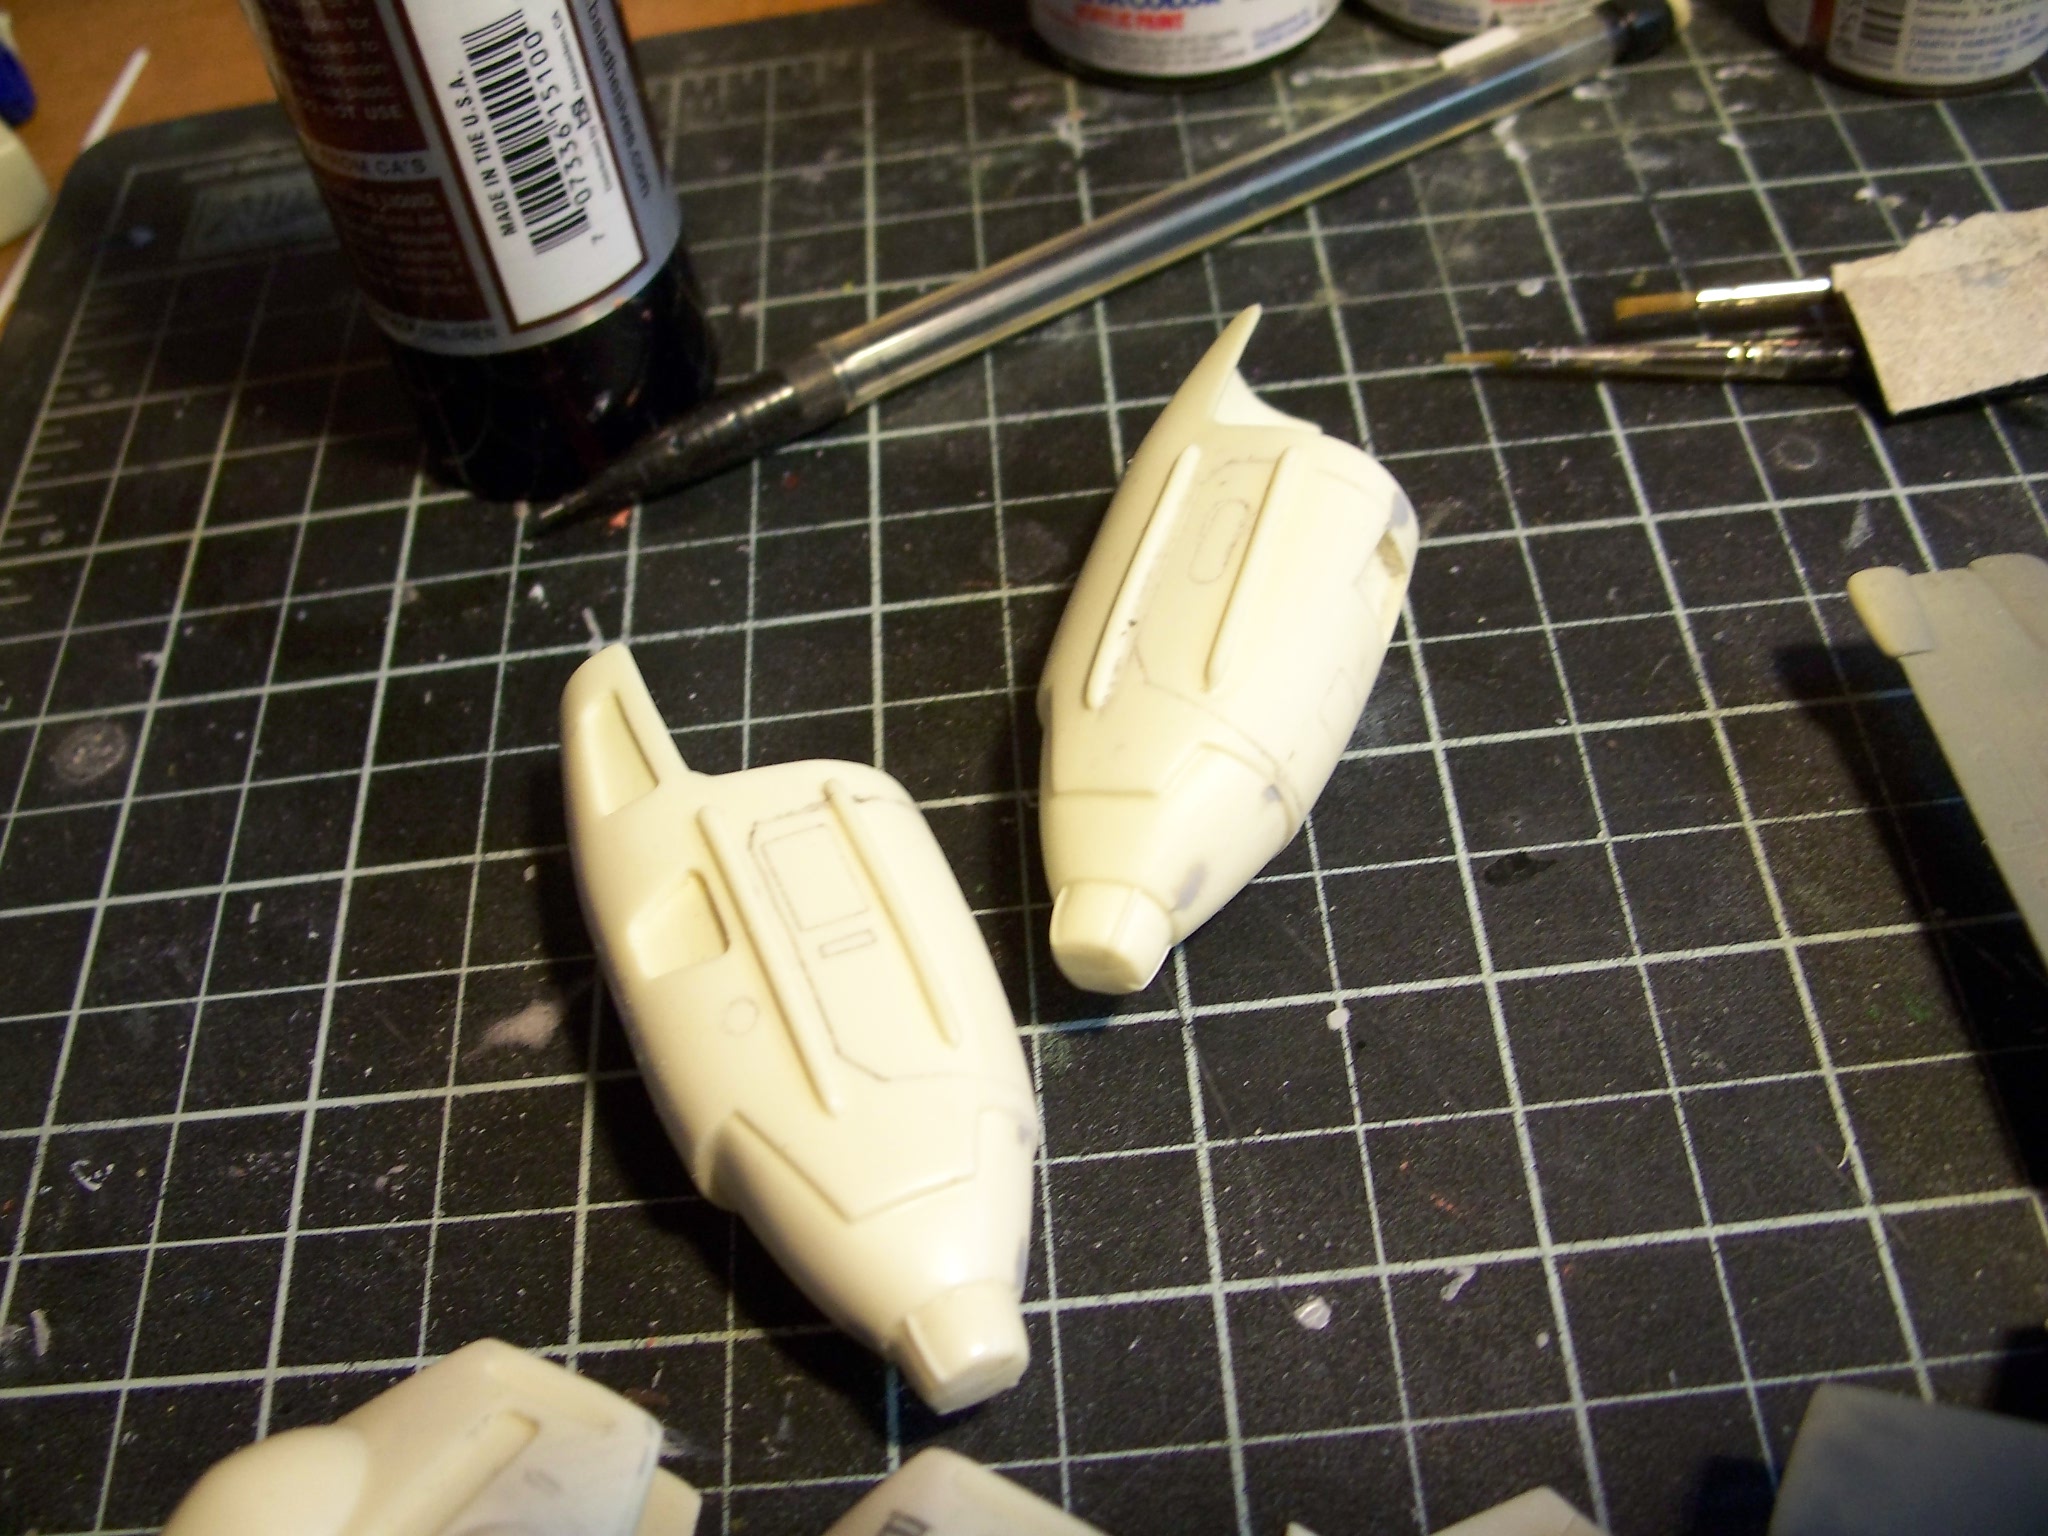
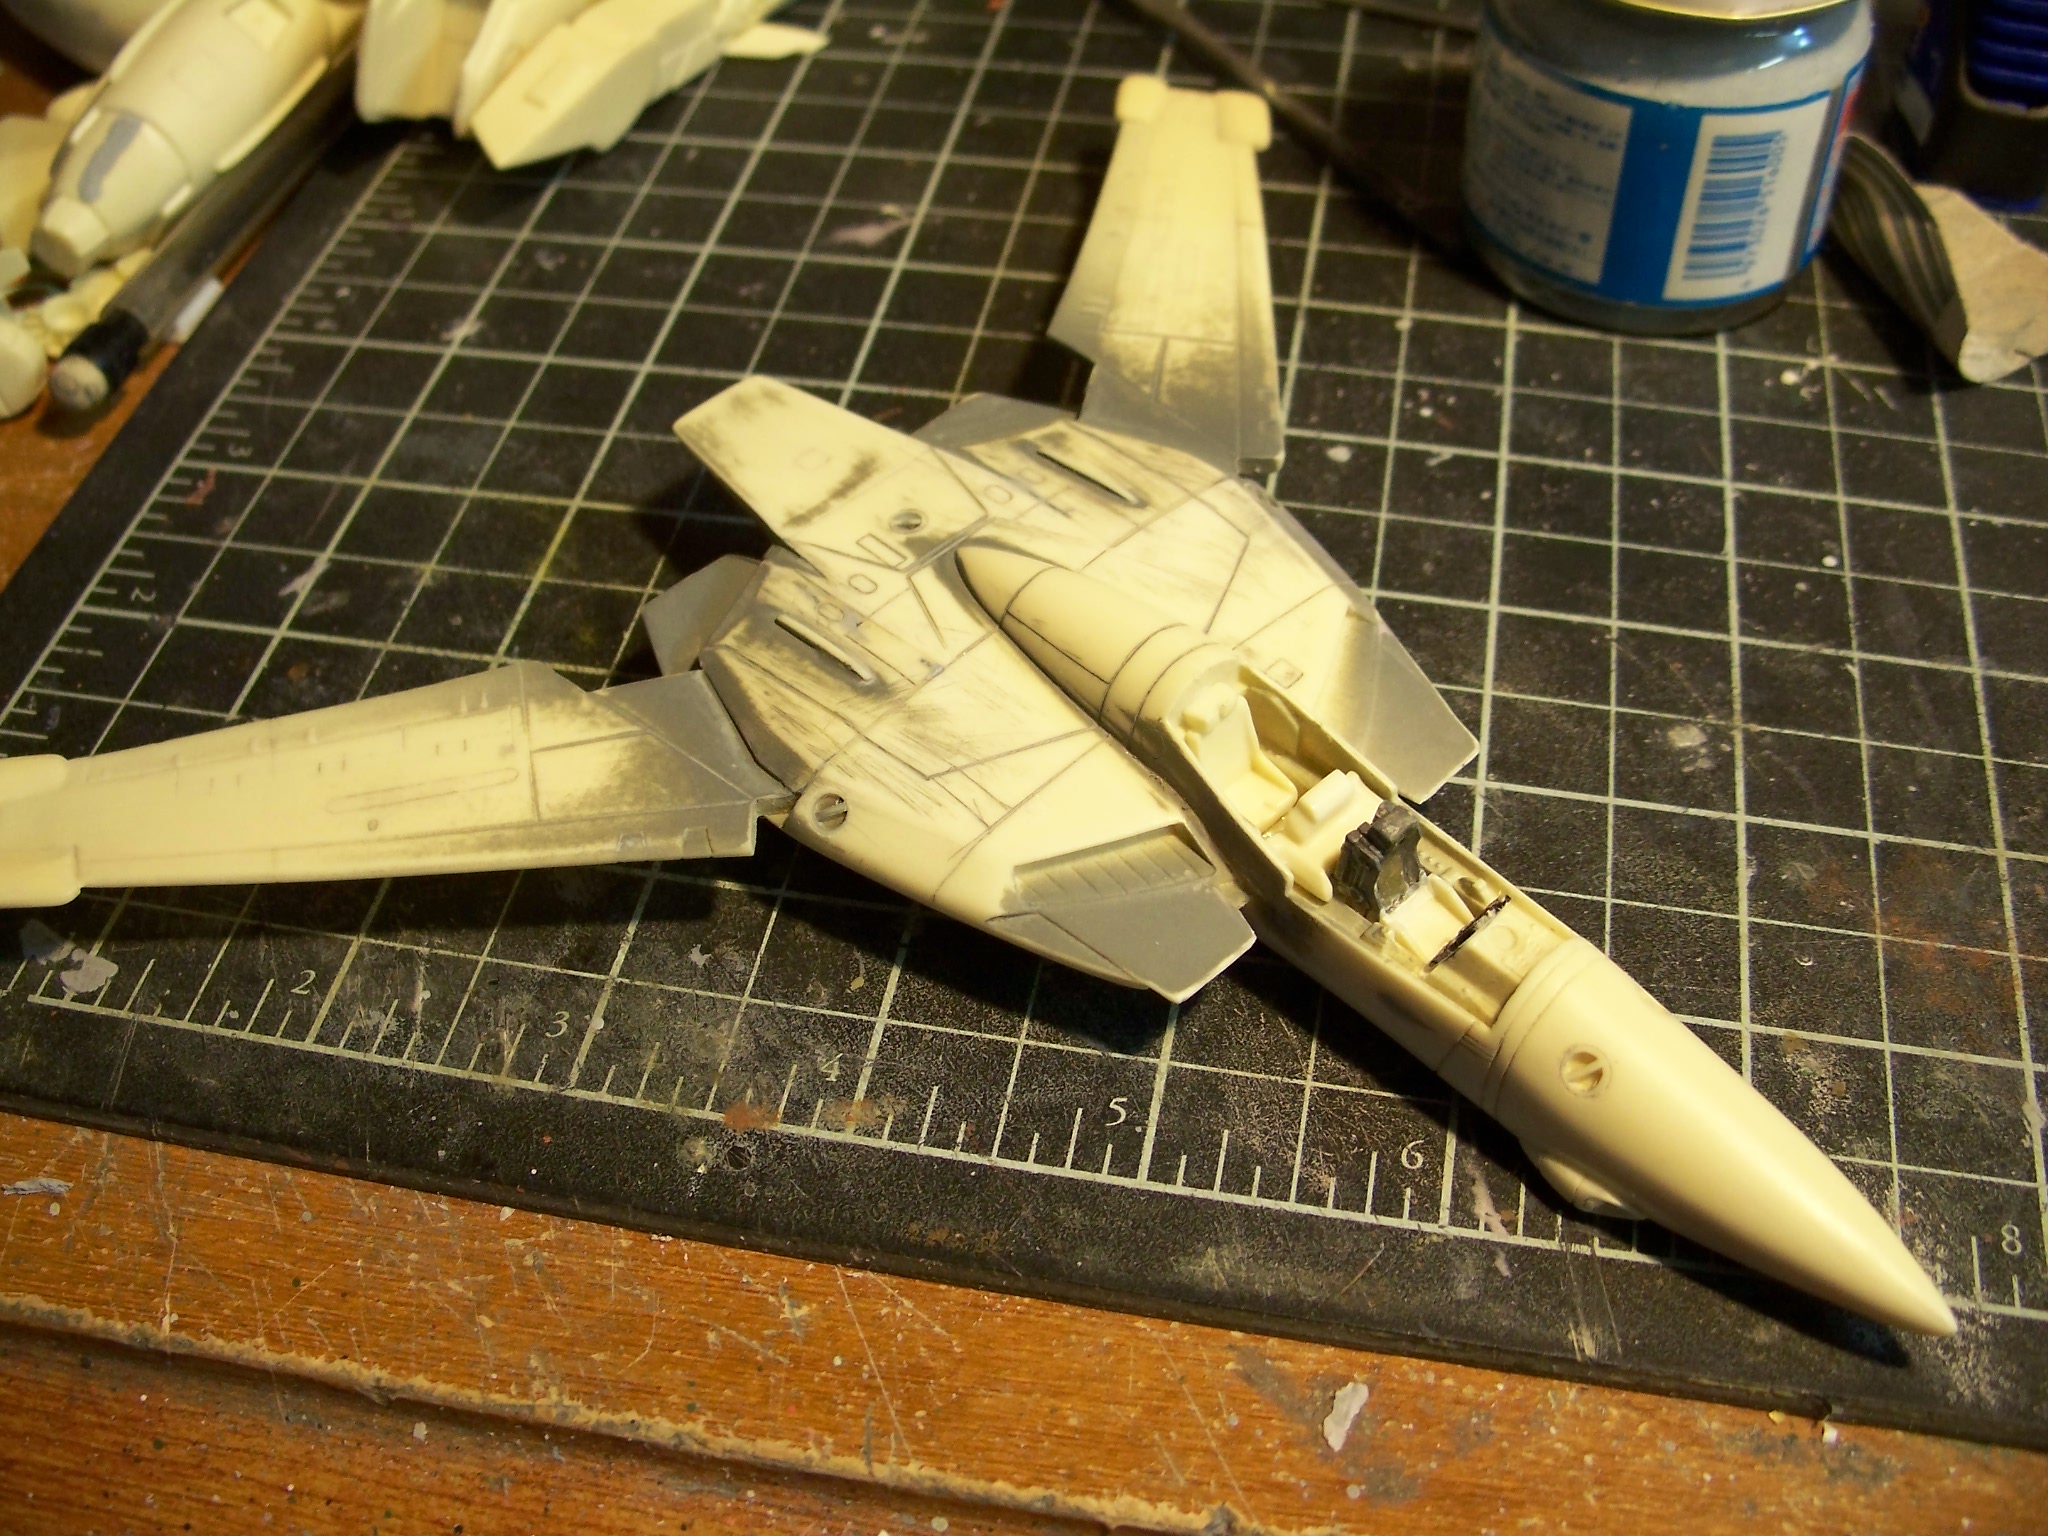
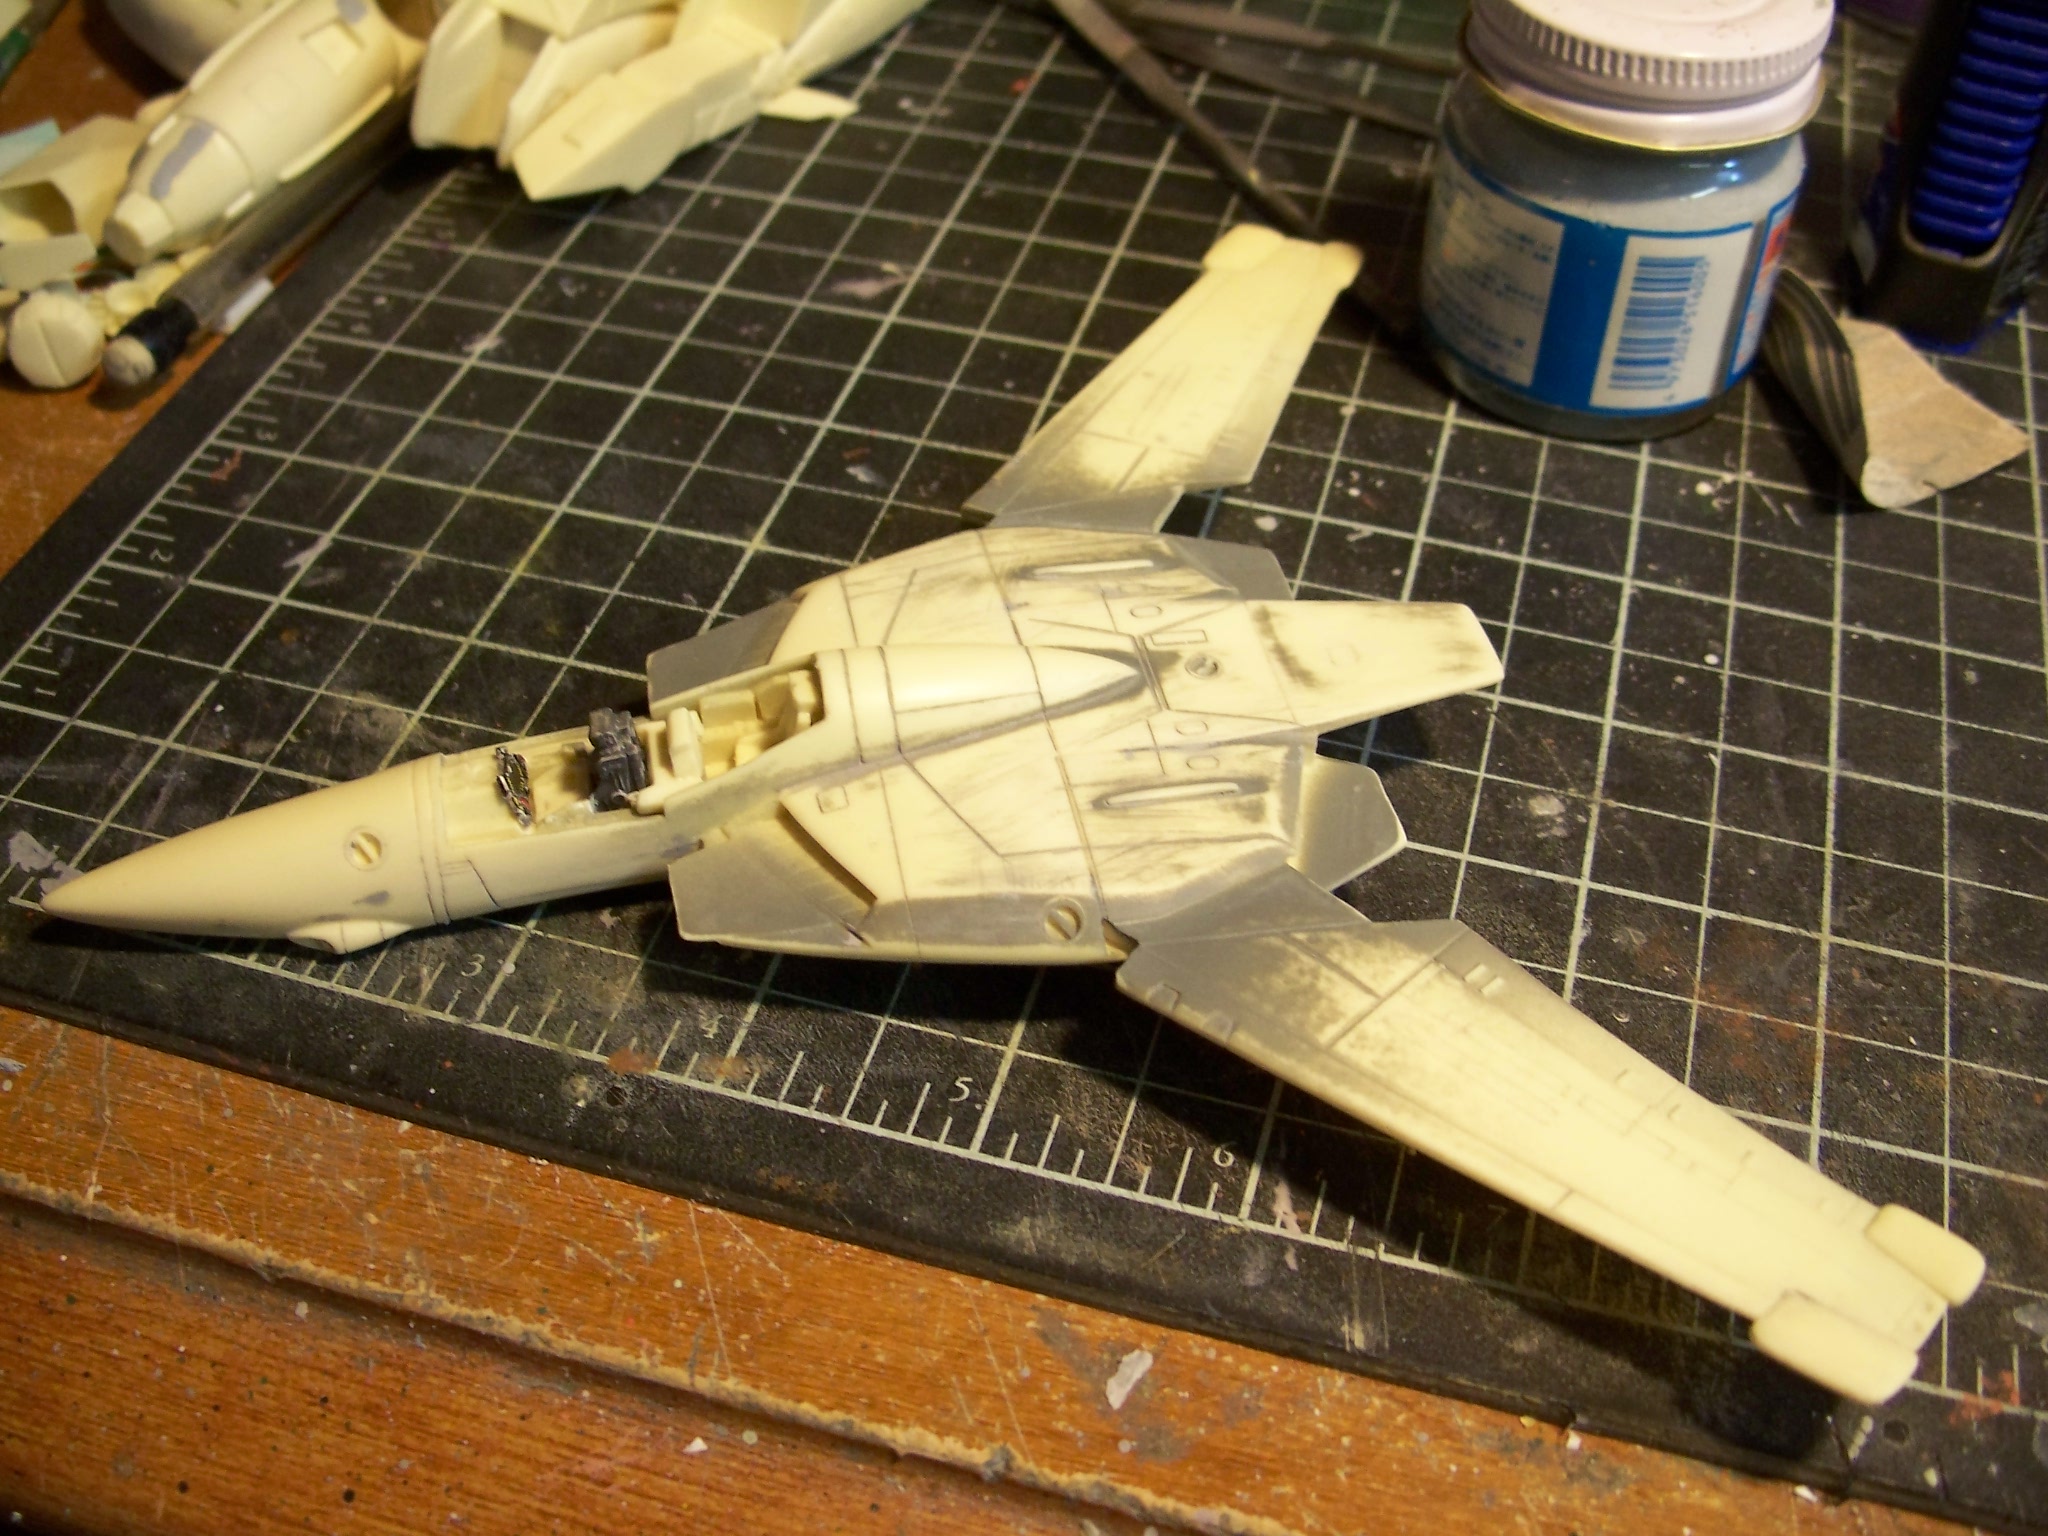
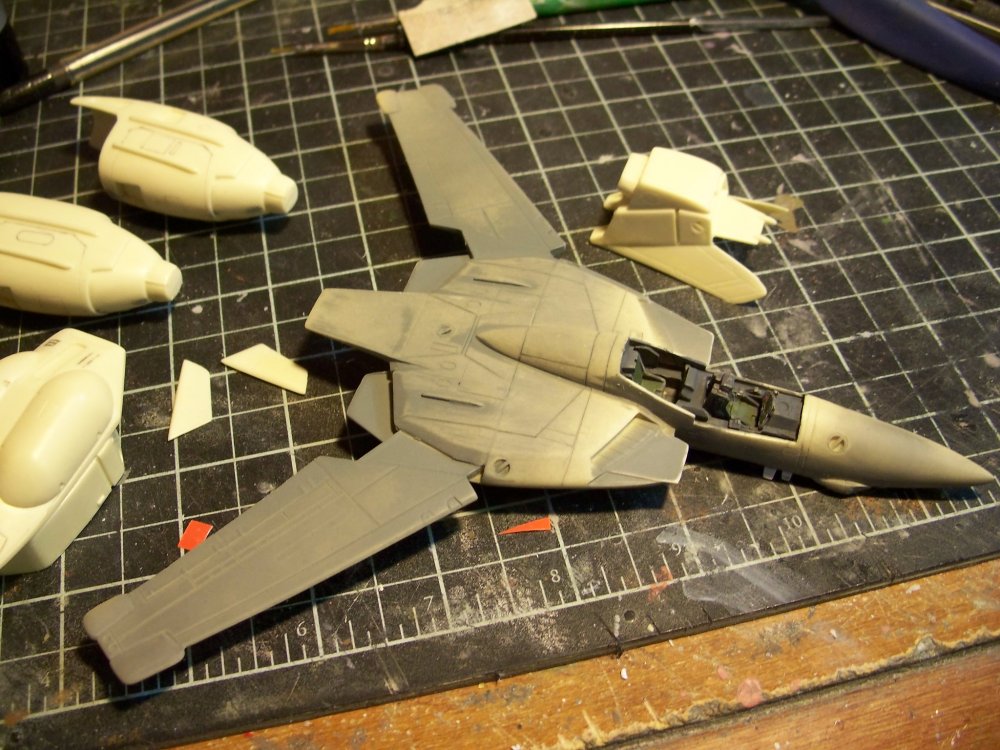
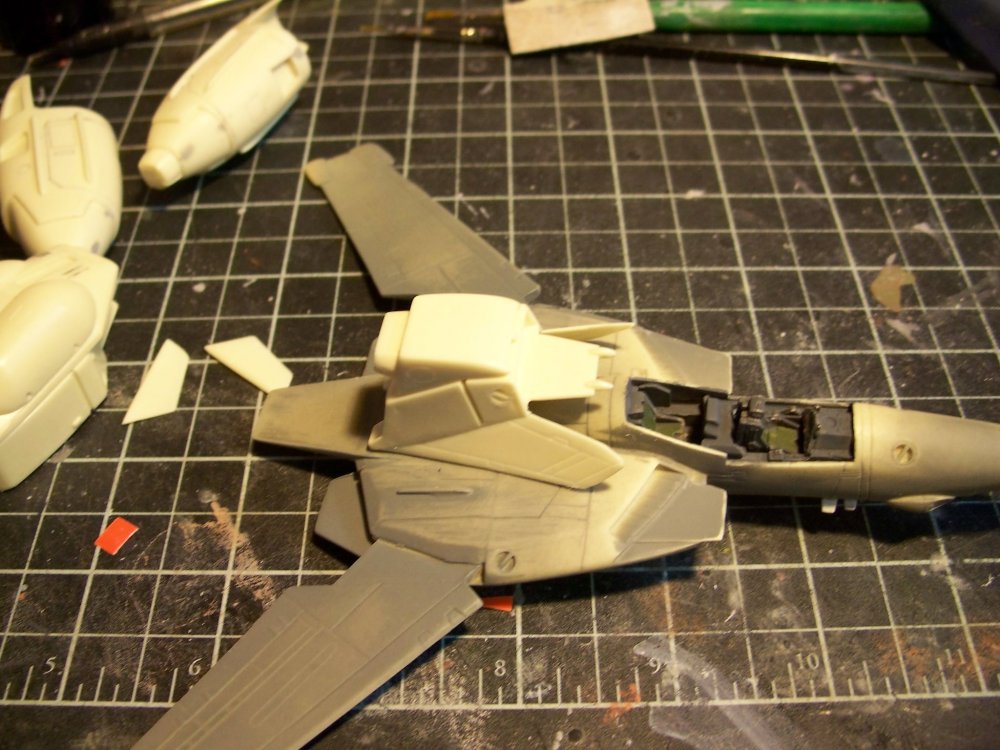
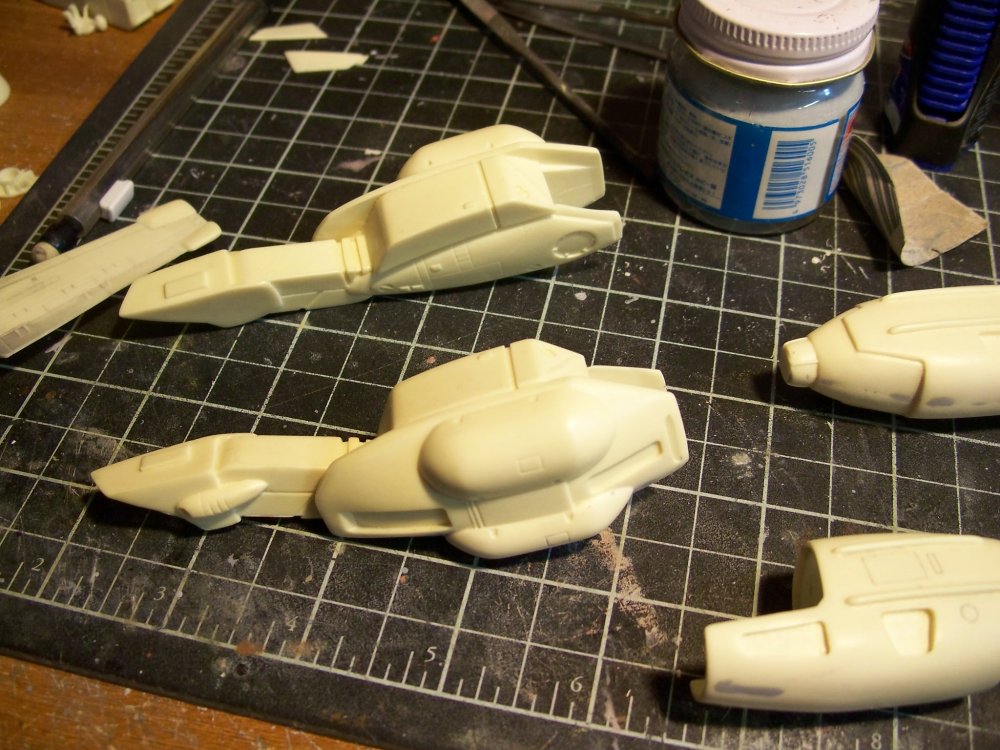
parts have been stripped and recoated with lightened tamiya deck tan. I actually like this color a bit more. As far as i can tell teh VT and VE 1 have almost the same wing tips. If one is going to go as far as calling a descrepancy in line art inaccurate than that is their issue. Ill live with it as it is. If i wanted this to be detailed as all get out id have got a hasegawa. It so happens i prefer the lines of this kit more. Im building a little resin space fighter here not an F-15E.
-
Everybody give thanks to testors acrylic for making a totally suckass paint. now off to rip and strip
-
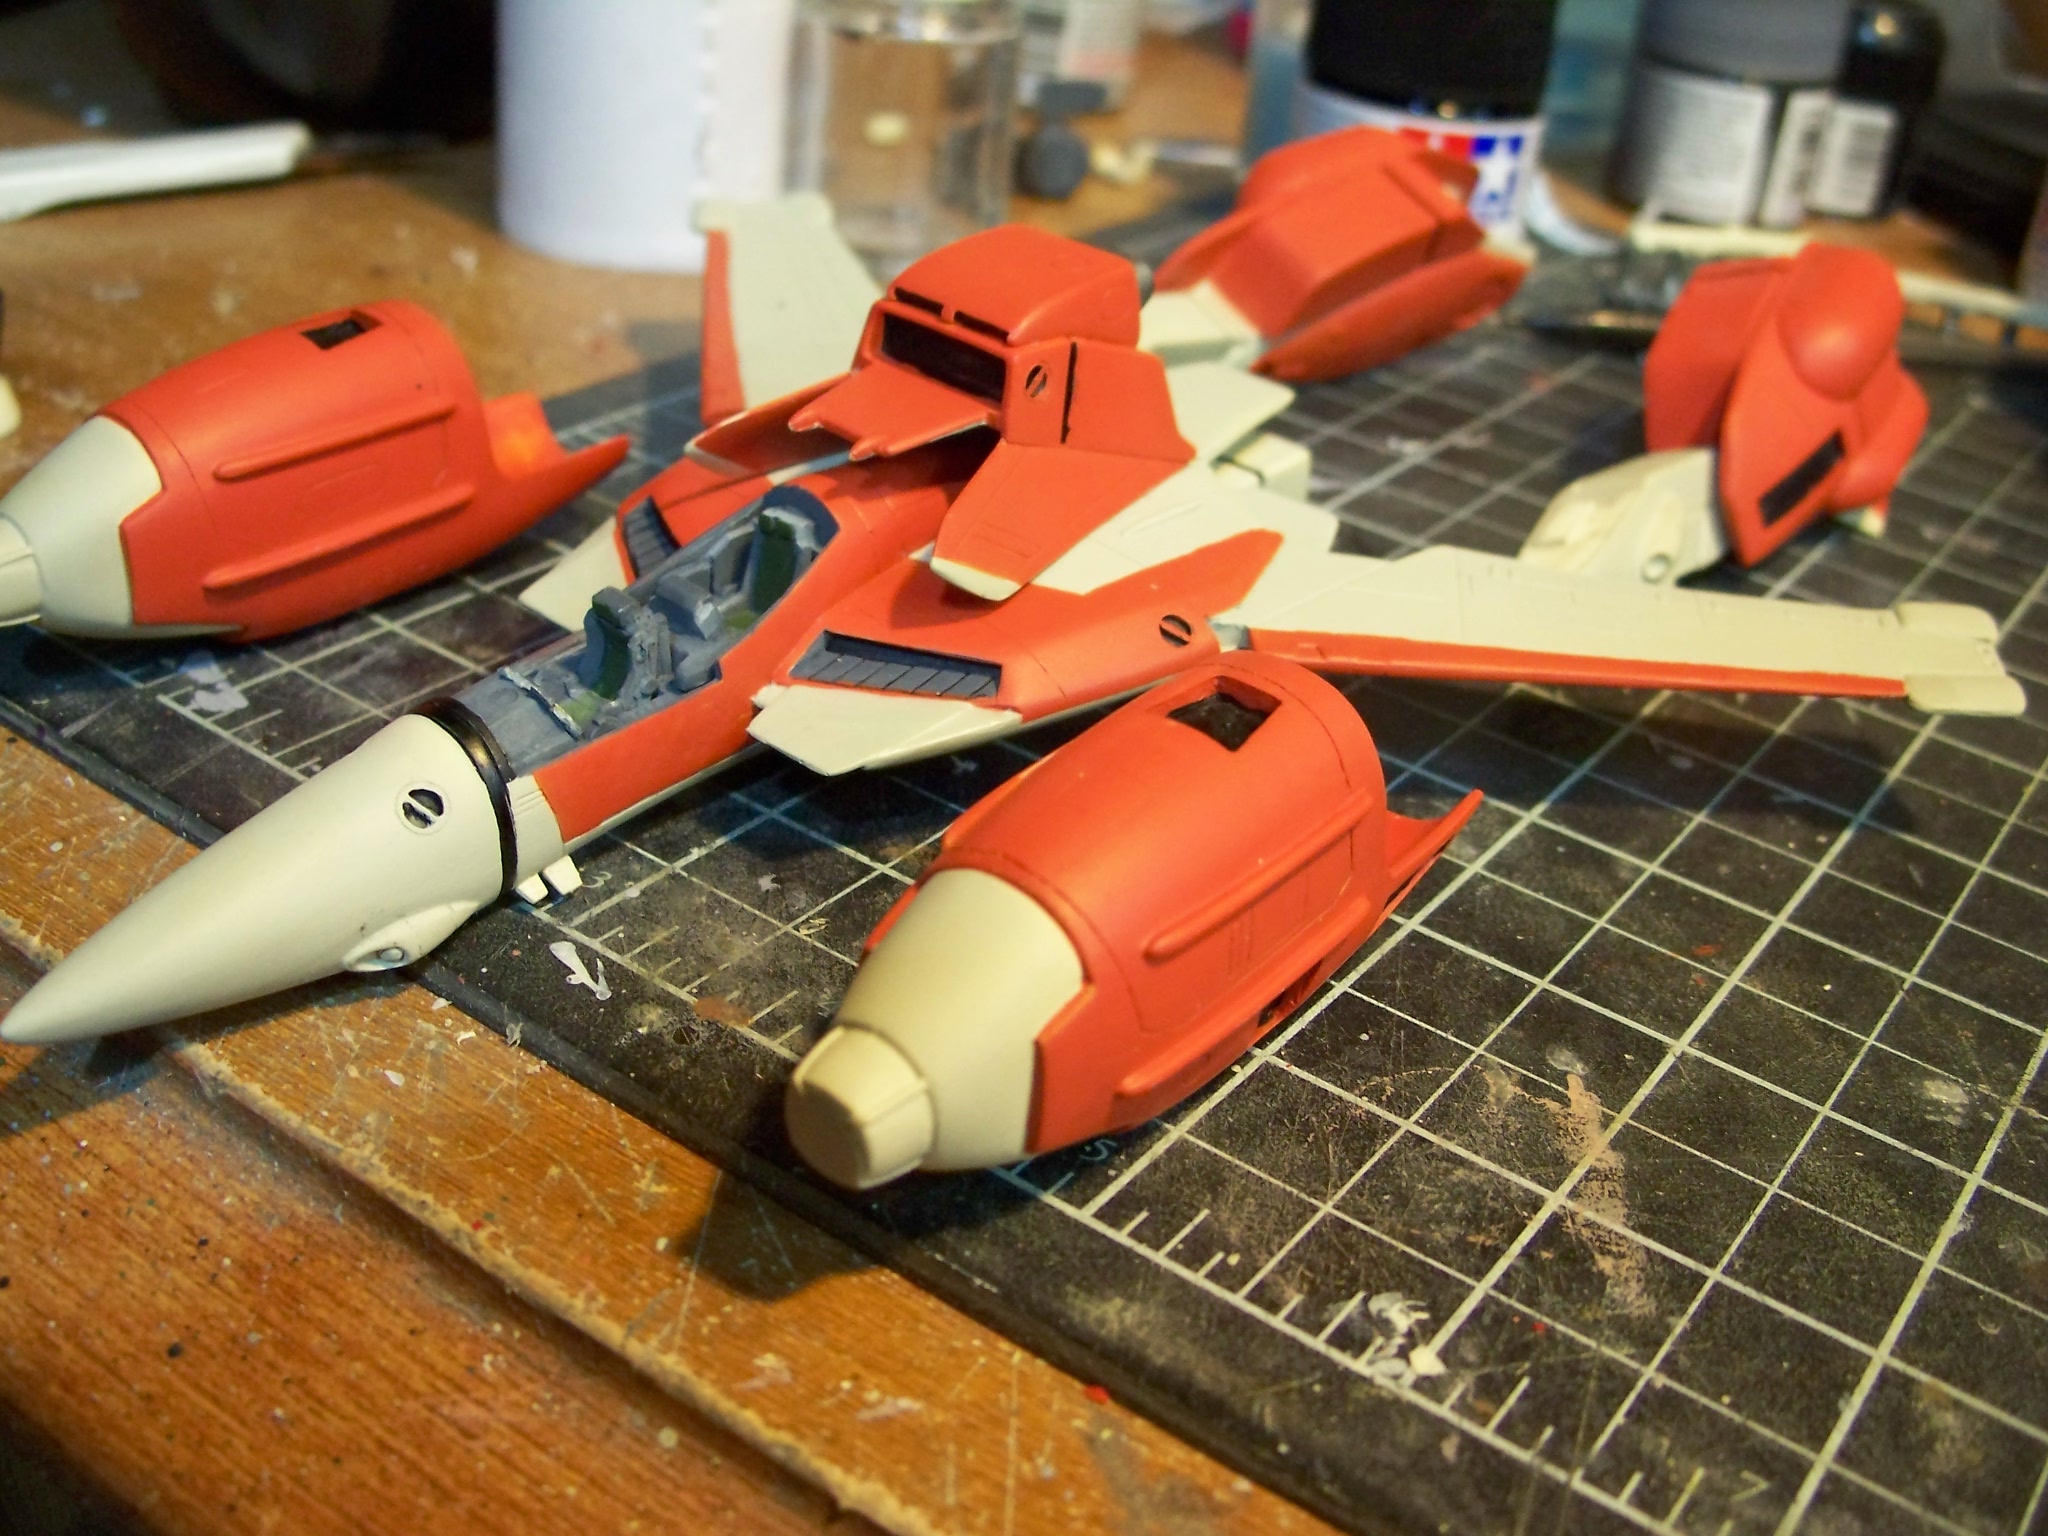
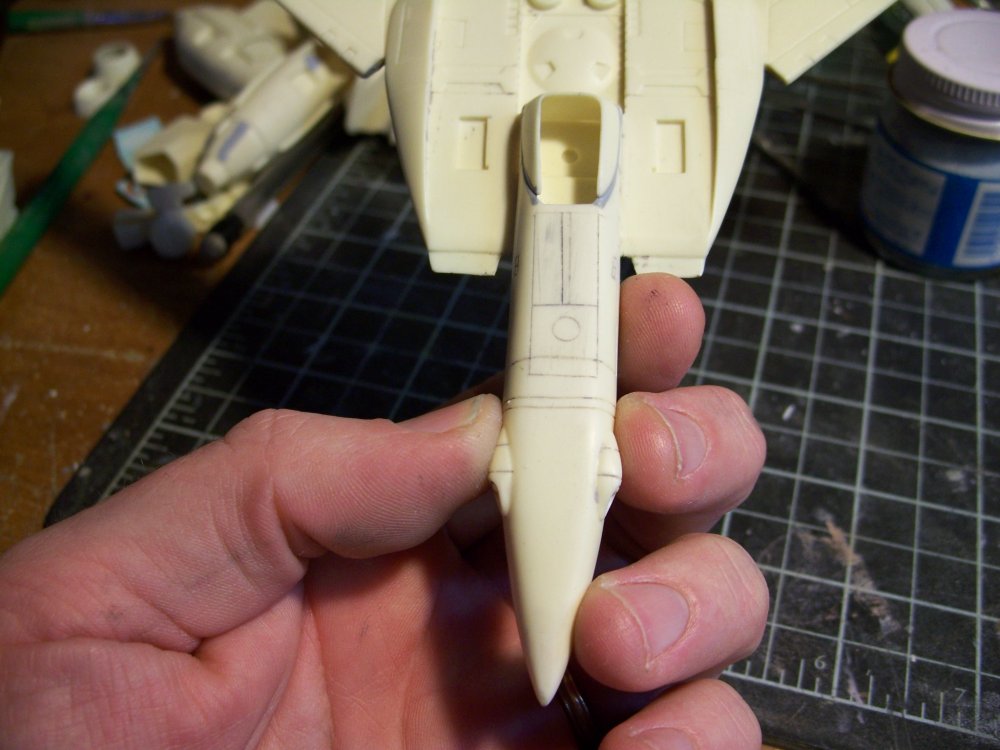
I have gone as far as i would like with the scribing. and all the necessary parts are ready for the initial color of radome tan.


-
I have just been contacted by a very gracious member who has a spare set of Hasegawa VT-1 decals. That problem has been solved!
-
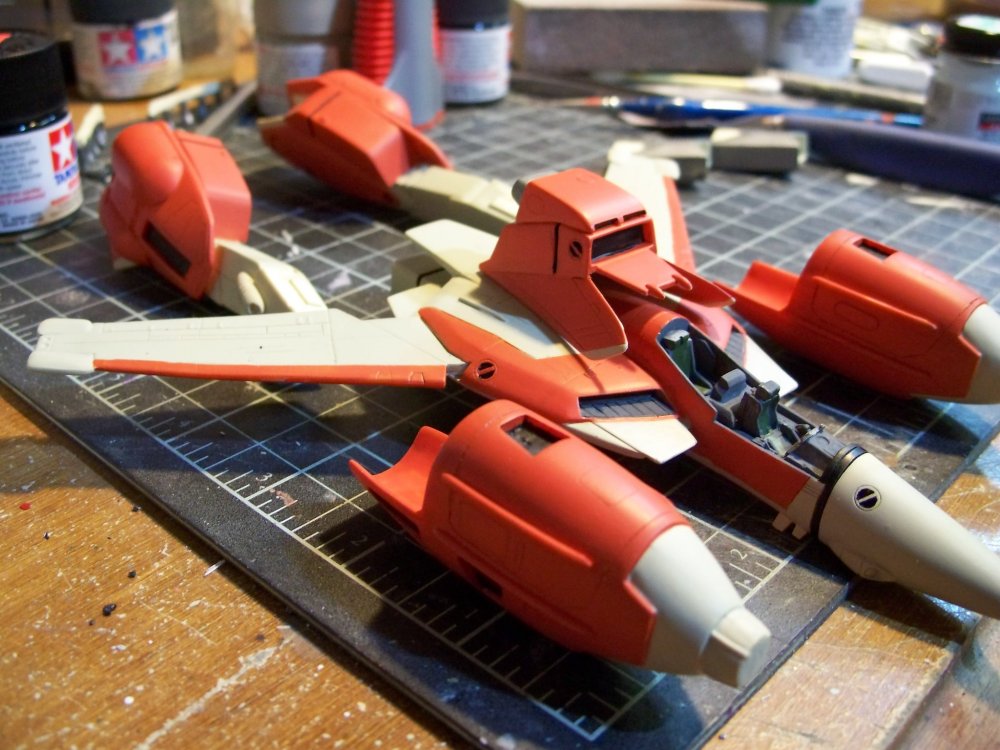
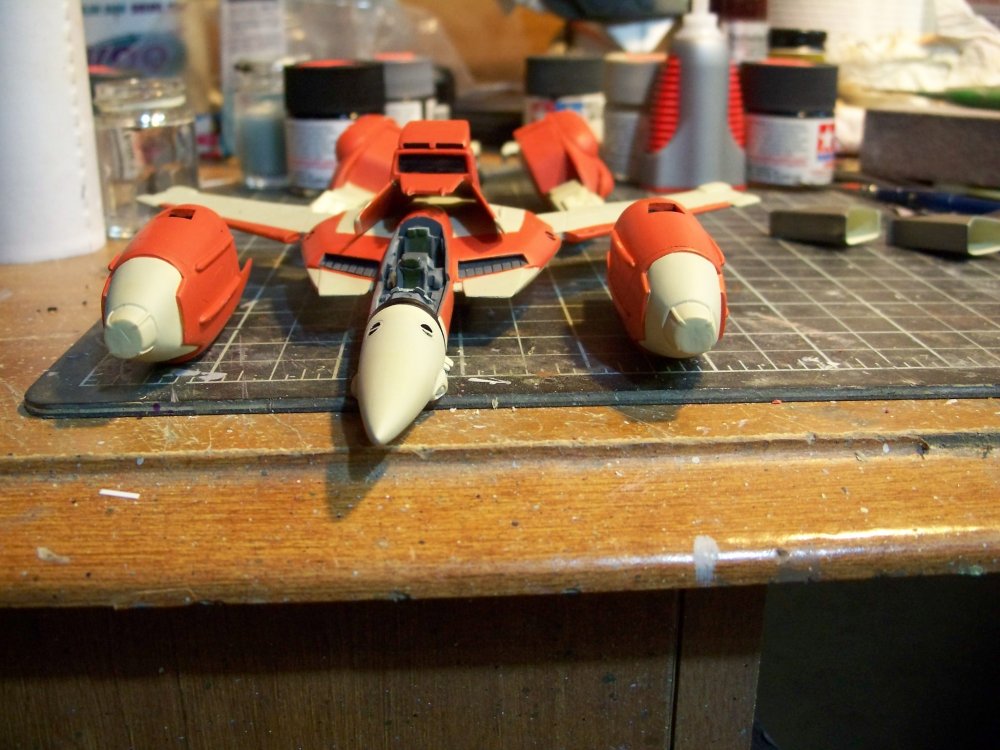
This will be a pretty clean build. Just sourcing better declas fot it. I should have what i need though. Doing some scribing work on the fast packs to bring more interest to them now.
-
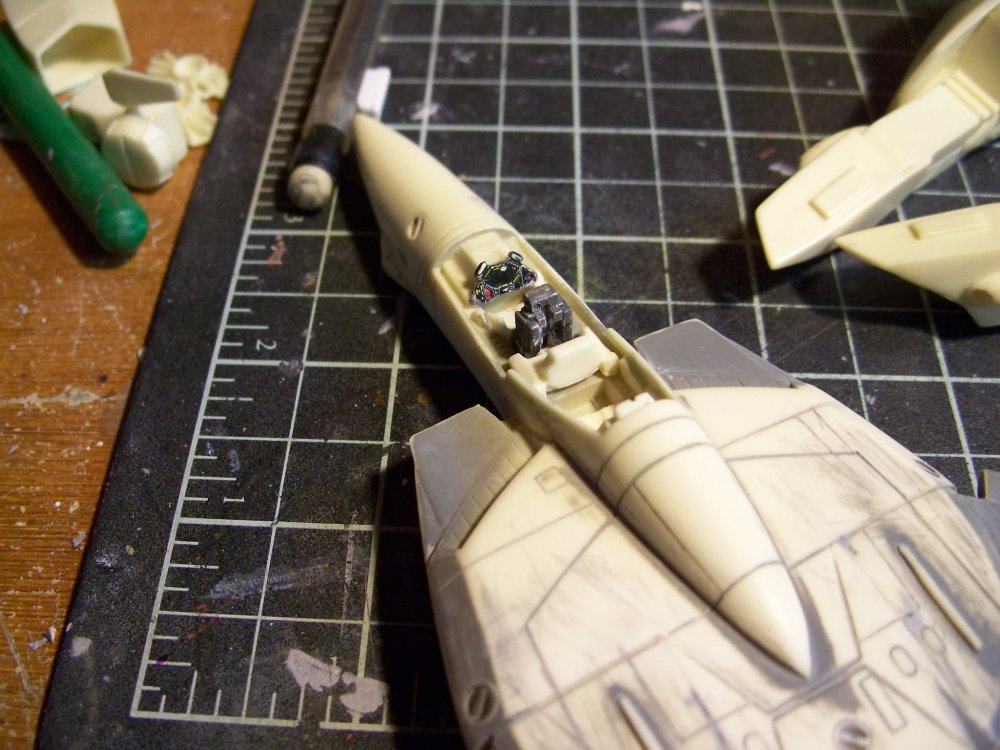
Here is last nights work. Glued on the wings and filled their respective seams. Also scribed in the upper wing fences that are prominent on every VF-1 kit from the Ultimate detail 1/48 to the 1/72 hasegawas. They are also seen in the PS2 DYRL opening scenes. Given 3 sources id say they are a safe detail to add. They also help fill out the wing and add a little interest. Next ill be cleaning up and getting everything ready for a coat of radome tan. In the cockpit i replaced the front seat top with a spare hasegawa VF-1 seat and the same with the front control panel. These add a needed detail touch to the cockpit that the kit was lacking. Not due to any fault in the kit. Its old as it is. Another reason im doing this build is that Macross Frontier has renewed my interest in the Macross series that came before. We have alot of new blood here because of it as well and some of the new members might also want to know more about what came before the VF-25.


-
It looks like they may be but the nose and legs have been so reworked that you have to look really hard to see.
-
Sunset Beach is the song Minmay sings in the back seat as hikaru tours the rings of saturn in DYRL. In that scene he is piloting a VT-1 Super Ostrich.
-
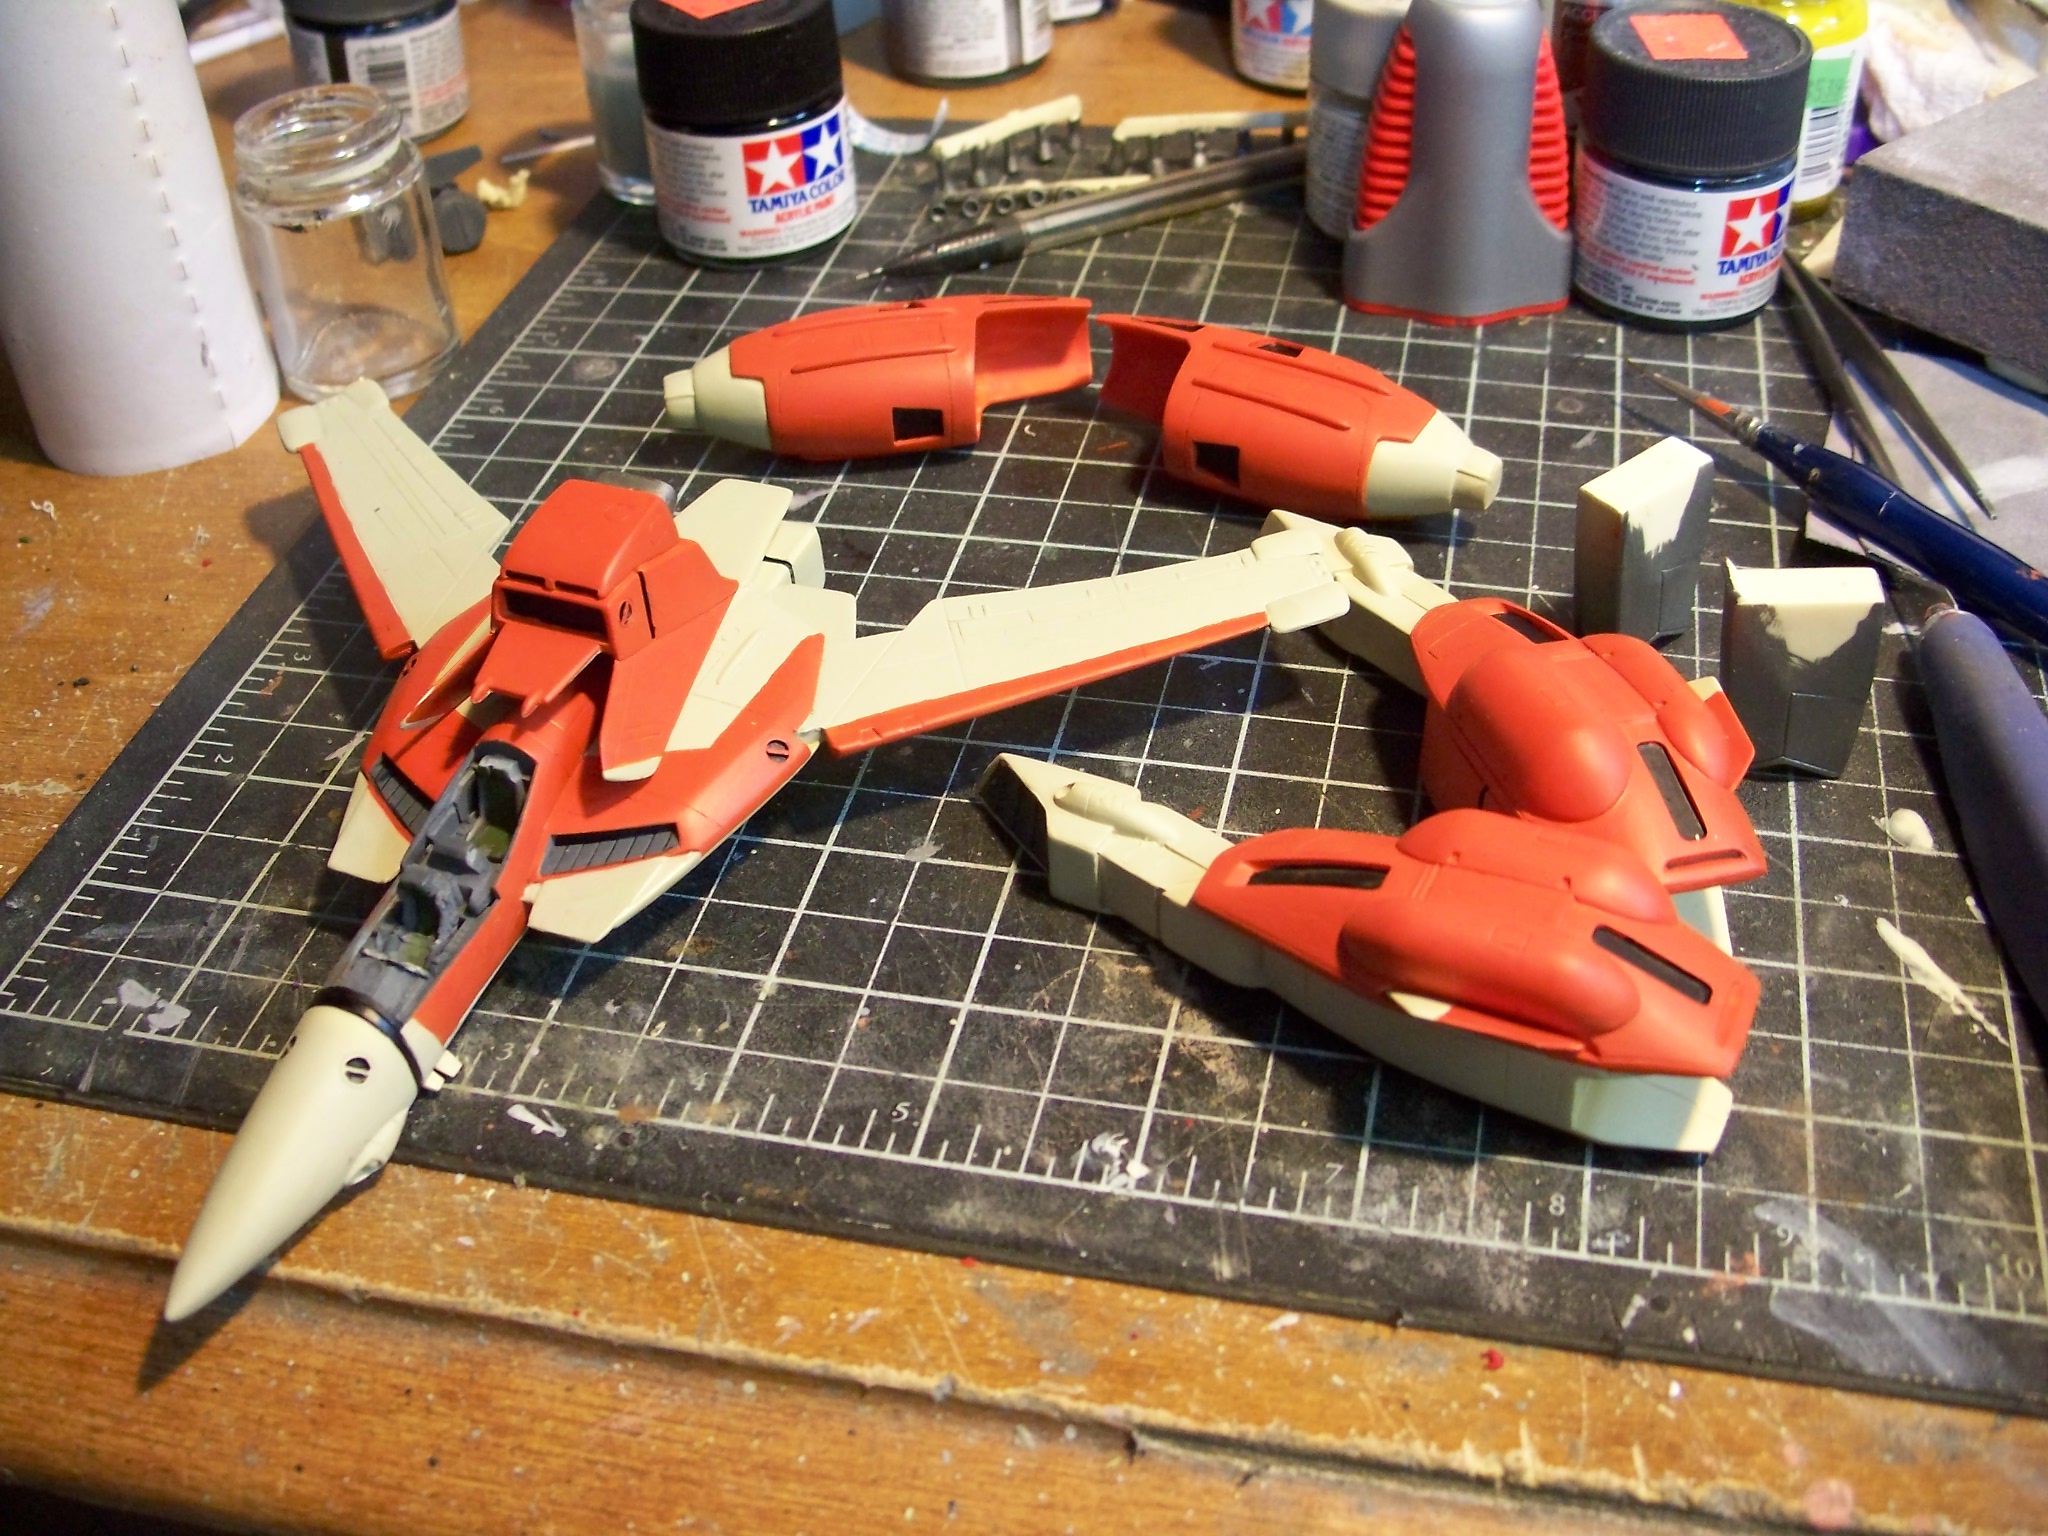
Picked up this kit recently. I will be working on it while i work on my VF-25. Sometimes i feel the need for a easier slam build and this fits right up that alley. I wont be doing a whole lot to it. Some slight scribing adding panels and details common to all VF-1 types. I hope alot of you follow along since this little orange bugger isnt seen much.
-
With how thin im getting the paint not very likely. I have found that a light coat of paint can actually tighten a join and make it less floppy. So far all parts fit nice and tight.
-
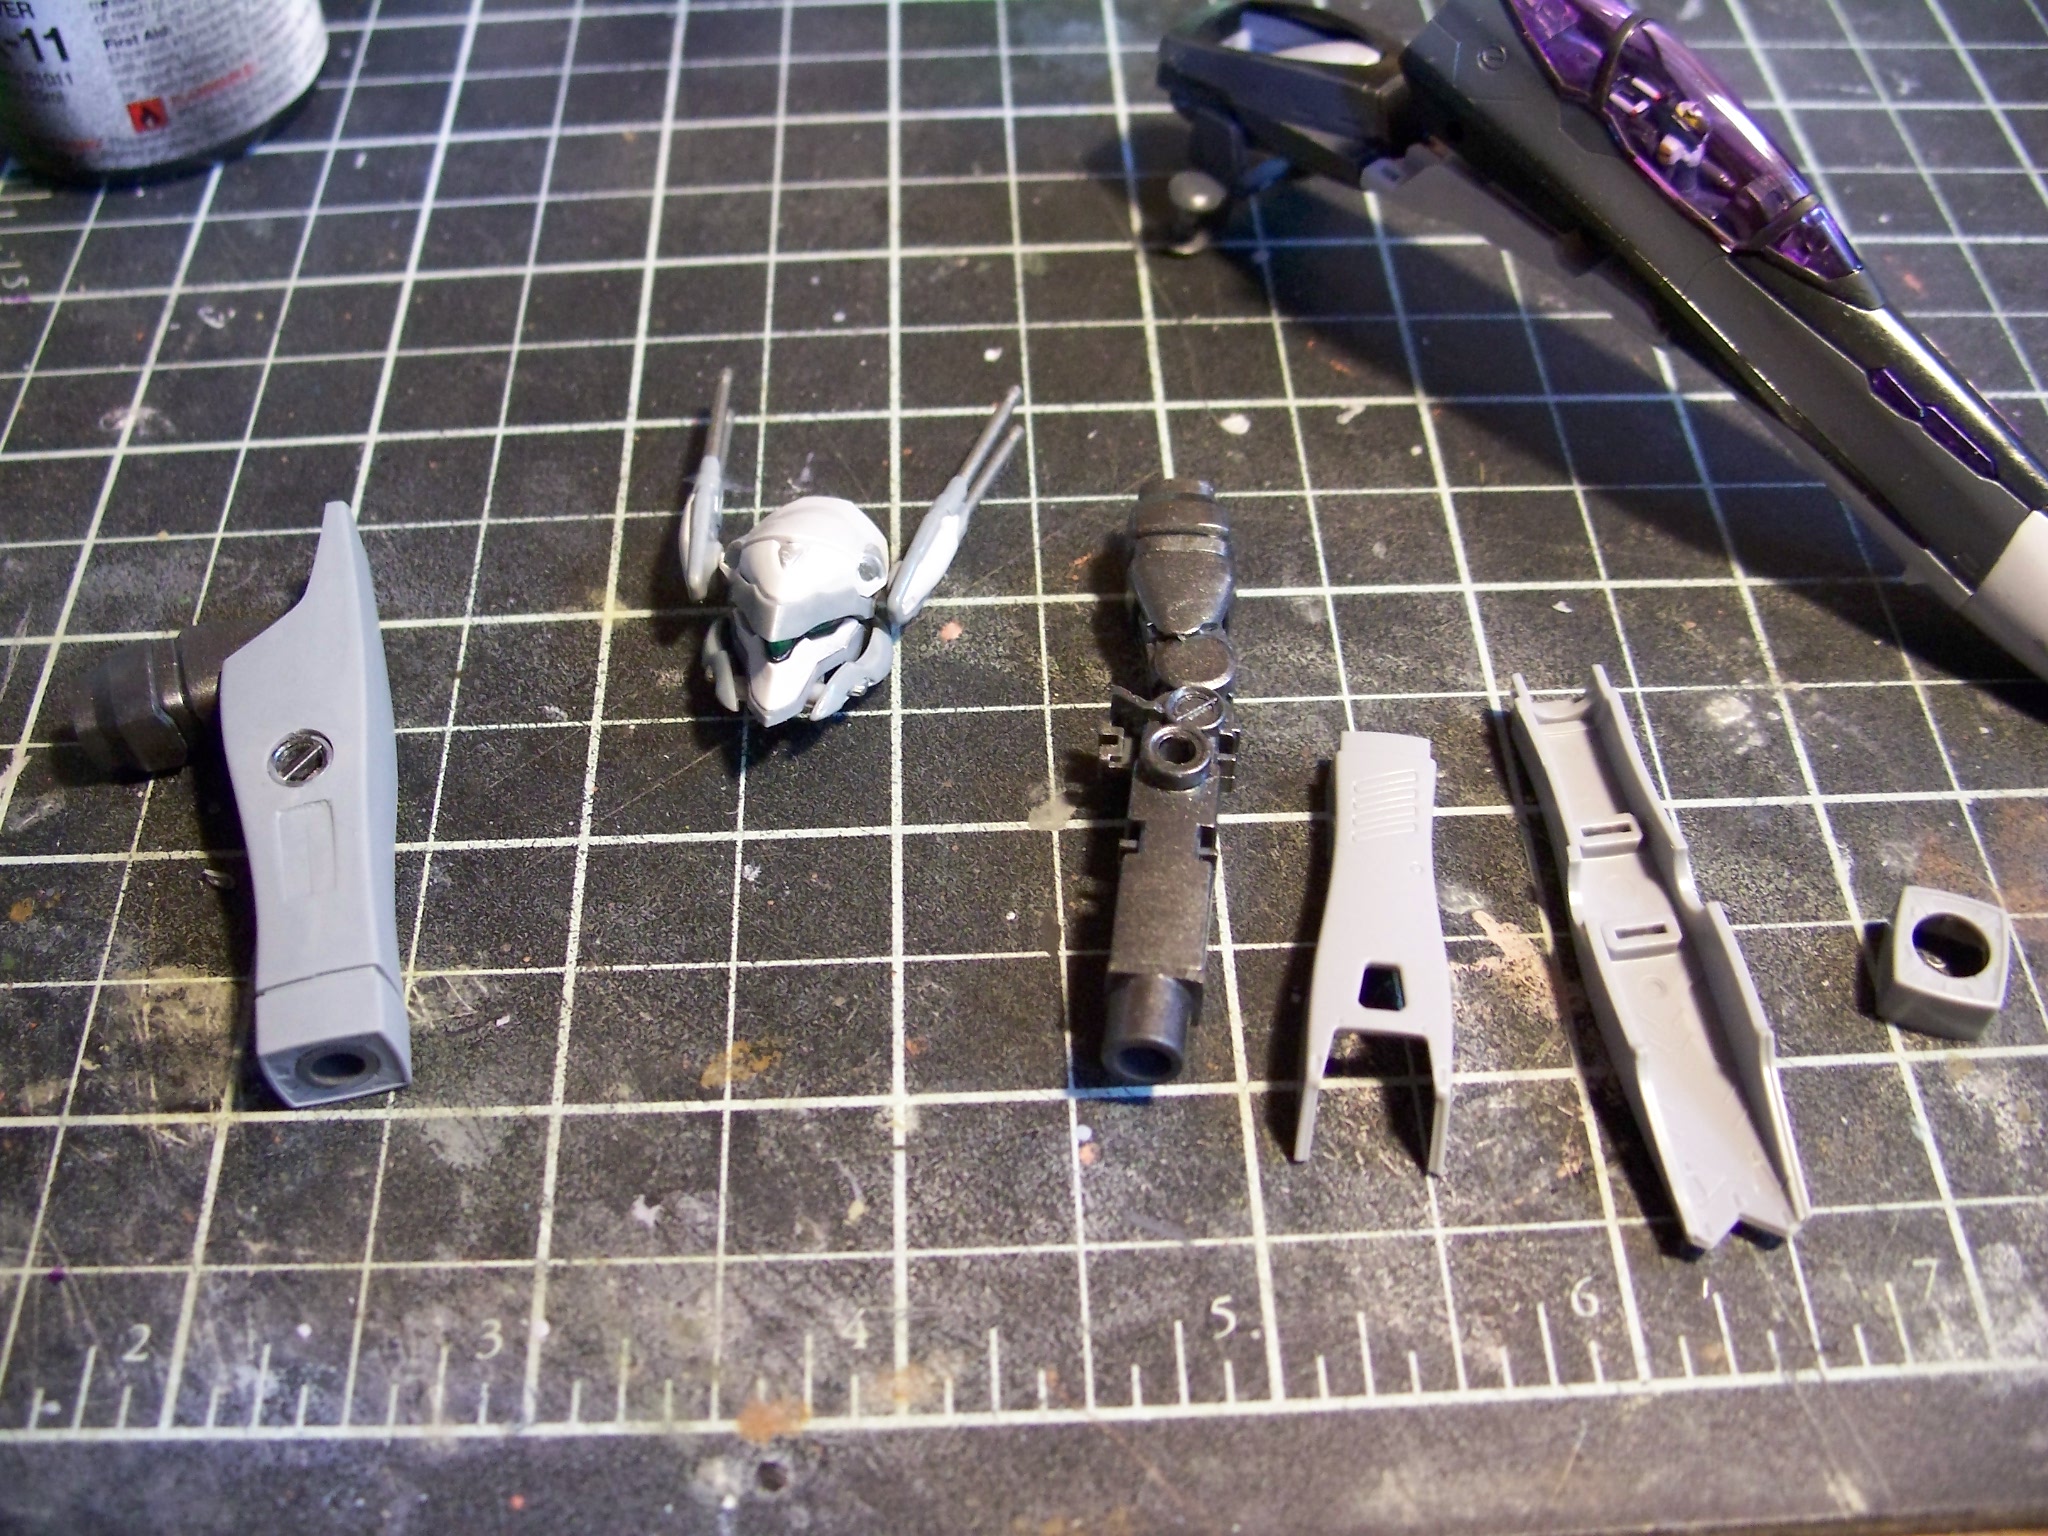
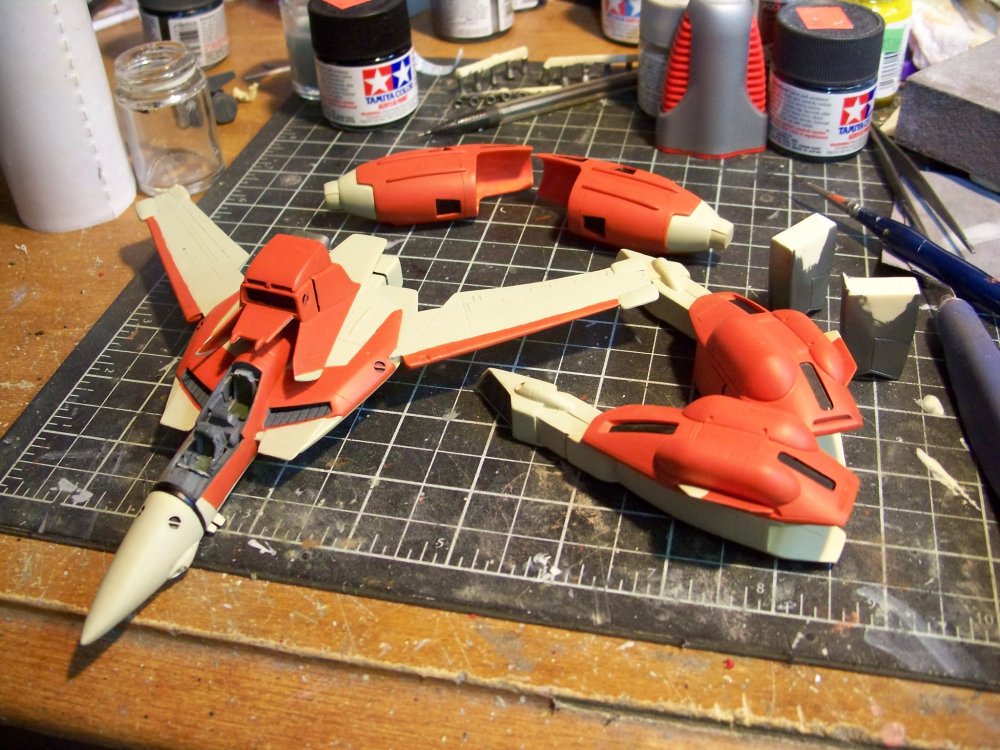
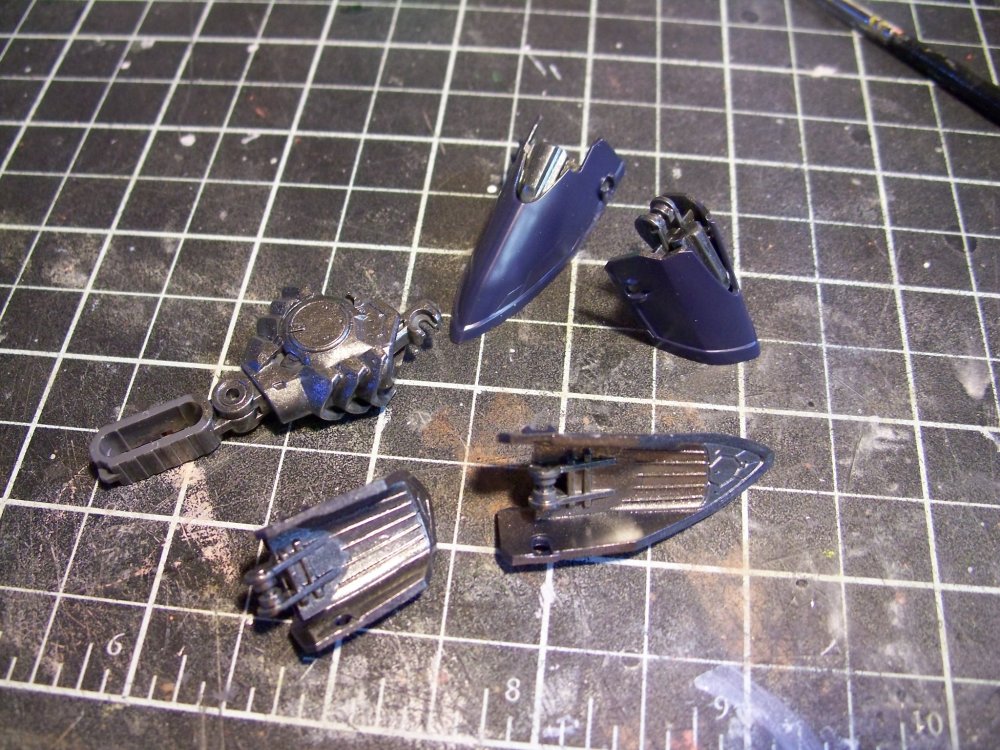
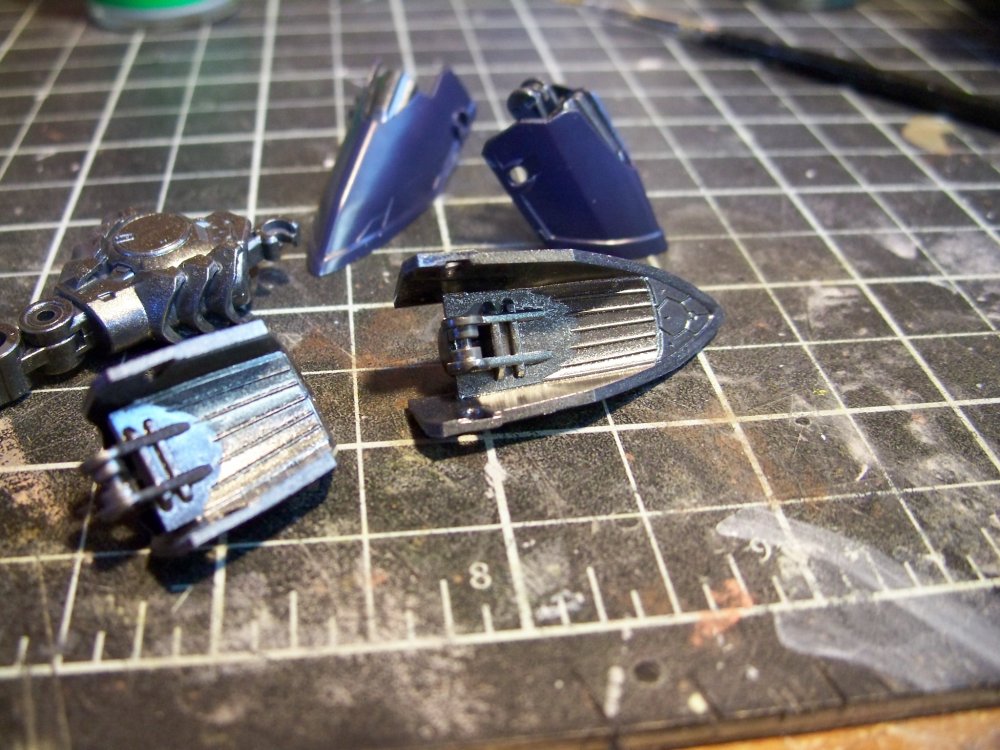
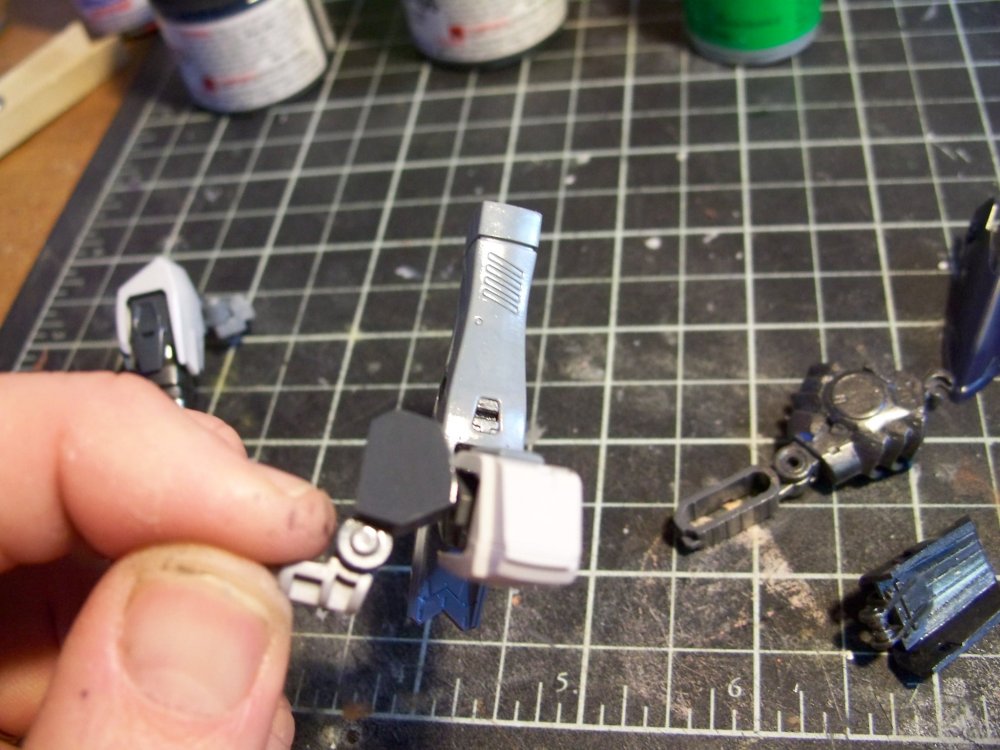
Arms and shoulder assemblies are done. For those wanting to do a darker grey on the upper fuselage pieces note that there is a panel on the shoulder part that needs to be painted dark grey. The part is molded in a lighter grey plasatic. I have fully painted all my parts. All internal mechanical parts will be gunmetal with grey metallic details where applicable. I have also started on the foot thrusters. Again the internal parts are overall gunmetal. I will pick out details later when the entire assembly is ready before fuselage panels go on. I dont like the purple plastic that the exhaust nozzles are. So the inside gets a coat of gunmetal while the outsides will be metallic grey. Aside from the very light grey all paints used are tamiya. The light grey is Polly S. Where possible i am prepainting all the parts before assembly. In cases like the arms though the parts must be assembled and the seam taken care of before painting. This kit reenforces my belief that bandai does not consider painting when making their kits. while it can be done they really dont allow for subassemblies when painting.
-
Steal away. Im not going to be able to work on it tonight. I work till 1030/11 and have to get right back up at 4 Am to be at work by 5.
-
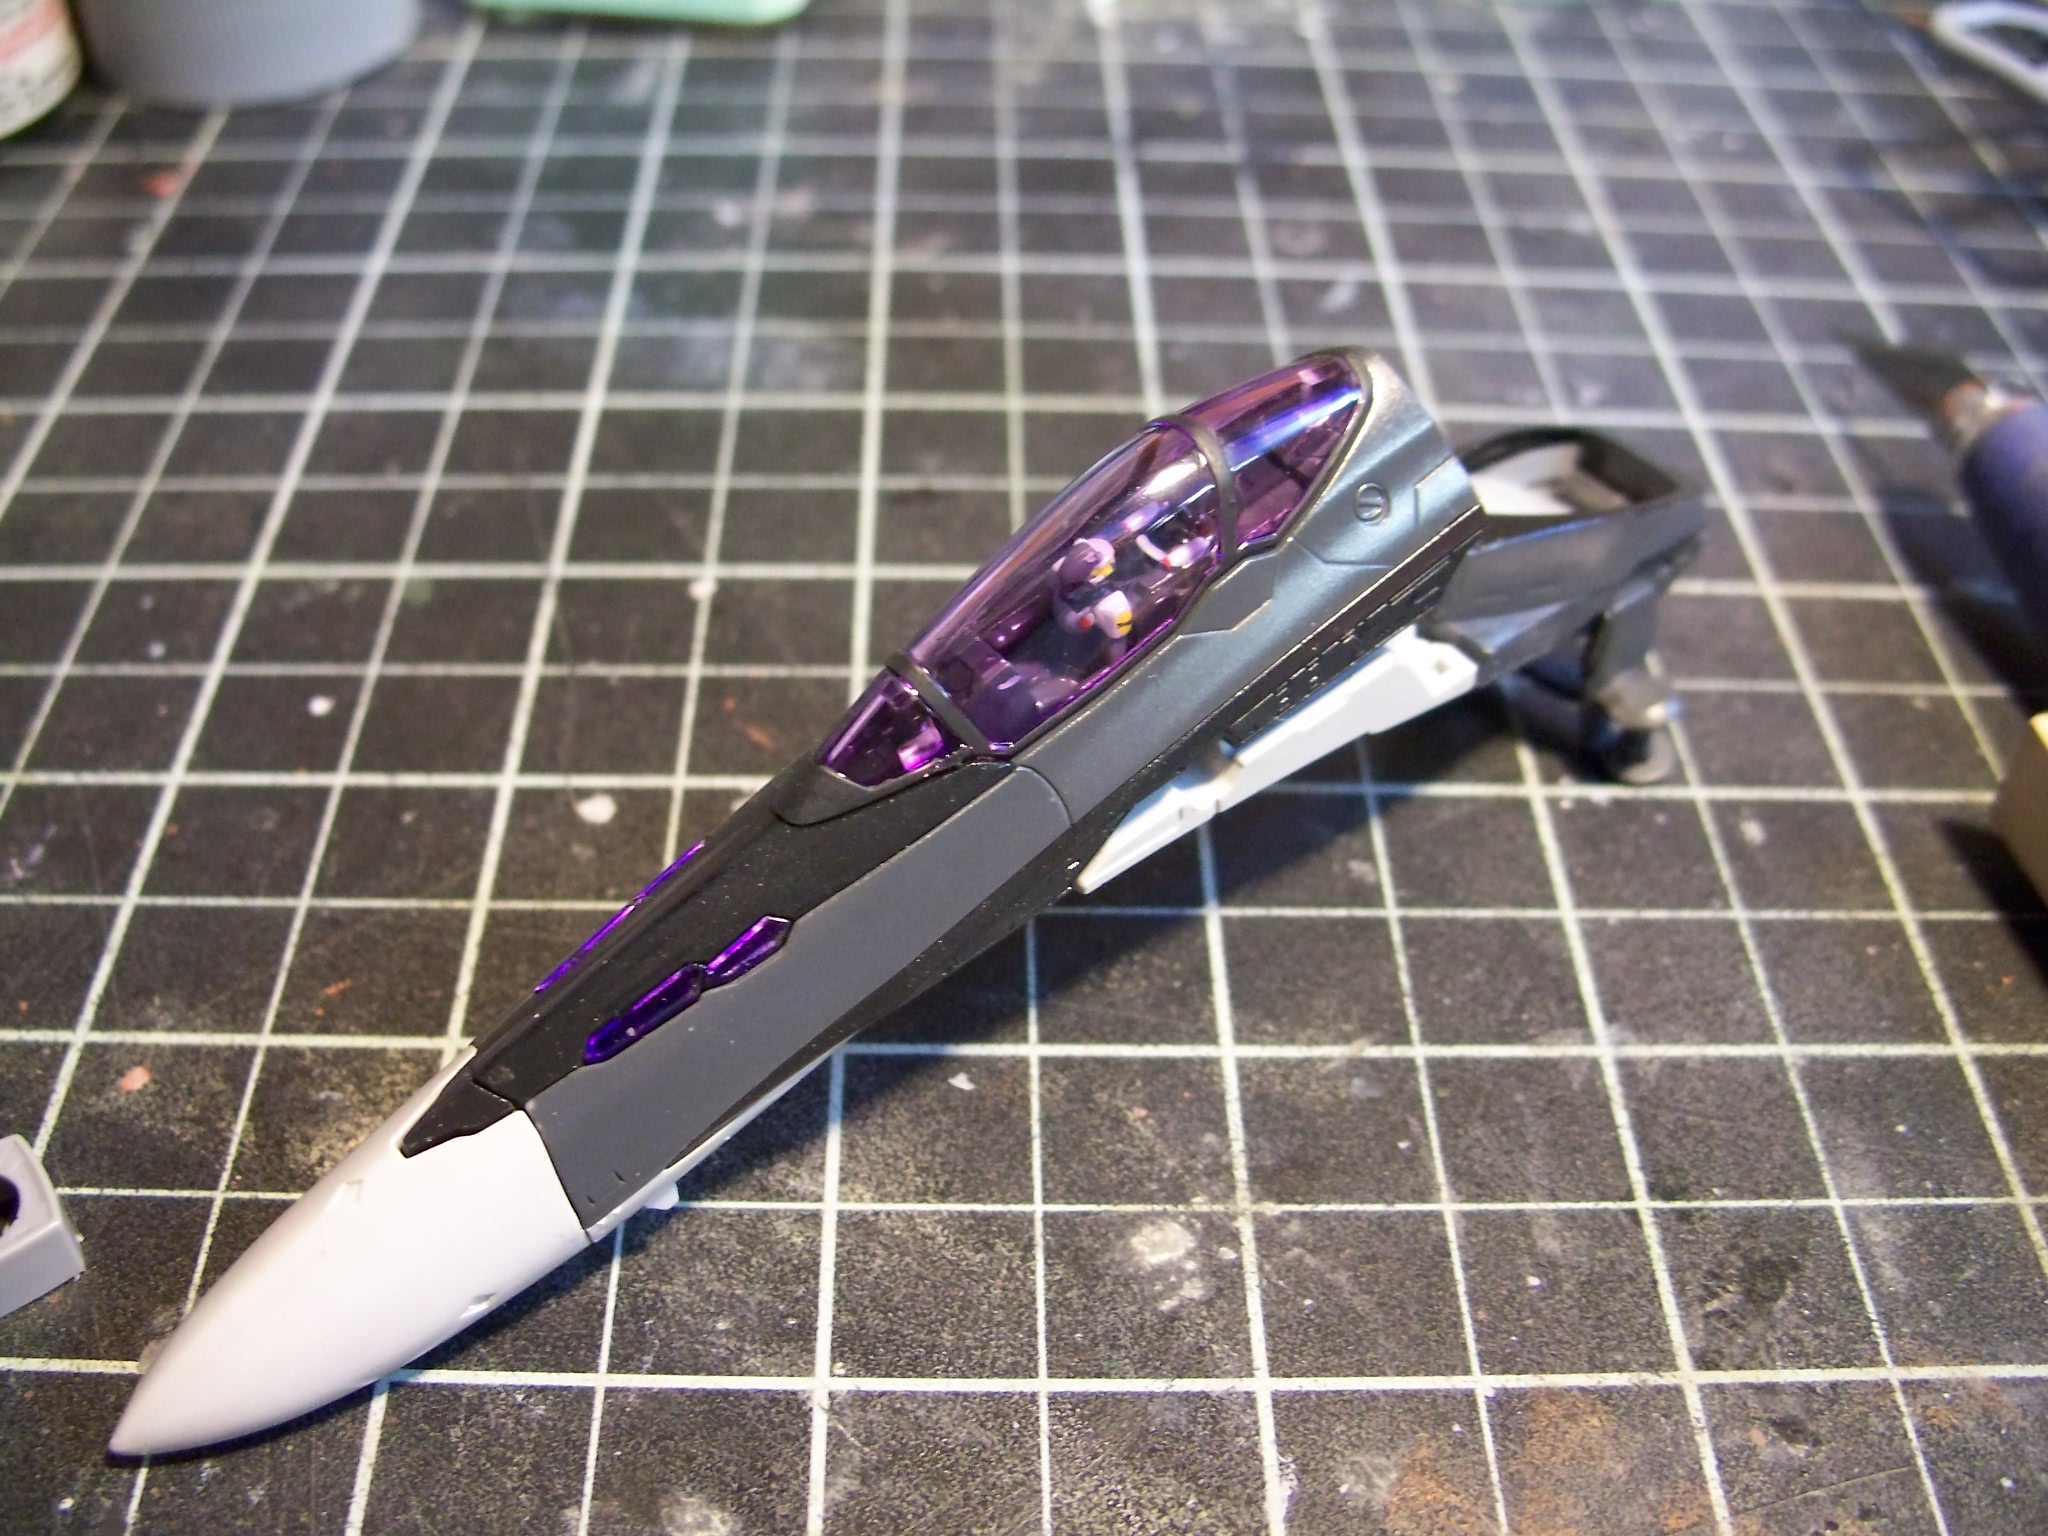
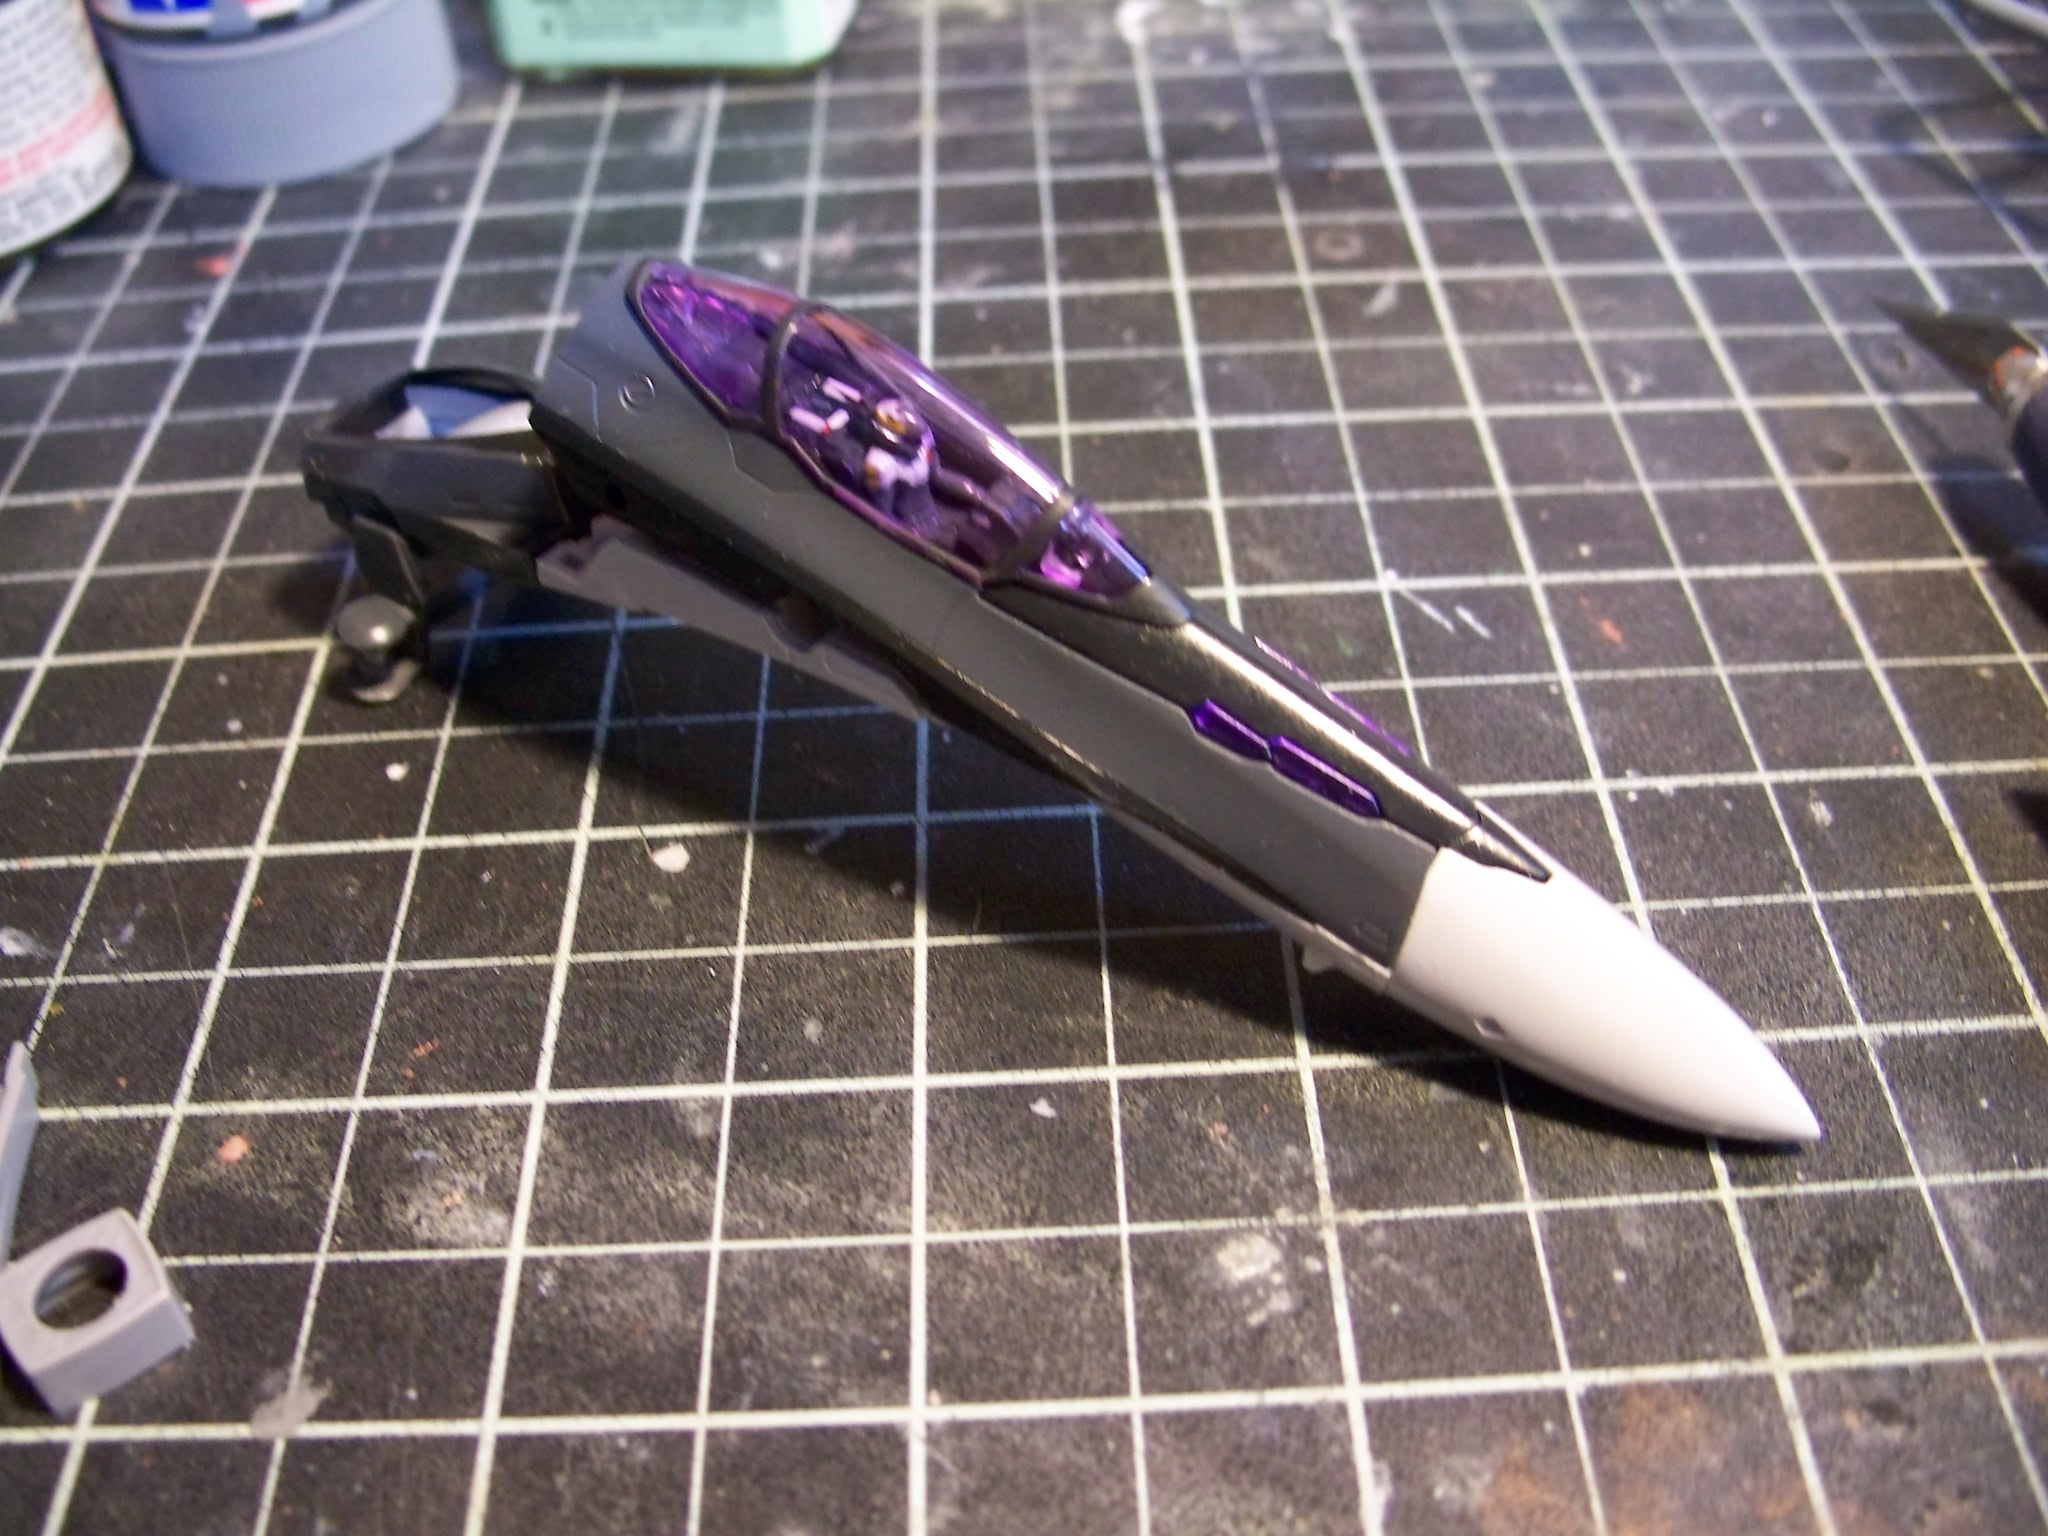
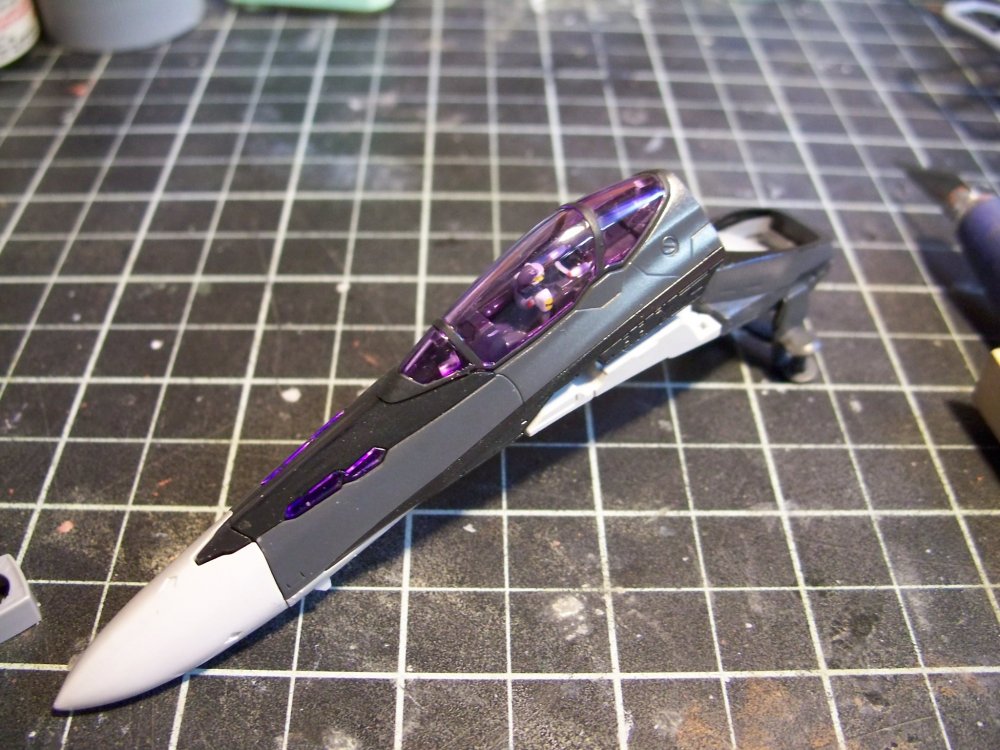
Its games workshop purple ink. its made for mini models and wargaming figures. I dont know the ratios. i just mixed it and tested it on the sprue. when i liked the effect i applied it to the canopy. just remember go light. you can always add more but its a pain to take off too much.
-
 Probably a fan made model or one of the older resin kits really well worked over.
 -
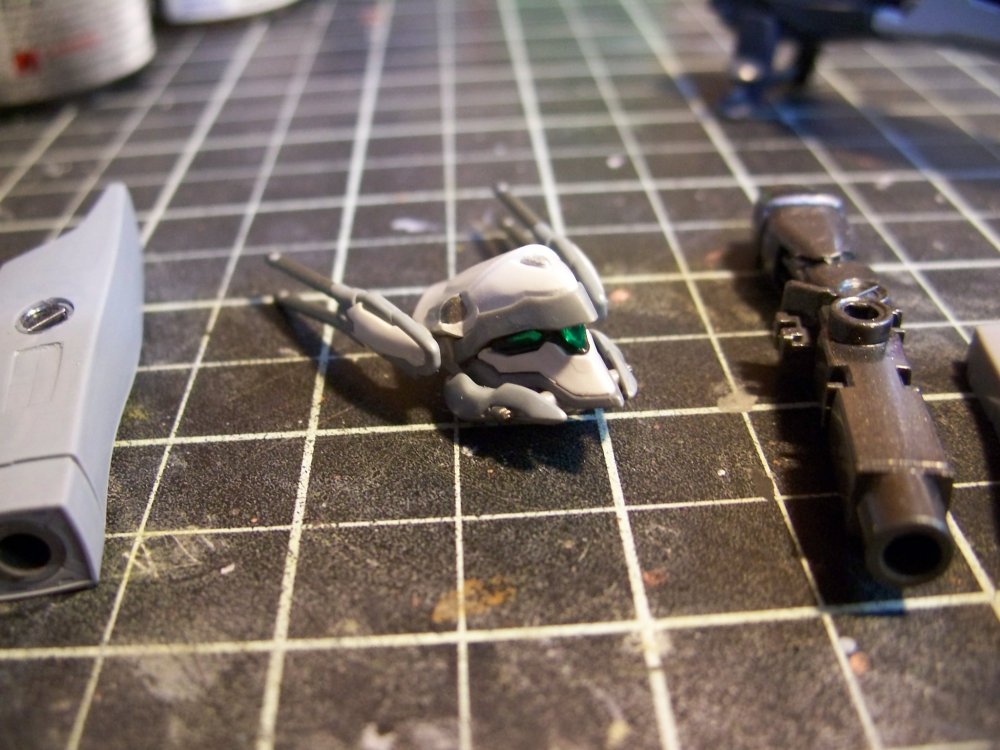
Heres the finished nosw and head with the arm parts still in work. The canopy is only just put in place so i can remove it for the dullcoat once the decals and wash are done. The decals will also be under a coat of future to protect them. I will not transform this kit until all layers are on. The clear reds on the head and other areas will be added after the dull coat so they will have a gloss. Other parts like the purple sensors will be masked


-
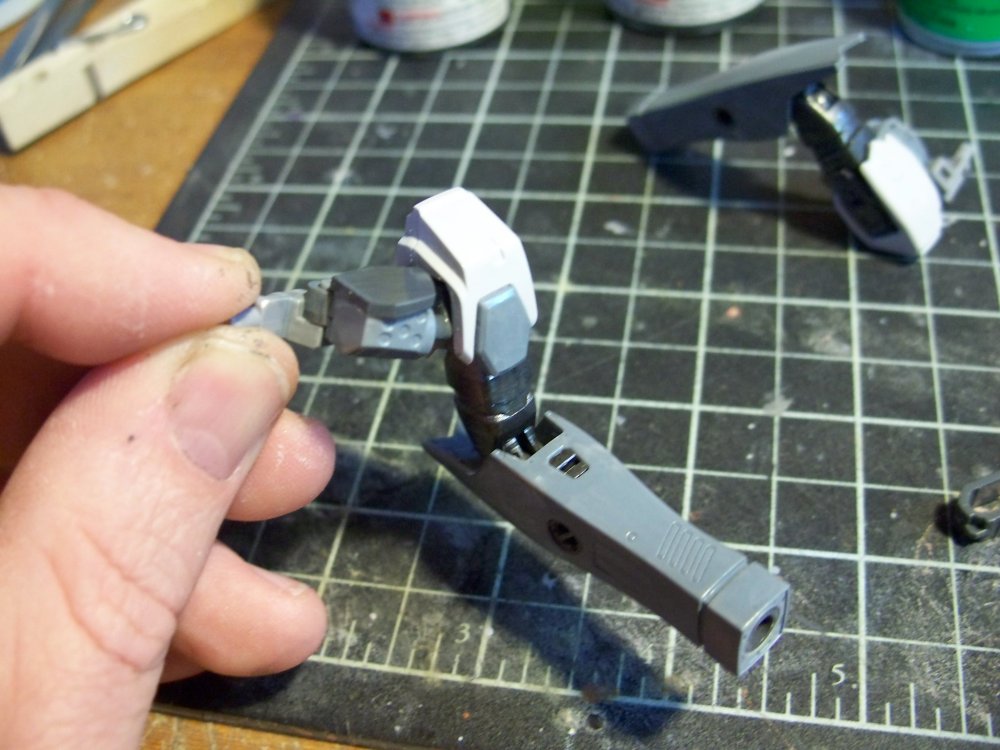
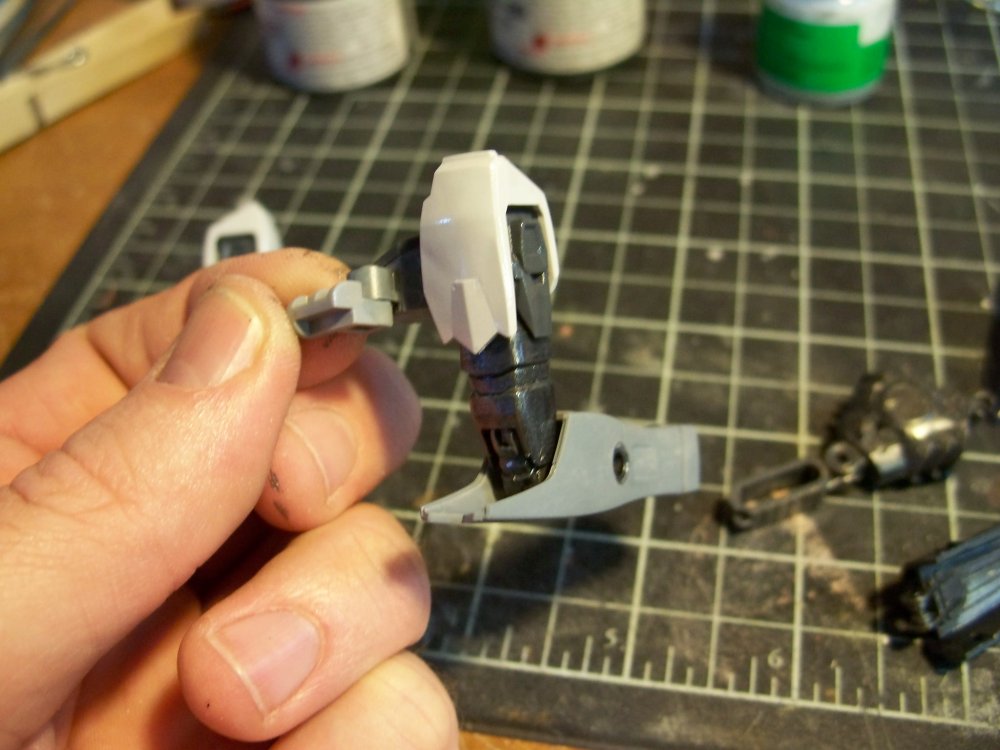
I have heard that. Kind of like bandai took the feedback from the Alto version and went and tightened up the molds too. I havent got the the main fuselage yet but i have heard its fit has been refined some compared to the Alto version. I also hope that the dark grey in the finish will blend away the thickness of the variable gaps some. We will see. I also think a layer of paint will help slightly tighten things a bit more. Im working on the arms now. These have the classic unavoidable seam line on them. not much you can do because of the design but i have a plan for these too. The fit is good and tight and the seam should be just as easy to eliminate as it was on the nose. Ill have some shots up in a bit of one assembled arm and one assembled frame and the forearm cover parts.
-
Daves pics were more than enough. The cockpit on this is too small to effectively detail. Plus its dark grey color under the tinted canopy will make it very difficult to see well anyway. I have the head assembled. Now i have the colors sorted out its a quite simple matter of painting the parts, letting it dry, slamming them together and giving them a coat of future. The future coating is proving pretty effective at minimizing scratches. I have color matches for the greys and am going one part at a time doing up some of the details. there is some airbrush work but alot of brush work too. The entire head was brushpainted. the parts breakdown really helped in this though. I didnt bother using the green sticker for the eye part. its molded in clear green as is. I just backed it woth silver and painted the black border on the outside.
-
Starship modeler has a few left in stock. Their Alto is out but their Ozma had 4 left last night i believe.
-
Dave to the bloody rescue. Thanks Mate!