

nightmareB4macross
-
Posts
5696 -
Joined
-
Last visited
Content Type
Profiles
Forums
Events
Gallery
Posts posted by nightmareB4macross
-
-
It’s just so weird. It had to be shared. 😆

-
Implementing the sliding heat shield and redefined the chins, yes chinS.

-
@Papa Rat that came out really well.
Kudos!!
-
-
1 hour ago, Special Sauce said:
Apologies if this question has already been addressed. Do the Super pack sets for the Bandai DX VF-1 Valks fit on the VF-1D as well?
Yes sir they do.
-
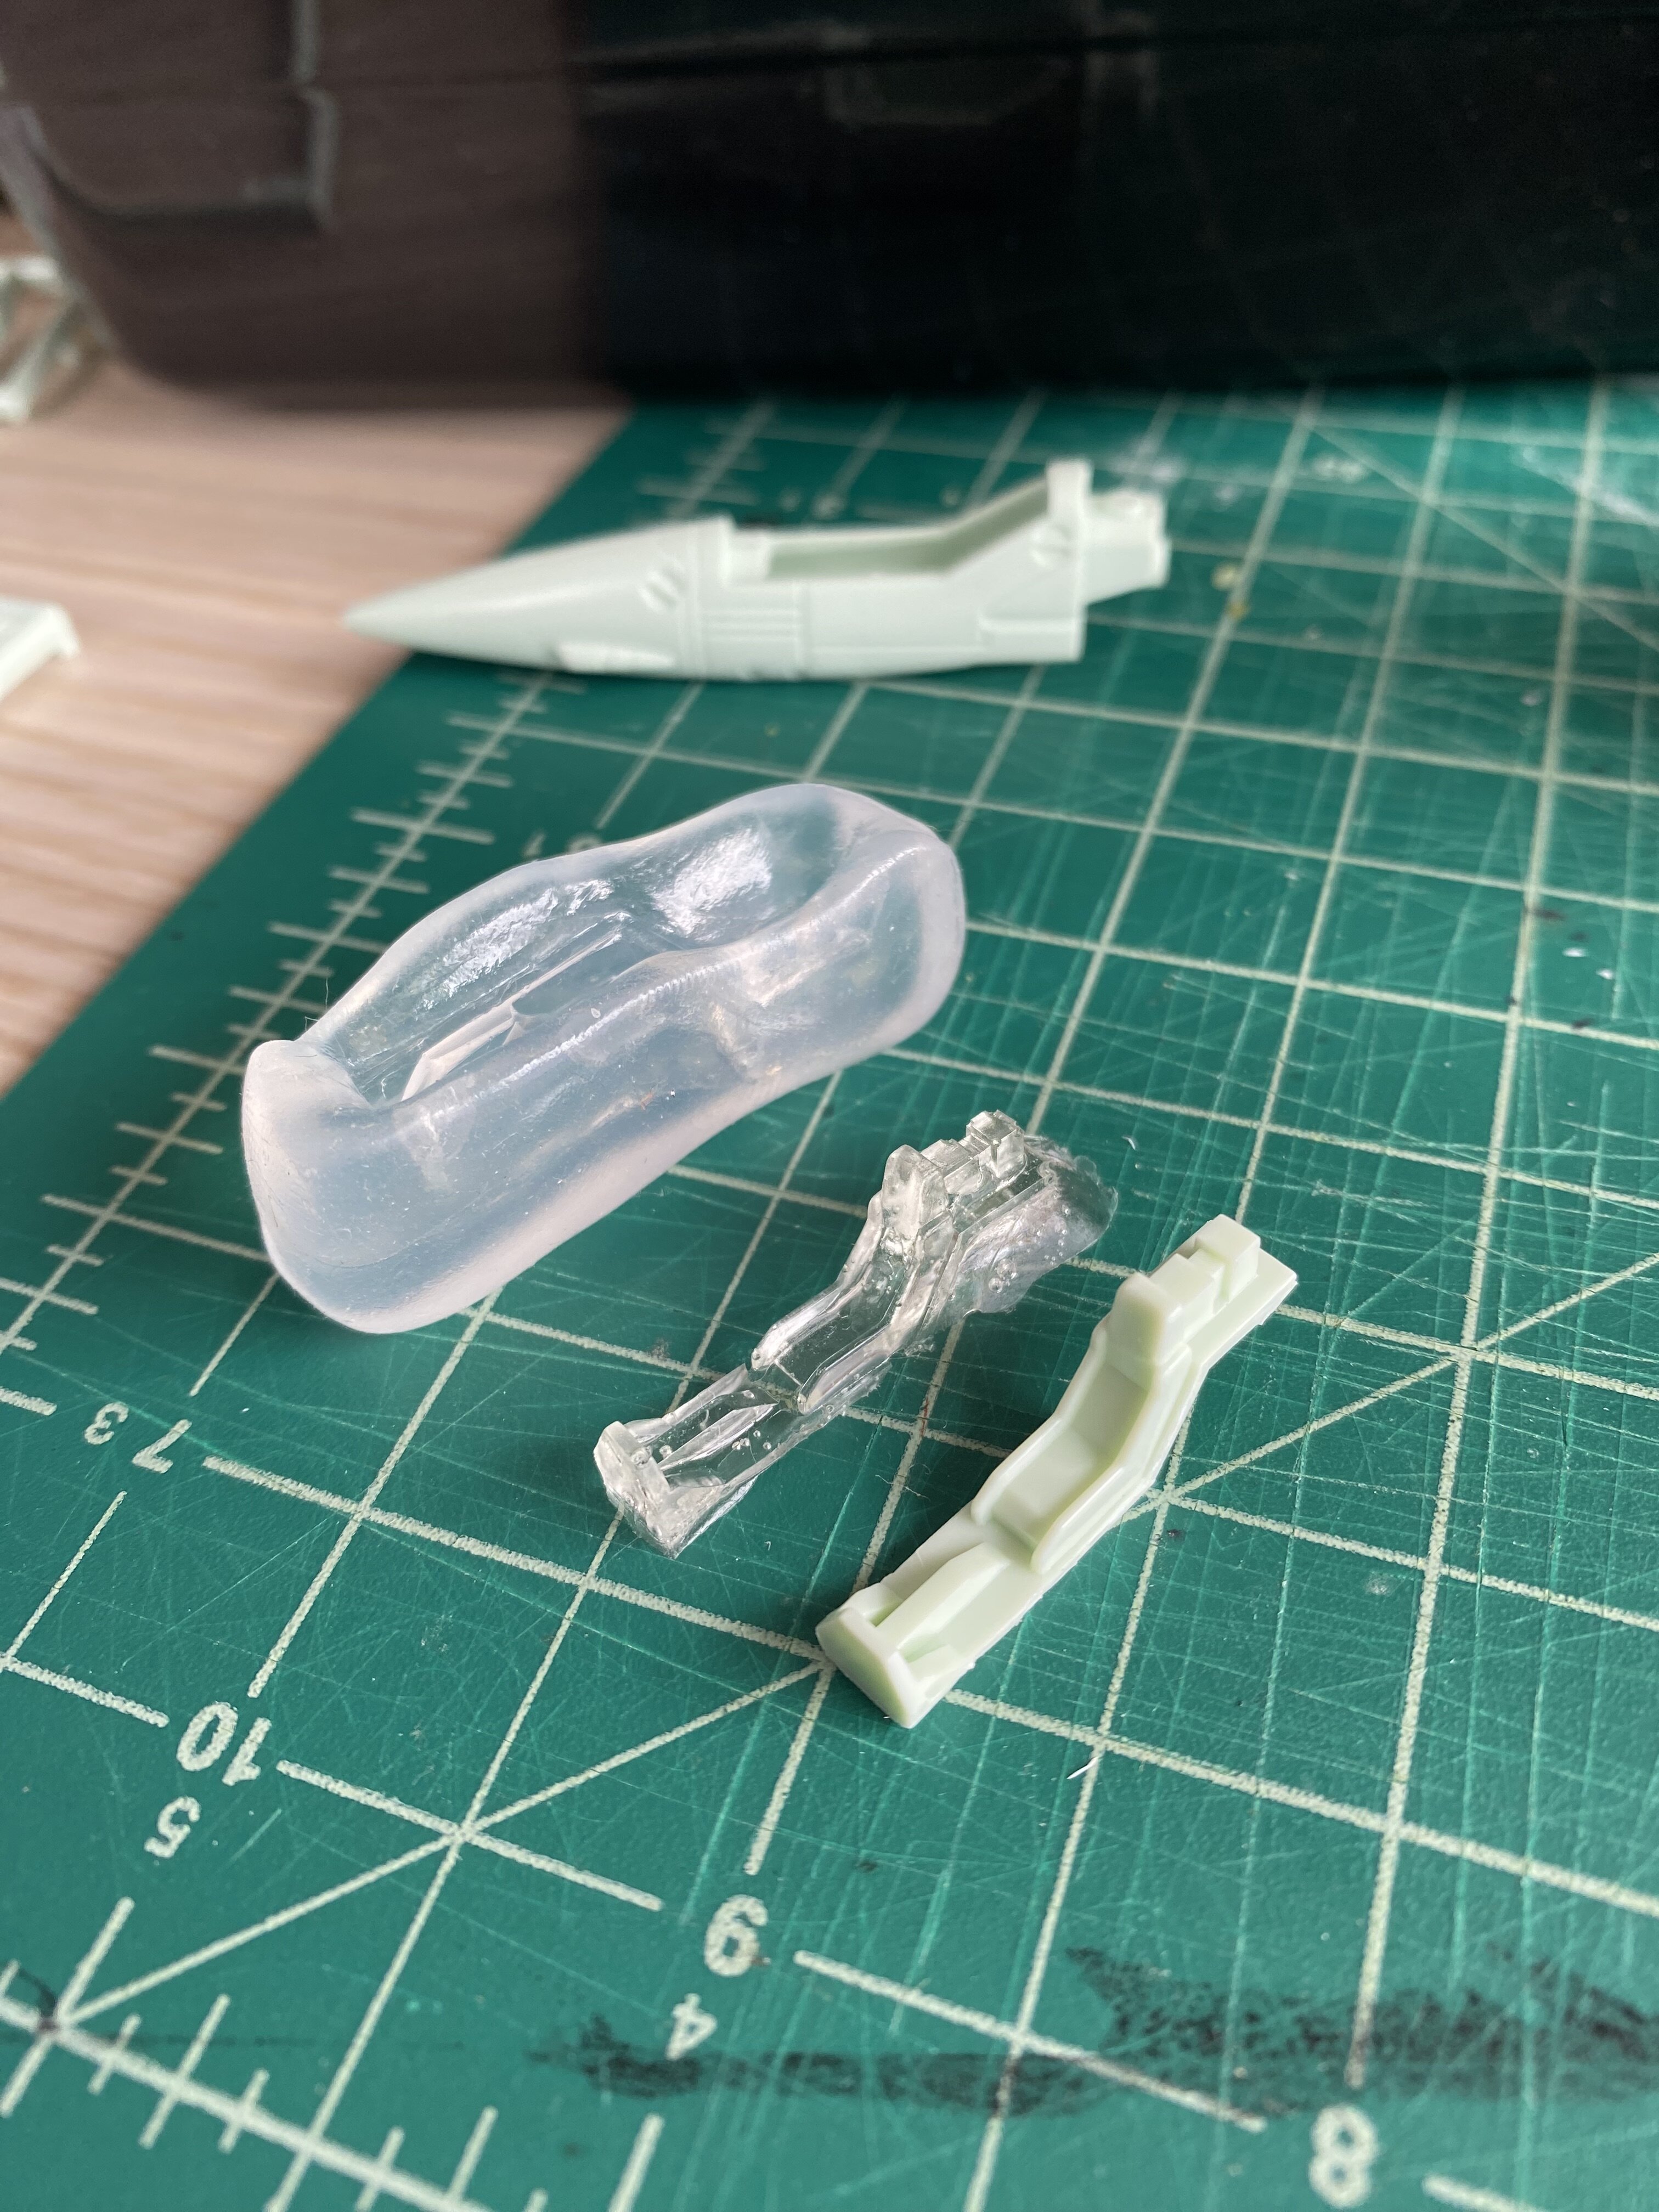
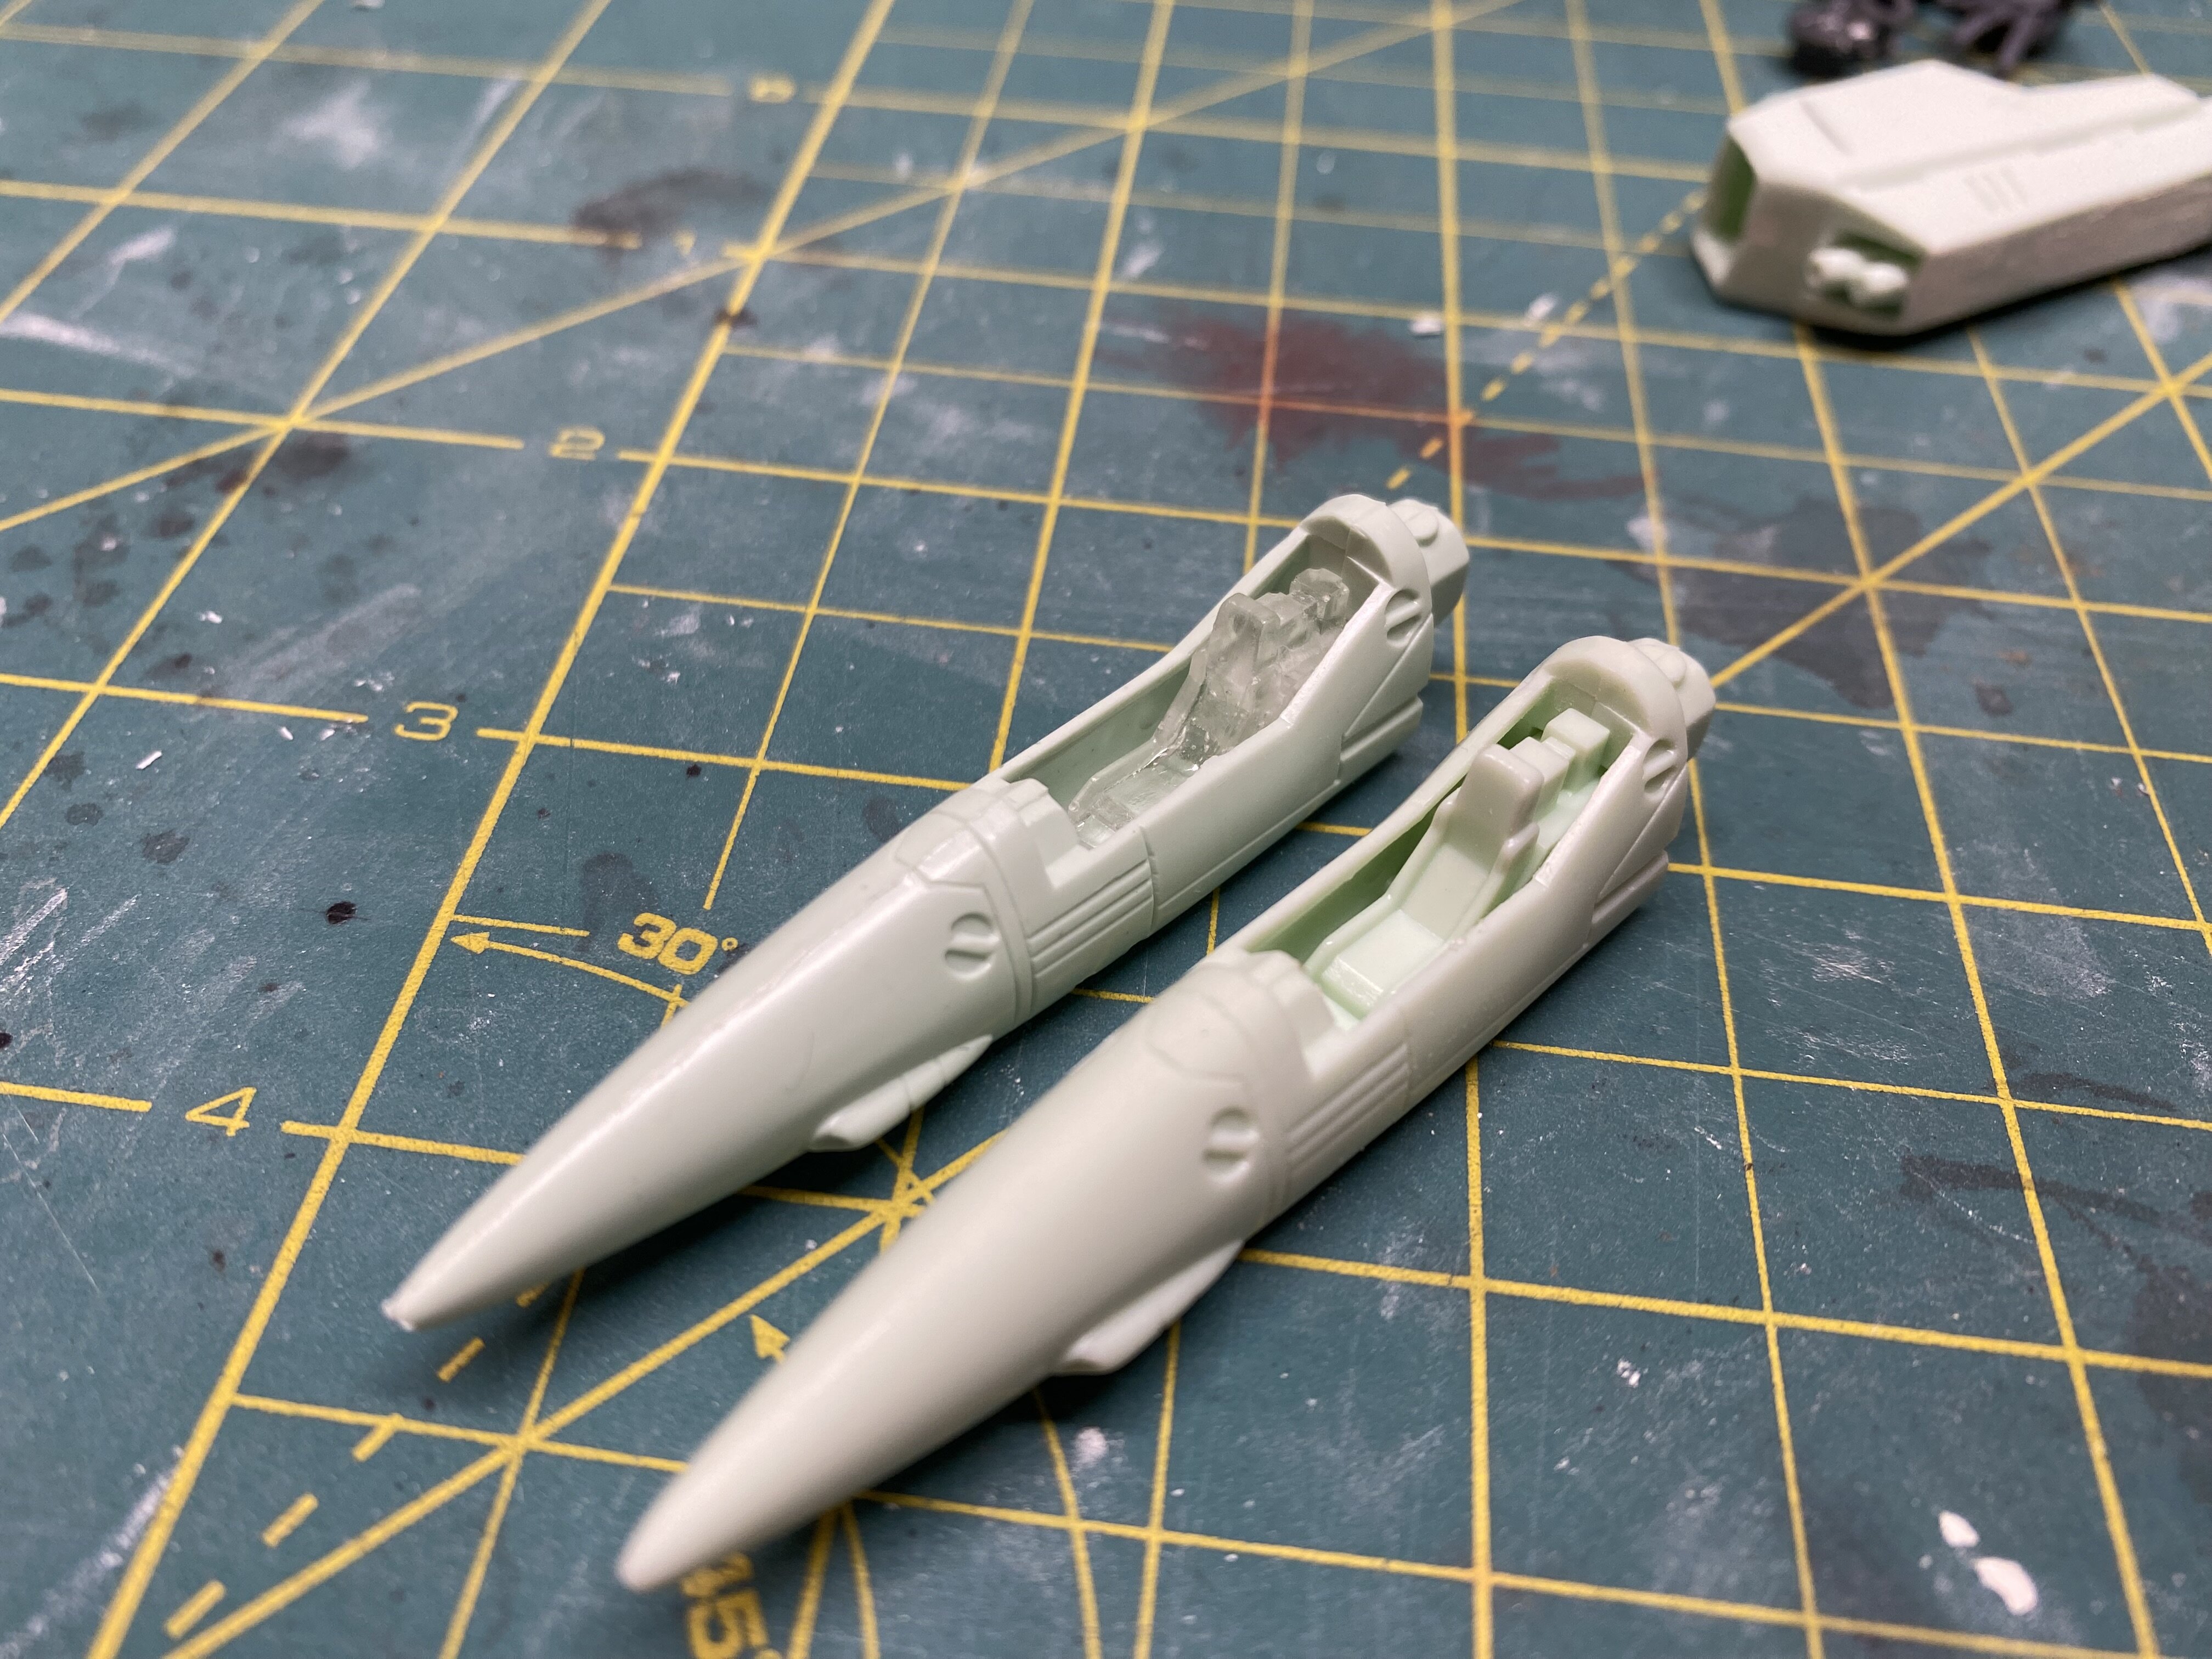
8 hours ago, Papa Rat said:
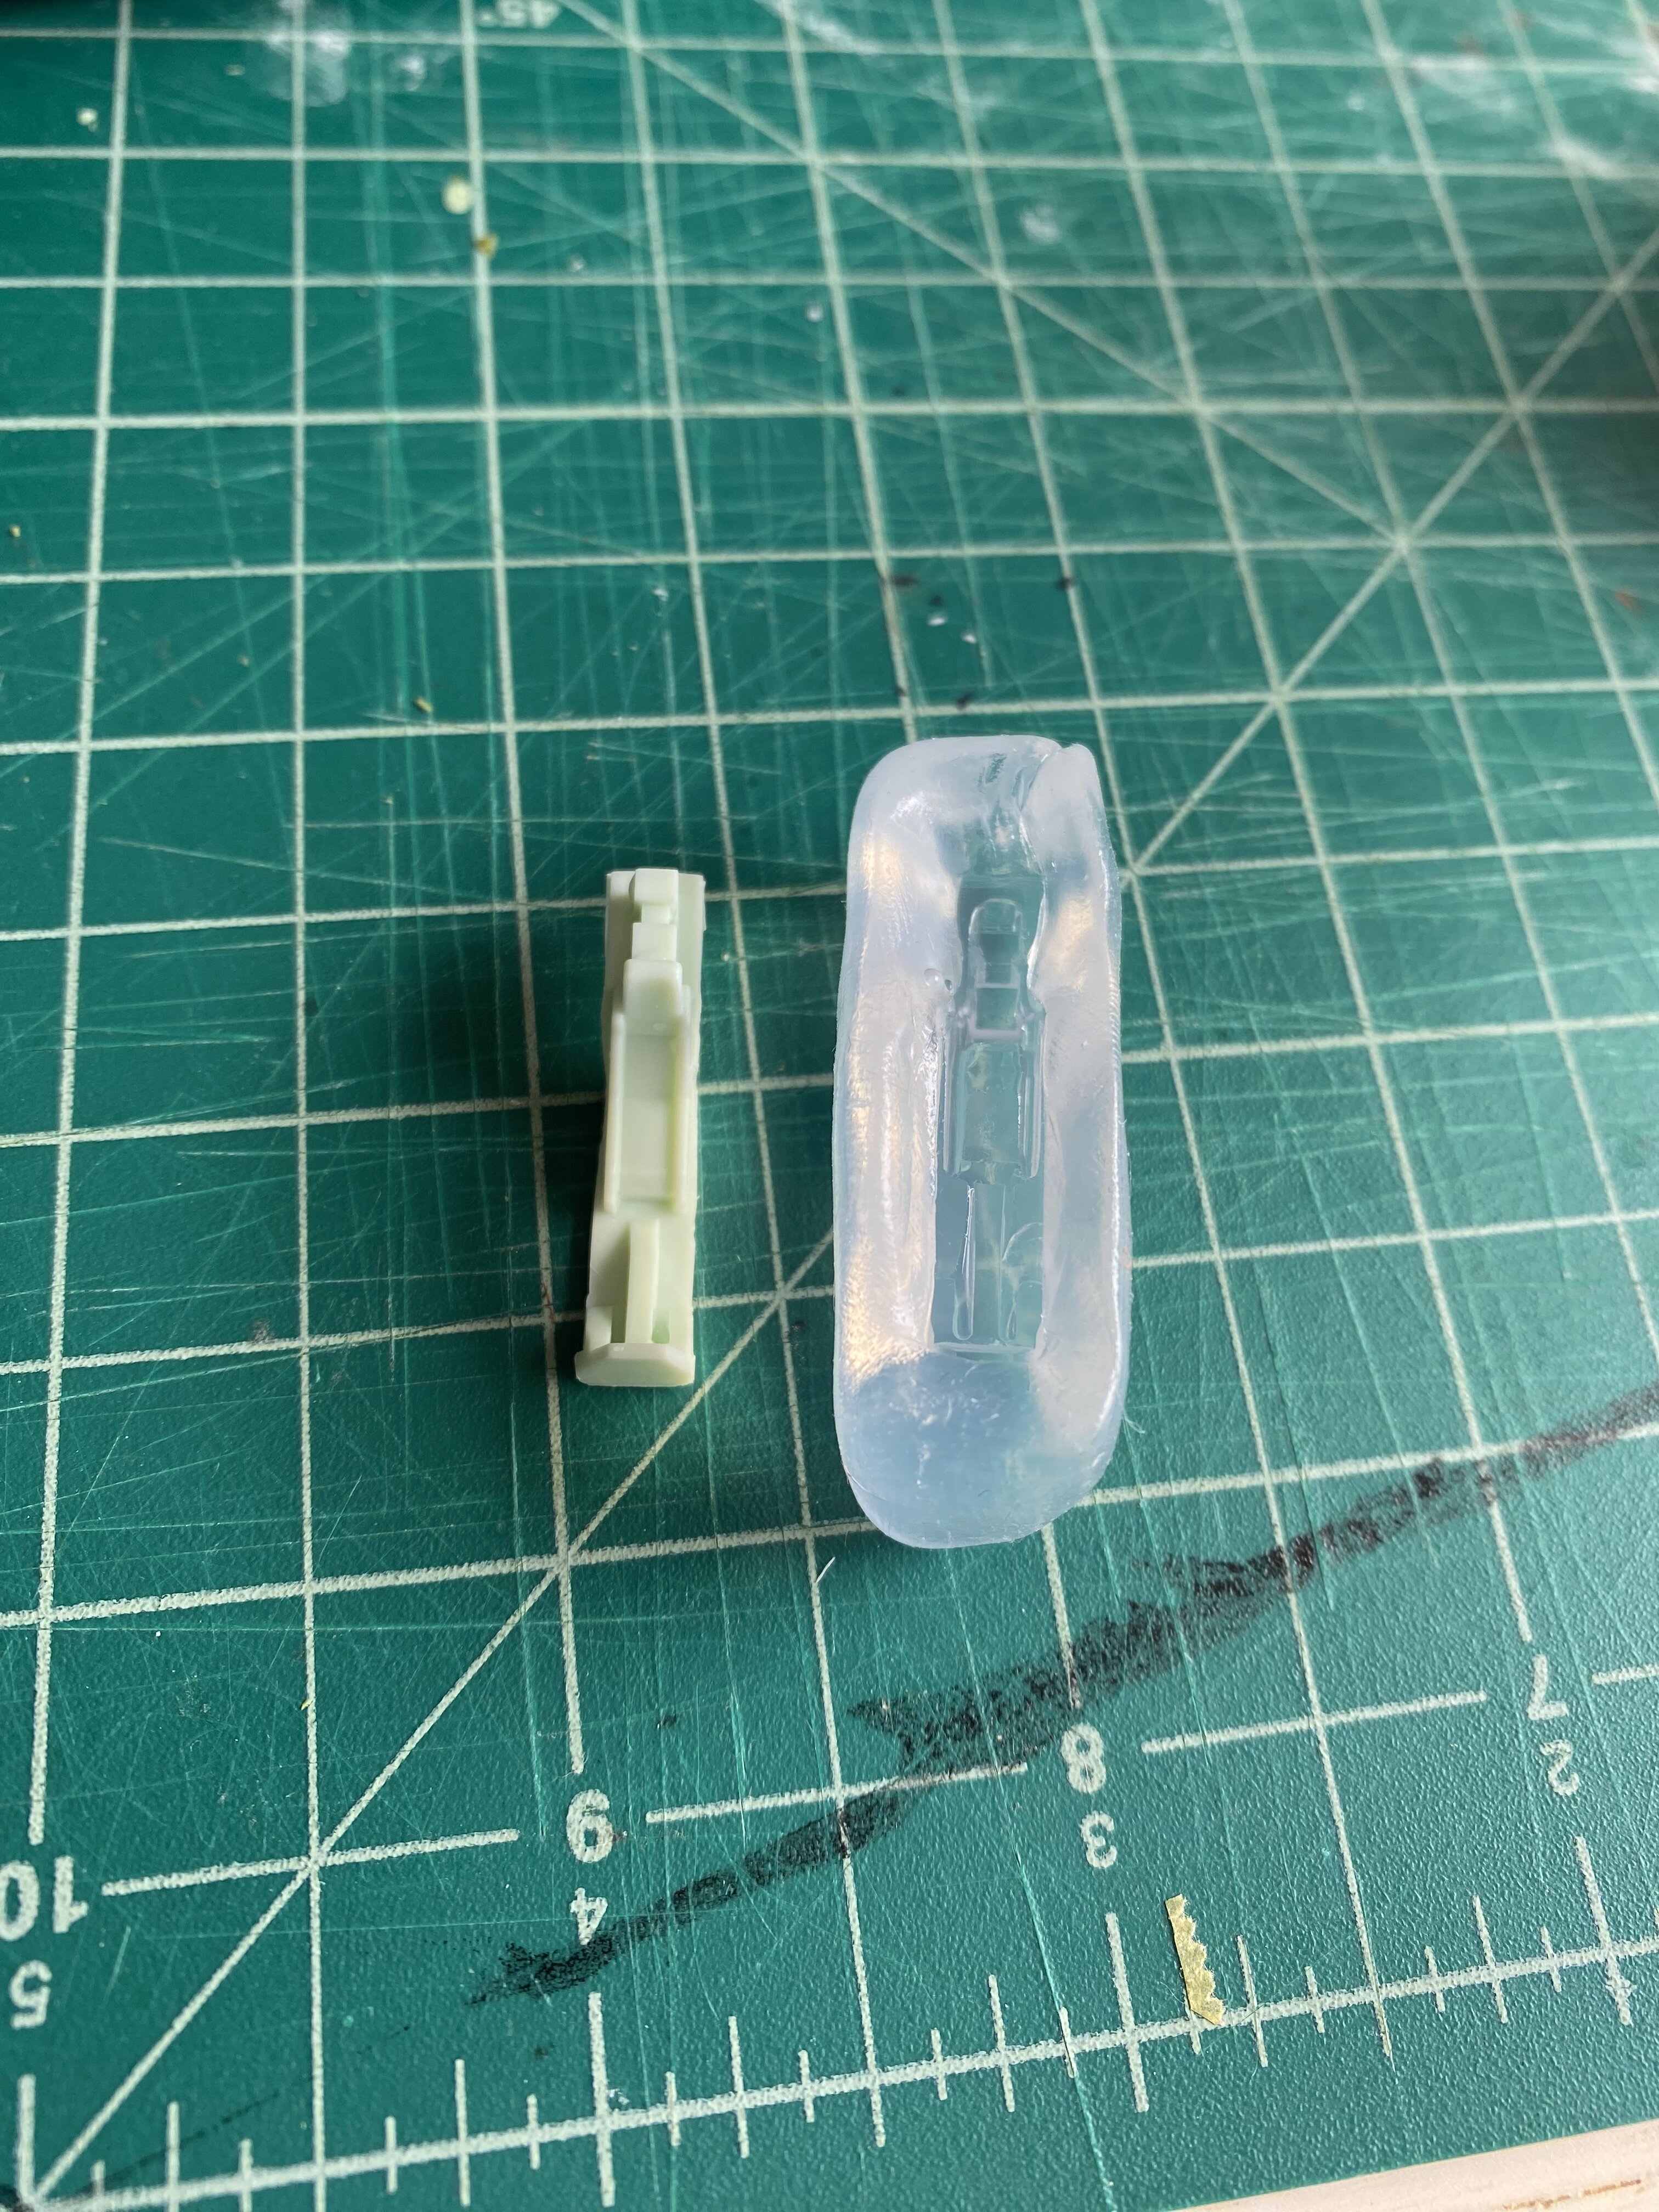
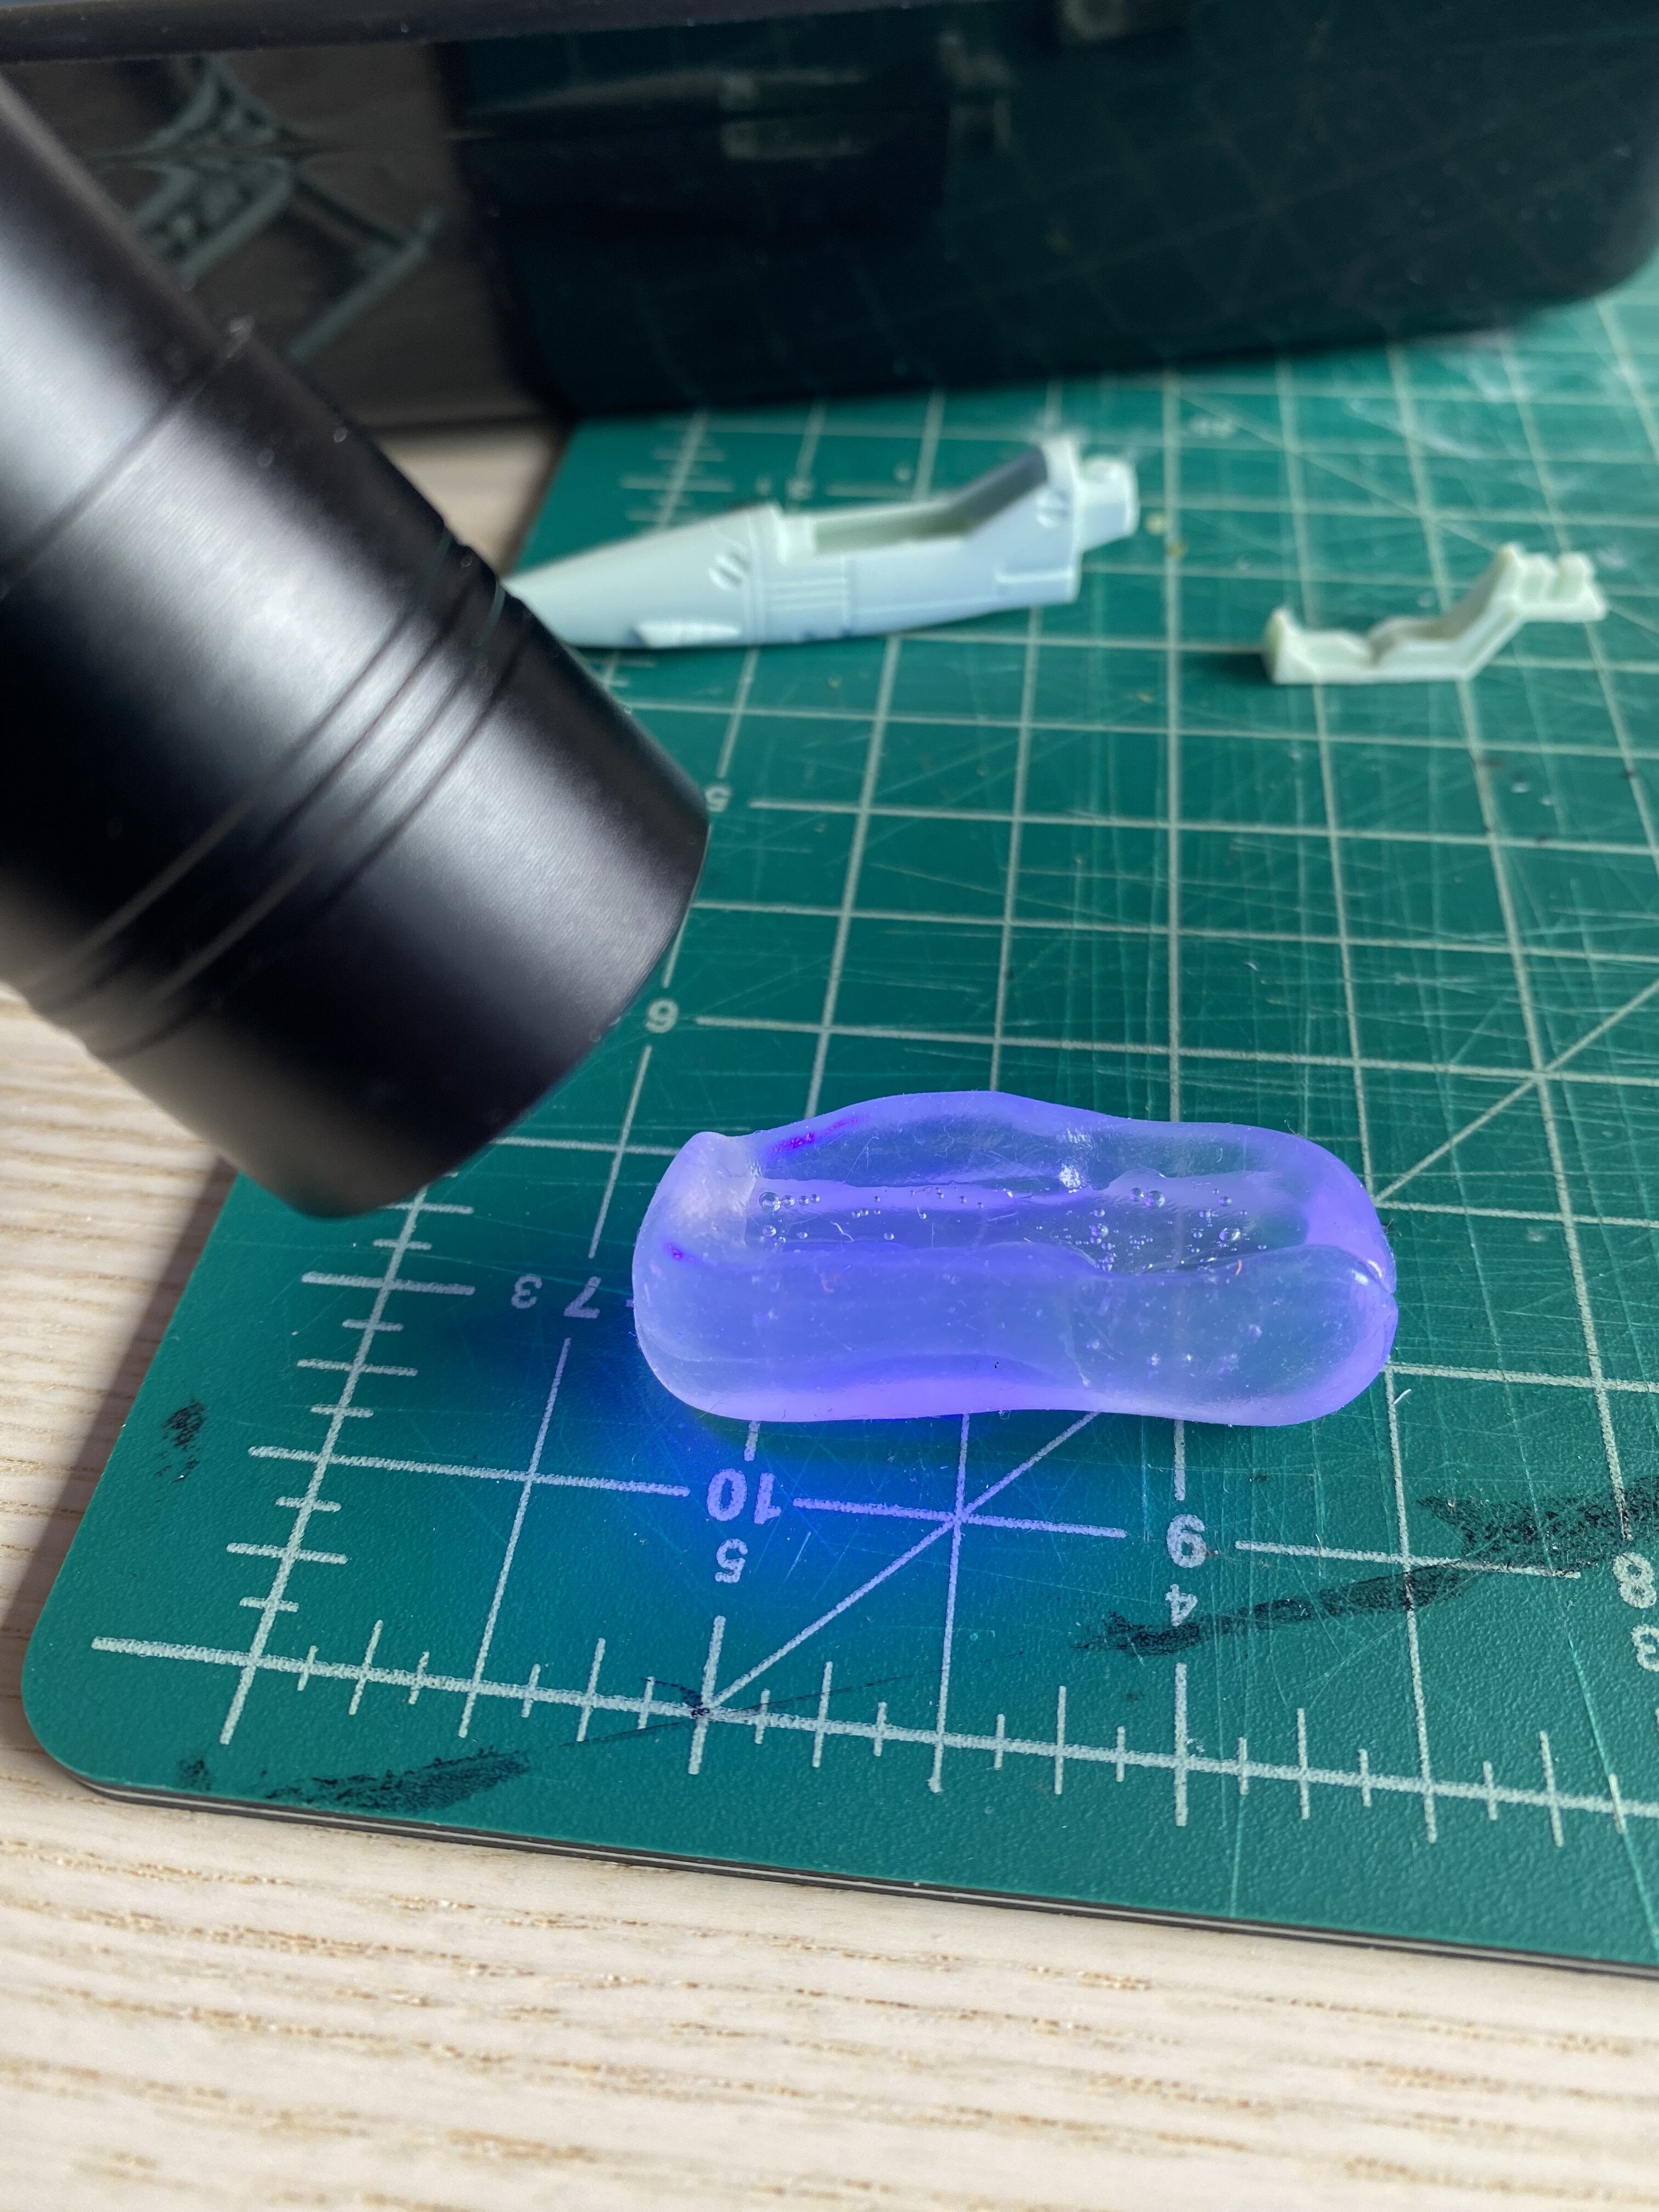
My first attempt at some UV resin casting. I needed a duplicate cockpit so here goes nothing.
I used this reusable mold clay stuff that softens in hot water. Pressed the piece into the clay and let it cool. Then it’s as easy as adding liquid resin and hit it with a UV light for a few minutes. Really easy to work with. After casting I just need to do some clean up and I’m good to go.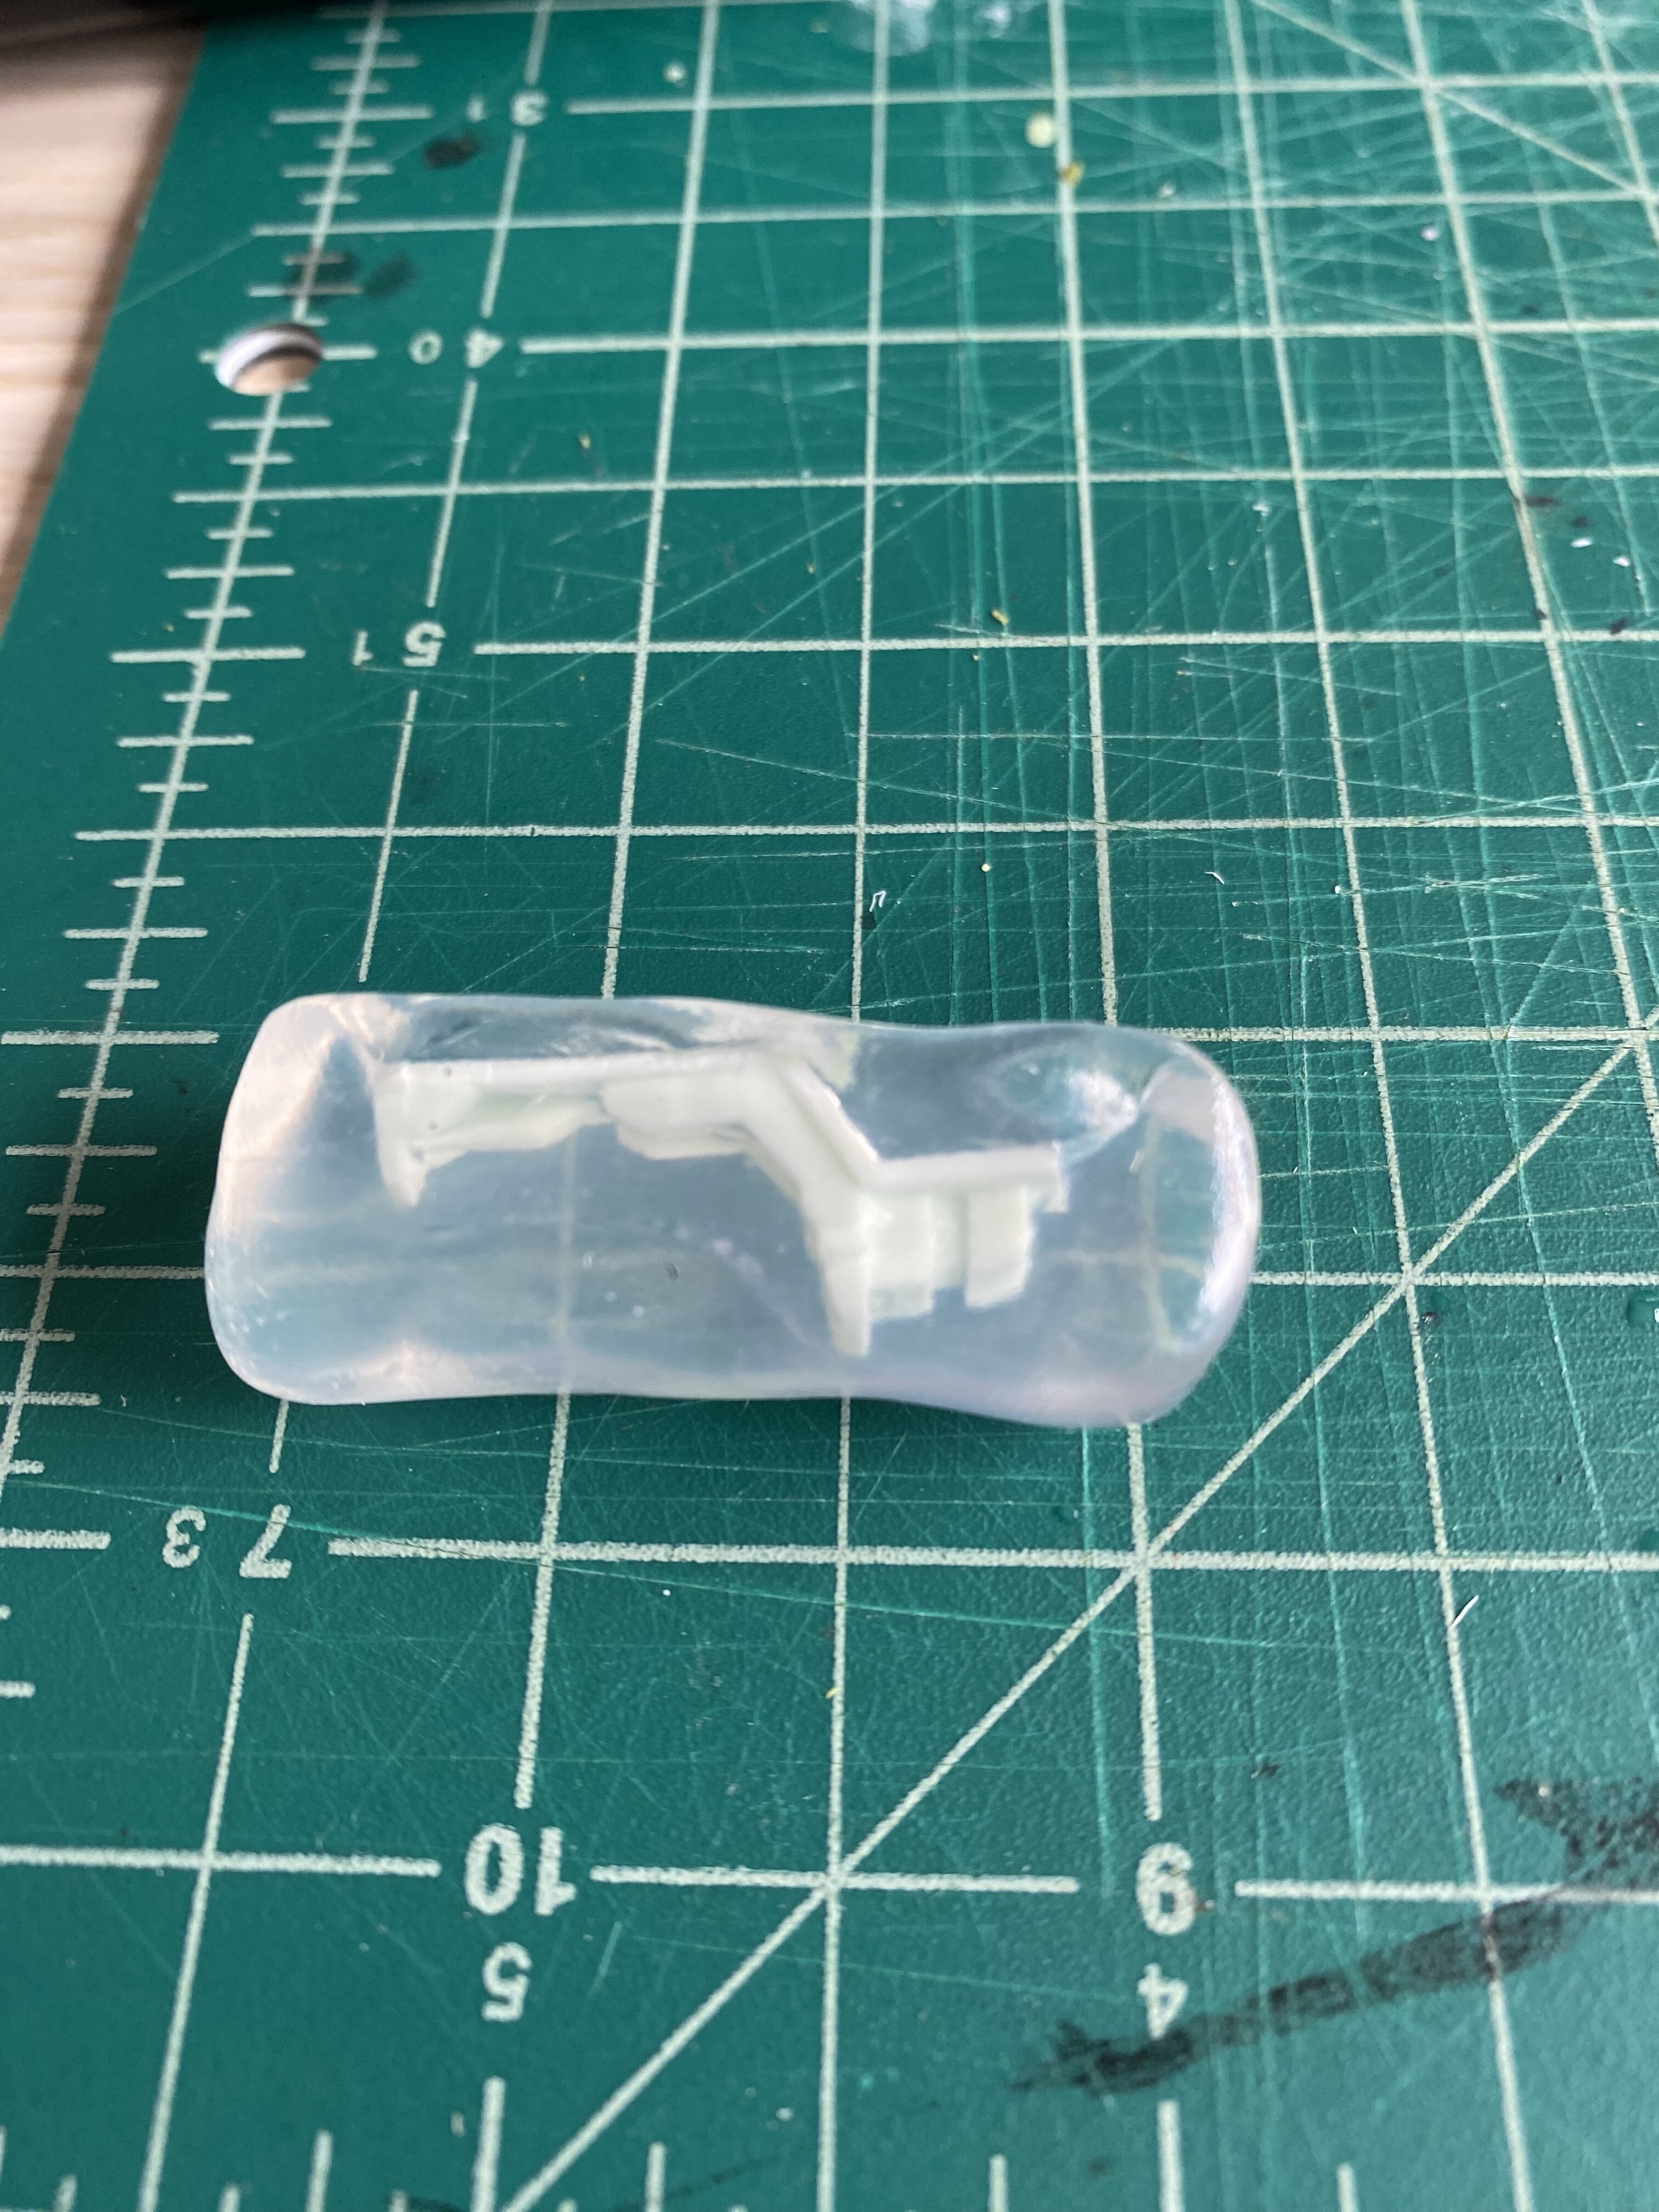
Looking good. So many kits at once. I love chaos.
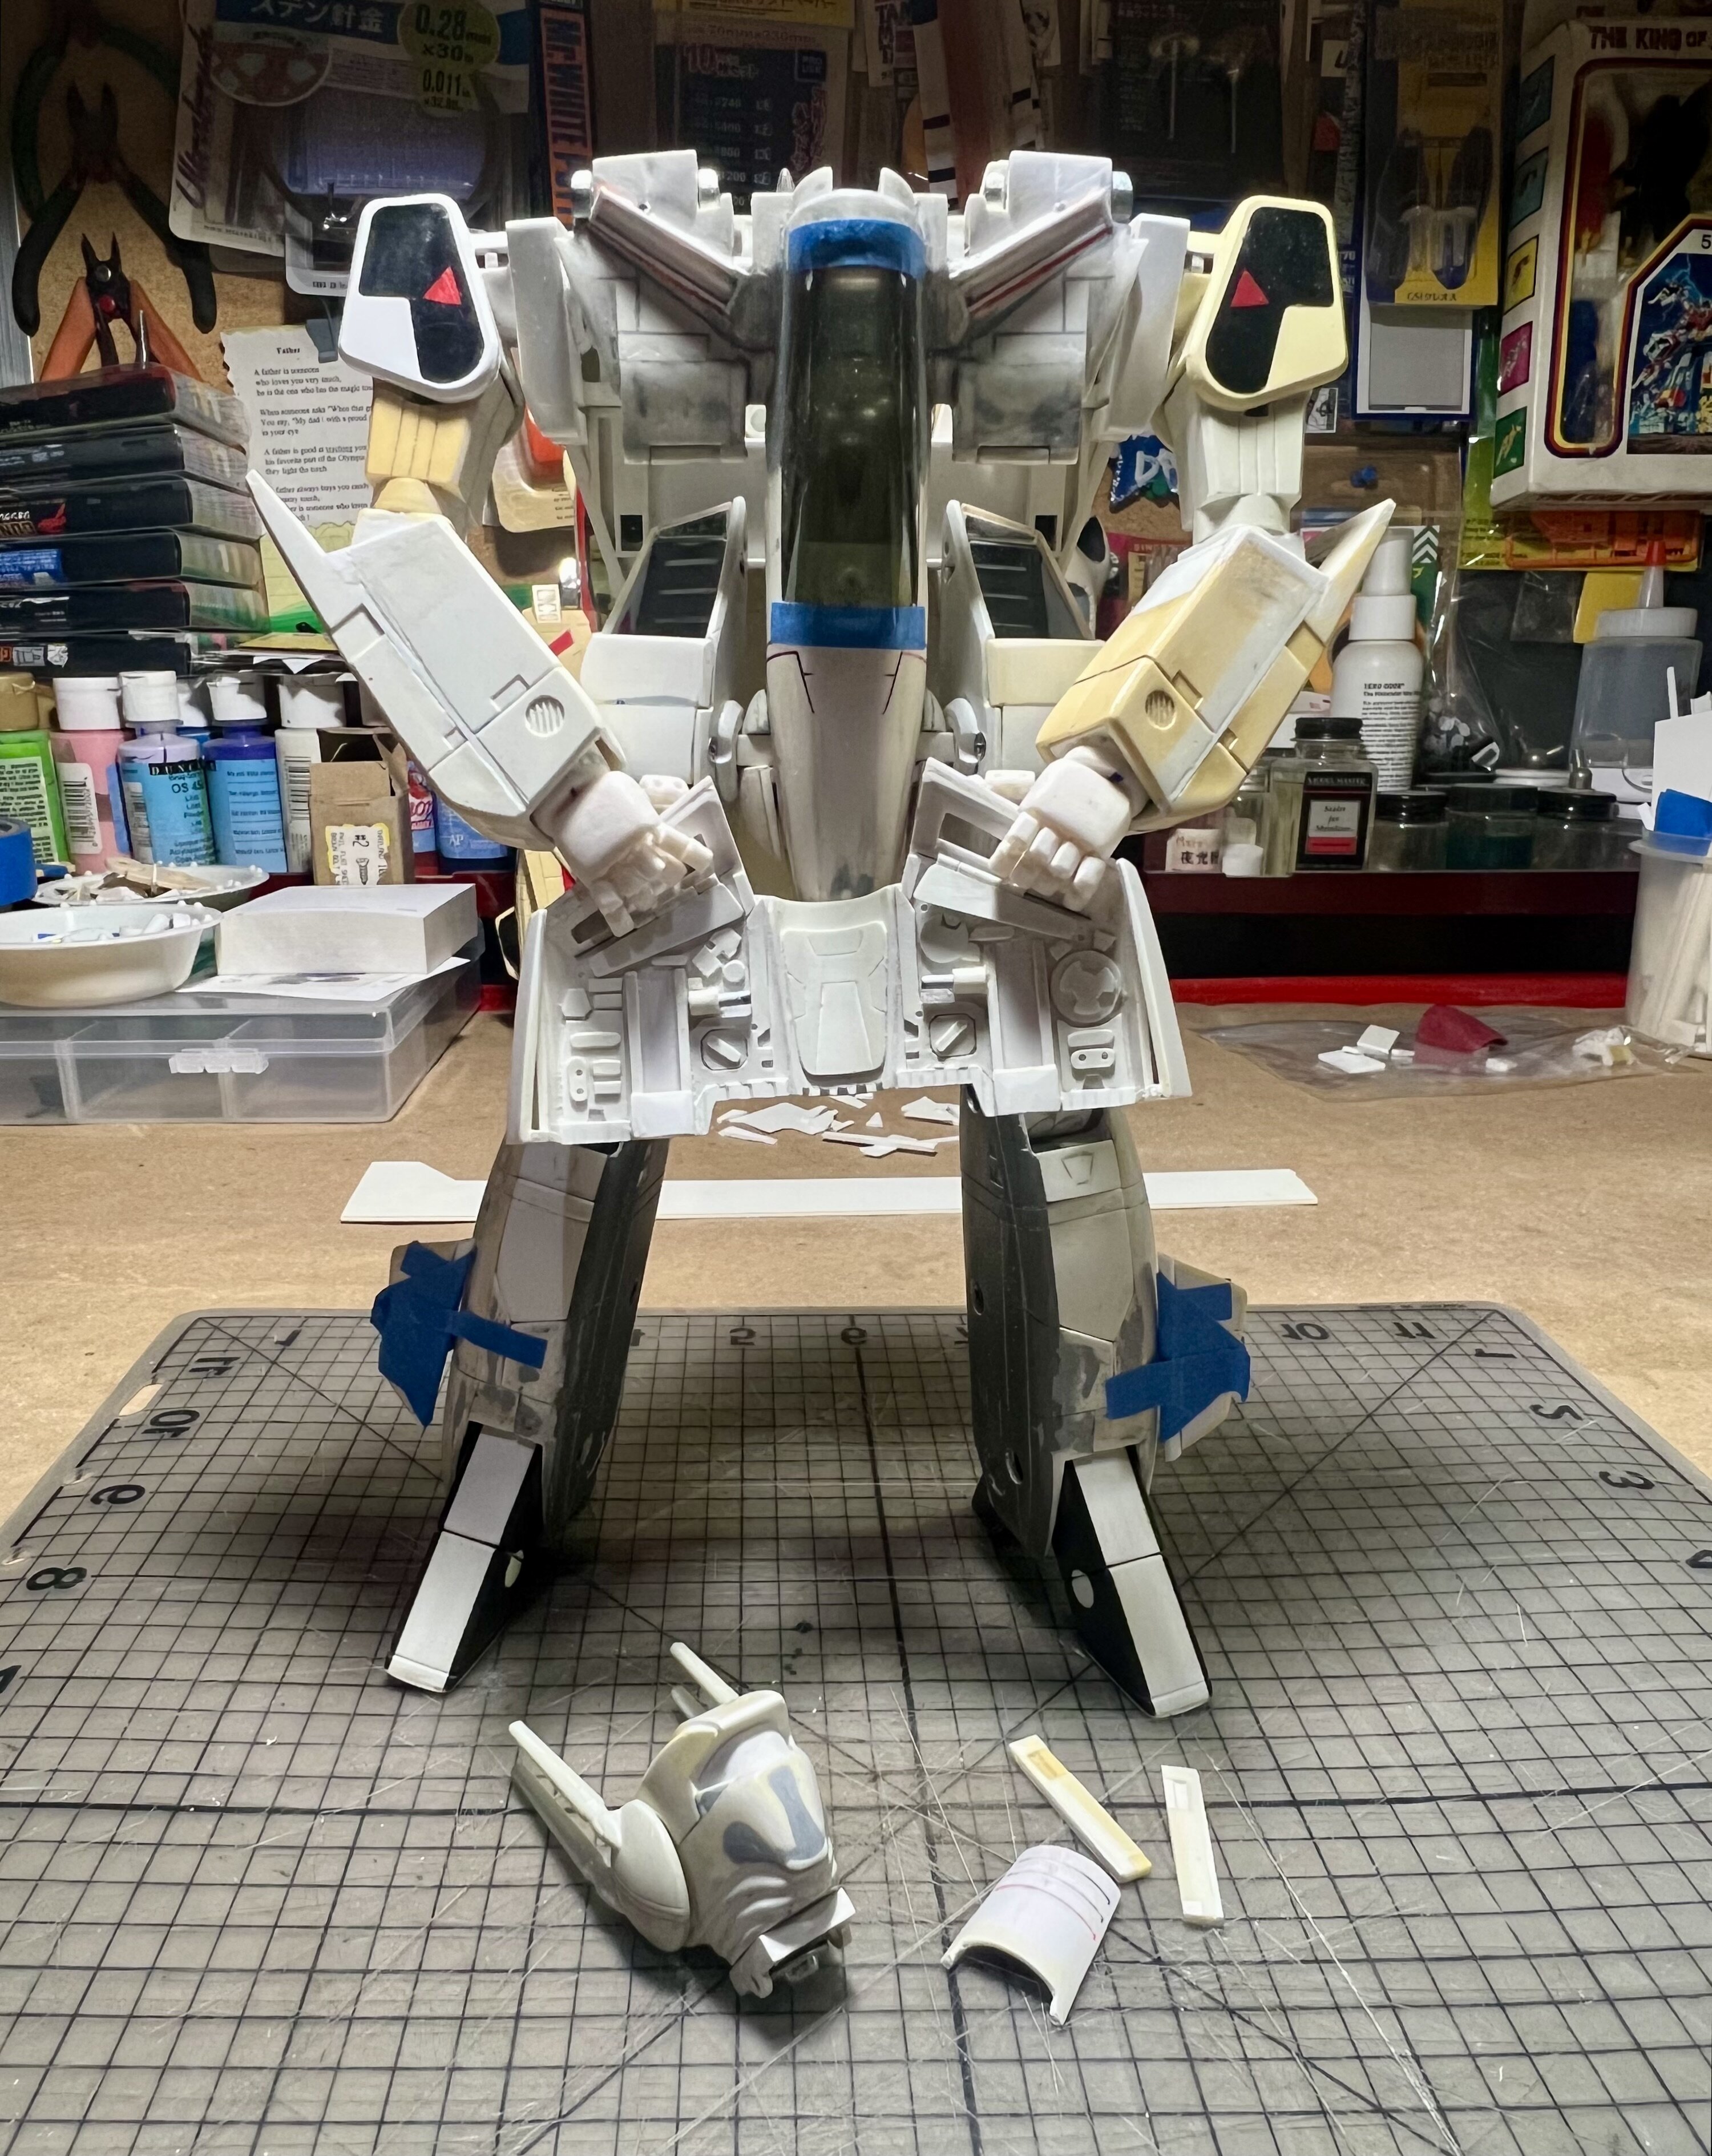
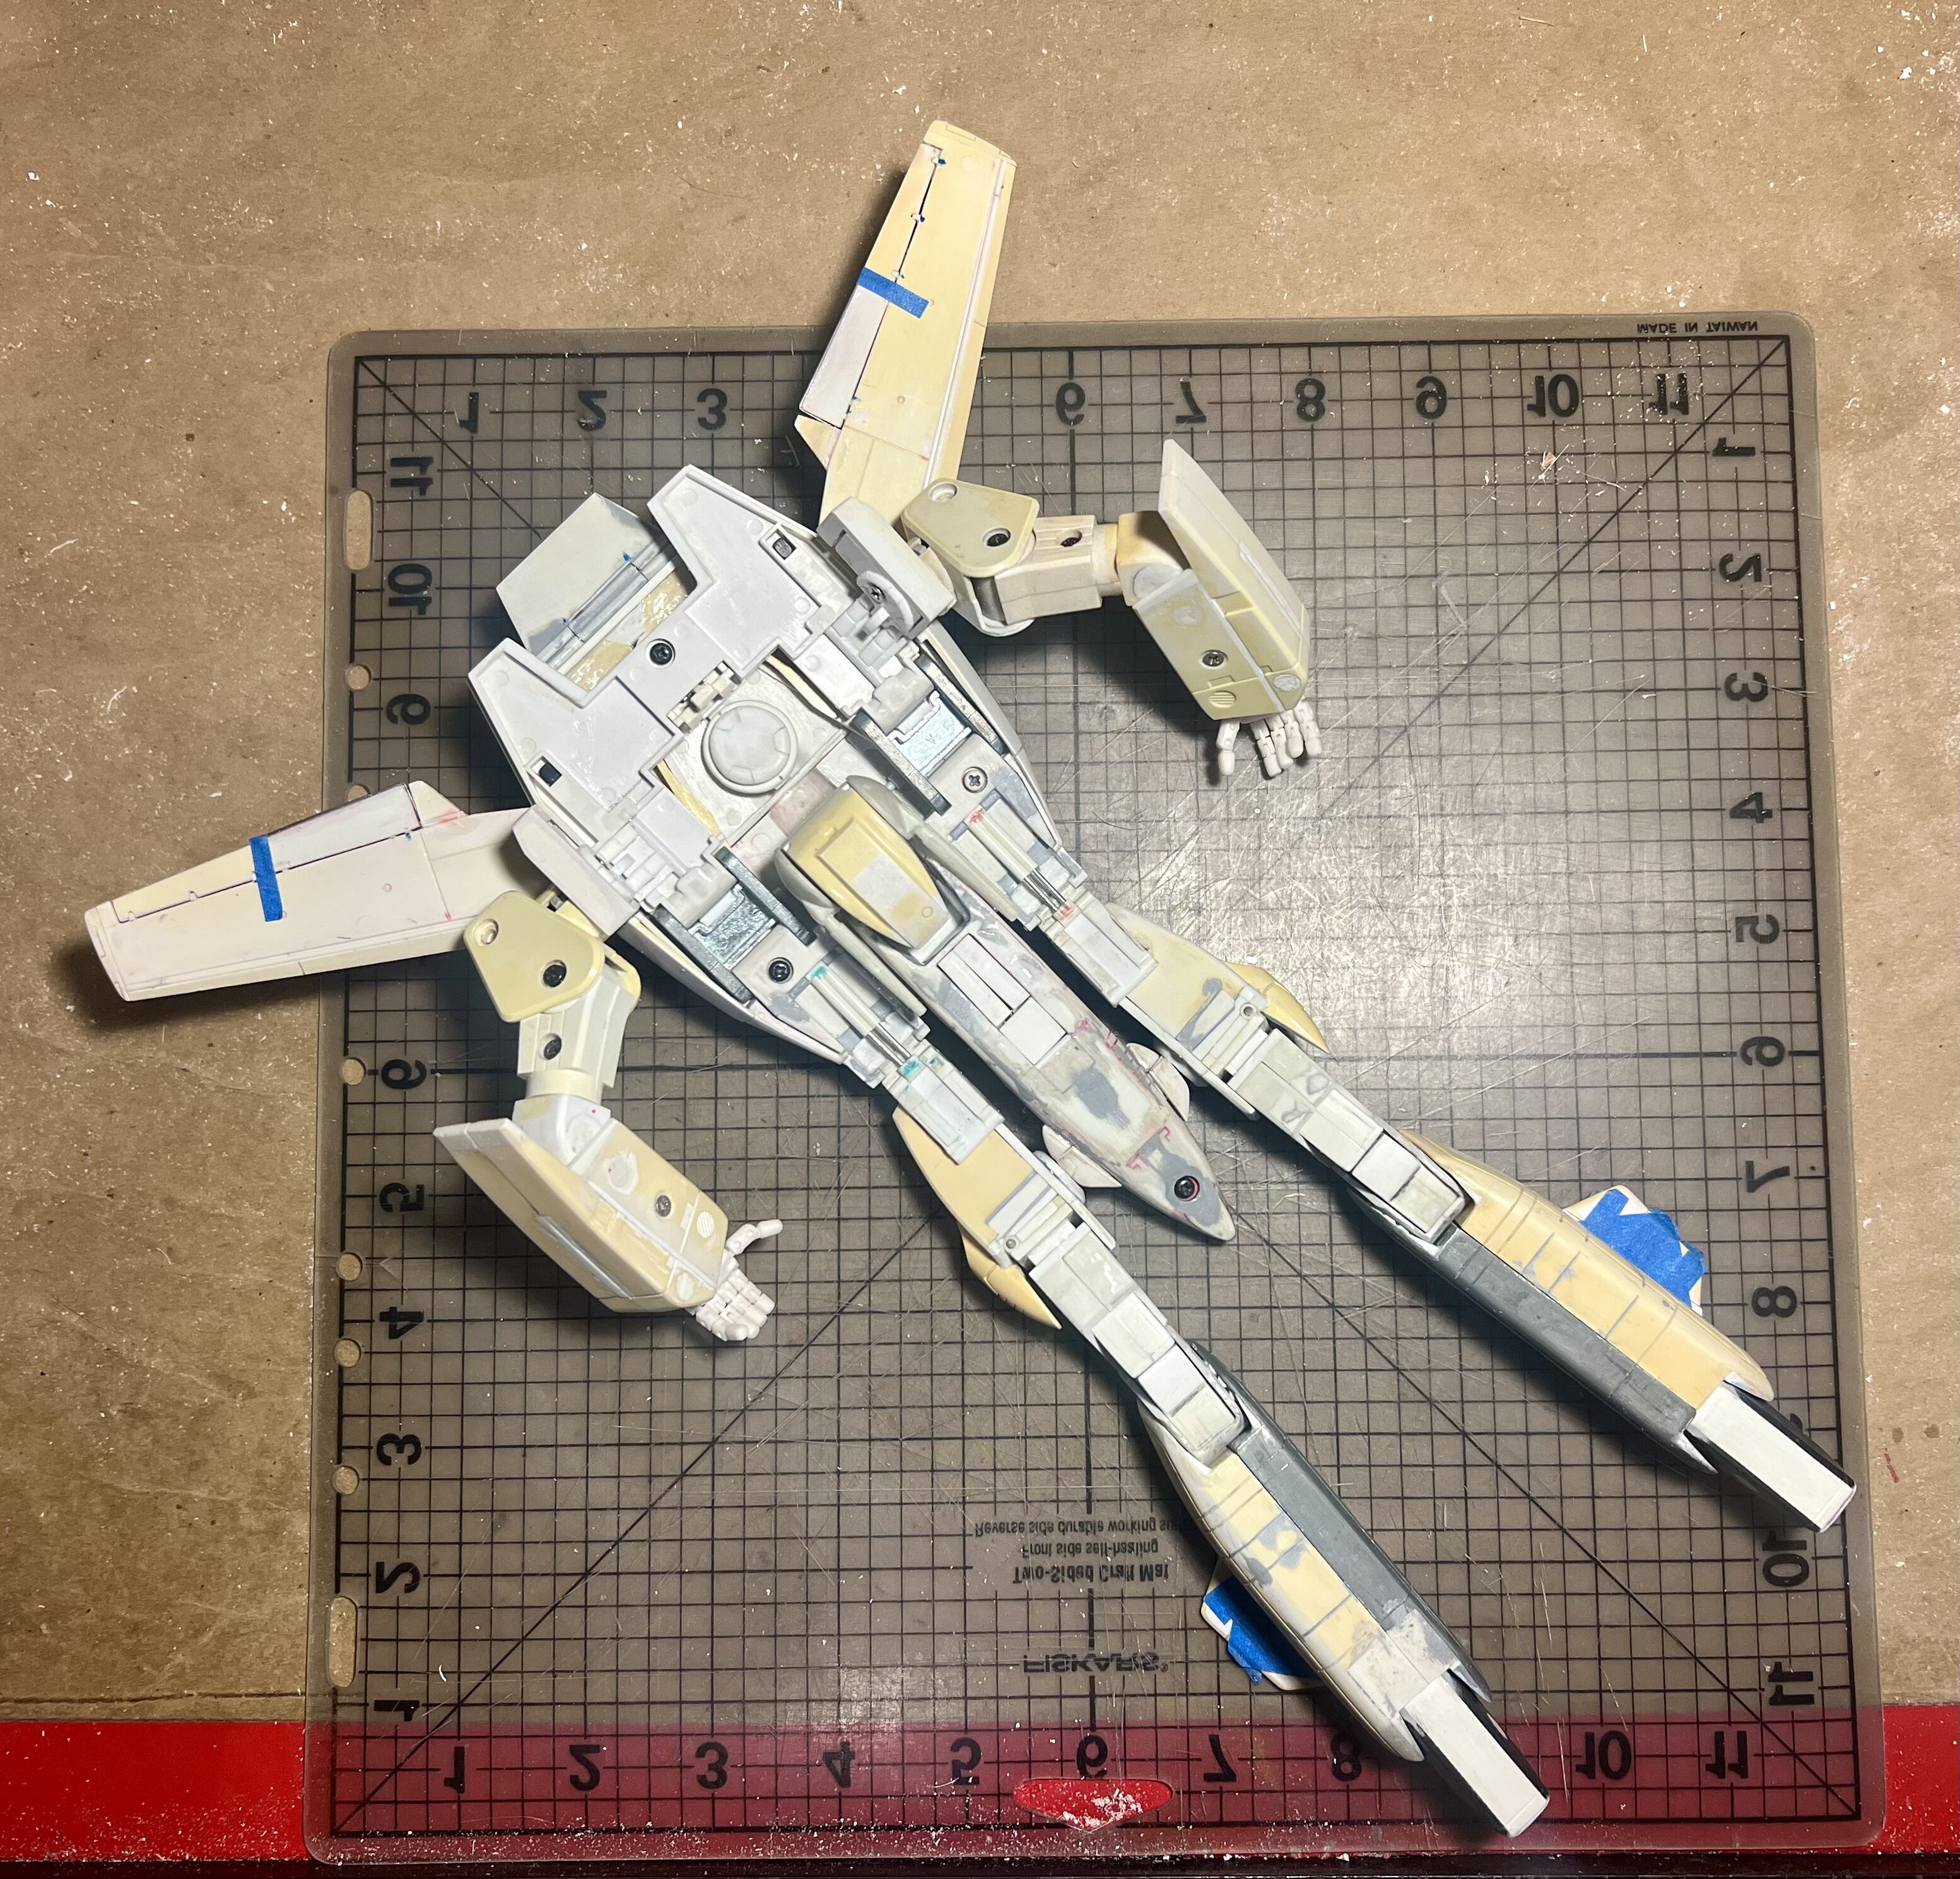
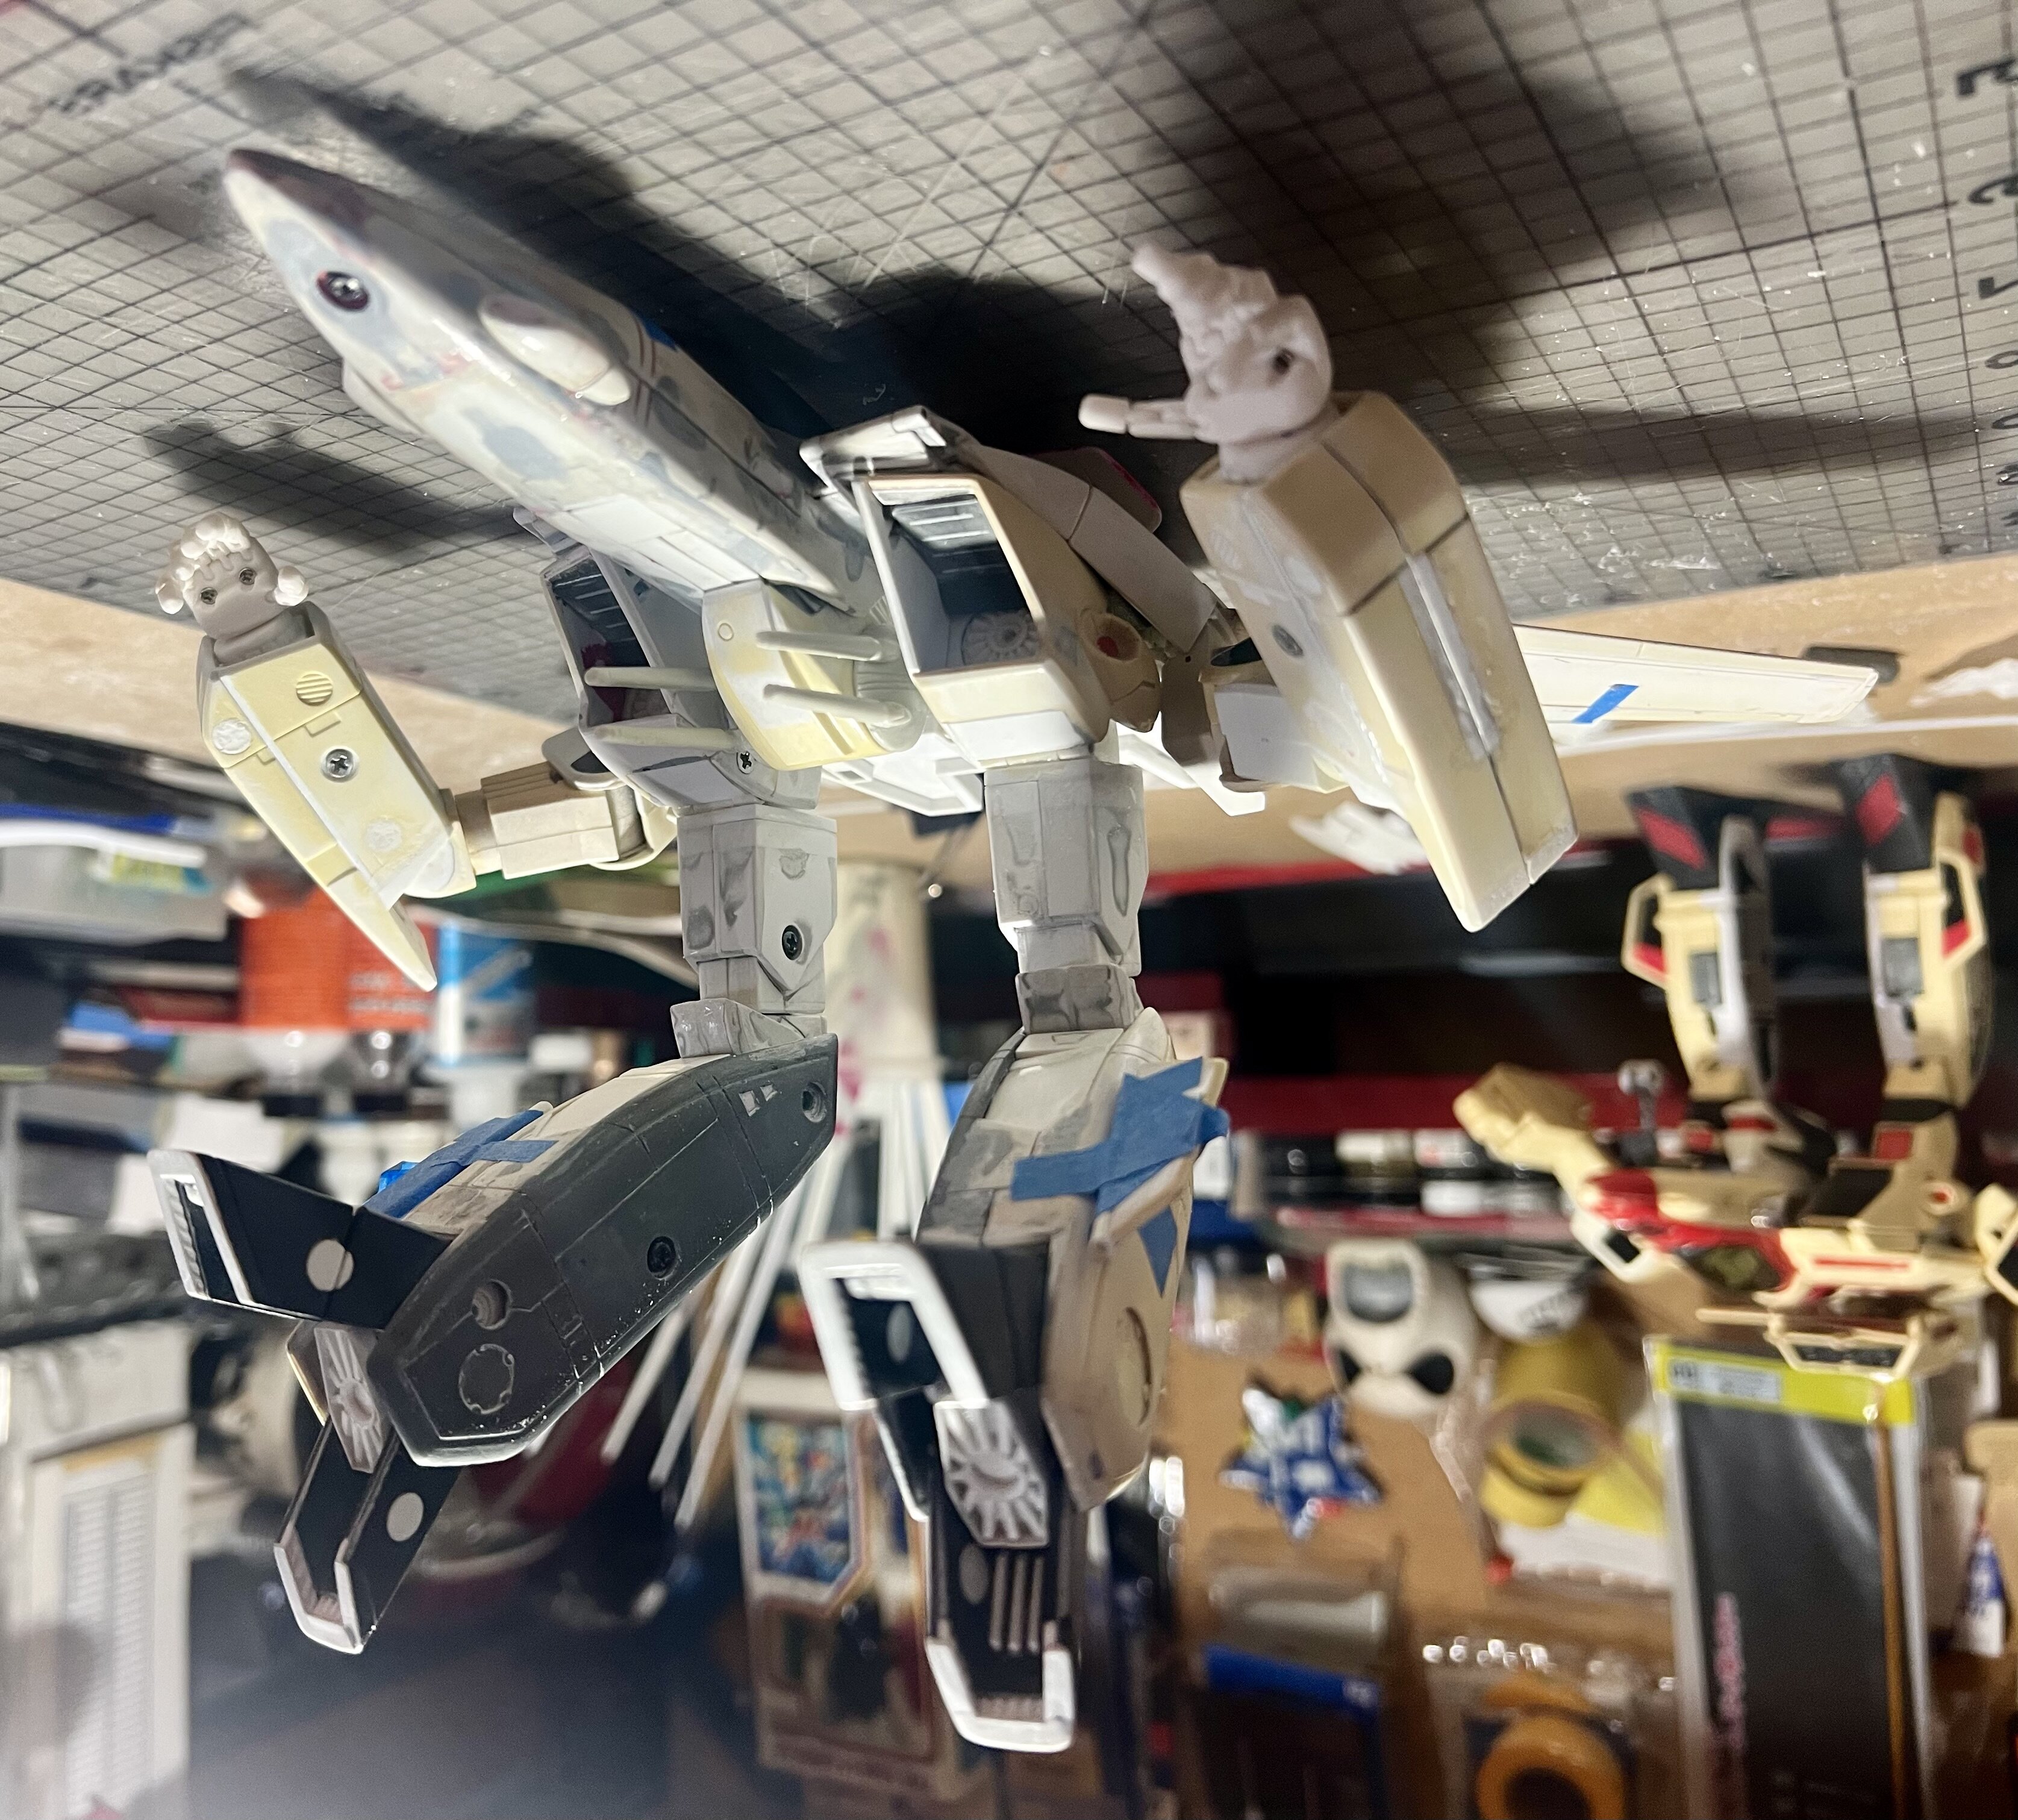
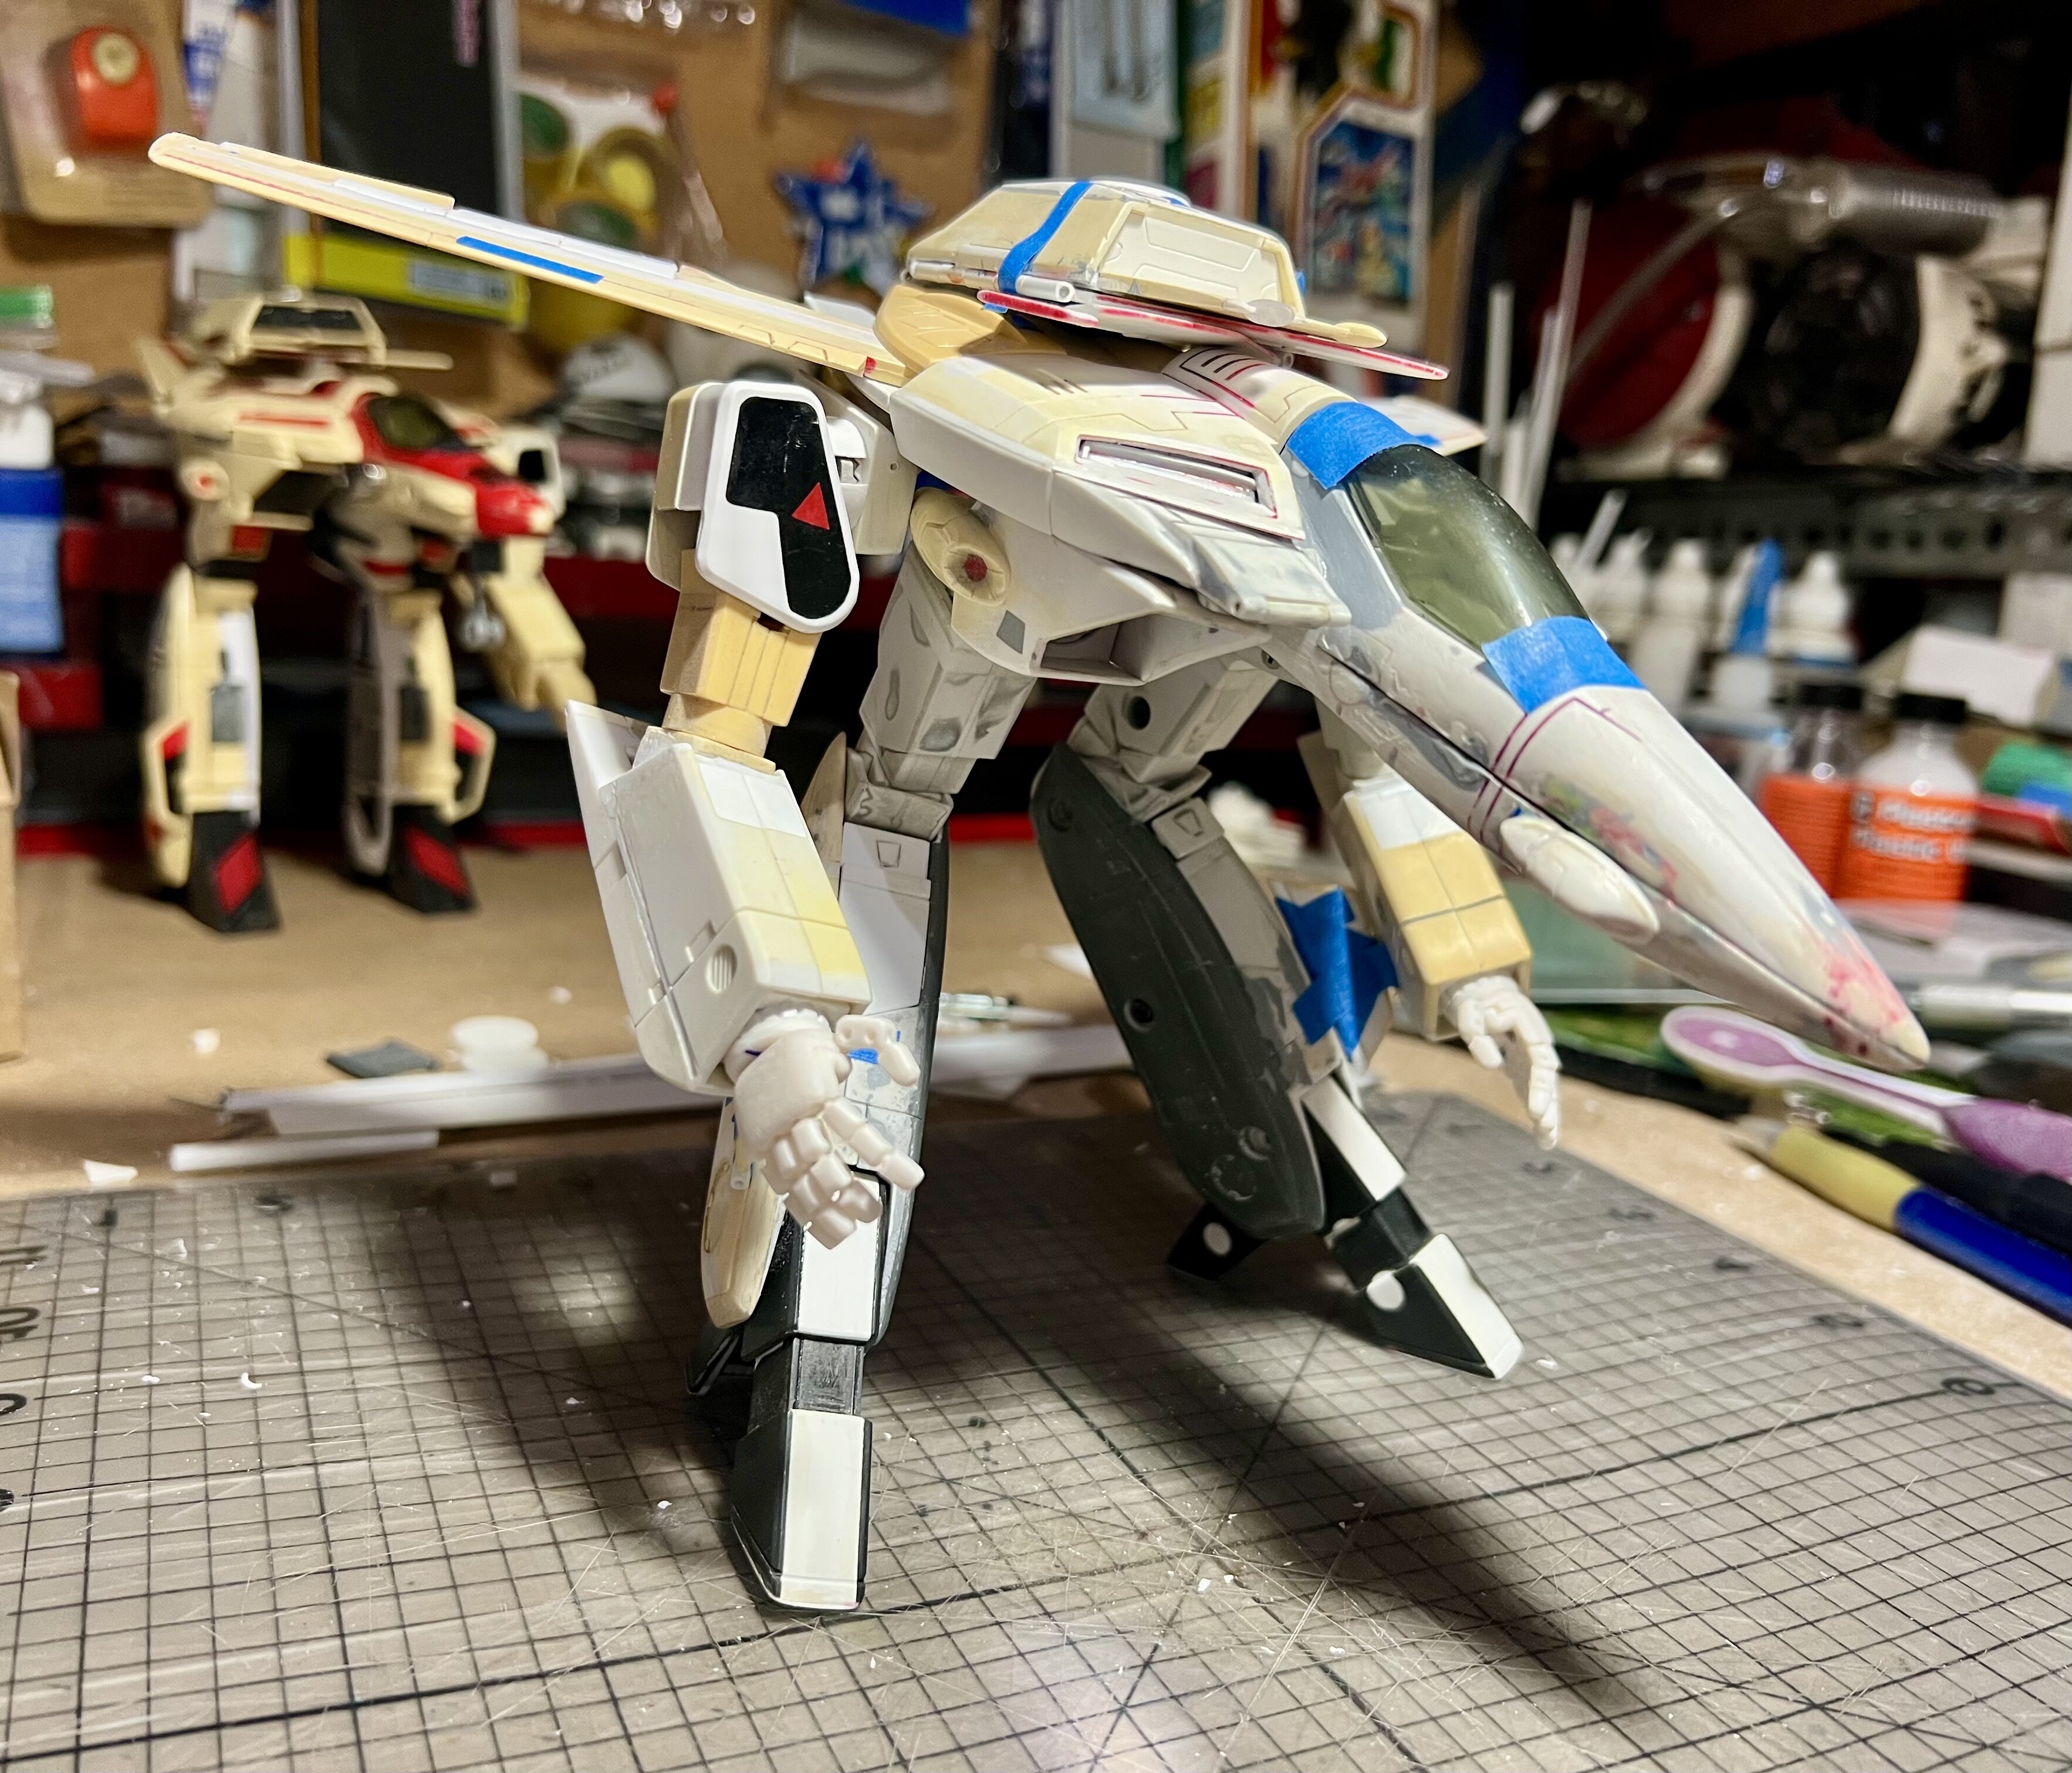
Still grinding away at details and adding more gimmicks.
Happy to find the was so much room under the chest to add all this in and still be able to remove the airbrake.
More to come.
-
9 minutes ago, MechTech said:
@Papa Rat That M.Lover looks GREAT! I love that Mr. Super Clear. It makes a lot of finishes just meld together. You're VF is coming along cool too!
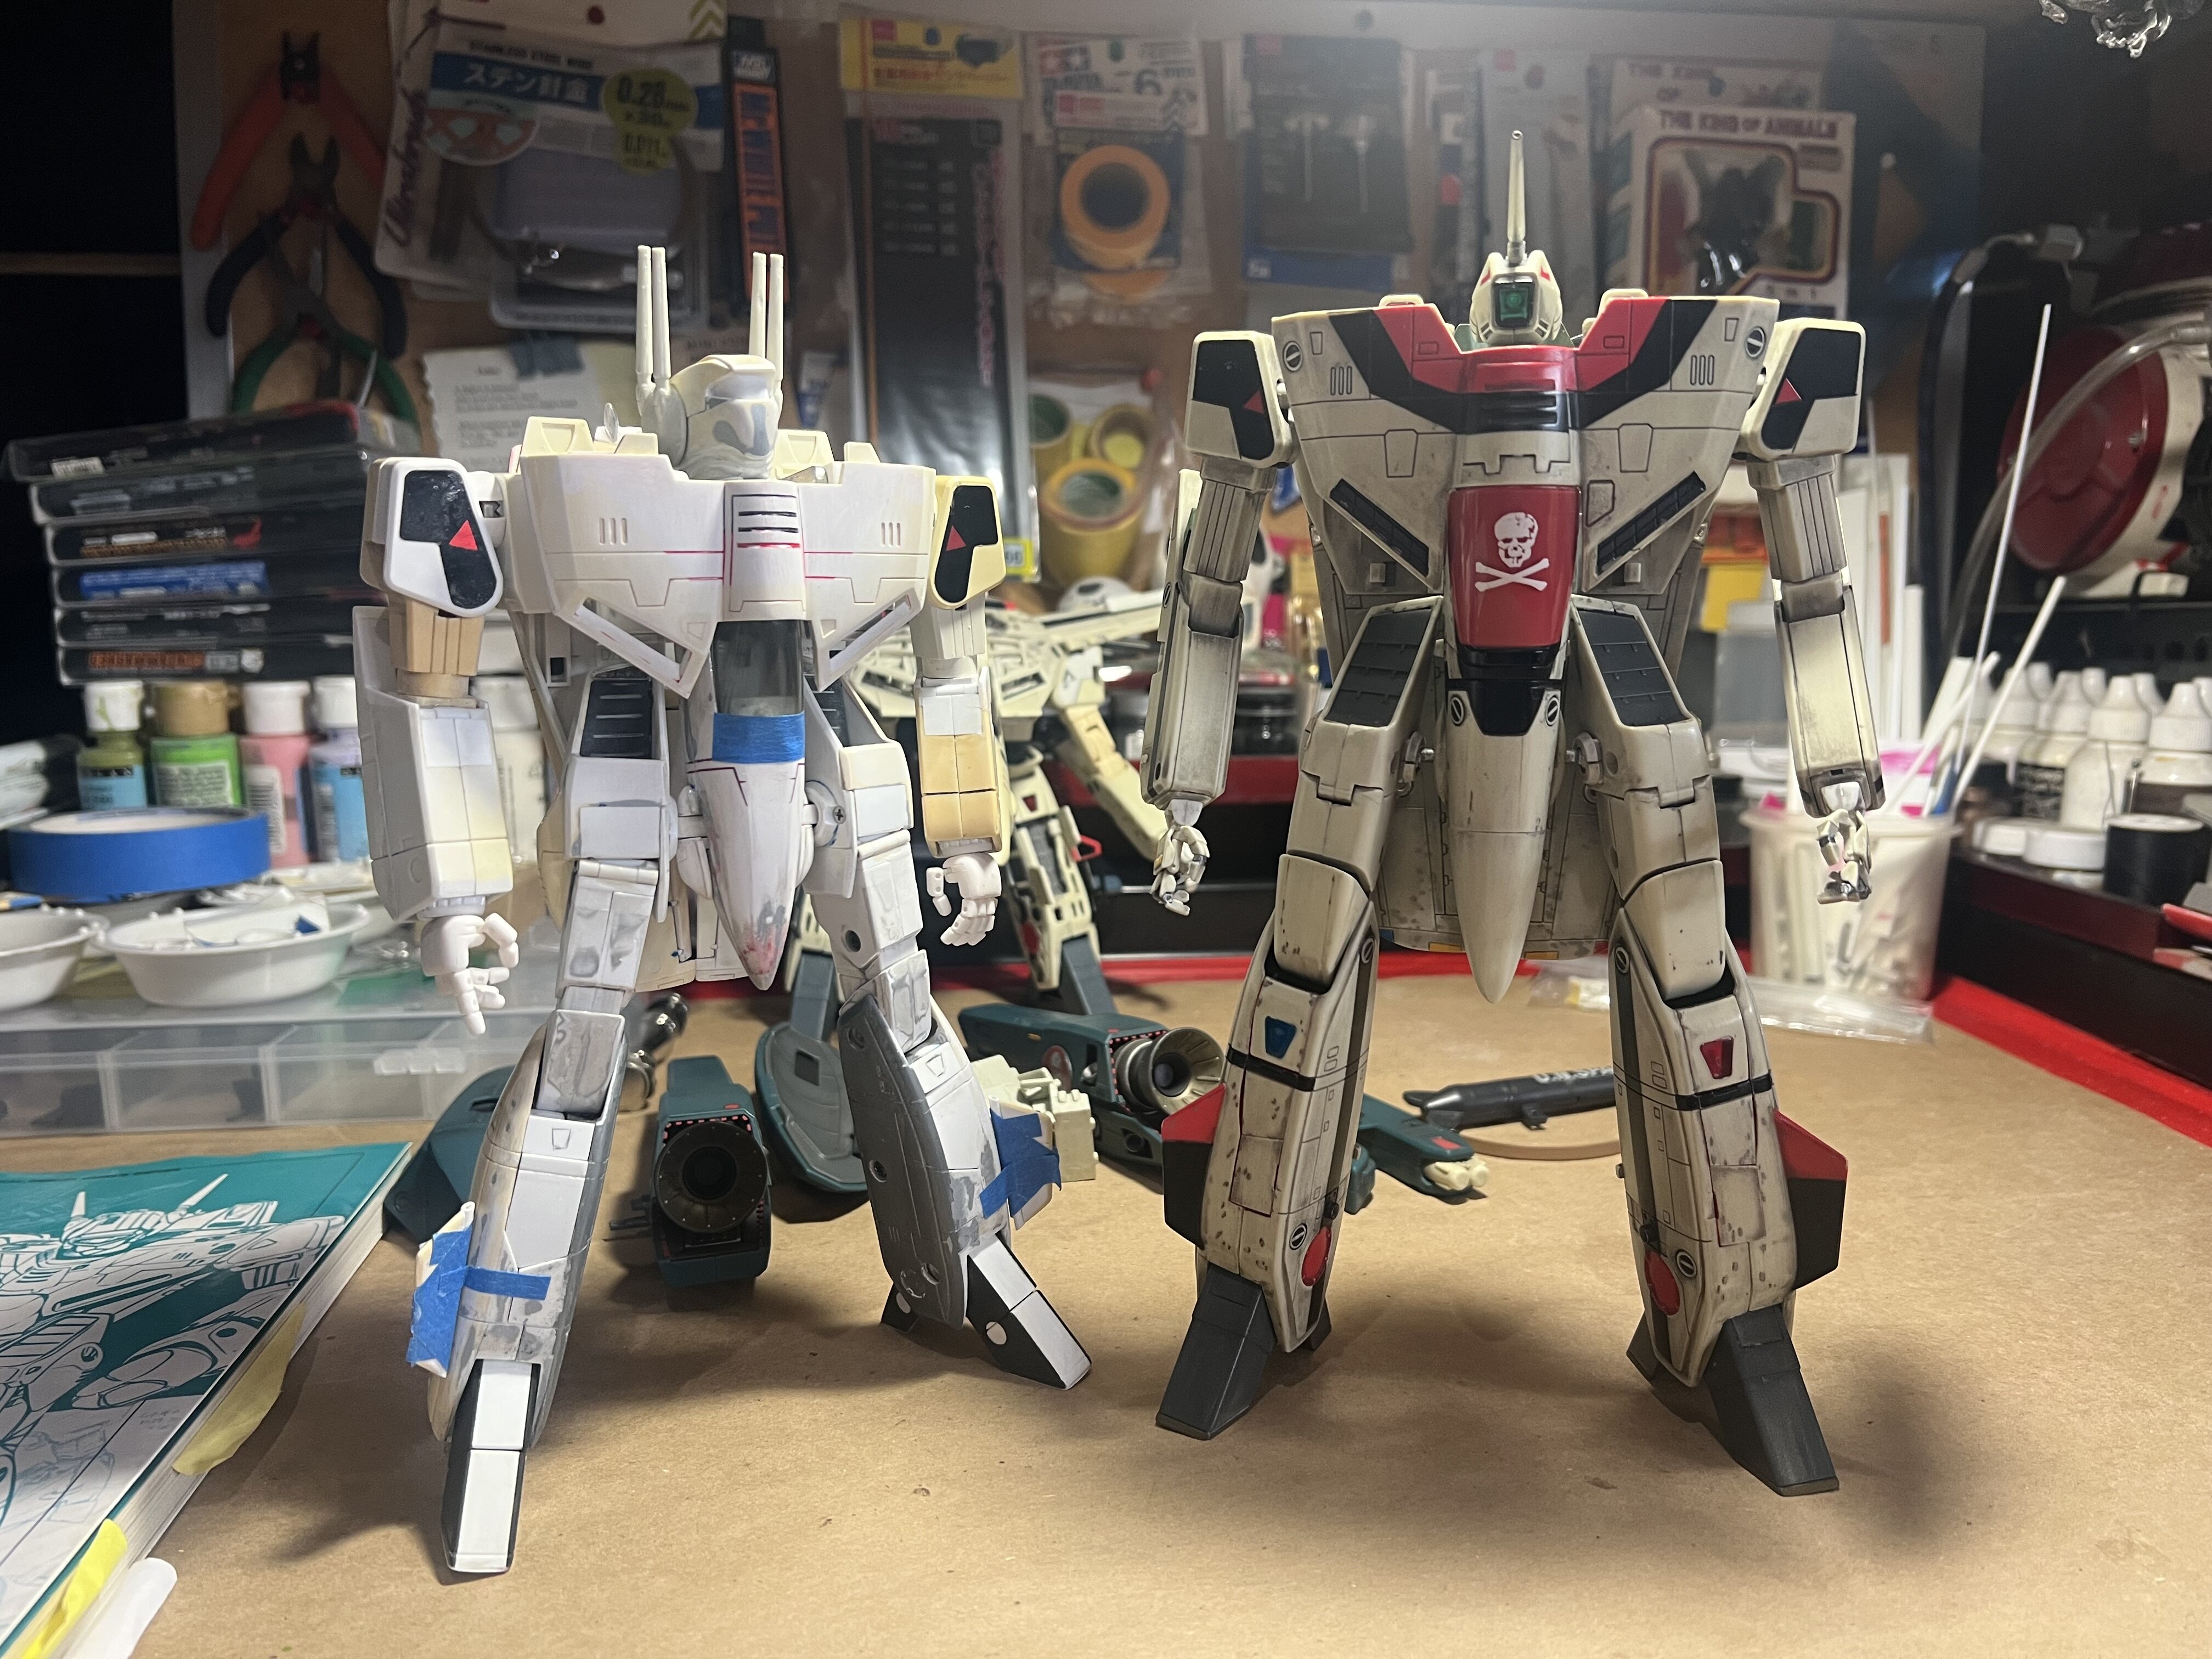
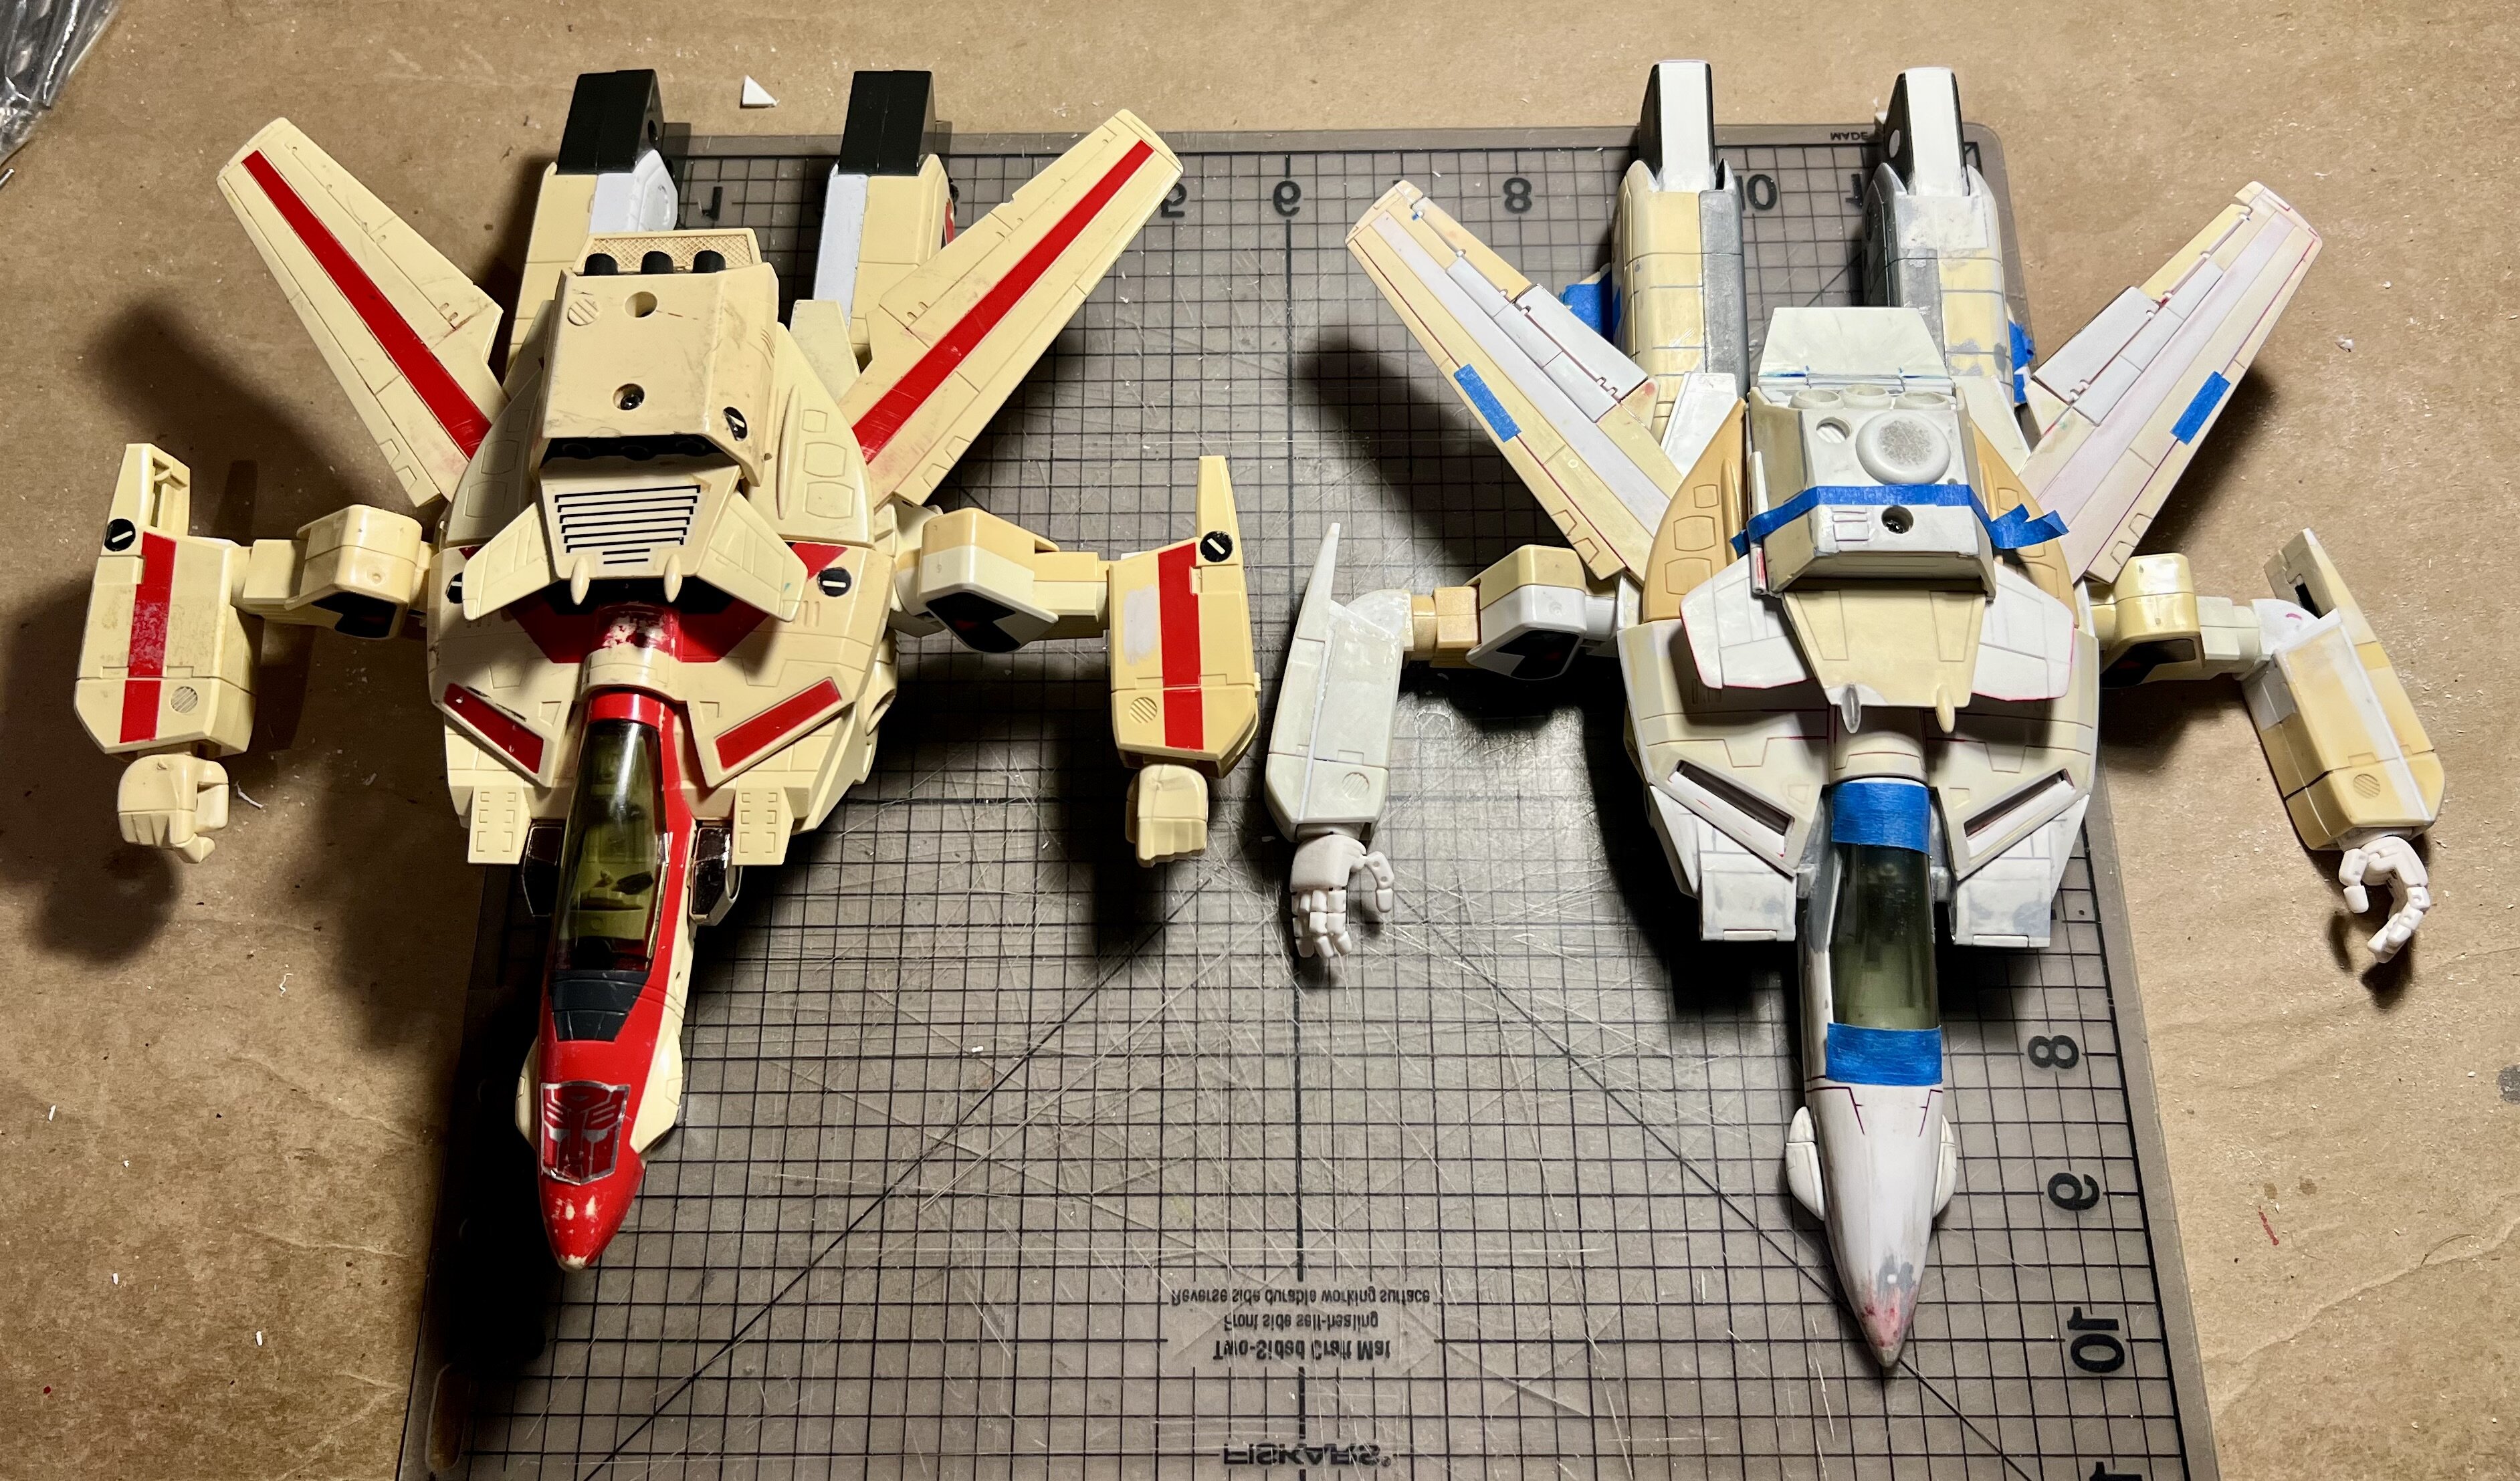
@nightmareB4macross Dude! Put your top back on, this is a family site!🤣 The Valk spread out reminds me of the old Imai cartoons where one of the girls has her Valks on display as insects with pins in them!😁
@Chas The paint looks SMOOTH on your SDF-1. The mods do too!
ALRIGHT, so, my apologies for all the photos. I thought some of you might wonder how I did what I did and how it may help you (as I learn from you guys doing stuff too).
Somebody I know wanted an F-35 for a temporary display. I mentioned I have an F-35B and they can borrow it after I build it. So I've been asked to build it, while forcing me to get it out of storage and building it. So, win-win!
Back in 2018, I got the Hasegawa F-35B when it was new. Probably one of the best 1/72nd iterations of that airframe. Downsides, no ordnance and the decals are now outdated. The RAM tape that shows up as lighter colored lines all around the plane are now dated. It's all now the same color except for some hatches and stuff.
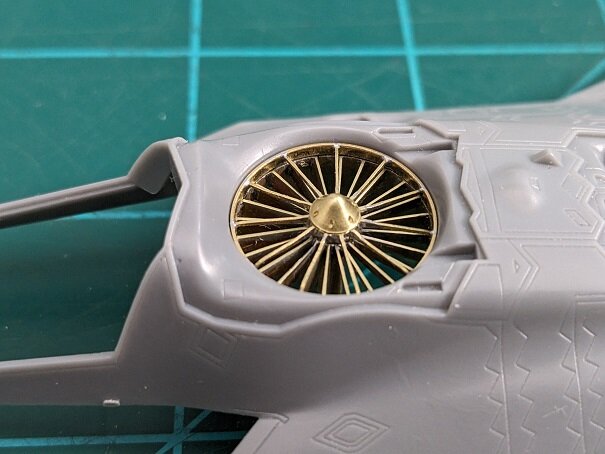
The first thing people do when they look at an F-35B is look into the giant LiftFan behind the pilot. Hasegawa just has the top guard and a 1950's looking turbine blade under it, so I decided to make it more accurate. I think the F-35B is a cool plane design and I wanted to put the effort into it.
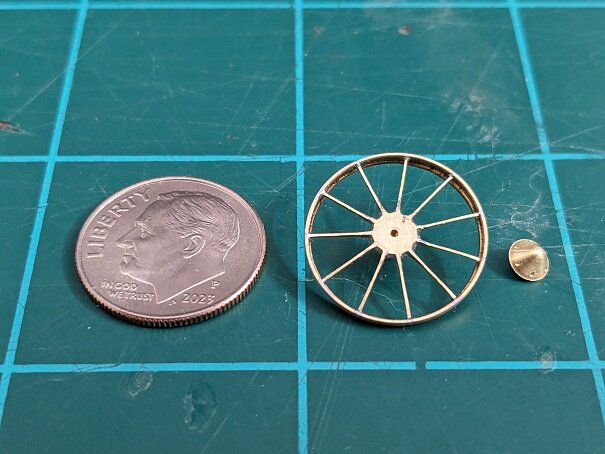
The LiftFan has three sections you can see from the top. 1. The top guard with 11 spokes (and small sensor tubes all around). 2. Variable vanes that look similar to fan blades, but they're not. They're variable guides to adjust air flow. 3. The actual lift fan. In fact, there are two lift fans (counter-rotating) and other stators inside the fan housing, but you won't see them on the kit looking down, so I left them out here and on the model.
First I tried making about seven turbine fans in styrene. All but one failed, and that one was shaped wrong, so I dropped that. This was about a week of wasted effort! So I'm showing you the bad with the good.😉
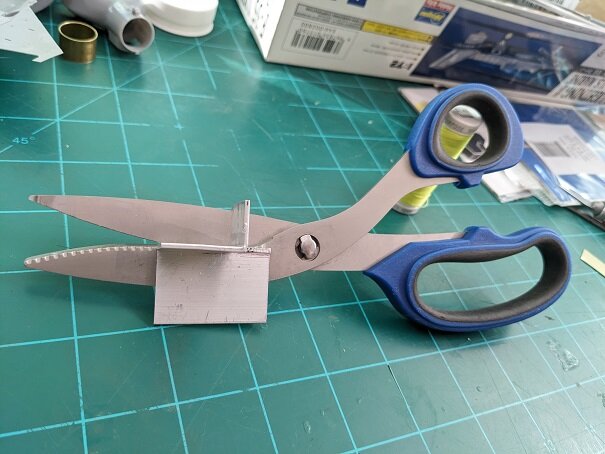
Next step was to build everything from soldered brass. That worked much better, but is A LOT more work. I used a pair of scissors and super-glued an angle piece onto it to act as a guide. - This is now how the "variable" vanes section went together:
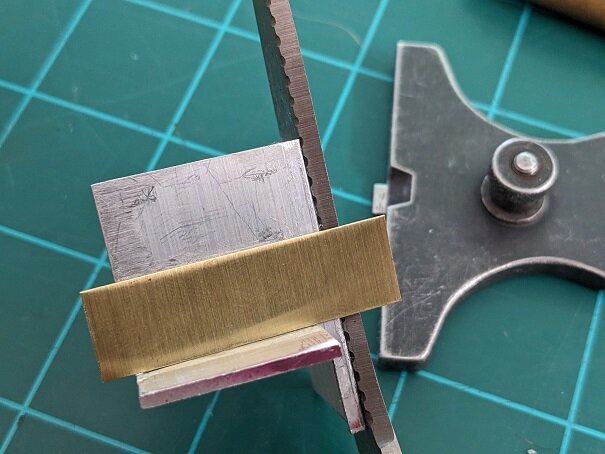
Then a depth gauge was used to keep the thicknesses the same when cutting all those tiny strips.
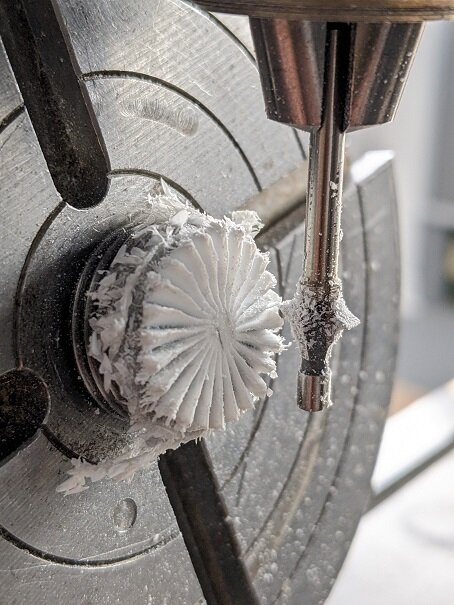
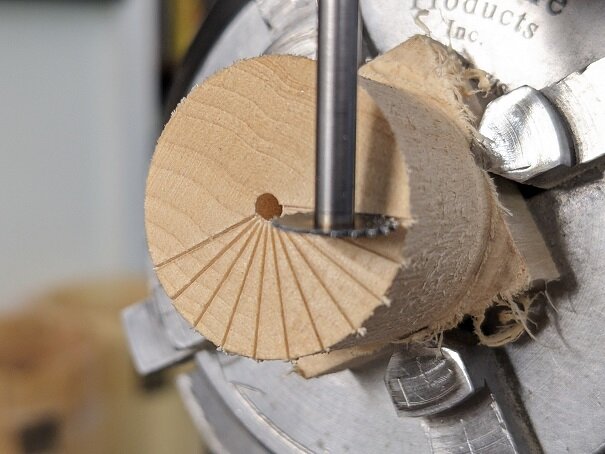
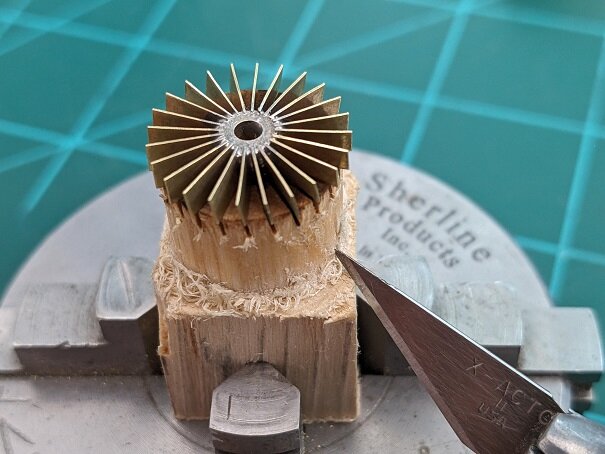
Next, I needed a jig to hold the brass blades while soldering and doing other stuff, so I lathed and milled a block of bass wood.
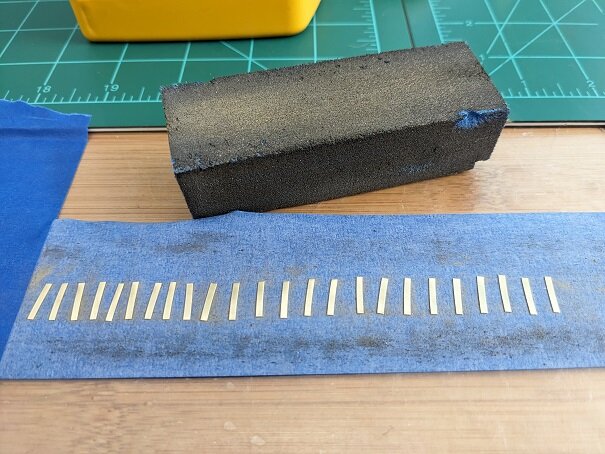
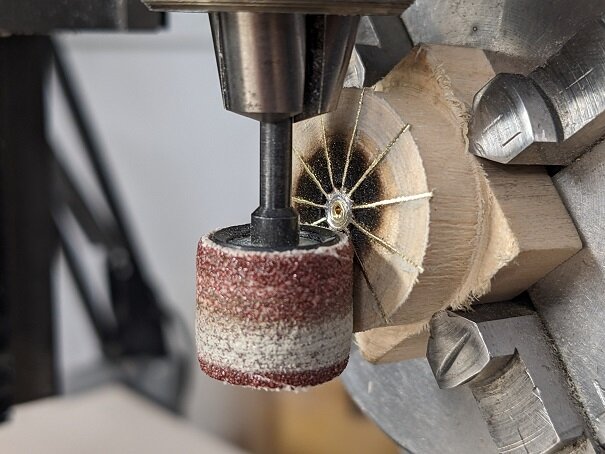
Next, all those little blades were sanded smooth to help with the finish and solder adhesion.
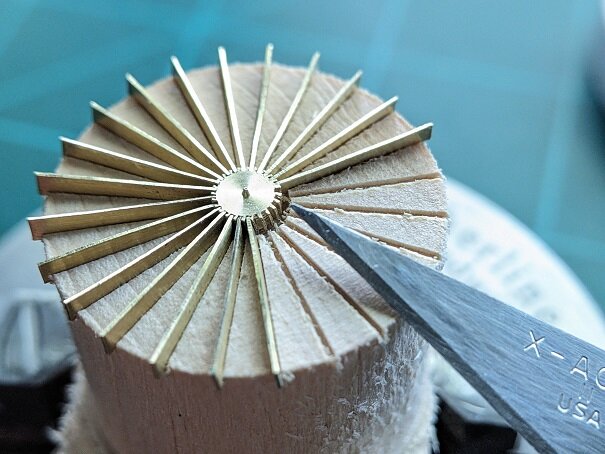
Then the center piece was milled. This took a couple of tries. You can see there is hardly any material on the splines sticking up. This was the delicate part. They could easily break off - even in brass.
The center piece and blades getting fit together. Then they were soldered. Note there is a slight angle to the left in the blades.
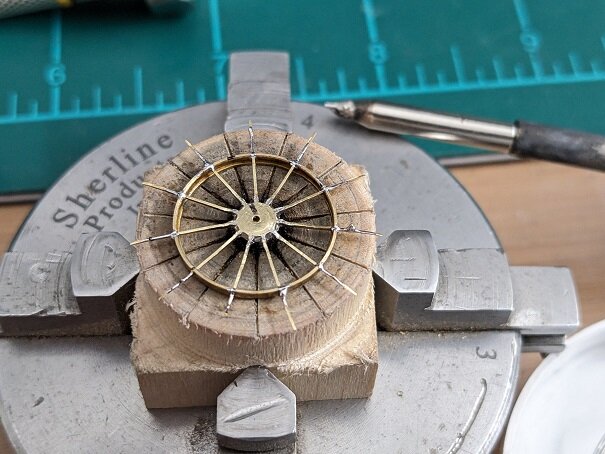
- This is the top "Guard" piece. This is a similar piece, but it is for the guard that goes over the top. This is how I figured out how to shape it without busting up the delicate parts. The pieces stayed in the wood while I CAREFULLY sanded them to an angle.
Soldered onto a piece of K&S metals tube. An iron was used because the mini-torch was too hot for this thin metal.
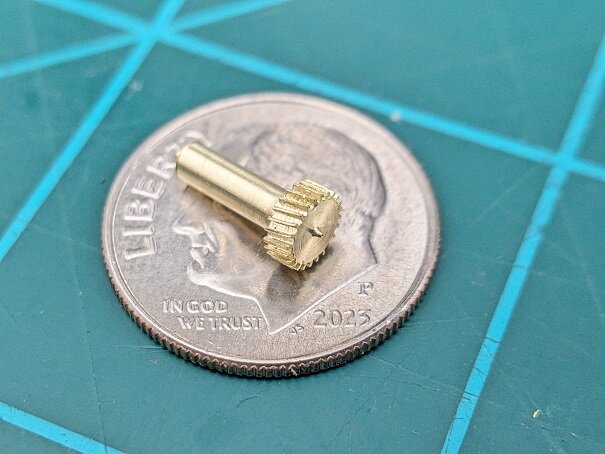
And after A LOT of cleaning up, filing, and the center piece milled out...
The top guard and vanes fit in place. The K&S tube was a God send, PERFECT fit after I cut out the center tub that came in the kit for the fan.
The turbine center hub similar to above. This is also canted and tapered like the actual fan.
The actual turbine was made similar to the vanes above. Just shorter, stockier blades. This is AFTER all the solder flux was cleaned off.
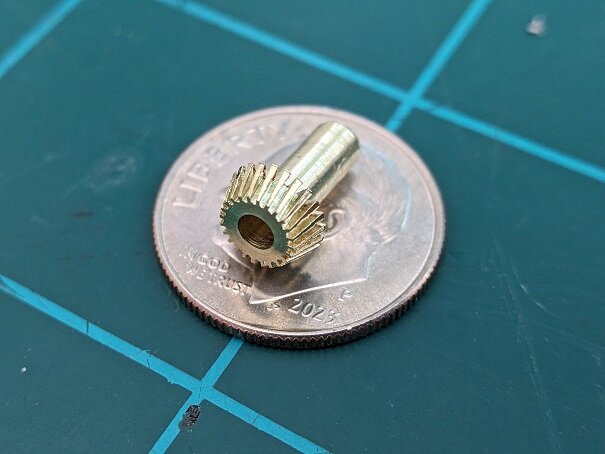
I tried to think of how to put the twist in the blades. The answer was in front of me. I did opposite of the milling. I made a "reverse" screw driver blade with a taper. Then put it in the mill like I was going to make cuts. Instead, I manually twisted the bit just a little. Raised the bit, rotated the rotary table, lowered it onto another blade, and repeat - 24 times! I had to REALLY resist turning the motor on each time. This is similar to how I mill stuff in rotary increments.
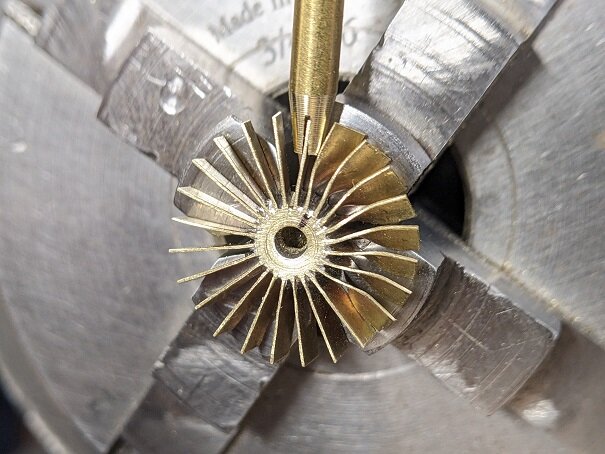
AND FINALLY, everything together. You can see Hasegawa's two pieces. Then (top right to lower left) came the LiftFan casing with the vanes in it, the top guard assembled, and the turbine - polished up and sized to fit inside the tube. The brass rod is the special tool used to twist the blades.
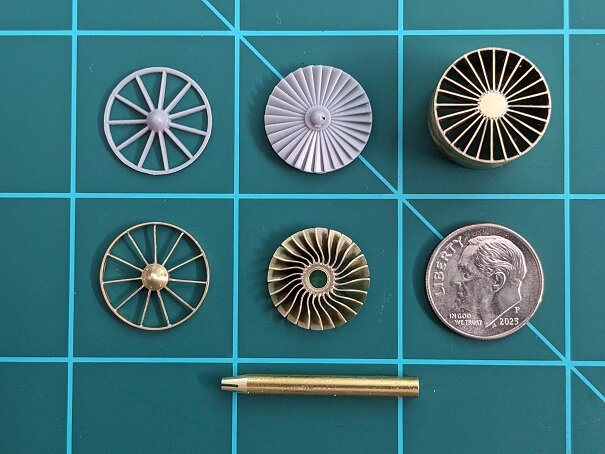
It was fun, but A LOT of work to finally make a turbine. I'll have to remember this process for future models. Thanks for checking in! - MT
That is some very intricate and astounding fabrication methods with excellent results.
One day, I’m going to grow up big and strong just like you.
😜
-
Hmm. I wonder if I should make this into a 1/55 conversion kit. 🫠
-
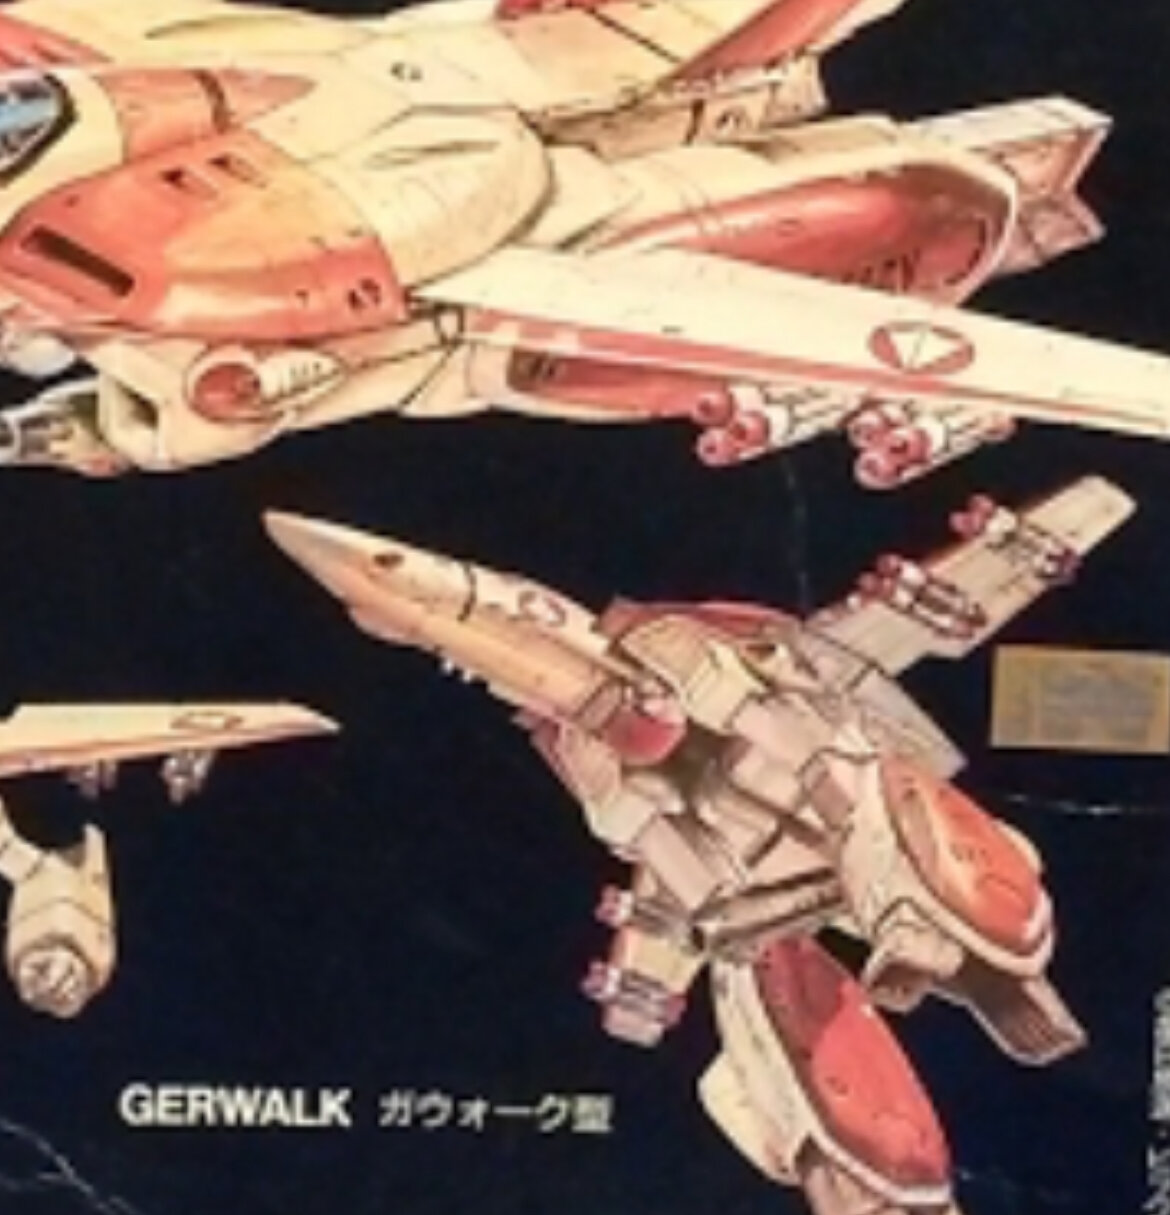
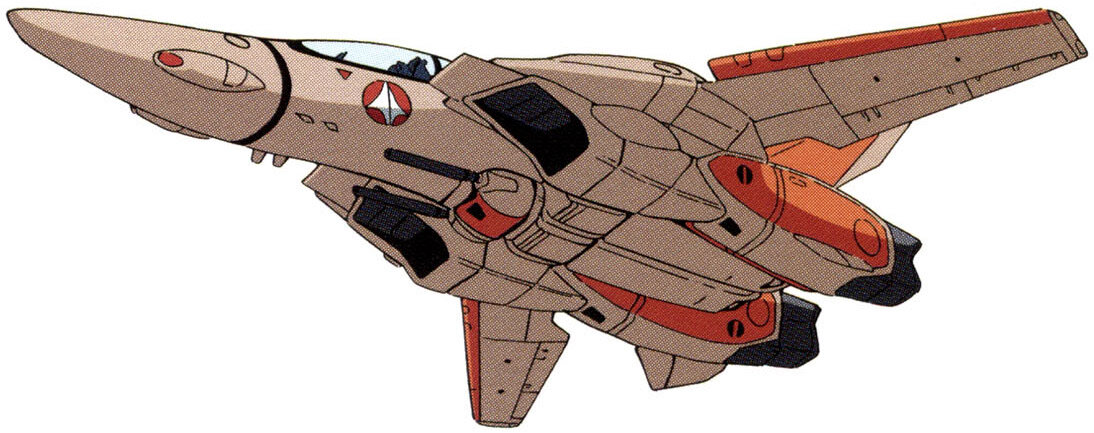
Sexy GERWALK pic incoming. Divert your eyes.
-
14 hours ago, pengbuzz said:
They're almost literally based on G1 Convoy's (Optimus Prime's) hands from the 1984 toy-
Arii model:
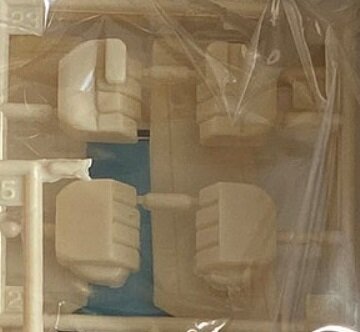
G1 Convoy/ Optimus:
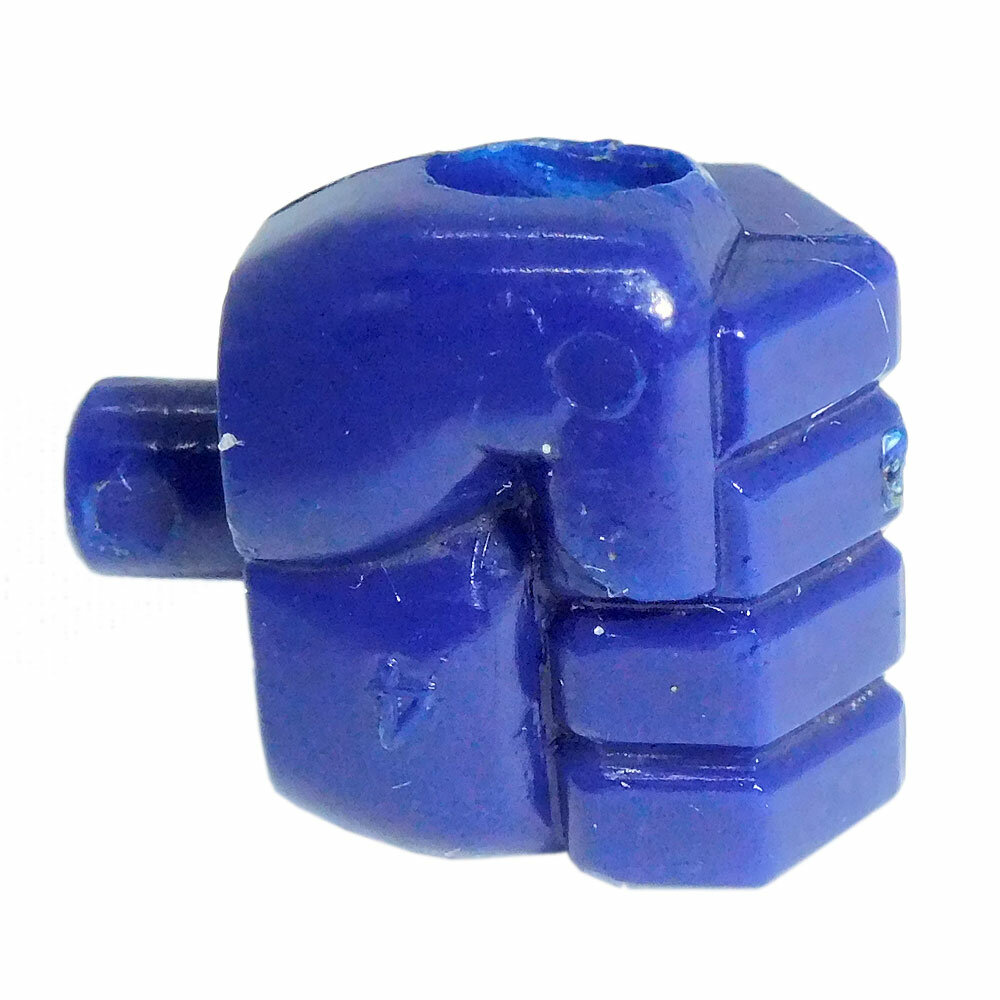
Those look almost exactly the same. I wouldn’t be surprised if they used one to sculpt the other. Both released near the same time frame. Possibly, even similar sculptors of the time.
-
NSFW. 😜
-
1 hour ago, glane21 said:
Hardcore!
You should see the other guy.
")

Counting down the days.
-
Hikaru: “Not again! I thought we were training.”
Britai: “Yes. Next time we train, I will keep your breastplate.”
Hikaru: “You suck.”
-
2 hours ago, Papa Rat said:
Well I think it’s done but I want to go back in for some weathering and a matte topcoat. Had a lot of fun with this one. Paint was sloppy in spots, but I just pushed on.
Some Orguss M.Lover, ♥️♥️♥️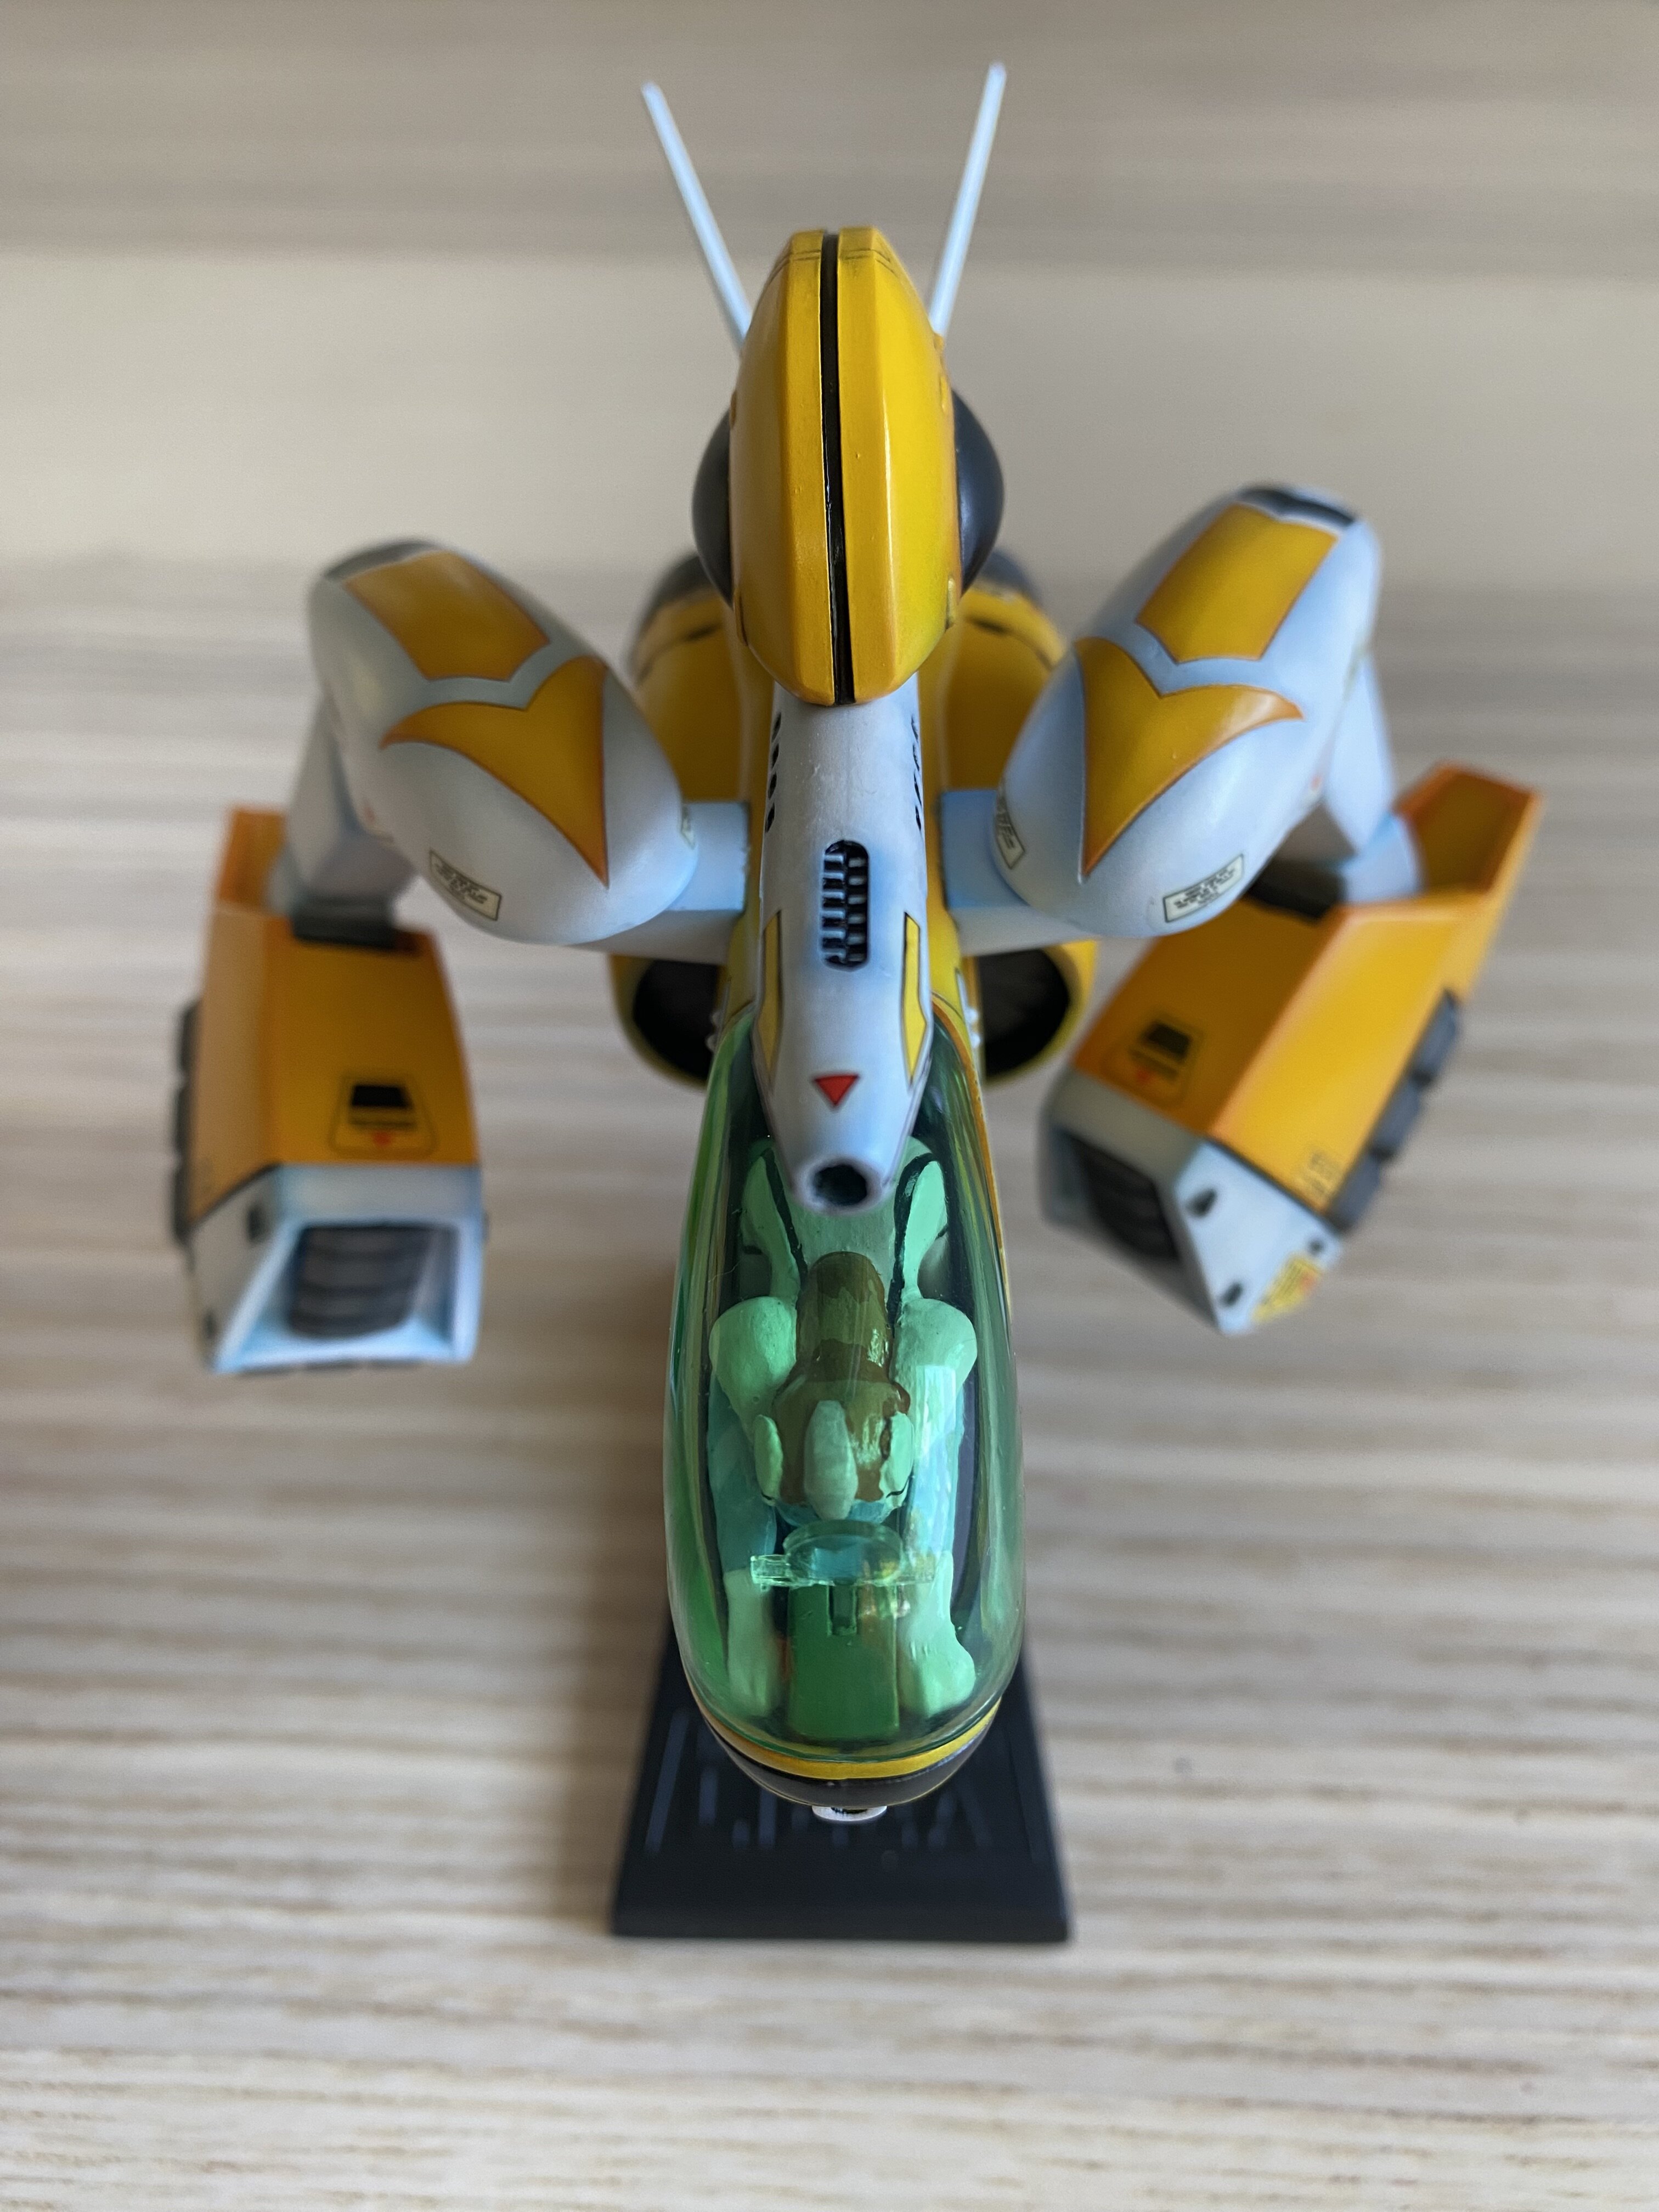

Wow, that was quick. And a very nice build.
Are you using an airbrush or rattle cans?
Nevermind - I just looked at the set up behind your Orguss GERWALK.
-
12 minutes ago, Papa Rat said:
Test fitting the IMAI Gerwalk while finishing up the M.Lover Lieea.
I don’t know why but I love these old kits soooo much. The detailing and fit is interesting I suppose, but they are so endearing. The price is right and it’s fun putting lipstick on a pig. Not sure if that’s the right expression?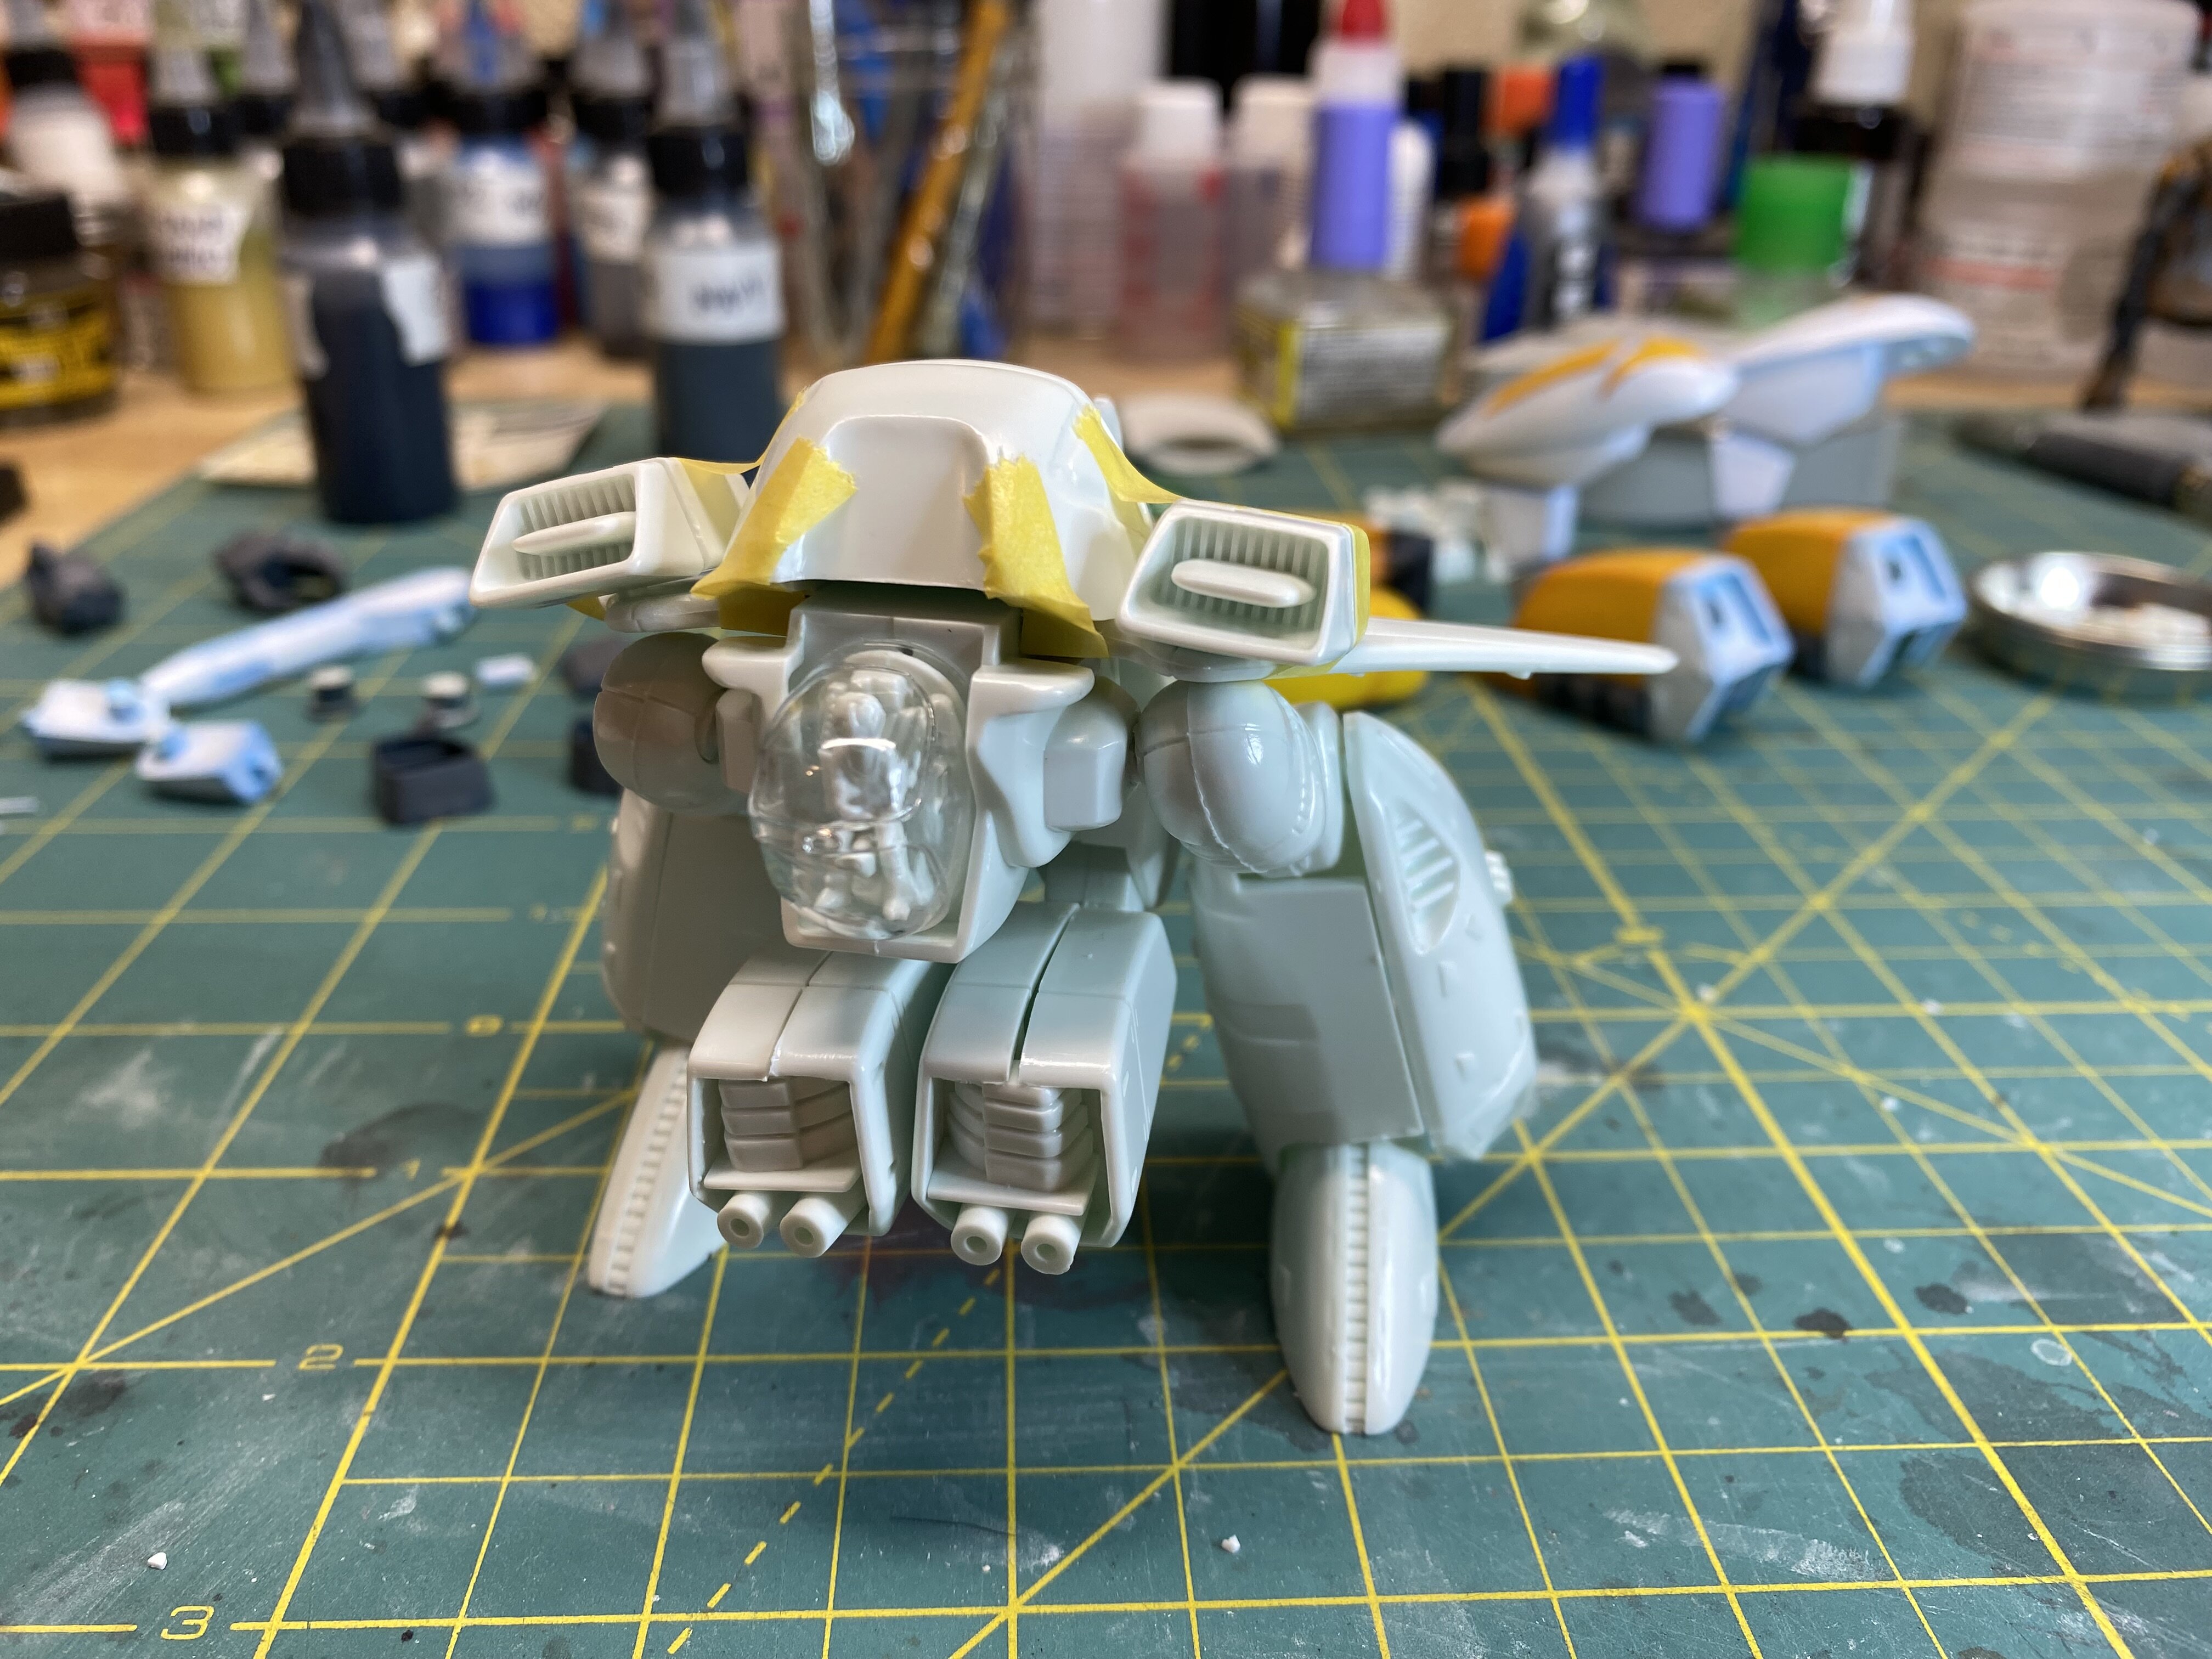
Will this be a straight build and paint plan? Or will you be adding a few touches?
Very cool.
-
Thanks for playing.
-
Chunky Monkey custom.

-
41 minutes ago, Papa Rat said:
Love the updates! Your project is looking great. 👍
Thank you.
Can’t wait to see you finish those Orguss kits.
-
Good Lord! I’m off customizing more and you guys are over here hitting out of the park with some amazing 3D work, model, and figure painting.
Great work everyone!
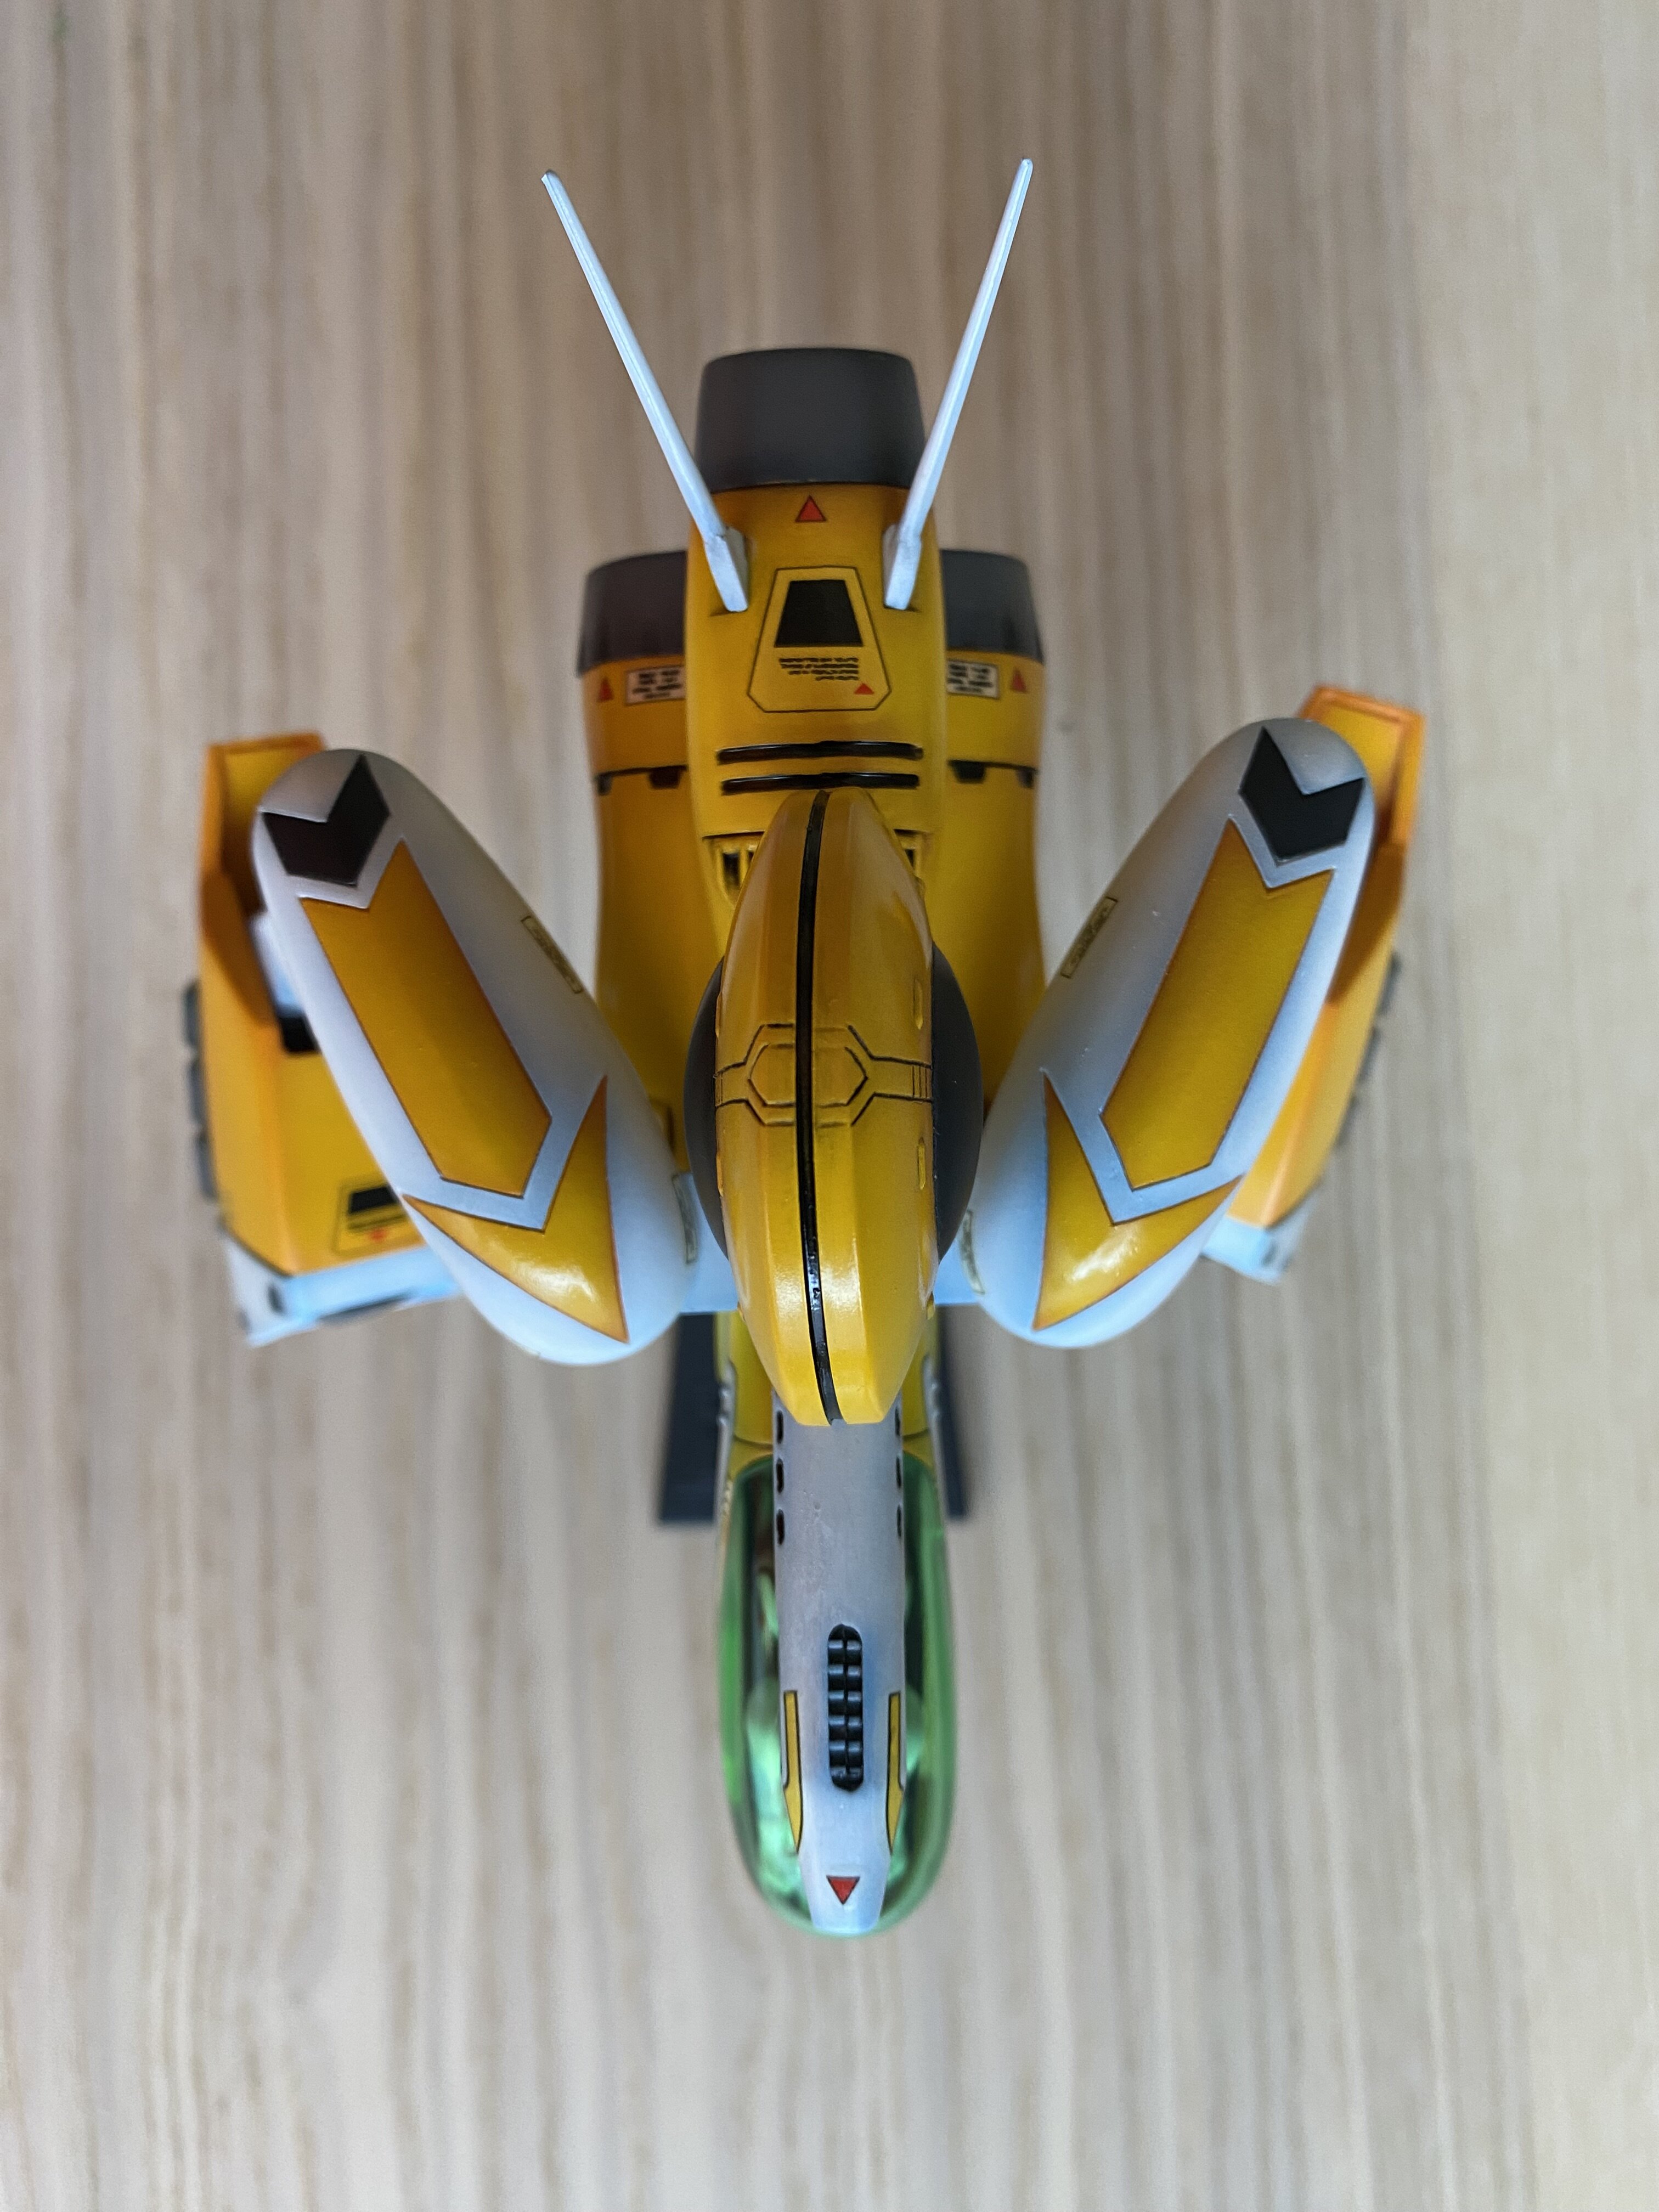
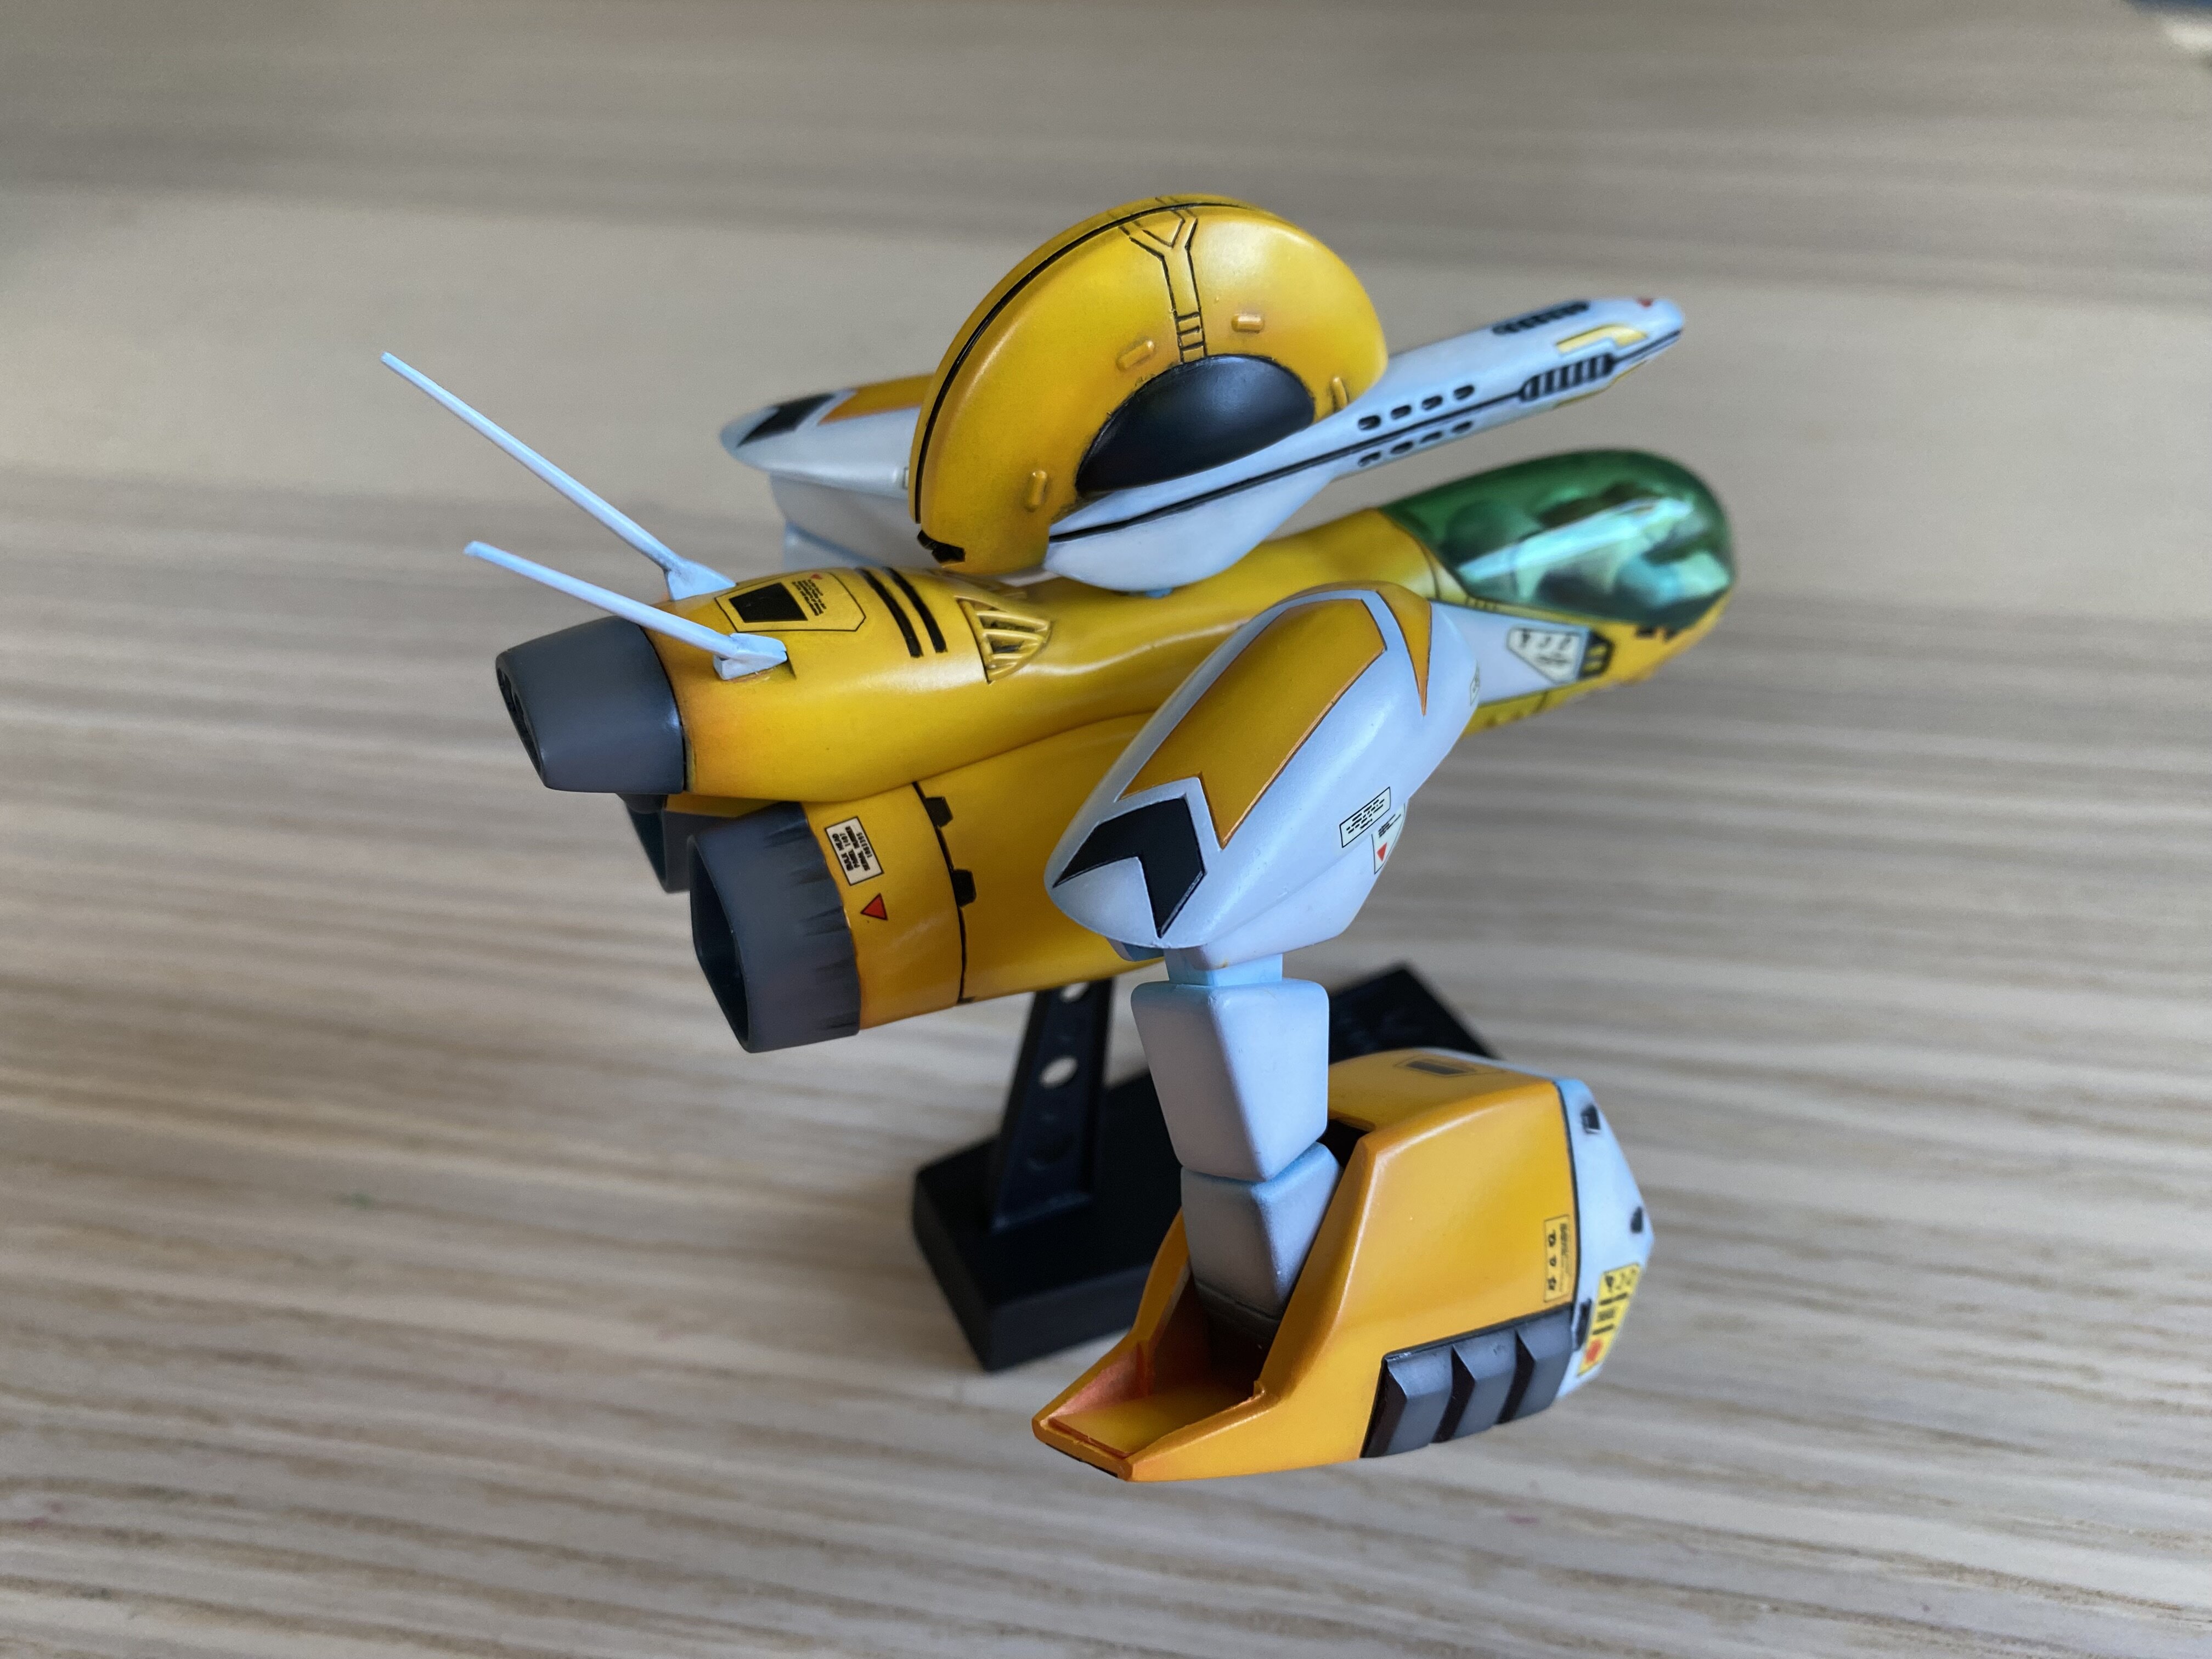
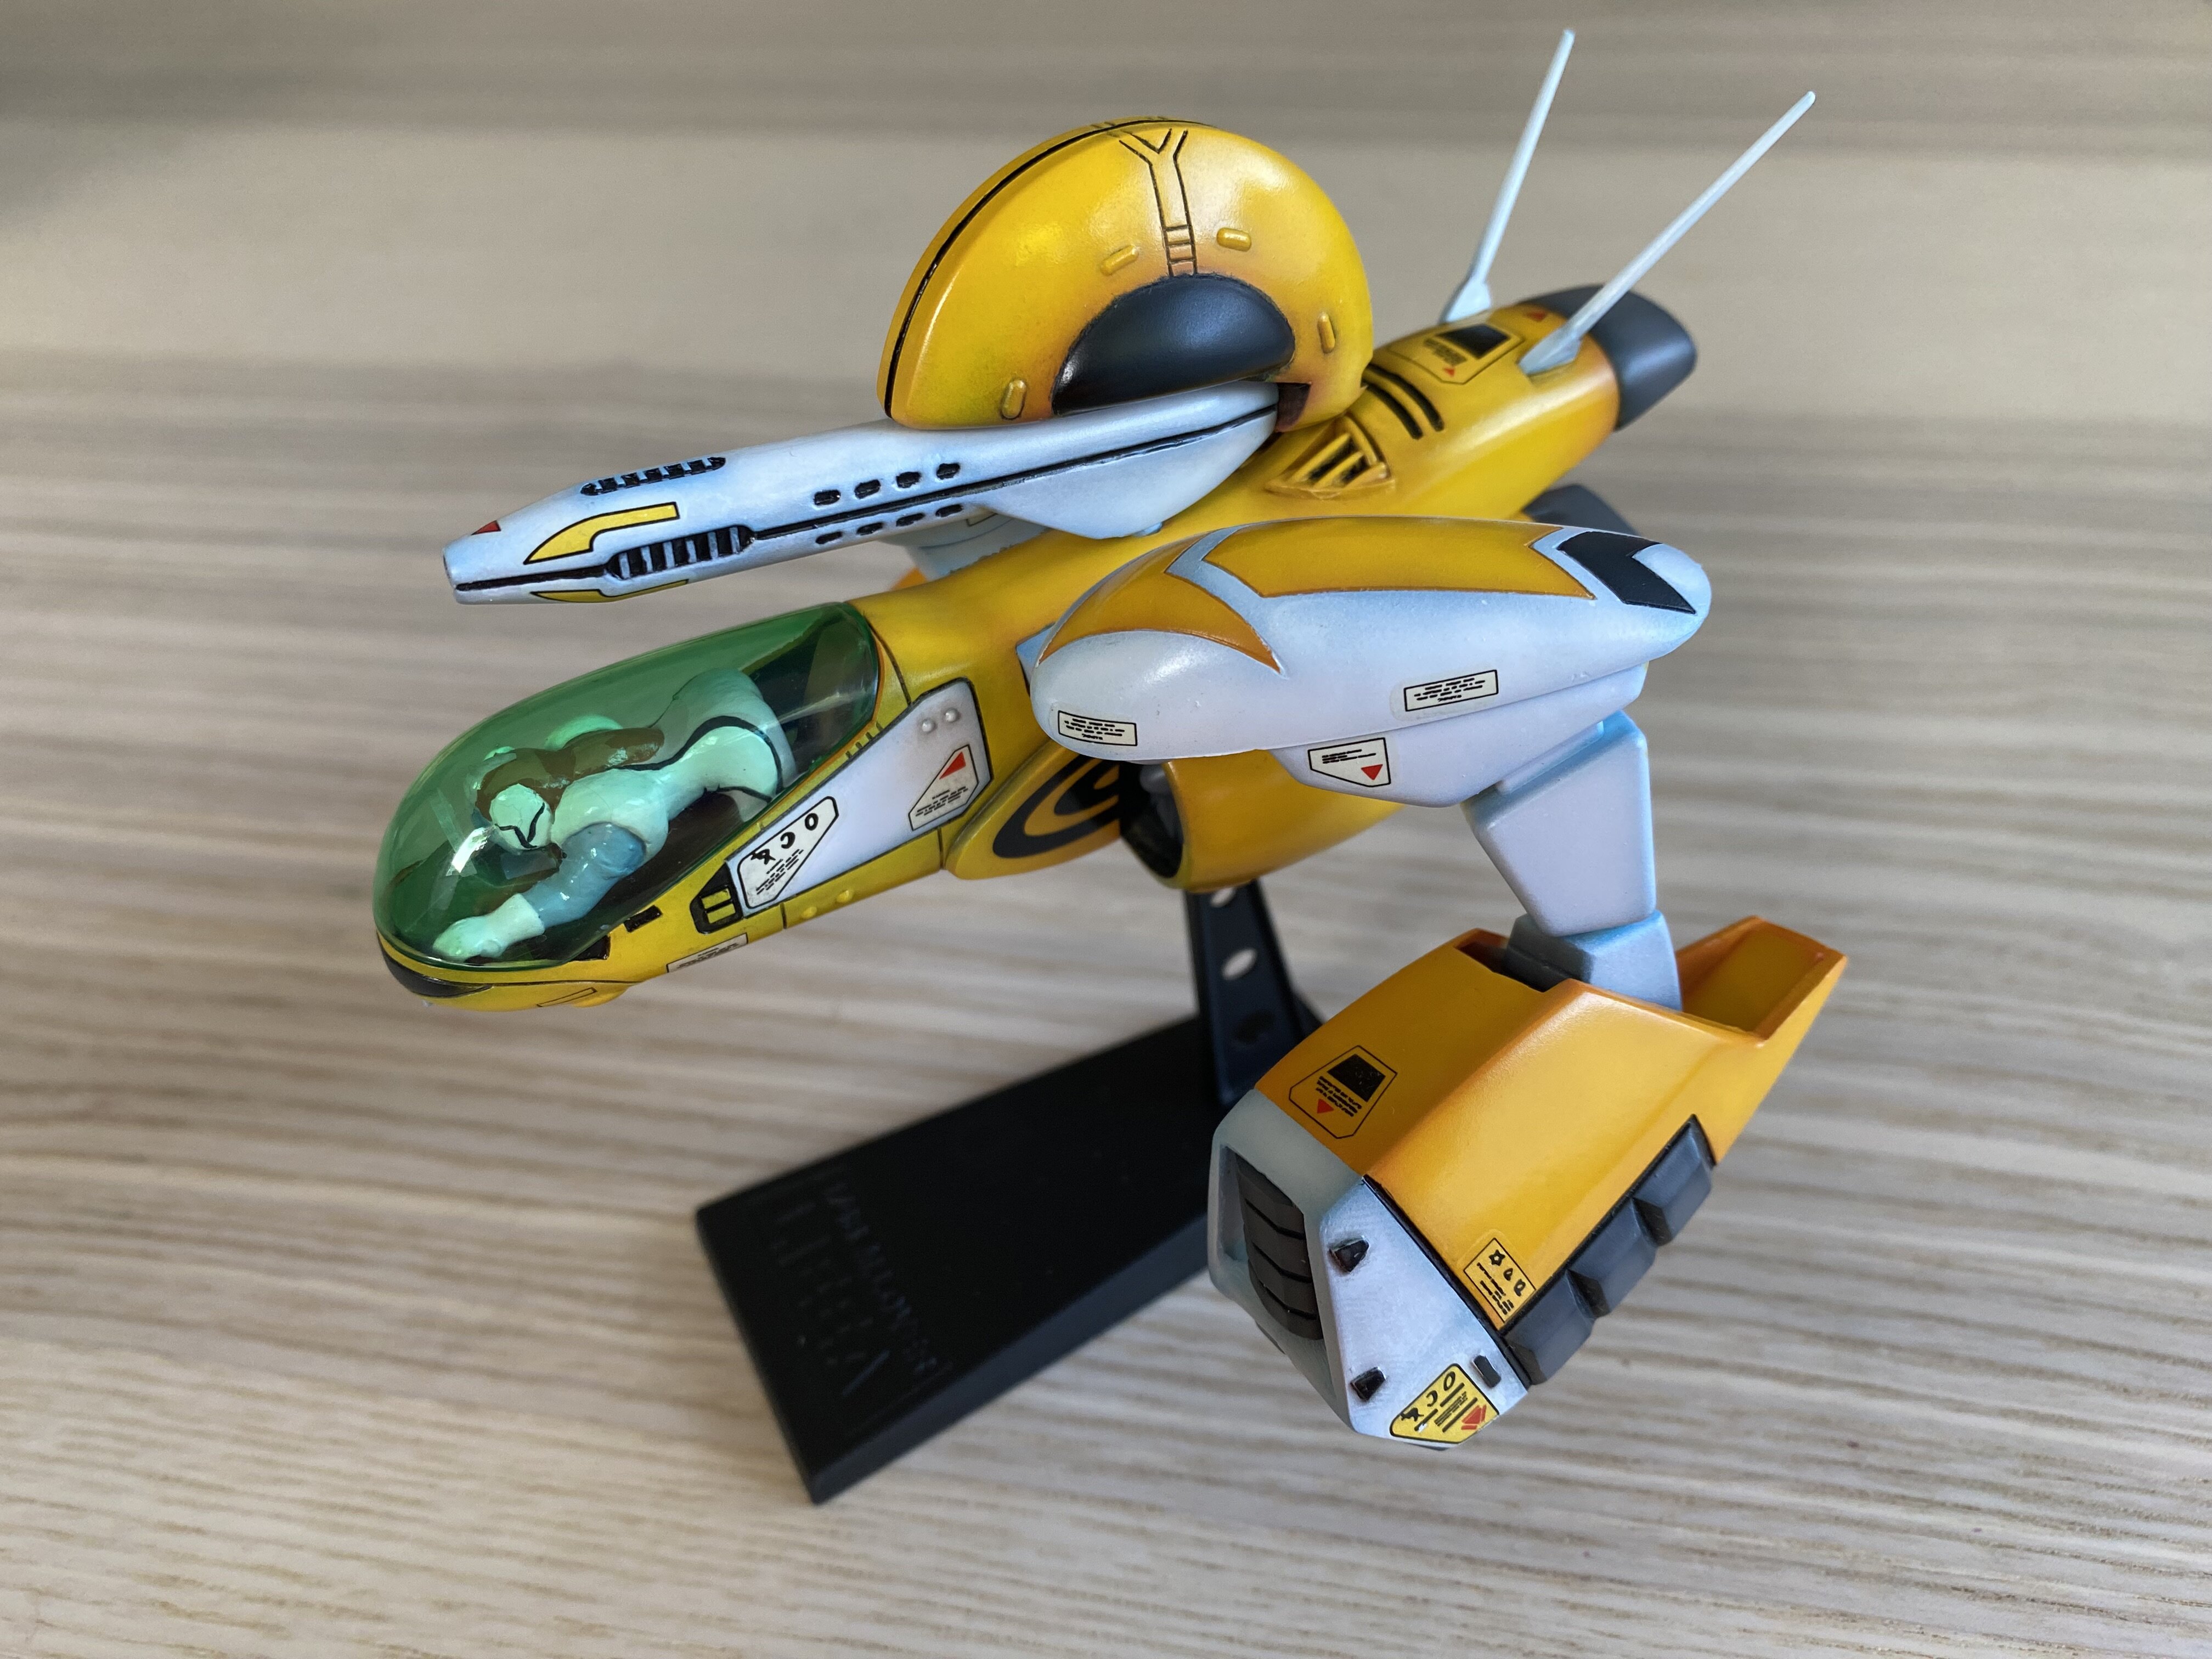
Do You Remember this scene.

JF for comparison. Note anything different??
-
On 5/1/2025 at 11:20 AM, Jasonc said:
Wow, now that's an expensive piece of something not many of us are even aware of, or care of to spend that type of money. It's a cool piece, but for that price, well, yeah, no! It's cool that you have a set of them.
Tell me about it. I was just surprised this listing even existed. I paid almost nothing for these poster. Maybe the artist is an industry professional, not sure.
-
5 hours ago, Big s said:
I have a feeling that Arii just f***** up the sculpt on the tucked in head. Then again they could’ve tried sneaking something in that they thought no one would notice, but I’m pretty sure they messed up.
they may not have had the best of art to go on and just figured it was good enough. Some of the box arts looked a bit funky at the time as well. Arii wasn’t always the best at details or proportions. I’m still surprised at the overall appearance of their fighter kit in comparison to the oddities on the fighter and gerwalk kits
Not quite. The VF-1C was an intended VF.


-
22 hours ago, Papa Rat said:
Thanks for the compliment!
It’s supposed to be the VF-1D but lacks any details for the most part.
Have a look.
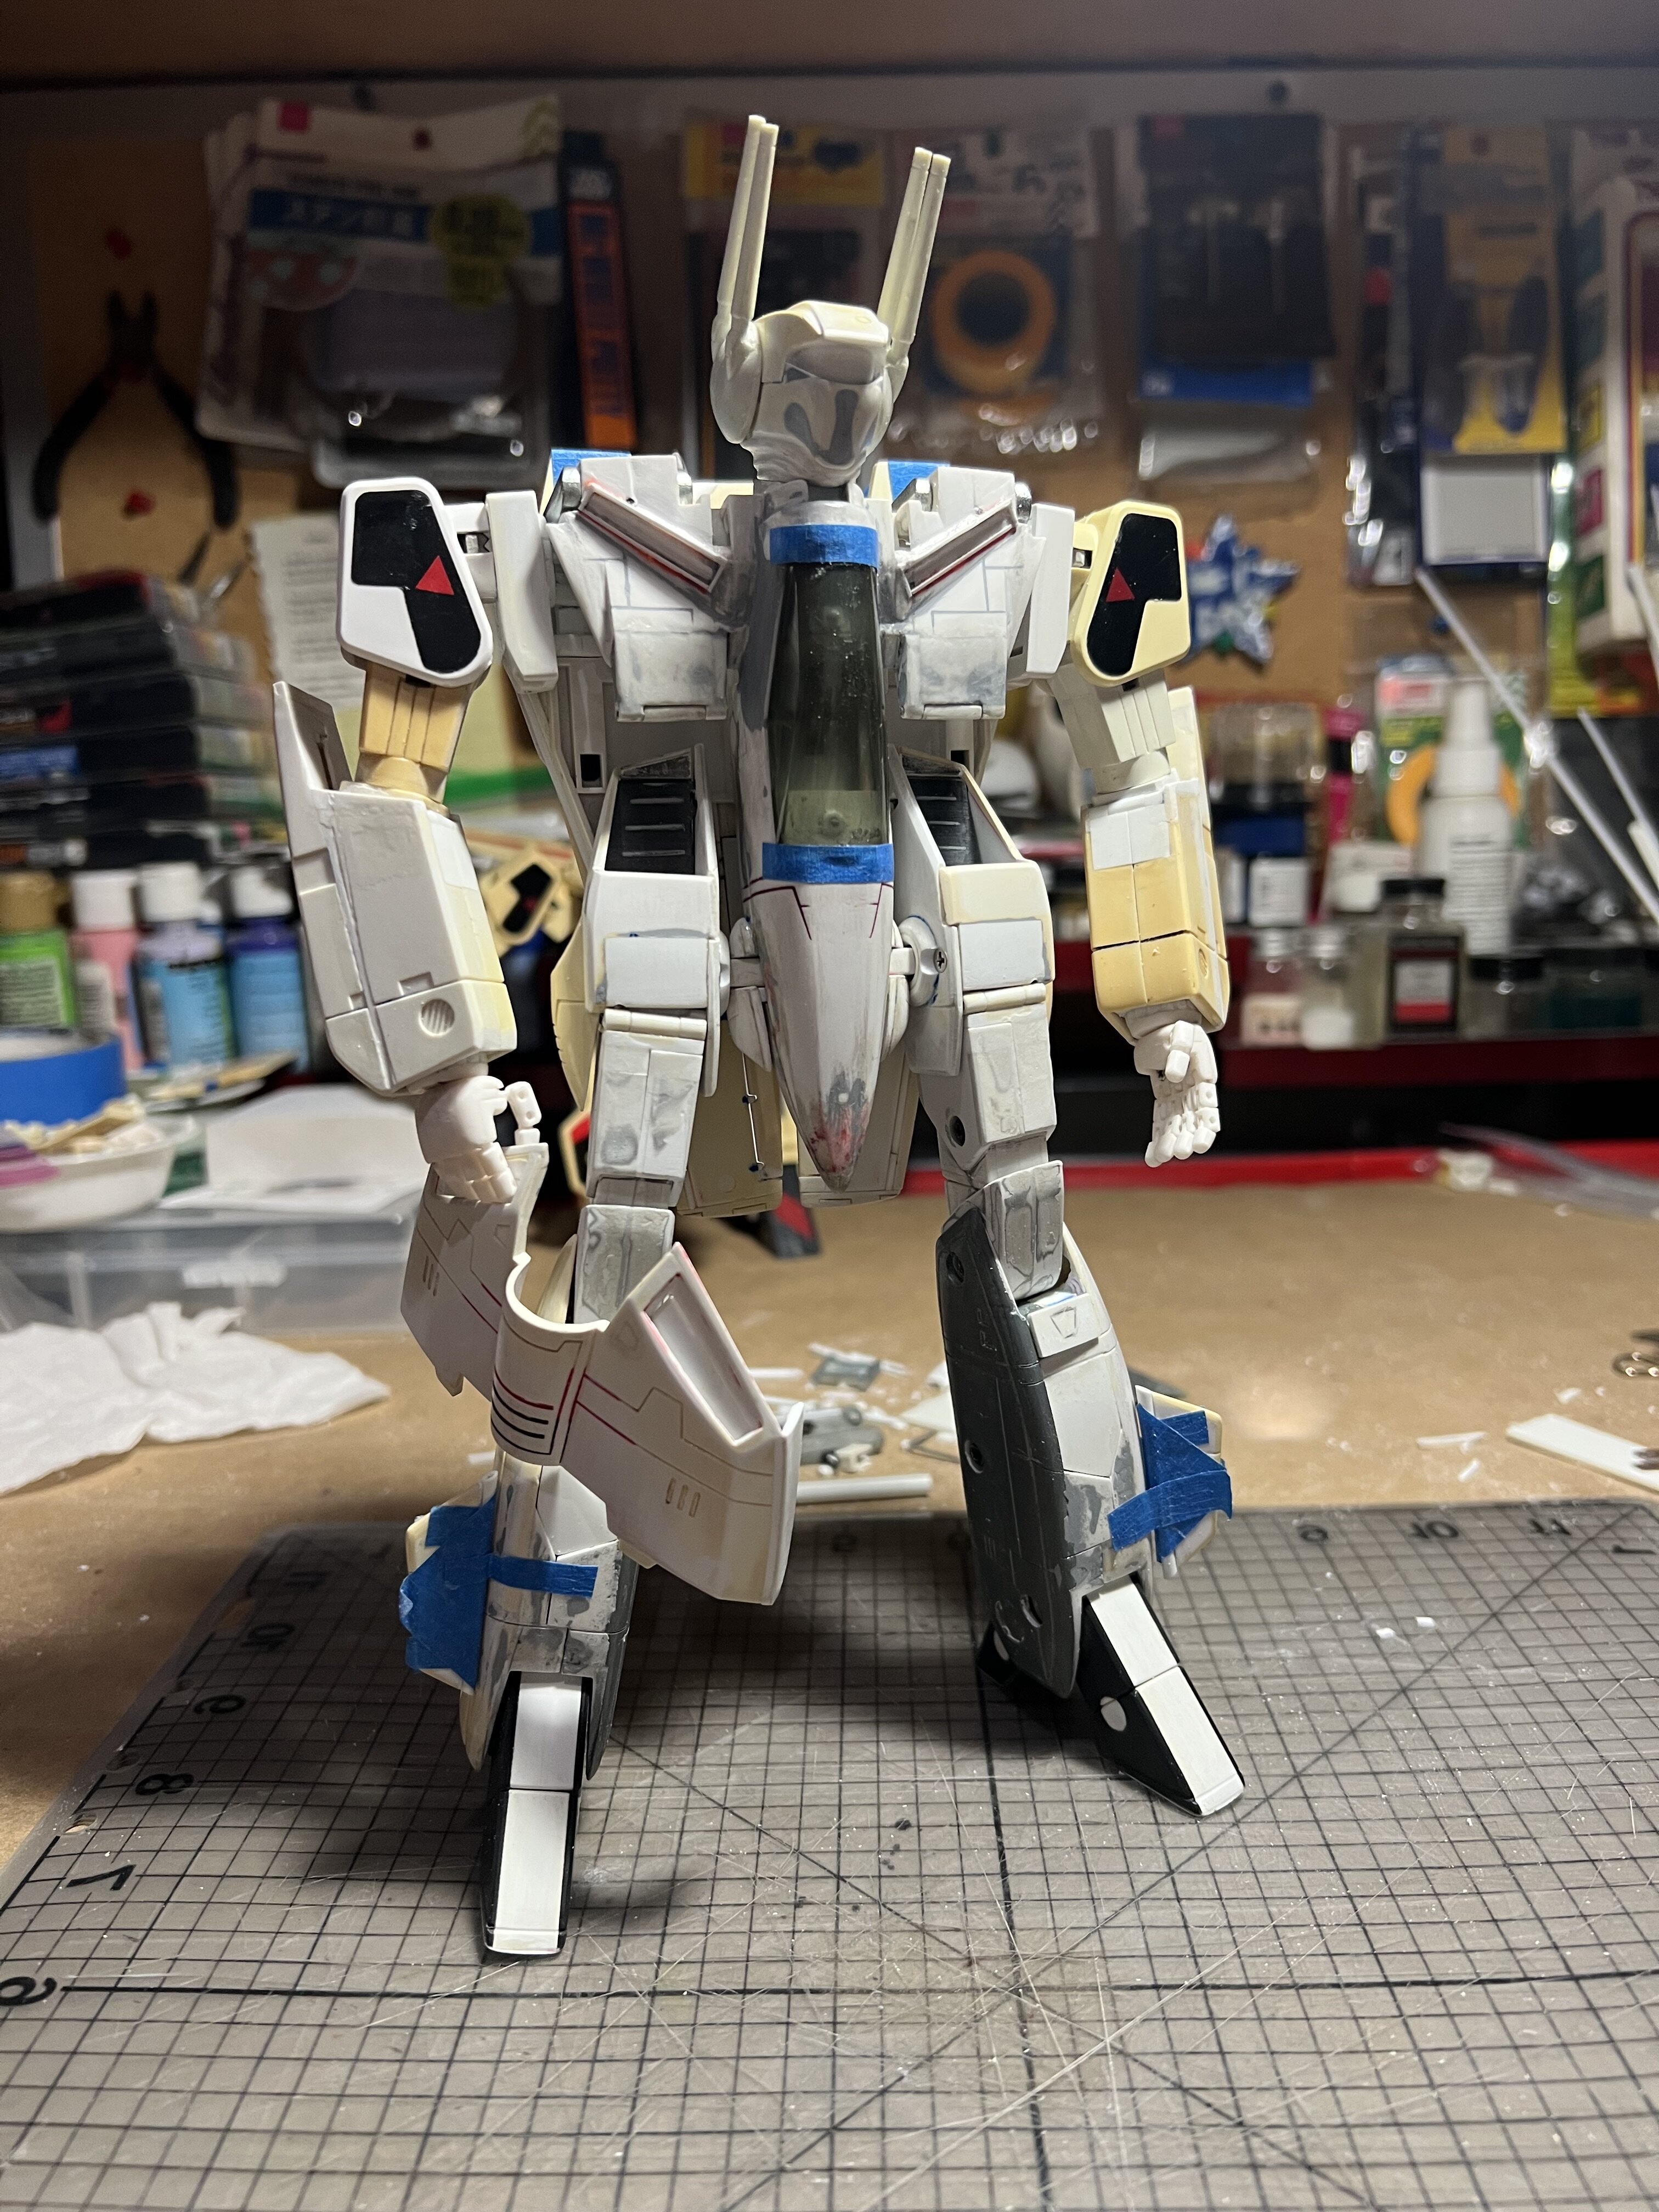
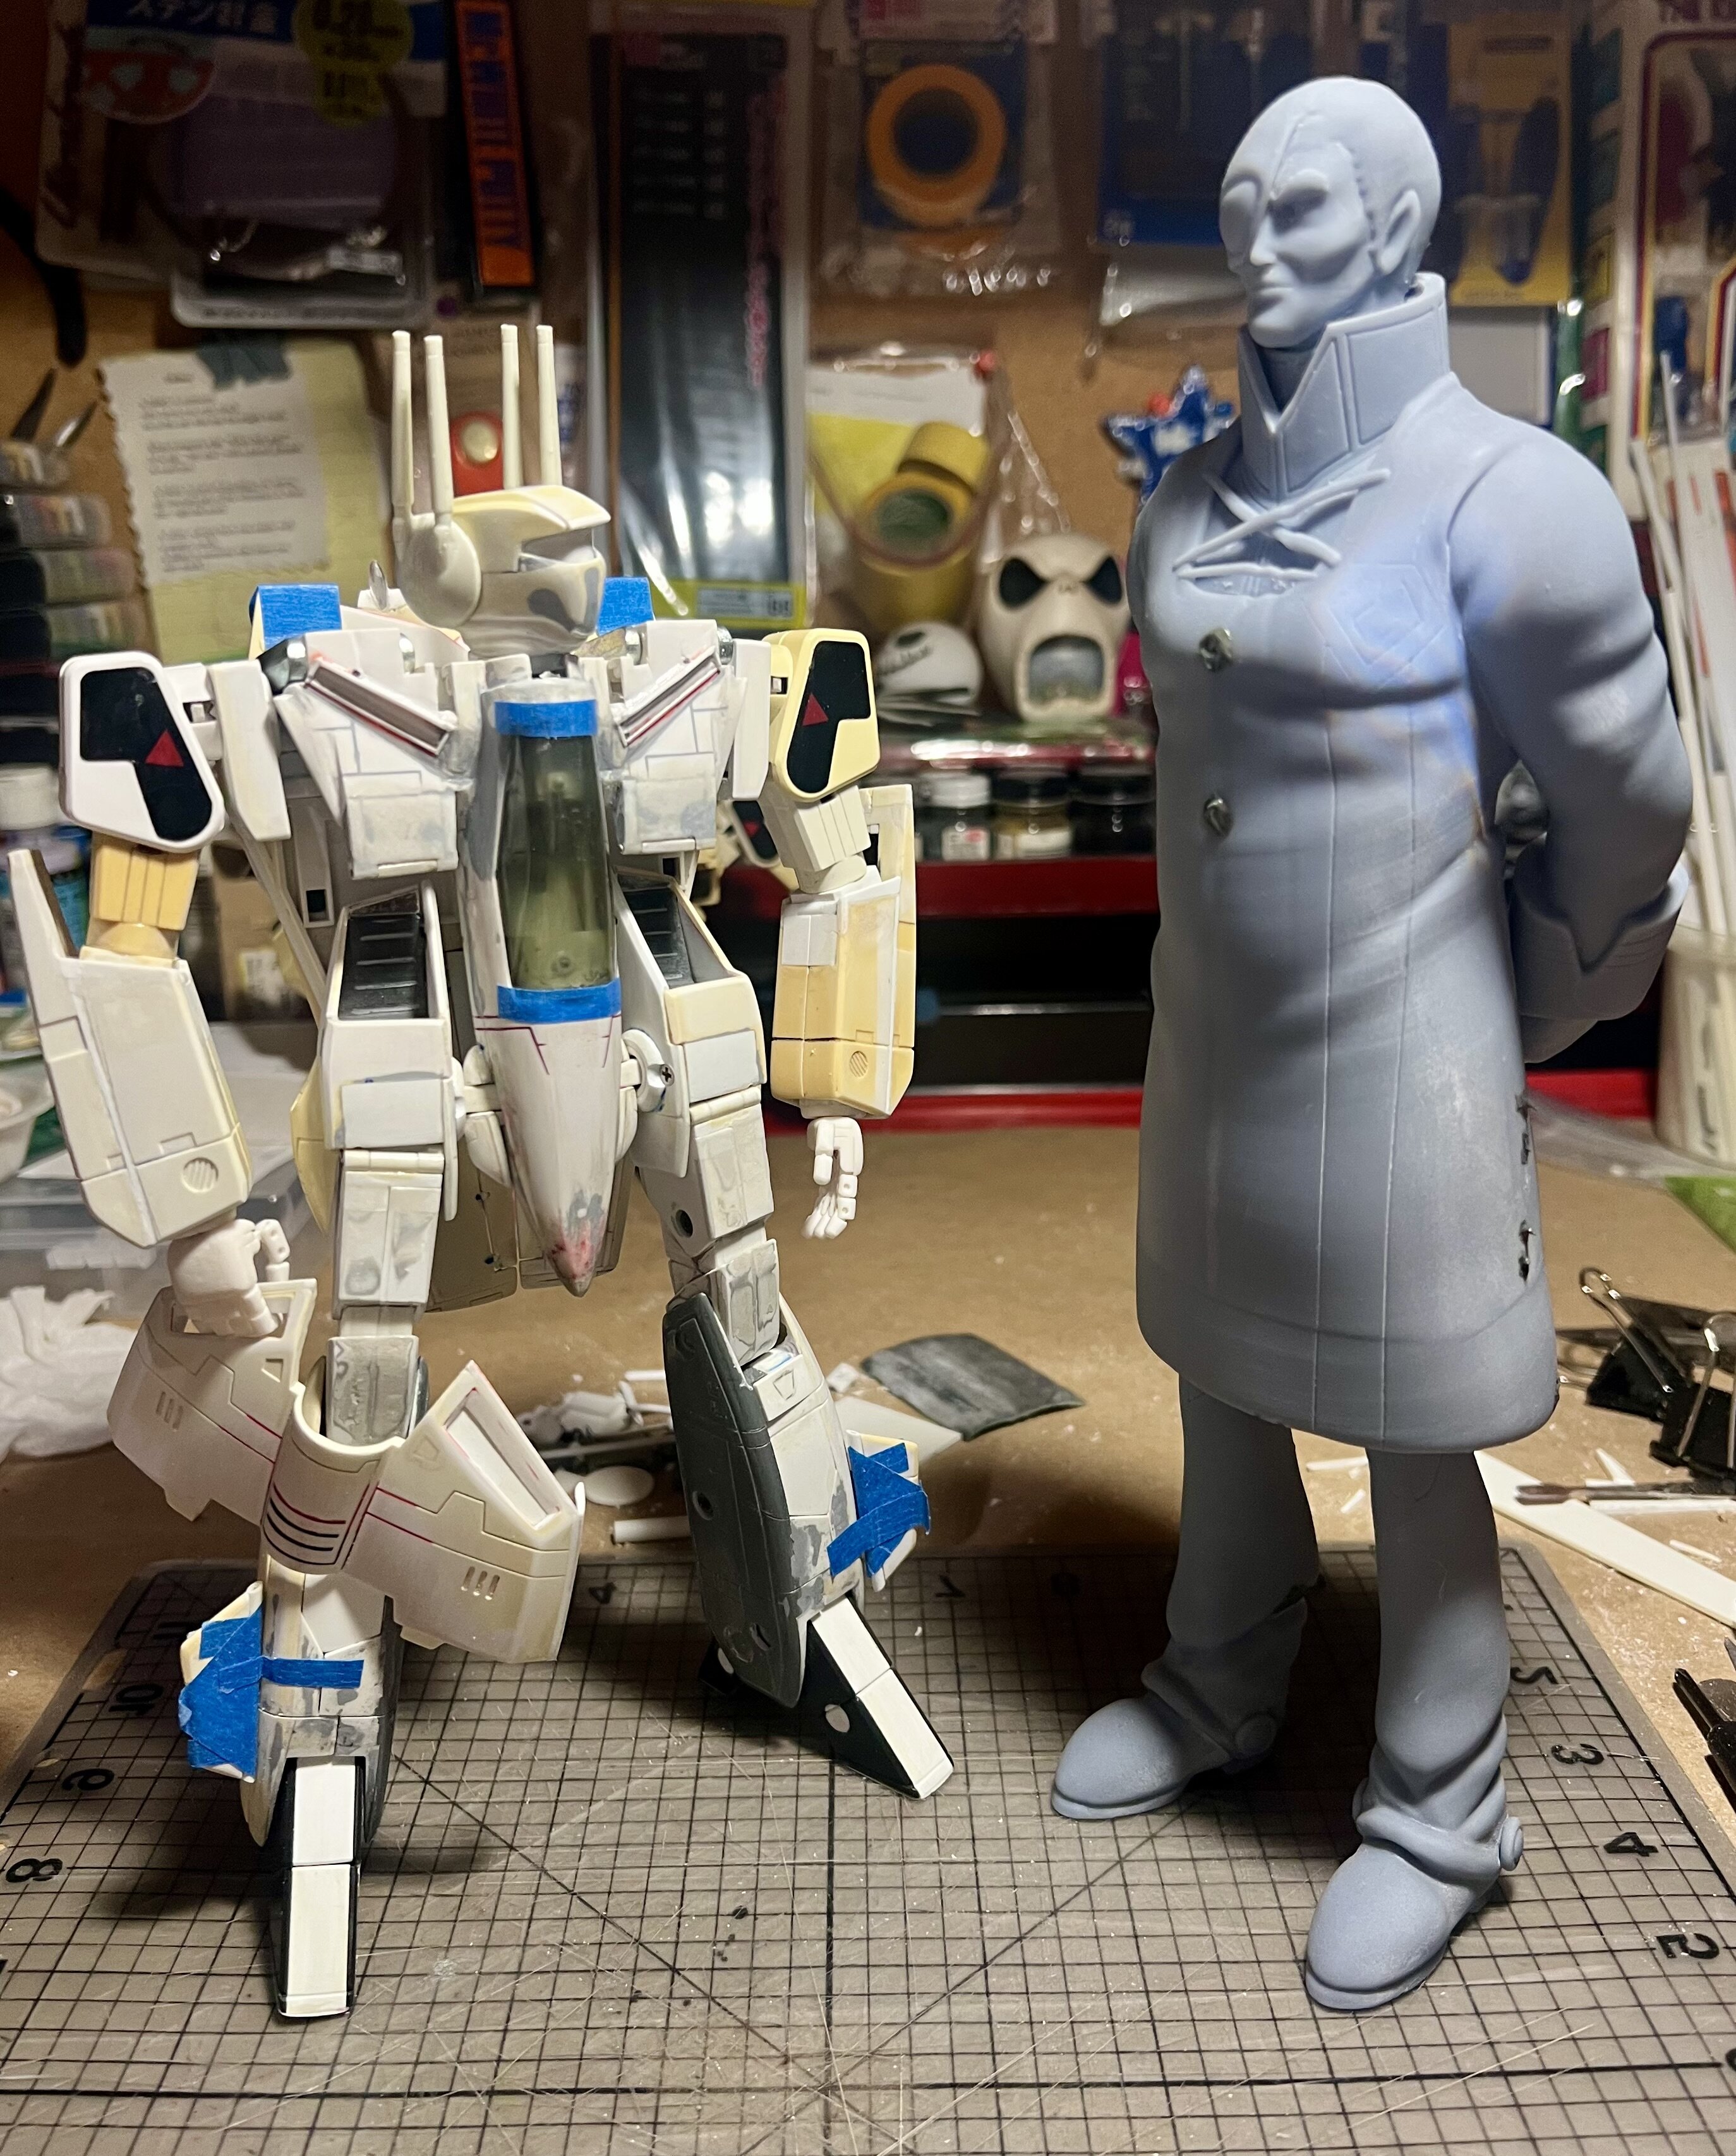
That’s the VF-1C. Nice.
The kit is labeled as the VF-1D. The version of that head makes an appearance in Macross Design Works and possibly in SDF-M in grey.
The 15th anniversary VF figures also had this unique head found on the Super VF-1D GERWALK, but not in the Battroid. 🧐
https://anymoon.com/blog/?p=5625
Very cool.
-
2 hours ago, Papa Rat said:
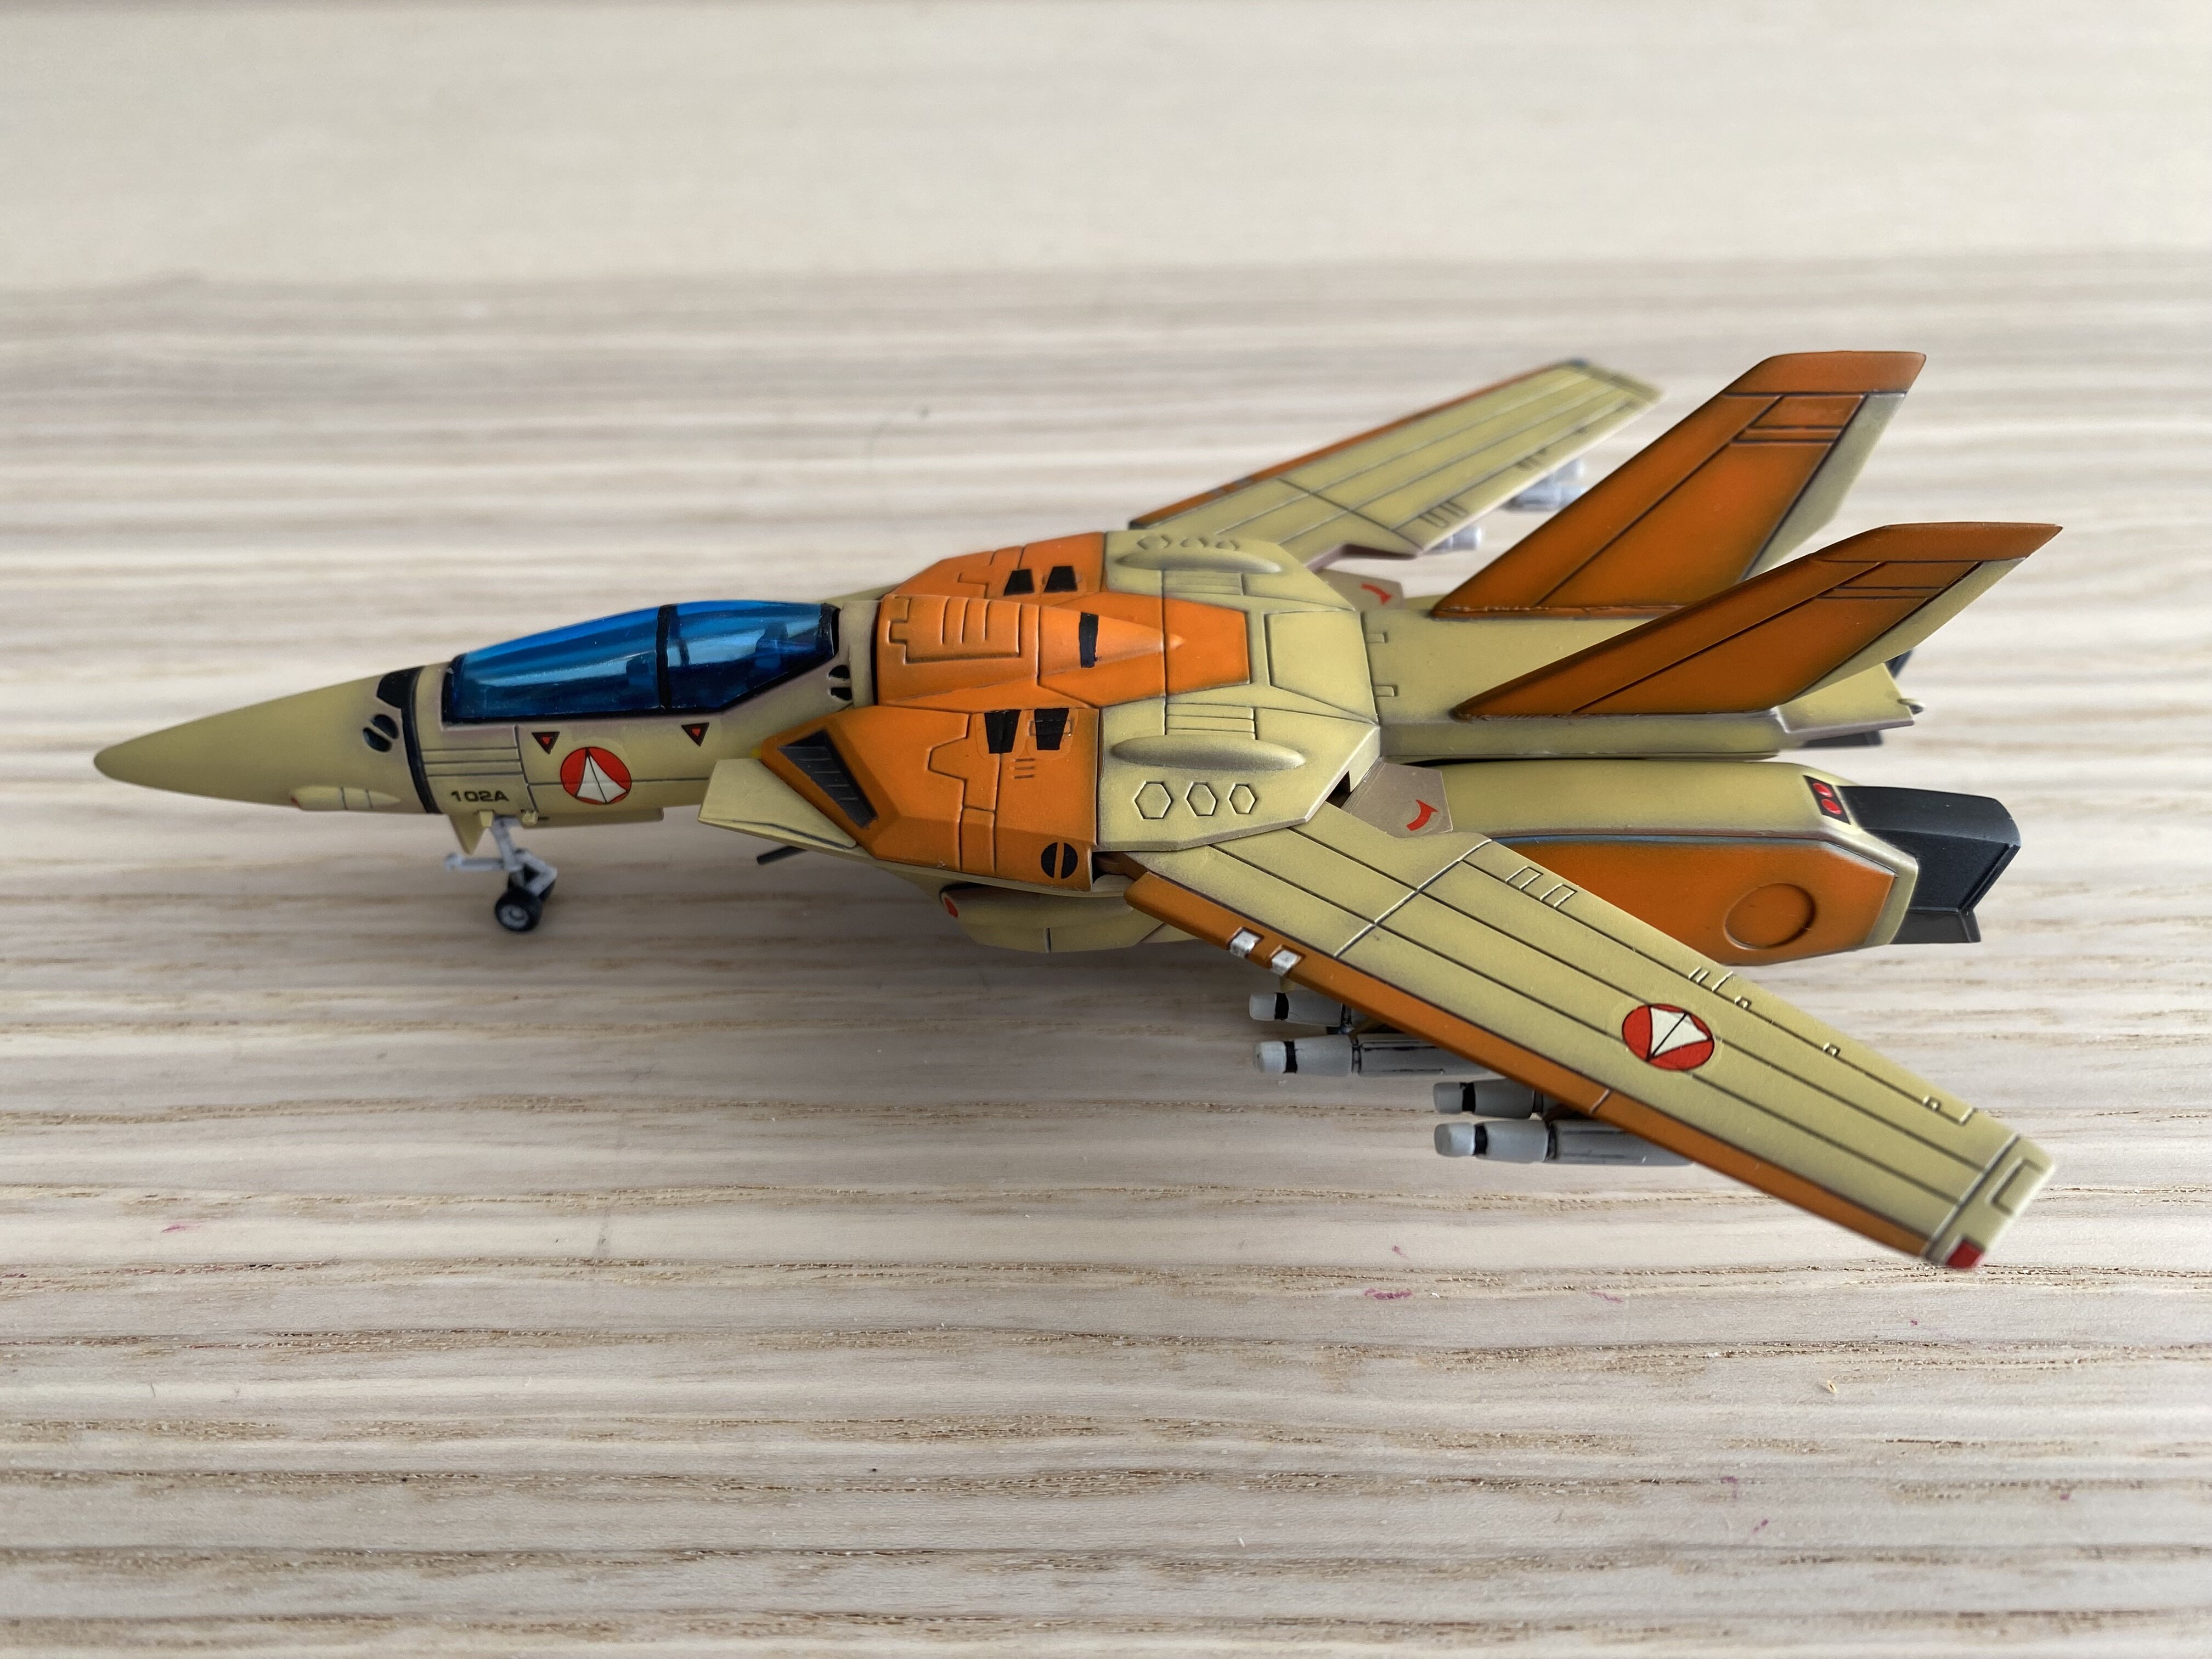
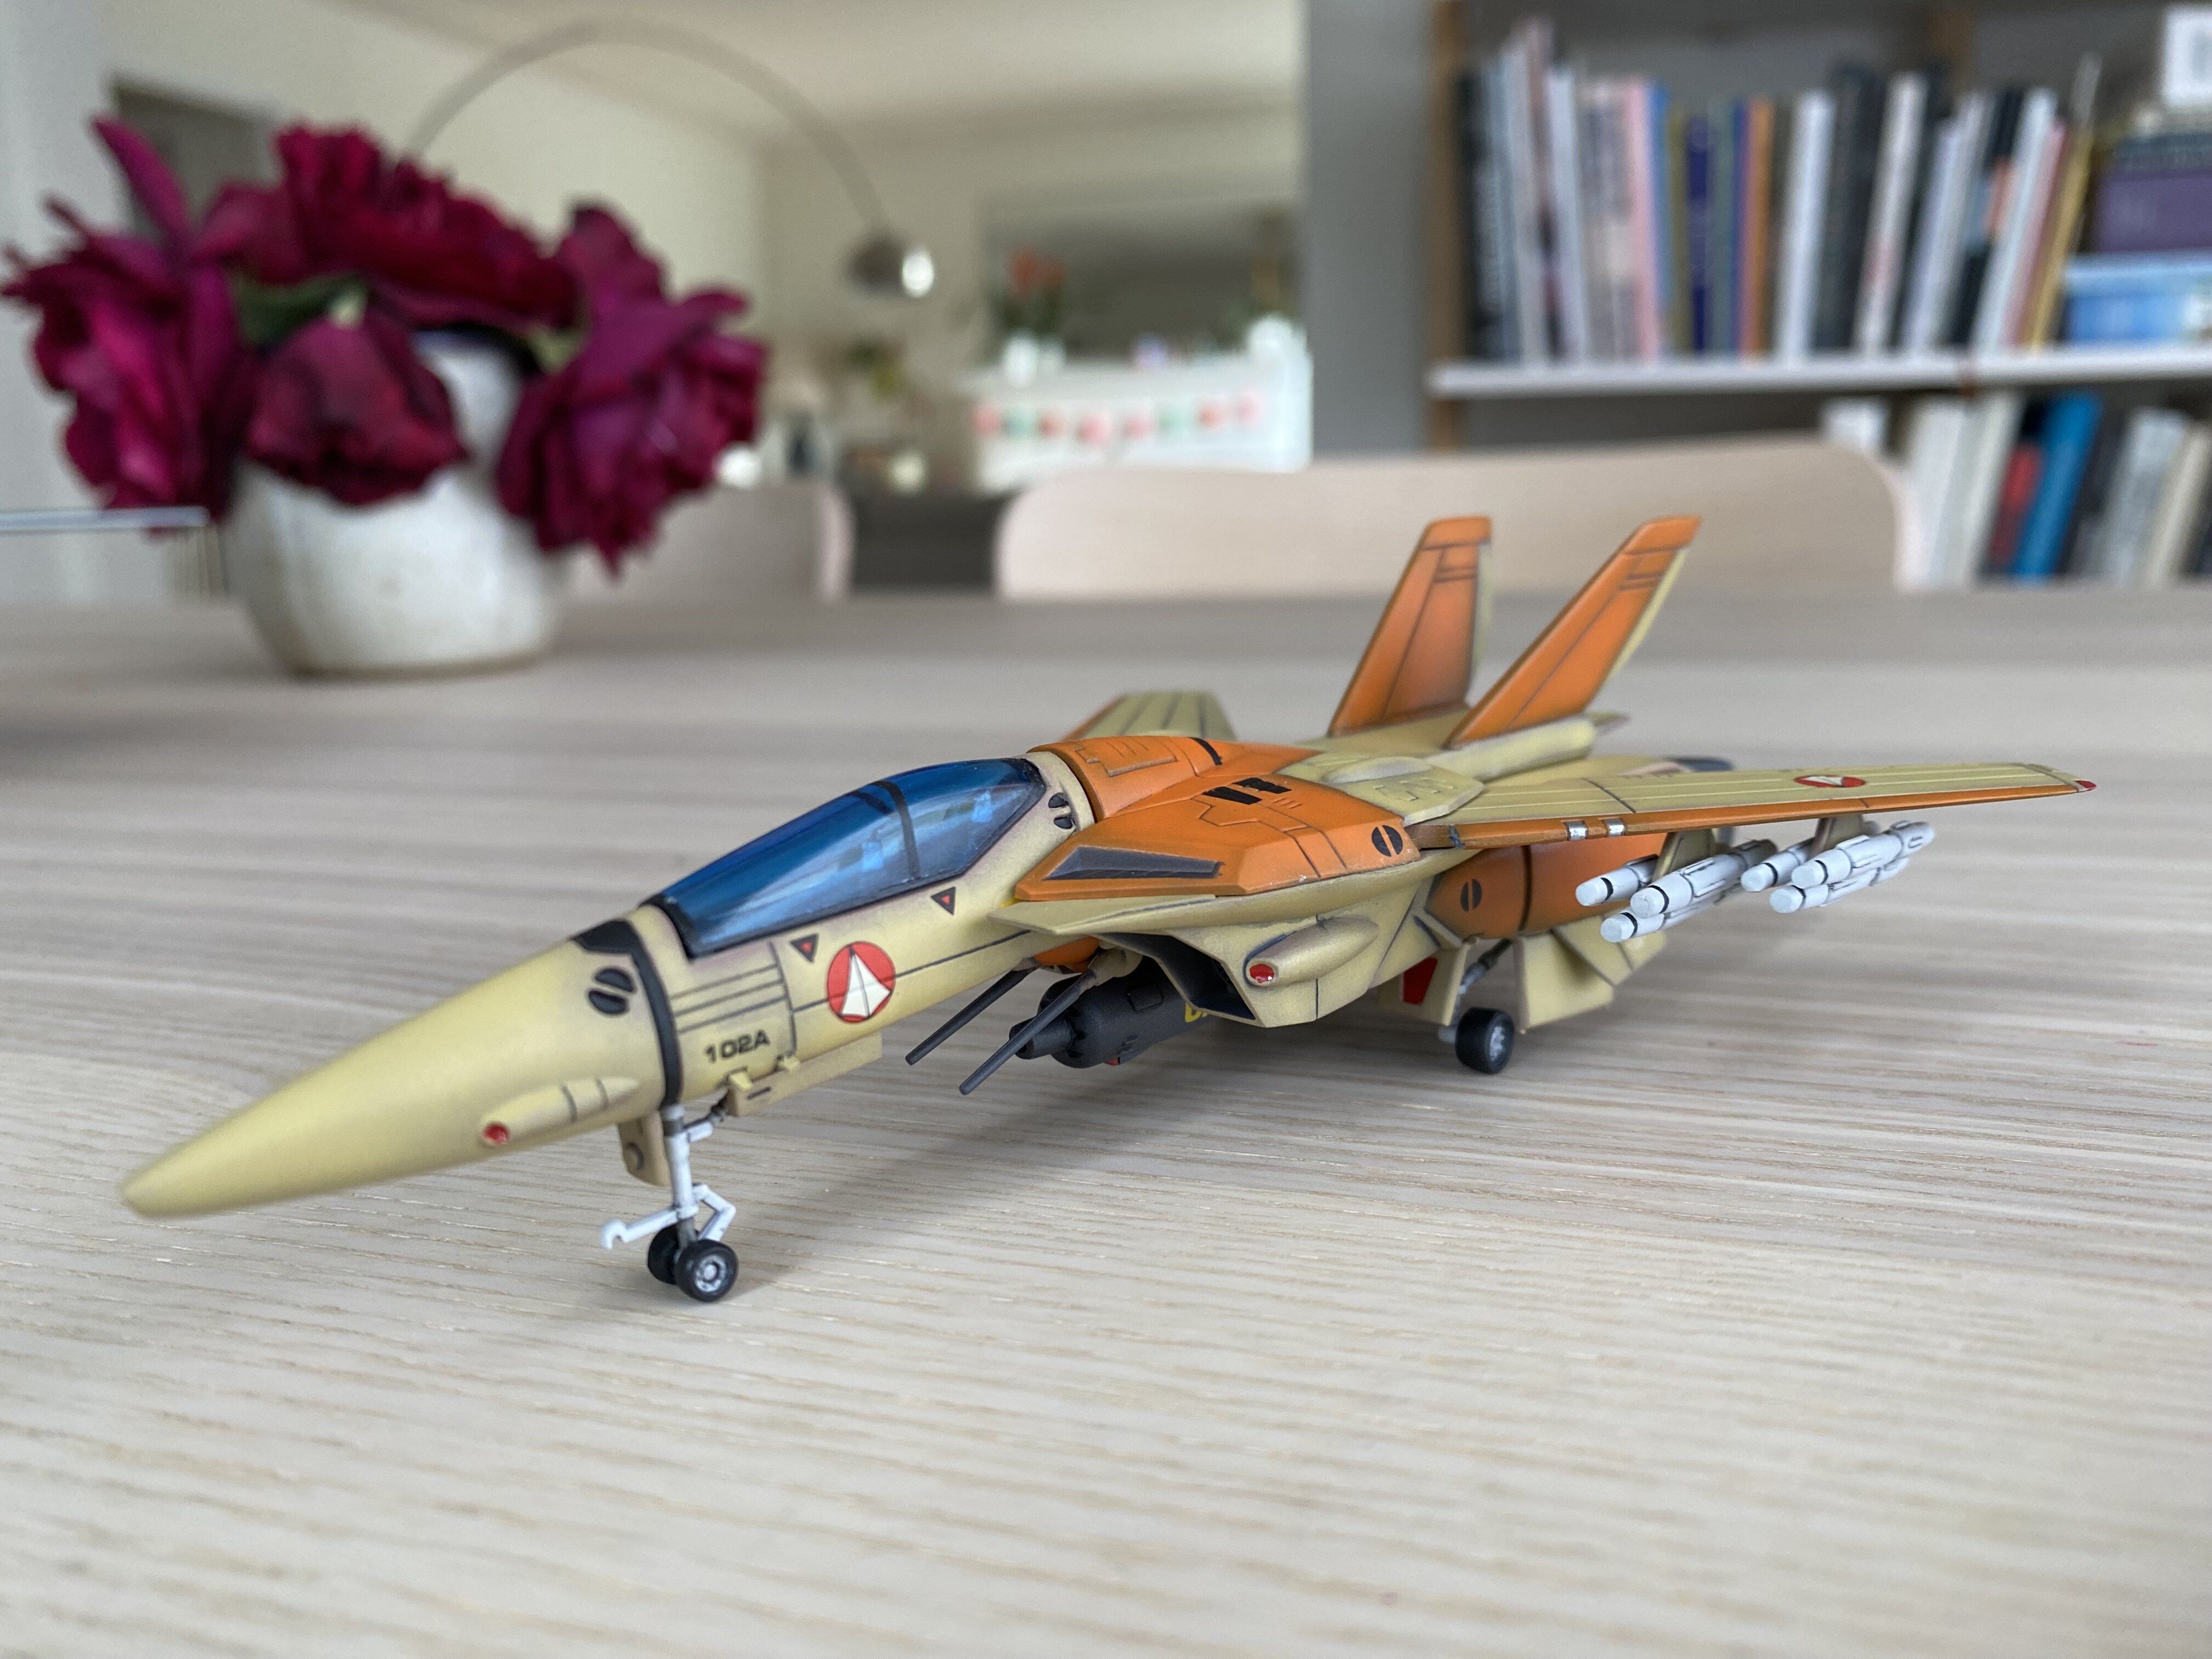
Well that’s a wrap. My first aircraft build is complete and I want to do more. It was a blast! Sun came out so I got a few photos.
There are some things I messed up on which is a given for me, leading to plenty of learning moments In this simple kit. It was fun painting over a darker/colorful underpainting. That might have been my favorite part. I also added a few minor details here and there and I’m so happy with how it turned out.
Absolutely stunning!
Is the head the standard VF-1D type or is it the VF-1C? It’s hard to tell.
Can’t wait to see your next projects.
😍
-
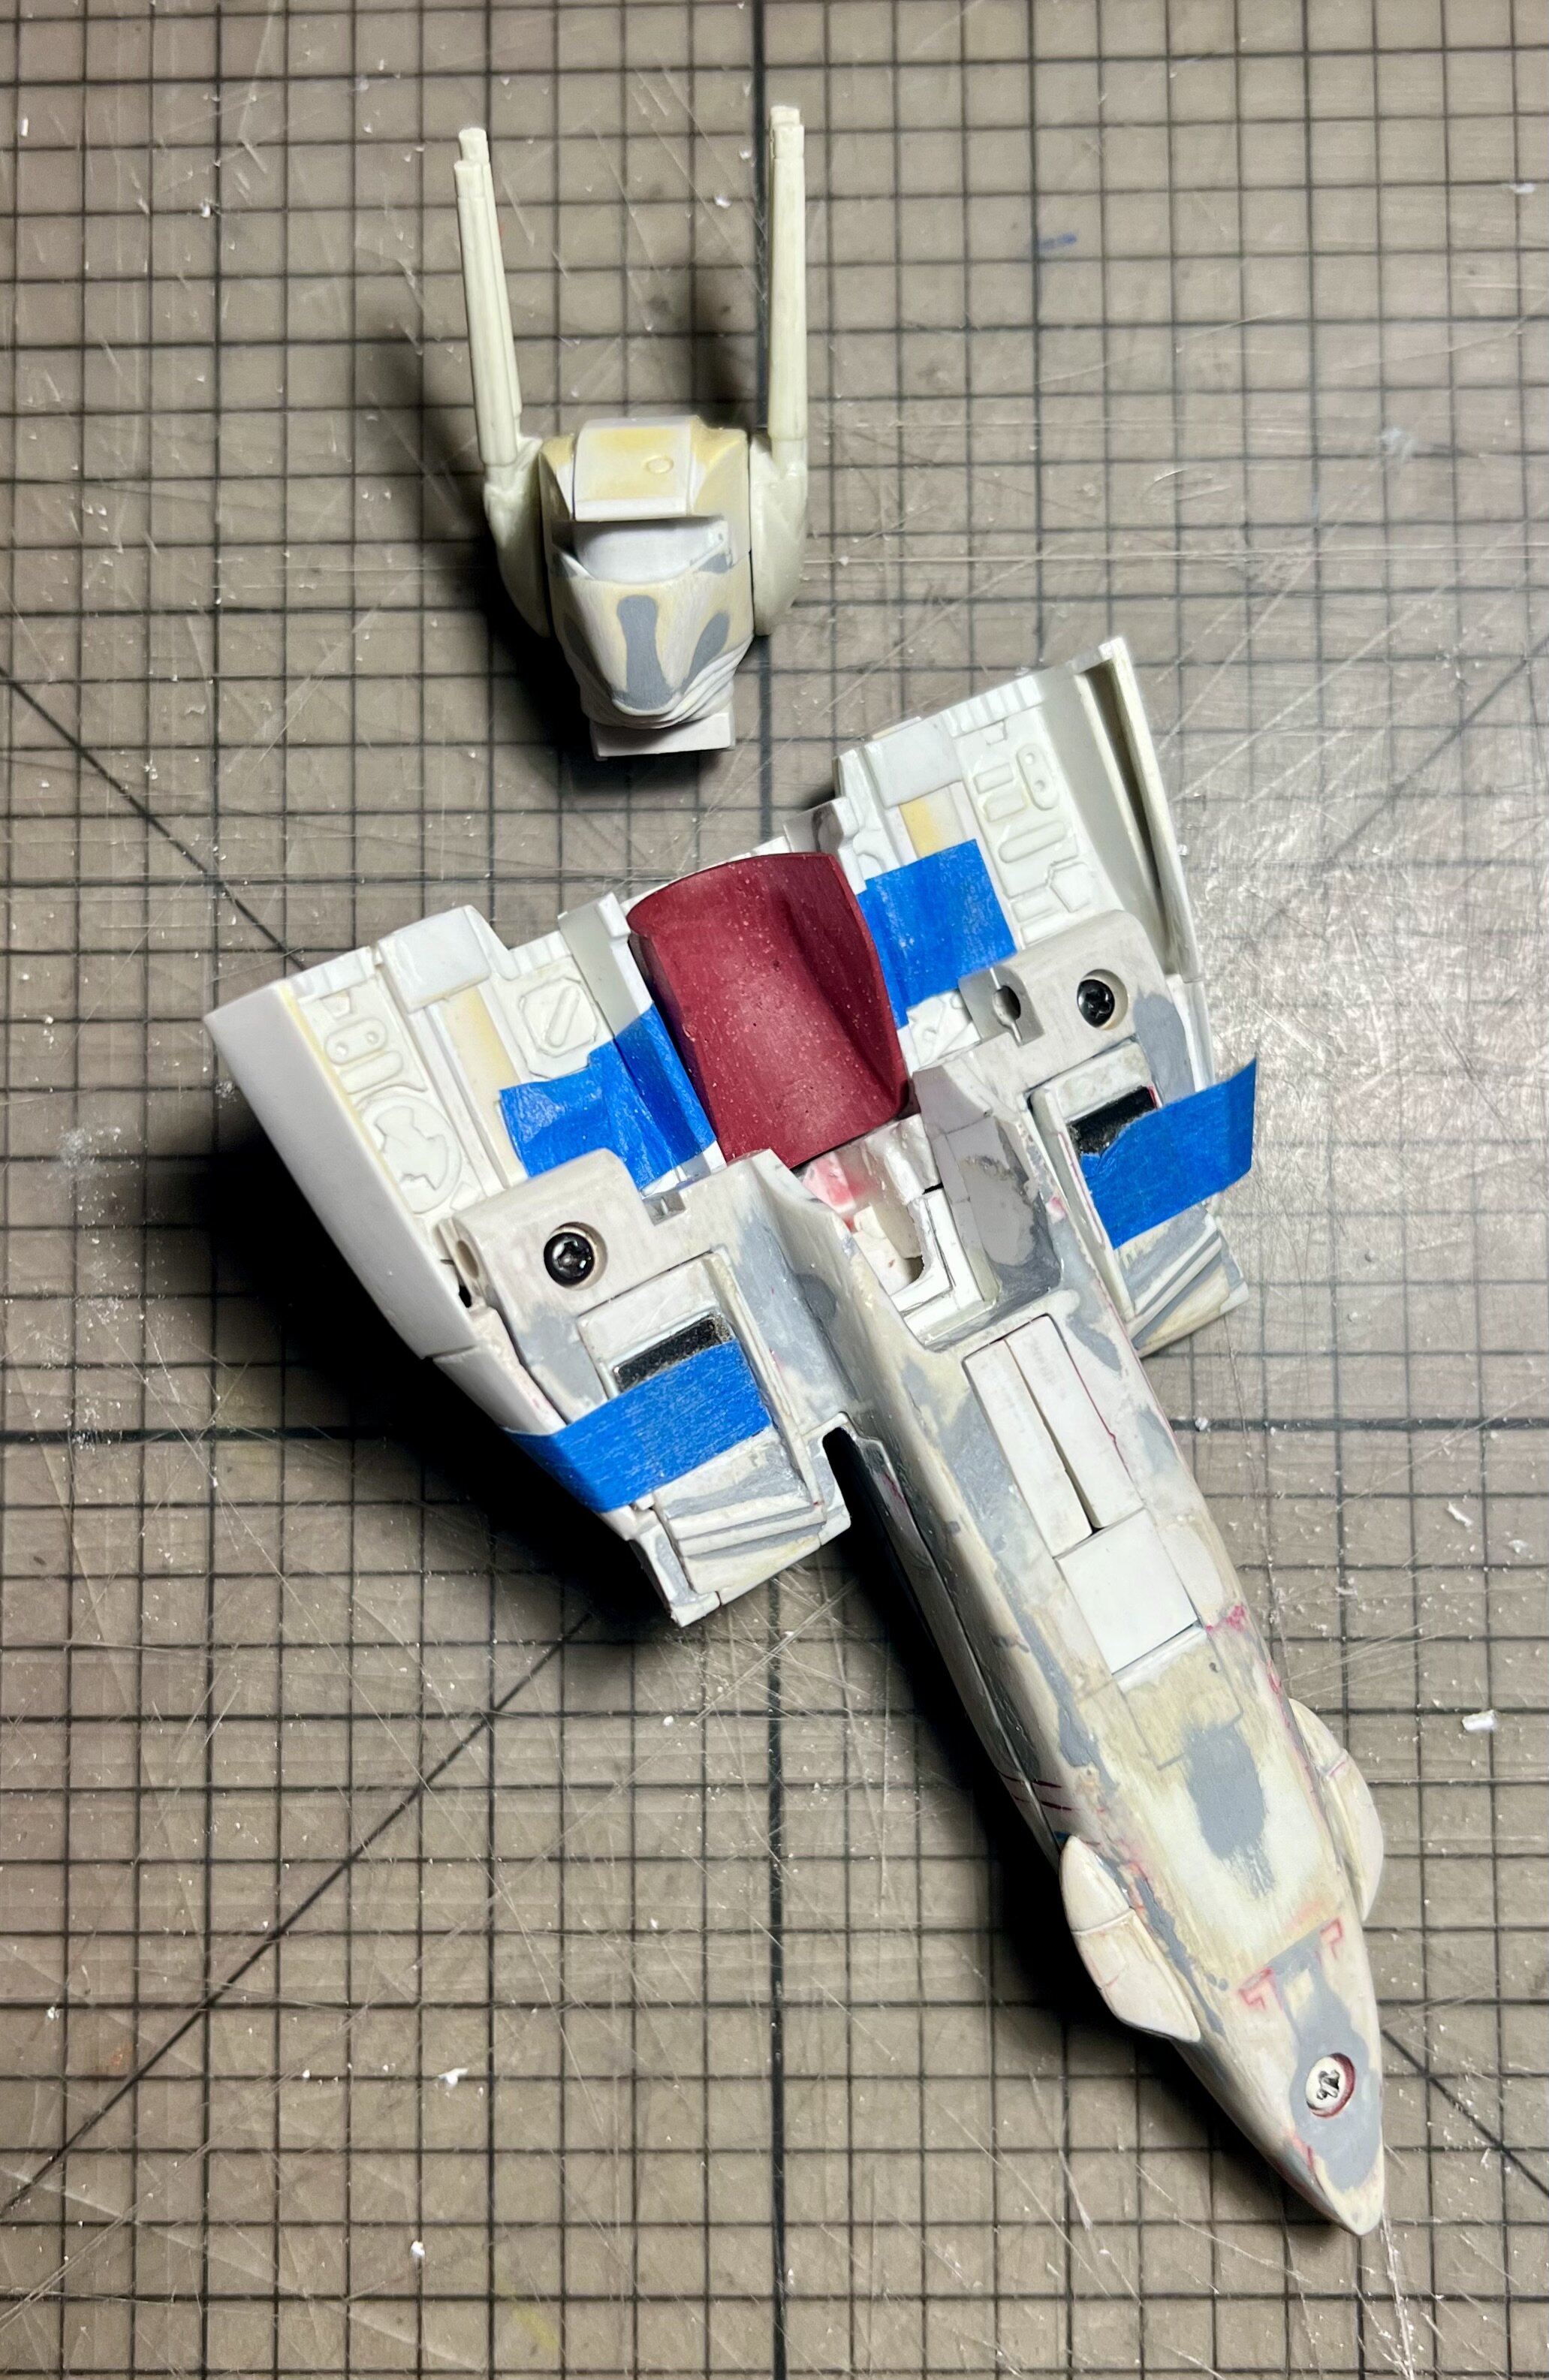
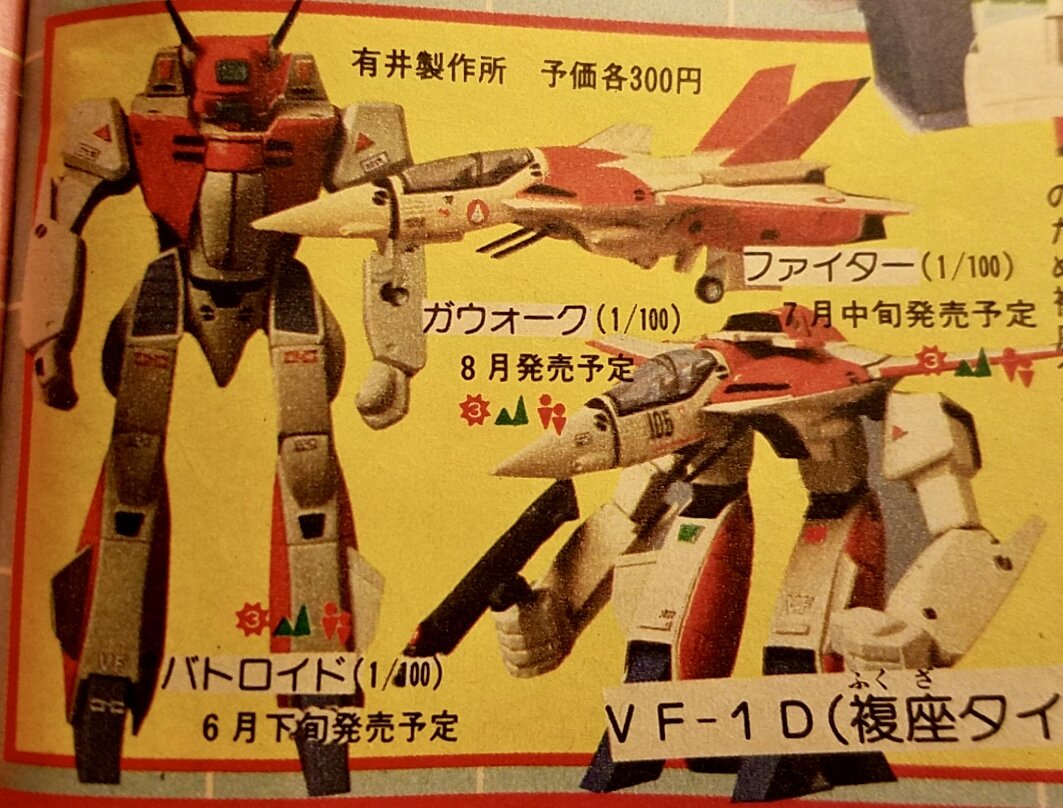
This might help a bit more.
Litardi - Takatoku - Litardi.
Whats Lying on your Workbench MK IV
in The Workshop!
Posted
Took me a while to find this, but here is the reason red is prominent in TV missiles.