Flarpen
-
Posts
25 -
Joined
-
Last visited
Content Type
Profiles
Forums
Events
Gallery
Everything posted by Flarpen
-

1/72 F203 Dragon II Kit Proposal --Moscato Hobby
Flarpen replied to captain america's topic in Model kits
😍 Wow. Truly fantastic show. Looks great. -
1/72 F203 Dragon II Kit Proposal --Moscato Hobby
Flarpen replied to captain america's topic in Model kits
Hi Cap. Are you going to hollow out the engine air intakes? -
Ah, challenge accepted. The use of magnets may be needed. We'll see when we get to it.
-
Fantastic work John. Can't wait for delivery. Does the Milia figure fit inside the closed cockpit?
-
Very nice. You wouldn't happen to have any more of those monitor decals?
-
Ditto
-
Well, this will be epic. Have signed up for one with R2KF. Will the Milla bust look anything like that line drawing?
-
Legult, Heavy Missile Carrier (R2KF Build Comp Entry)
Flarpen replied to Flarpen's topic in Model kits
Thanks Cap. Much appreciated. Sure, I guess that's ok. -
Hi Here is my Recently completed Legult Heavy Missile Carrier, for the R2KF Build comp. /Johan
-
Clash Of The Bionoids--Moscato Version!
Flarpen replied to captain america's topic in Anime or Science Fiction
I desperately want one, but I just can't afford it right now. AAAARRRGGGH -
Clash Of The Bionoids--Moscato Version!
Flarpen replied to captain america's topic in Anime or Science Fiction
Love it. When do you want my money? -
Fantastic looking Viggen. The colours look spot on. Just a few remarks if you don't mind. As this depicts a JA 37 Jaktviggen (the fighter version) there are a few things that is different. It should have a fourth activator for the elevons on each wing and the navlights should be moved to the vingtips. Just a few nitpics on anothervise fantastic looking build. /Johan
-
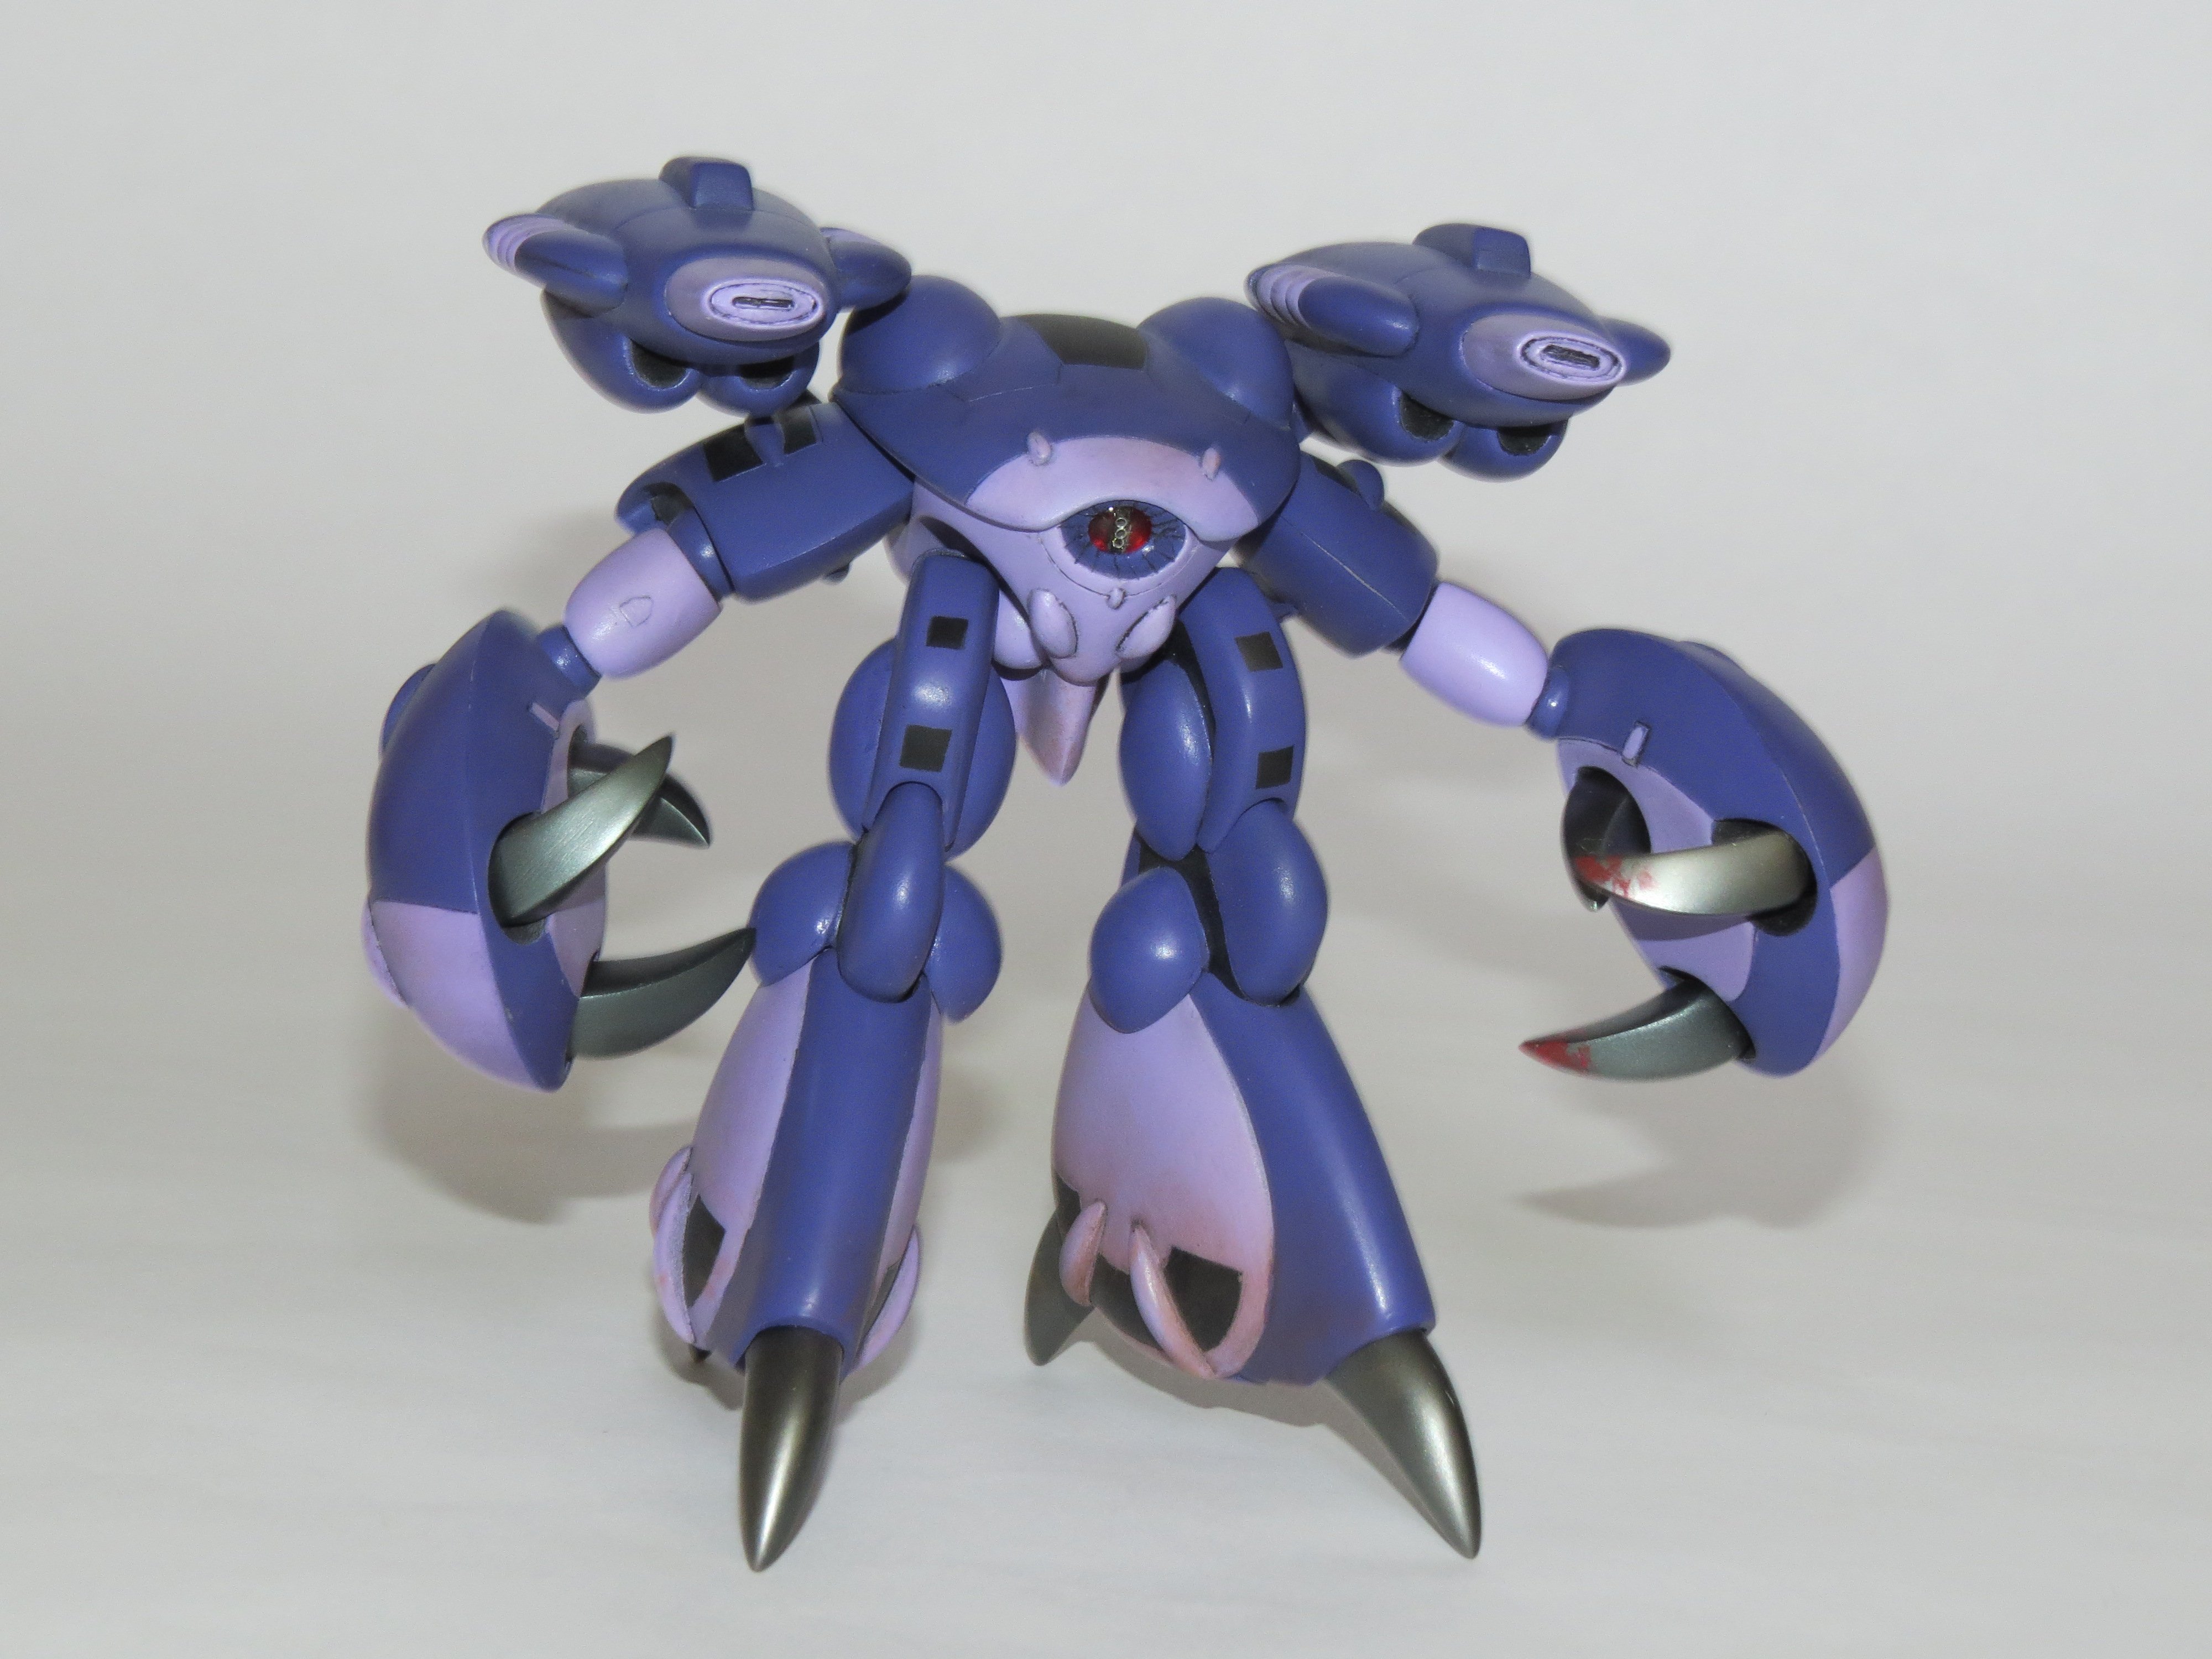
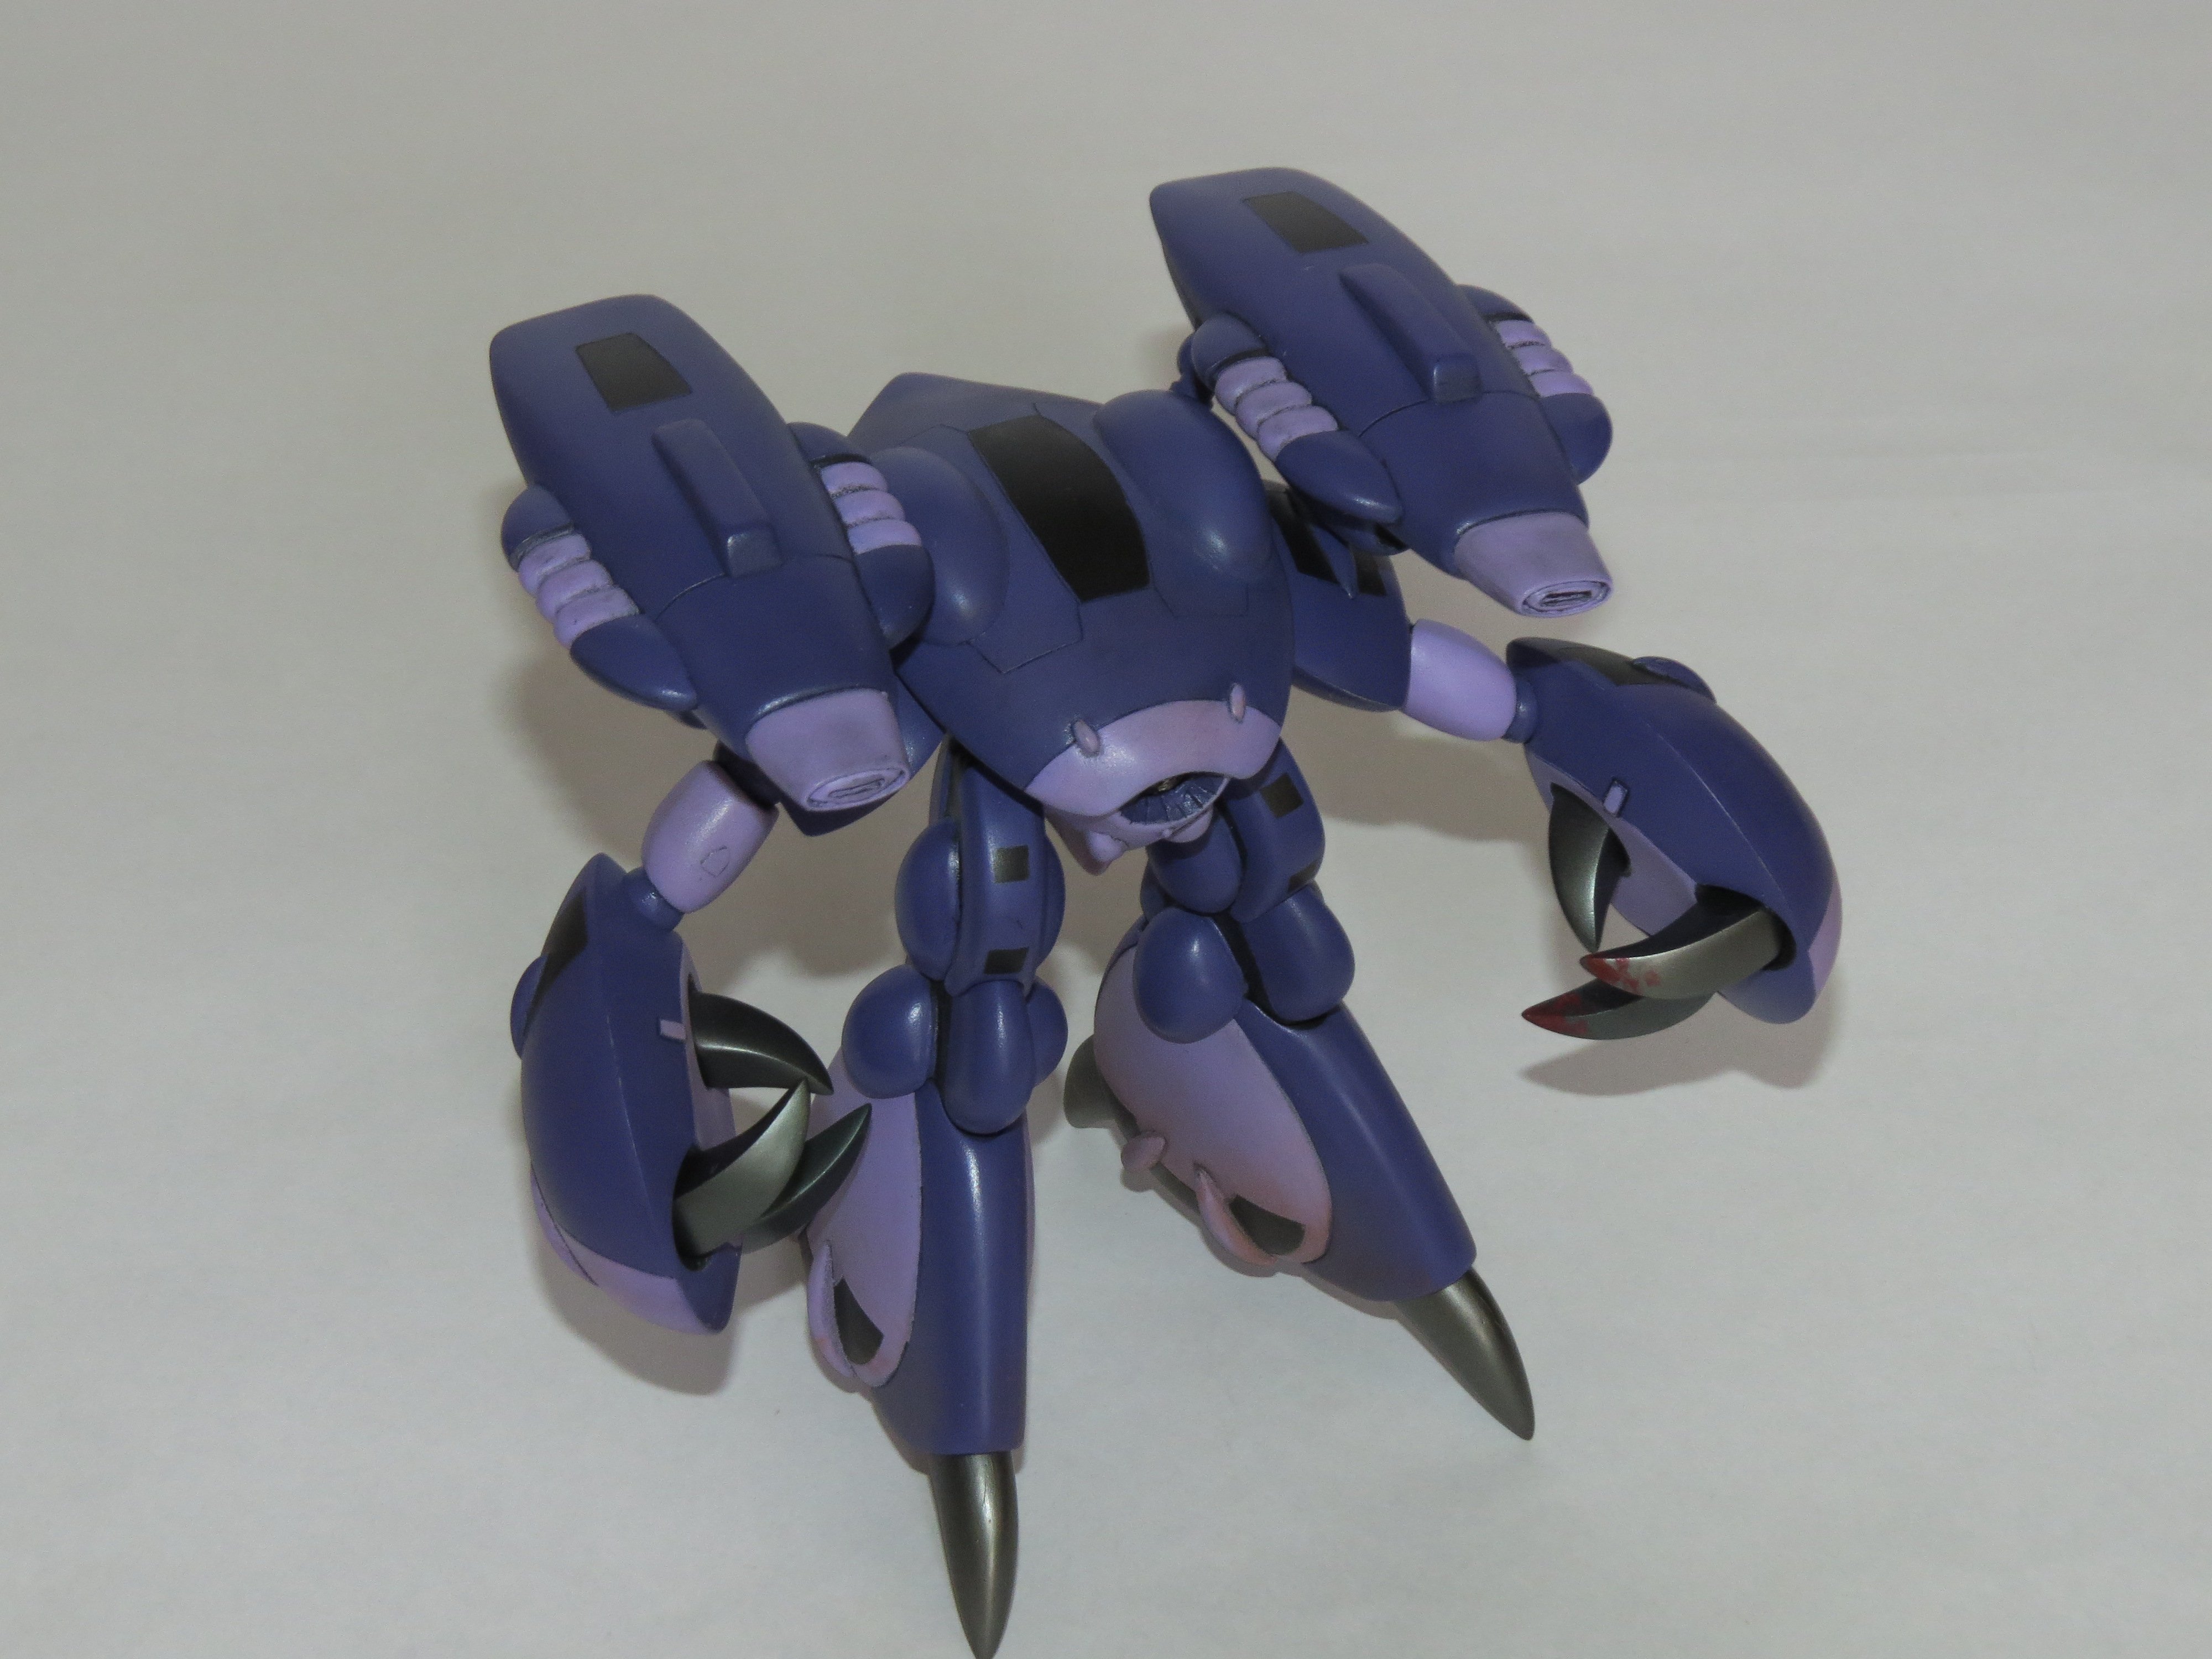
HA HA. I love that. I'll have to change the title on this thread. Thank you very much for those kind words Cap. Much appreciated. I do have a lot of other projects going, so I don't know when I can build the other crabs, but when I get to it you'll see it here. That's a very good point regarding the watermark, have to think about that in the future. If you like to use any of my pics to promote your kits you have my blessing. /Johan
-
Right back at you.
-
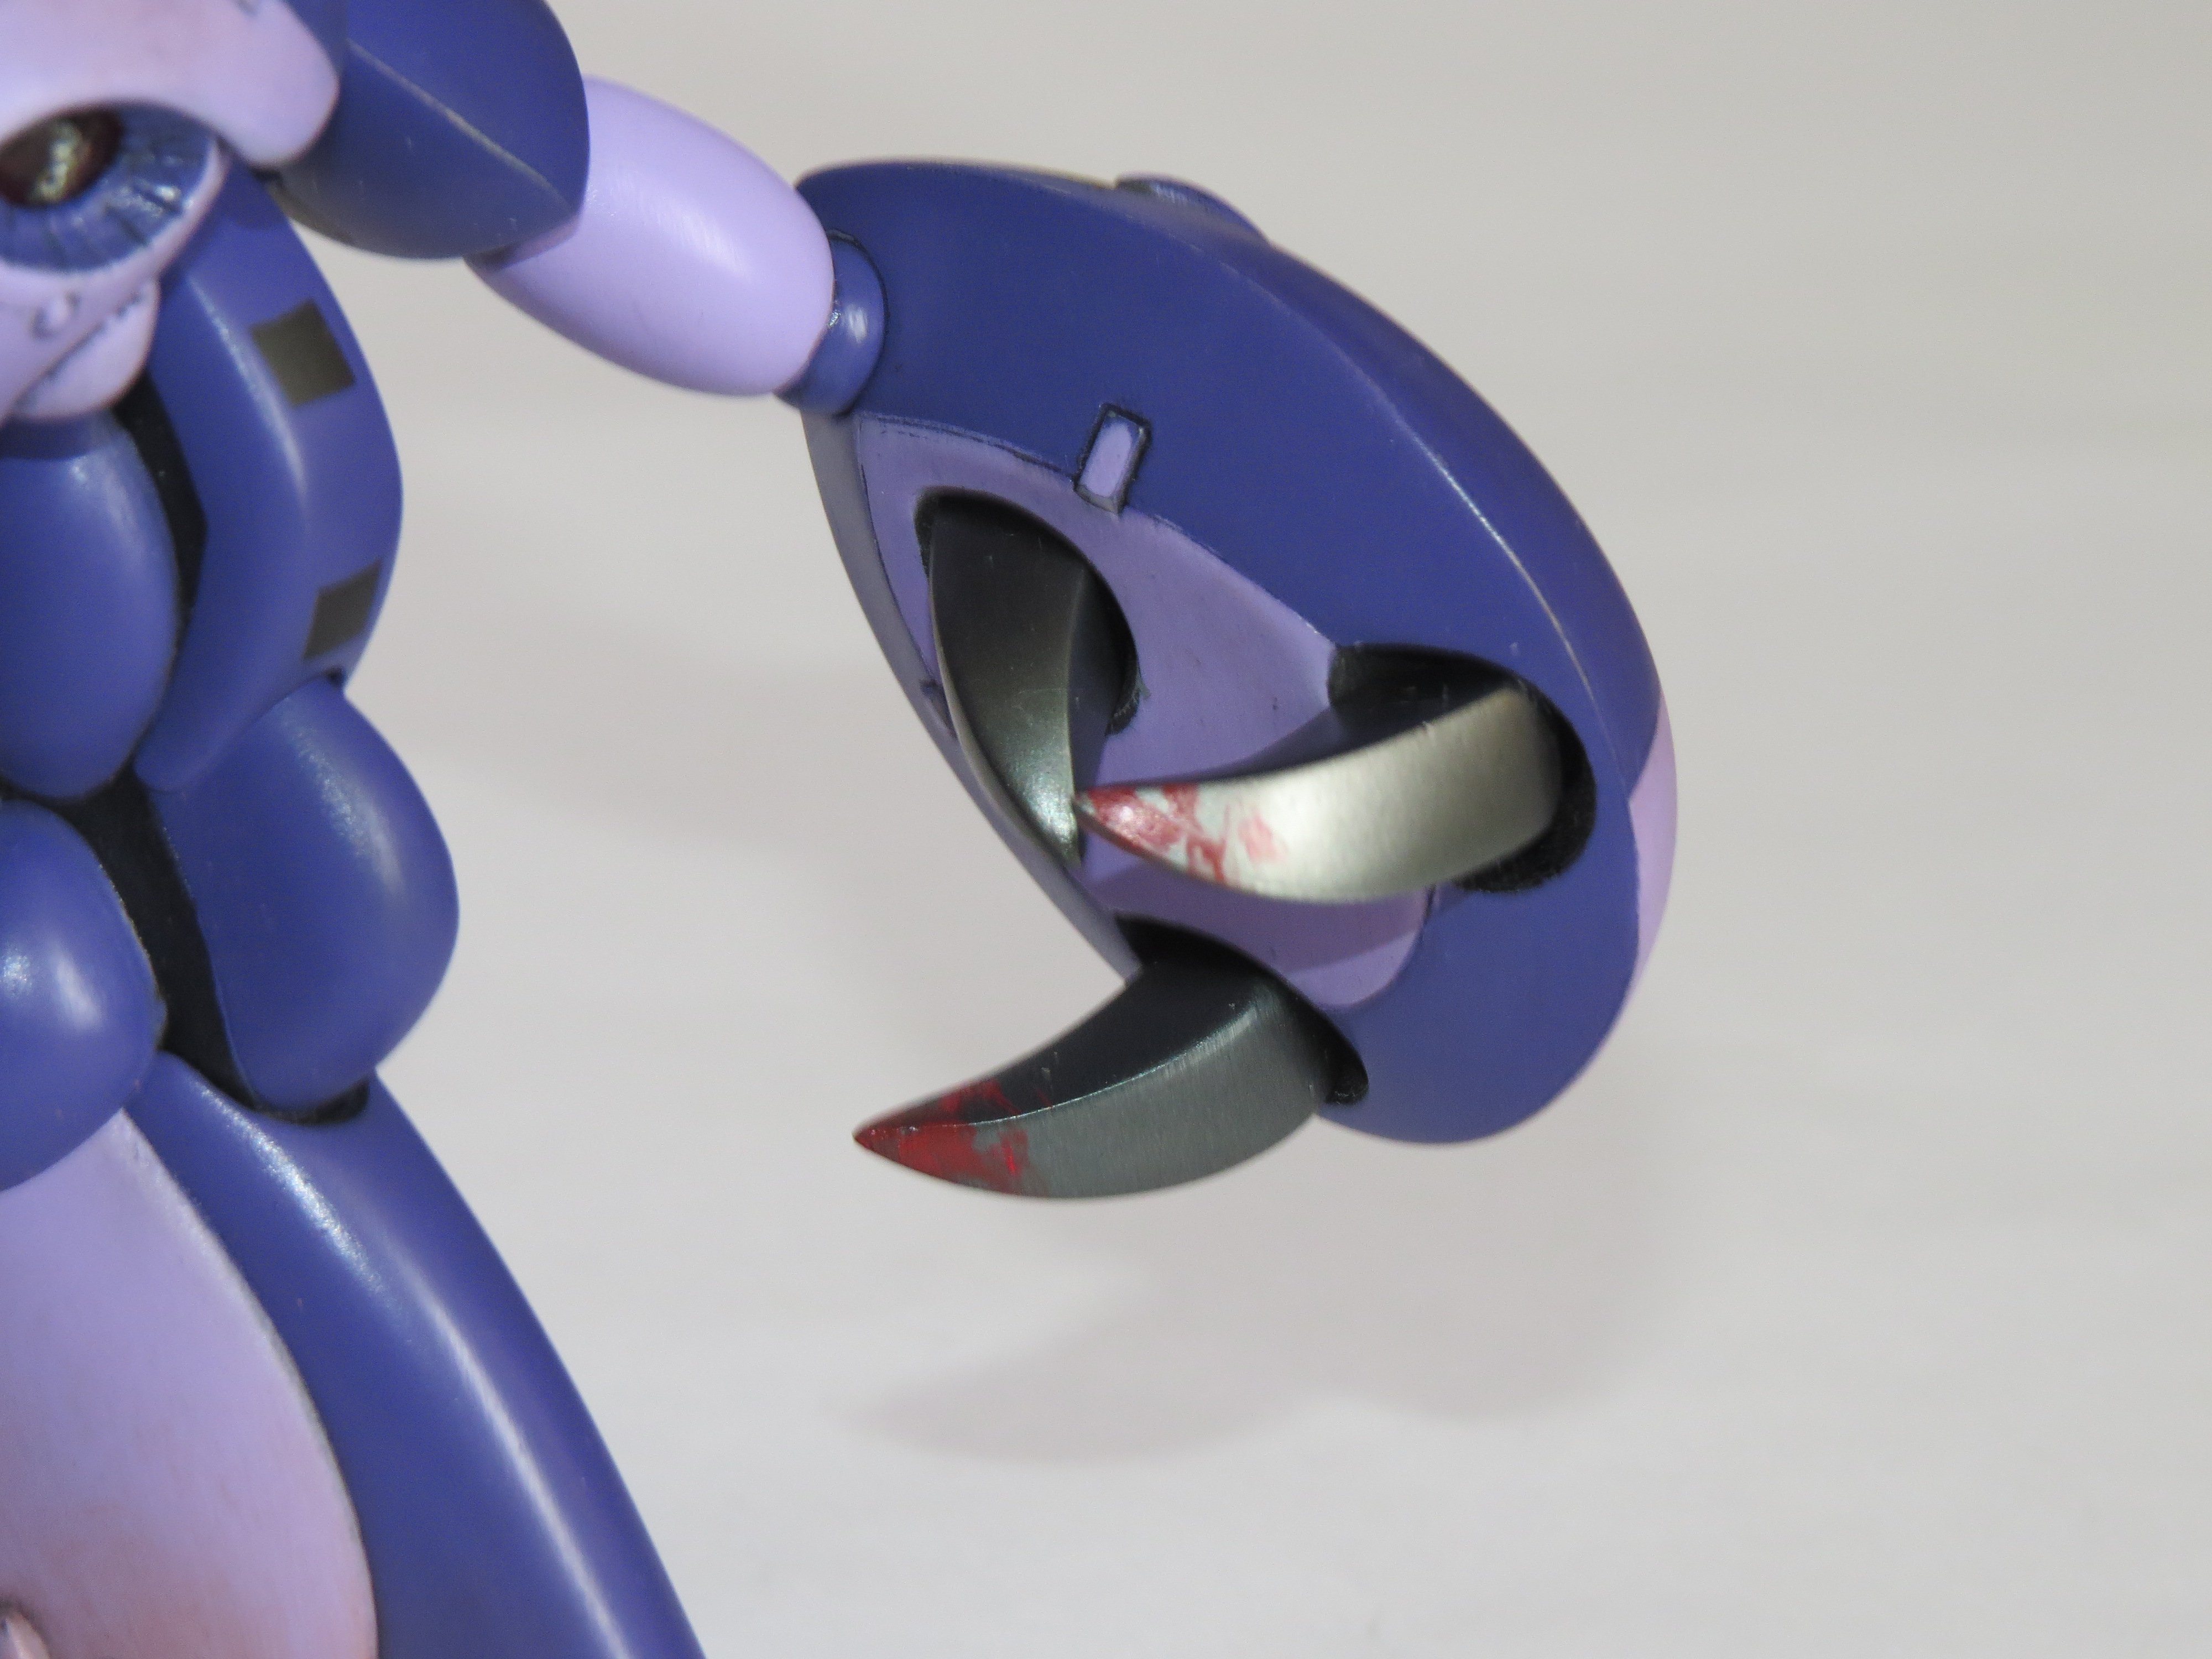
Thanks. I thought it would add a bit of character and tell a bit of a story that this individual is a bad ass and has seen some action.
-
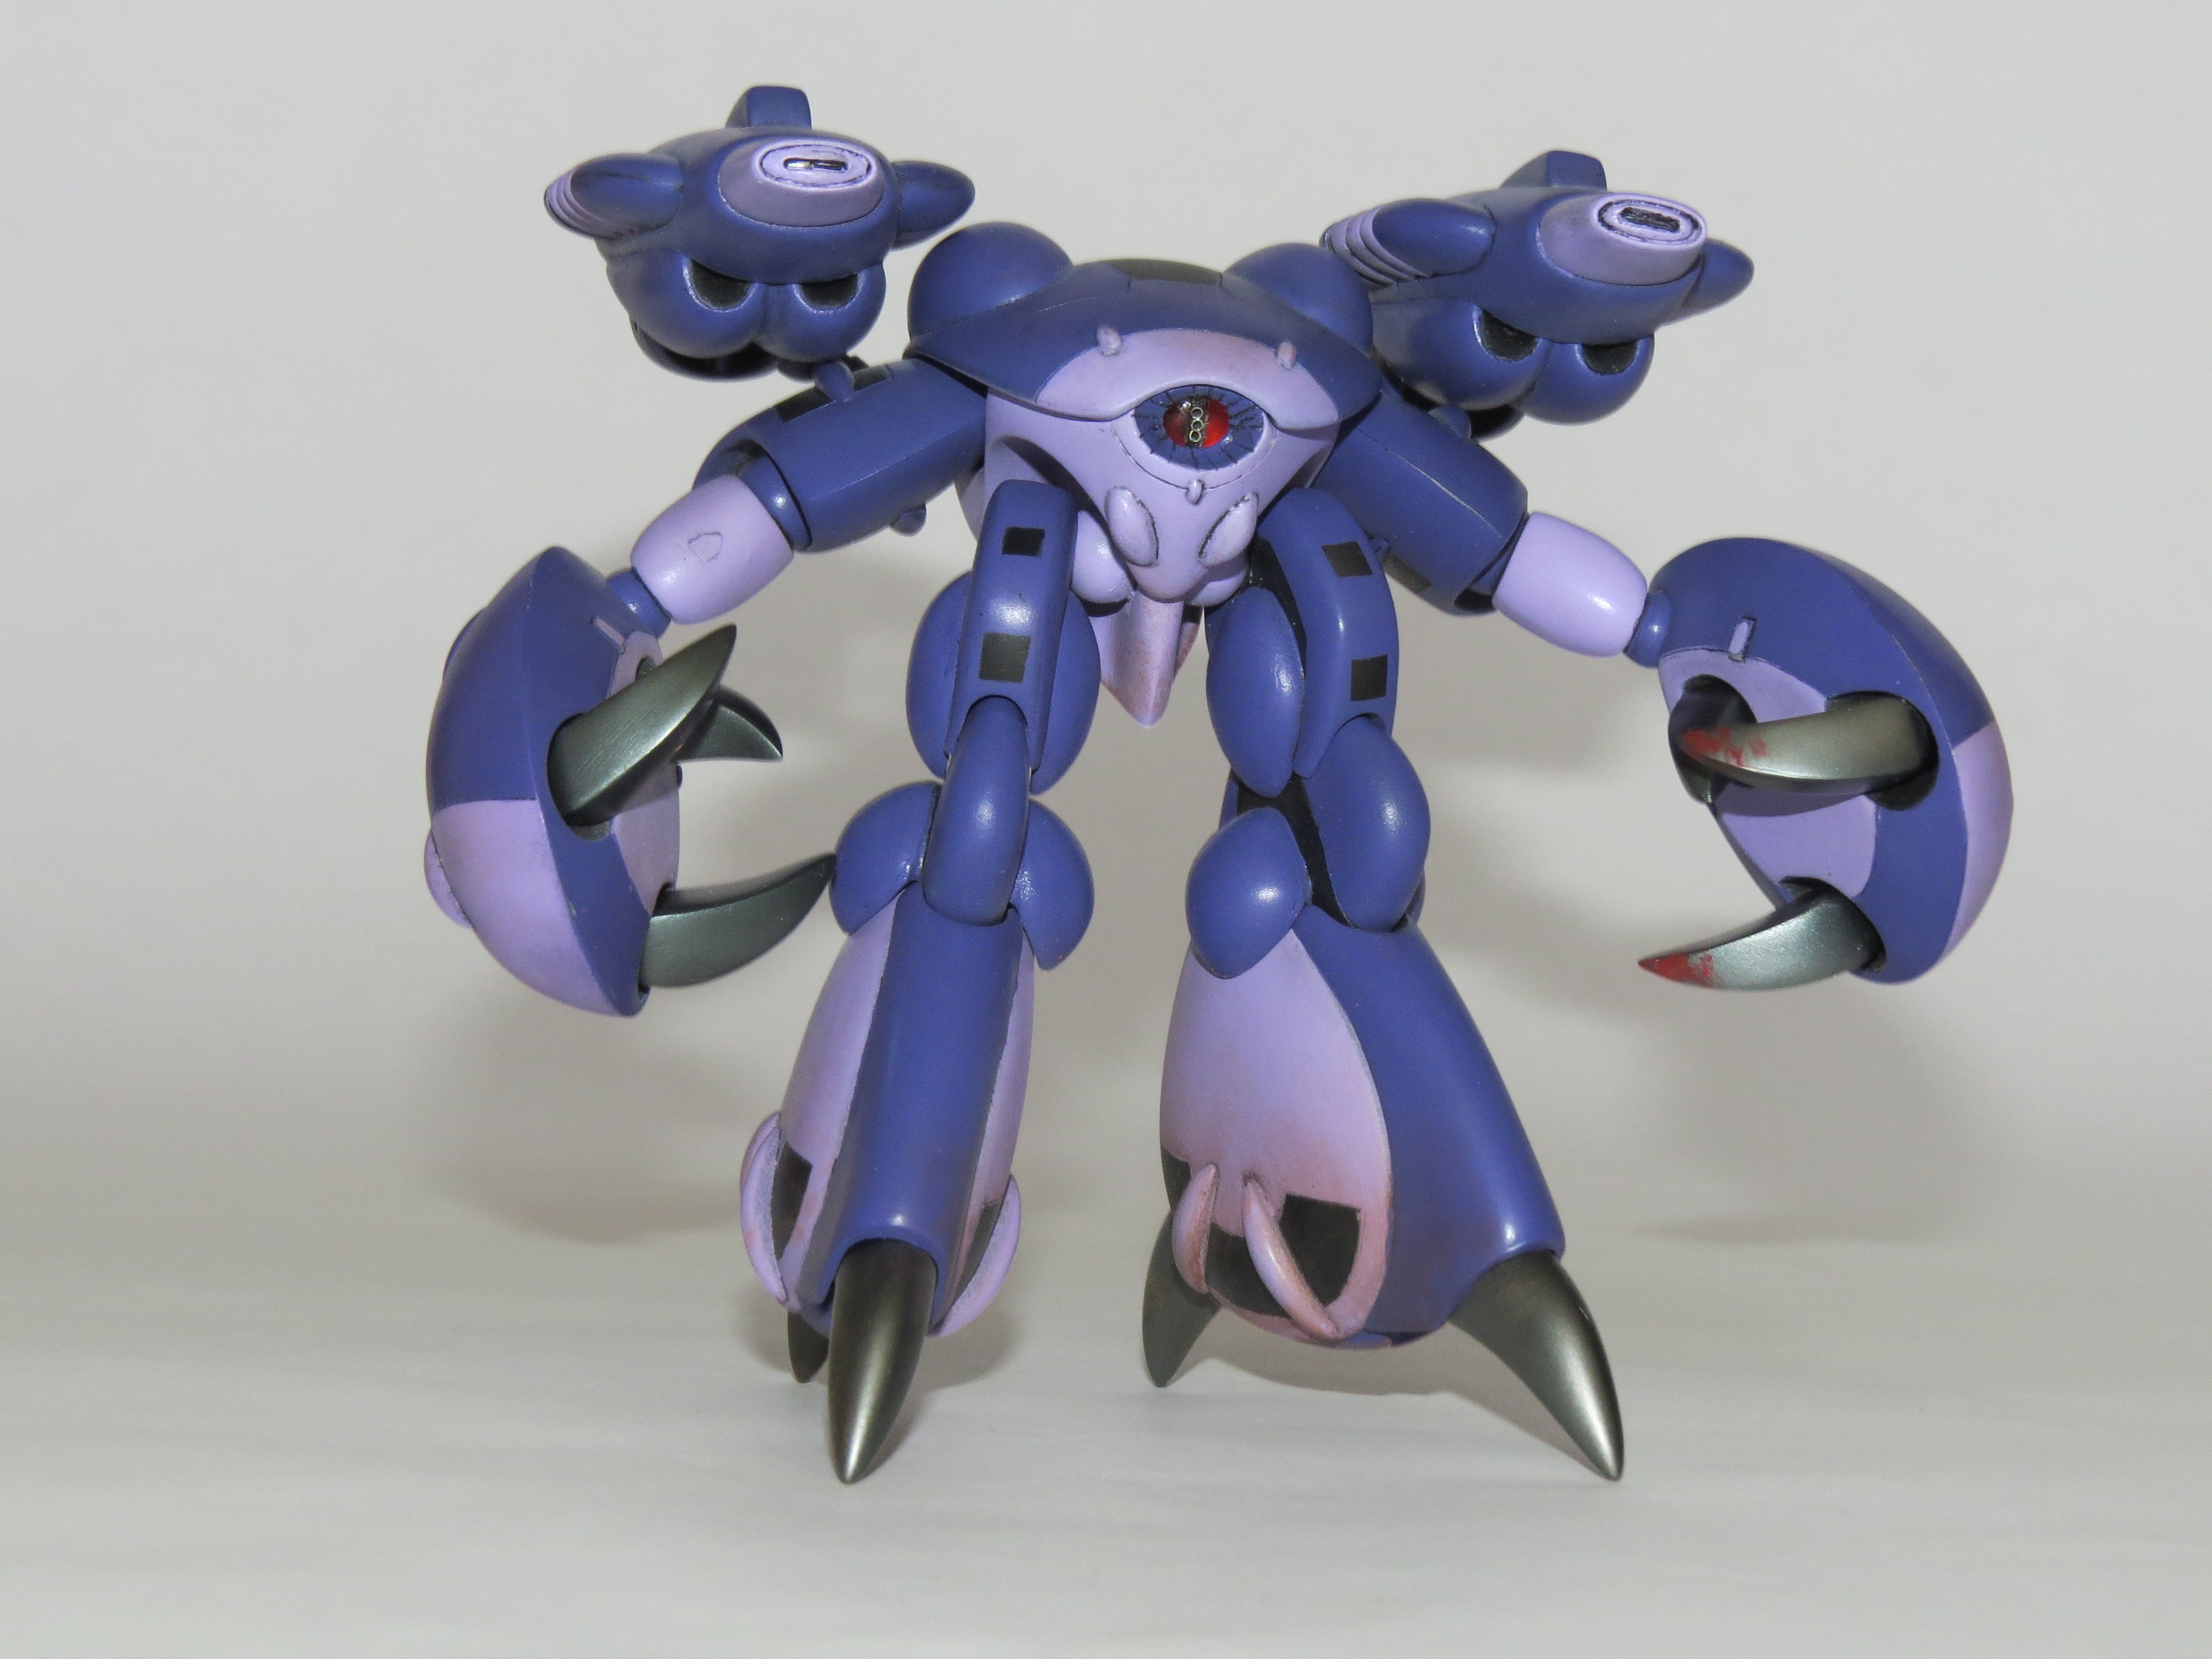
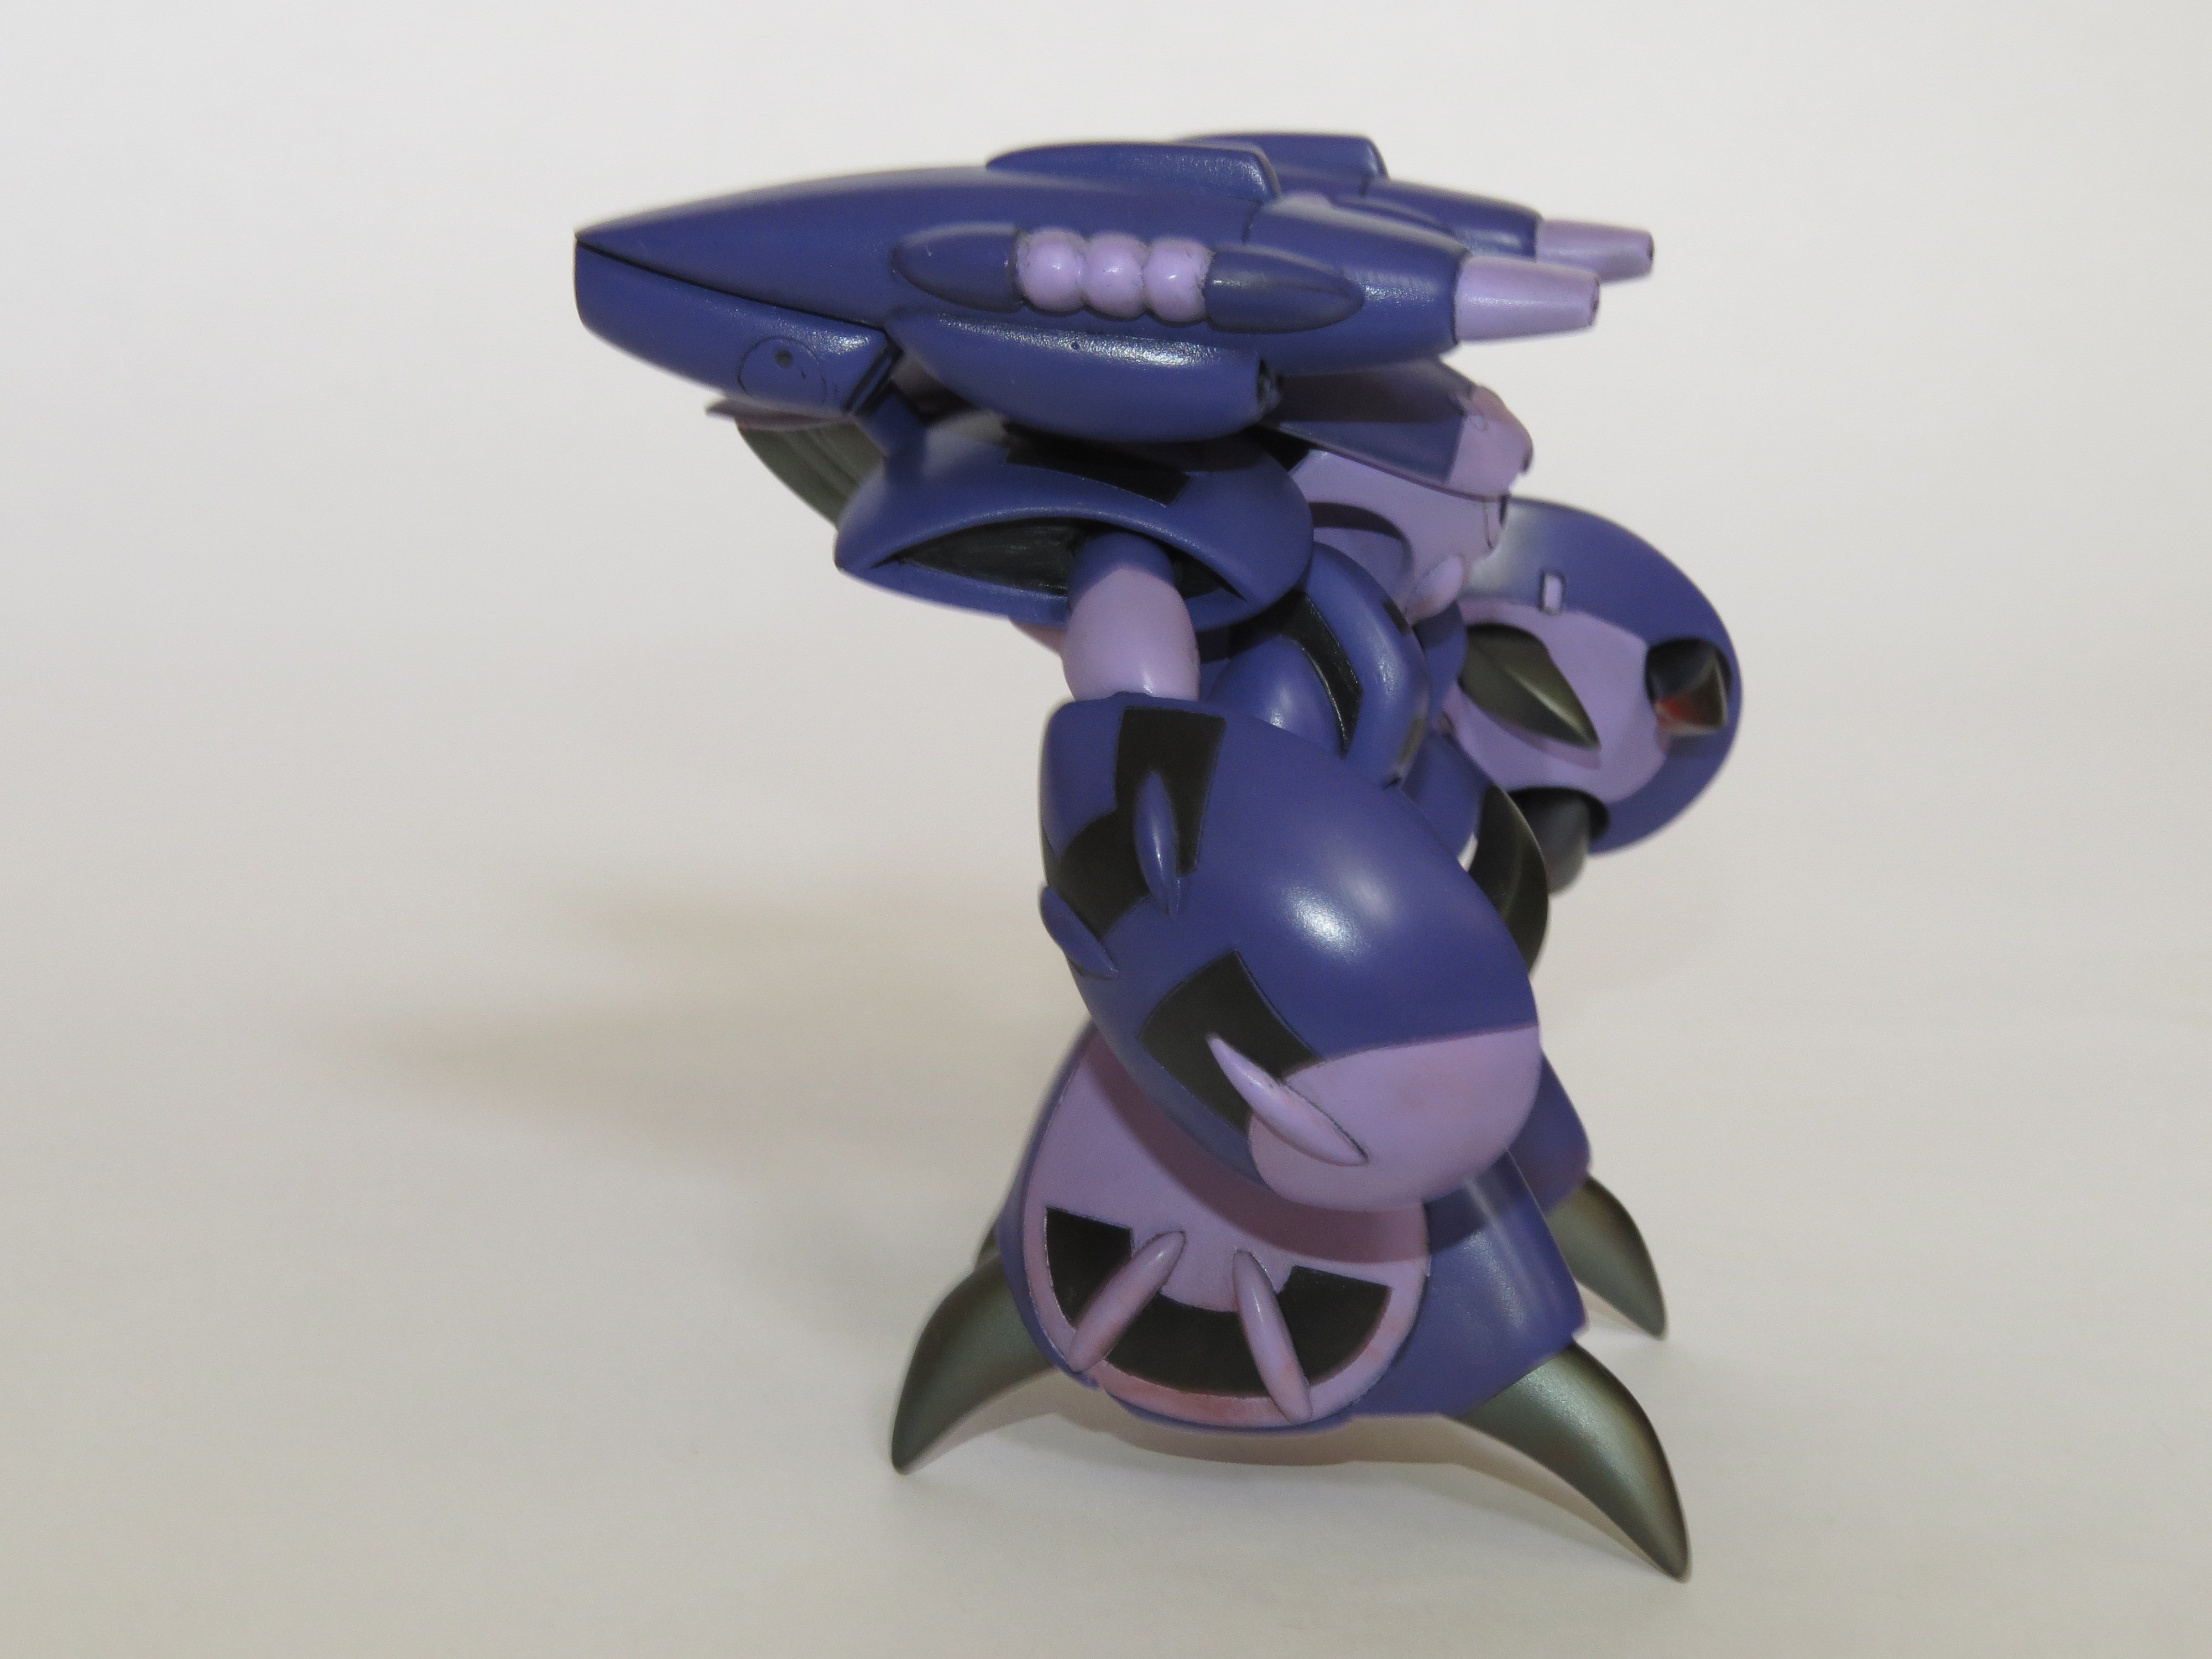
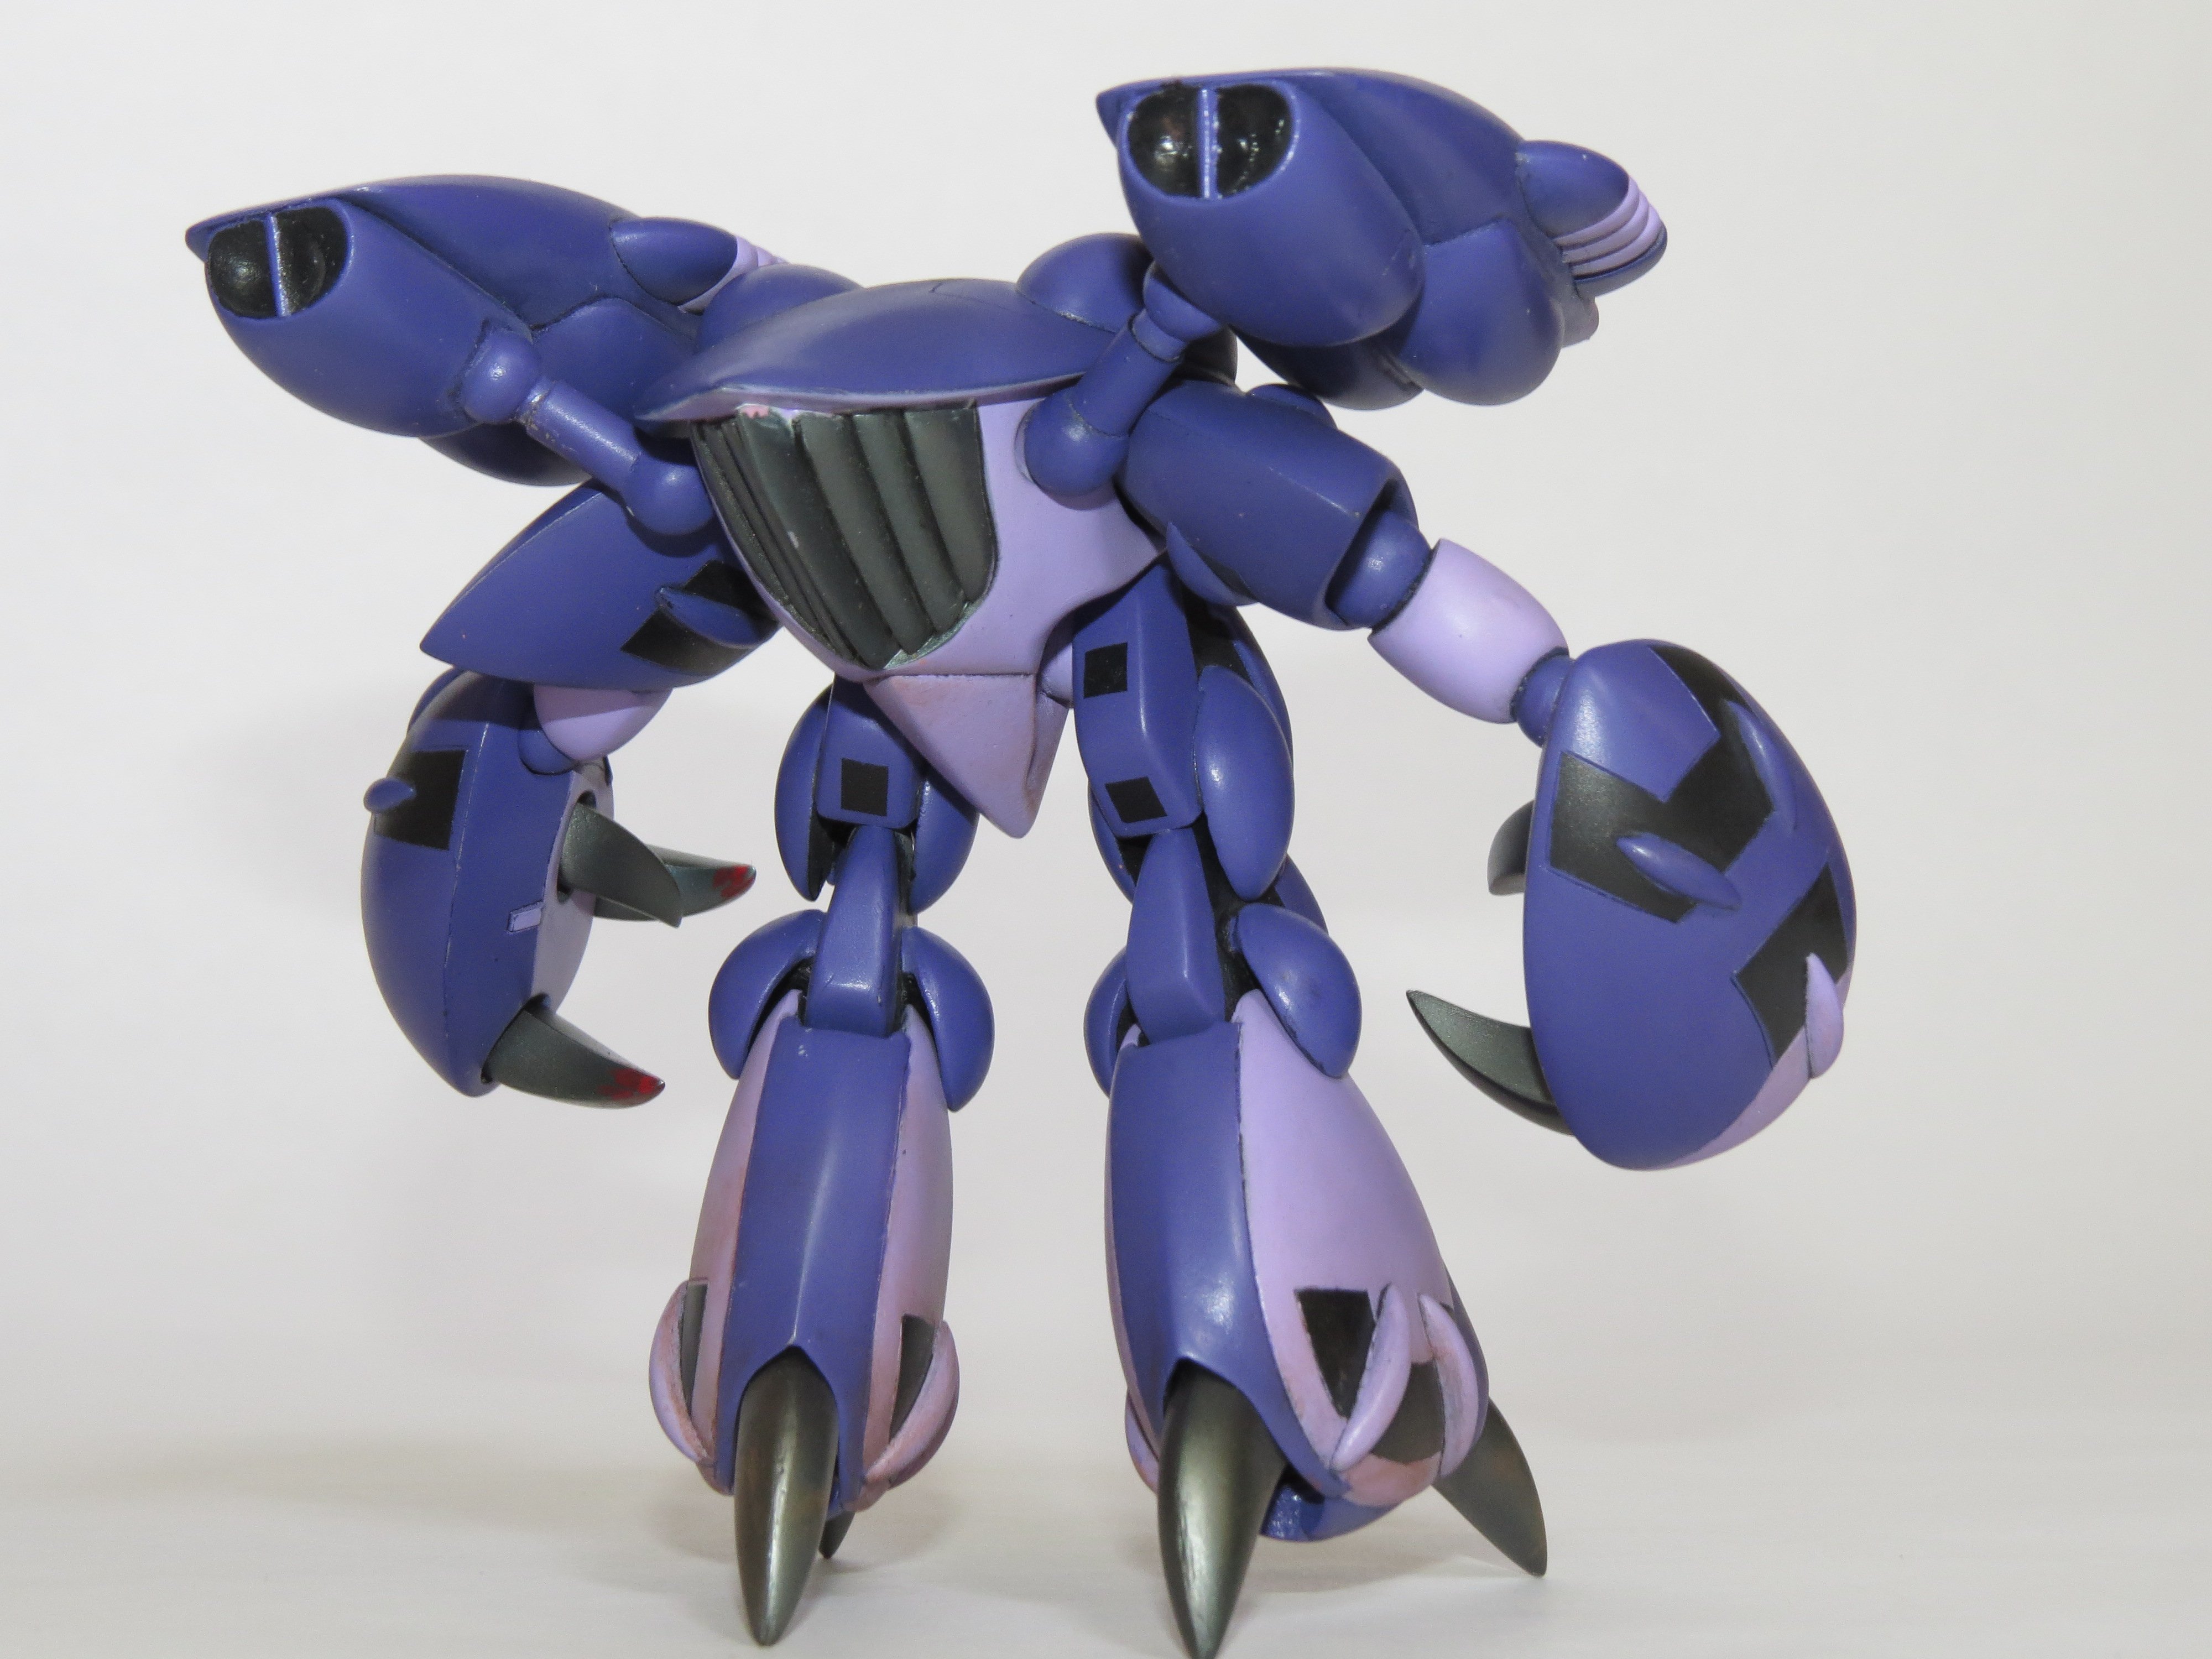
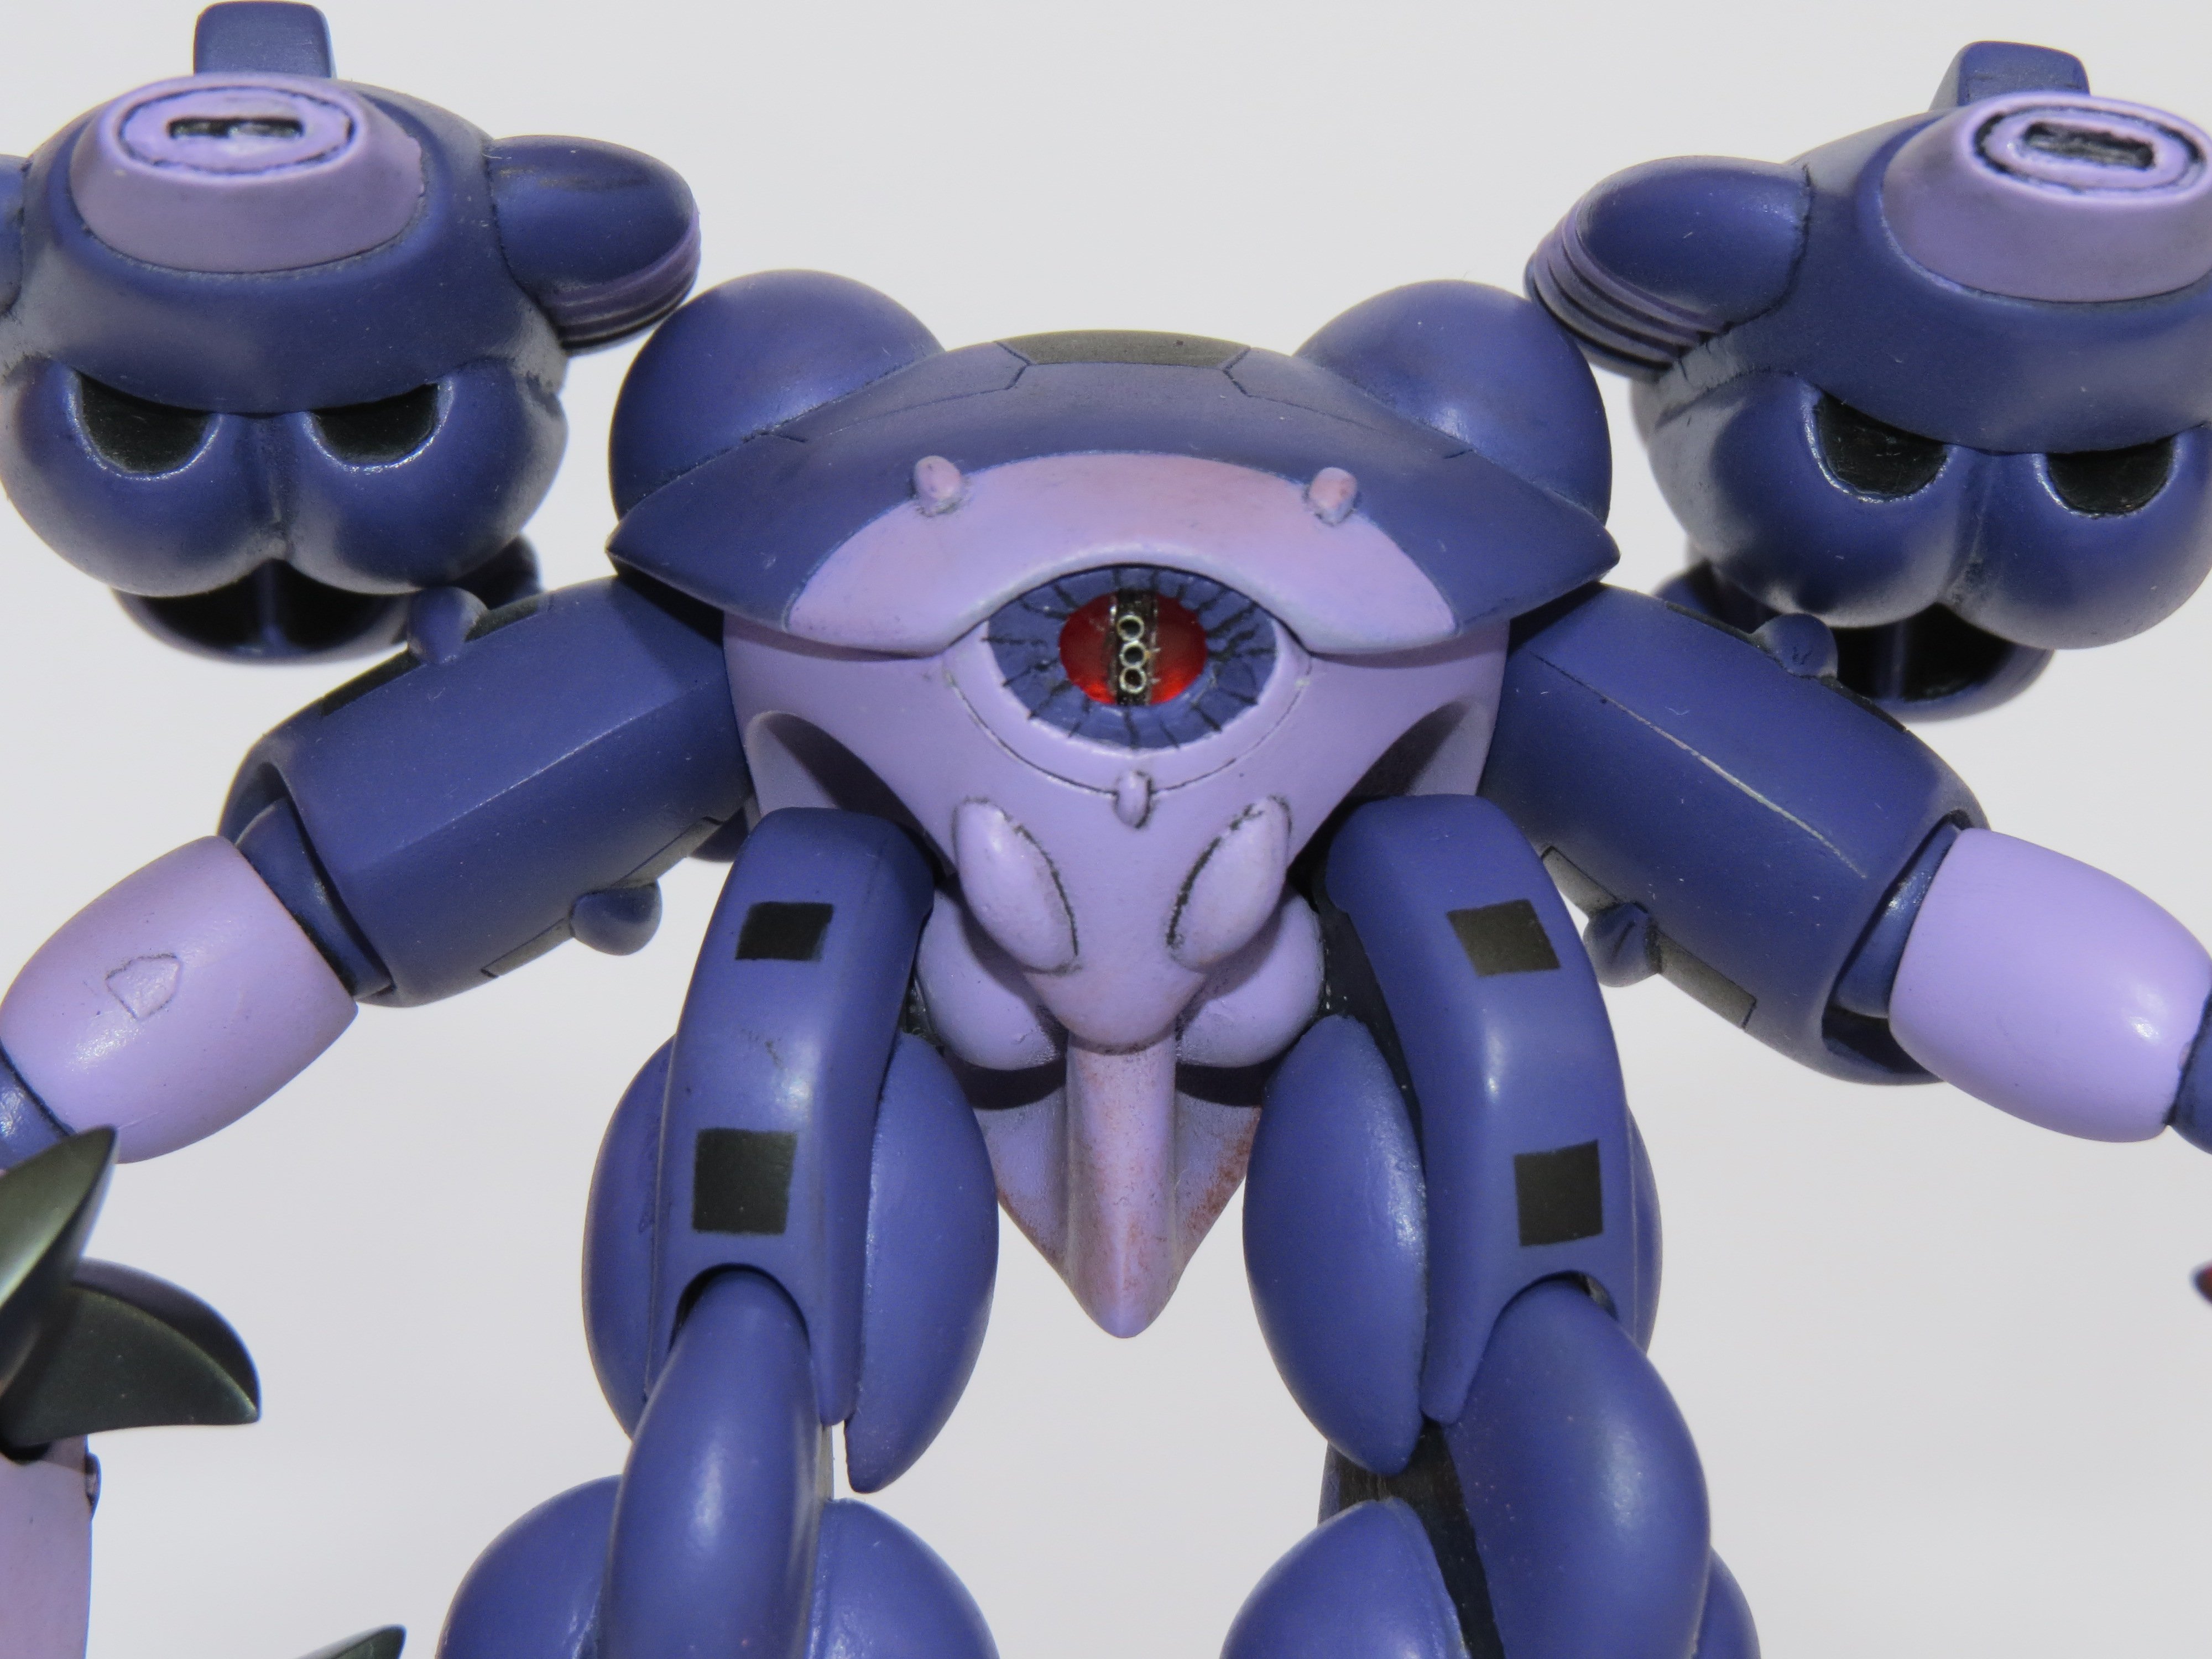
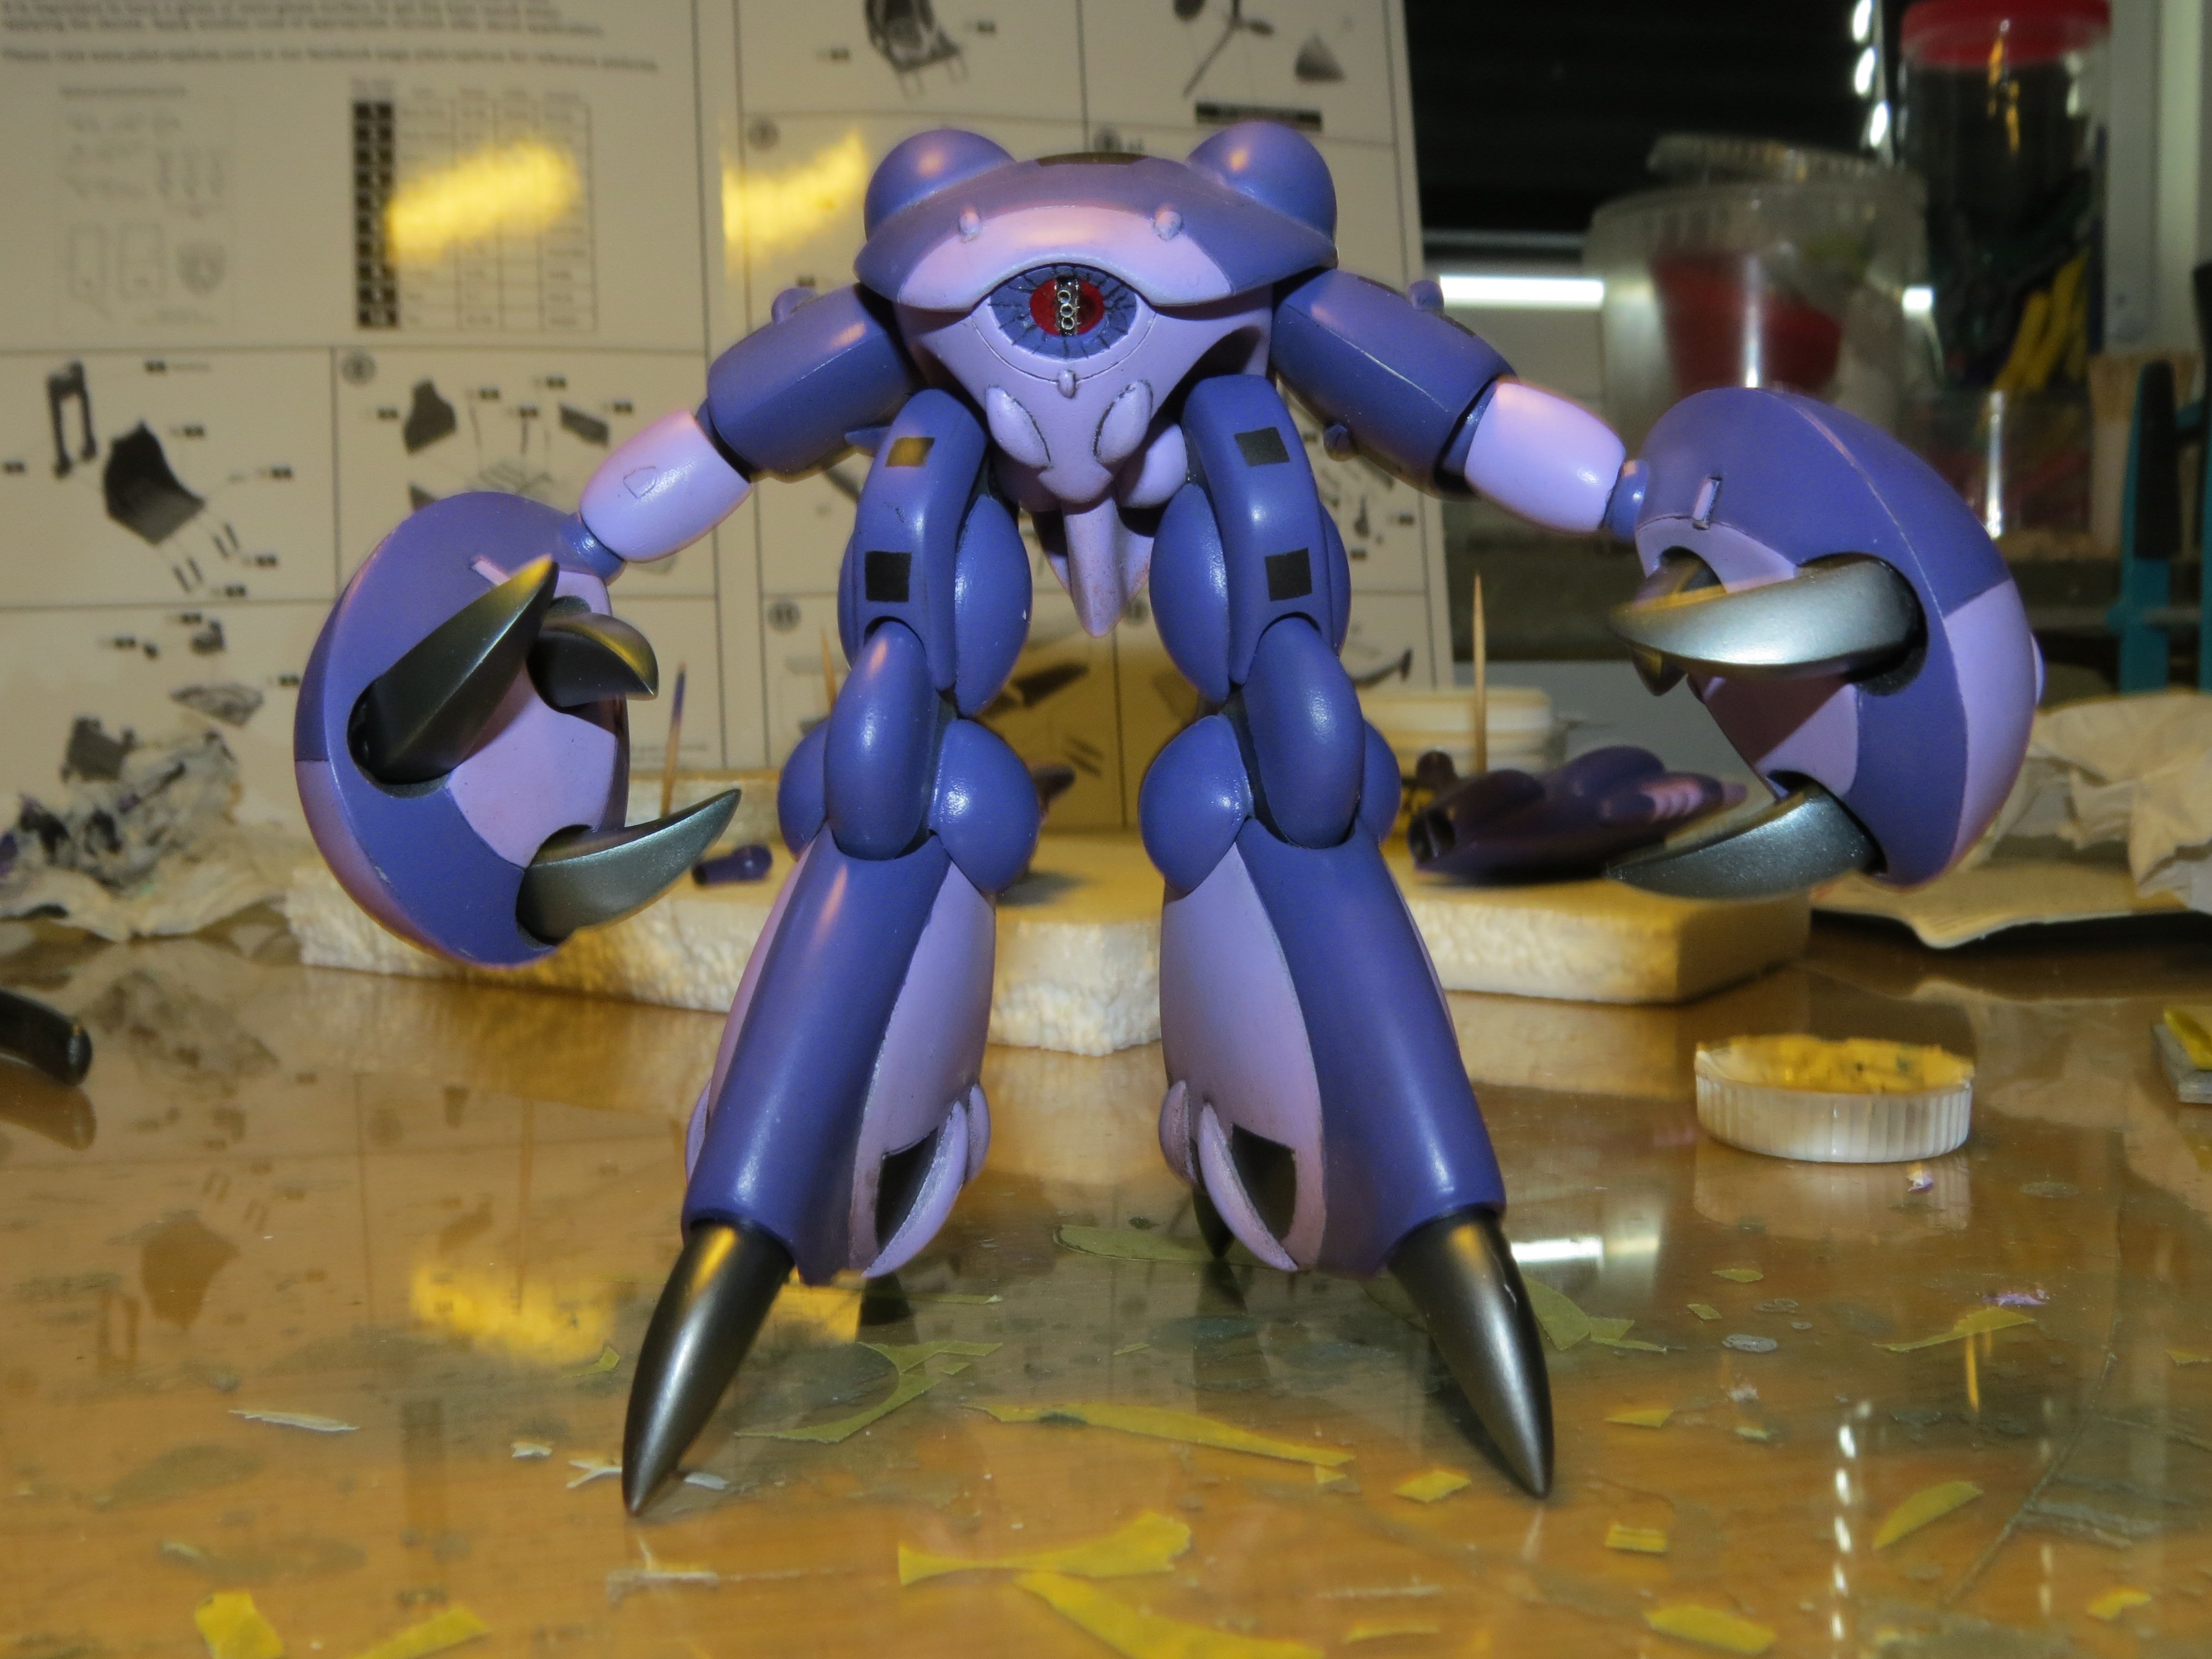
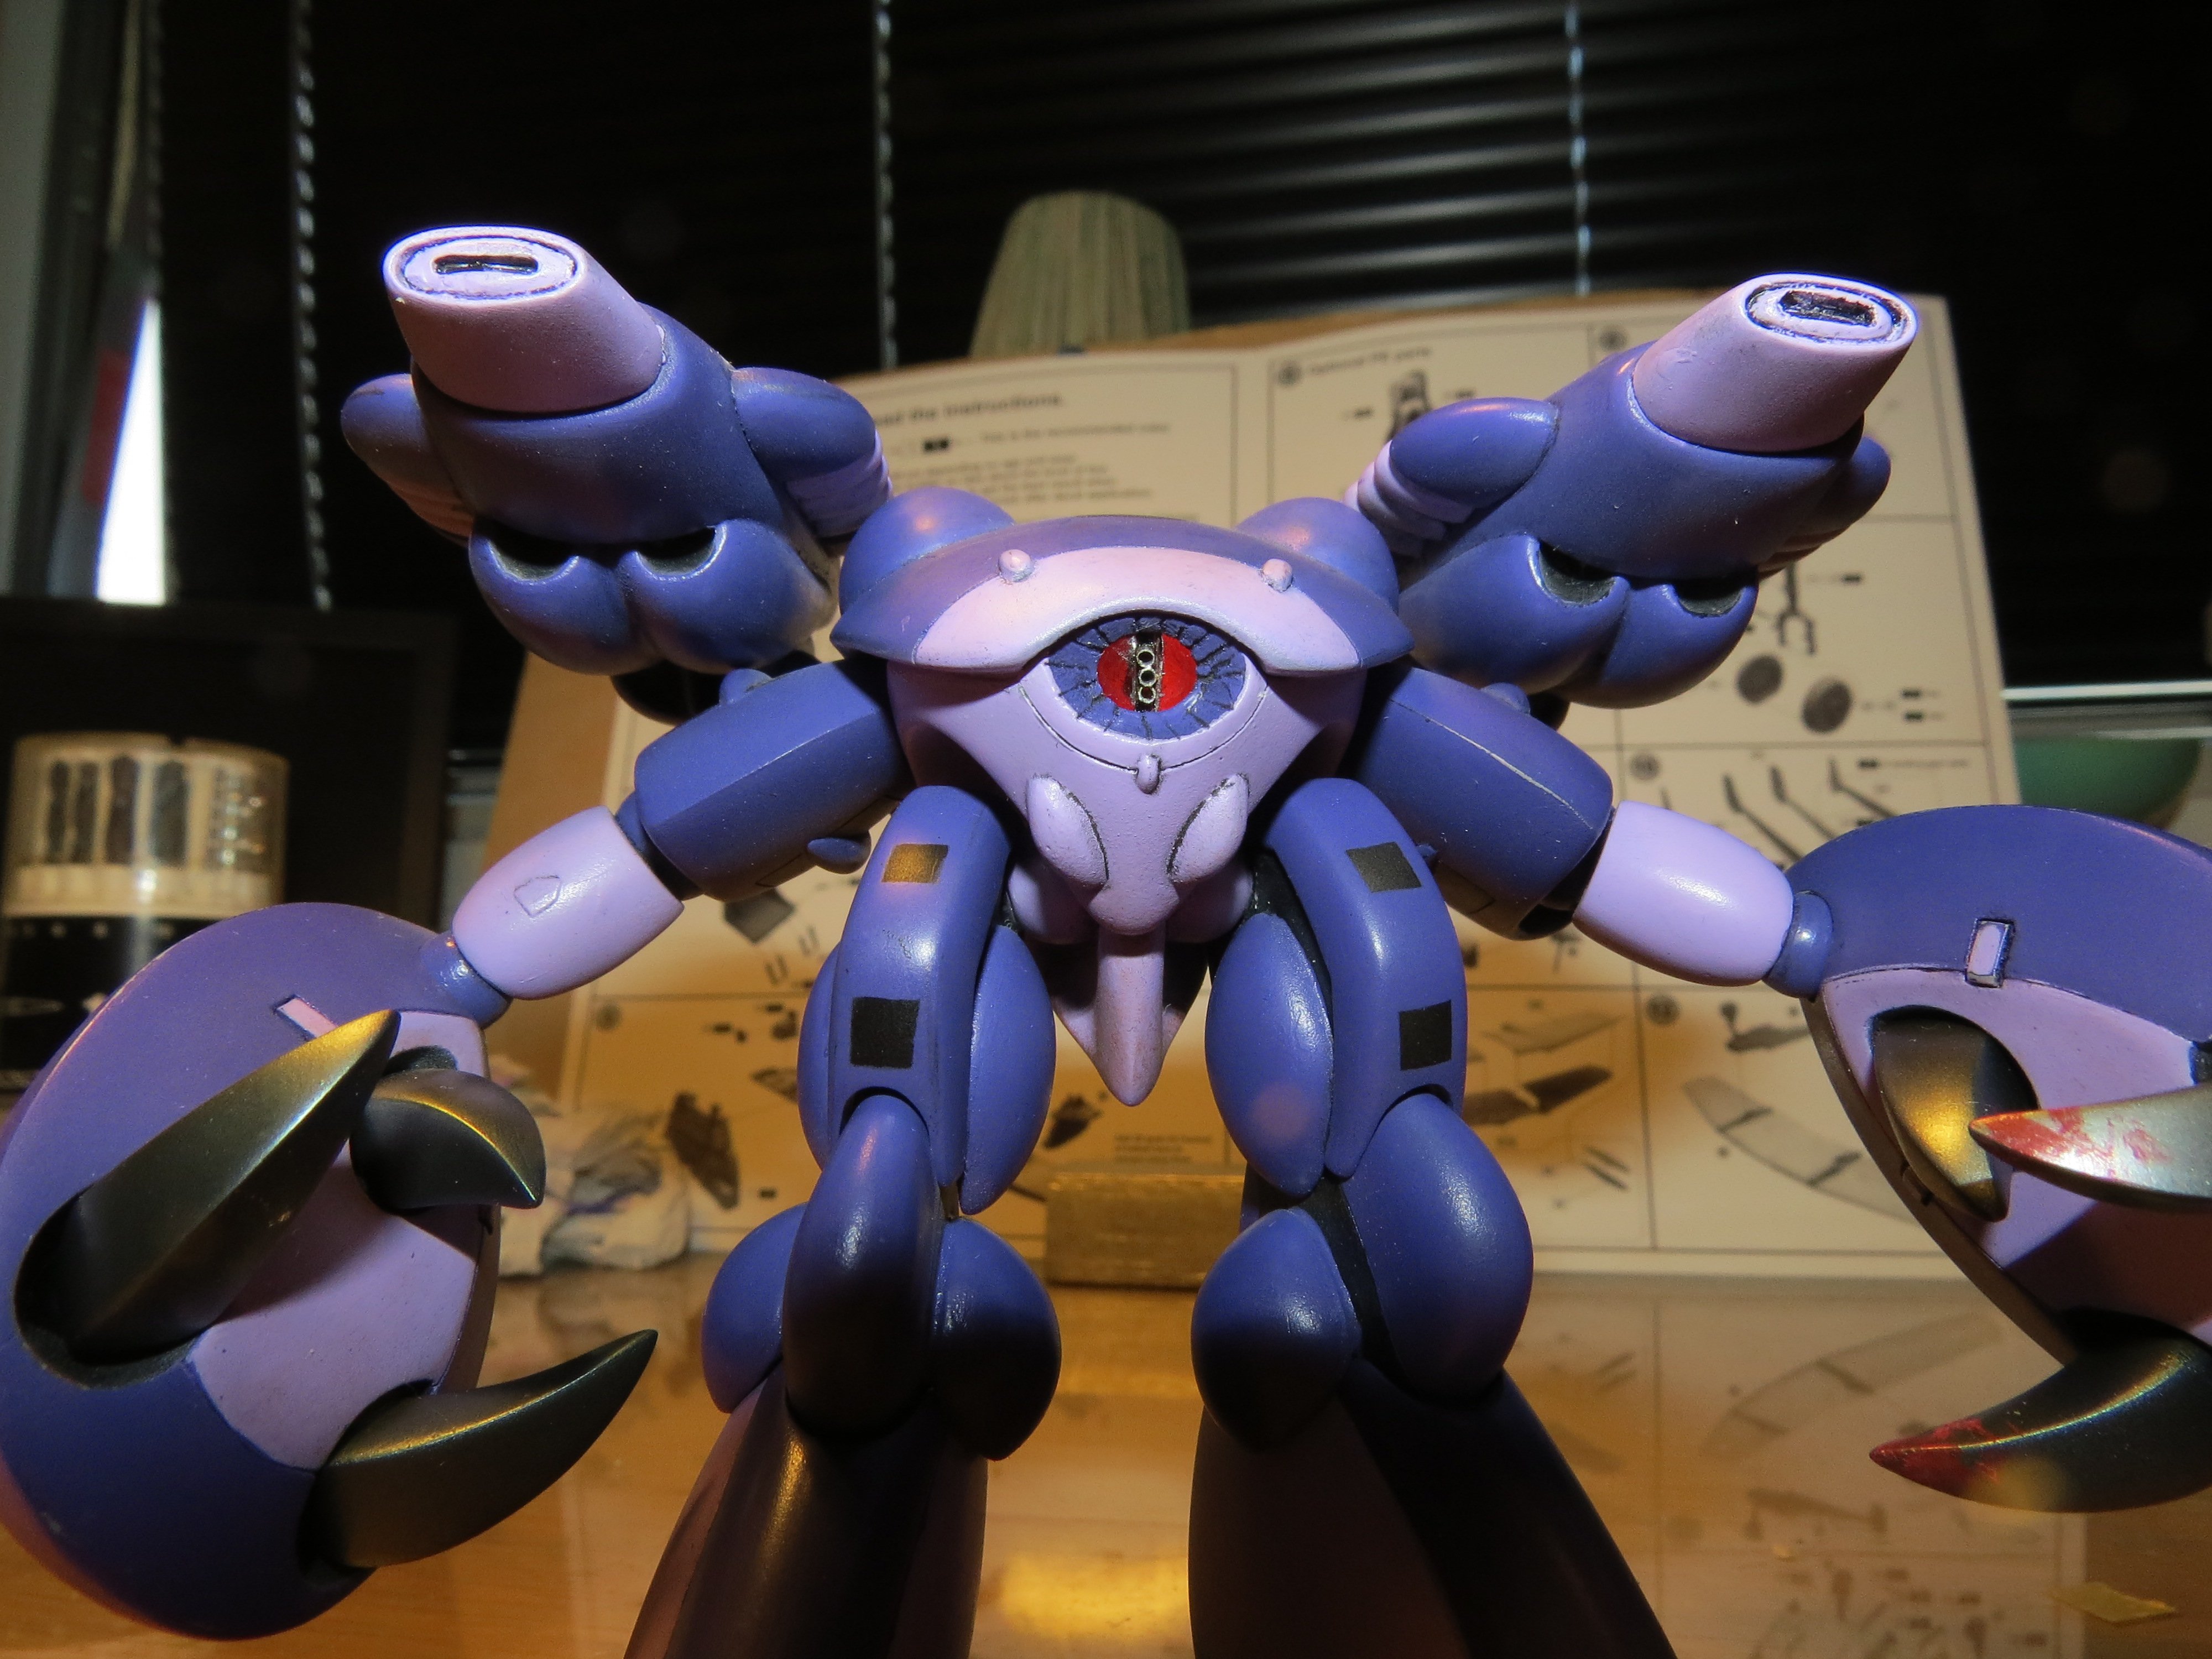
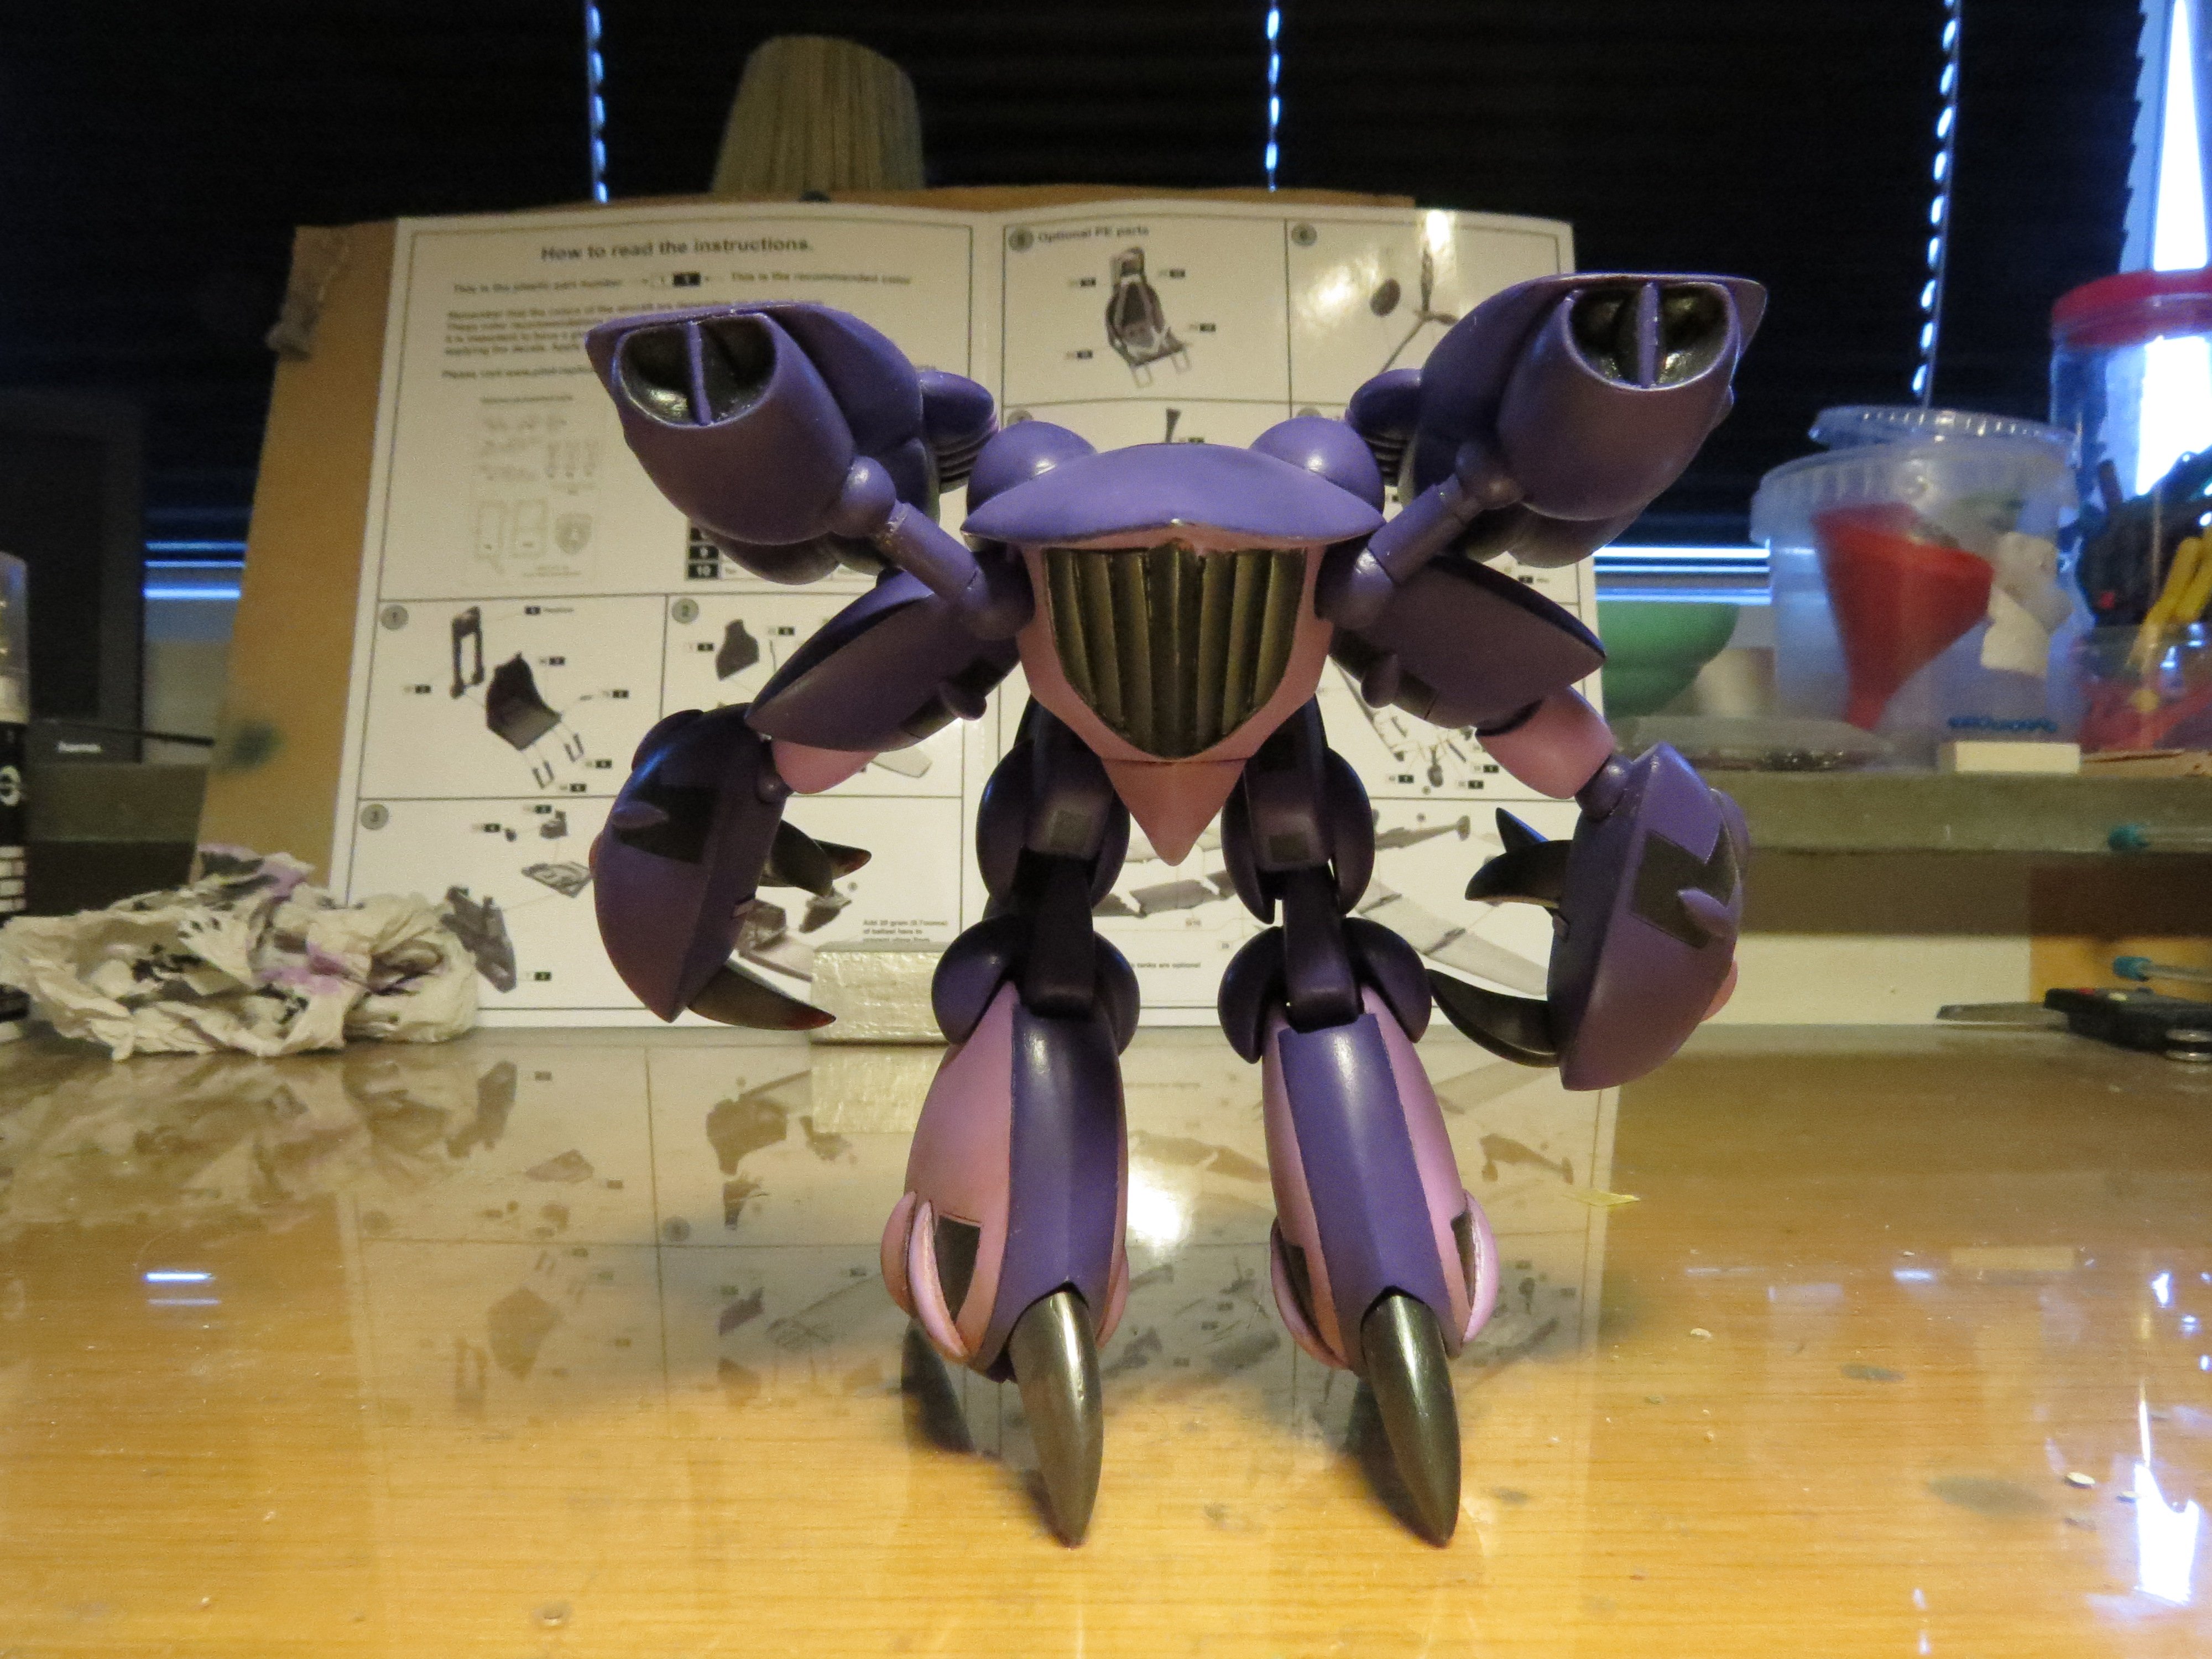
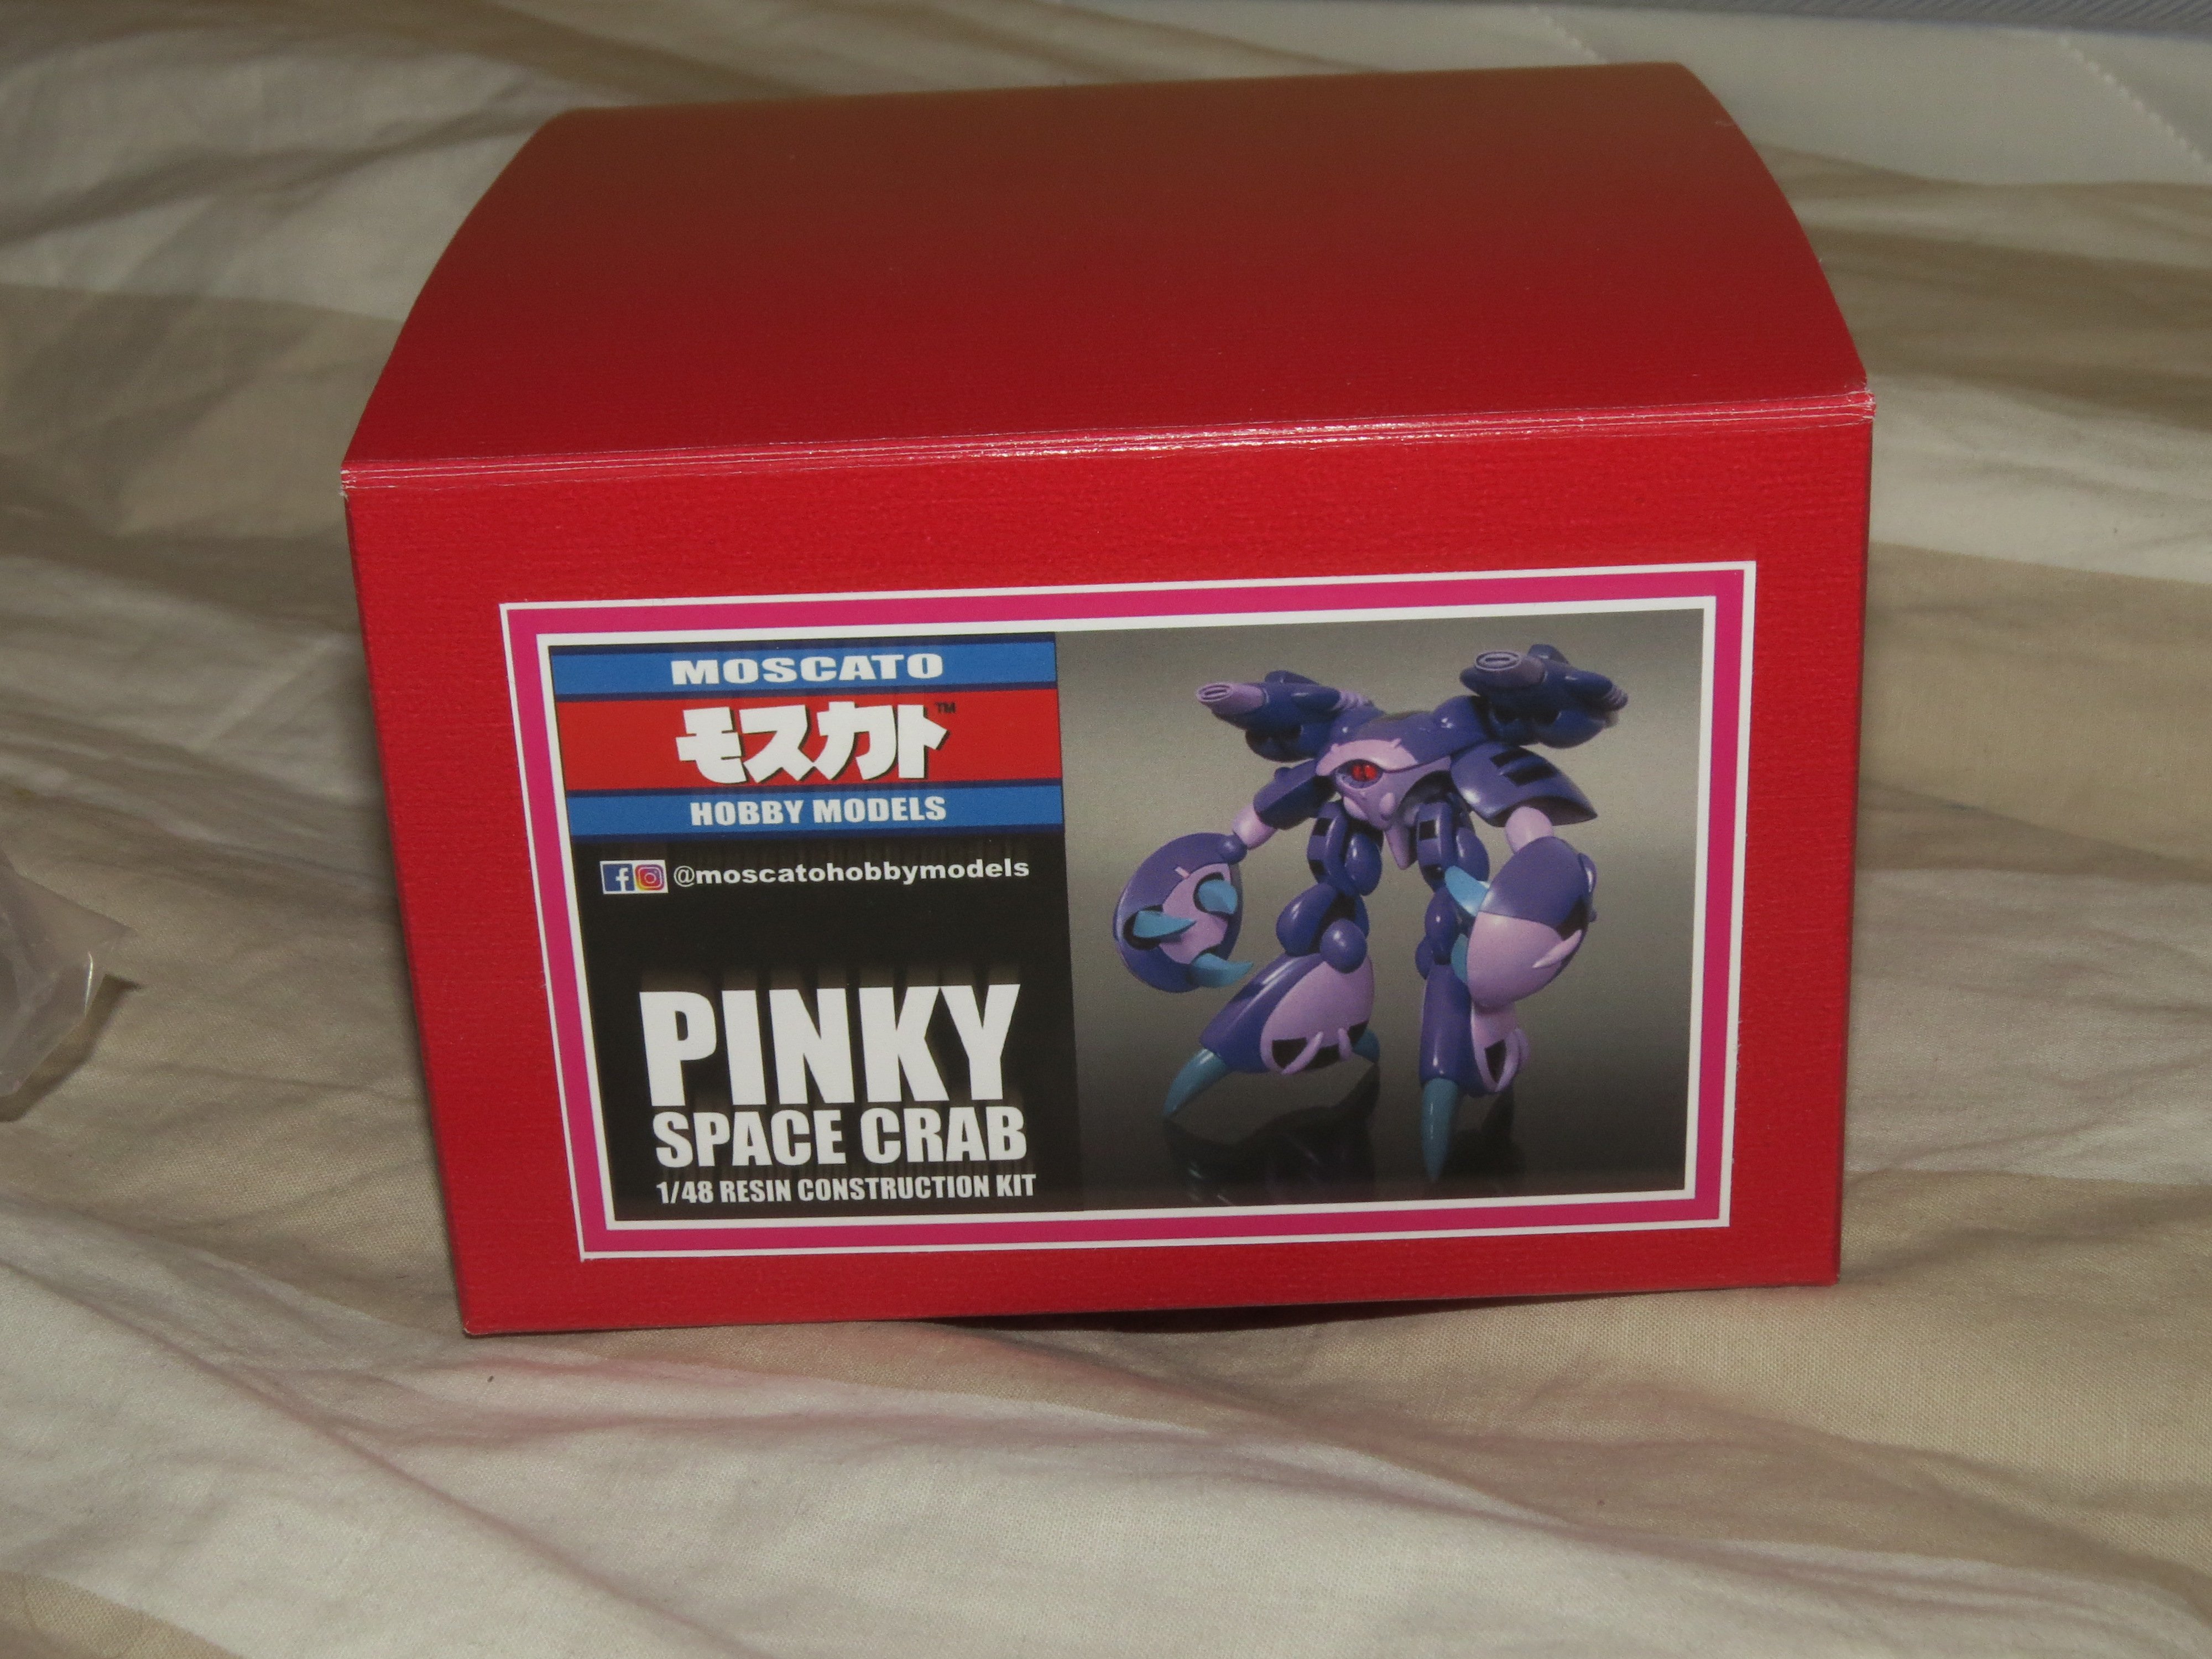
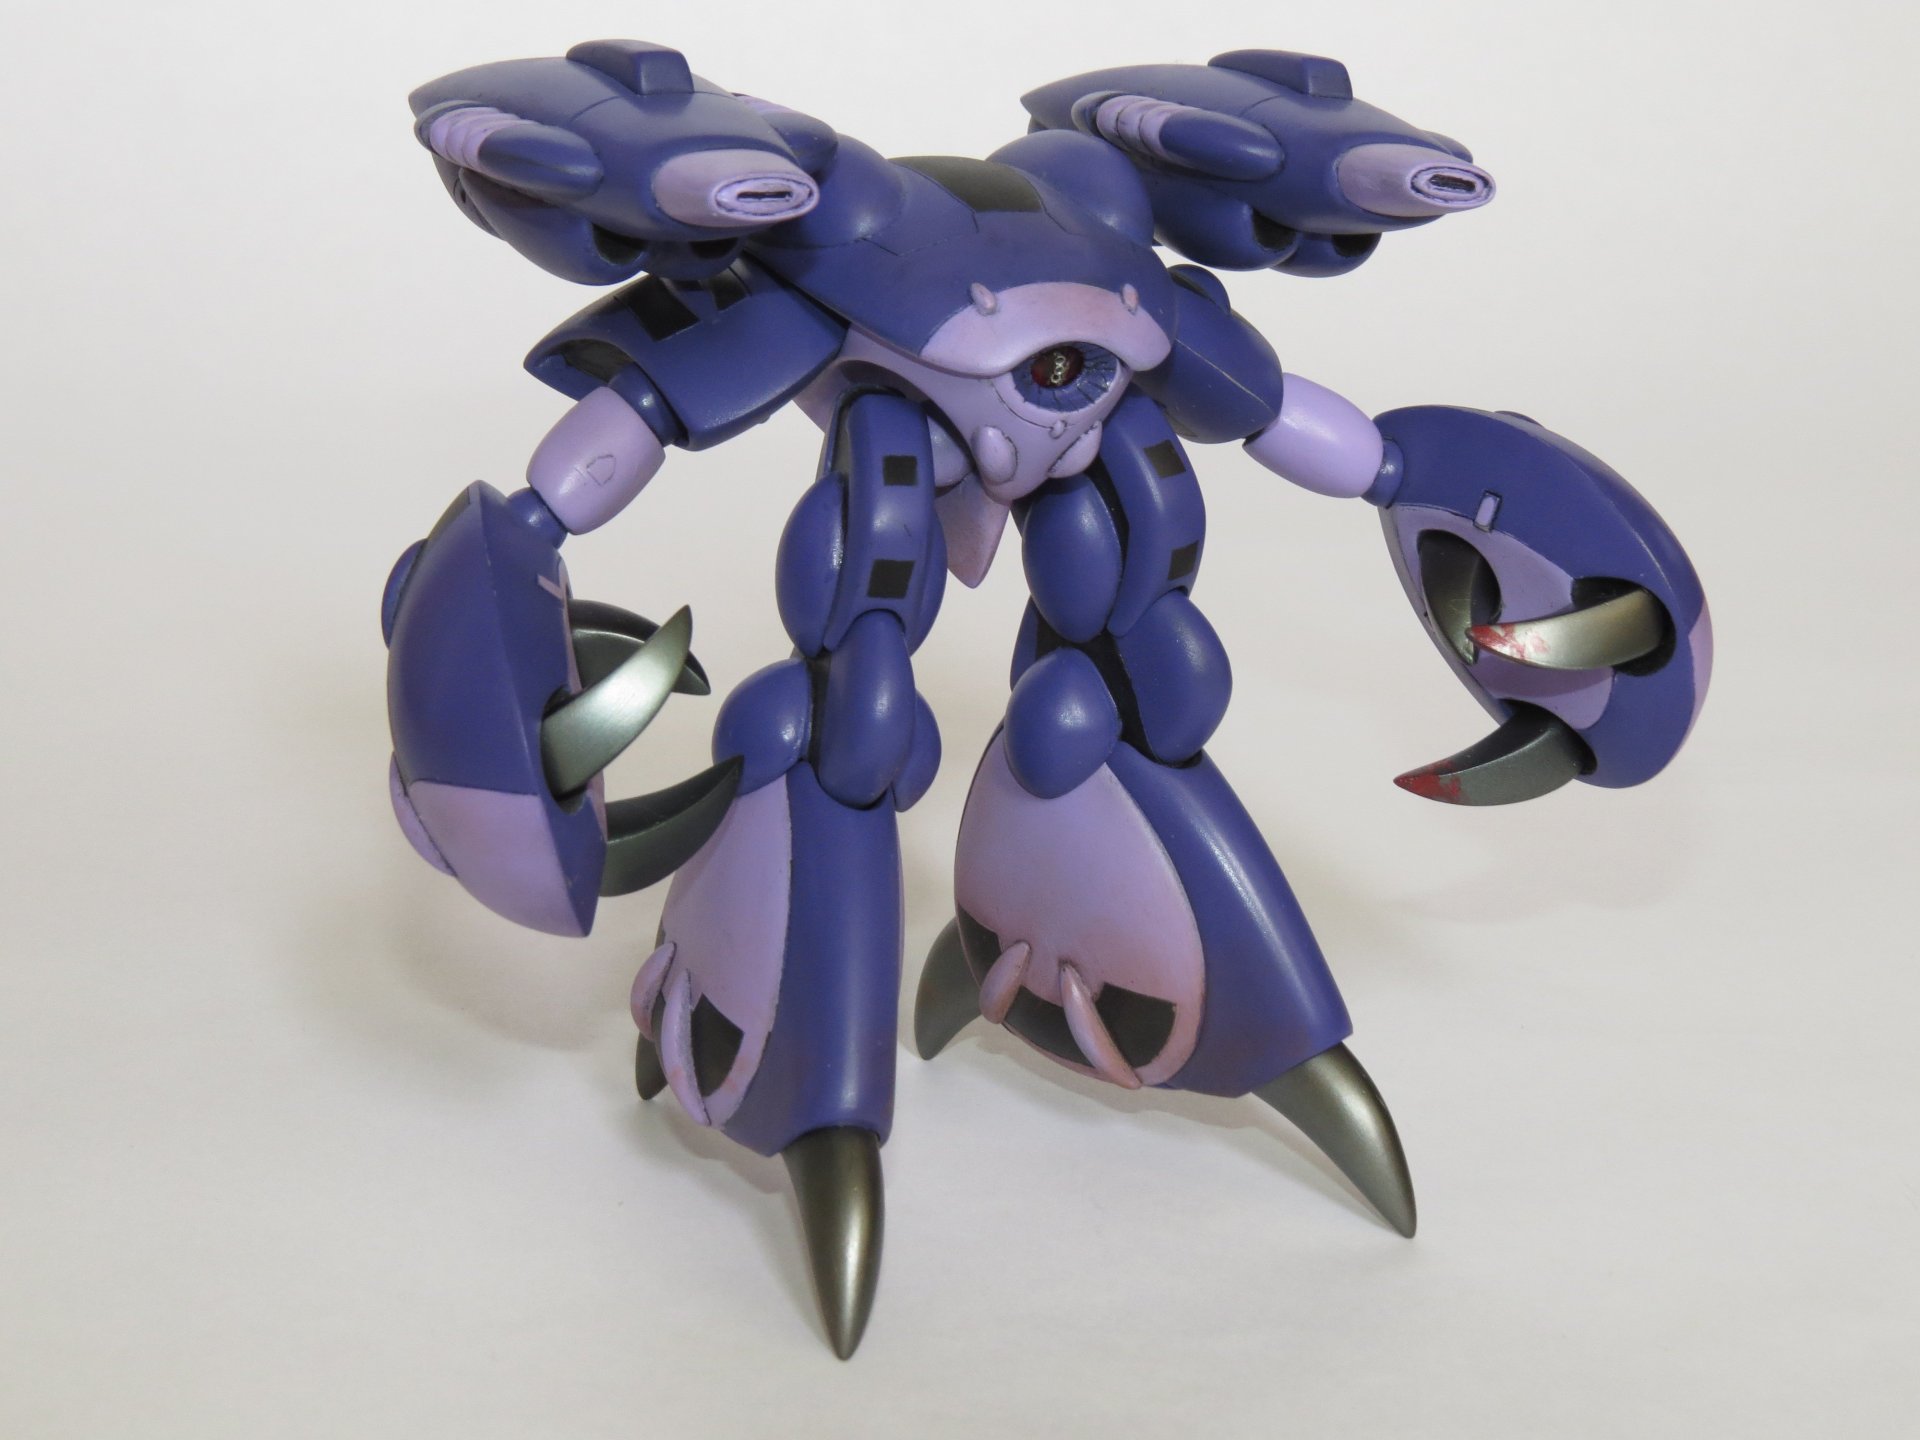
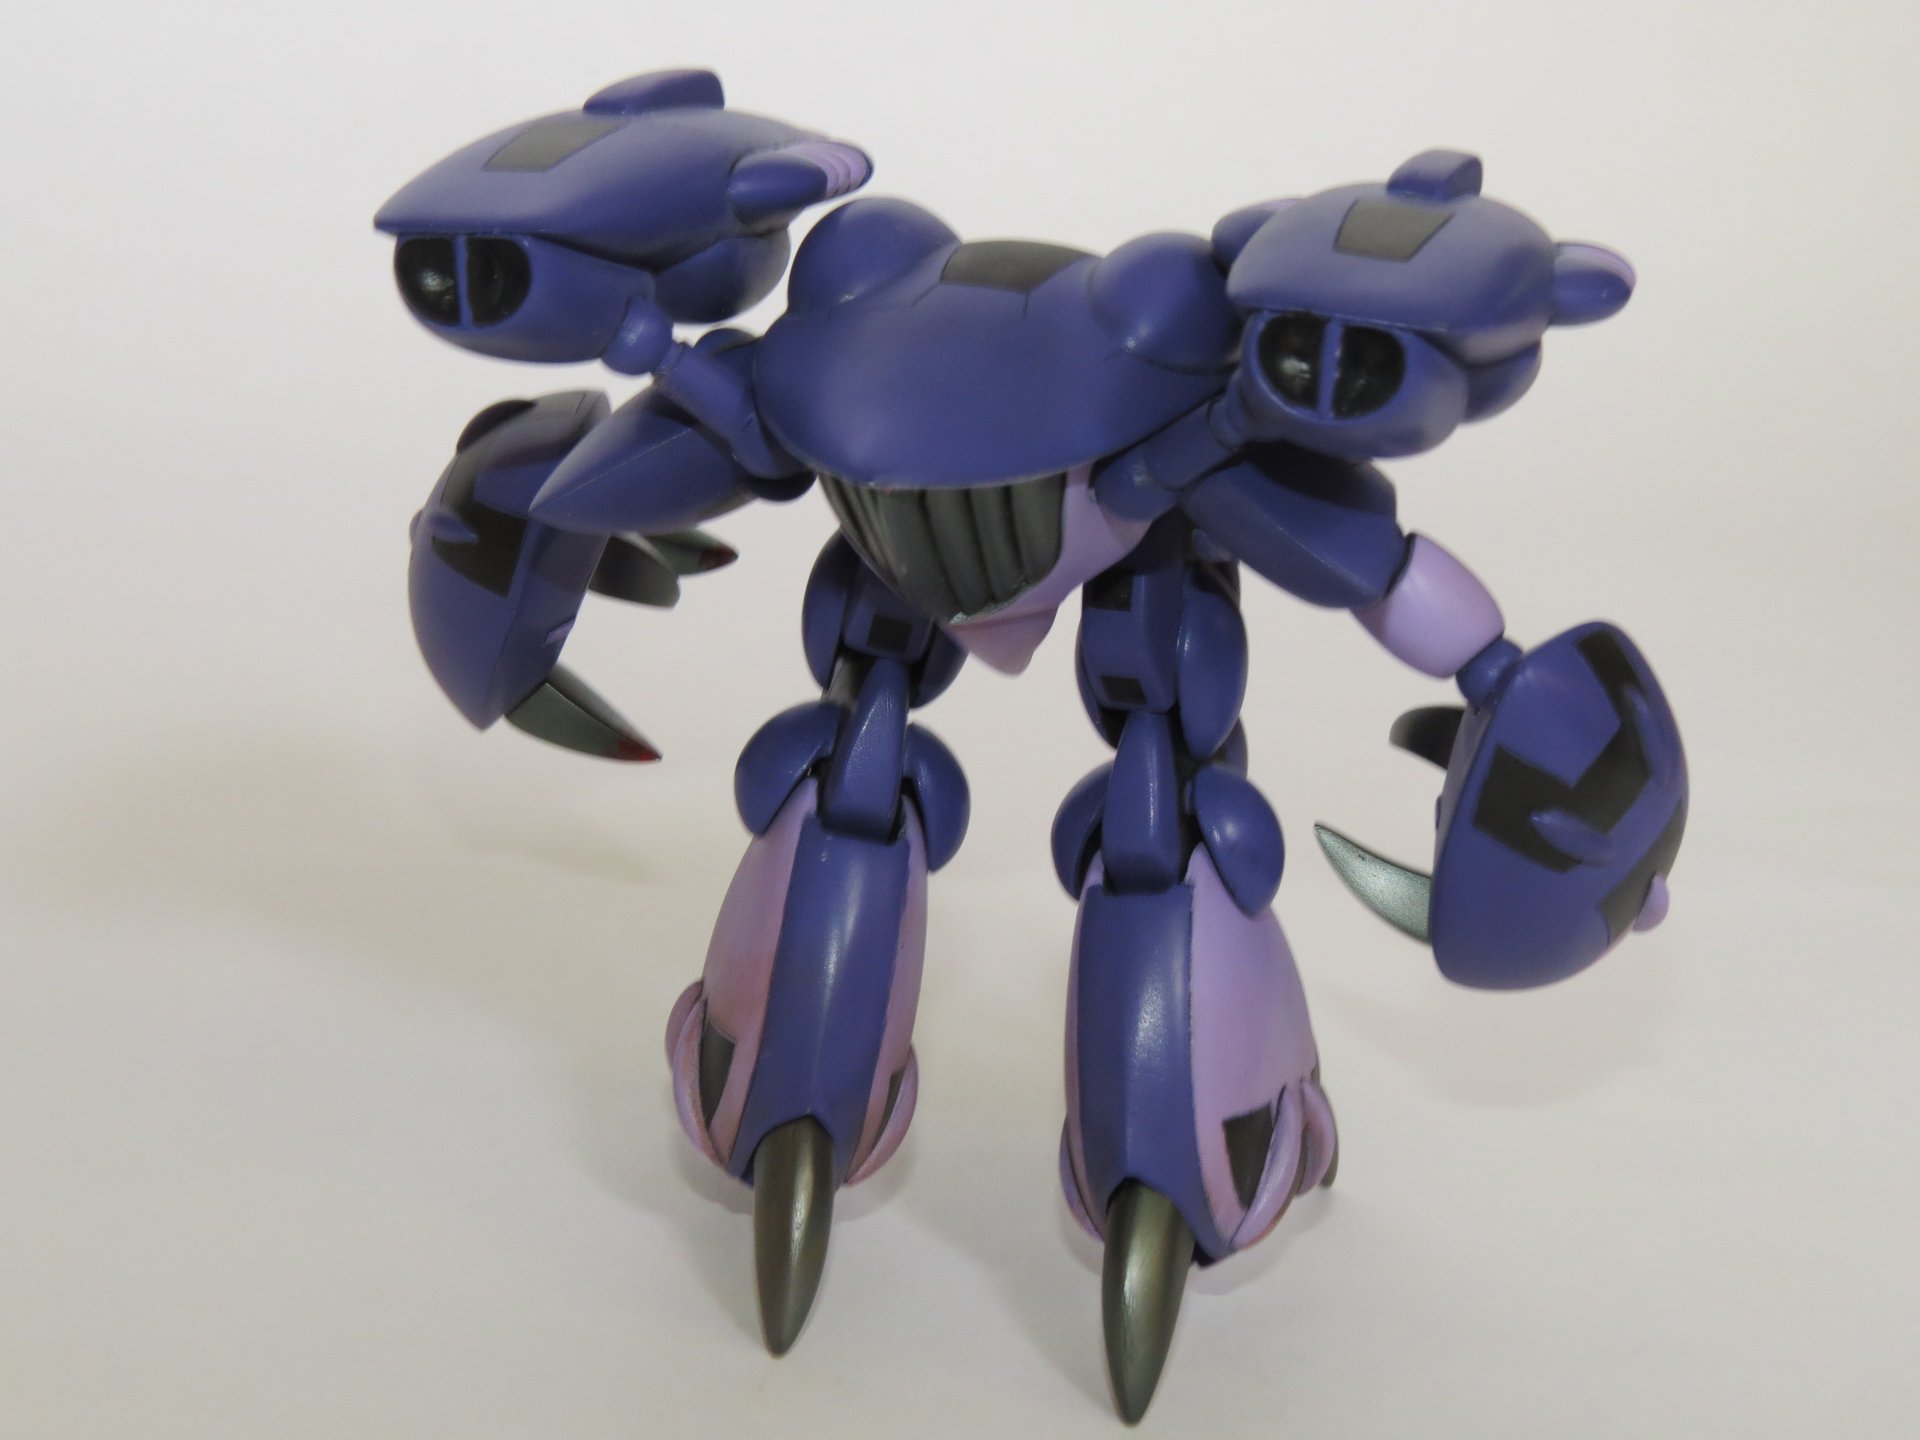
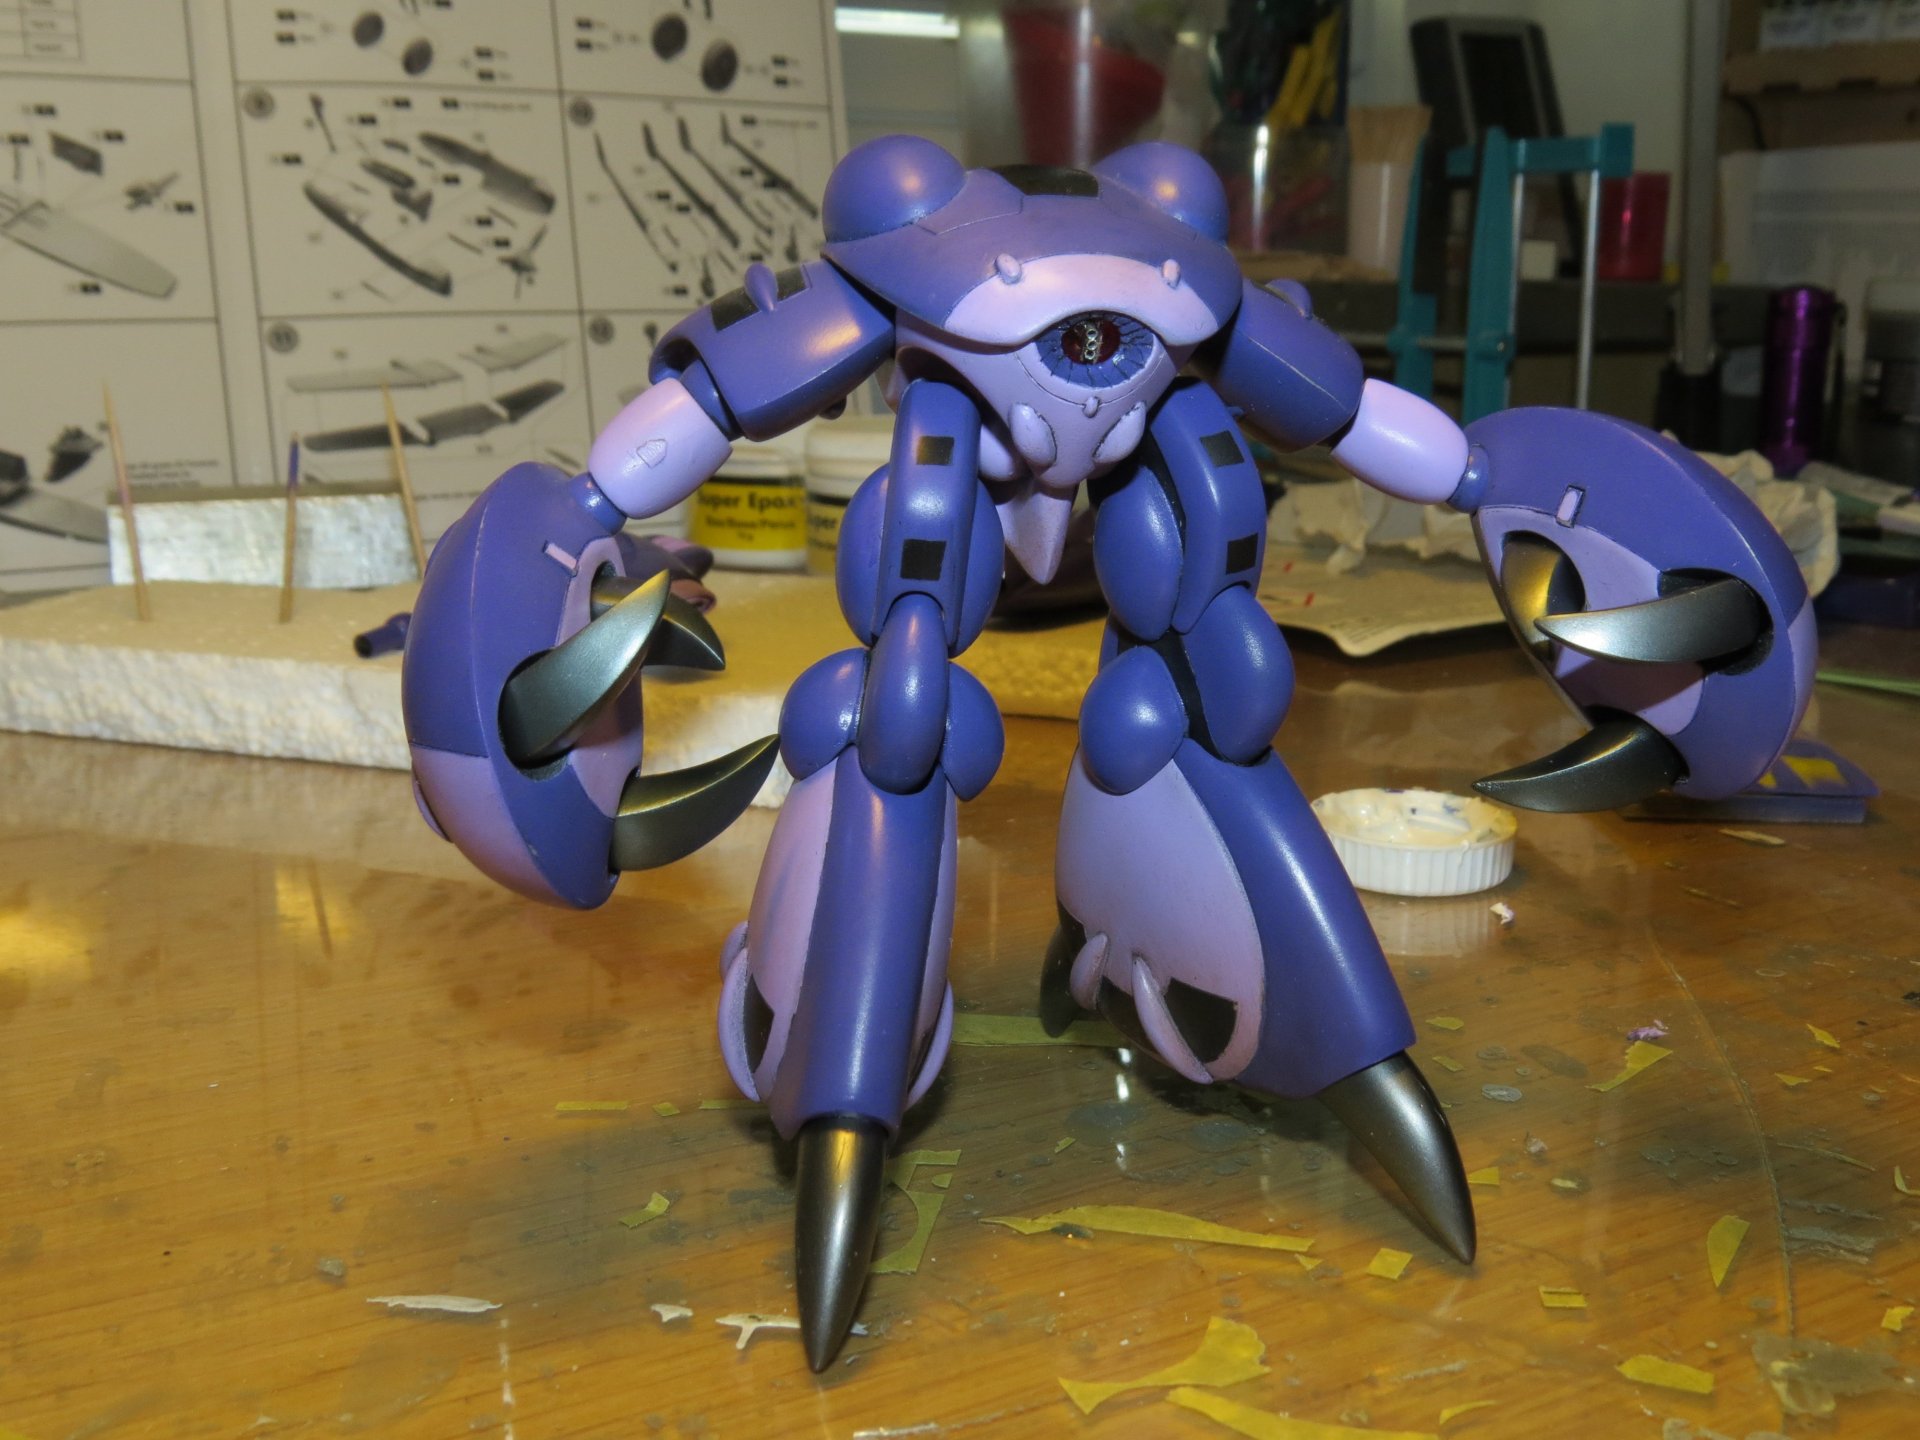
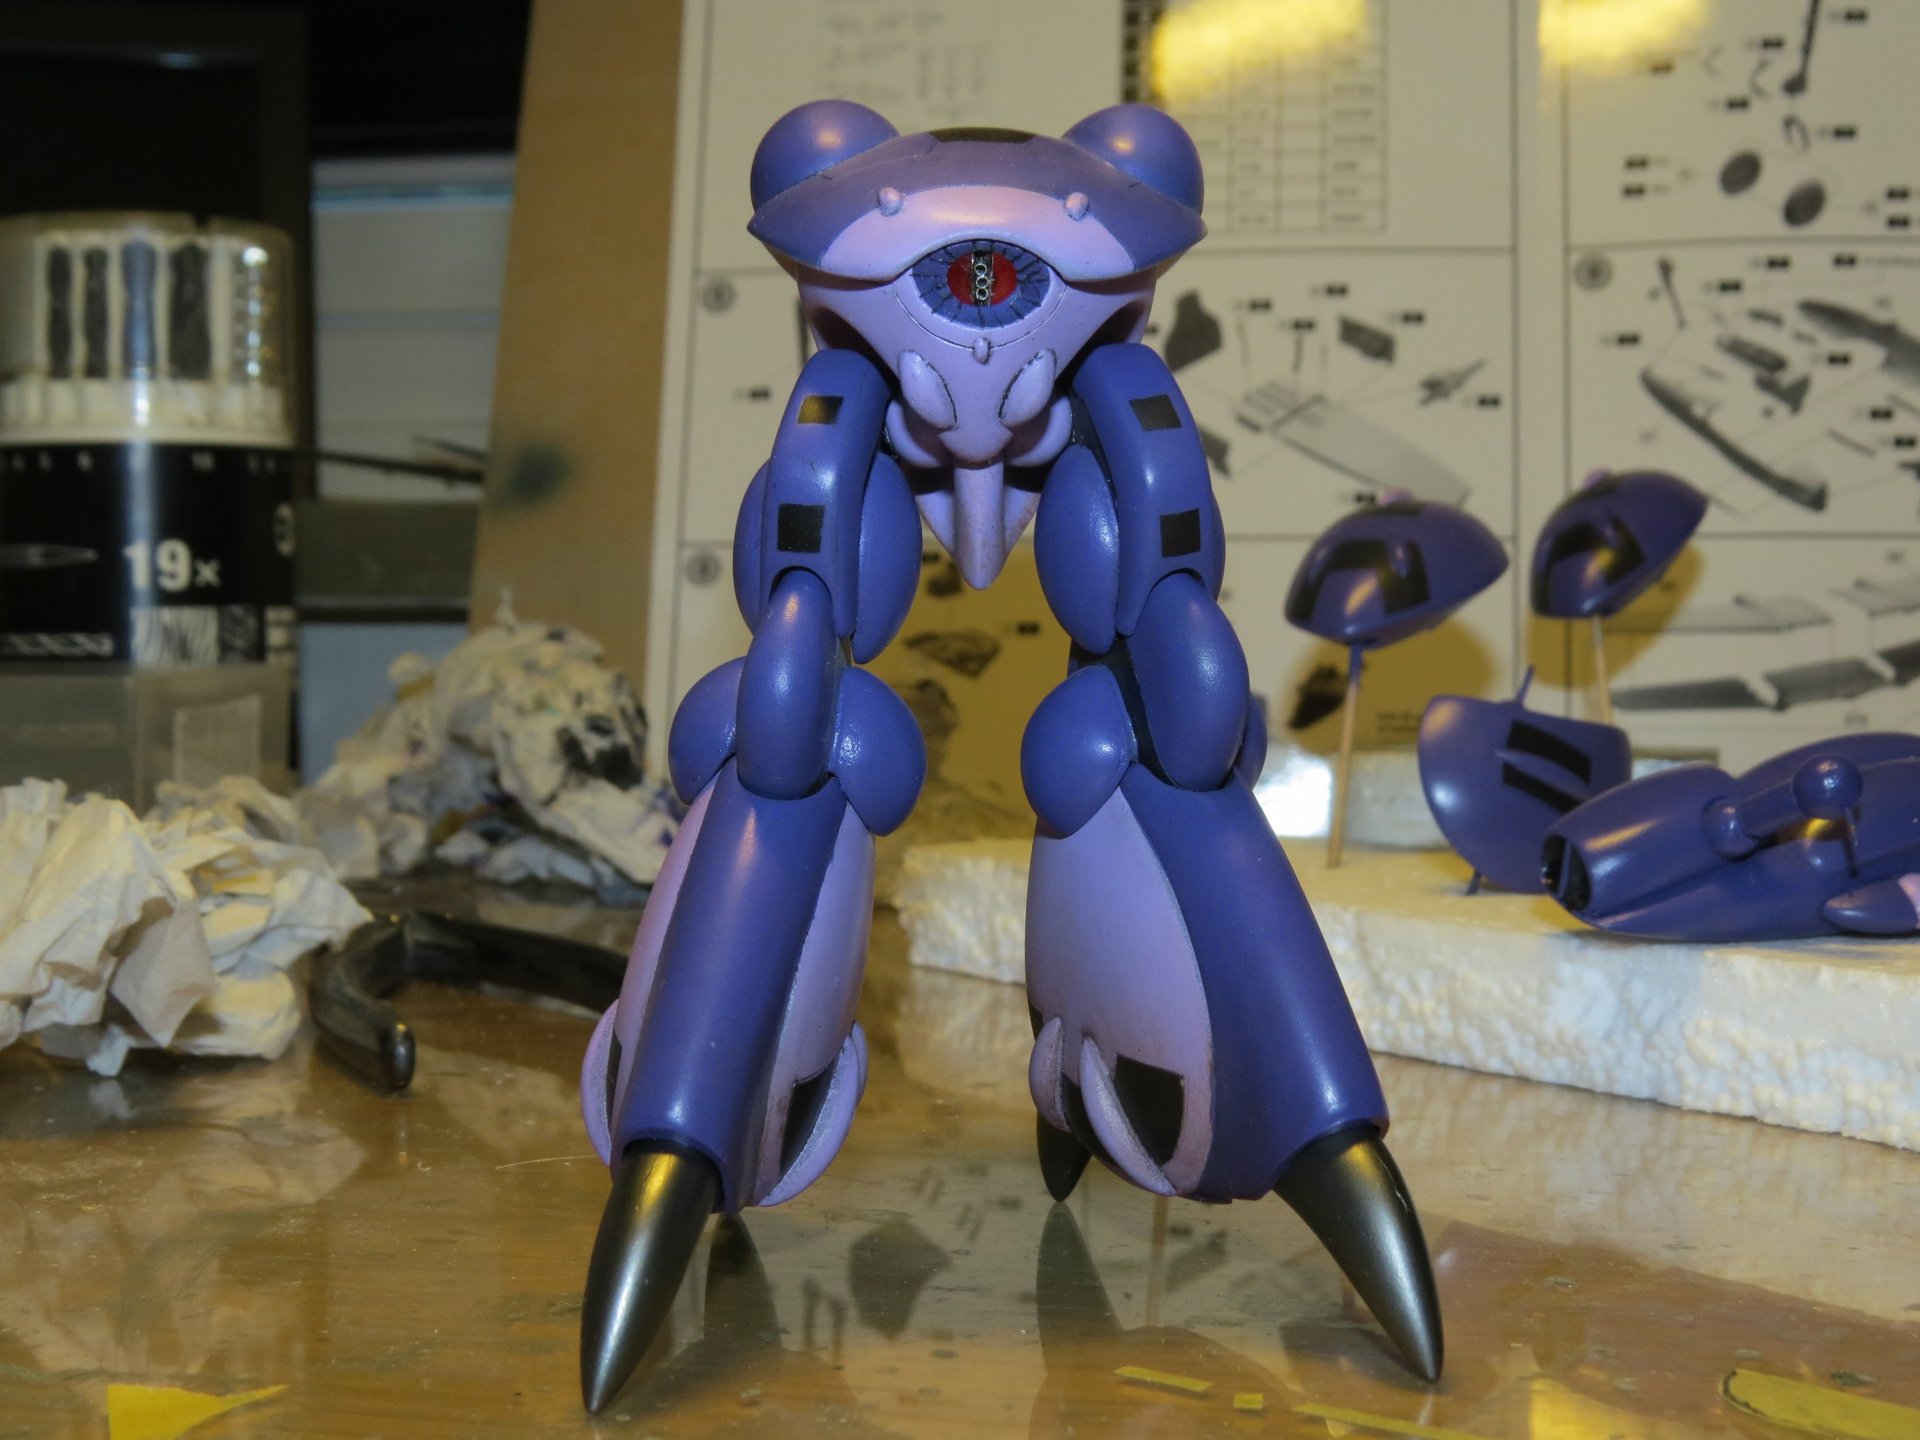
Thanks for your kind words. Hera are the final pics of the finished pinky crab. It's been a real joy to build. Unfortunately, my camera has problems picking up purple colors, so it looks more blue than it actually is in reality.


-
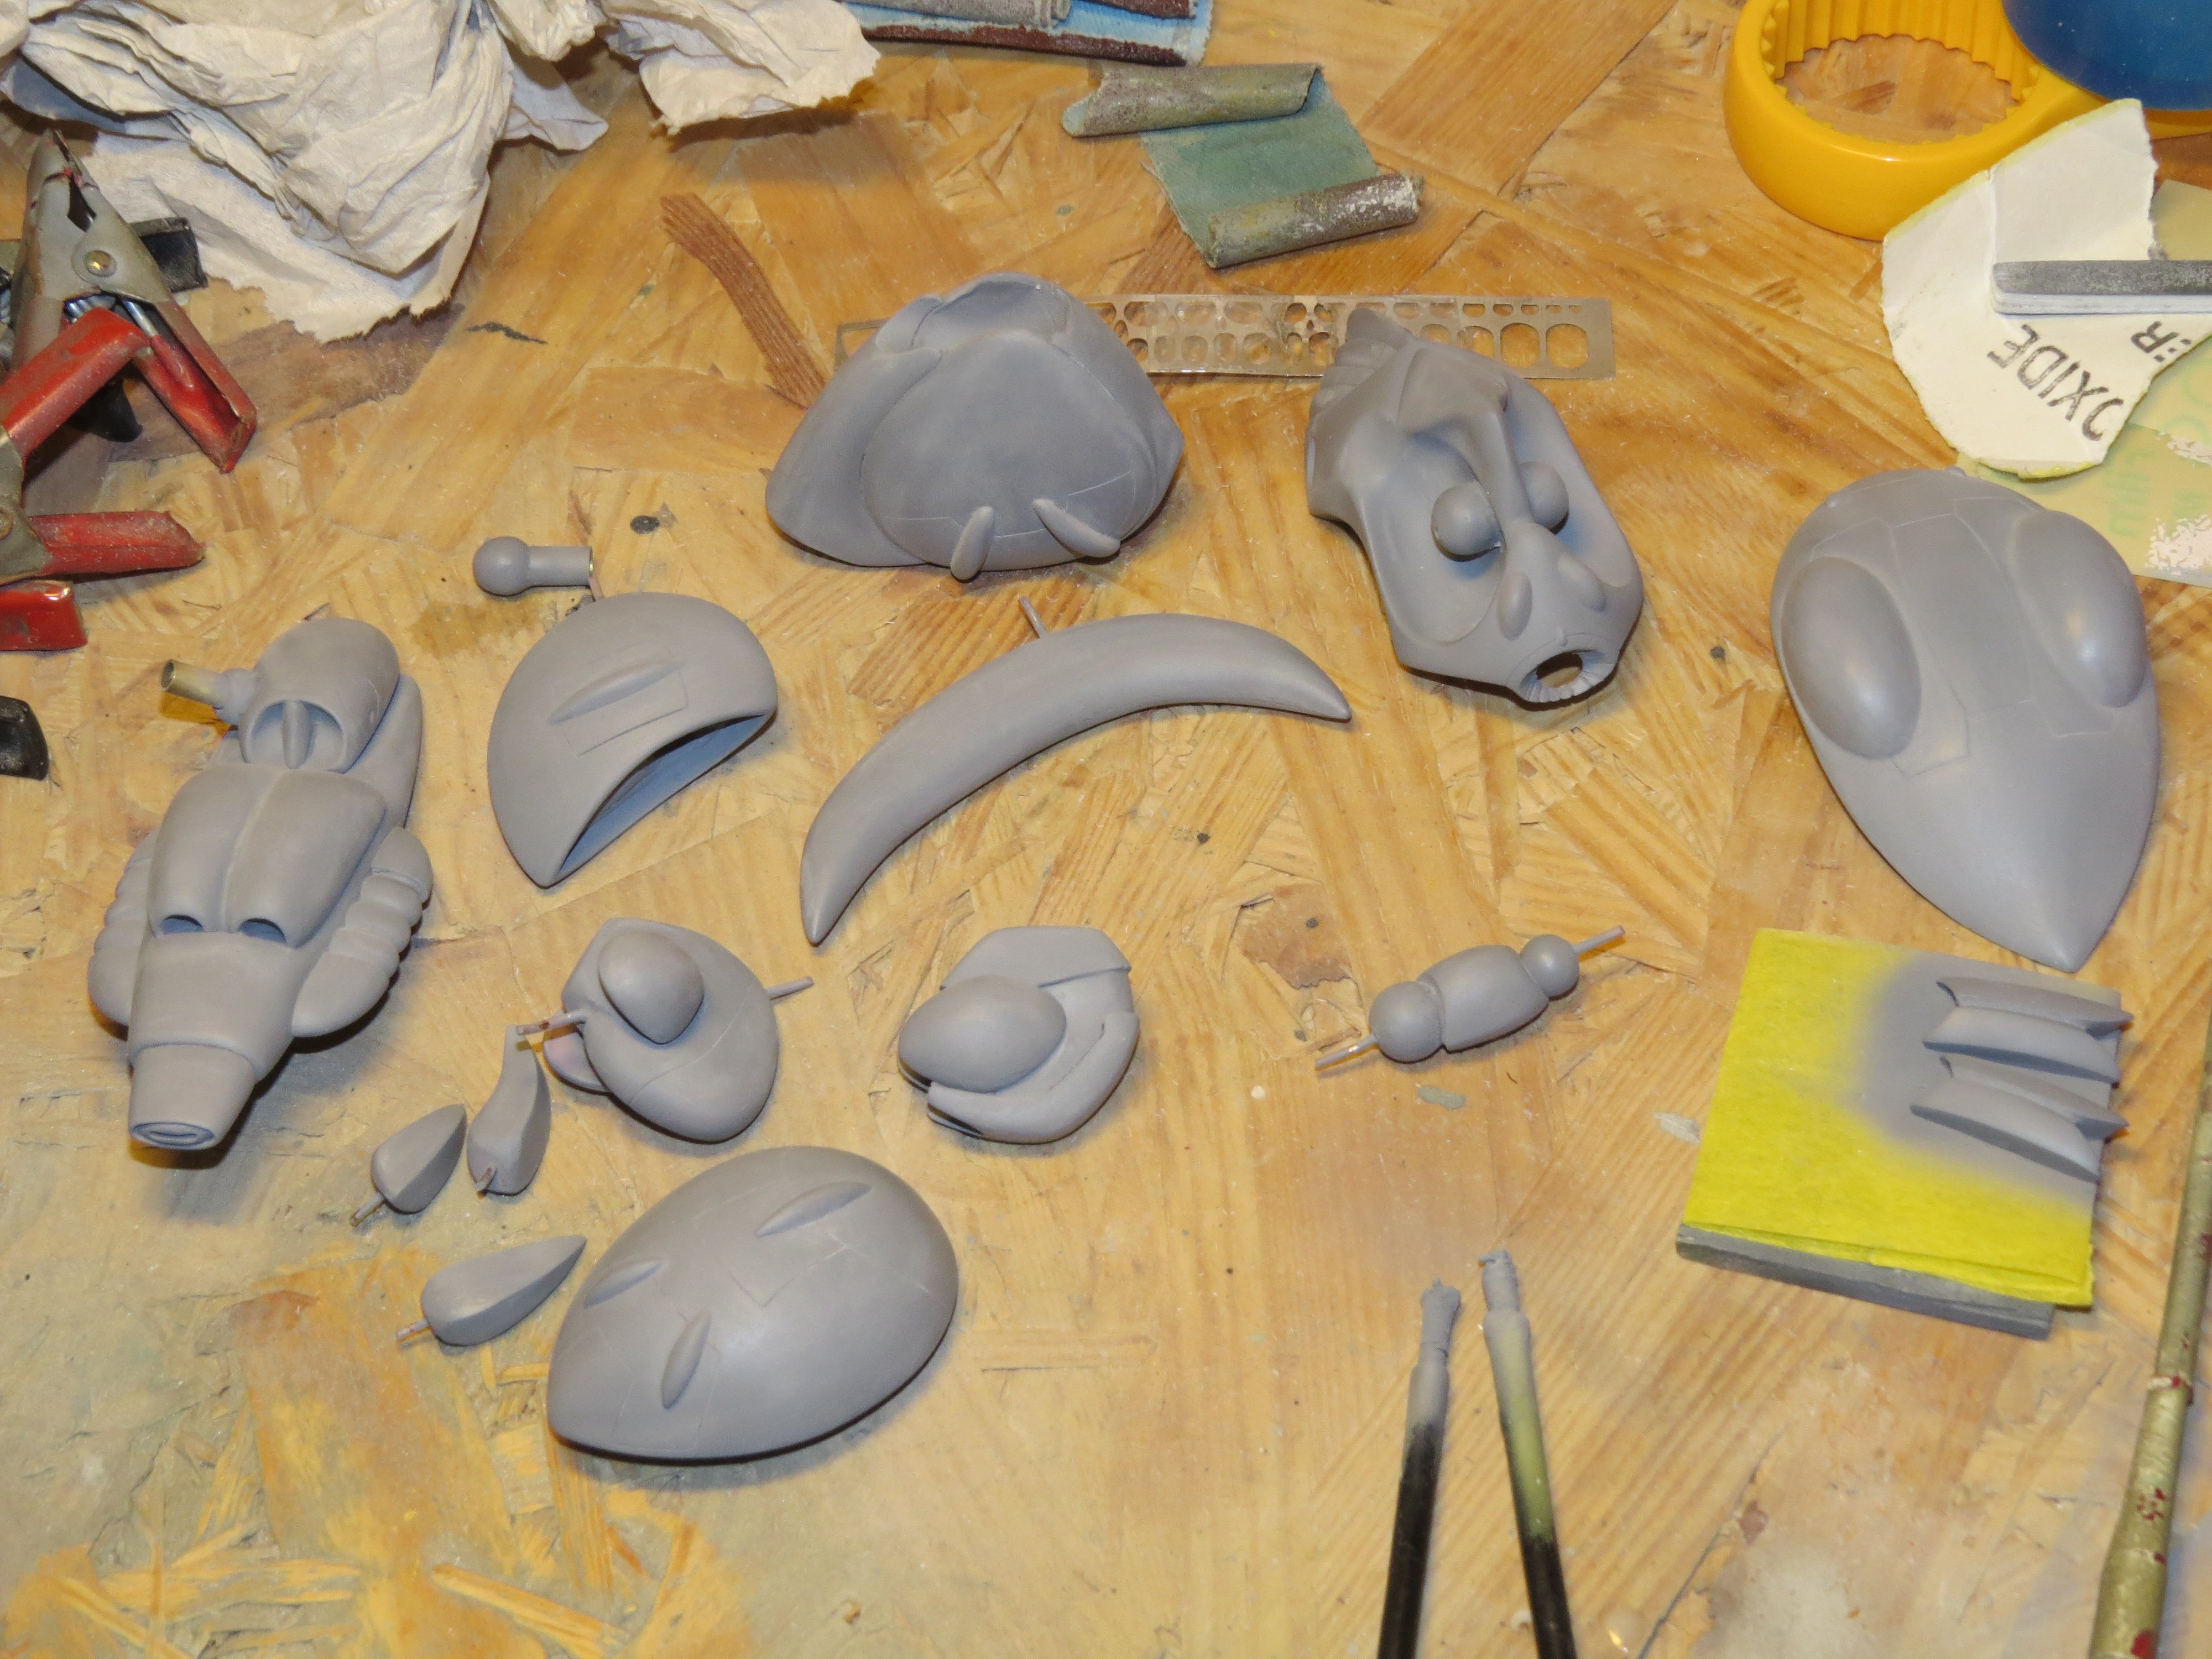
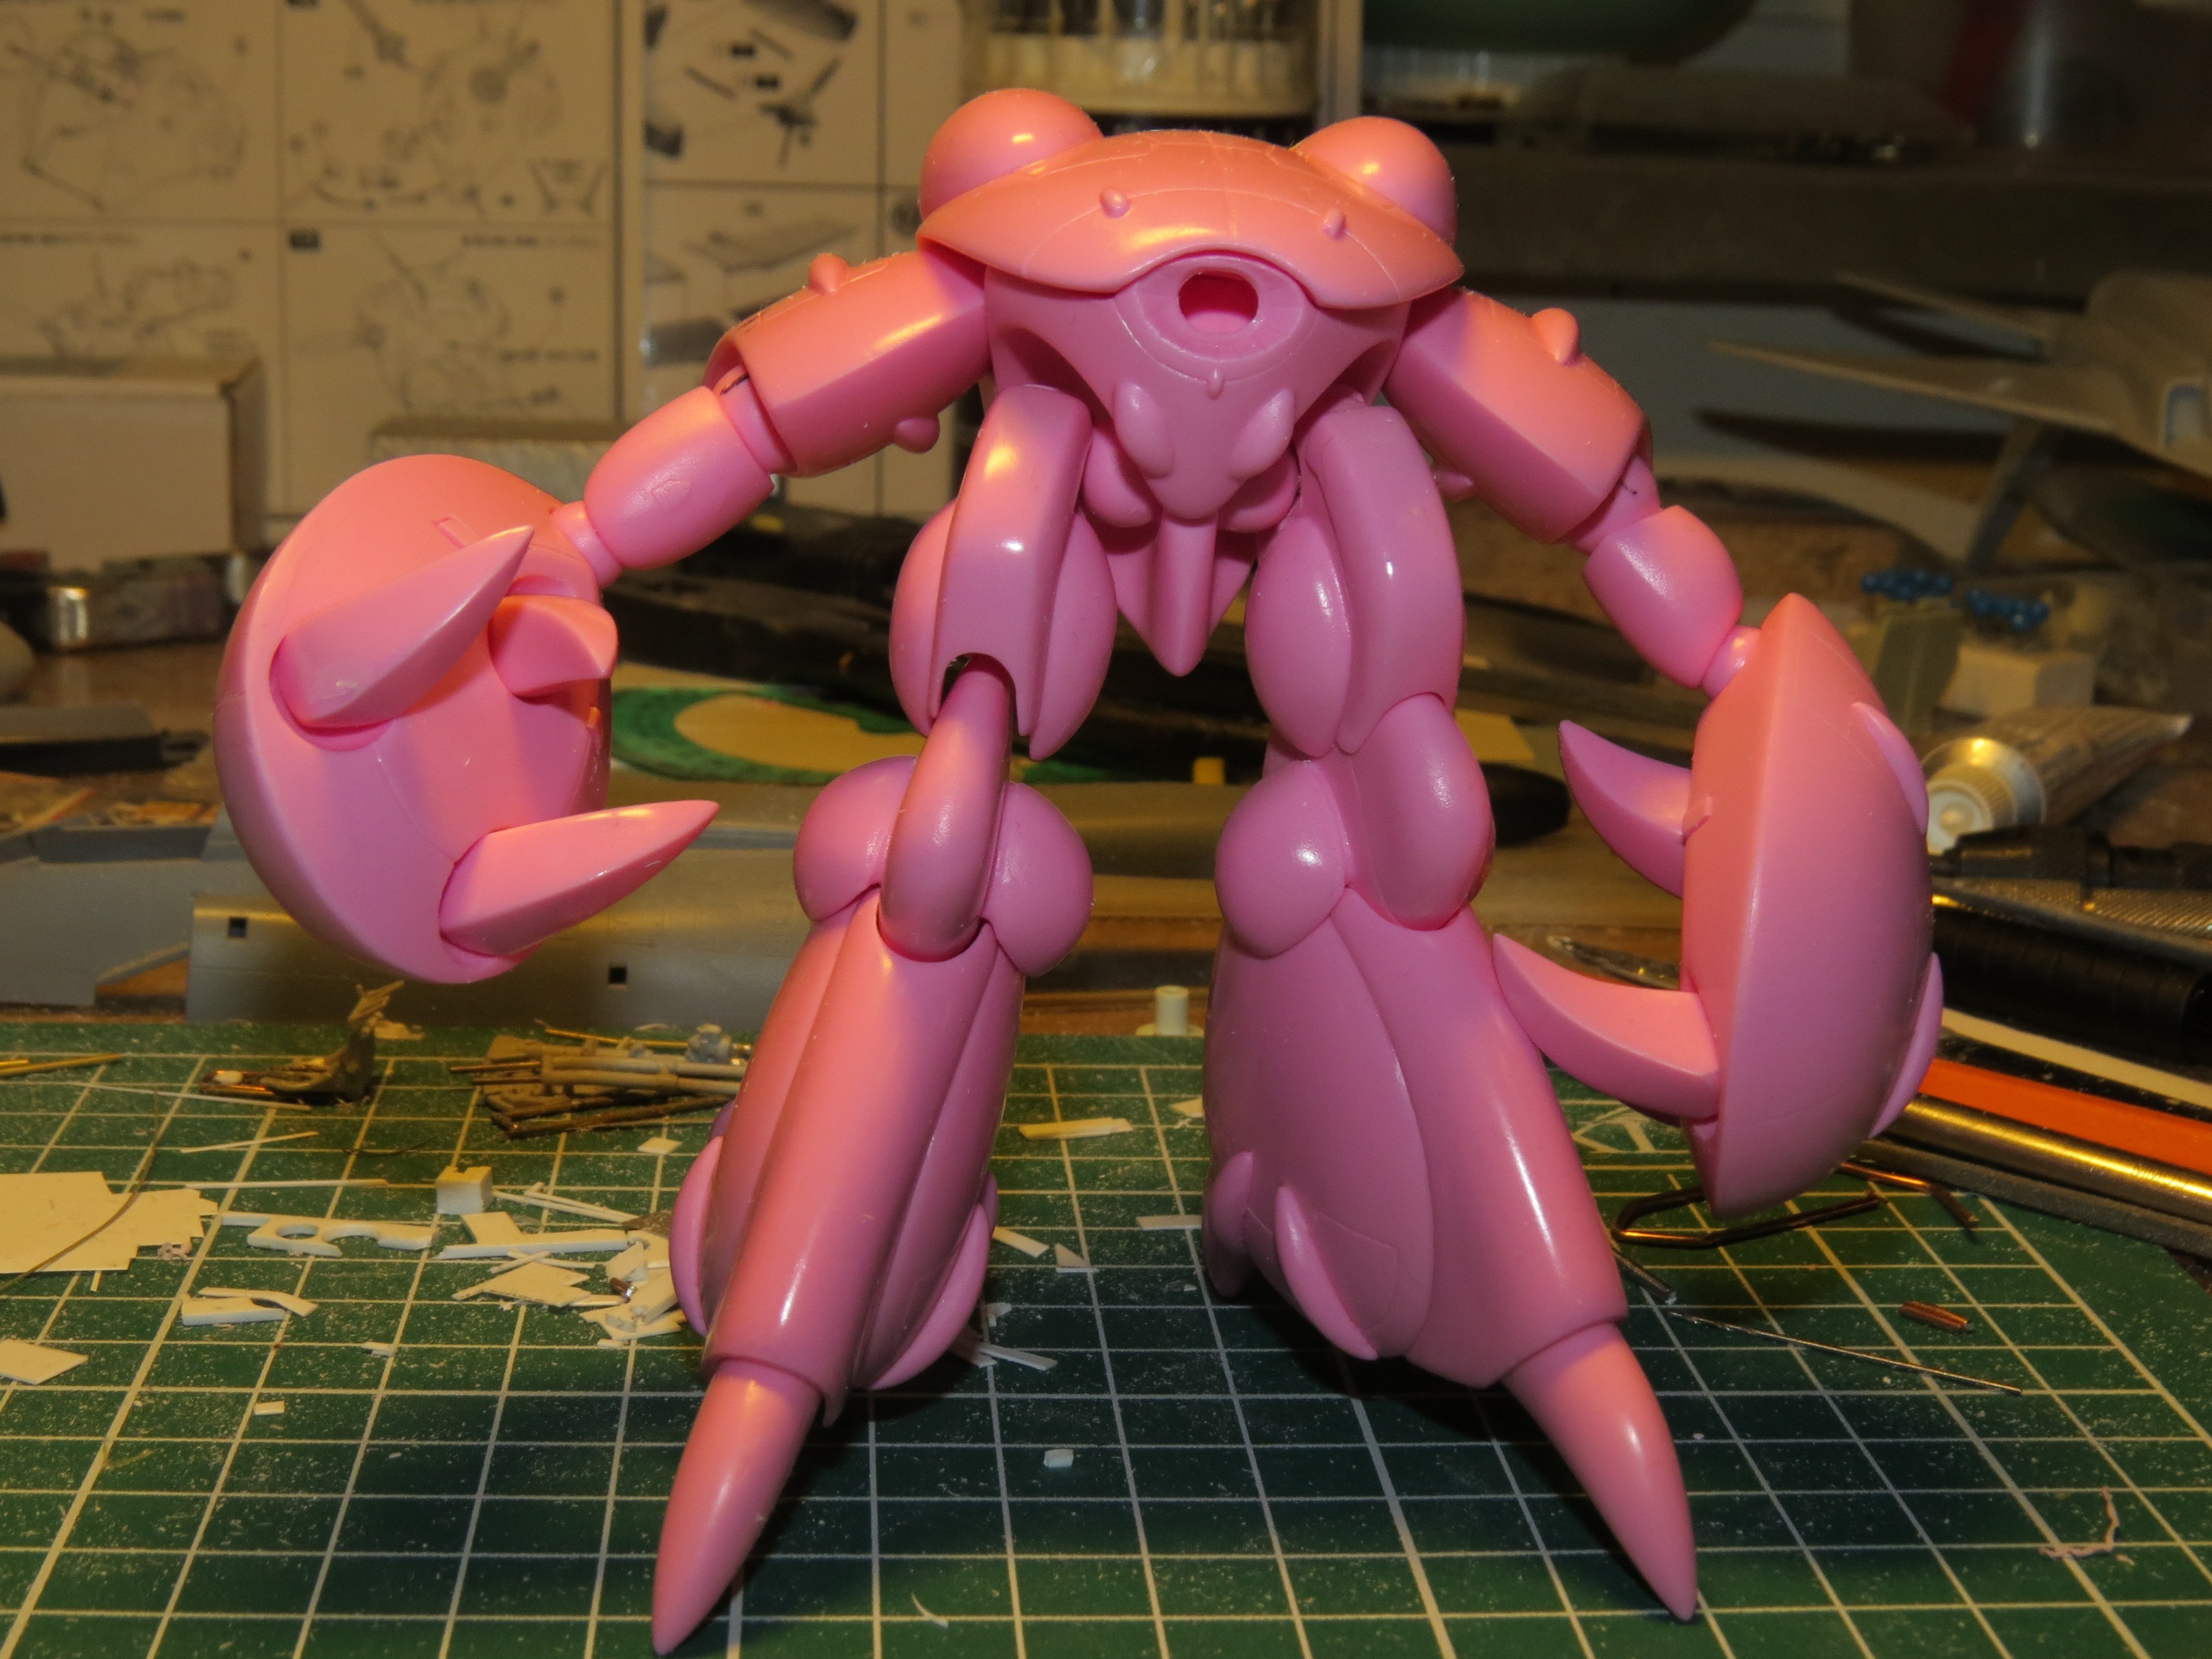
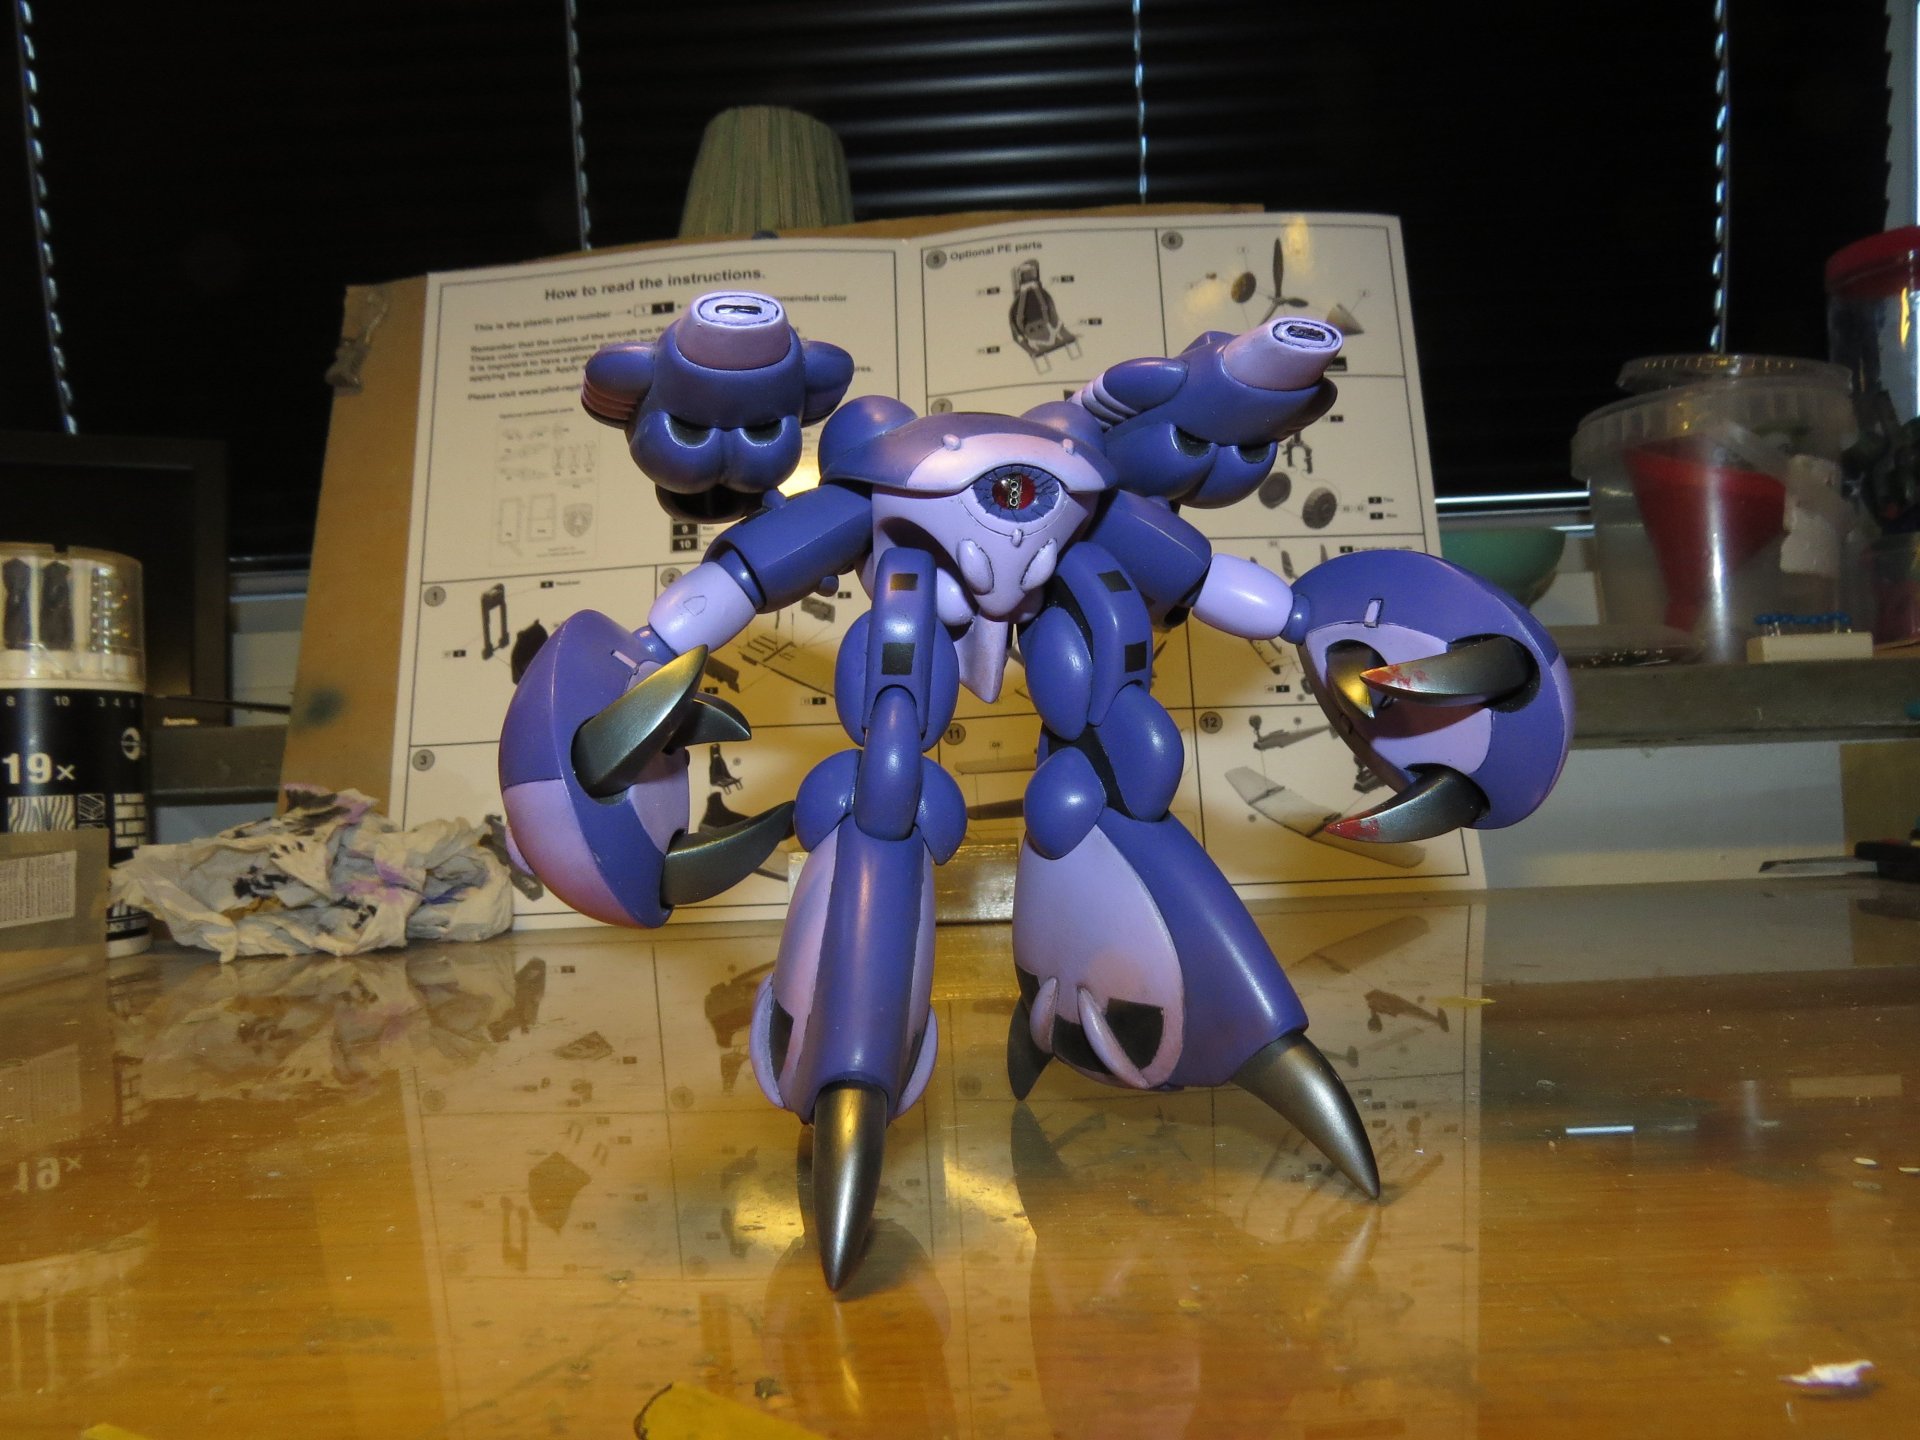
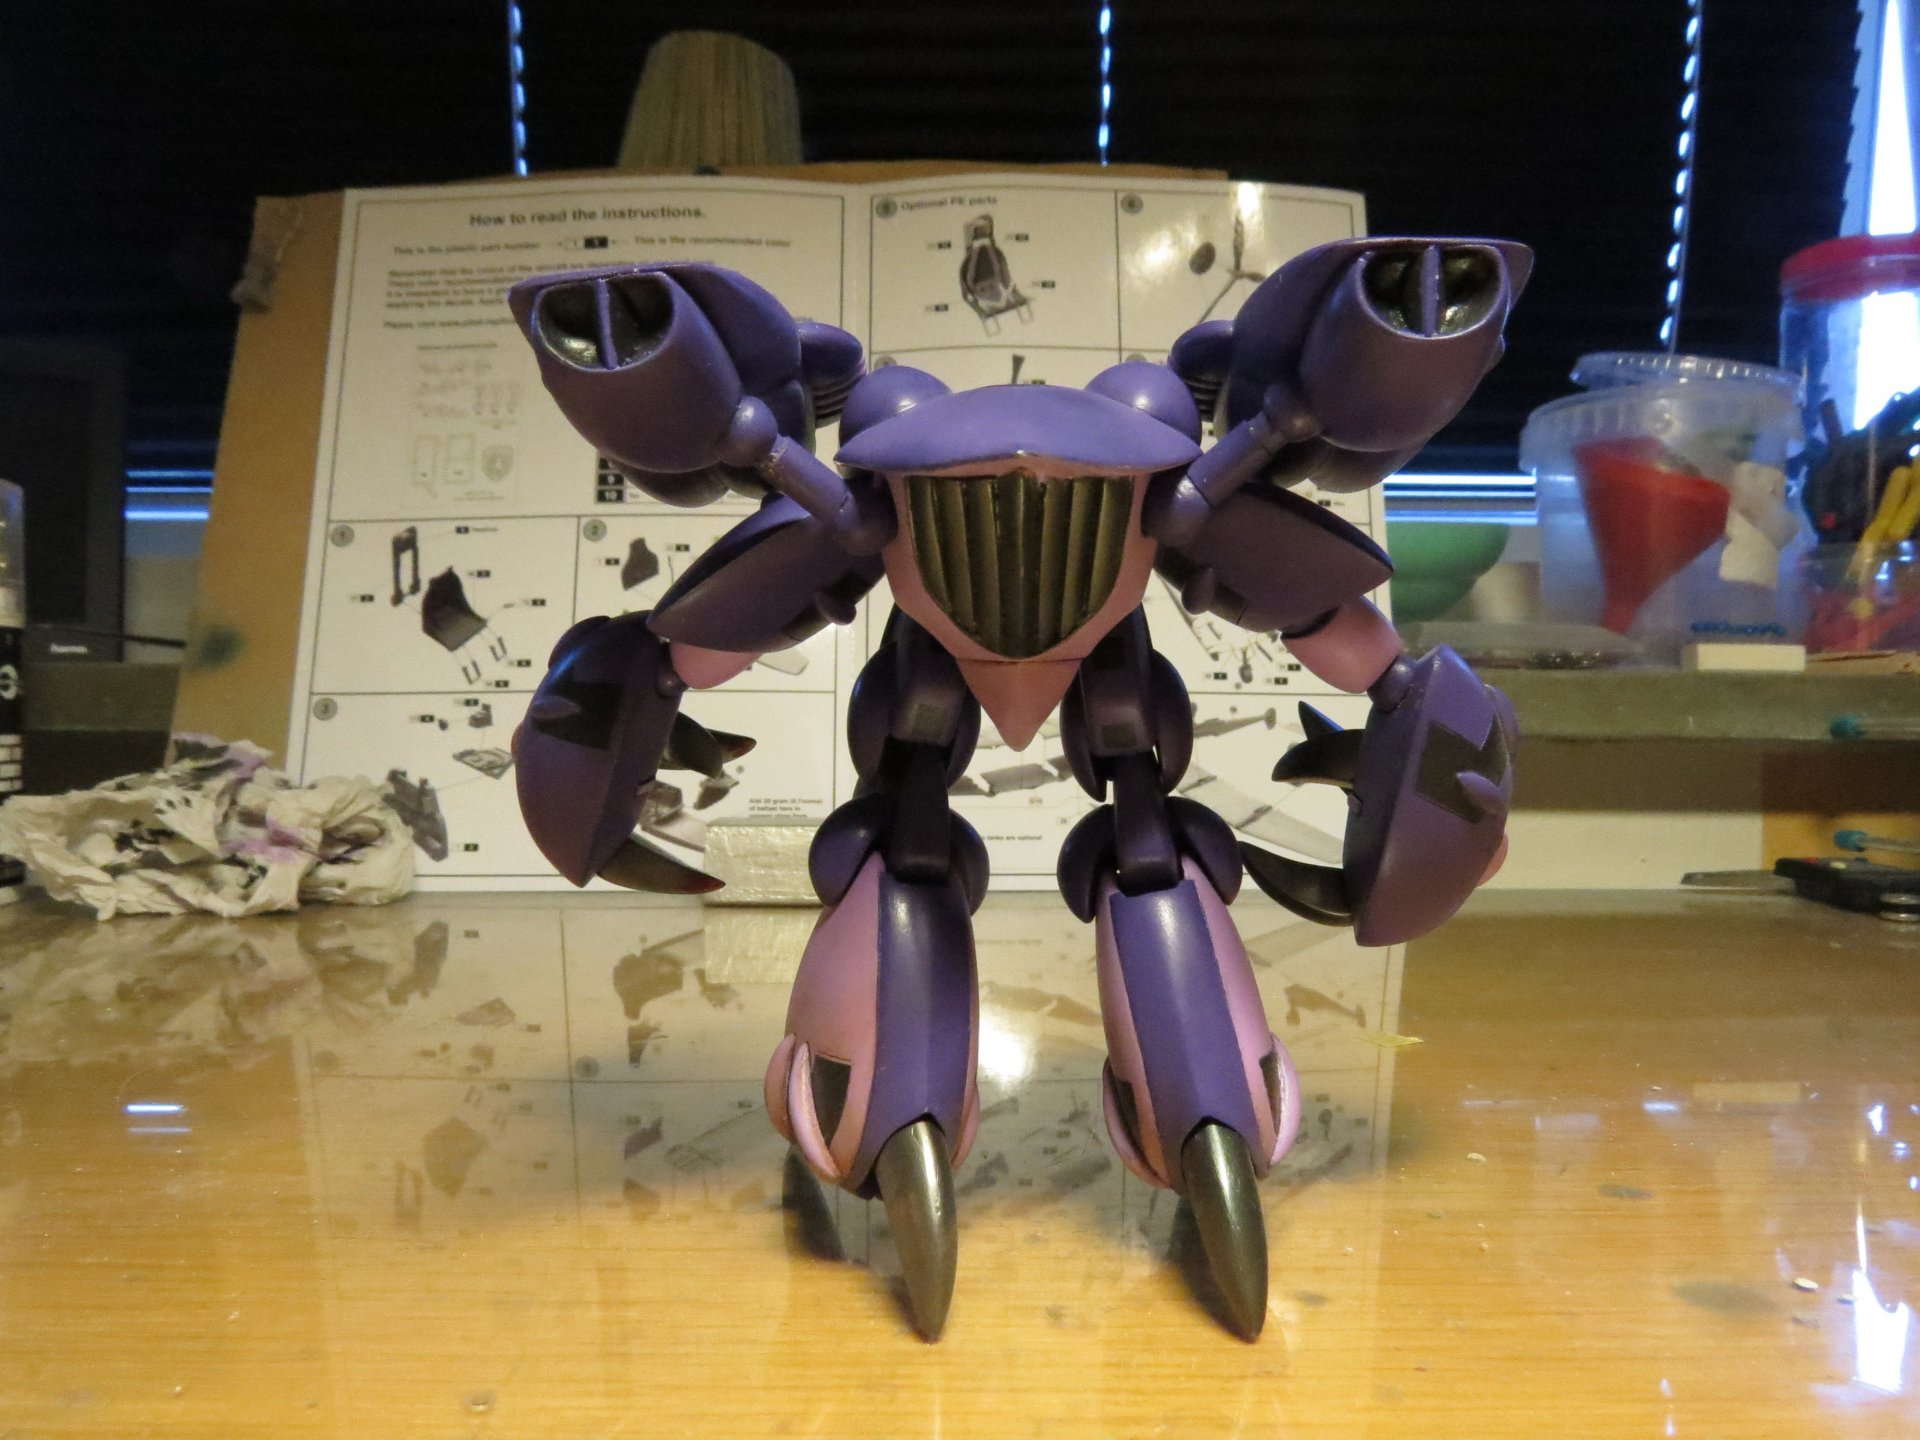
Final assembly Legs and head assembled and installed. Arms assembled and Installed. And finally, the guns.


-
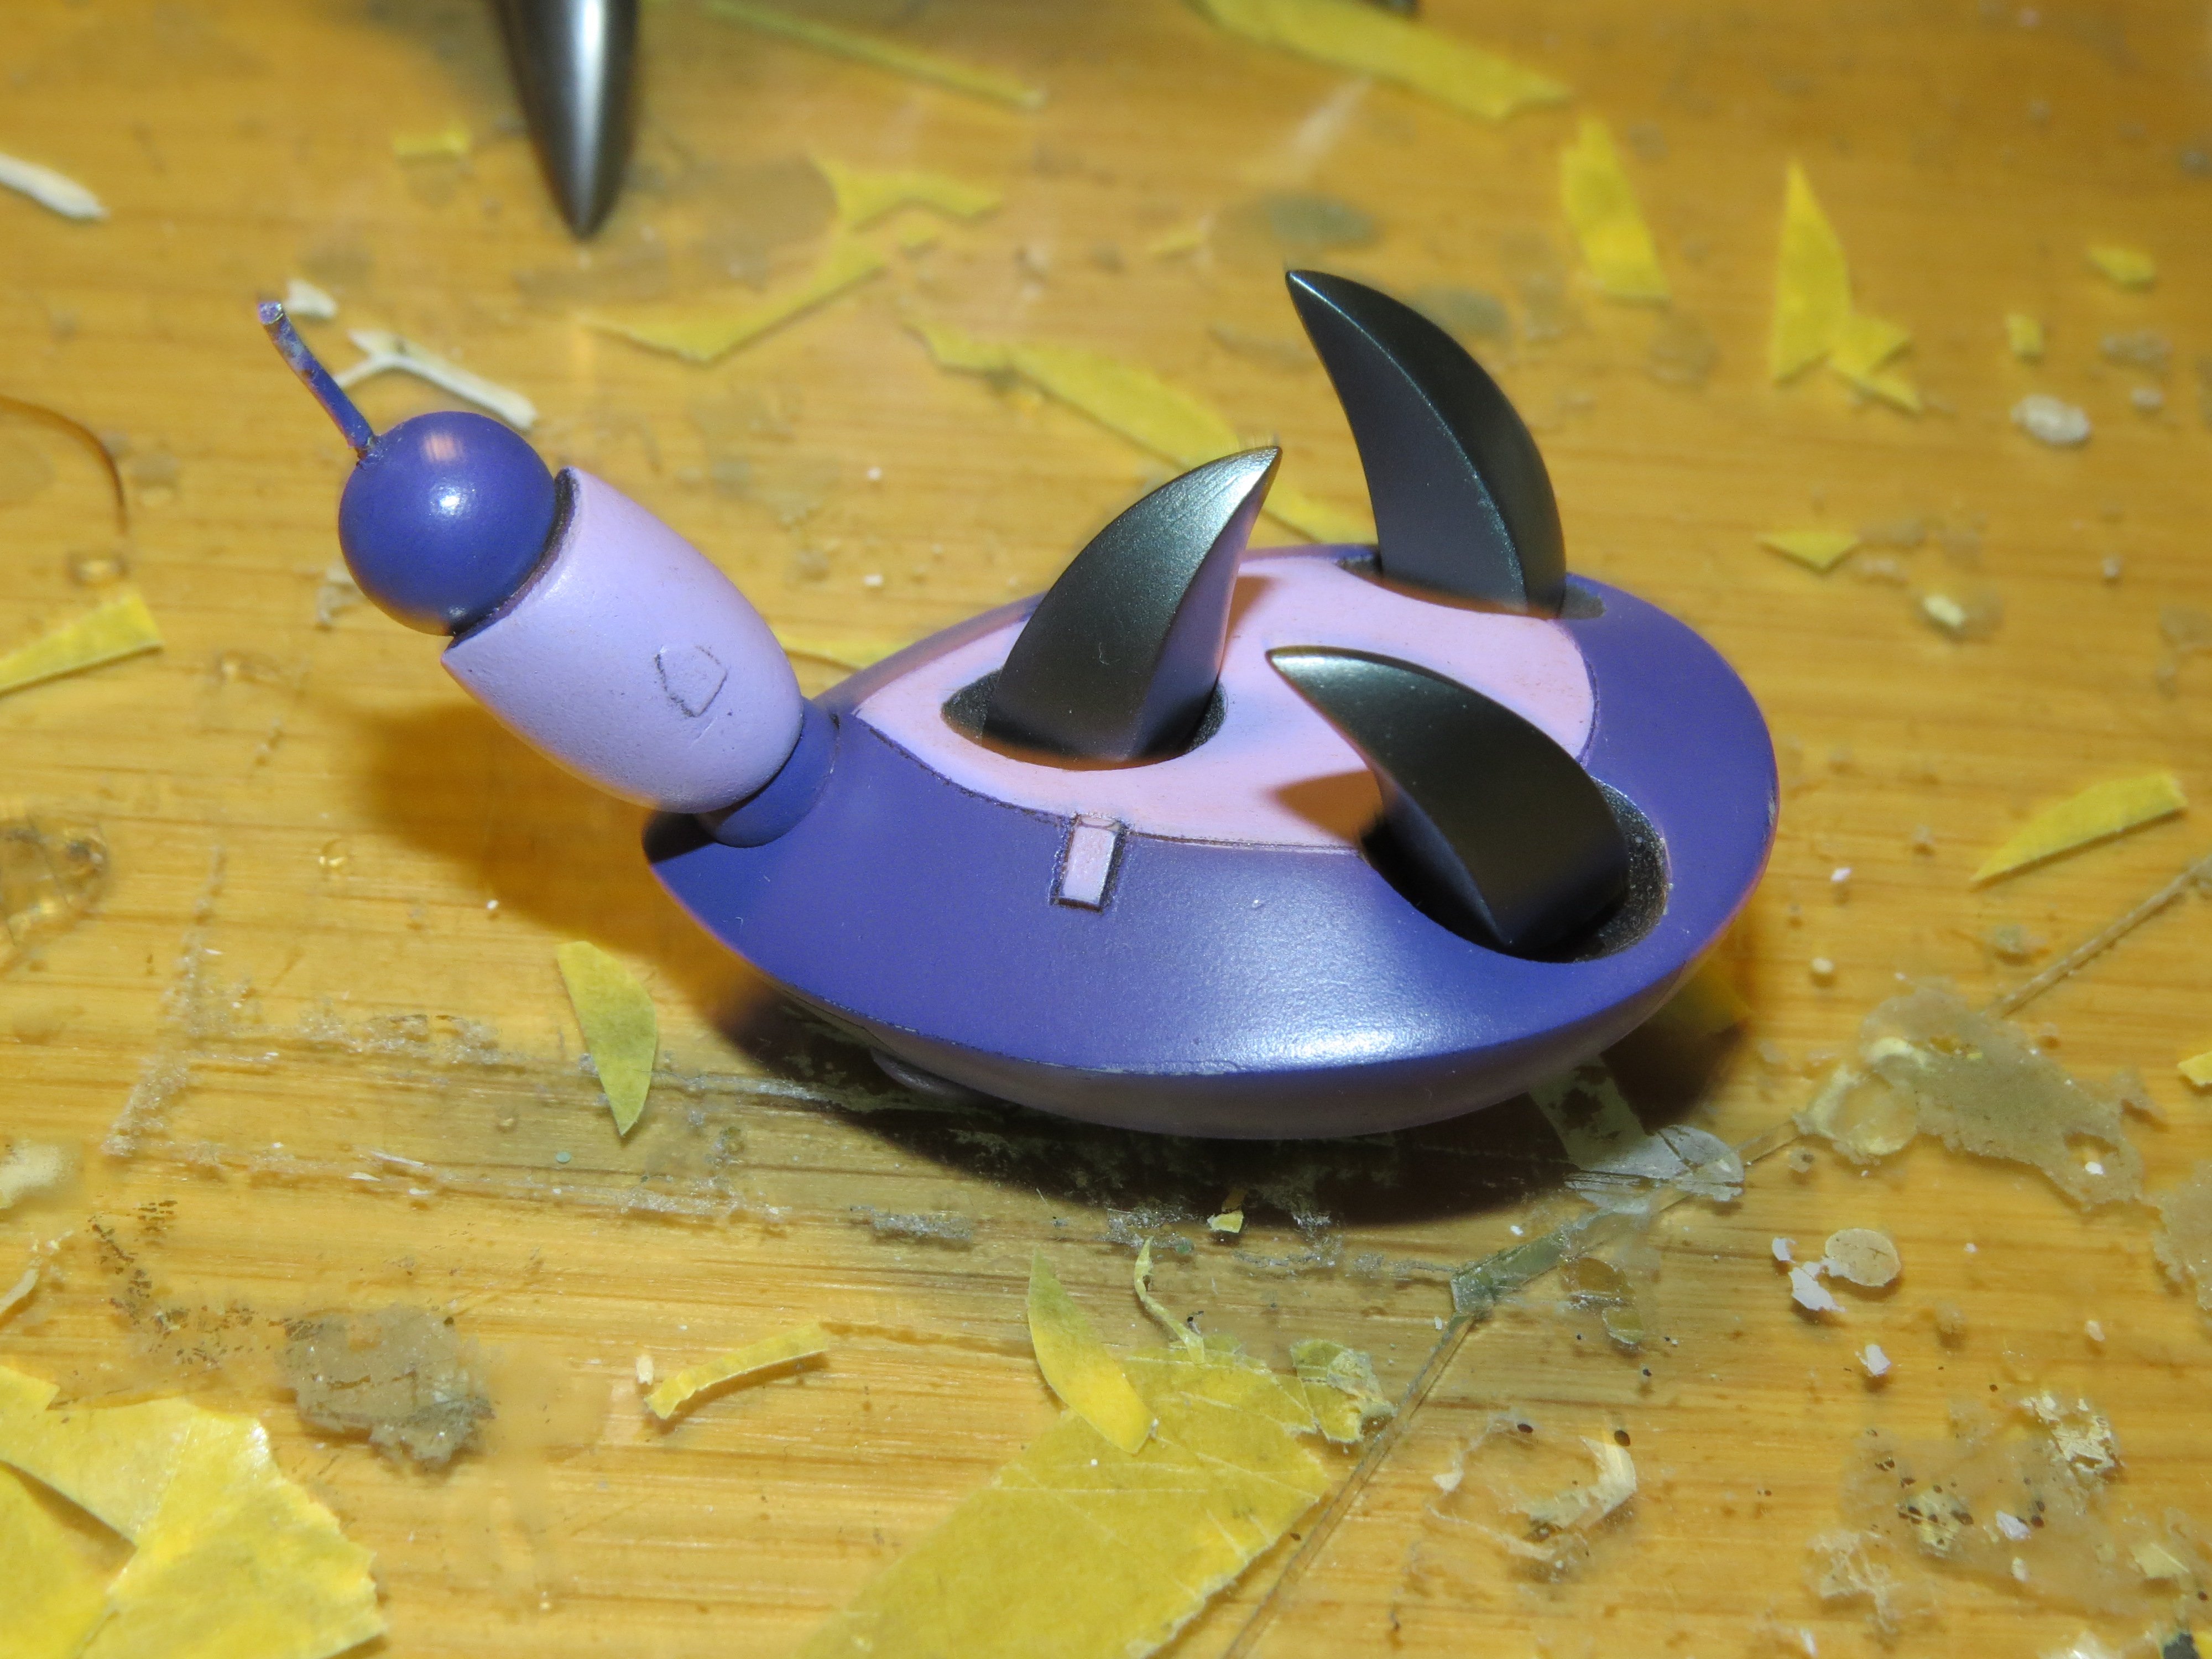
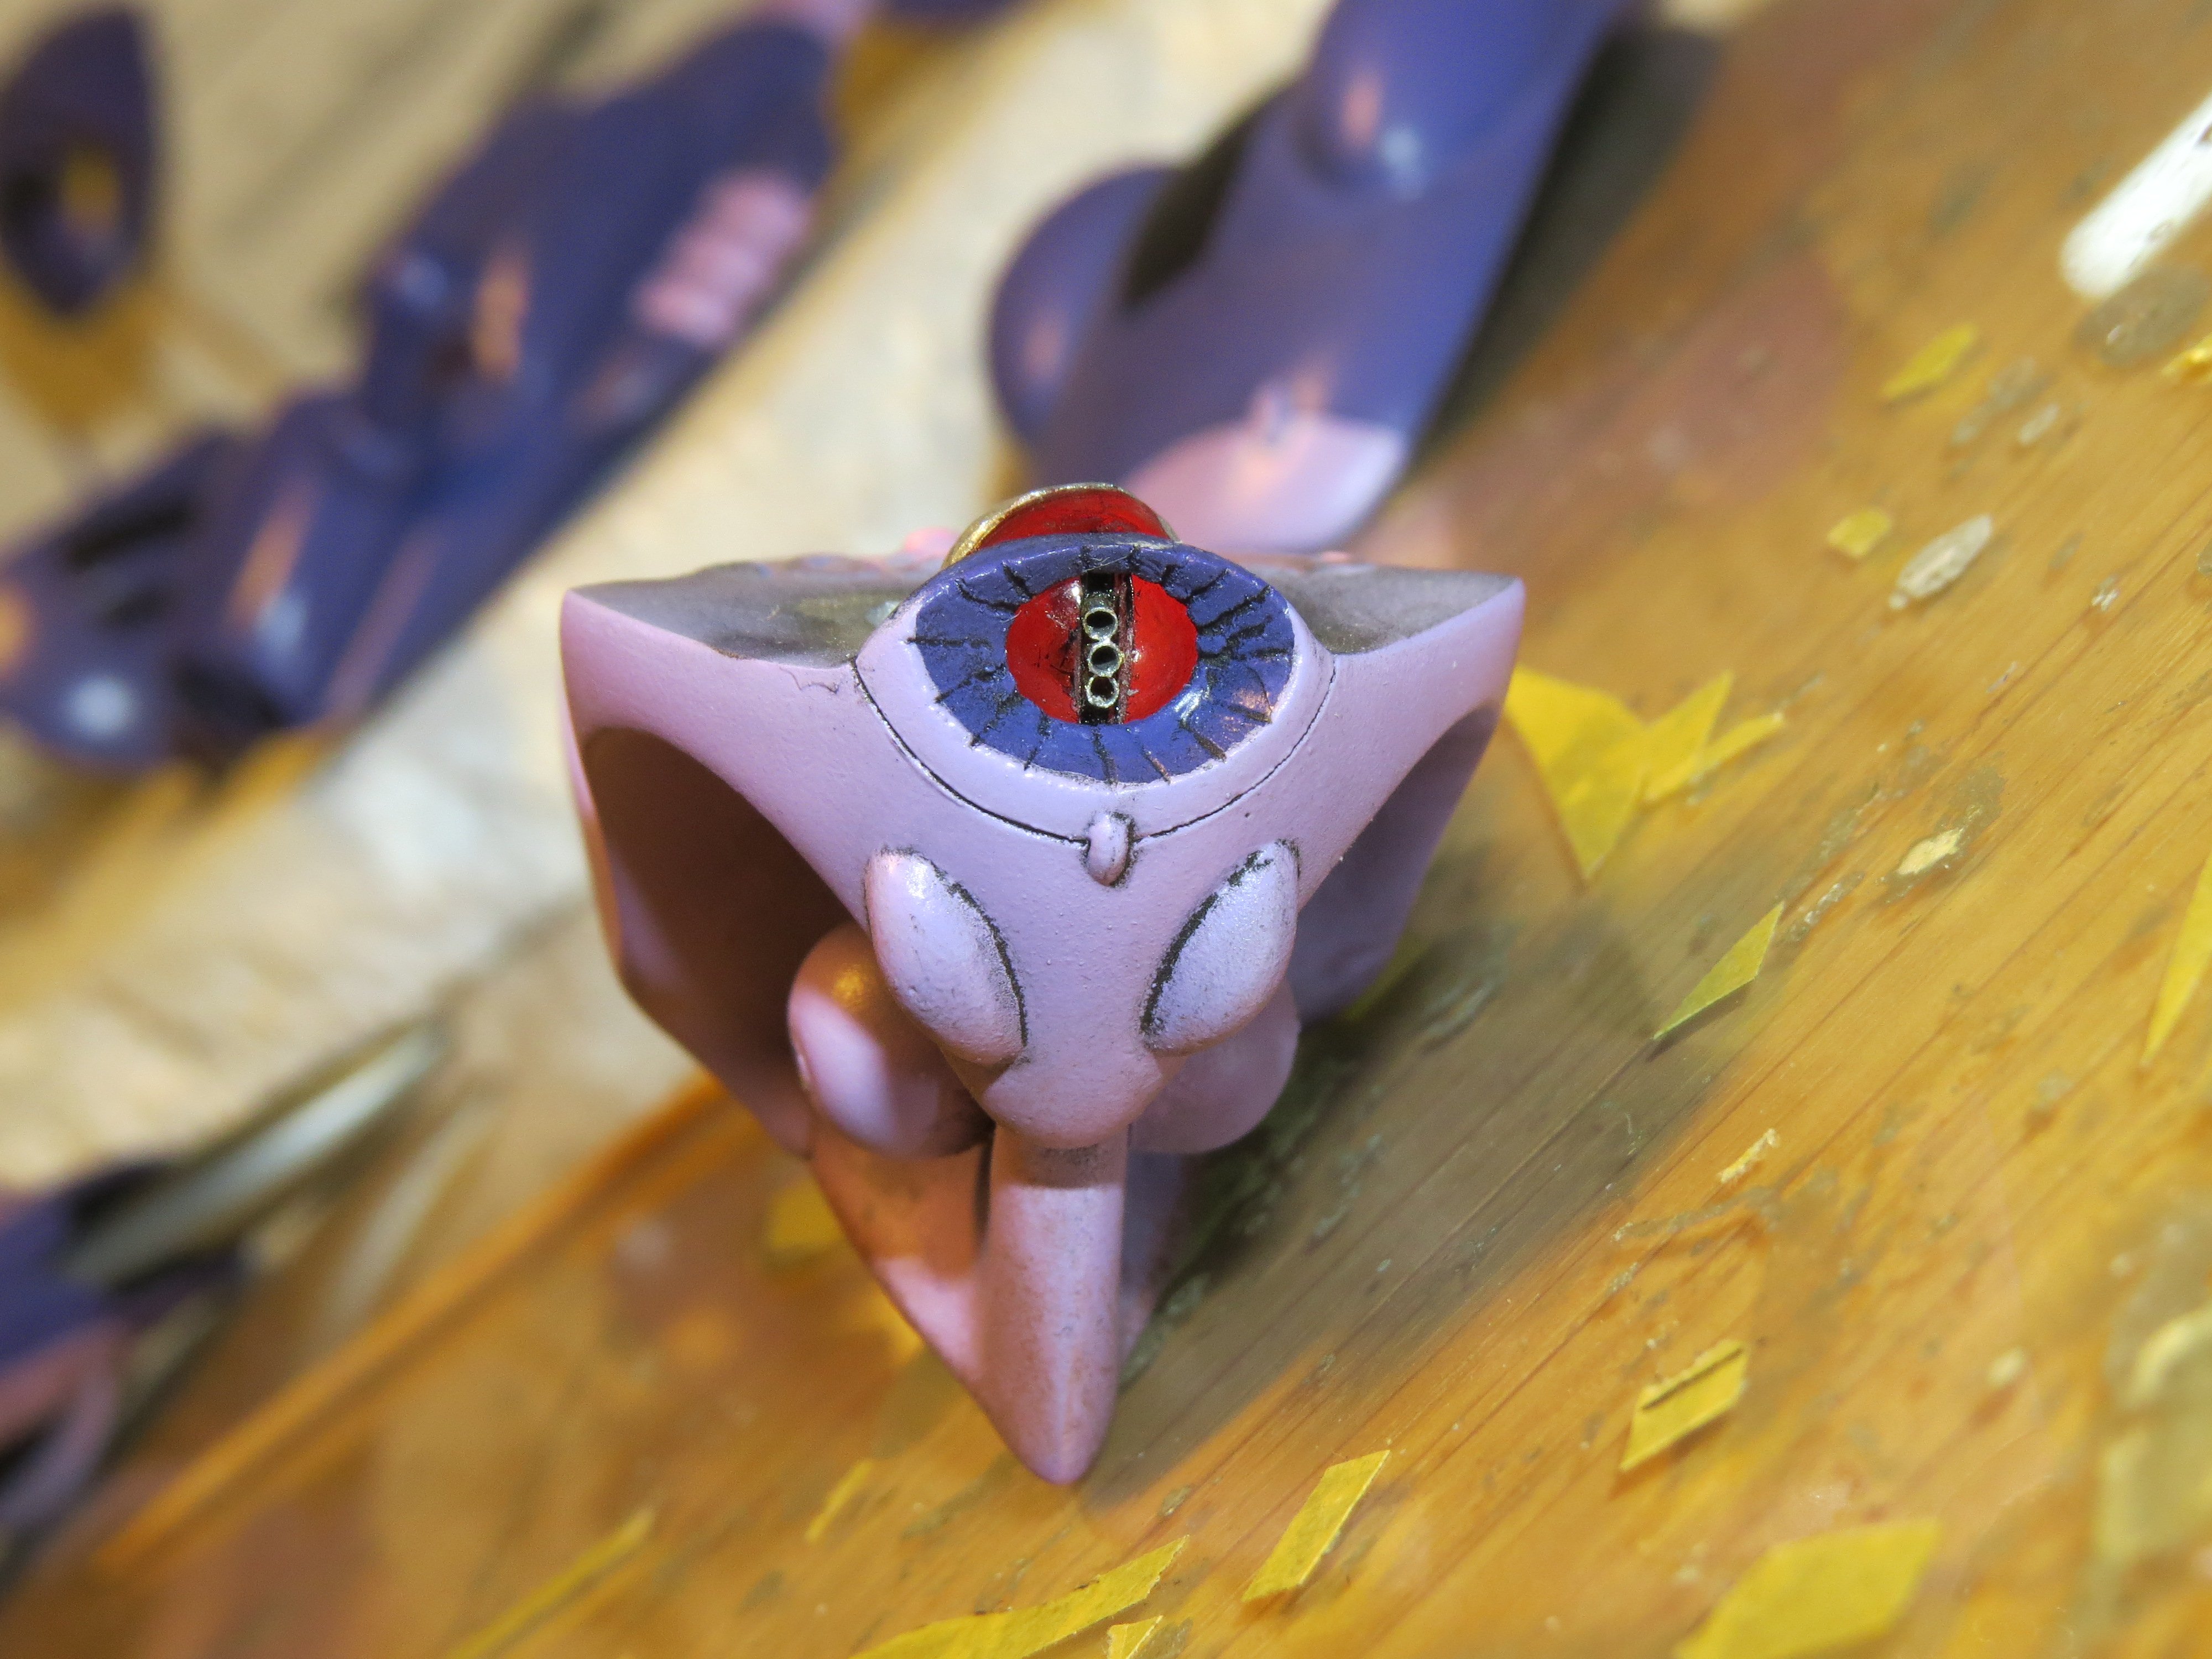
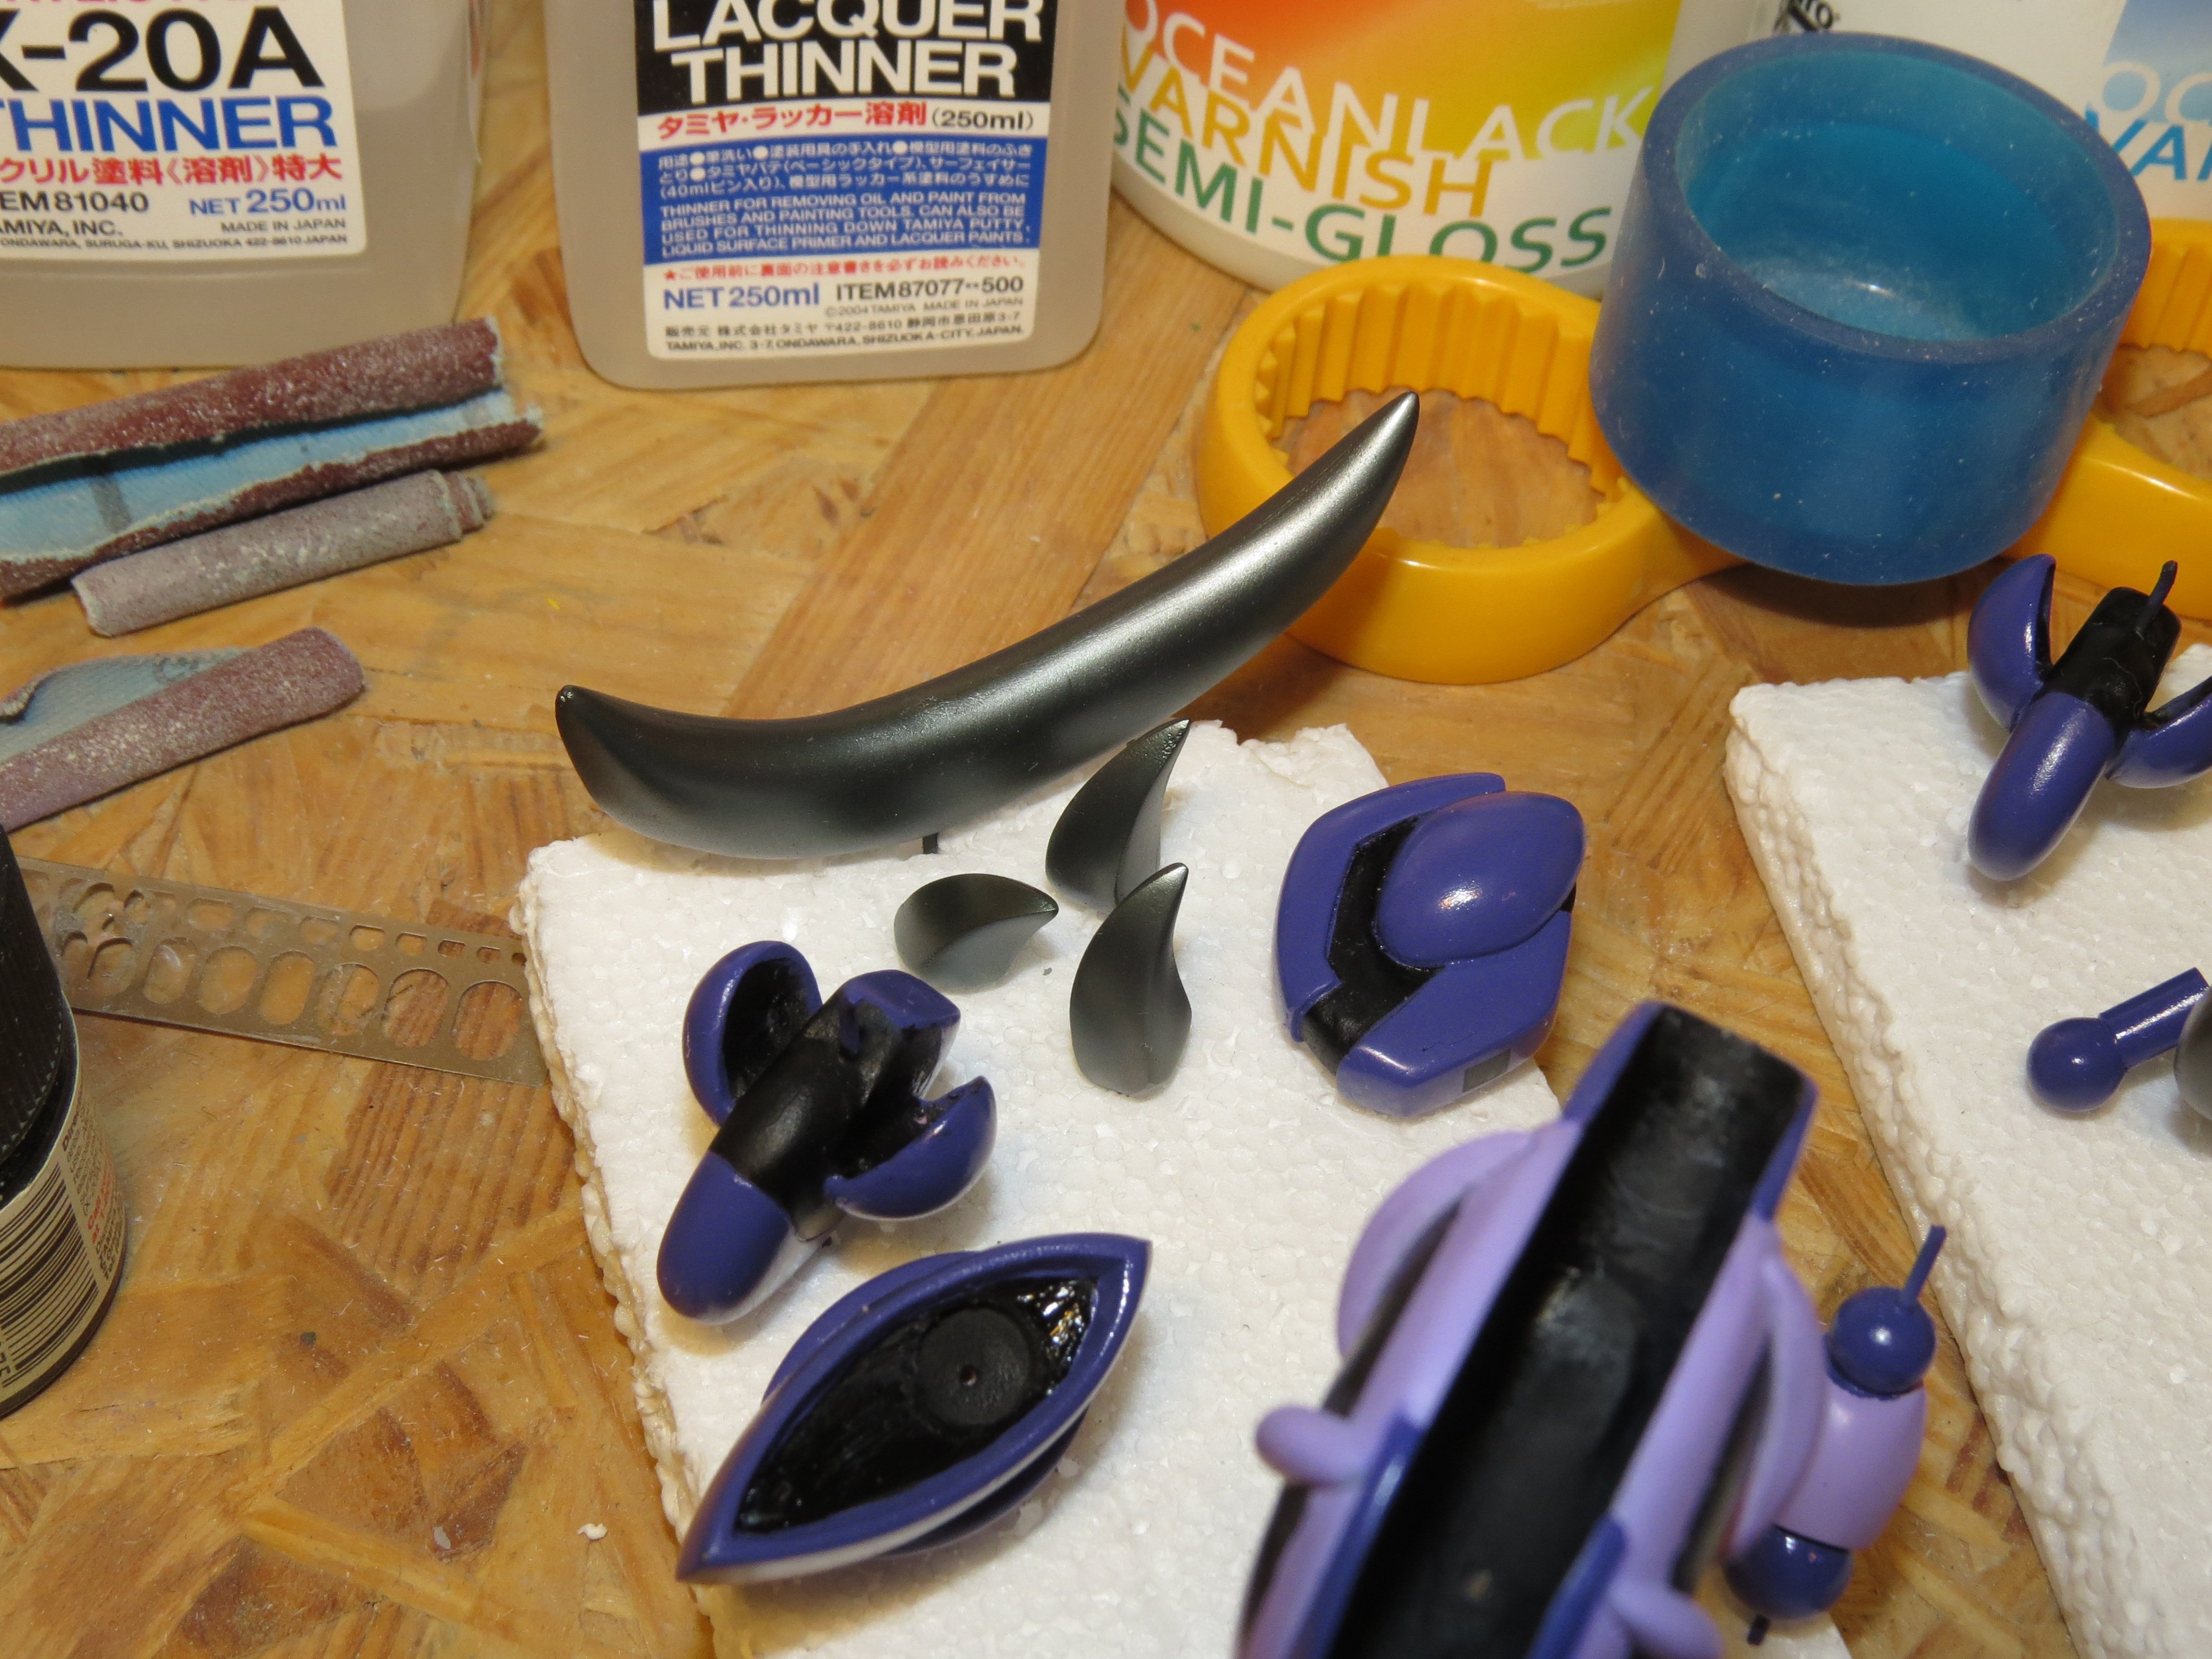
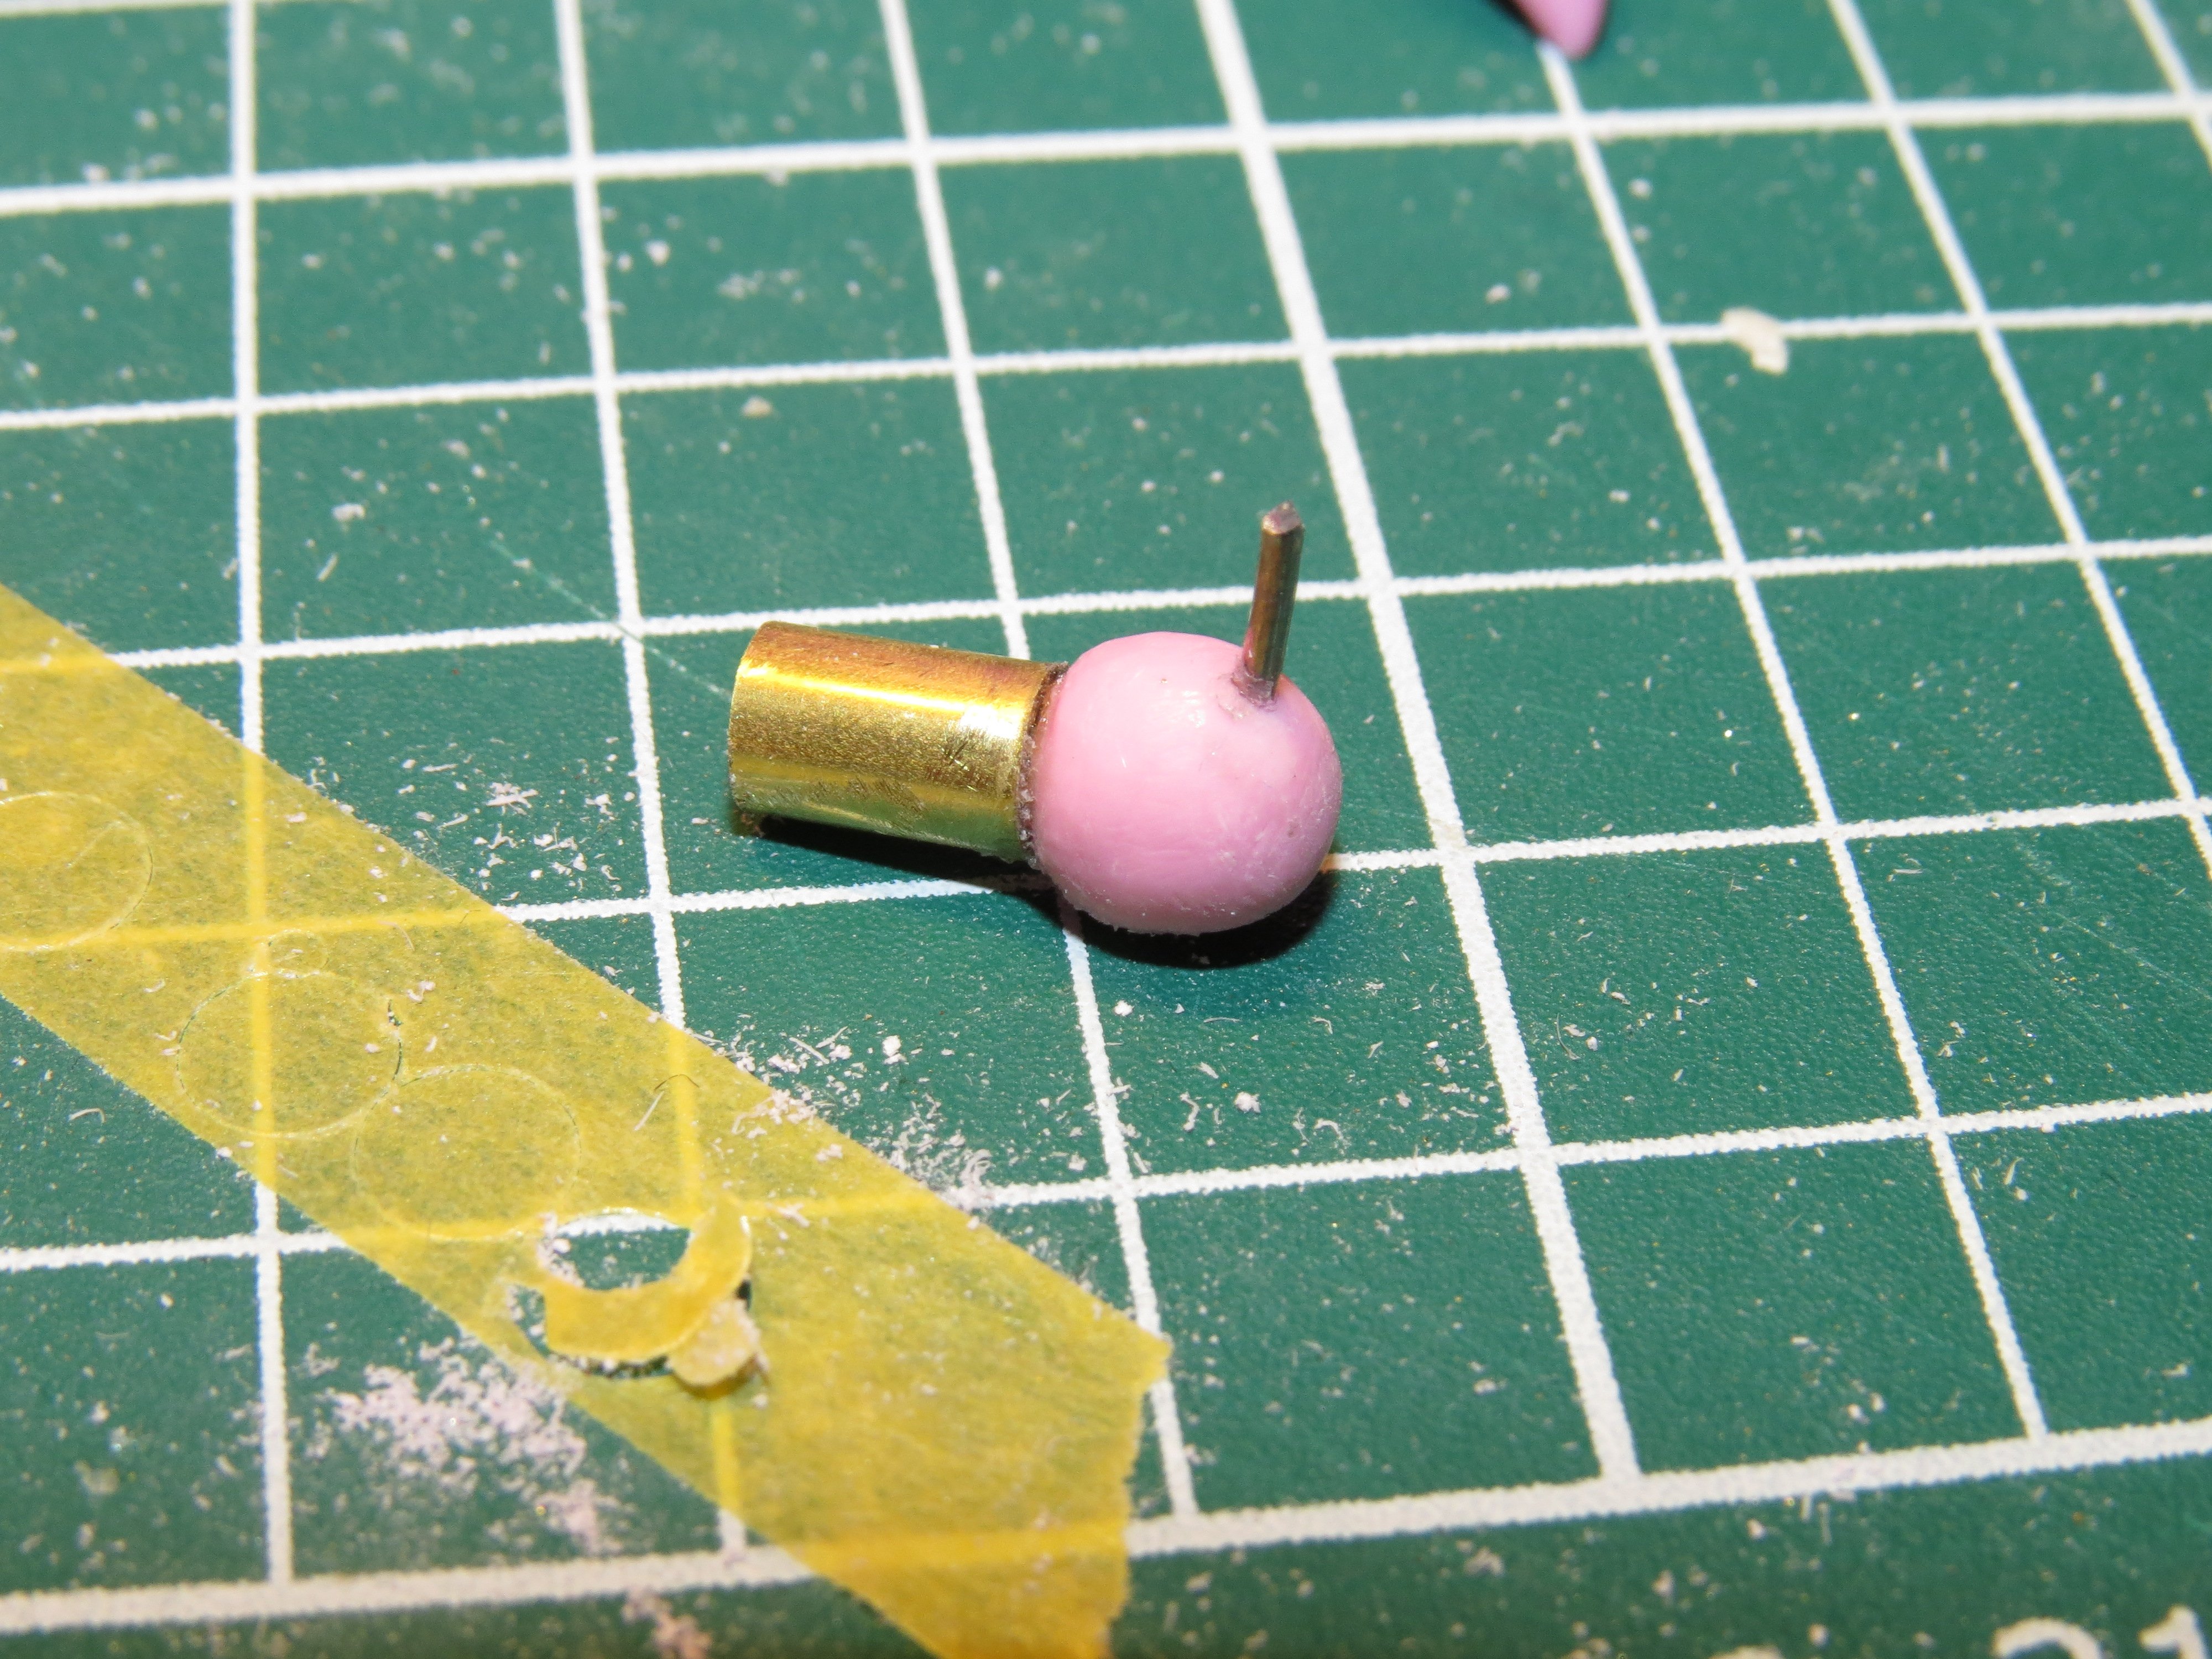
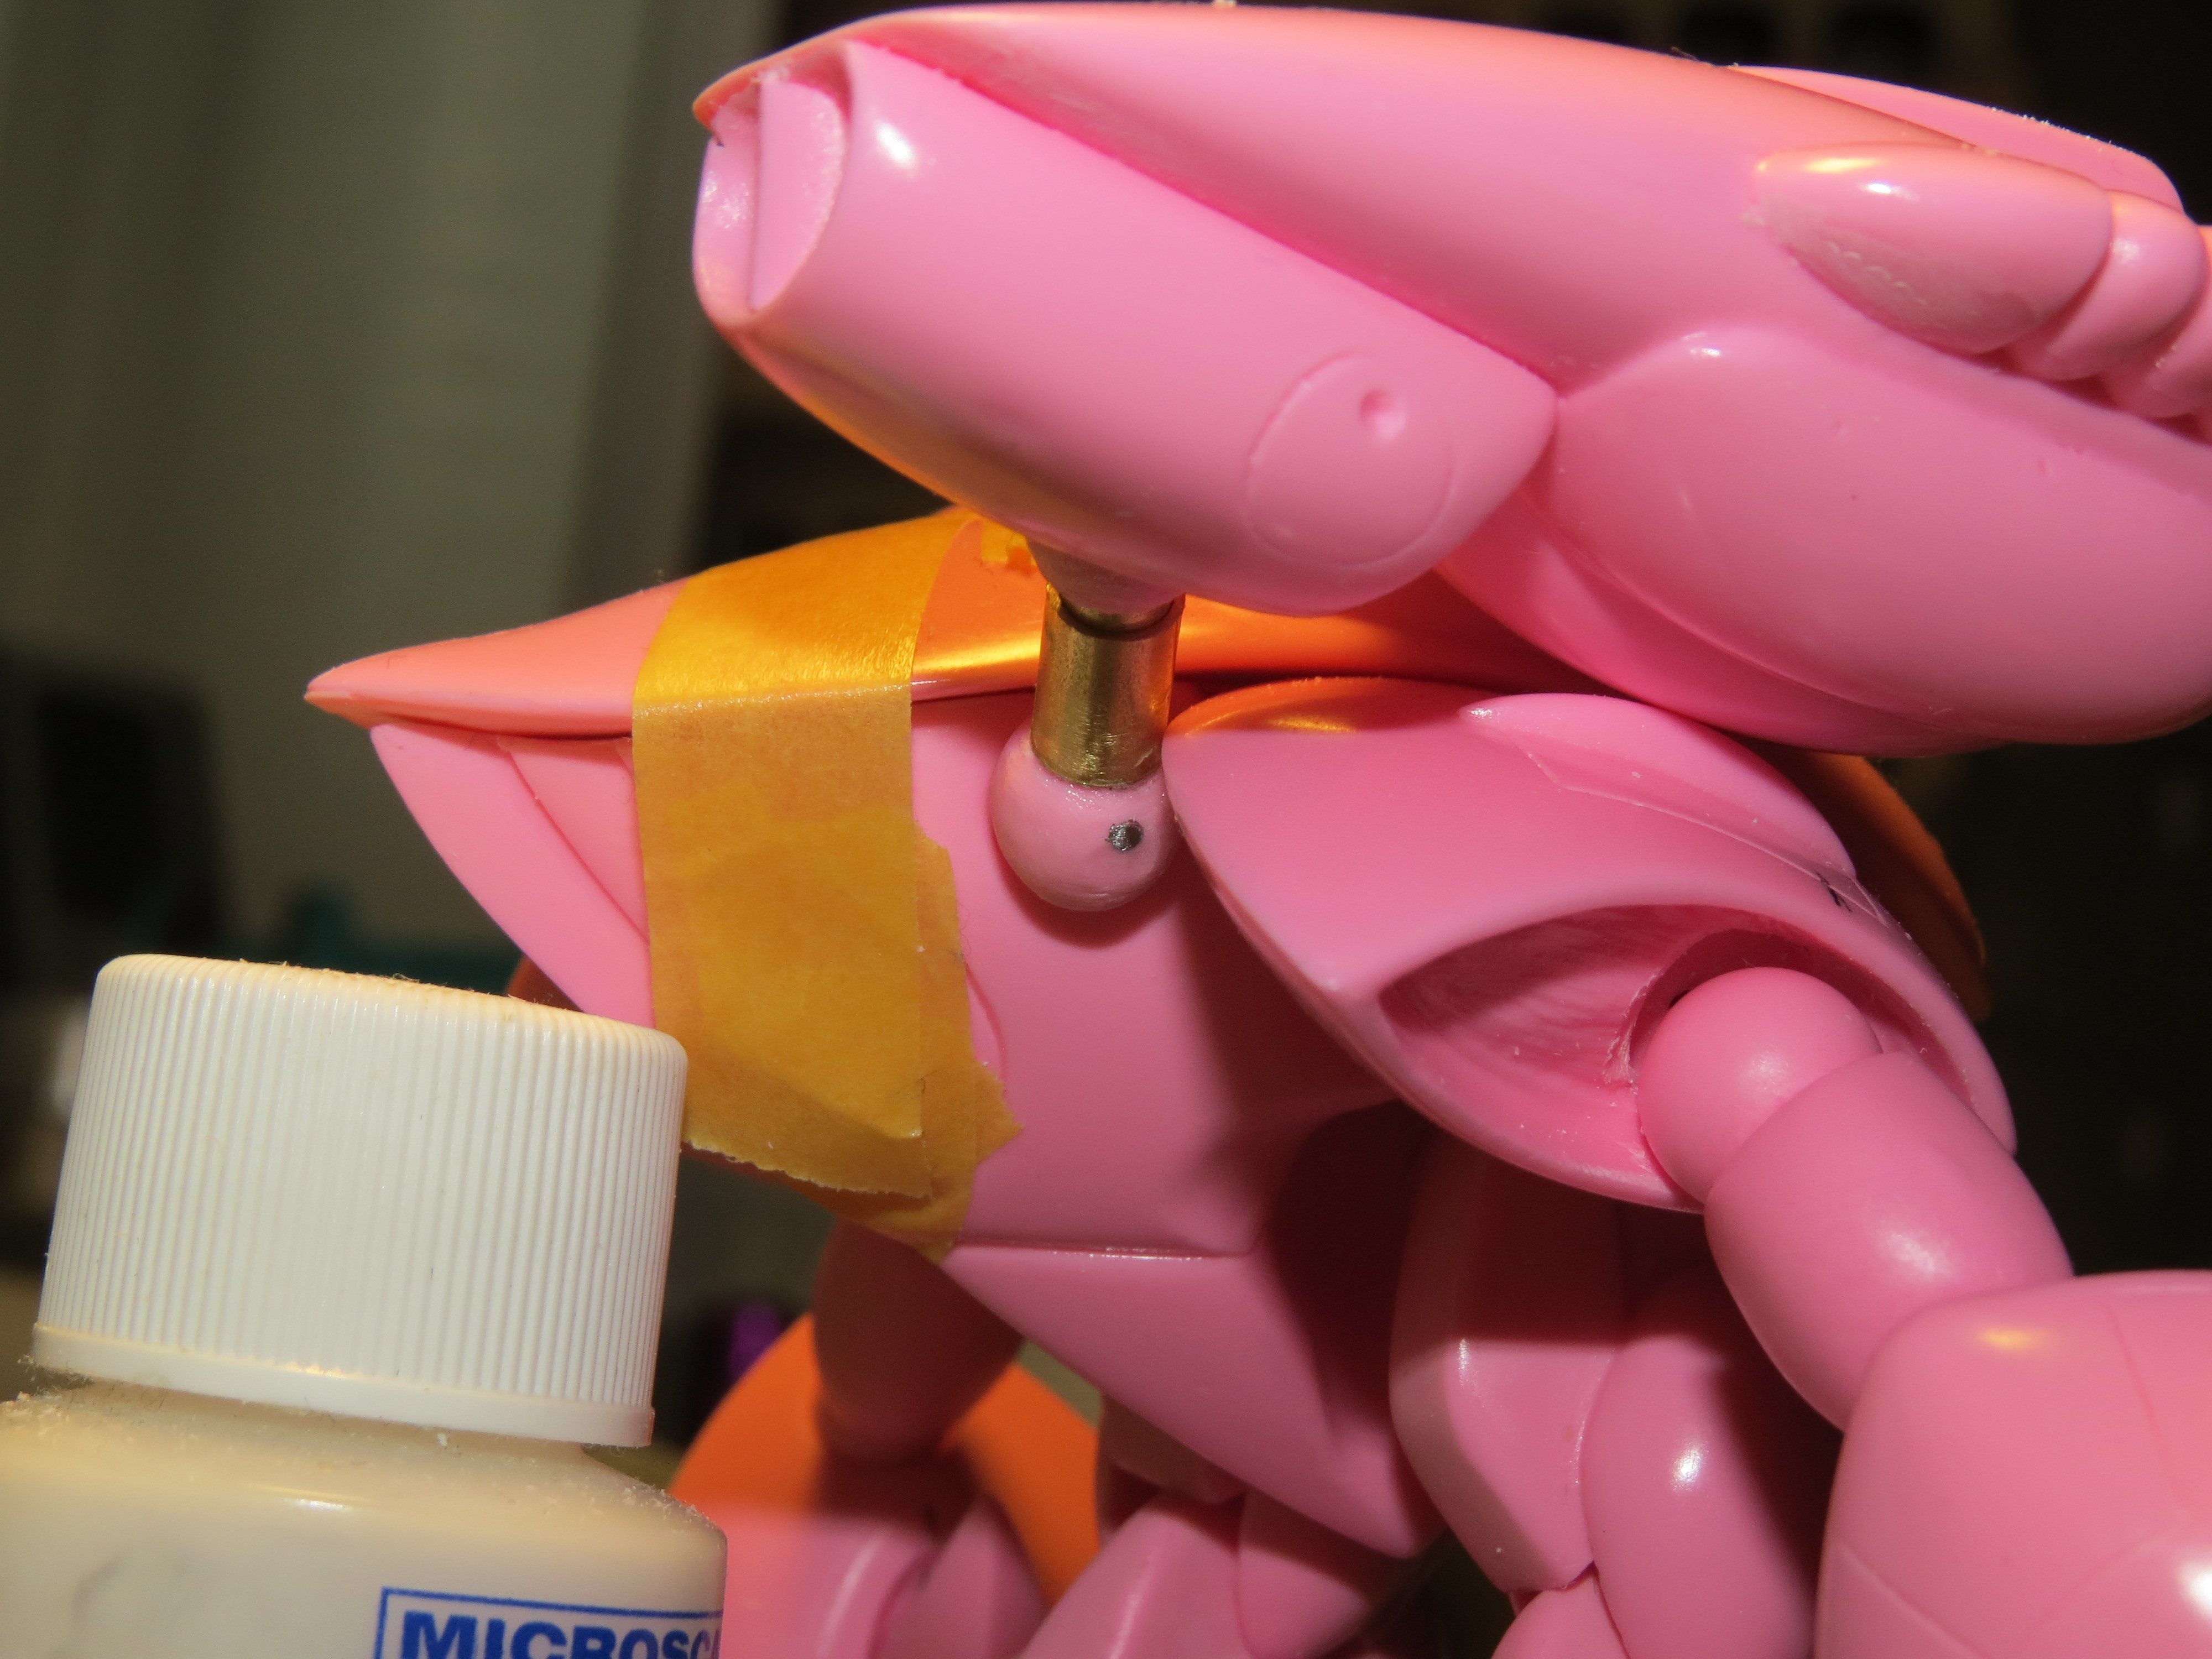
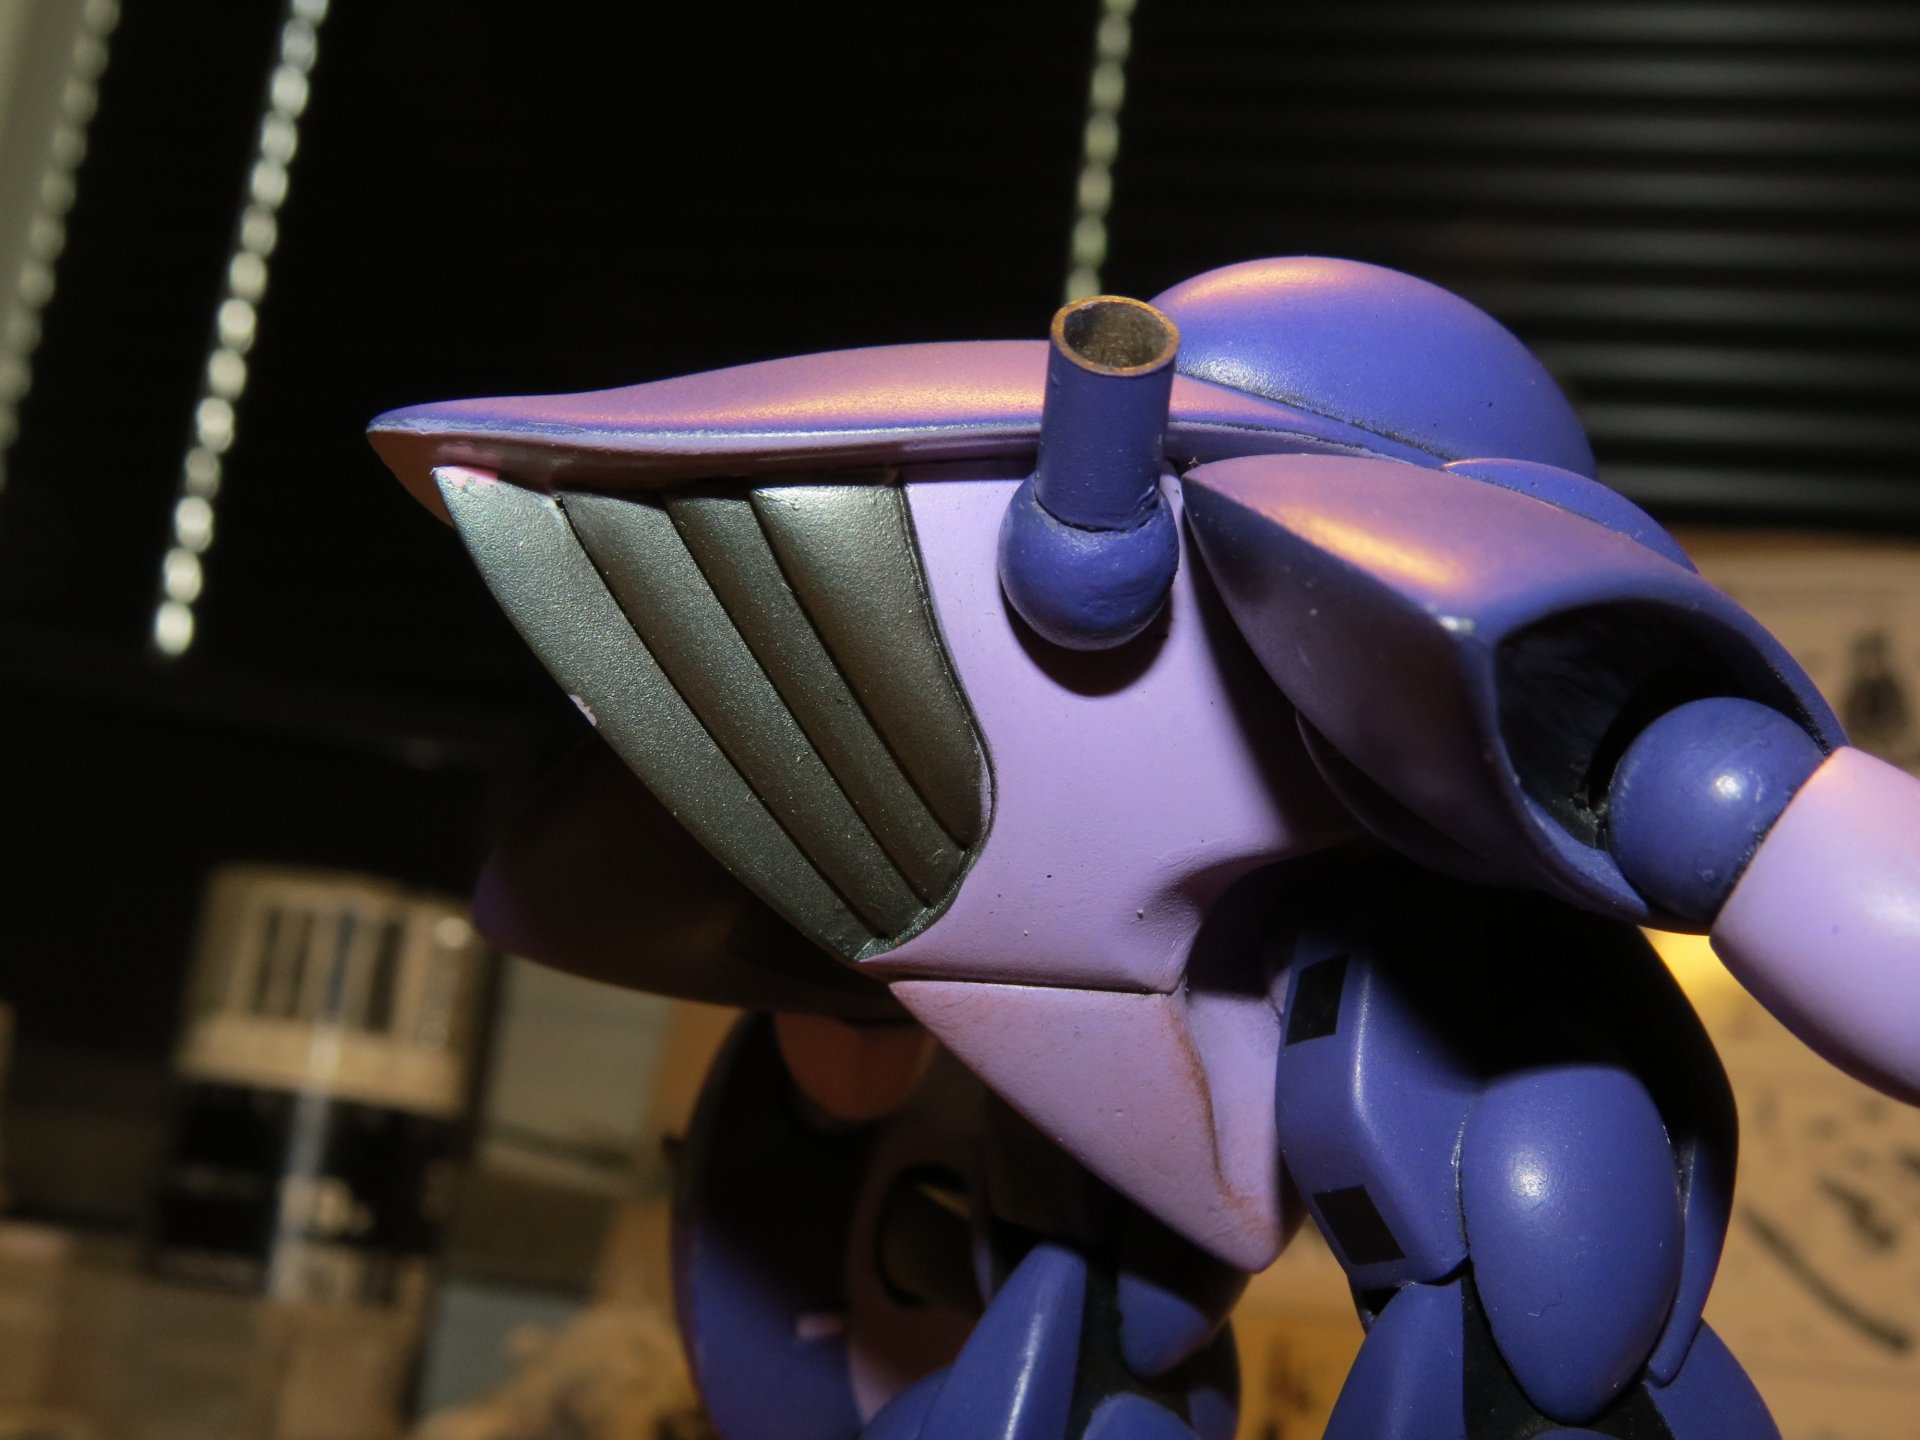
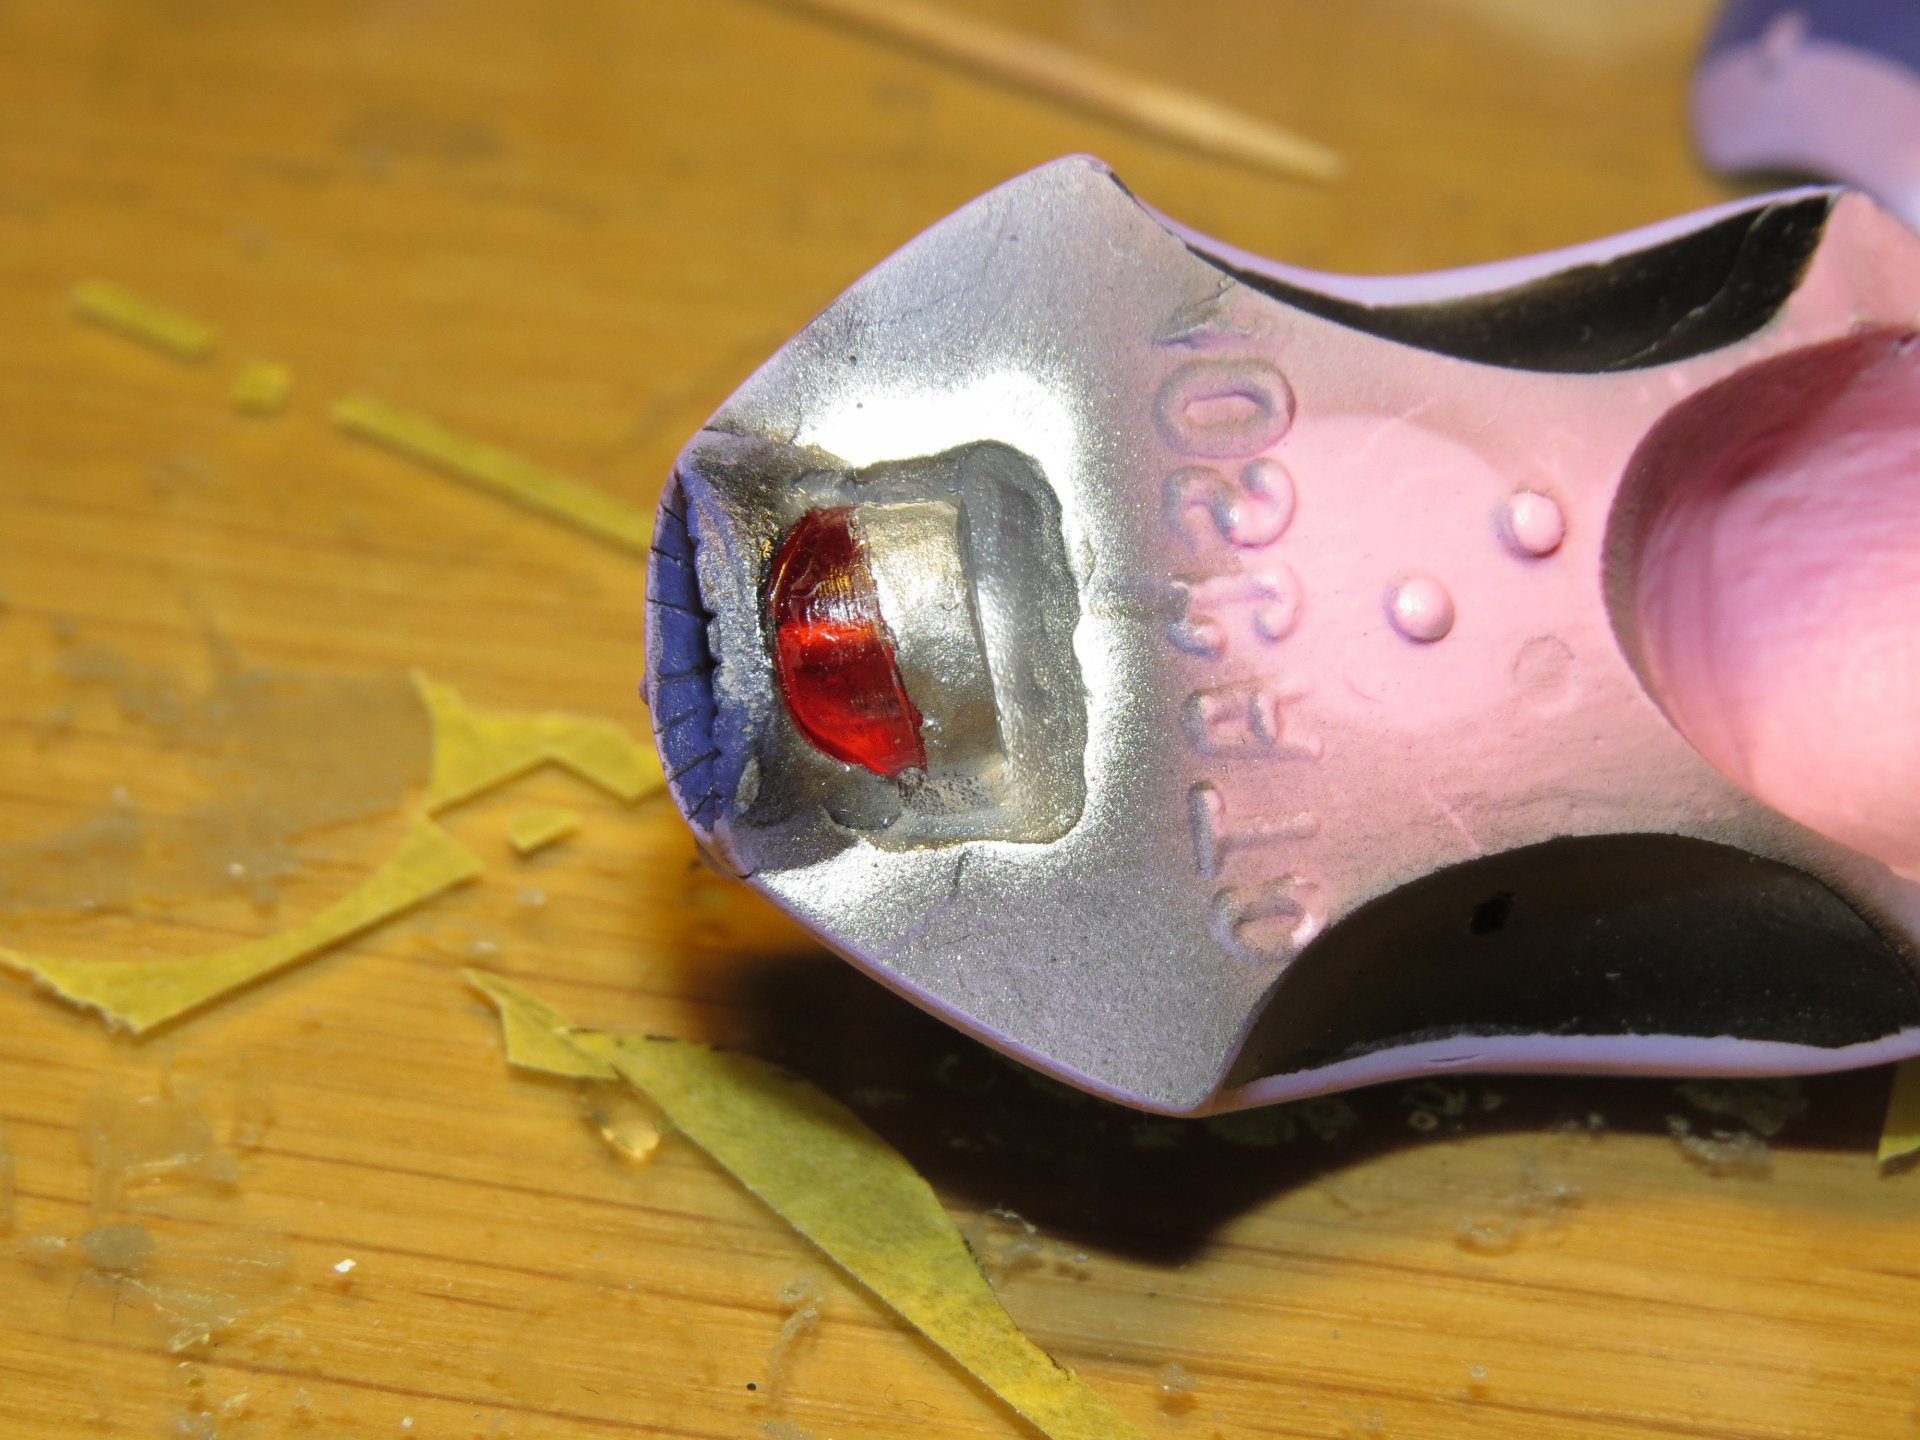
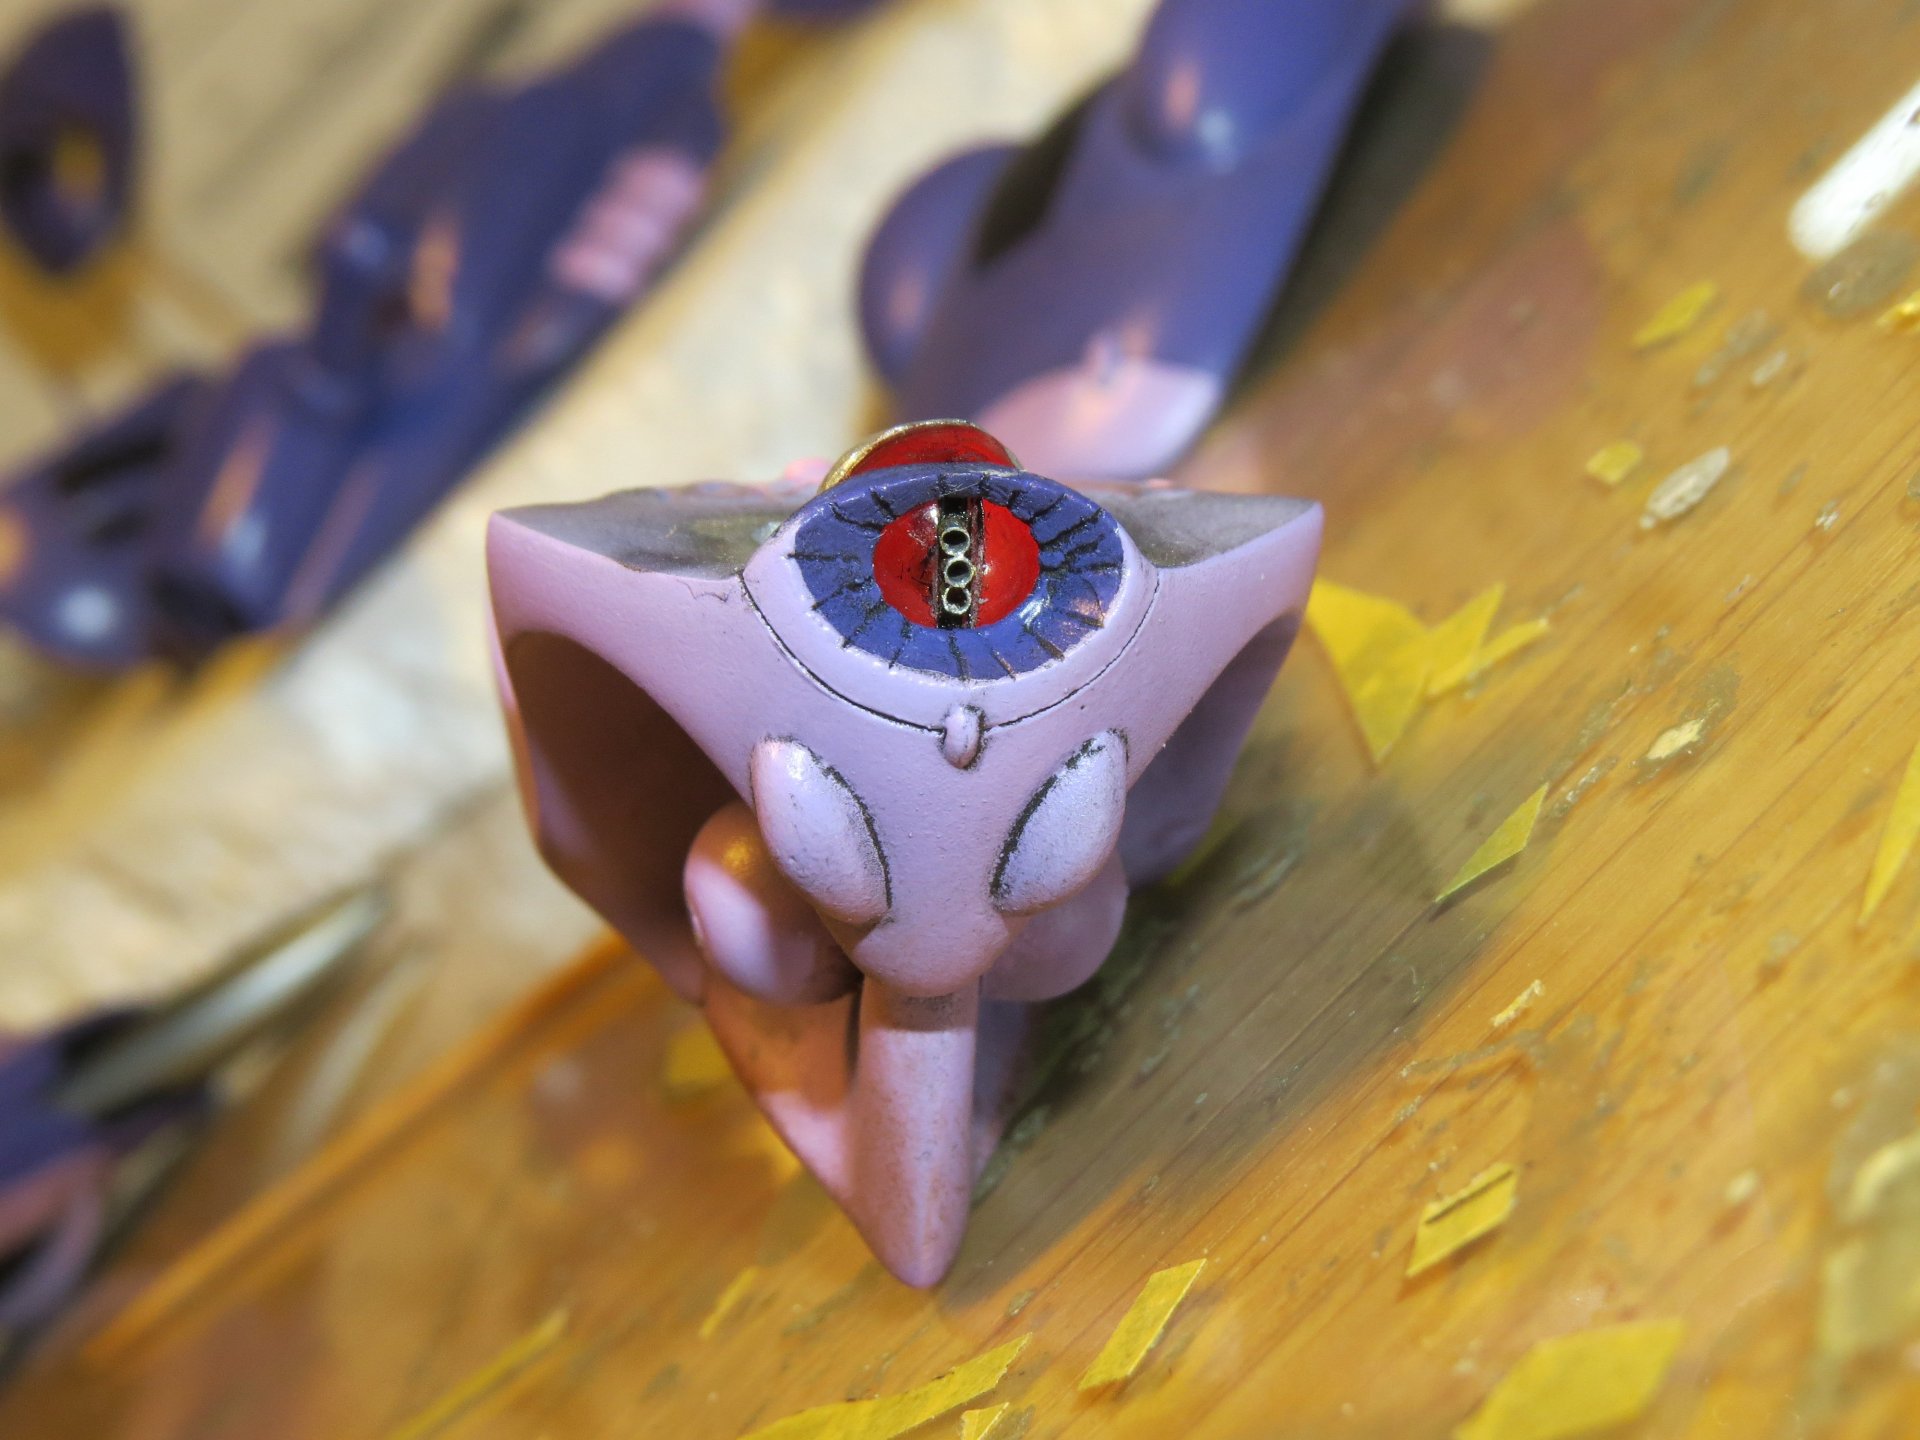
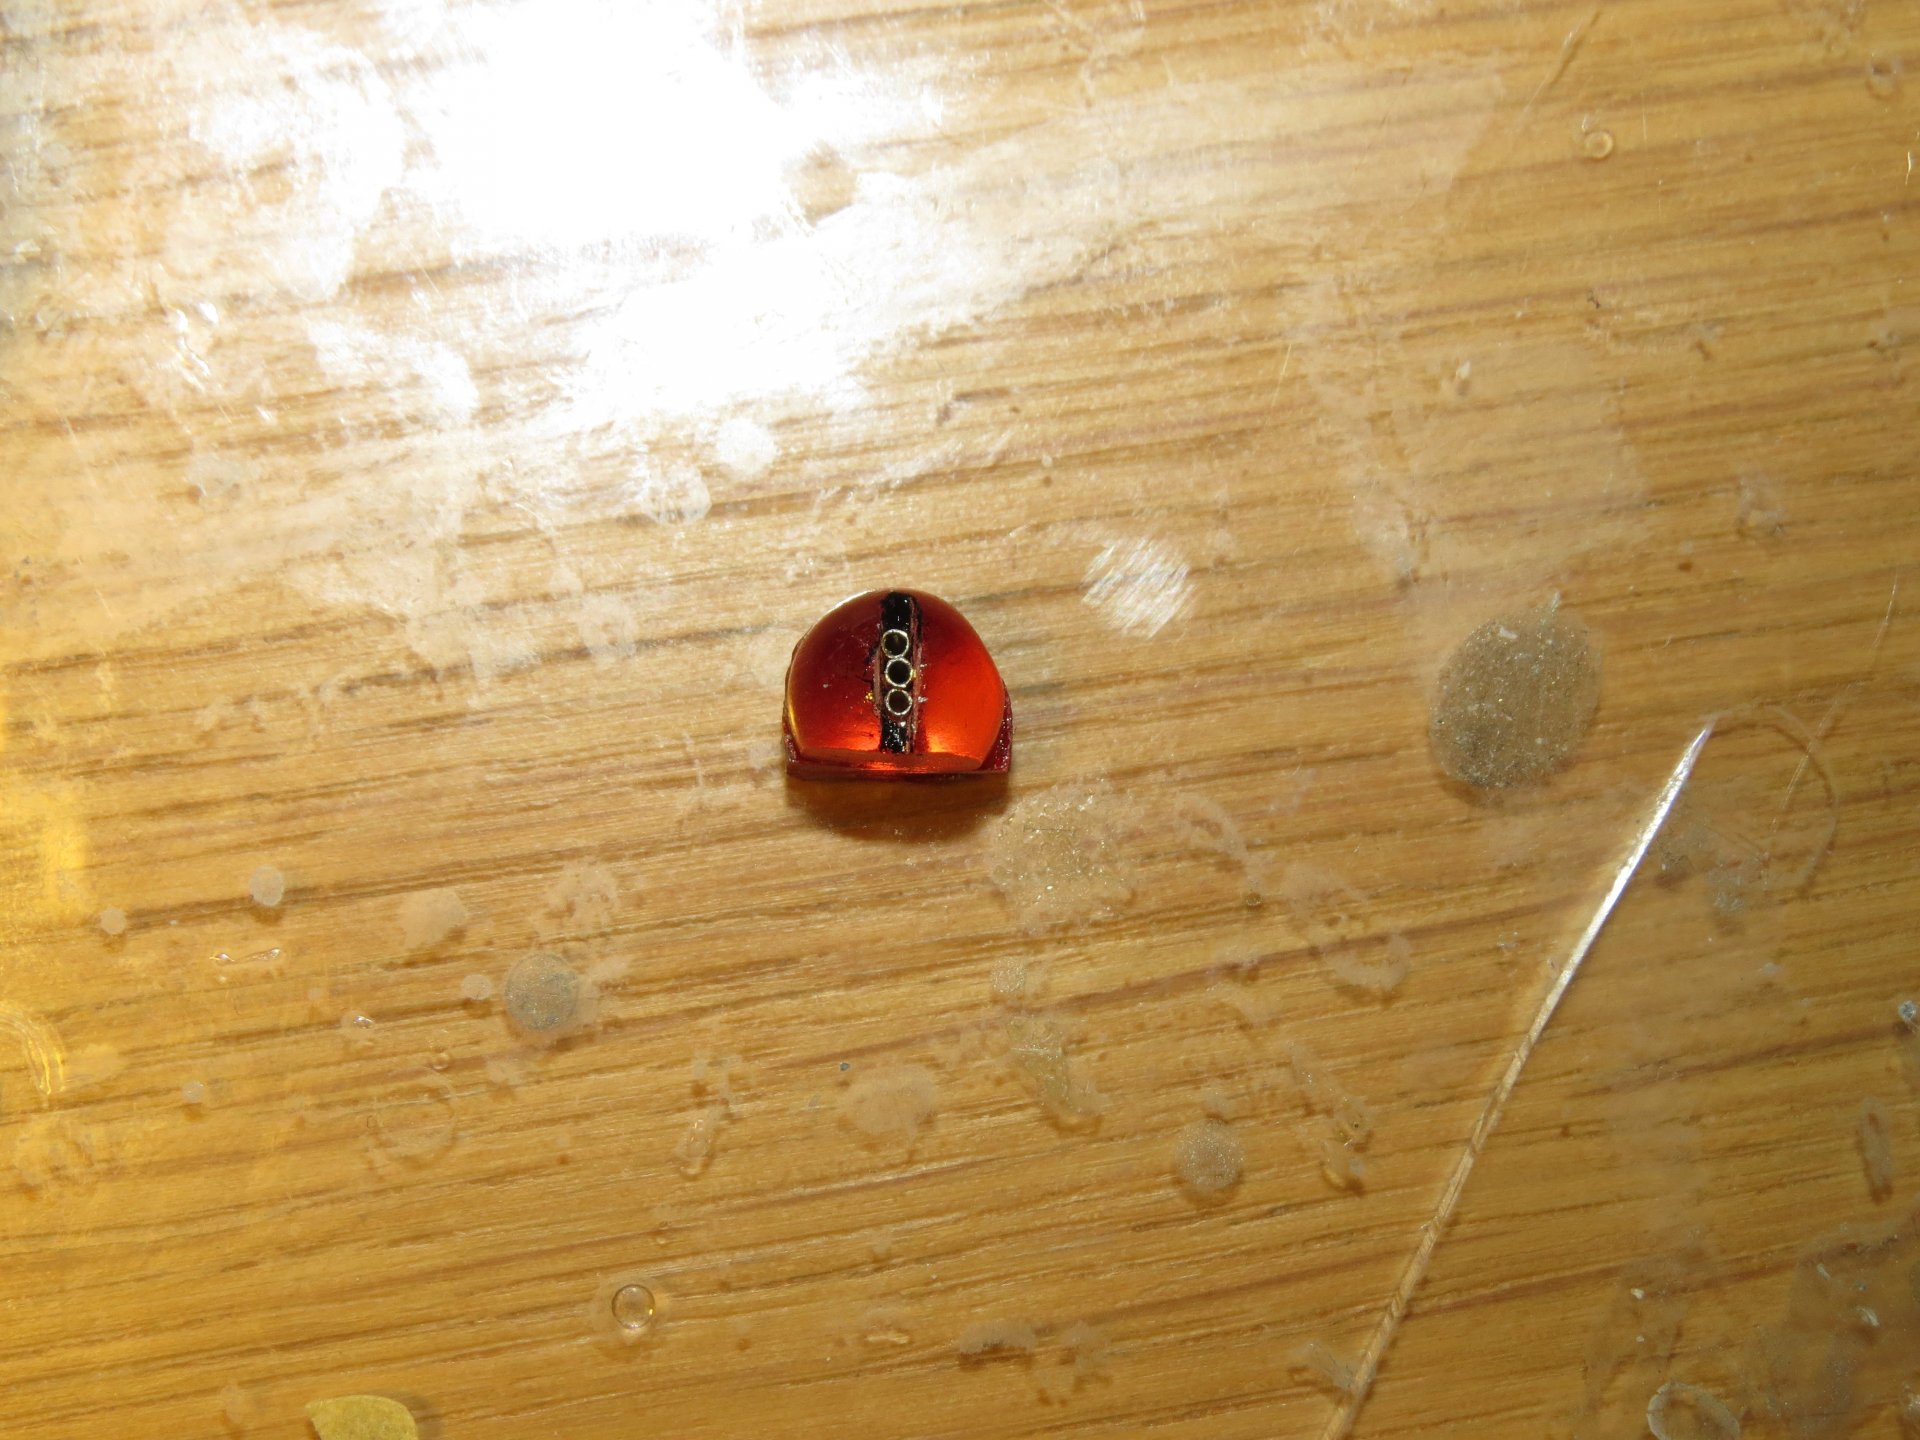
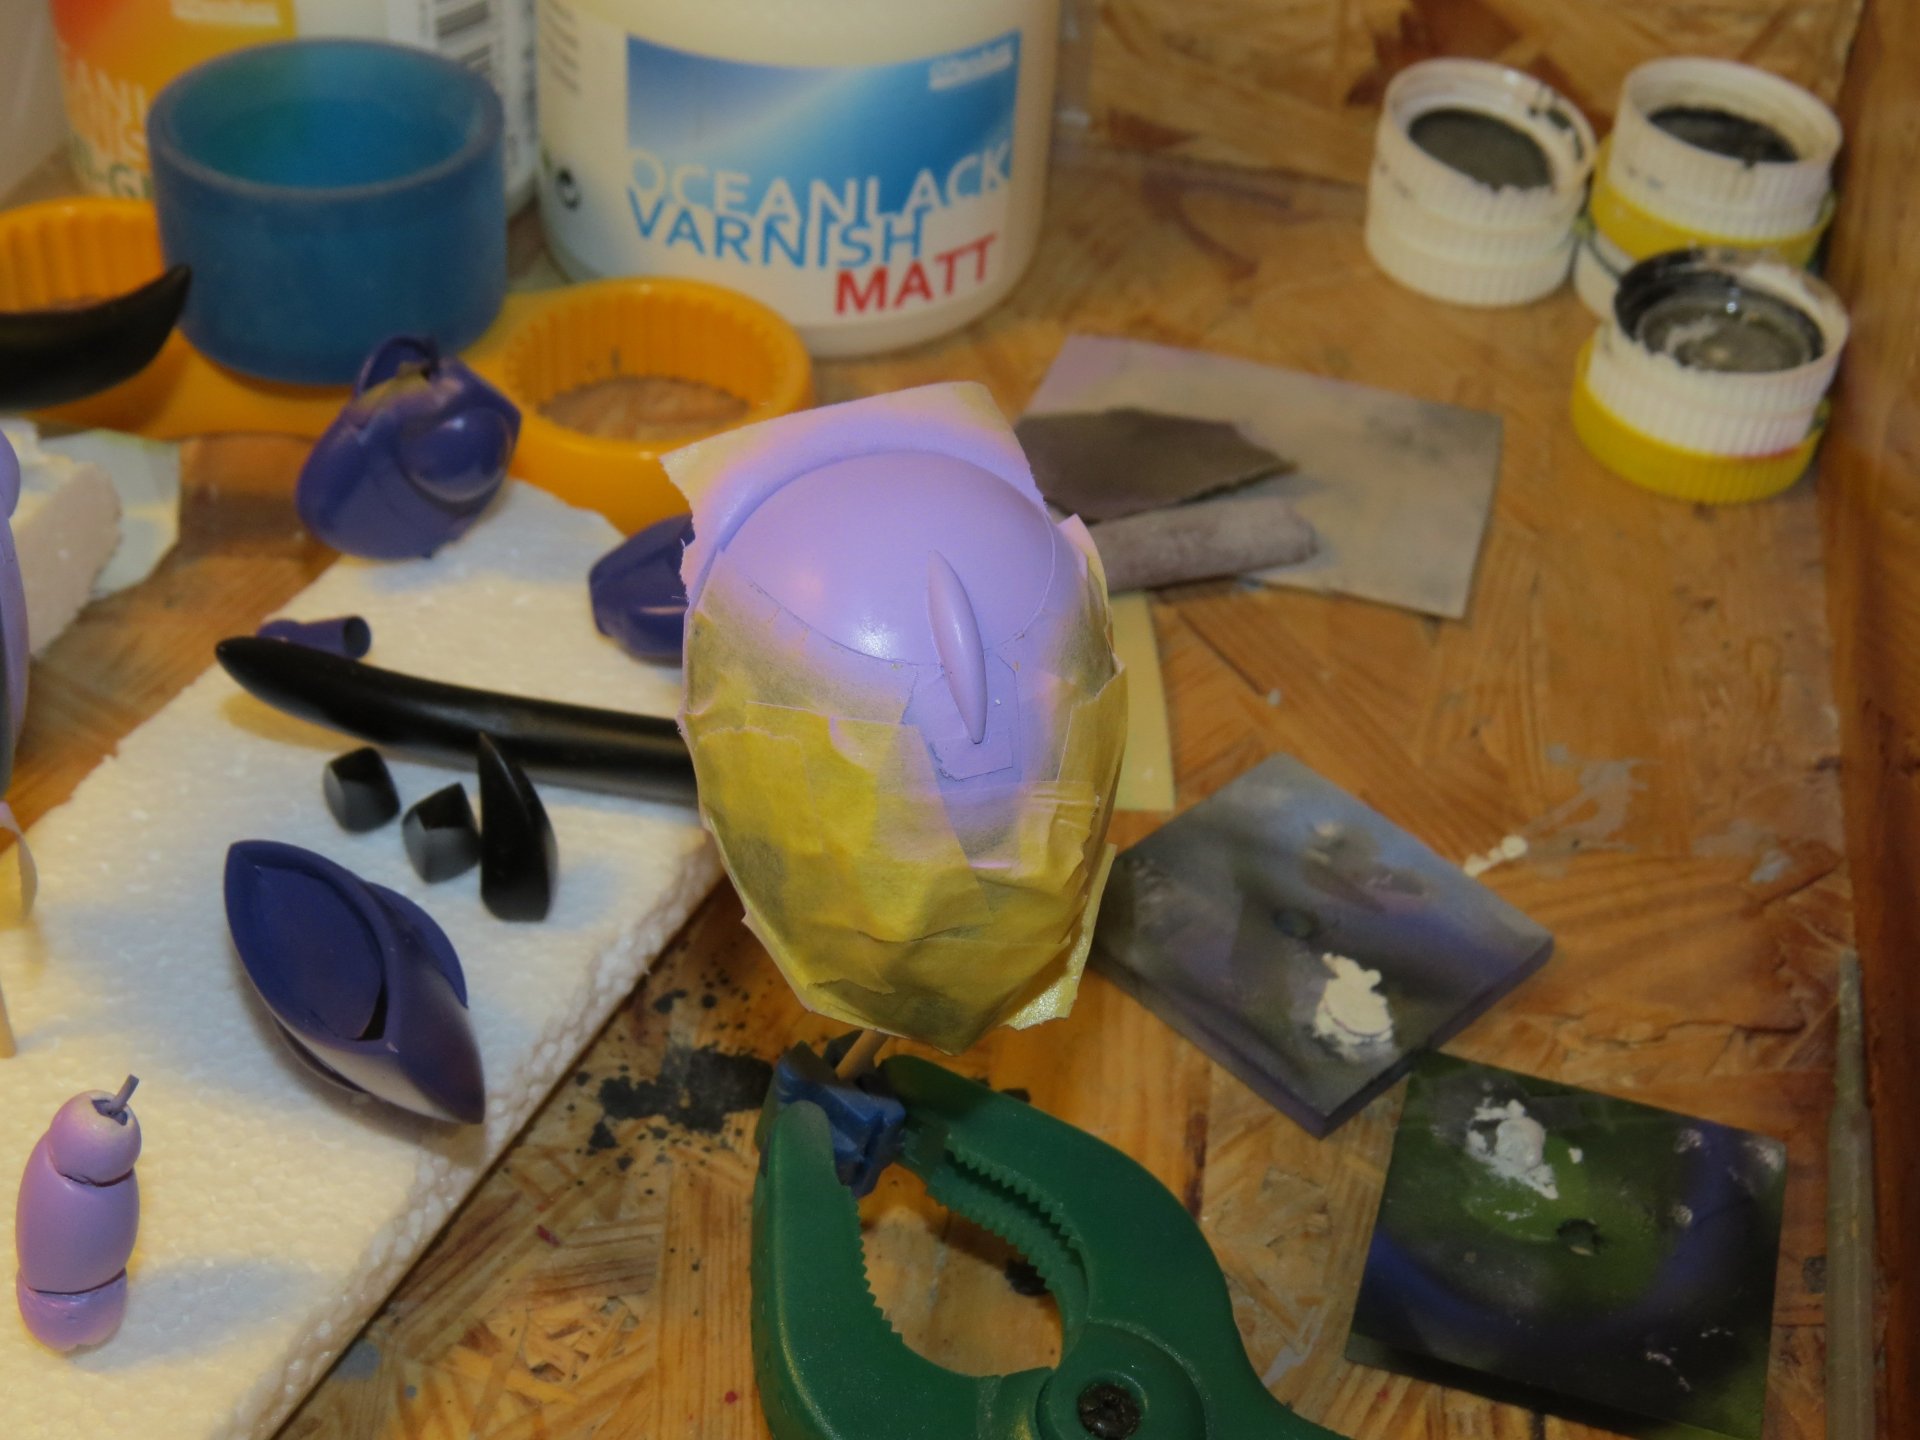
The sensor eye was next. I cut a groove in it which i then drilled holes and installed thin brass tubing for sensor cameras. It was painted with tamiya clear red and a silver backing.
-
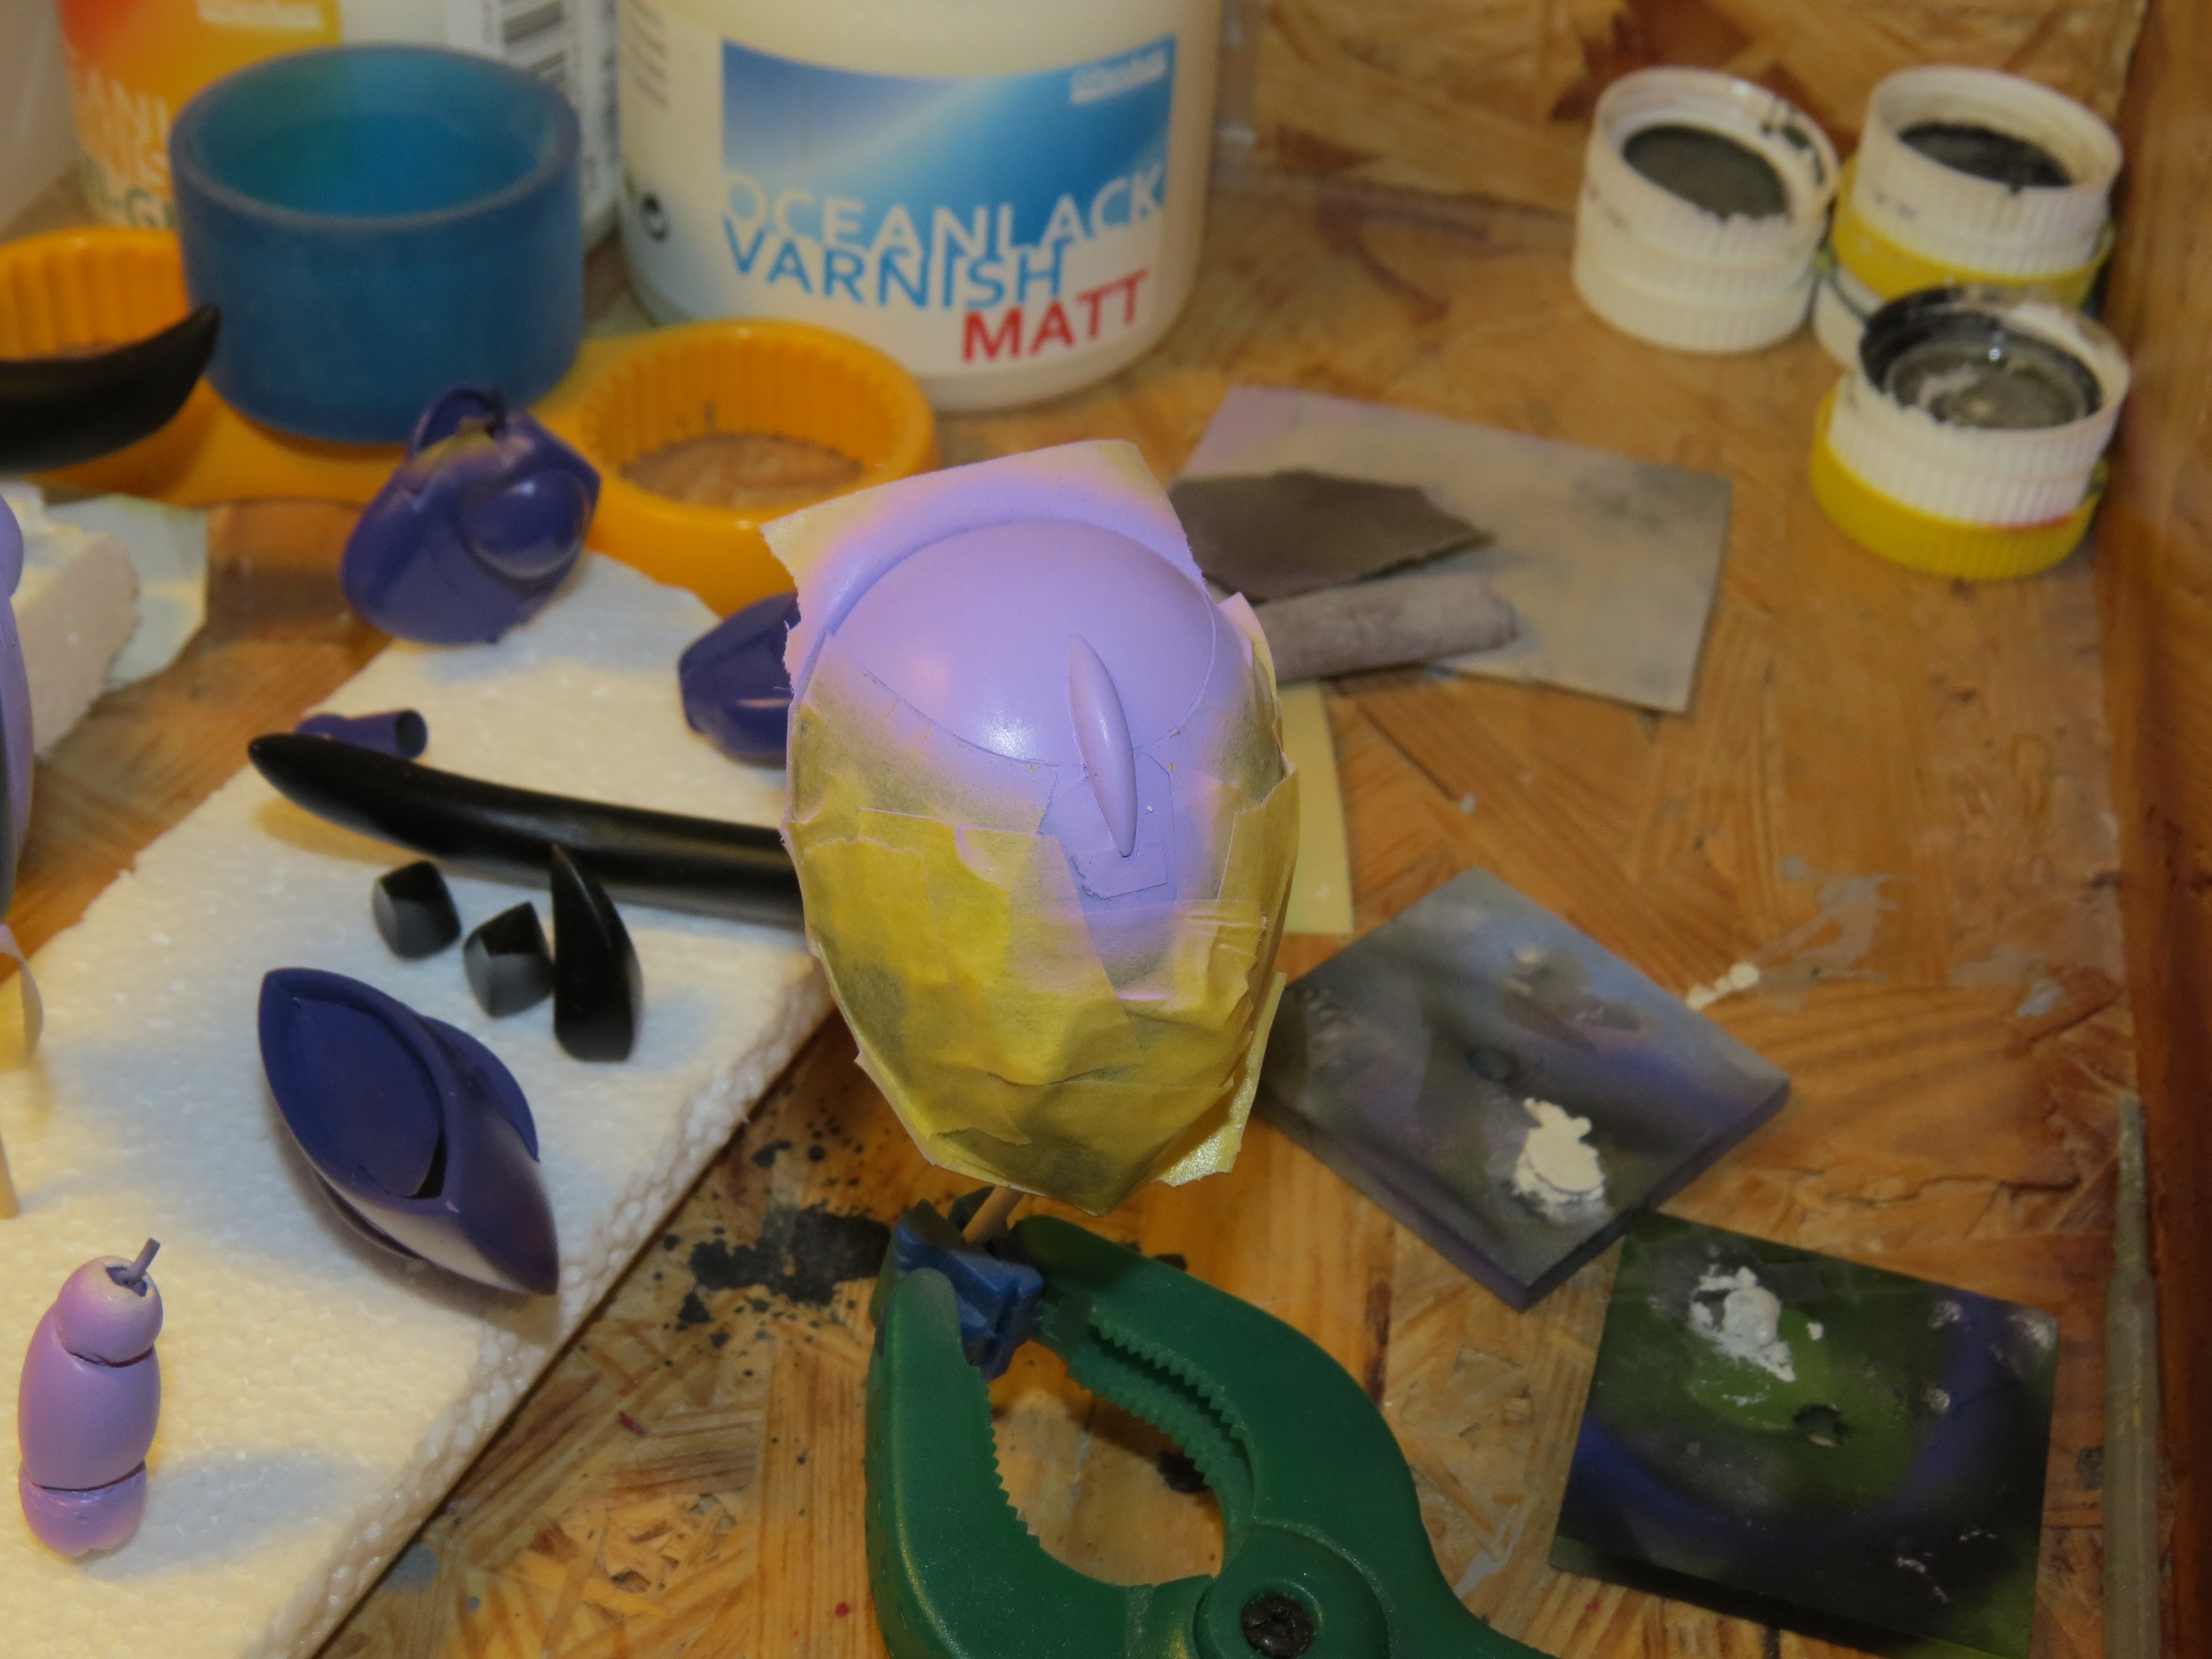
Thanks guys. I didn't want to depict my crab in a shiny new factory fresh uniform. So I applied some weathering, mainly on the lower legs as mud and dirt would have built up during it's operational career. A Mr.Paint semi matte clear coat was applied after the weathering was done. The Legs assembled.


-
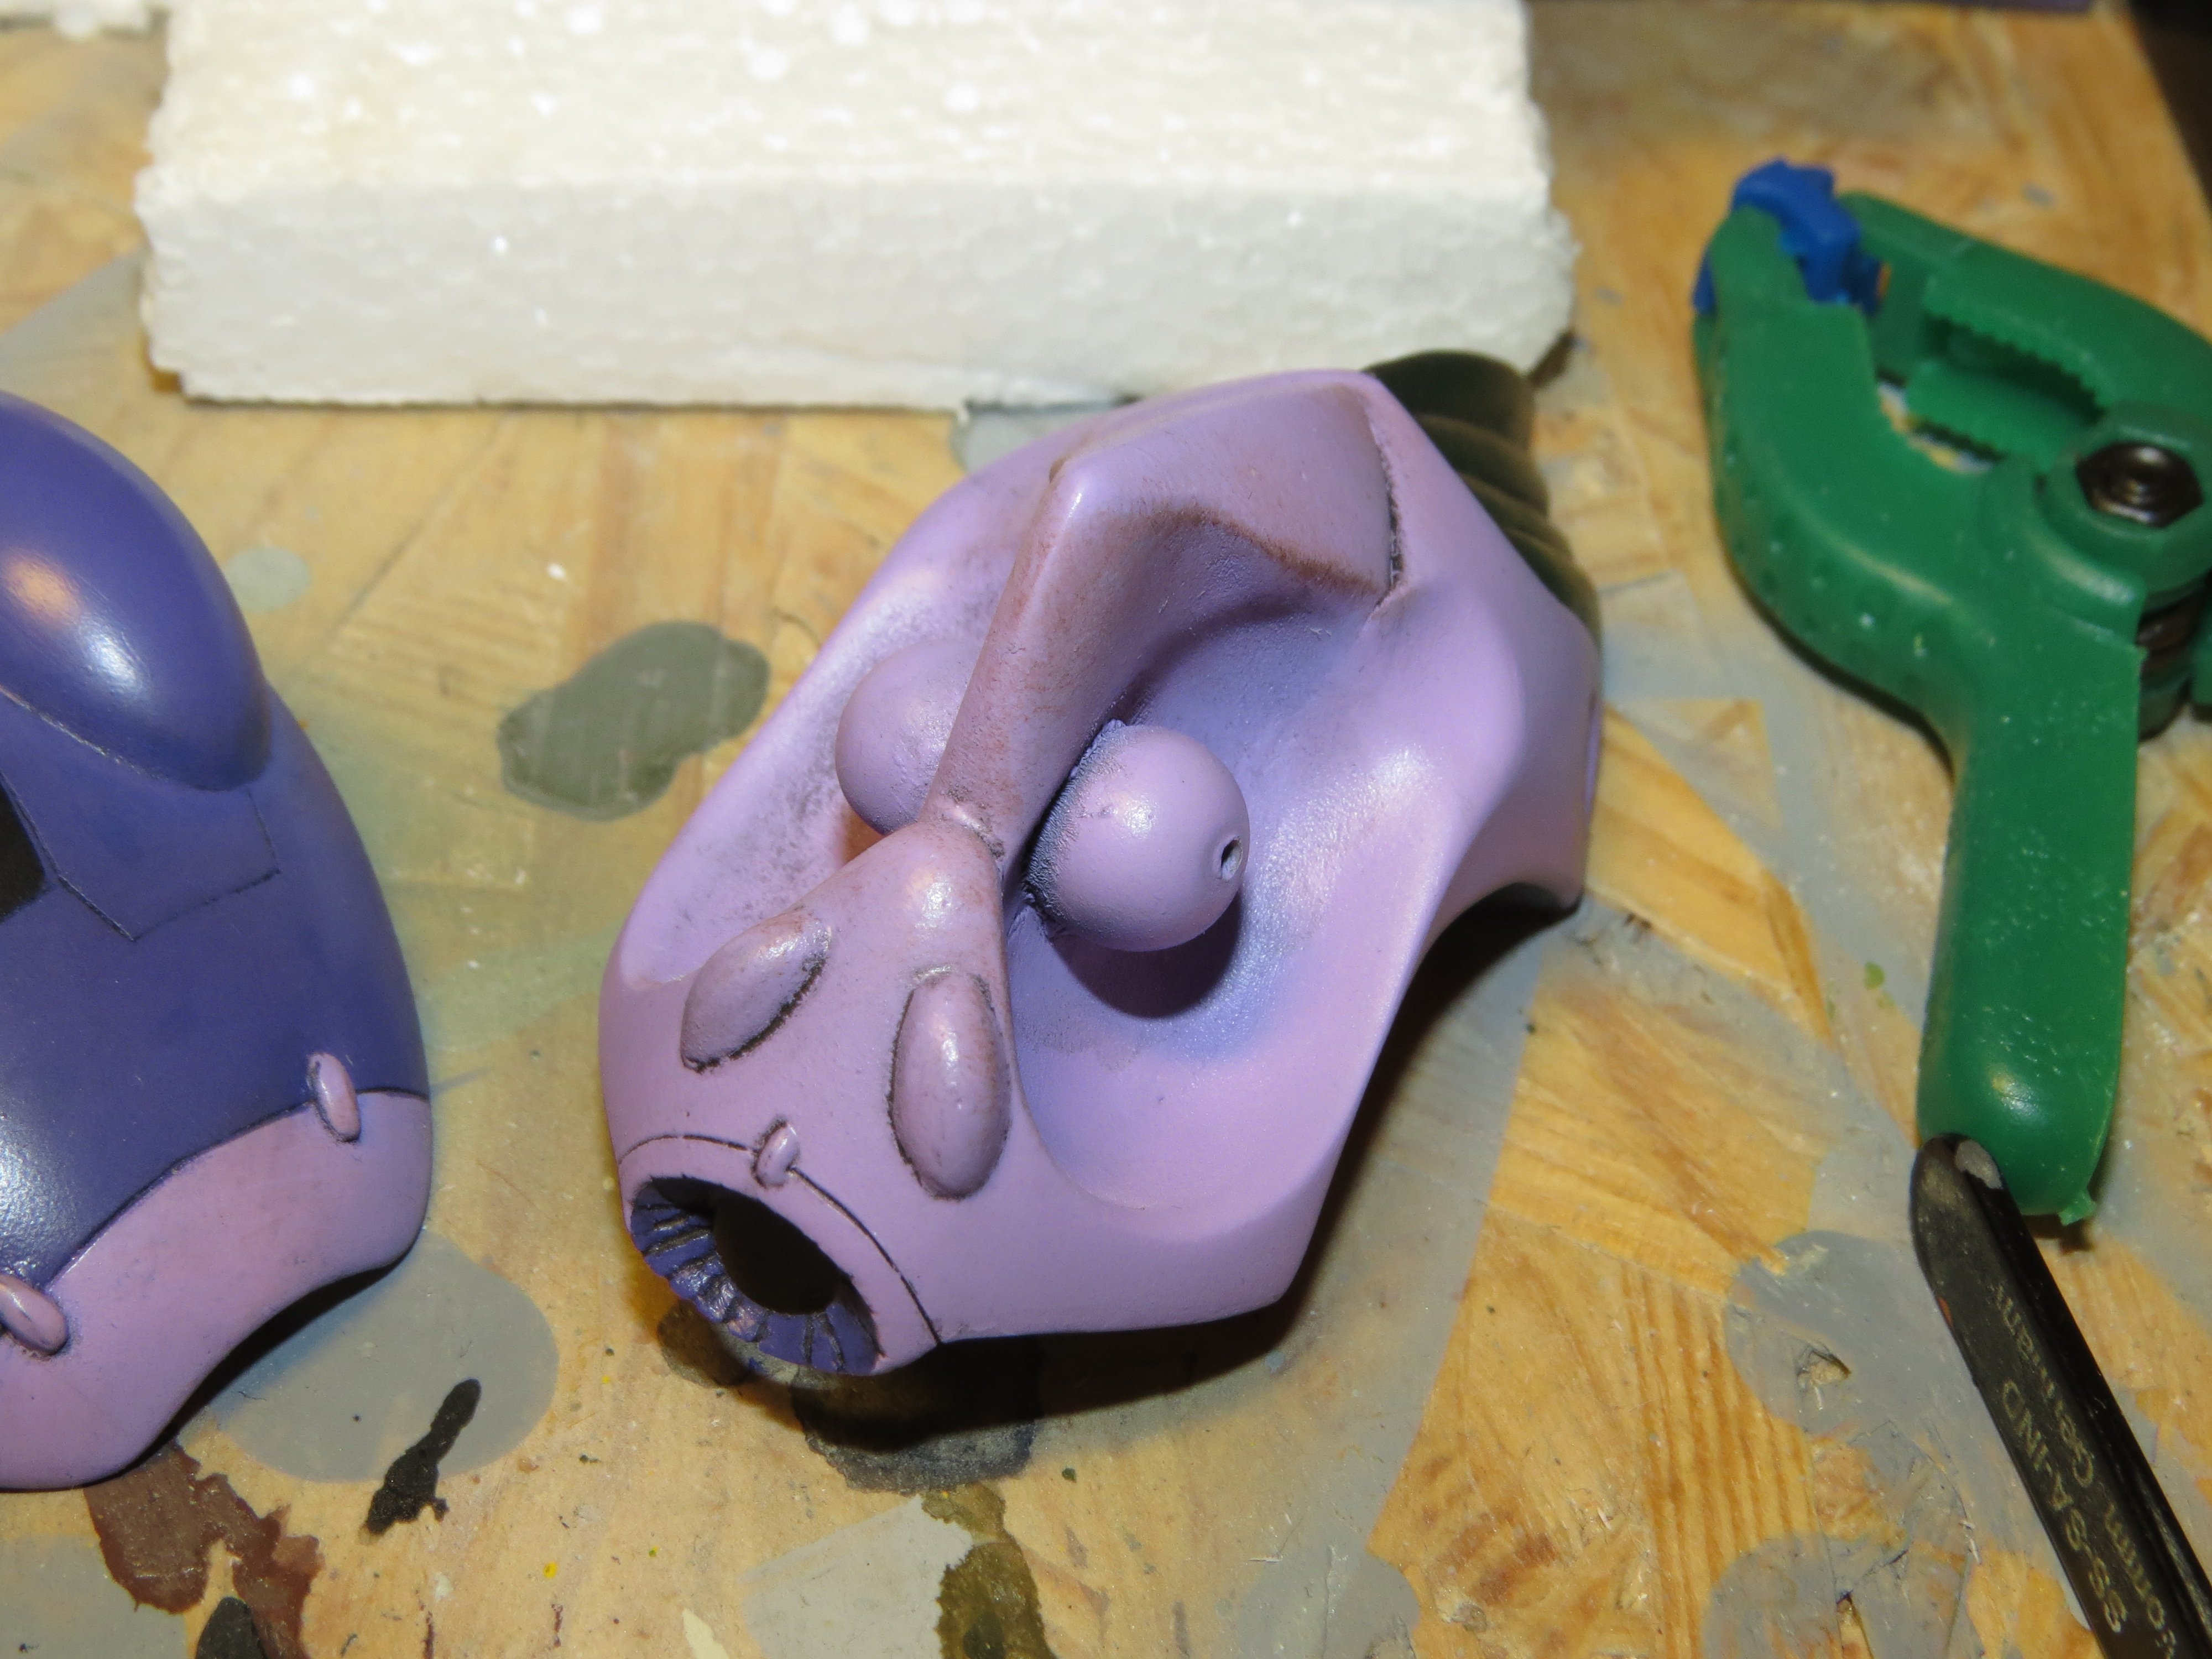
The masking removed. Quite pleased with how it turned out. I had some problems with the paint lifting in some small areas, probably due to me being a bit sloppy with the cleaning of the parts prior painting. The claws where painted with alclad steel and given a mist over with alclad hotmetal blue.


-
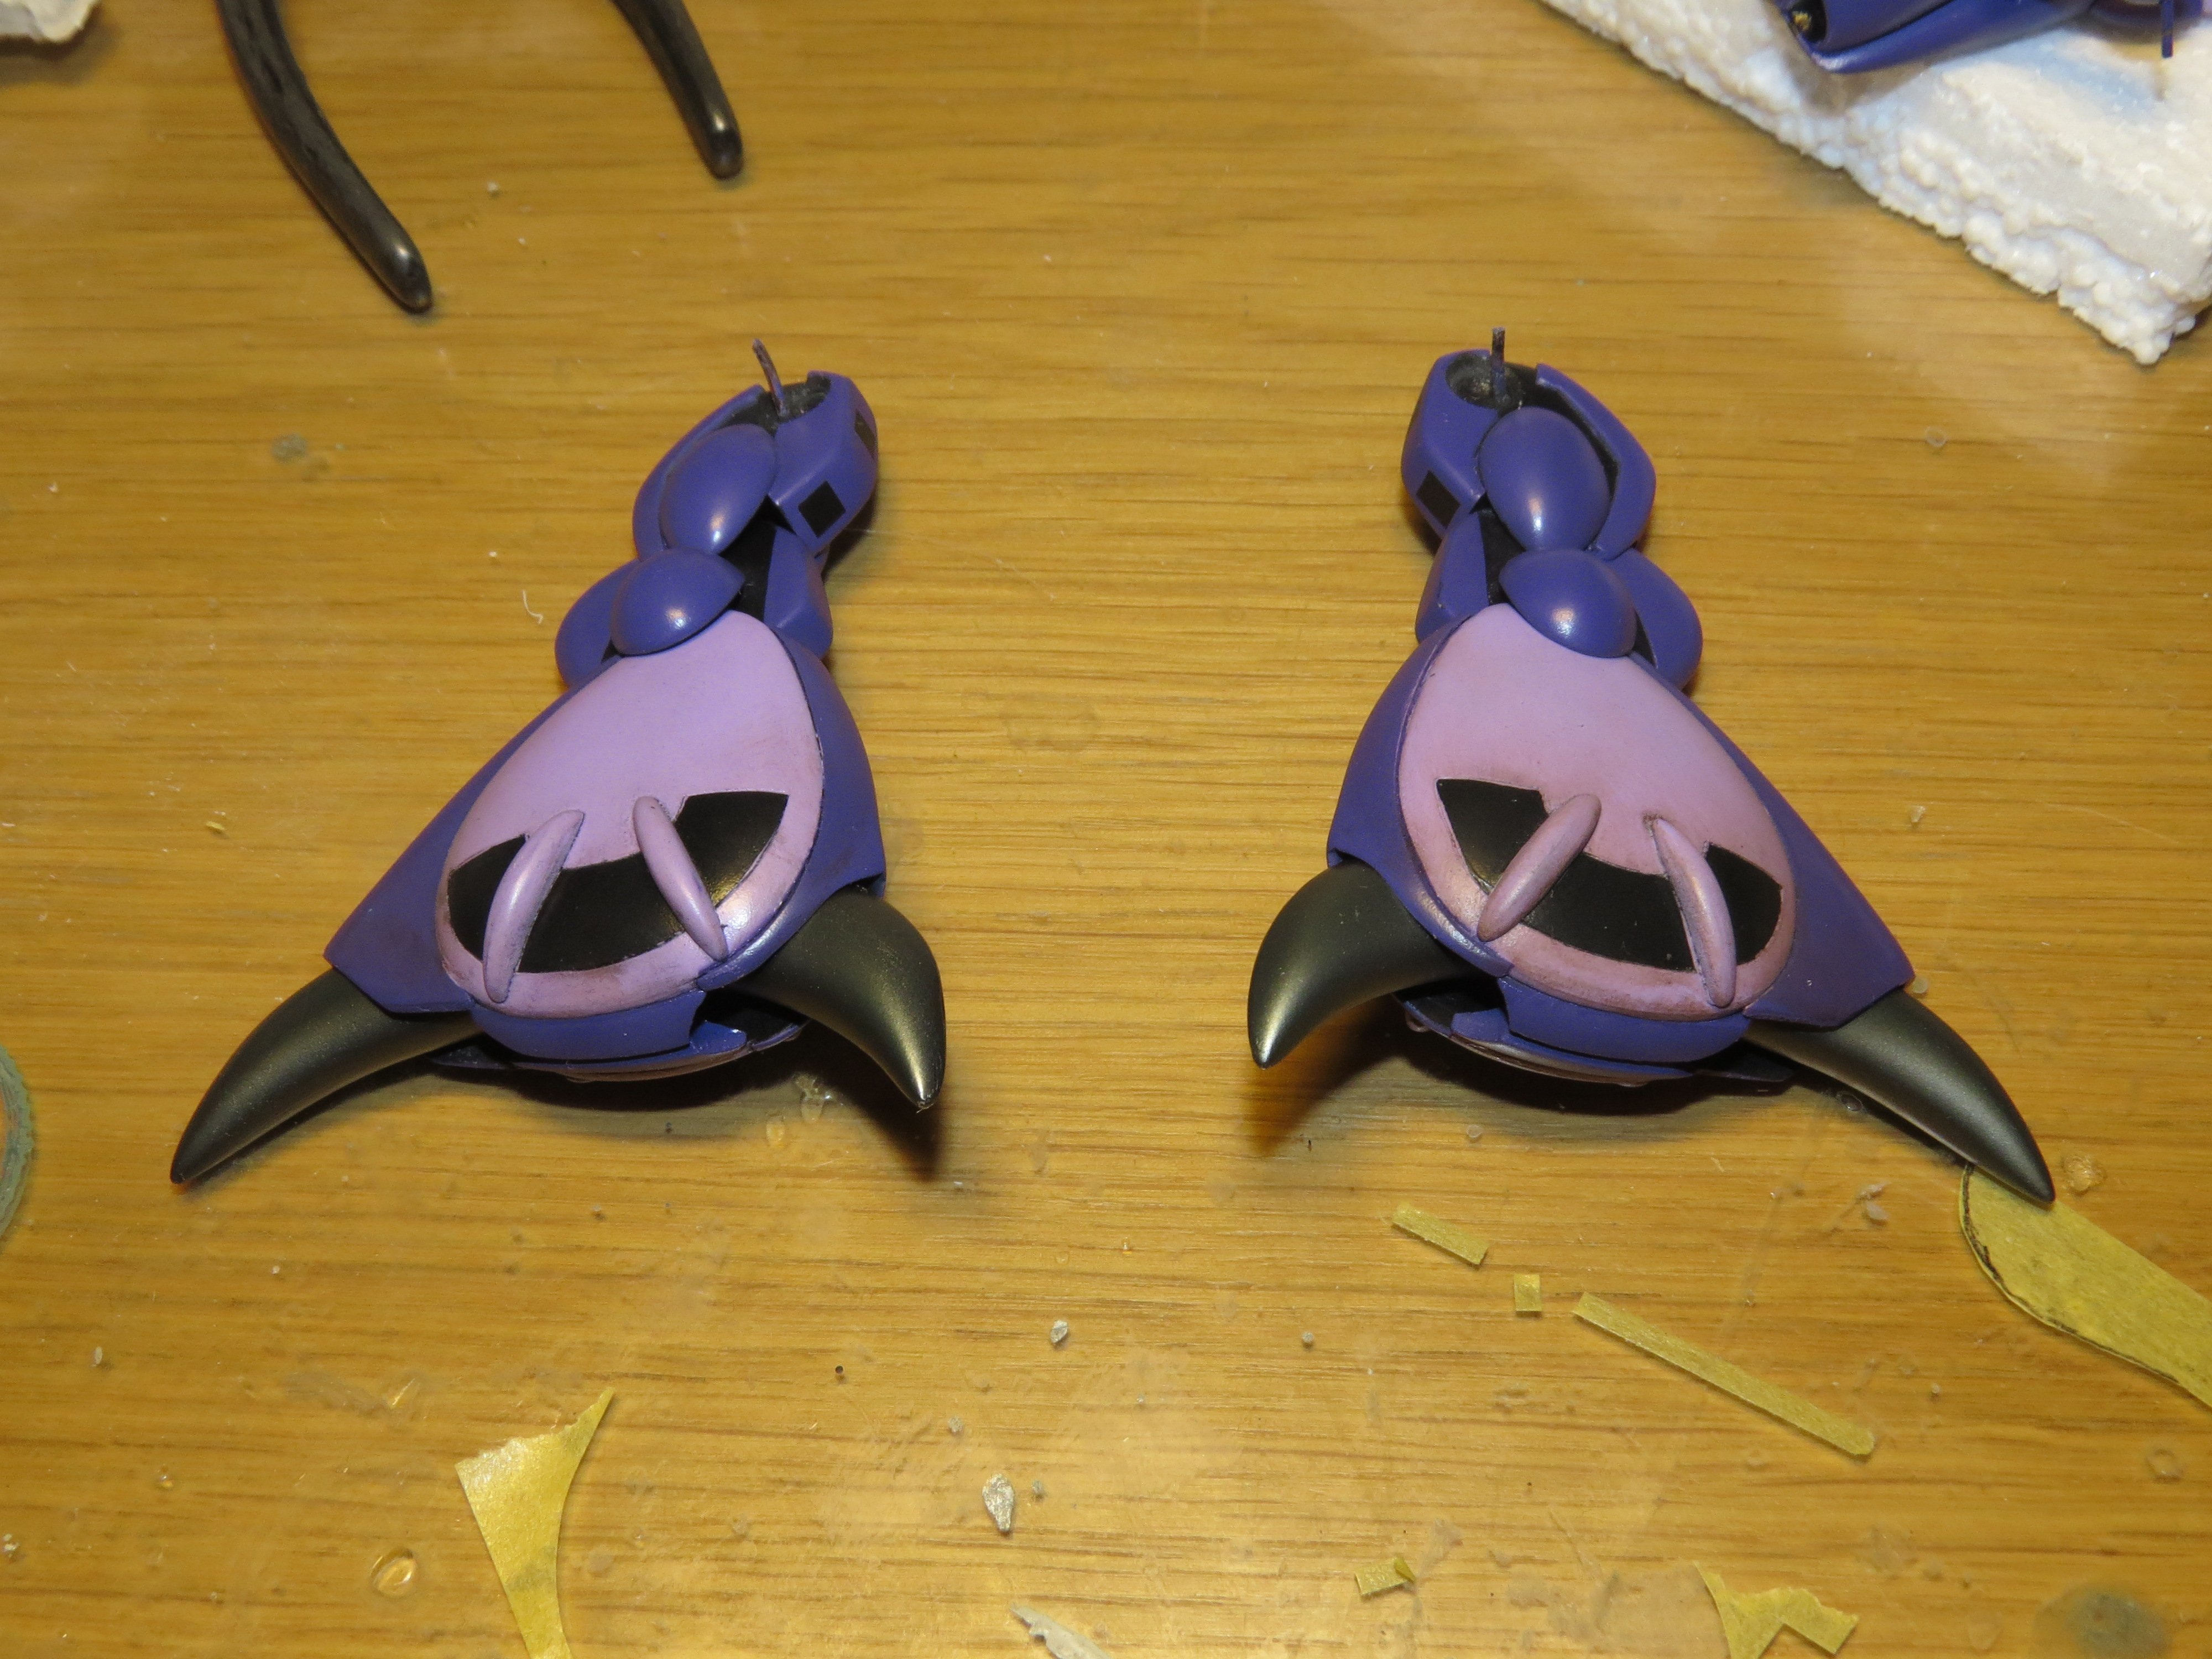
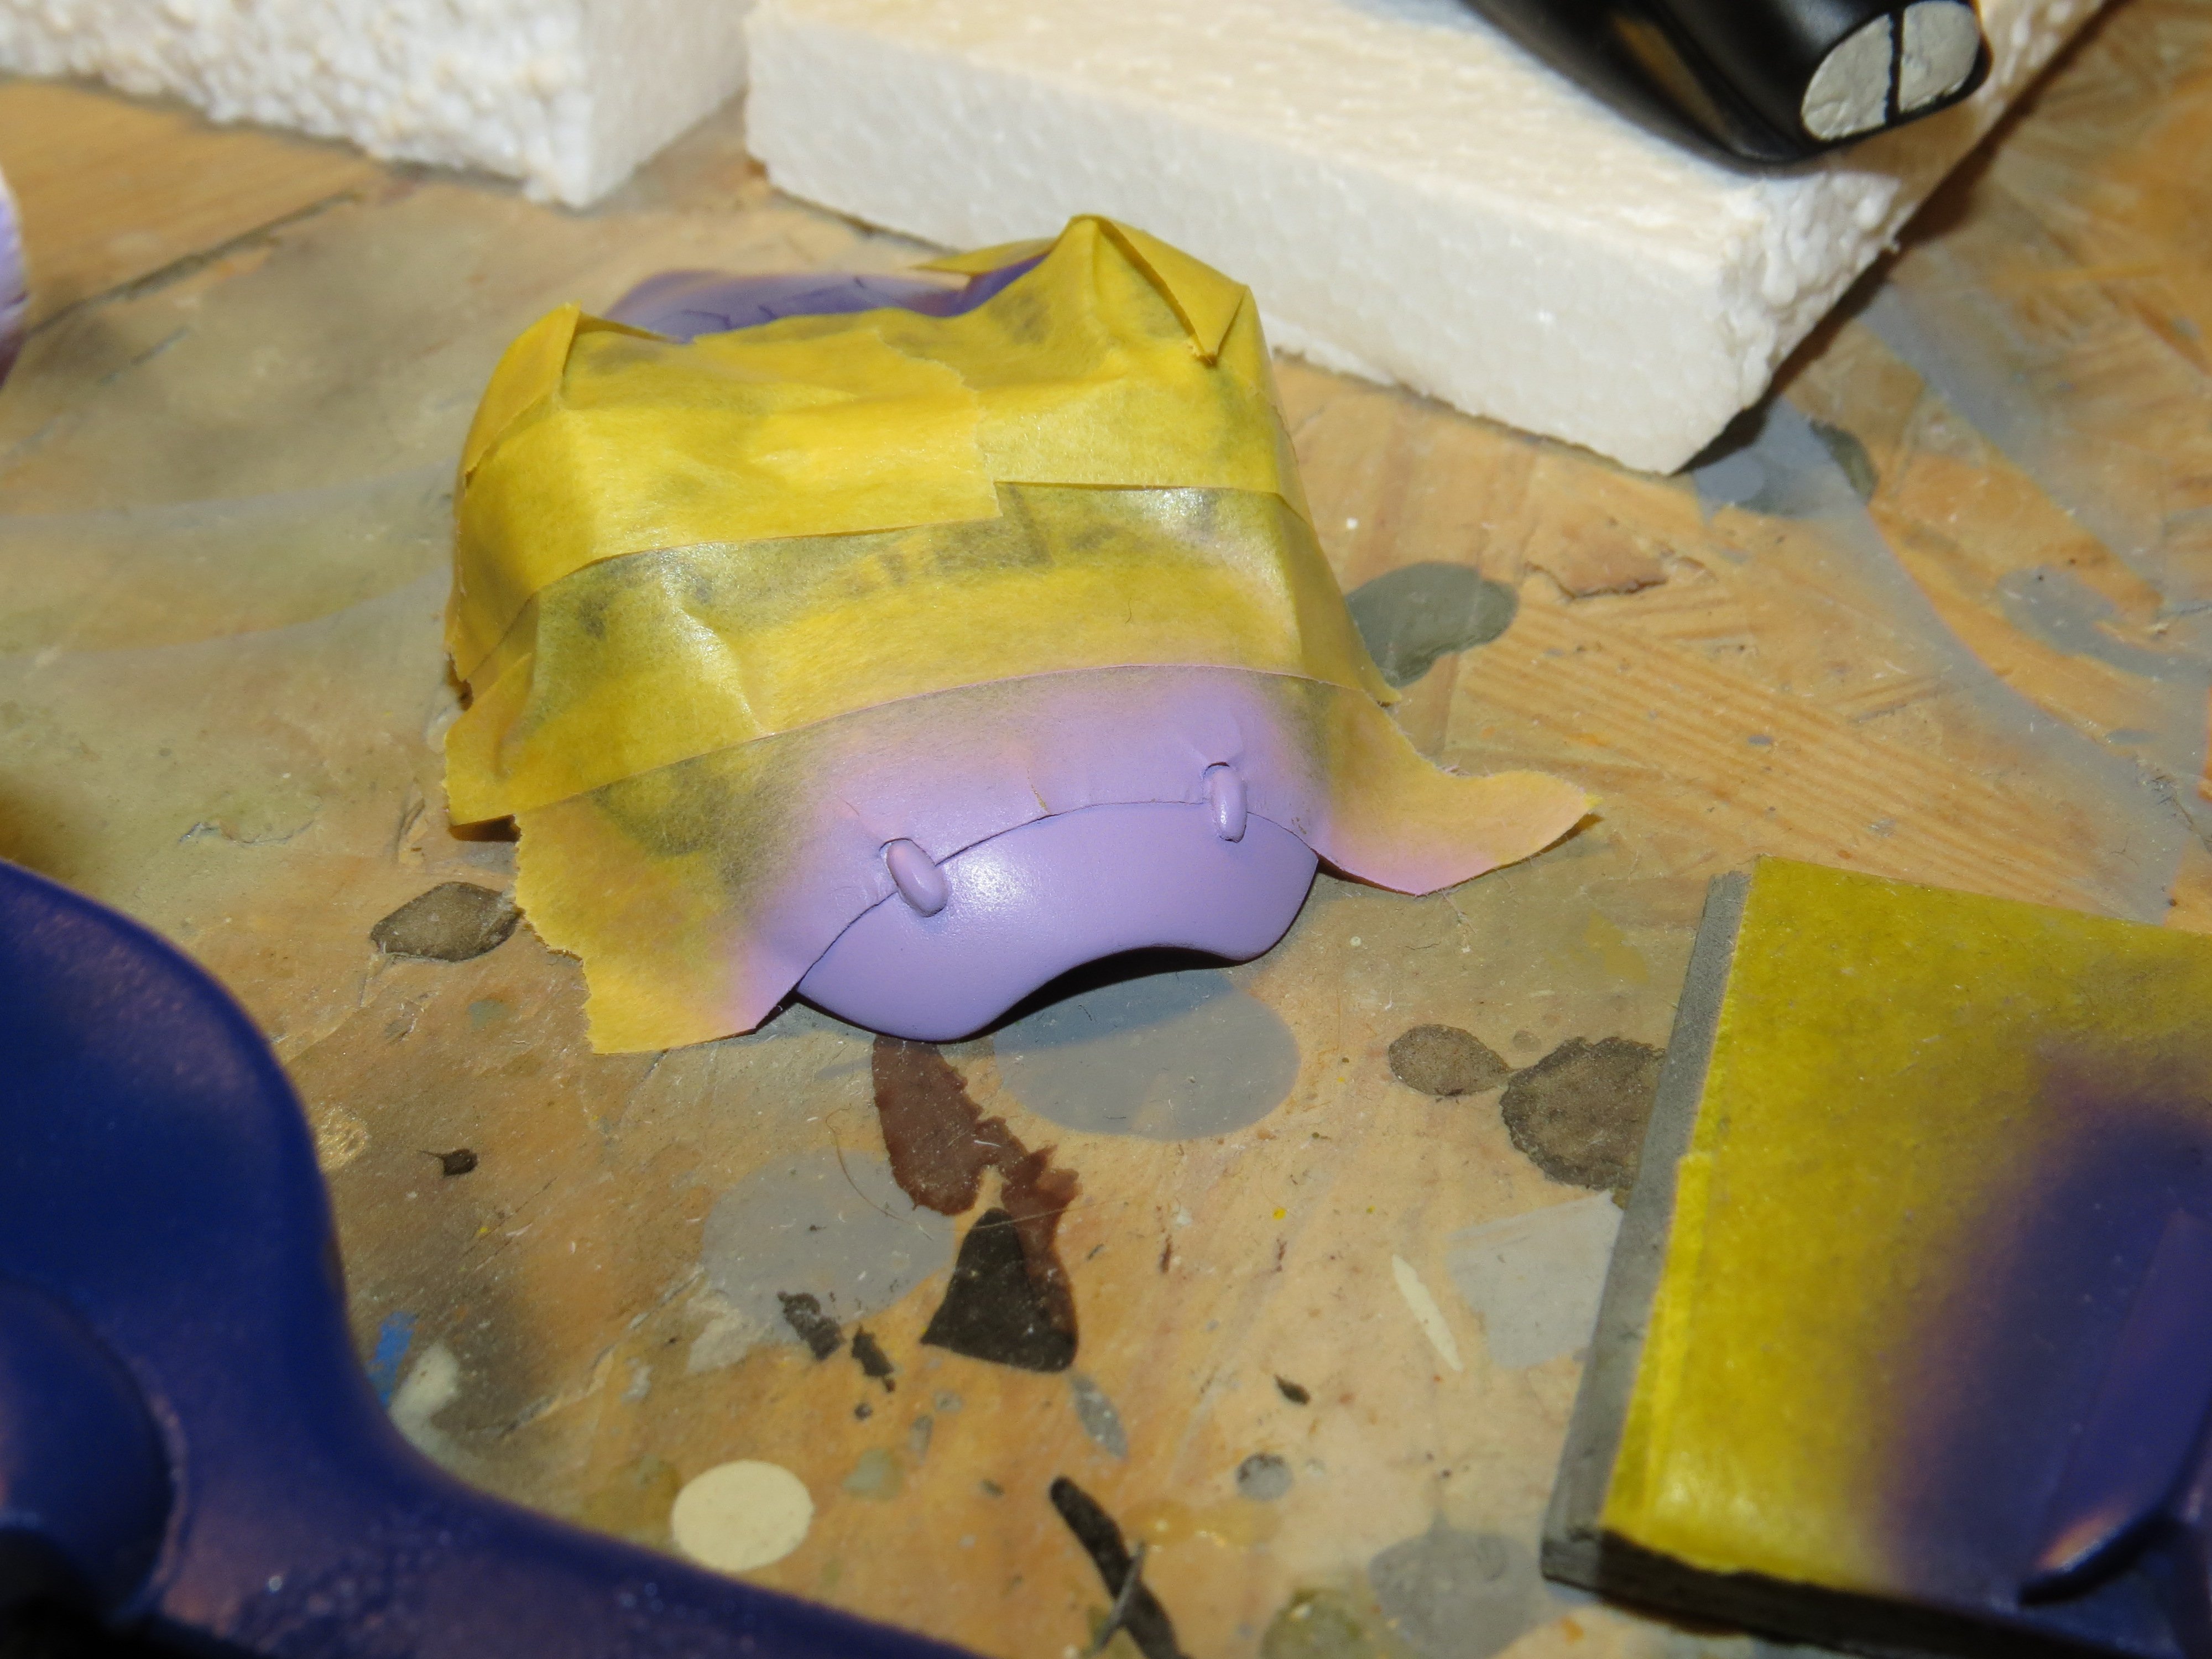
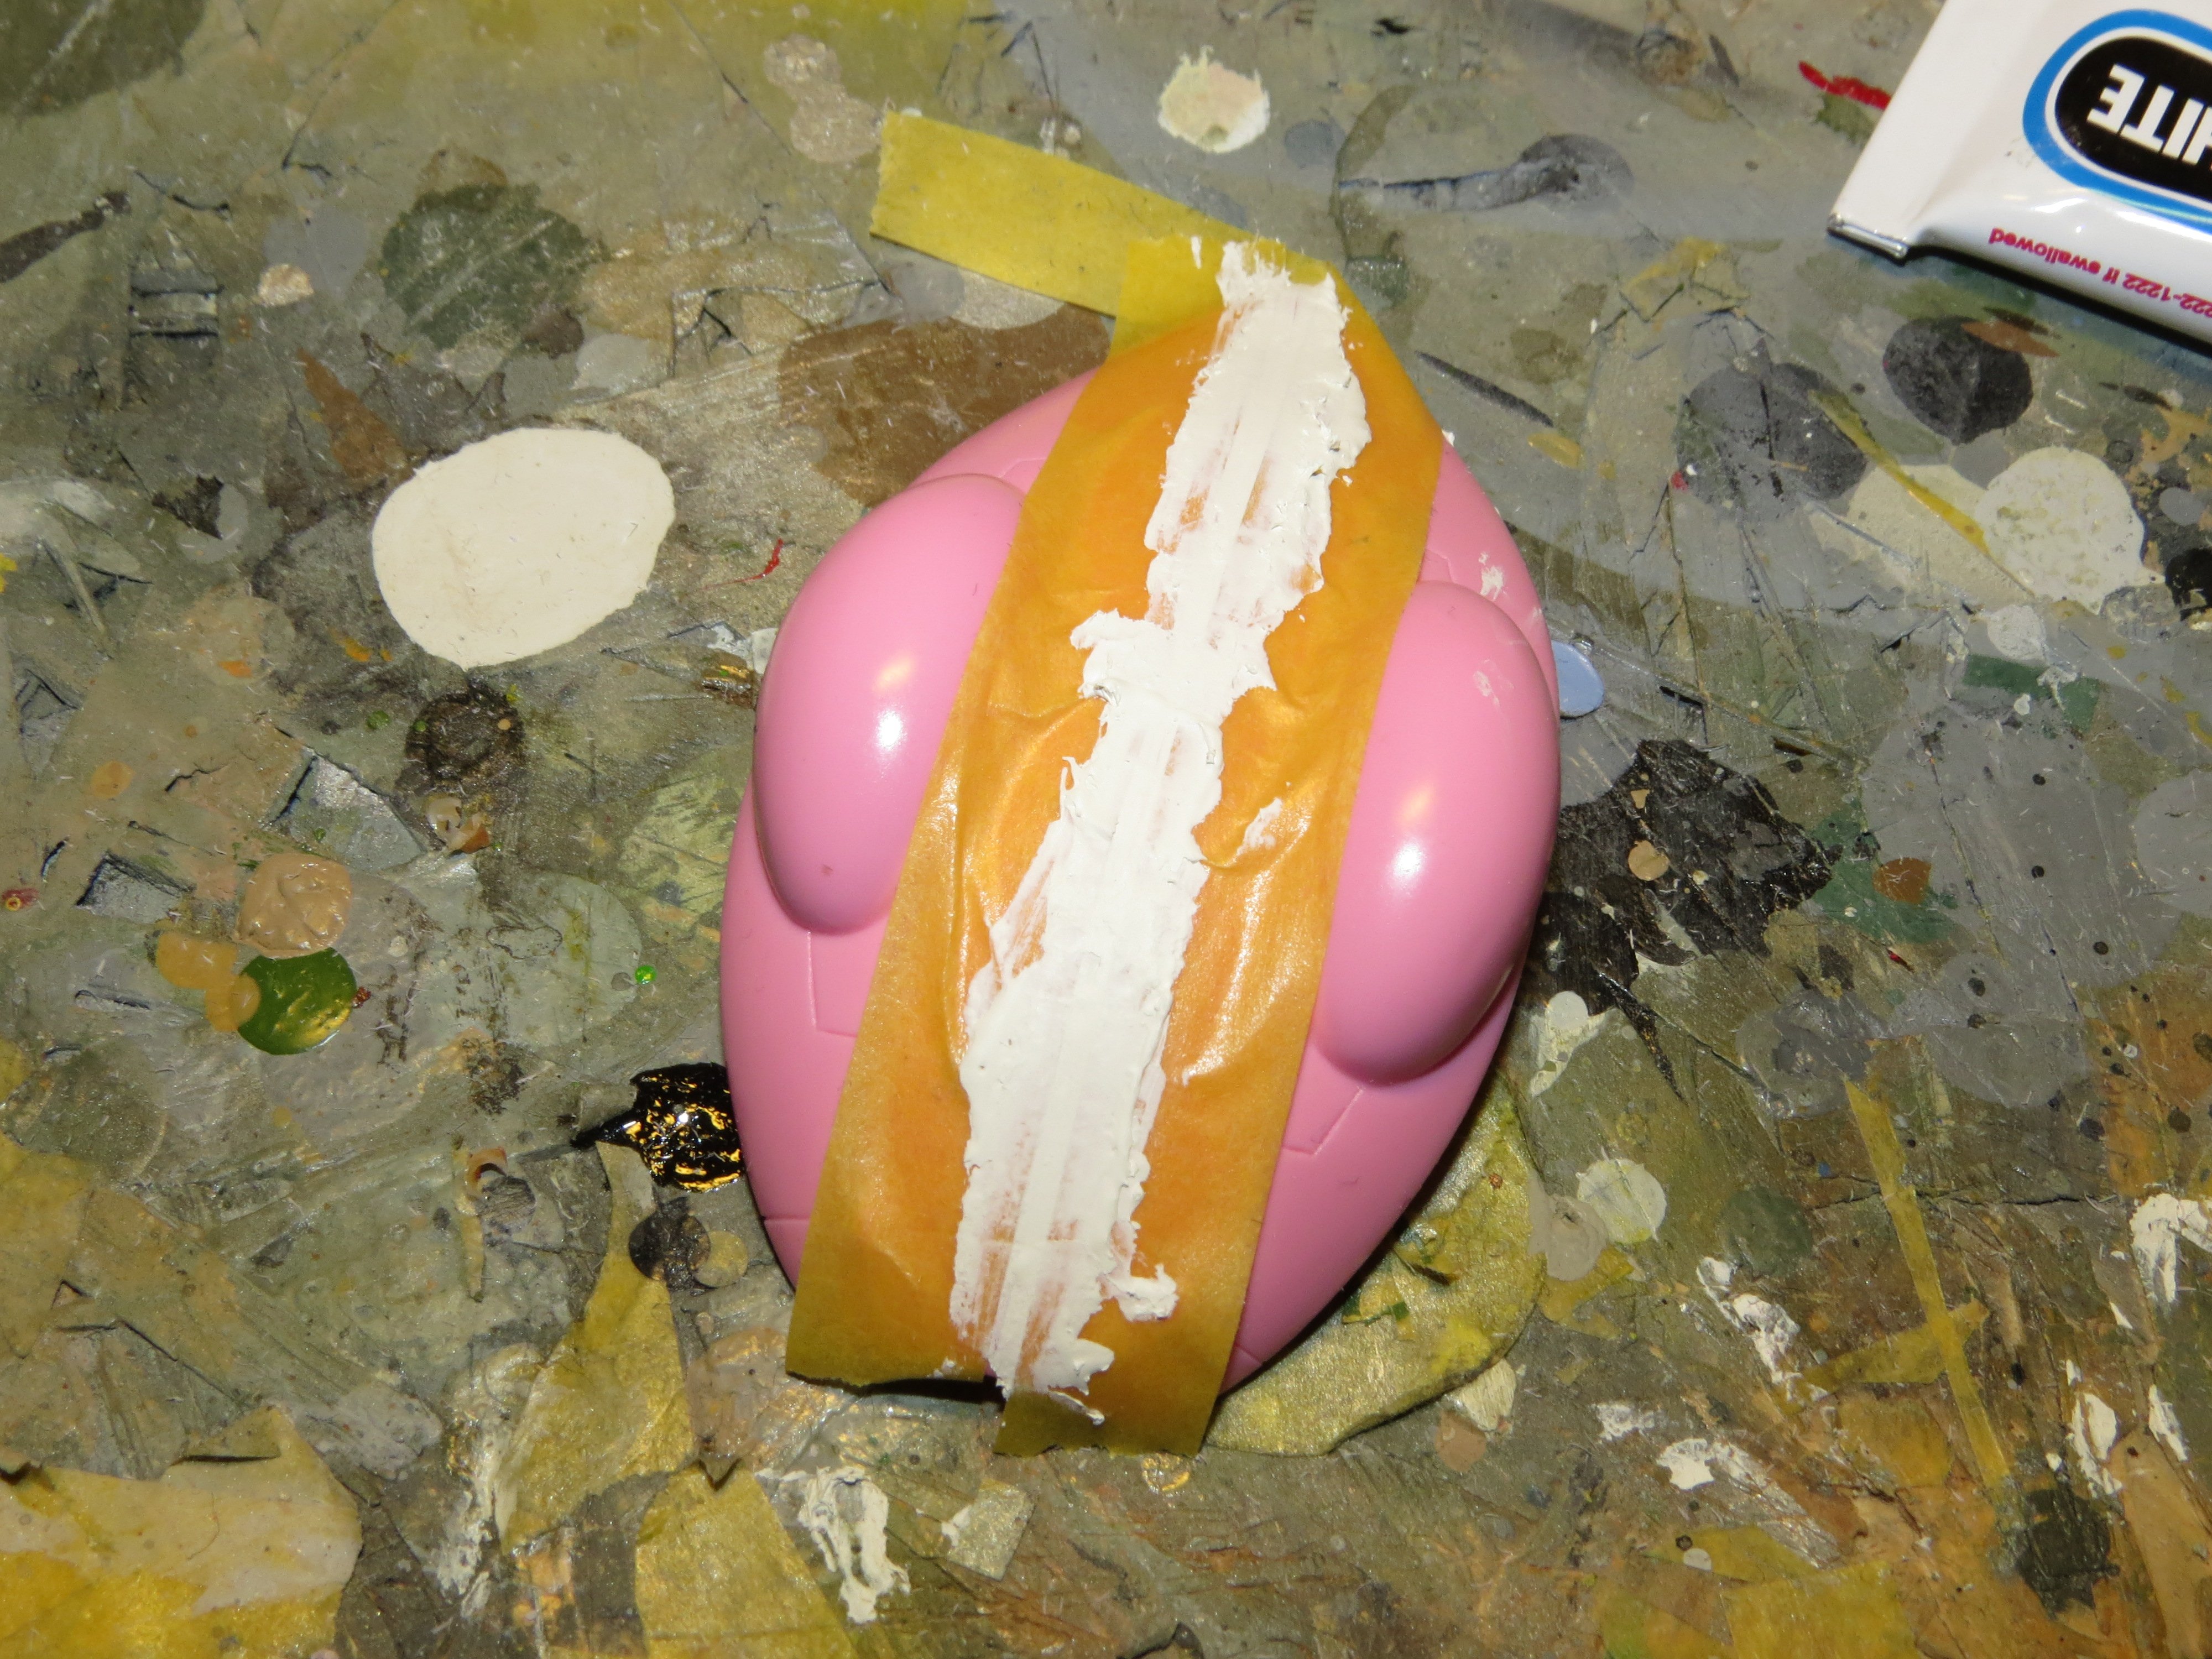
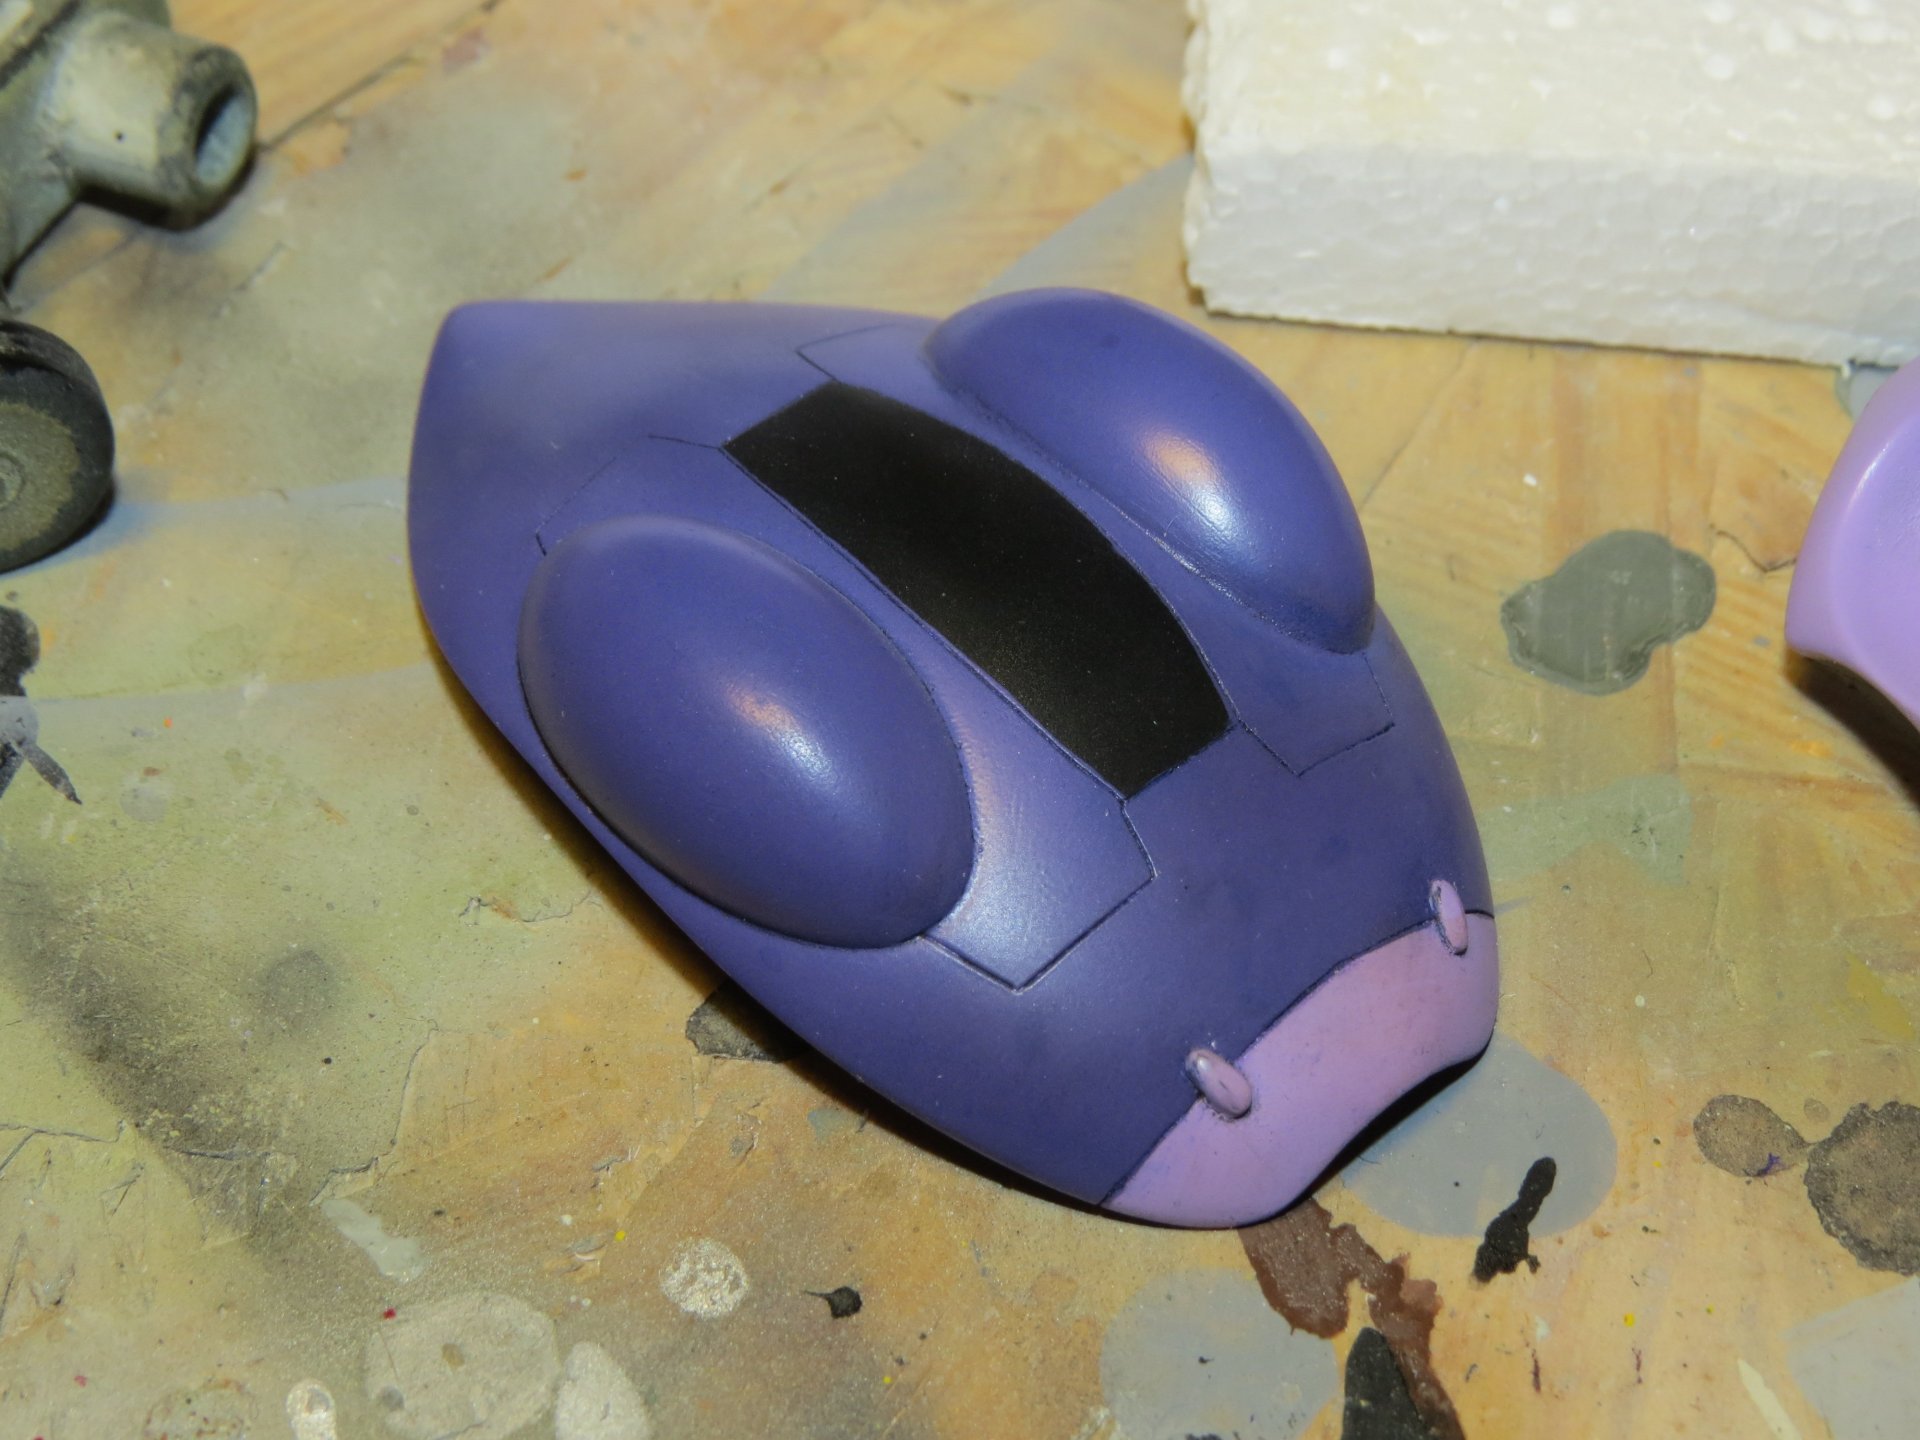
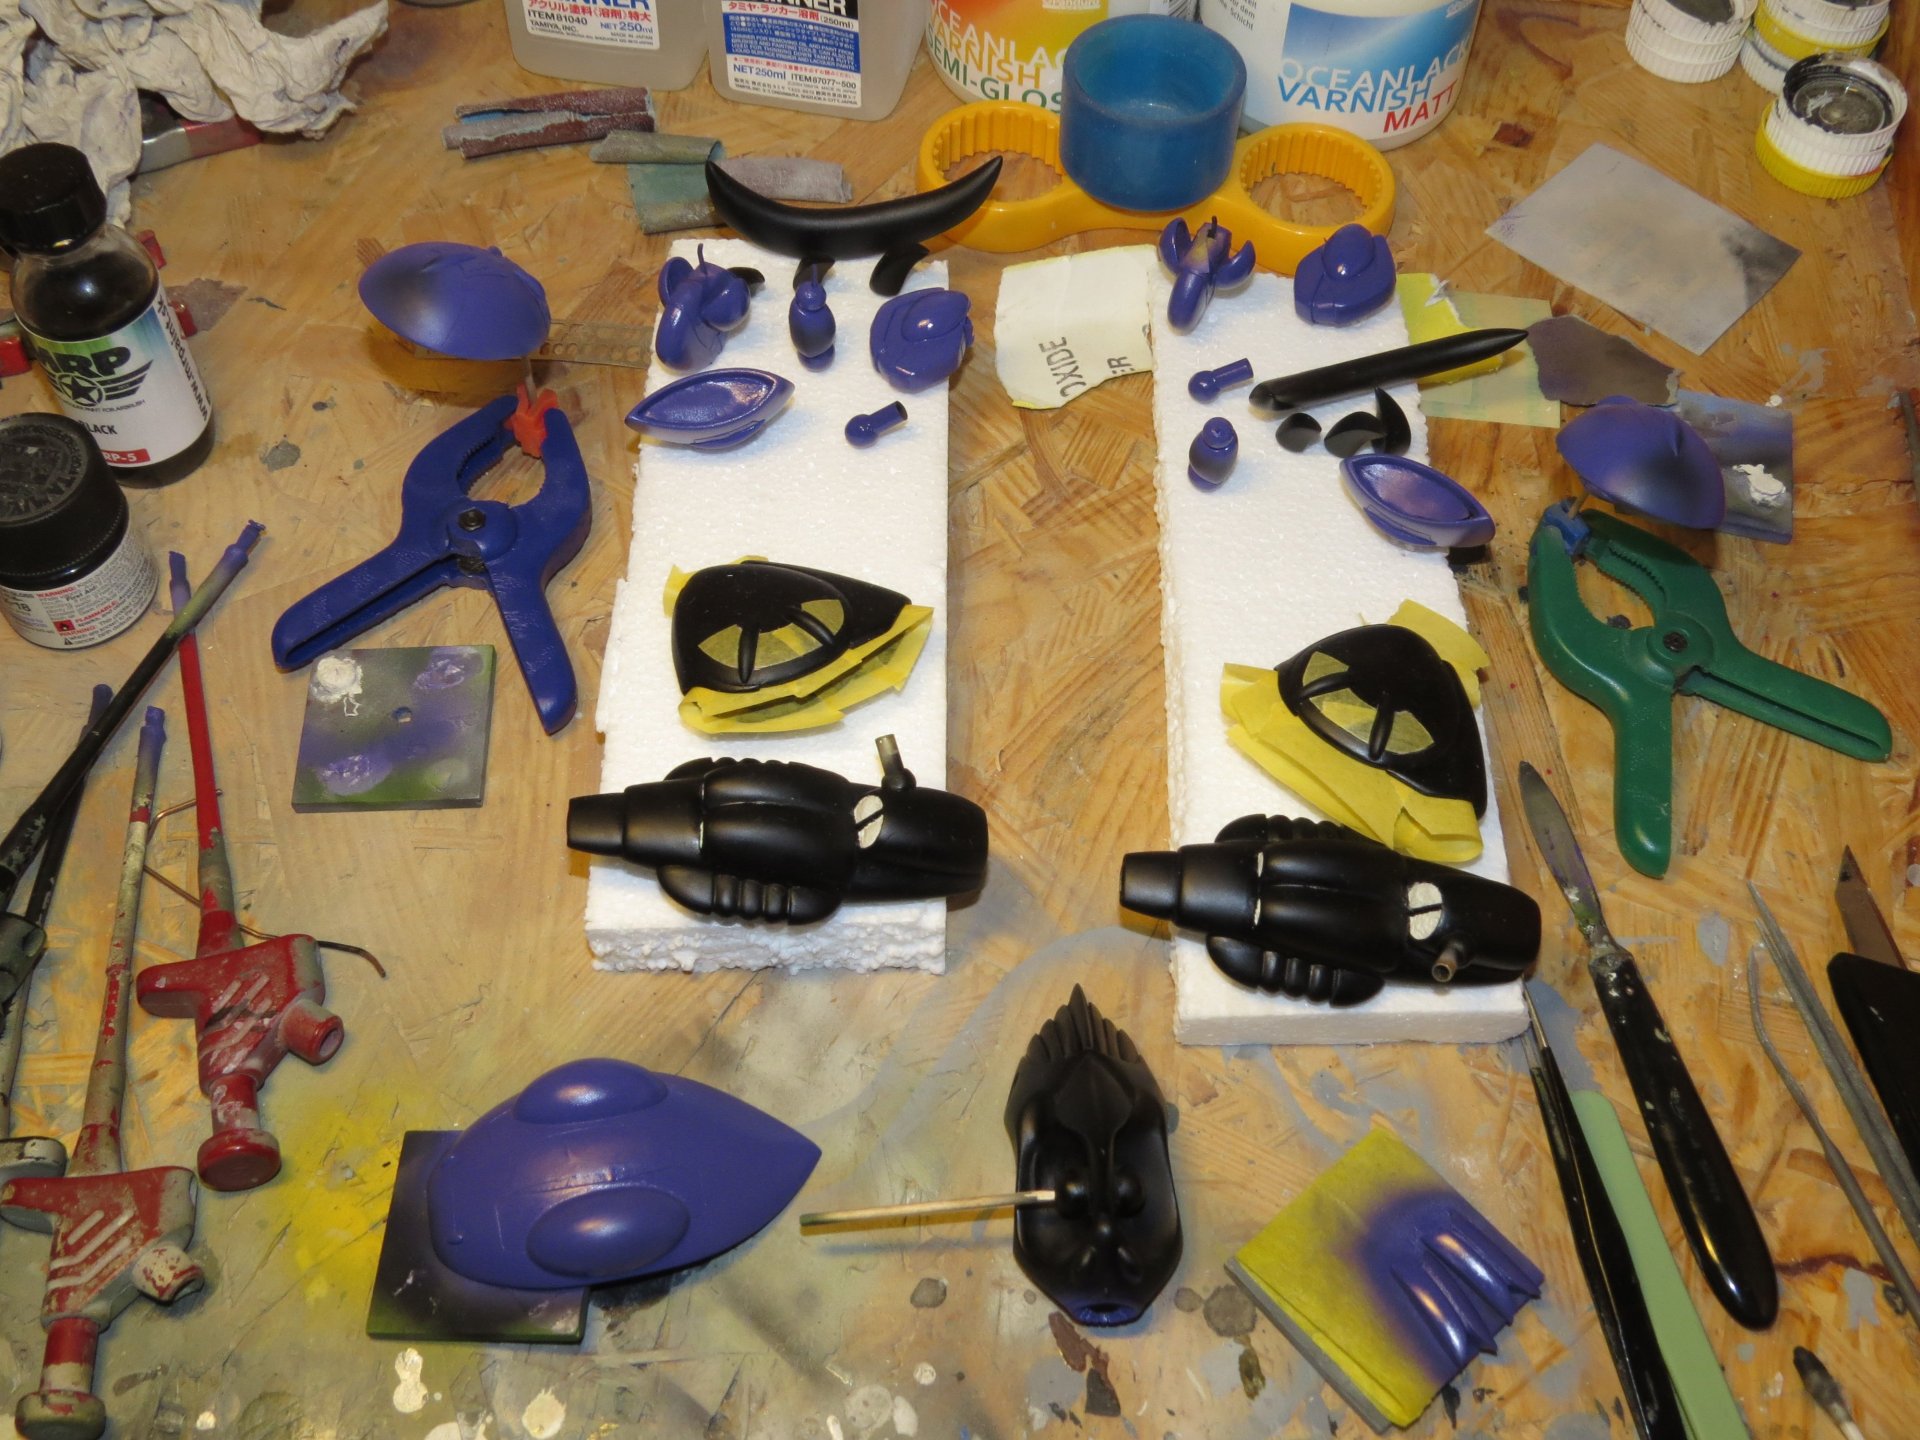
Everything that is supposed to stay black was masked, which took forever. The base coats of Tamiya Purple X-16 and Mr.Hobby Gundam Color MS Purple UG08 was applied with additional masking sessions in between.


-
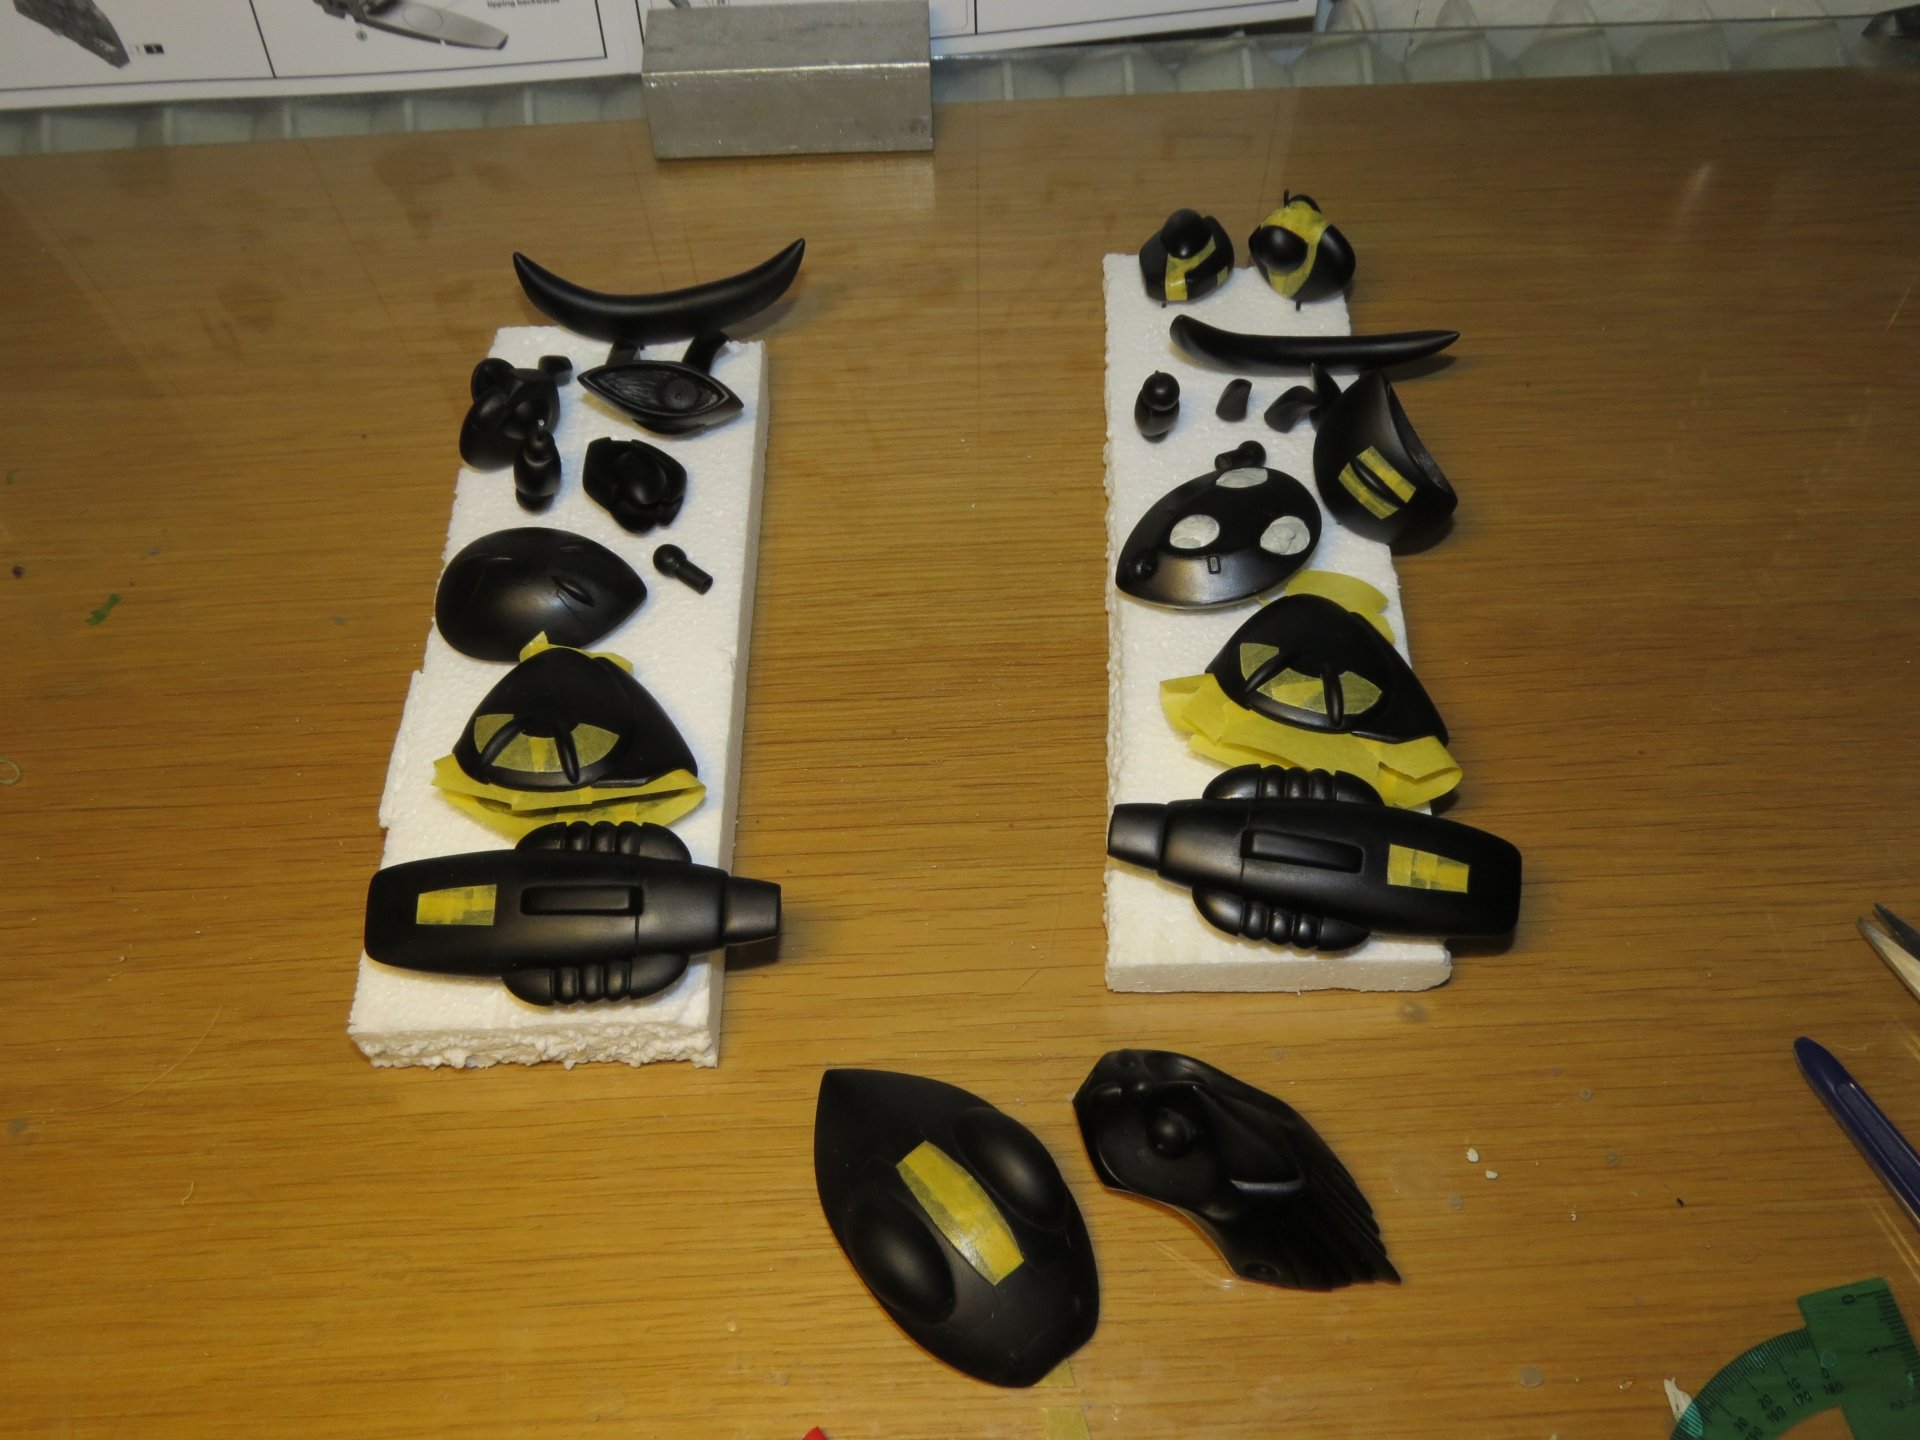
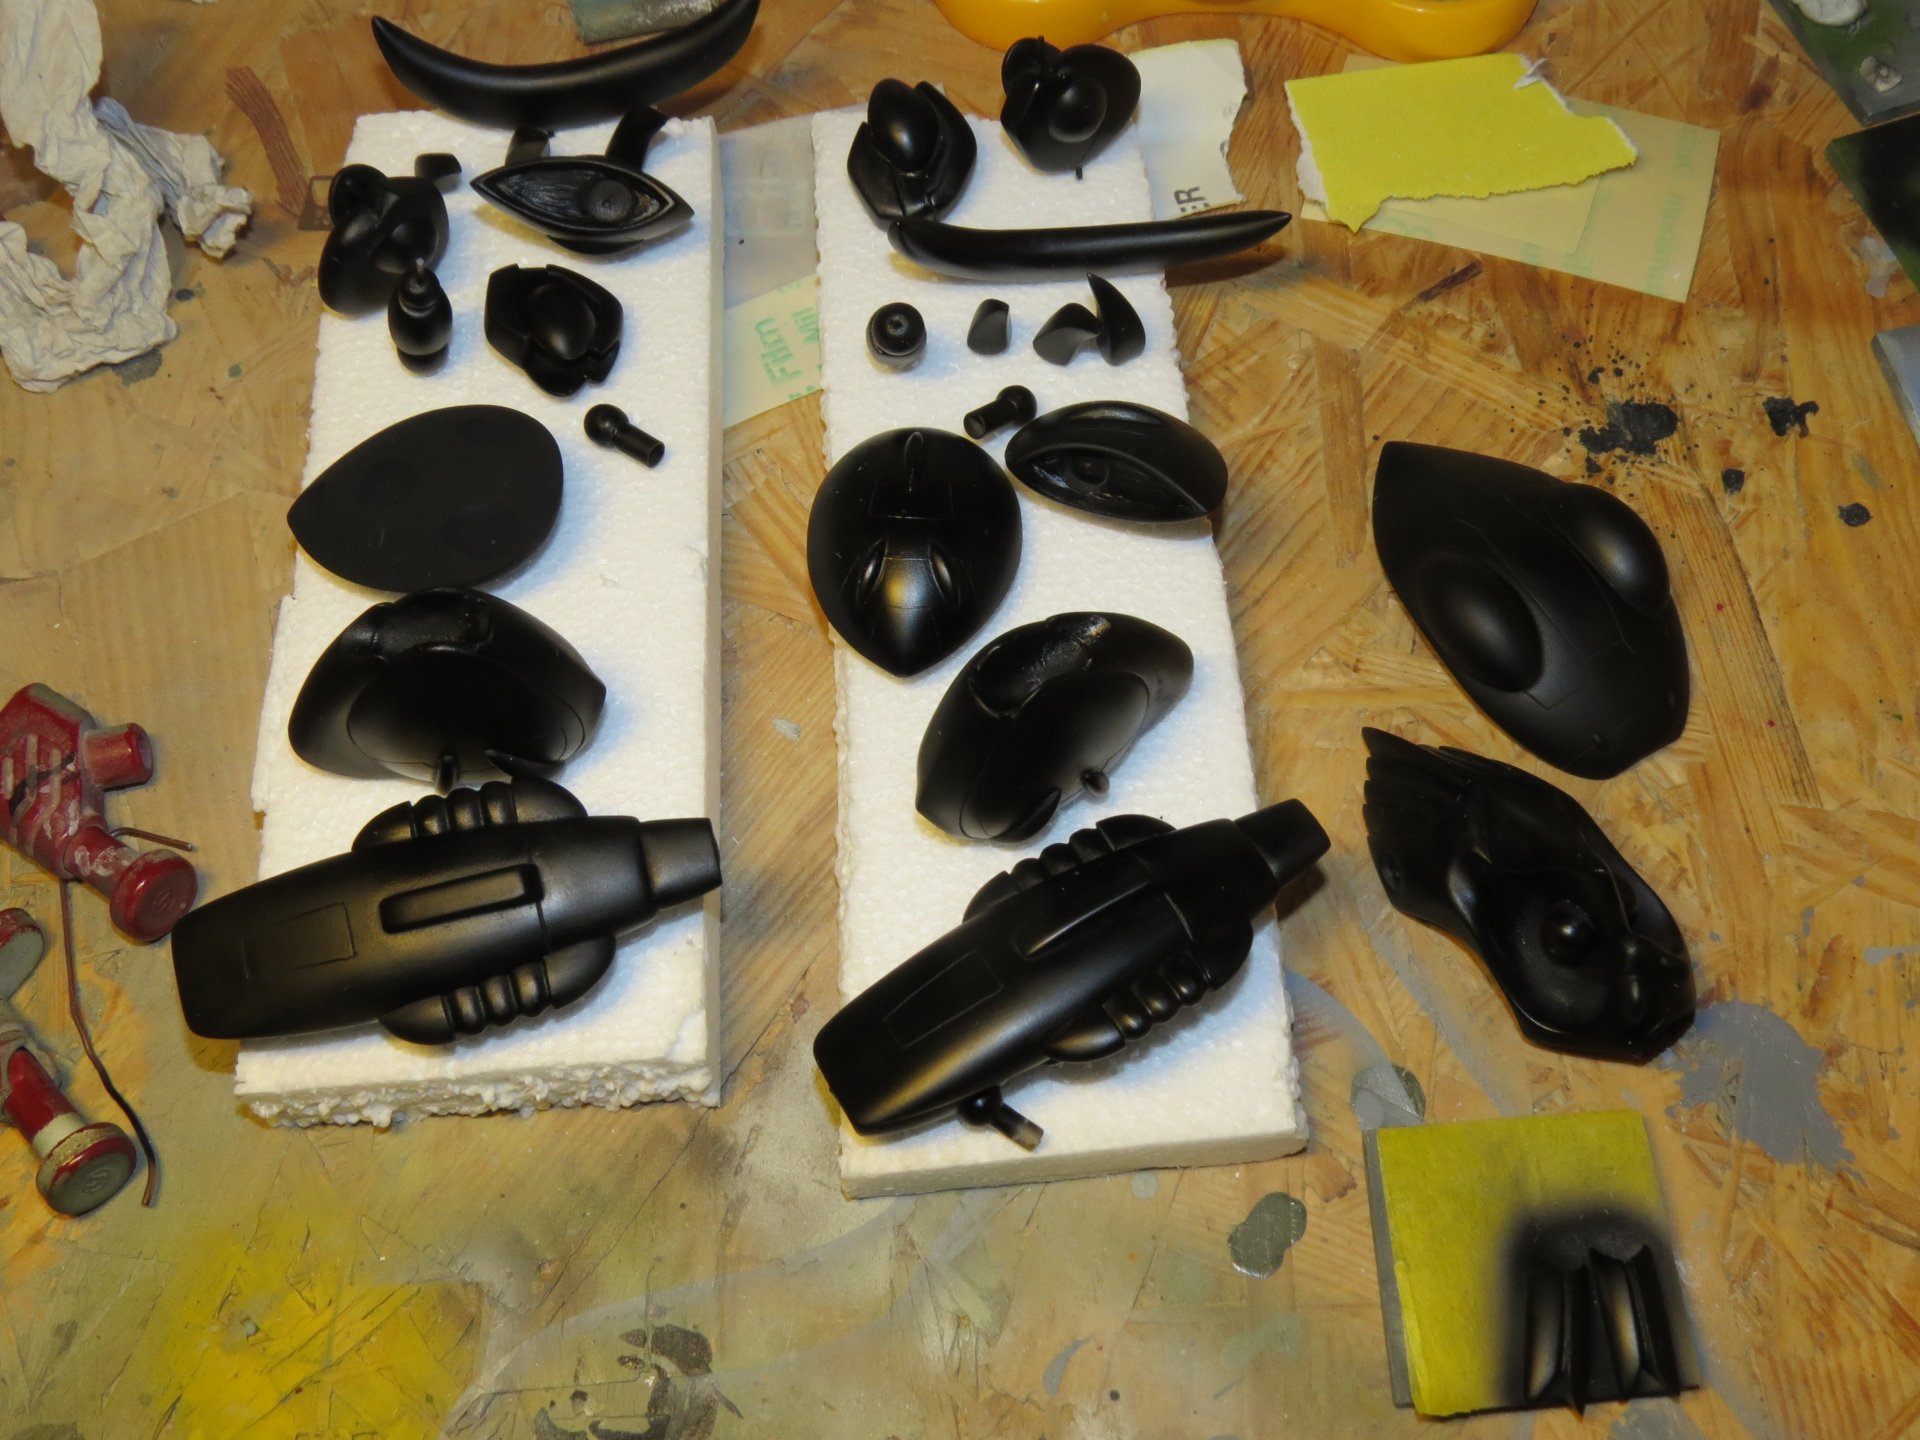
Time for paint. Everything was primed with alclad grey primer & microfiller. After several sanding sessions to get everything as smooth as possible a black base coat was applied (tamiya X18).

-
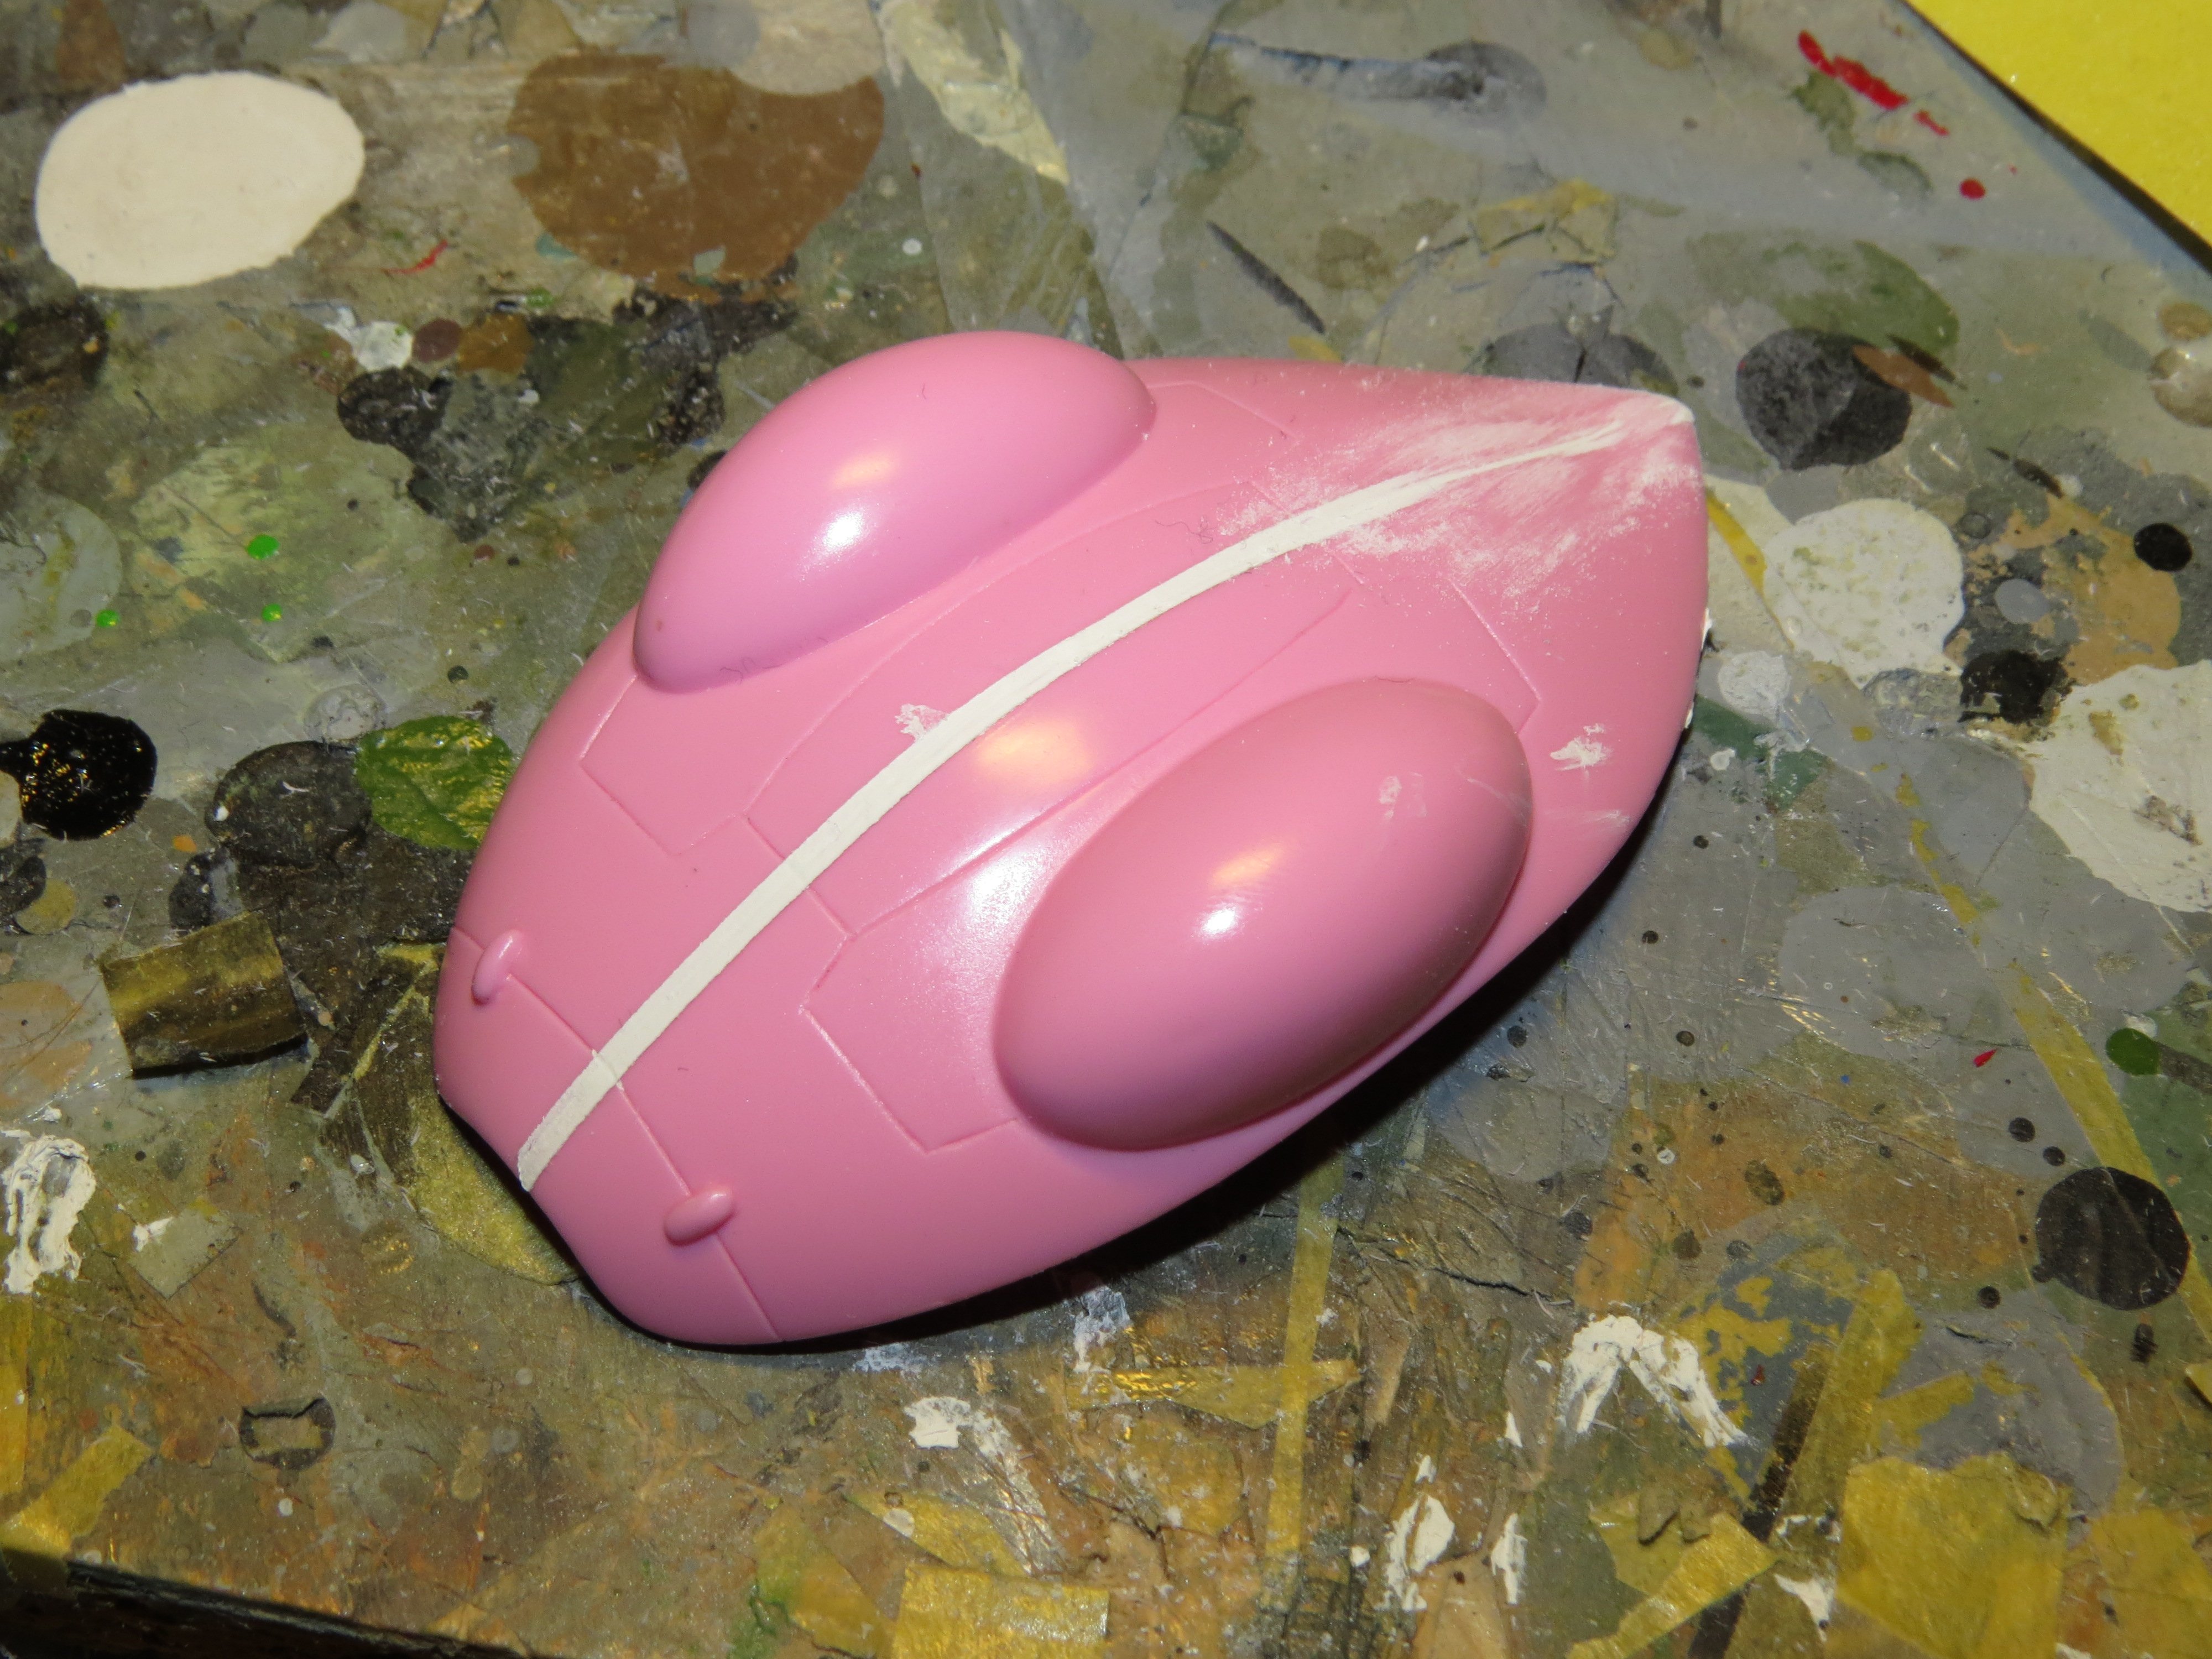
So, I have seen pics of the Gurab with the center line on its "head" and without. I decided to eliminate the center line only because I think it looks better without it.


-
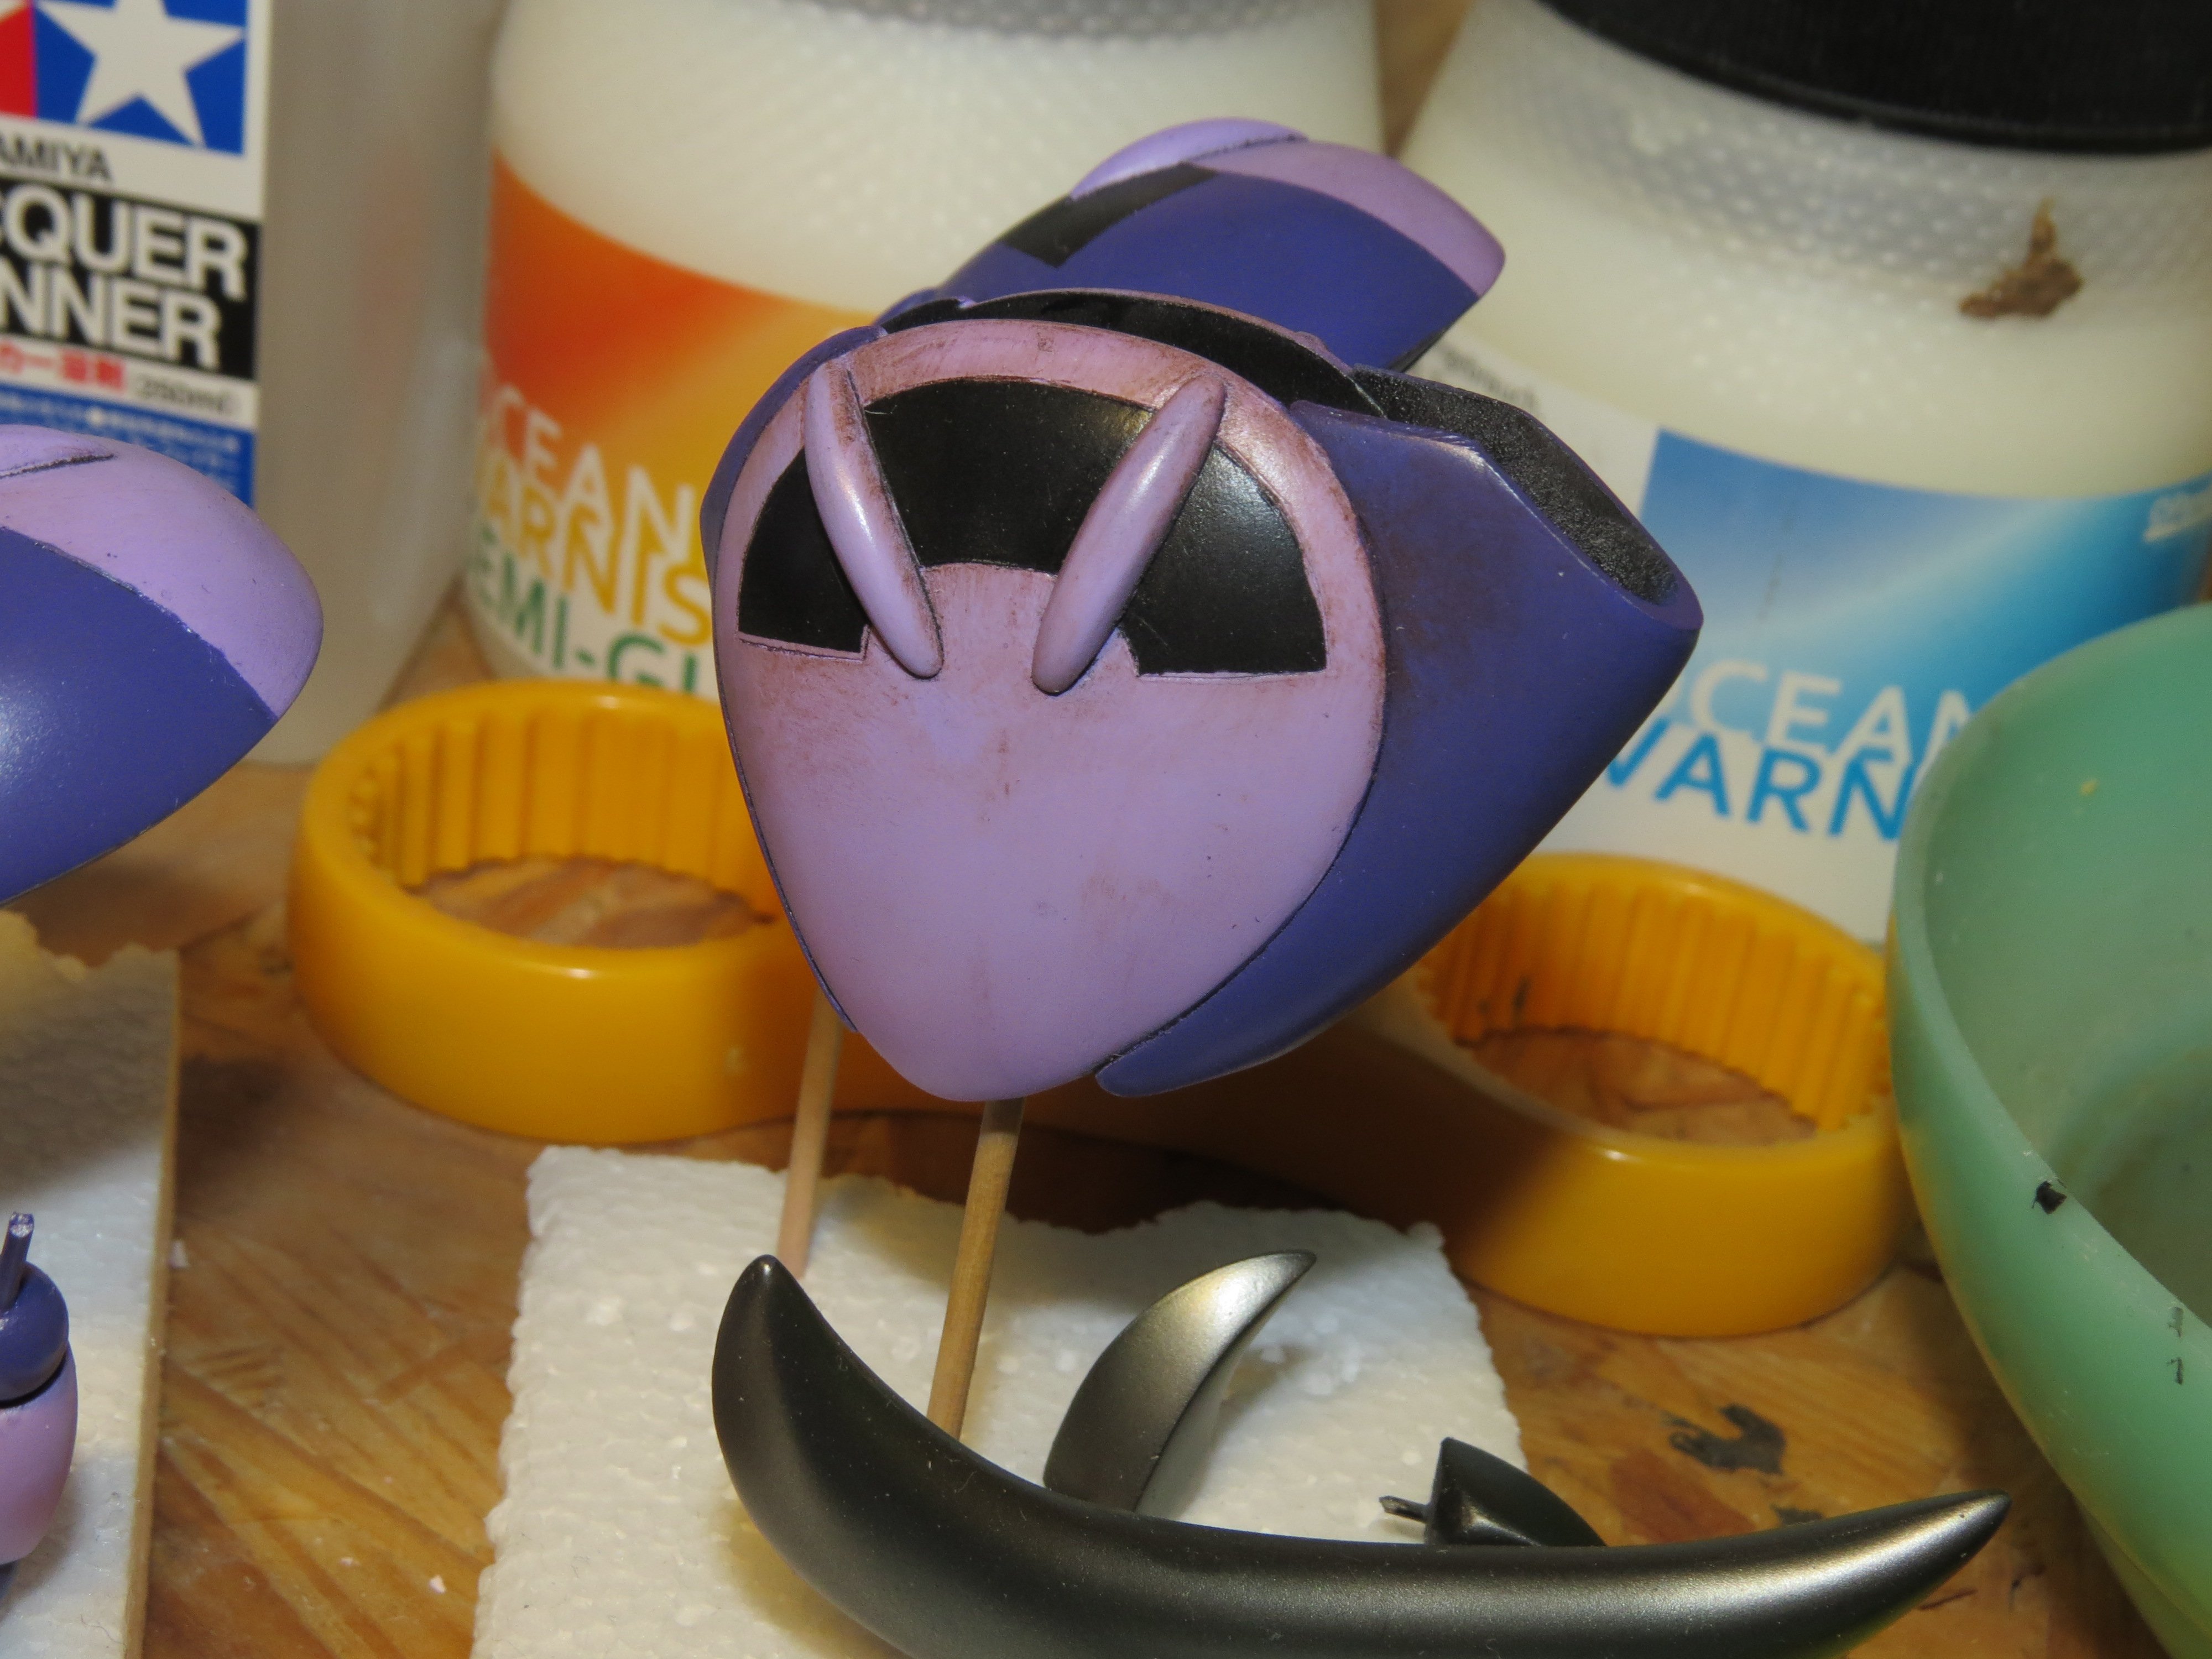
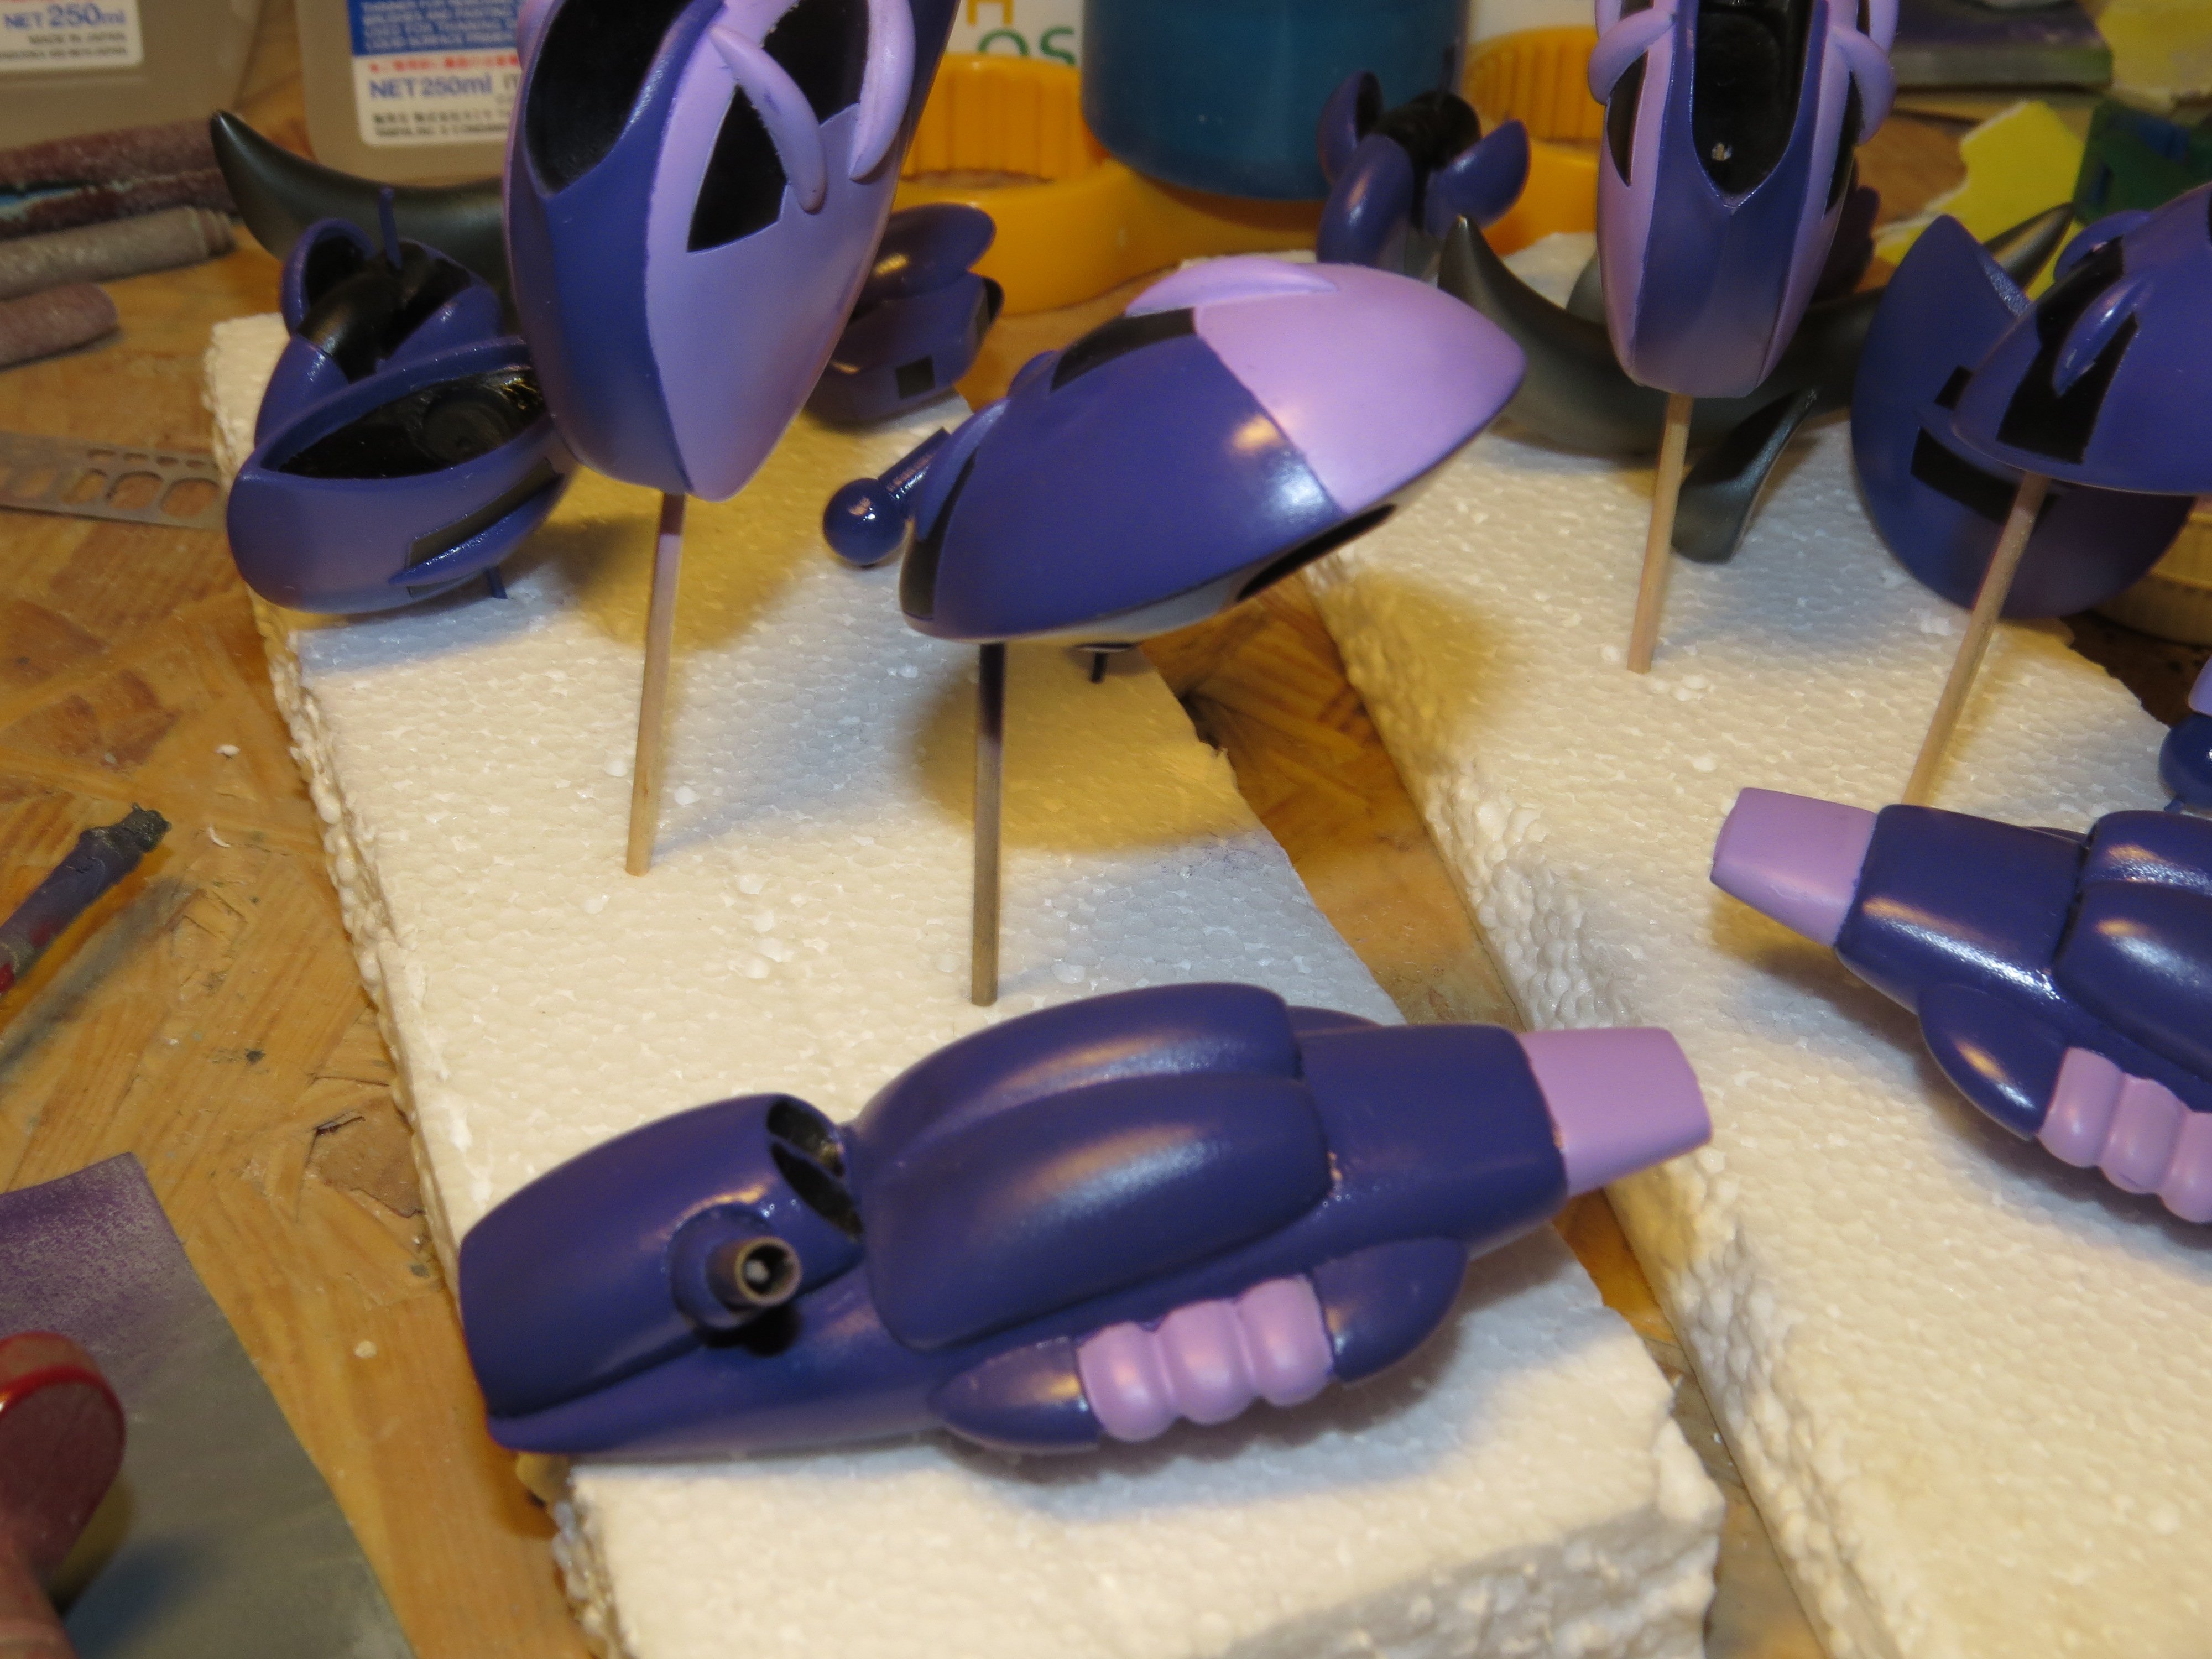
Thanks guys. Continued work with the beam guns. I had to modify the attachments for the guns with brass tubing because I was not to keen on the supplied bits. It also supplies a bit of adjustments to the guns this way.


-
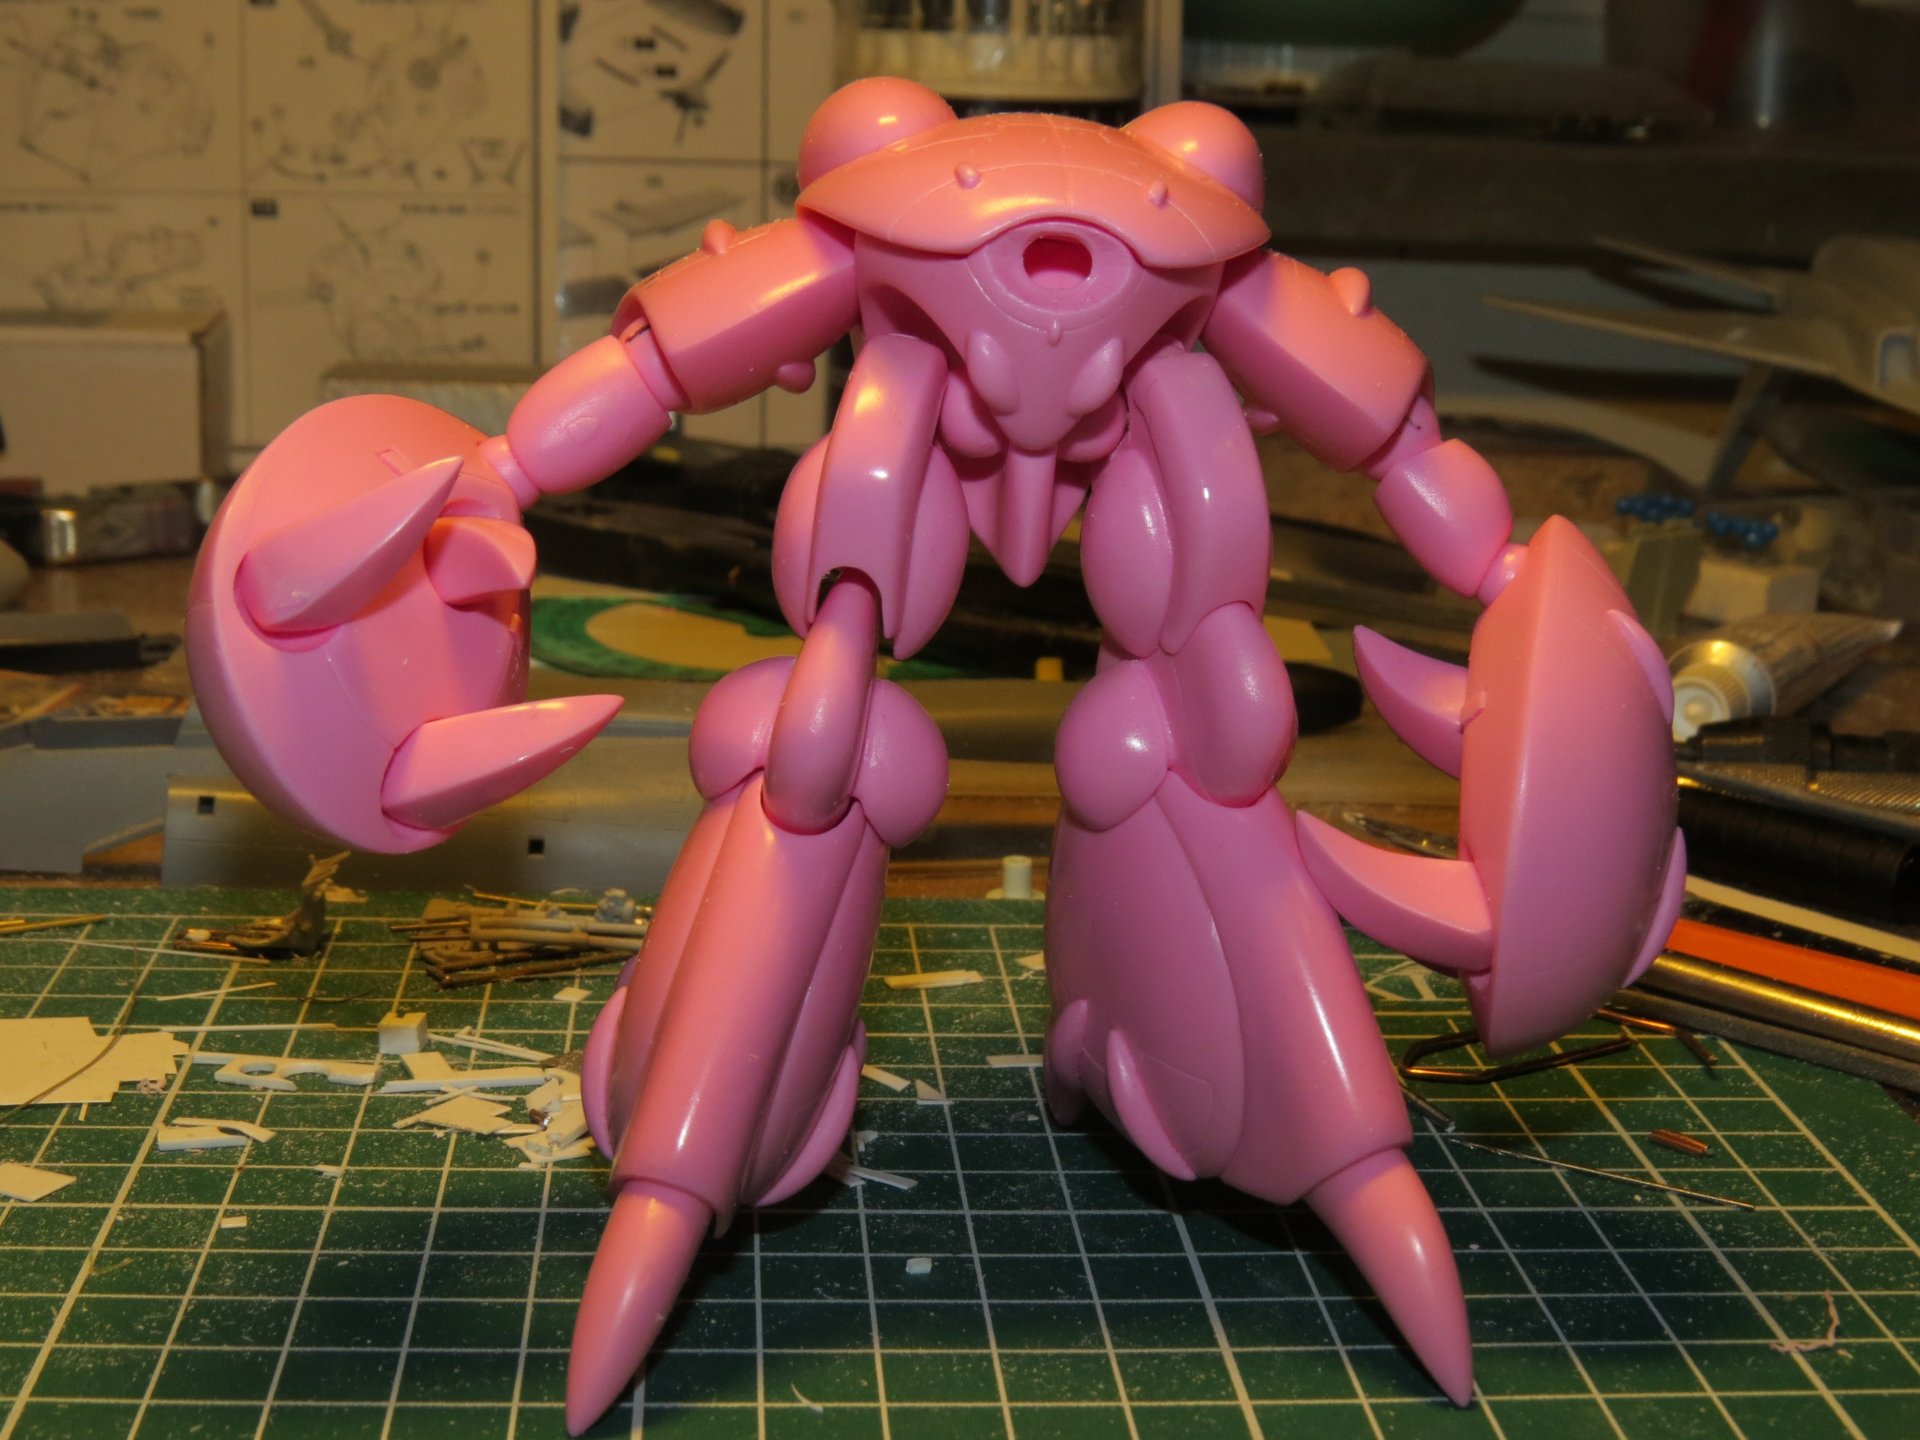
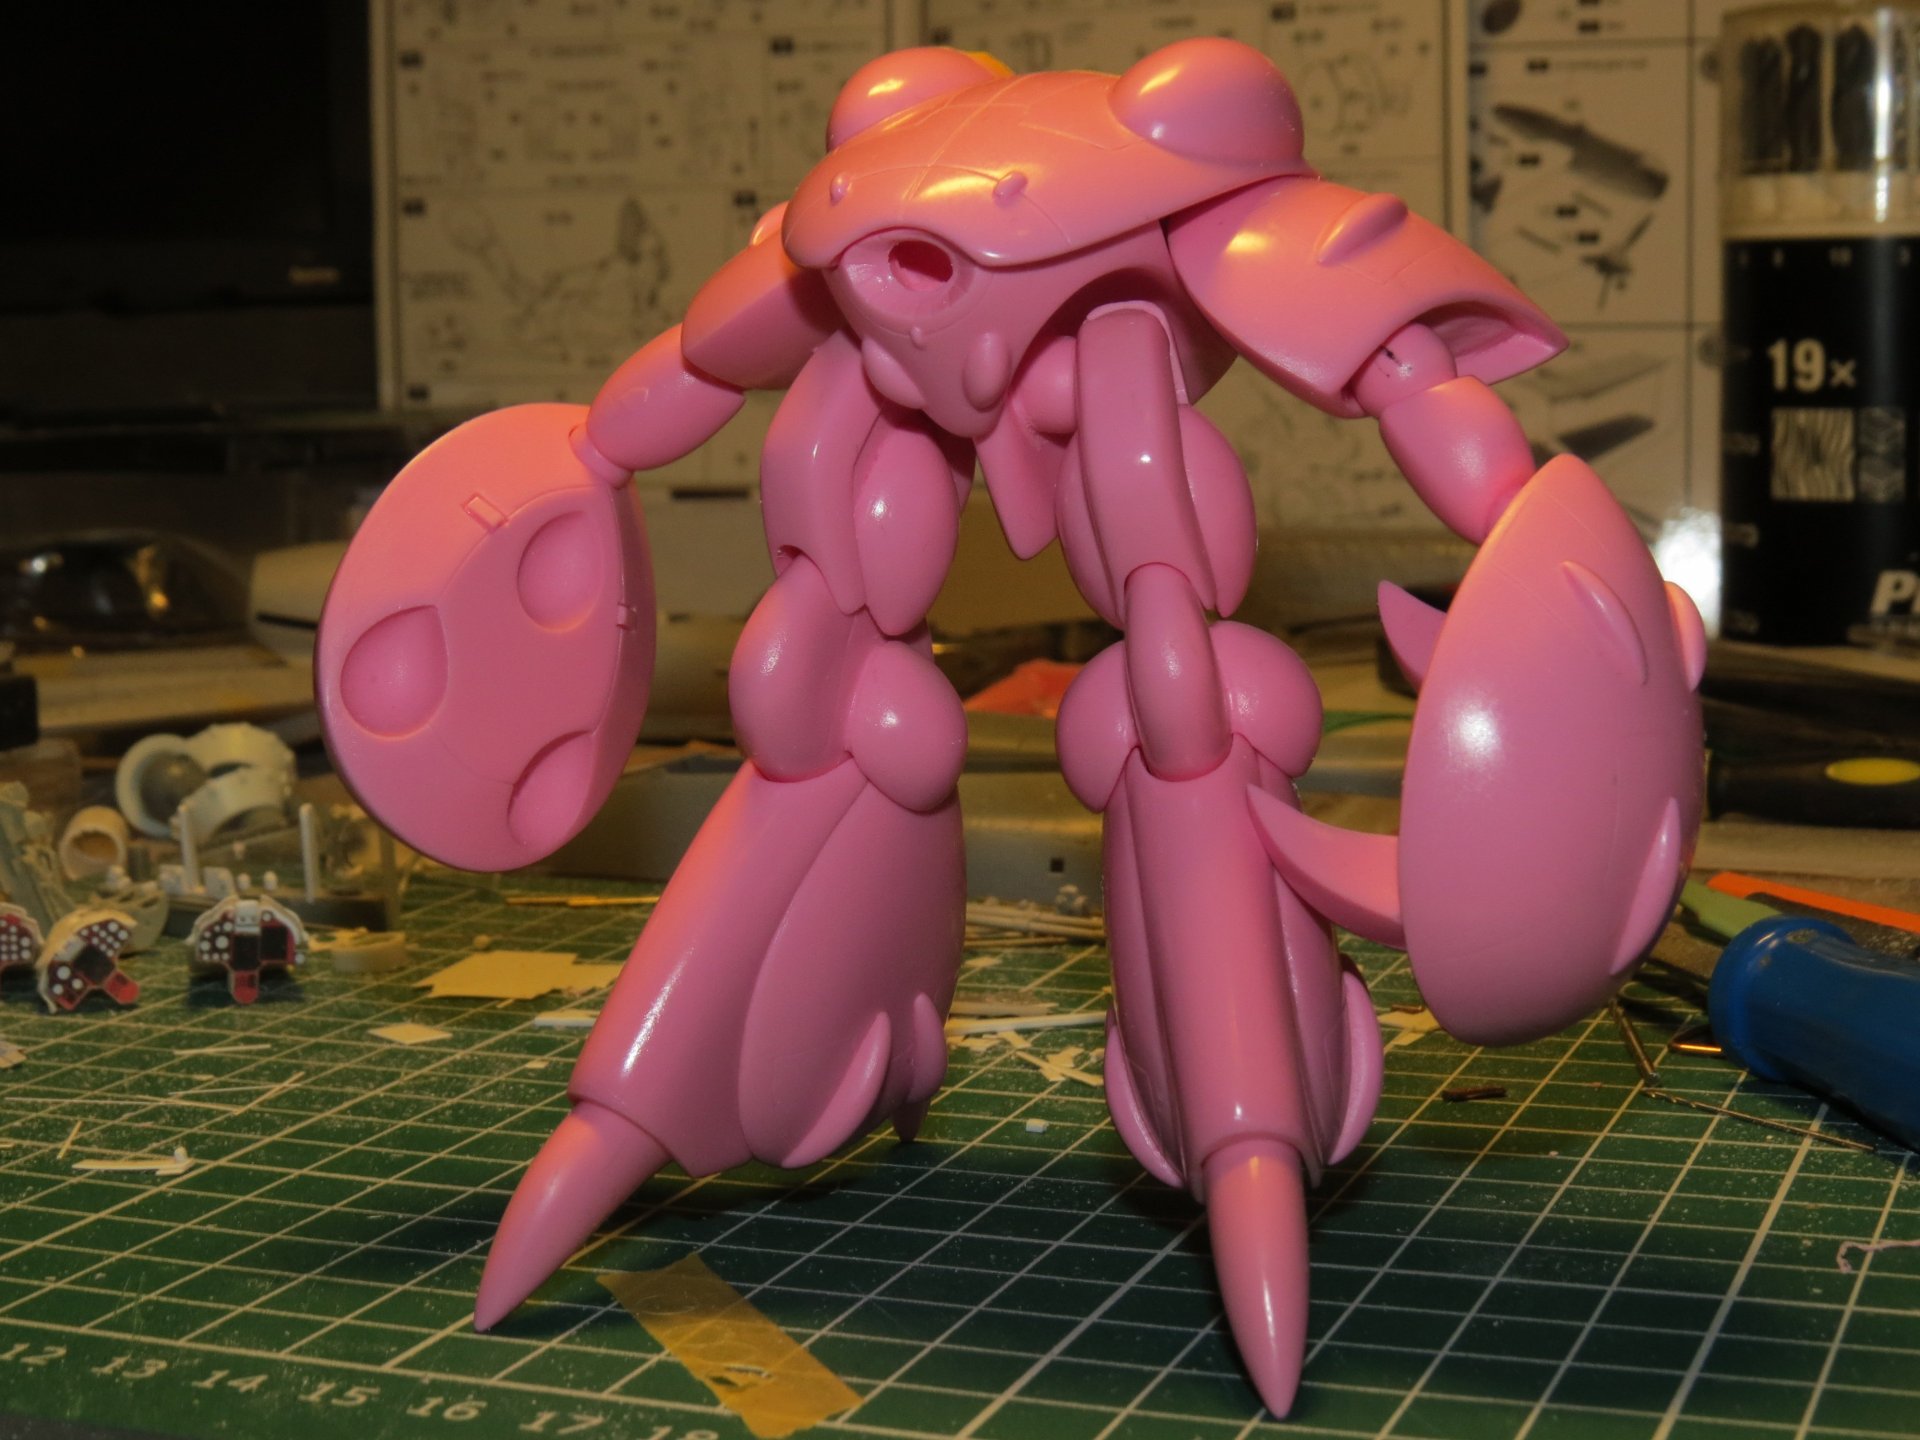
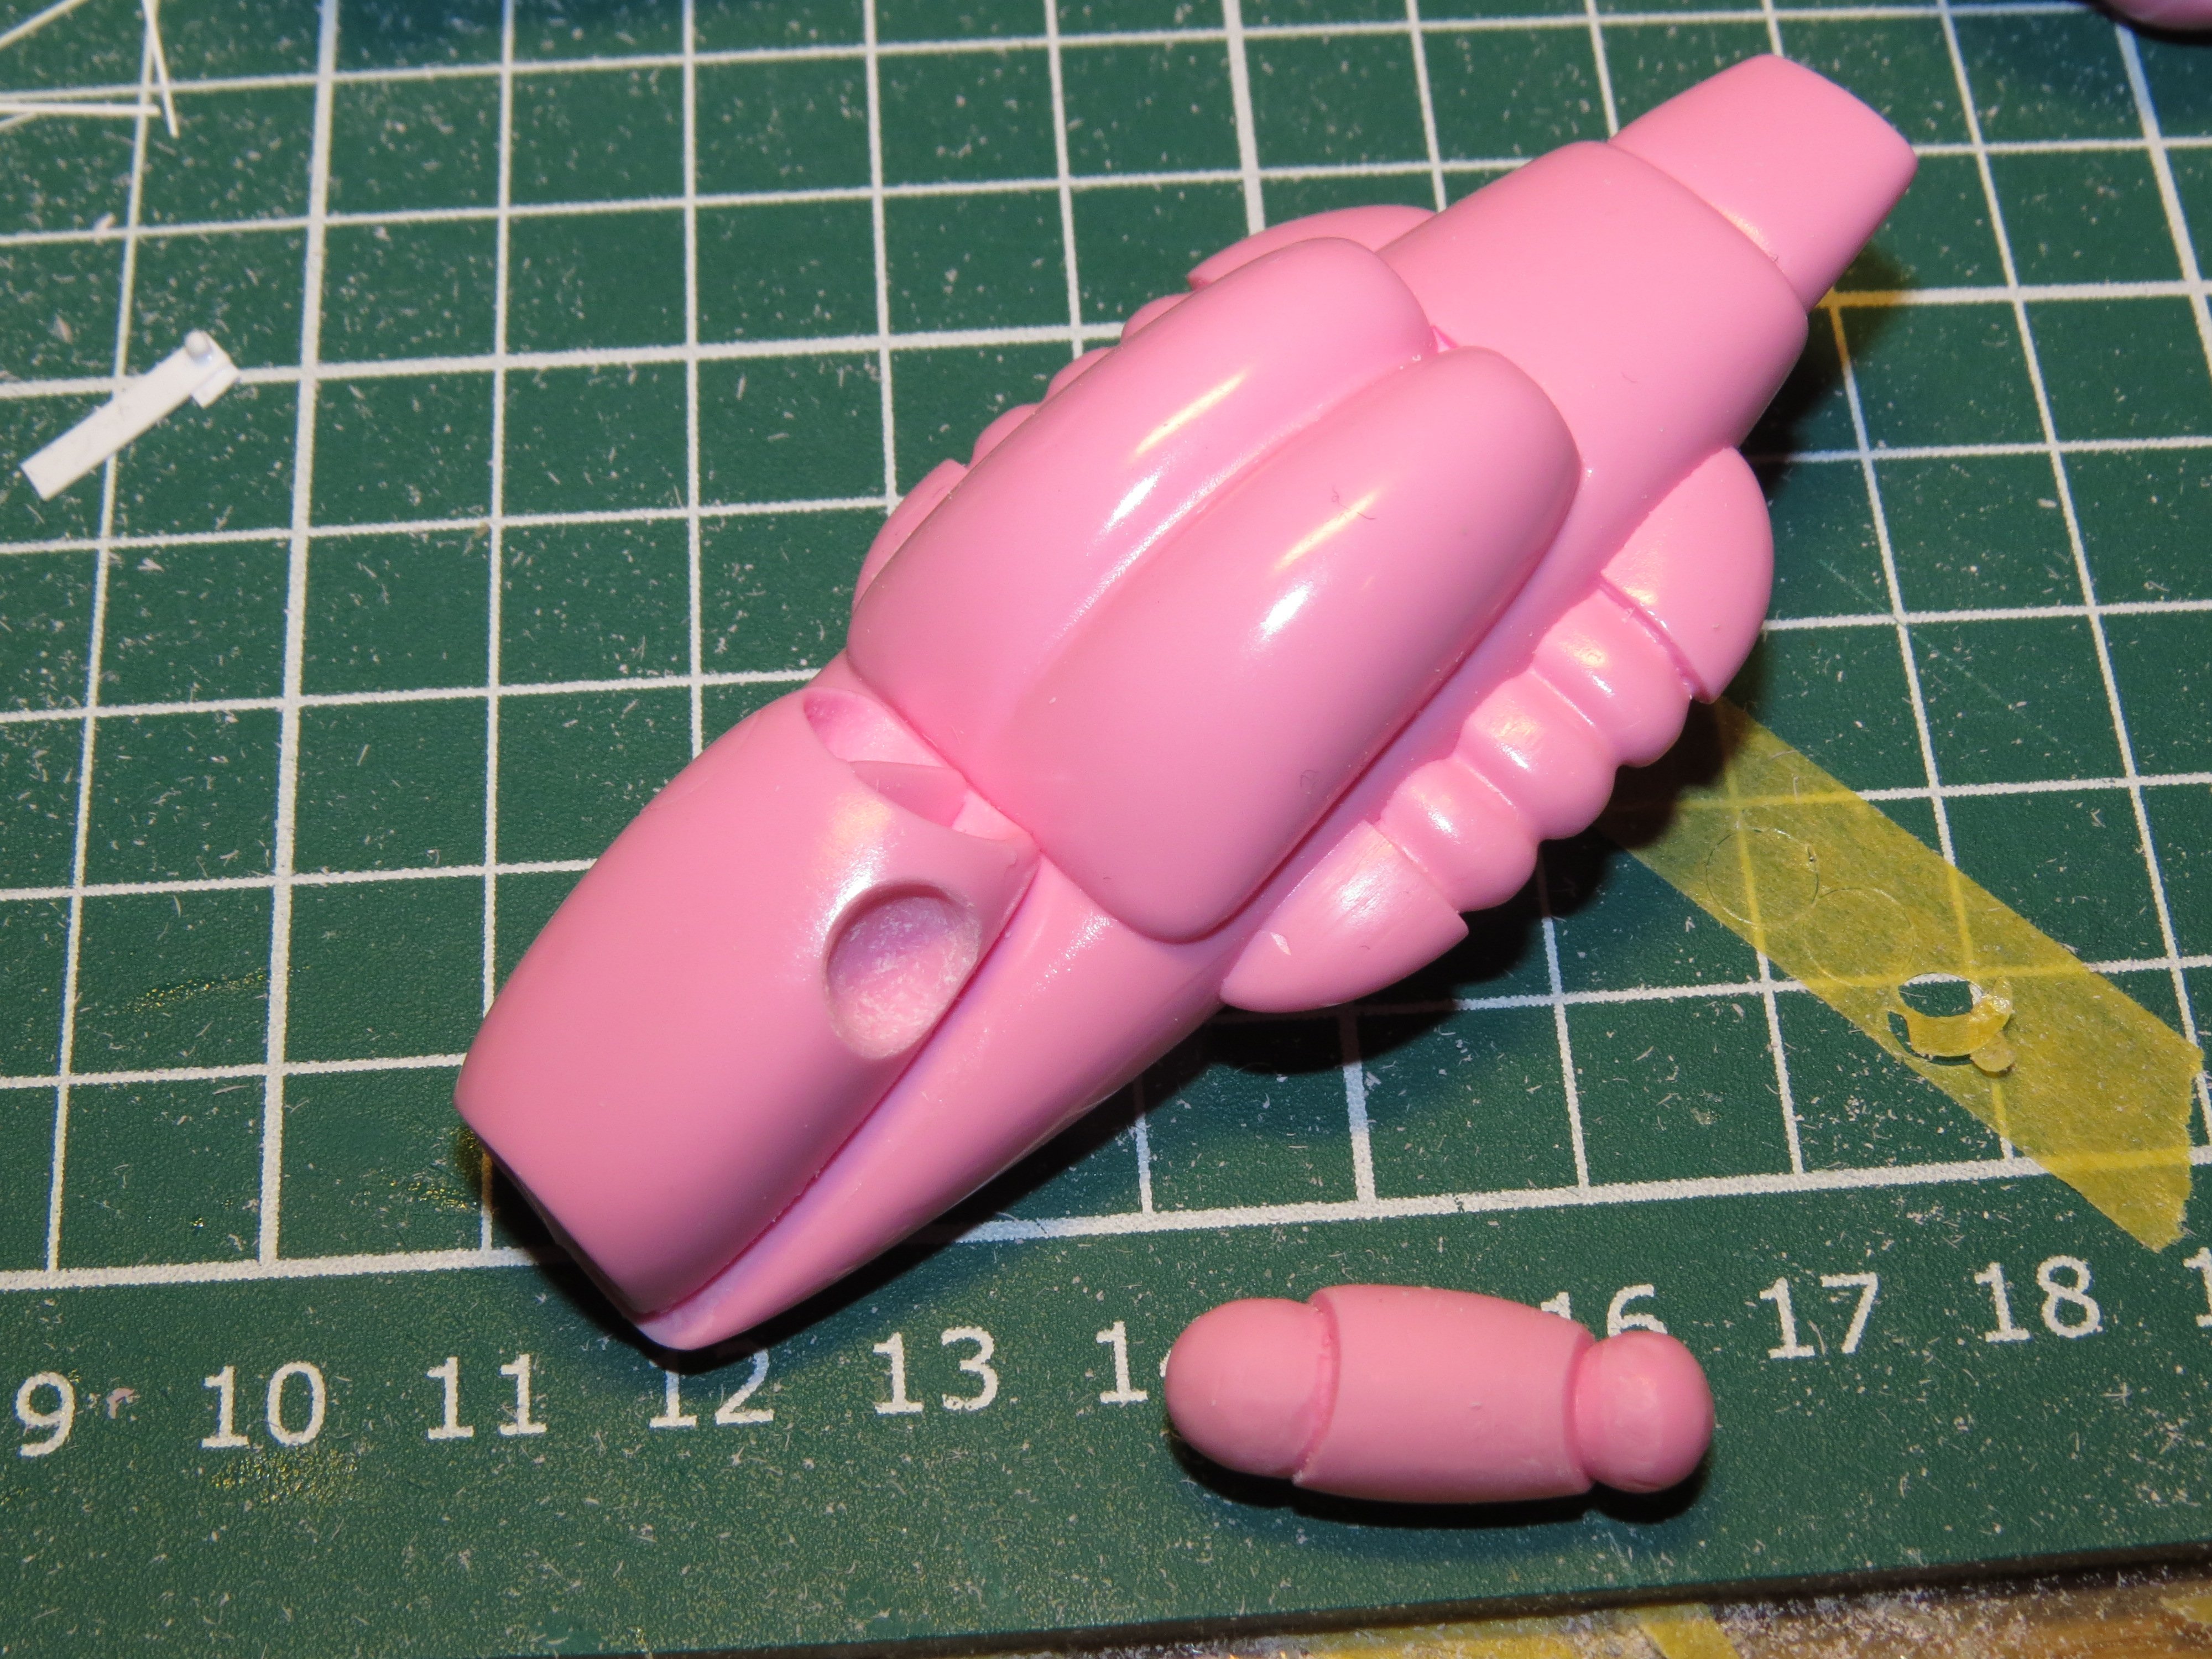
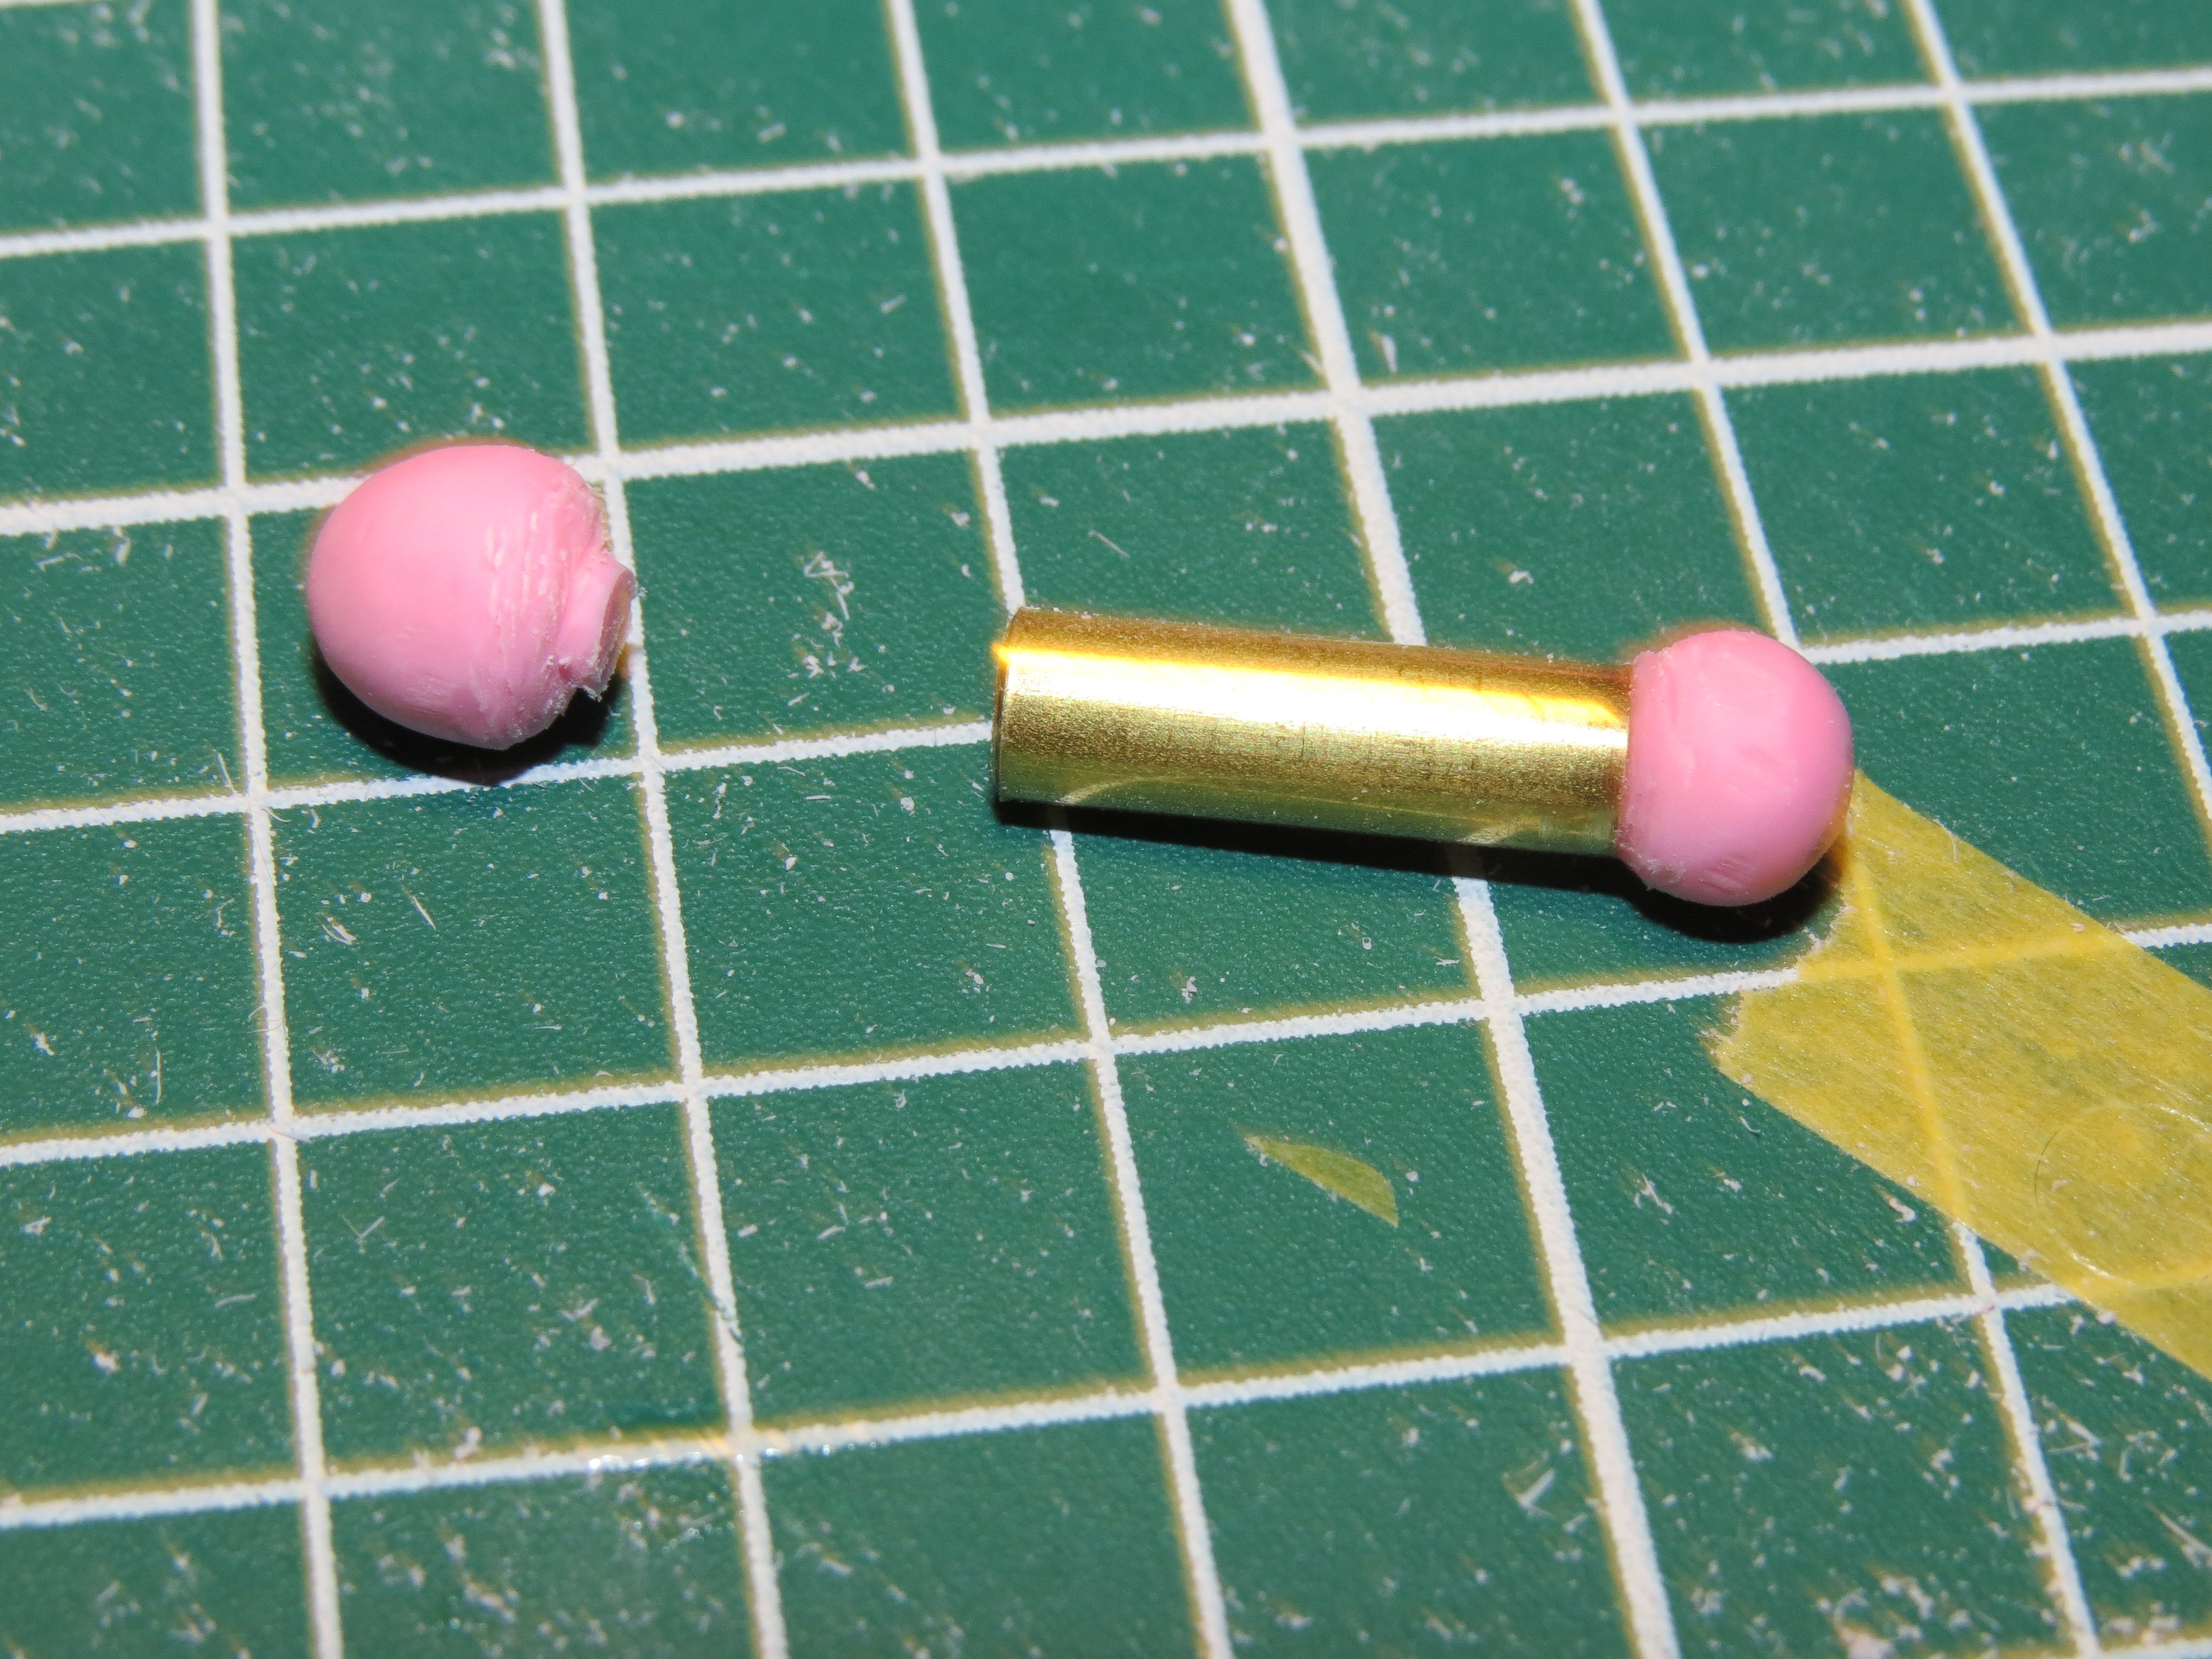
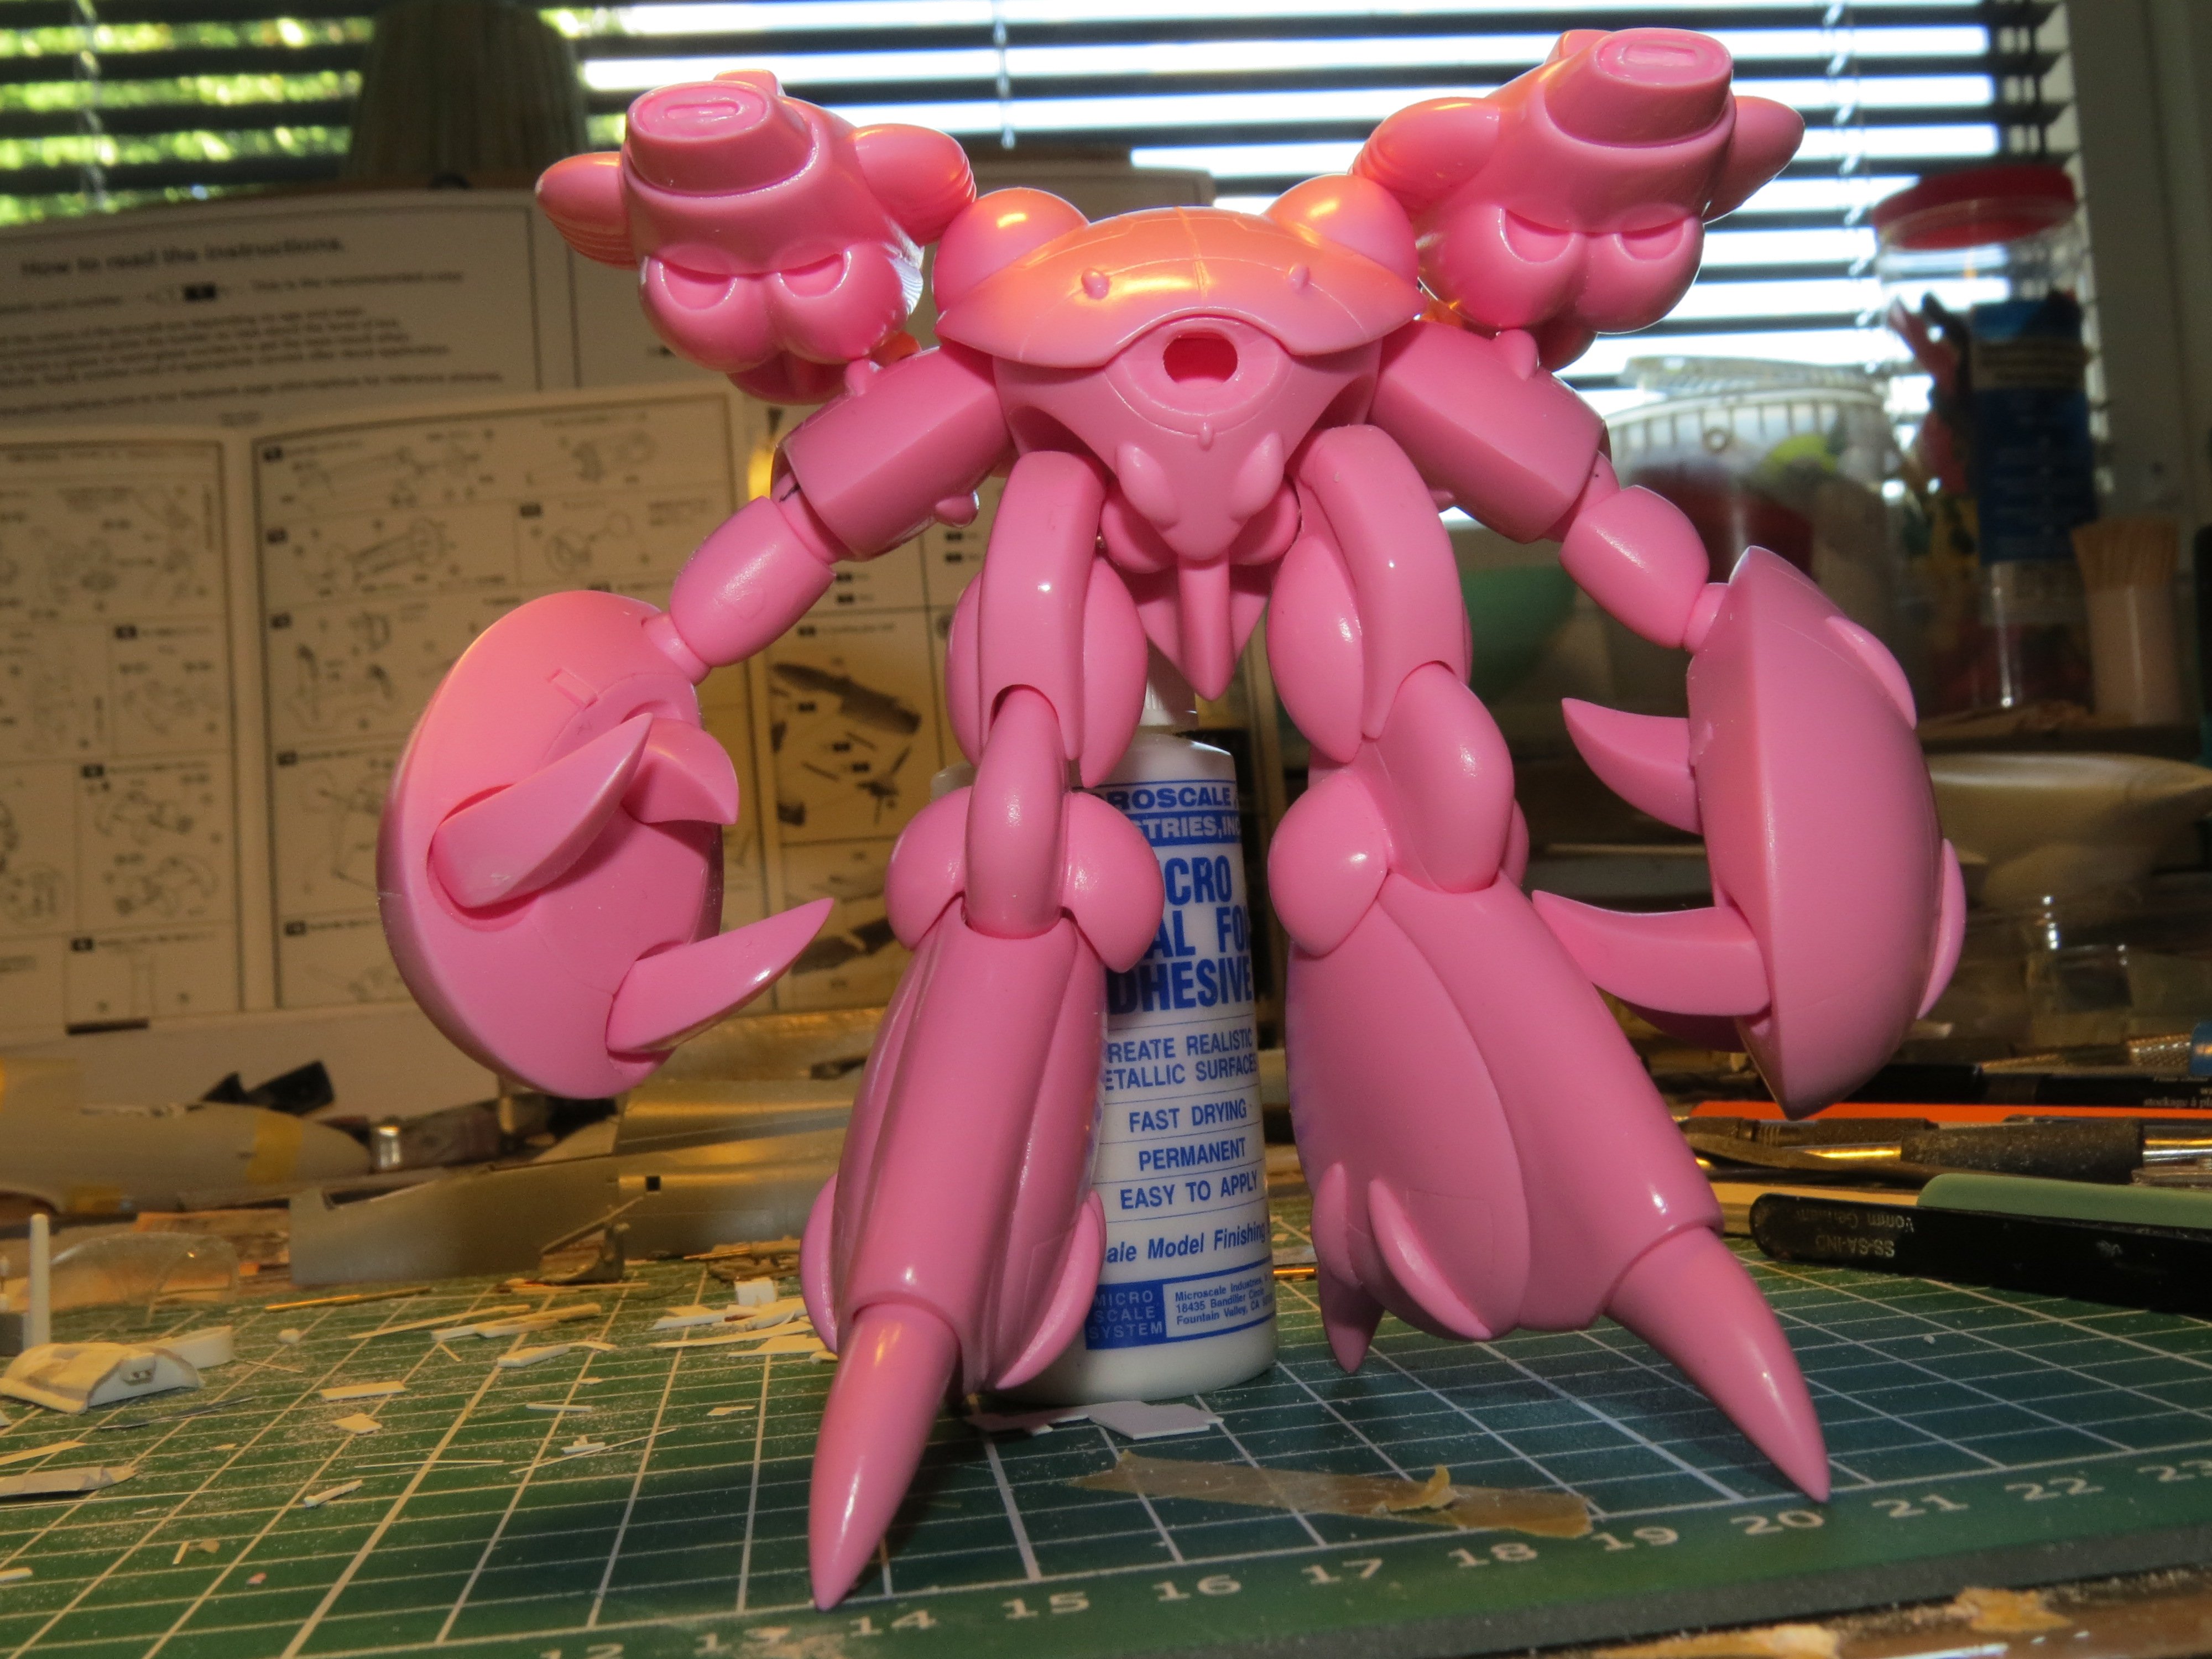
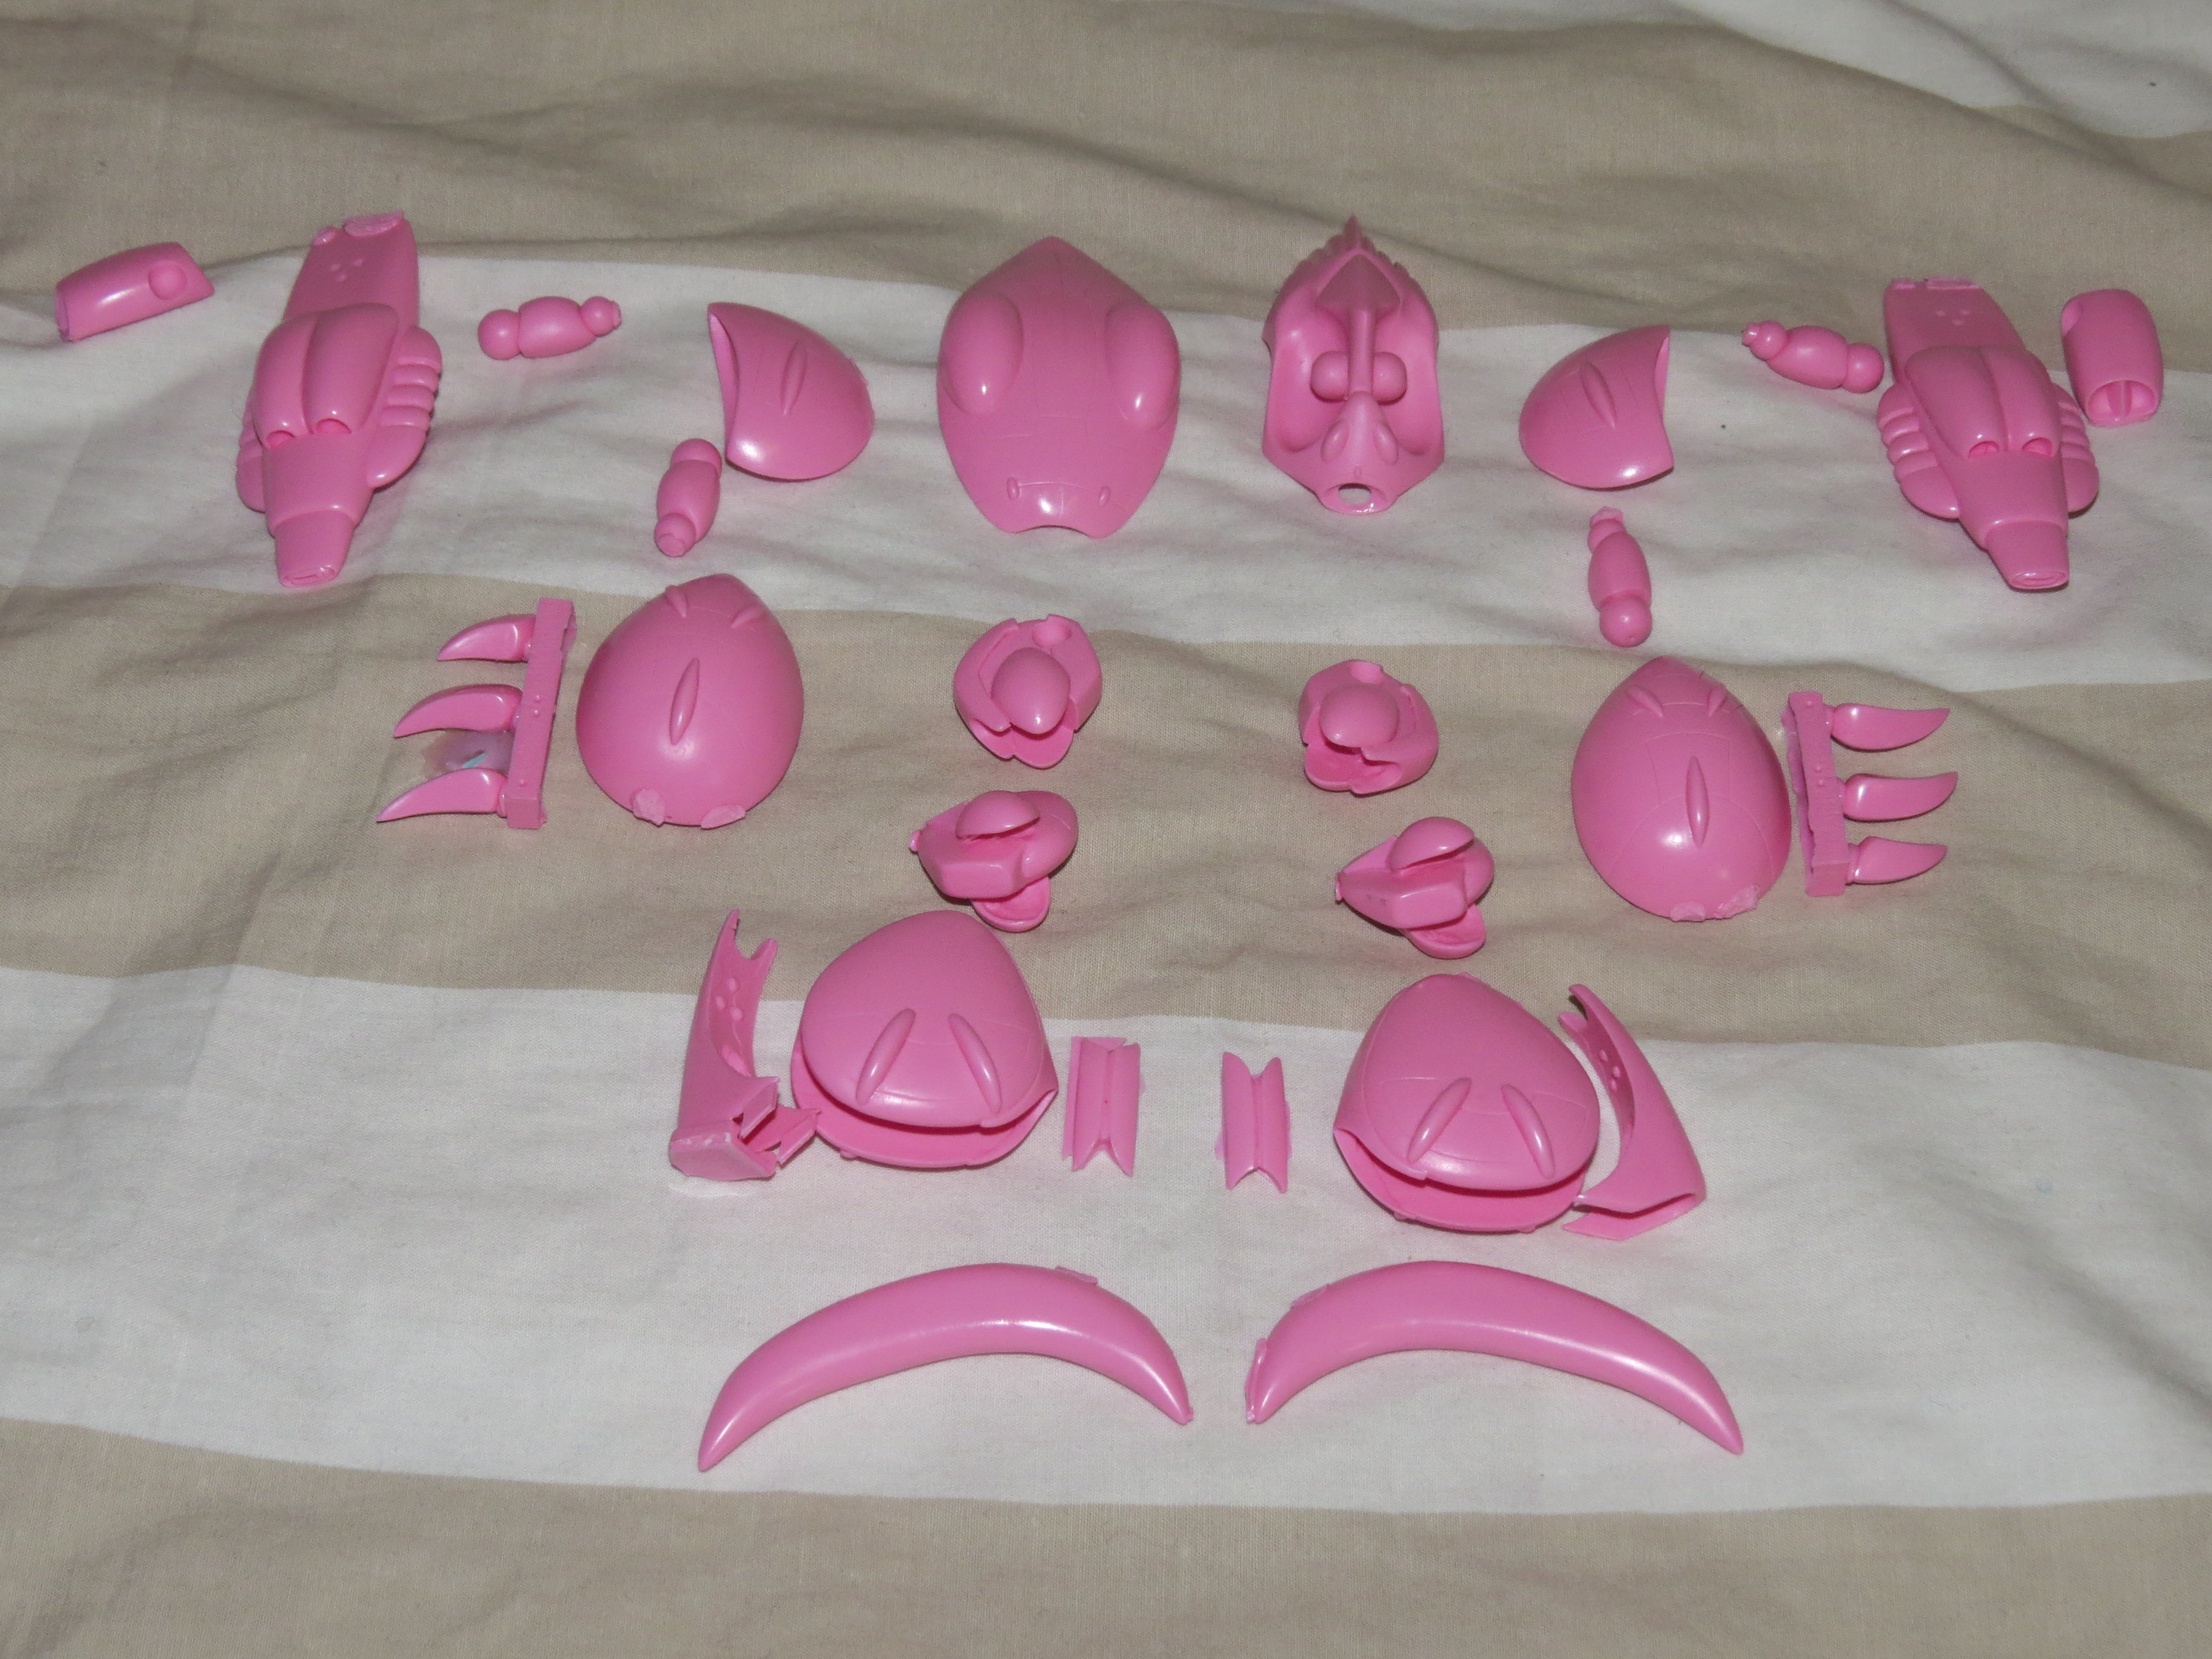
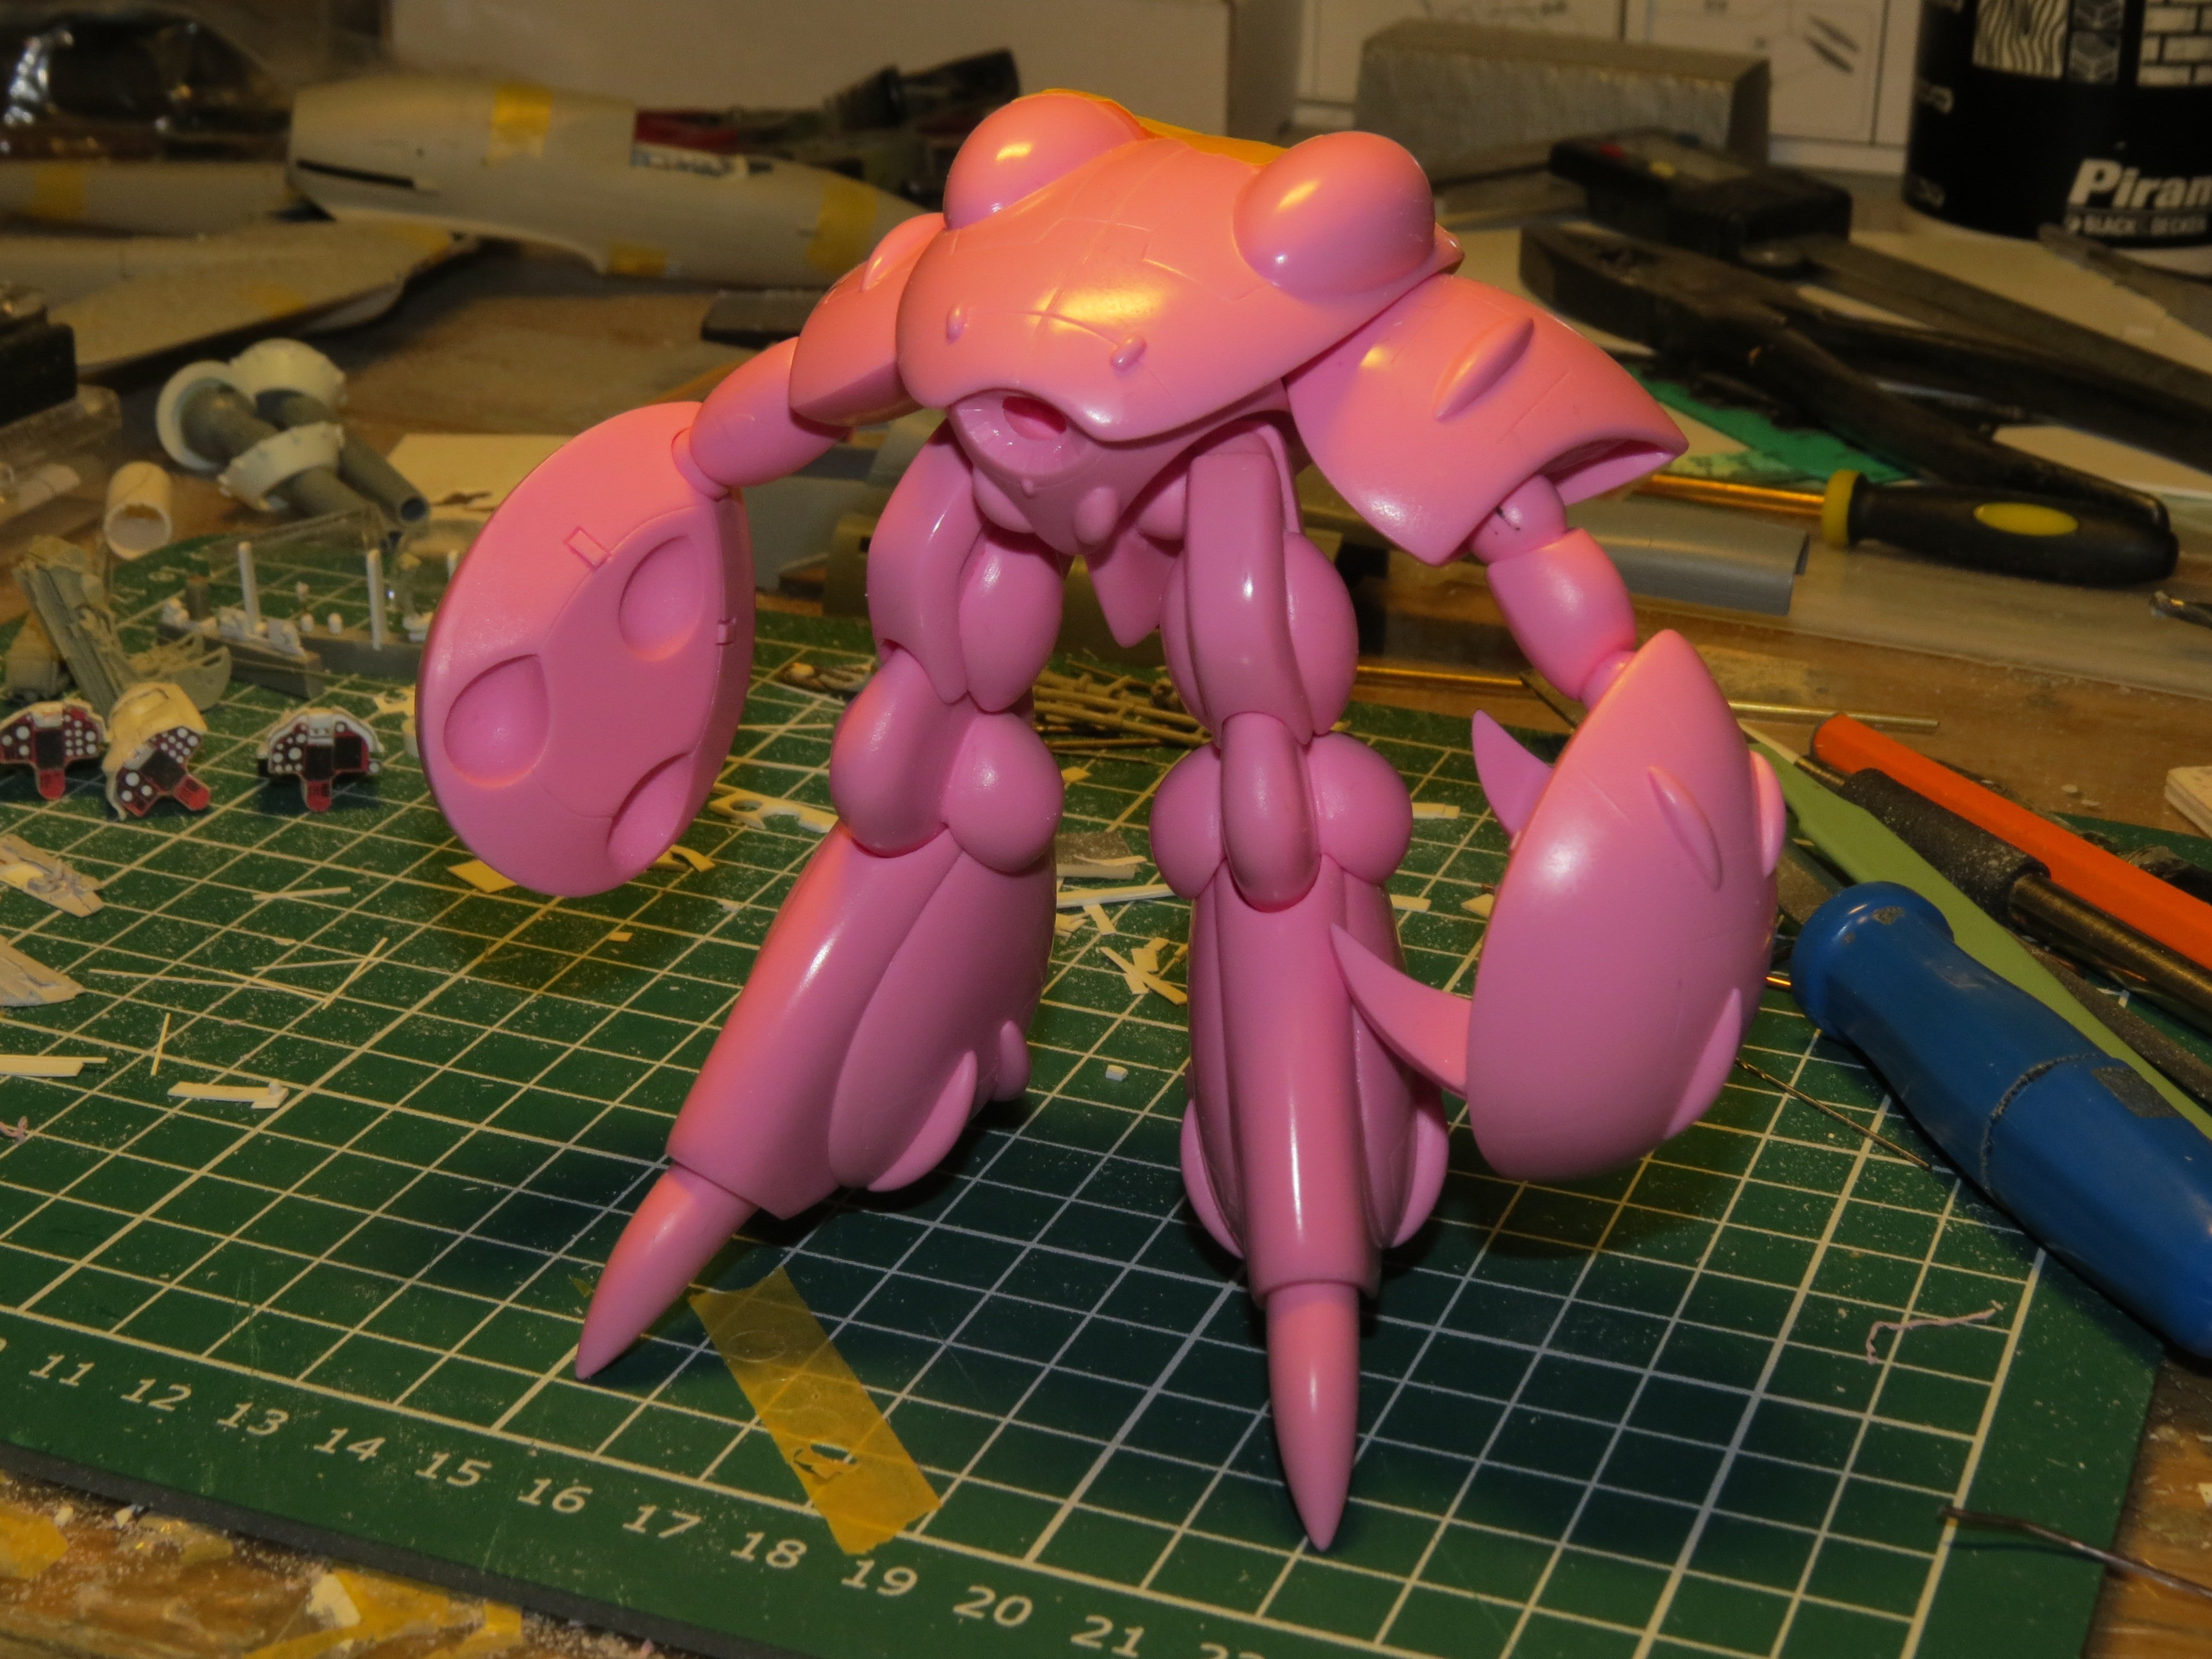
Hi This is my very first post in this forum. So let me present myself. I live in Sweden and has been hooked on the Macross world ever since I saw Robotech all those years back when it aired on TV. This though, is my first real model build of a macross related mecha, but I have a lot more of them in the stash. I was lucky enough to get hold of the captains 1/48 Mospeada kits. And I started straight away with building the pinky crab, clearing the work bench of all other ongoing projects. My plan was to build in some articulated joints, but my order for them did not arrive in time so I just drilled and pinned all the parts instead. I'm not going to play around with it anyway so it's no big deal. All the major parts pinned and attached in a desired pose. Some final adjustments needs to be dona att the final assembly after paint.