captain america
-
Posts
3537 -
Joined
-
Last visited
Content Type
Profiles
Forums
Events
Gallery
Everything posted by captain america
-
Nope
-
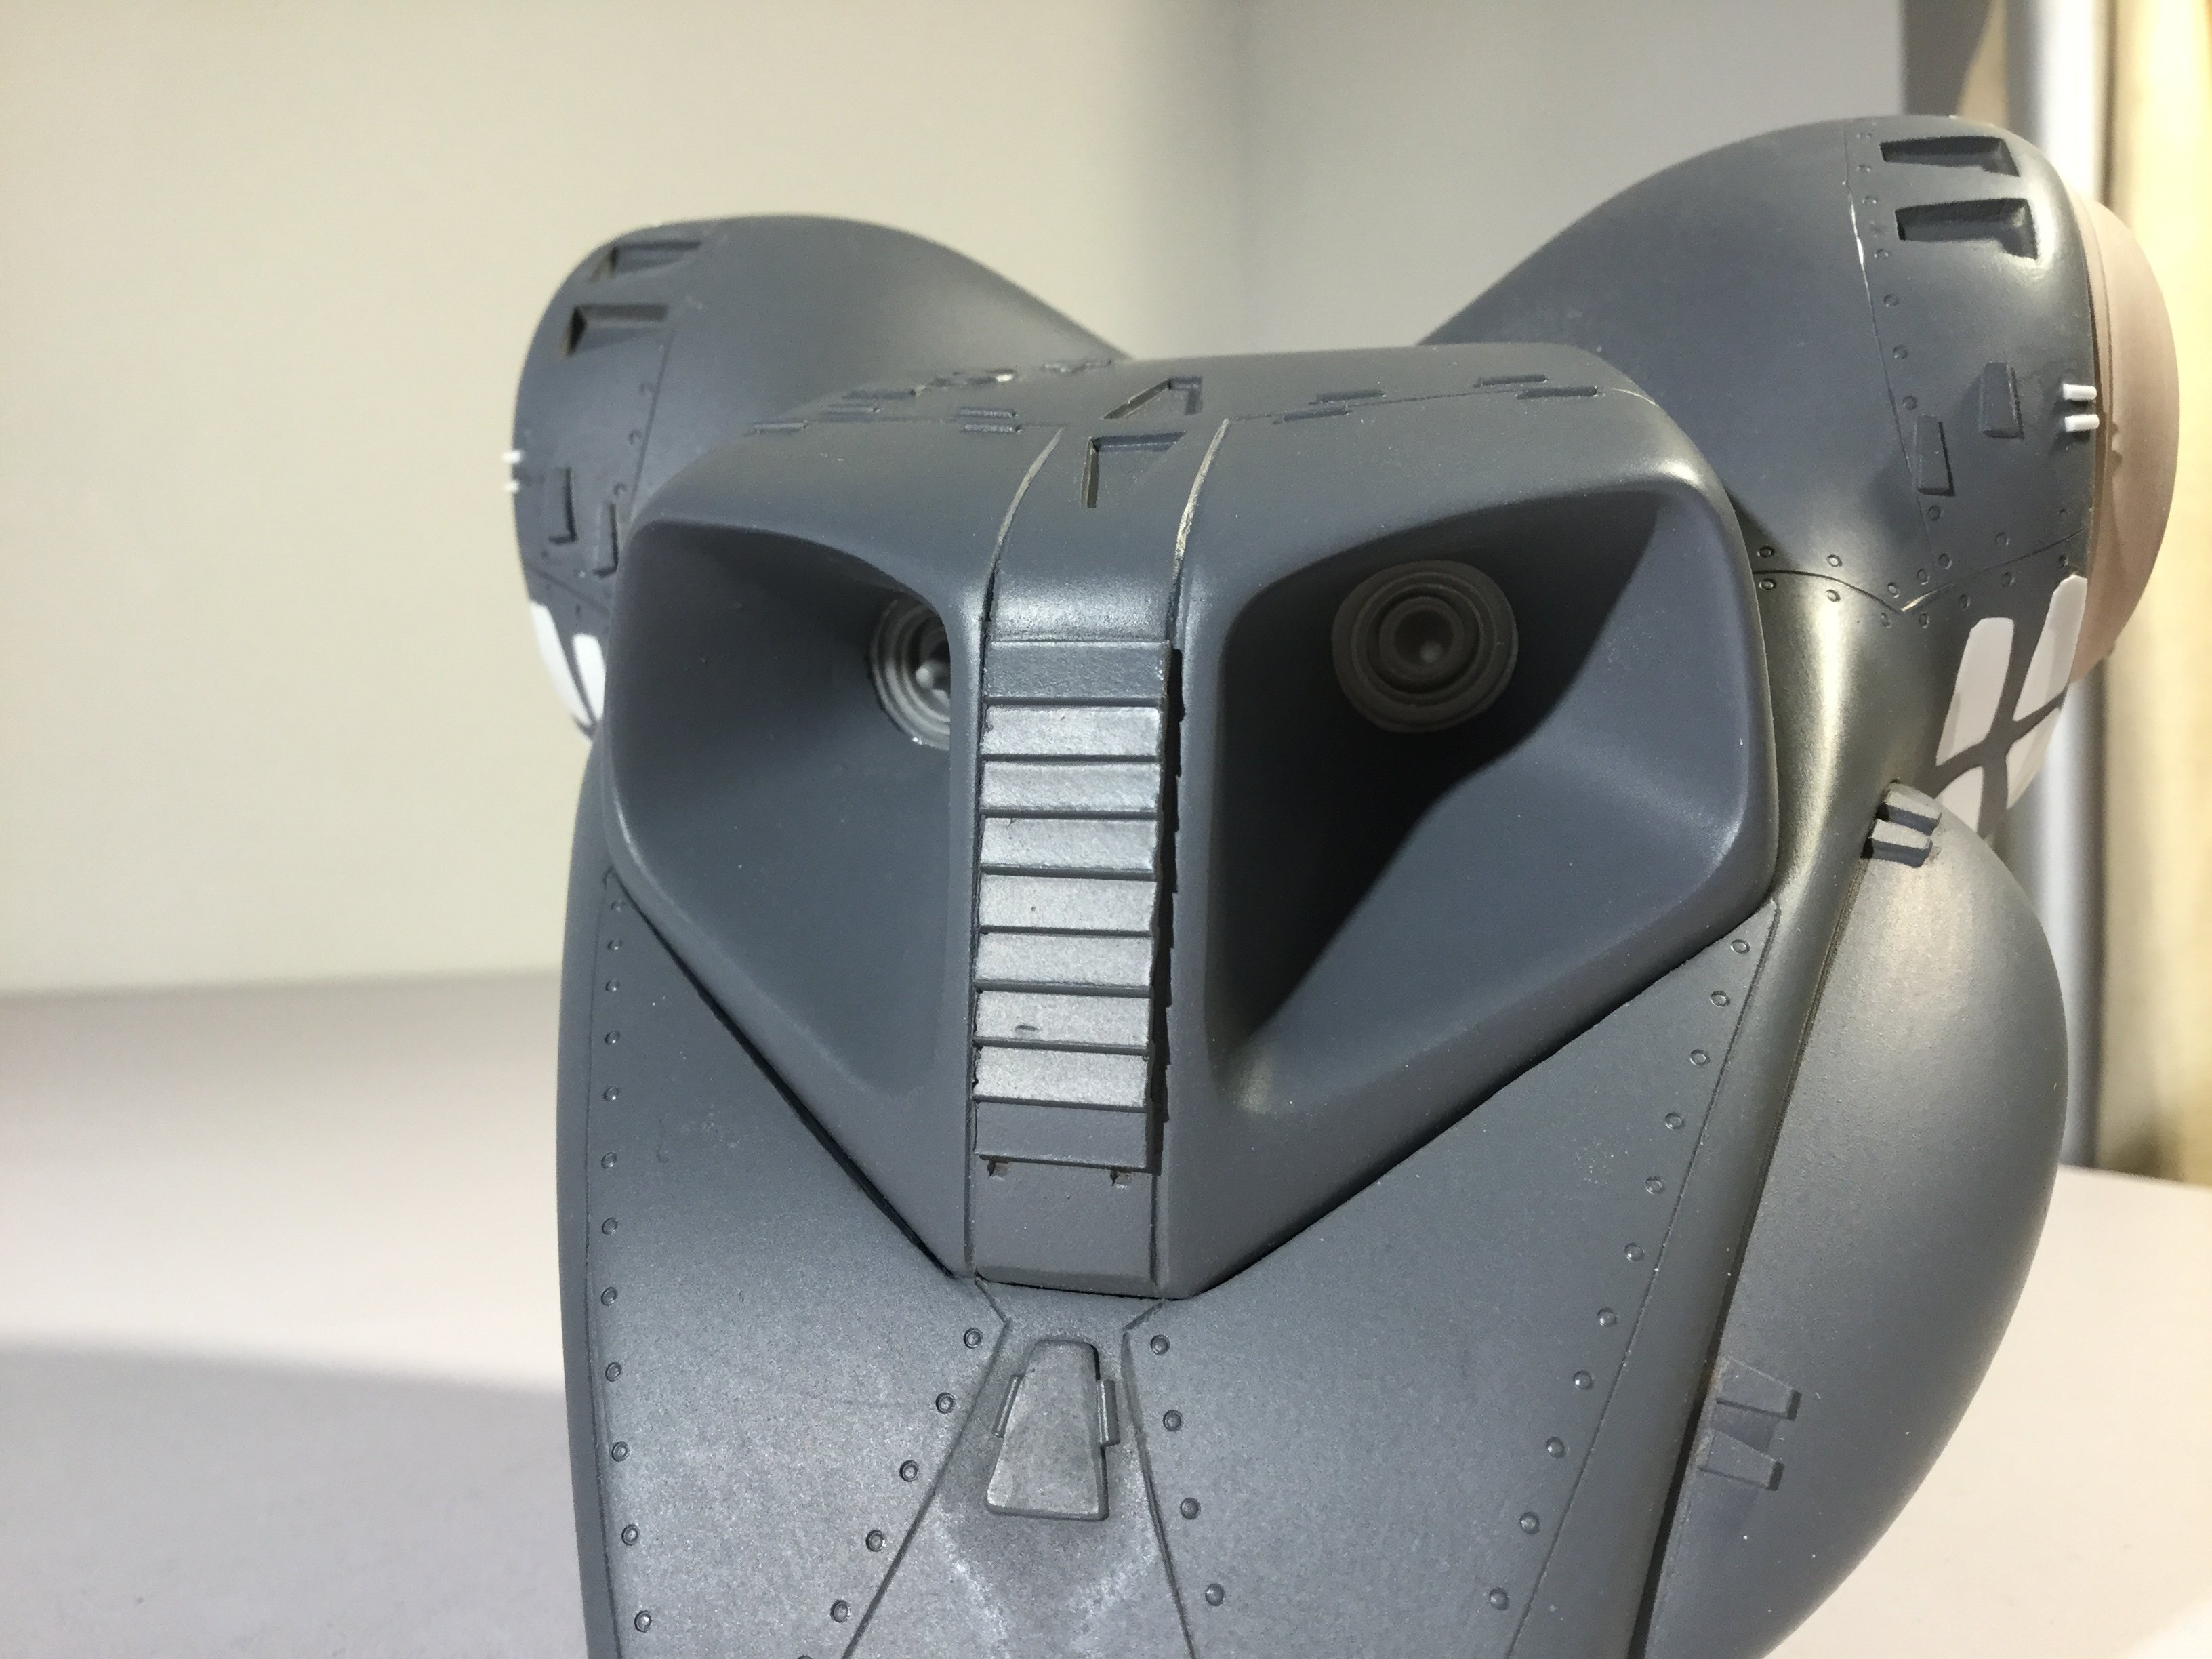
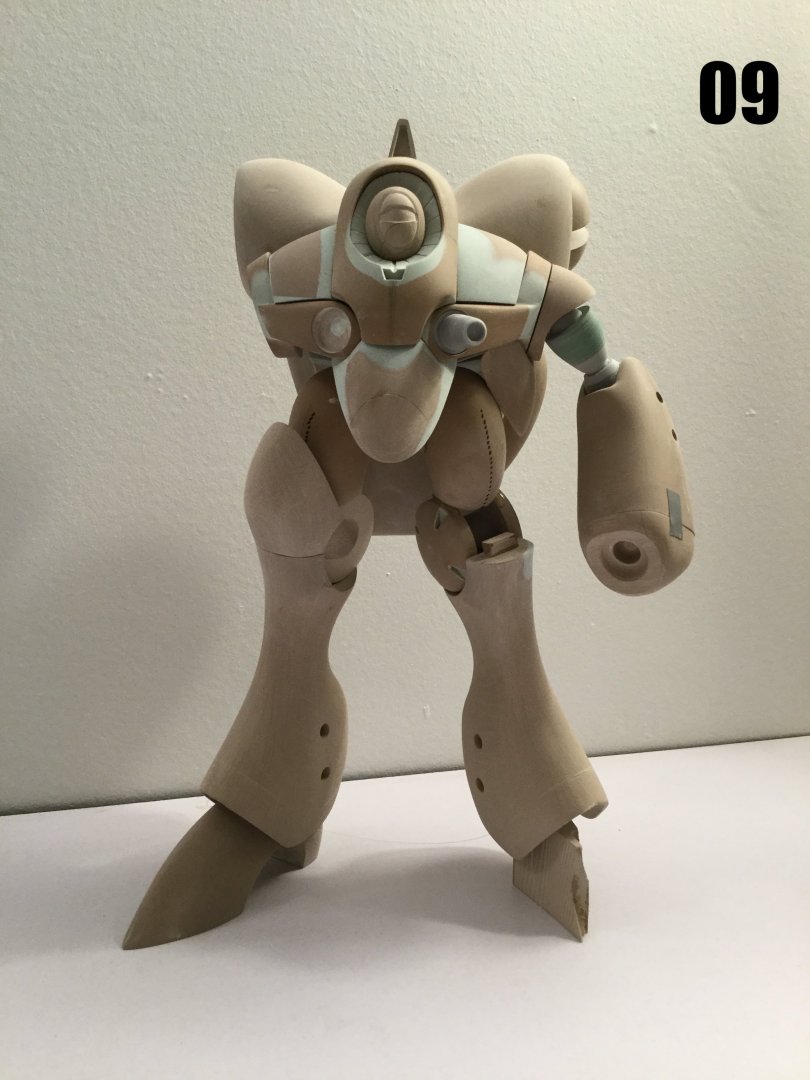
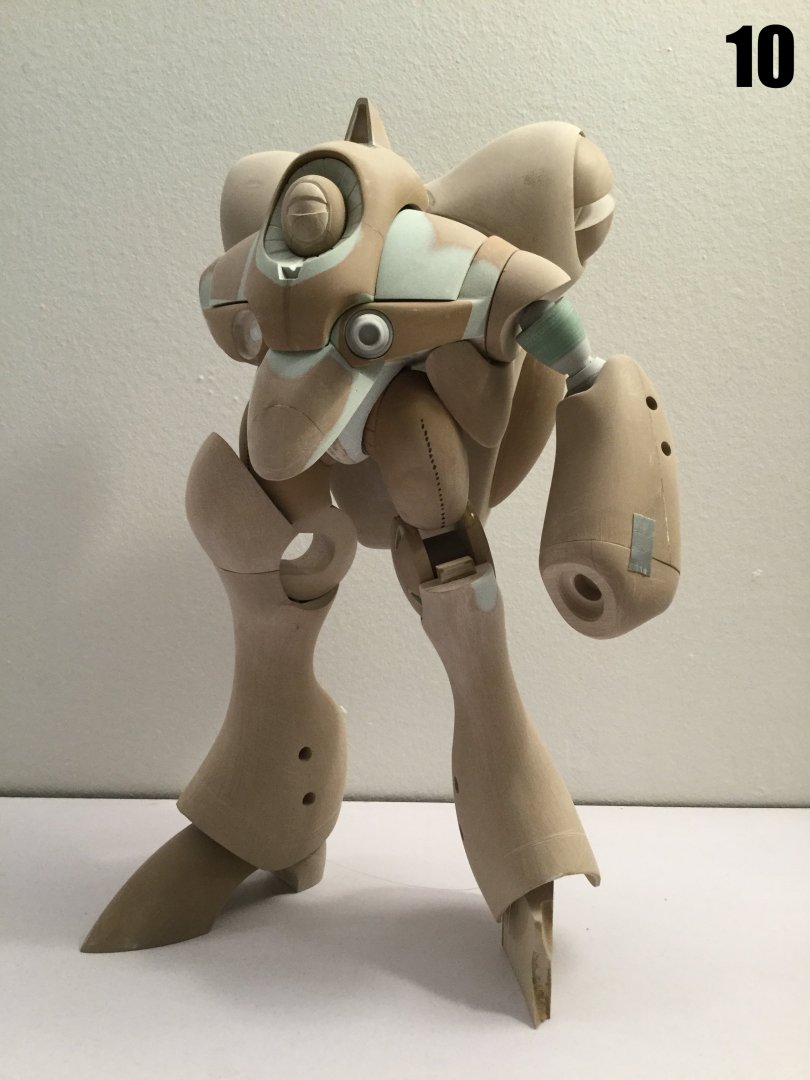
Thanks, that means a lot. Admittedly, this is one of the more tedious projects I've worked on in recent memory, hence the longer-than-usual building time. The design of the mecha really does strike me as a succession of blobs: not very practical, but certainly pleasing to the eyes.
-
Captain’s log: Friday, December 27th. The masters are almost done! Milia’s helmet s also done, I just have the Milia bust left to sculpt, and then a few small details left on the battle suit itself. Some molding has already begun—necessary to make the final adjustments to the pose. The decal artwork is also well underway, but I want to do some test-fitting to make sure all the markings fit perfectly. It’s only now that I’ve gotten it almost done that I realize what a lackluster job Club M did with their 1/72 Q-Rau kit all those years ago. Alas, enjoy the pics: I begin molding next week.

-

The Mandalorian - Star Wars webseries from Jon Favreau
captain america replied to SMS007's topic in Anime or Science Fiction
Makes me wonder if the kid hasn't picked up on something the rest of us missed. -
The Official Moscato Hobby Models Thread
captain america replied to captain america's topic in Anime or Science Fiction
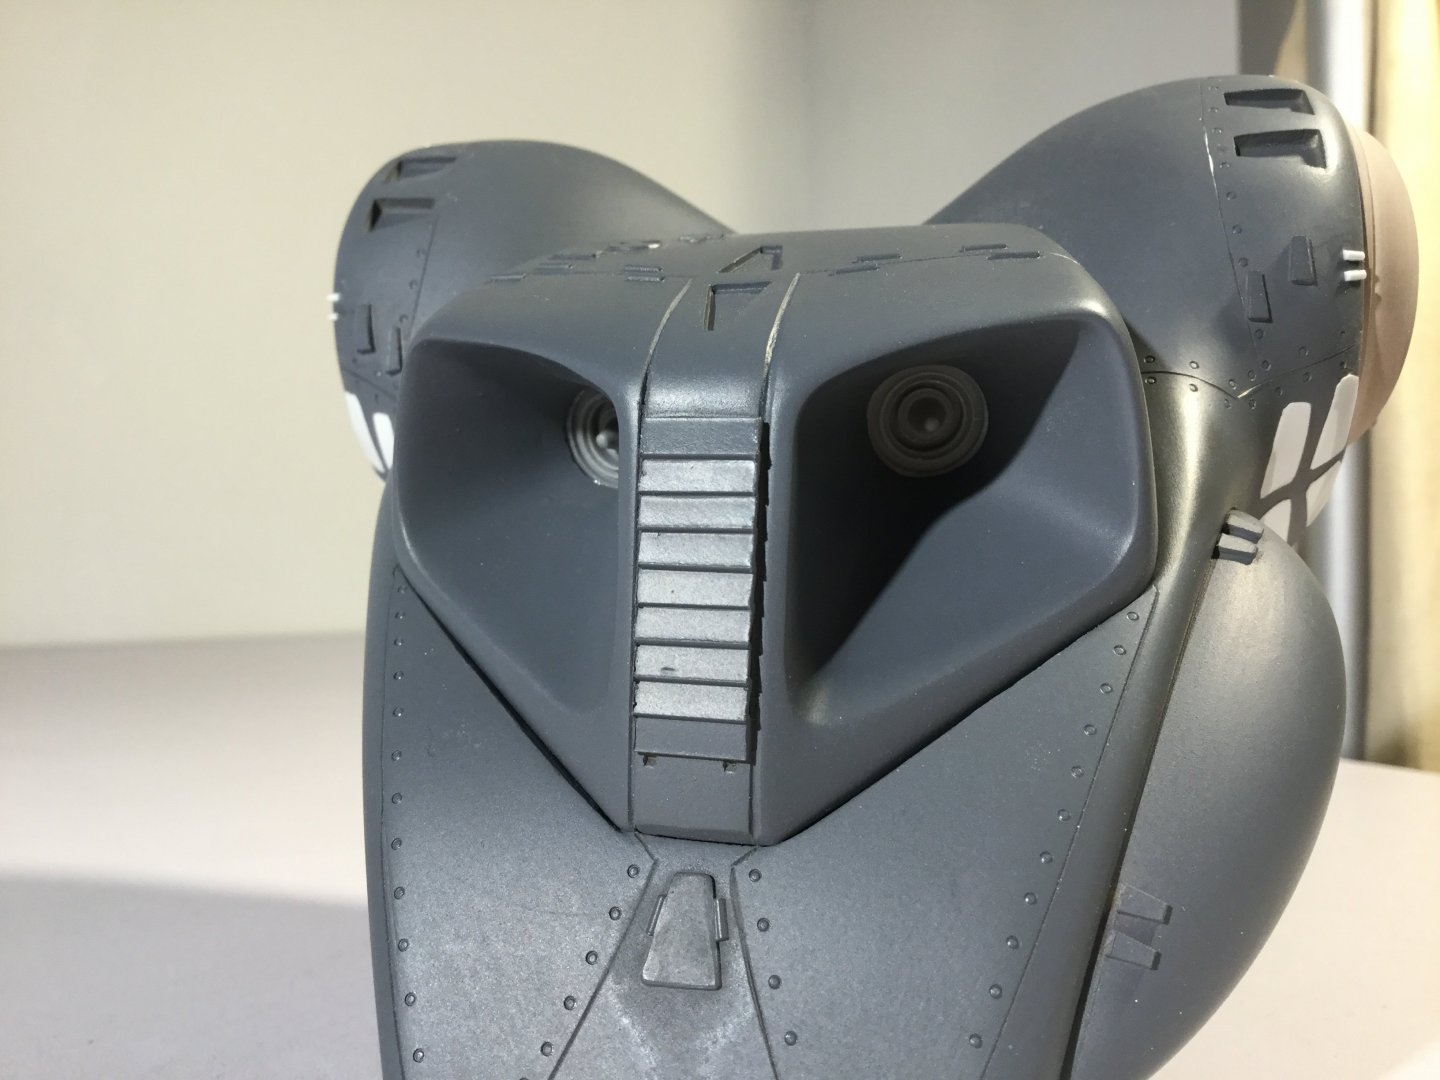
Three of those hard points are usually used for ammo magazines, so with the mag in the rifle it has 40 tank-killer rounds. One hard point is reserved for a directed energy weapon and the two on the back mount the smoke grenade launchers. -
The Official Moscato Hobby Models Thread
captain america replied to captain america's topic in Anime or Science Fiction
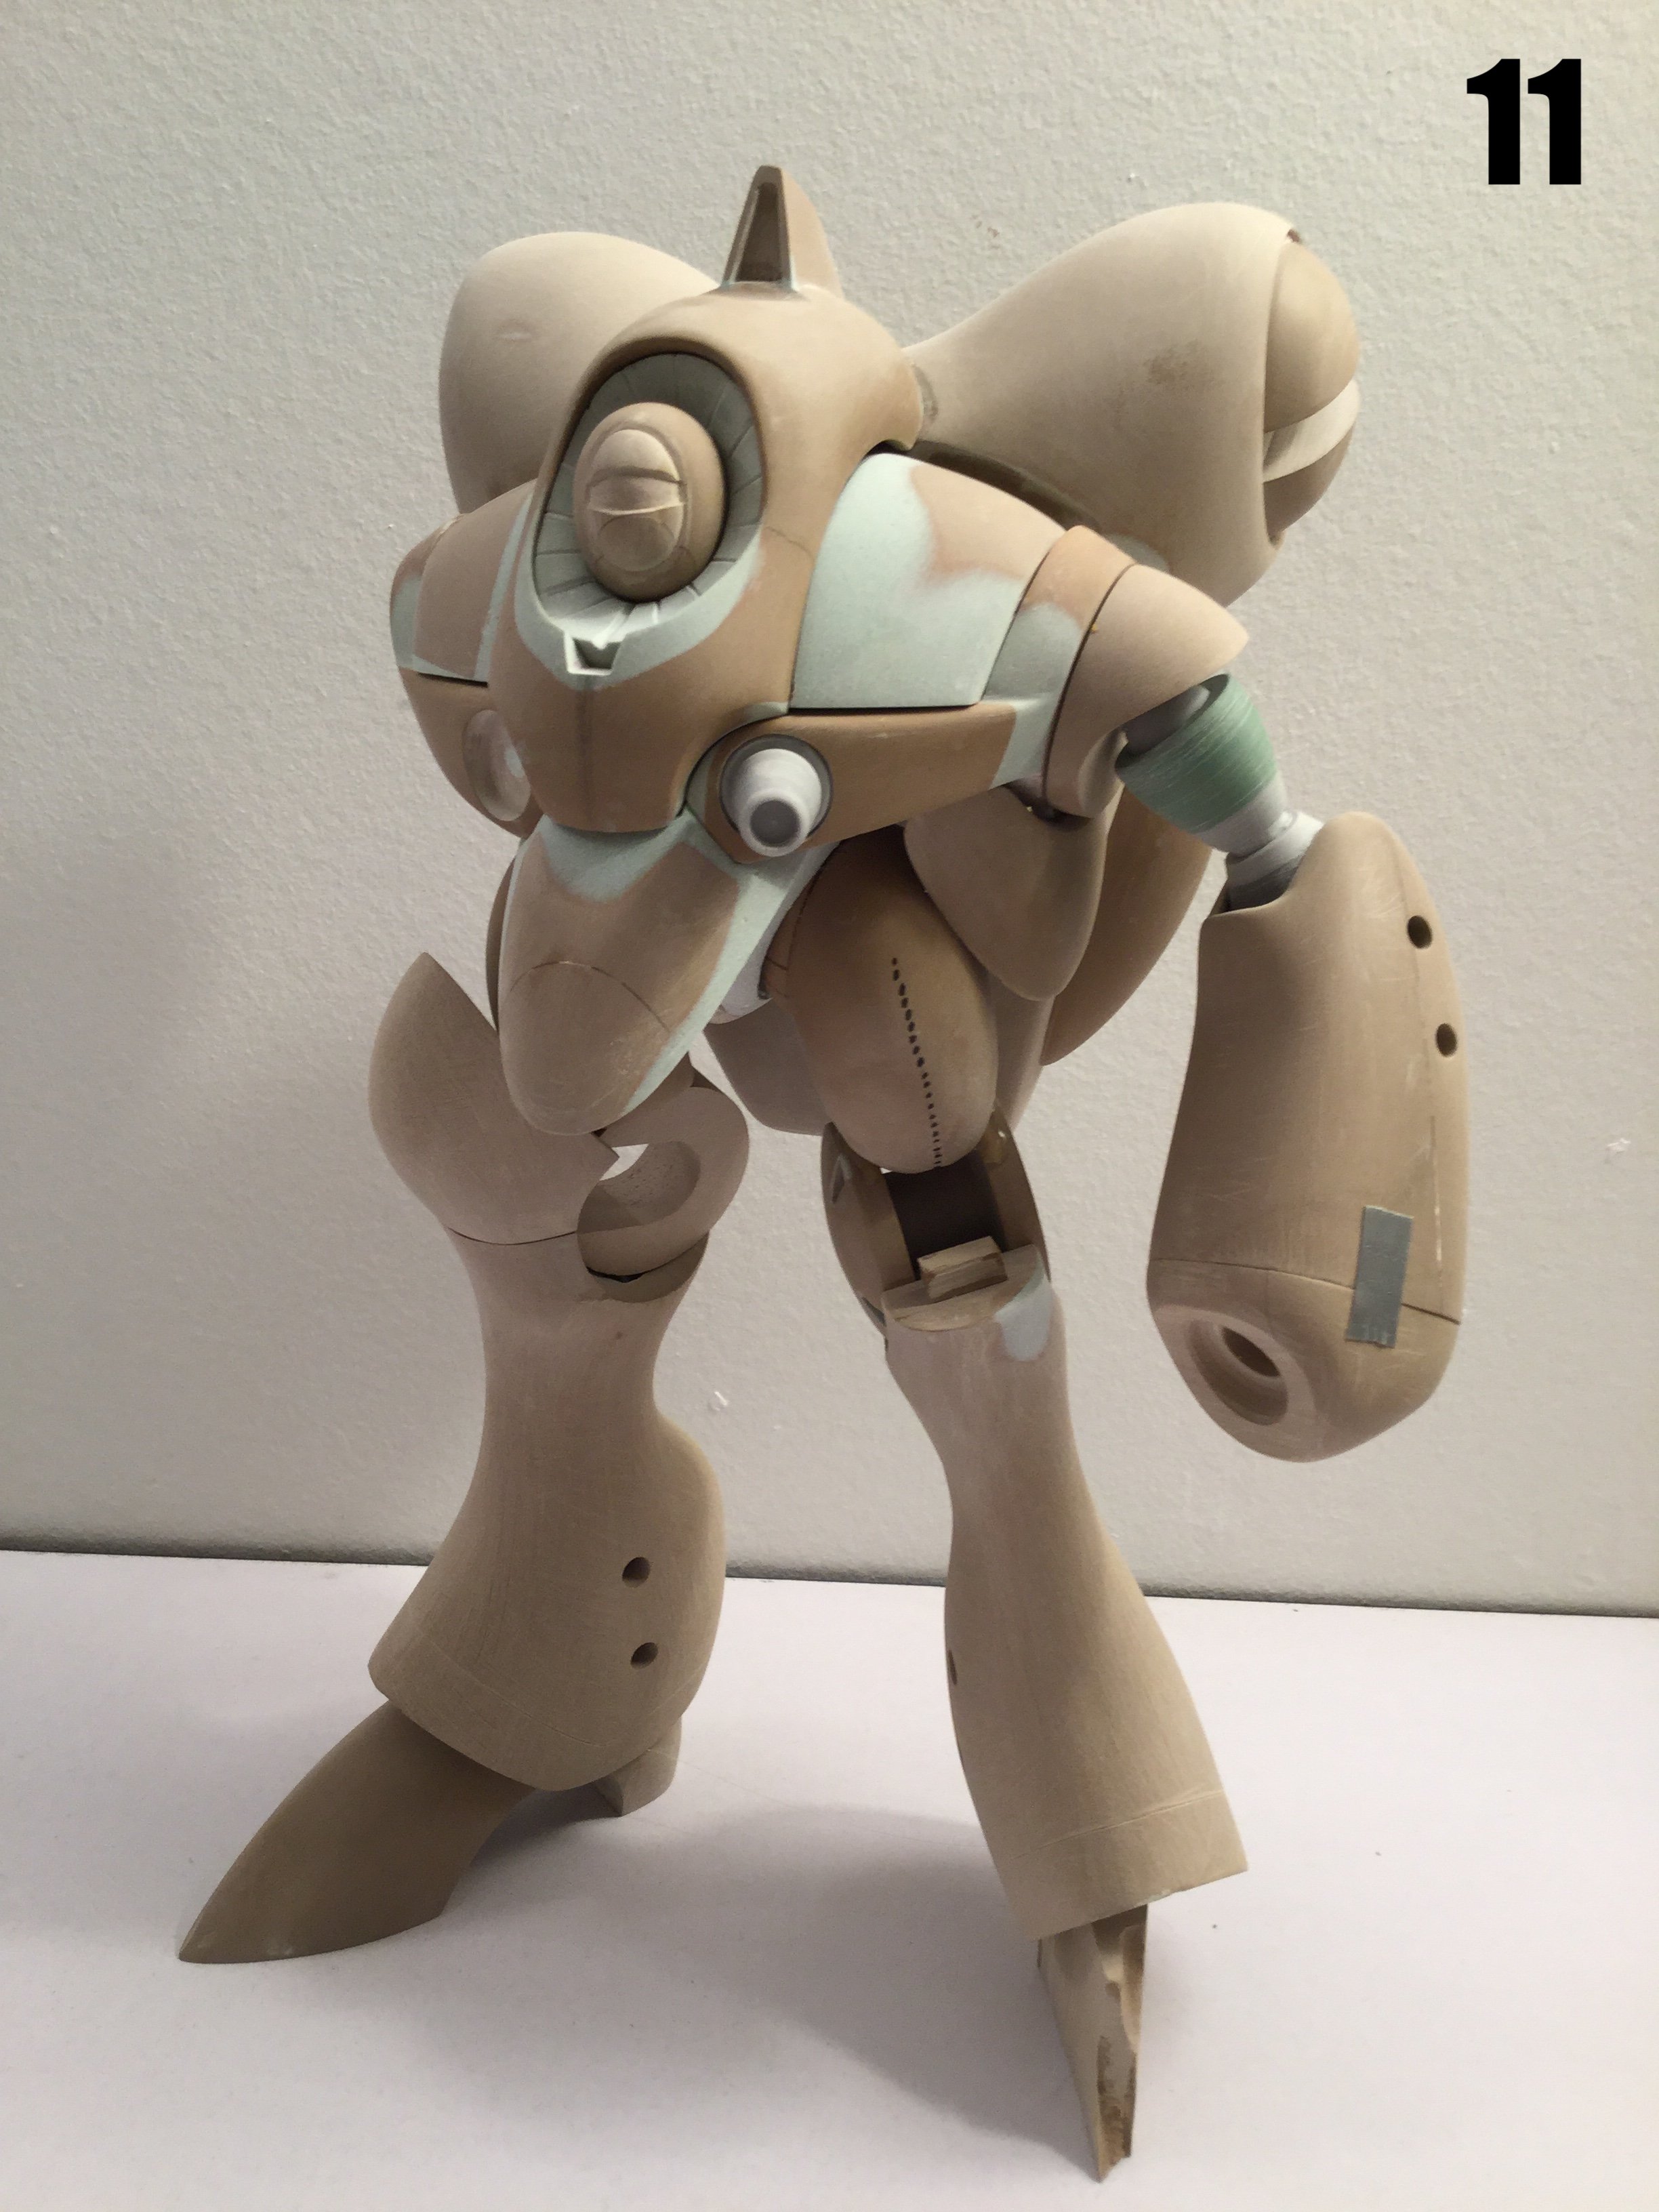
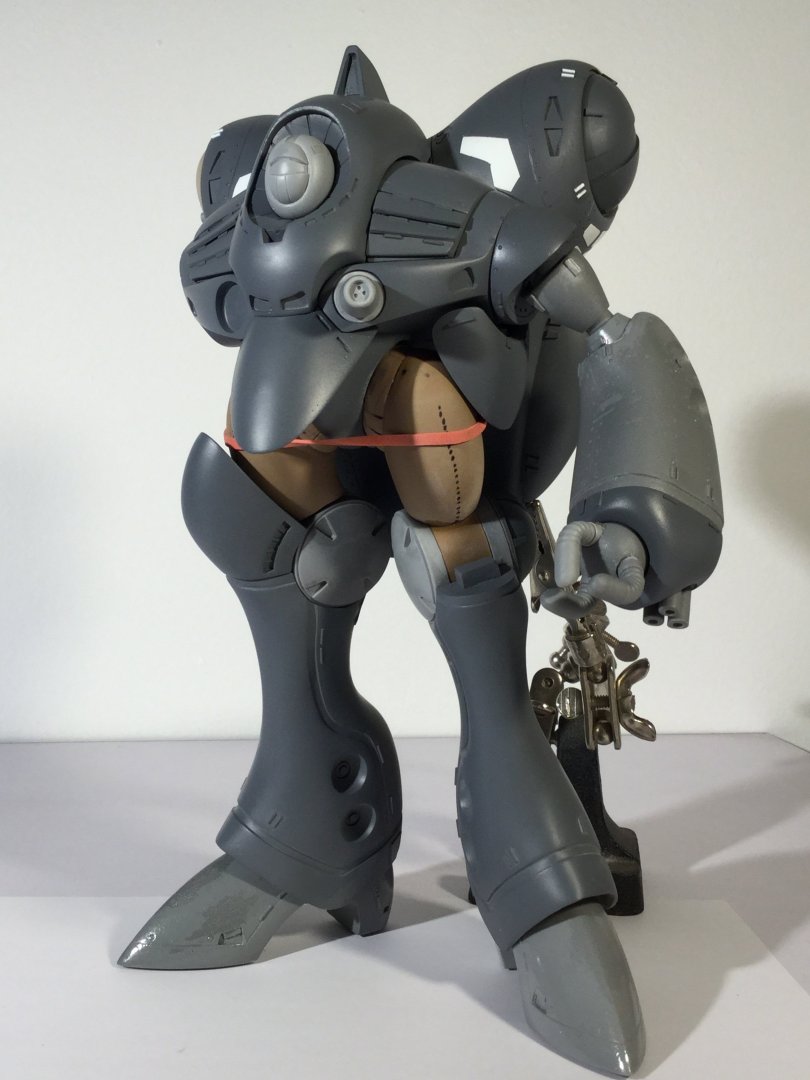
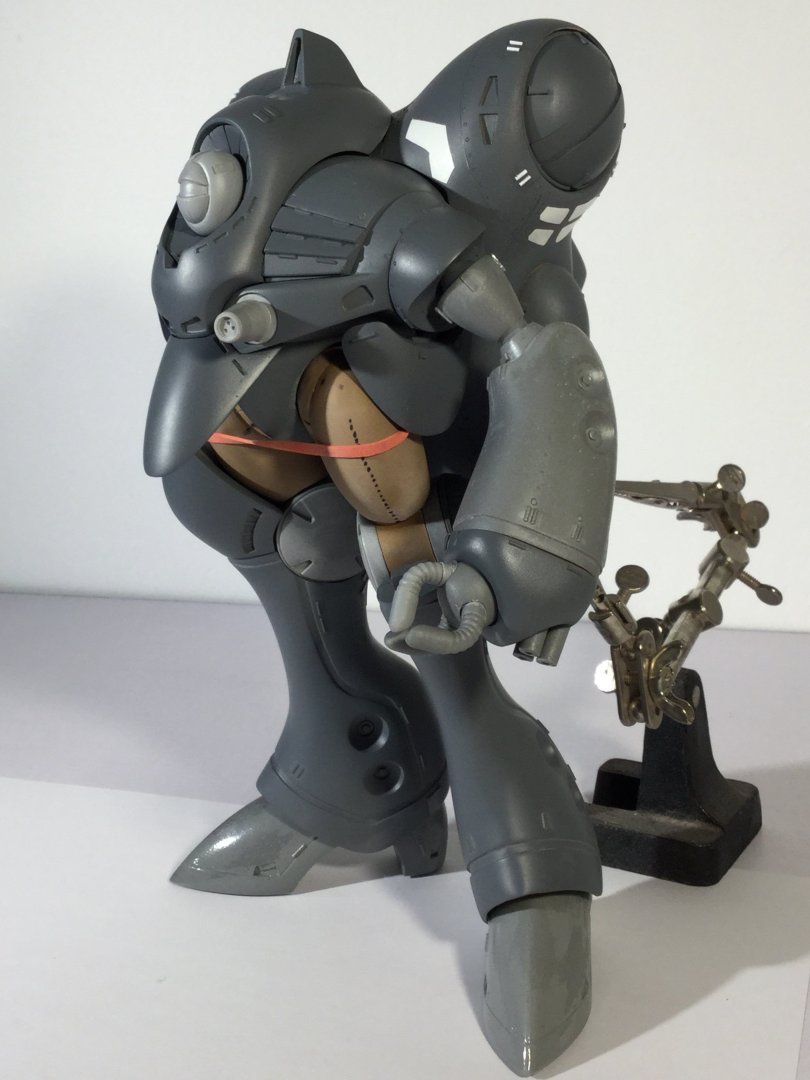
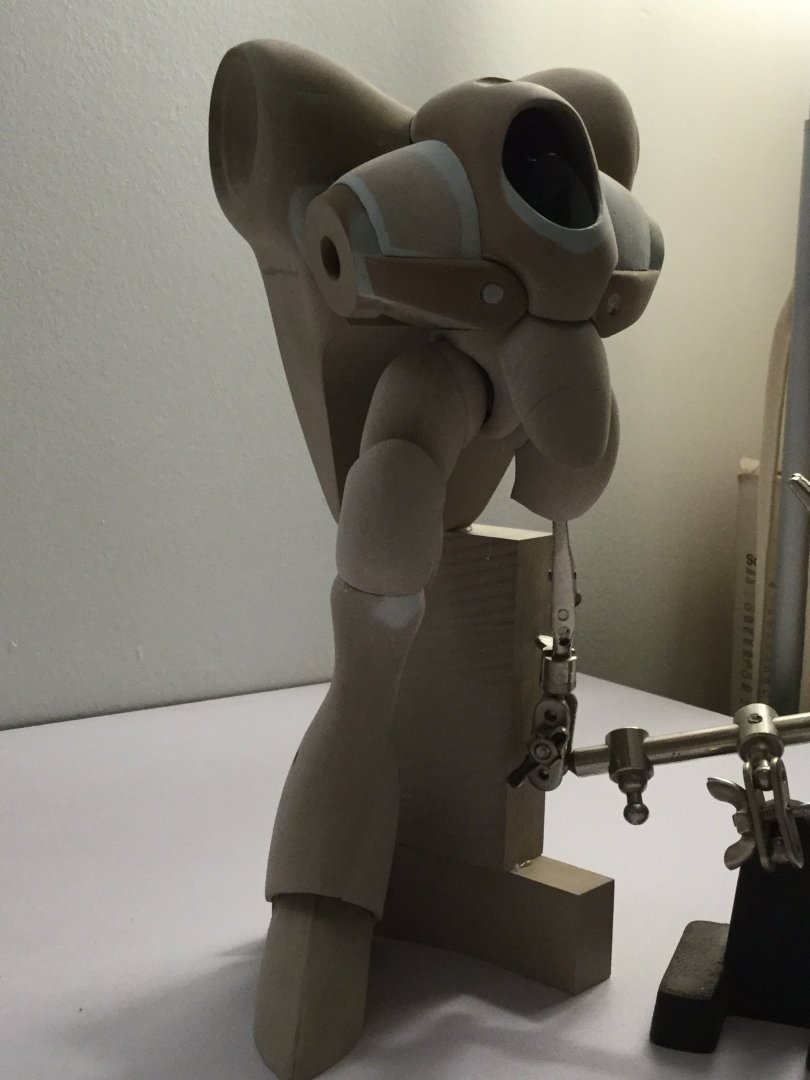
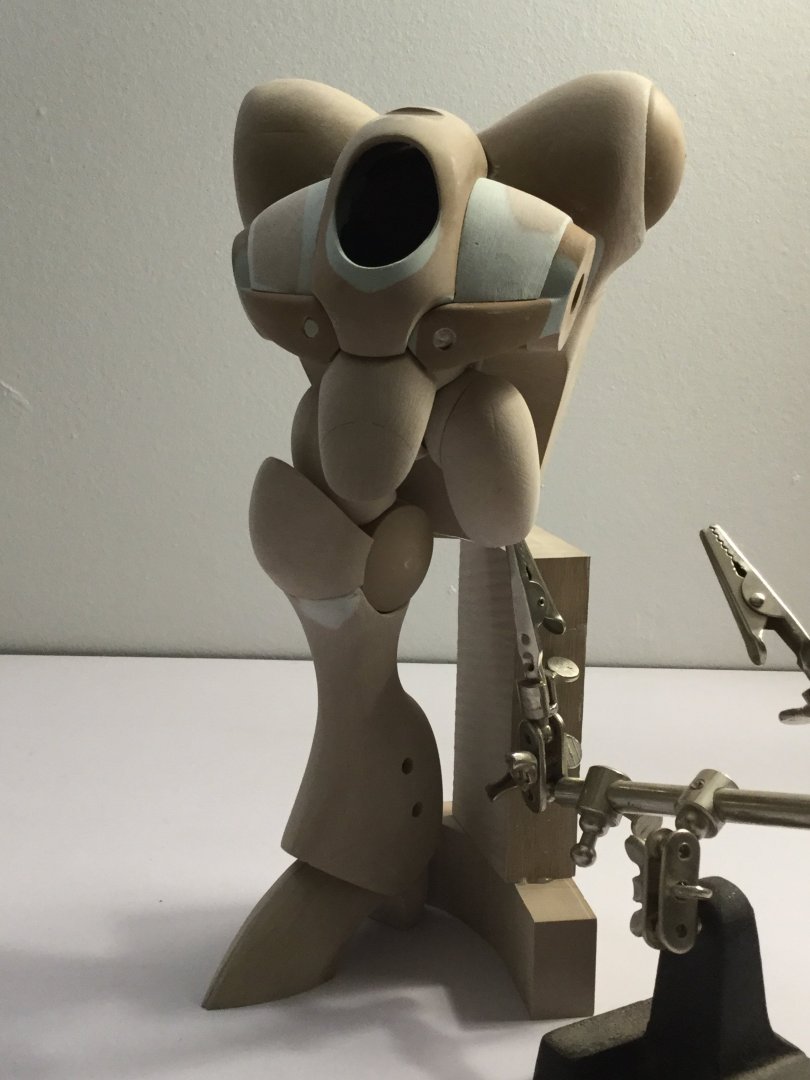
After several months of teasing, I'm proud to present my new mecha creation: the M-72 Gabriel Heavy Infantry Armor Unit. It was actually designed all the way back in 1992, and put into cold storage for almost 25 years. Earlier this year, I dusted off my old sketches, dived headlong into research mode and proceeded to update and refine the unit into something more real-world. Beyond being just a concept, it's also a 1/48 resin kit: all the patterns have been created and the molds are done. In the next few months ahead of its March 2020 release, I'll be working on and presenting at least one ( hopefully two) different tactical color schemes/markings for the unit, and unveiling more of its features, weapons systems and battle tactics. This will also mark a new stage for Moscato Hobby Models, with original kit designs that feature more refined product images and packaging. The Gabriel unit shown below is the M-72B Marines version, which is visually identical the Alpha unit used by the Army. Also, since Macrossworld is my spiritual Mecha-mecca, I decided to unveil the project here first.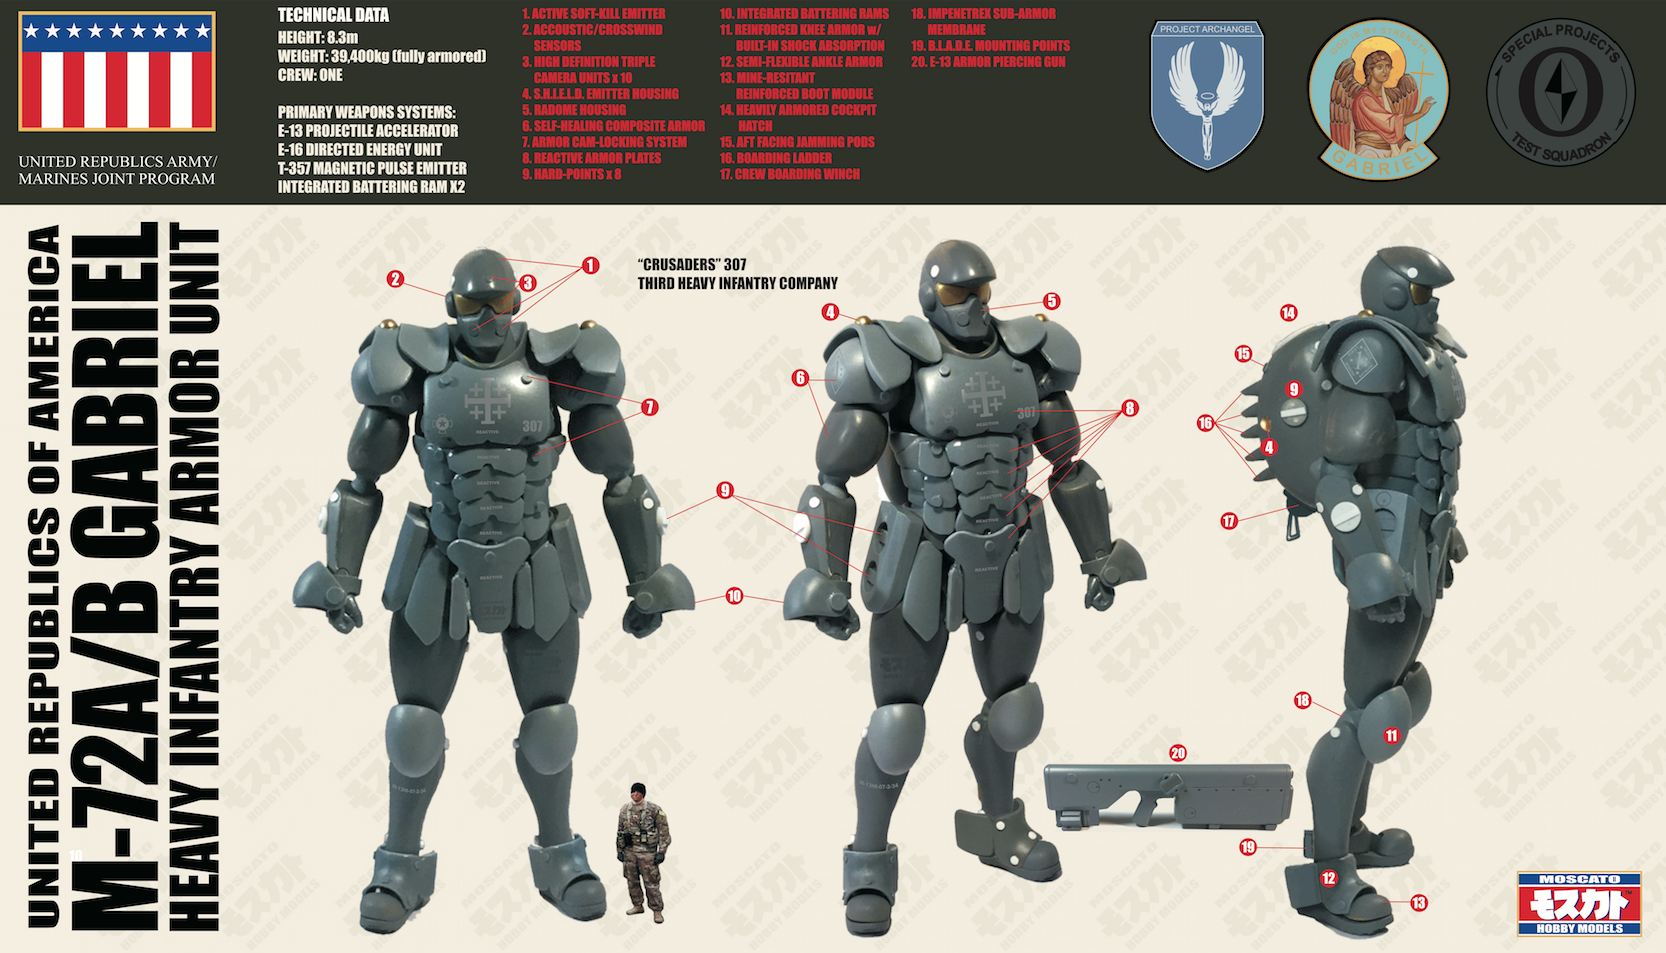
-
Hey guys, I'm going to push back next Friday's update to after Christmas. I have something else to unveil on the 20th.
-
Just a friendly PSA: I have two (2) 1/12 Motocycle Freak accessories sets left. If anyone wants them, just PM me.
-
Top Gun: Maverick (Top Gun 2 is comin)
captain america replied to Ladic's topic in Anime or Science Fiction
Maverick stole my Legioss!! -
The Mandalorian - Star Wars webseries from Jon Favreau
captain america replied to SMS007's topic in Anime or Science Fiction
*Patiently awaits the end-of-season Baby Yoda/Apollo Creed death match*- 1438 replies
-
- 1
-

-
- star wars
- the mandalorian
- (and 10 more)
-
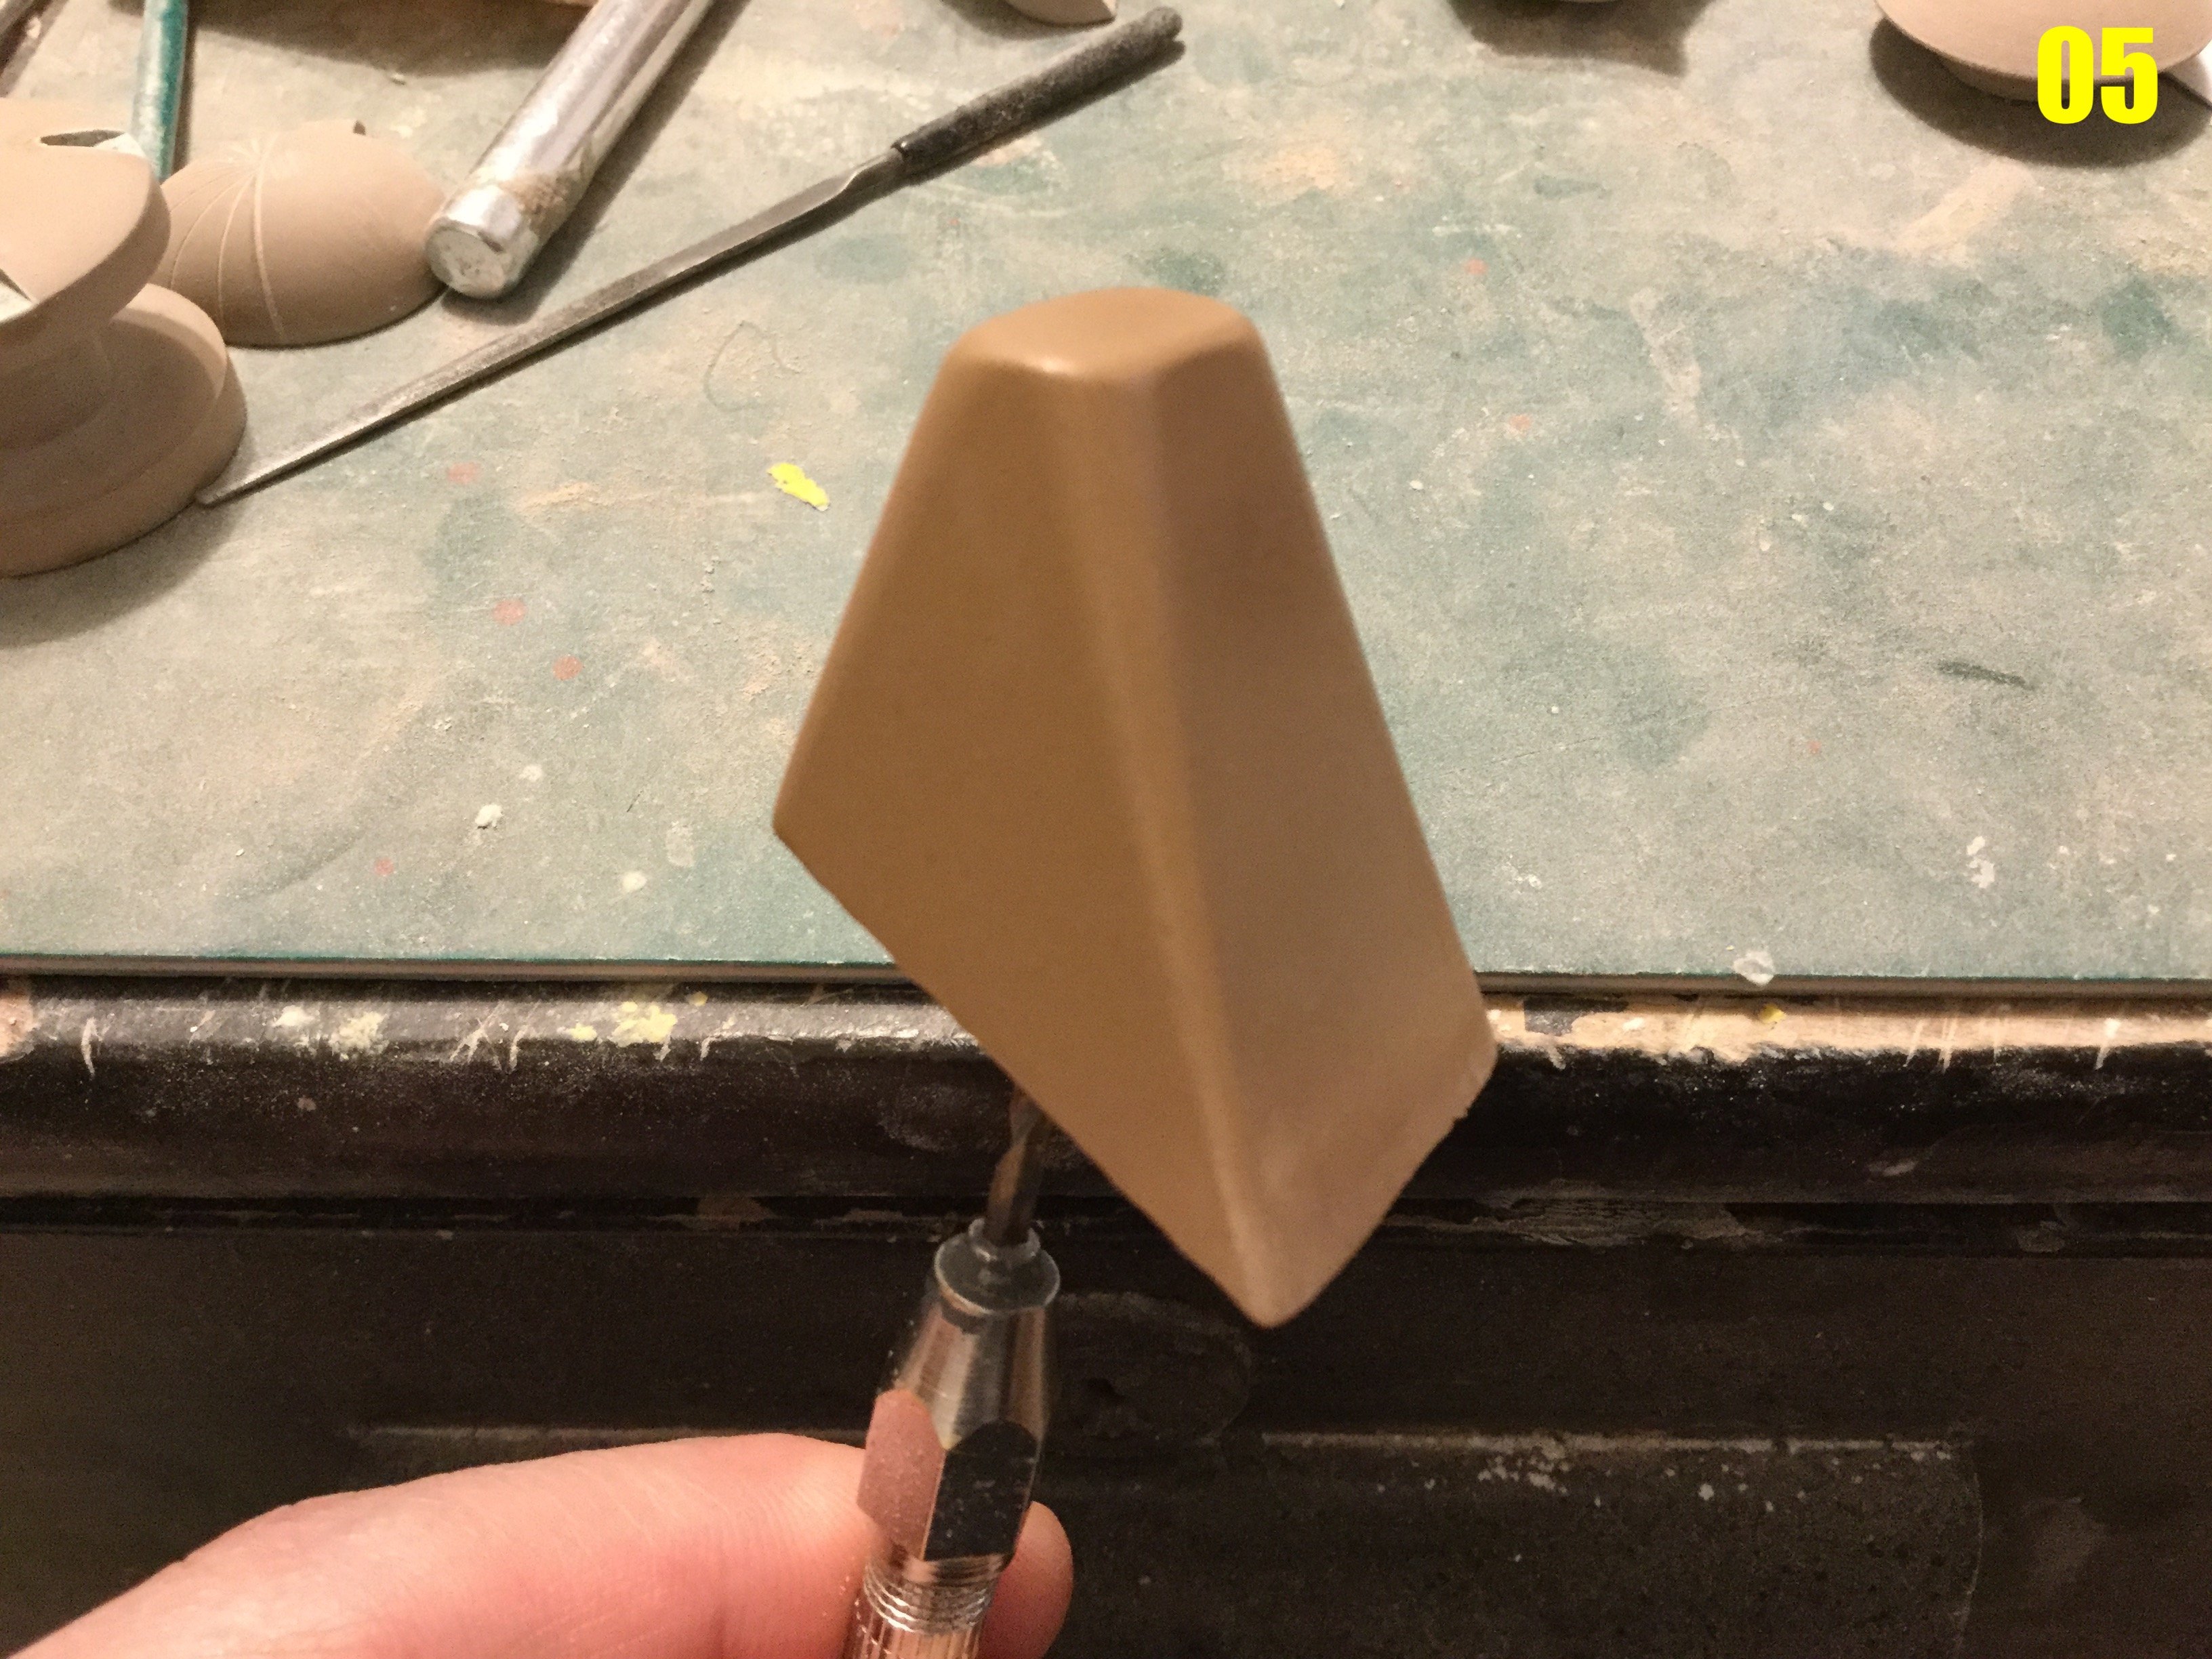
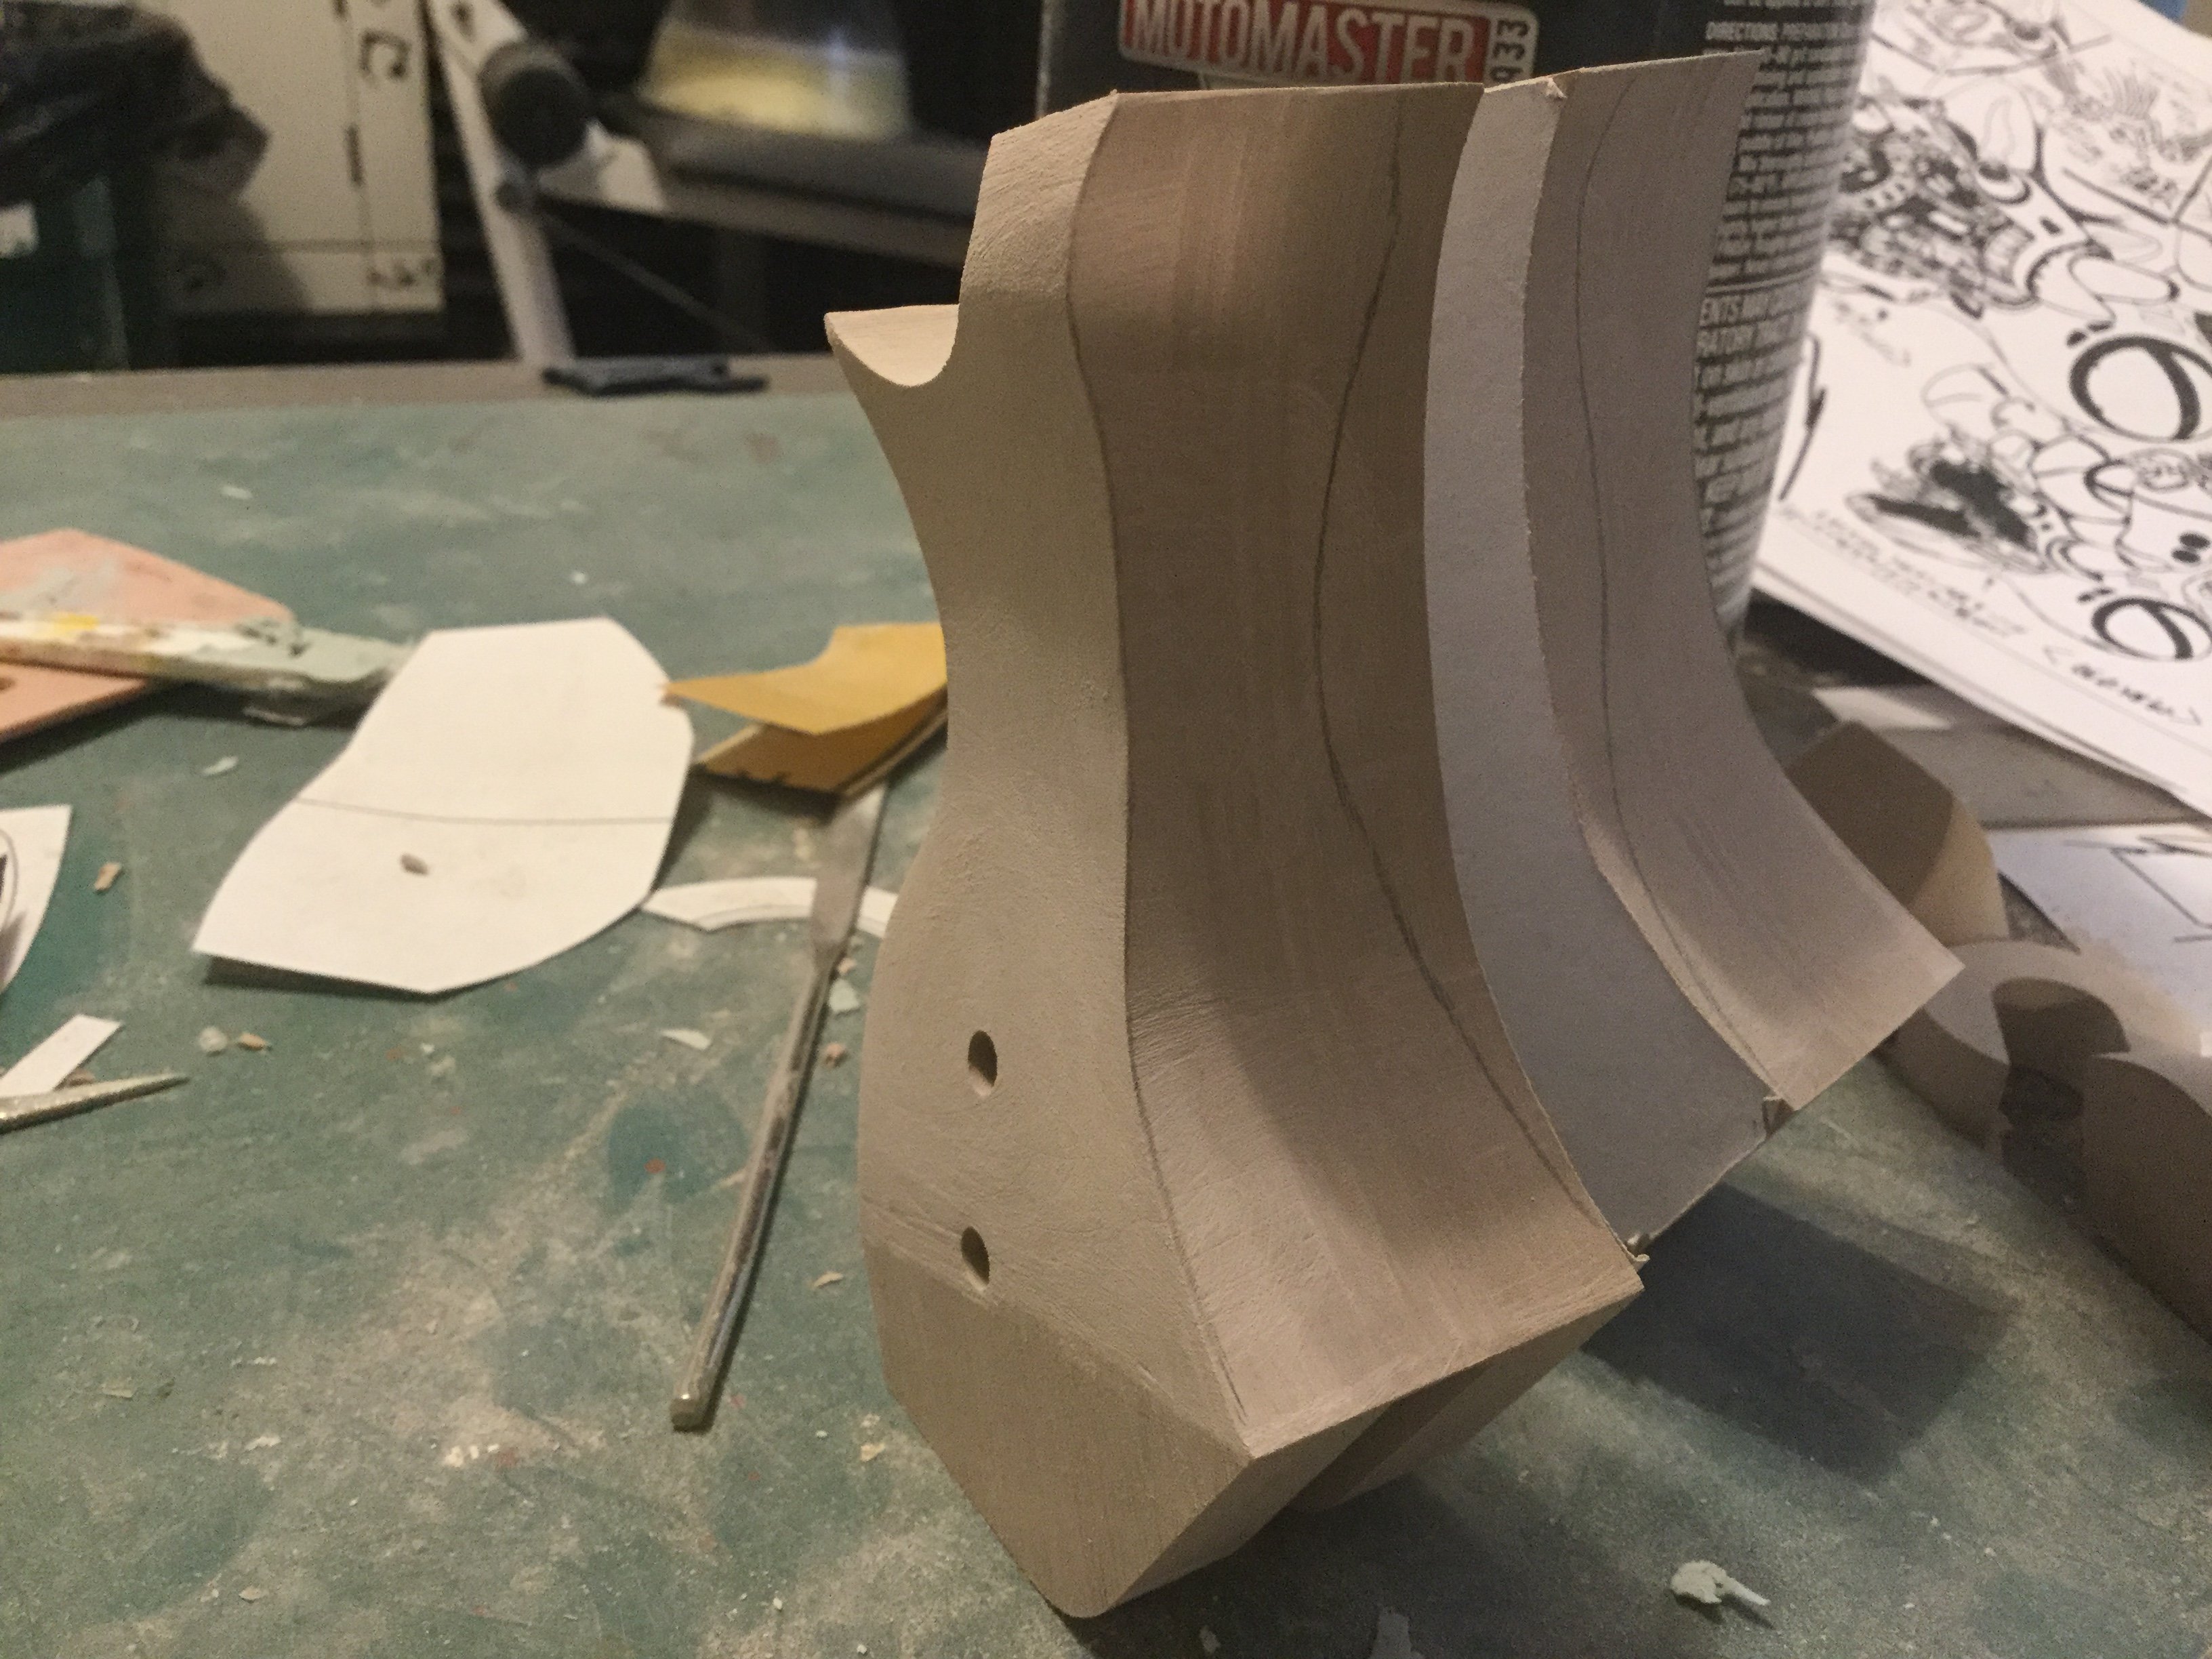
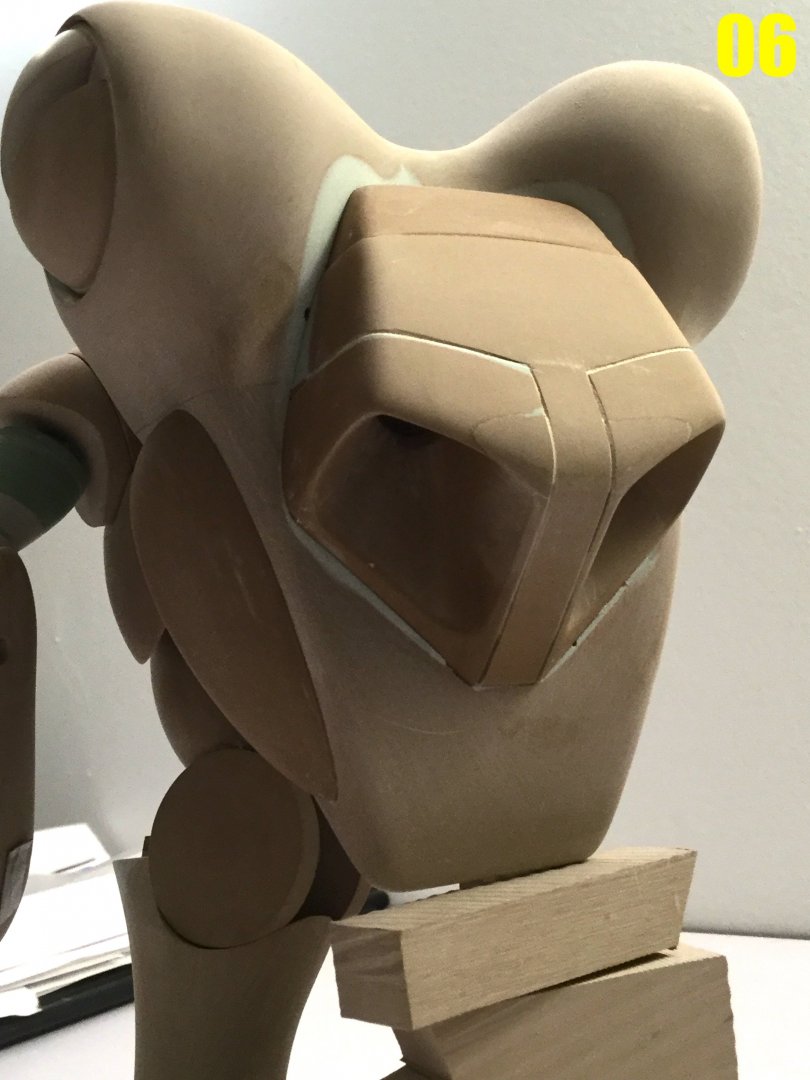
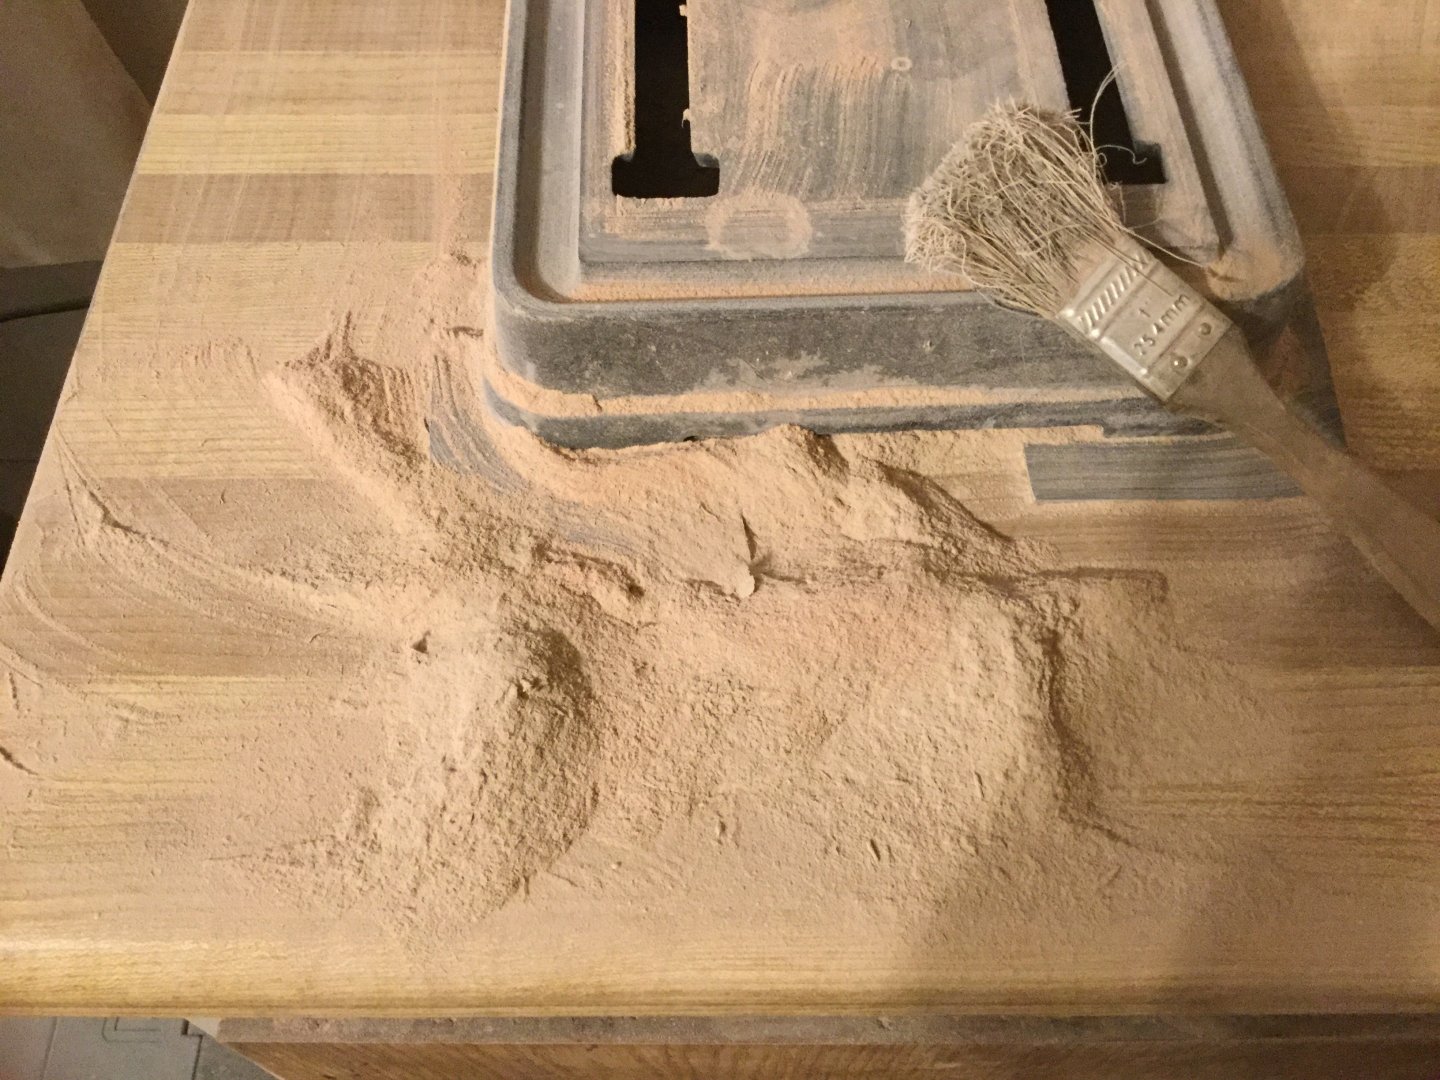
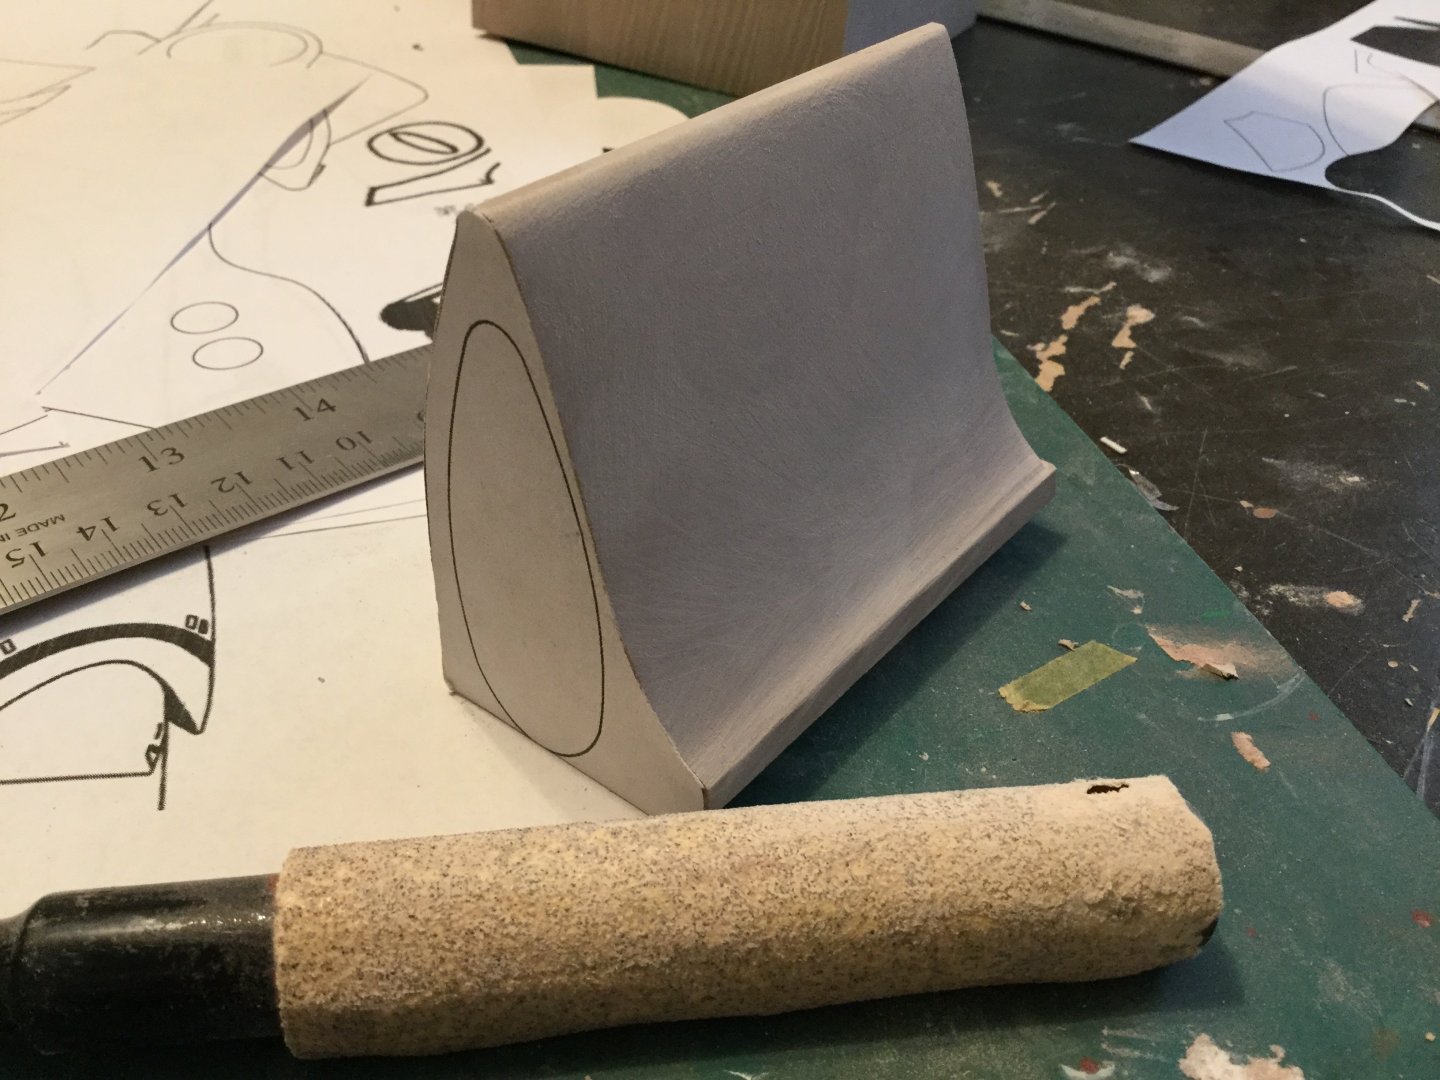
I've never used wood to sculpt anything: the beige/sand colored material you see is industrial modeling board. It was recommended to me by a toy pattern-maker back in the 90s and it suits 80% of my building needs. I'm sure wood is fine for some applications, like a simple vac-form buck, but it has grain, cannot be machined, and isn't dimensionally stable (shrinks when dry, swells when humid, etc.)
-


-
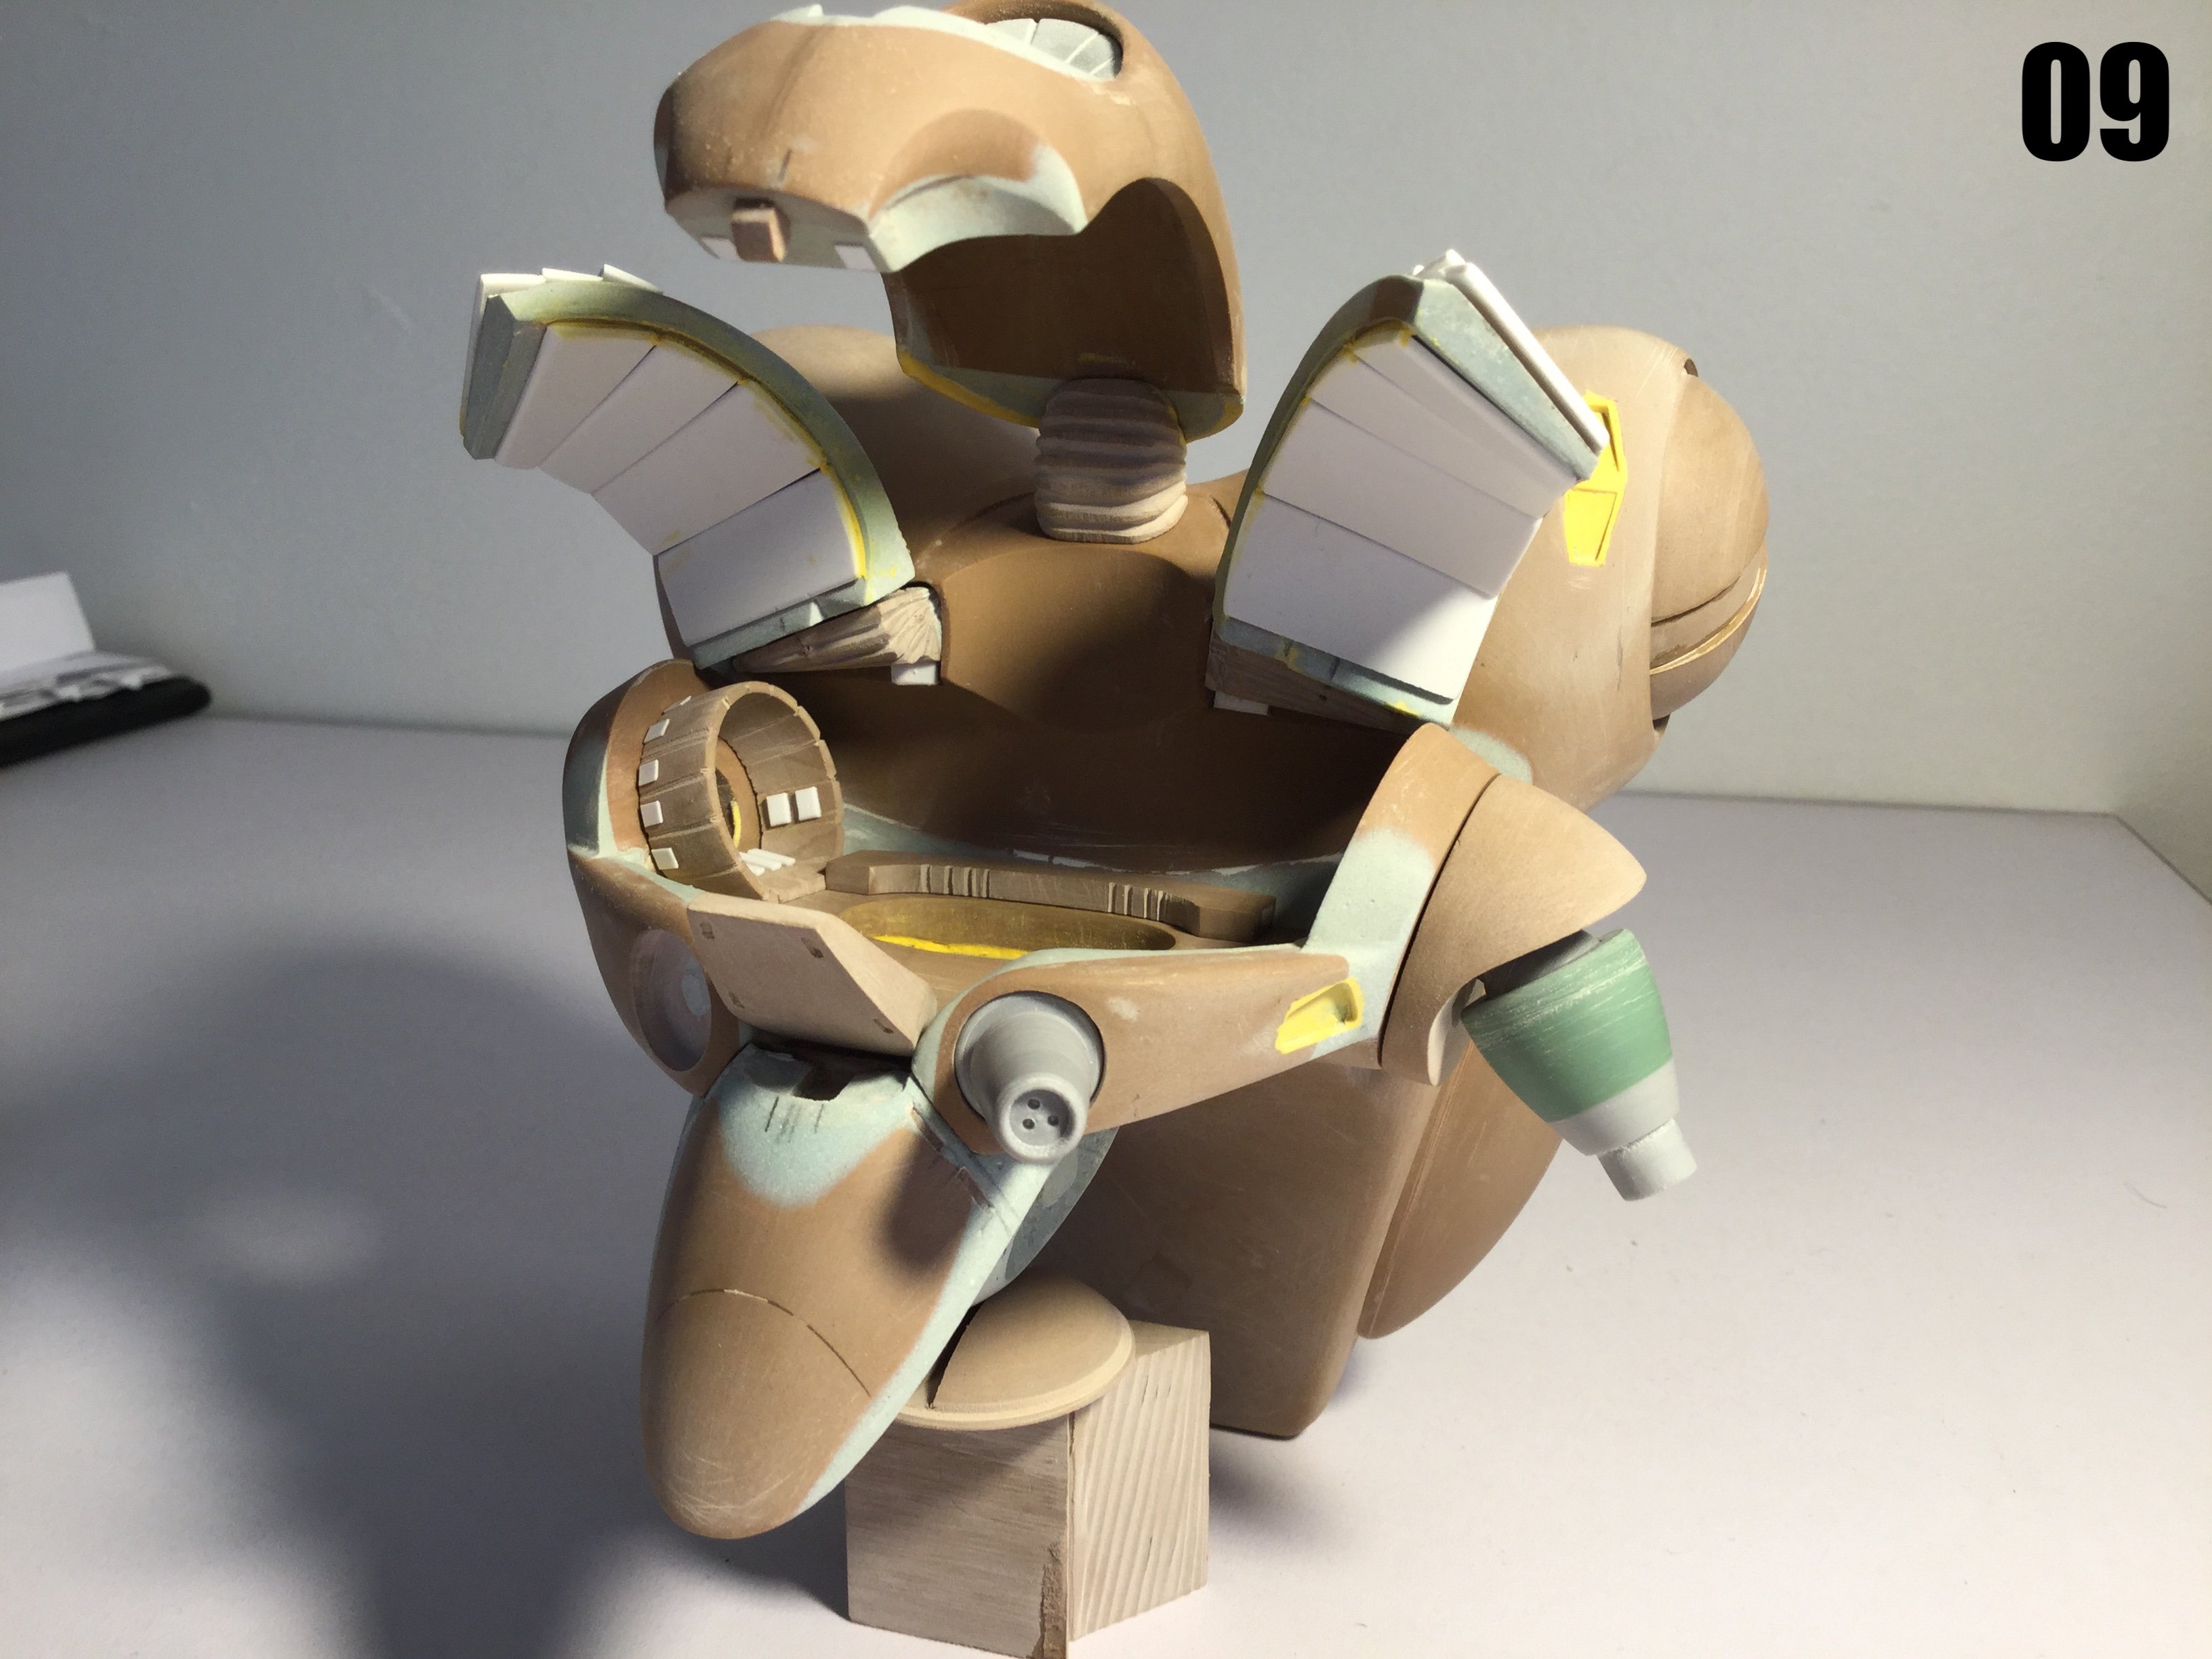
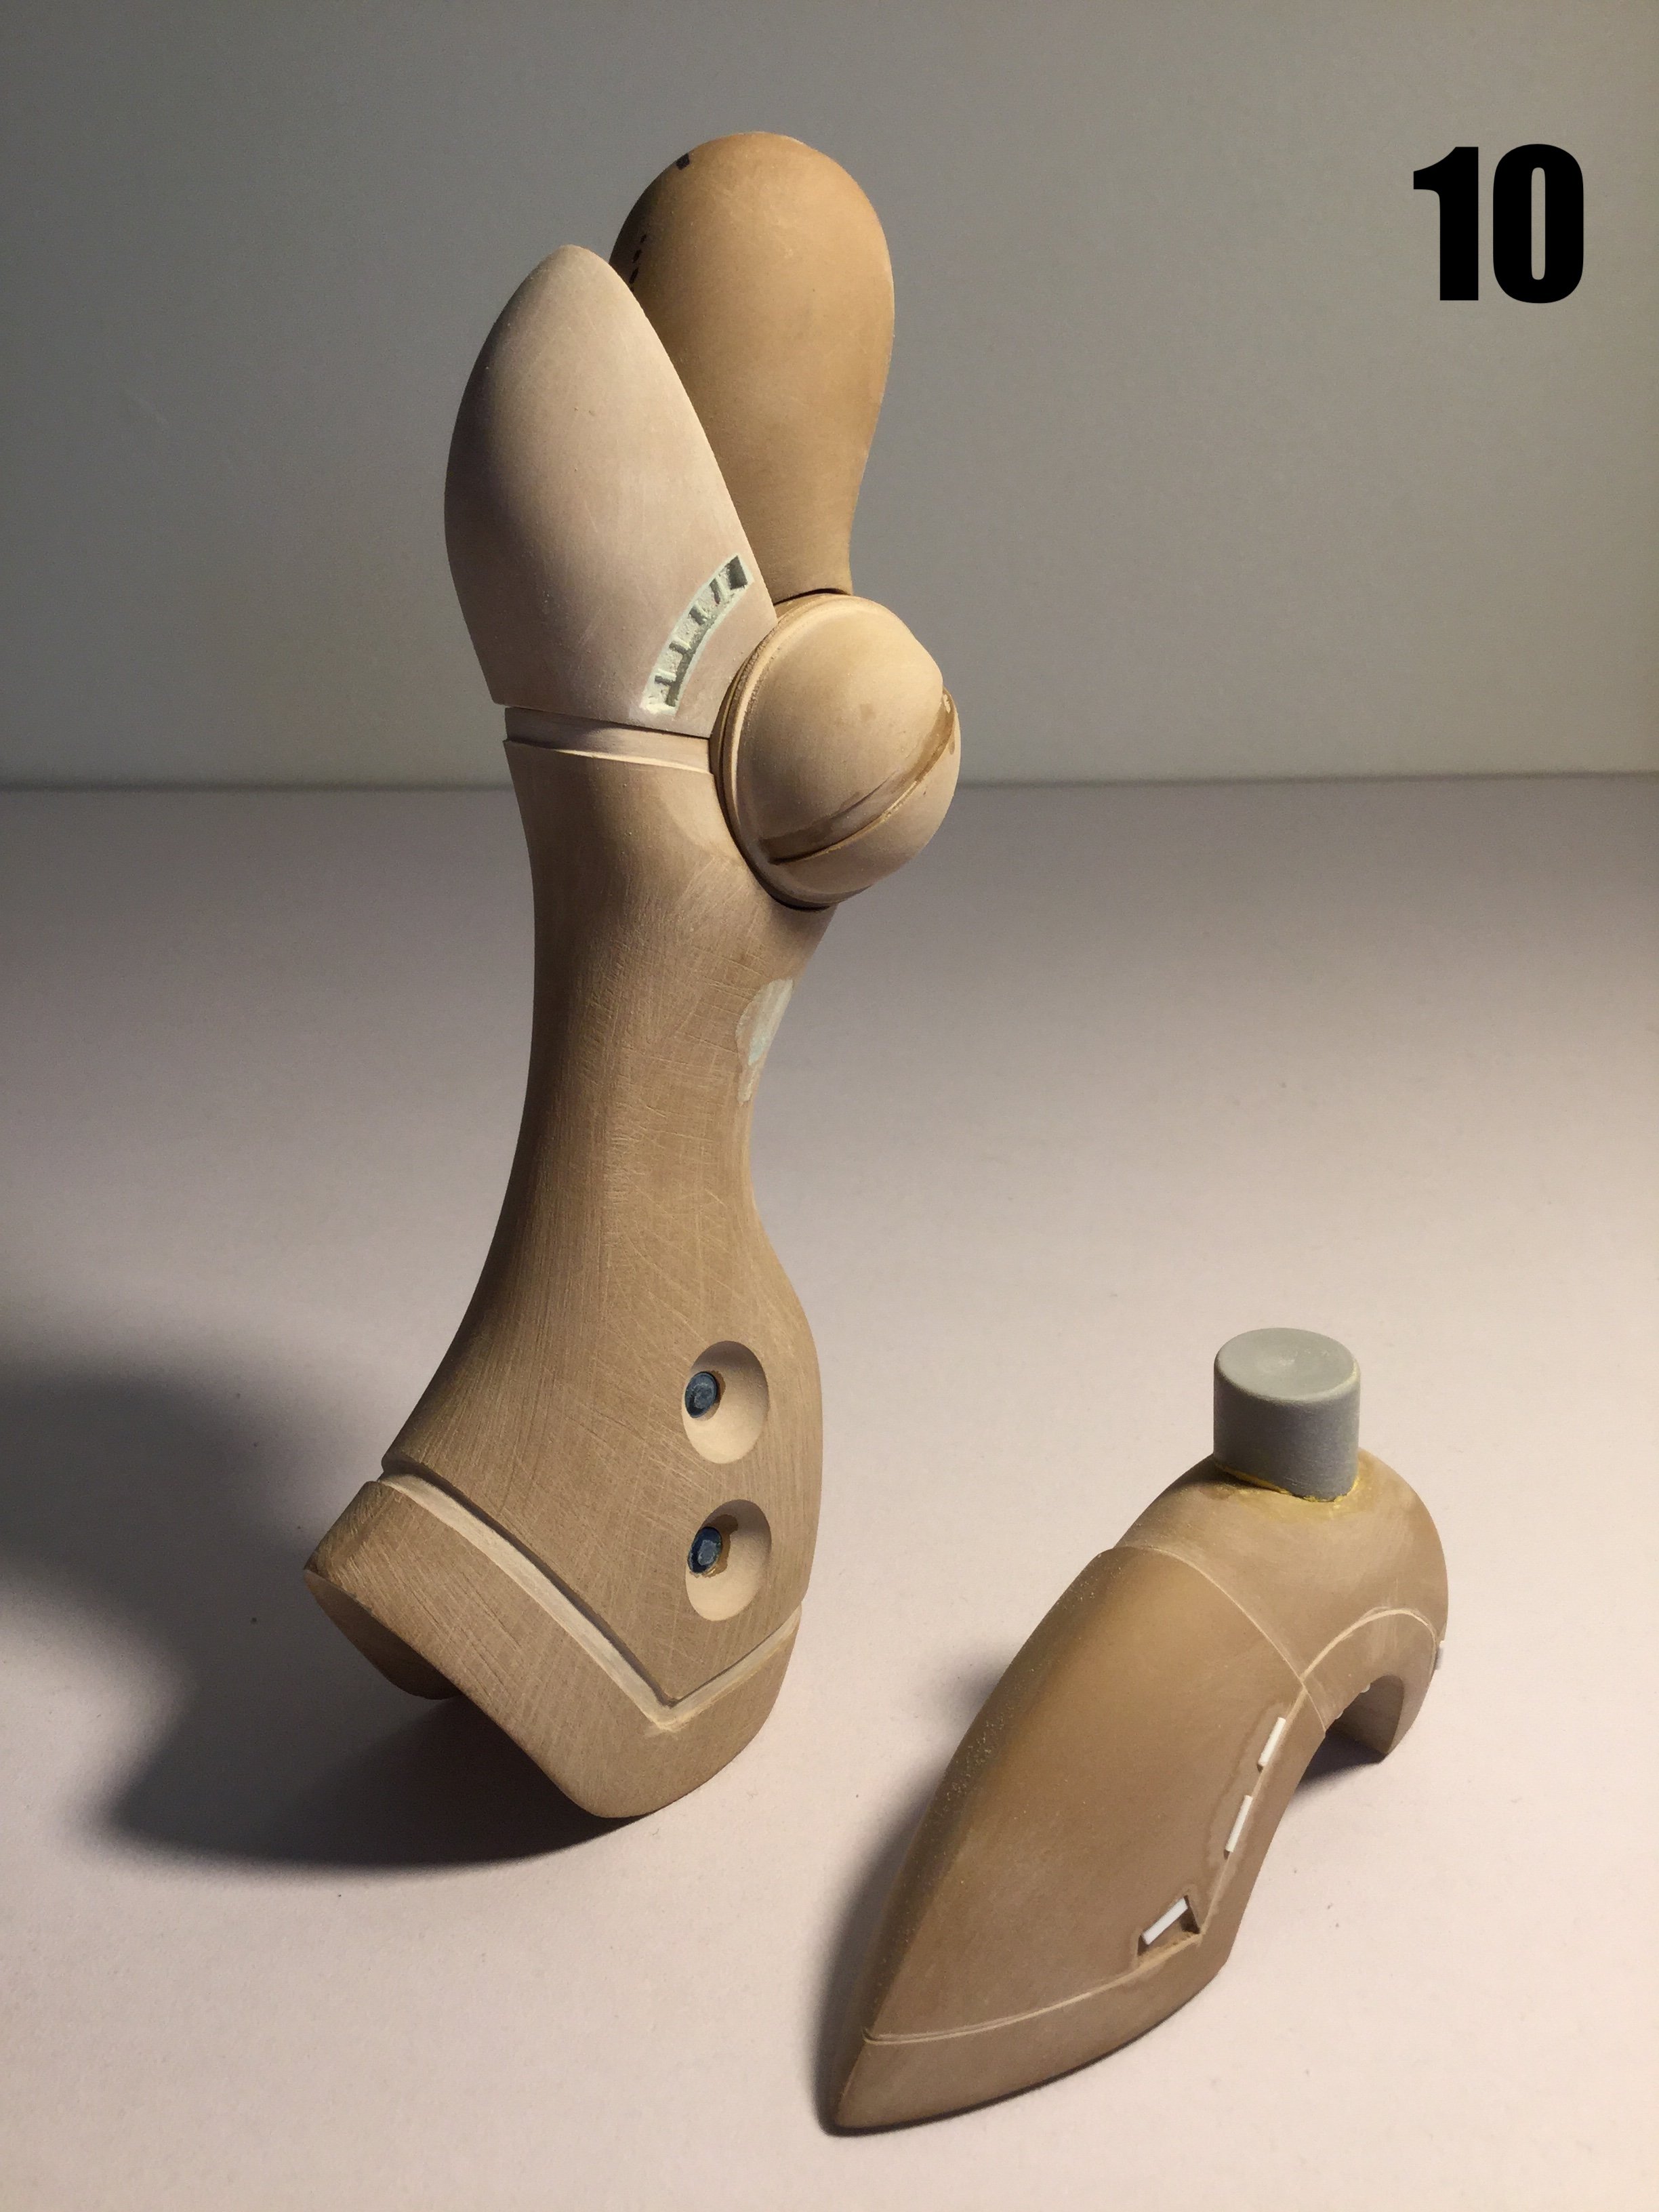
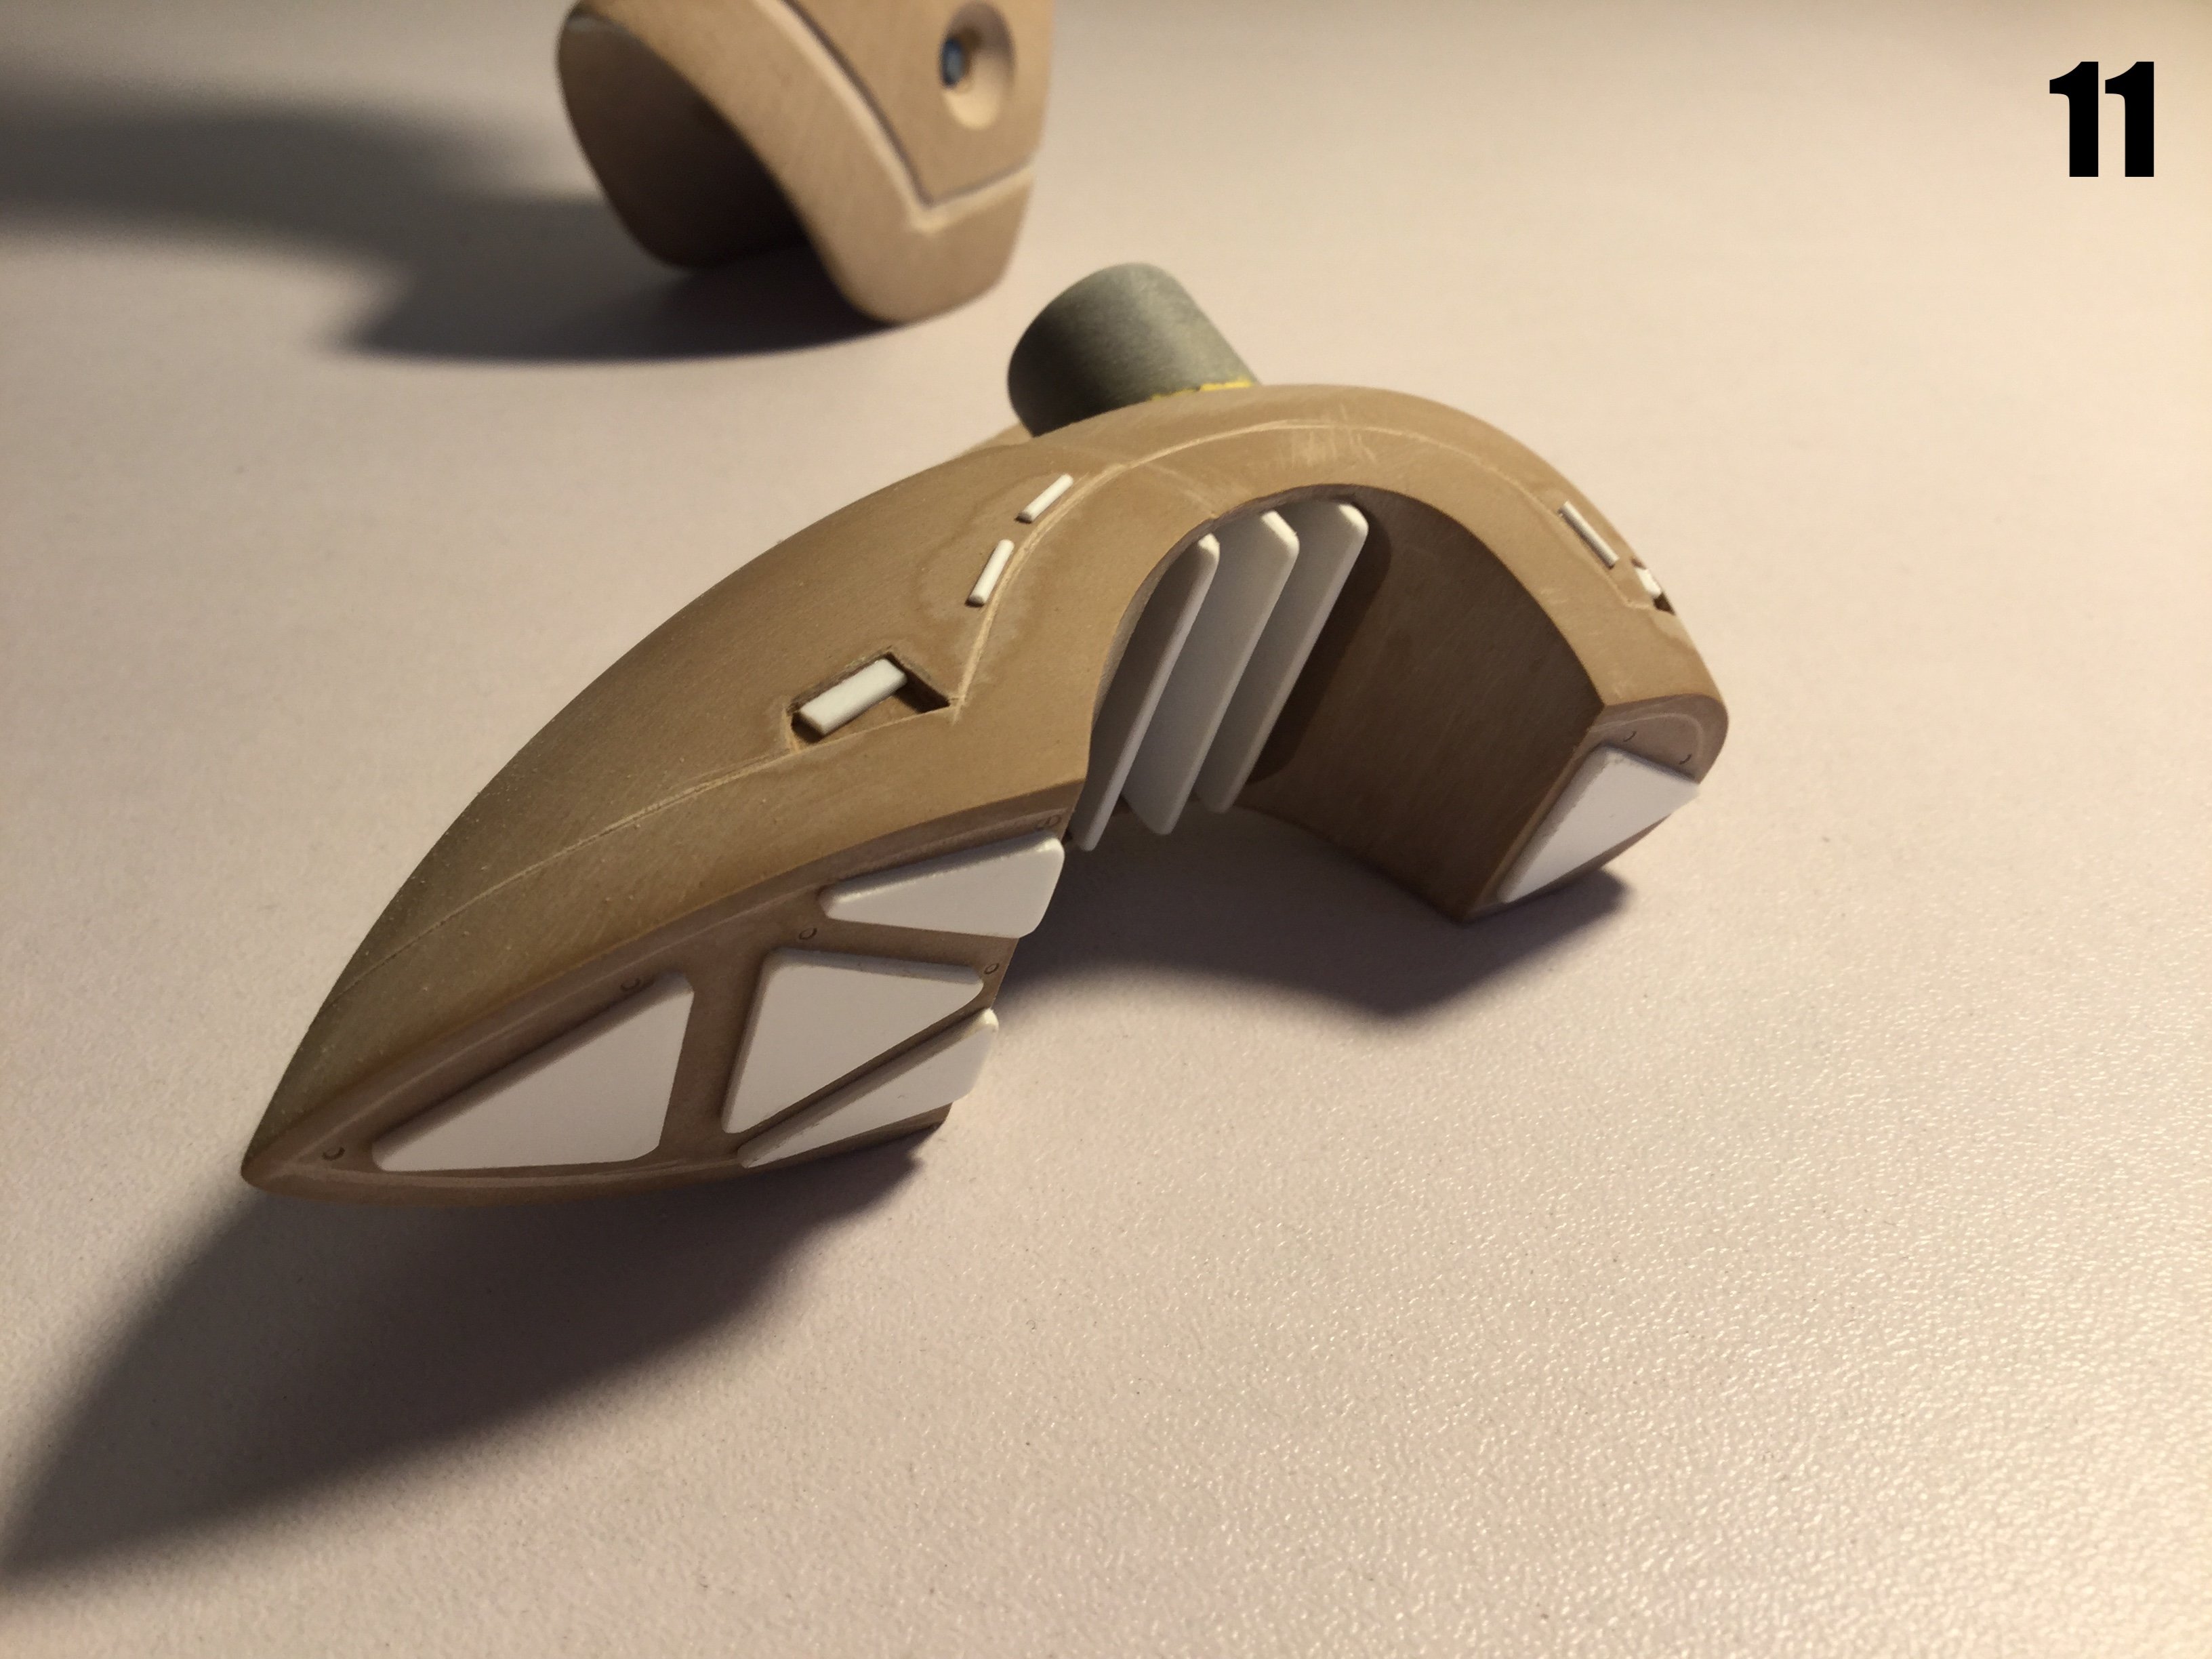
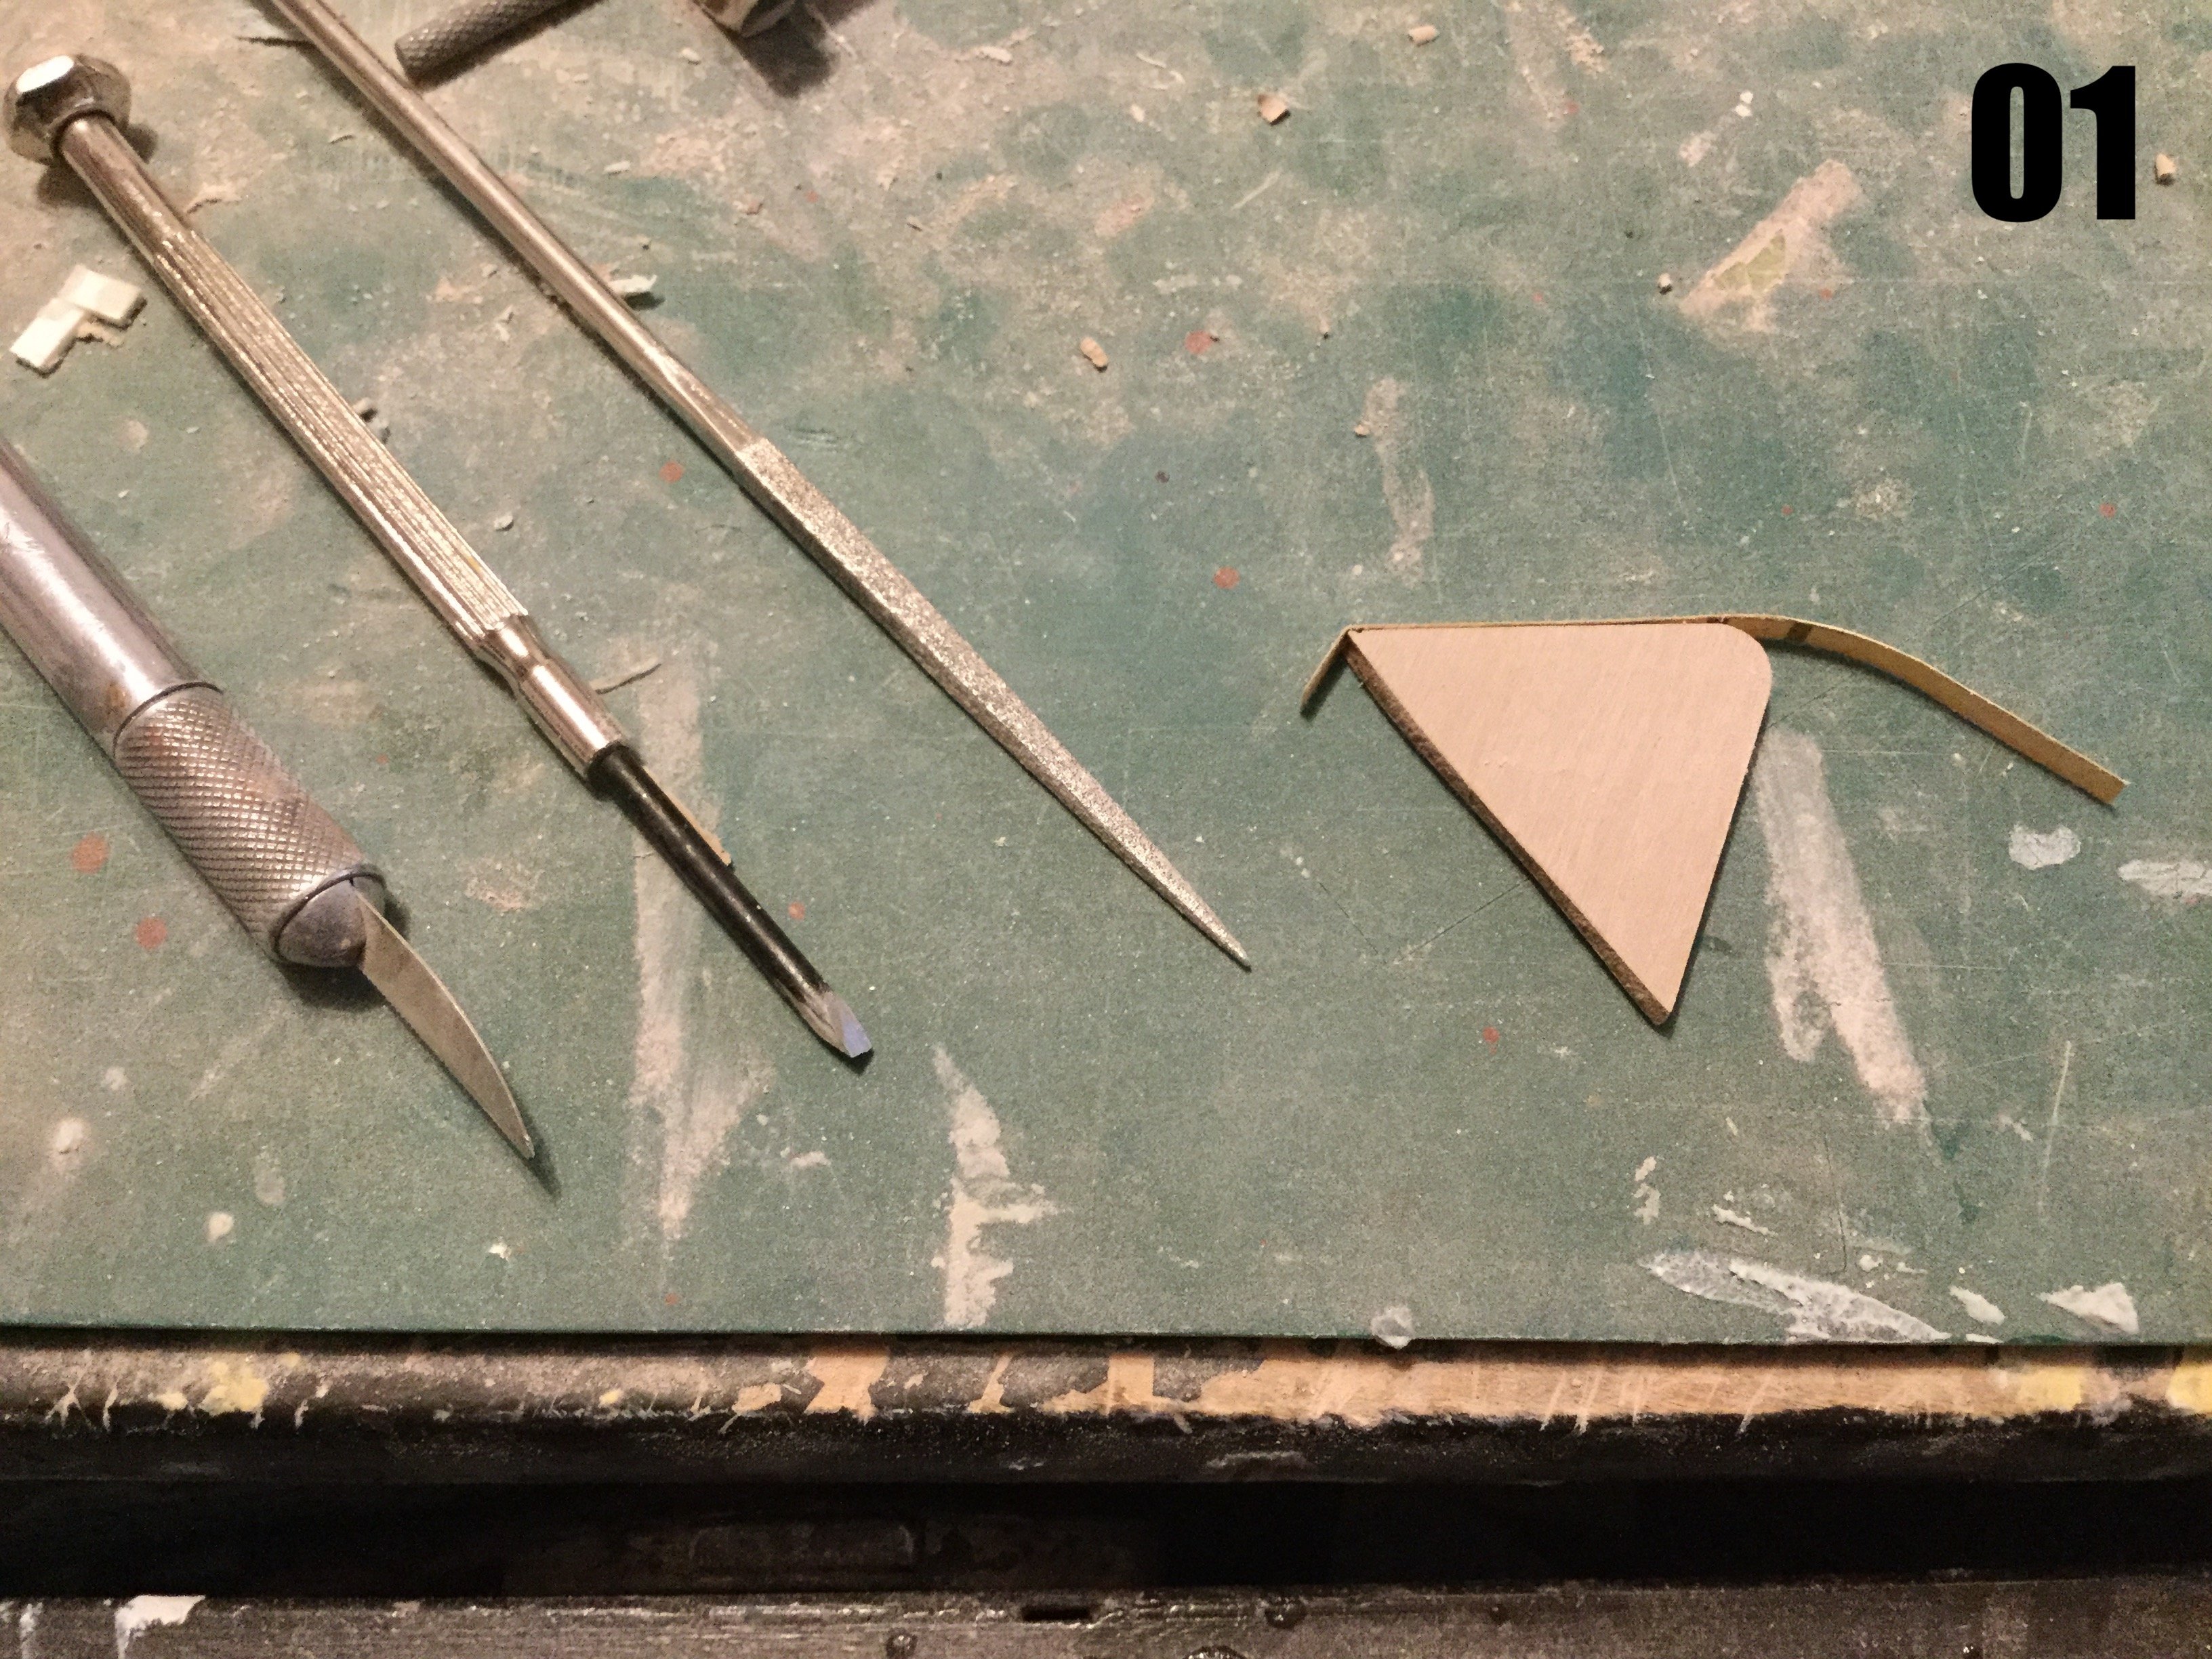
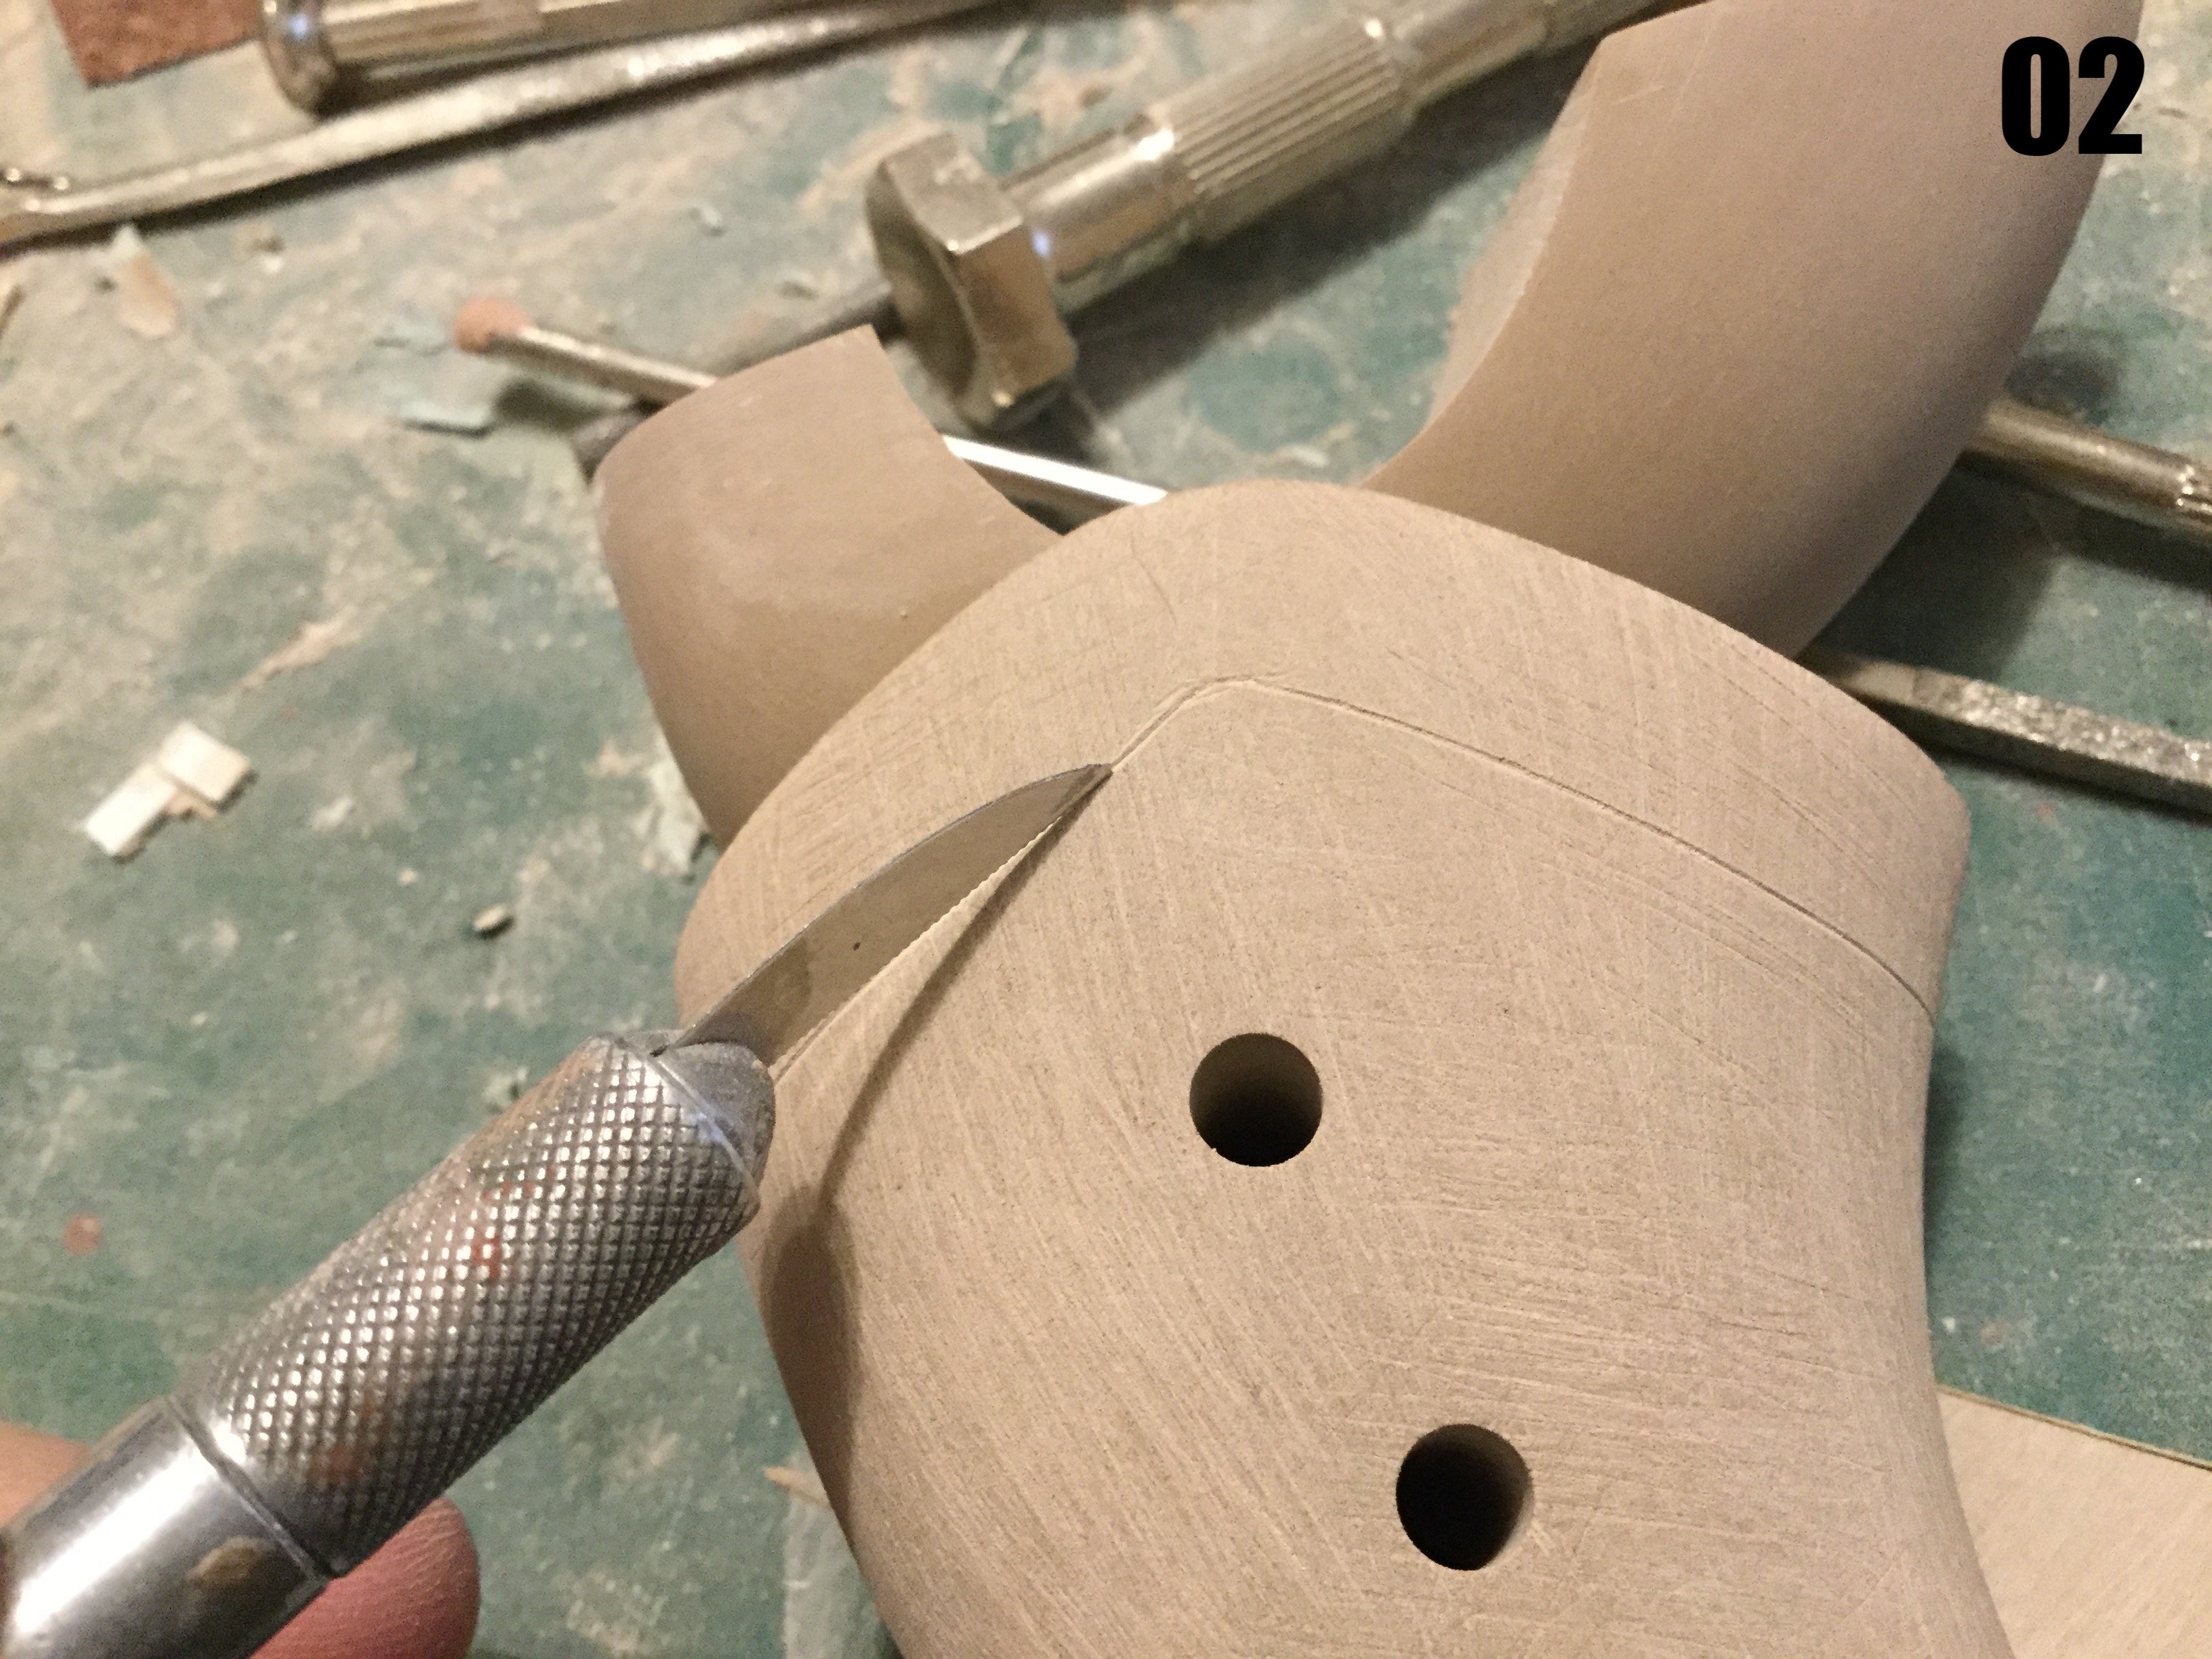
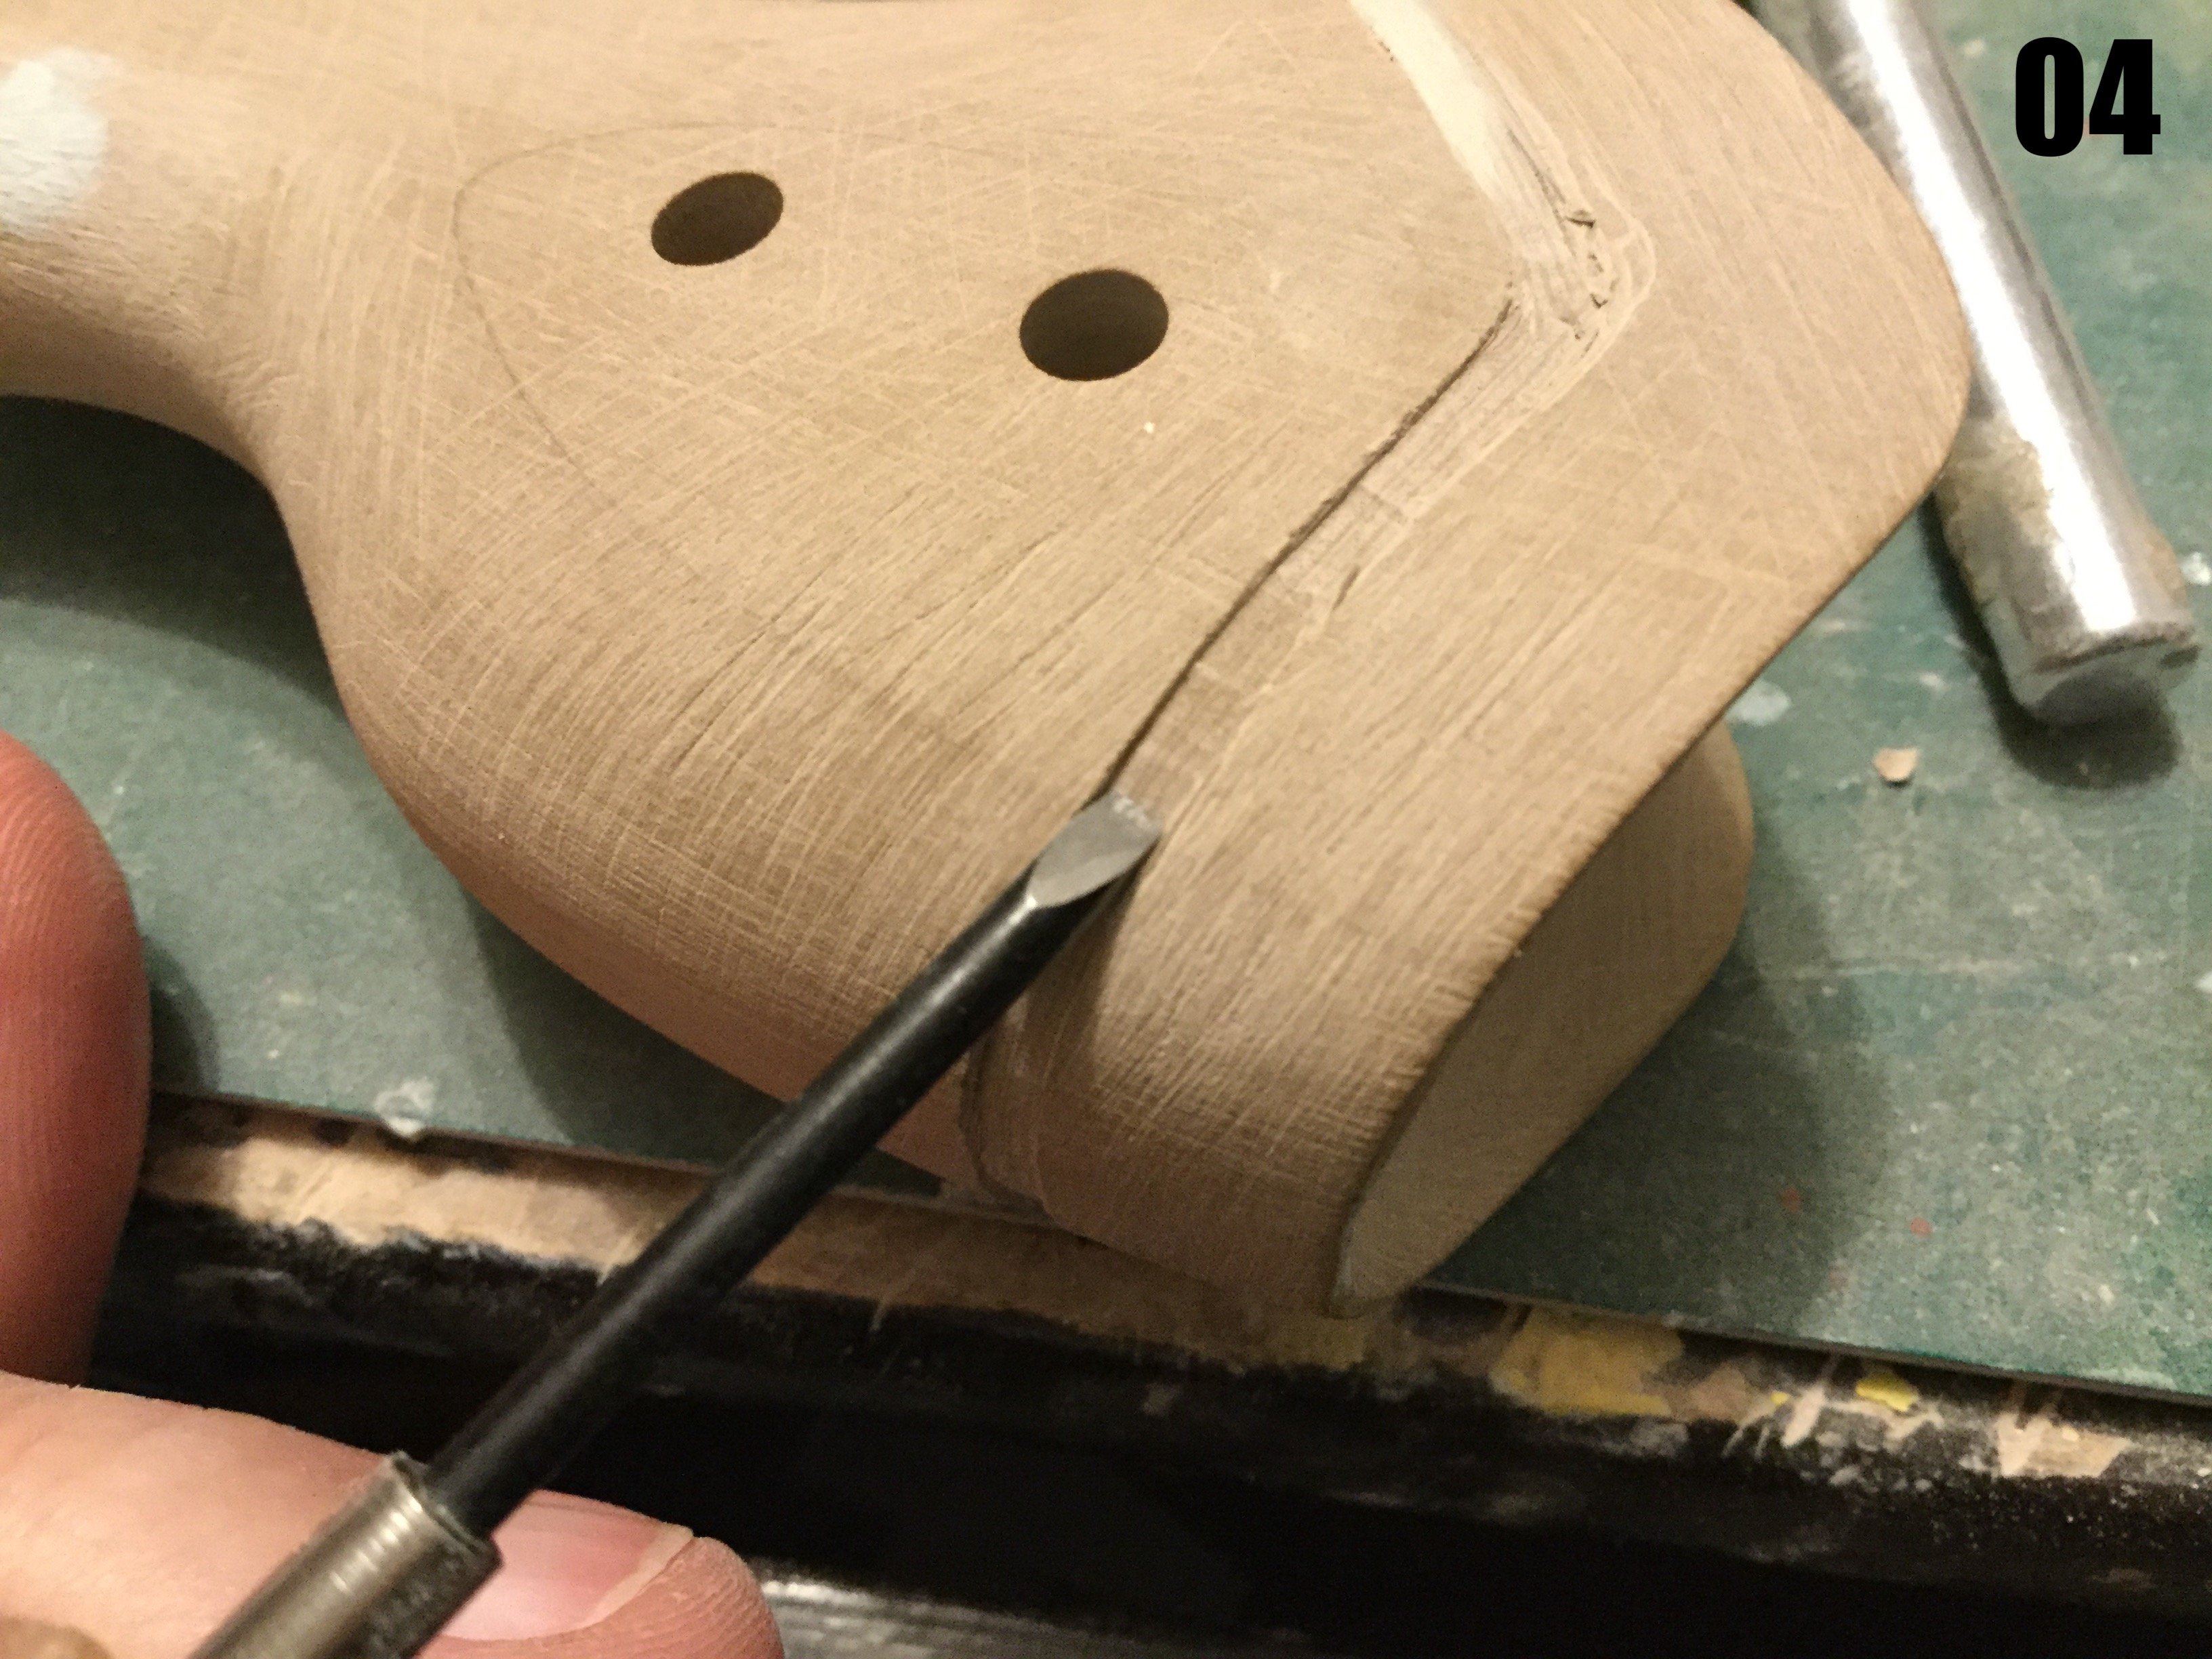
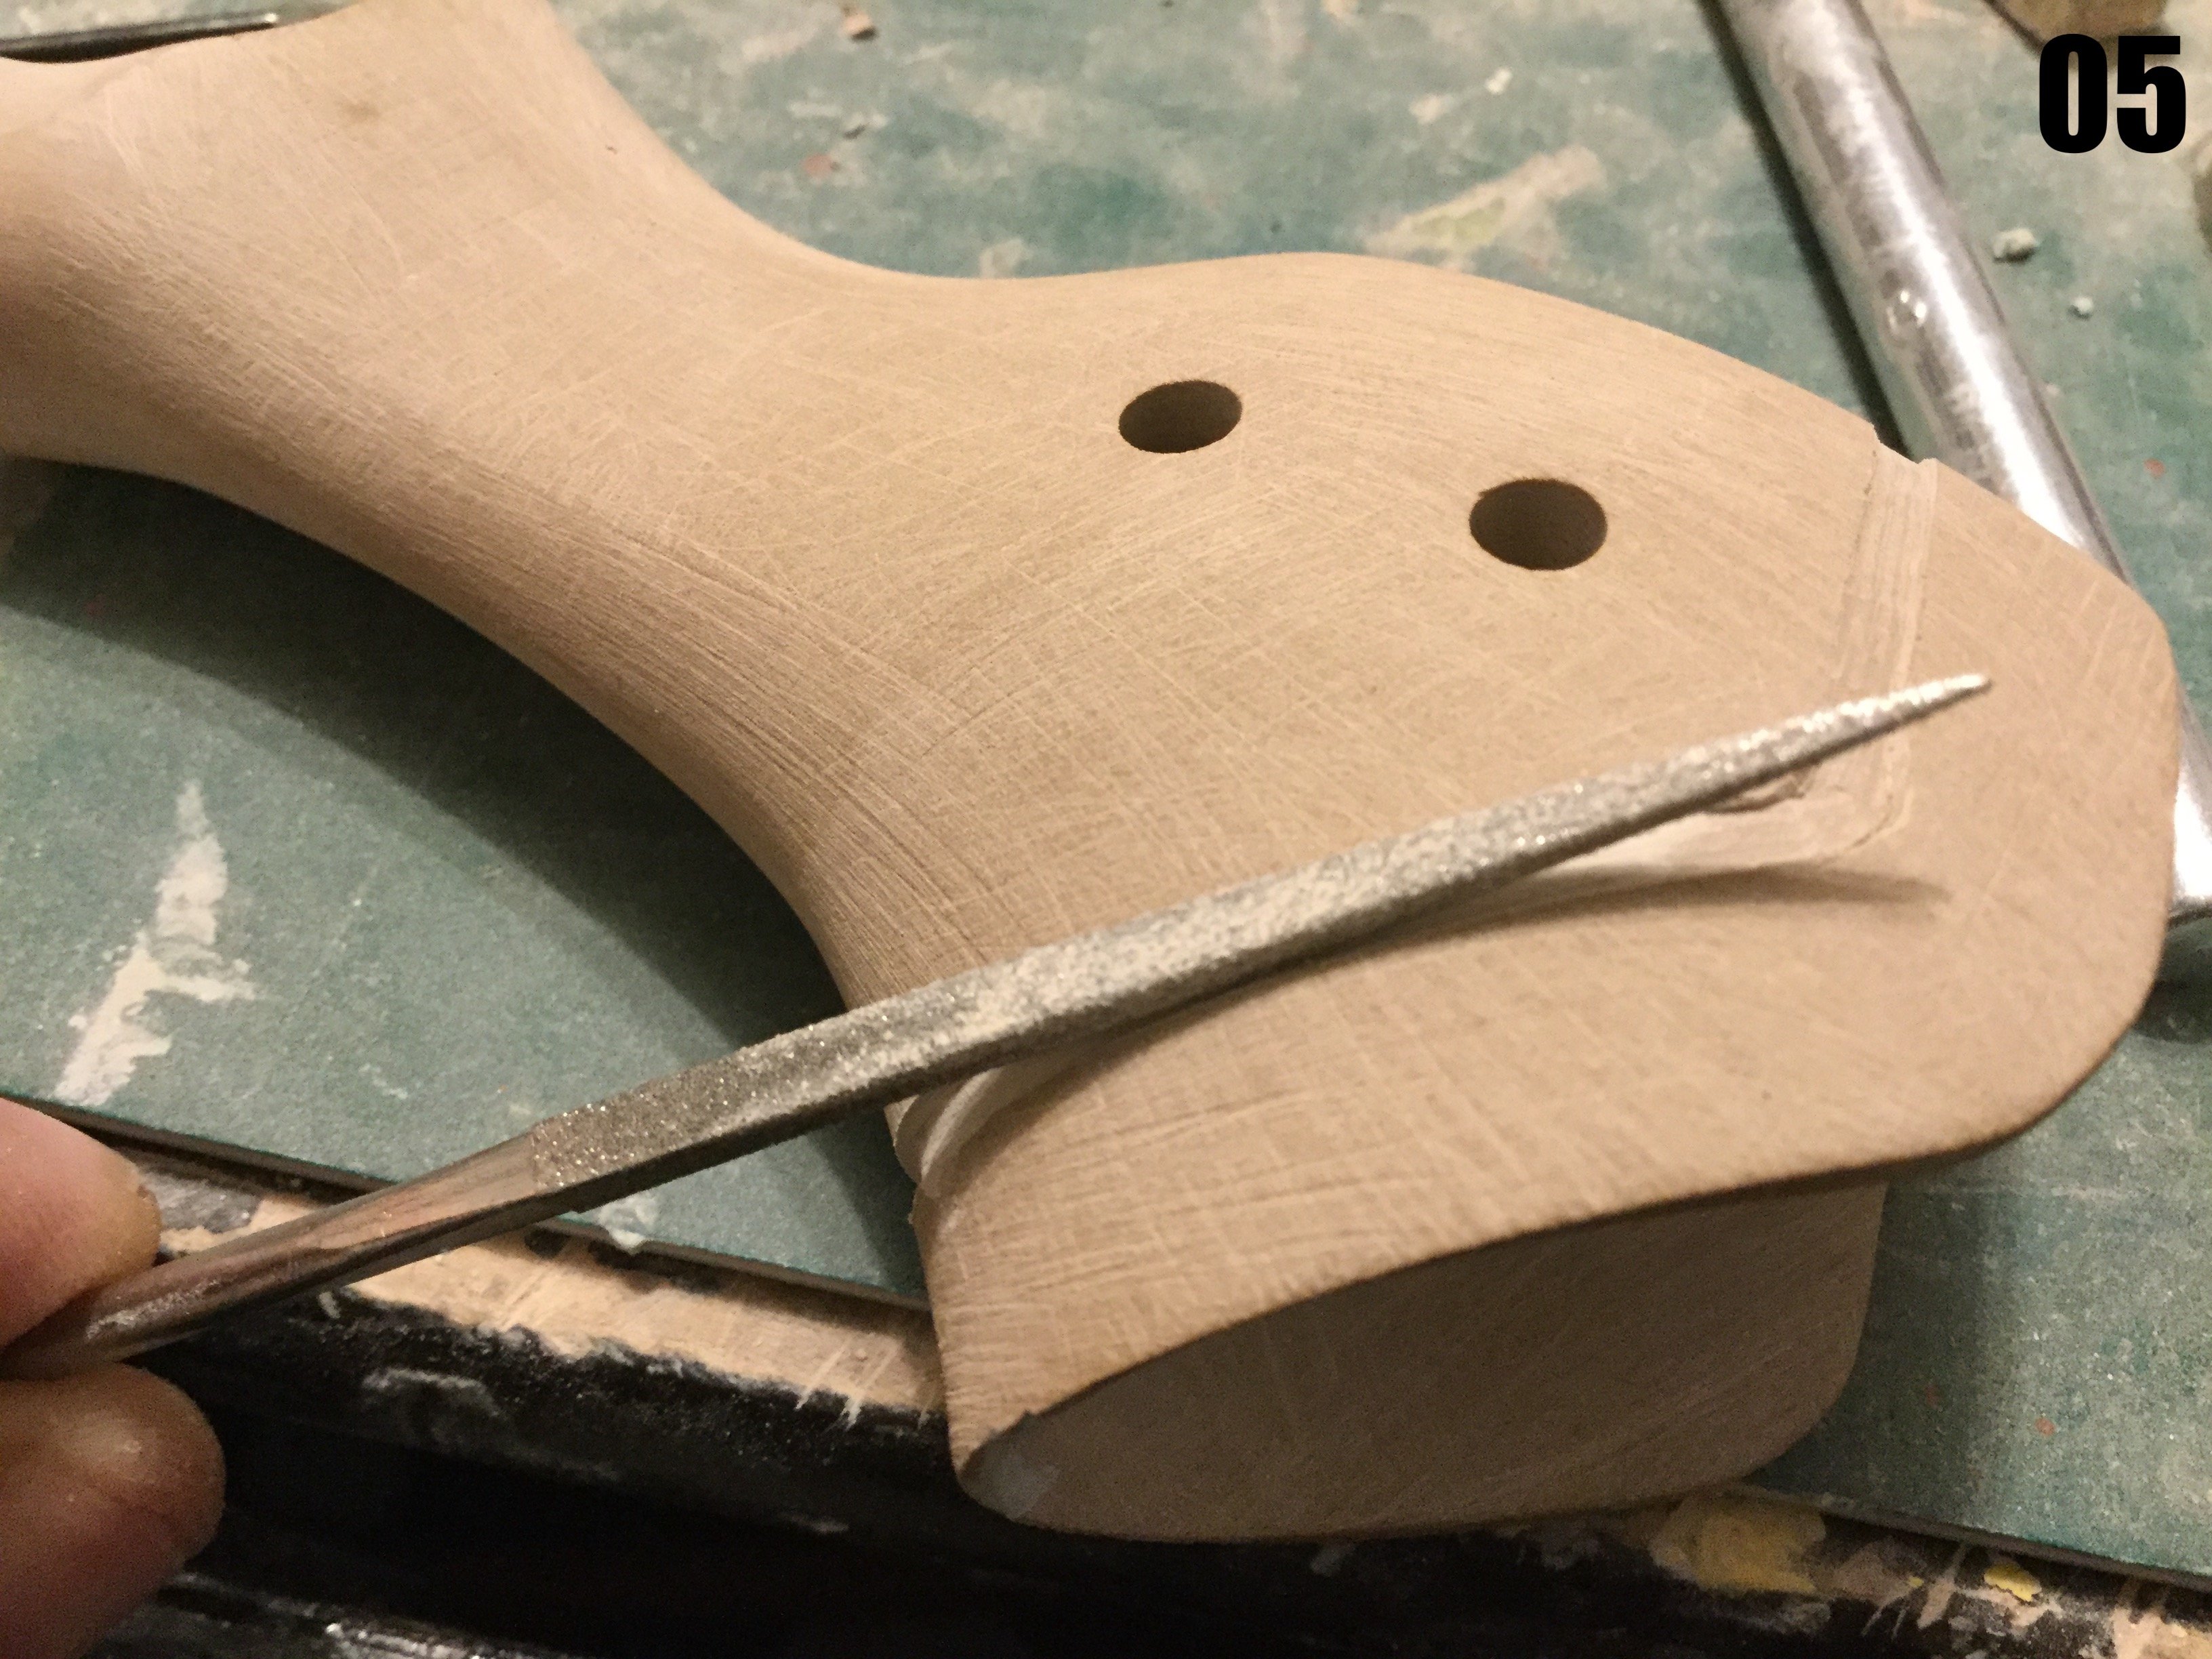
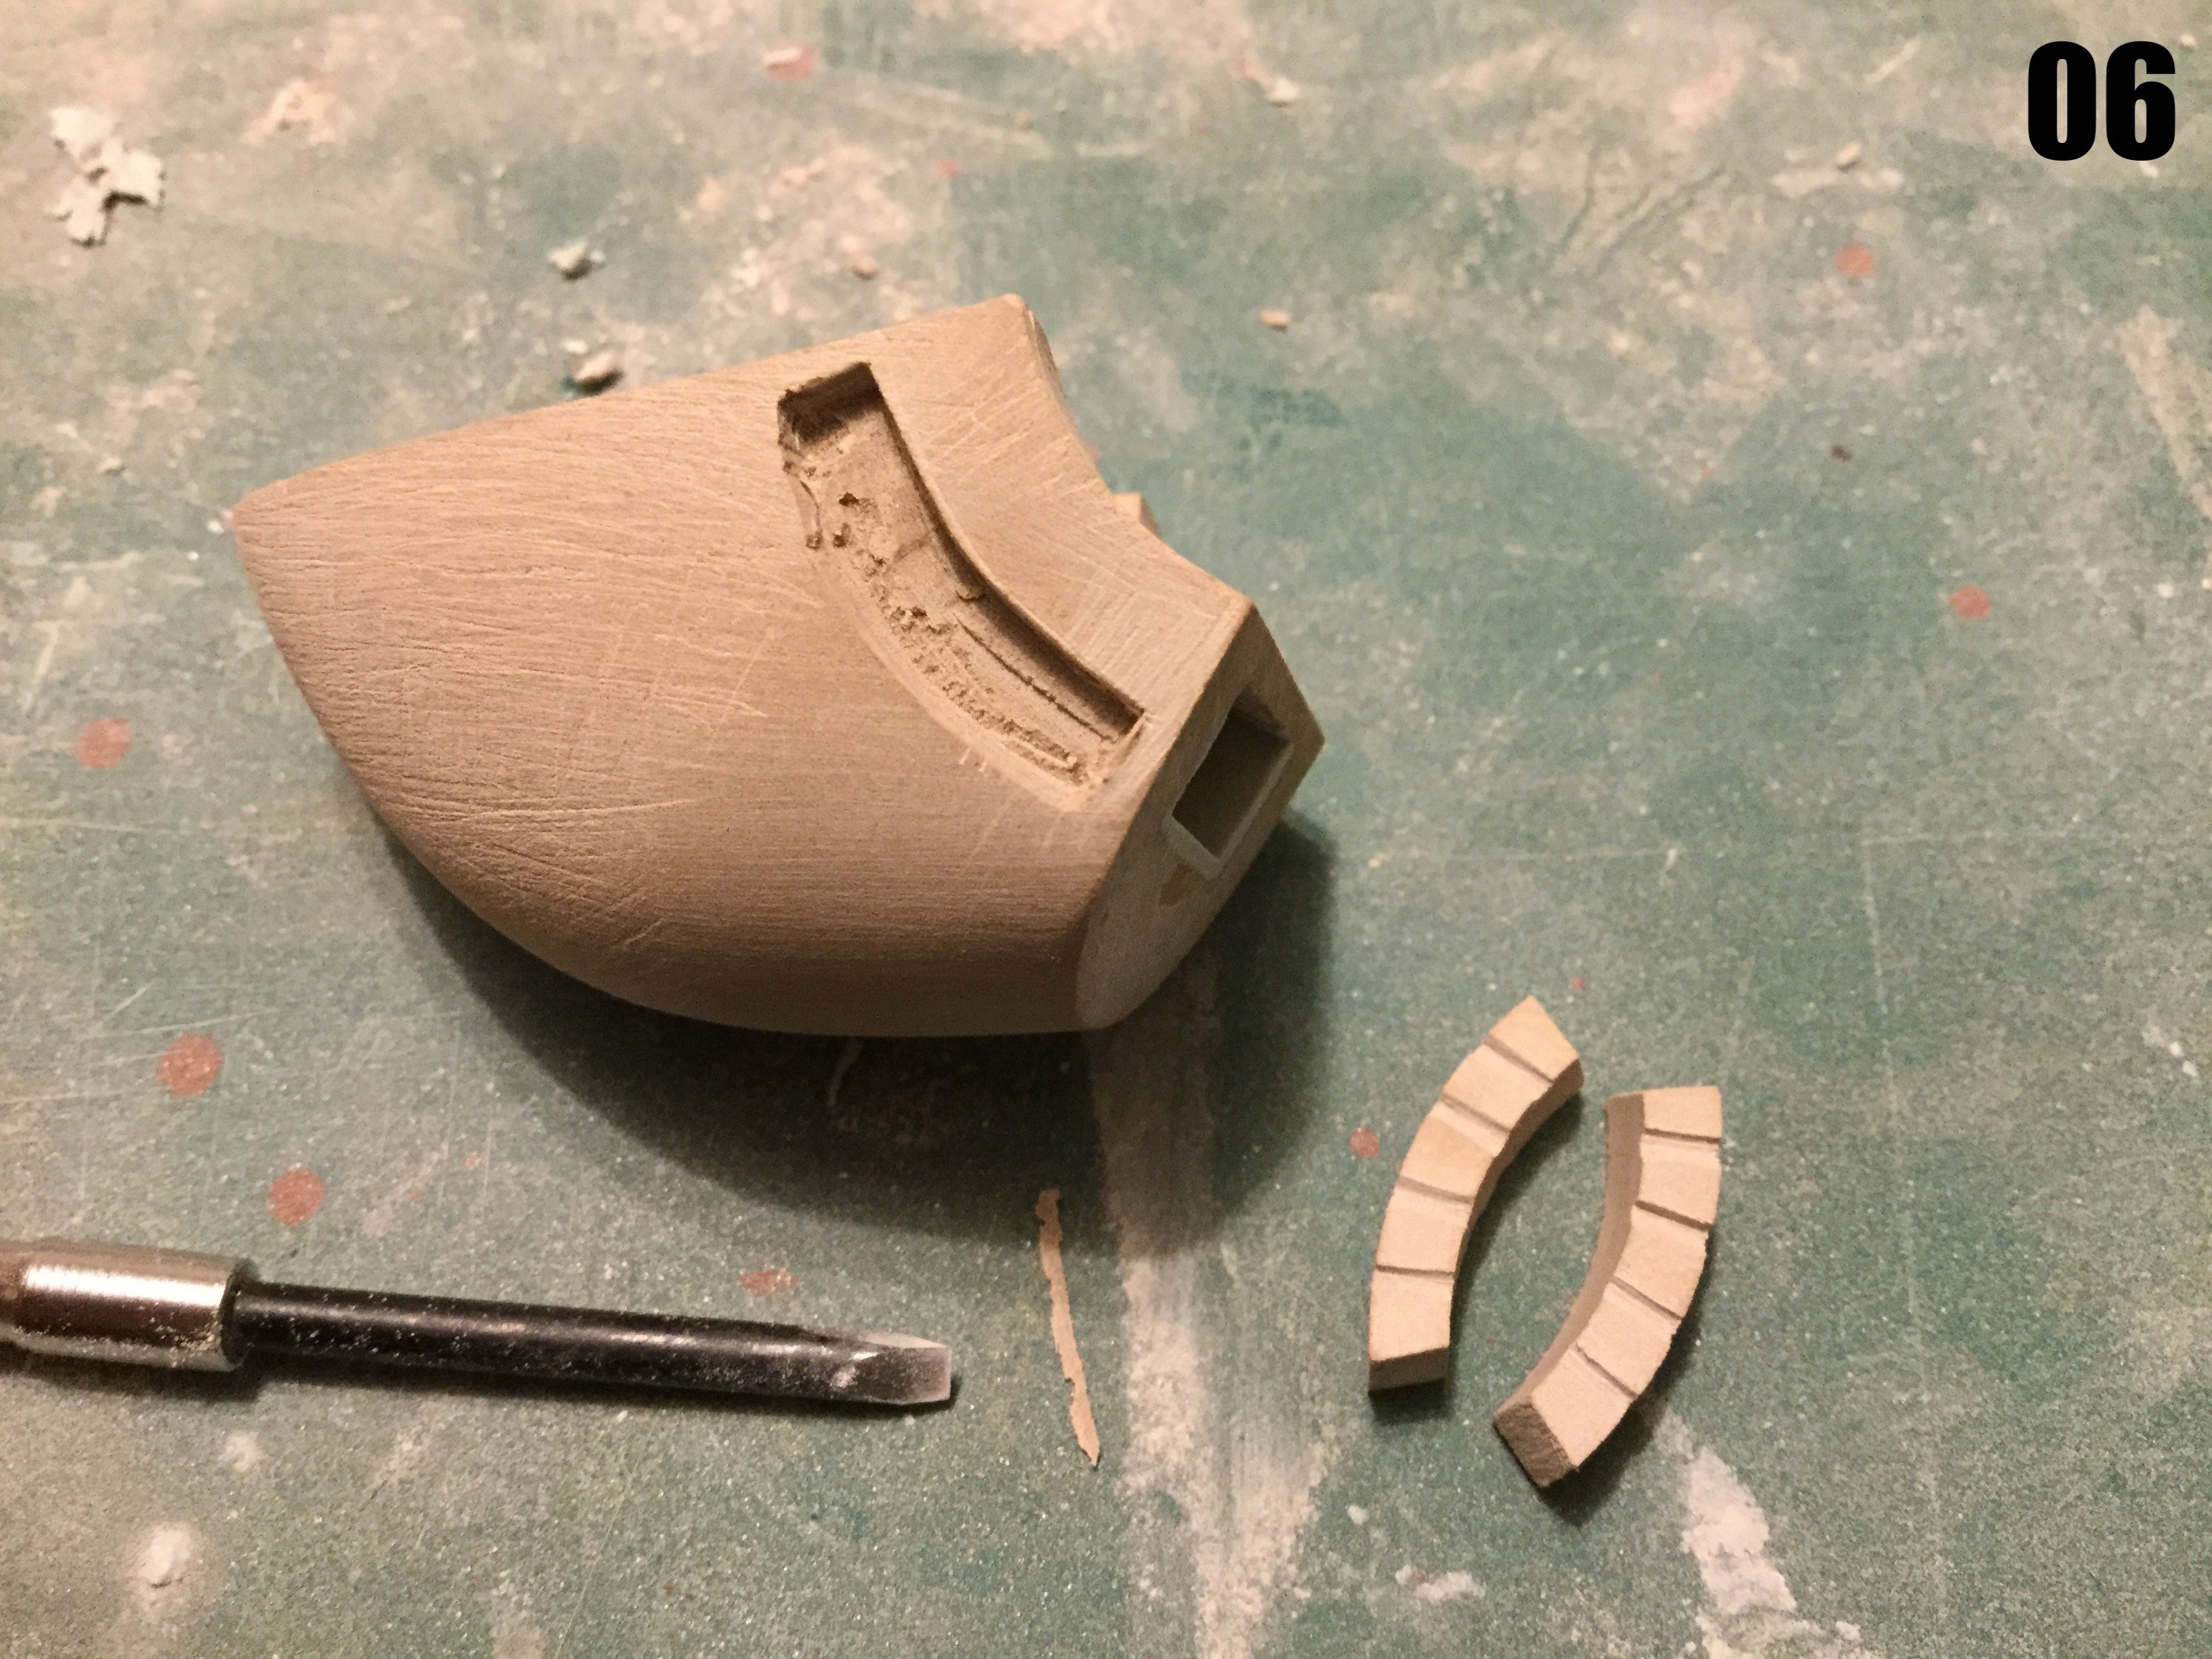
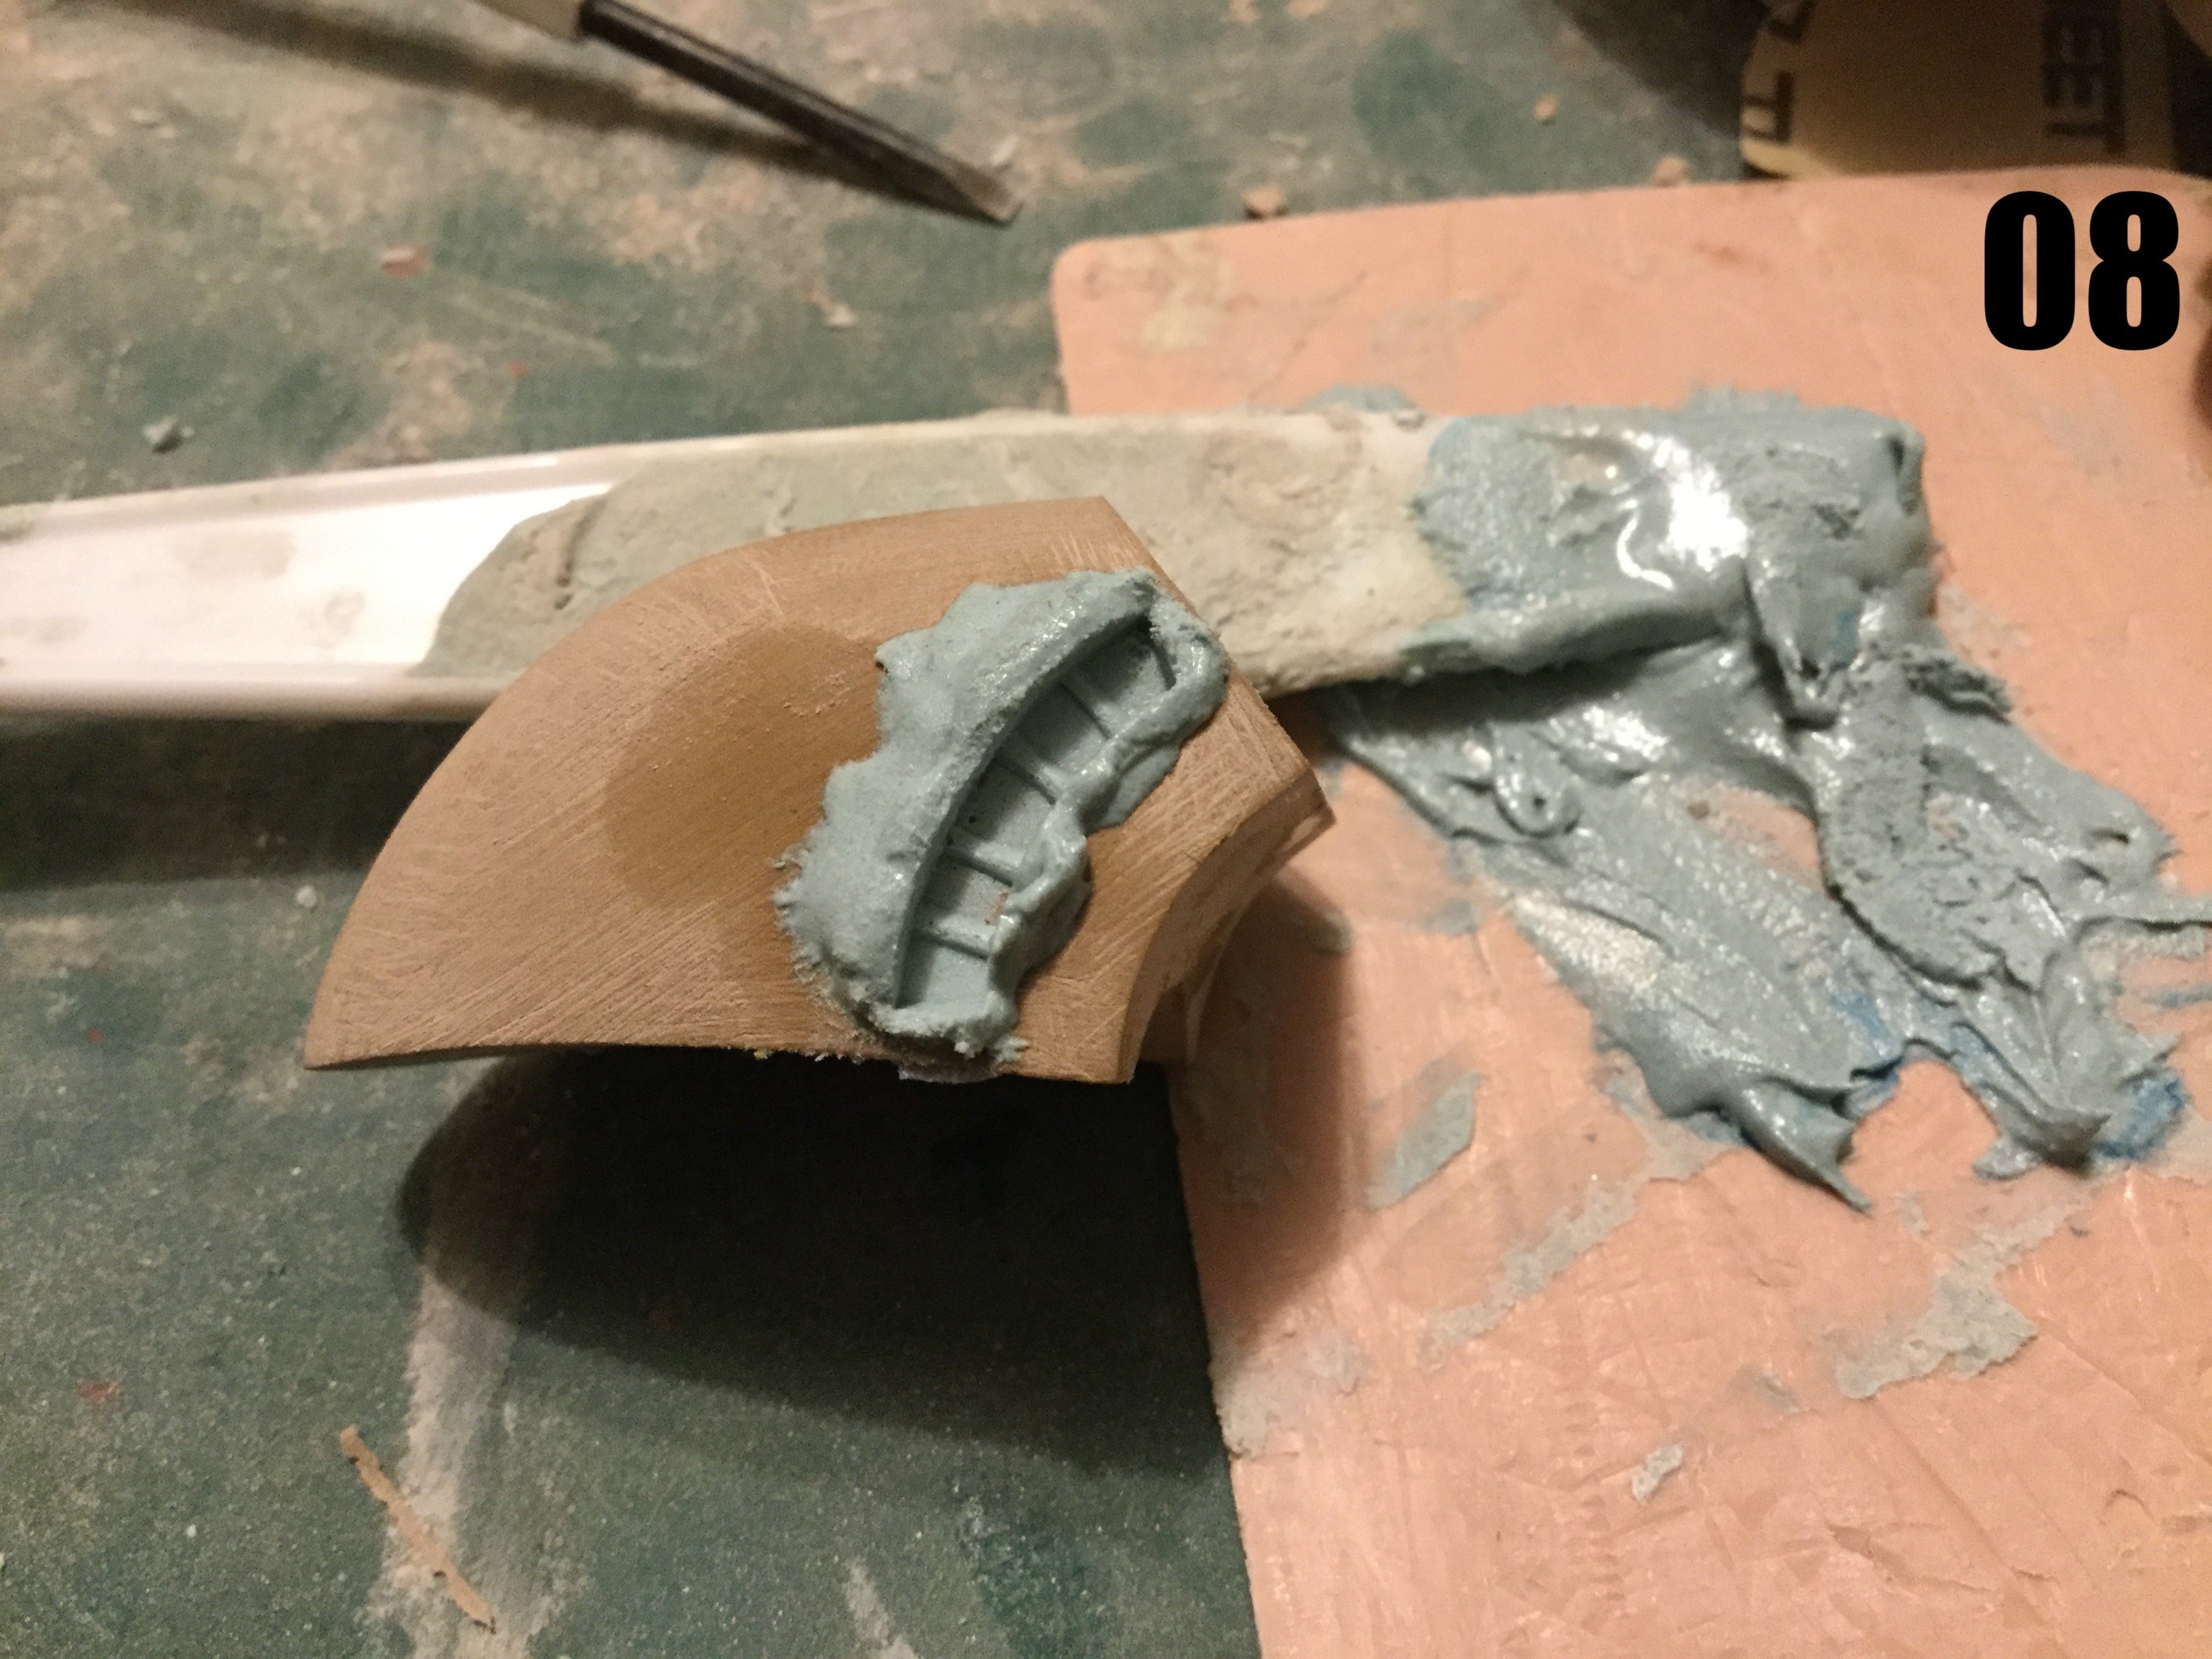
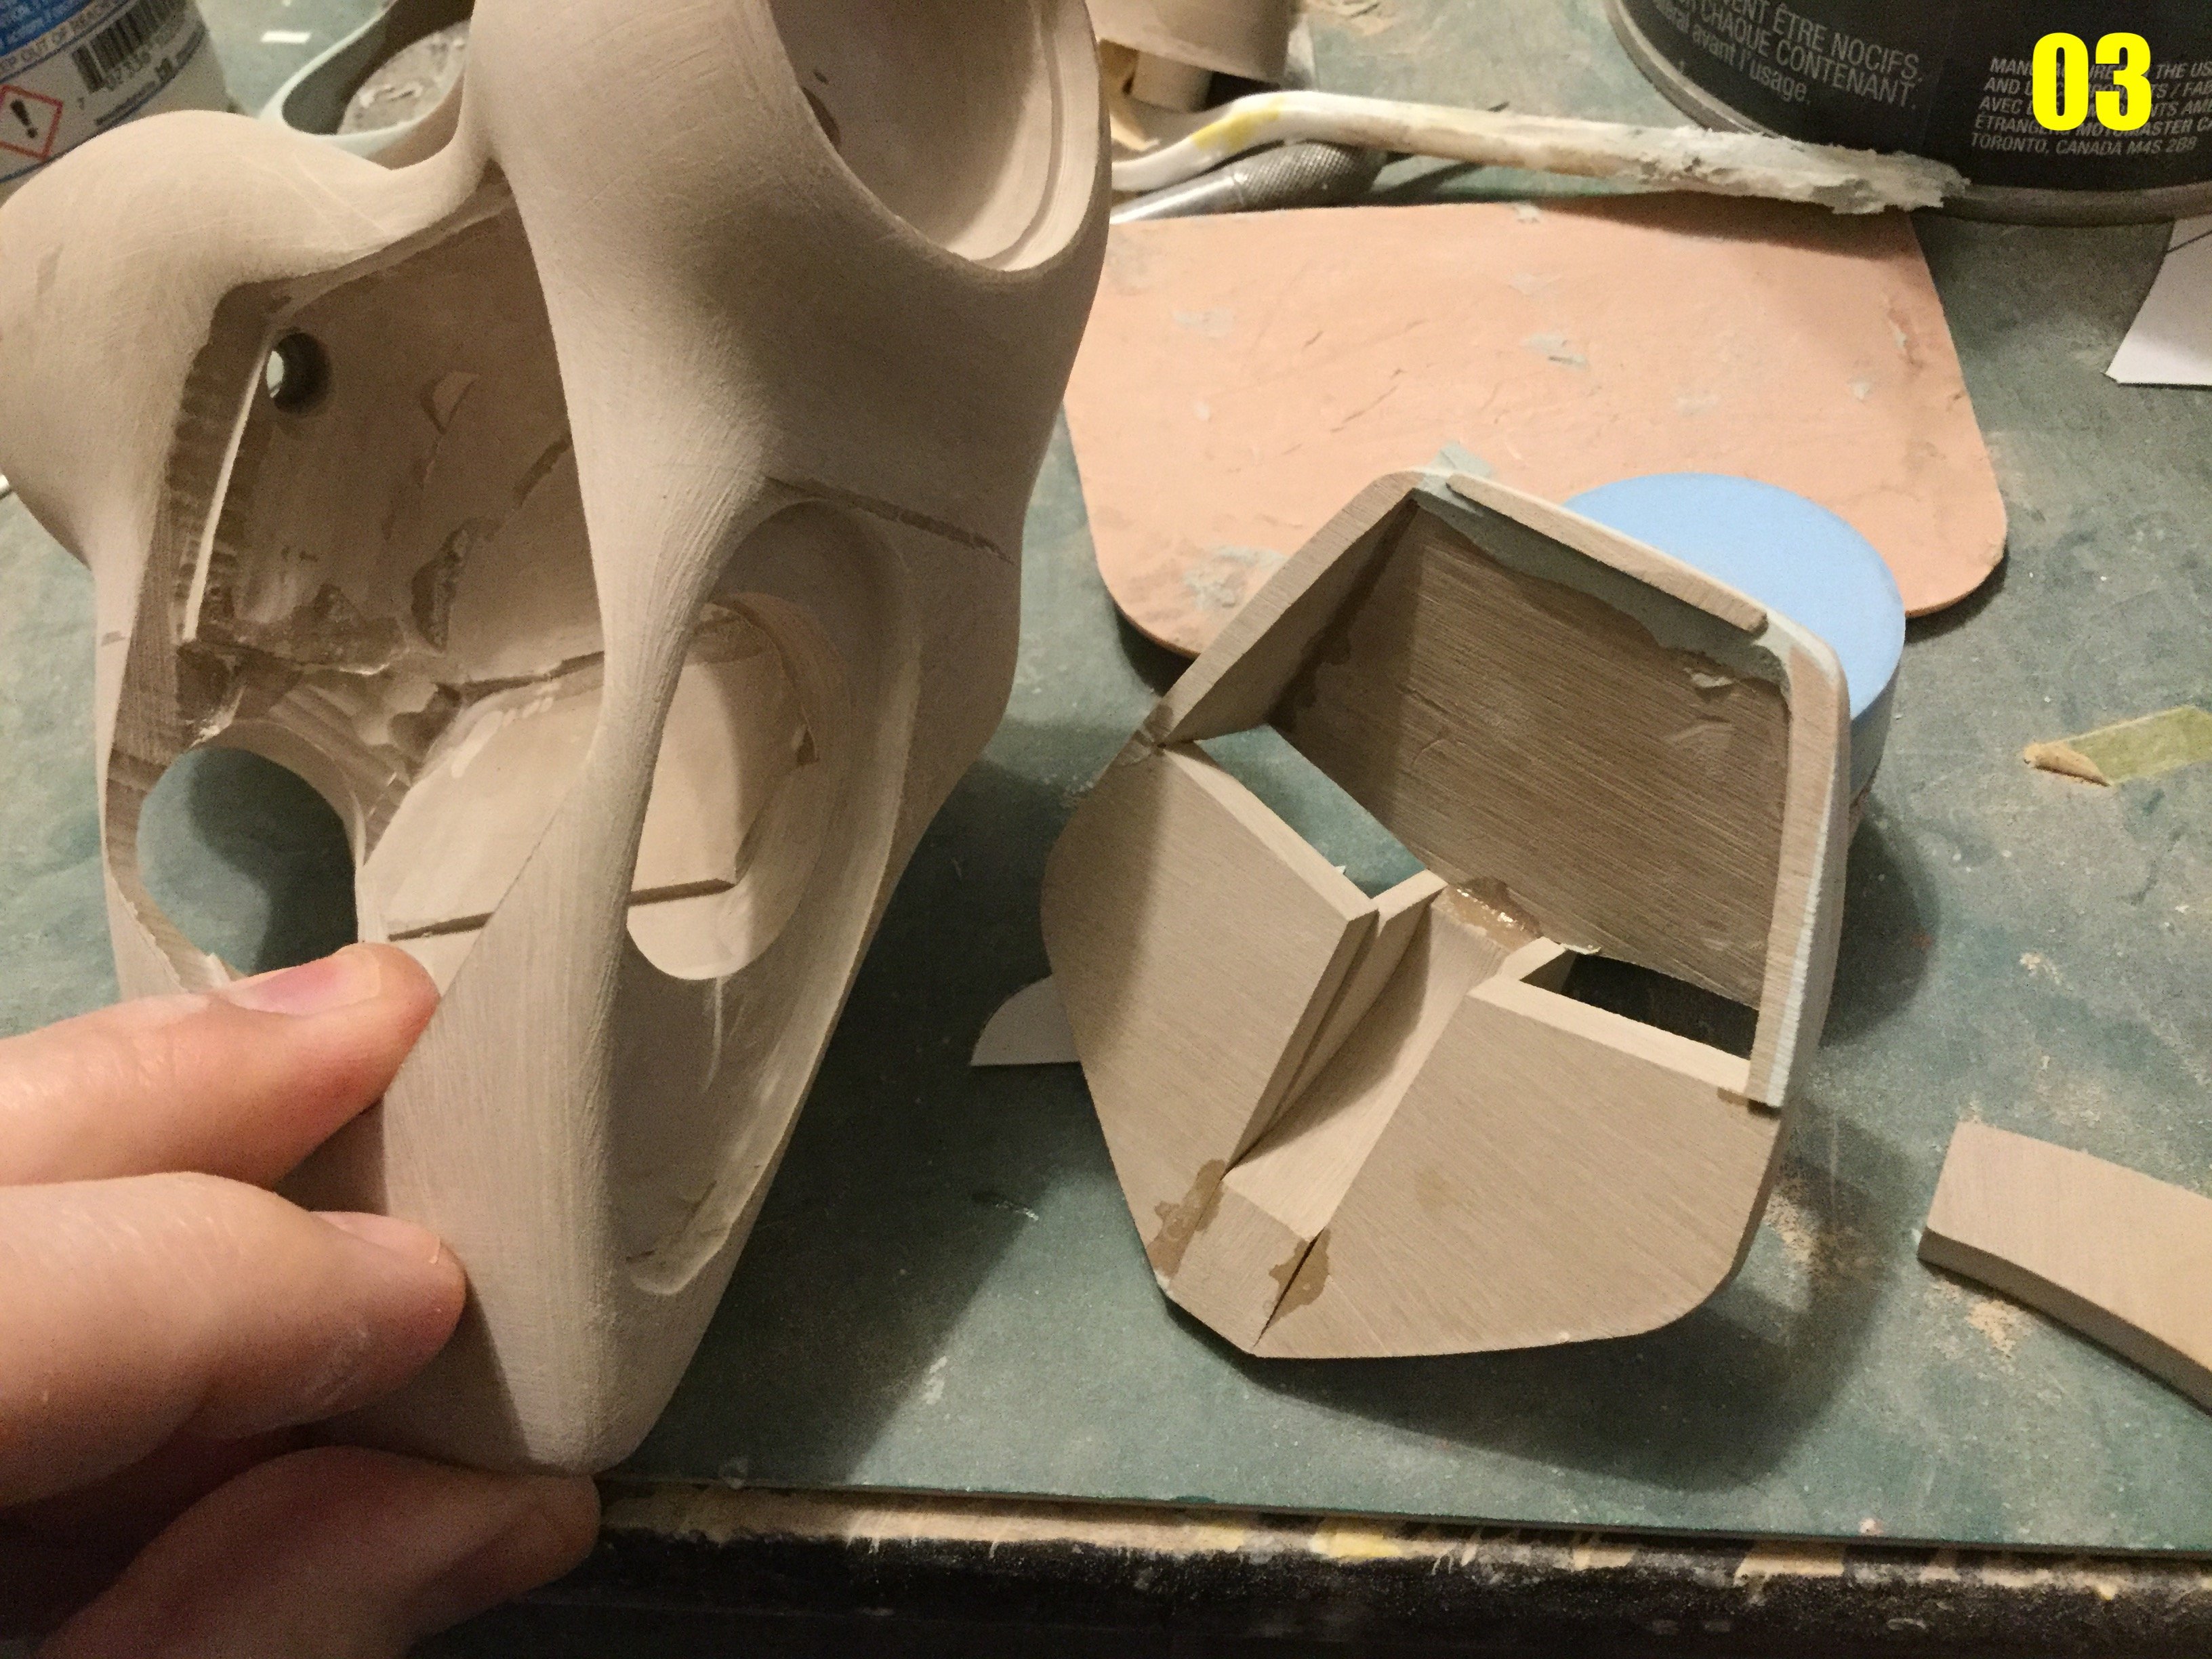
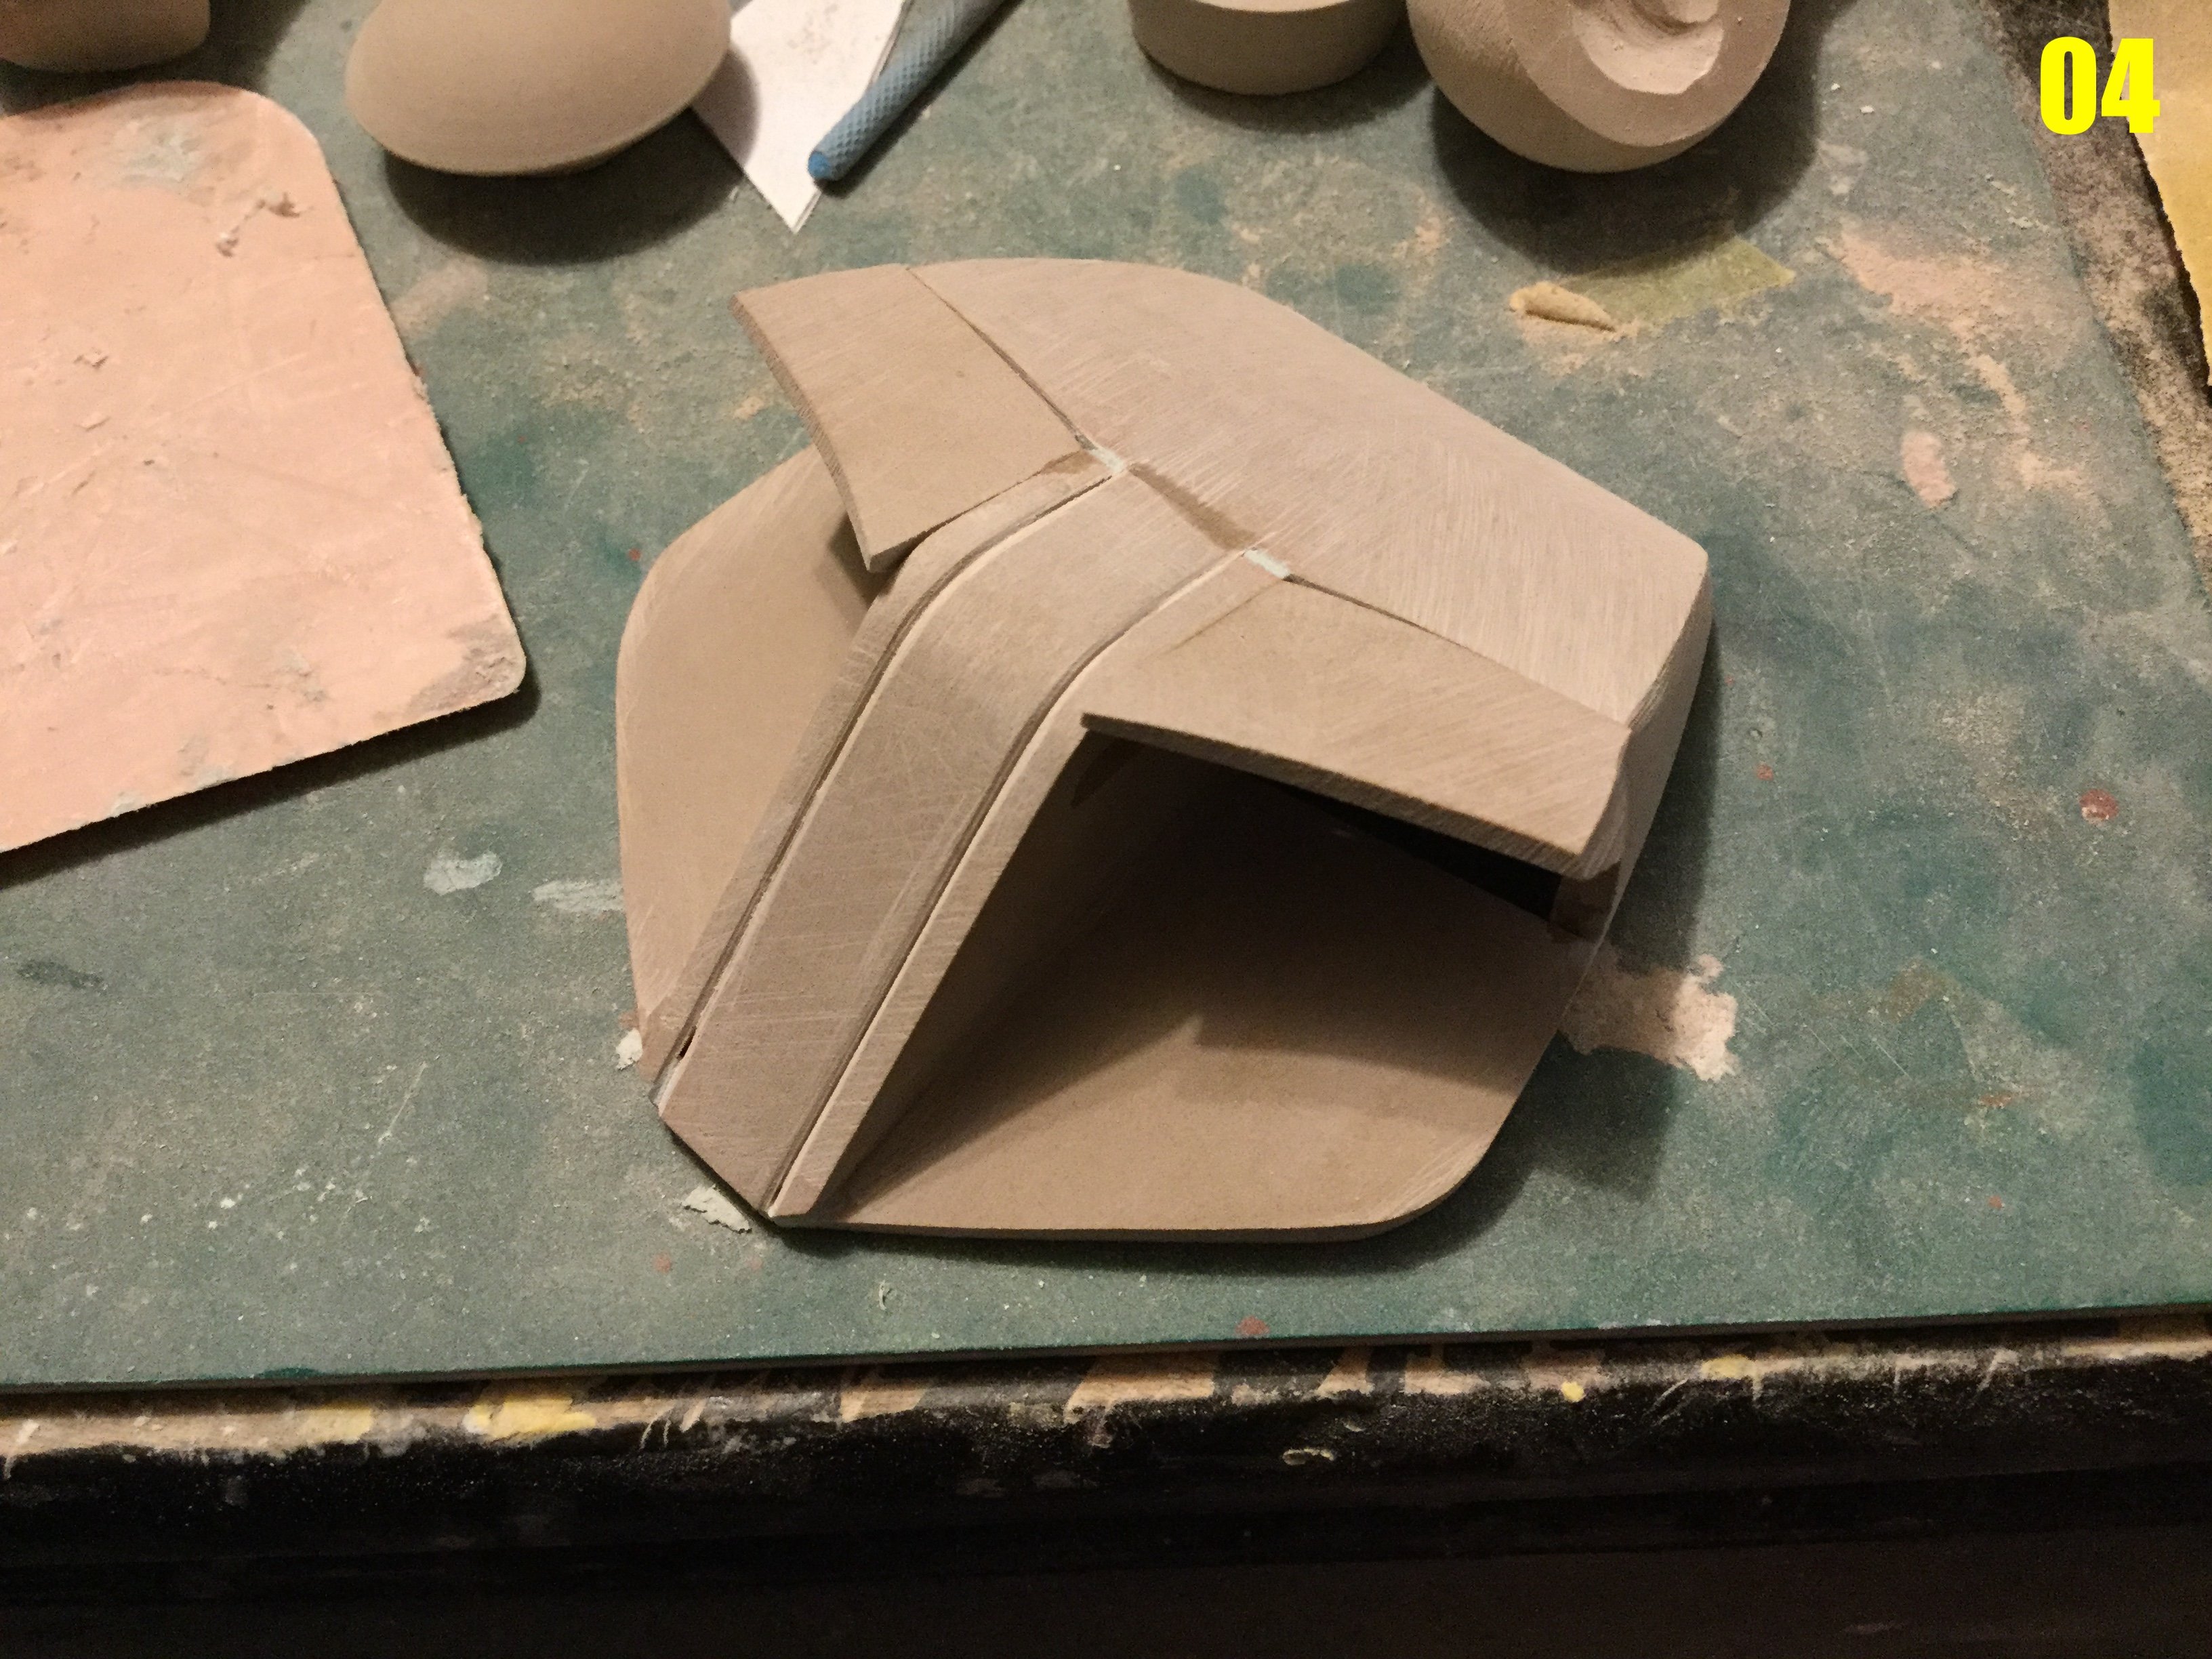
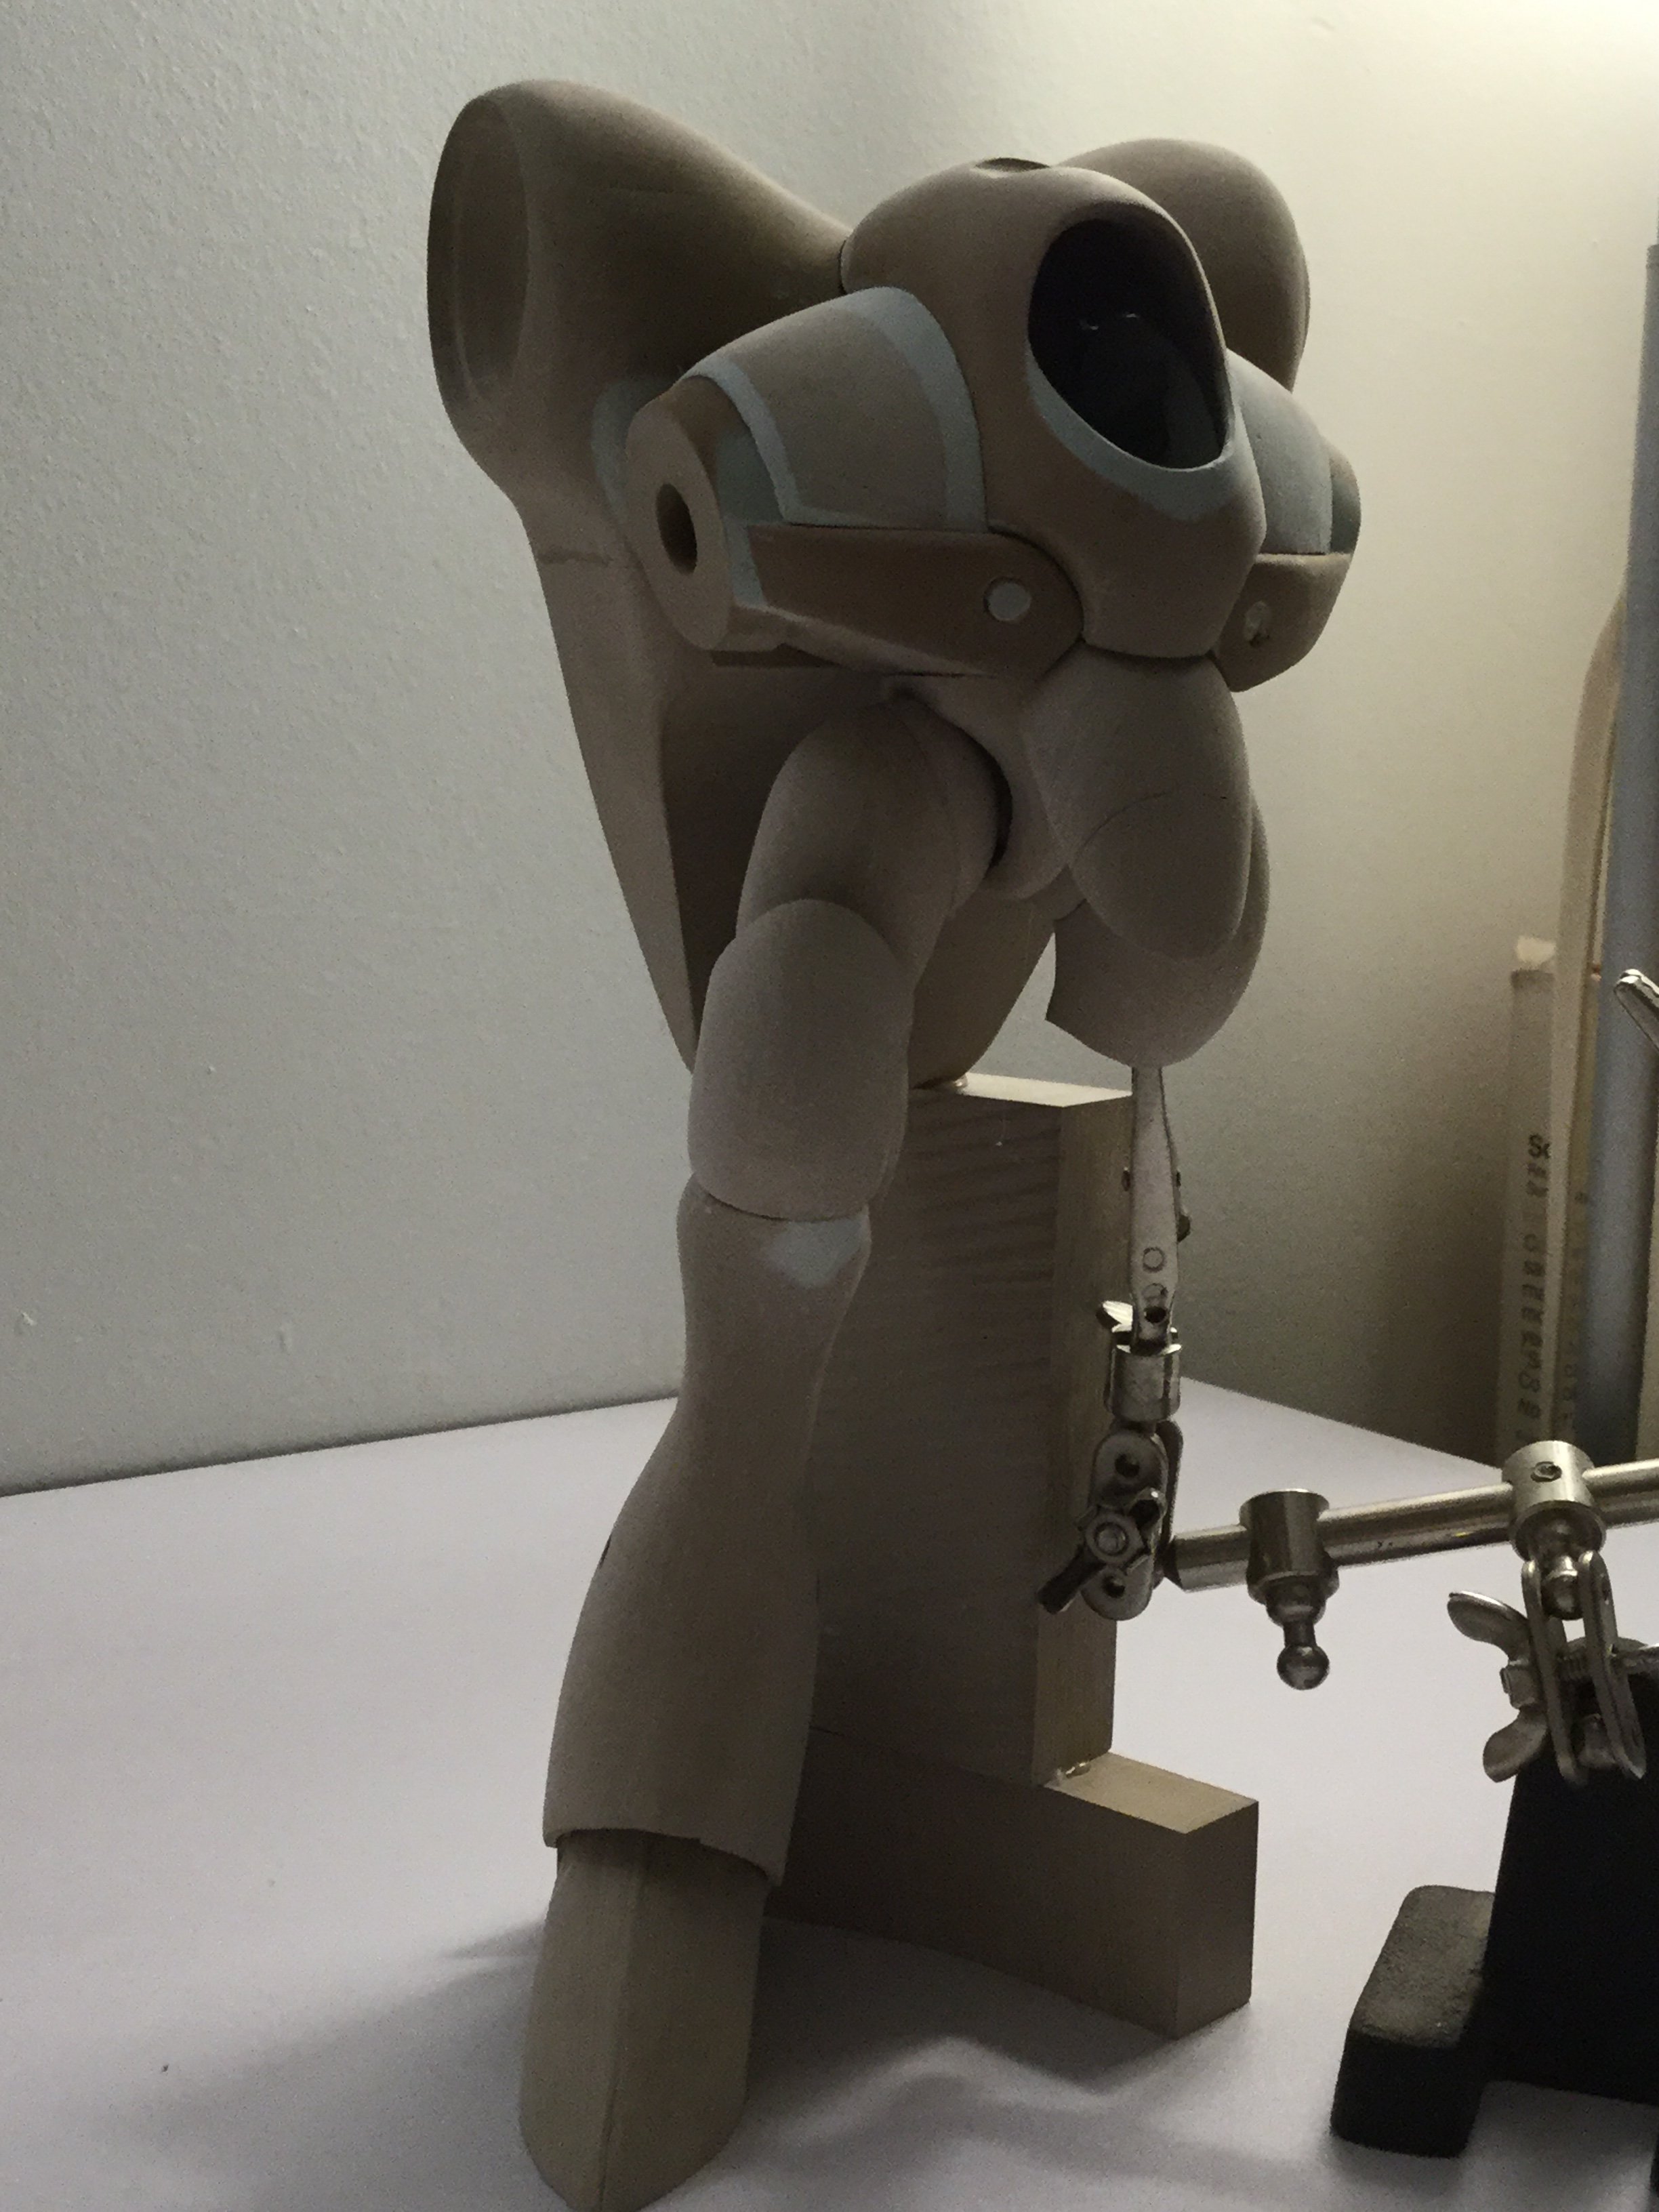
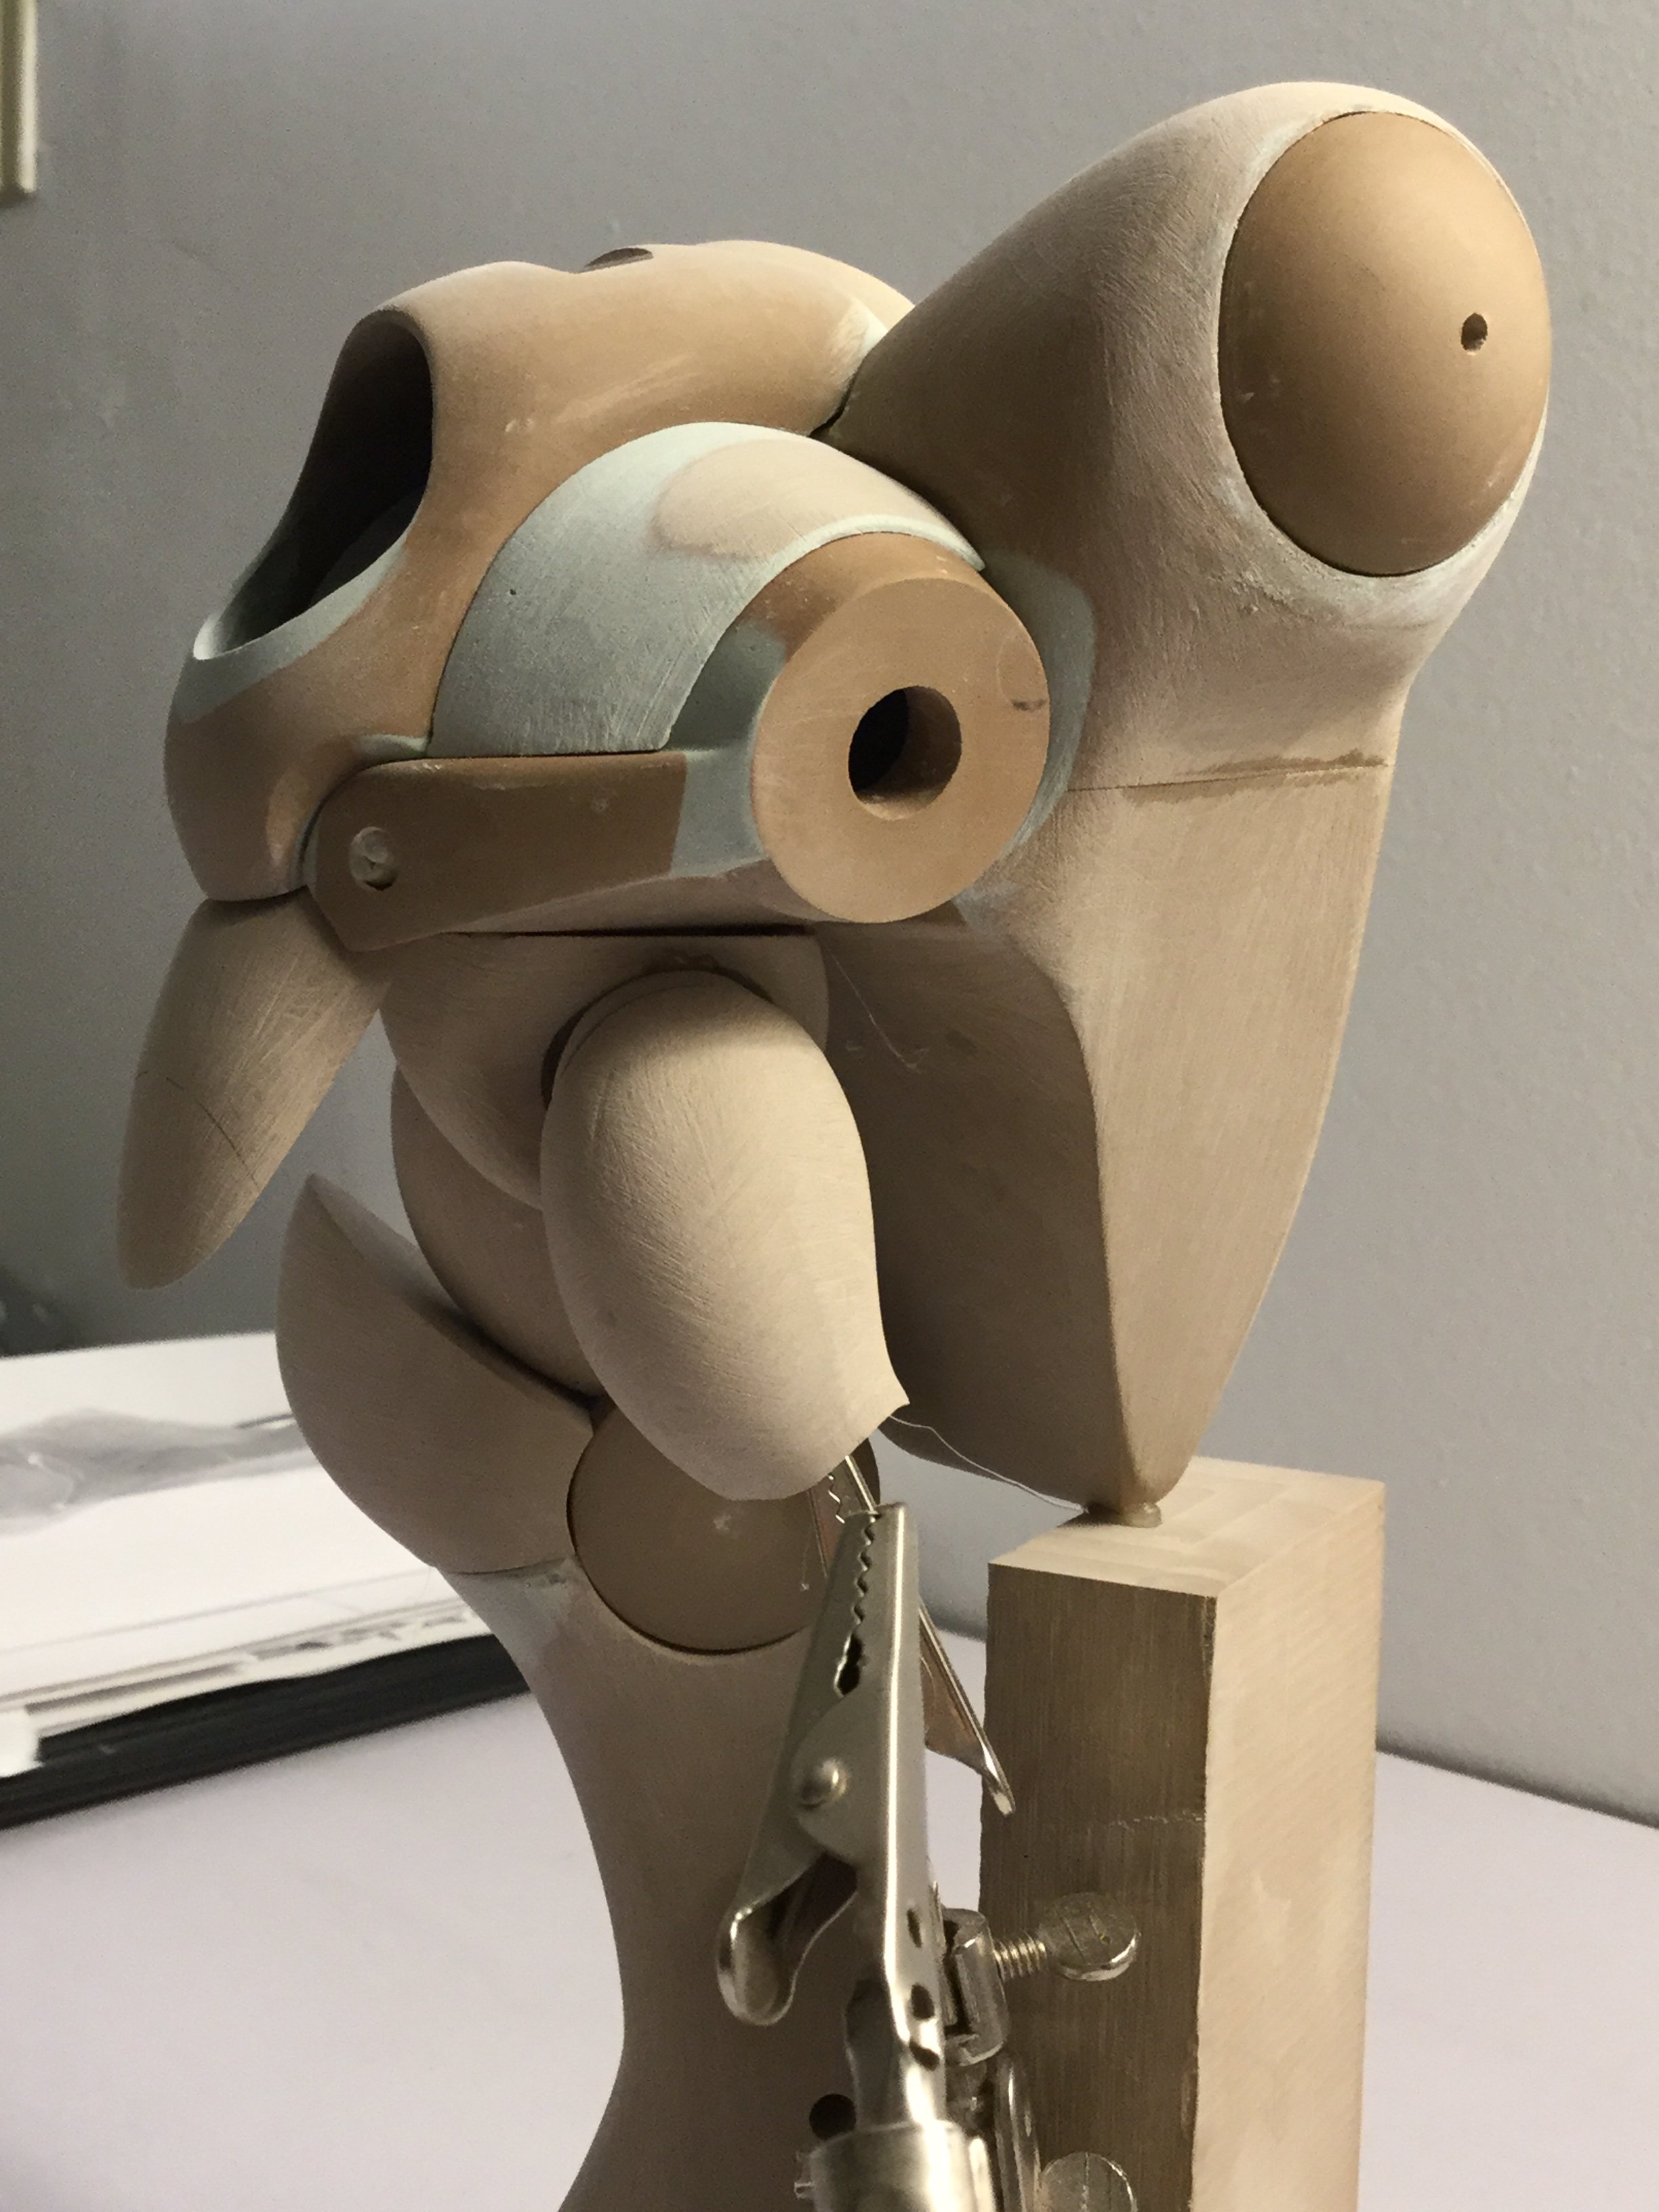
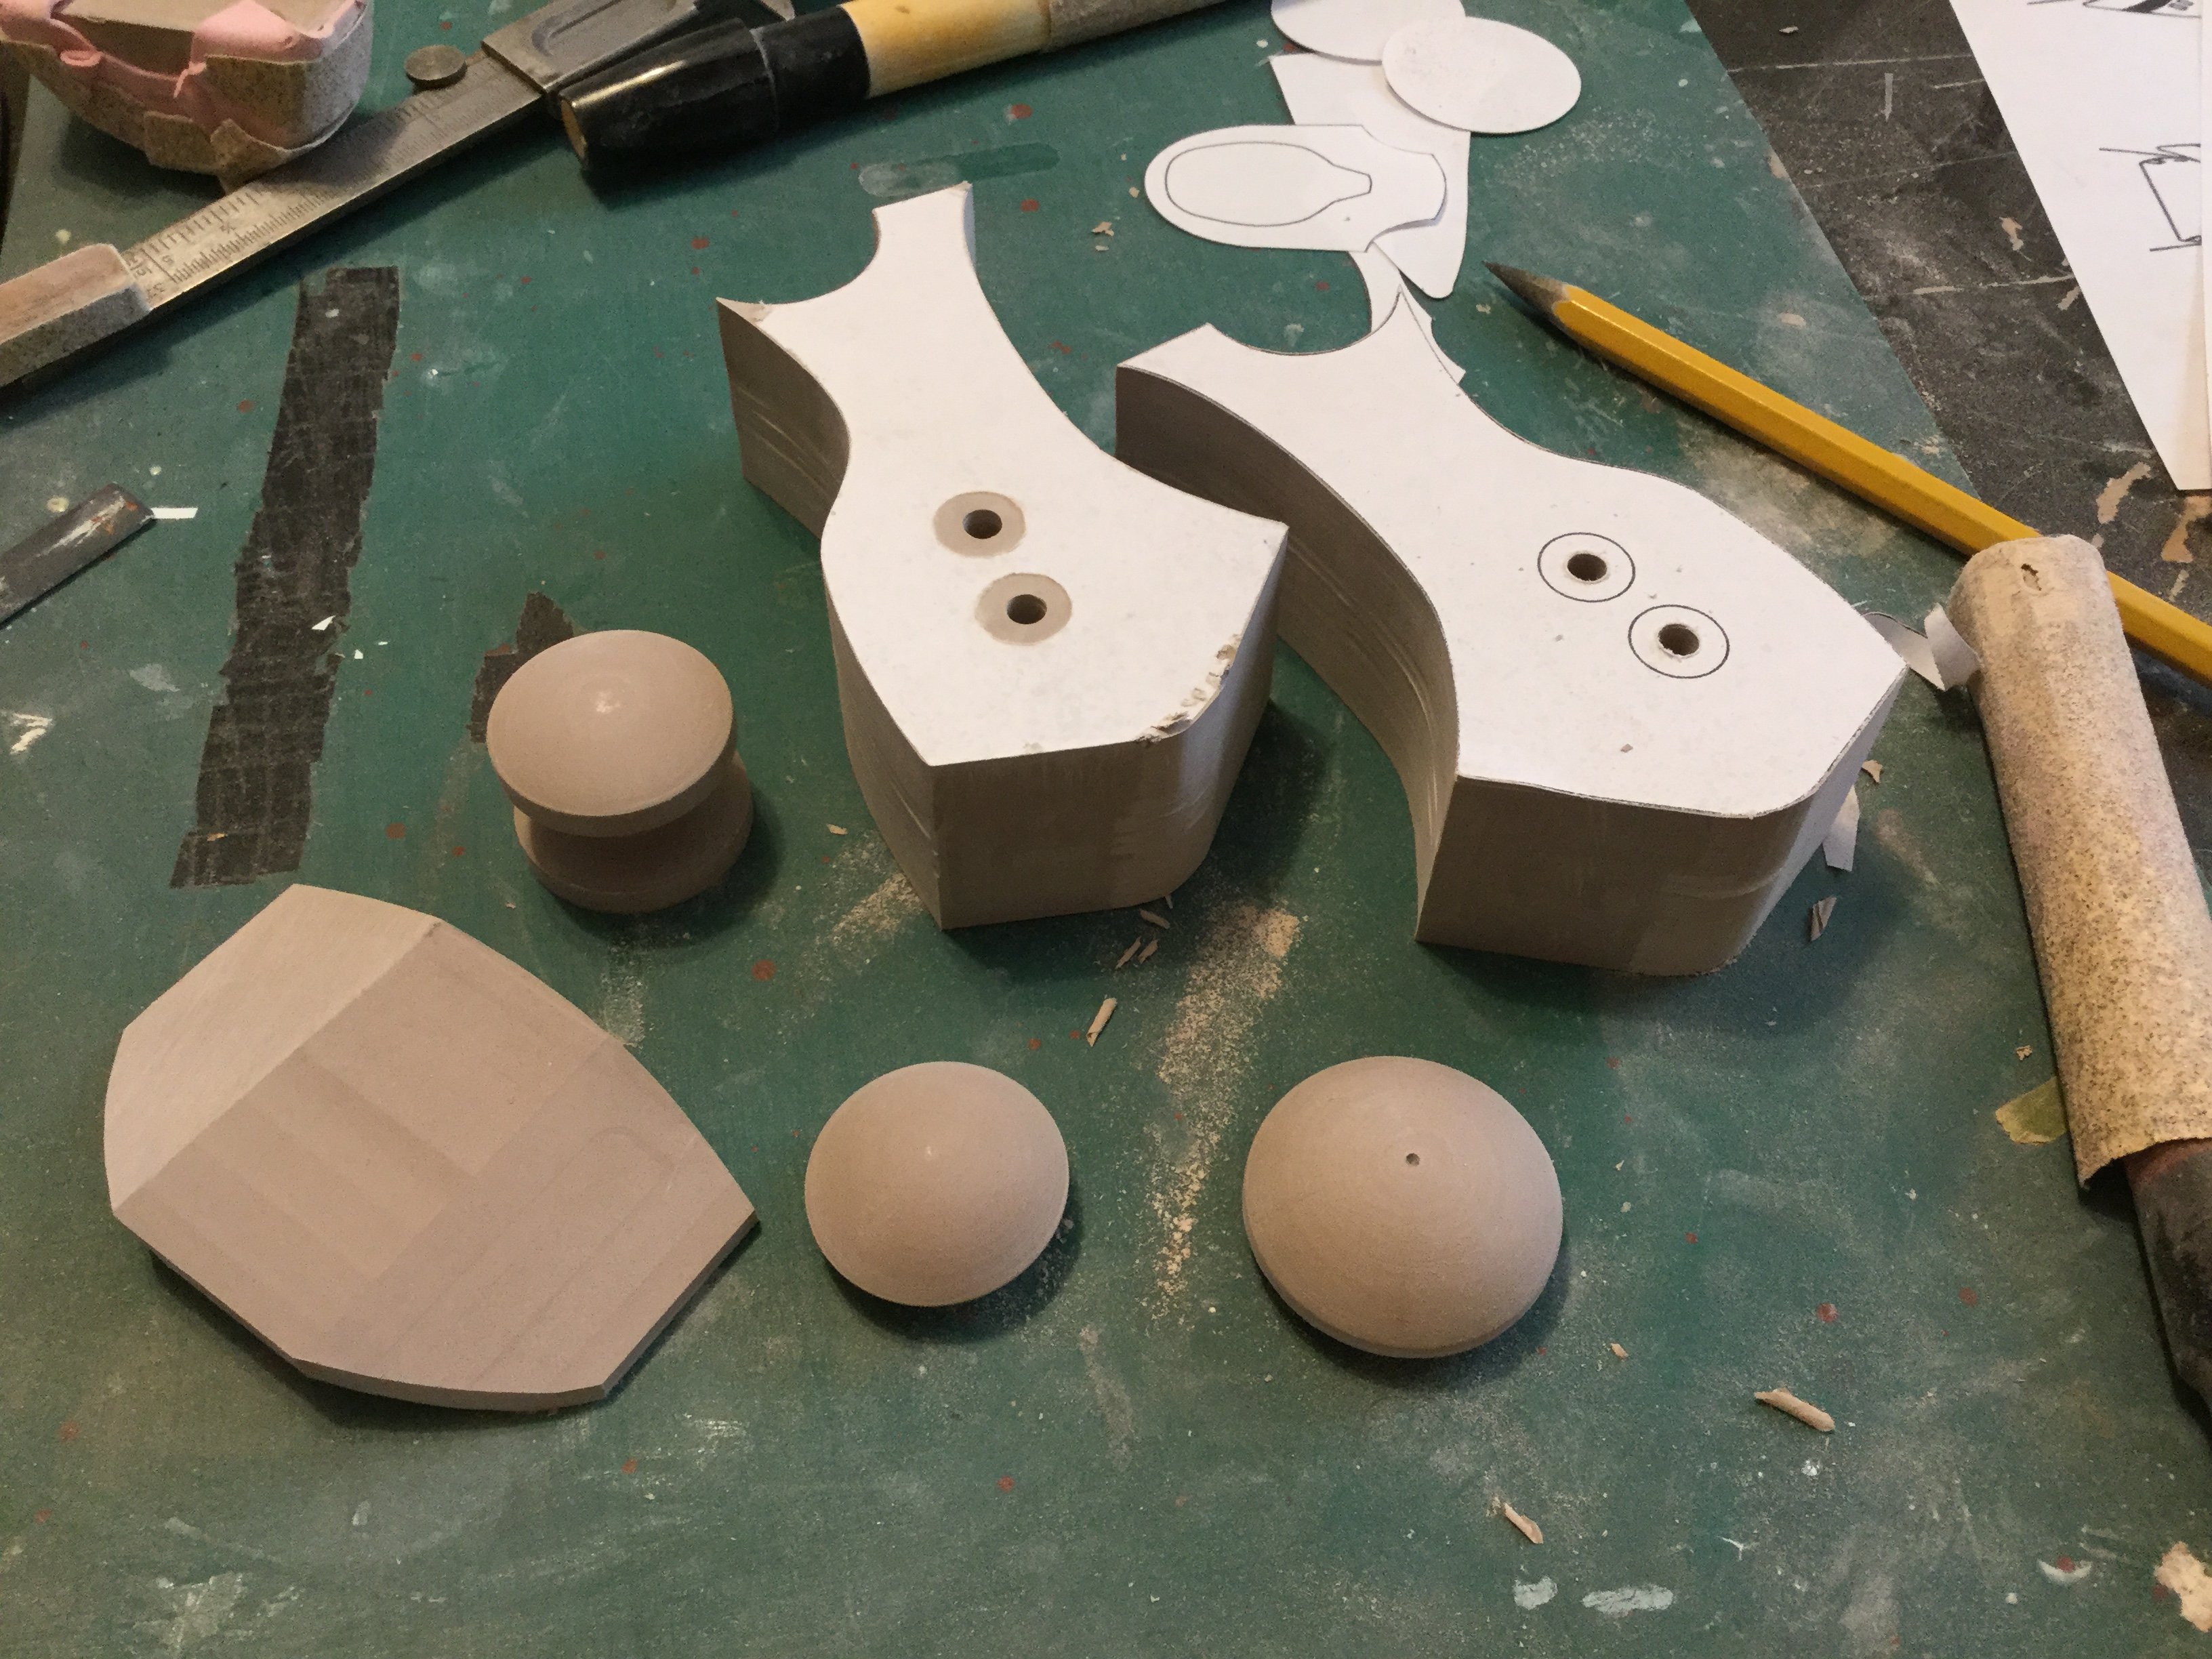
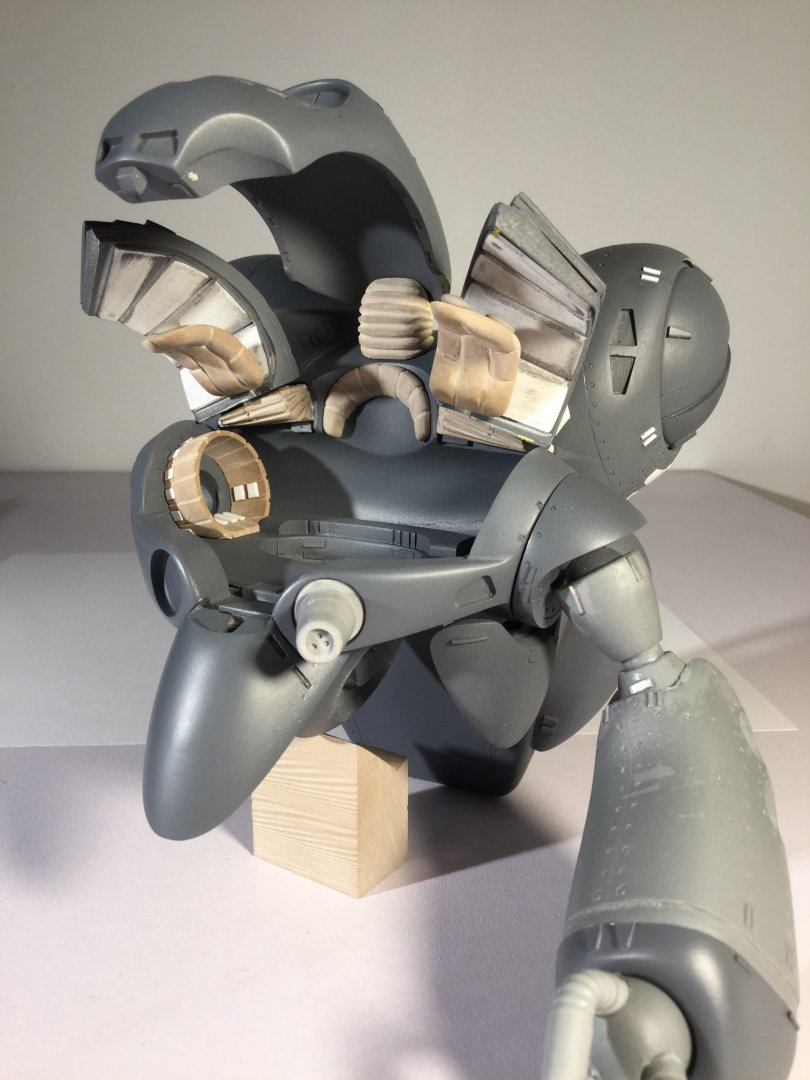
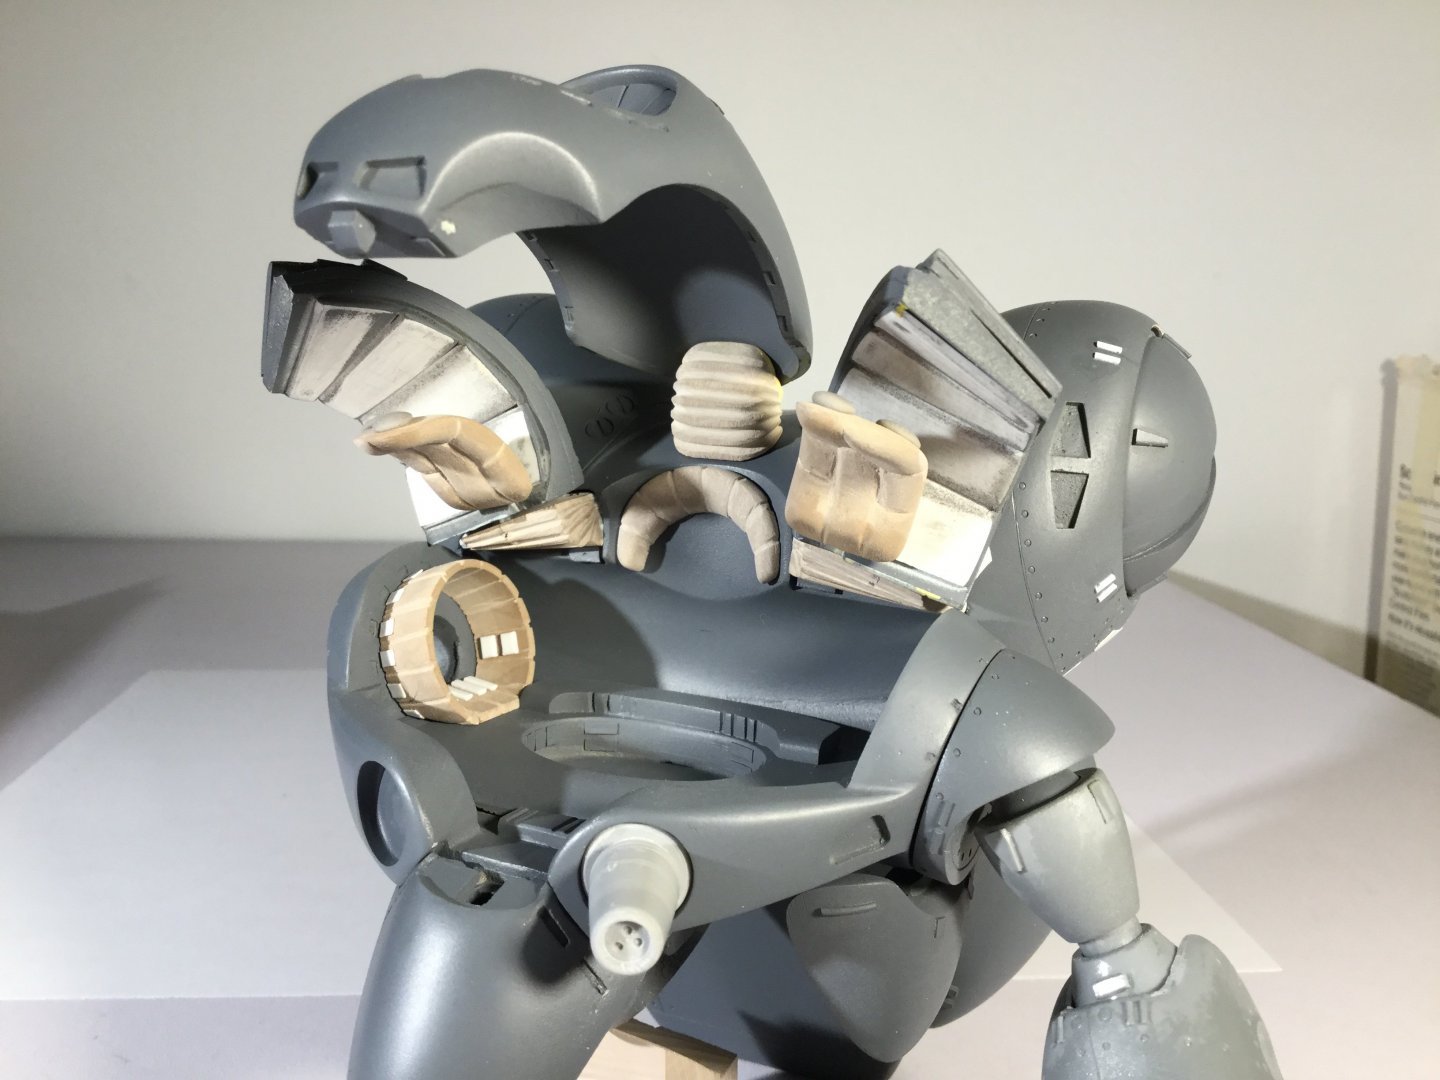
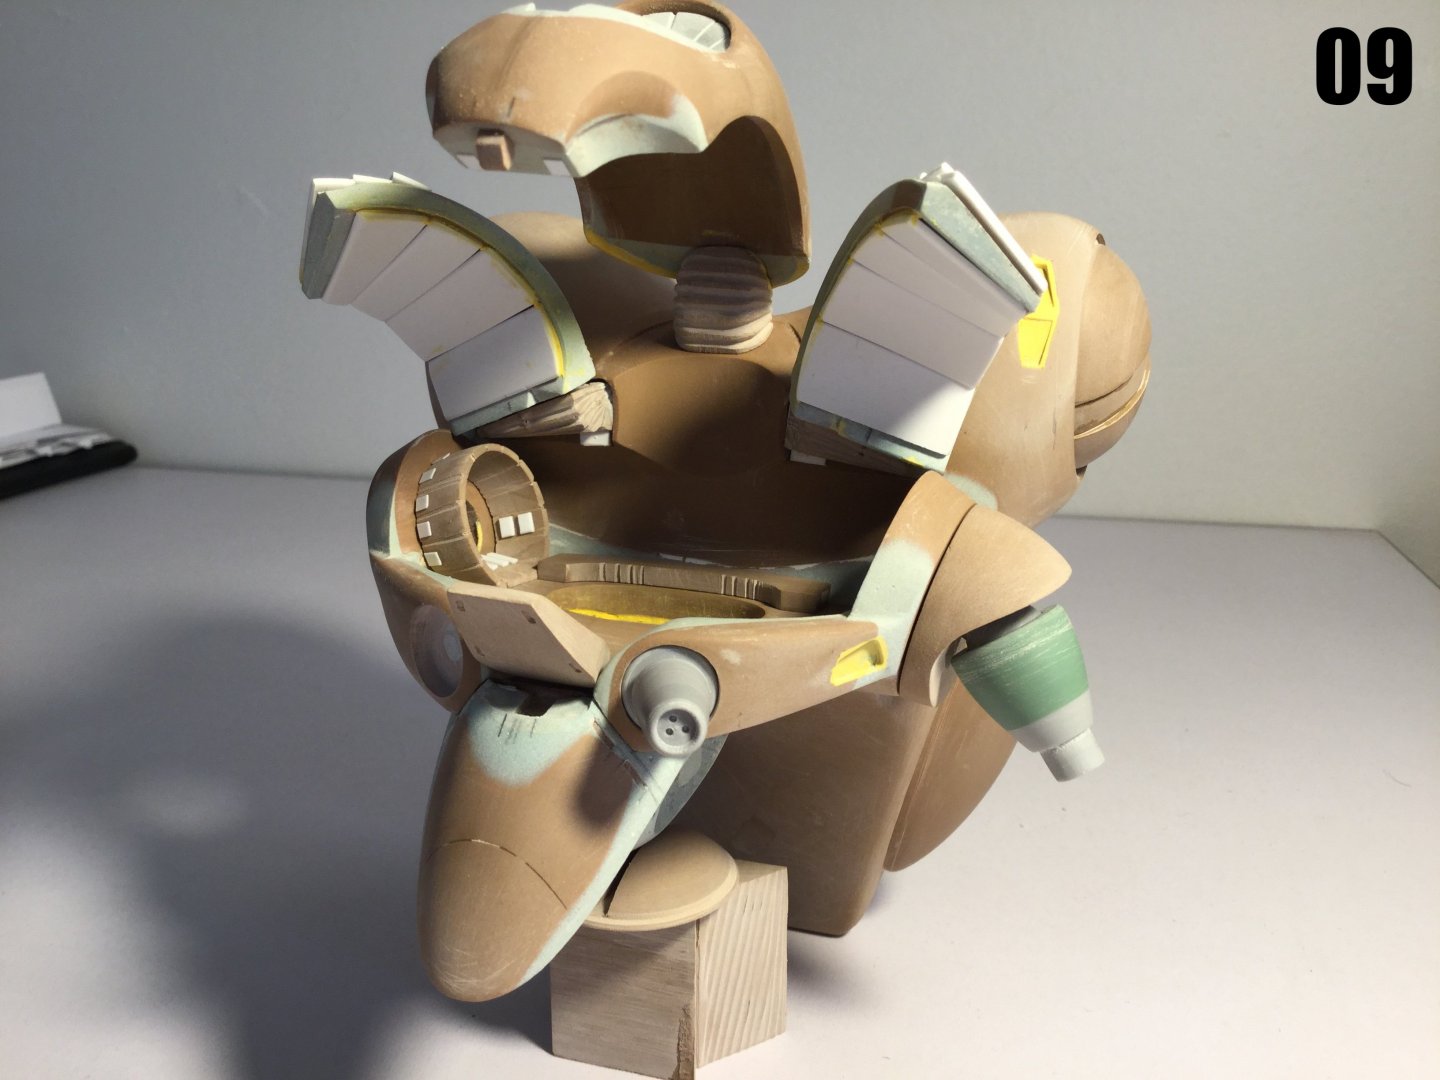
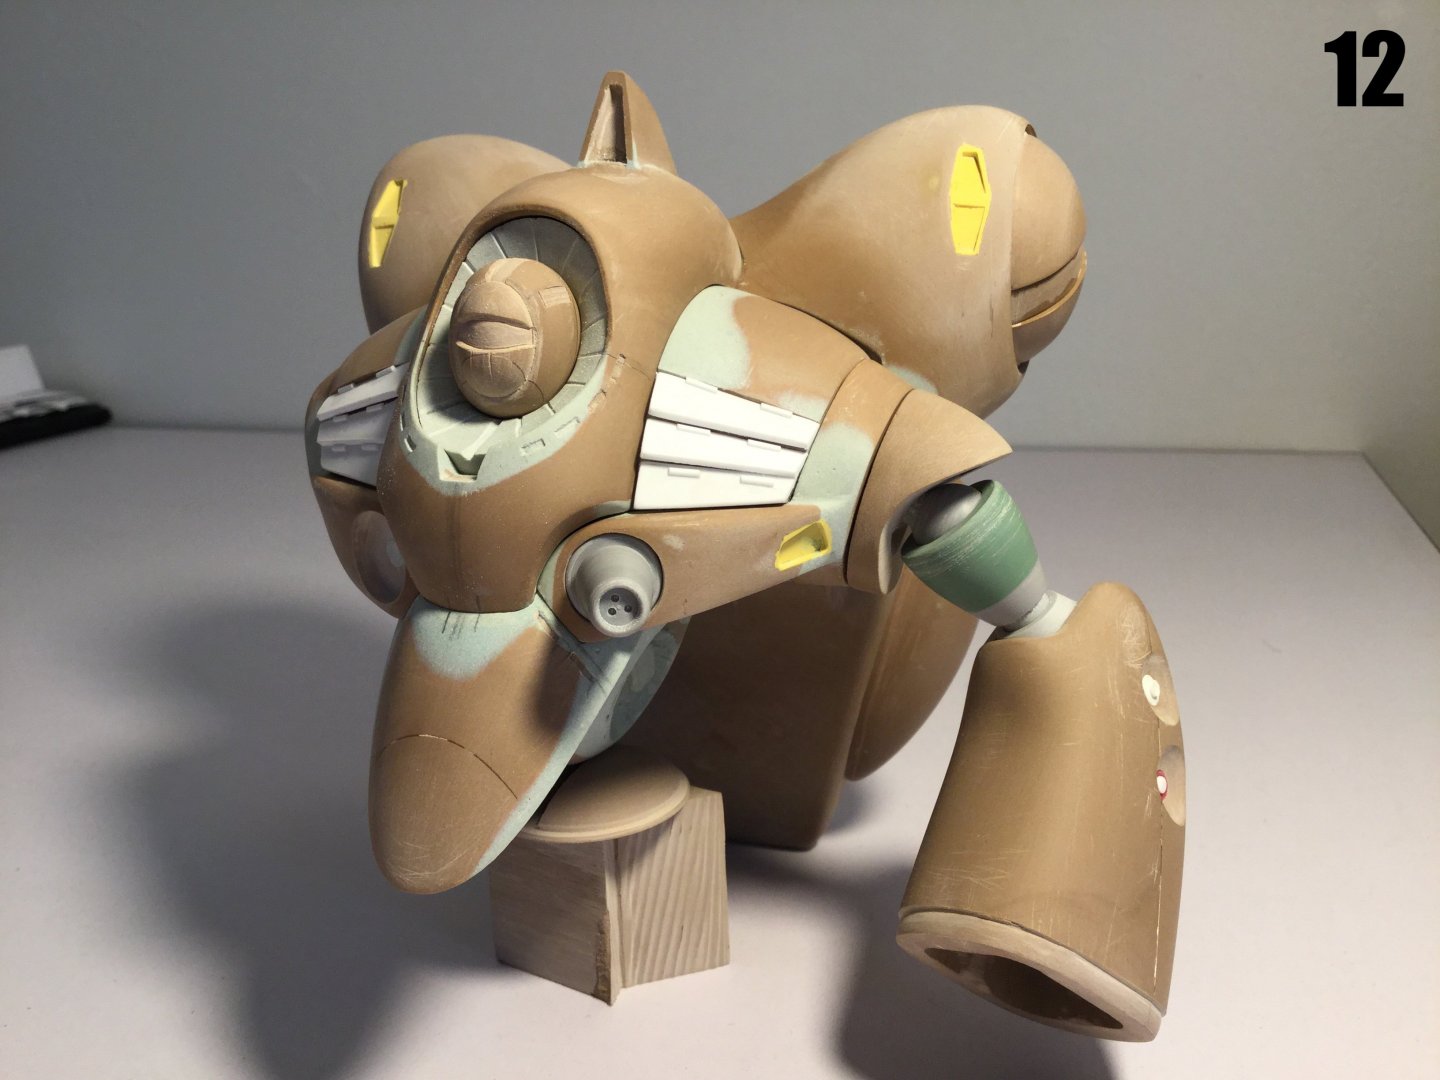
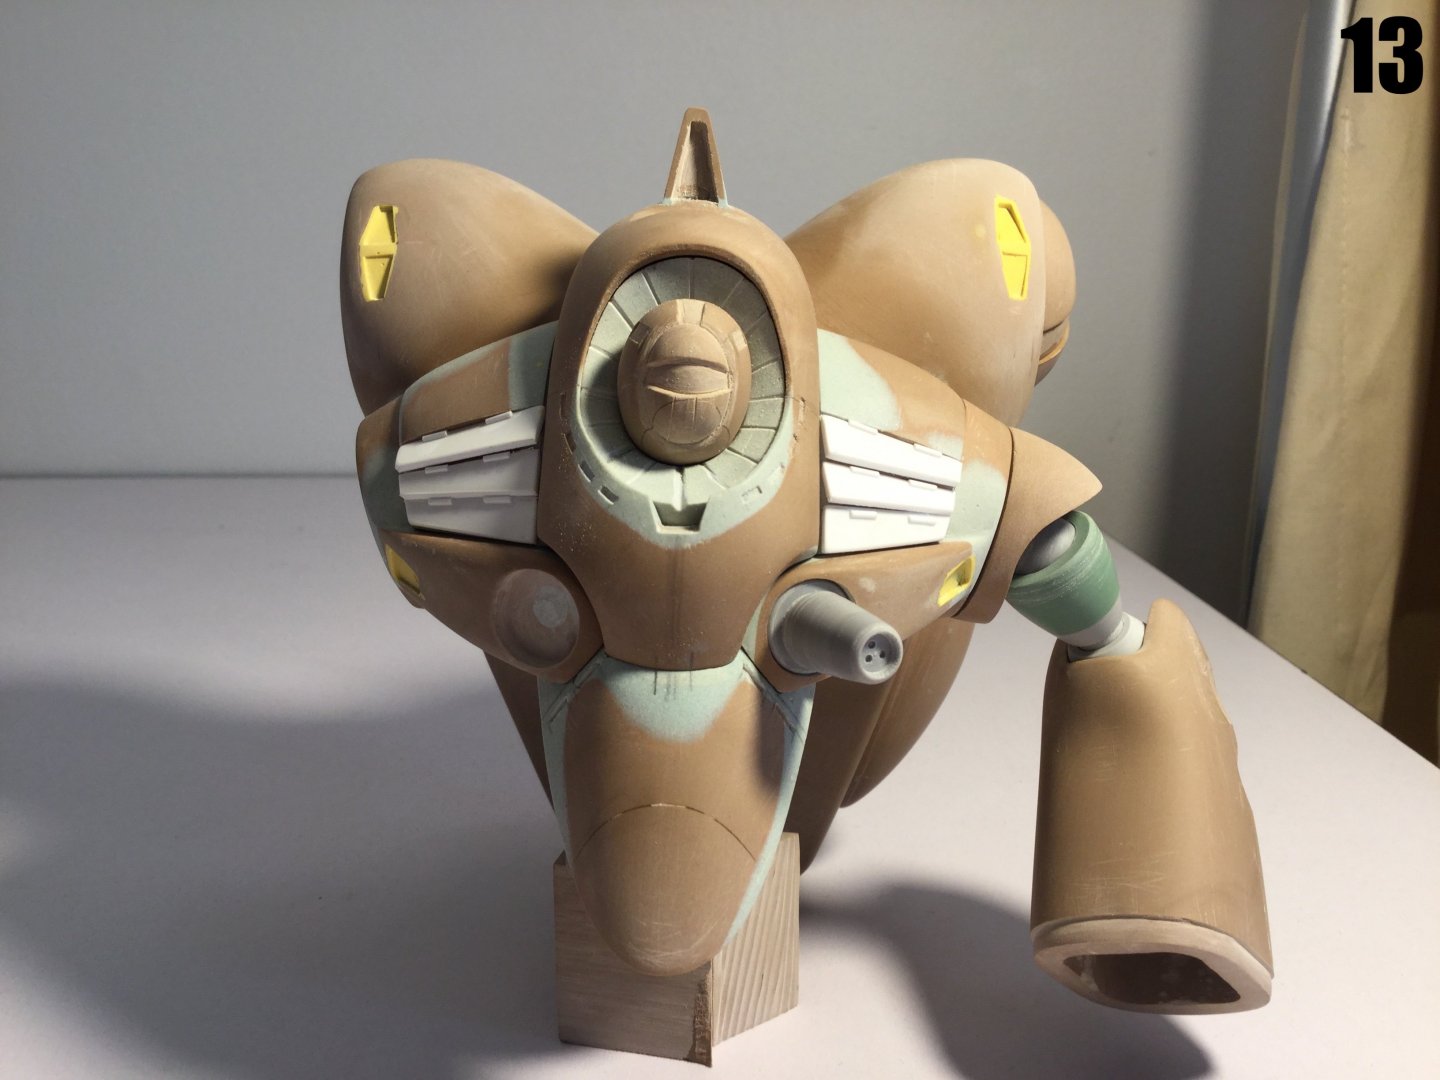
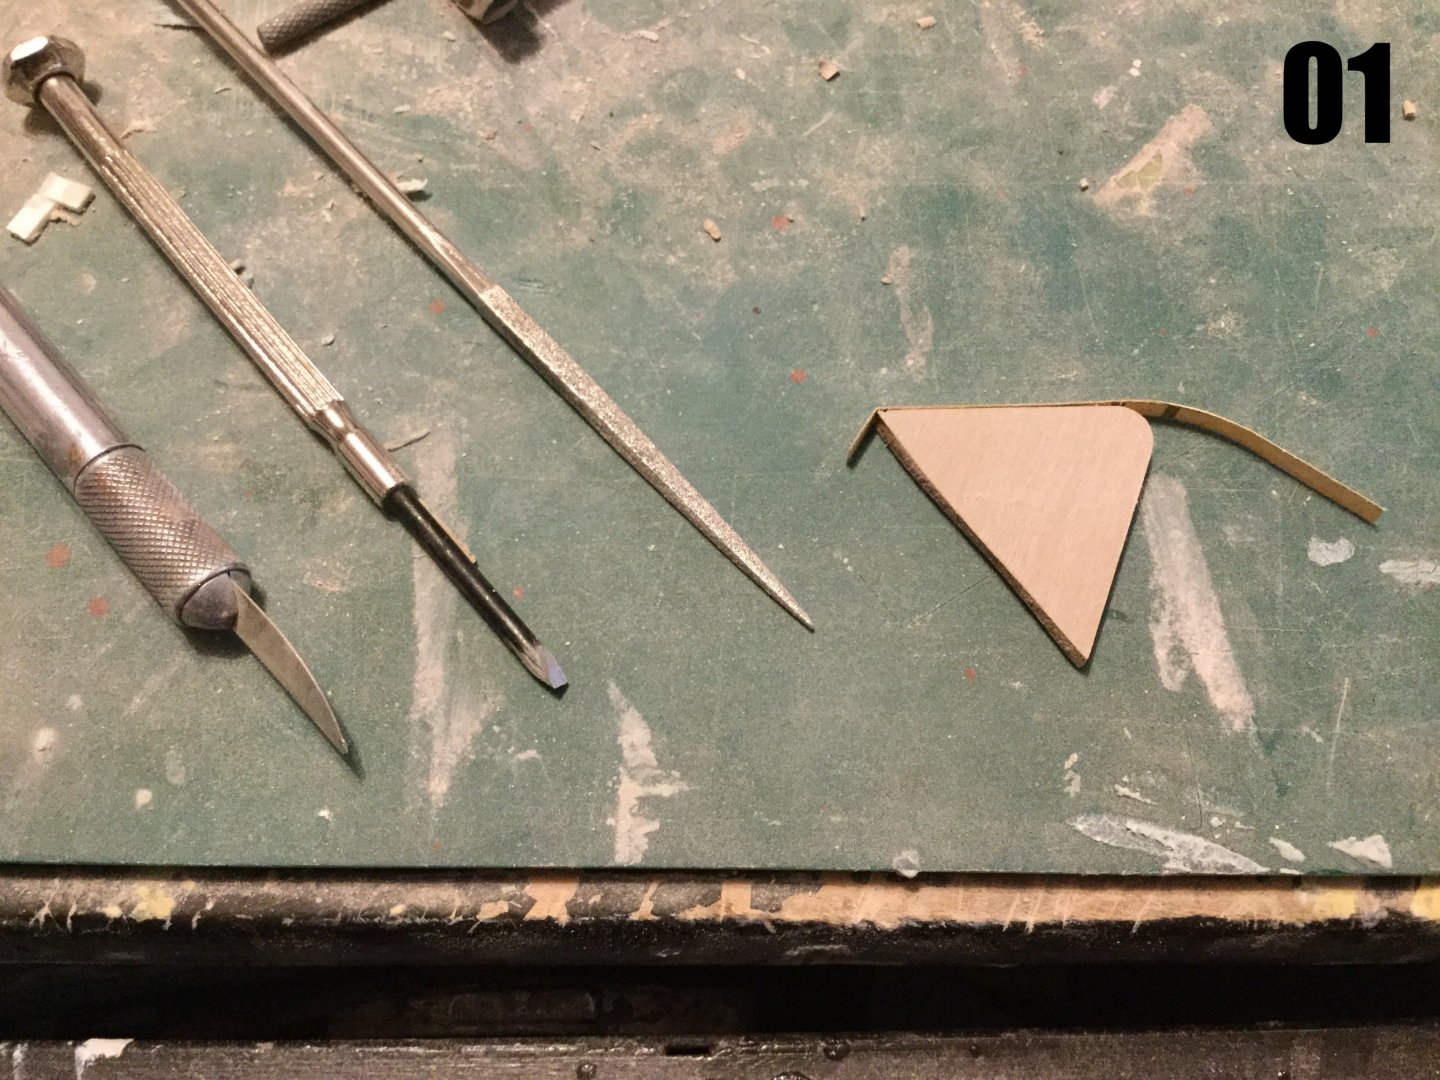
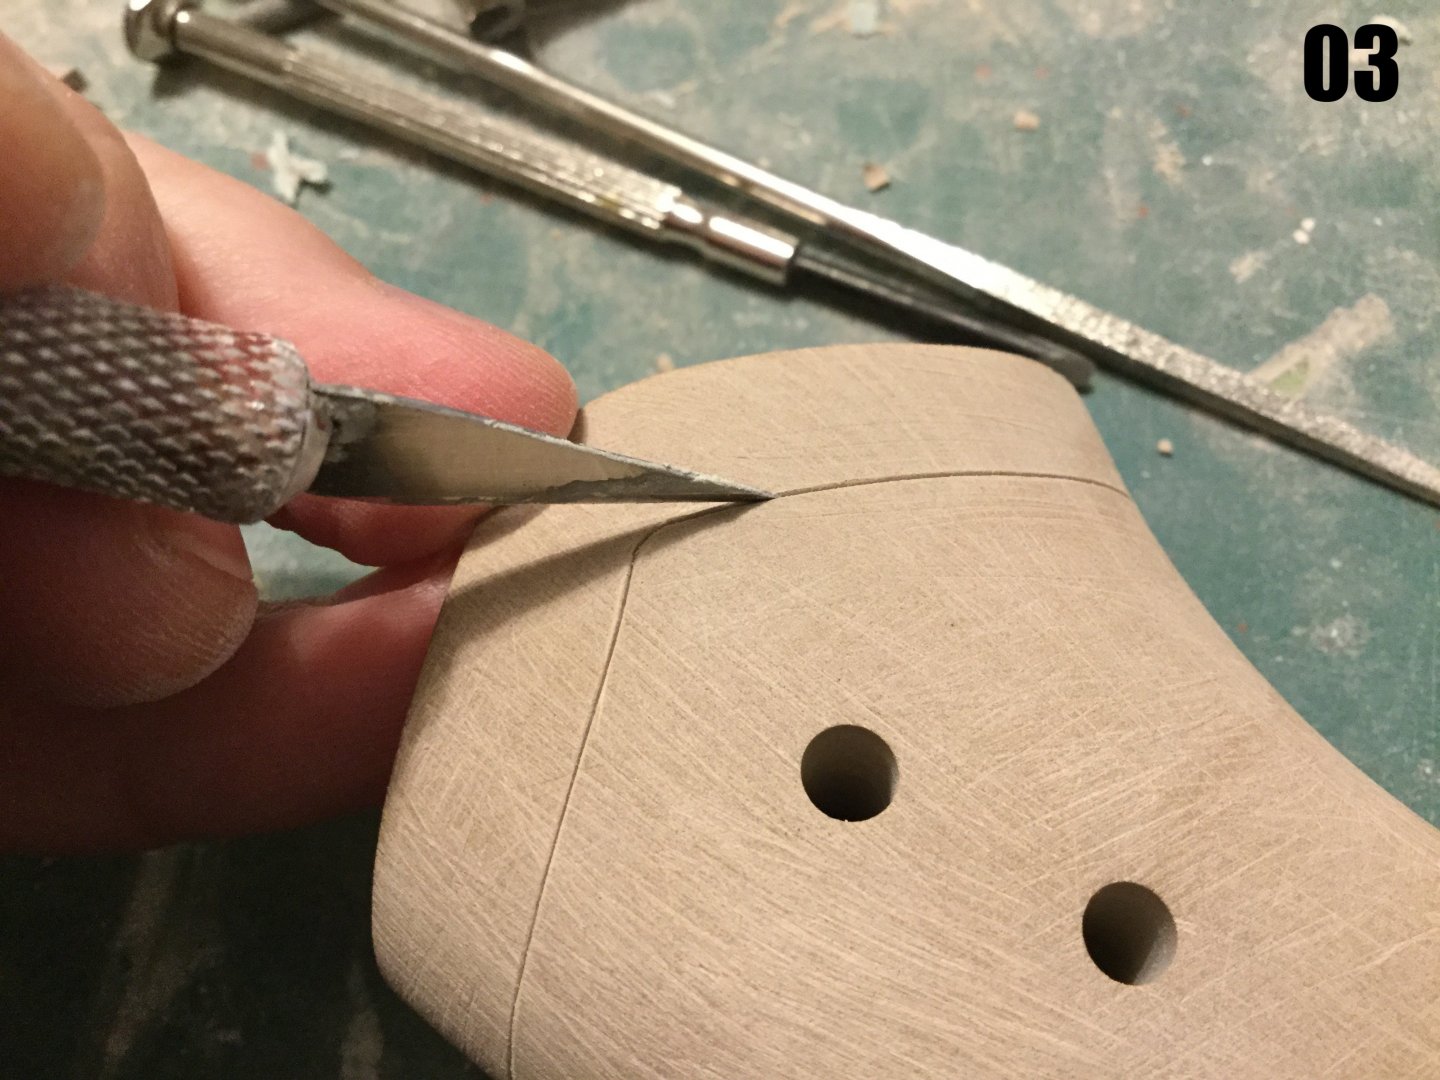
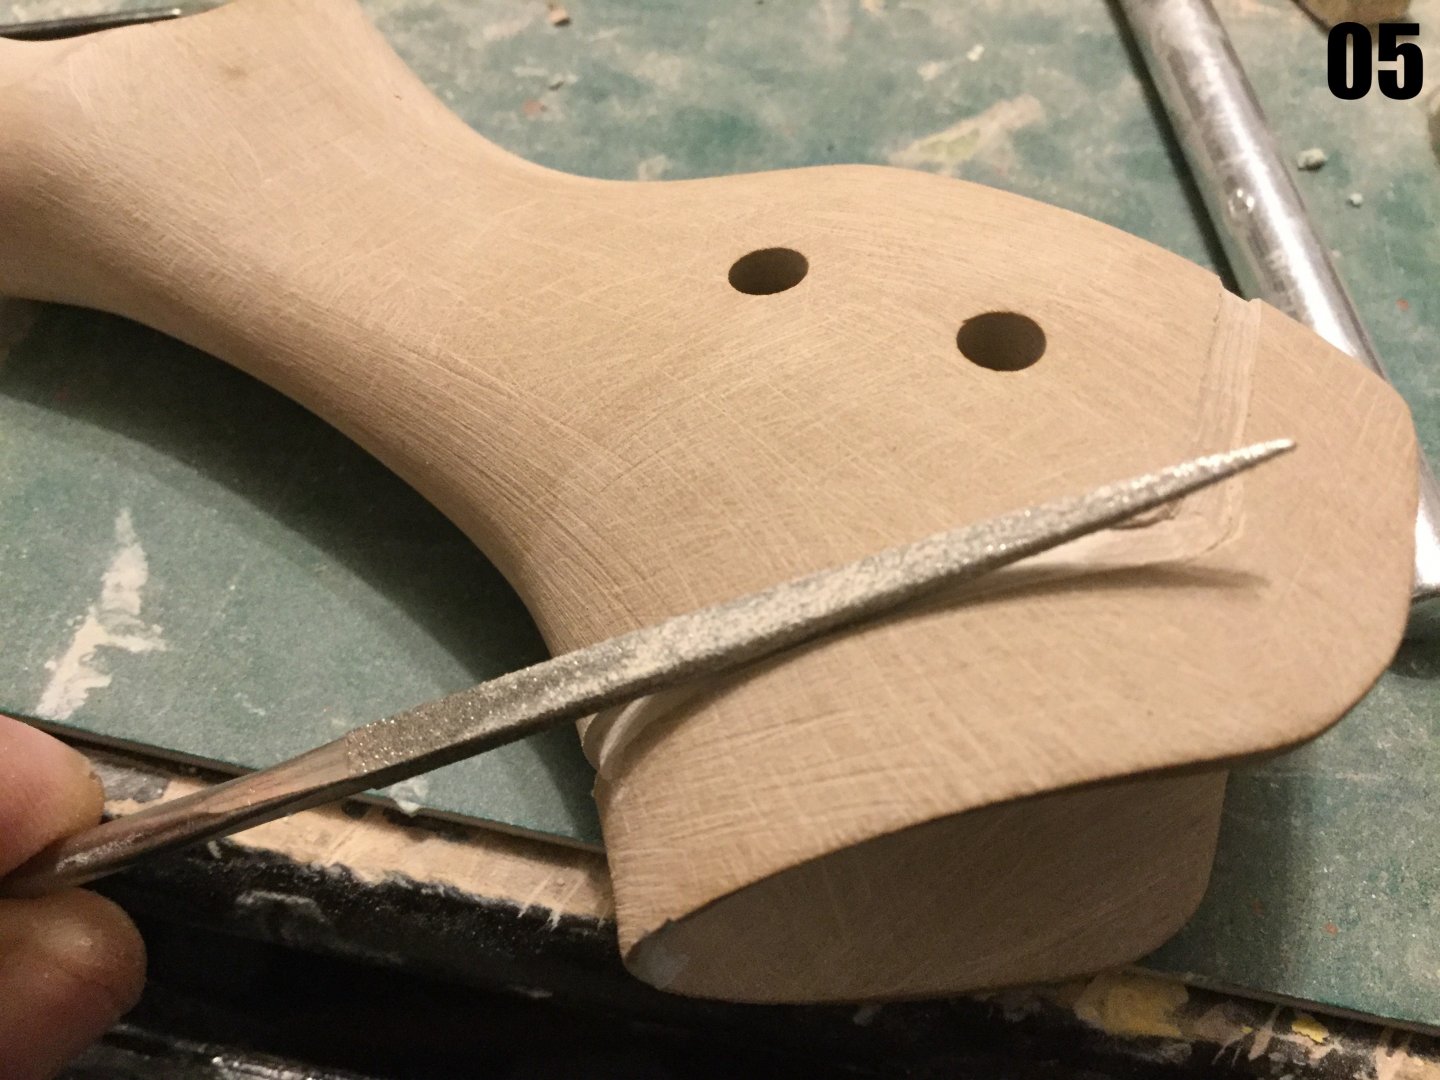
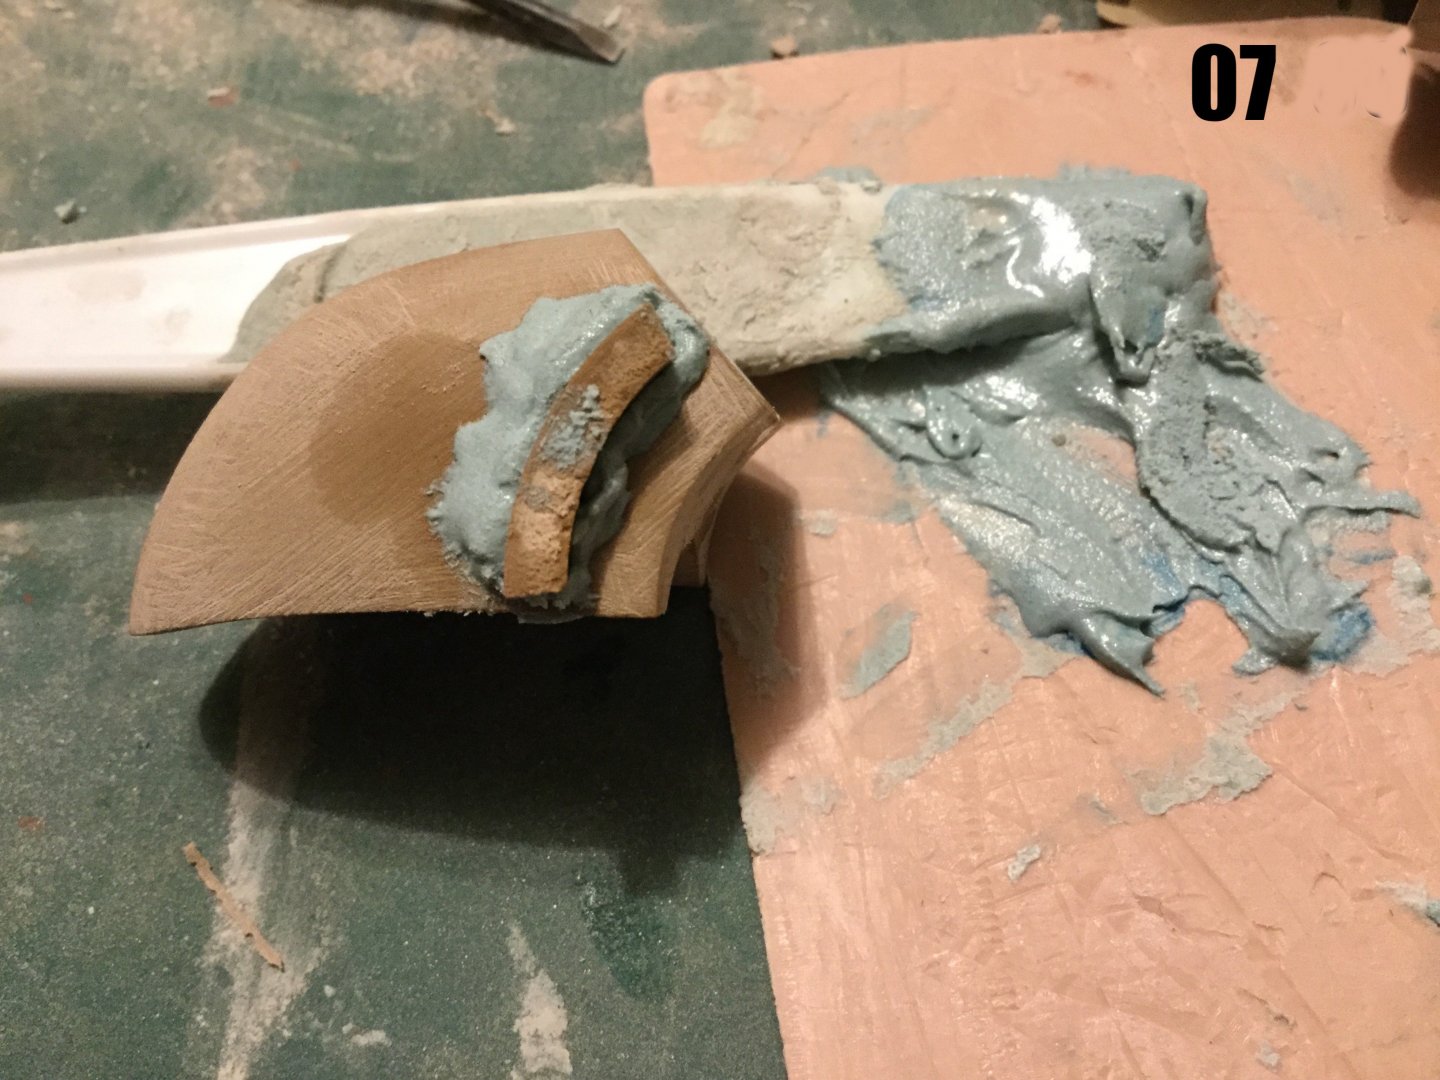
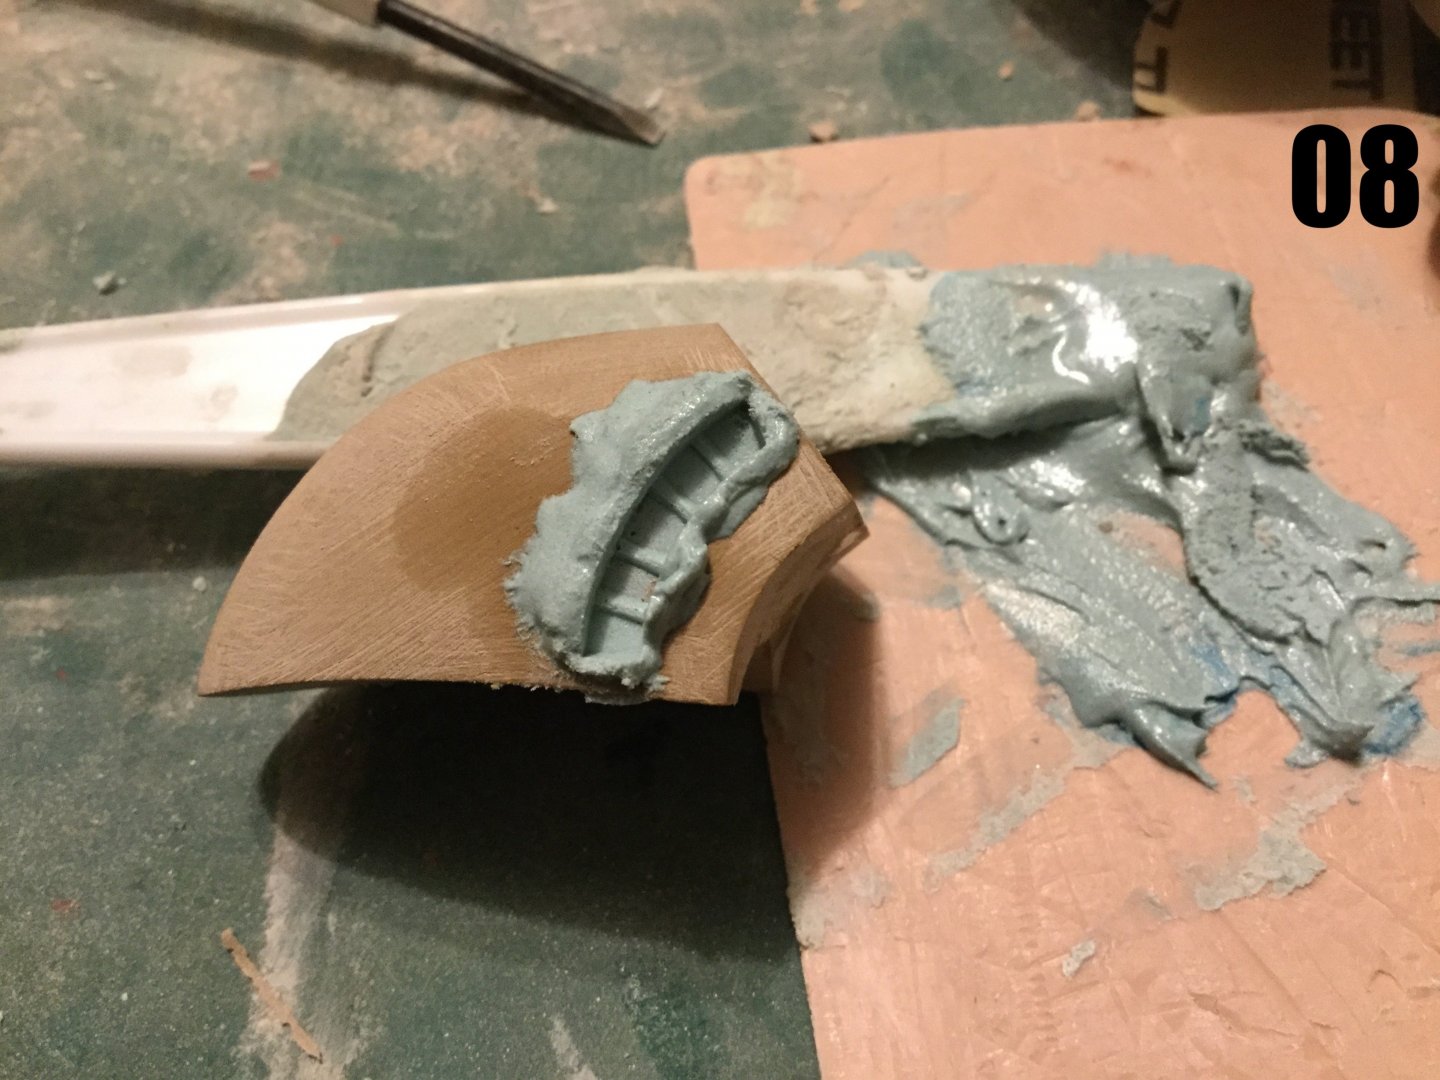
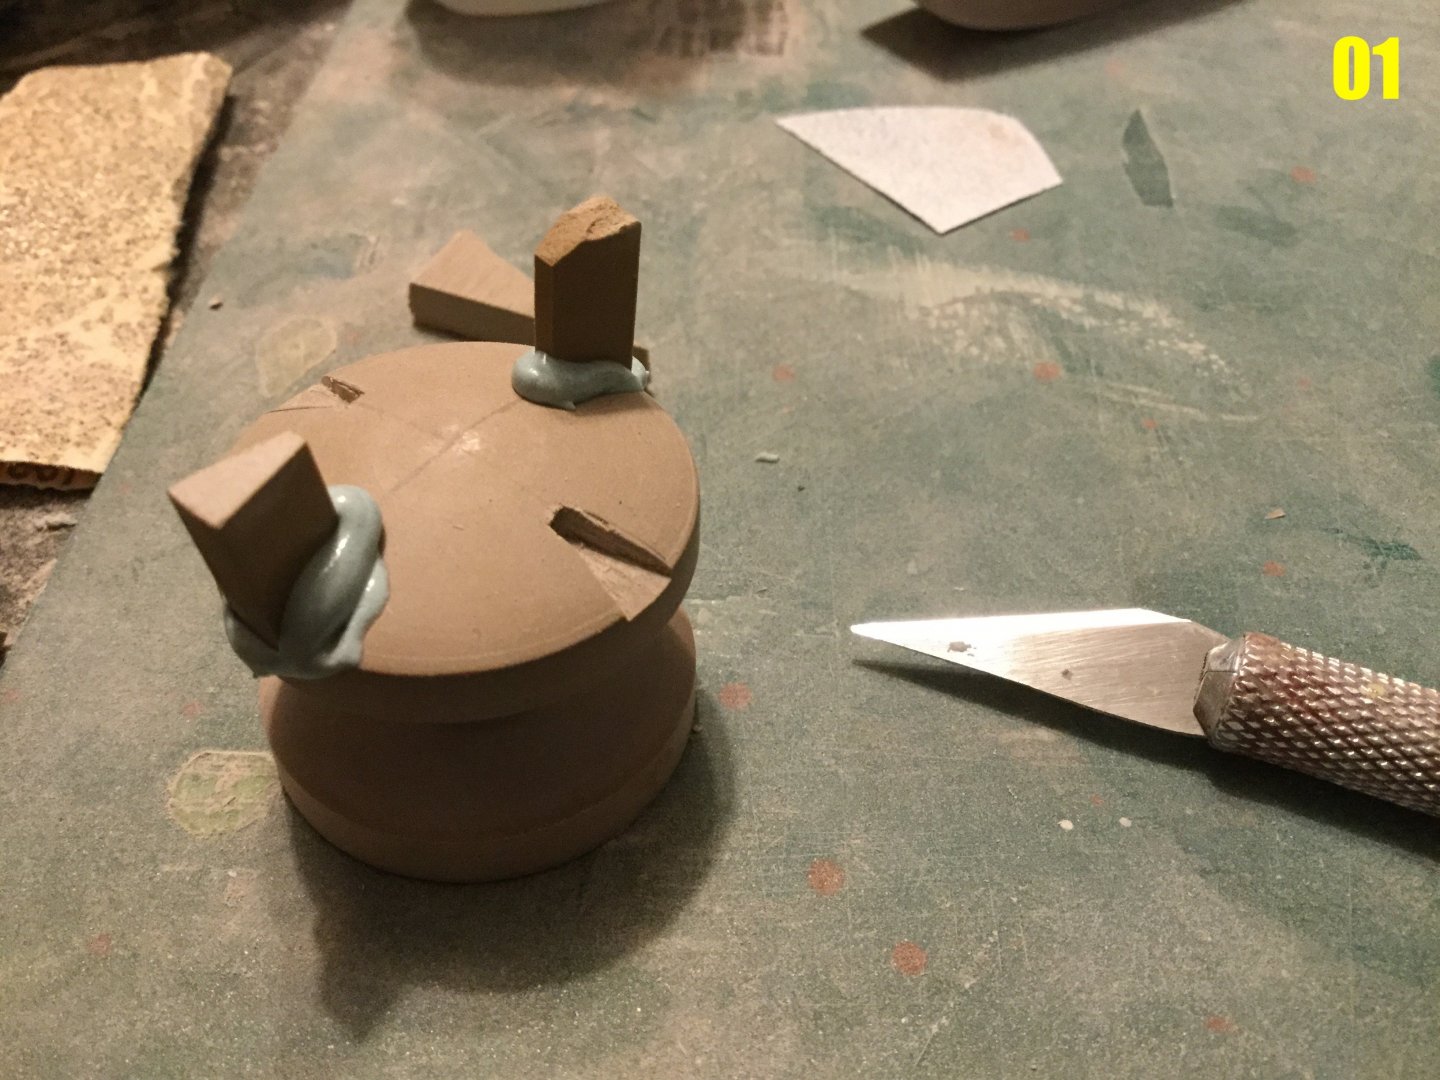
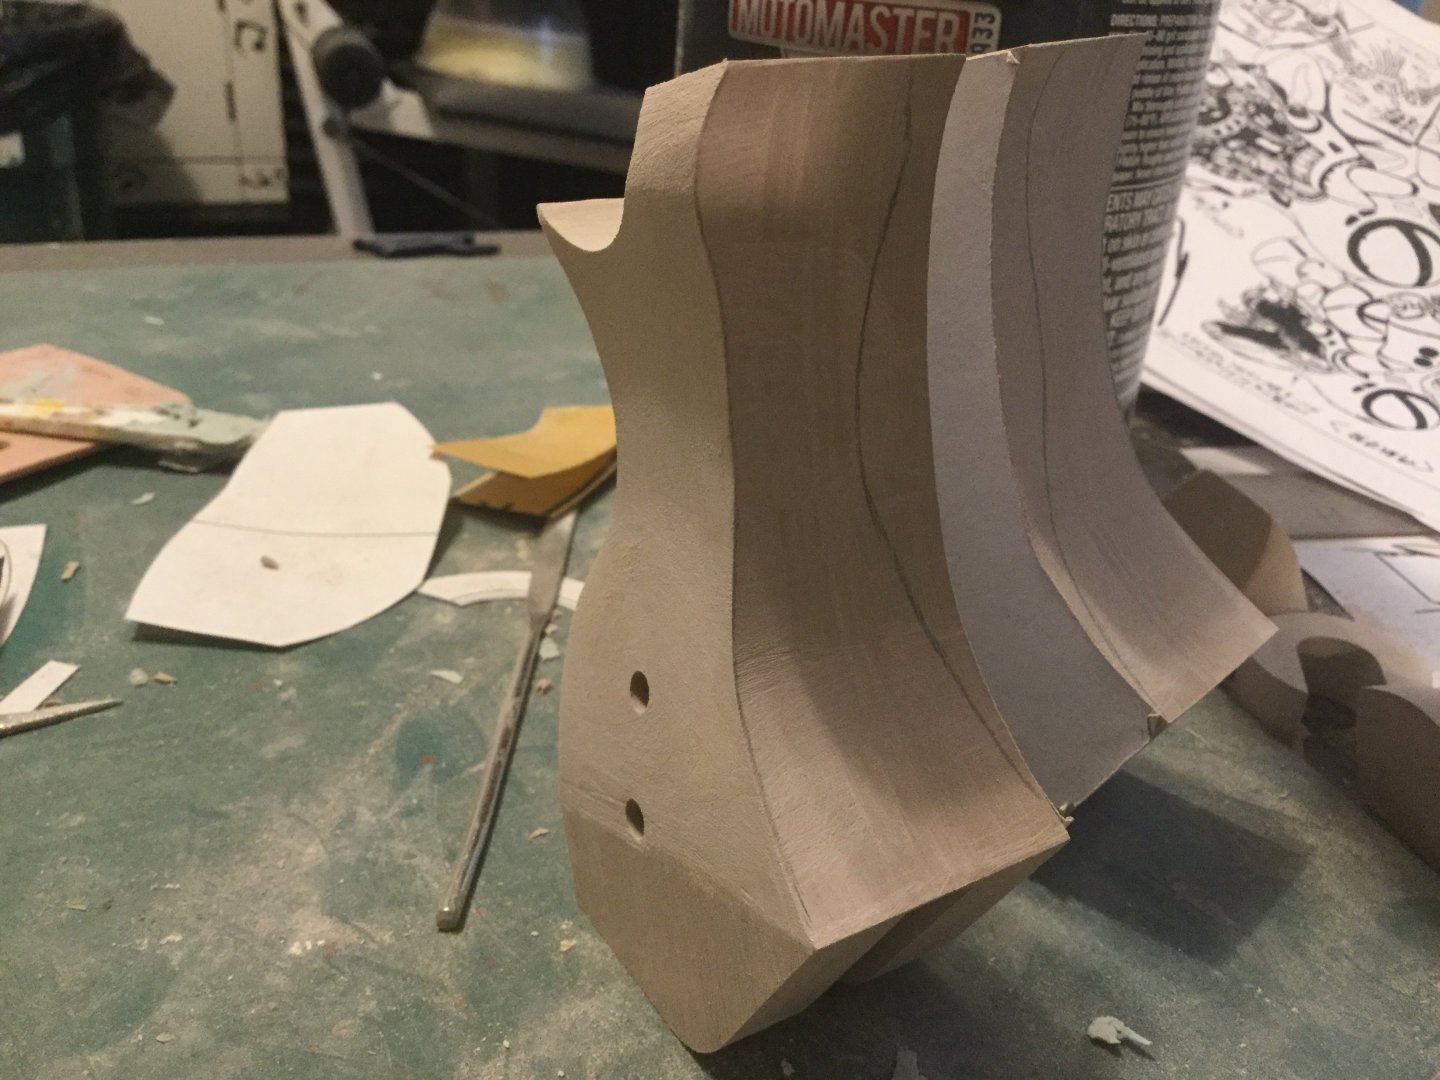
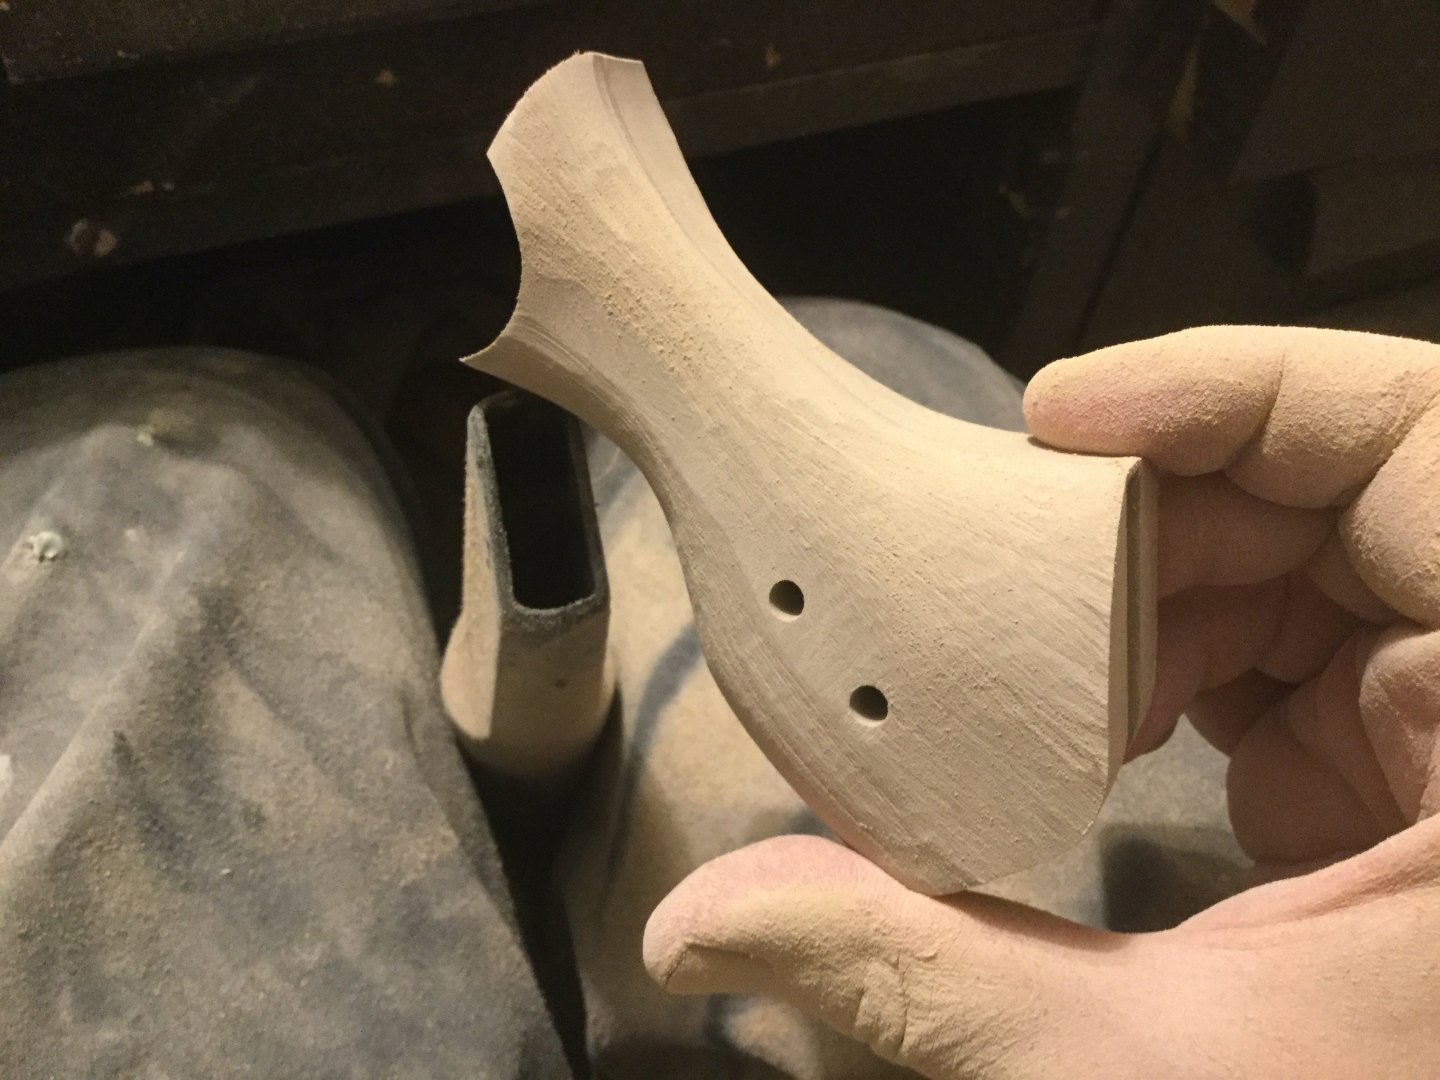
Captain’s log: Friday, December 13th. I’m going to start this update off by showing you one of the modeling techniques I employ, and then showing you the result. This is very tedious work, but if you want the results, you’ve got to be willing to put in the effort. This exercise will consist in creating a shallow, recessed channel along the surface of a compound curve, just like the black bands you see on the Q-Rau. It would have been far simpler to merely scribe some lines, but if you want to do things right… Well you know. So the first thing you need to get or make are the right tools. From left to right in pic 01: -a fine-tooth photoetch razor saw -a chisel (or sharpened screwdriver which is just a hair narrower than the channel you want to create -a squared diamond file -a sanding block, the thickness of which is about the width of the channel, that has 320 grit sandpaper glued along its edge. Pic 02: once you have carefully mapped and traced your guides in pencil, take your razor saw and scribe either the upper or lower edge of the channel; just one will do. Take your time and go slowly. Pic 03: once this is done, take an X-acto blade and score the line created with the saw 3 or 4 times. Ue just moderate pressure, and the blade doesn’t have to be new. Pic 04: now take your chisel, and using your scribed line as a guide, begin to slowly and carefully chisel out the shallow channel. Take your time, because mistakes will require lots of time and putty to repair! Pic 05: Now that you’ve chiseled out a shallow channel, you’ll need to even the surface out. For this, the squared diamond file is best. Once again, take your time. Pic 06: you can use a similar technique to create recessed details on a part. In this case, there’s a recessed grill-like thing on either side of the knee, so I start by creating a plug, that is to say, a negative of the detail I wish to produce. Both parts have to be identical left and right, and most importantly, the plug parts must be very smooth, otherwise it won’t release cleanly. One I have the plugs made, I chisel out the area of the detail with my trusty screwdriver. I like to make the hole extra large. Pic 07: I coat the plug part in mold release, then mix some polyester putty. I carefully fill the cavity on the part with the putty, then gently insert the plug and hold it there until the putty starts to harden. Pic 08: One the putty has started to turn rubbery, carefully remove the plug and clean away the excess putty. Now do it 20 more times with various other shapes, across the rest of the mecha’s surface! Pics 9-13 are of what the techniques above produce in terms of details. I’m happy to say that the cockpit is coming along nicely. I’ll probably start doing some intitial molding next week if all goes well, then start on the pilot bust. So much work, so little time!


-
The Official Moscato Hobby Models Thread
captain america replied to captain america's topic in Anime or Science Fiction
Hahaha!!! I initially thought that too about the spacing of the figures, but convinced myself that it was just my imagination. Lesson learned! :P -
The Official Moscato Hobby Models Thread
captain america replied to captain america's topic in Anime or Science Fiction
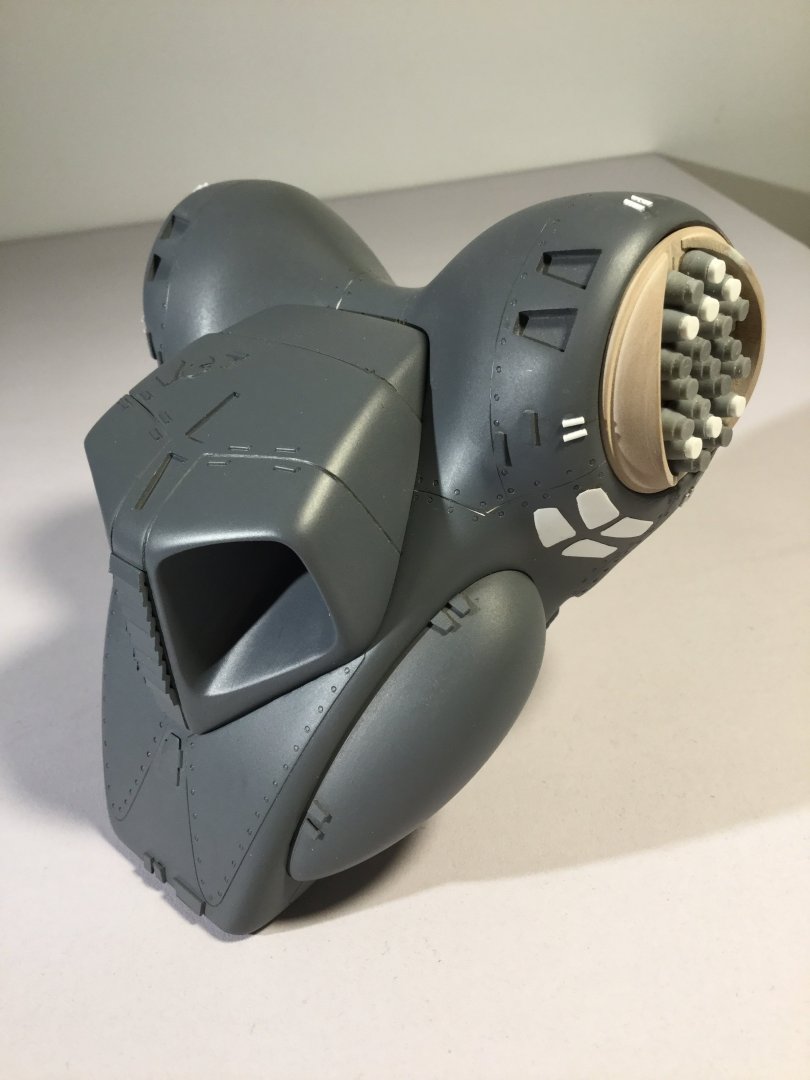
Final teaser.
-
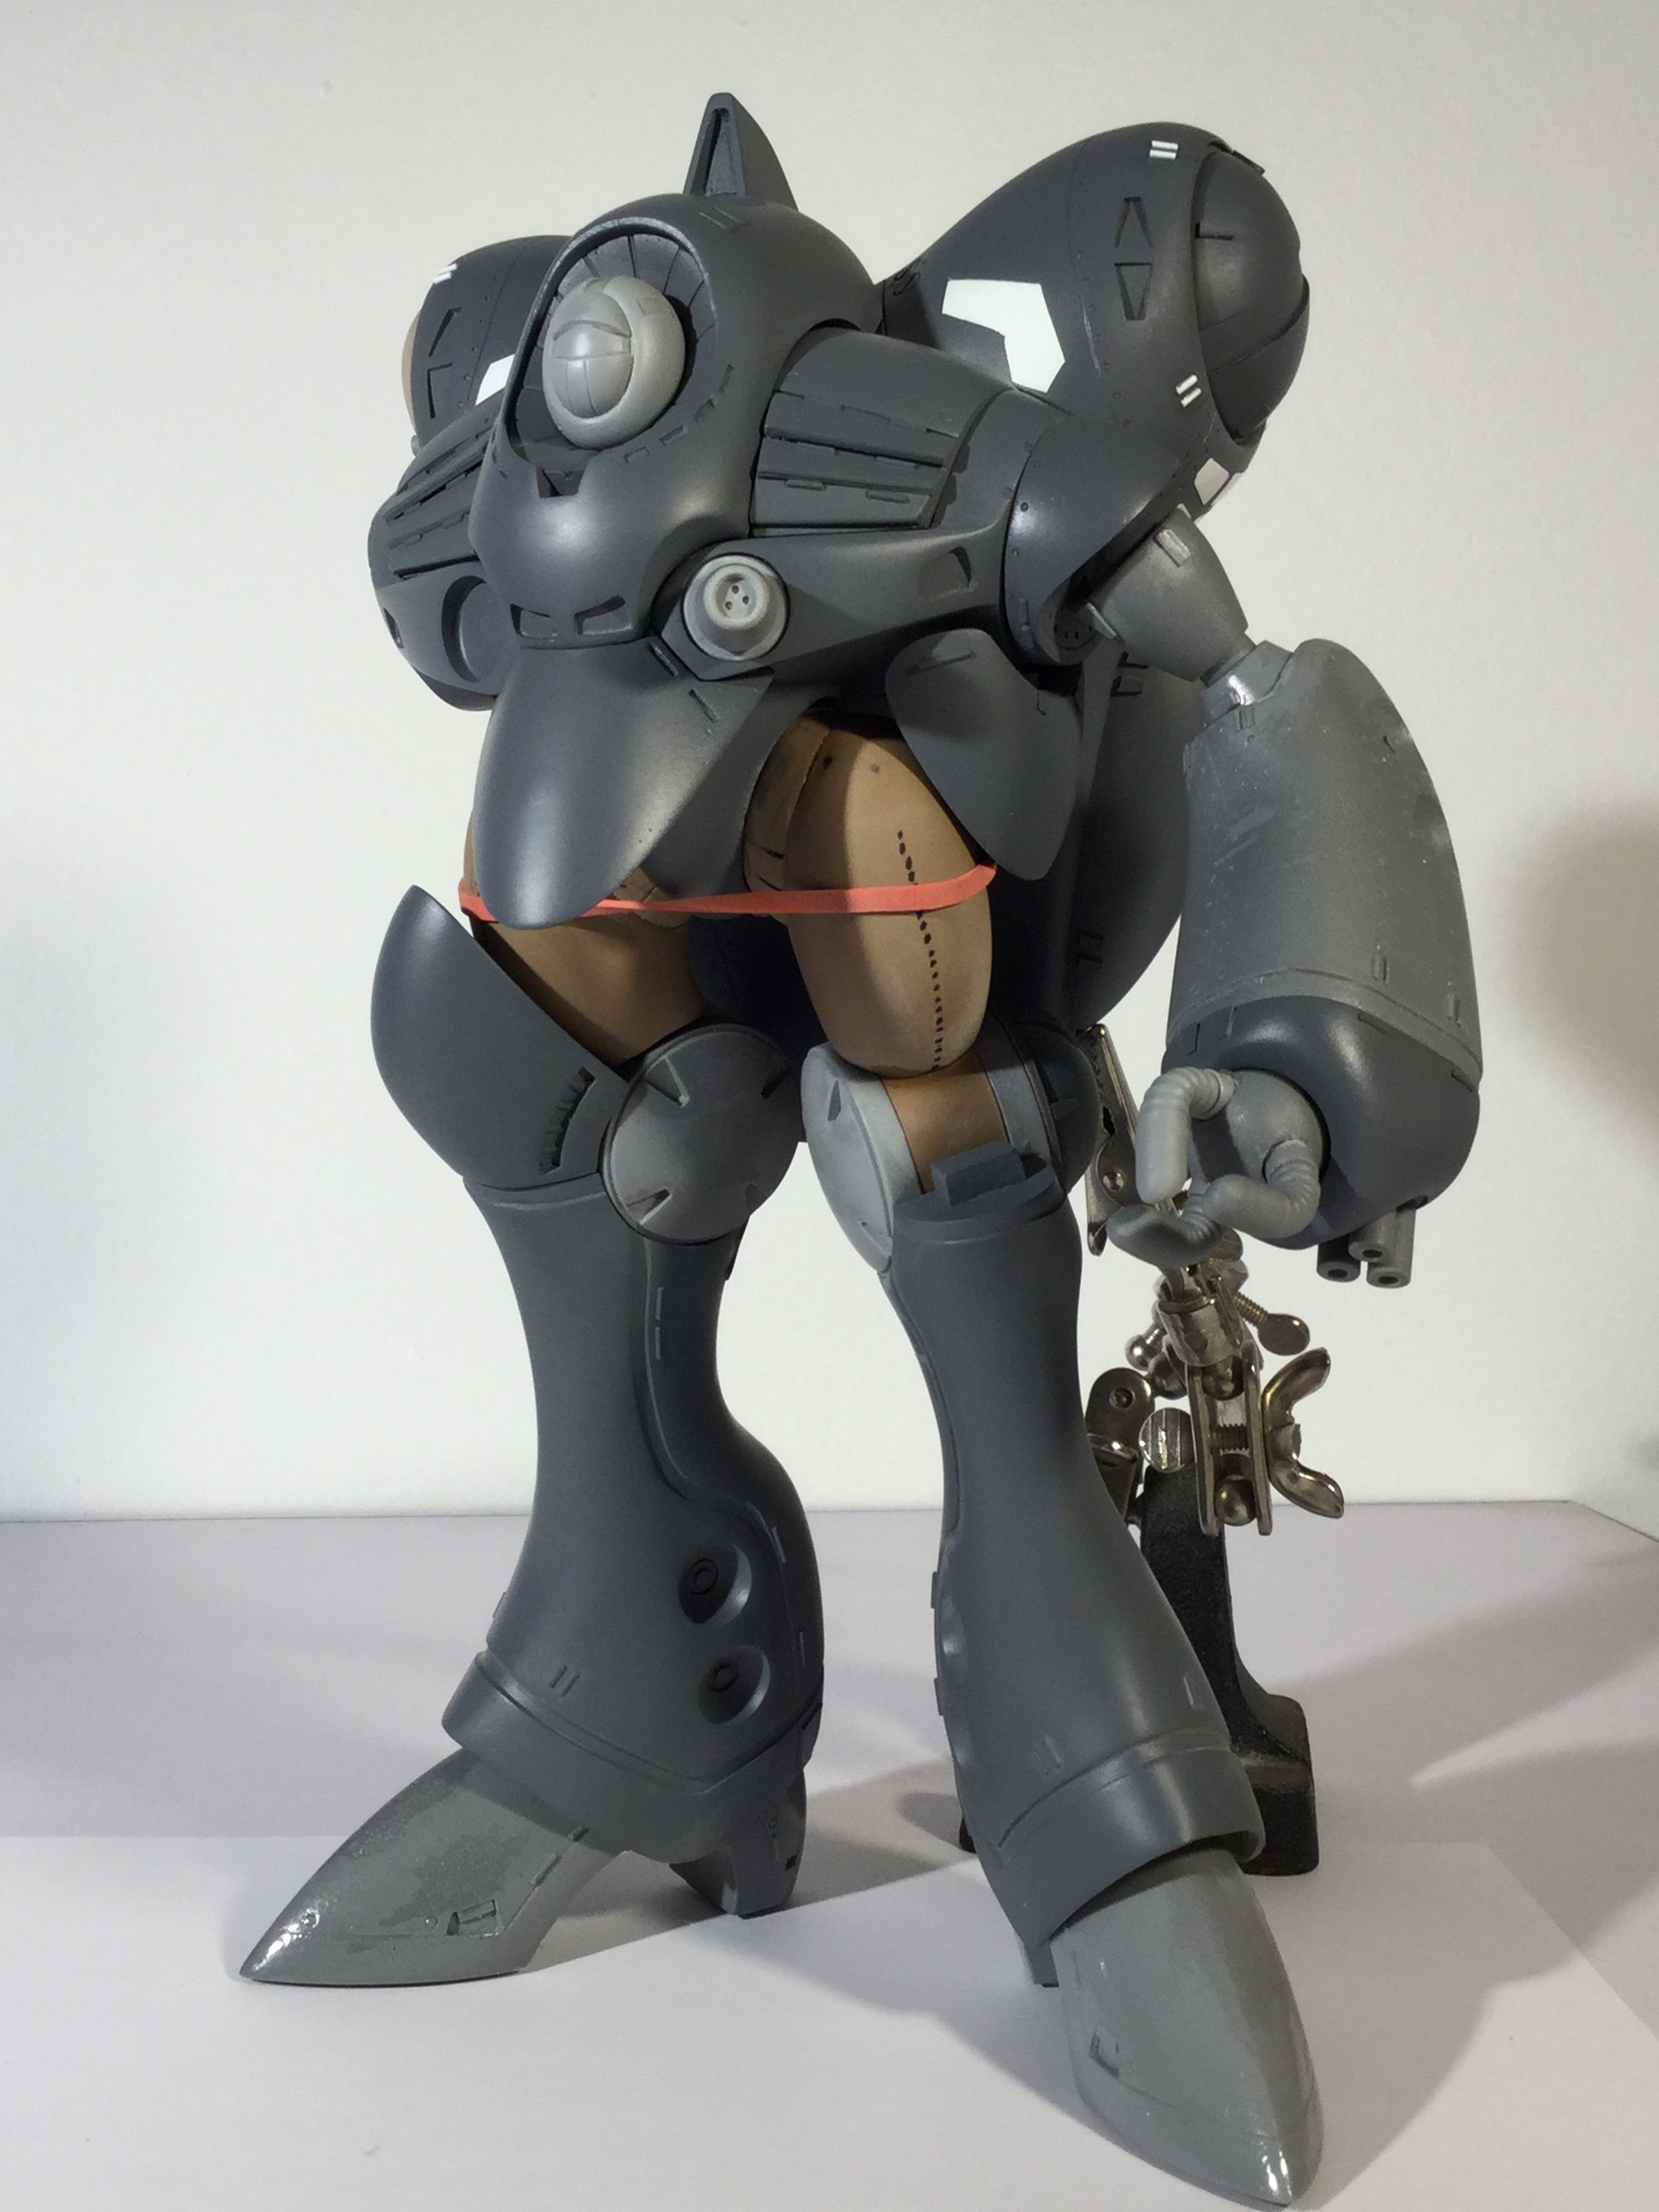
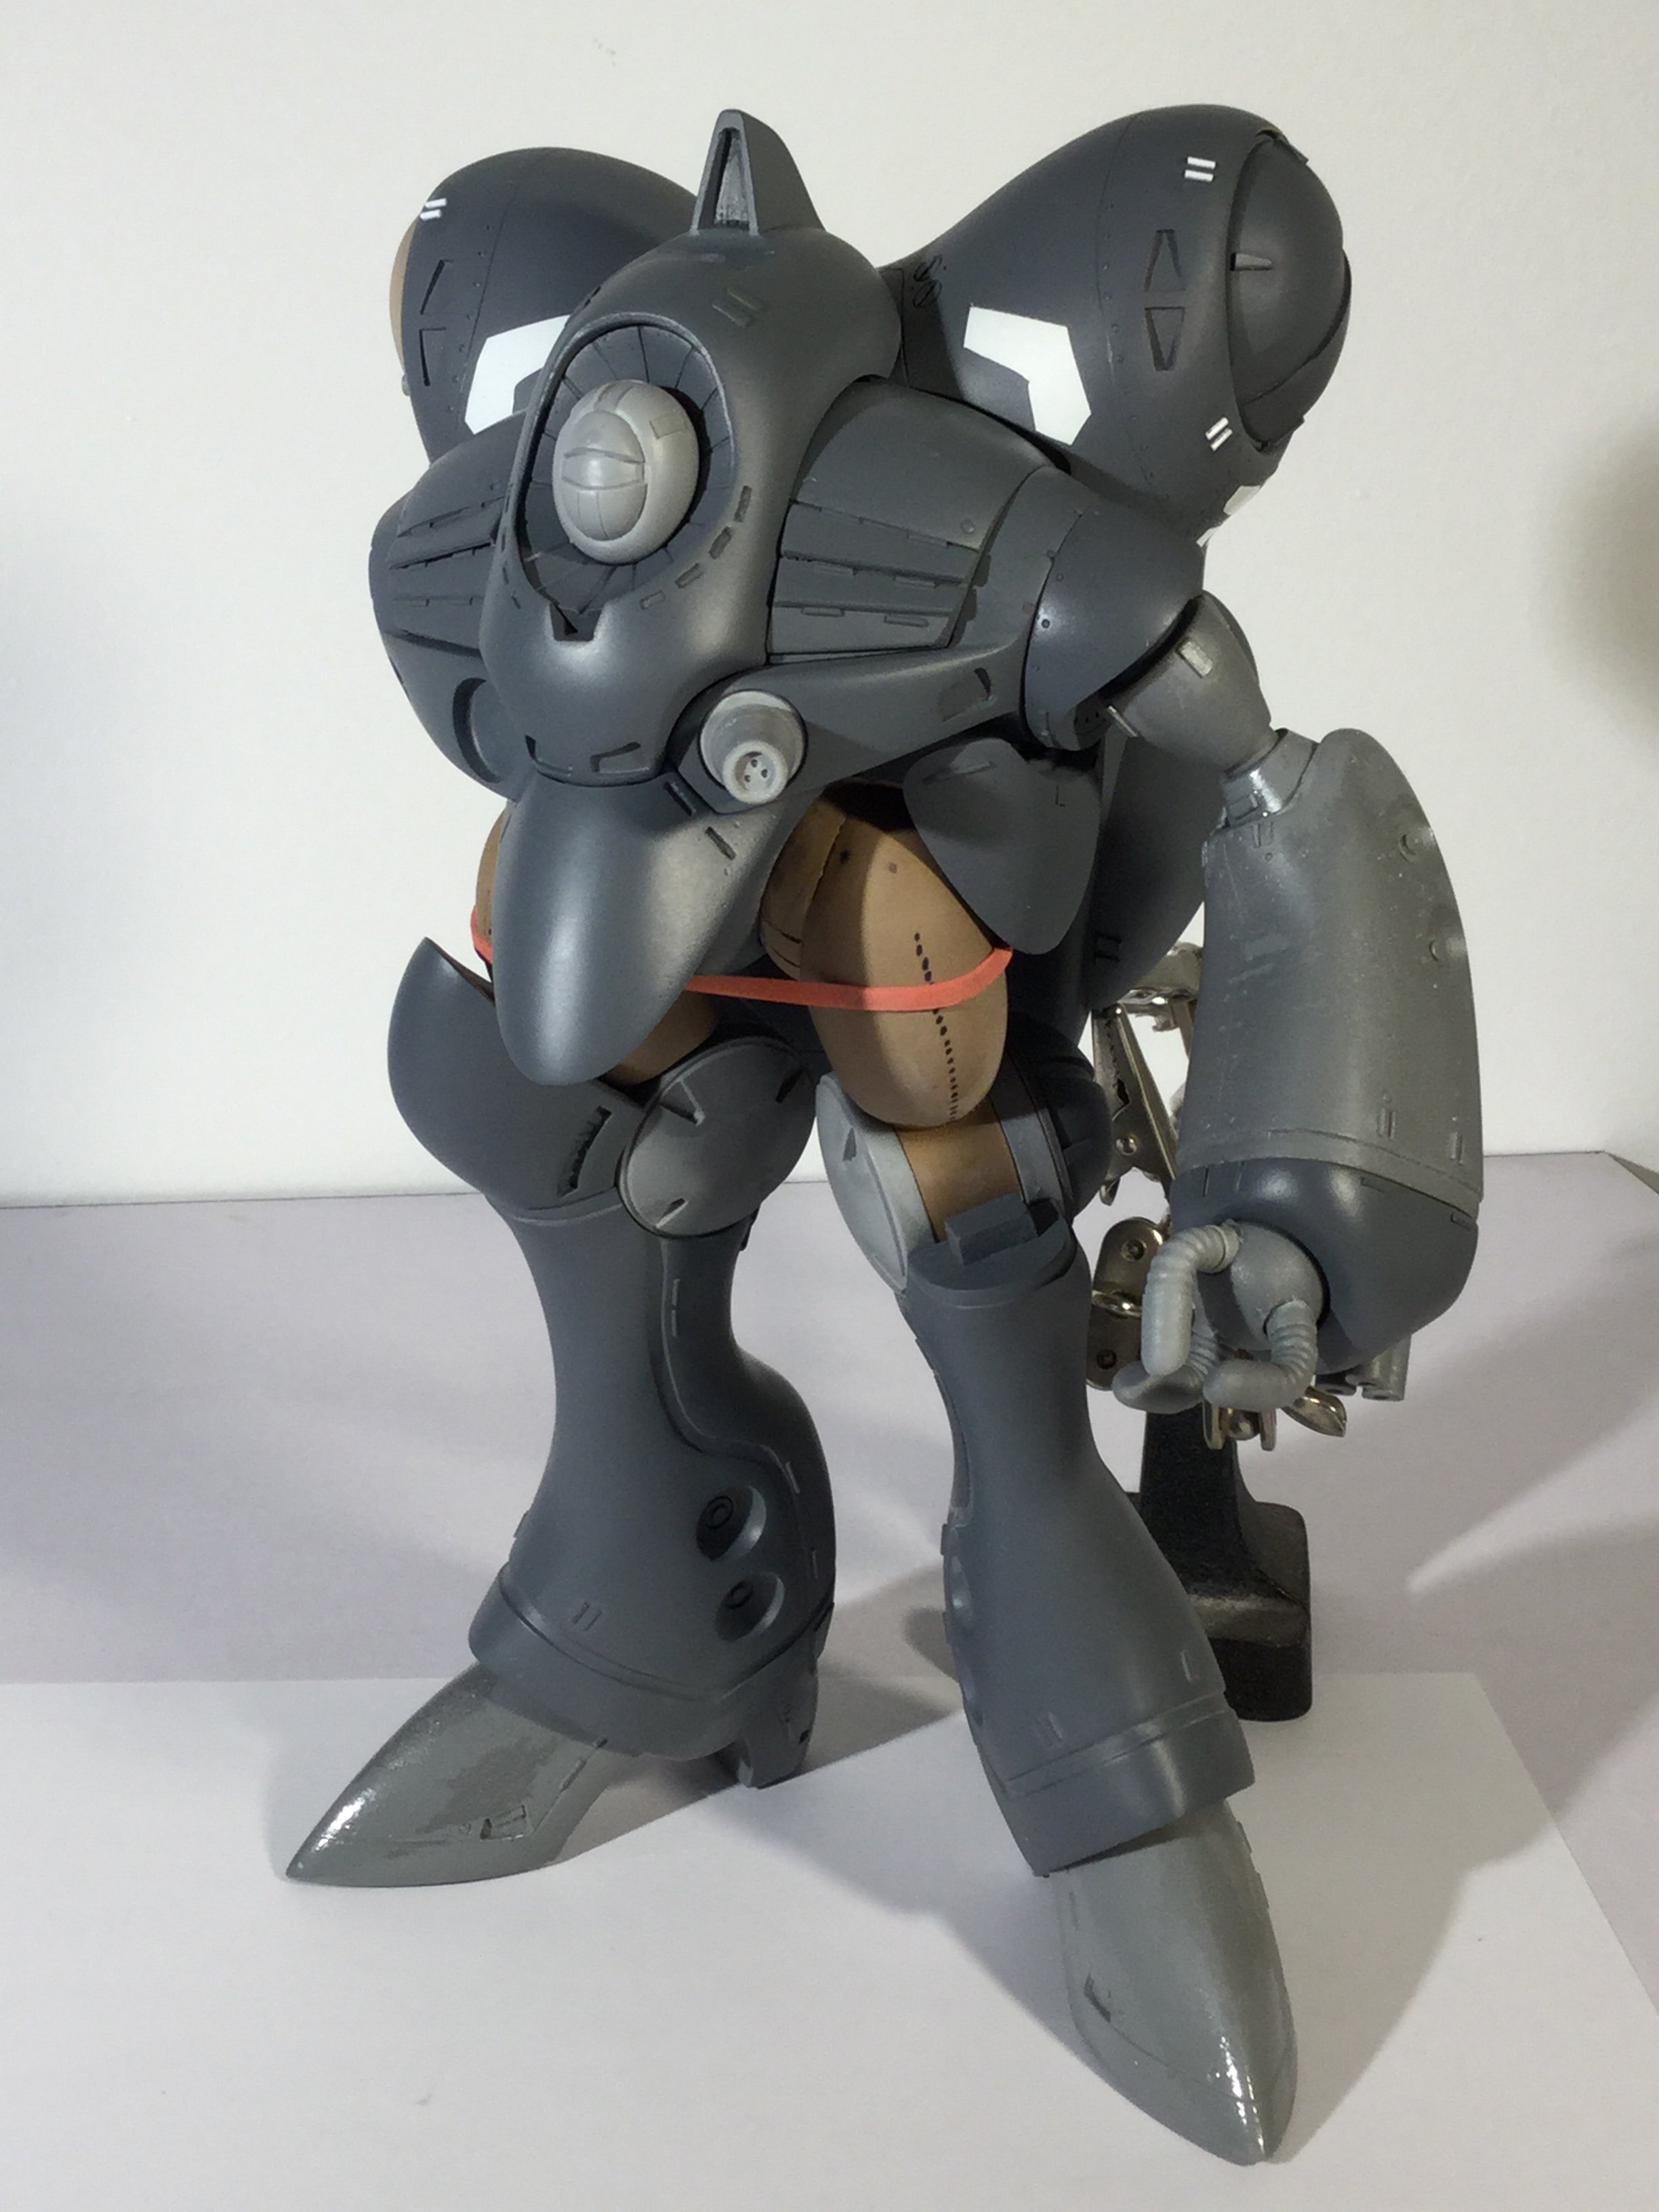
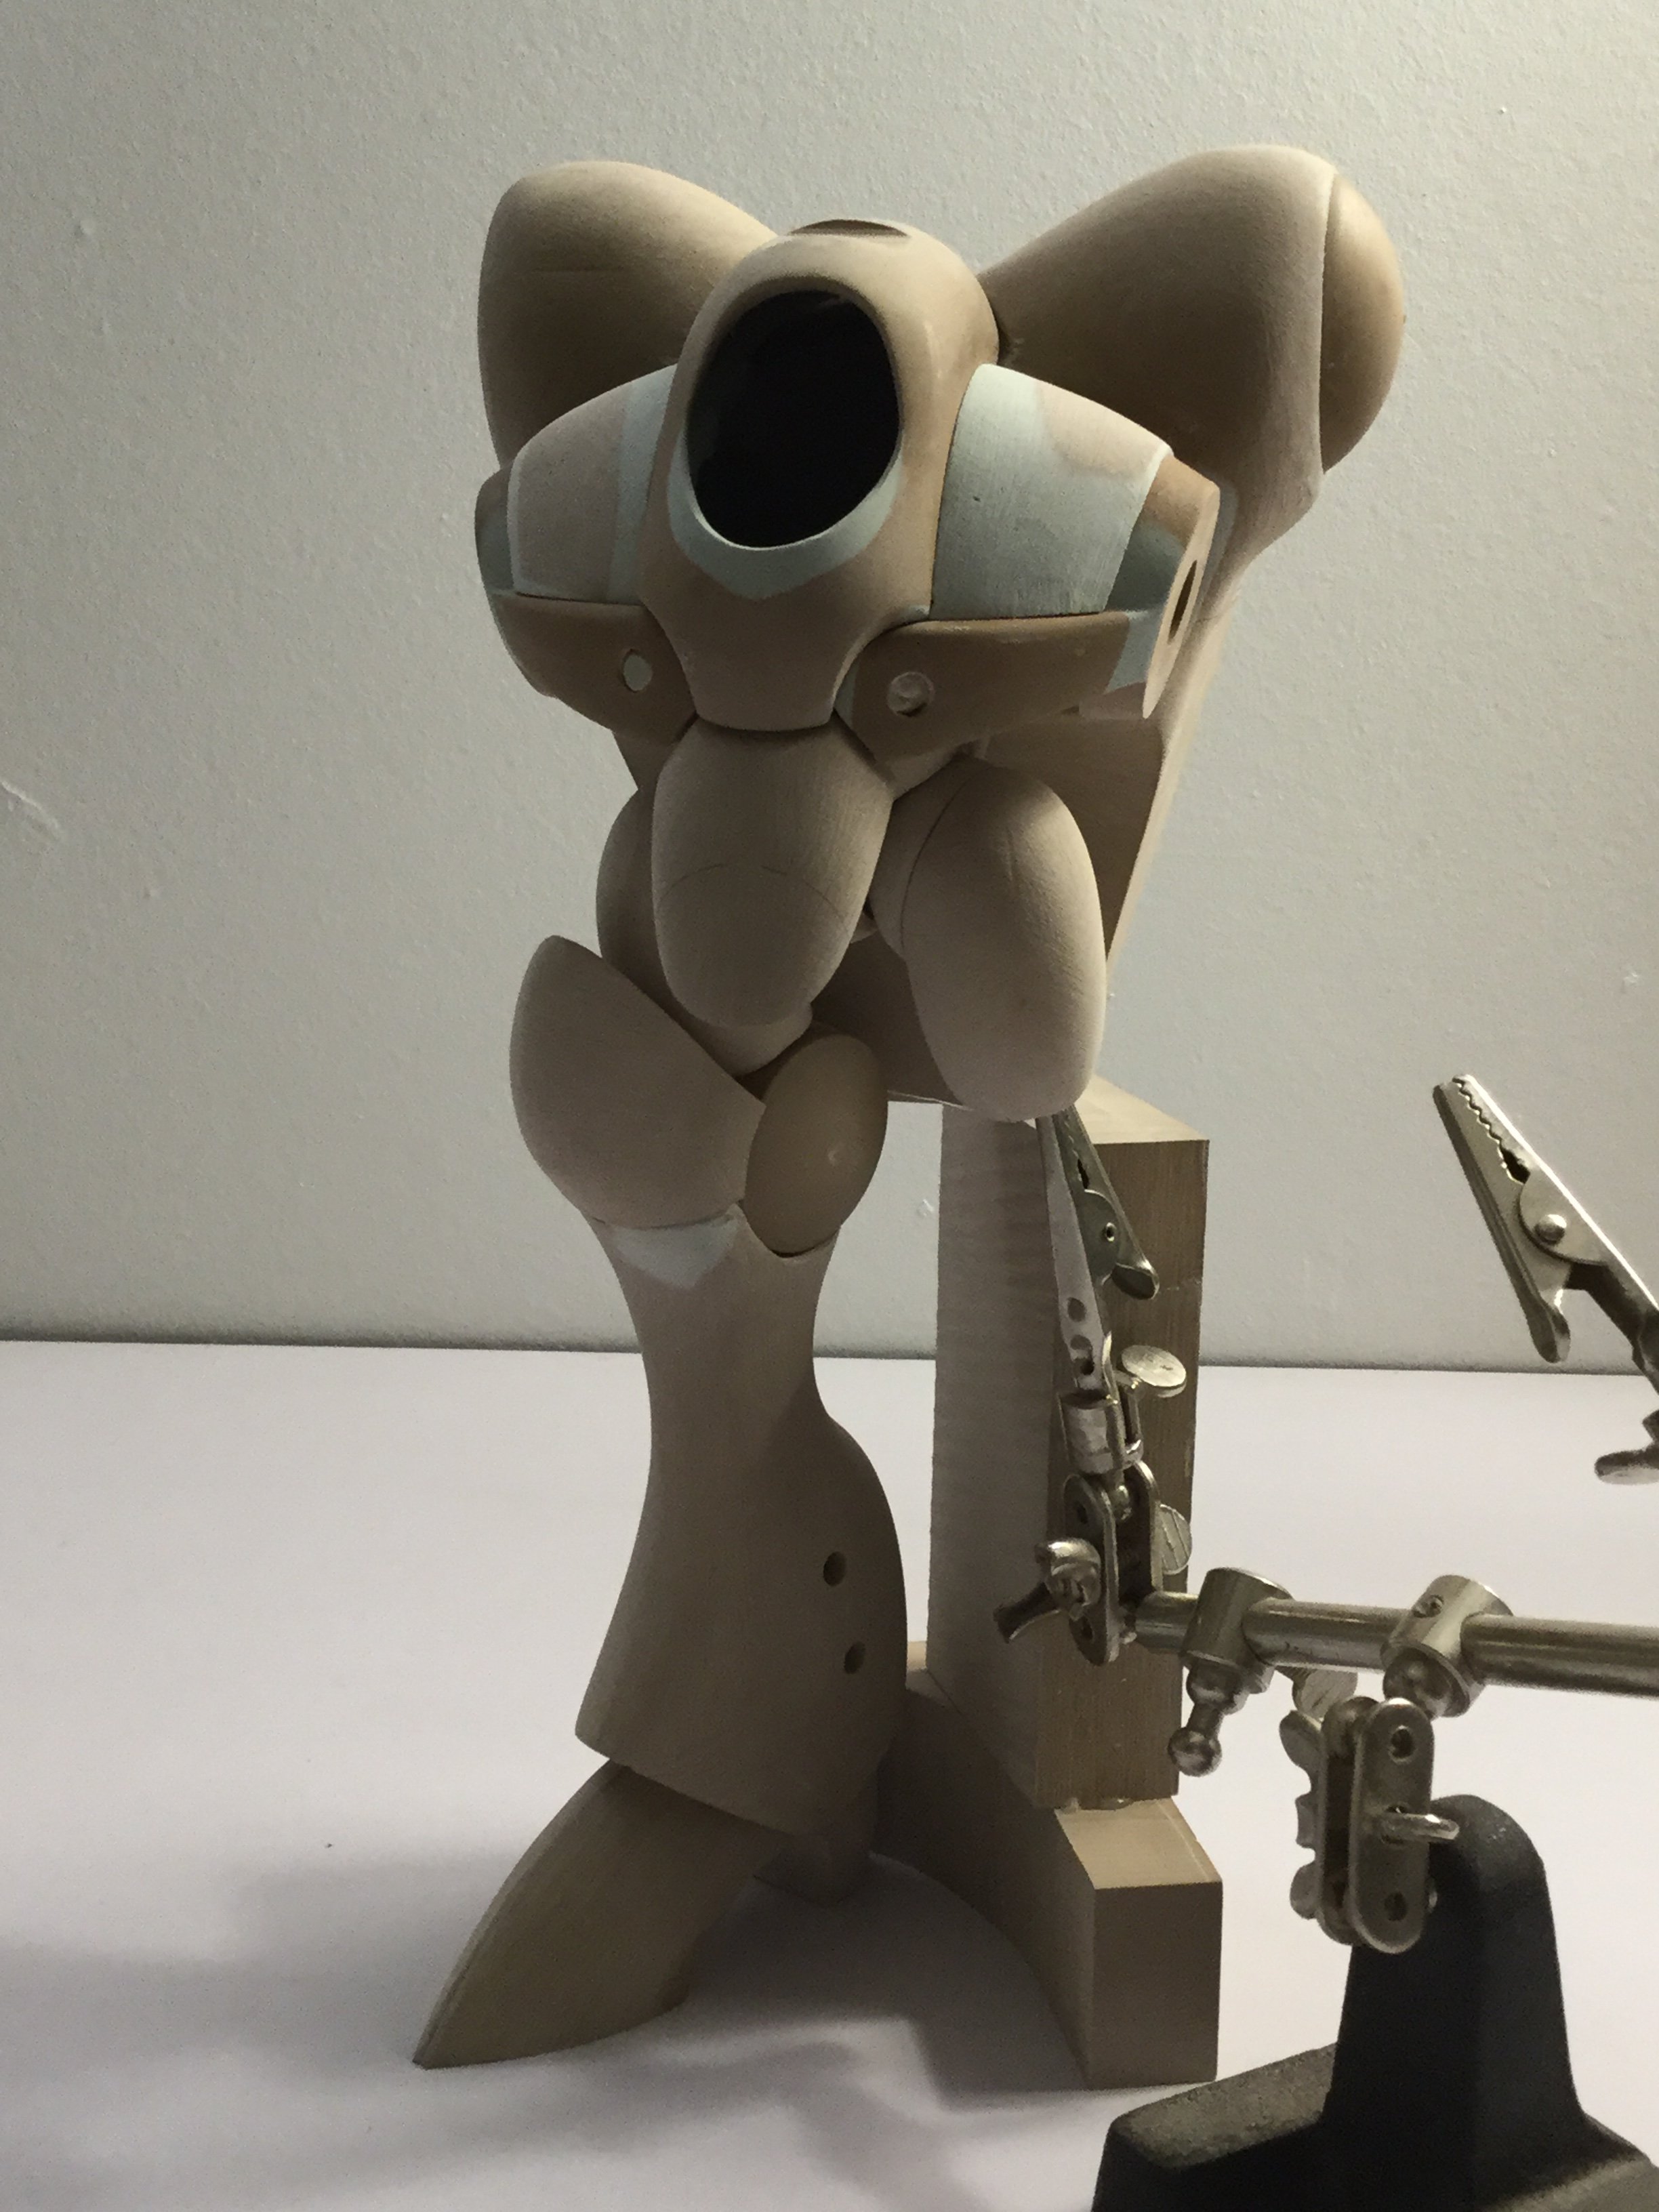
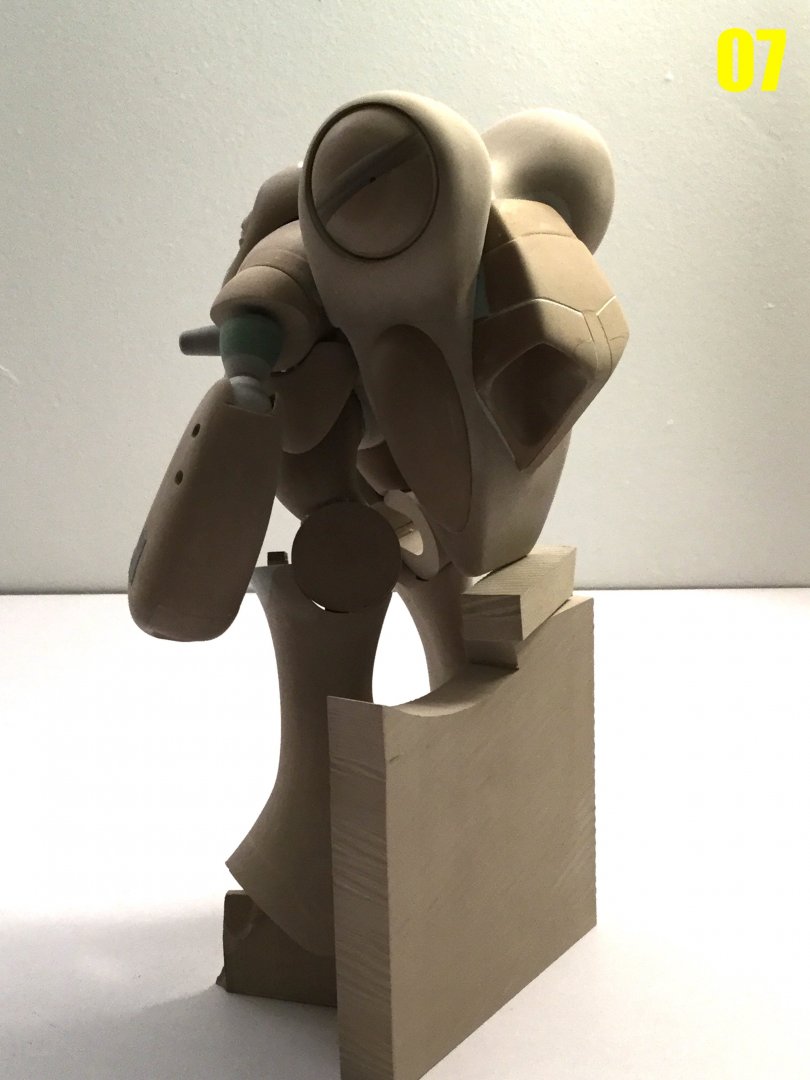
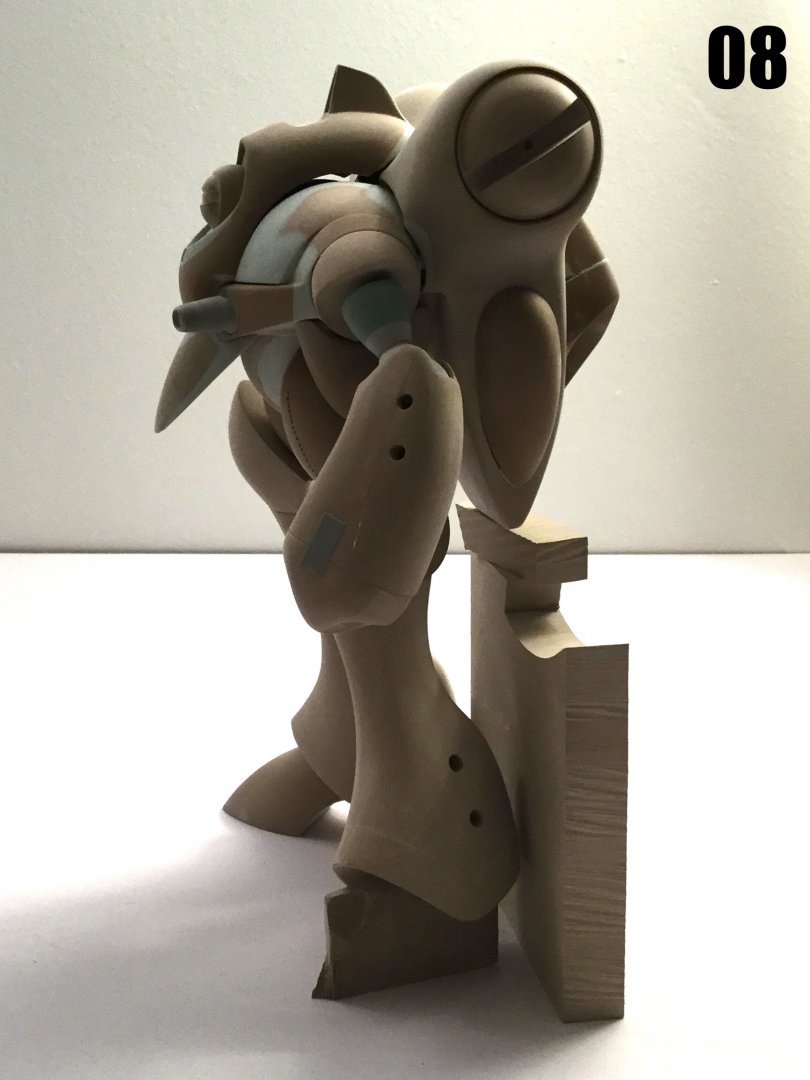
Roughly 9.5 inches to the top of the backpack, and closer to 10 inches to the top of the antenna.
-
The Mandalorian - Star Wars webseries from Jon Favreau
captain america replied to SMS007's topic in Anime or Science Fiction
I hereby put forth the motion that baby Yoda be rechristened Gizmo. -
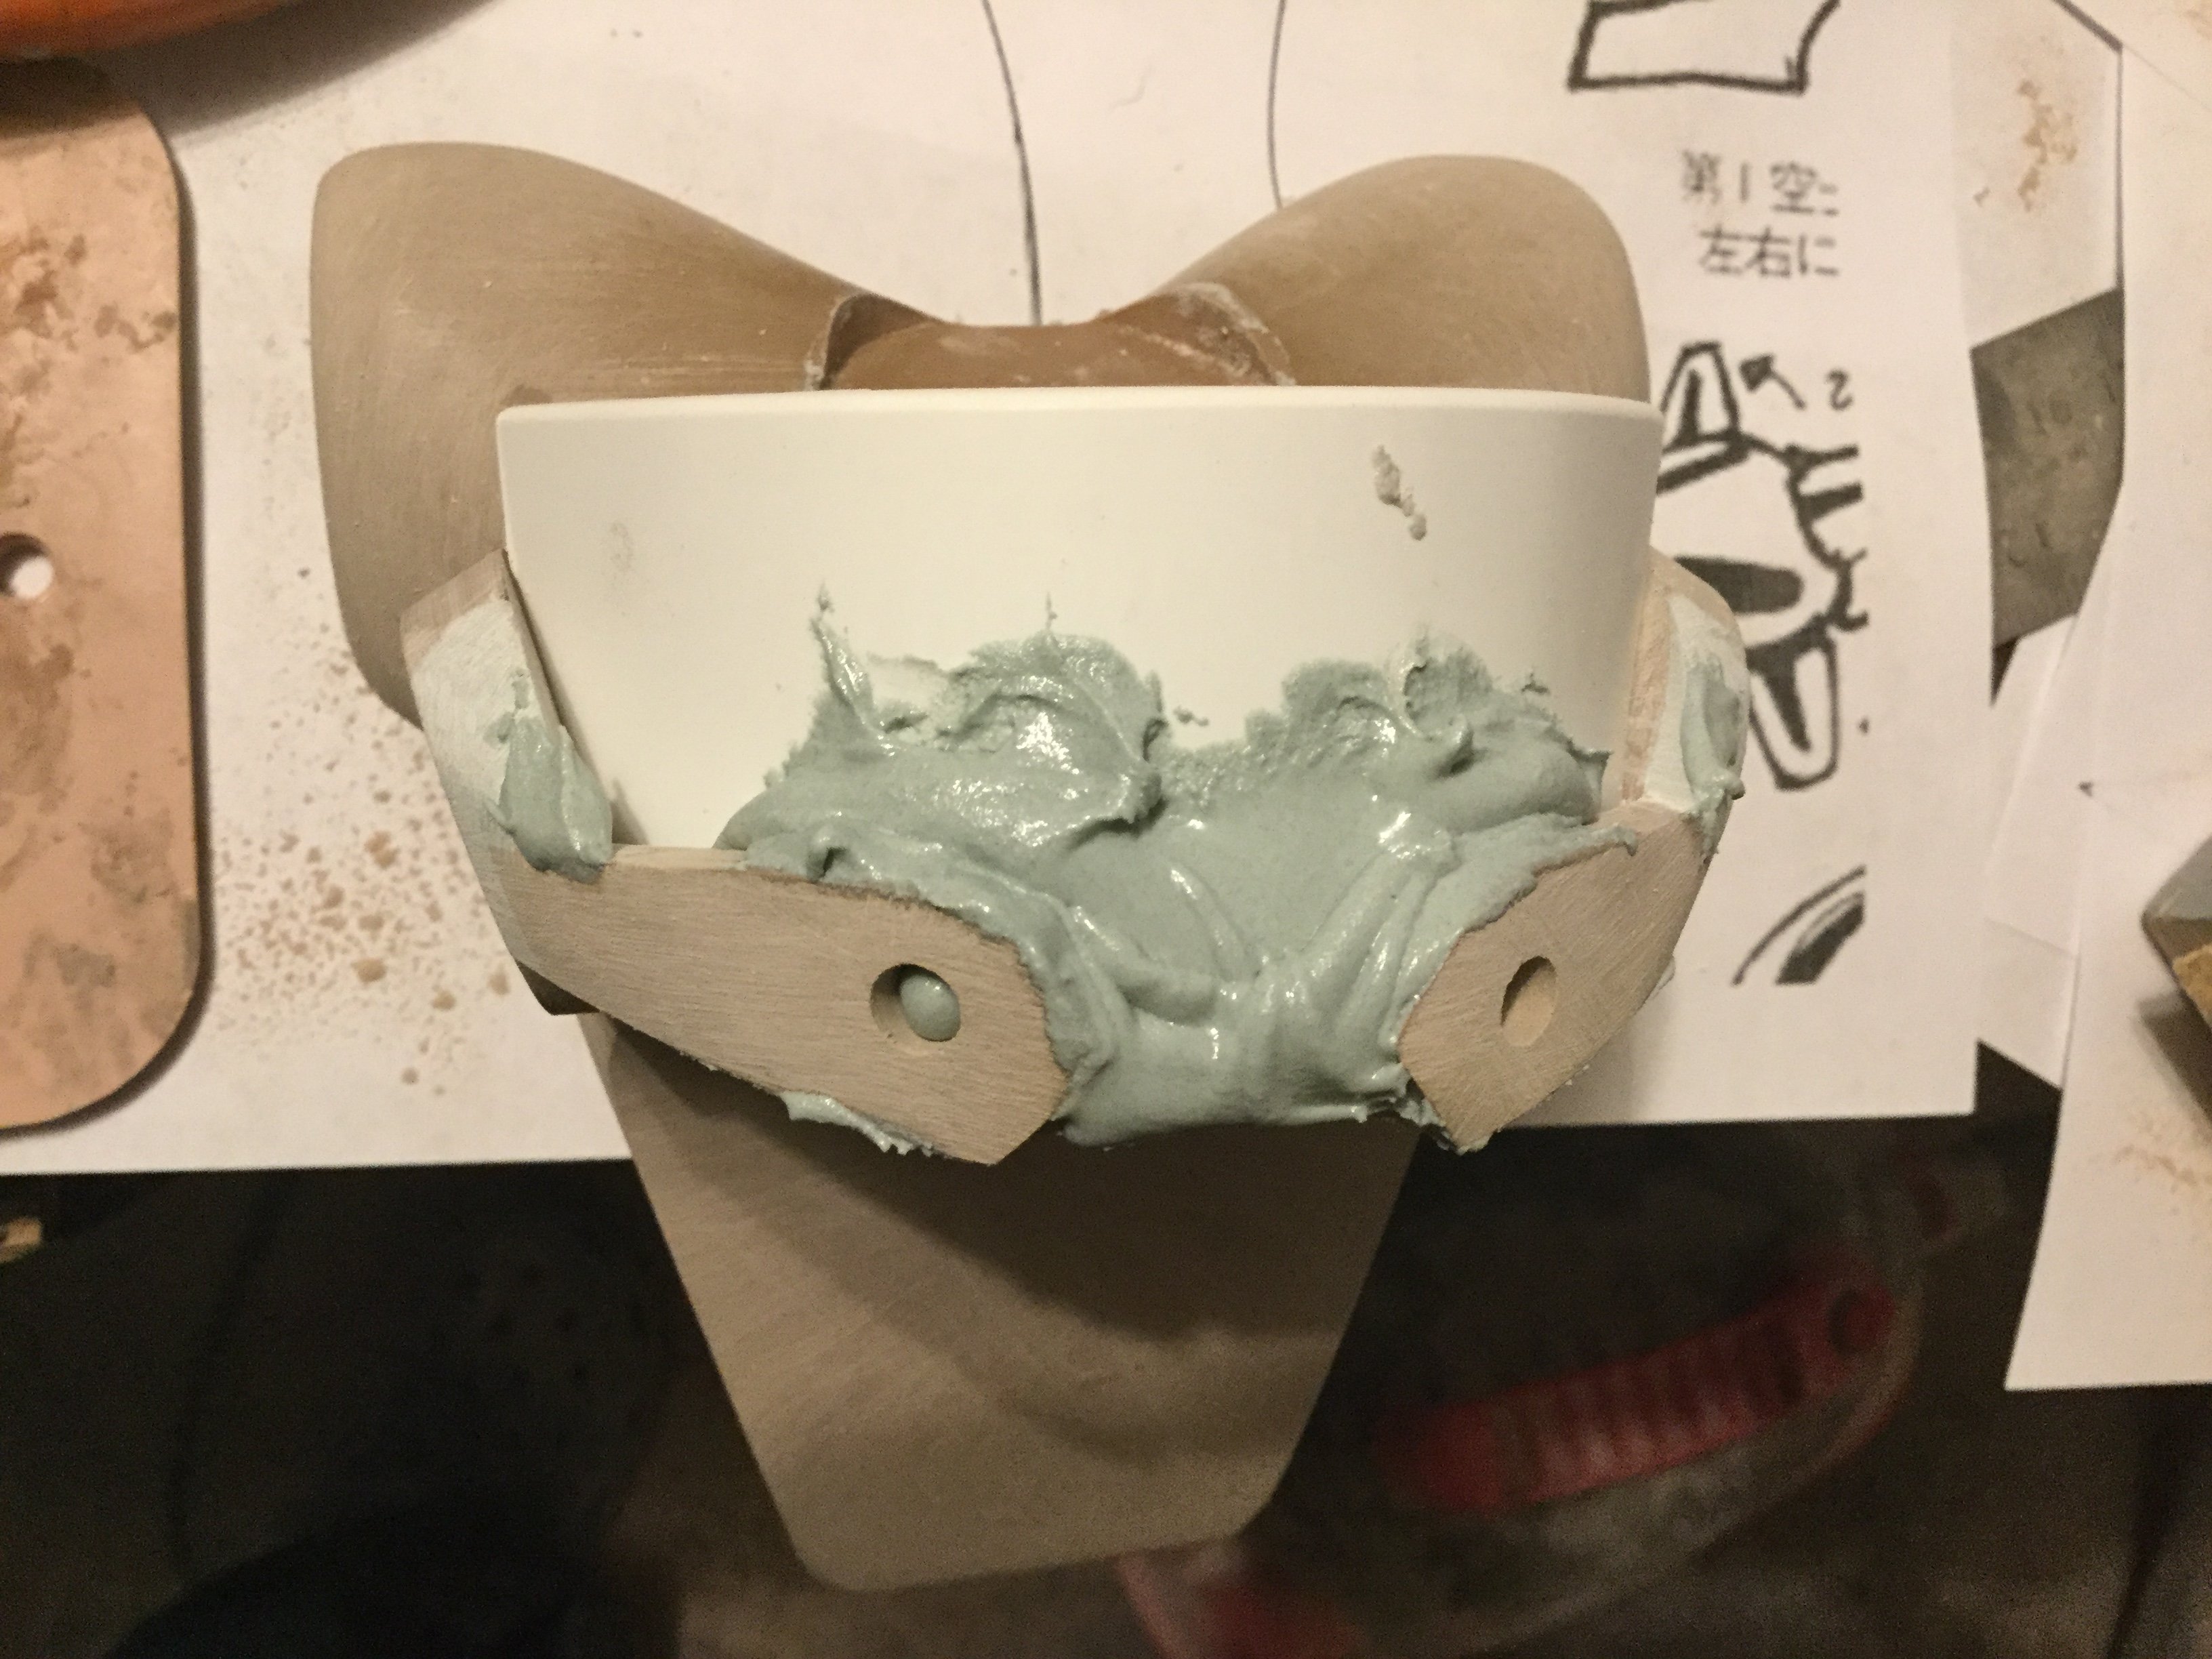
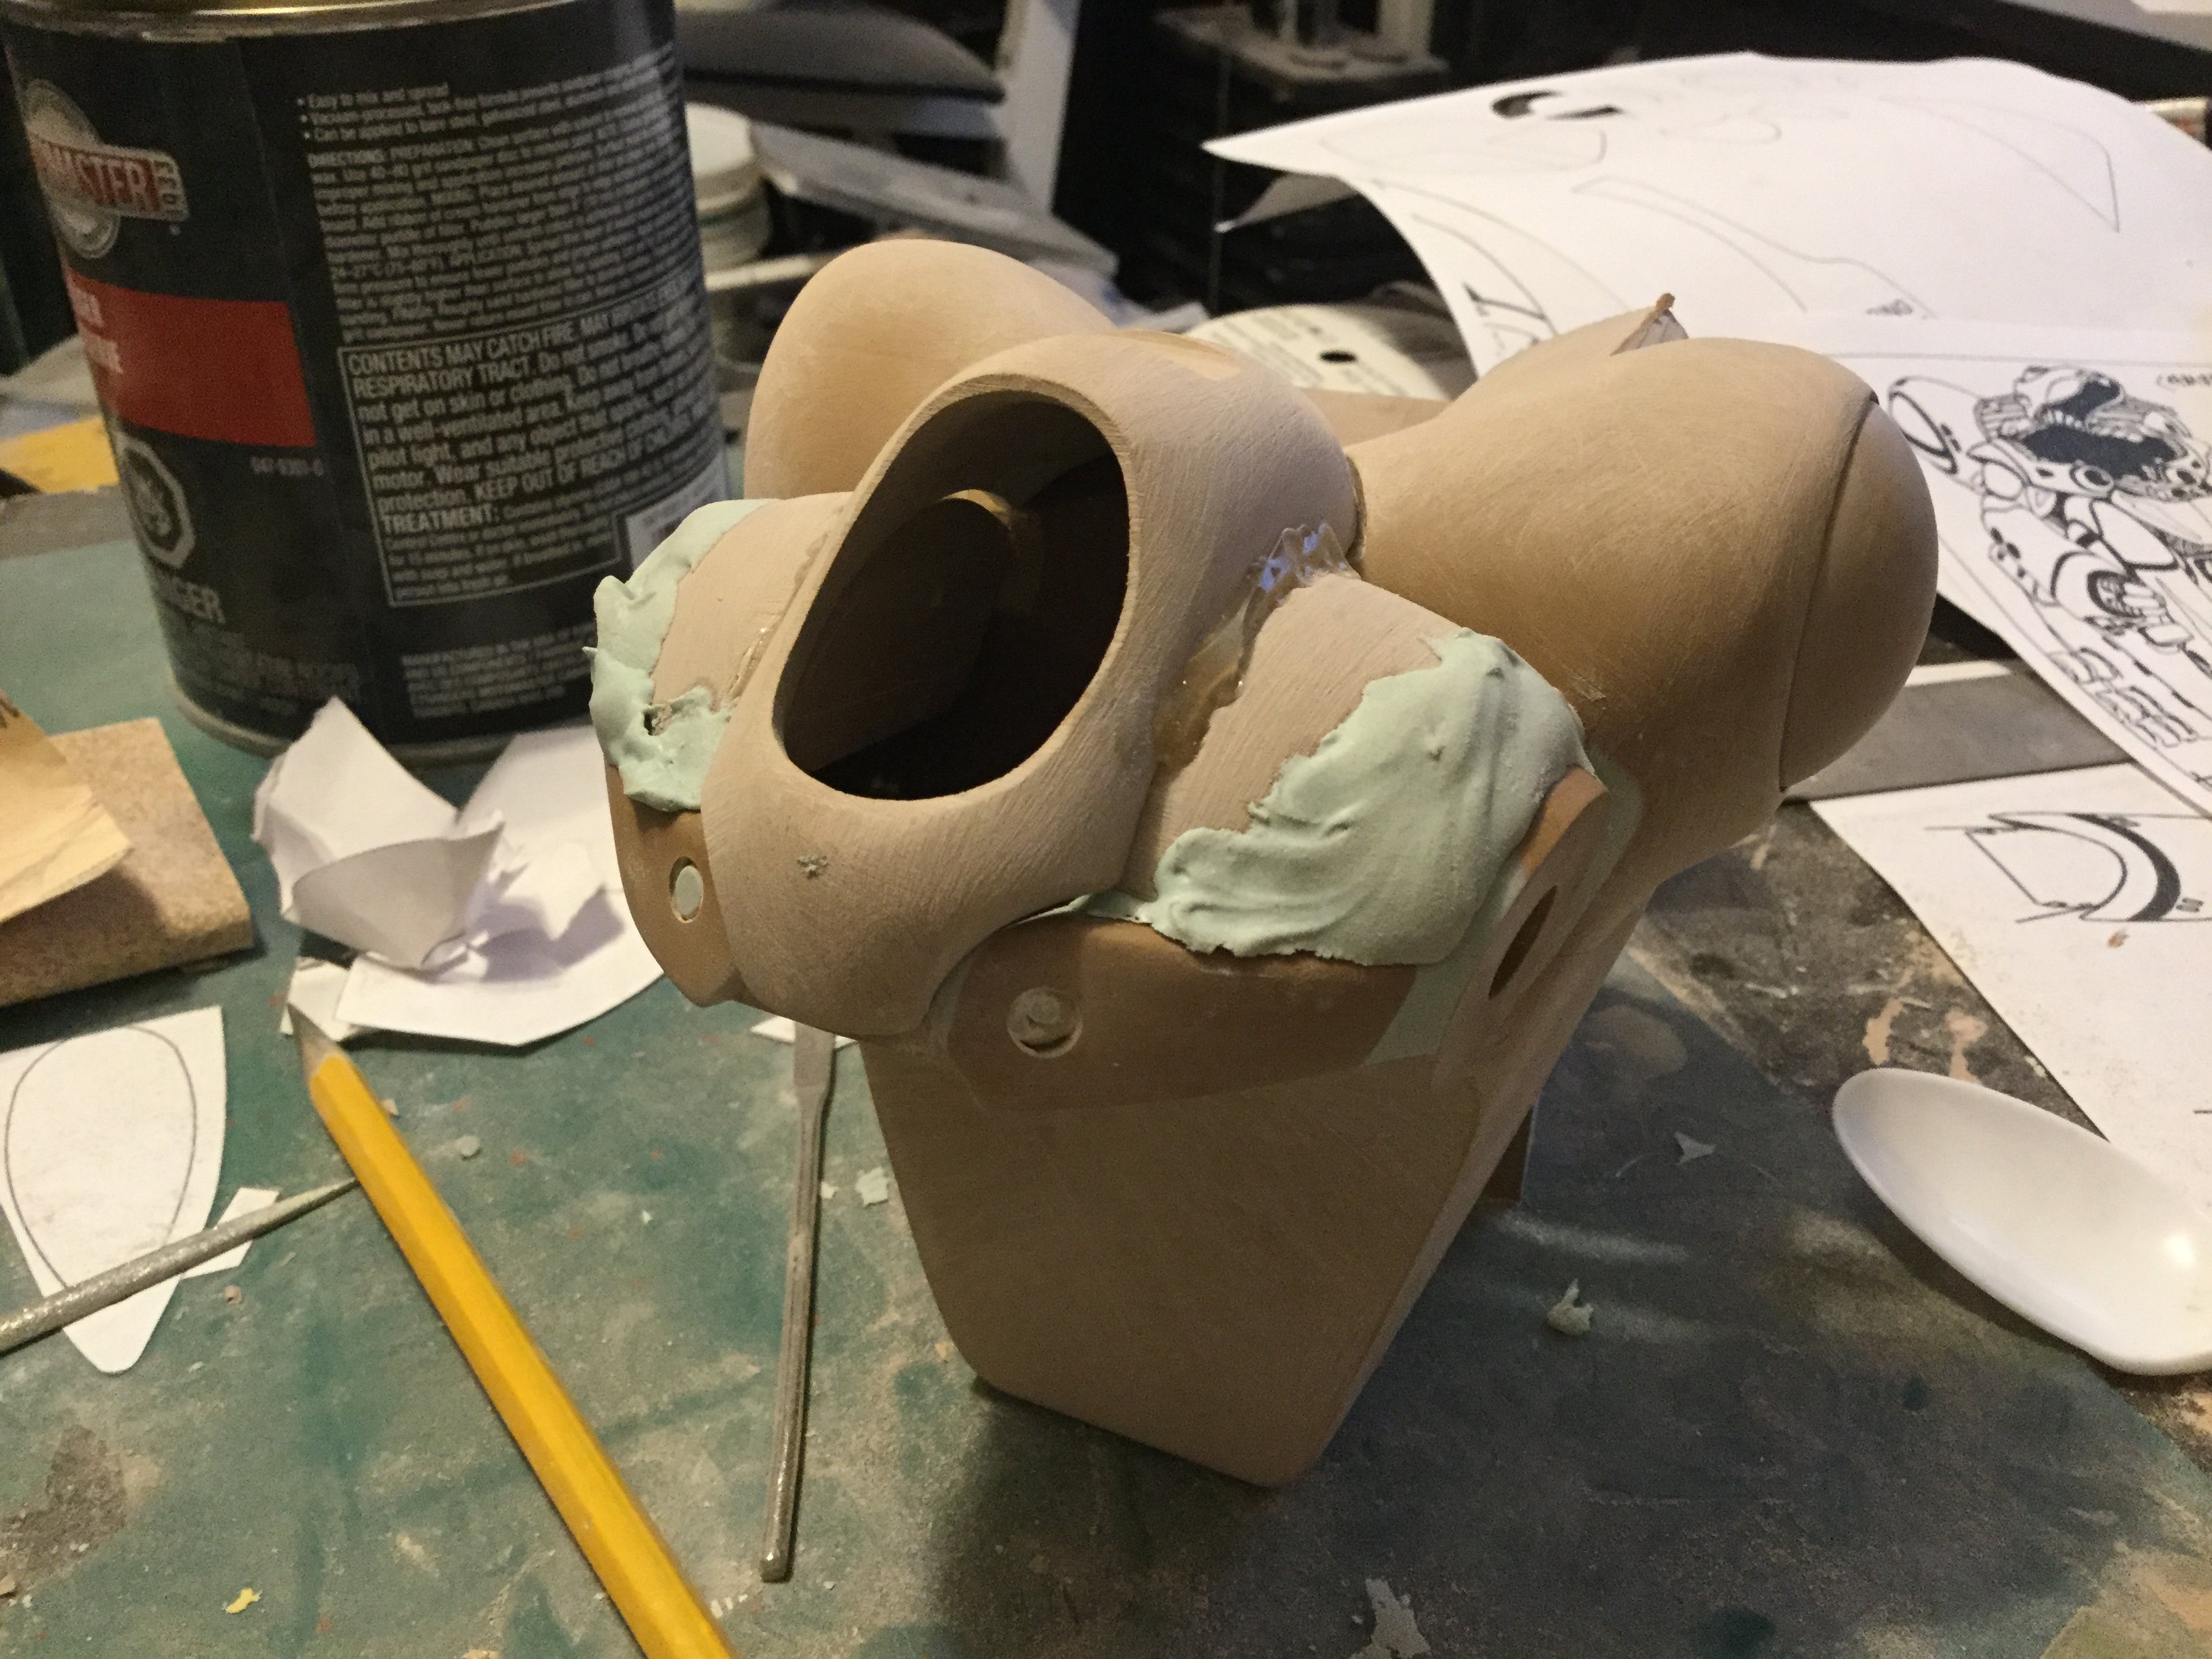
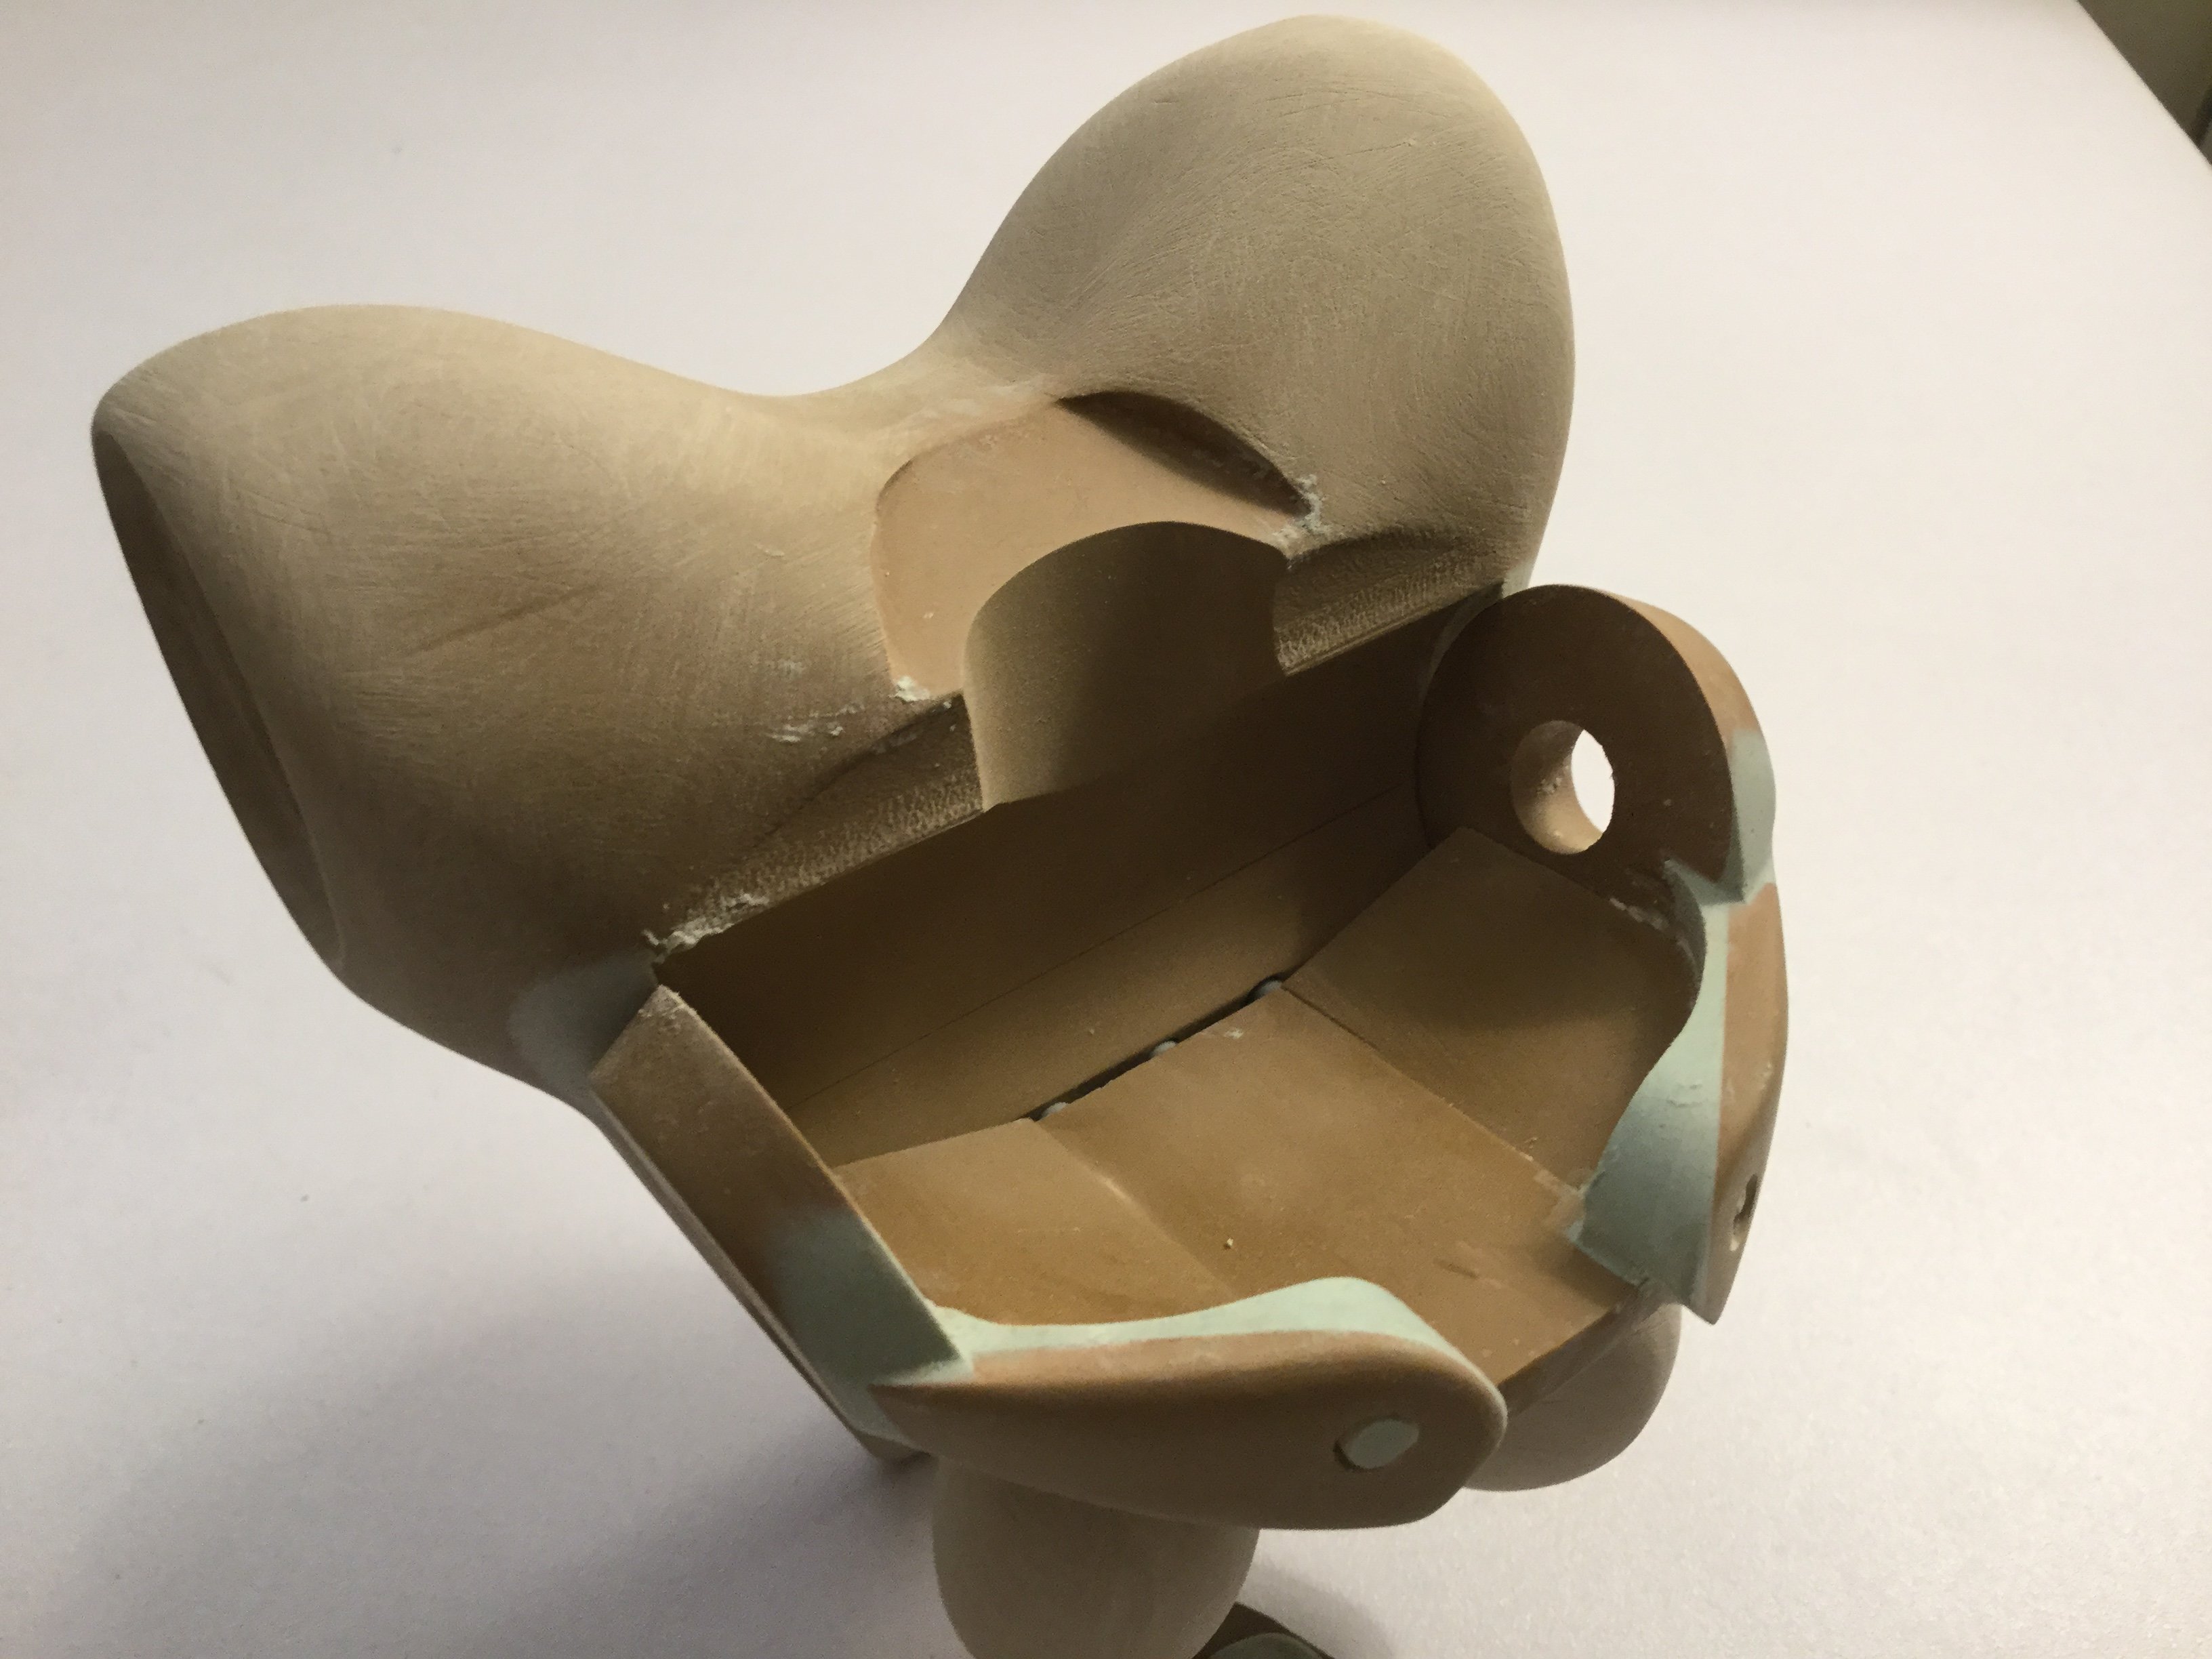
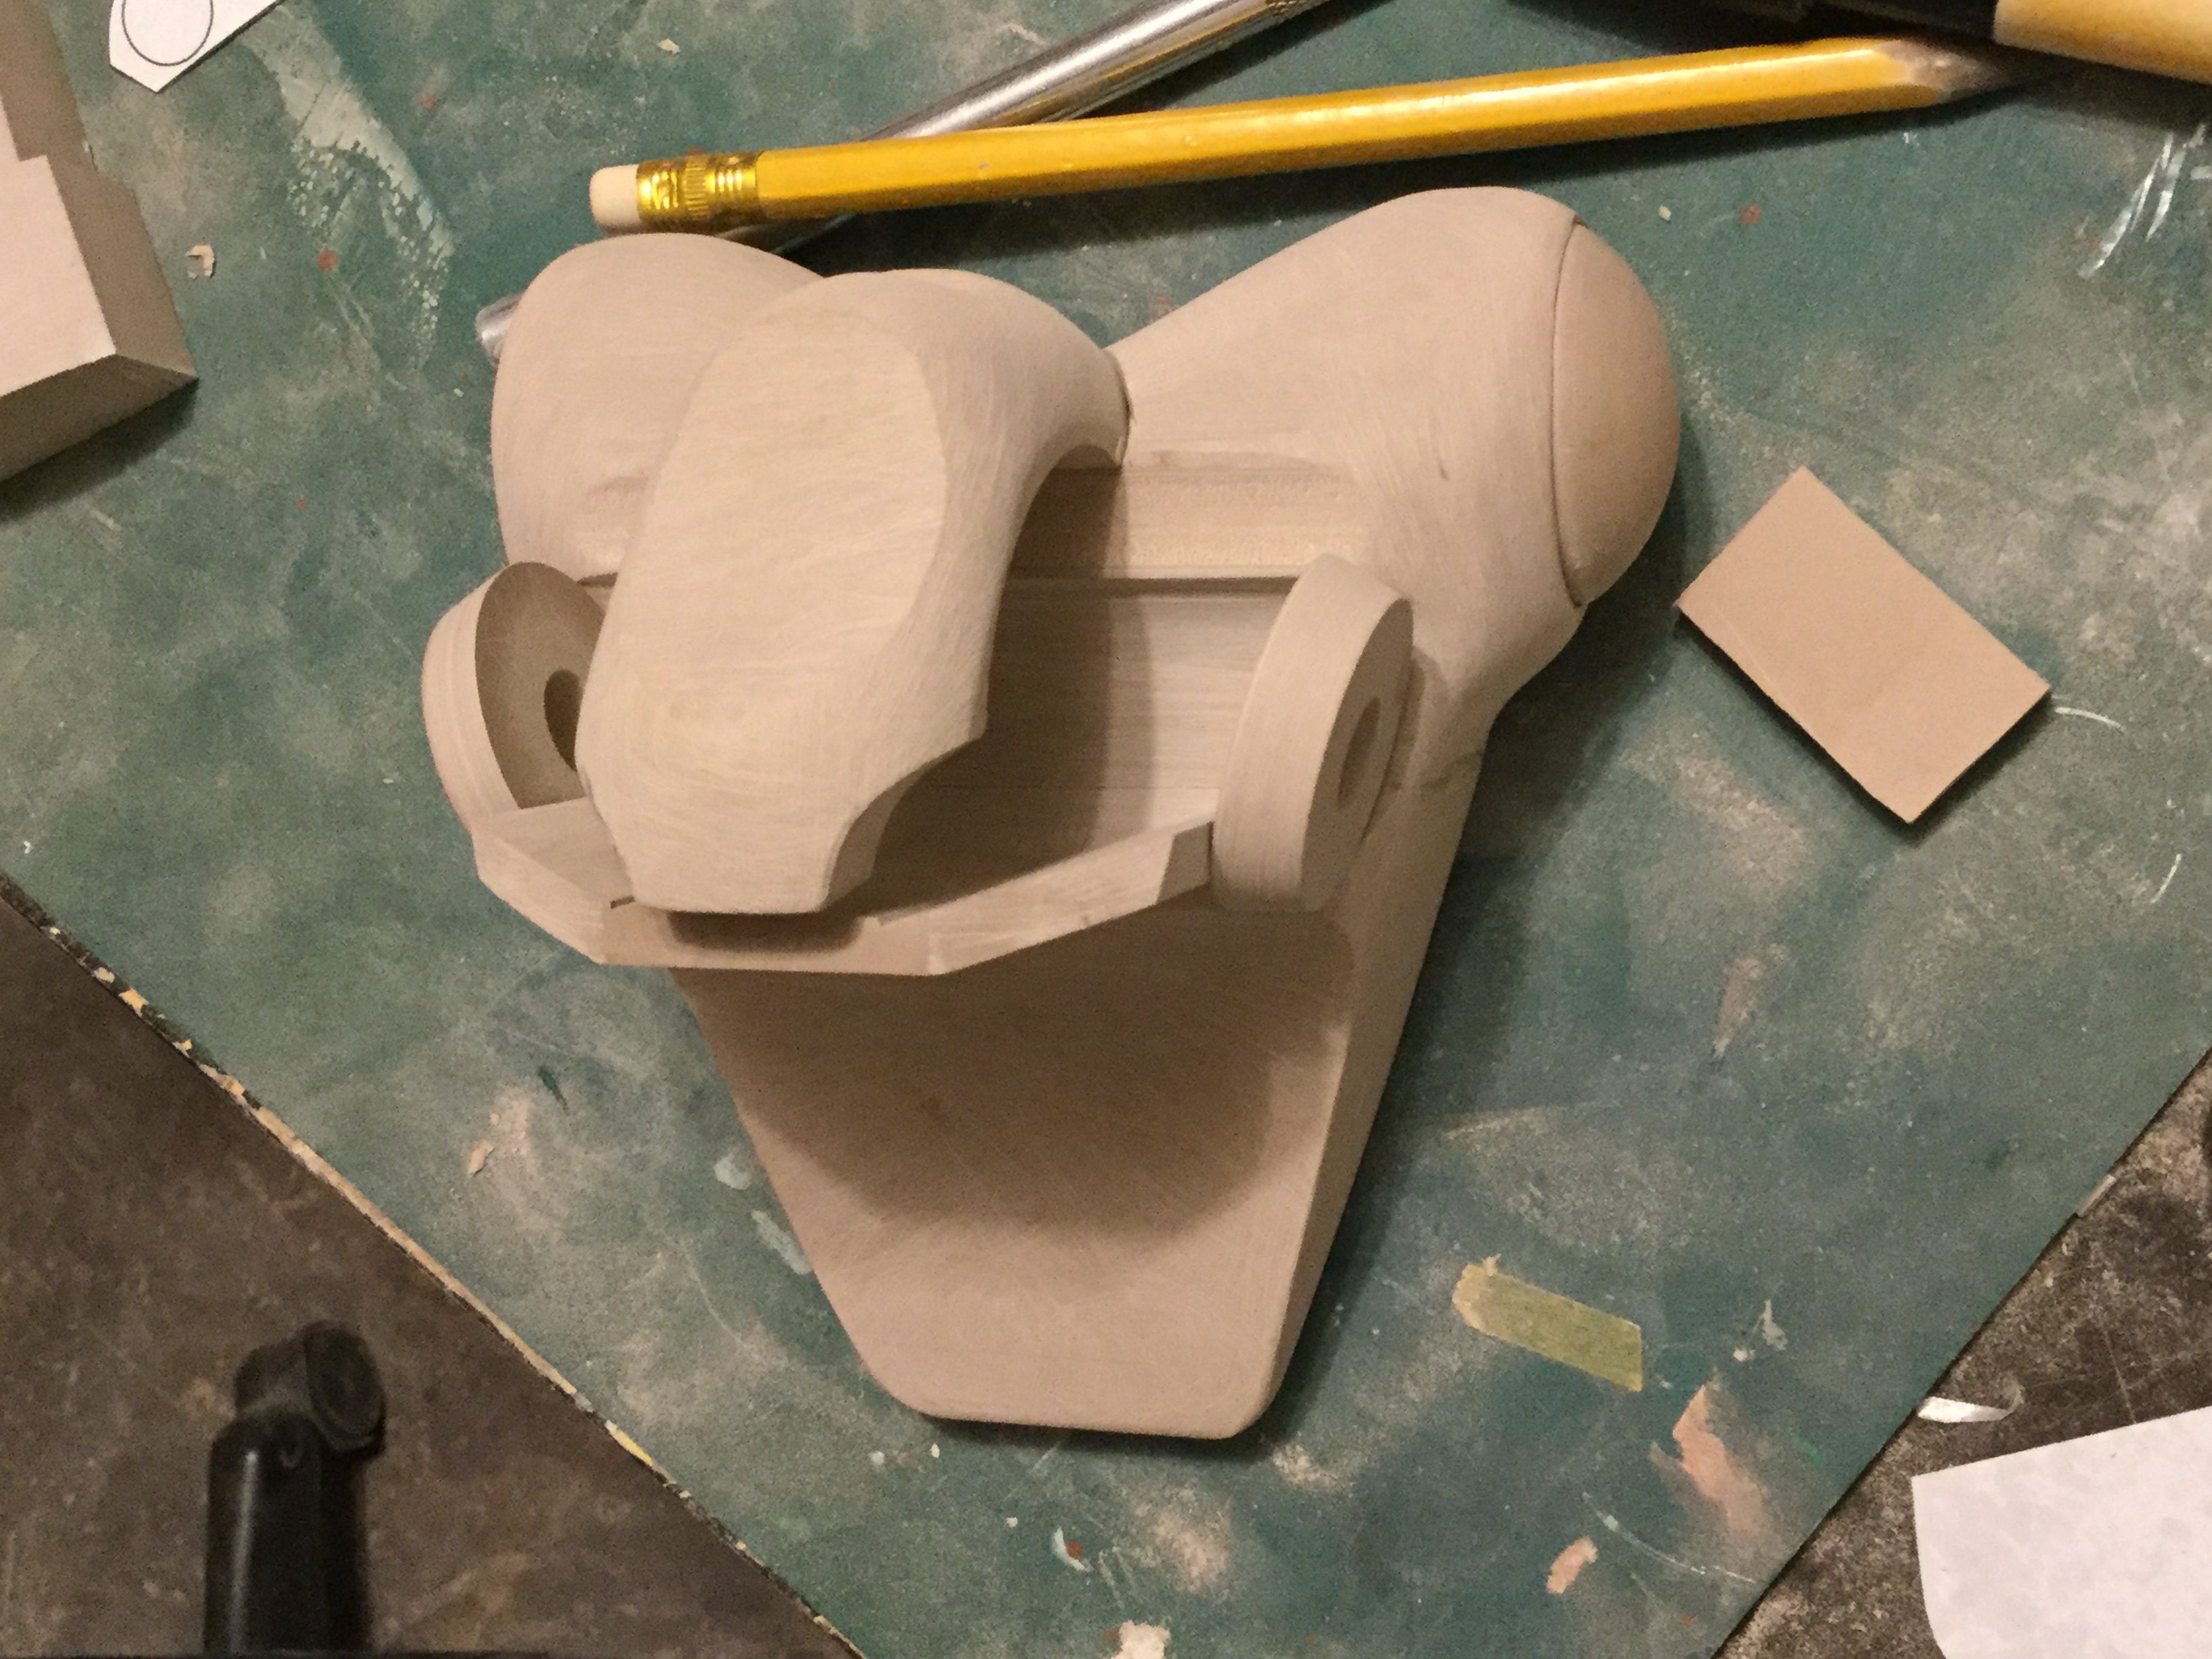
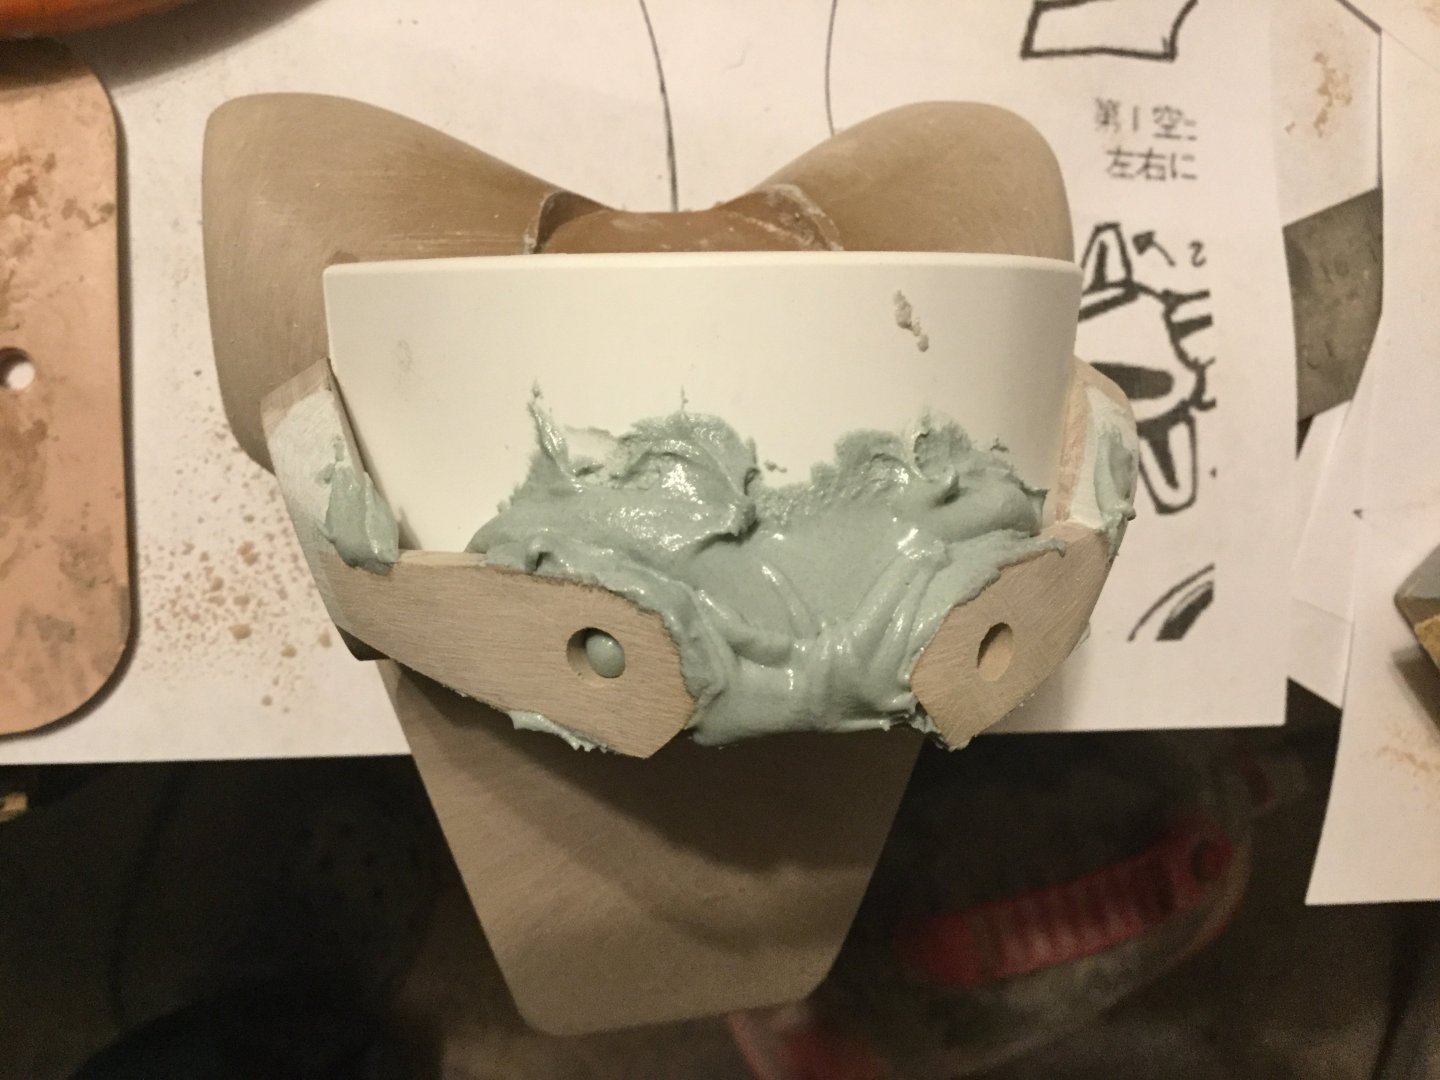
Captain’s log: Friday, December 6th. The fiddly work continues! Pic 01 shows the knee module receiving its customary detail courtesy of the putty-smash technique. A technique which will come back to bite me, but more on that later. The recesses were carved with a sharp blade and slightly oversized, them a Renshape plug was made and said plug was used to shape some polyester putty placed inside the carving. As the putty starts to harden, the plug is pulled out, and the excess putty sanded away. Pics 2 and 3 show the thruster module, which, like the backpack itself was made as hollow as possible to save on weight. Pic 4: here I’m starting to build the thruster nozzles using Renshape walls to hold the putty in place when I insert the plug shown in pic 5 to create the thruster tunnel… Aaaand that’s where things went wrong. Terribly wrong! I suspected it was an overly-optimistic move, simply by virtue of the size of the plug and the high degree of surface contact. It was only once I was committed to the move that I realized that the plug was firmly stuck inside the thruster unit. So stuck in fact, that the only way to remove it was with a hammer and chisel, thereby destroying the thruster unit. Sigh. To boot, my shop vac died, and the bearings in my drill press gave up the ghost. In Canuckistan, you no make model; model make YOU (crazy!) Alas, that which is broken can be fixed (or in this case replaced) so after lots of work… Ta-daa! Pics 6 and 7 show the reconstituted thruster module looking even better! Pic 08: don’t you just love how I use improvised Renshape Jenga blocks to hold my models up? But wait, there’s more!! Pics 09-11: Did I mention that it can also free-stand? A little hot glue helped with that, but it demonstrates that the kit is well balanced. Now that most of the big parts are done, I can start to tackle the more fine detailing. The adventure continues next week: stay tuned!


-
Thanks. I suffered a triple-whammy when both my drill press and shop-vac conked-out on me, and to top it off, I had to start the backpack thrusters over from scratch after a very dubious putty-smash experiment went very wrong. It happens. Oh, and a little less than 7 hours left on the preorder special.
-
No update today; dealing with some technical issues. Will be back next week.
-
The Official Moscato Hobby Models Thread
captain america replied to captain america's topic in Anime or Science Fiction
Second teaser.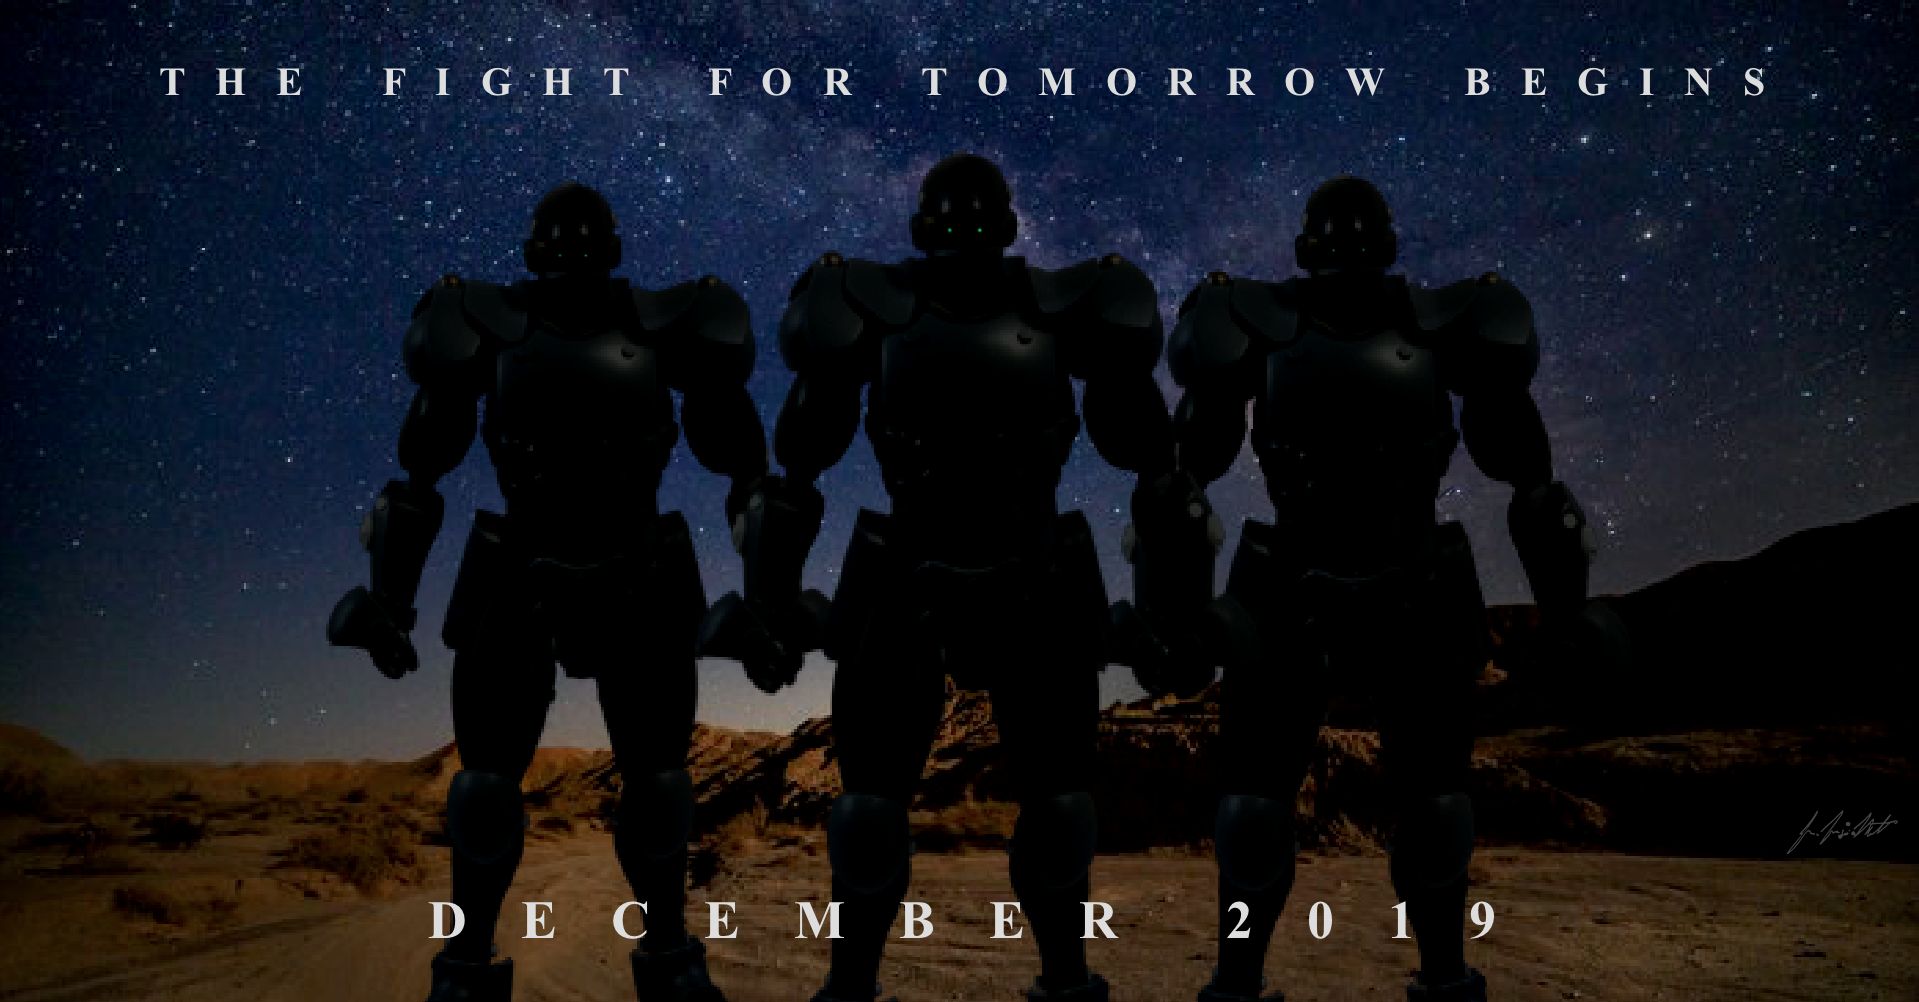
-
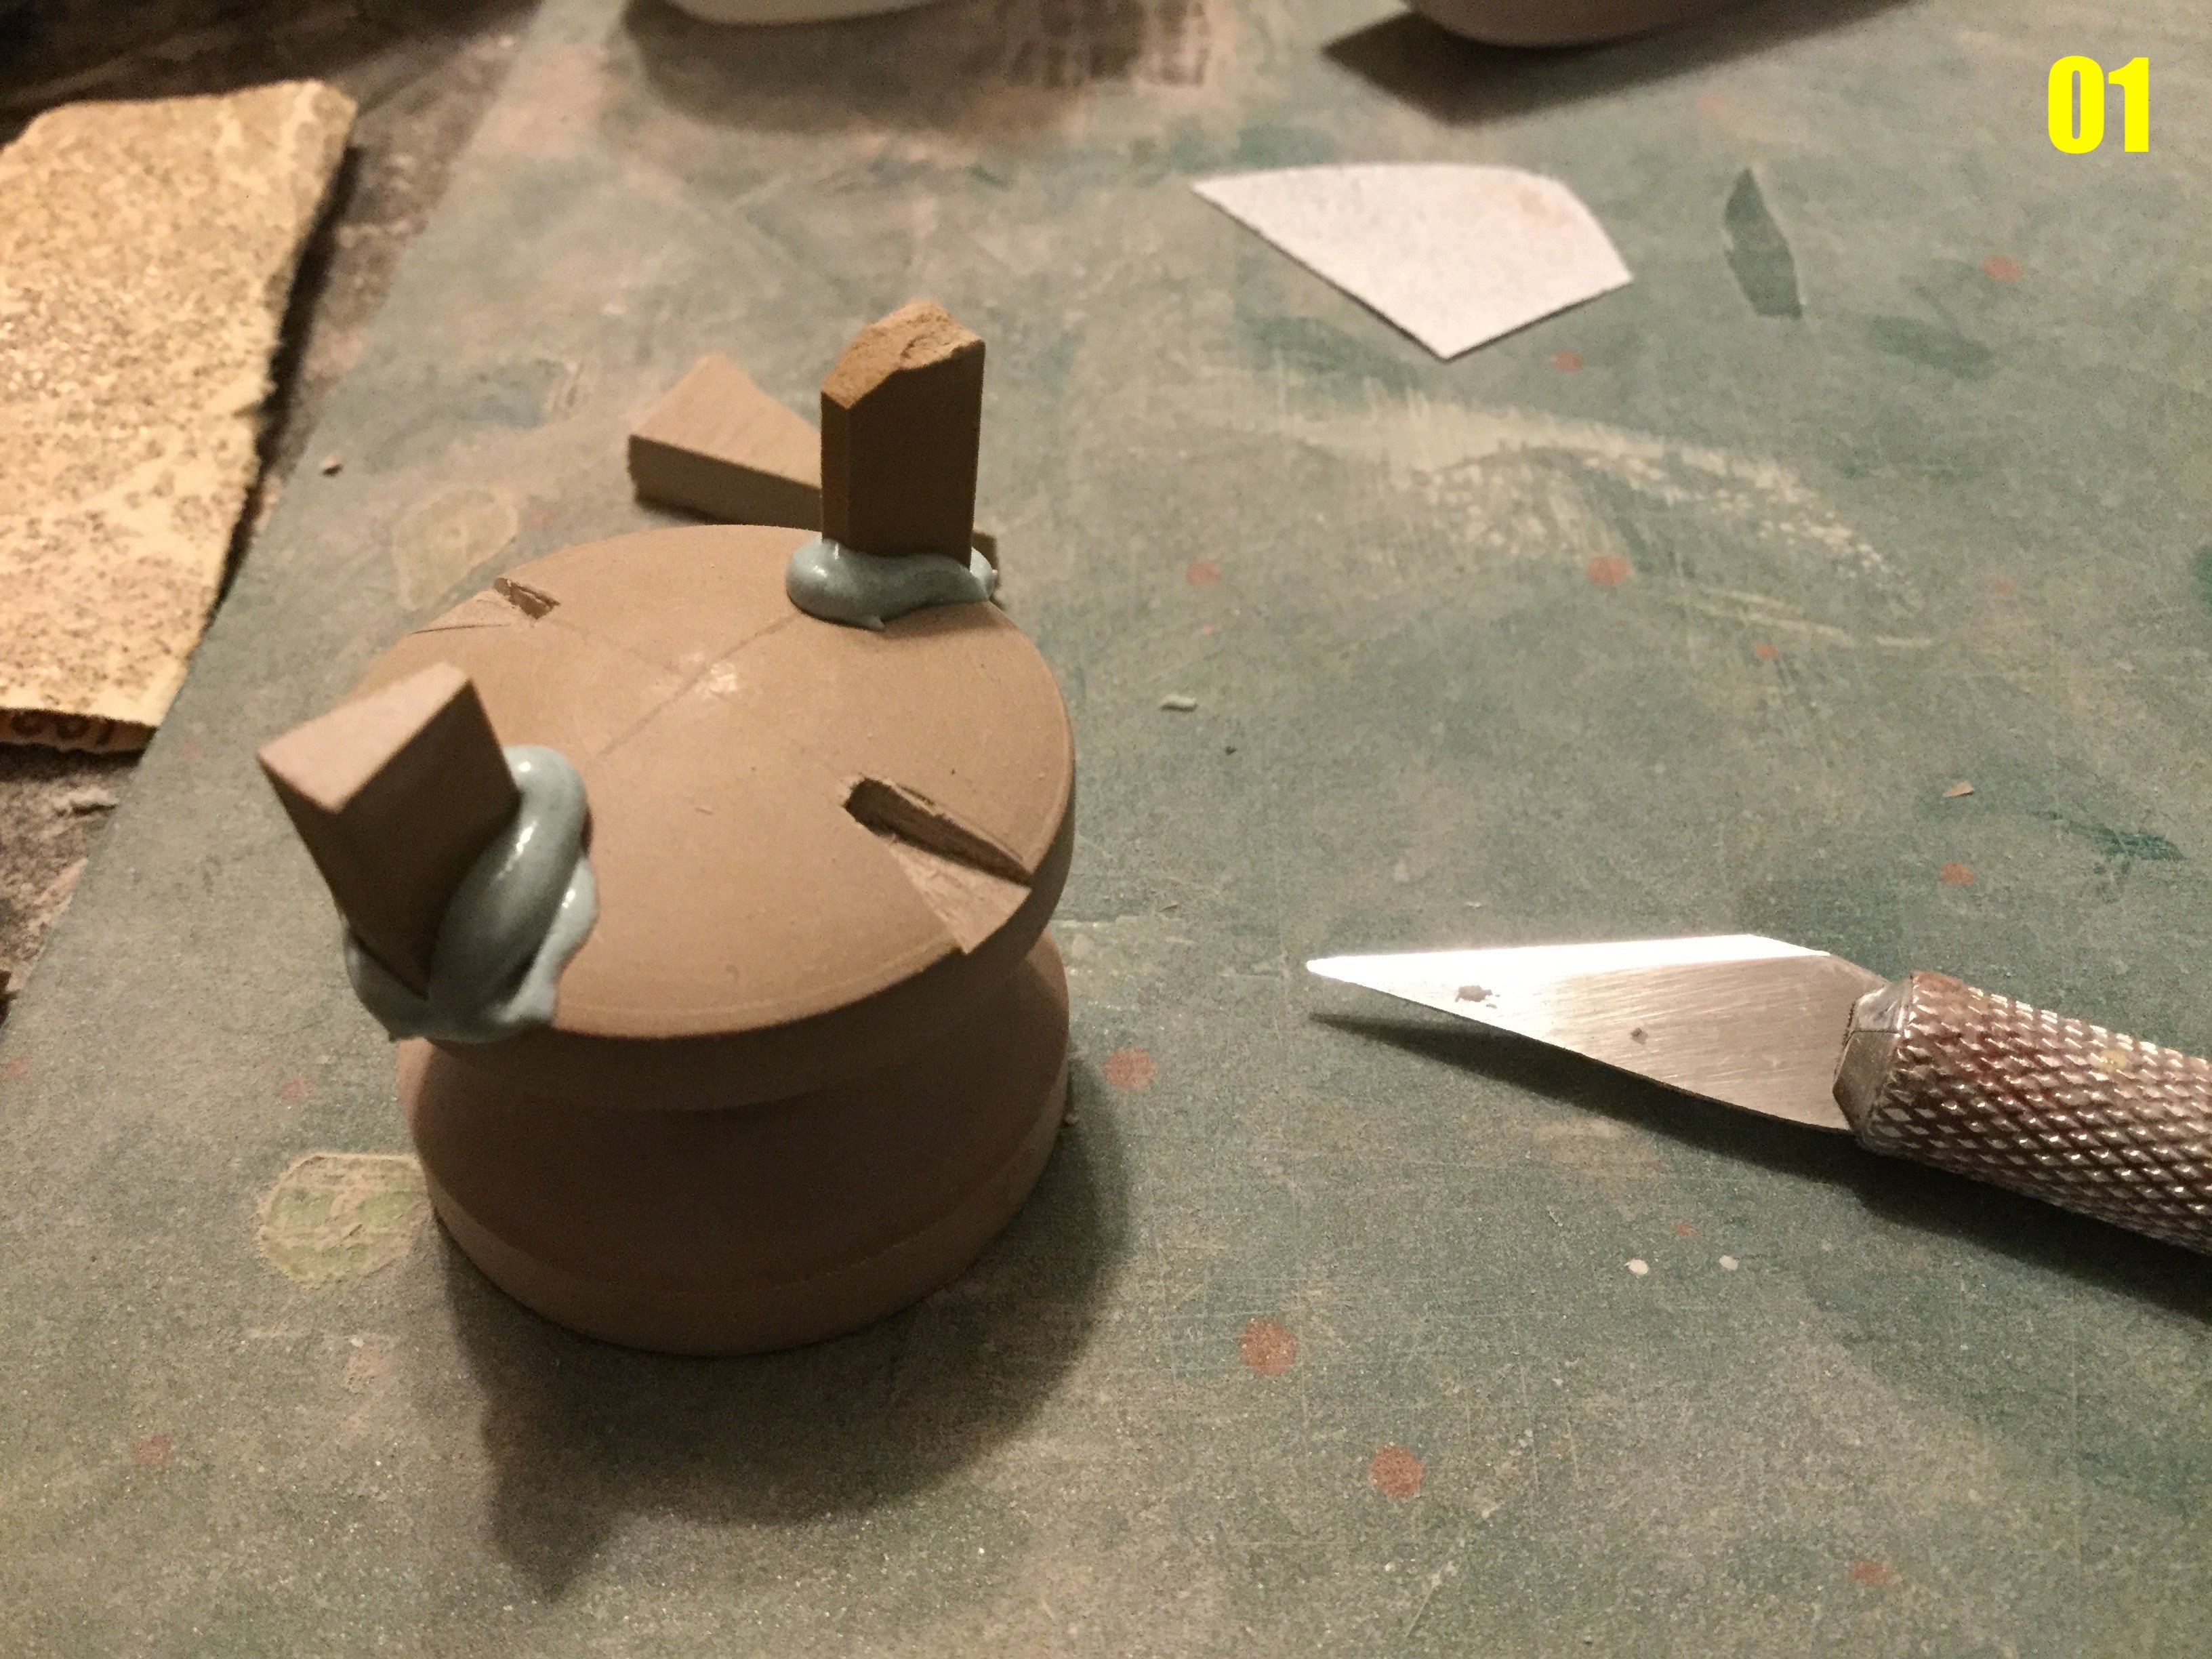
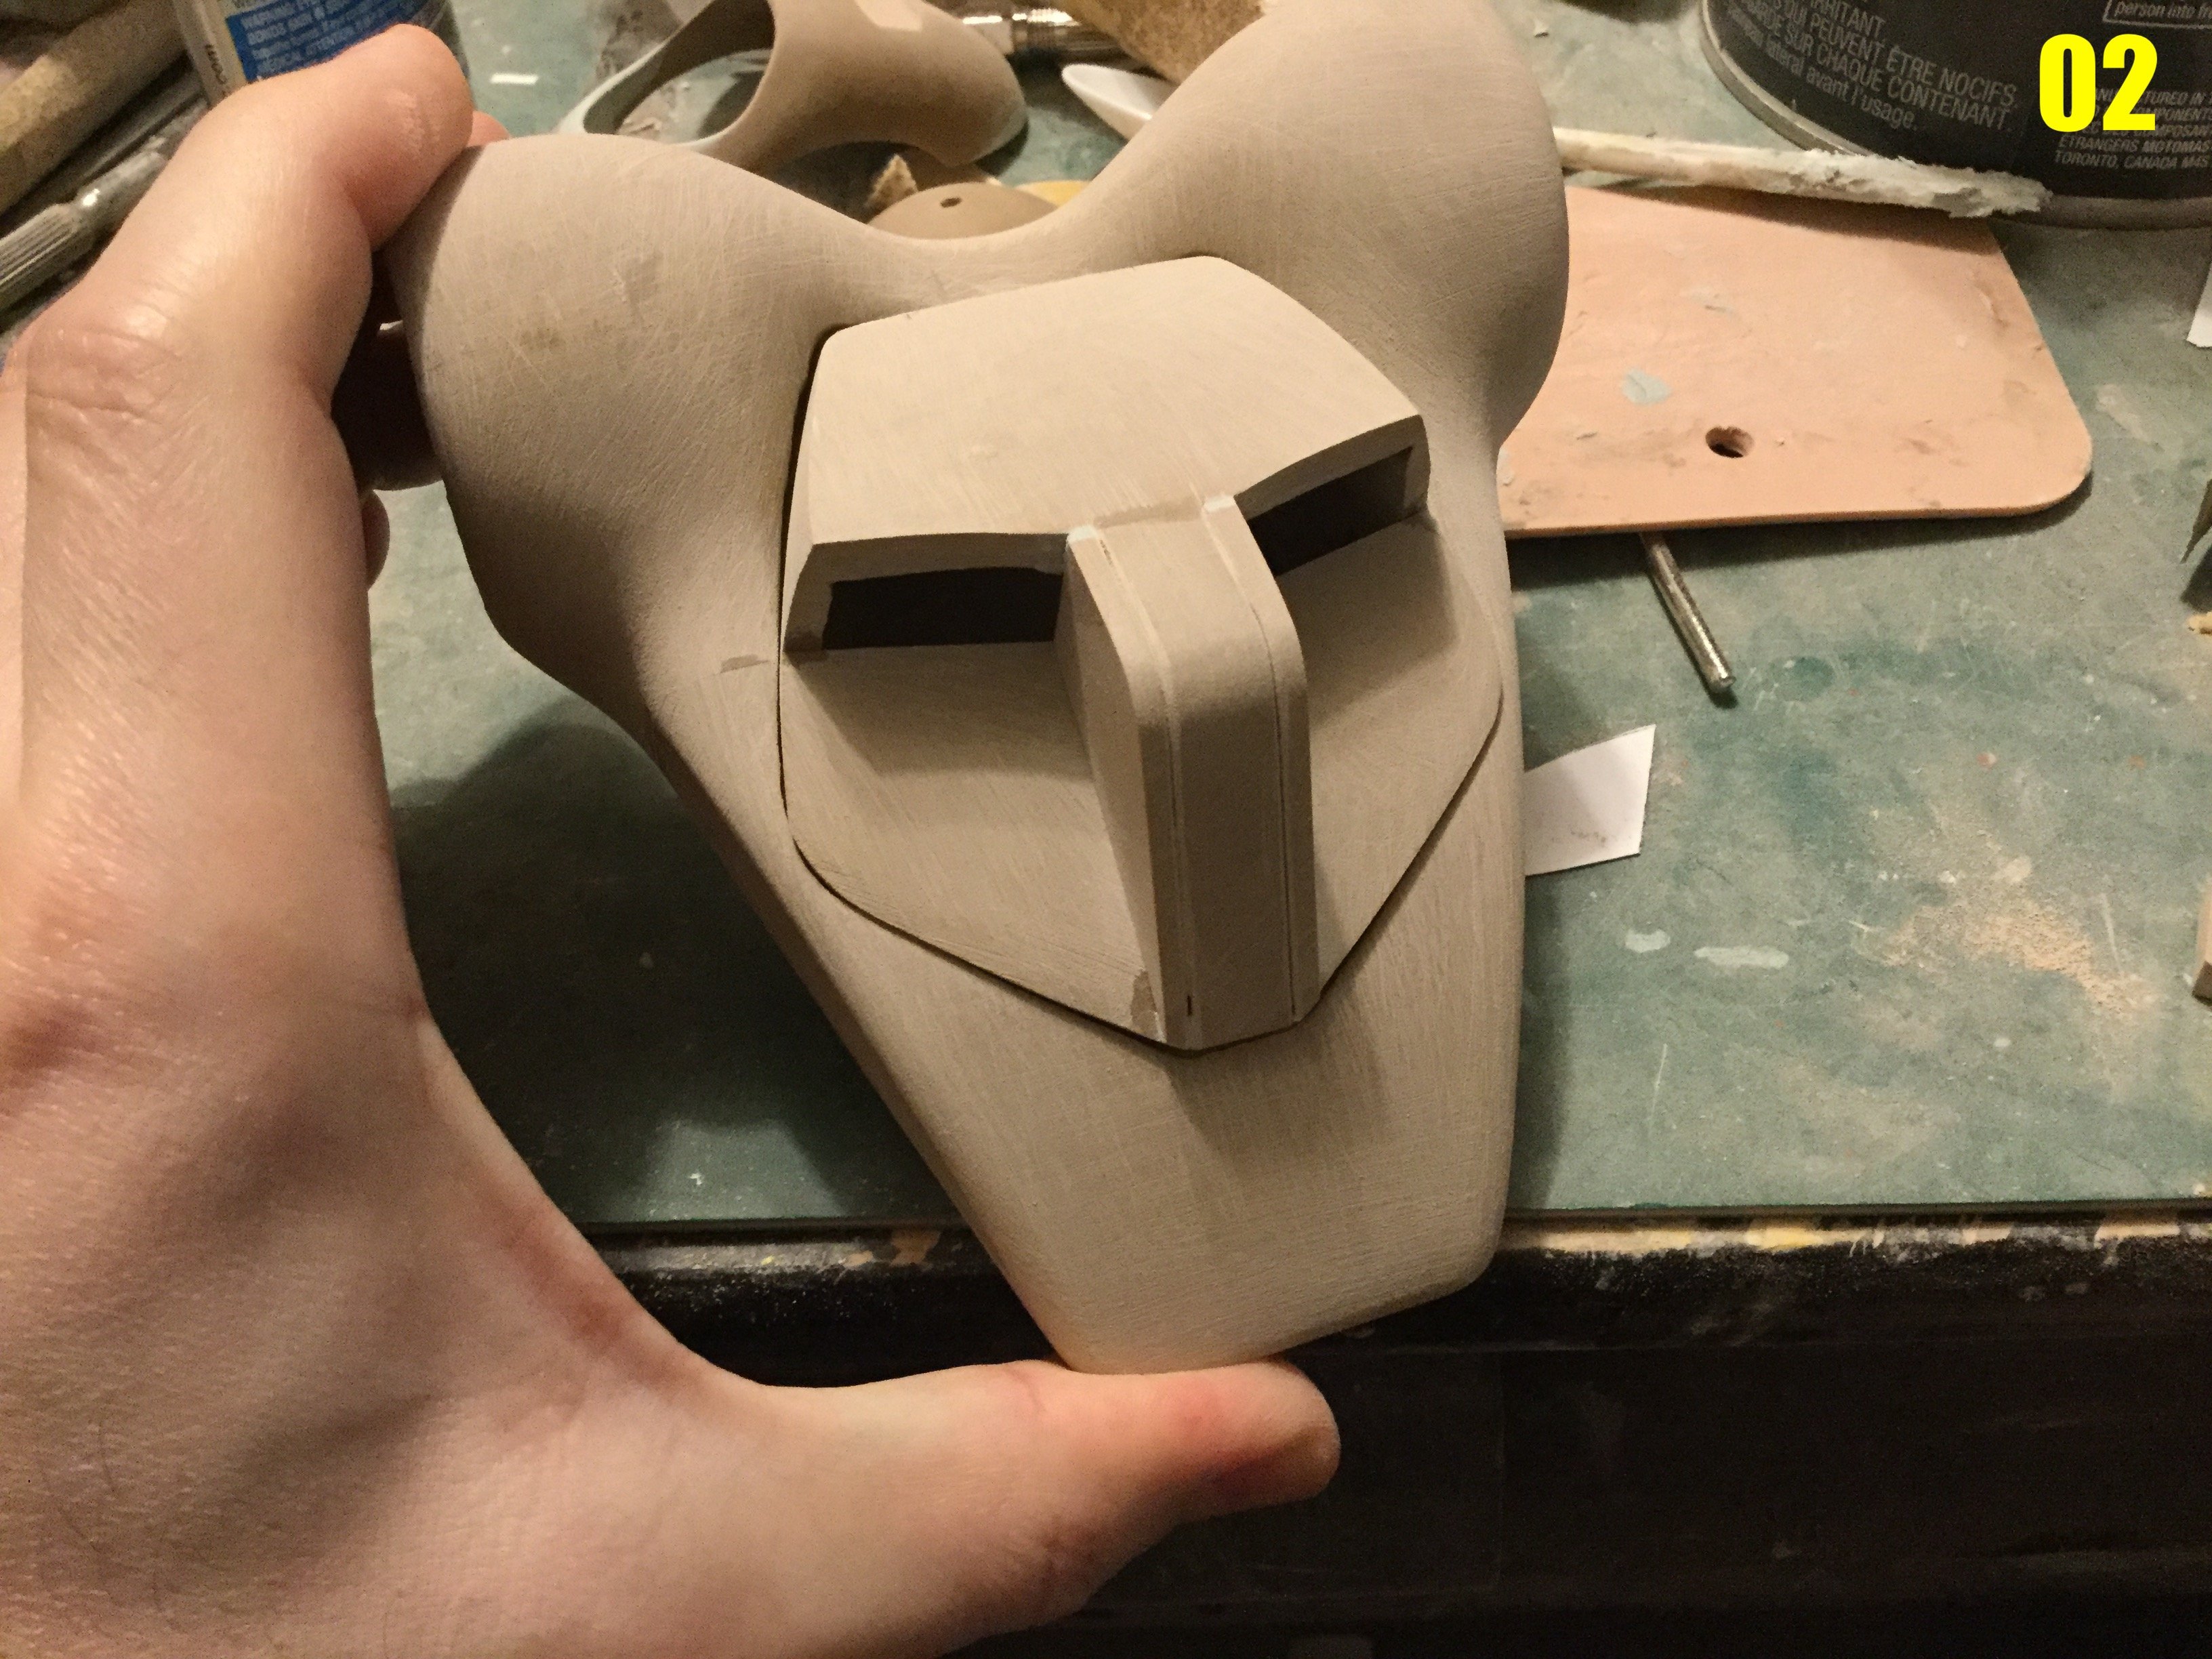
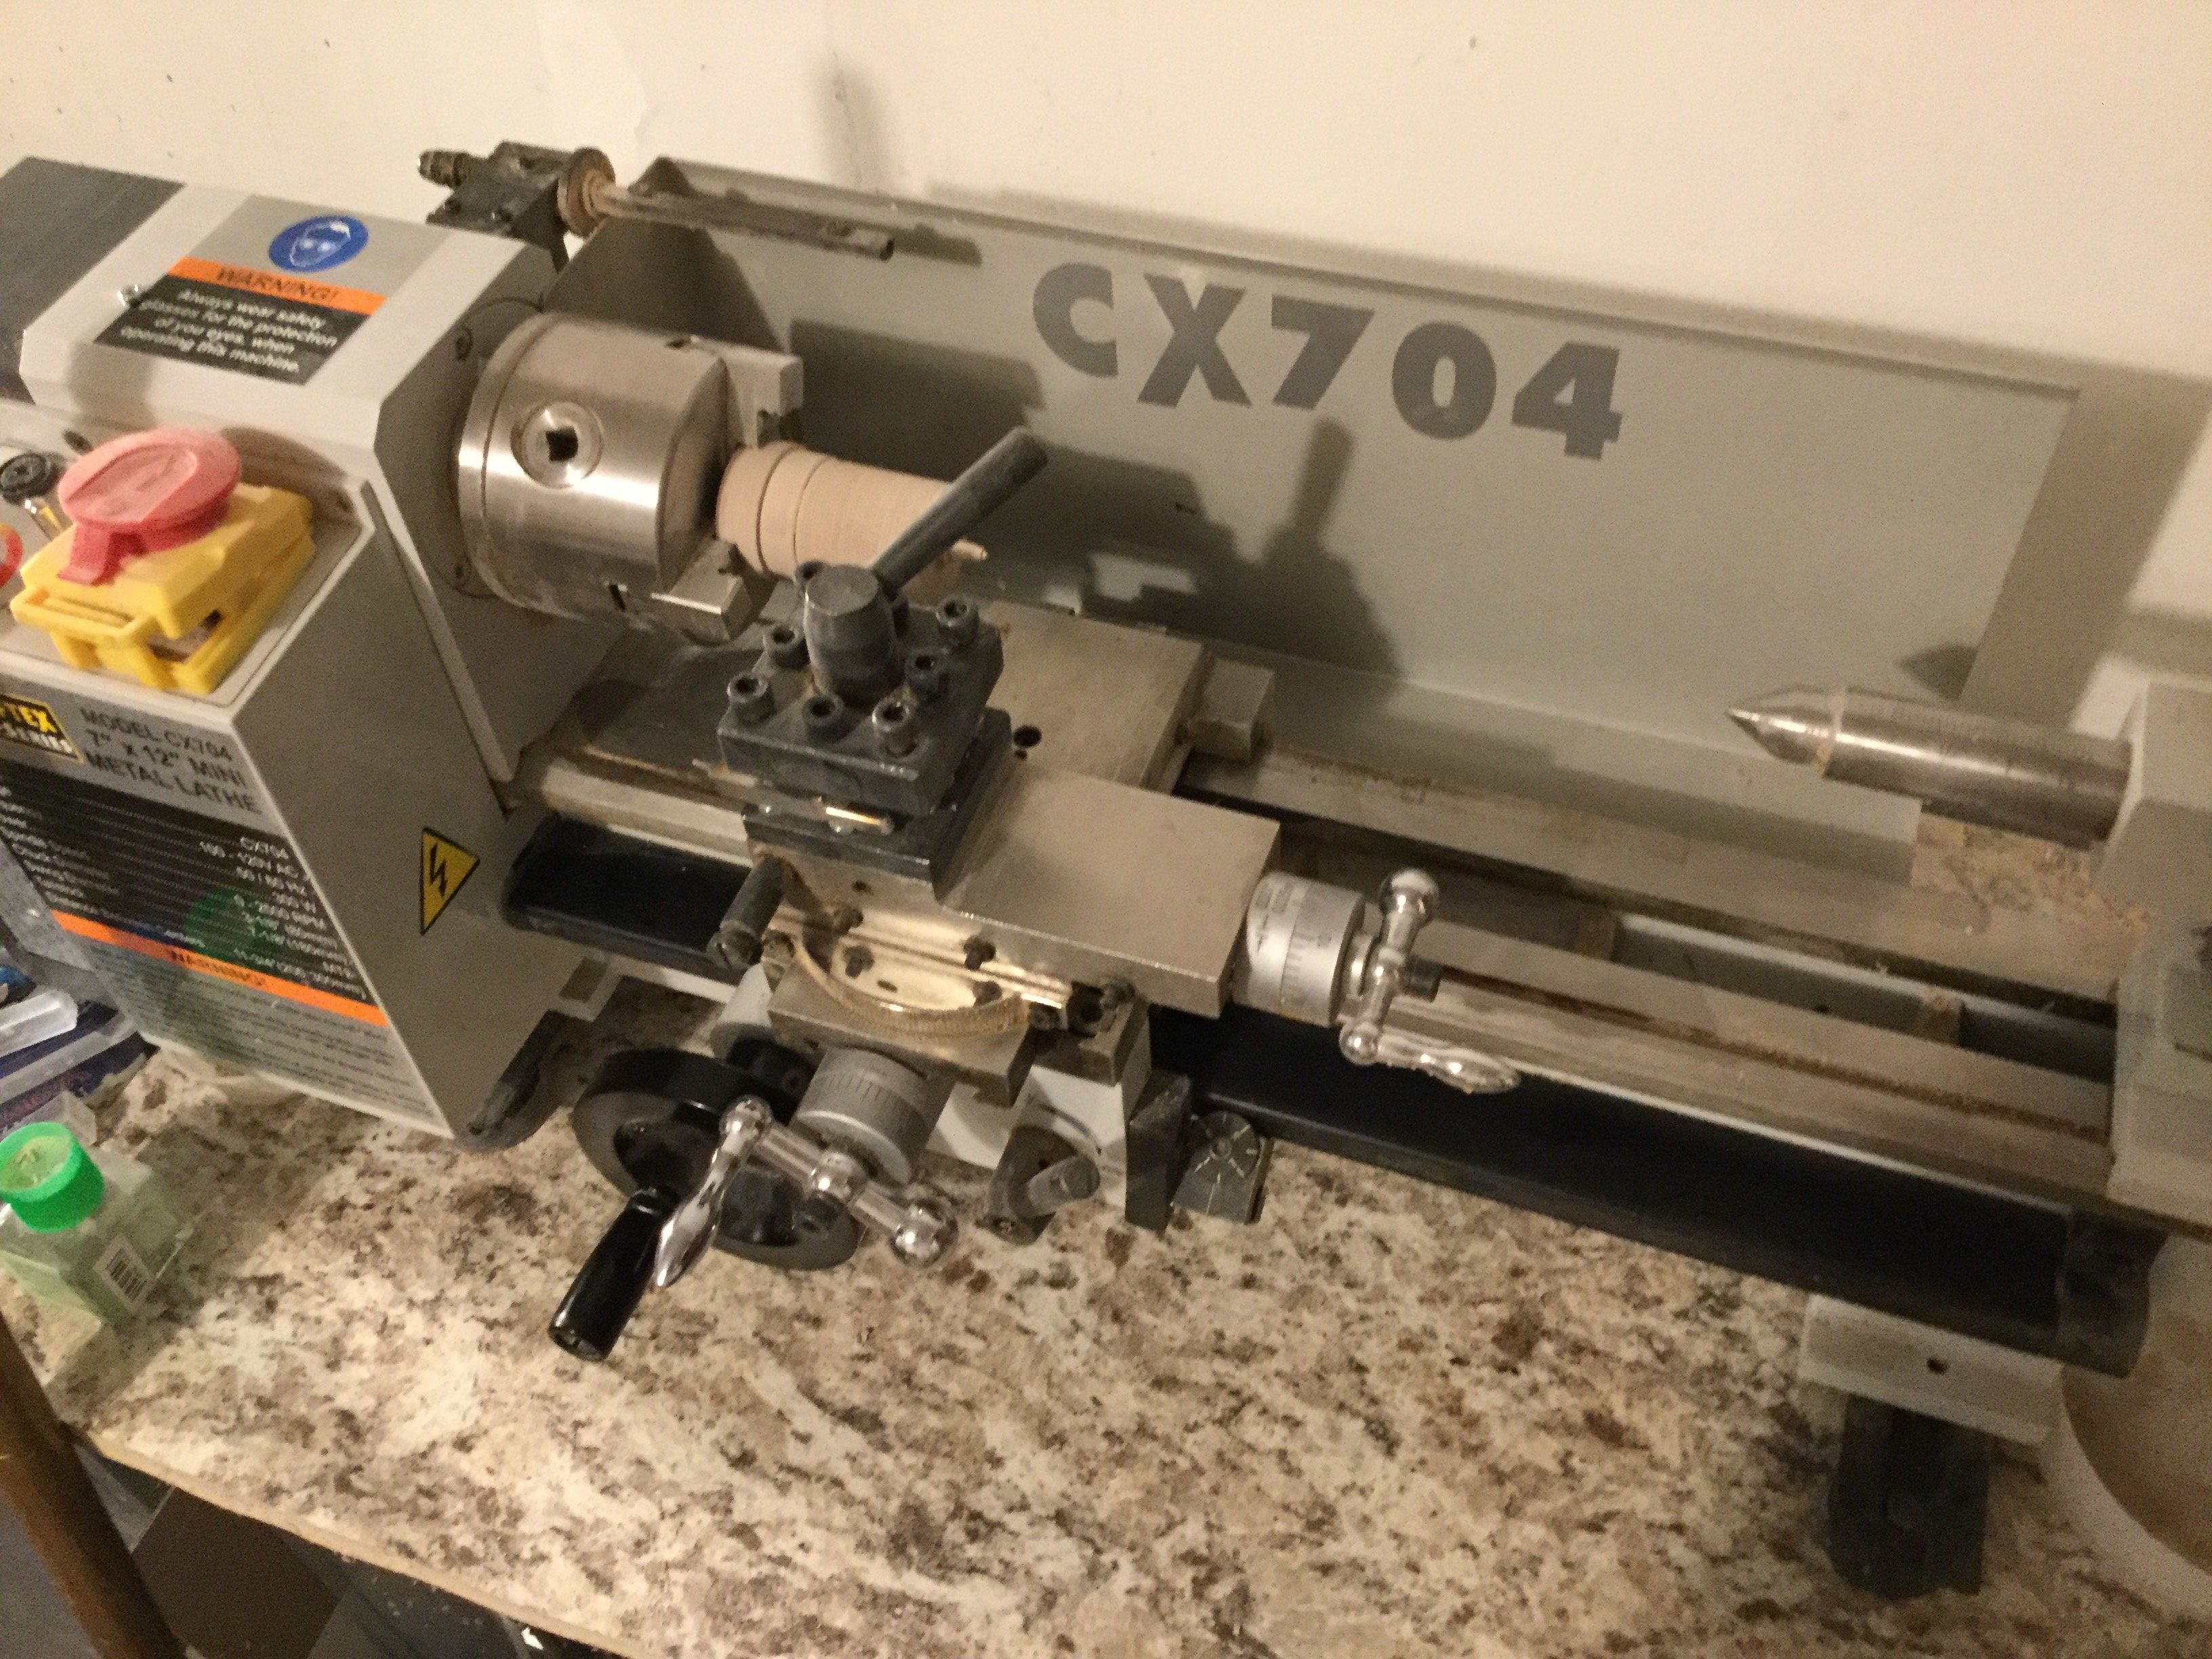
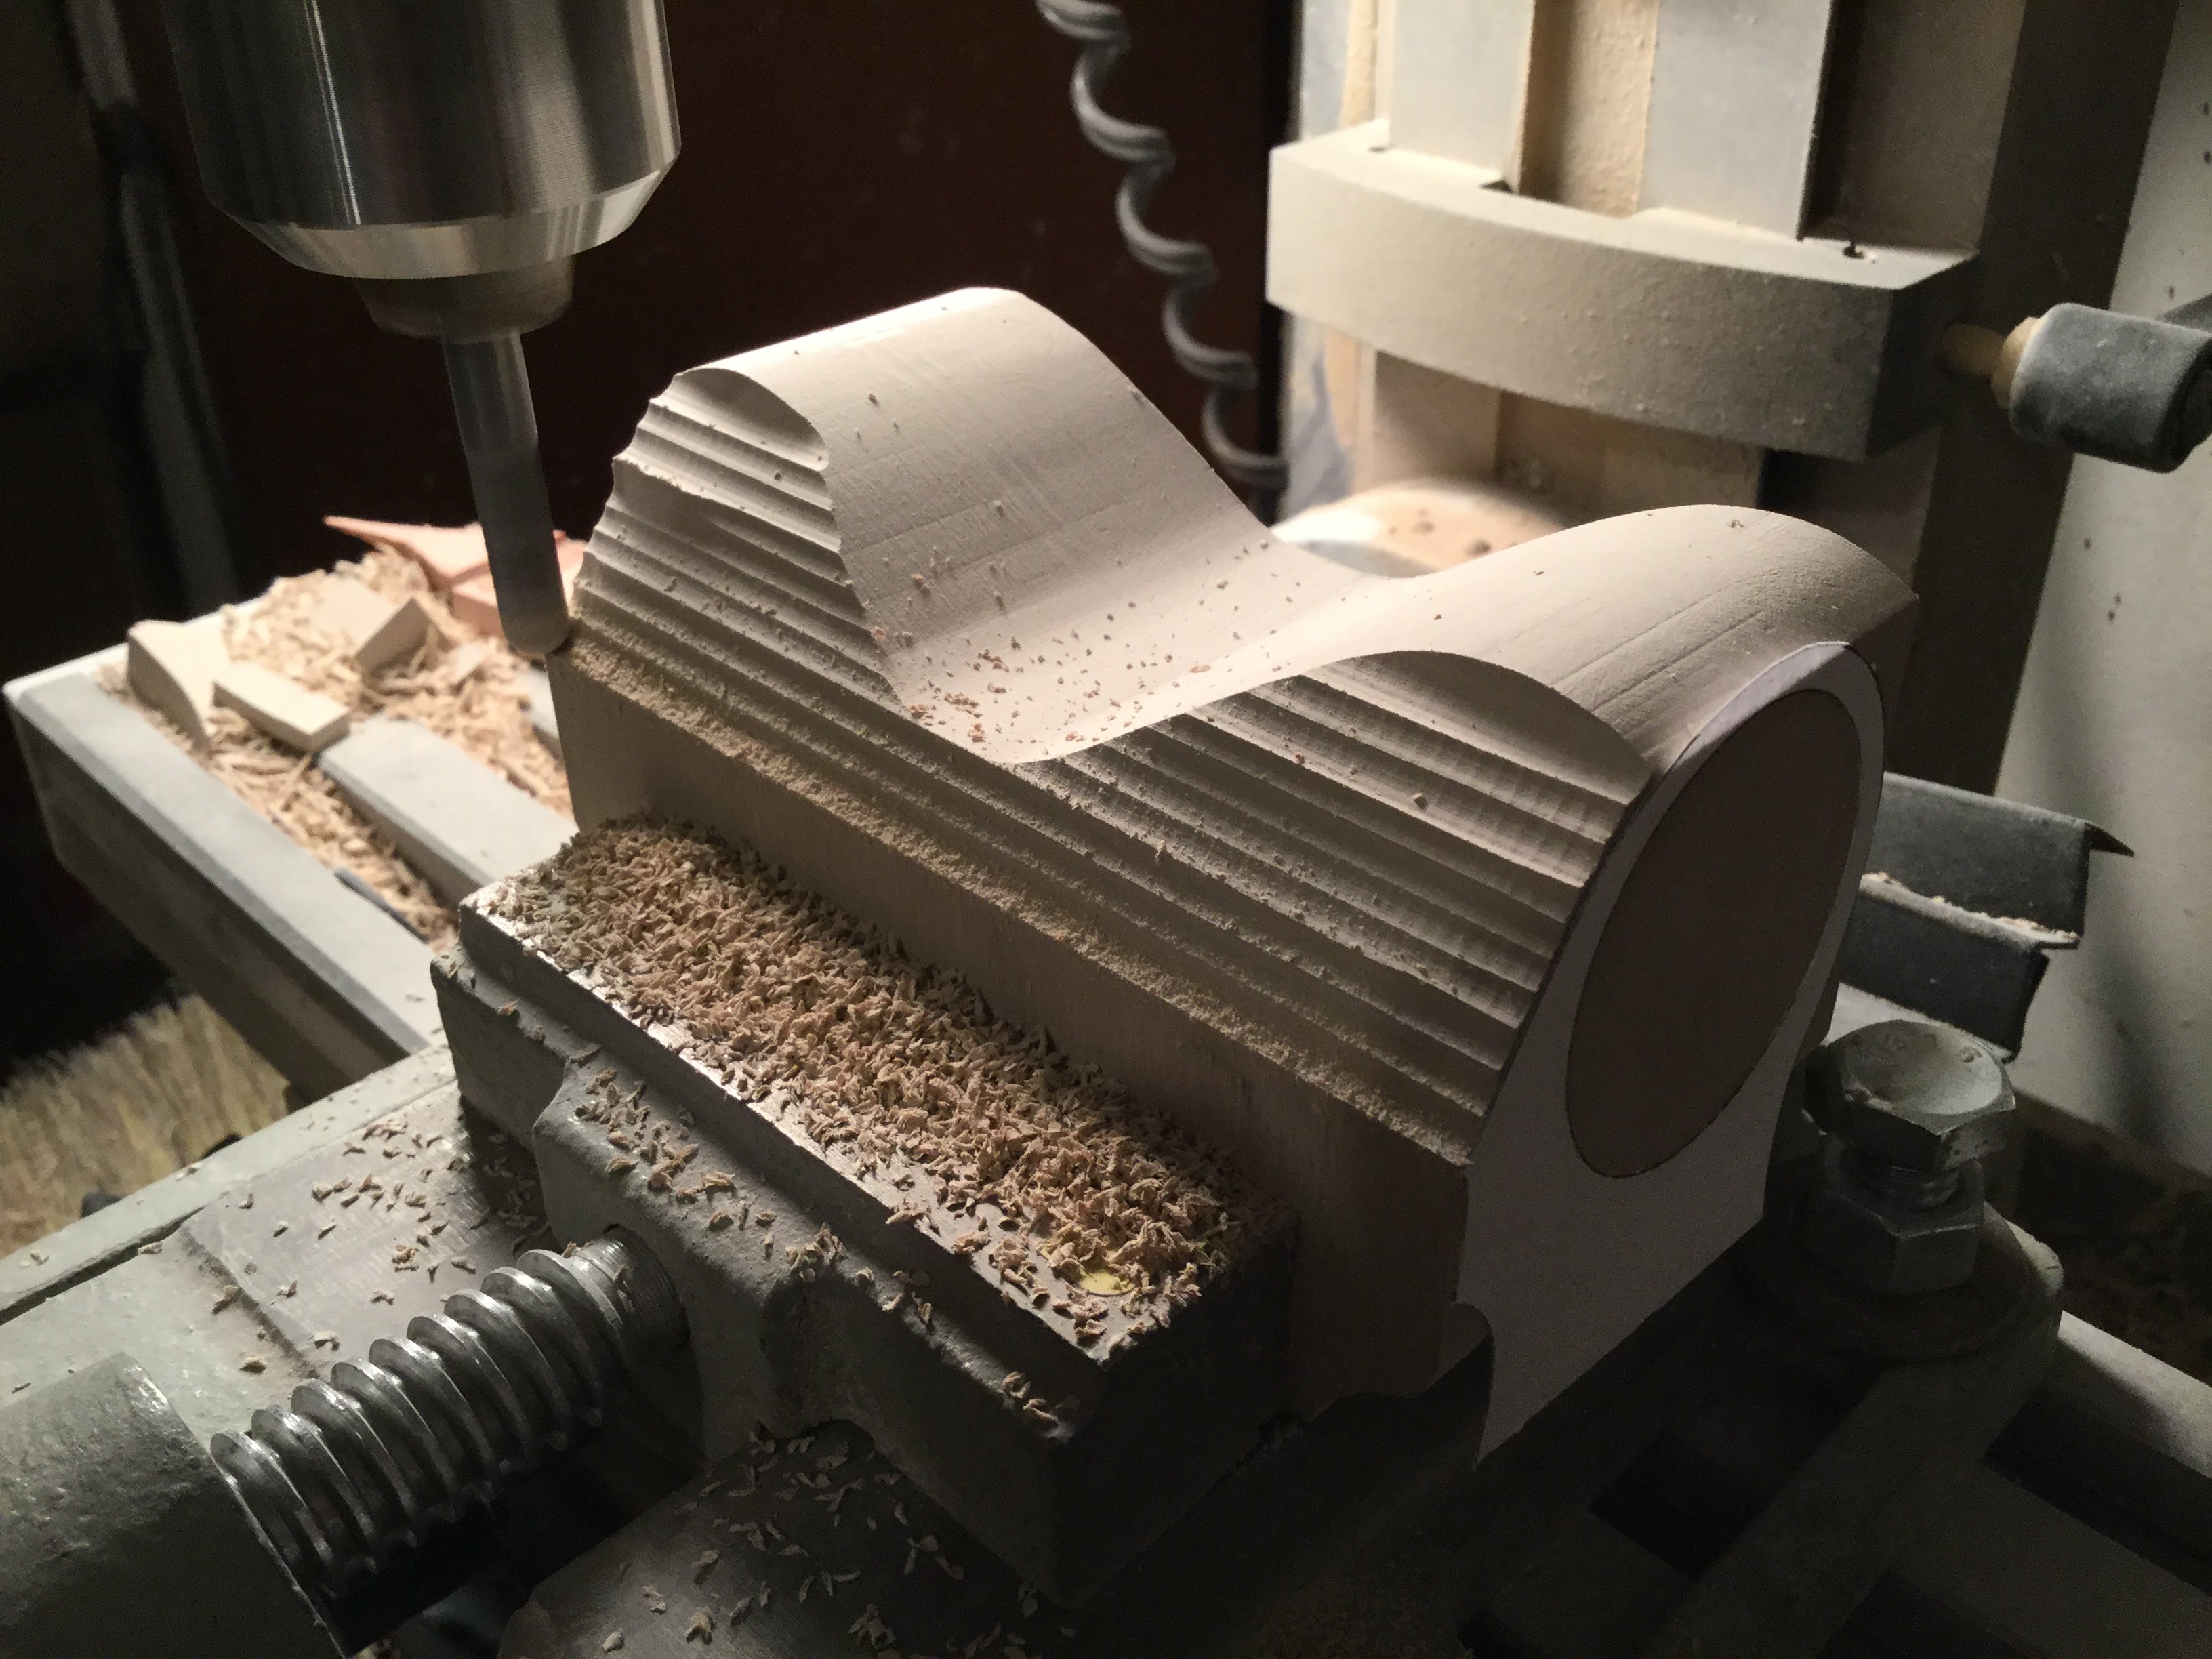
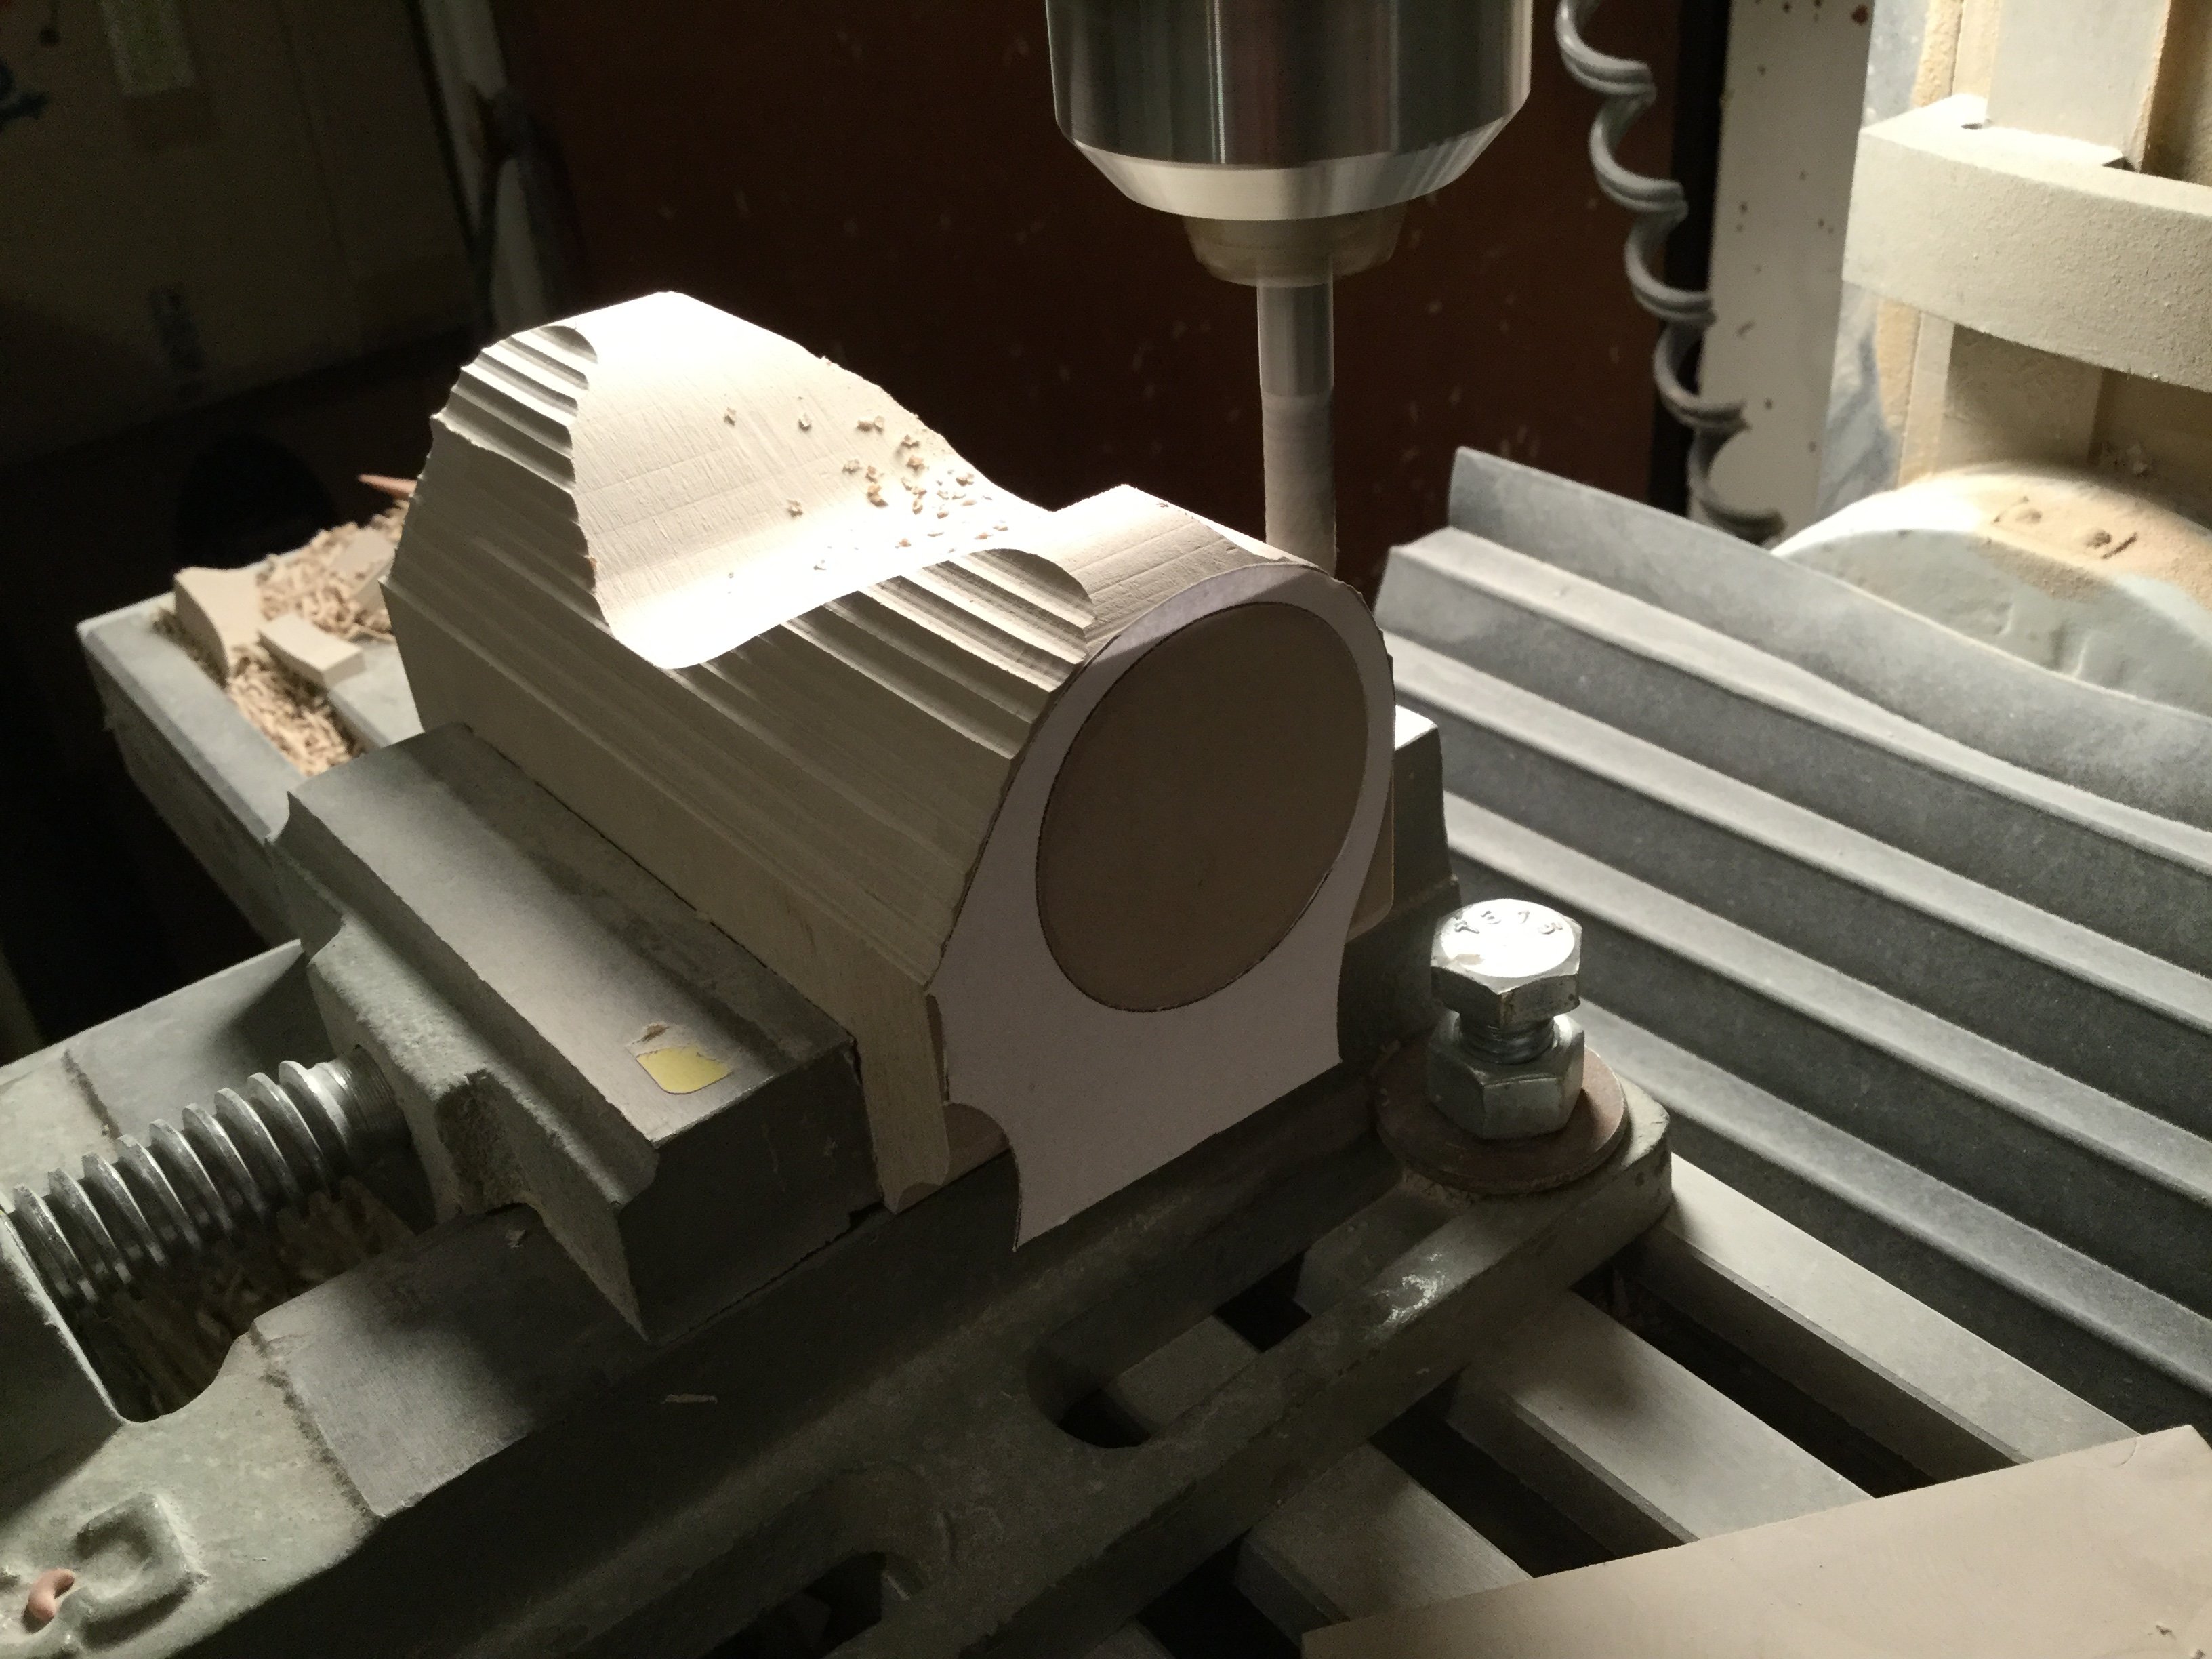
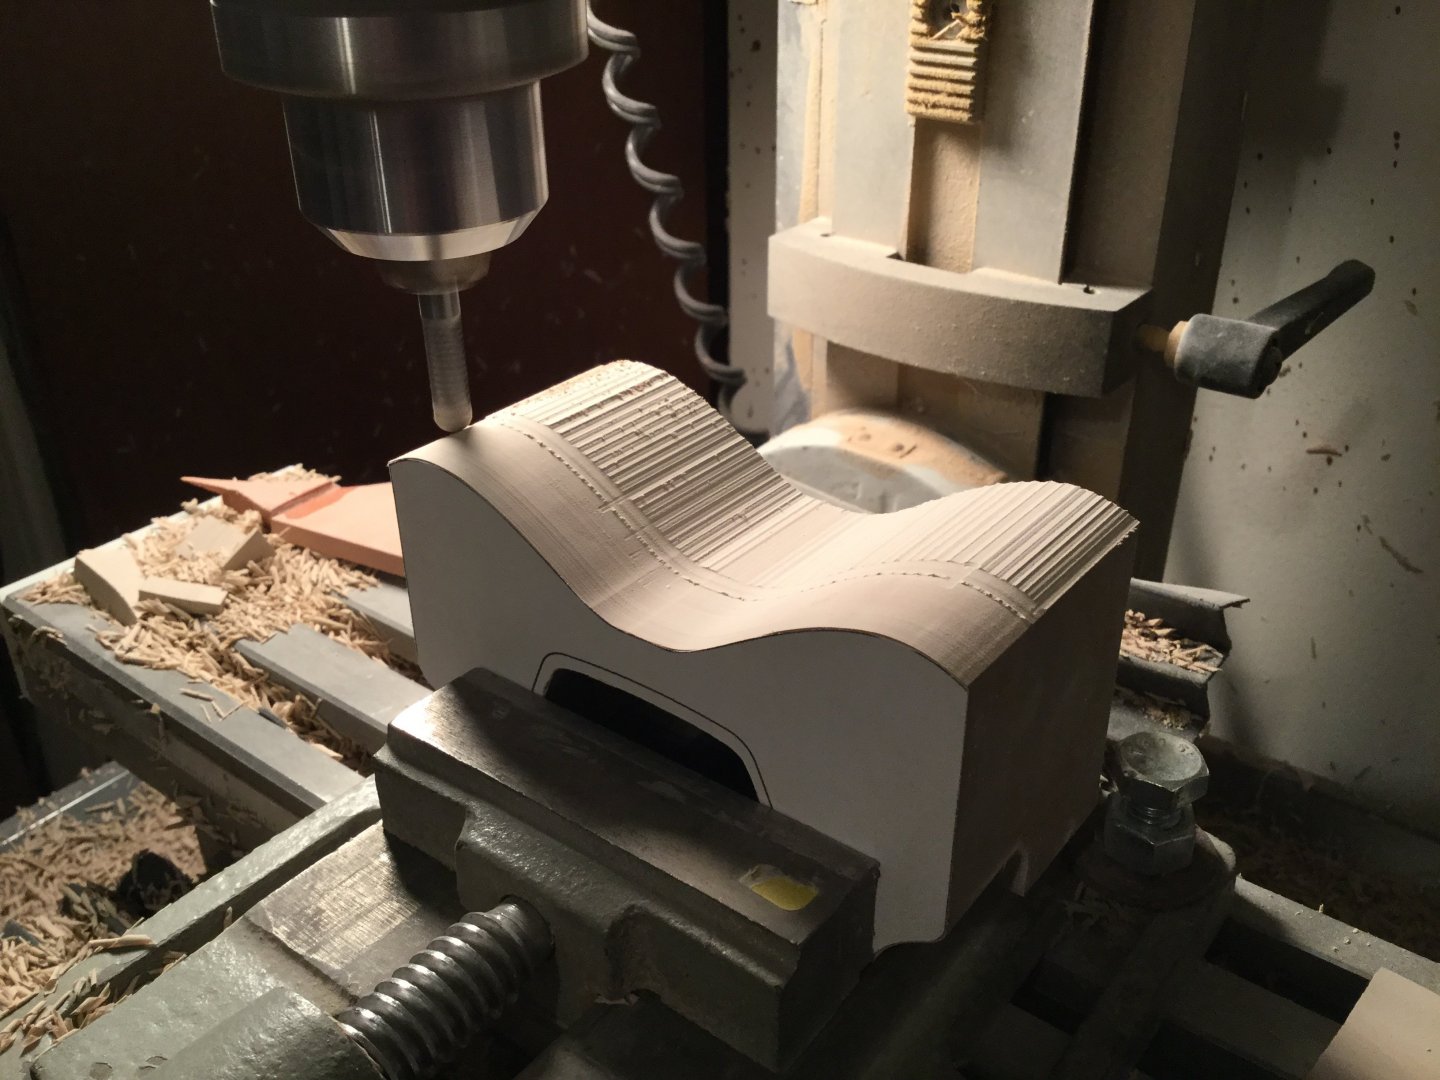
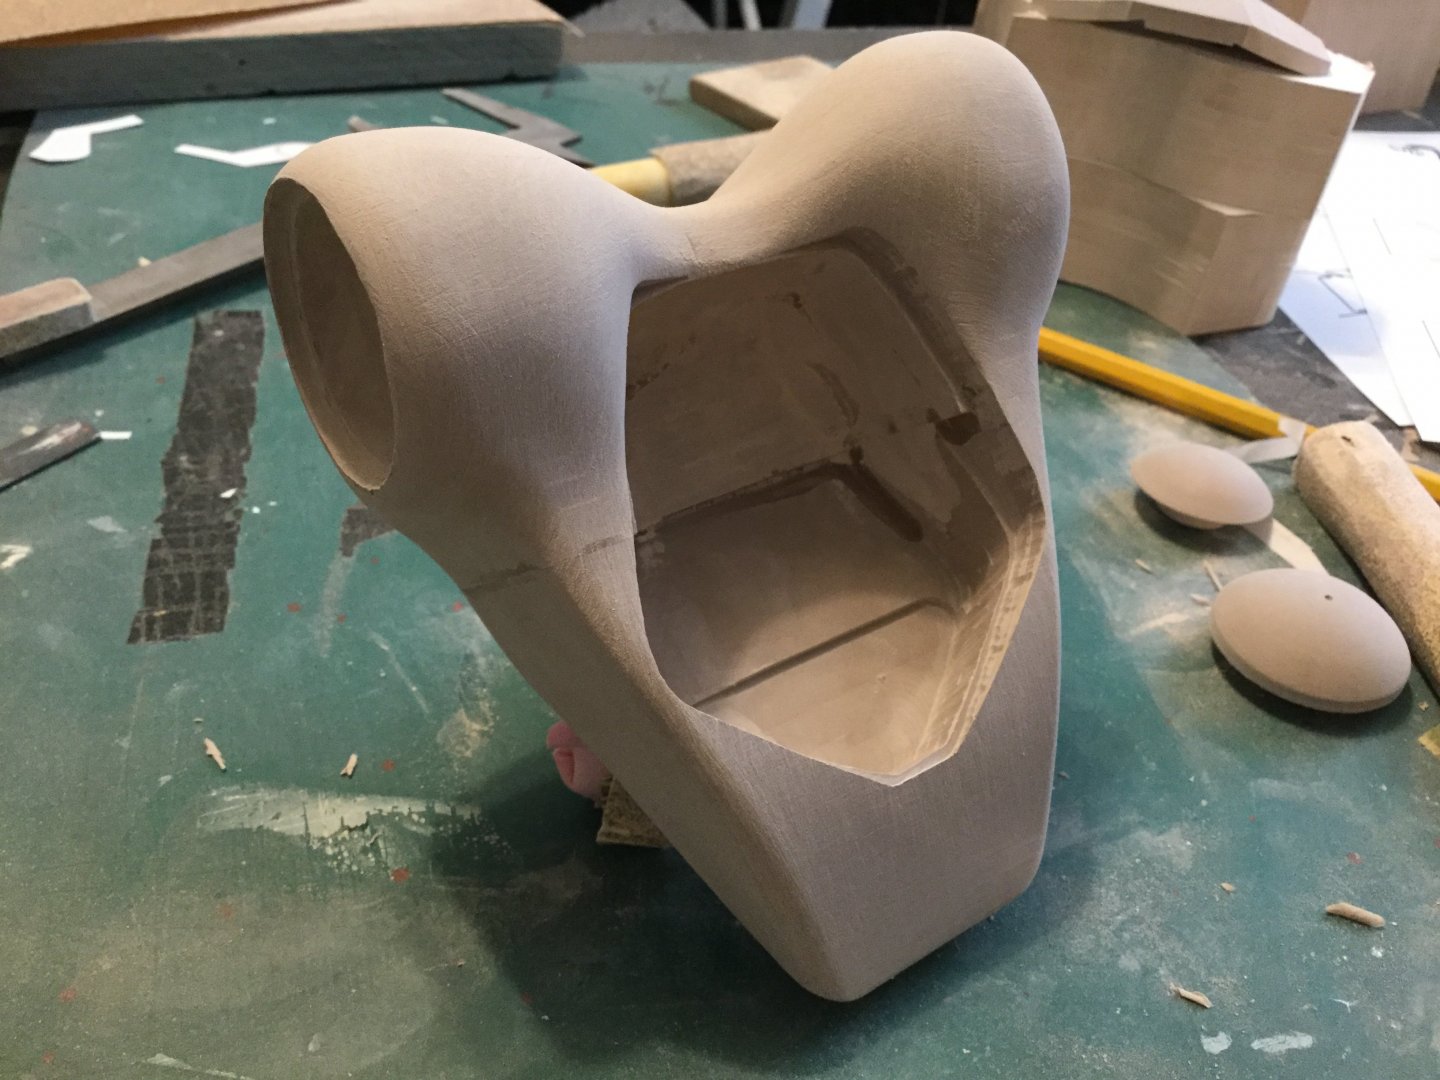
Captain’s log: Friday, November 22 Dusty. If I could resume my week in one word, that would be it. The previous week was spent predominantly on the mill and lathe, while this week was more about the Dremel… And all the wonderful dust it makes! Pic 1: the lower legs start out blocky, but once I’ve traced the profile onto the Renshape blocks, I cn start digging into it with the rough grinding tool. I always leave a half milimeter or so of extra material, simply to avoid removing too much. Pic 2: the same part, now shaped with 80 grit sandpaper. I use specially shaped sanding blocks and tools to keep the surface even. Pic 3: Back to the Dremel once again. I can now start to carve the roundness into the part. If you look carefully, you’ll see that I leave a small center strip (the highest point in the cure) untouched by the rotary tool. I can then proceed to blend the shapes into a proper, smooth curve with sandpaper while preserving all my dimensions. Pic 4: It’s not what you think it is, honest! Sure, it looks like I’ve made an unGodly mess, but I really haven’t. Pic 5: this is also not a mess, despite appearances. In order to get parts that fit together like a glove, I will finish one surface of a part, then apply mold release to it and mate an adjoining part to it with putty. When that putty begins to harden, I can carefully separate both parts and have a perfect fit. Pic 06: while it’s not nearly done, the cockpit shaping for this kit is extremely tedious and long because of its many bizarre compound curves and odd parts arrangement which must securely interlock. The N-Ger cockpit was quite the cake-walk by comparison! Pics 7-10: It’s finally starting to look like a power suit! This is still just a rough fit test, and the thighs need to be more tucked-up against the body, but it’s looking great so far! *********************


-
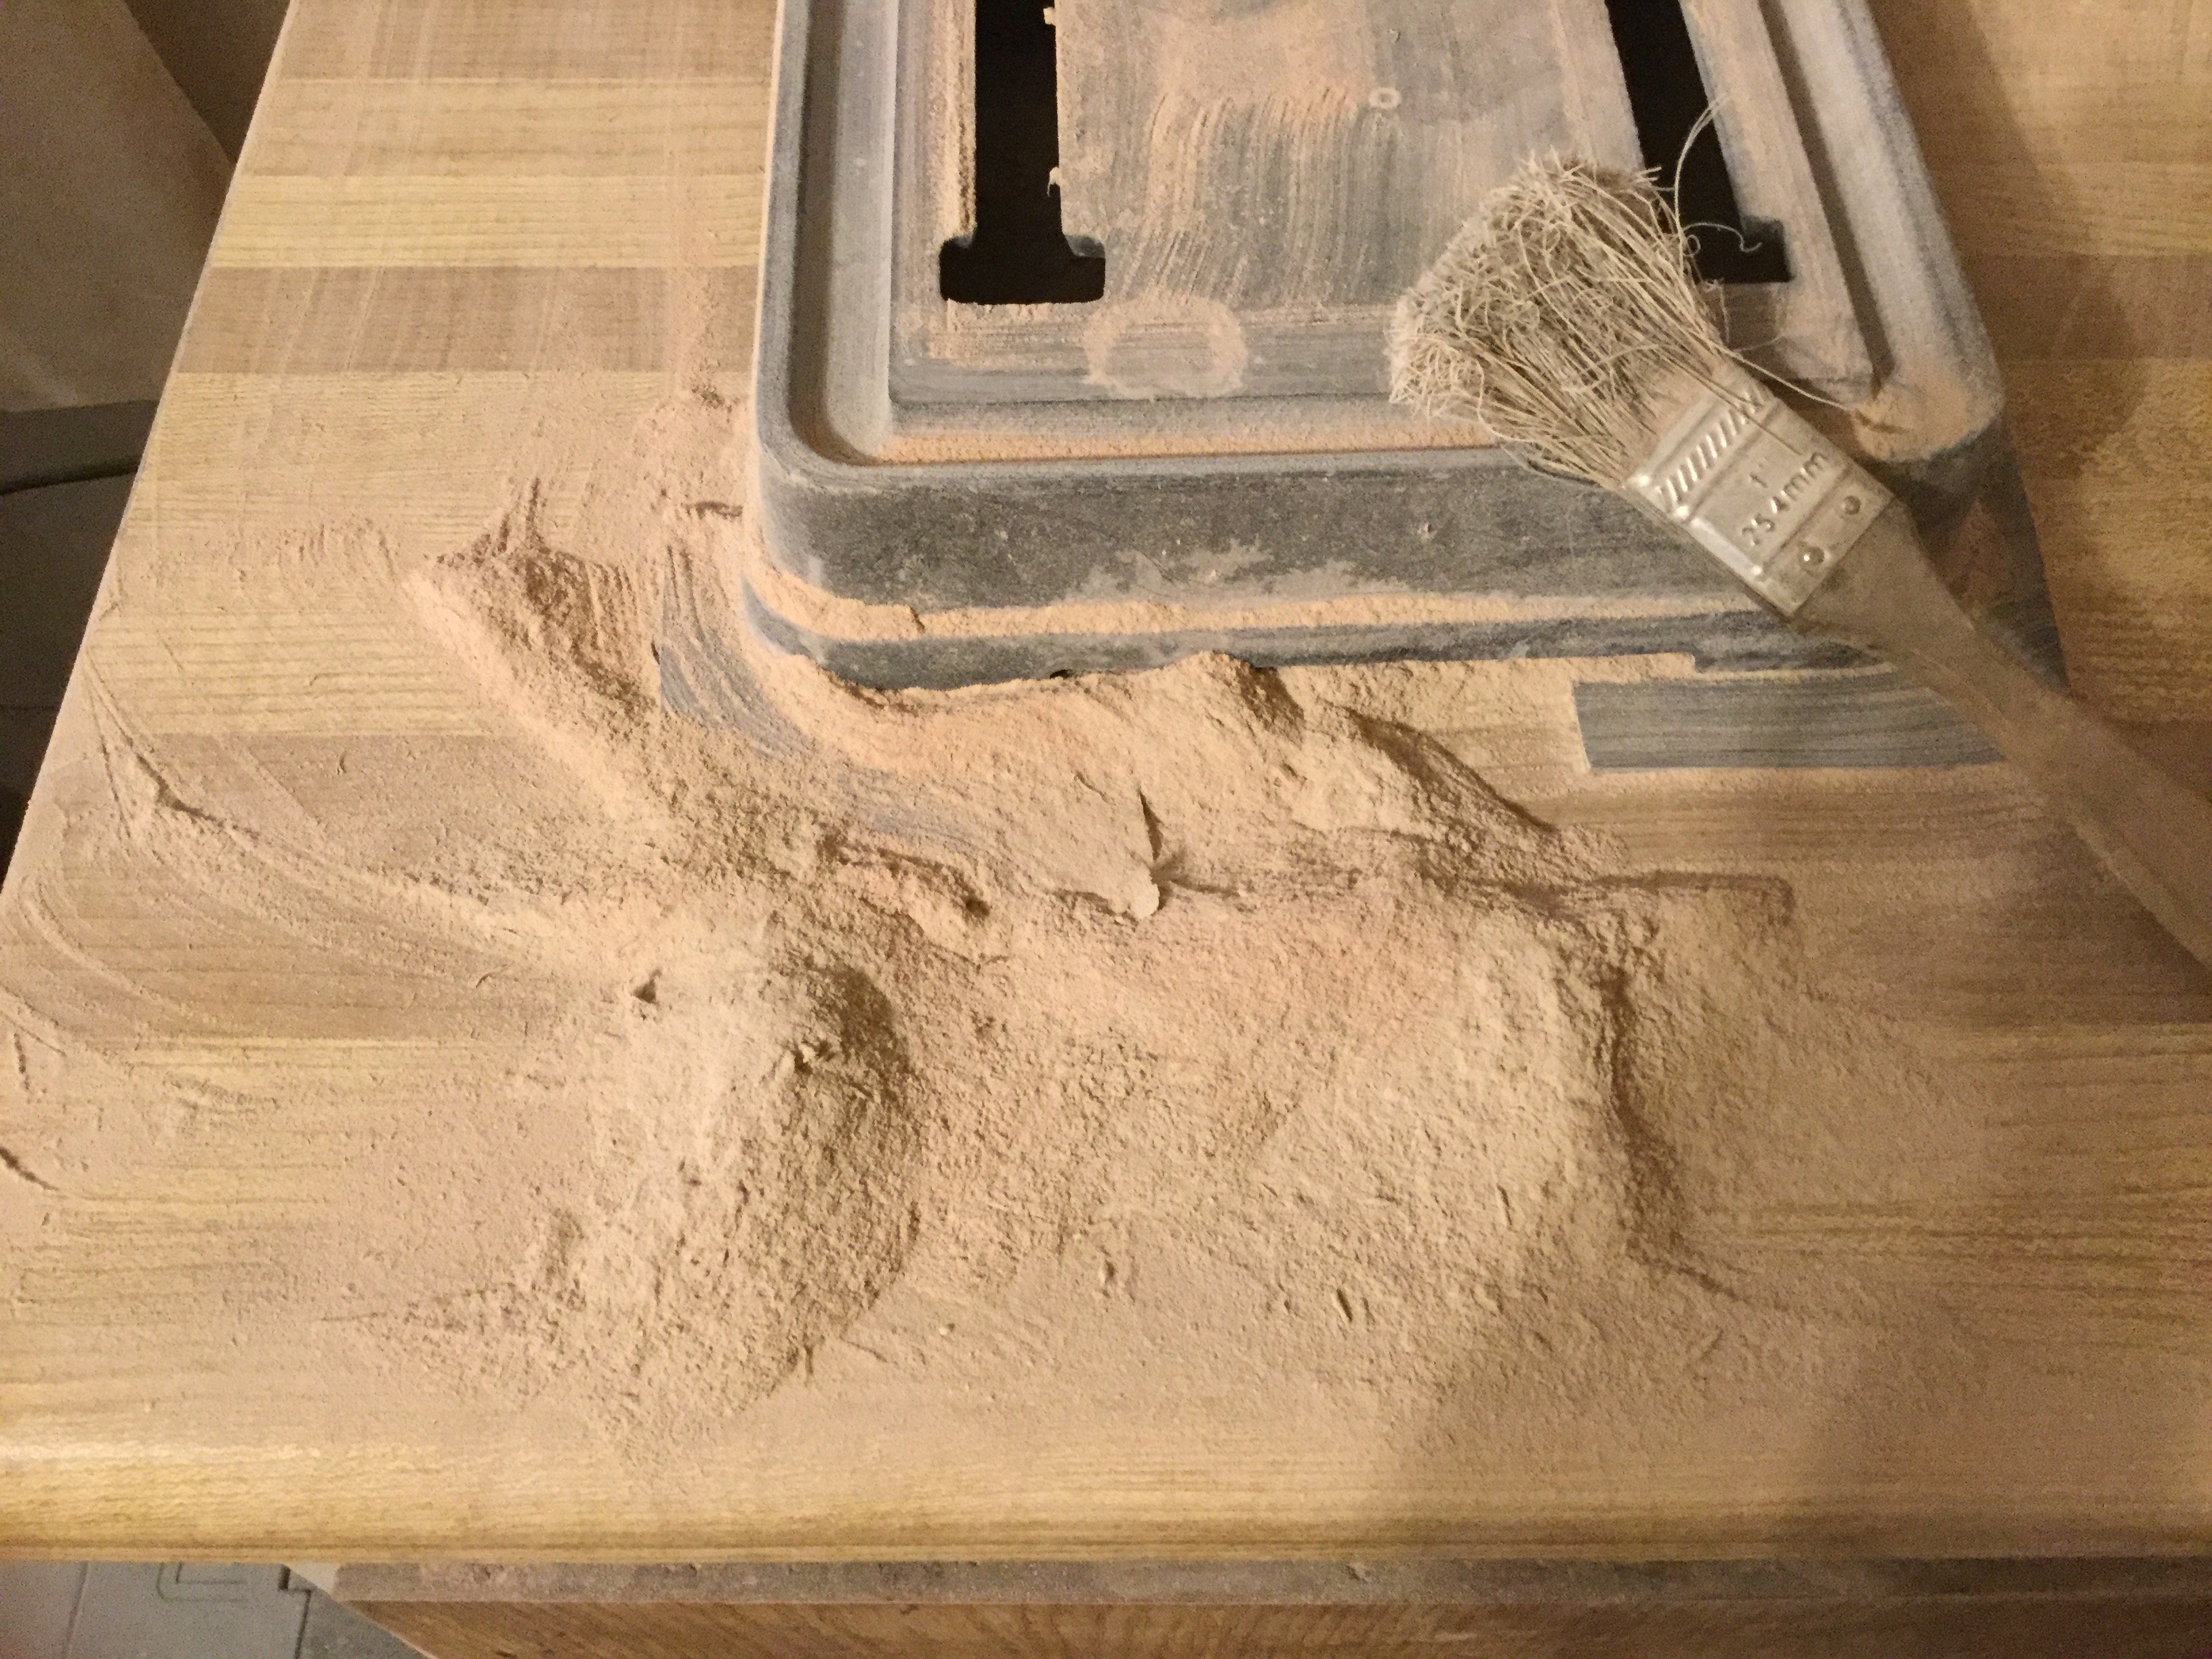
I'm the little minion that vacuums the shop! It only takes about 10 minutes to properly clean both machines. However filthy they may look in the building process, this is what they look like after every 2-3 days or so. The dust that comes from fine grinding (Dremel, drill press) is the nasty one, because it's very fine and gets everywhere. Most of the time when I'm doing either of those operations, I have a shop vac running and have to change the filter out every 4-5 days. Lots of critical maintenance goes on behind the scenes, without which the entire operation would grind to a halt... Much pun intended.

-
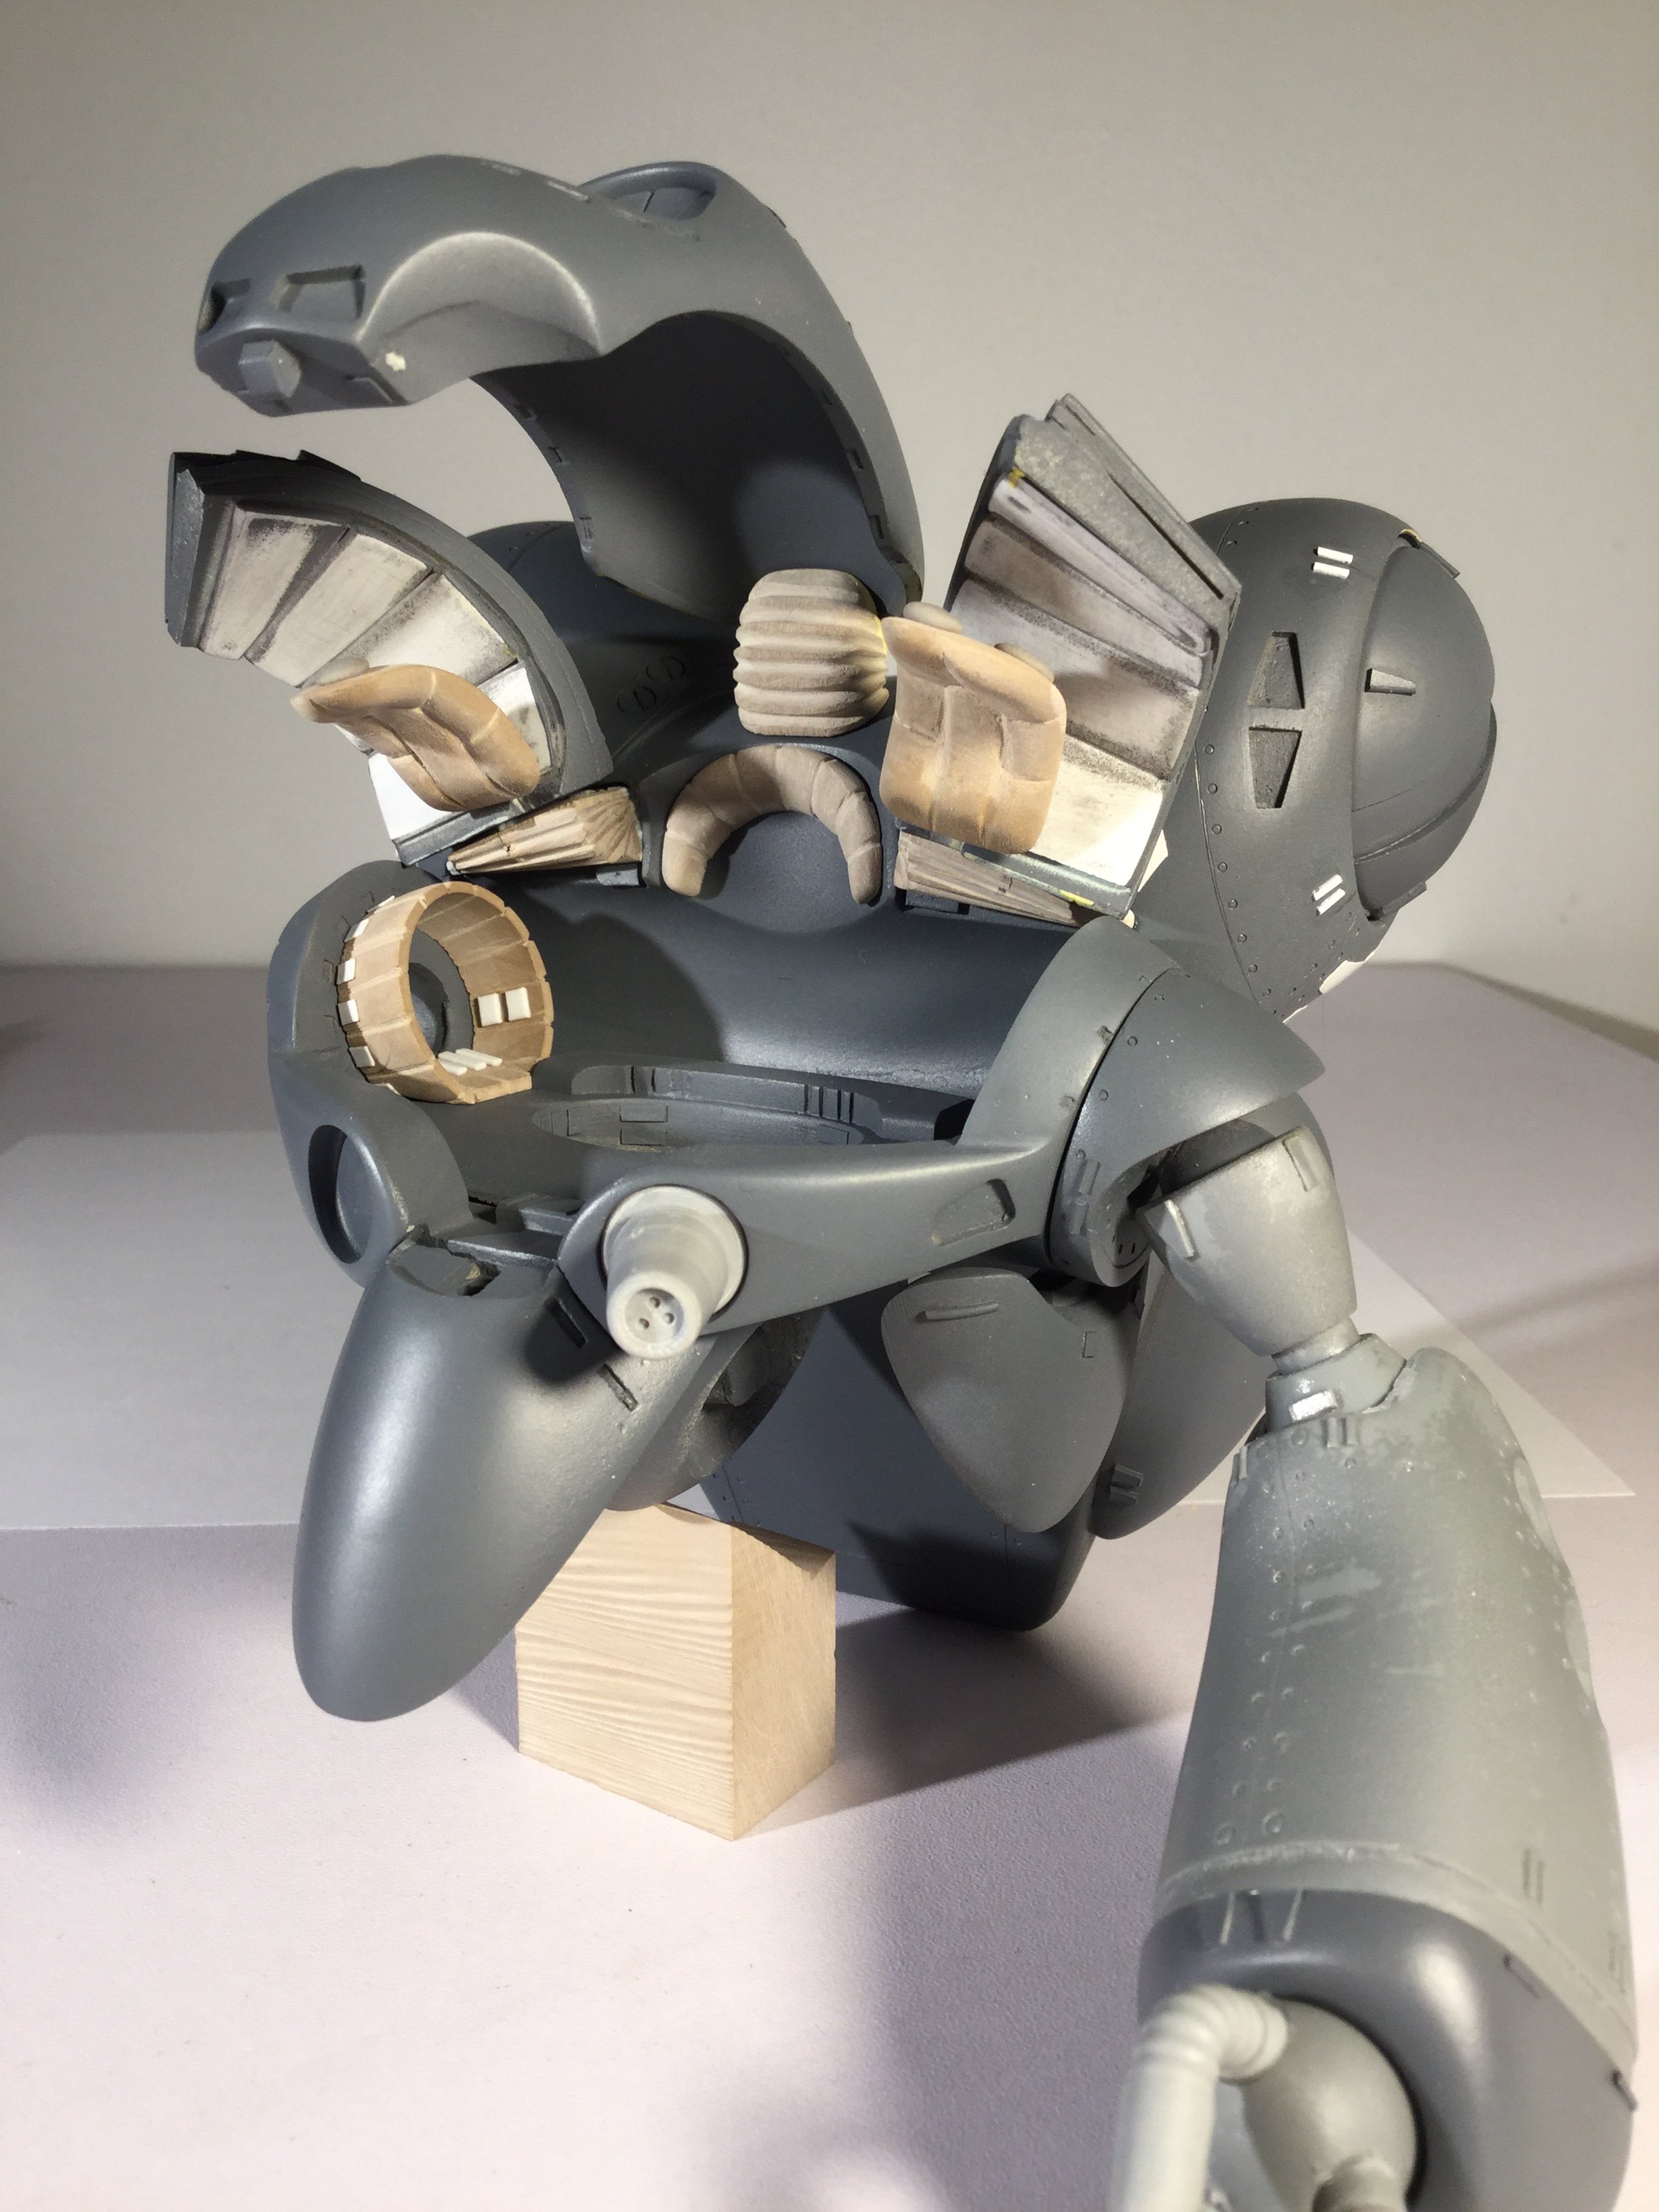
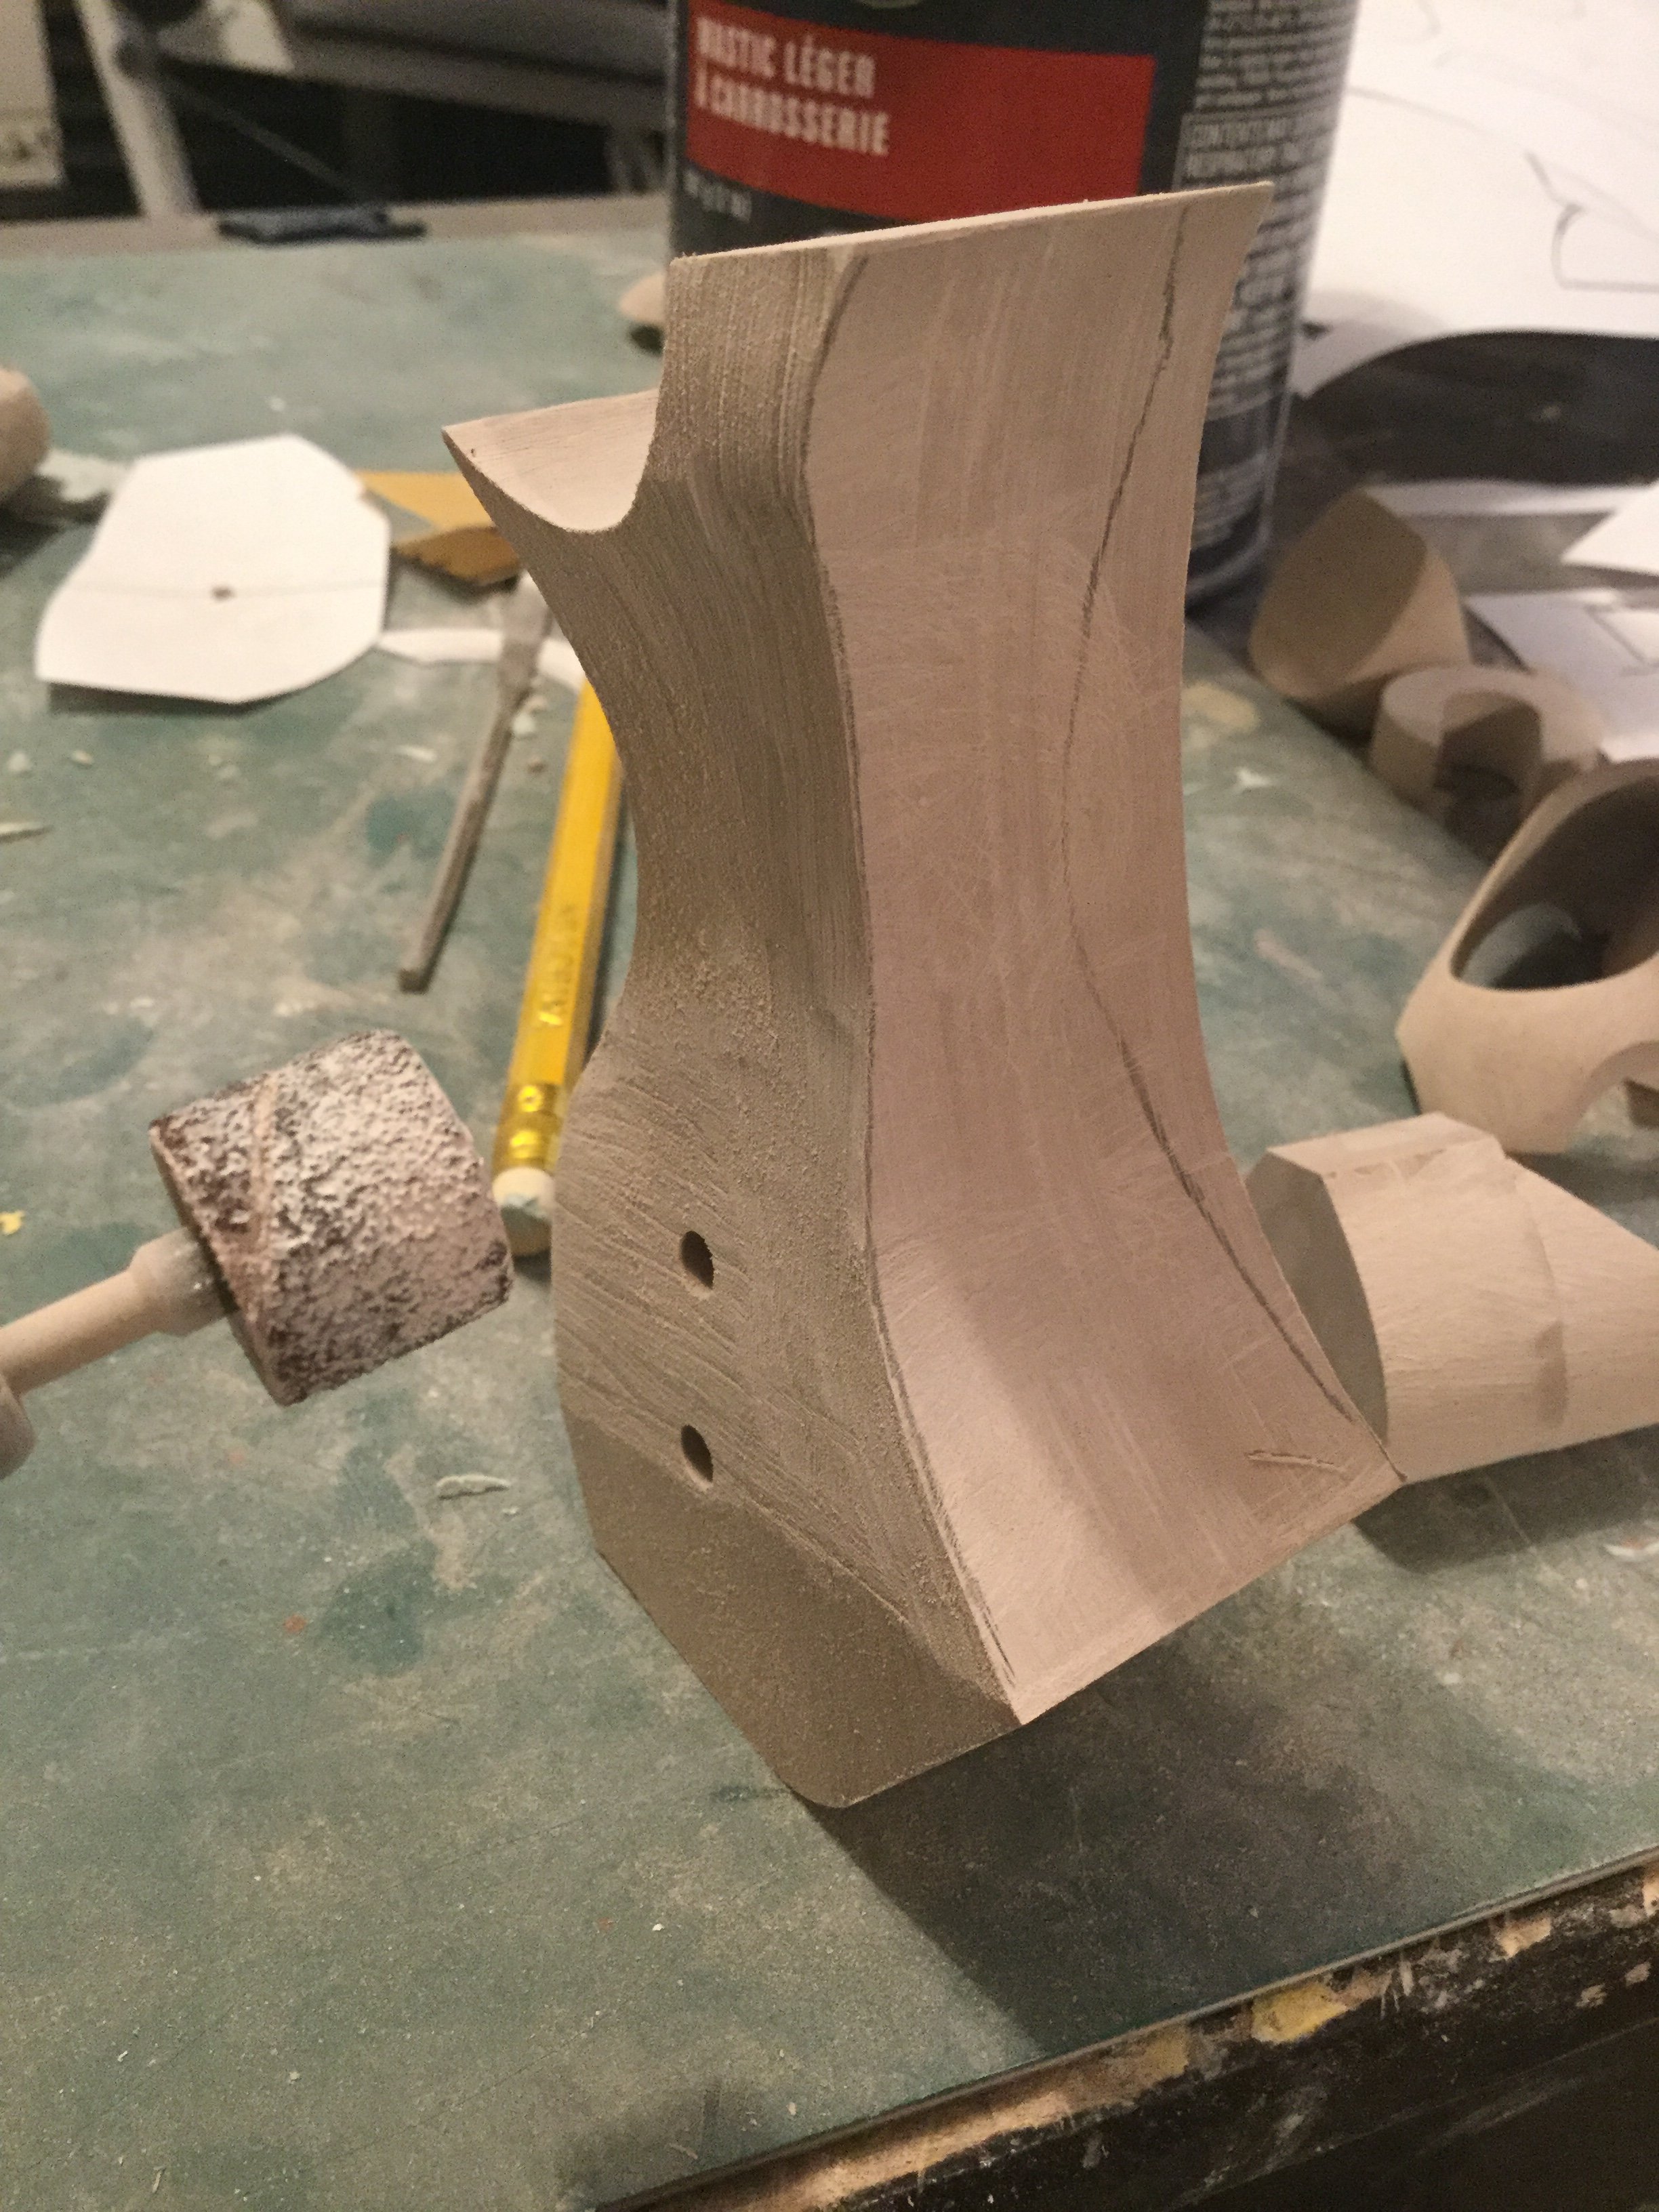
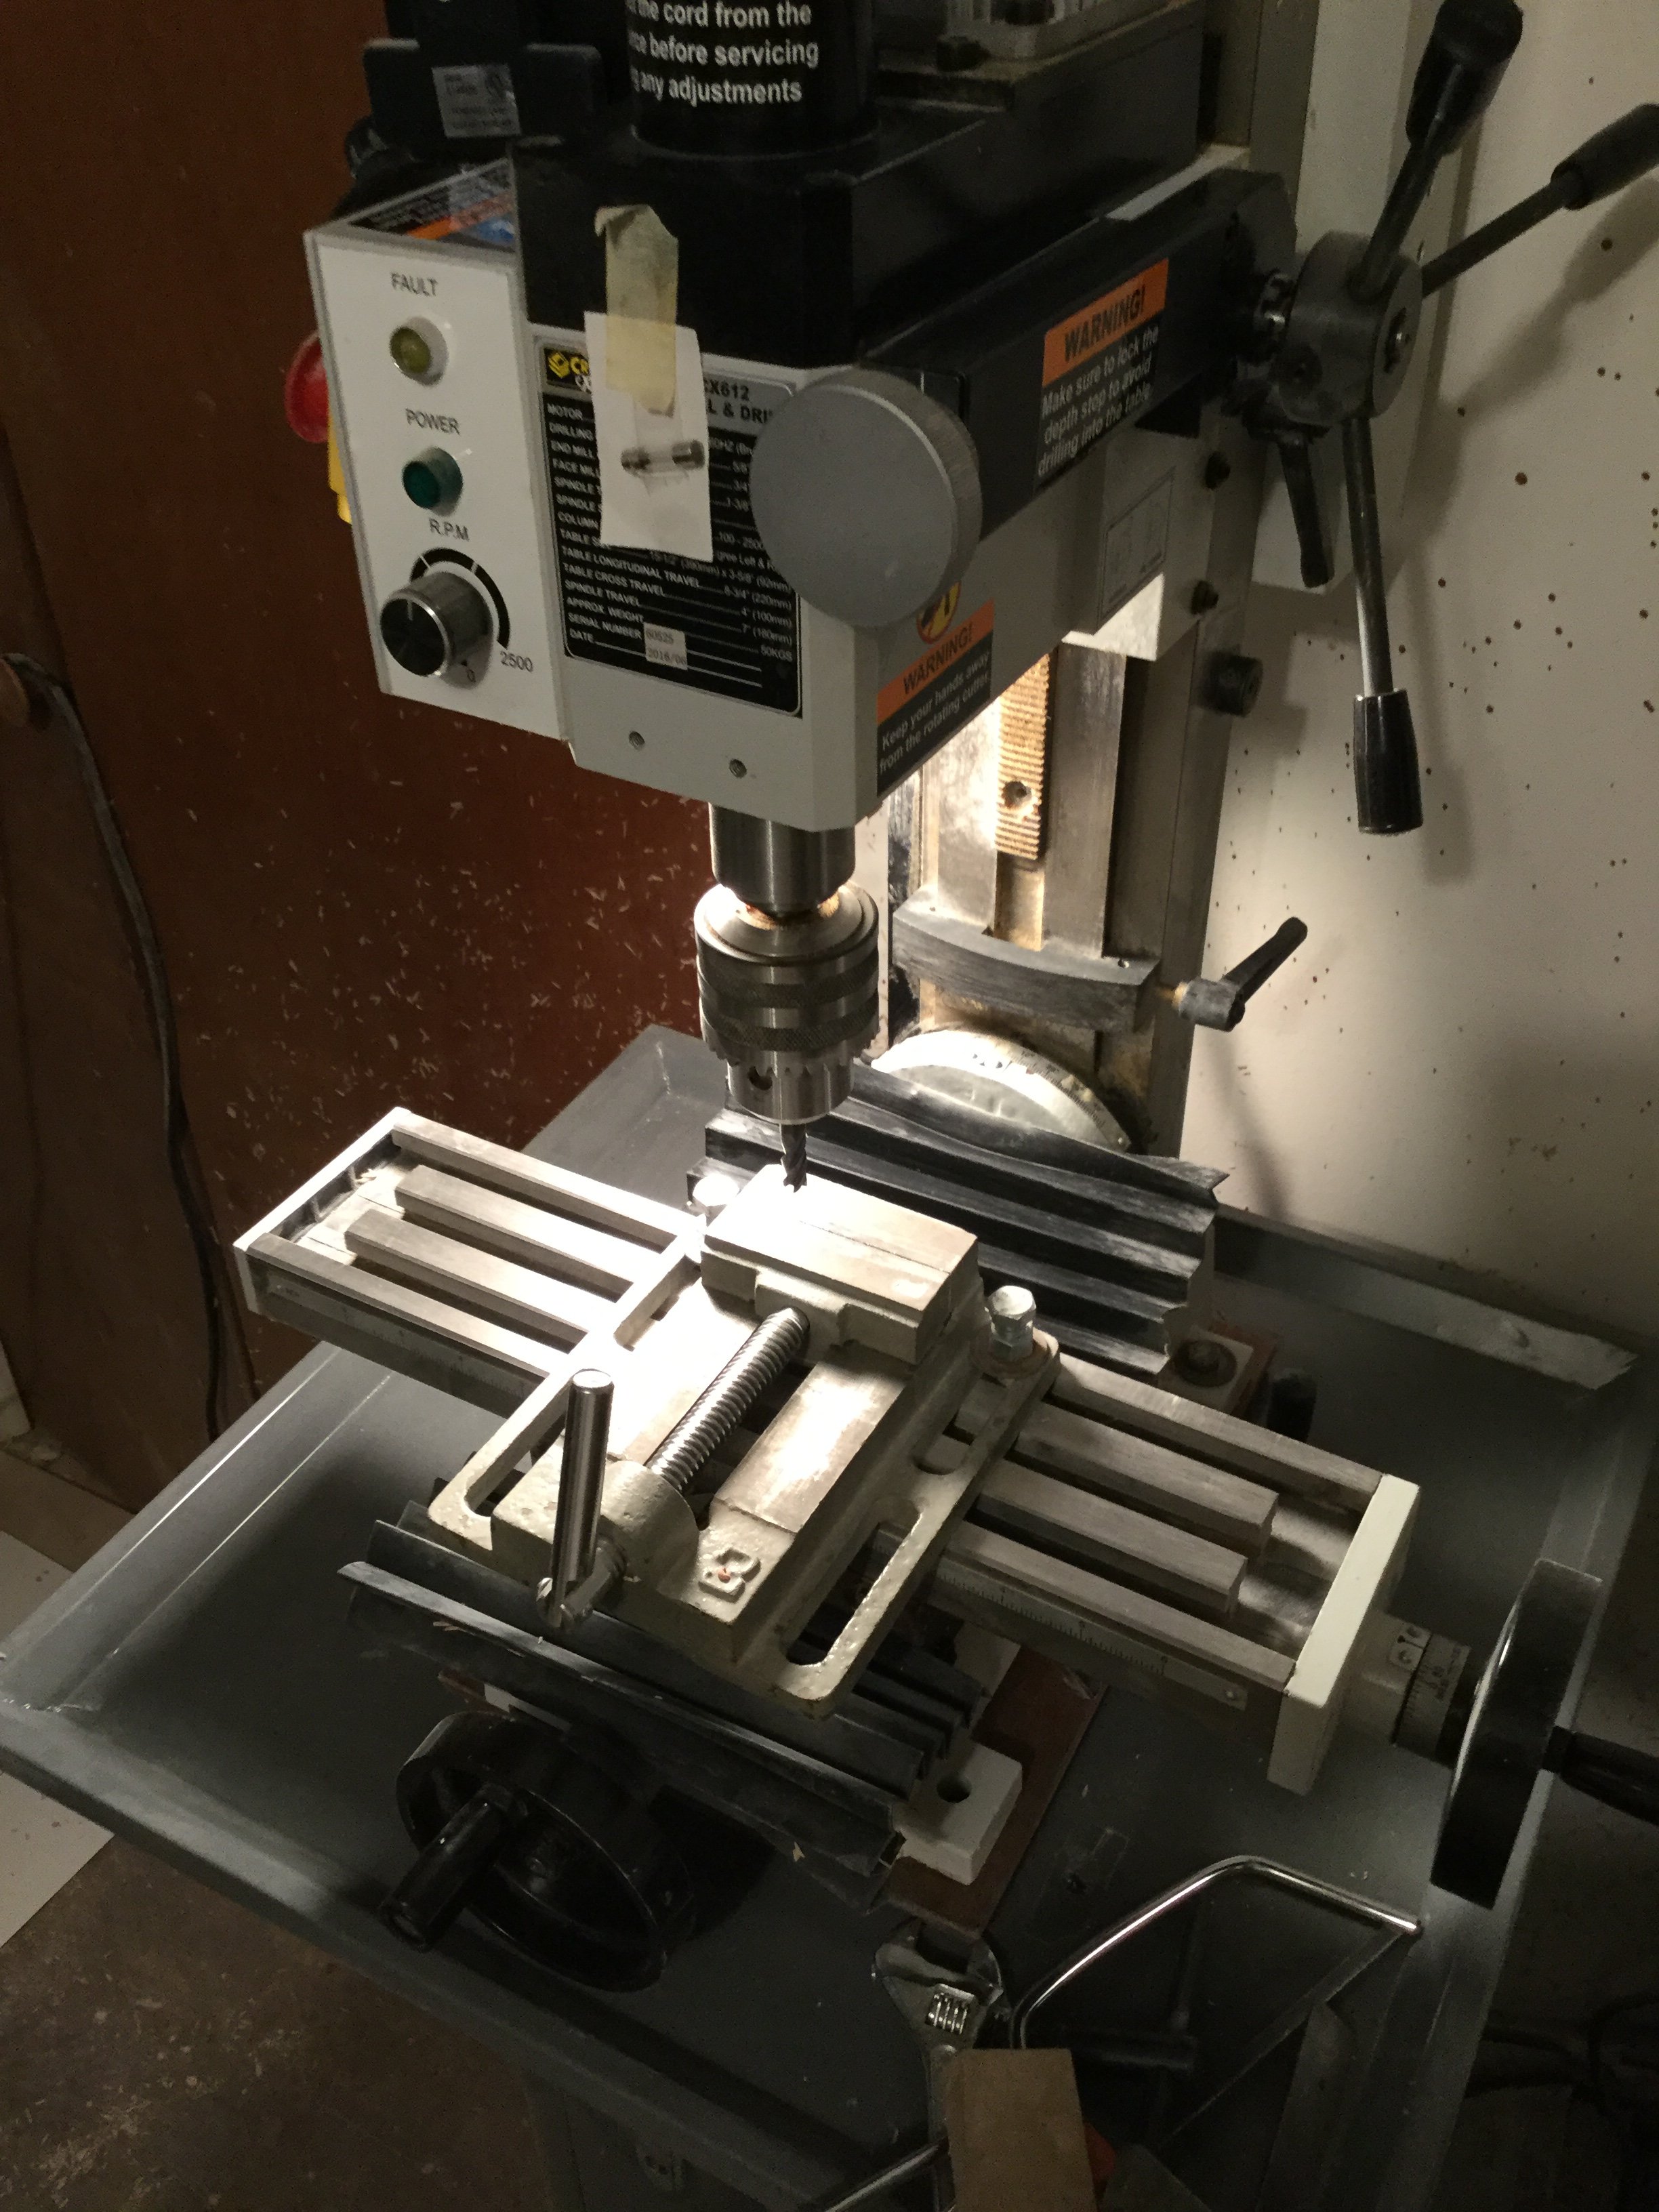
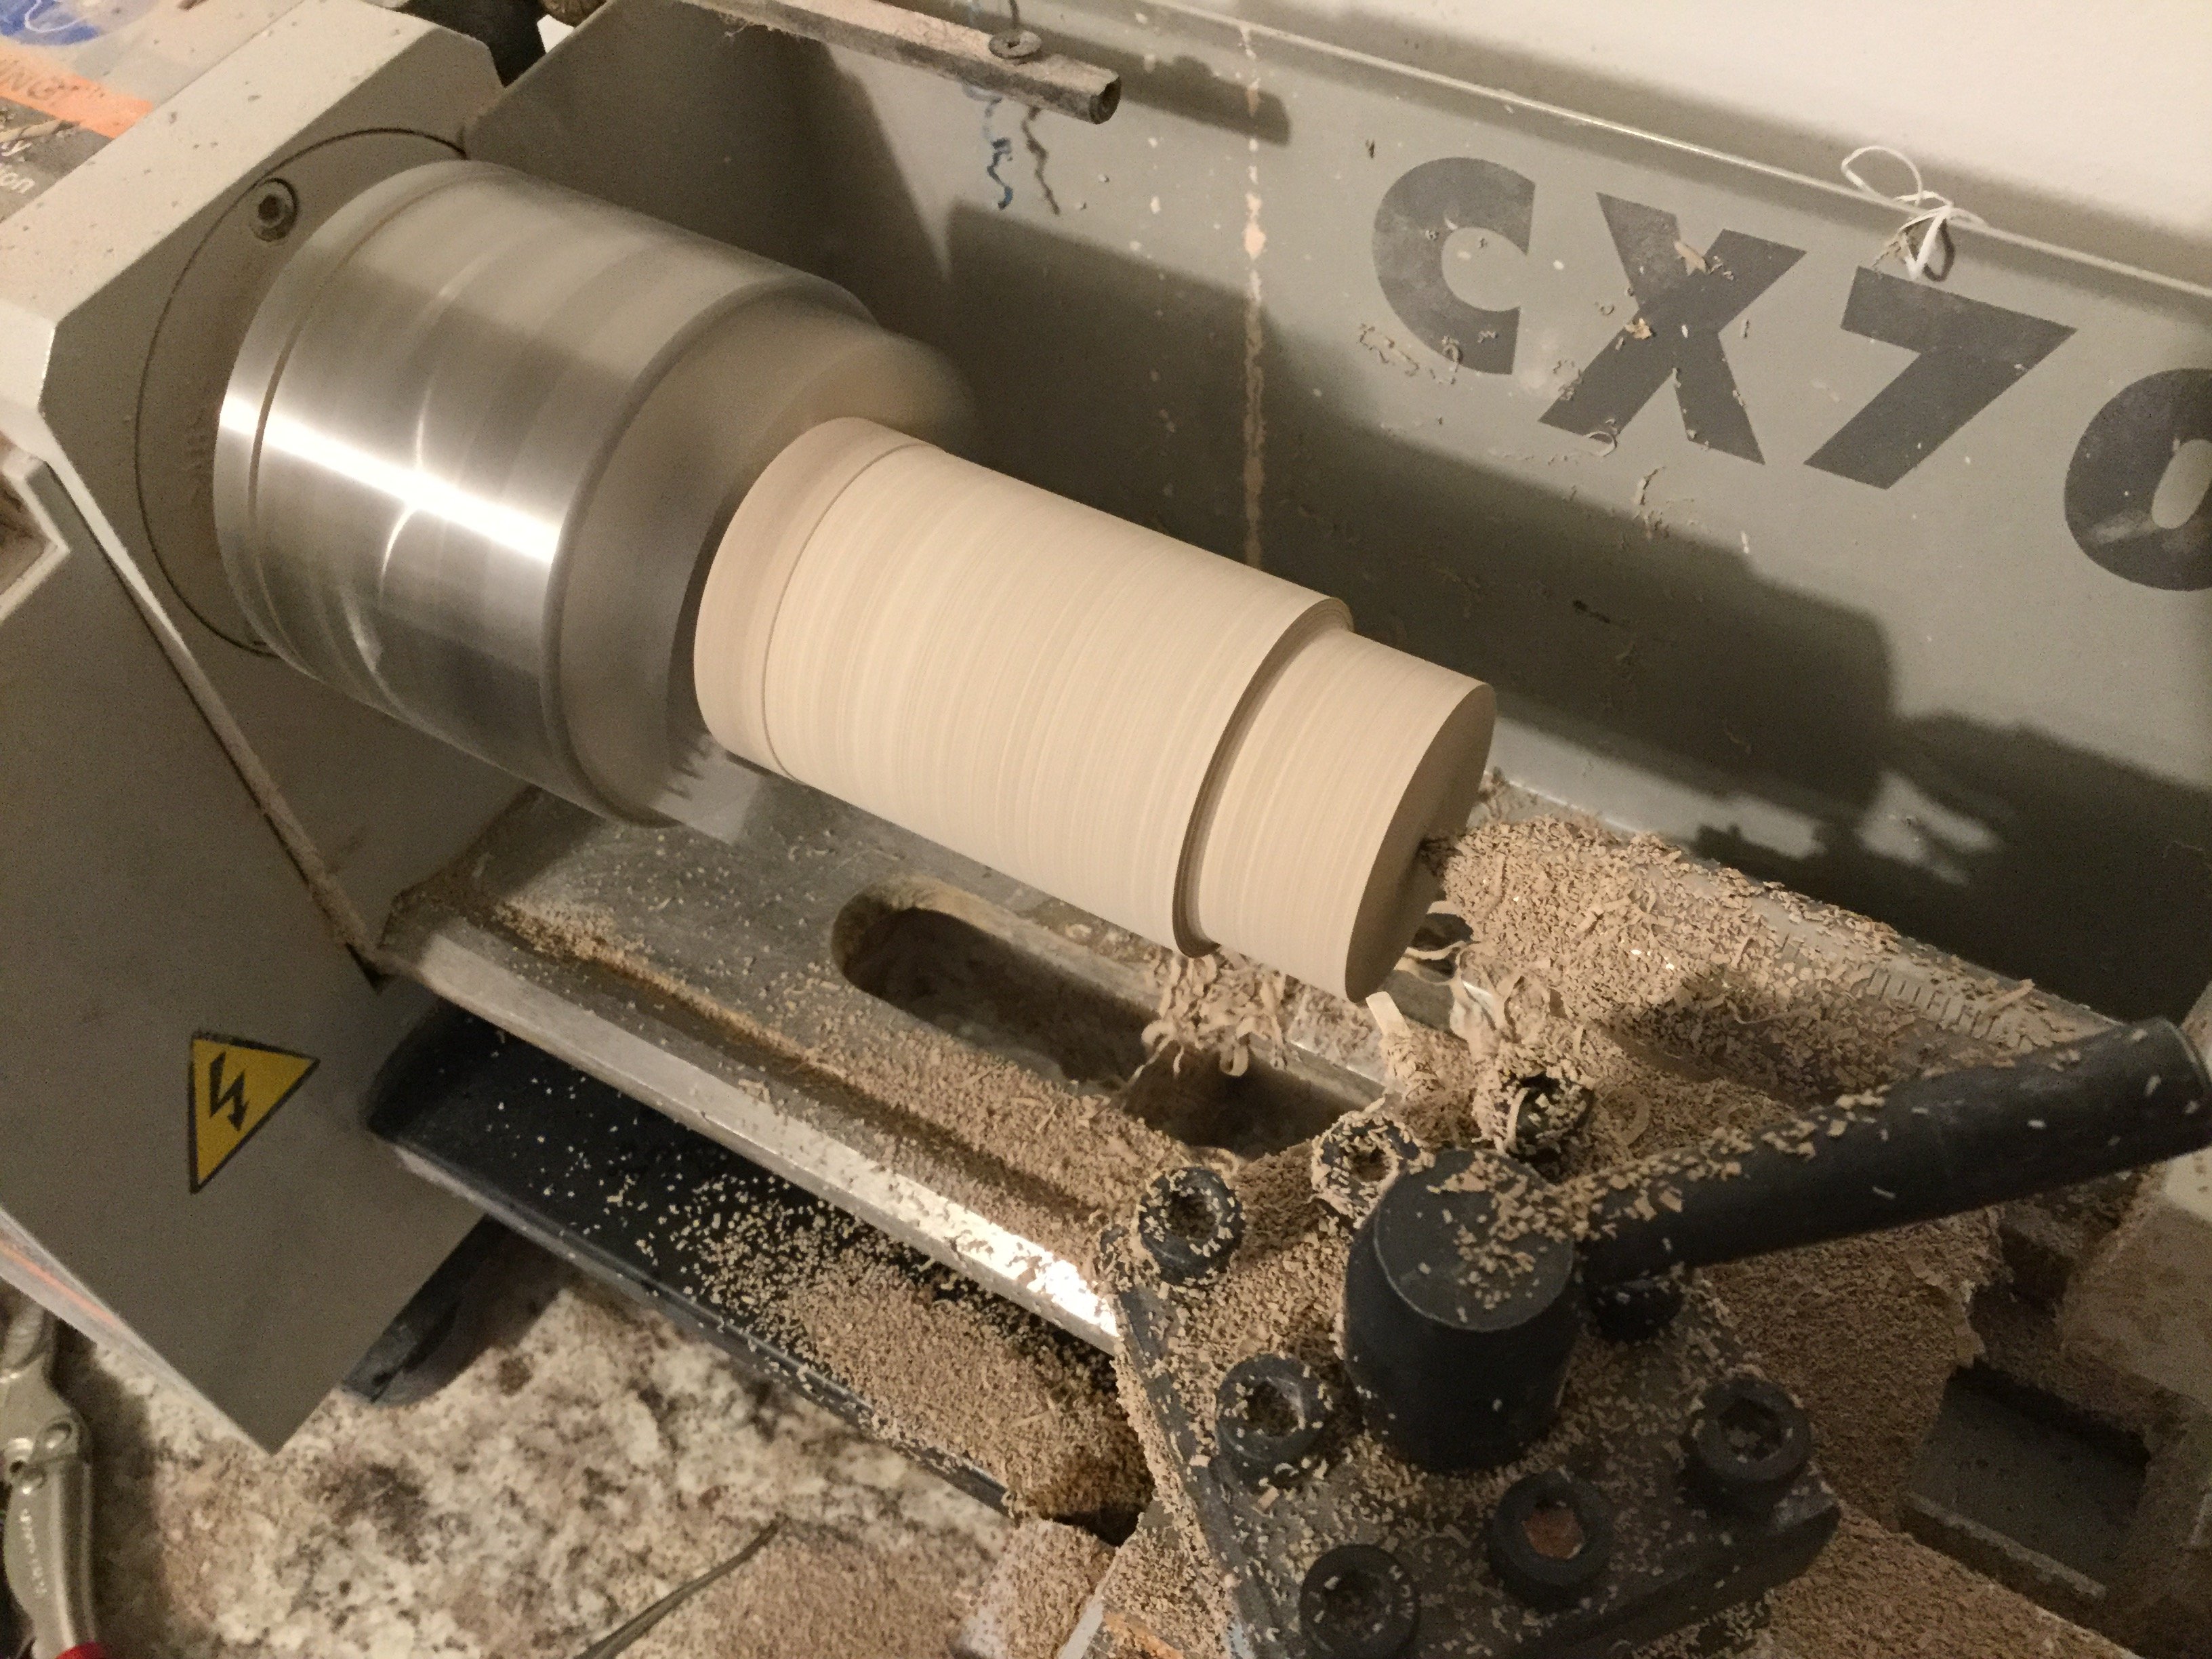
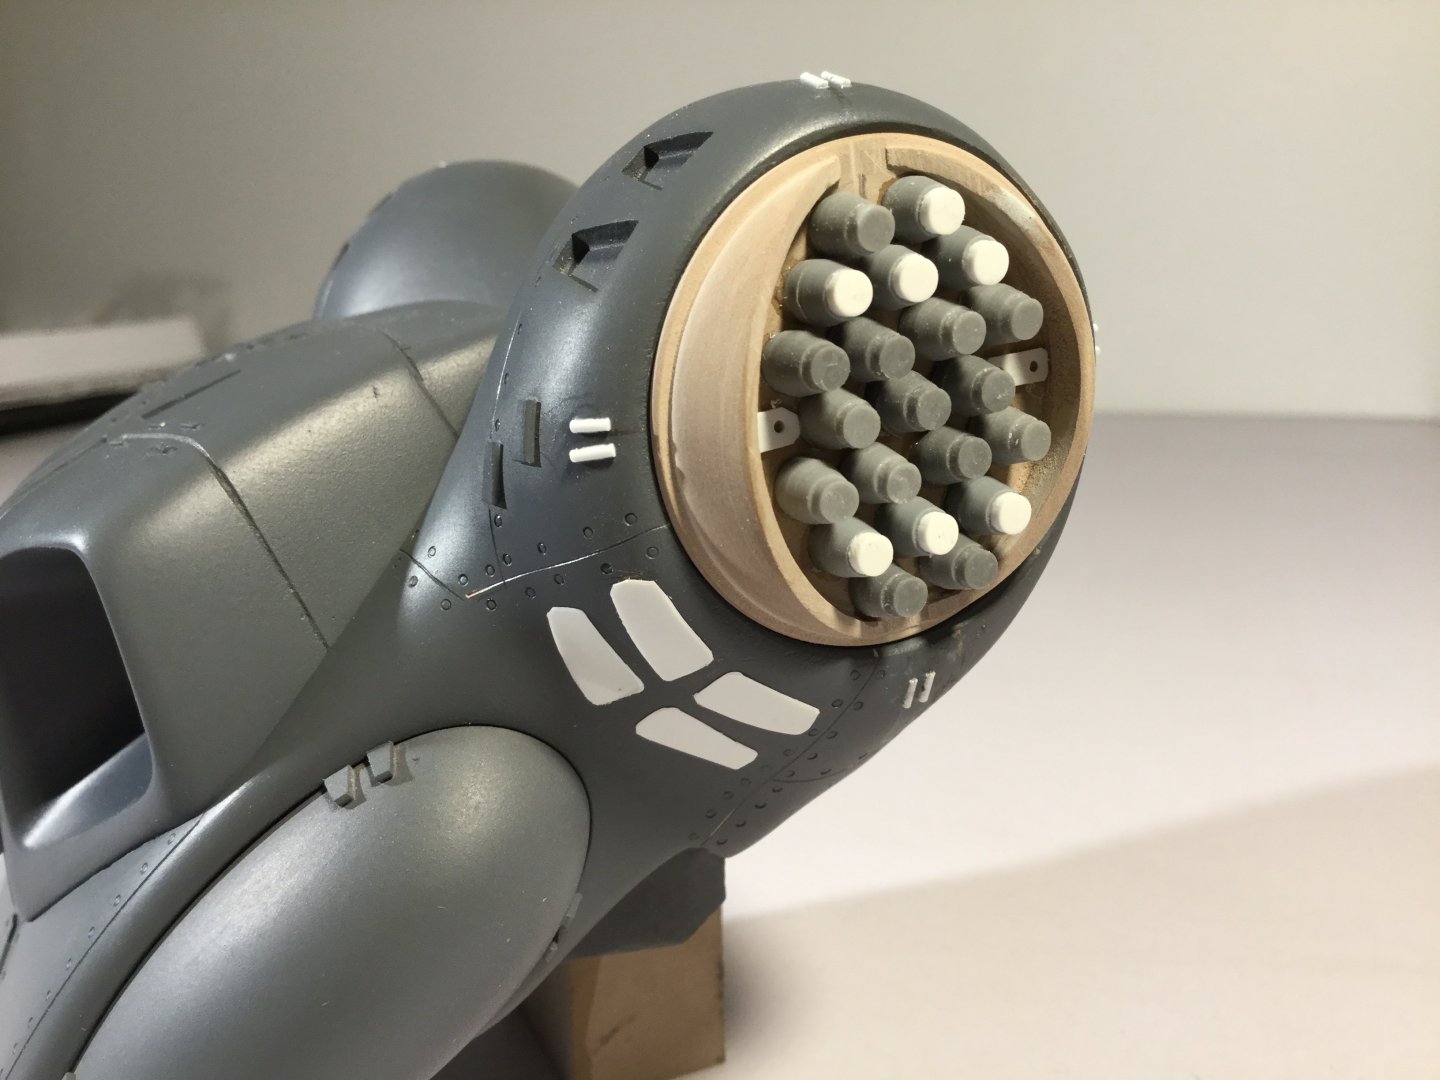
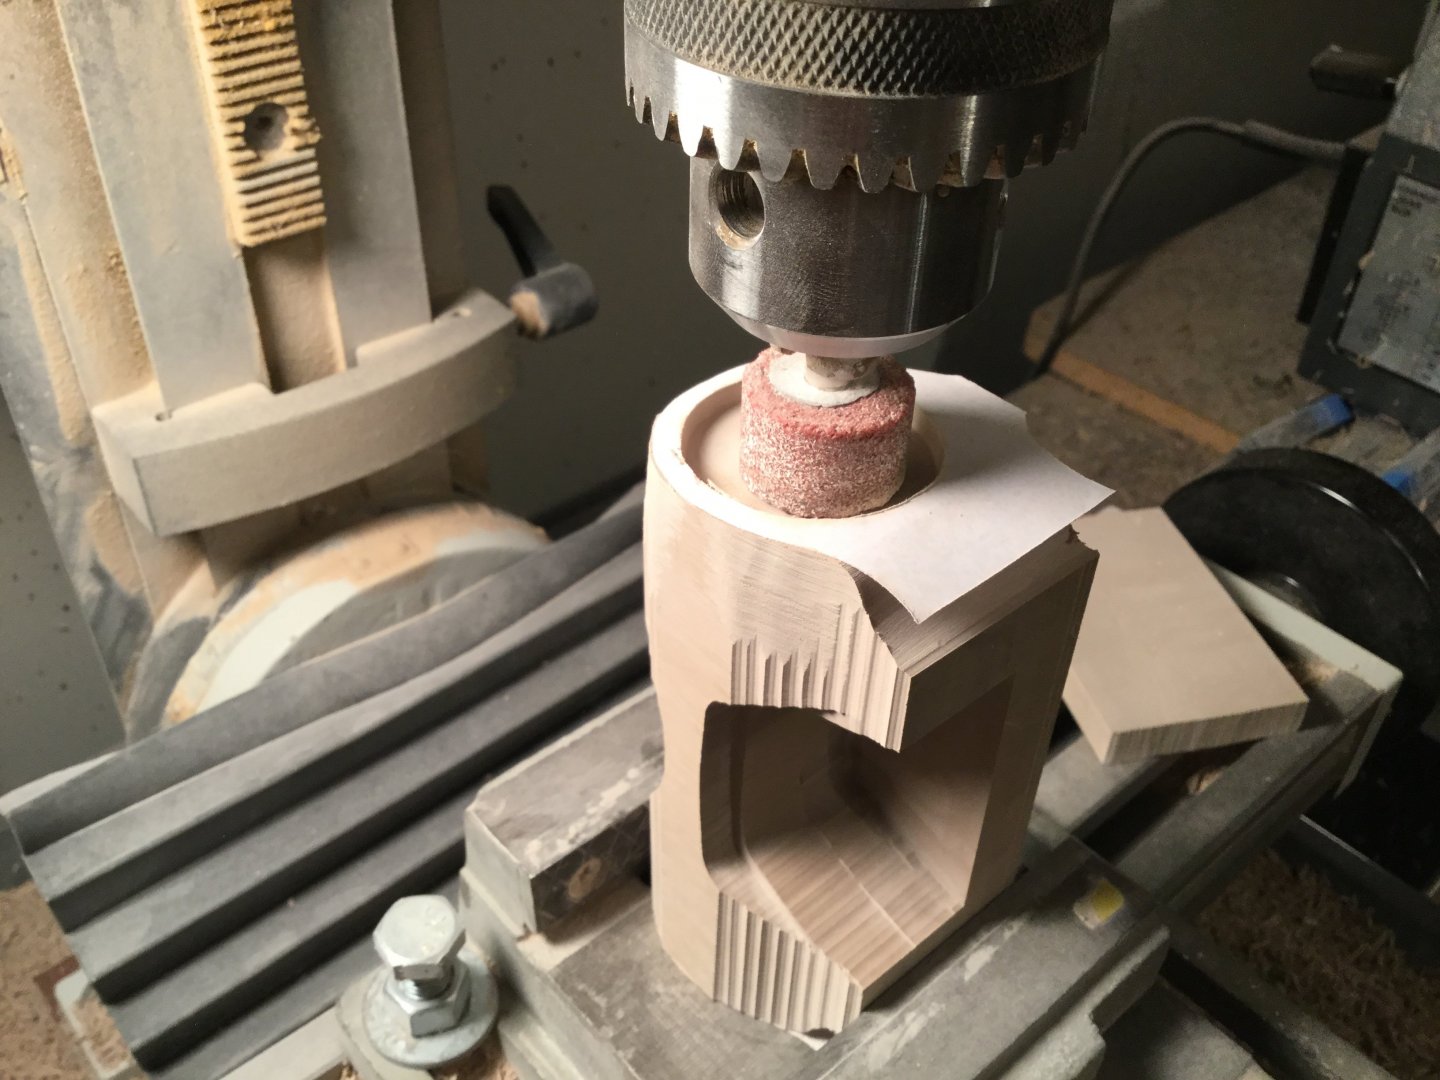
Captain’s log: Friday, November 15th. Holy cow, that’s a lot of dust!! Seriously, my workshop hasn’t been this filthy since the Norbert Gerard project, and I’m only just getting started. Thankfully, I’ve been able to do more of my shaping on the mill as opposed to using the rotary tool for those operations. It’s a slower, but more precise process. The flight pack is simply huge, so I decided to break the main structure into two components, if only to get it to fit in my milling vise. IMG_1625: while this cross-section milling is quite tedious, it gets the job done with great precision. I started the process off by carefully grinding a small section of the cross-section on the drill press, then the mill (the rougher cuts) are done on the lathe. IMG_1626: Same part, different orientation. You’ll notice that the milled section from the previous pic was sanded down almost completely IMG_1627: Aaaand down the other side of the slope. It’s important not to remove too much material at this stage; i can take my time and hand sand right down to the edge of the template afterwards. IMG_1628: I used a little ghetto hack to open up the missile housings by using the grinding stone normally fitted to the drill press, which you can see here. I started the process off with the Dremel to open up the cavities, otherwise trying to remove that much material with the mill-mounted grinder would have induced terrible vibrations and risk damaging the part itself, if not the milling table. IMG_1629: Now that I have the missile pod openings, I’m going to need to make those bulbous covers. Normally I’d turn the part out of cast resin barstock, but it’s so big that modeling board is the only way to go. IMG_1630: This is the bottom part of the flight pack, which has undergone much the same process that was shown previously, and has been hand-sanded into shape. IMG_1632: The angled part at bottom-left is actually the chassis of the mecha. It doesn’t look like much, but everything will be bolted to it. The knee components were also made, and the lower legs started. IMG_1633: the flight unit, now bonded together and tediously sanded into shape. The hollowed center section will provide a substantial weight savings, and will undergo still more strategic bulk removal in the time ahead. IMG_1636: The chassis and crude cockpit parts are already beginning to take shape. Even at this early stage, the parts are looking better than I’d anticipated. You can’t tell, but I’m actually giddy behind the camera. That’s all I’ve got for this week, I’m afraid. That flight pack was practically its own mecha project, and I’m glad that the rough shaping for it is done. Next week I’ll have more done with the body and legs, so it might actually start to look like a power suit… Stay tuned! 15 days remain for preordering... Tick-tock.


-
The Official Moscato Hobby Models Thread
captain america replied to captain america's topic in Anime or Science Fiction
I actually put a lot of thought into the design. Hopefully it will be well received.