

captain america
-
Posts
3475 -
Joined
-
Last visited
Content Type
Profiles
Forums
Events
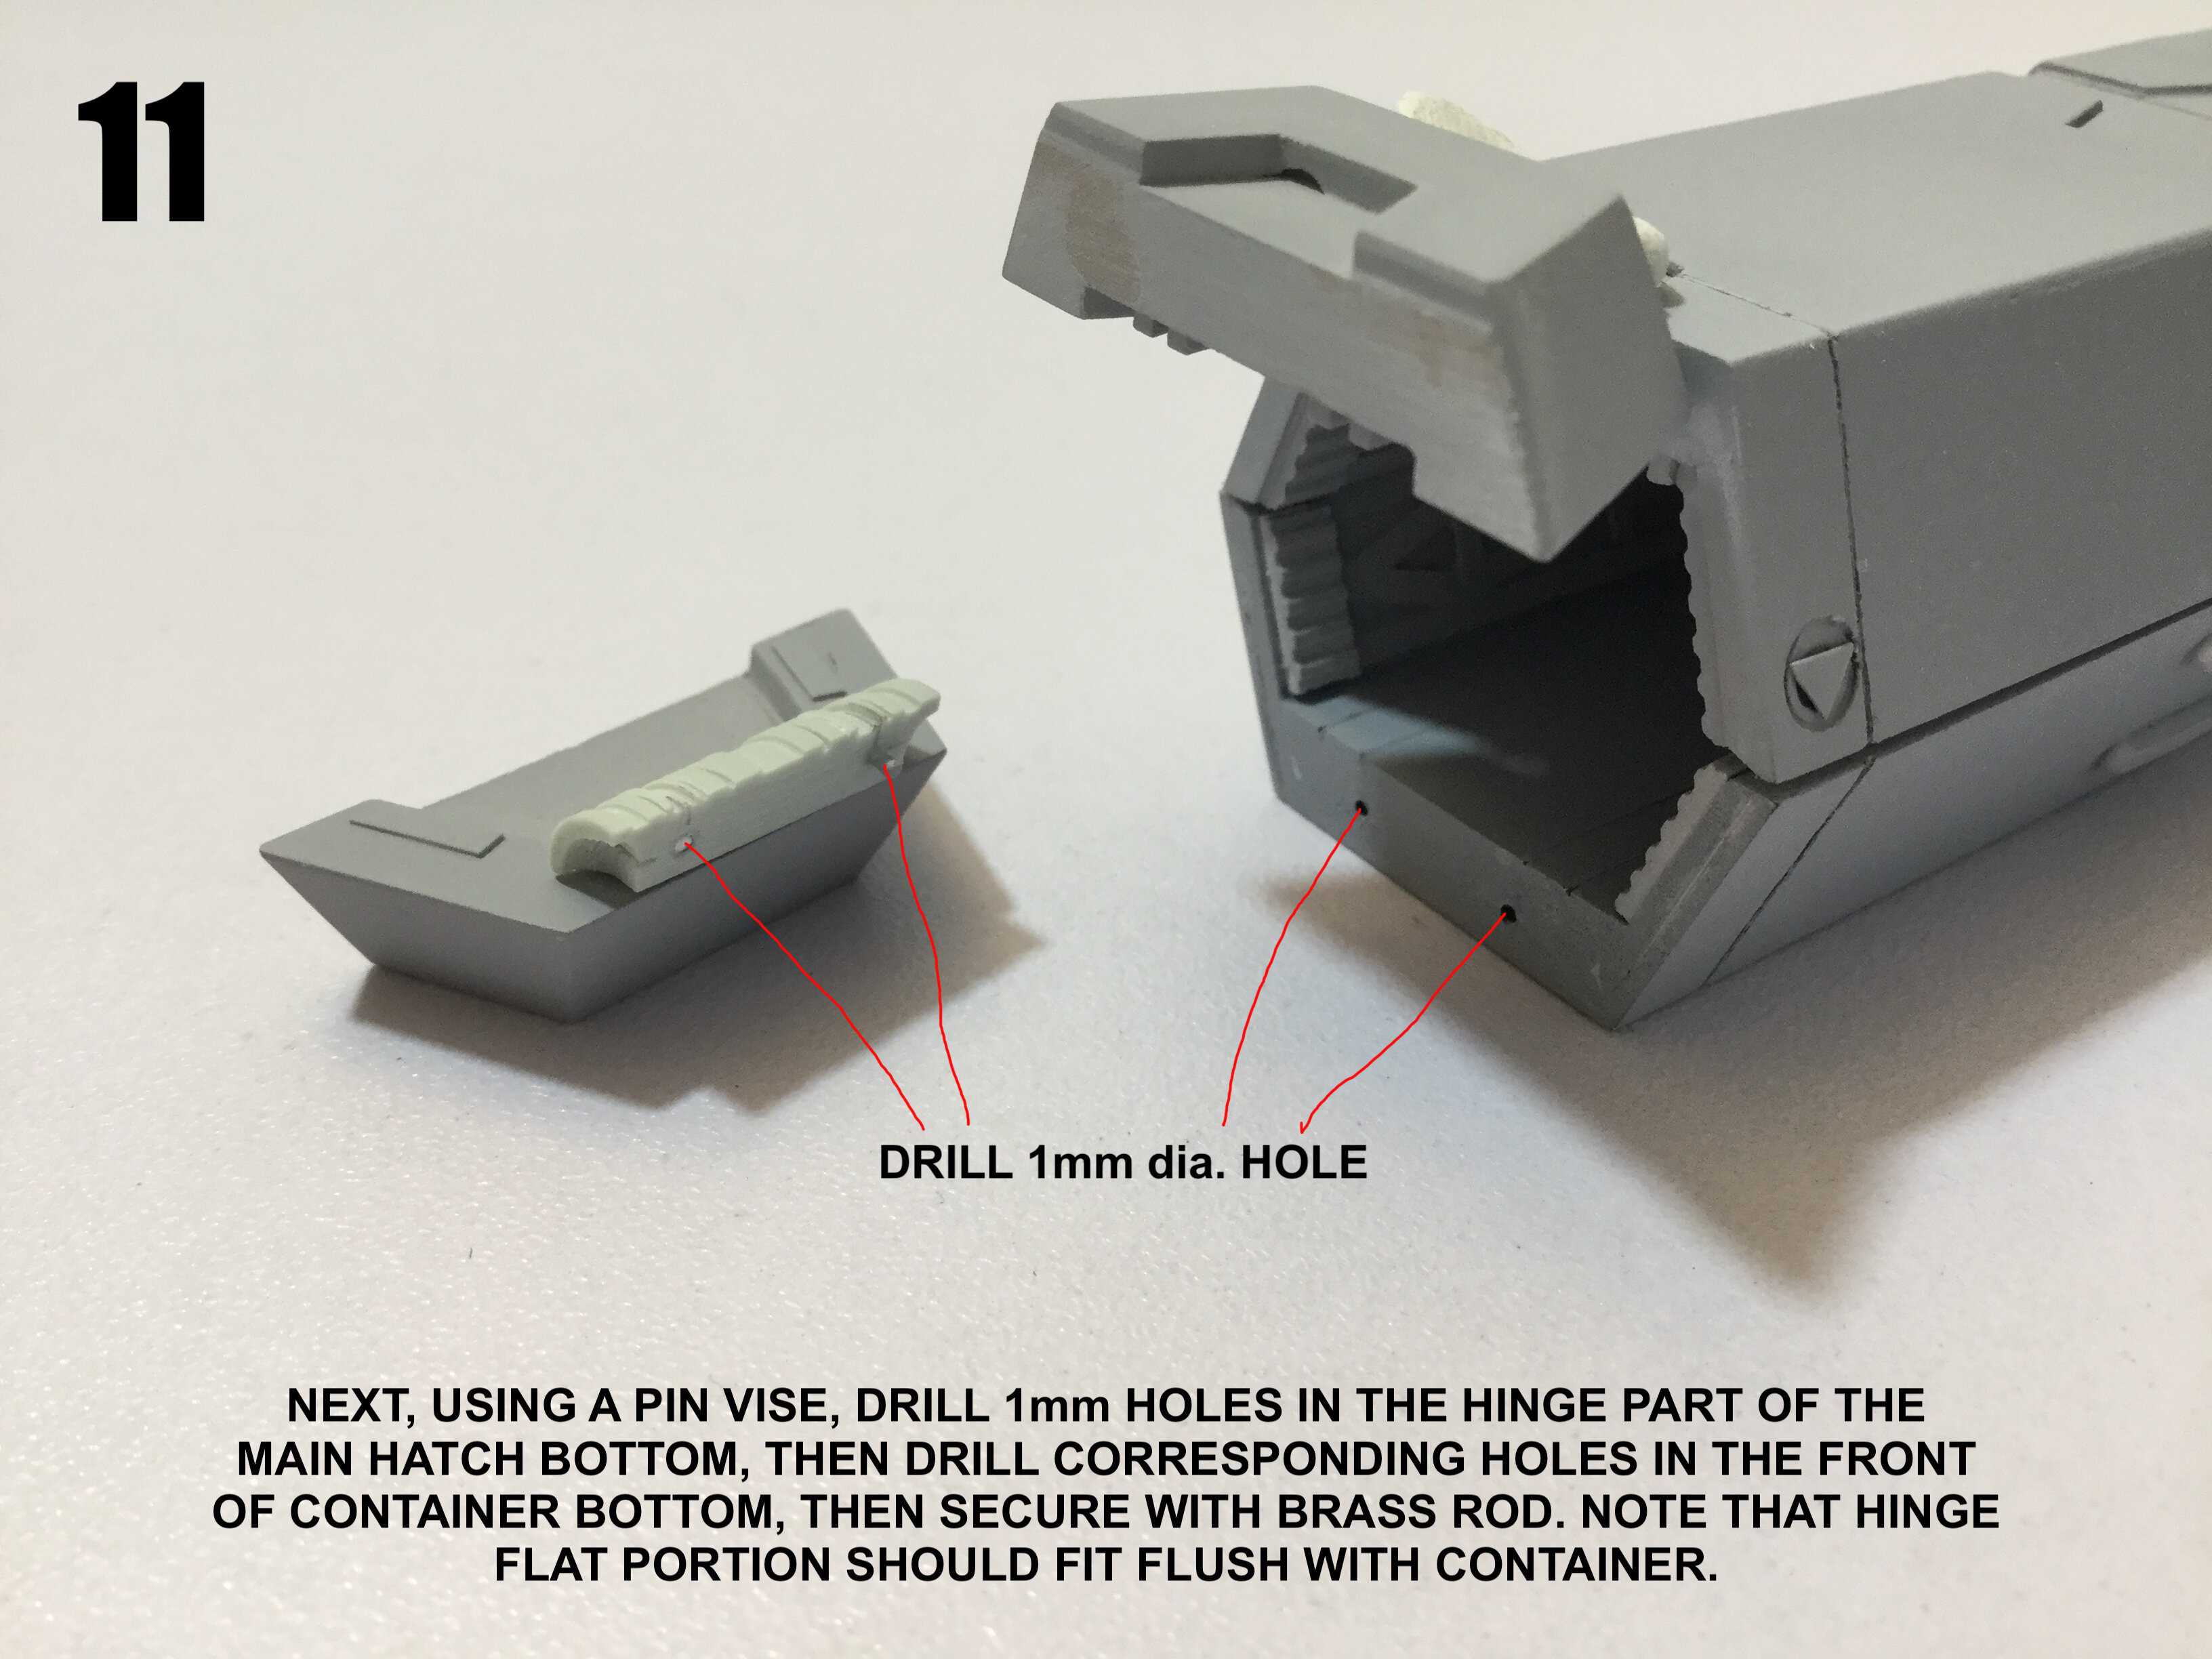
Gallery
Posts posted by captain america
-
-
Those parts look like ABS or something similar. Putty won't bond to it and it will constantly crack. Ideally the part should be replaced. I think this is something that 3D printing can do well, provided that something tough (nylon?) is used.
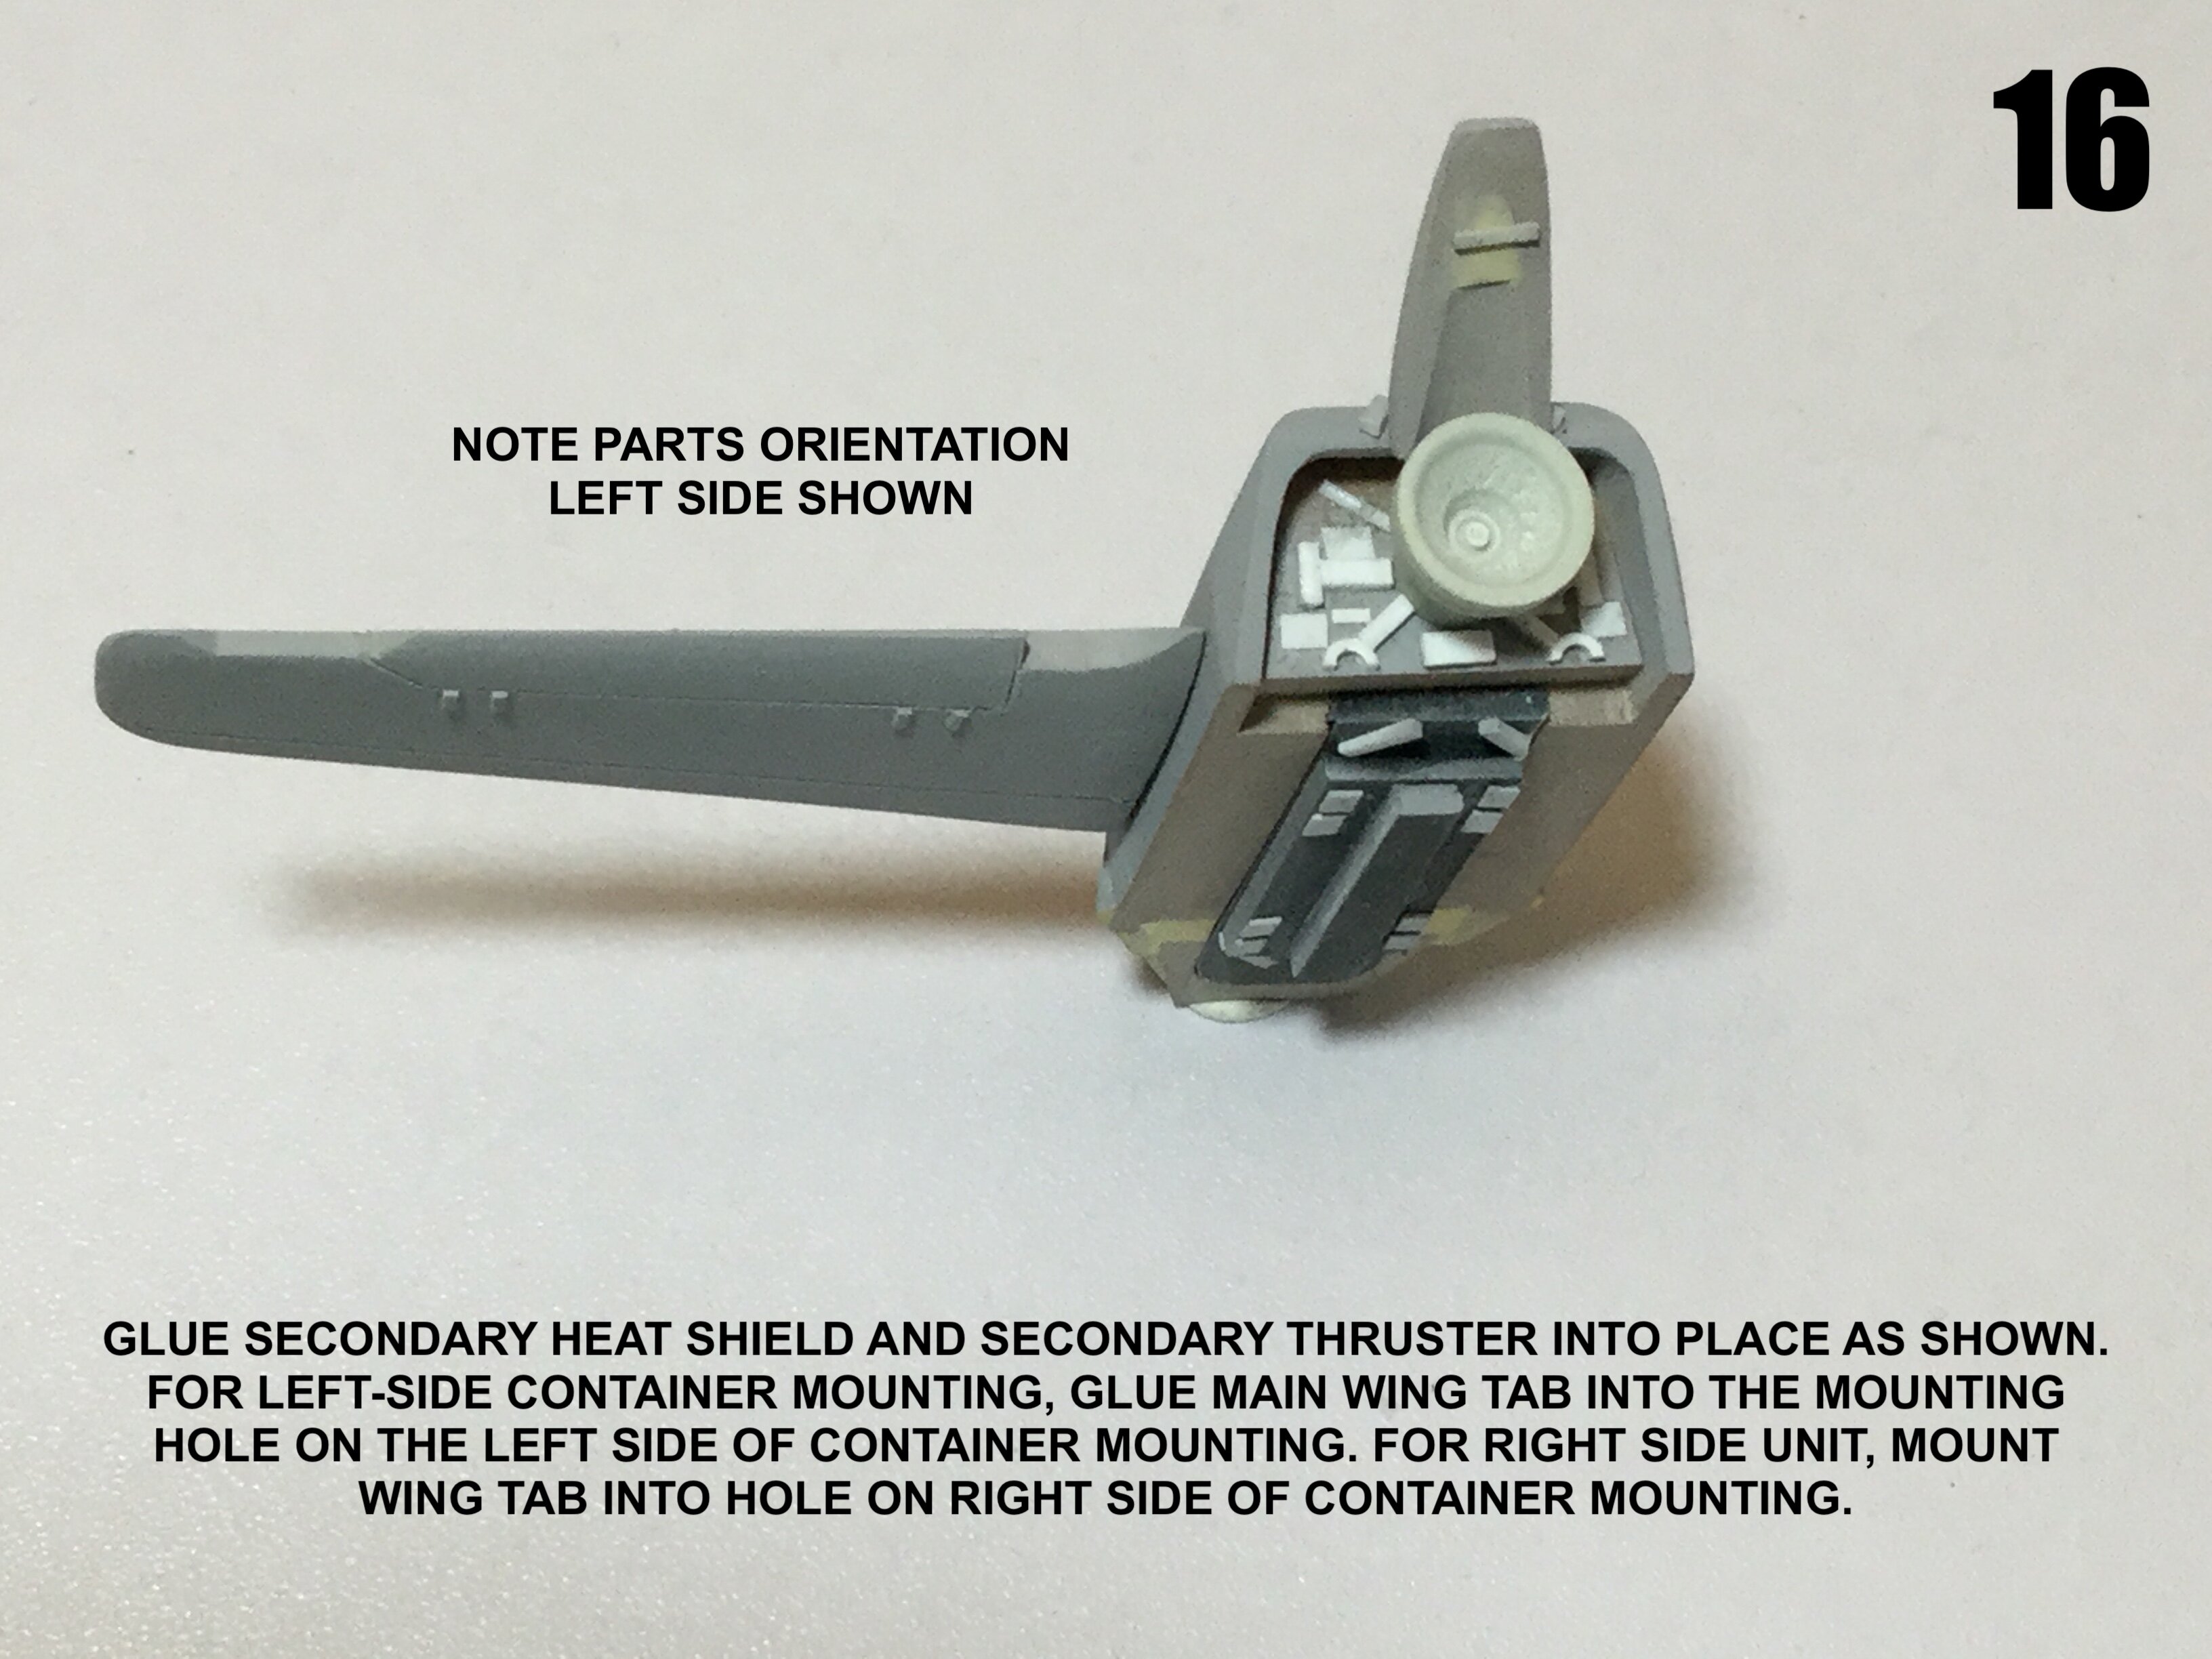
-
2 hours ago, Masked Aviator said:
Sentinel still uses plastic to connect the two metal parts. I'm afraid the cracking issue will persist. I wonder why they don't switch the material to metal.
Or just a different type of plastic, which wouldn't necessitate new tooling and can just as readily solve the issue.
-
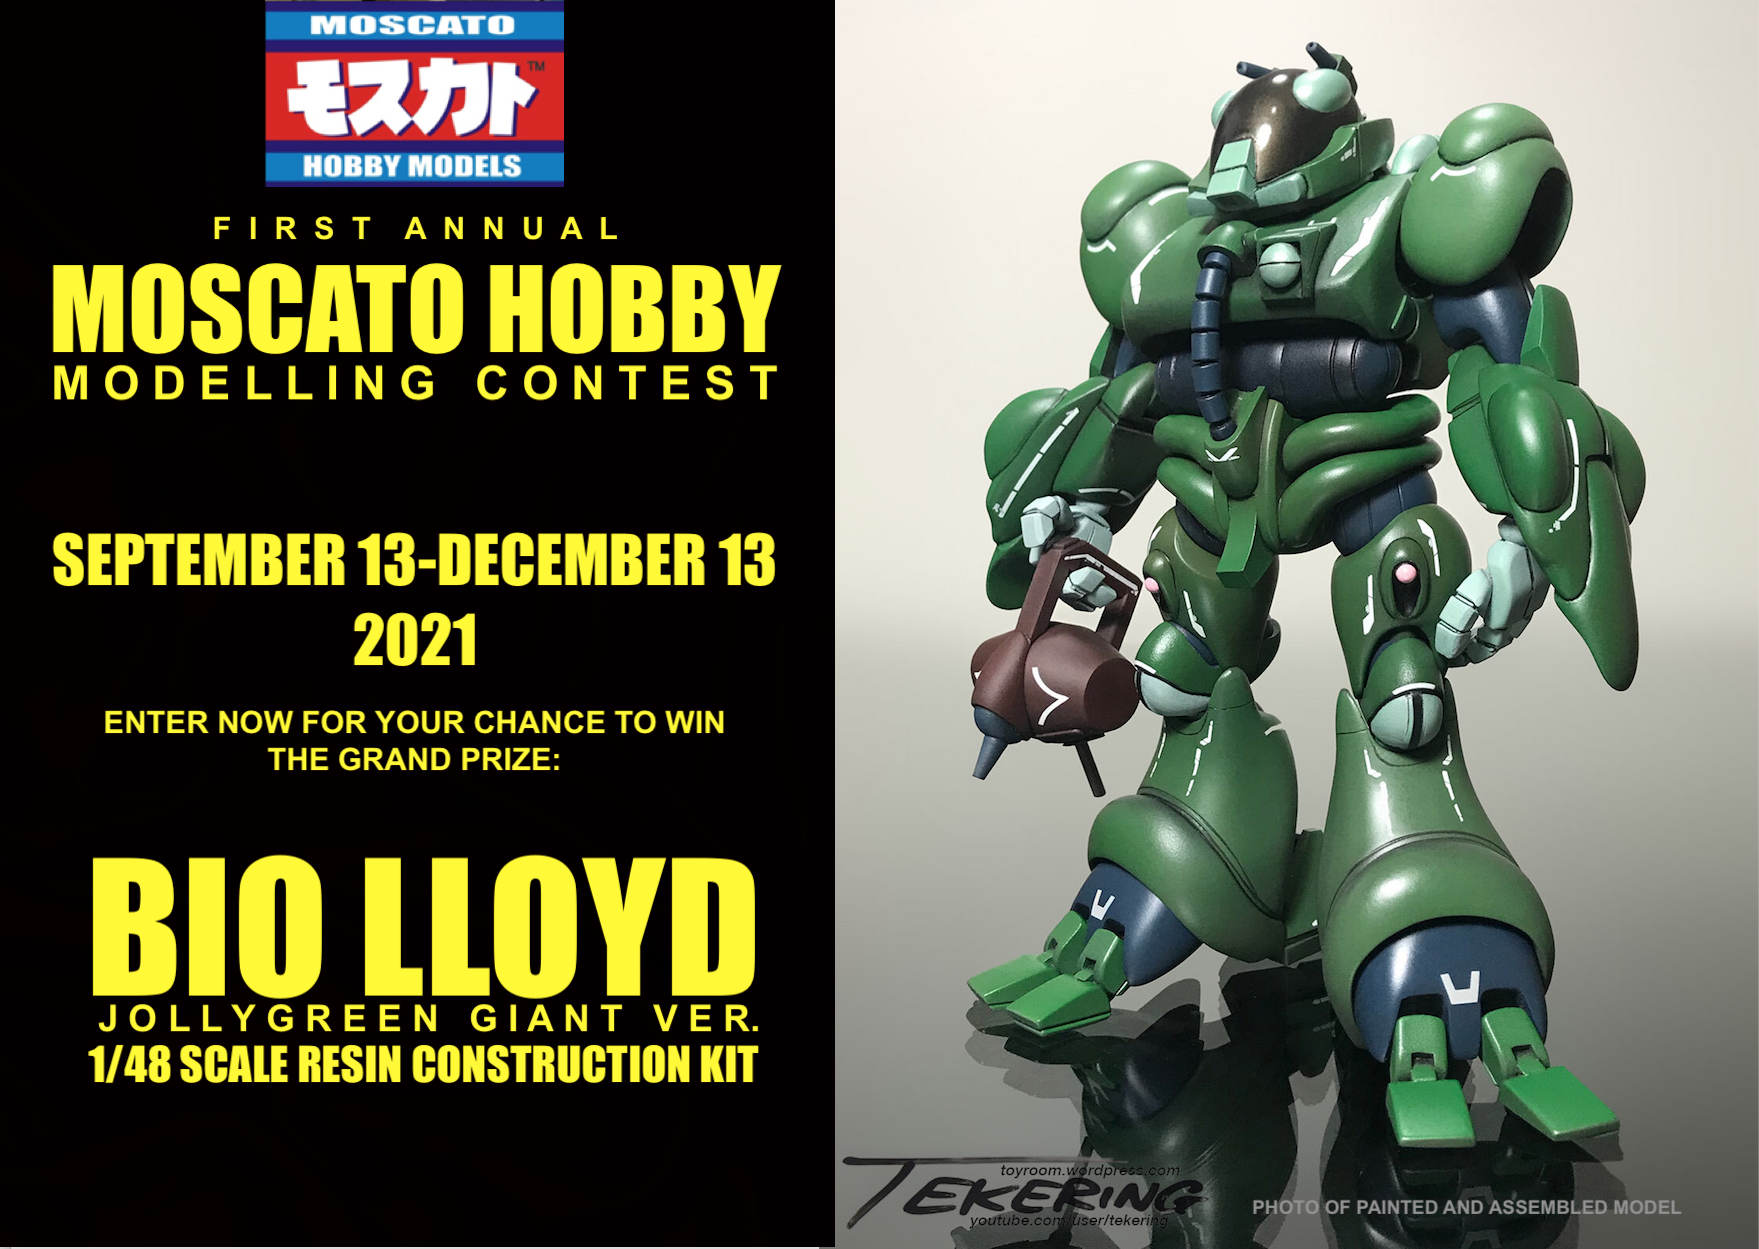
A month to go!
Put those modelling skills to good use and stand a chance to win a 1/48 Bio LLoyd kit. The parts for the green version were offered only once with the initial run, and will never be re-issued.
-
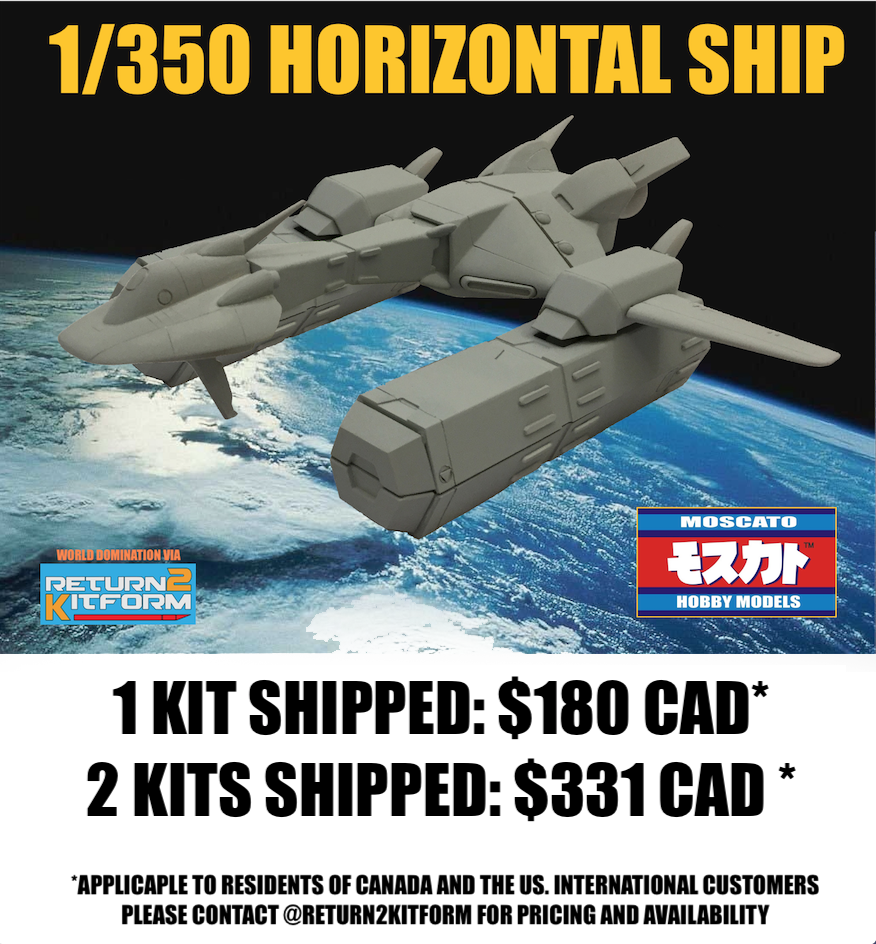
Bump! Y'all have until the end of the day on October 31 to make the Horizontal ship re-issue happen.

-
Part deux.
-
Destructions are ready, and all kits have shipped.


-
8 hours ago, peter said:
Sadly (for me at least), there are no life size Blue Thunder replicas apart from what's left of this:
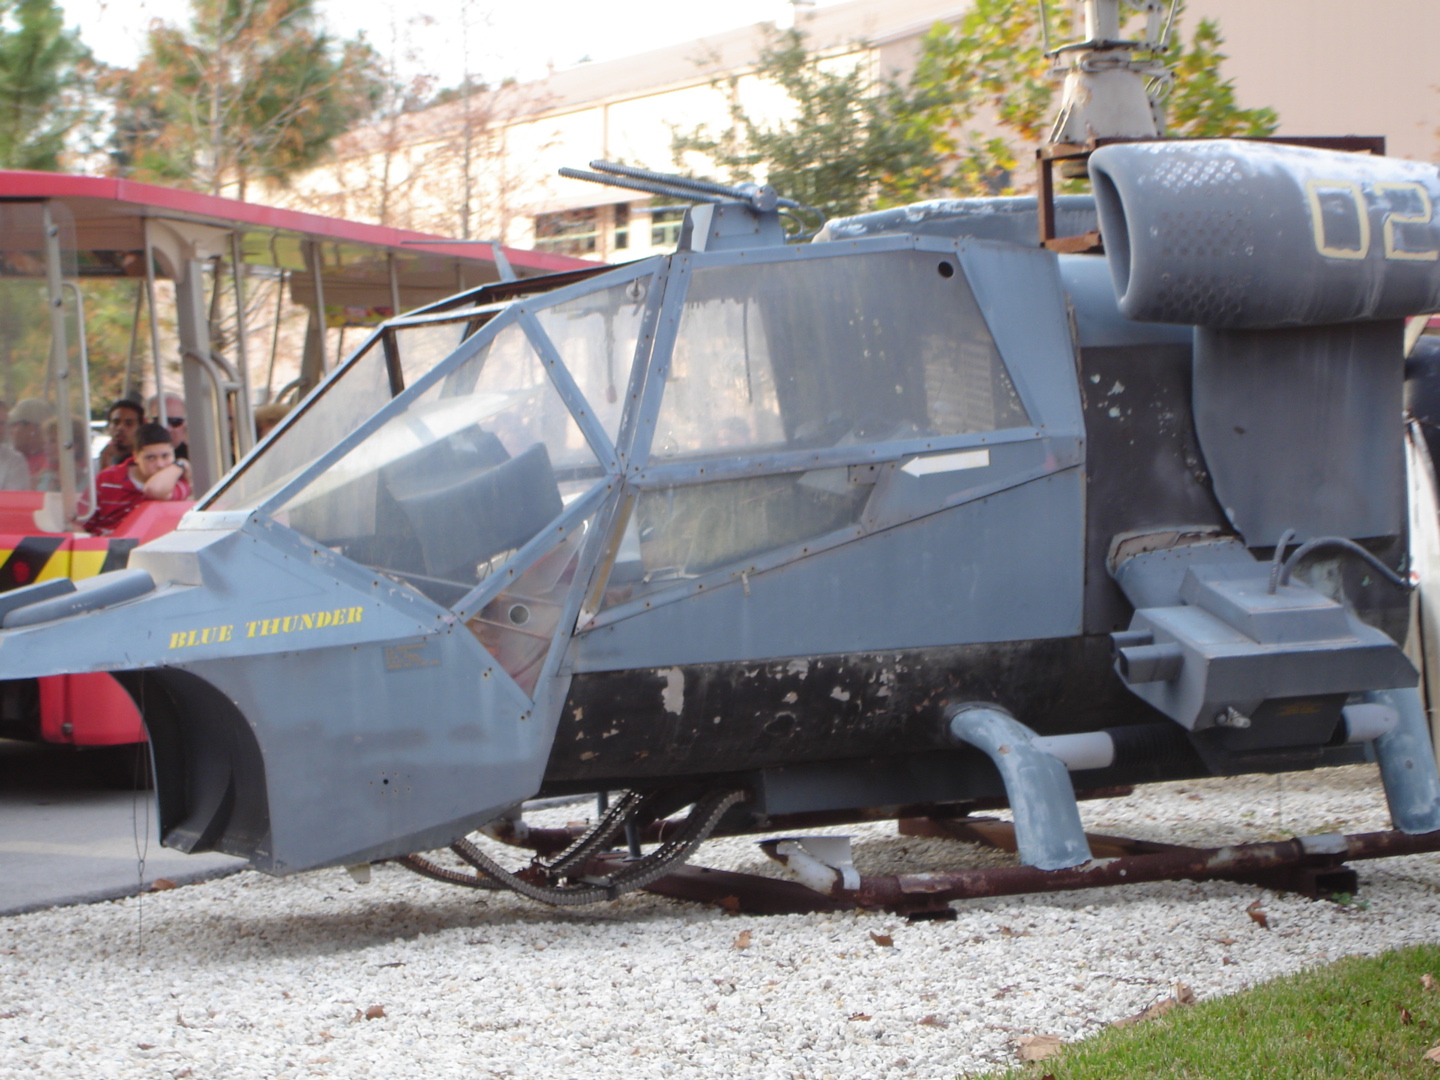
I think the original filming helicopters modified back to their original form, sold off and eventually crashed somewhere.
Seeing as how it was a pricy and still functional piece of military hardware, it probably made more sense to sell it. That pic of the derelict bodywork is/was part of a studio tour somewhere, IIRC. Fun fact: the modded Gazelle also appeared in a mid 80s dystopian tv miniseries caked Amerika, where they had temporarily painted it black.
-
For those who may have missed out on the initial run, I'm offering a potential re-issue. I'd need a dozen orders to make this happen.
-
Quick update: castings are looking excellent. Decals are done and on their way, so I should start shipping in the next 3 weeks.

-
To be fair, that Japanese line-art sketch is a bit of a detailed trainwreck. Could he have been a bit more faithful in capturing some of the exposed machinery? Yes. Also, those dome shapes look more like chrome hemispheres to me than what he rendered, but that's just my interpretation. The other thing most fans don't understand is that all these illustrations have to abide by what art directors decide and give approval to. To say that you'd be shocked at the lack of competence in some management circles is an understatement.
I like the artist's character renderings; that seems to be his strength. His mecha are a bit soft.
-
*Heavy breathing intensifies*

-
42 minutes ago, Gabe Q said:
I'm planning on starting something soon. I still have to decide what I'm going to build. I'm excited to see what everyone else enters into the contest.
I think everyone's waiting for the other guy to stick his toe into the pool first.

-
So... Who's currently building something?
-
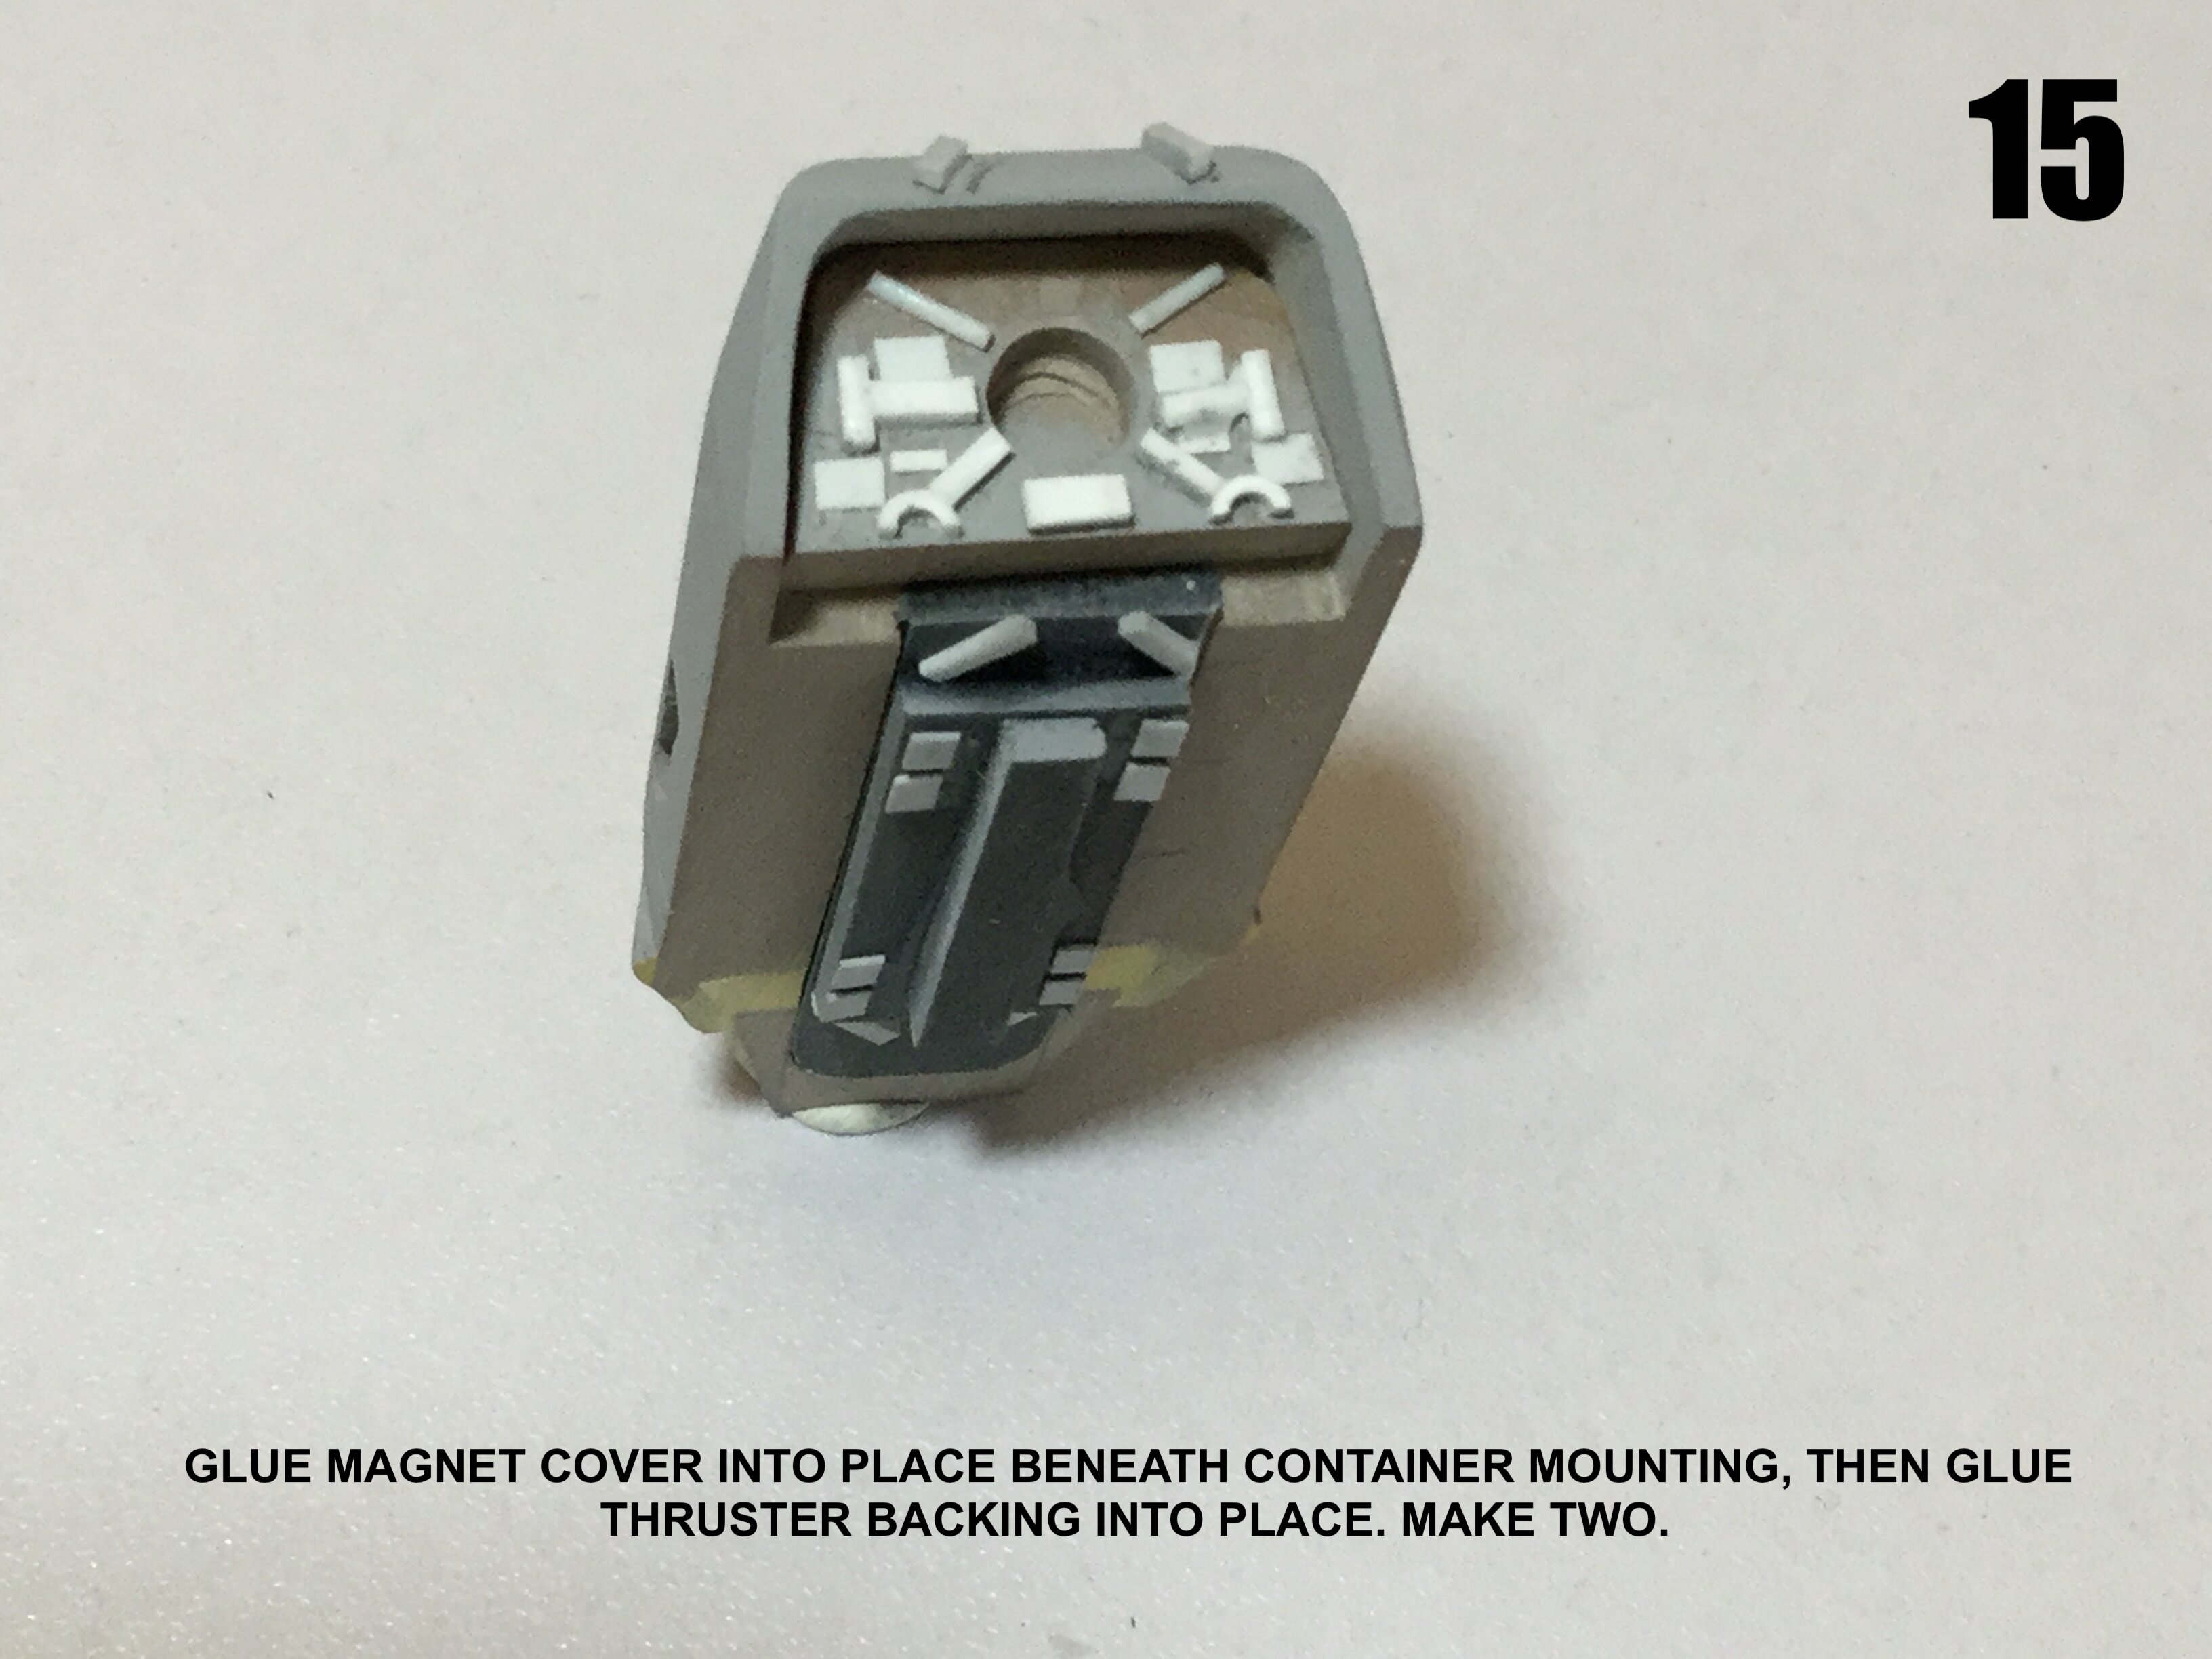
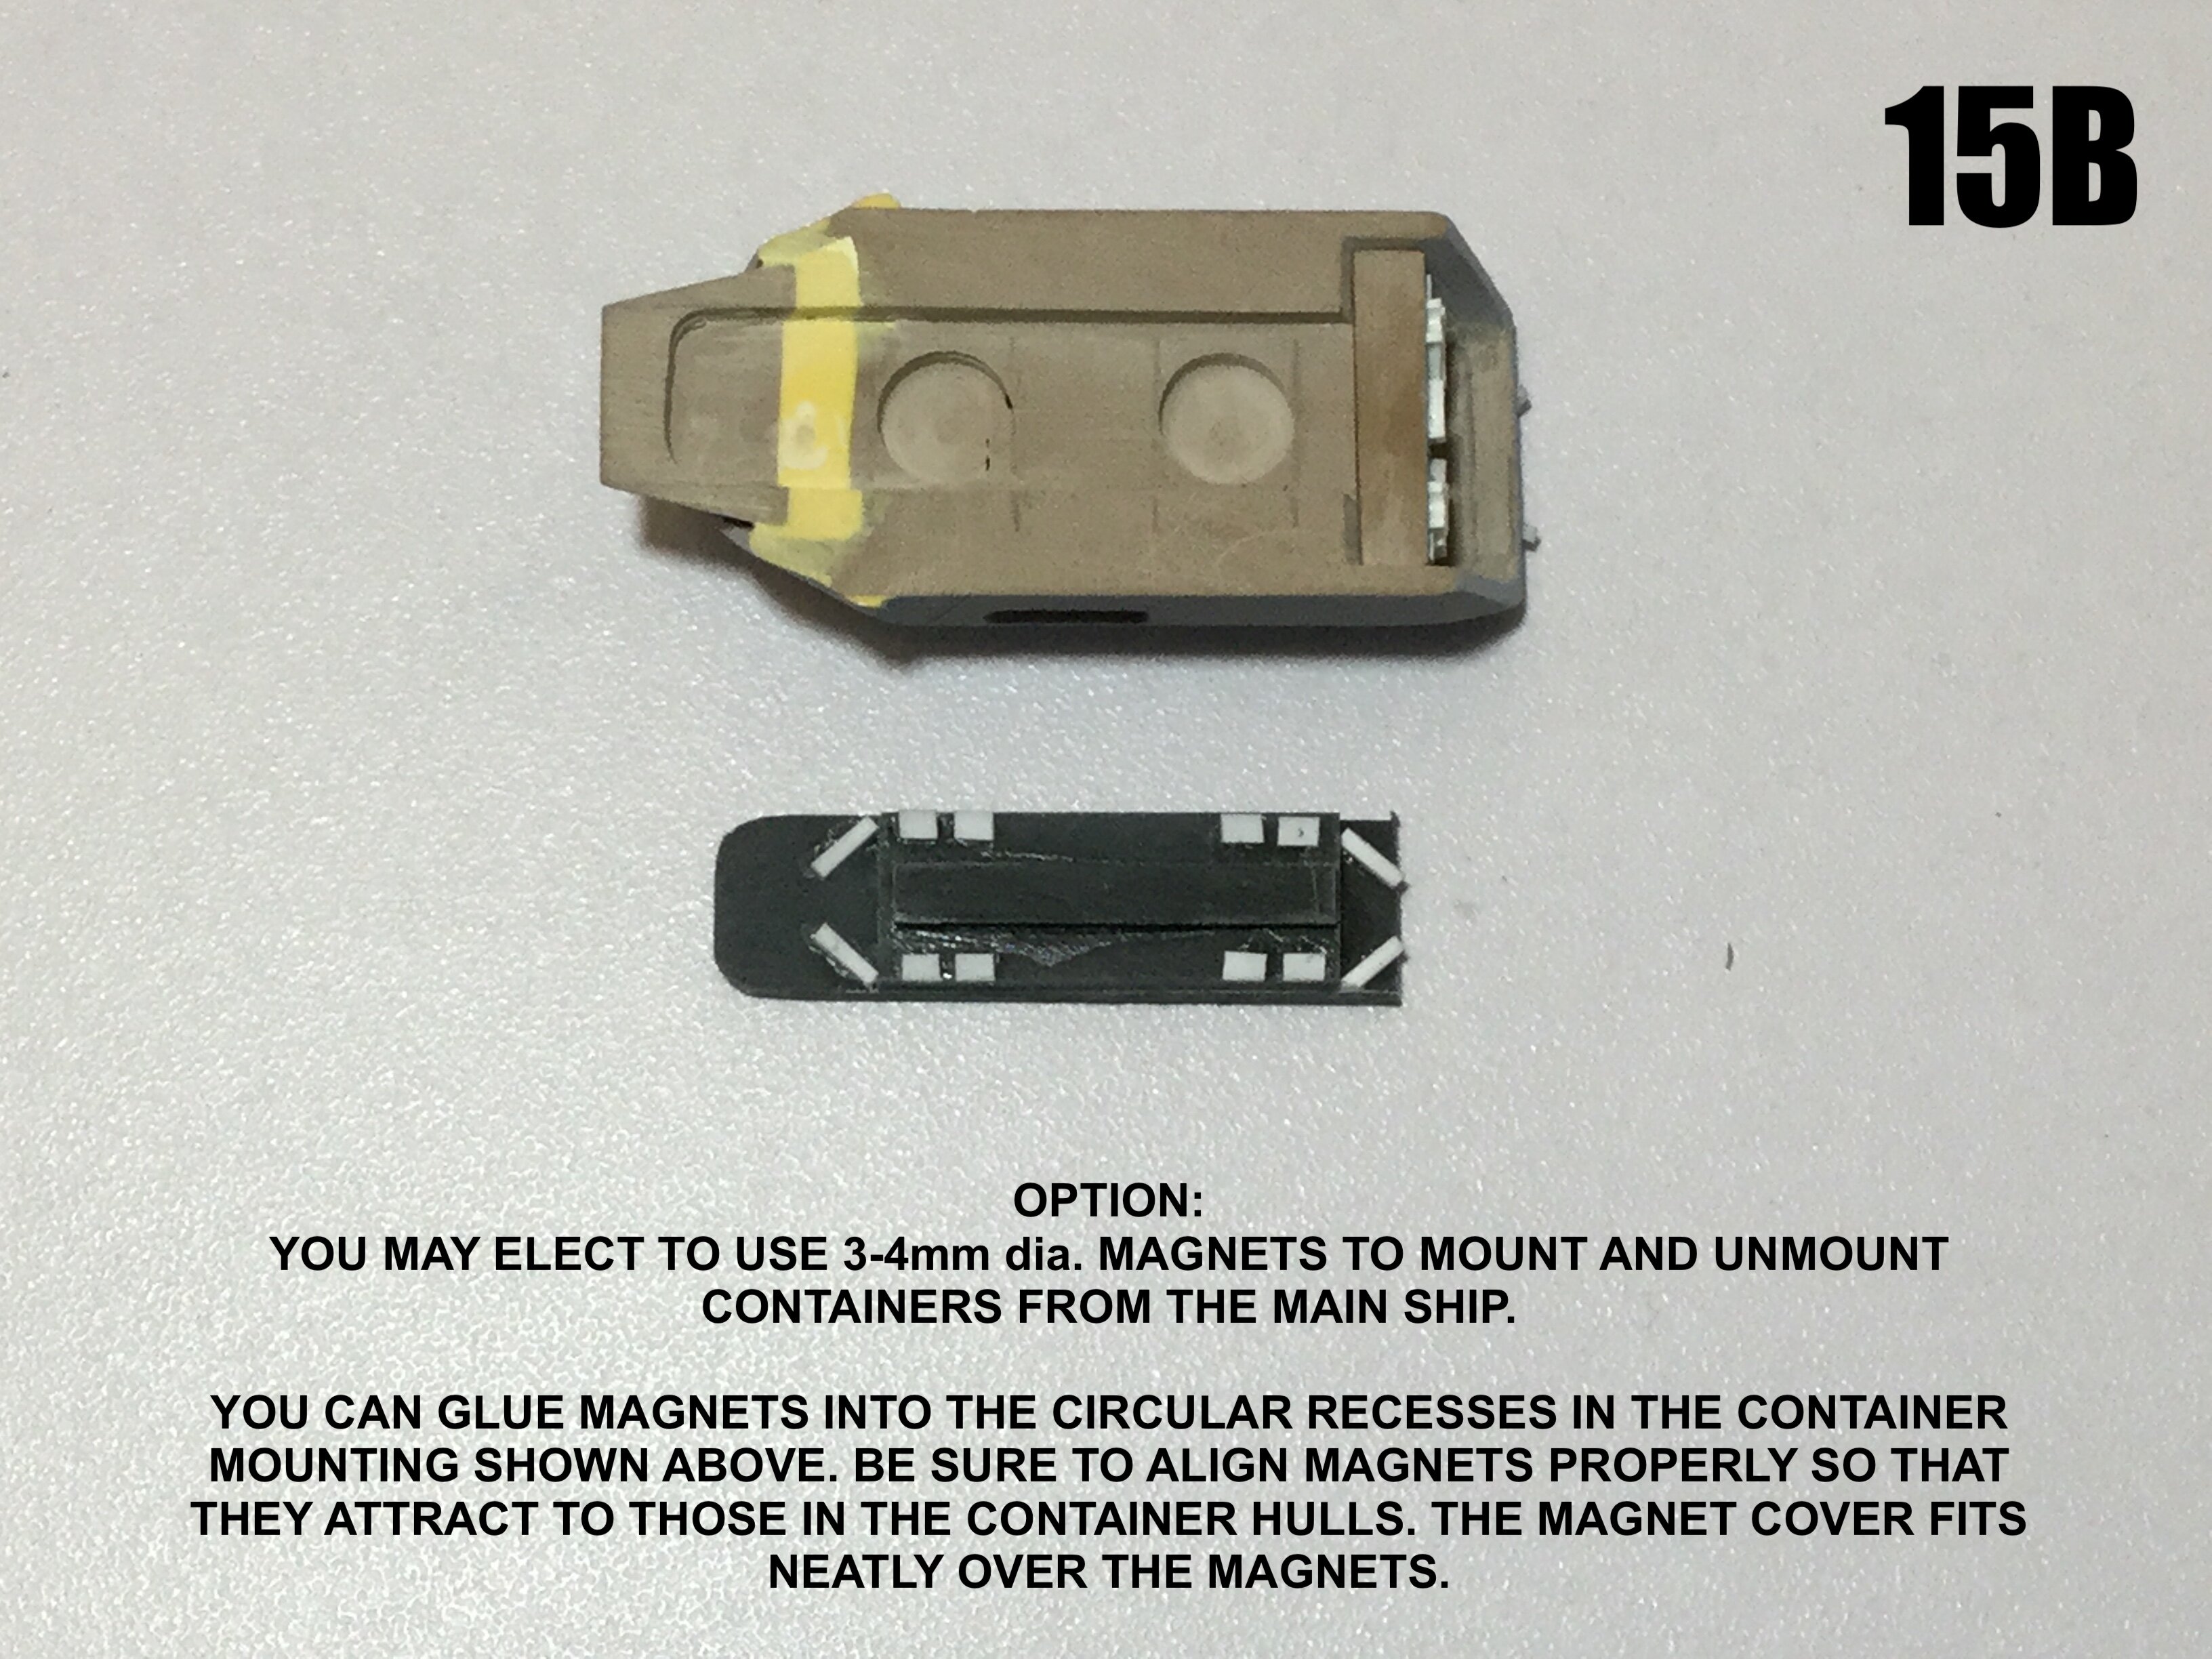
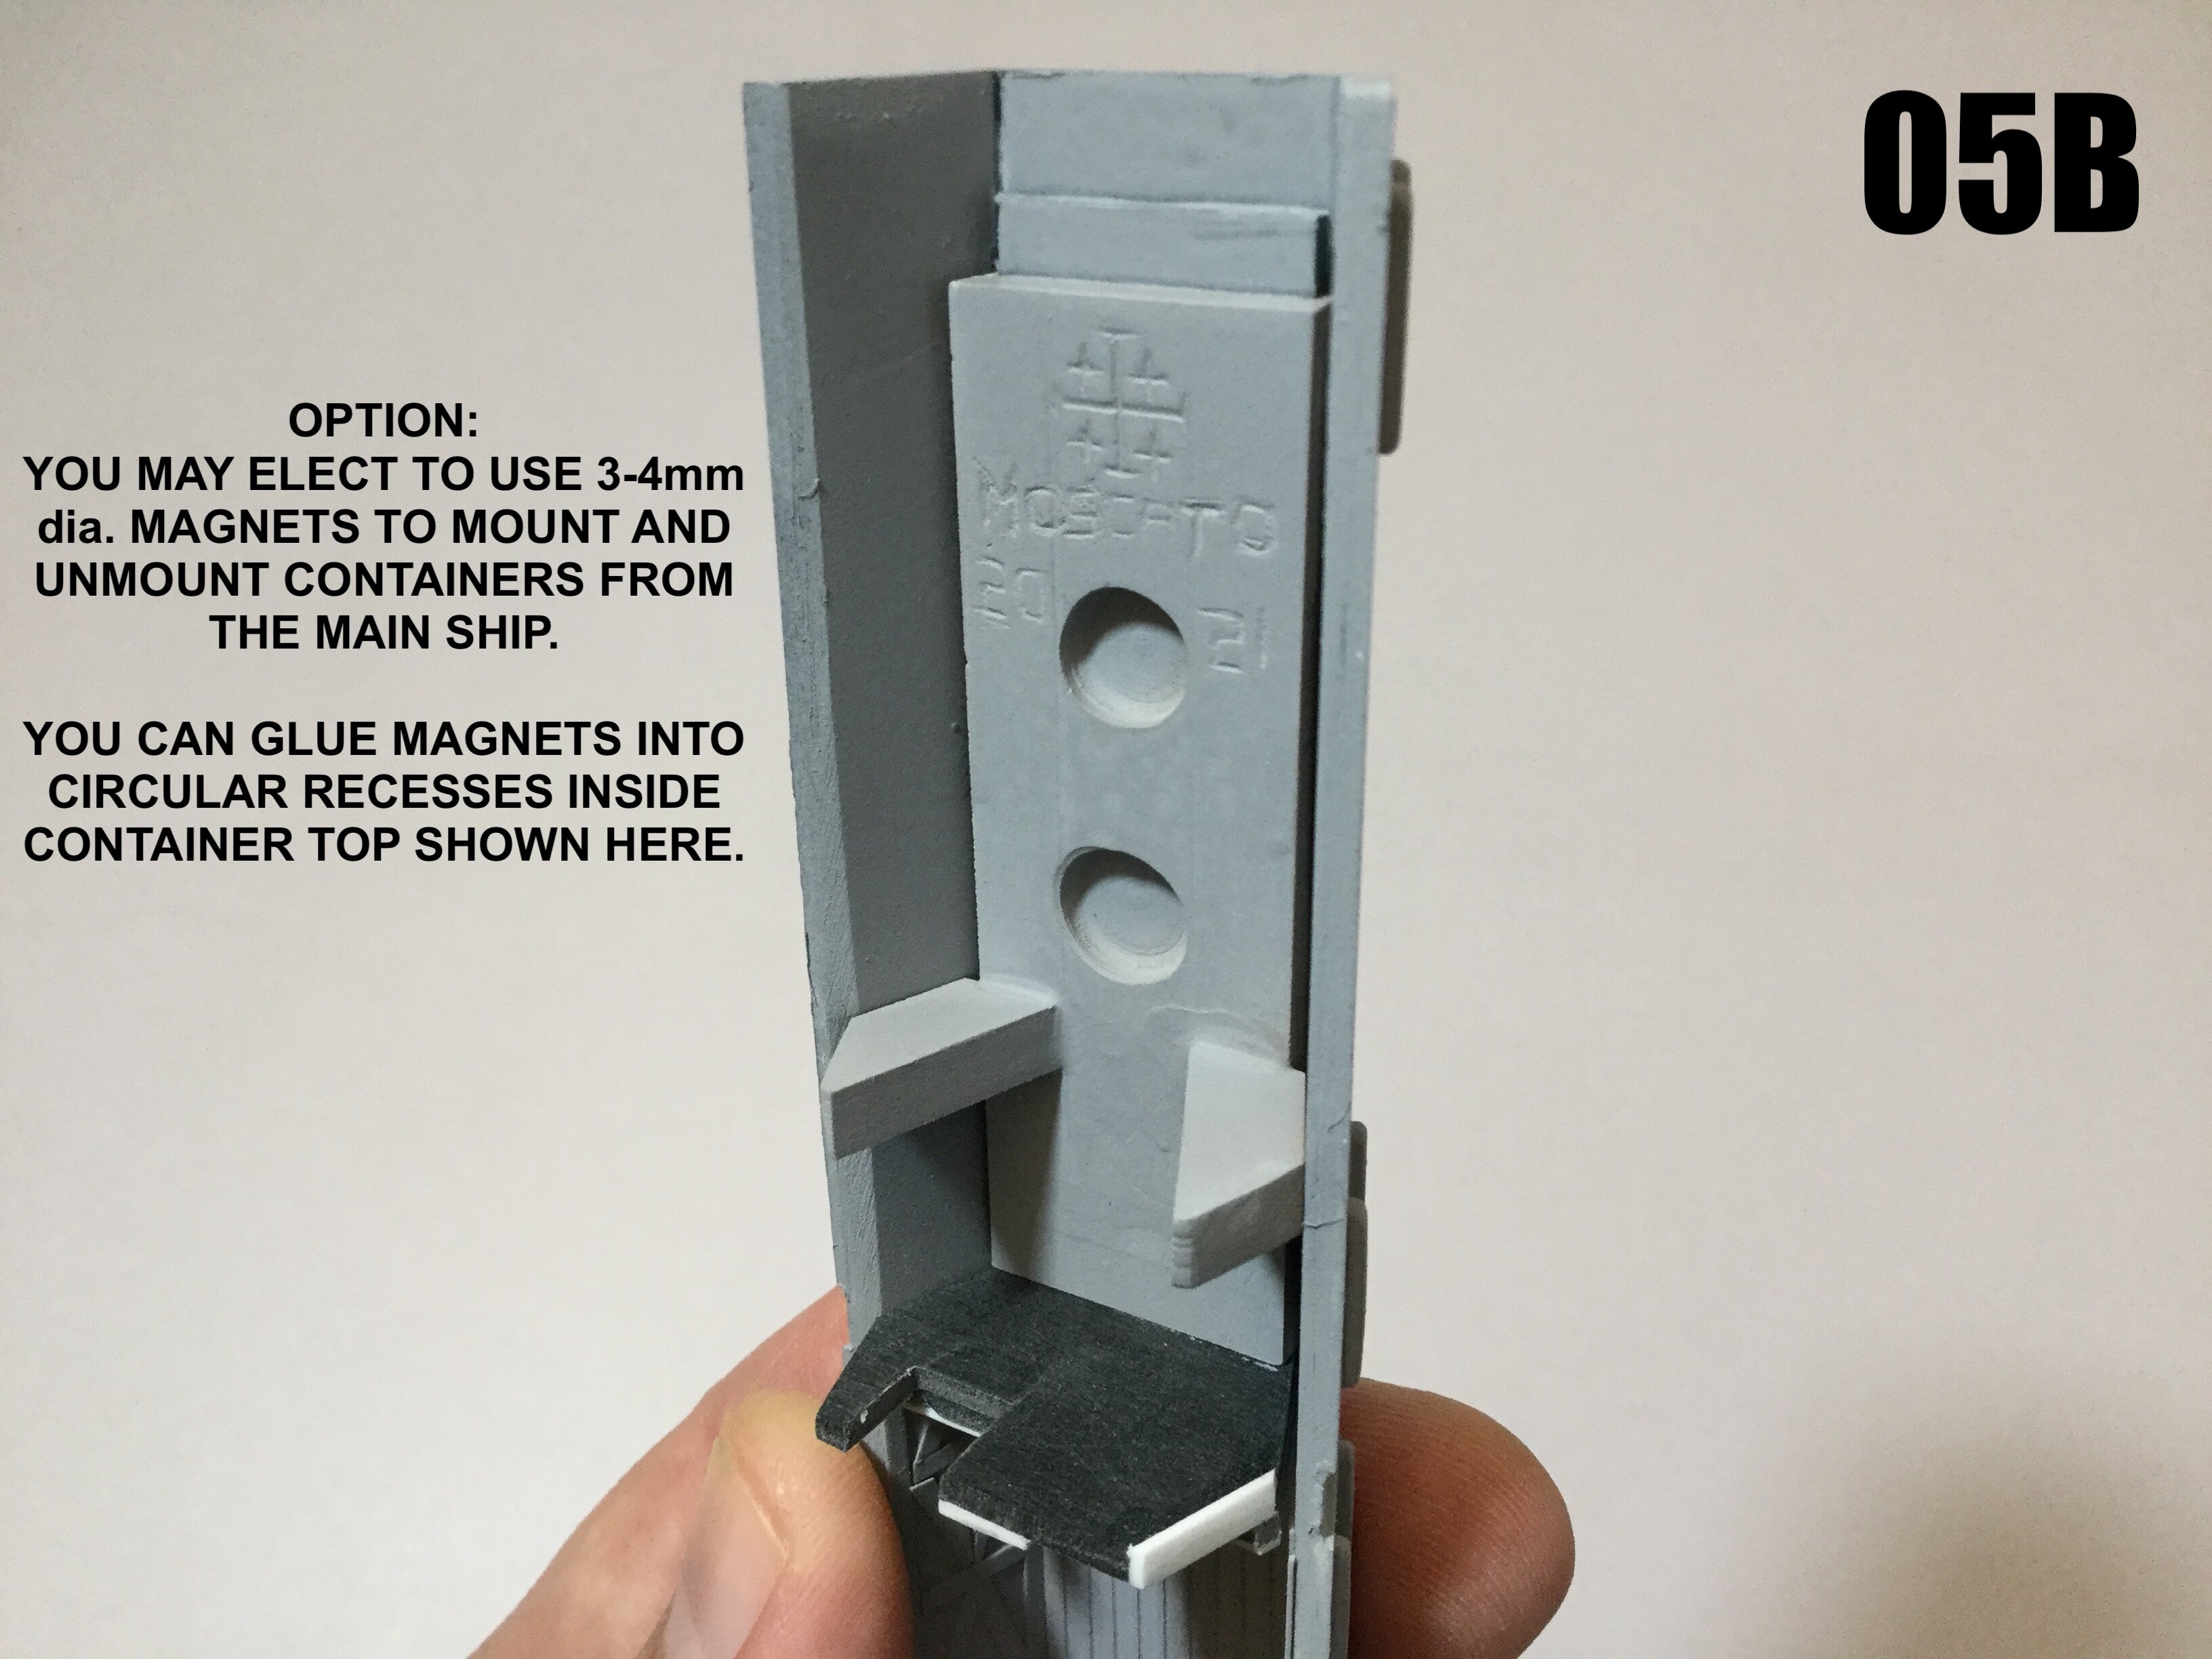
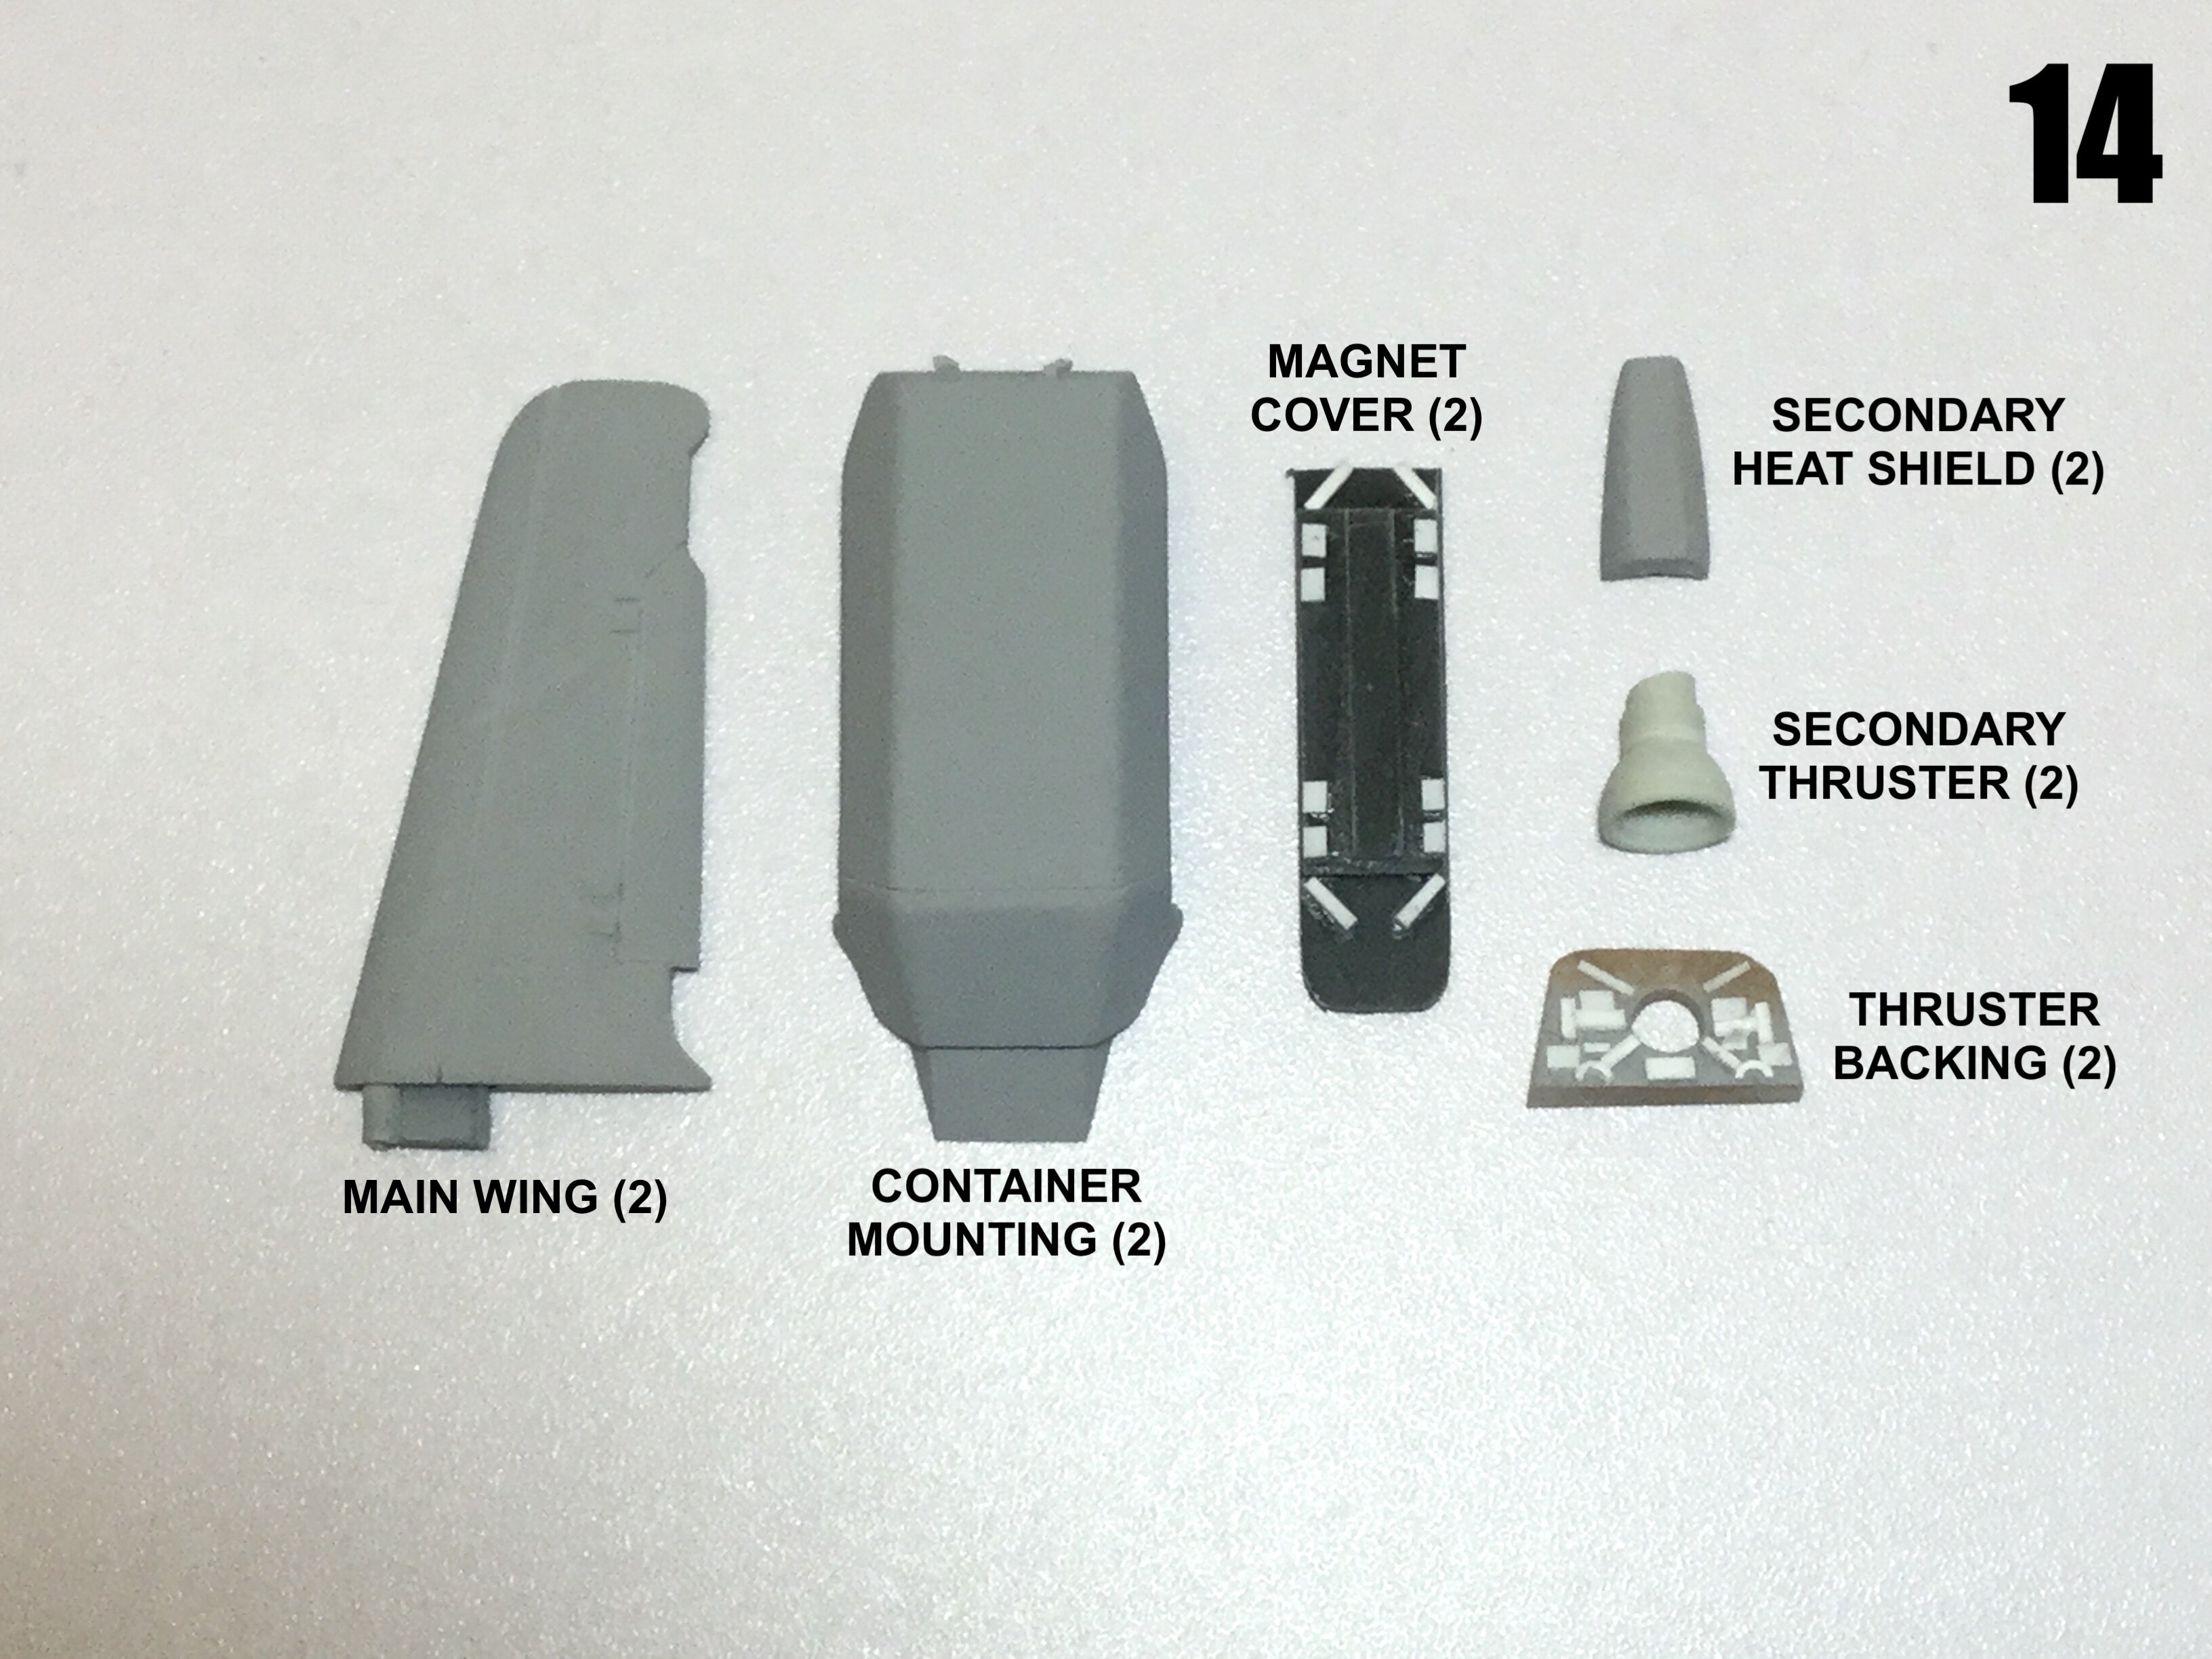
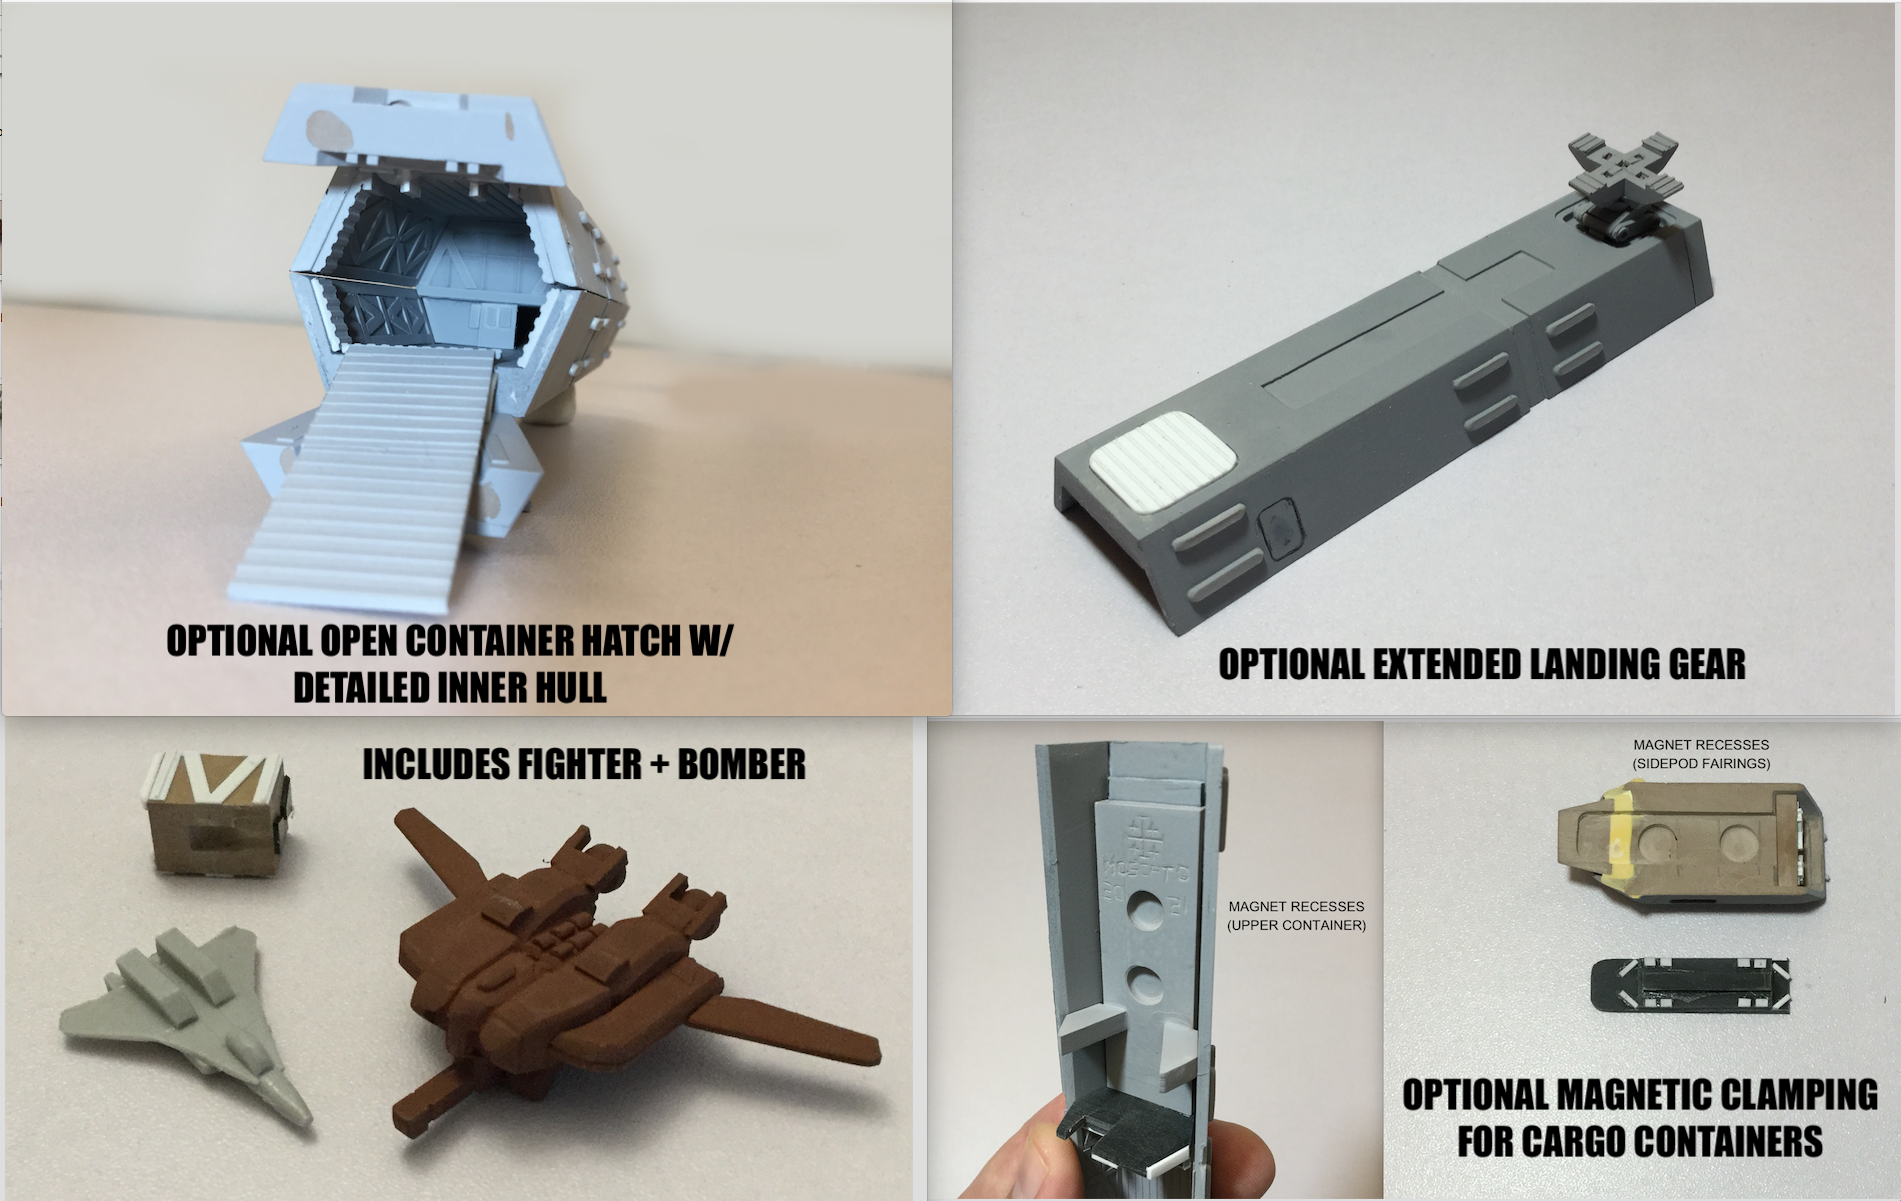
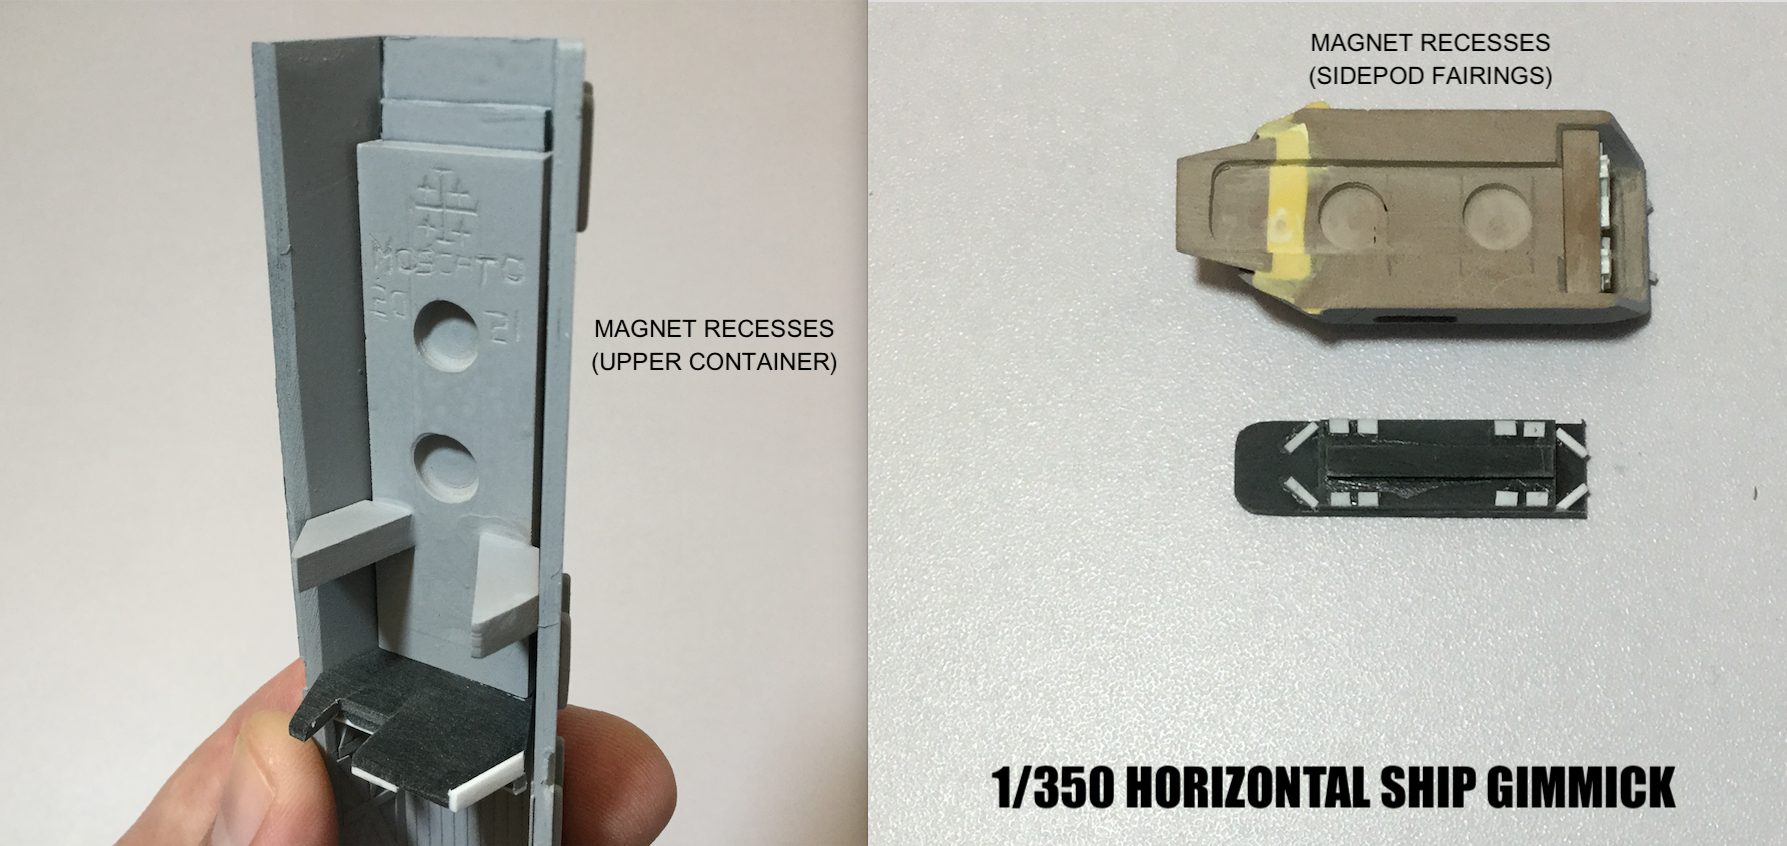
Just a quick update for you guys: mold-prep is going well. I've already poured the first couple of molds, and from those I'll have the necessary duplicates to cast the rest. As promised, I also included a pic of the magnetic interface for the containers. With this, you'll have the option of using some 3-5mm N52 disc magnets to mount/unmount the cargo pods. While I would have liked to do something similar for the main hatch, there just wasn't enough material thickness to pull it off: Anime-magic hinges have their limitations if you want to preserve a semblance of scale realism.

-
I just came here to spy on you guys.
-
35 minutes ago, tekering said:
Feel free to copy-paste this instead, if you like:

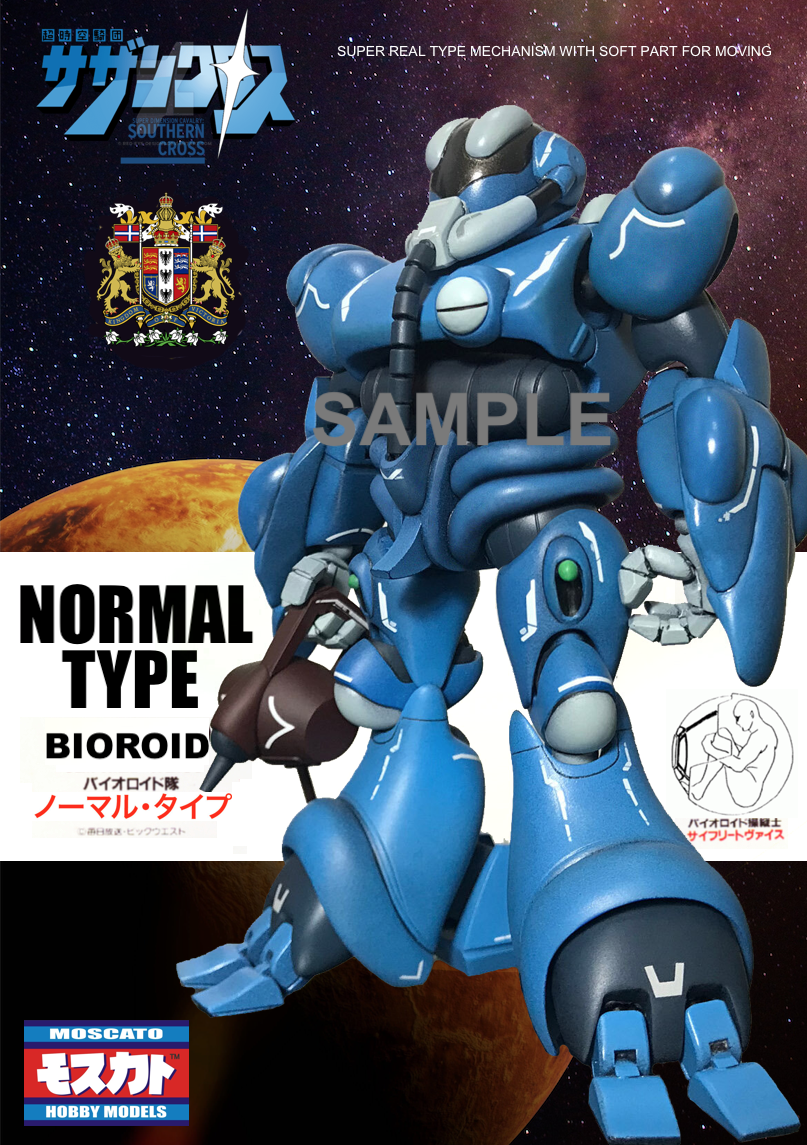
I see what you did there! Noo-maa-ru Taipu!
I'll have to try to find a suitable armorial achievement for the top-left corner. If not, I'll just make one. Does the rest of the text make sense, or will that need correcting as well? Bear in mind that this is just for fun. If I ever tried to release a kit with that box art, HG would get so far up my butt that I'd be coughing-up Rick Hunter hairballs for the next 5 years!
-
11 minutes ago, tekering said:
Cap's got real Photoshop skills, too!

You know that katakana in red says "Seifried Weiss," right?
I do, but I don't have the ability to create Japanese words/sentences, so I contented myself to copy-paste the text from the plastic kit packaging. It was an exercise to see what a proper Bioroid kit might have looked like had the series not been such a failure.
-
-
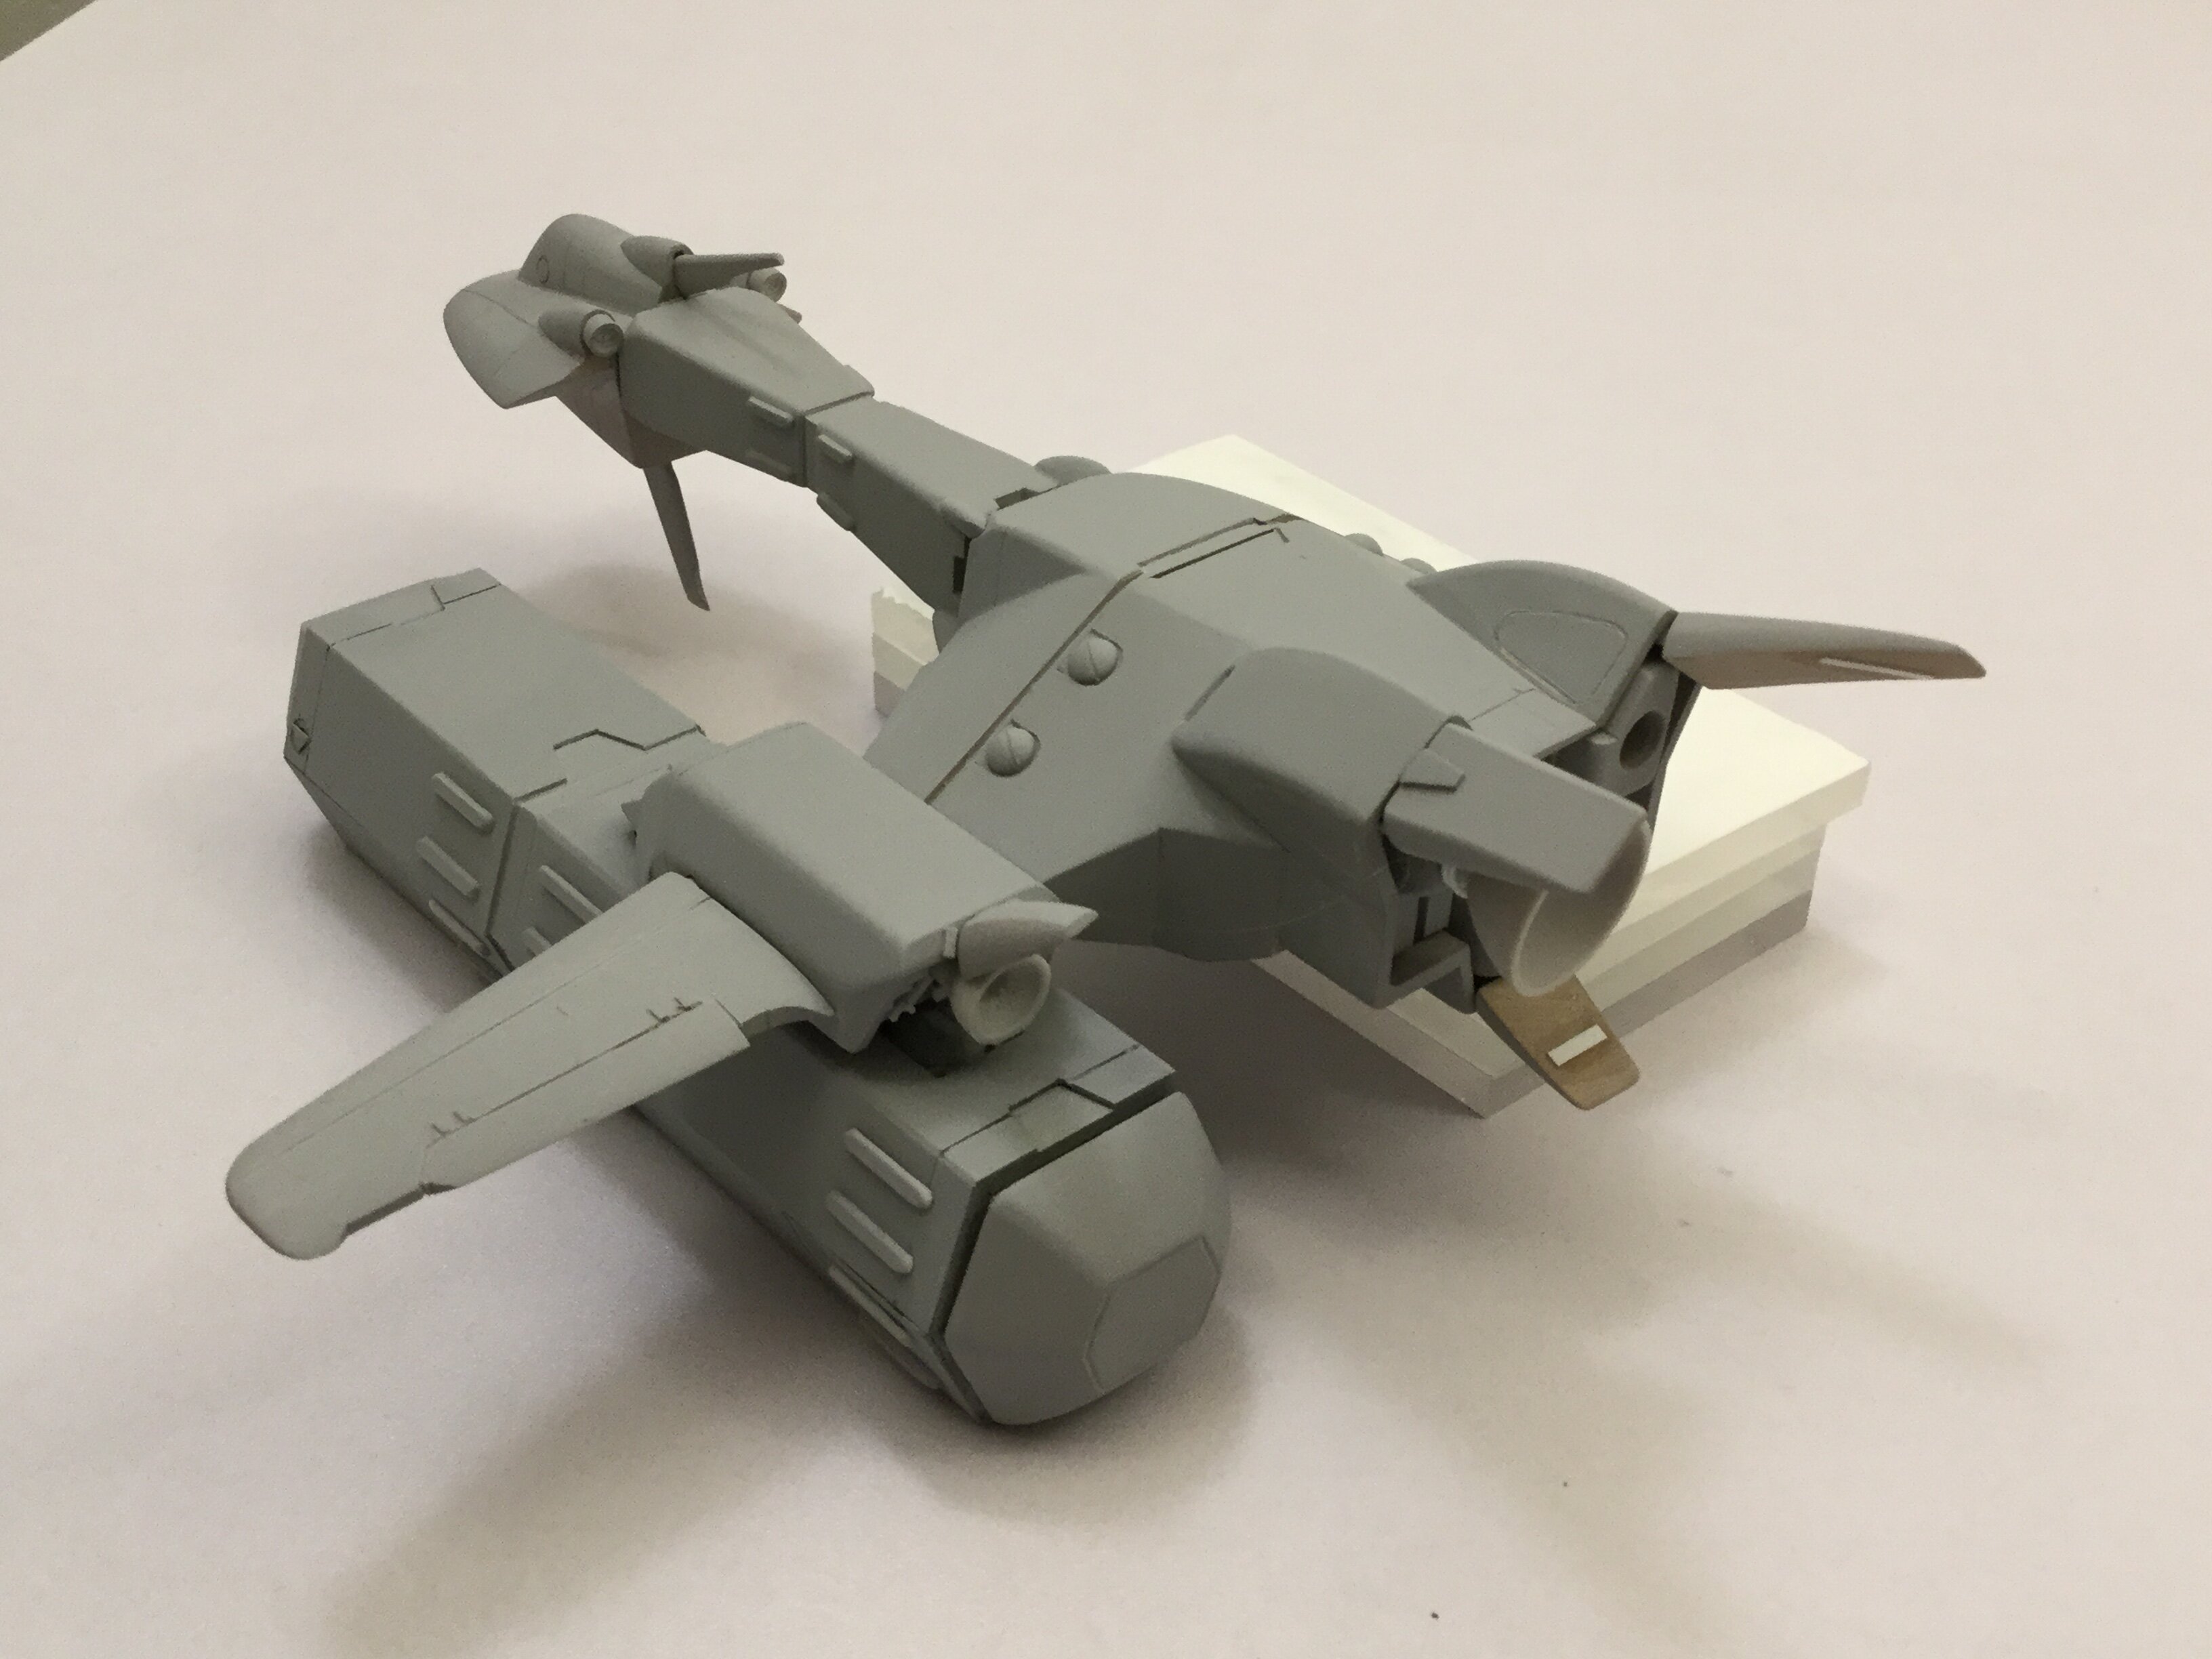
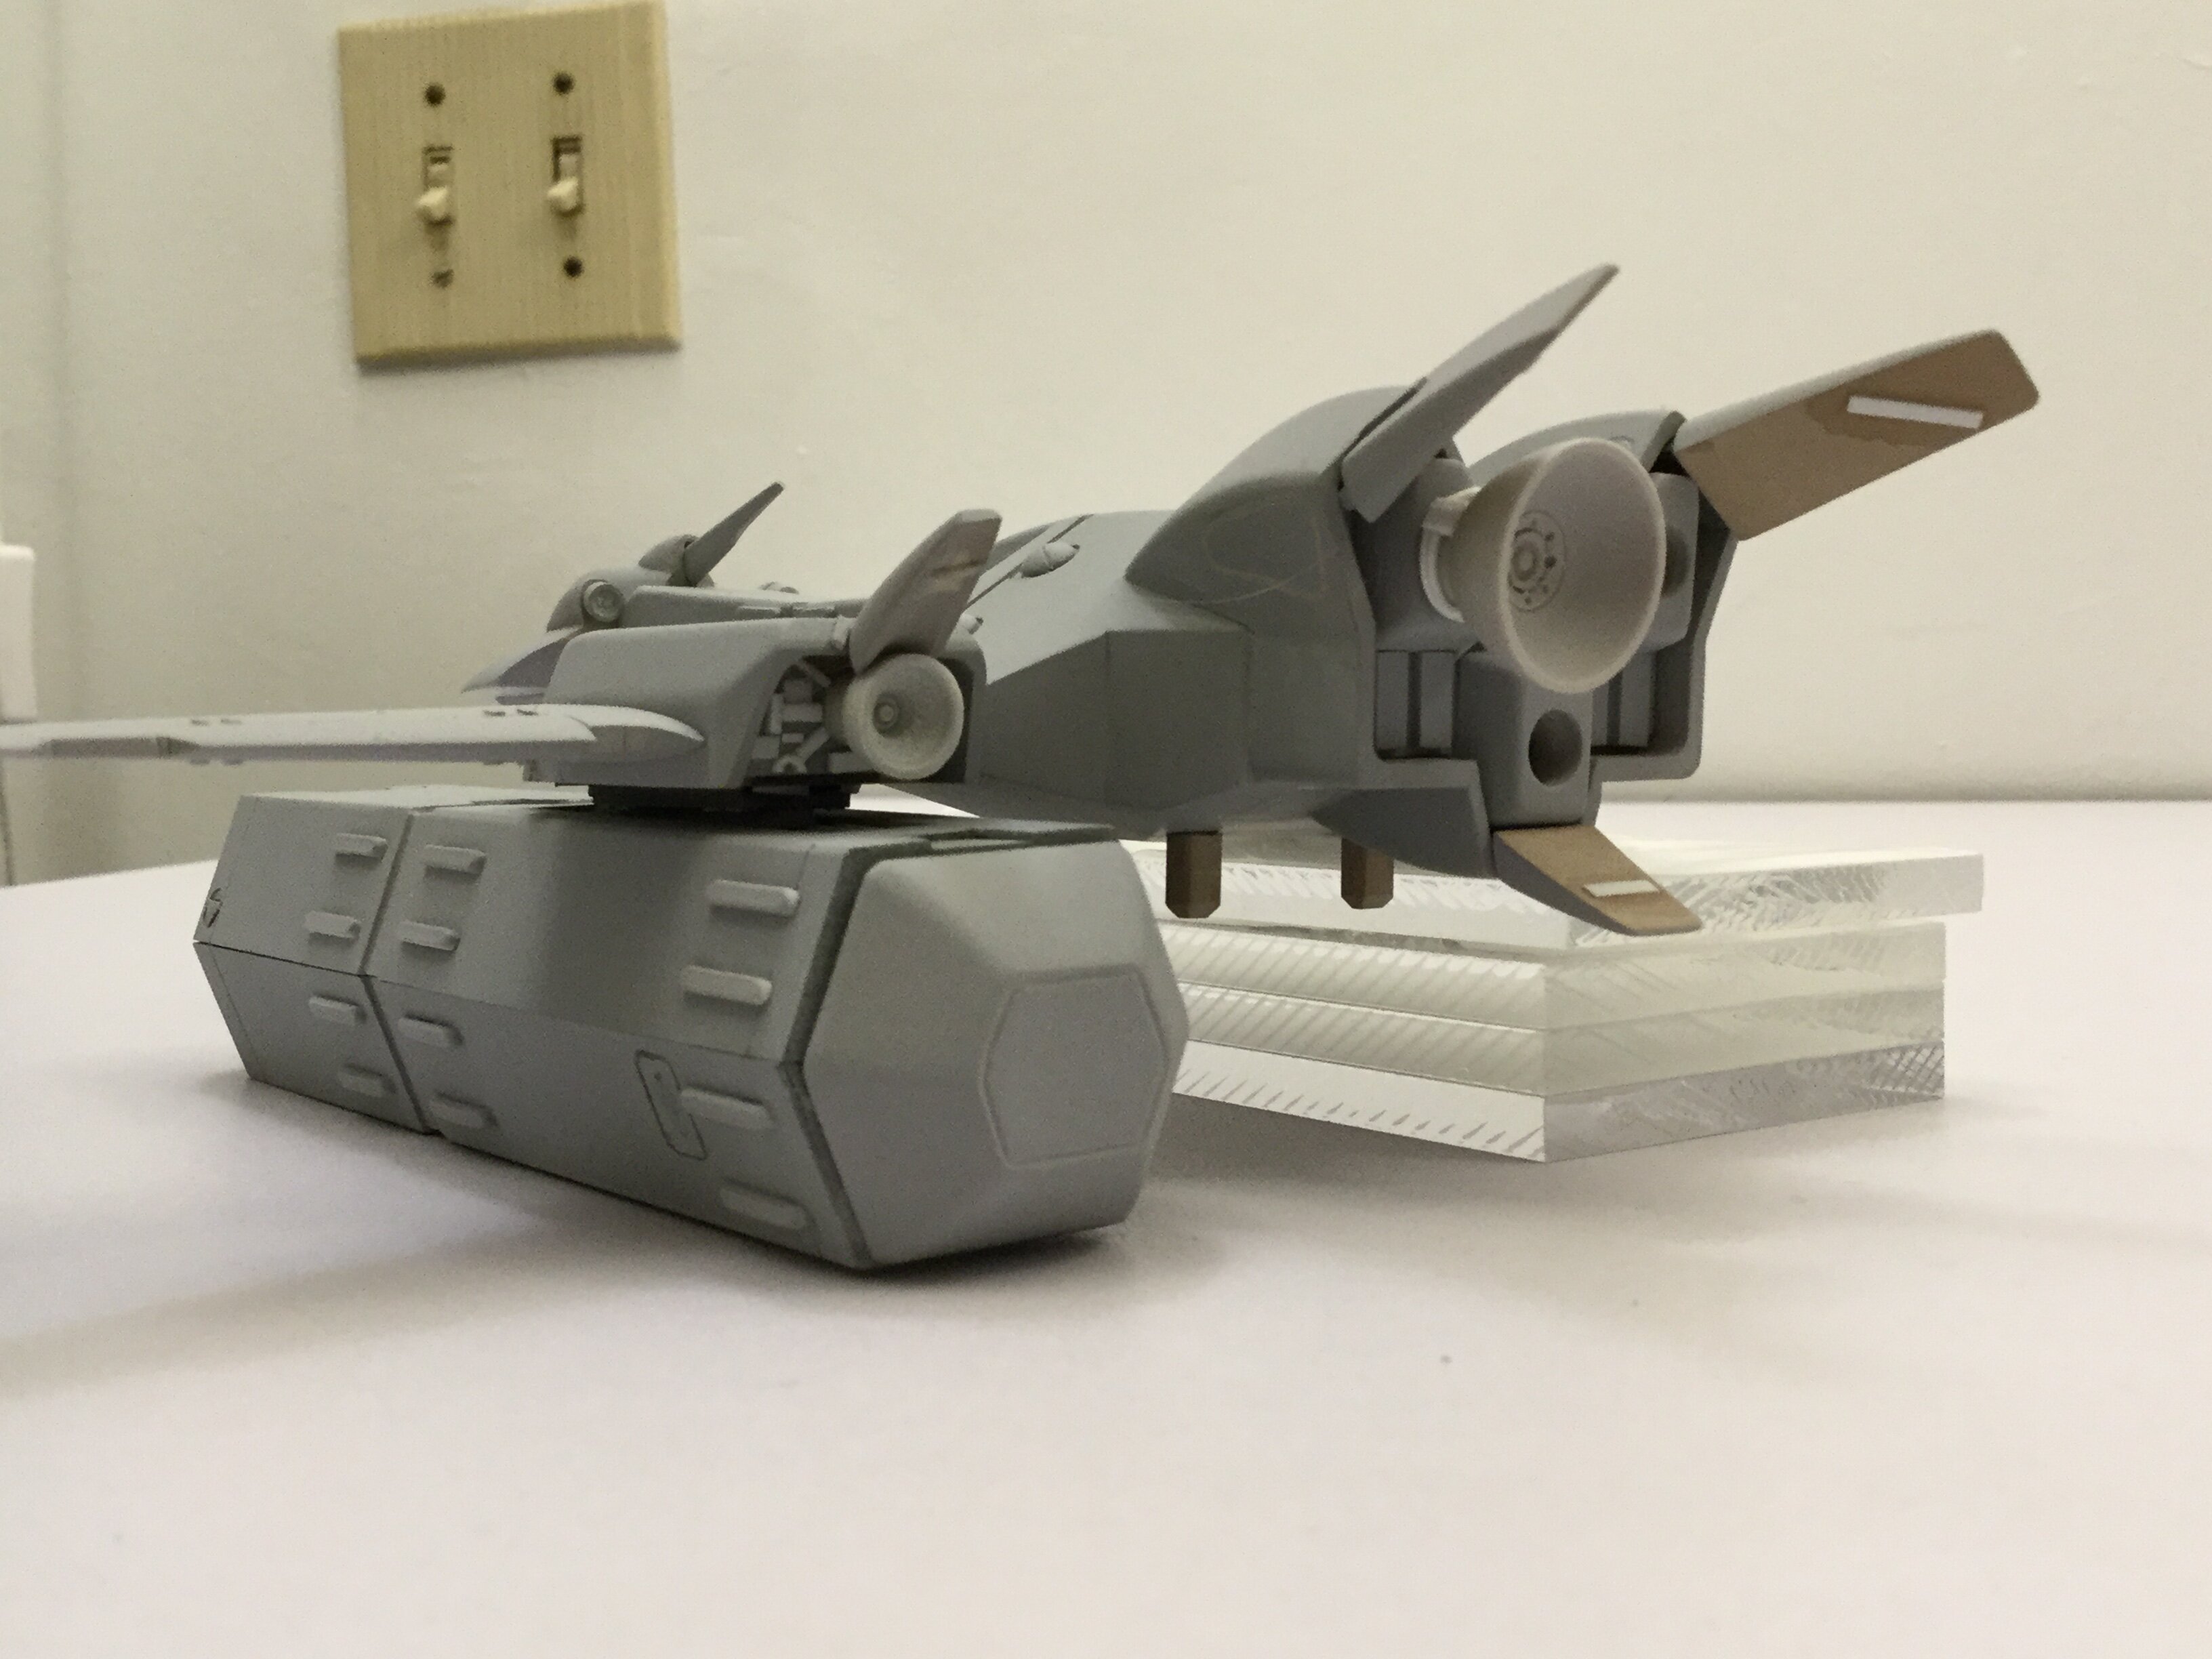
10 hours ago, tekering said:
Awesome. I especially like the detailing behind those secondary engine bells.

Well, they weren't deployed that way... and it wouldn't make a lot of sense, would it?

I don't even think that the containers were designed to support the extra weight of fully armed fighters, to say nothing of the fact that they don't fit despite my oversizing them and the ship.
-
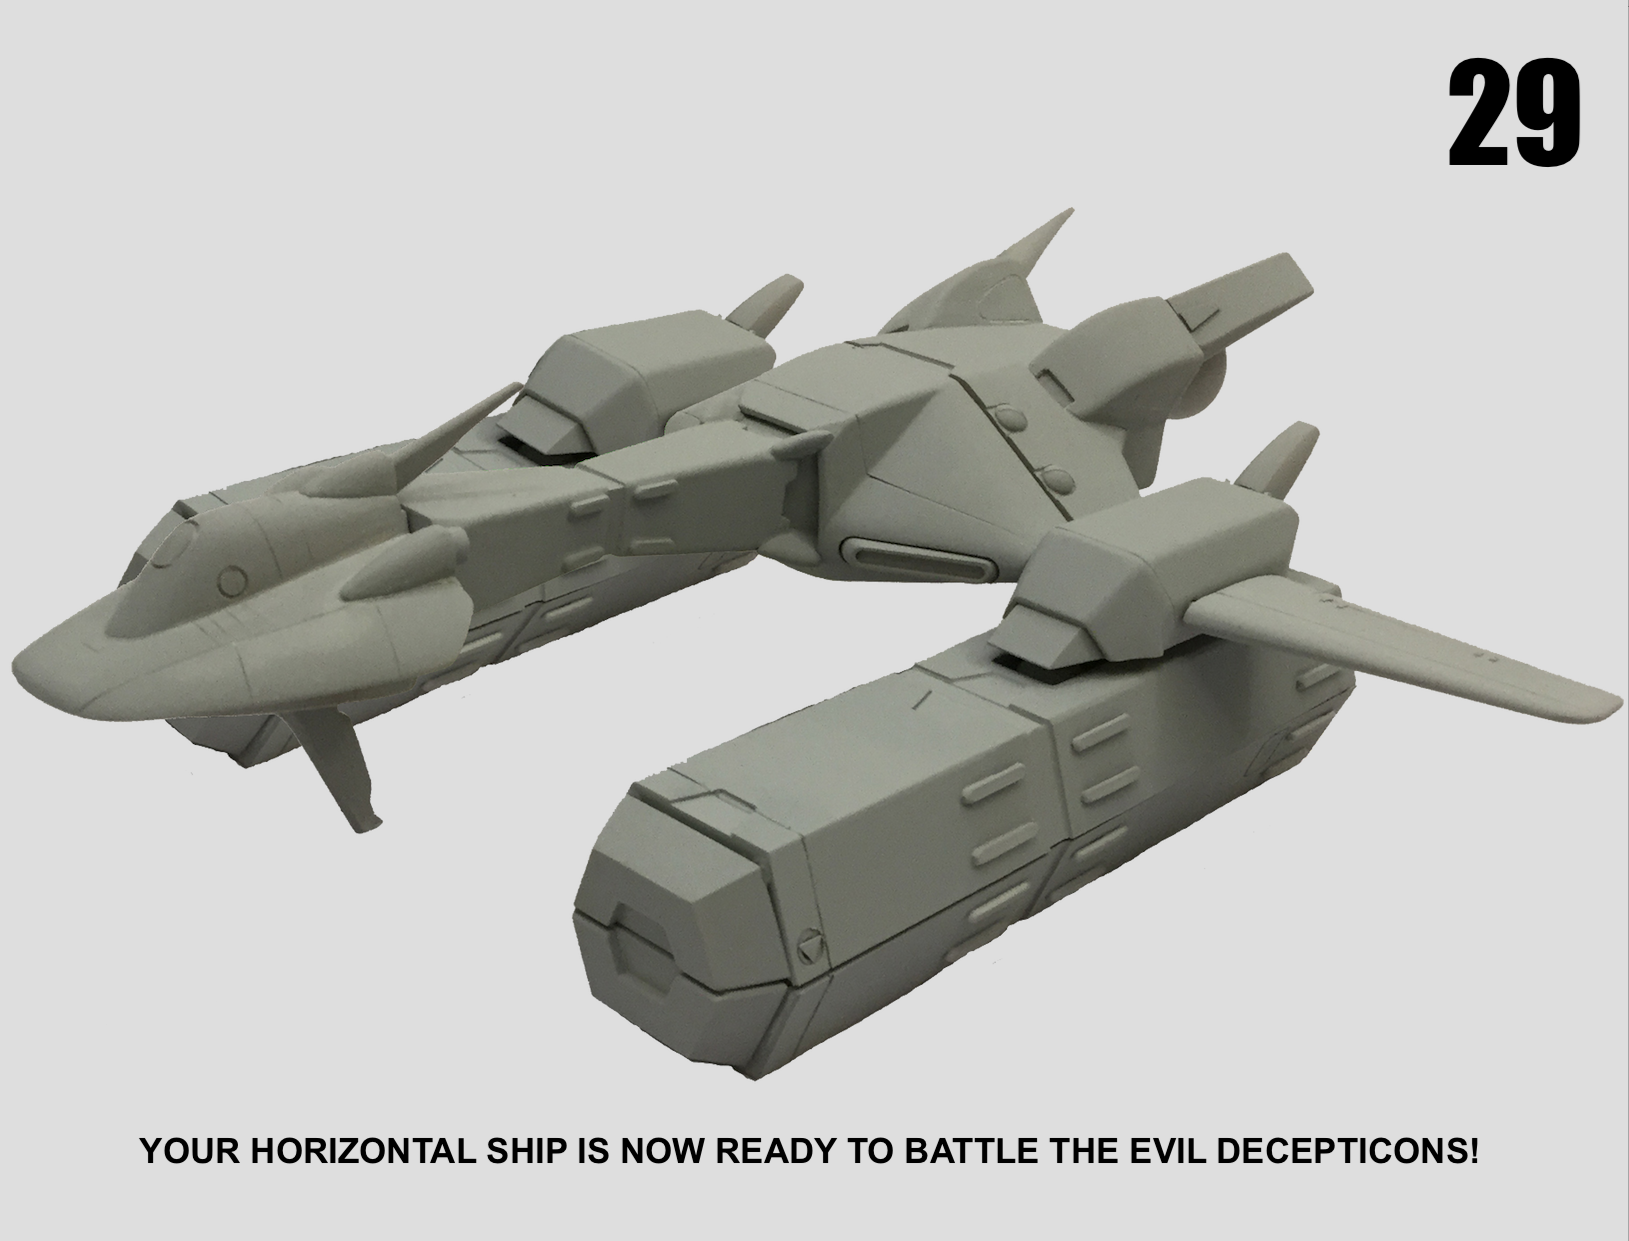
It is done.
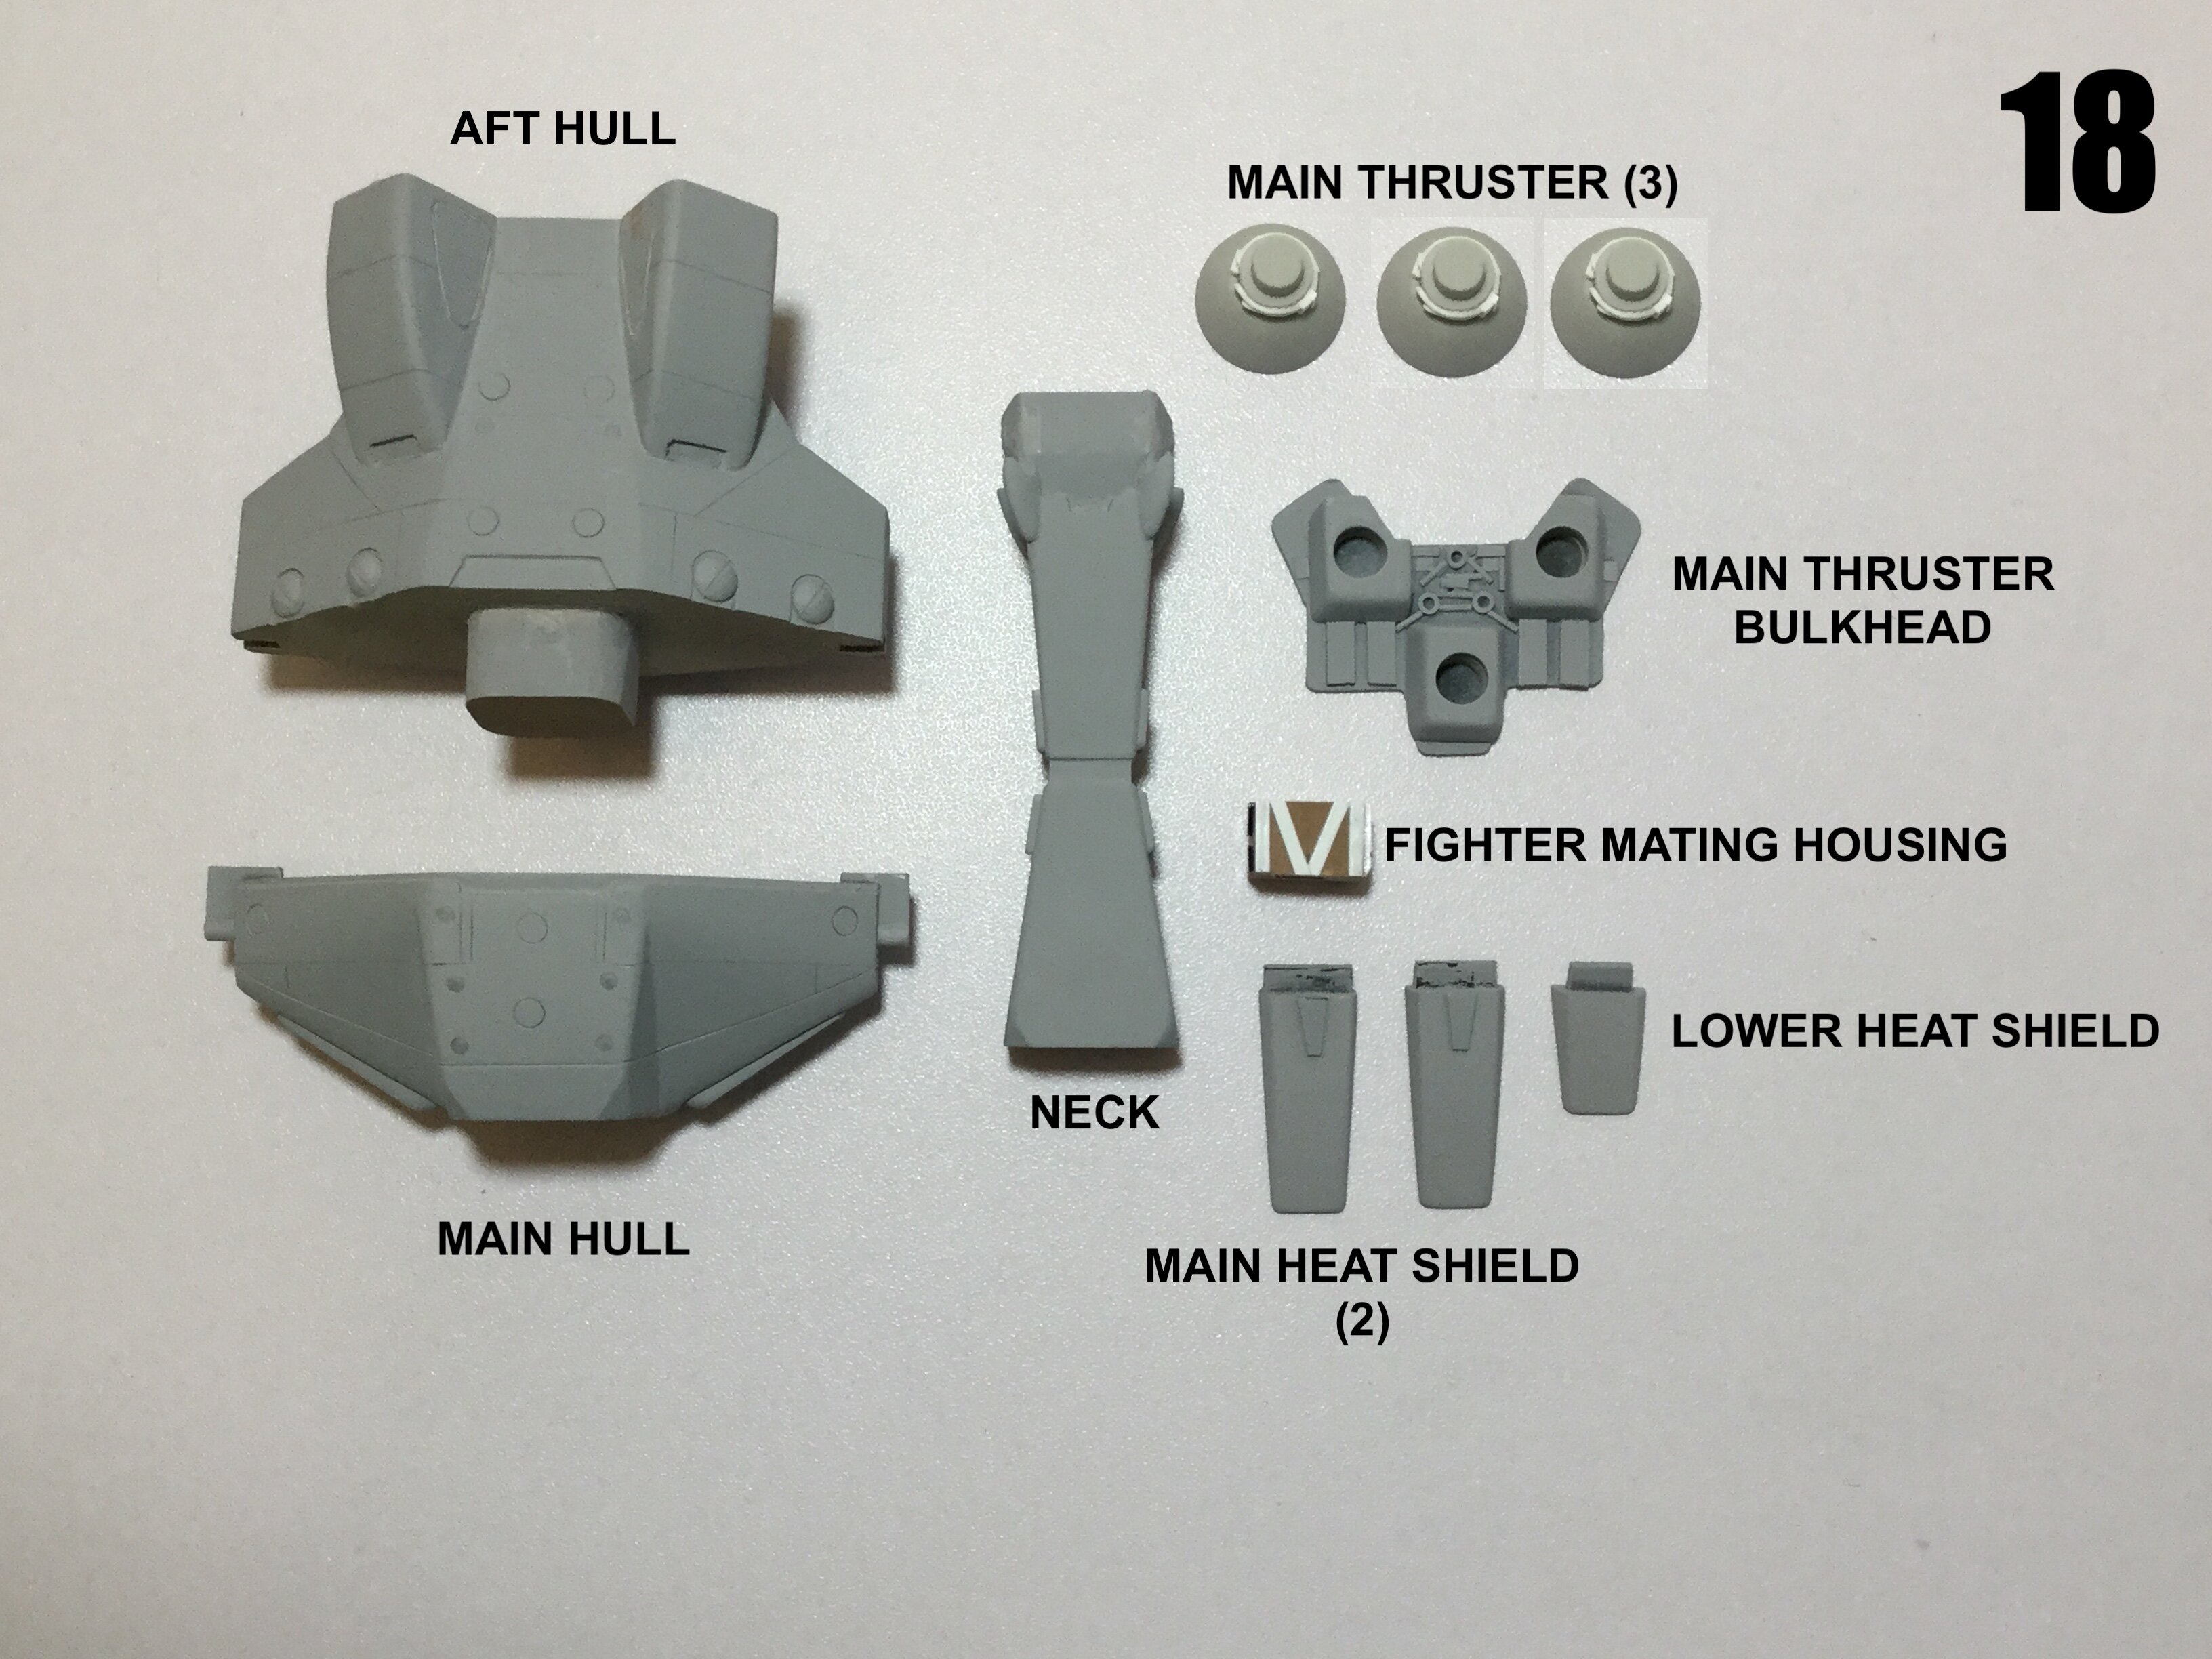
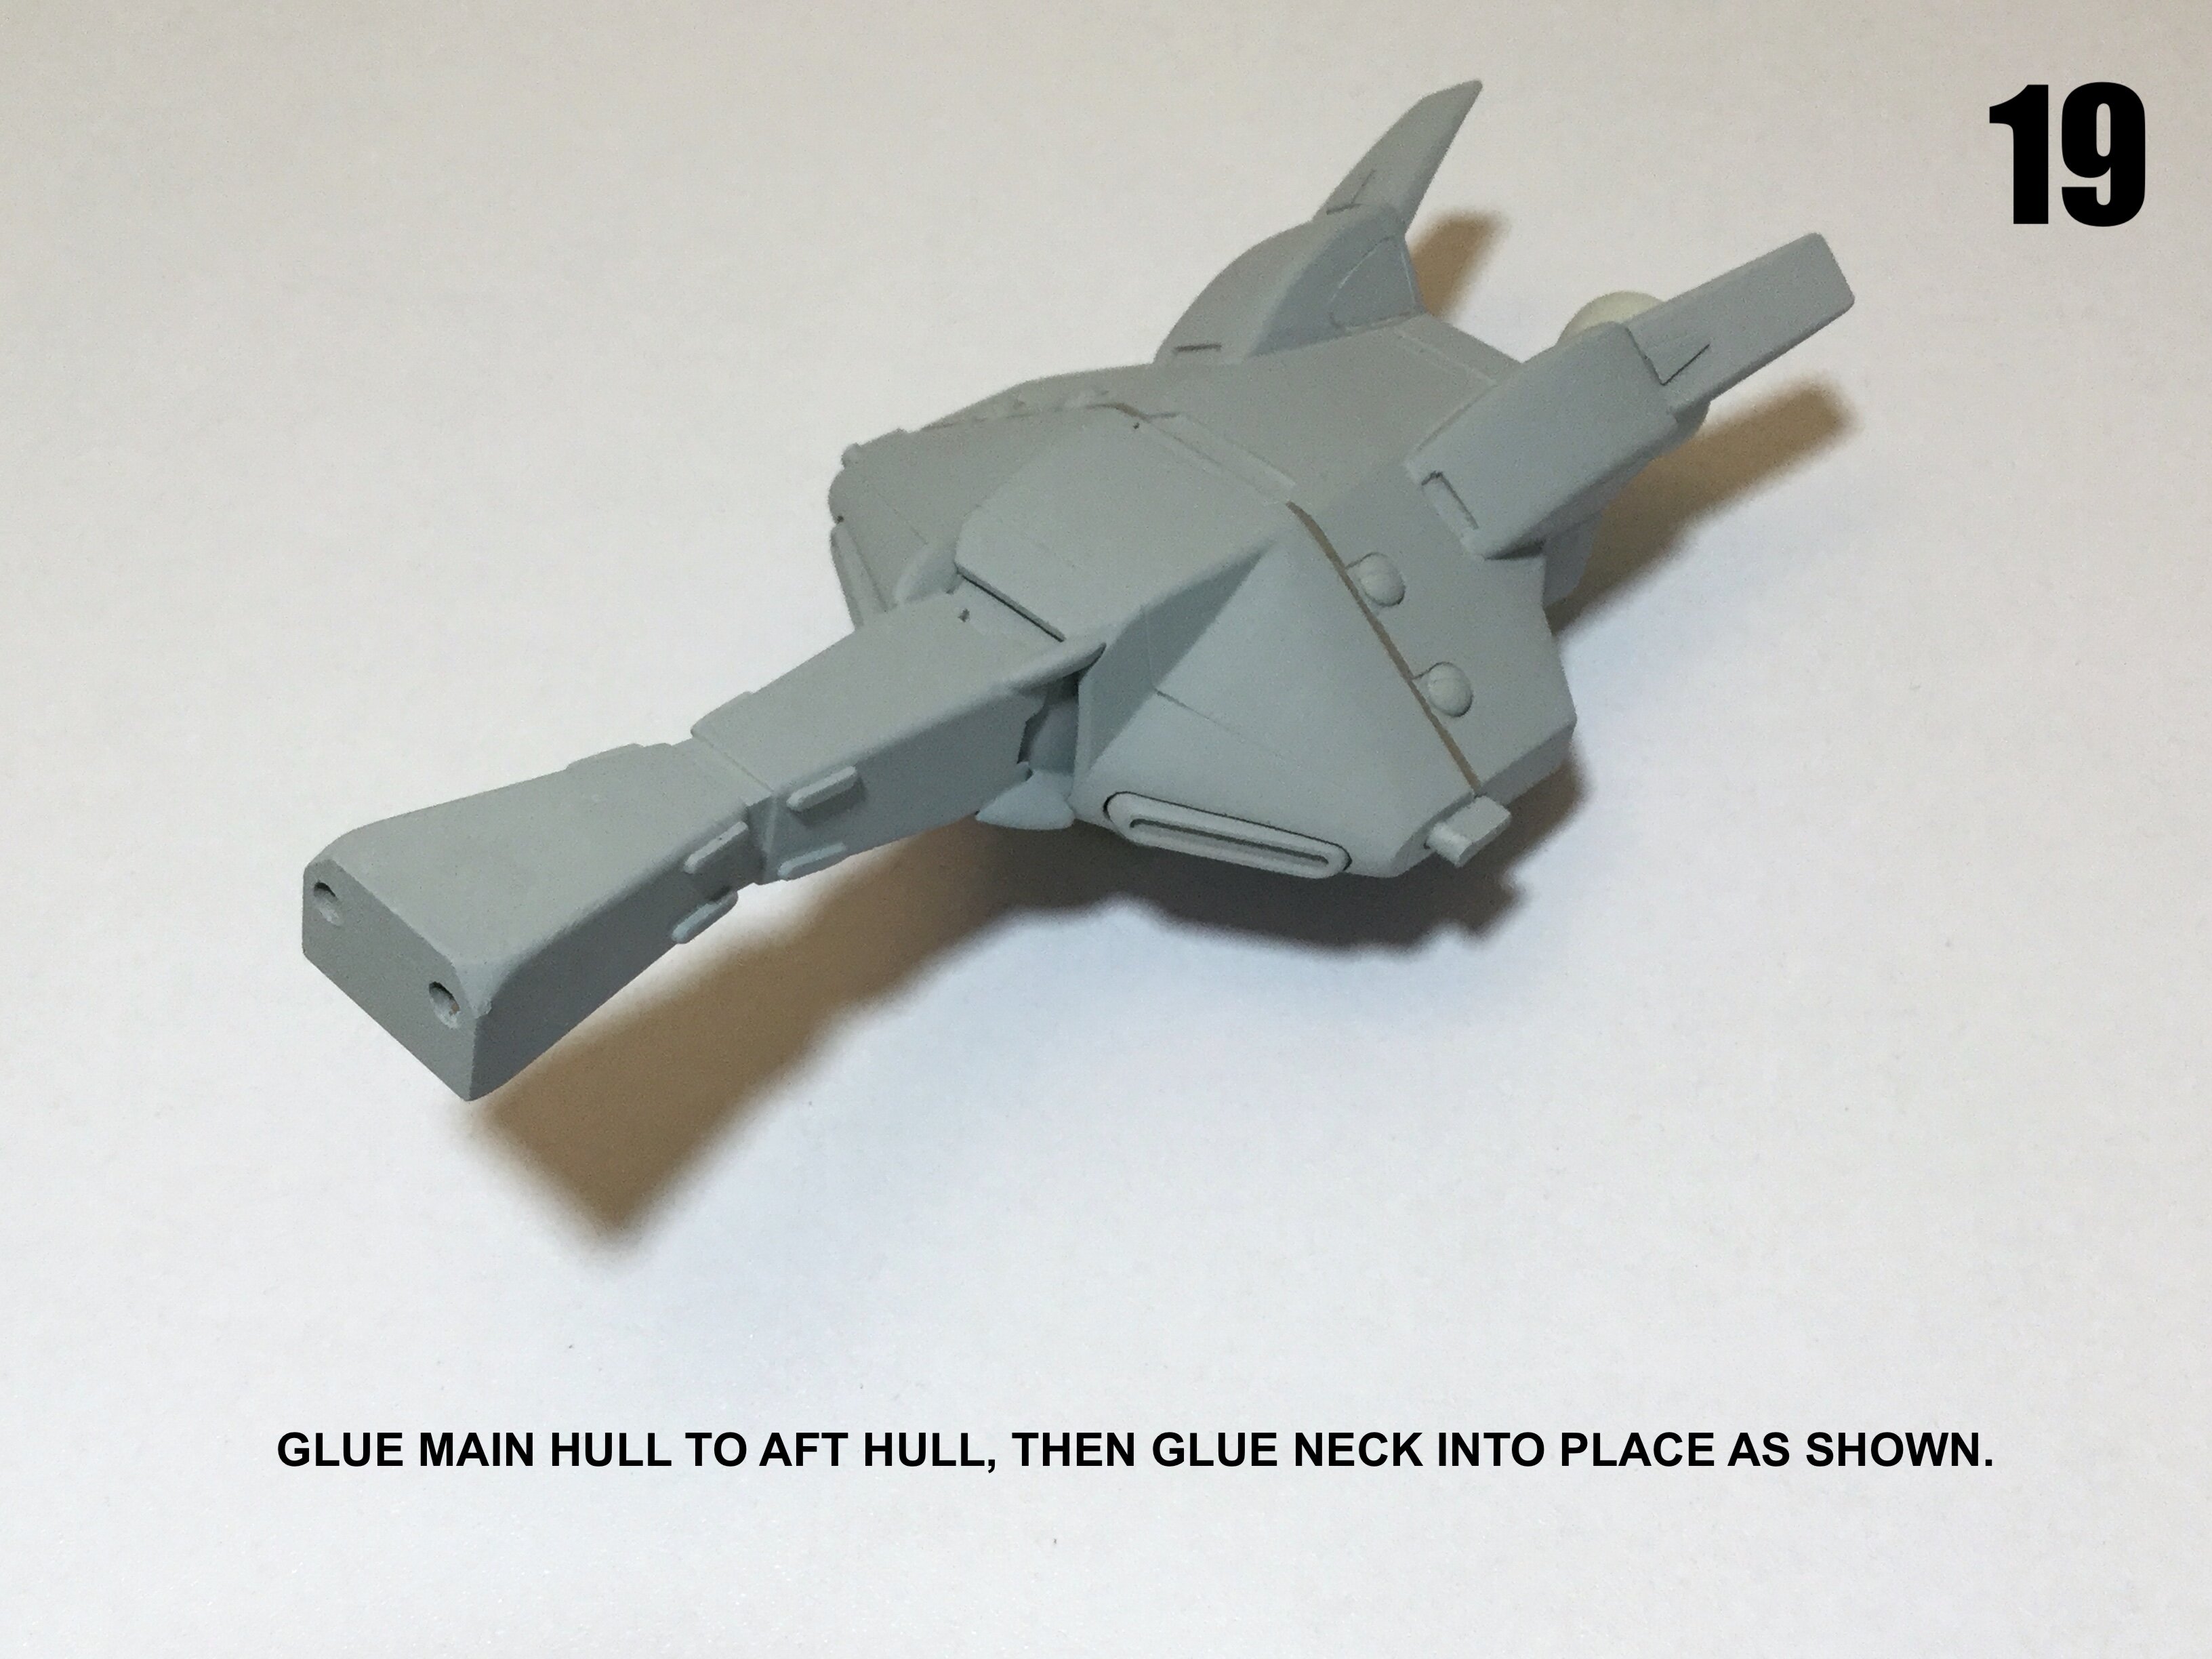
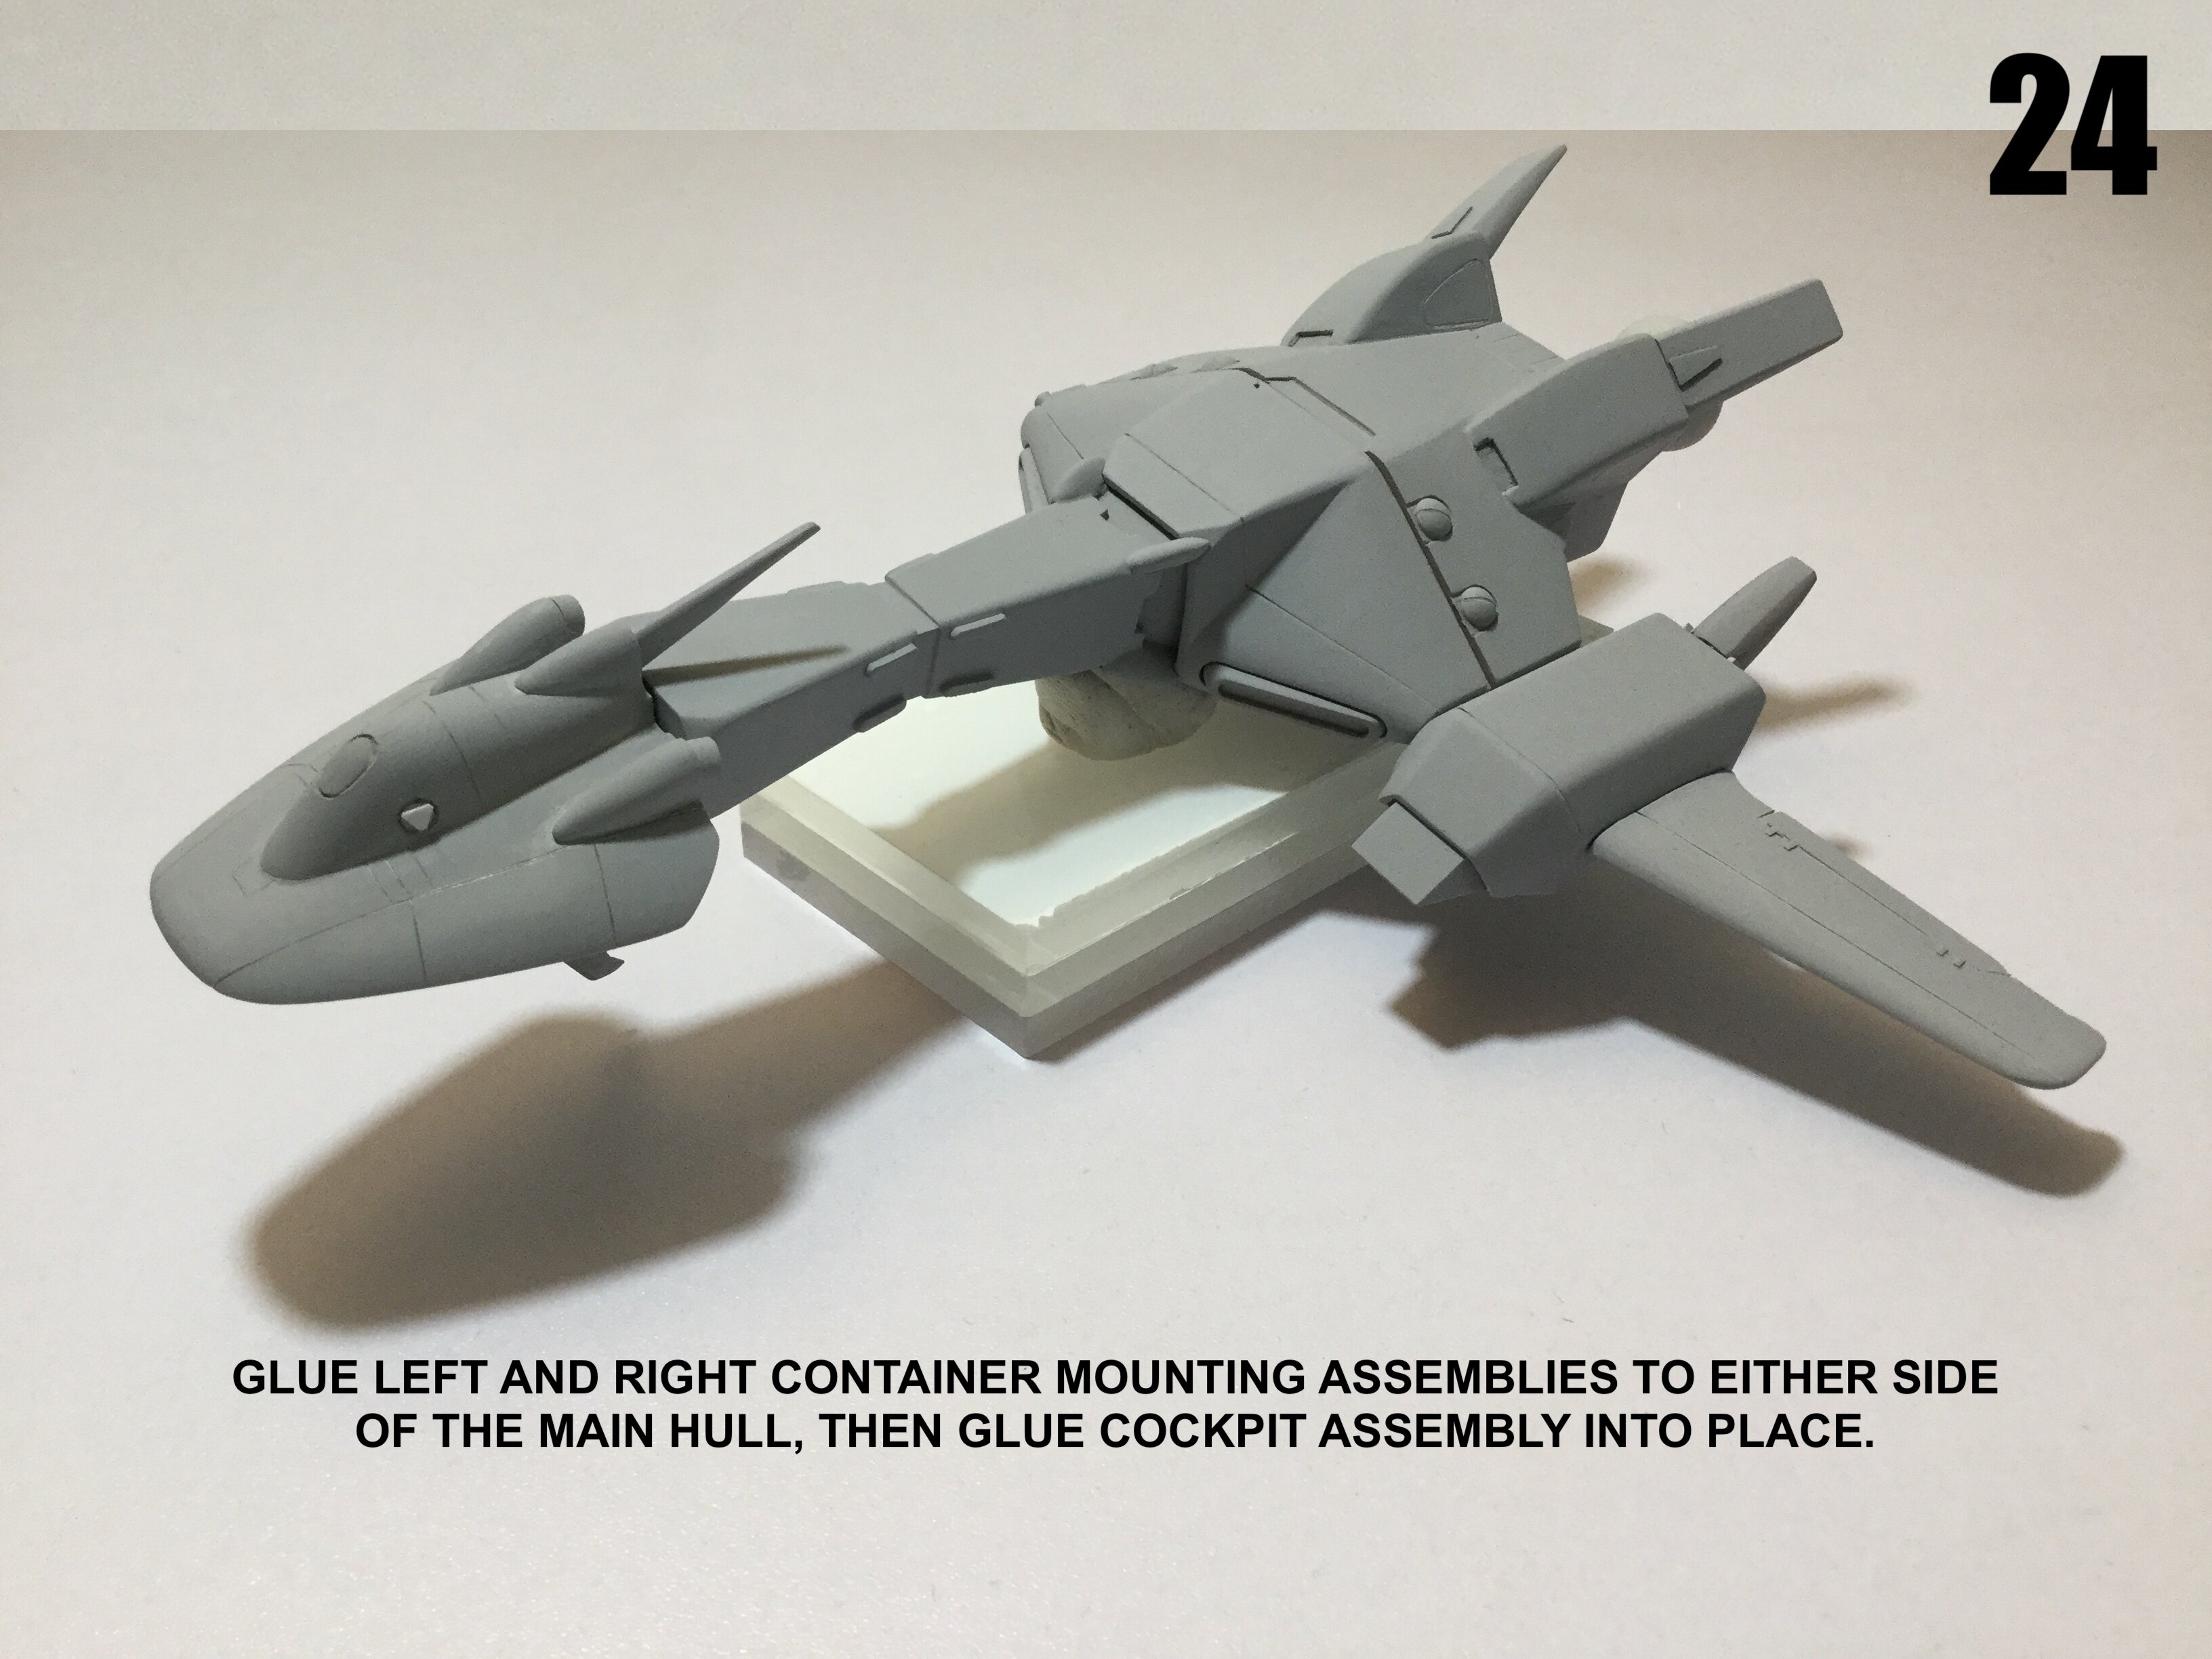
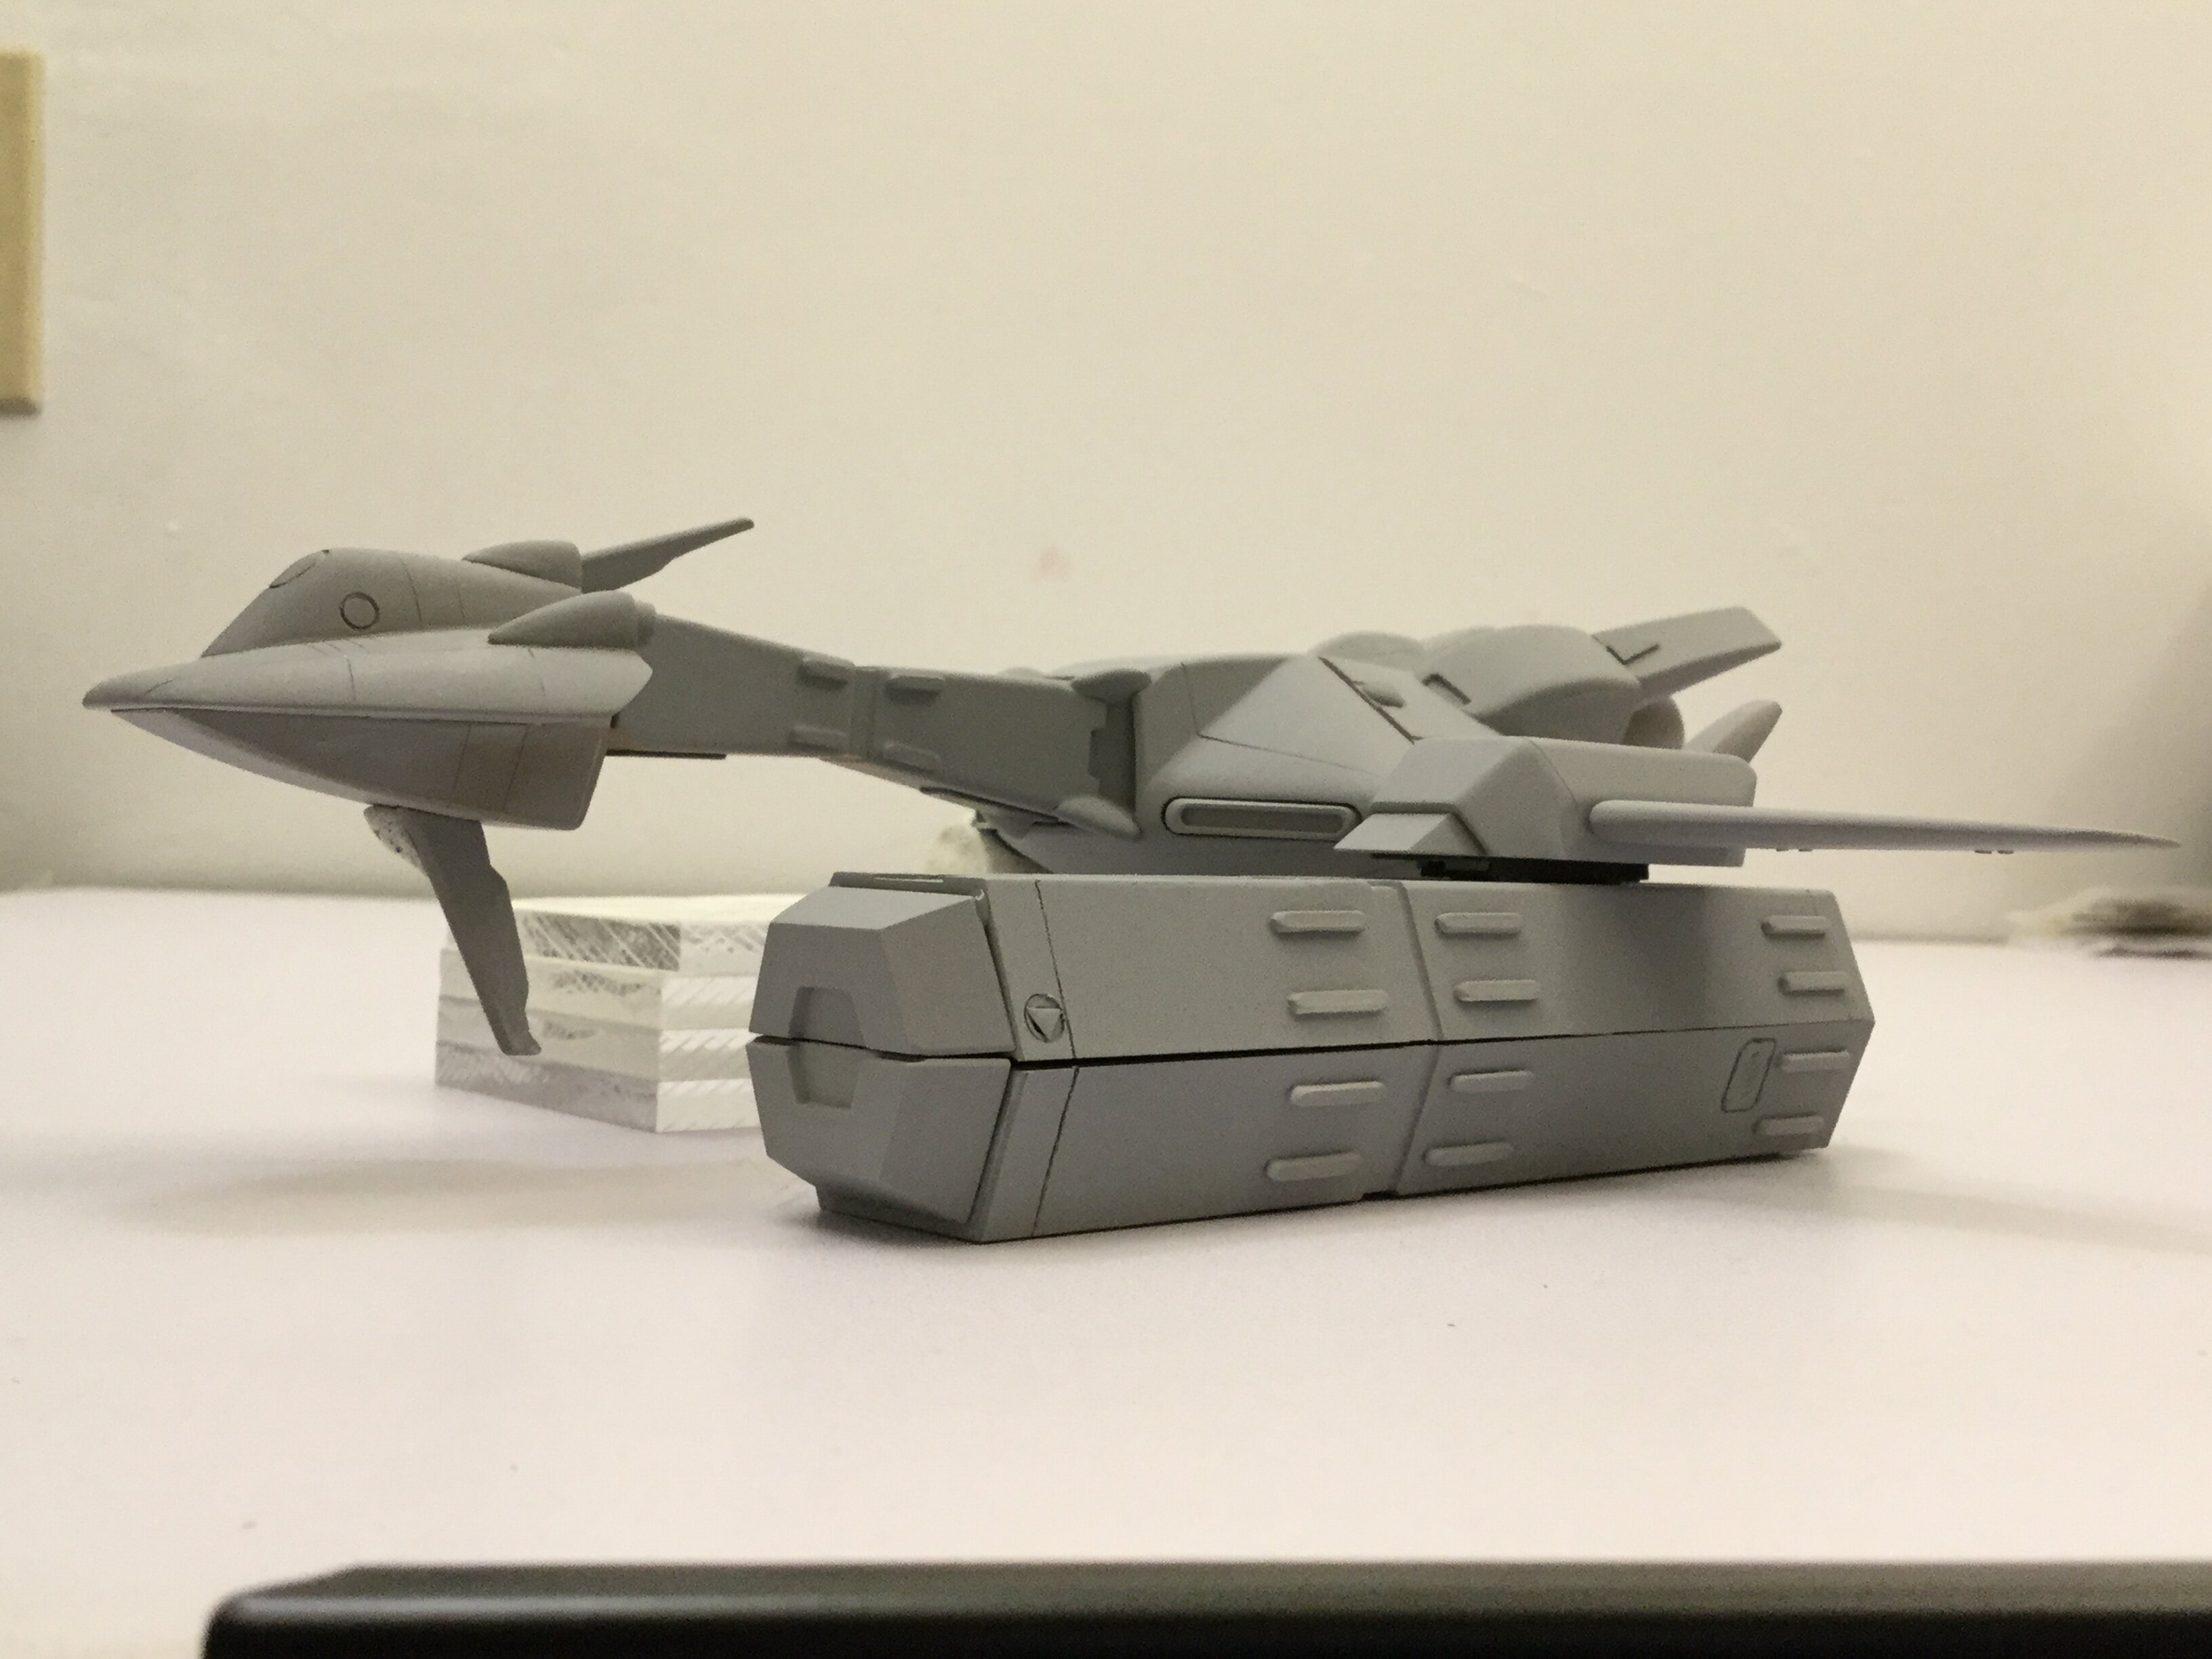
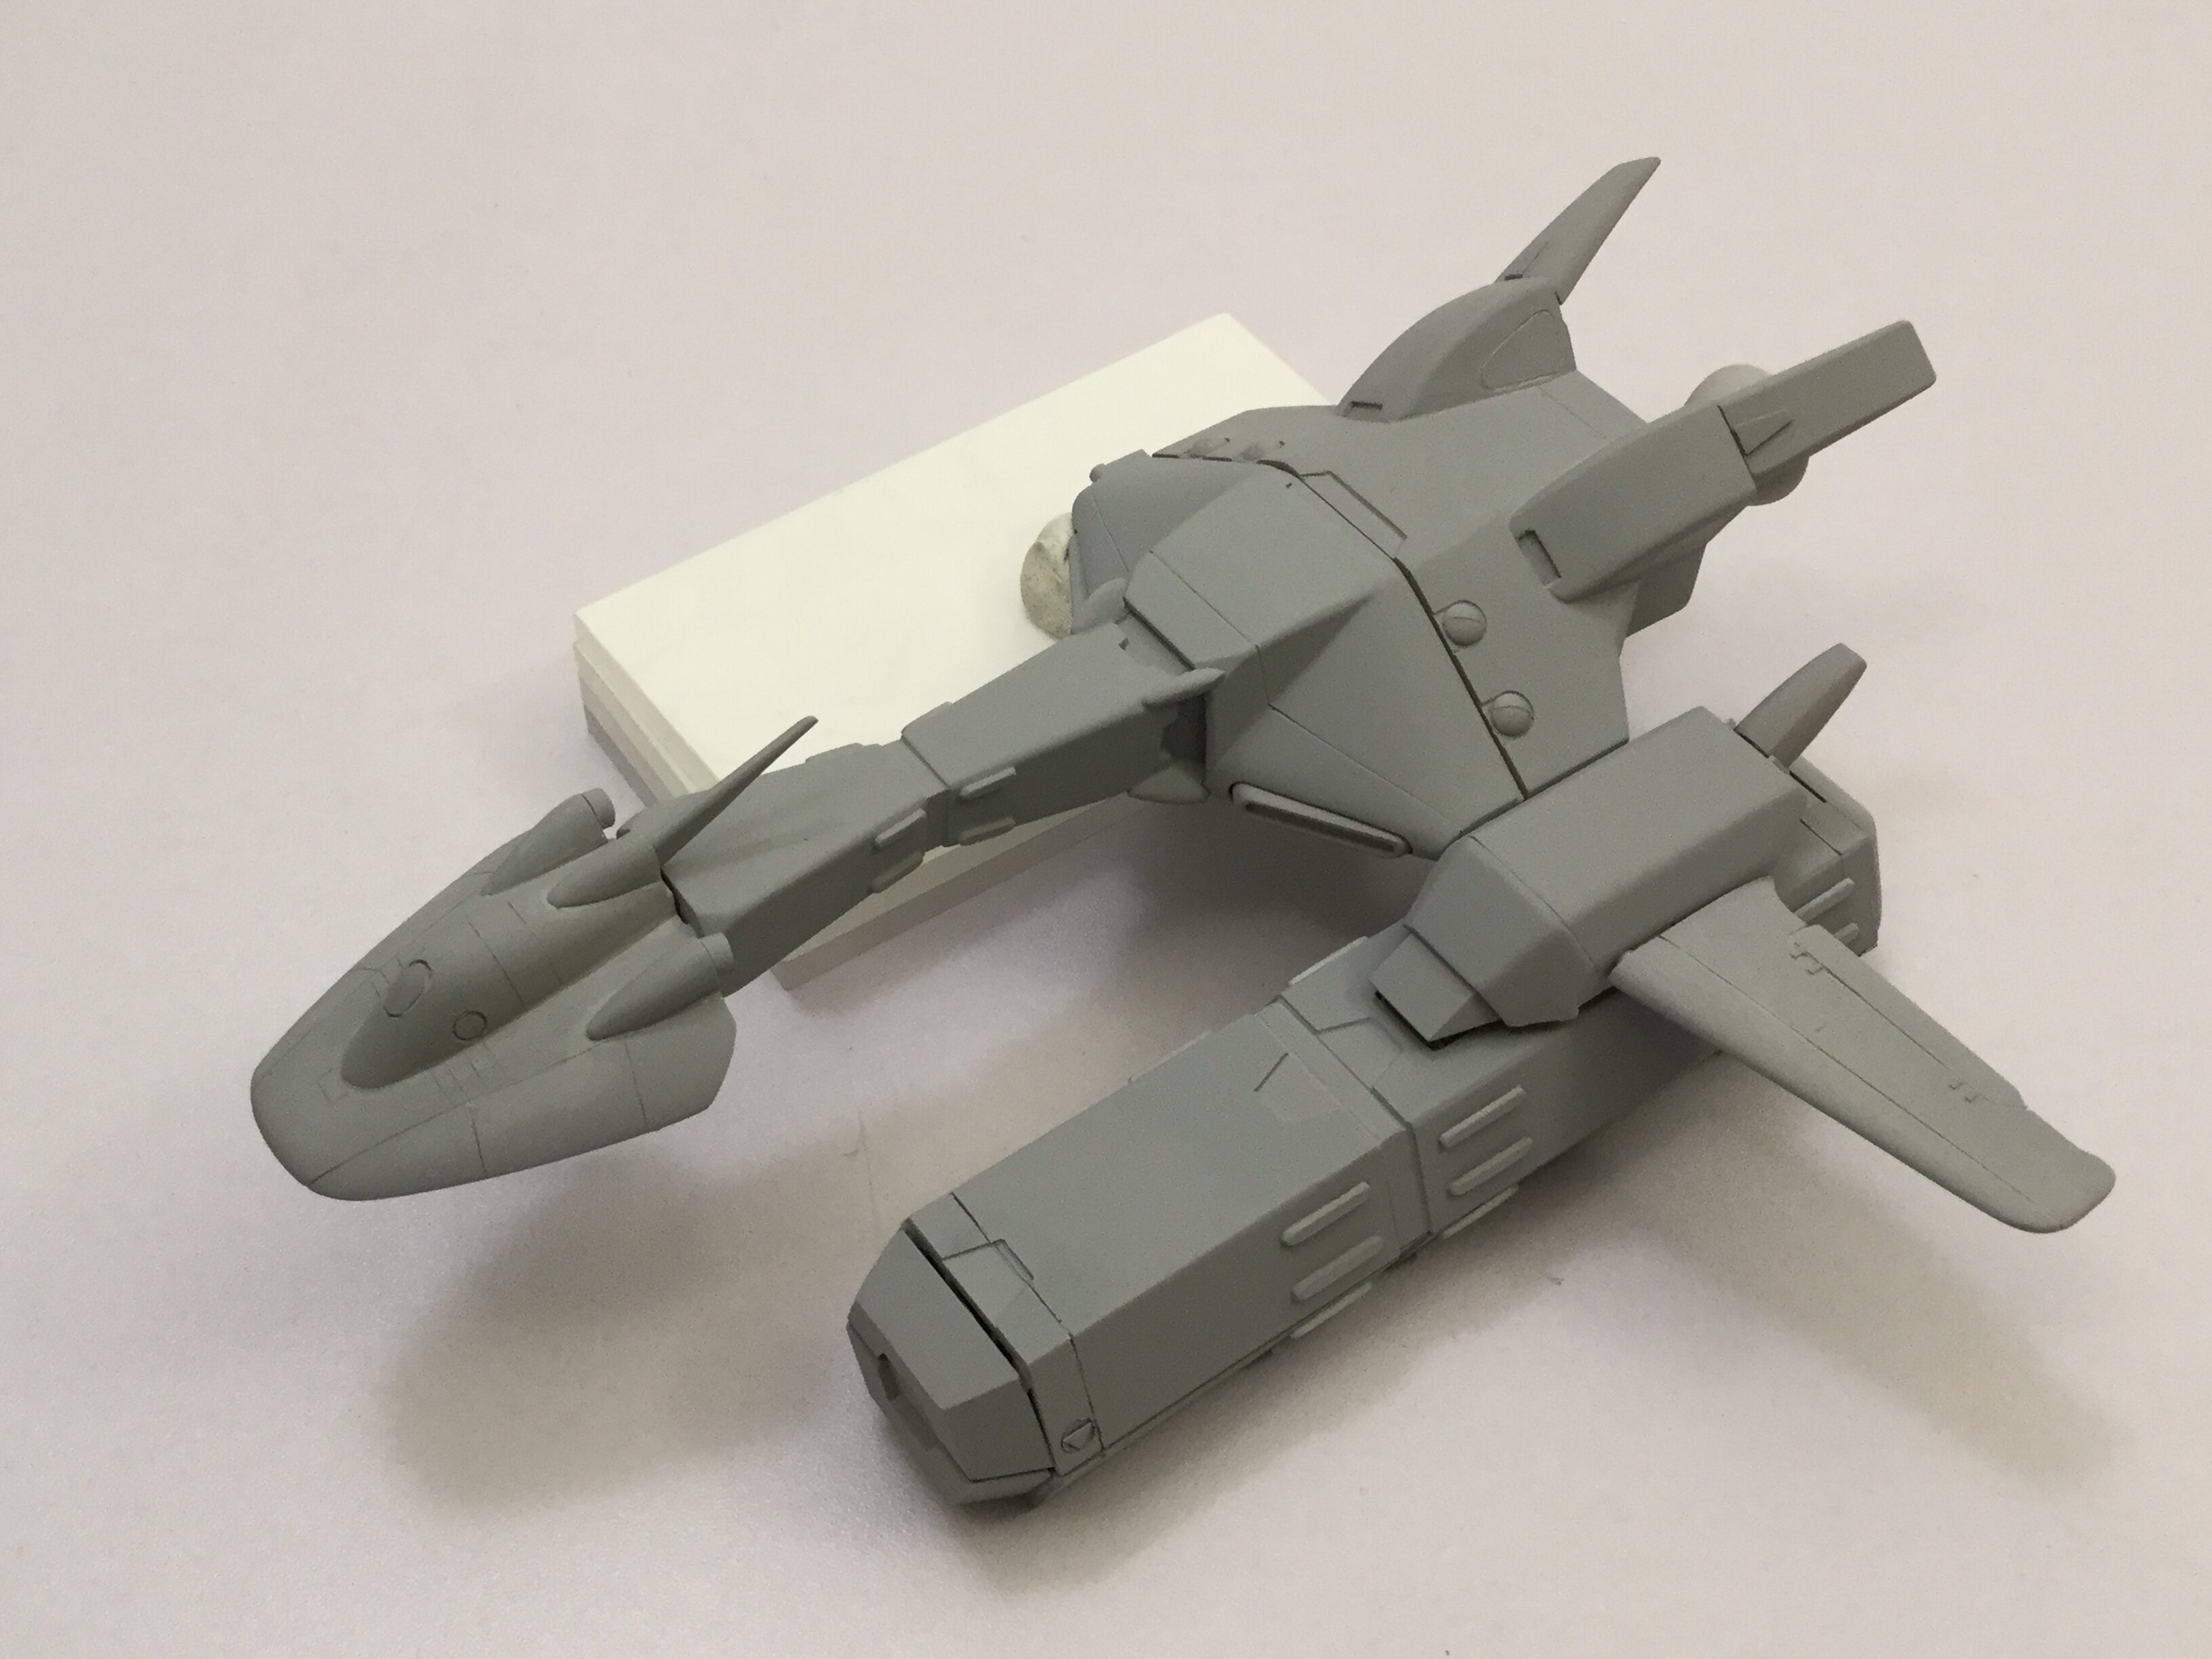
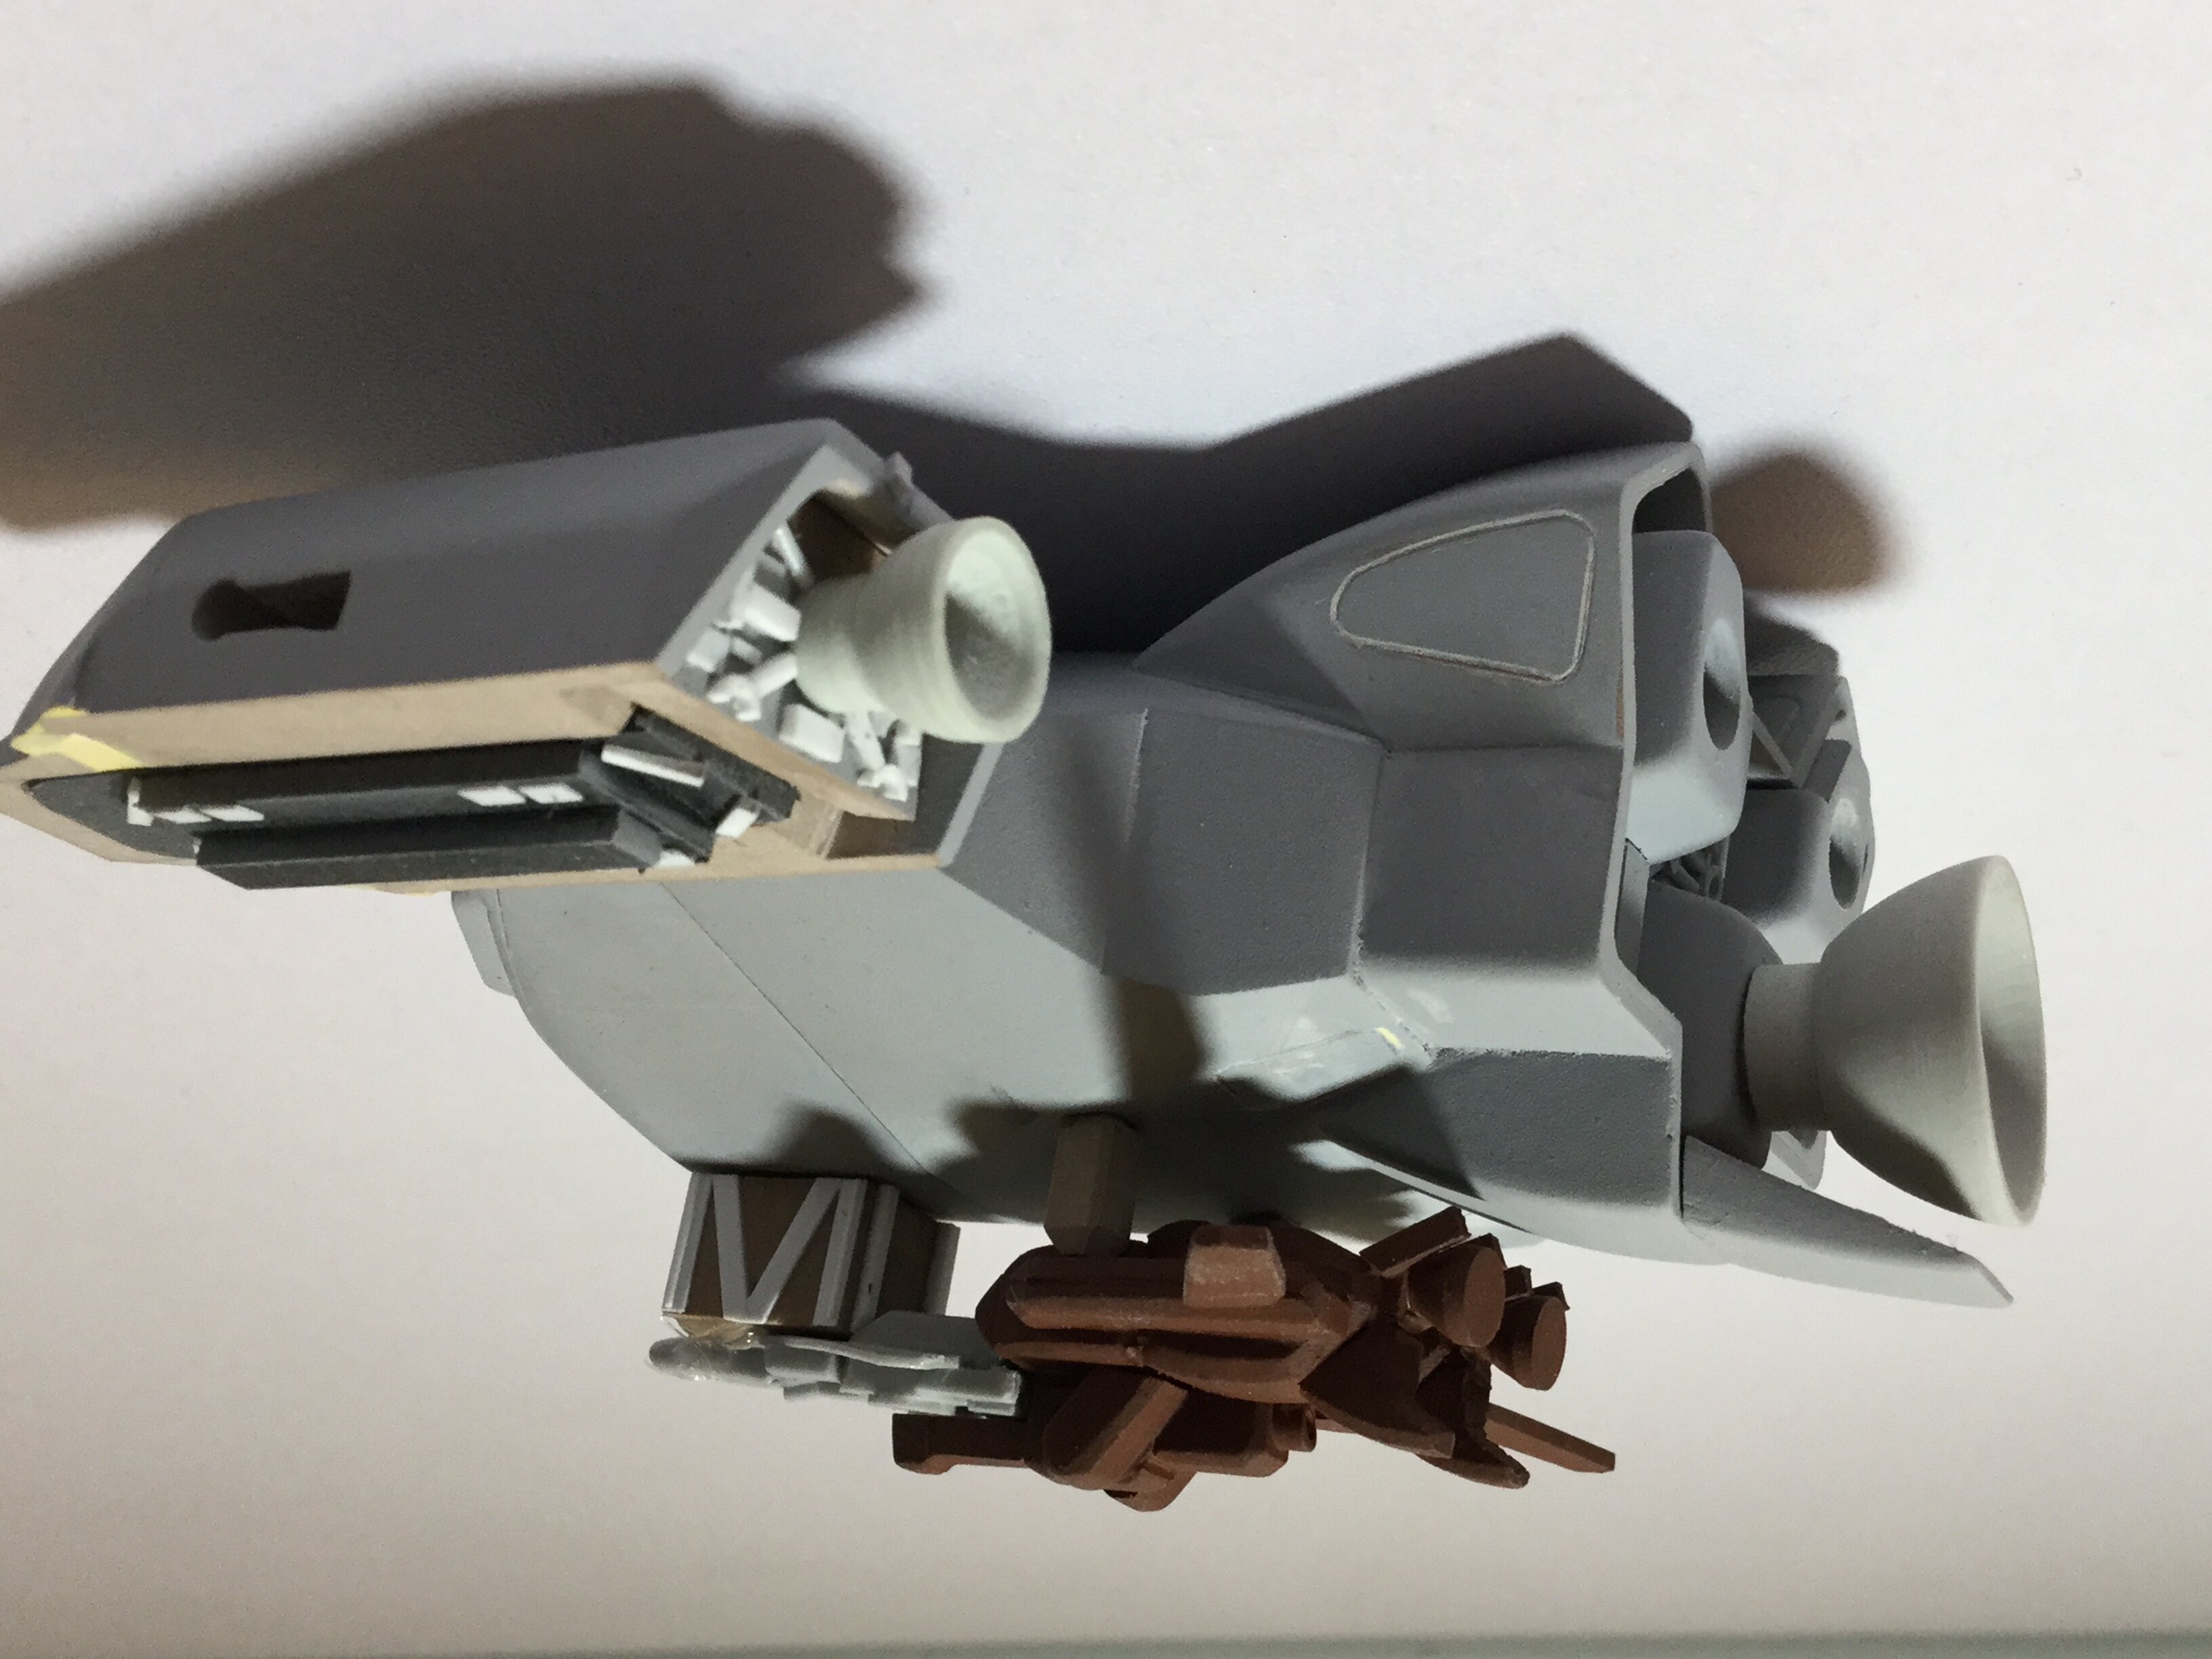
Save for a few small details and markings, she's ready for mold-prep. I'll take a few pics of the mounting system for the containers, which fits rather snugly as-is, but you'll also have the option of mounting these with small (3-5mm) magnets, thanks to cleverly hidden housings.
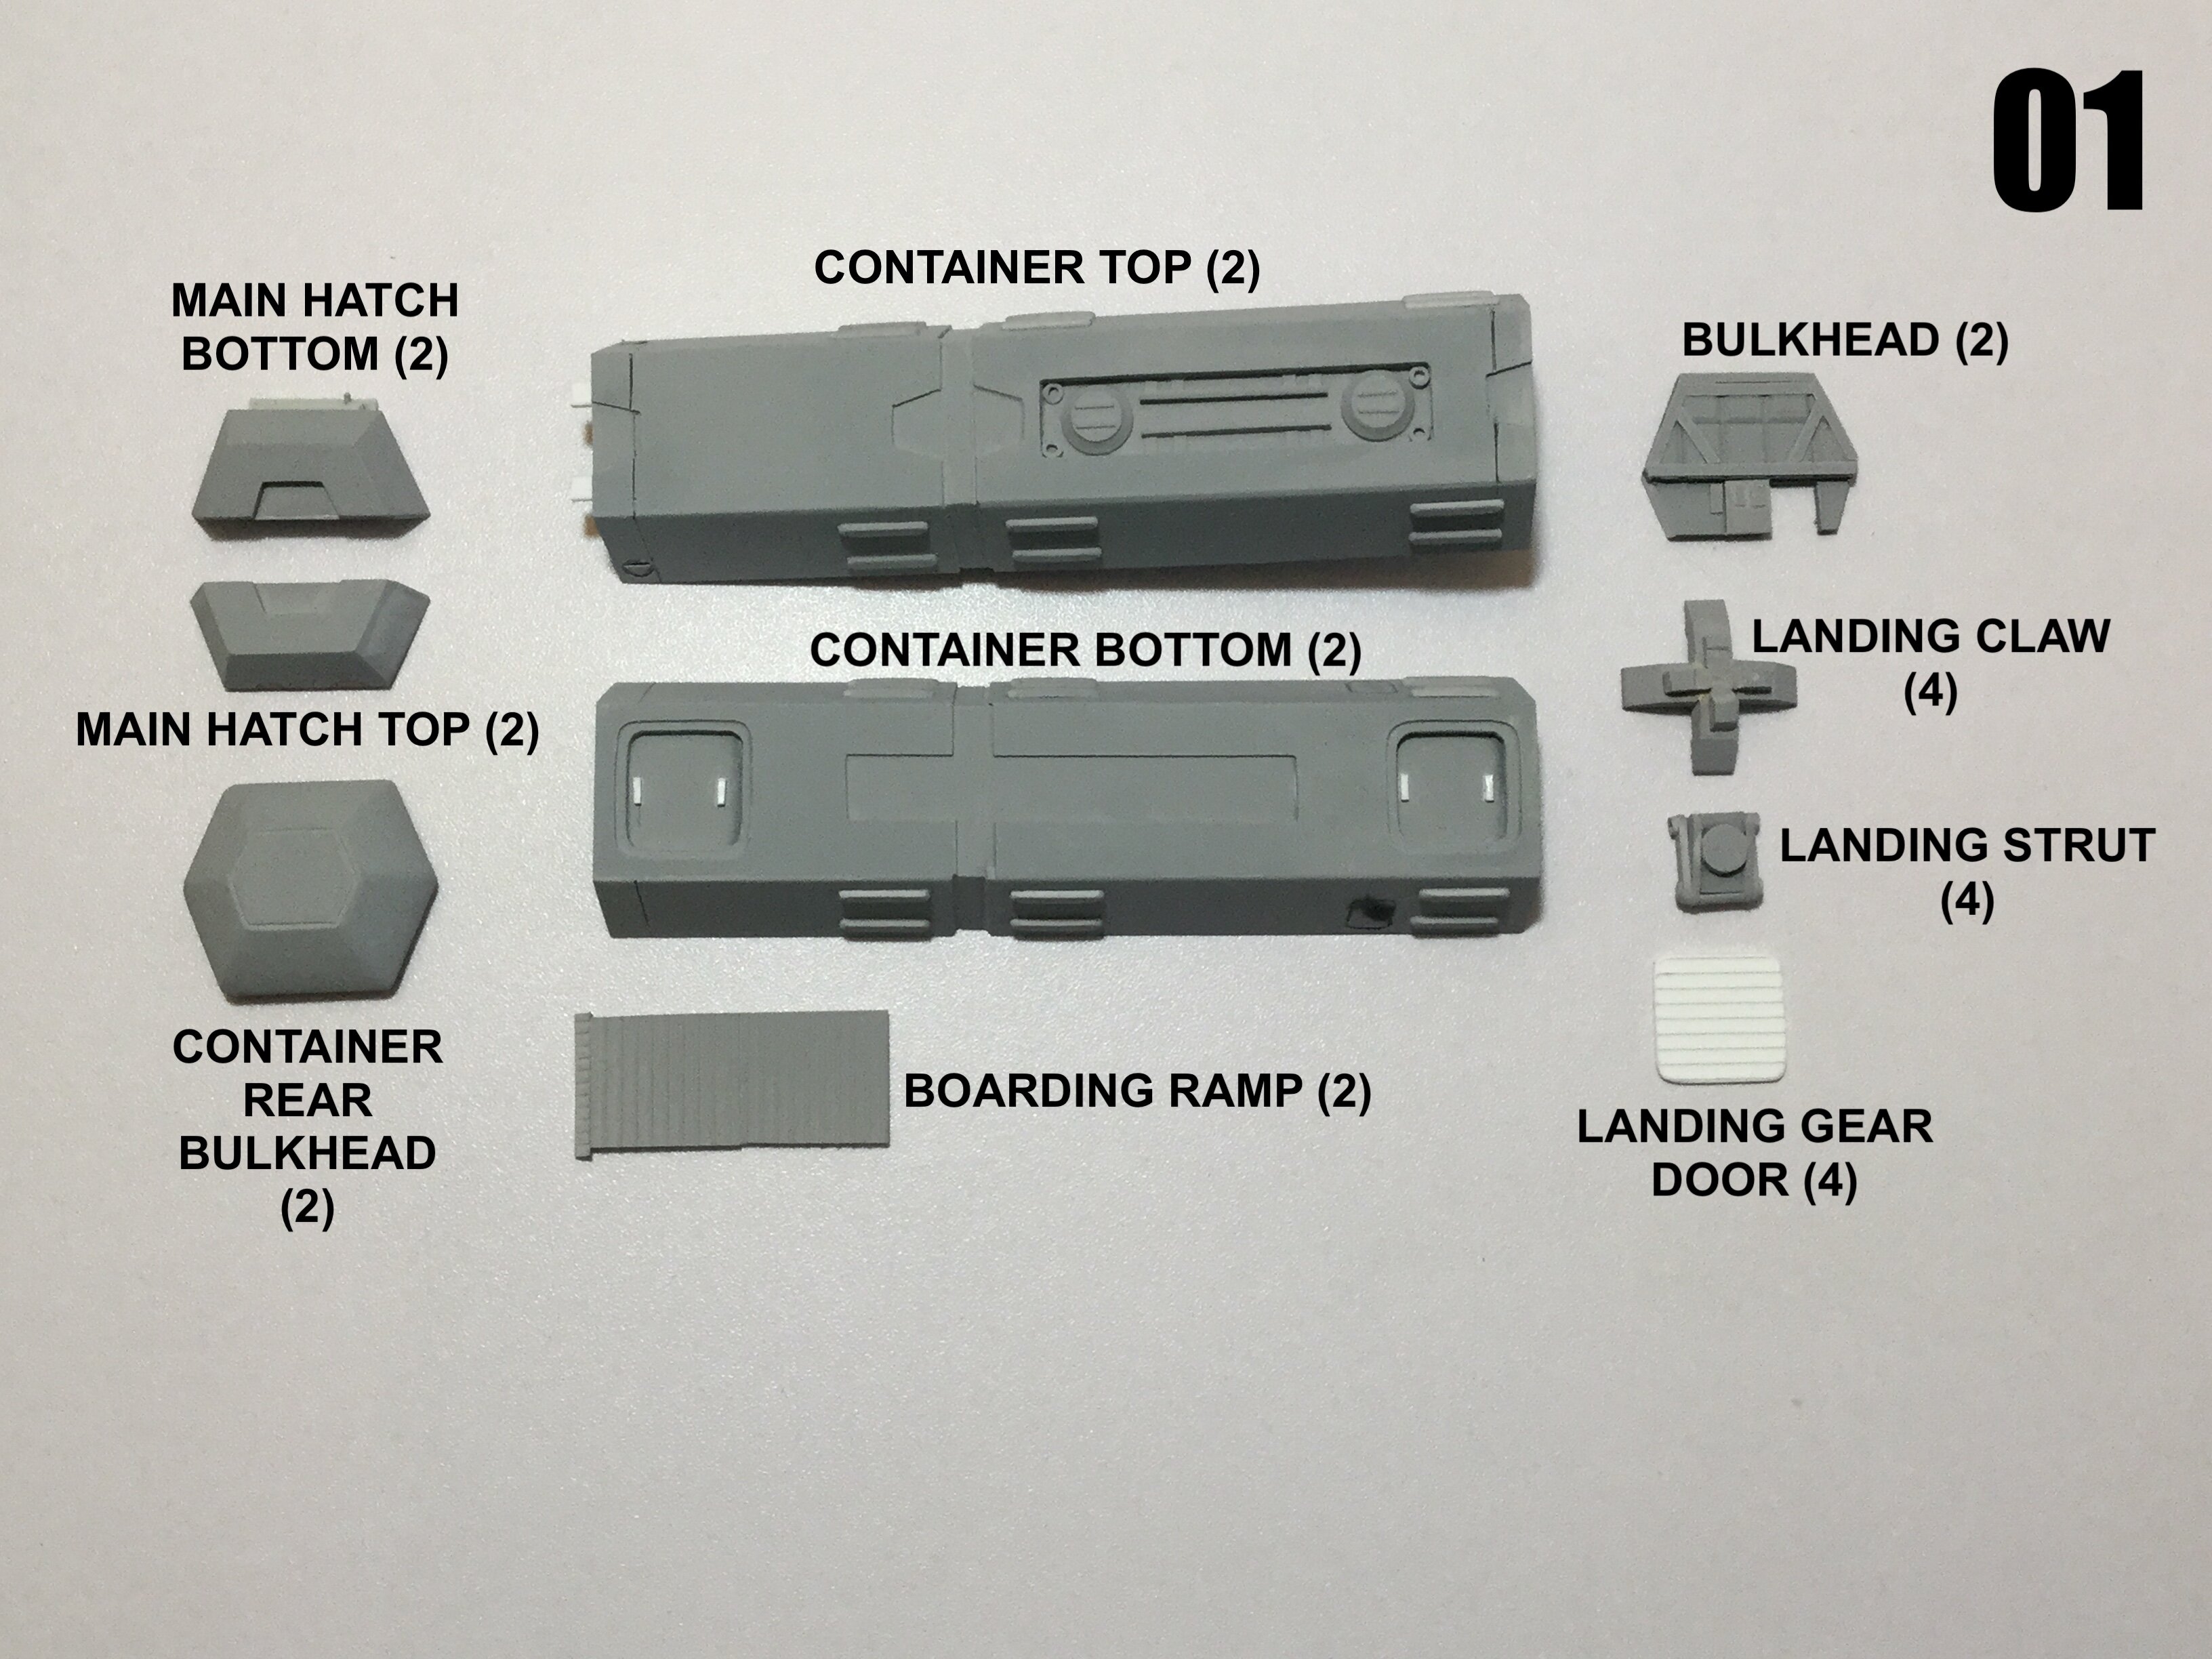
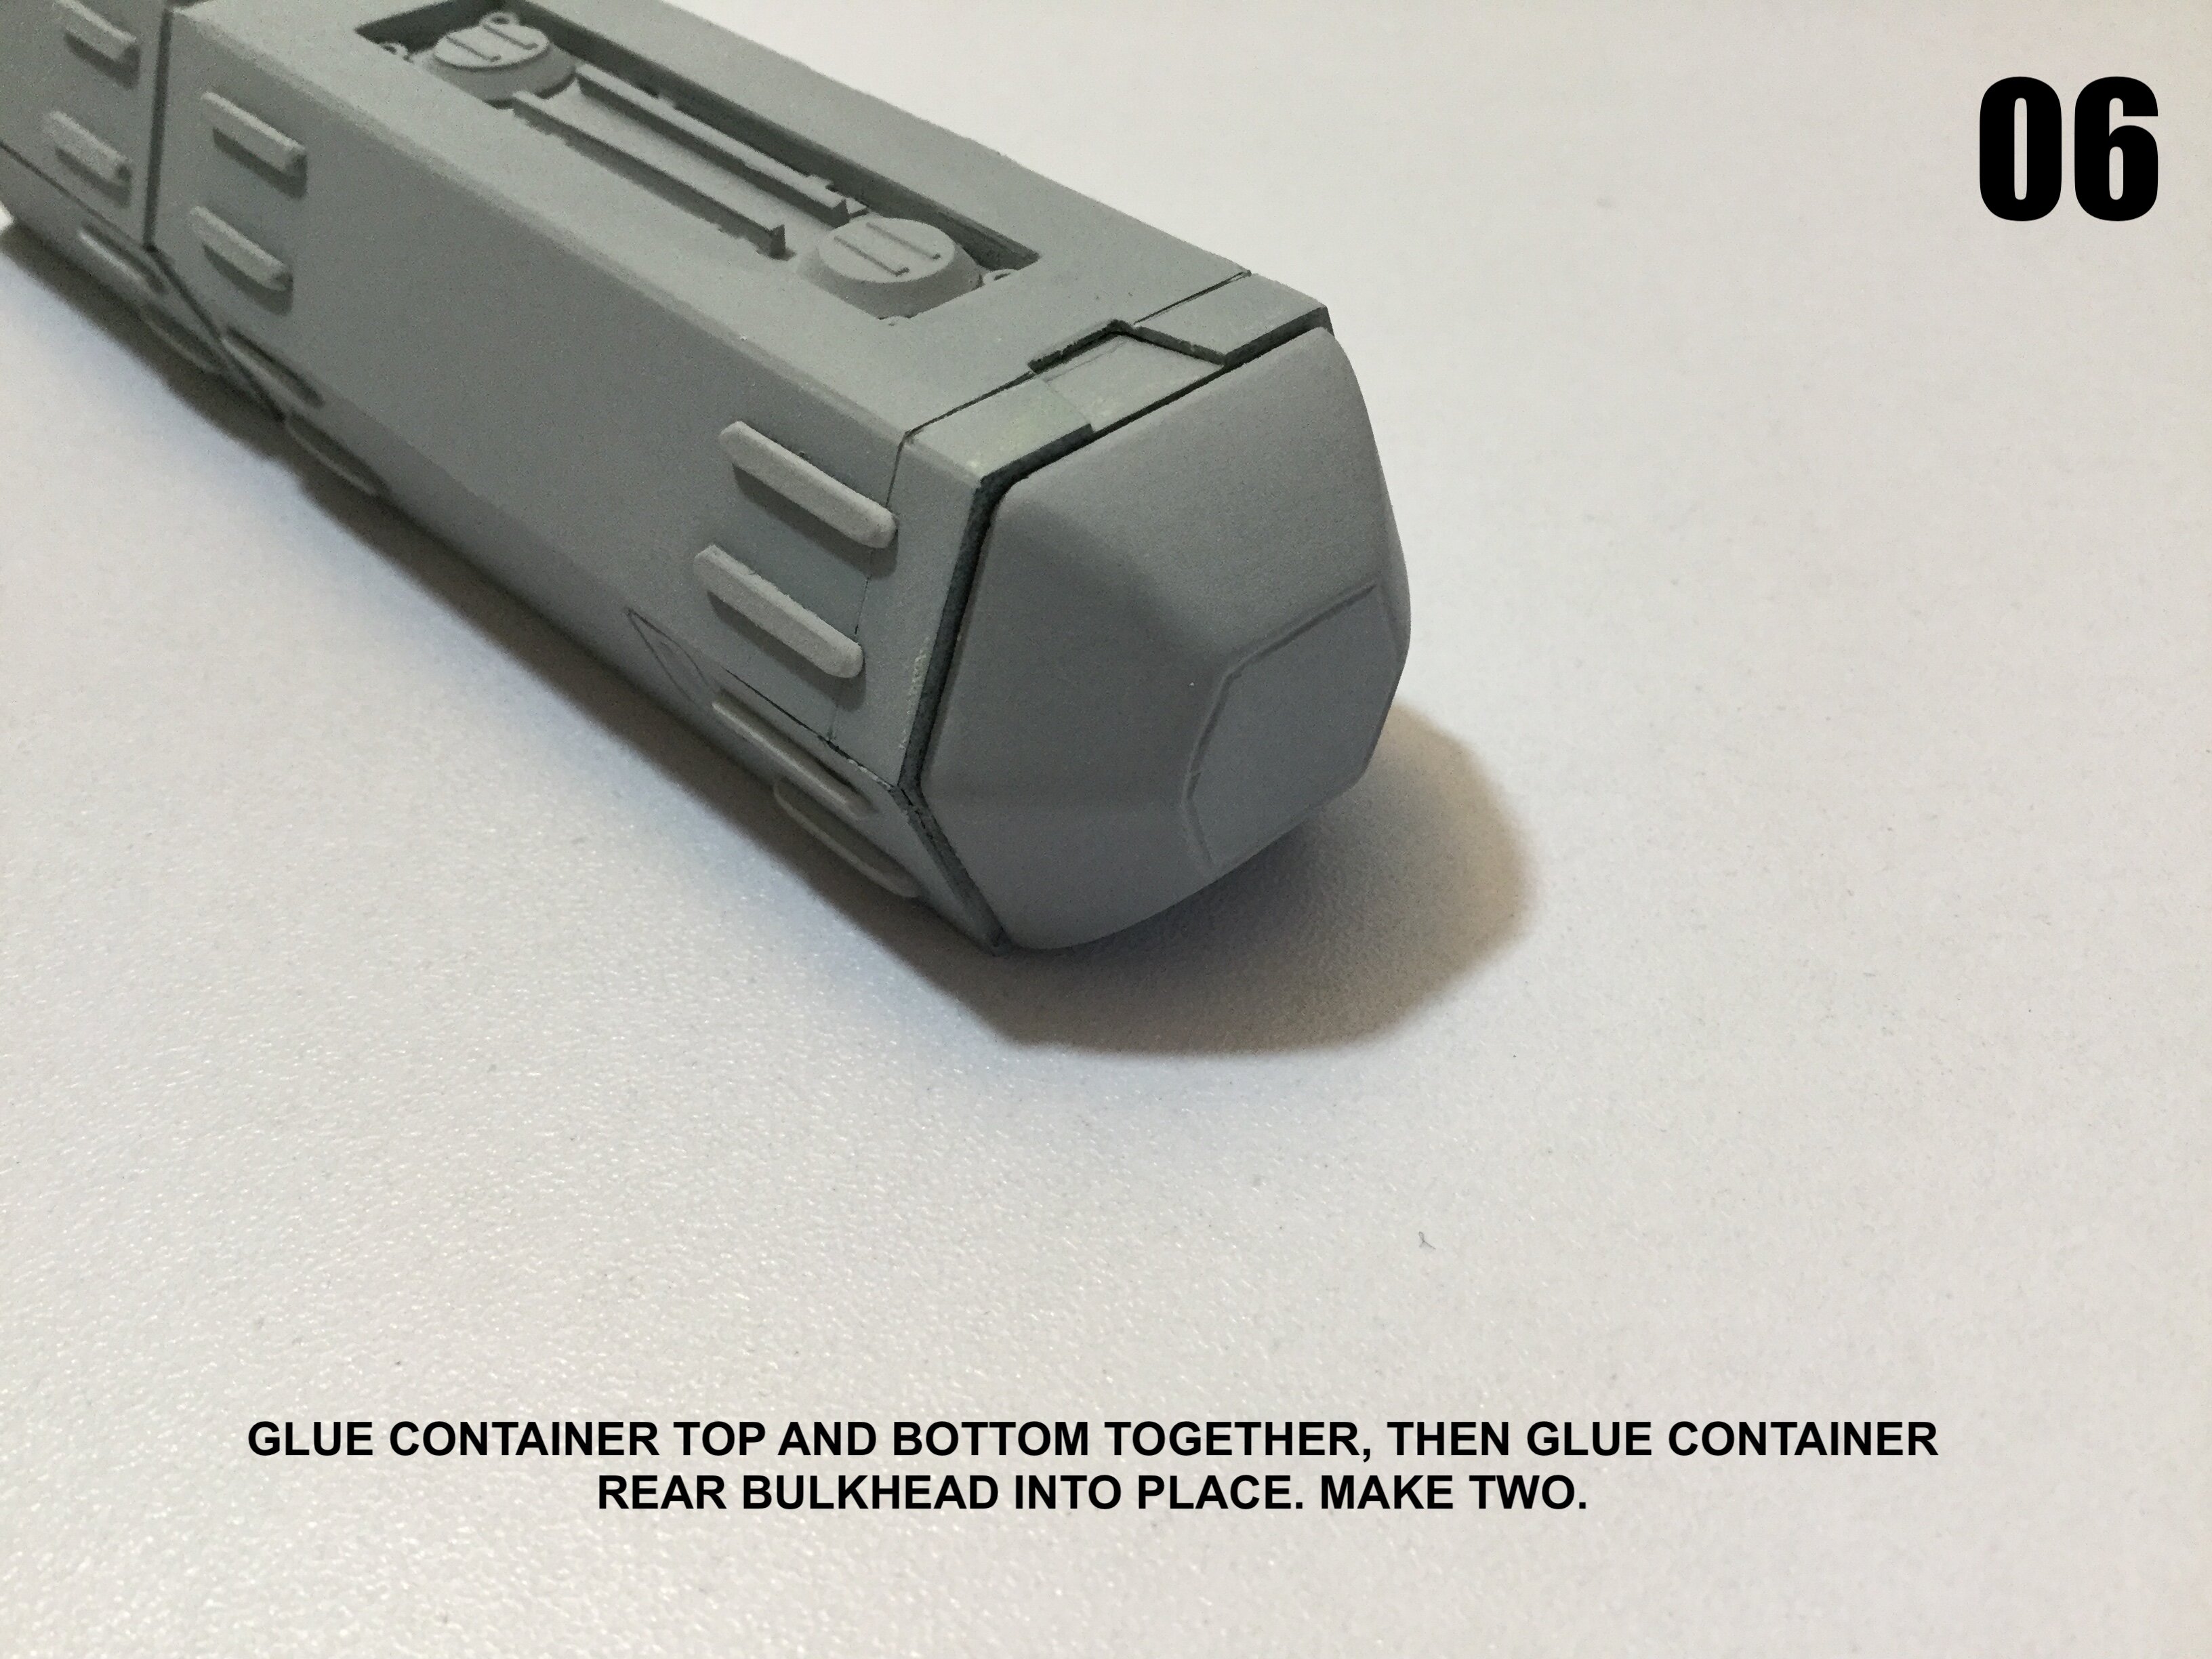
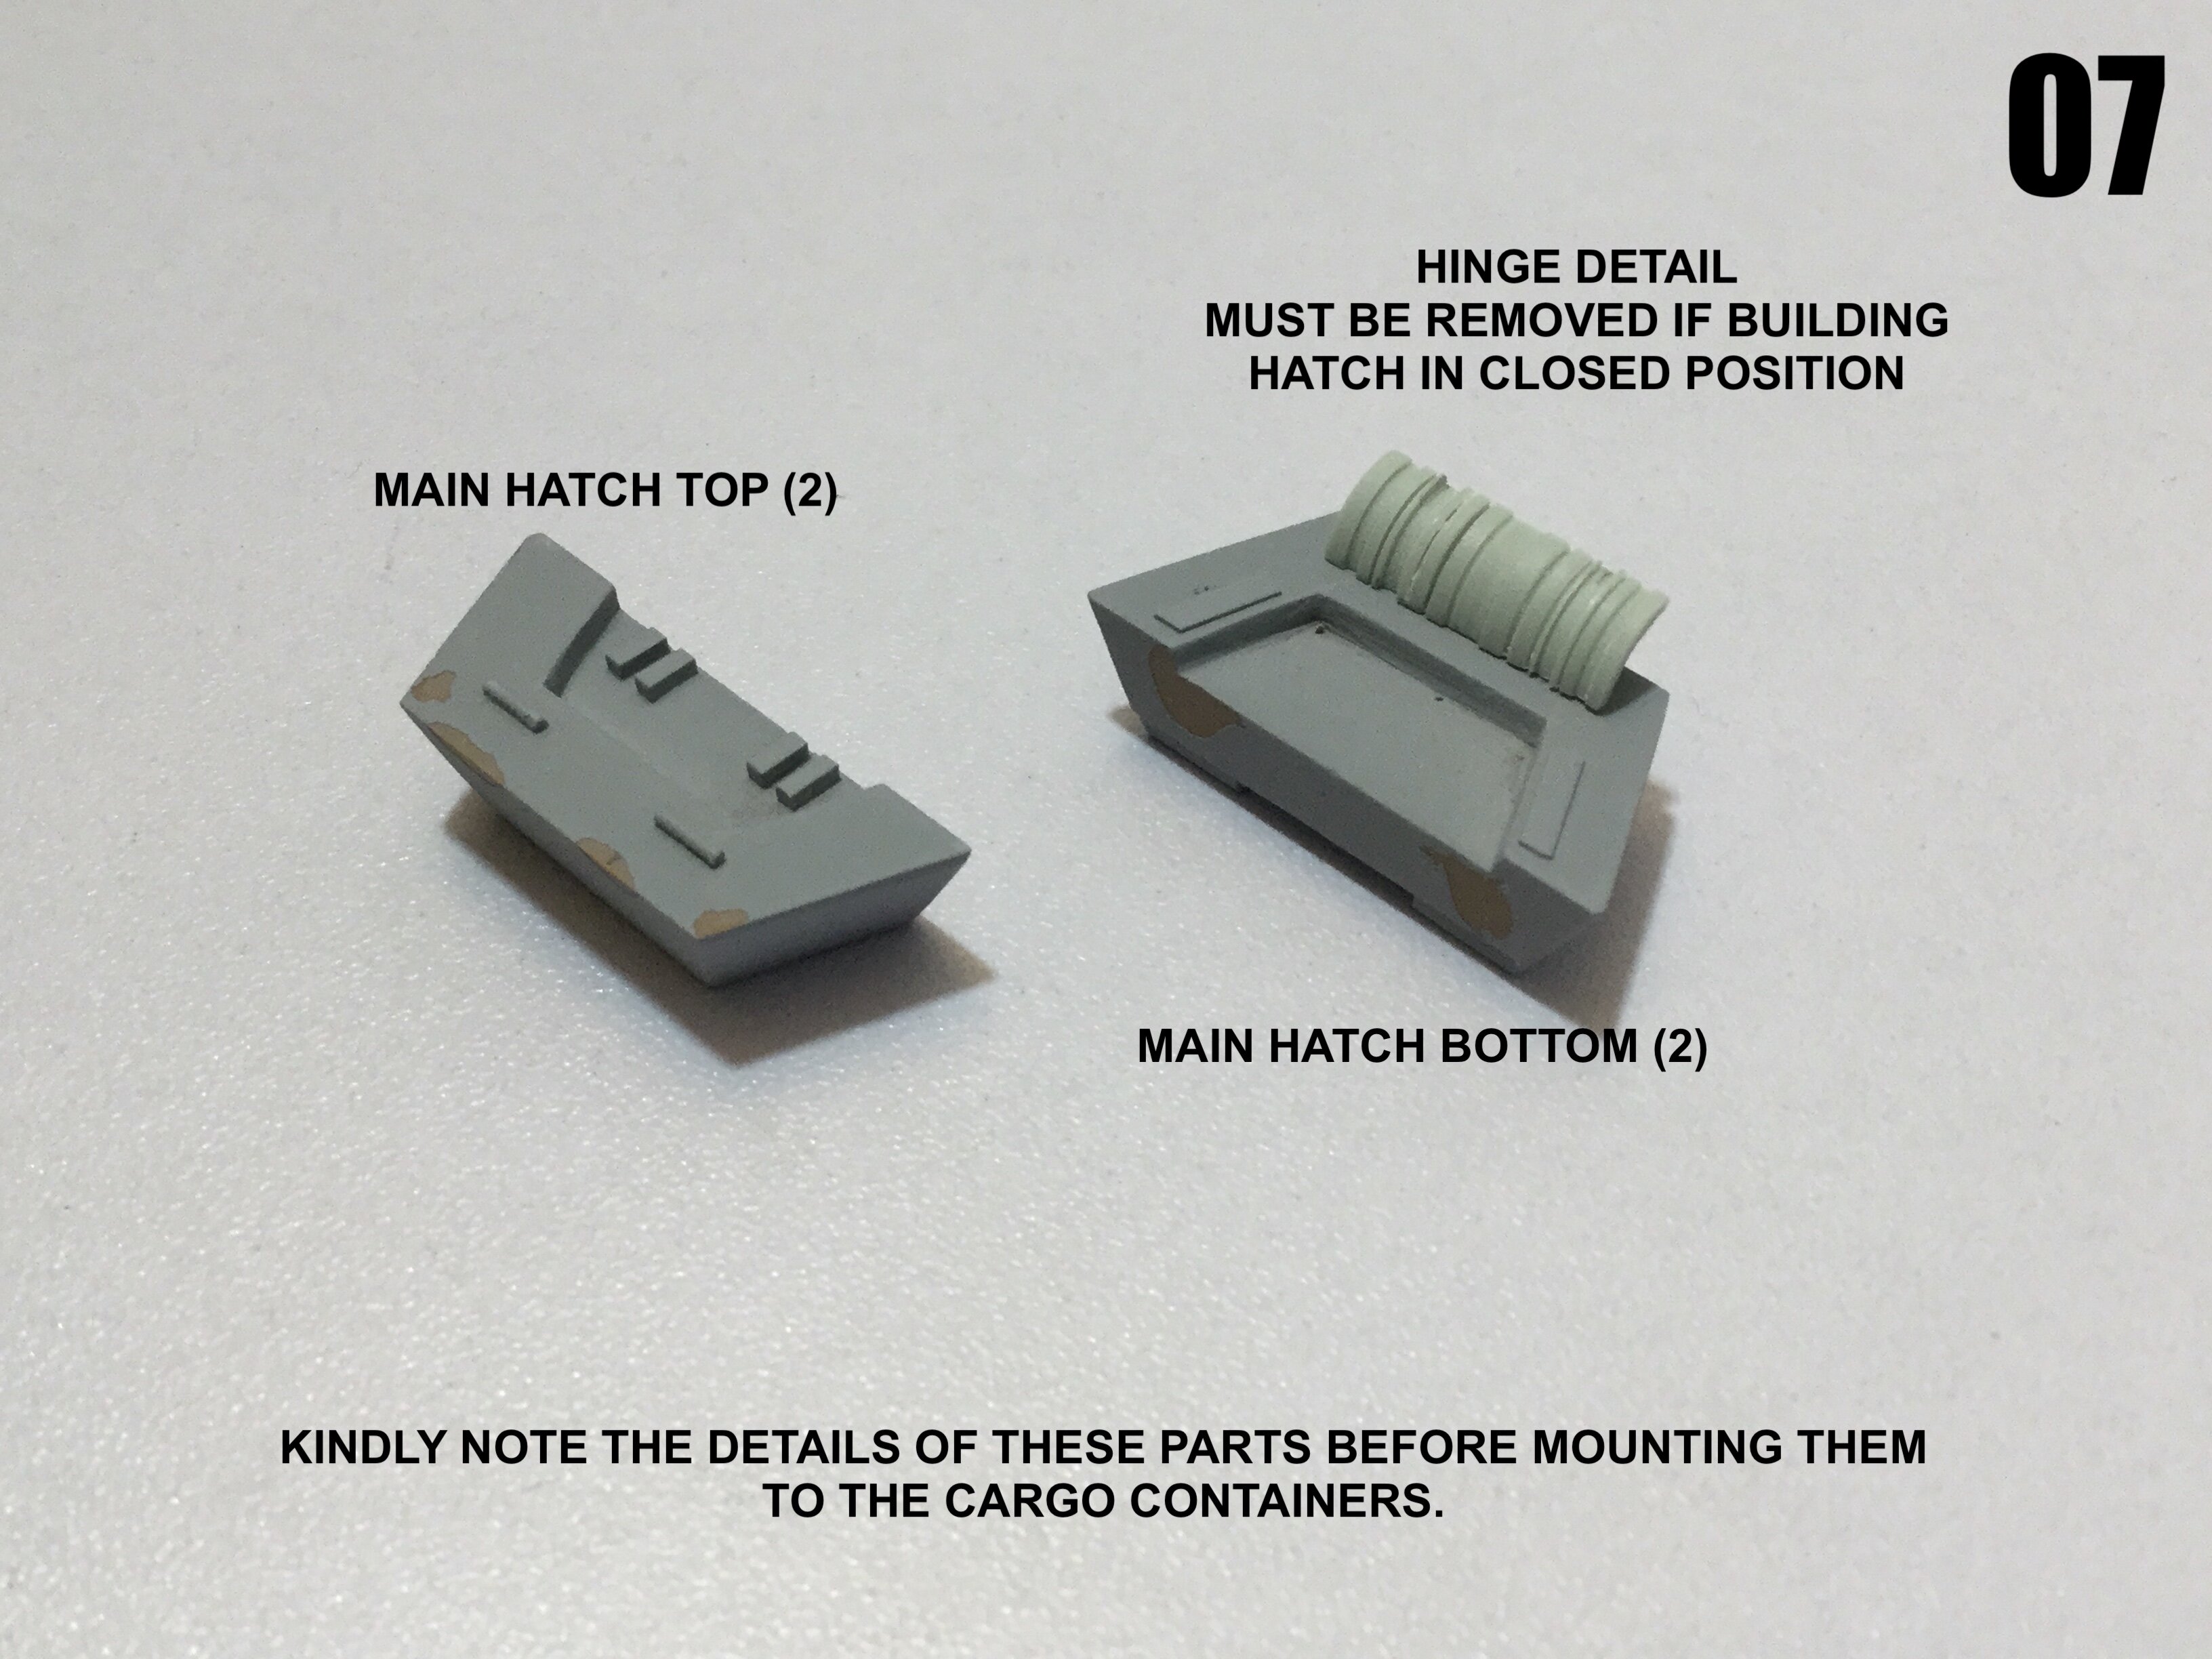
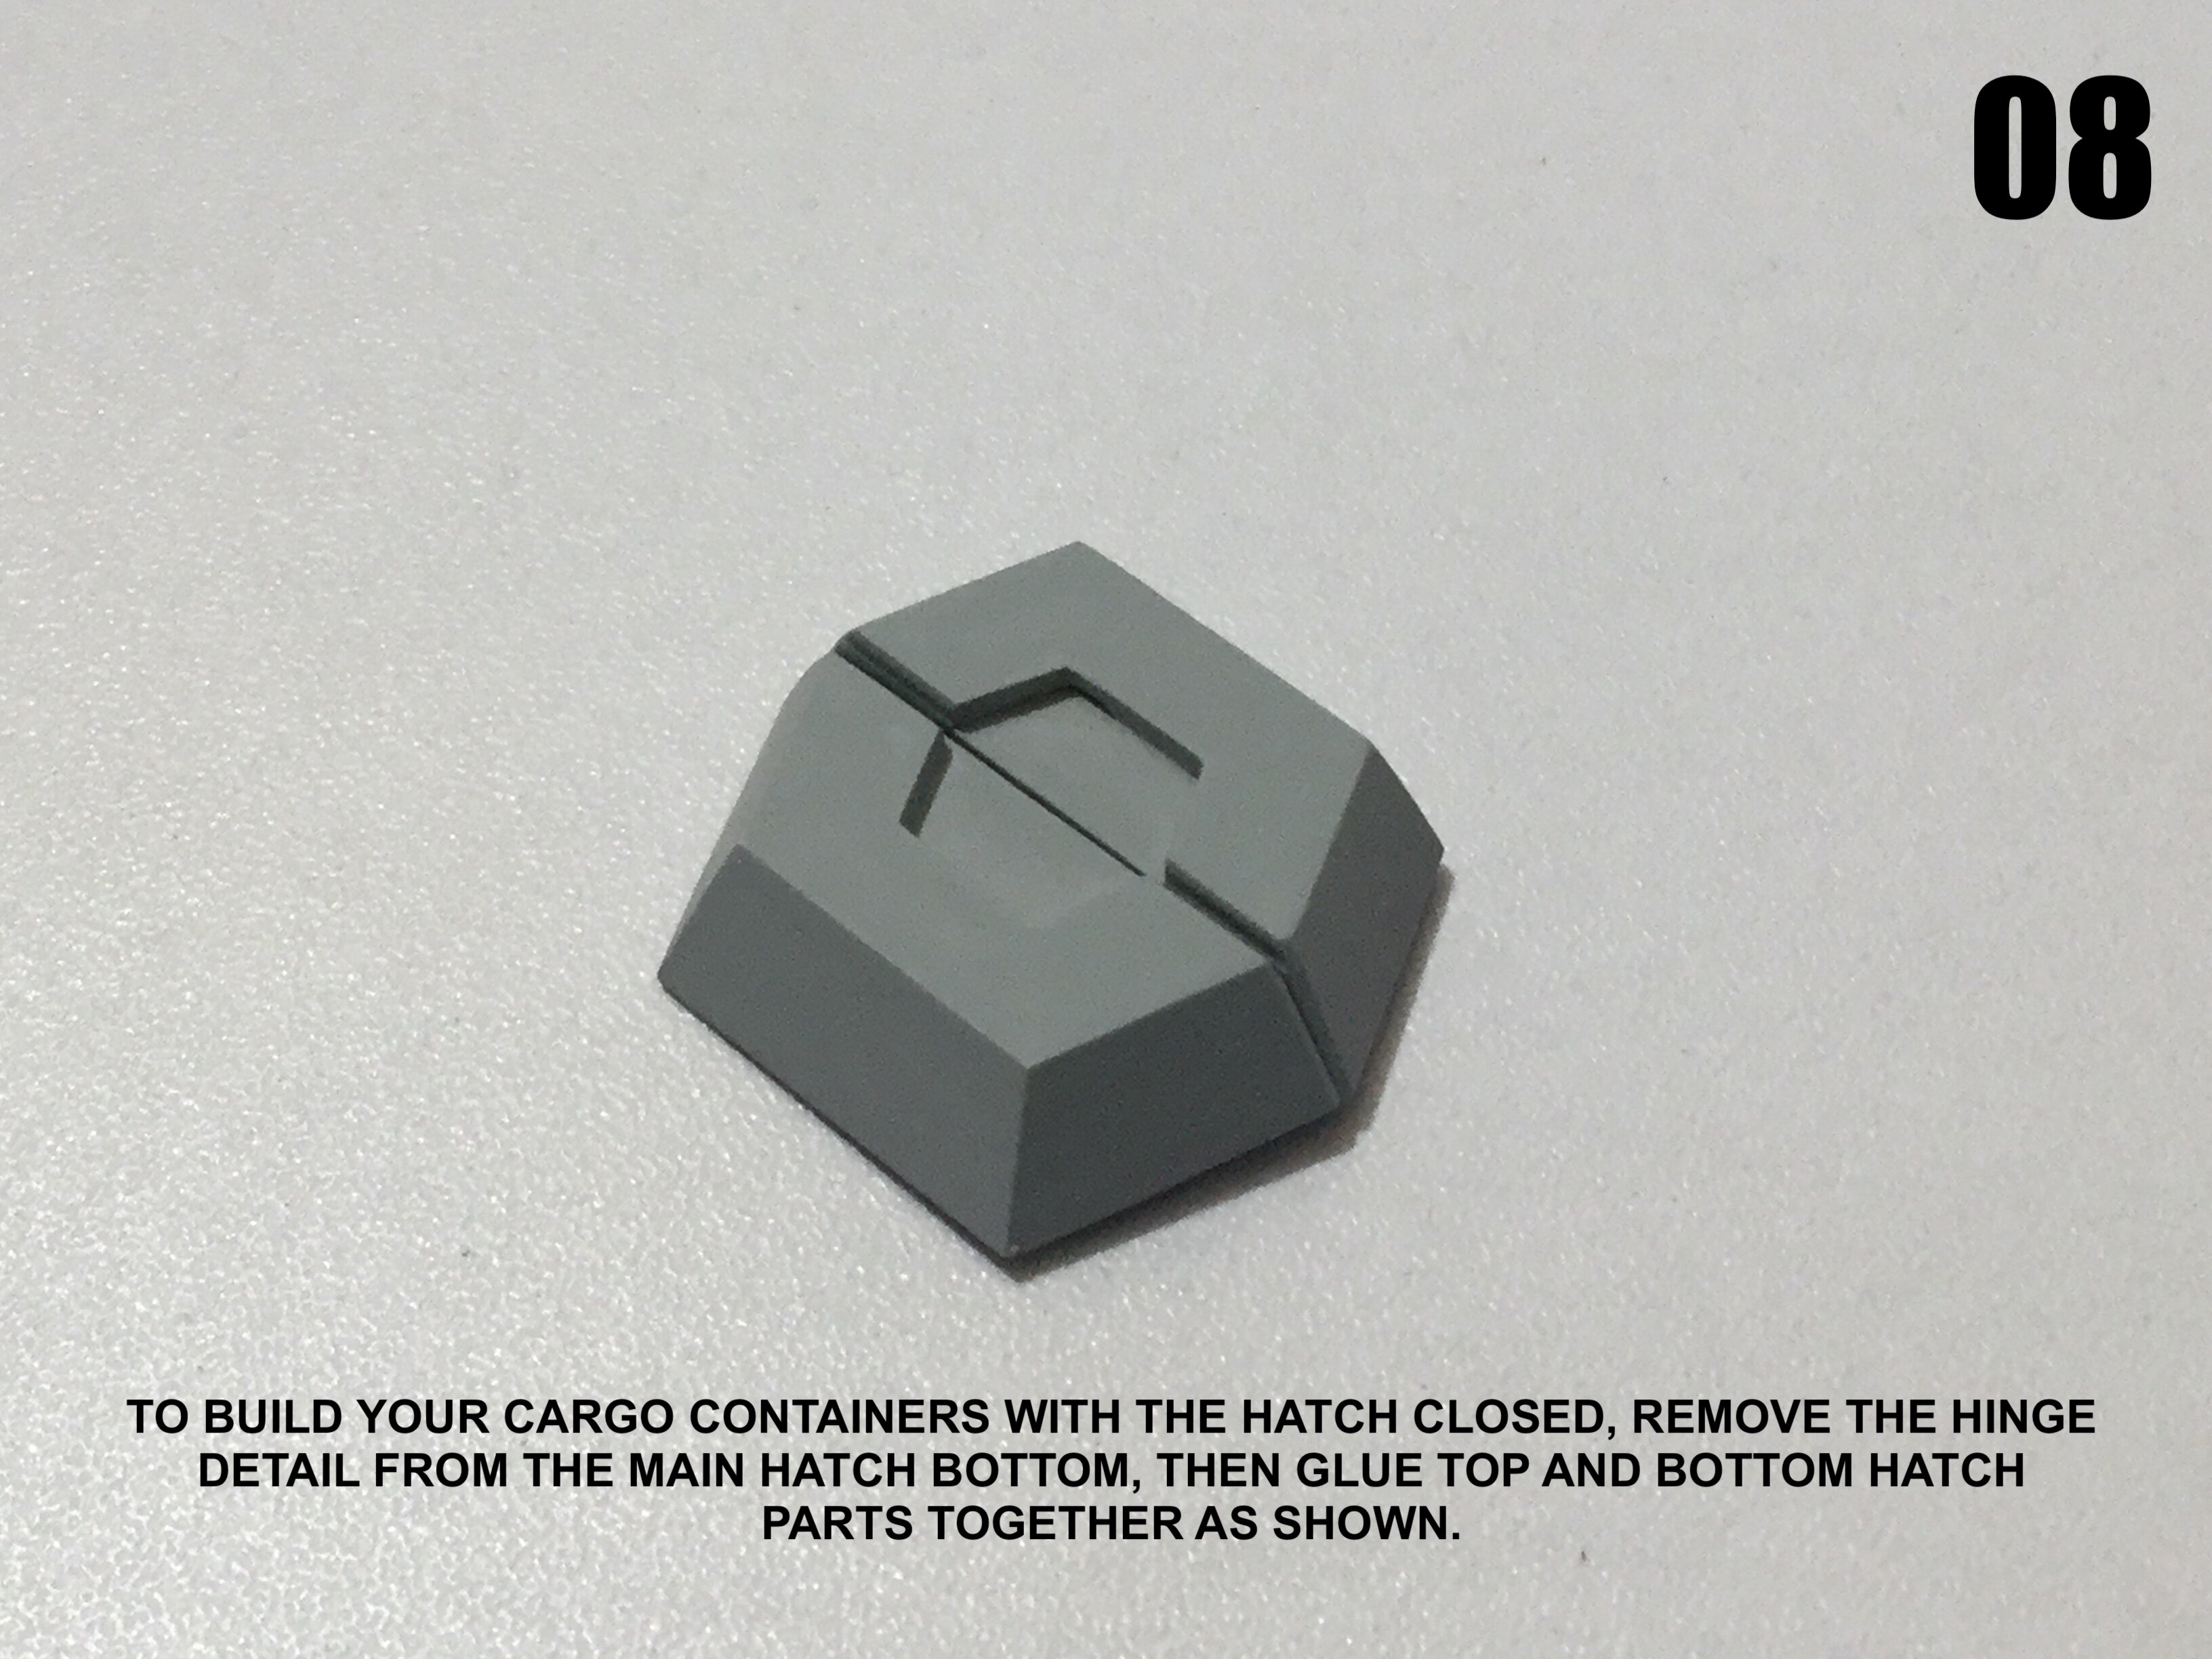
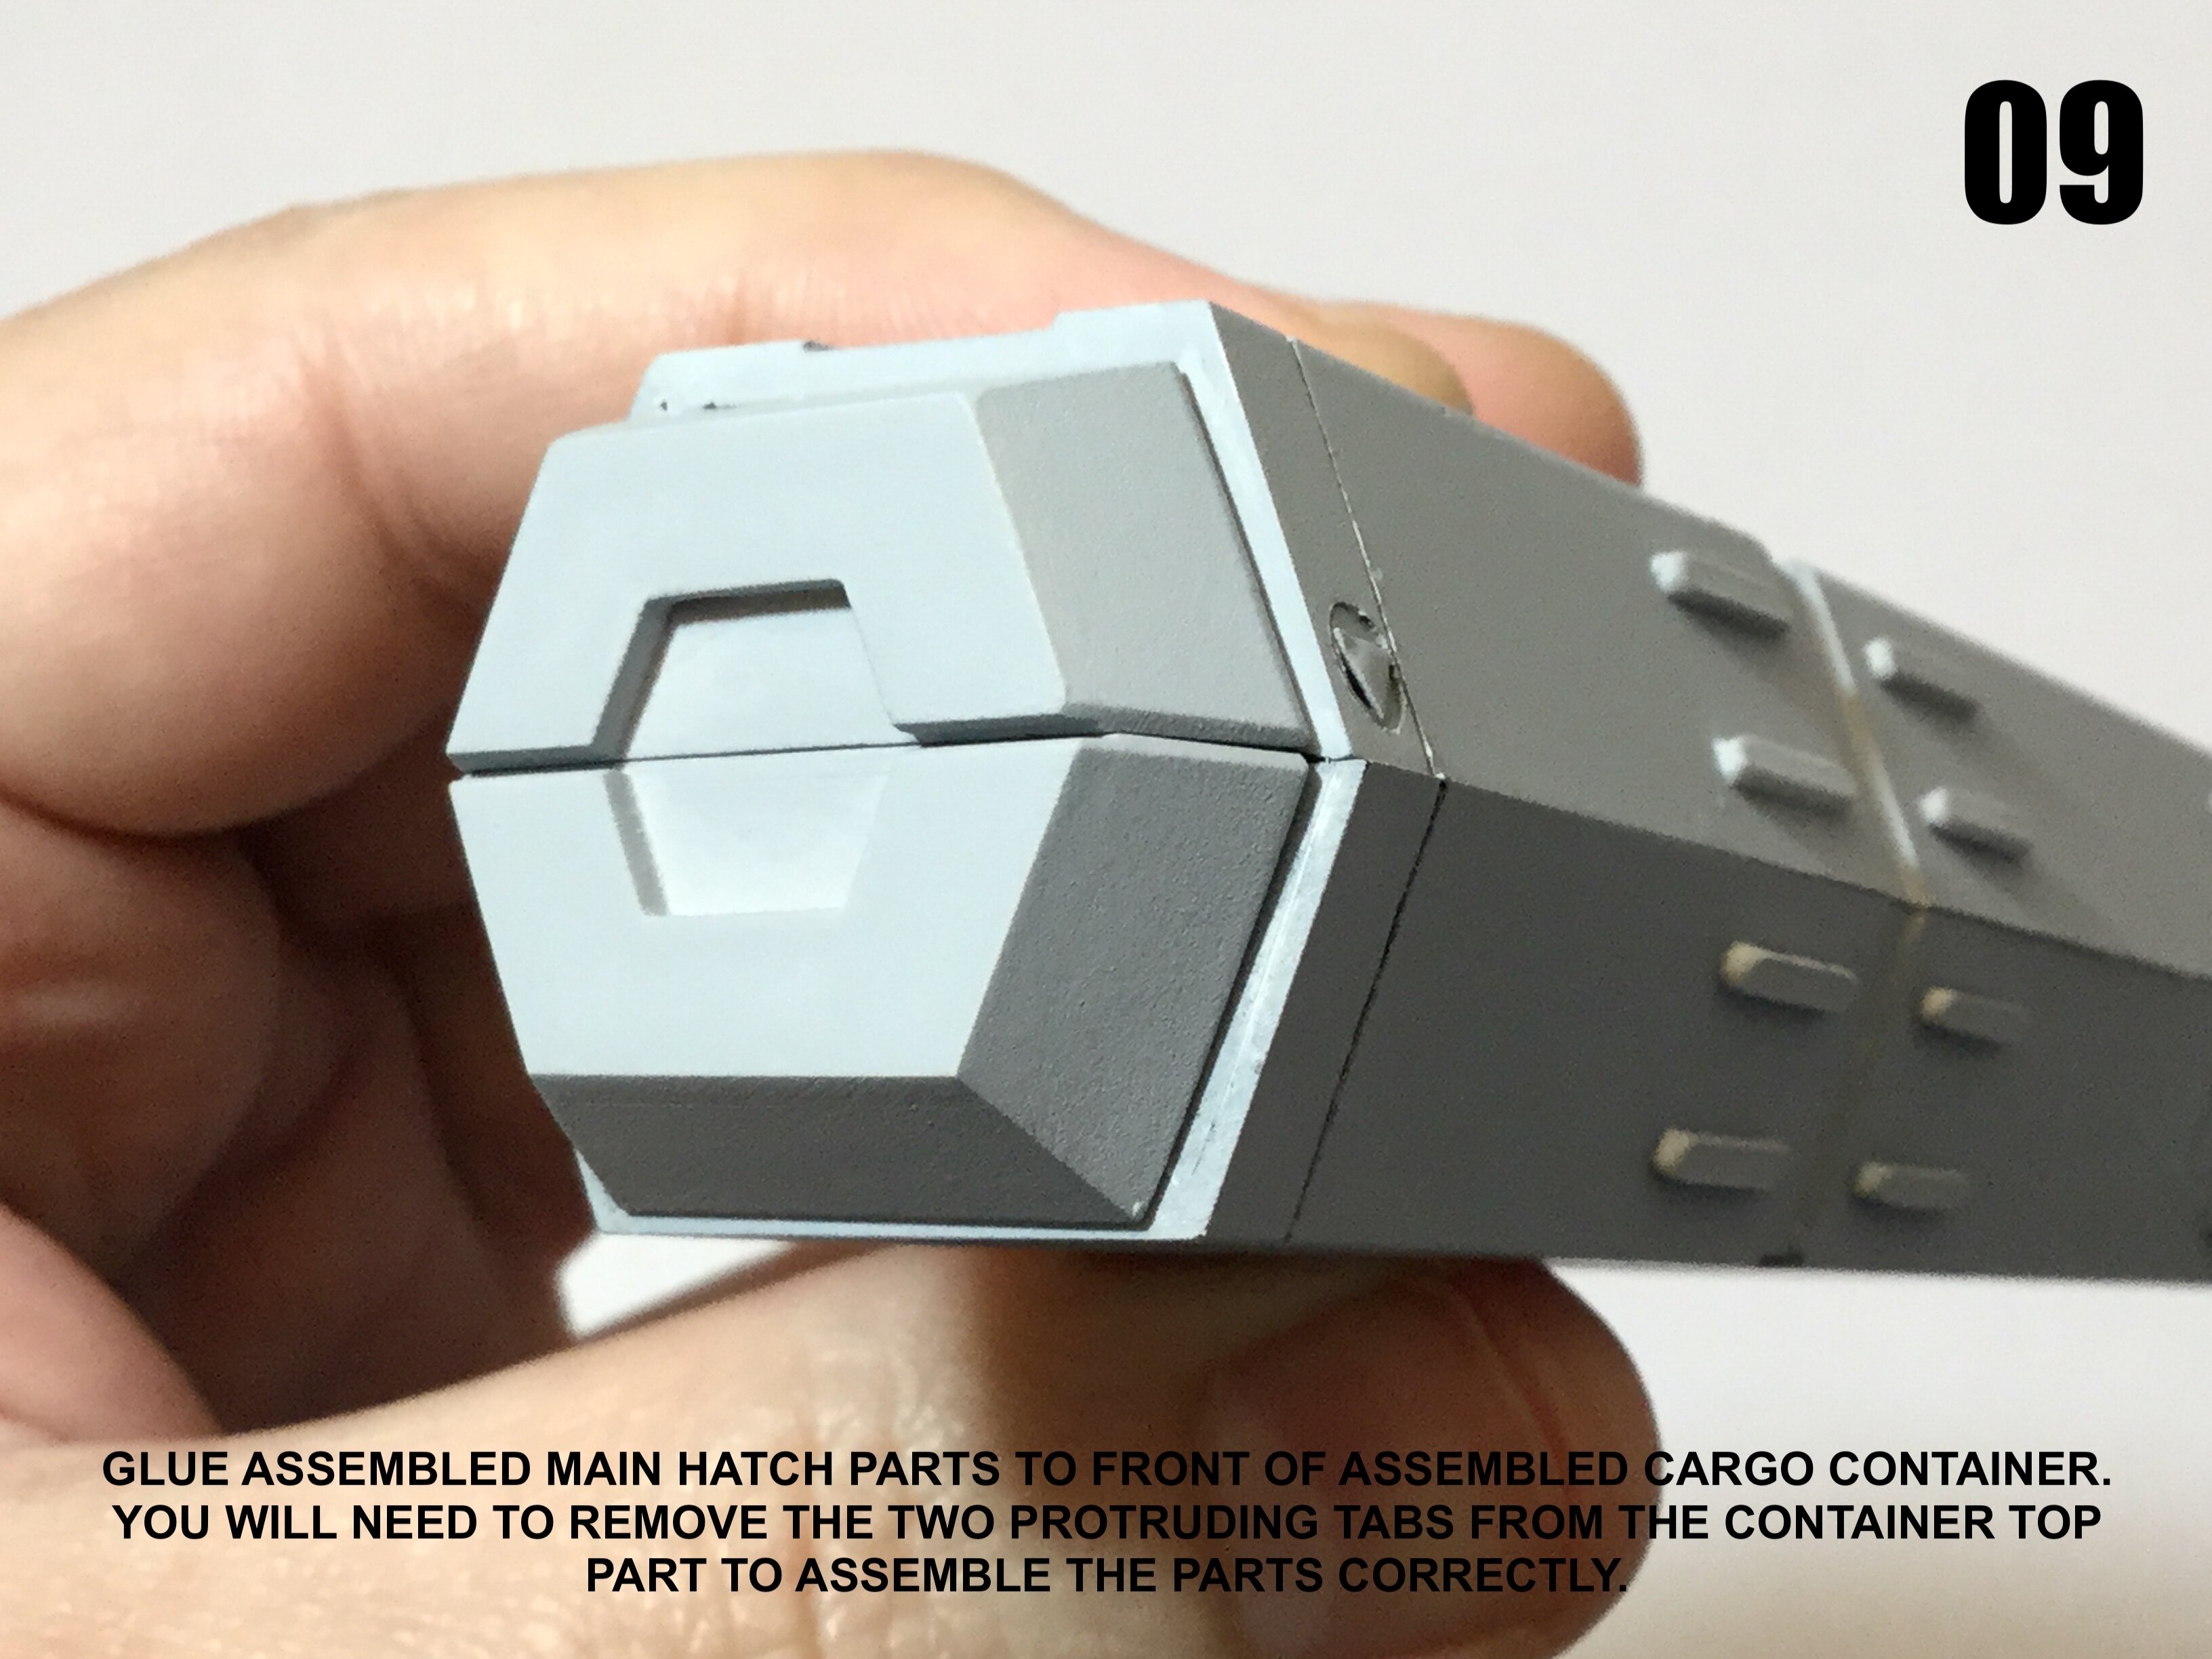
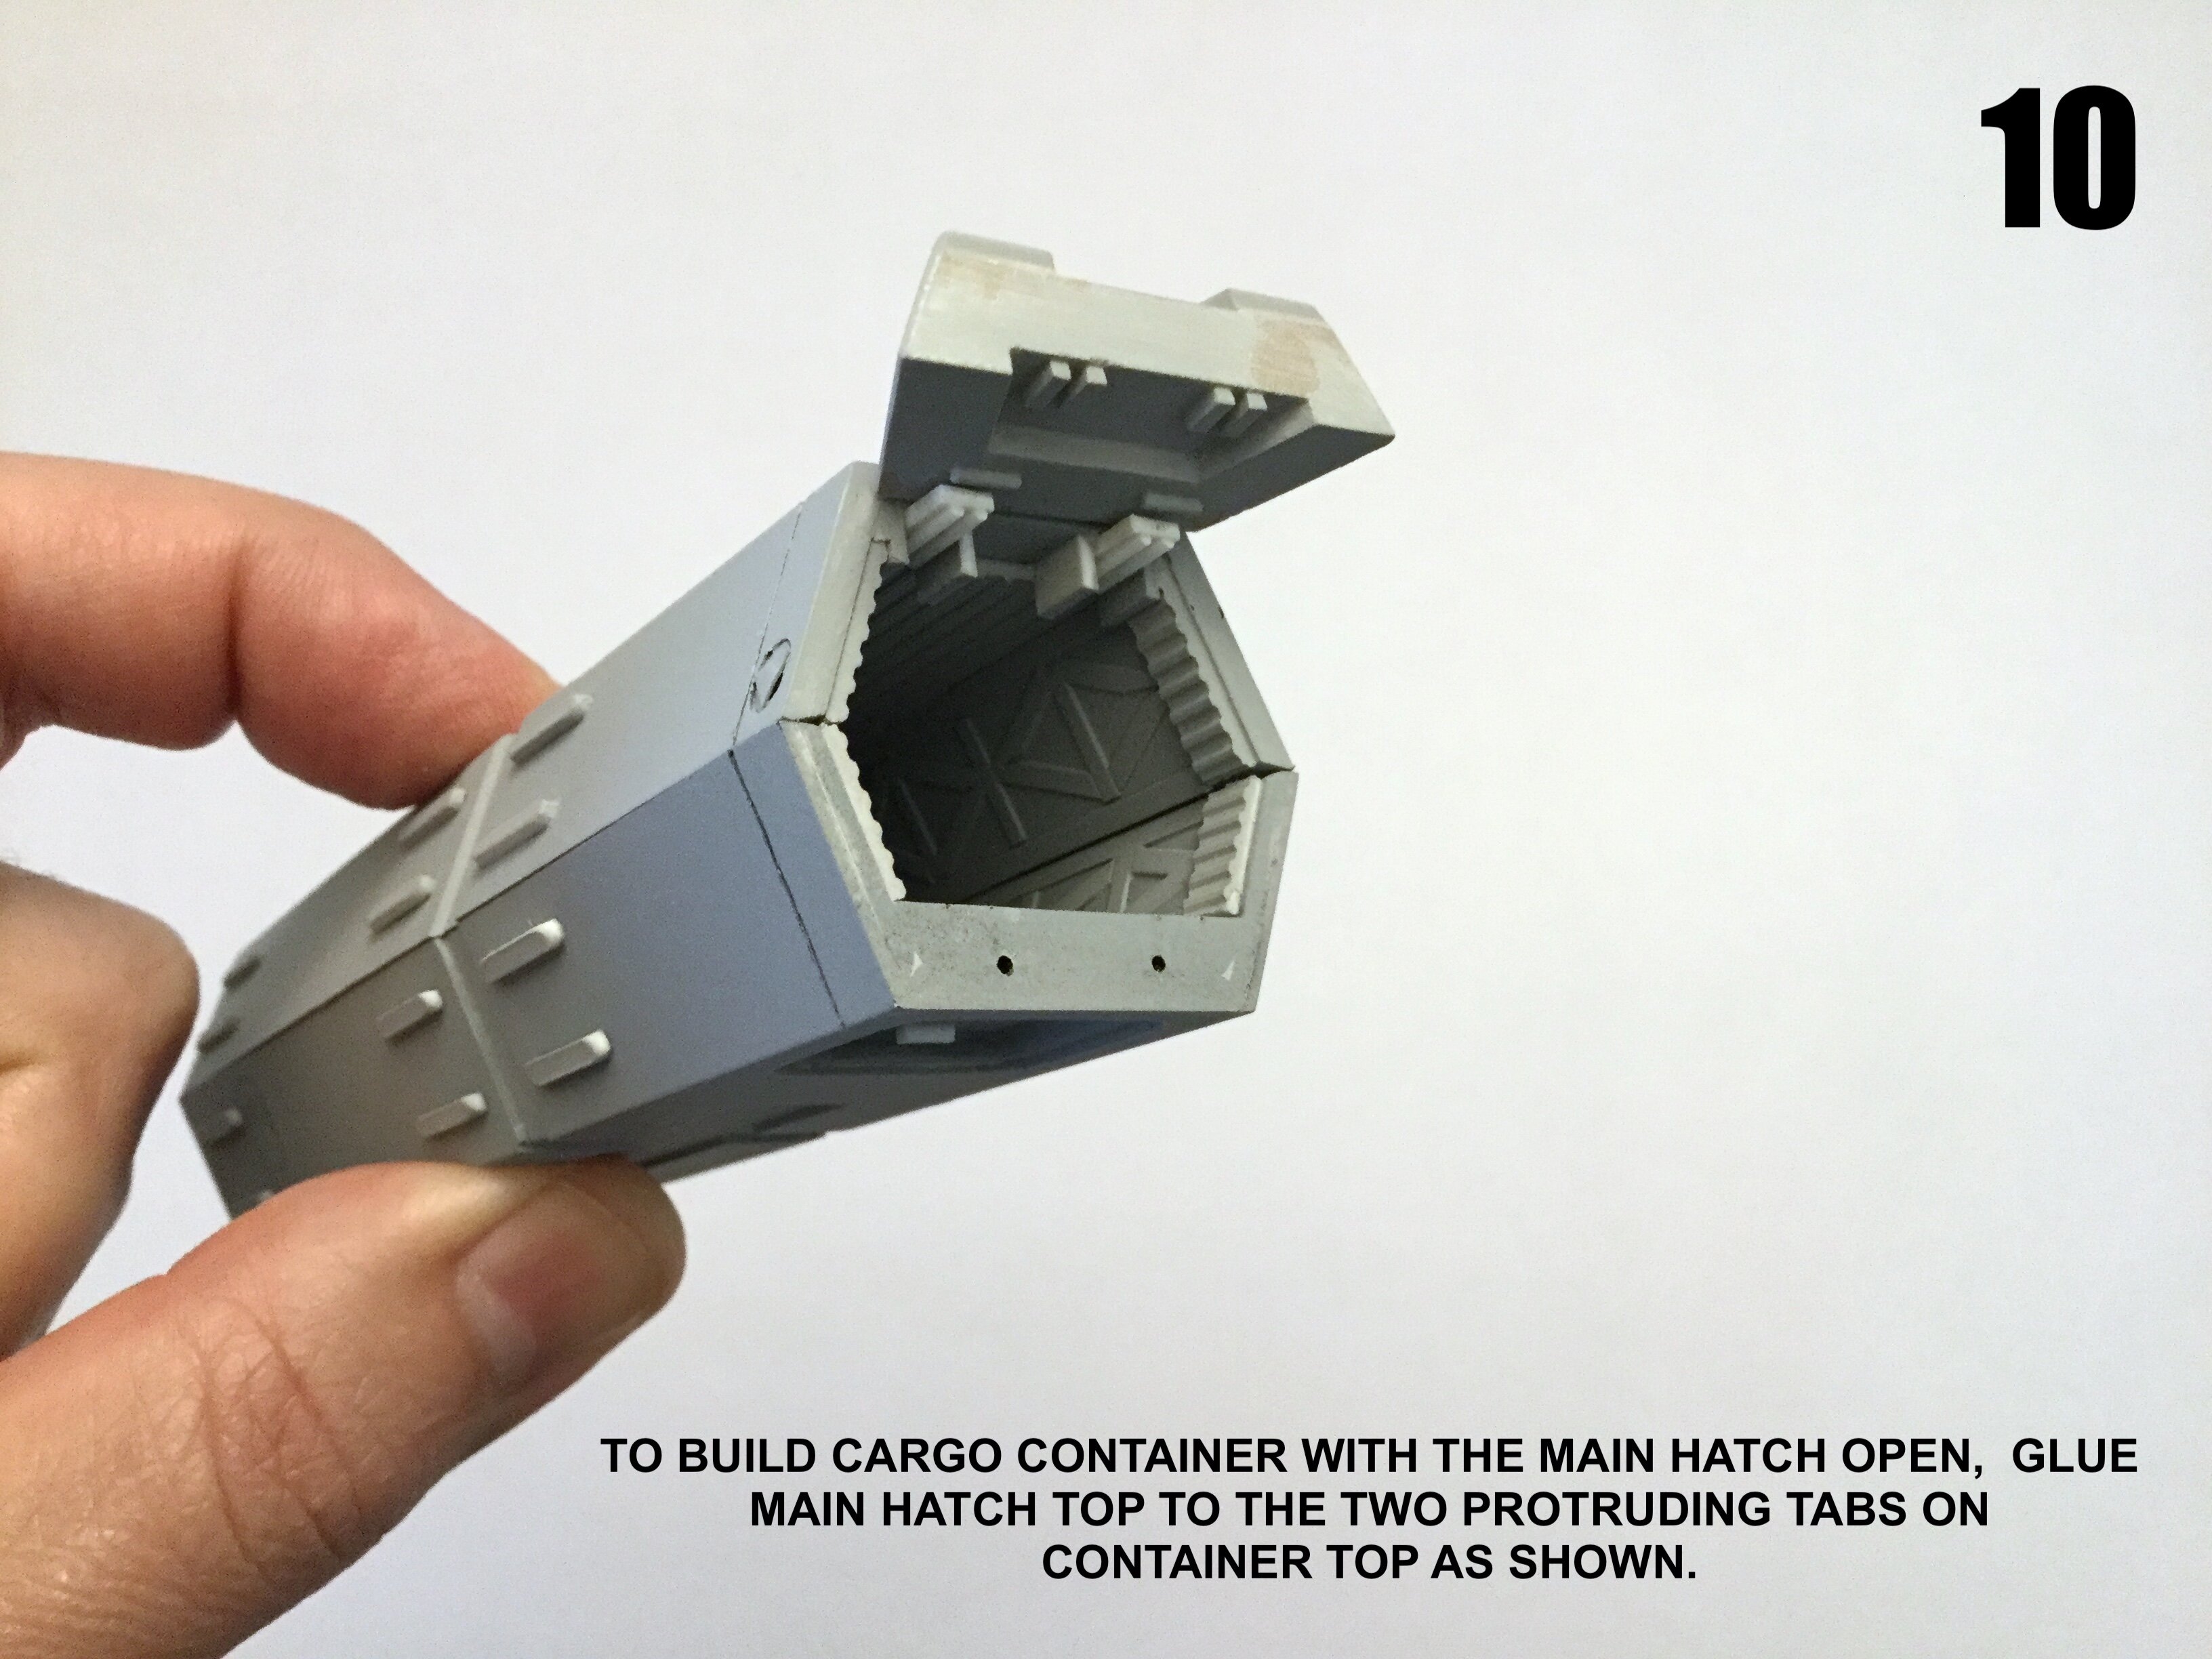
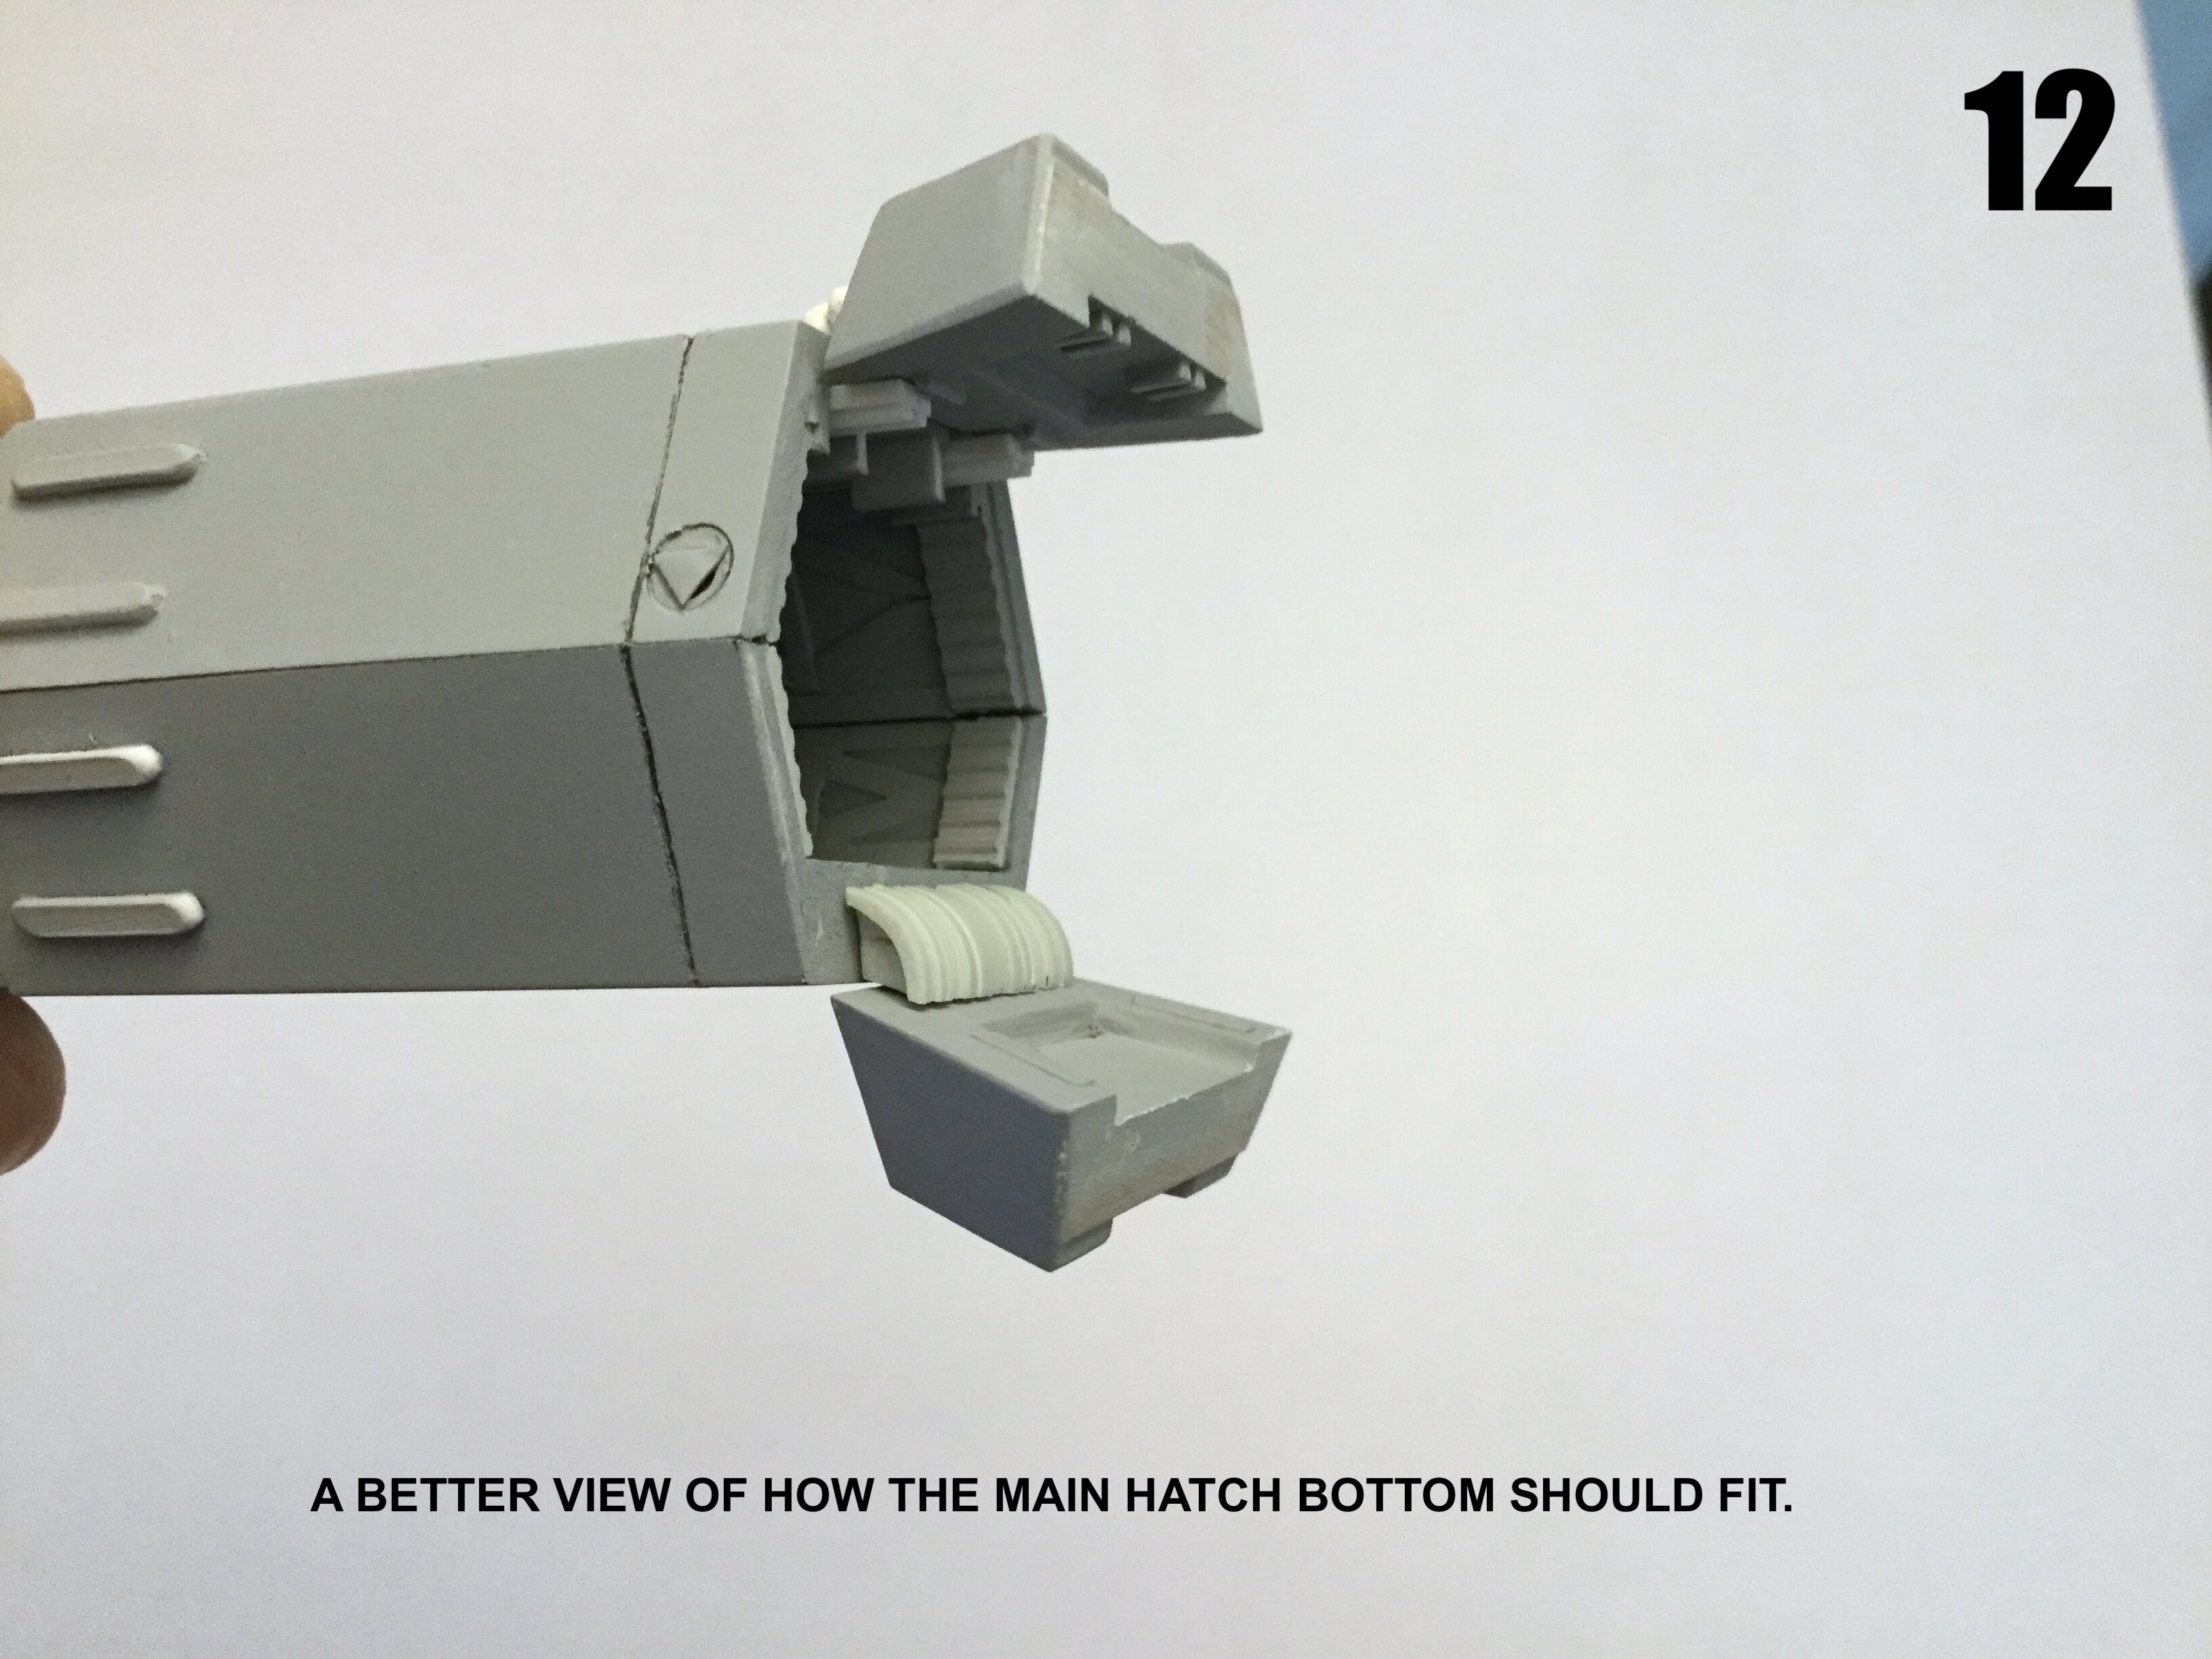
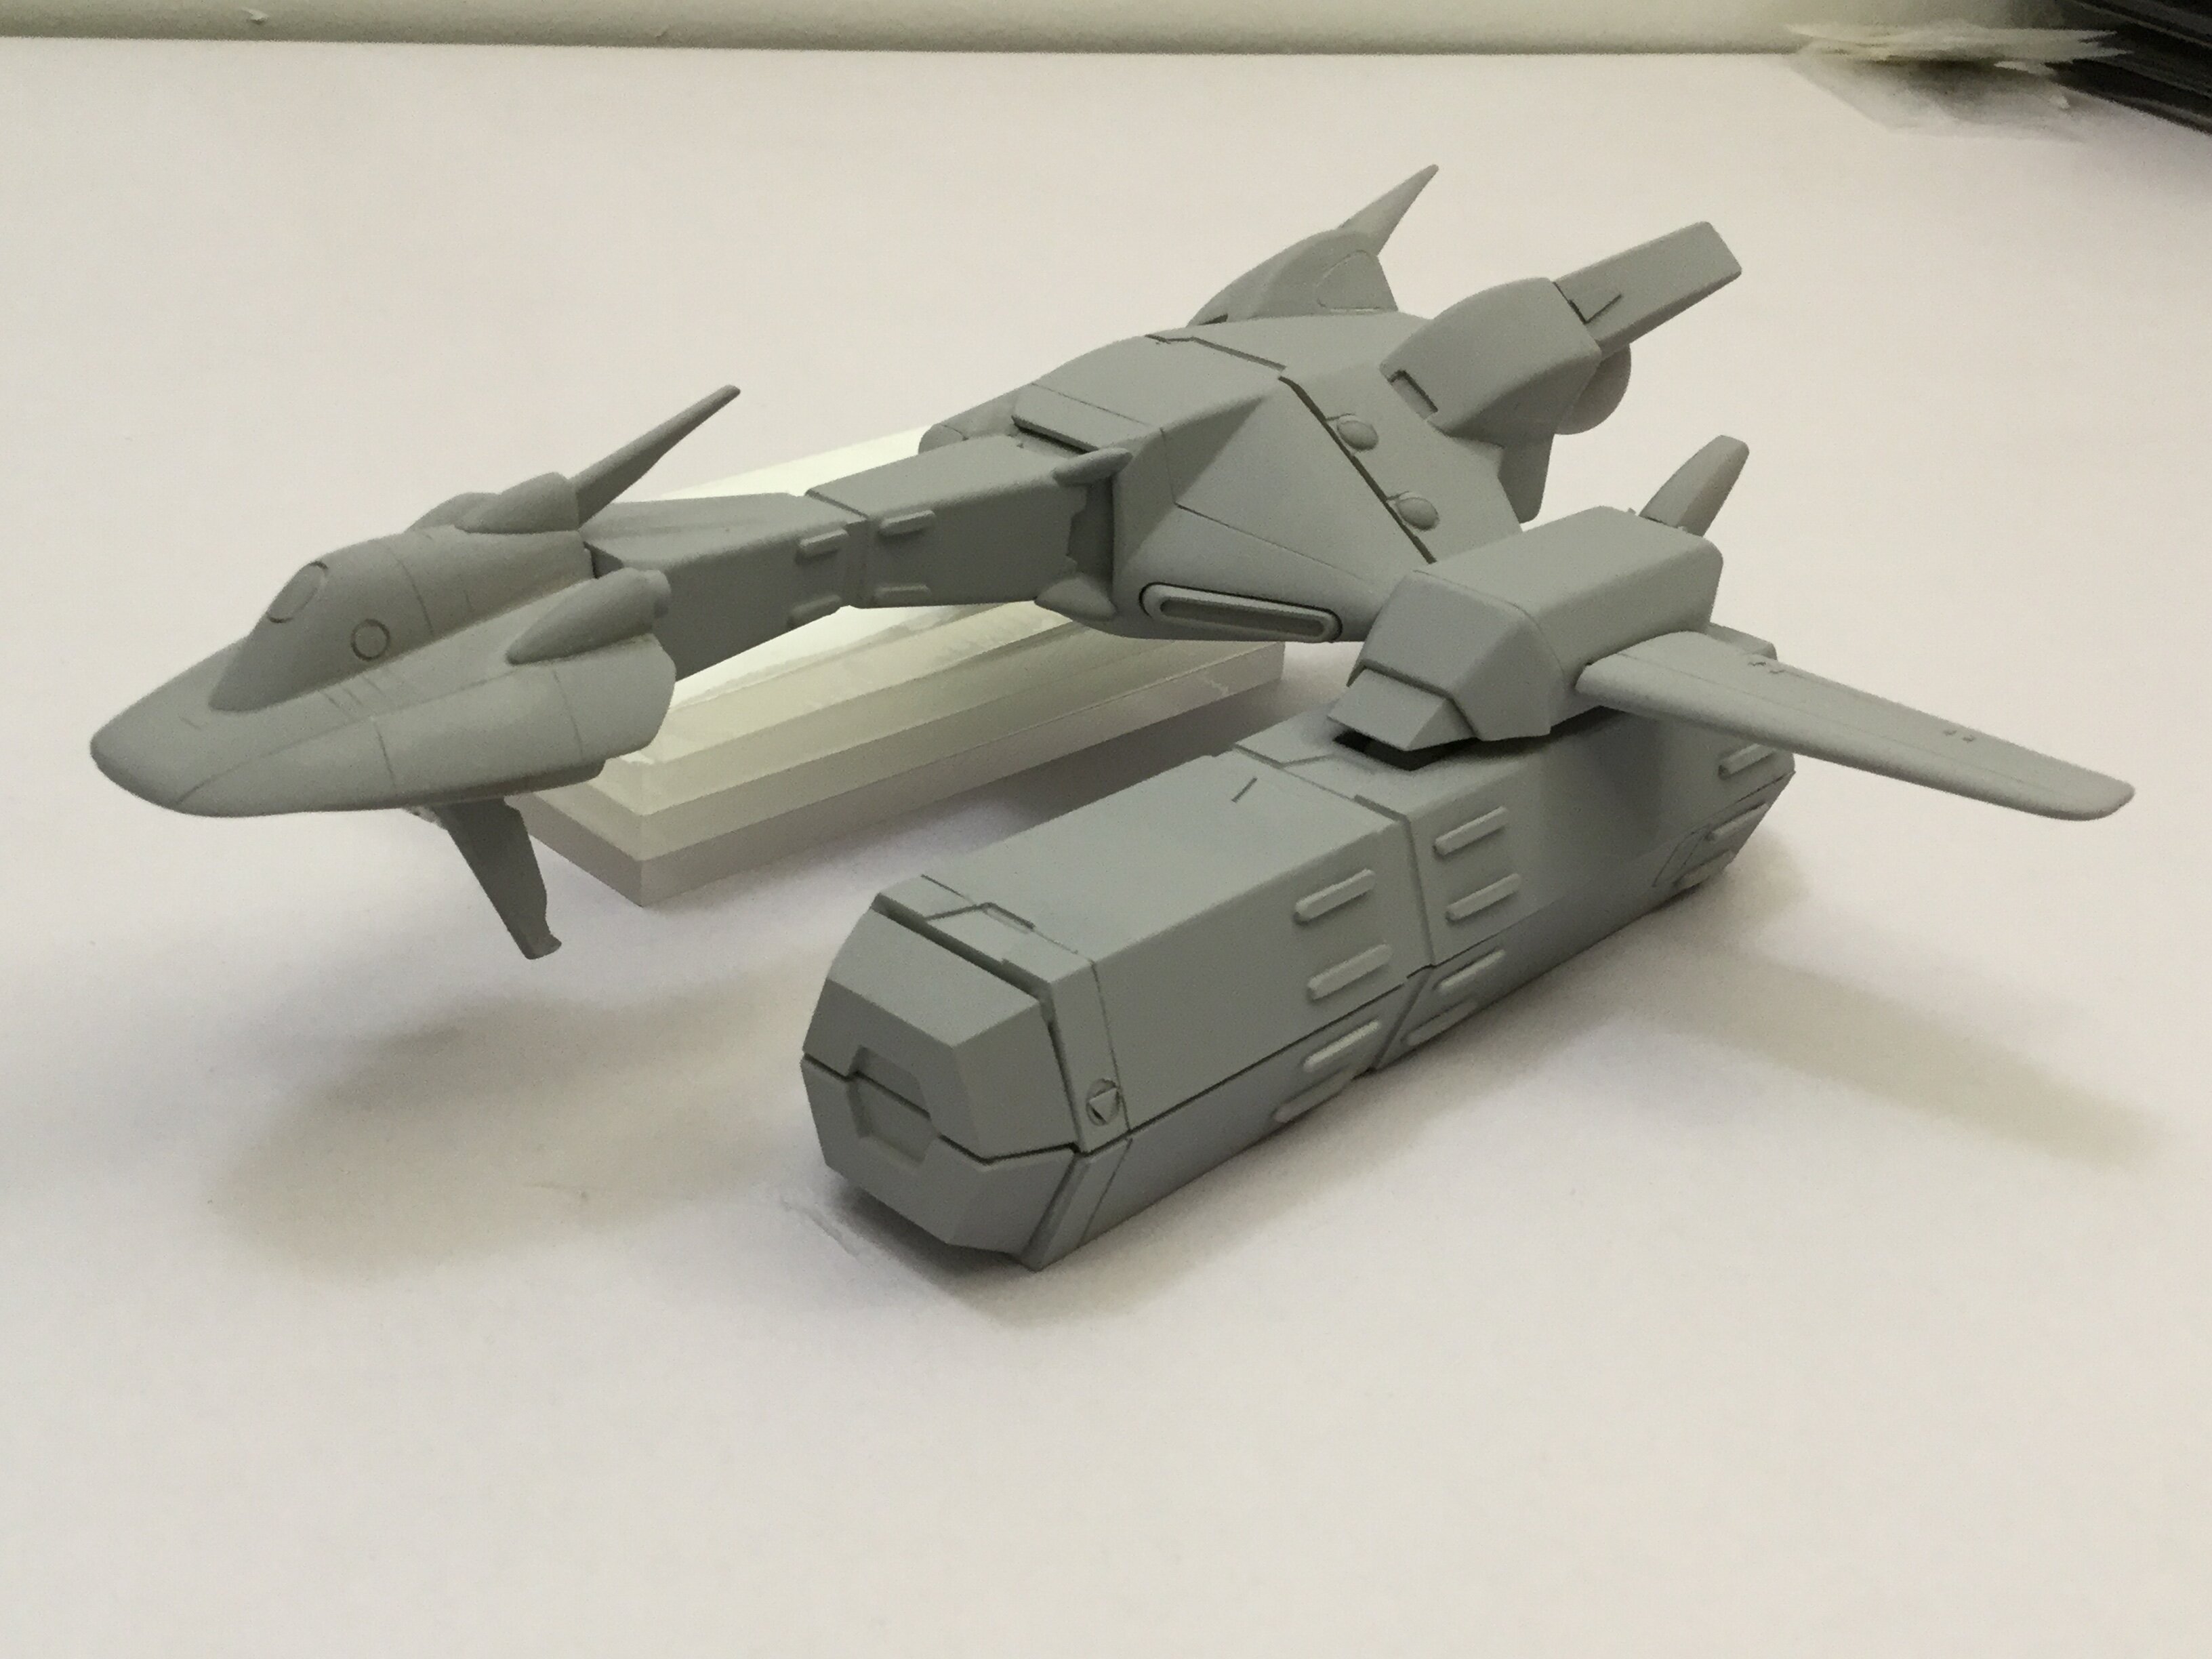
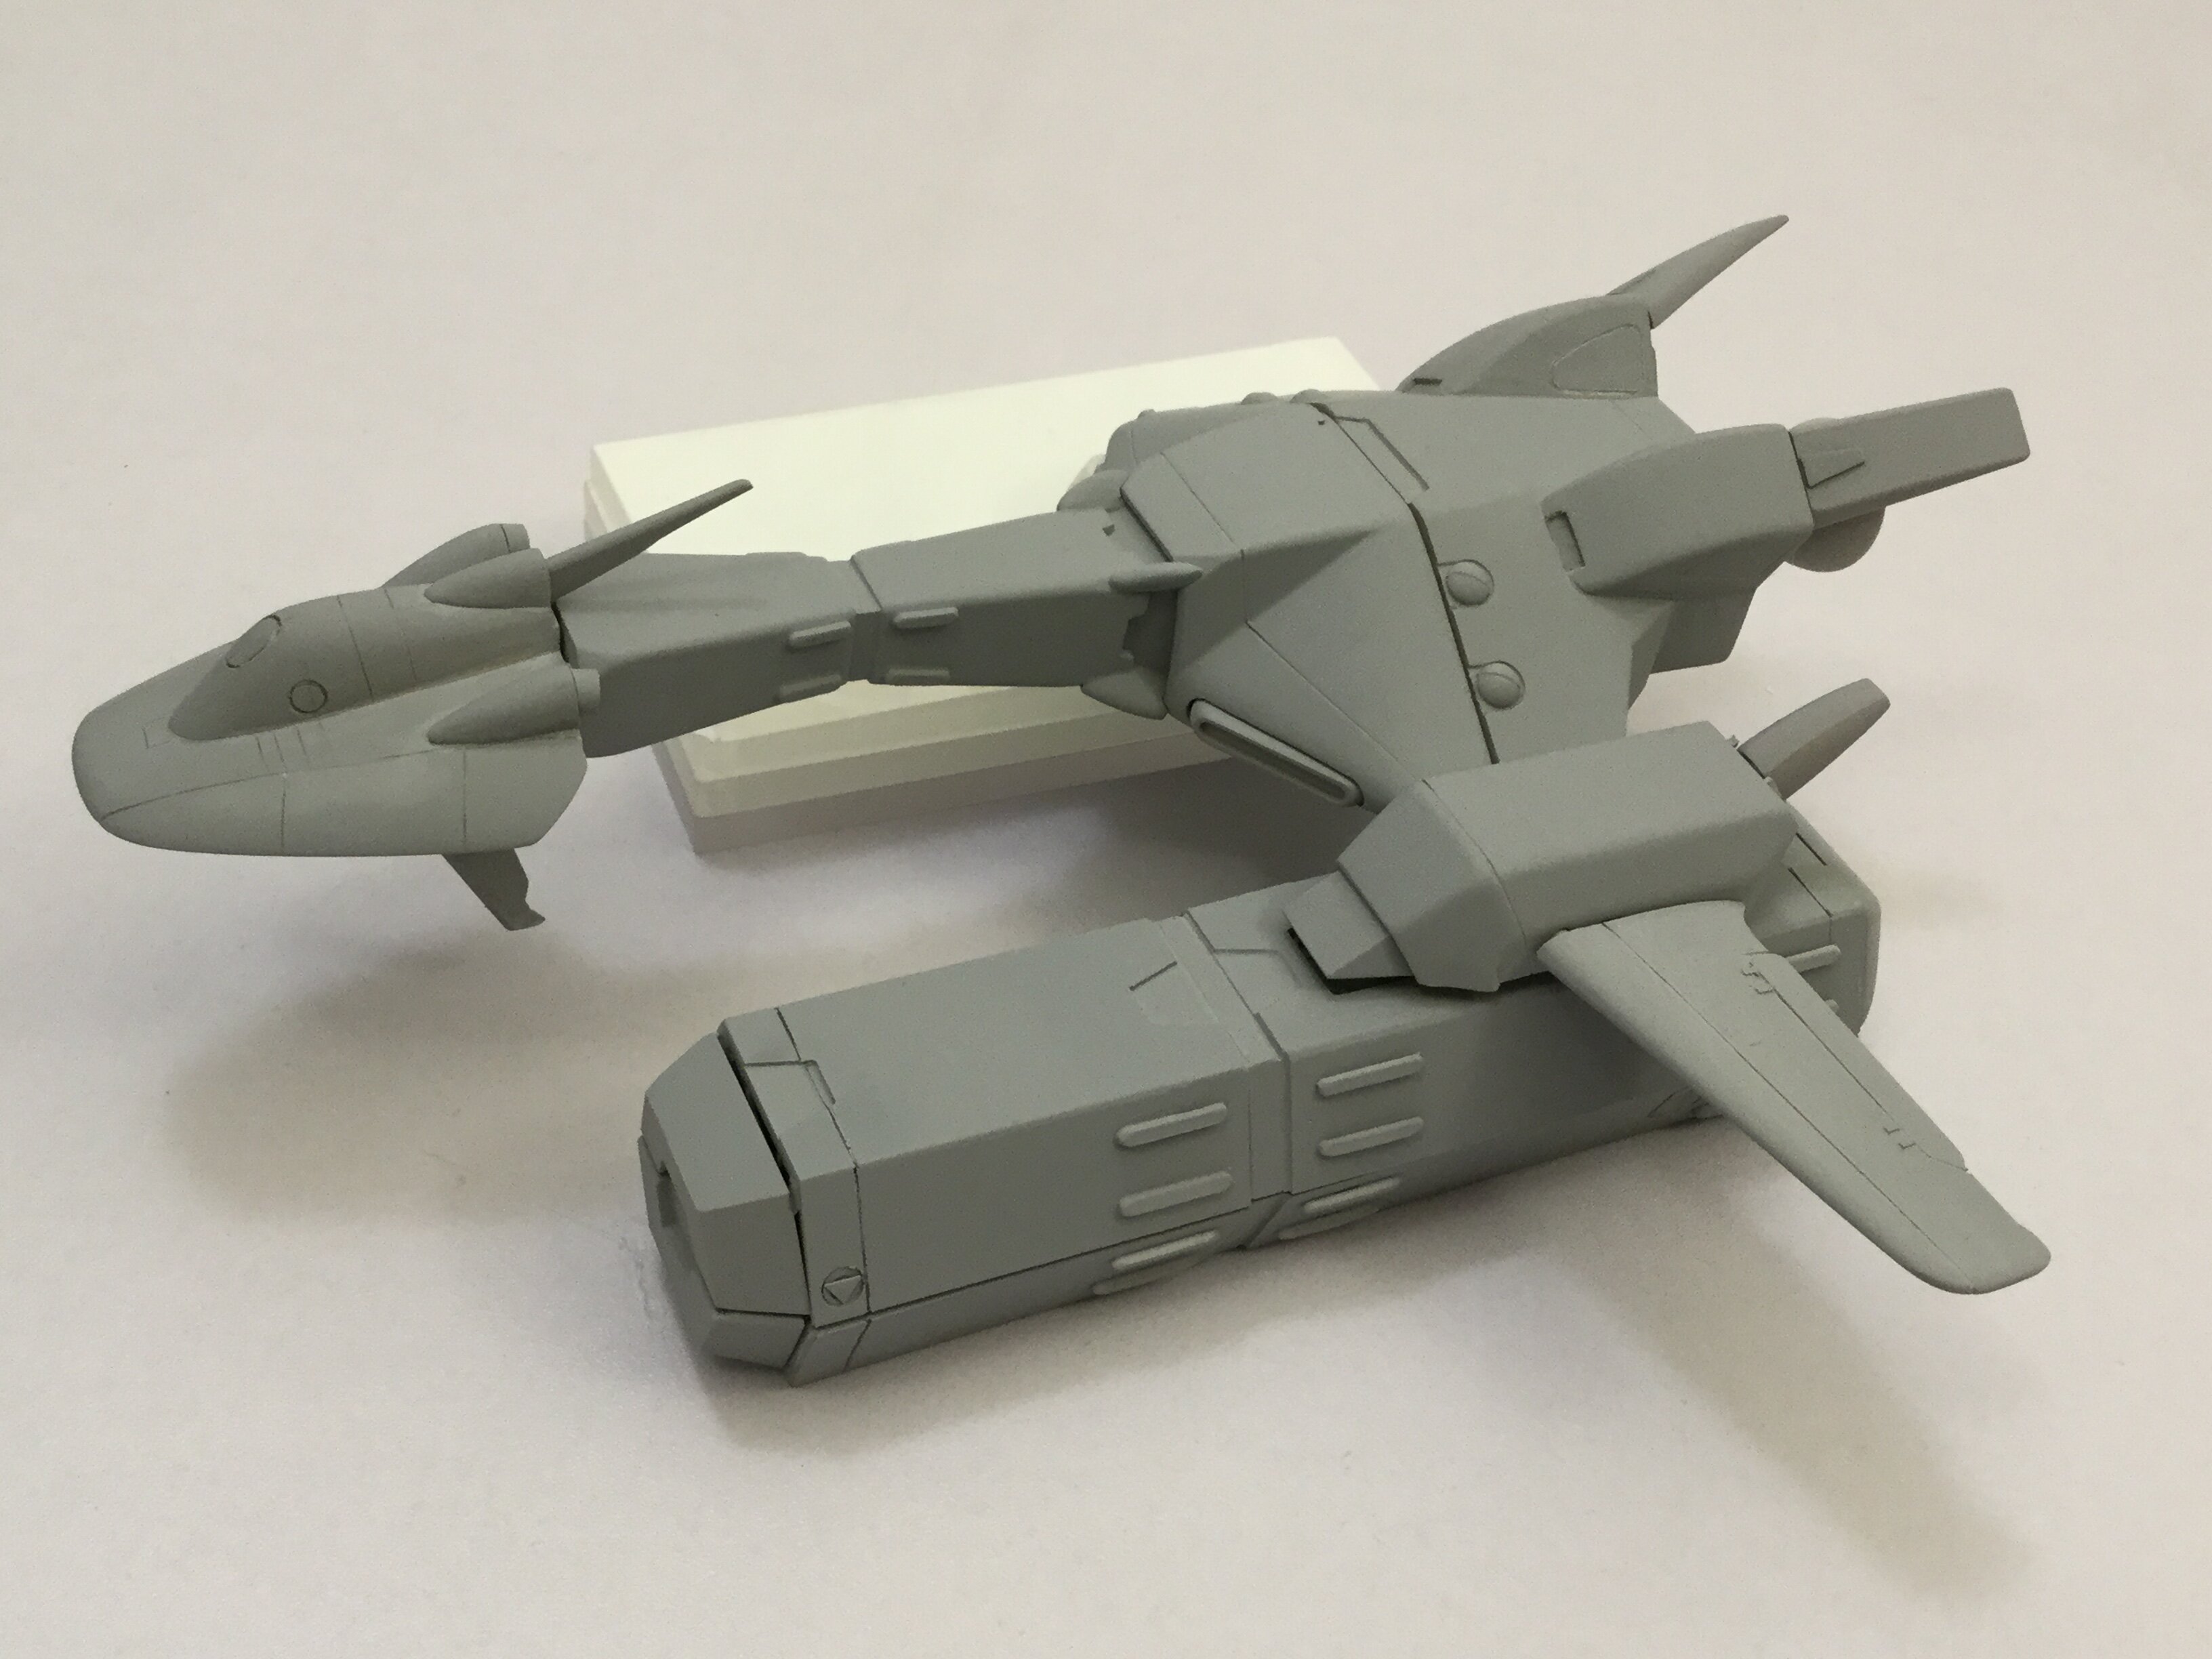
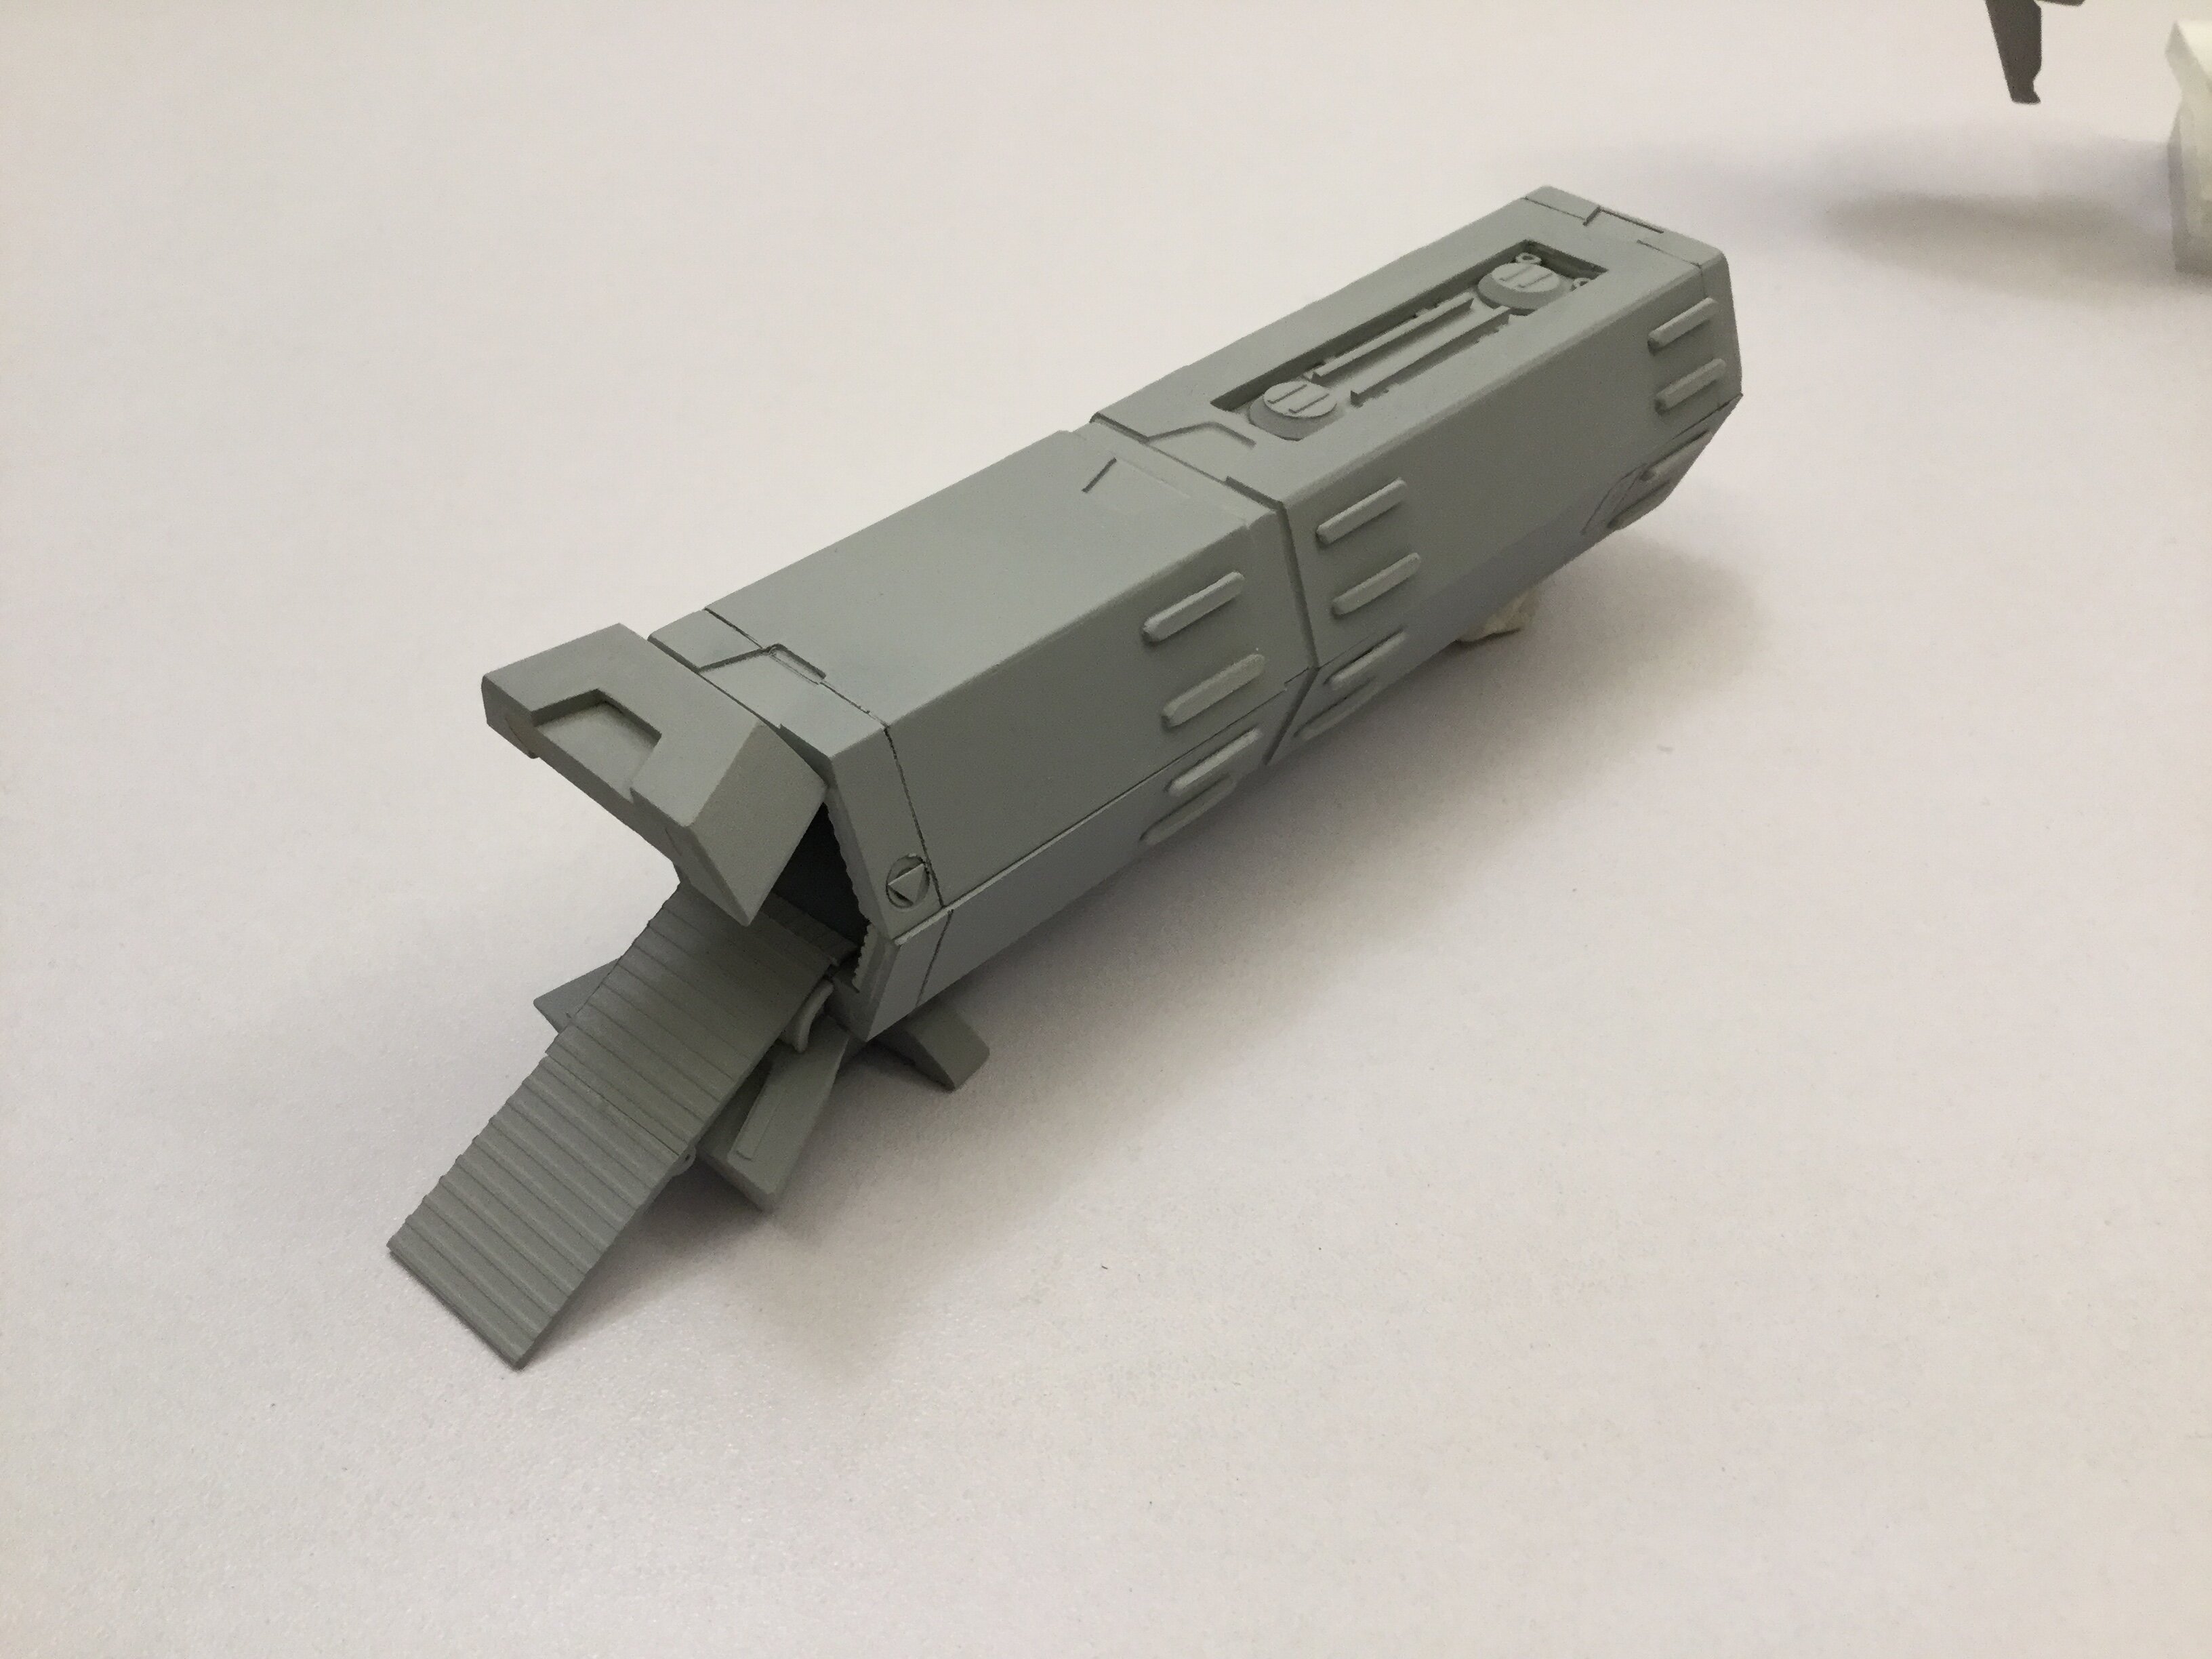
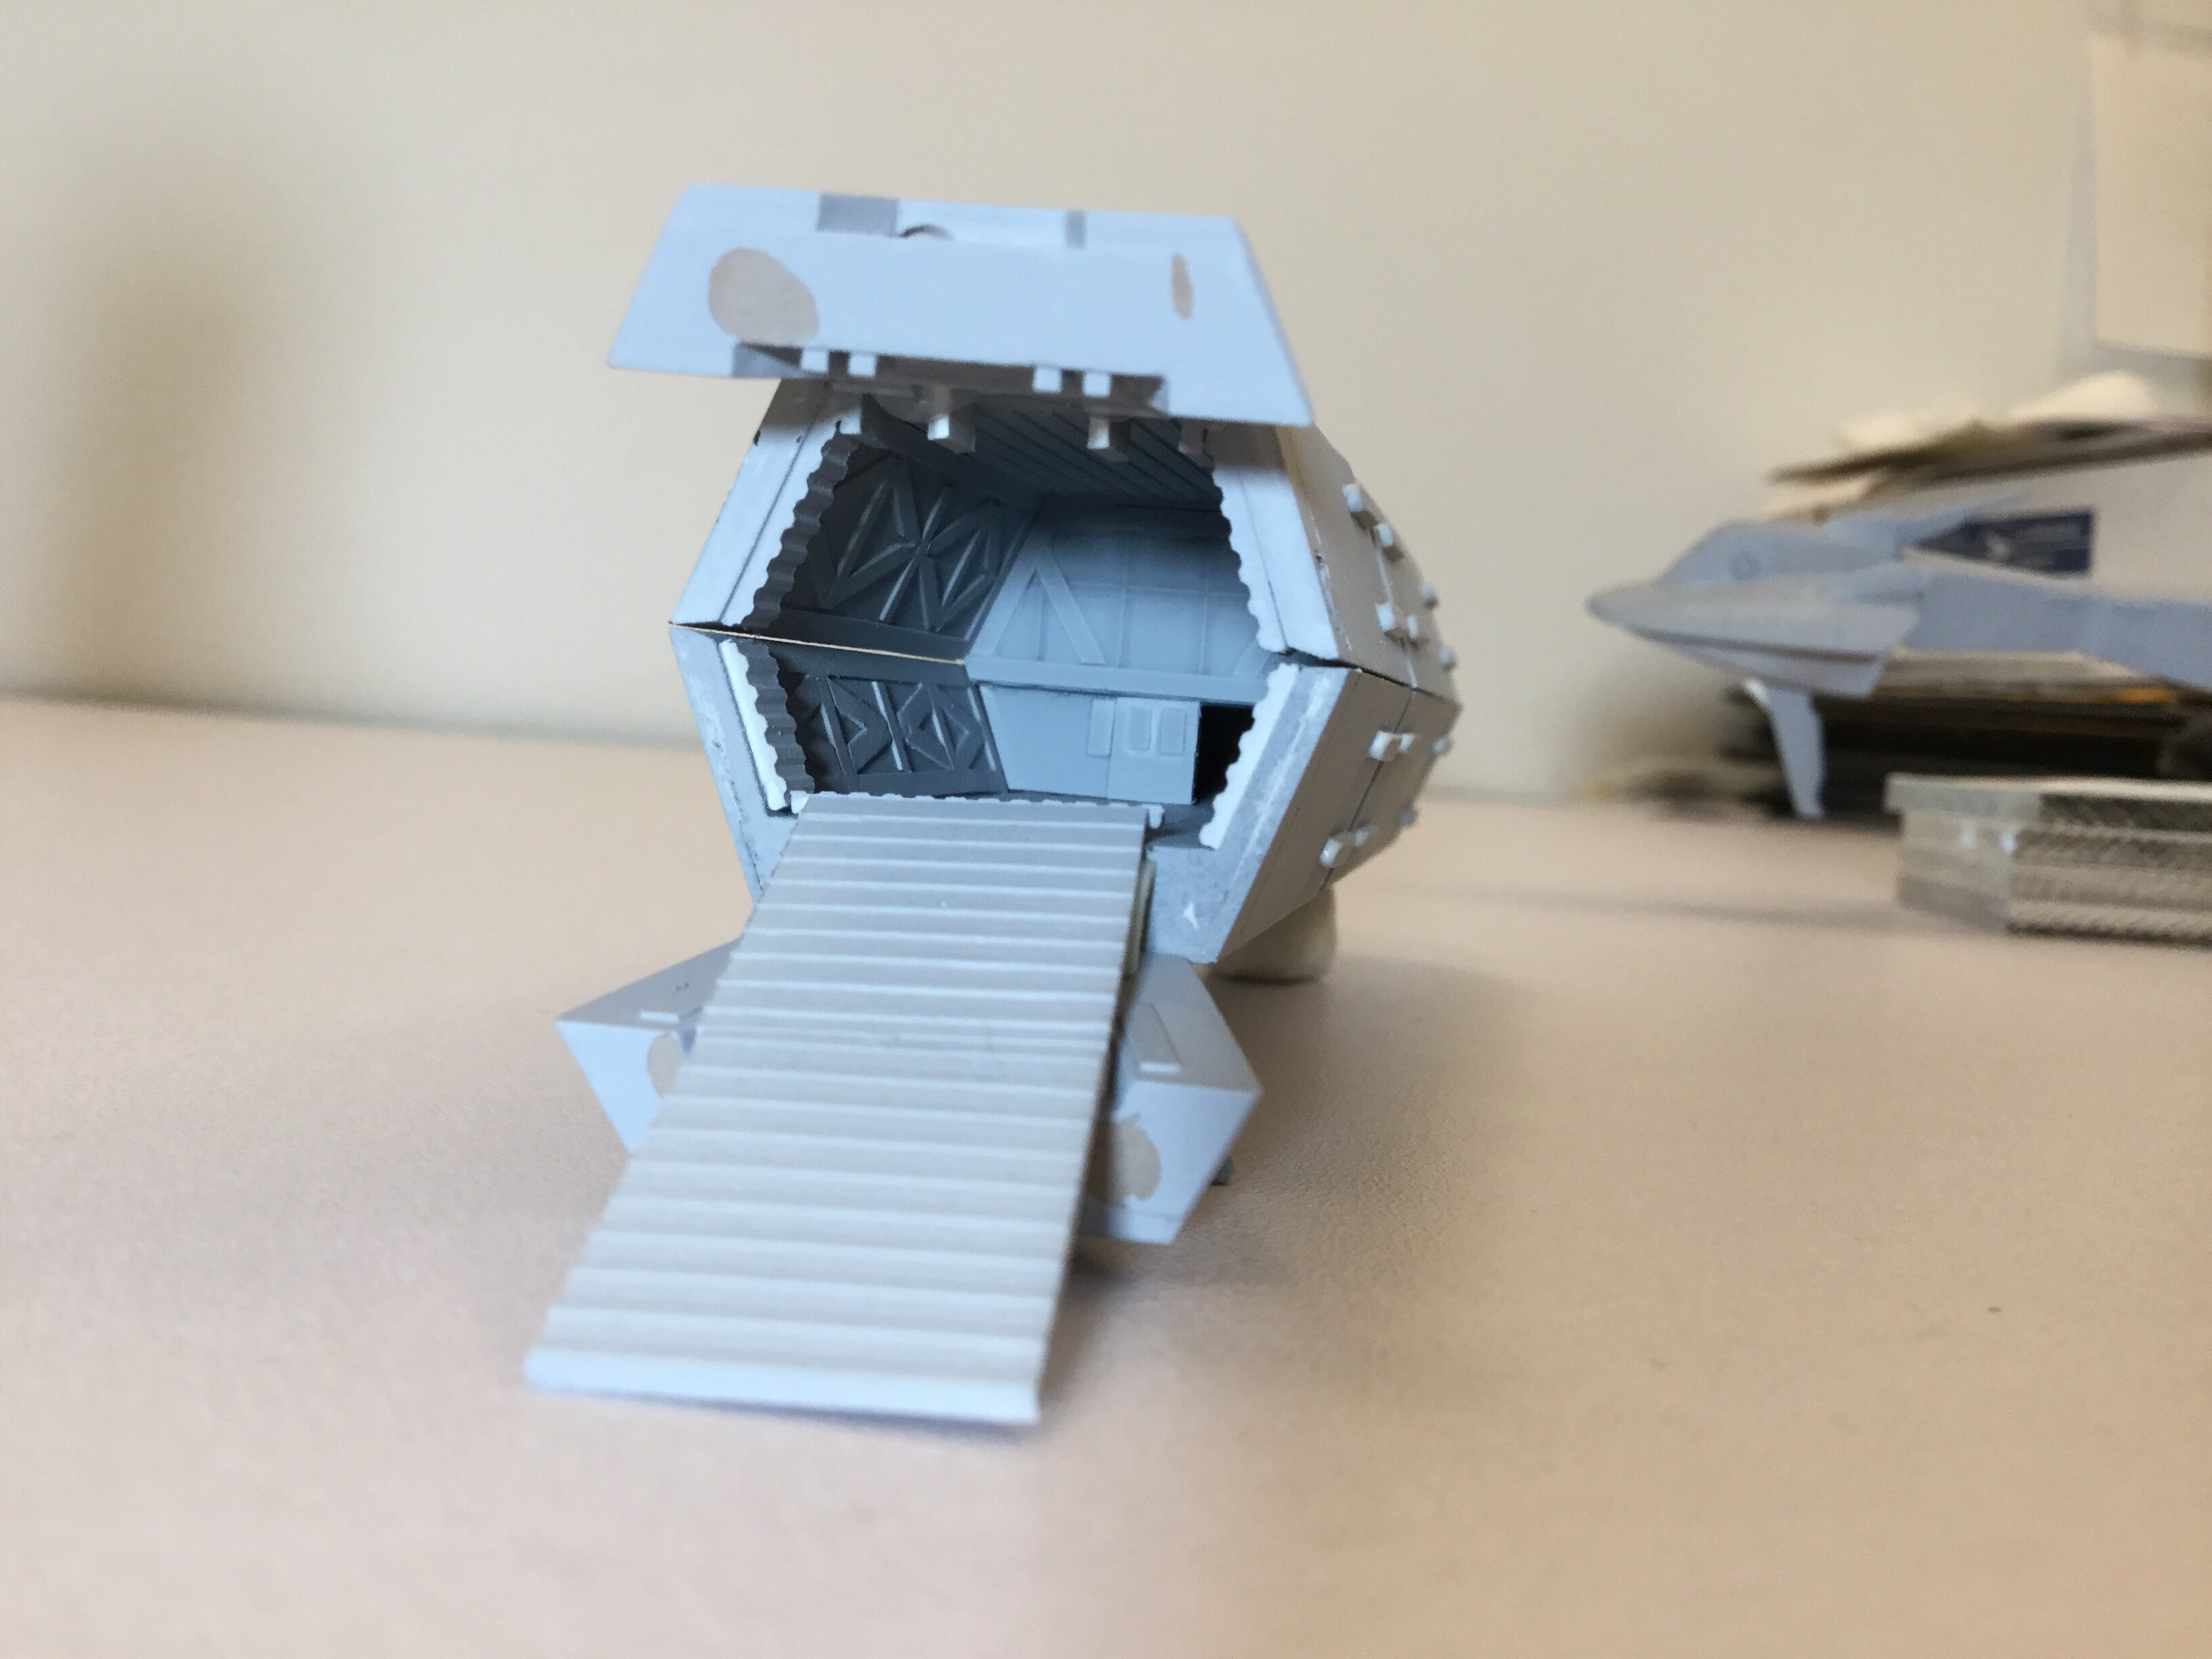
CARGO CONTAINER: while I wasn't able to achieve a posable, hinged cargo container door, I opted for better scale realism and came up with something fairly nifty especially considering the scale. The line-art shows what looks like a one-piece retractable boarding ramp, but that would interfere with the already VERY cramped landing gear, so I replaced it wth a folding ramp that stows right behind the main door, so more realistic.
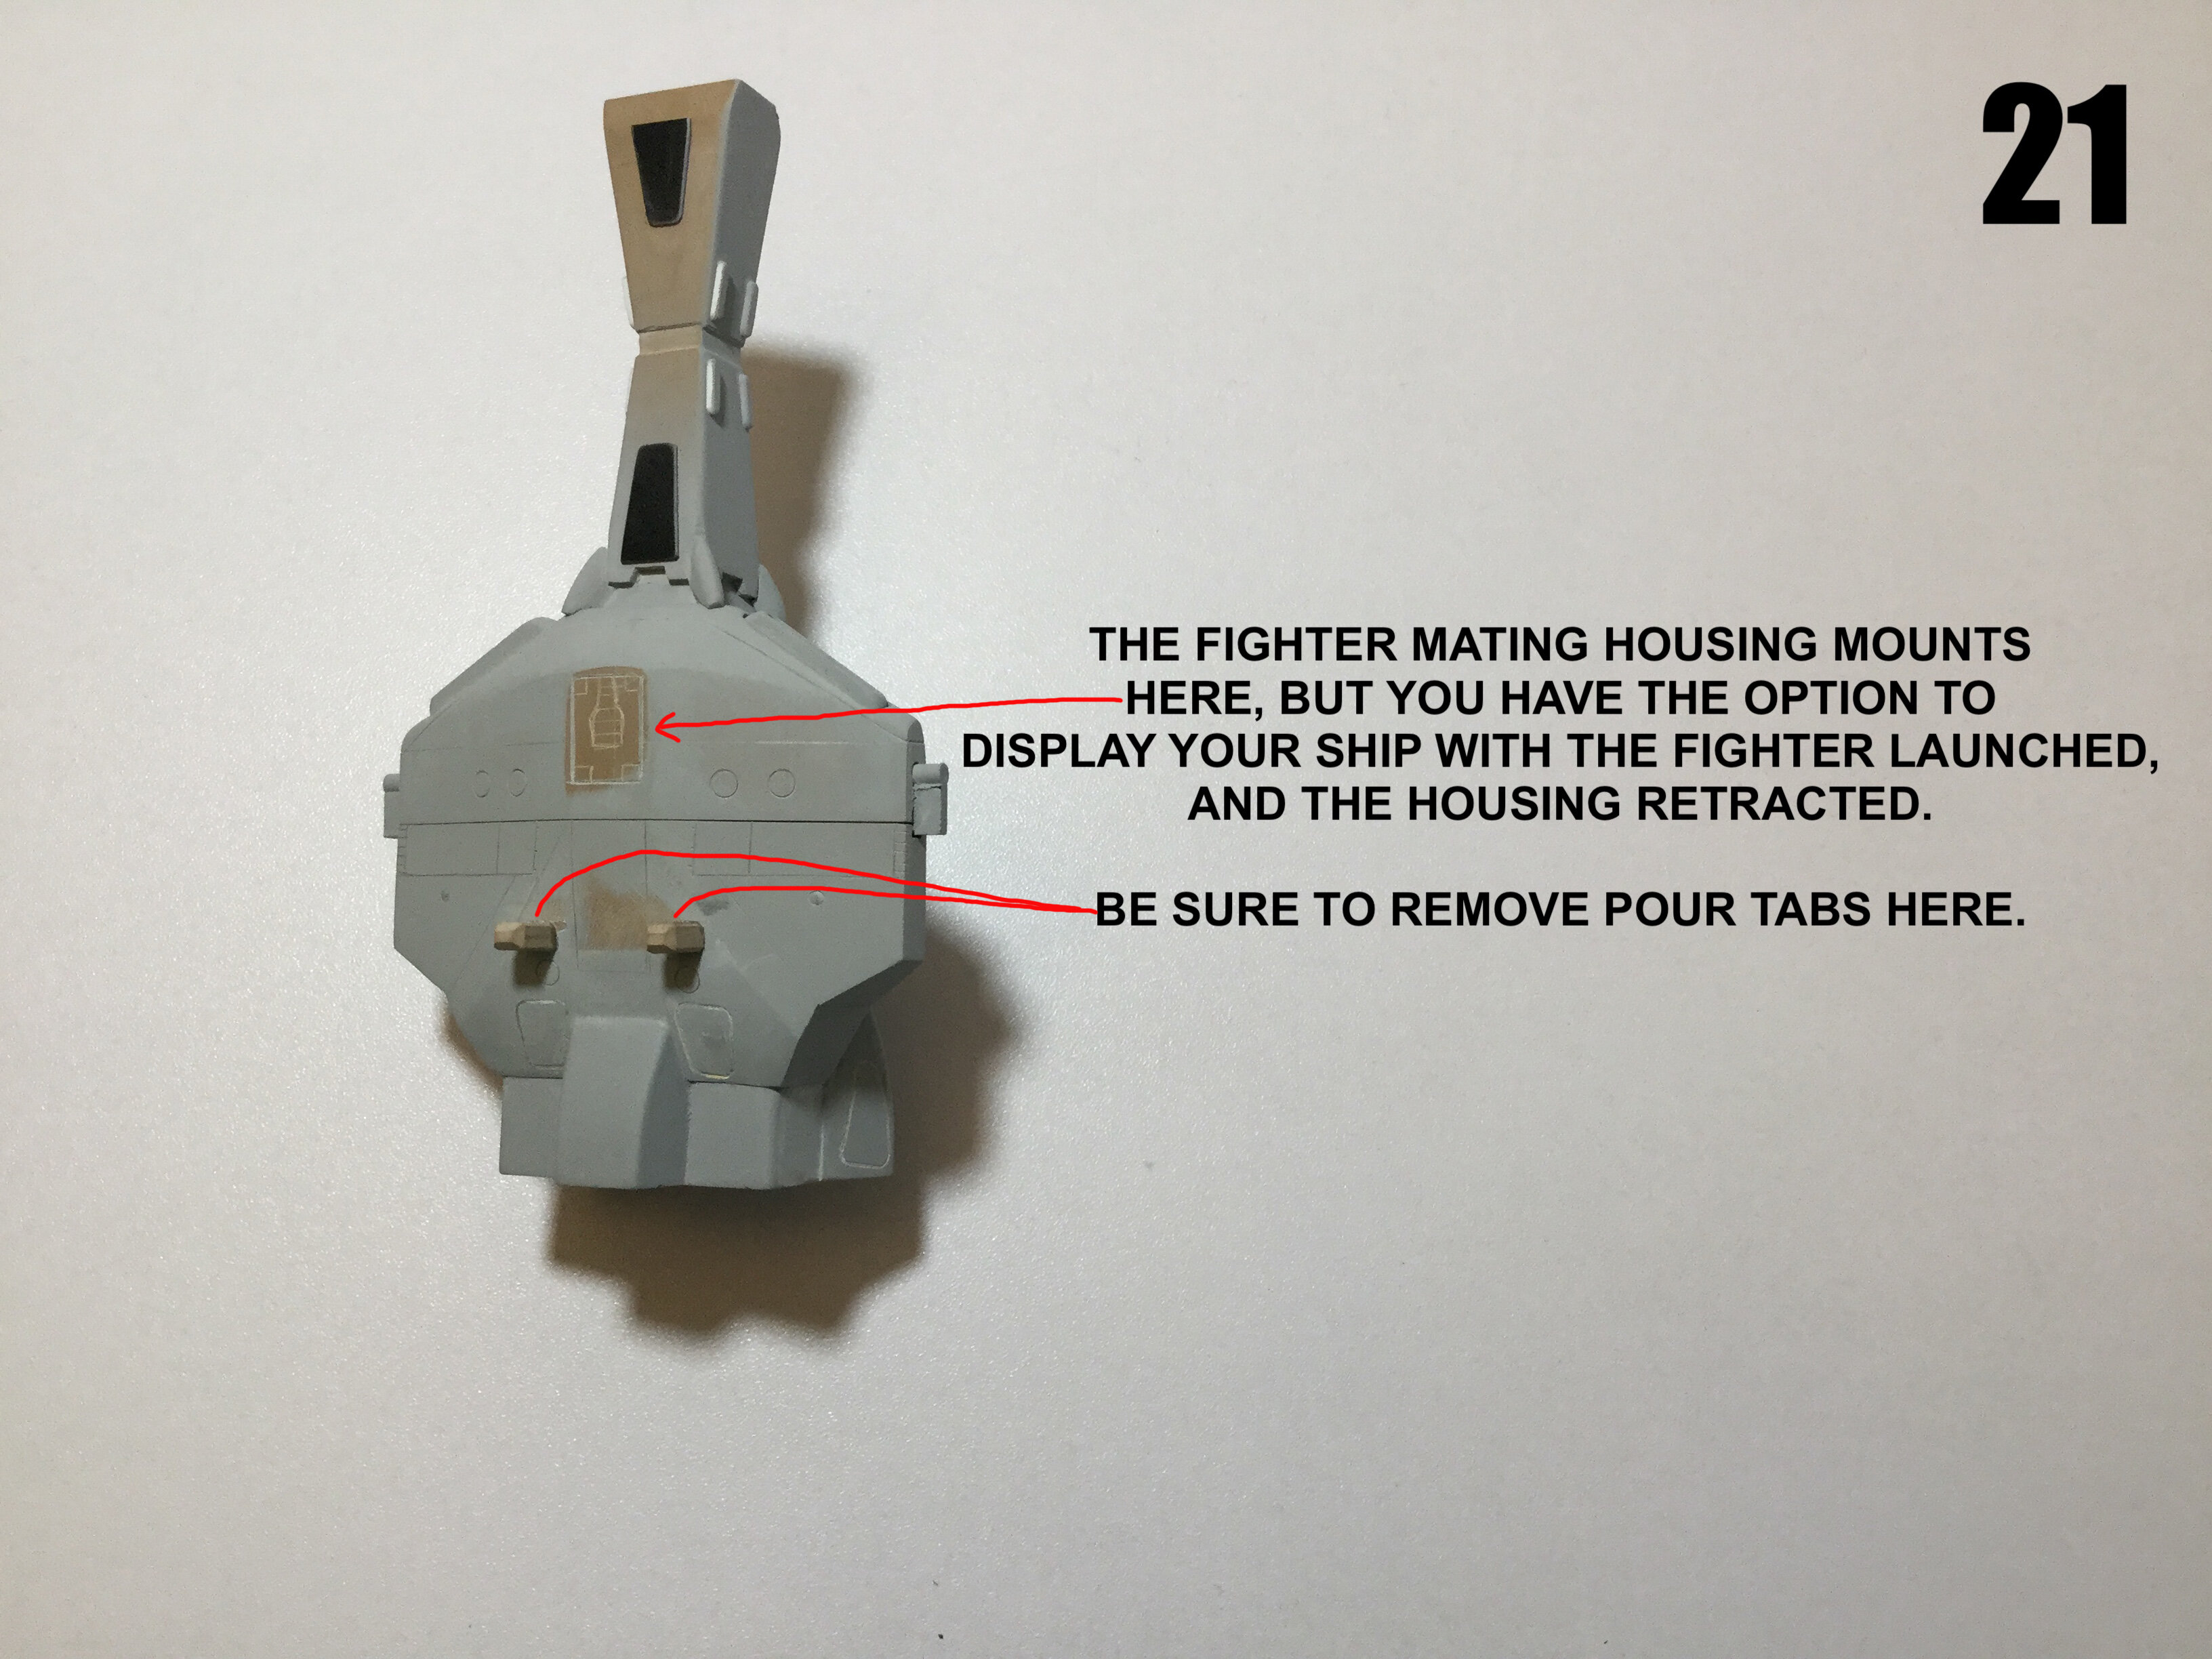
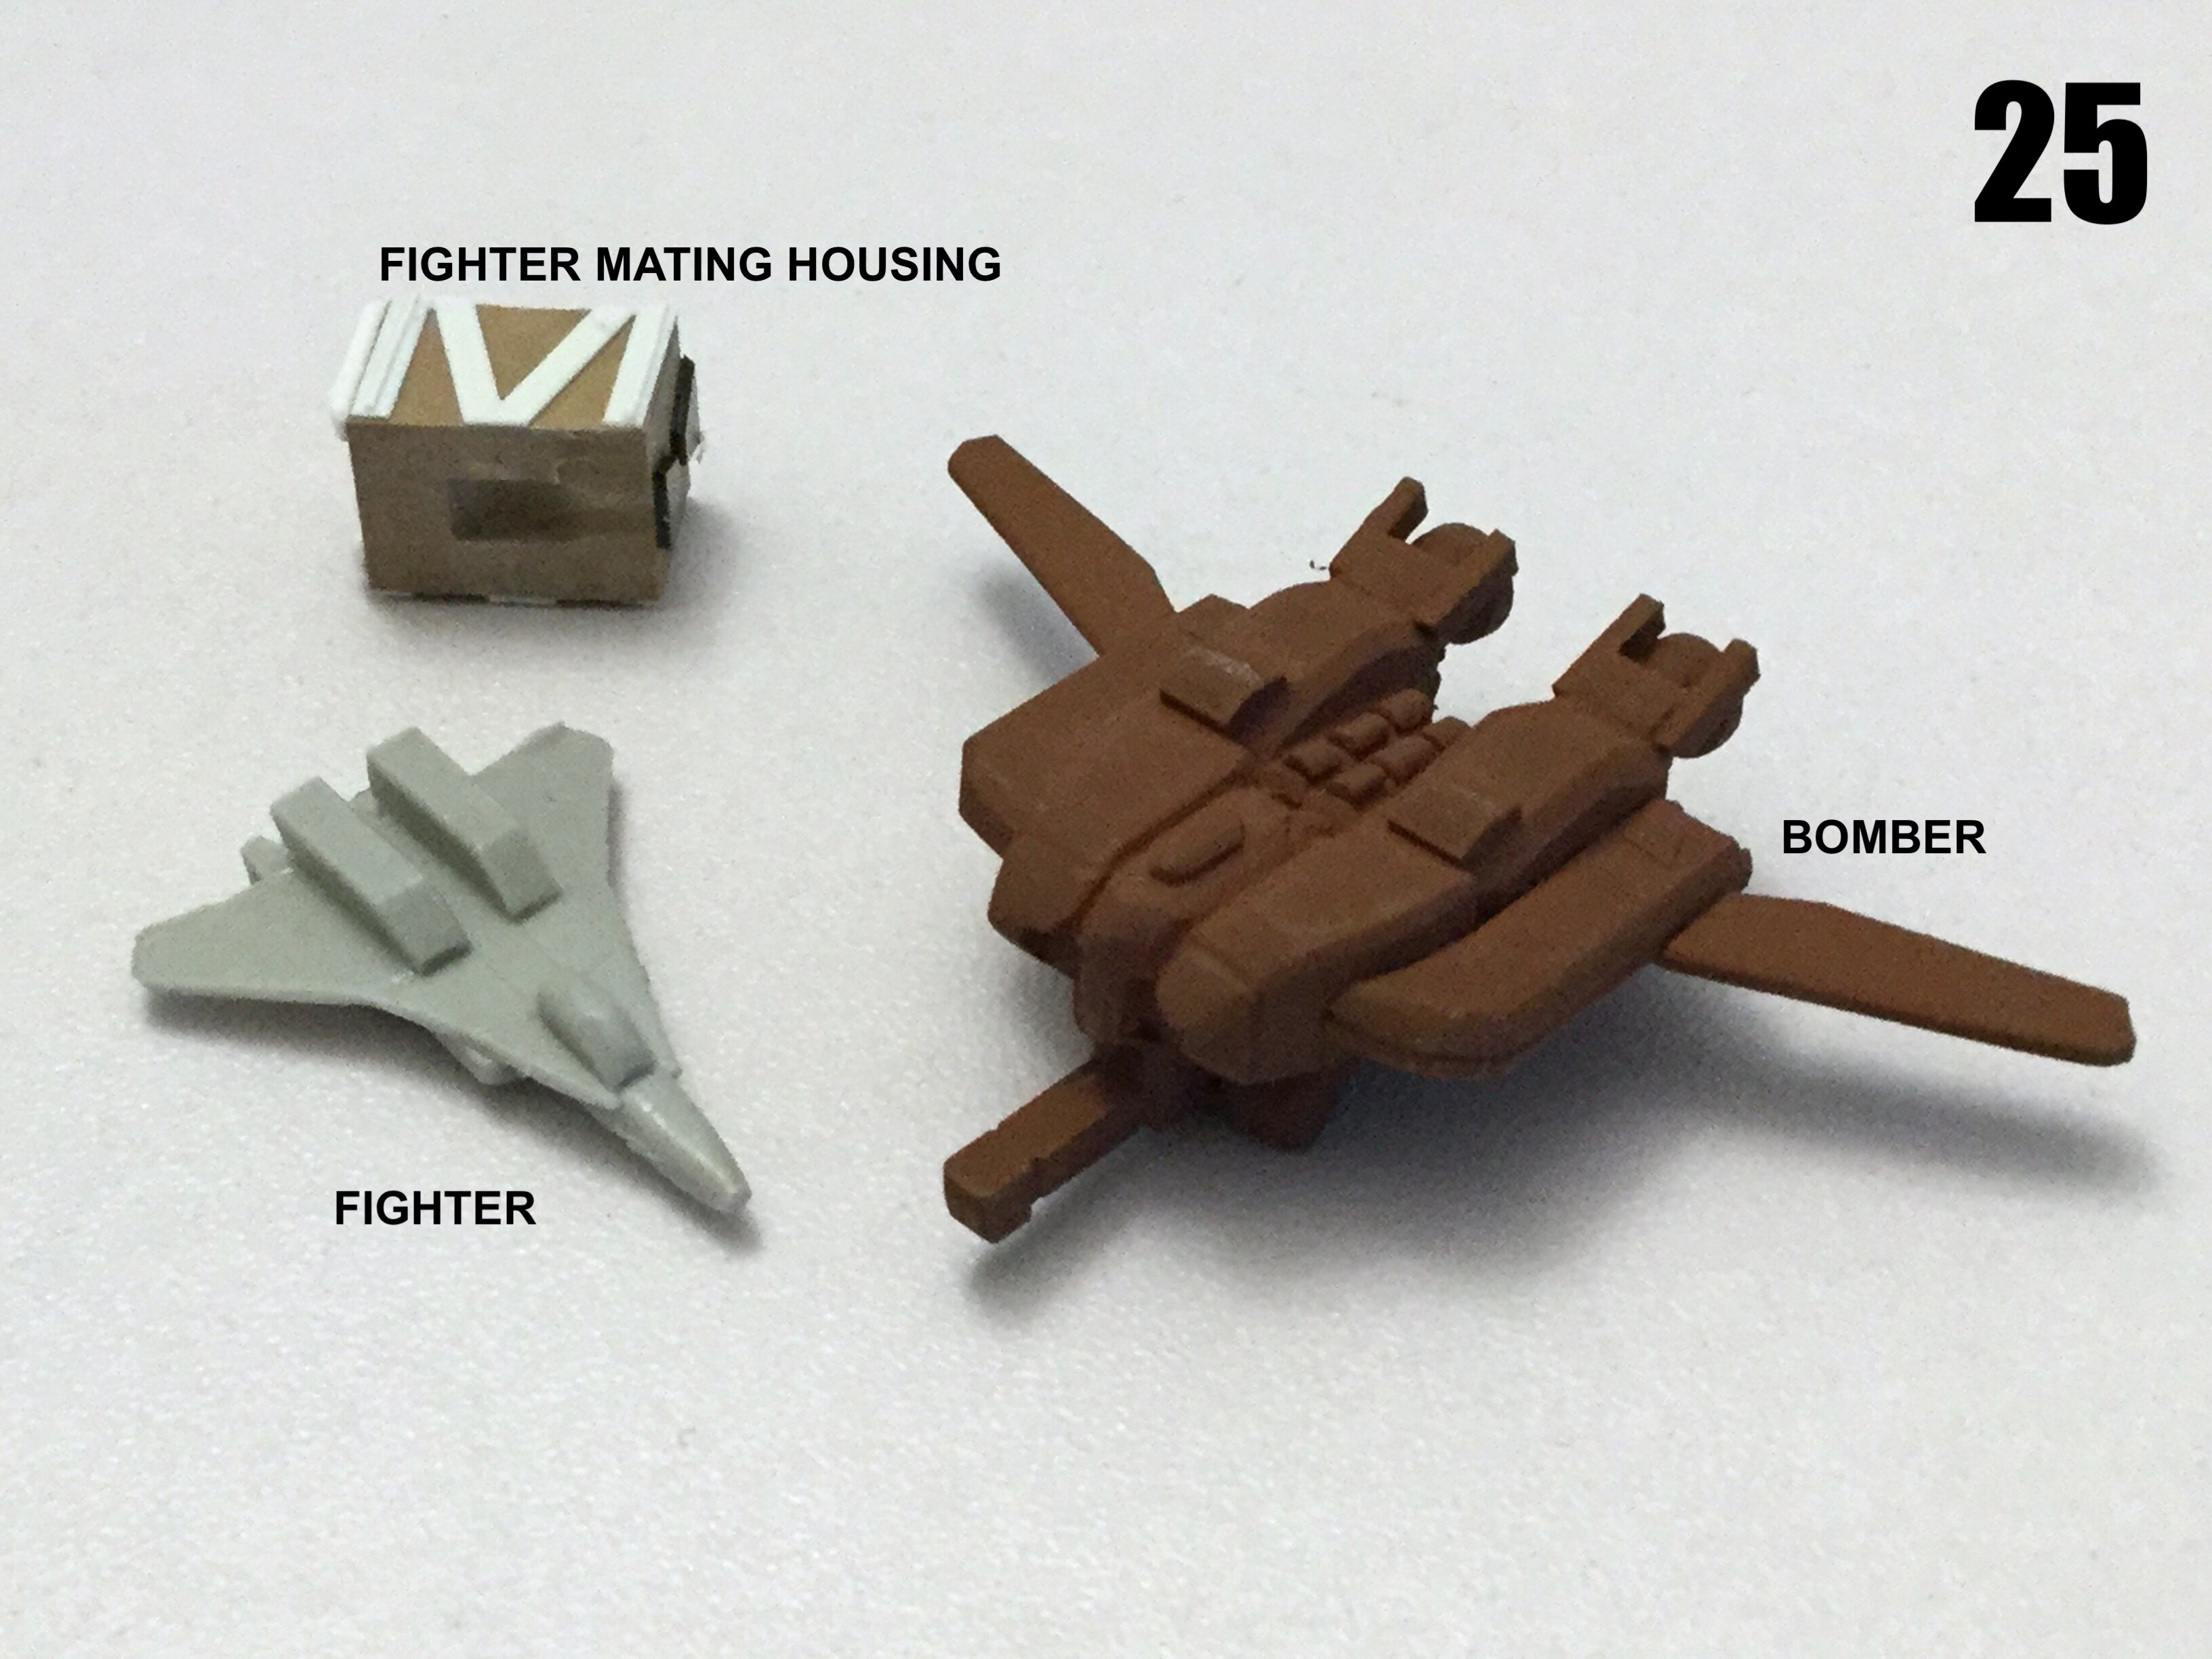
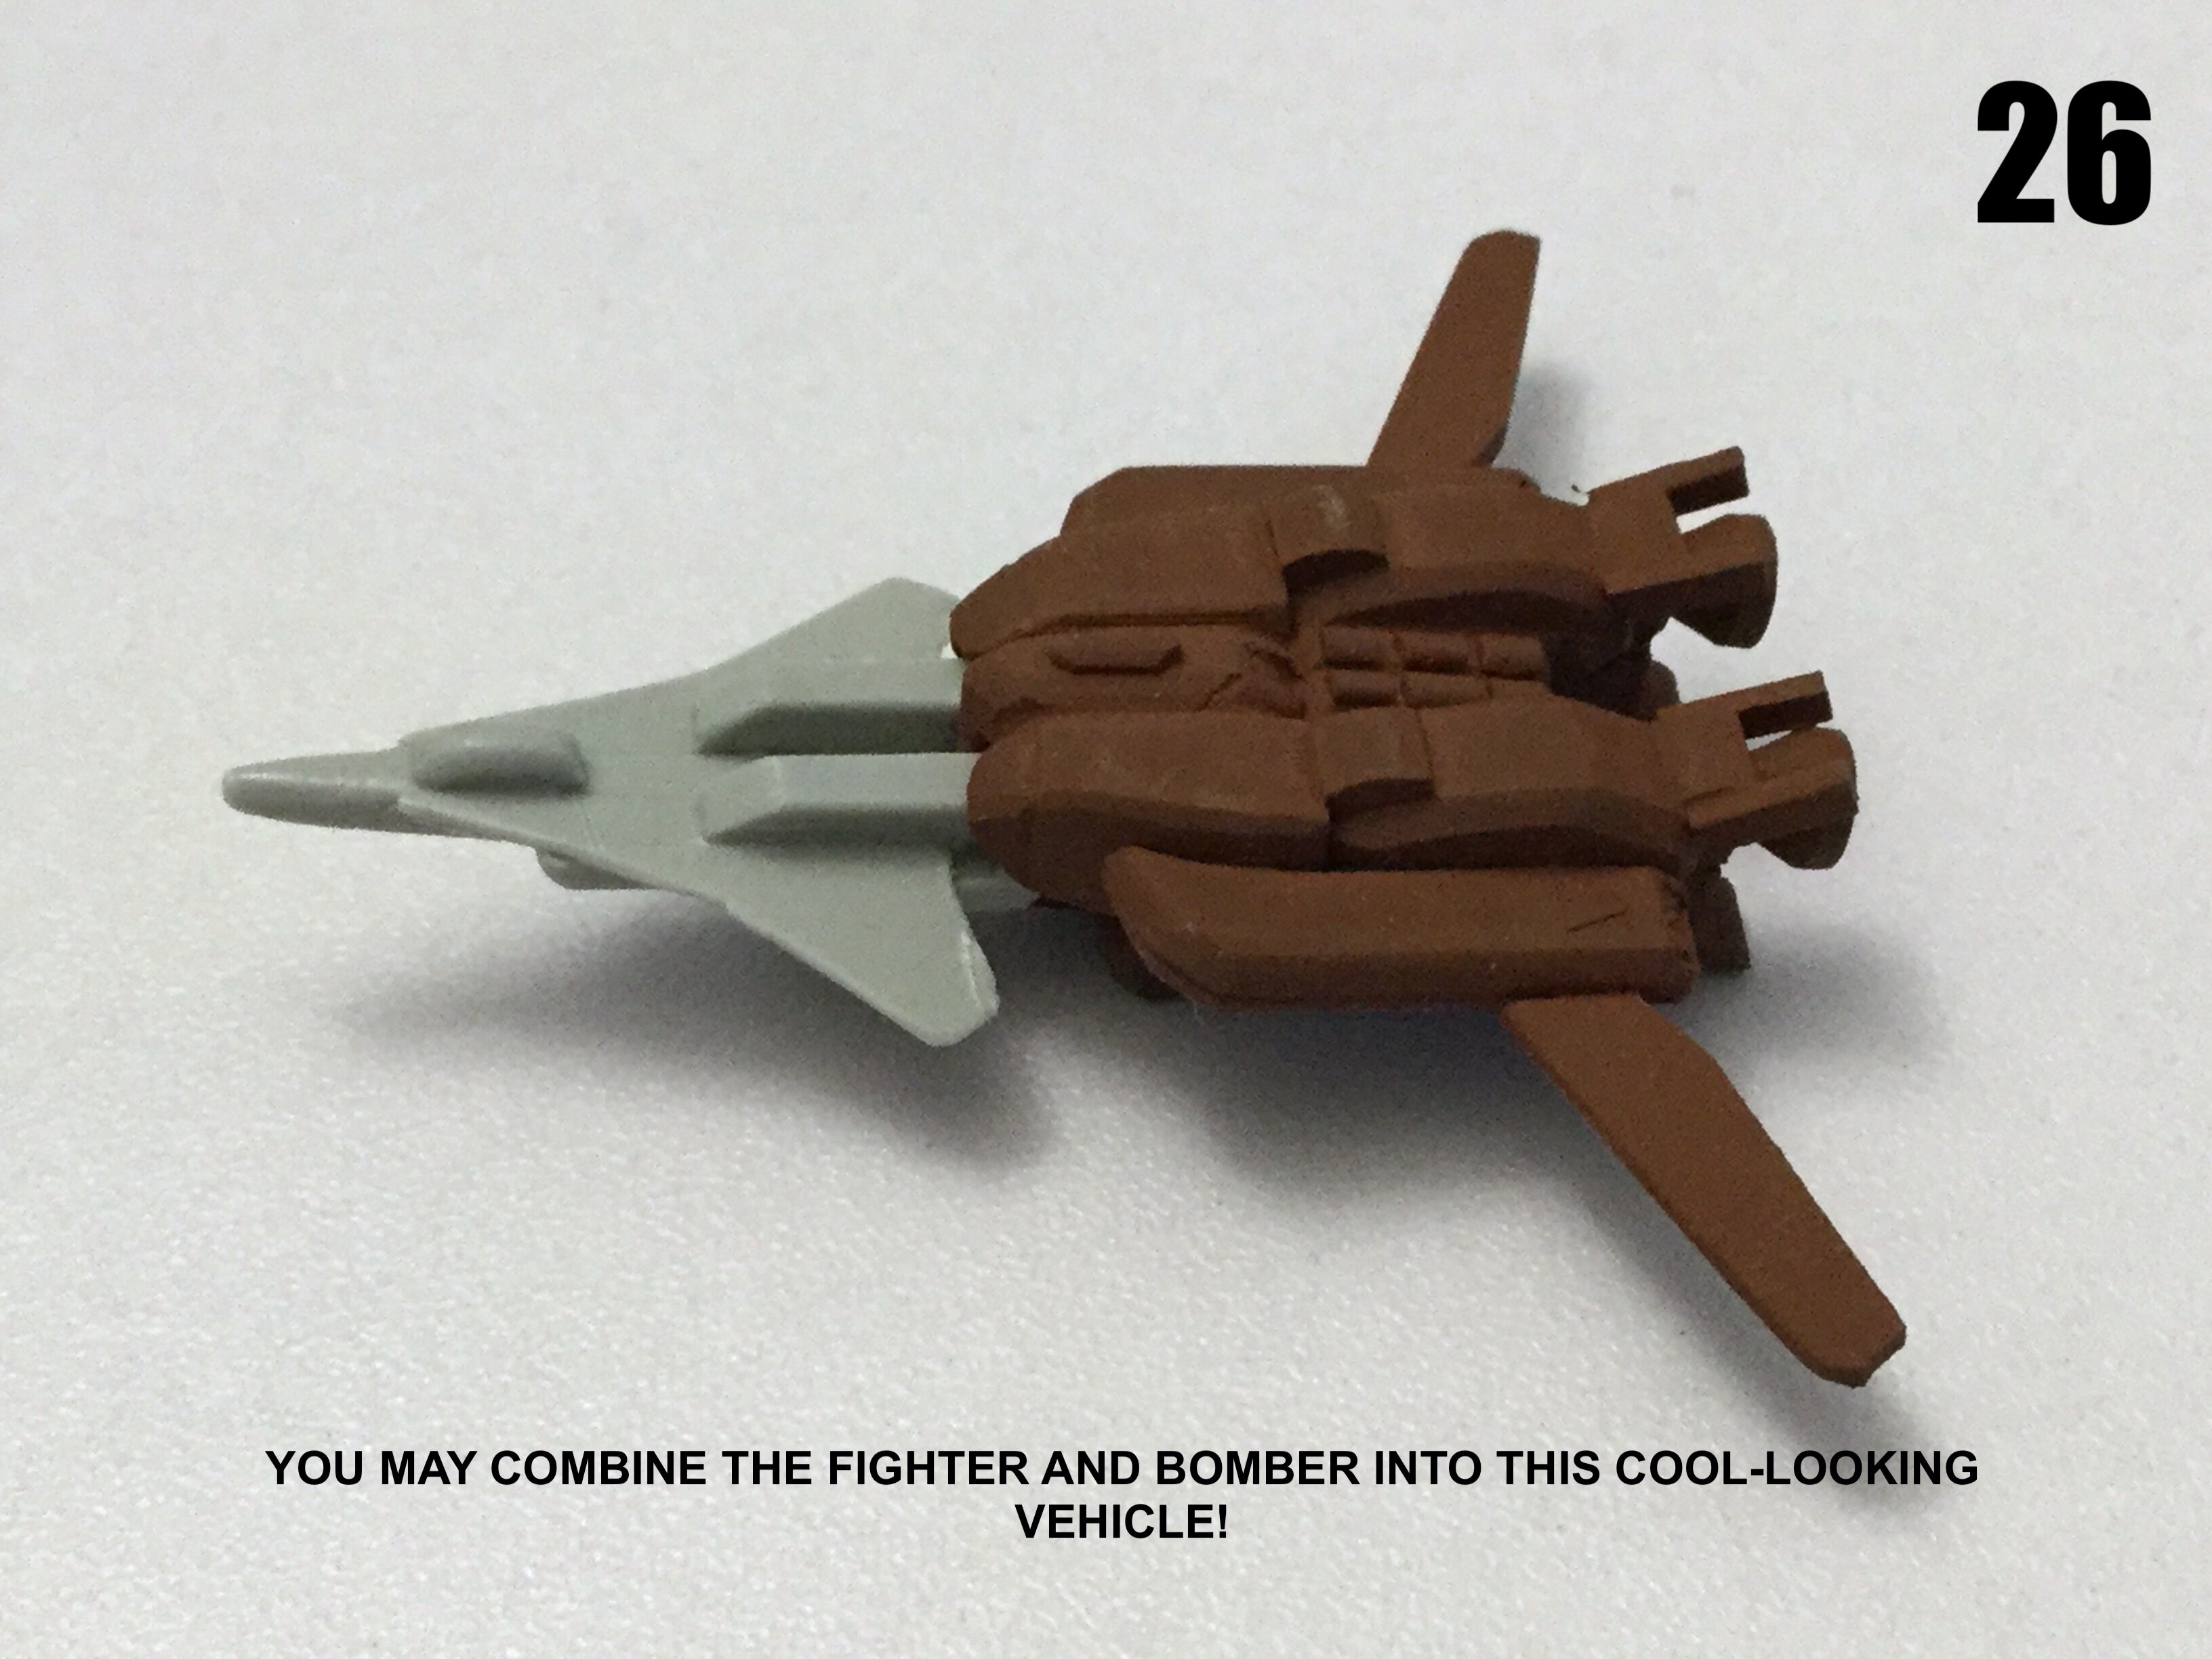
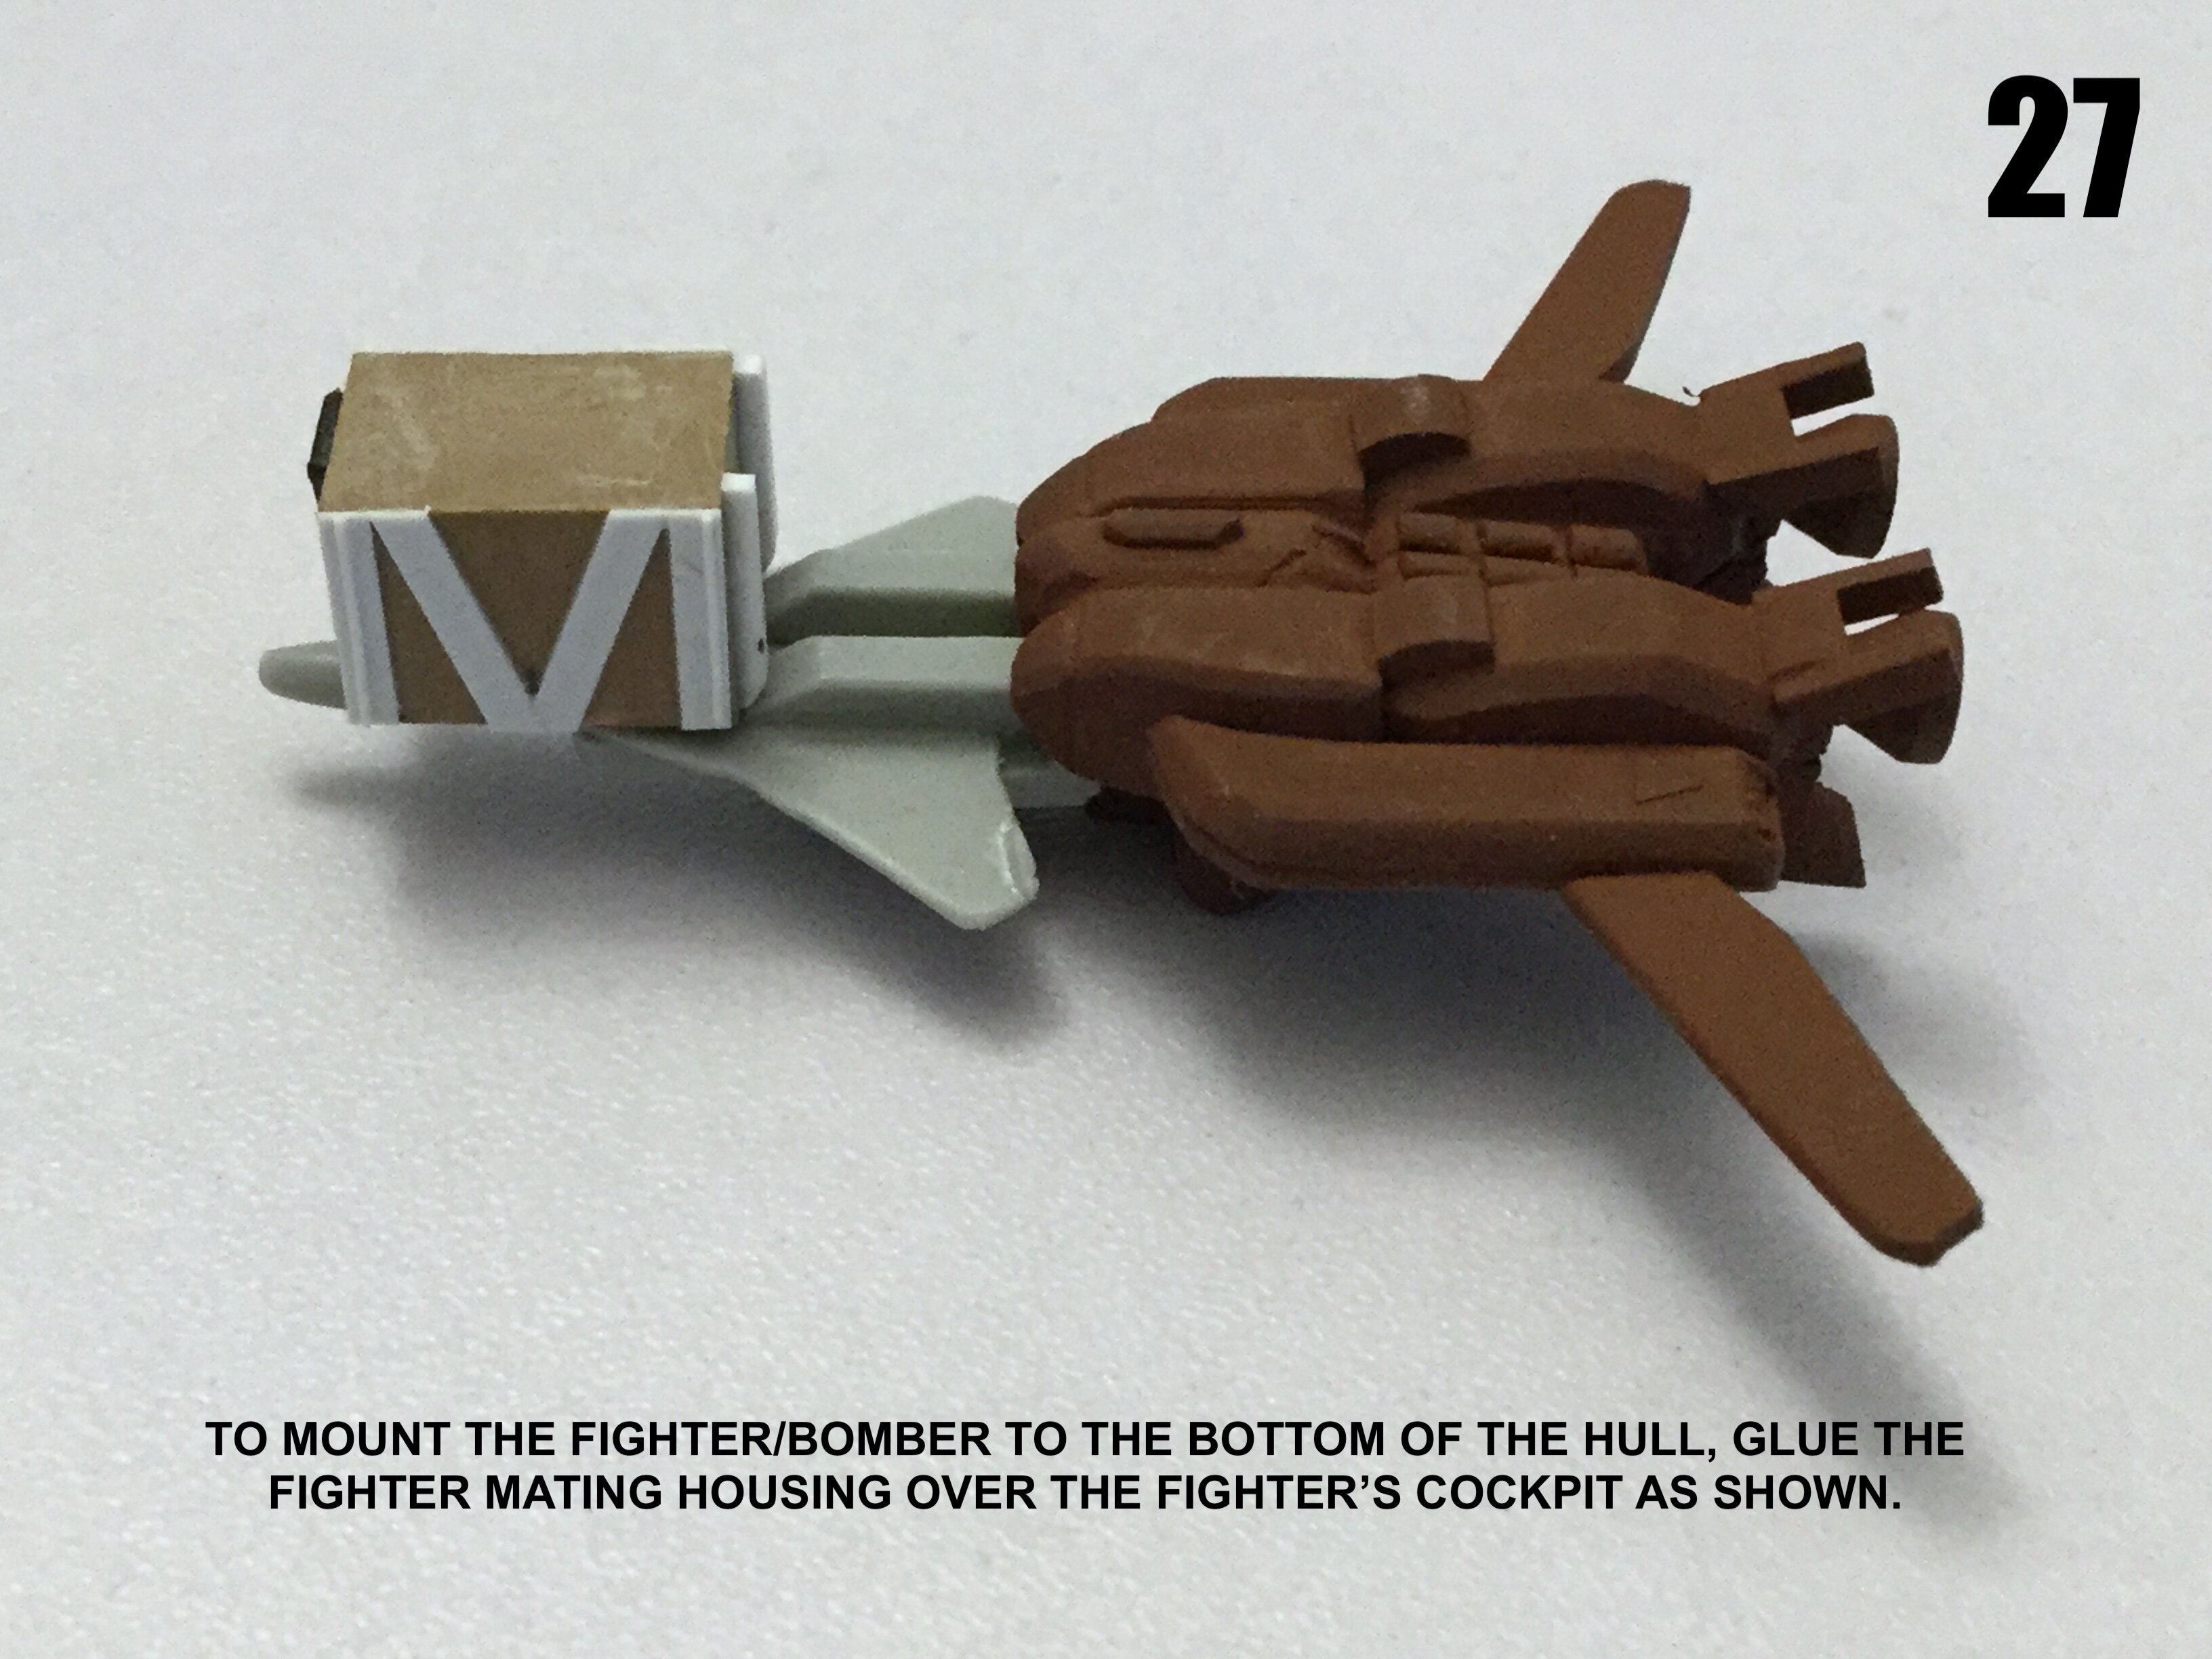
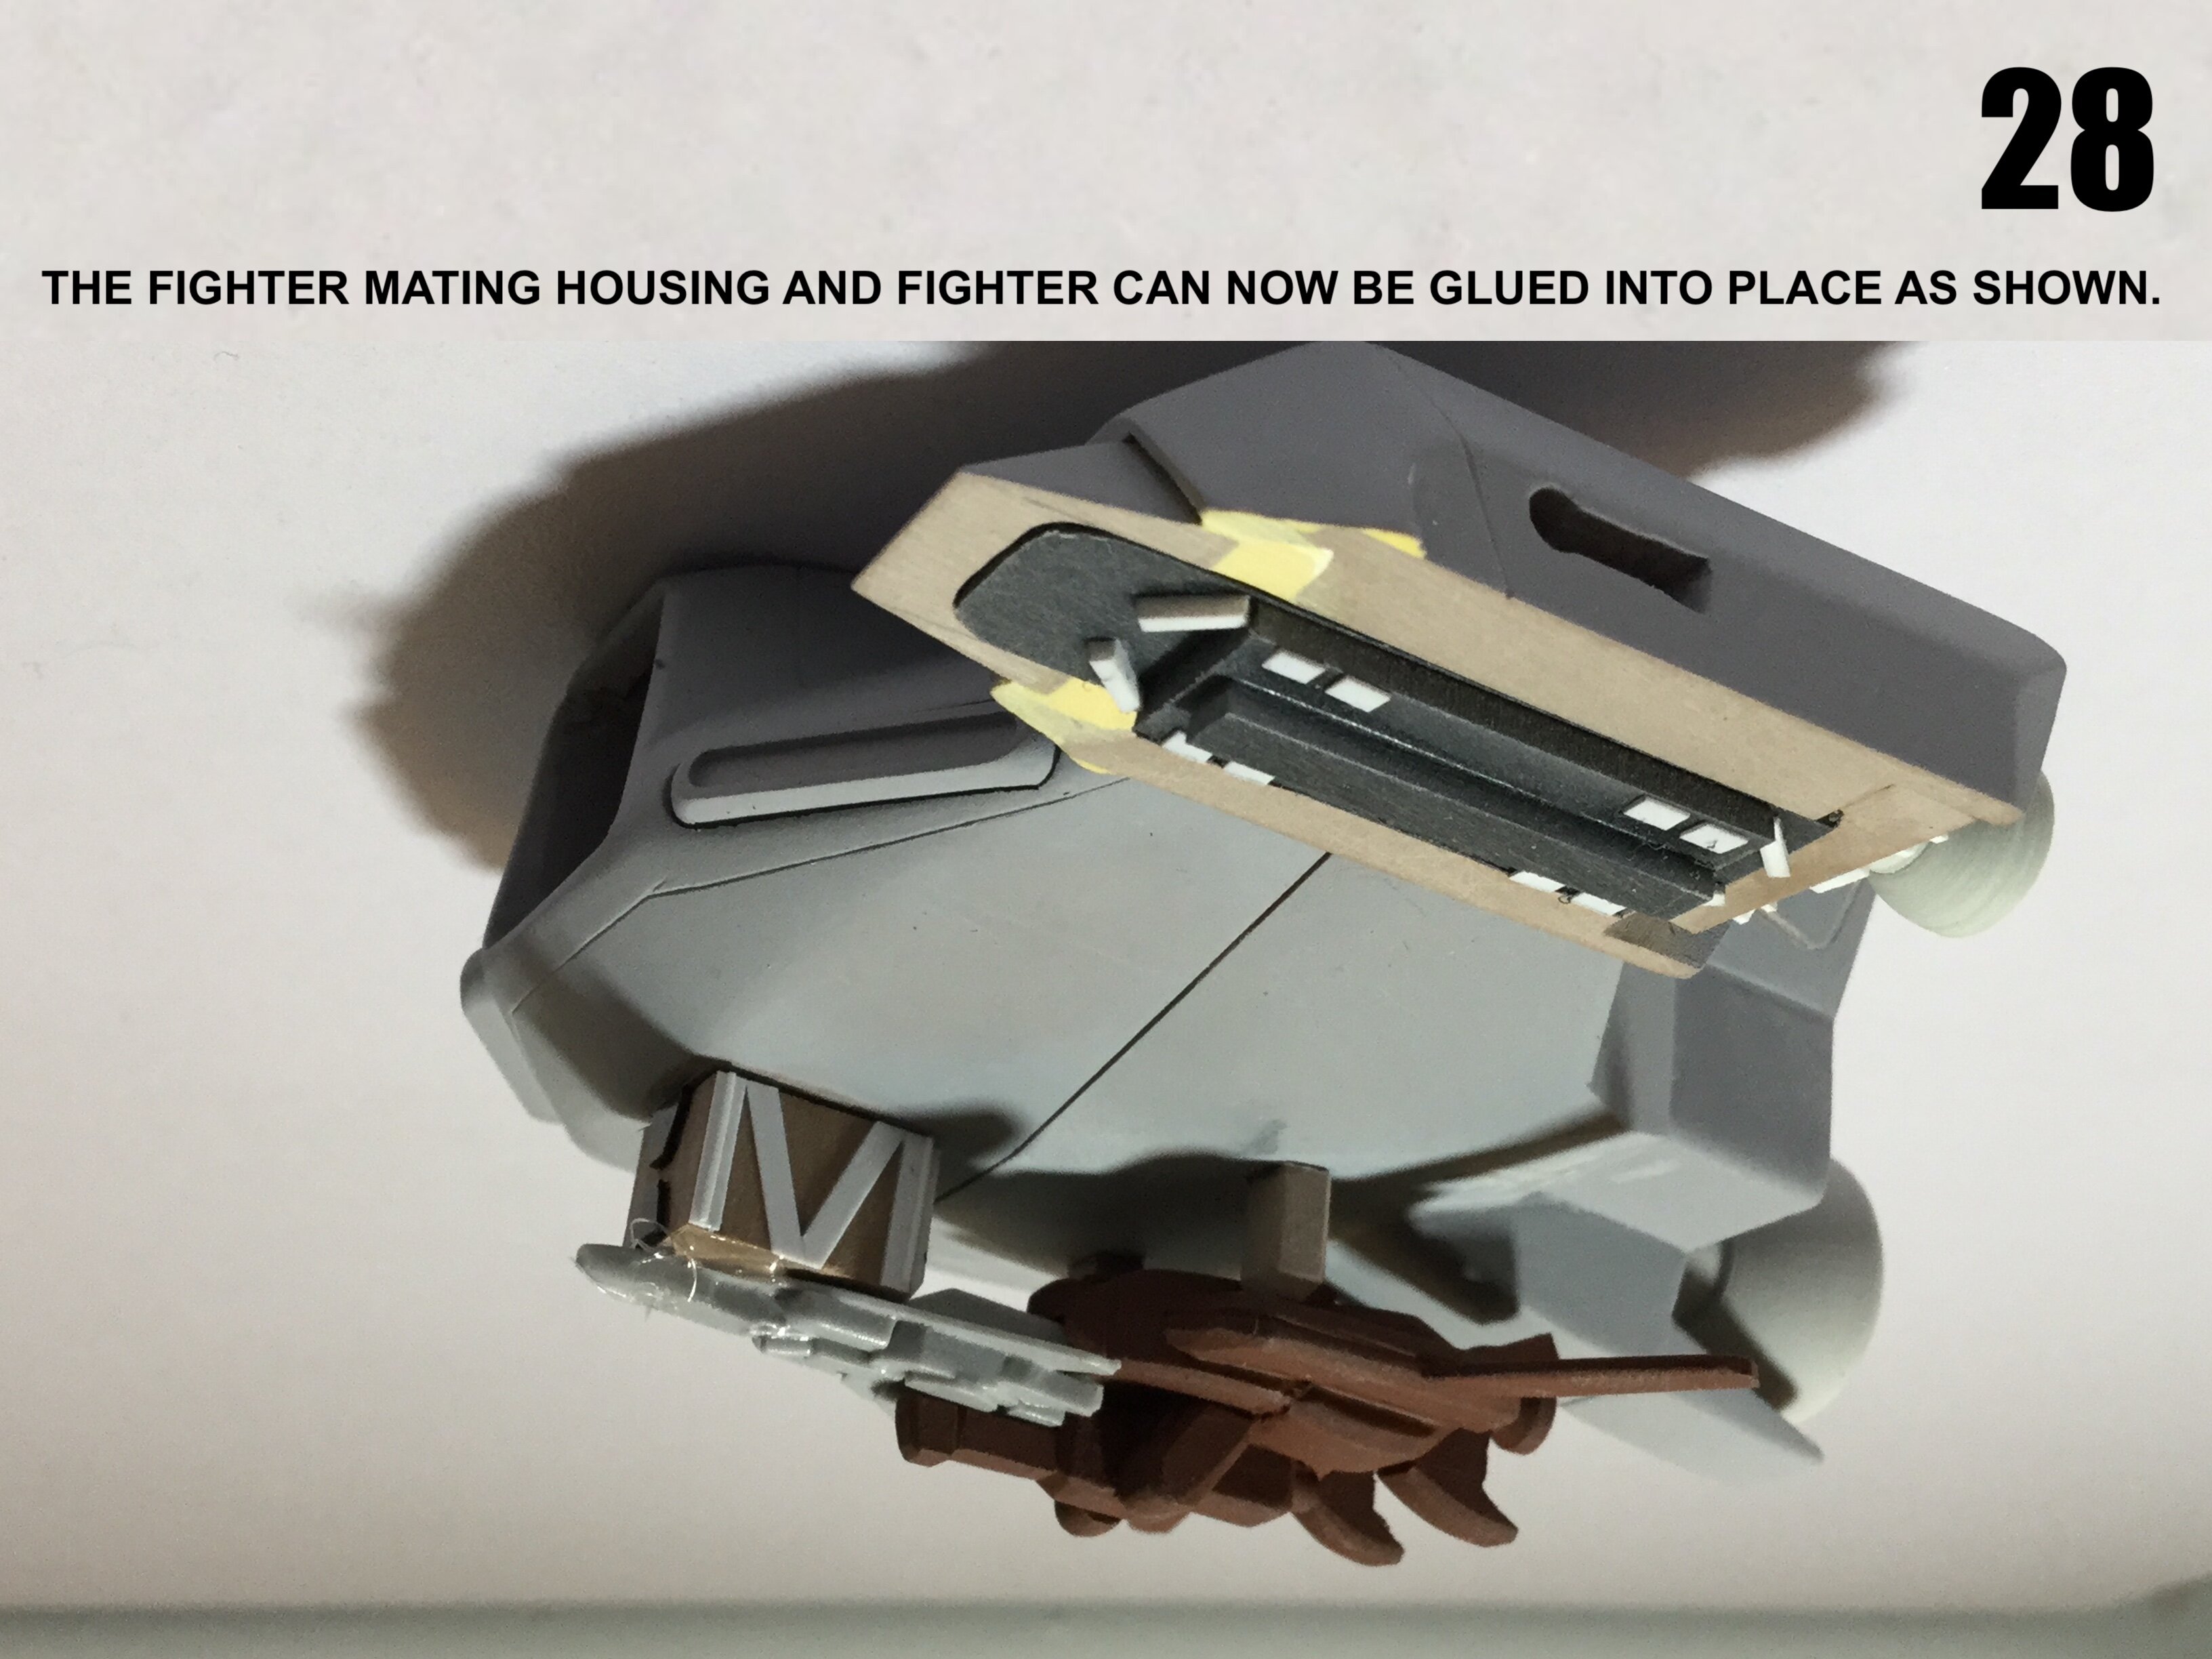
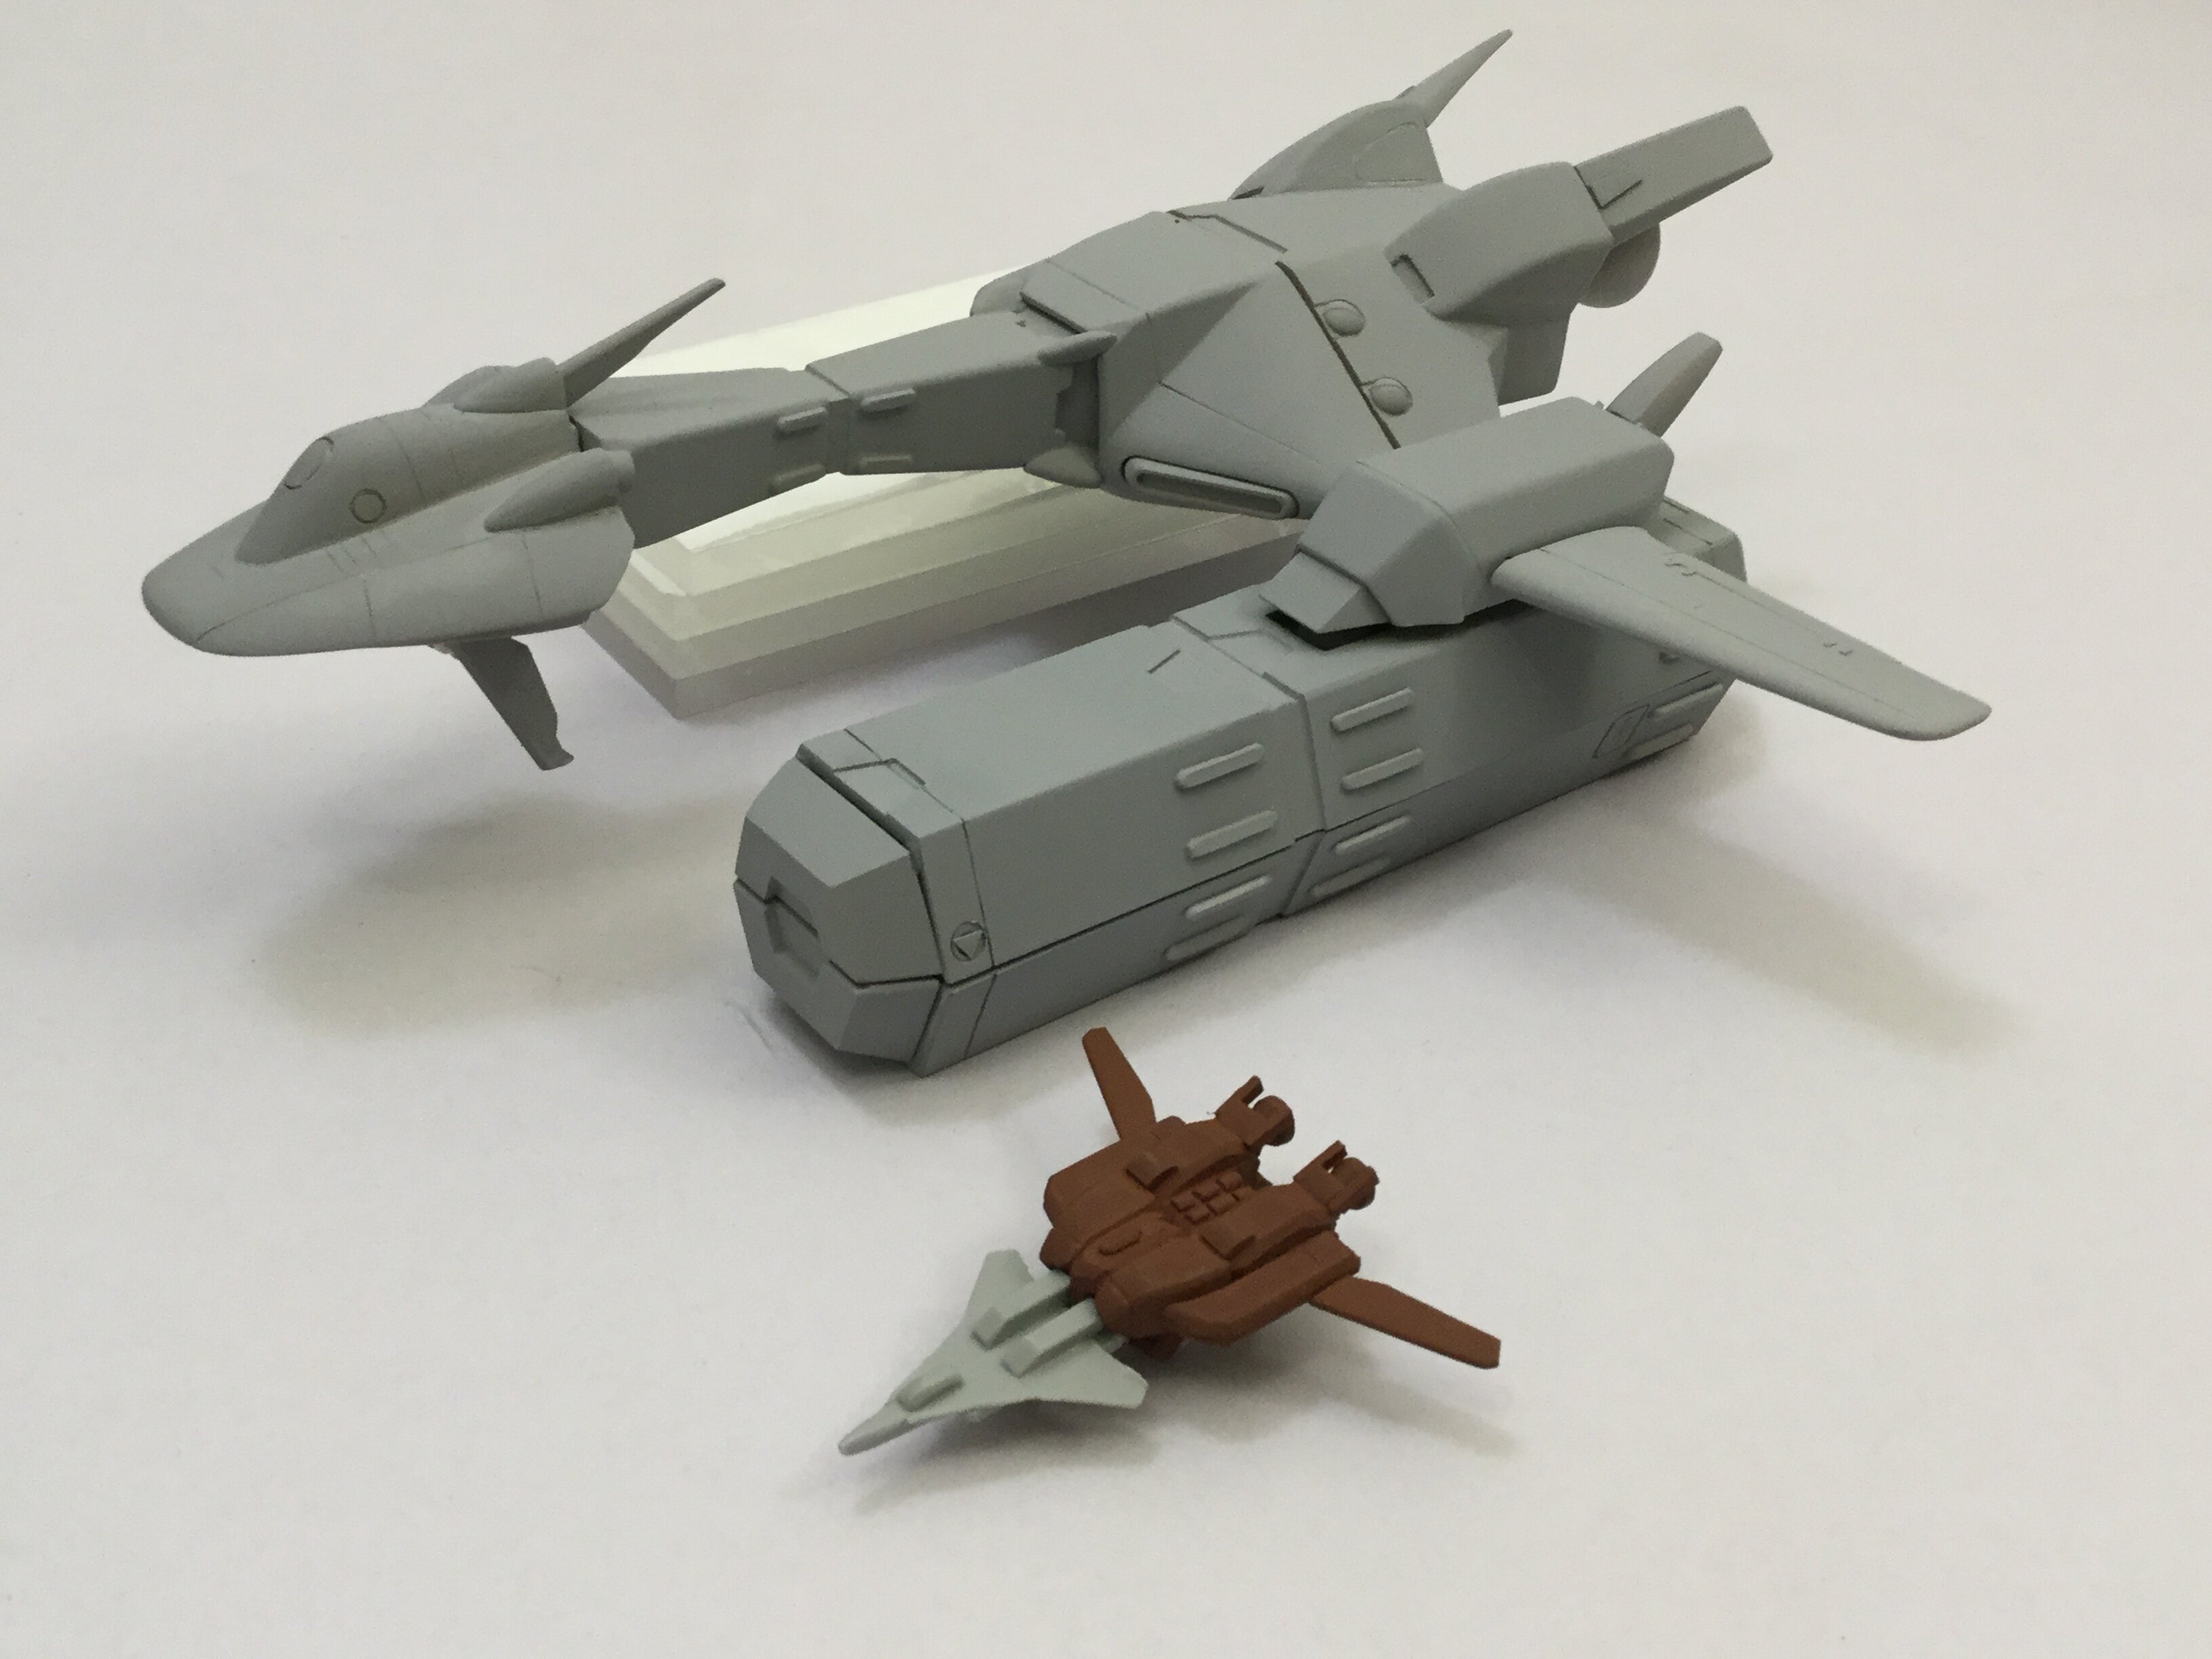
The fighter-booster also mounts nicely under the hull. You have the option to build the ship with the fighter/booster mounted, or with the cockpit mating box retracted and the fighter displayed separately.
-
Today, it begins!
-
12 hours ago, tekering said:
Despite the SC designs being "heavily inspired" by those of Gun-Damn, they do have a far more pleasing and futuristic aesthetic. Functionality is quite the clusterfrack, but then, so are most Anime designs.
-
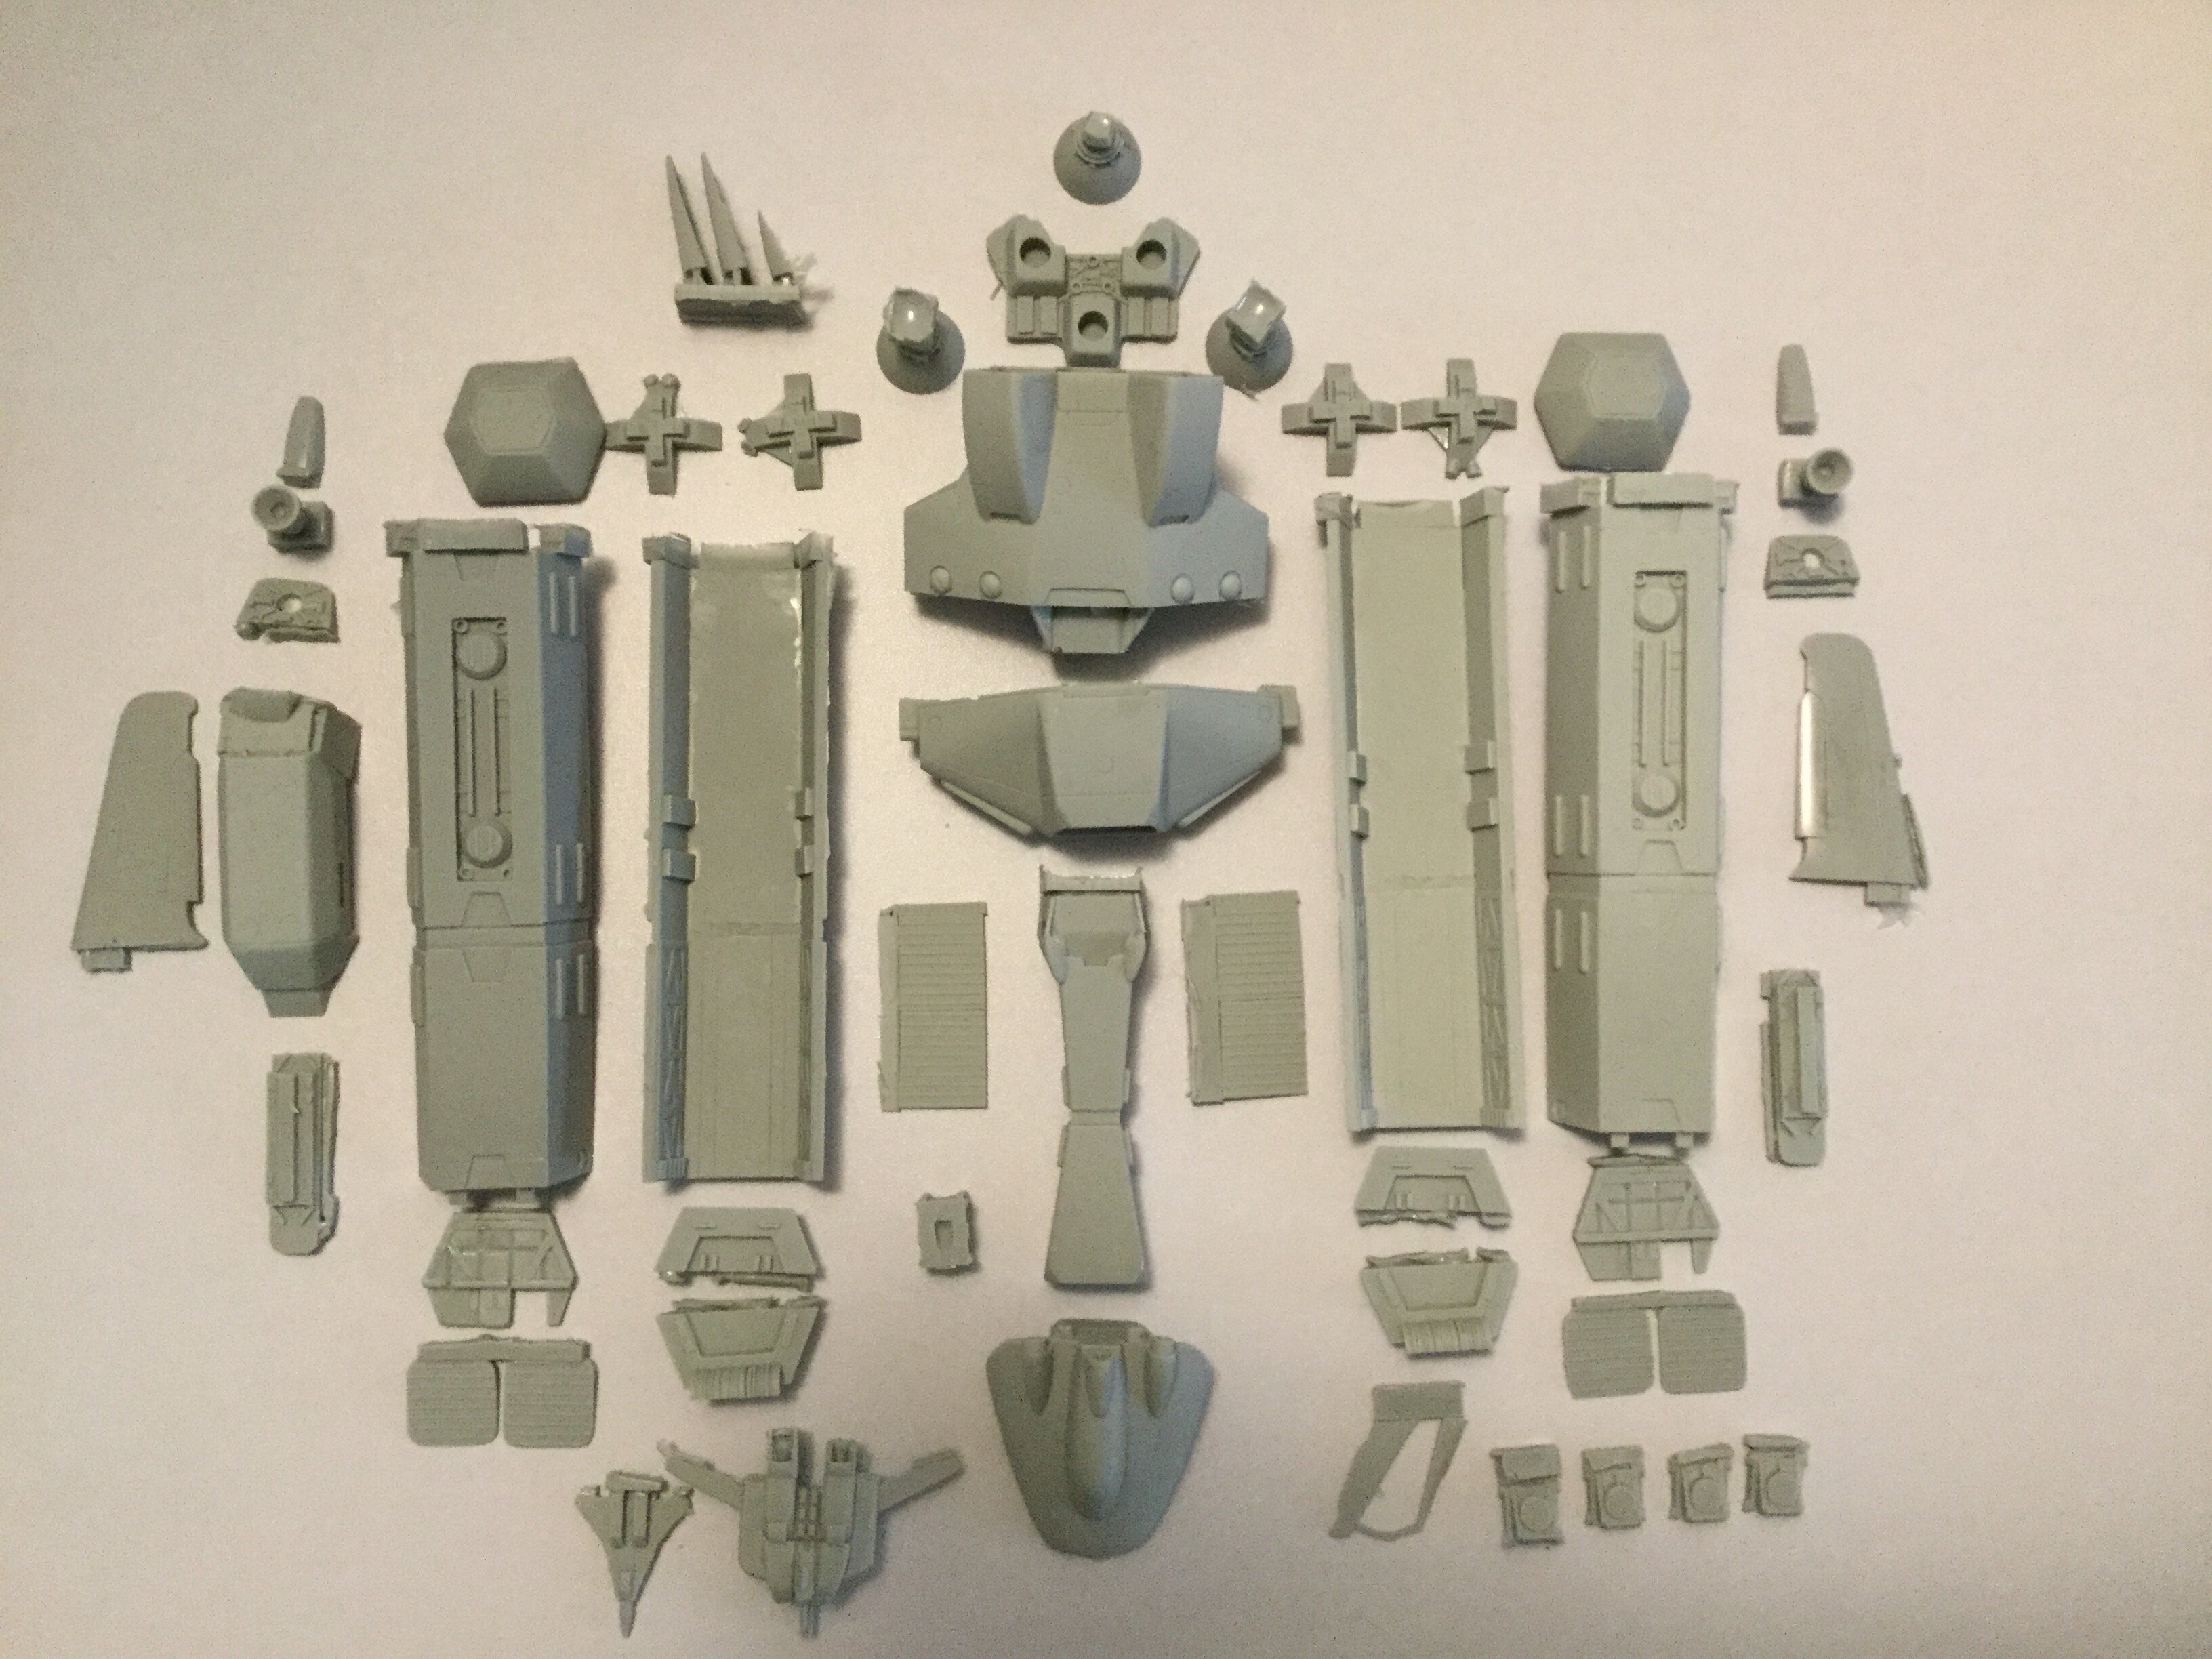
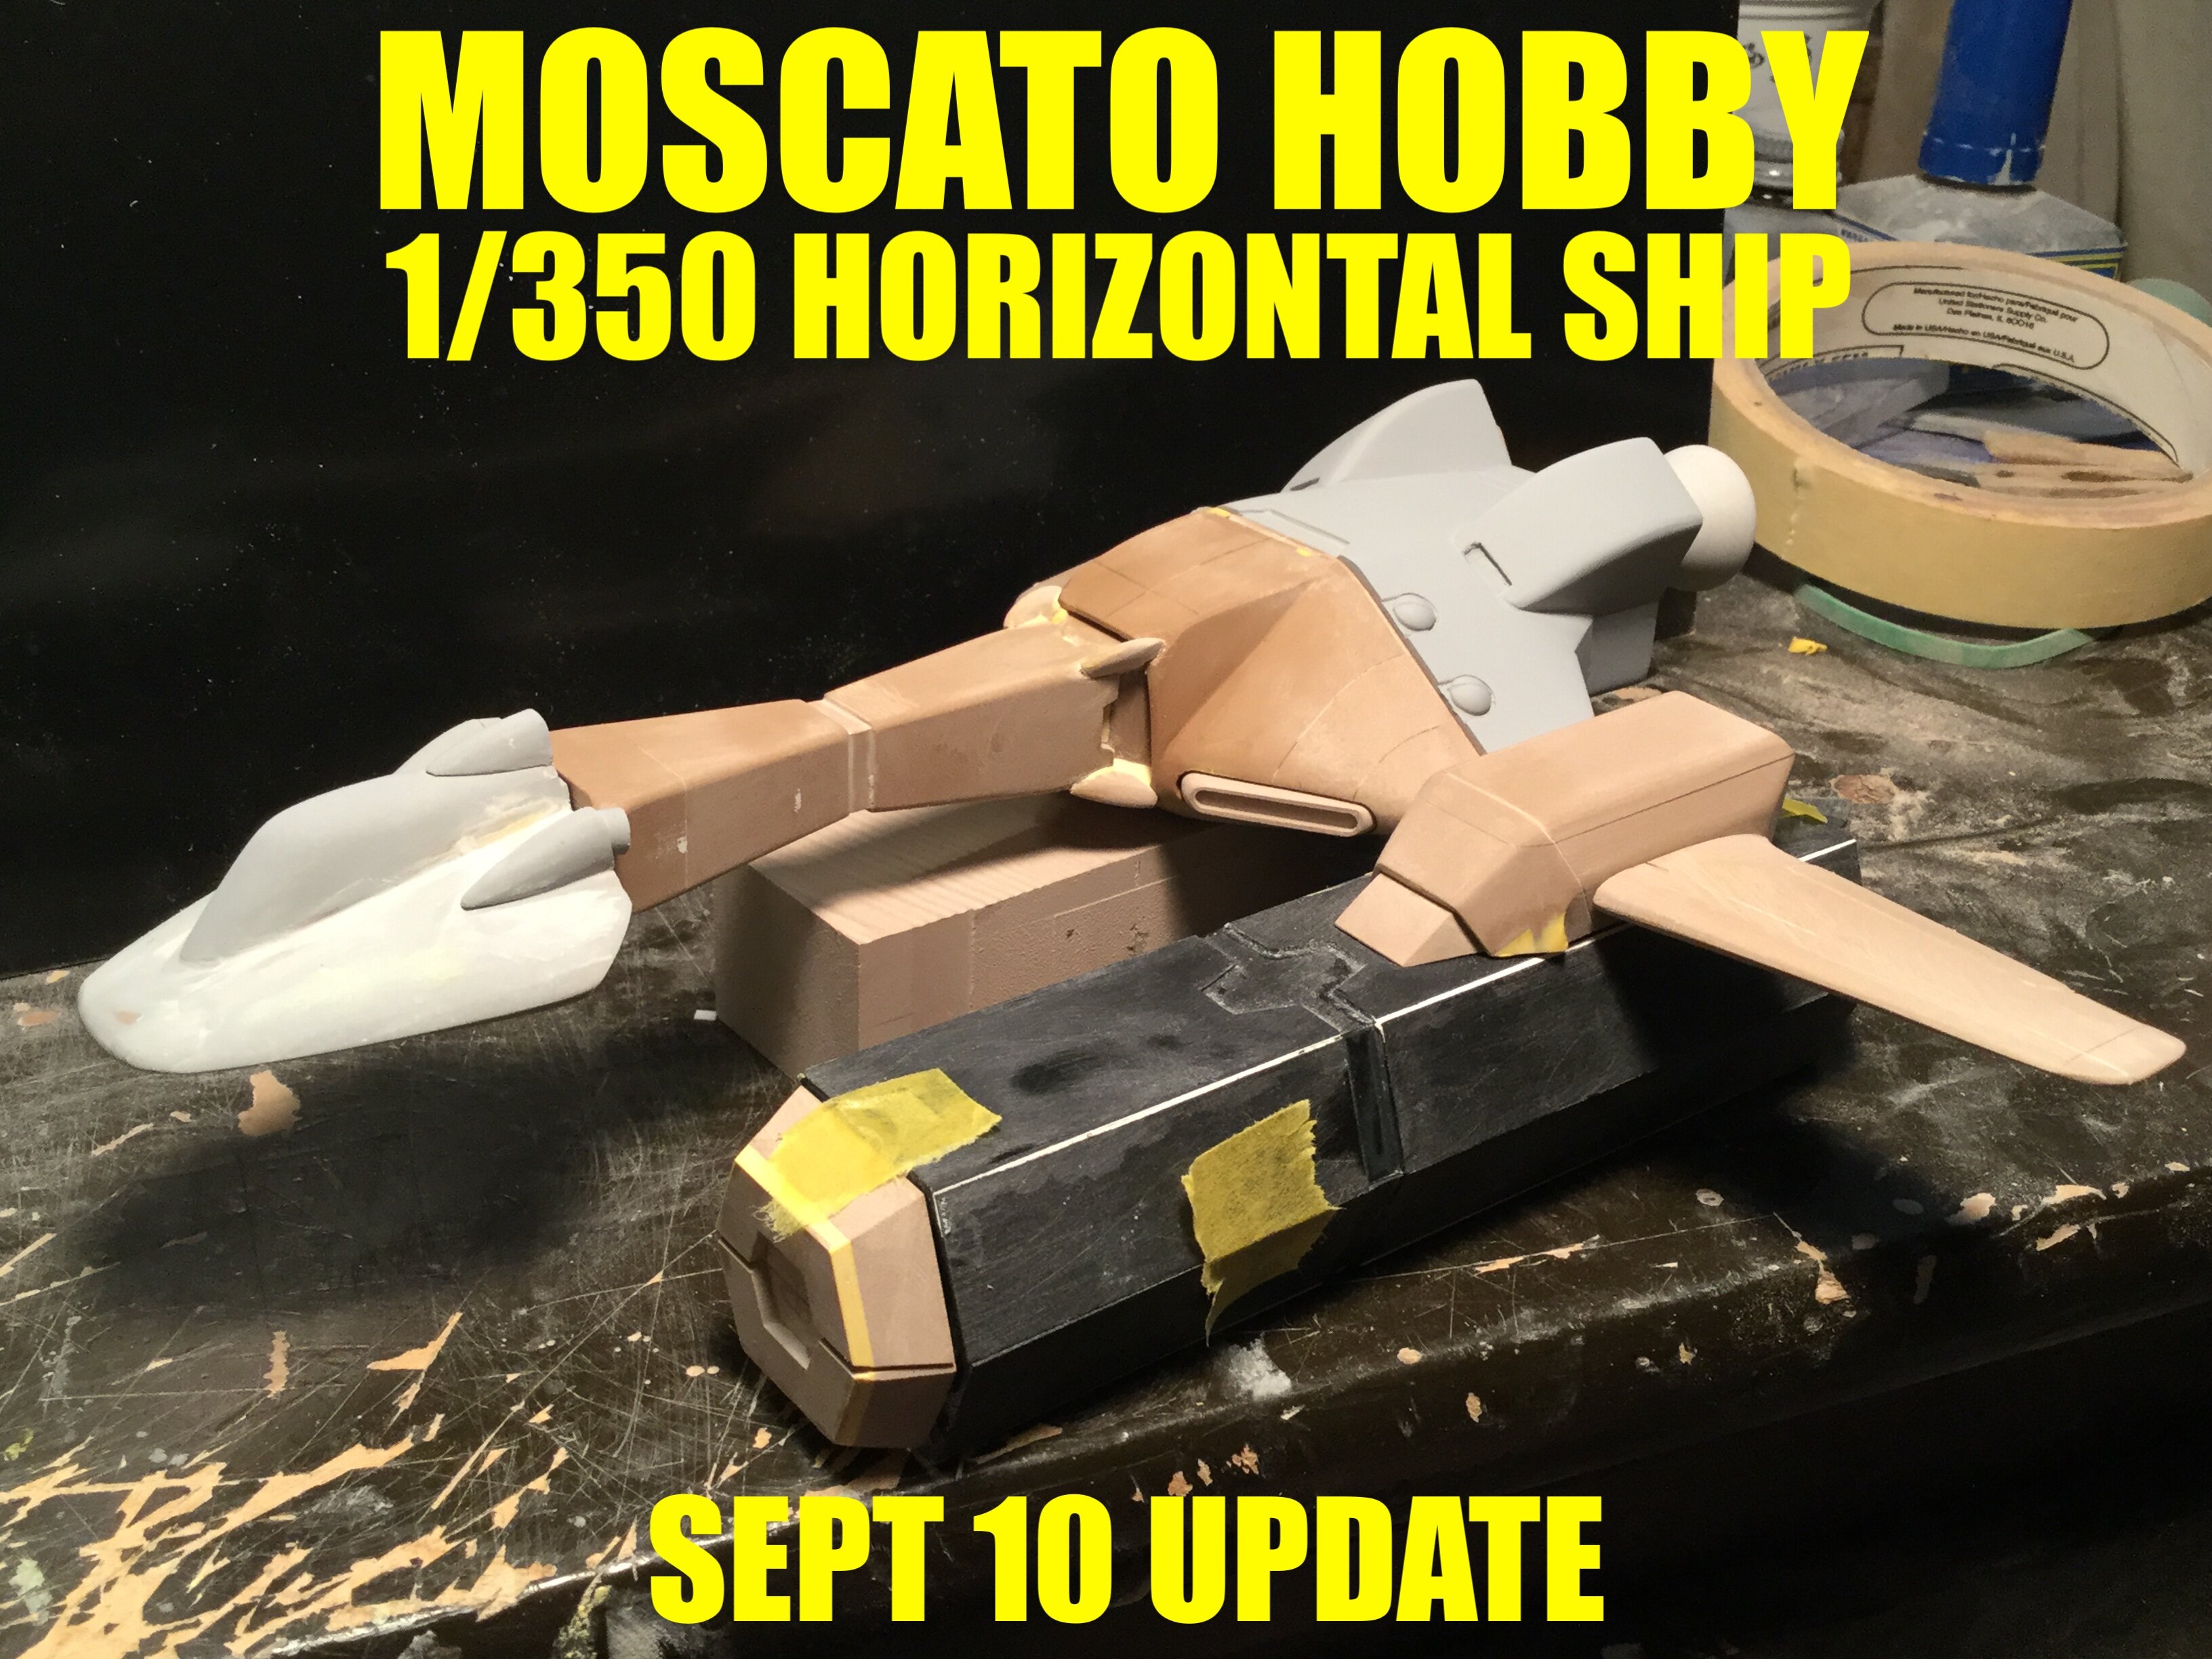
Captain’s log: September 9-10, 2021.
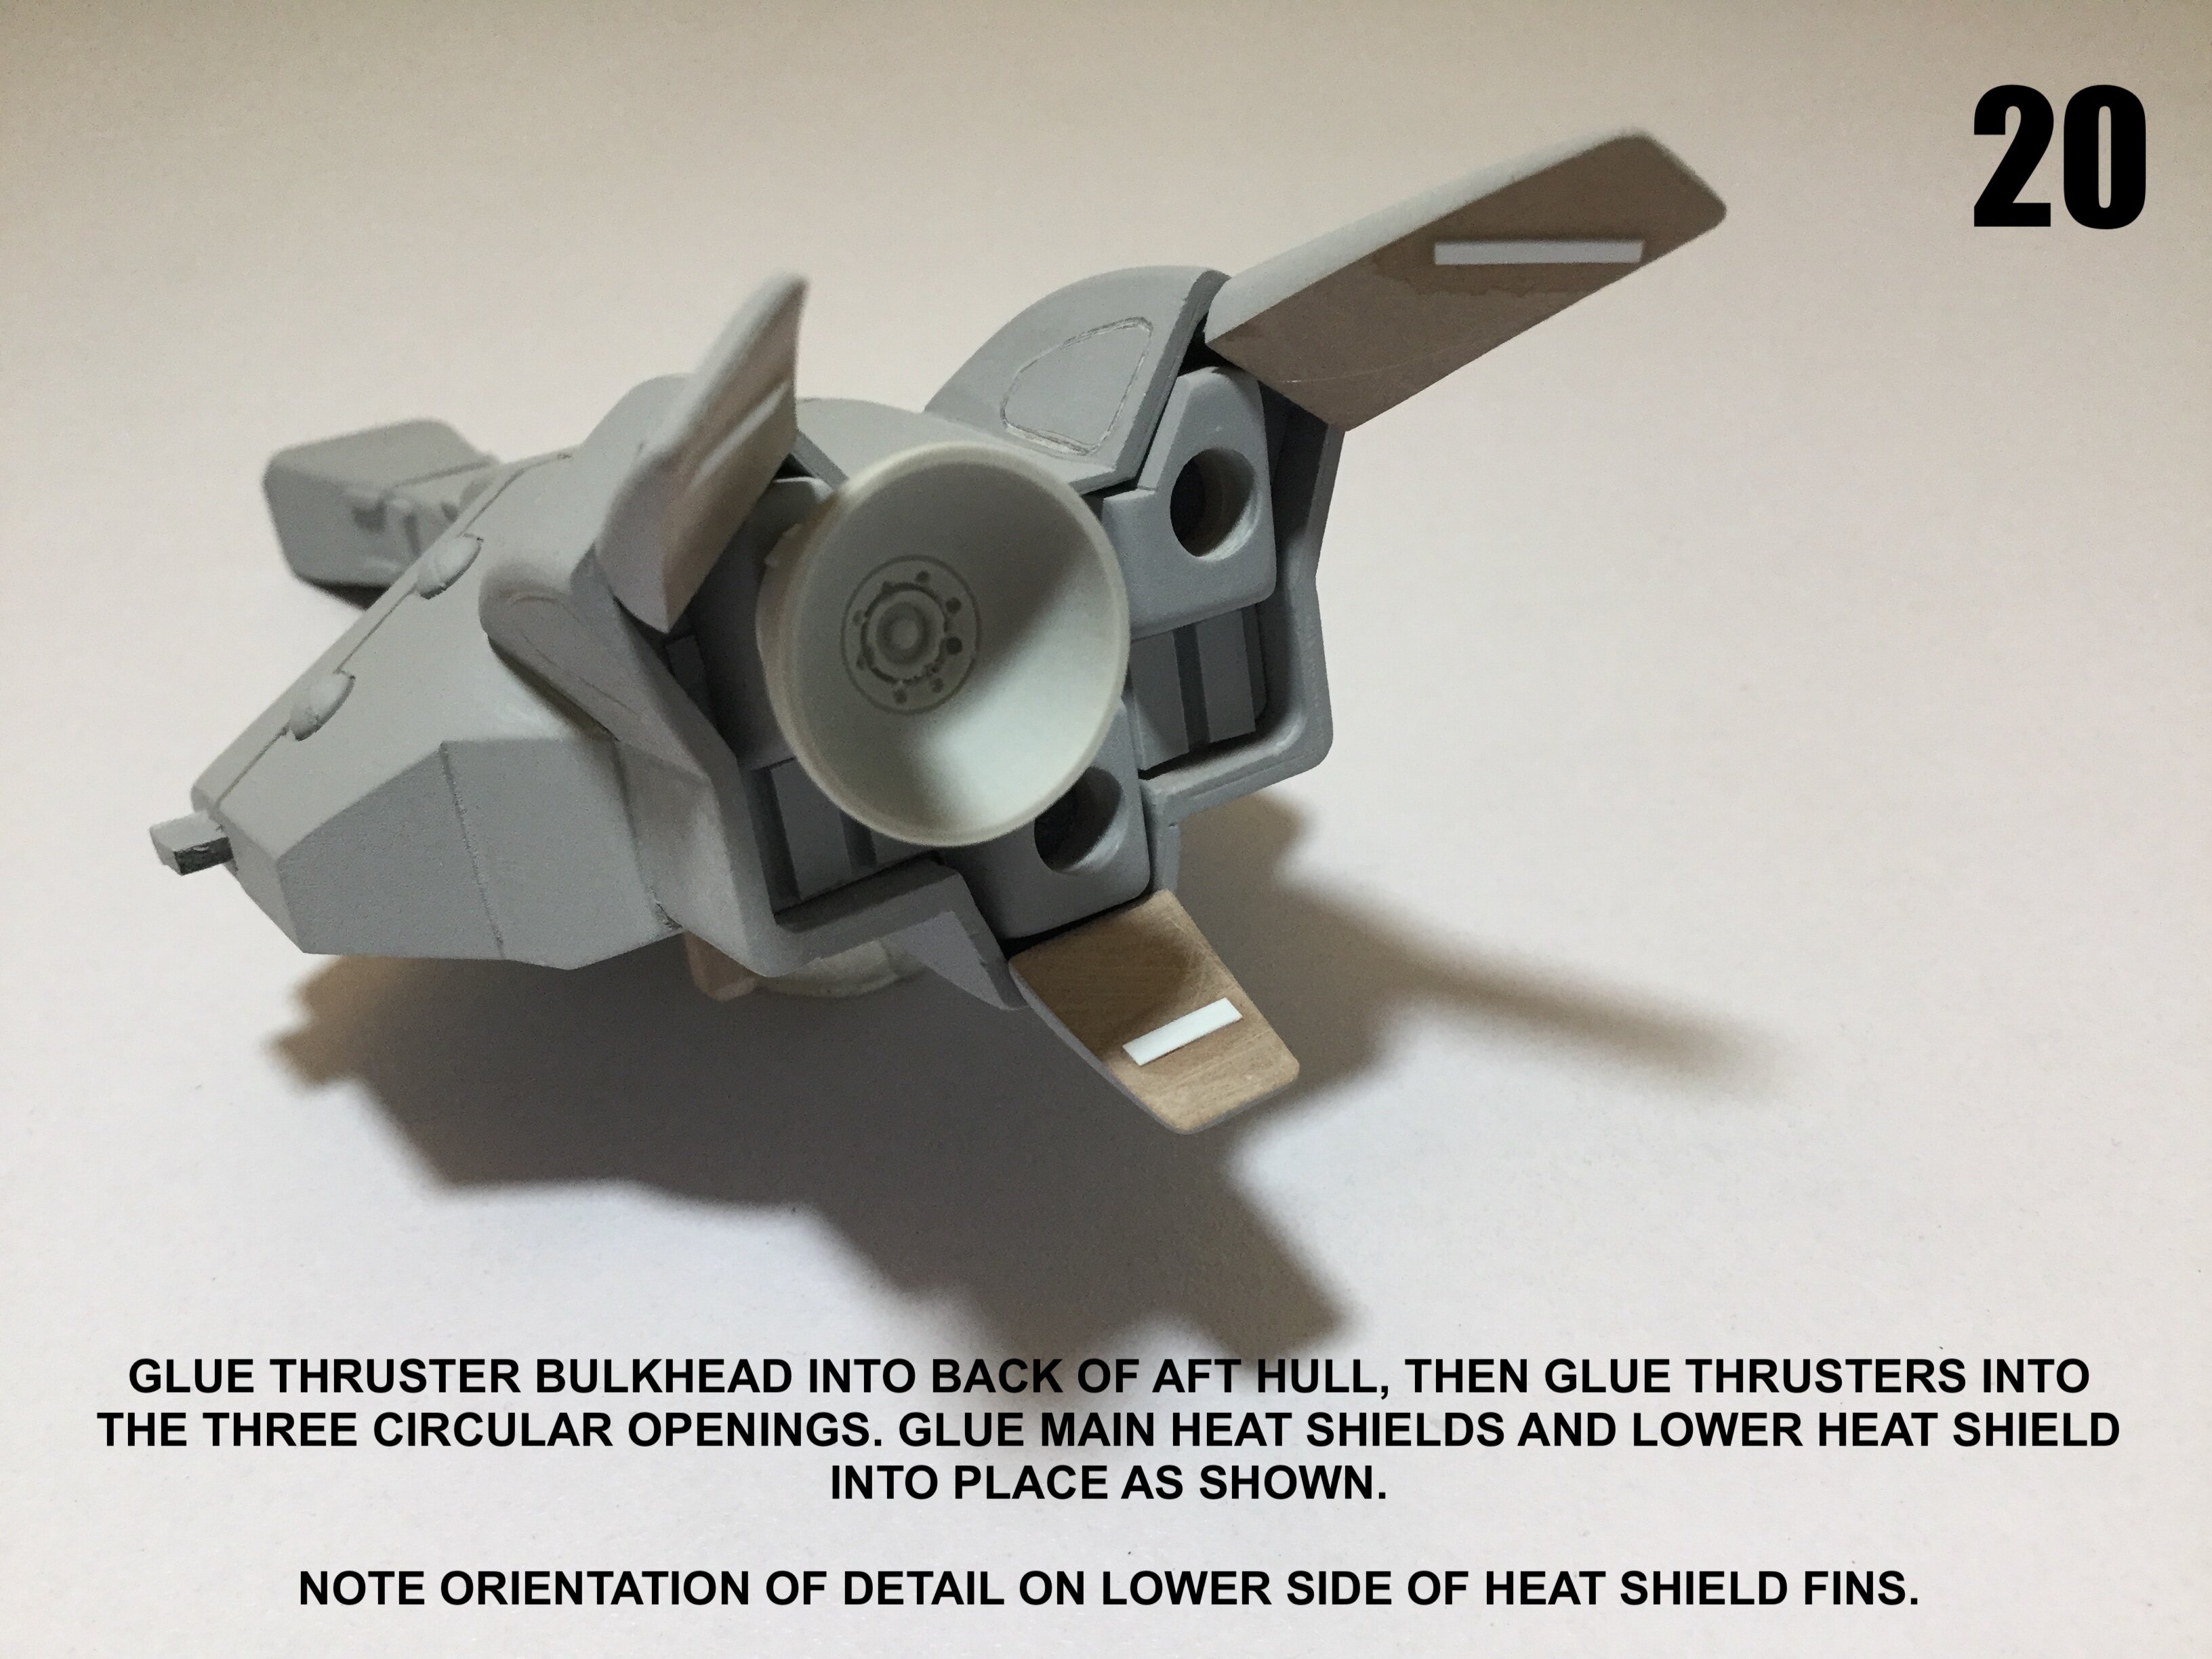
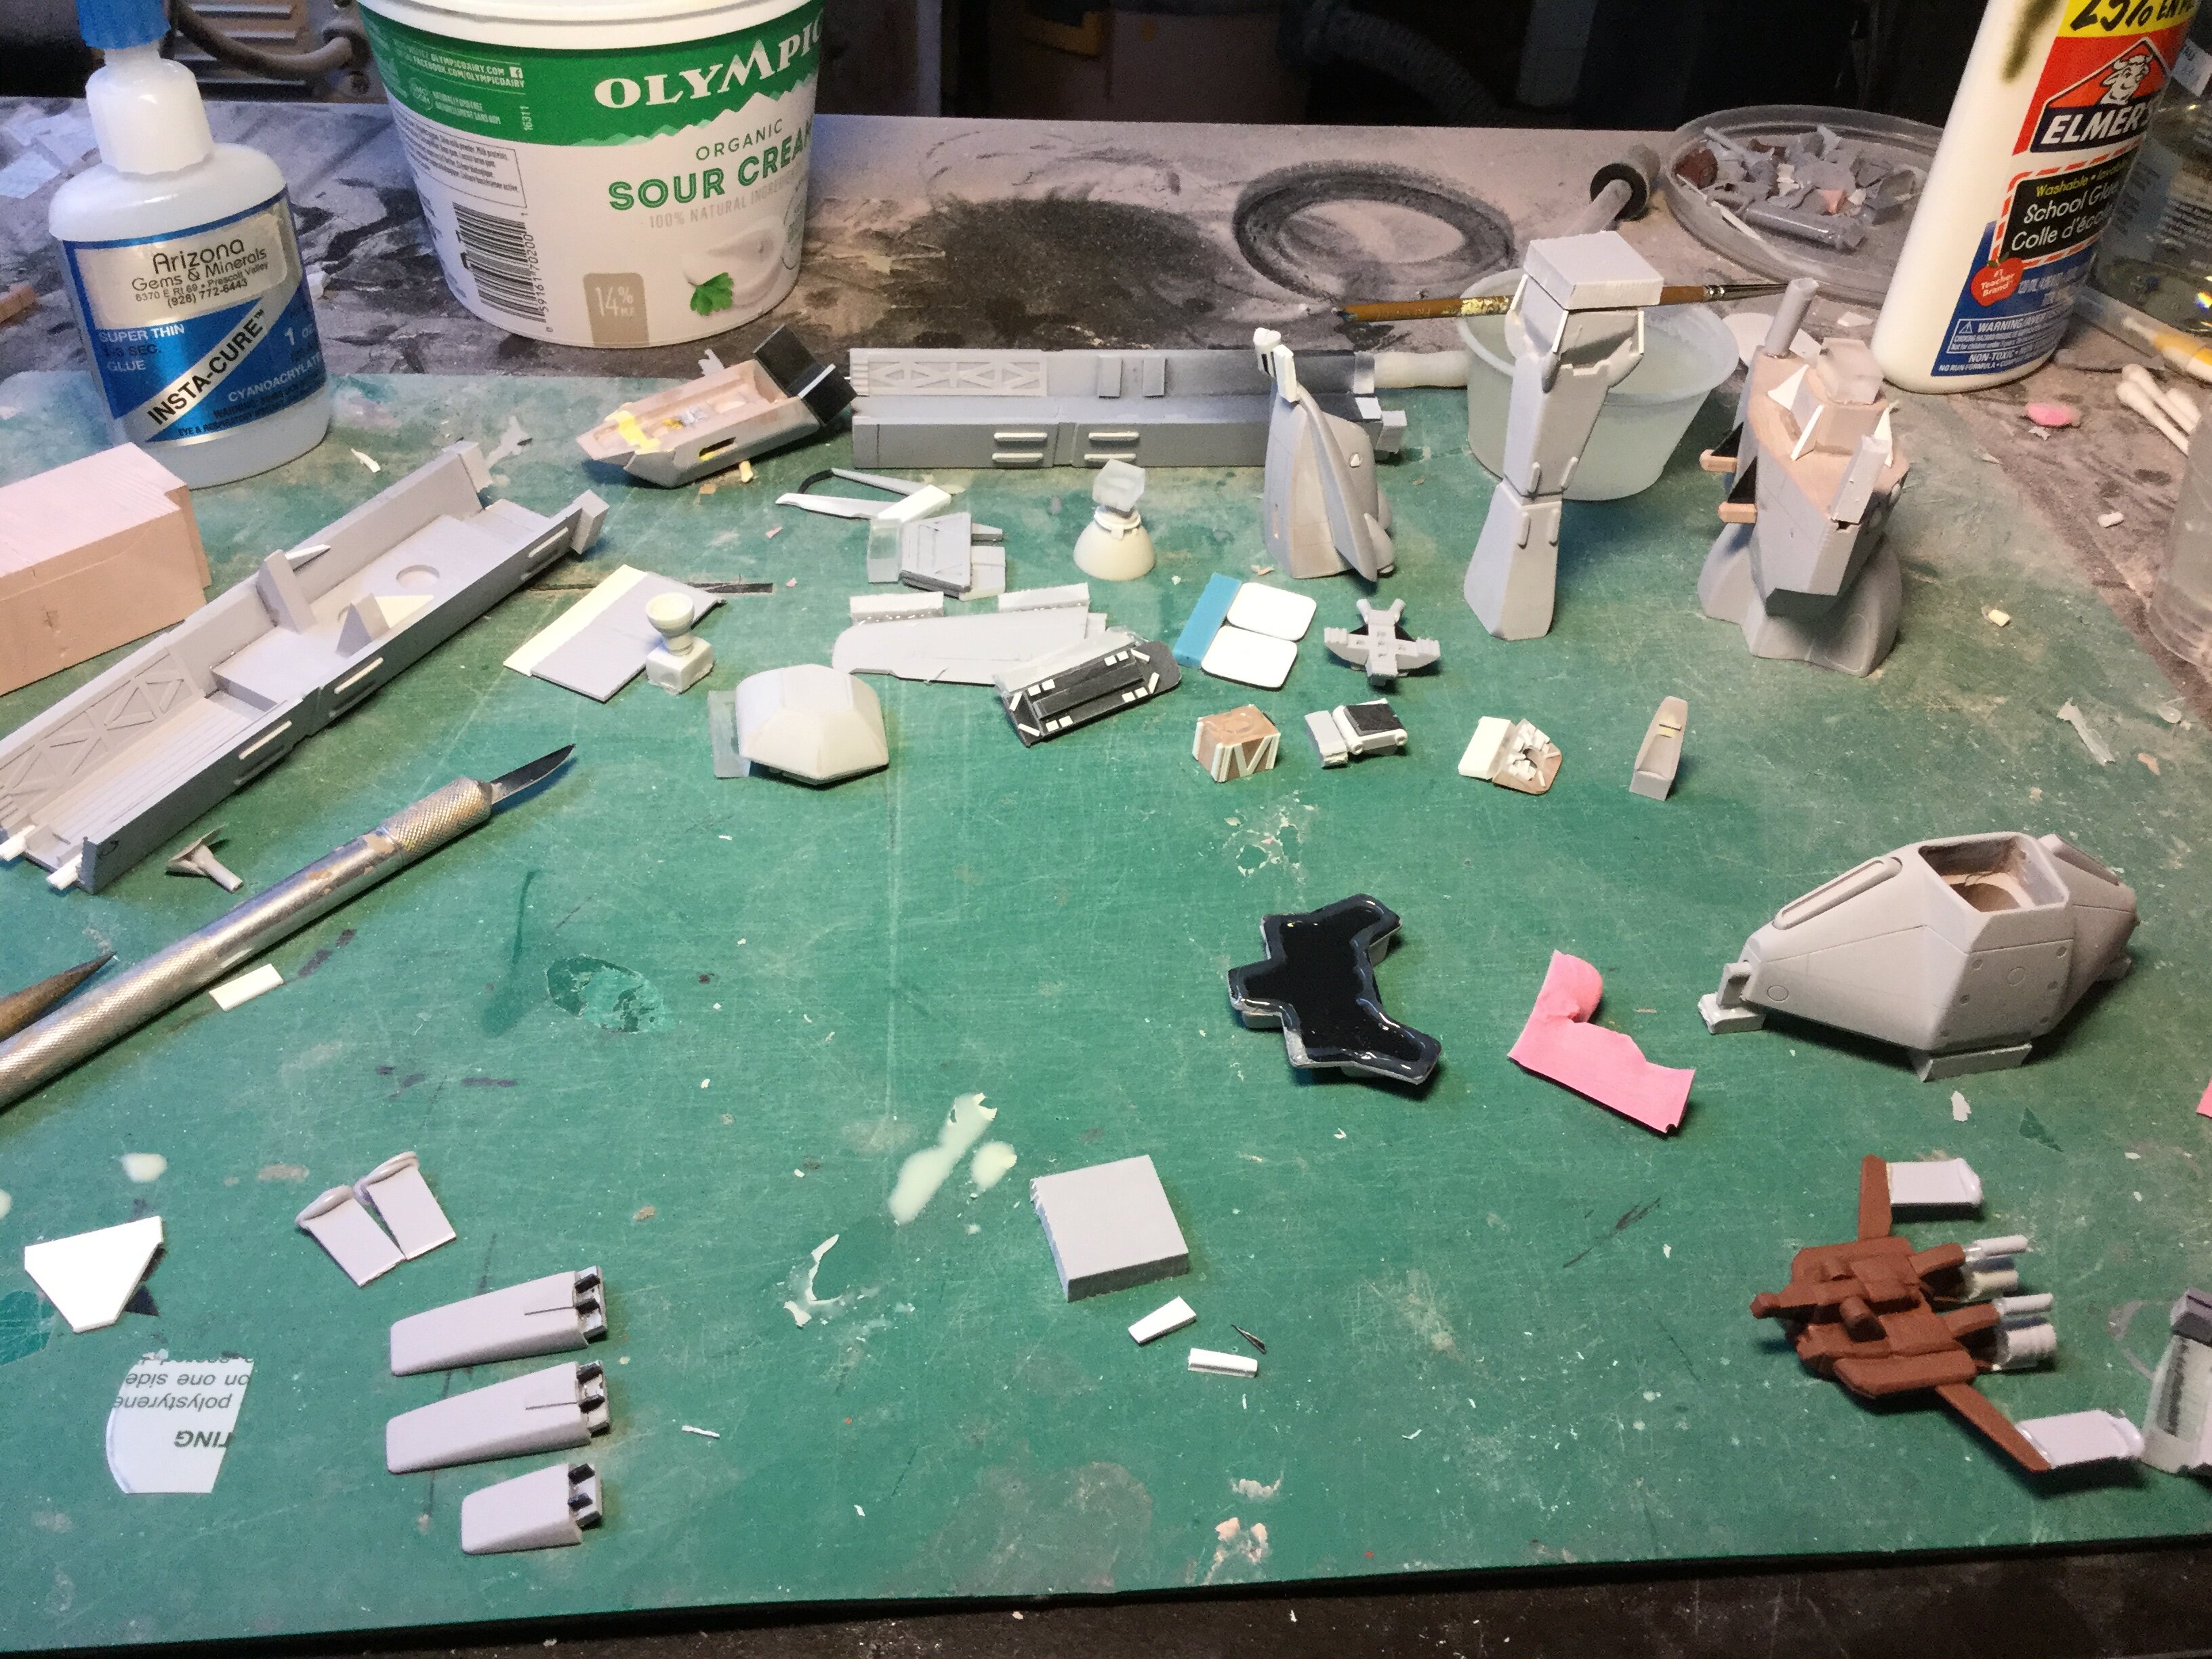
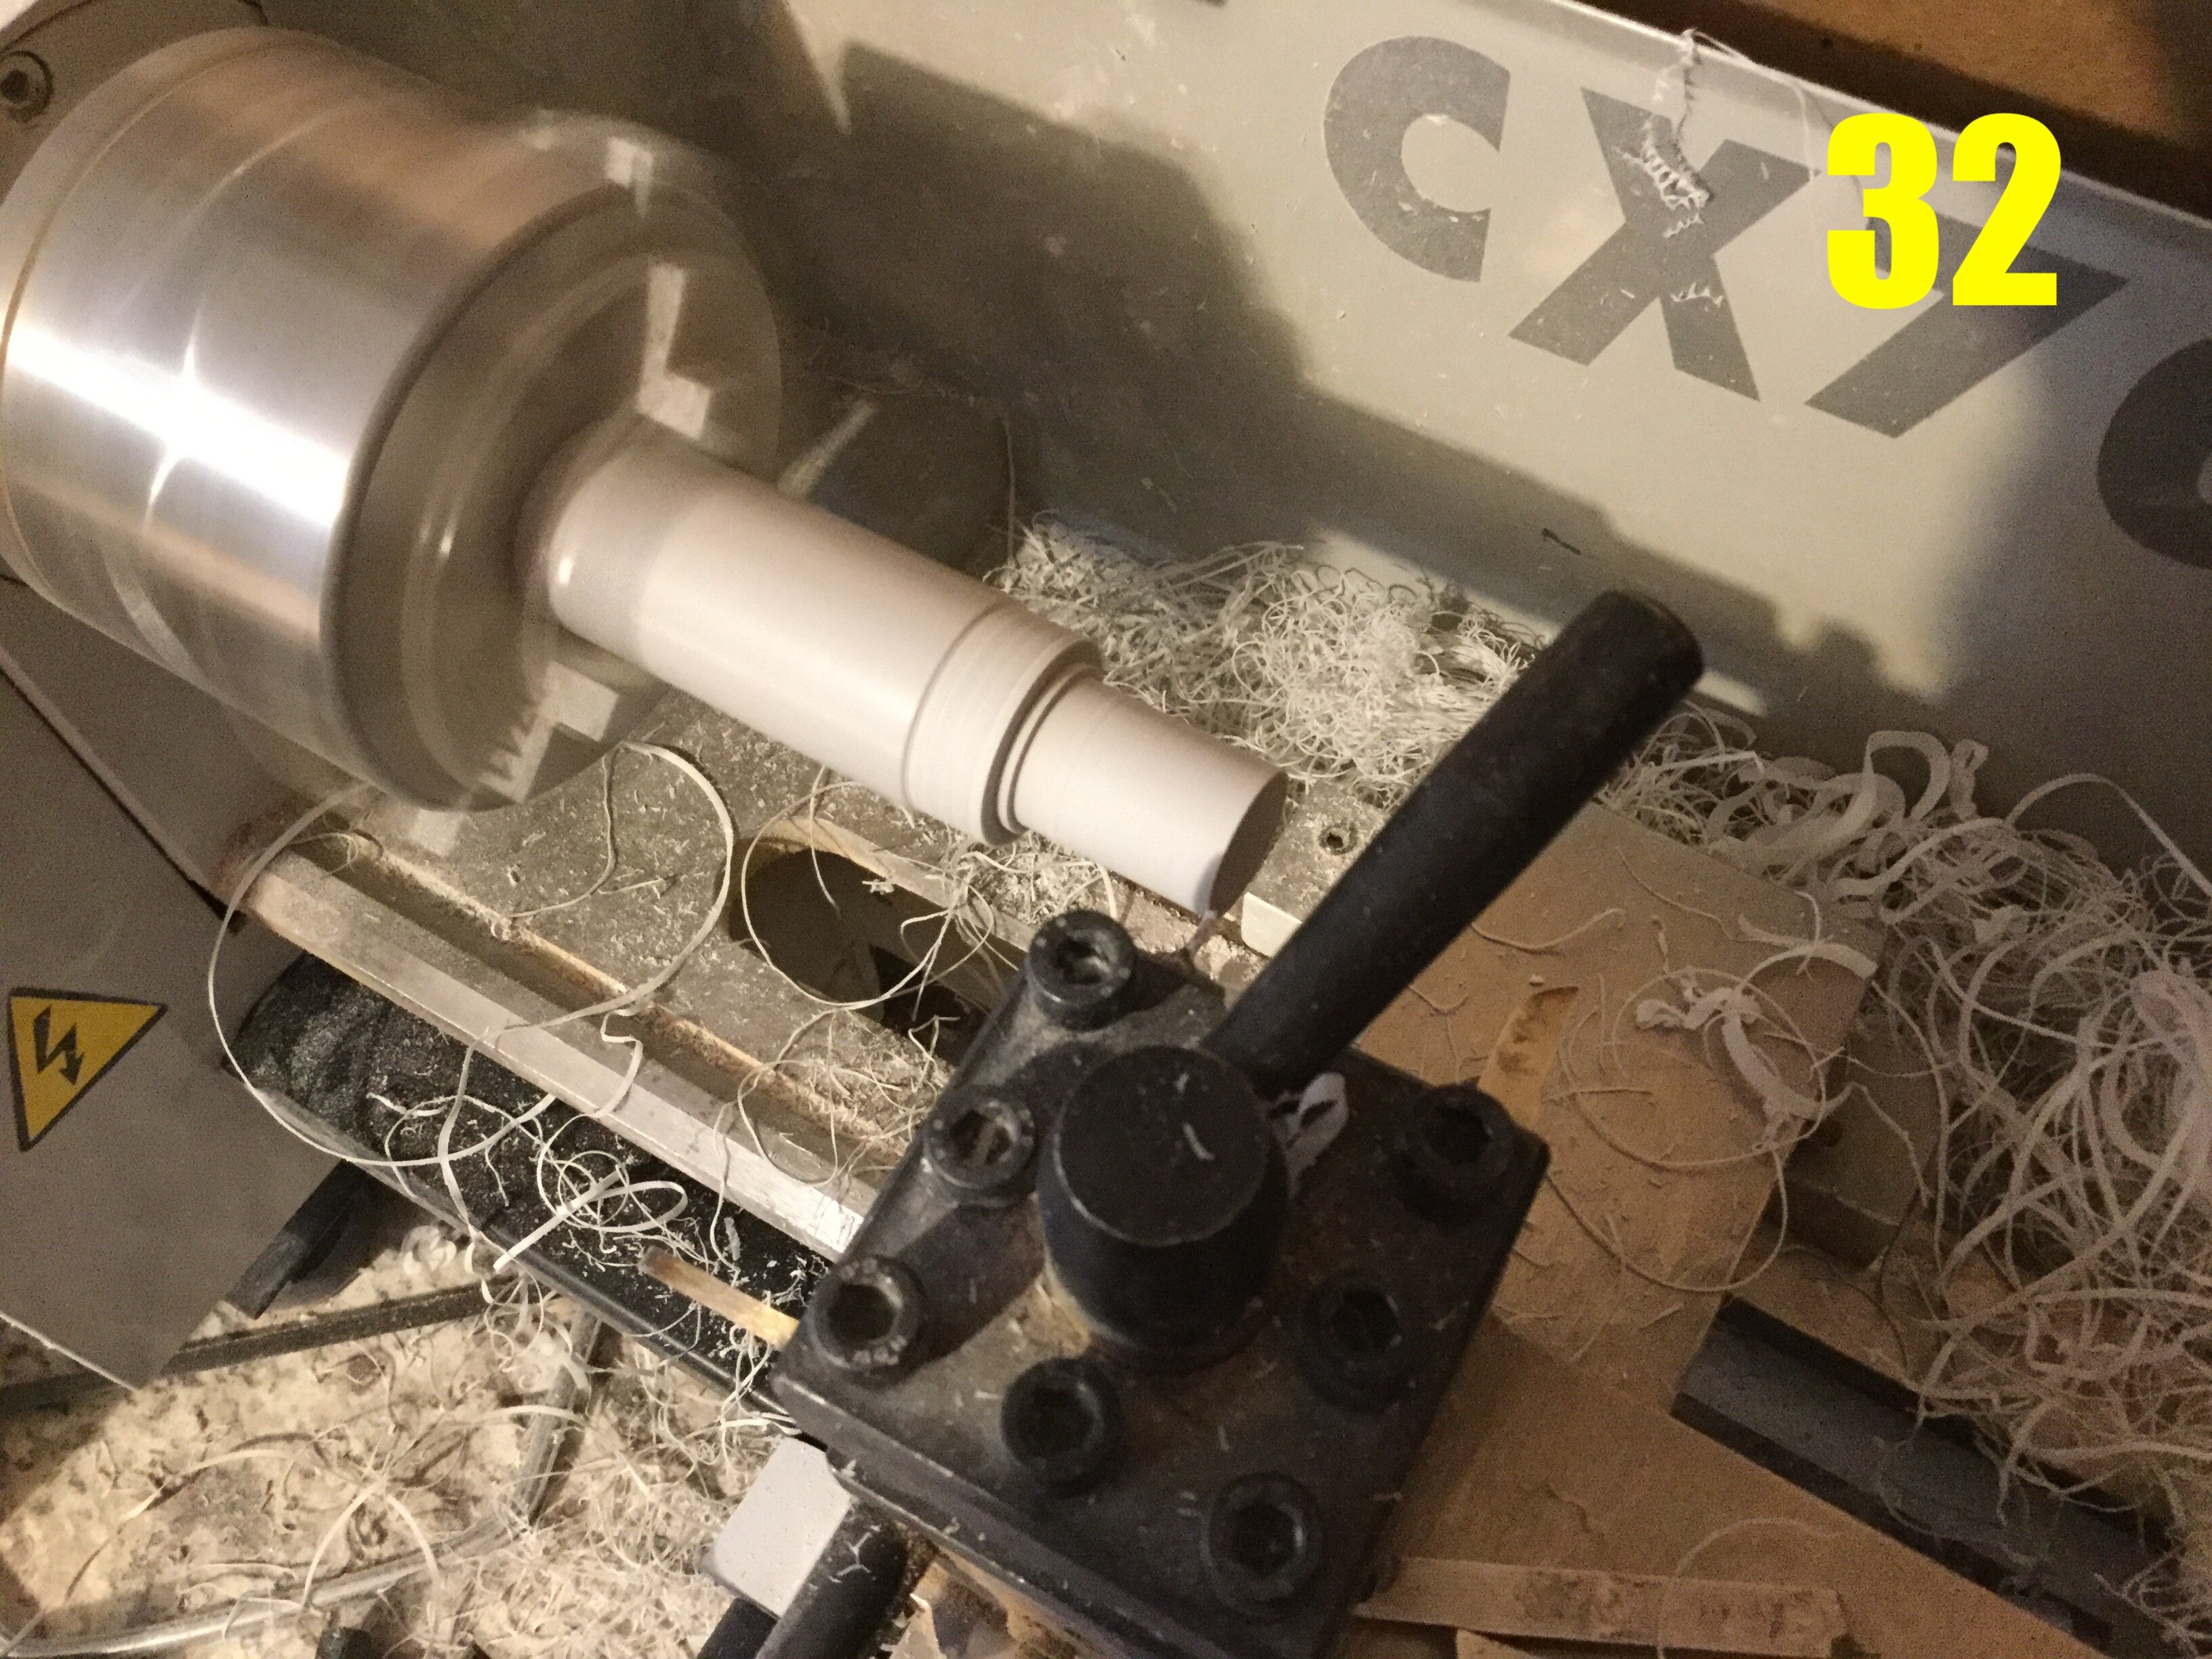
Getting there. In pic 32, I’m doing some much-neglected round parts on the lathe, namely thruster bells and a few other small details. That said, this project is much less lathe-intensive as the previous one.
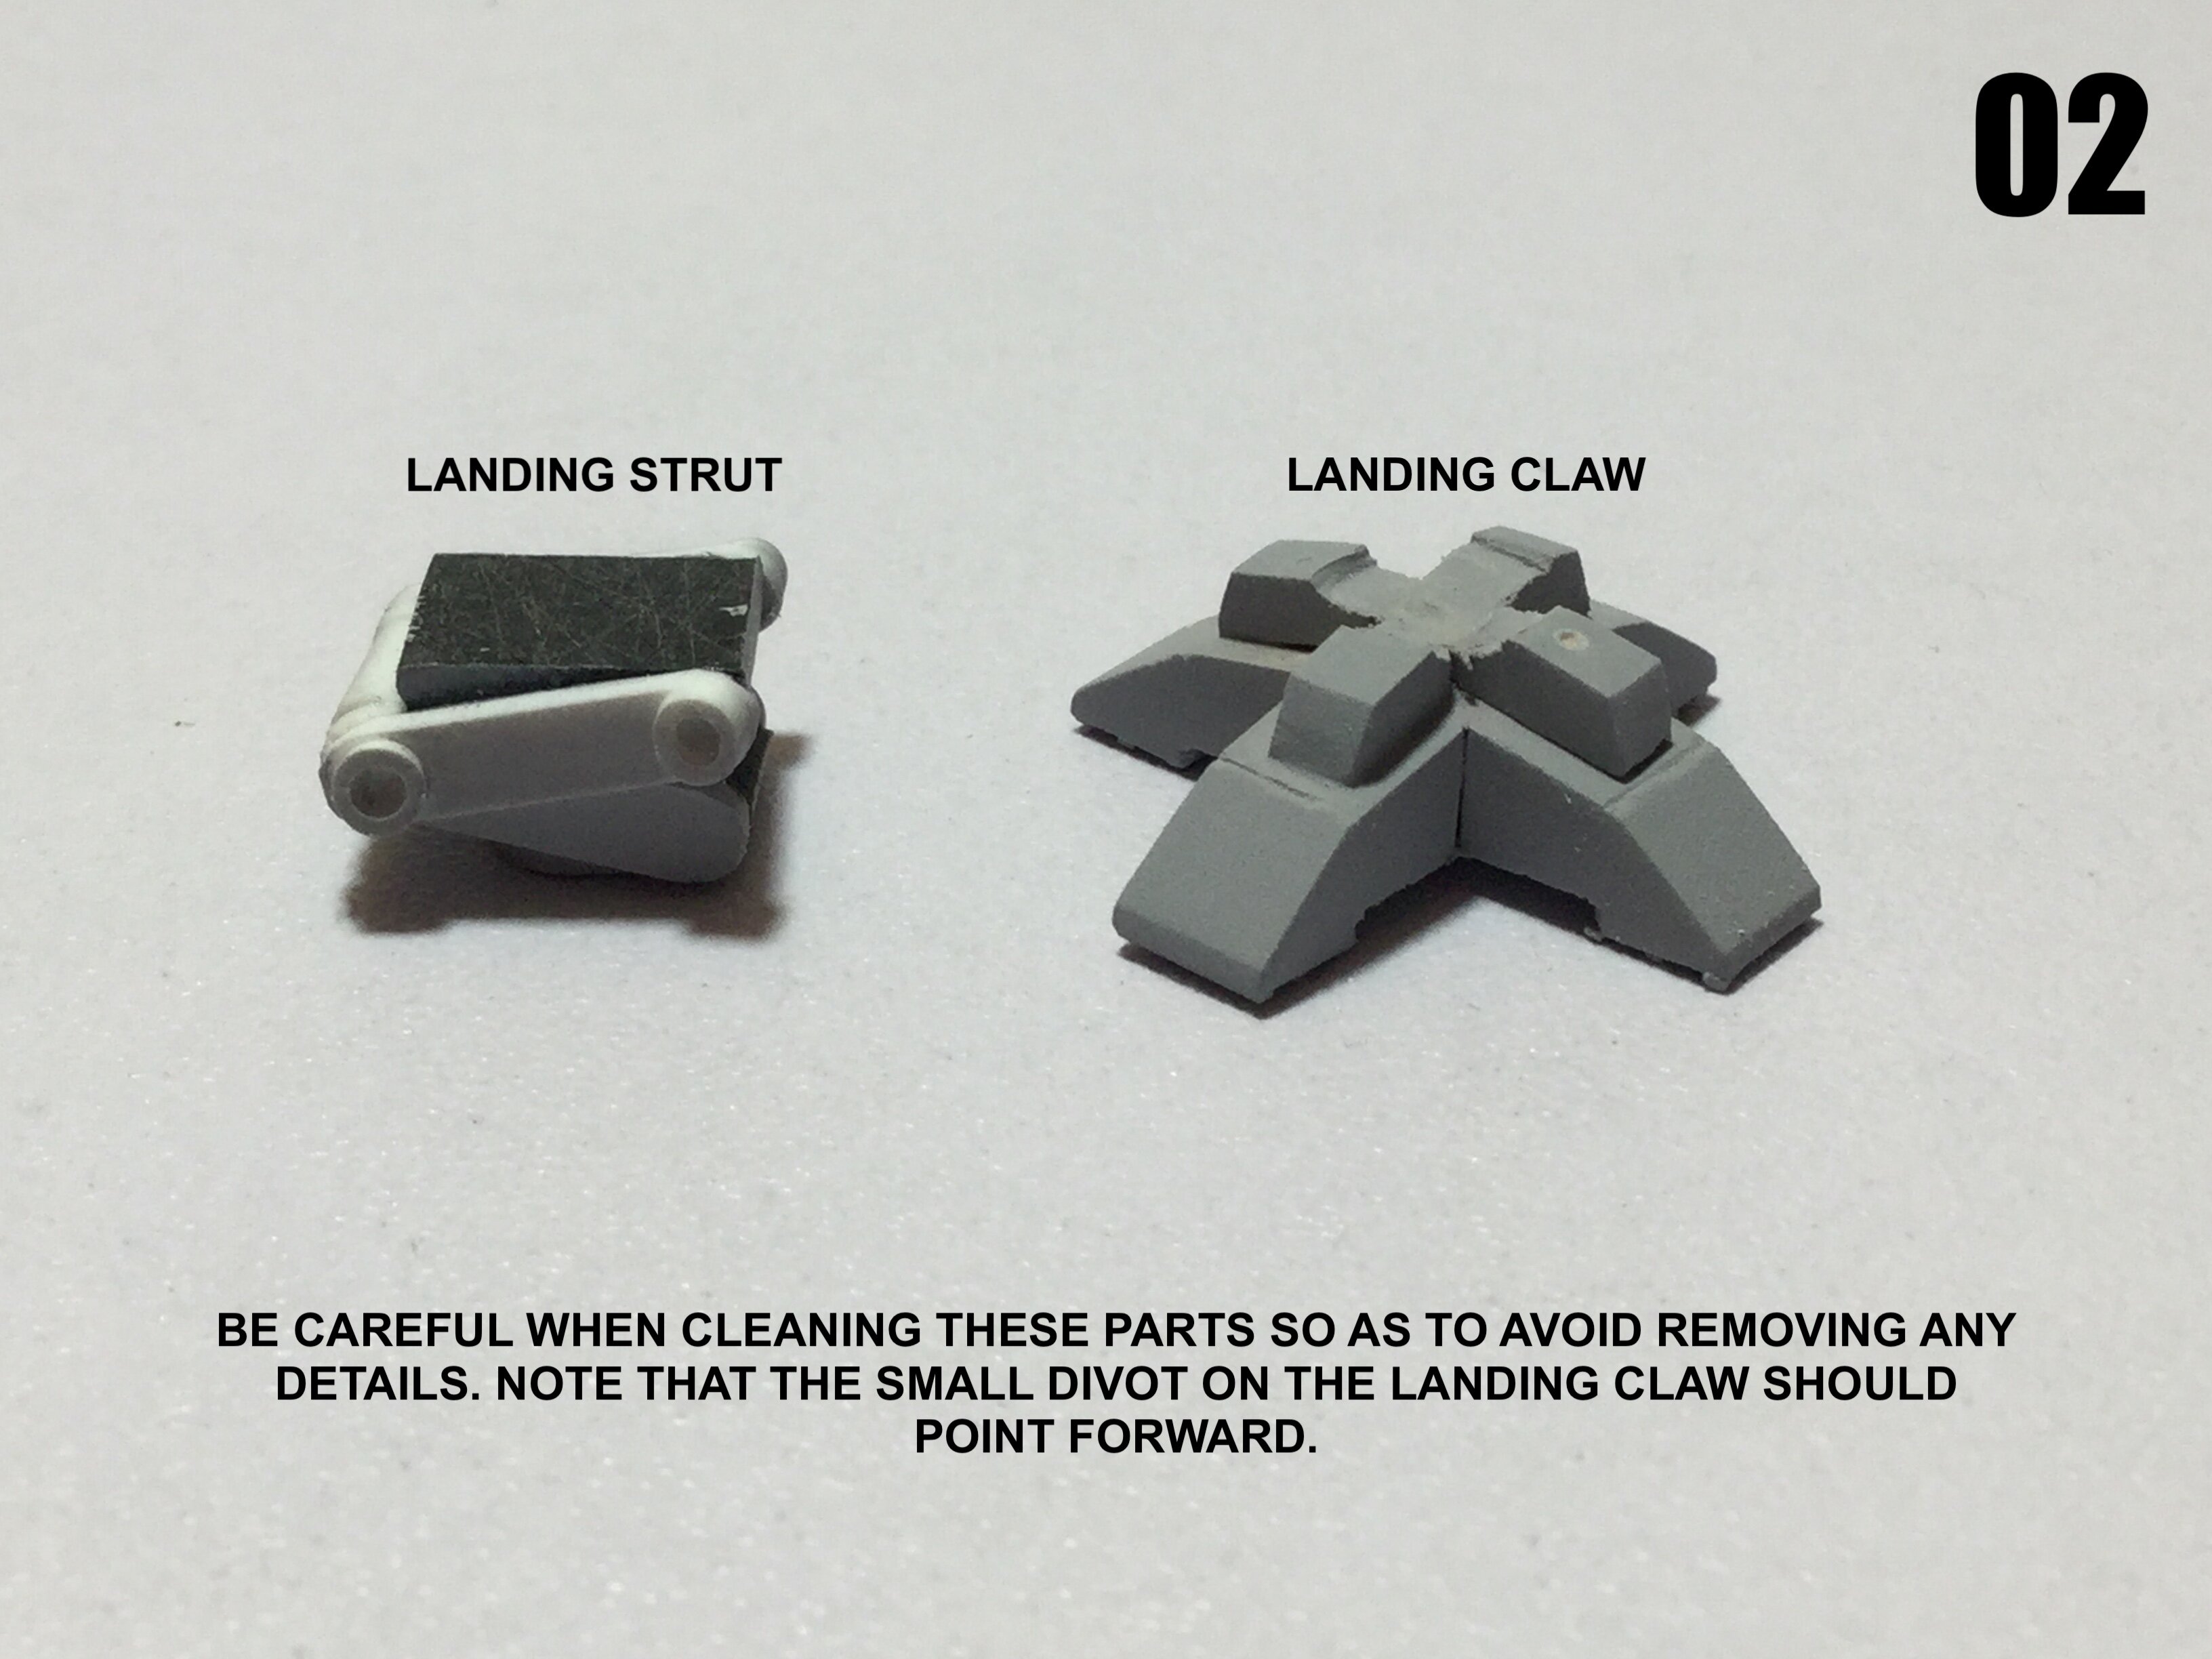
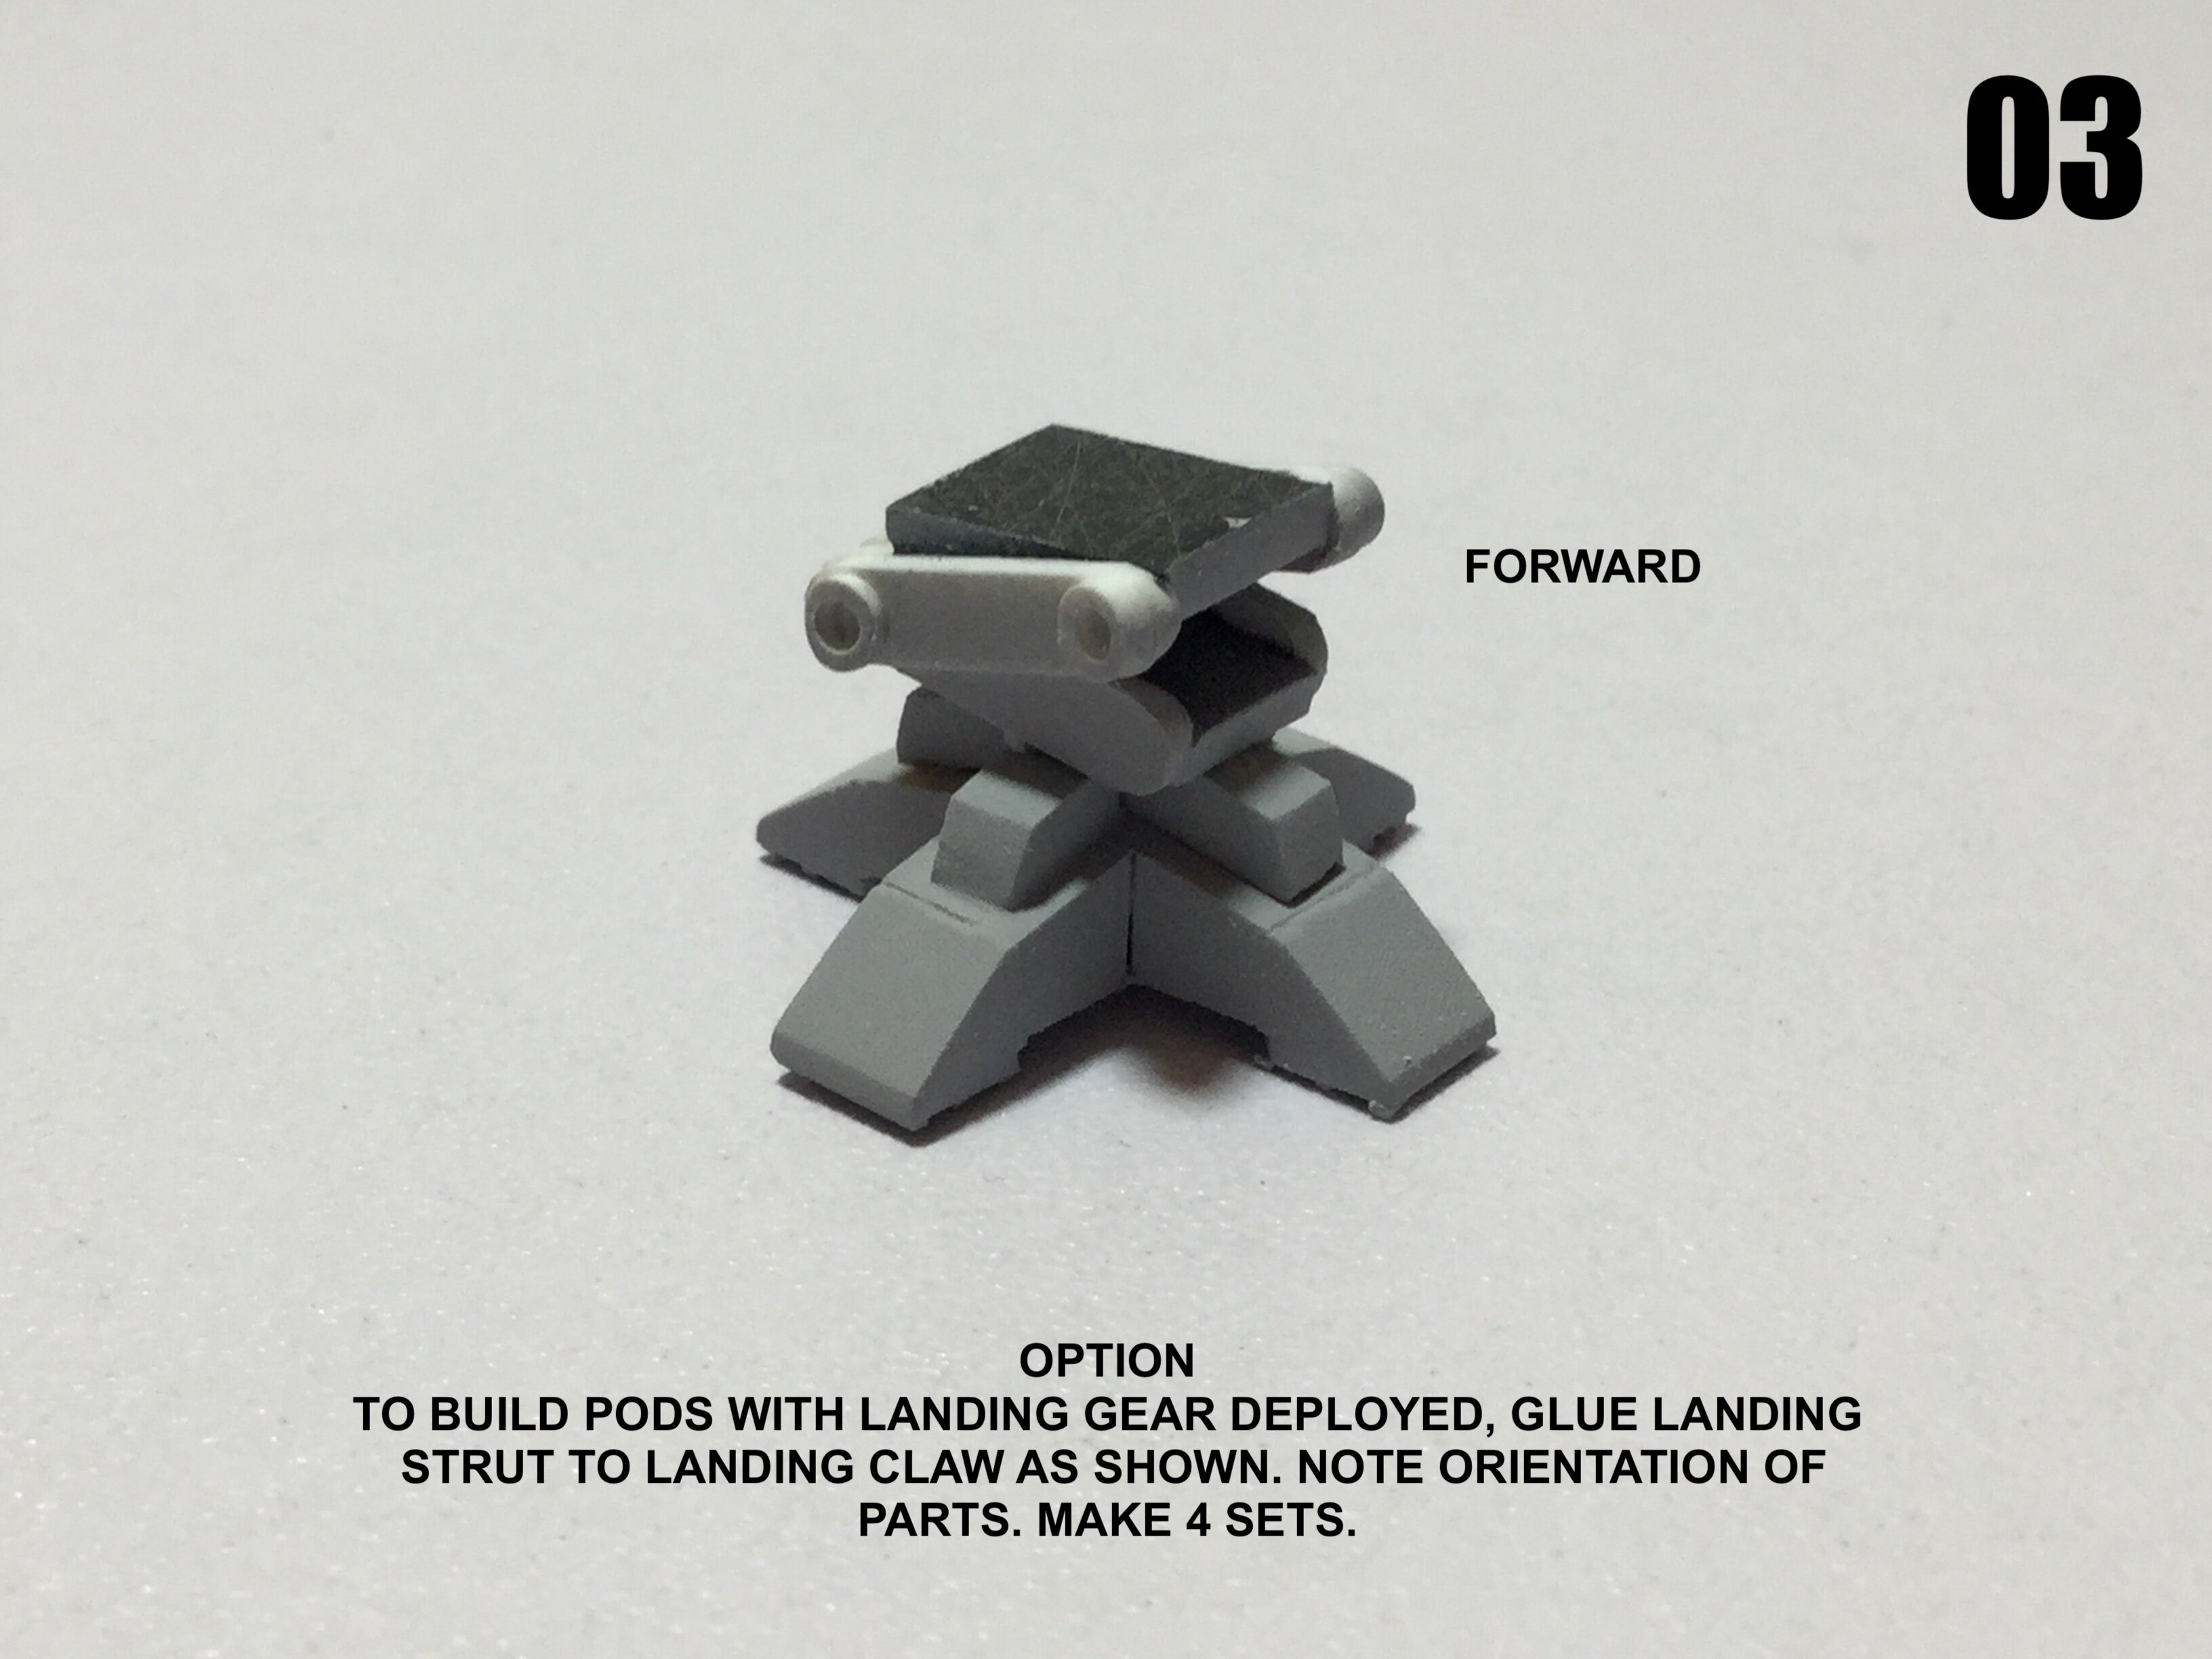
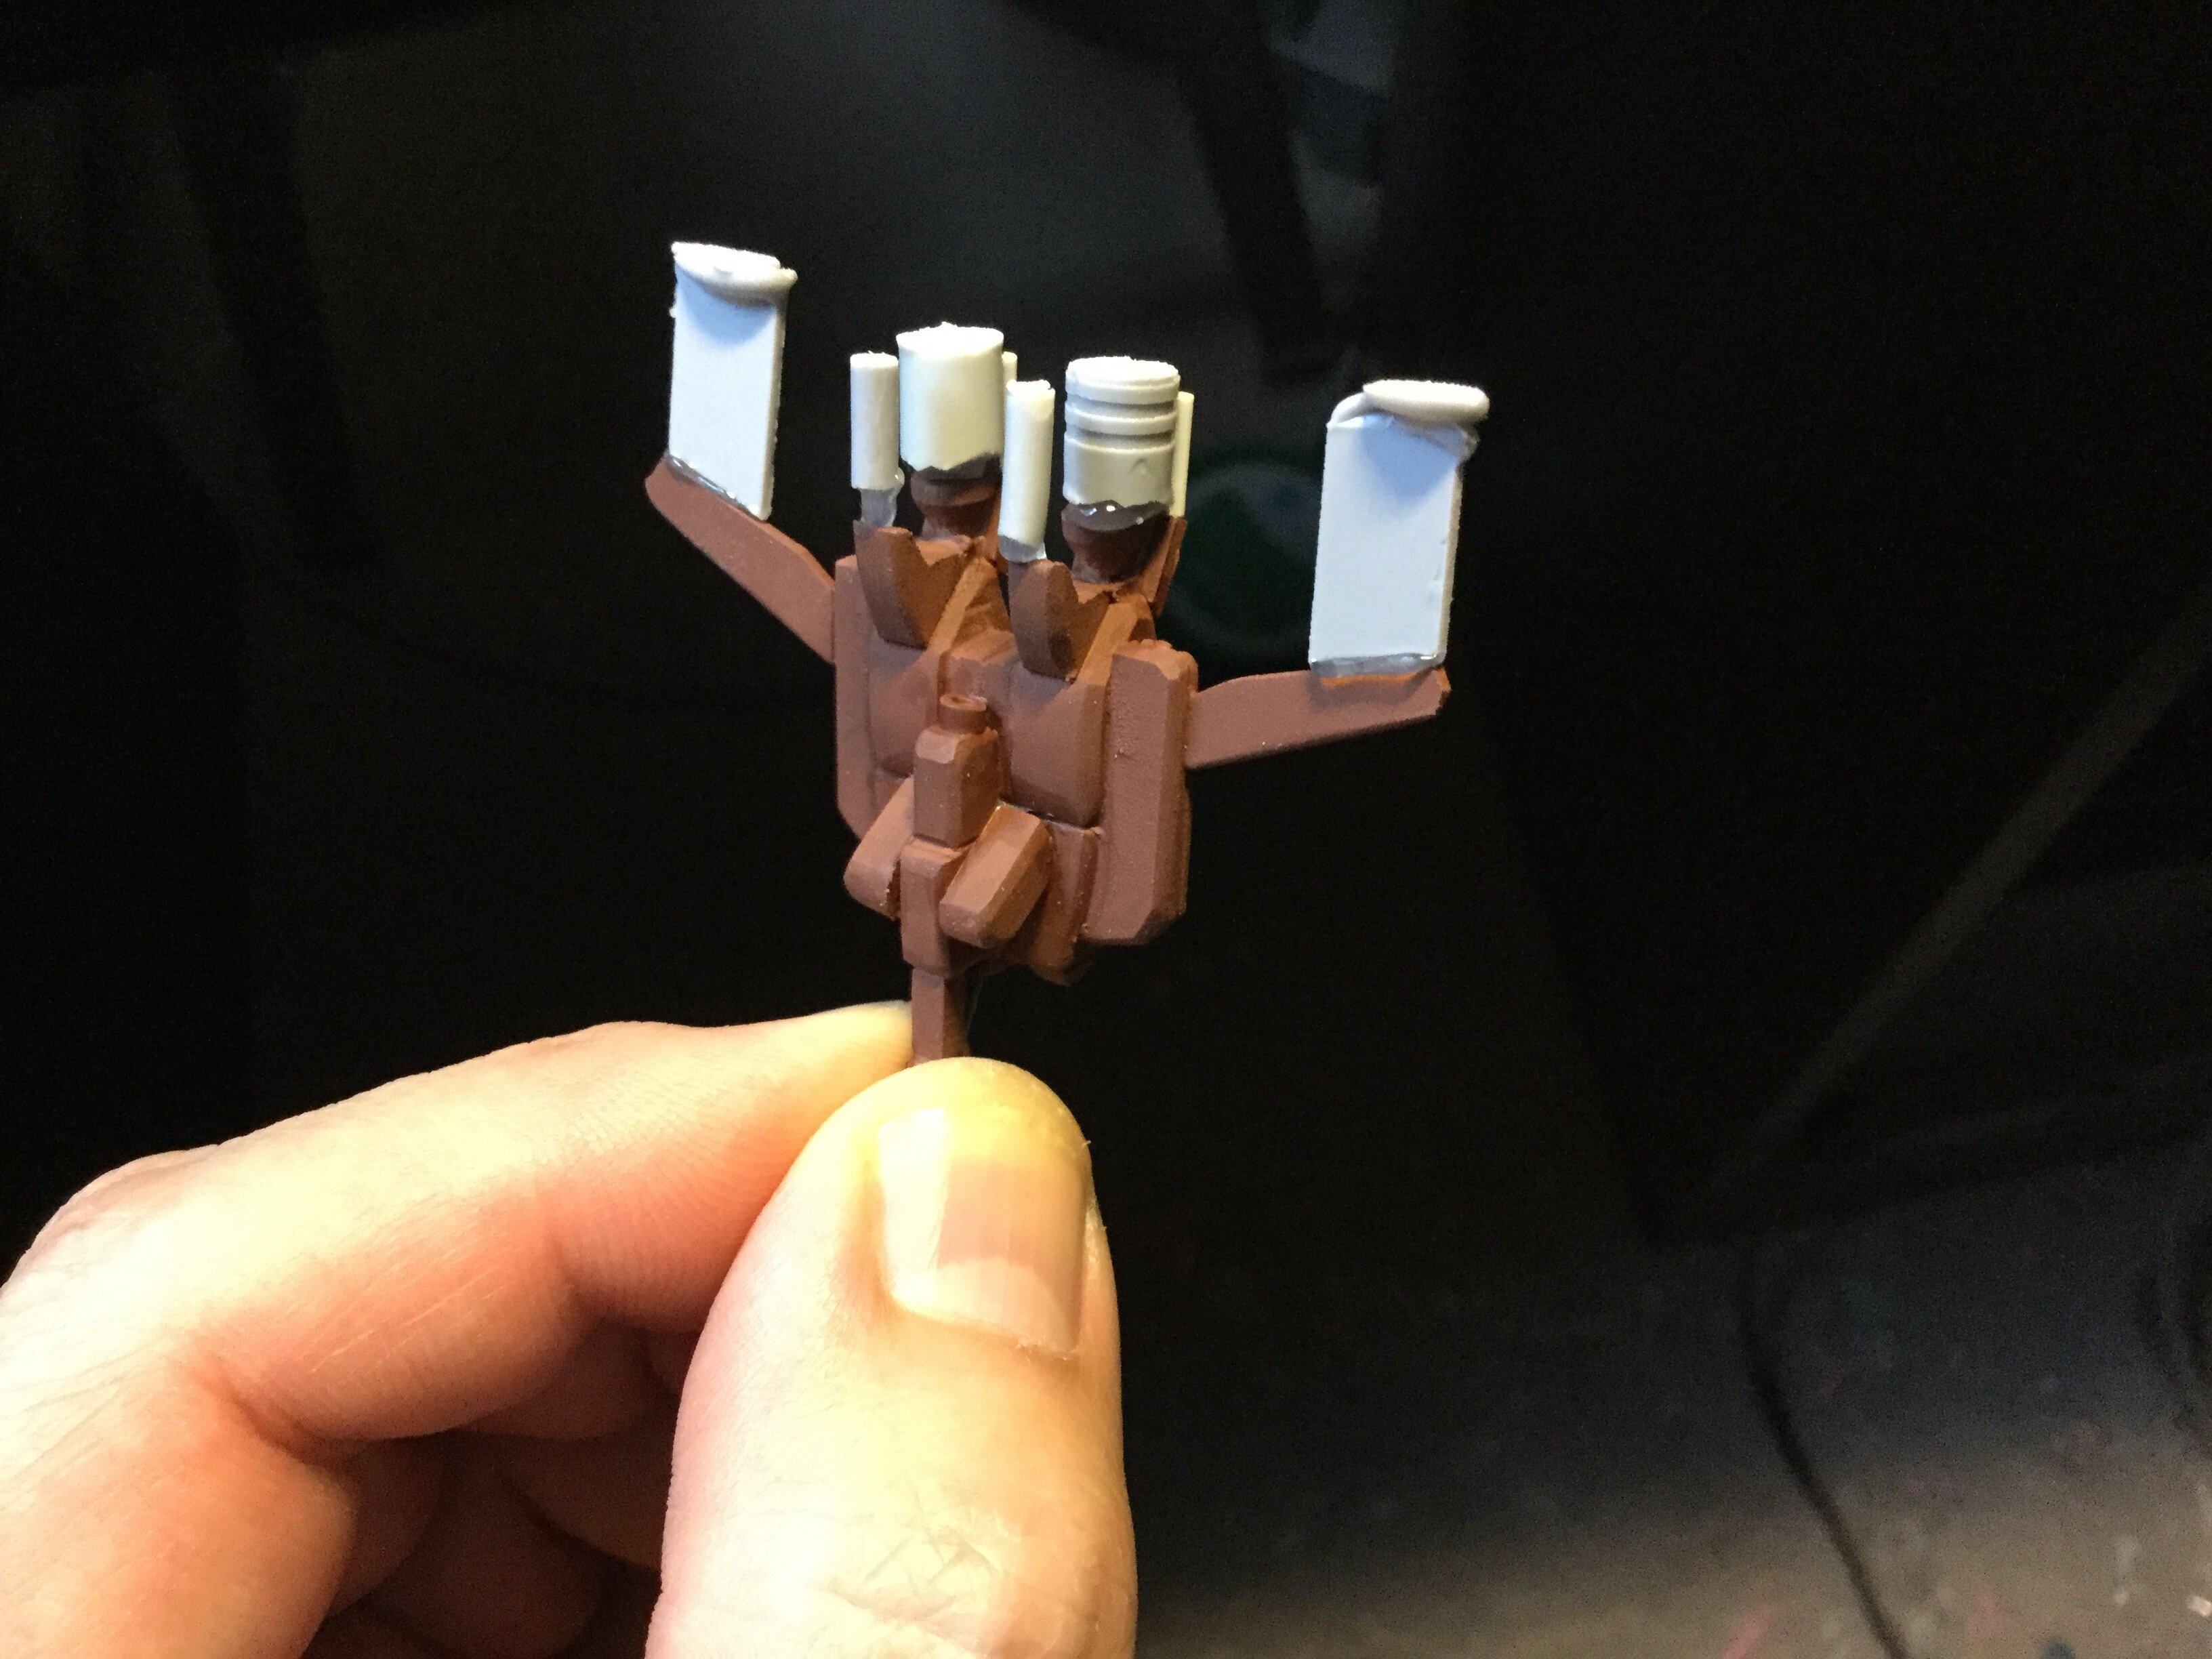
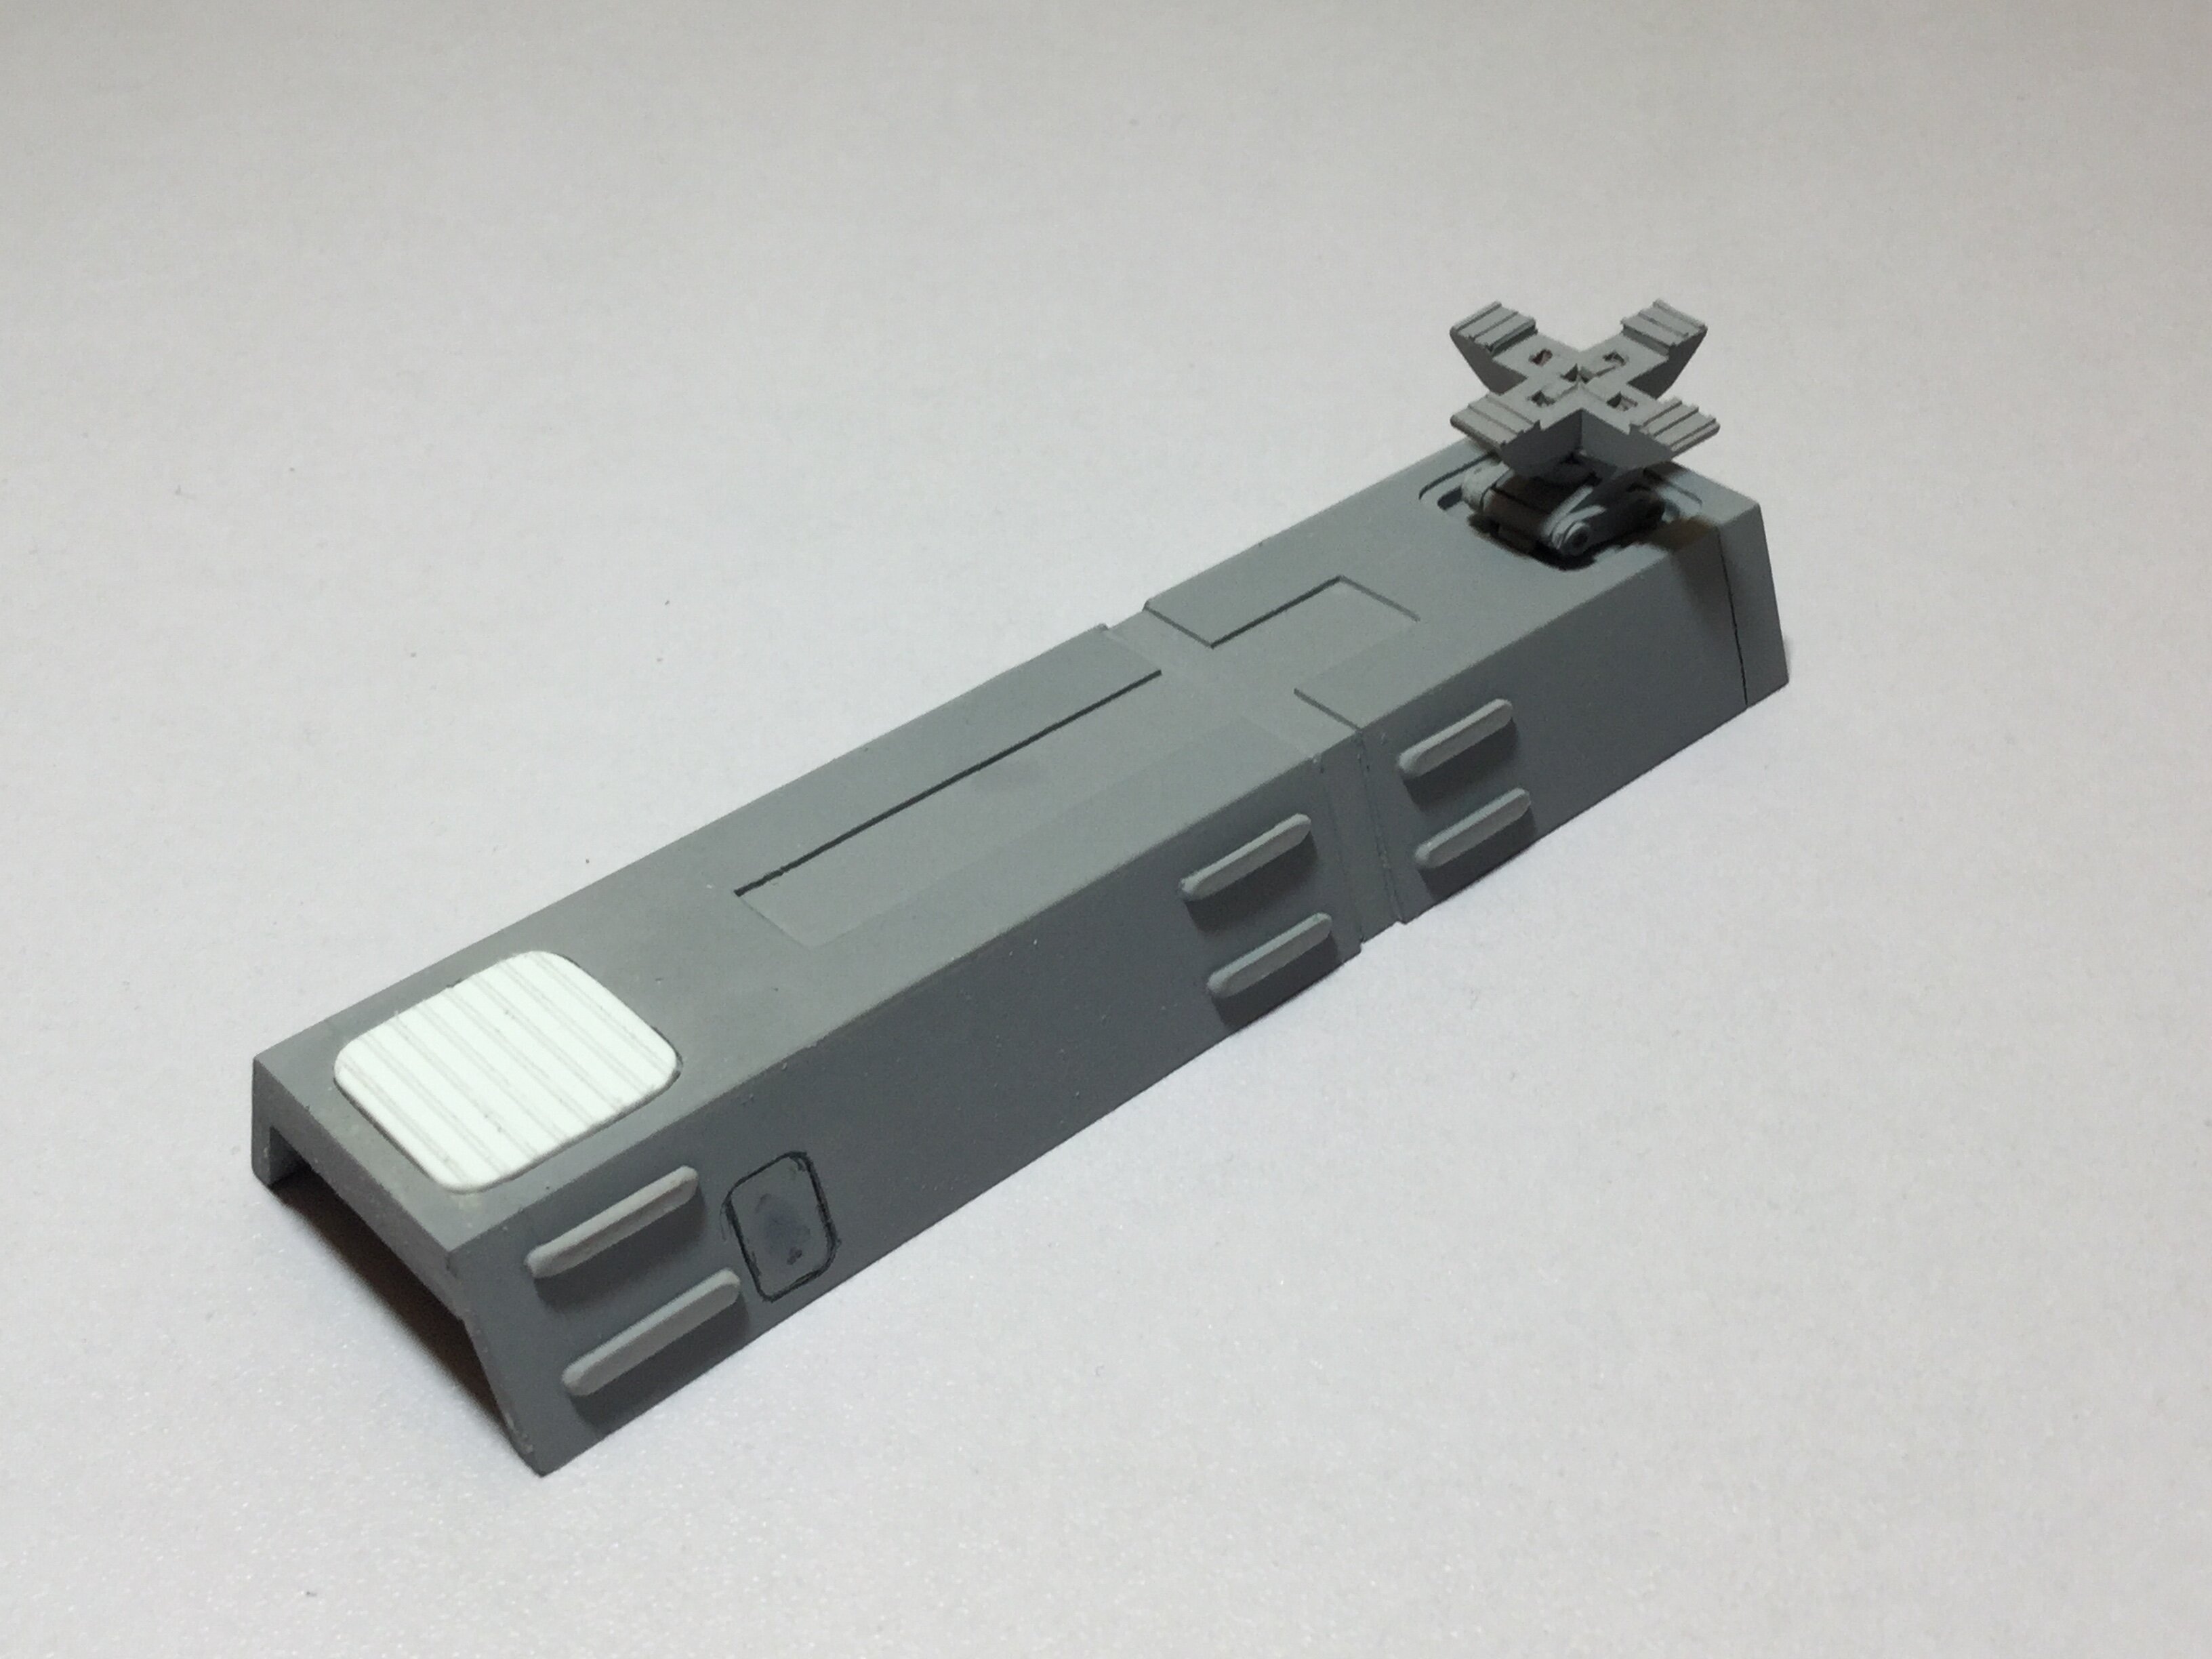
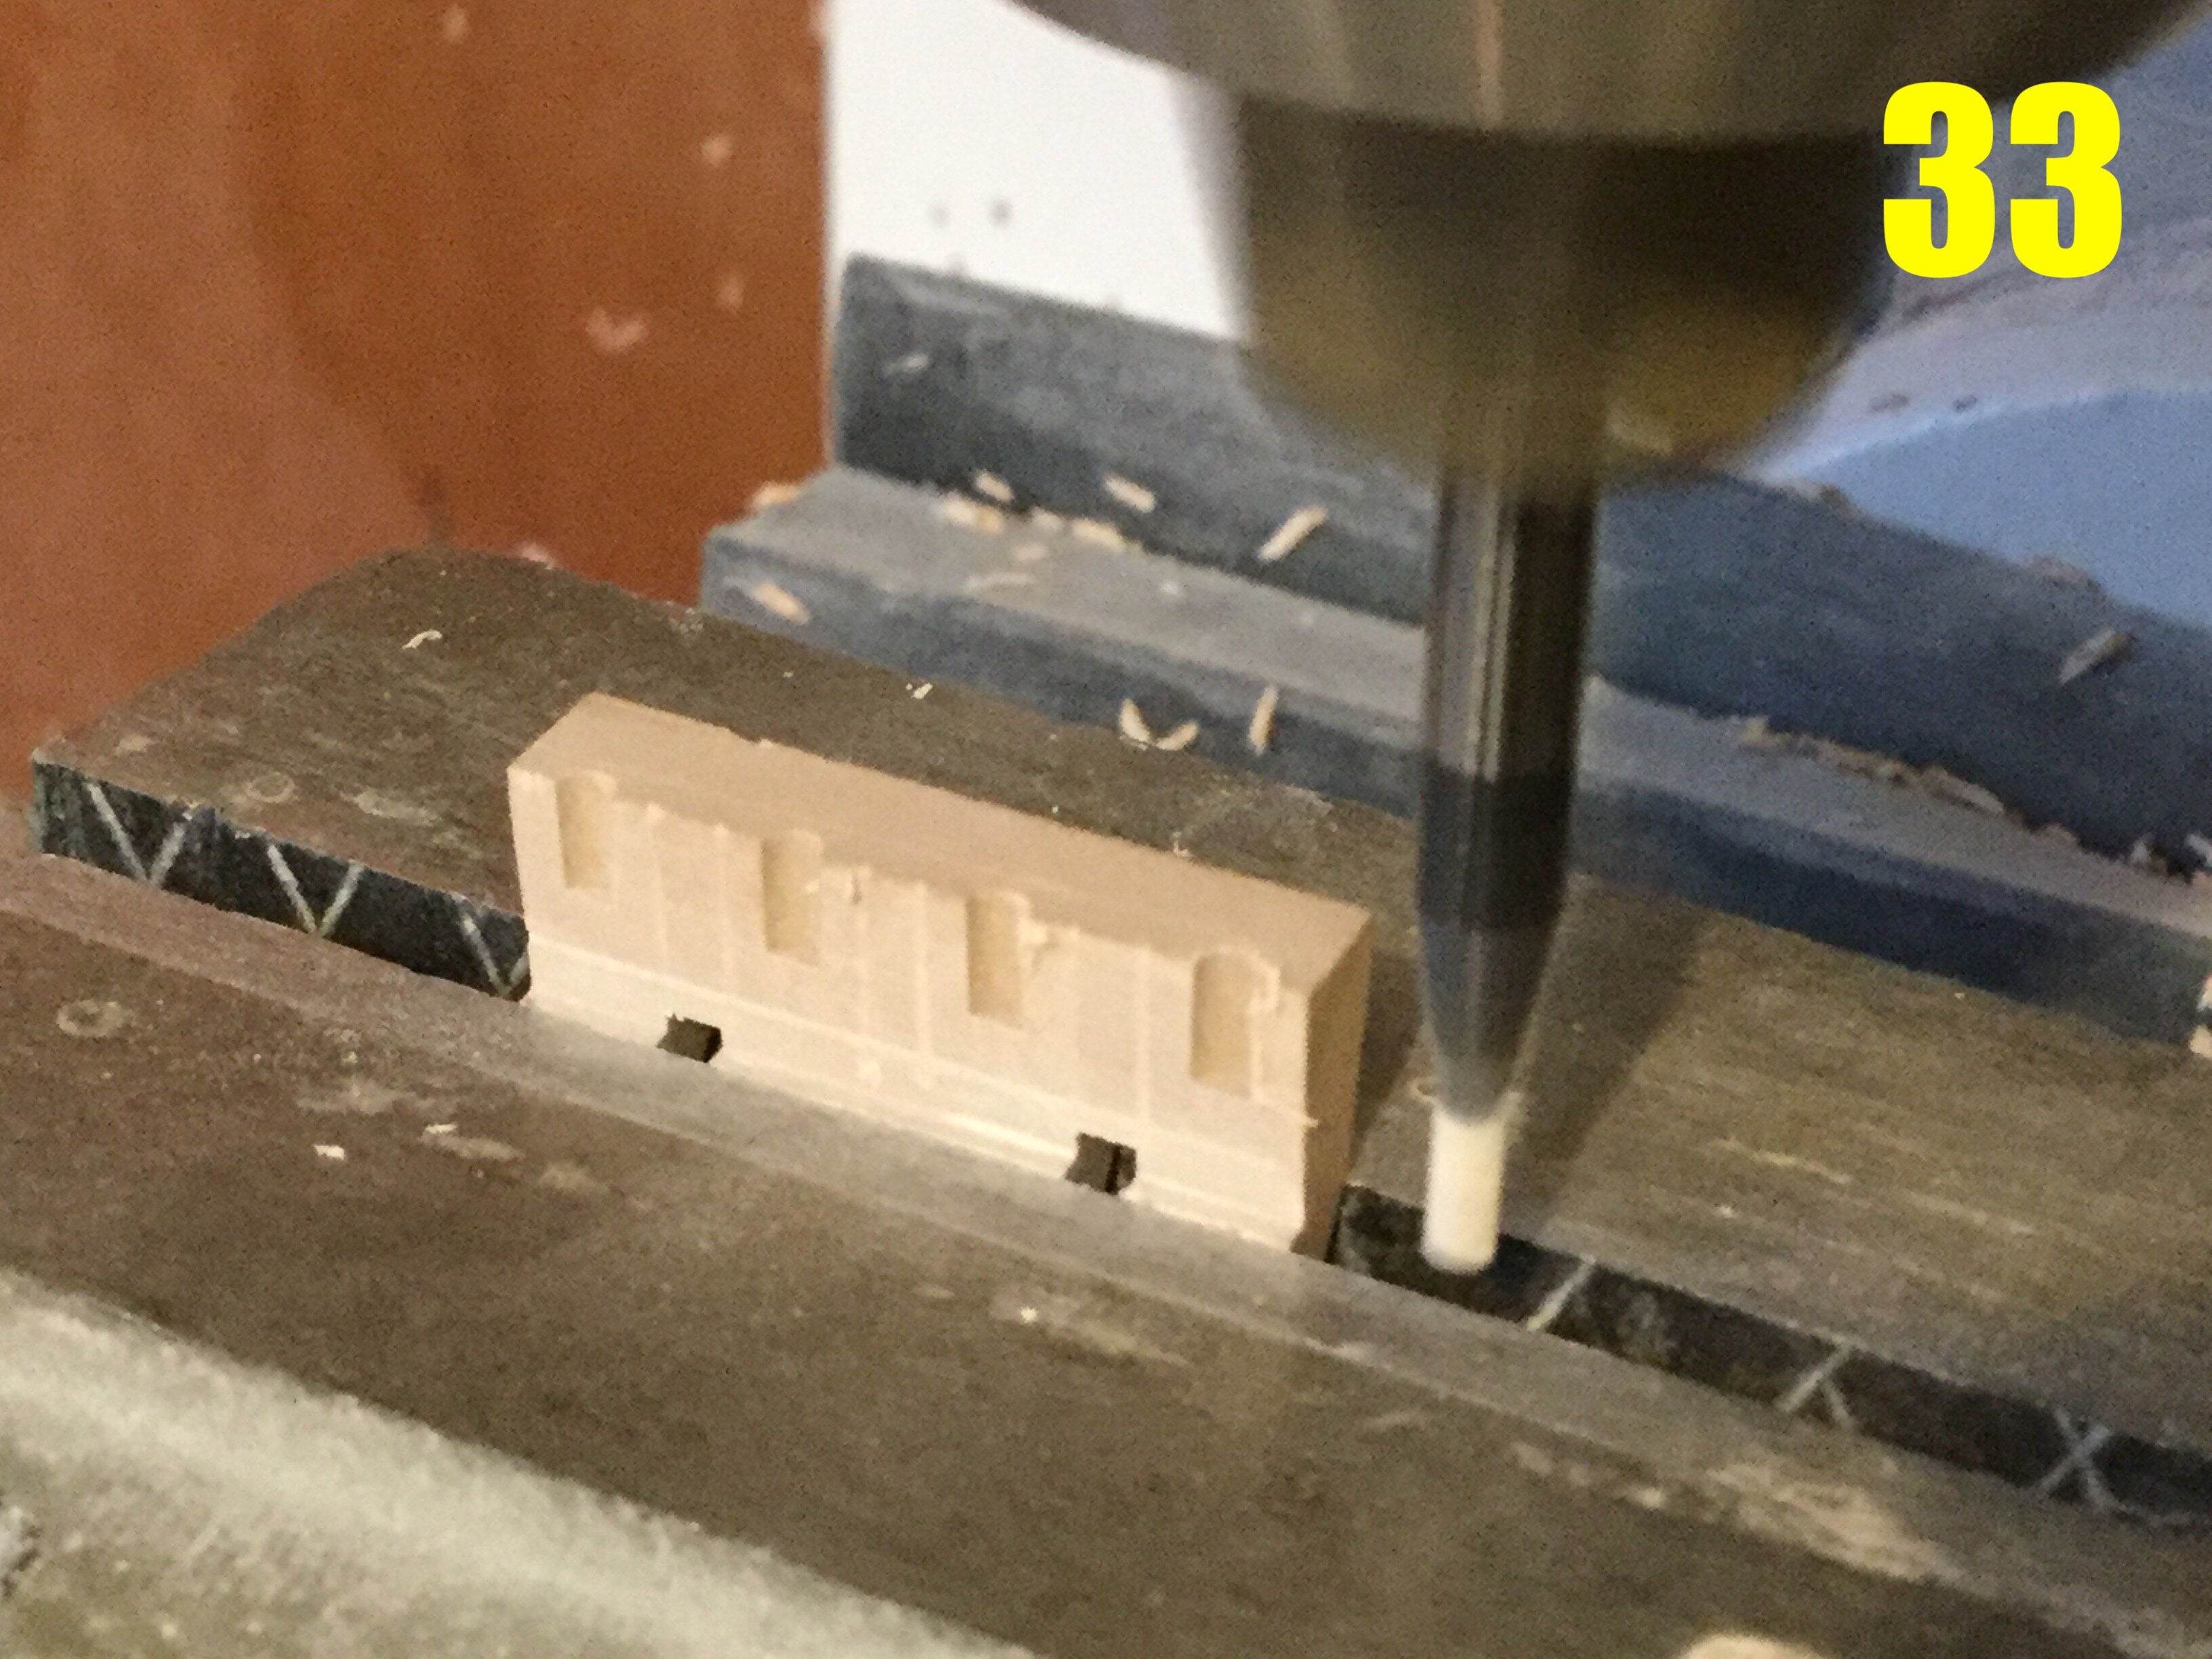
Pic 33: some tiny, delicate parts being machined, which will become the landing gear/claws for the cargo modules.
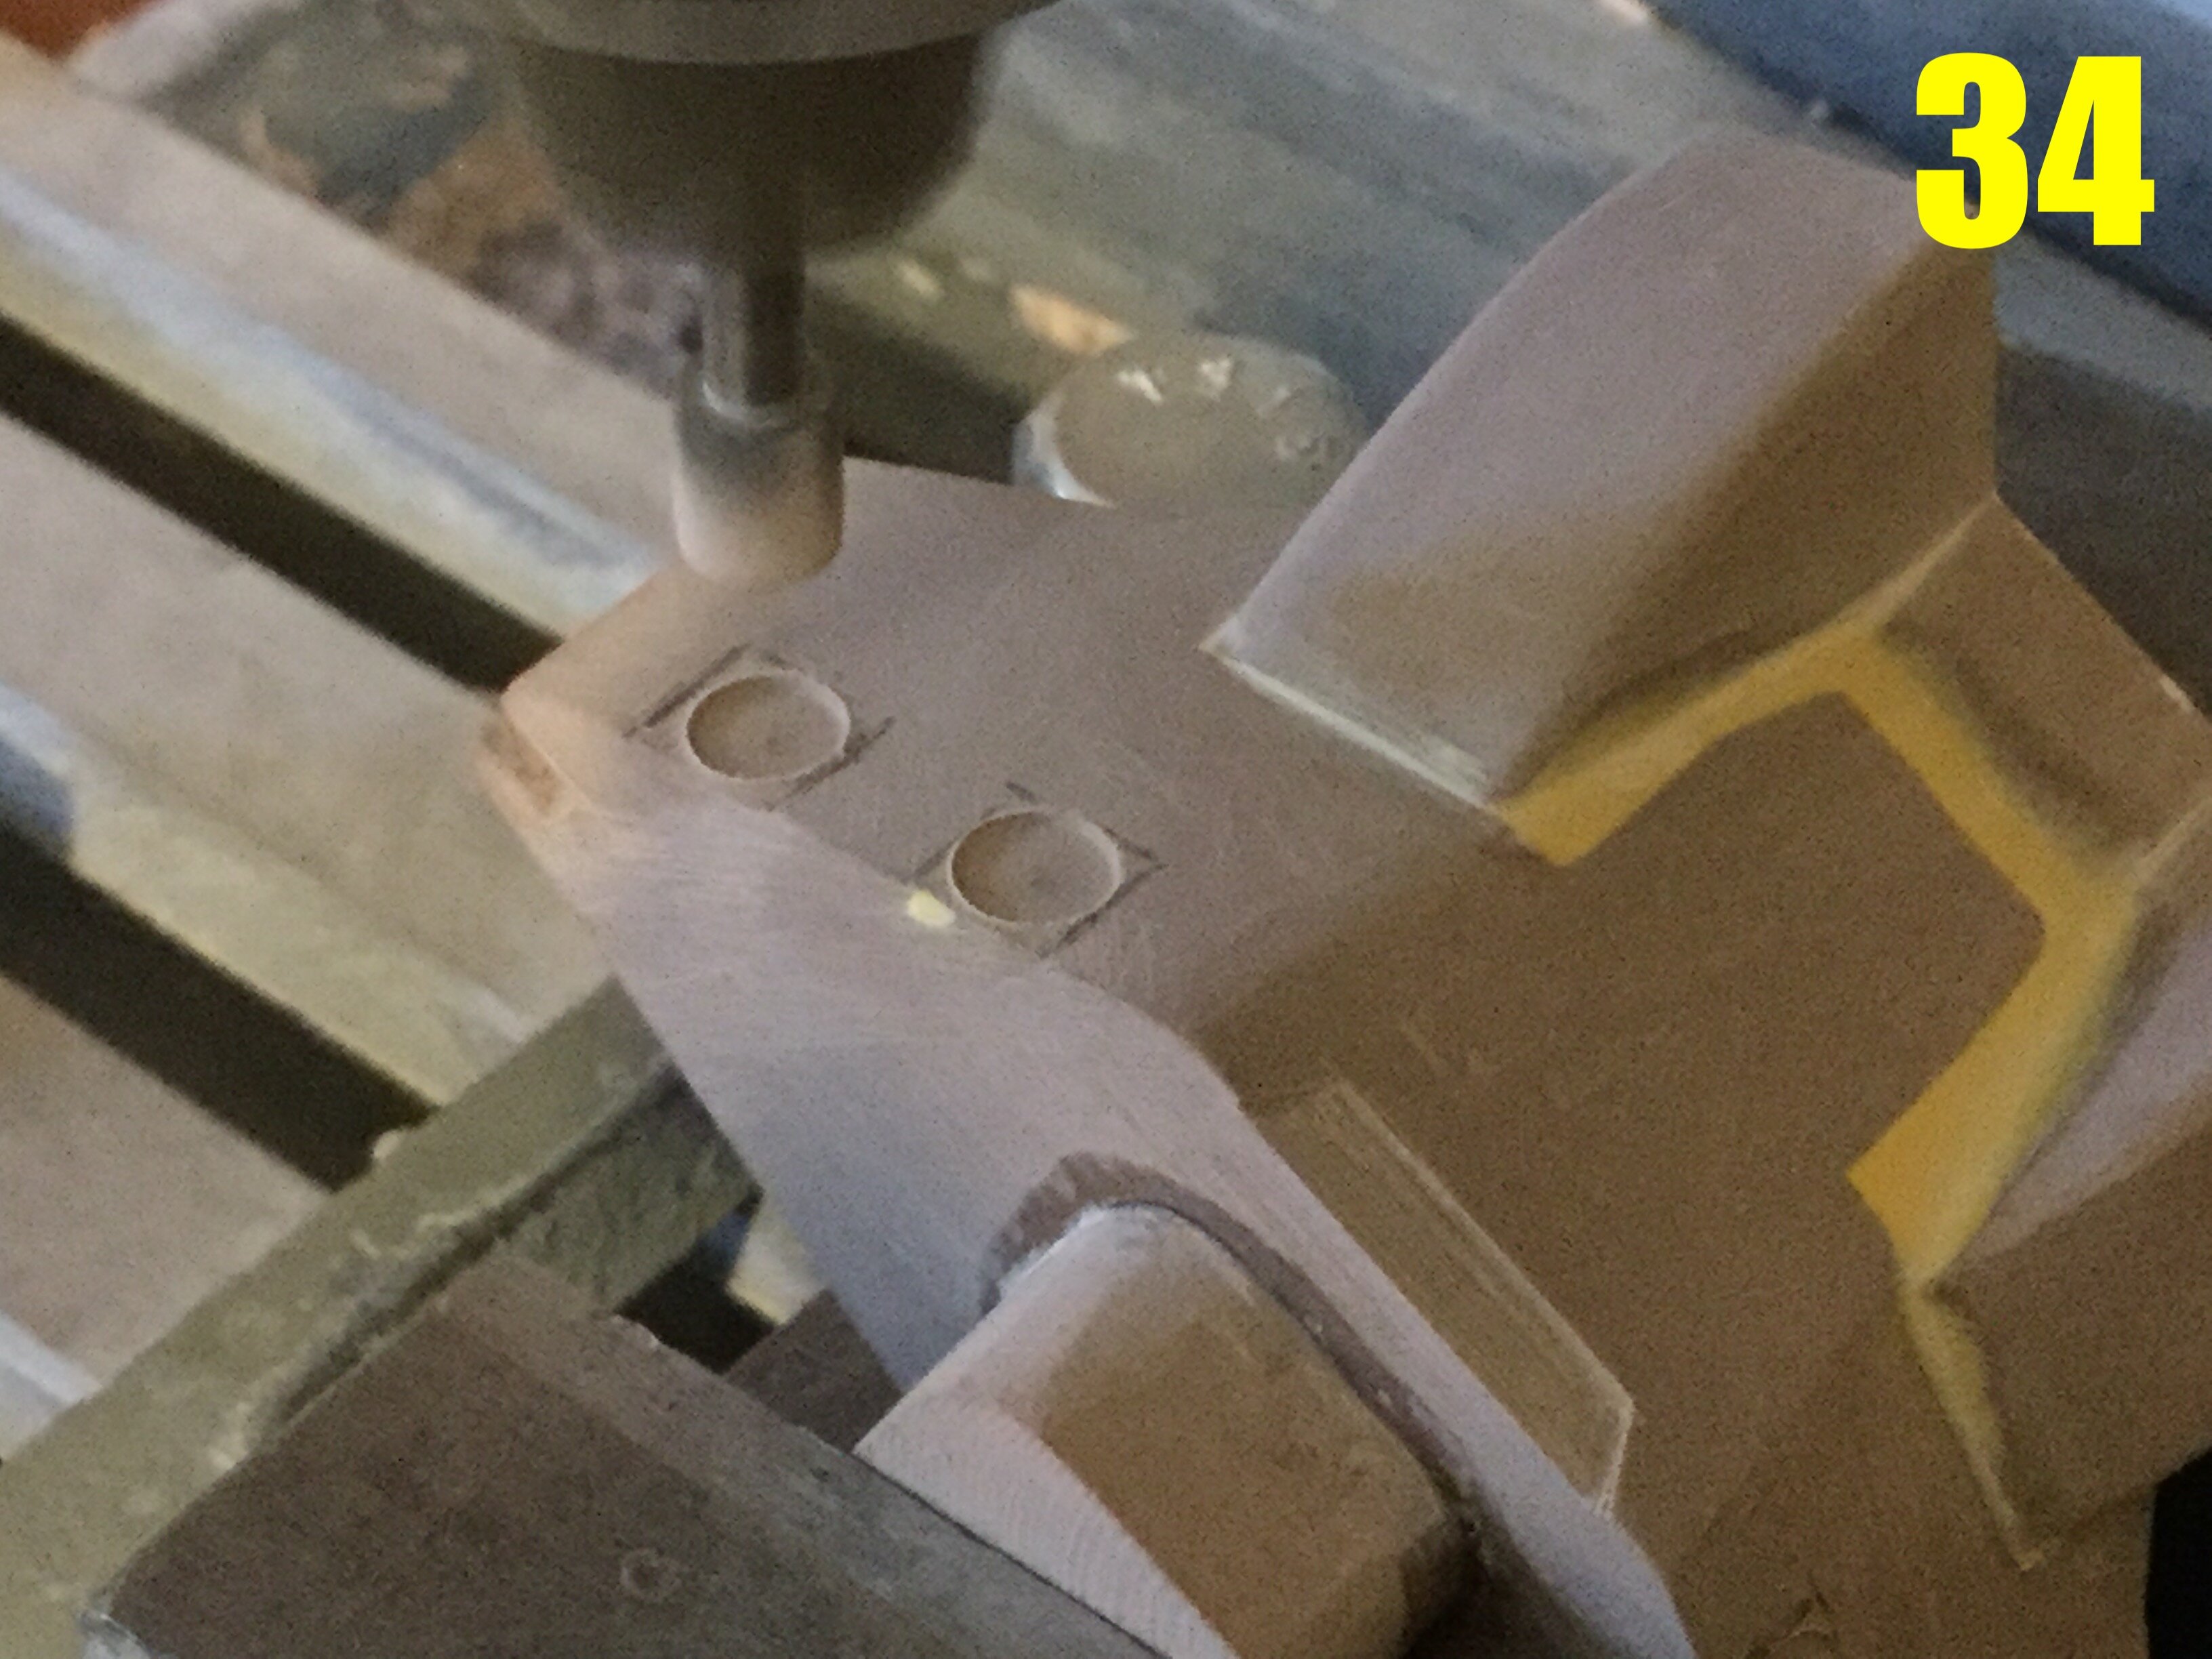
Pic 34: I rarely ever bring parts this far along back into the jaws of the mill, but there were some small details I thought needed that machined touch, so here I am playing with fire! I had to secure the part tight enough without cracking it to avoid it shifting under the pressure of the bit and ruining it completely.
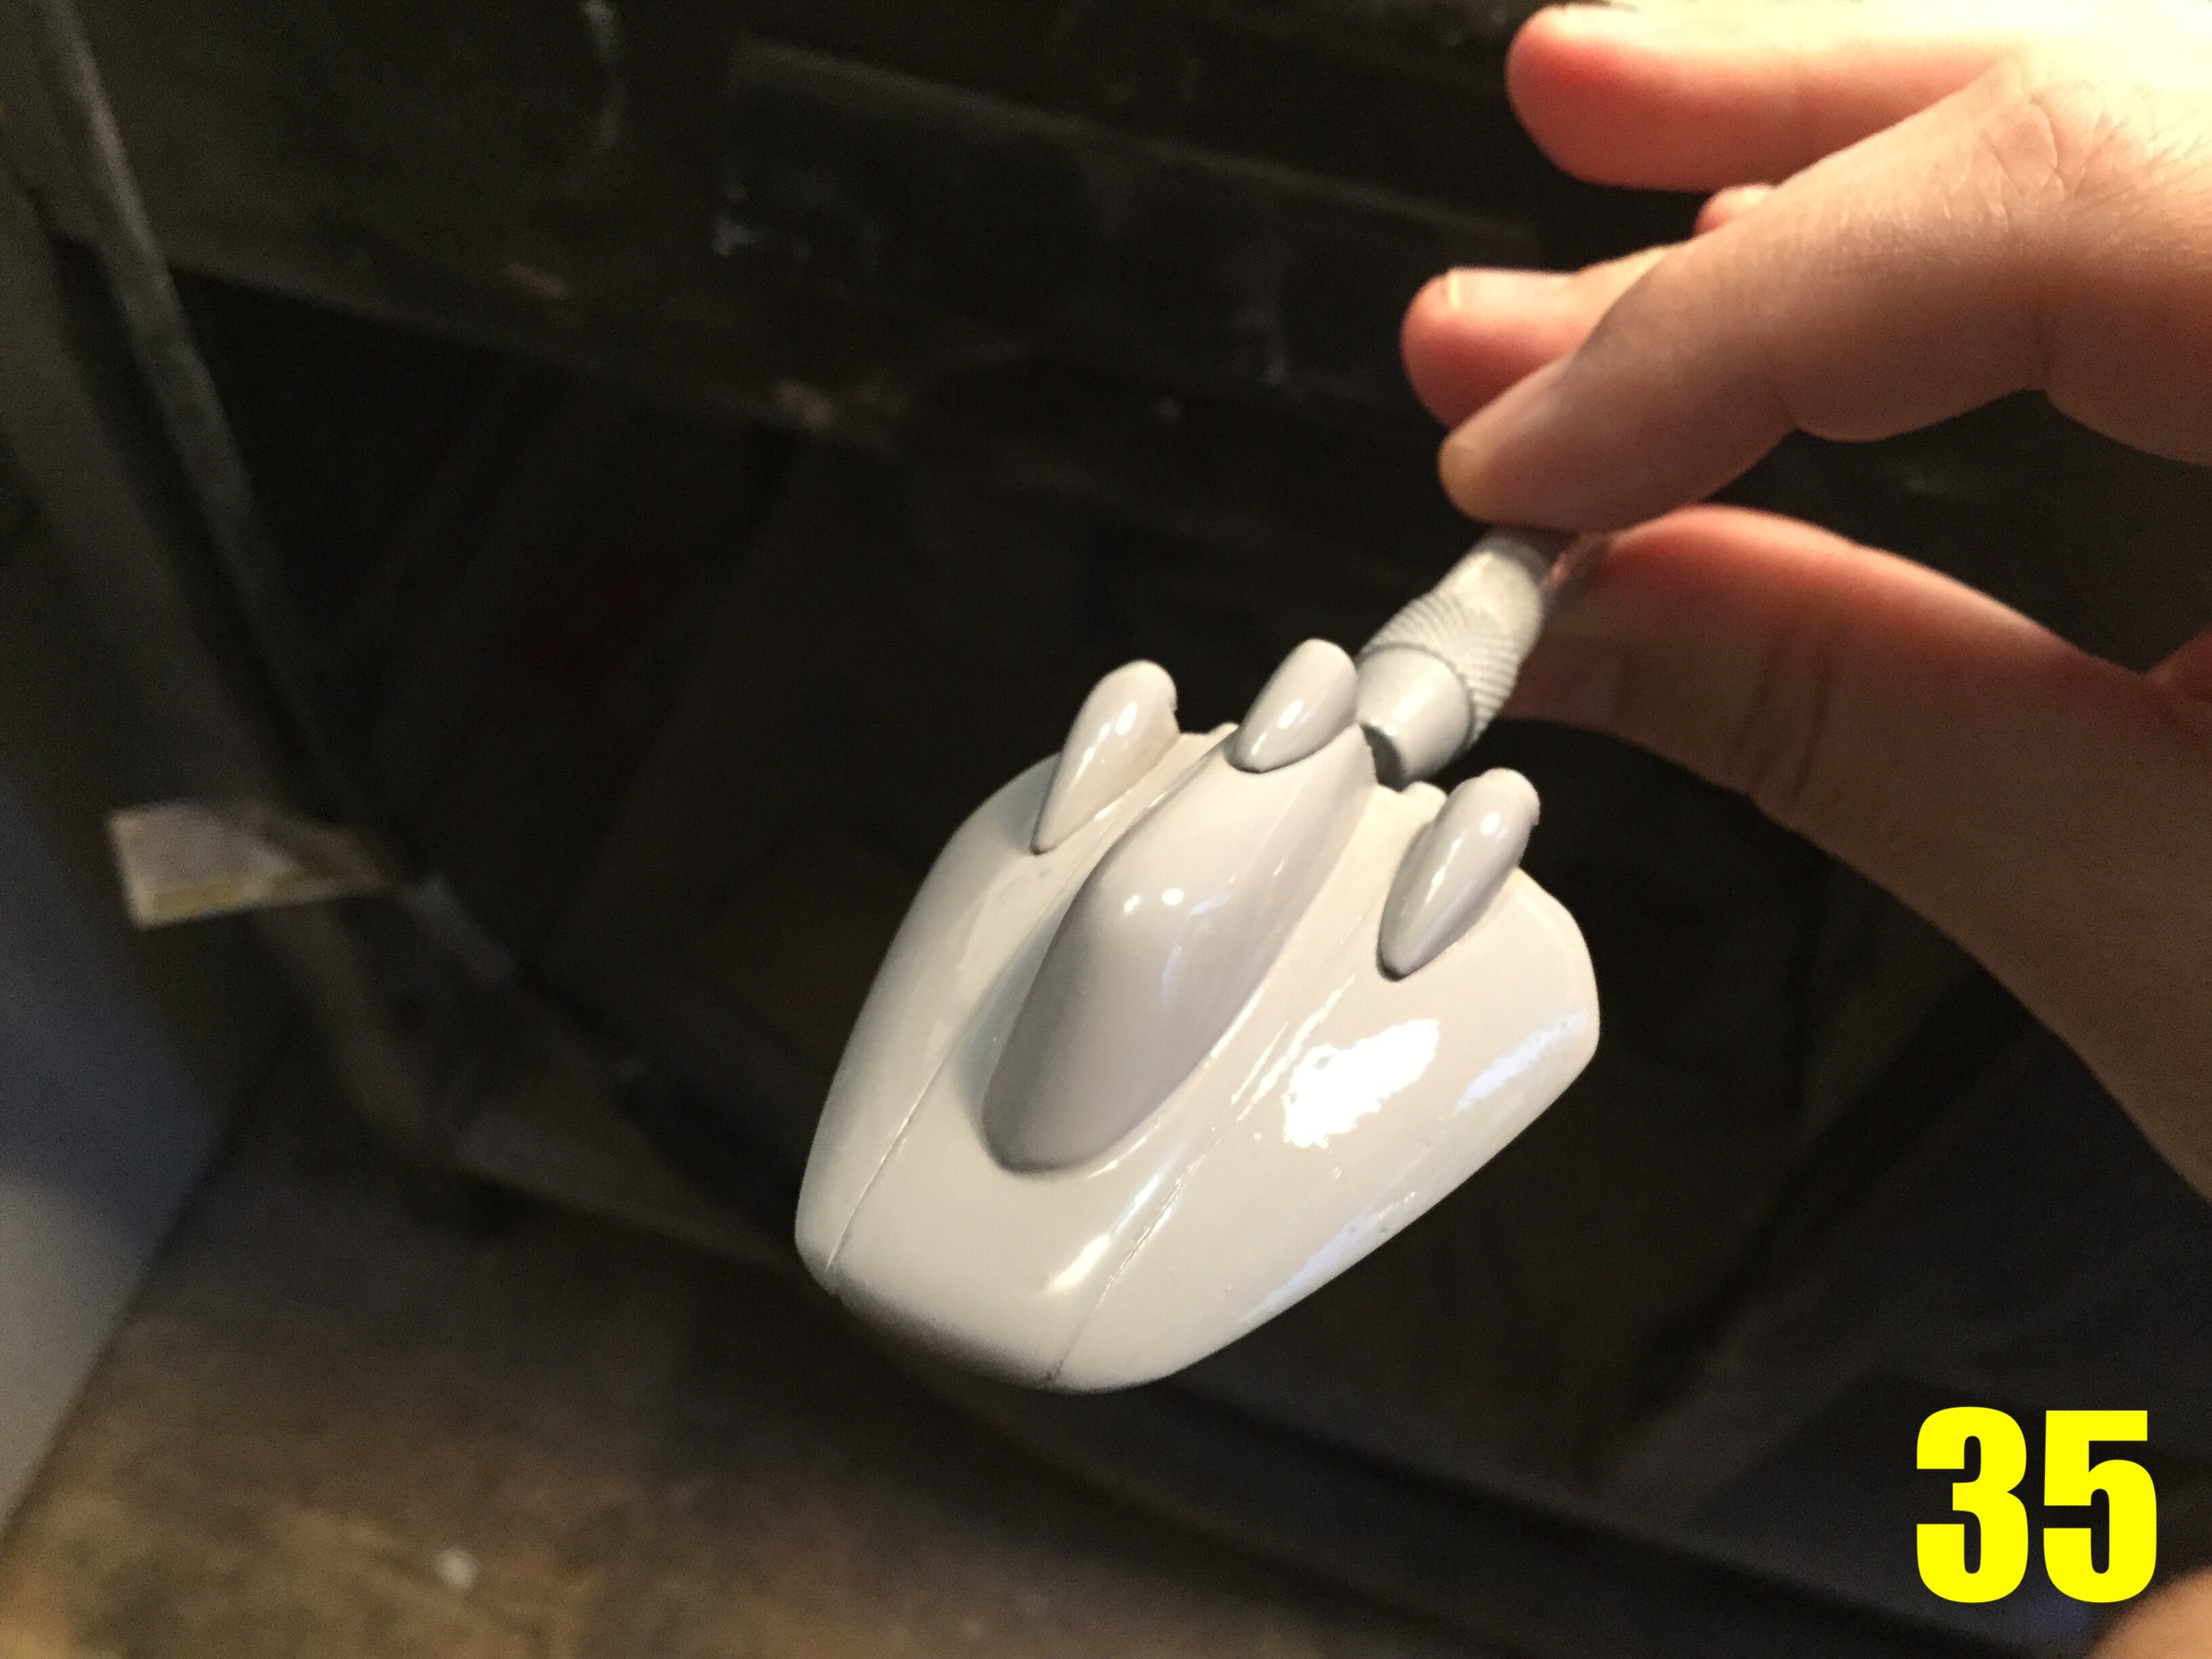
Pic 35: what a difference hours of shaping, putty, and sanding makes! The cockpit module has just received a fresh coat of primer and it looks great.
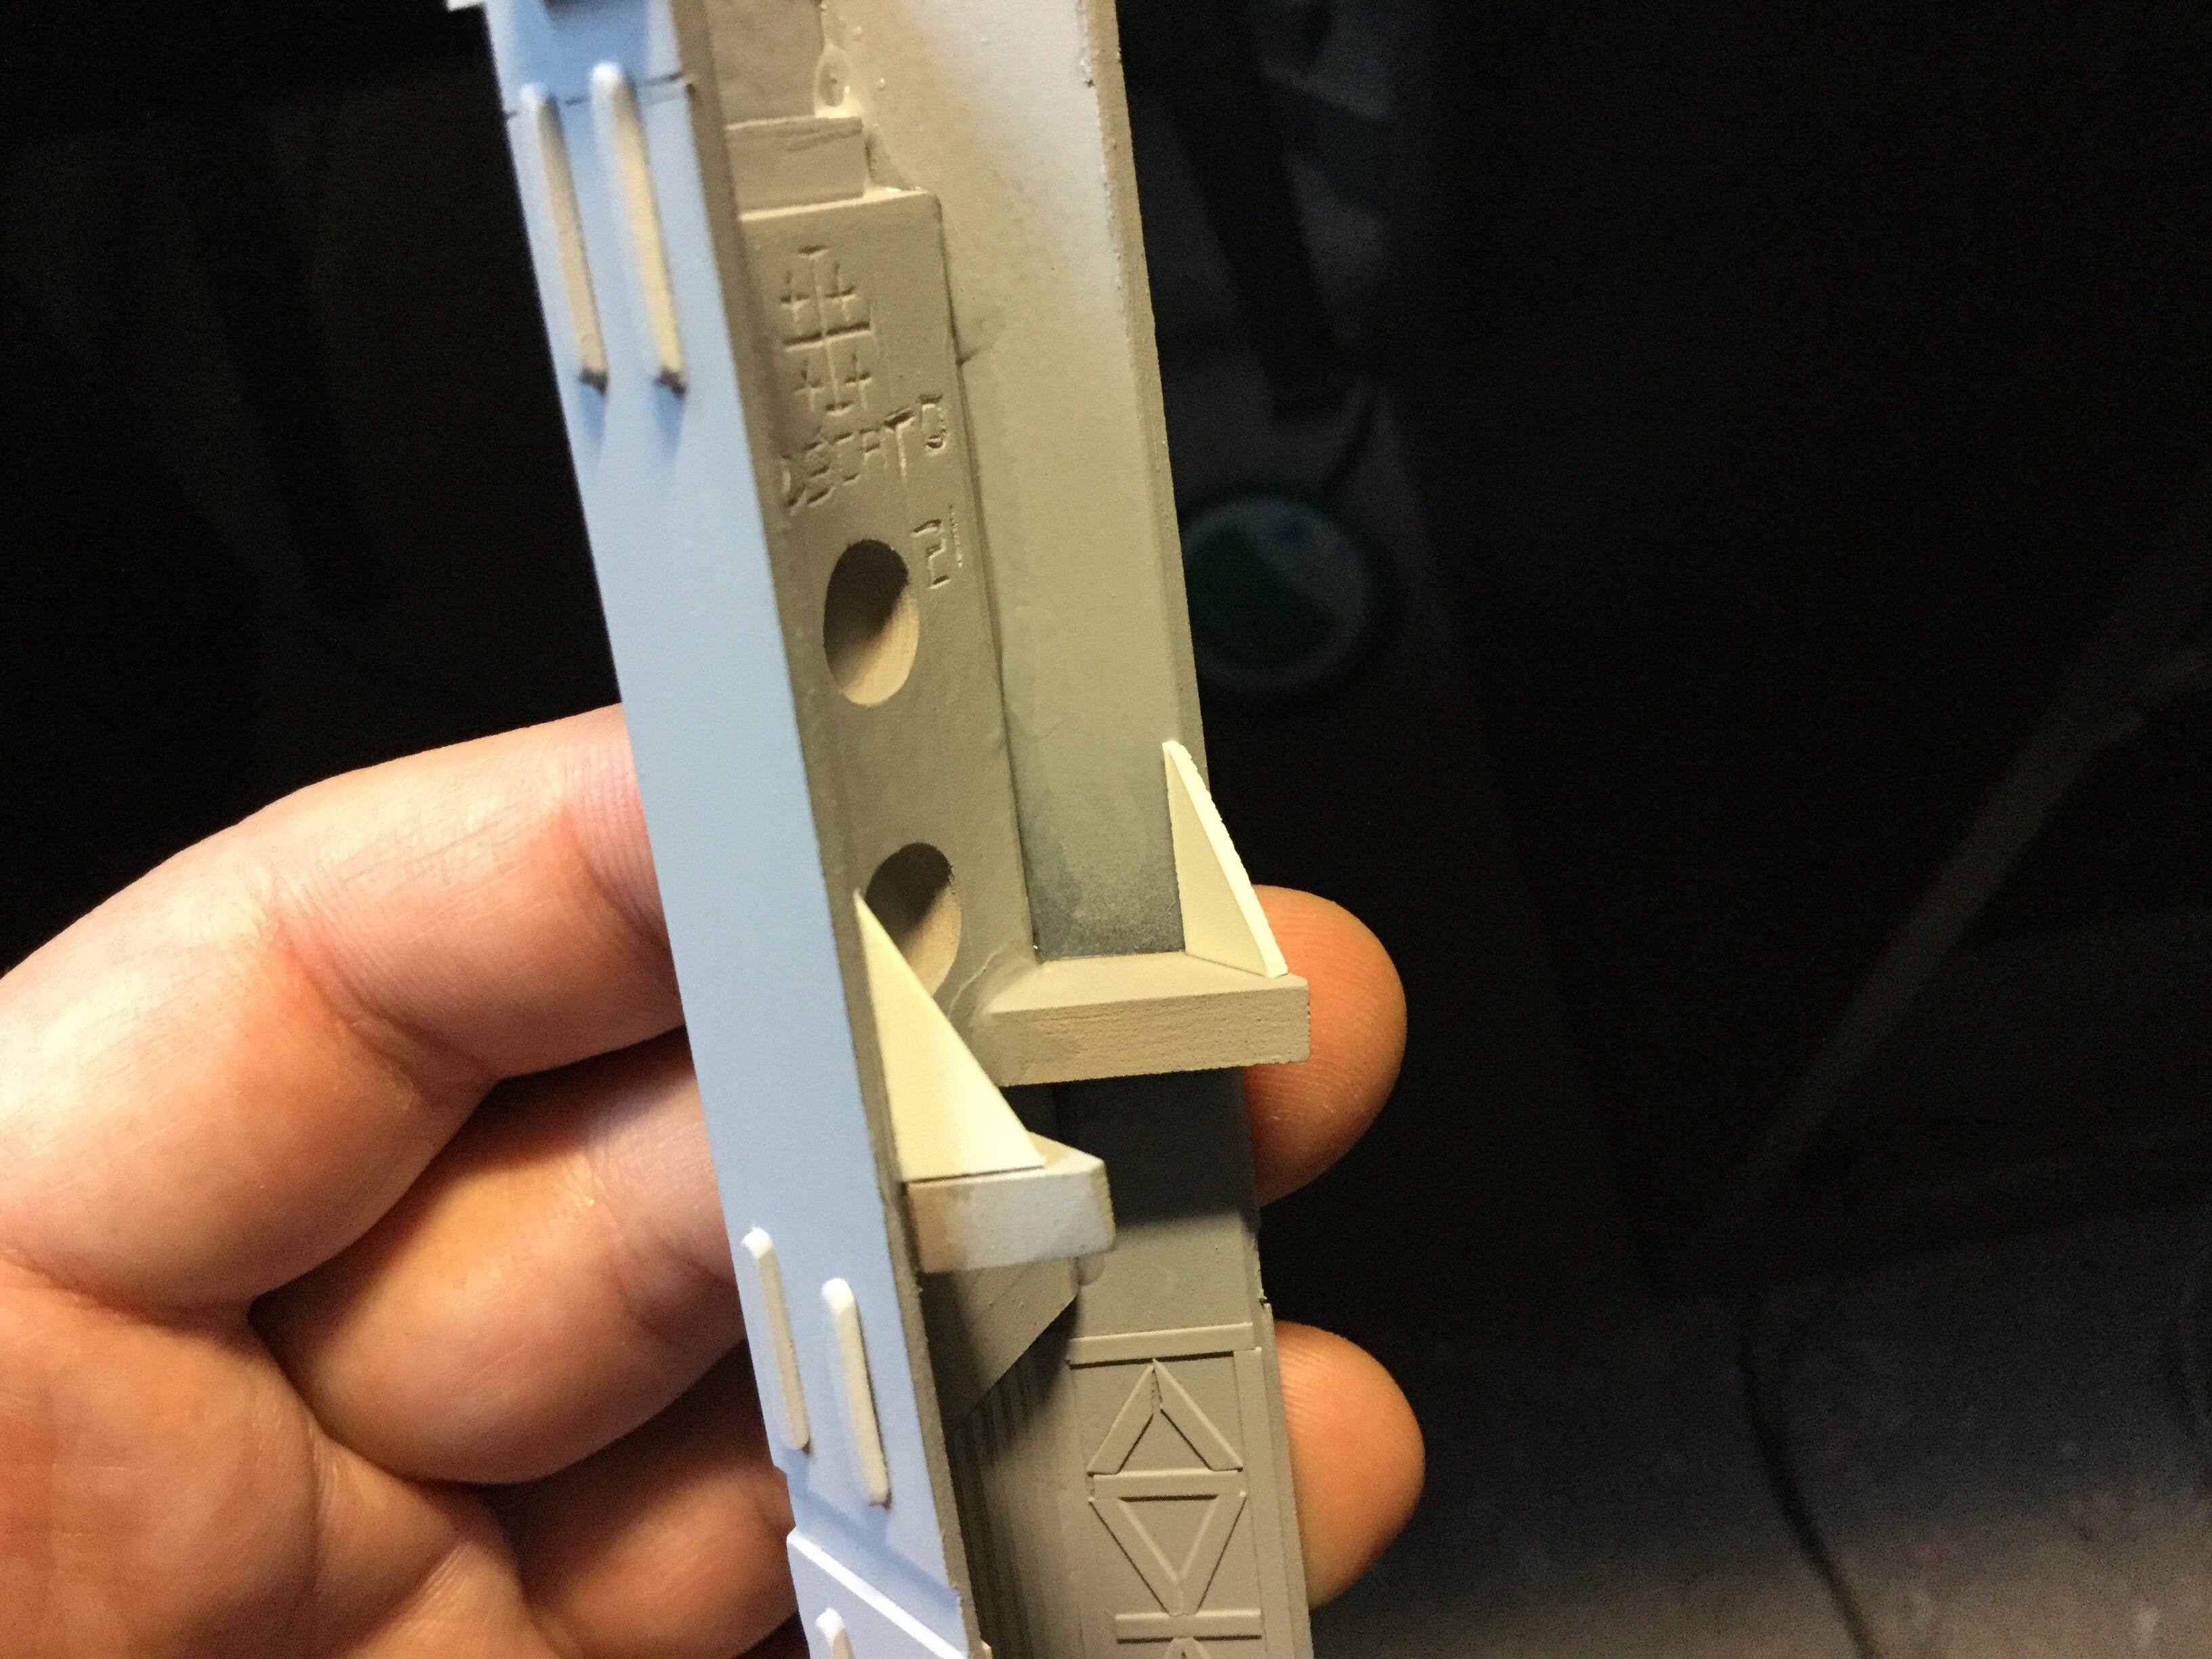
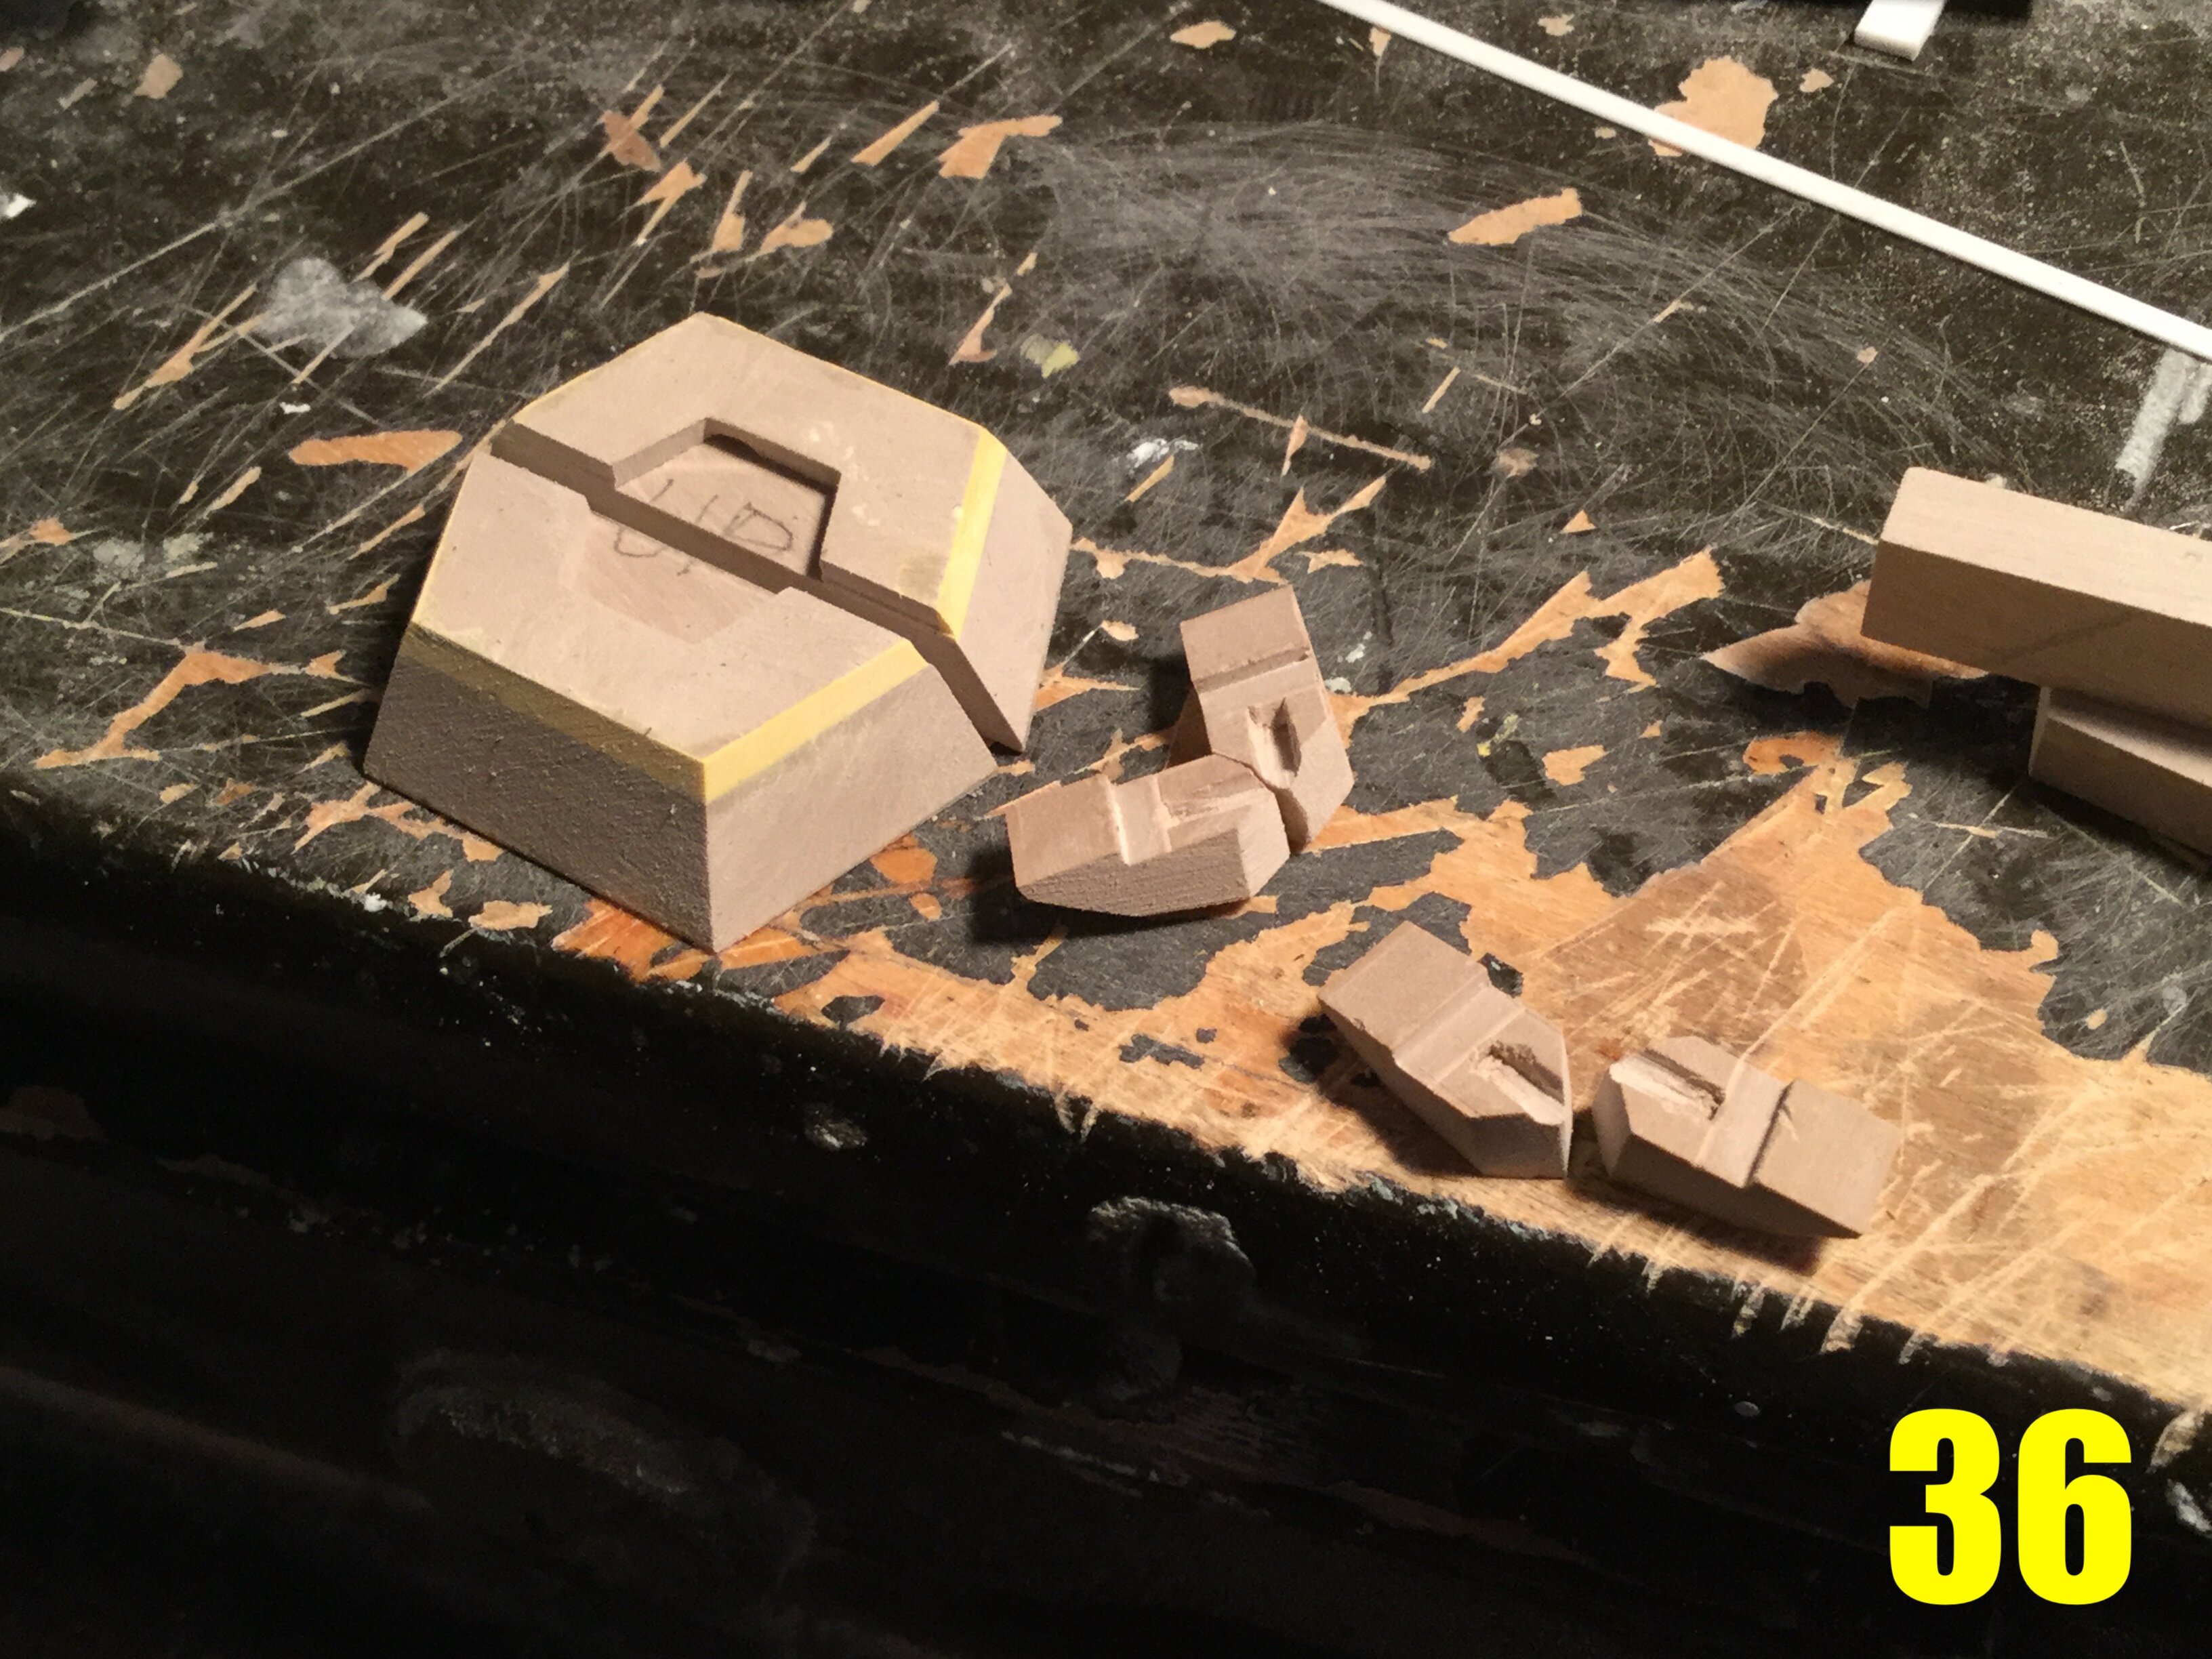
Pic 36: some exceptionally infuriating small, complex parts being prepared, namely the container cargo hatch and landing claw. More obtuse, awkward and impractical parts are few and far between, but that’s what the line-art calls for, so I dutifully reproduce it in tiny scale.
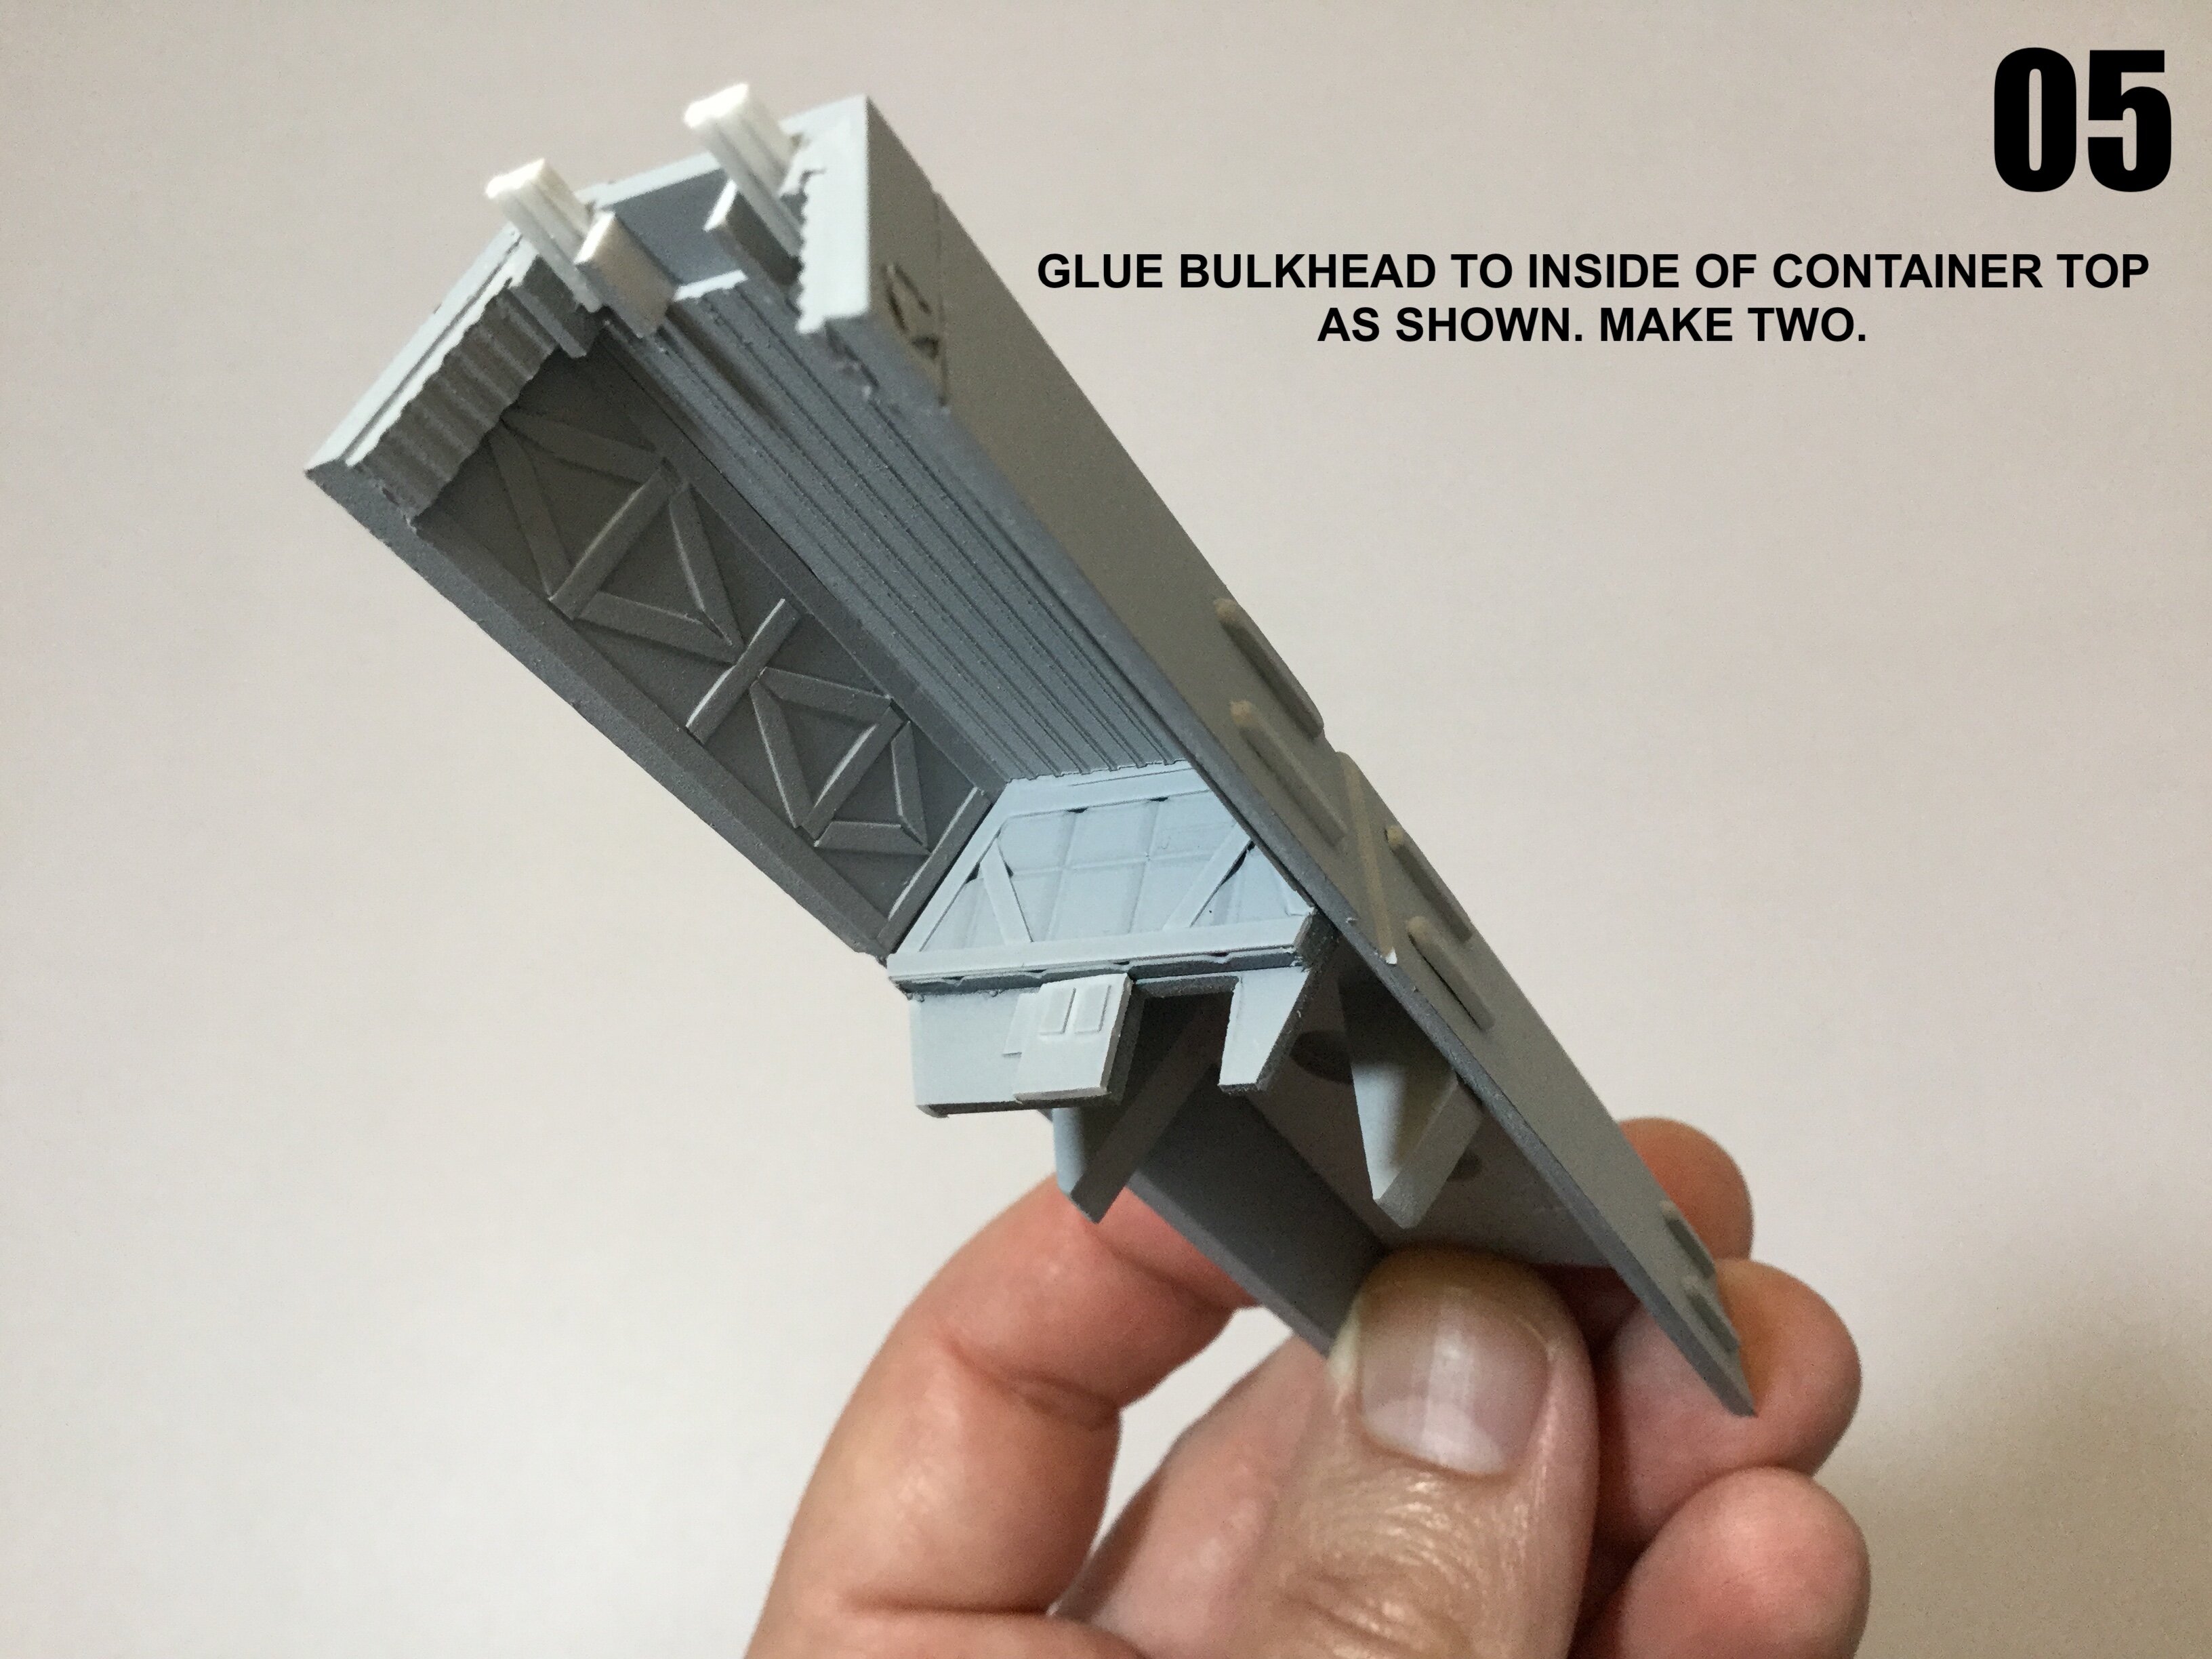
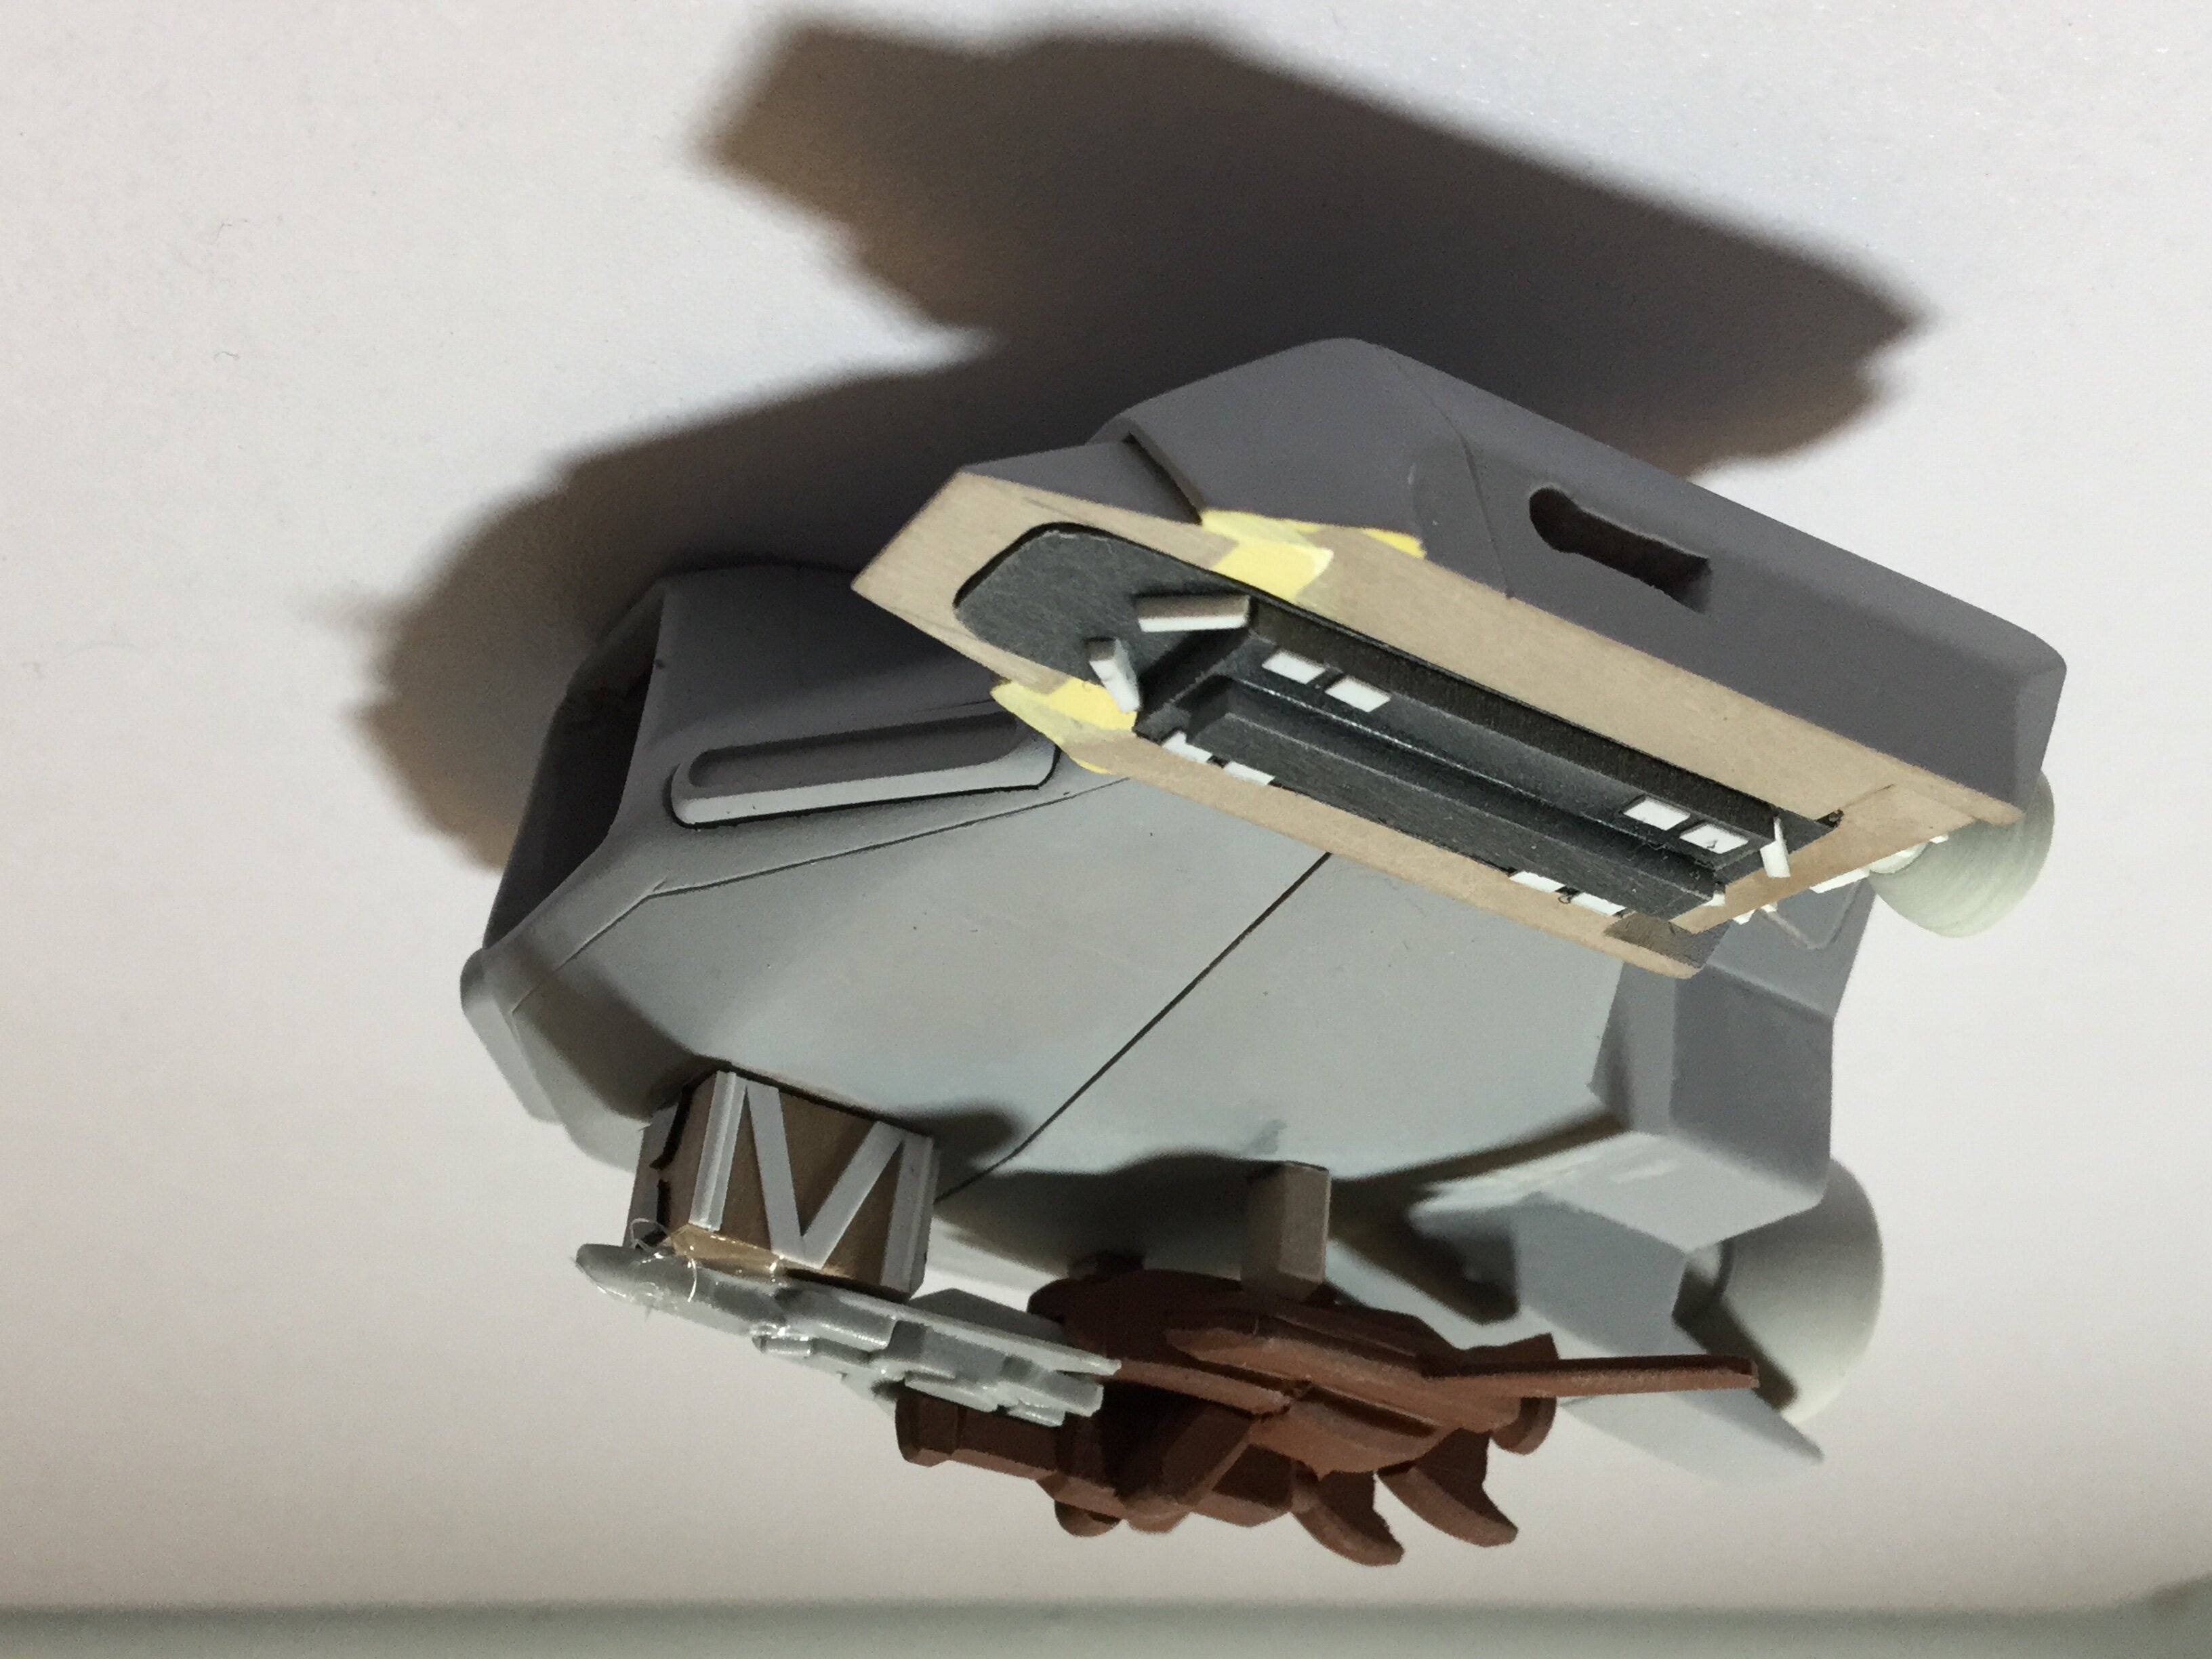
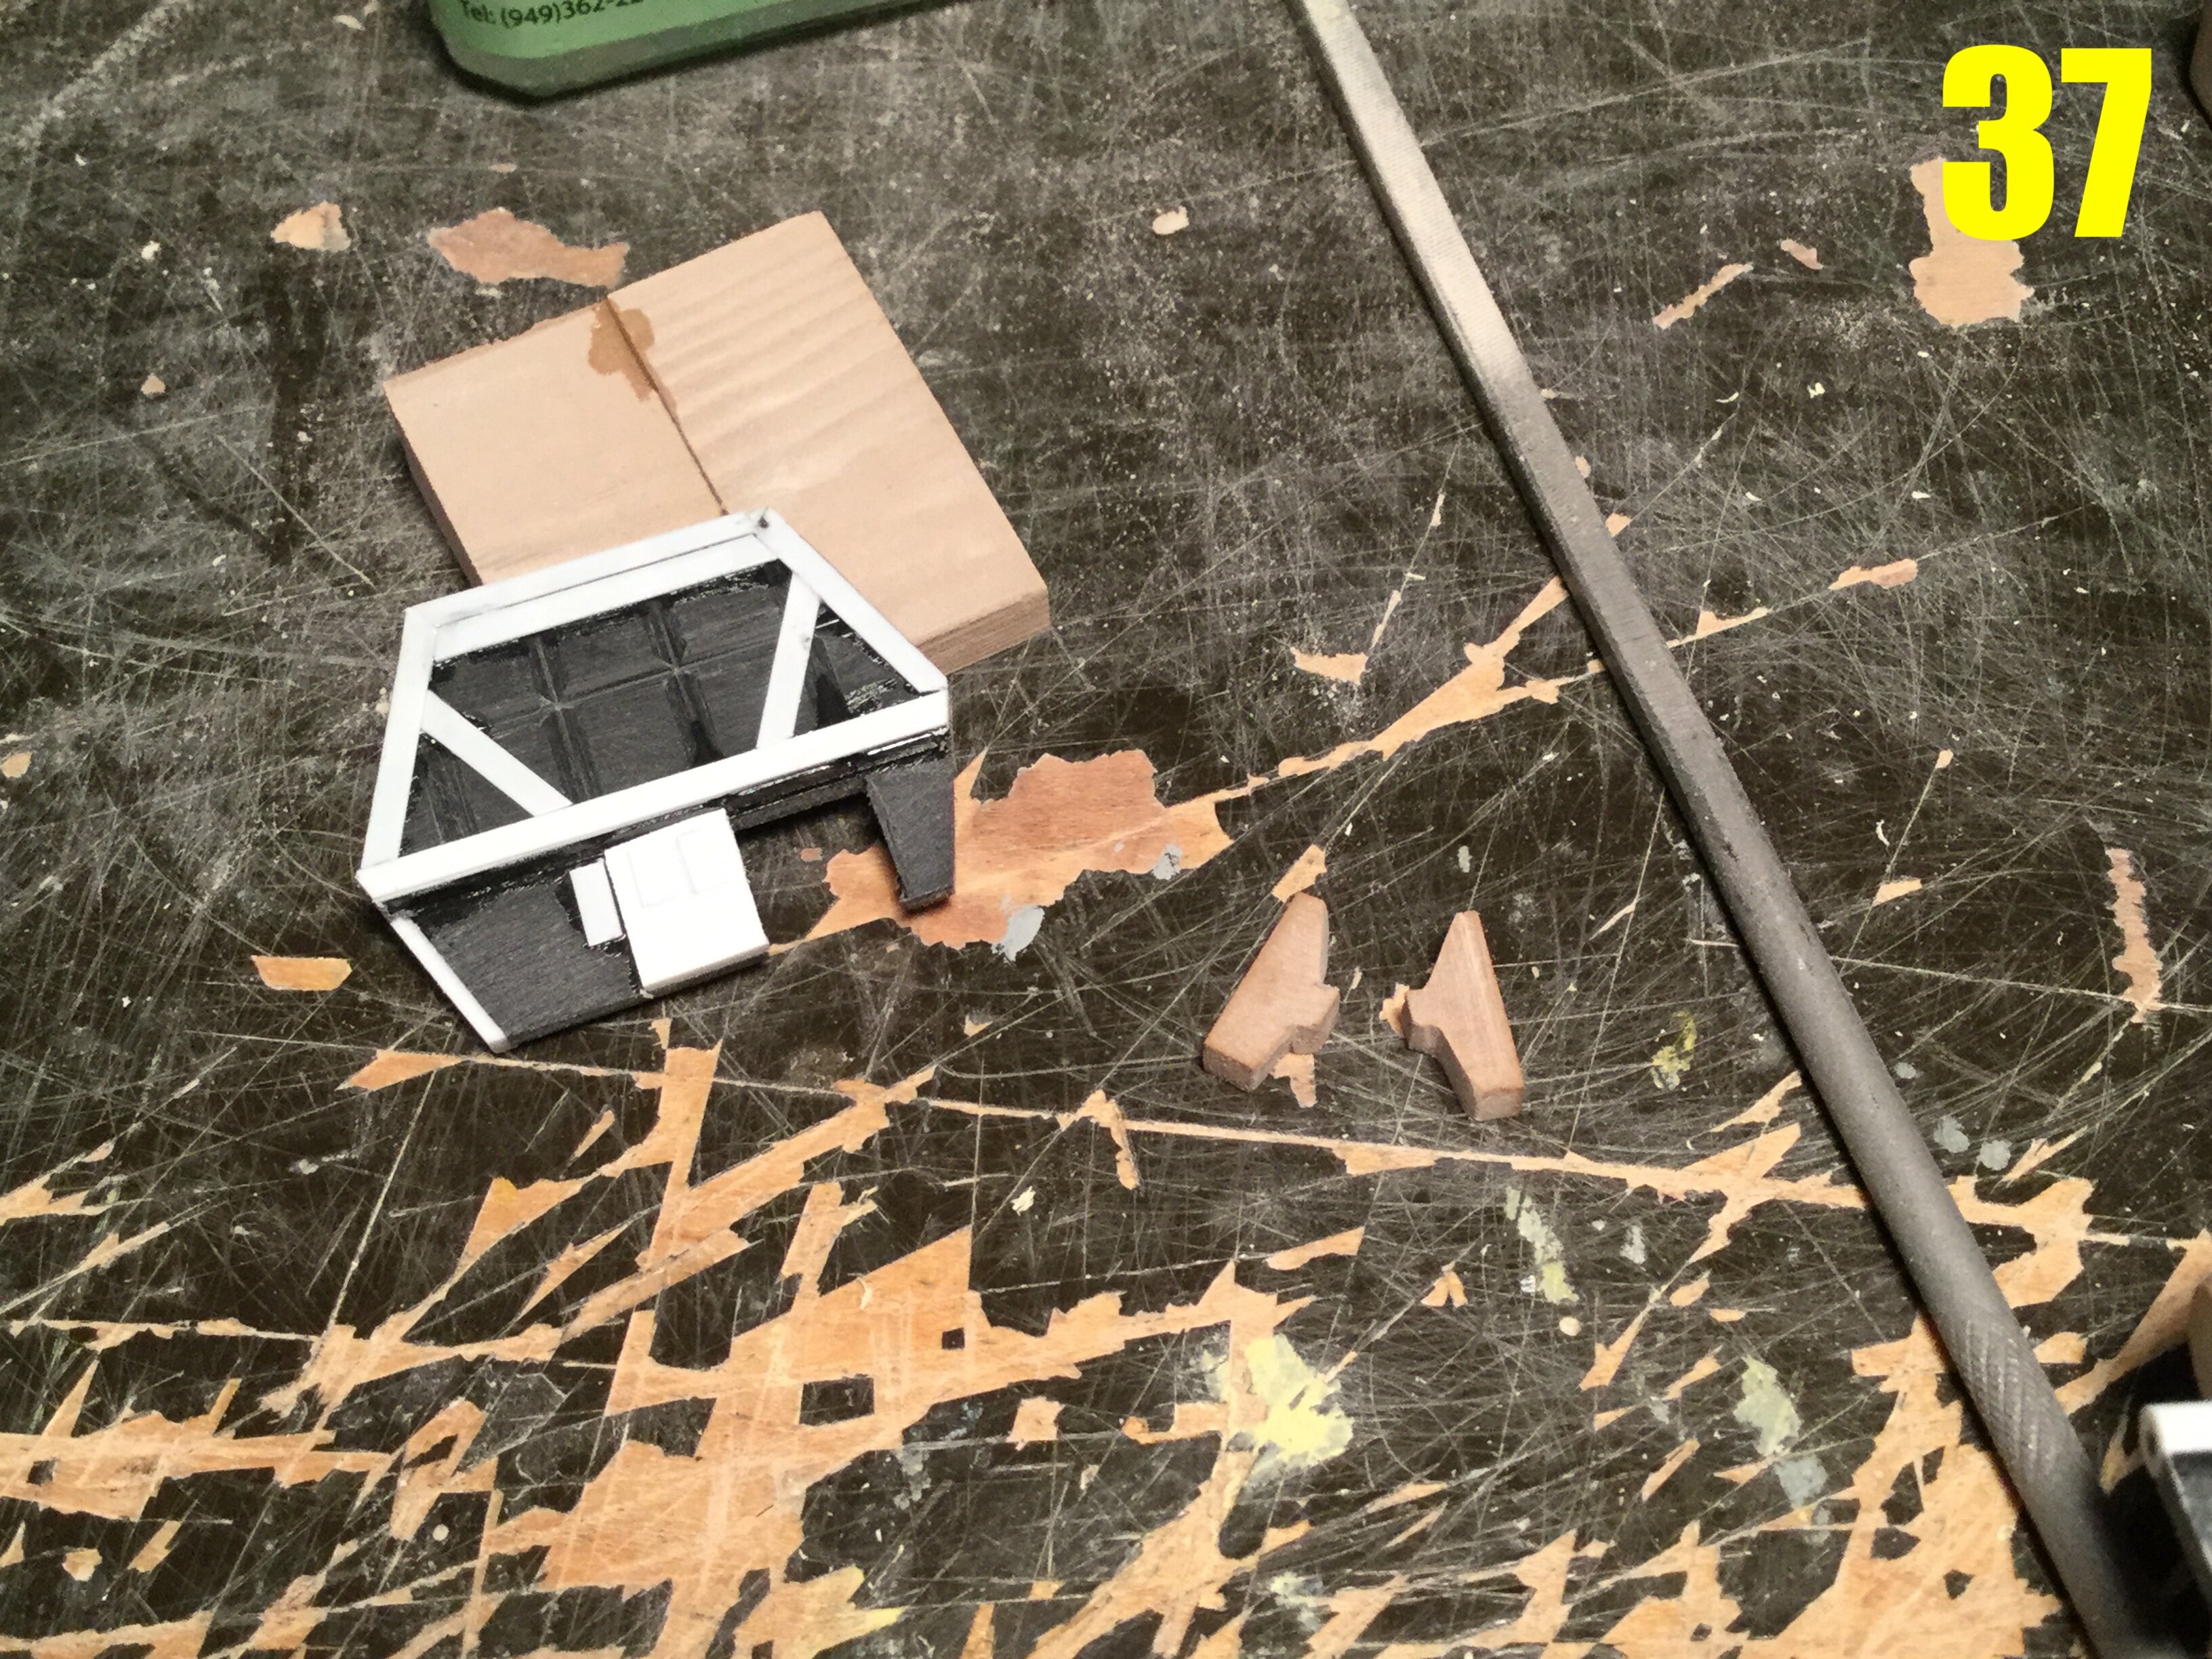
Pic 37: the bulkhead for the inside of the cargo containers on the left, and on the right, two of the four « thingamabobs » that are used to connect the neck to the forward part of the main hull.
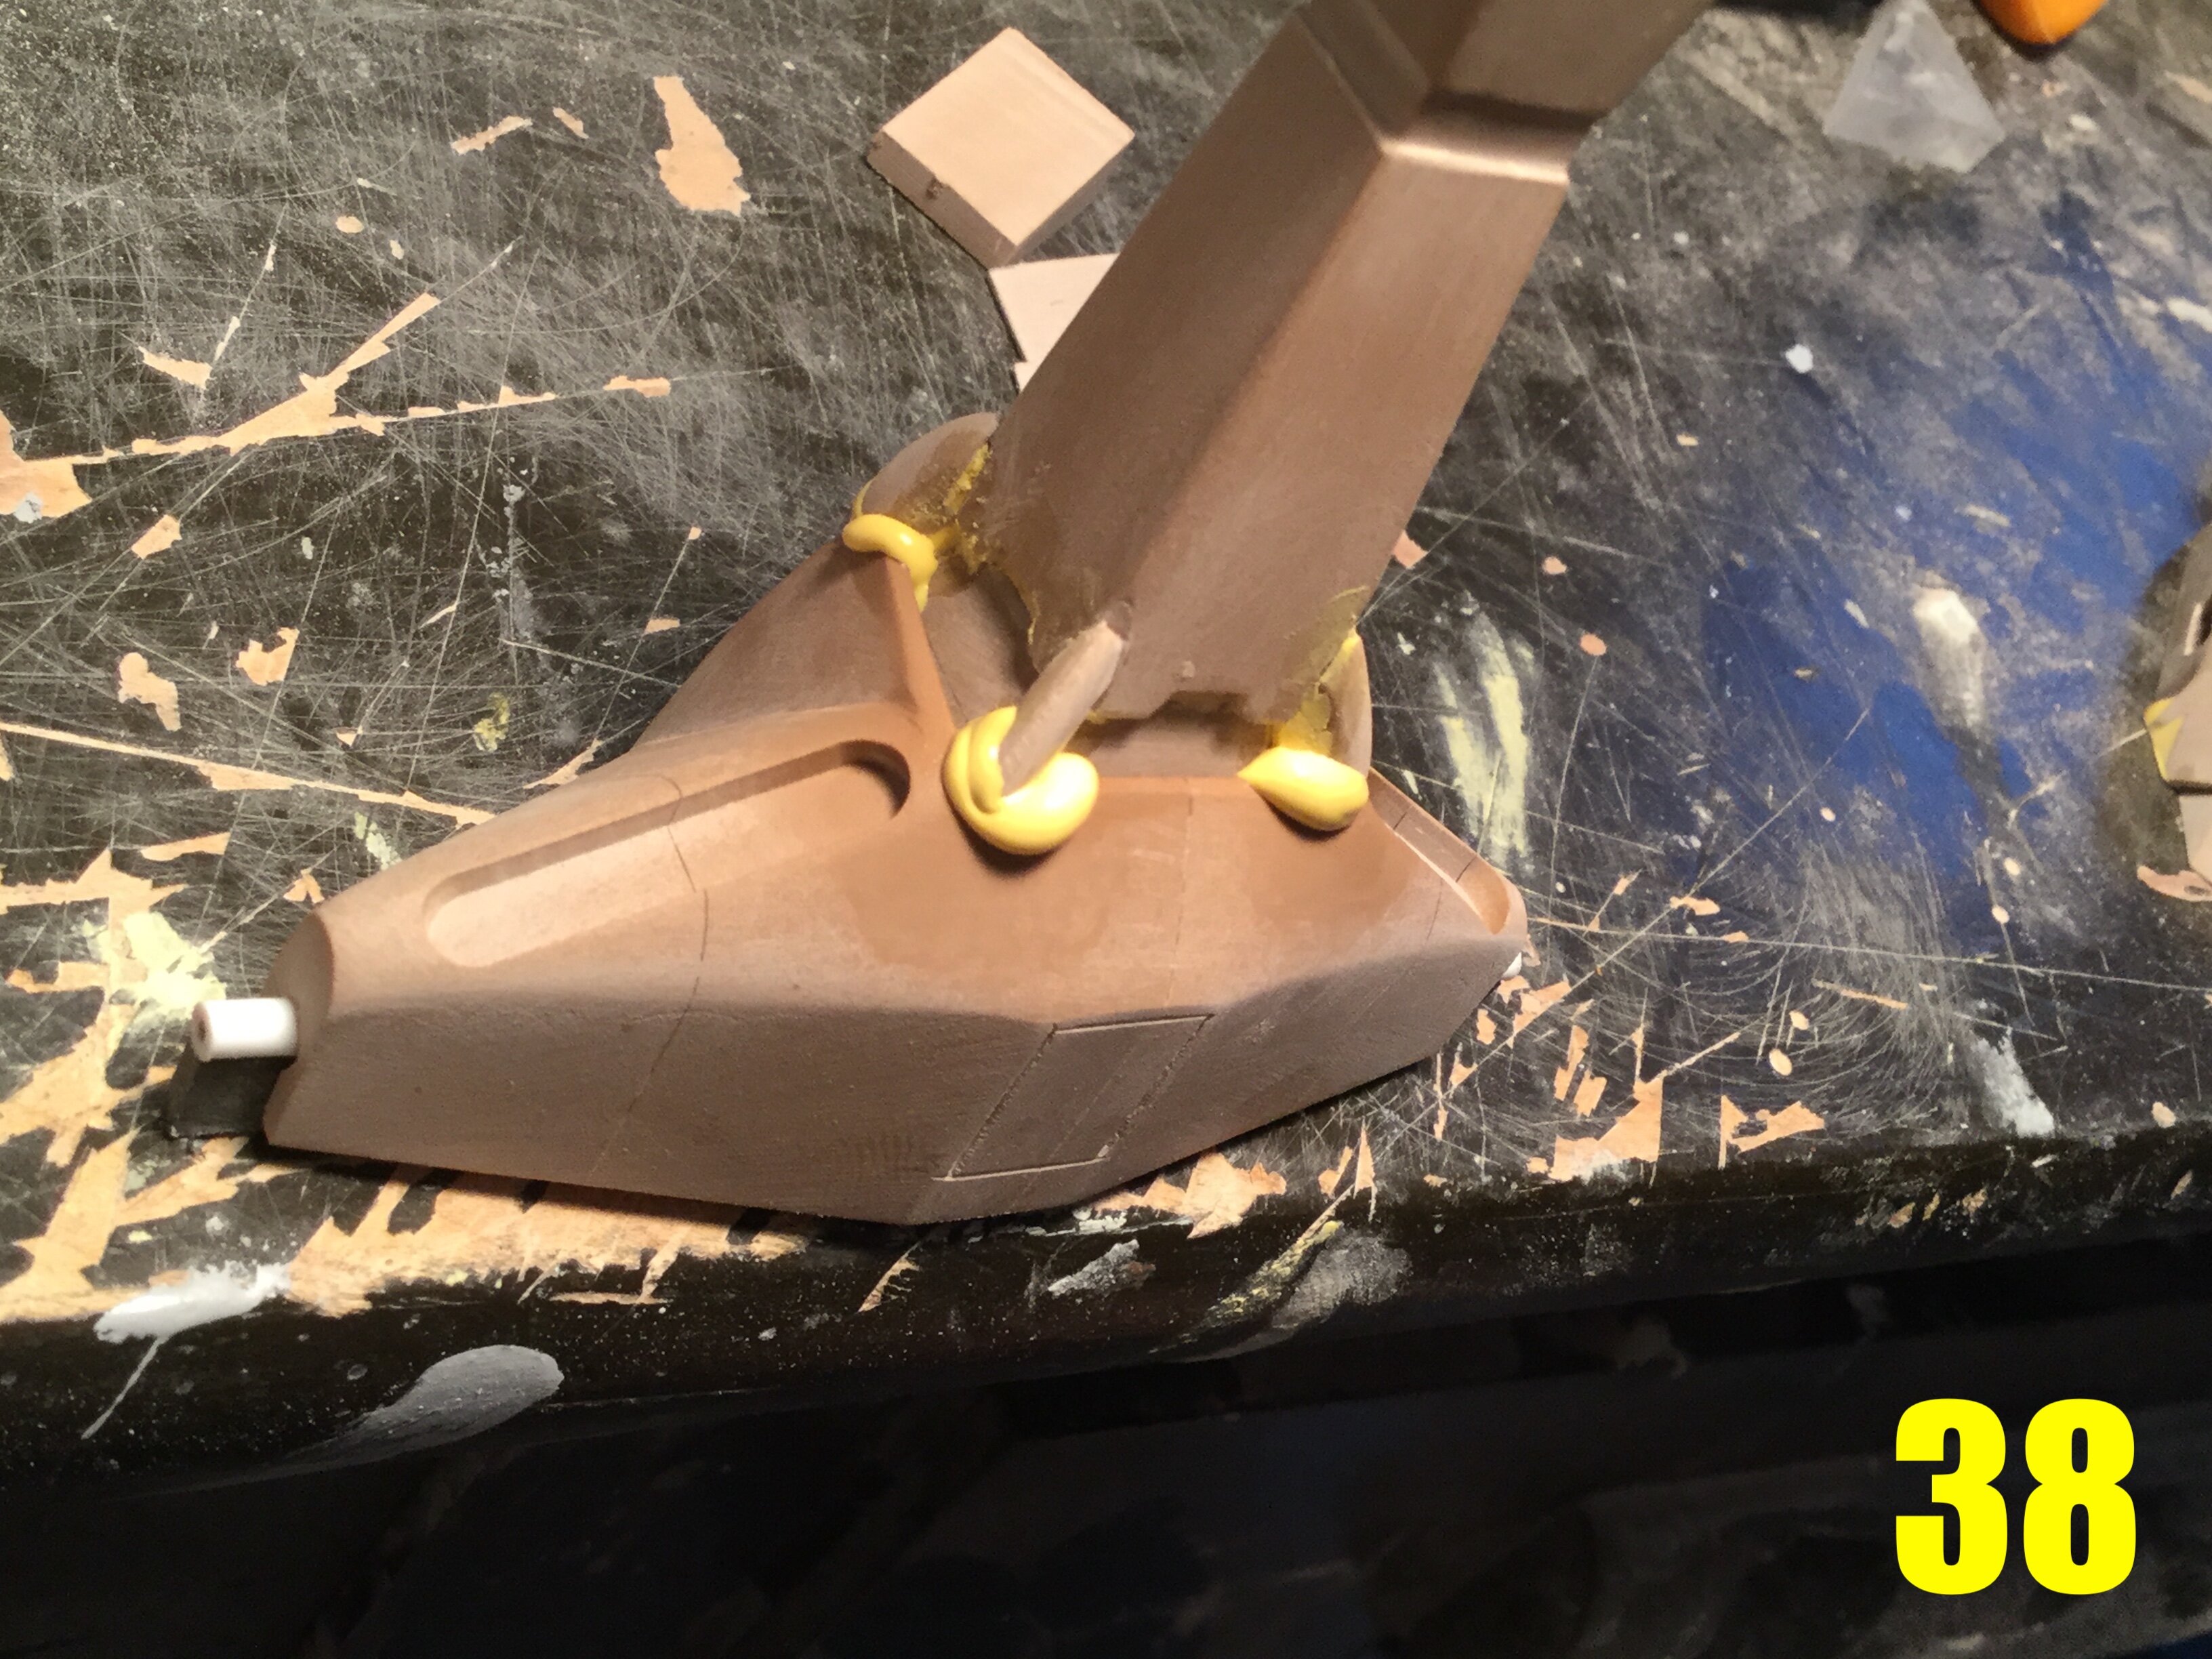
Pic 38: those same thingamabobs, being fitted to the neck module. While the ship itself is small, it features a number of dainty little details with odd geometries that are a bear to fabricate… But itll look right when it’s done!
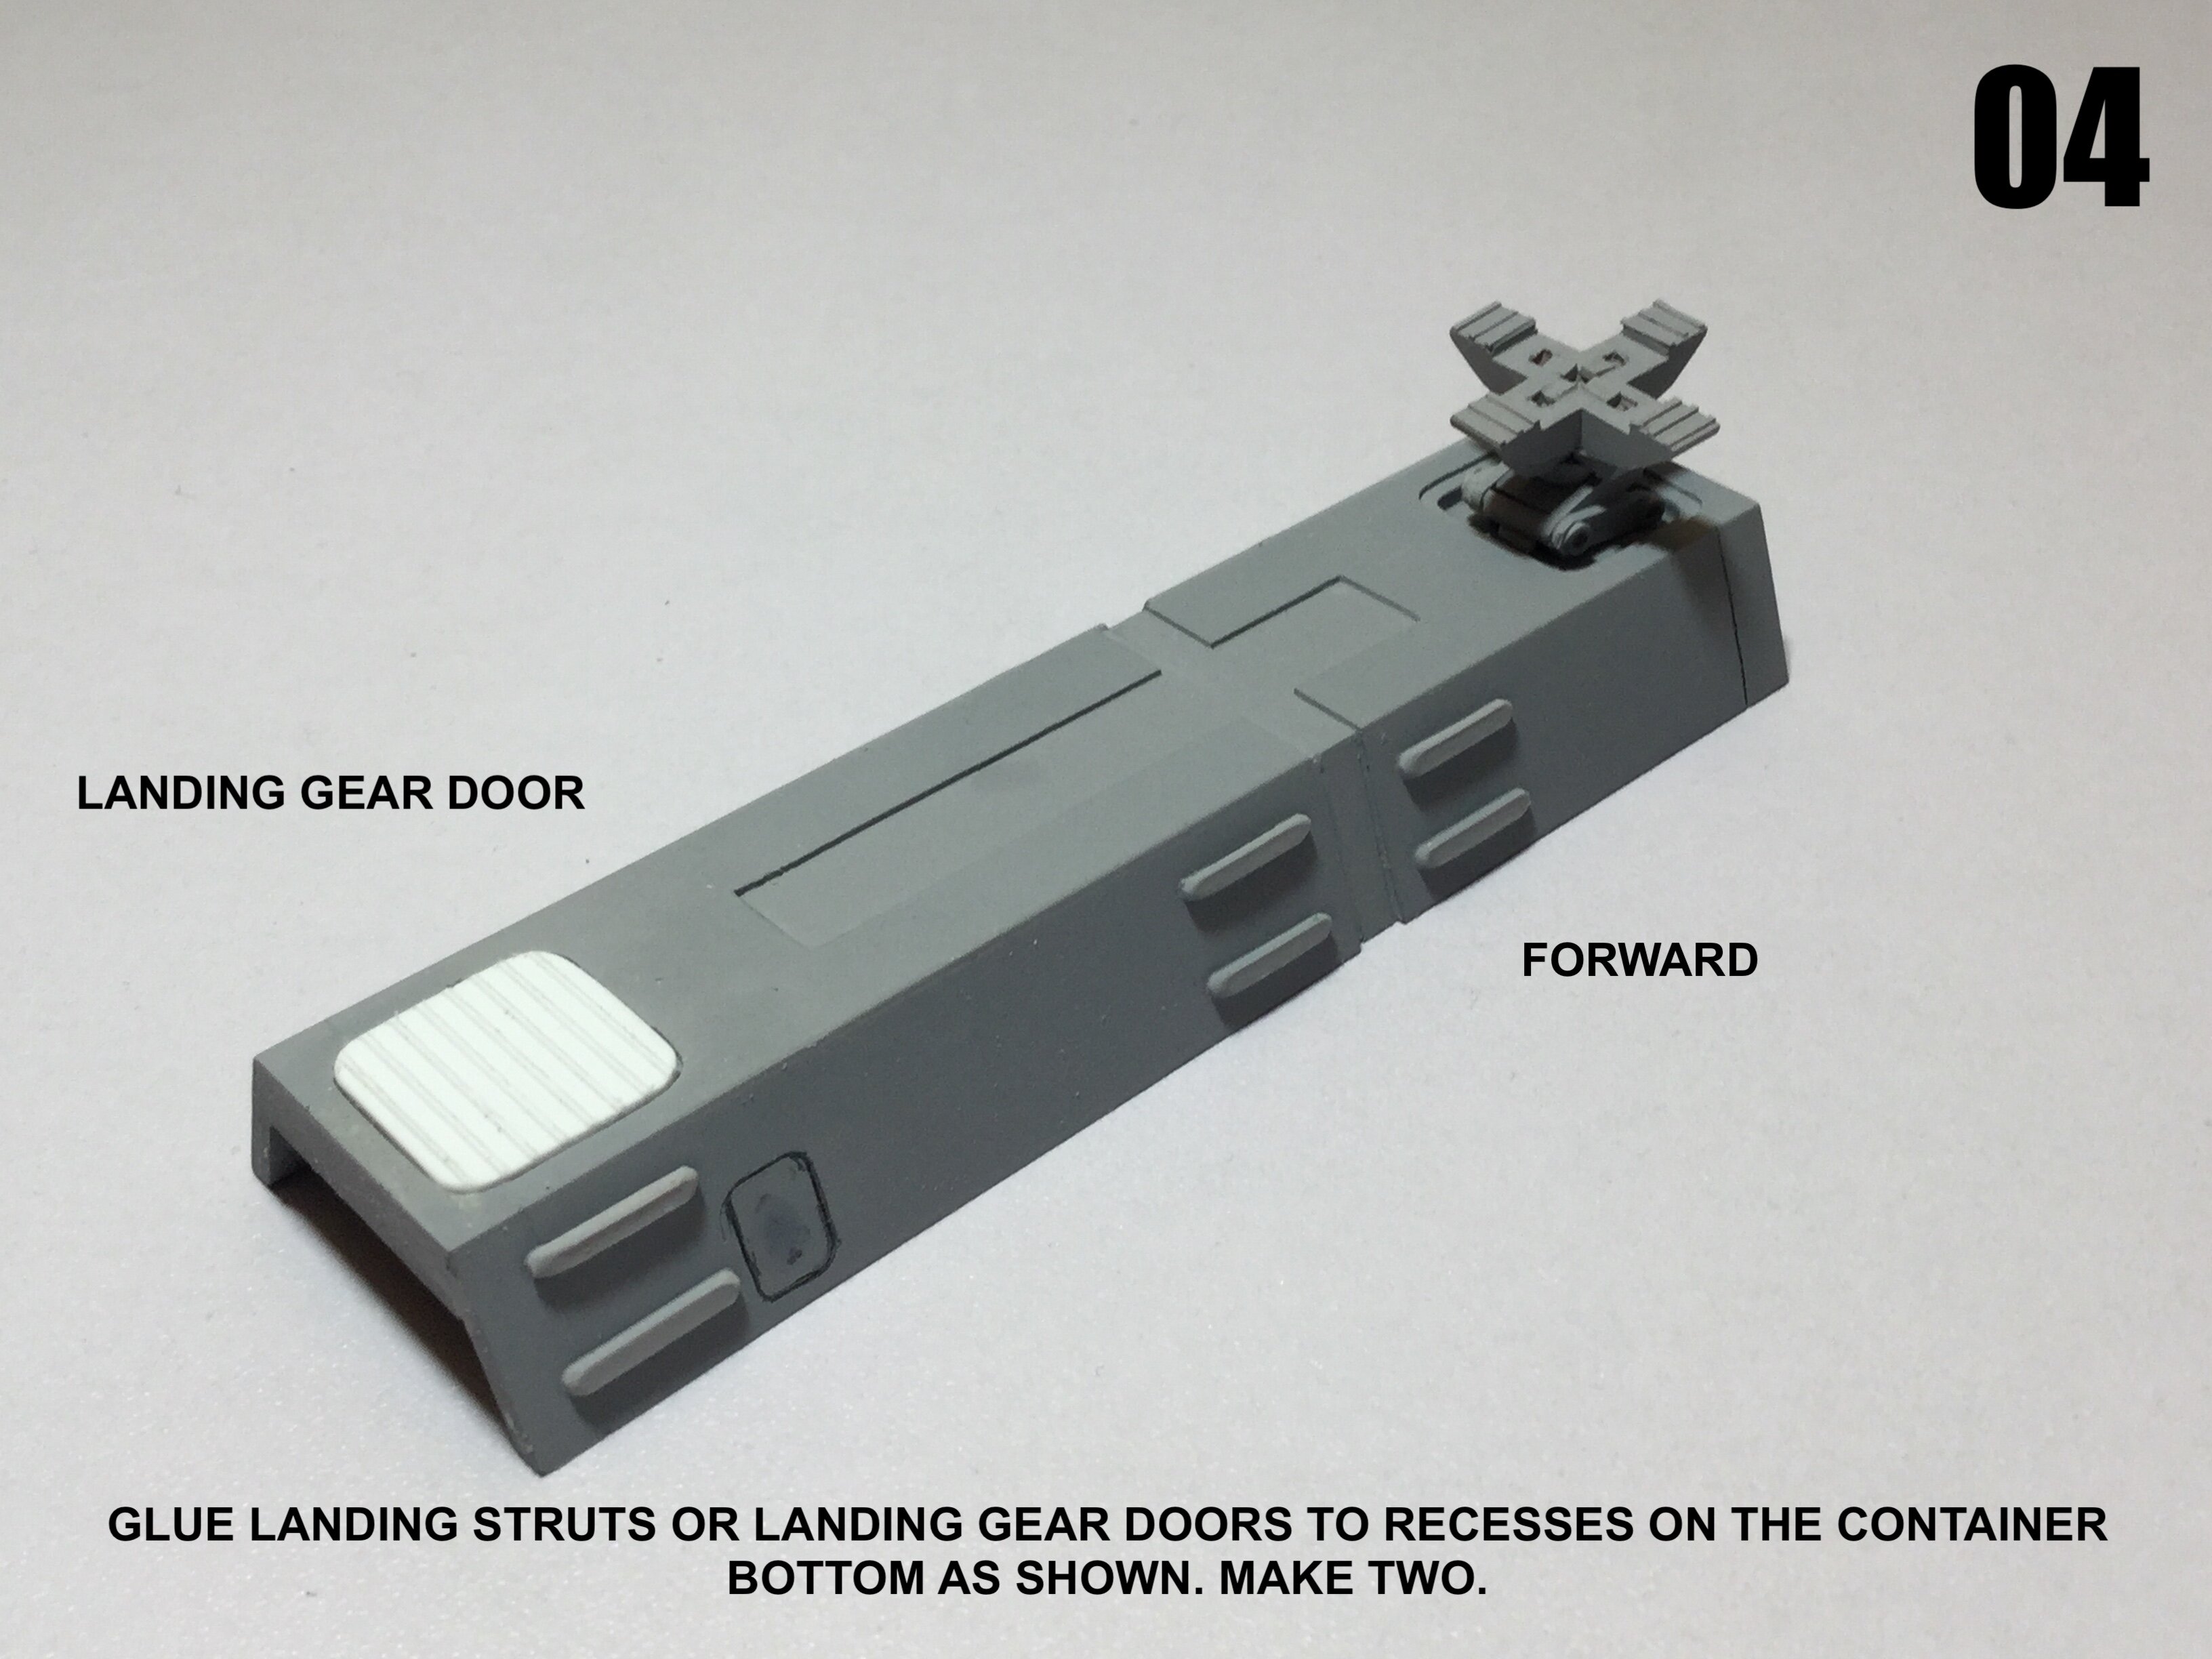
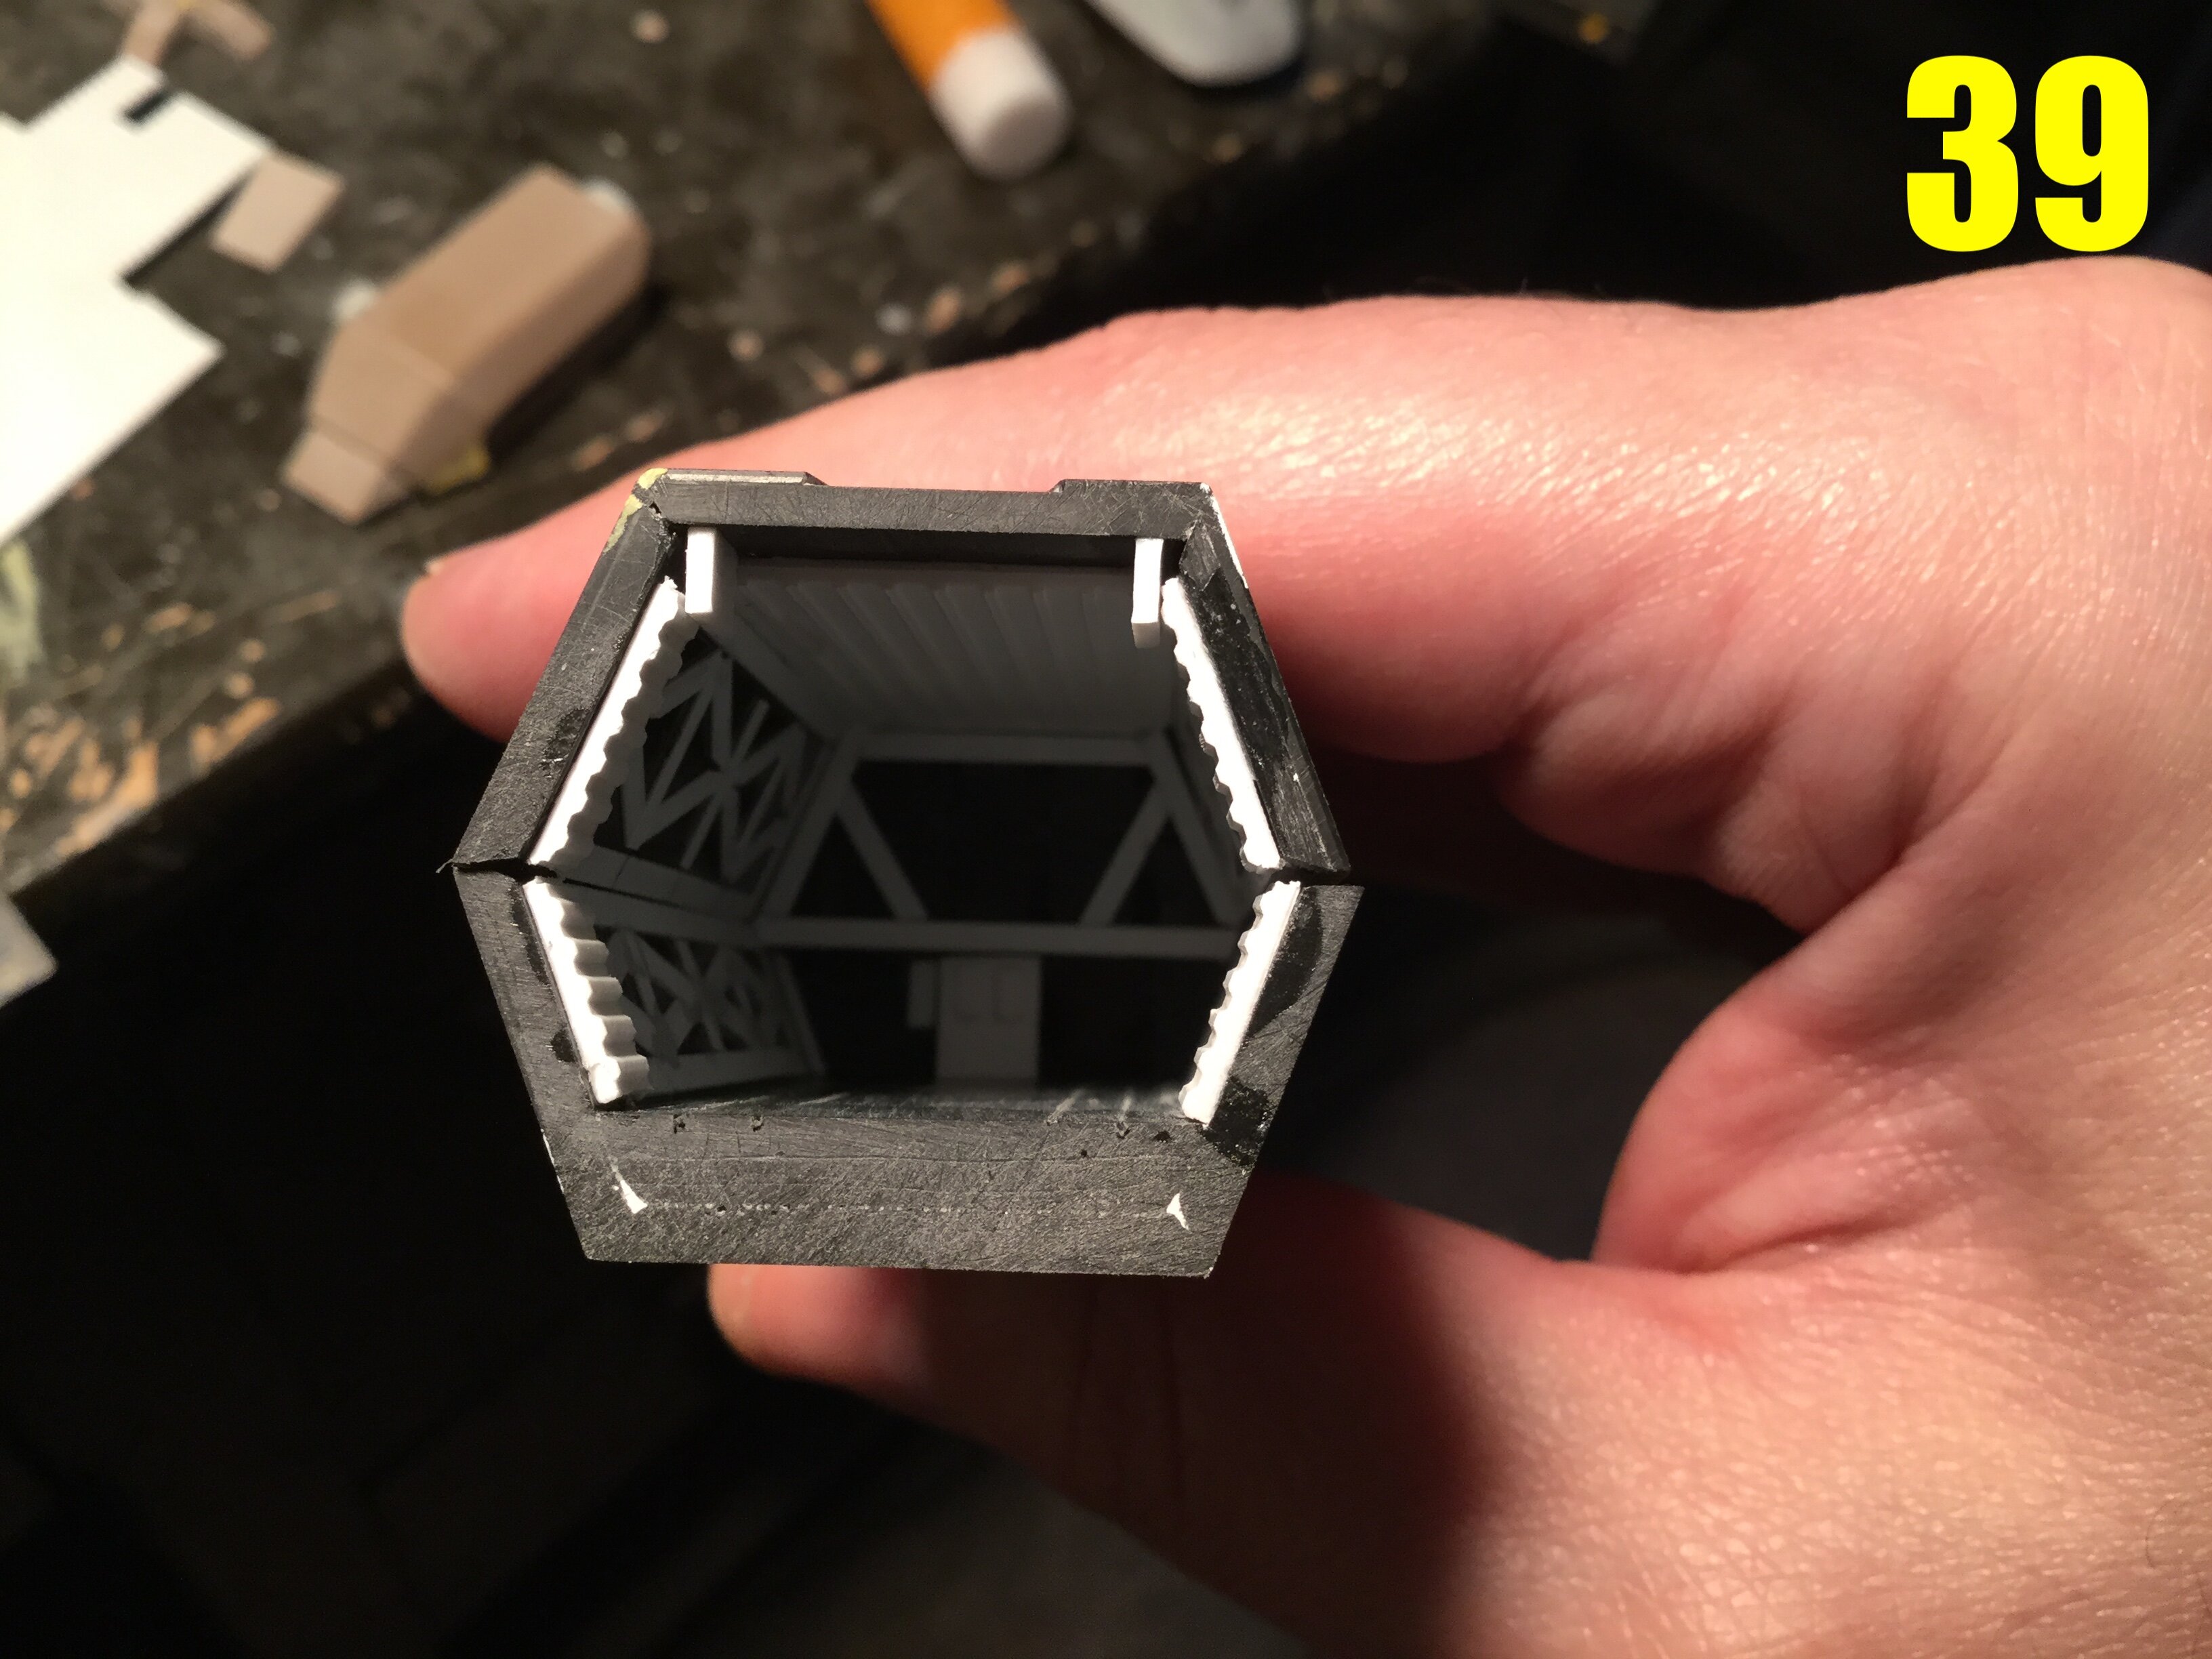
Pic 39: the absolute kings of design clusterfrack: the cargo containers themselves! Wonky and awkward outer geometry, featuring even more frustrating inner detail. Many hours spent detailing such a small space that will rarely ever be seen properly, but for this scale, it’s quite decent.
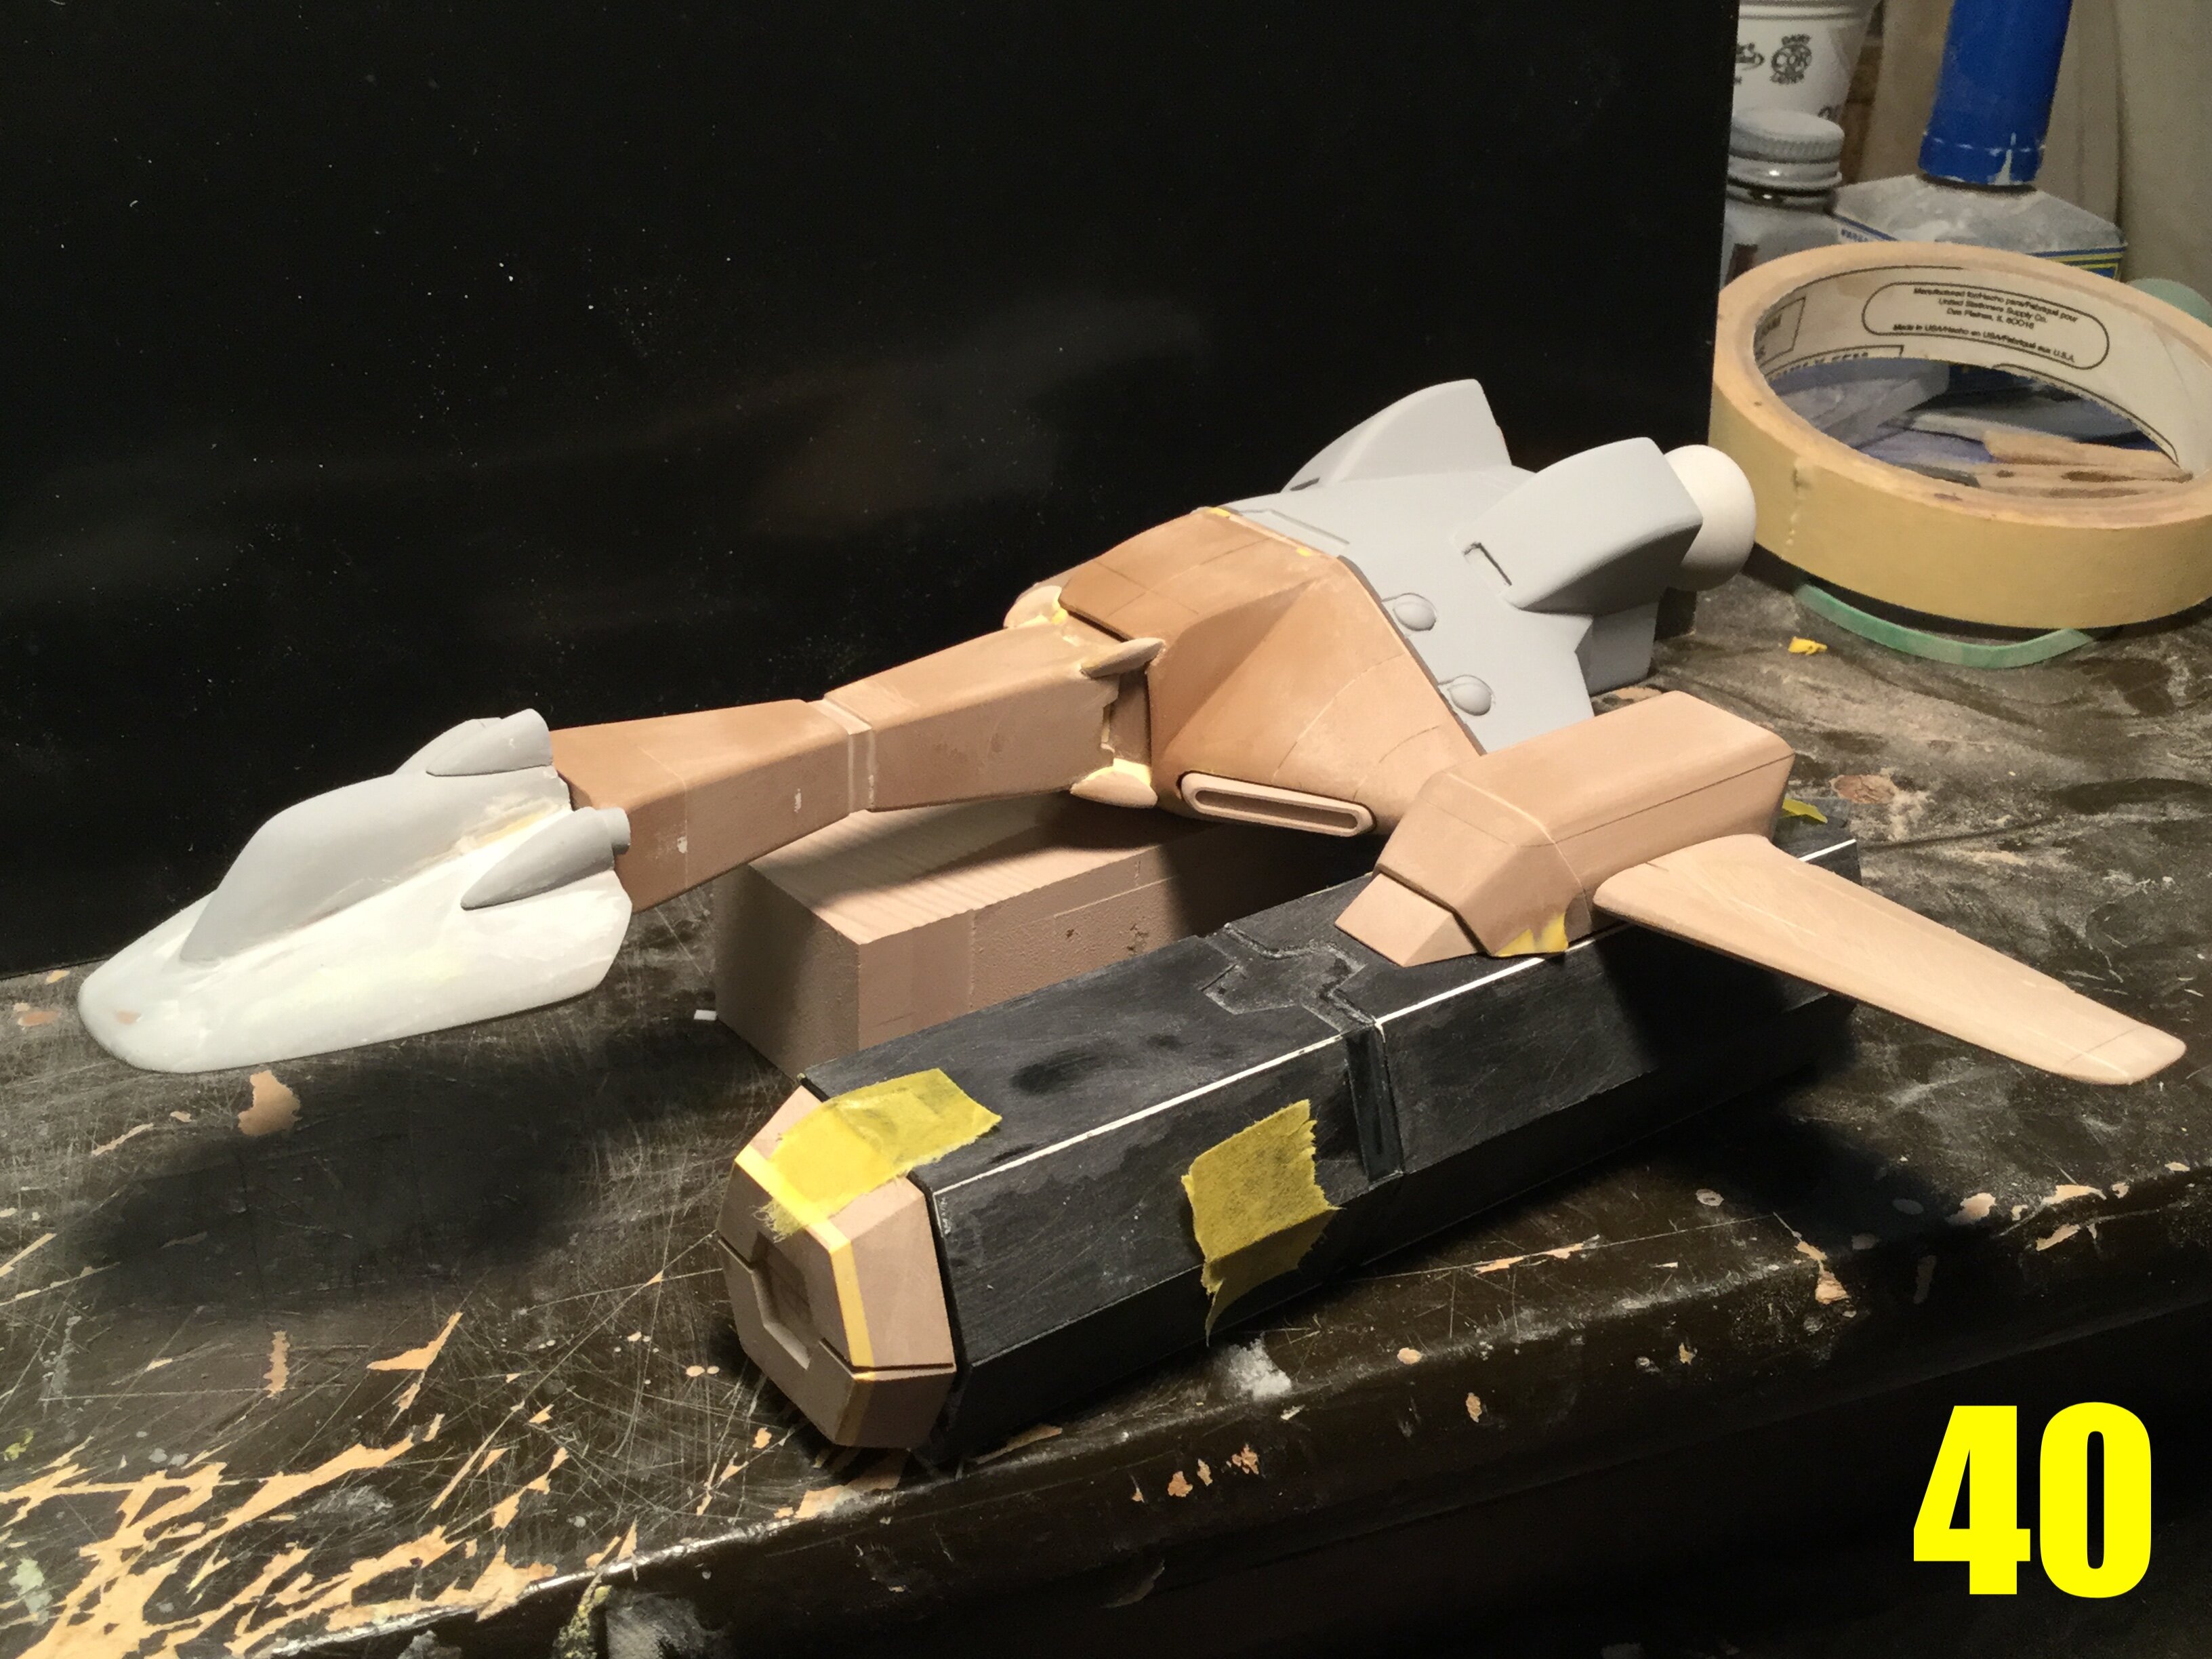
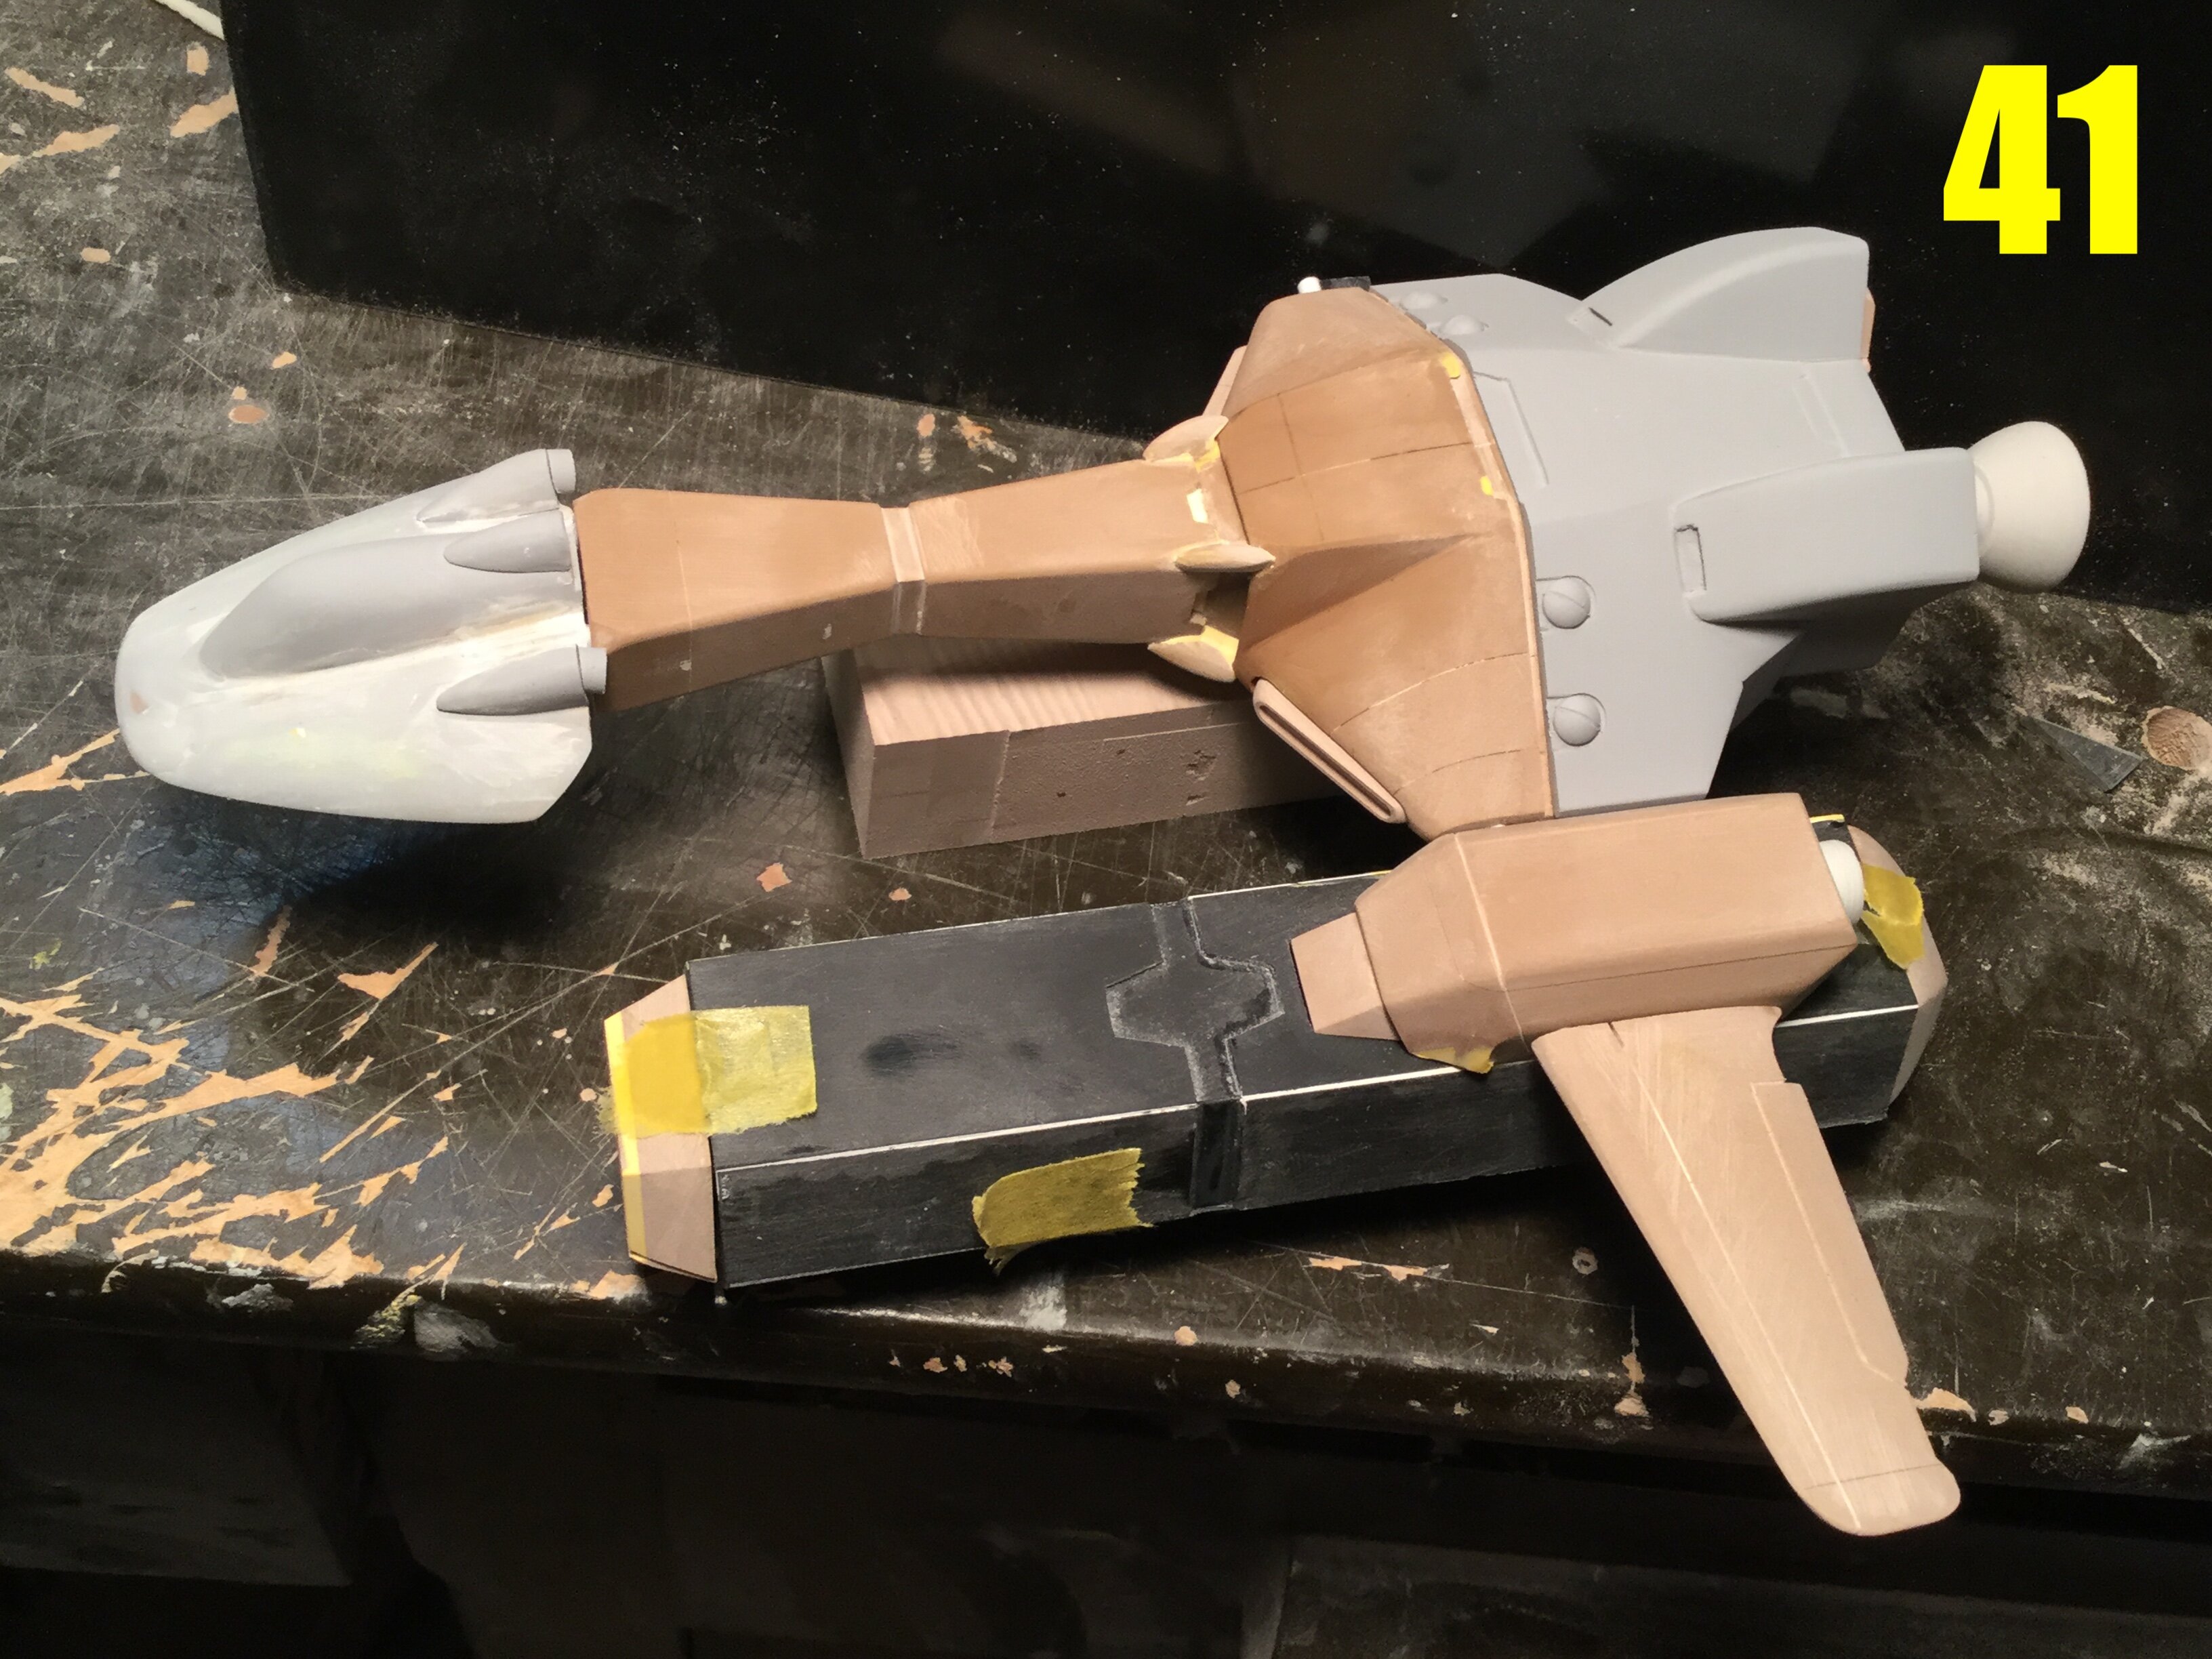
Pics 40-41: finaly in the home stretch! Admittedly, it’s a nice looking ship and I’m quite pleased with how it compares to the line-art. Next week’s update with be a lighter one, as I finalize the little details and markings to complete this baby! I’ll be showing-off some of the improvements I’ve made to the boarding ramp design: the style-sheets were seemingly drawn by someone with no understanding of proportionality or perspective, so of course it falls to me to unf*ck their design mess and make it (almost) functional. Stay tuned!
-
49 minutes ago, tekering said:
Congratulations on launching your inaugural contest! 🥳
Just a few questions for clarification, Cap'n:
Would a subject (or diorama) photographed against a real sky background be acceptable?
Yes! I will ammend the rules to reflect this clarification. I'll allow it for dioramas/vignettes, since their purpose is to show models in an environment.
Could said diorama include models (or toys) that weren't Moscato products?
Yes, so long as the models/toys/tree products, rocks, etc. Are not the focal point of the diorama. So long as a Moscato kit is the main subject, the other, decorative props are fine.
I imagine something like this is out of the question, then...?
Correct. I want the physical model to be as clearly visible as possible, so while I enjoy lens flares and muzzle flashes and things of that sort, not for this competition. That said, I would be happy to have the modeller show-off those extra effects in a side-by-side pic without the digital bells and whistles after the competition is over.
How about, say, a pose that required the support of a stand? Could the stand be edited out of the photograph(s)?
Yes, the stand can be edited out. That actually falls under the umbrella of EXAMPLE A, where some cluttering elements can be digitally removed.
How about extortion, kidnapping, or blackmail...? 😄
Love me a challenge!
Mospeada
in Anime or Science Fiction
Posted
That's a challenging fix. If you had the dexterity, a small enough drill bit and same diameter brass/steel rod, you could reinforce the snapped ball-joint, but it would still be very fragile. Ideally, I would push-out the rivet that's still on the fairing, have someone 3D print the broken part in a tougher material and use that as a replacement. At the core, this is a materials problem that Sentinel needs to address, because as you can see from the pressed rivets, the toys aren't made to be disasembled and if someone doesn't have the skills to perform that kind of repair, it will only make the problem worse.