

Cesar Enrique
-
Posts
164 -
Joined
-
Last visited
Content Type
Profiles
Forums
Events
Gallery
Posts posted by Cesar Enrique
-
-
LOVE this. The 'panel lined' look is amazing. Its hard to tell whether is was brush or airbrush painted - looks like the best of both techniques.
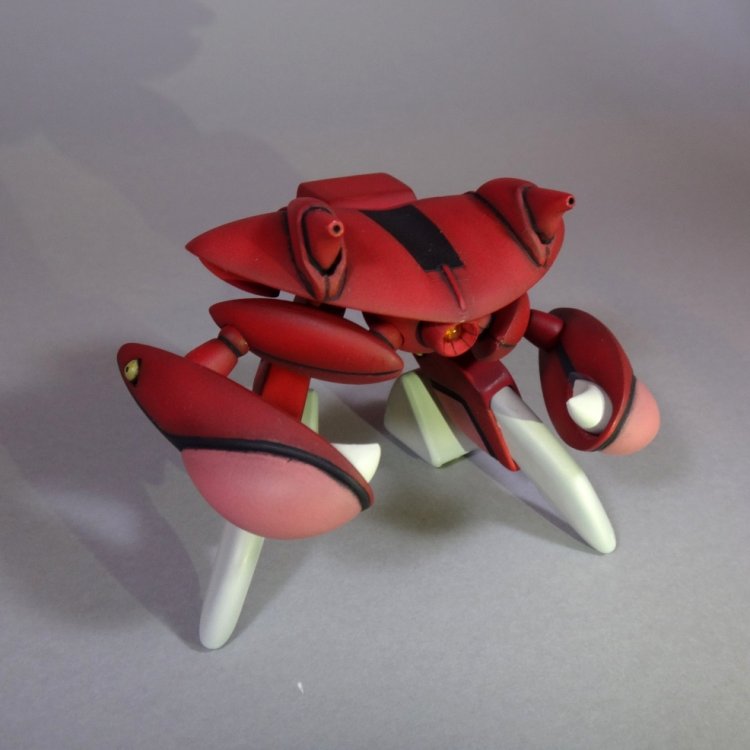
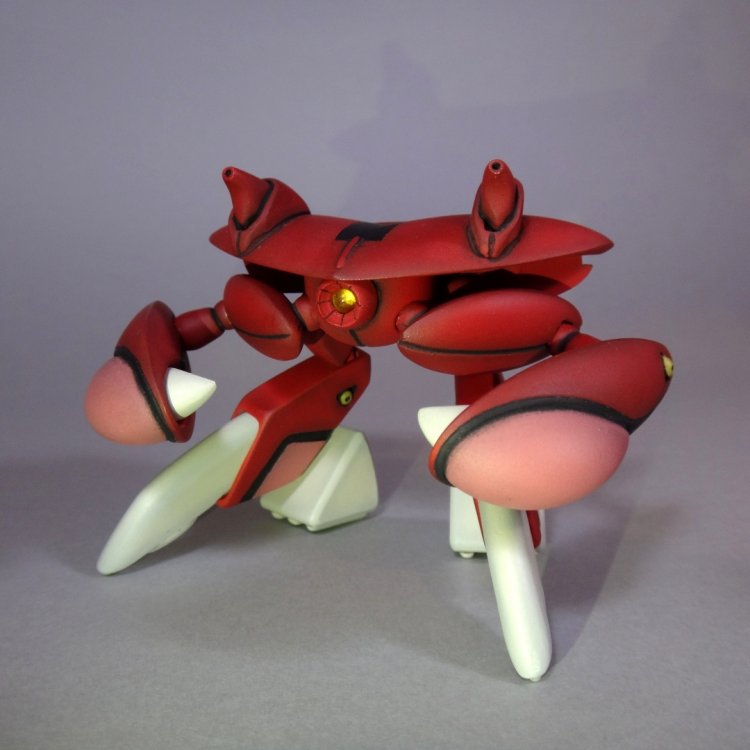
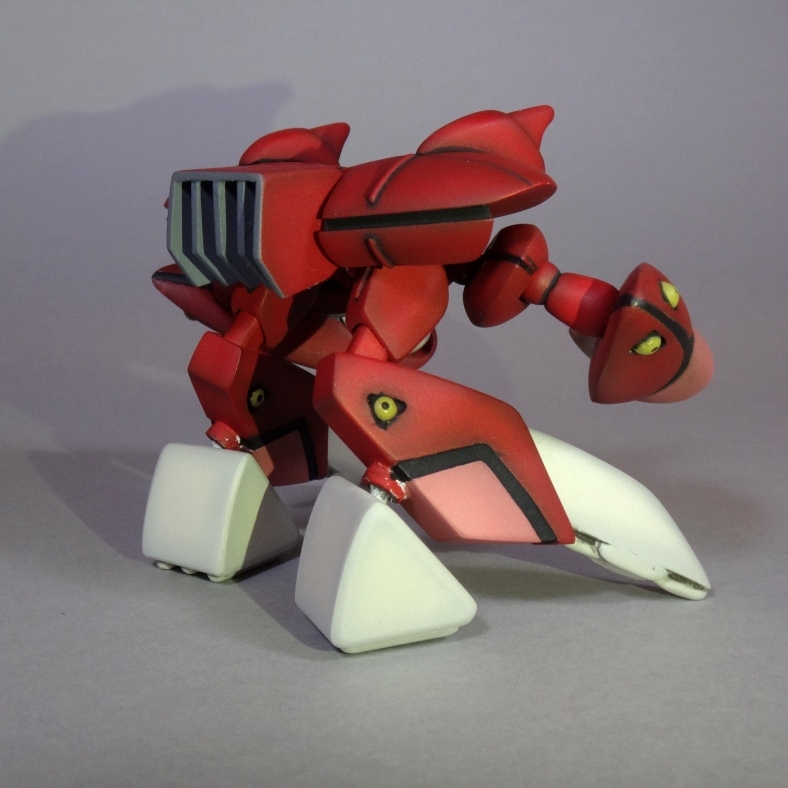
I can see the ball-joint added to the back heels - nice.
Why did you decide to use a piece of sprue for the eye instead of the one included? Color?
Thank you. The Black lines were masked and airbrushed, some brush touch ups were necesary.
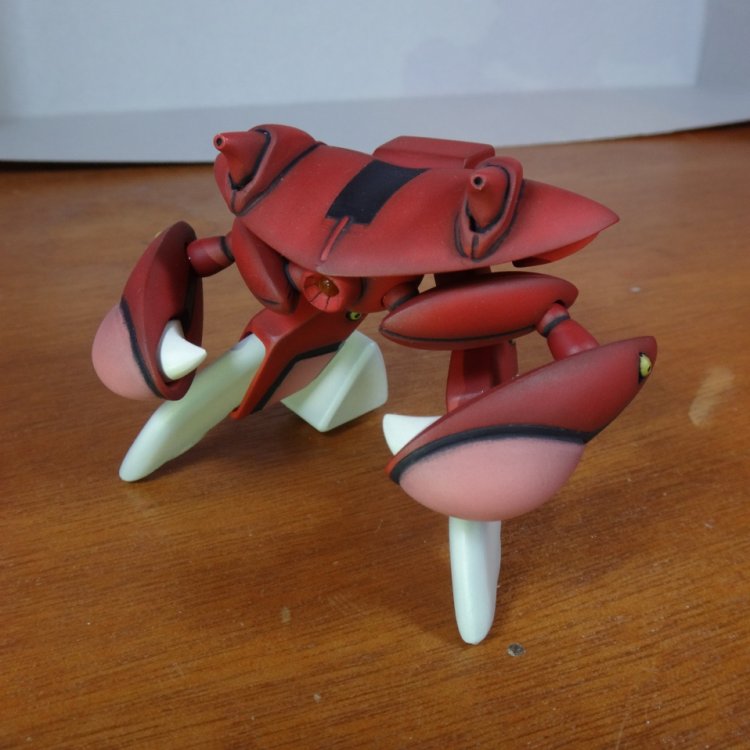
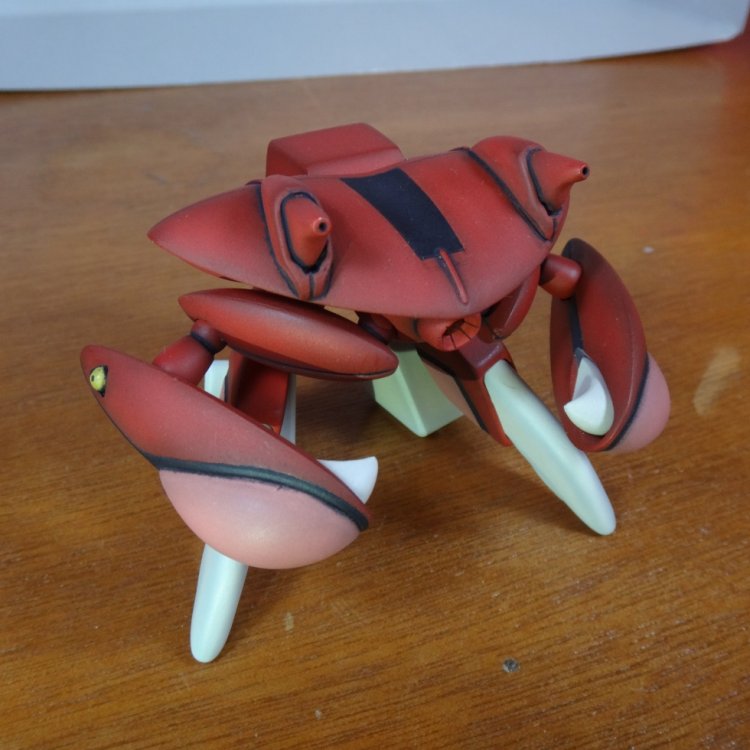
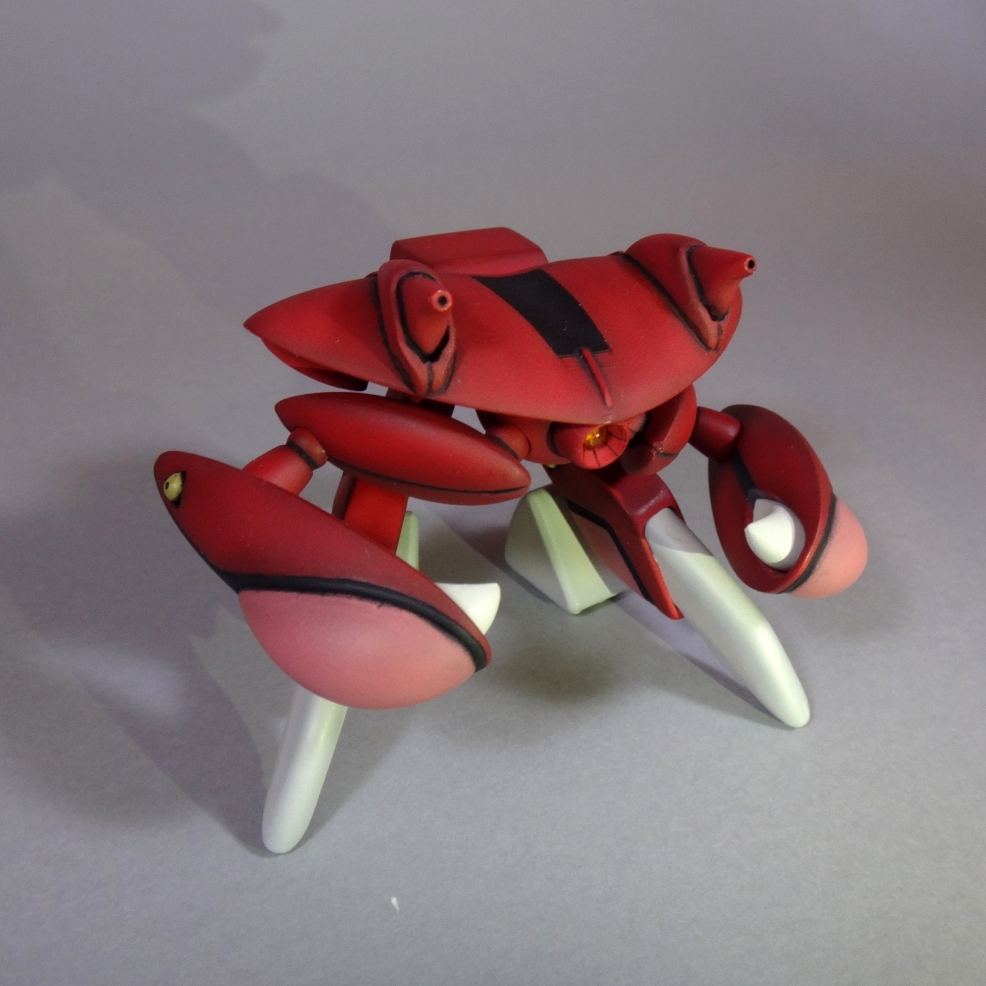
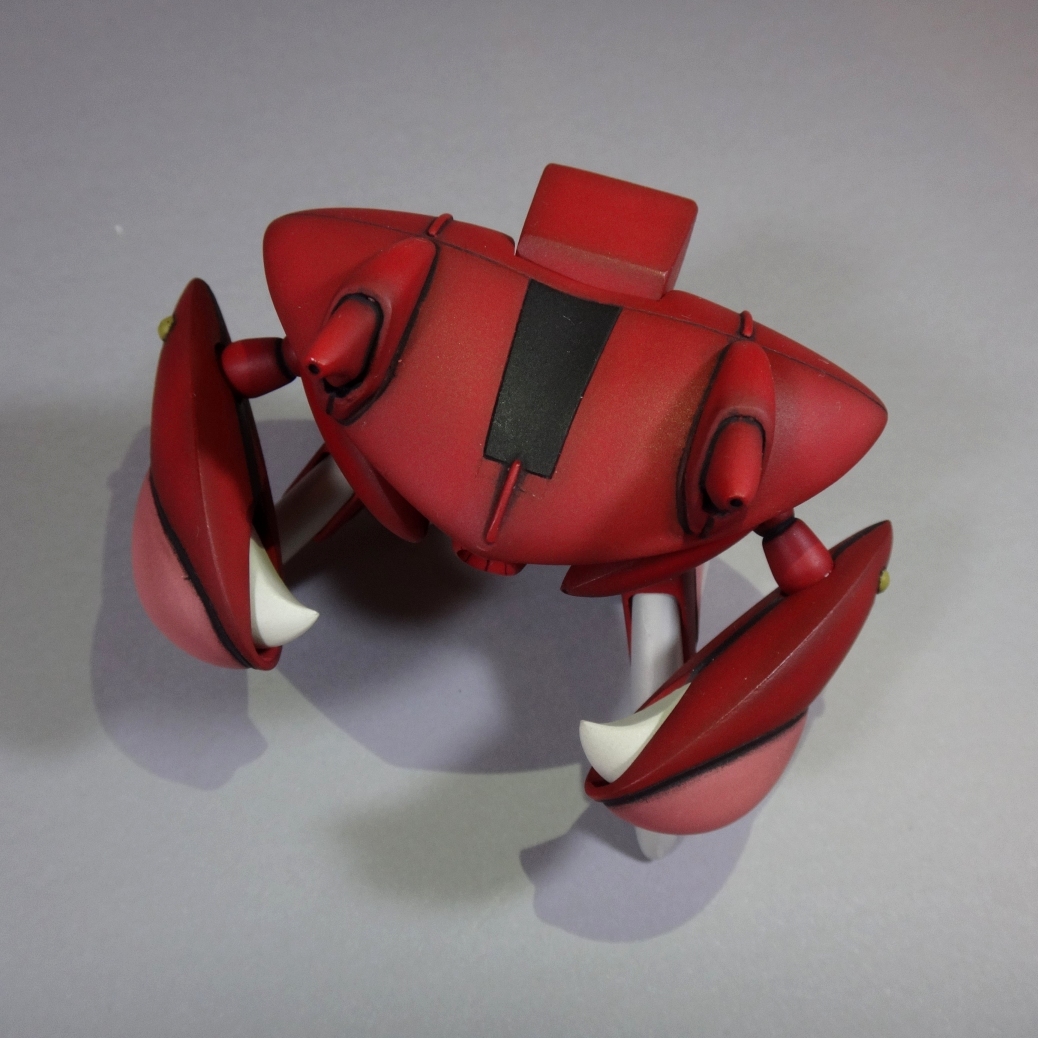
I wanted a smaller and rounded clear eye Ball, so the light reflects better on the Back of it and make it look like a LED (in some angles), as you can see in pictures.
-
I wonder why the topic was moved to "Anime and Sci-Fi" where you can post off topic if the Inbit is a Robotech character, and it is a Kit.
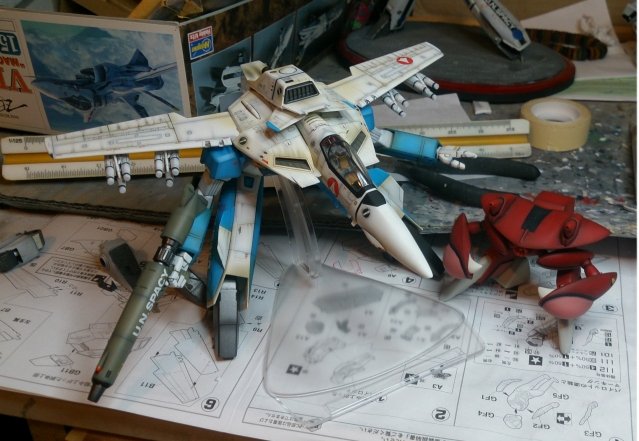
Awesome work. I love these mechs. They make no sense but then who cares right? What scale is this?
Althought it is 1/48th scale the kit is pretty small, watch it compared to a 1/72 Gerwalk:
Great job! I've been contemplating whether to weather the Inbit kits. I really like the shading you did.
If you make it weathered I deffinitely want to see it, I was very tempted to do it that way...I still have the second baby crab, so...
-
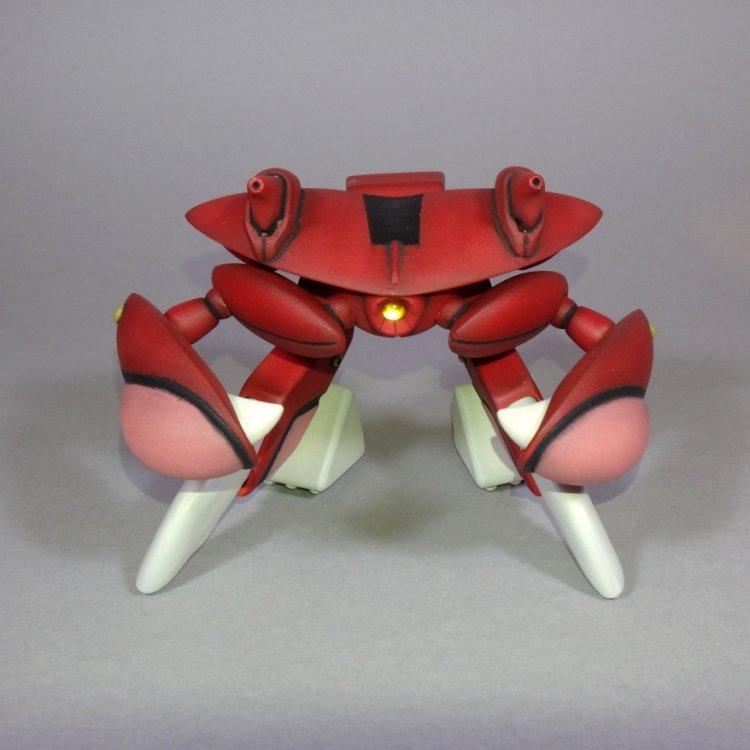
Hello again!!
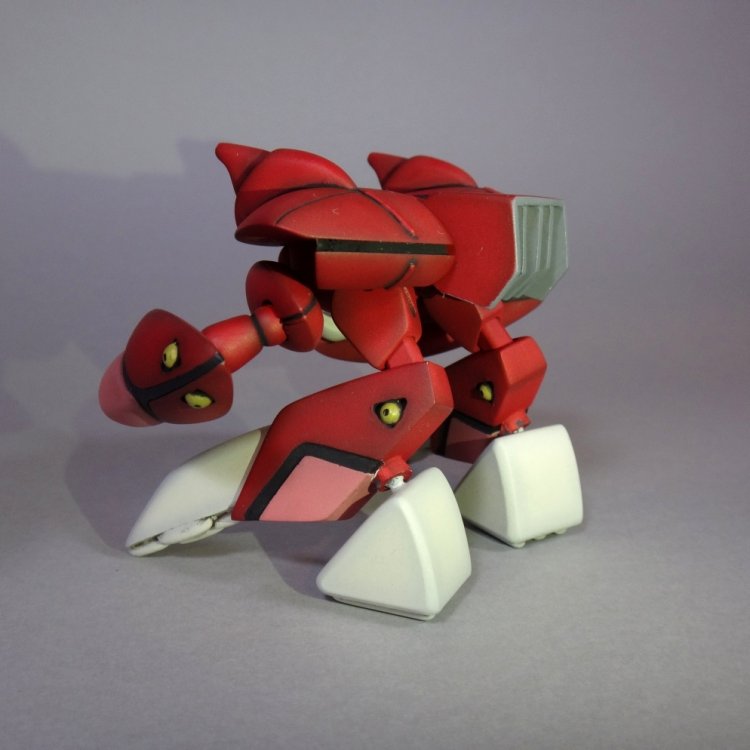
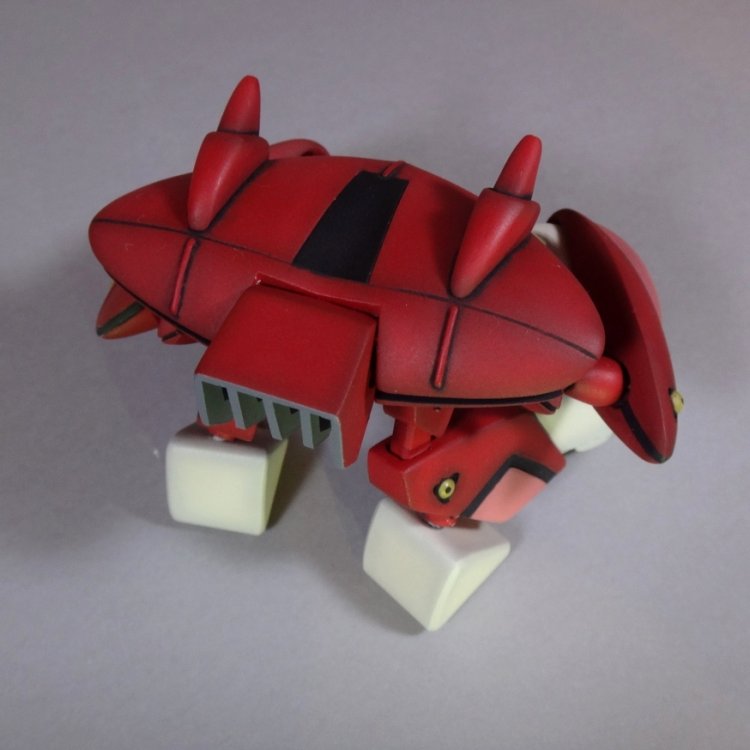
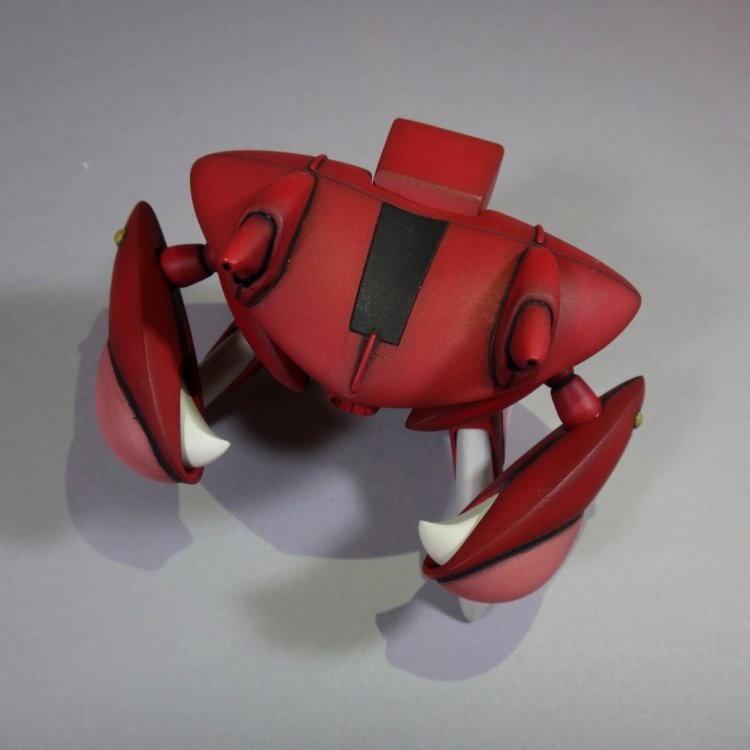
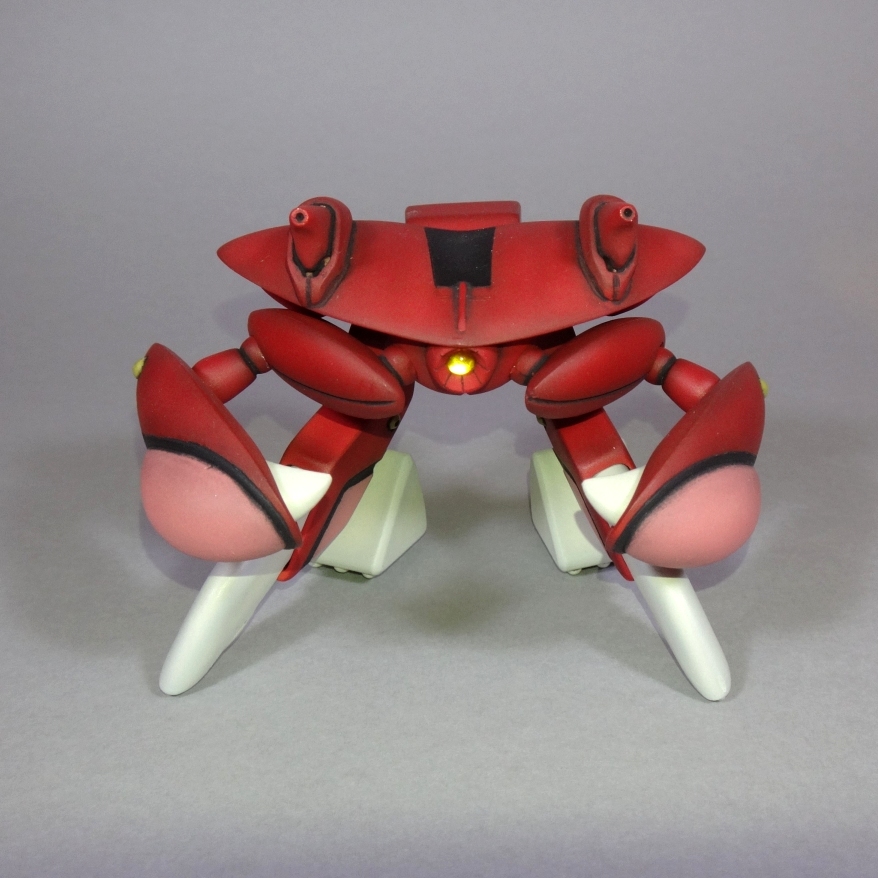
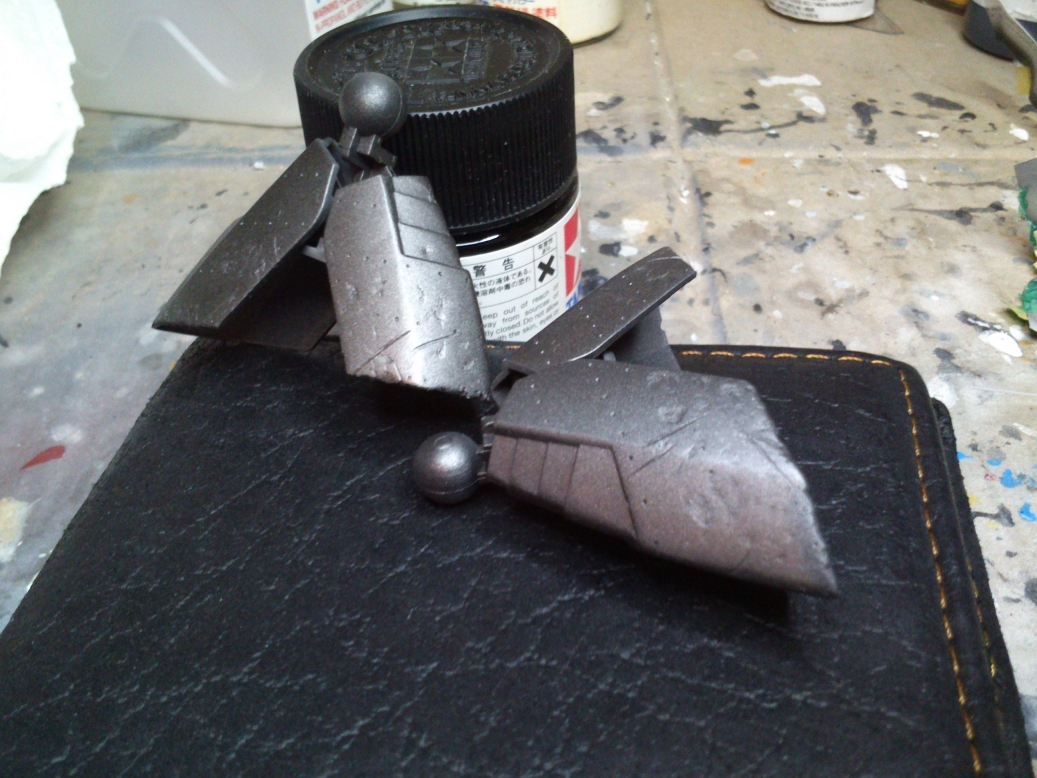
This time I will share a fast project that was very fun to do, very enjoyable (Thanks Cap). I decided to do this baby crab with a simple paint scheme, with no weathering, only preshading. I replaced some of the resin joints for ball joints from kotobukiya to make it posseable, making easier the process of painting, assembling and correct the pose to the end. I also replaced the original eyeball and made my own from a clear piece of sprue.
Now, I need to find time to finish the pinky space crab, wich is ready for receiving paint. I`m eager to work on that one.
What do you think?


-
Well, it's awesome. Why did you decide to paint the forward-facing thruster on the side of the intake yellow on the Max bird, and red on the Hikaru bird?
Did you use the decals for the verniers, or paint them?
Thanks!
Me too about the rifle, as with Max's!
Thank you so much to all for your kind comments.
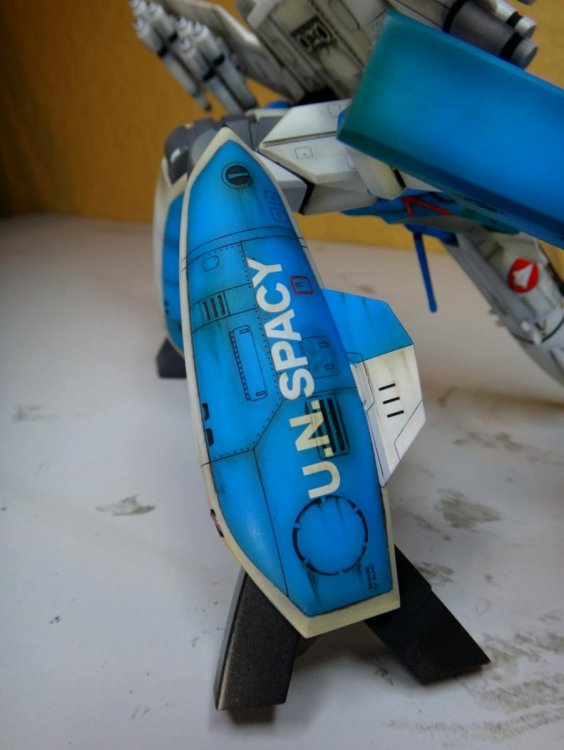
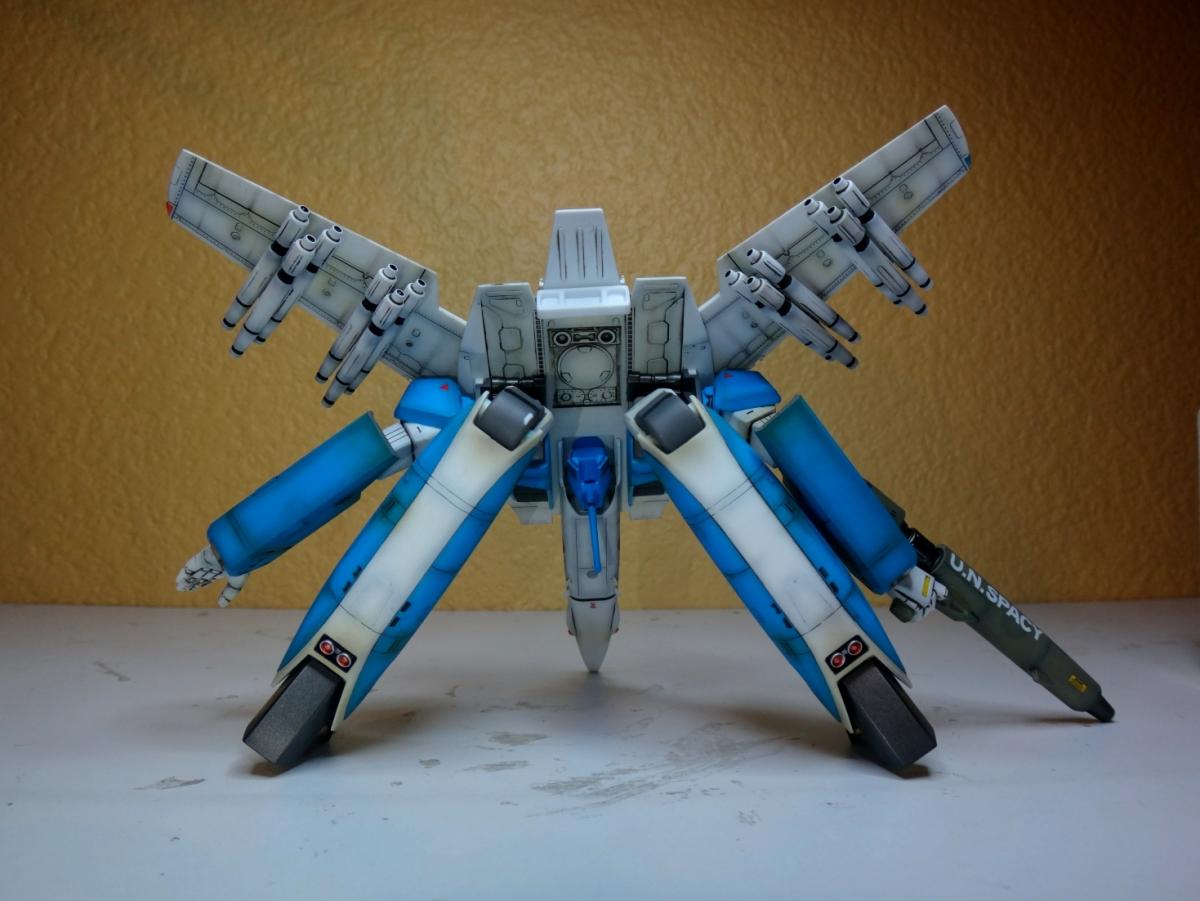
I painted the forward-facing thruster yellow in this blue bird because red color doesn't stand out that much over the blue, besides I have seen some Max J. battroid builds with Orange-yellow on this thruster and I like how it looks.
And the verniers were painted, I try to avoid decals on verniers whenever I can.
-
This is awesome!! I love dirty valkyries way more than the clean ones.
What is your photo studio setup? Or is it a light box?
I hope to see moore macross from you.
-
Wow,never saw a strike valk in that scheme, the paint job and weathering look very interesting, deffinitely I want to see more and better photos.
-
My friends,
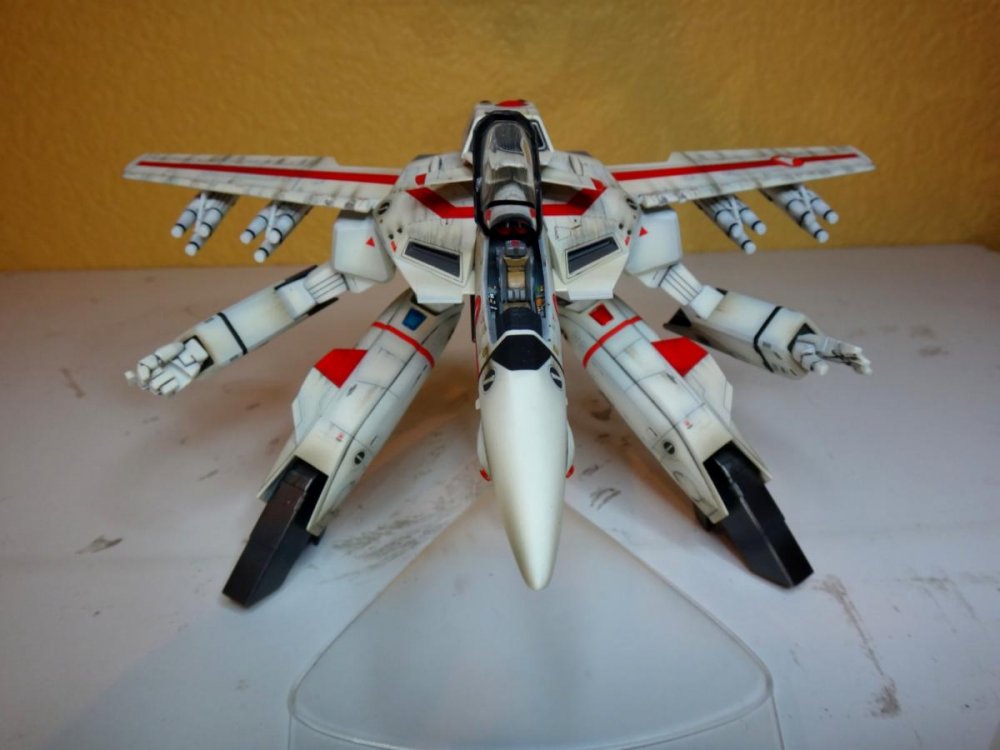
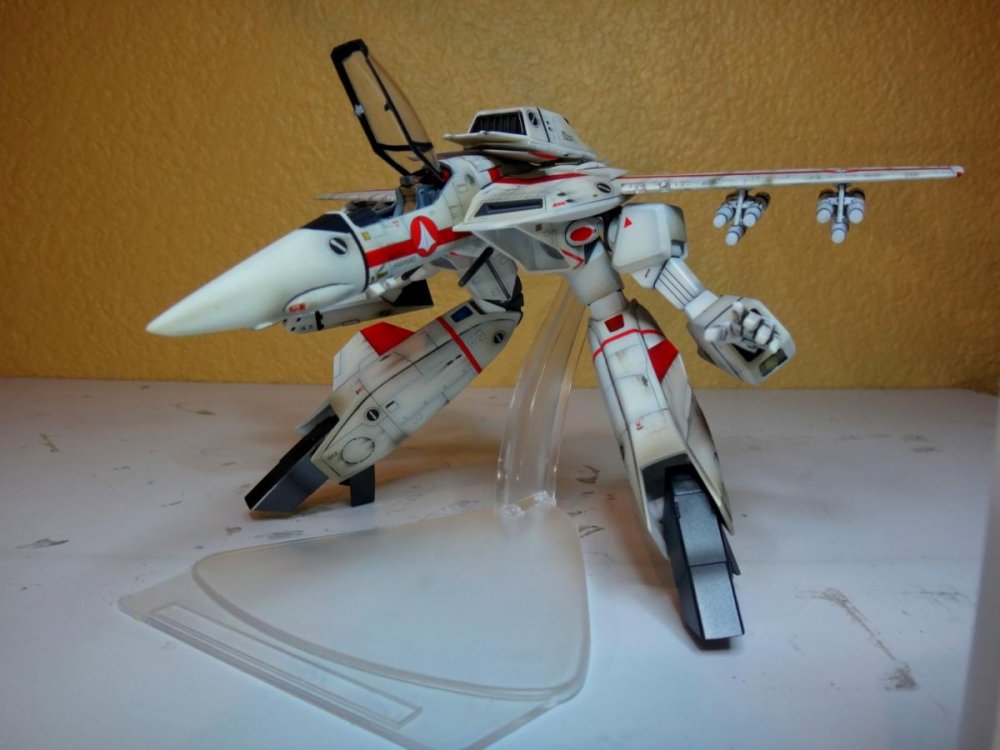
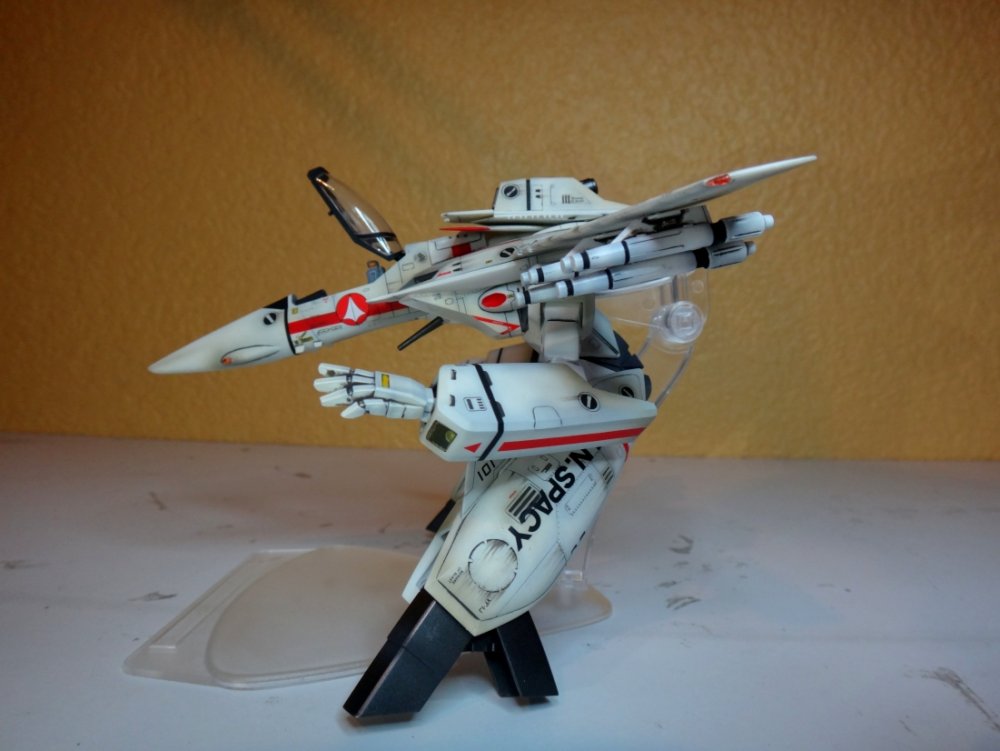
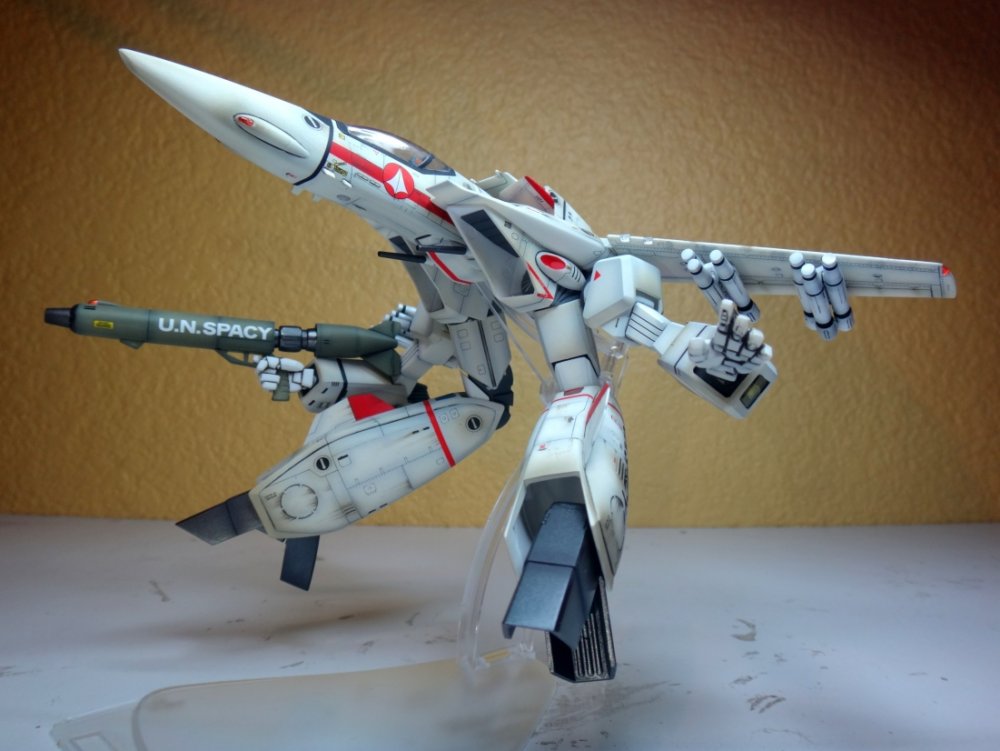
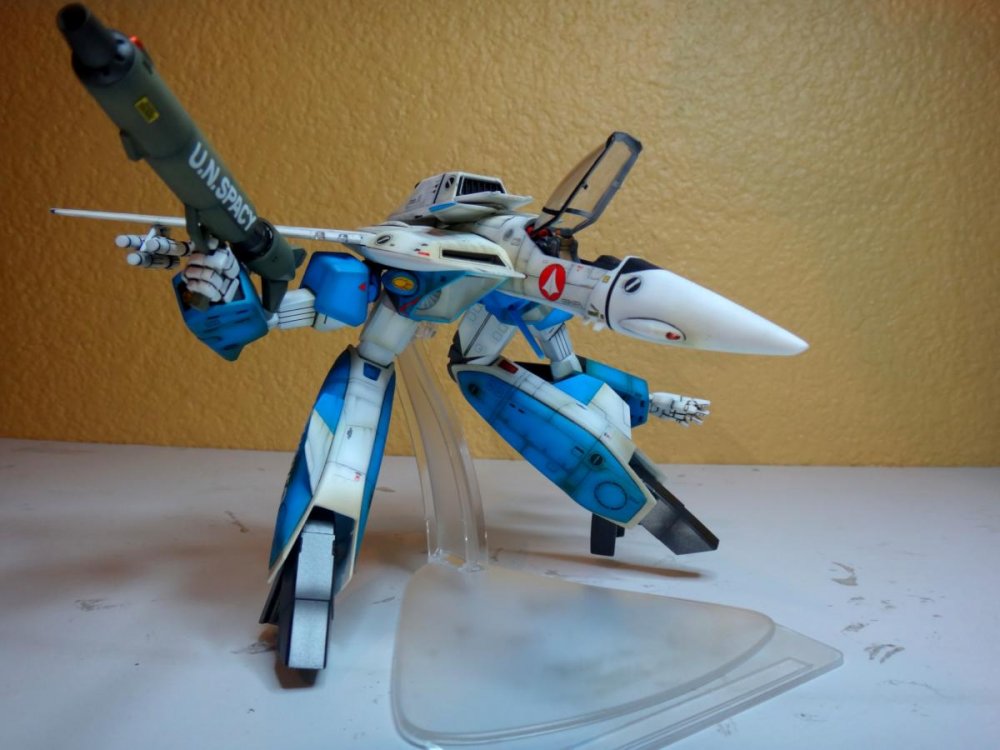
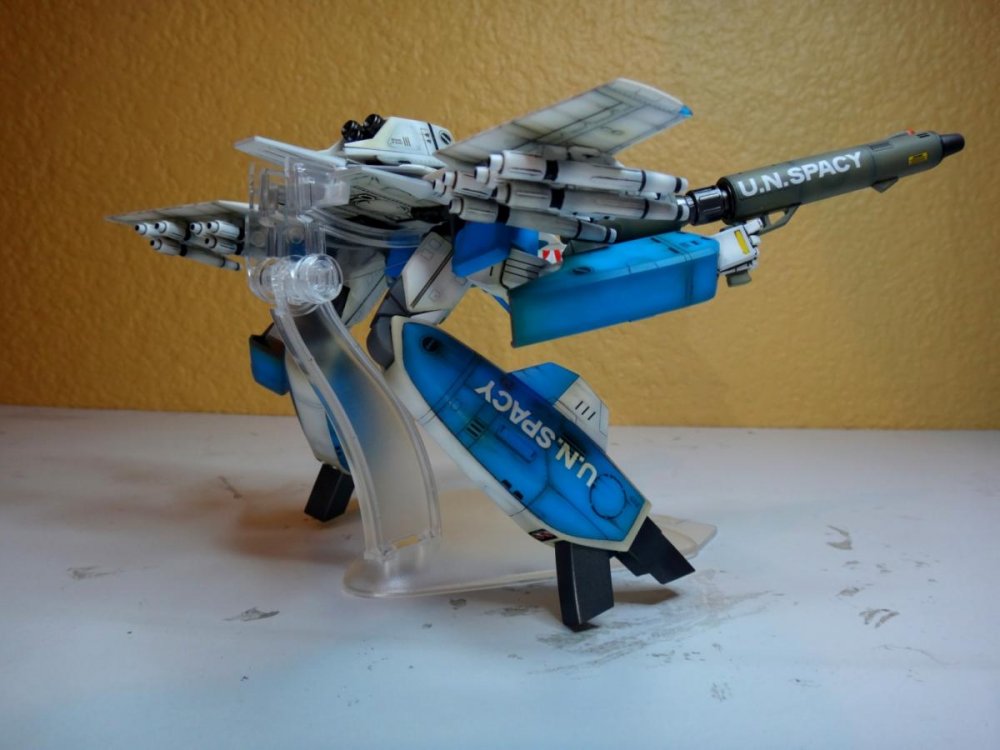
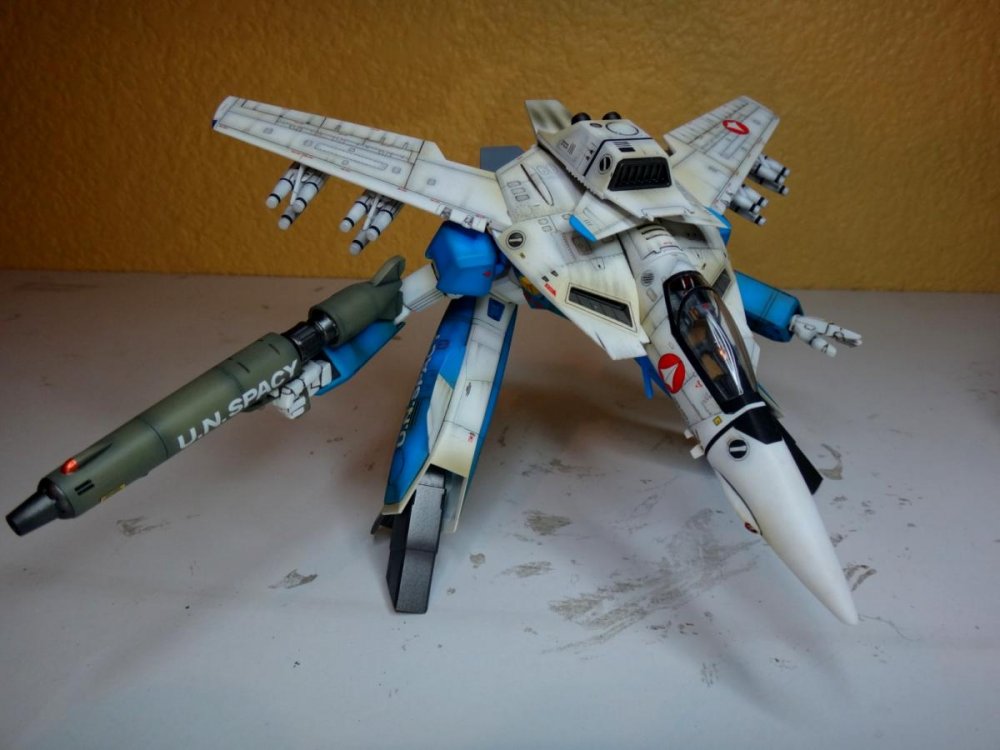
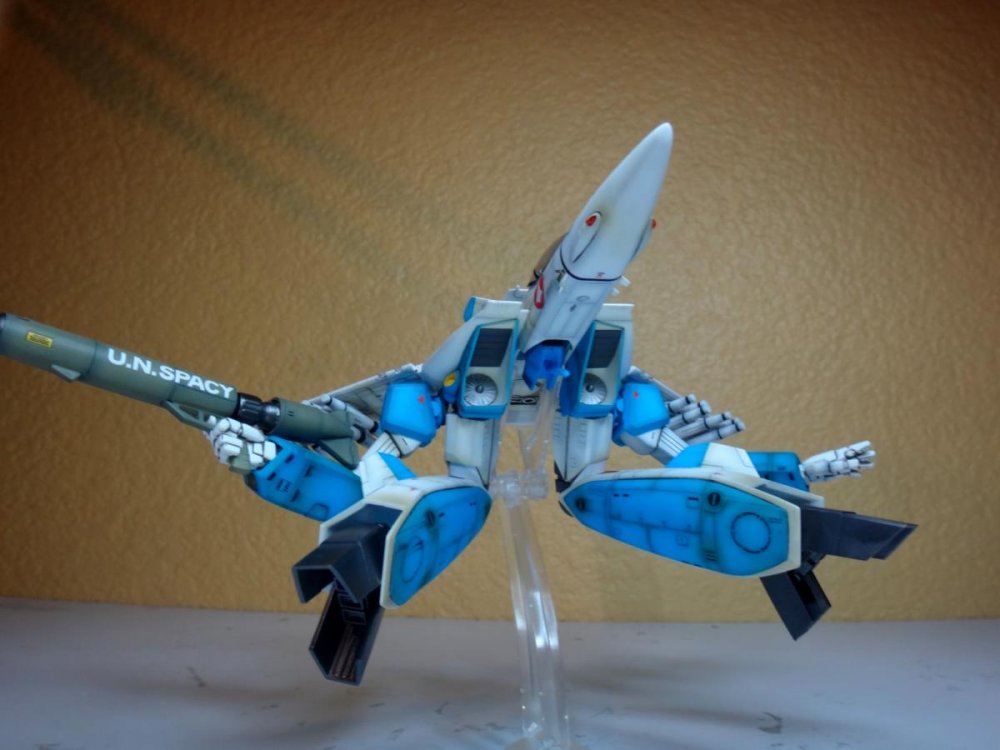
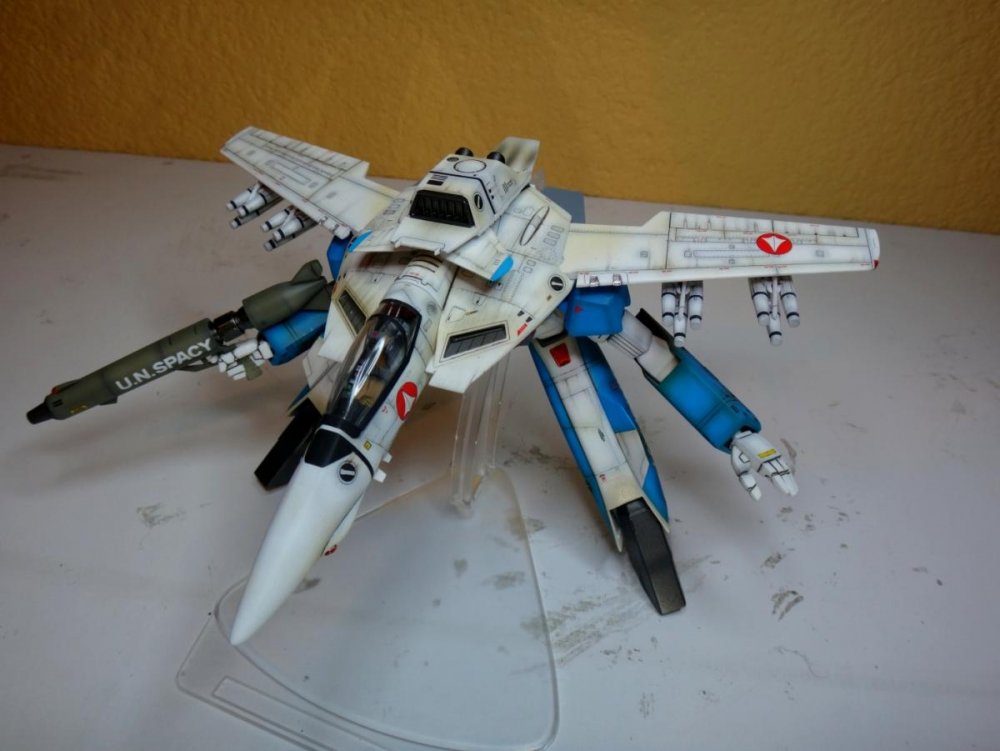
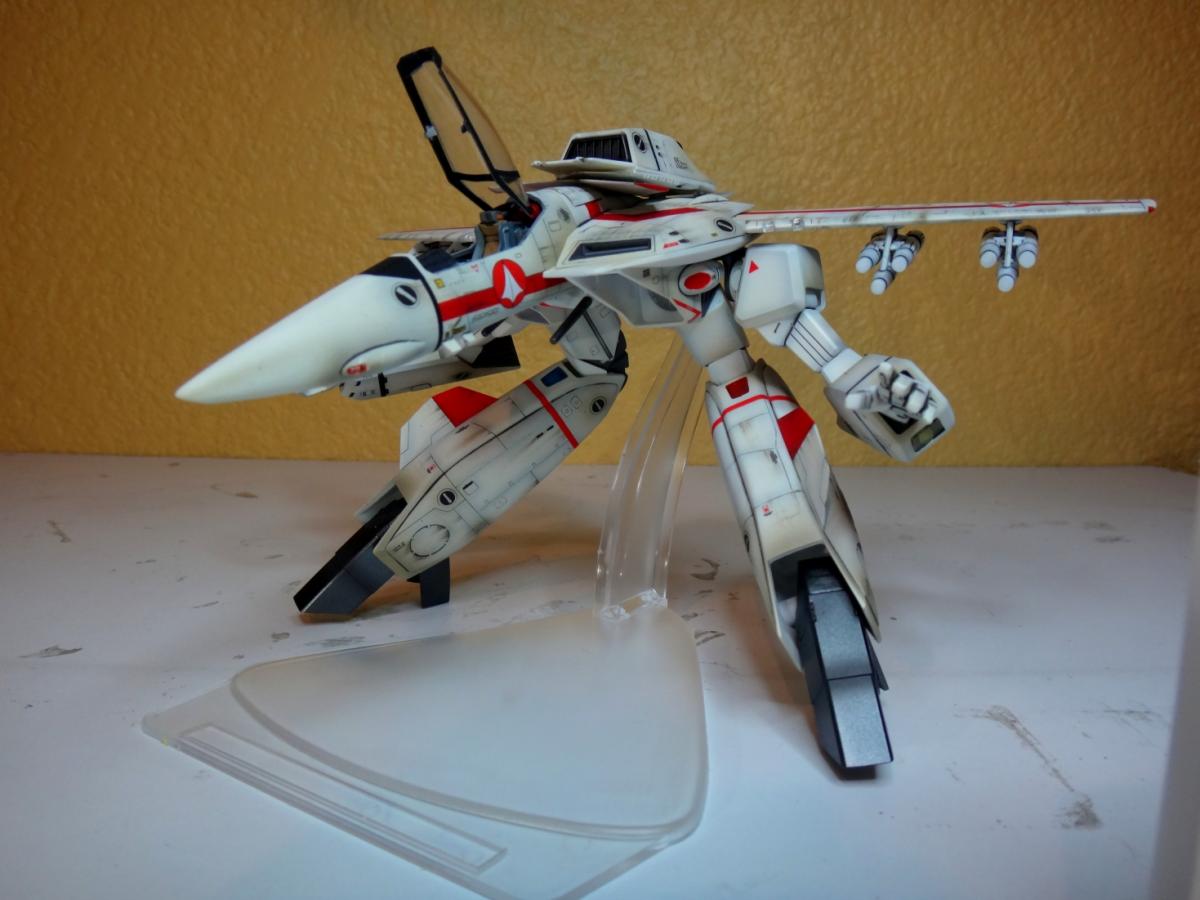
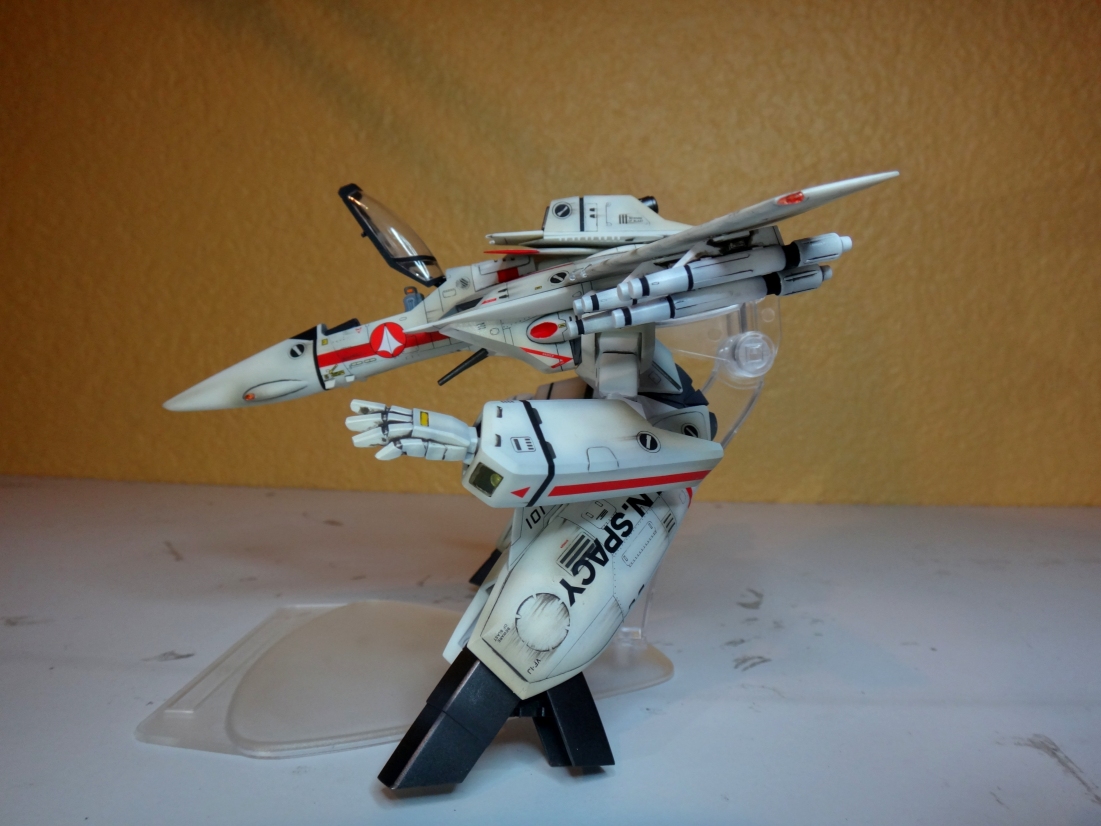
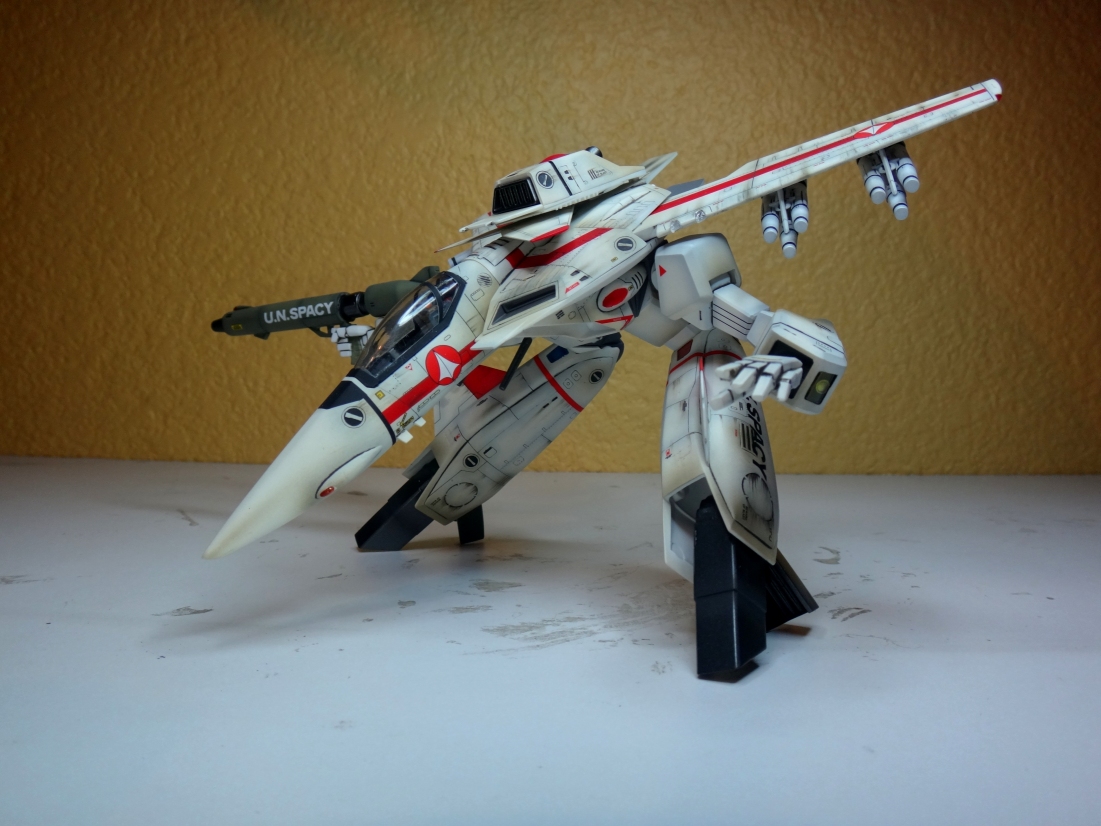
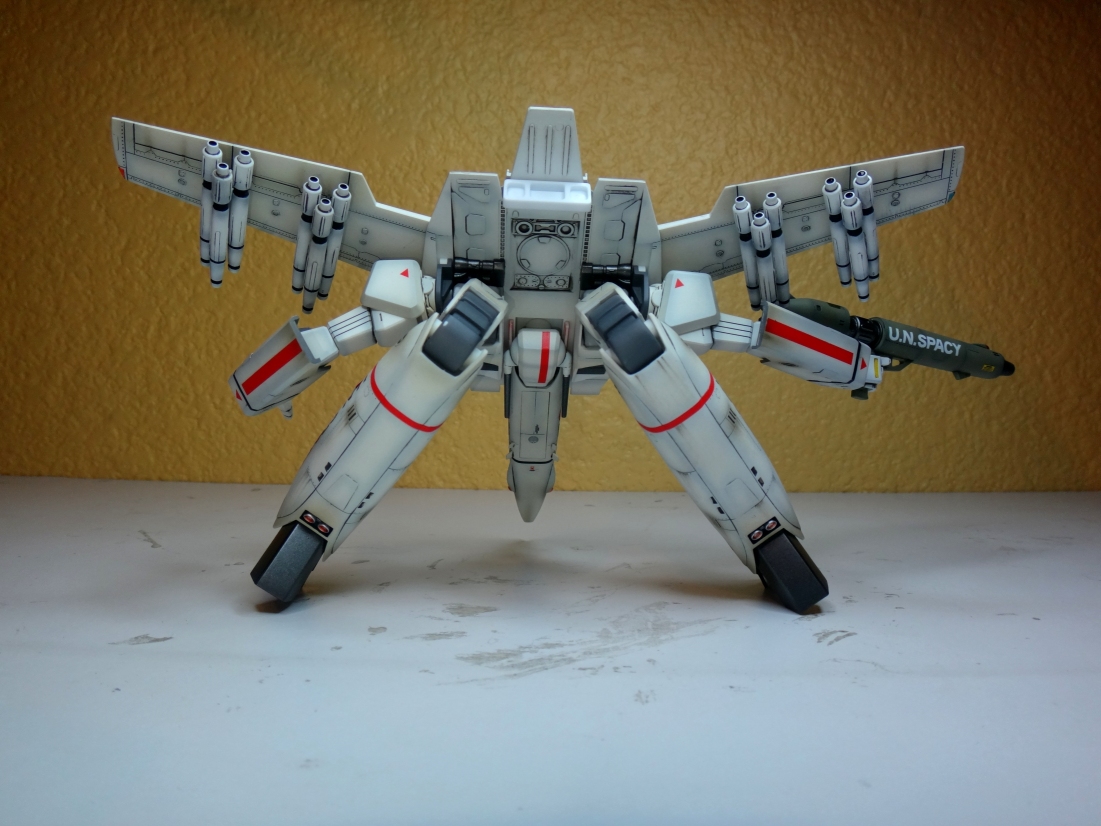
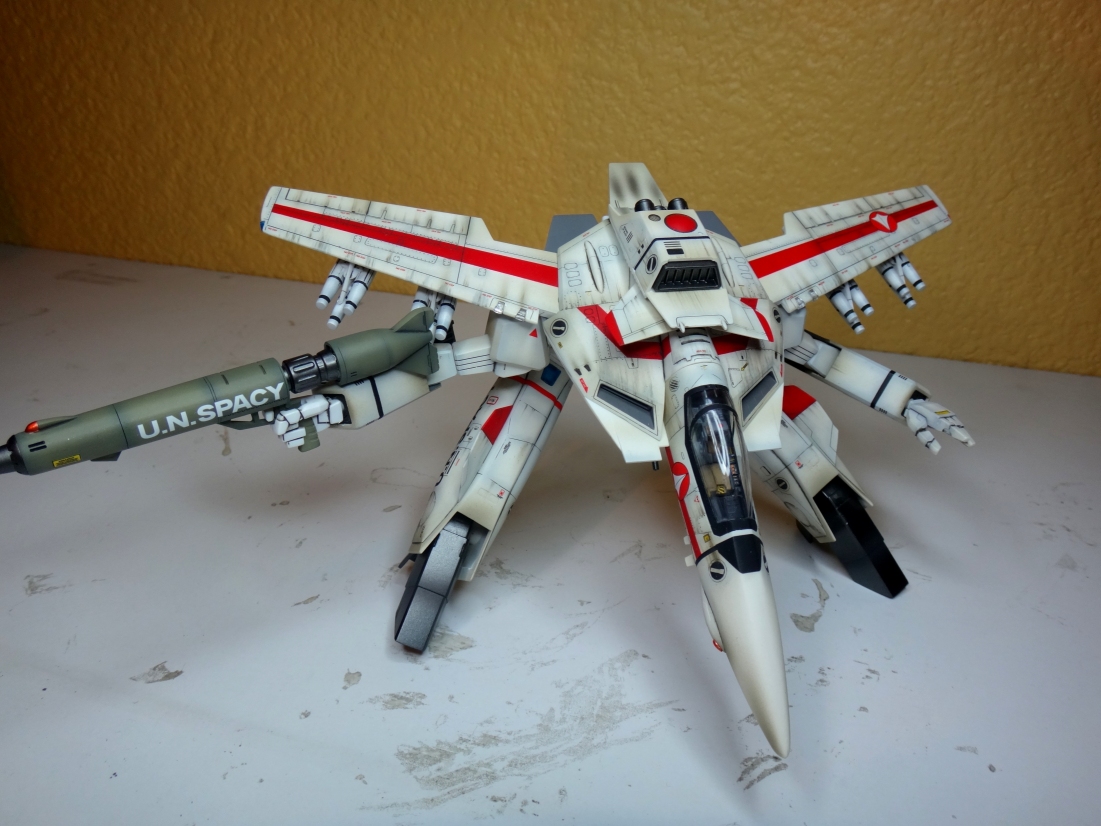
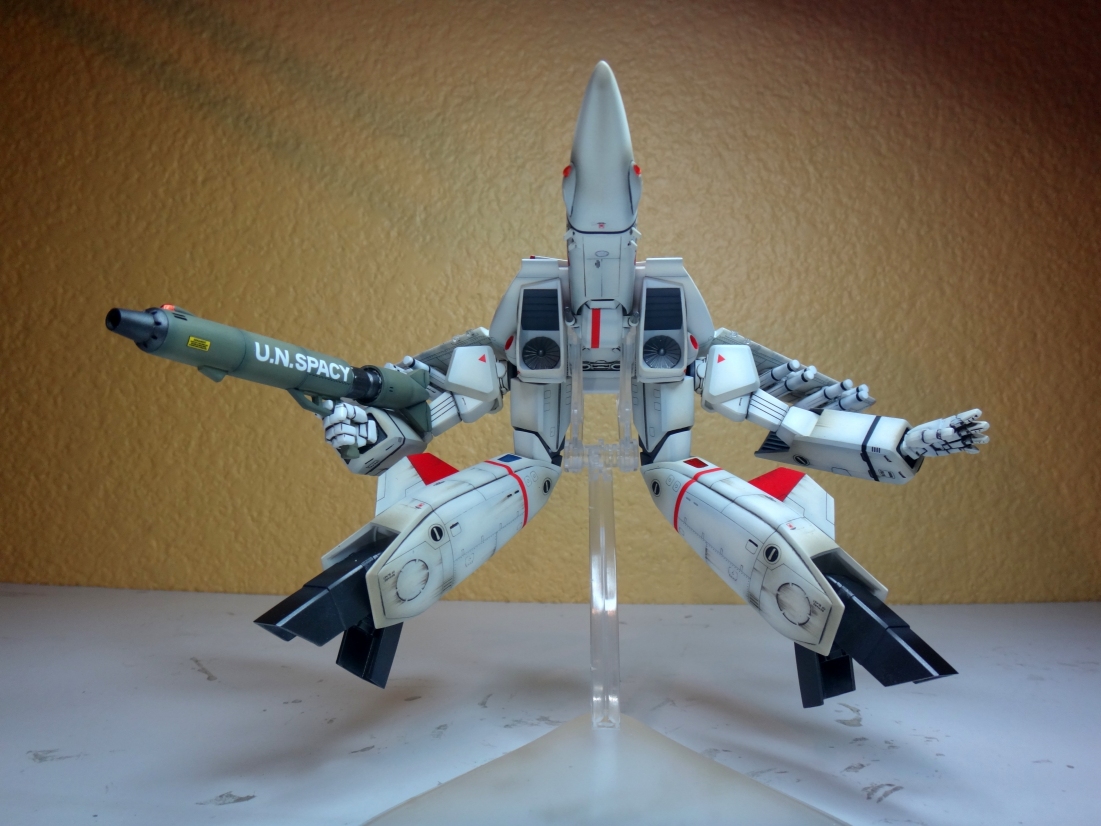
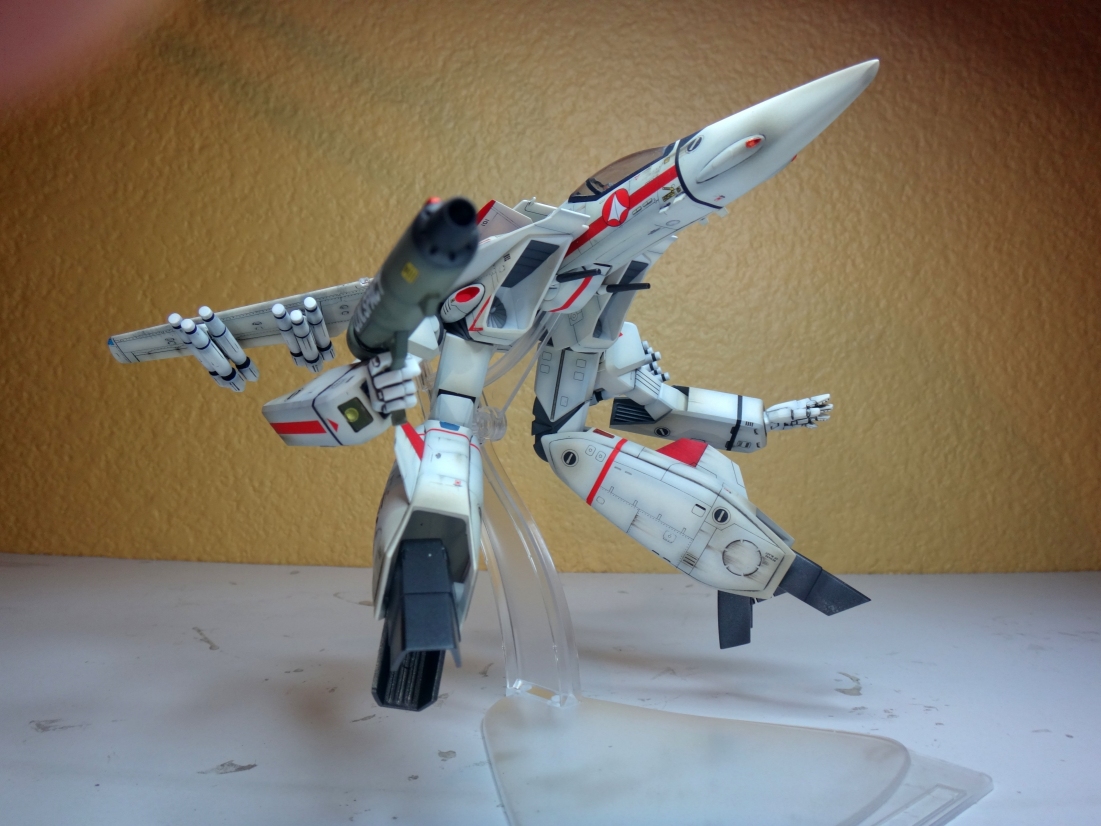
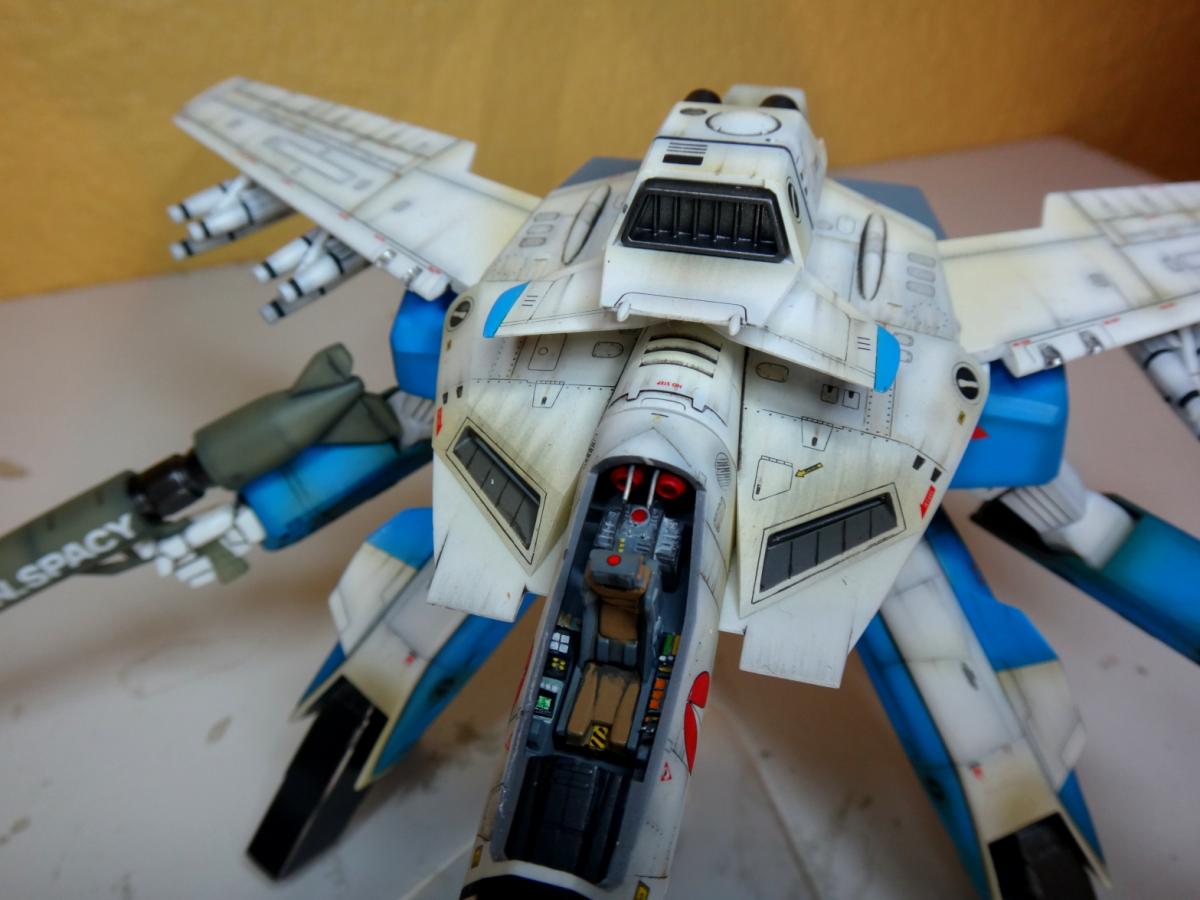
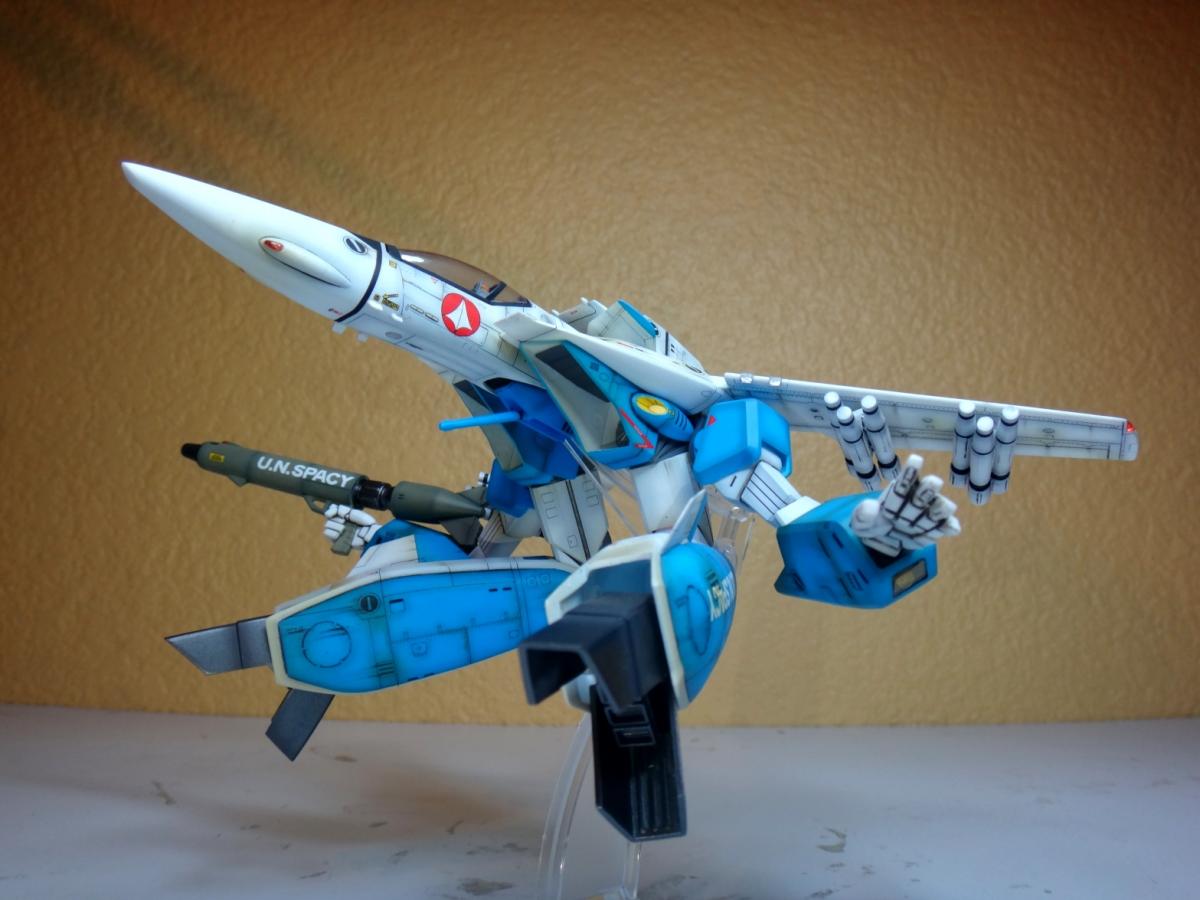
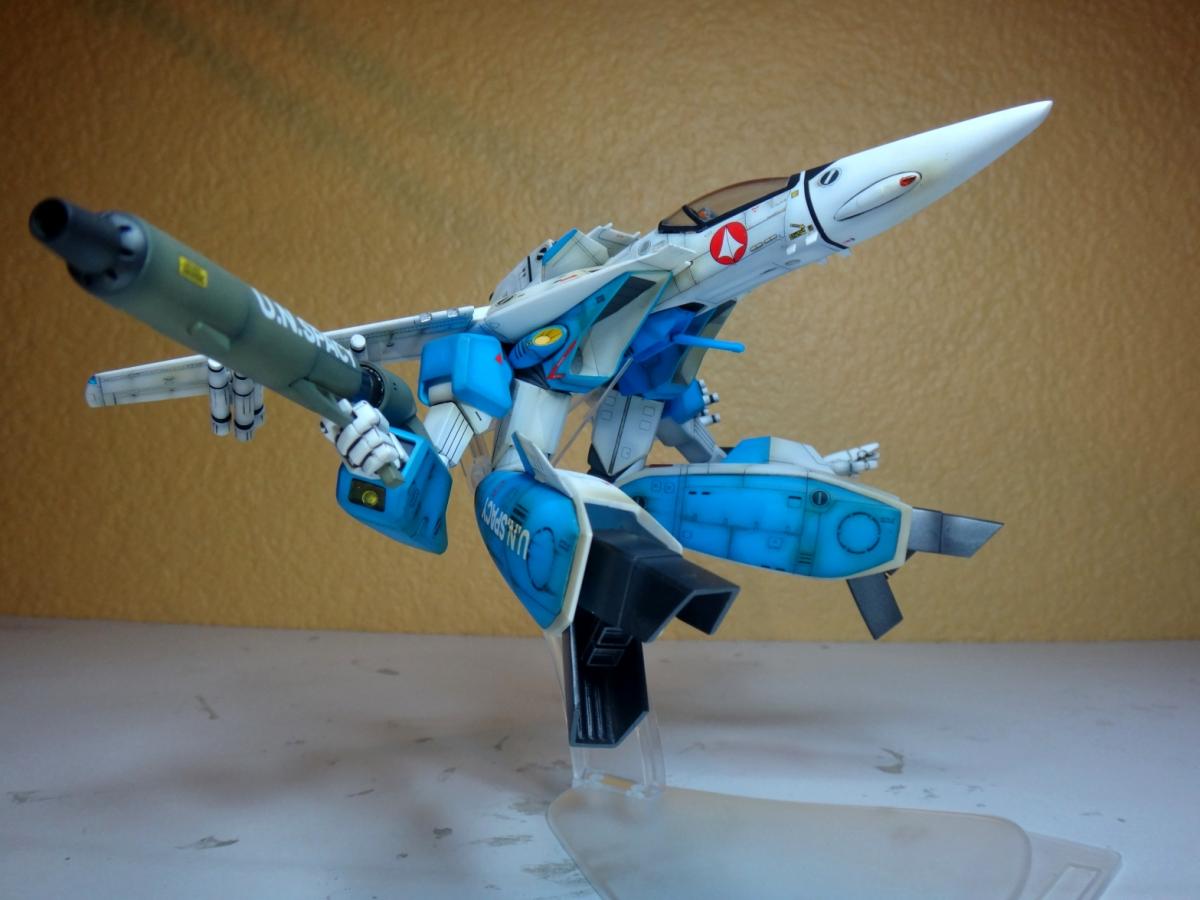
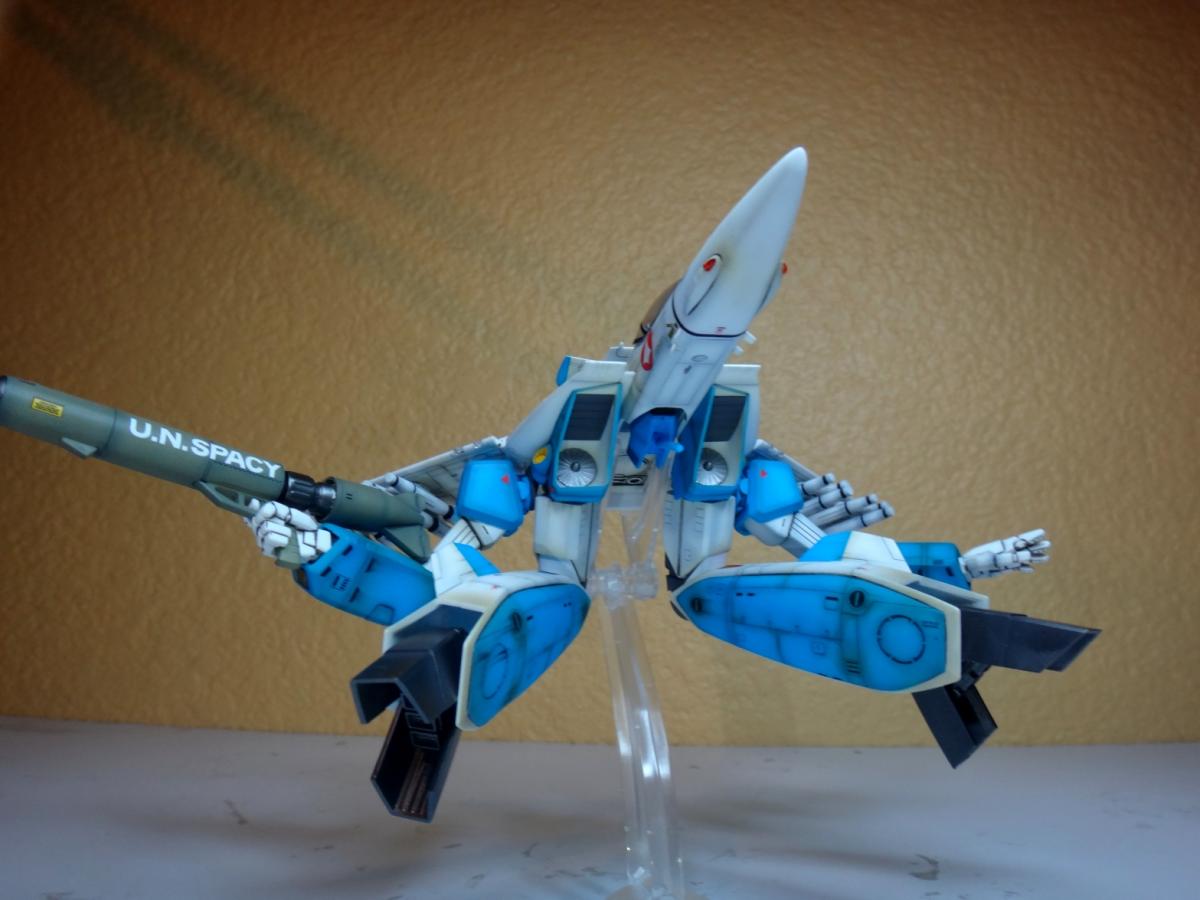
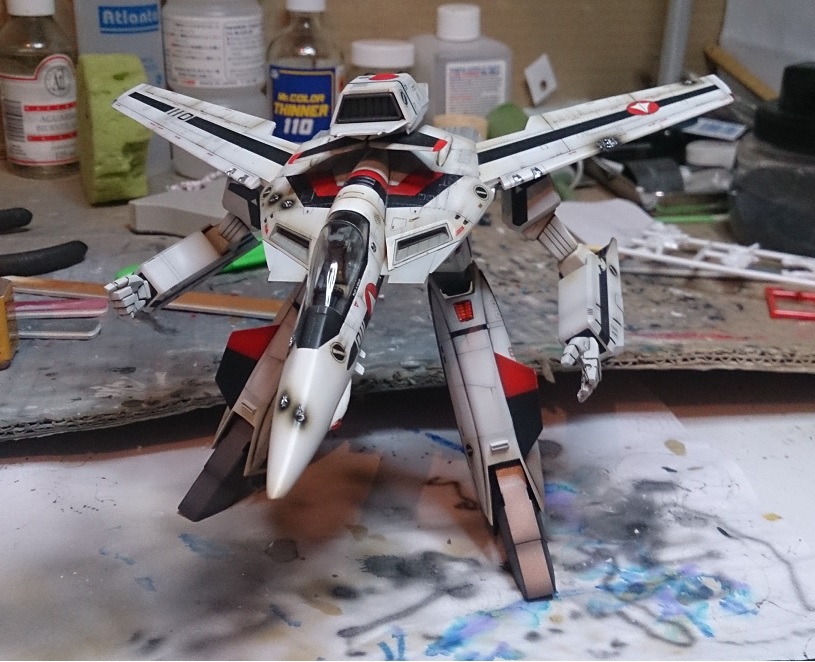
Here is a new finished kit from Hasegawa, also with scratch detailed cockpit (added buttons and the modified canopy that can be displayed opened, closed or without it. I already posted my Max VF-1A gerwalk wich you can see in this forum.
No more words, let`s see the picutres, please let me know what you think.
I really hope you like it.


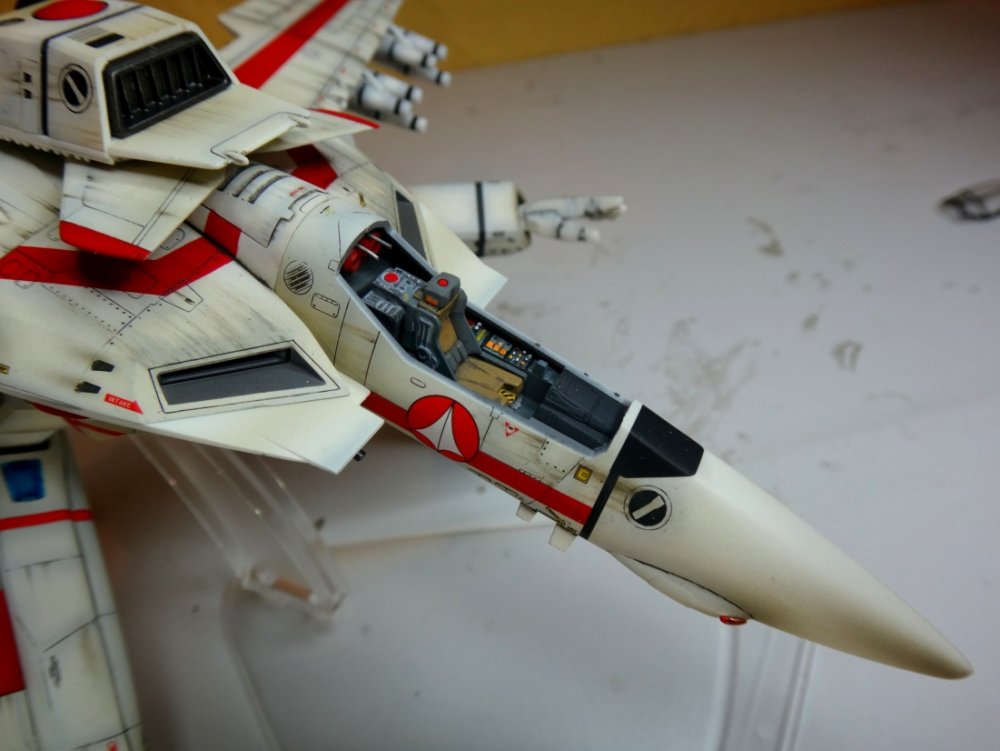


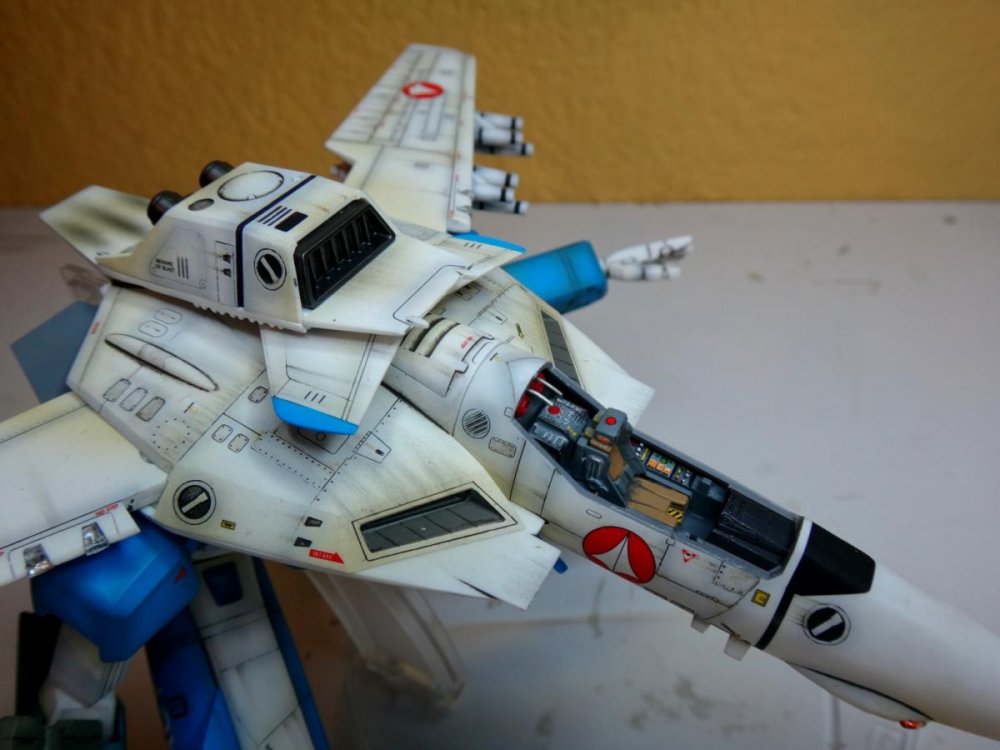
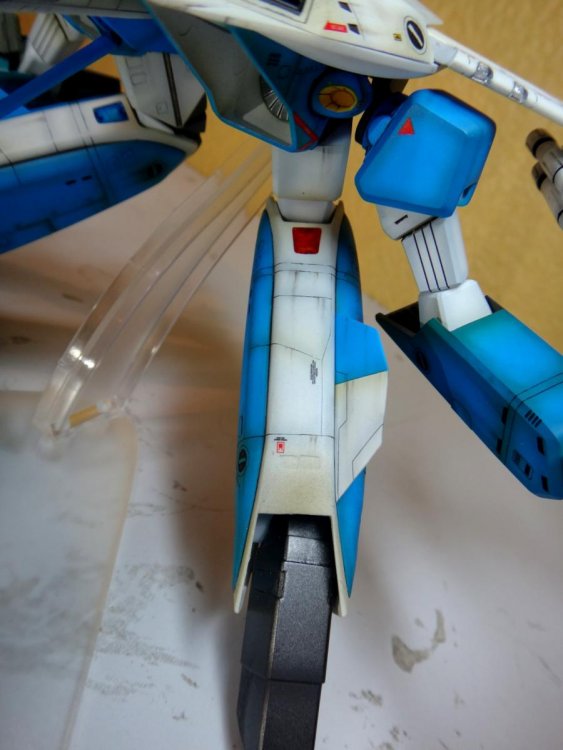
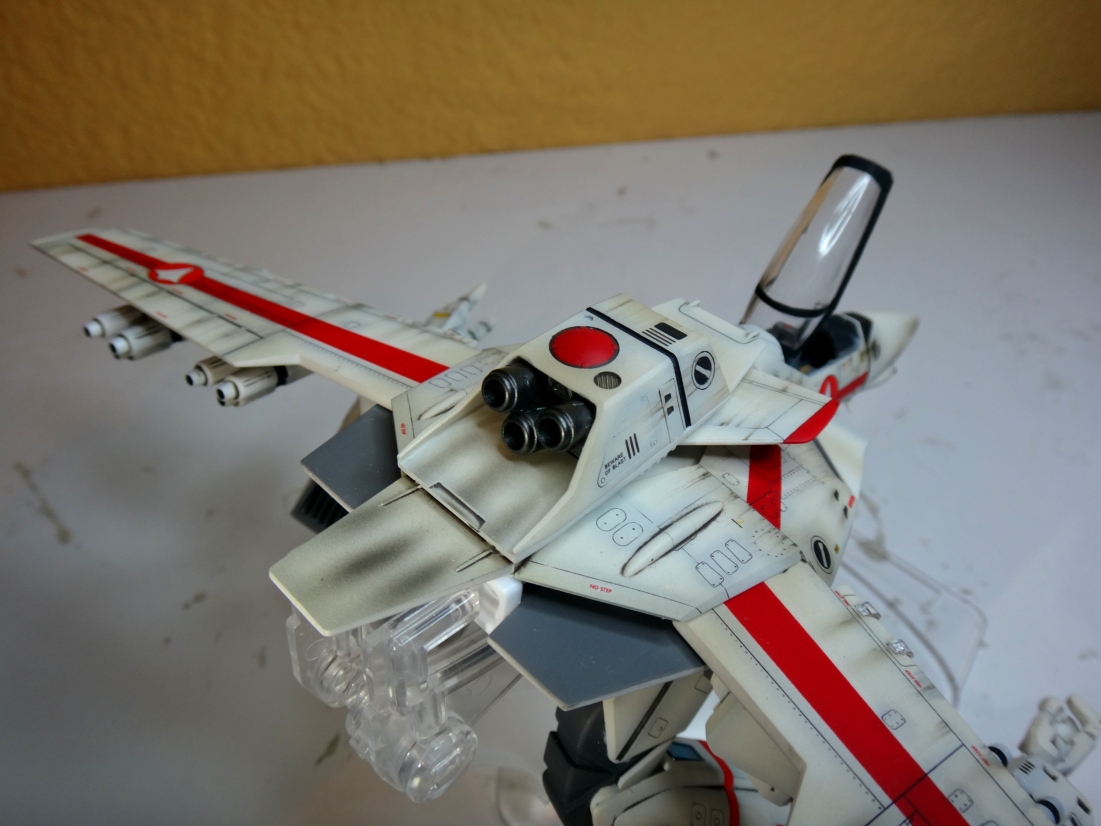
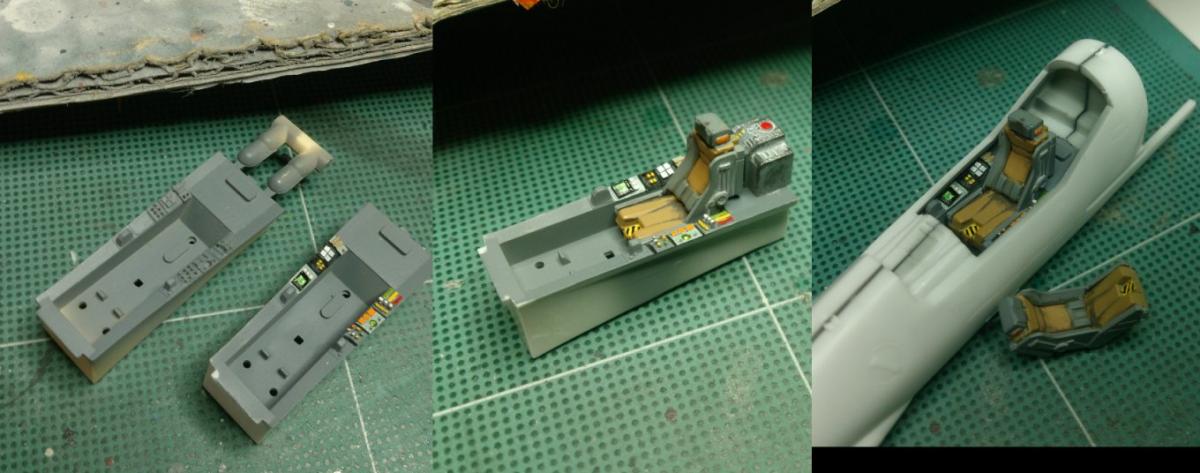
And this is the detail of the scratch cockpit

-
How exactly did you do the cockpit armrest buttons? I know that's the TV version, but Hasegawa still has the DYRL cockpit for that, so they're a nice addition I'll have to try.
Thank you all for your comments.
Scratch buttons on the armrest were done by cutting square and rectangular pieces of a very thin styrene sheet from evergreen, round buttons were done by heating the sprues and stretching them to make thin stripes of styrene, then I drill small holes of .1mm - .3mm on the armrest to insert the sprues with a small drop of cement on the tip, let it dry and with your hobby nipper you cut the excess to leave a small button rising over over the cockpit armrest.
-
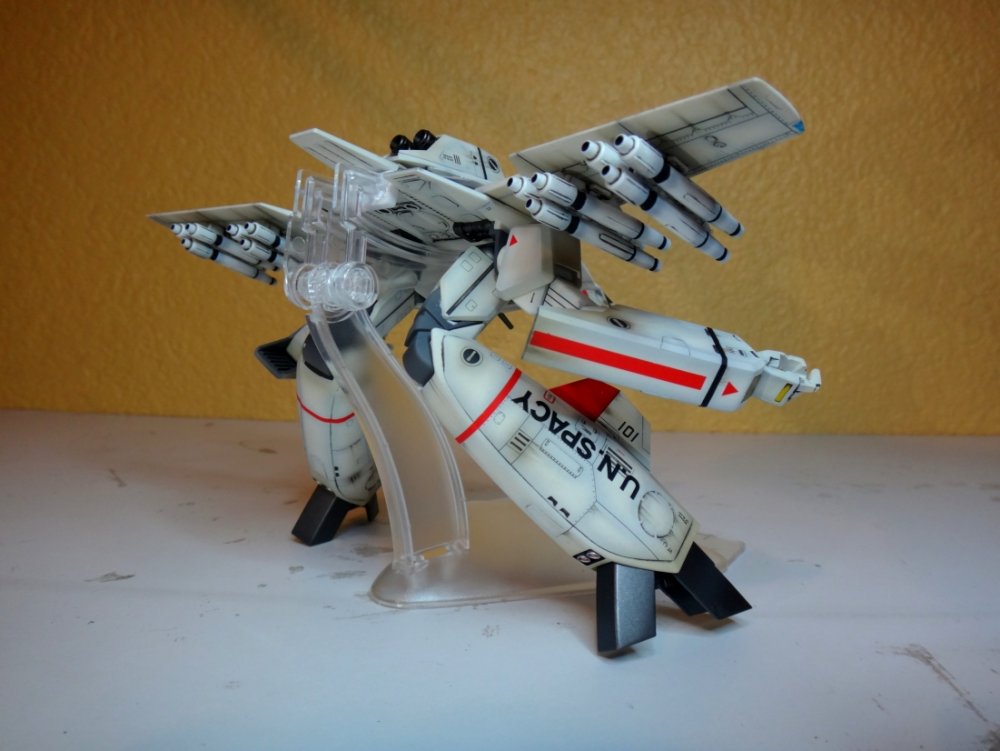
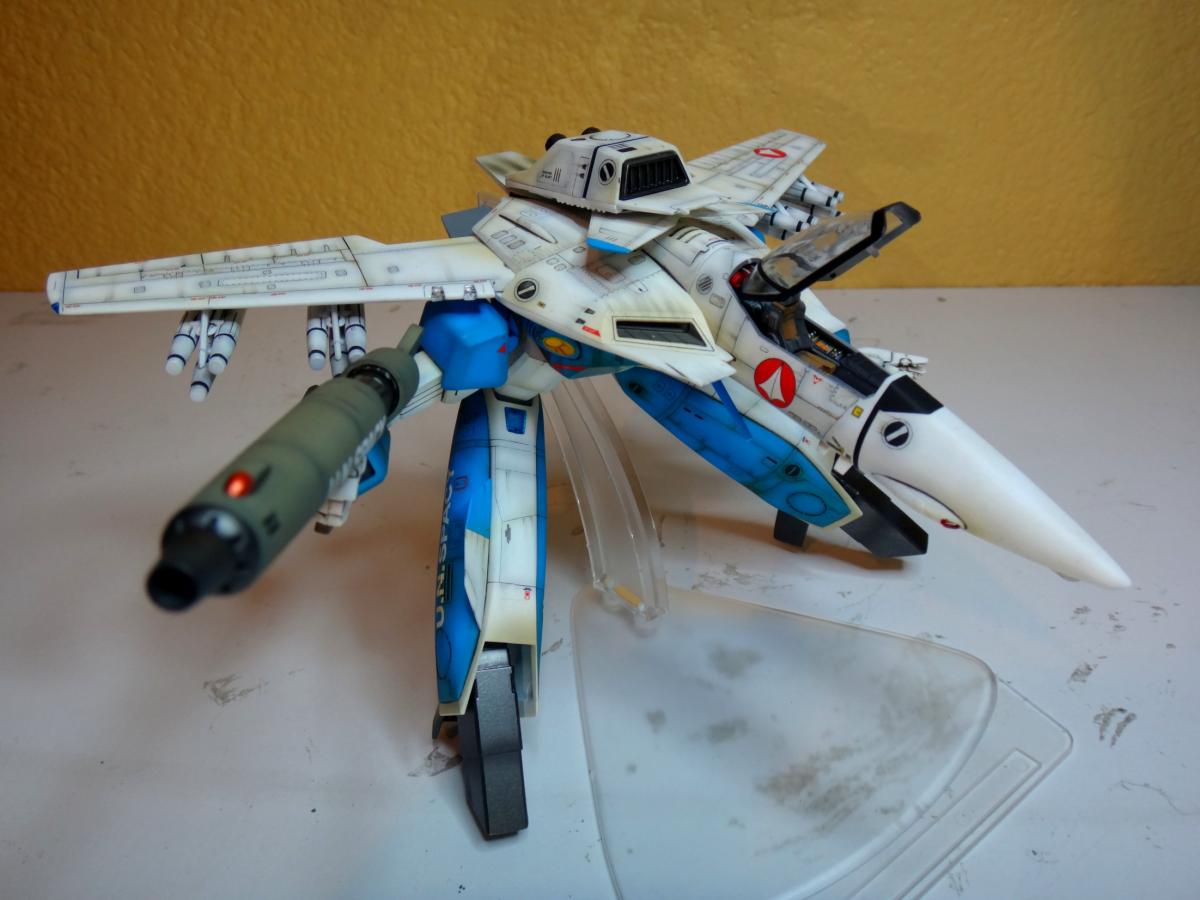
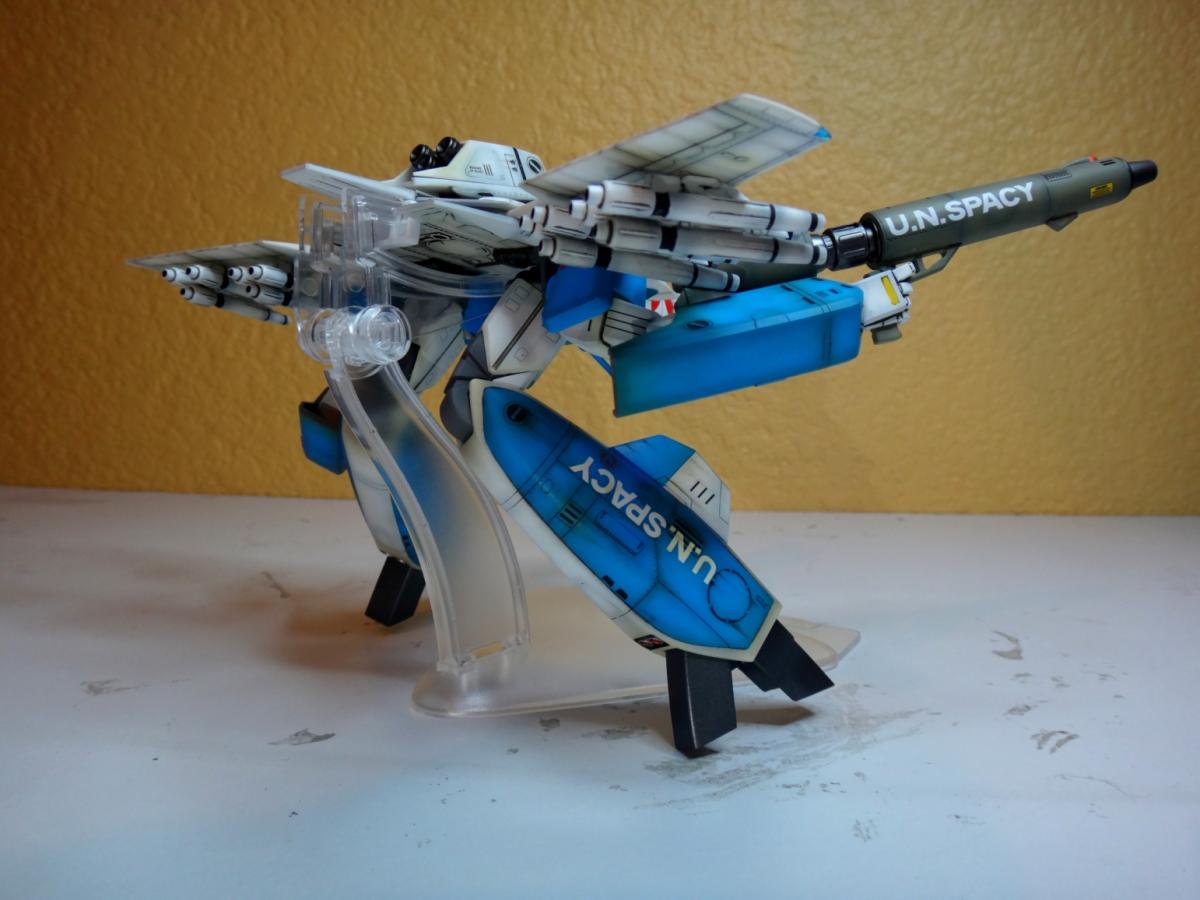
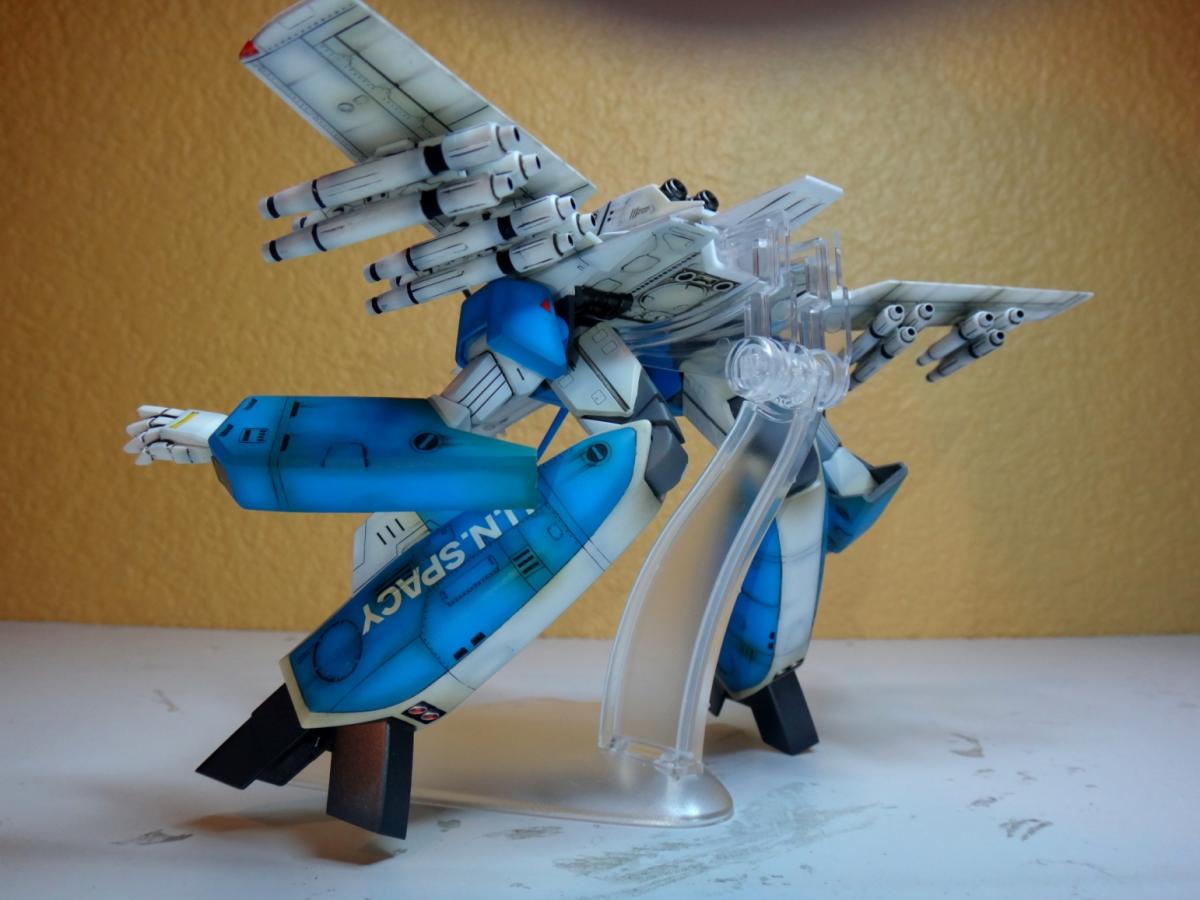
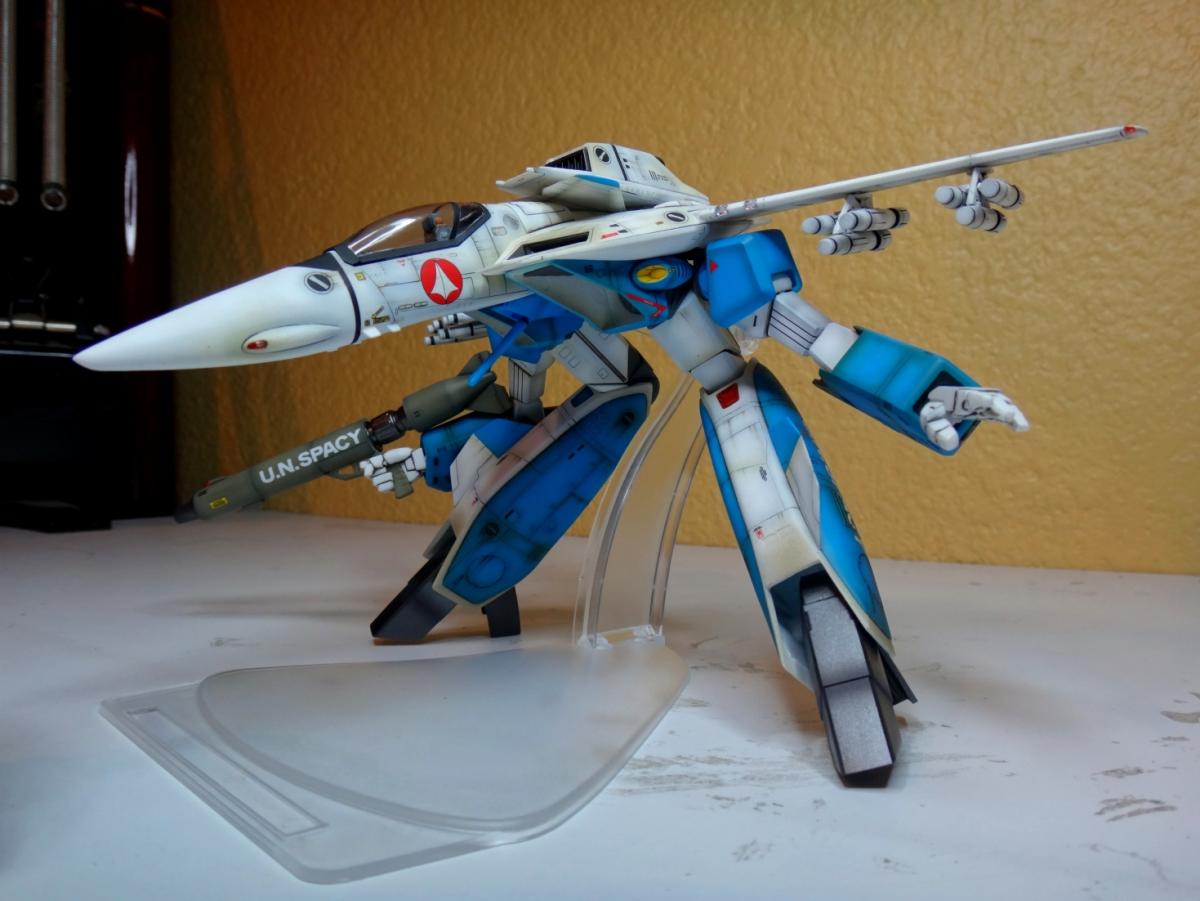
My dear comrades,
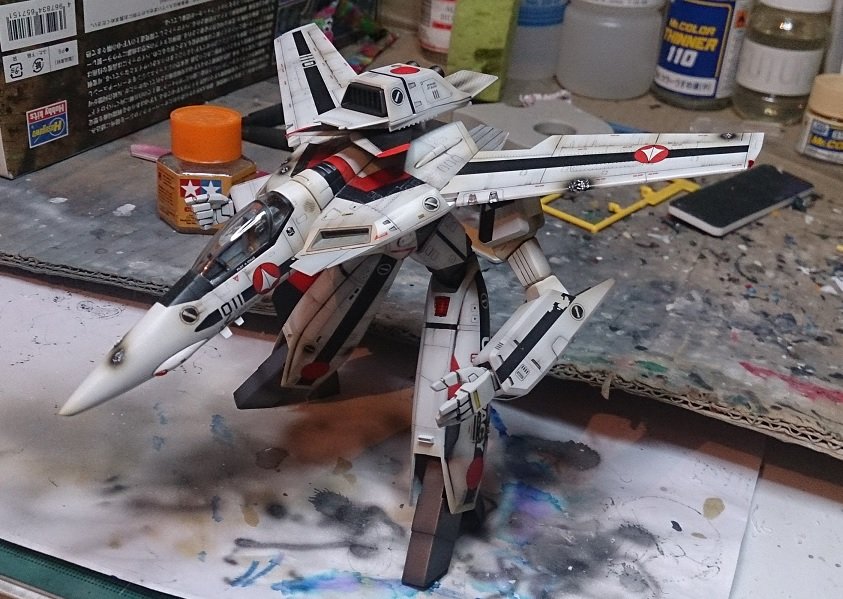
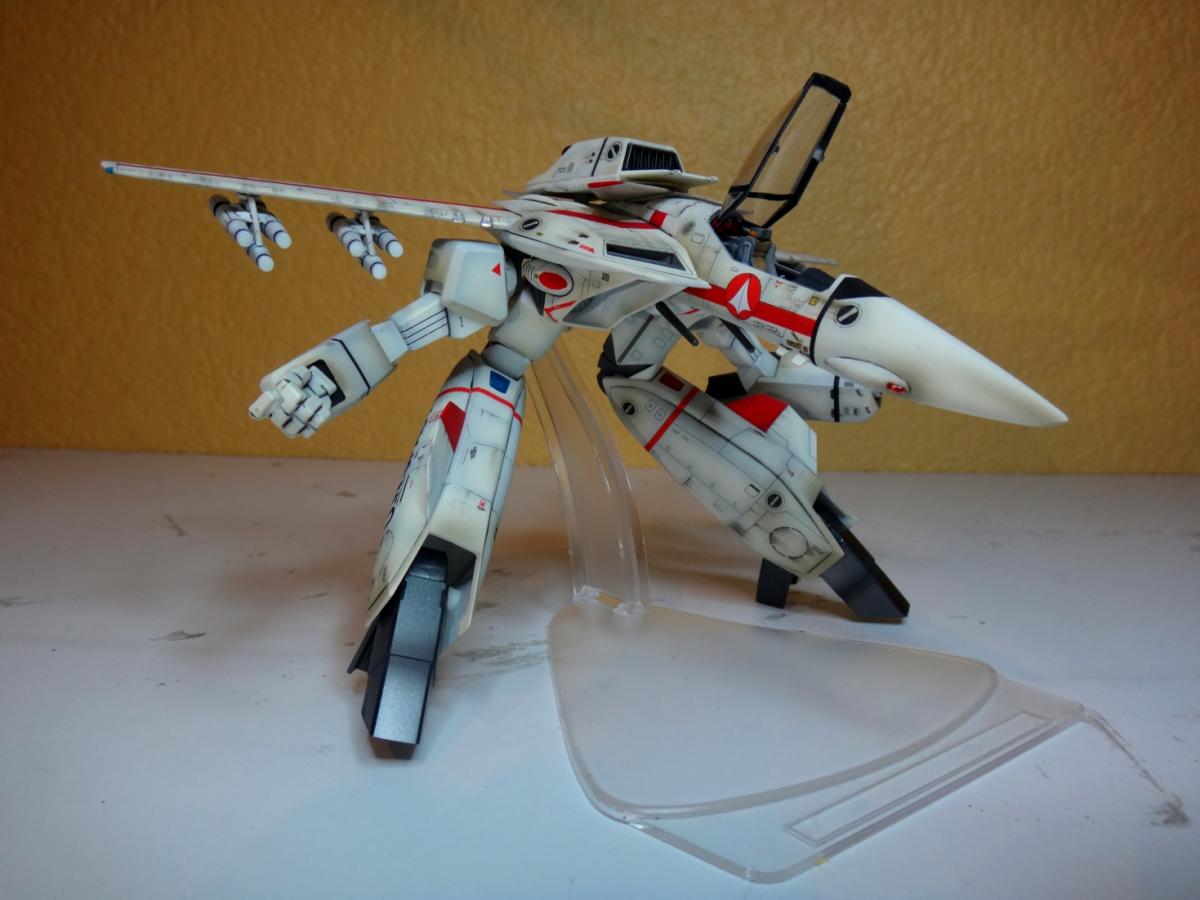
Long time since my last topic, I had to take a rest after 6 months of hard work on my VF-0S reactive armored with battle damage and so much detail on the armour, many months after that, in December, I had time to work on this beautiful hobby again.
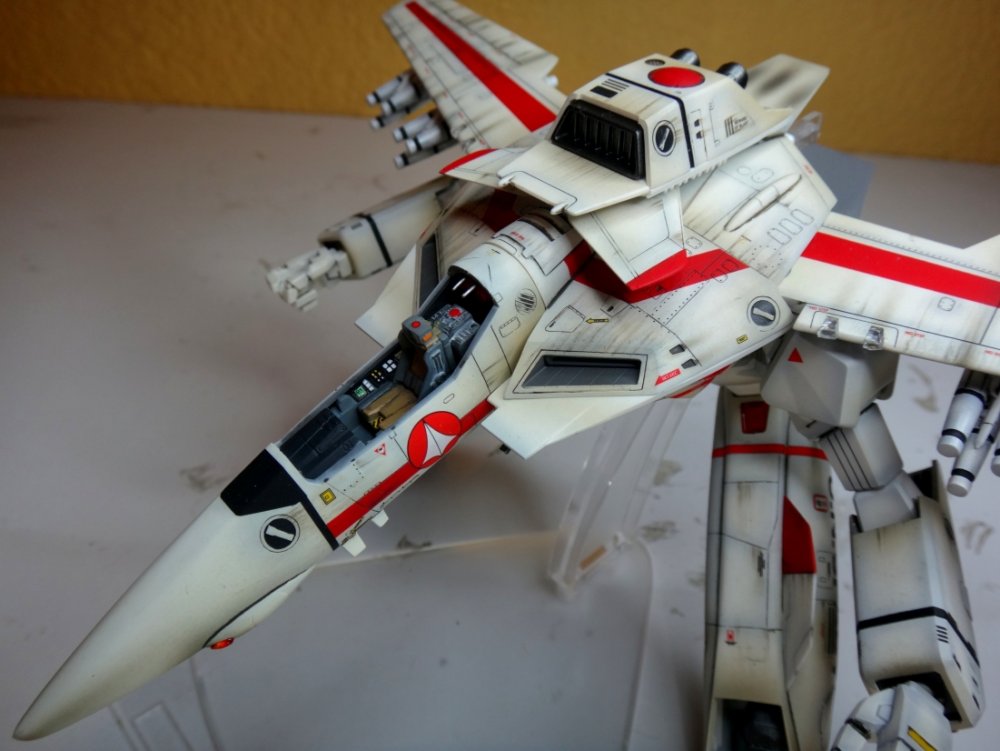
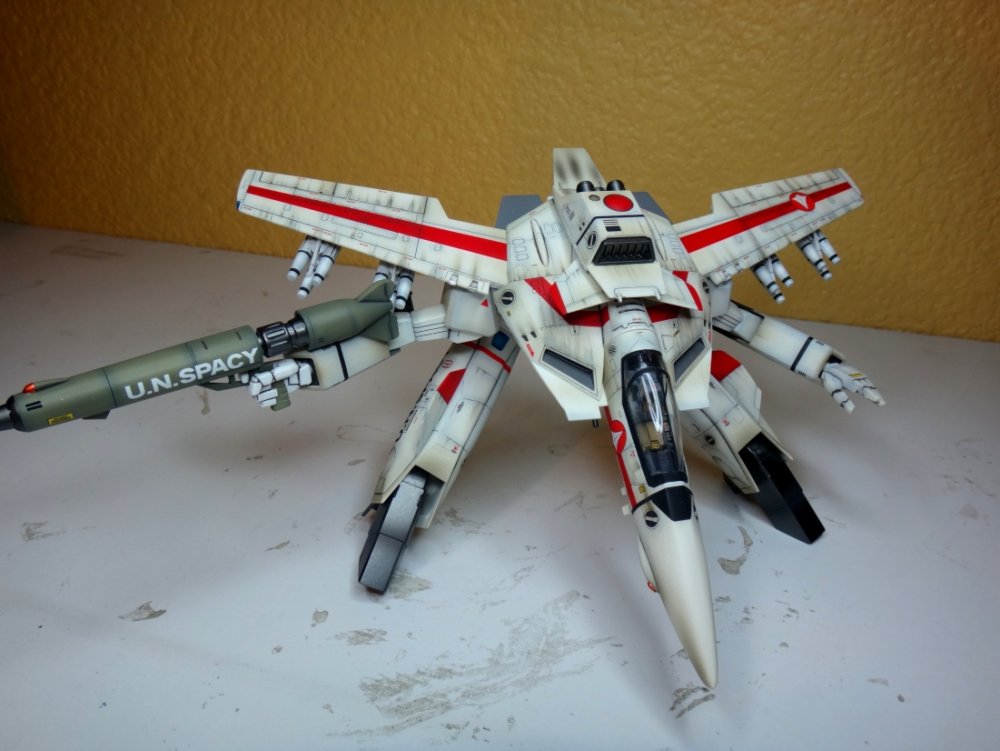
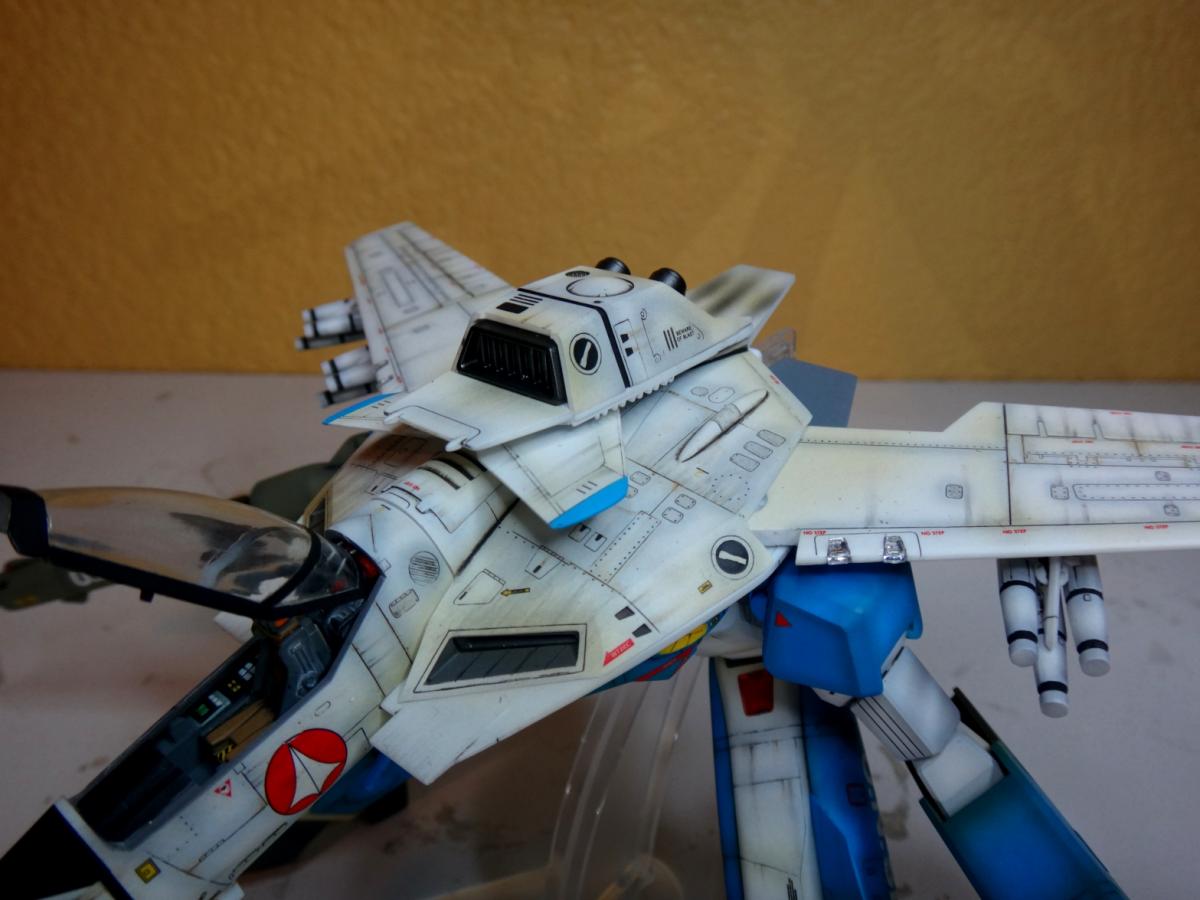
I present to you the first, a VF-1A Gerwalk from hasegawa (I love Hasegawa for making this gerwalk series), wich have the particularity that I scratch build the buttons and screens on the cockpit with styrene, and the canopy was built to be removable and can be displayed closed, opened or without it. I must say I love how this came out, and I love the fact that you can display it with the canopy in different “configurations”, I added some round minus molds on the back of the seat (because I like how they look), and add some styrene on the inside of the elbow to cover the seam of the arms.
My impression on the gerwalk kit is, it is a very nice and very good looking kit that combines battroid and fighter parts, the only complaint I have after I built 3 of this kits, is that the joints on the knees and shoulders are very loose, it can barely stand in a decent position by itself, the display stand included in the kit, more than a nice touch by Hasegawa, was a necessary add on, if the weapon is heavy for the right arm, and the knee joints are weak to hold right the gerwalk position, imagine how the weight of the super/strike packs in the back pack and the arms will affect the stability of the new gerwalk kits without the display stand.
After this thoughts -that no one cares about-, here is my baby, wich I might sell in the near future.
Any comments positive or negative are welcome.
Canopy Opened


Canopy removed and detail of scratch build interior


Canopy closed


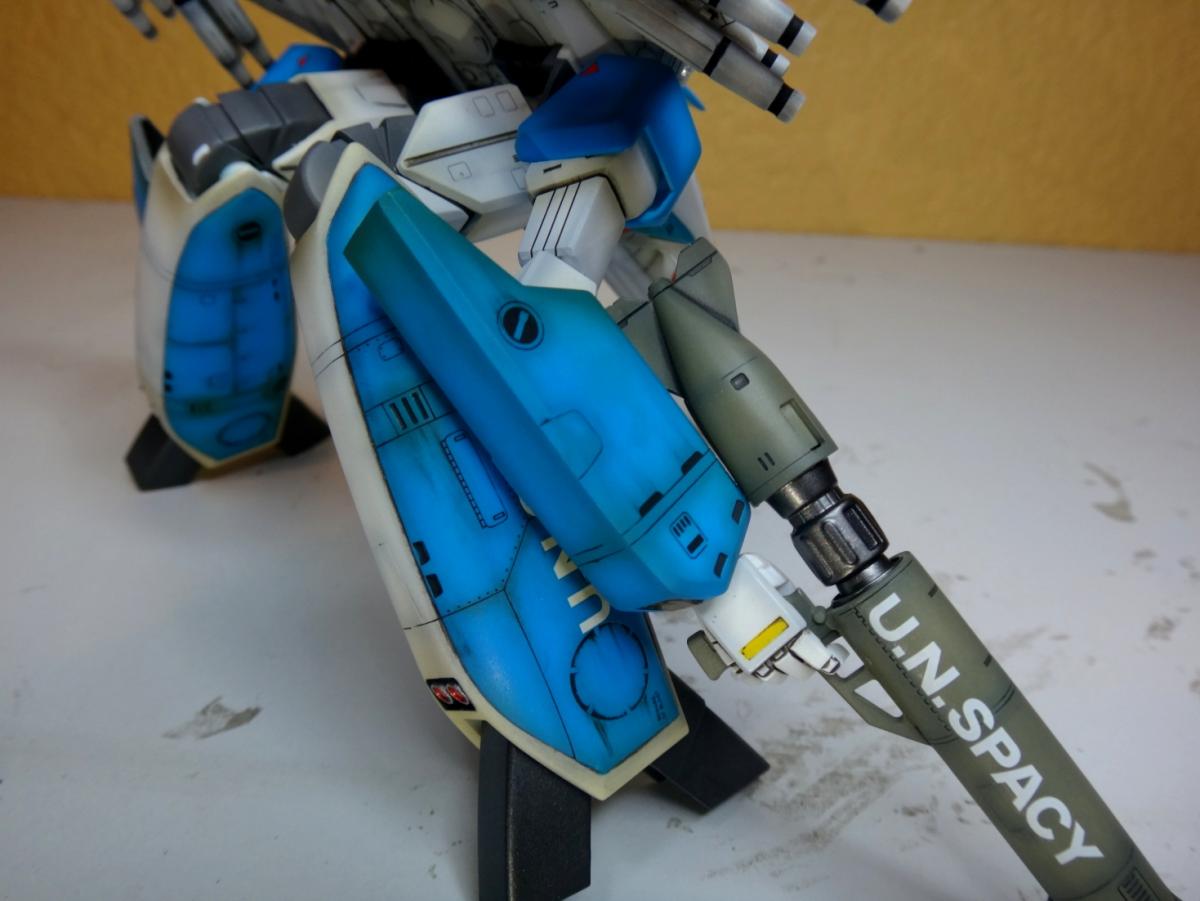
Close ups and details


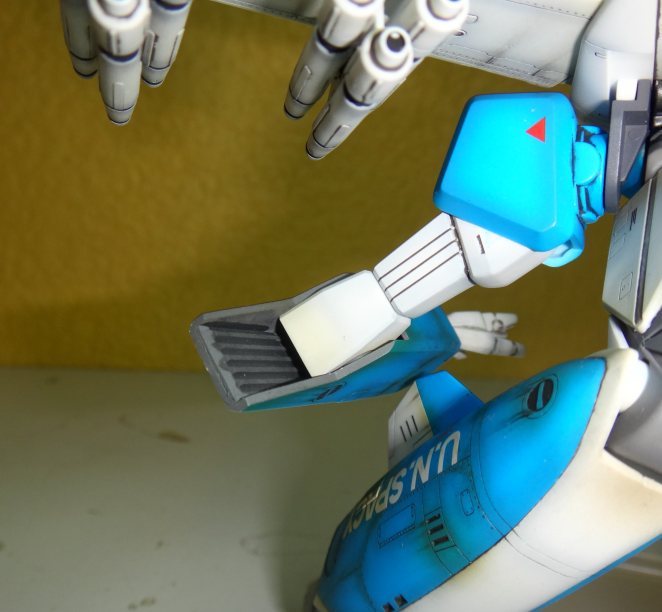
Detail of Elbow and scratch build canopy (process)


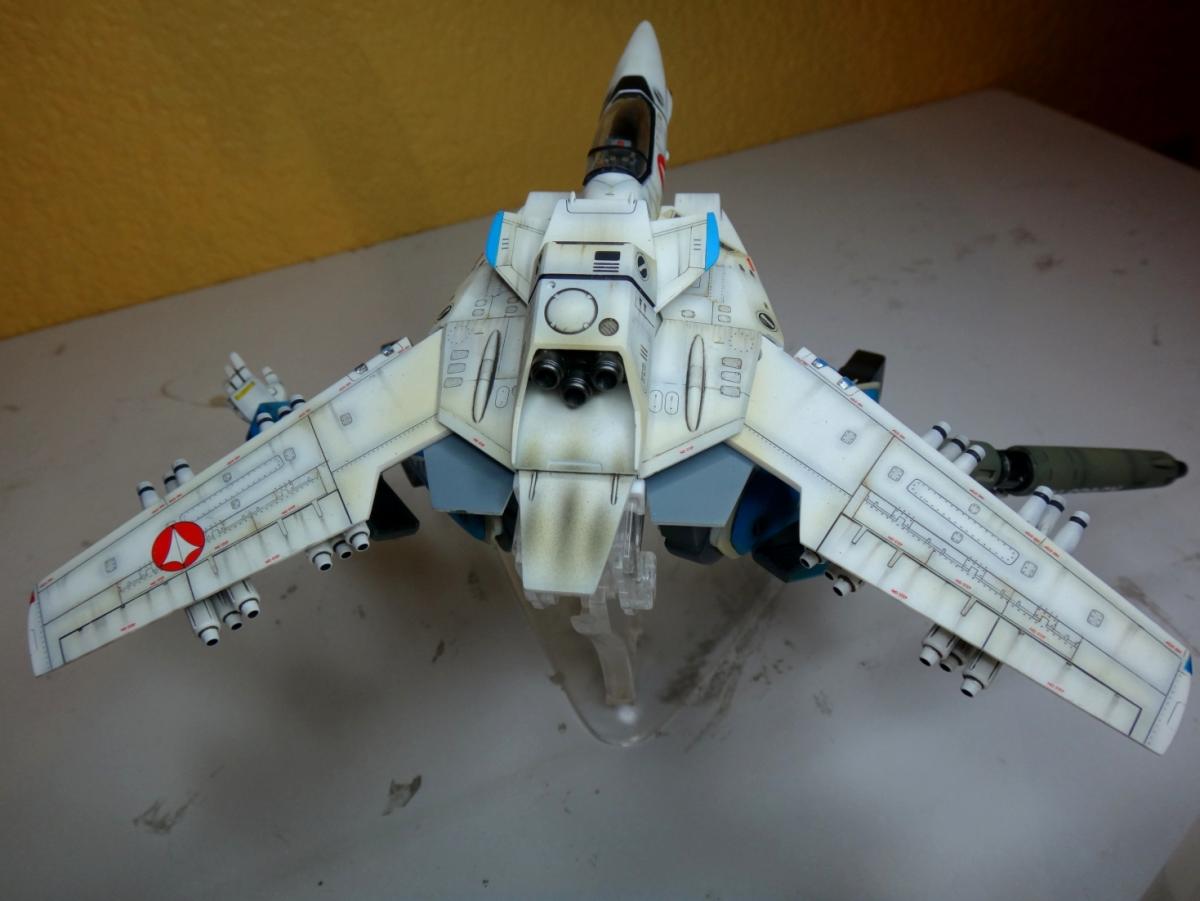
And the best for the end...that ass!

-
And VF-1J Super Gerwalk (Hikaru Hichijo) will be a different kit?
-
Hi my friends,
I want to ask for your help. Some time ago I found a web page that sells different decals for scale models, that site was selling waterslide decals of minmay guard moon act and paris act in 1/72, 1/48 and 1/60 scales, also offered zentraedi waterslide decals for Glaug and Regult ( for resin kits I guess), of course all this were reprint, not original, but I can`t find that site now, I wish to know if you can help me in this one, does anyone know a web page that sells those decals?
Thank you very much.
-
Freaking awesome!!
-
Whoahhh!! And the good thing is they are 2 figures, I will build them as soon as they arrive
-
Hey, I´m sorry for the off topic, but...how´s going your Inbit 1/10 - 1/12 sculpting? I am interested in one of them.
Thank you.
-
Jesus Chris!!
That is the most impressive weathering on a Valkyrie I have ever seen....
Very inspiring, I would pay to that guy for teach me how to do that weathering.
Thank you for sharing your finding
-
Another Legioss?
I vote for the reissue of Captain´s regult scout, regult pod and Officer´s Zentraedi battle Pod kits.
Or even a bigger Pink Space Crab, as the last one was pretty small.
-
So, how is this project going? Any updates? I am very interested.
-
I can´t wait to have it, build it as soon as it arrives, and compare it with my own hasegawa gerwalk:

-
Payment Sent, can`t wait to see progress pics.
-
YES!!! Finally, the Invid I was waiting for.
I am in for 1 set

-
Impressive!!
I join to the petition of compressed full size images Please.
-
What? No more Invid mechas?
-
Very nice work, clean and very well painted. I have this on my shelf waiting to be painted, but sincerly, those decals..... I am affraid of them, also the colored styrene sucks, I don`t know how to start painting it.
Please share with us, how did you primed it? And what color you used for preshading? I saw a thread where they primed this bird in white, then used clear blue for preshading (yes, clear blue), then some light coats of the final paint.
-
Thank you for all your kind comments, the hurt in my neck, all my effort and all that time spent in my room making this figure worth just by your comments.
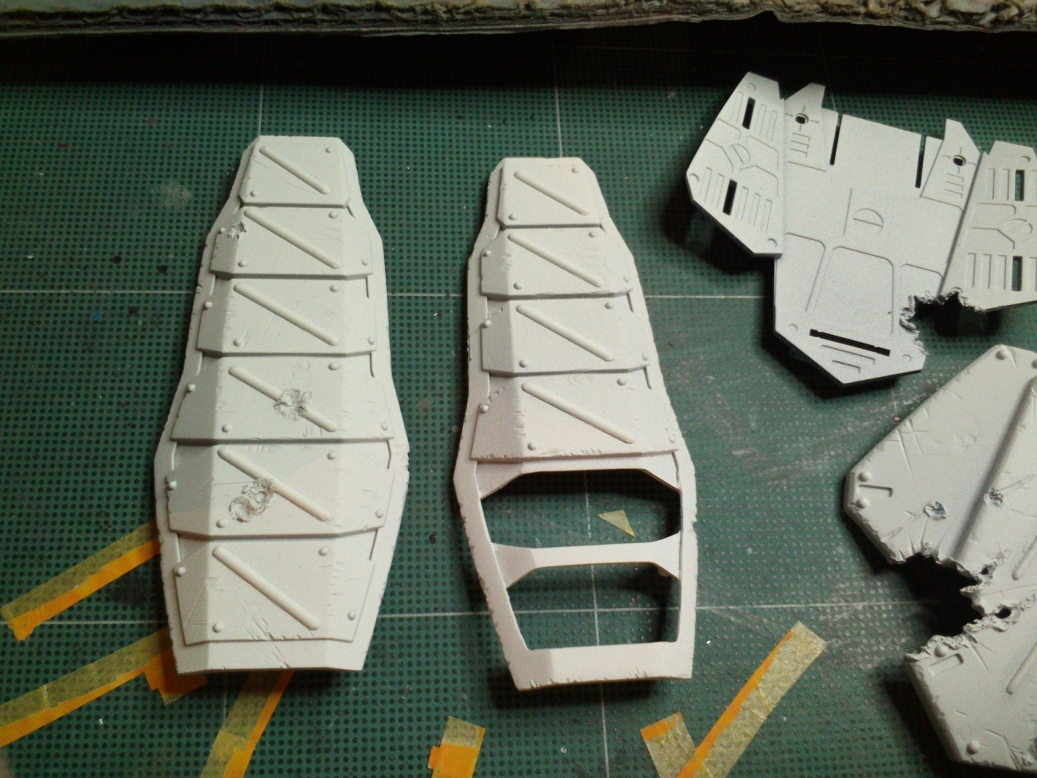
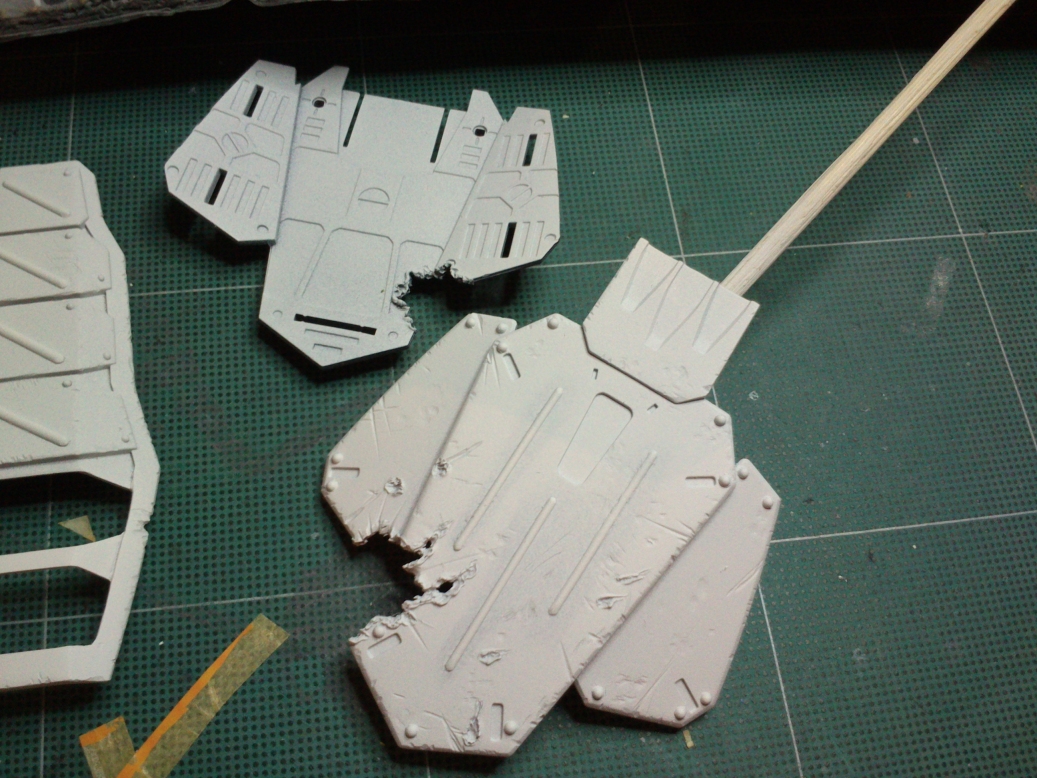
But there is more, the VF-0 battroid inside the armour has it`s details as well, but I don`t know if I should add those pictures here or open a new thread... I think a new one would be better.
I let you this images of the details of the armour before priming.


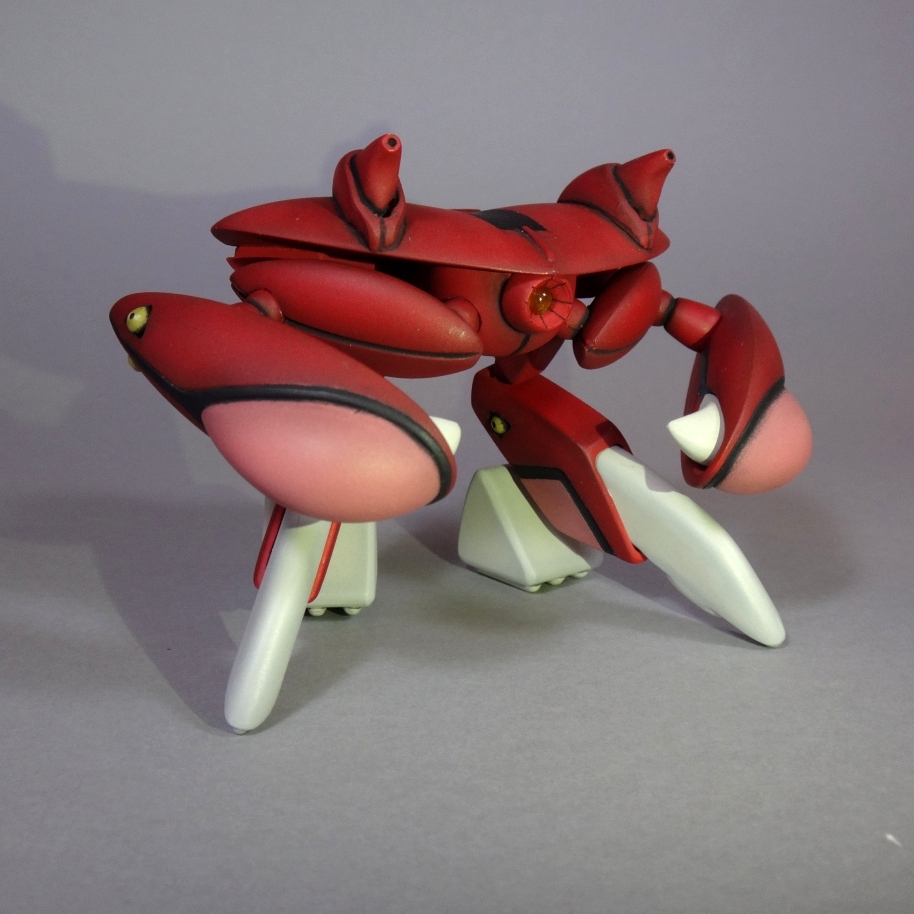
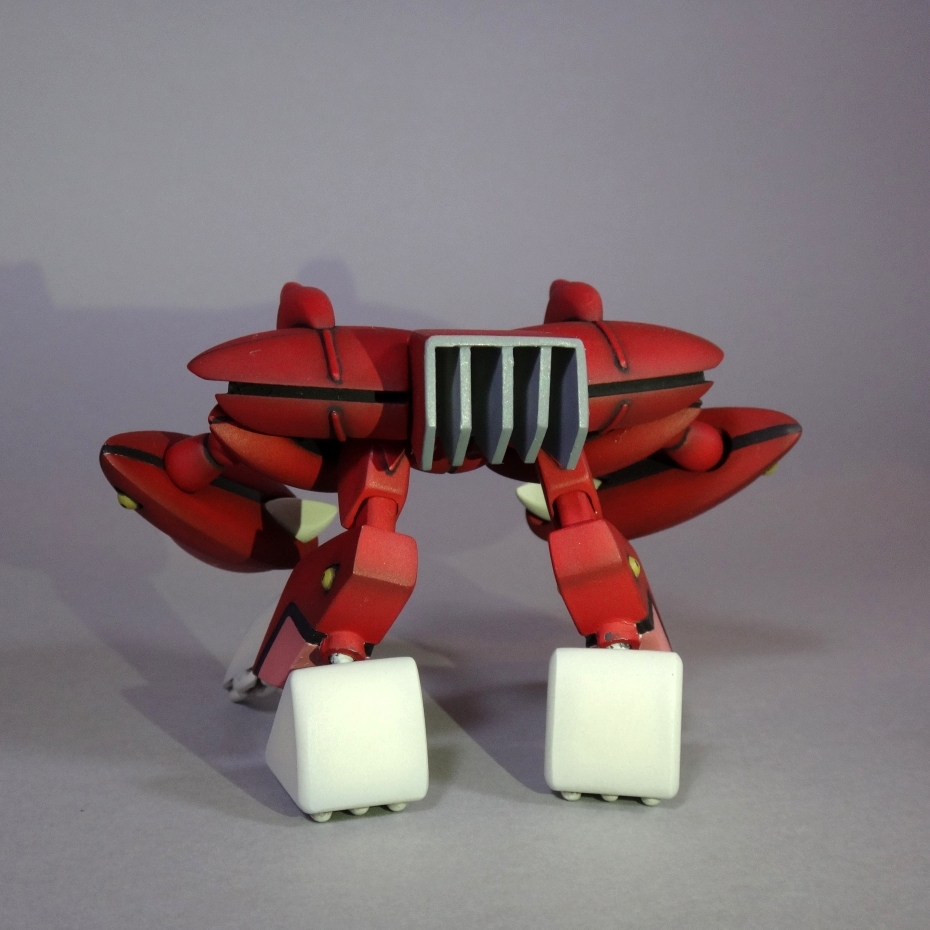


Inbit Baby Crab with color
in Anime or Science Fiction
Posted
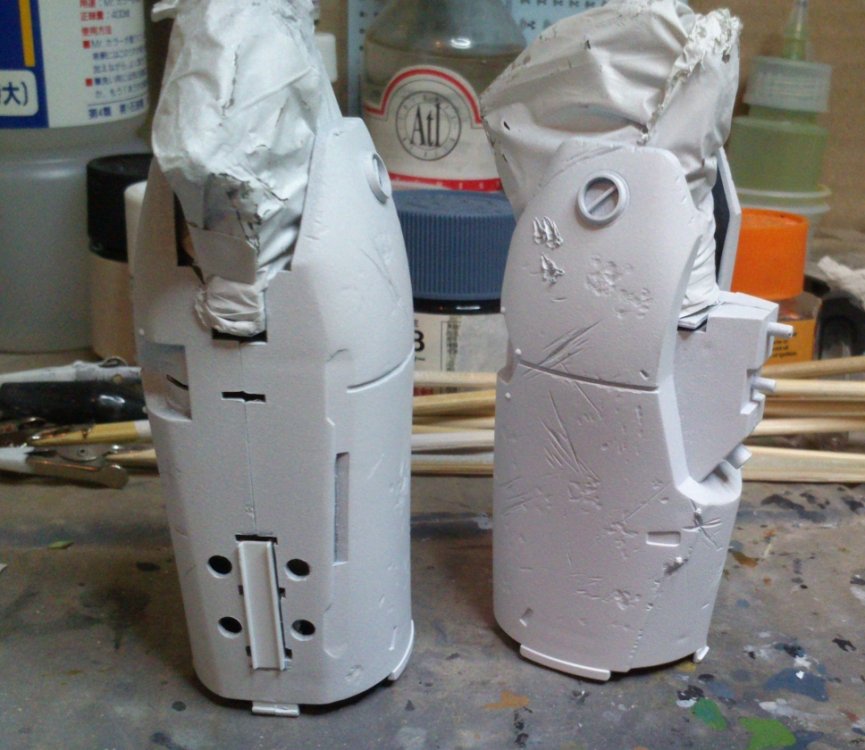
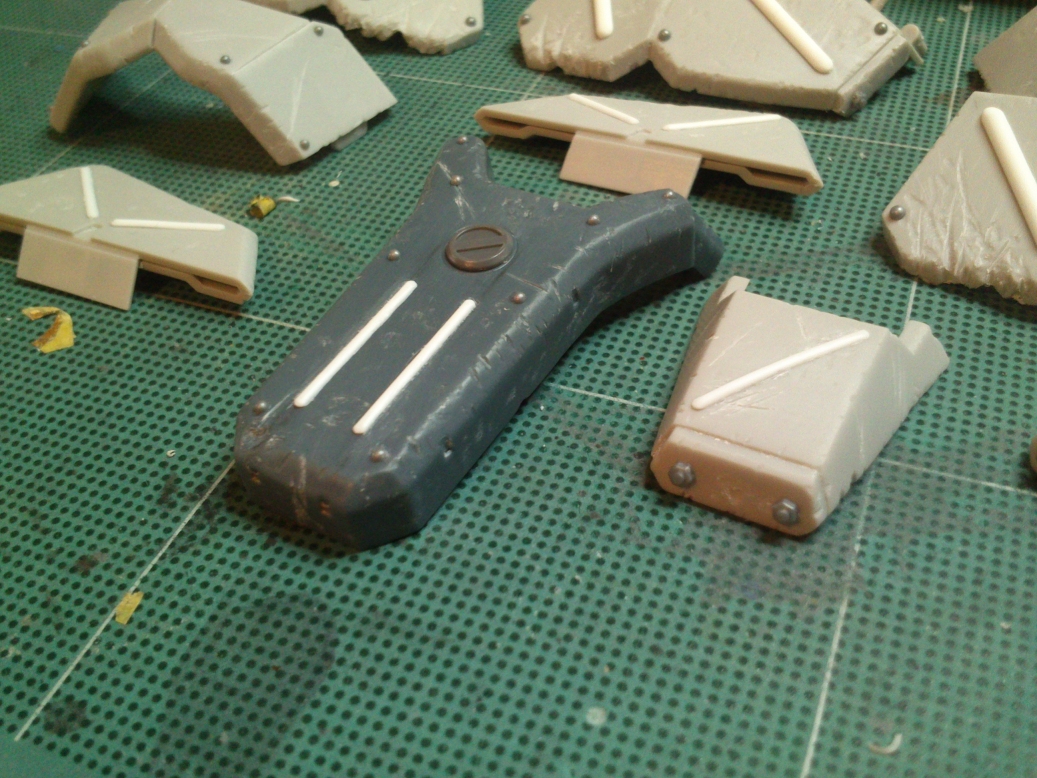
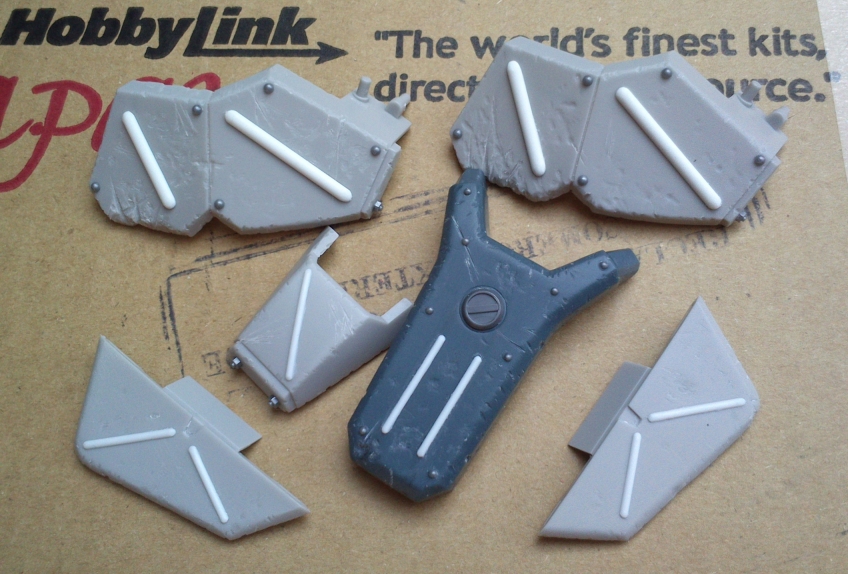
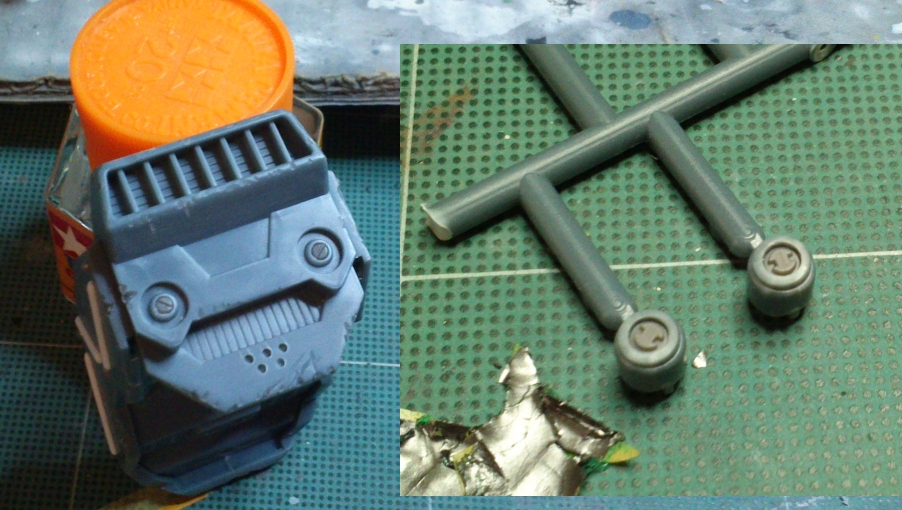
I hope this helps:
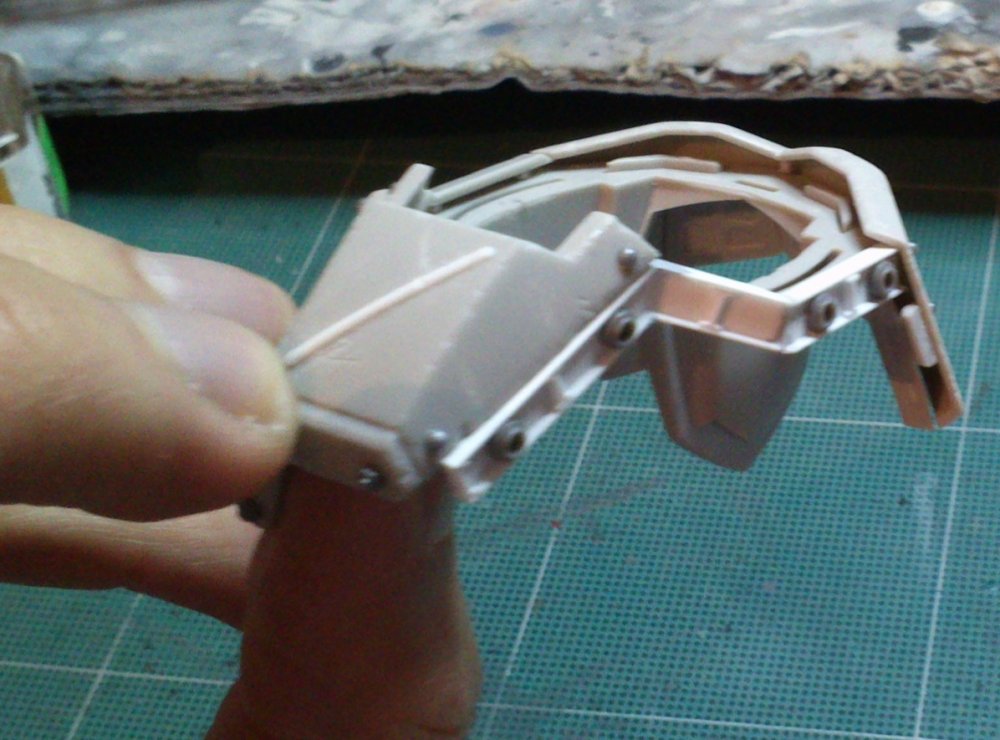
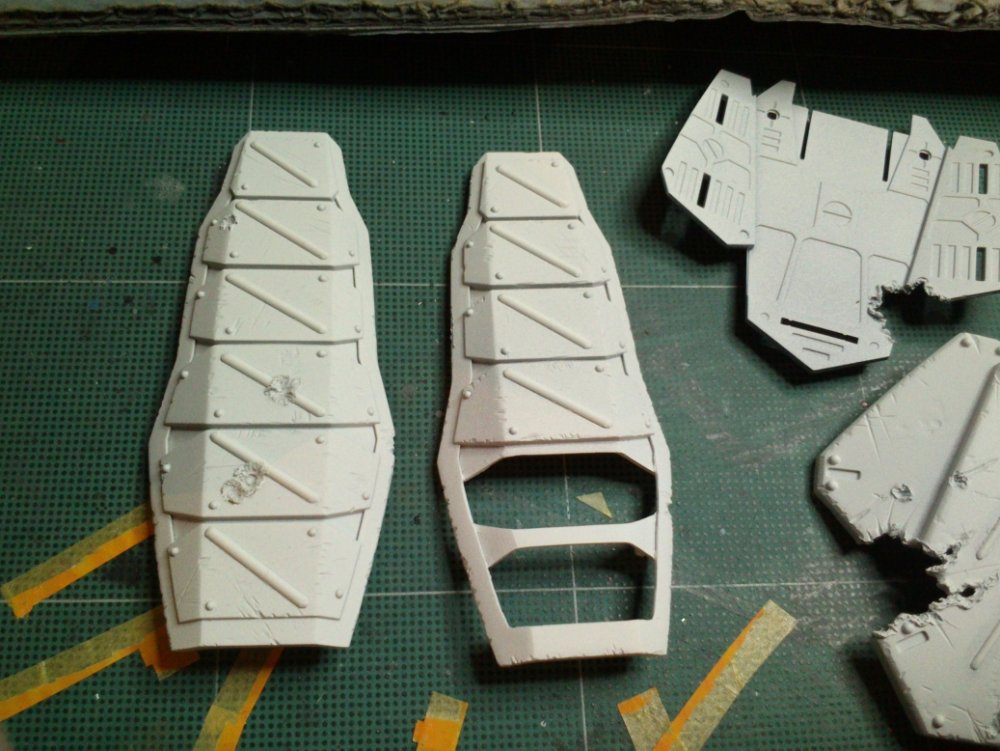
You can see a comparison between original parts vs parts that were modified or prepared for pinning and ball joints. Basically I cut the original resin joints, sanded the area, and used a dremel tool and a pin vise to fit the new ball joint system, I used cyanoacrylate to glue them in place, then I primed, masked and painted as usual.
For other parts, I just used brass beams and cyanoacrylate.