
Goodman Models
-
Posts
419 -
Joined
-
Last visited
Content Type
Profiles
Forums
Events
Gallery
Posts posted by Goodman Models
-
-
That’s too bad, Alan is a great guy and hope they land on their feet!
-
52 minutes ago, tekering said:
Thanks Tek! that made me chuckle 🤭
-
Thanks for asking Thom!
-
-
On 10/9/2025 at 12:17 PM, Thom said:
Indeed, very nice! How's this coming?
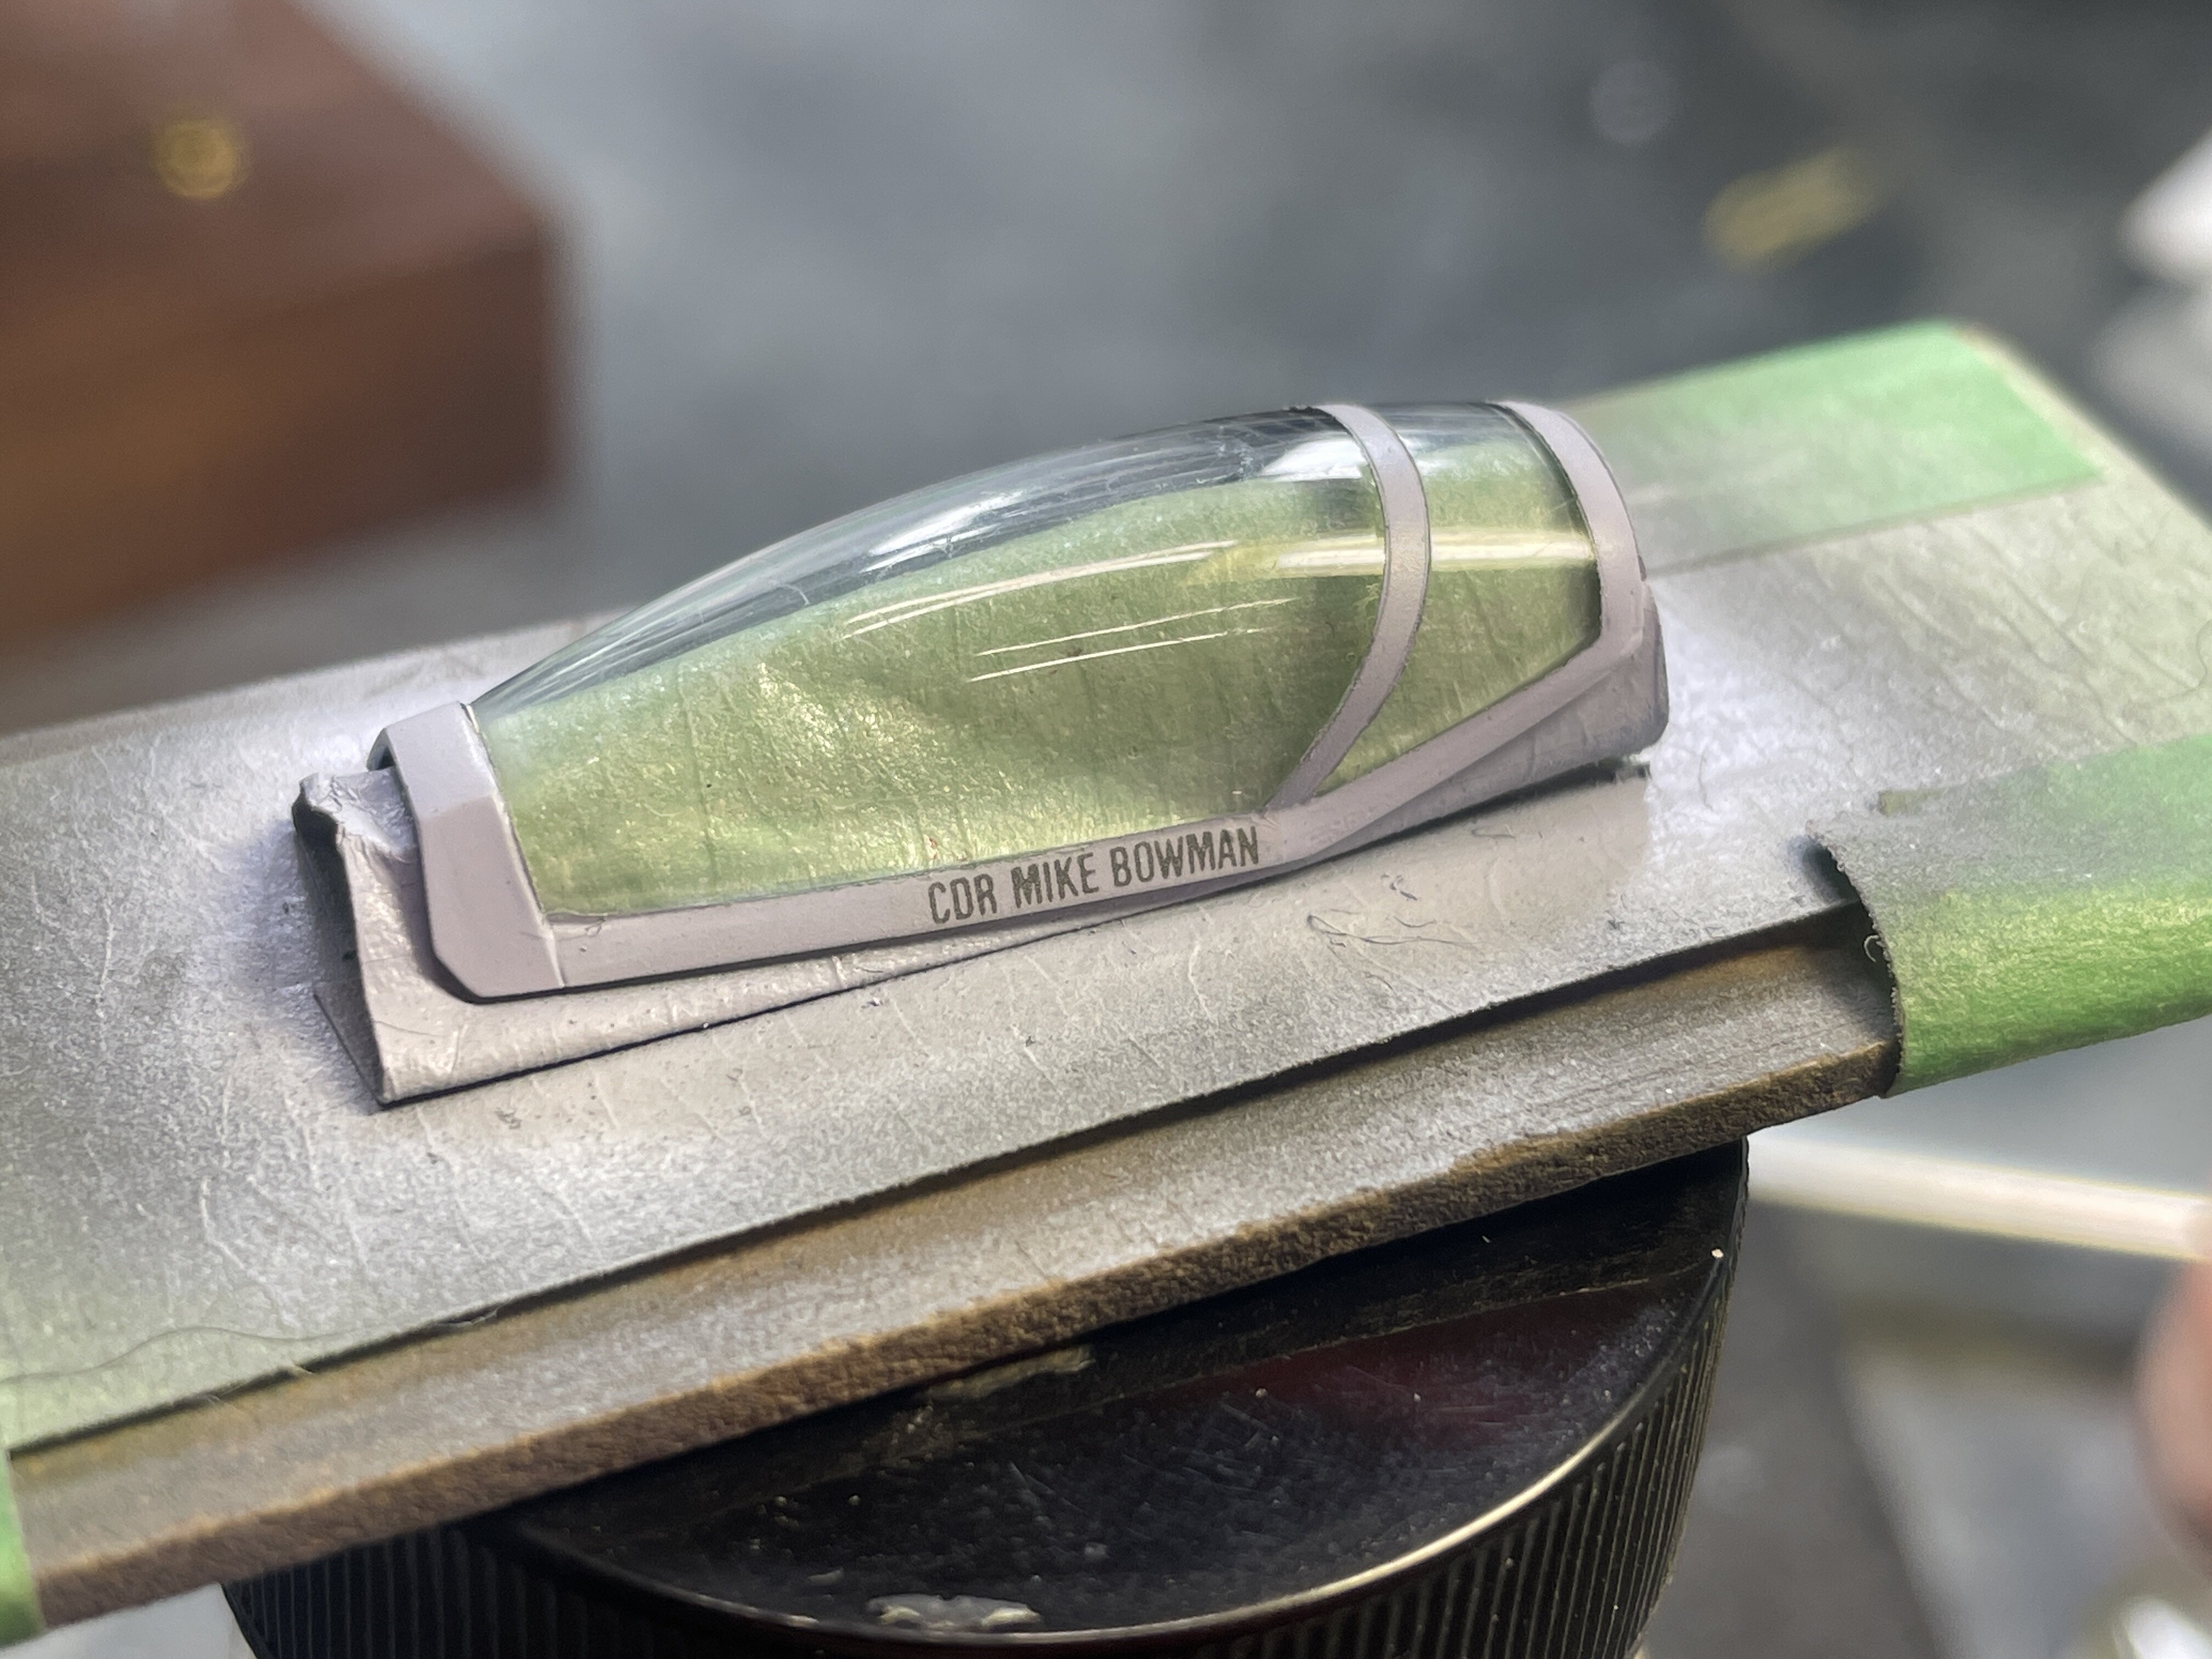
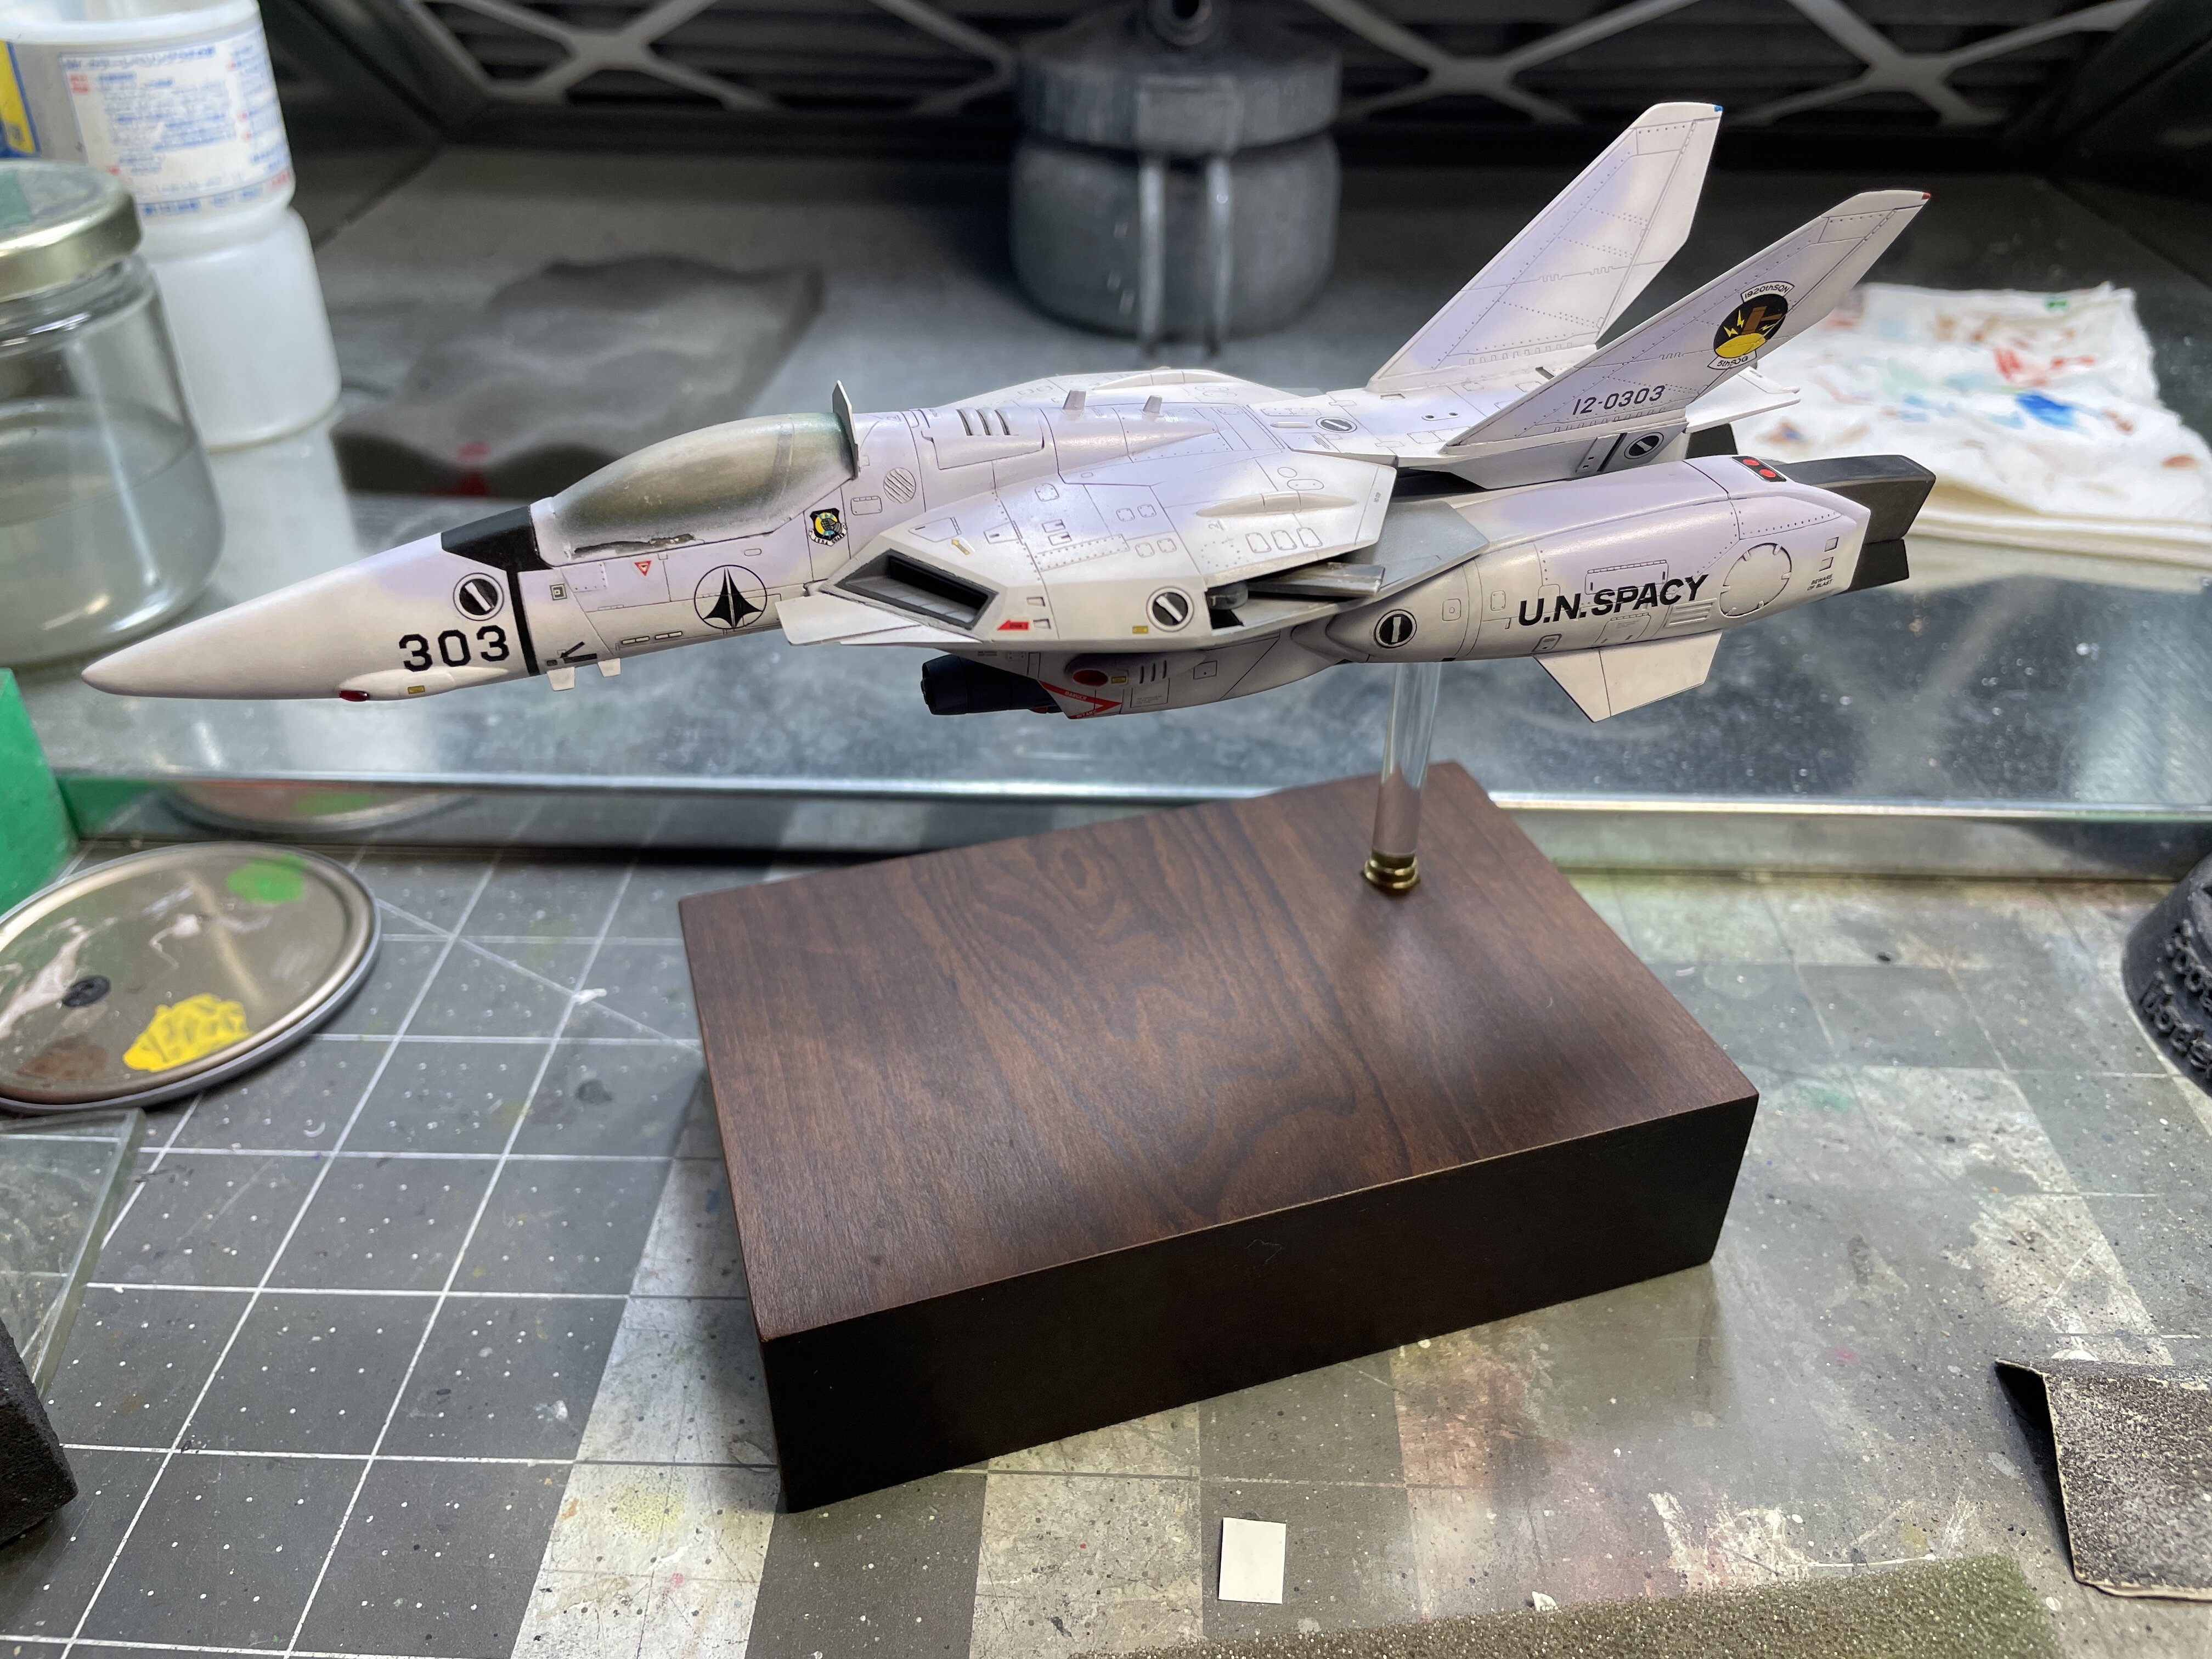
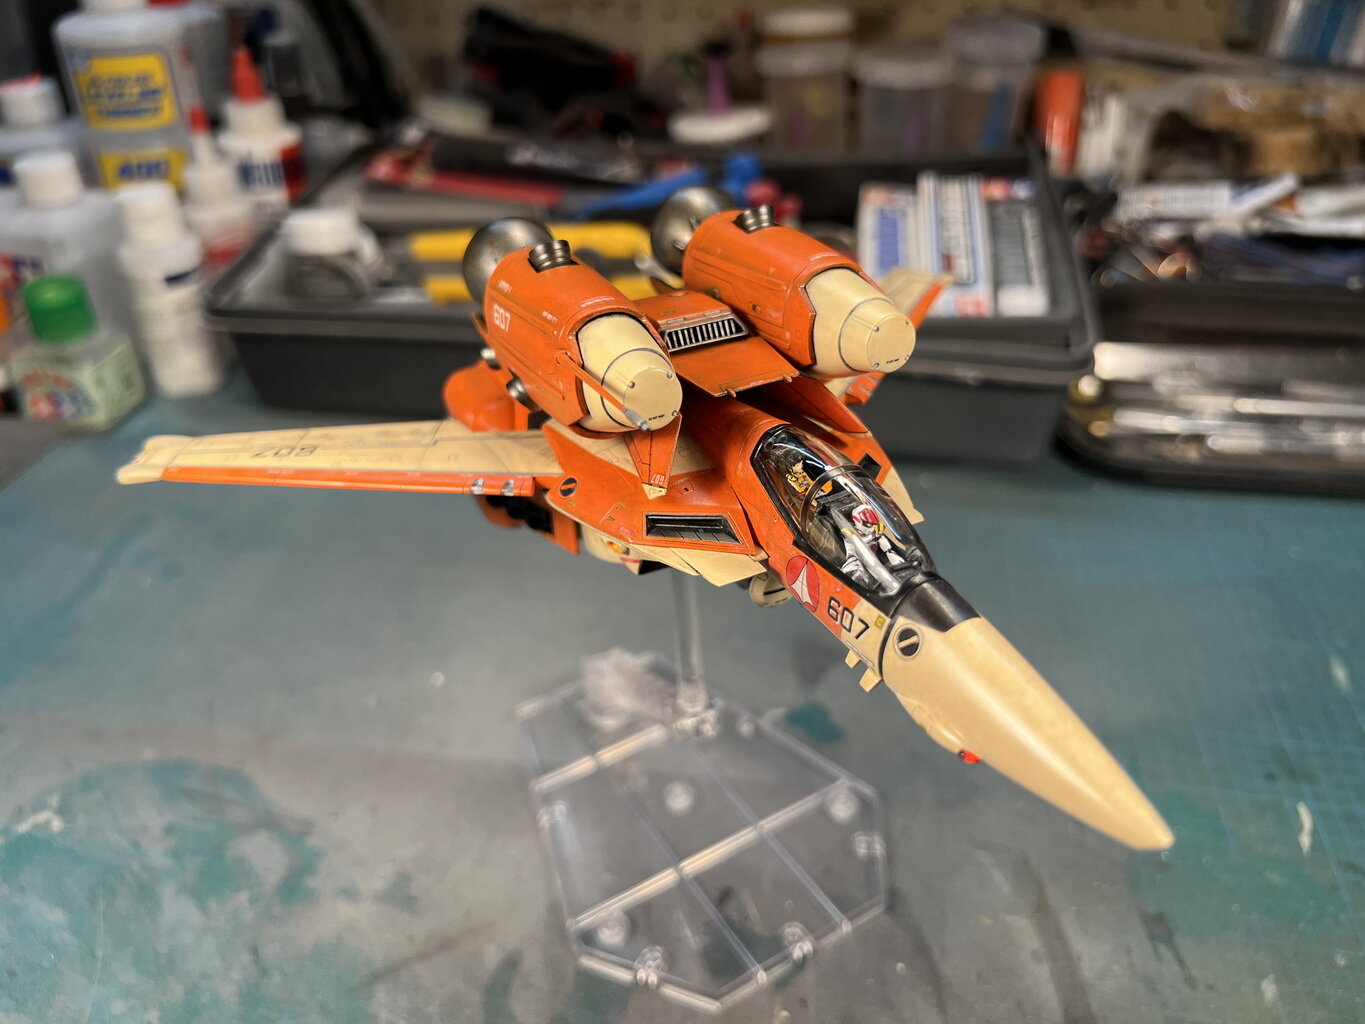
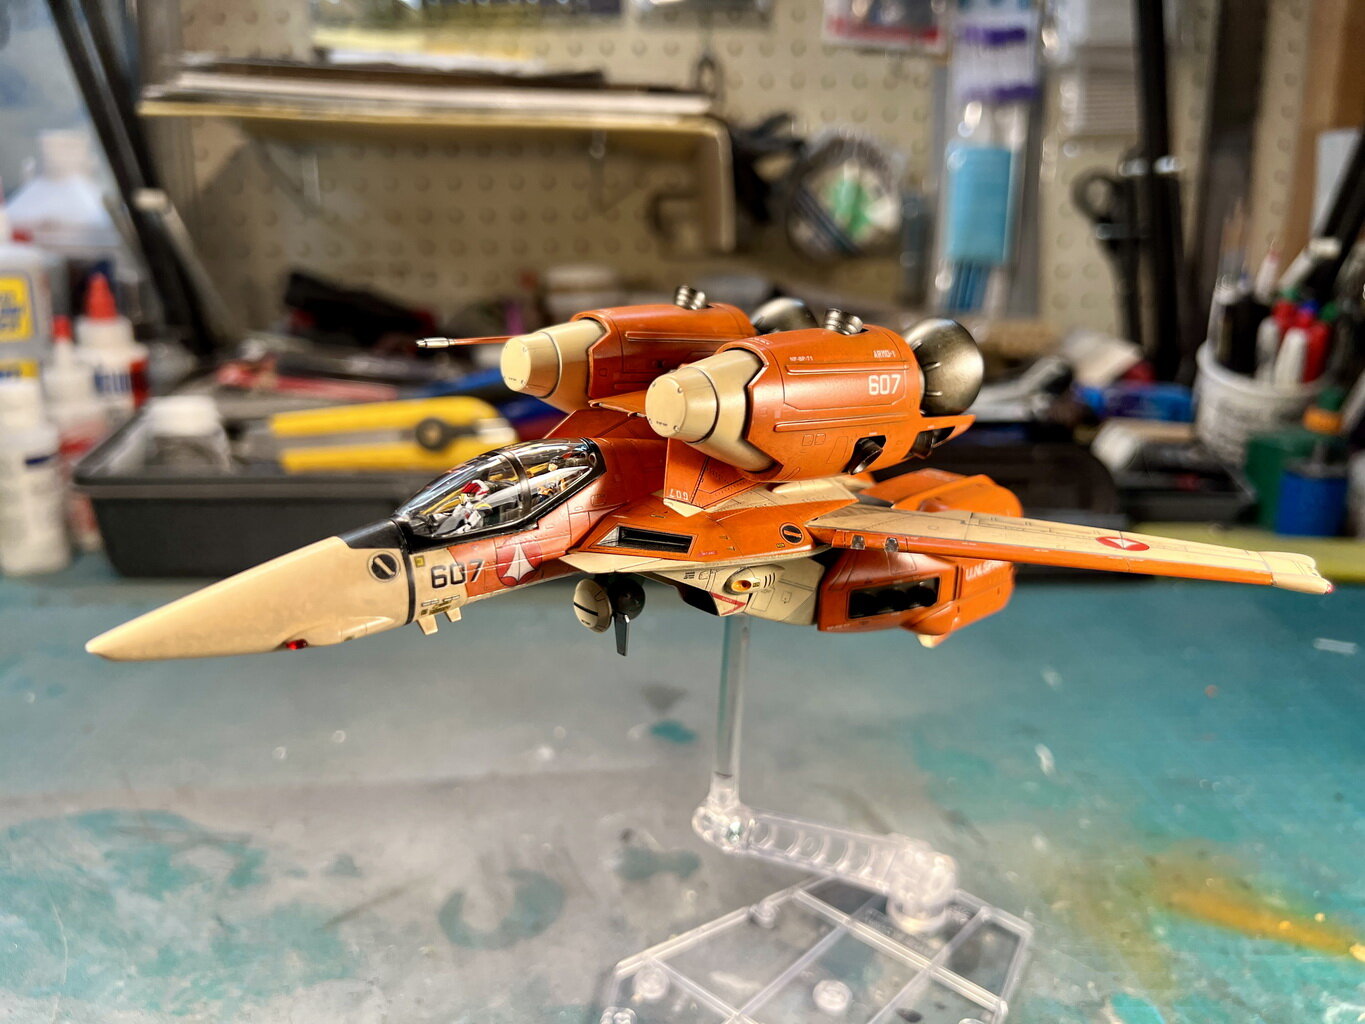
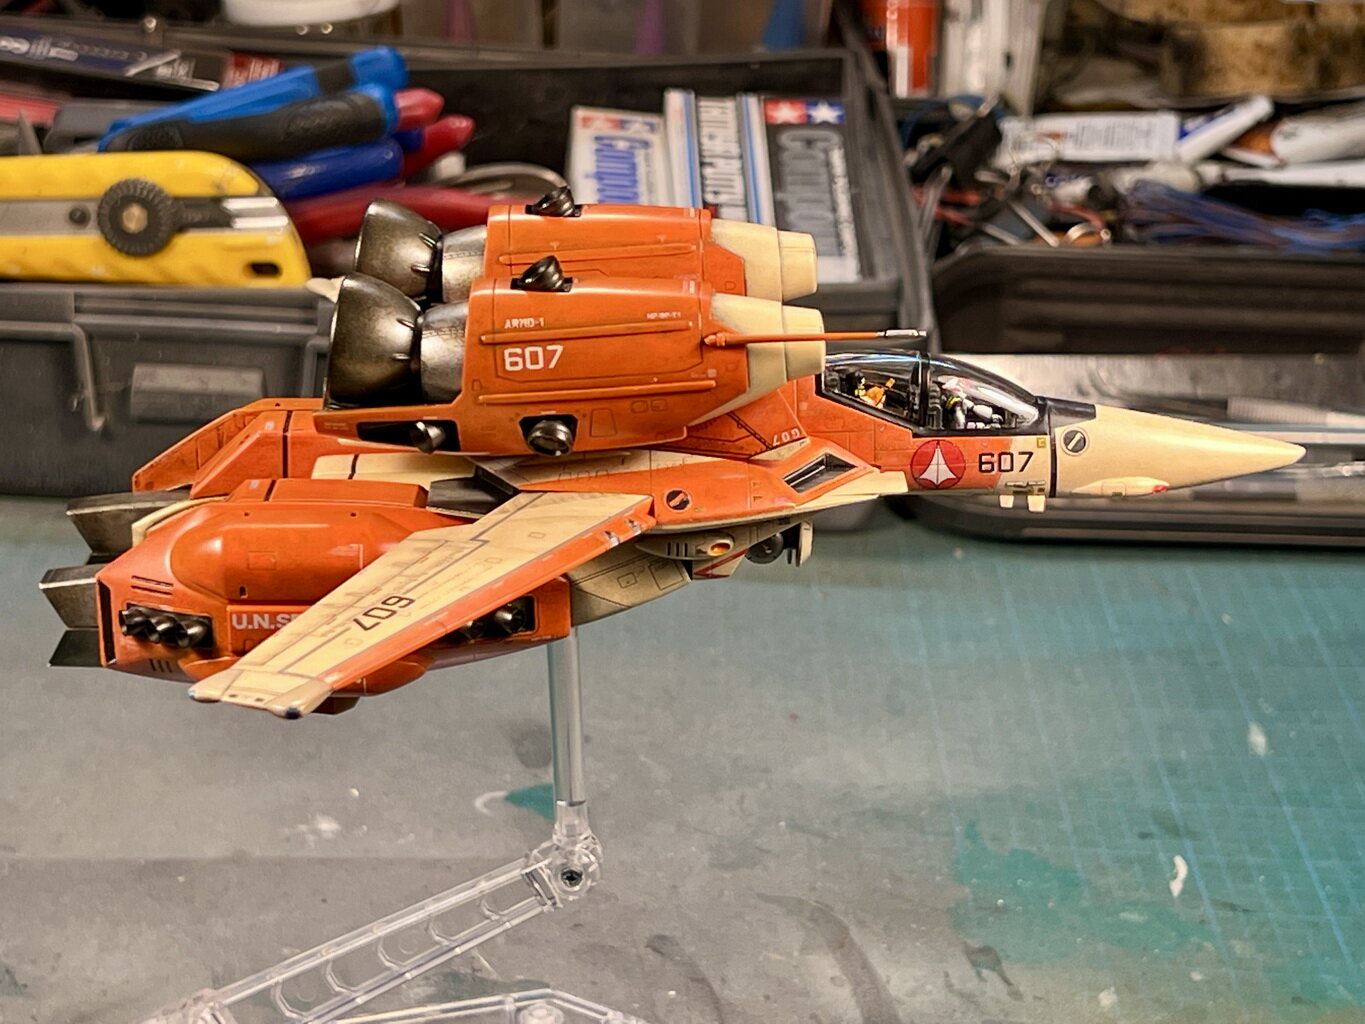
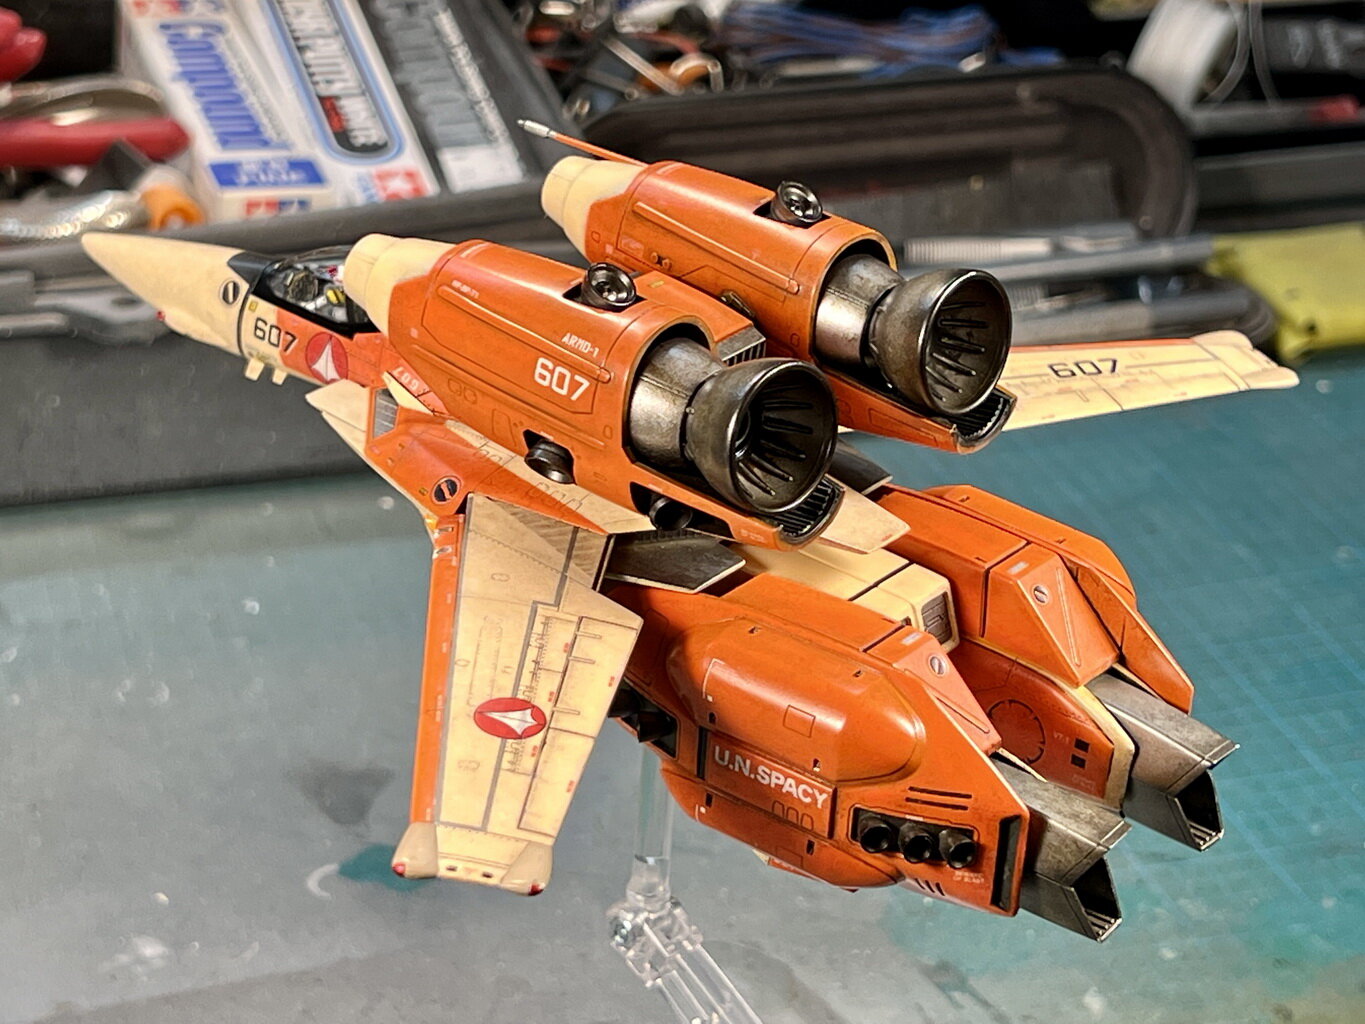
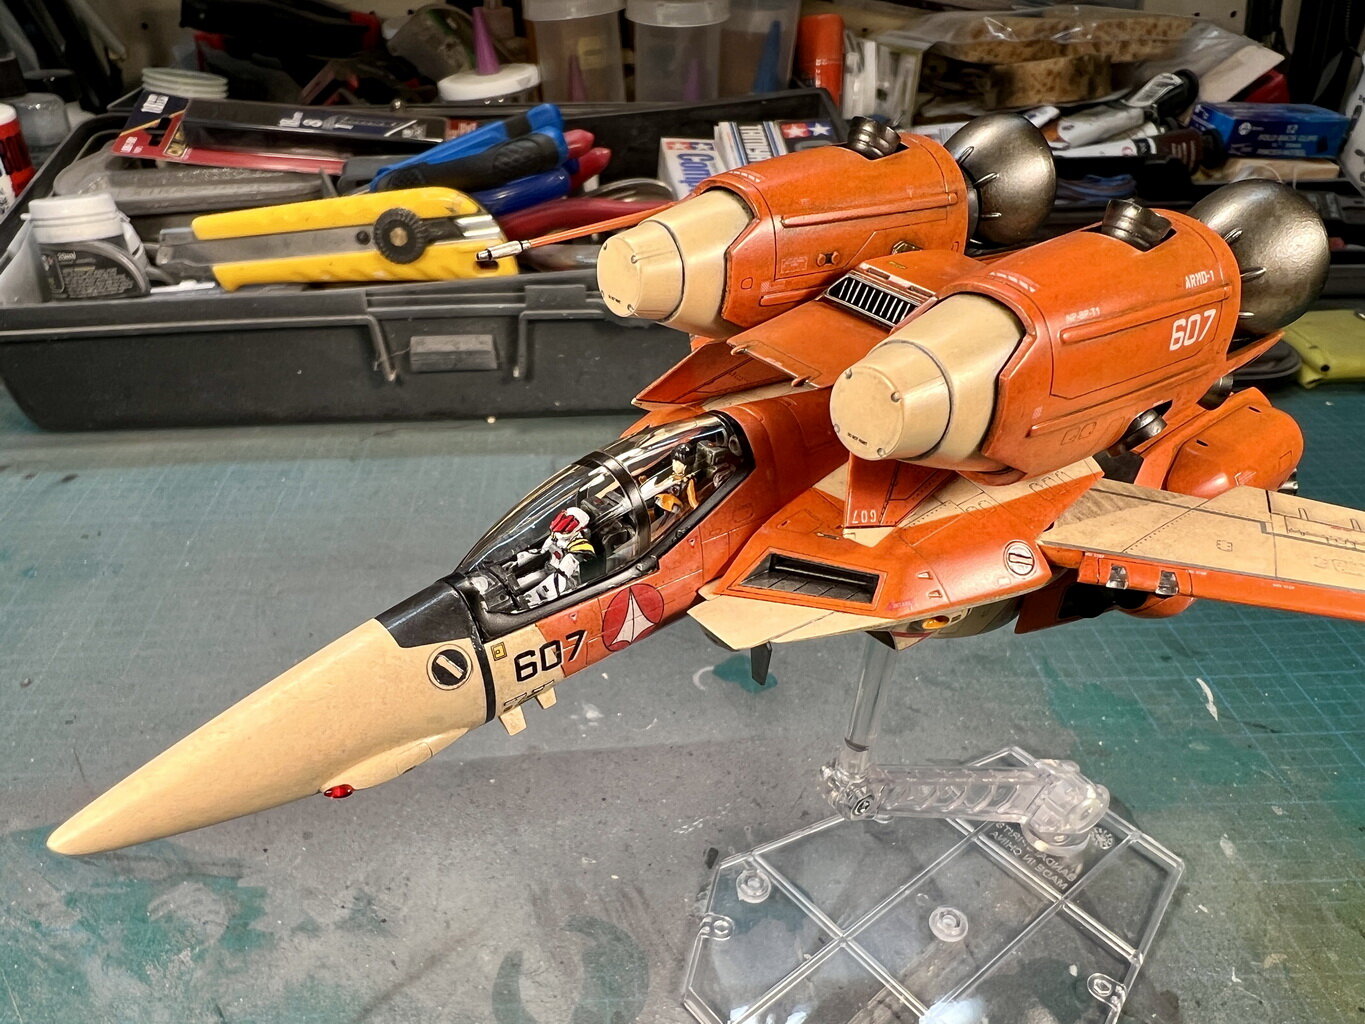
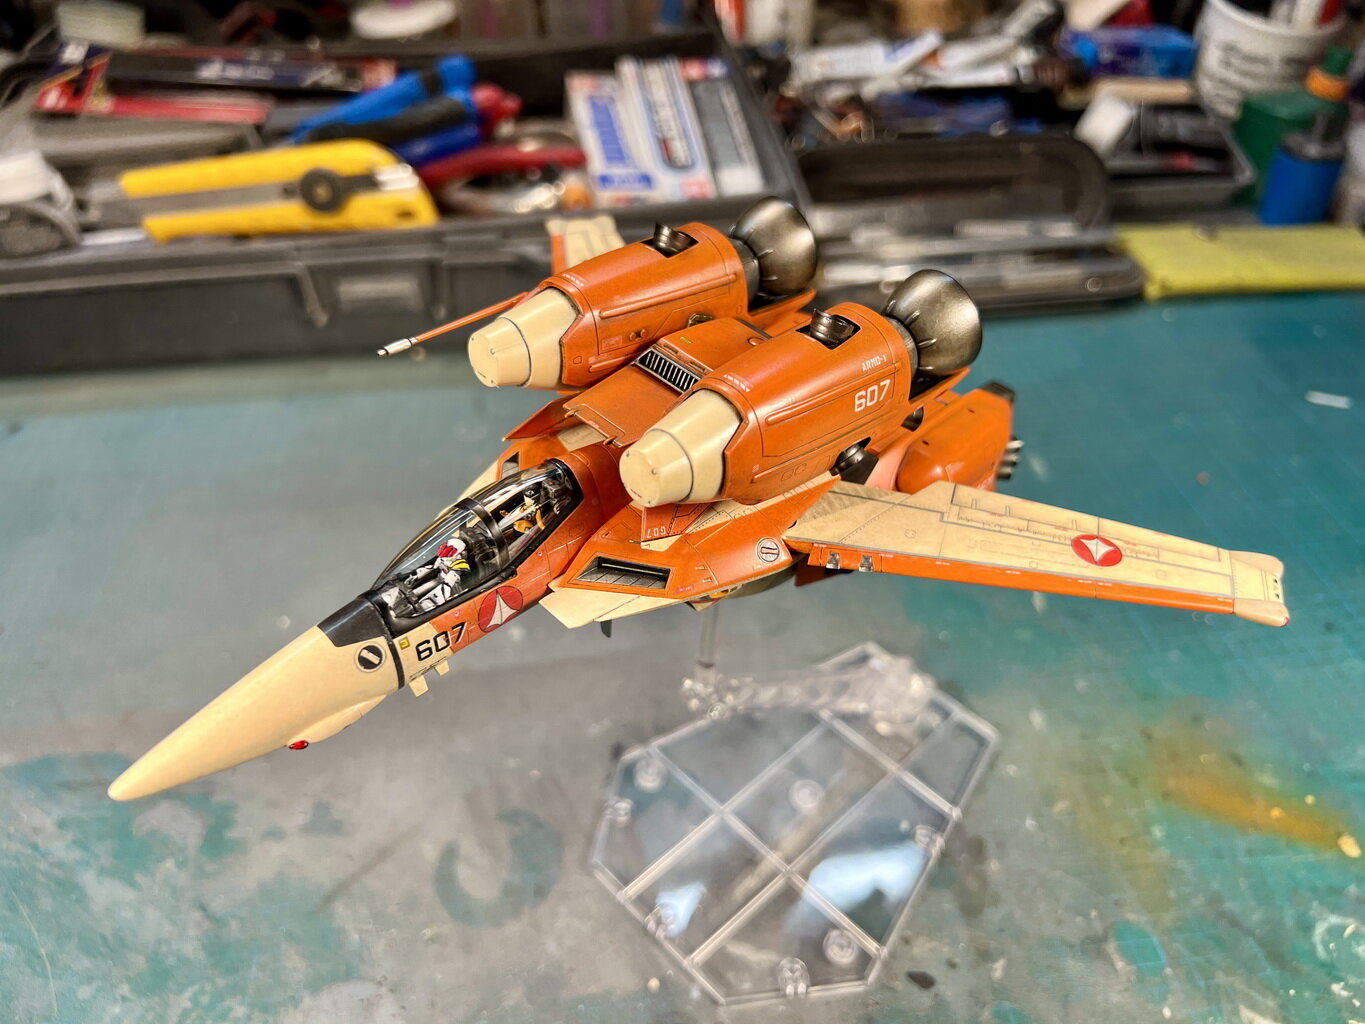
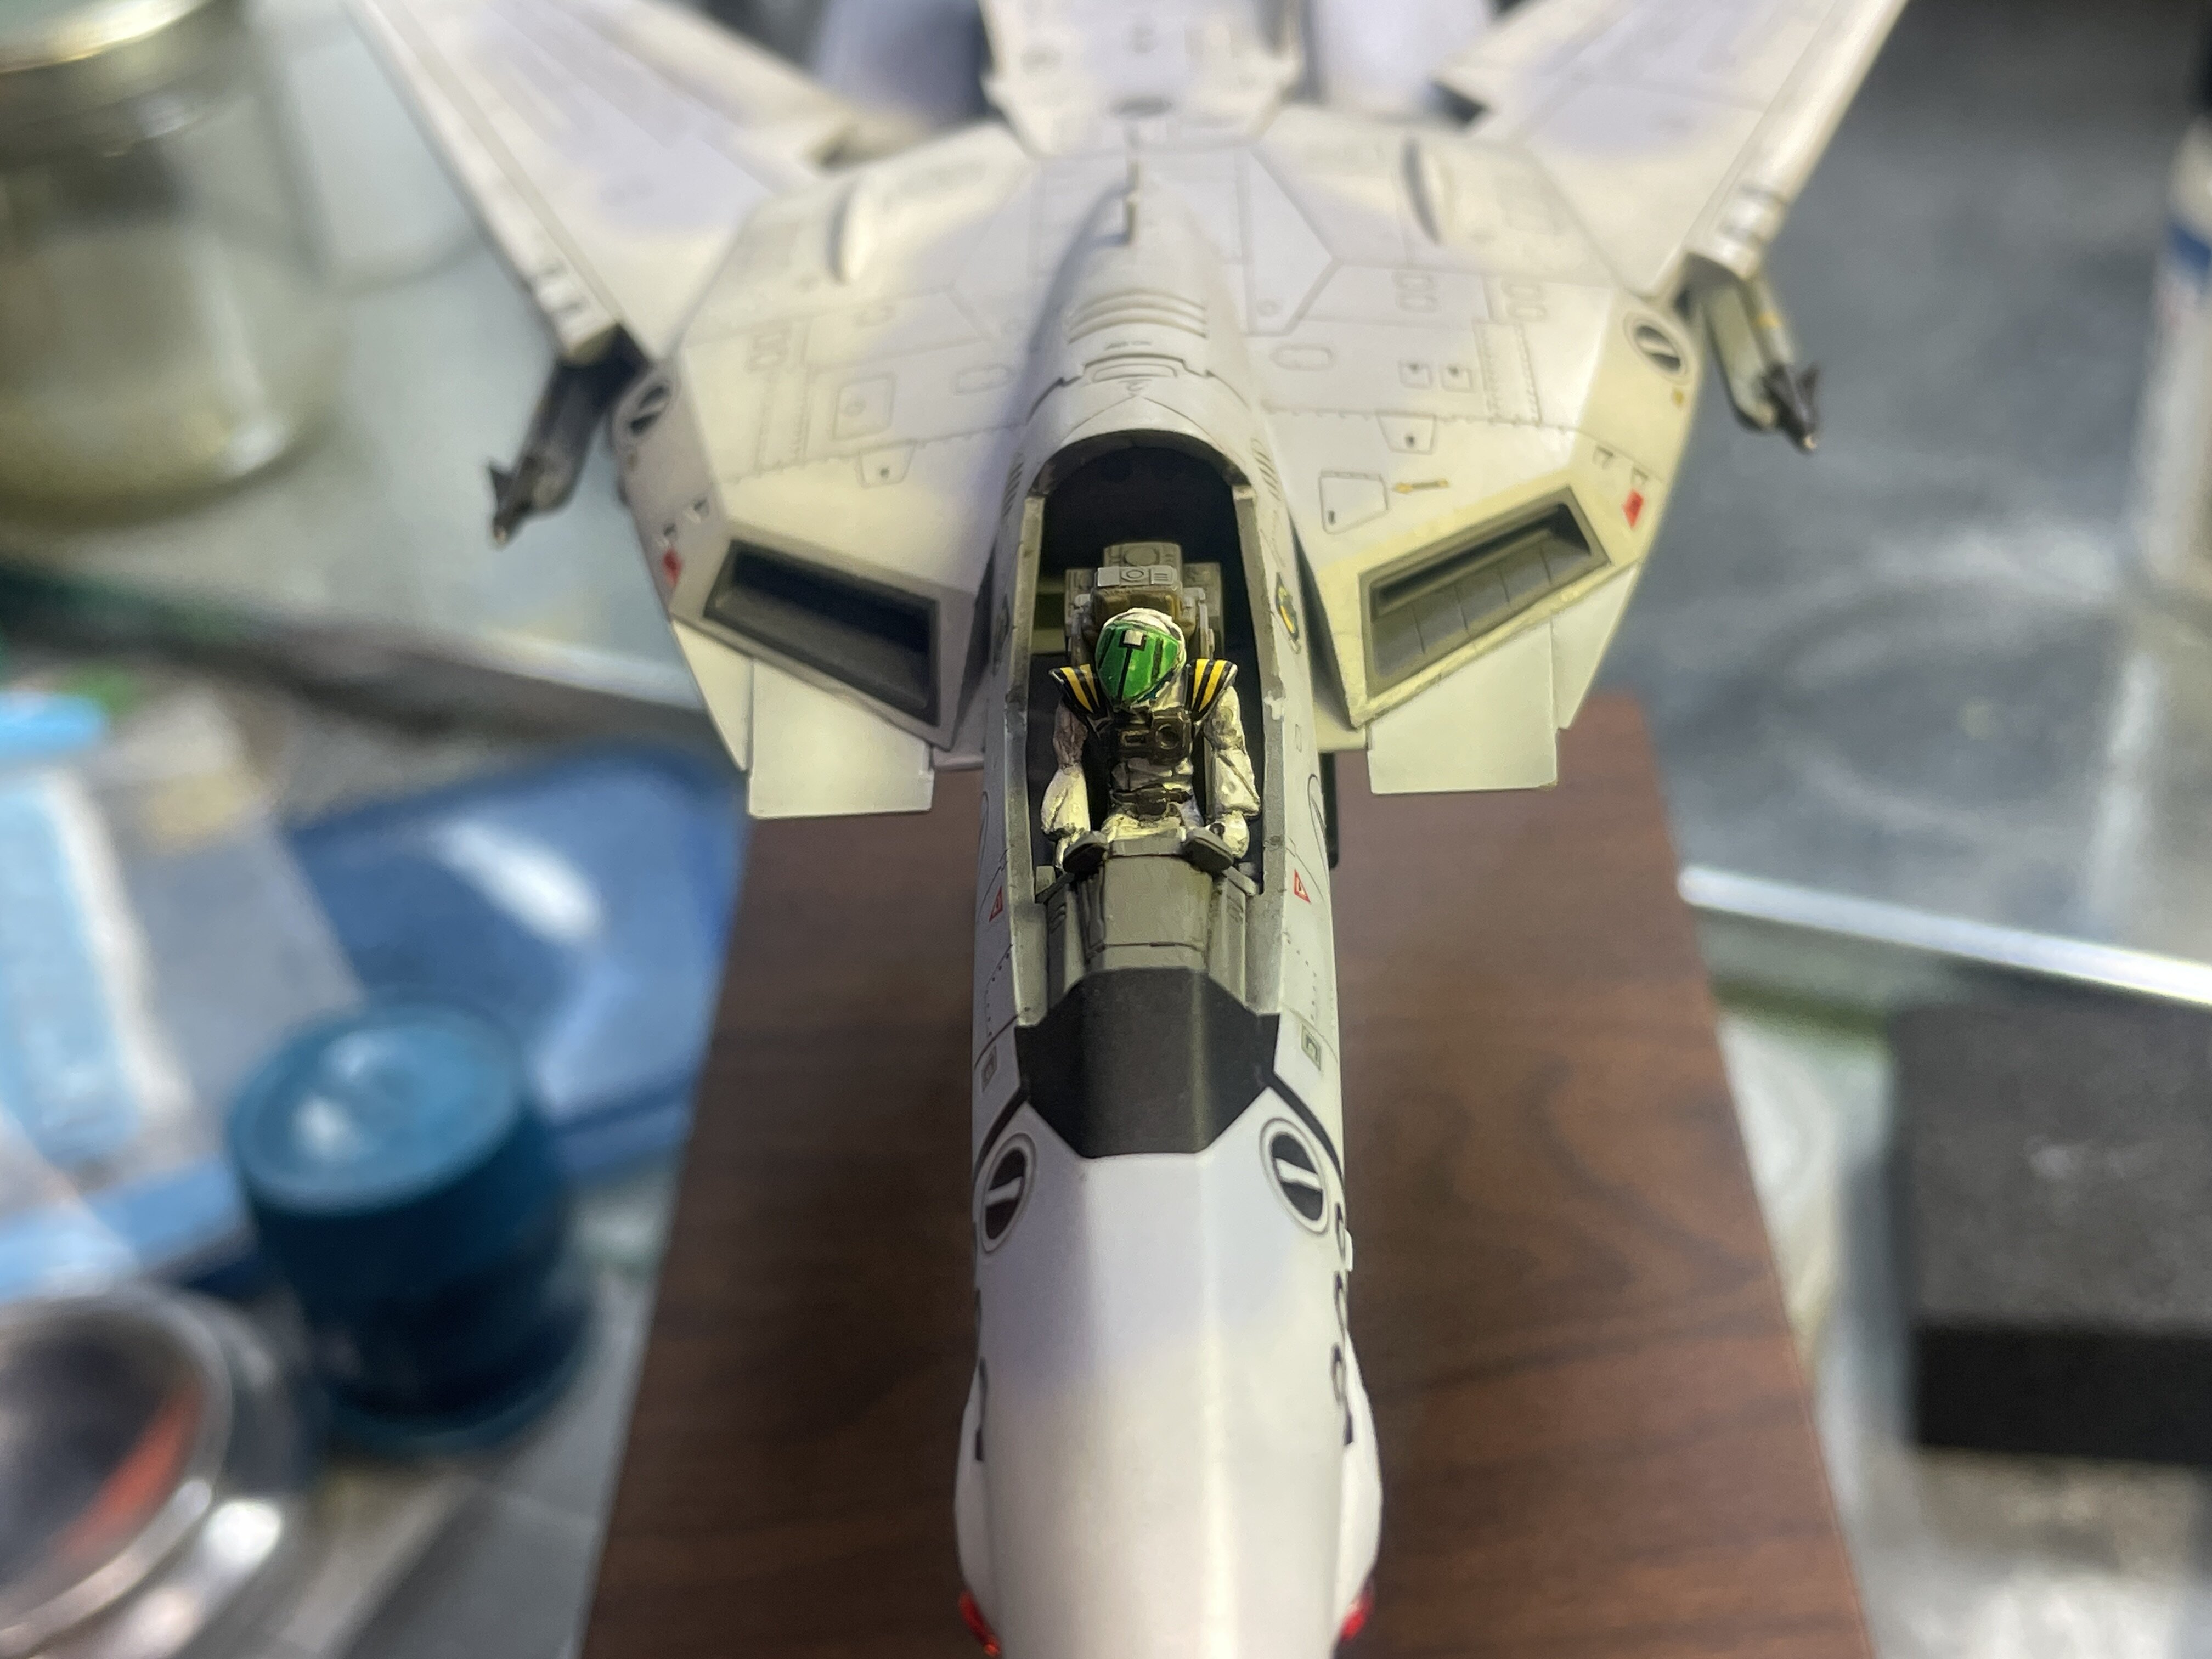
I’m happy to report that this bird 99% finished! I’ve been really busy with a kitchen Reno, but I’ve been chipping away at this build and it’s about to wrap up. I ended up re painting the wings. The pilot and canopy are done and just need to be fitted with some ova glue.
-
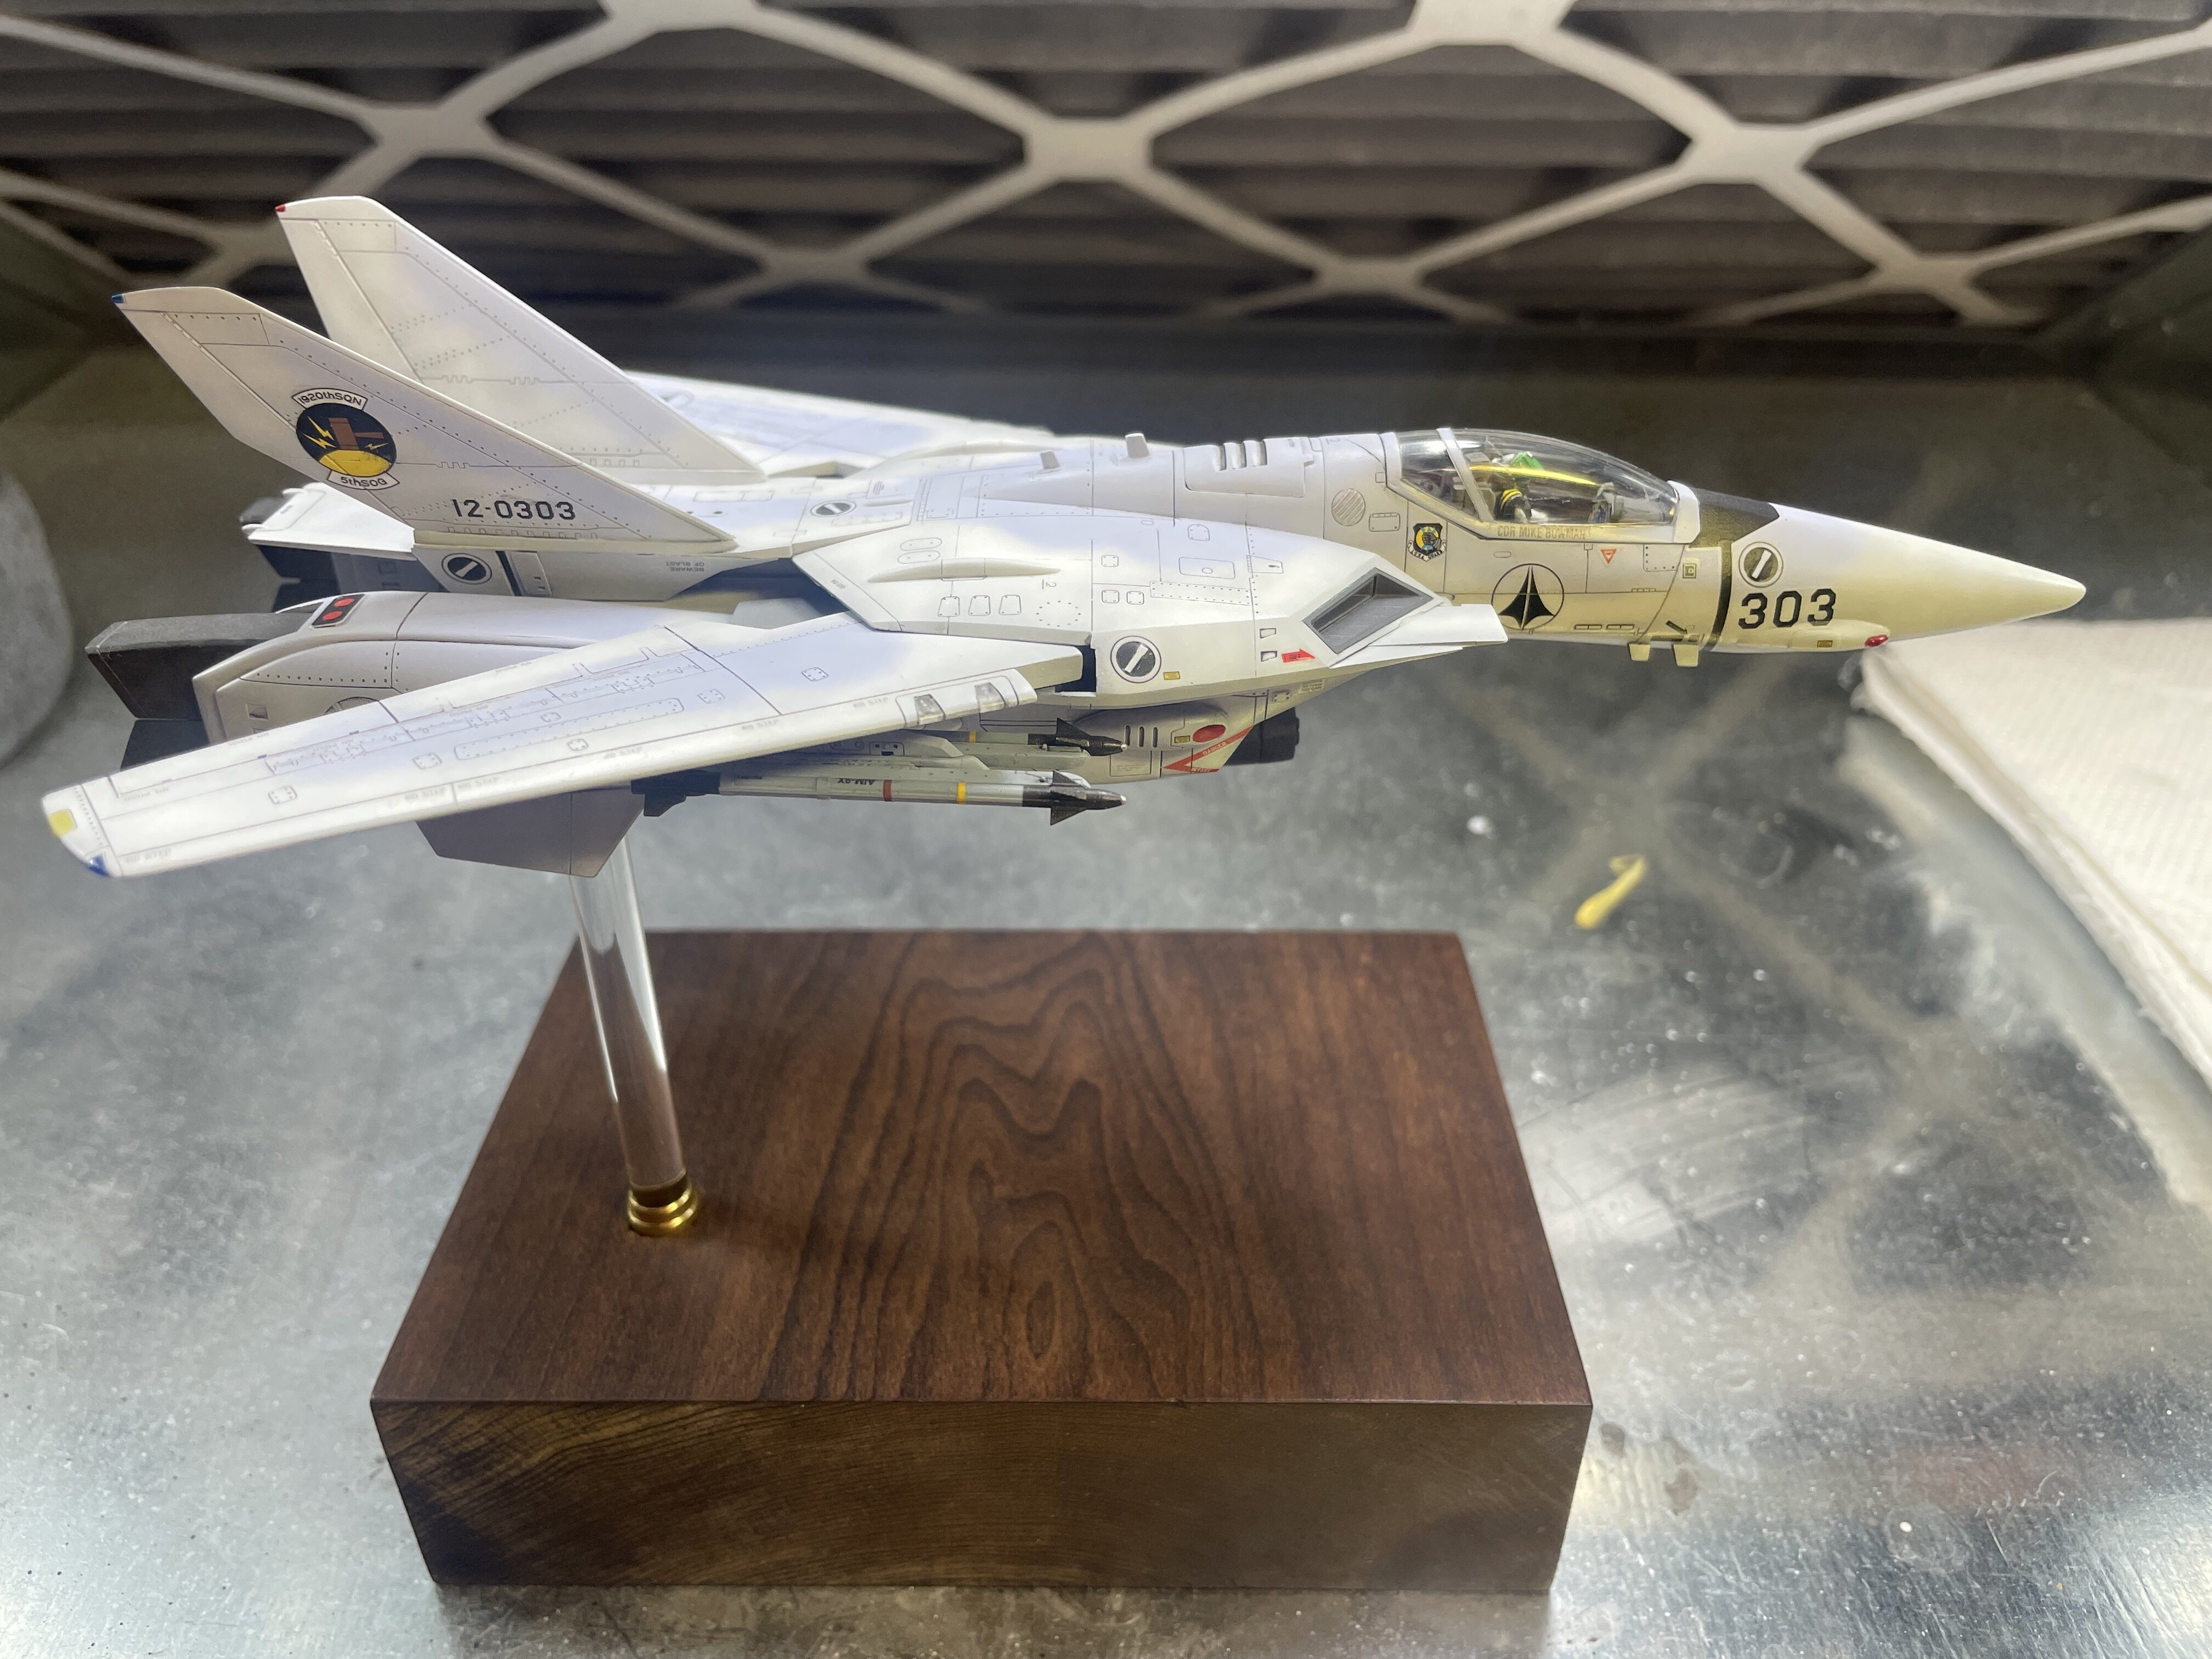
Looks great! Photos came out well!!
-
On 6/13/2023 at 4:23 AM, pengbuzz said:
This is what I use for mine; I just refinished a canopy for my F-14 Tomcat:
If you use these with water to speed the cutting action in order of coarsest to finest, this should return your diecast car's windshield to crystal-clear. After use, just buff with a cotton cloth and that should do it!
What Peng said; also if you have a super glue spill you can use Debonder to remove it without damaging the plastic. It will remove paint also but you can repaint the area. Check for it at your LHS, Amazon etc.
-
As to the second issue, you could use a drill bit to open the female mounting holes SLIGHTLY, or you could use a bit of sandpaper to LIGHTLY shave down the diametre of the male insert peg. Just take it slow and test fit until you get the fit that you want.
-
Holy moly those 2 listings are $300+! That seems like those inflated eBay prices. Does anyone know what the original price was?
-
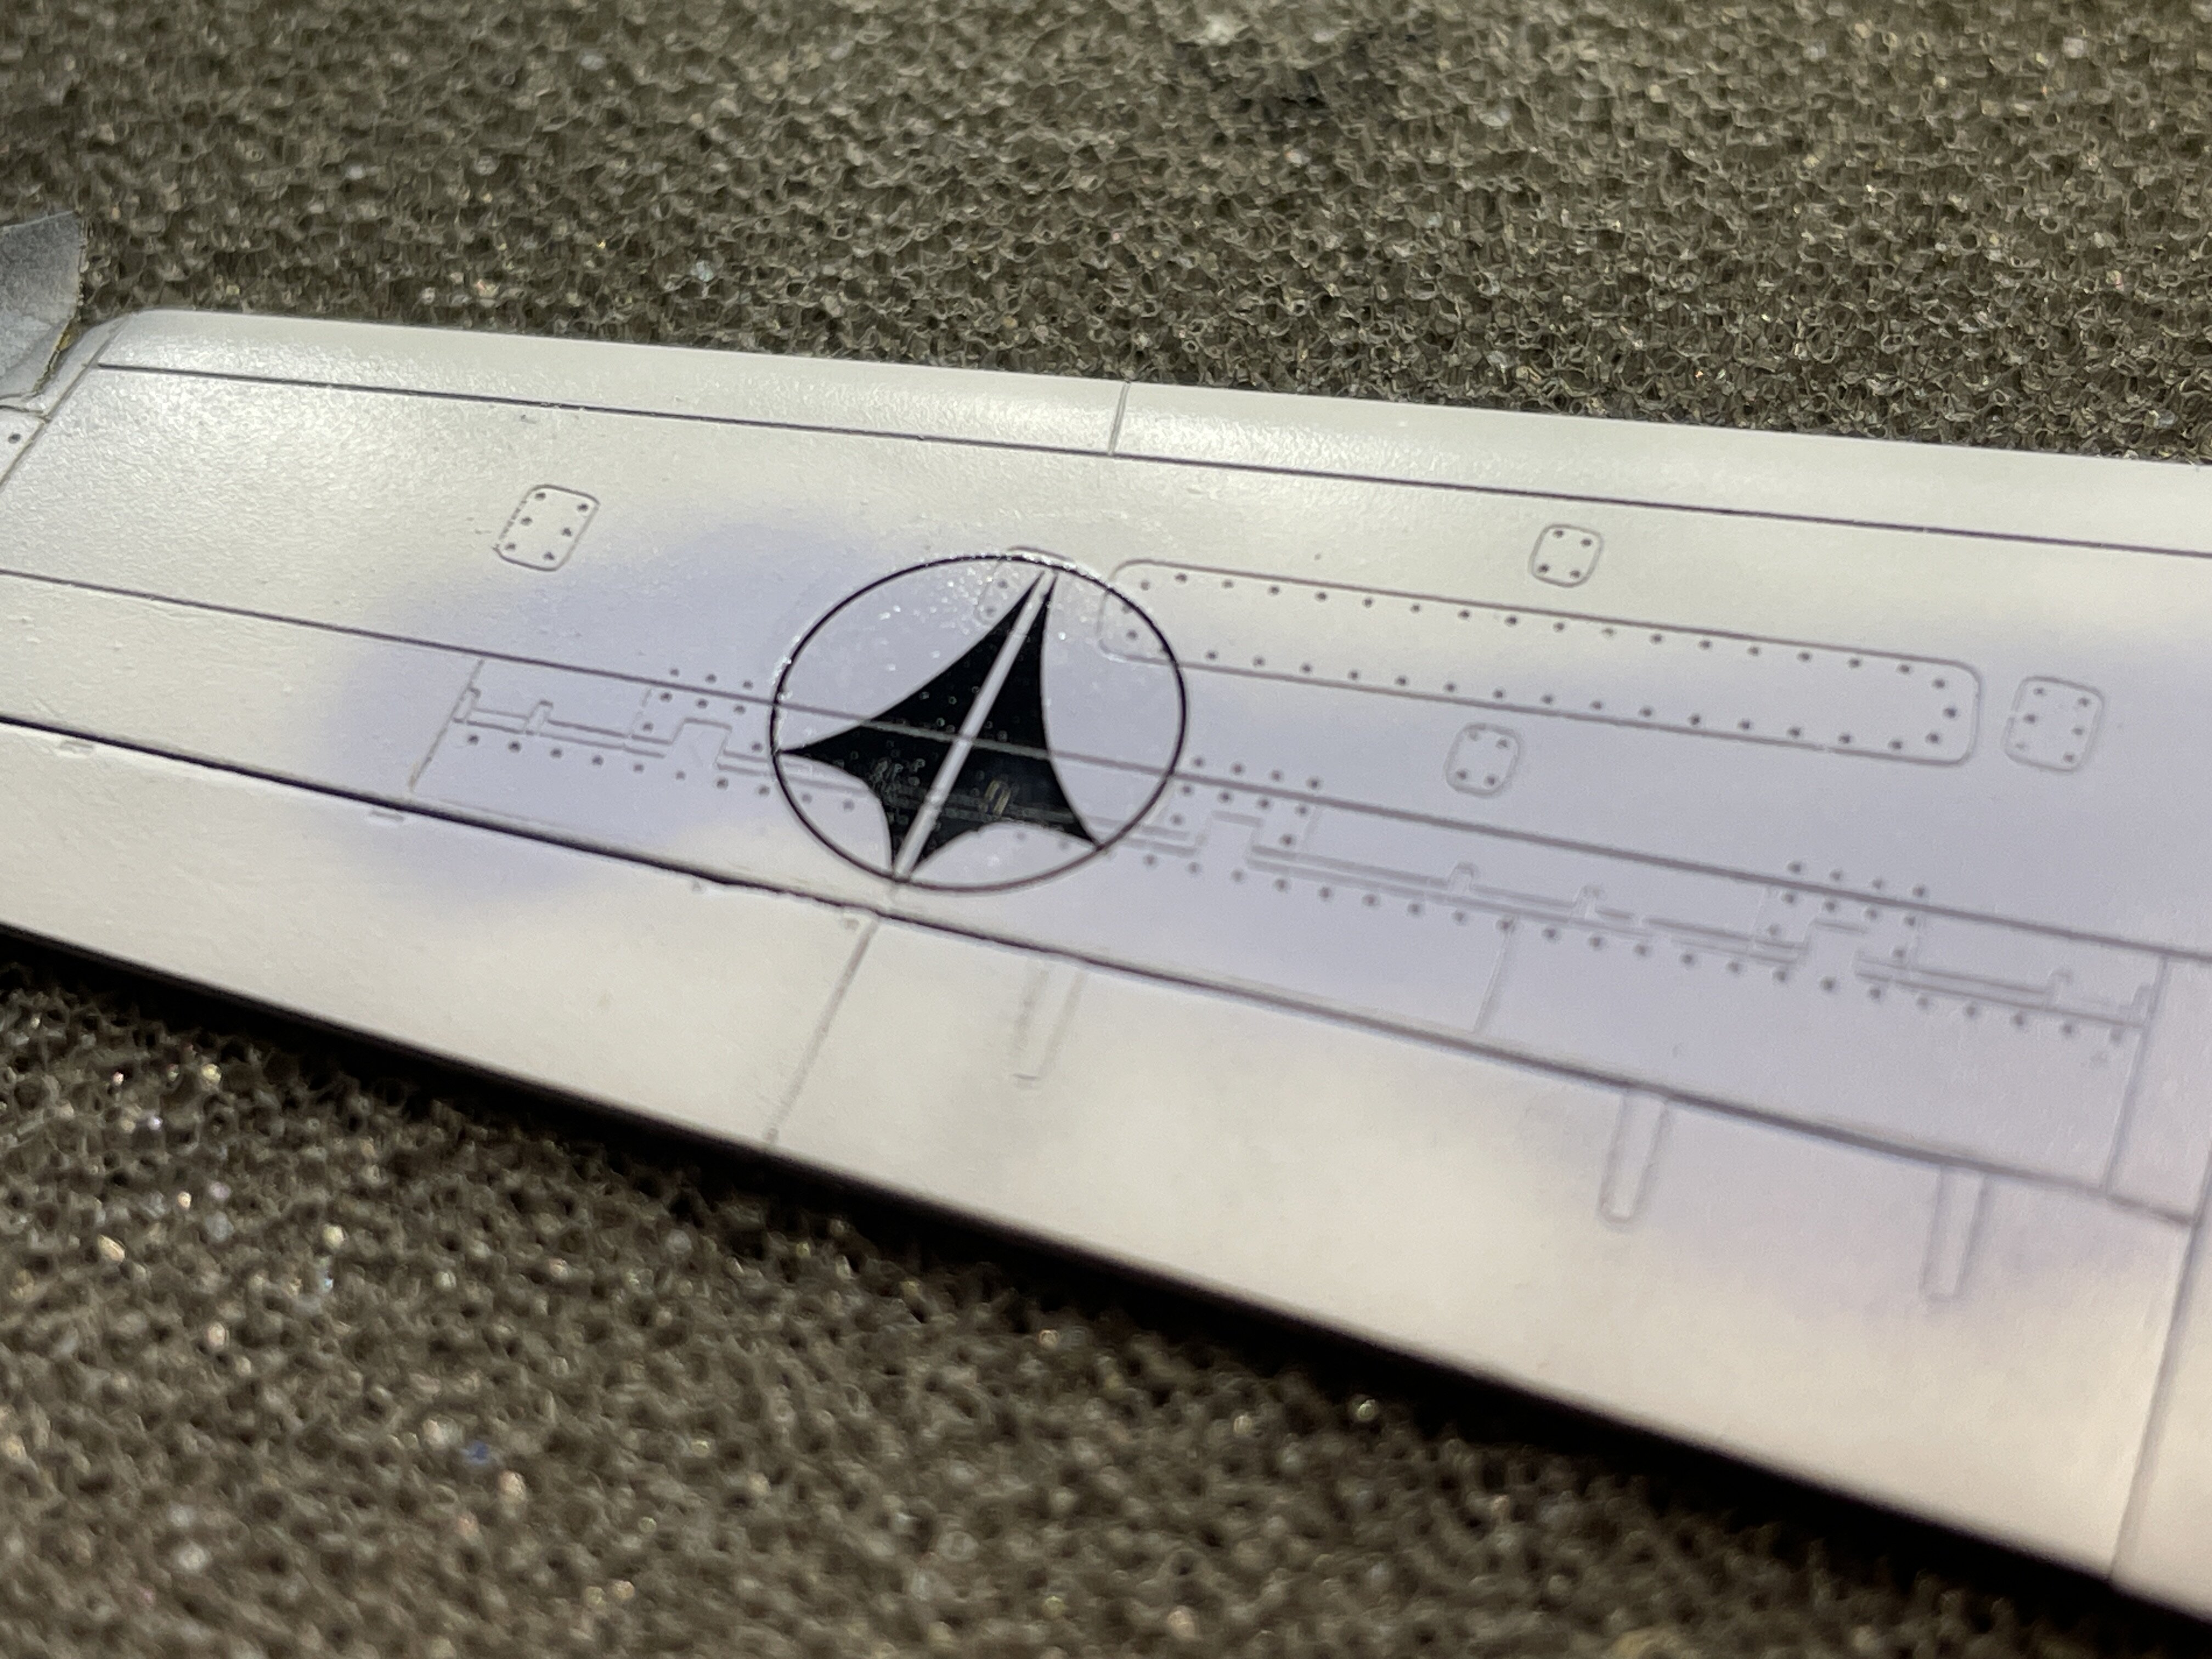
Almost done then screwed up the roundel on the wing…in the process of replacing it and flattening the No steps placards.
-
Anyone know where to get a copy of this kit?
-
So it appears that none of these links are working anymore?
-
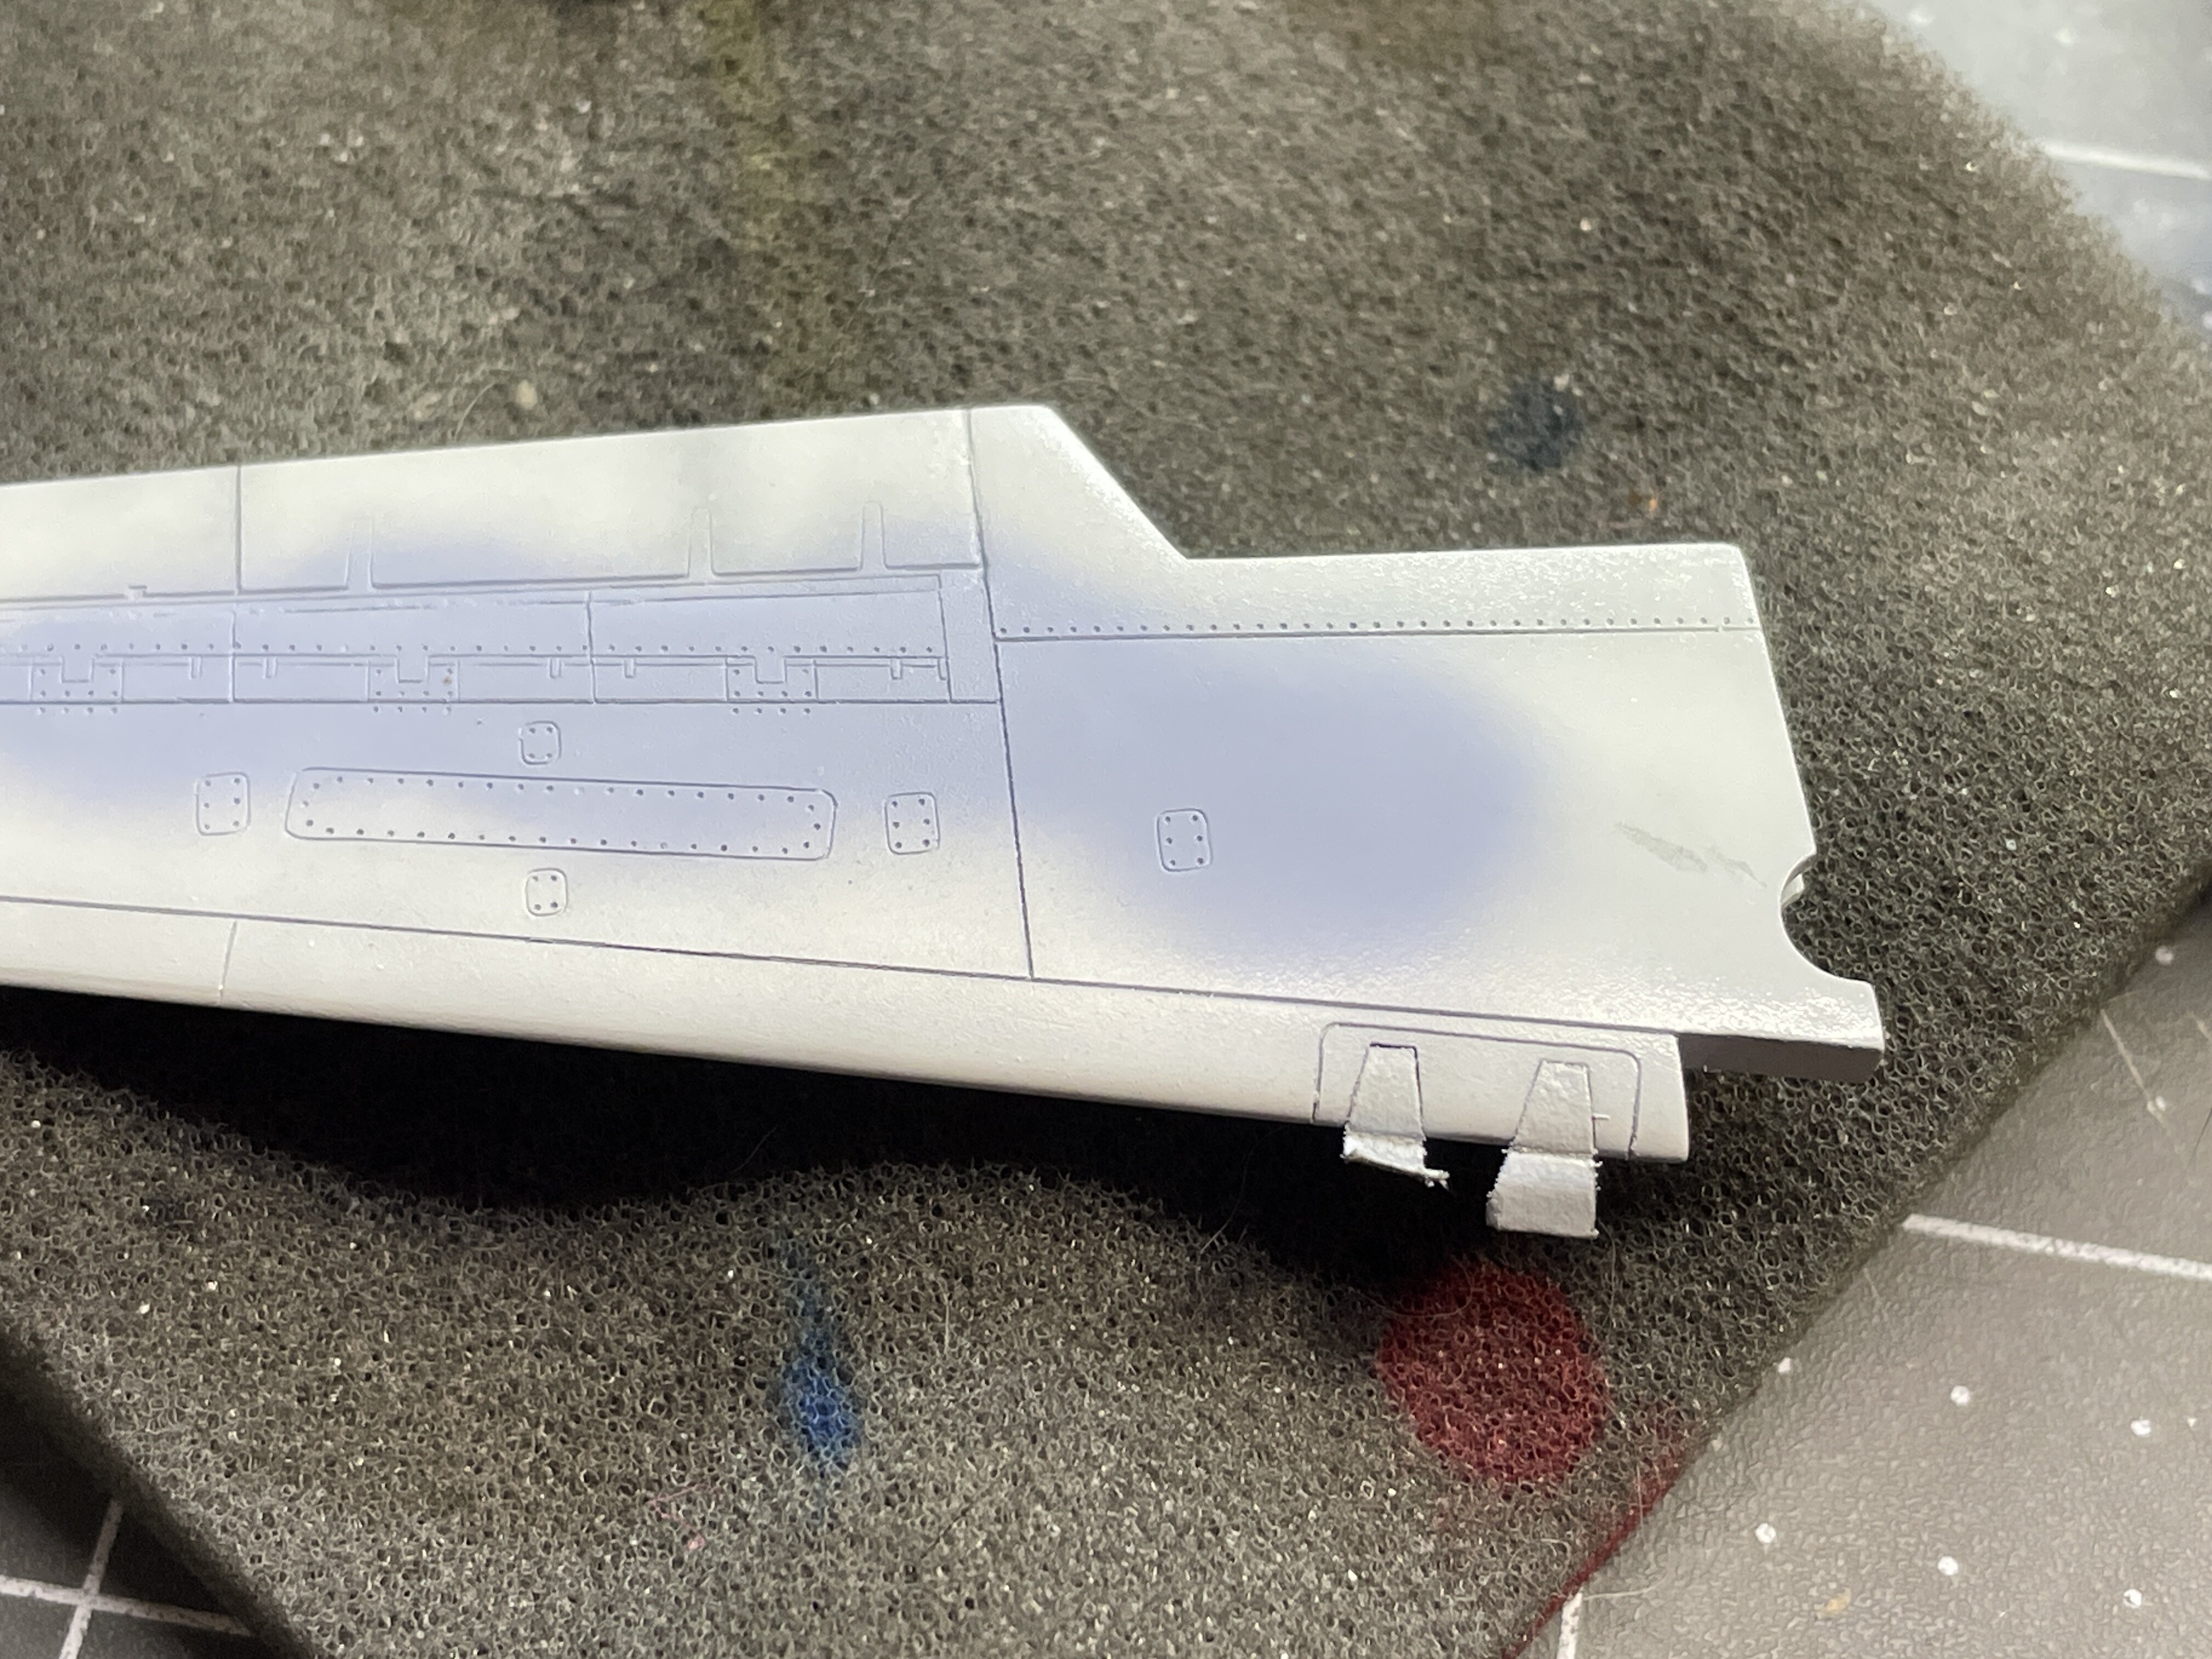
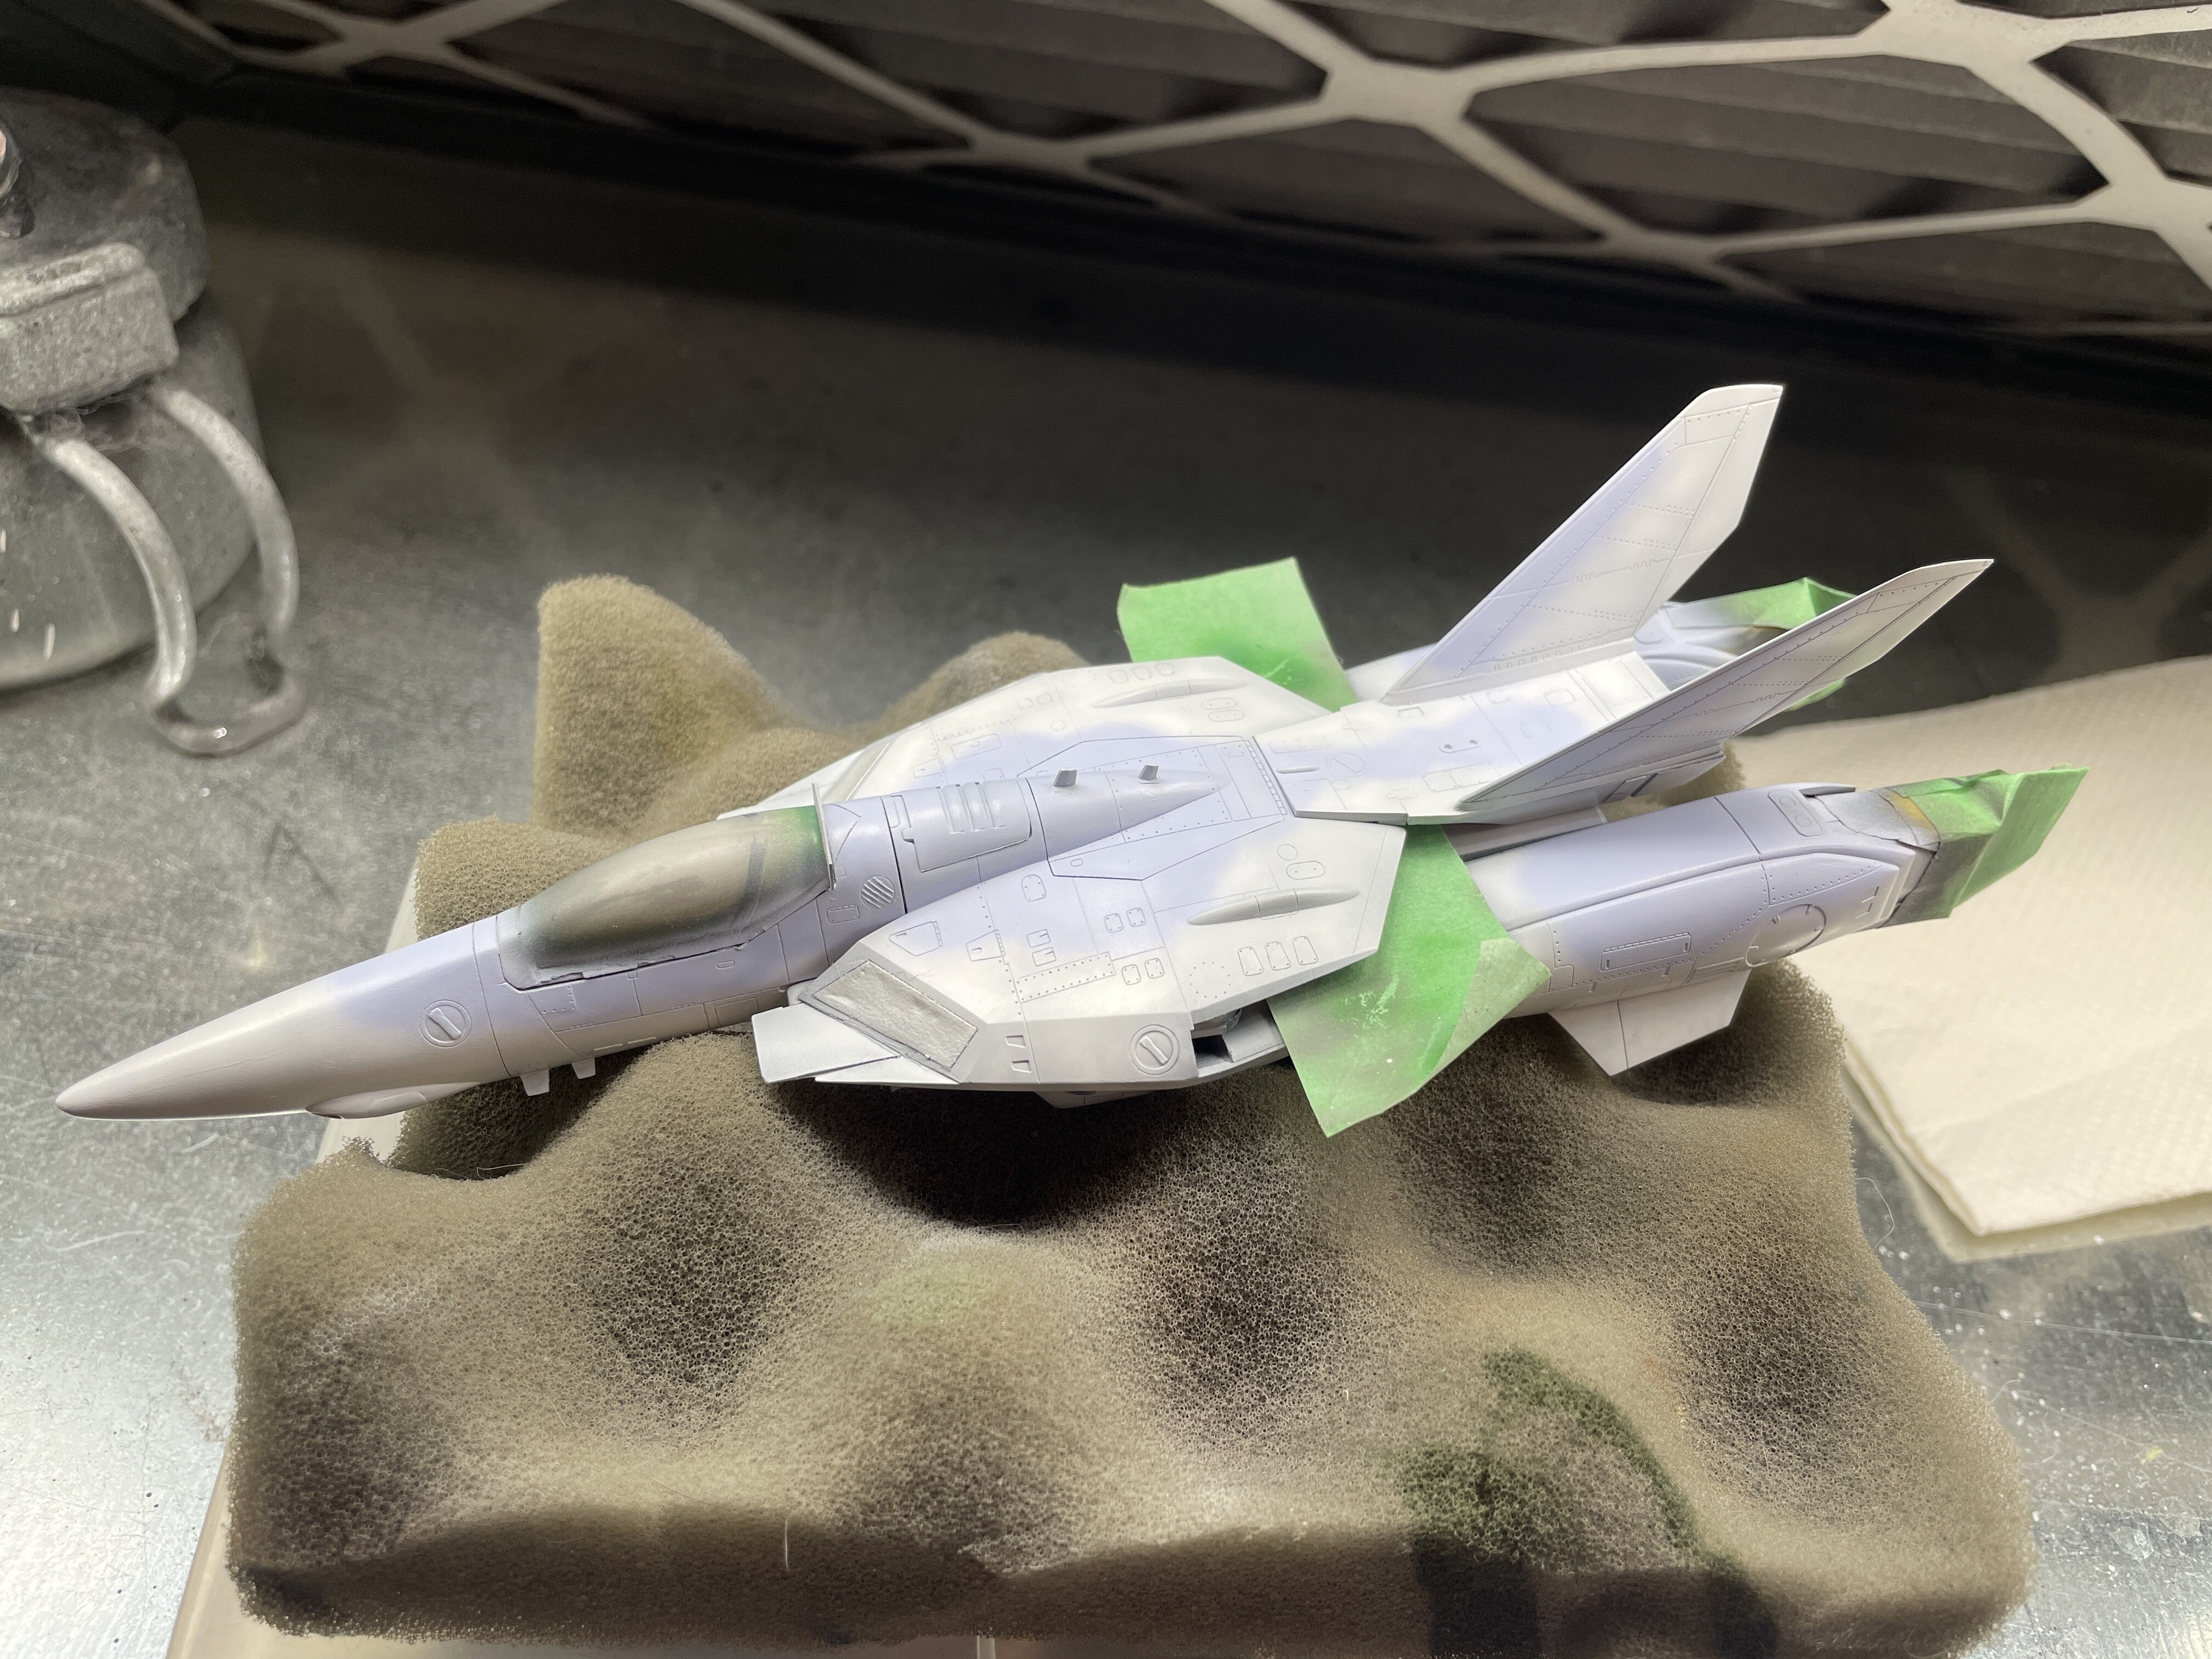
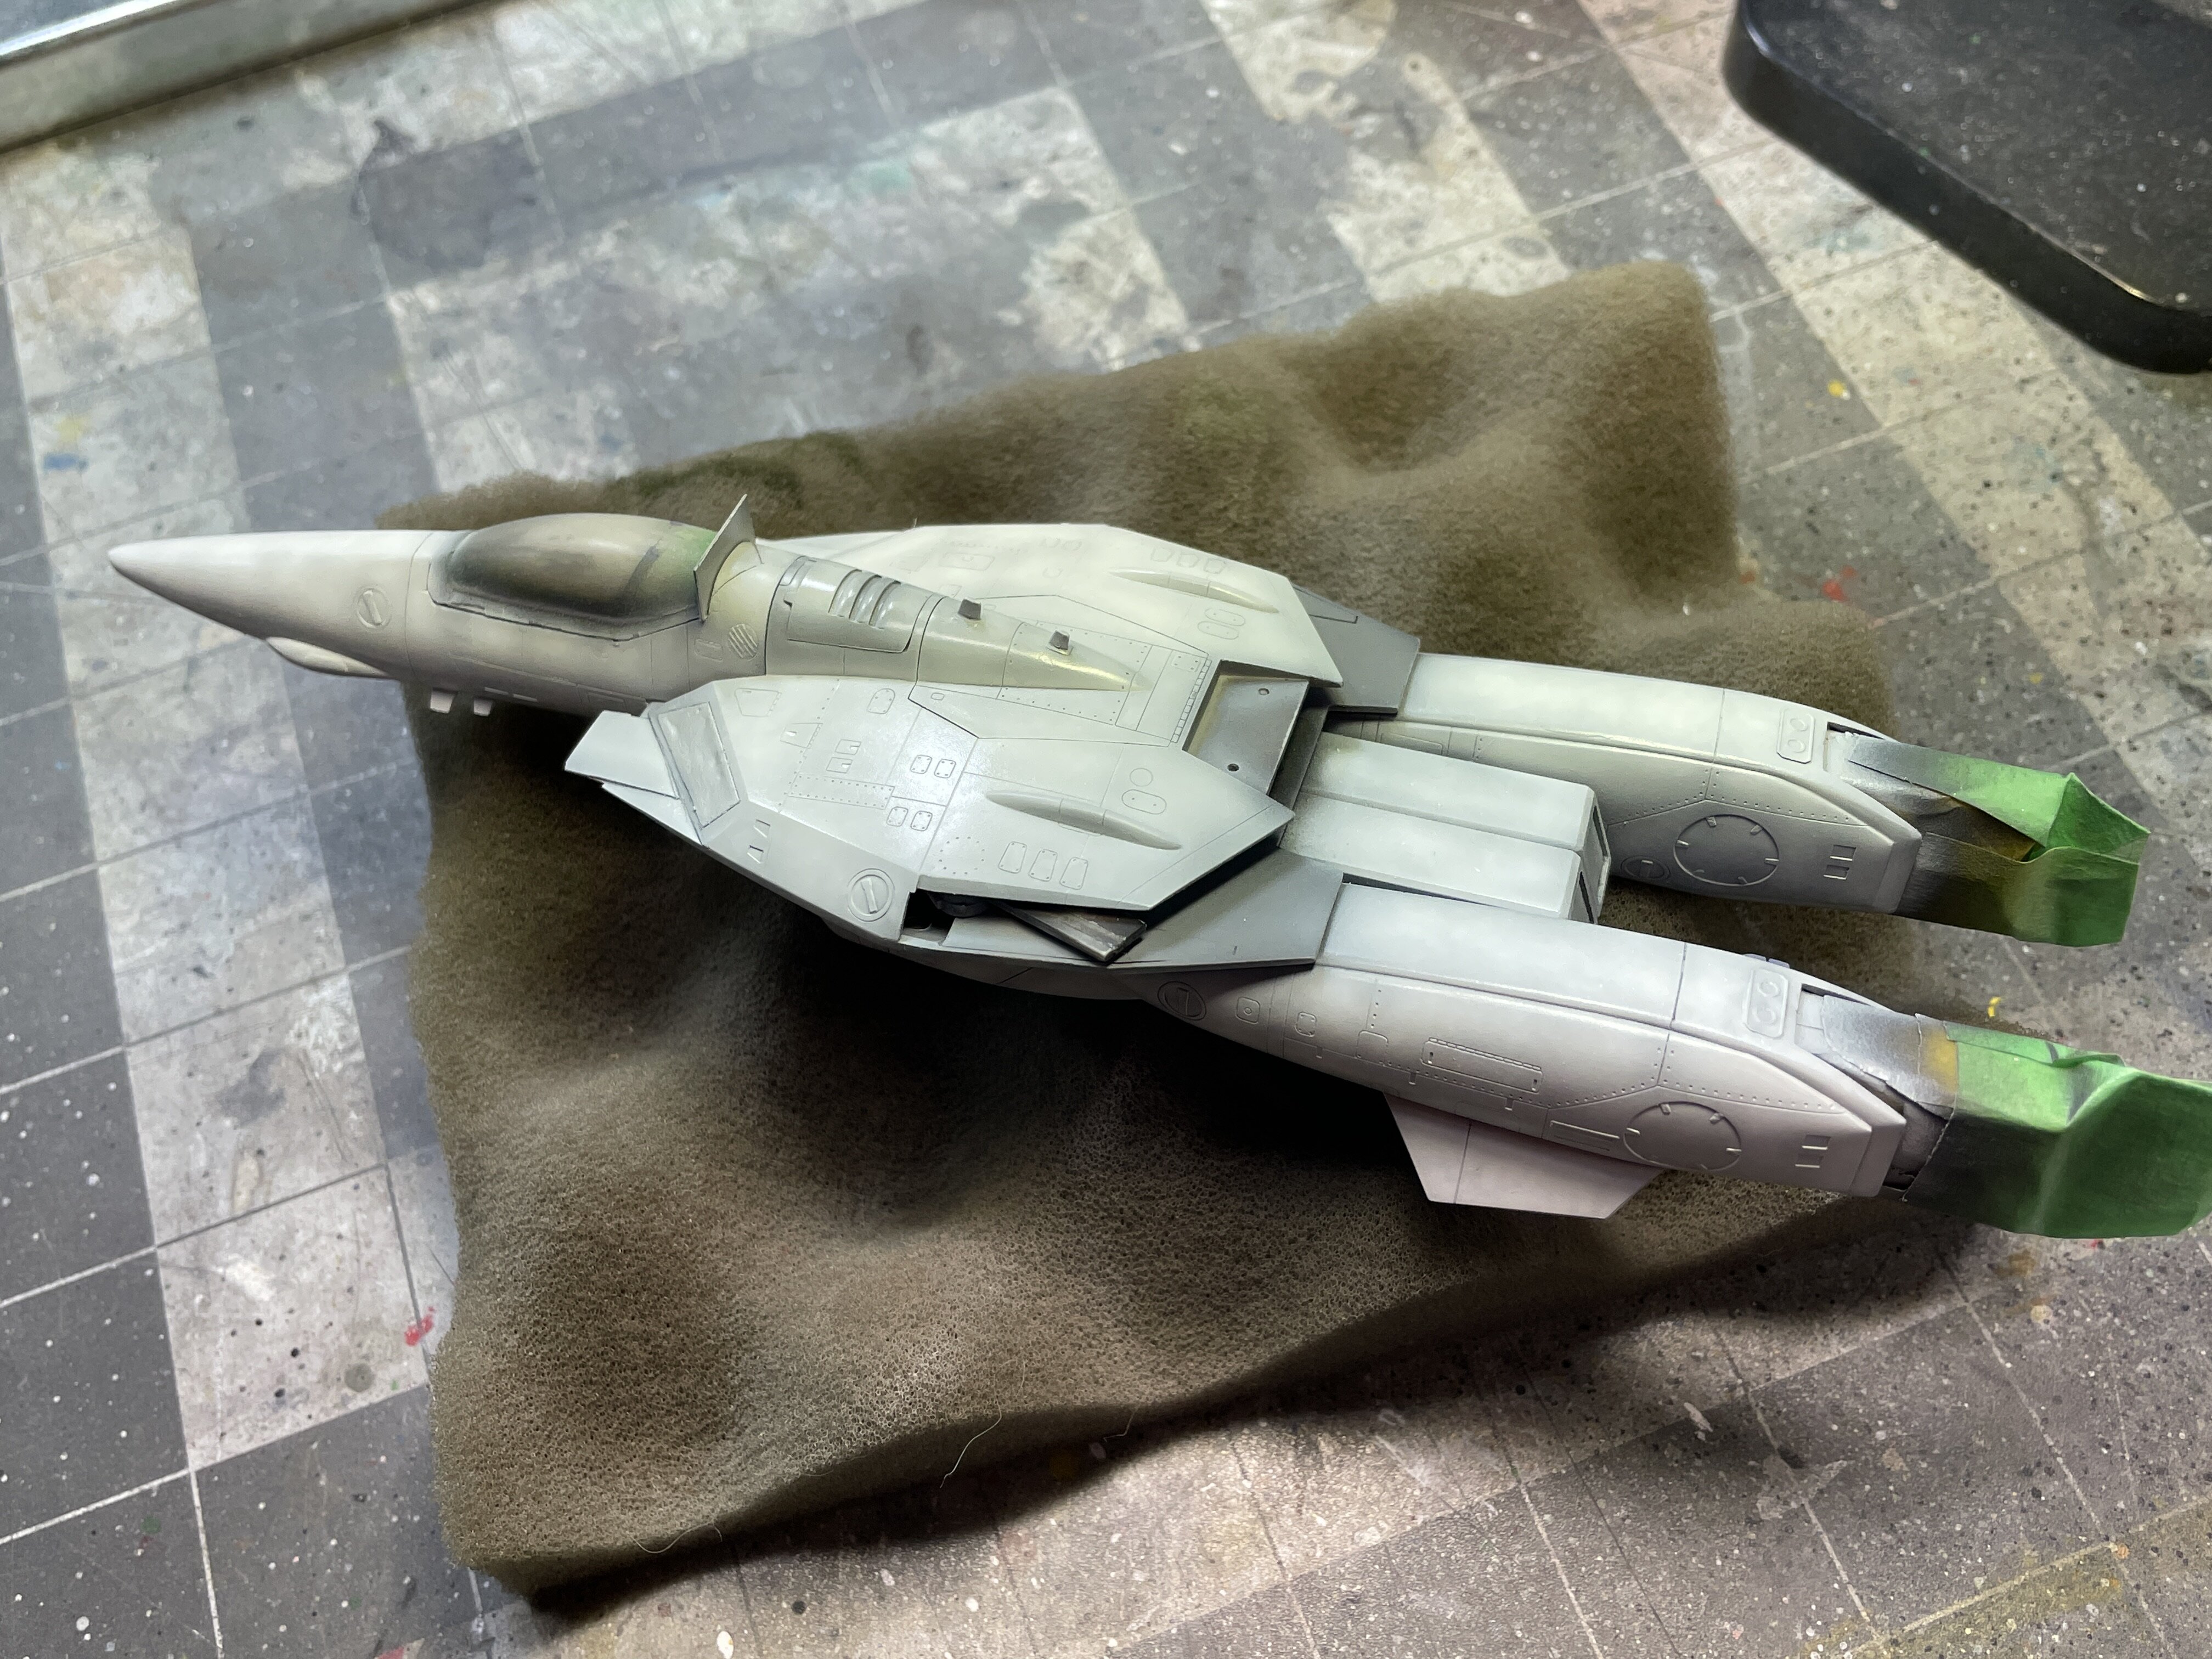
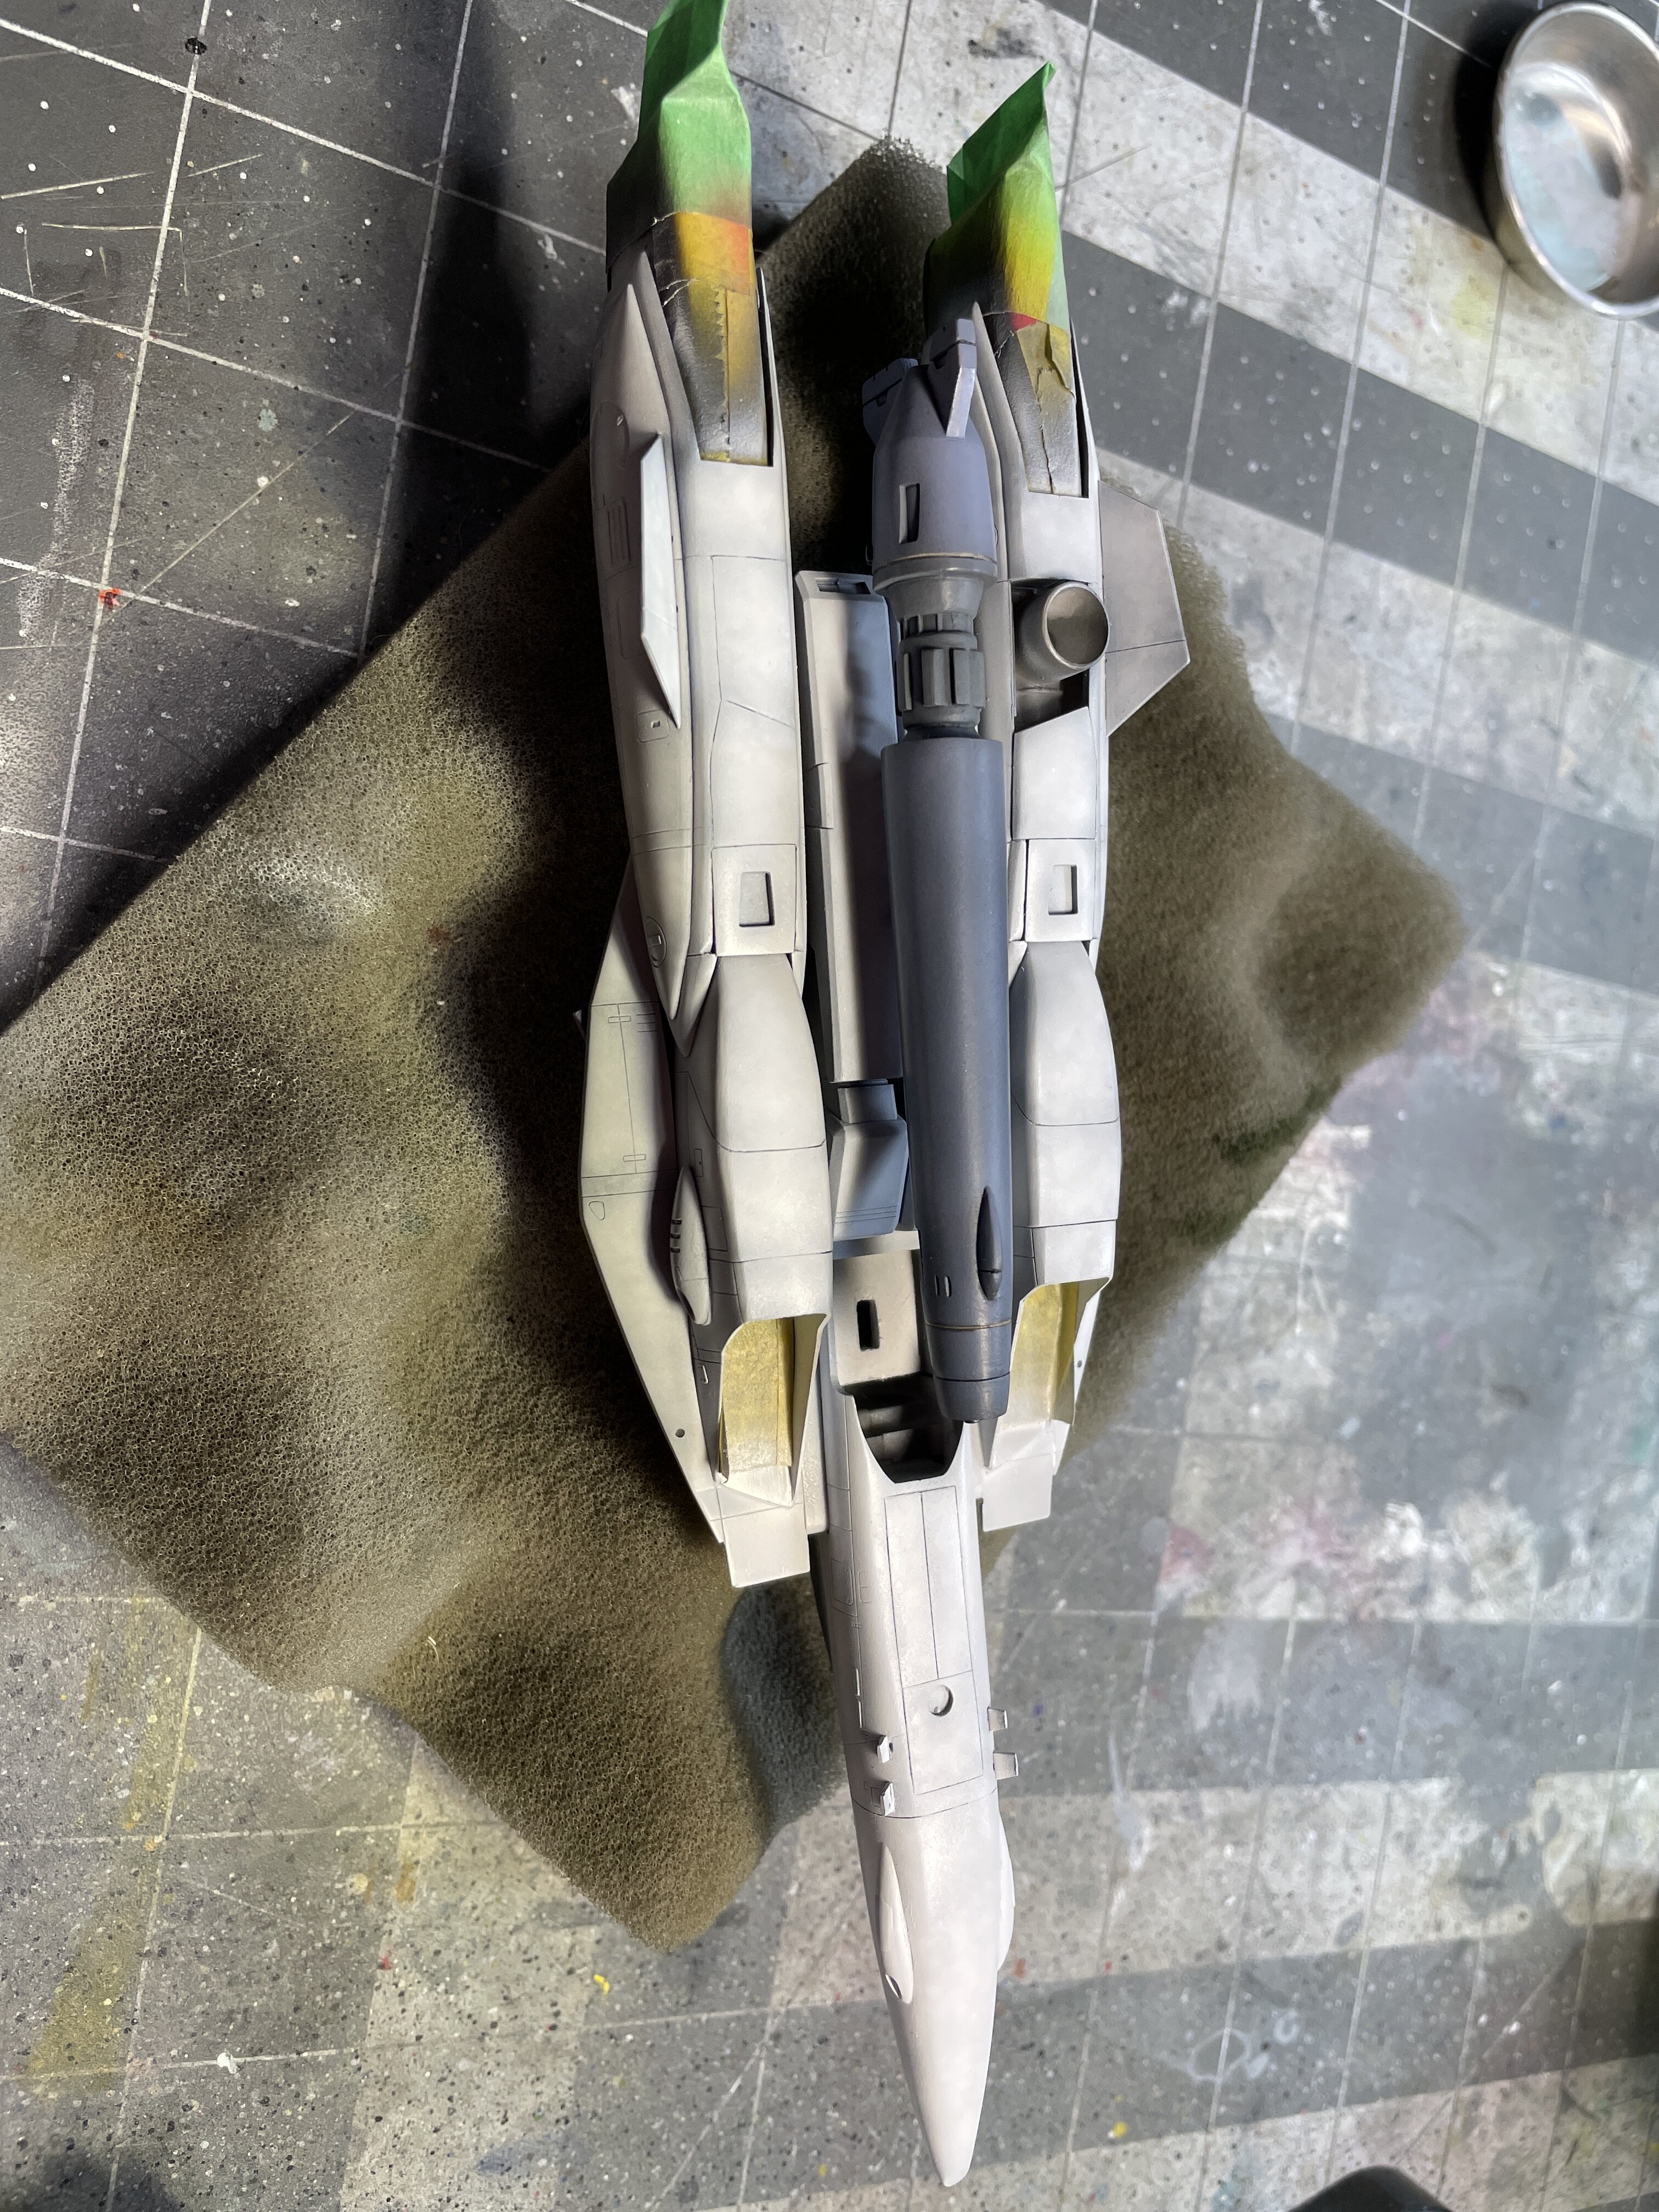
Some more WIP shots:
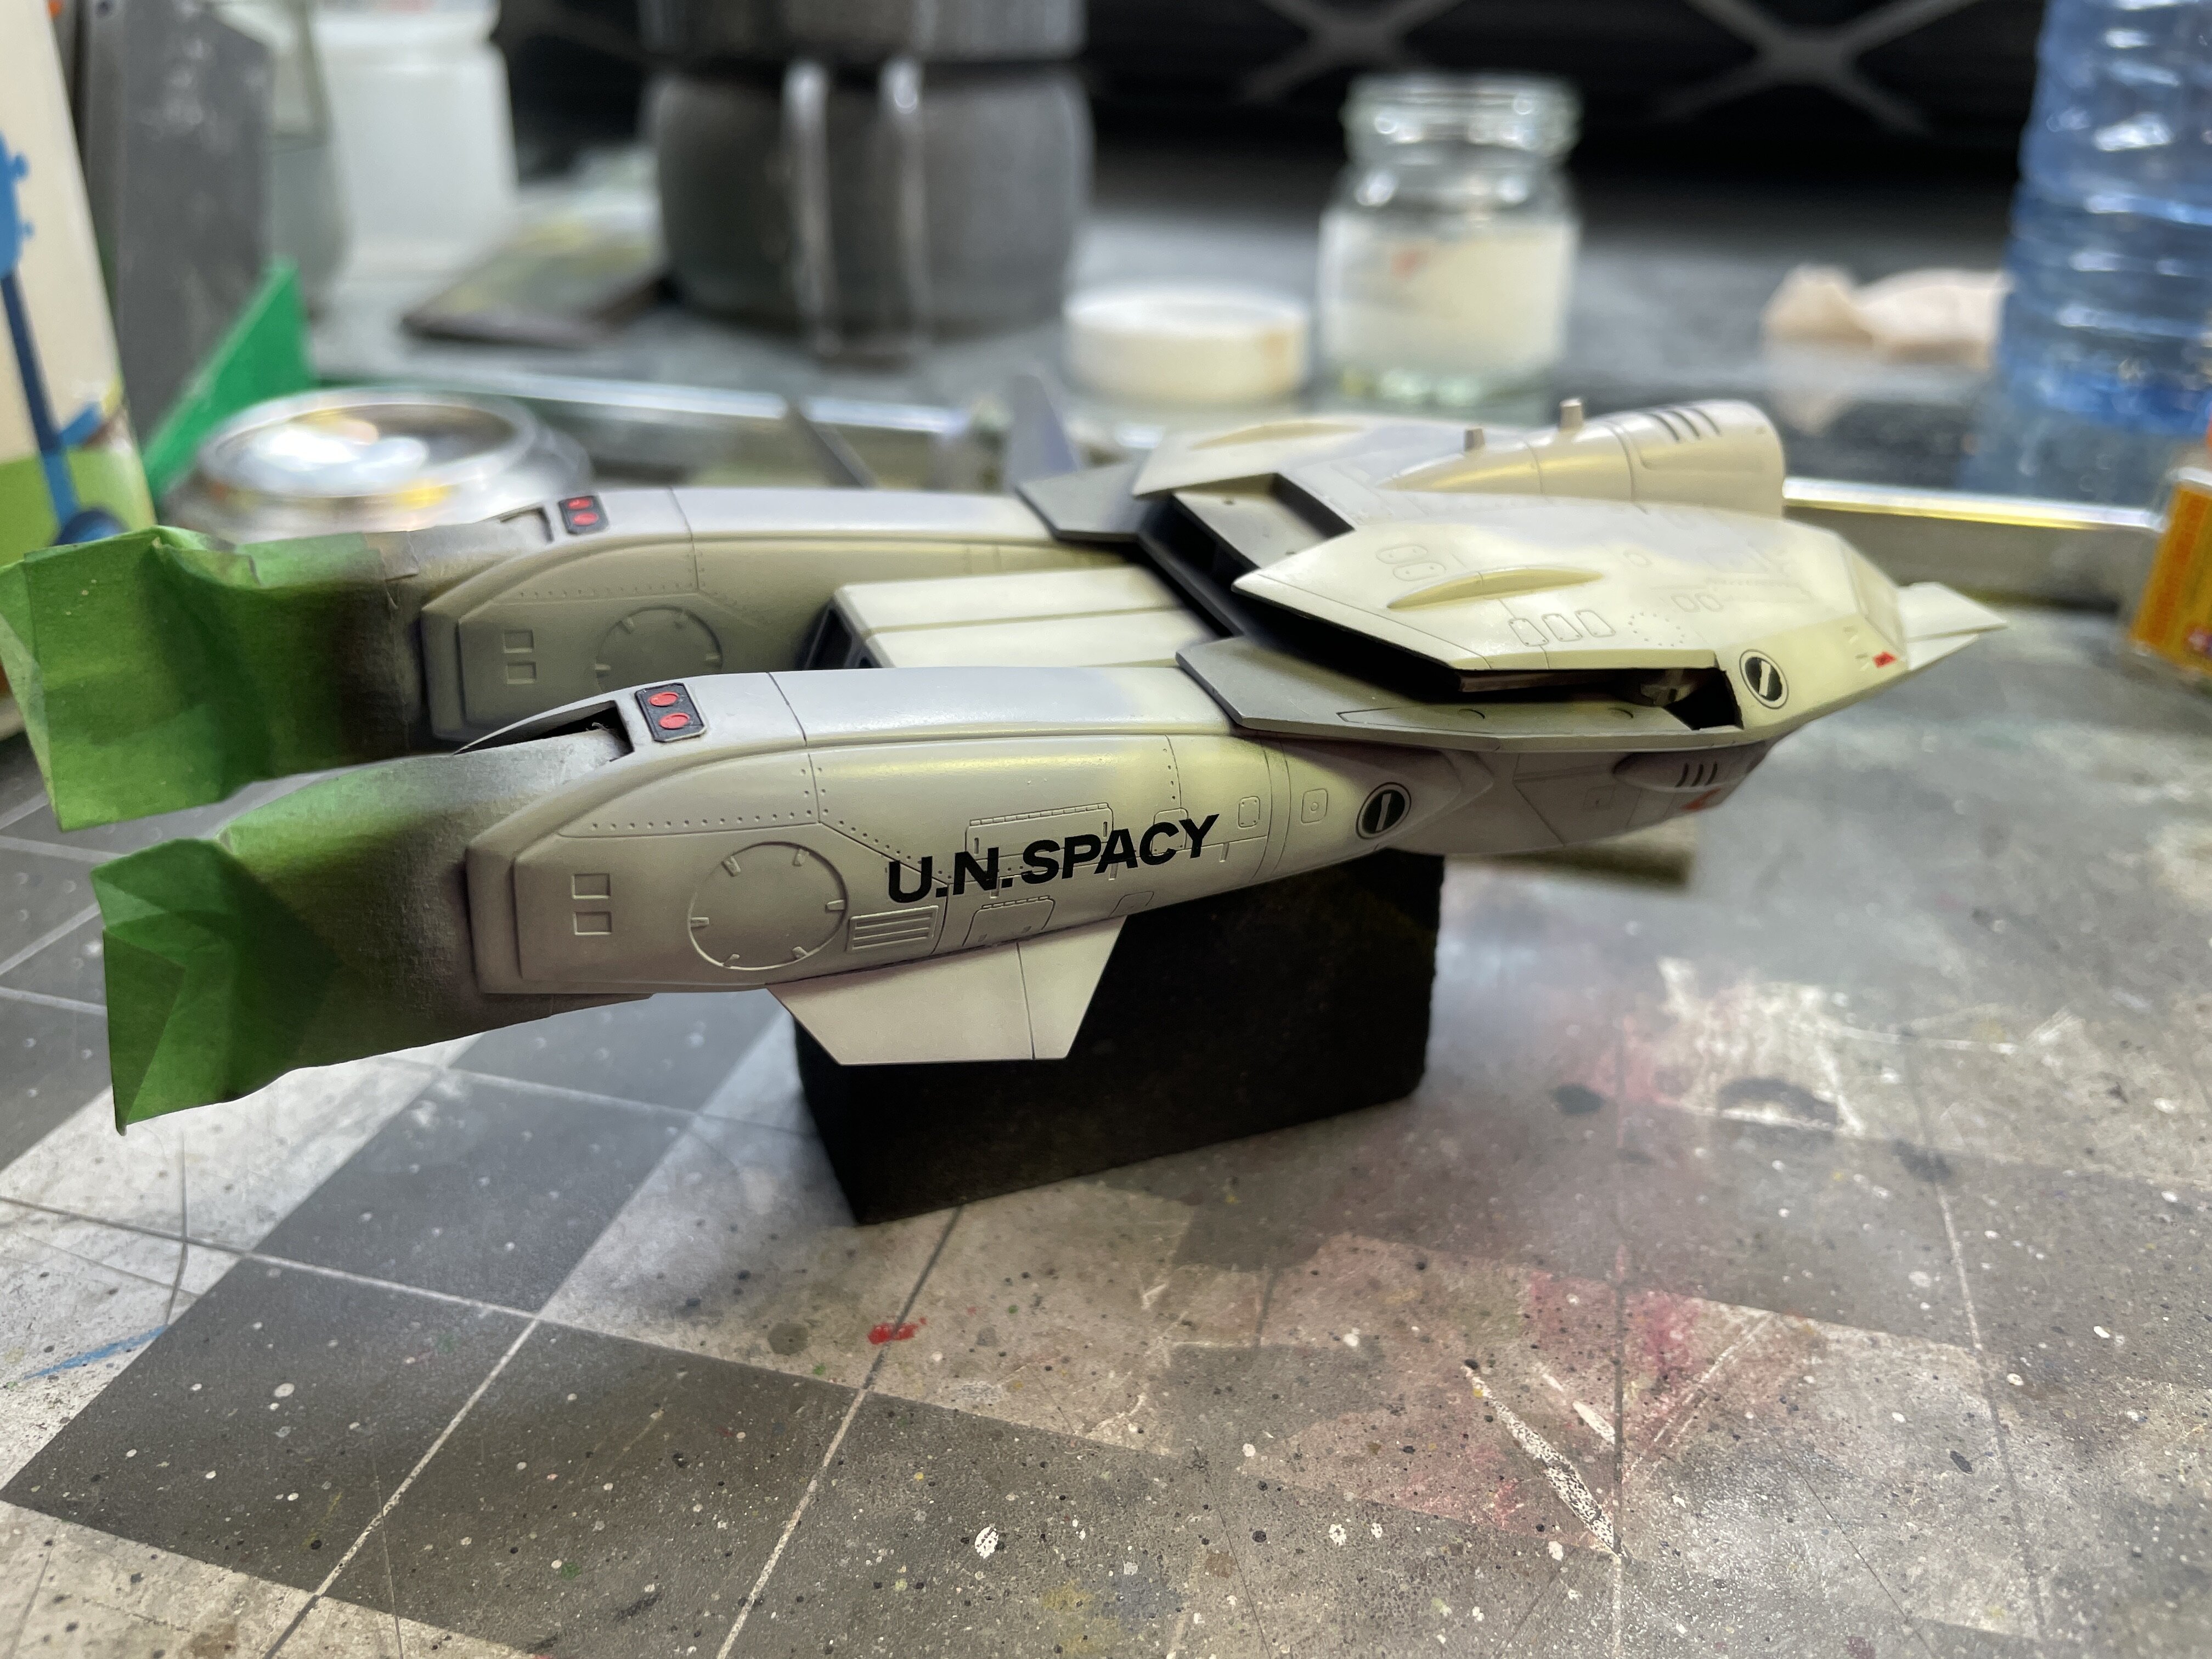
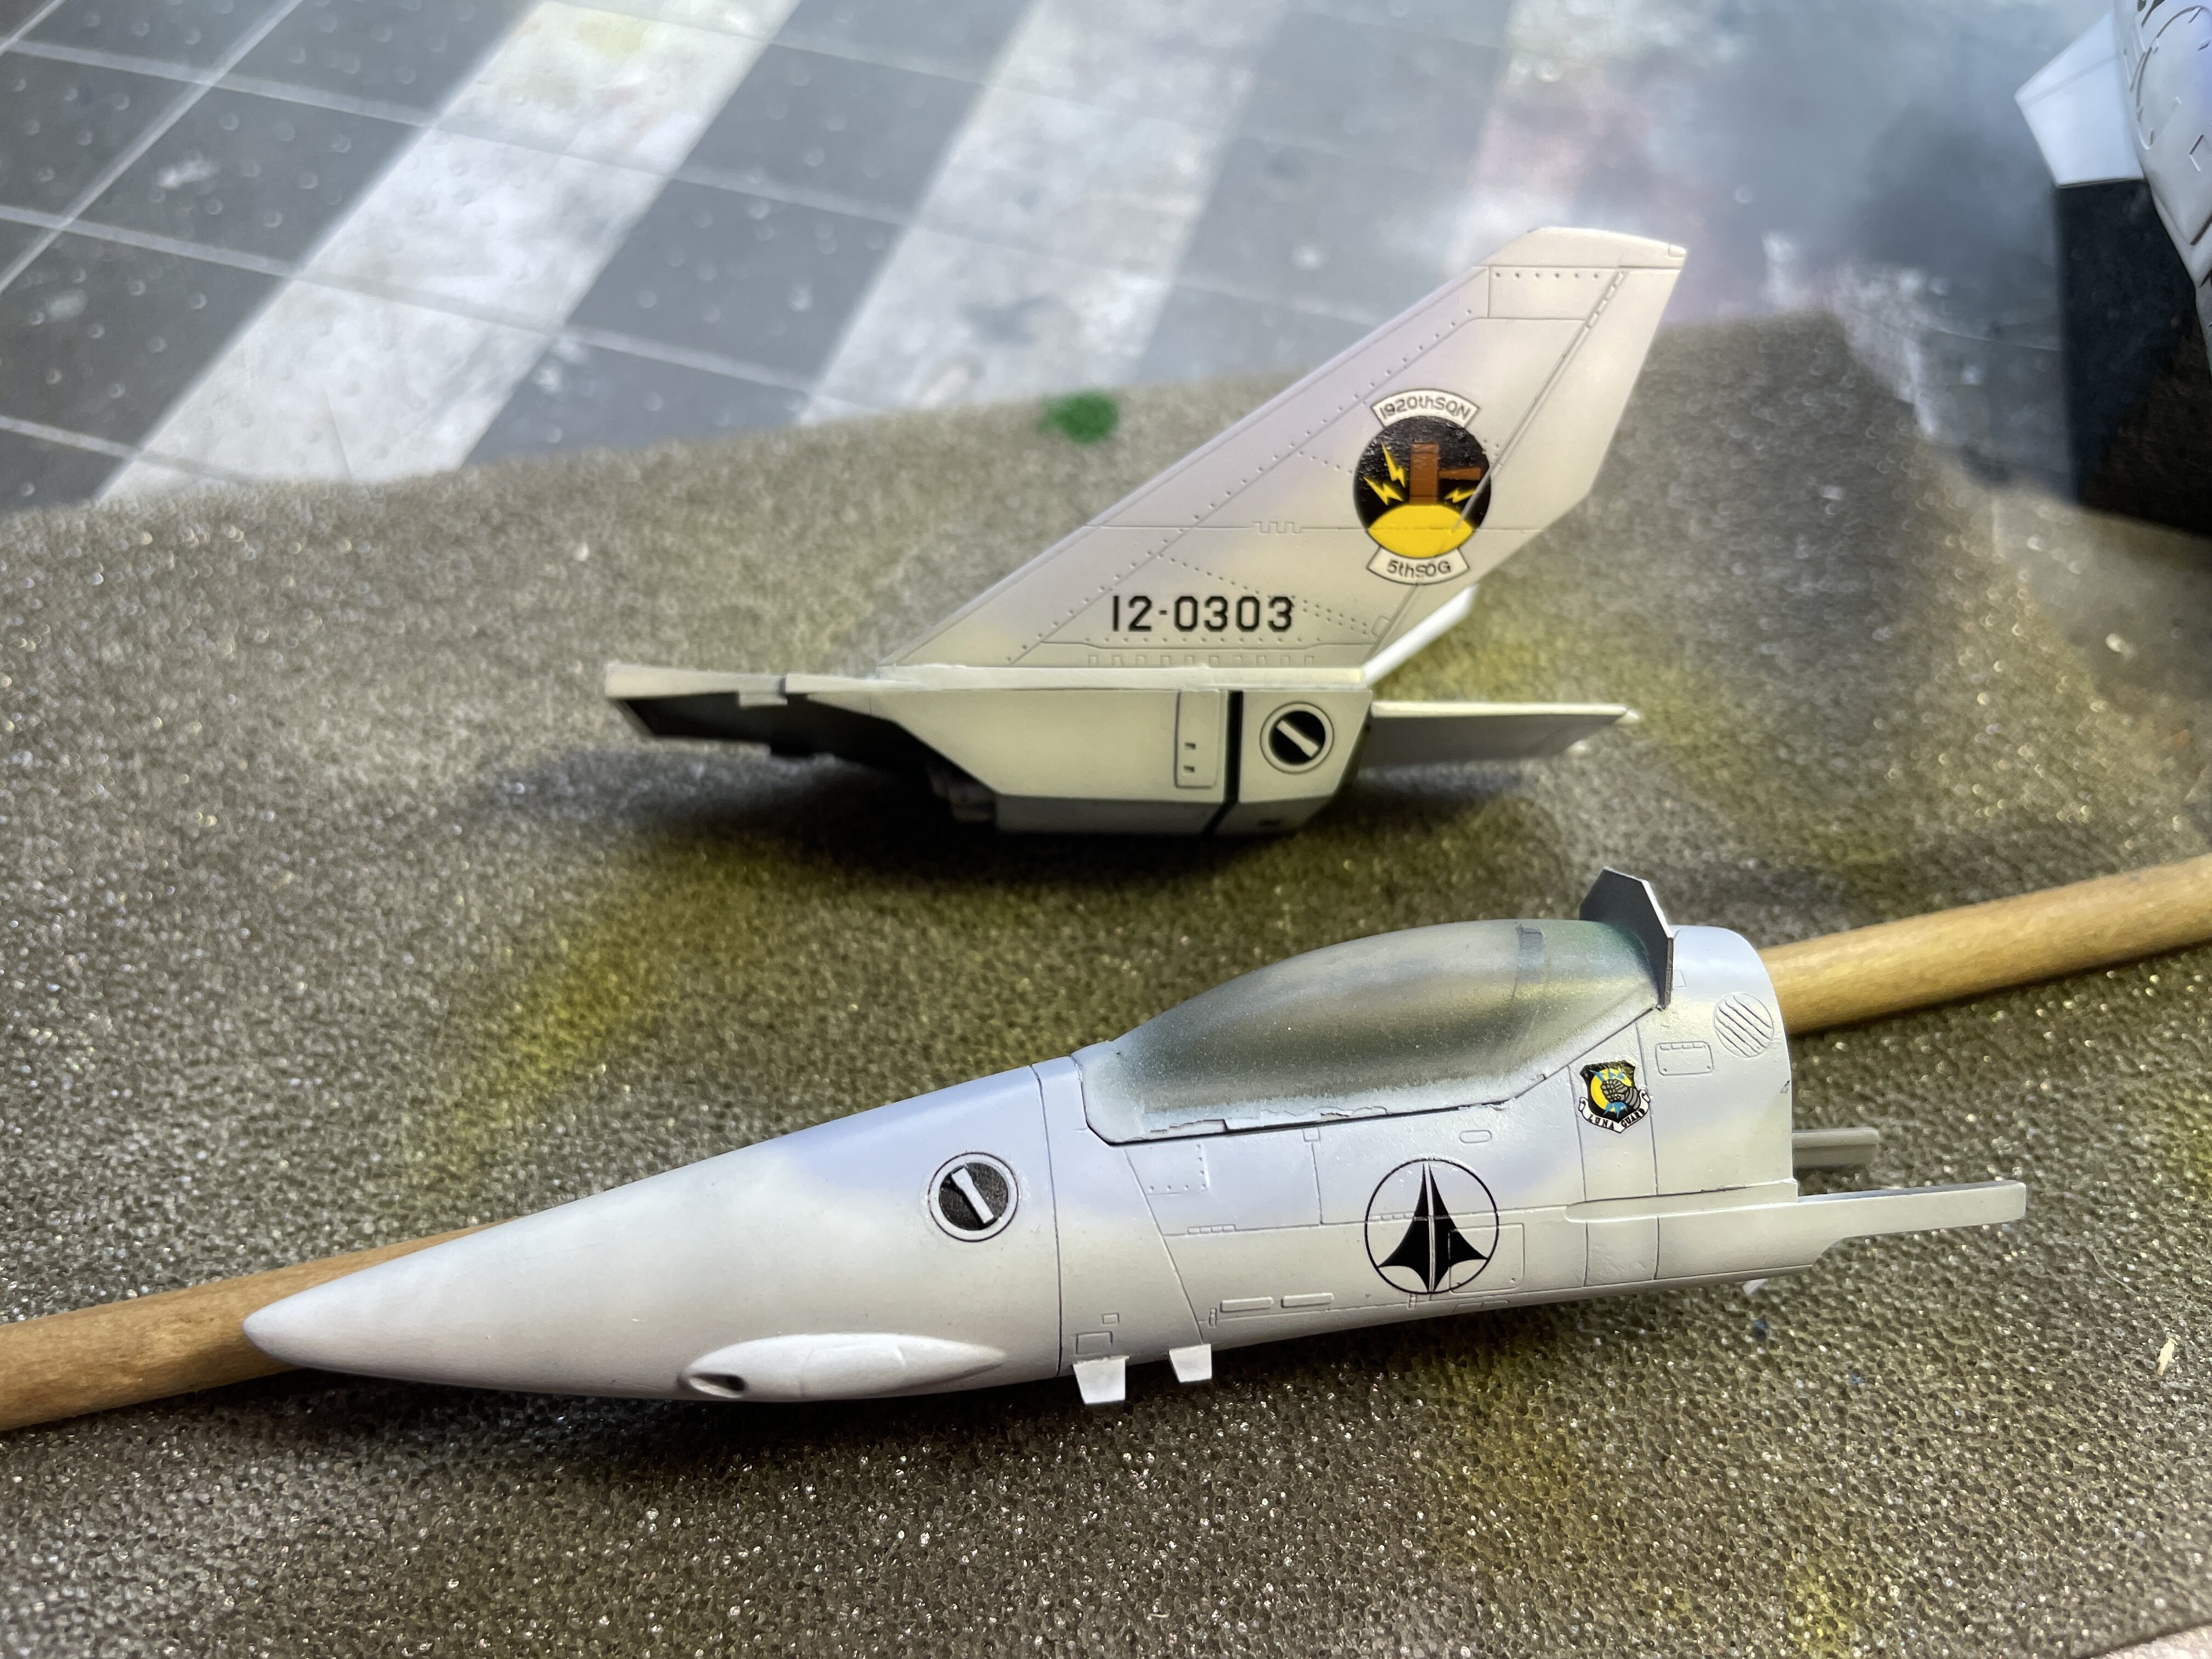
-
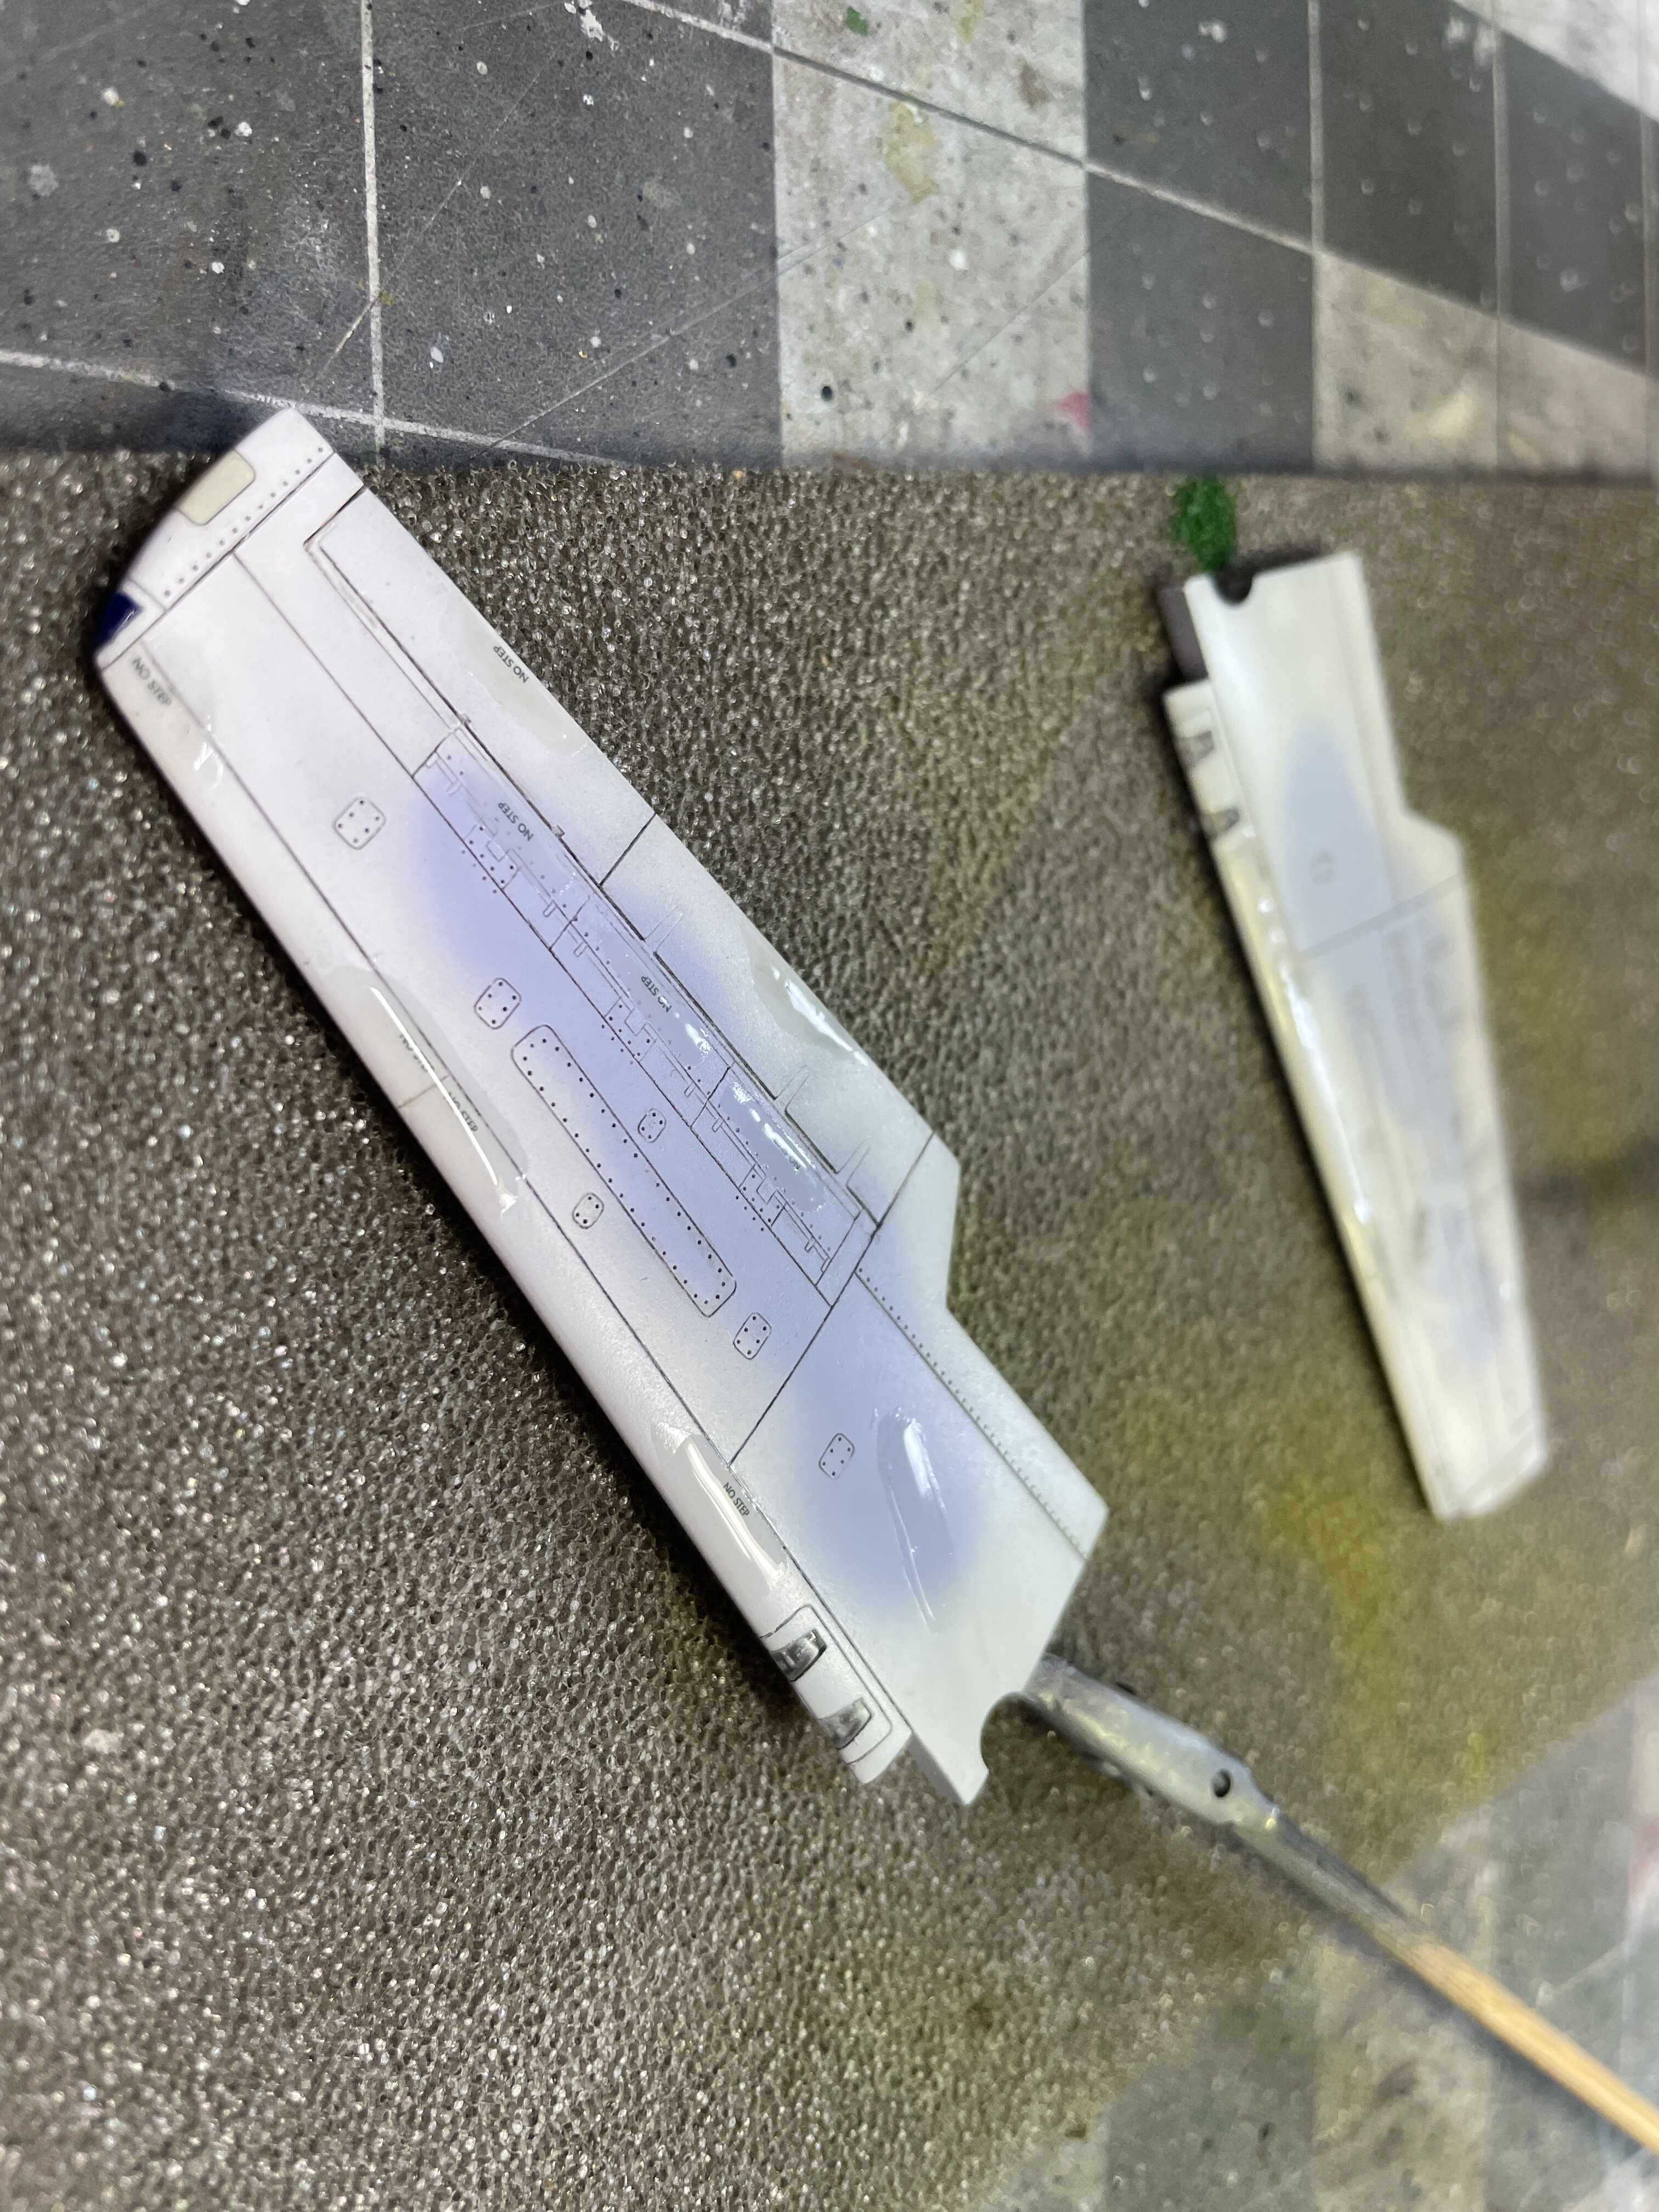
The repaired paint.
-
On 8/2/2025 at 9:25 PM, Bolt said:
Saw this on Pinterest . https://pin.it/434kO1jHo
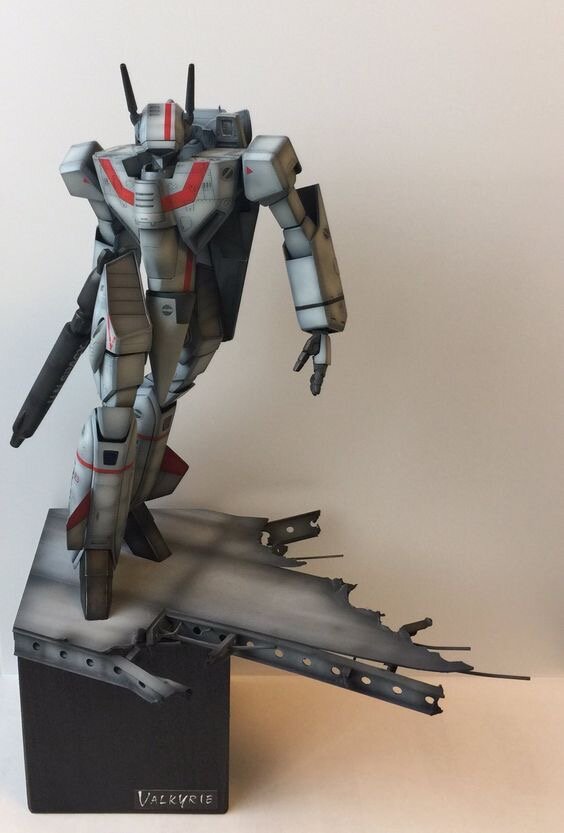
That is exceptional! That’s a great model and great display.
-
5 hours ago, KOG Water Dragon said:
Same as this same. And also, same.
Same, same and same. It’d be disappointing if to get that set as preordered early and at the same time. Oh well we’ll see what happens. I ordered the hguc Gallus J as soon as it popped up from hlj and noticed that it looks like I somehow missed it!
-
-
On 7/28/2025 at 7:12 PM, wm cheng said:
Finally finished! The canopy decal didn't fit properly, the left side did, but the right half was a tad too long, wierd, the VE-1 decals fit perfectly, it also crumbled into 4-5 pieces - probably due to age, but I noticed some of the round vernier thruster port decals didn't fit the engraved details perfectly too. That serves me for having 20yr old models to get to in my stash! Funny some of the weathering paint mottling didn't show up on my iPhone photos as much. I will take some better photos of them, but you can see @arbit amazing Minmay sculpt so well in the those huge bubble canopies.
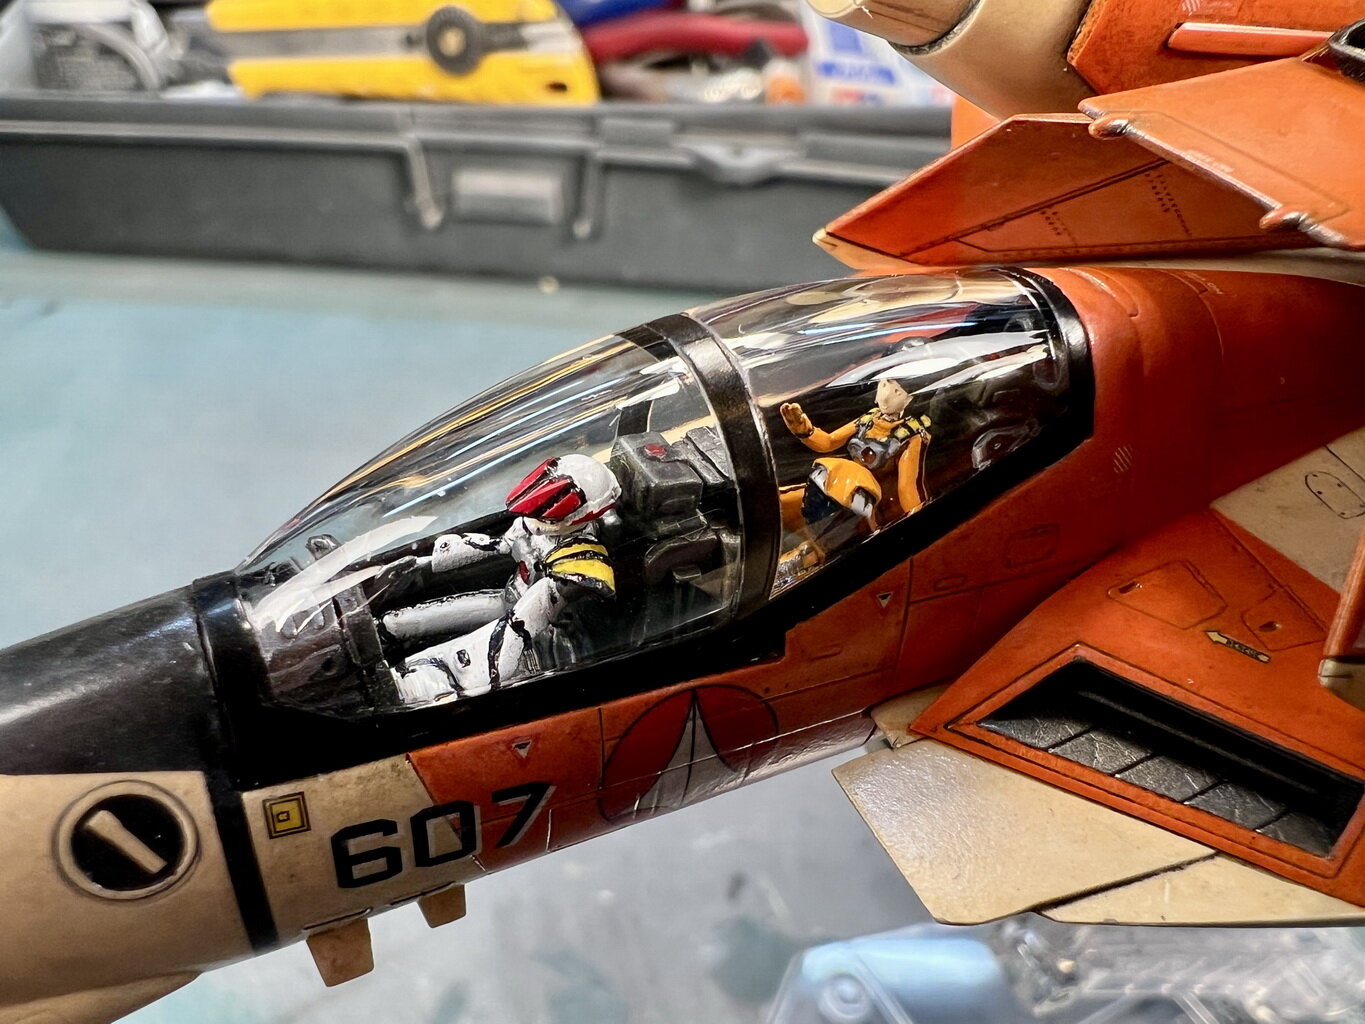

Awesome 👏 looks great!
-
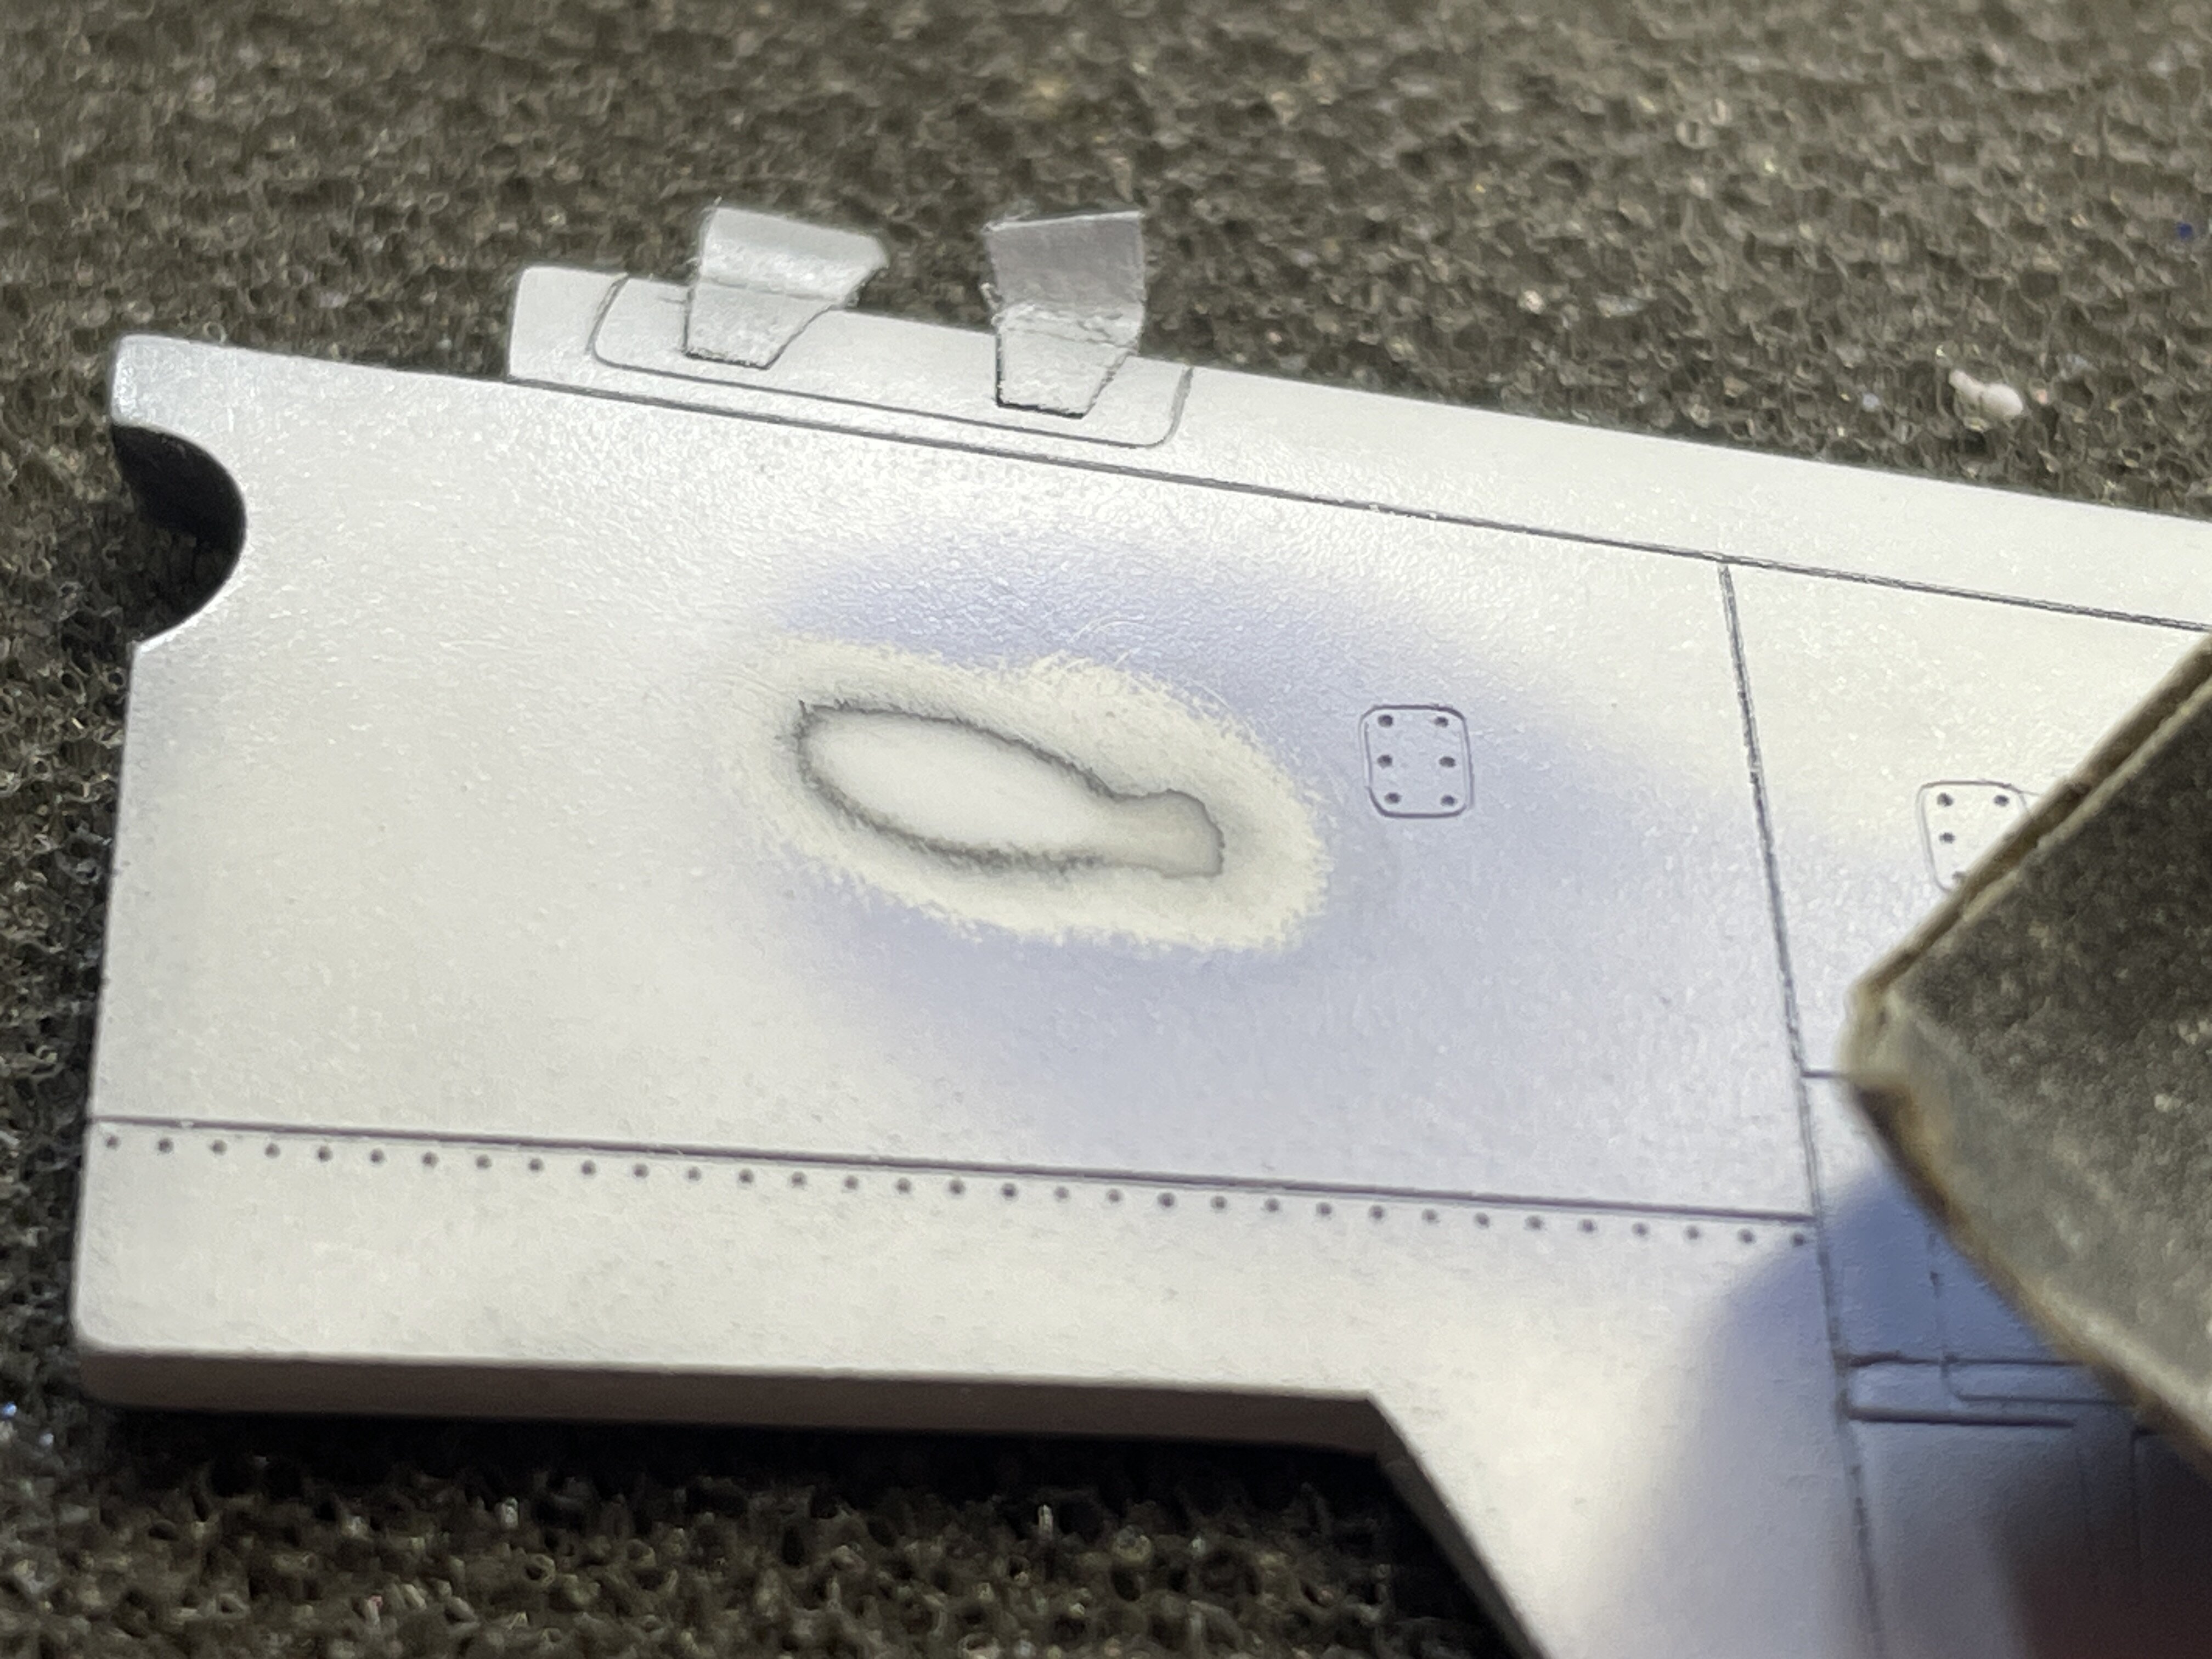
Here’s the white over black primer. Next is the violet to correct the camo blob.
-
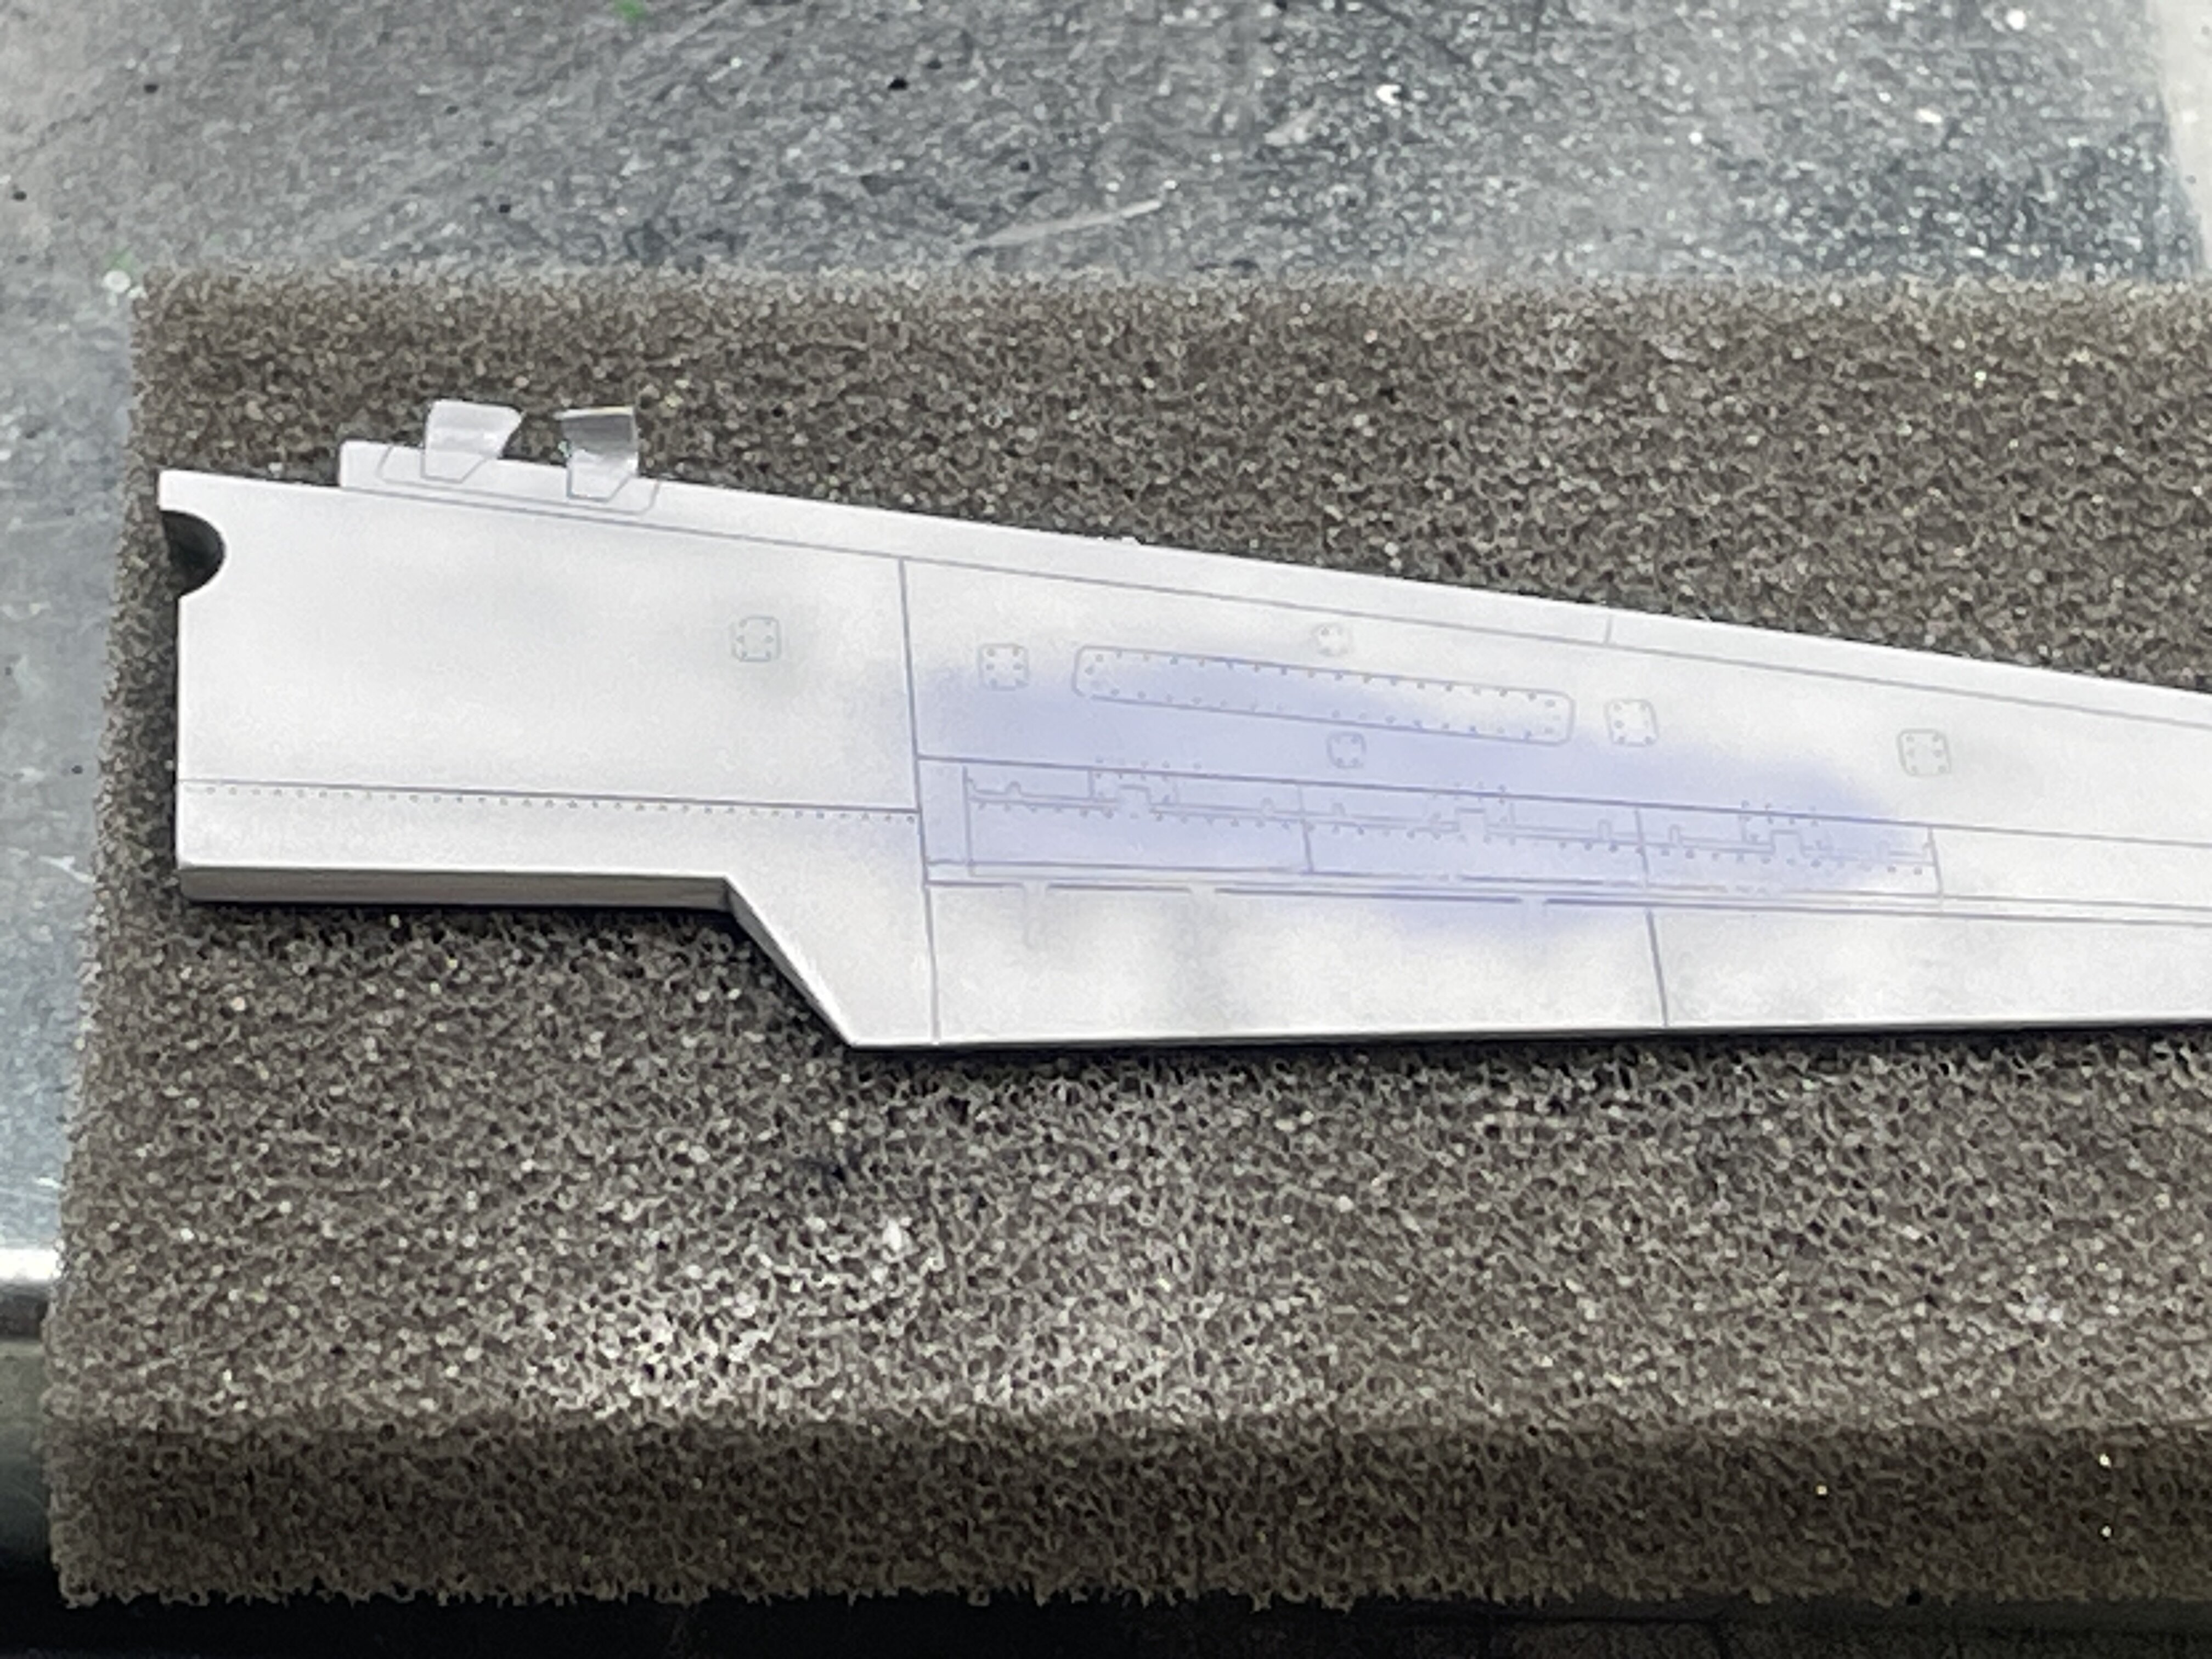
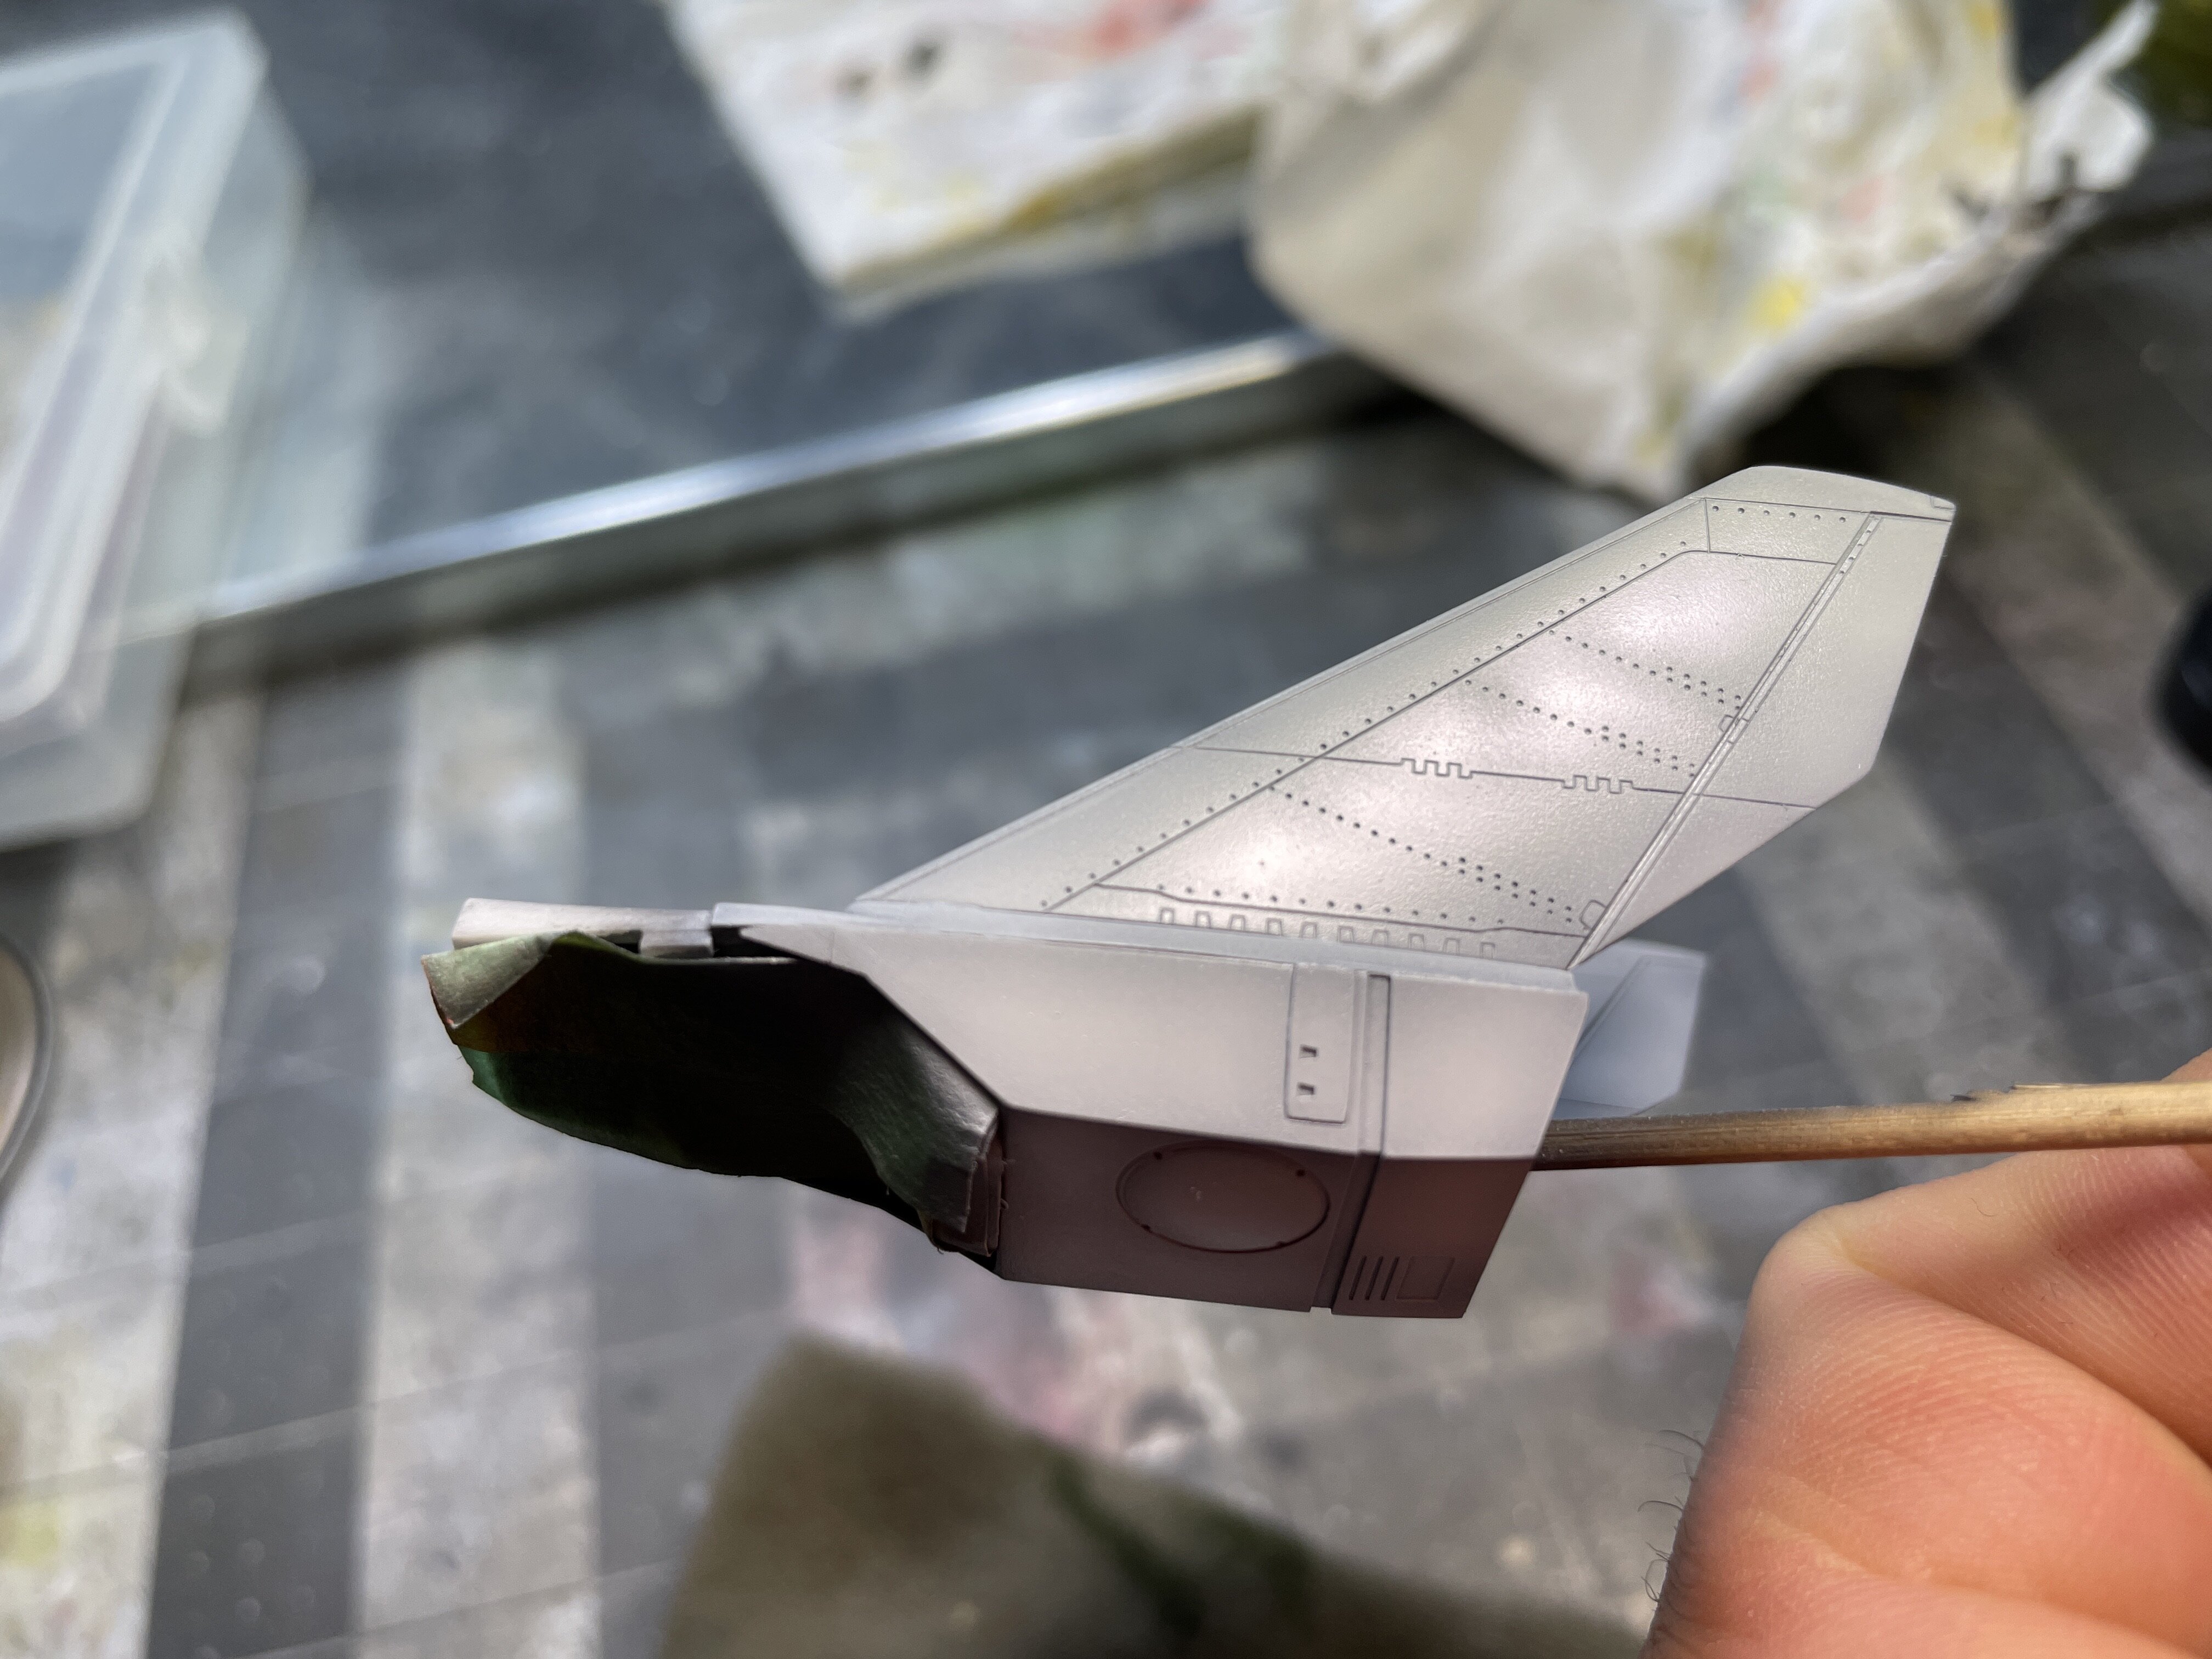
There was a scratch across this section that I didn’t notice until the camo was applied.. I’m buffing it out and now ready to repaint.
-
I’m laying it down as a soft edge rather than the hardline in the profile… although I may give it a tighter line.
-
On 7/25/2025 at 3:19 PM, Big s said:
It’s doable, but can be very risky. You kinda have to sand the lop layer a bit, and poke a tiny hole for the softener to soak through. This method runs a few scary risks since the weathering is already applied and can just make everything even more noticeable, or ruin the decal
the best way I’lve found to do decals from the start is after the base colors are layed down to use a gloss coat and then lay them down. After they dry, use the softener like microsol or Mr marksofter and usually that allows it to conform better. You can do the needle trick if there is a spot the decal didn’t conform to well like with a panel line and the softener gets under there and usually does the trick. Then there’s a couple other techniques that work well for blending the edge to make it disappear. You can mix your base color with some clear and spray around the edges to blend them in, or there’s the method that takes a bit more work and that’s to put a few layers of gloss over the decal and use a smoother sand paper and gently sand at the edges to level them down. Be very careful not to over sand and ruin the decal or the base color. Then add a final gloss to make sure the edge is gone. As long as the edge is gone using whatever method works best, then you can do all the weathering and final top coating to finish up.
All of what big said; I’ve had success removing decals by carefully sanding them off and doing a bit of touch ups with the airbrush and then reapplying new decals. Just take your time.
-
Some painting - Mr. Color 1 white over black 1500 surfacer using post shading and some stencils
-
19 minutes ago, Big s said:
I’m pretty sure it retracts for fighter so that it’s more aerodynamic, but why it extends for gerwalk and Battroid is a mystery to me. Probably just a rule of cool kinda thing. But maybe it has an odd purpose, like cooling or something. But more than likely just to add interest in the design for the more robotic modes visually.
I think you nailed it Big! I was thinking of it like a “GU-11 mk. ll” since it has a different profile and is larger than the Hs version.
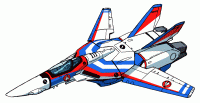
Macross Group Build 2026 SDF-1
in The Workshop!
Posted
I think I’ll be going for the Imai 1/5000 kit gifted to me by my good friend Tony. I will have to get some pics together.