-
Posts
1955 -
Joined
-
Last visited
Content Type
Profiles
Forums
Events
Gallery
Posts posted by NZEOD
-
-
Love this model! You've inspired me to try one!
-
Update 20/8/15
VF25 Photoetch set arrived today - The last one I could find anywhere, found and bought through Buyee.jp
Wasnt expecting miracles from this site but.... Well packaged Jasmine VF25 set arrived today at work! 5 days since arriving at the BUYEE Warehouse.
First Italeri Aircraft carrier deck should be arriving by this weekend so I can begin taking a mold off it and making a 350x350 sized version of it.
After seeing the Fastpack V1.1 on here I'm building one of those as well. Strung the LED Modules up last night and working on the ATTiny85 programming to get all 4 boosters and the main feet jets to light up correctly.
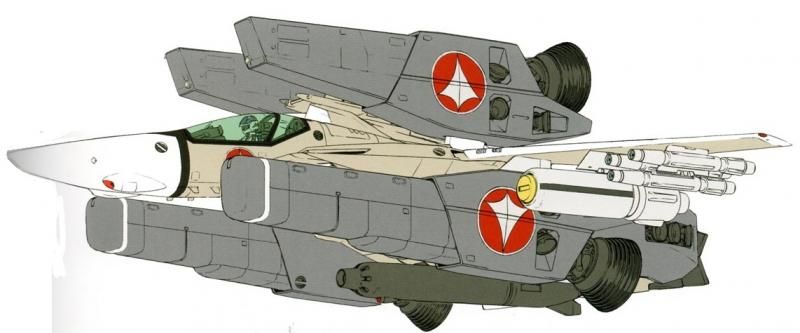
Not happy with the lineart version way of mounting the lower boosters on the wing stores pylons. I would have expected them to be mounted to the body. They look like they would rip the wings to shreds and tear off mounted on the spindly pylon!

The second issue I have with it is the lower boosters side mounted Verier thrusters... one nozzle is pointing straight at the rather angry Reaction Missile on the adjacent Stores Pylon!
I'll be airbrushing up the booster nozzles in Alclad on Saturday, after a morning blast in the hills on the Triumph 675, to see how the LED Modules reflect off the Nozzle sides and fill them with light. Will be experimenting with making Resin and melted plastic lenses to go in the centre of the nozzle to help spread the LED light beam to 120°.
Going to be a busy weekend
-
Are they real production paintjobs on actual operational jets? Damn!!!
Also, new to all these Chogokin things... what does "DX-chogokin" mean or refer too?
What scale are these? 1/60 or 1/72?
-
Will the Lancer pilots work in other 1/72 scale Hasegawa models?
-
Anyone know if anyone has made any 1/72 scale alternative pilot figures? The standard Hasegawa and Bandai ones arent too flash. How do these ones look?
-
Well I could bring it to Paragrafix's attention.
That would be cool if you could.
-
Dude I tried so hard to get their attention but they will not budge and create a new batch despite the fact that they sold out!!! Can anyone here some how reproduce those etched pieces???? I can possibly help to produce artwork I know auto cad and illustrator!!!
yeah... I think I'll have to make my own. I only need the Exhaust turbine detail to go over the LED I'm fitting. I have the last VF-25 set arriving next week so I'll get them scanned.
-
This still going?
If so I want:
5 x 272001 VF-25 Series
5 X 272002 YF/VF-19 Series
5 X 272003 VF-1 Cockpit
10 X 272004 VF-1 Intake and Nozzle5 X 272005 VF-11 Thunderbolt
-
Hell yes. Will be doing a work in progress vid as well. Visiting Weta Workshops next week to talk to a mate there about the project as I may need to make the carrier decks from scratch. I need the planes sitting diagonally to fit in the 400mm x 400mm cases and all the Deck kits are 400 x 200ish with the catapult straight up.
Heading to Cambrian Plastics (they made all my medal cases and the display cases for the items in the Ammo Wings IED and Ammunition museum) and after work tonight to get my quote for making the display cases. Hopefully not too crazy expensive.
-
I thought both the VF-1 and VF-19 are meant to be the same colours, the Purple/Blue with the gold highlights?
-
Update - Working on the coding for the Display Base lighting.
The base is an Aircraft Carrier Catapult Launcher.
In the corners will be an Amber hazard flasher
Lining the Cat channel will be flush mount rectangular LEDs that will flash red in sequence from the plane out off the deck.
They will change to Green.
The Blast Shield will be a segmented Servo controlled item that will lift up into position from the deck. I'm hoping to get it to lift in segments slightly out of sequence to add to the realism.
The little Adruino board runs all this and the plane lighting - Its a brilliant piece of kit!.
Sequence will be as follows.
1. PIR picks up movement near the display and initializes the ATTiny circuit.
2. Tiny red Fibre Optic with be on the cockpit dash and flash like a car alarm.
3. Cockpit lighting will flicker on.
4. Deck Hazards will come on and flashing. Would love to be able to make them spin like real ones...
5. Engines on to idle - red to orange - Engines will throb, pulse and flicker slightly the entire time they are on as will the cockpit lighting.
6. Red cat lights start flashing in sequence down launch path.
7. Shield raises.
8. Throttle up to Blue/ Purple for a few seconds with each engine switching to full burn and back to normal slightly out of sequence with each other. Both feet engines for most, the Super packs as well for those with them.
9. Cat lights change to green flashers.
10. Engines slowly up to full burn again and hold for 10secs.
11. Deck lights to Red, engines rapidly back to normal then shutdown with a fading red glow without flicker in each nozzle. Cockpit lights off using a rapid fade and flicker. Dash light to flash red.
12. Cat lights off.
13. Shield down.
14. Deck Hazards off.
15. Dash light to off.
1 minute sequence.
The programming is a MAJOR but its kind of satisfying as I'm getting each function coded and working.
Something like this but busier as befitting a Veritech Era launch.

-
http://scalemodeldb.com/paintcharts/vallejo
helpful chart
What model is it on and where on the model? There will be a substitute colour. Guessing its an out of production colour.
-
Read the instructions.
try to be helpful... the instructions are in Japanese.
To the OT, take your time, plan is out as some parts need painting BEFORE final assembly - Turbine blades, engine exhausts, Cockpit details, Undercarriage wells etc.
Clip the parts off the Sprue, dont twist them off as this deforms them.
Use your cement (not superglue!) sparingly and get the parts together quickly once you apply the cement. It welds/melts the parts together so dont use too much and dont touch the join with a finger until its dry.
Use Tamiya putty to fill join lines then fine sand paper to gently smooth it off when set.
Use what ever you find/buy/make to rescribe any panel lines that need redoing after using the putty.
Greenstuff 2 part putty is good for making/sculpting parts if needed but thats advanced stuff.
Google using FUTURE Floor Polish on your model.
Google assembly guides on how to put your models together as a guide.
Take your time.
-
Park the Raven, I'll grab that from you, but wont be able to pay until the 17th. Assuming you are ok with that.
-
Ha! that's the one I'm using as a test rig for the LED lighting project. Side by side with the Hasegawa kit there is no comparison. Bandai's one is way more basic in every respect.
-
-
After either or both. Want to strip, light up and rebuild them for the Macross Wall display. Apart from Seventh Moon did anyone else make a 1.72 scale version?
-
Your list shows you have a VF4 but I cant see it in the photos?
Do you still have it?
-
Just found one of the last Jasmine VF25 Photoetch kits! bought for 4400yen including freight but its worth every cent. For another 9000Yen I also found another 2 VF25s and a whole stack of custom decals!
-
Be after one 1/72 scale one unpainted to make into a Low Viz with light up engine. Will pay in full on the 17th Aug is thats ok including shipping to New Zealand.
-
Thanks for the welcome and yeah, I'm VERY familiar with having my work ripped off with graphic design work I do on weapons and race bikes/cars. Can be infuriating.
-
I used to have my own afterhours signwriting business, before racing and Army studies and deployments took too much of my time up, called Slydesigns, then AsylumArt, doing door paint on airforce helos, APC names, Unit logos, Drift car full wraps and Motox helmet airbrushing. I still have the airbrushes, vinyl cutters and the Design programs which I use to camo up real steel and airsoft rifles.
Might just give this a go if I can convince the wife.
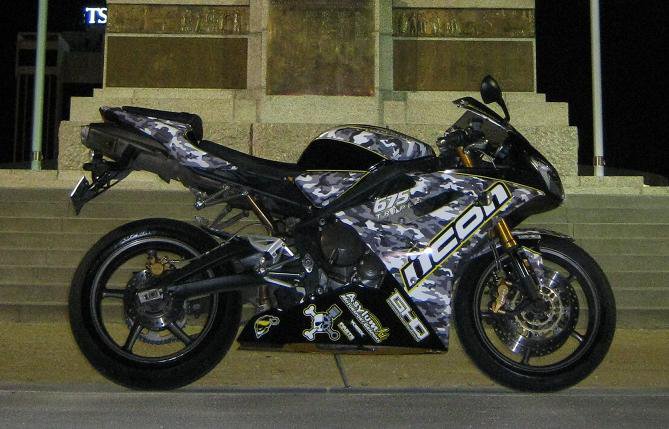
My own ride... make an interesting macross scheme...

-
The printers you guys are wanting are called ALPS printers. They print using a opaque coloured resin impregnanted onto a tape cassette. Besides the usual colours they are the only desktop printers that can do white and metallics. The bad news is twofold. They are no longer made BUT you can still get the ink cassettes as they are hugely popular printers.
Second, they are between 900NZD and 1300NZD for a refurbished model out of Hongkong etc.
The MD 5000 is the one you want. They carry 5 film cassettes and do 2400DPI resolution!

I'm looking at getting one to do the Hallway display models with my own logos.
-
Oh, that was a recast? Damn! The instructions threw me. Blanking out the link now.
Is a recast a bad thing?


How is Alclad paint?
in The Workshop!
Posted · Edited by NZEOD
Citadel is non toxic. I used to paint alot of 40K figures on commission for other soldiers at Trentham and Waiouru camps and had a bad habit of wetting and re-pointing fine detail brushes with my mouth. I'm mostly still ok.
Picking up some Alclads tomorrow night from Hobbycity here in Auckland.
101 Aluminium
102 Duraluminium
104 Pale Burnt Metal
106 White Aluminium
113 Jet Exhaust
117 Matt Aluminium
119 Airframe Aluminium
120 Gunmetal
121 Burnt Iron
123 Exhaust Manifold
$200NZD!
A helpful visual of the effects below...