UN_MARINE
-
Posts
905 -
Joined
-
Last visited
Content Type
Profiles
Forums
Events
Gallery
Everything posted by UN_MARINE
-

SDF-1 3D Model + 3D Print [SD Machine Style]
UN_MARINE replied to UN_MARINE's topic in The Workshop!
Thanks! Hopefully, it's the first of many projects. -
SDF-1 3D Model + 3D Print [SD Machine Style]
UN_MARINE replied to UN_MARINE's topic in The Workshop!
I'm looking into digital distribution for the files, or printing & shipping - depends on which is more cost-effective for you. It can be scaled up or down. In theory, you can print one that's 5 feet tall, if you had the resources to do it. -
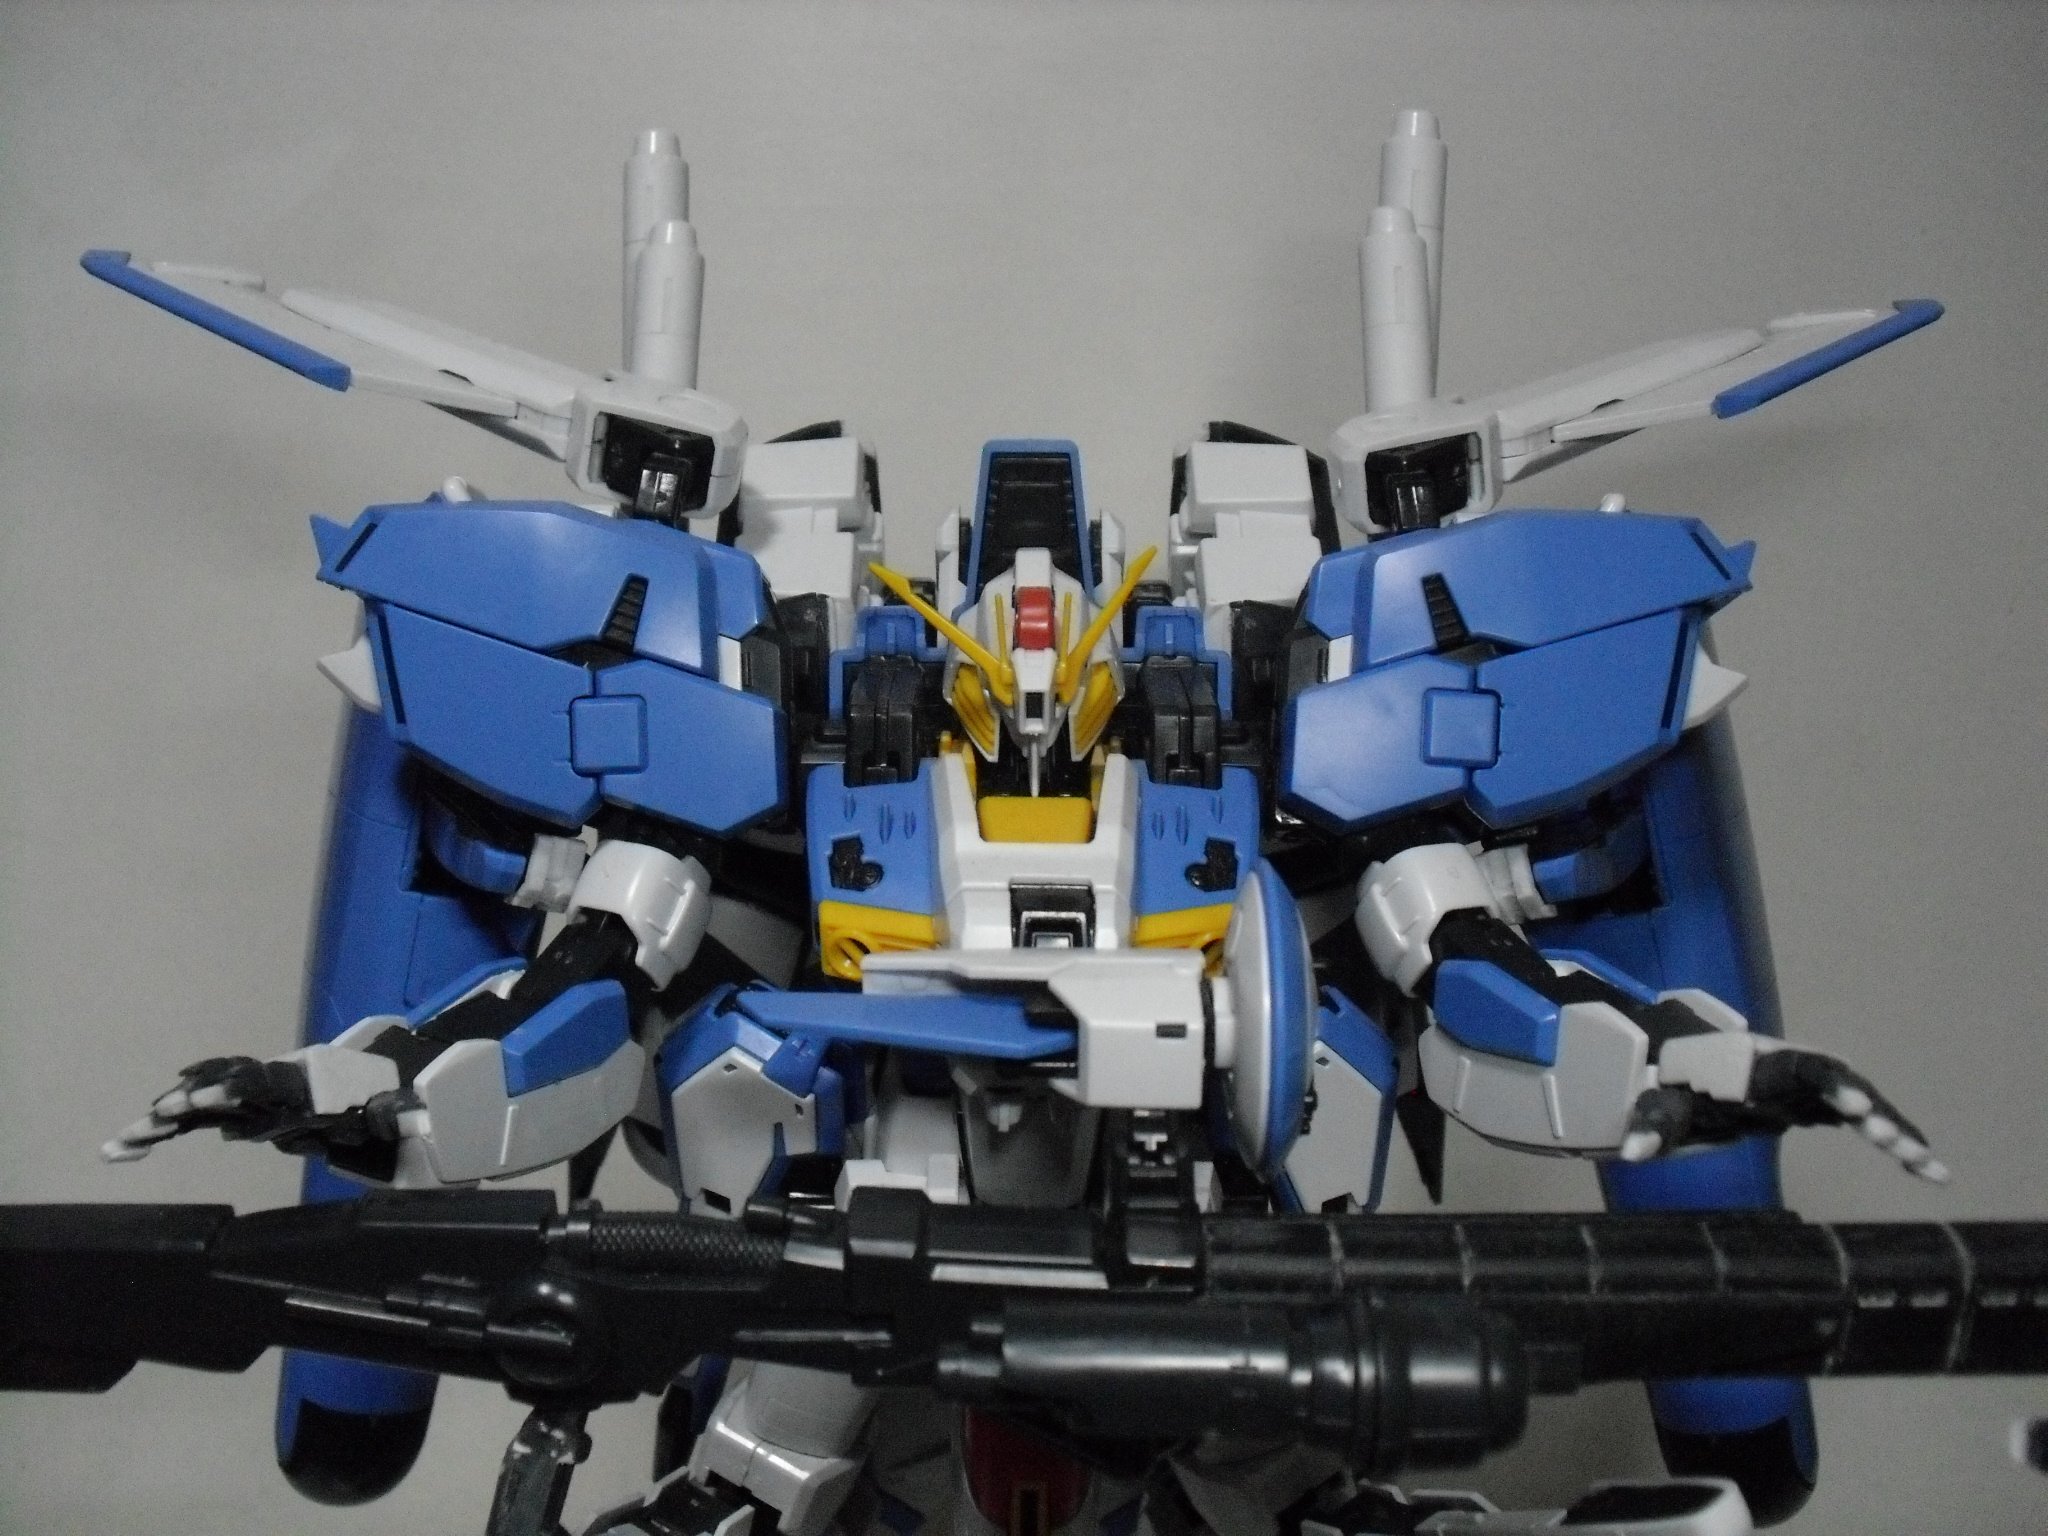
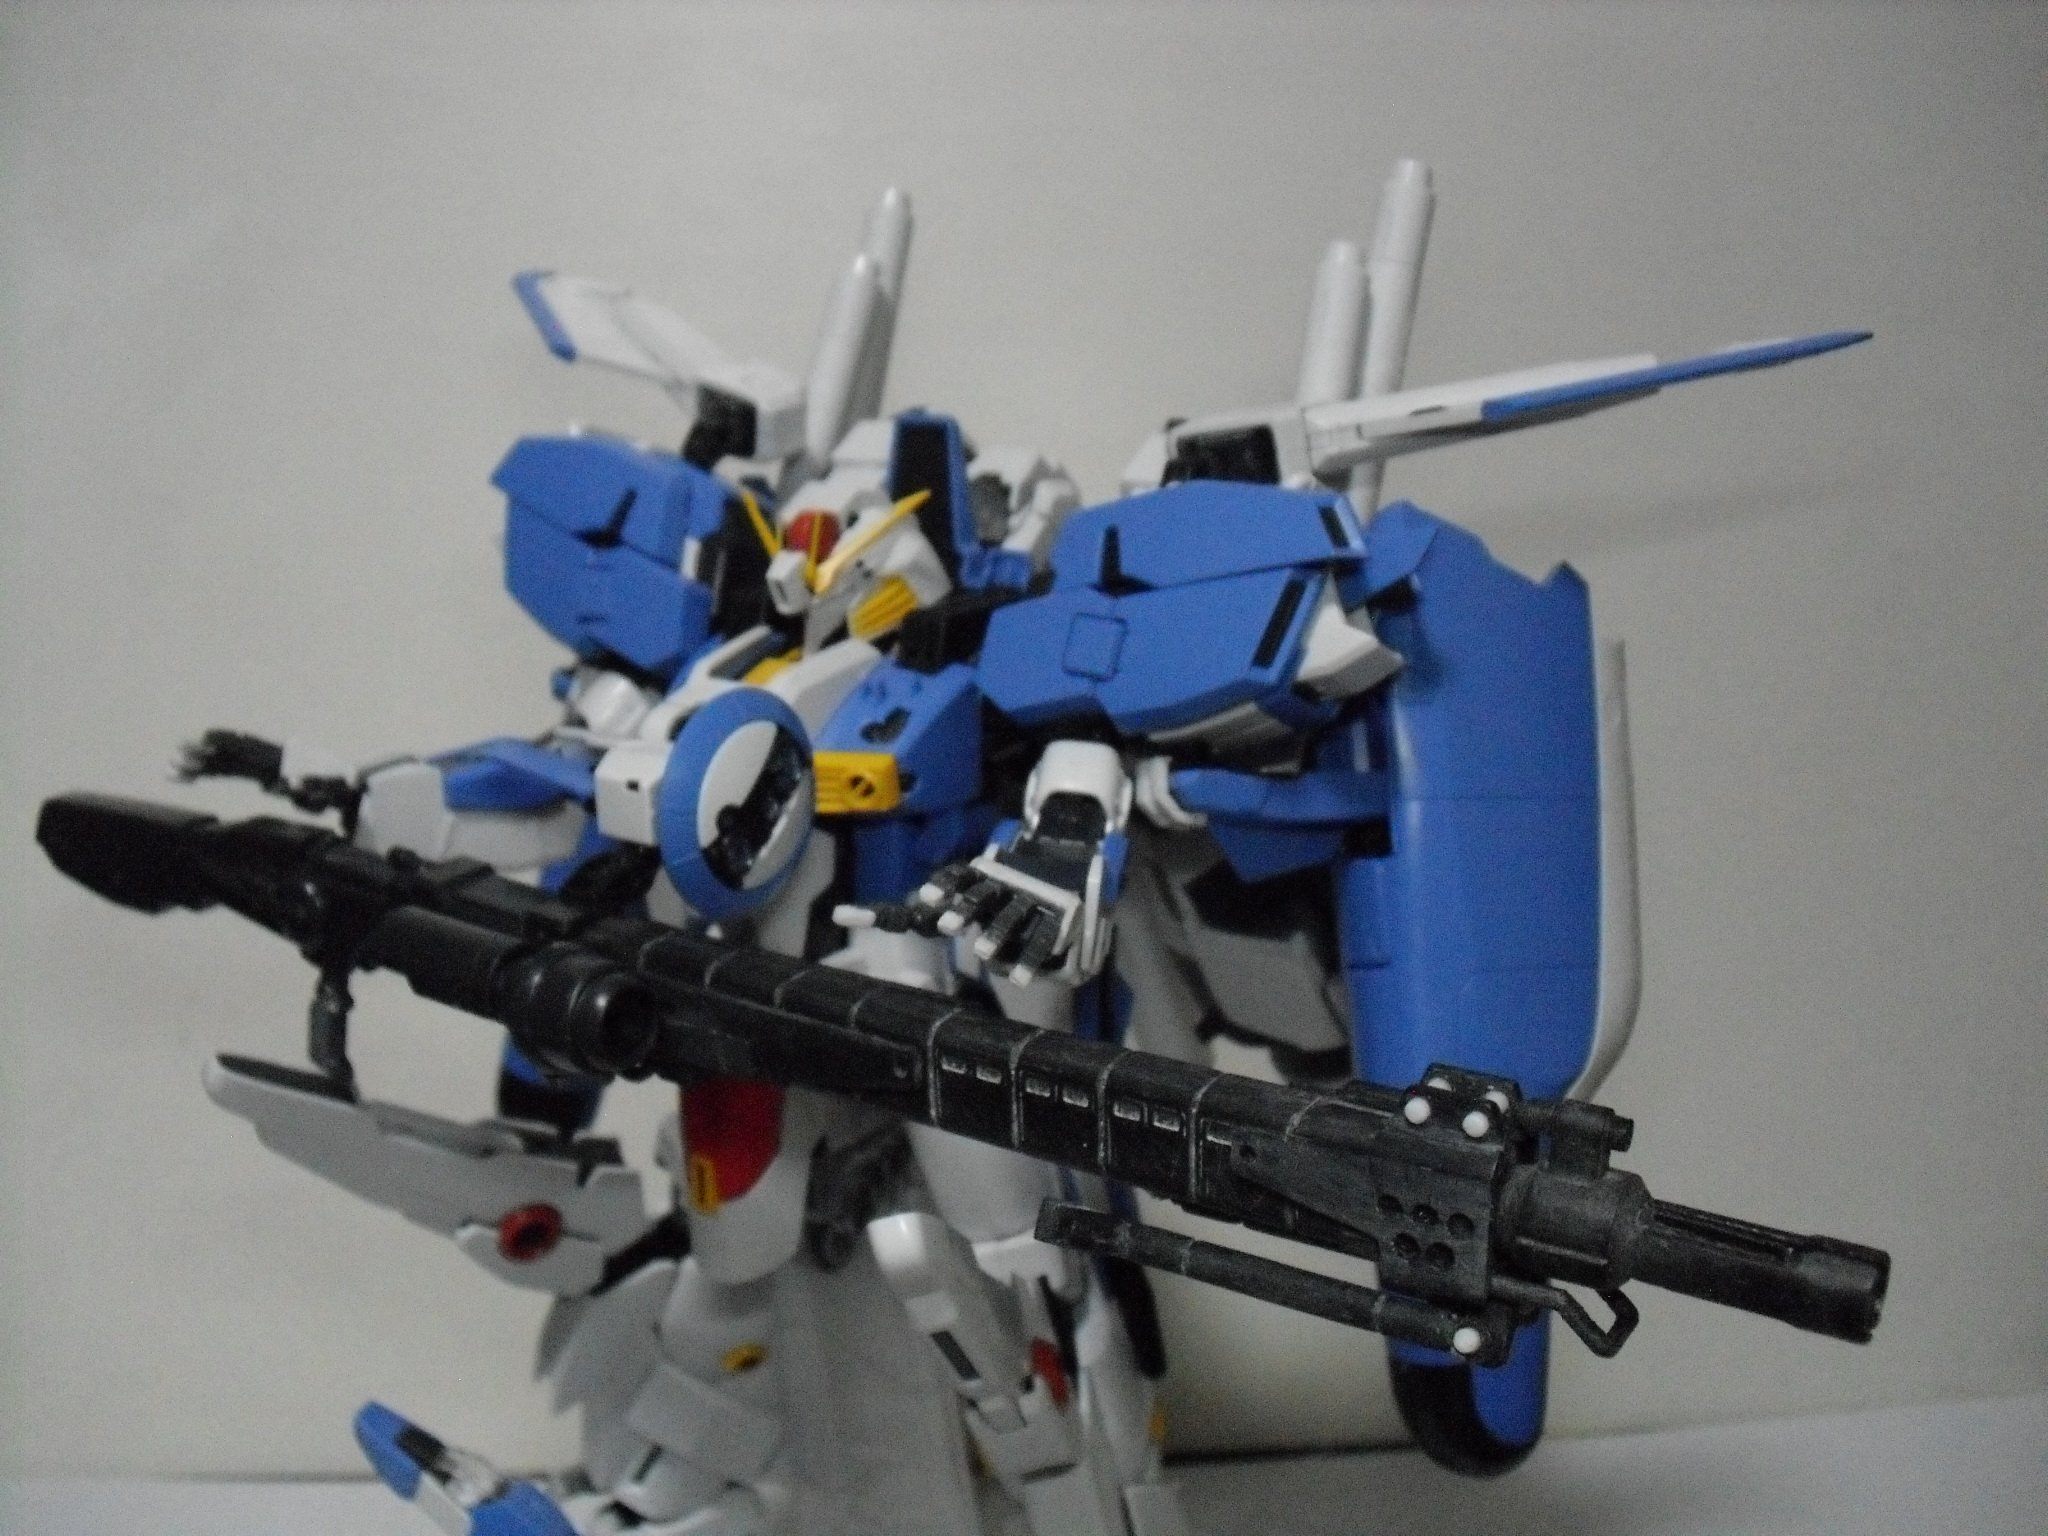
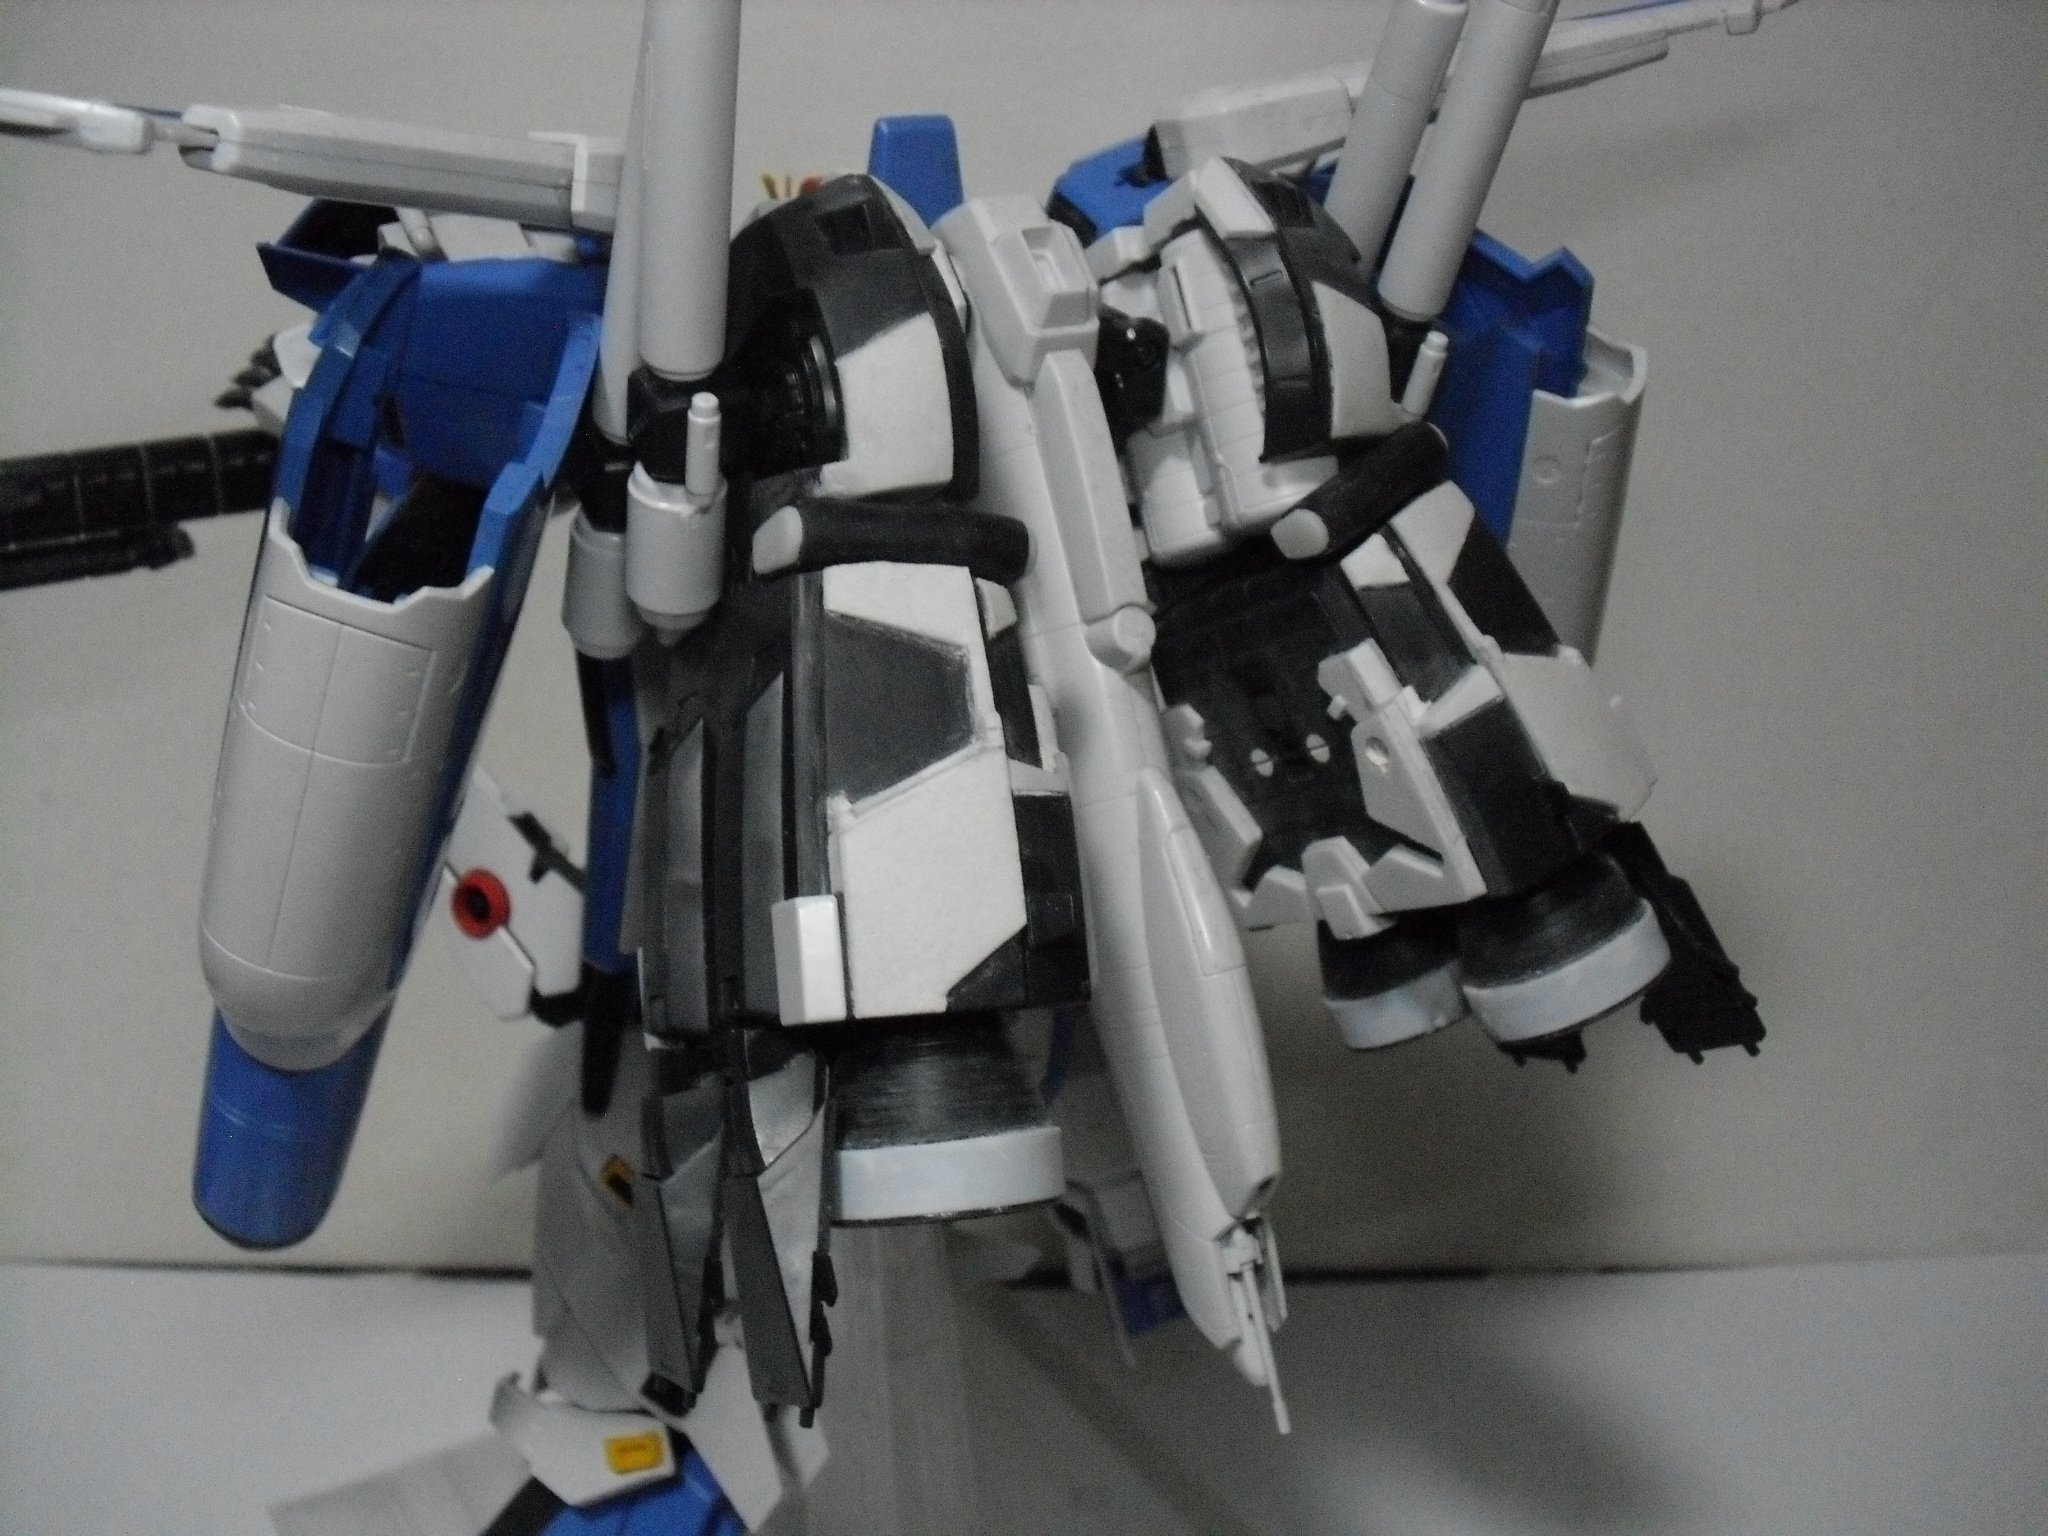
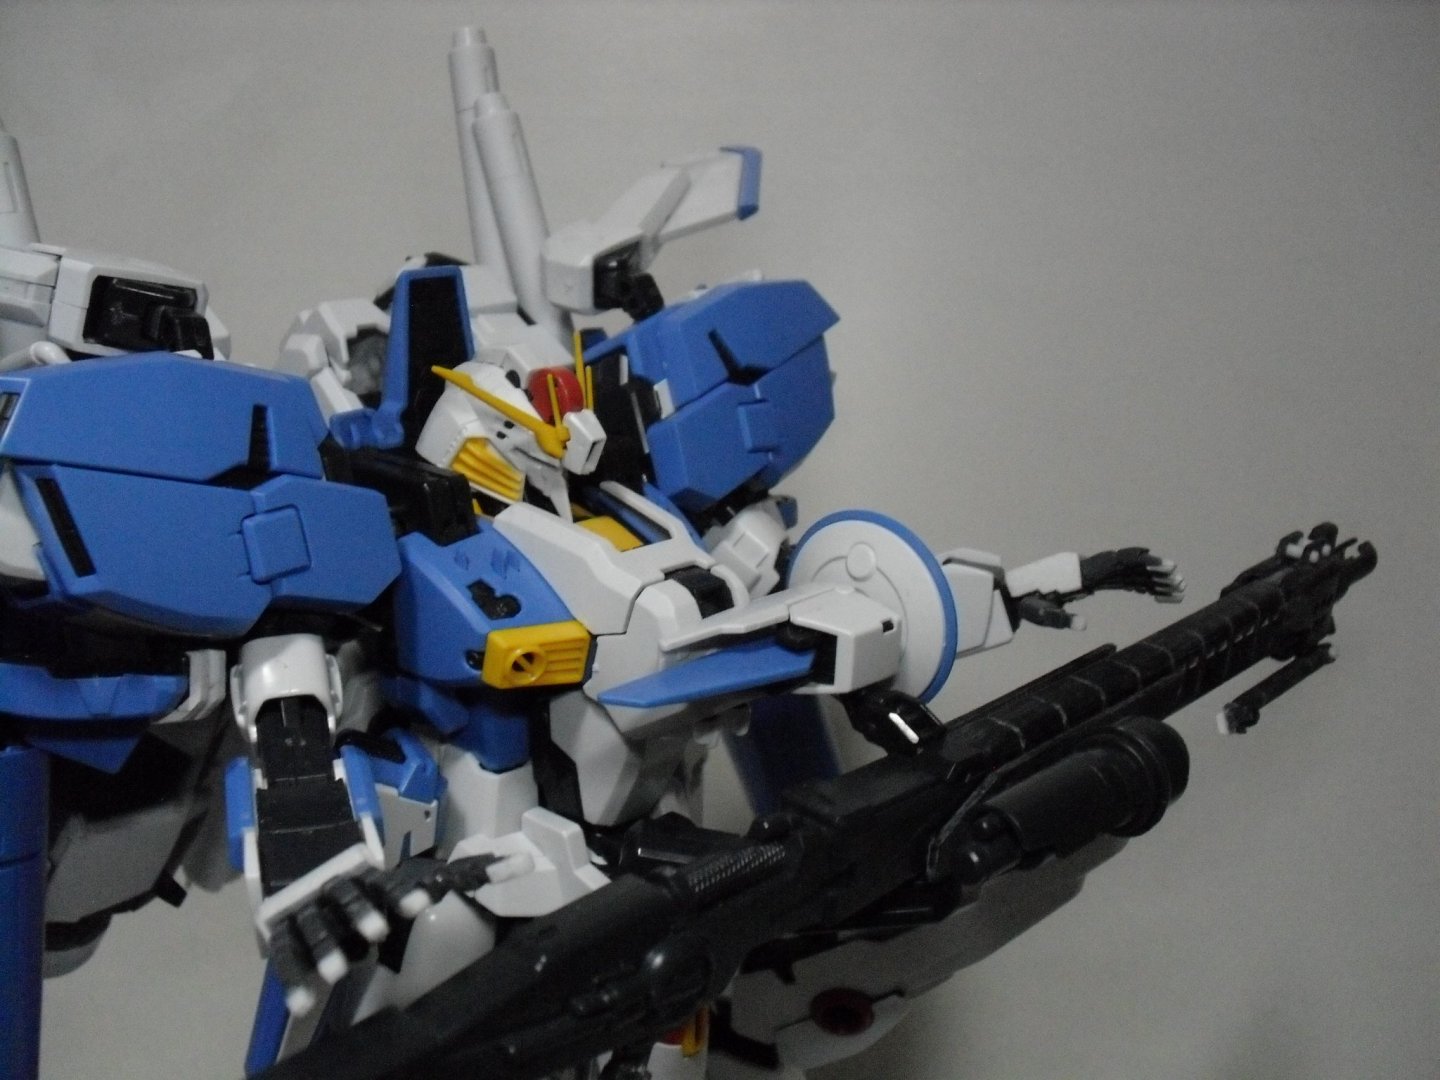
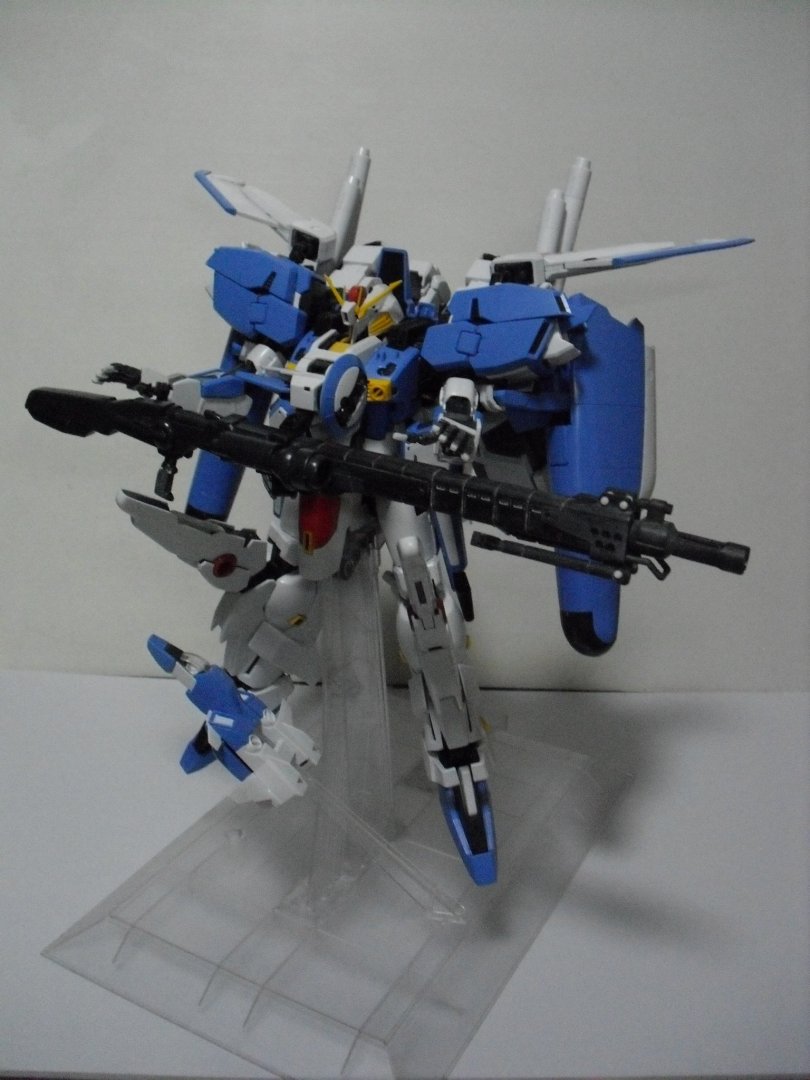
Thanks! That's great! never too early (or late) to get into the hobby. Yeah, they should've held off until a proper 2.0. Thanks! They're based on the Hummingbird boosters, which they also used on the Signature Ka. Robot Damashii Ex-S - I figure this will be as close to a Ver. Ka. I can get, until they actually make one. The face is still stock, didn't feel like it needed further improvement.
-
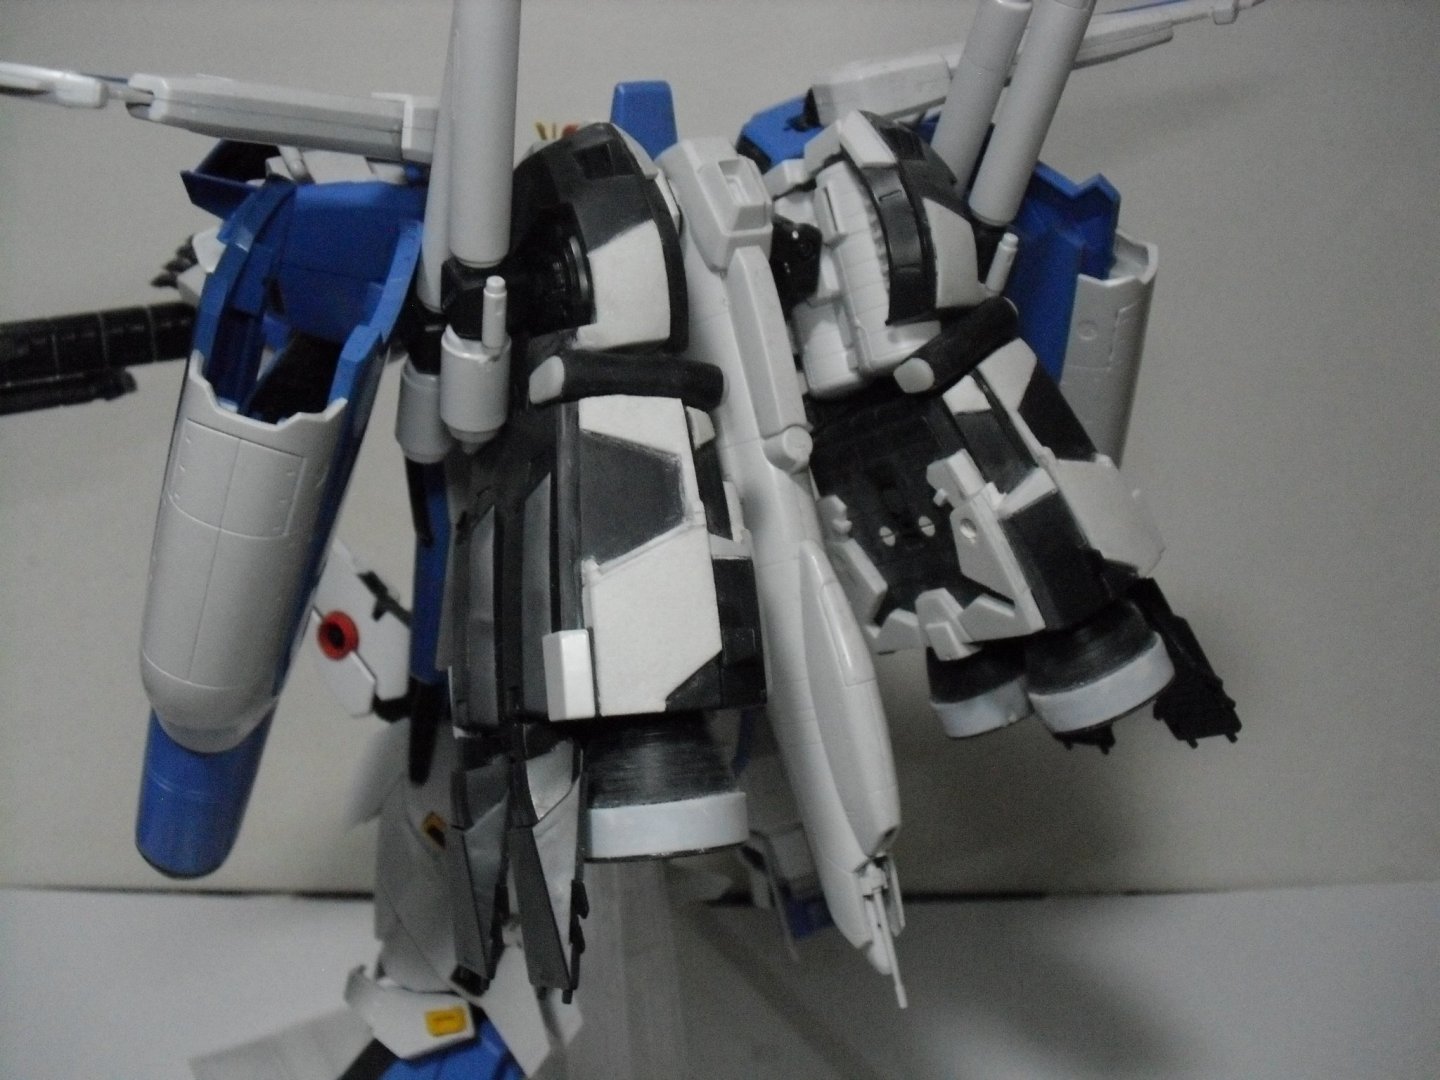
Got a hold of the new MG Ex-S. Pretty significant improvement over the old one, but didn't feel "modern" enough, so I did some modifications. The smartgun barrel is 3D printed, with a CA bath & a bit of sanding.


-
SDF-1 3D Model + 3D Print [SD Machine Style]
UN_MARINE replied to UN_MARINE's topic in The Workshop!
Digital distribution seems like the easiest way to go, but I'm willing to print & ship to anybody who wants one*. *Colors may vary (based on how much of the specific color filament required is still available). -
SDF-1 3D Model + 3D Print [SD Machine Style]
UN_MARINE replied to UN_MARINE's topic in The Workshop!
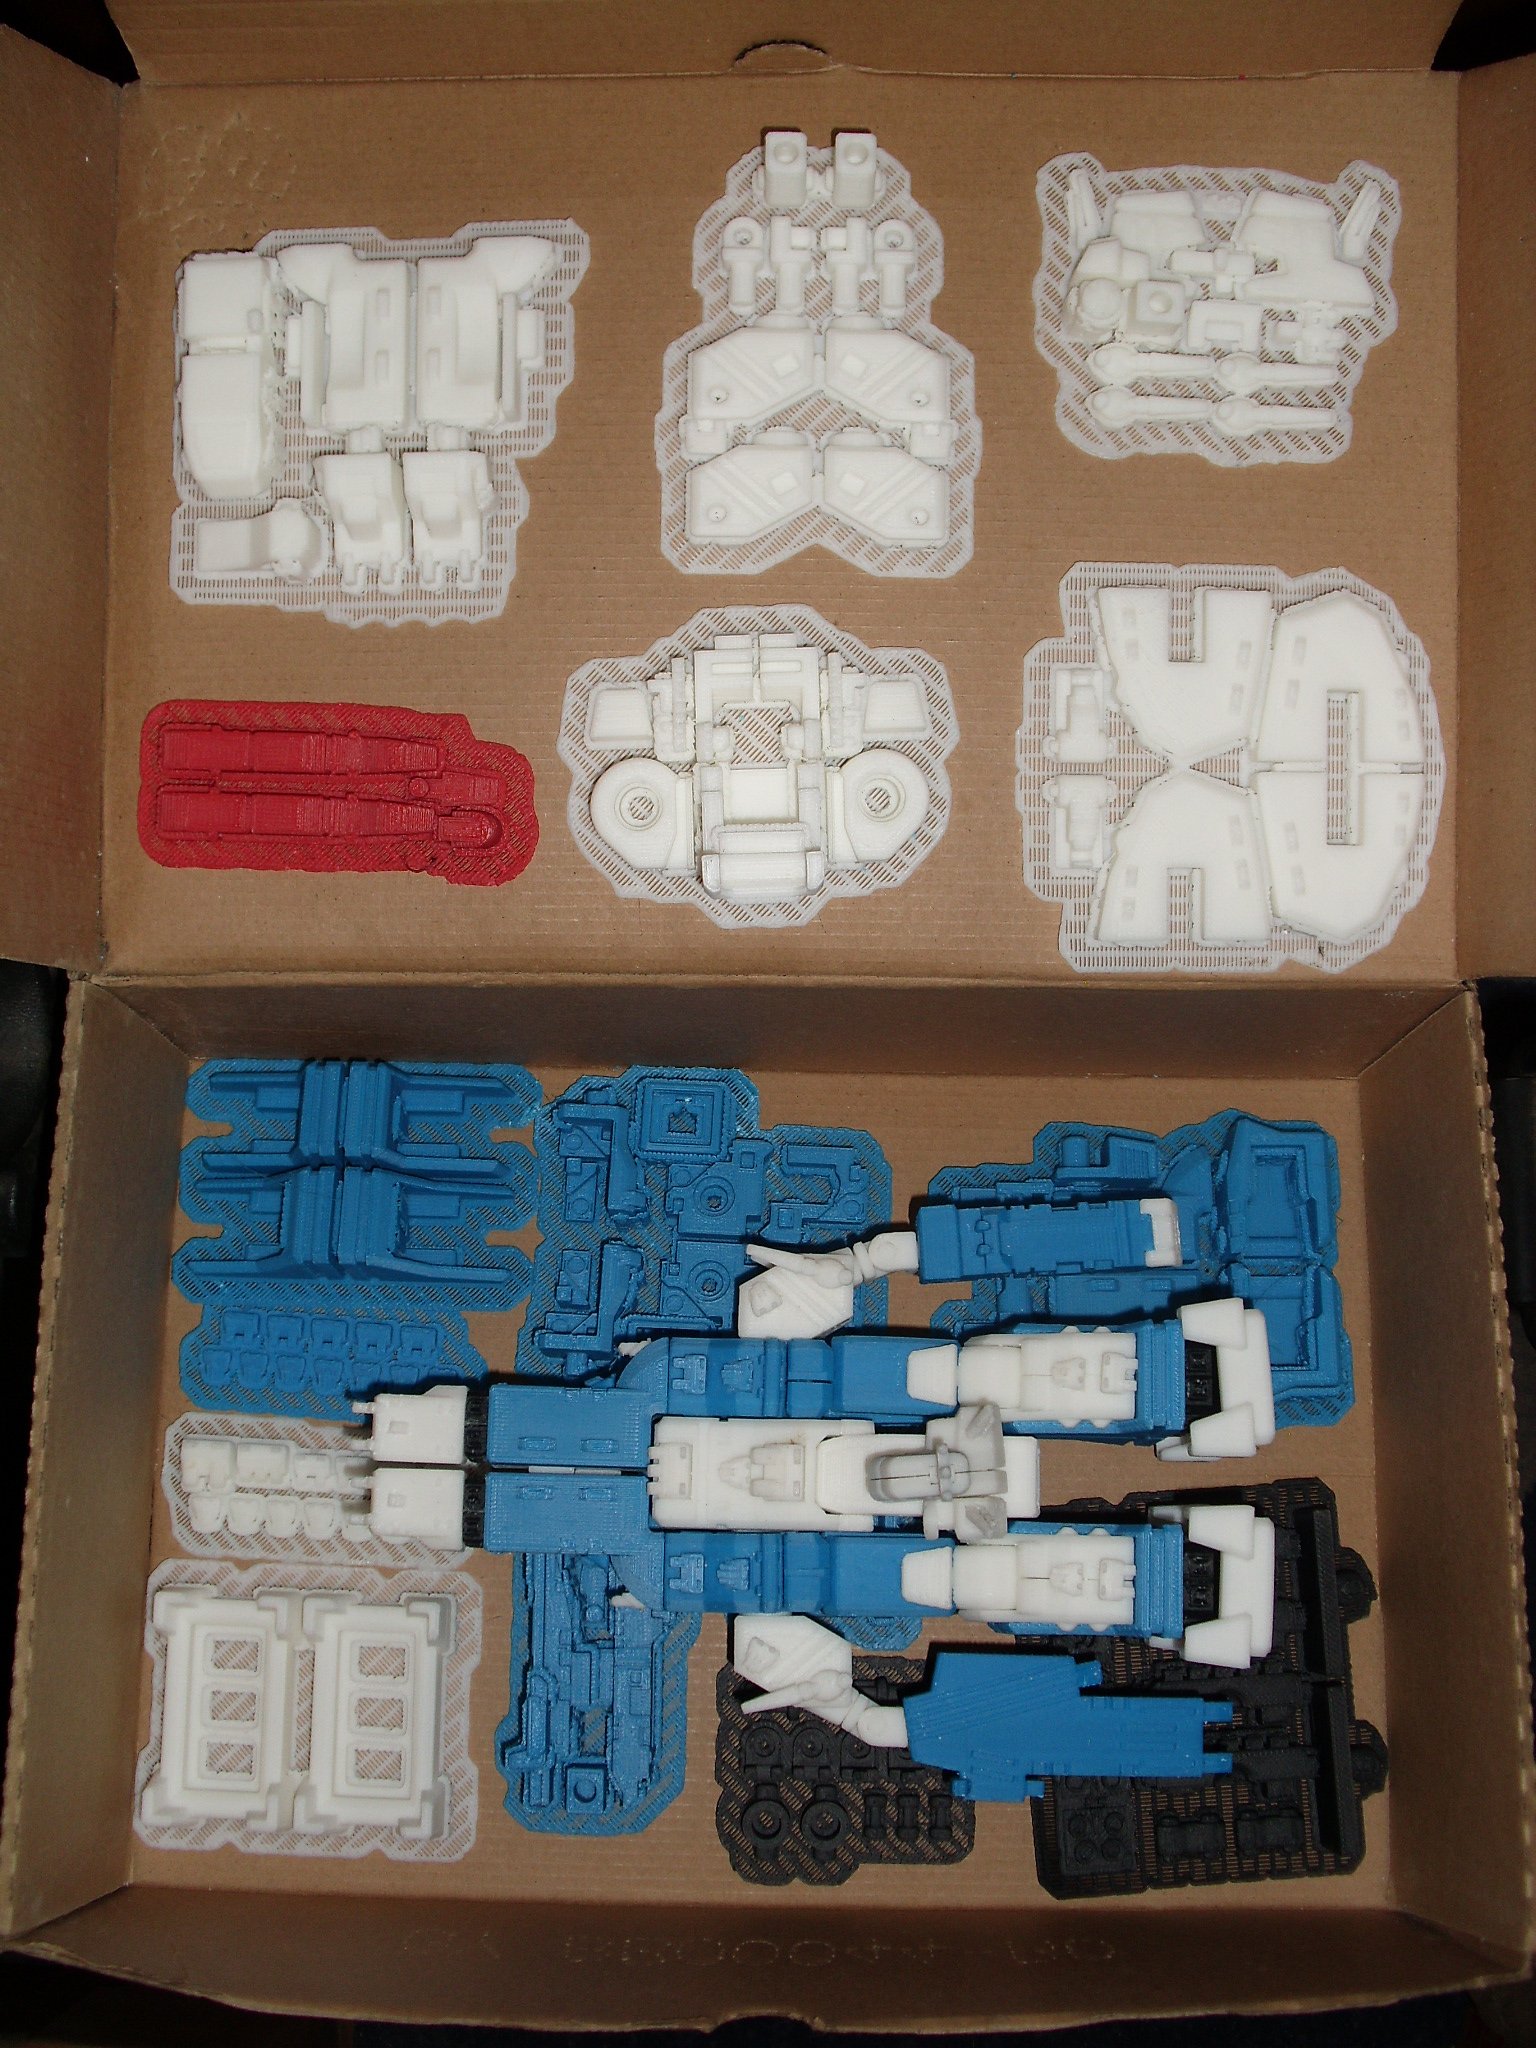
Version 1.5 is standing! (Red canopy) Needs a couple of minor adjustments, then it should be good to go!
-
SDF-1 3D Model + 3D Print [SD Machine Style]
UN_MARINE replied to UN_MARINE's topic in The Workshop!
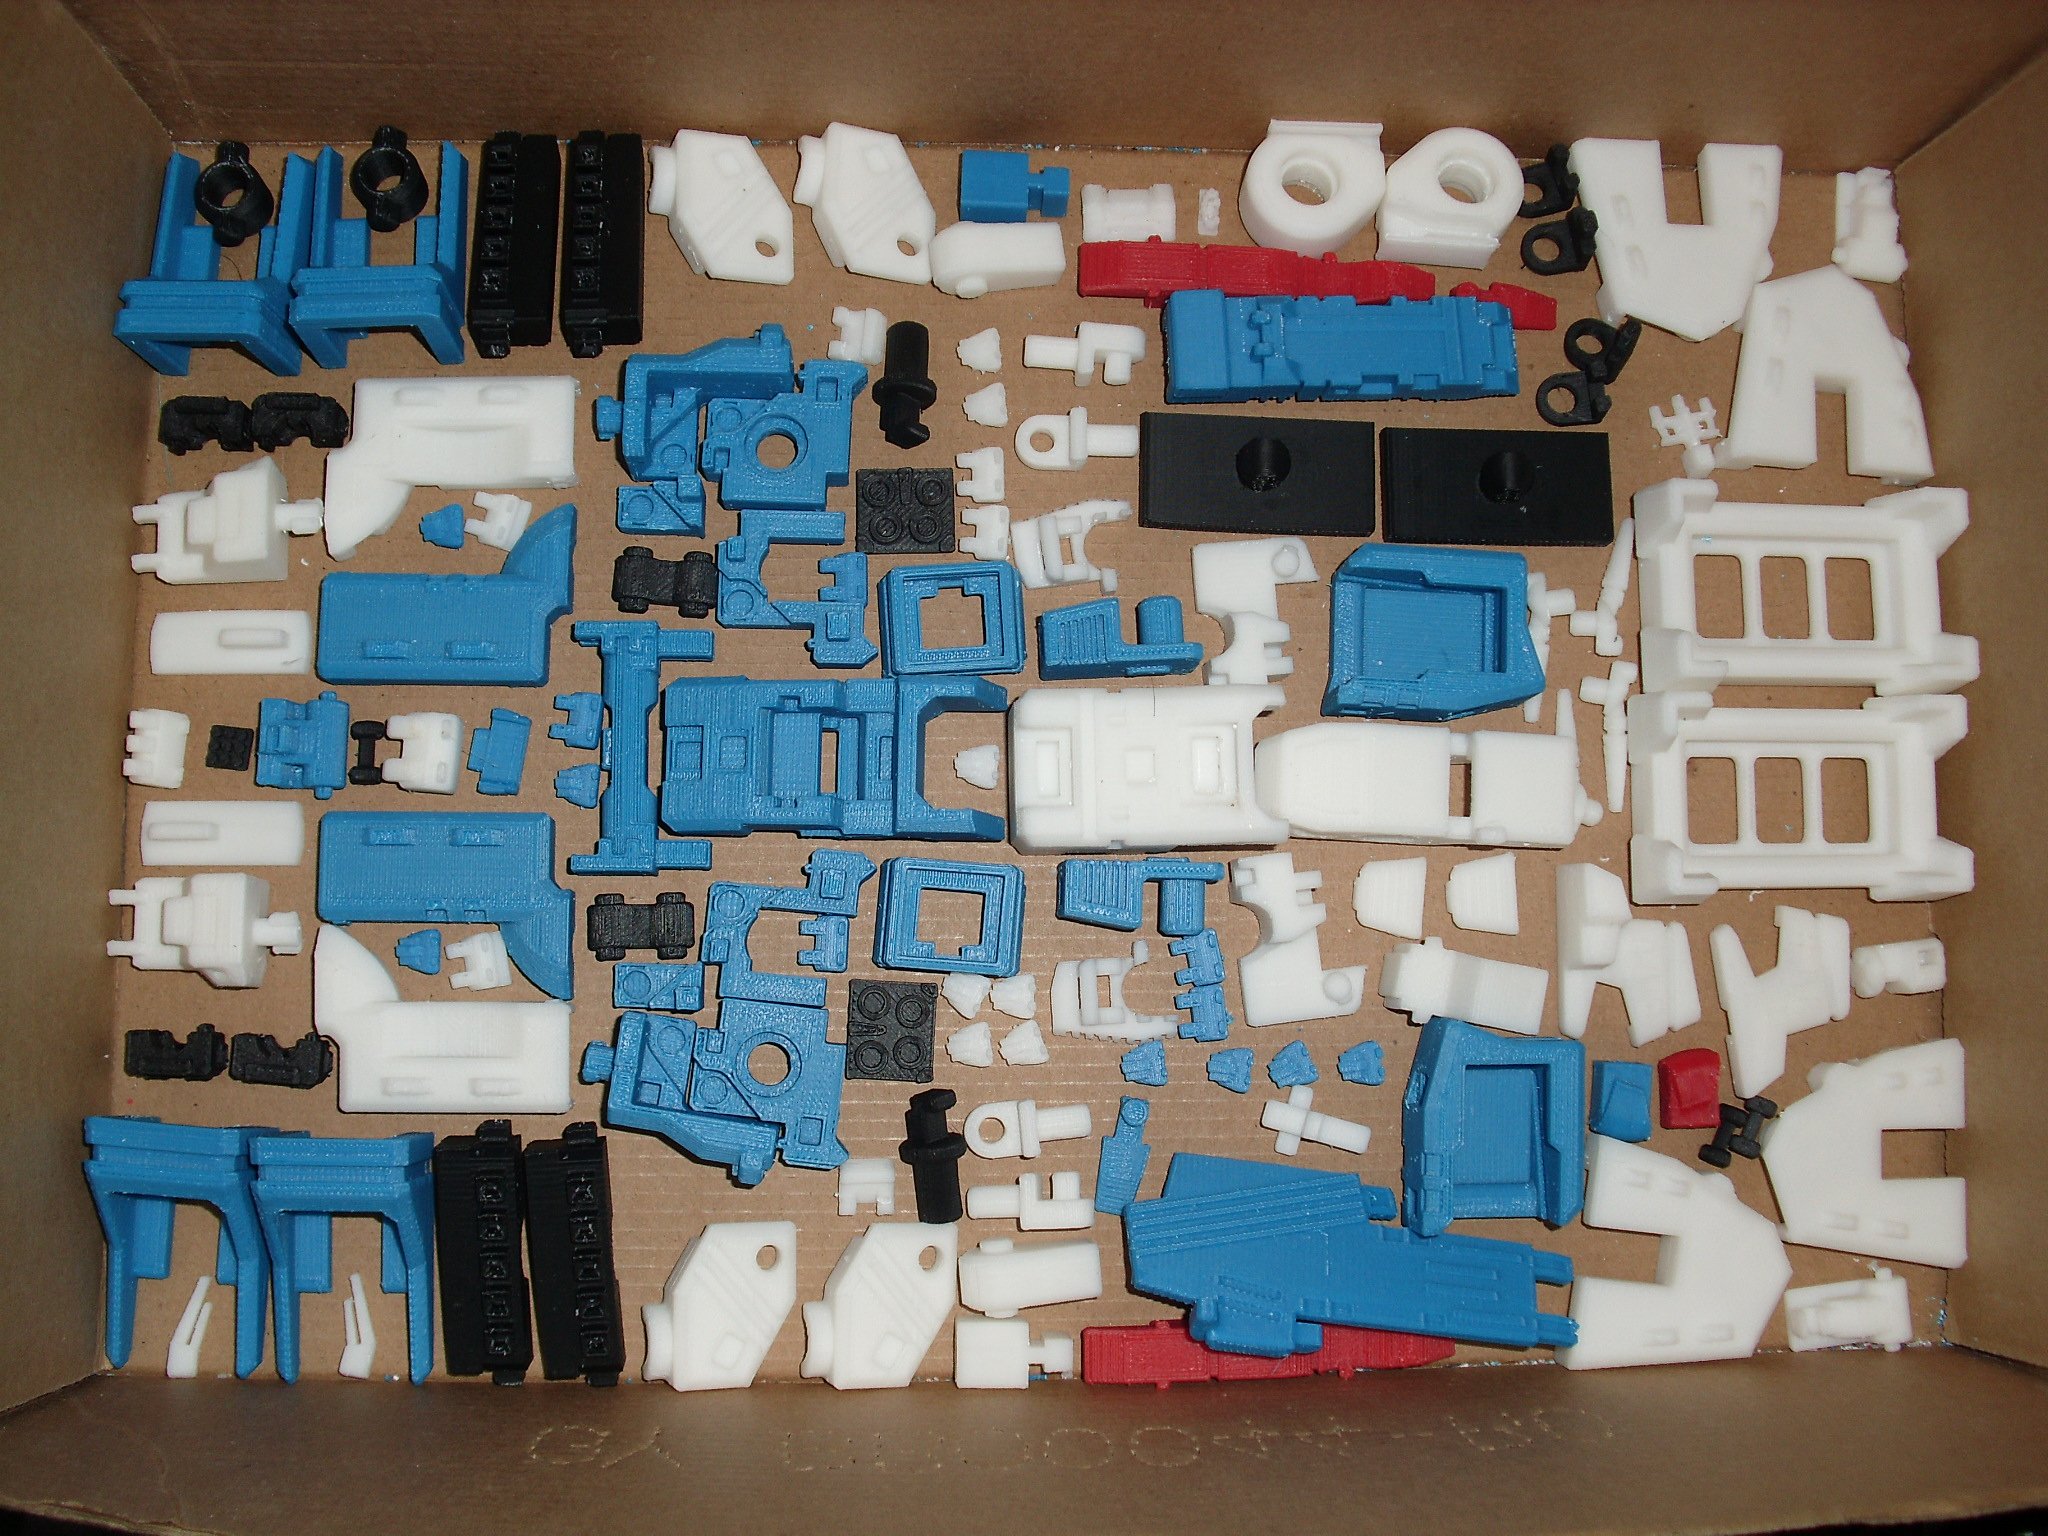
Here's what 134(+1) parts looks like. The +1 part is a a red canopy, for the classic Takatoku look.
-
SDF-1 3D Model + 3D Print [SD Machine Style]
UN_MARINE replied to UN_MARINE's topic in The Workshop!
Just finished printing v1.5!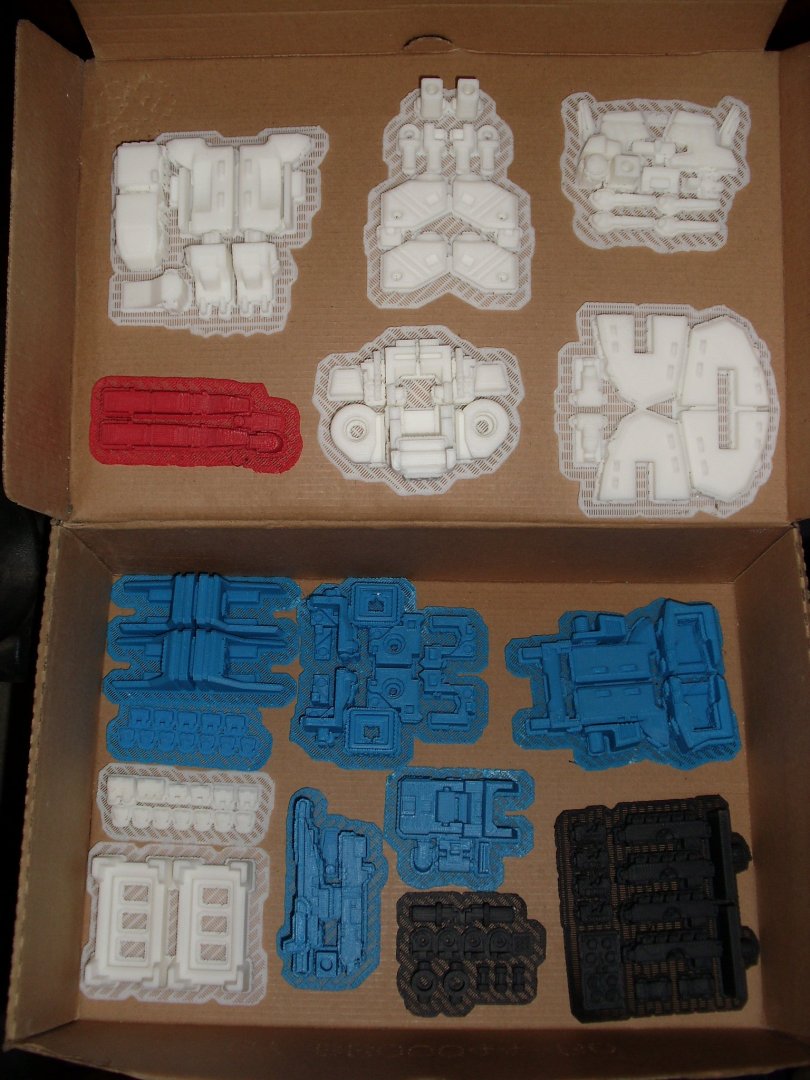

-
Indeed it its! I was half expecting the printer to ignore the model.
-
SDF-1 3D Model + 3D Print [SD Machine Style]
UN_MARINE replied to UN_MARINE's topic in The Workshop!
I adjusted the canopy part so it installs better - the canopy will slide right in, after the control tower halves are secured together, no more need to trap it inside before painting. Looks like it'll go together with minimal effort, except for the "snap-of-doom" in the hip segment. We'll know for sure as soon as the new test prints are done.
-
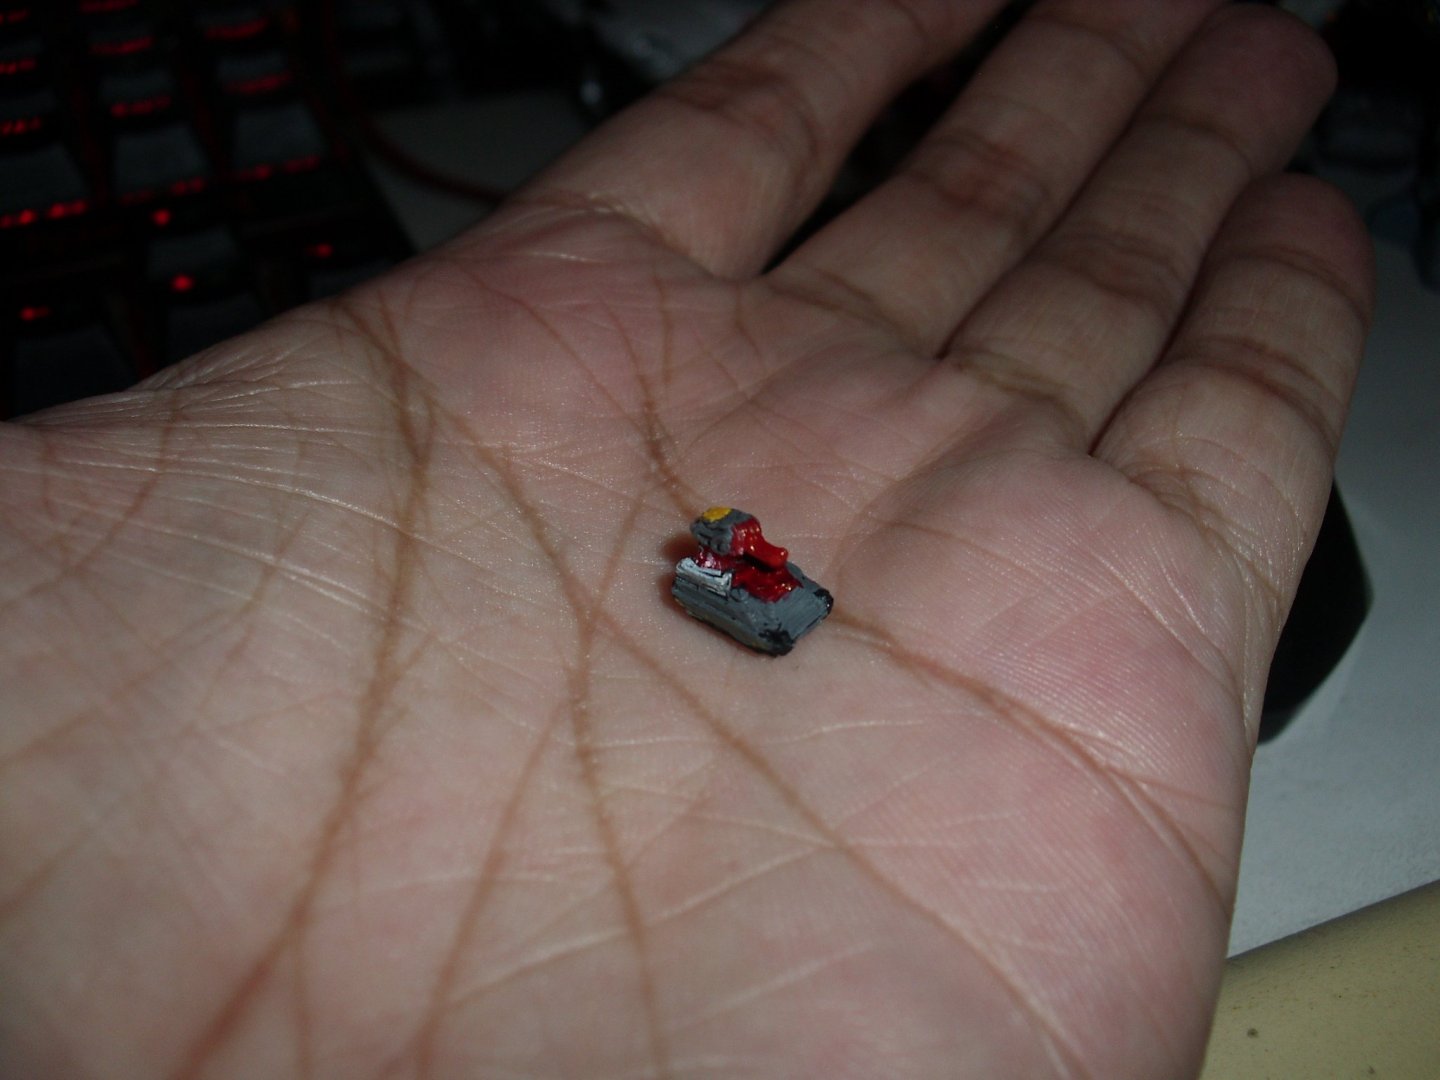
This is probably the smallest model I've printed. Quick & dirty Gundam marker paint job.

-
SDF-1 3D Model + 3D Print [SD Machine Style]
UN_MARINE replied to UN_MARINE's topic in The Workshop!
The model took a week to finish, about 4-6 hours a day. Possibly 35-40 hours total. Plus 31 hours of printing. Thanks! -
SDF-1 3D Model + 3D Print [SD Machine Style]
UN_MARINE replied to UN_MARINE's topic in The Workshop!
That's pretty cool. I don't believe that level of security is necessary for this little project, though. Got some minor adjustments to the model. The center antenna mast now has holes, so it doesn't look like a sail, and added some detail on the thighs. Also added/enlarged some tabs for more positive locking for transformation. I'll run a test print to see if everything works, then I can work on uploading the files.

-
SDF-1 3D Model + 3D Print [SD Machine Style]
UN_MARINE replied to UN_MARINE's topic in The Workshop!
Thanks! I guess that's one way to impose DRM haha. "Printing complete. This 3D file will self-destruct in 5 seconds..." -
SDF-1 3D Model + 3D Print [SD Machine Style]
UN_MARINE replied to UN_MARINE's topic in The Workshop!
I figure once the files are out there, it's pretty much the wild west/high seas. So uh... just remember to point to where it came from, I guess (A feature or interview on a blog/site will do nicely). -
SDF-1 3D Model + 3D Print [SD Machine Style]
UN_MARINE replied to UN_MARINE's topic in The Workshop!
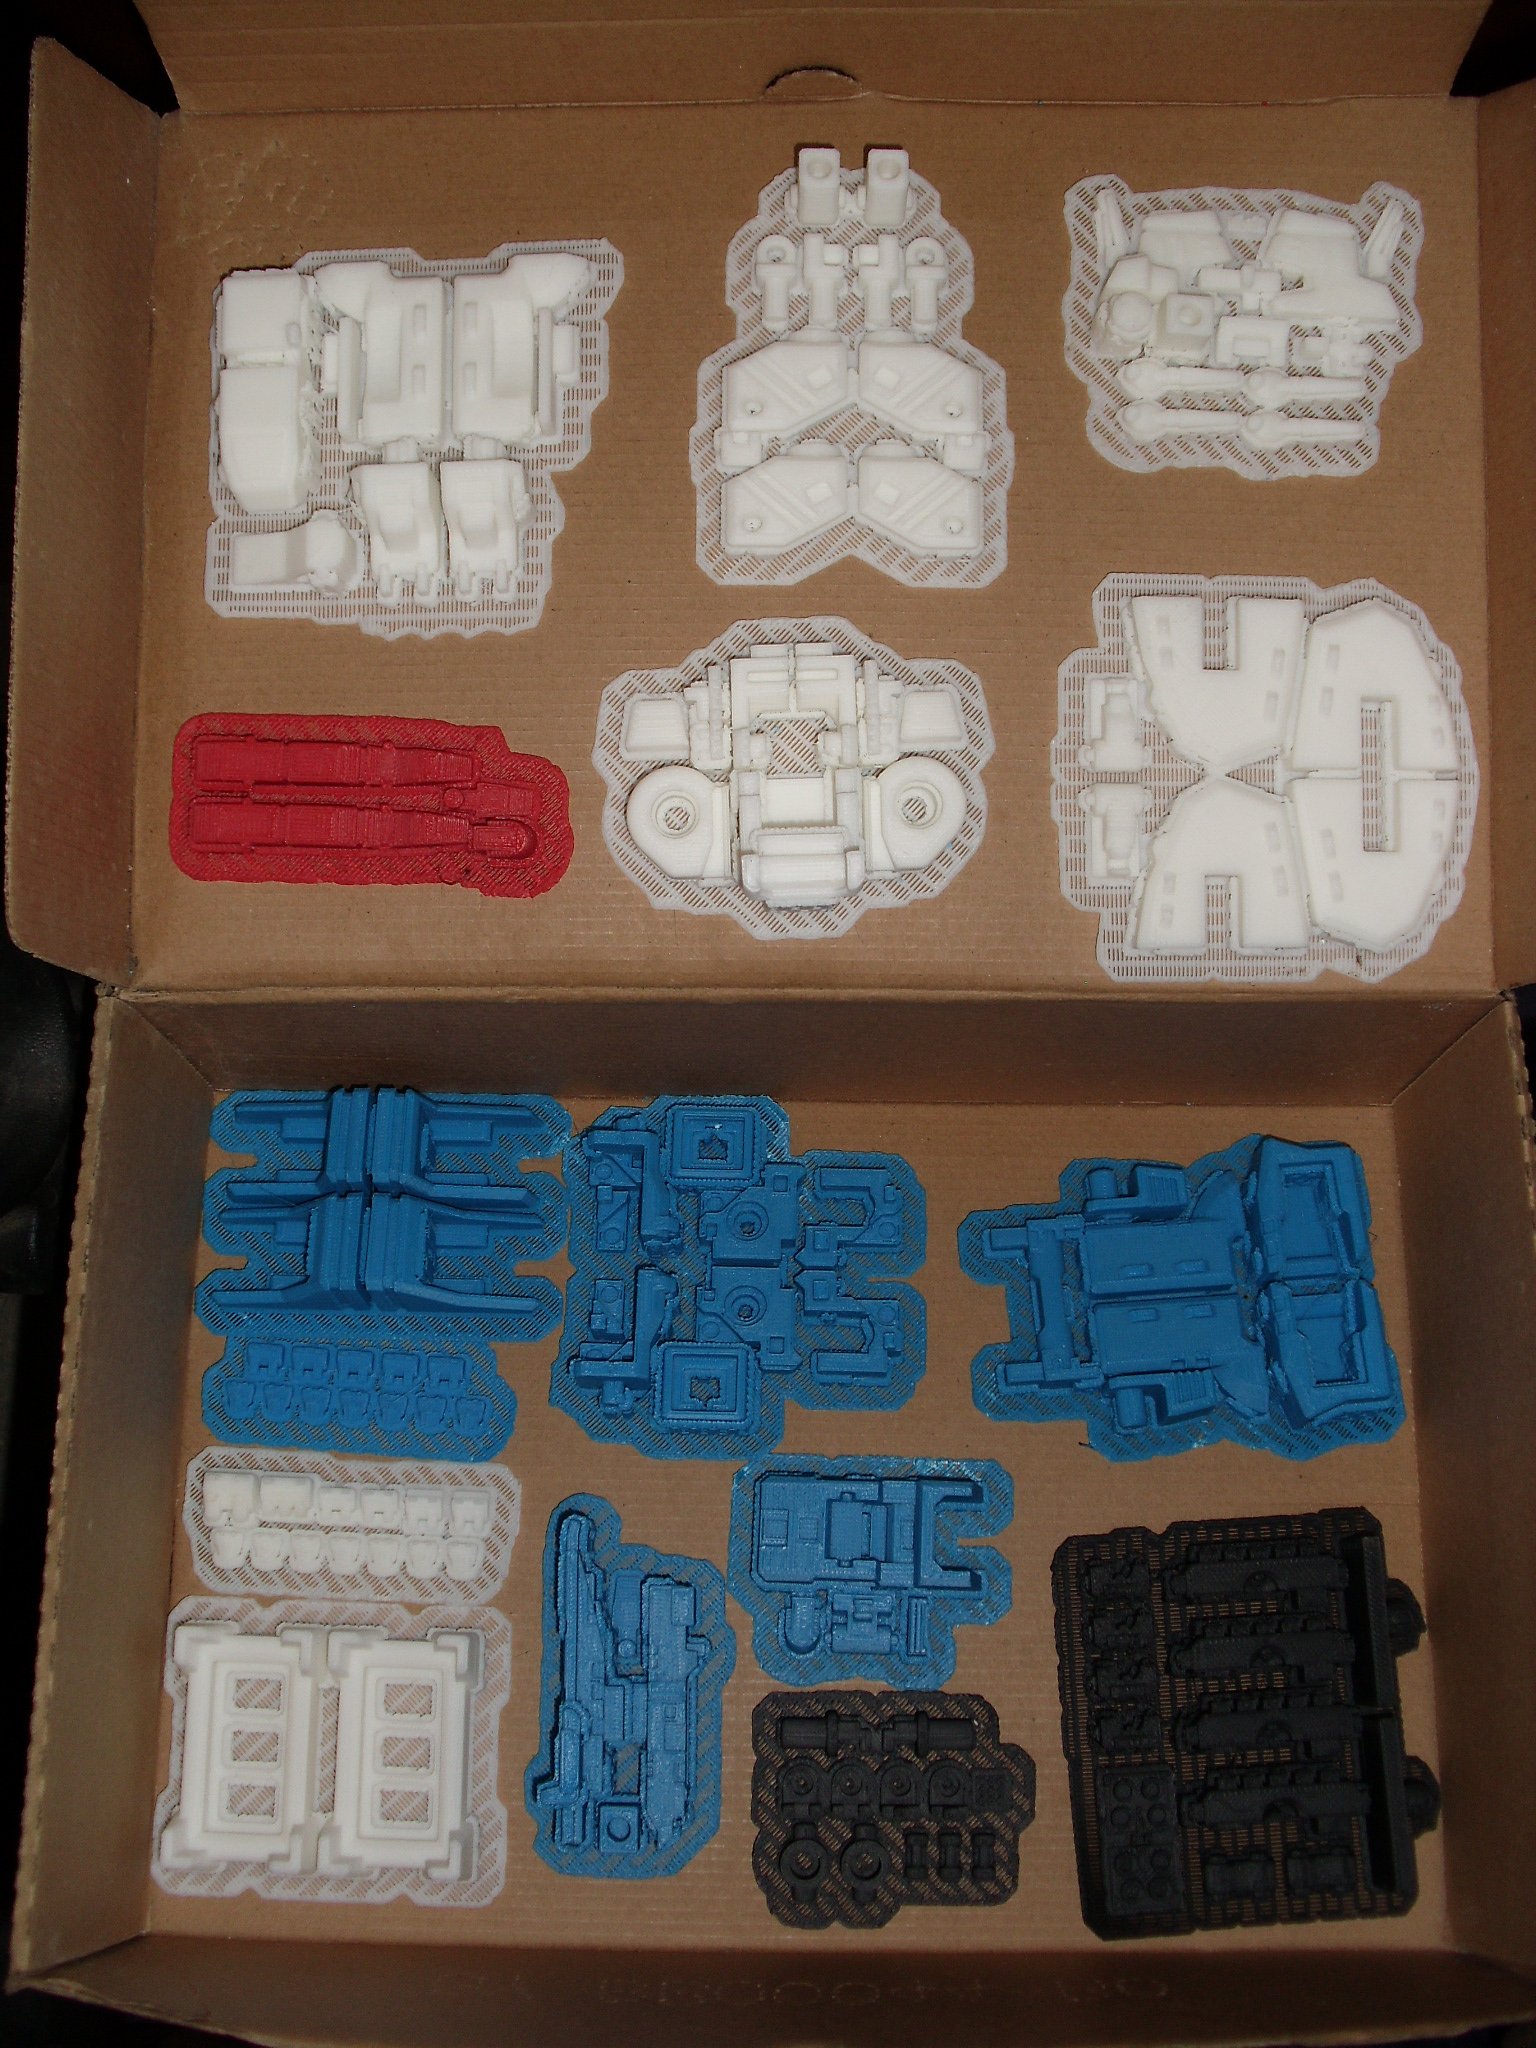
That's what I was worried about. All that extra work to add sprues to lower the price by a fraction isn't really winning me over. Option 3 looks feasible through Pinshape. I've uploaded a design for free distribution there before, I just need to check the payment option. I'll probably upload the files arranged per group, color, and optimal layer thickness, like the raw print pics. I don't think the site will let me upload 80 individual model files. -
SDF-1 3D Model + 3D Print [SD Machine Style]
UN_MARINE replied to UN_MARINE's topic in The Workshop!
It's about $150 to print on this type of printer, + $65-$110 shipping estimate, from this side of the world (yikes!). And it'll need a bit of extra work to make it look smooth & pretty. I'm still in the middle of improving the model for weight/material reduction, I'll get back to you guys when I get everything "packaged" for Shapeways. -
Wow... I forgot I posted in this thread. Nice prints! It shows the difference between a competent slicer/g-code and a not-so-smart one. I never printed any kind of calibration blocks or benchmark models, I just tend to adjust after the fact. After a couple of mishaps, we pretty much adjusted for any quirks the printer had. I'm still using an Up! Plus 2.
-
SDF-1 3D Model + 3D Print [SD Machine Style]
UN_MARINE replied to UN_MARINE's topic in The Workshop!
I'm looking into possible options: I figure a fully built kit will be very expensive, on top of the shipping - this may as well come from Mars. The second option is Shapeways, which will probably be ridiculous expensive. Third option is a distribute-able file set, for a reasonable cost. Considering the time & effort required to build & make it pretty - I figure # 3 could be our best case scenario. Thanks! -
SDF-1 3D Model + 3D Print [SD Machine Style]
UN_MARINE replied to UN_MARINE's topic in The Workshop!
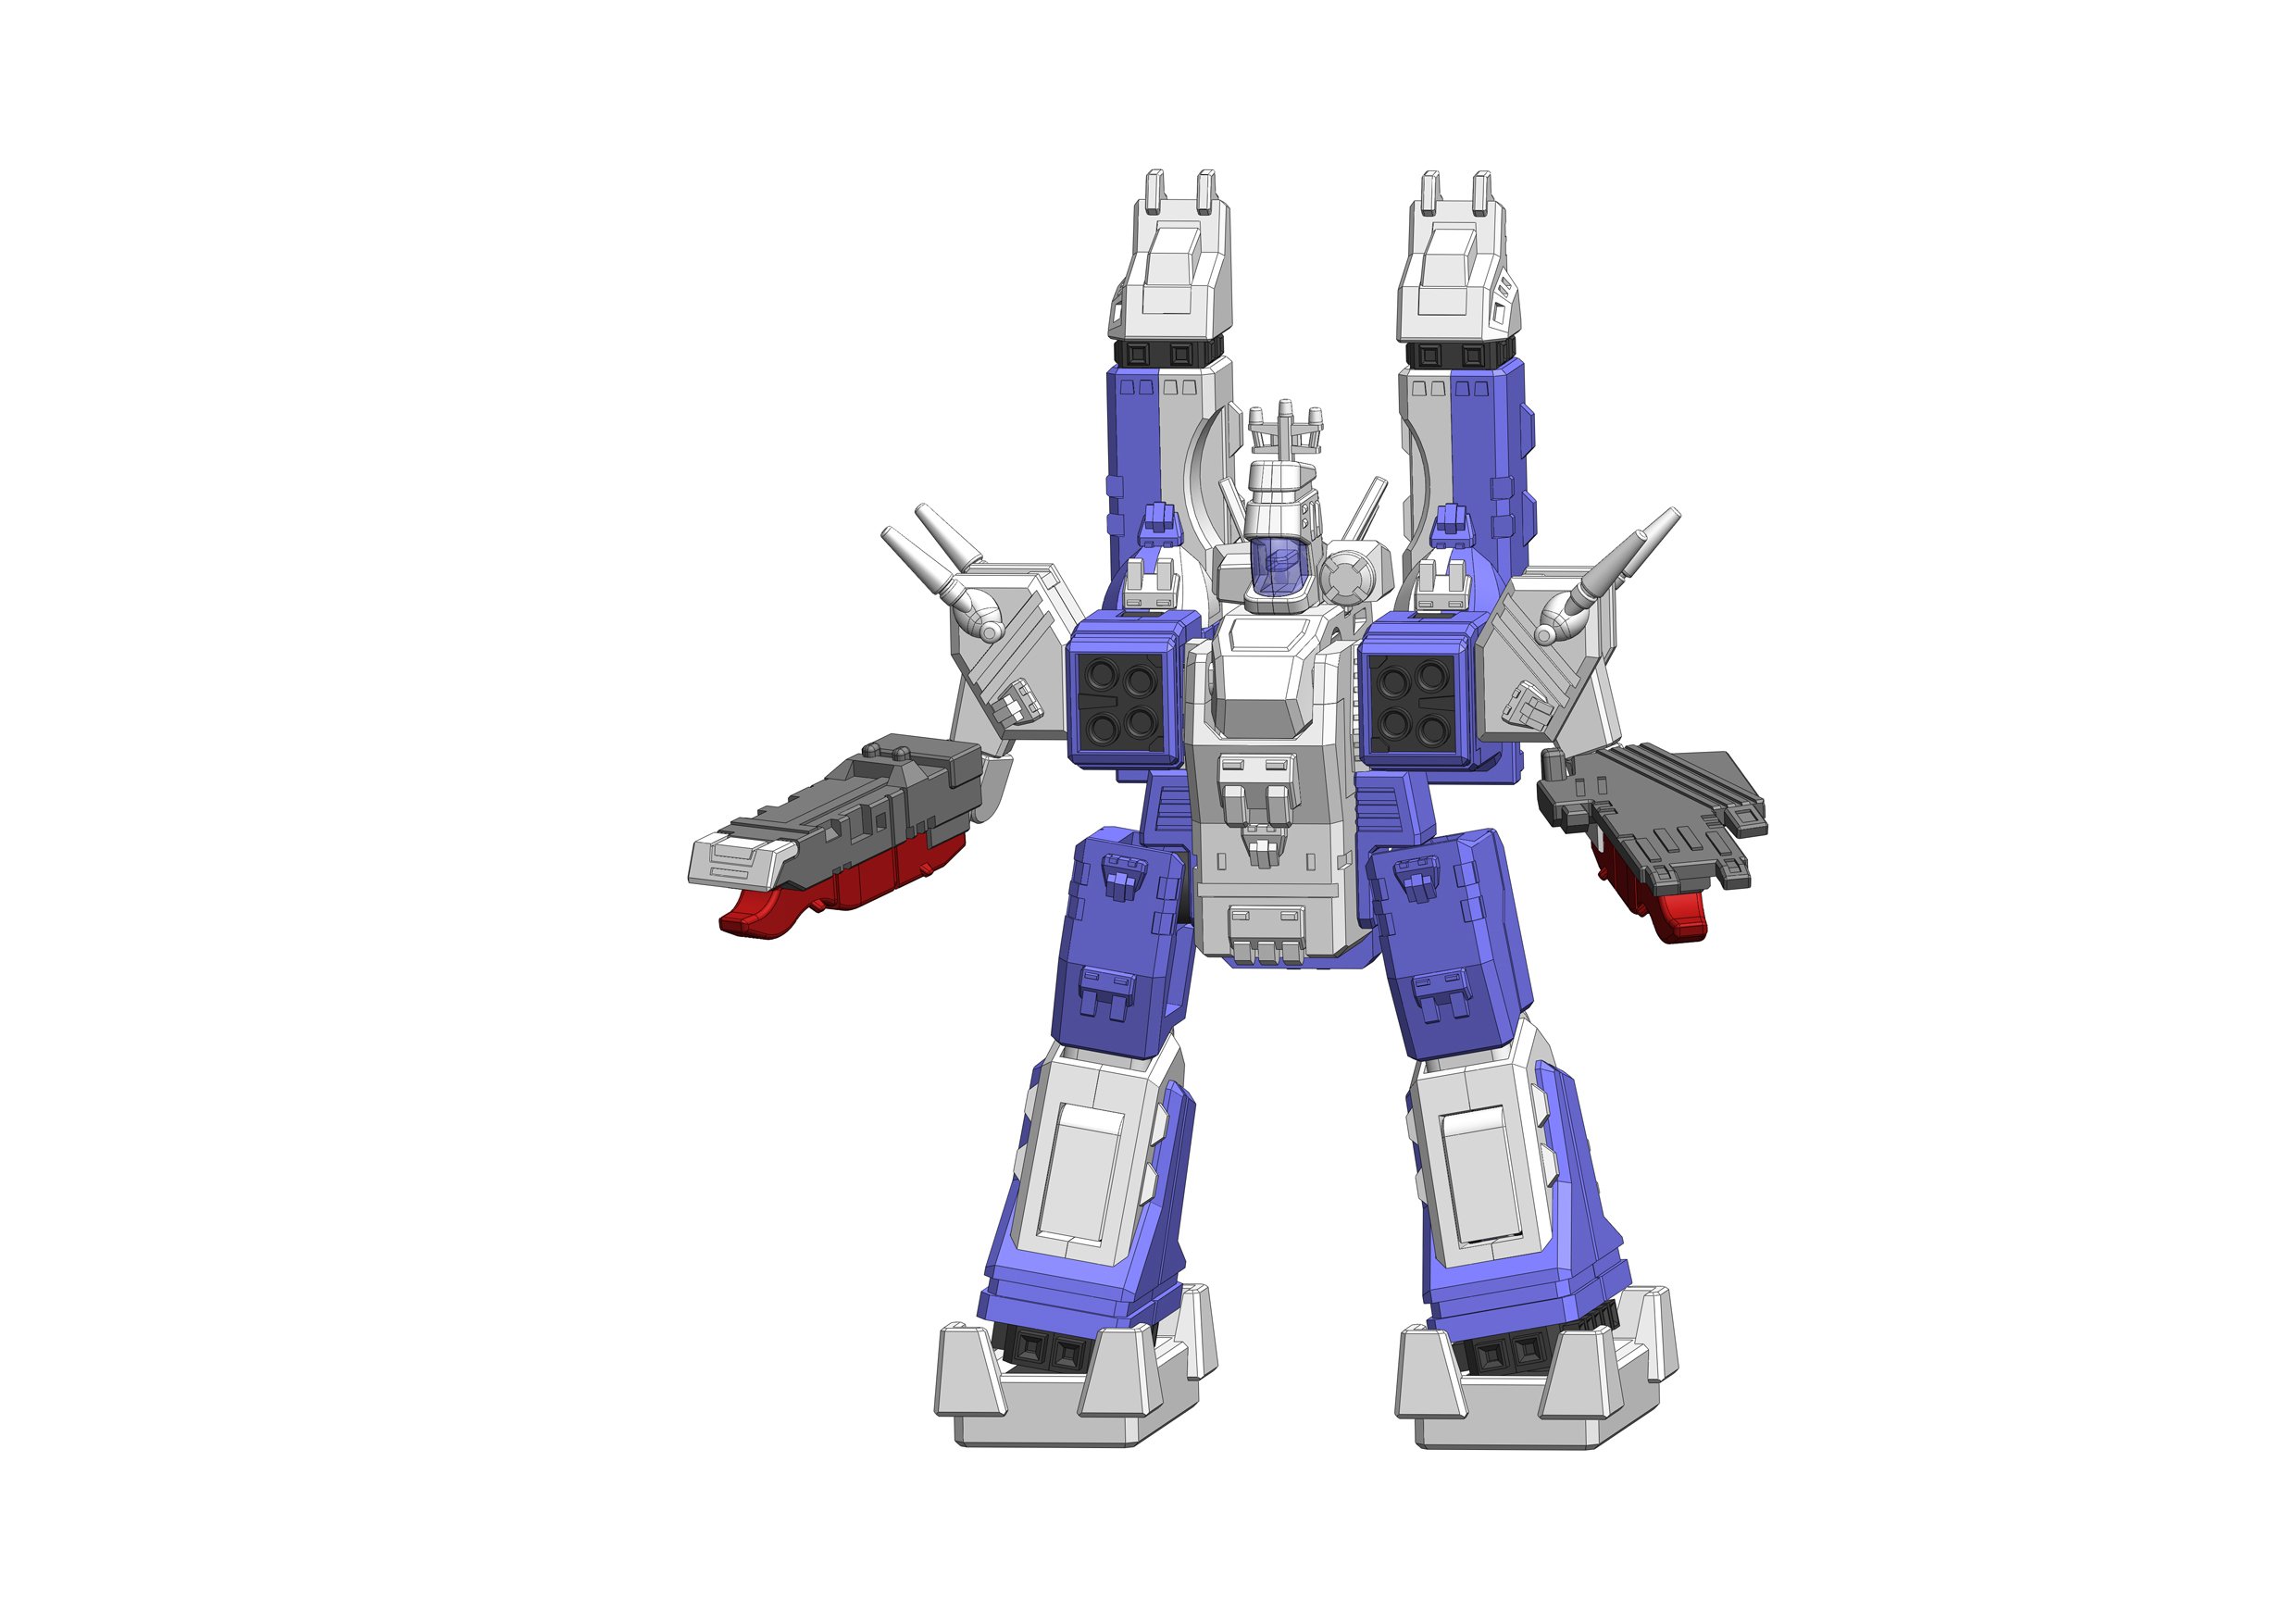
Messing around with a composite of the transformation sequence.
-
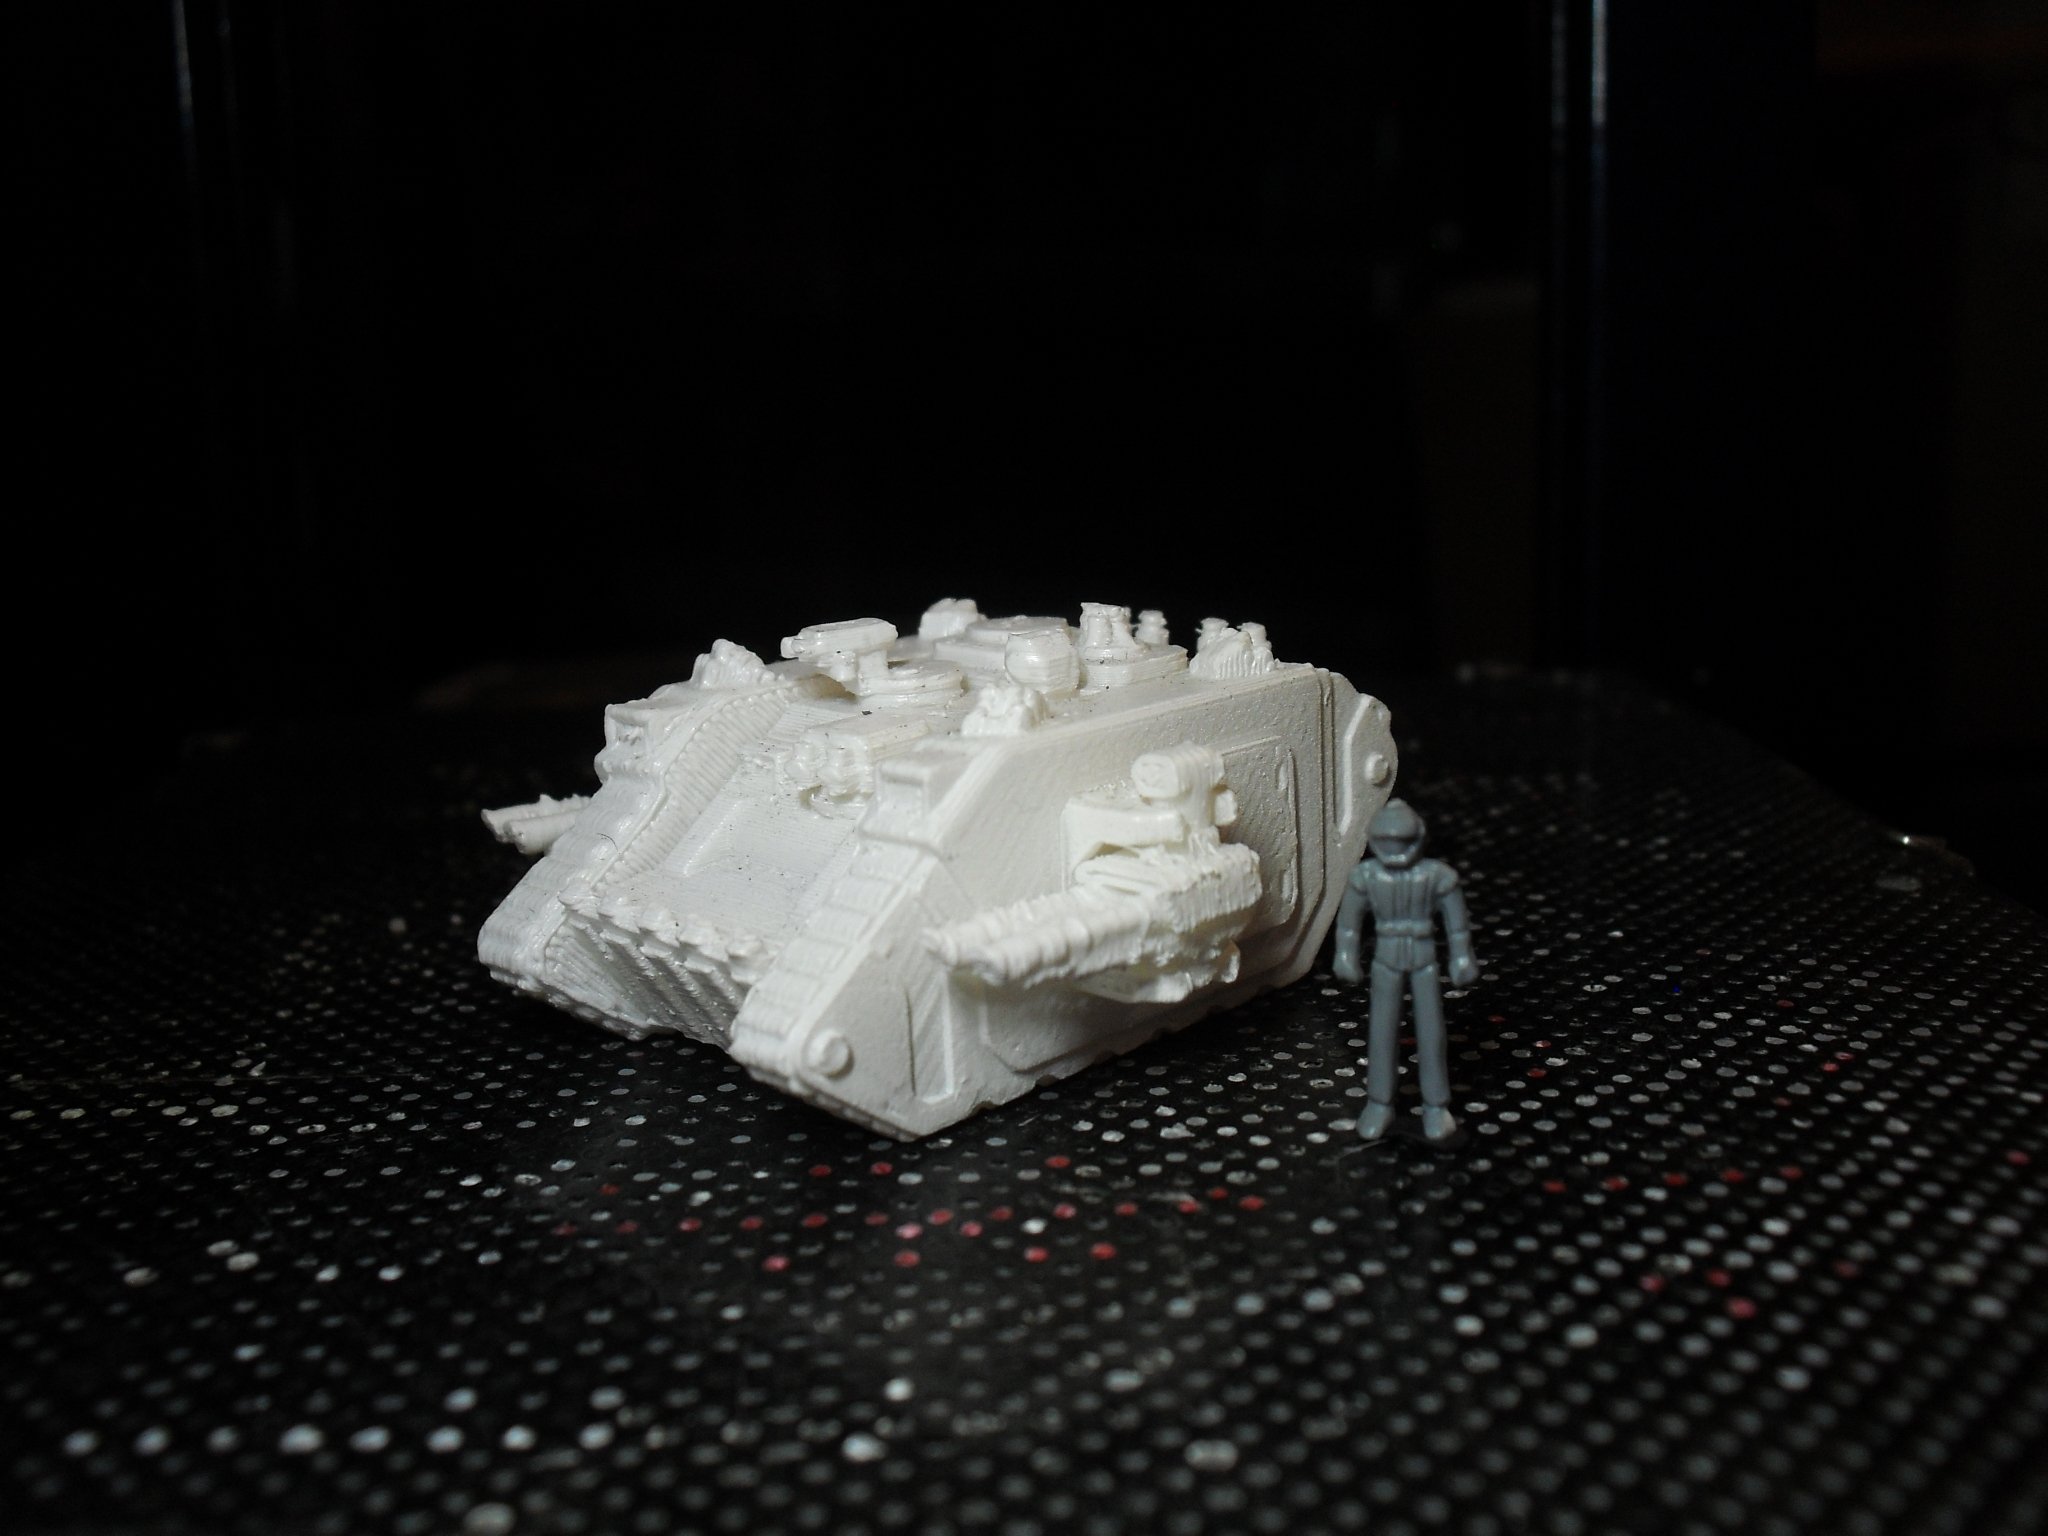
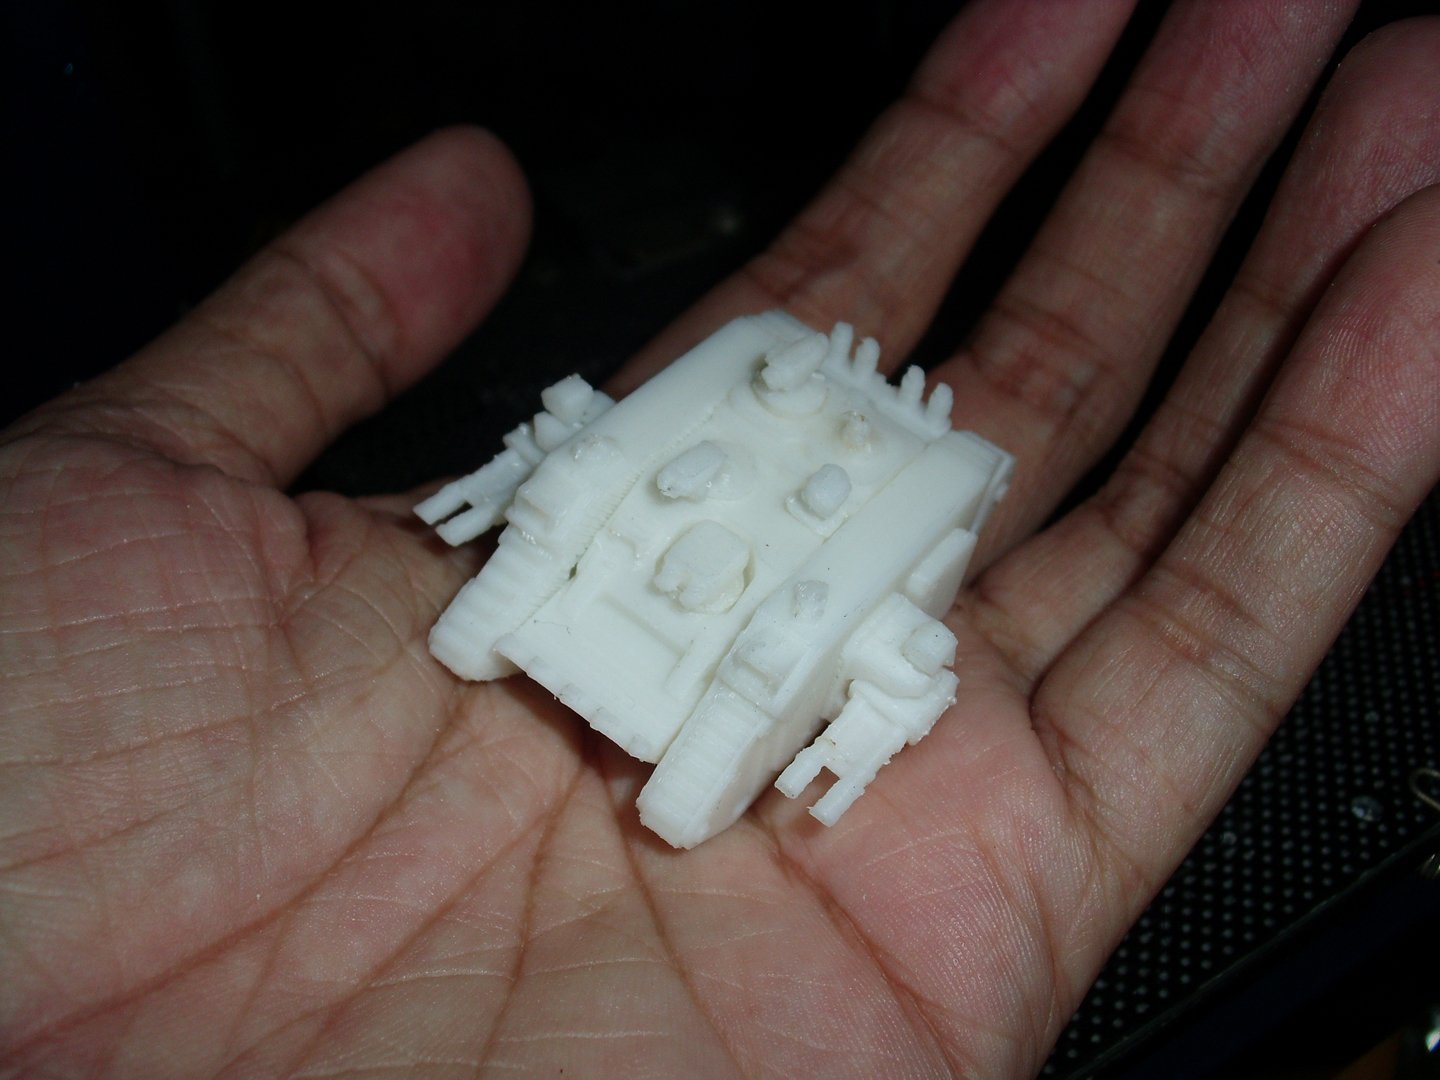
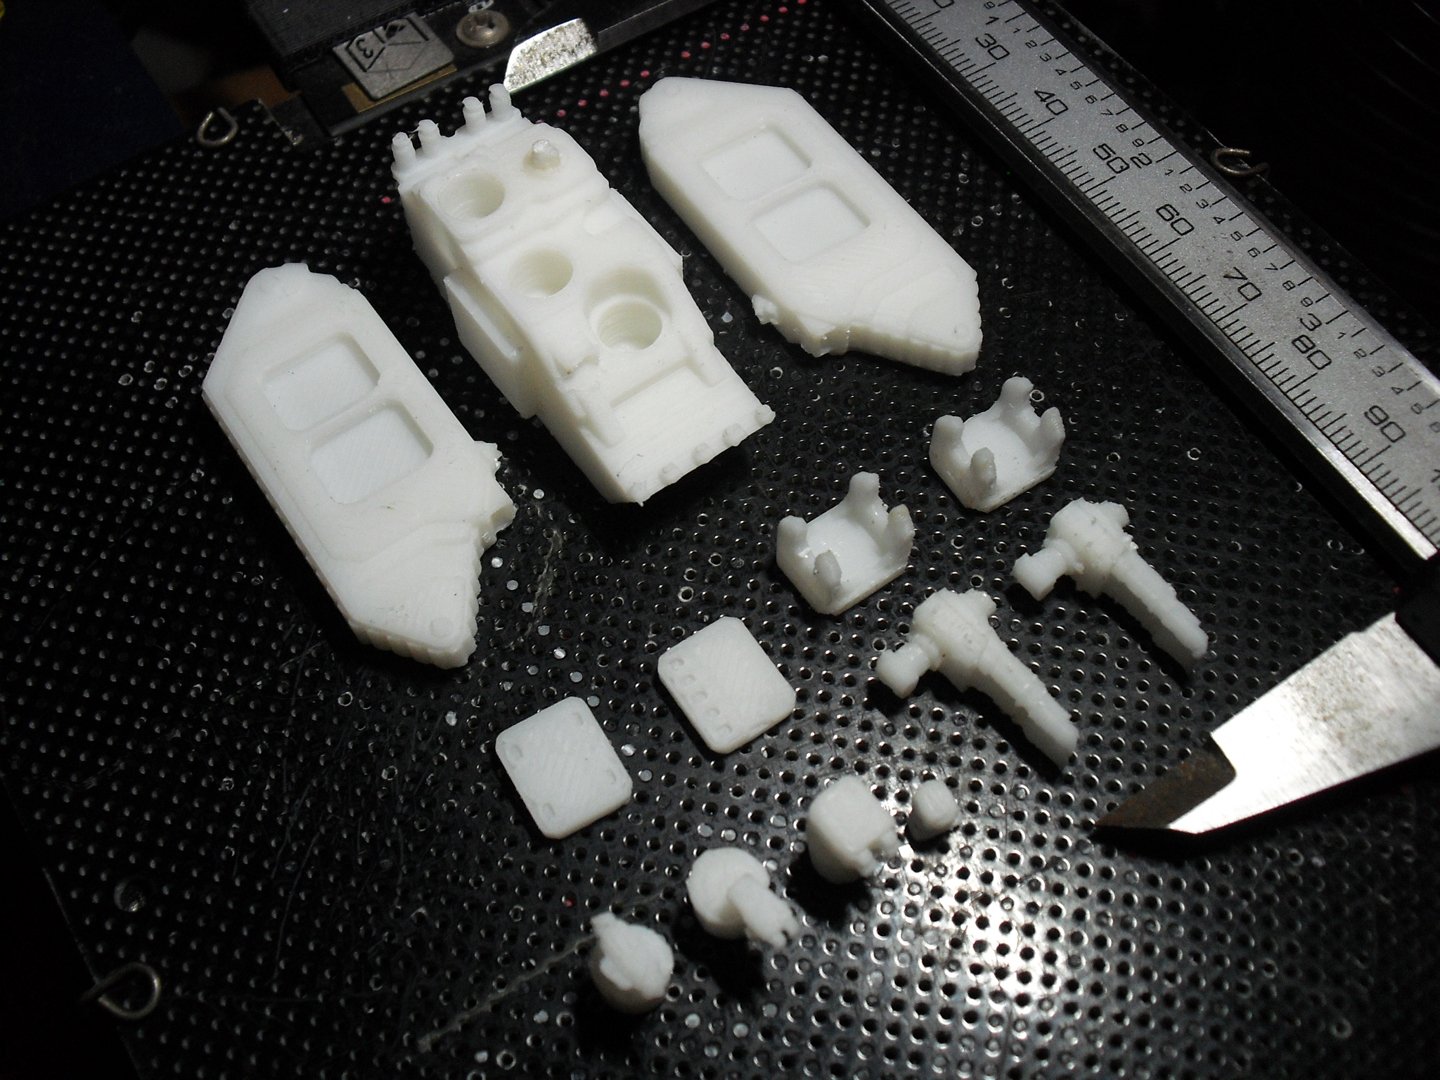
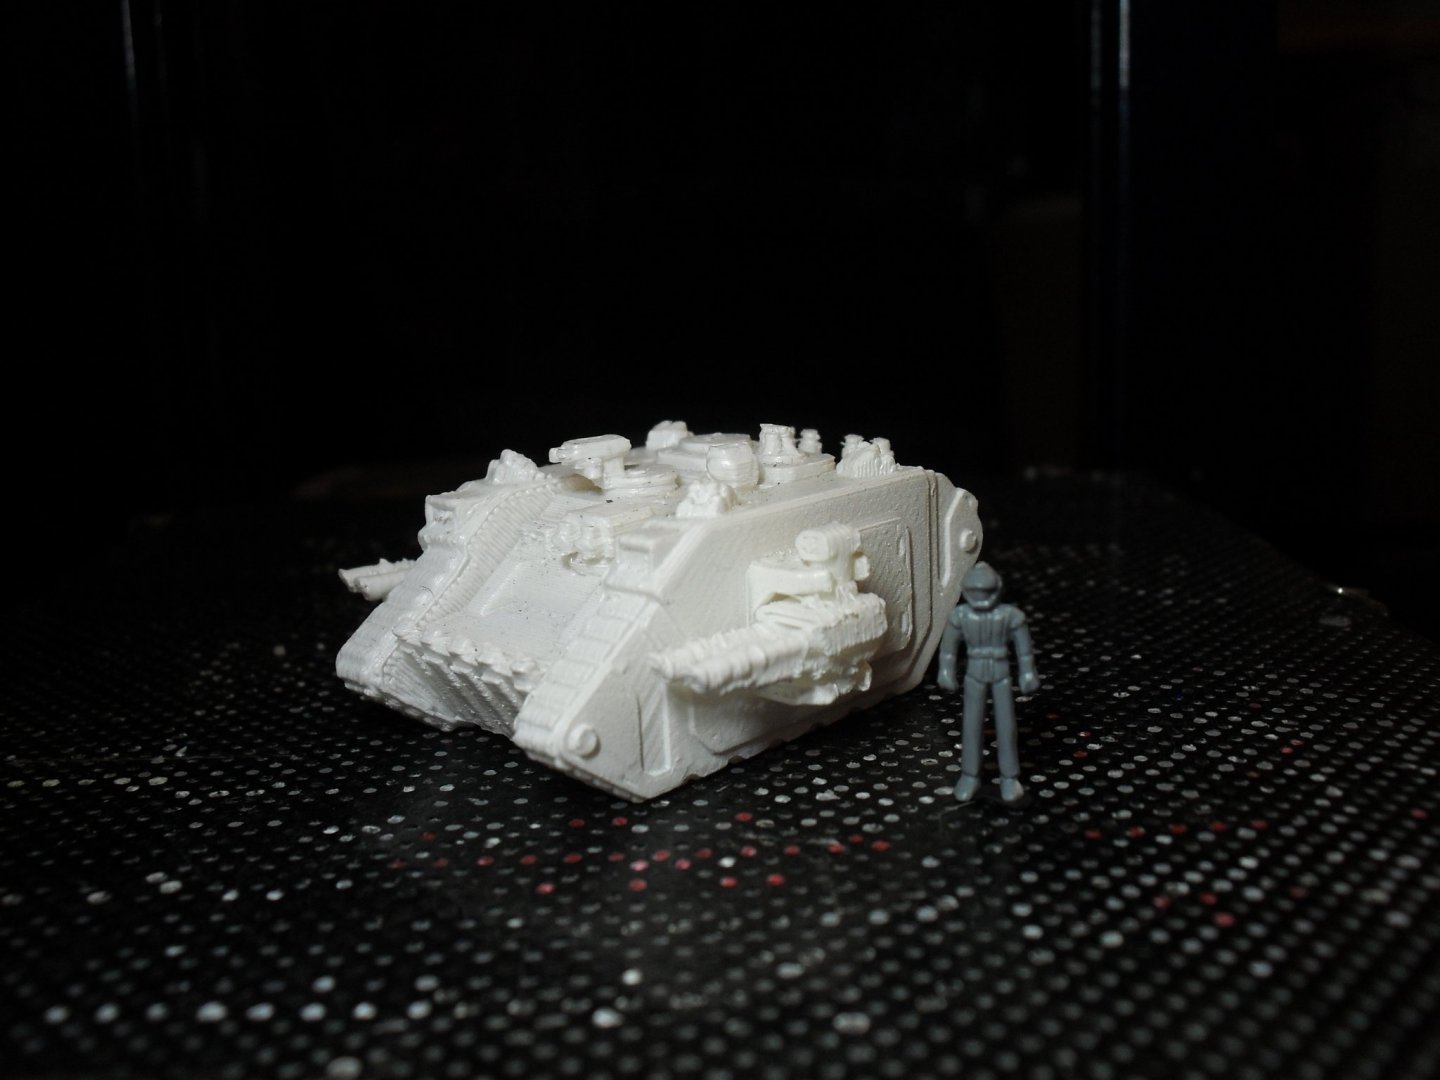
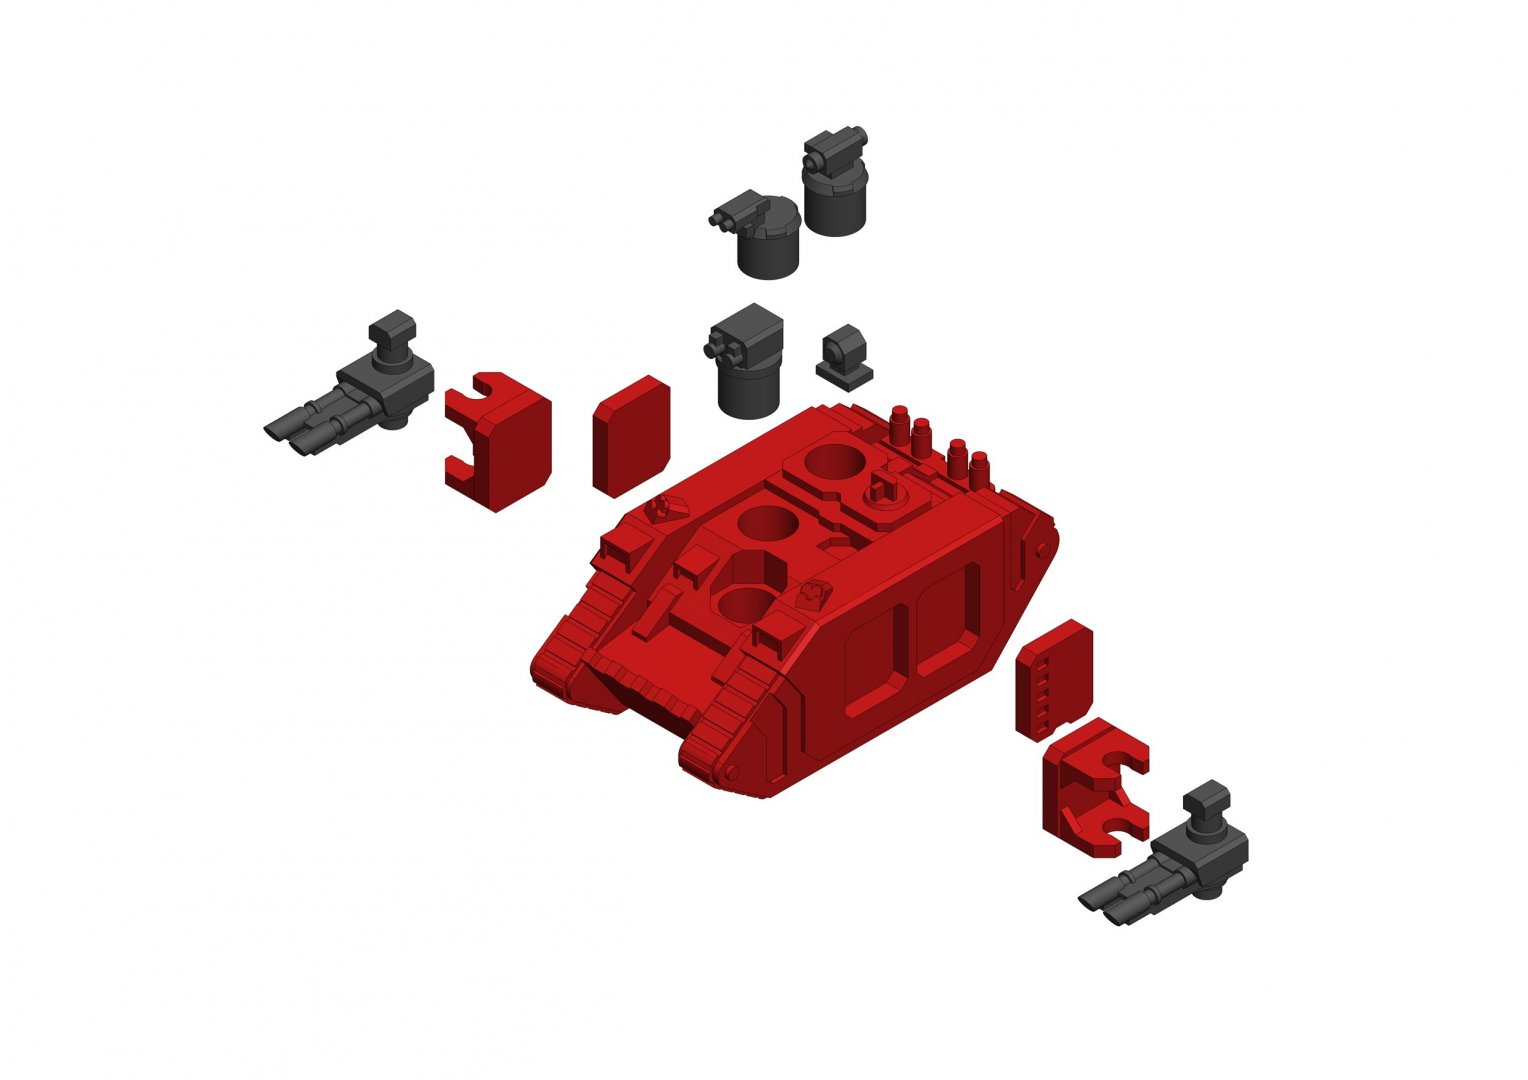
Thanks! It's in Epic scale (I think). The STL's are free if anybody's interested in it, although I wasn't able to layout the parts for proper print orientation (I figured different orientations work for different printers). Micro Land Raider .stl files I pretty much go for a "close enough" model for printing, it gets sanded down & improved anyway, so any fine details the printer missed is "recovered" later.
-
SDF-1 3D Model + 3D Print [SD Machine Style]
UN_MARINE replied to UN_MARINE's topic in The Workshop!
Thanks! I found the Valk at a local swap meet/convention, the box was messed up, but everything inside was complete, including the sticker sheet. -
SDF-1 3D Model + 3D Print [SD Machine Style]
UN_MARINE replied to UN_MARINE's topic in The Workshop!
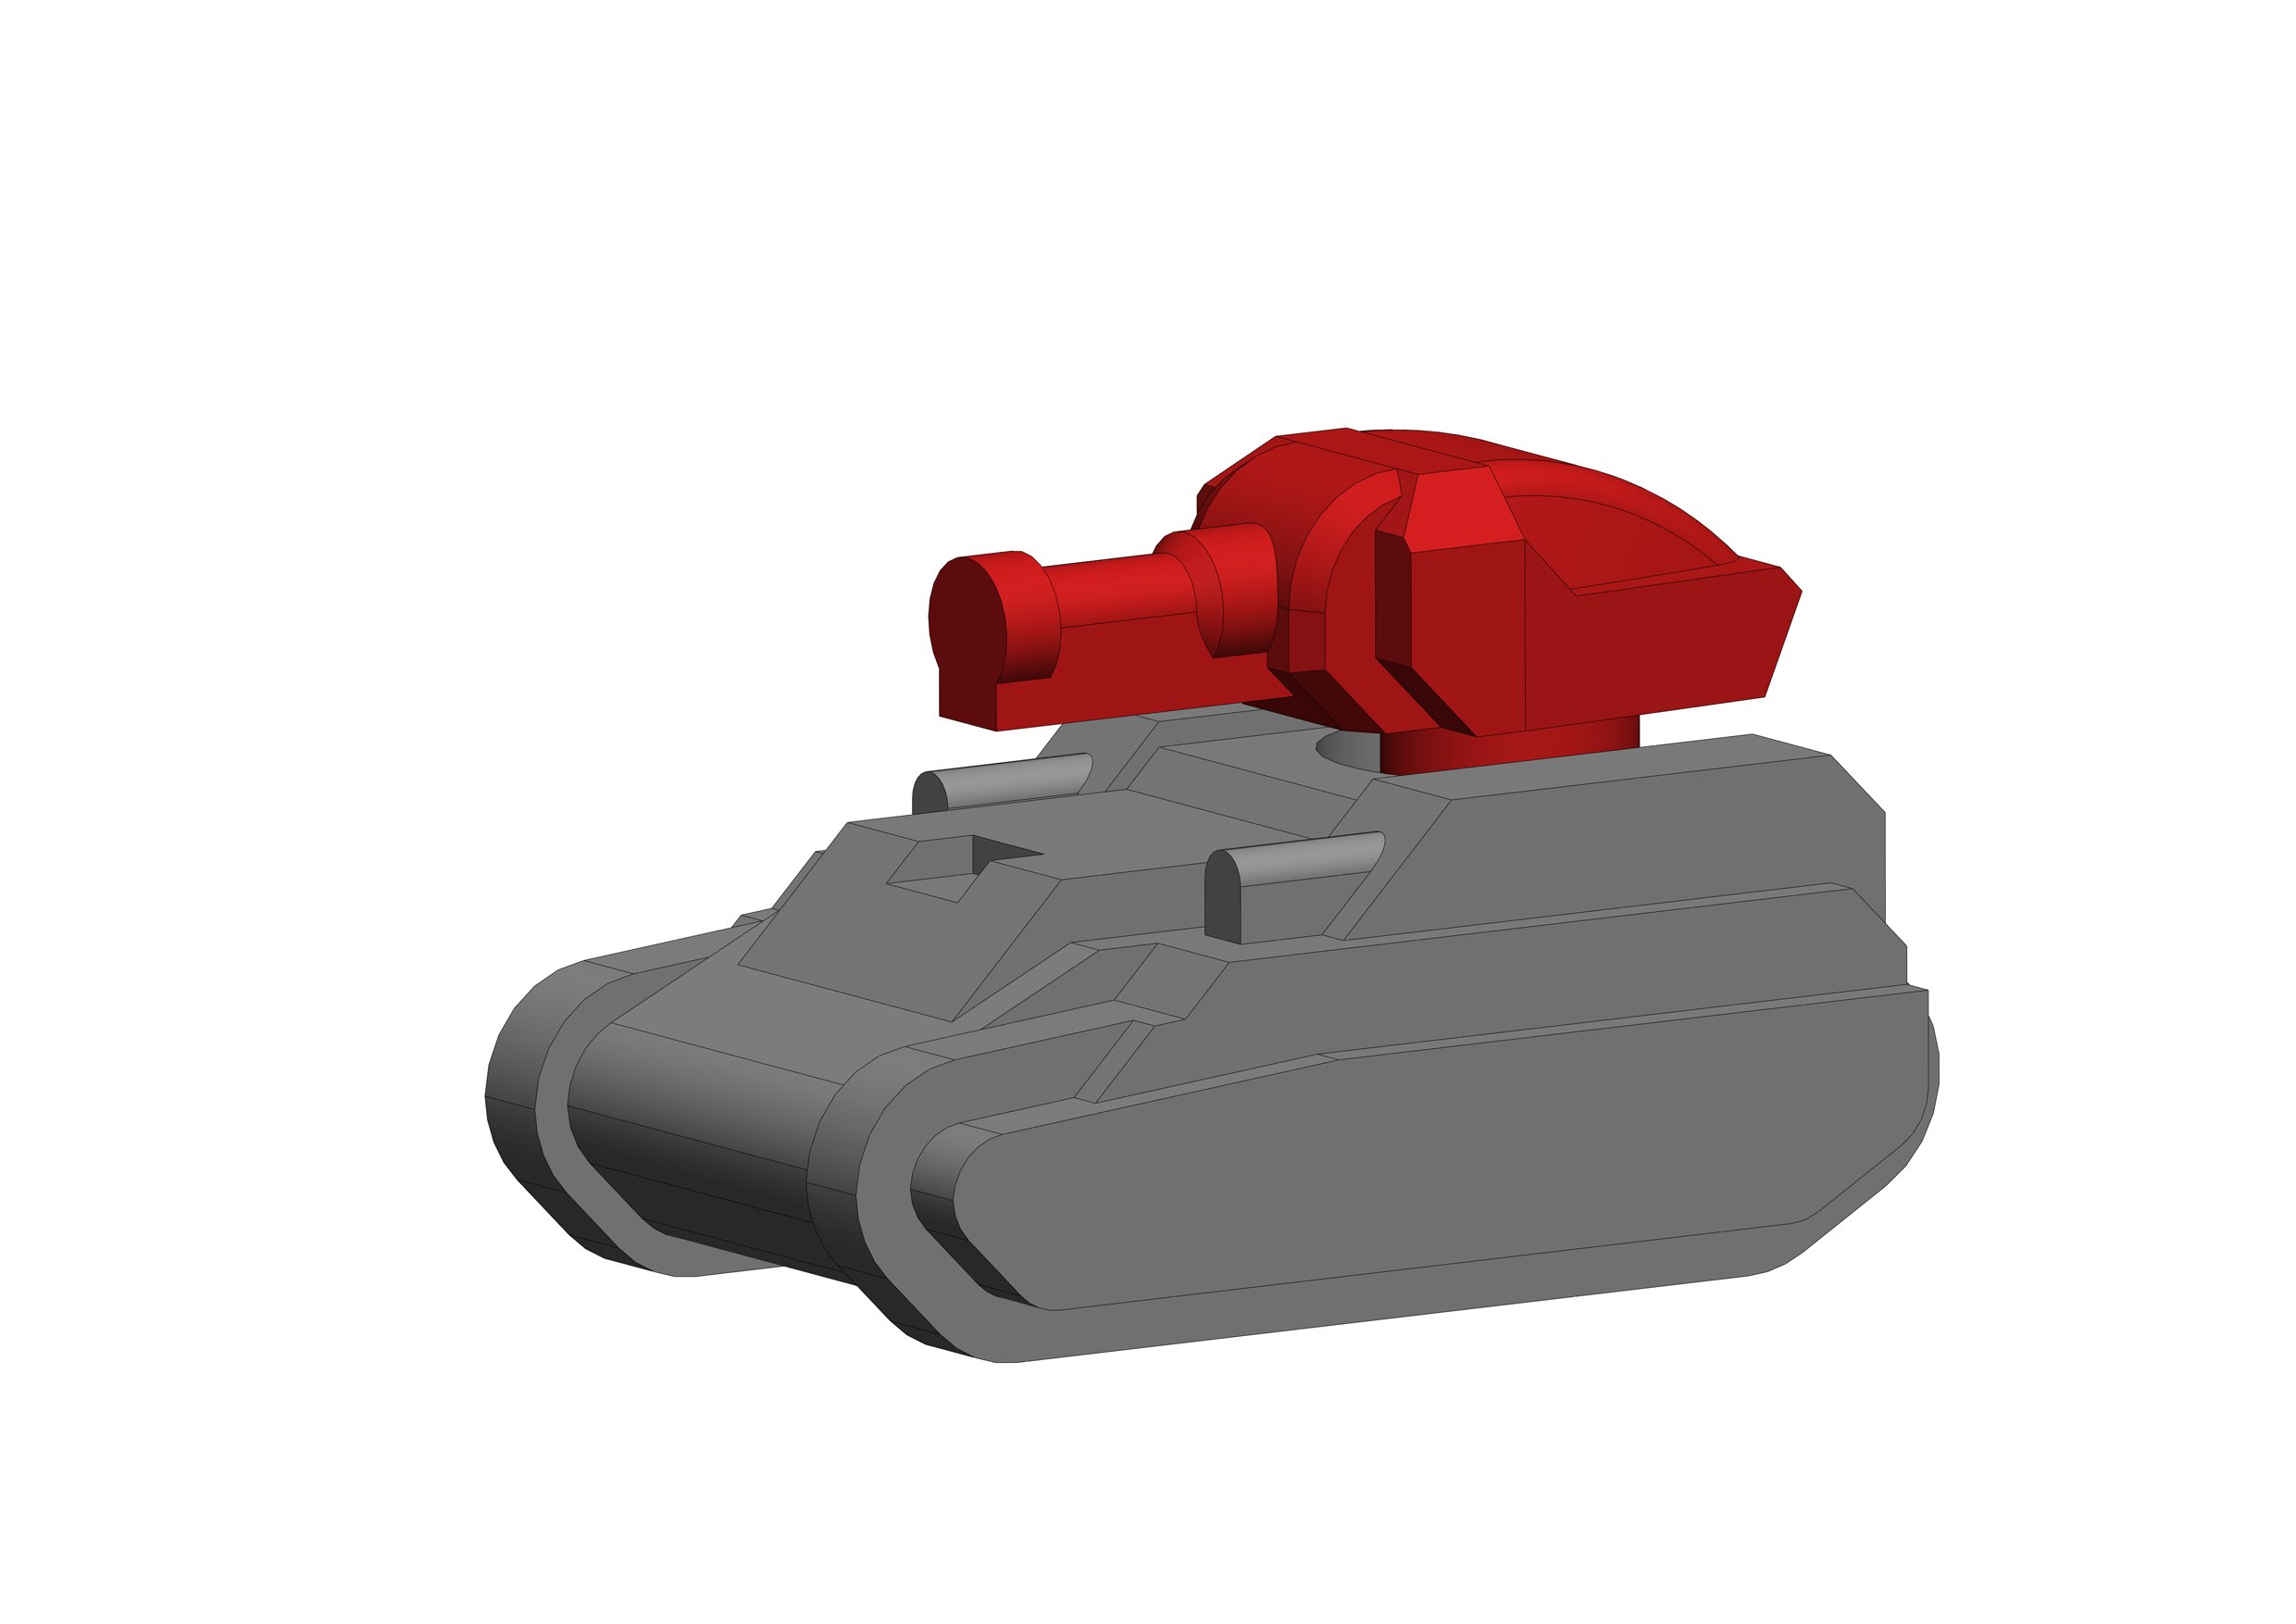
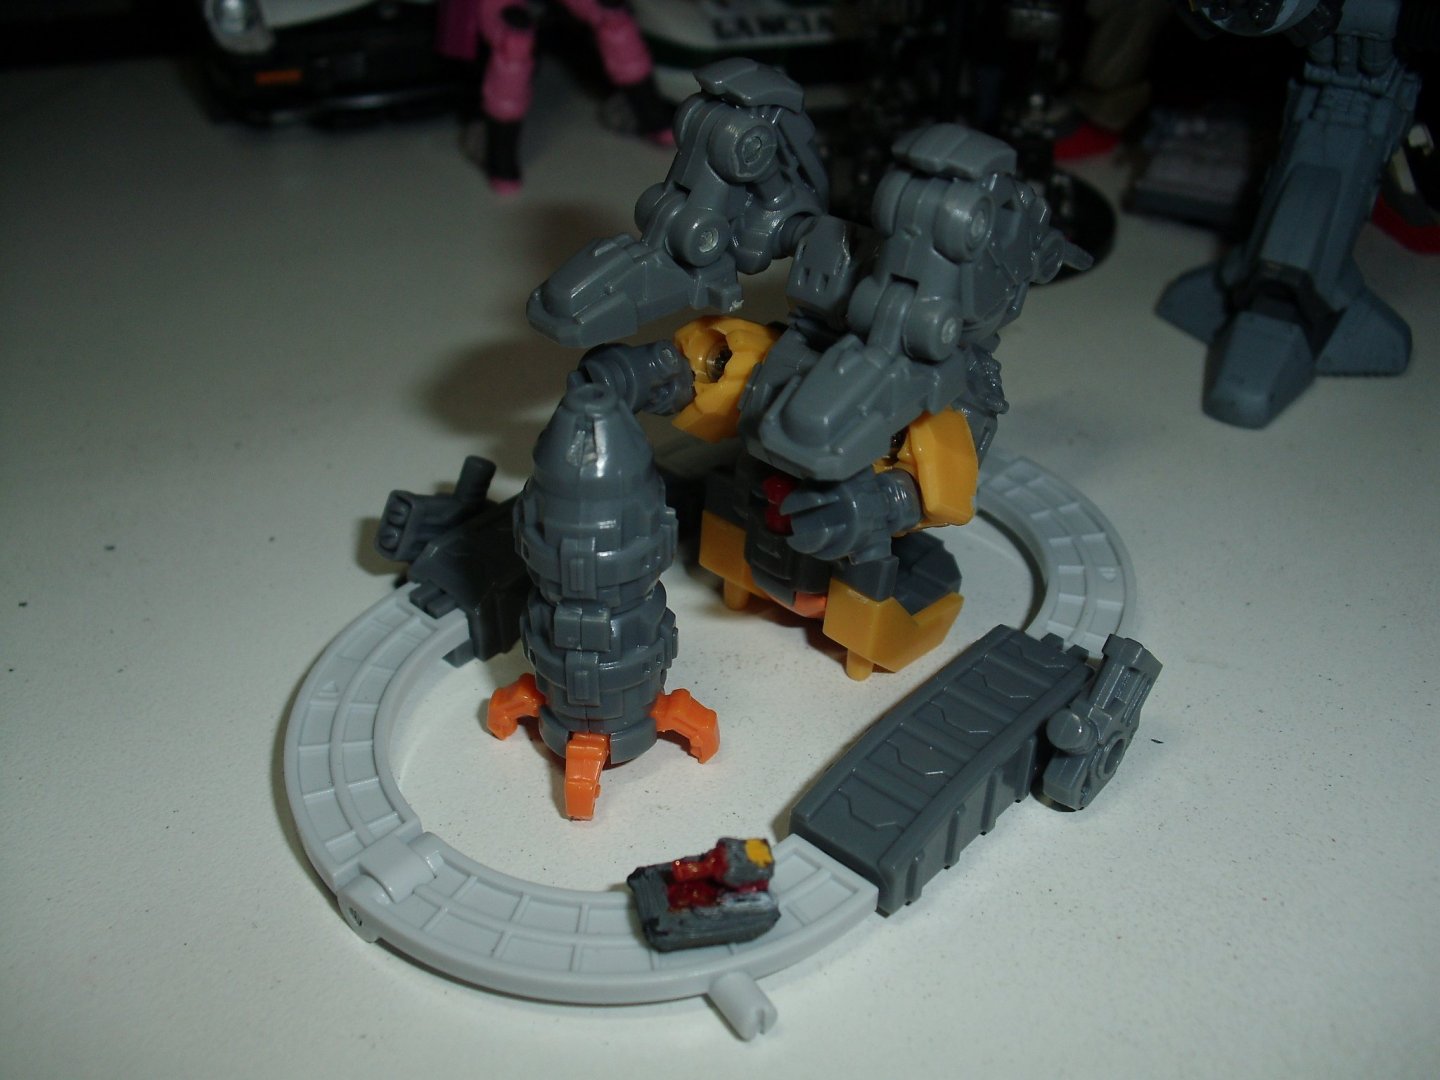
After a bit of sanding, the parts fit a whole lot better. I can probably run a v1.5 print with improvements next week. Tiny Destroid Monster! Also got rid of the chest/cannon drooping in Storm Attacker mode.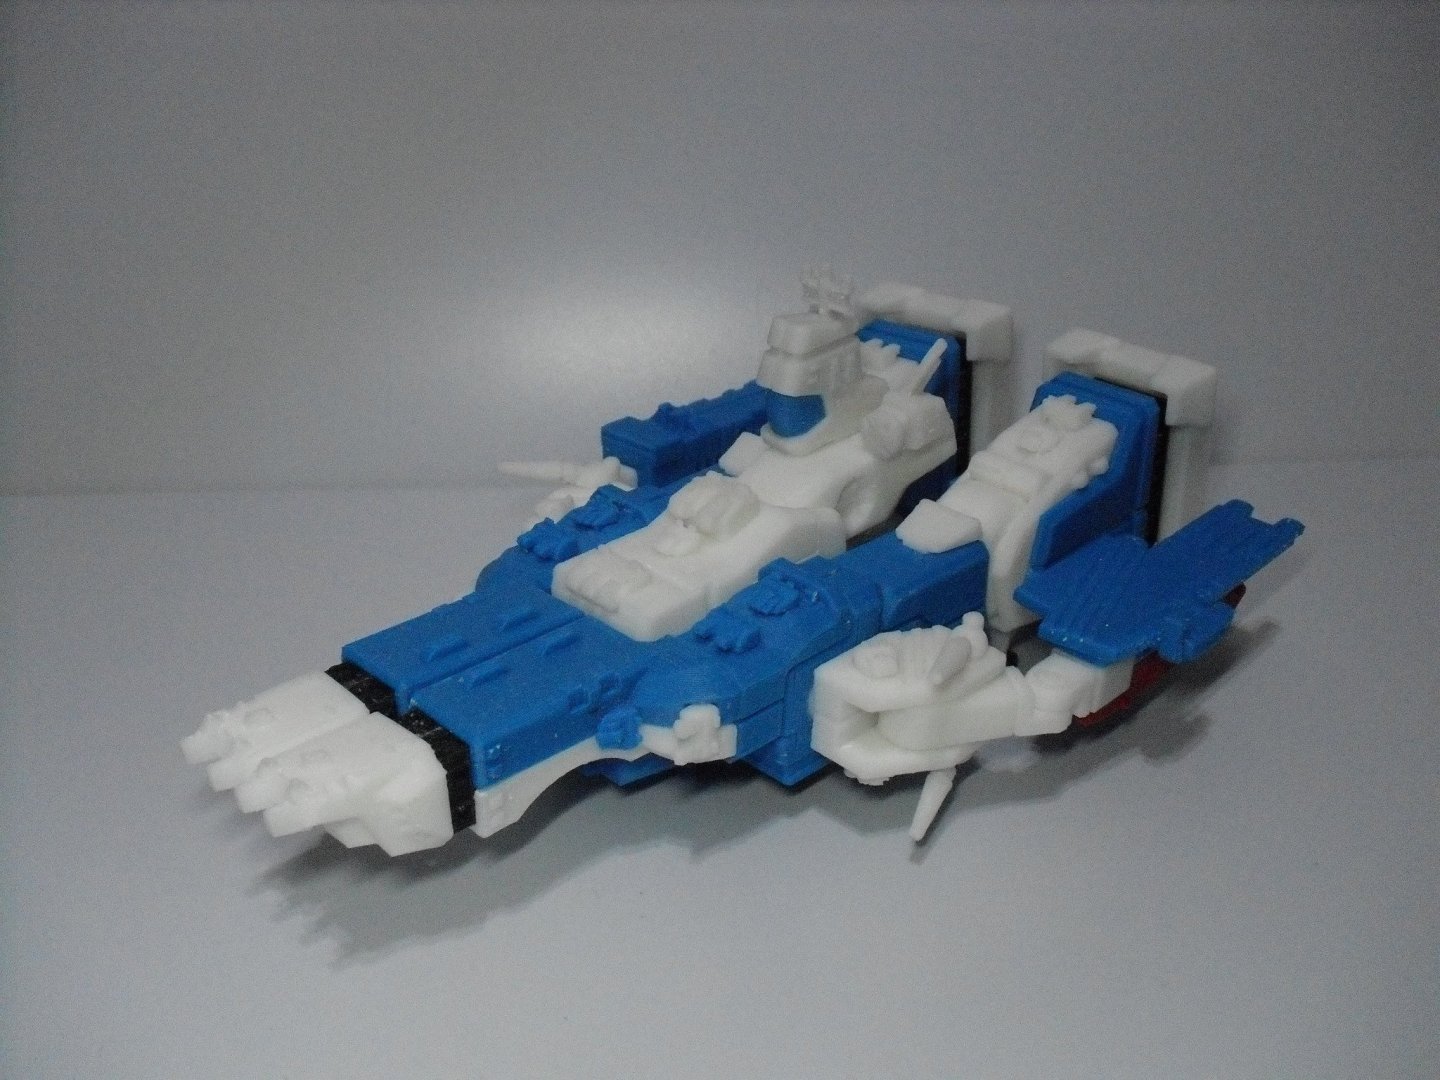
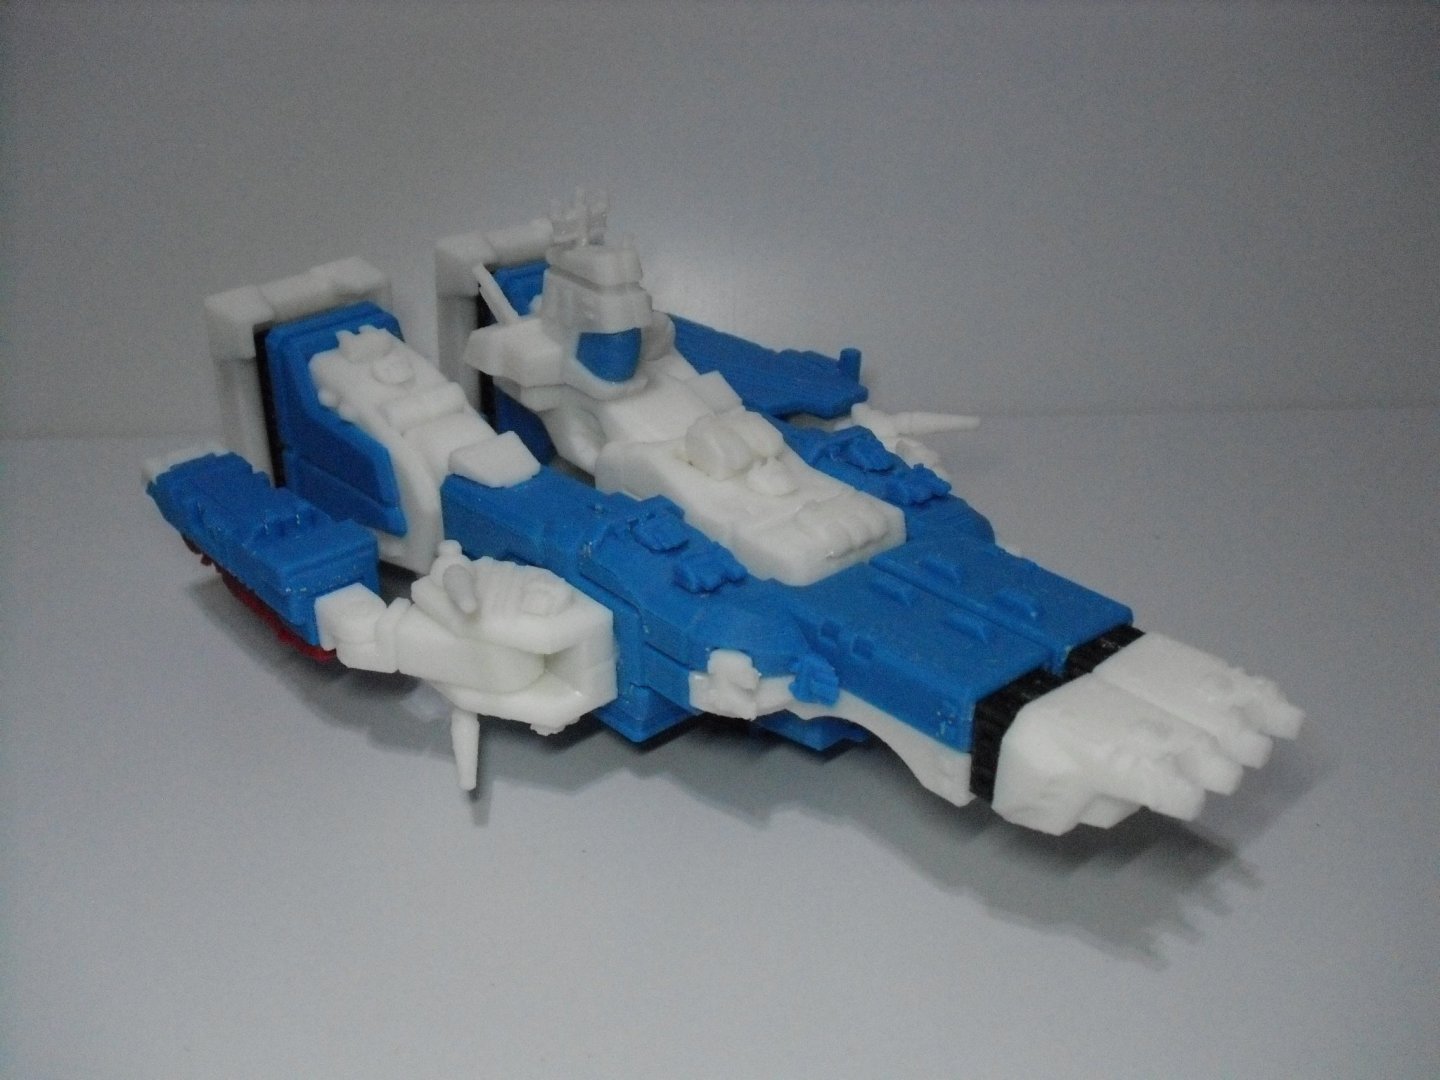
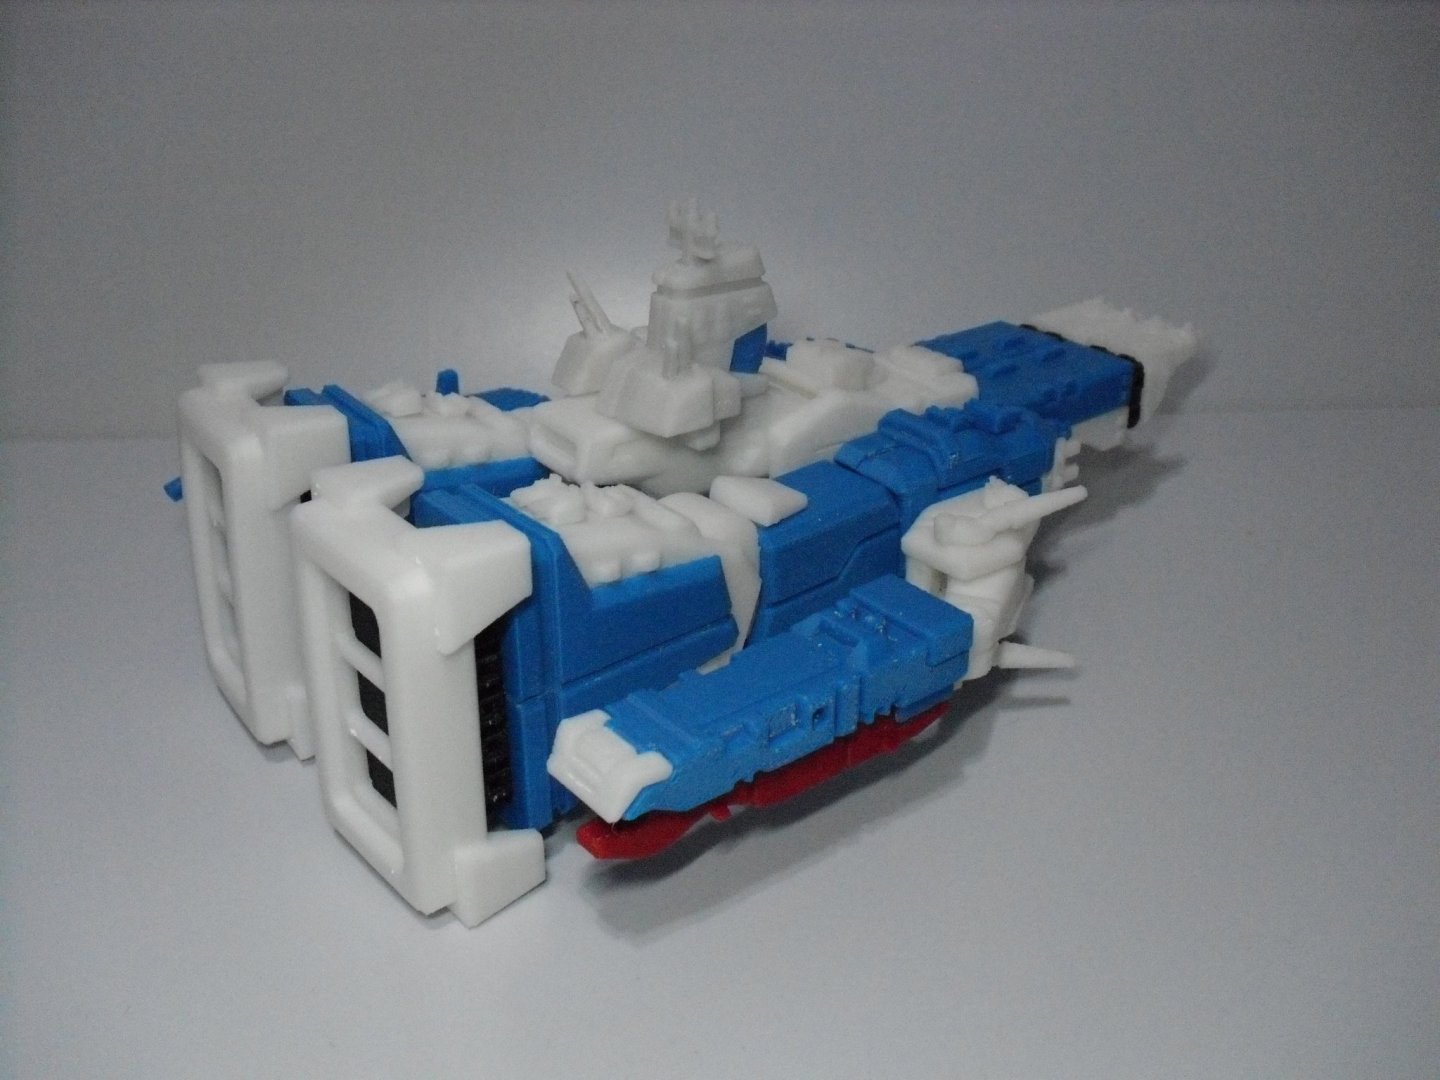

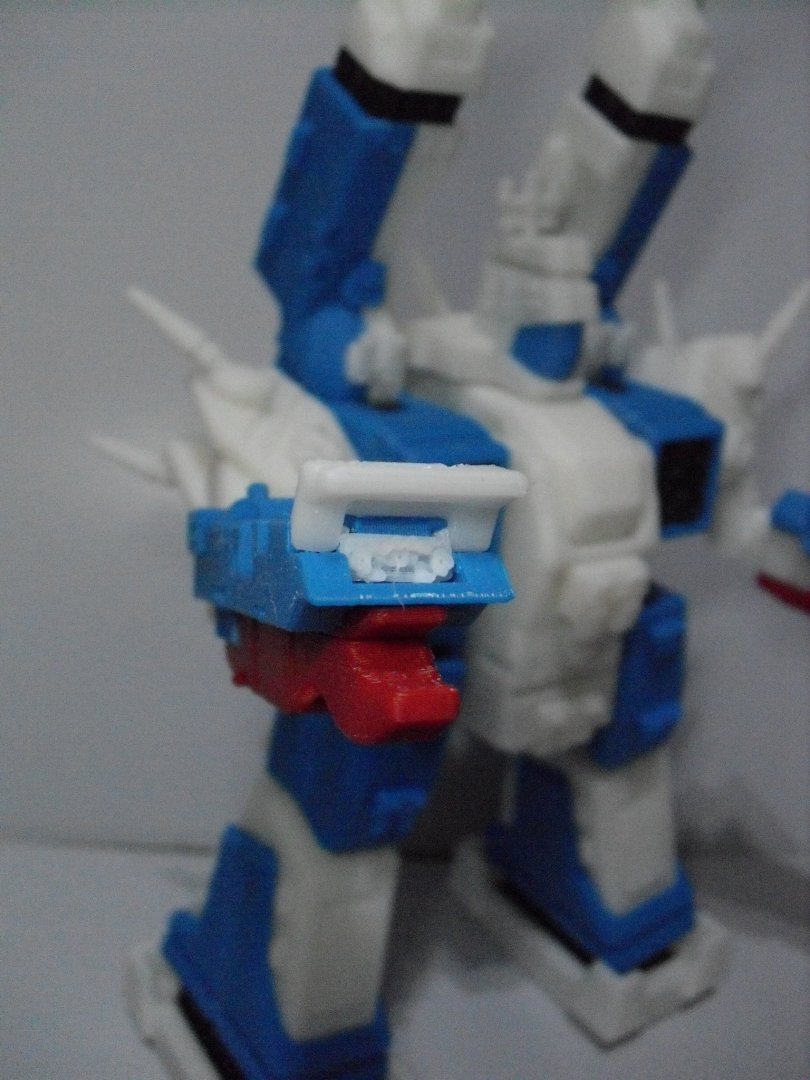

-
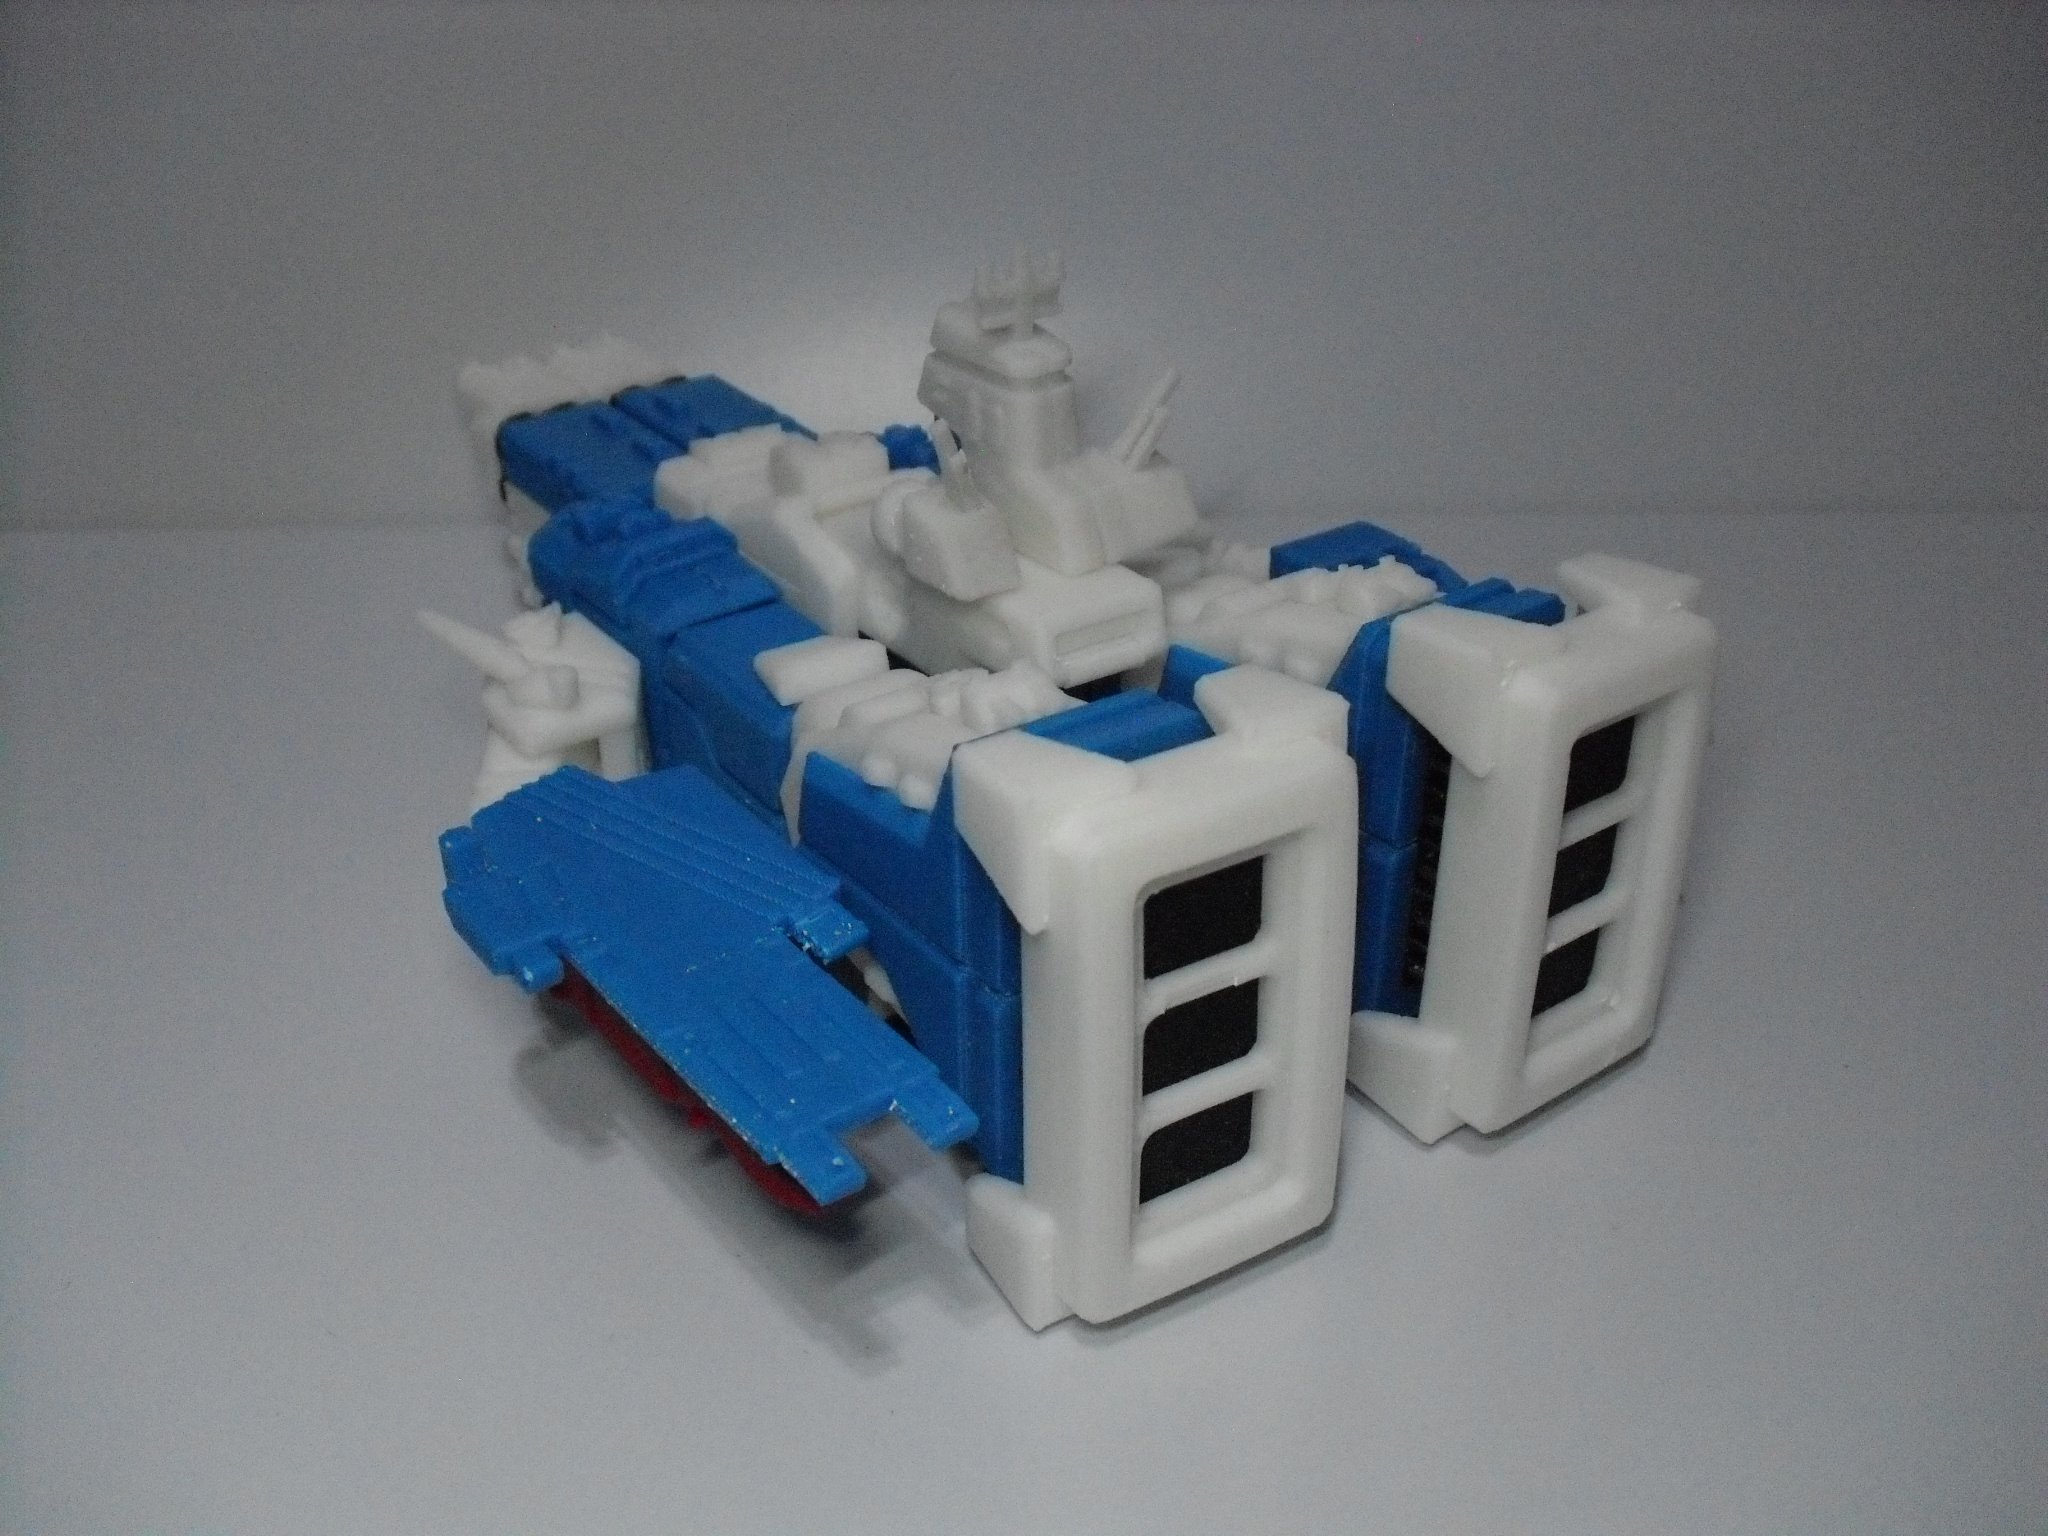
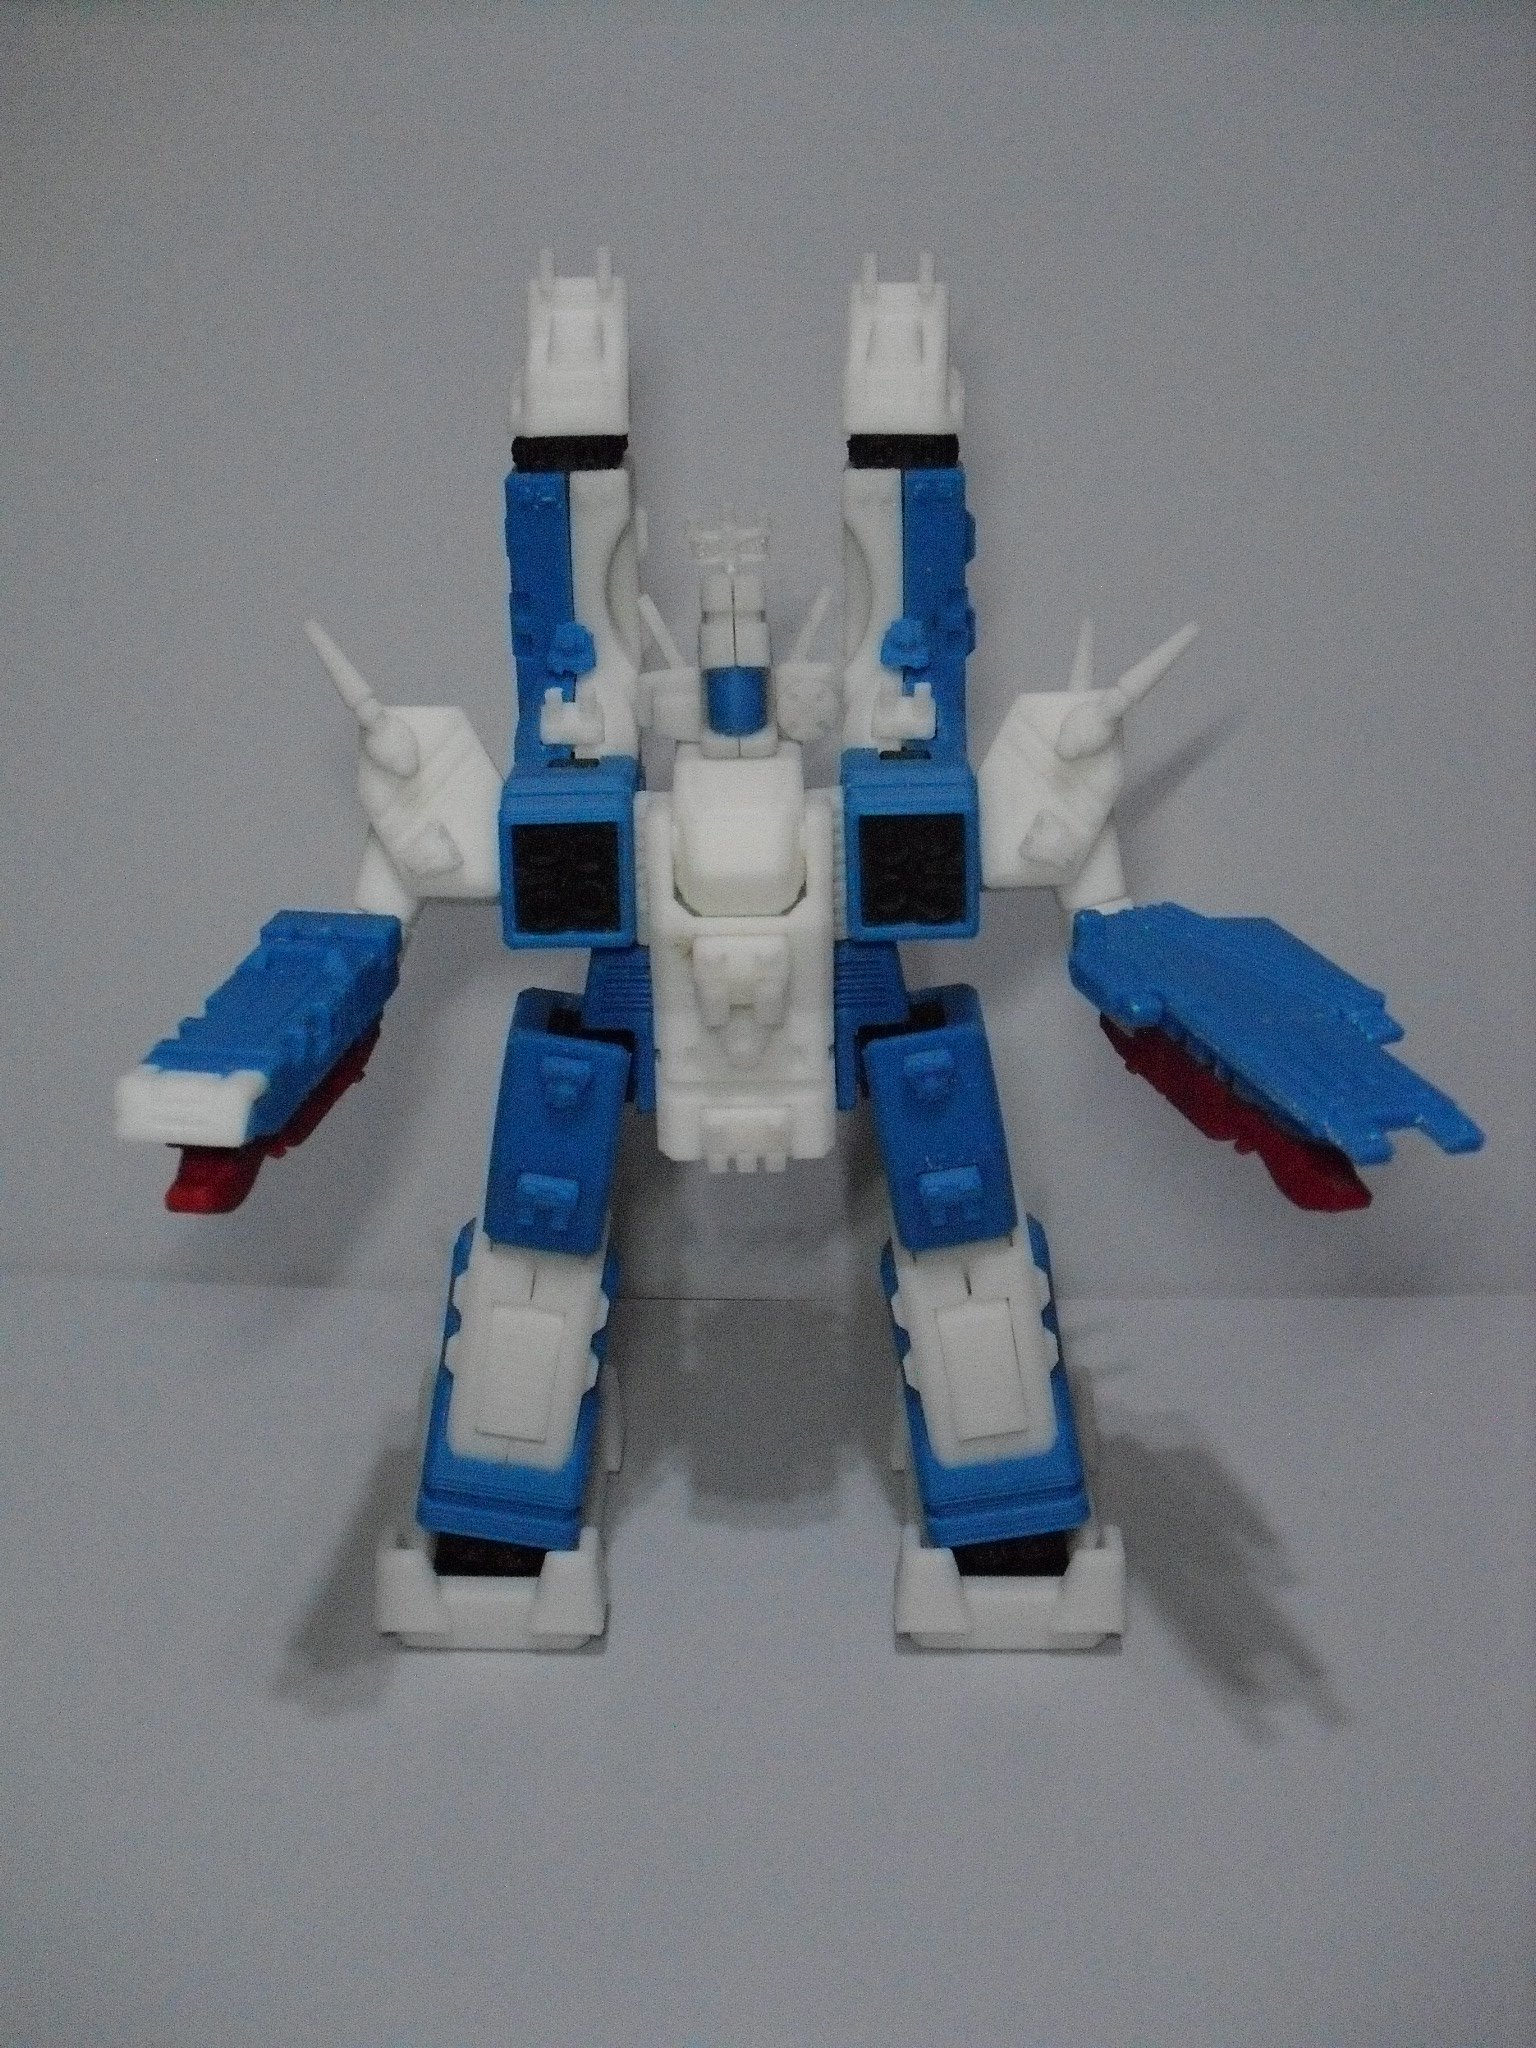
I managed to print something smaller, and with slightly less horrifying results. The trick I use is to keep dimensions above 0.3mm in the model - the printer recognizes the detail as "large enough" so it doesn't ignore them in the g-code. But sometimes, there are way too many details to keep track of, so they don't negate each other. Oh, and... surprise WH40K model!
-
Thanks! I figured it would be the easiest way to split up parts for color separation & printing in batches. The head proportion's pretty much a side-effect of not wanting a parts-former. Thanks! I've never tried acetone, sand paper's always been the preferred method. The printer and I have a mutual understanding, where it doesn't embarrass me too often. That is truly impressive work!