

Iceblue106
-
Posts
145 -
Joined
-
Last visited
Content Type
Profiles
Forums
Events
Gallery
Posts posted by Iceblue106
-
-
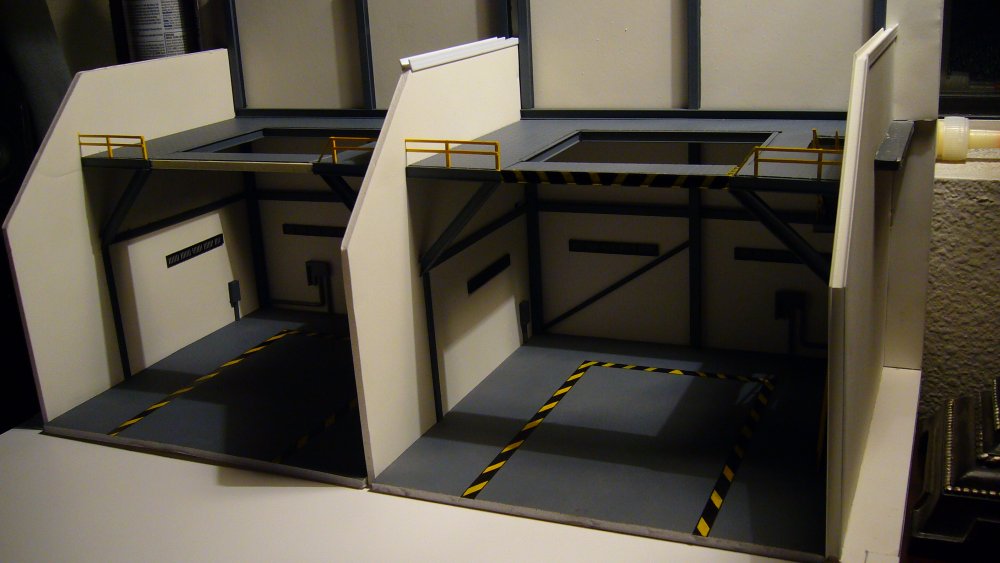
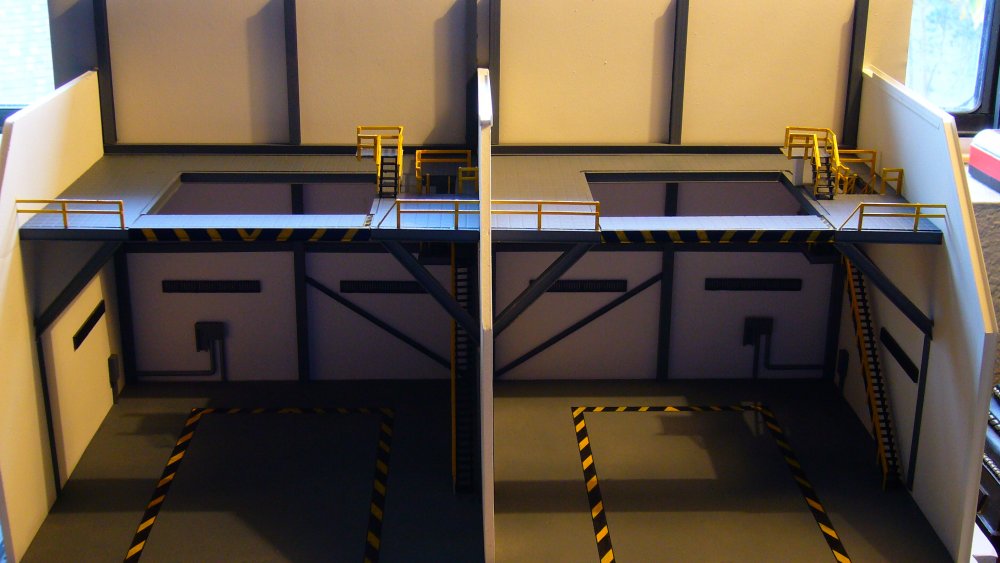
Hello everyone,
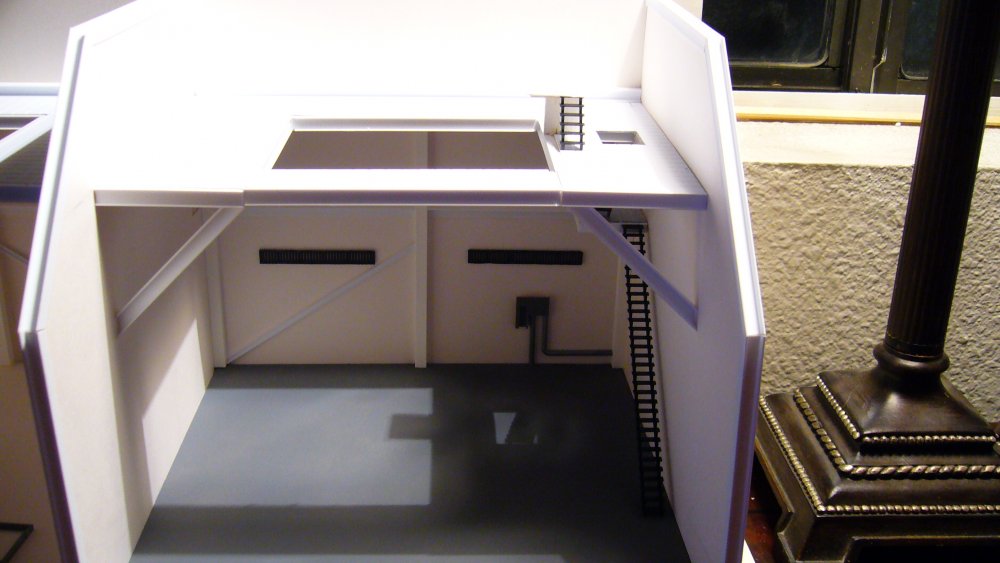
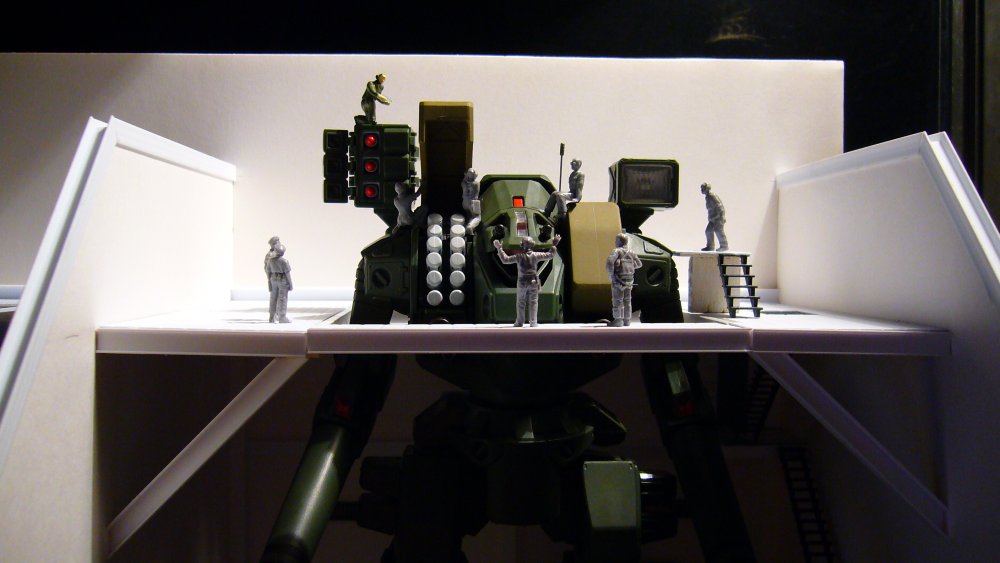
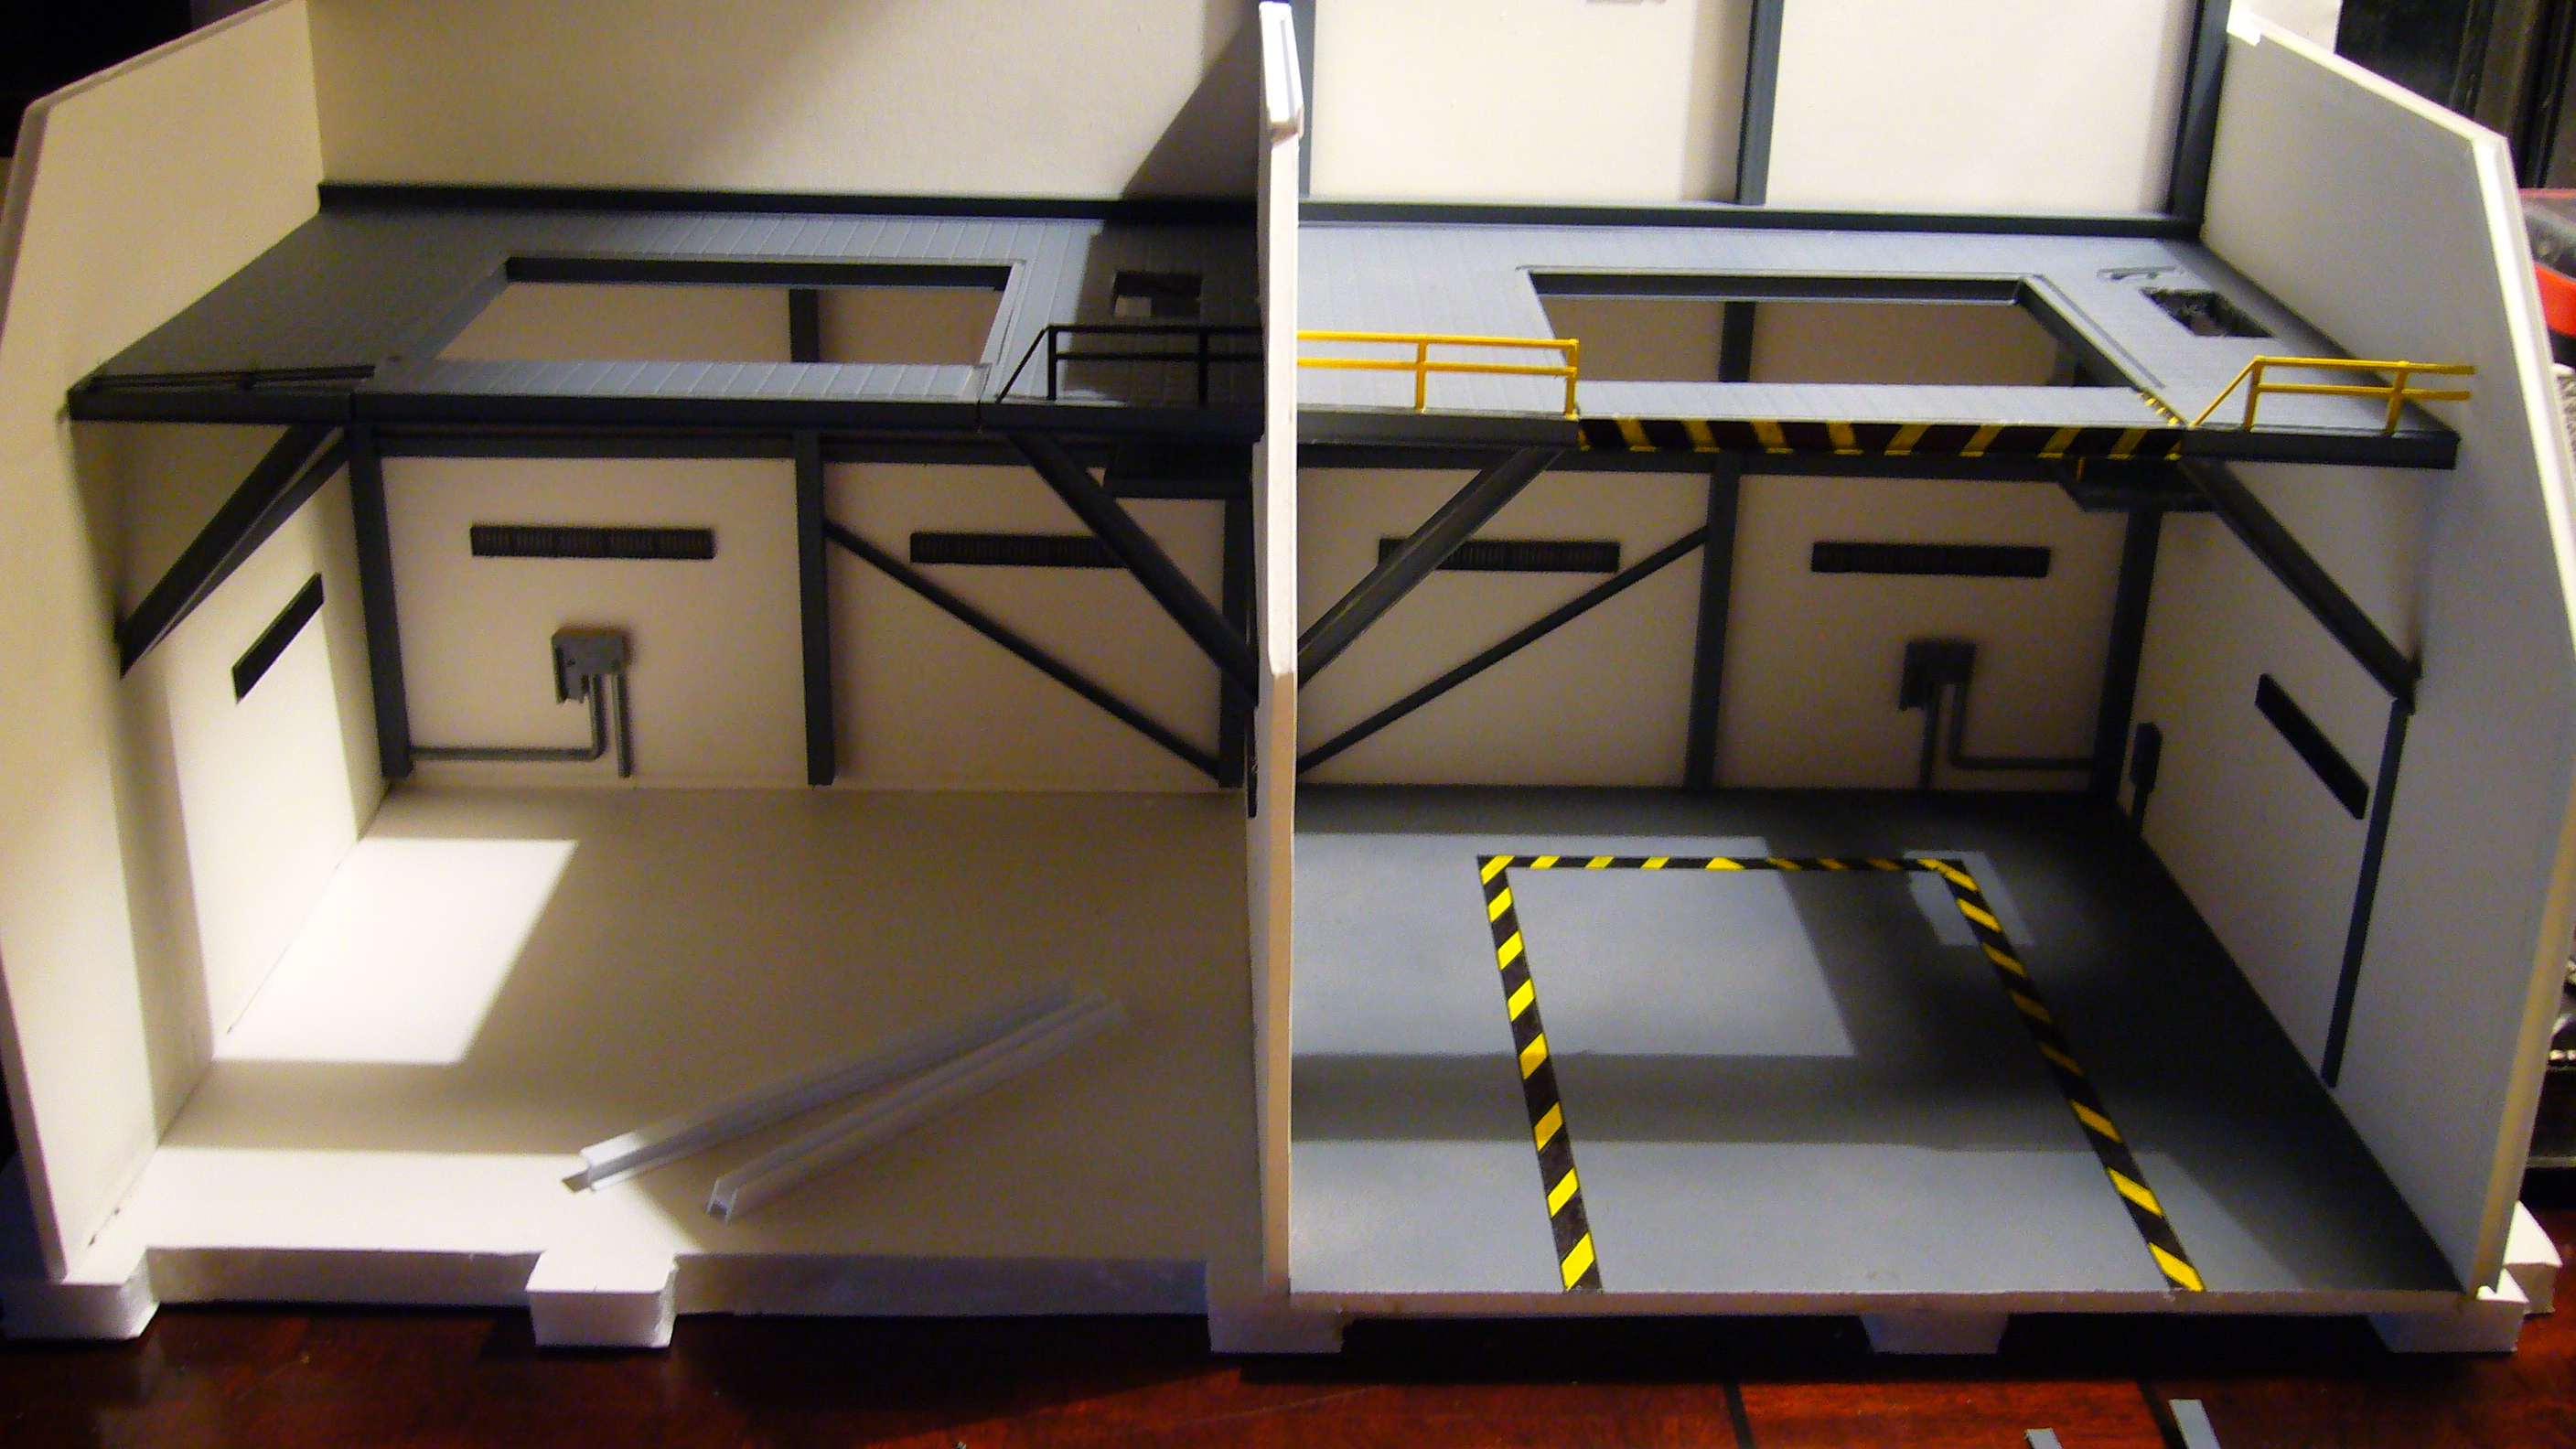
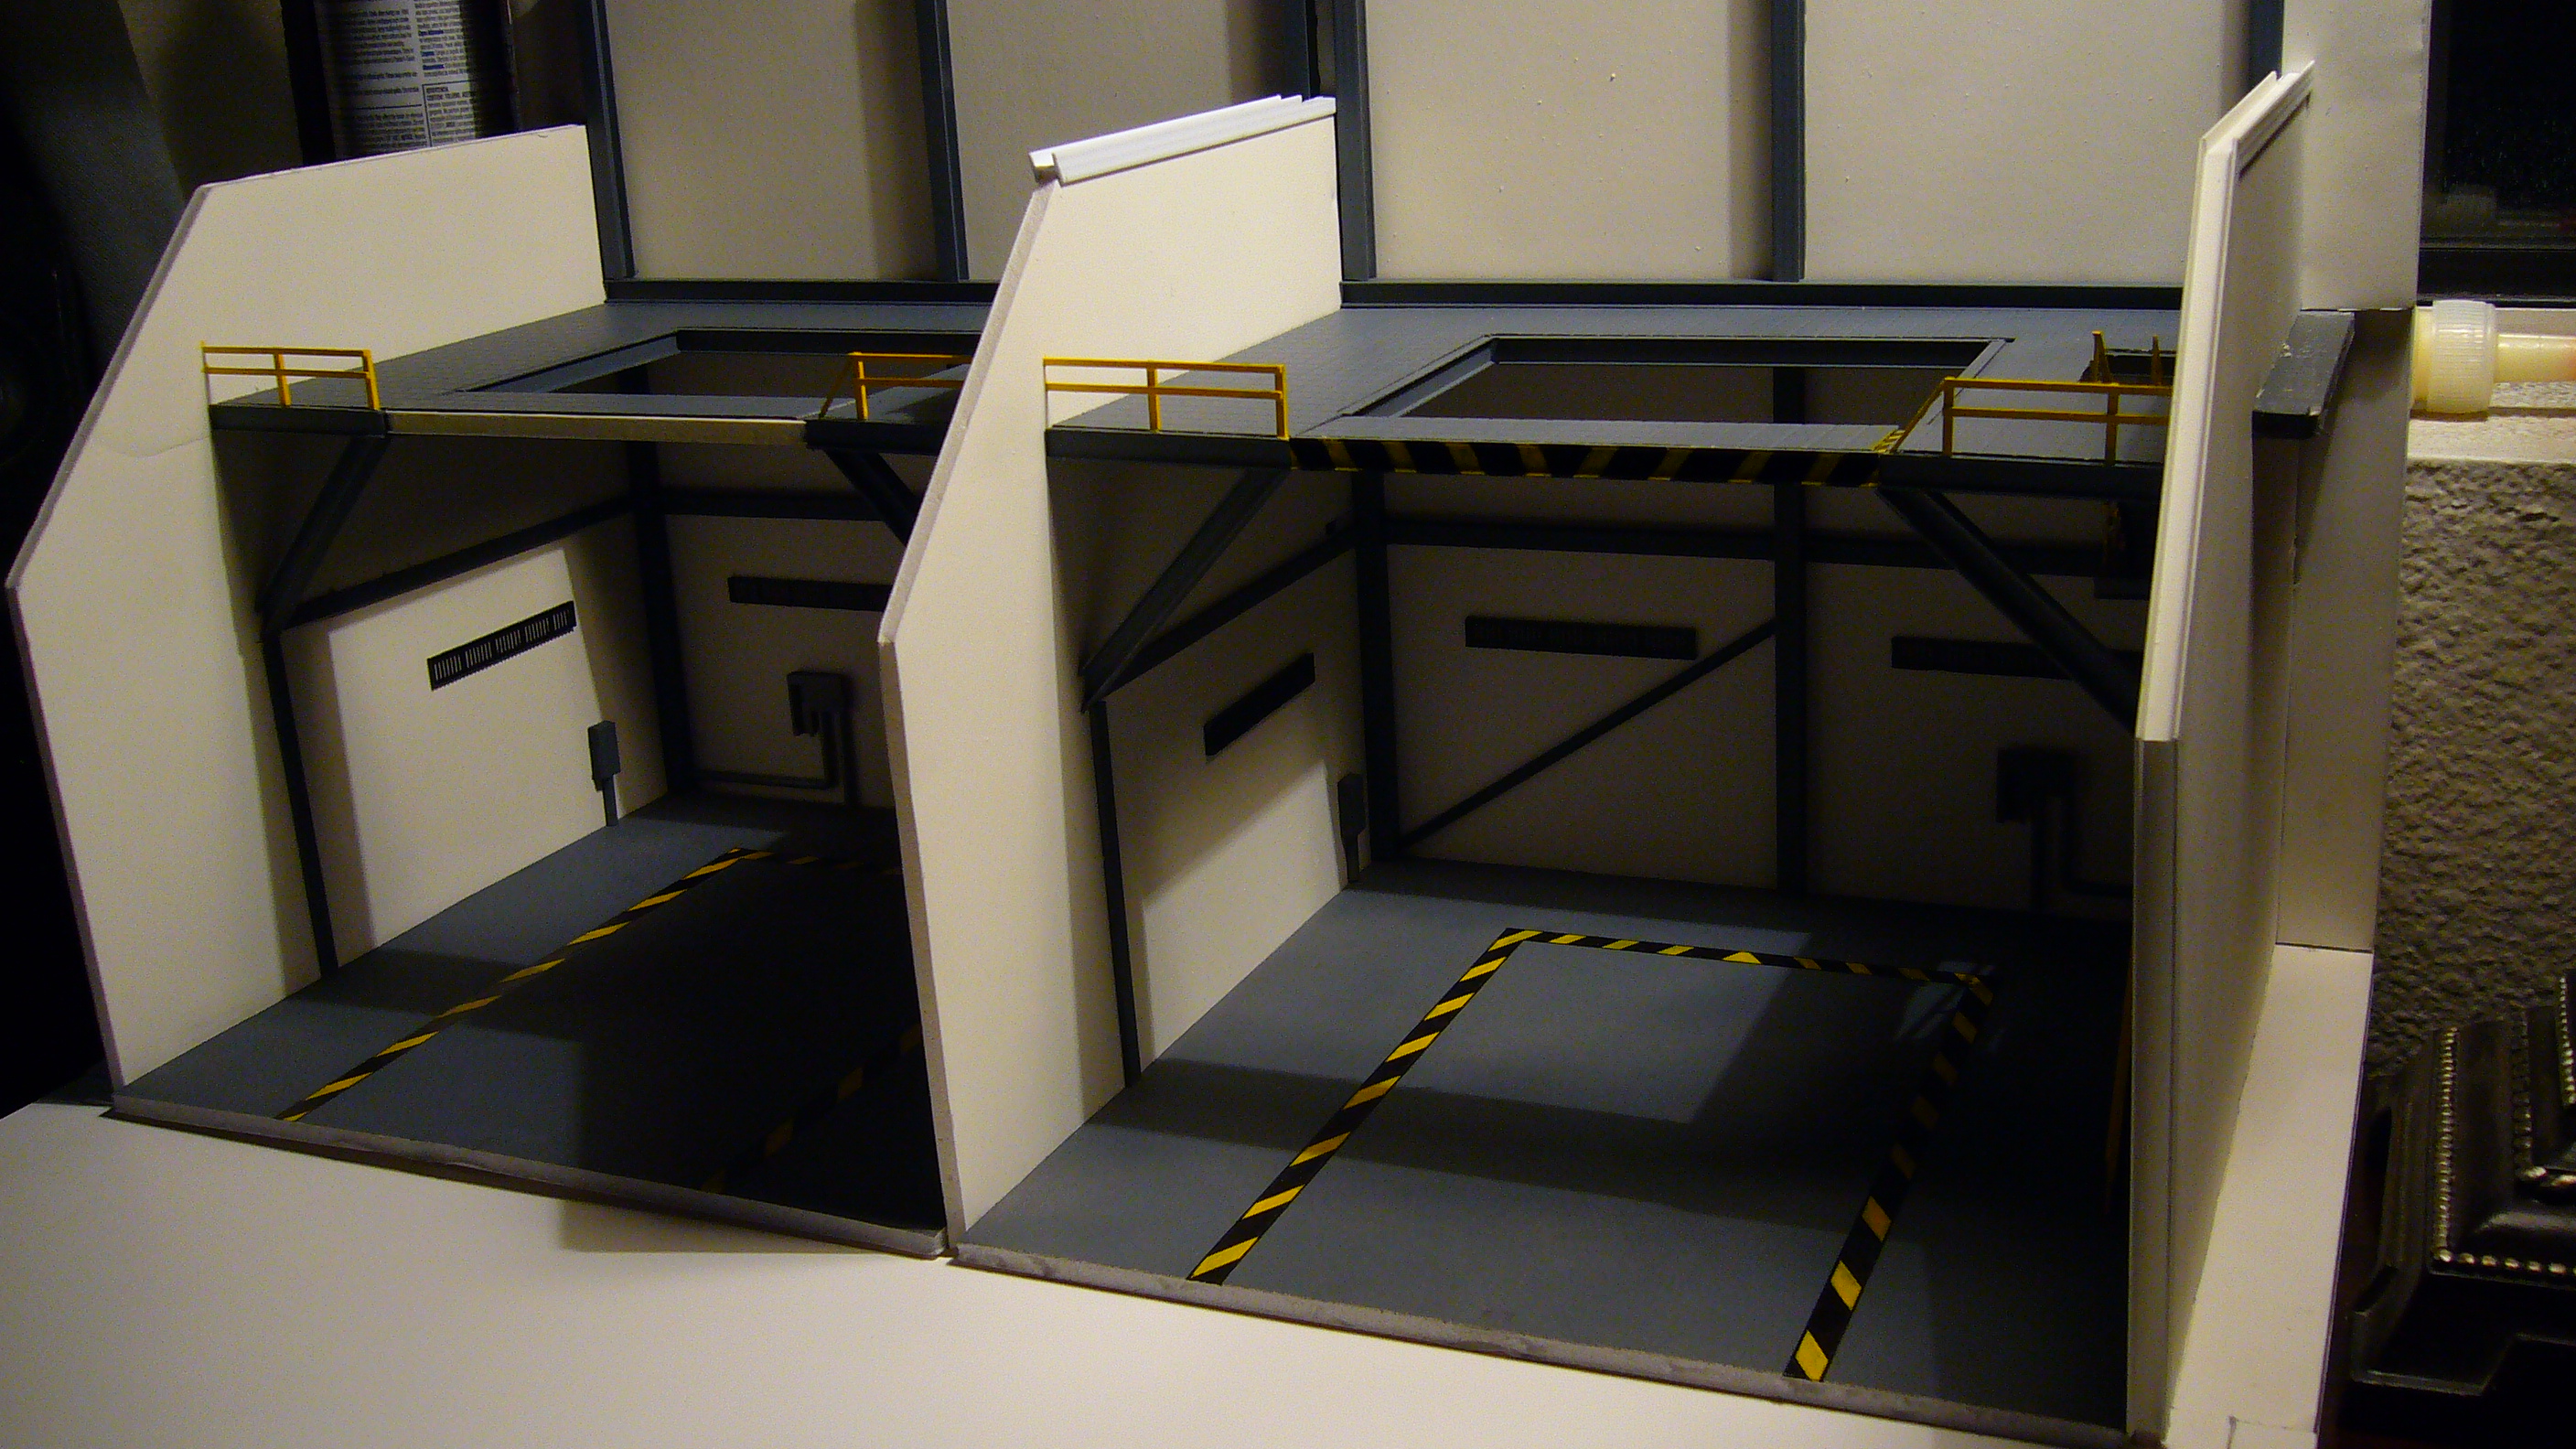
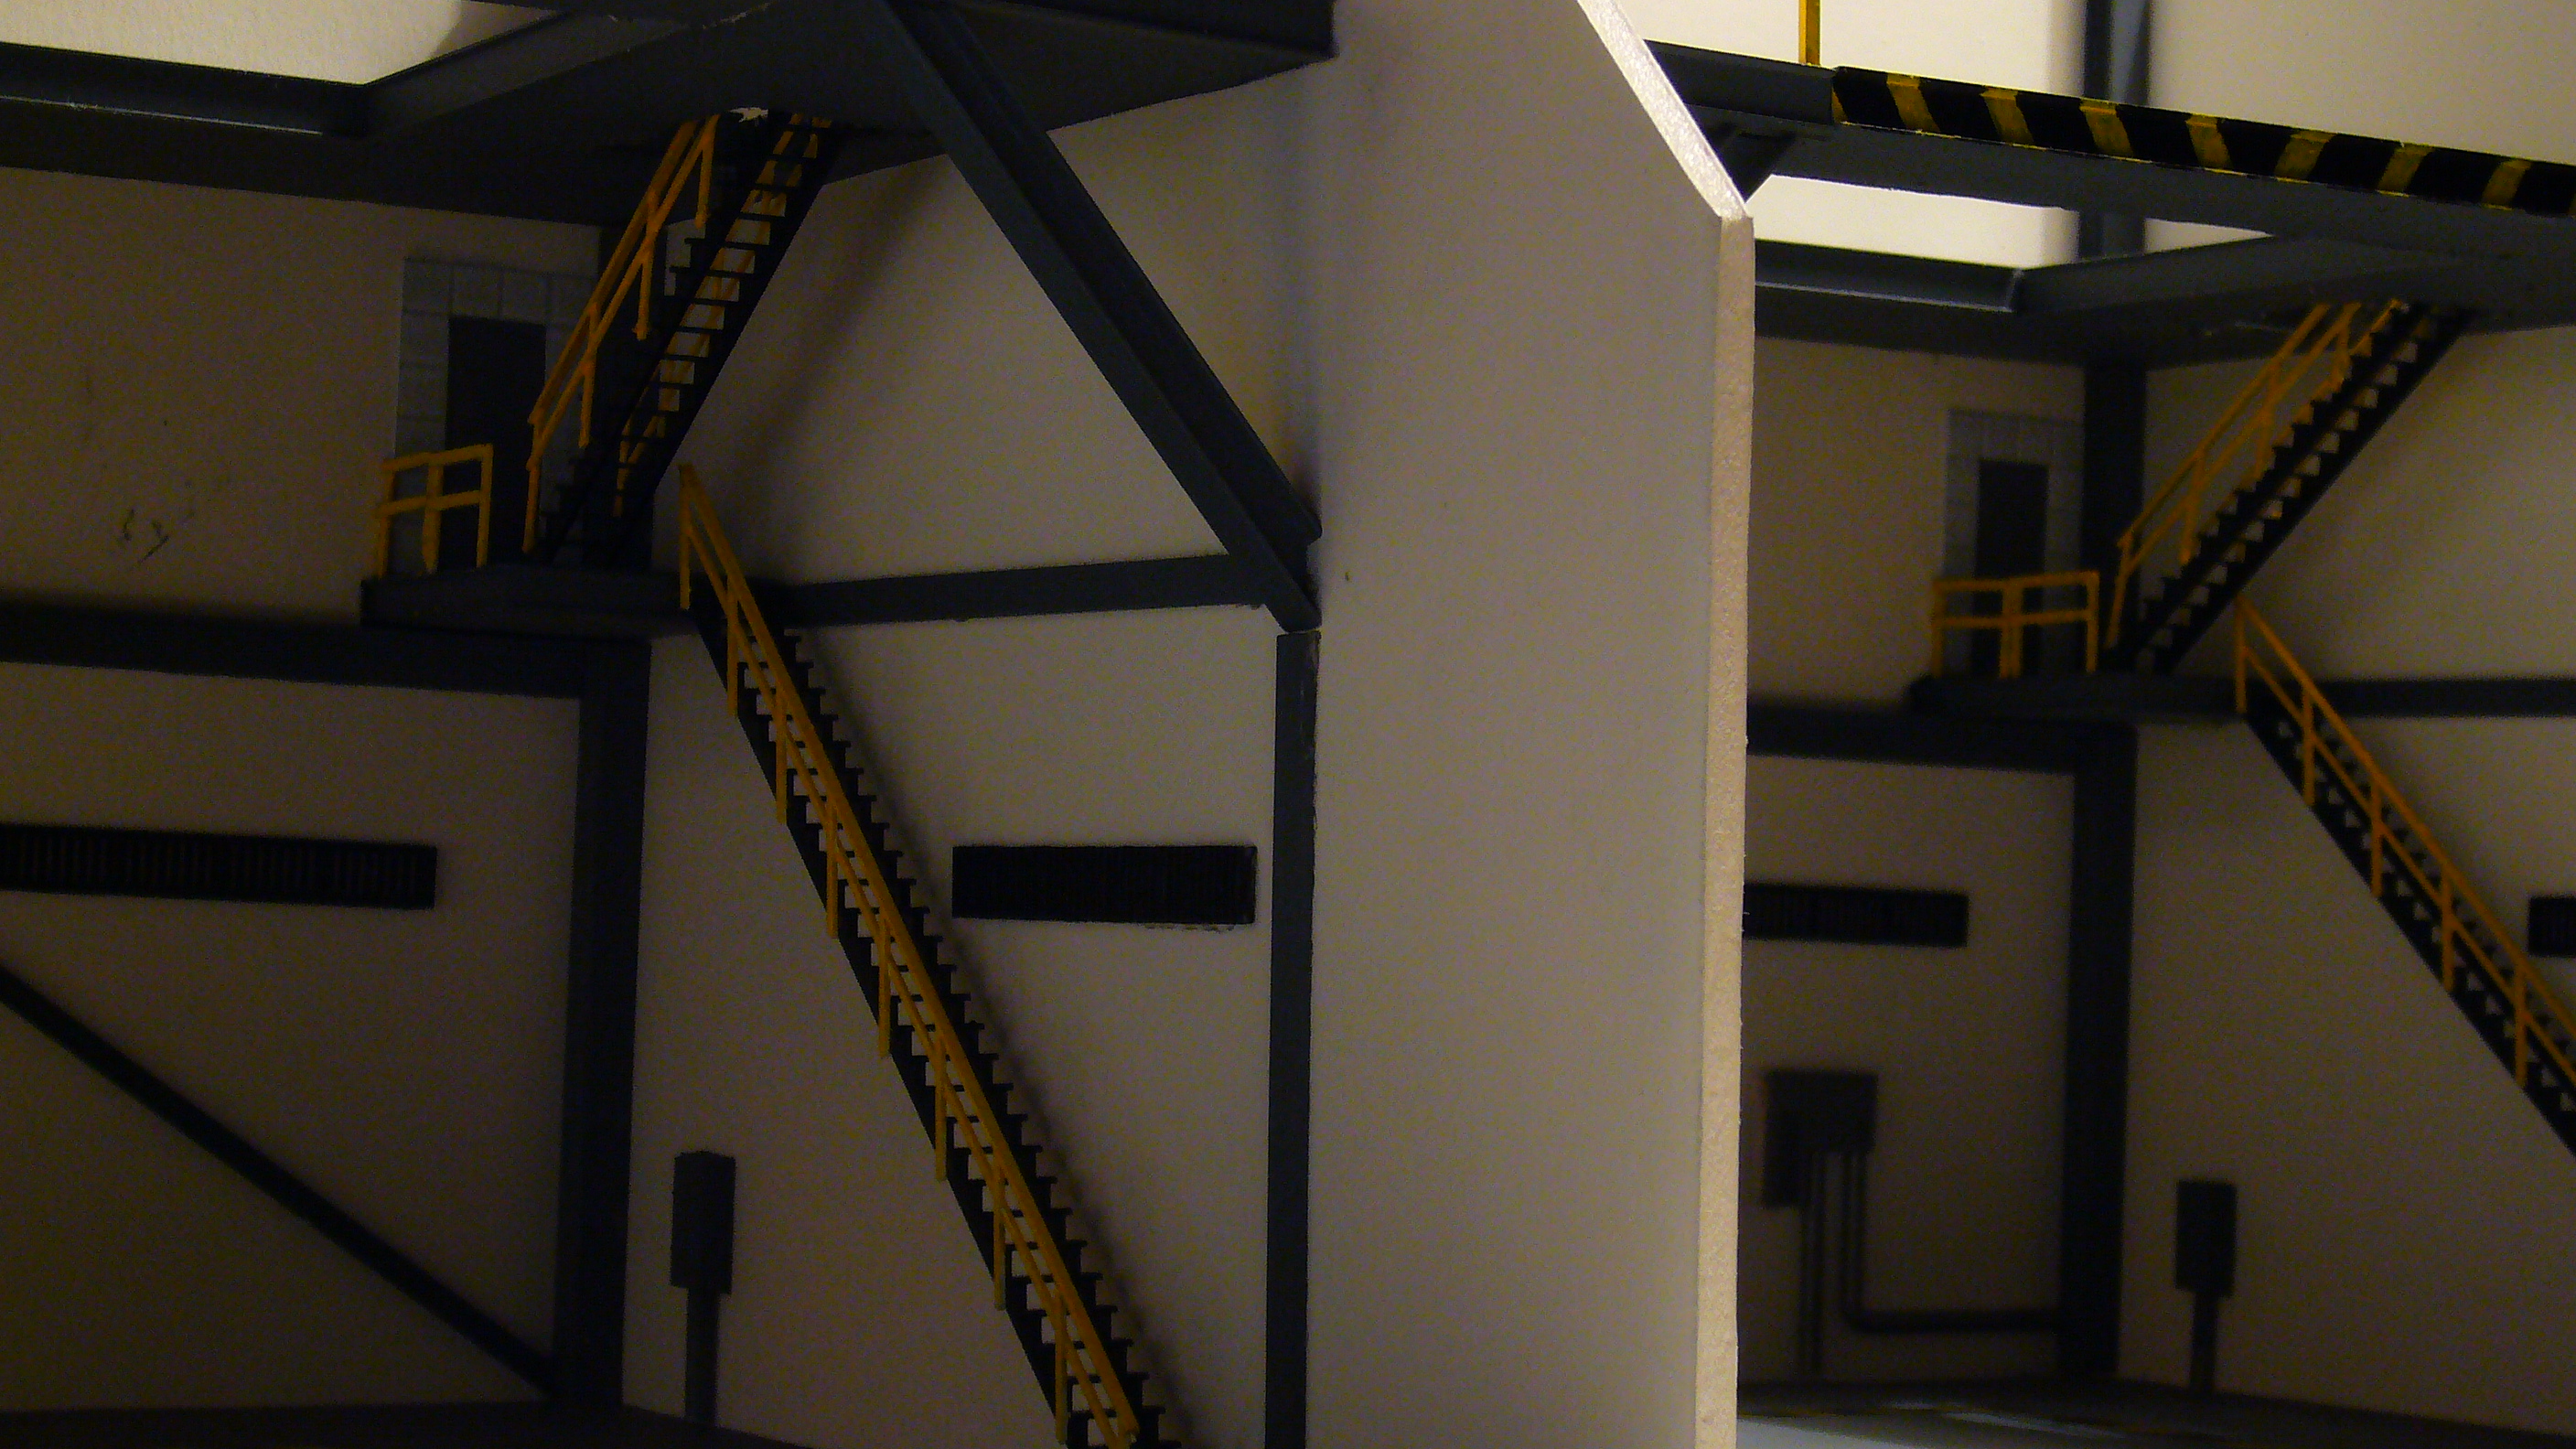
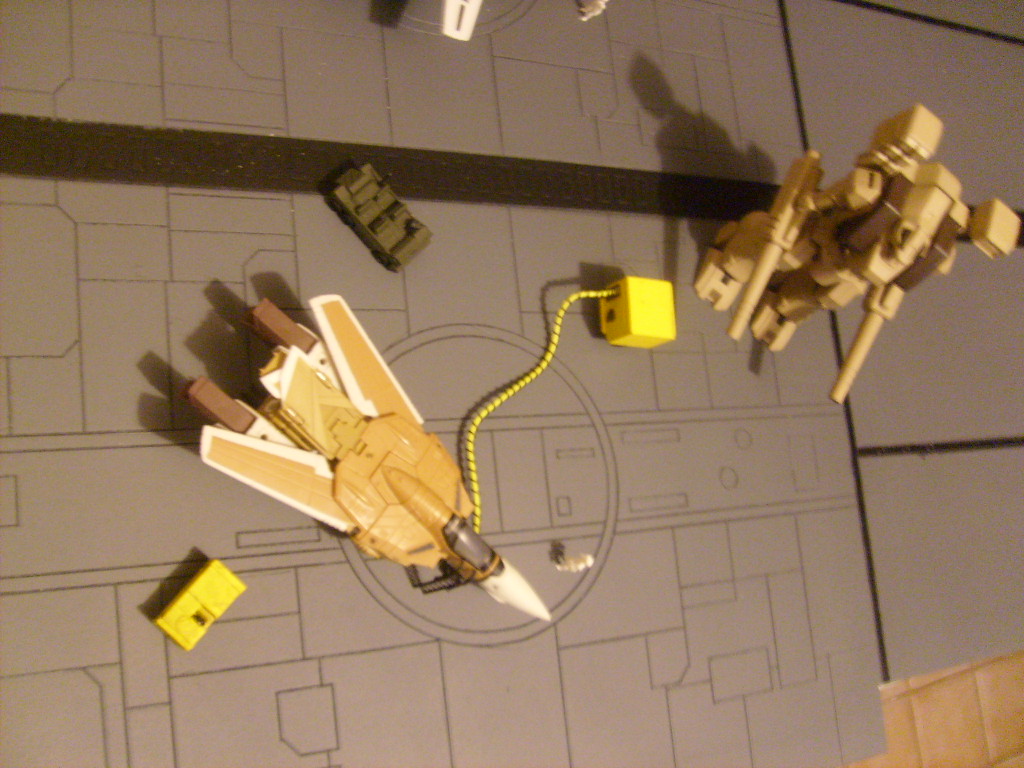
I just wanted to update you all on this project. I've only done a few more things since the last set of
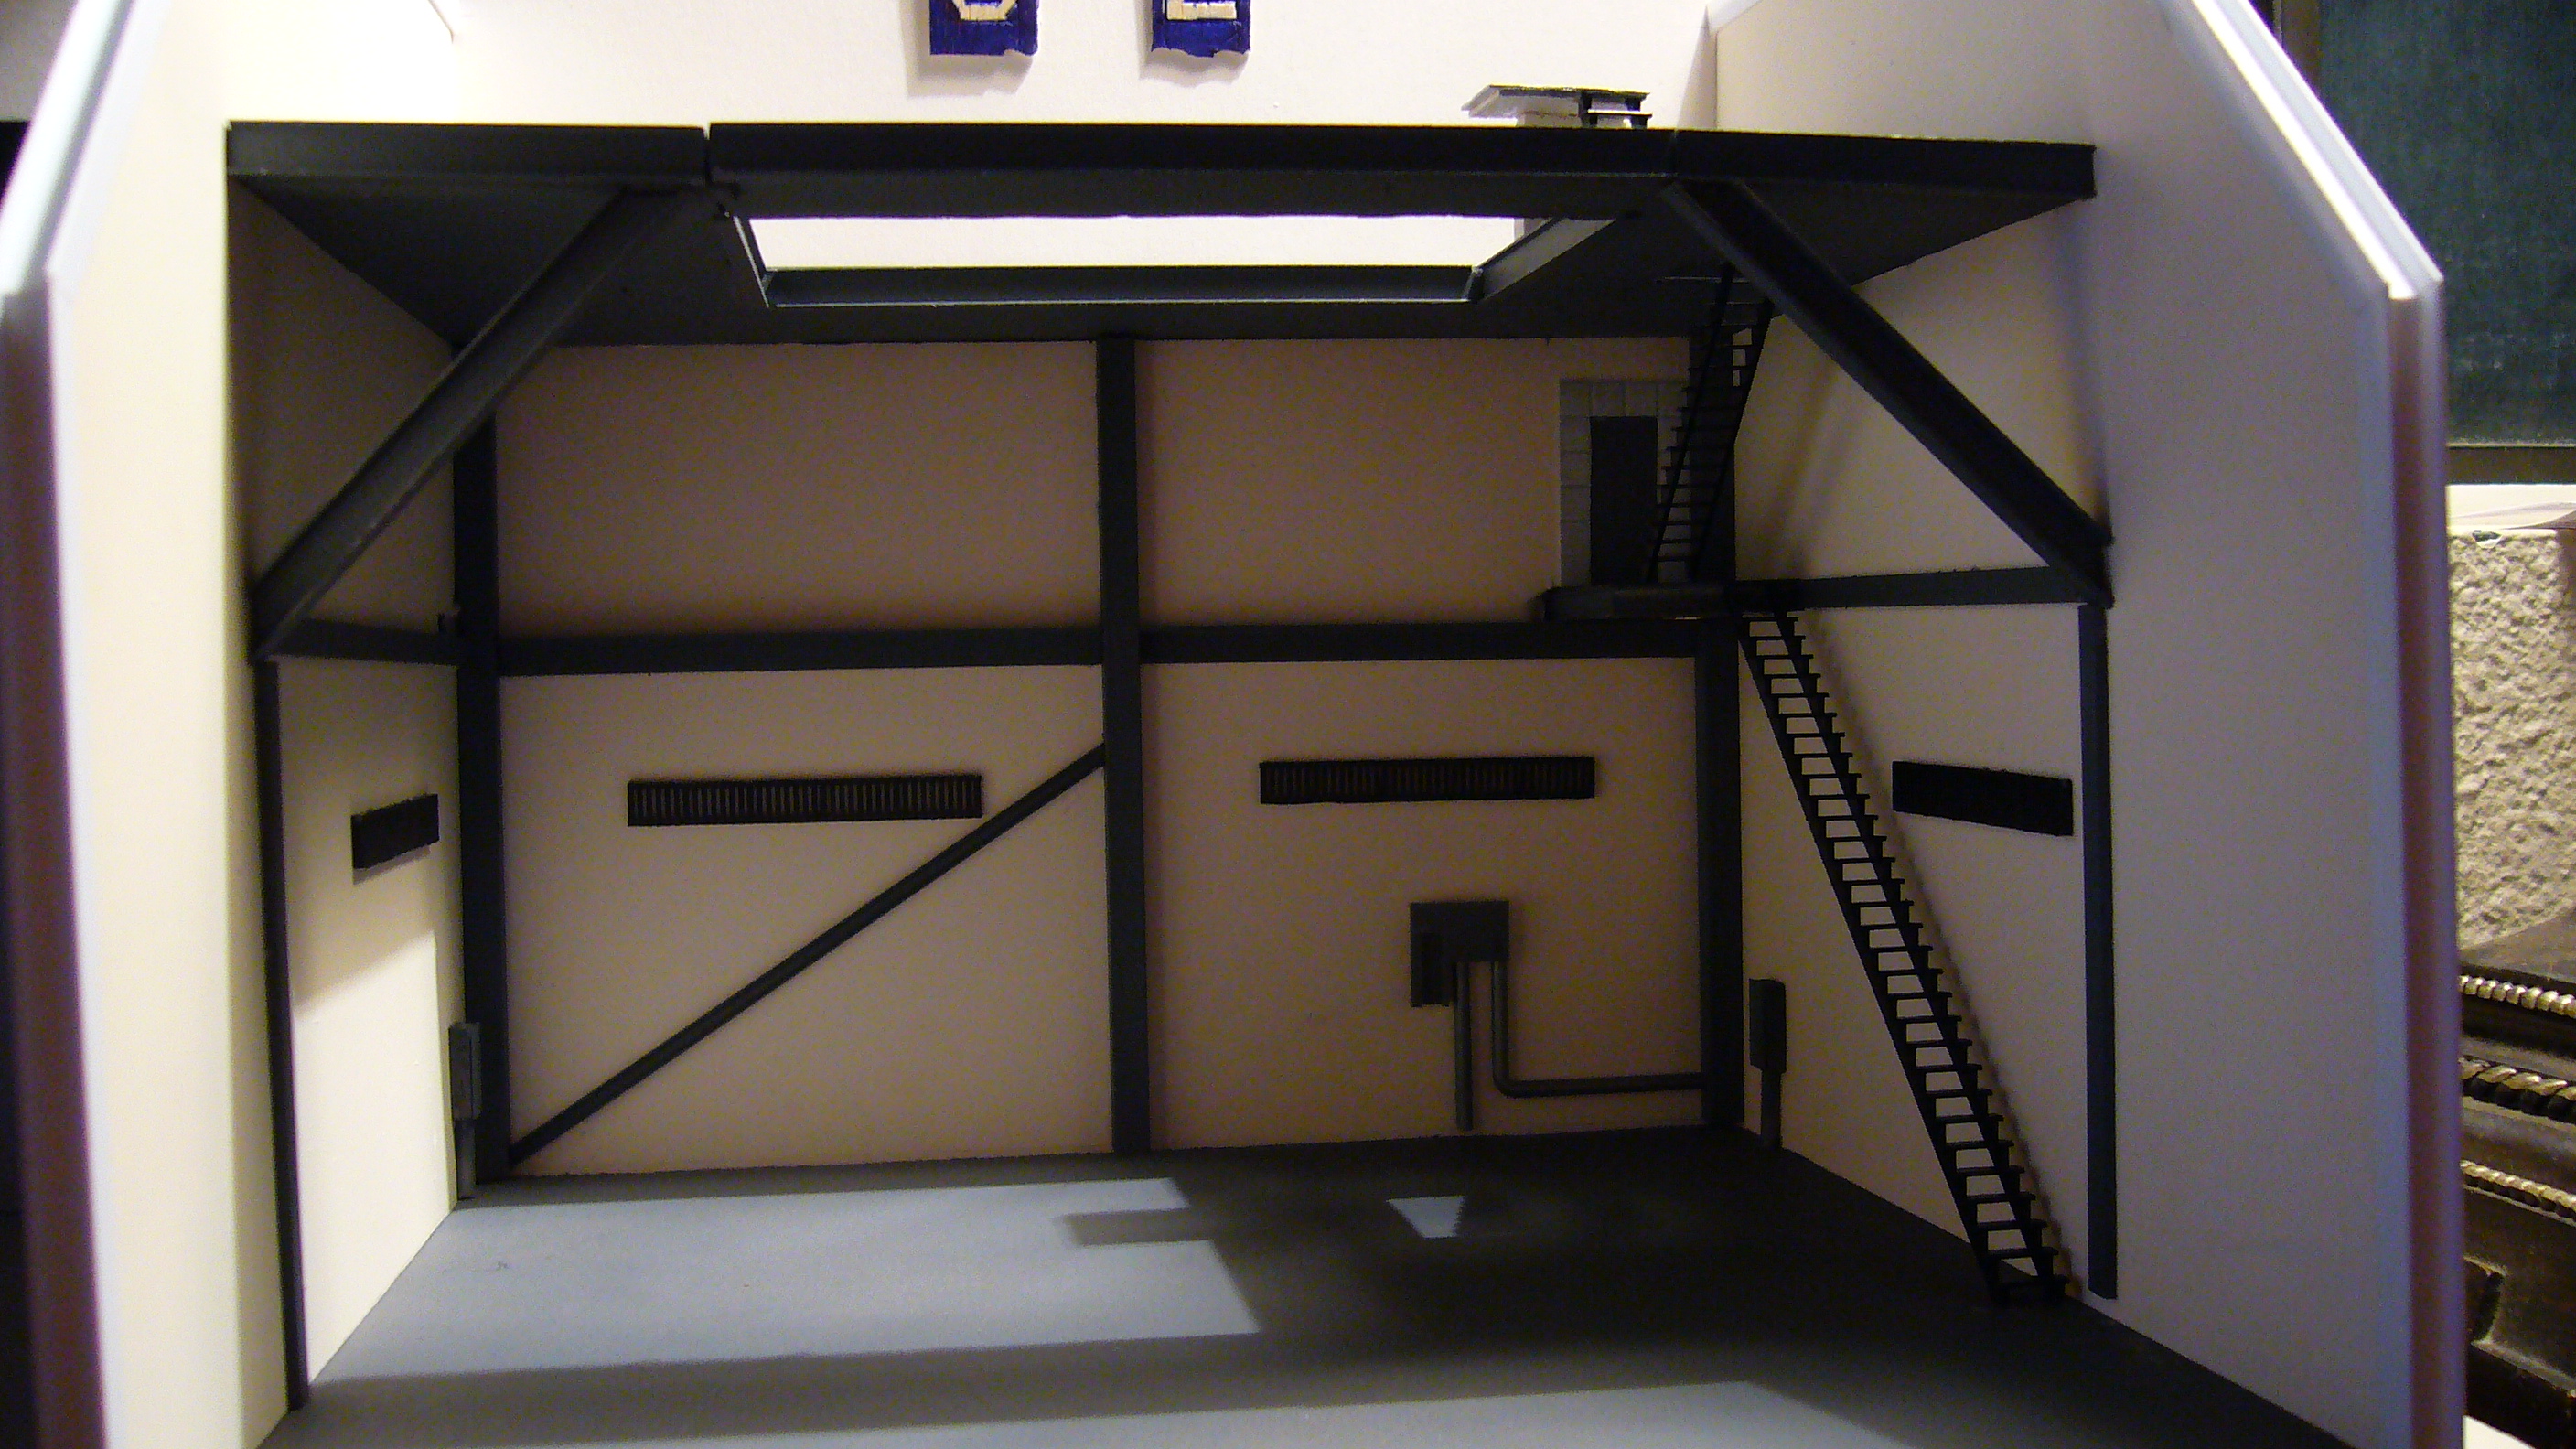
pictures but I figured I would share my progress anyways. In the fallowing set of pictures you will see added
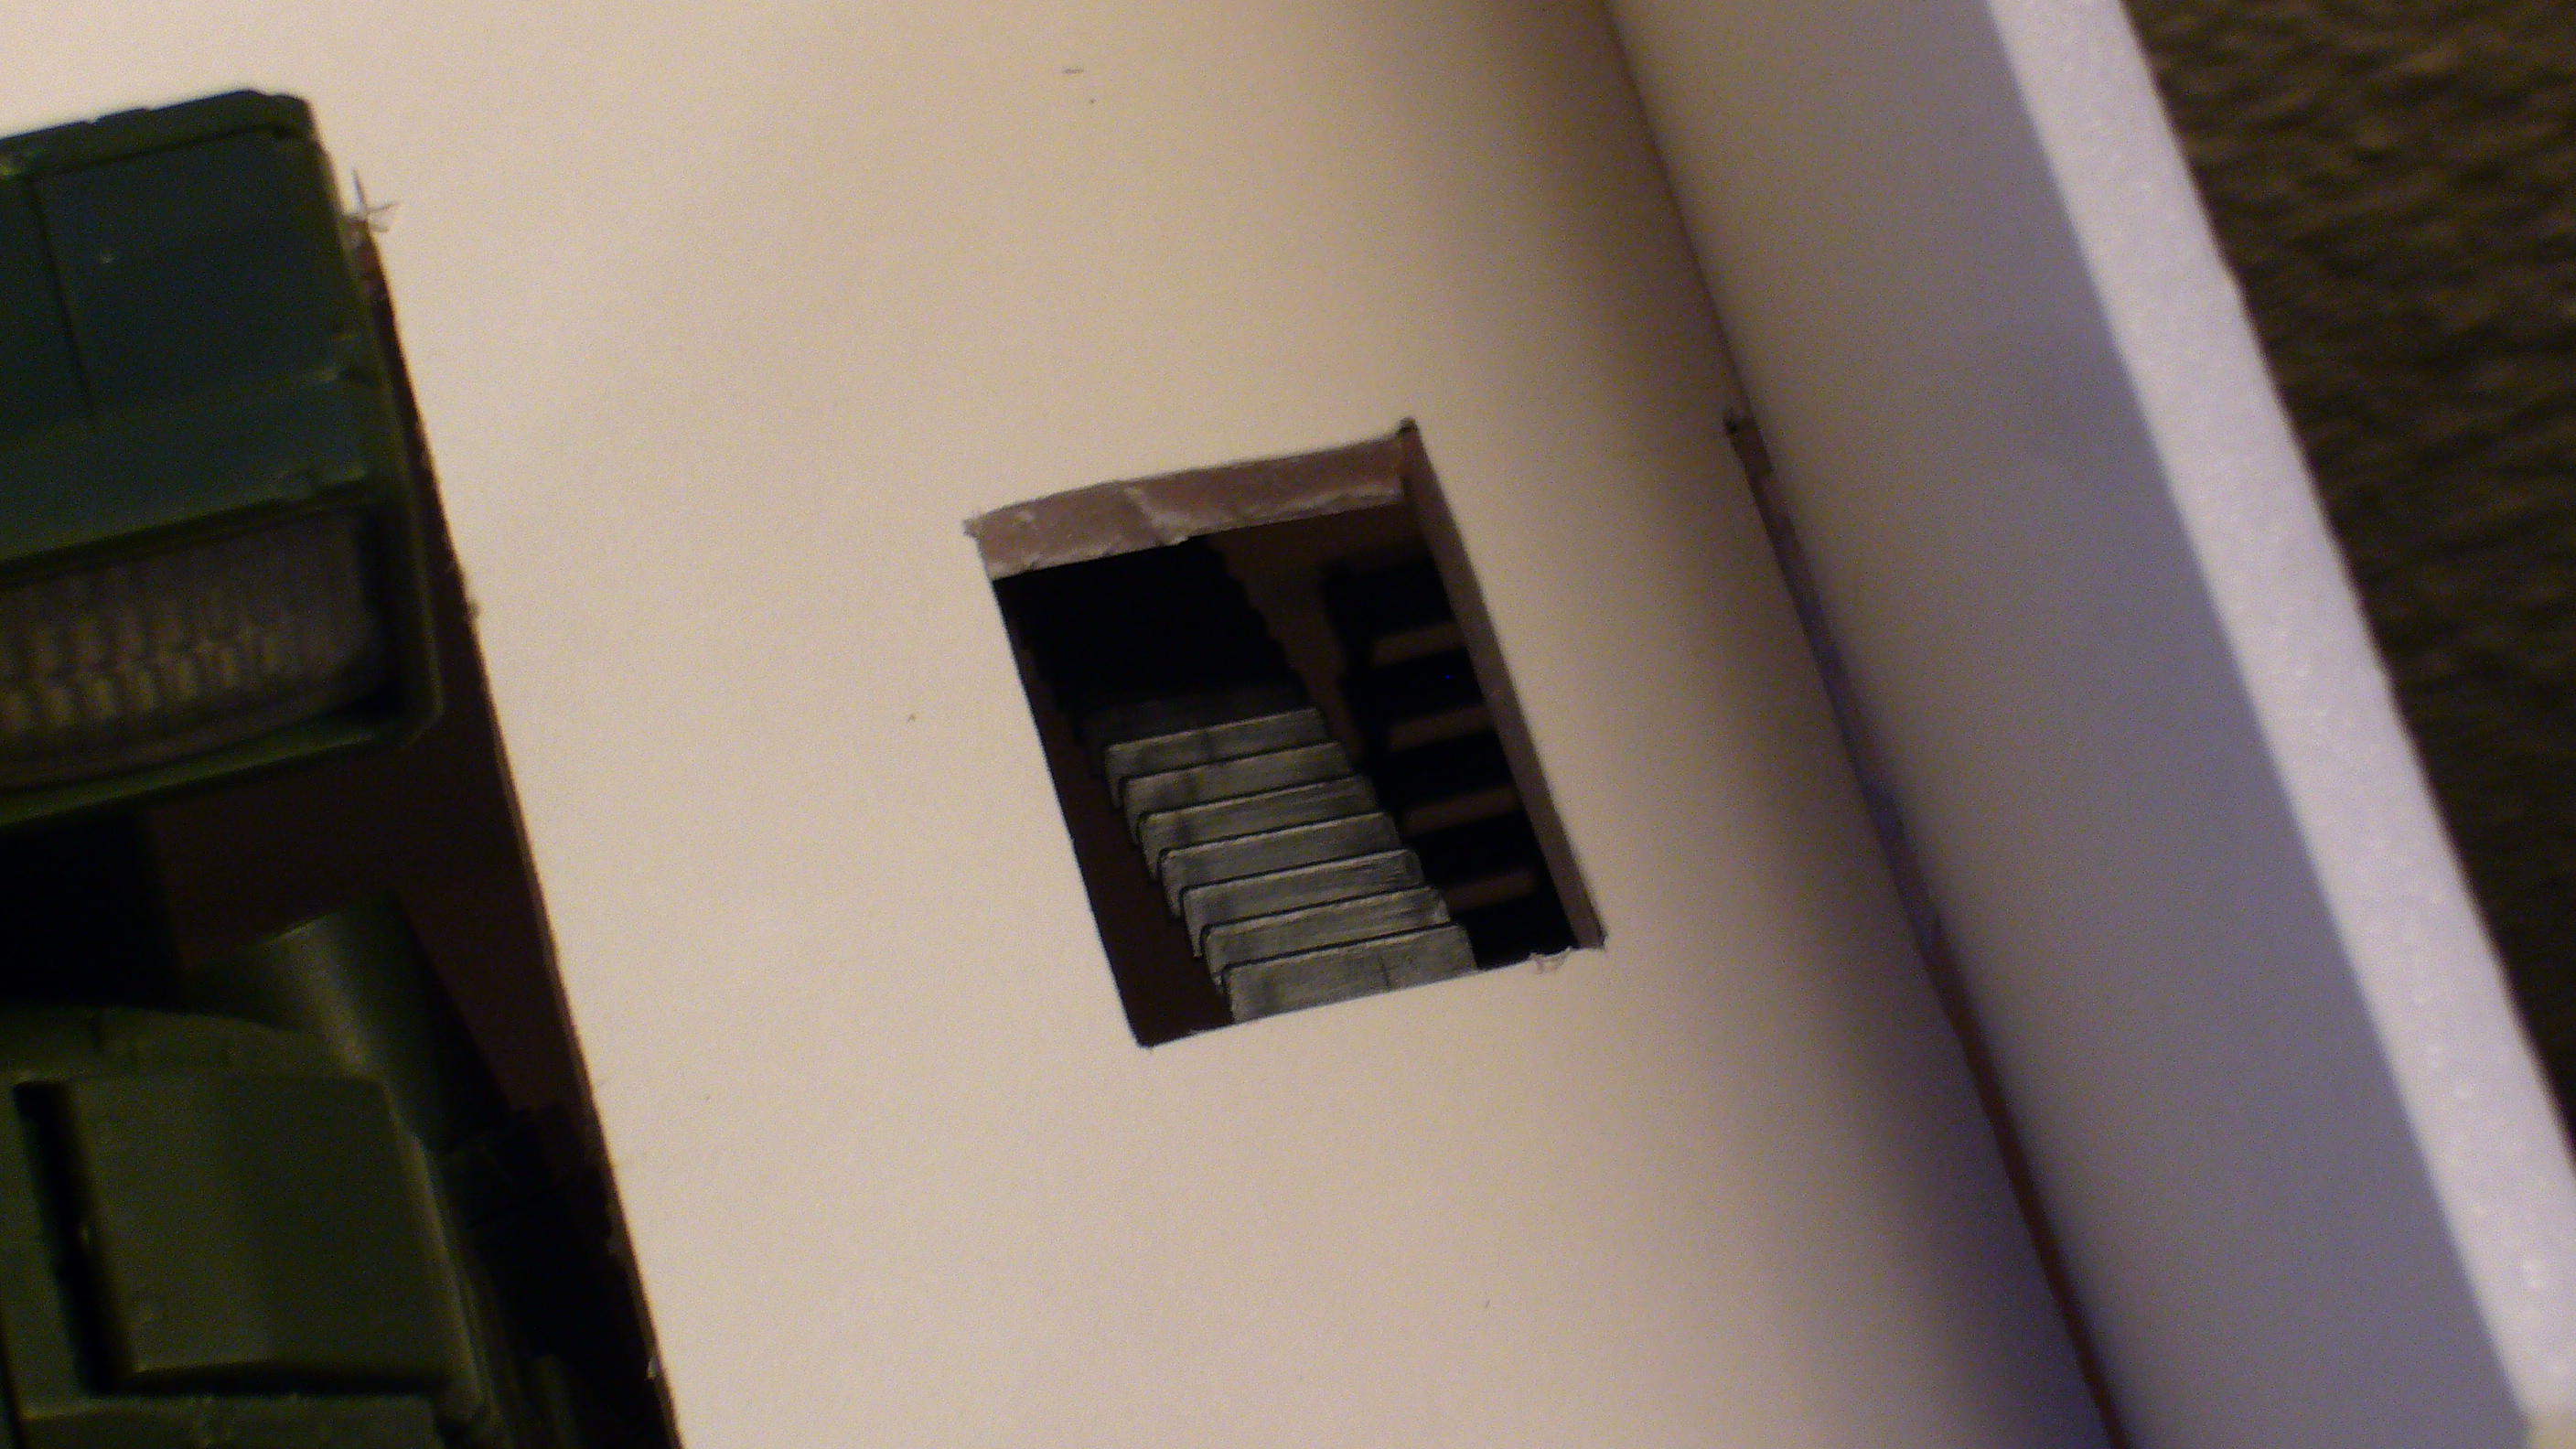
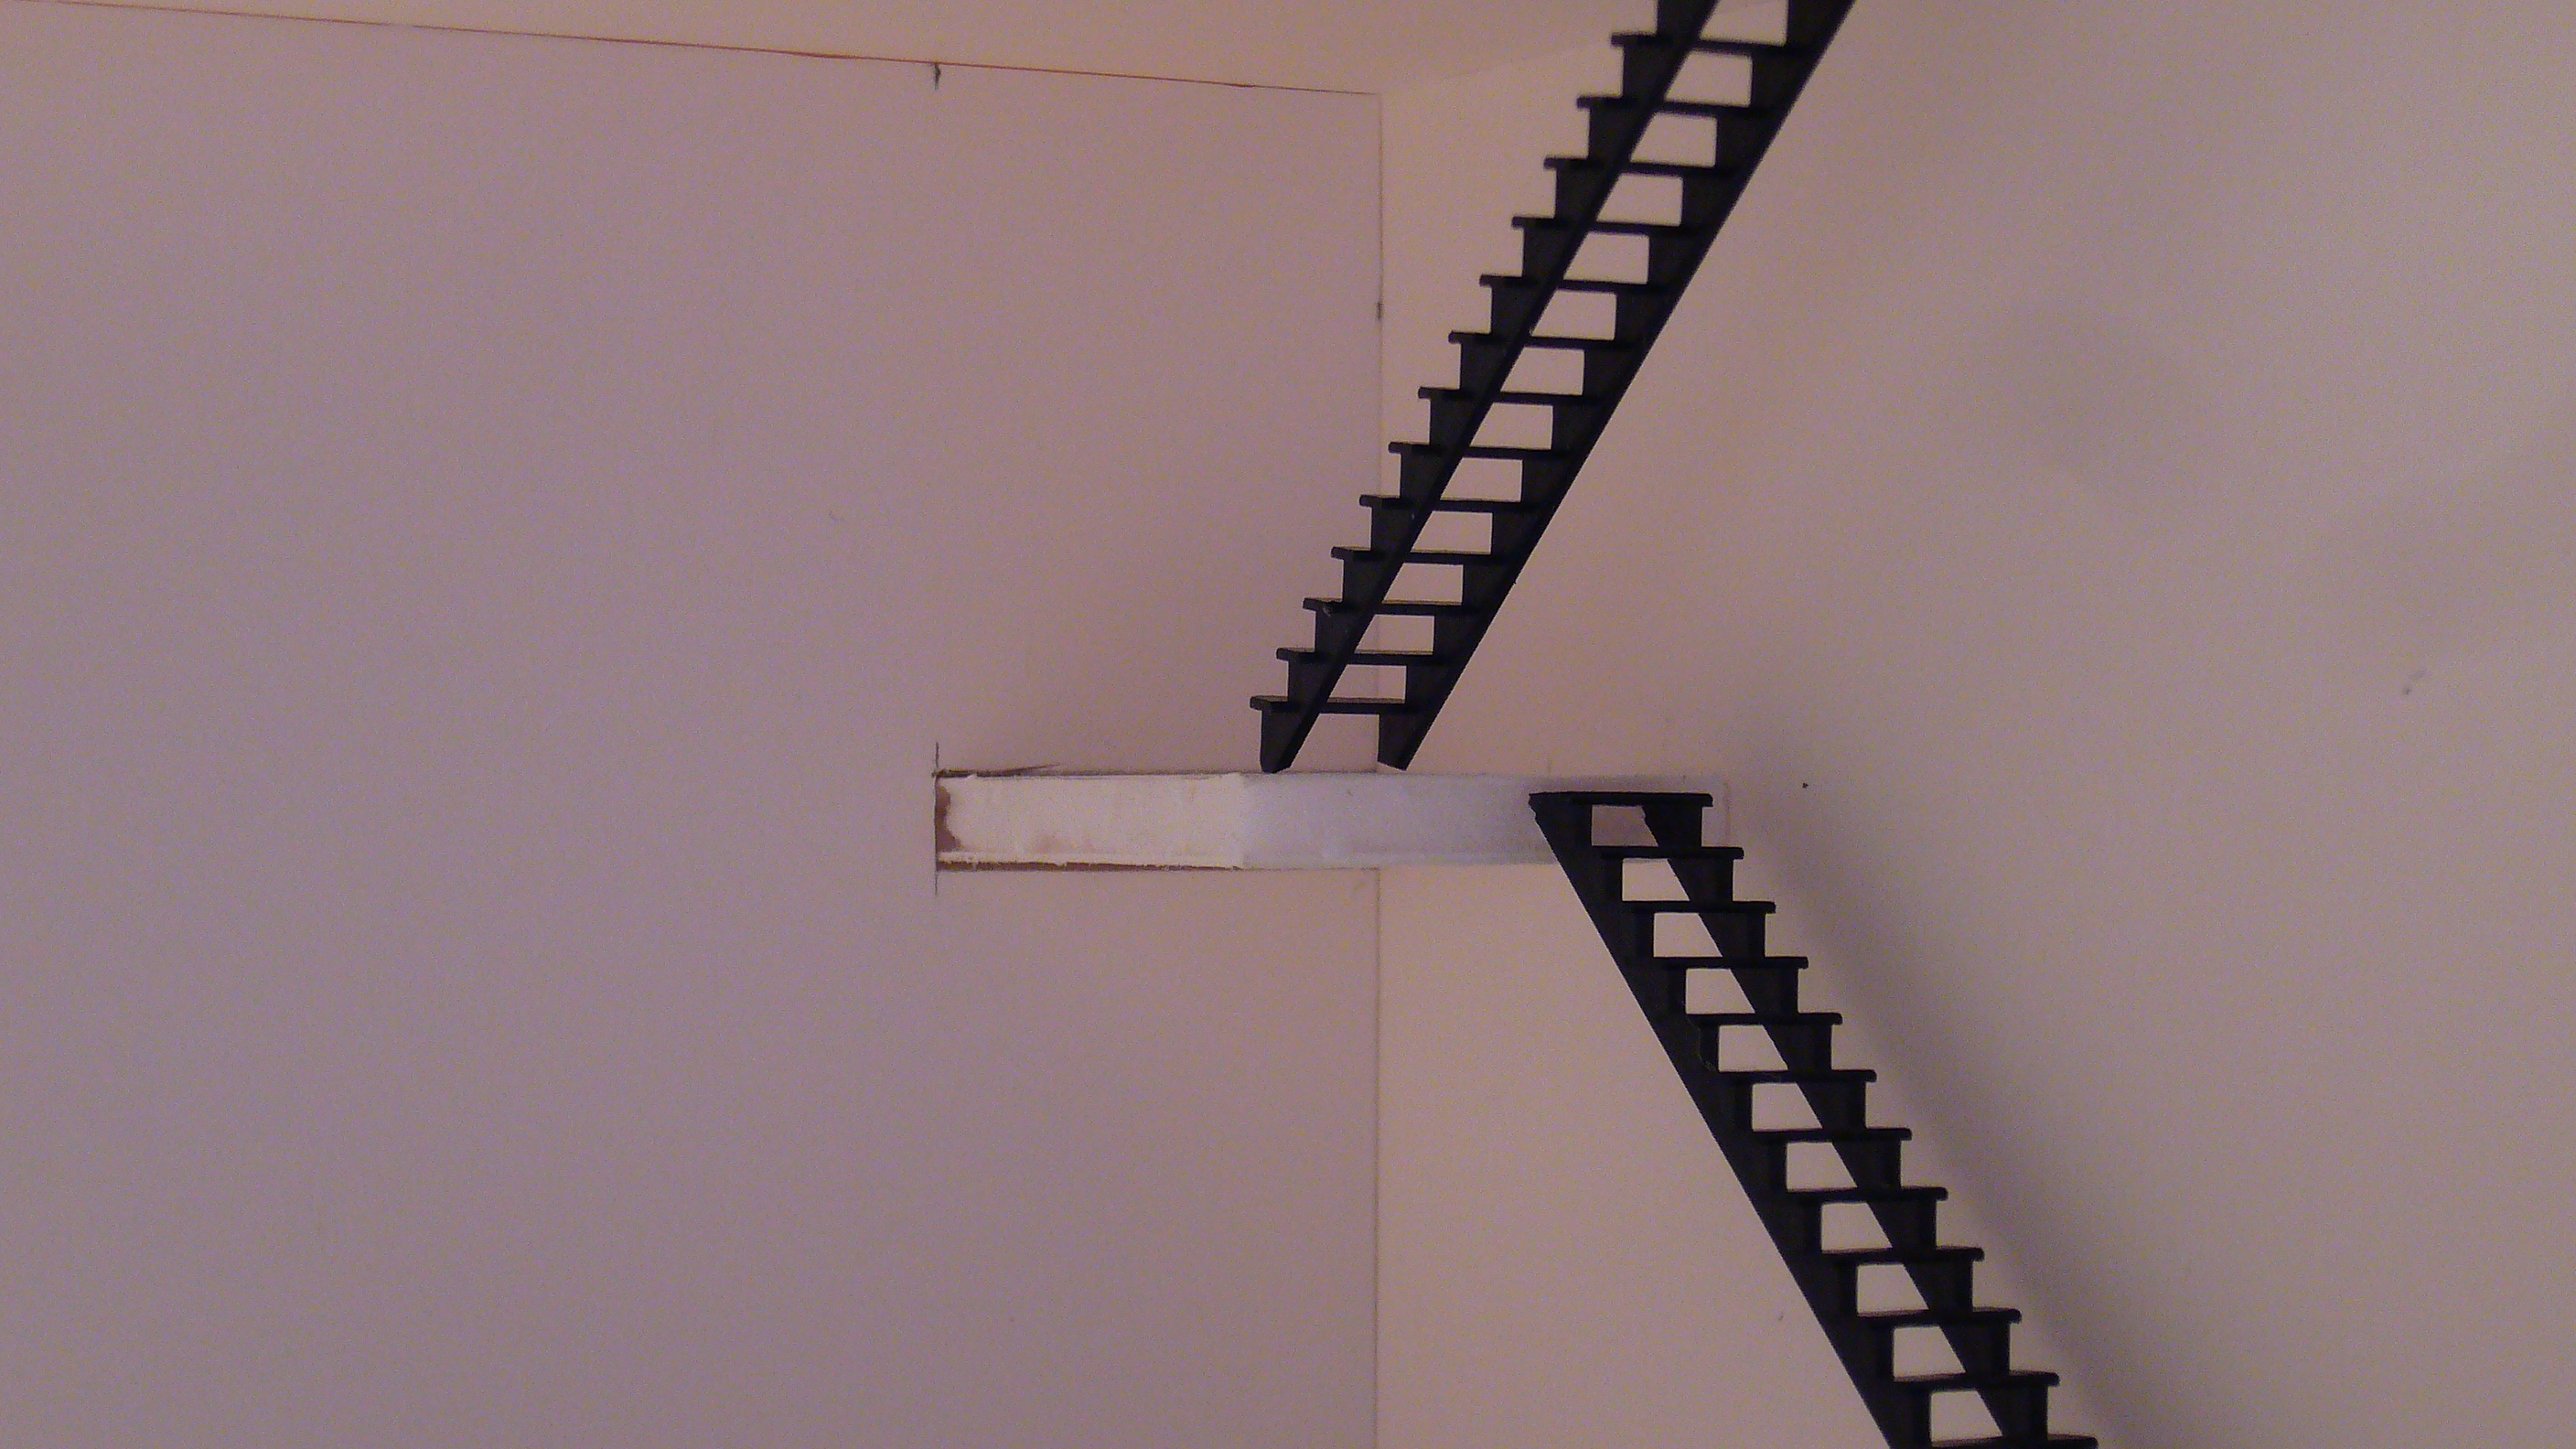
detail done to the floor of the hanger bays, new stairwells and railings installed, as well as some frame work
to the backside (upper) wall.


-
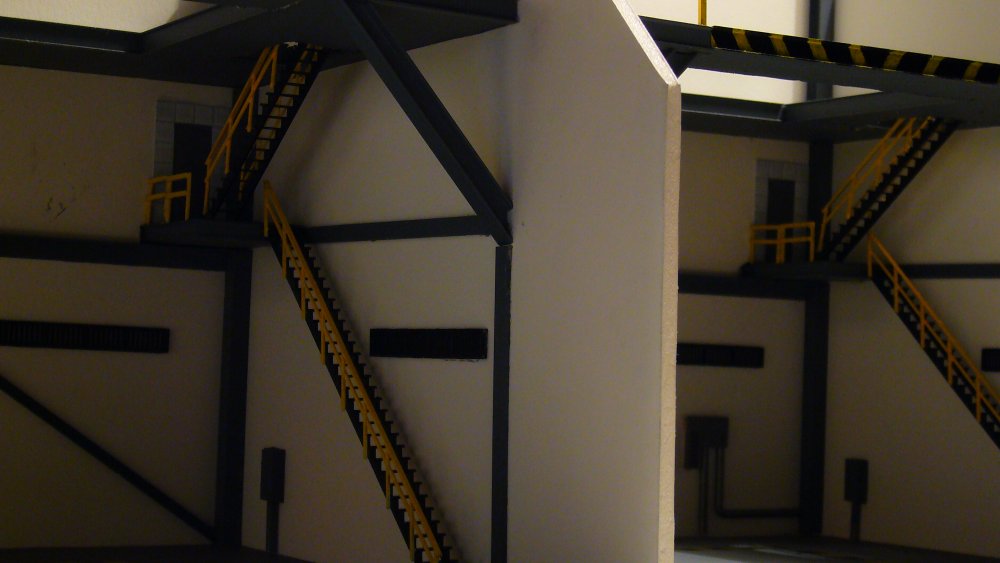
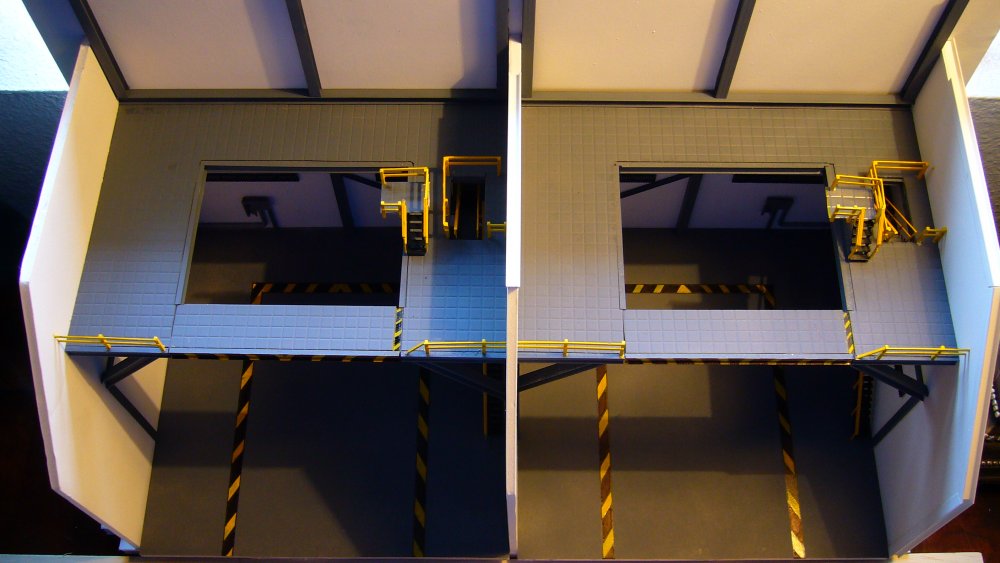
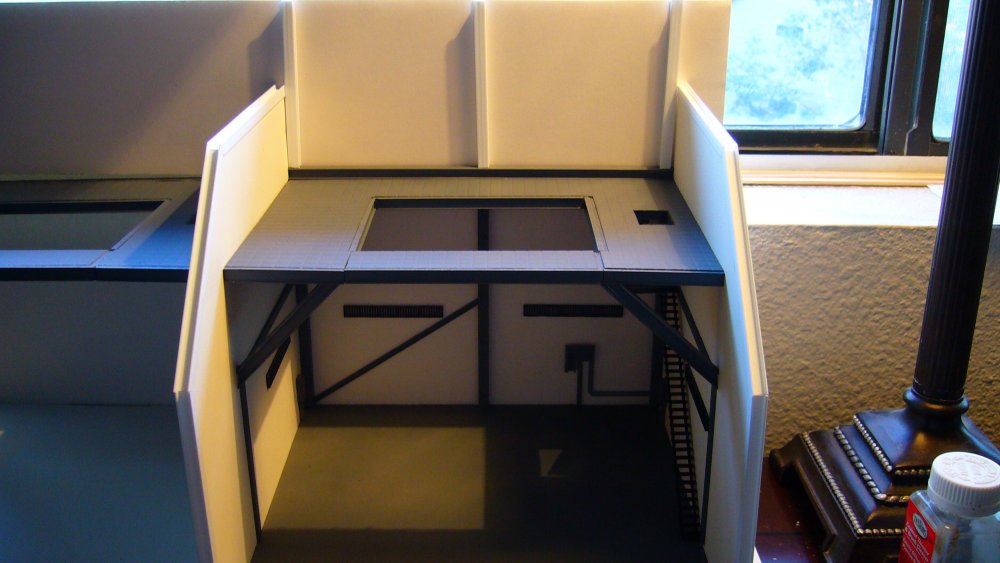
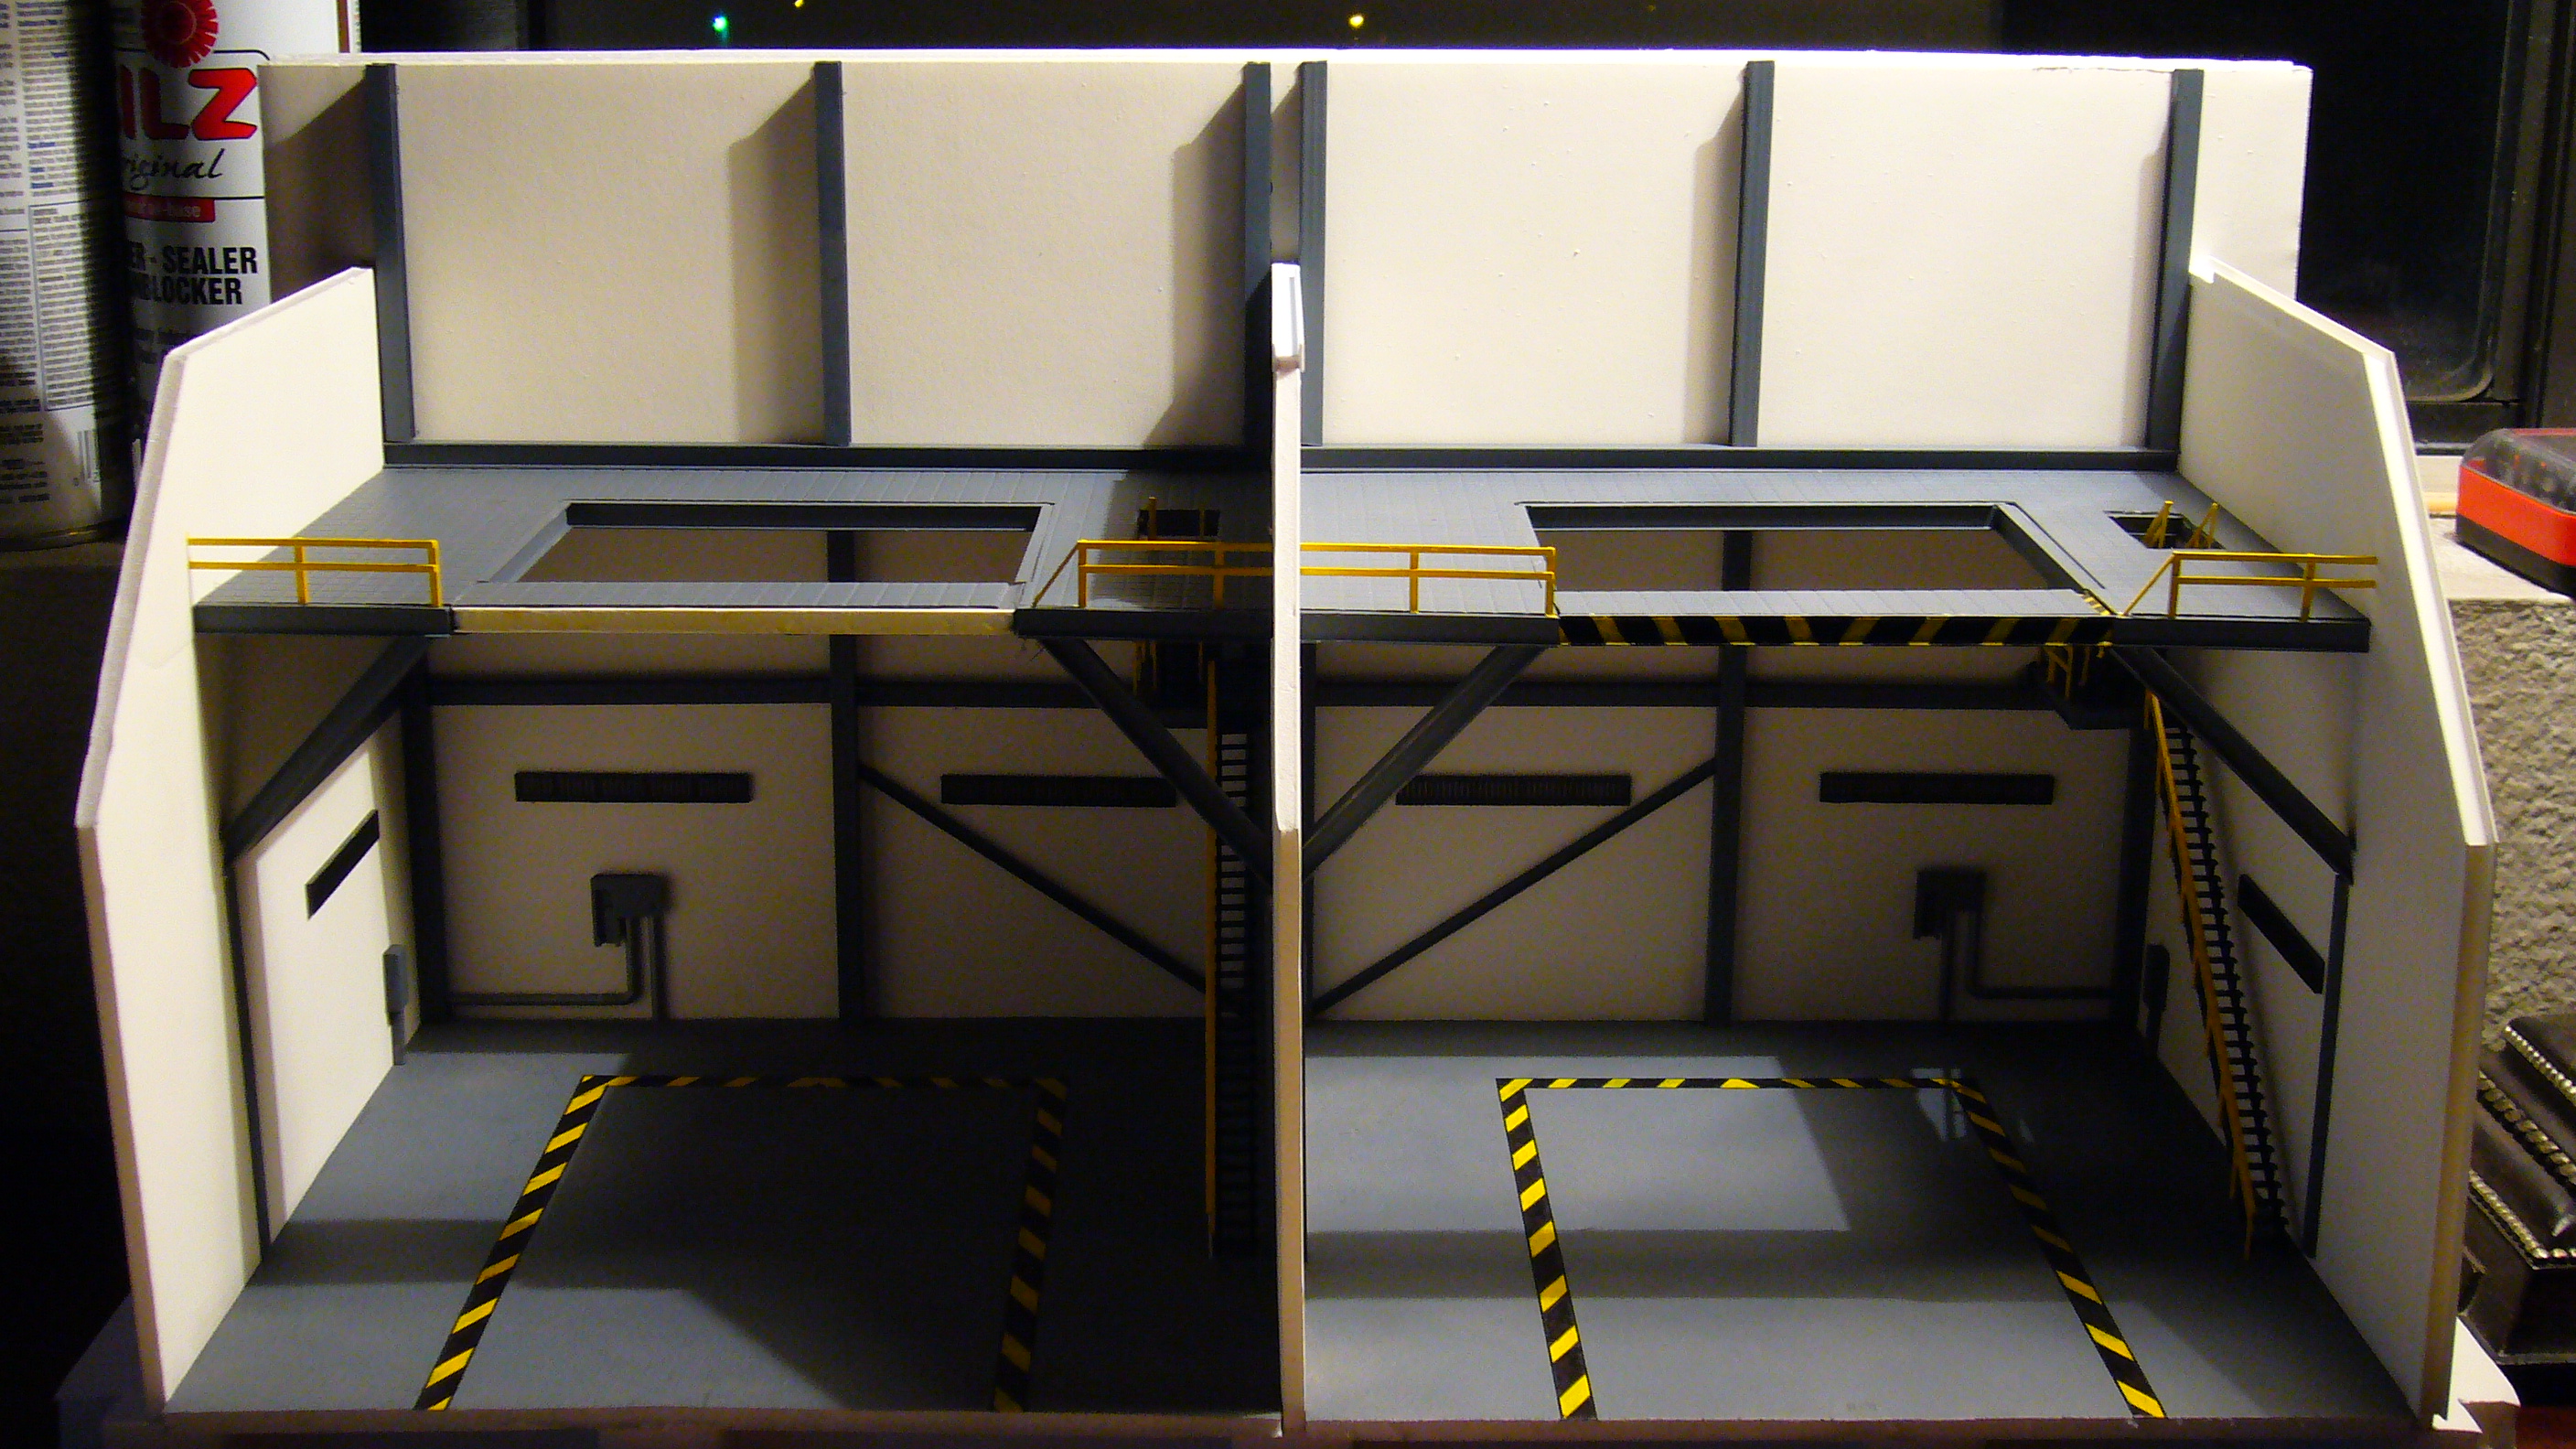
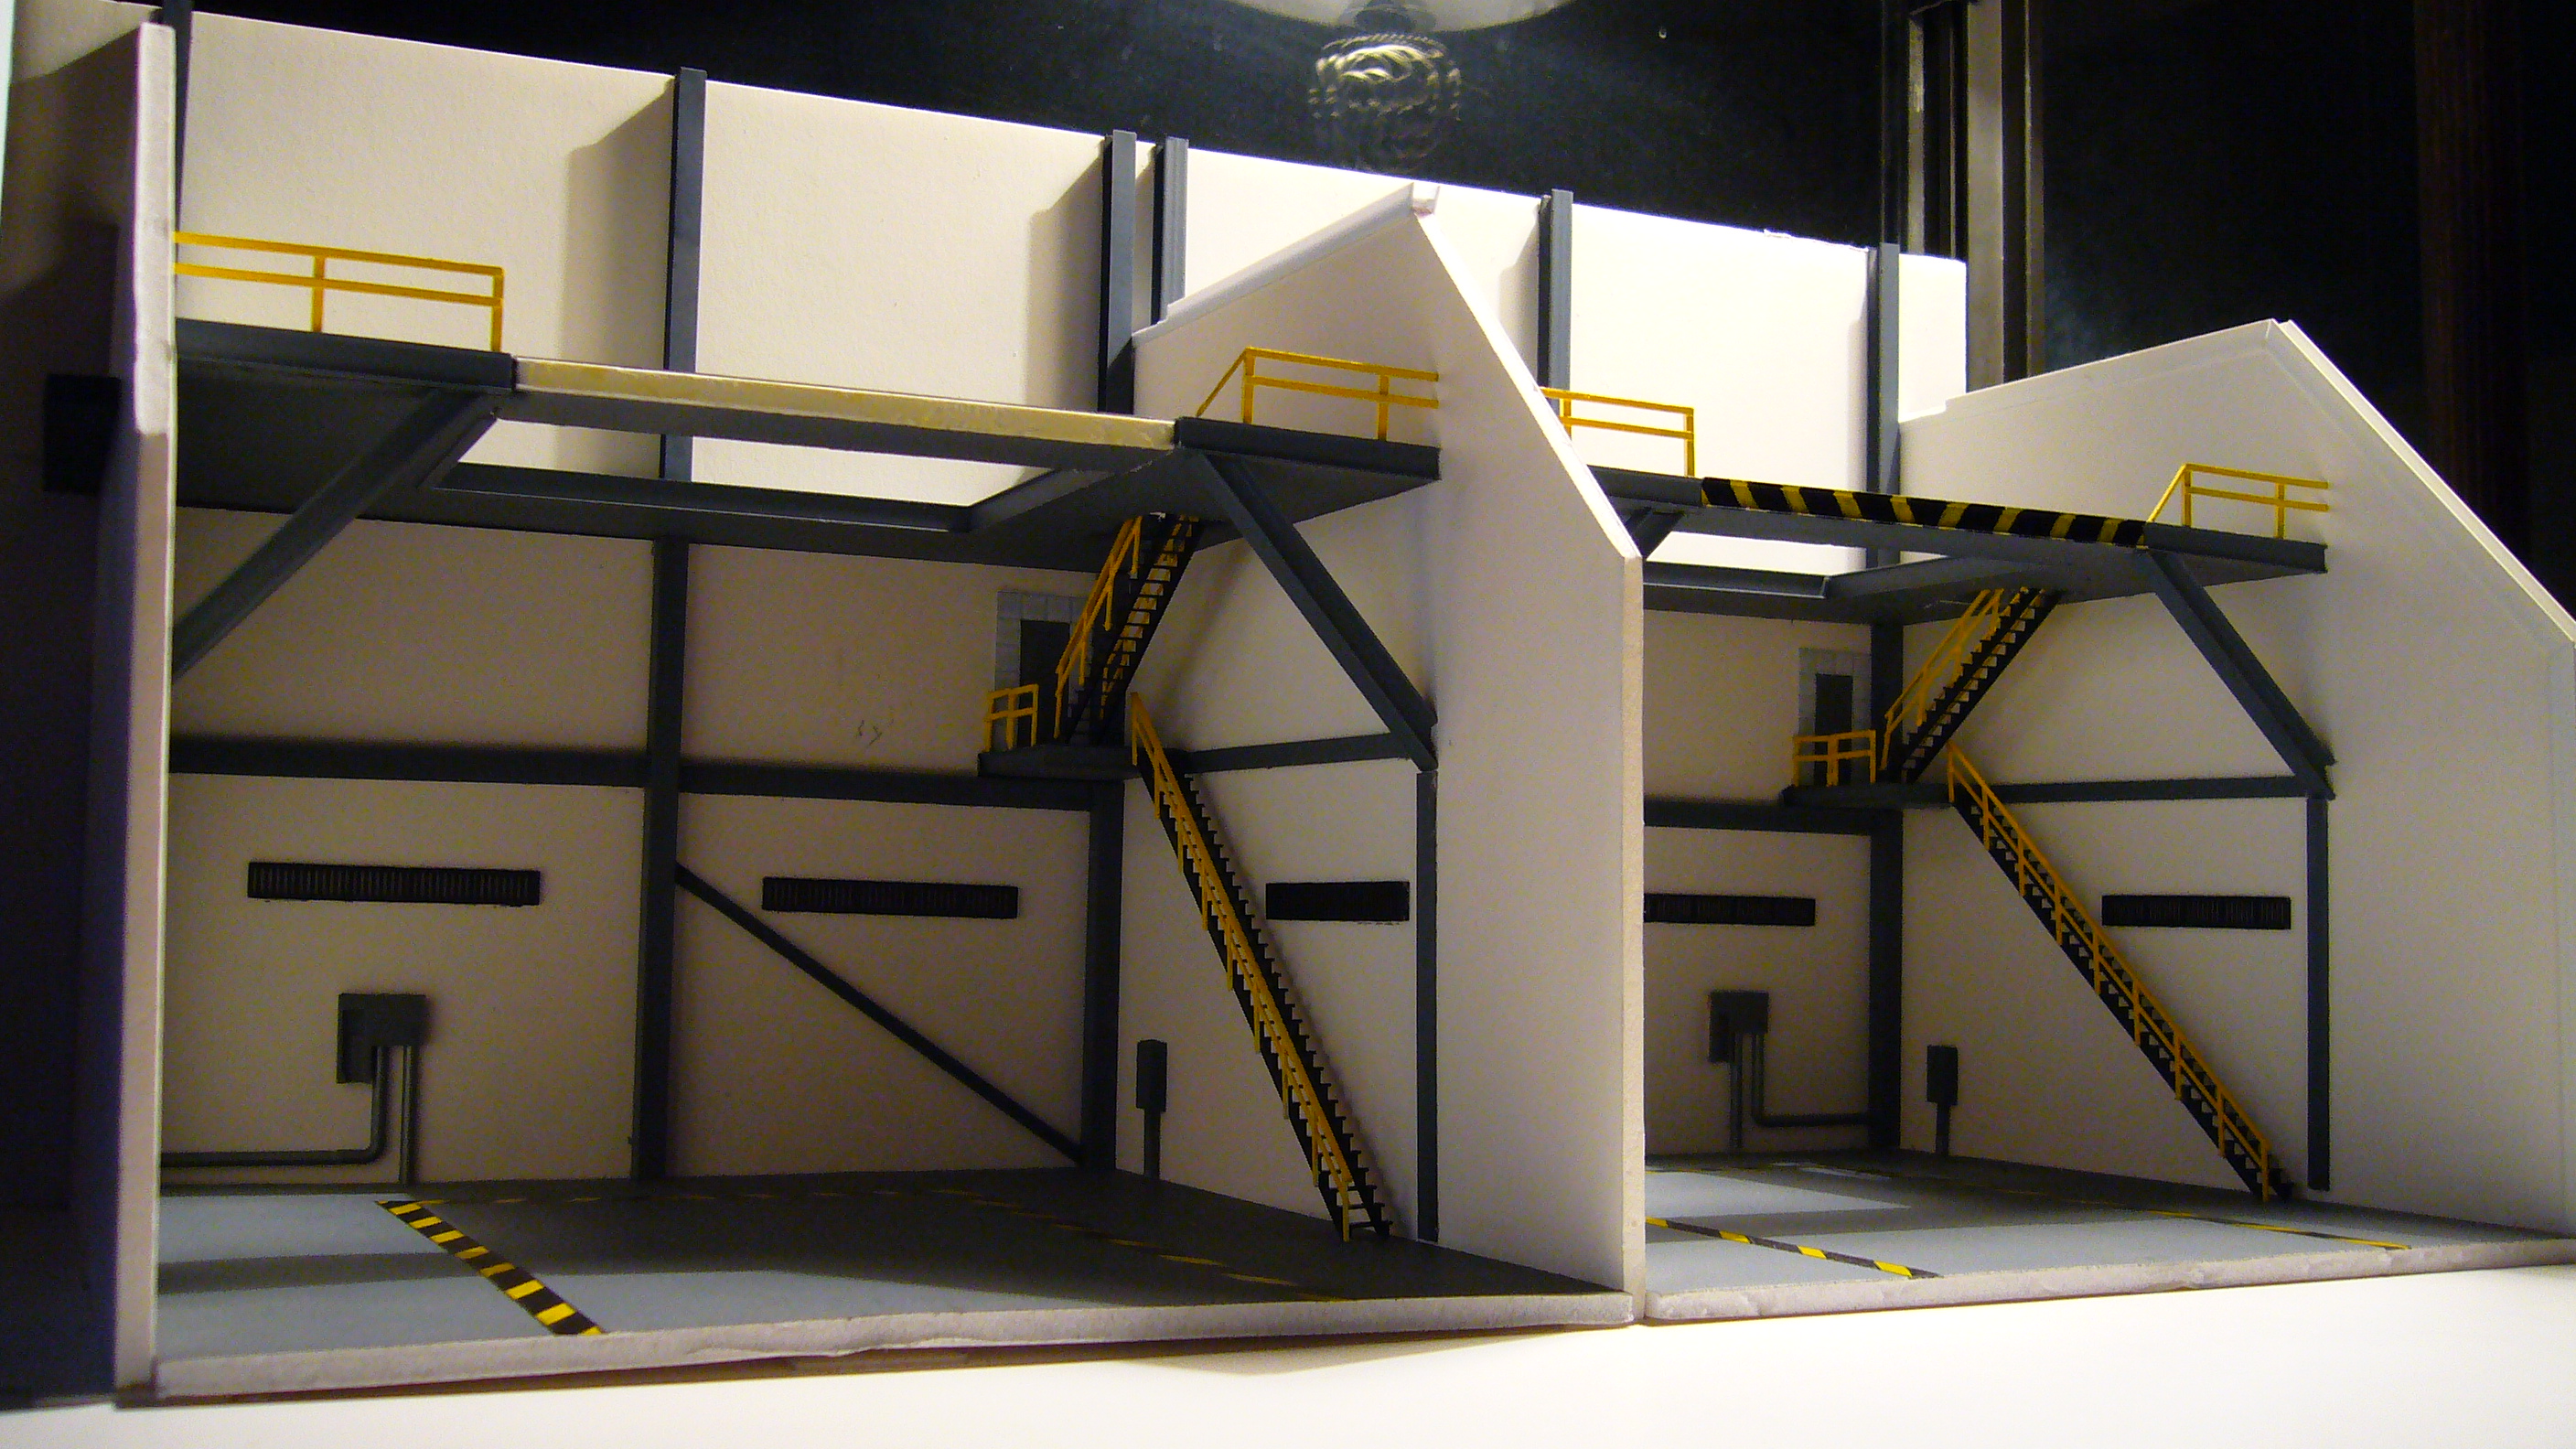
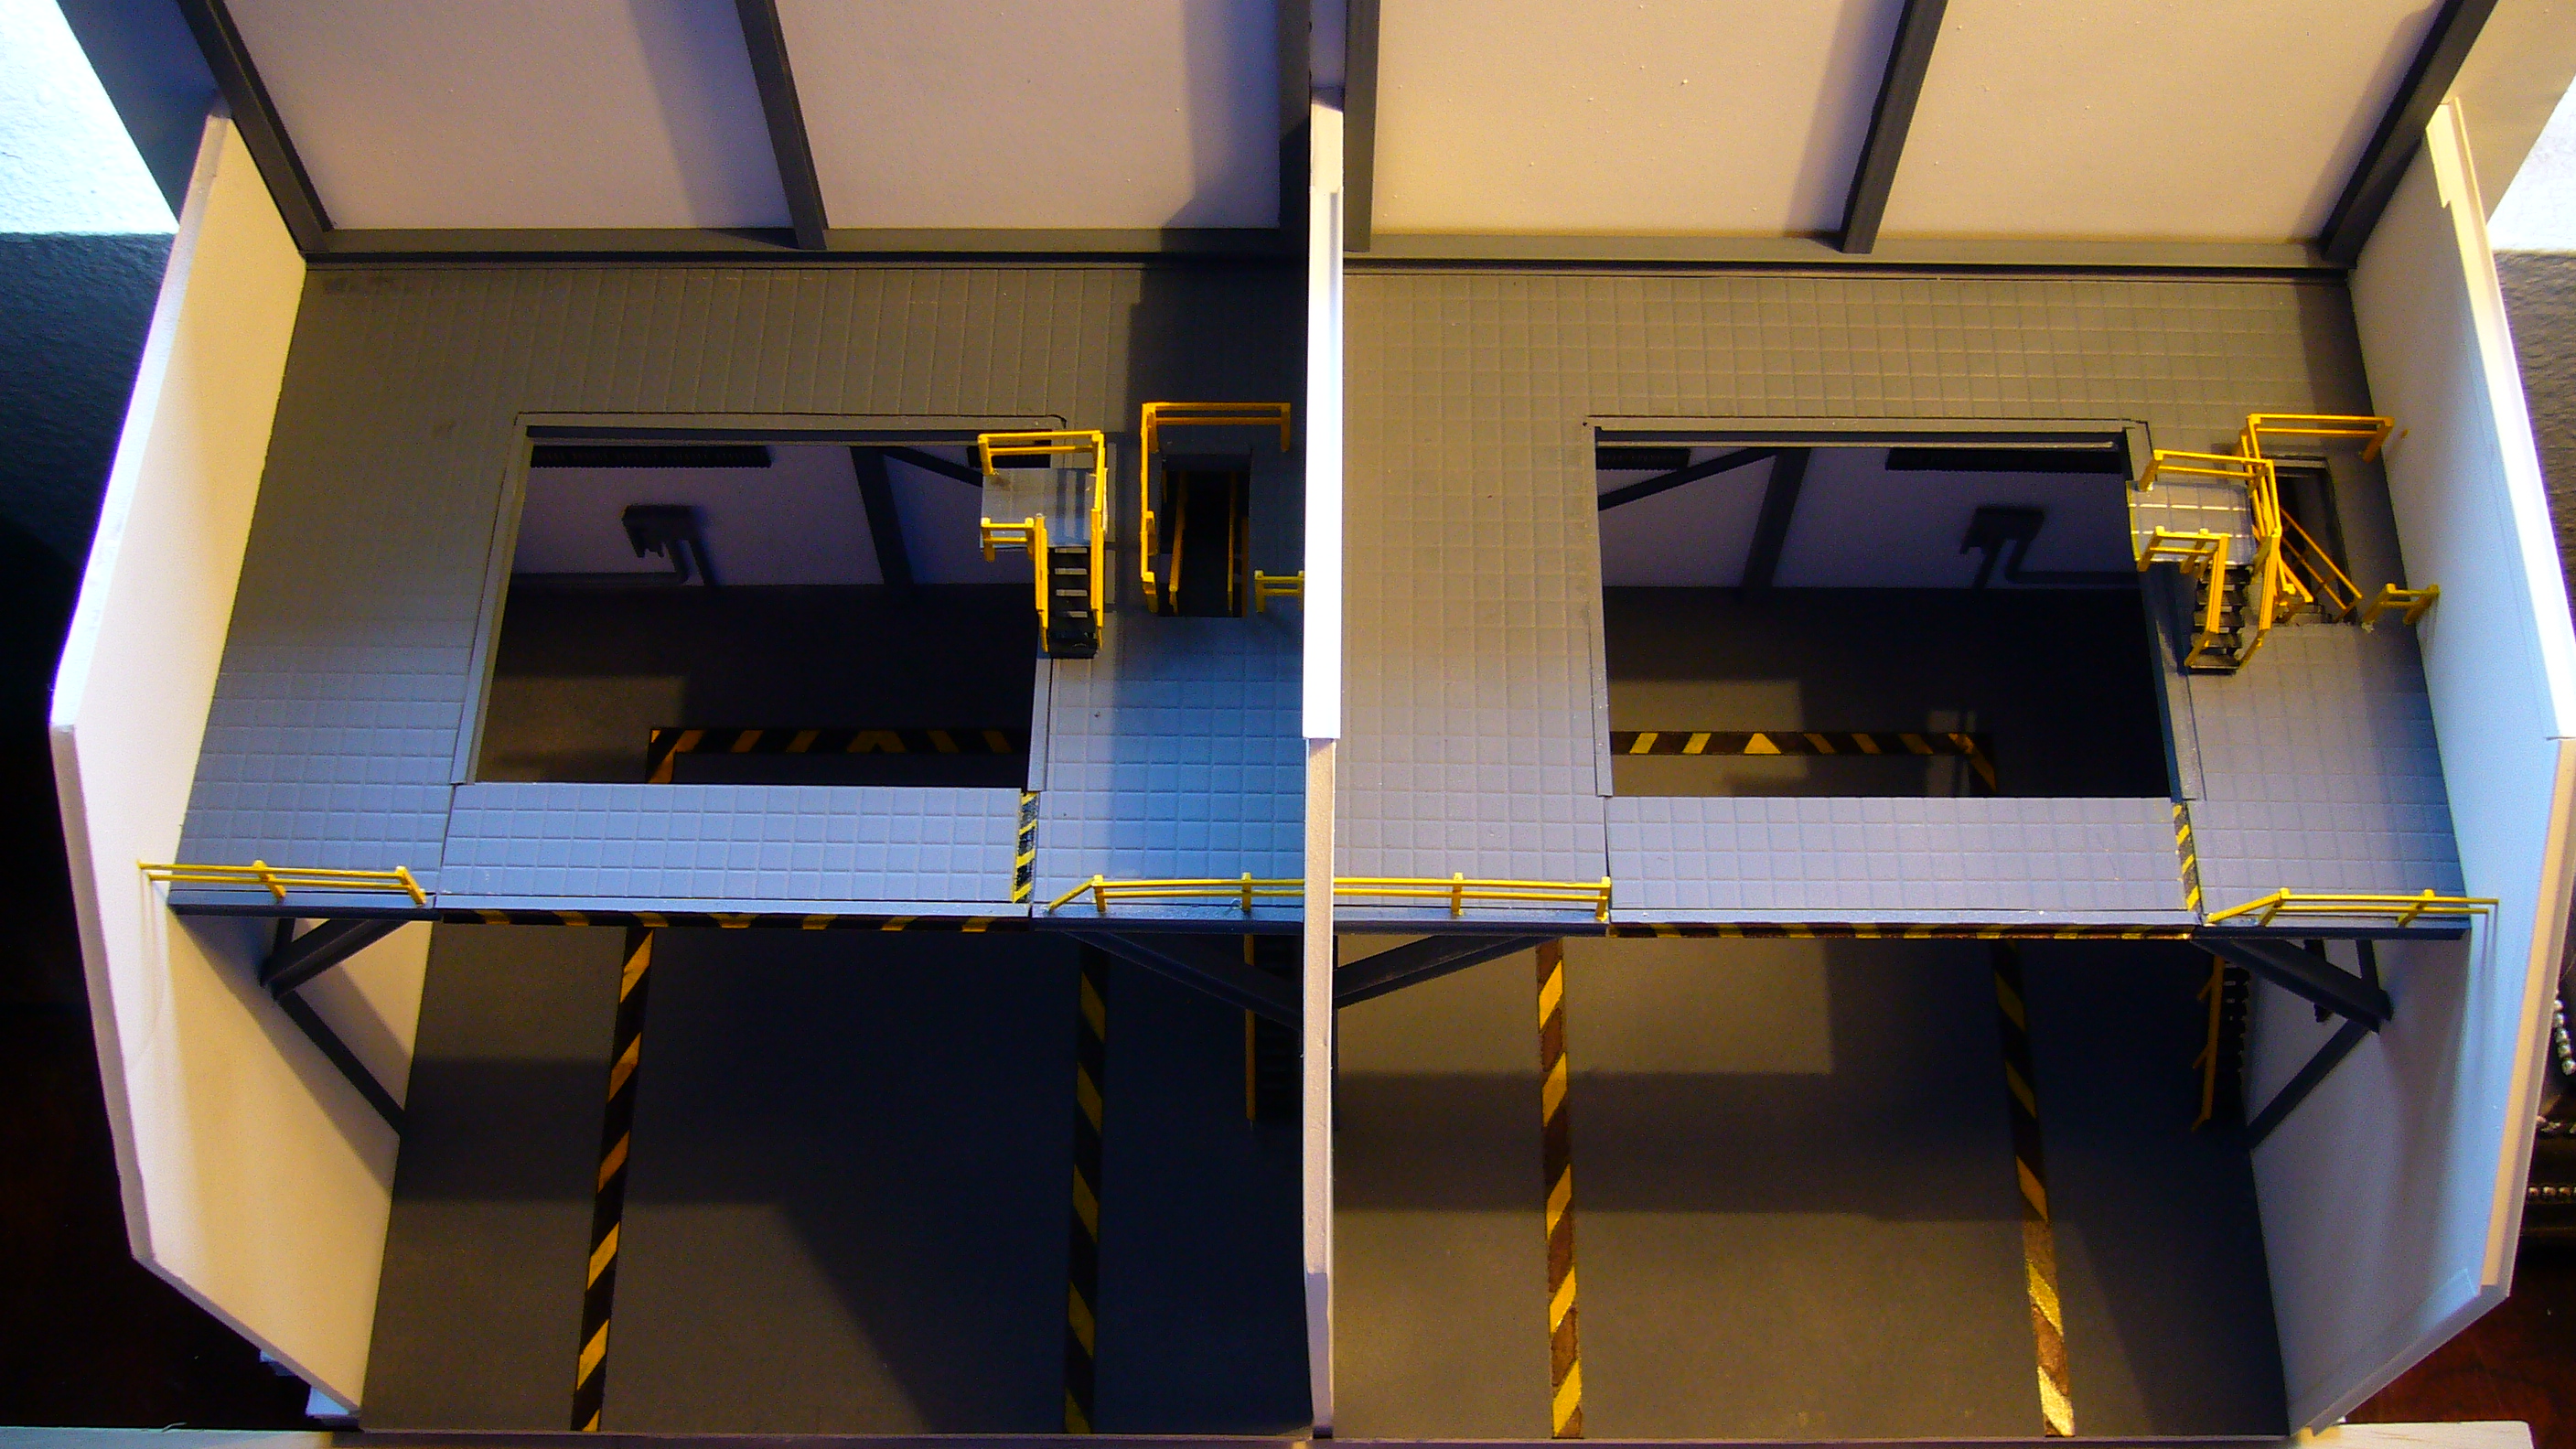
Ok back again with some updates.
In the pictures below I have added wall structure detail as well as some vents and electrical panels.
Also noted is the base coat of paint to the floors and wall structure assemblies.


-
Hello all,
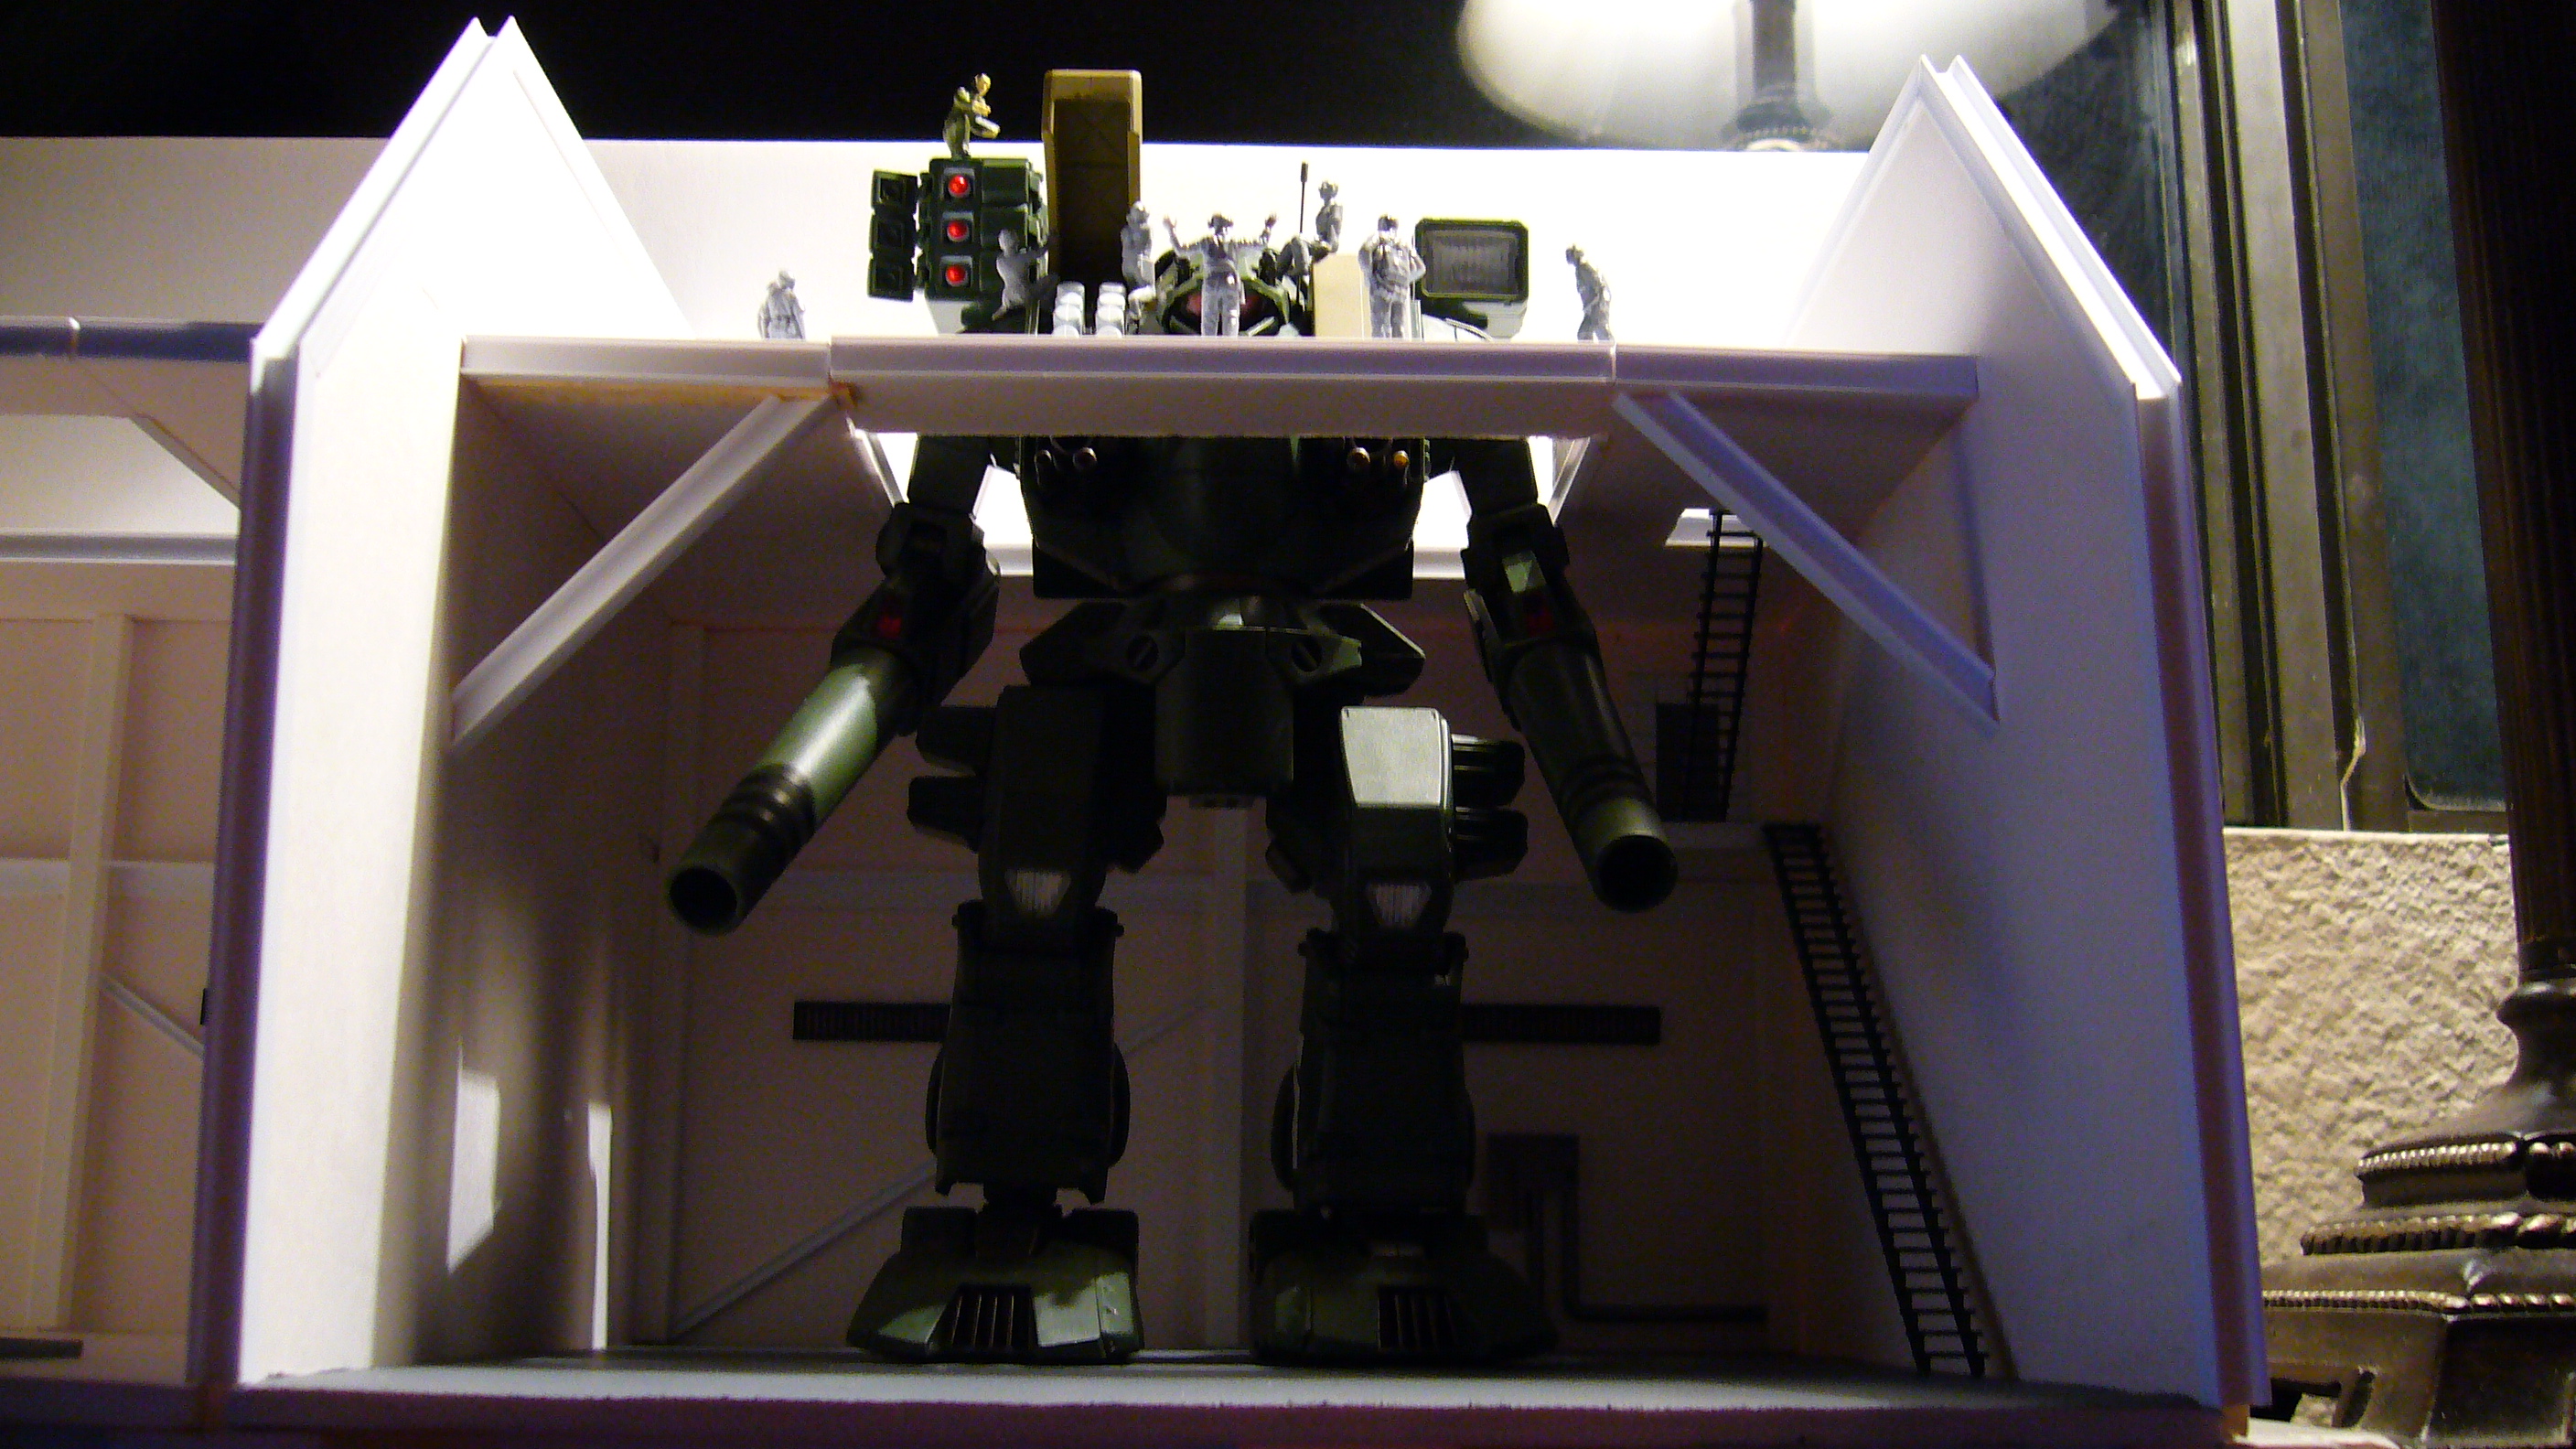
I have decided to post some pictures of some work I have been doing regarding the construction of a Hanger for a 1/60 Tomahawk.
The actual Inspiration was from a friend and a fellow member here on Macross World.
He goes by Viper or Robelwell202 on various sites and is the Author / Creator of a fiction based novel called "The Destroid's Last Dance"
and can be found at www.destroidslastdance.com.
The Model being constructed is per his request and is being constructed to specifications based on his story.
It only compromises a third of what the actual completed project will contain but it is a beginning.
(Note: A future hanger will be built from this layout but to my specifications at a much later date.)
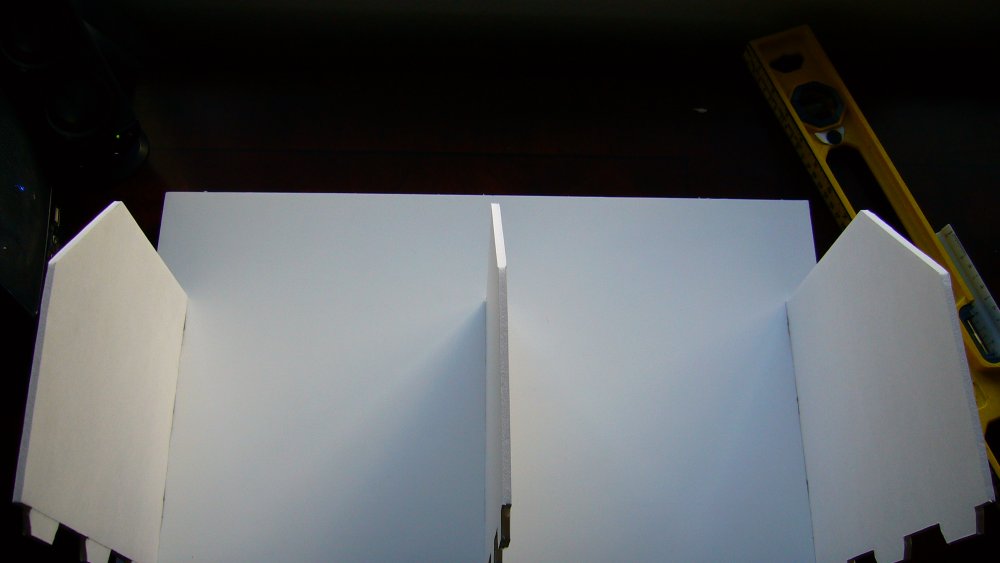
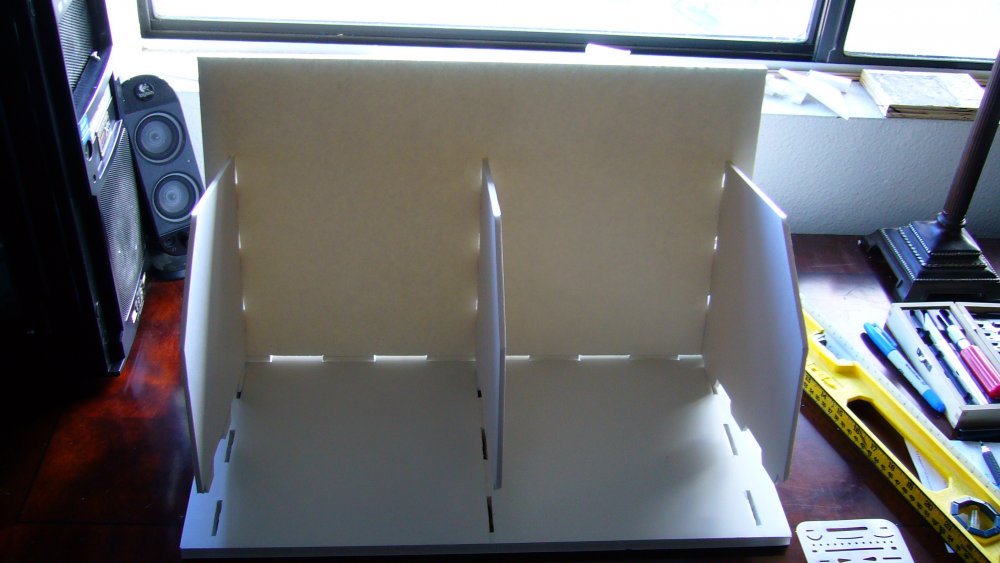
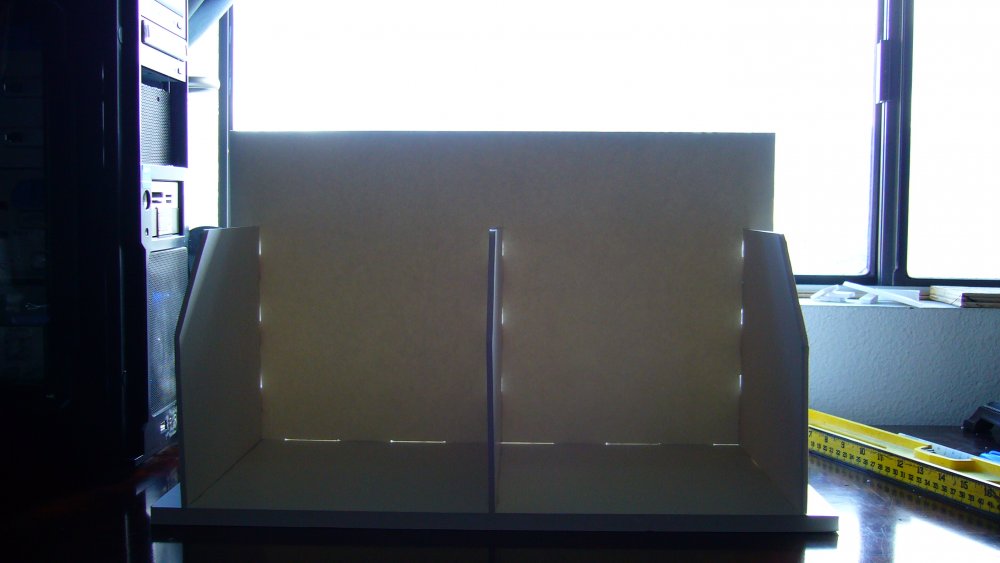
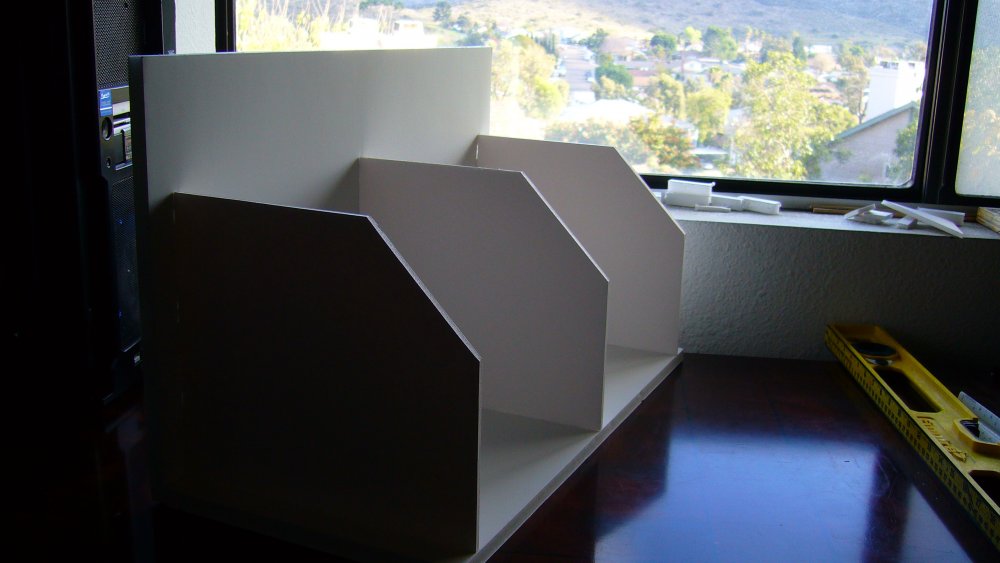
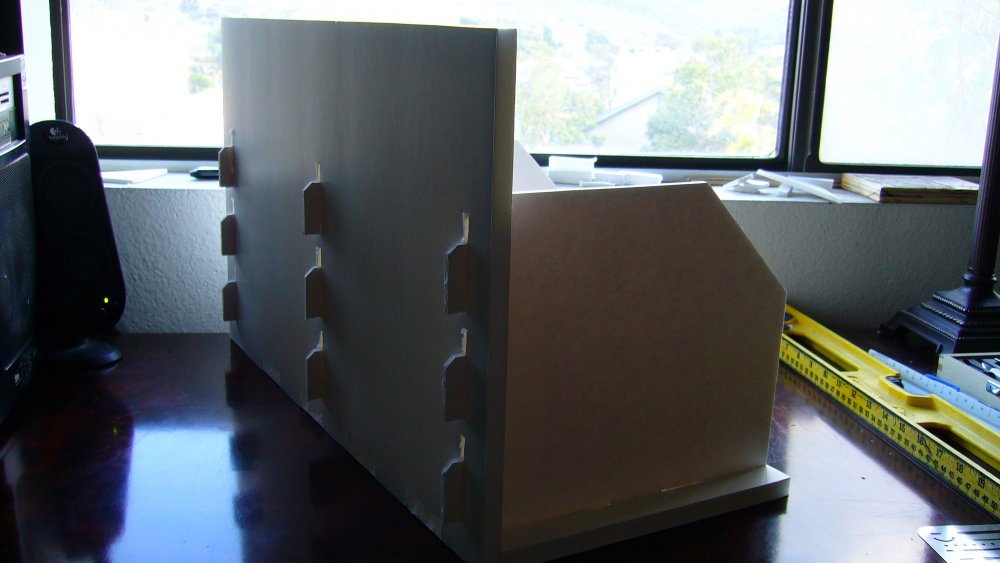
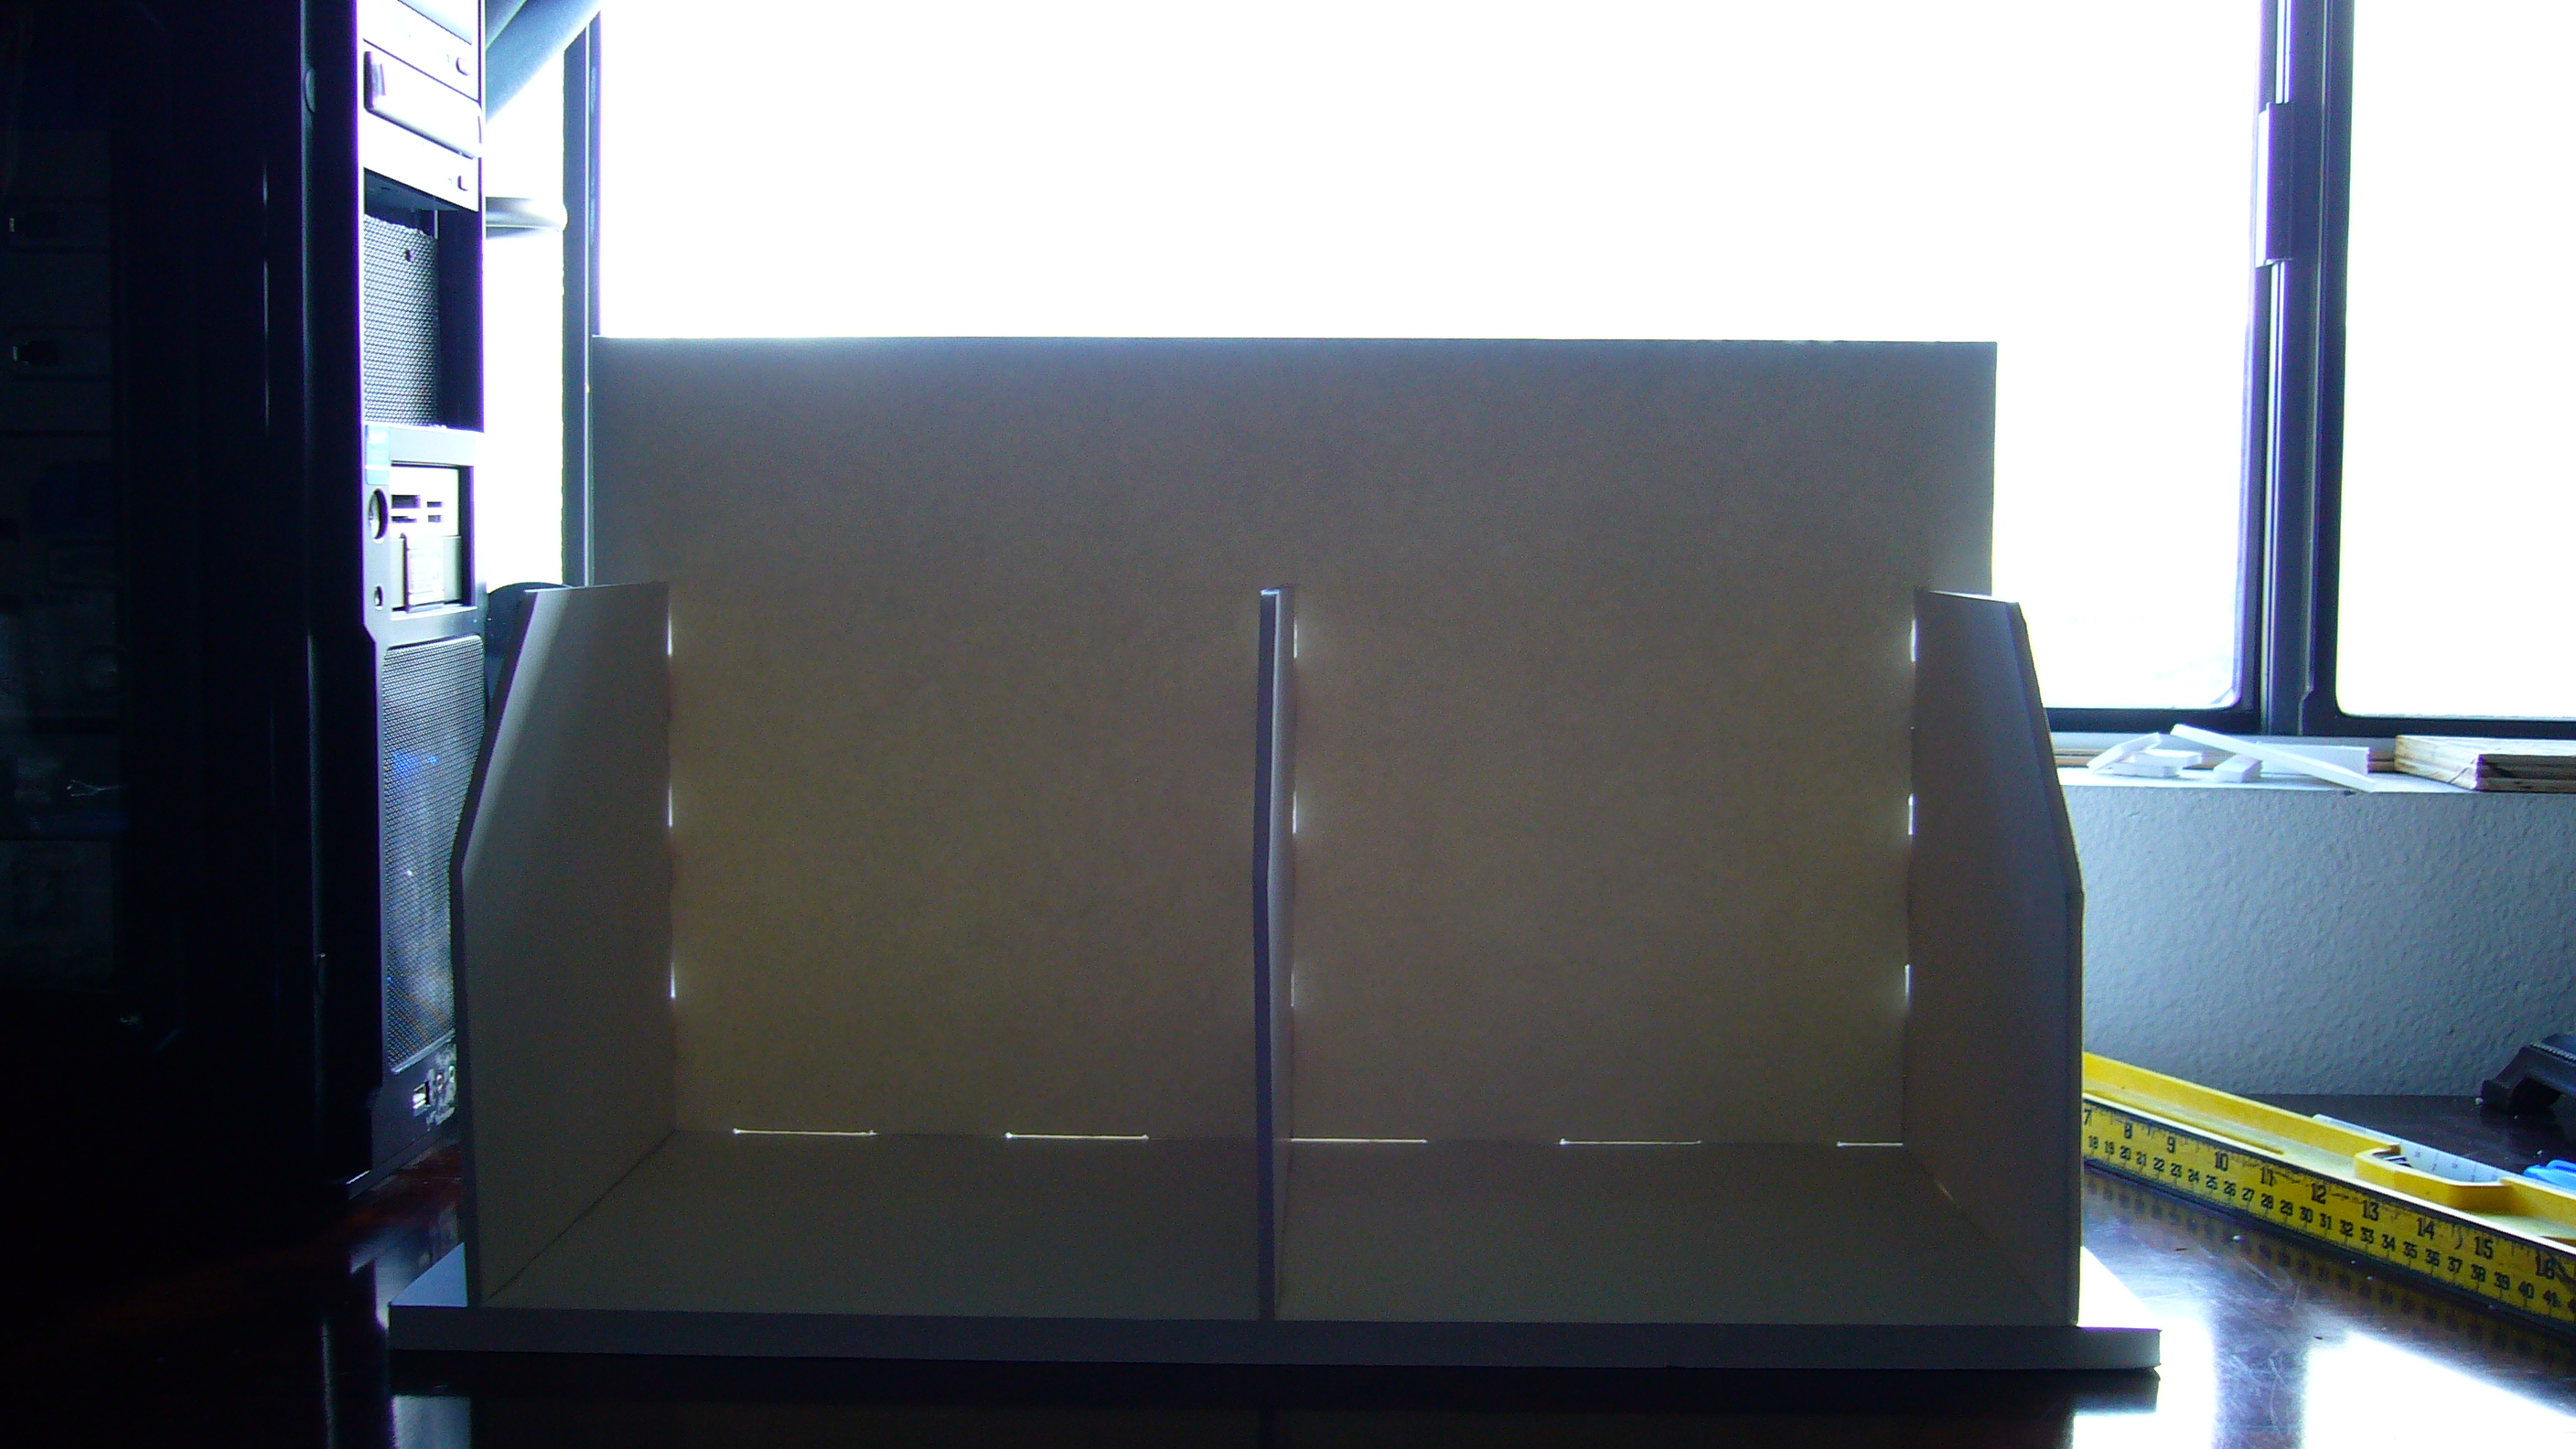
The material being used is Foam board that can be found at hobby or art stores. The Styrene materials are from a hobby store as well.
This particular hanger is built with a modular concept in mind...the sections are built so that there is minimal assembly needed for when
the future product will be shipped.
So without further ado....here are the pictures from start to present...


-
Wow! Thank you so much Iceblue106! That is exactly the information and photos I was interested in. That is great! Also I am loving your diorama. Please post pics up of the diorama when you are finished.
Miriya since you asked I have decided to begin a forum in the building/customizing thread.
It will be a walk through from start to finish, as well as a brief description of where the inspiration came from.
Hope you enjoy it and I will see you there.

-
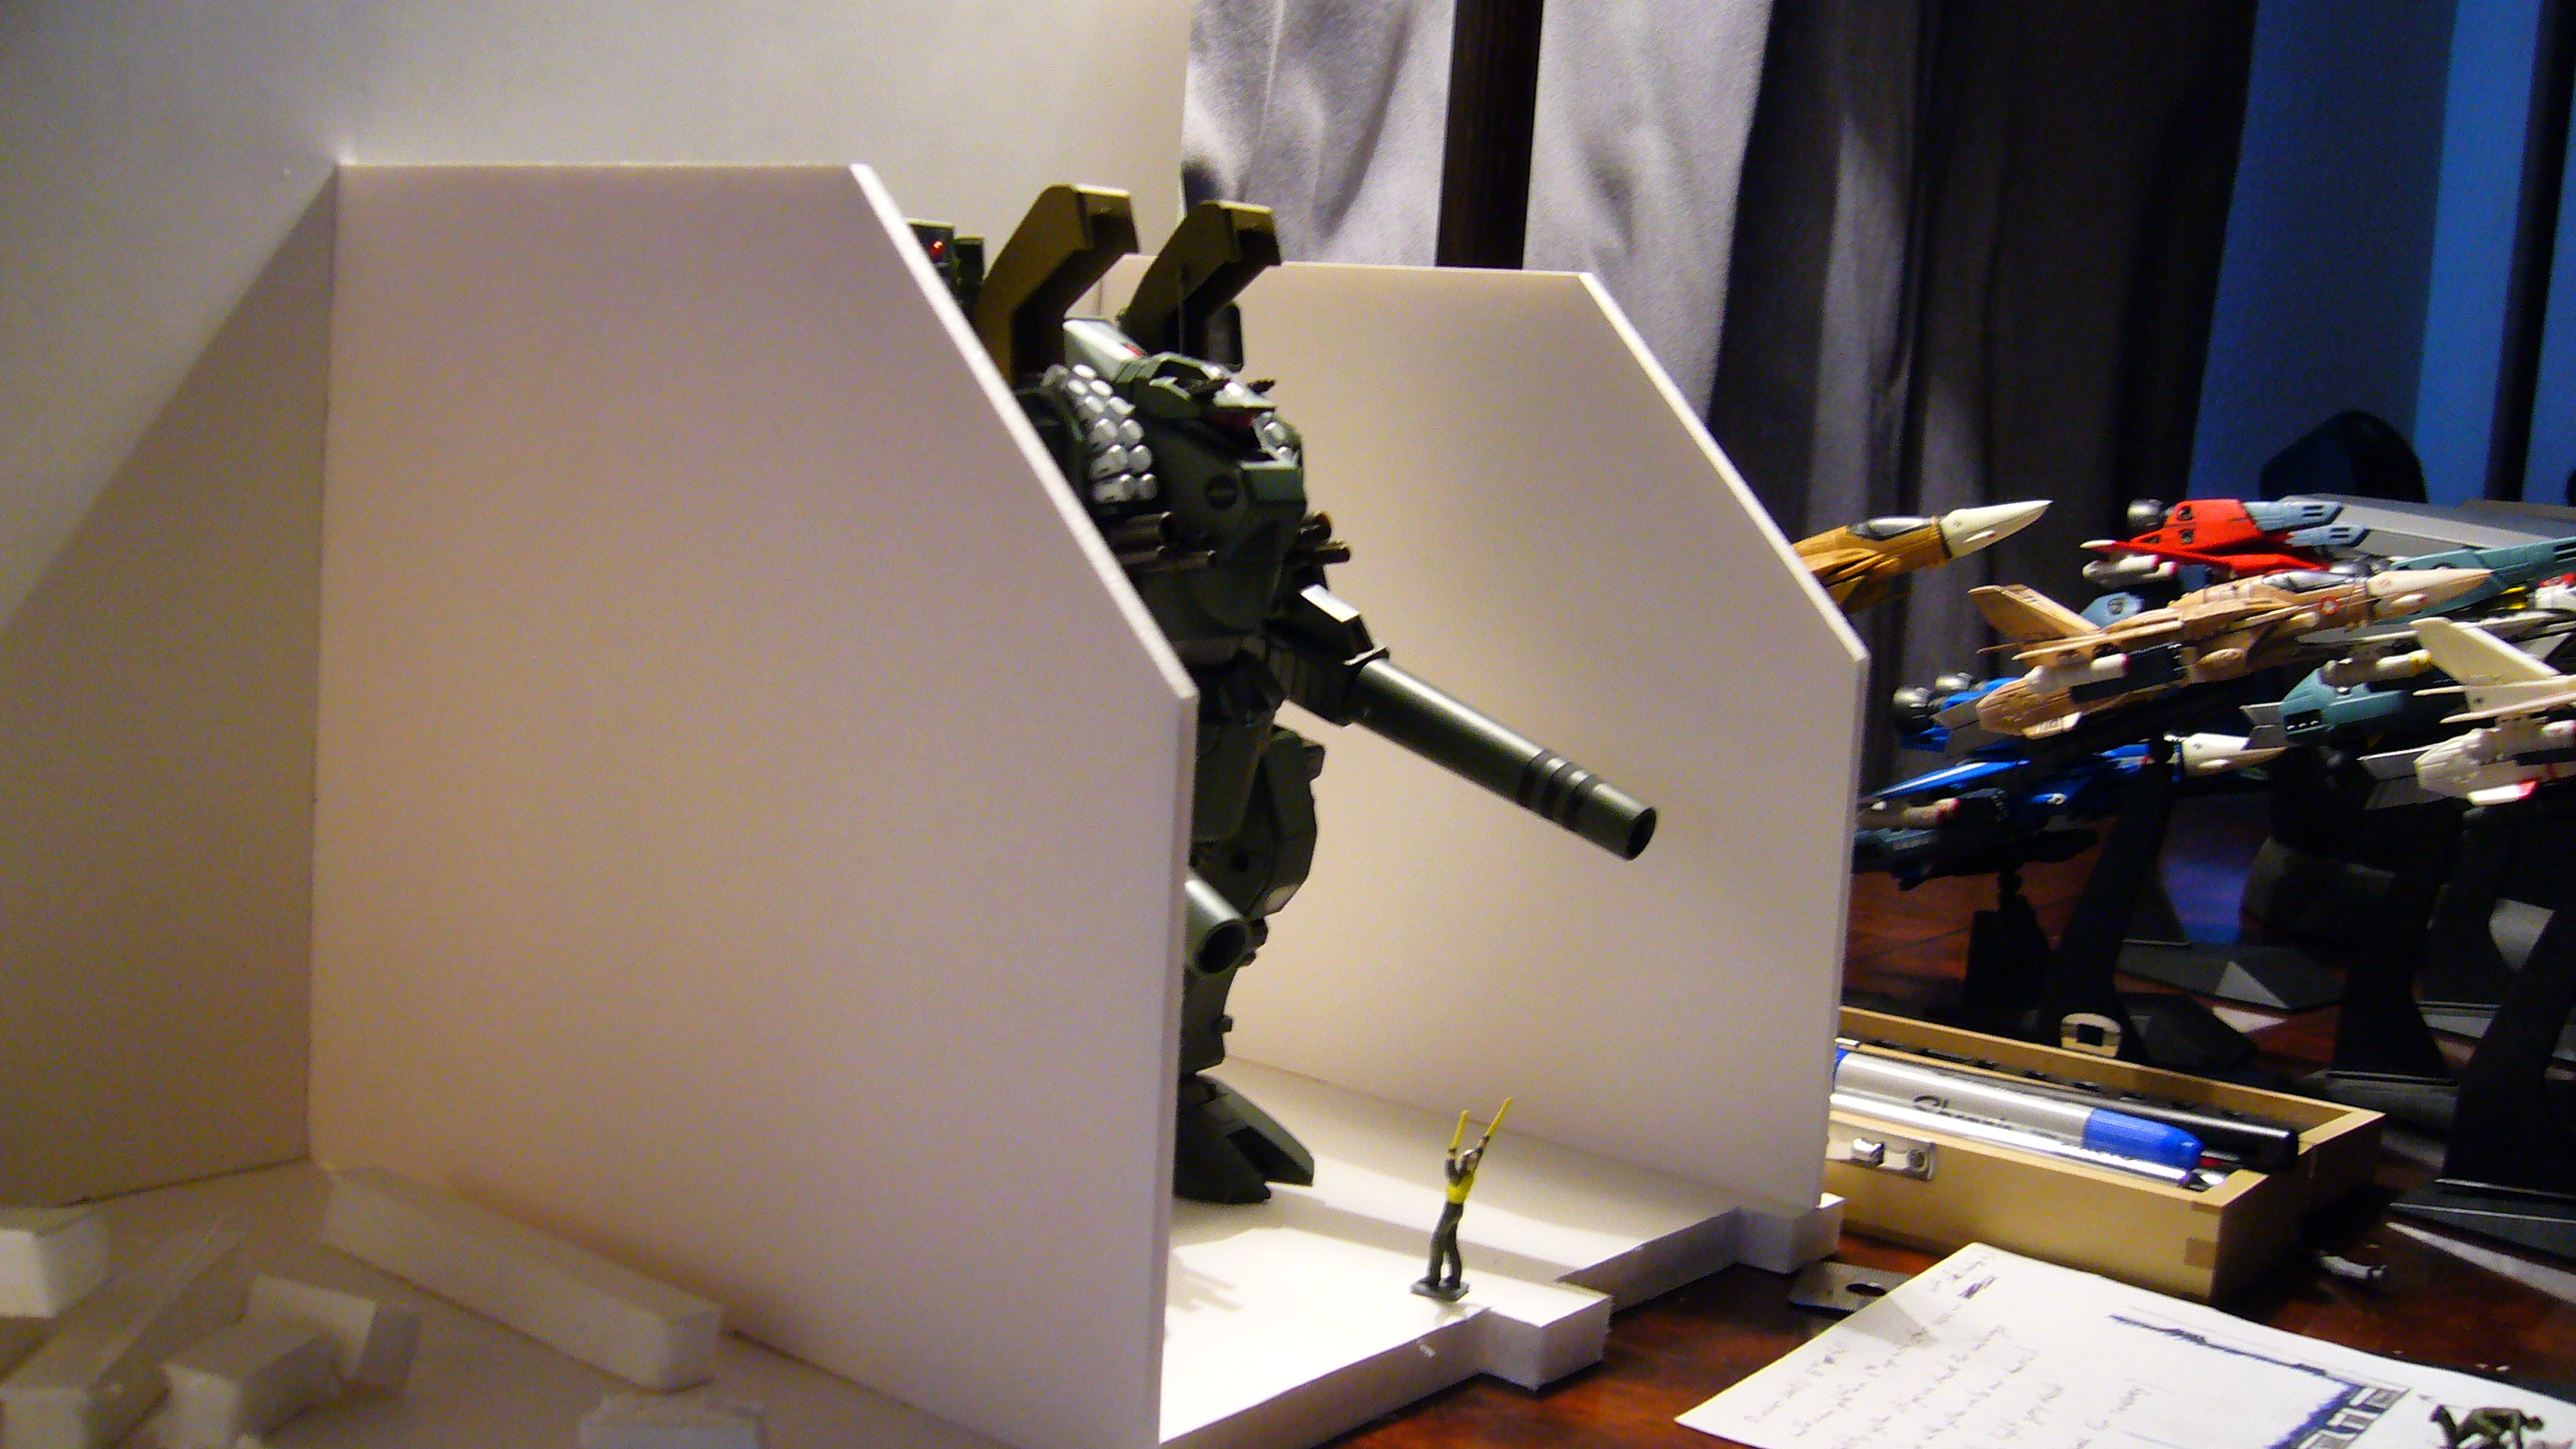
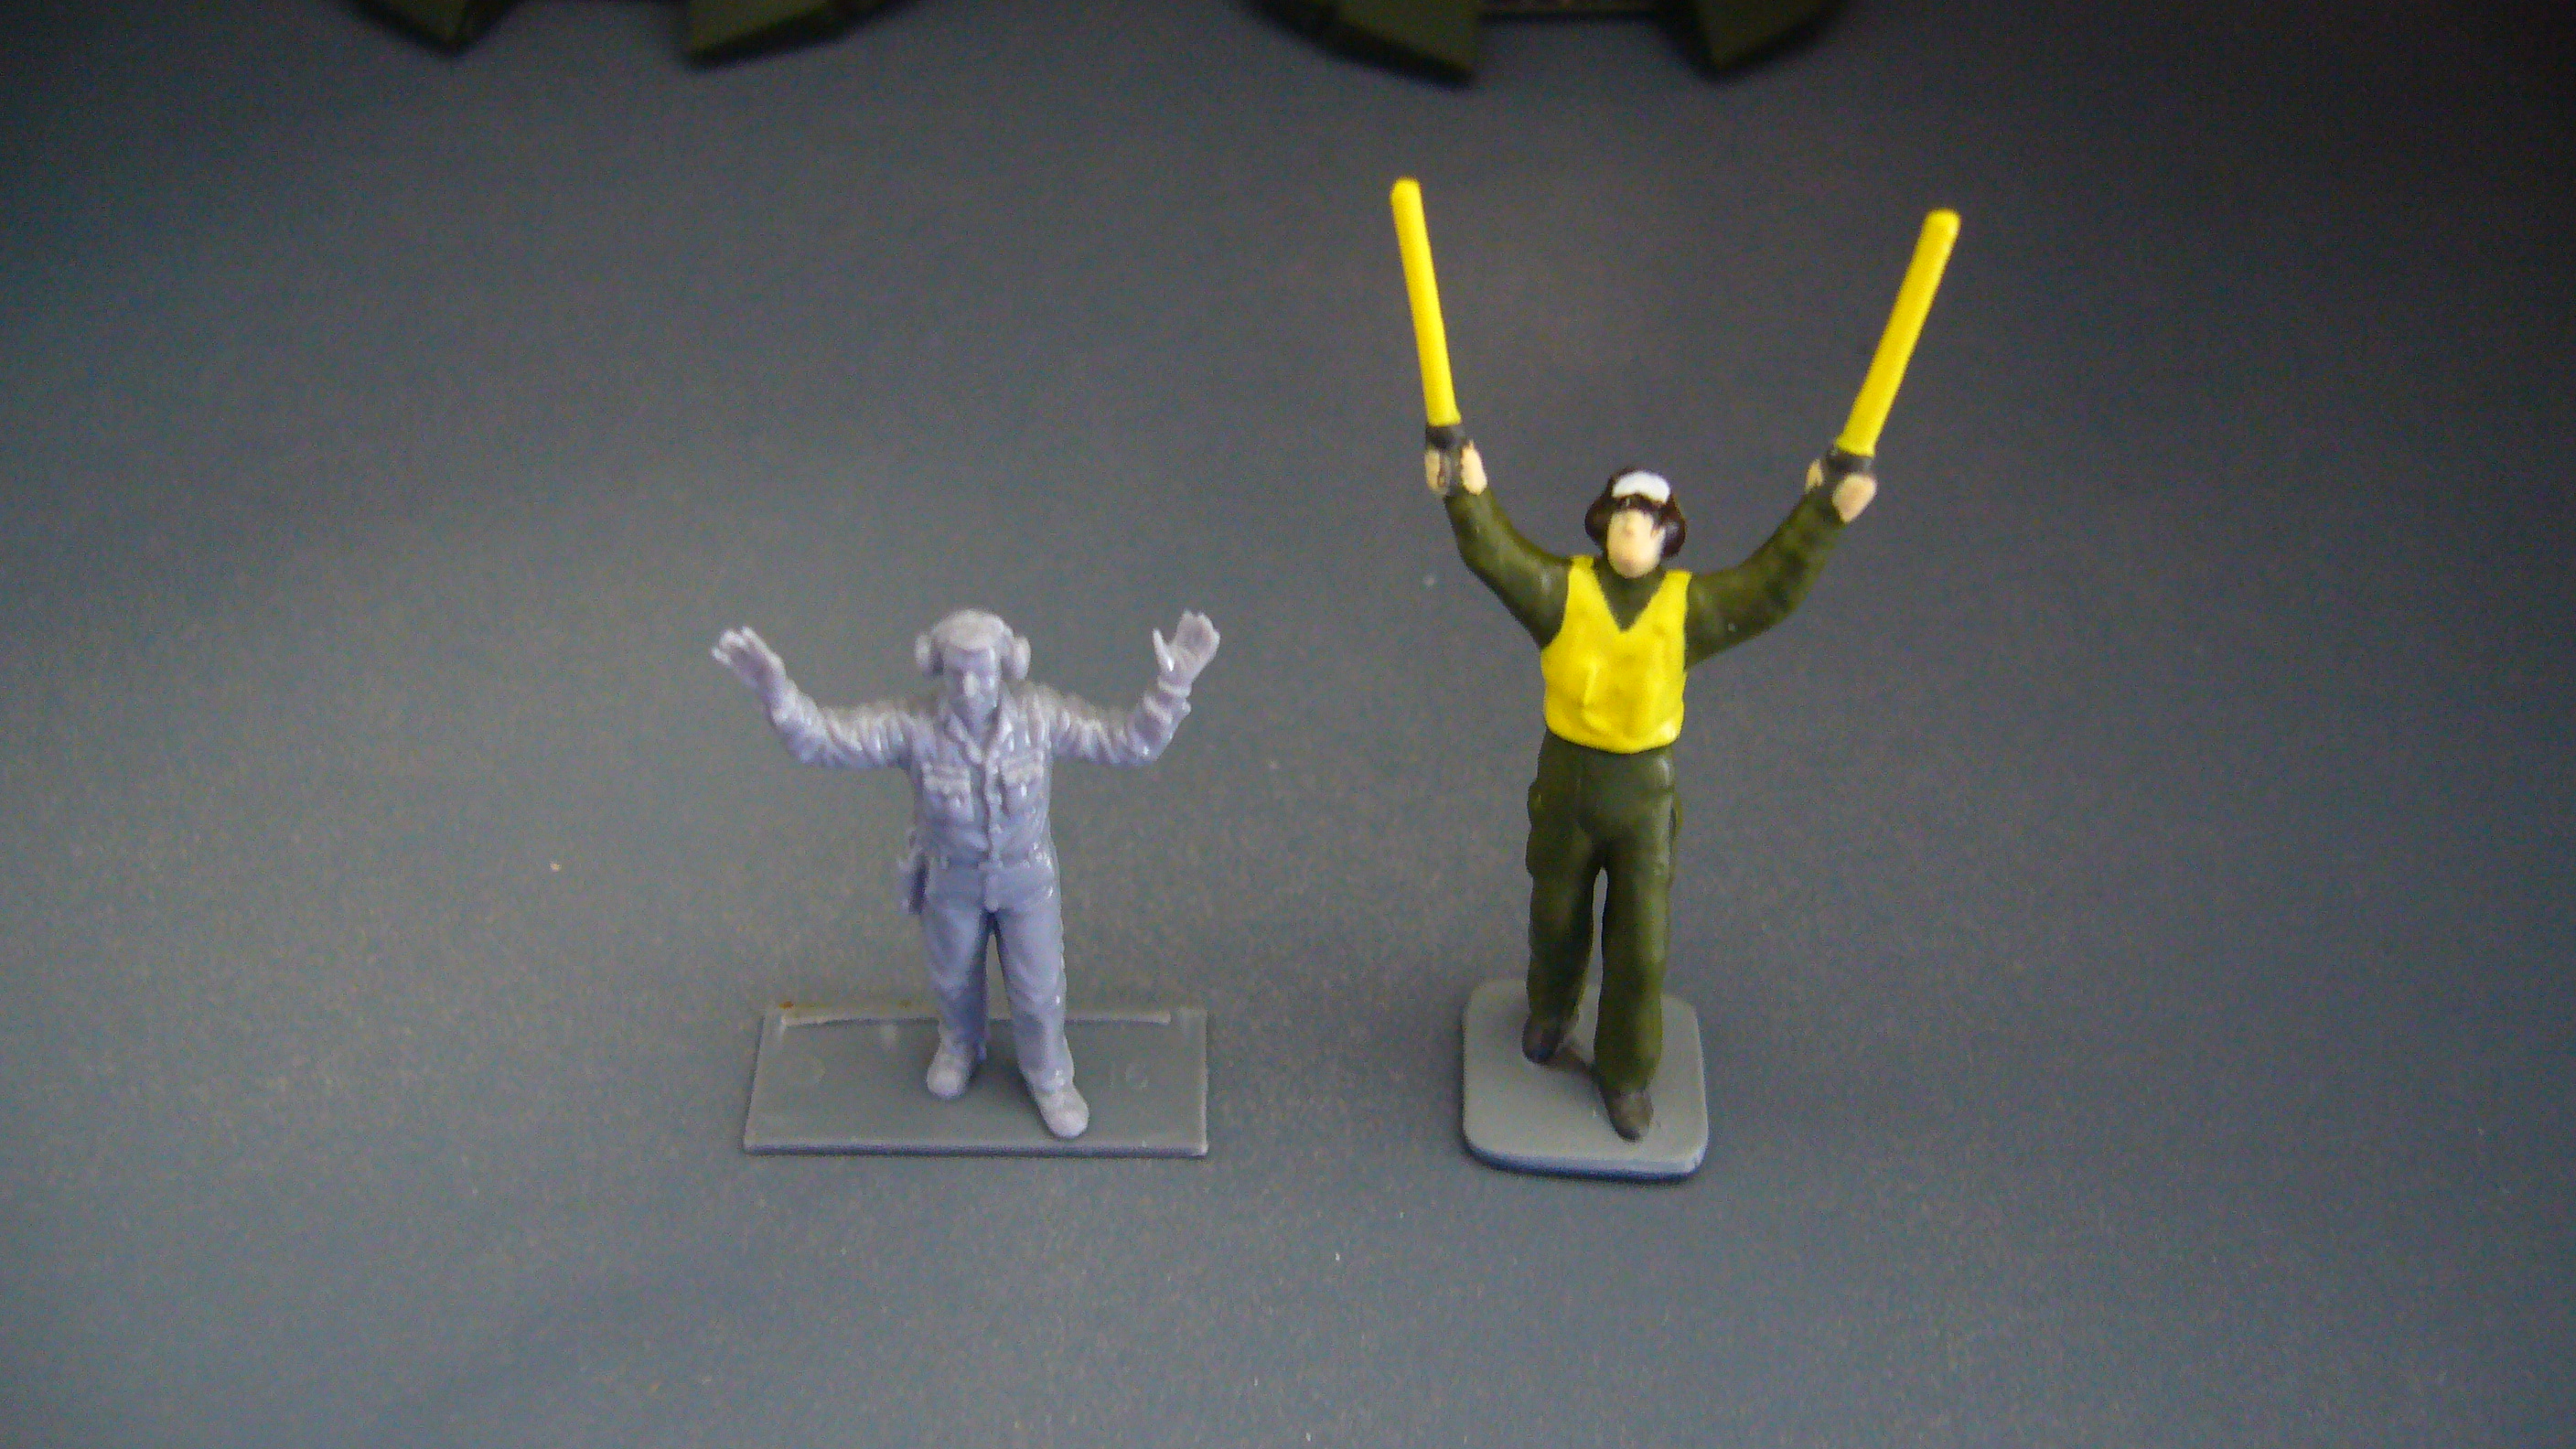
Would the 1/72 Hasegawa ground crew set be visually off too much for the 1/60 Yamato line?
I couldn't put them in the same display as the ones that come with my Destroids probably . . .
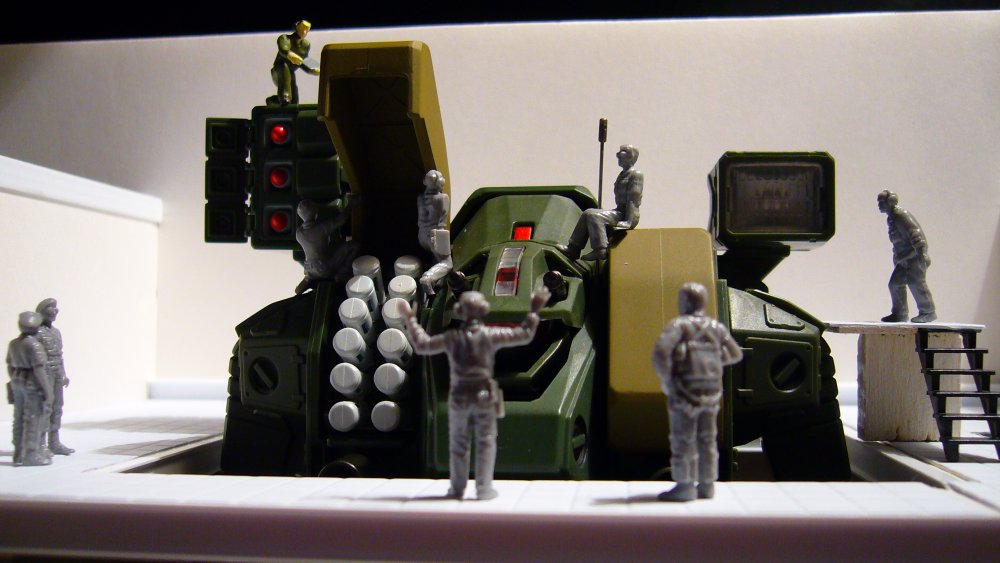
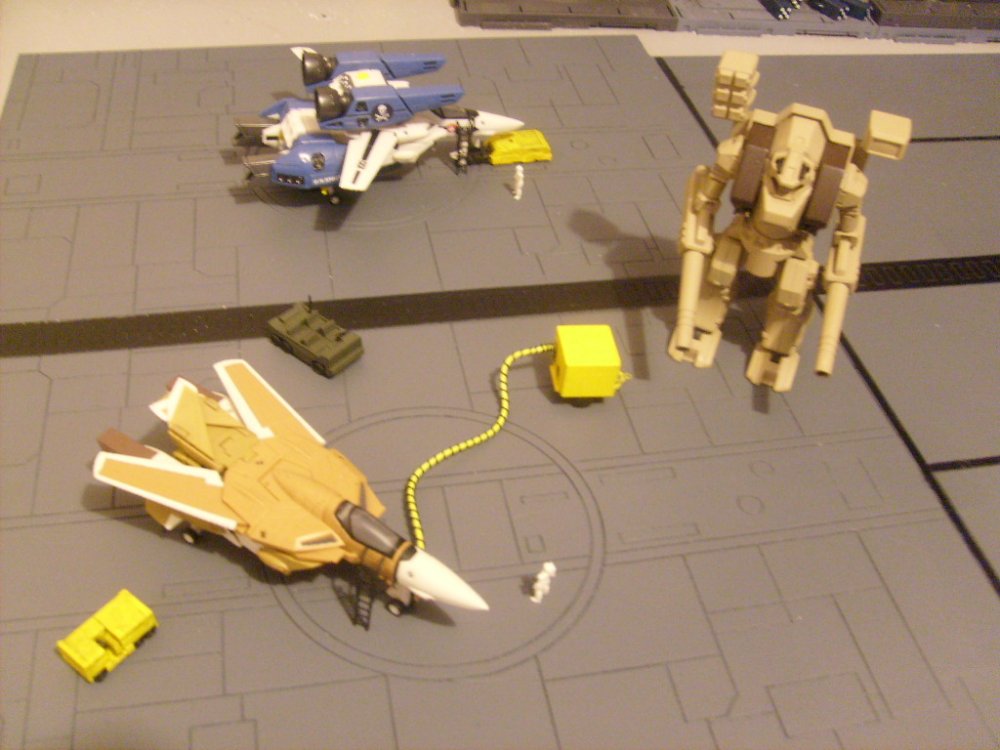
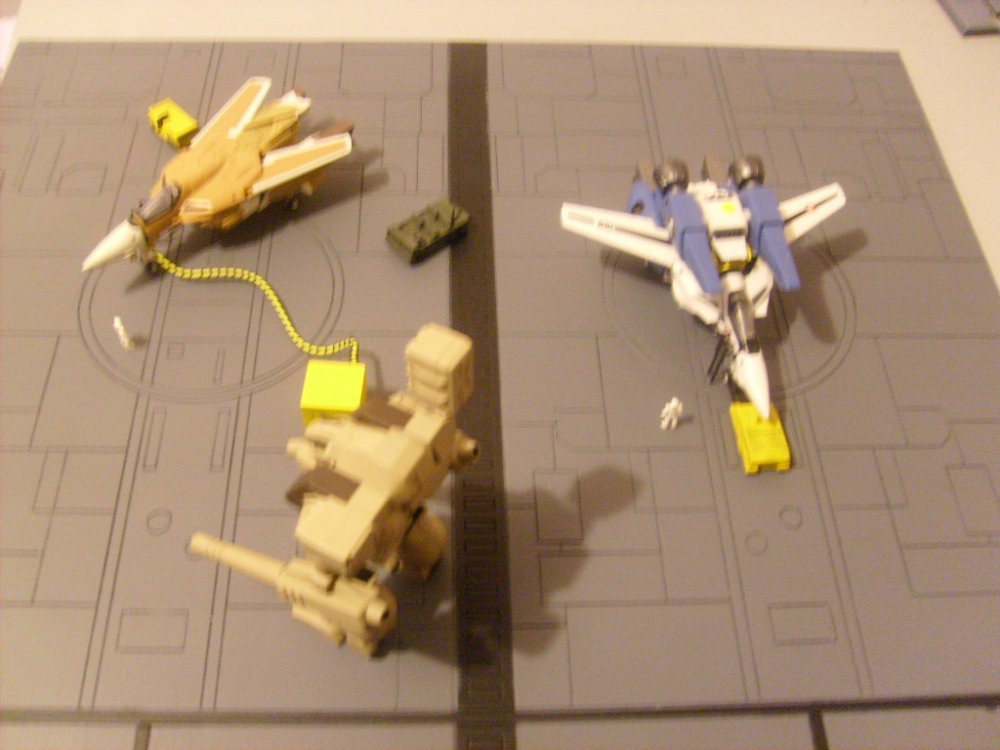
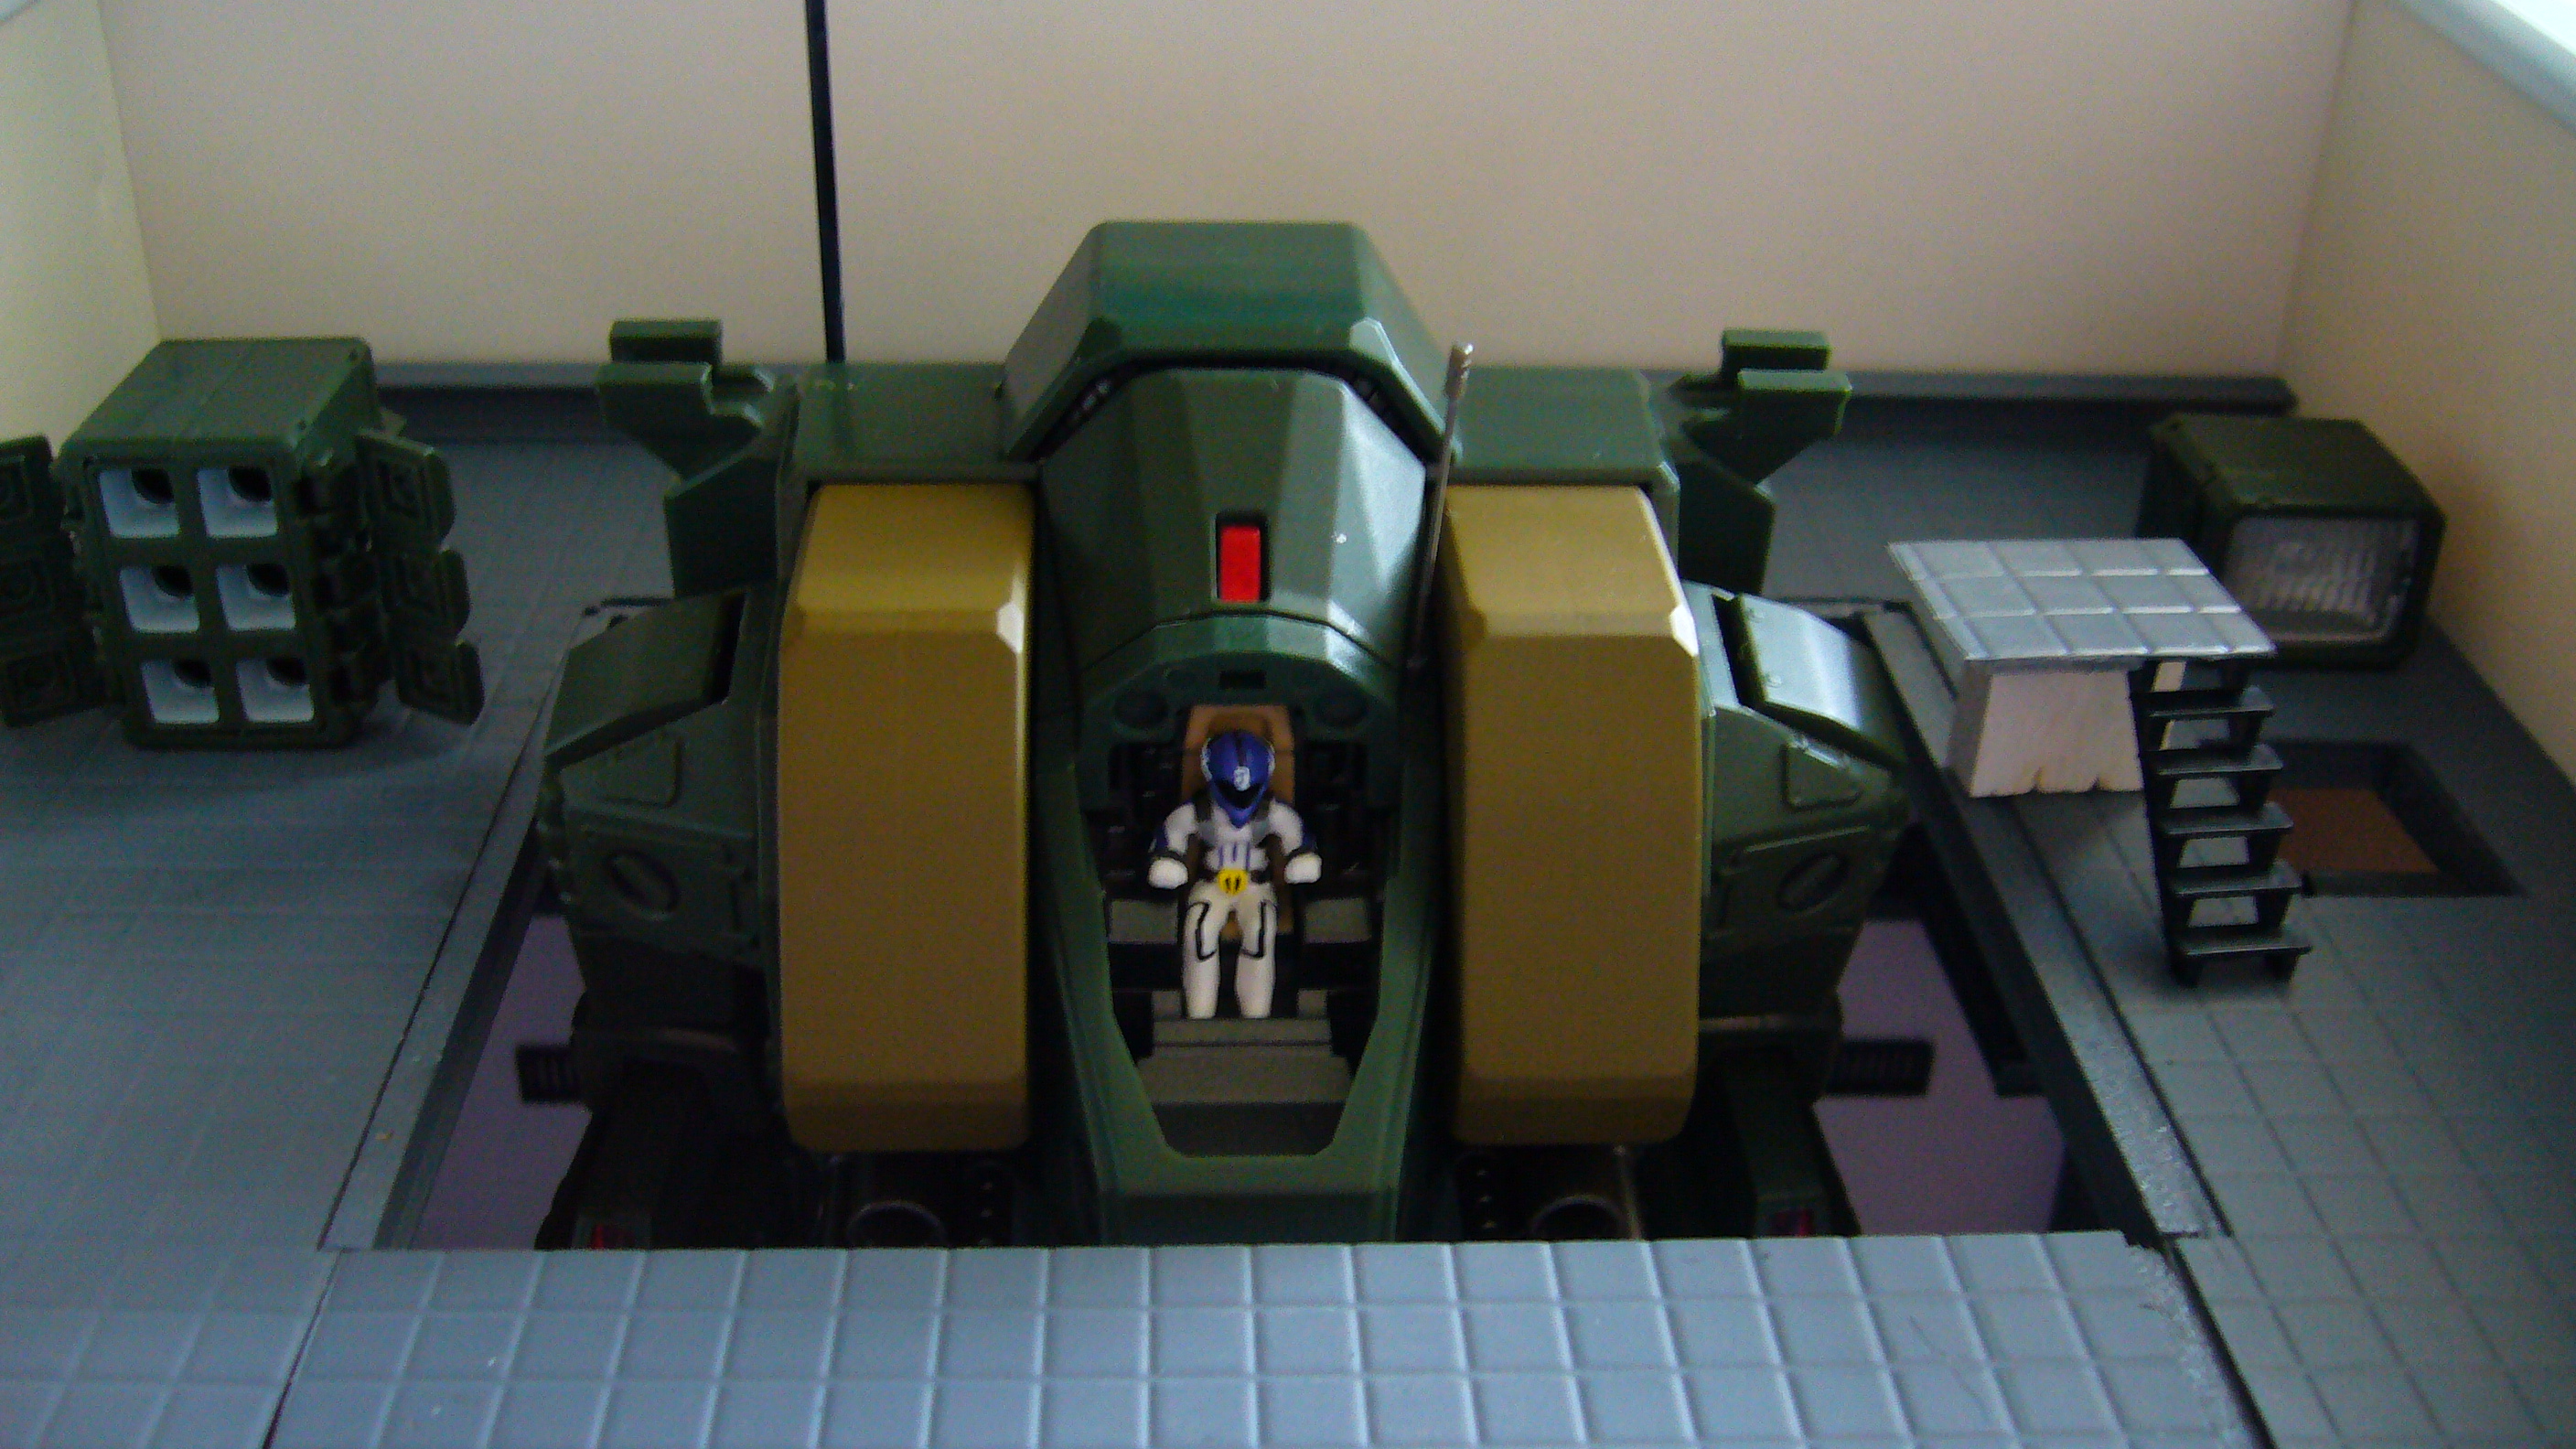
Ok I know this is also a late post but I just wanted to give DarrinG an example of difference in scale between the included crew and the 1/72 crew from Hasagawa. If you get the chance I would just use the crew from the Hawagawa kit by themselves or just not use the included directing crew member from the tomahawk. I will Include a picture of the ones I use as well...note they are not painted yet.


-
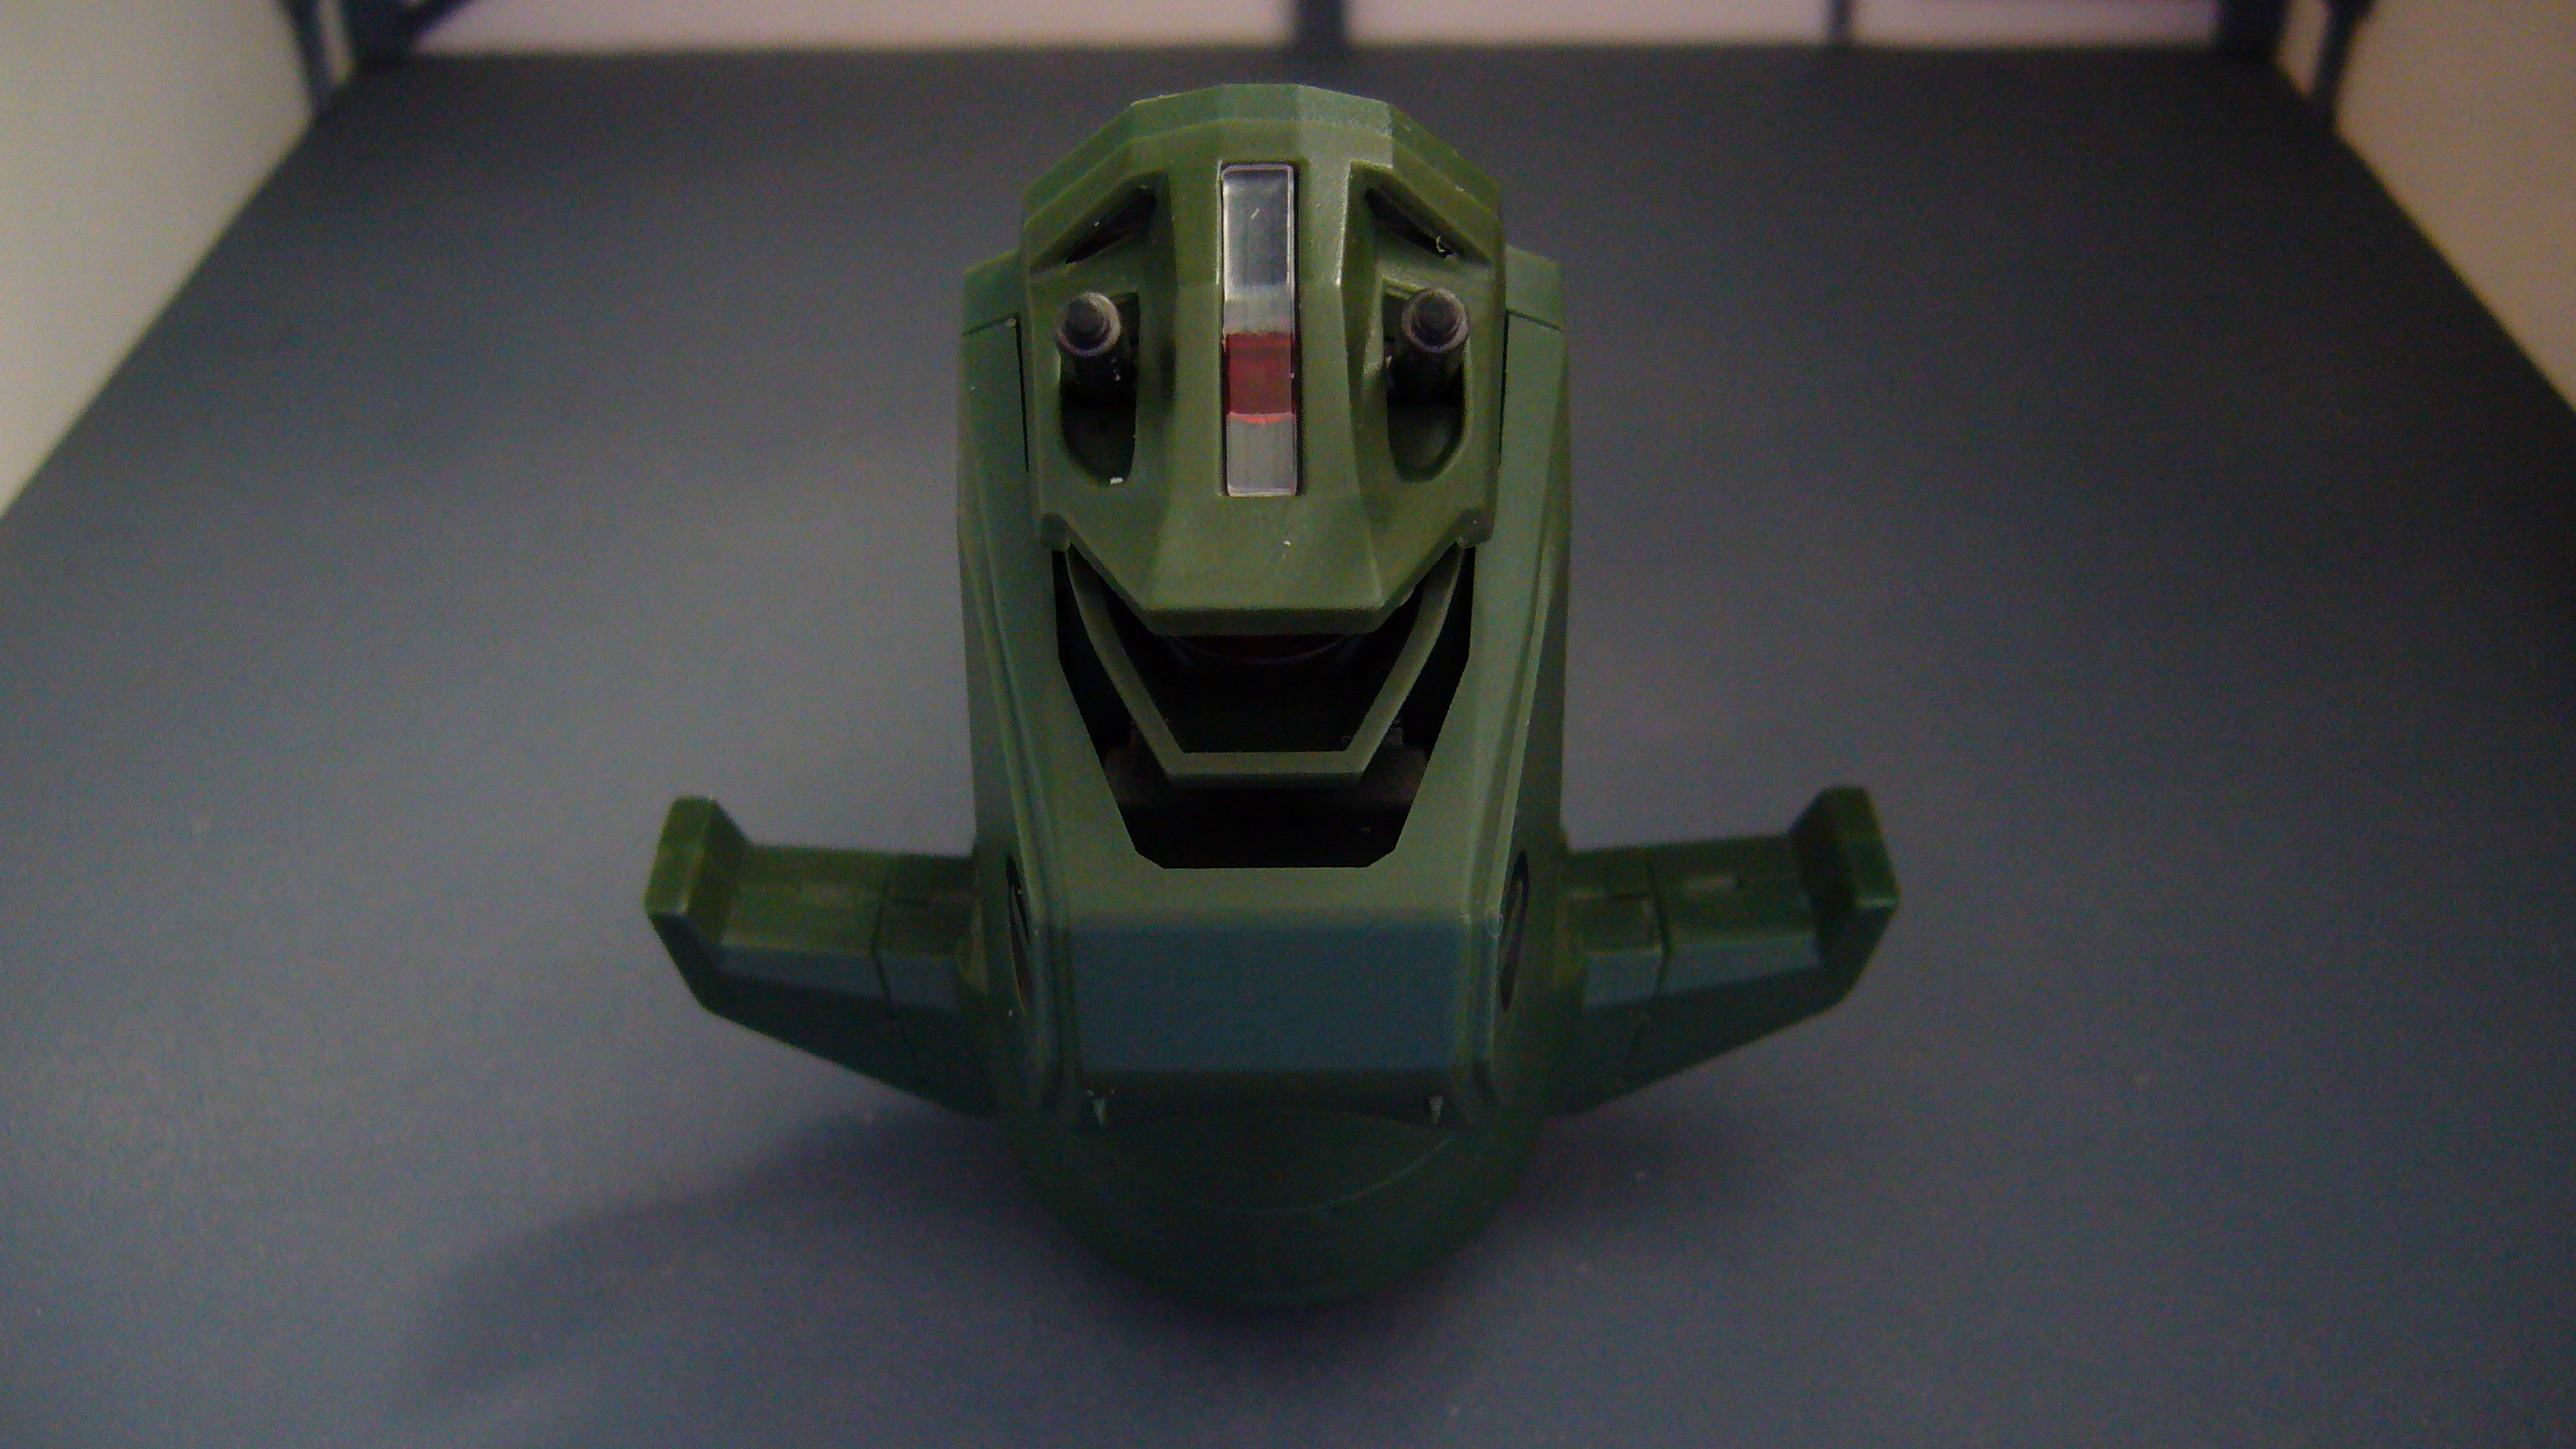
I sure do. It just looks like a silly happy face to me most of the time. The cannons being the eyes and the visor being the mouth.
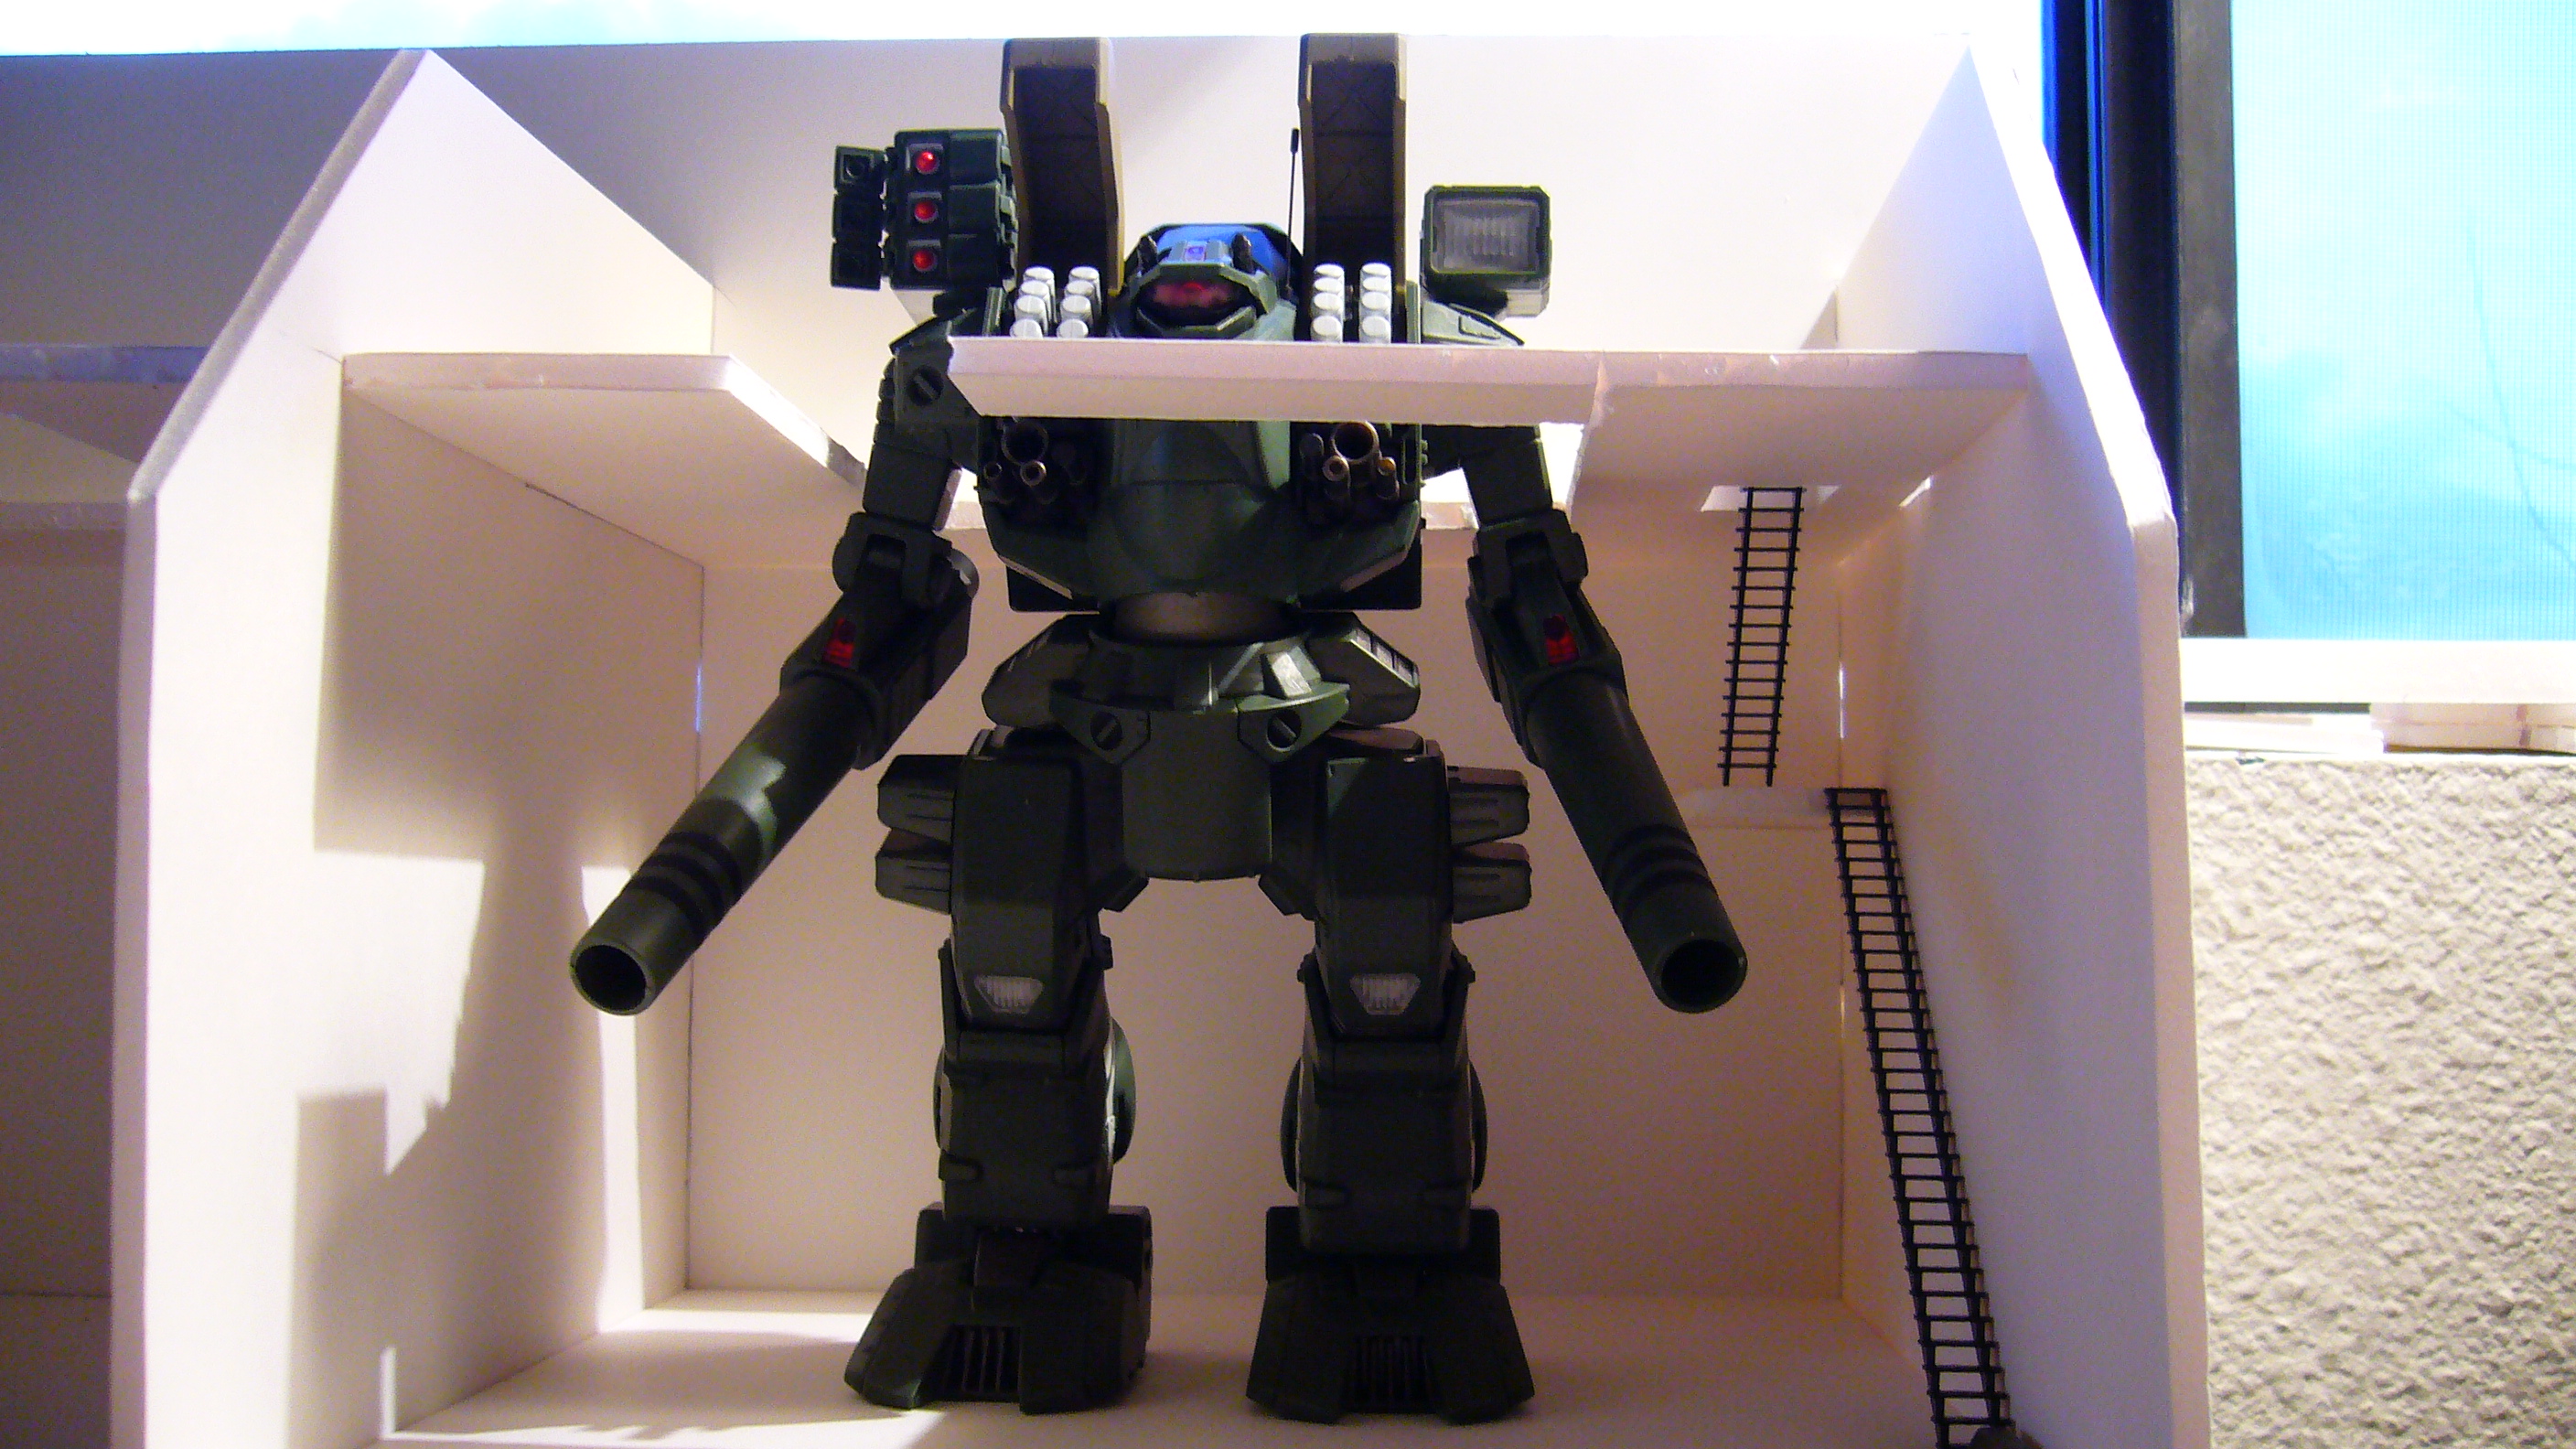
Thank you for the picture. That helps but does that part, where we can see the pilot underneath, the whole thing, except for the cockpit and pilot, come off? Or easily modified?
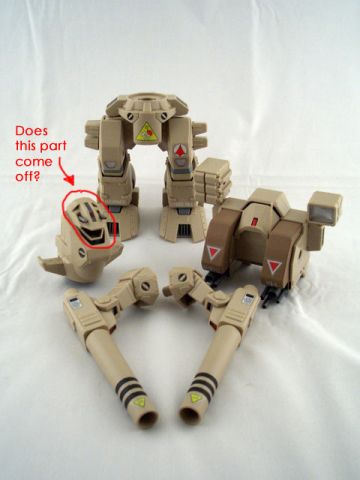
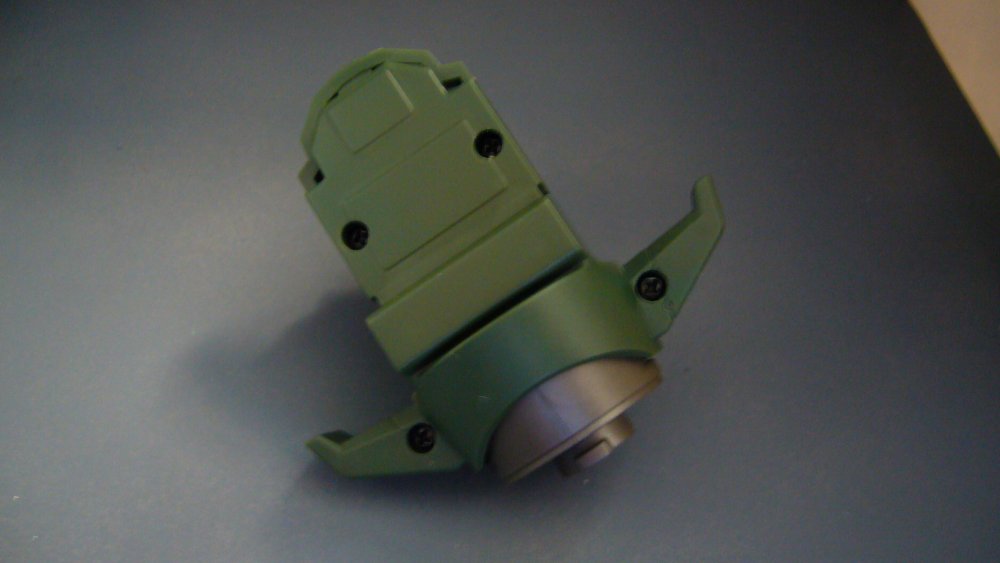
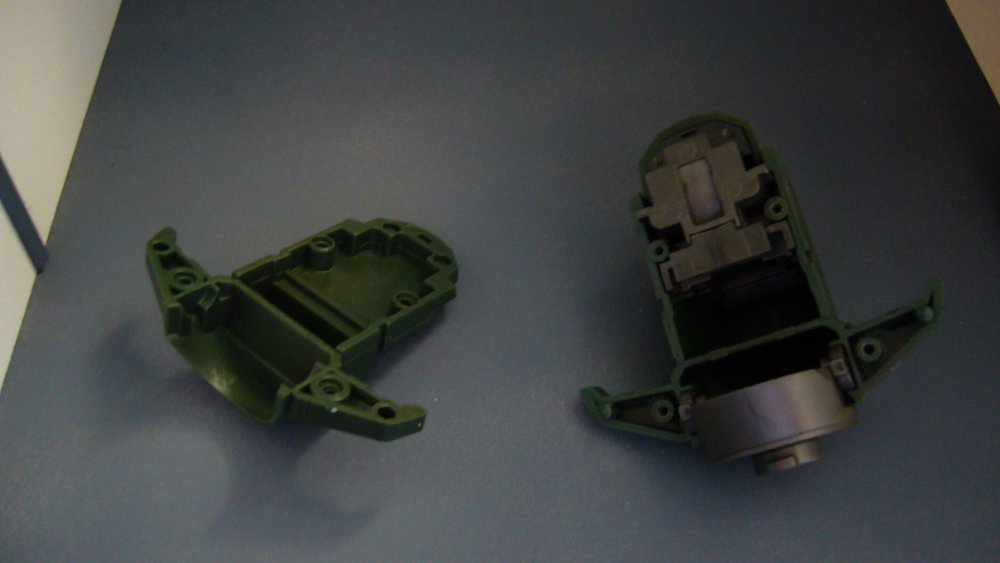
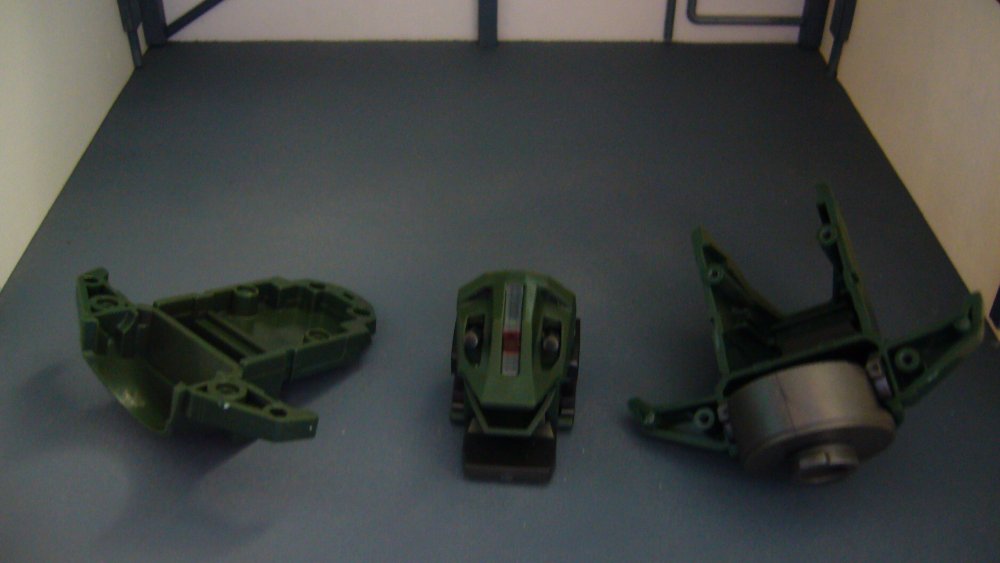
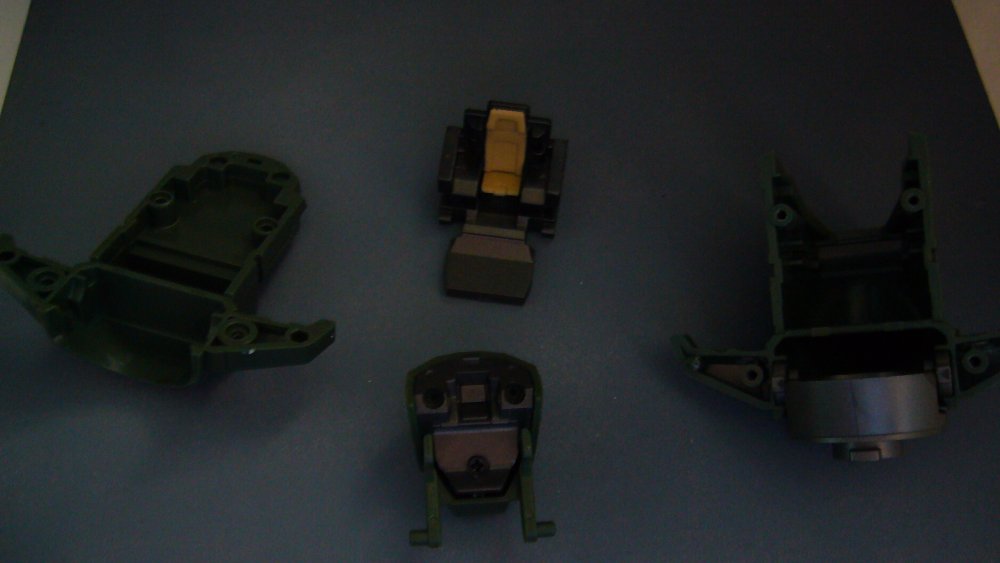
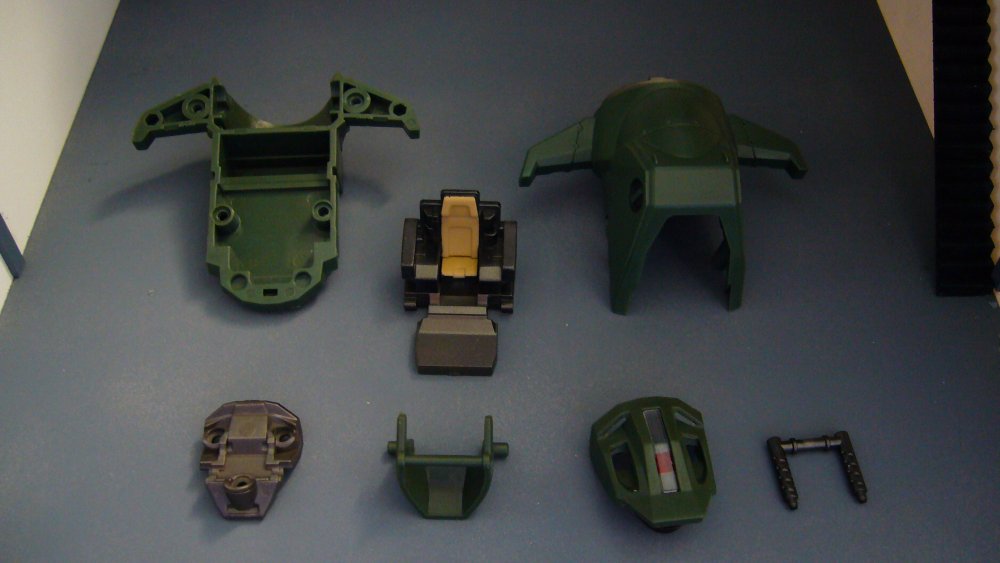
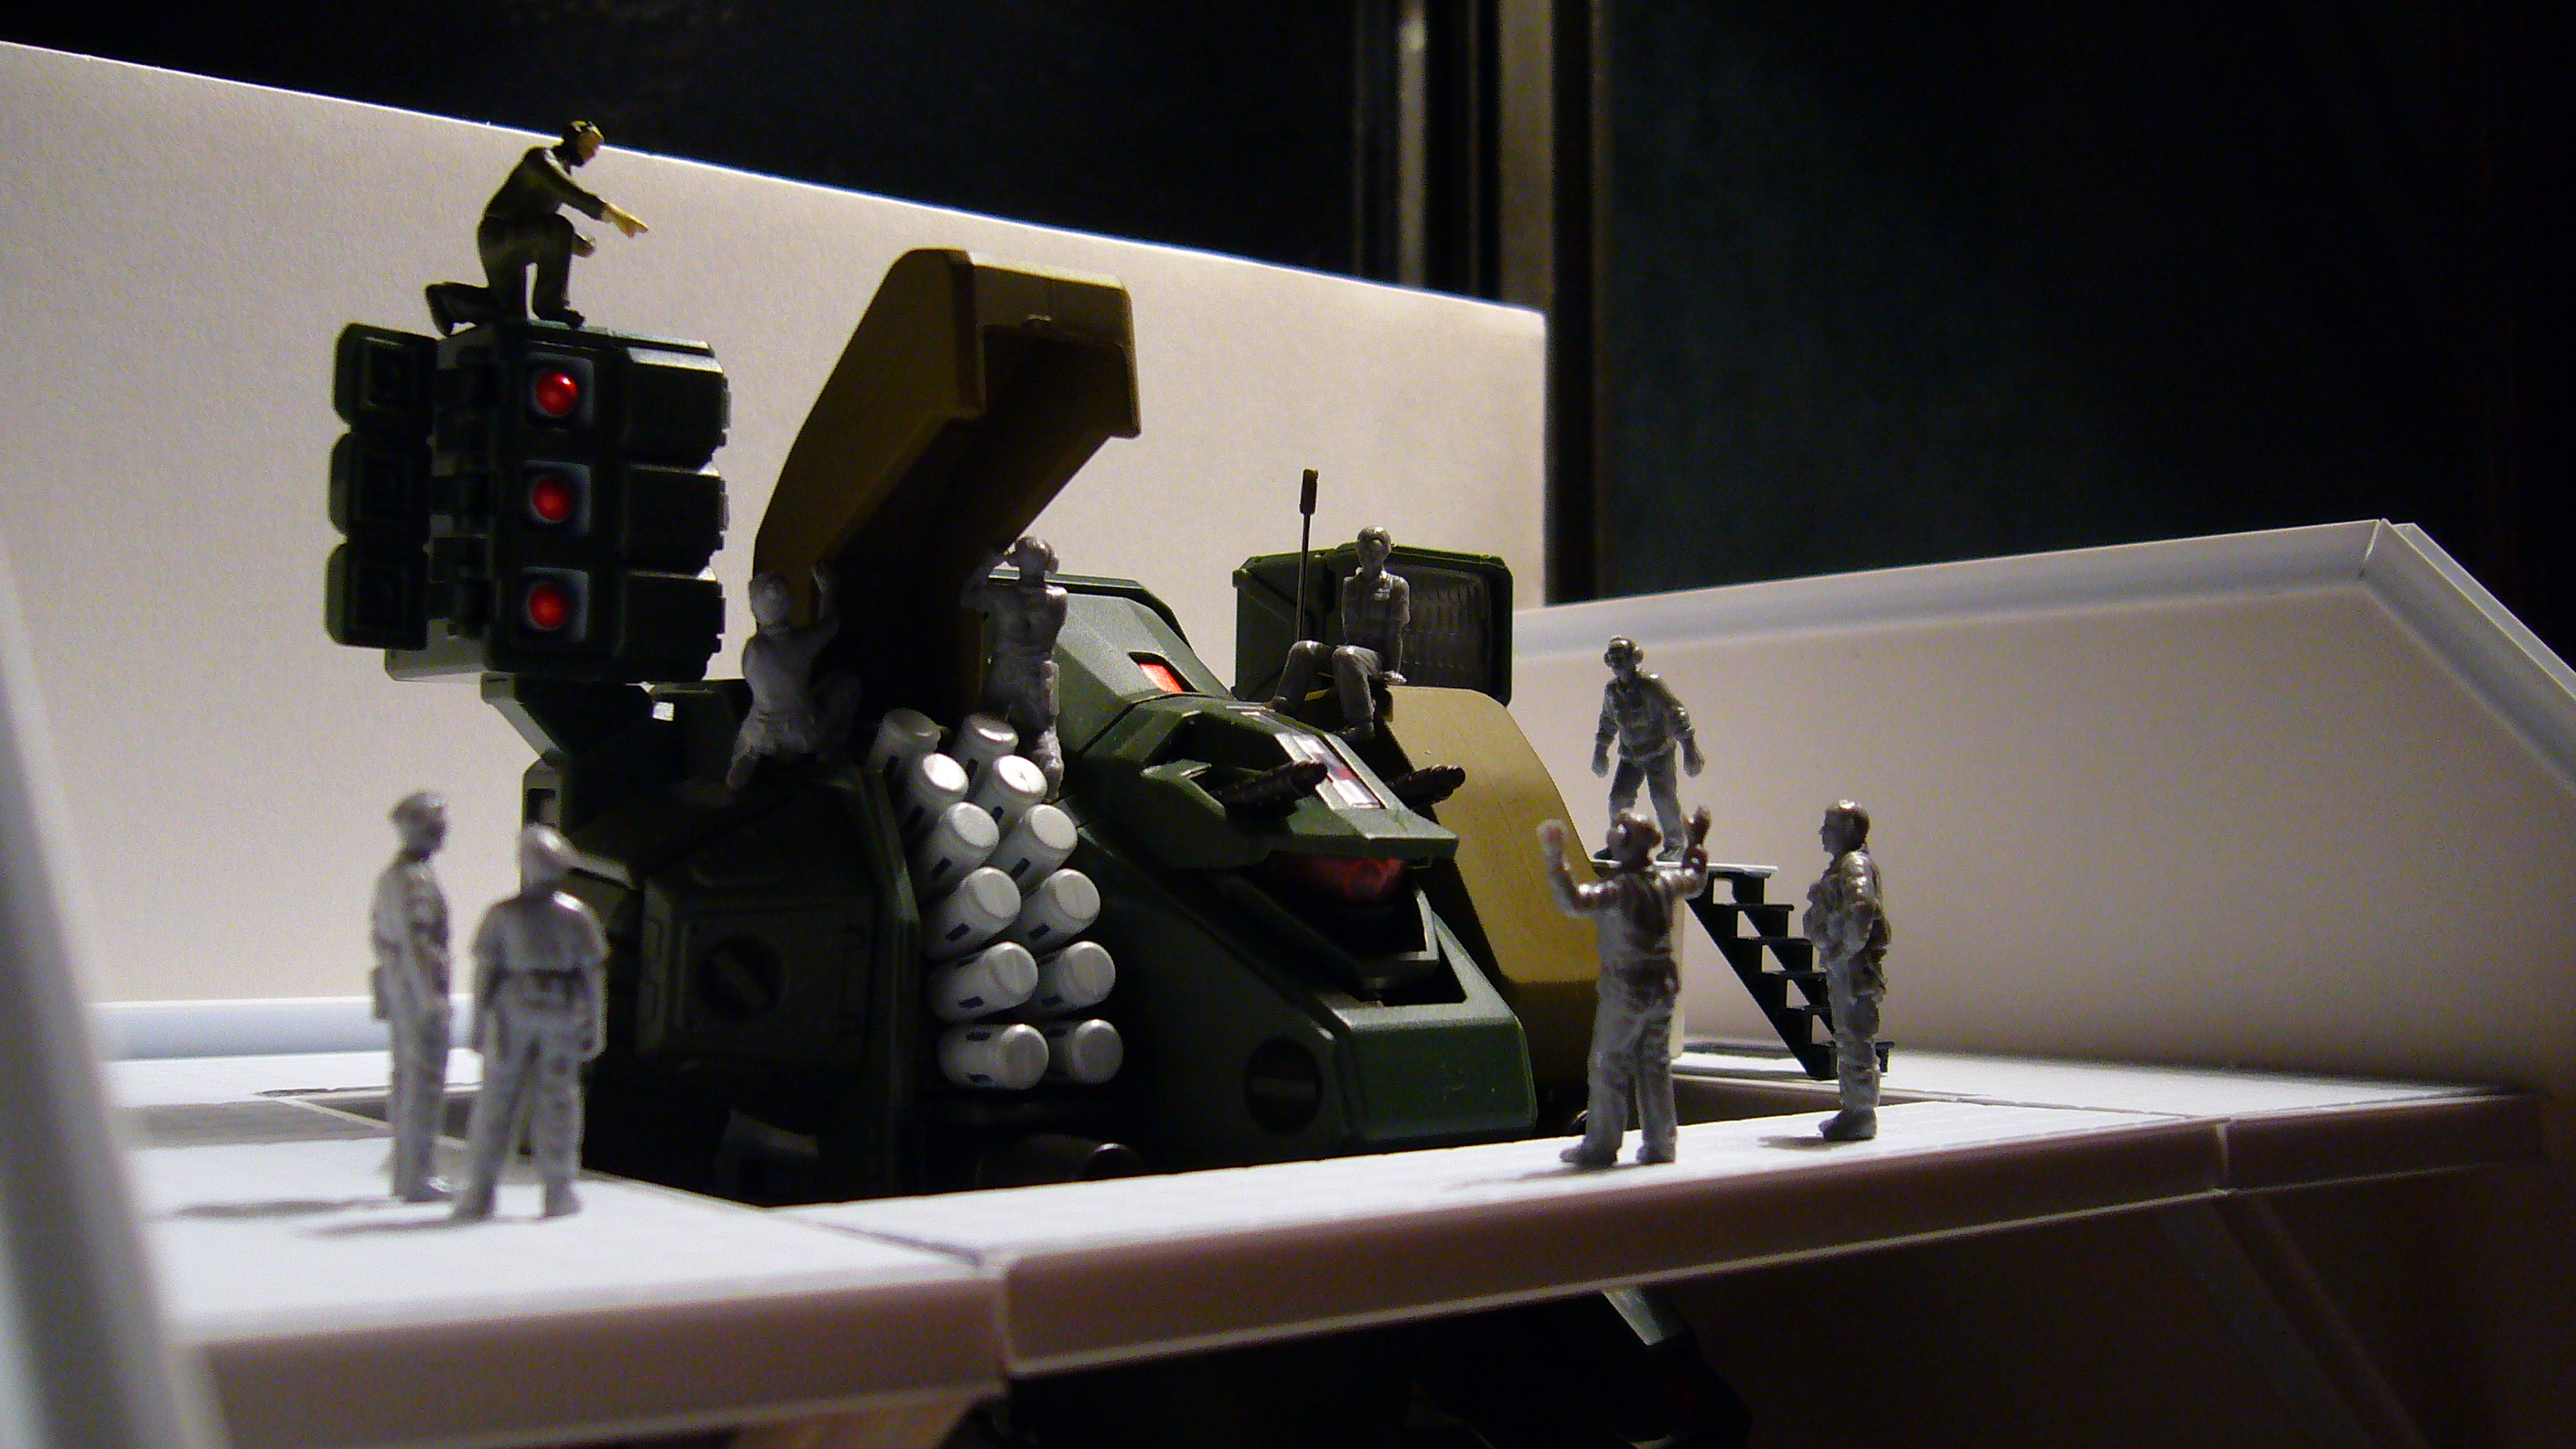
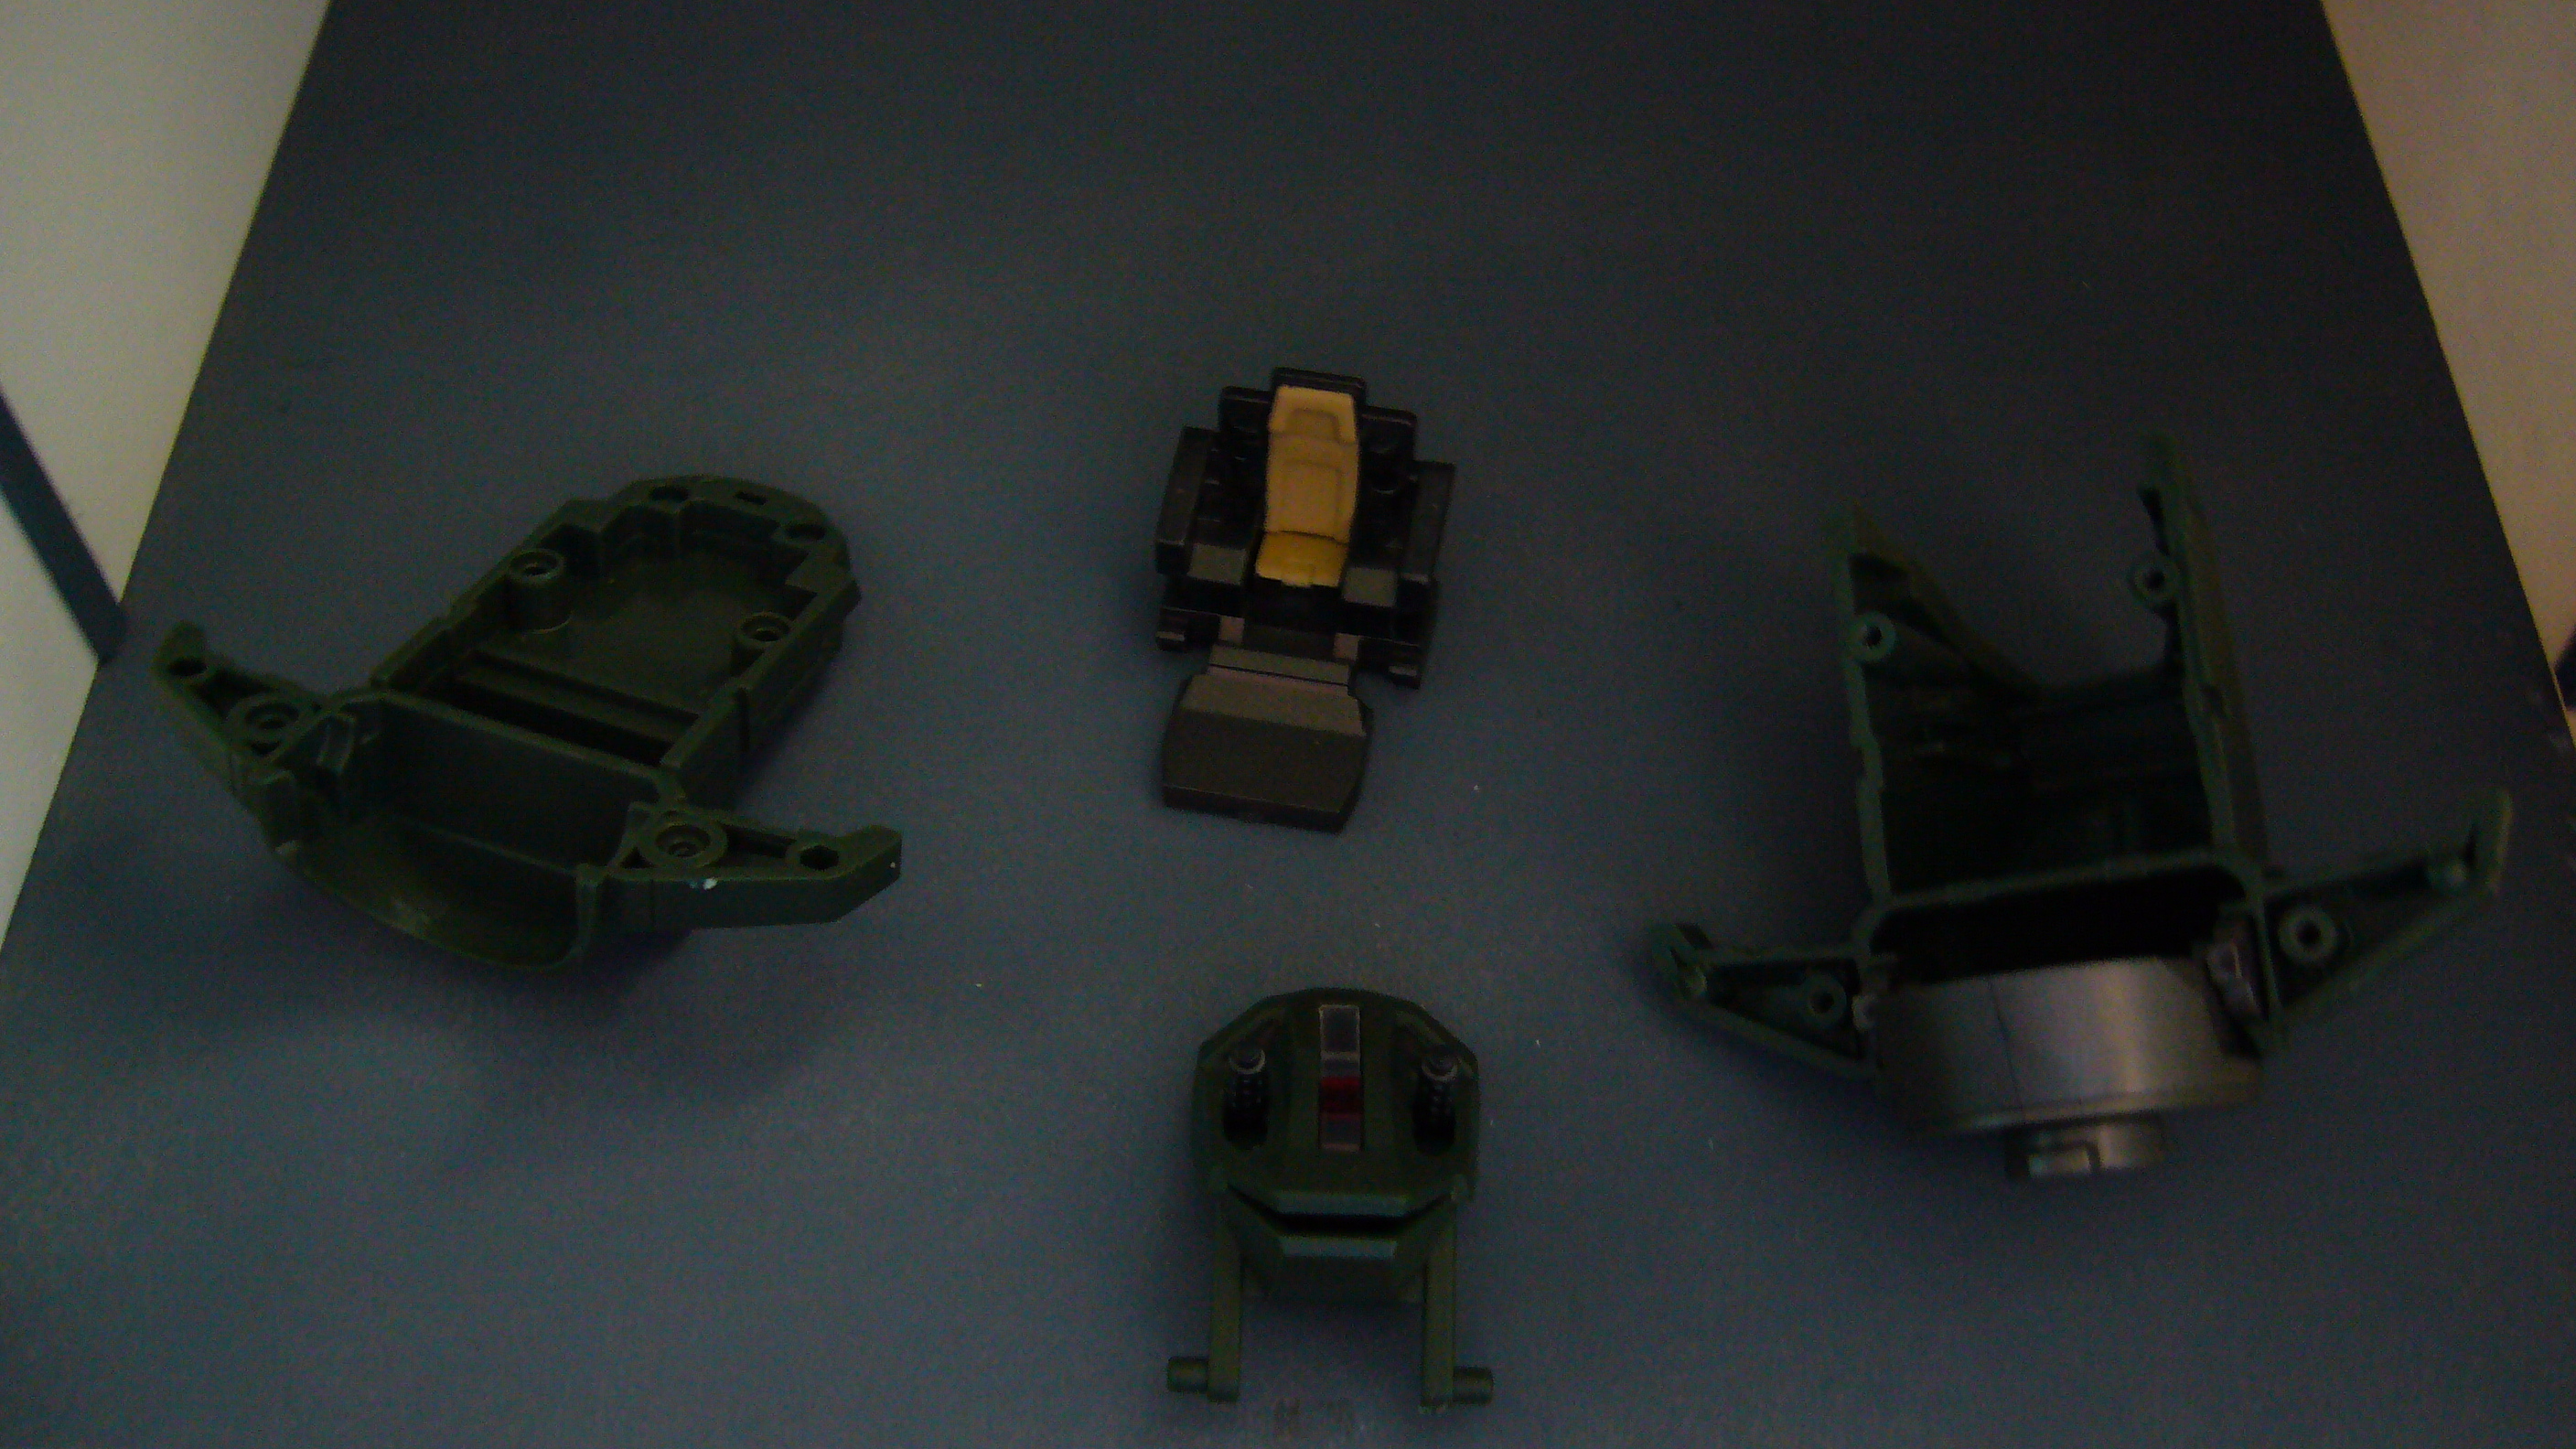
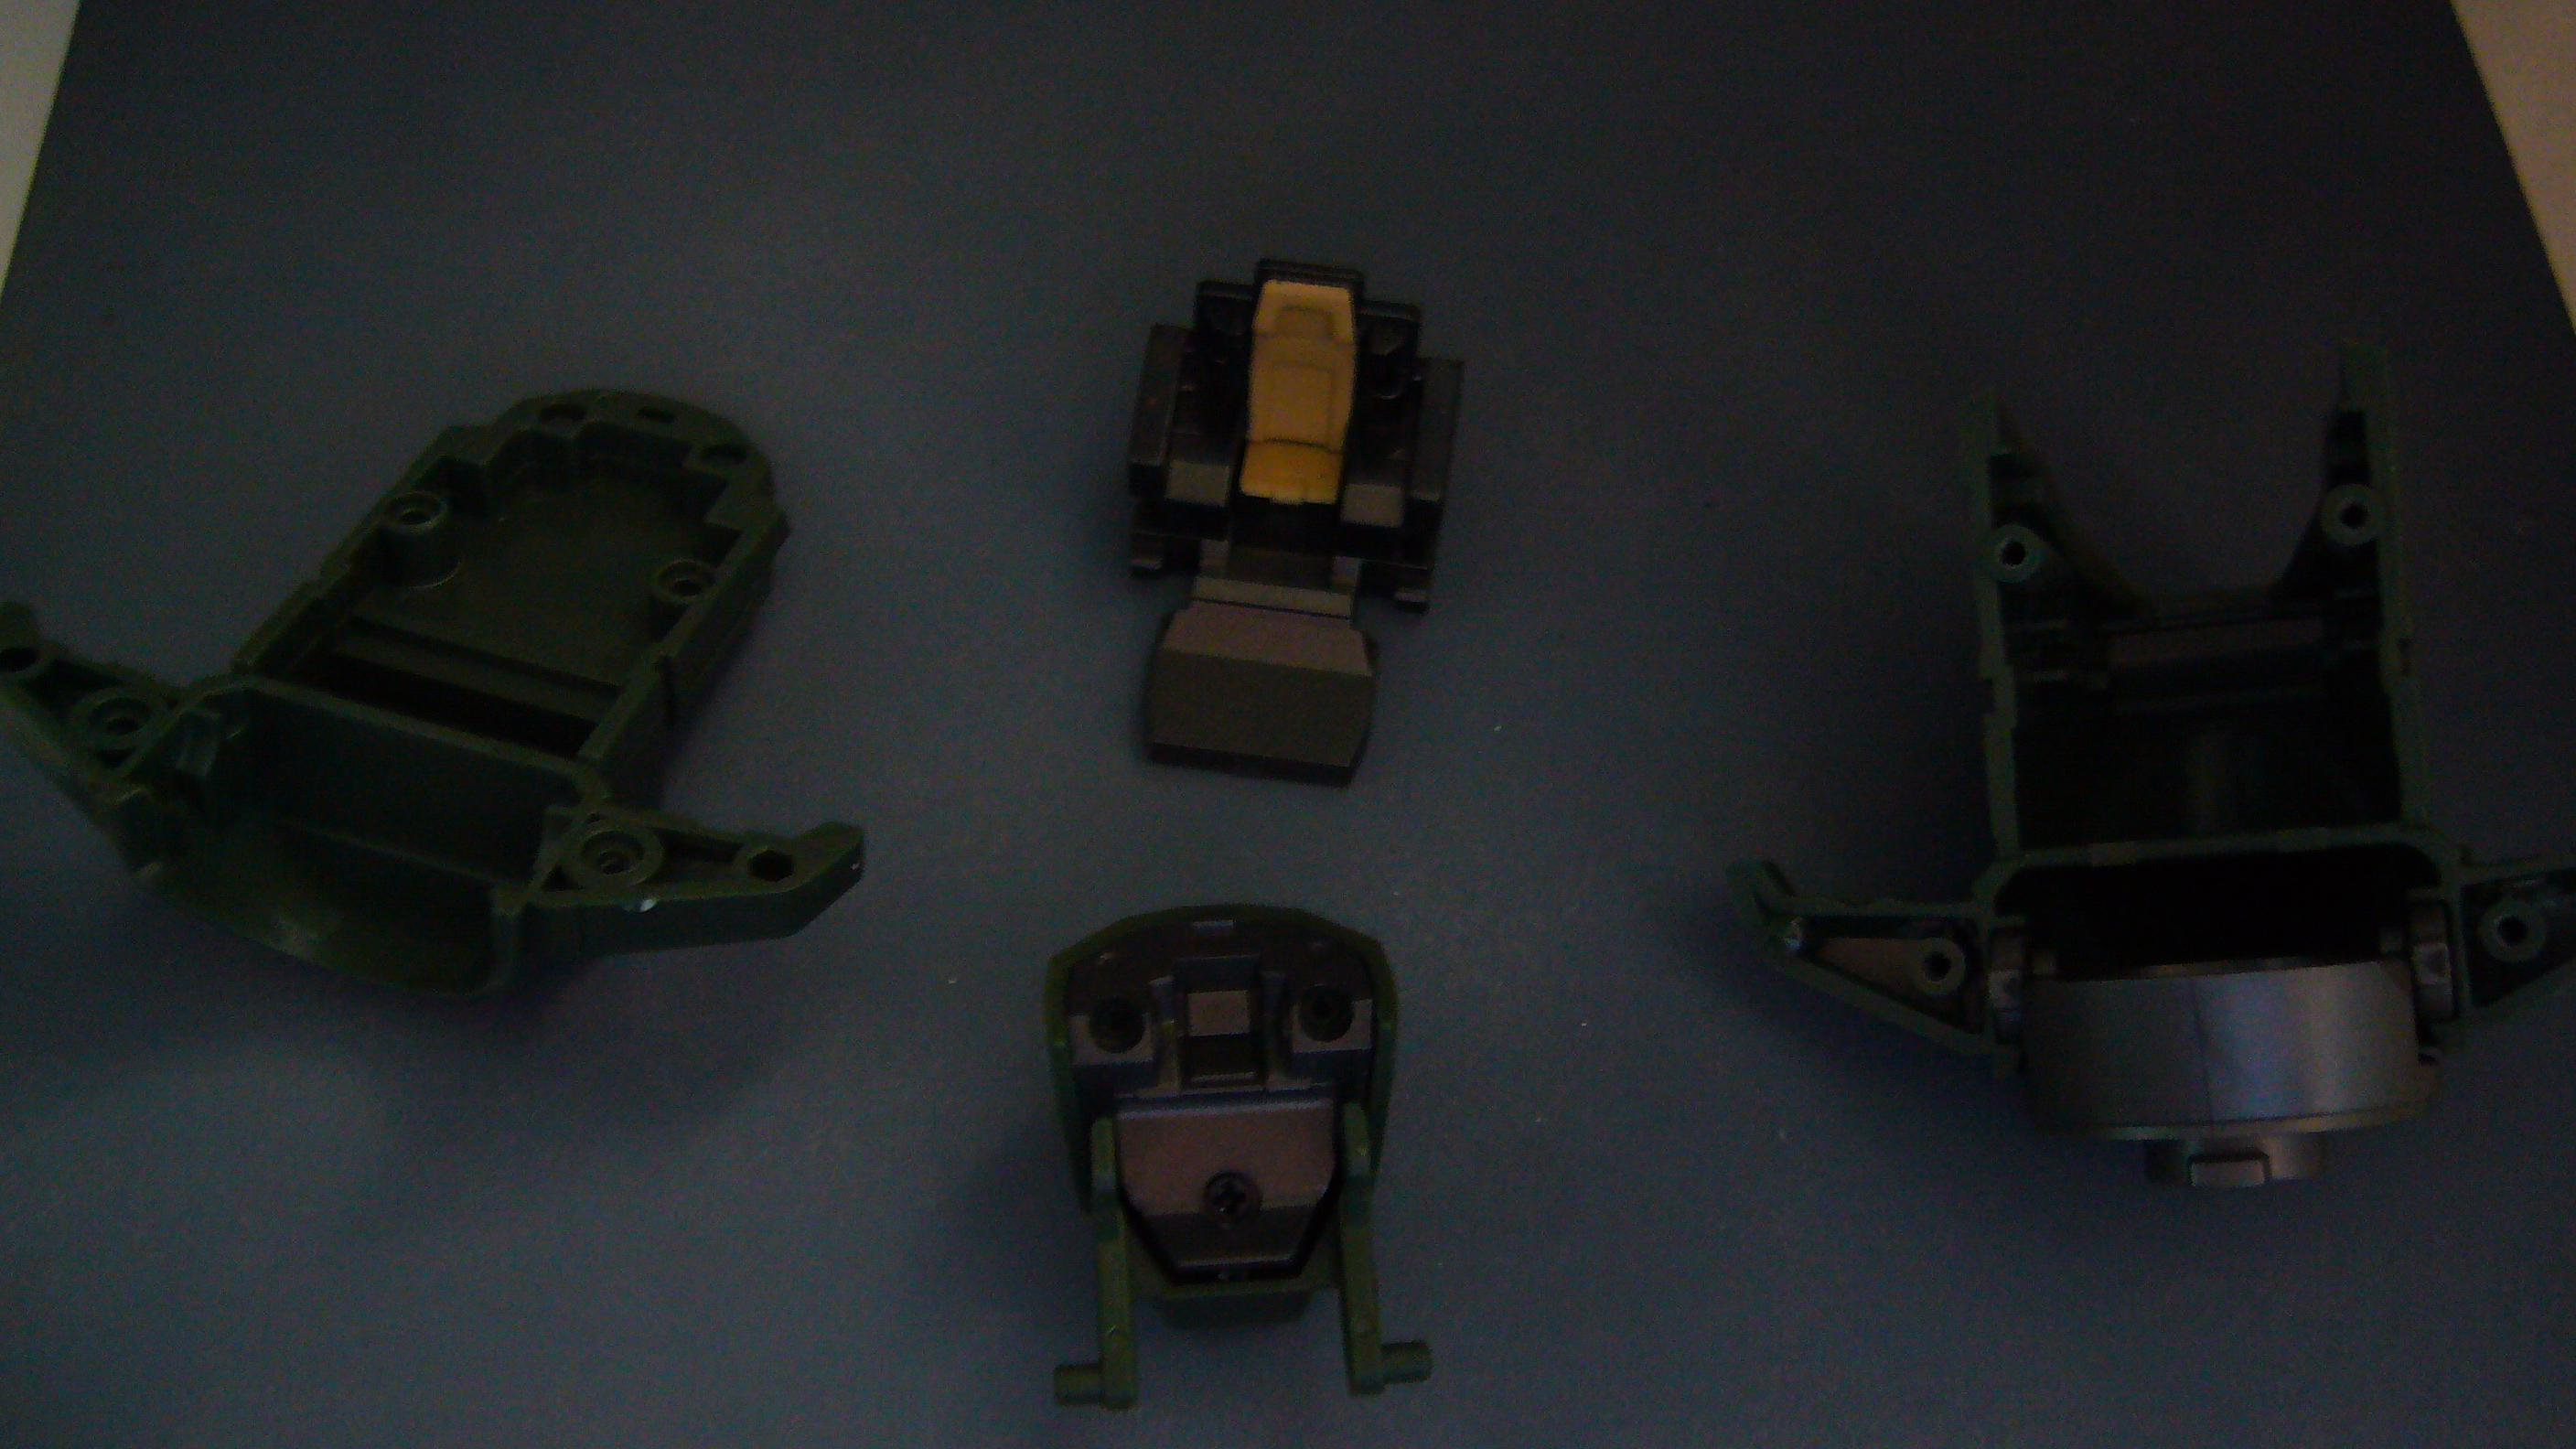
Hi Miriya, I realize this is quite a long time since you asked the above question but I finally received my tomahawk and will provide pictures to answer your question. The area you have highlighted can come off but only through the removal of several screws.


-
Just some quick pics. Still doing some painting. but these should give you an idea of what i was going for. Sorry if some are out of focus, my camera is acting weird with the macro.


Tundra,
I just found this post again after much searching and am really liking the results thus far. I can't remember what you said the material was though...
regardless me likey and me want a set lol.
-
Currently waiting for my first Yamato Macross 1/60 Destroid Tomahawk (OD version) from Hong Kong.
No clue when its gonna arrive but it has only been a week.
-
Okay Rob it appears to me that you may just have to purchase one of each (1/60 version 1, 1/60 version 2, and a 1/48 scale valk) and based on what feels right for you, go with that size. In my honest opinion I can't afford a slew of 1/48's, so if I were to choose a collection, I would go with a the 1/60 version 2. (detail or no) Not to mention if you collect the 1/60 Yamato Destroids, than why would you combine them with 1/48 Valks? Unless I am mistaken, I don't think they make 1/48 scale Tomahawks.
Again this is my humble opinion and nothing more. I suggest go with your gut

-
there were already pics of Phalanx pre-production from Yamato... I can't believe it's taking this long!
Hello <EXO> ya I did see the pre-production pics of the Phalanx, but what I was referring to was more to the likes of us macross fans. Has anyone of us
thought to build or create their own attachment / custom modification to an existing tomahawk or defender in the 1/60 scale? If not than I think I may do
just that as soon as I get mine in the mail.
-
Out of curiosity, Has anyone thought of converting / modifying a tomahawk or defender into a phalanx?
Maybe we could run the idea by someone familiar with constructing parts (perhaps MechTech) and have
them build a prototype or something of that nature. Just an Idea.

-
Thank you all for your helpful Information
 leading edge I have a slight disadvantage...I can't seem to find either kind of polystyrene (pink or blue) anywhere within the area of Southern California of which I live. So I guess i will have to resort to shopping at Michaels for the foam board stuff. With that said is there any advice in using it? shaping it etc?
-
Hmmm... Stryrene is relatively easy to work with, but with anything there's advanced techniques than can be difficult also. But mostly it's simple.
First off is using a styrene solvent cement. It looks like water and comes in a bottle with a brush. It'll melt the plastic and bond it with another piece. It's very effective and you don't need to use a lot. Careful though, use it in a room with good ventilation and don't breathe in the fumes and for goodness sakes never ever drink it... lol. You can't use the solvent for really thin sheets, it'll either wrinkle it up or dissolve it. Superglue will adhere it to other surfaces.
Cutting Styrene is pretty easy also. Depending on the thickness, most of the time you just need to score it and then you can break it or even use a scissor sometimes.
You can sand it pretty easily.
You can also put thicker parts in hot water (faucet water works sometimes) to soften it up to bend it into shape.
It's easy to clean.
Try to use thin sheets to detail stuff and only use the thicker sheets for structures. Cutting the thicker stuff is sometimes more difficult if you don't have the proper equipment.
Its pretty simple to paint.
It's waterproof and non-porous, so it's ideal for recasting.
That's pretty much the elementary stuff I can think of, I'm sure others can give you more tips.
Thanks for the tips >EXO< granted they may seem elementary, but good to know for a first timer with the stuff.
every little bit helps and your info gets me one step closer to building. -
Hello all, a handful of you may know me, some have seen my 1/100 scale hanger deck build from another site, however most don't even know of my existence. Regardless of that fact, I have decided to open up a post to ask for tips and ideas as to working with styrene and/or foam board products since I honestly have never worked with either. I am planning on making another hanger diorama (this time on the 1/60 scale) for a buddy of mine and was wondering if any of you could assist me with ideas as far as details in the fabrication process. I have seen many posts here for 1/48 single bay dioramas and have decided to use those as a reference.
Any help and suggestions will be greatly appreciated.
Thanks,
Blue
Note: below picture is one of many pictures of my finished Hanger deck composed of balsa wood,
plastic, metal, and computer parts and can be seen on The Lost Universe site.

-
I am also in the process of building my own hangar in 1/100 scale. I must say i like some of what you have done! very nice work ICE! My wife got me some of the toynami 1/100 scale valks and I was hooked. So i had to build something to put them all in. I am currently working on some 1/100 scale models to go with them let me know if you are interested. I am also making my own customized panels. But it's always nice to see that other people have the same ideas.
Tundrayeti I am interested in seeing what you have accomplished so far...I too have a small collection of the 1/100 scale and would like to see these "customized panels" send me a link if you have one or just point me in the right direction
Also if you haven't seen this already here is a link to the completed version of this build with Valks included at the end.
http://thelostuniverseofrt.forumotion.net/...or-now-t317.htm
-
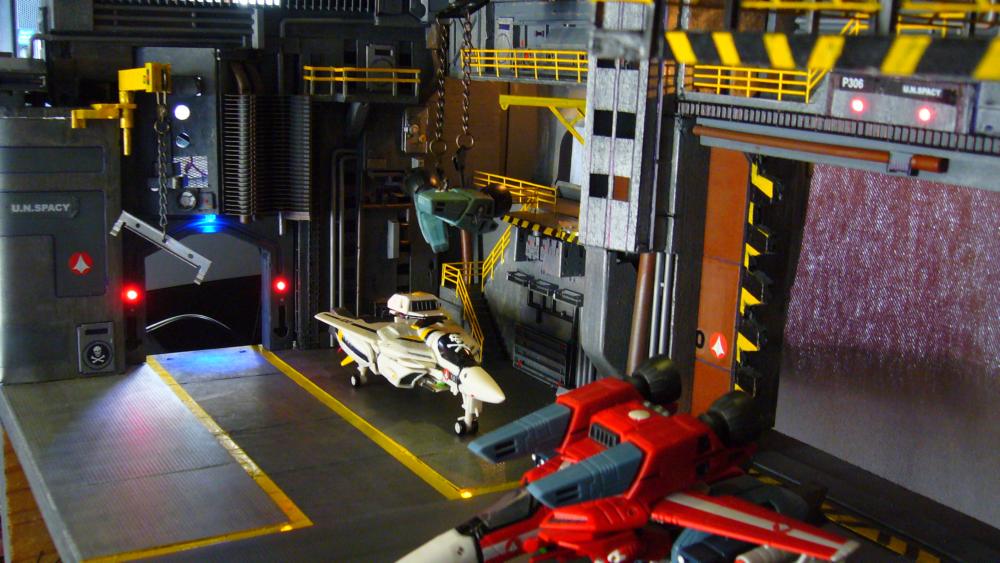
Hello all, I am glad that my project has made it's way here finally and will be more than happy to answer any questions you may have. I hope you all enjoy the diorama. Also if you check out the links above you can see the different lighting views as well as with some 1/100 scale valks in place.
Nice!What did you use for the railings?
The railings as well as most of the items used in this build where that of a kit from Model train accessories (Ho scale to be exact)
Now granted the scale is slightly off (1/82 scale) but it was the closest I could get to true 1/100 scale.
-
MaveRick,
I'm new here but I have to thank you for your inspiration!! I viewed this build awhile back and it made wonder if I could do something similar.
I started my build with your factory as a reference but in 1/100 scale instead, however it evolved into a hanger deck scene instead. The materials used where mostly balsa wood, plastic model scraps, and computer parts (from a horrible crash). Anyways your display of the lighting helped me out drastically since I never messed with LED's. Thanks again and I look forward to more builds from you in the future.
If anyone is interested this is the link to my build so far..
http://thelostuniverseofrt.forumotion.net/hangerdeck-hang-out-f46/
(hanger is almost complete but pending pictures with final lighting, crew, and support equipment)


1/60 Tomahawk Hanger Build
in The Workshop!
Posted · Edited by Iceblue106
Well honestly I have only gone through 3 blades so far and that is mostly
due to the wear and tear from cutting the styrene / plastic pieces.
Also as far as the railing goes, you should be able to purchase it at your local hobby store.
The set I purchased is actually used frequently for model train dioramas and generally costs
between 4 to 6 US dollars for a pack of 5 sprues that contains railing, fencing, and some stairwell sets.
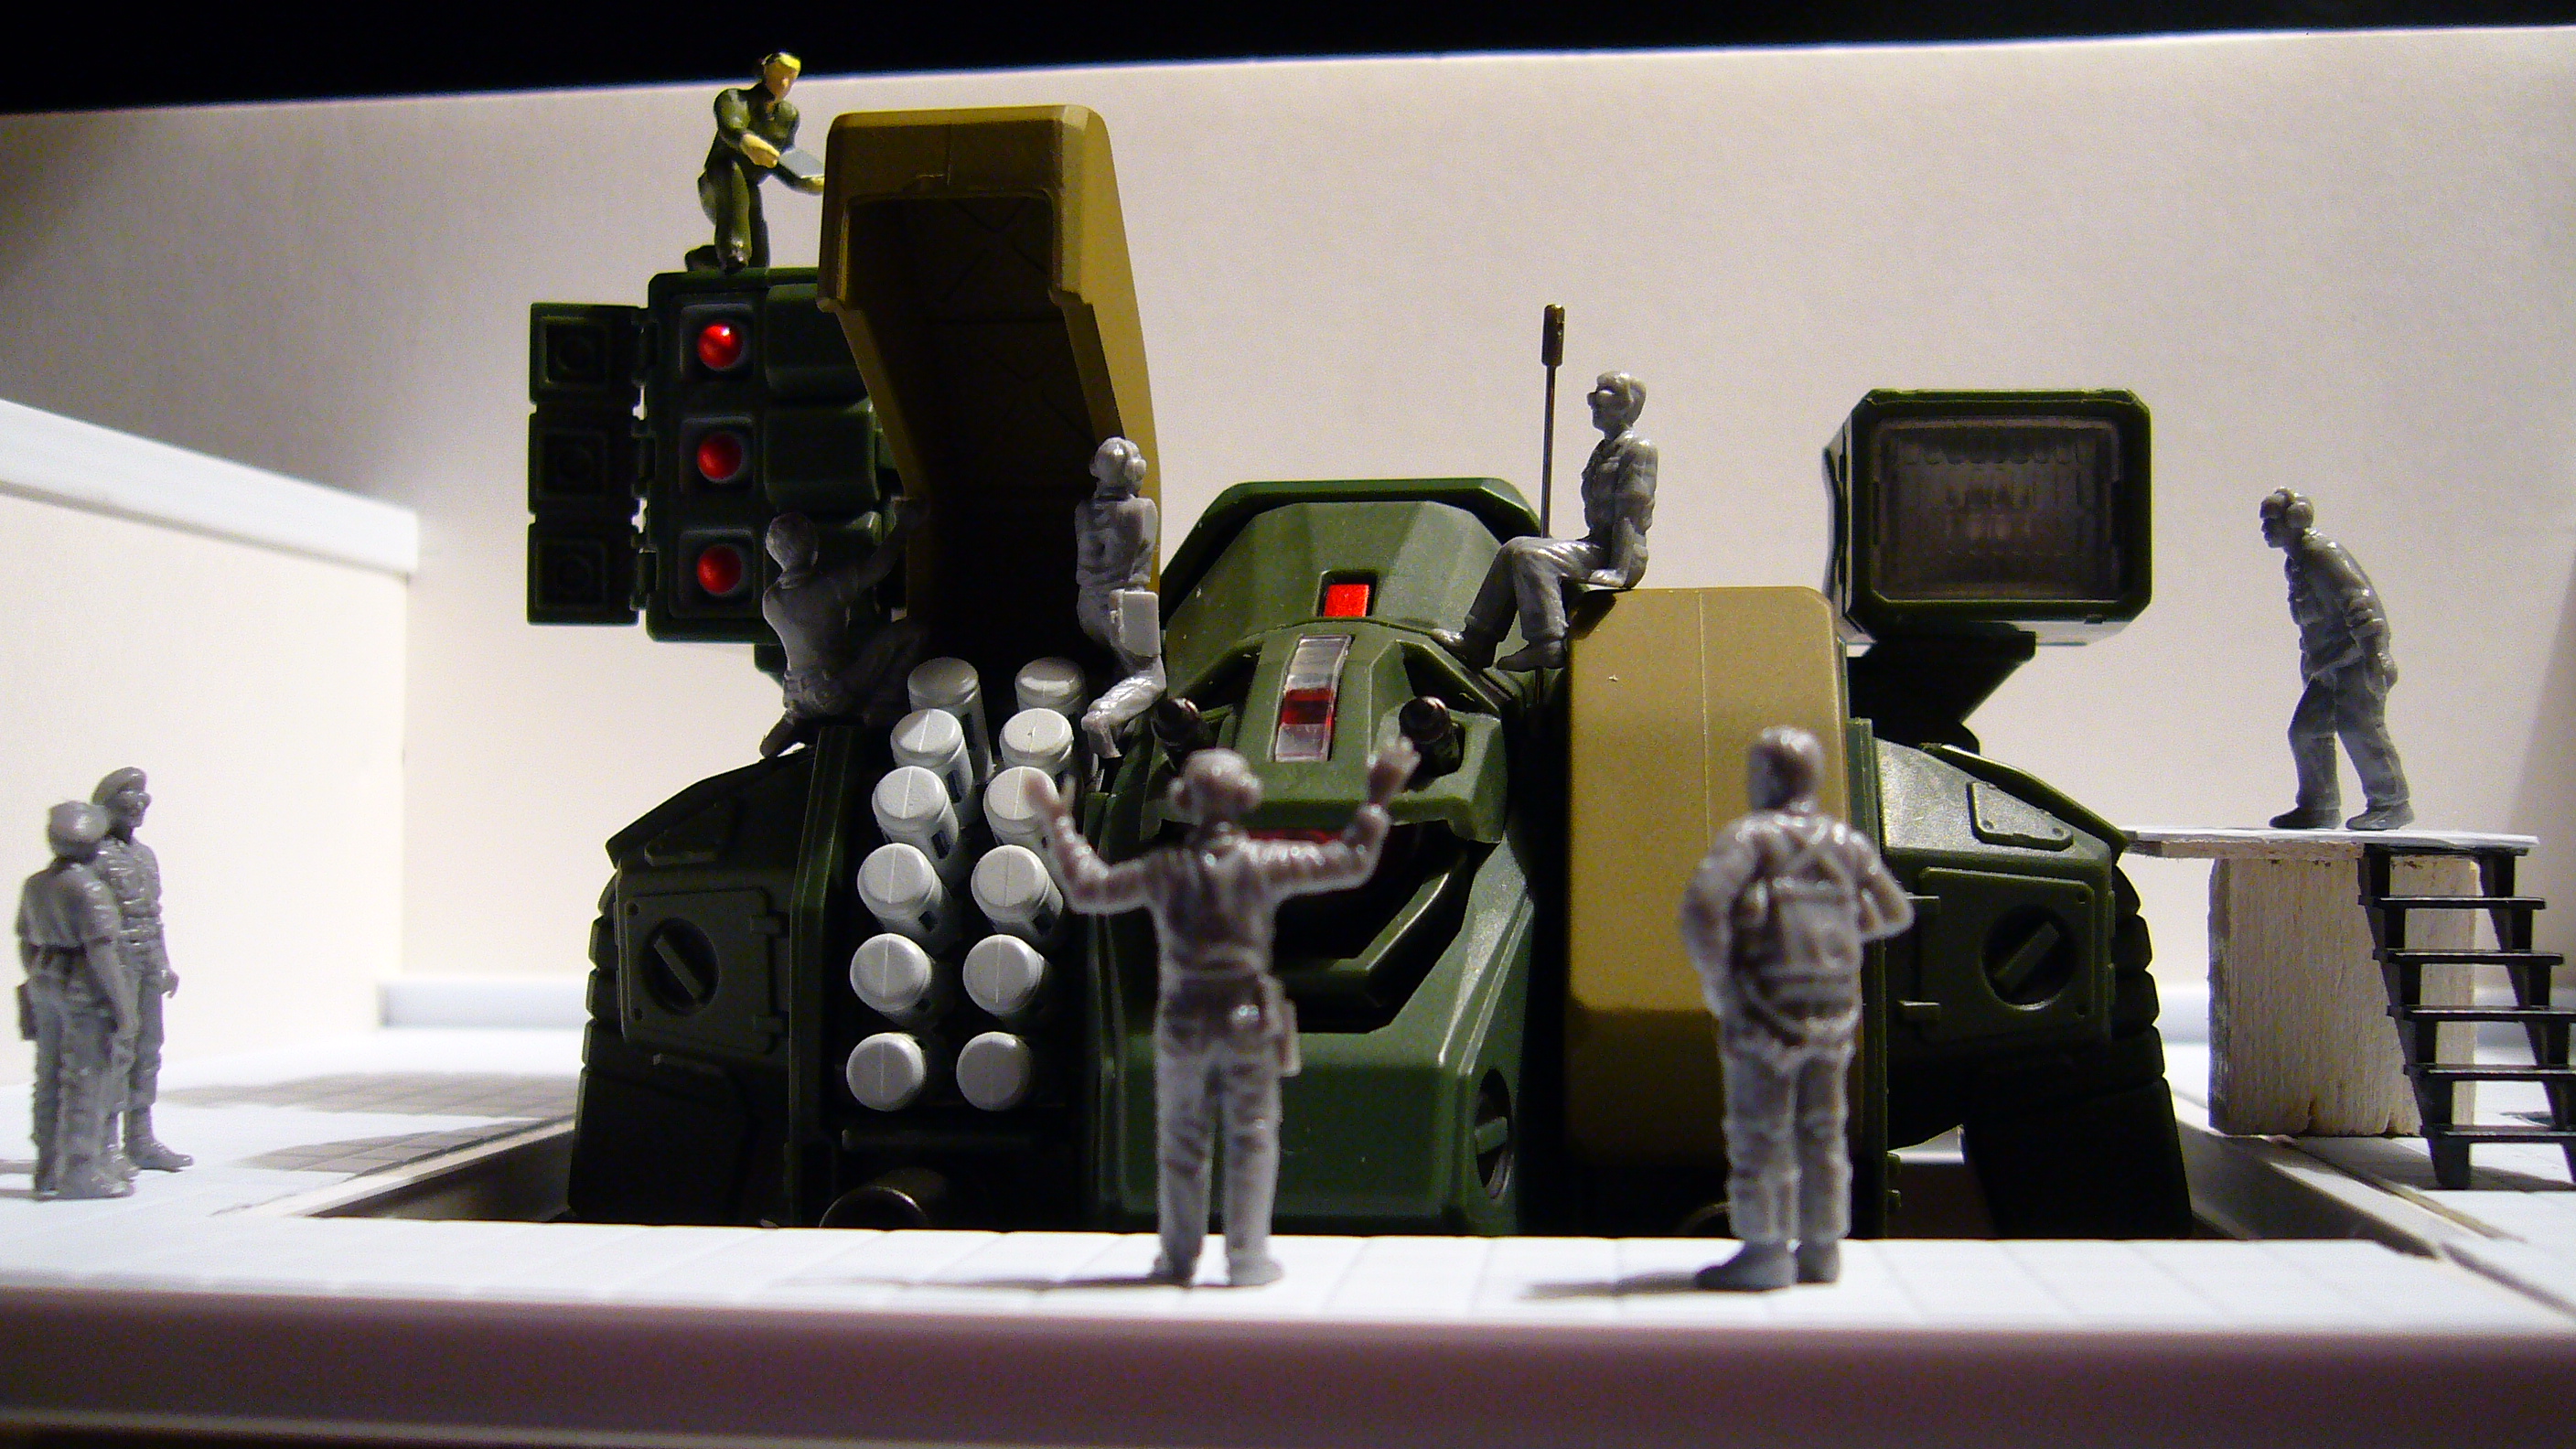
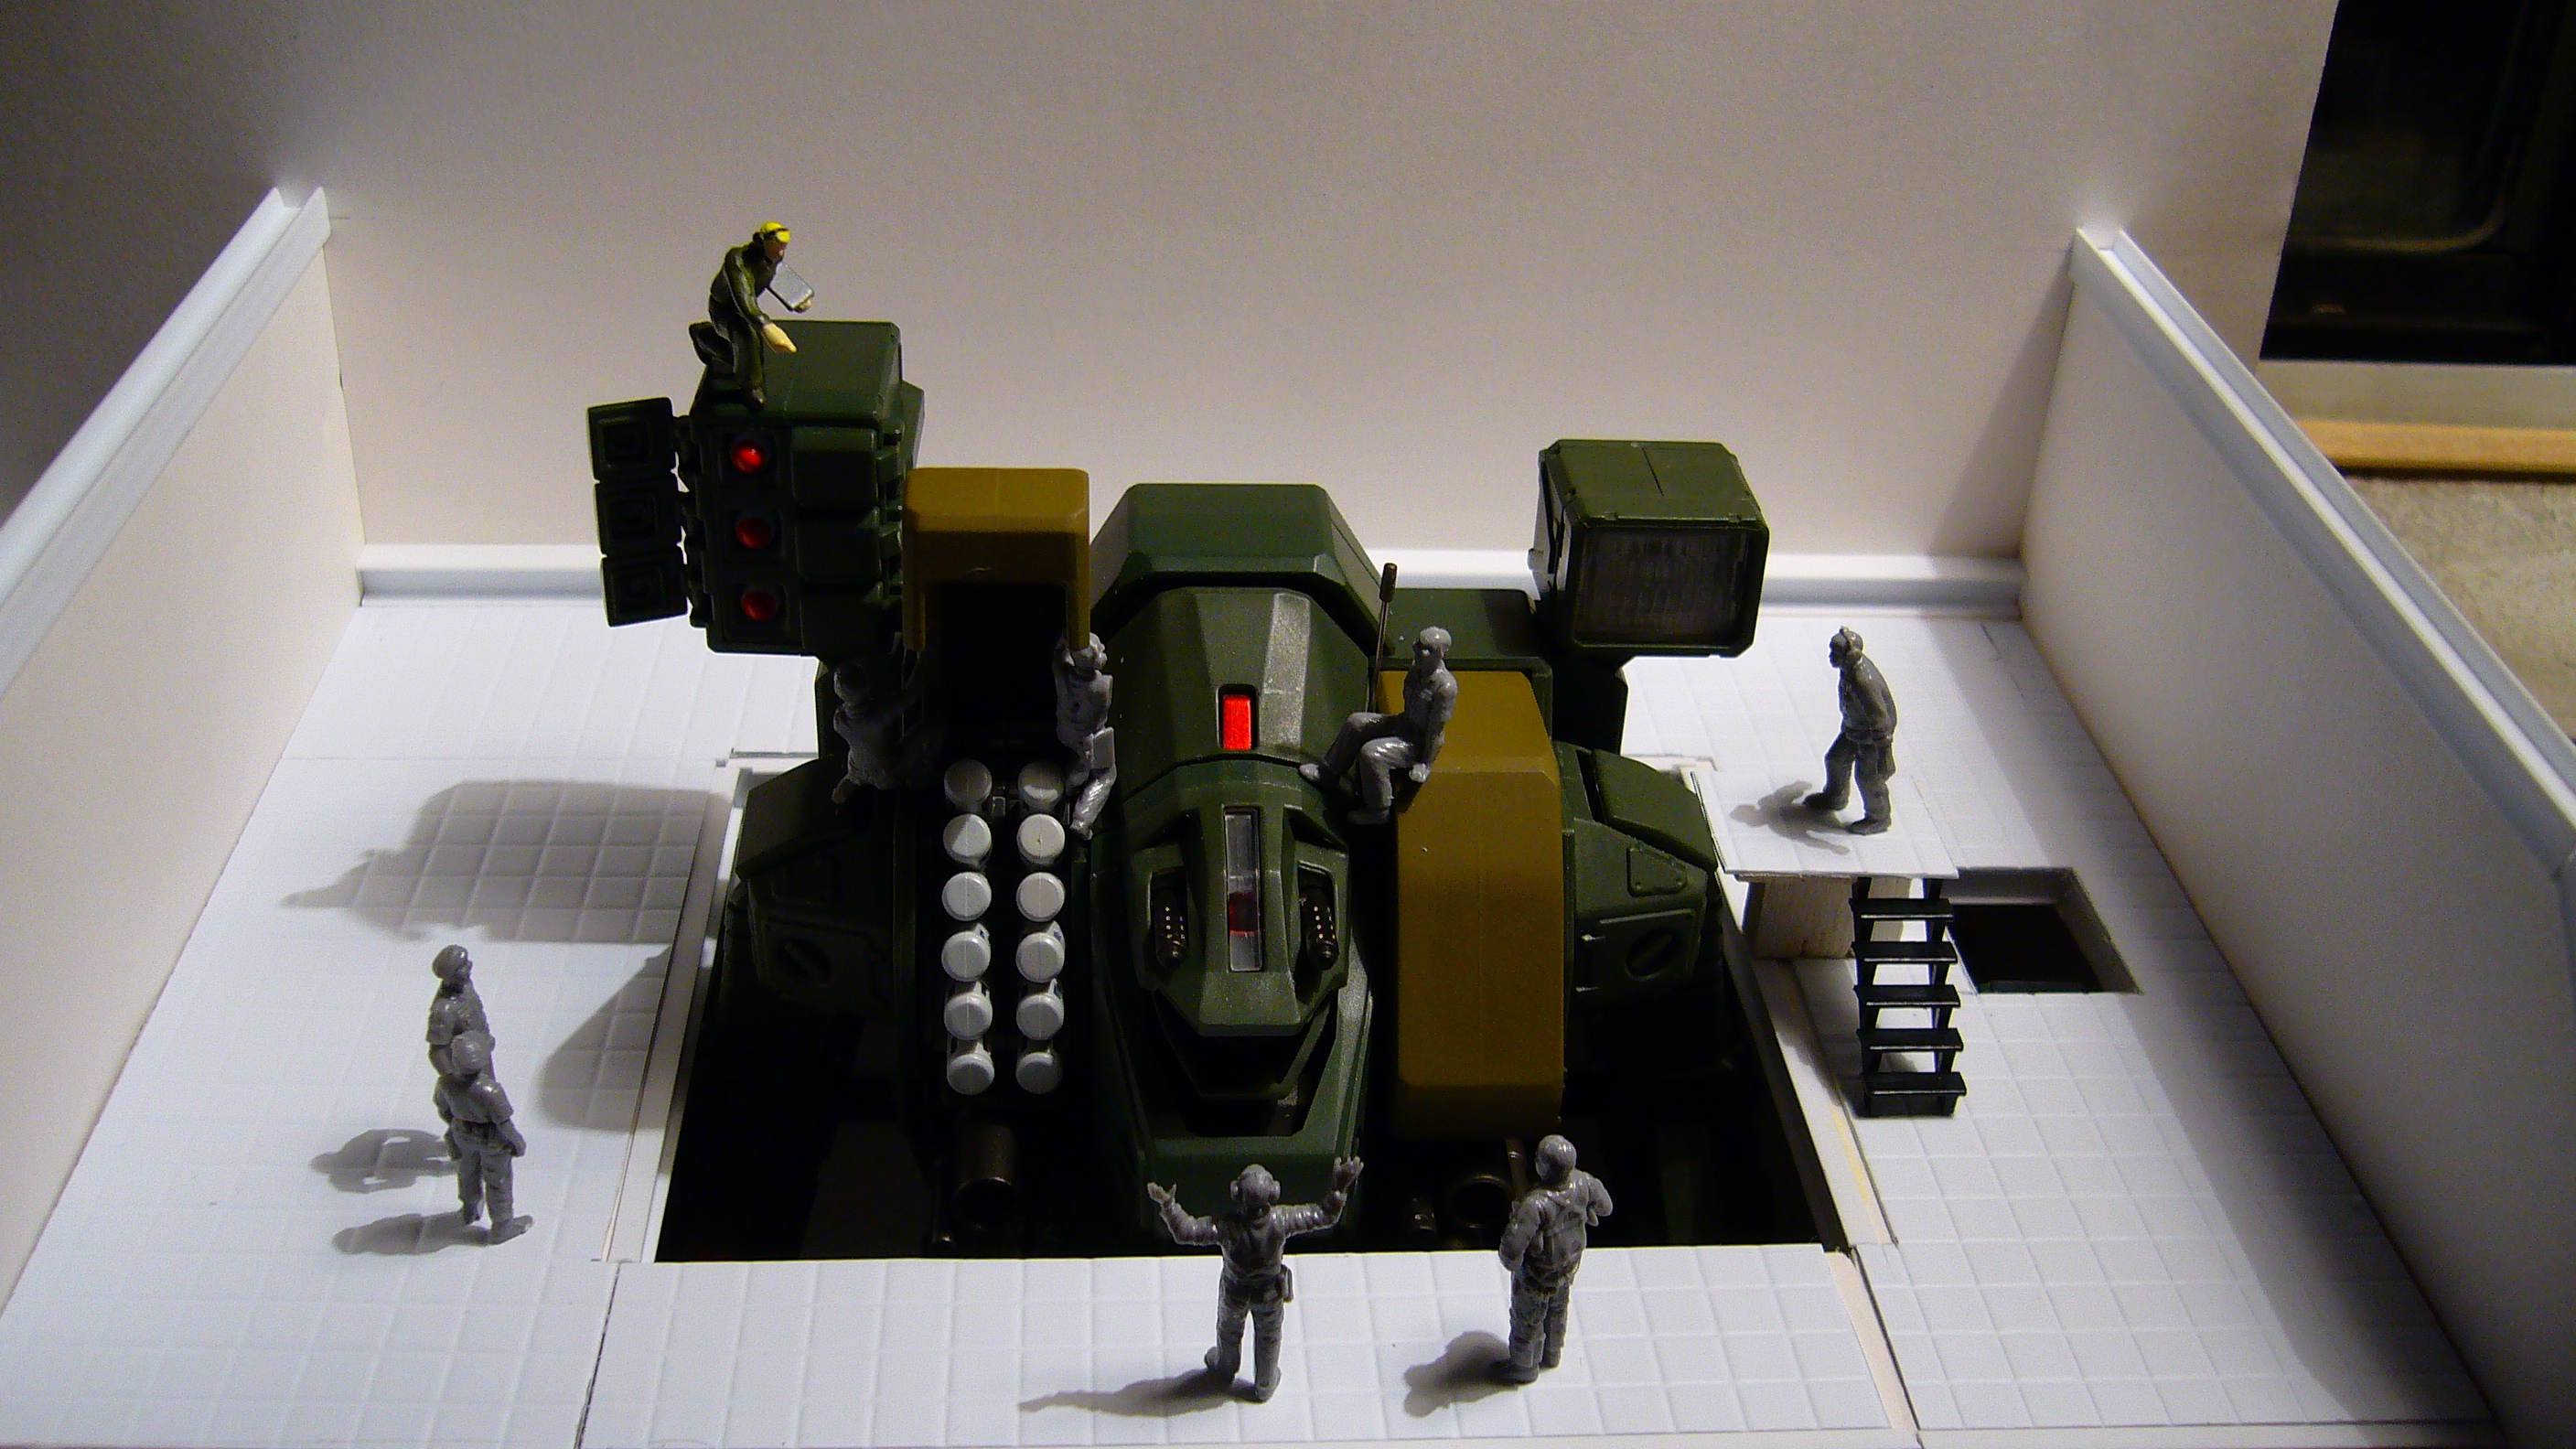
And again the figures I use in the mock hanger are that of the 1/72 scale (which sadly is the closest I have
been able to find by Hasagawa )
More pictures will be coming soon..thank you all for visiting!!
Blue
Oh and by the way Welcome to MW there LVS I hope you enjoy this site as much as I have so far
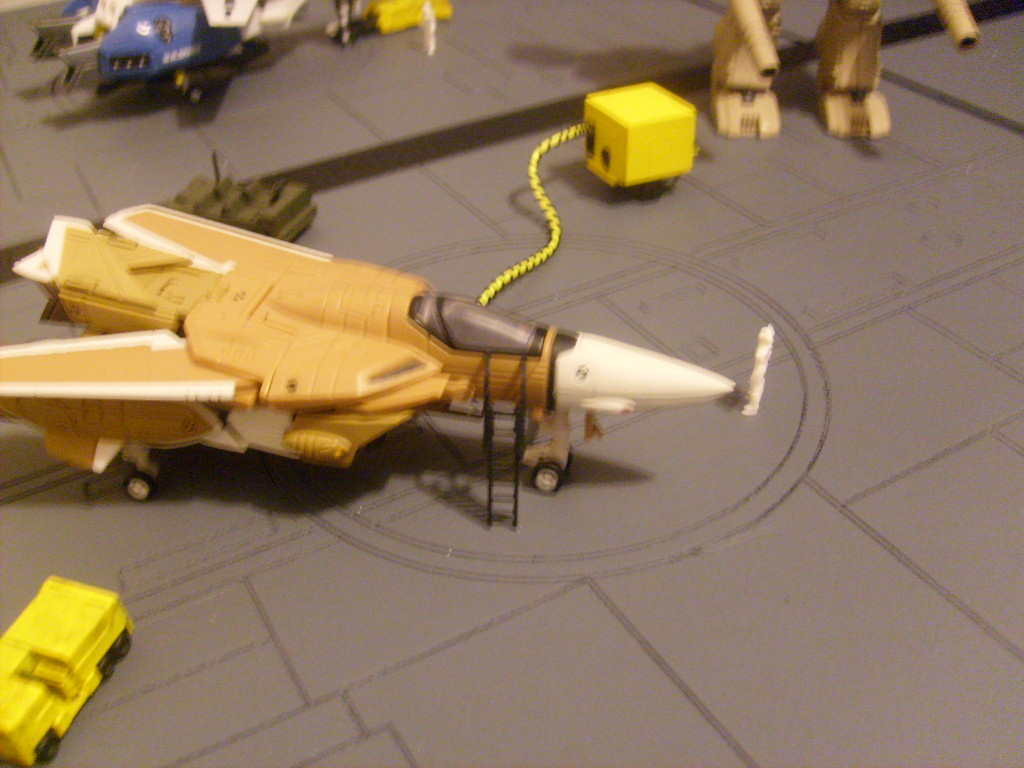
Also here's a sneak peak of a near completed version of what is to come soon!!