

Iceblue106
-
Posts
145 -
Joined
-
Last visited
Content Type
Profiles
Forums
Events
Gallery
Posts posted by Iceblue106
-
-
(sigh) oh yes i know this only too well. but that is why the gods created the eraser. and the catchphrase "back to the old drawing board!" (hey if you doubt me look at a platypus) and then man created the computer and made the eraser, the gods, and the platypus obsolete.
lol well sad to say, I am still at the eraser part in life....haven't had the urge to go out and blow (a minimum of) 400 bucks on CAD software, nor do I
have that kind of cash to spend at the moment but perhaps in the near future. As for now its the old drawing board and equipment from ITT Tech.

and MechTech thanks for the encouragement...its nice to know that we're not the only ones that have been there or done that before

-
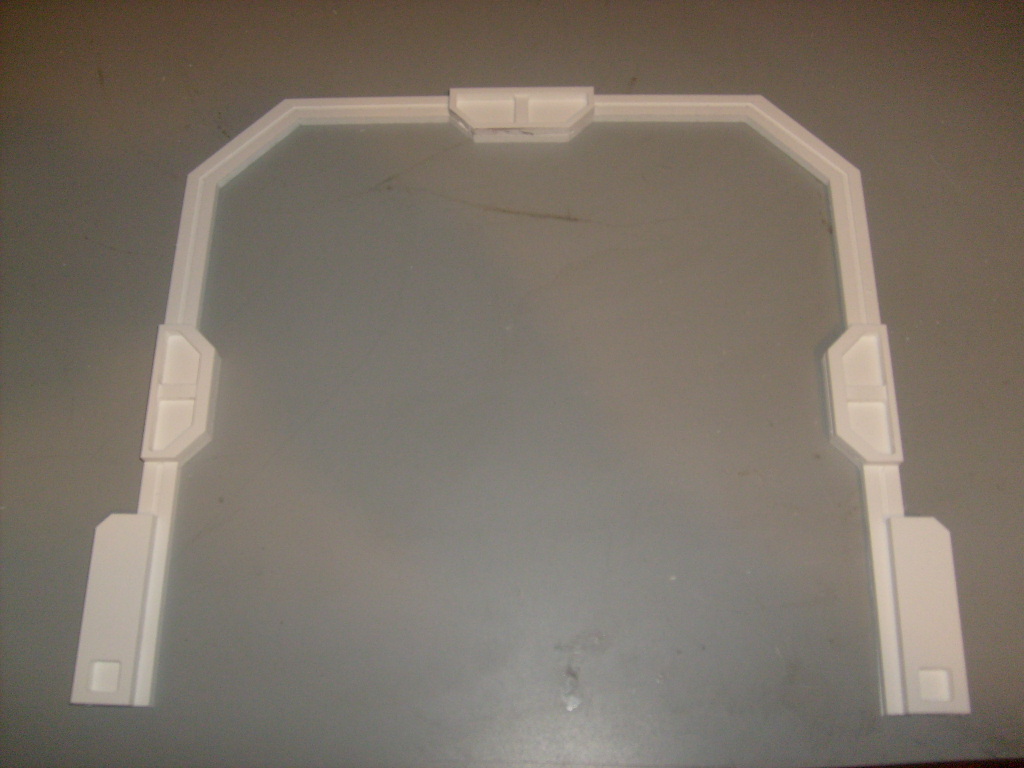
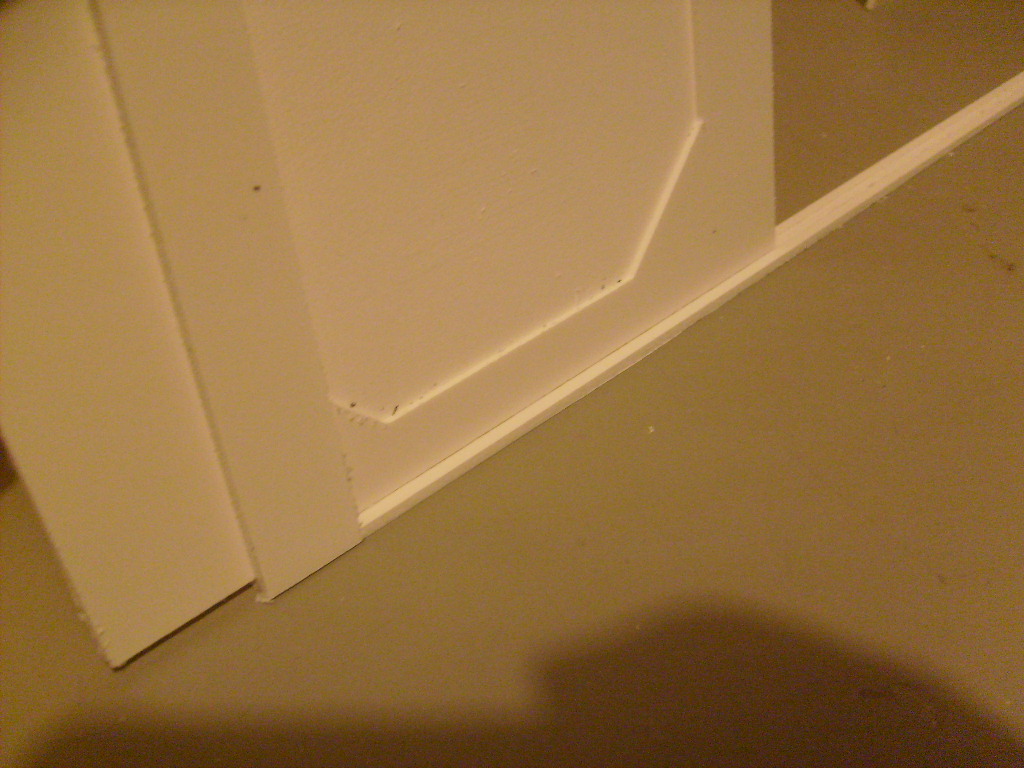
Okay everyone! jere are some quick photos of the greebles i did this weekend as well as the 3d hatchwat i did for Miriya's custom layout. This design allows for the doors to be displayed in either the open or closed position. the greebles are a little rough, but i'm still cleaning them up.

Damn Yeti these are looking awesome man!! Keep up the great work and keep us all posted.
Oh ya and also I will be picking up the panels today from the post office (sadly I wasn't home
for the delivery so I got a "sorry we missed you" card and will have to wait till later to get them)
lol that sucks but I will be sure to send ya some kudos and anything else I can think of when I get
the panels in my hands.
Blue

-
Looking good Blue! I love the repair bays! You have really planned this out.
Thanks Yeti!
Its taken some time, even had to scrap the drawings and re-draw up new prints....
I just wish all the ideas would come to me at the same time so I wouldn't have to make changes,
but how good of a builder would I be If I couldn't think on my feet and change at direction at the
lost possible moment? I am sure you can associate with this process.

-
Thanks Blue!
I got yours all packed up and ready to go. Just send me the word
Word has been sent lol.
-
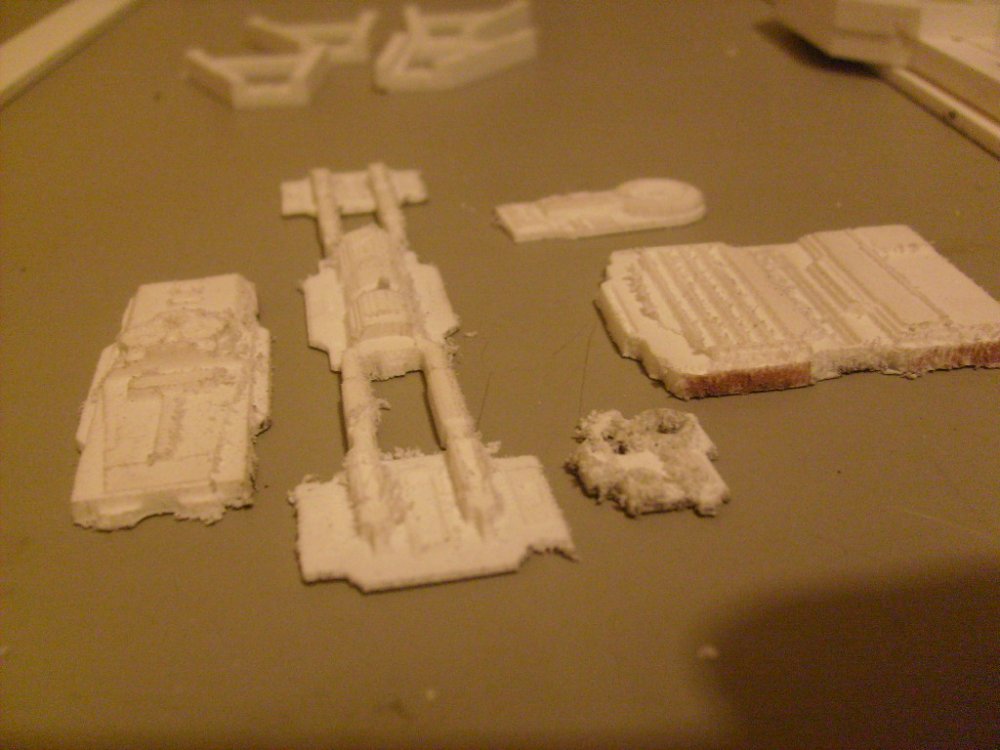
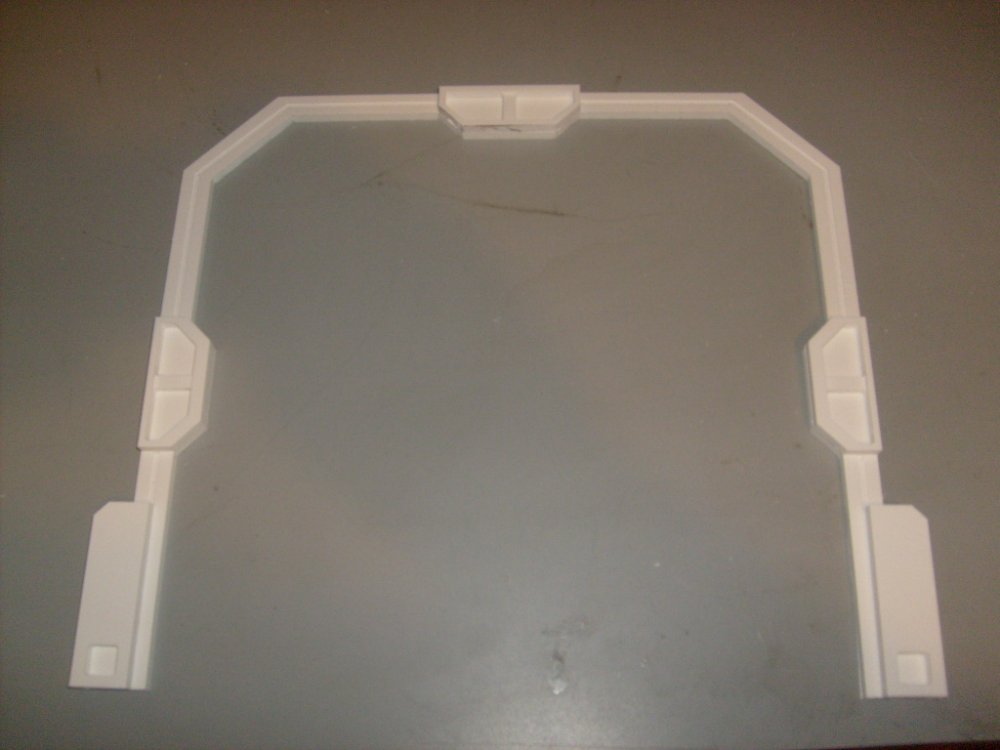
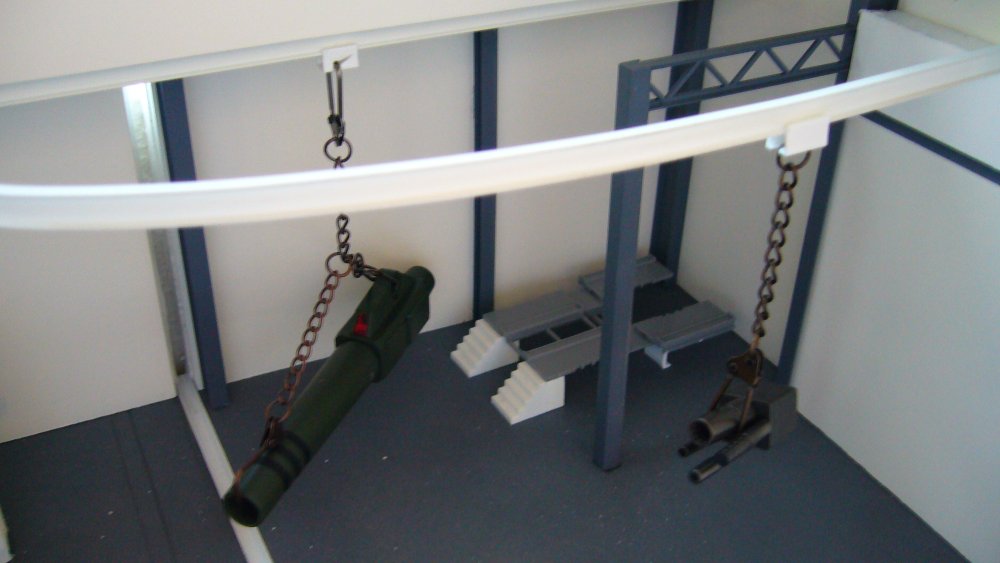
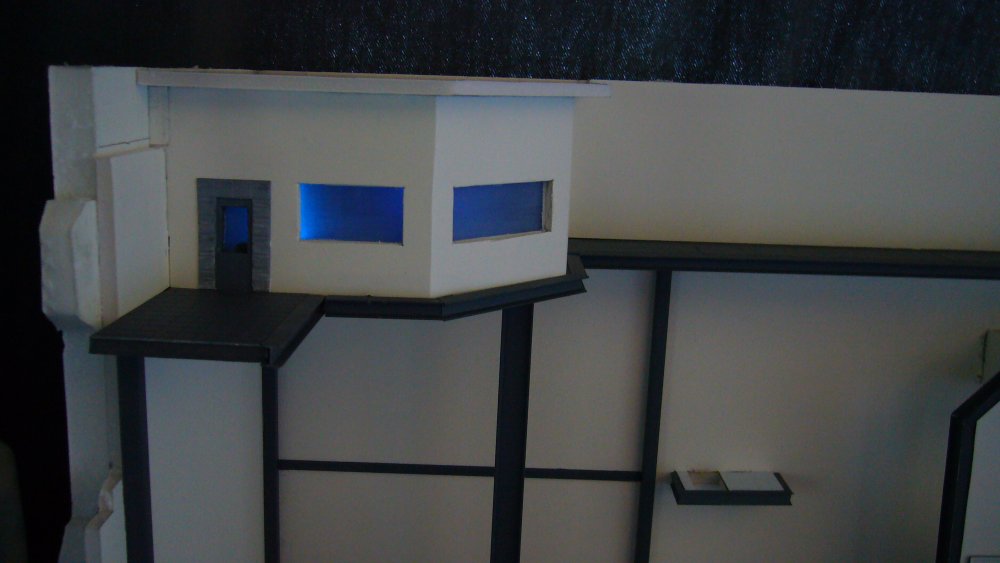
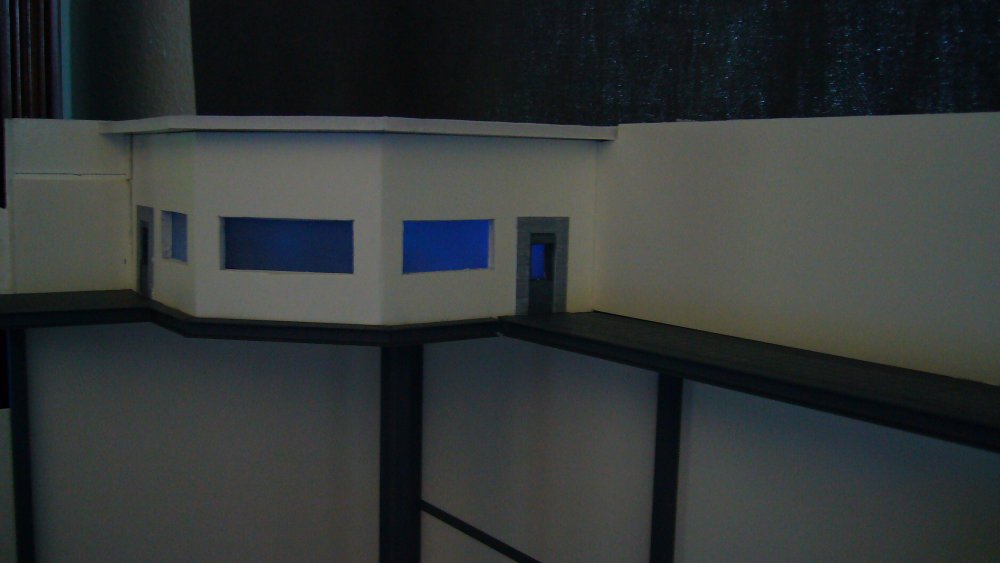
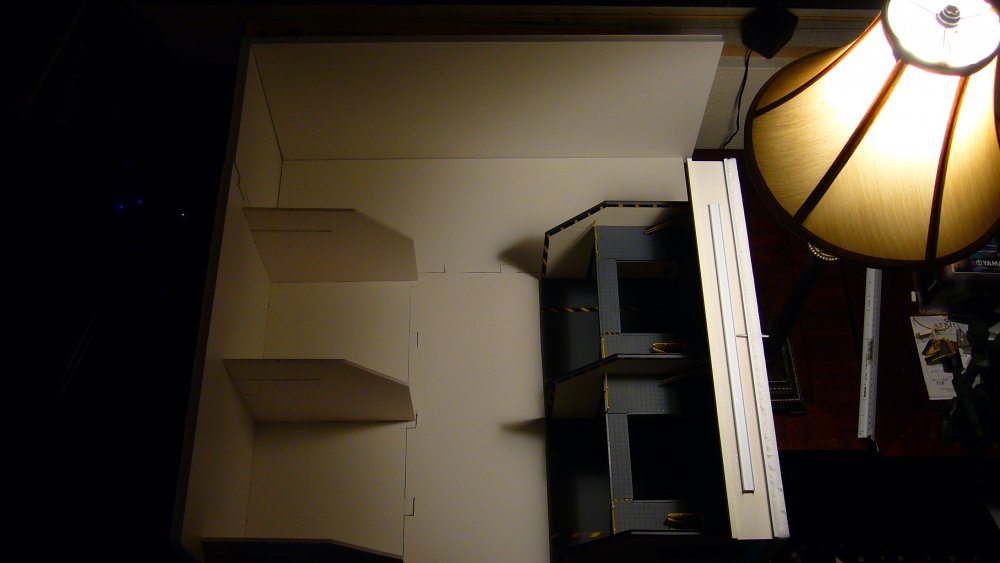
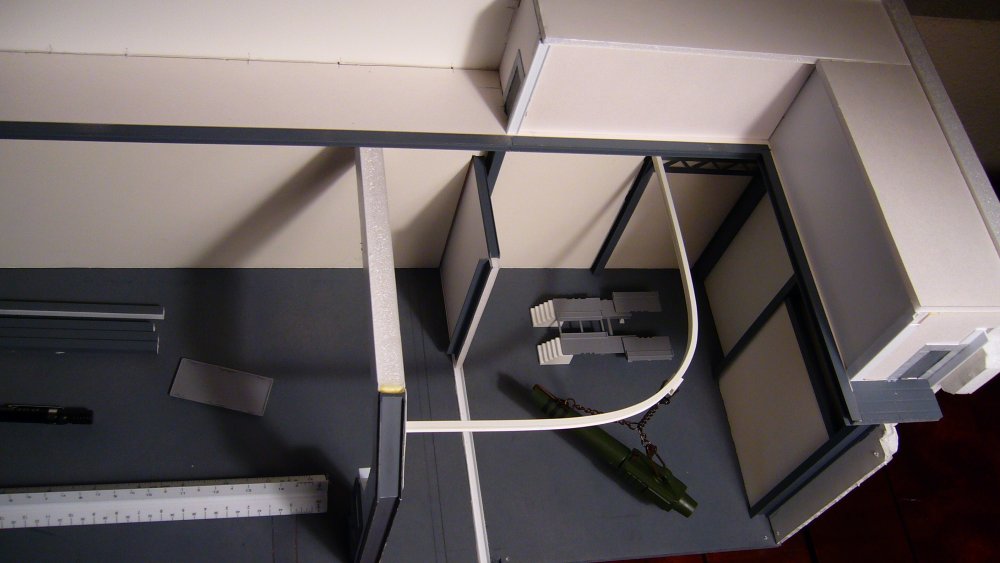
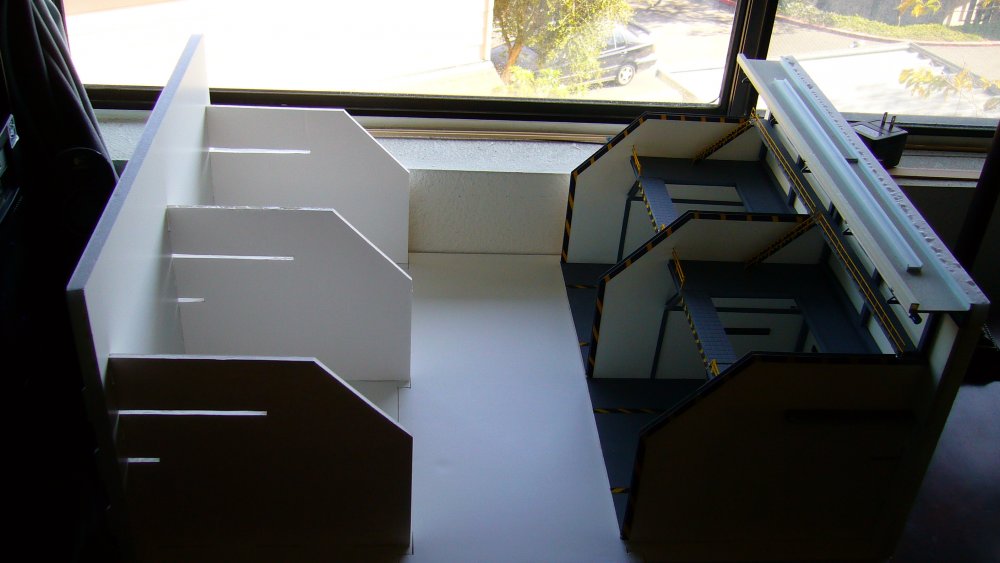
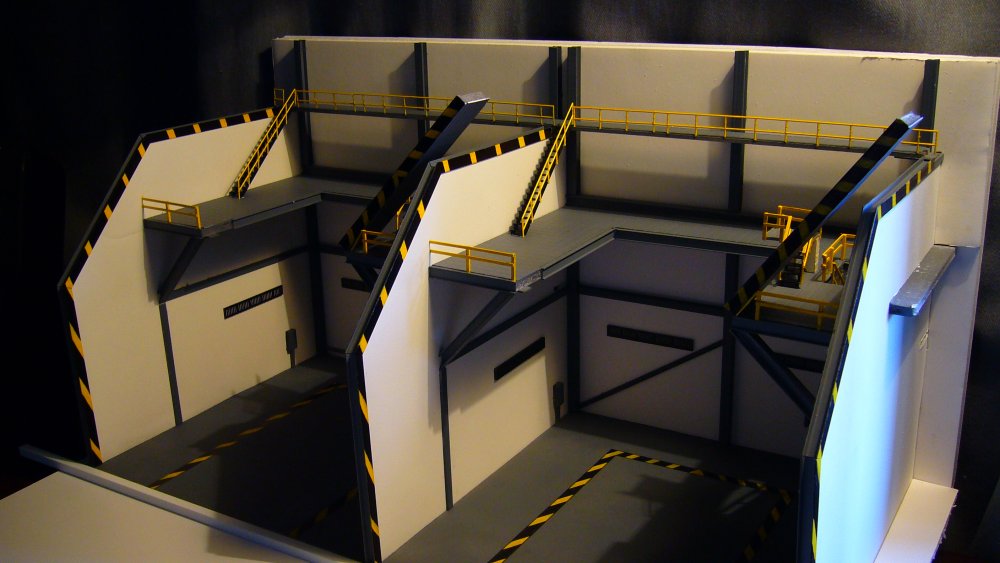
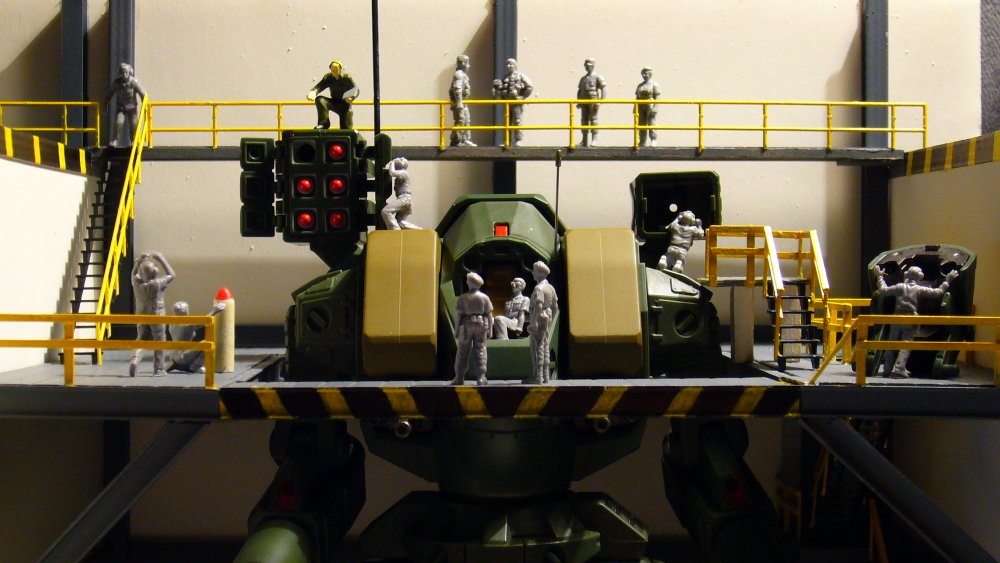
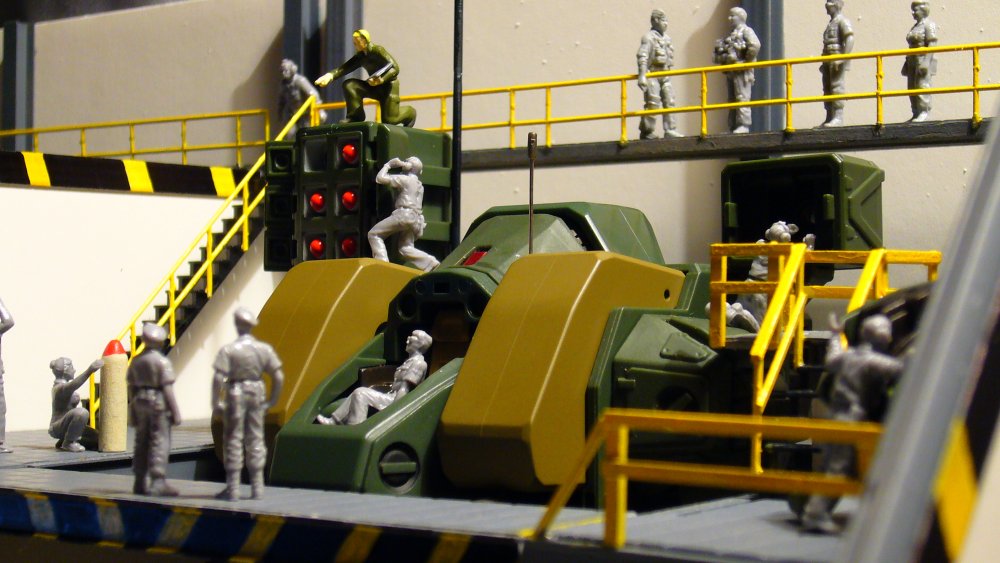
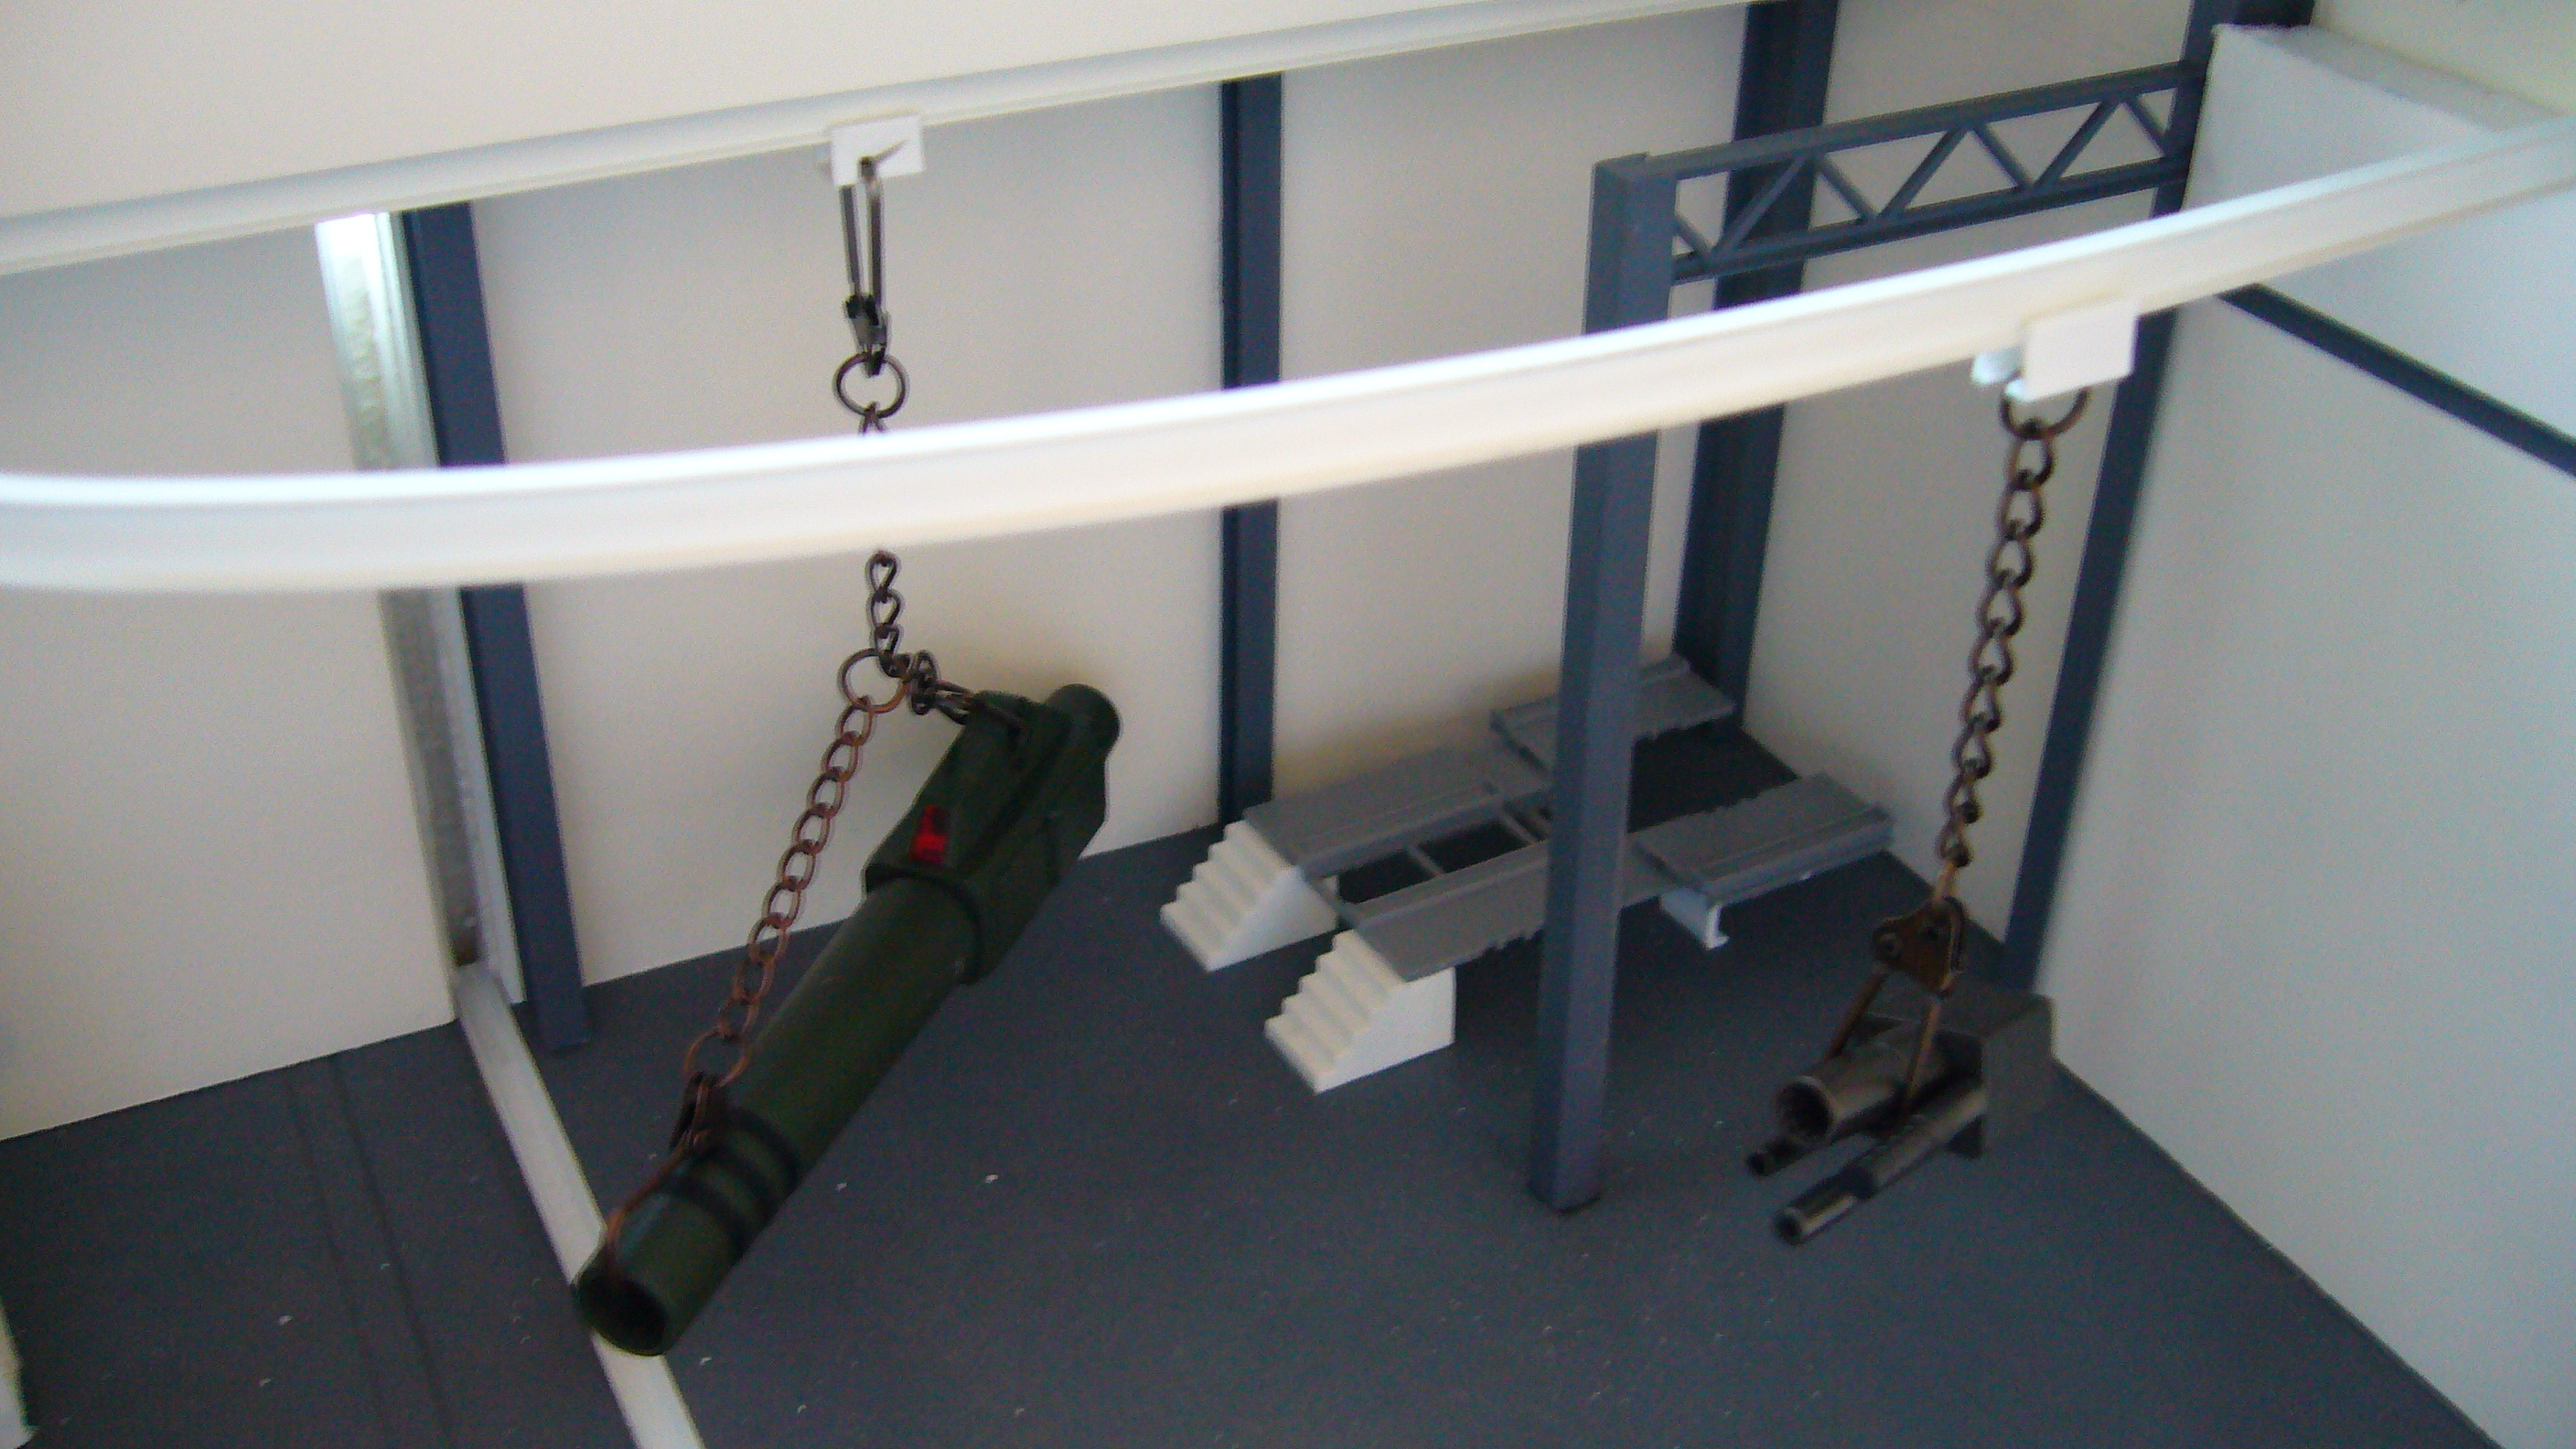
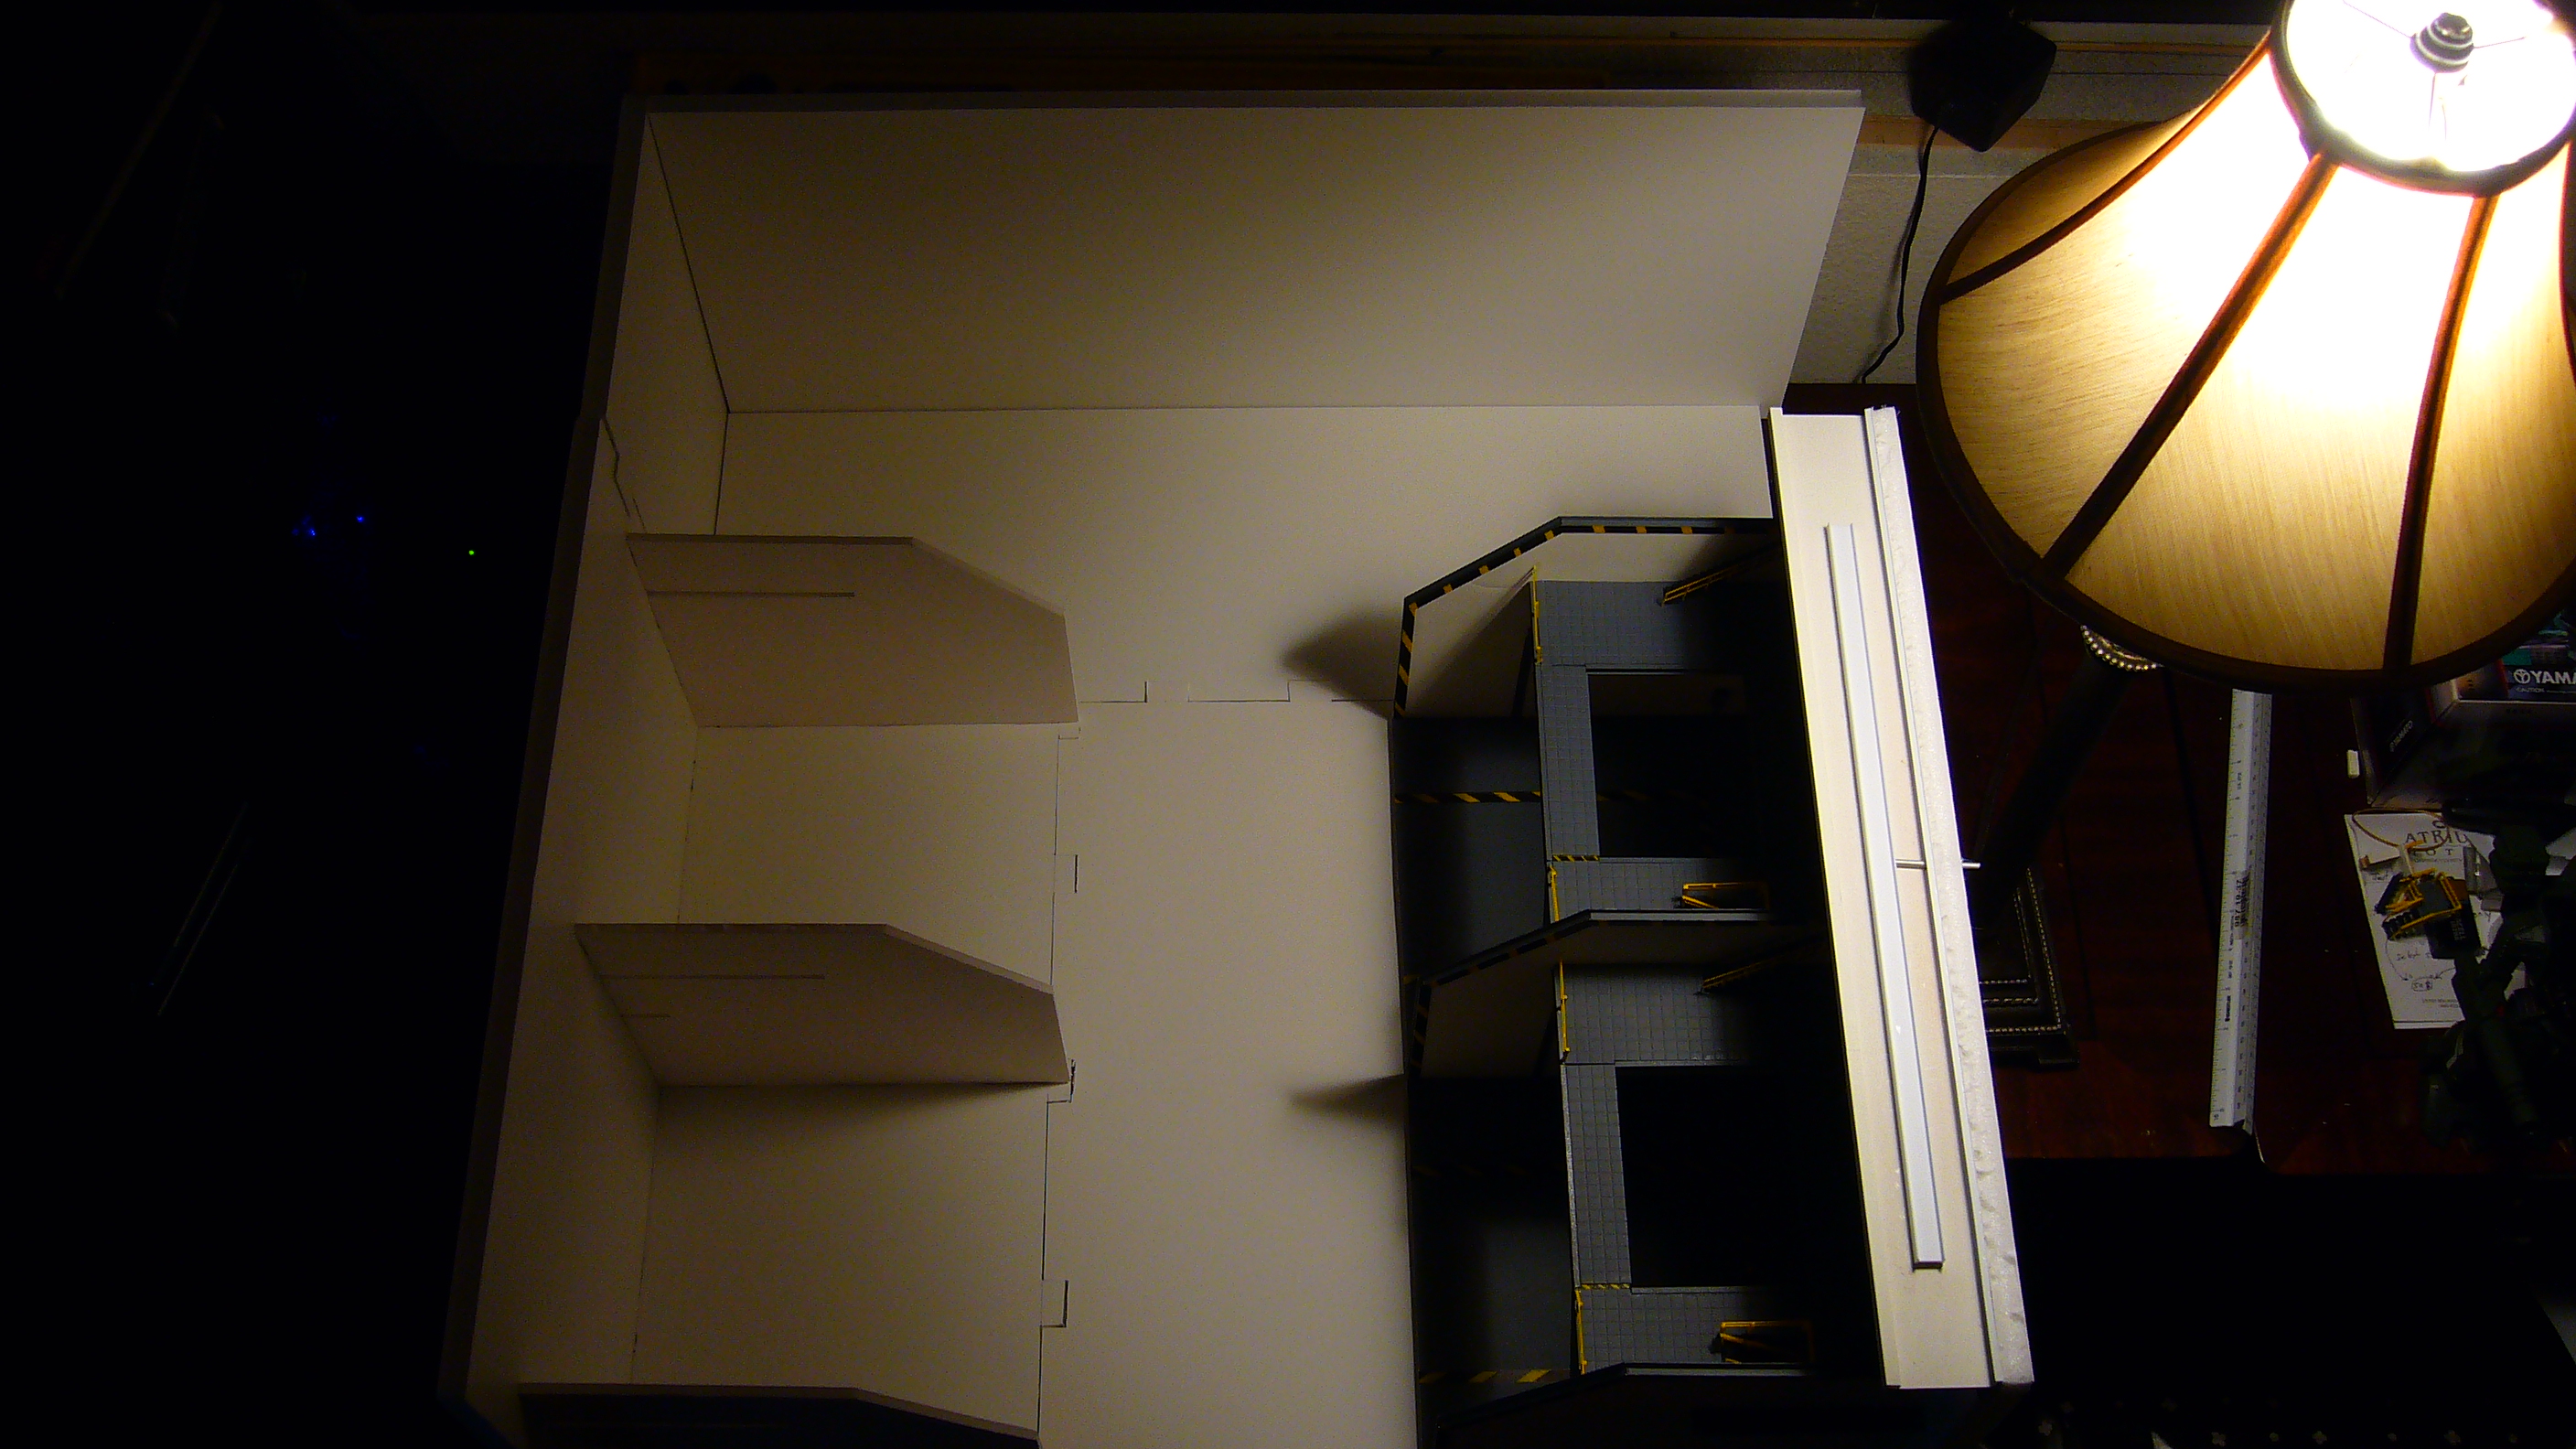
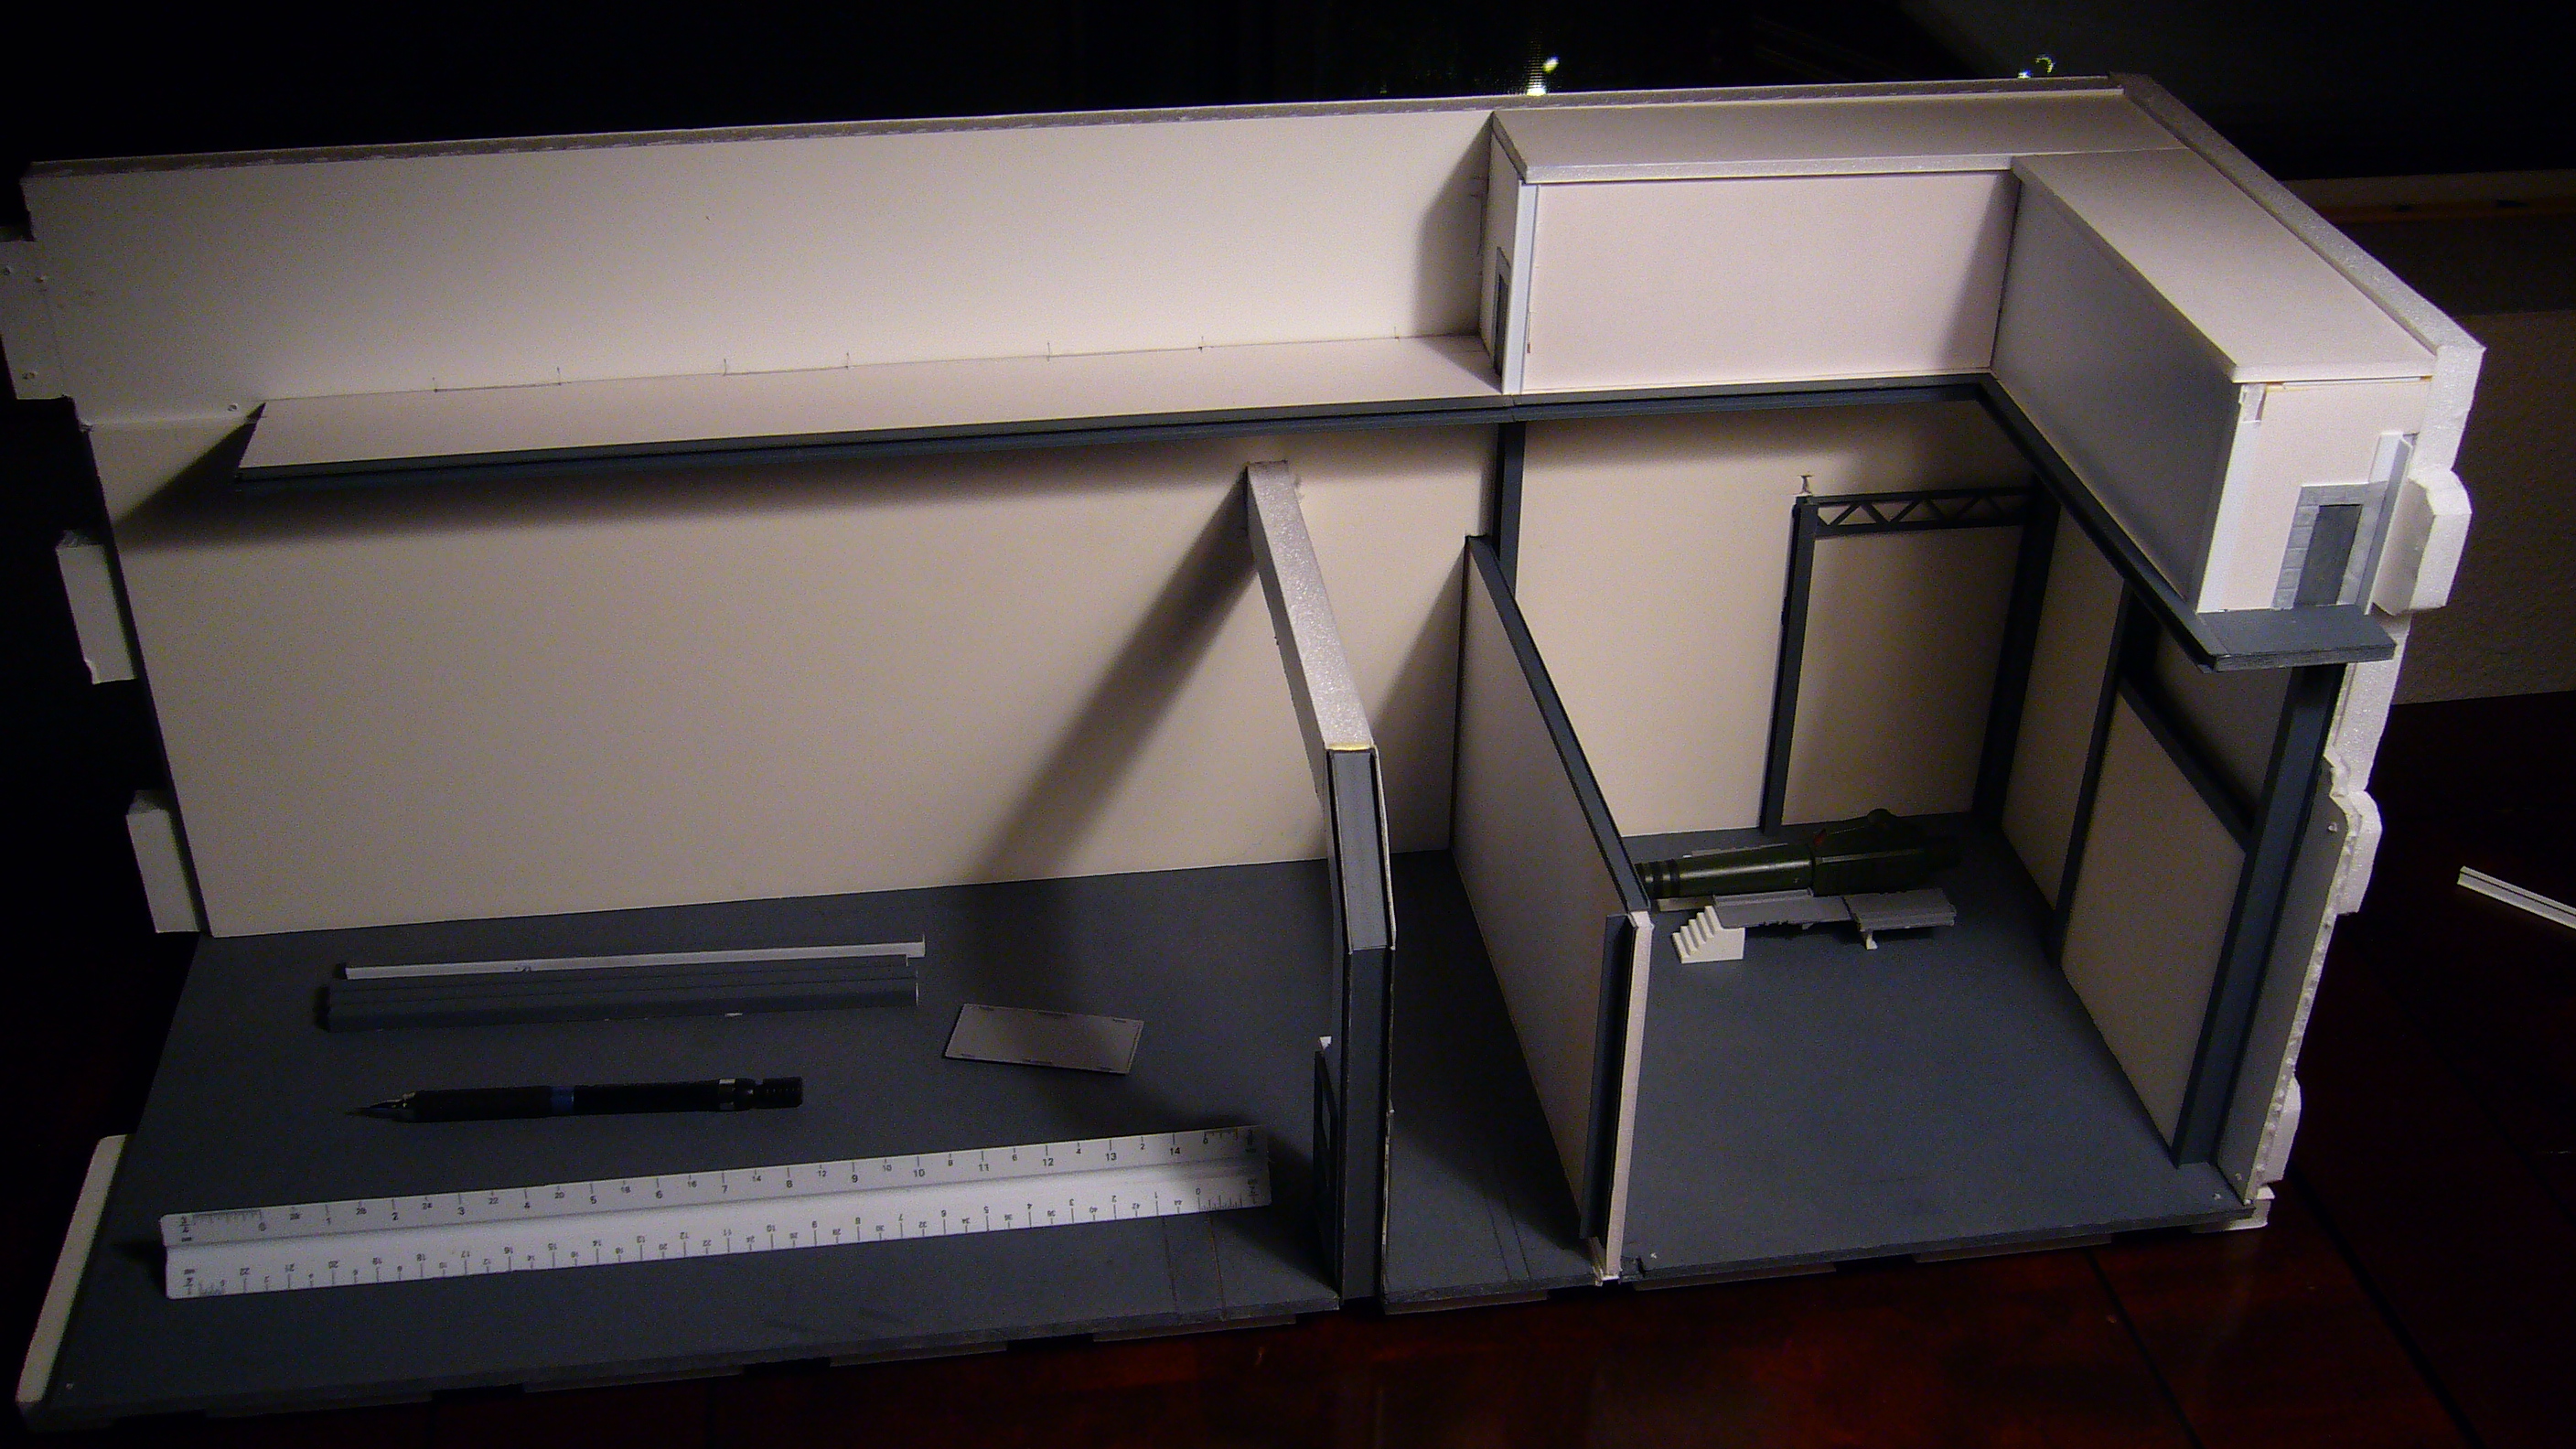
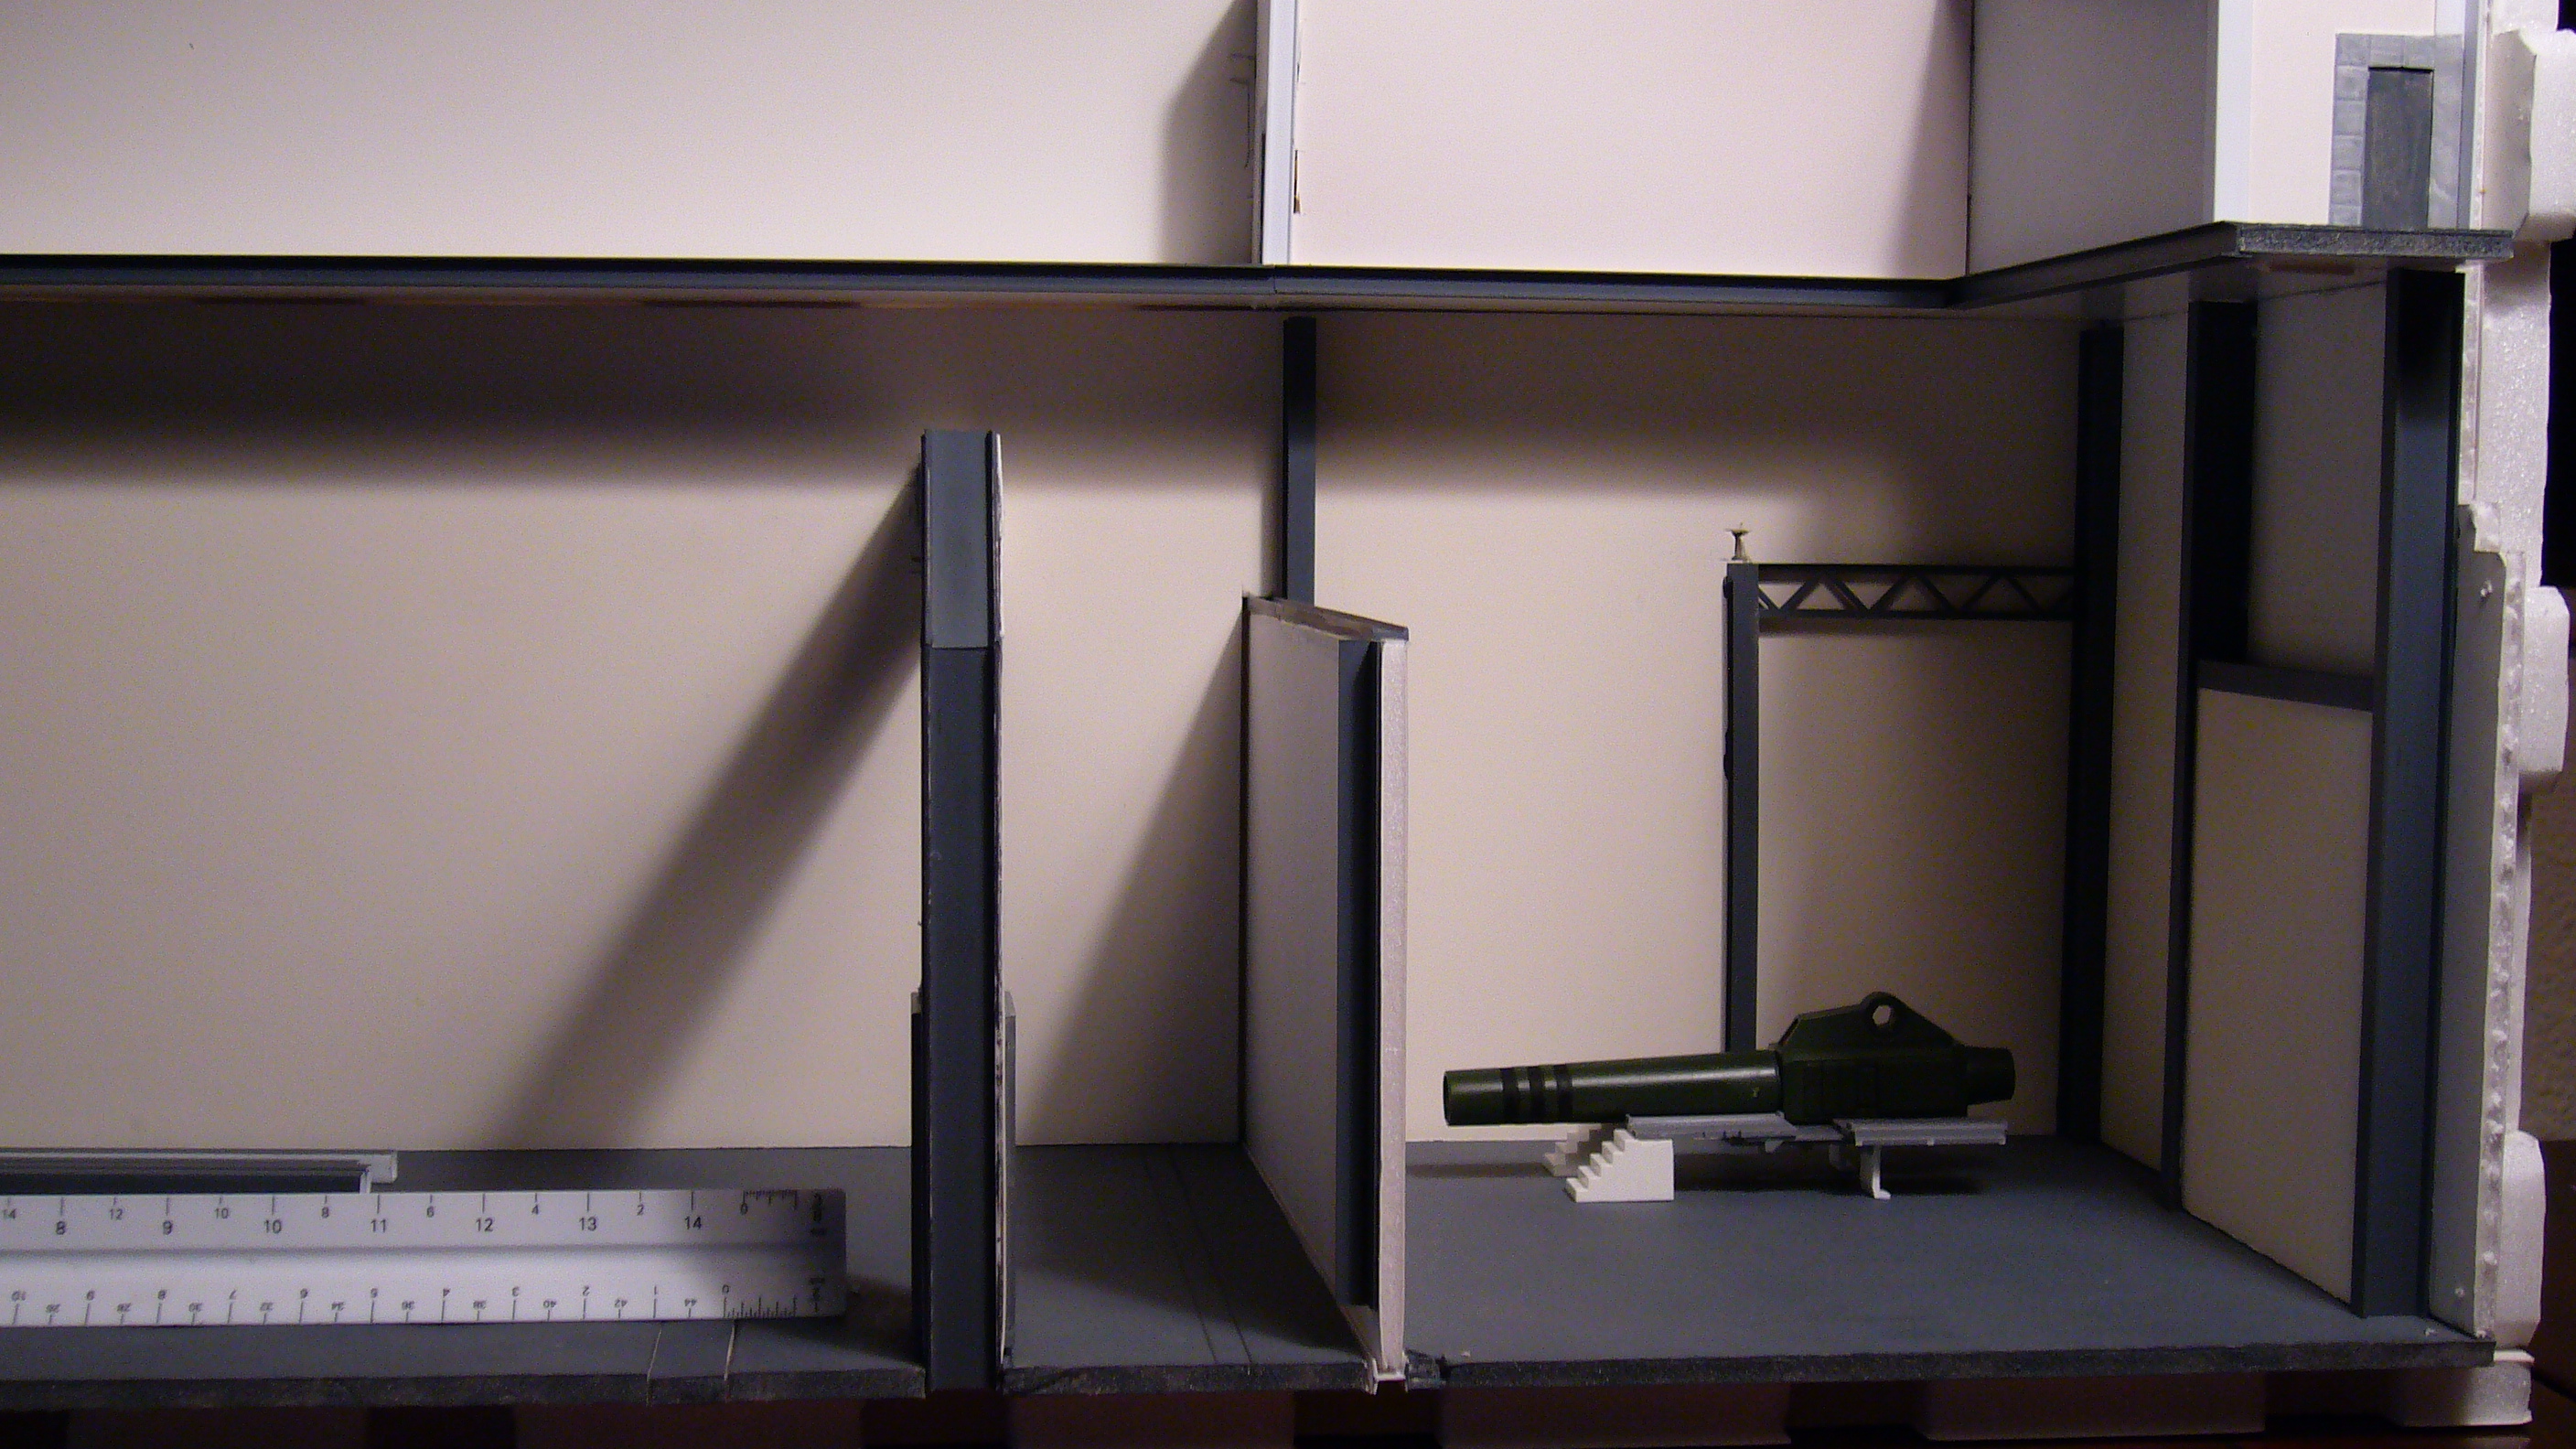
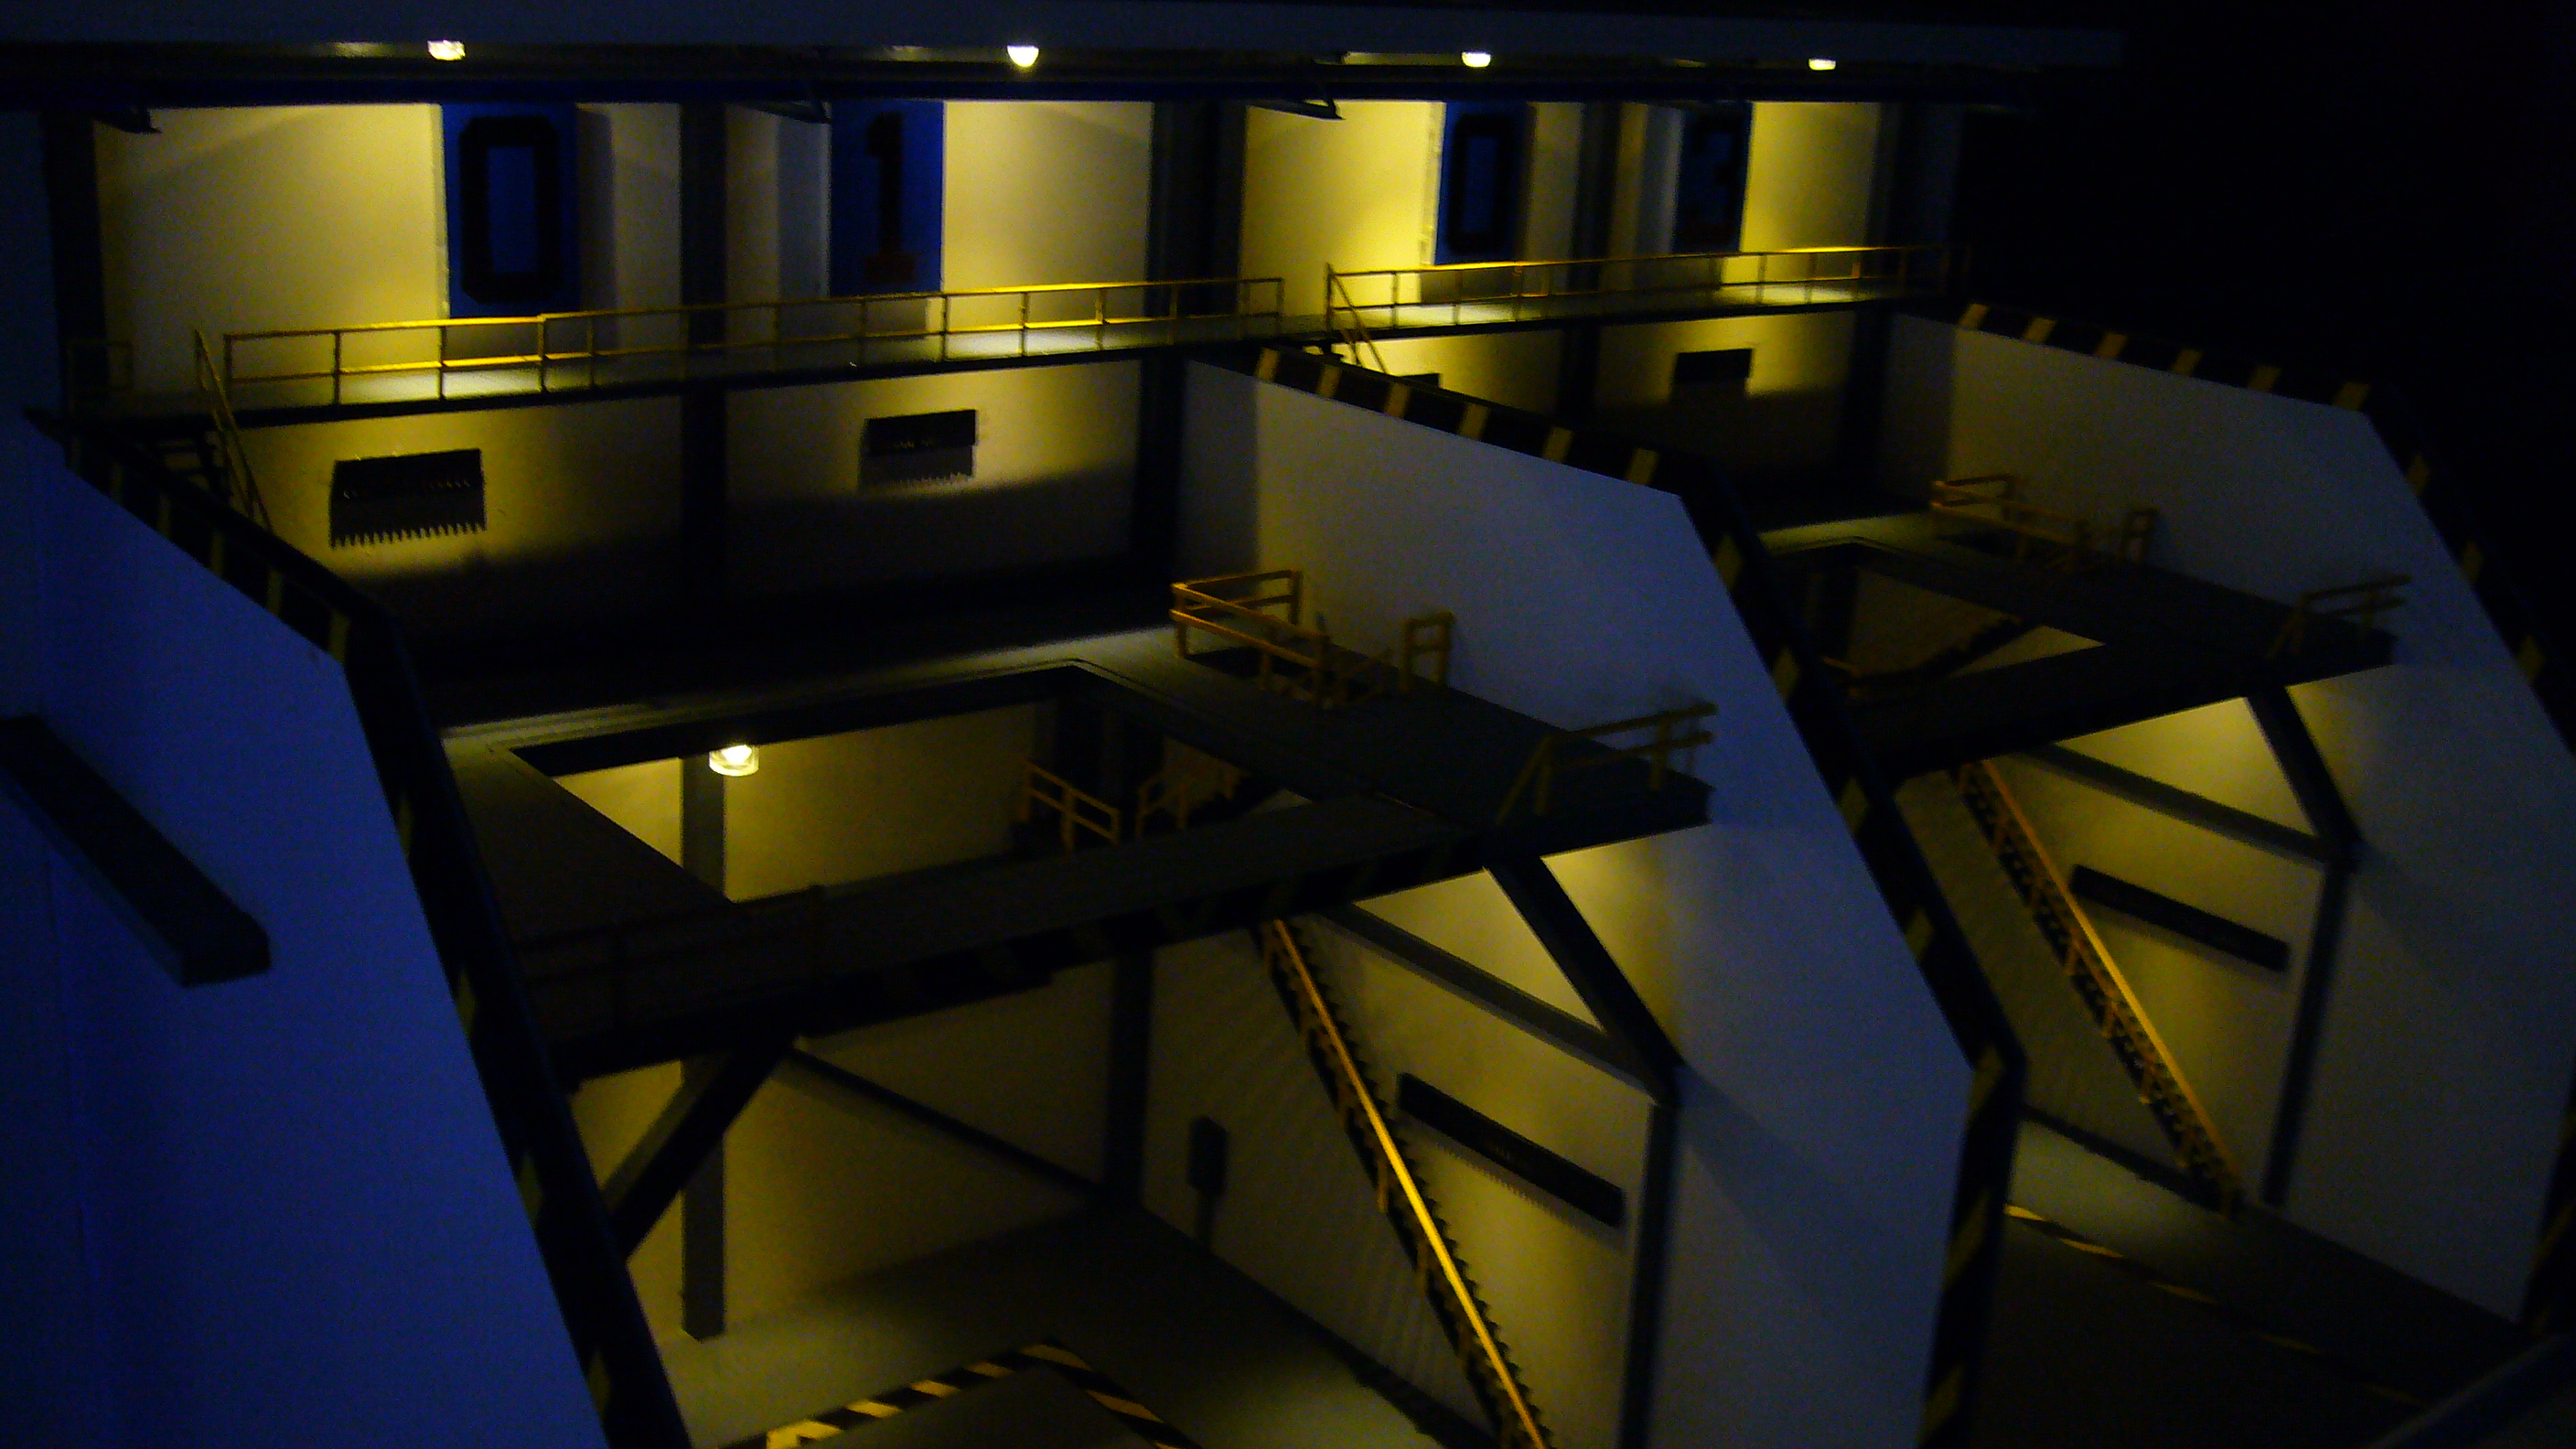
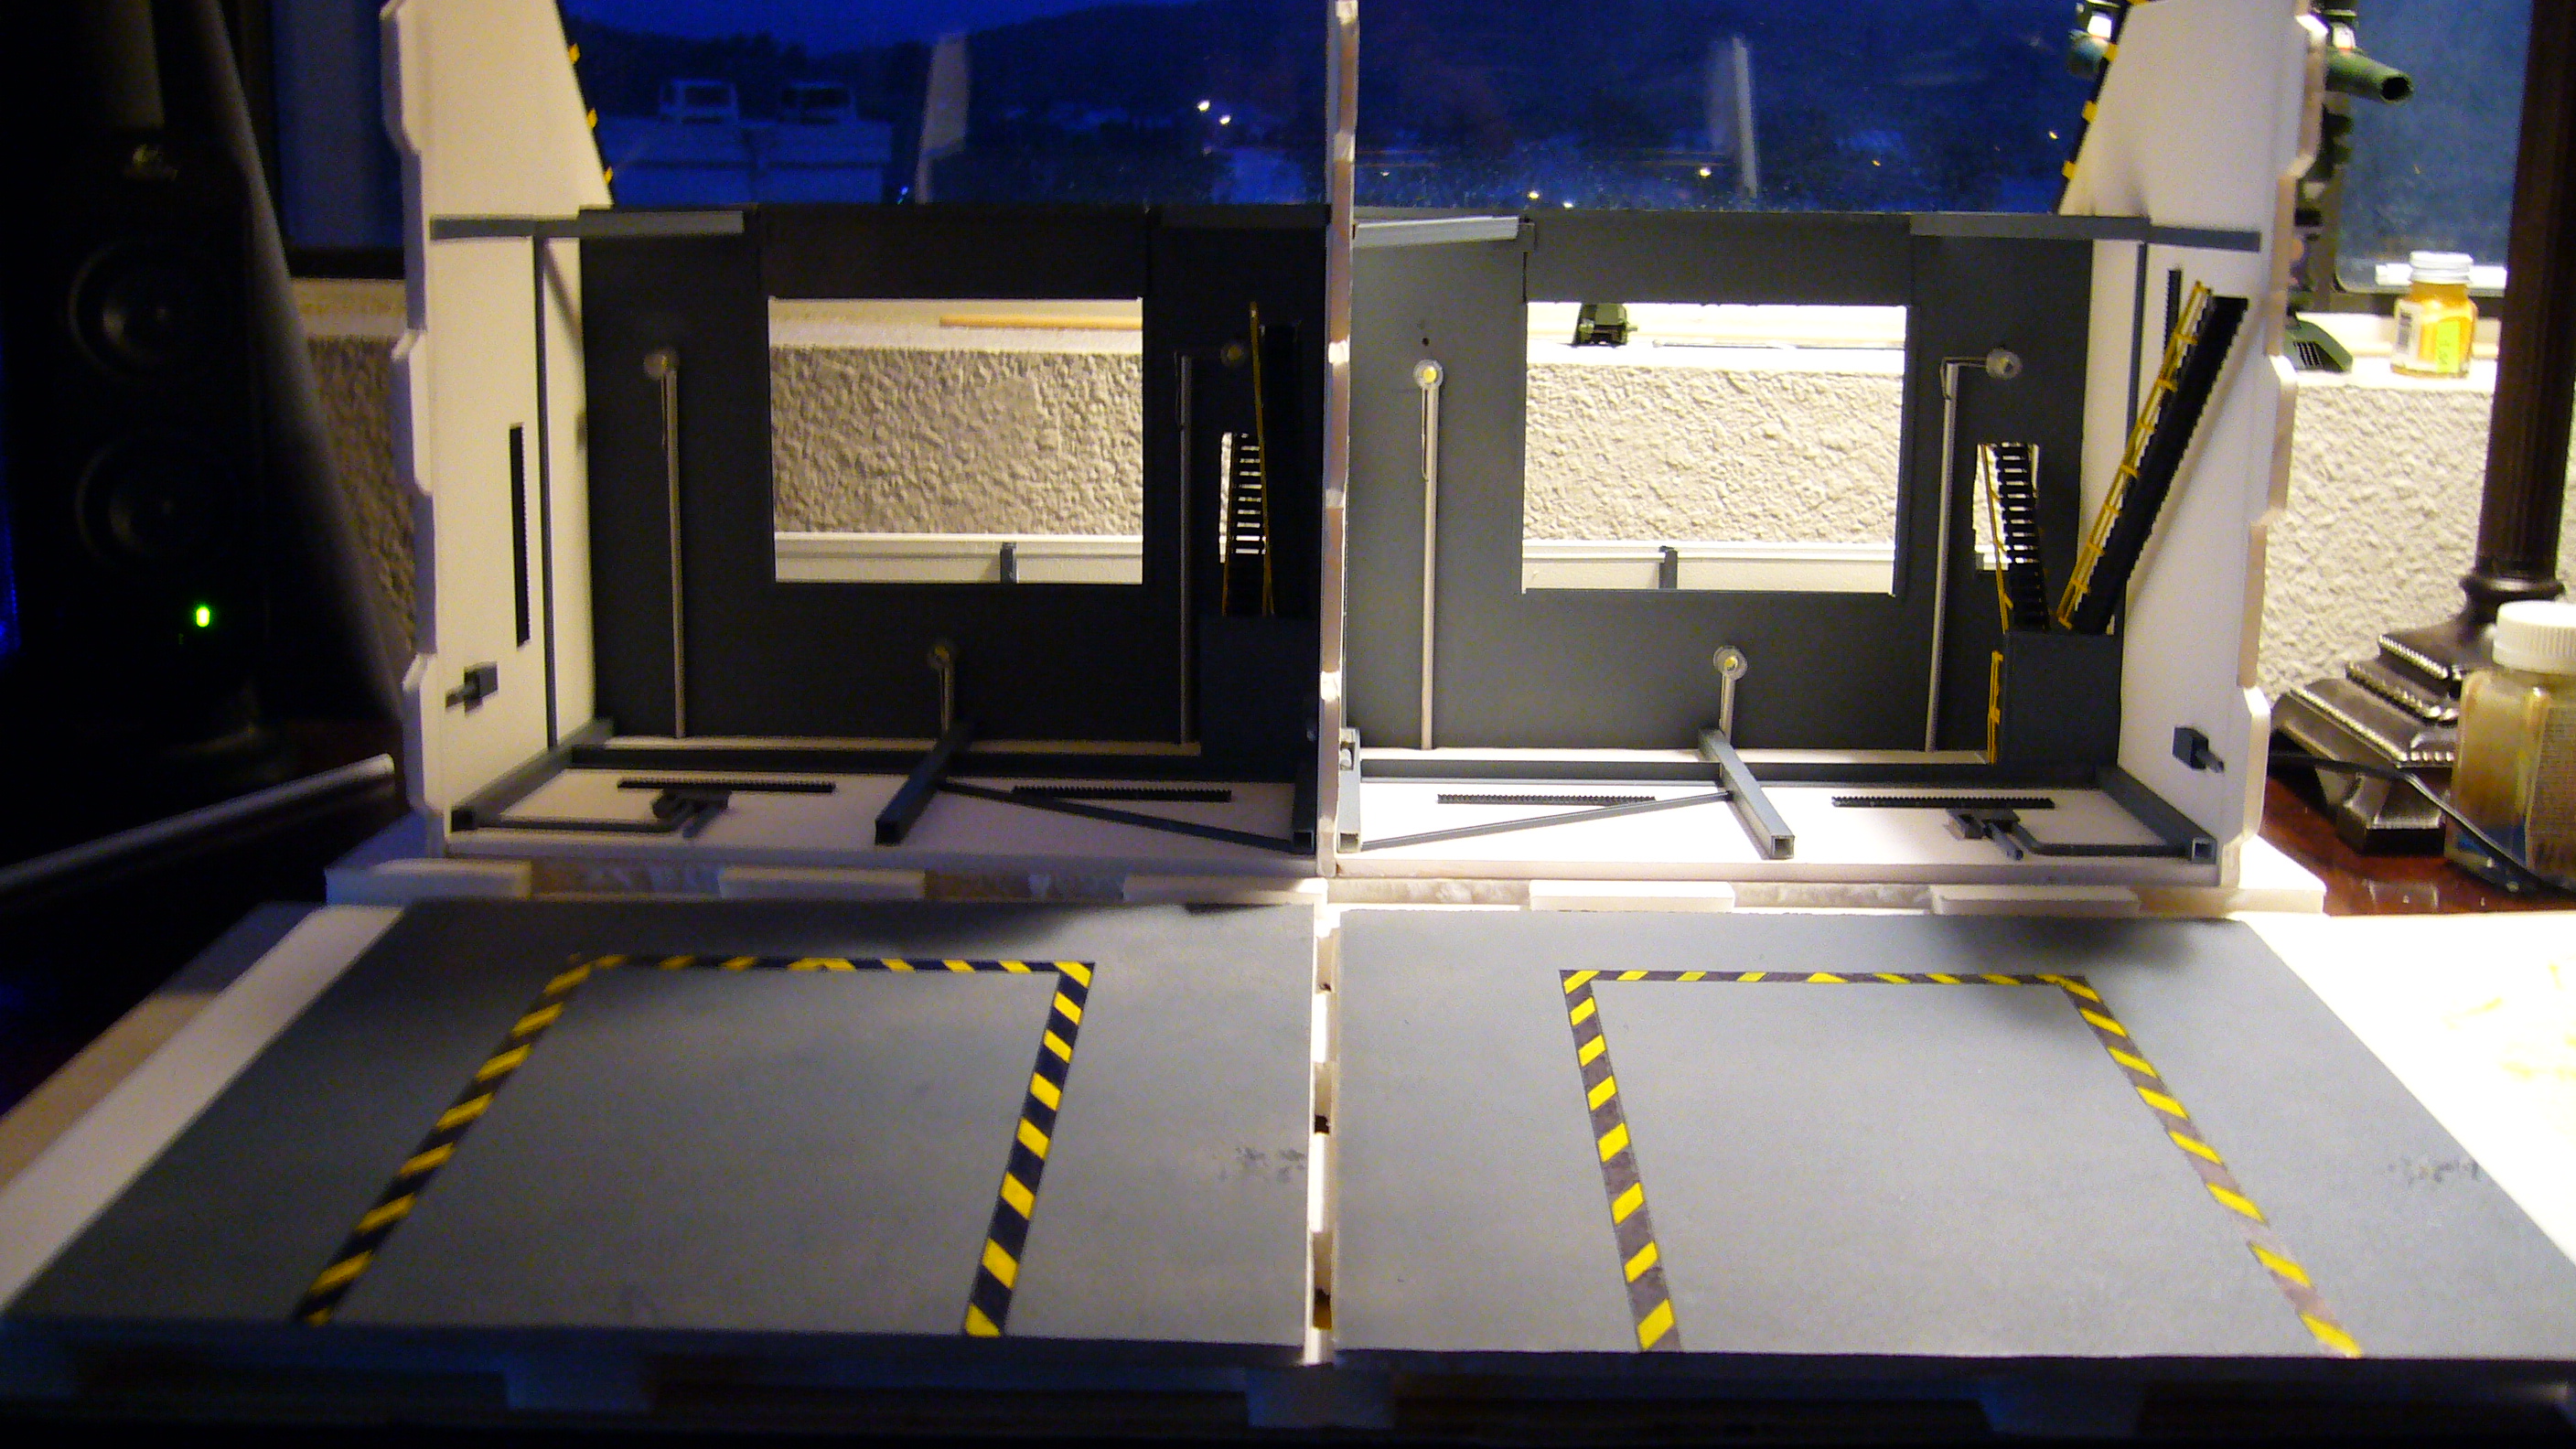
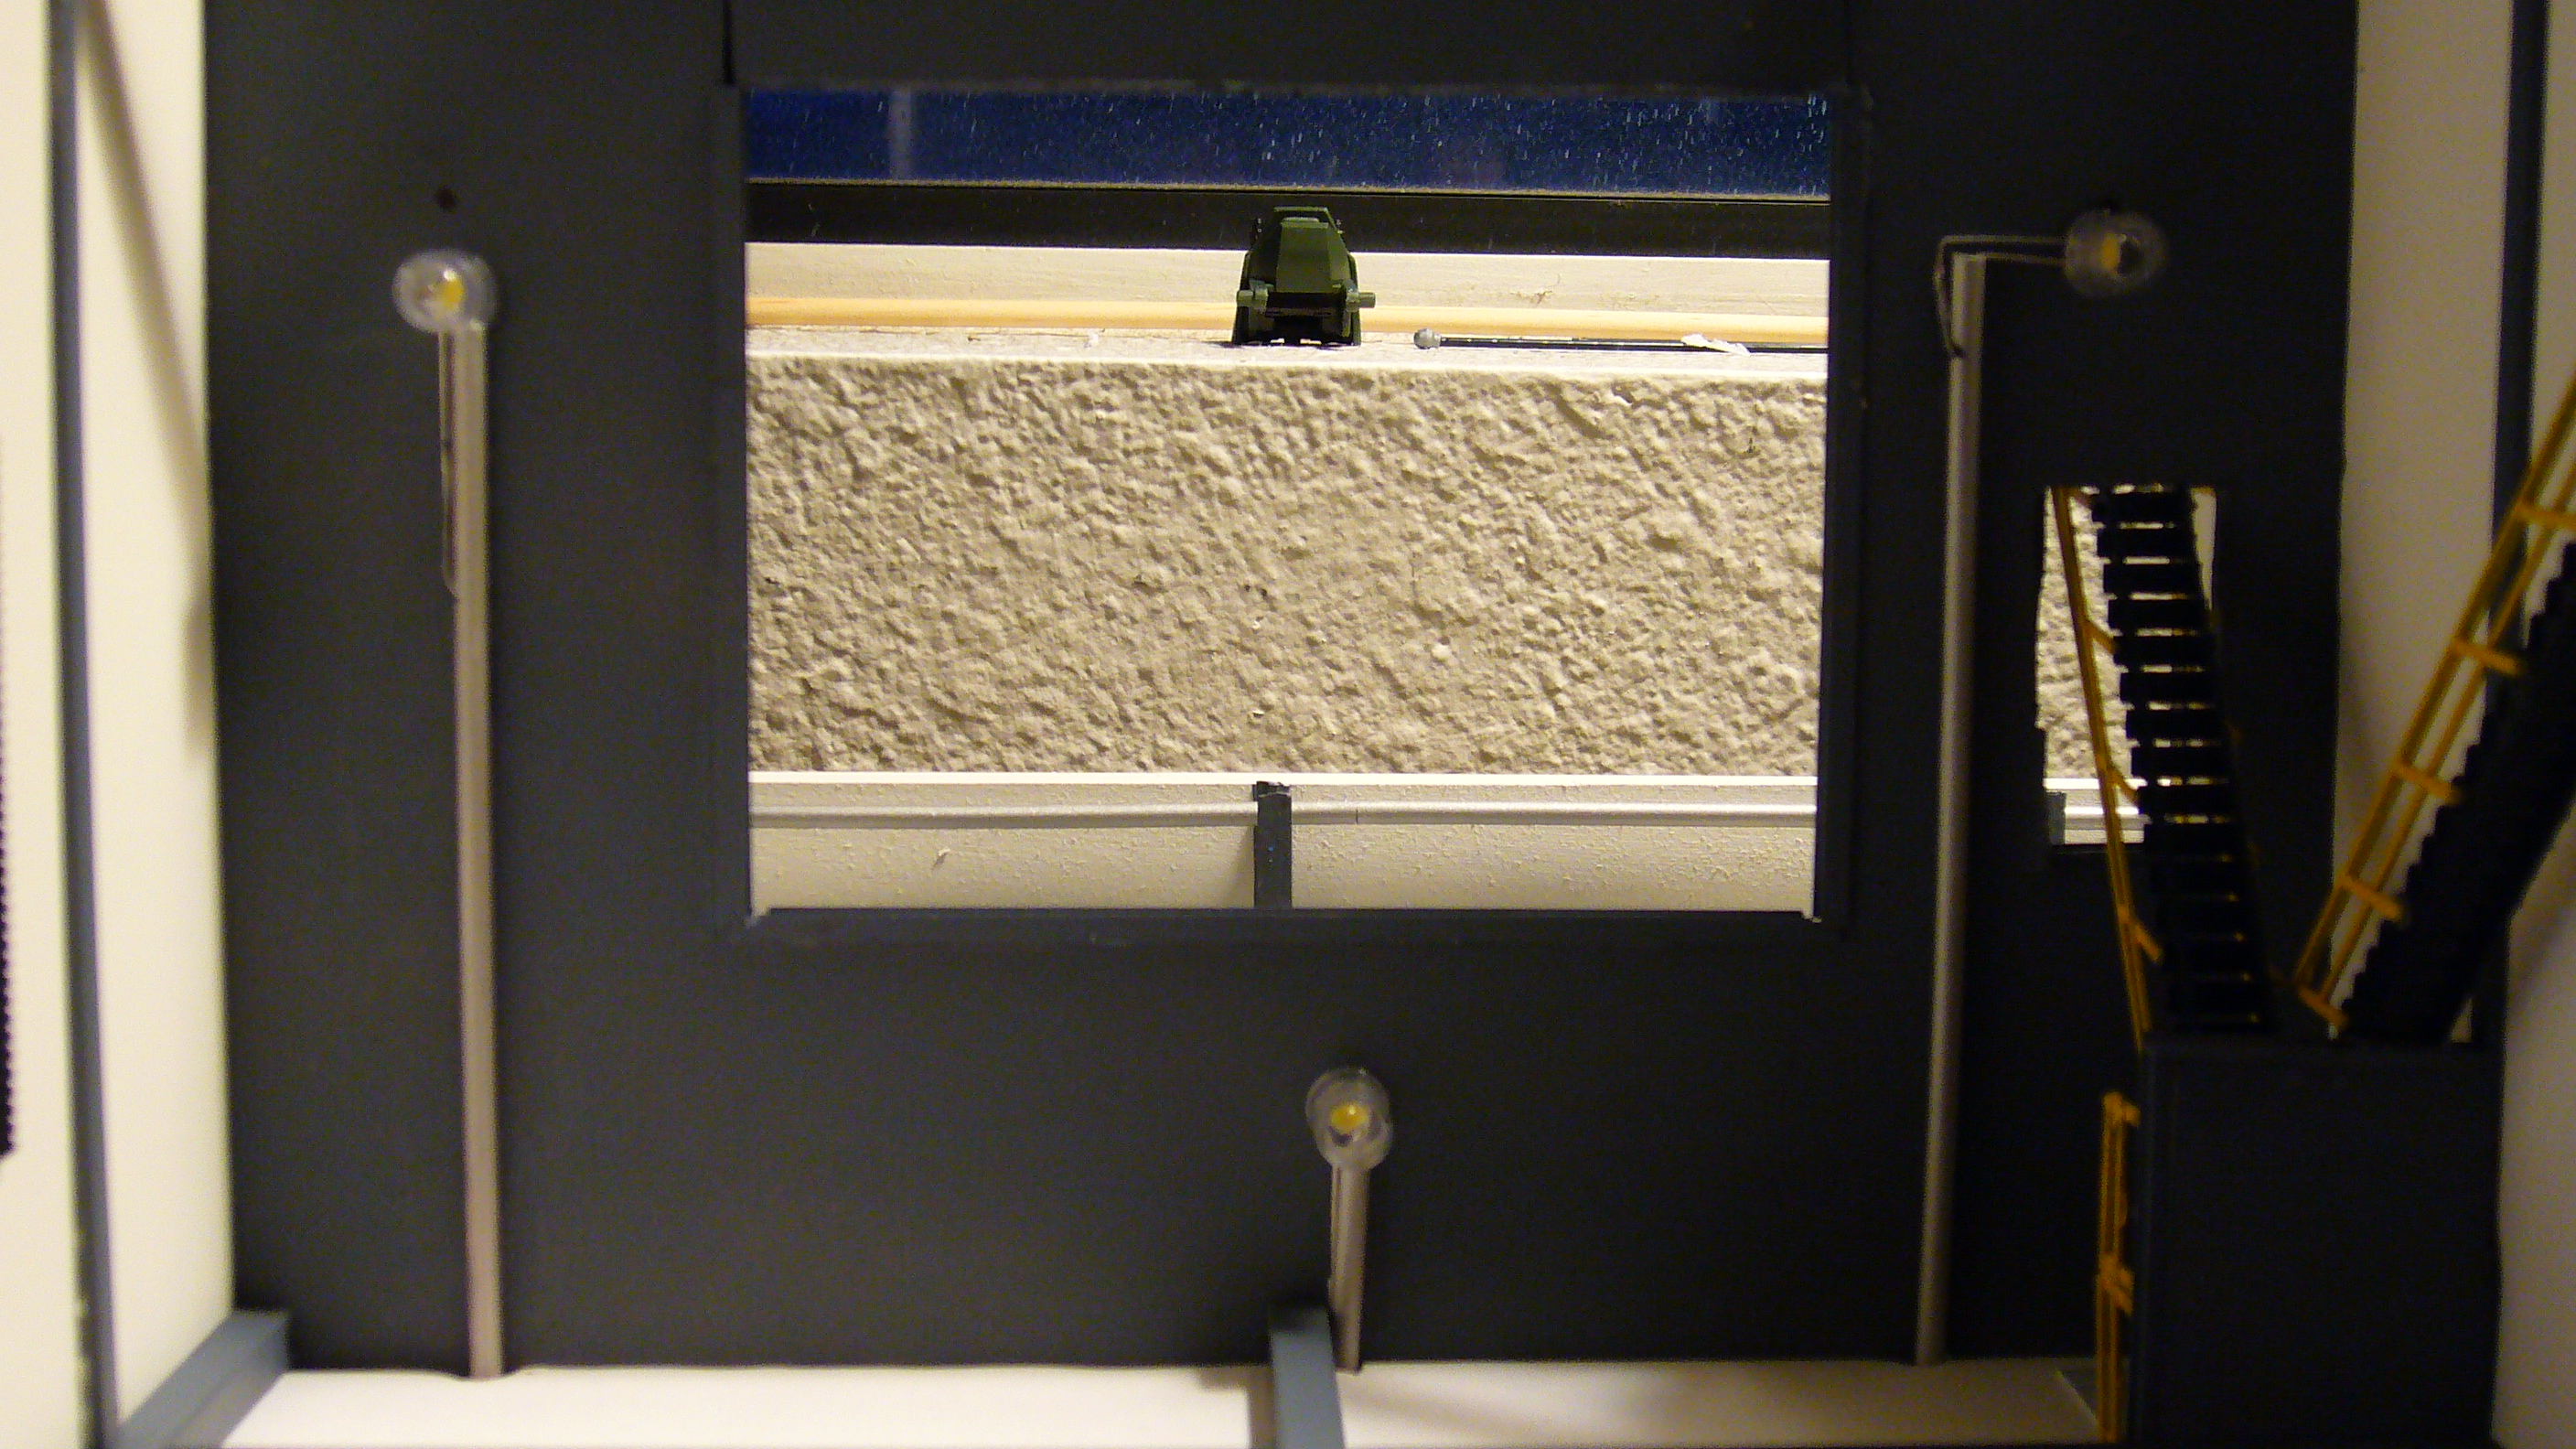
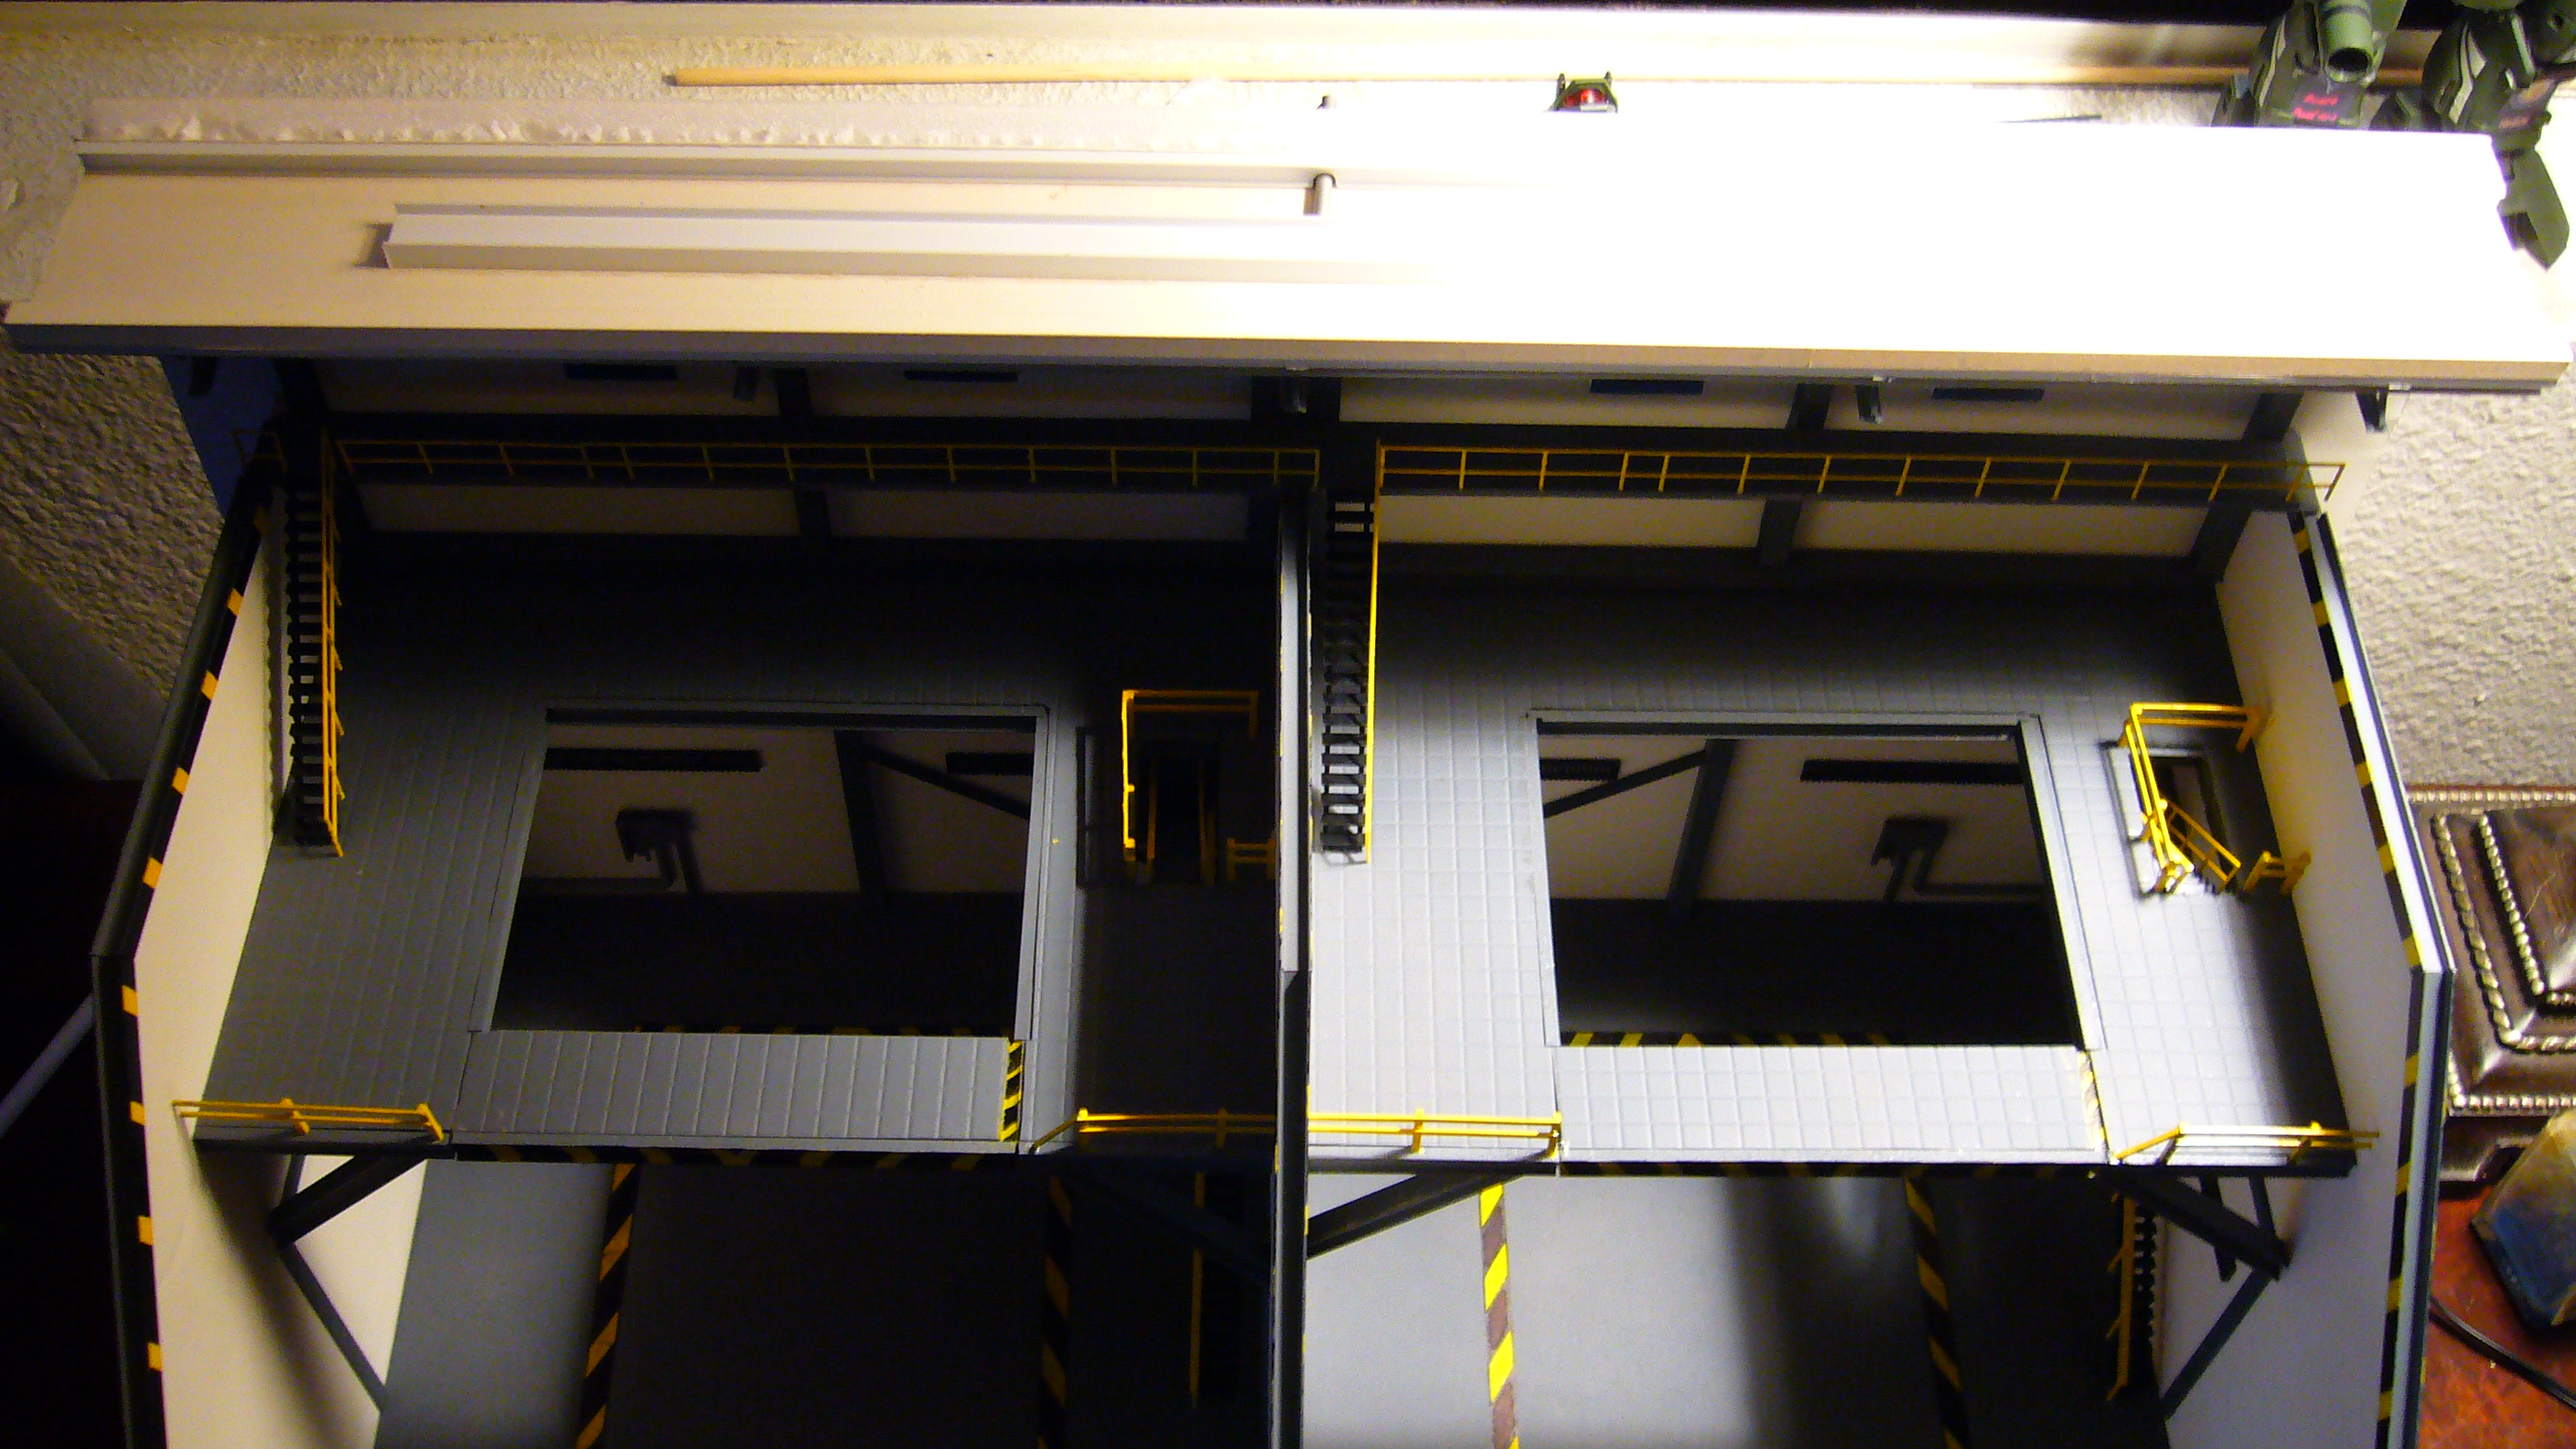
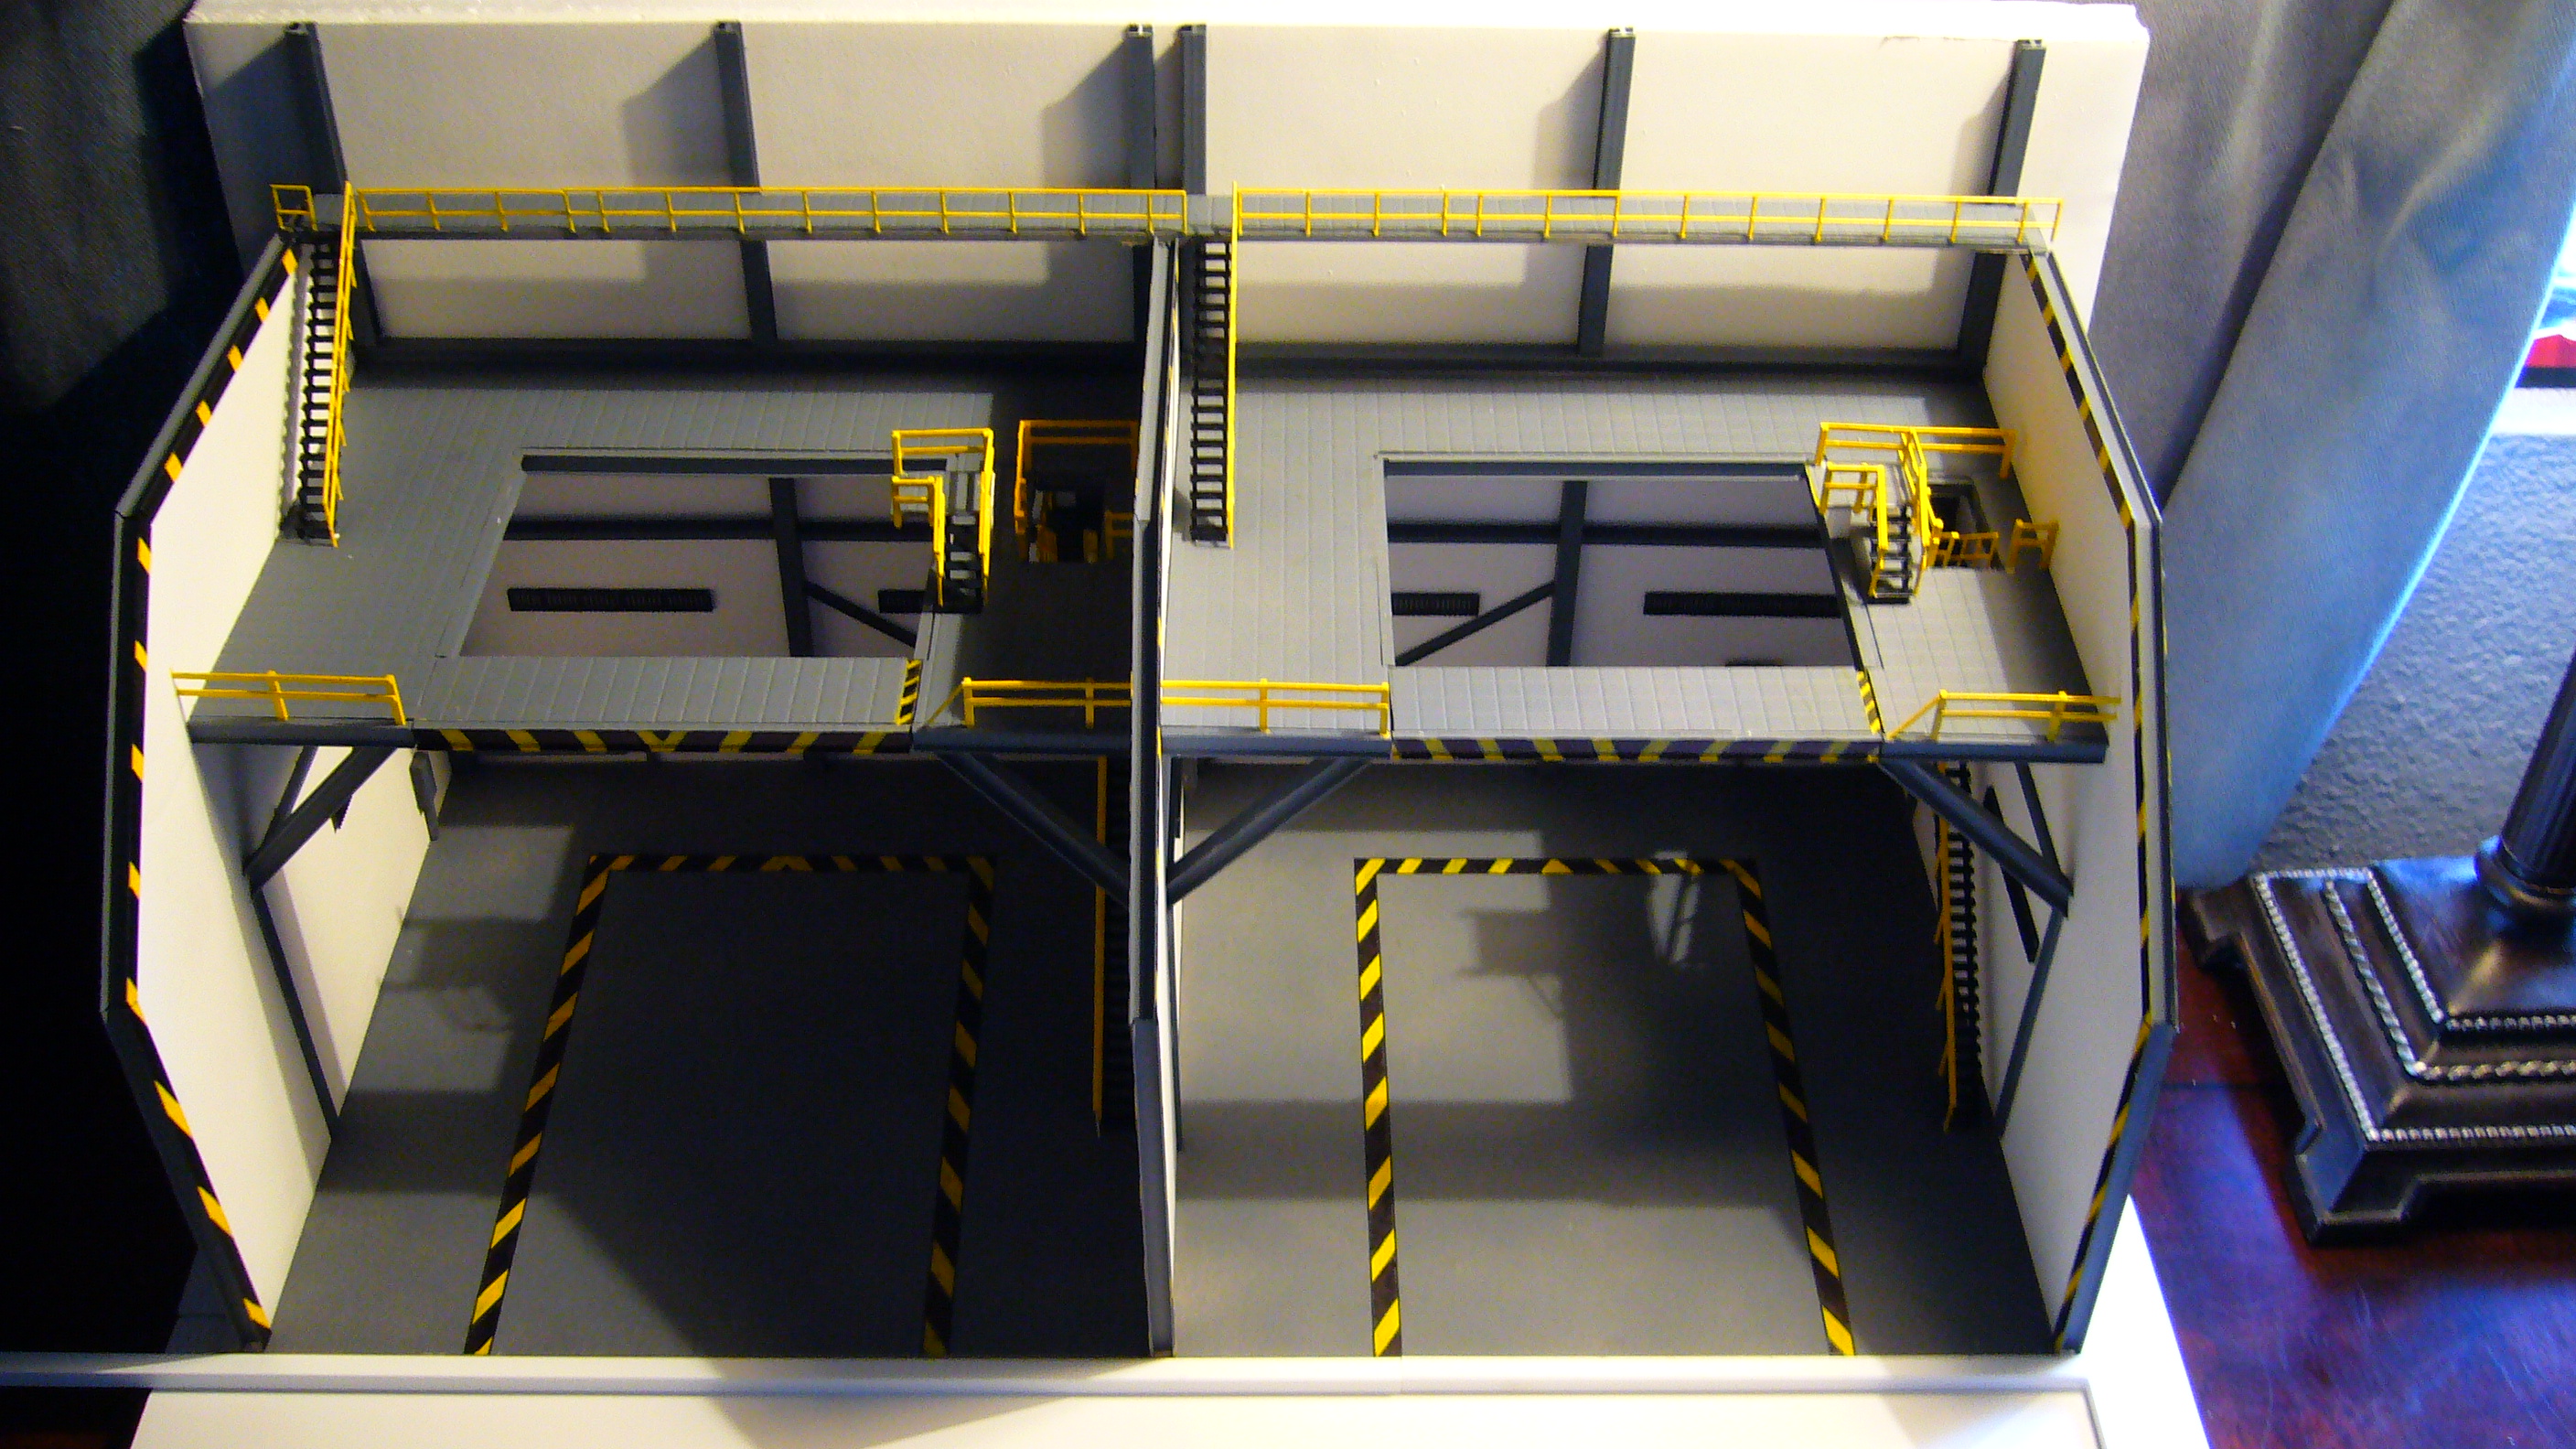
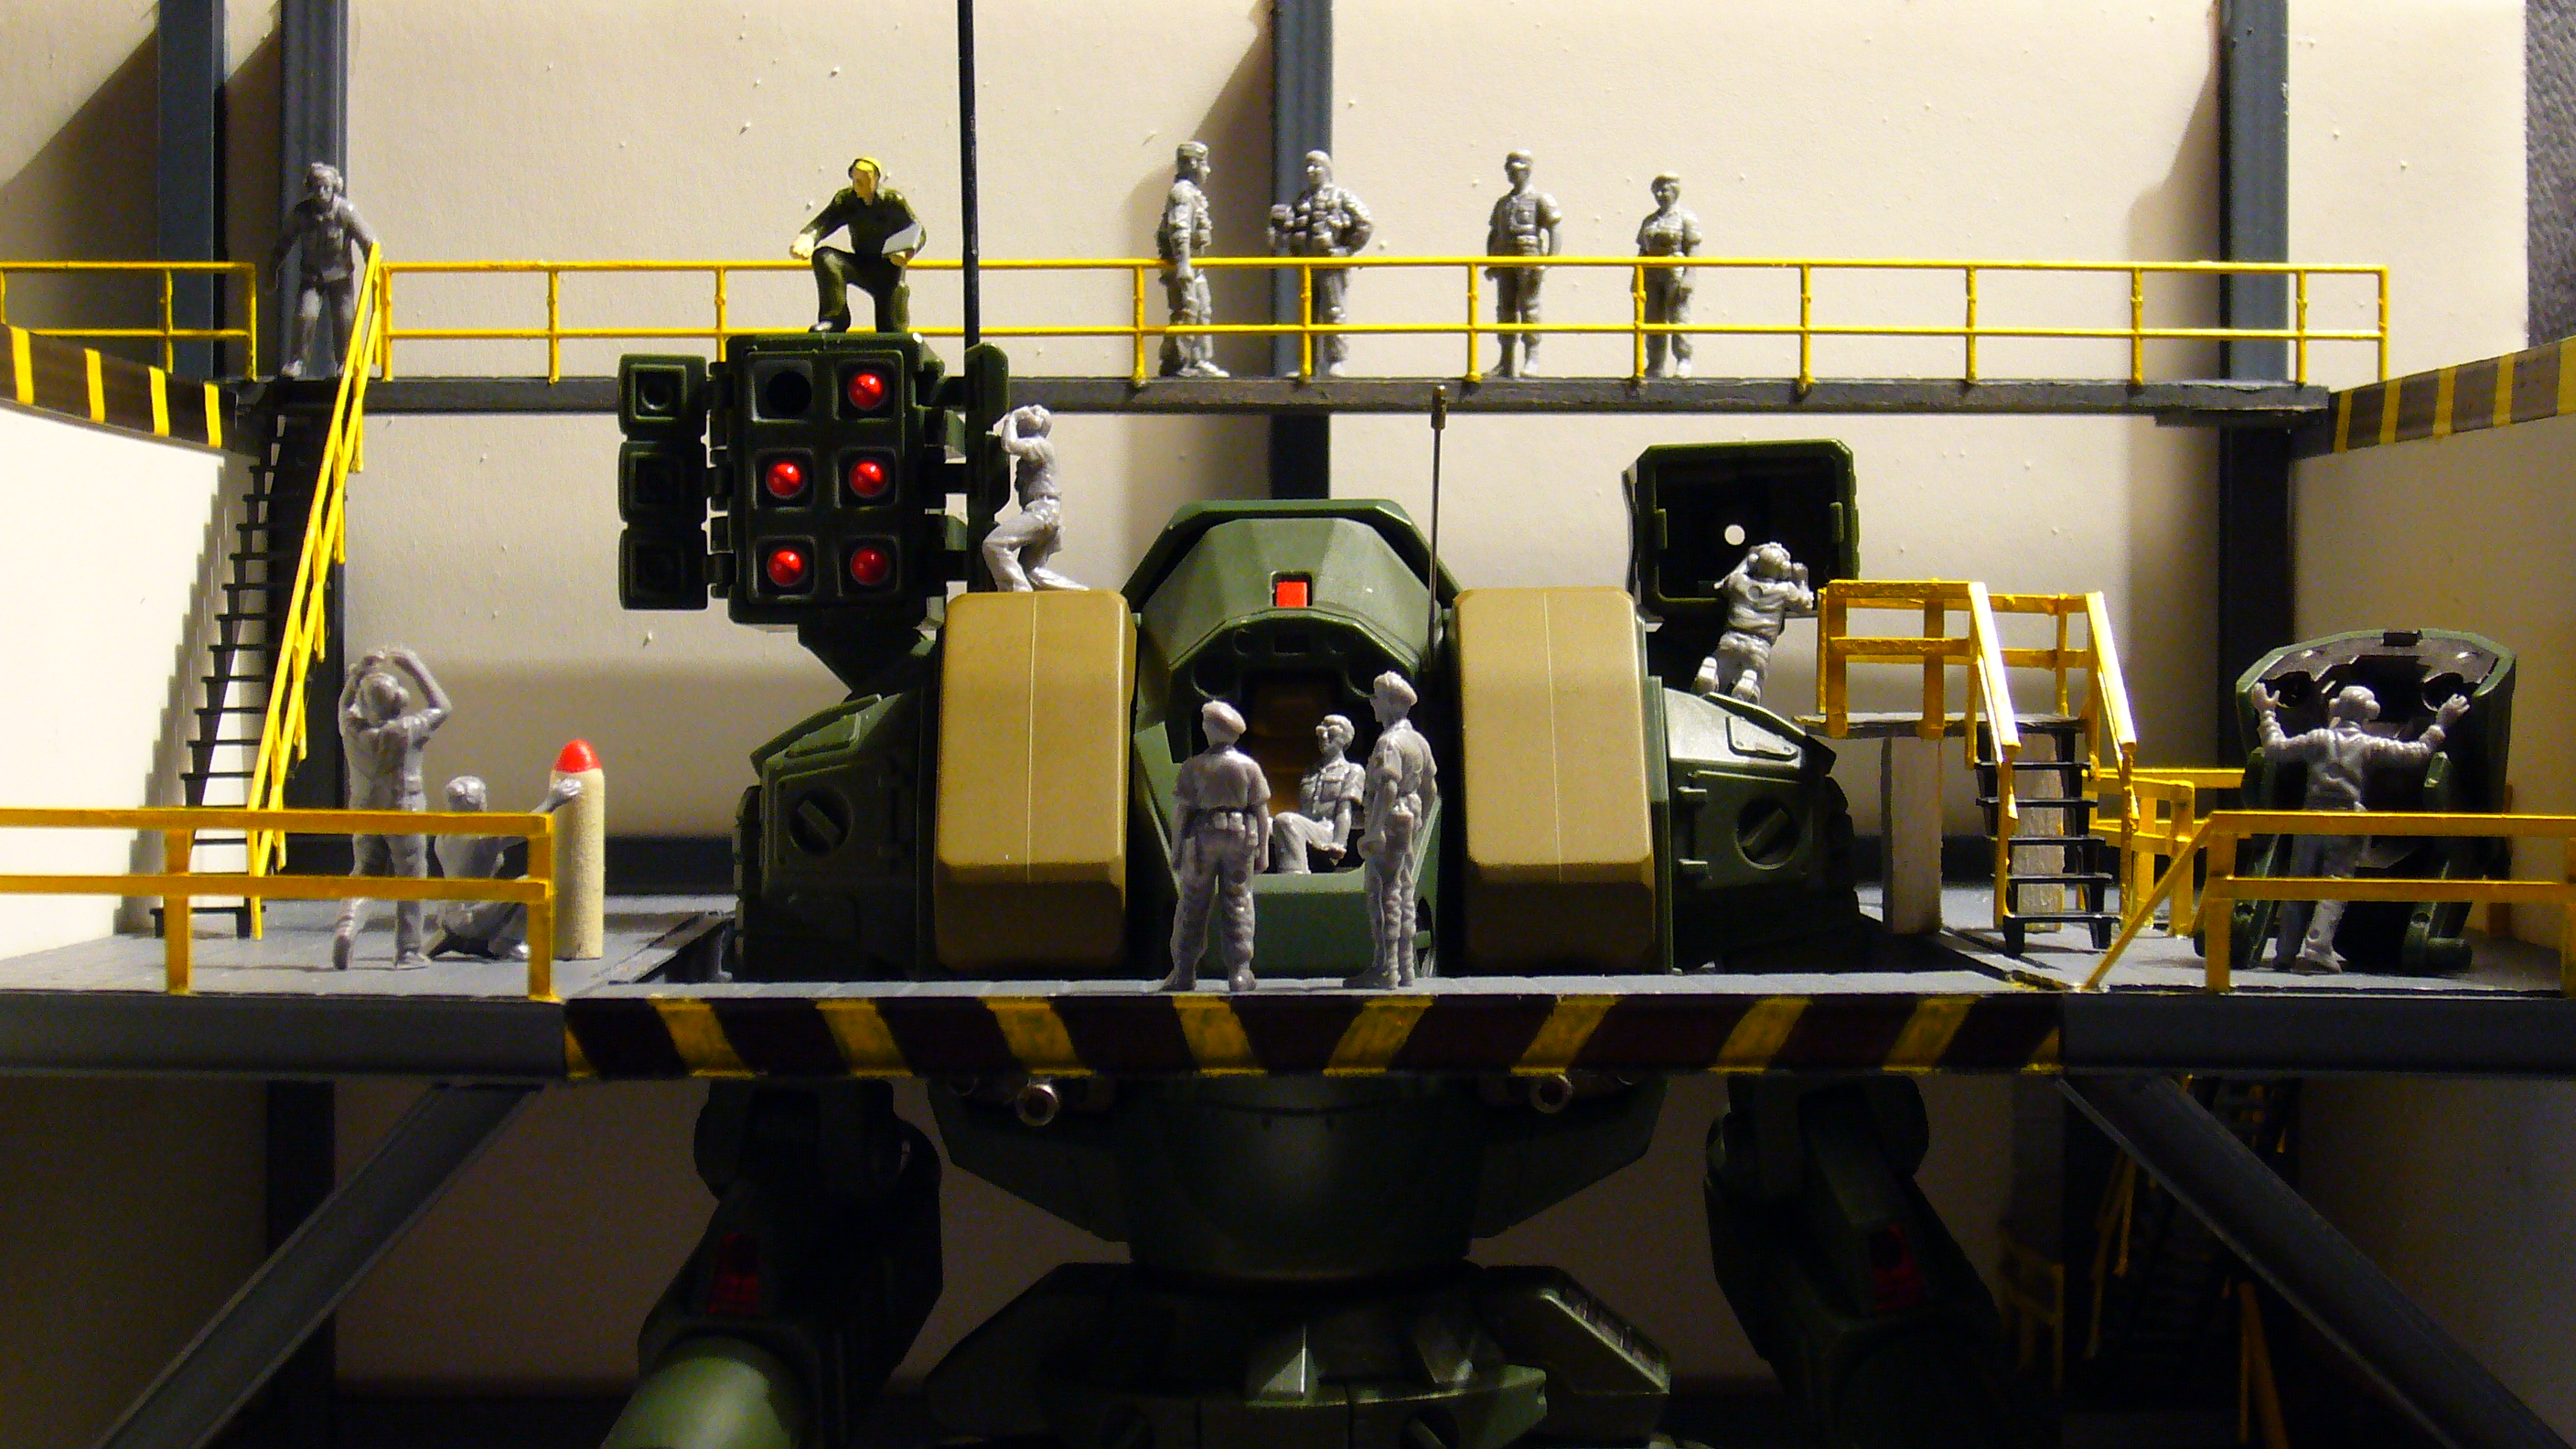
Back with some more progress to the build.
I have made some changes to the weapons repair/ammo prep stations. The first picture shows how the stations
used to look like and the changes made are shown is the pictures there after. I ran into a conflict with the crane
structure as it was too close to the divider wall structure when mated with the duel hanger cell.
I fixed this problem by moving the main crane structure and incorporated 2 crane systems out of the single structure.
Now the main beam is used for repair of the "big guns" and is more structural compatible for the weight/size ratio of the guns.
The initial crane rail is now connected to the same wall as the main but now supplies support for moving/loading ammo and
ammo containers (chest packs, shoulder packs, gun clusters etc.) as shown in the picture below.
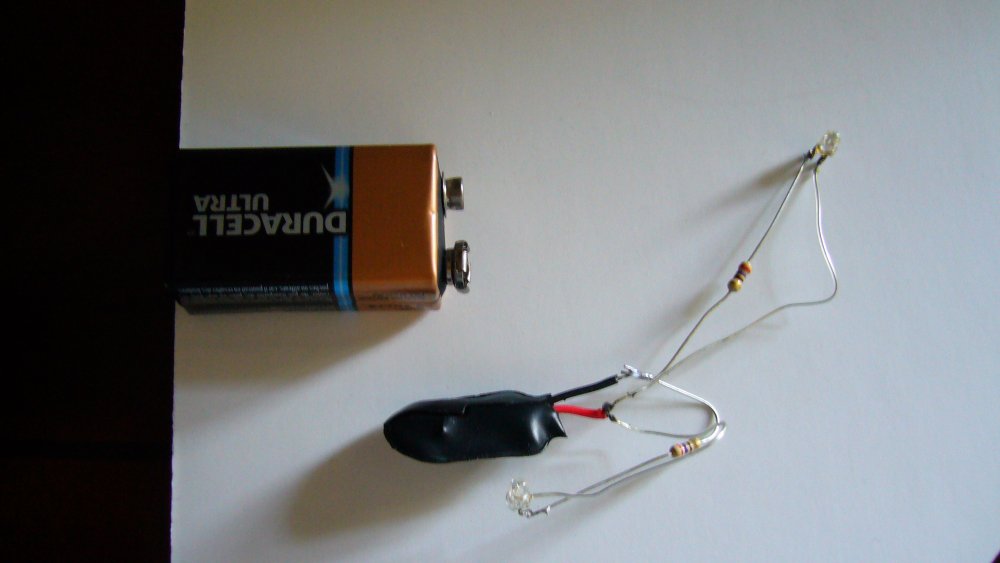
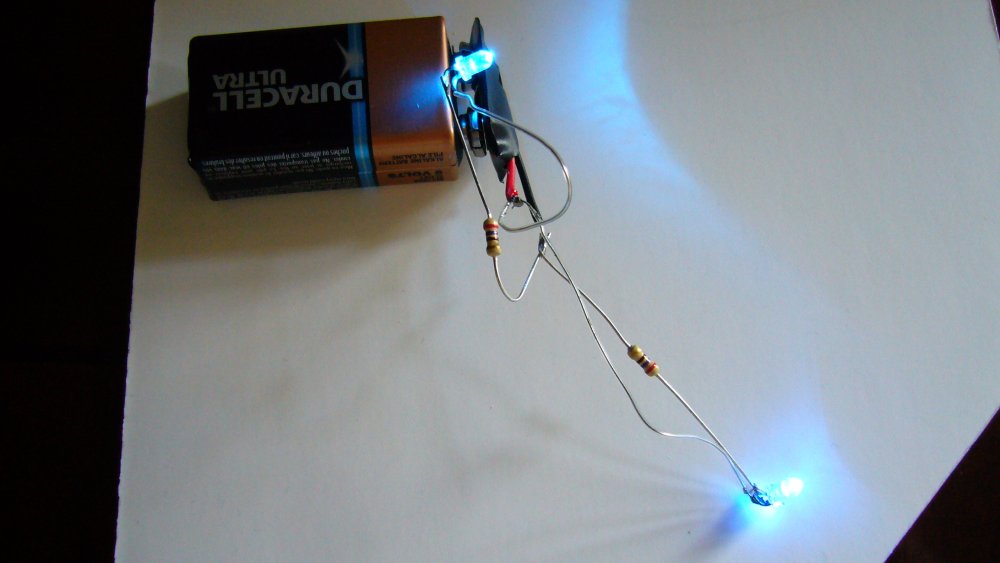
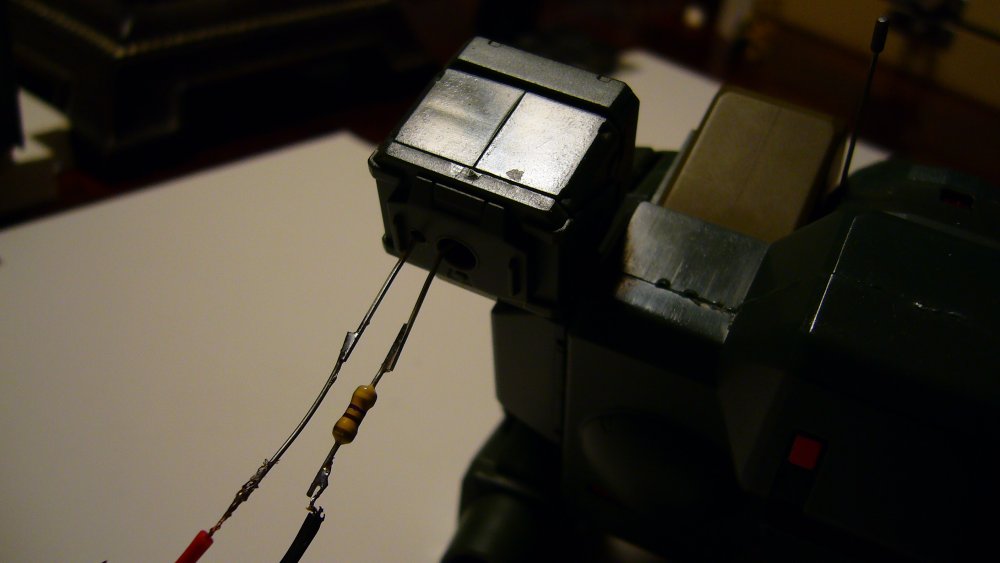
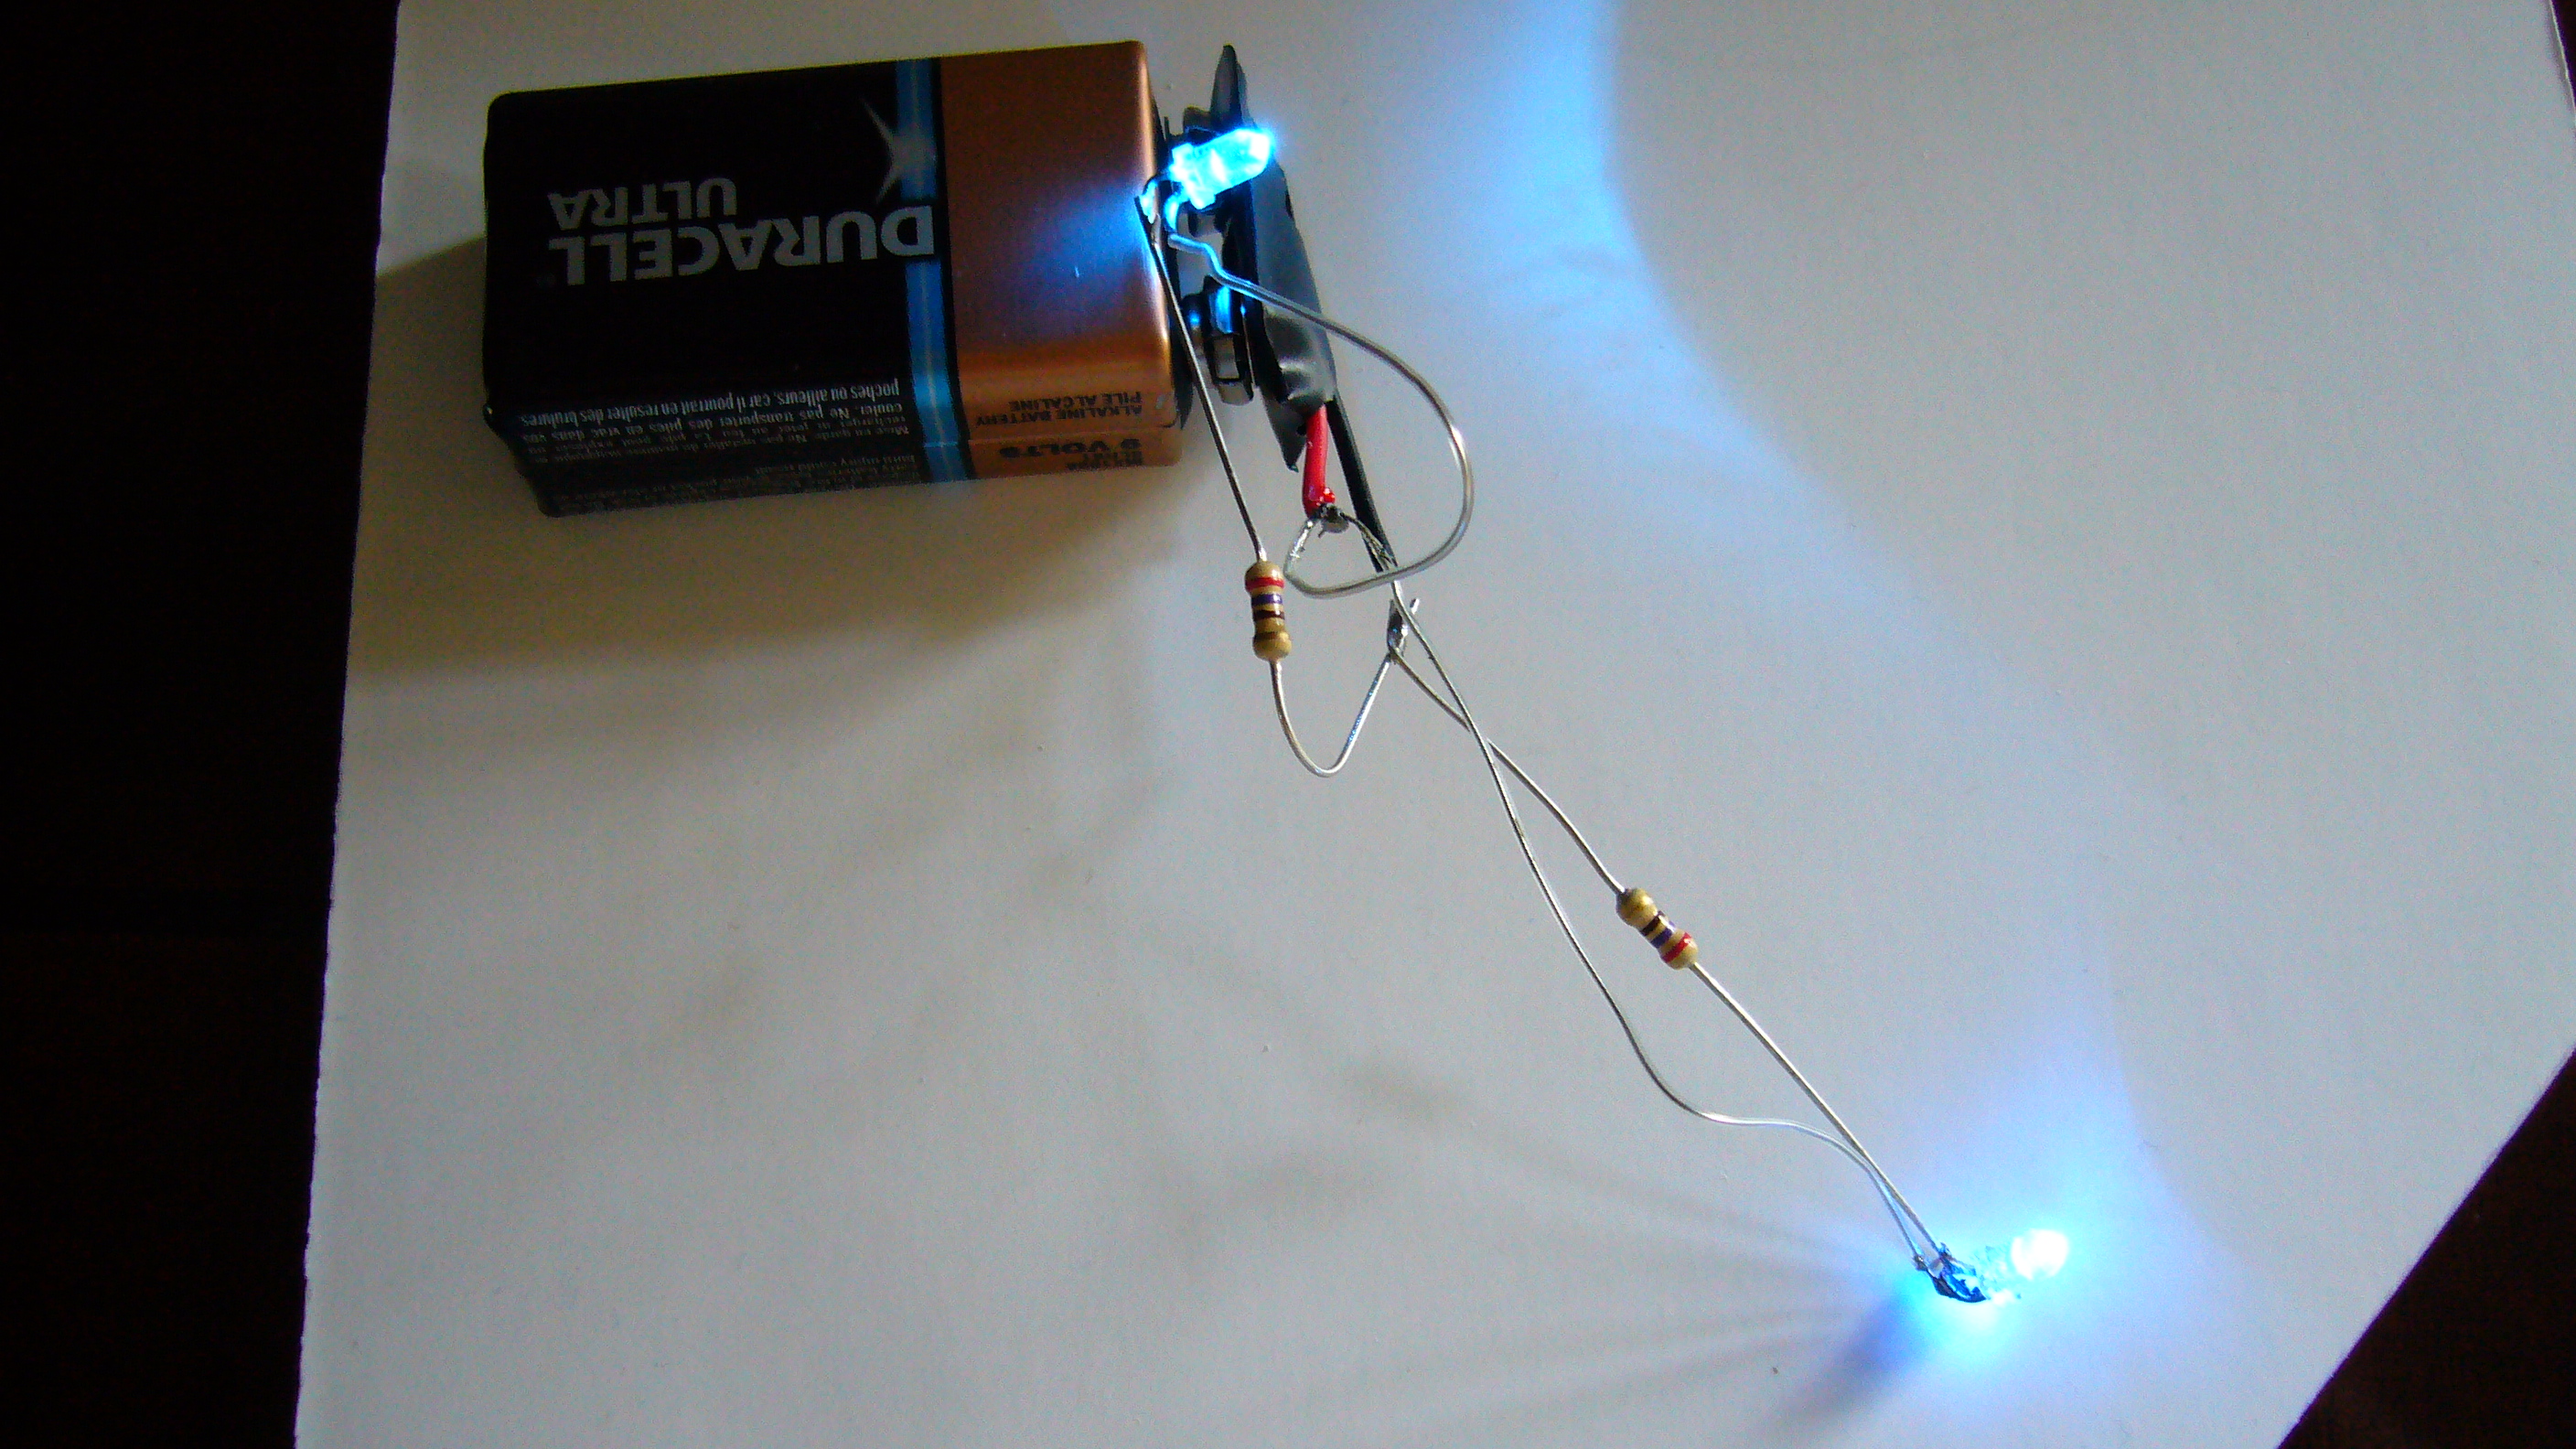
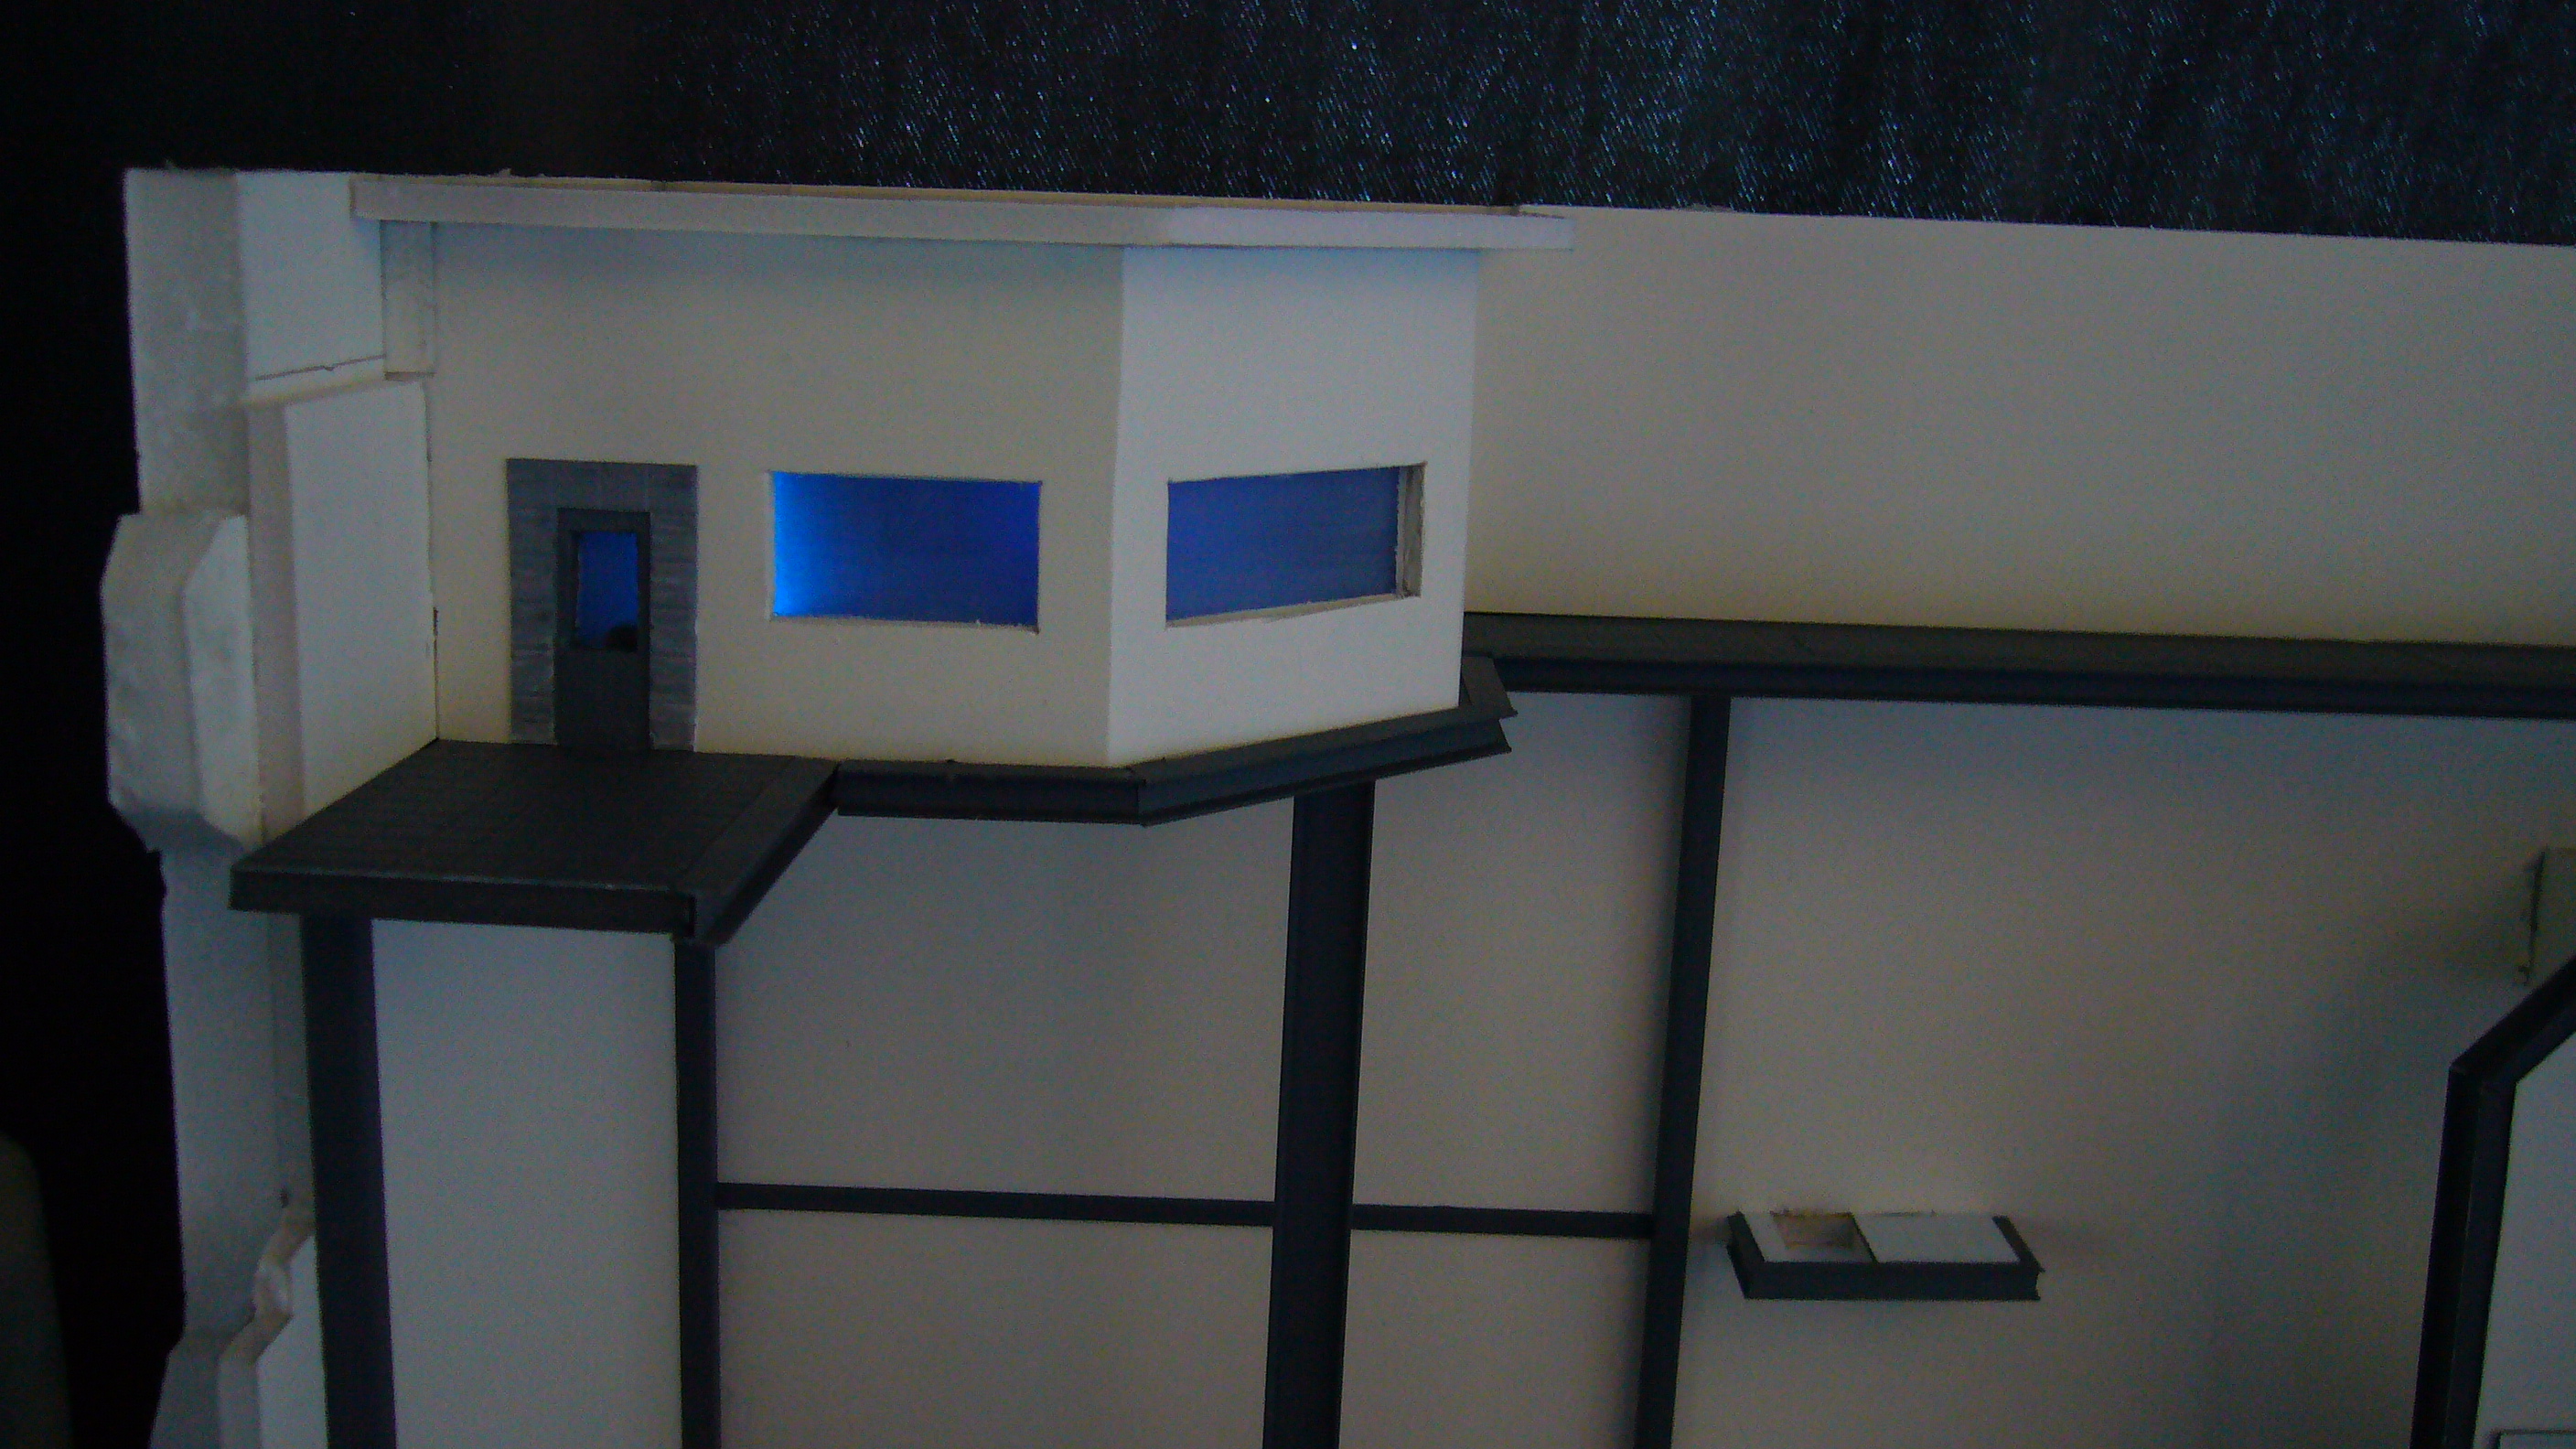
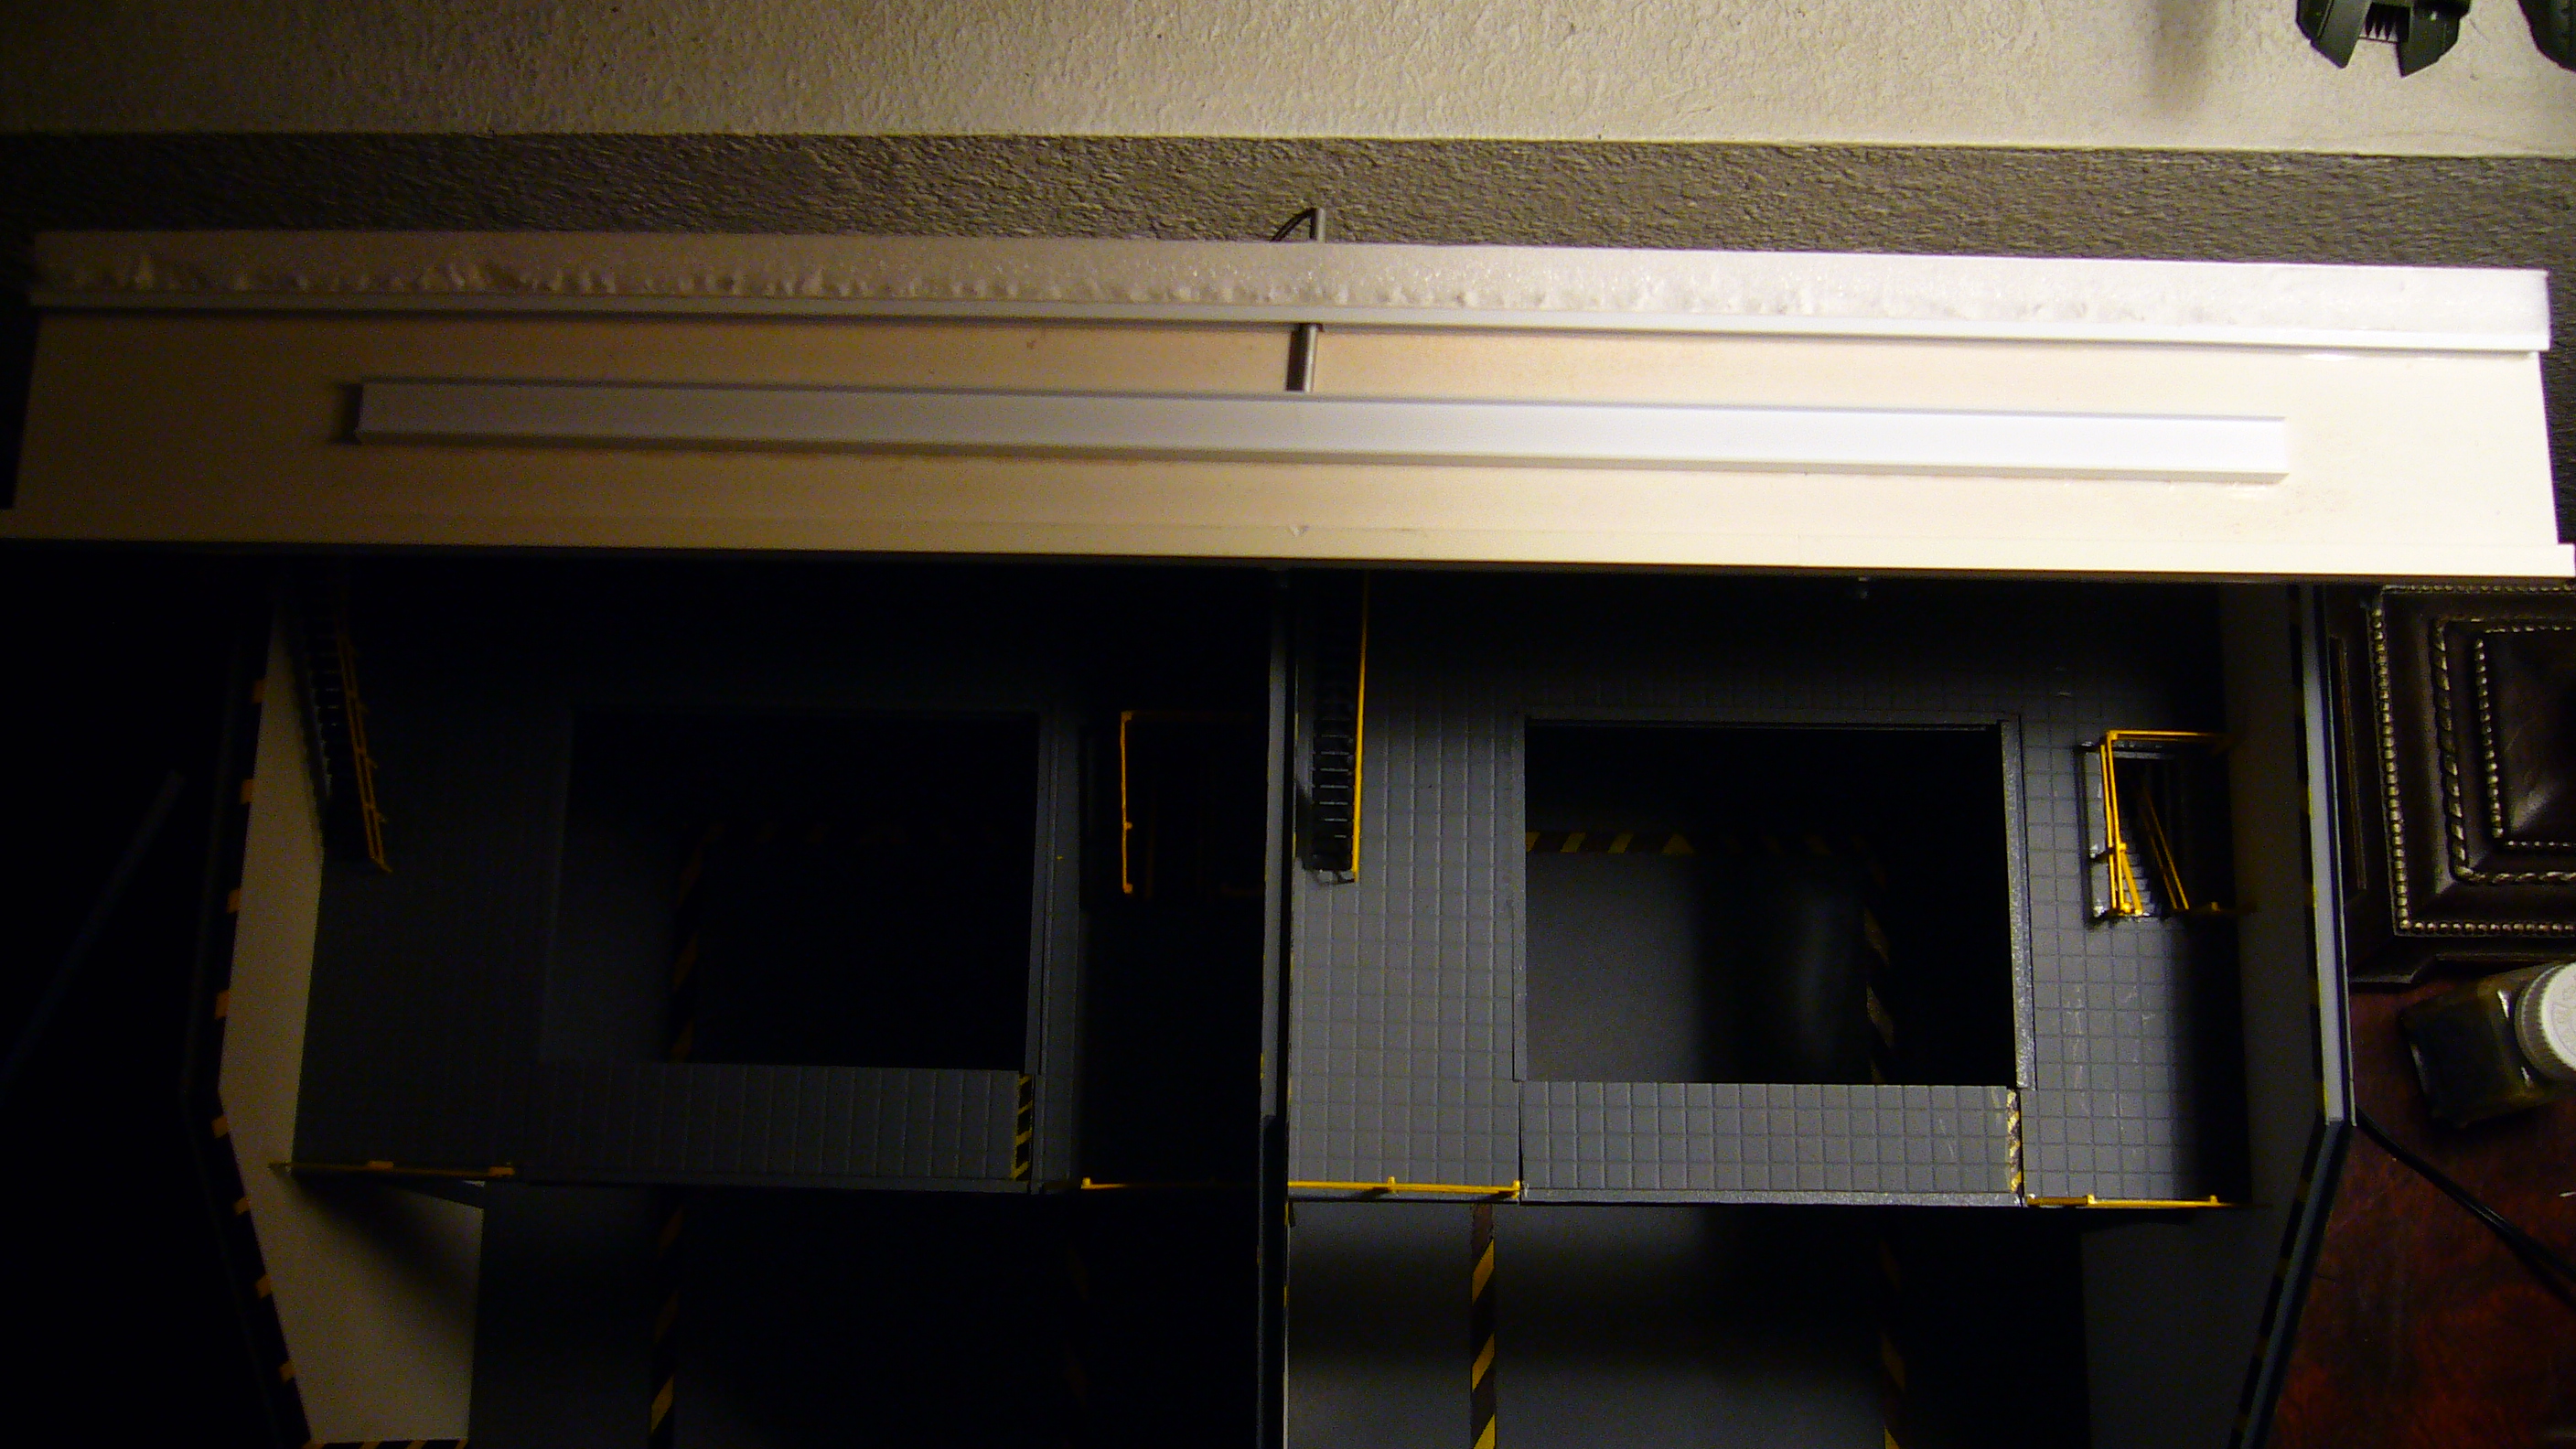
I also build a control room with windows and doors made with clear sheet plastic that was sanded with
polishing sand paper to give it a milky look. I then soldered up a simple light harness with LED's, resistors,
and a 9V battery to perform a light test in the control room.
After the test I decided I will need at least one more Blue LED for the desired lighting.
This is all for now but as always I will see you next time with more progress and/or changes to the build.
Blue


-
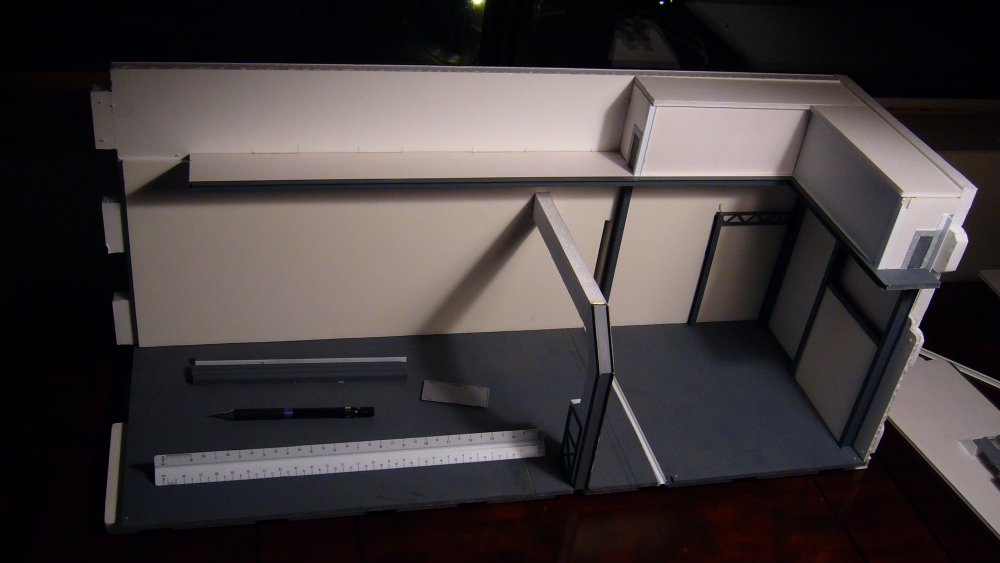
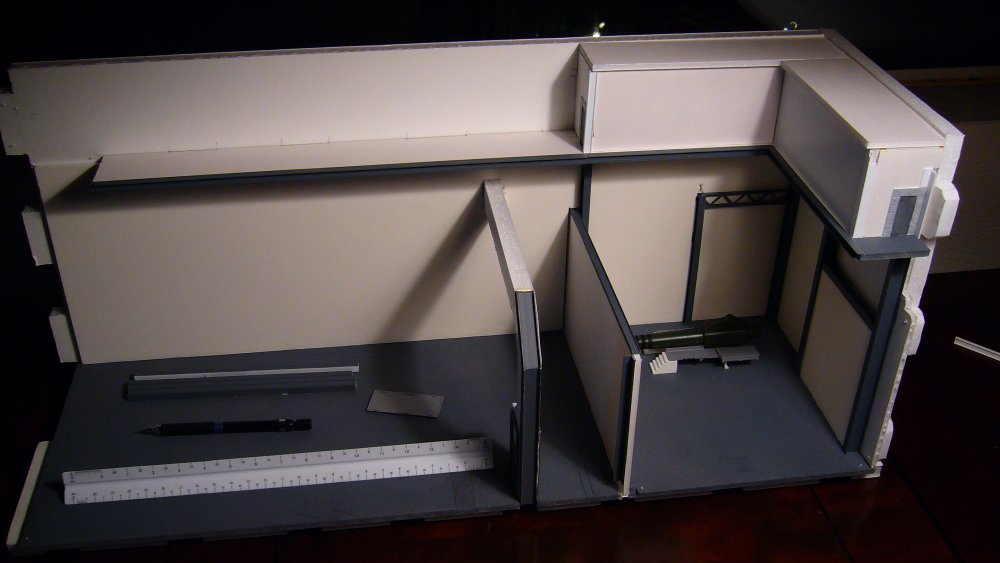
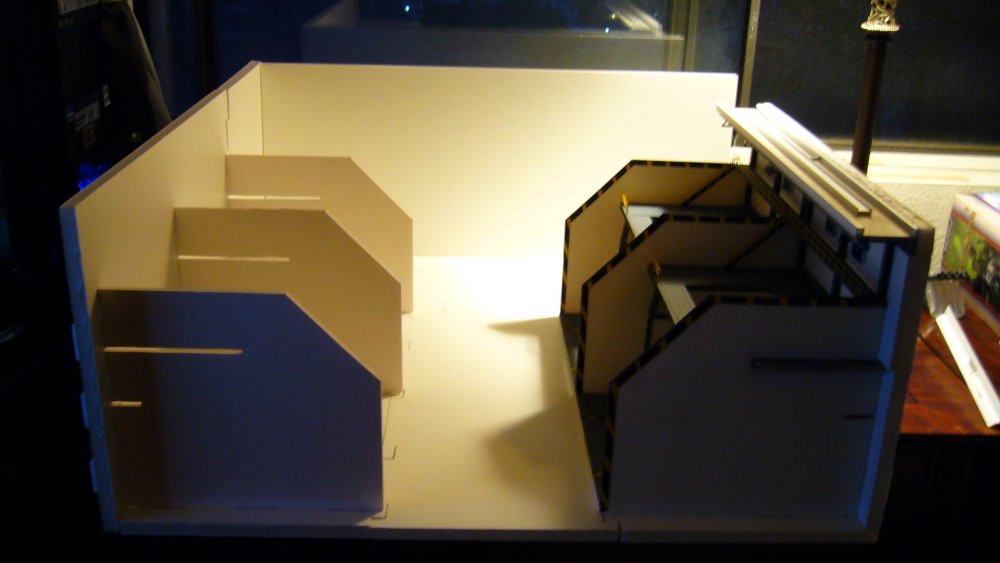
Hello All,
Well after much turmoil with the moving and selling bit of the condo,
I have finally been able to get back to this project. The first picture is a duplicate from
where I last left off and then went from there with new images.
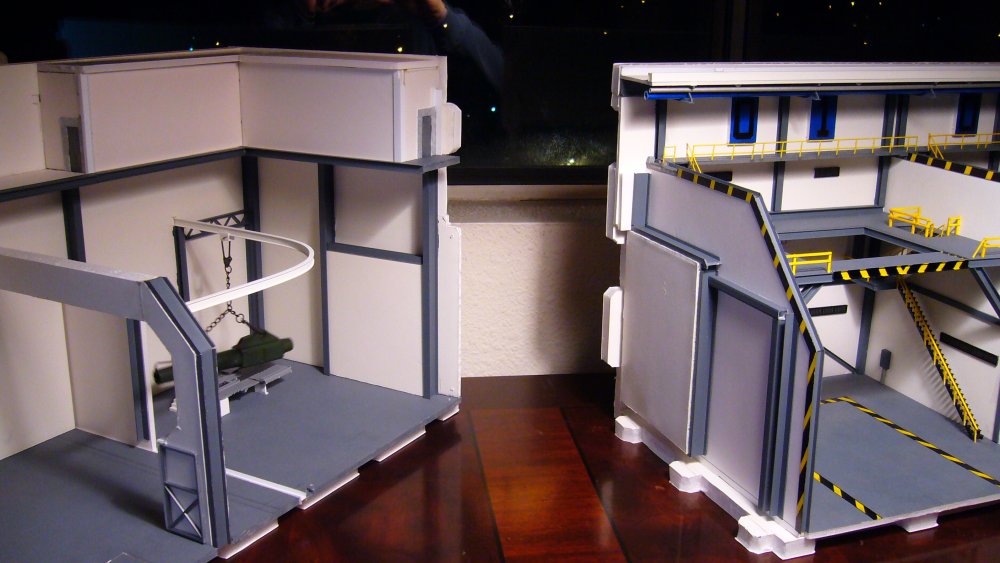
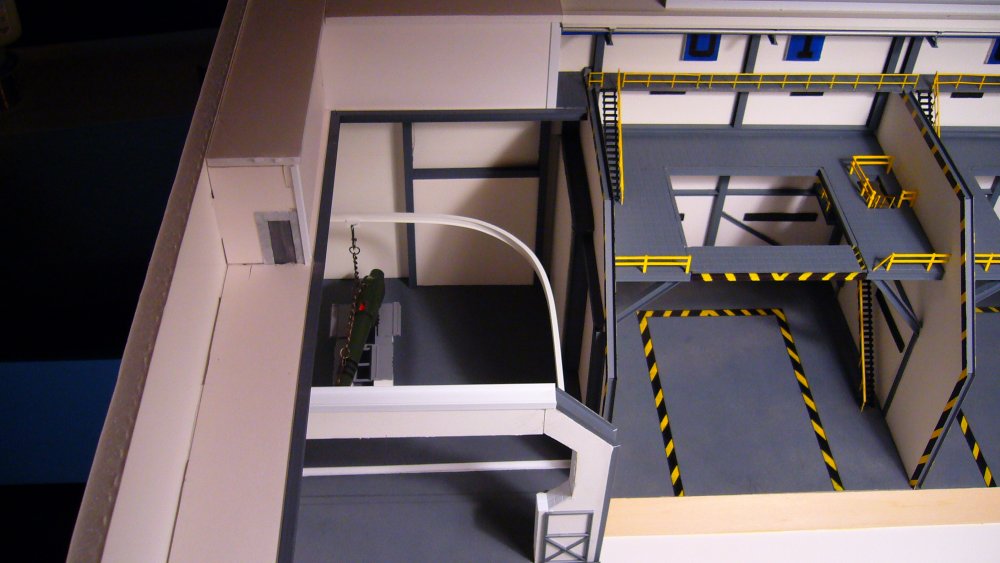
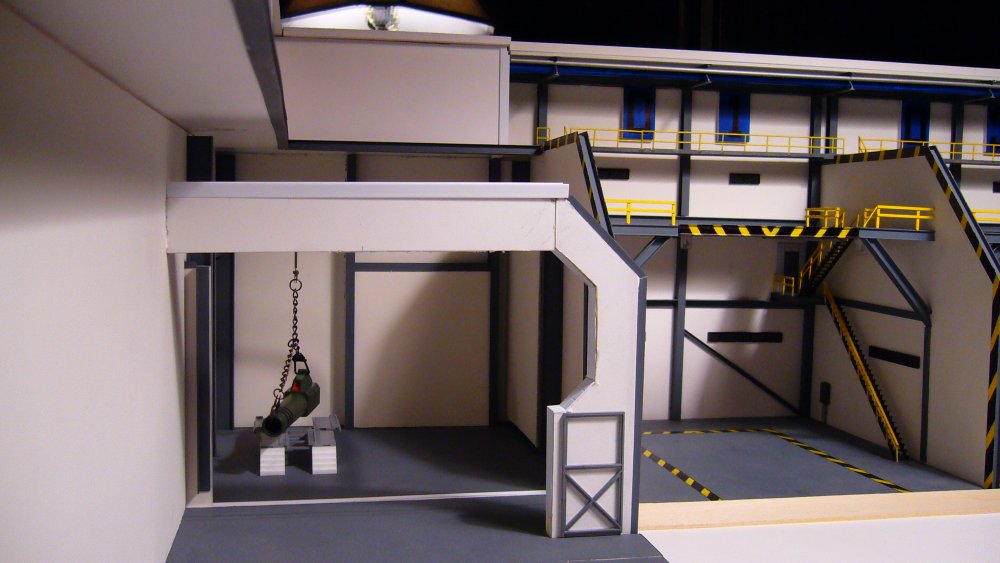
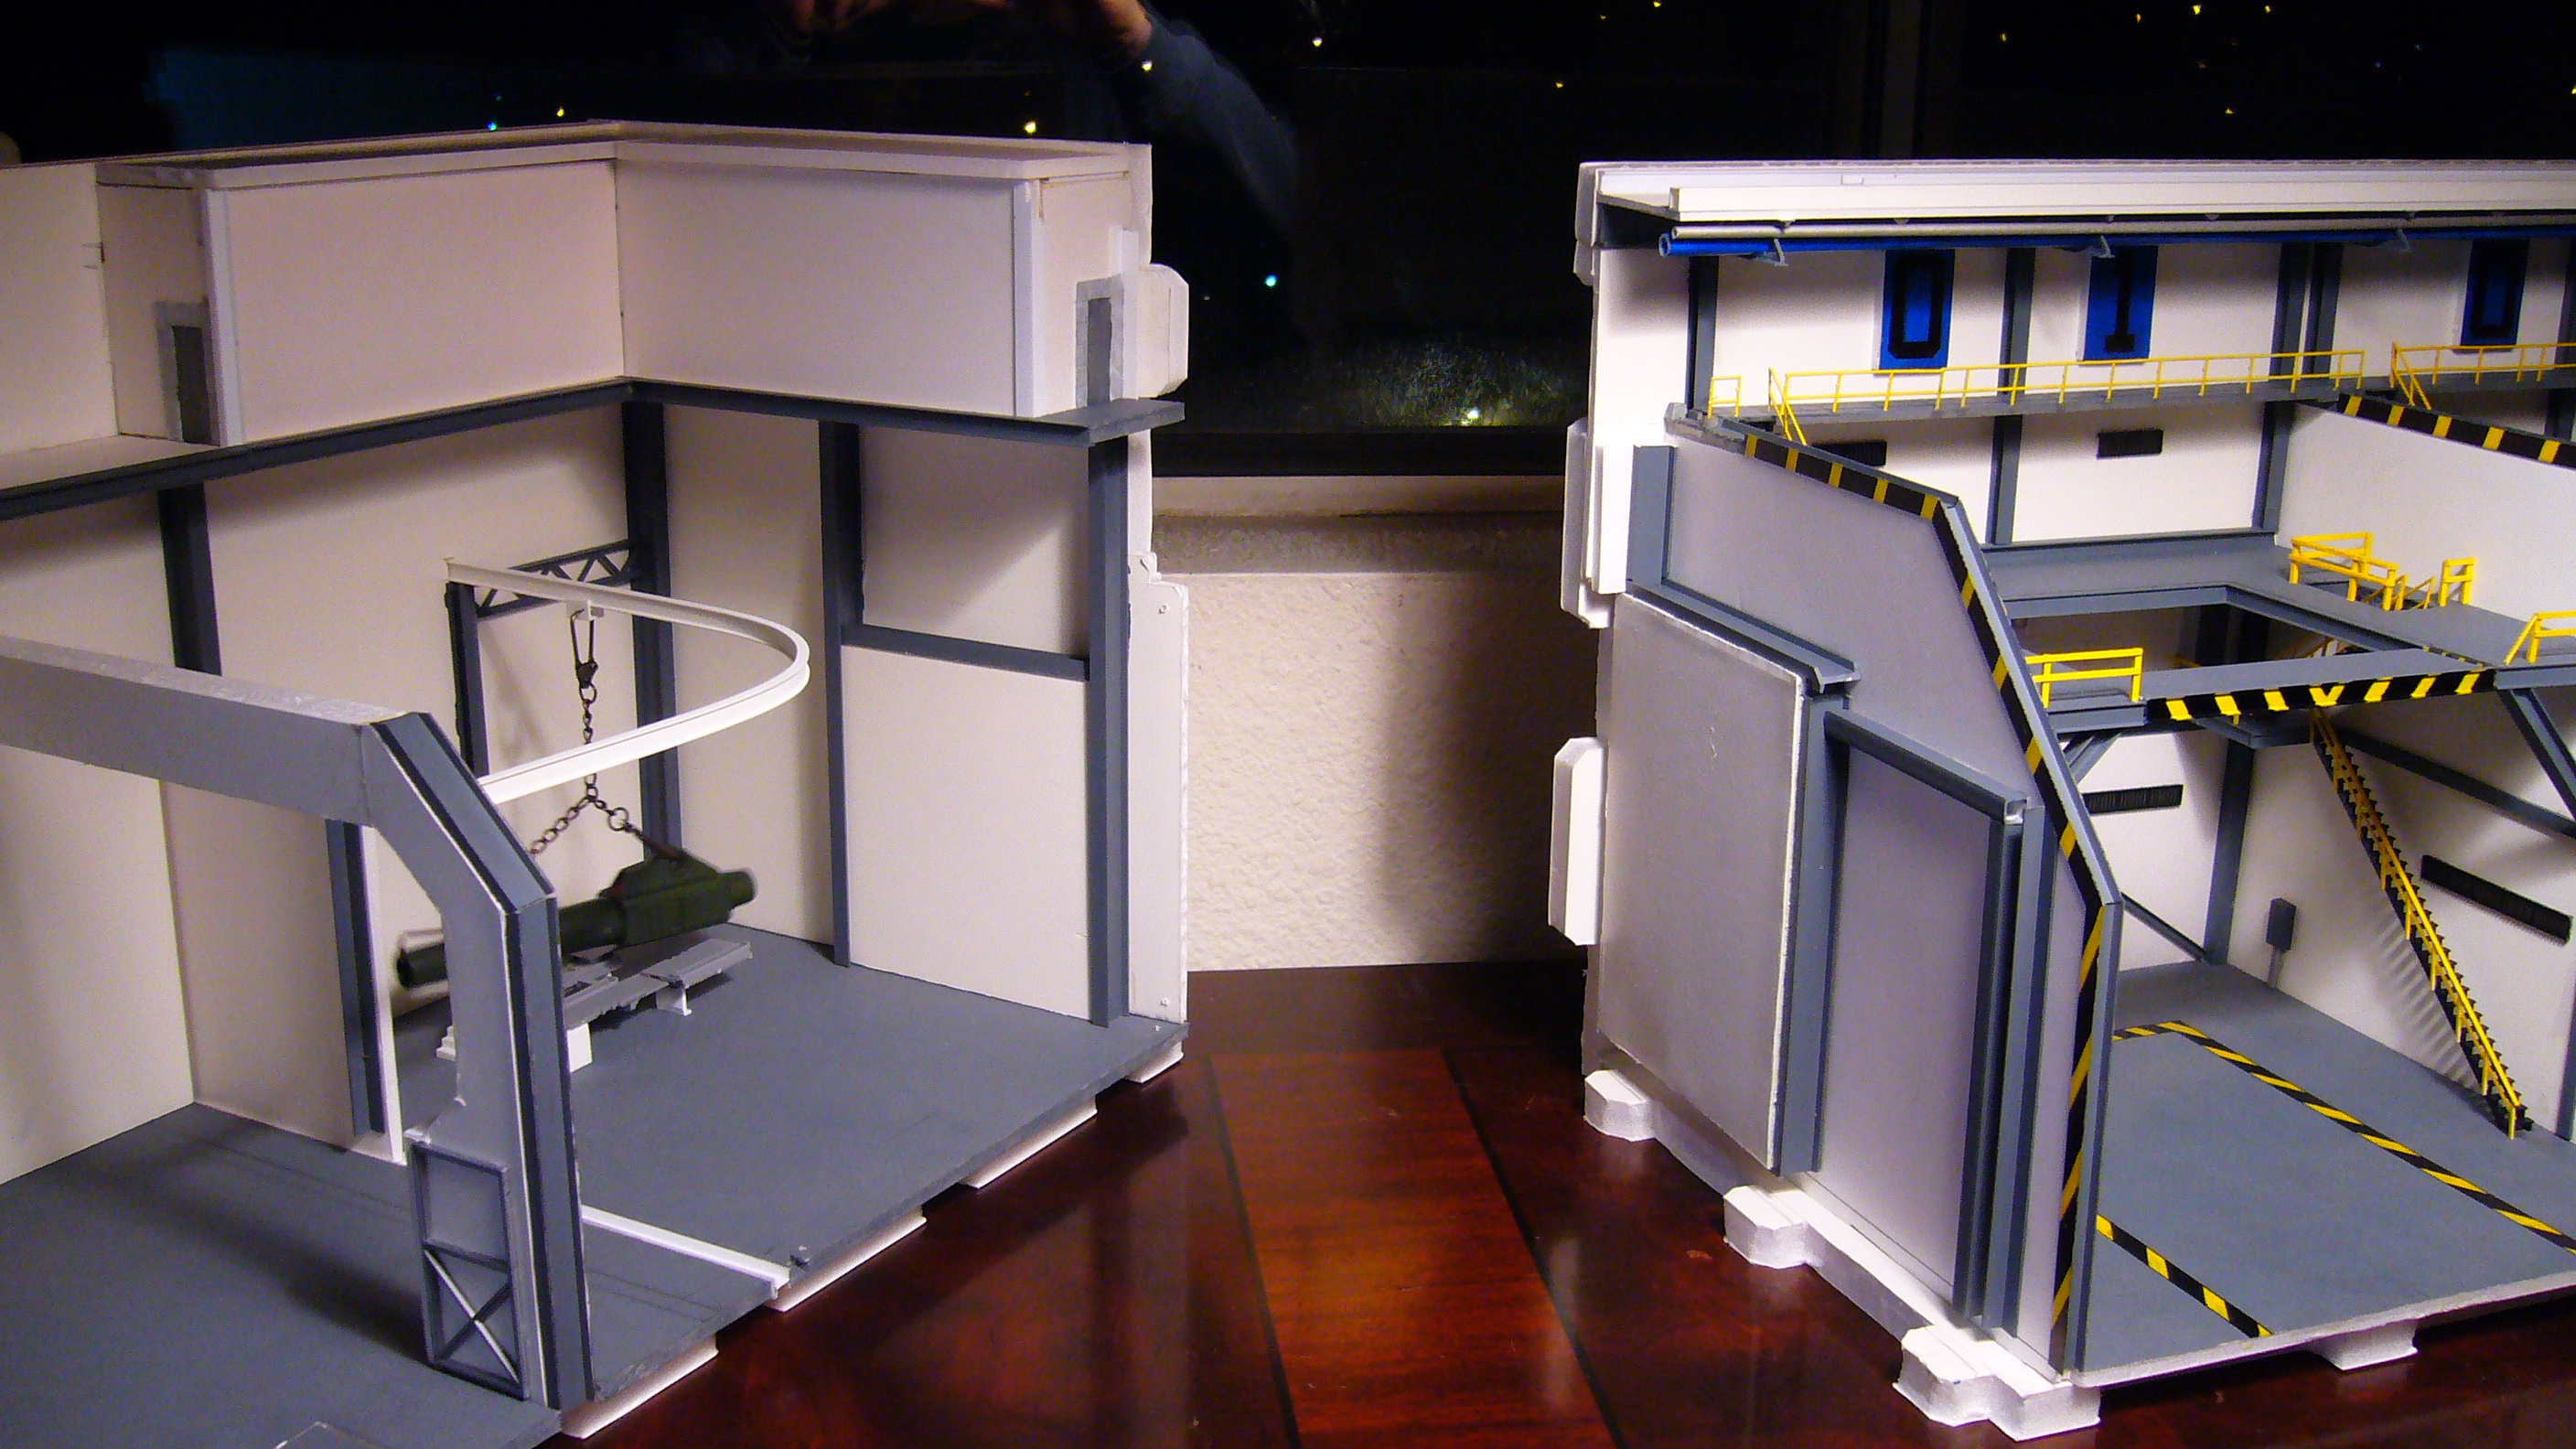
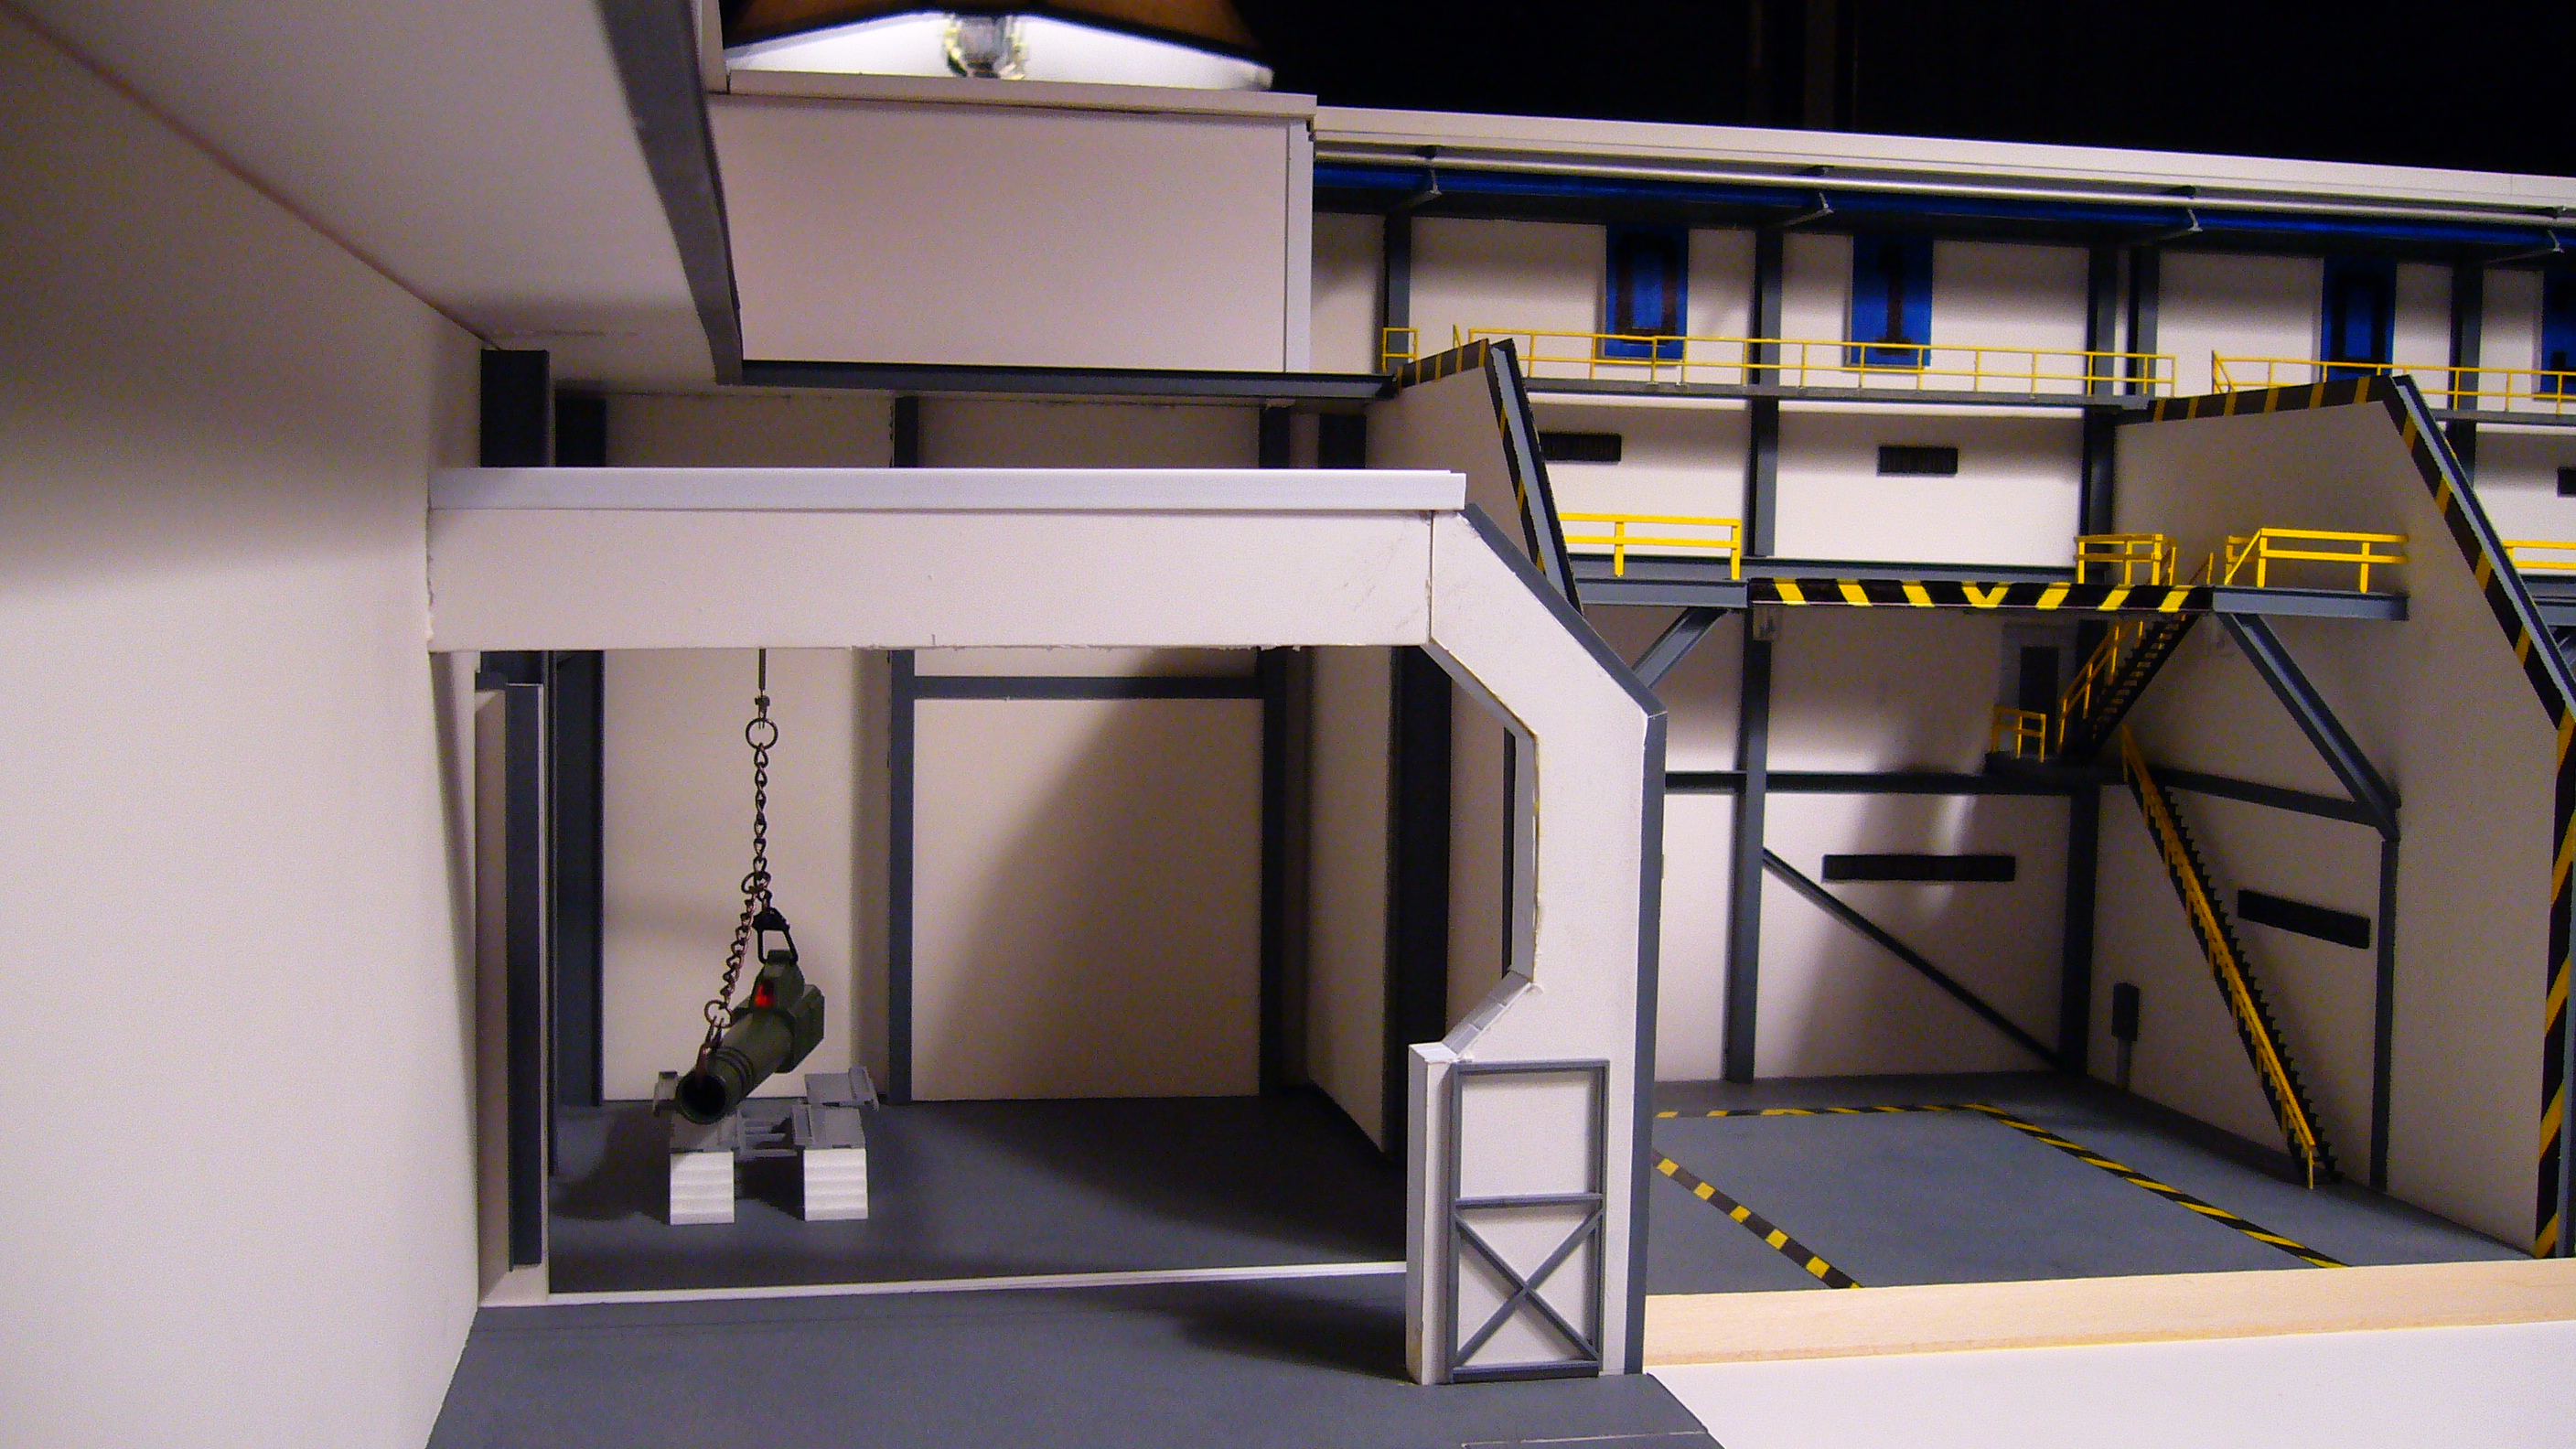
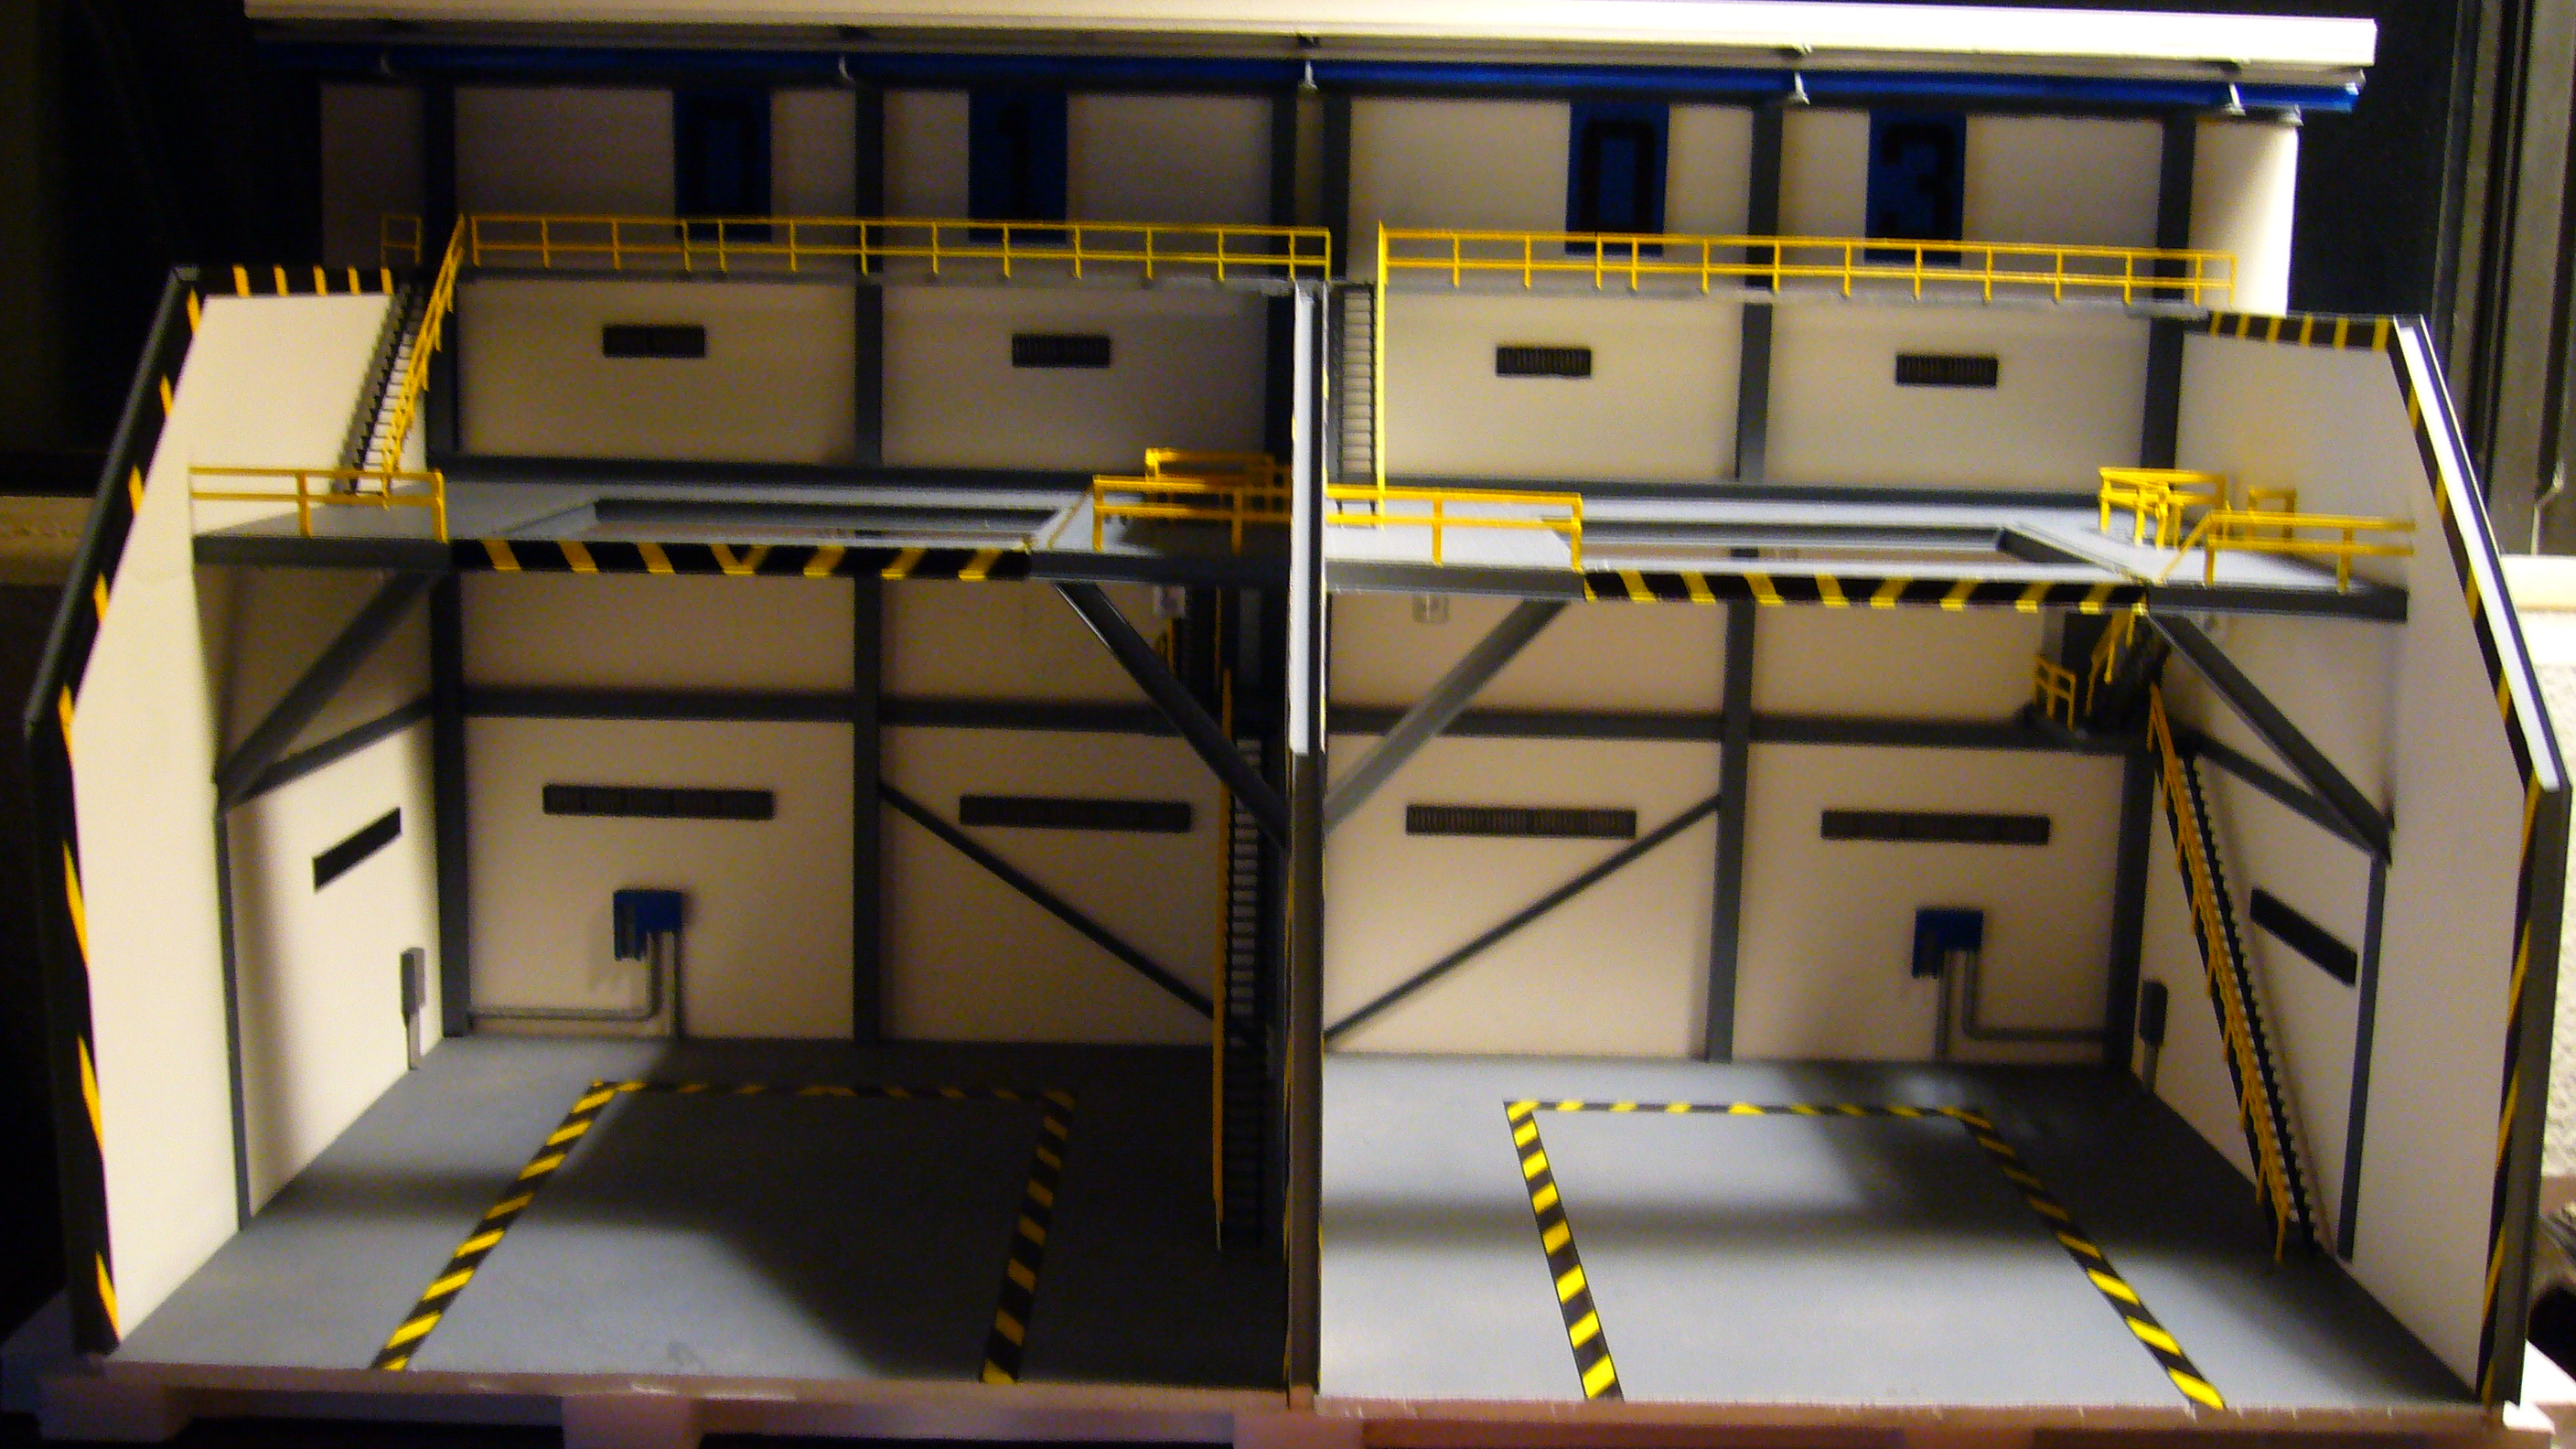
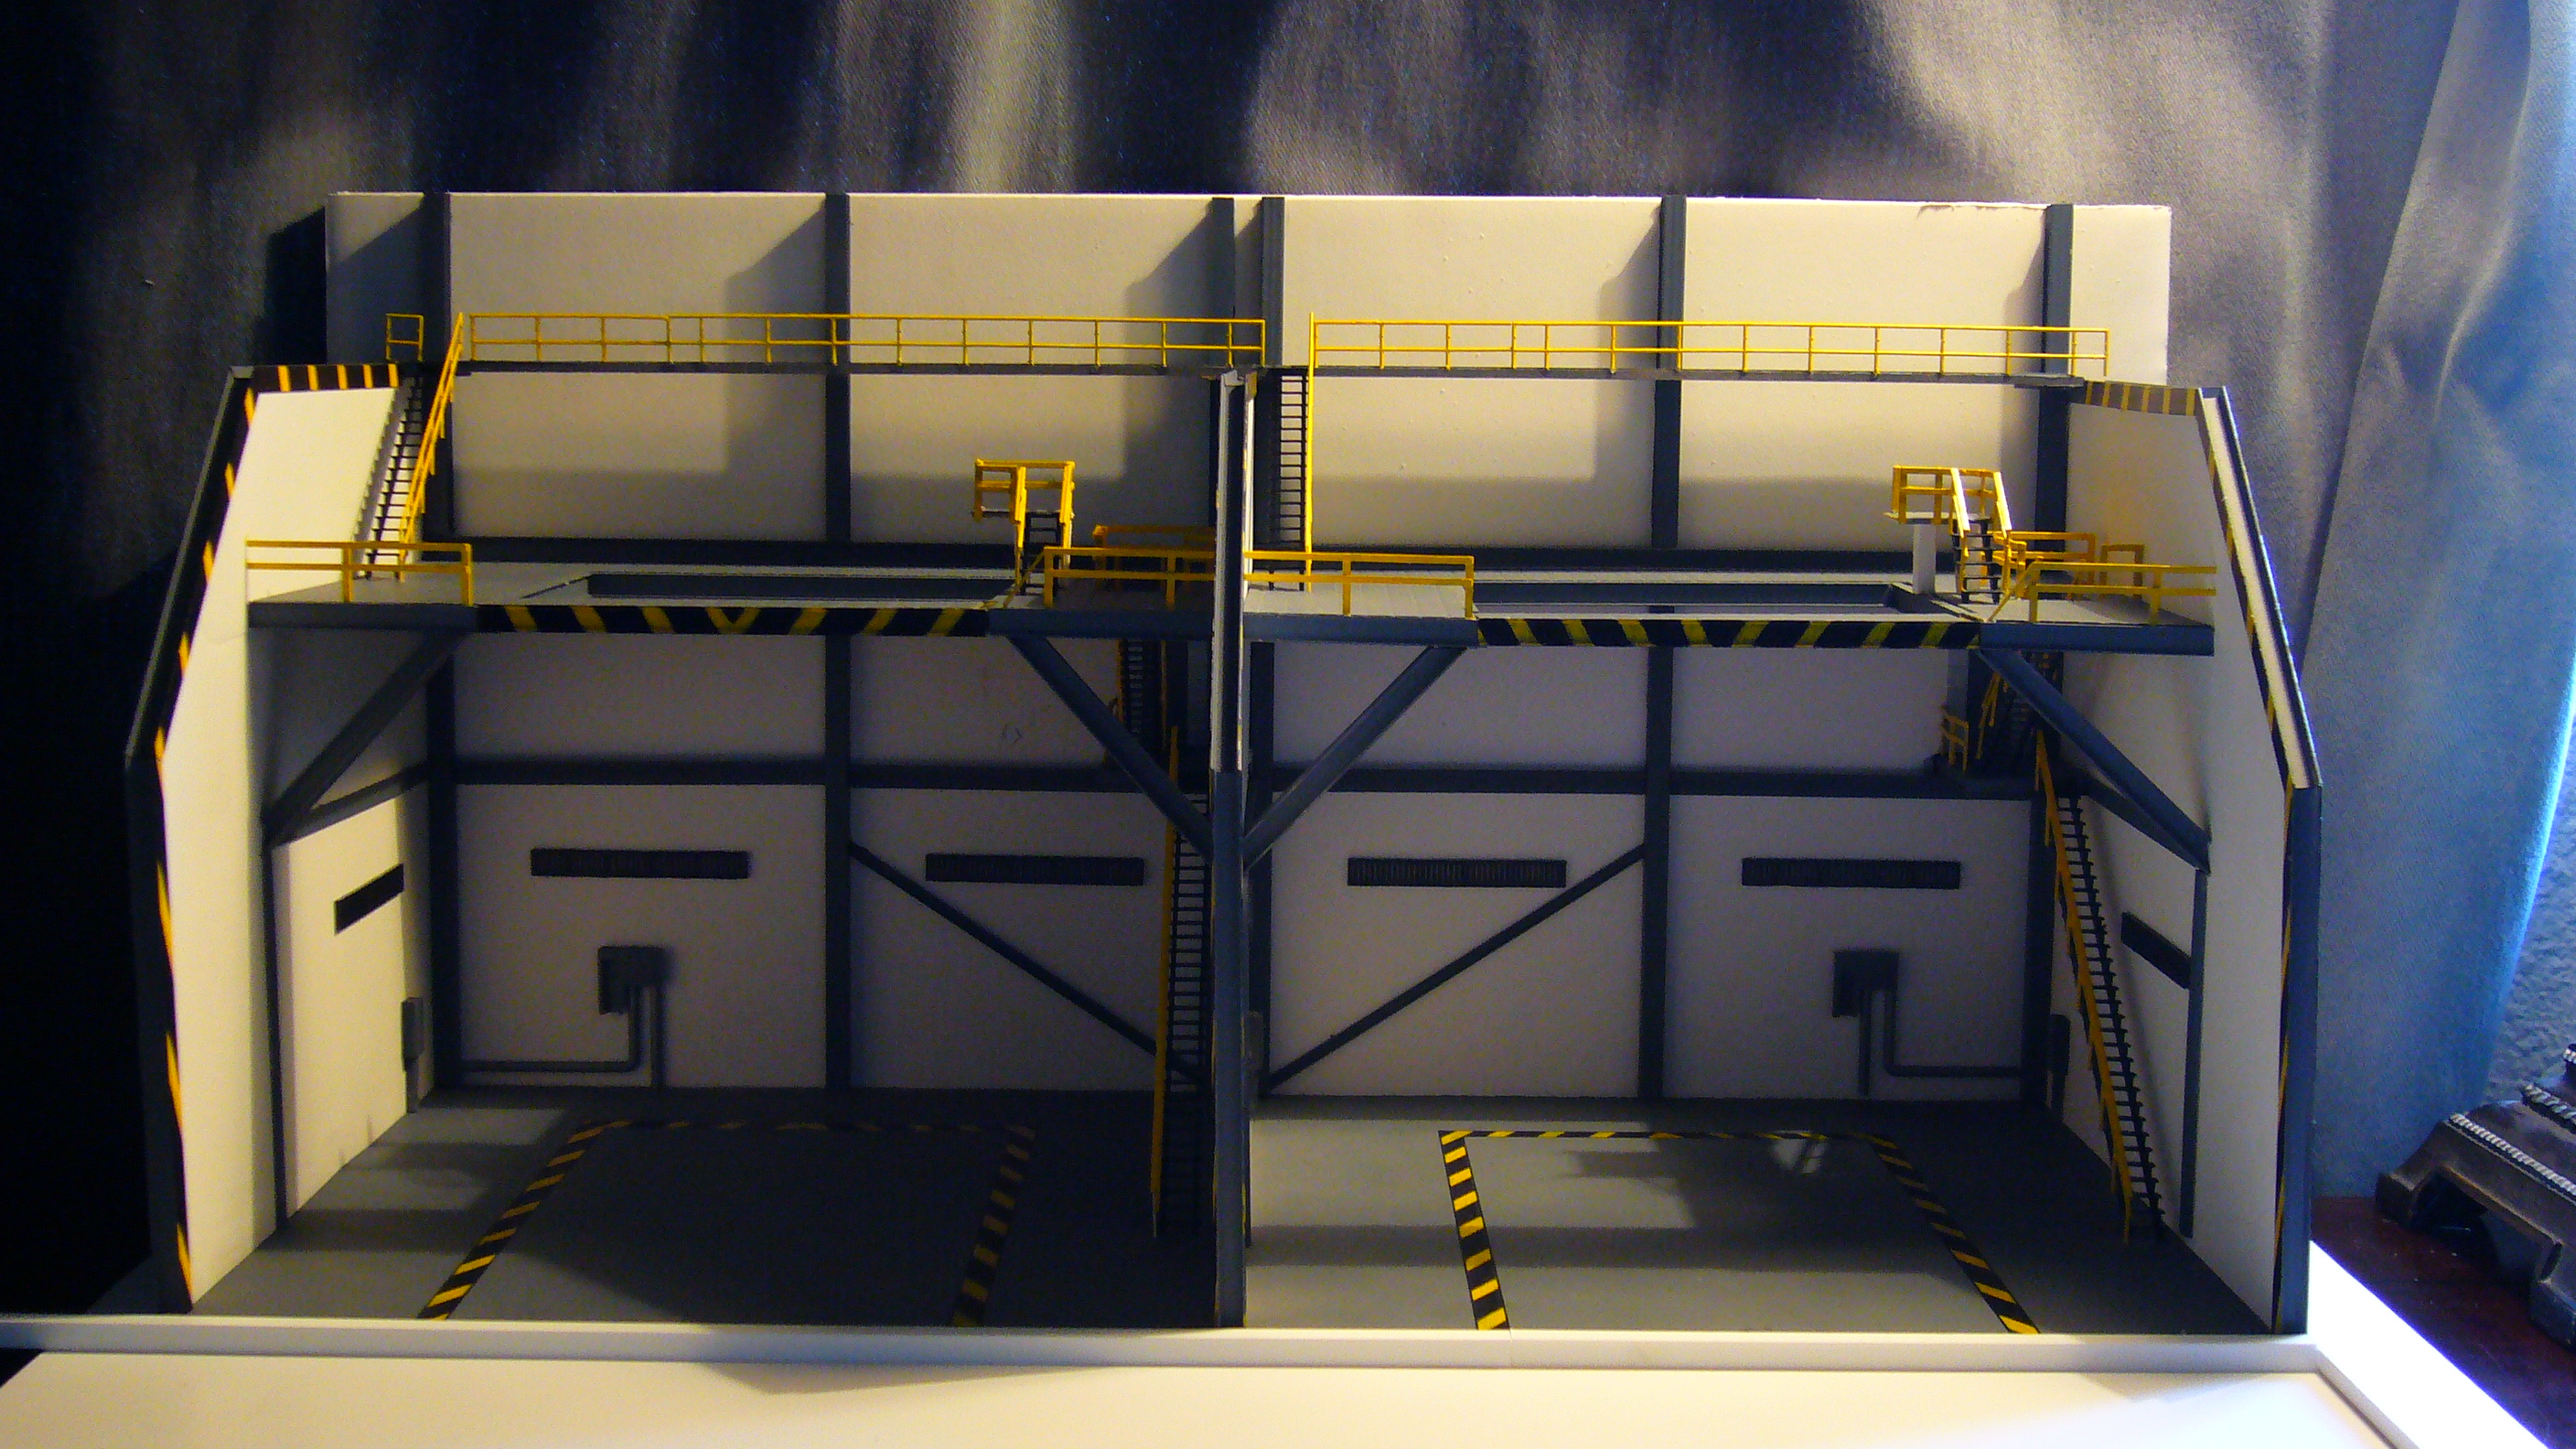
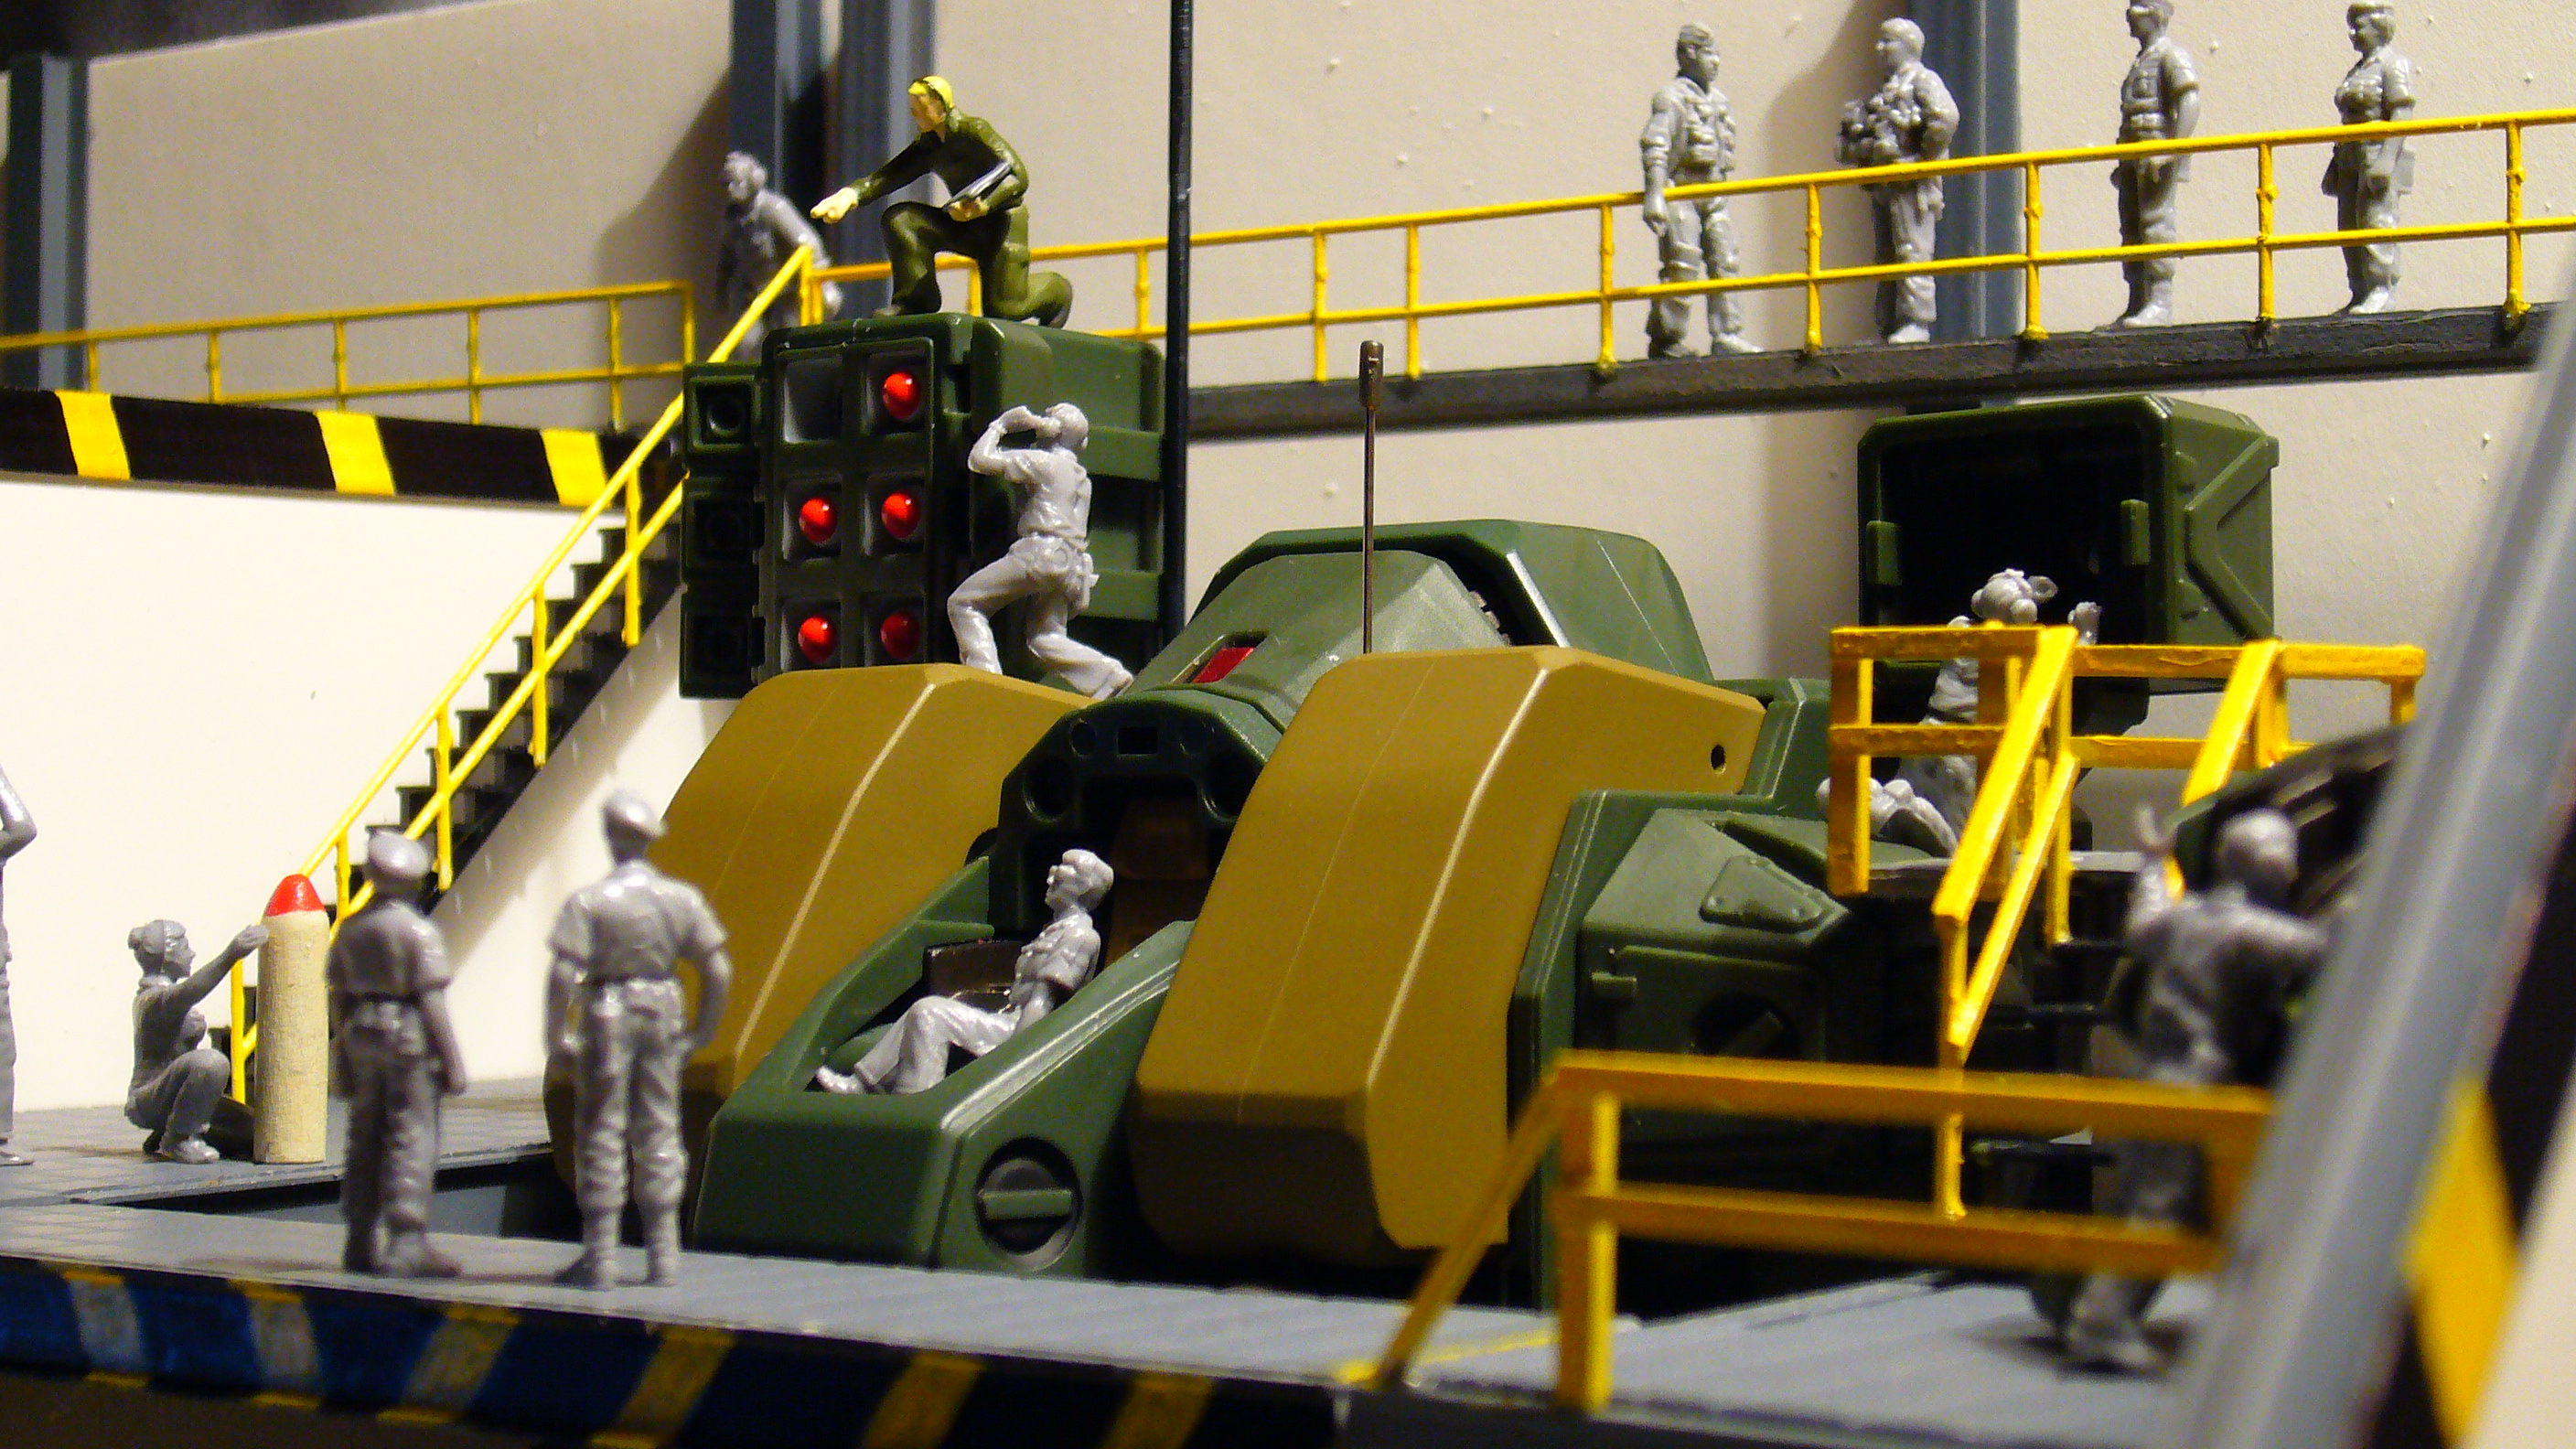
I have progressed with some detailing of the mated (double) hanger, however I have
moved my focus to the Weapons Repair and Ammo Prep stations within the Maintenance
Area section of the overall hanger build.
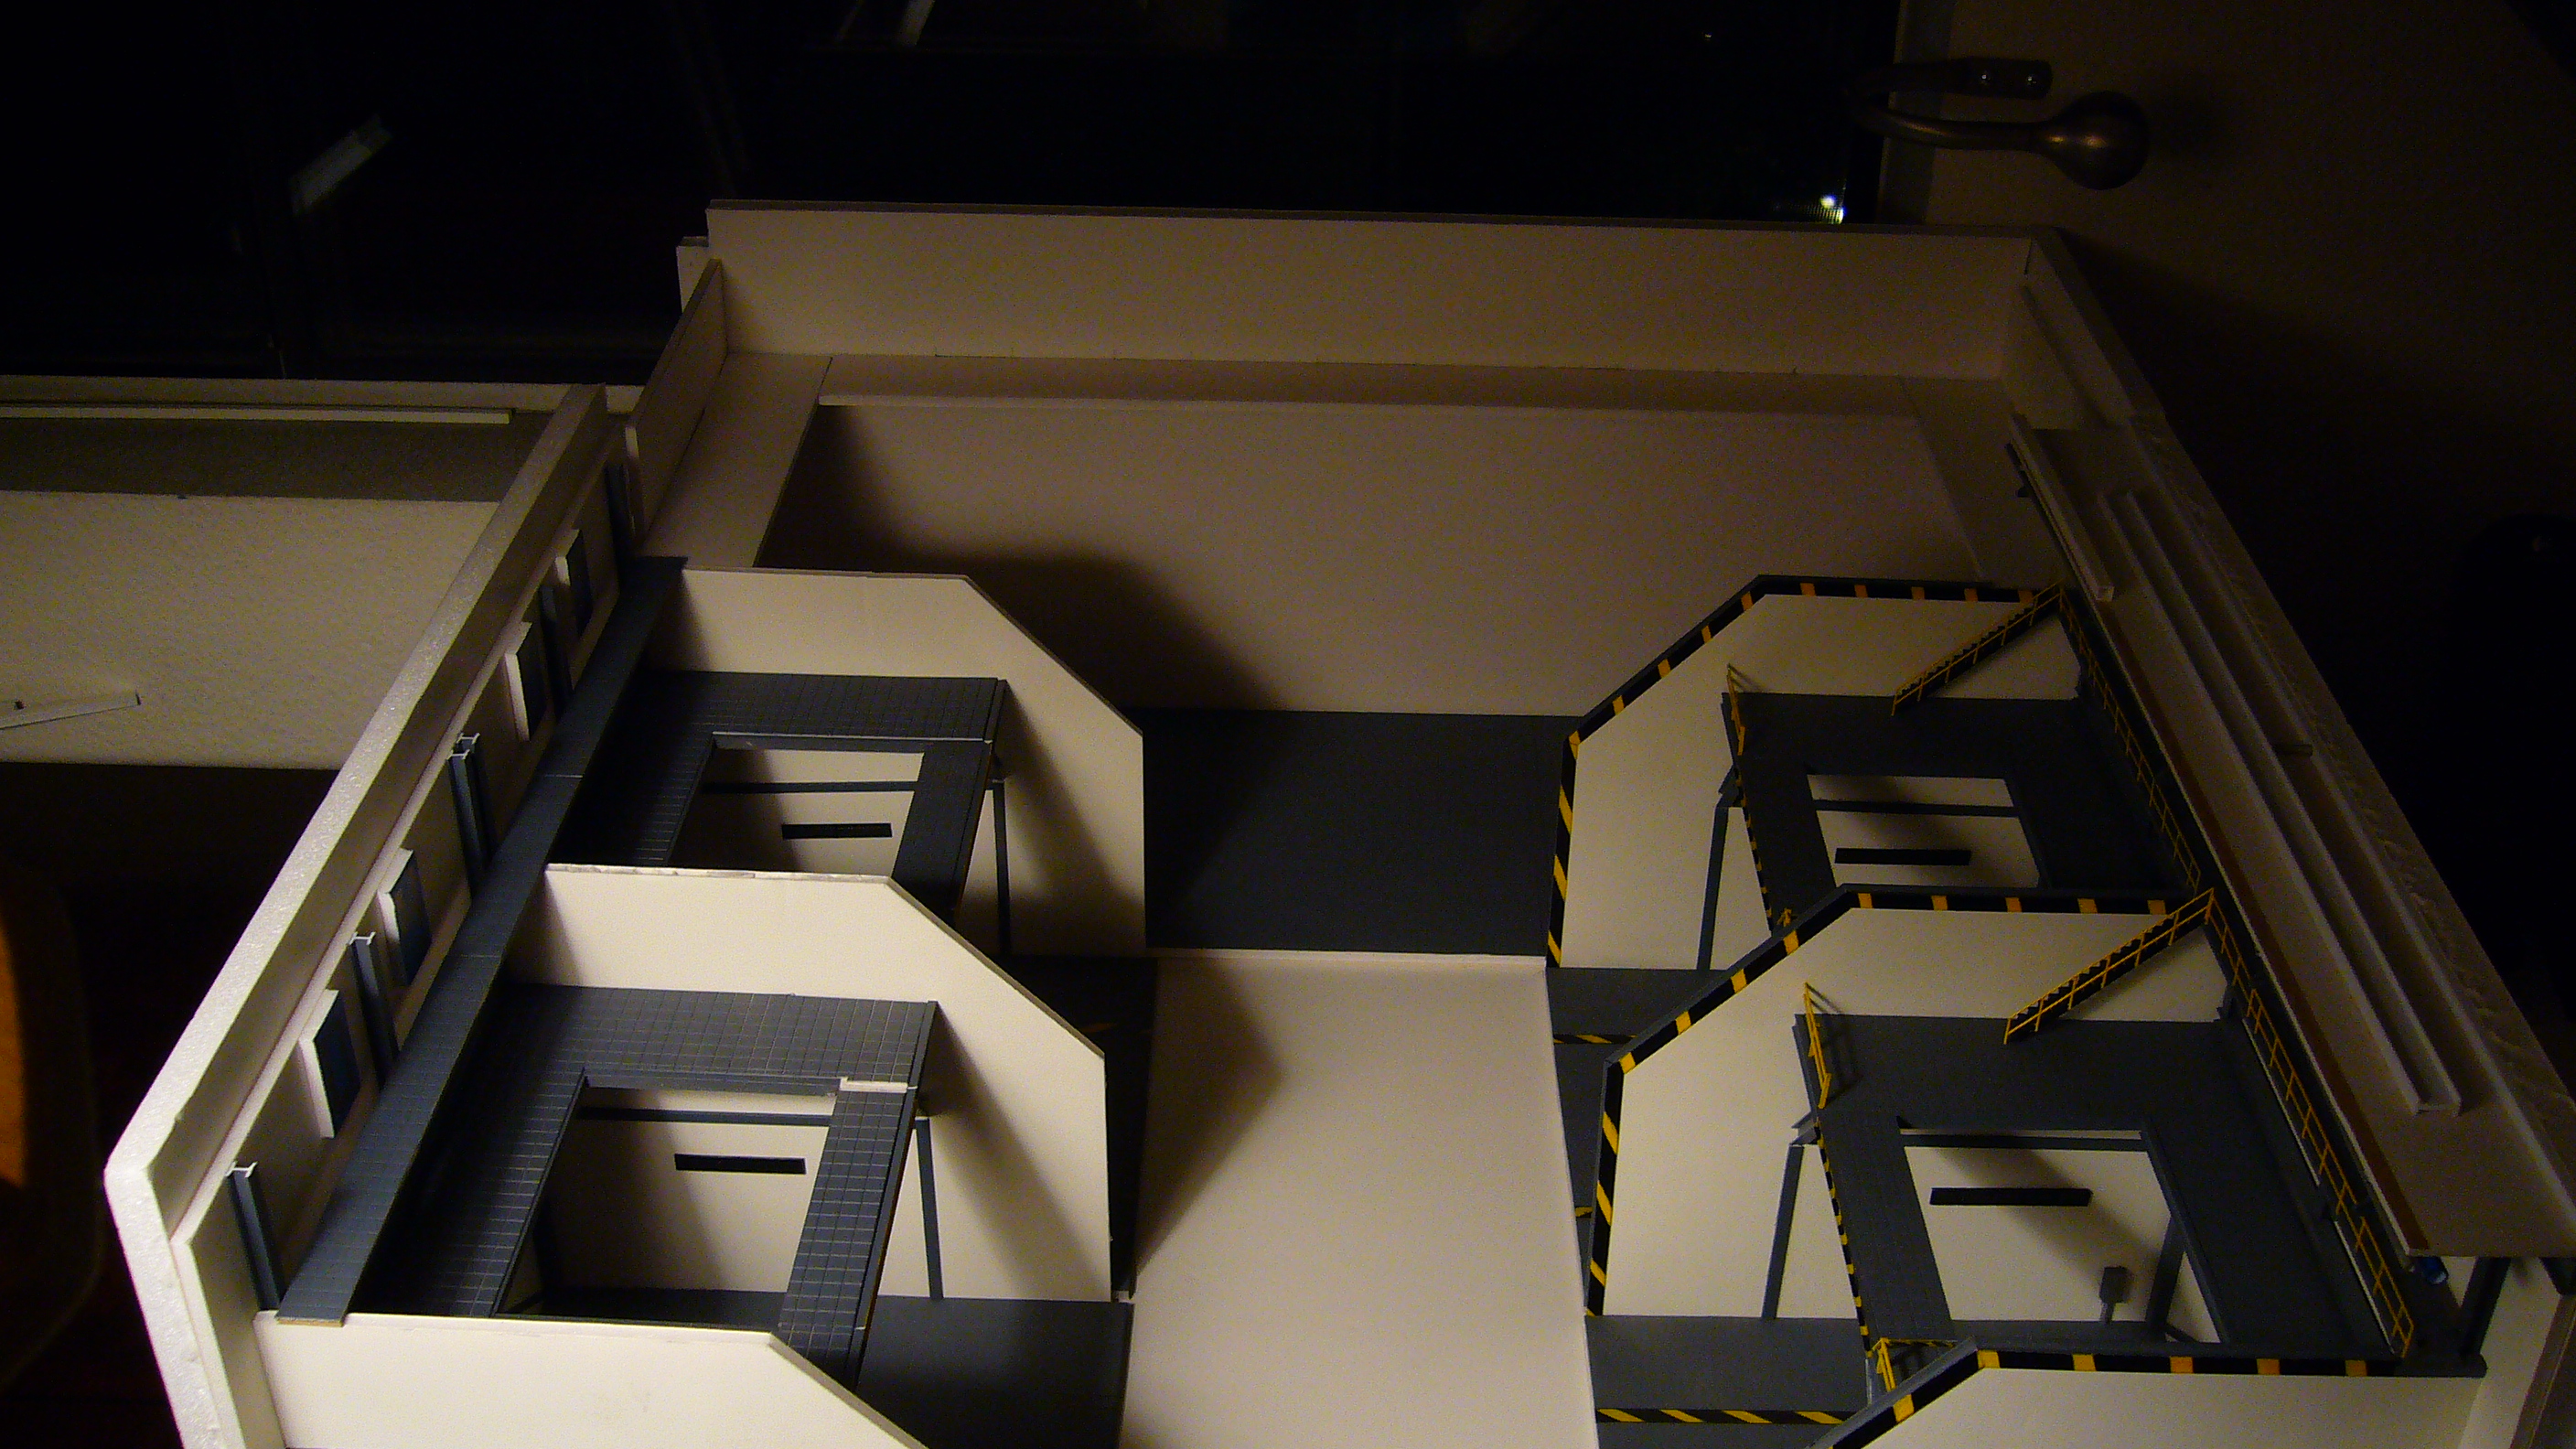
In the prep area you can see the initial foam board construction followed by added detail
to the walls and structure, as well as a weapons crane rail for moving the heavy cannons of the Tomahawk.
Also added is a divider door that slides open and closed to provide added protection and containment
during repair and/or reloading operations.
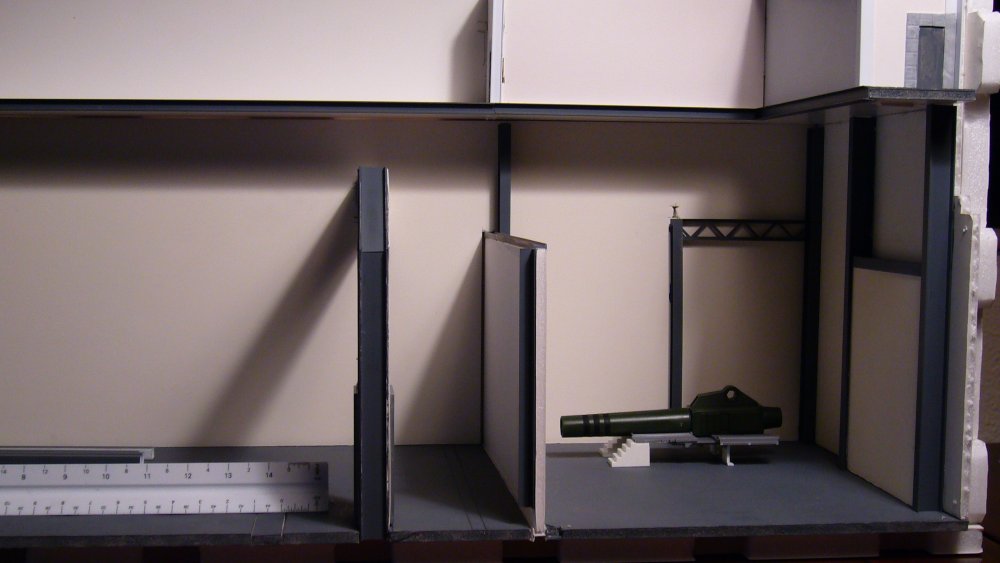
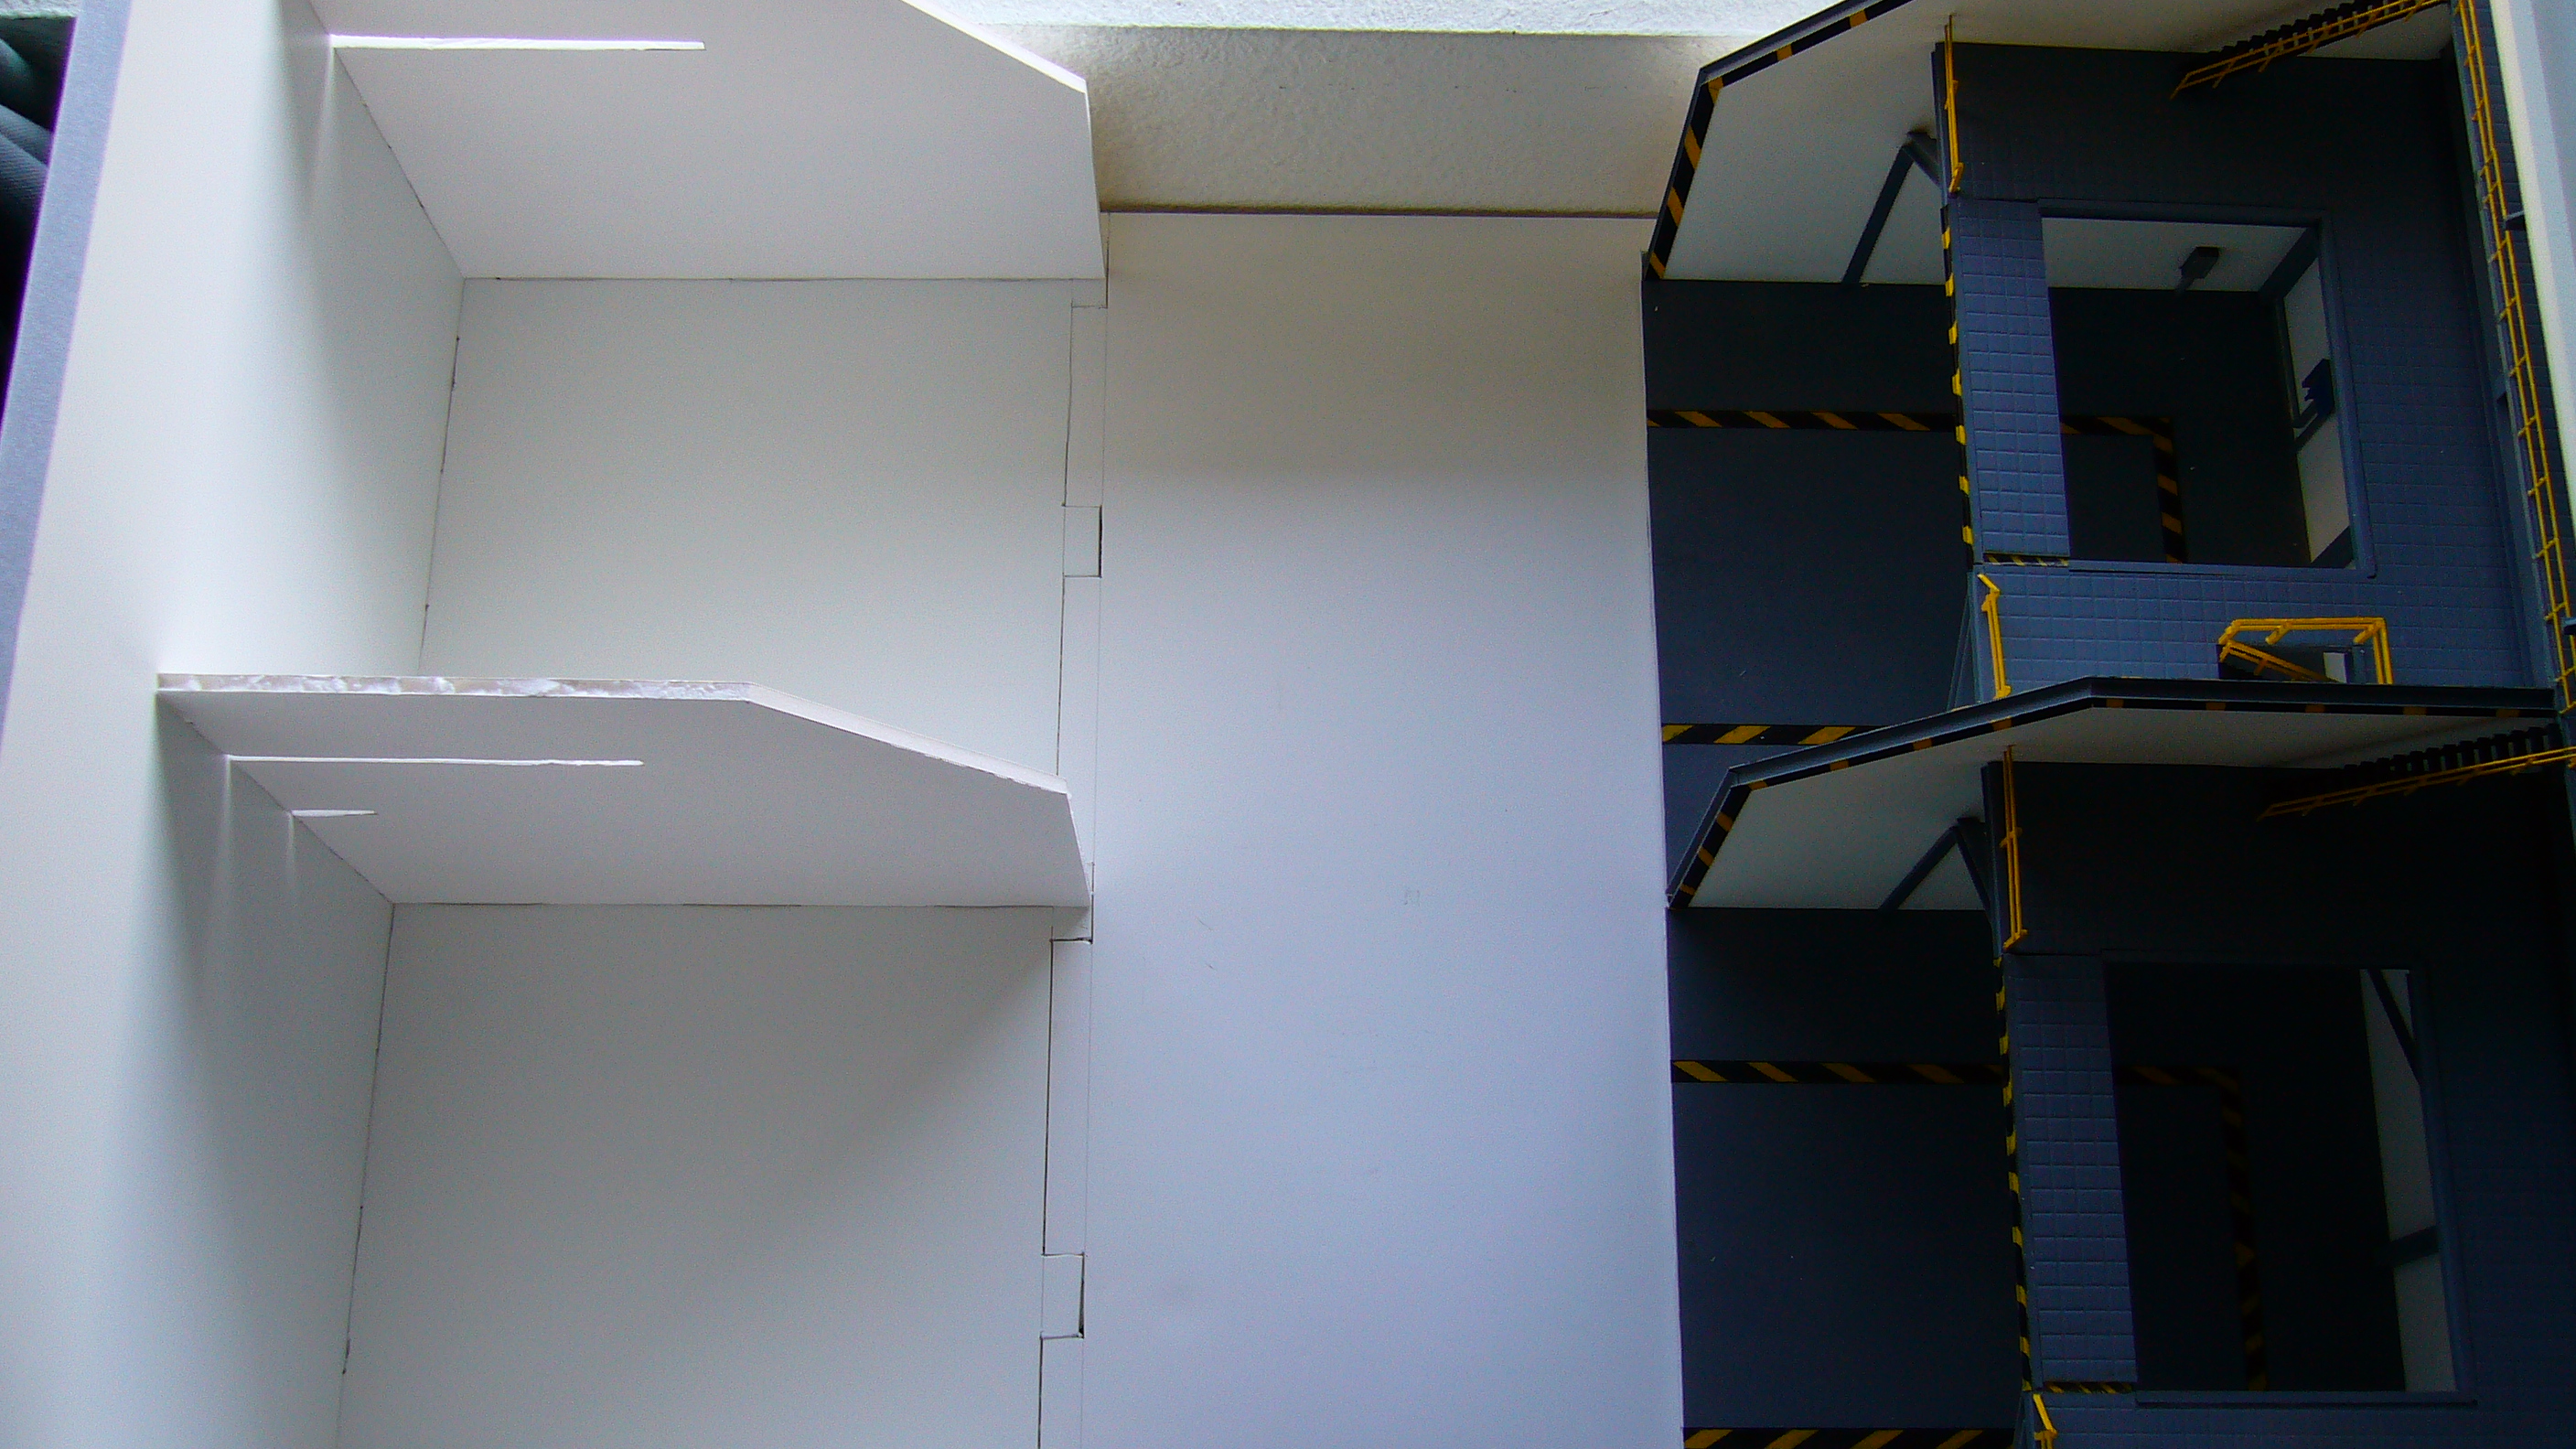
The last 3 pictures show how the Maintenance area mates up with one section of the (double)
hanger bay and the causeway (thus showing off the modular aspect of this build) and also provides
a close up of the Weapons Repair/Ammo Prep Area.
Hope you all have enjoyed these pictures and I look forward to seeing you again with more progress soon.
Blue

-
Congrats Yeti!!!!
These panels are looking great and I see you already have a few people interested in them.
I'll put in some plugs for you, spread the word a little more and see if I can get you more leads / Customers.
Anyways kudos to you and don't forget to check your (personal) e-mail. I sent you a reply.
Blue
-
Just an update for all of you who have been fallowing along.
Wanted to apologize for this post going stale. I'm currently in the process of selling my condo and relocating at the same time.
I honestly haven't made much progress since my last post and would like to let you all know that I will continue as soon as I can.
Thank you all for your support and for viewing this build.

Blue
-
WoW! very good work Iceblue 106, it look awesome!
Are you going to make a weathering on the hangar+tomahawk after you finished all the paint job?
There is a good possibility of doing just that however it will be when I build a hanger for my own personnel display...
This one is for Rob and is based off of his story.
-
Man awesome work!!! When are going to start taking orders? =) Lmk hehehe very nice.. I need some diorama now for my collections
Thanks for the compliments Kicker, however I'm uncertain if the worth of the hanger would match the cost.
Meaning that the materials (Mostly styrene packs) tend to cost more than I think one would pay for a completed basic model.
To fabricate a complete 2 bay section without lighting costs around $60 US dollars,
and it costs me around $80 US dollars with lighting and power adapter. (and that's the pricing just for materials)
Unless I can find a cheaper distributor for the styrene pieces, than I'm afraid the above costs would have to be
the bare minimum charge not including labor or shipping and handling. Not to mention I still have to complete this
larger build that I am working on right now. If the interest is there, I may be able to build some kits for individuals
should an agreement be made with cost and time issues. As for now I will focus on this build, but to all the members out there
who would be interested please PM me.
Blue
P.S. the above mentioned cost for materials only will result in a build similar to the picture below.

-
Hey Iceblue...
Sorry for the late reply... still in sculpting mode. These pilots figs have way more details than the others. I thought it'd be faster to do them all at once but it's not... lol.
I'll send you a PM soon with answers... thanks!
Everyone else thanks for being patient.
Not a problem >EXO<, I'm a patient man. Thanks for the reply and I'll be looking forward to your PM
Blue
-
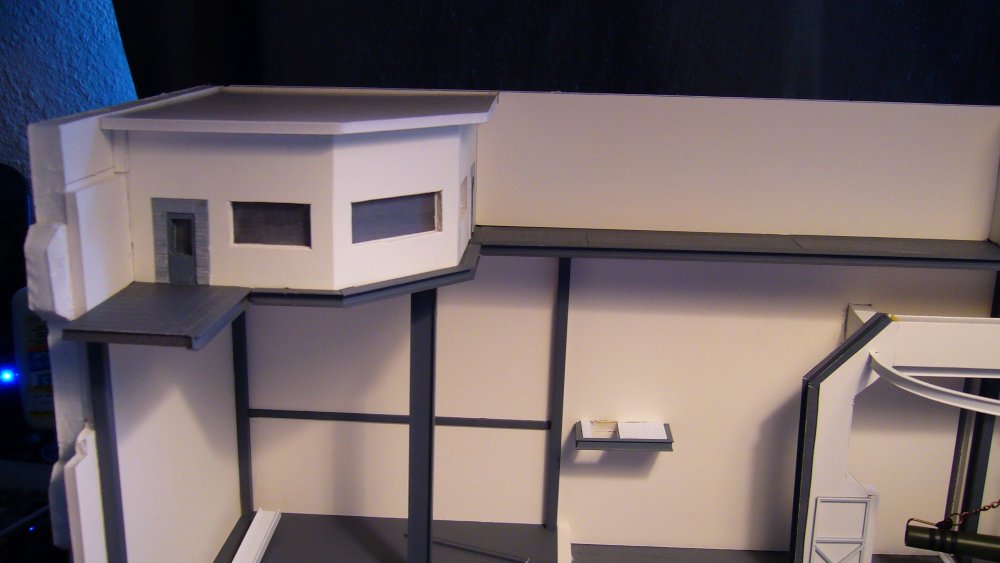
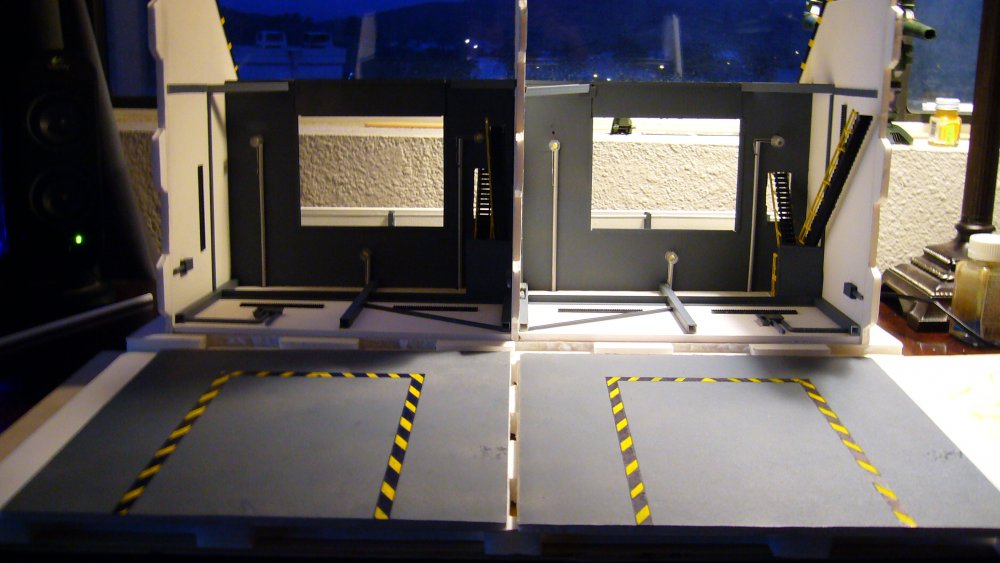
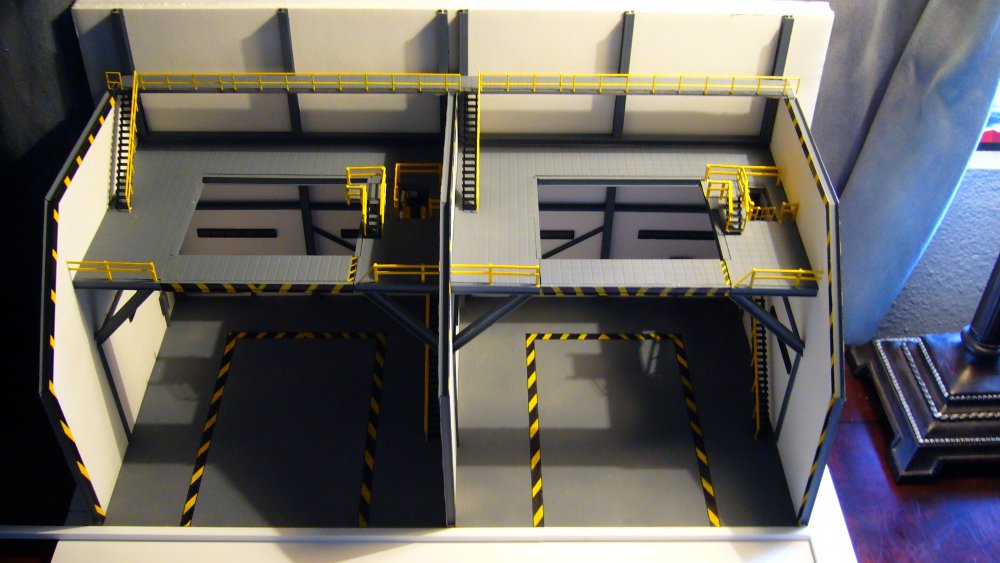
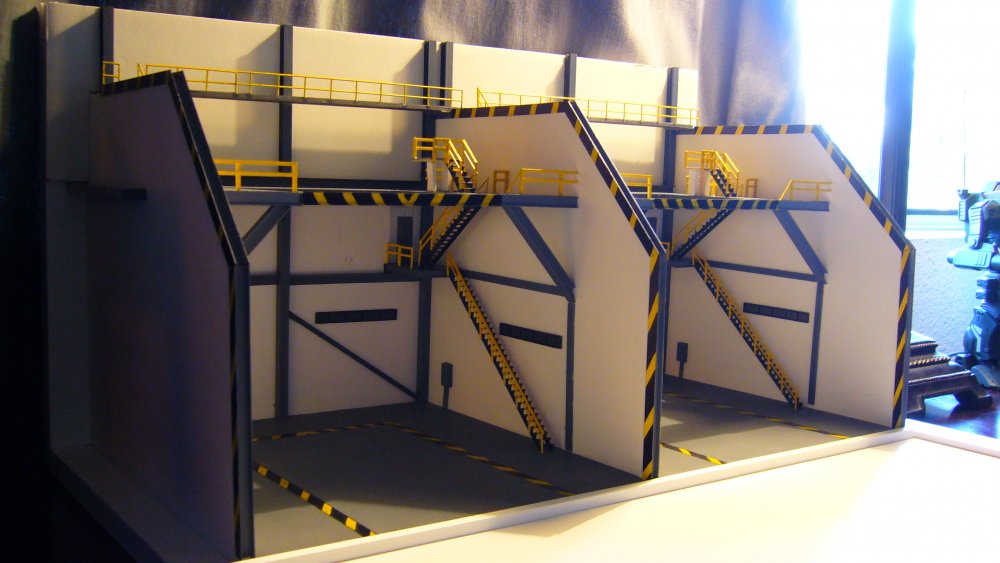
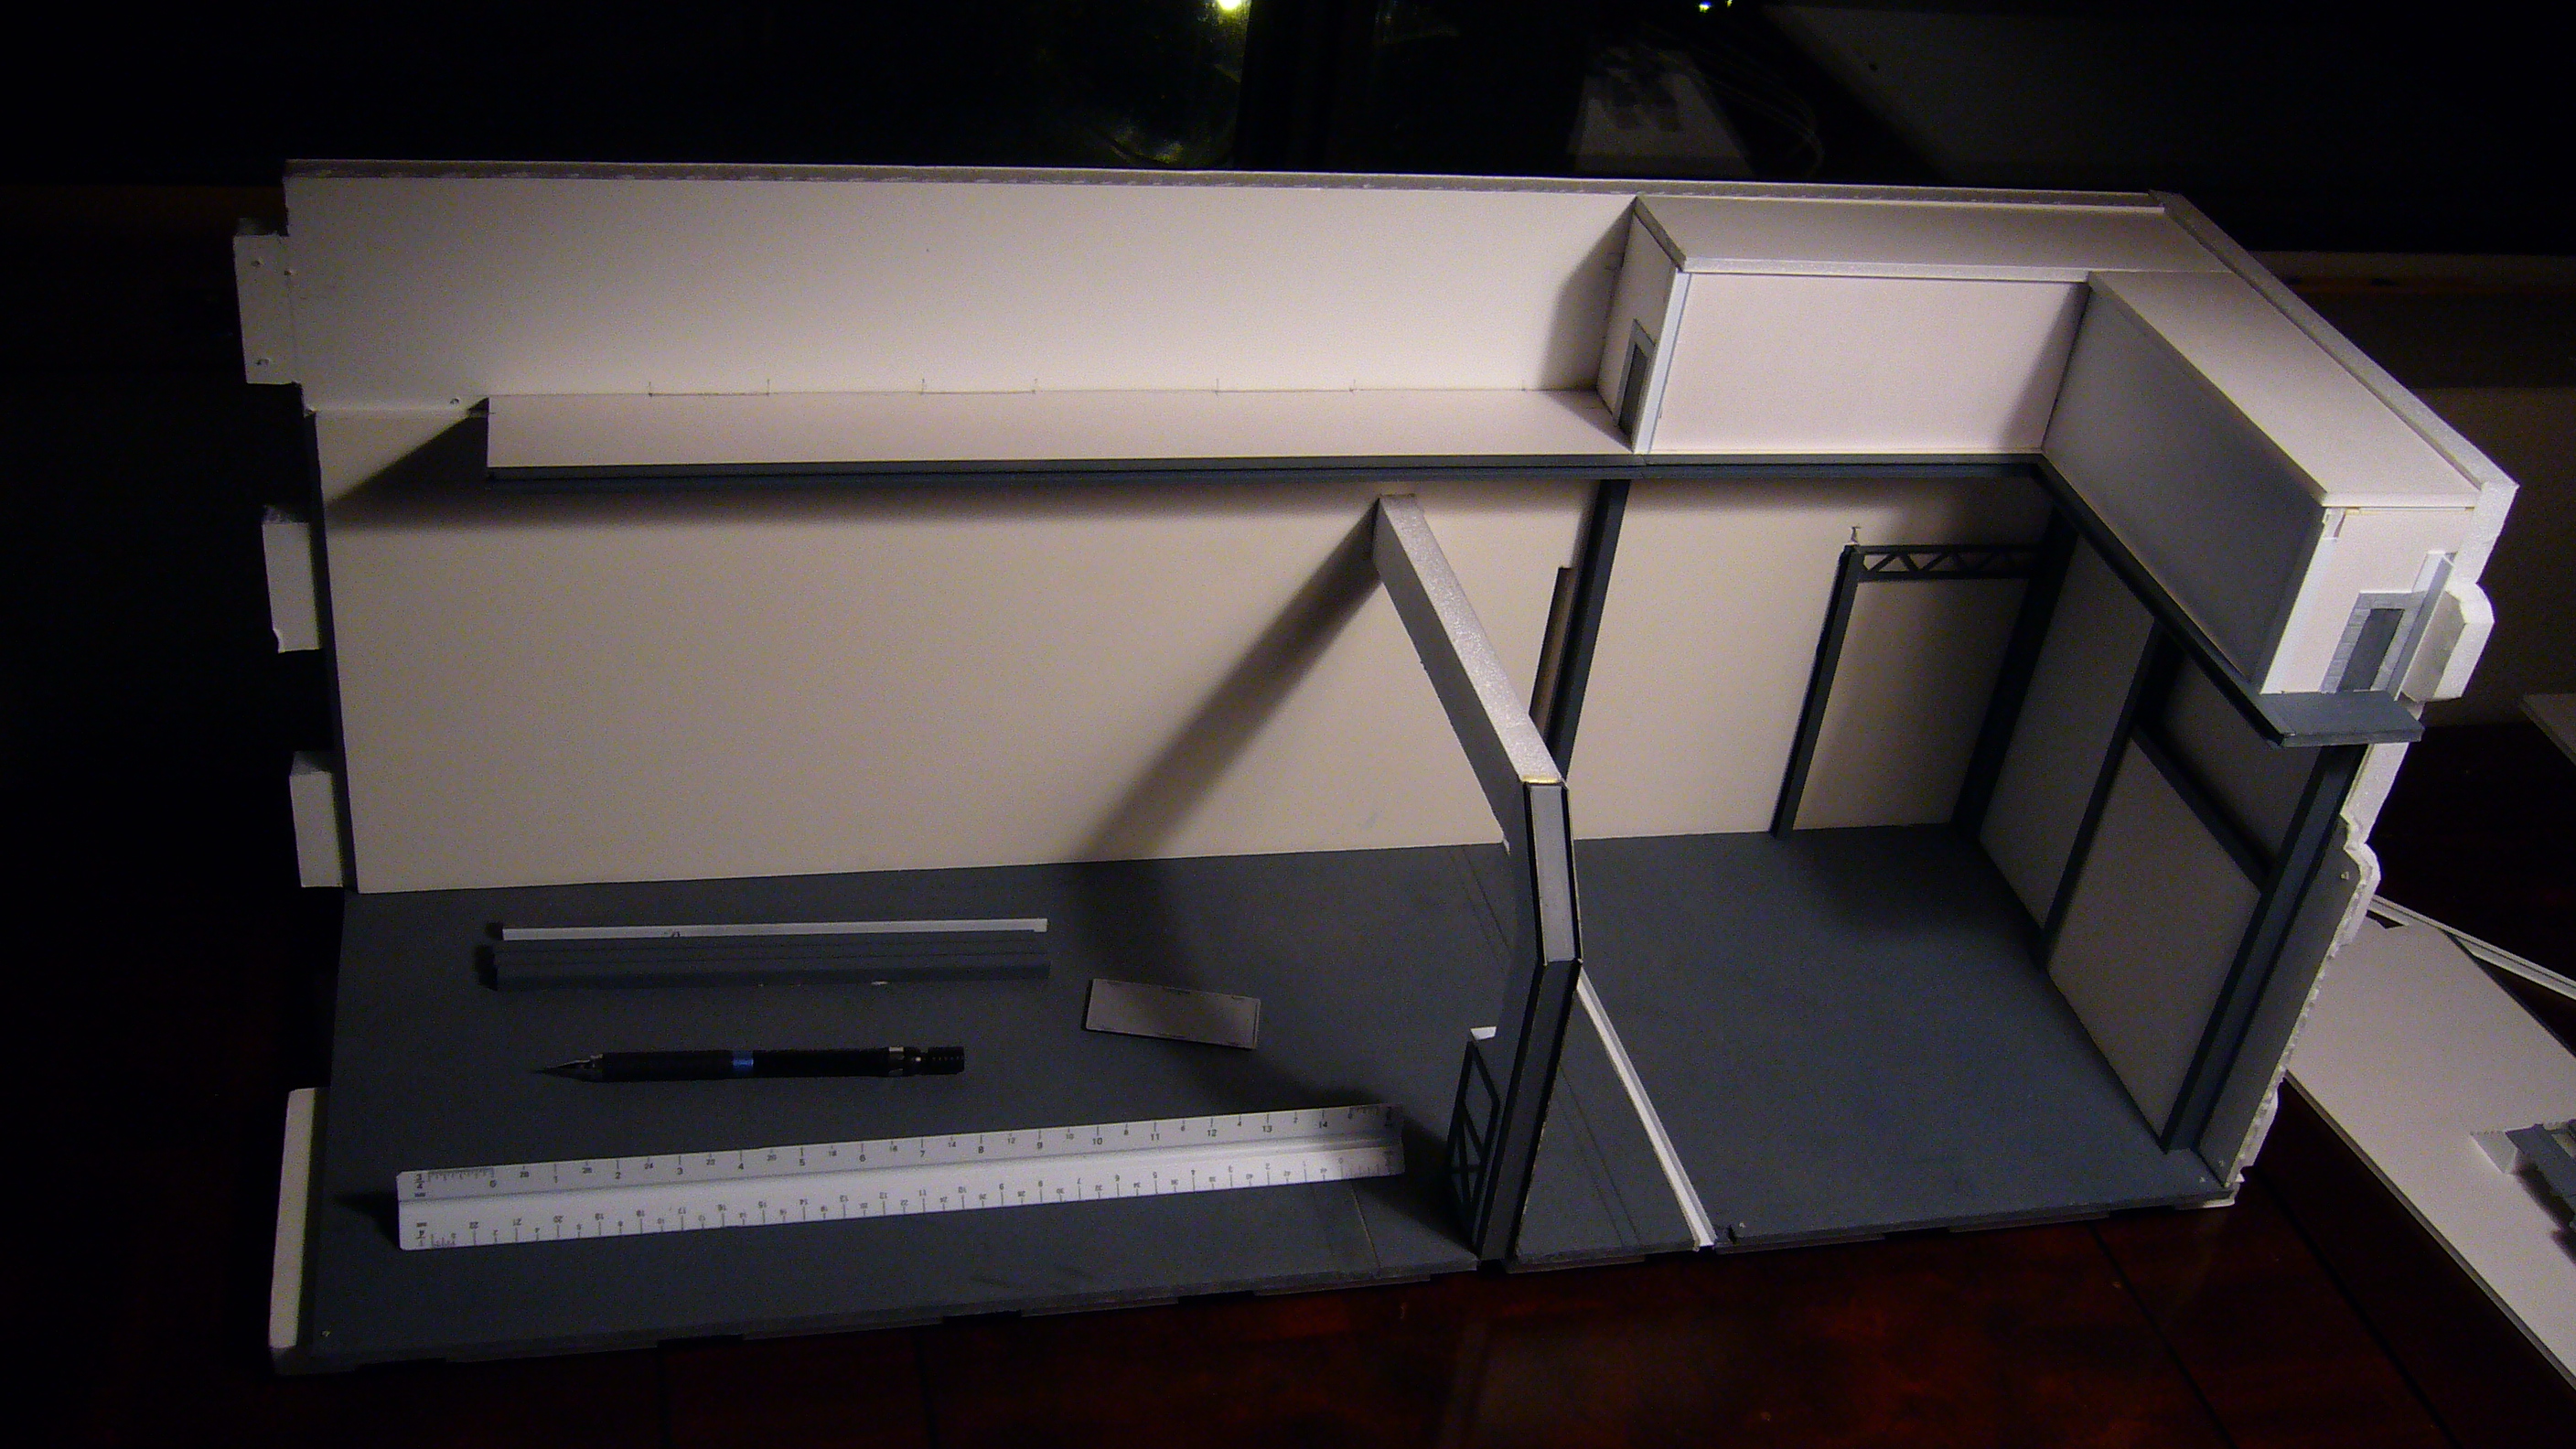
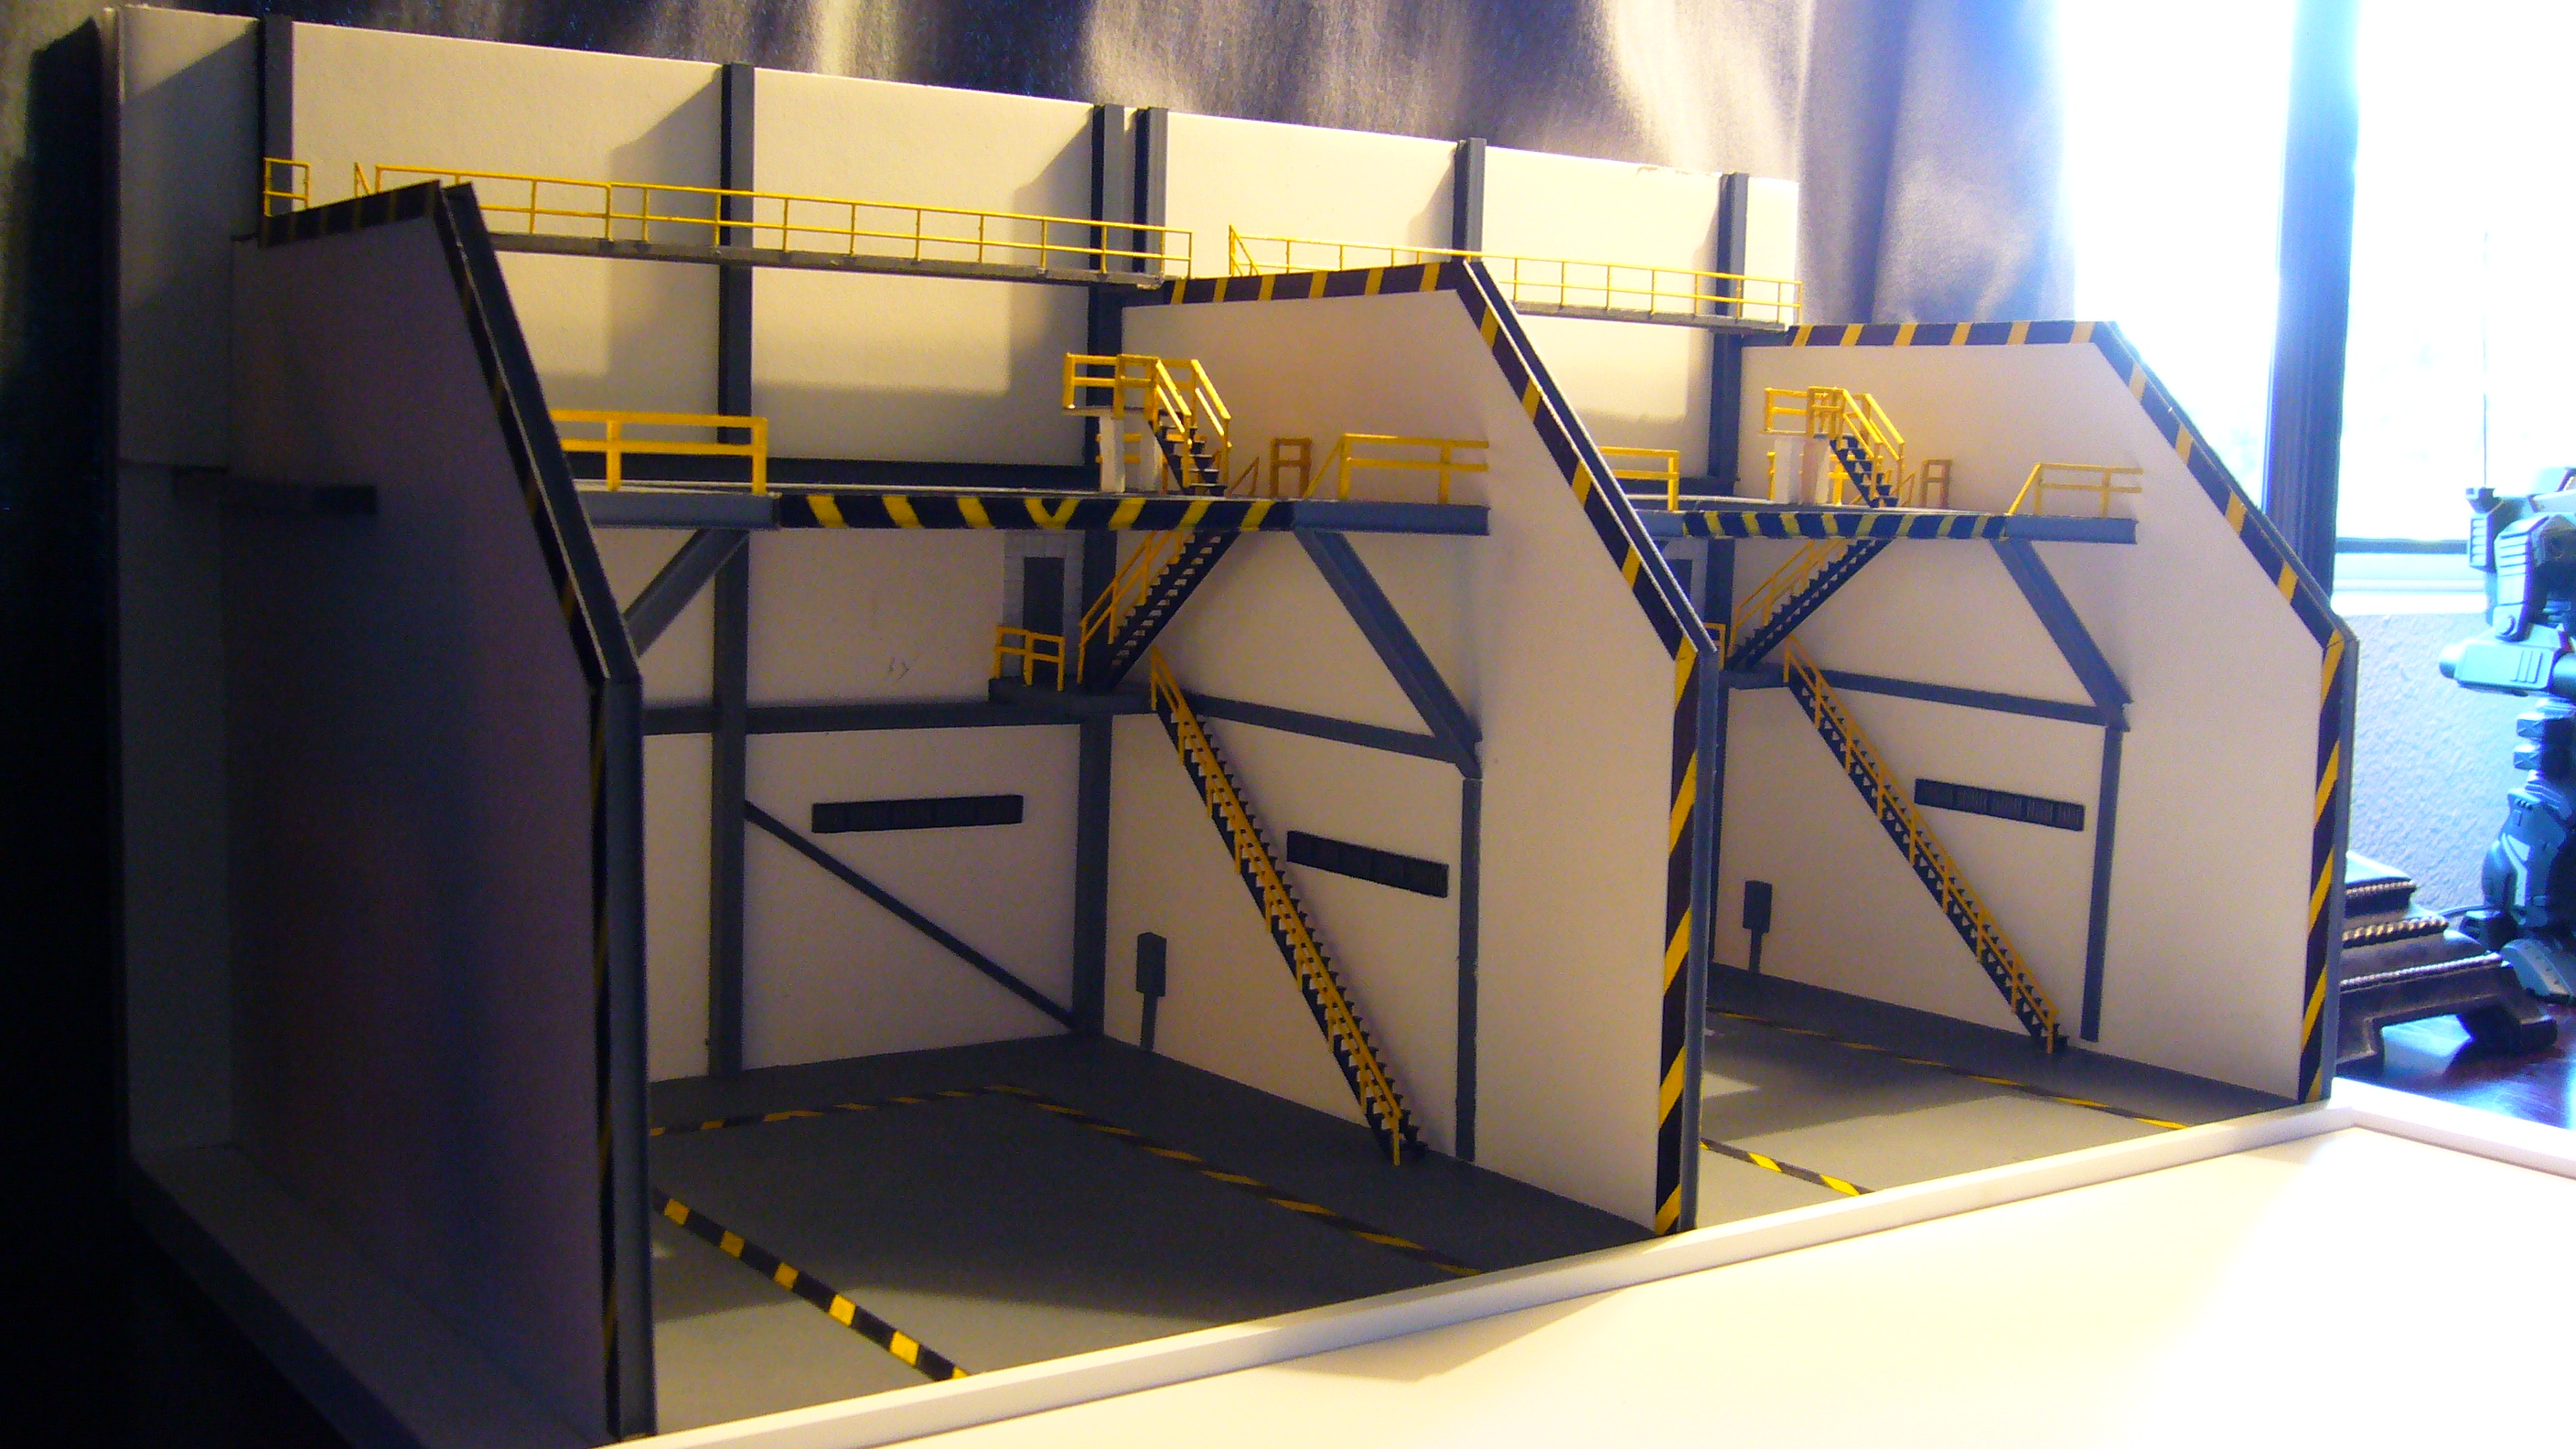
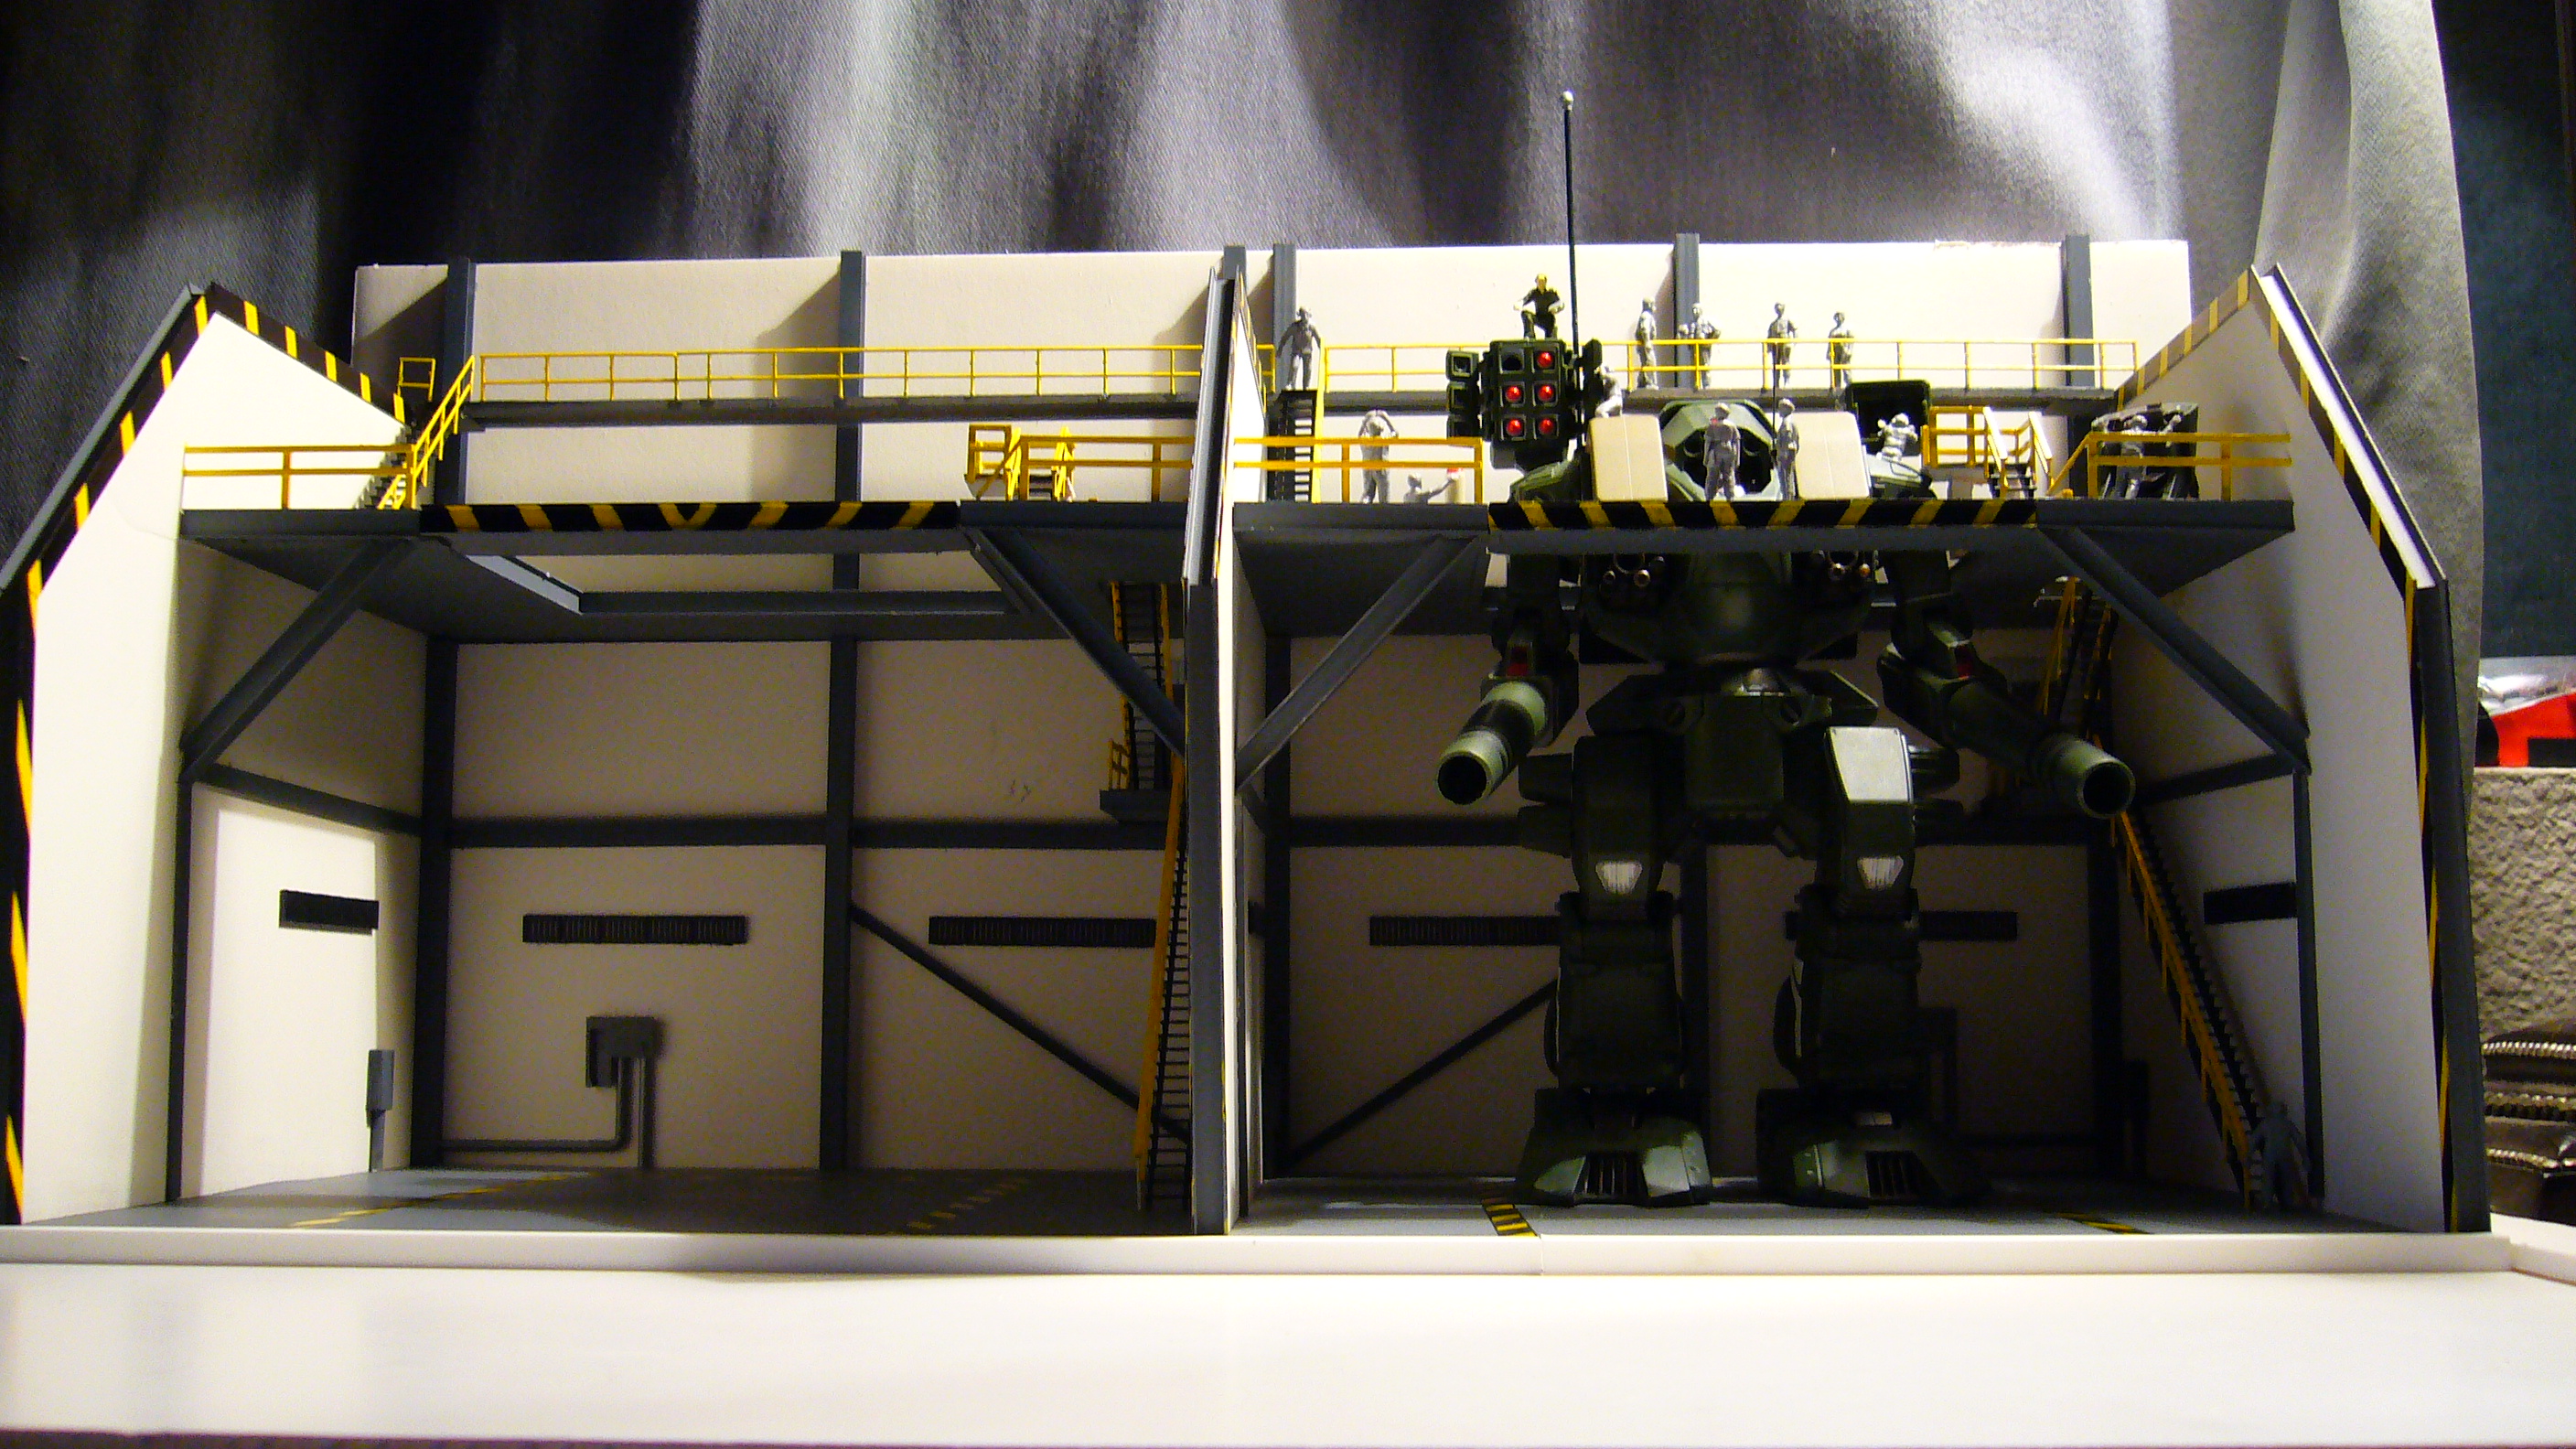
Thought I would drop by and show some more progress on the build.
In the next few pics you can see the additions I have begun to make.
(Included a cause way, a mirrored section of the first hanger build, and a soon to be maintenance area)
Enjoy and feel free to ask questions or make comments
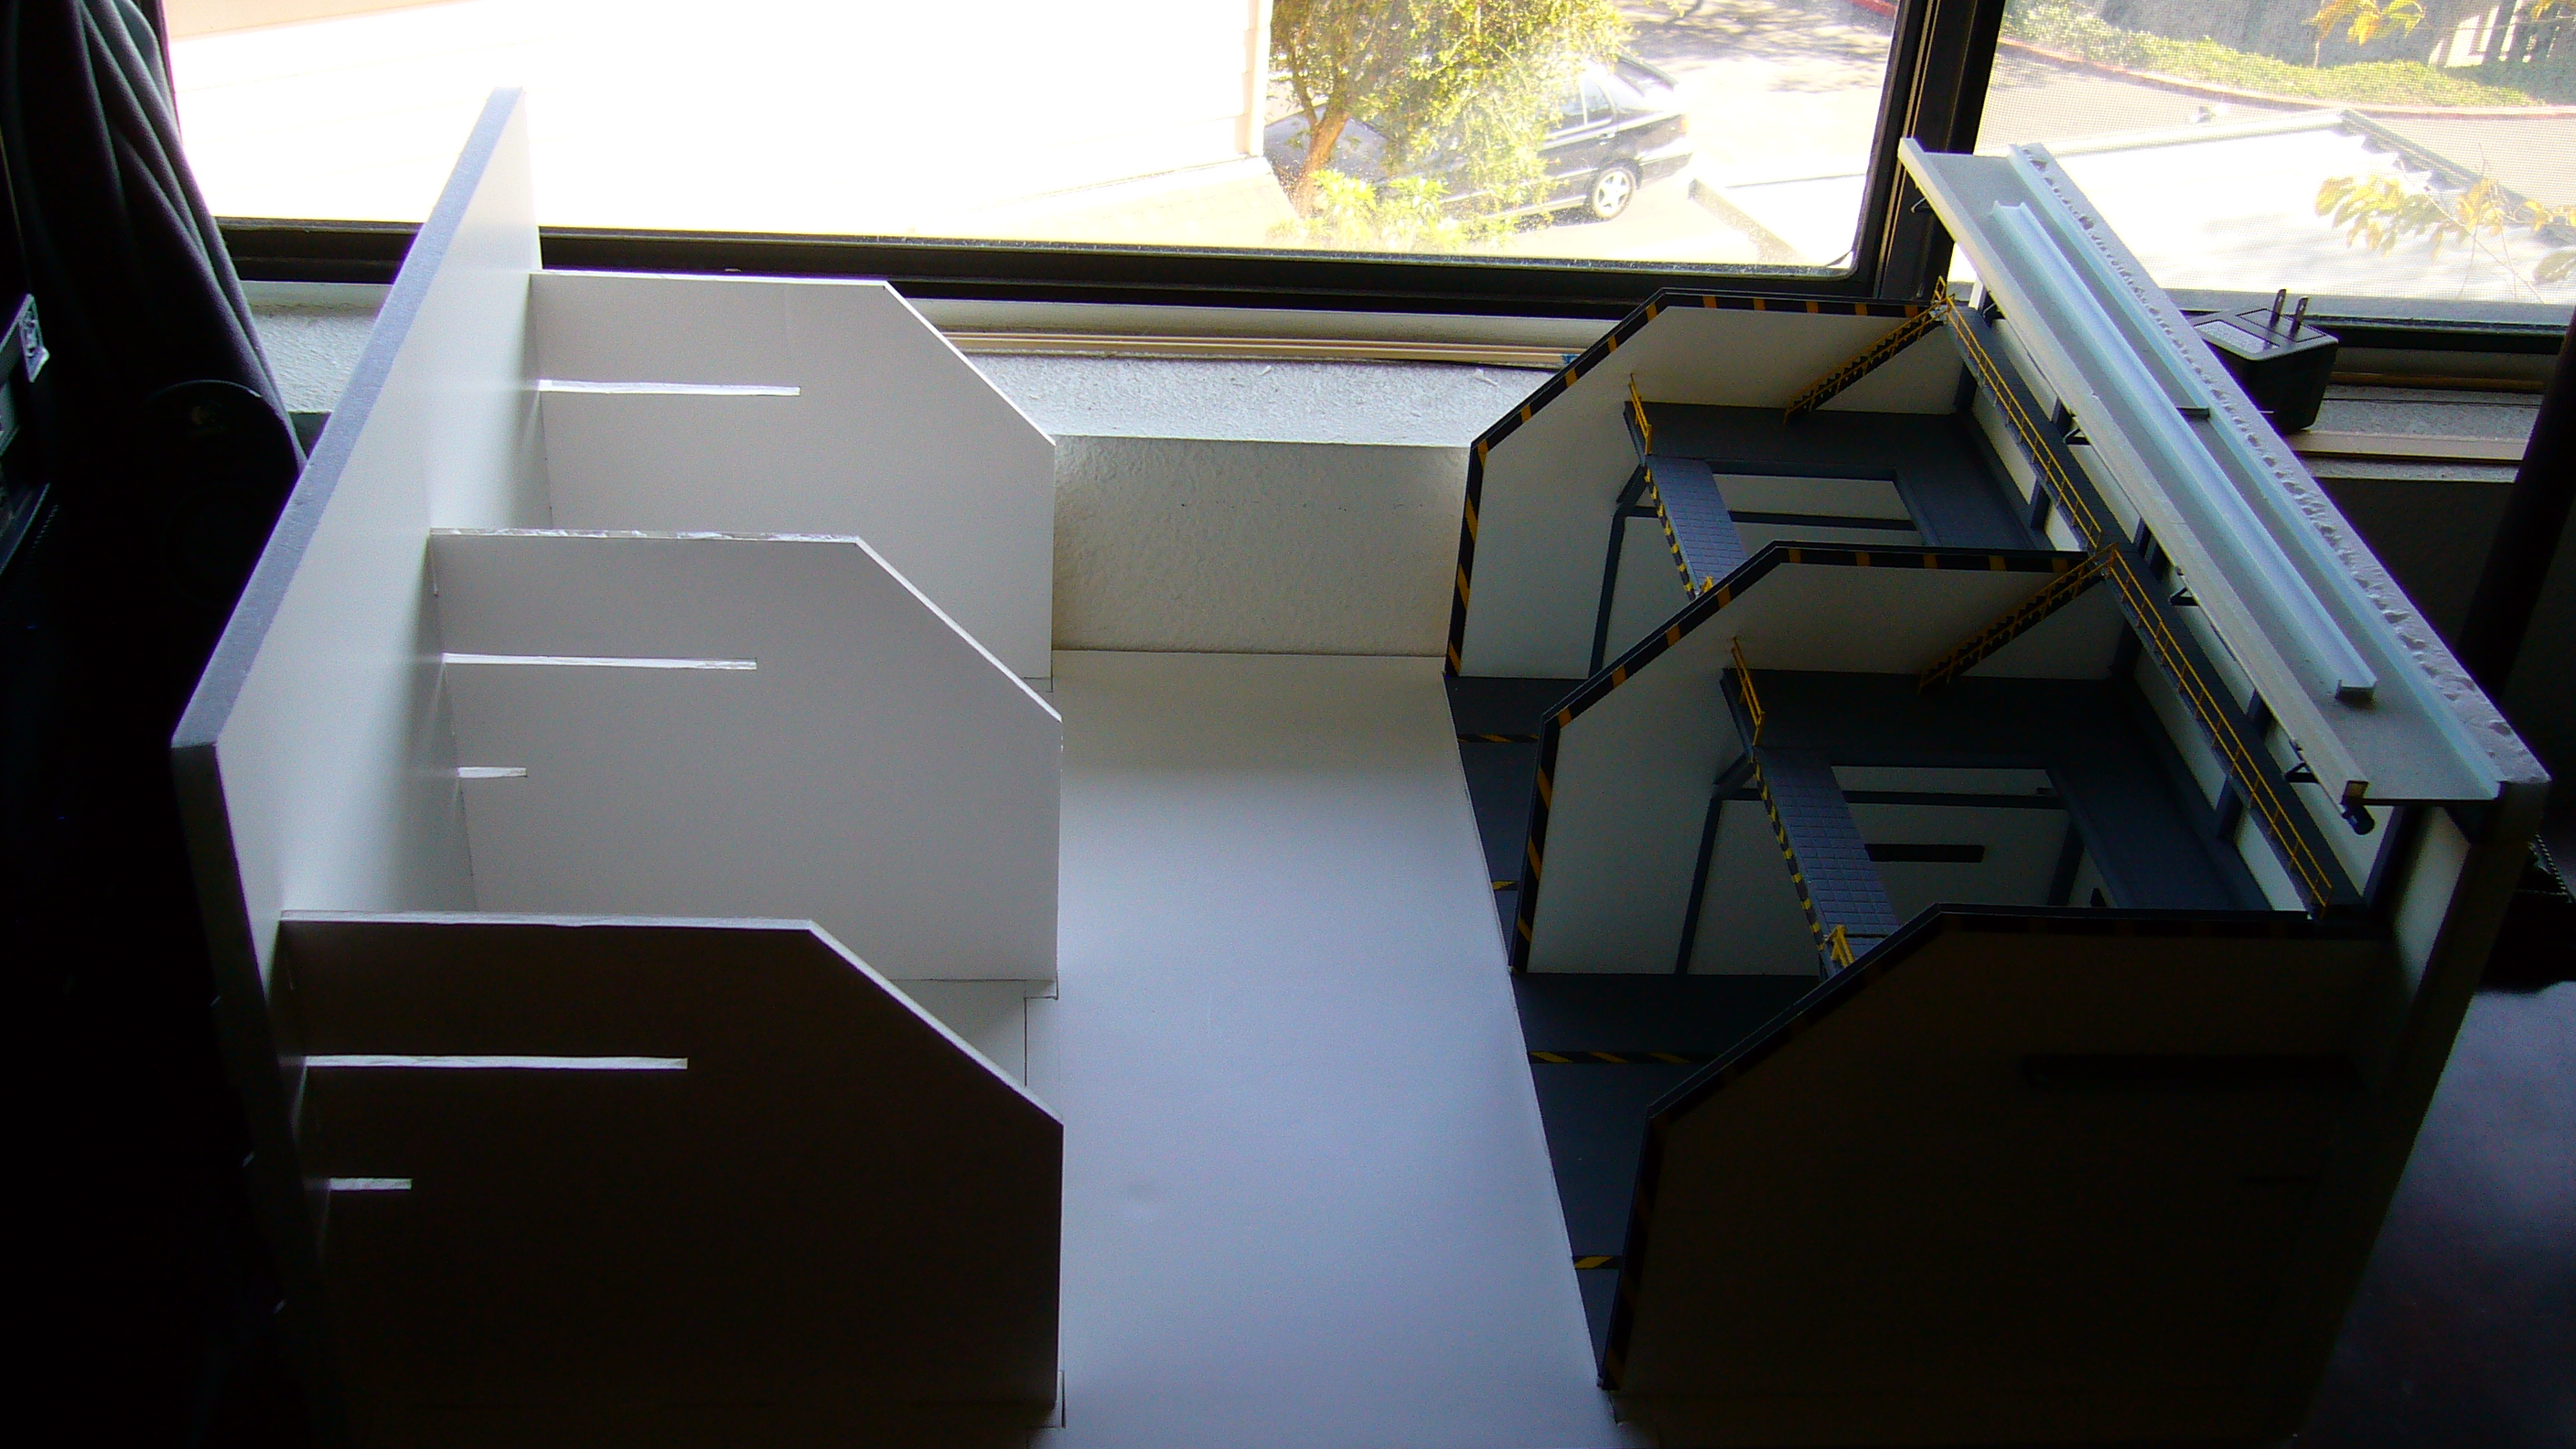
First picture is a demo of a side by side setup, fallowed by across the cause way set up,
and then lastly the mock set up with maintenance area minus one wall.


-
Absolutely amazing work EXO!!!
Silly question, but will these be cast for multiple sale?
Or do you hand sculpt every single one for sale?
Regardless, I'm in!!
Blue
EXO's new motto: Will work for wine

just kidding of course
-
Mav buddy,
You never fail to amaze and inspire me with your work man!!
Many many Kudos to a fine job!! Keep the pics coming bud!
Feckin awesome man!!
Blue
-
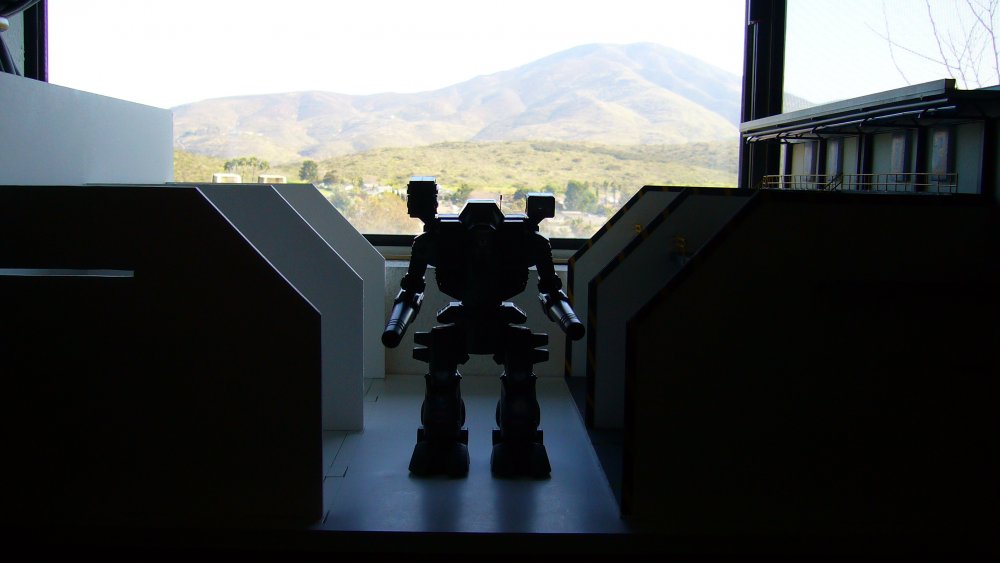
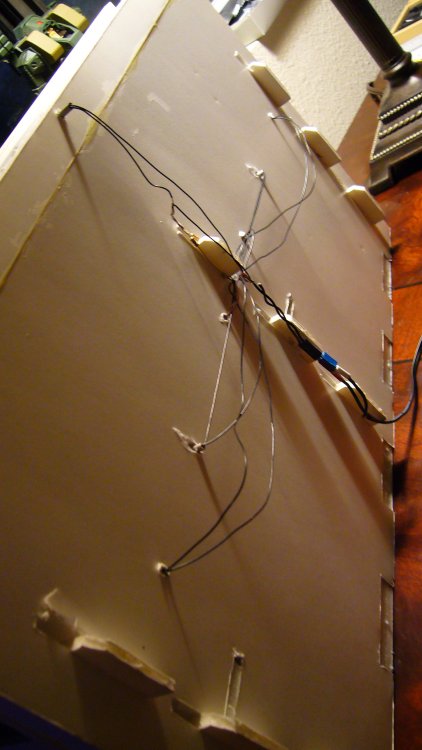
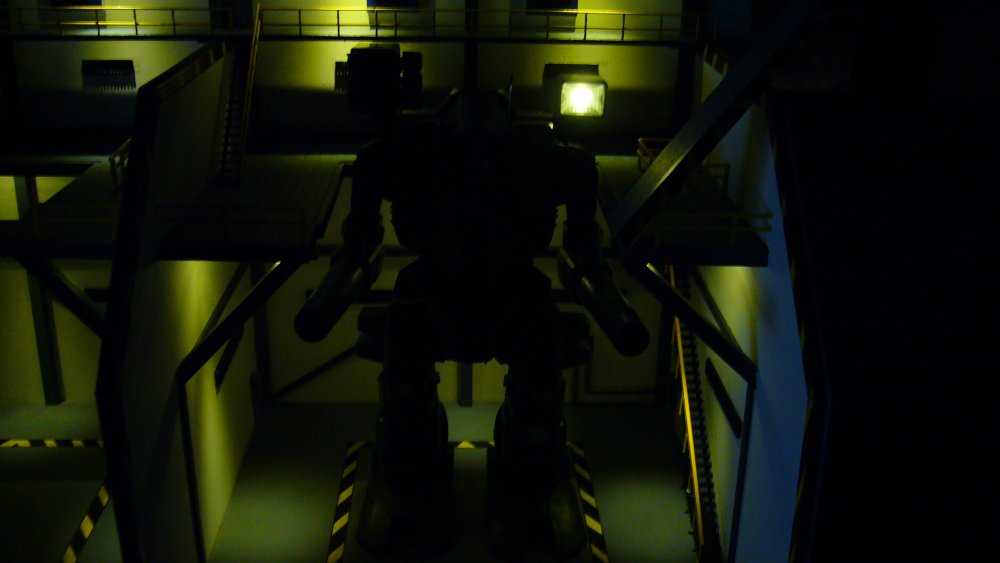
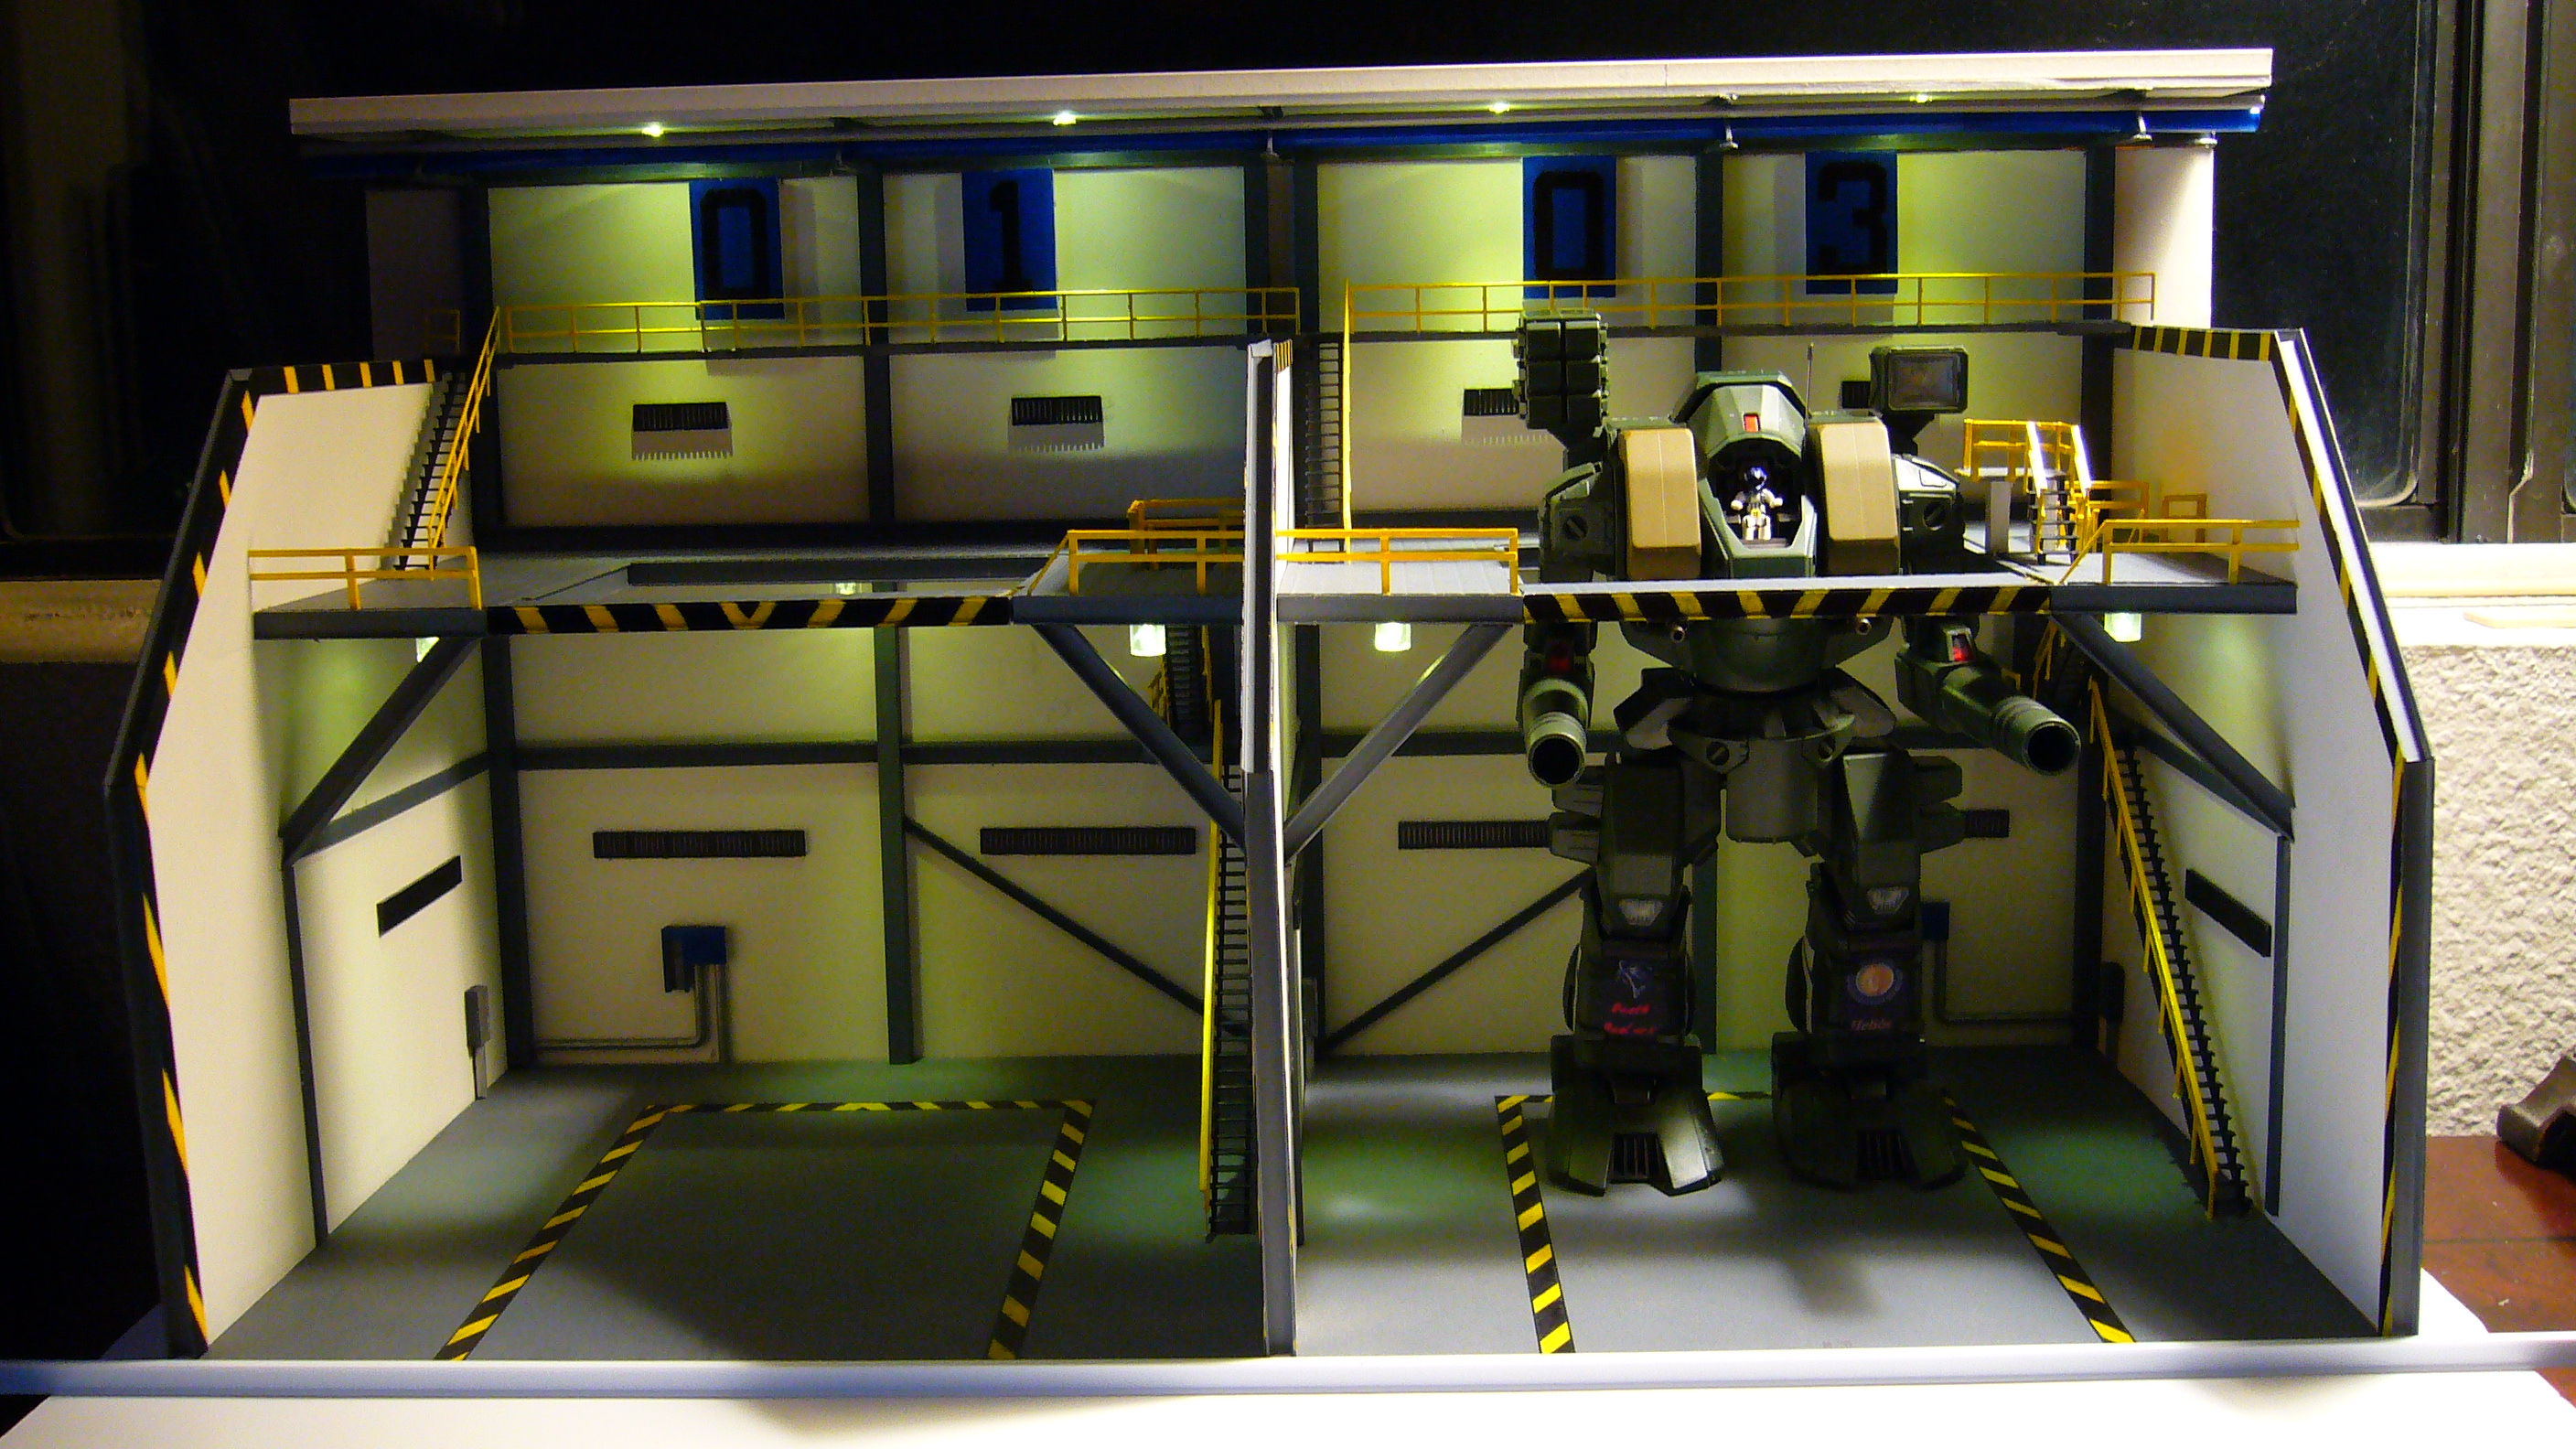
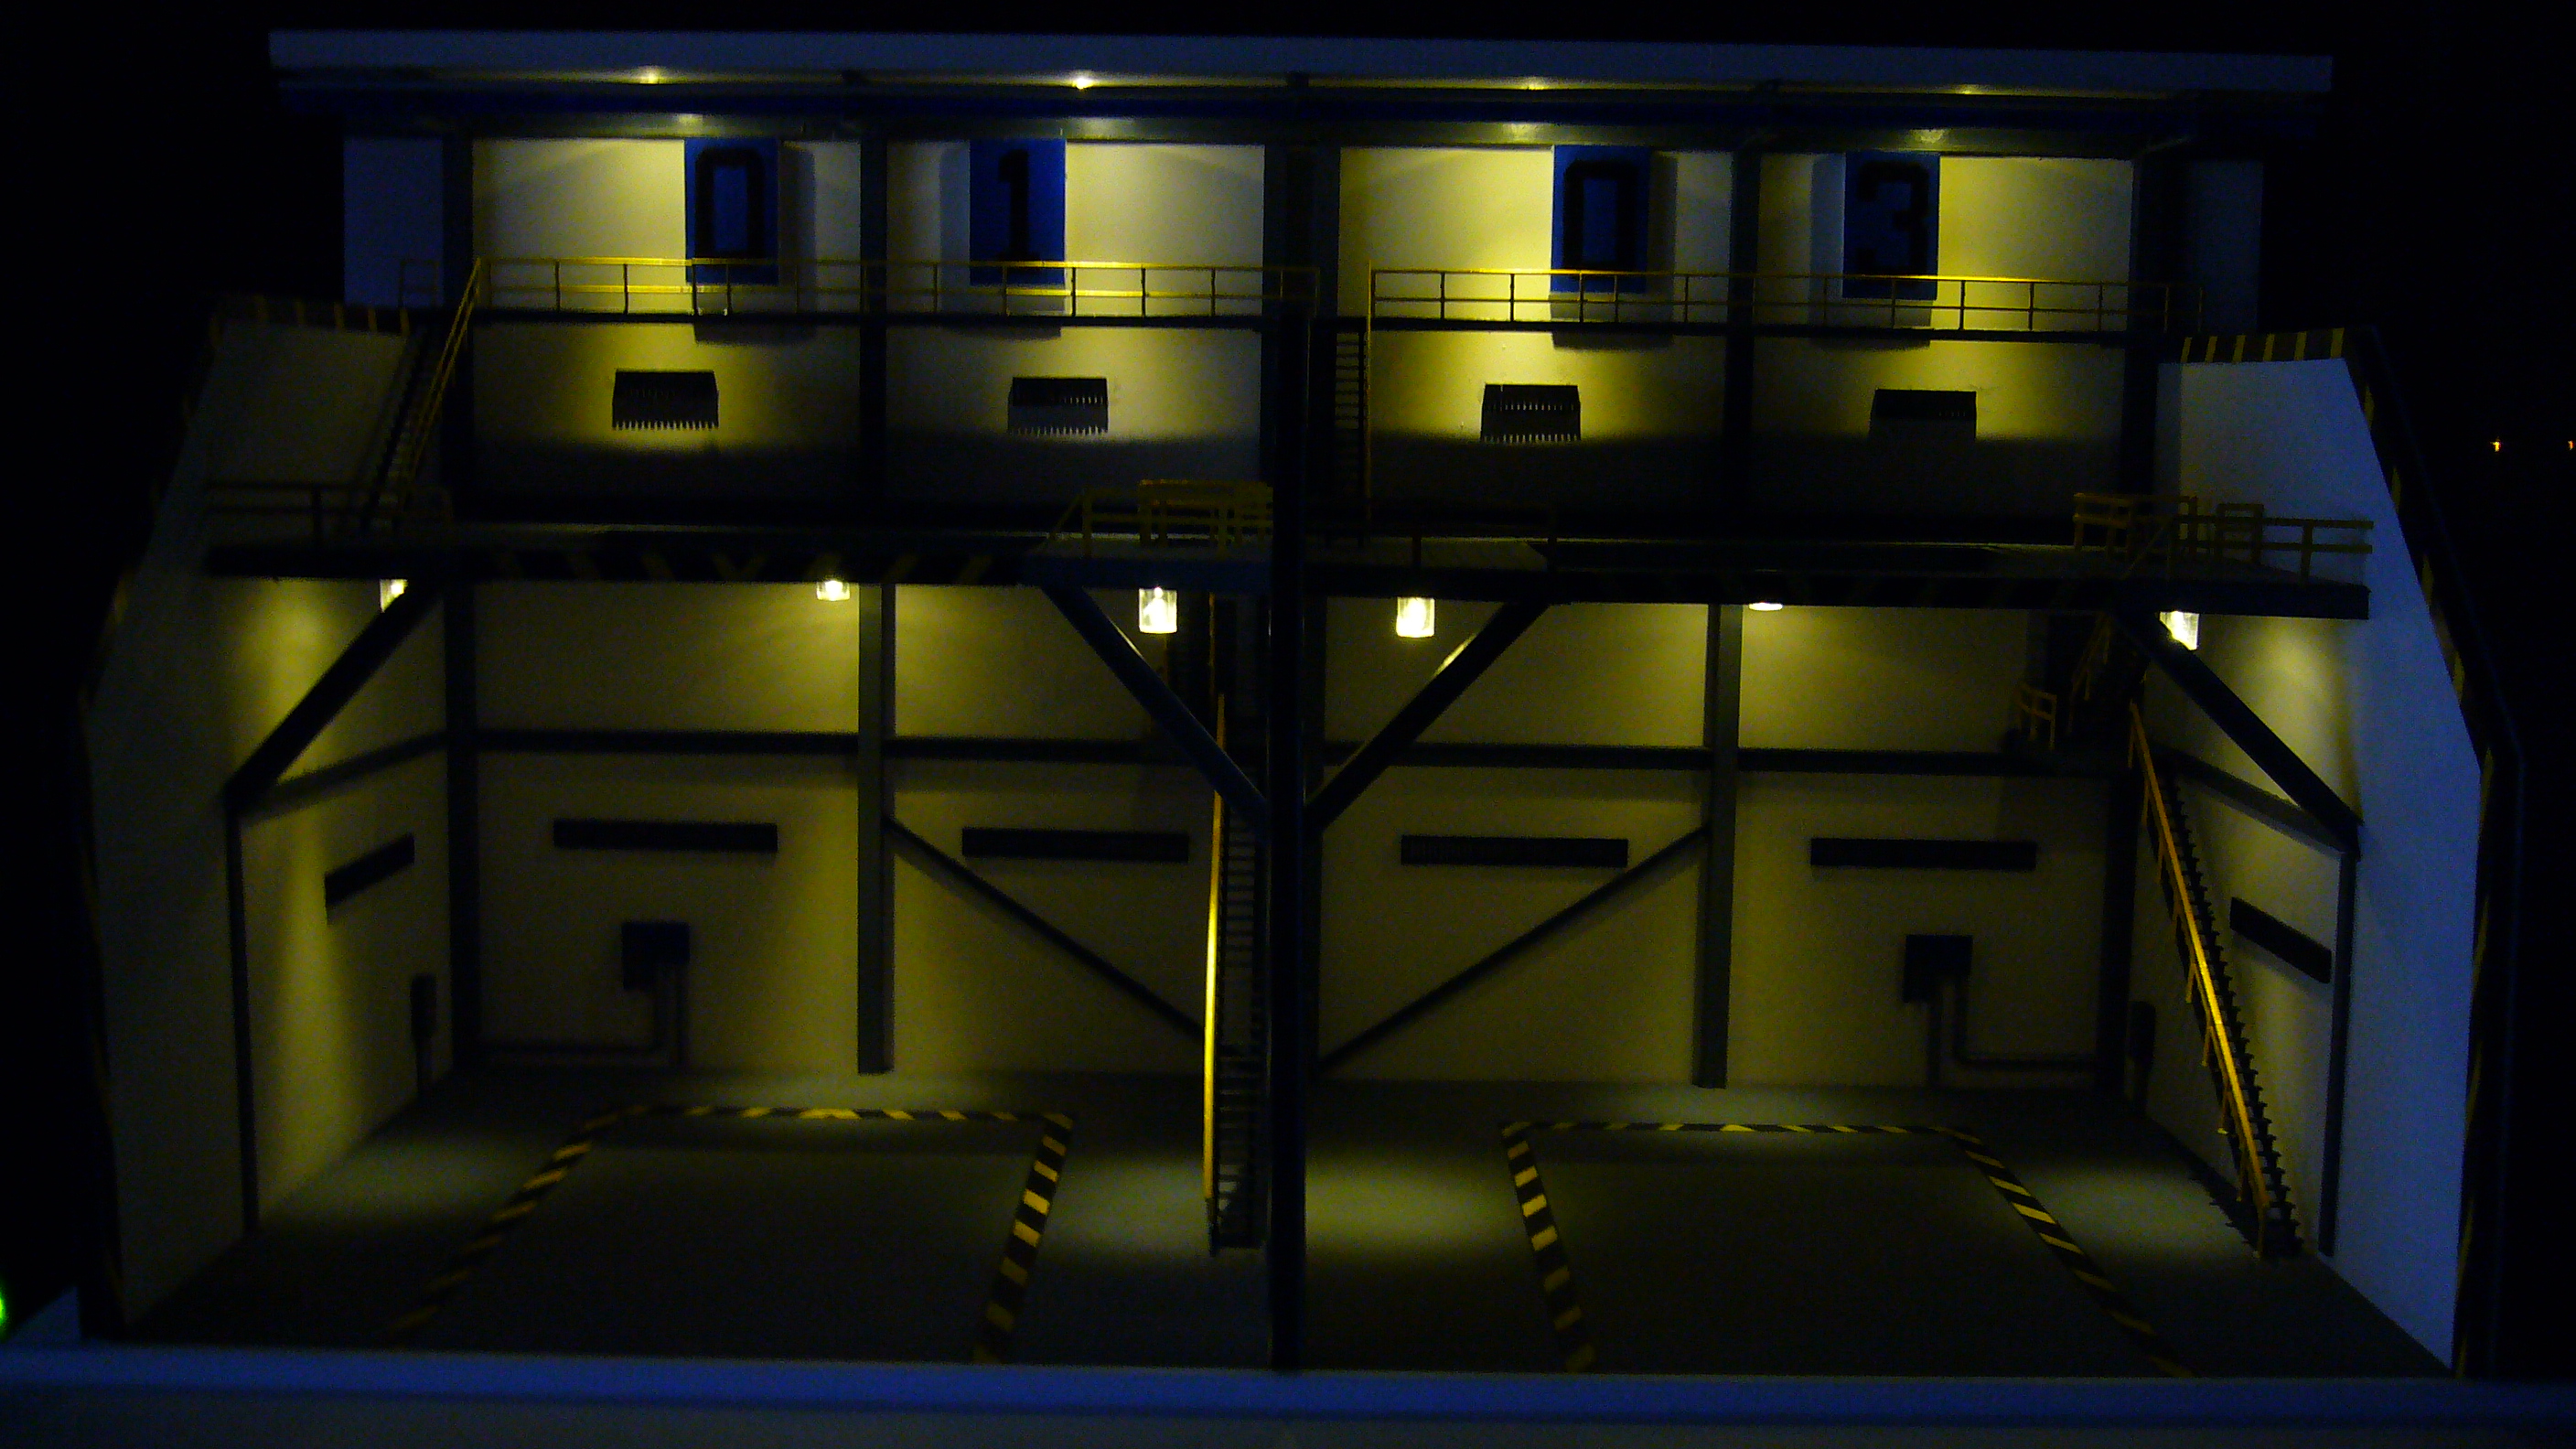
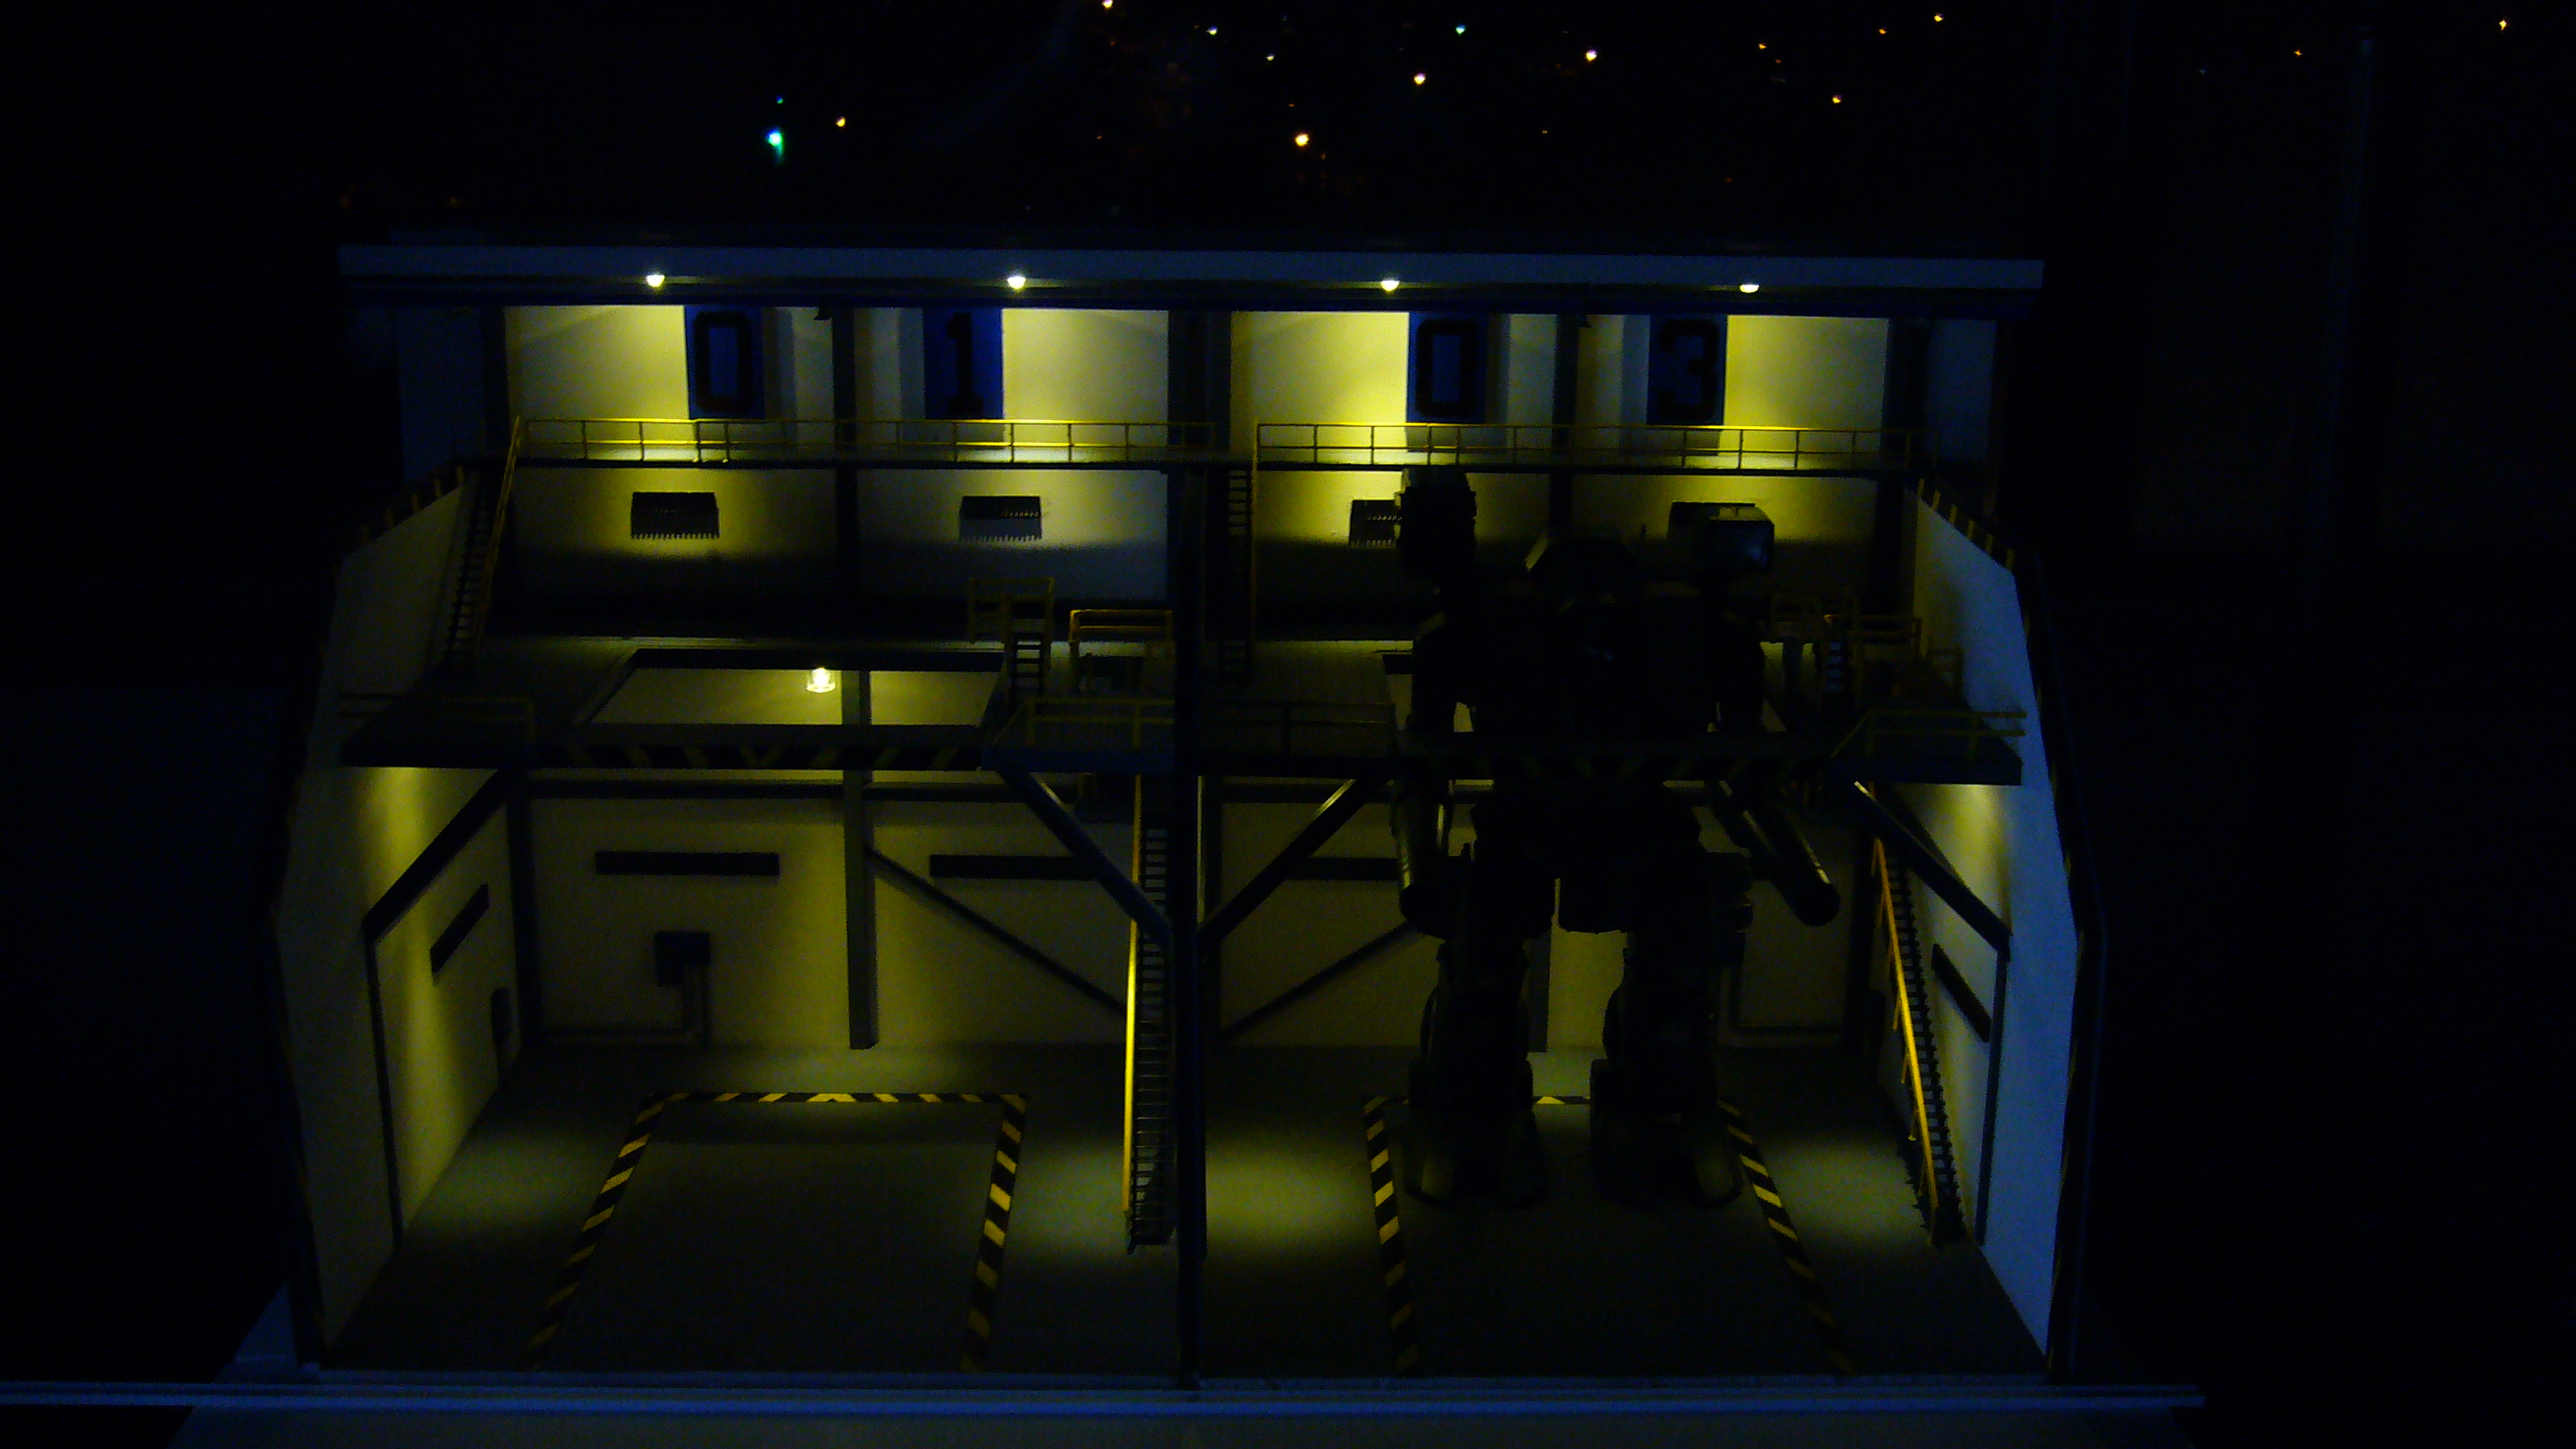
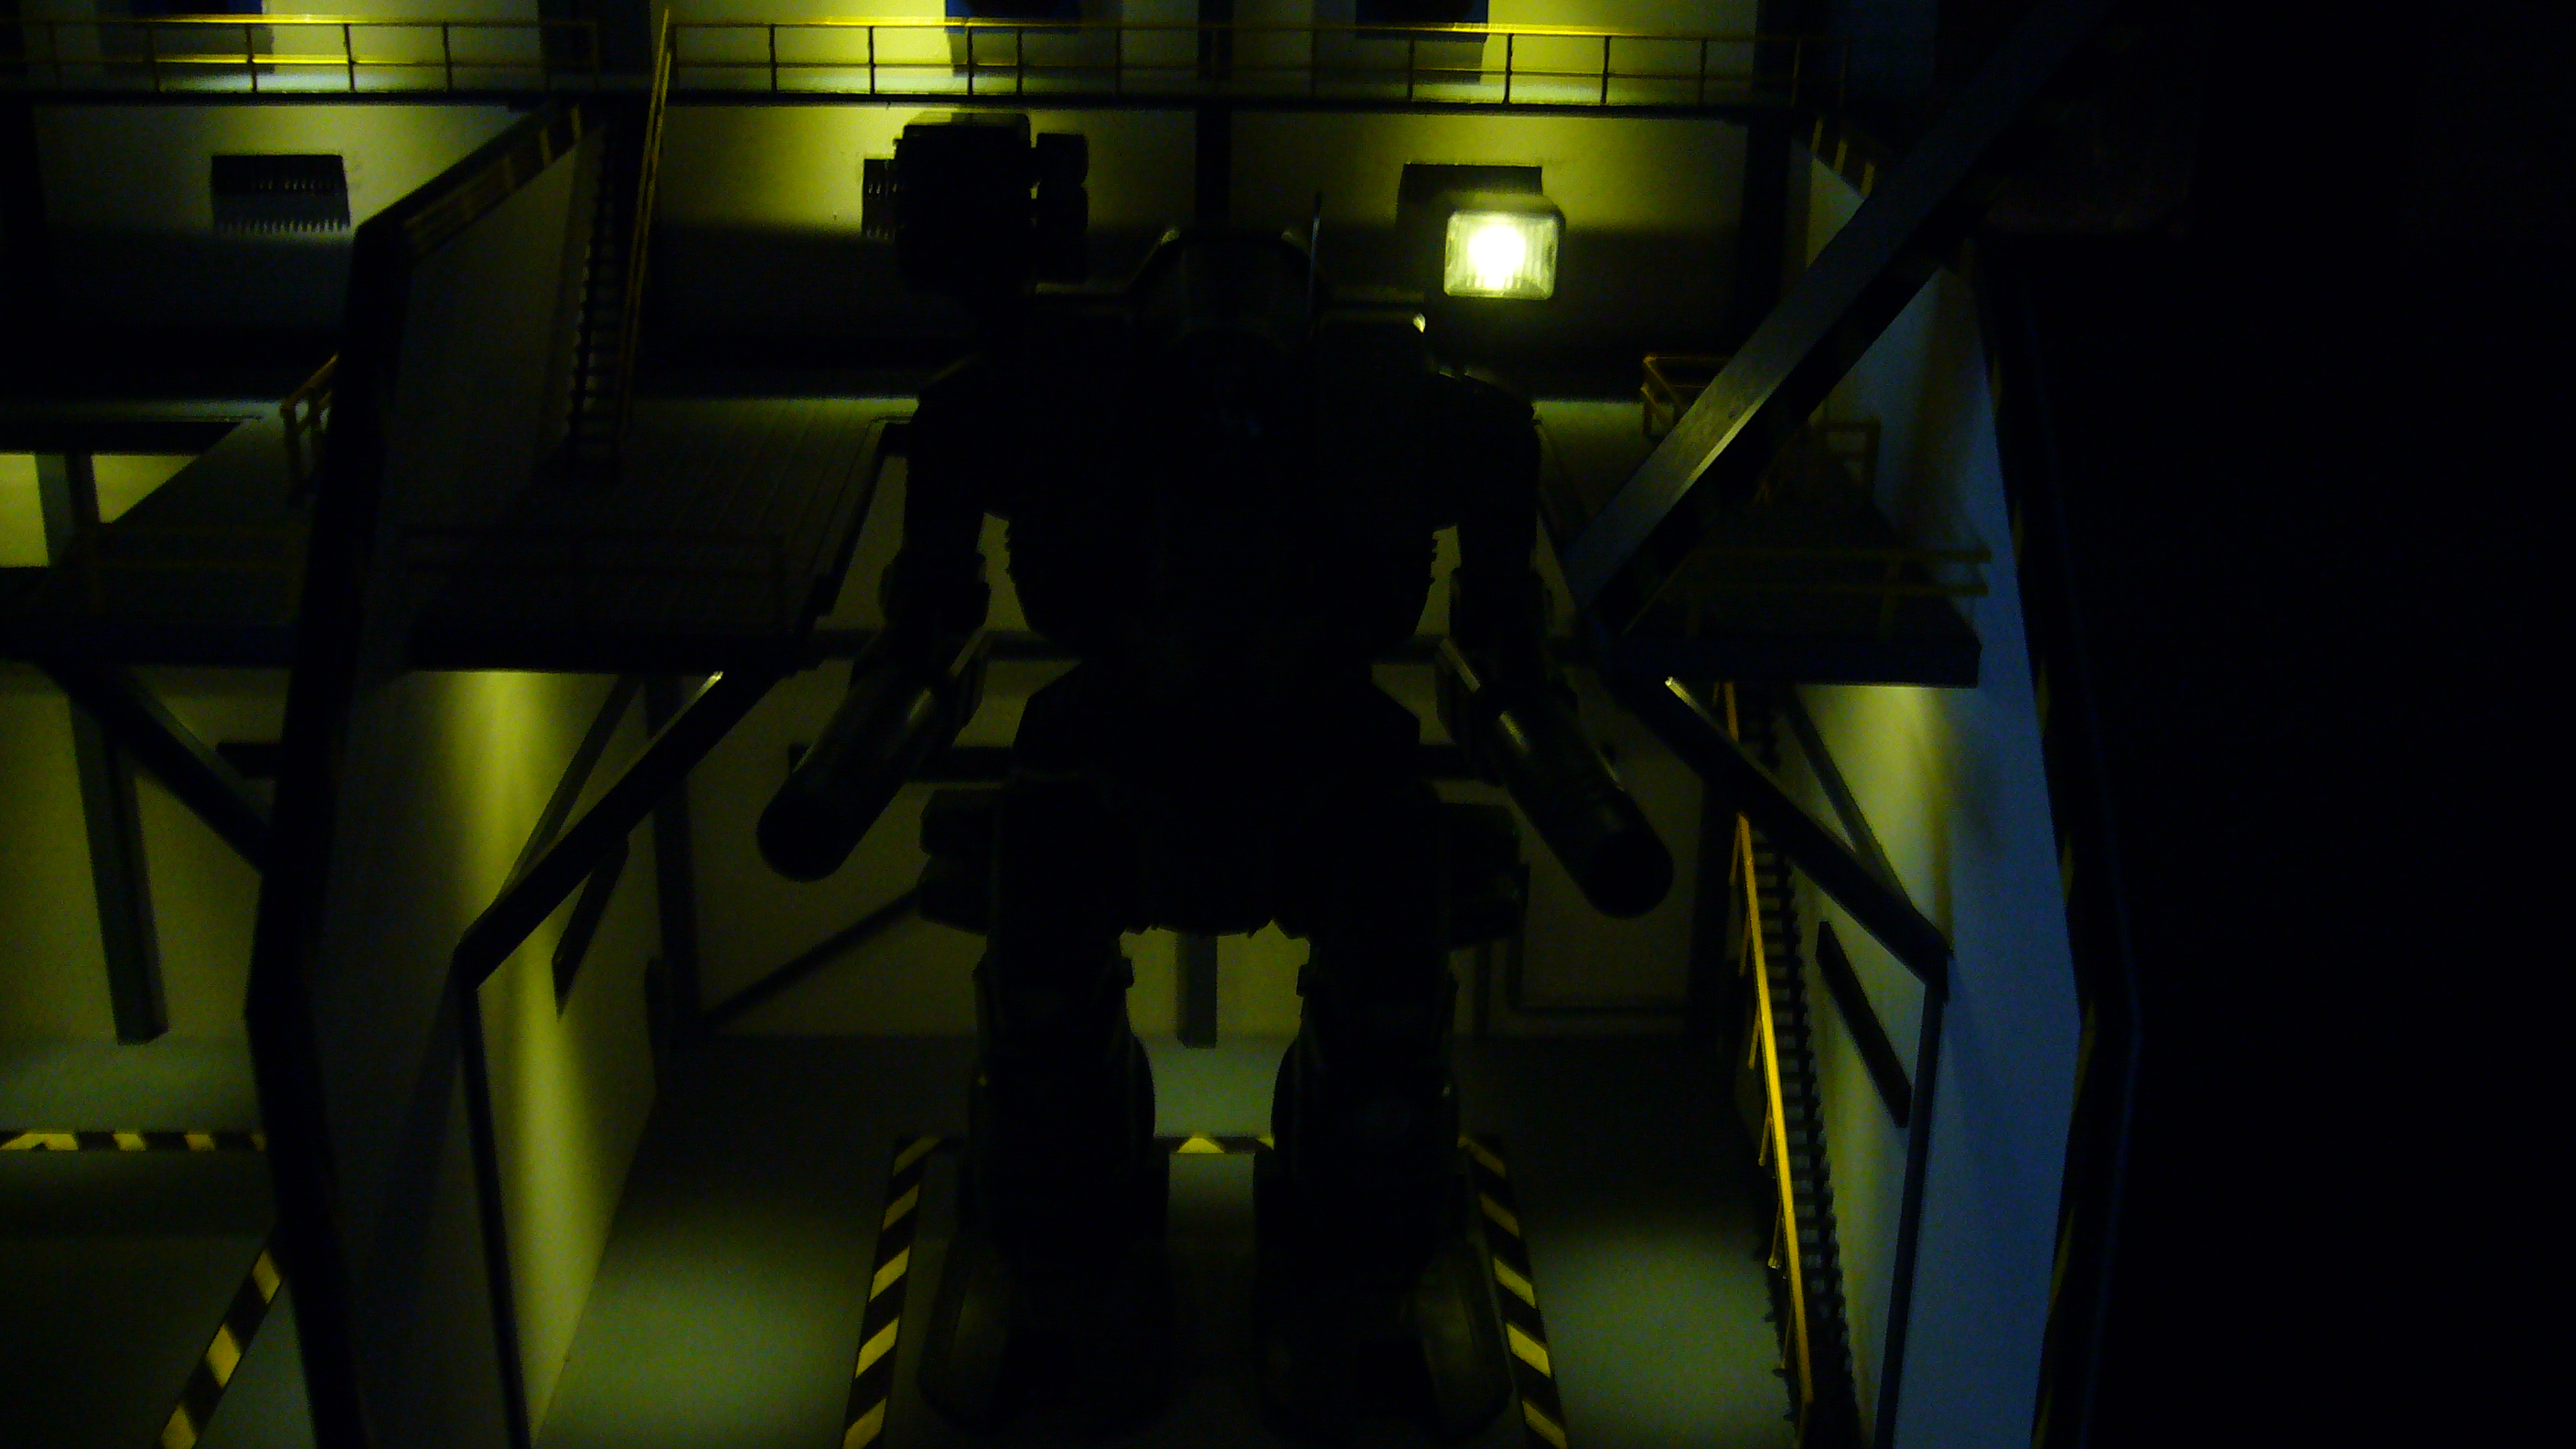
Hello again!!
I'm back with yet another update as this part of the project comes to its conclusion.
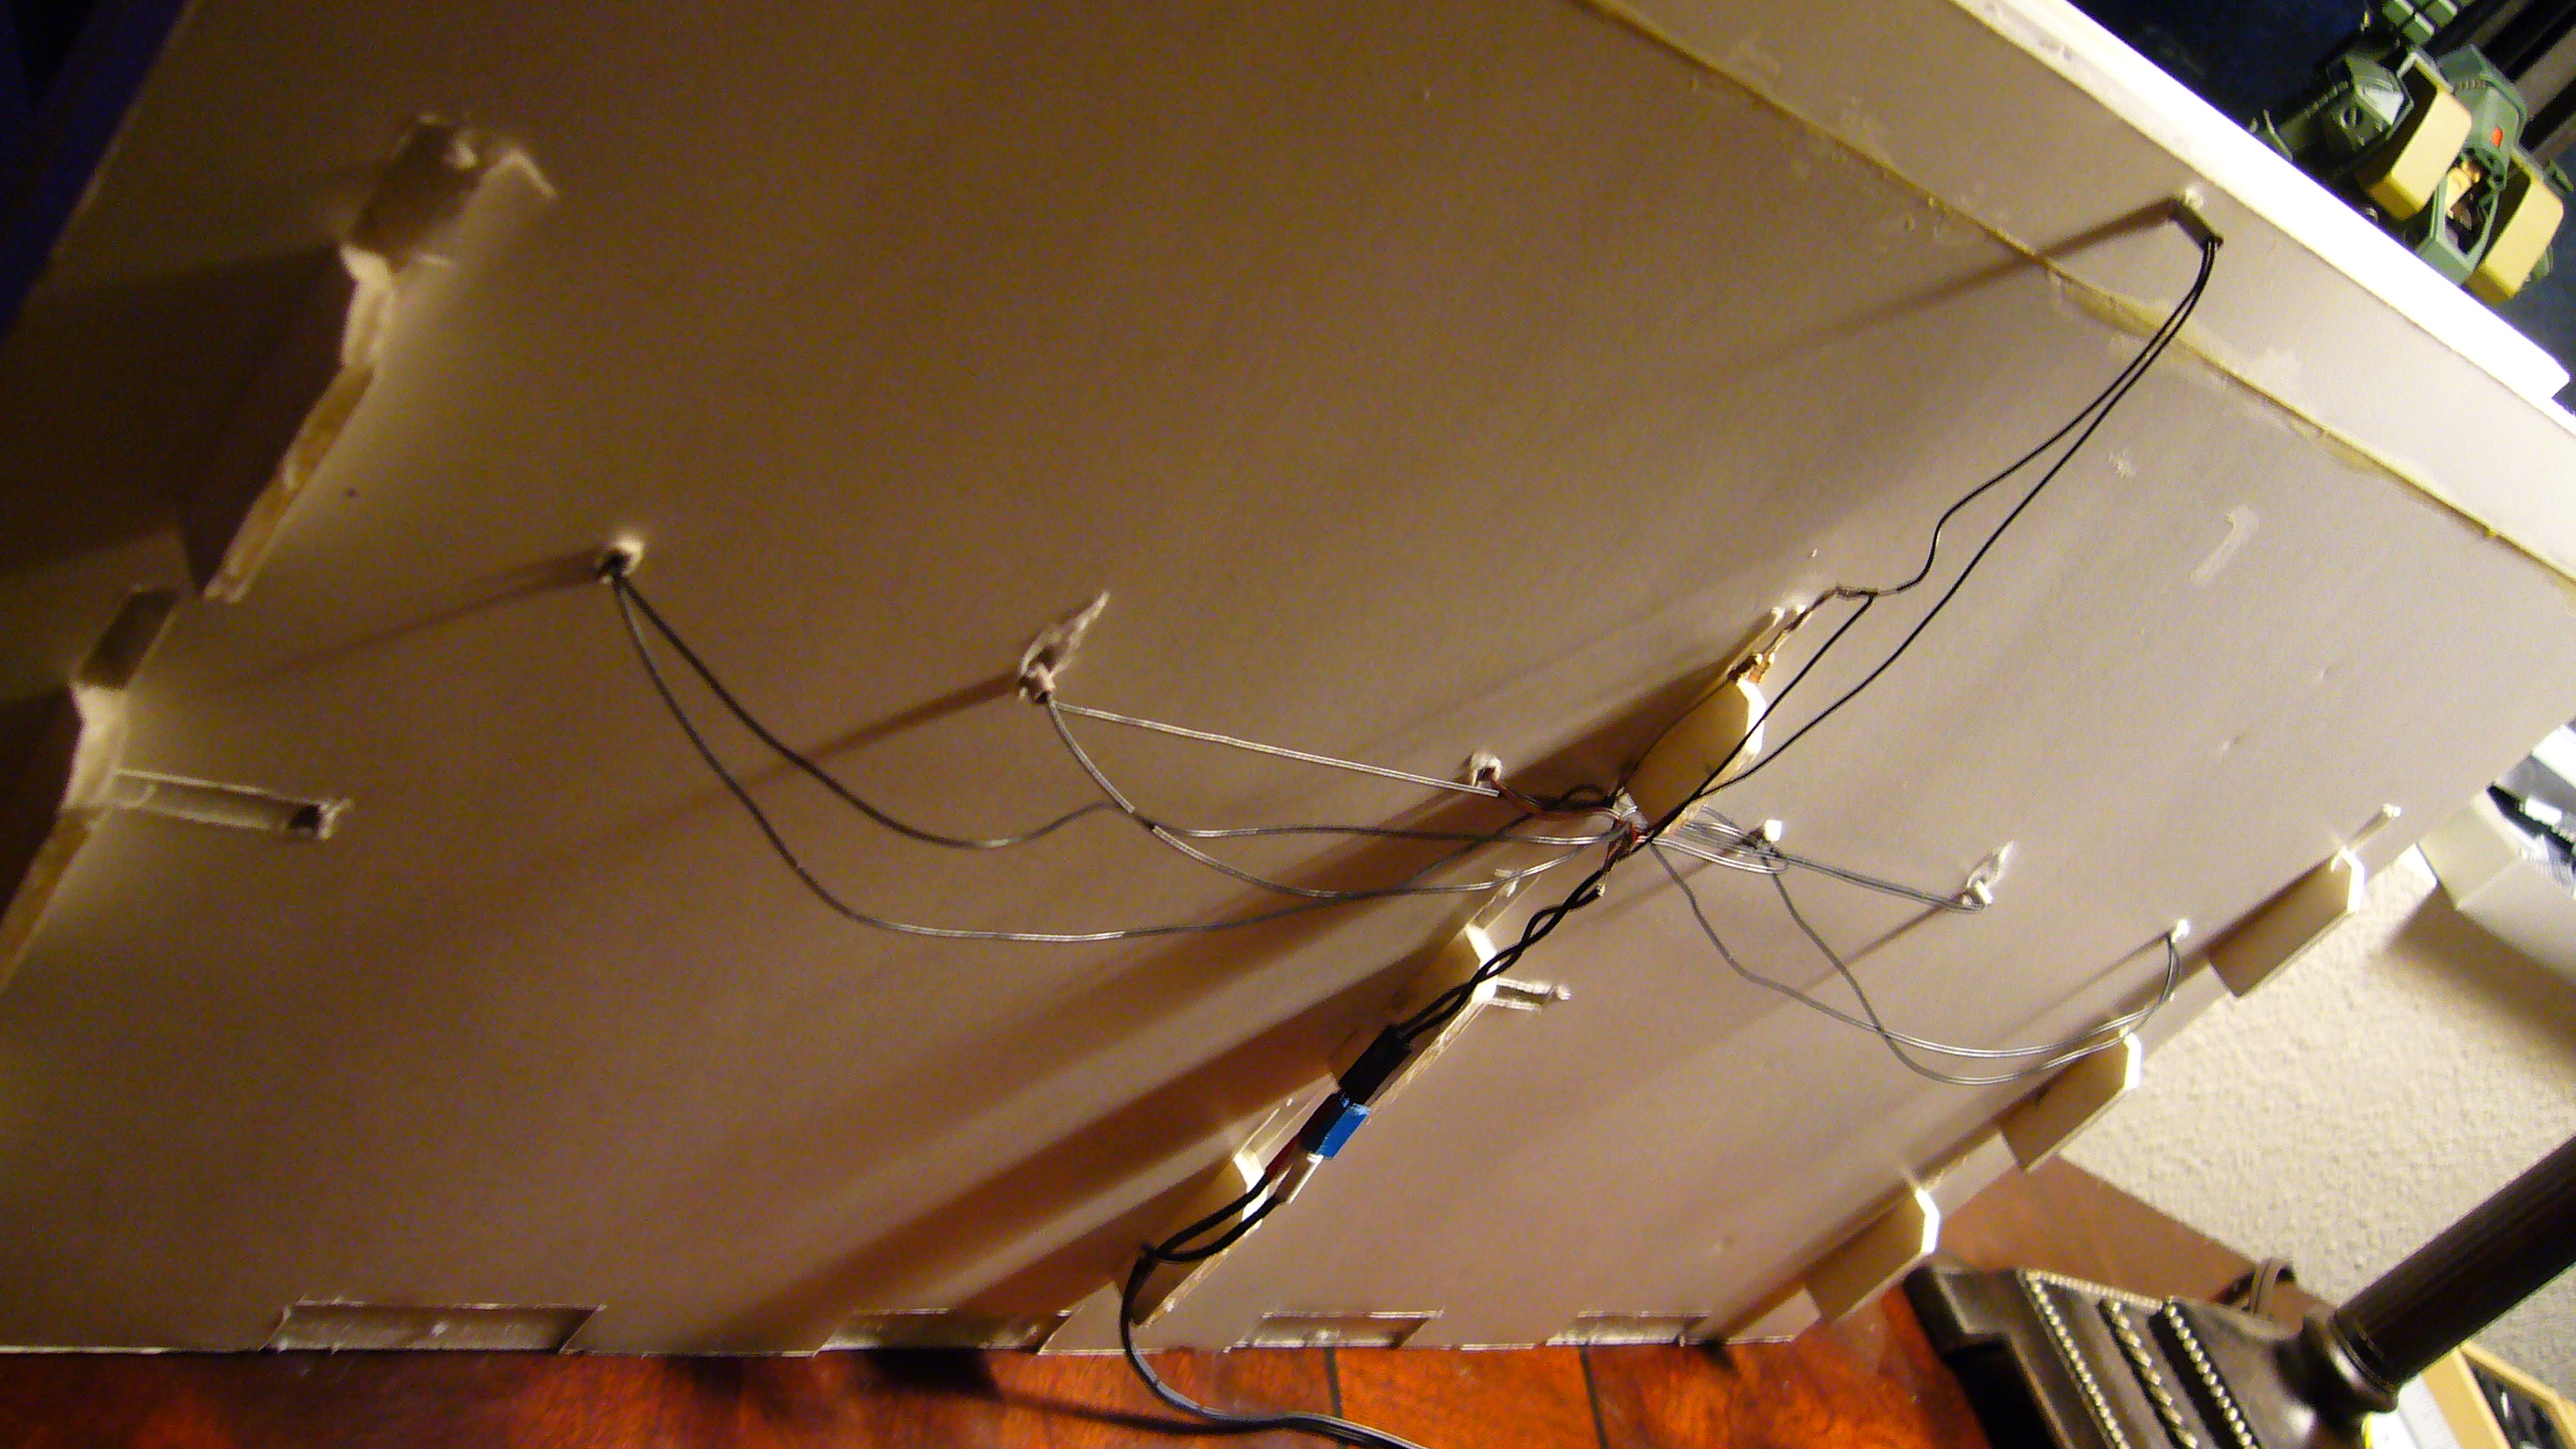
In the fallowing pictures you will see clips of the wiring harness and a temp cover to
provide some sort of safety from snags and such. Also will be included pictures of
the hanger in different lighting settings as well as different angles for your viewing pleasure.
(and even a couple with a Hawk included)
The first few will have normal lamp lighting on and then the fallowing pictures after that will have
only the lighting of the bay itself. (with some reflection lighting from my computer monitors)
I hope you have enjoyed this project thus far and look I forward to showing you the other
sections (in the near future) that will compile the overall display of the diorama called Purgatory.
(as described and detailed by the Author and Creator of Destroids Last Dance, Rob Elwell.)
So without further ado...kick back once again and enjoy the eye candy!!
Blue


-
Freakin awesome! Where did you get those lights? They are perfect.
The lighting assembly is hand made and consists of 1/8 inch round styrene tubing for the conduit and 1/4 inch clear tubing
that can be found at a pet store or anywhere they sell clear tubing for fish tanks and such. the clear tubing allows
a nice fit if you where to install LED lighting as well.
-
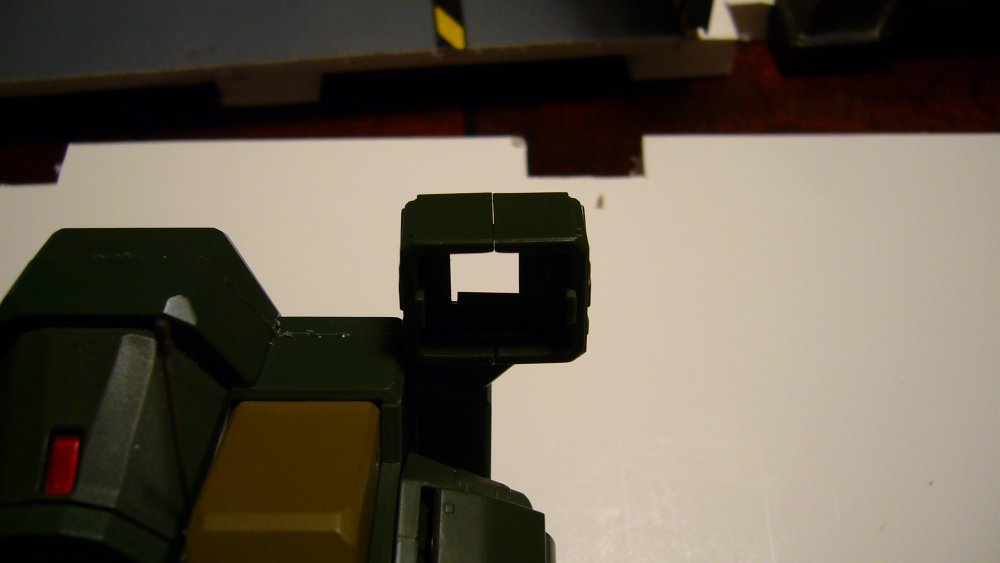
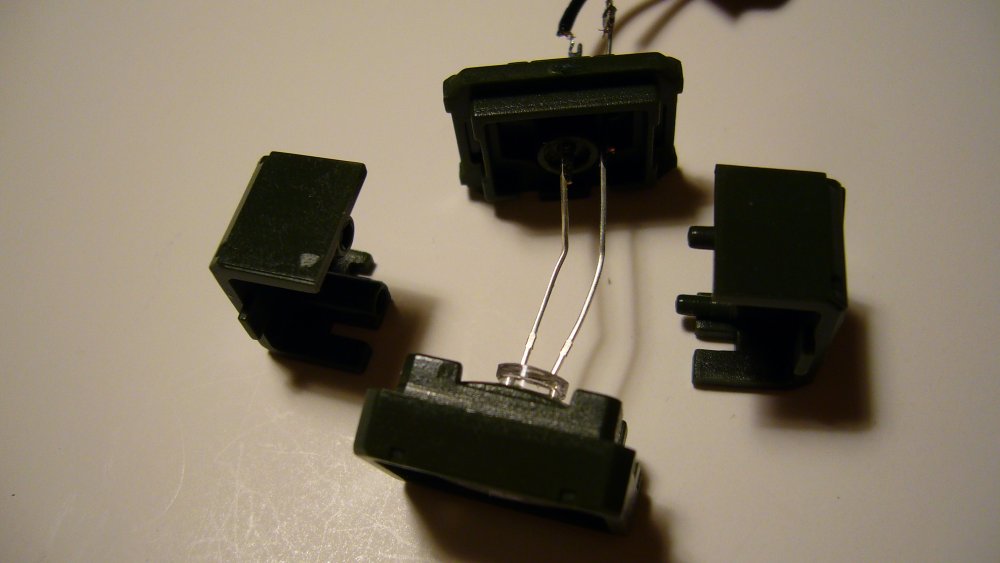
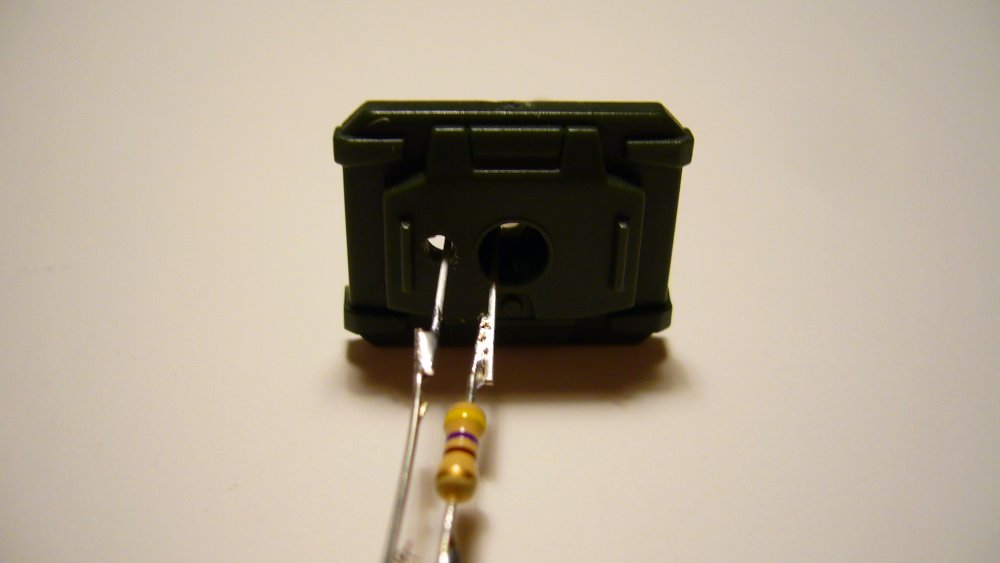
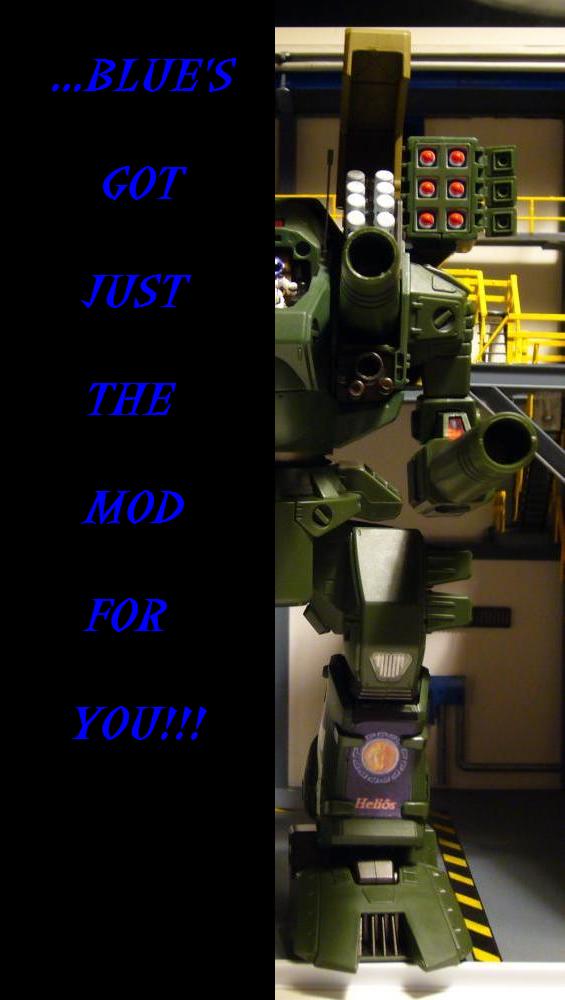
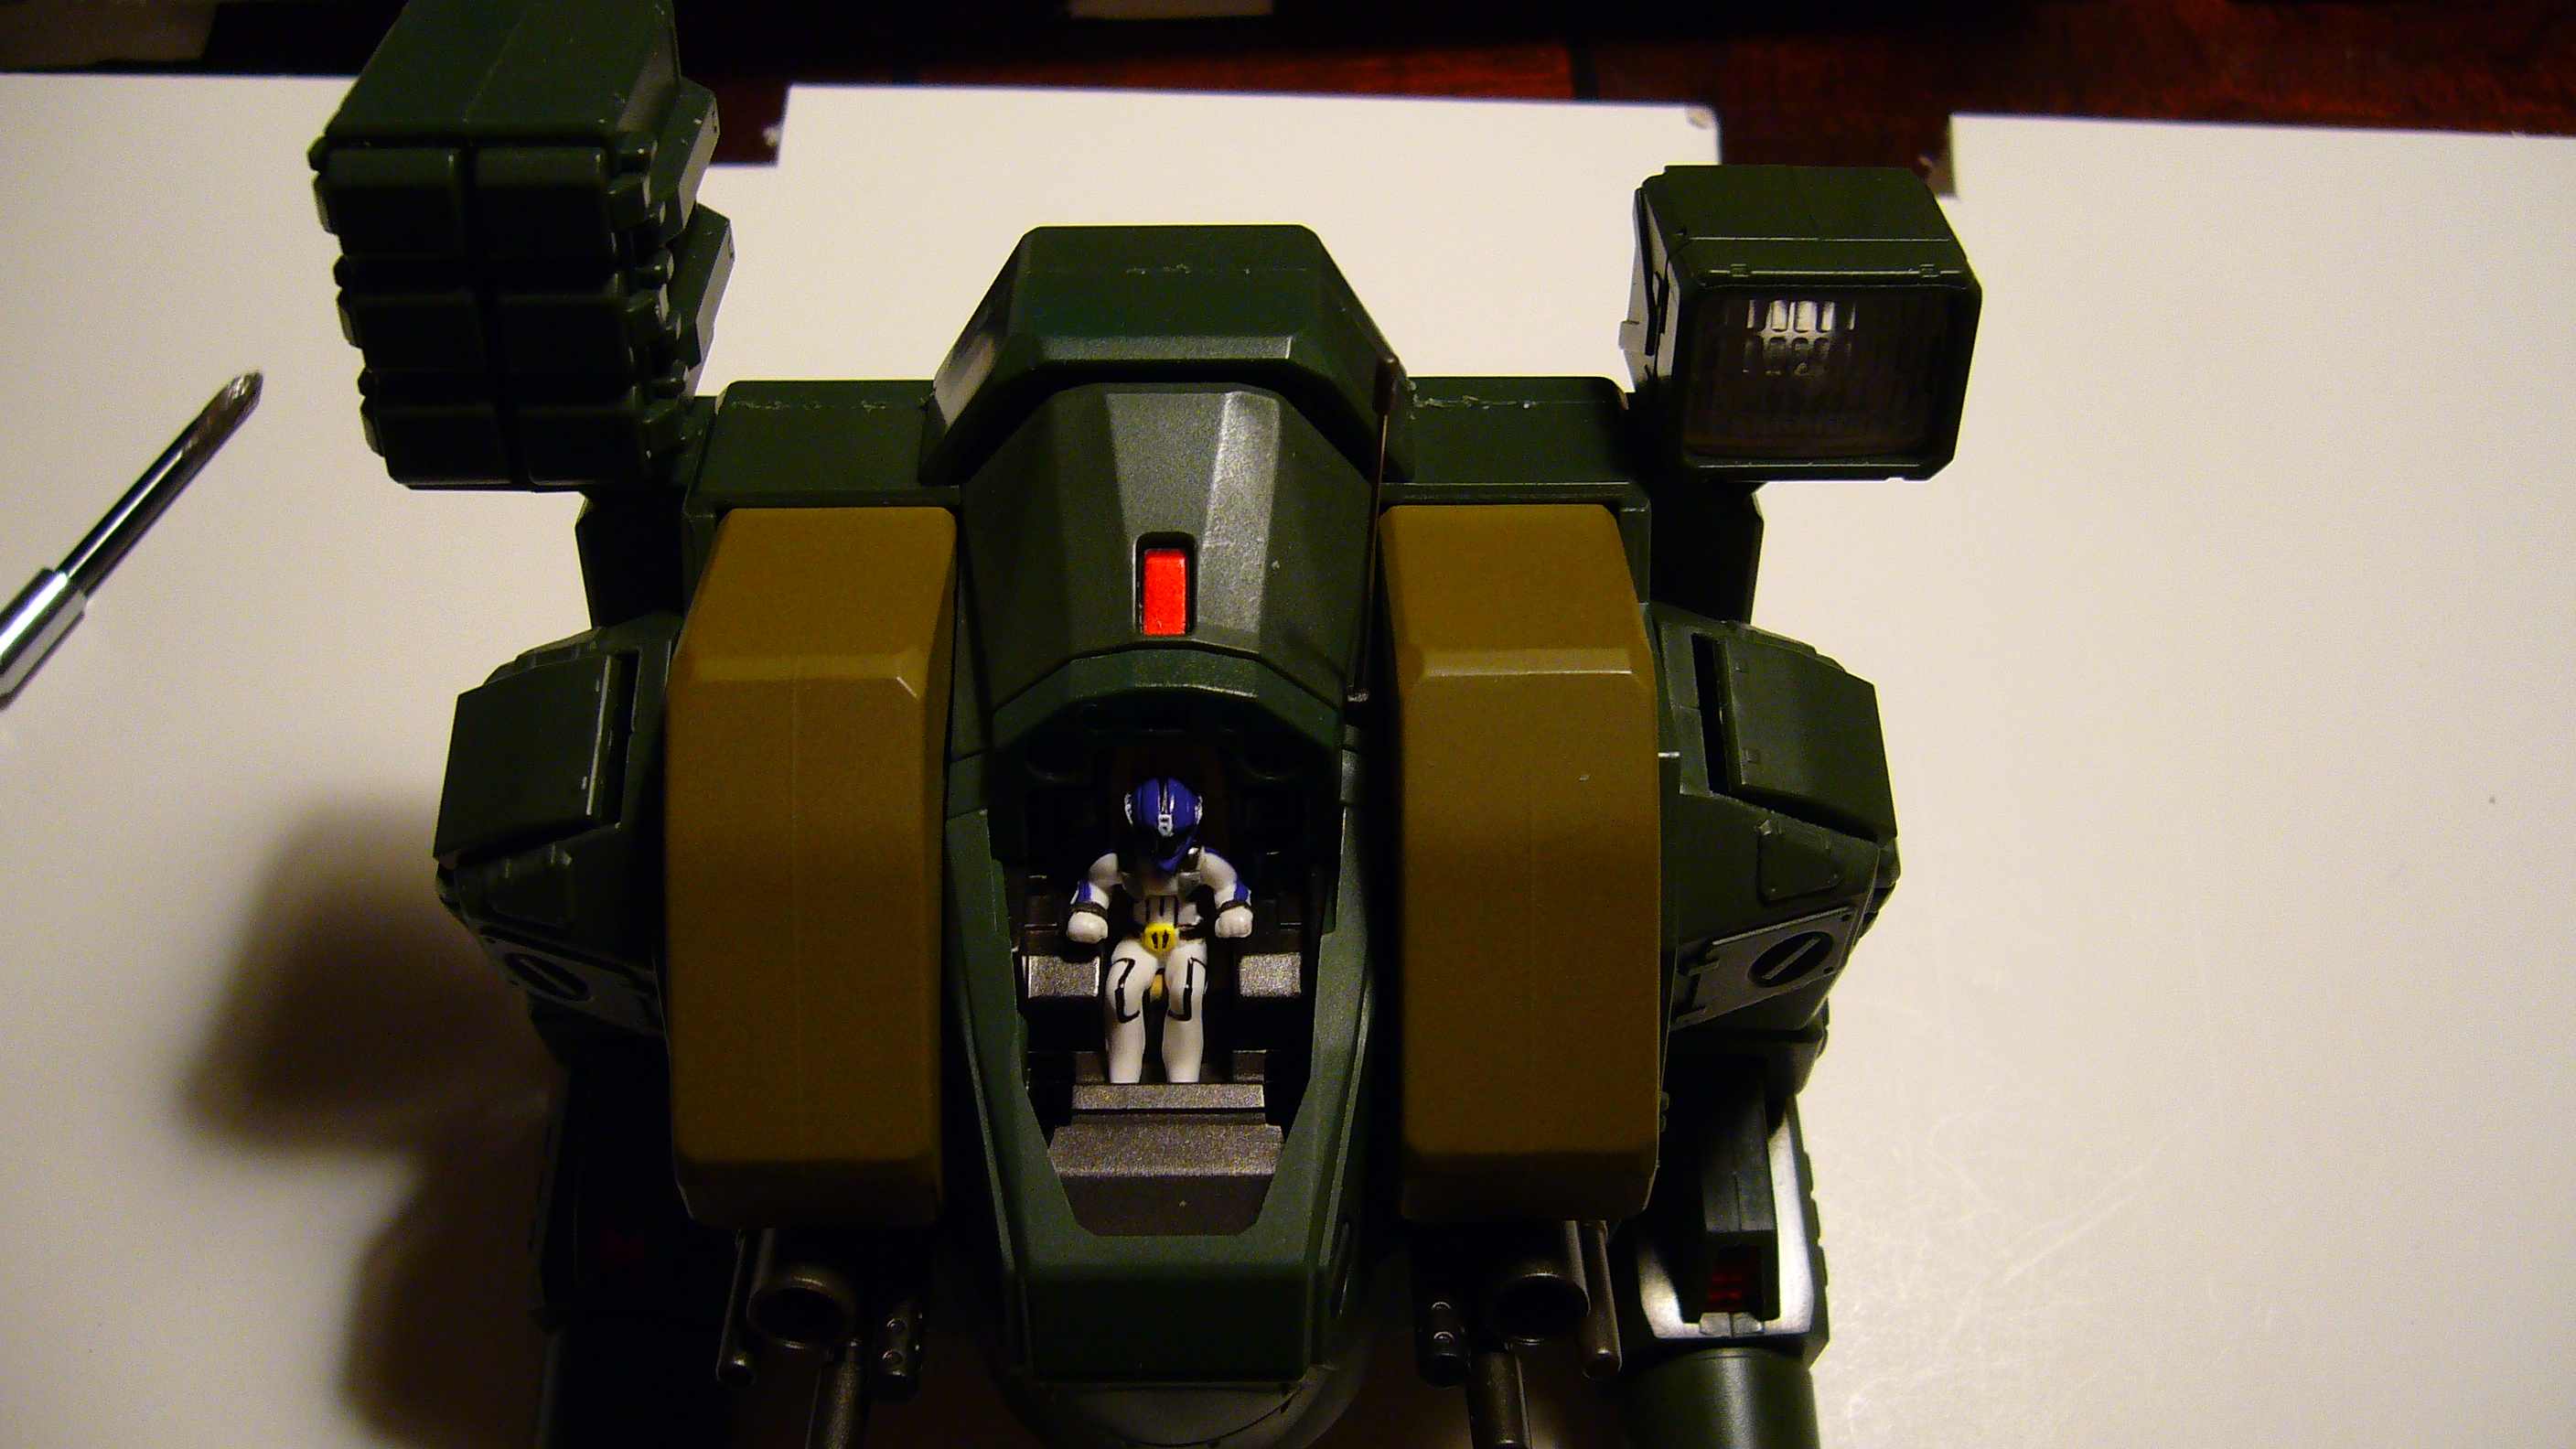
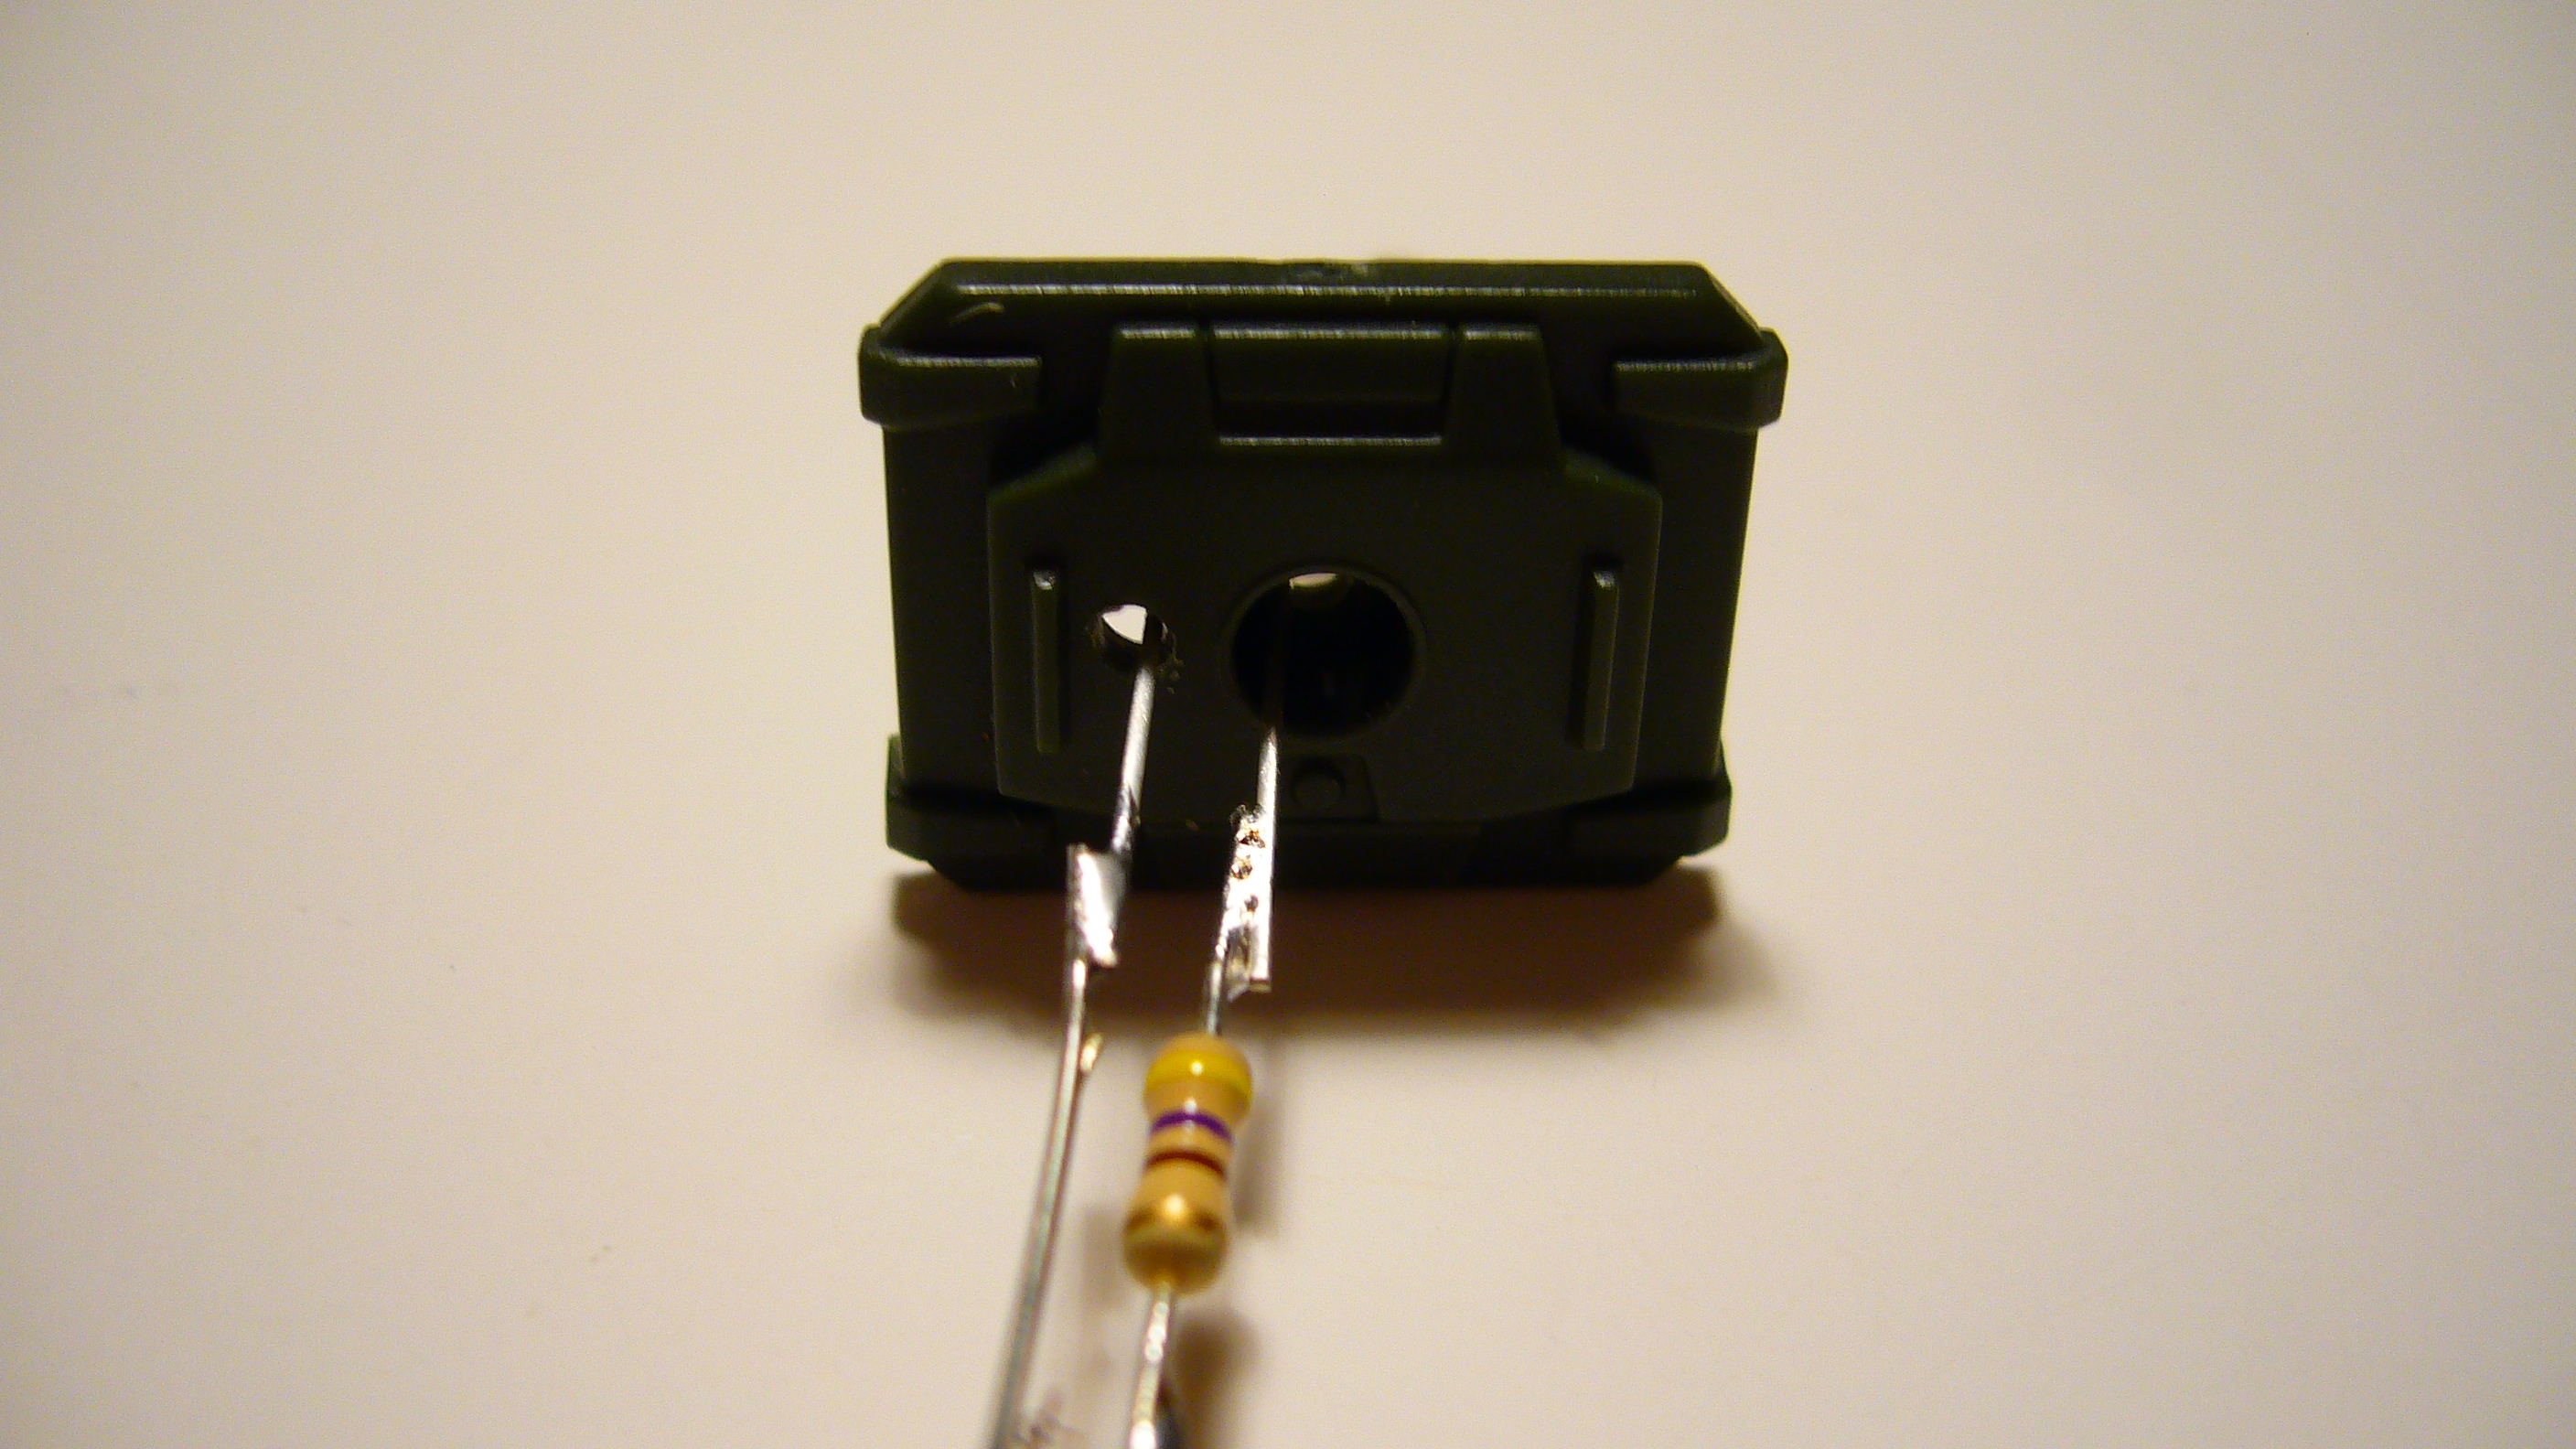
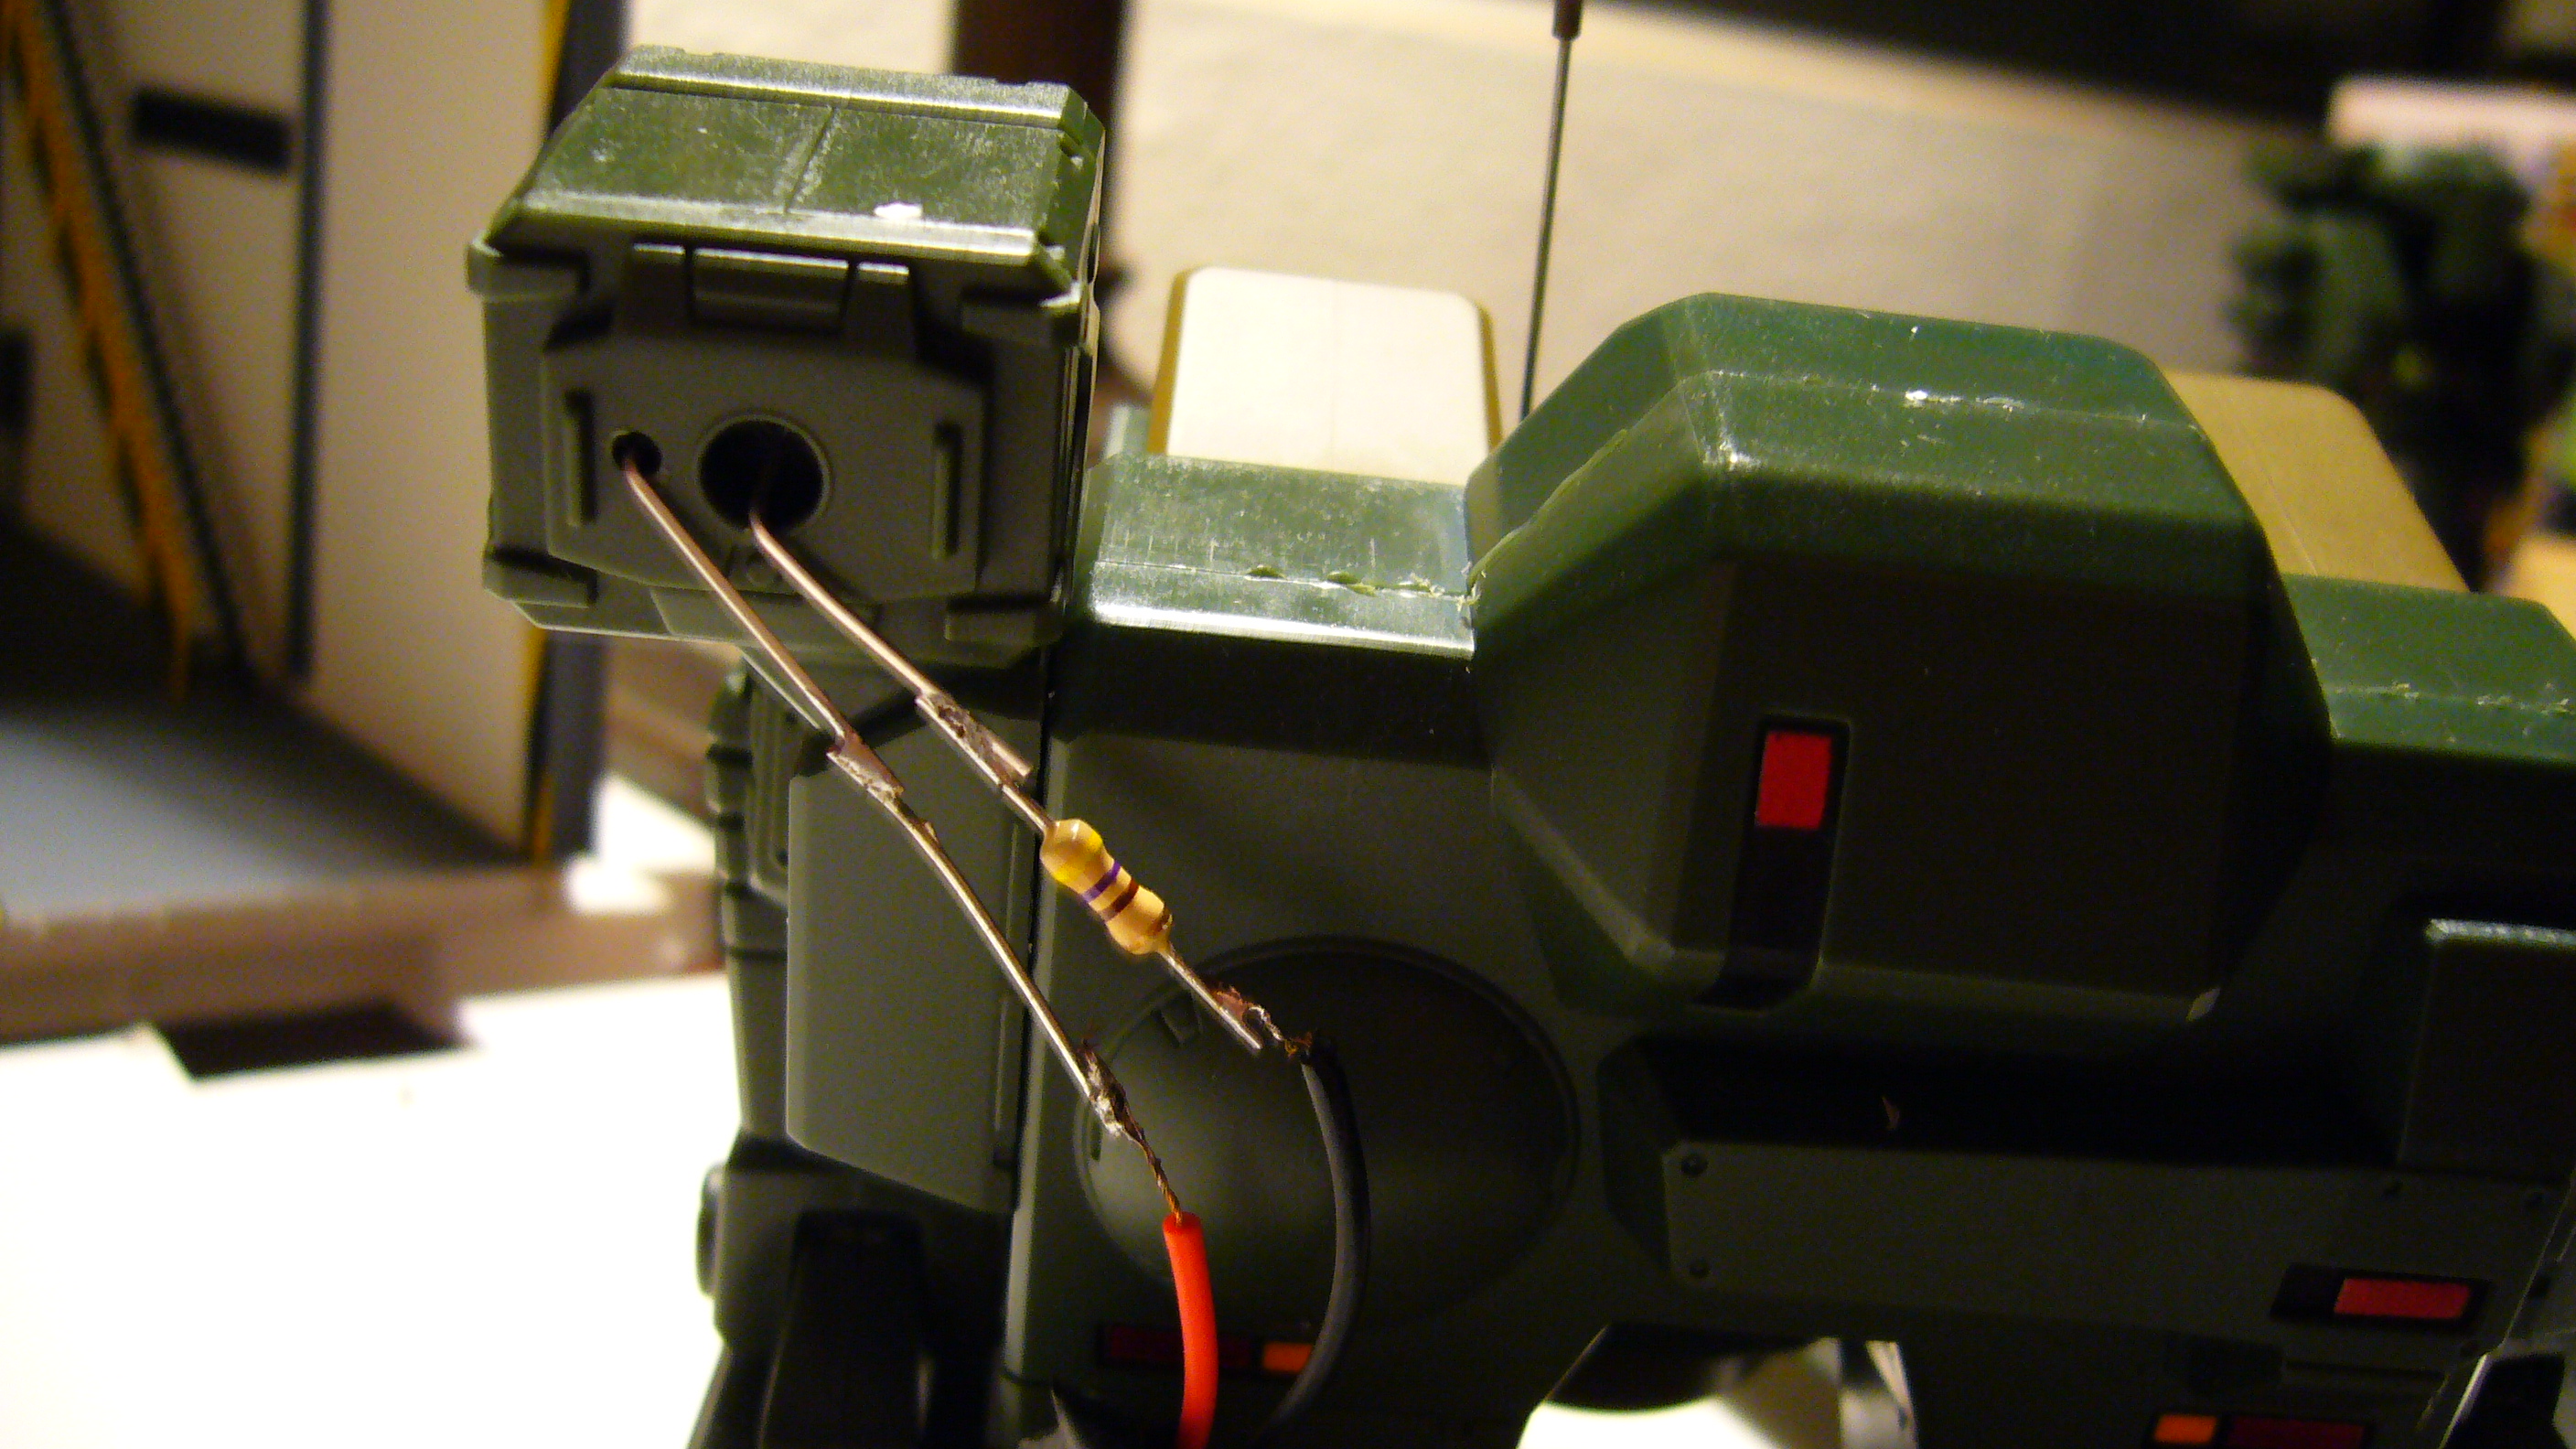
I take it you don't have the search-light's LED set up to be fully internal?
I'm curious if anyone has developed anything that can be isolated into the search-light housing. Most of the inexpensive dollar-store toys I can find usually require 3 batteries and a resistor or two, which is a bit much to pack in there.
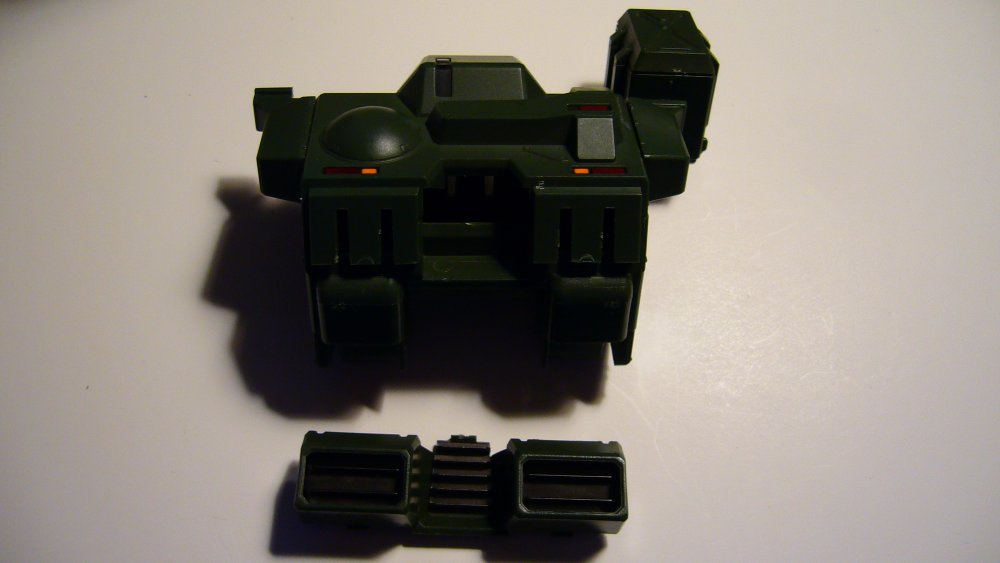
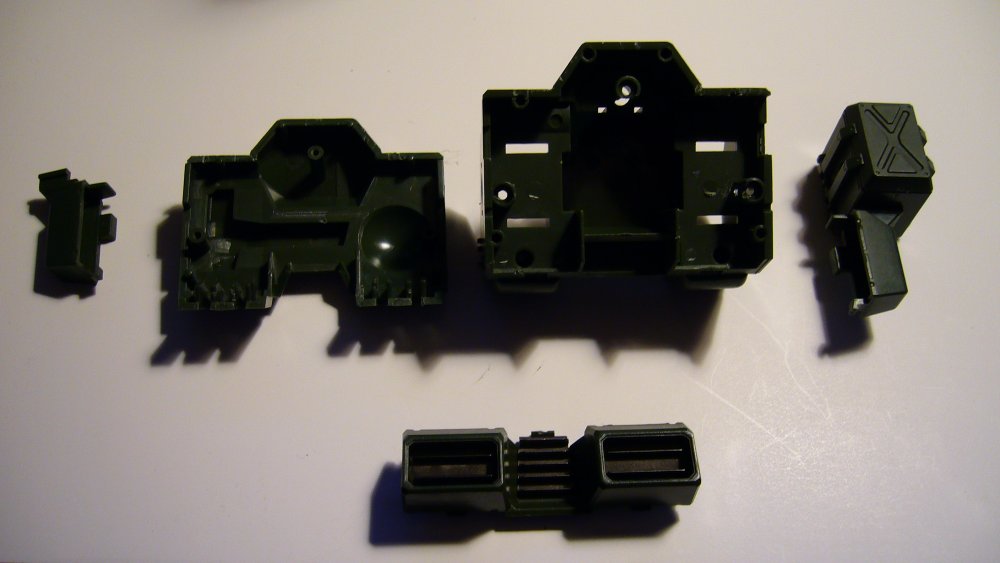
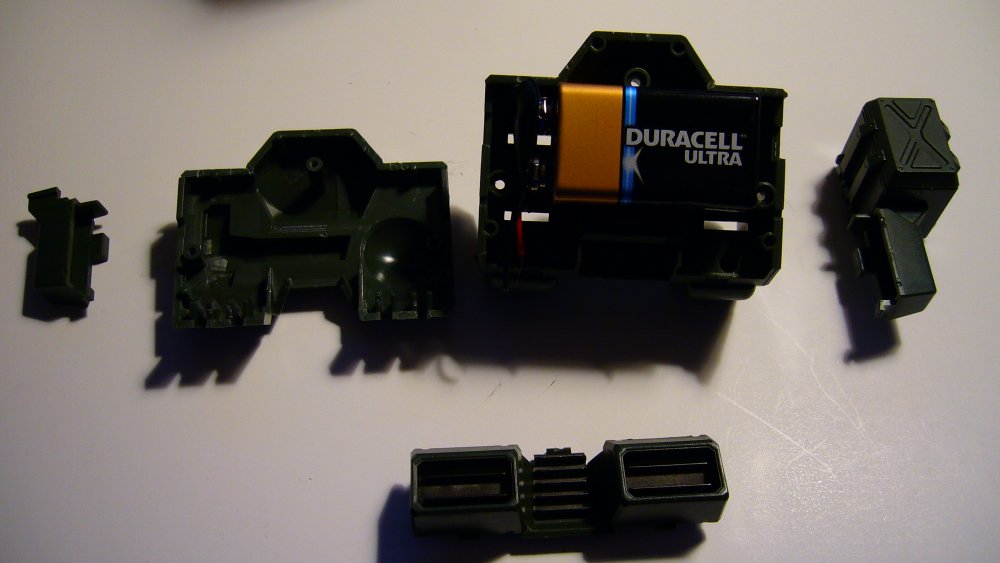
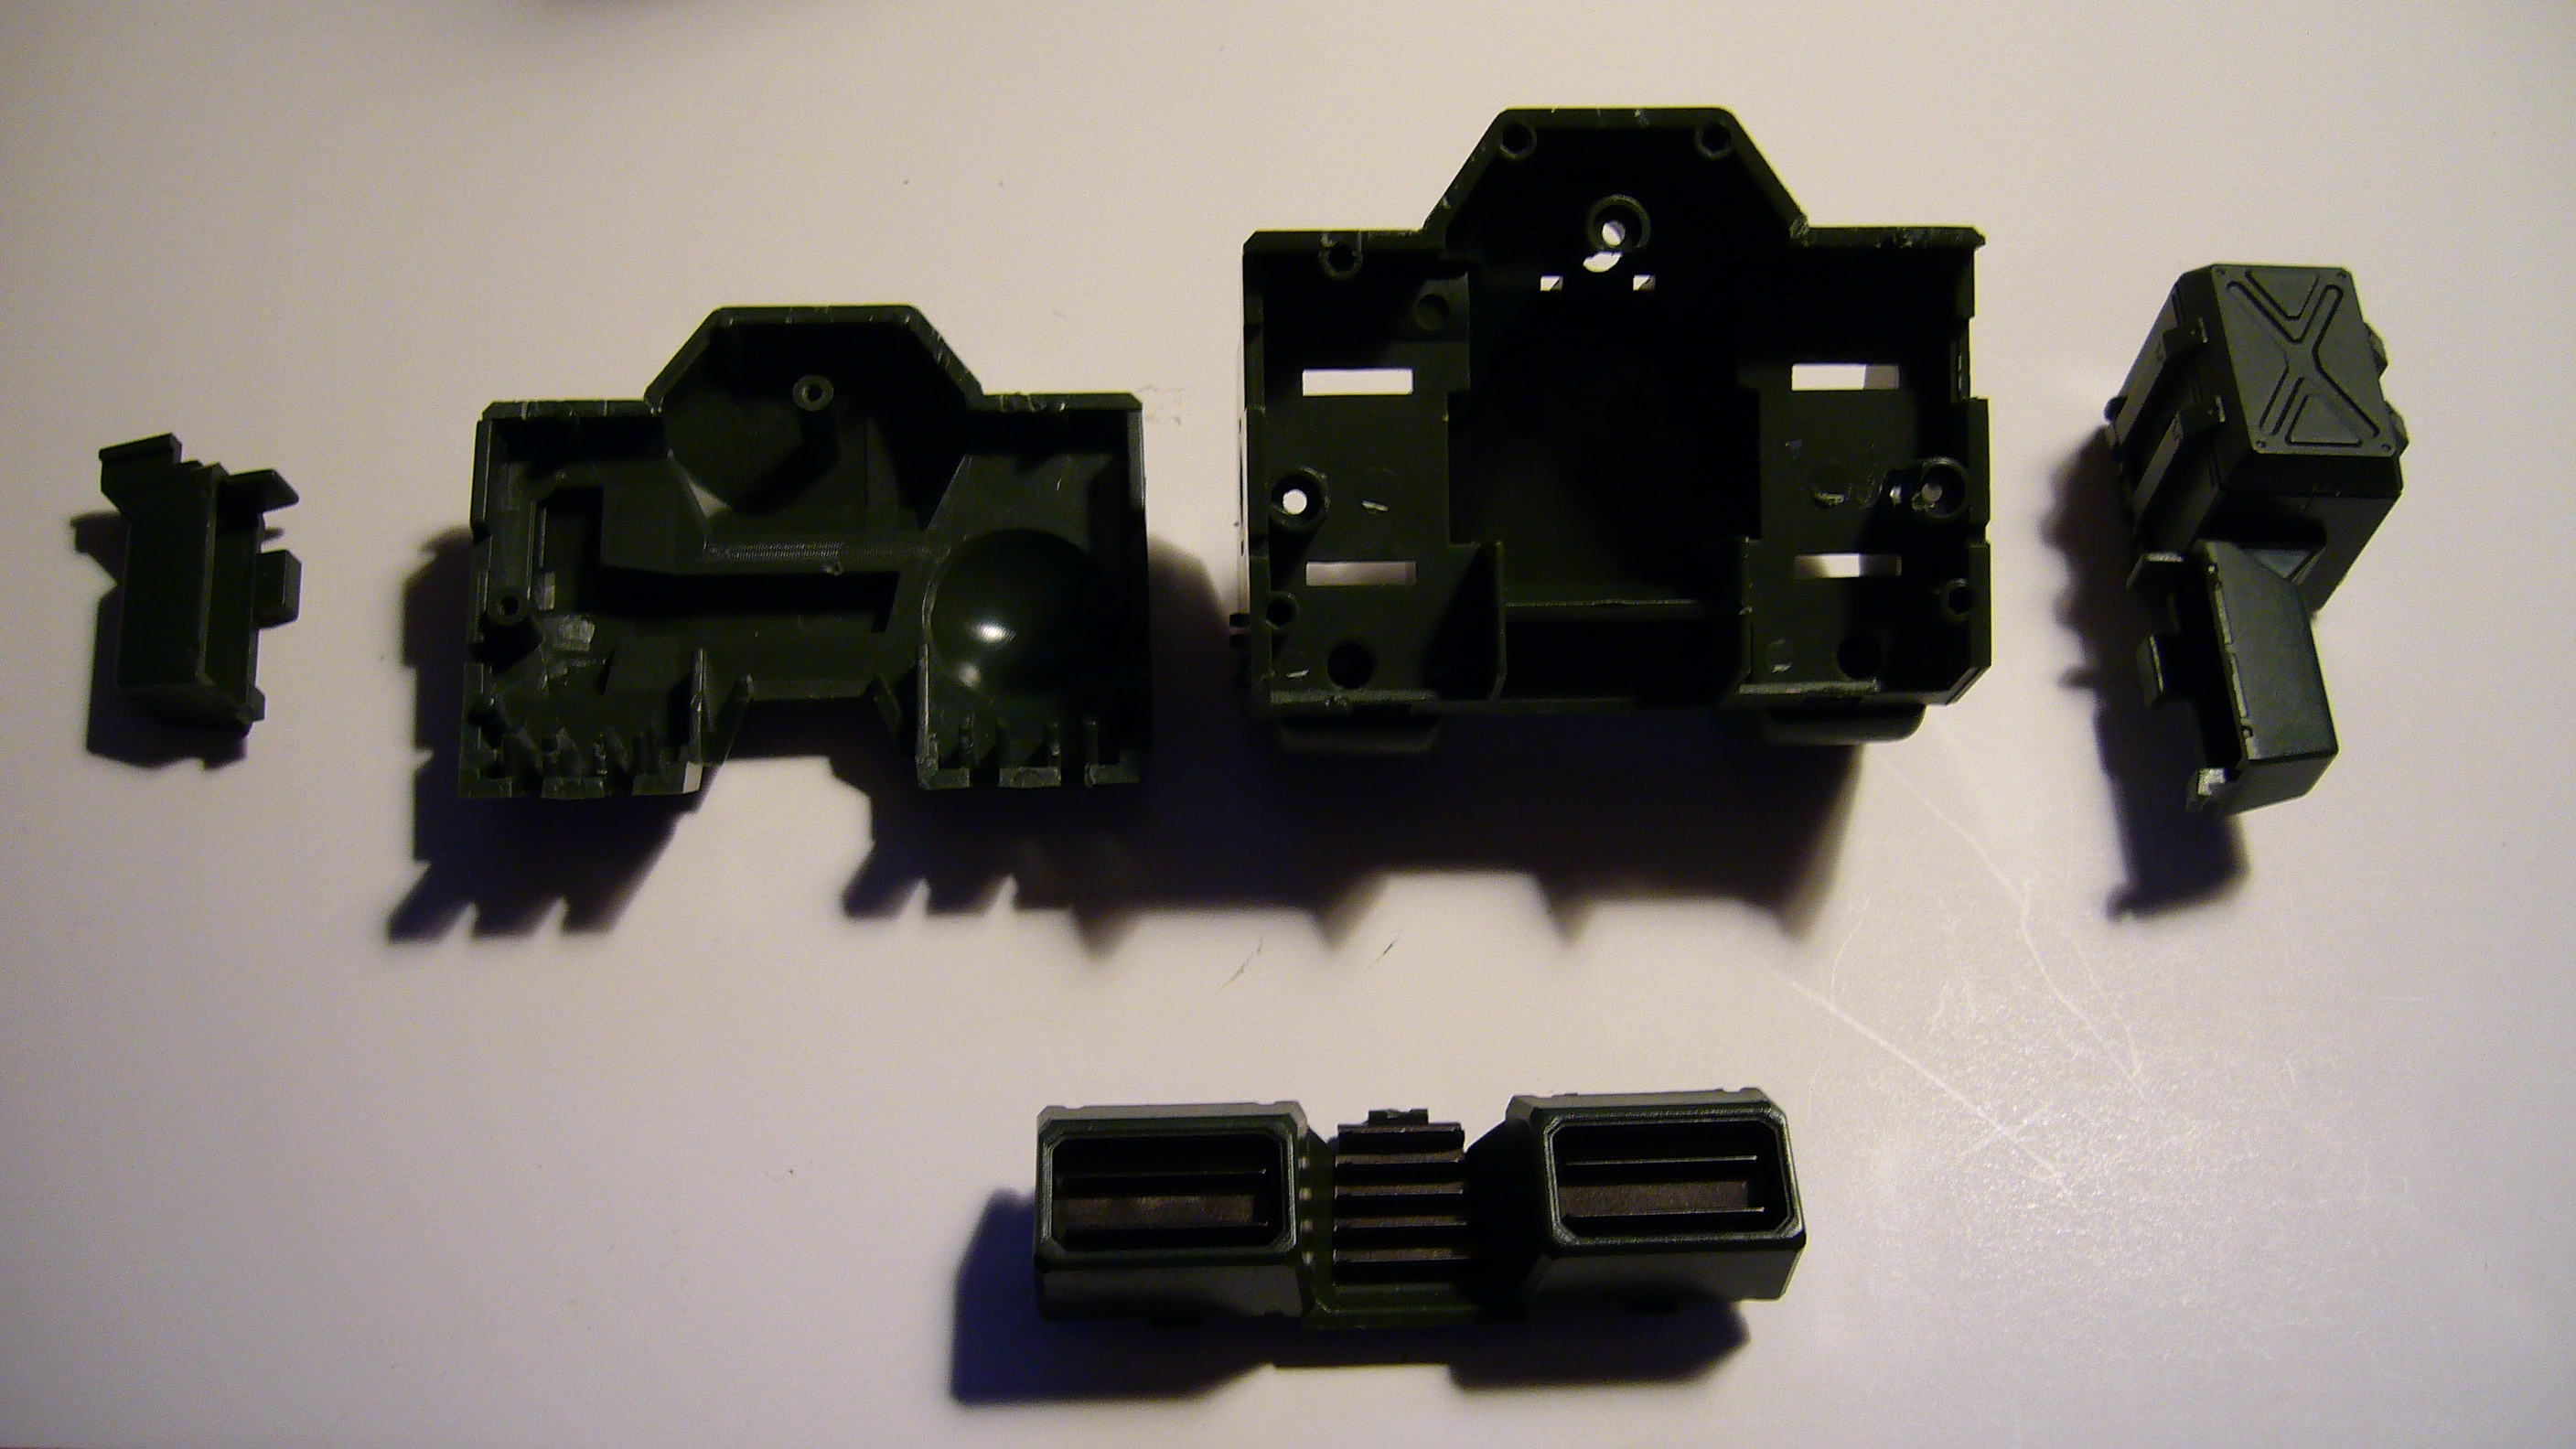
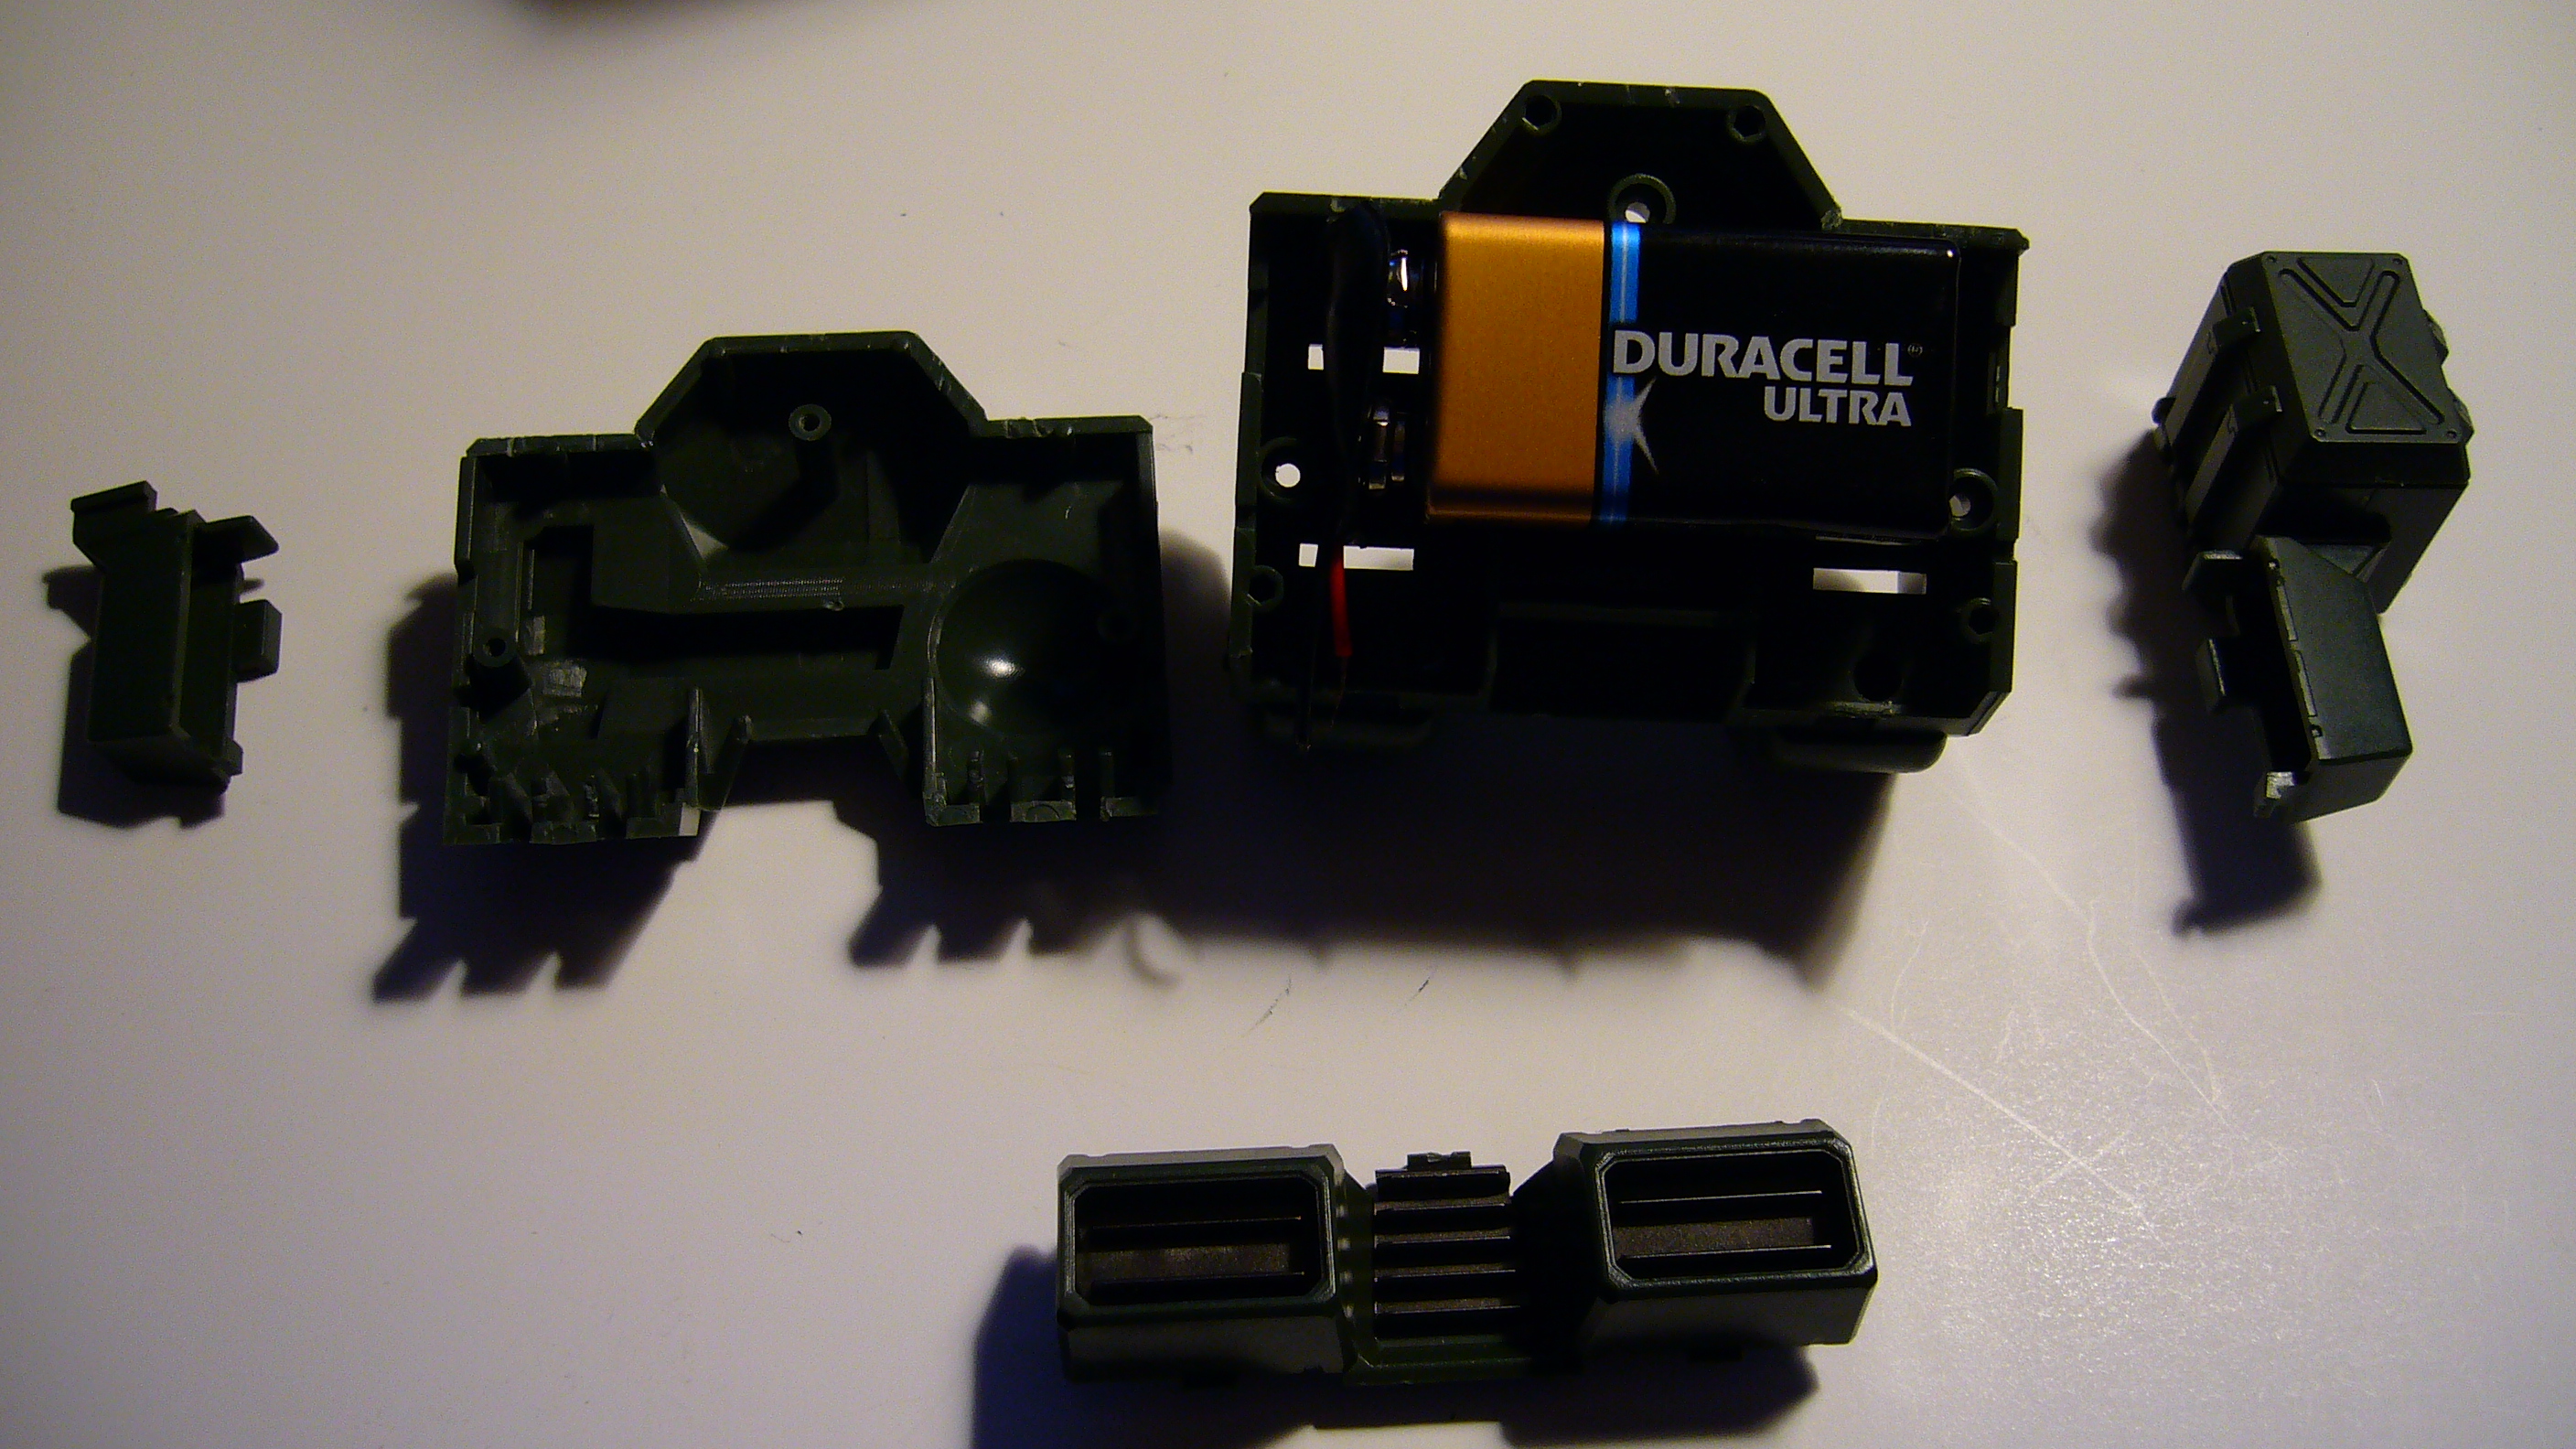
I've actually been doing some tinkering with this concept/idea and have made minimal progress...
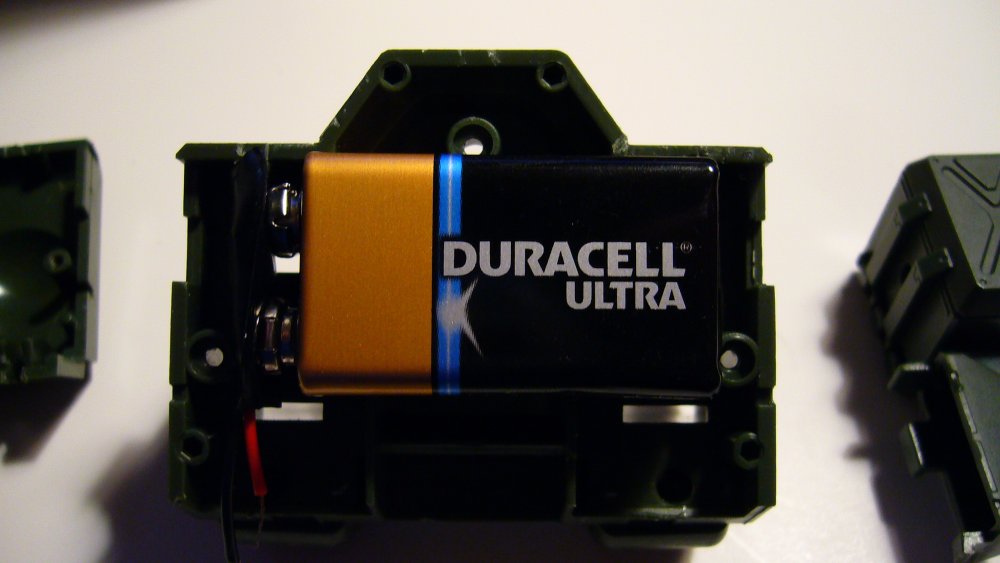
I was trying to fit a standard 9volt battery within the back of the Hawk itself. It fits dimensionally with
some minor trimming of the mounting posts. (internally) However the battery unfortunately is too thick
and leaves about an 1/8 inch gap when you try to install the back plate.
Sadly because of this I have decided to do a complete internal wiring and have an out source power
connector. (plug in method if you will) Regardless I will post more on that later on. For now I will include
pictures of the attempt to install the 9 volt battery below.
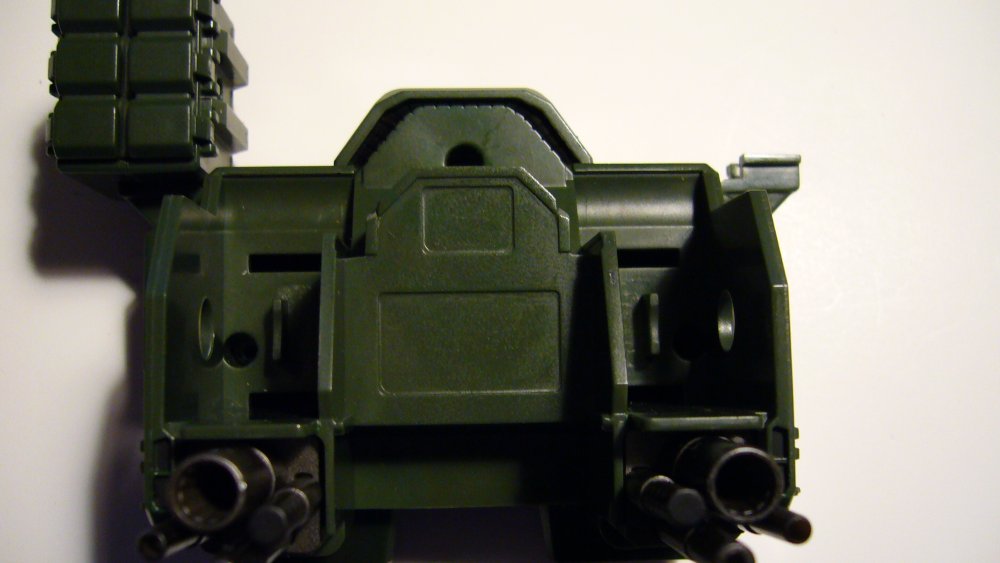
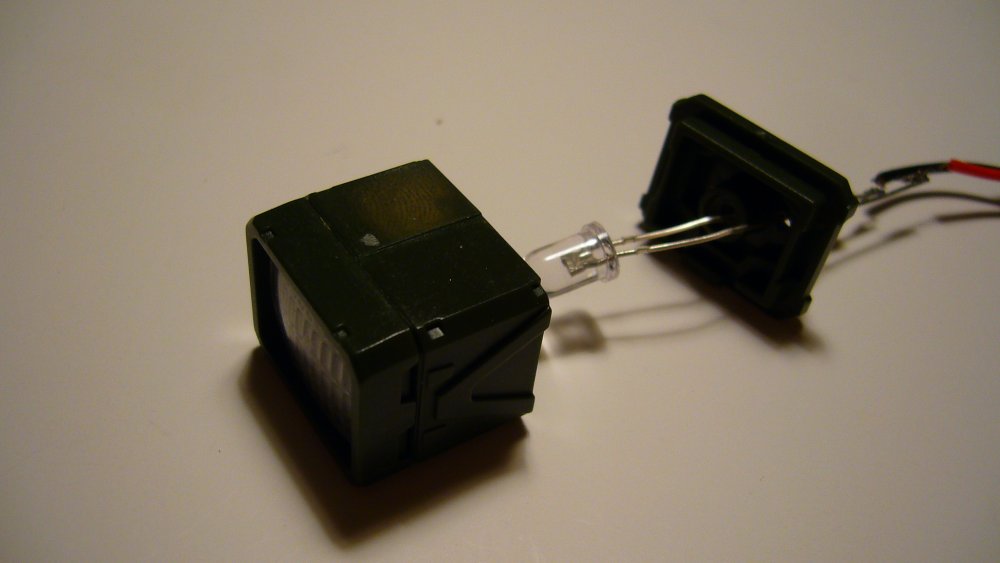
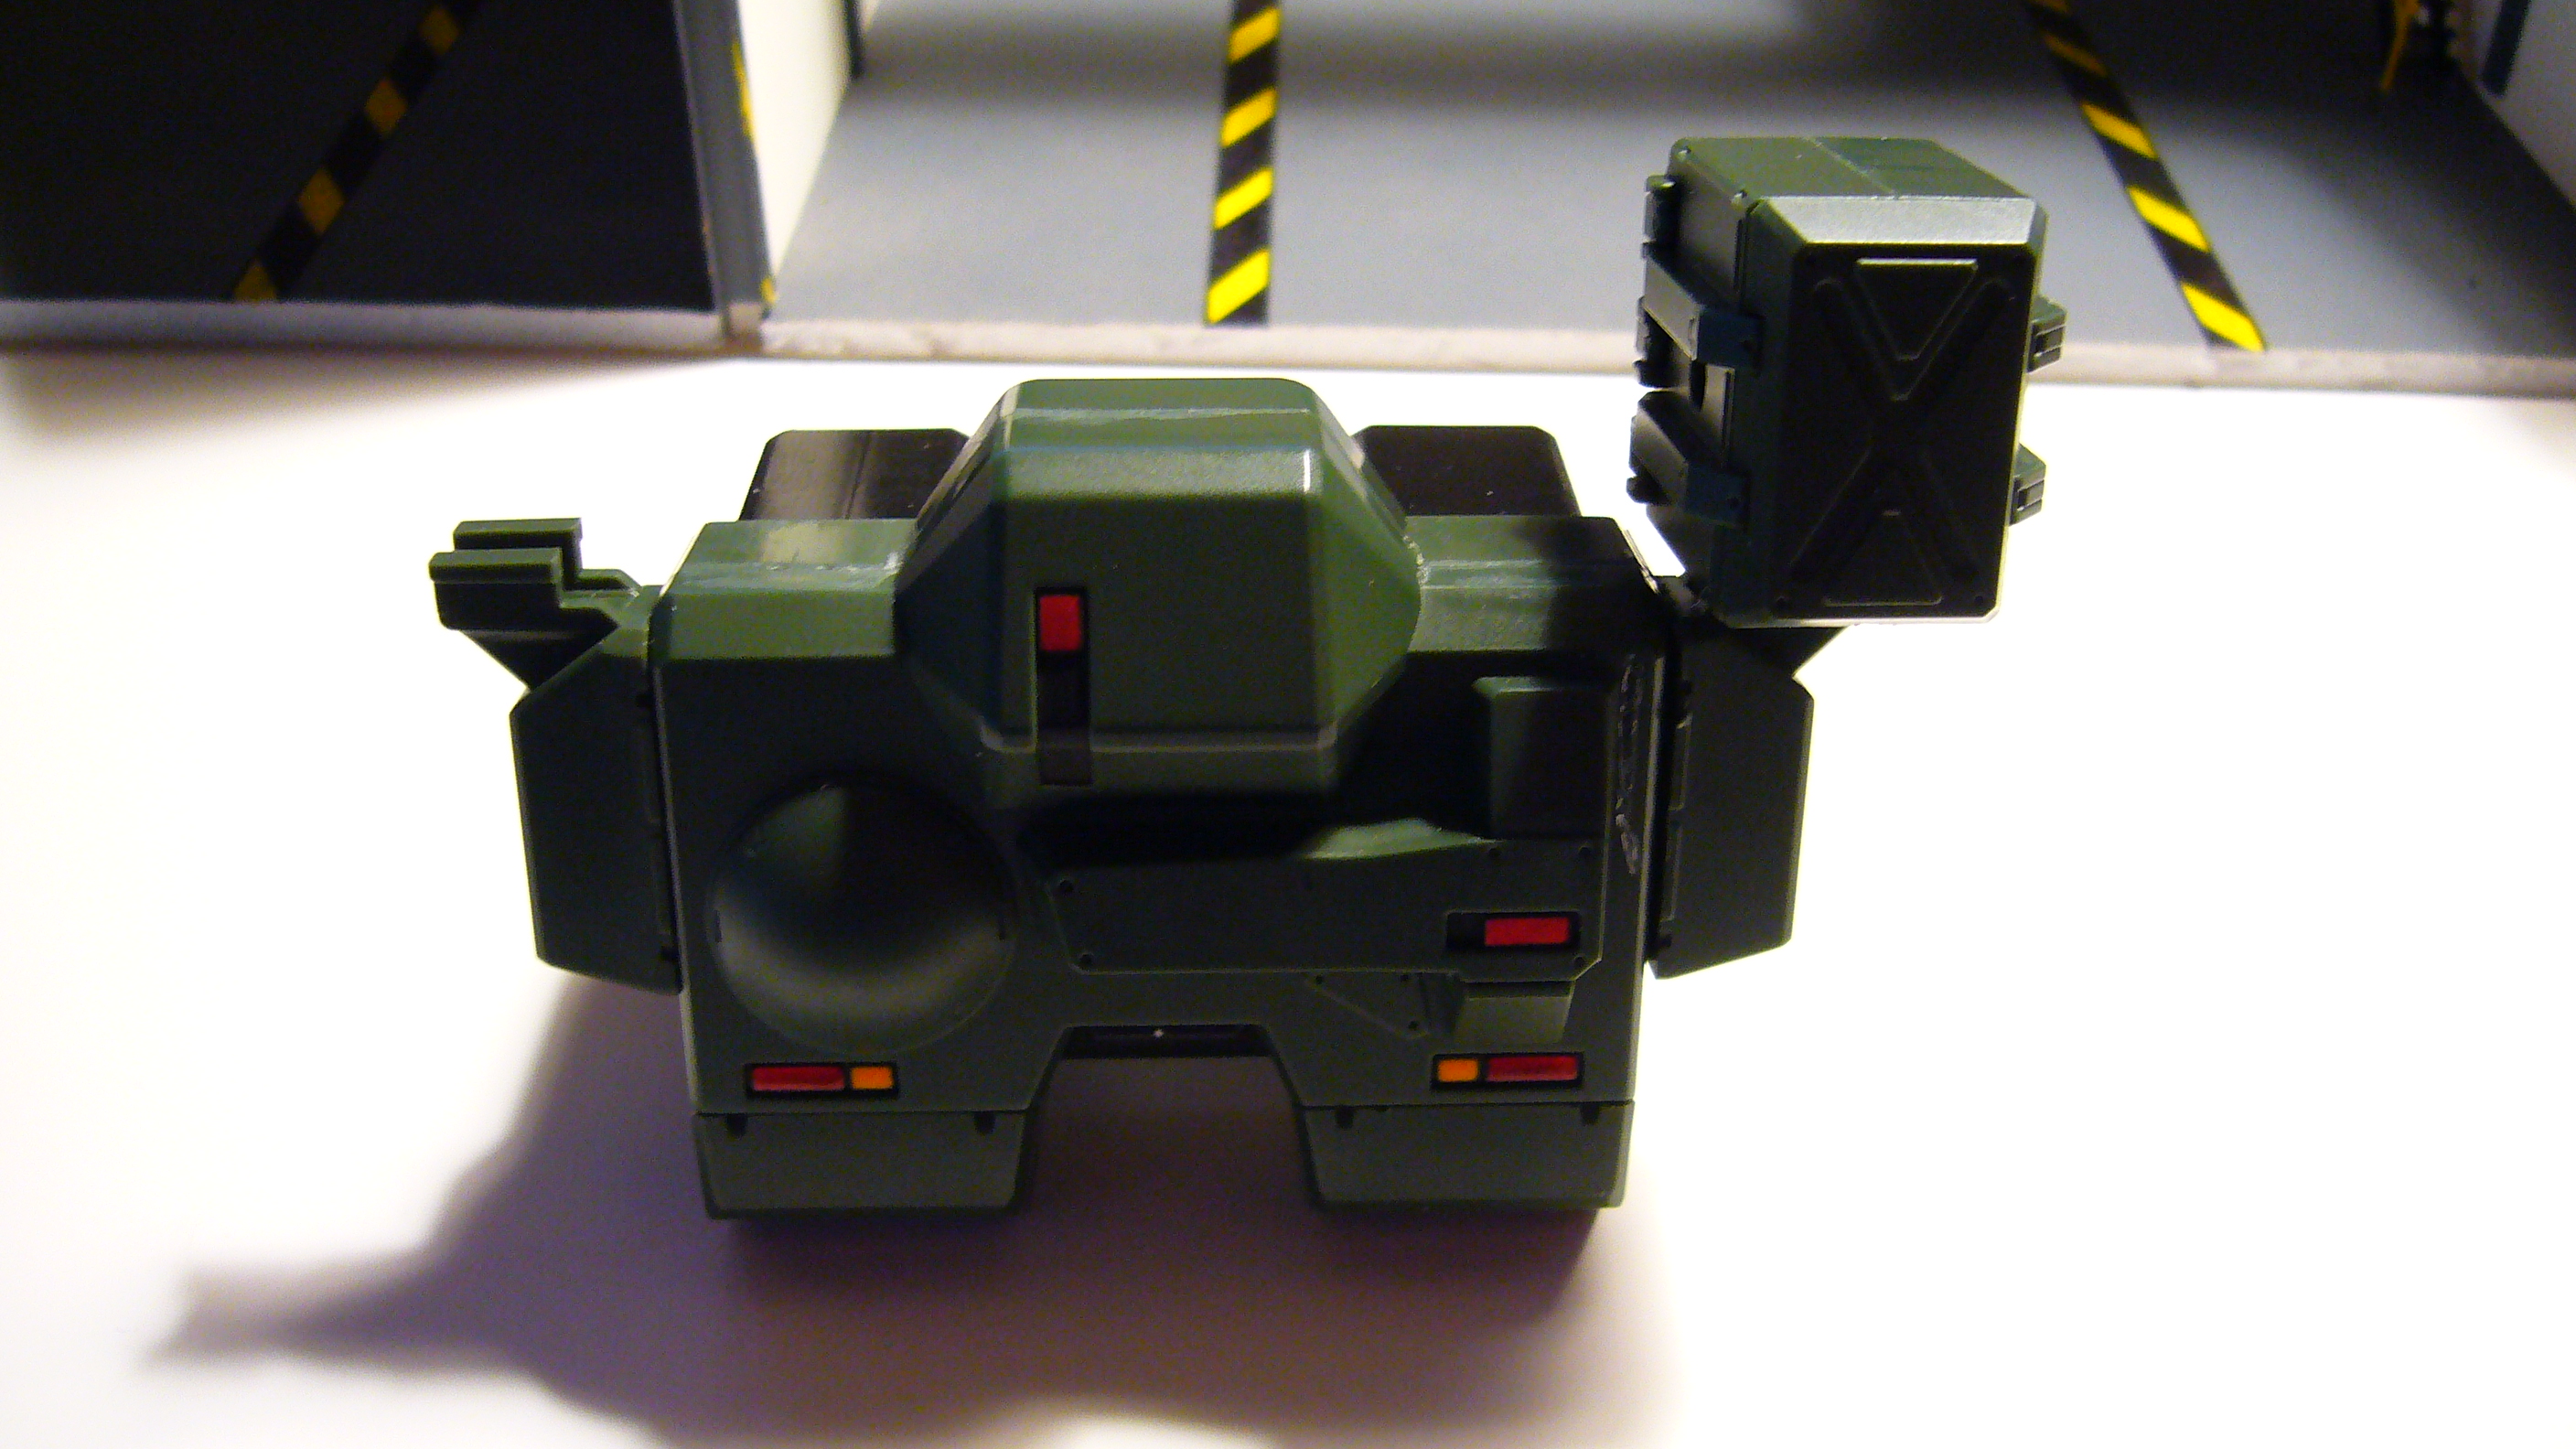
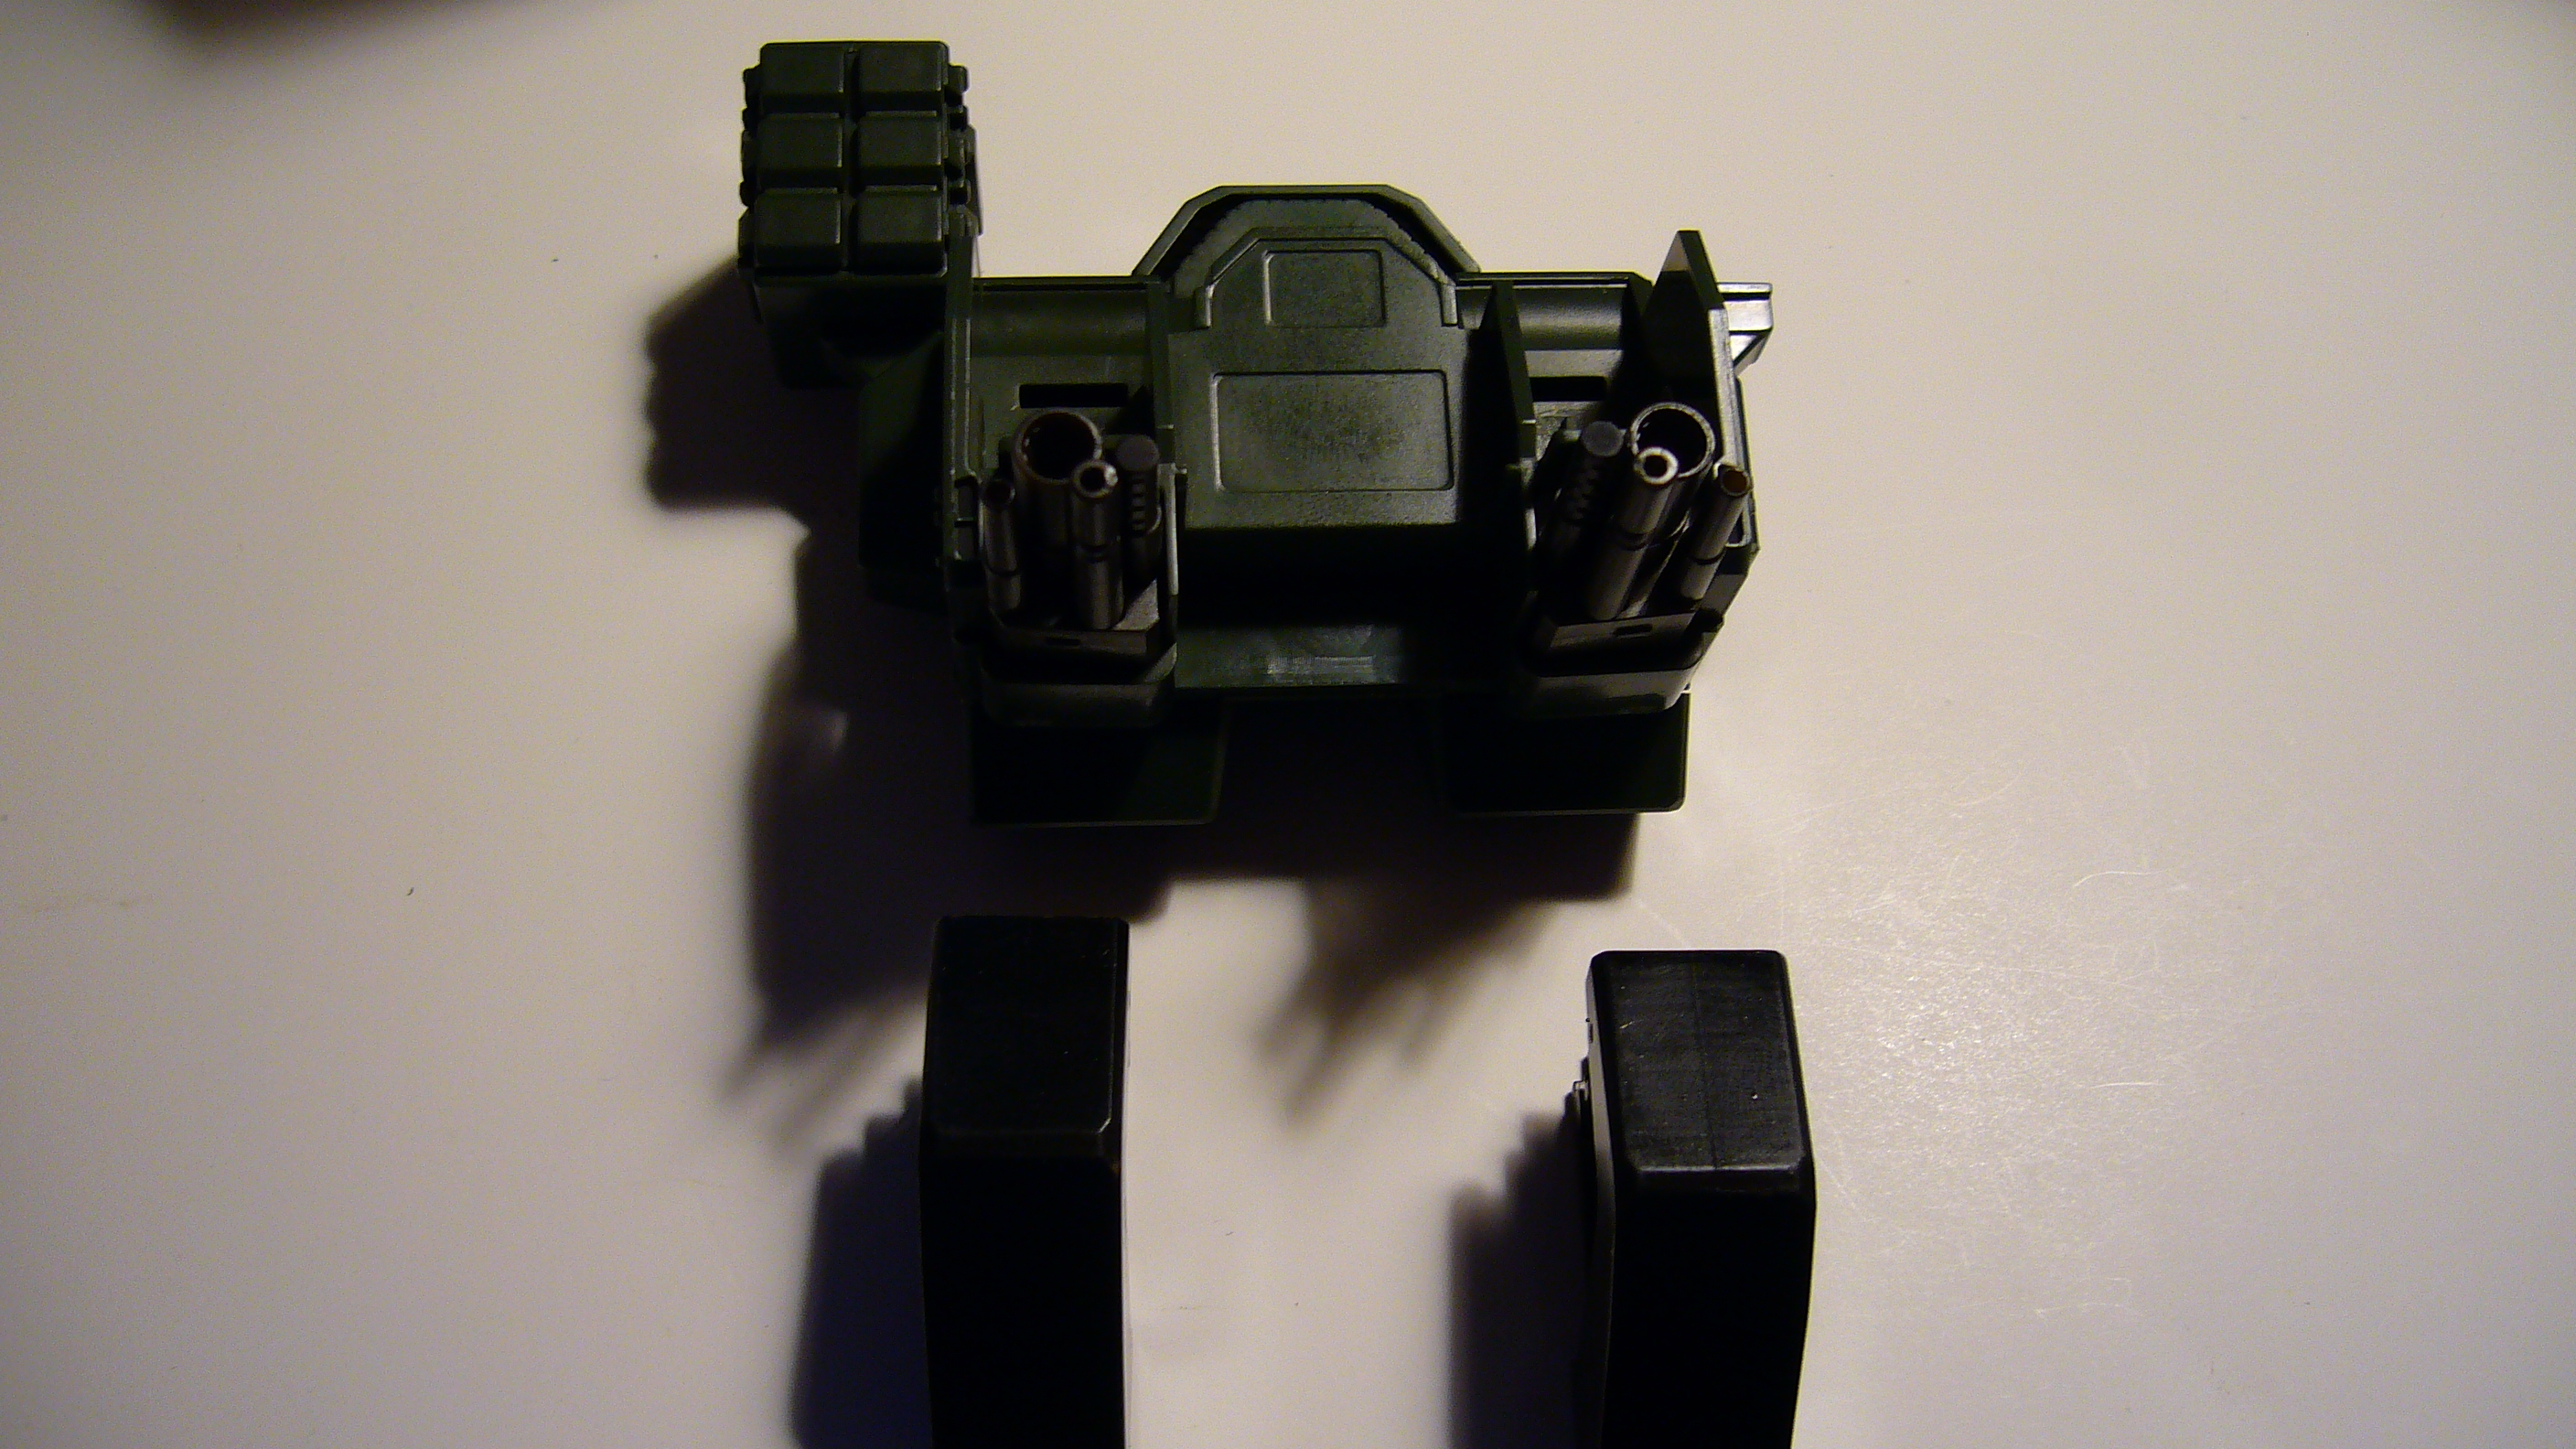
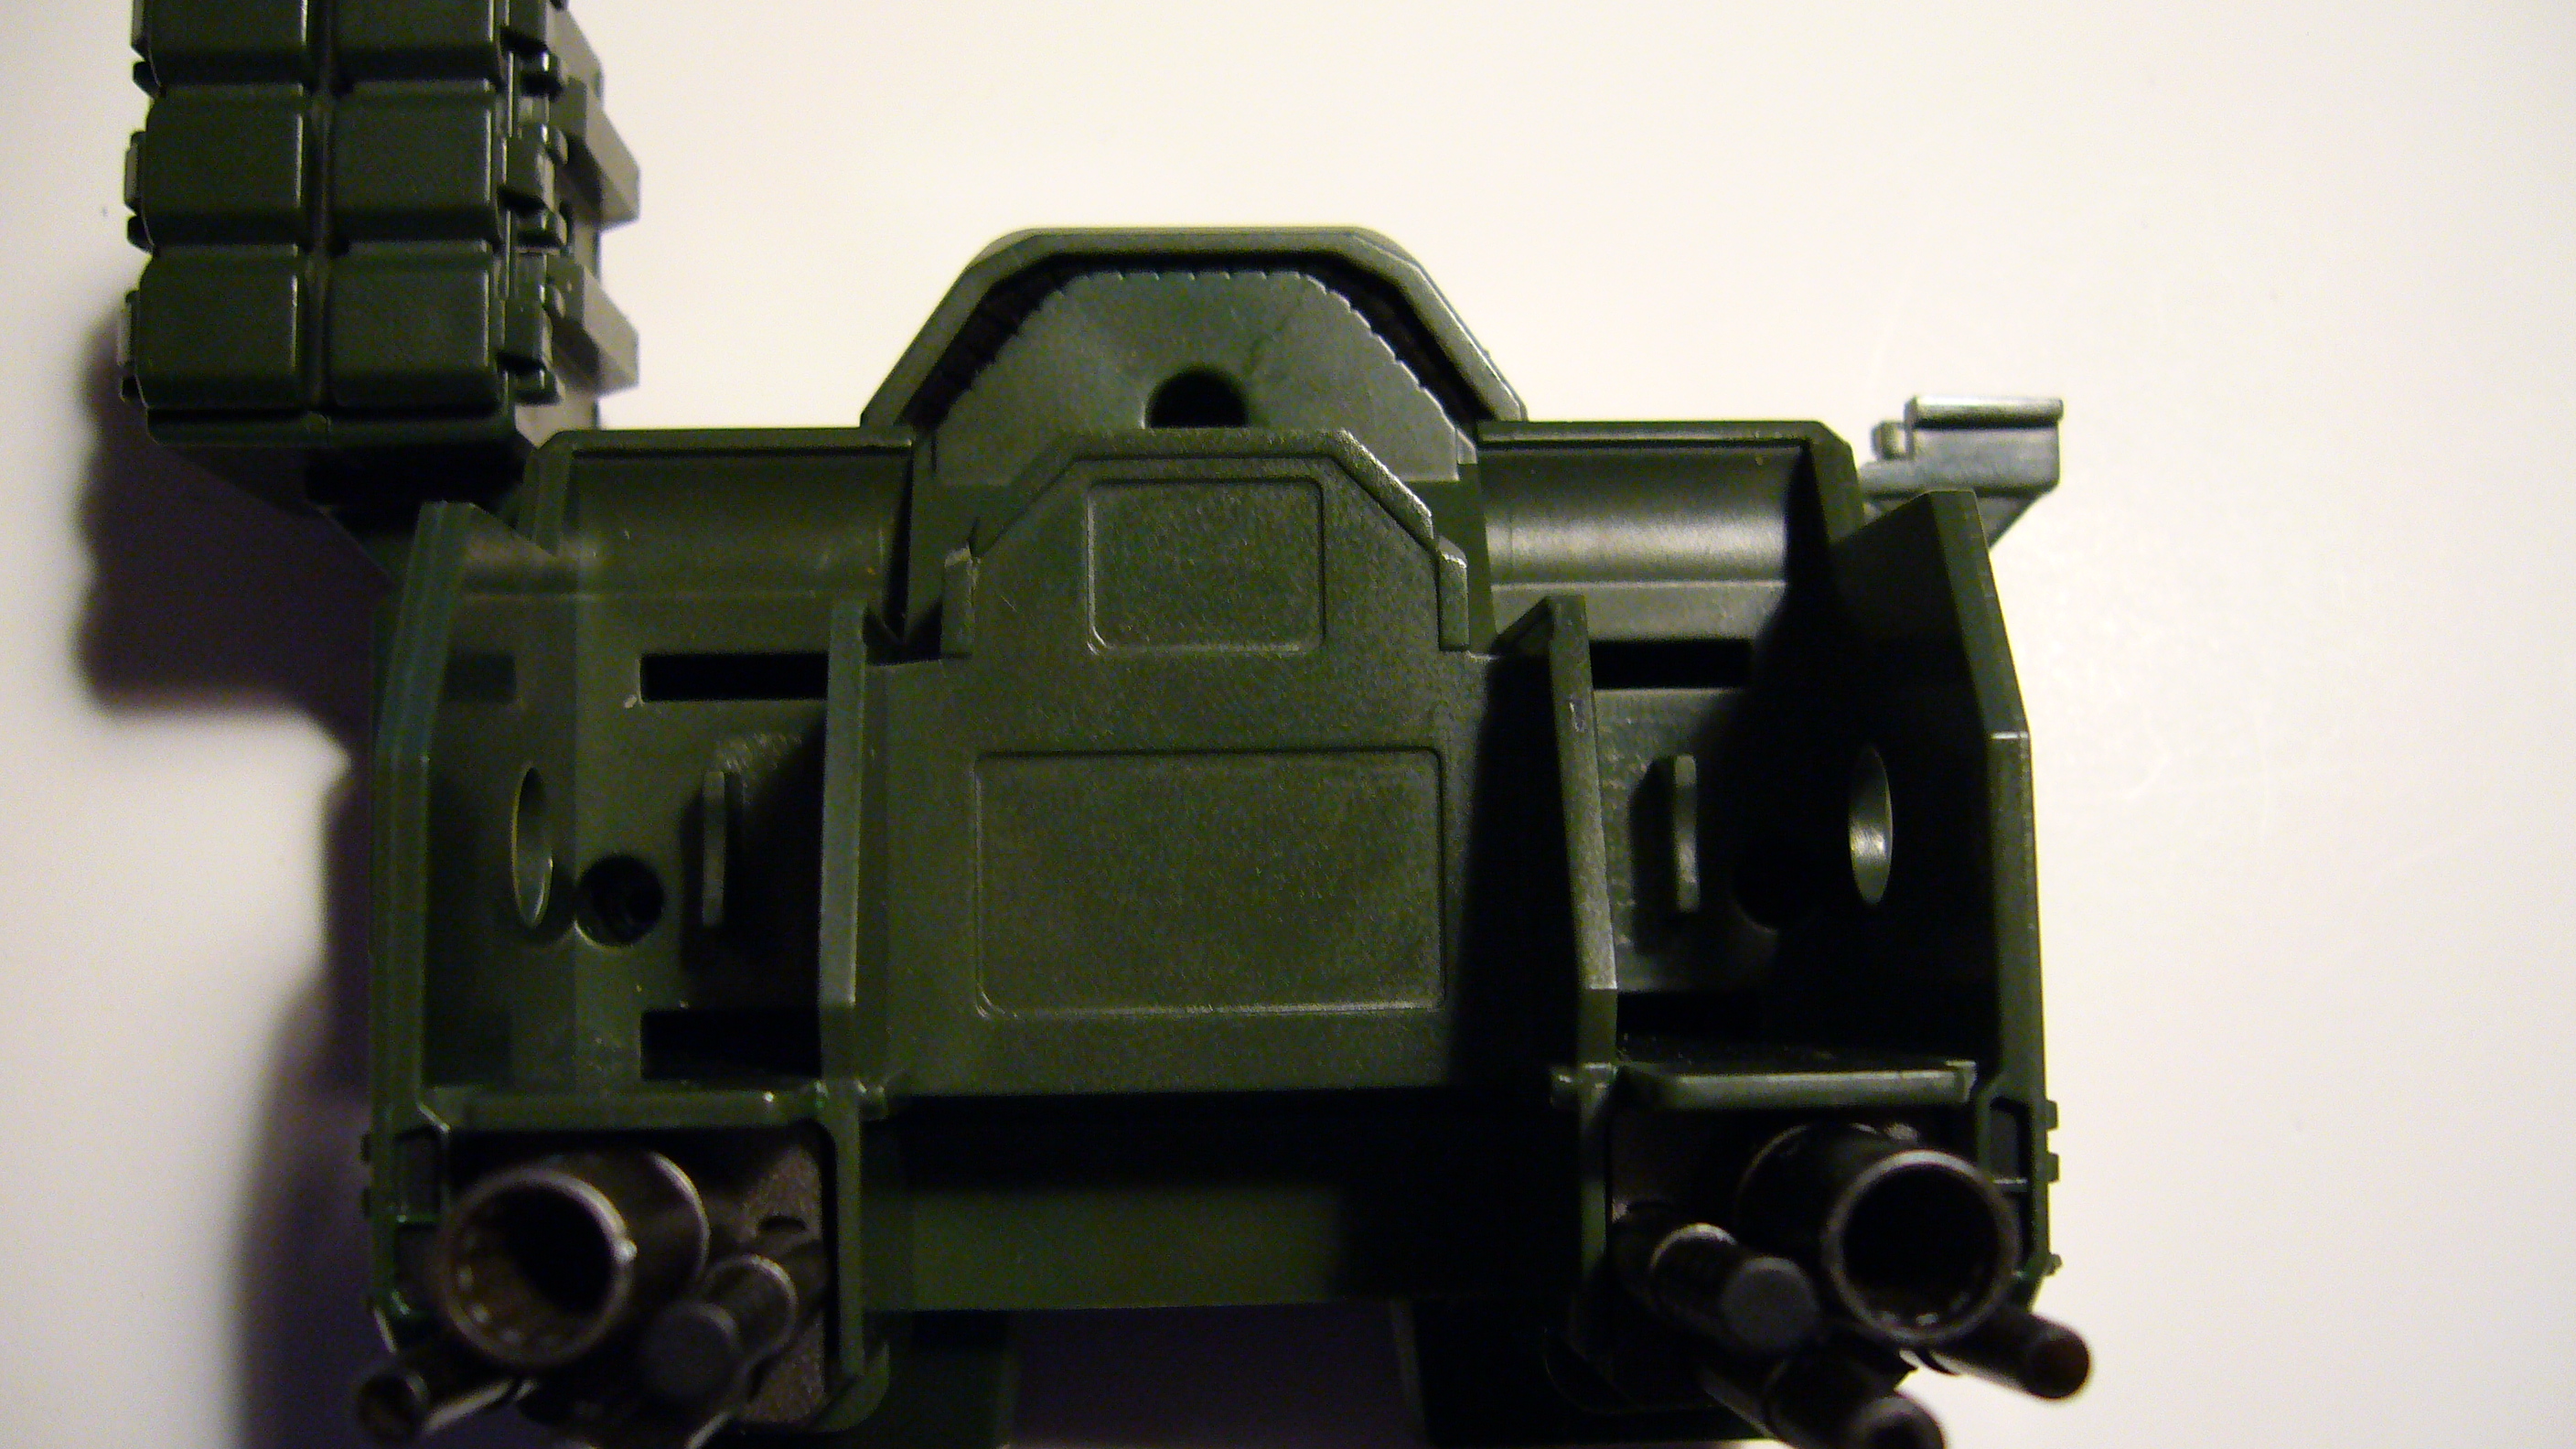
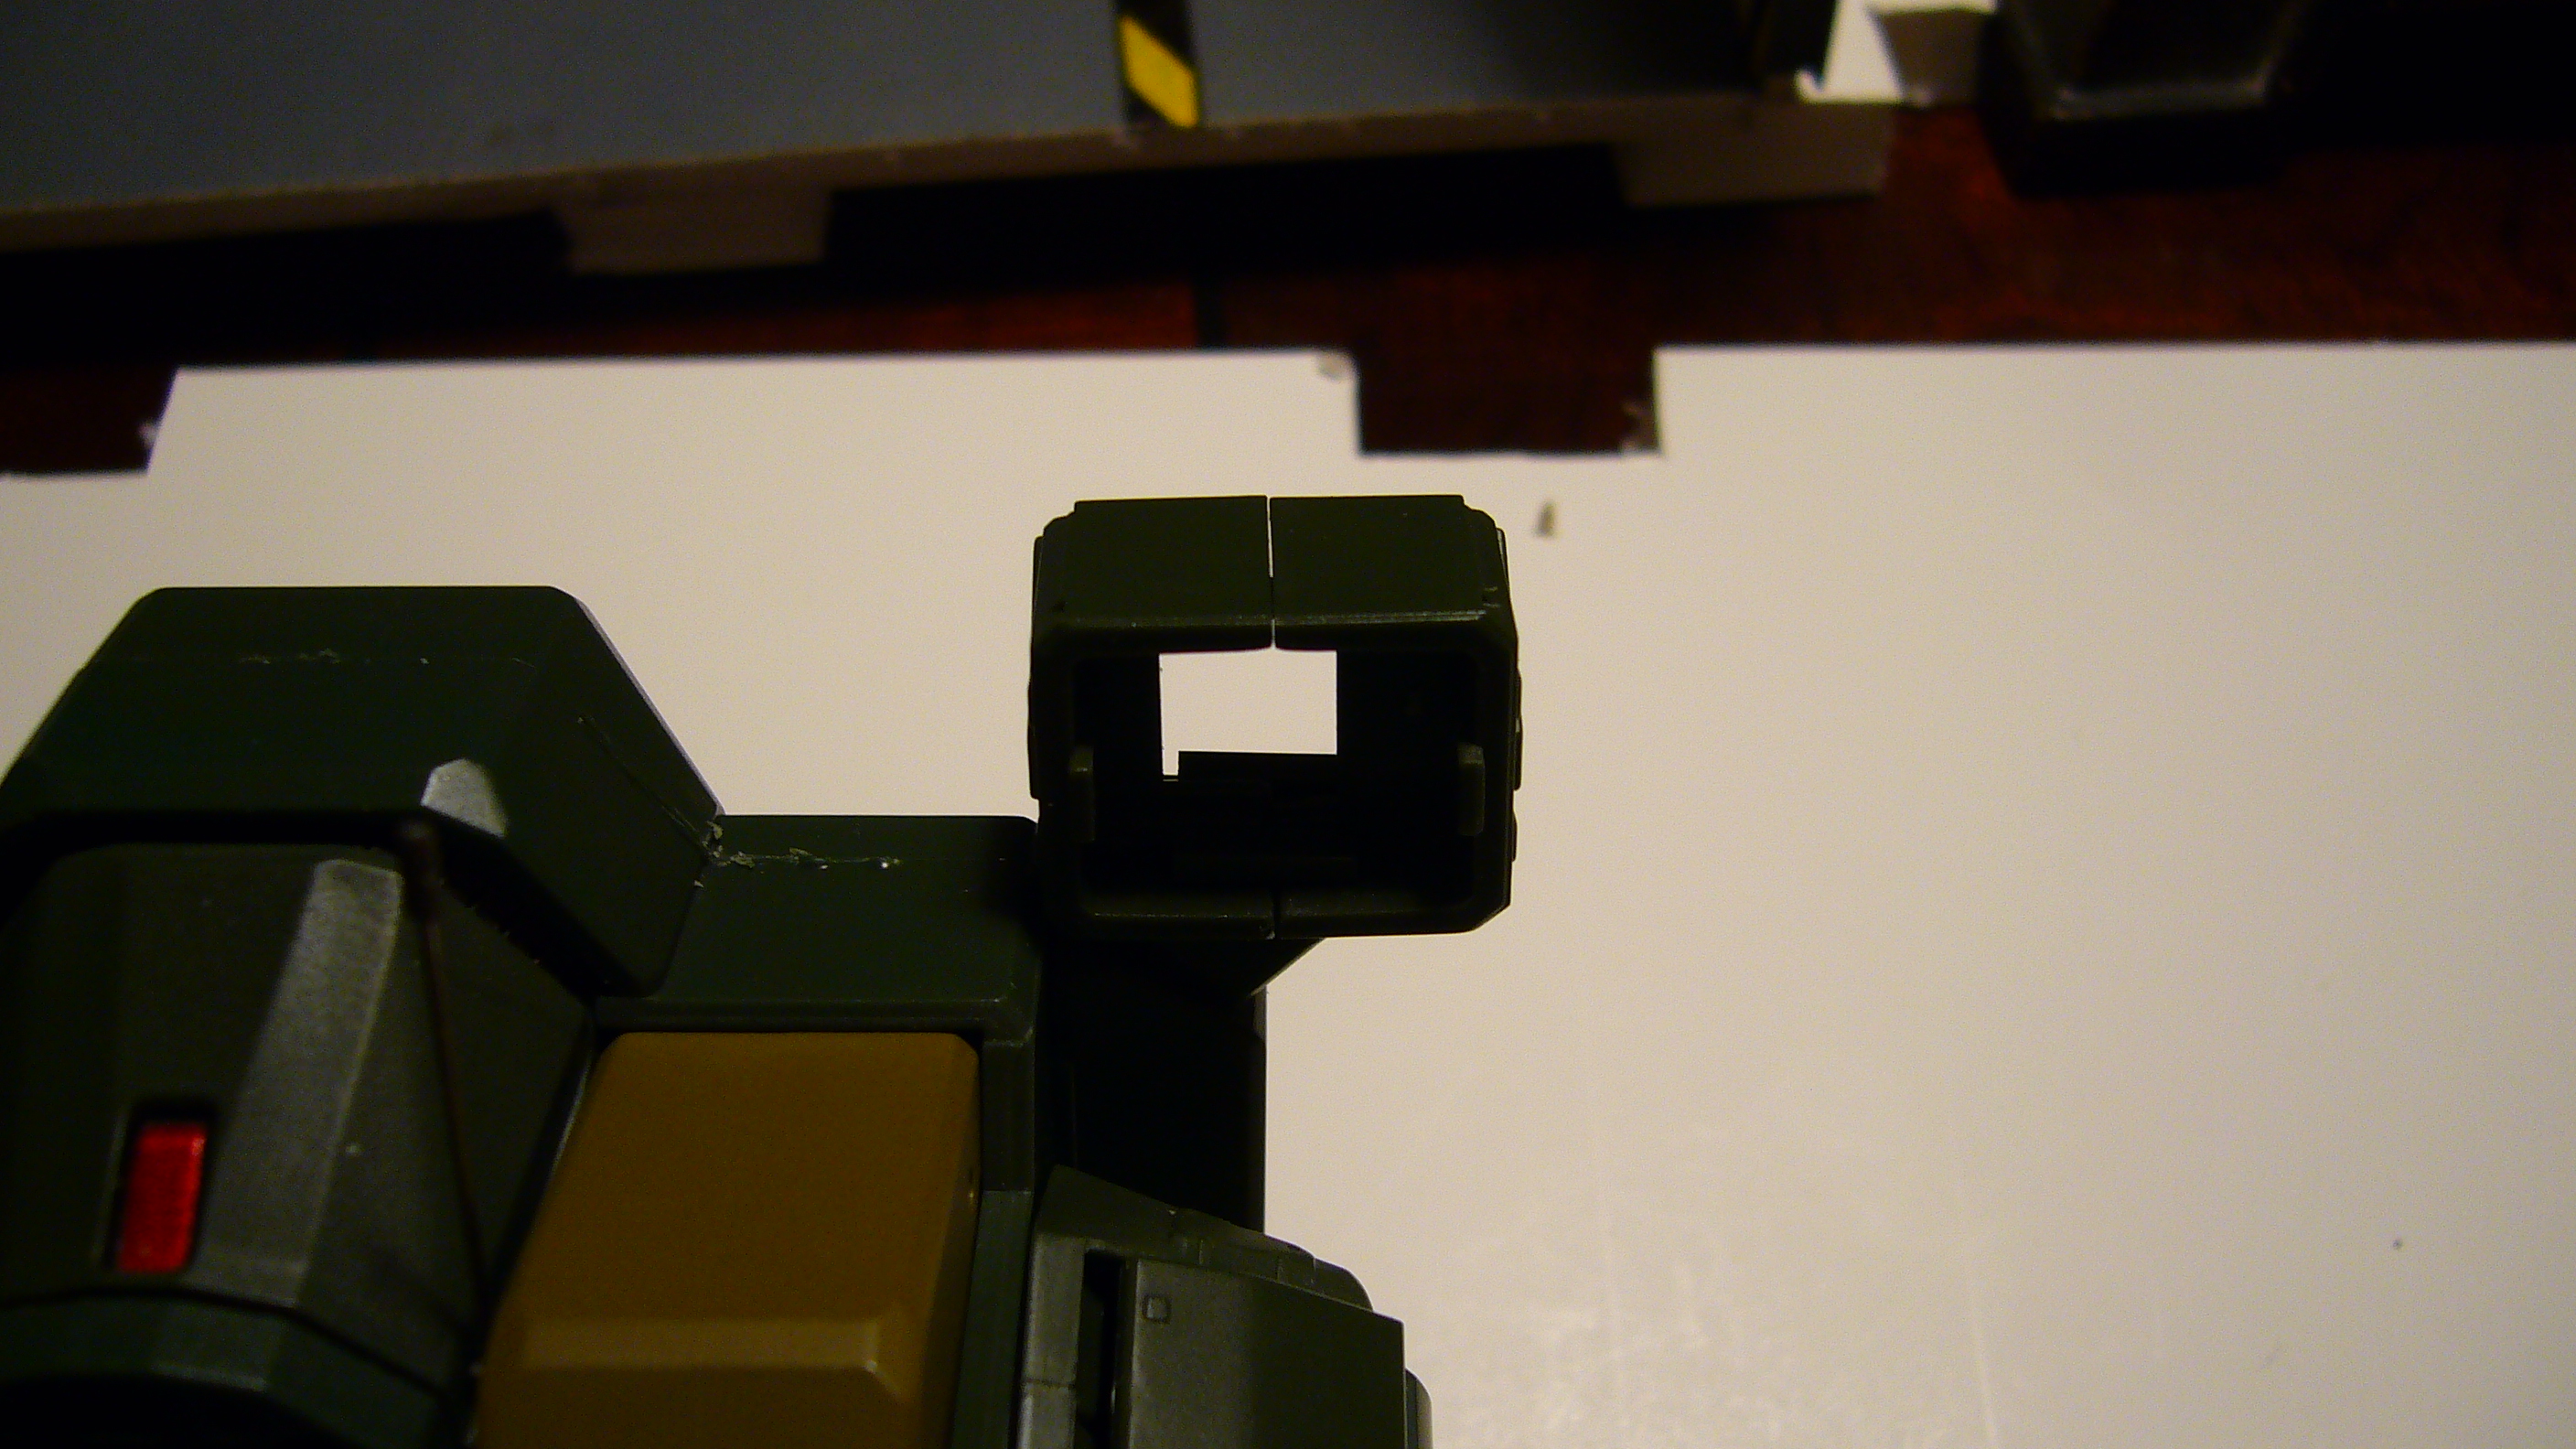
To disassemble the chest section you need to pull off the arms and then pull out the chest missile packs.
Once these are removed as well as the cockpit and upper head cover, you will be able to see the 3 screw
locations that enable access to the inside. Remove these and then on the base of the back, pull the exhausts outwardly
(front to back direction) With this done you can remove the back cover as well as the side shoulder mounts
and gain access to the internals.
Blue


-
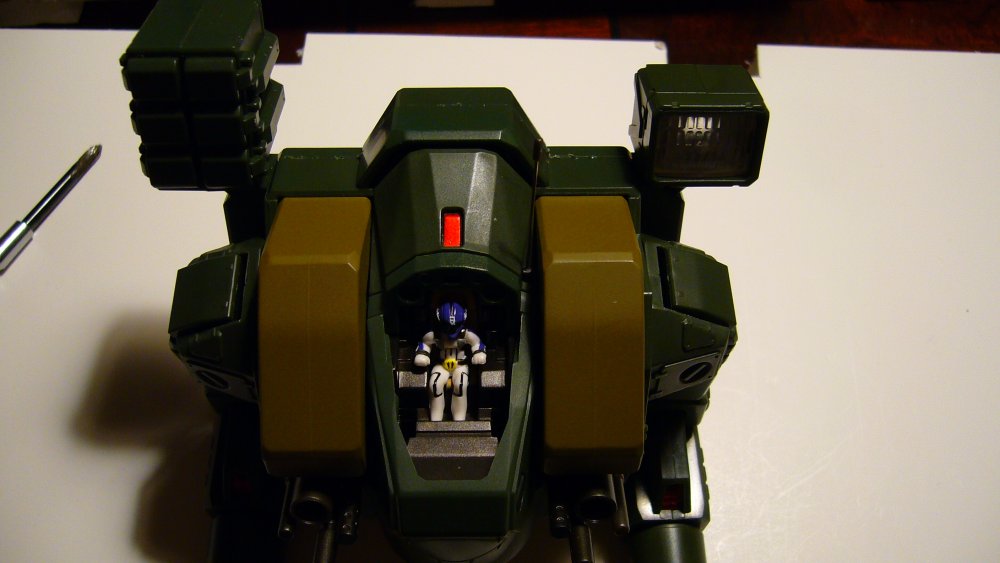
Hello all,
Well I have this terrible tendency to want to tinker with things. Whenever I get a new toy
I have the curiosity of a cat of just how its put together and how it could be improved
and/or modified. So with that said I have decided to start this thread and share a little
Tomahawk love. (which may be horror to some of you) My first pictures are what I like
to call my promo pictures.
Anyways this thread is designed to walk you through steps of disassembling your hawk
and adding the modifications should you wish to do the same. Otherwise you can just
sit back and watch in either horror or in pleasure as I work some wonders.
With that said welcome to the pictures...
Note: Precision tools are required for the following procedures.
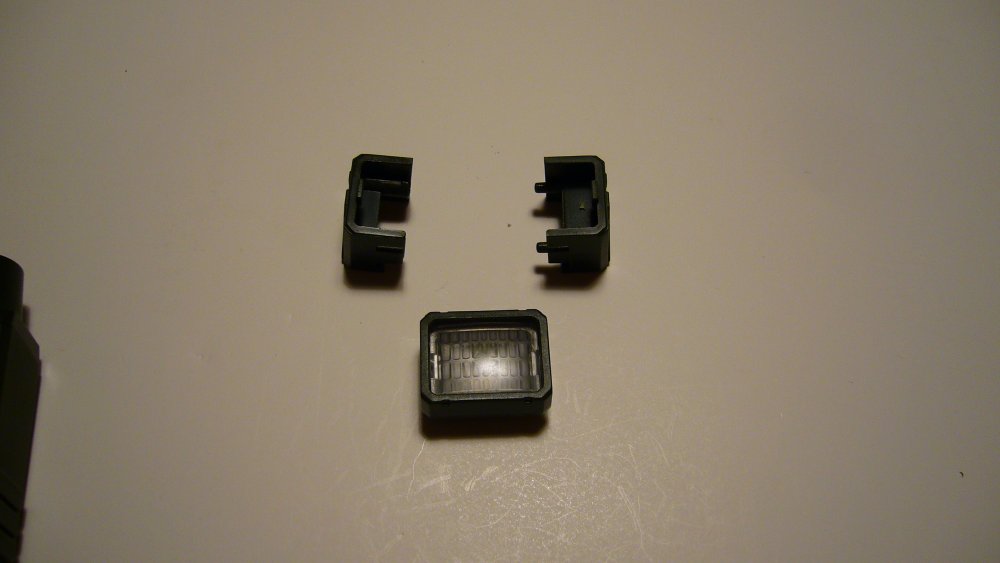
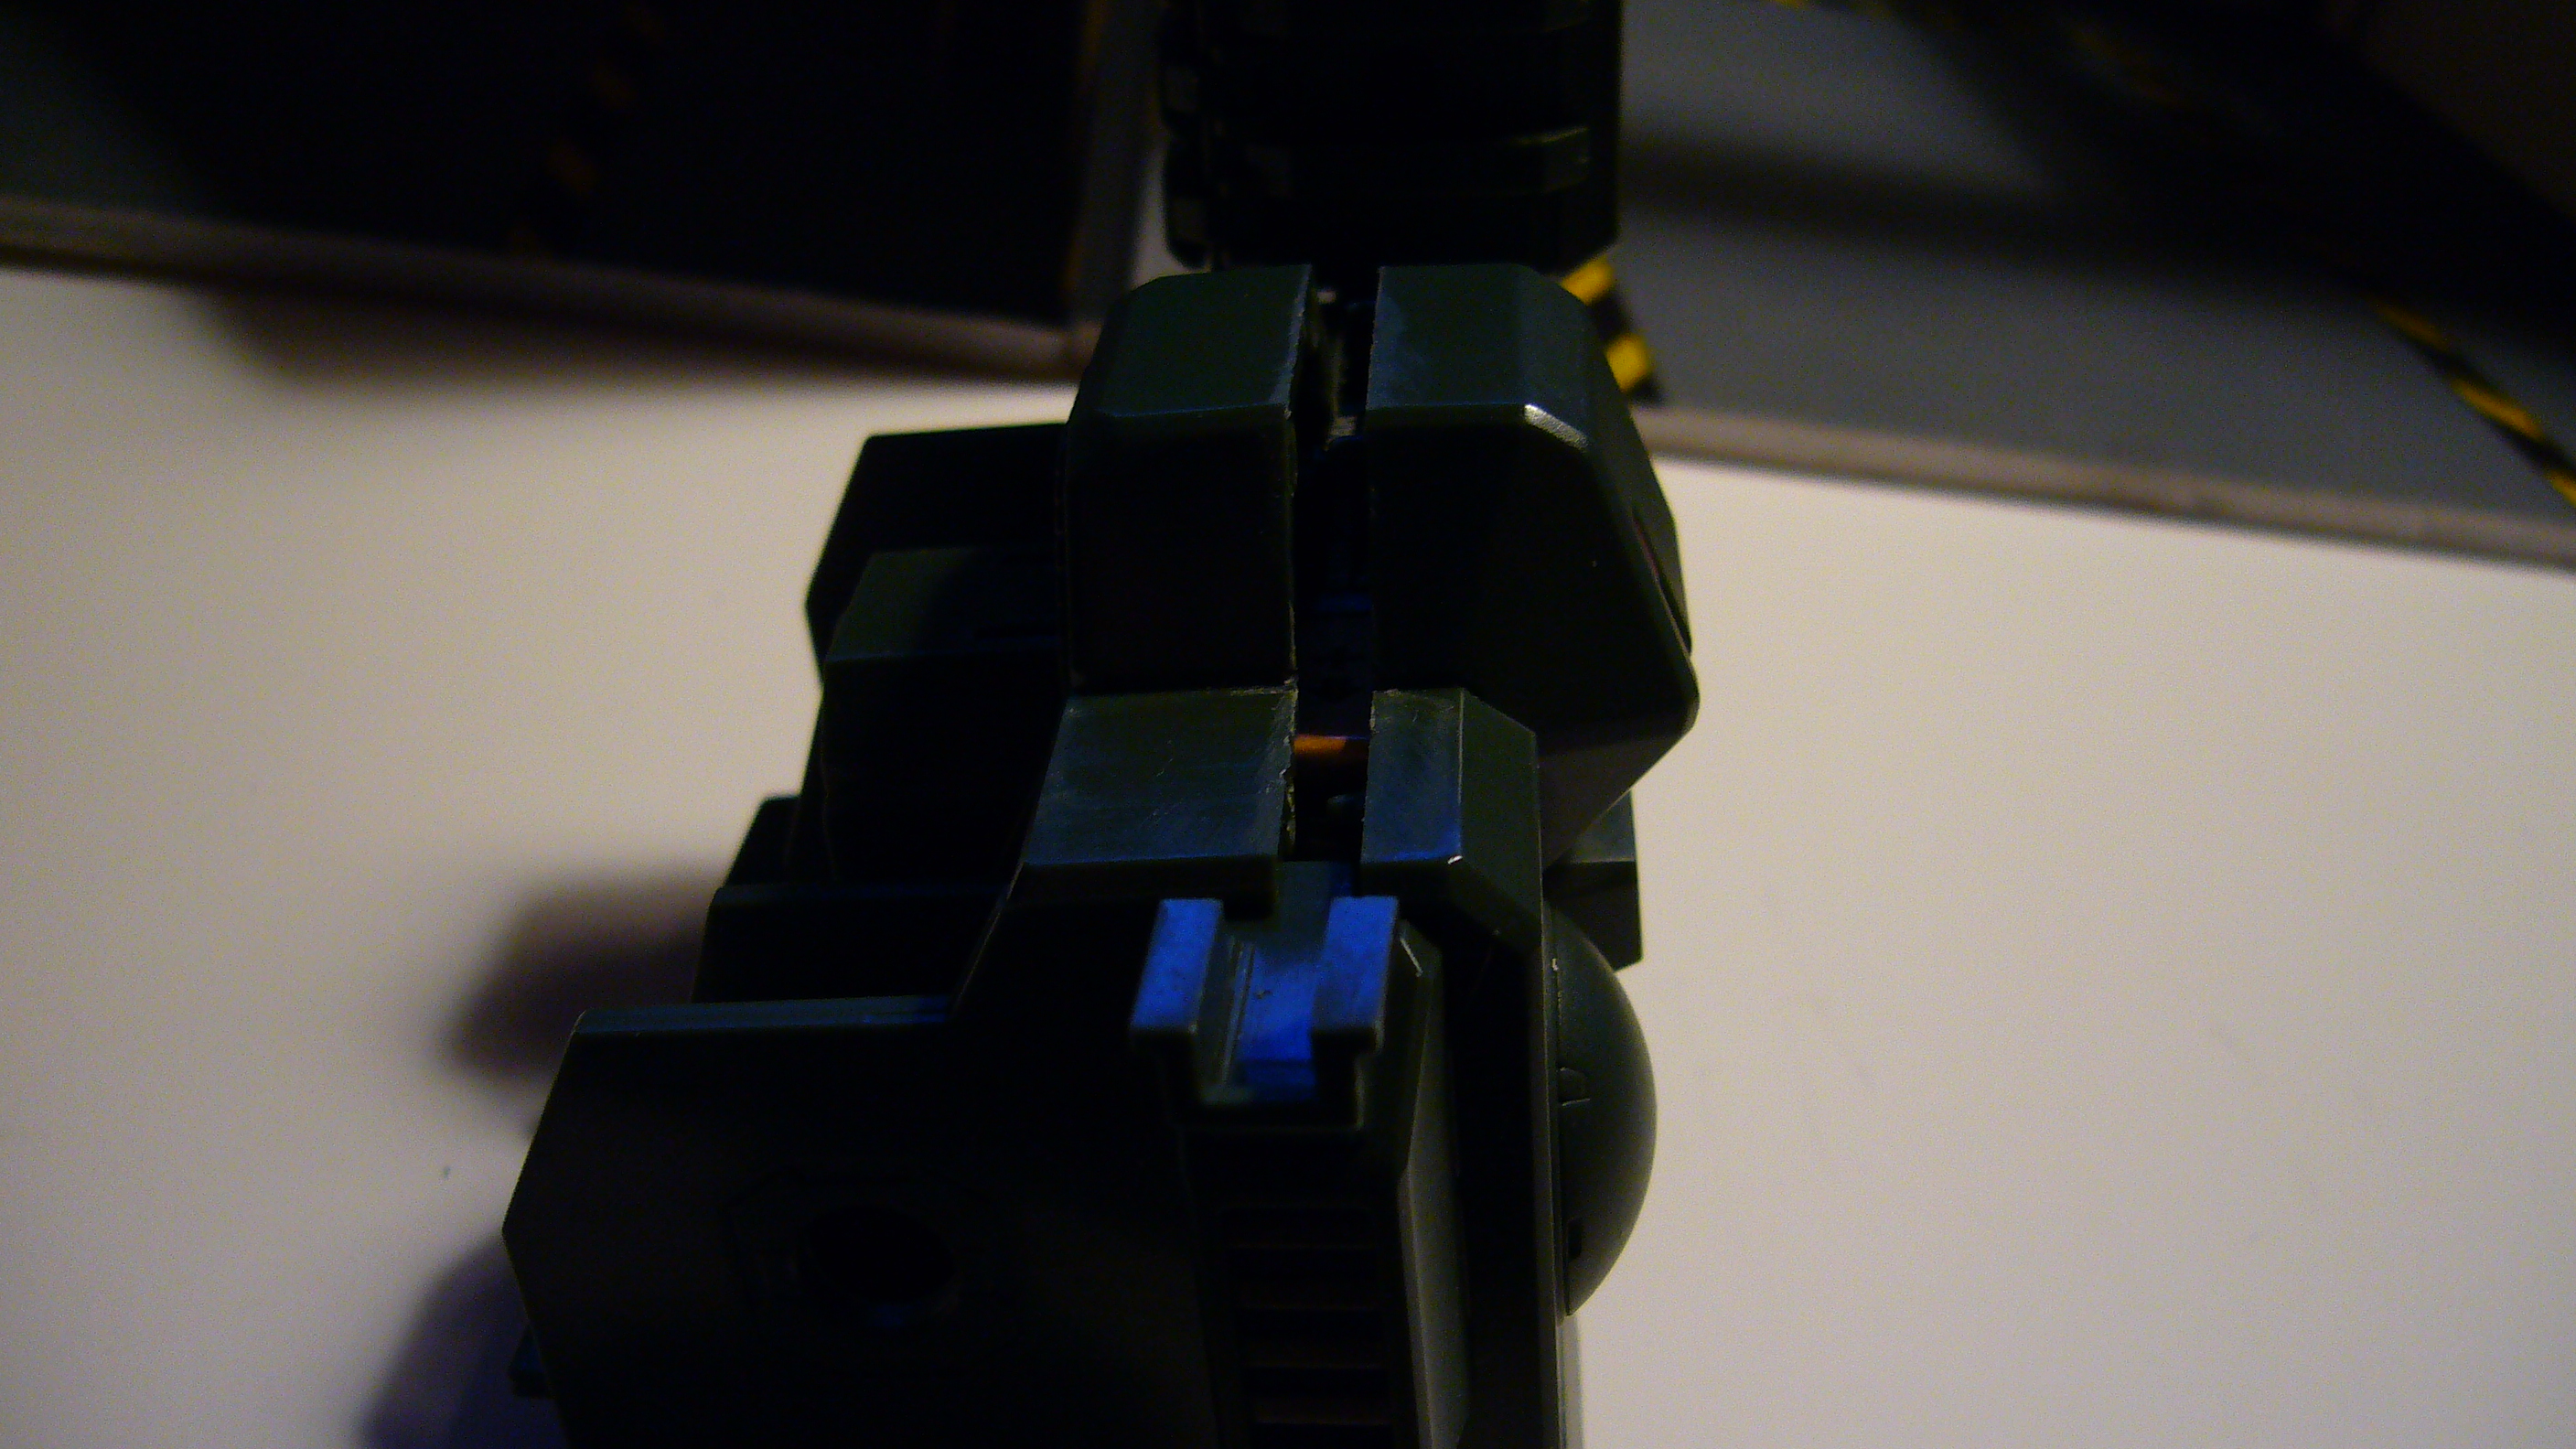
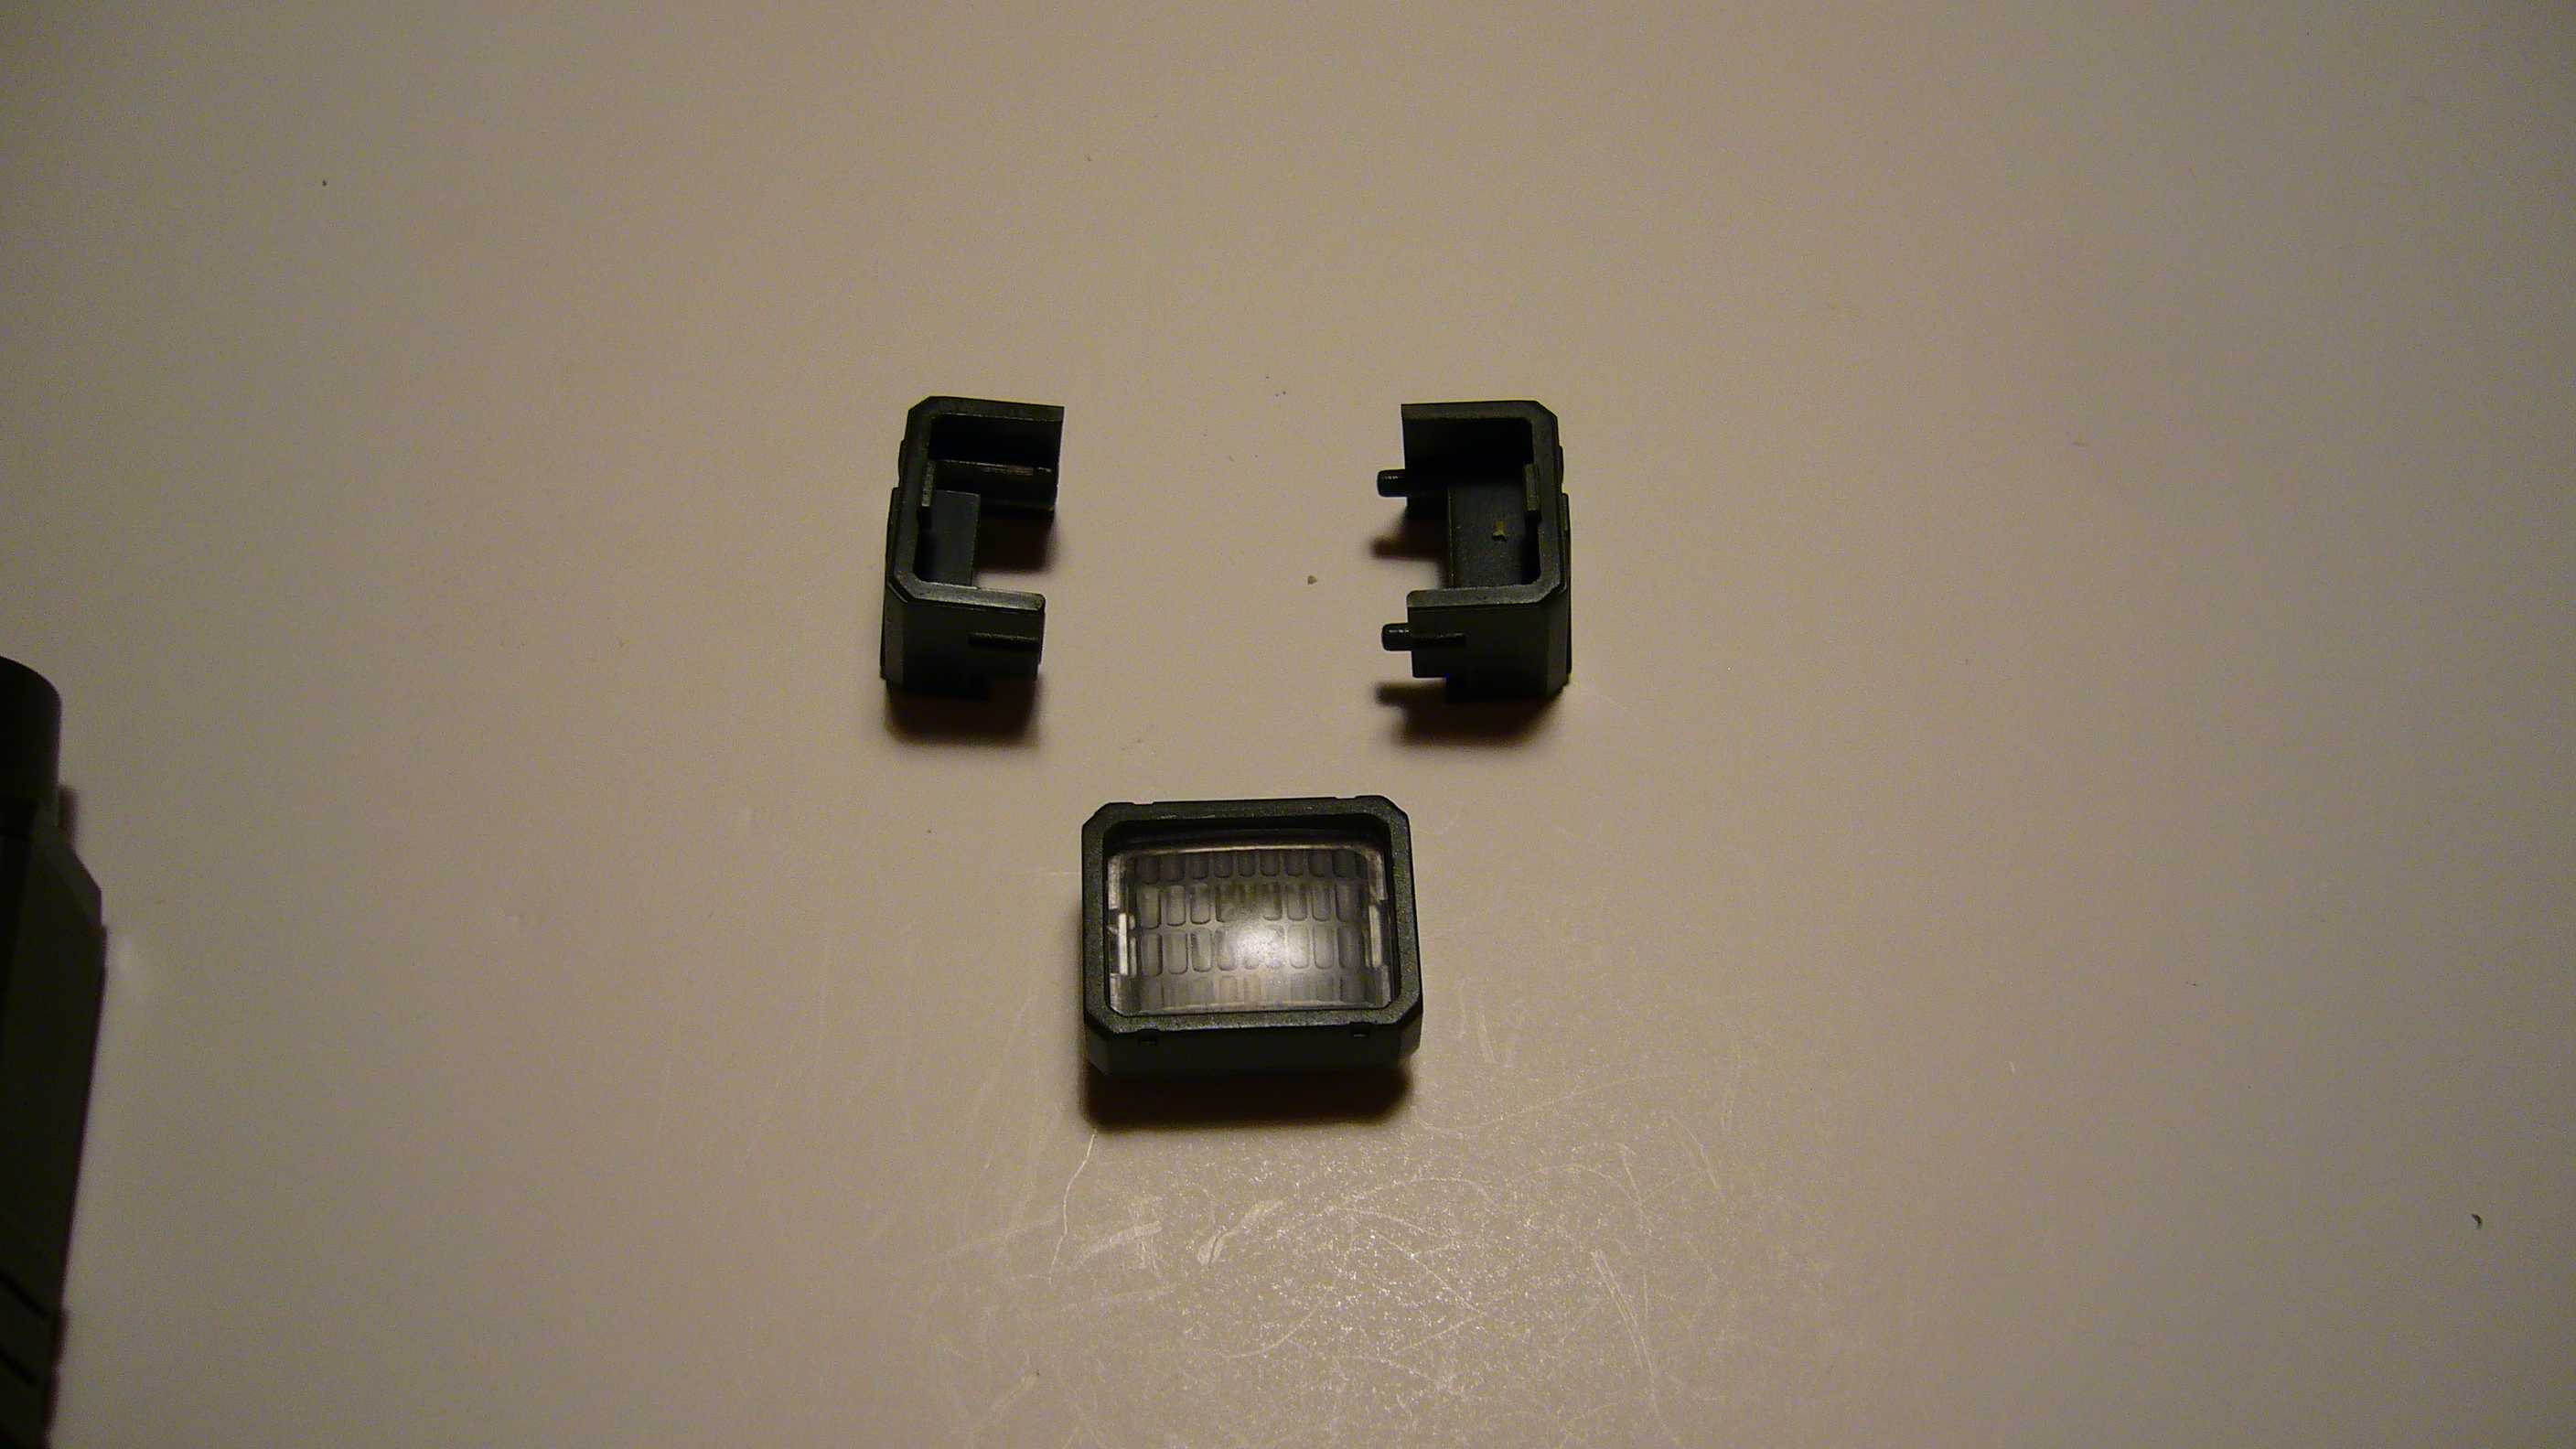
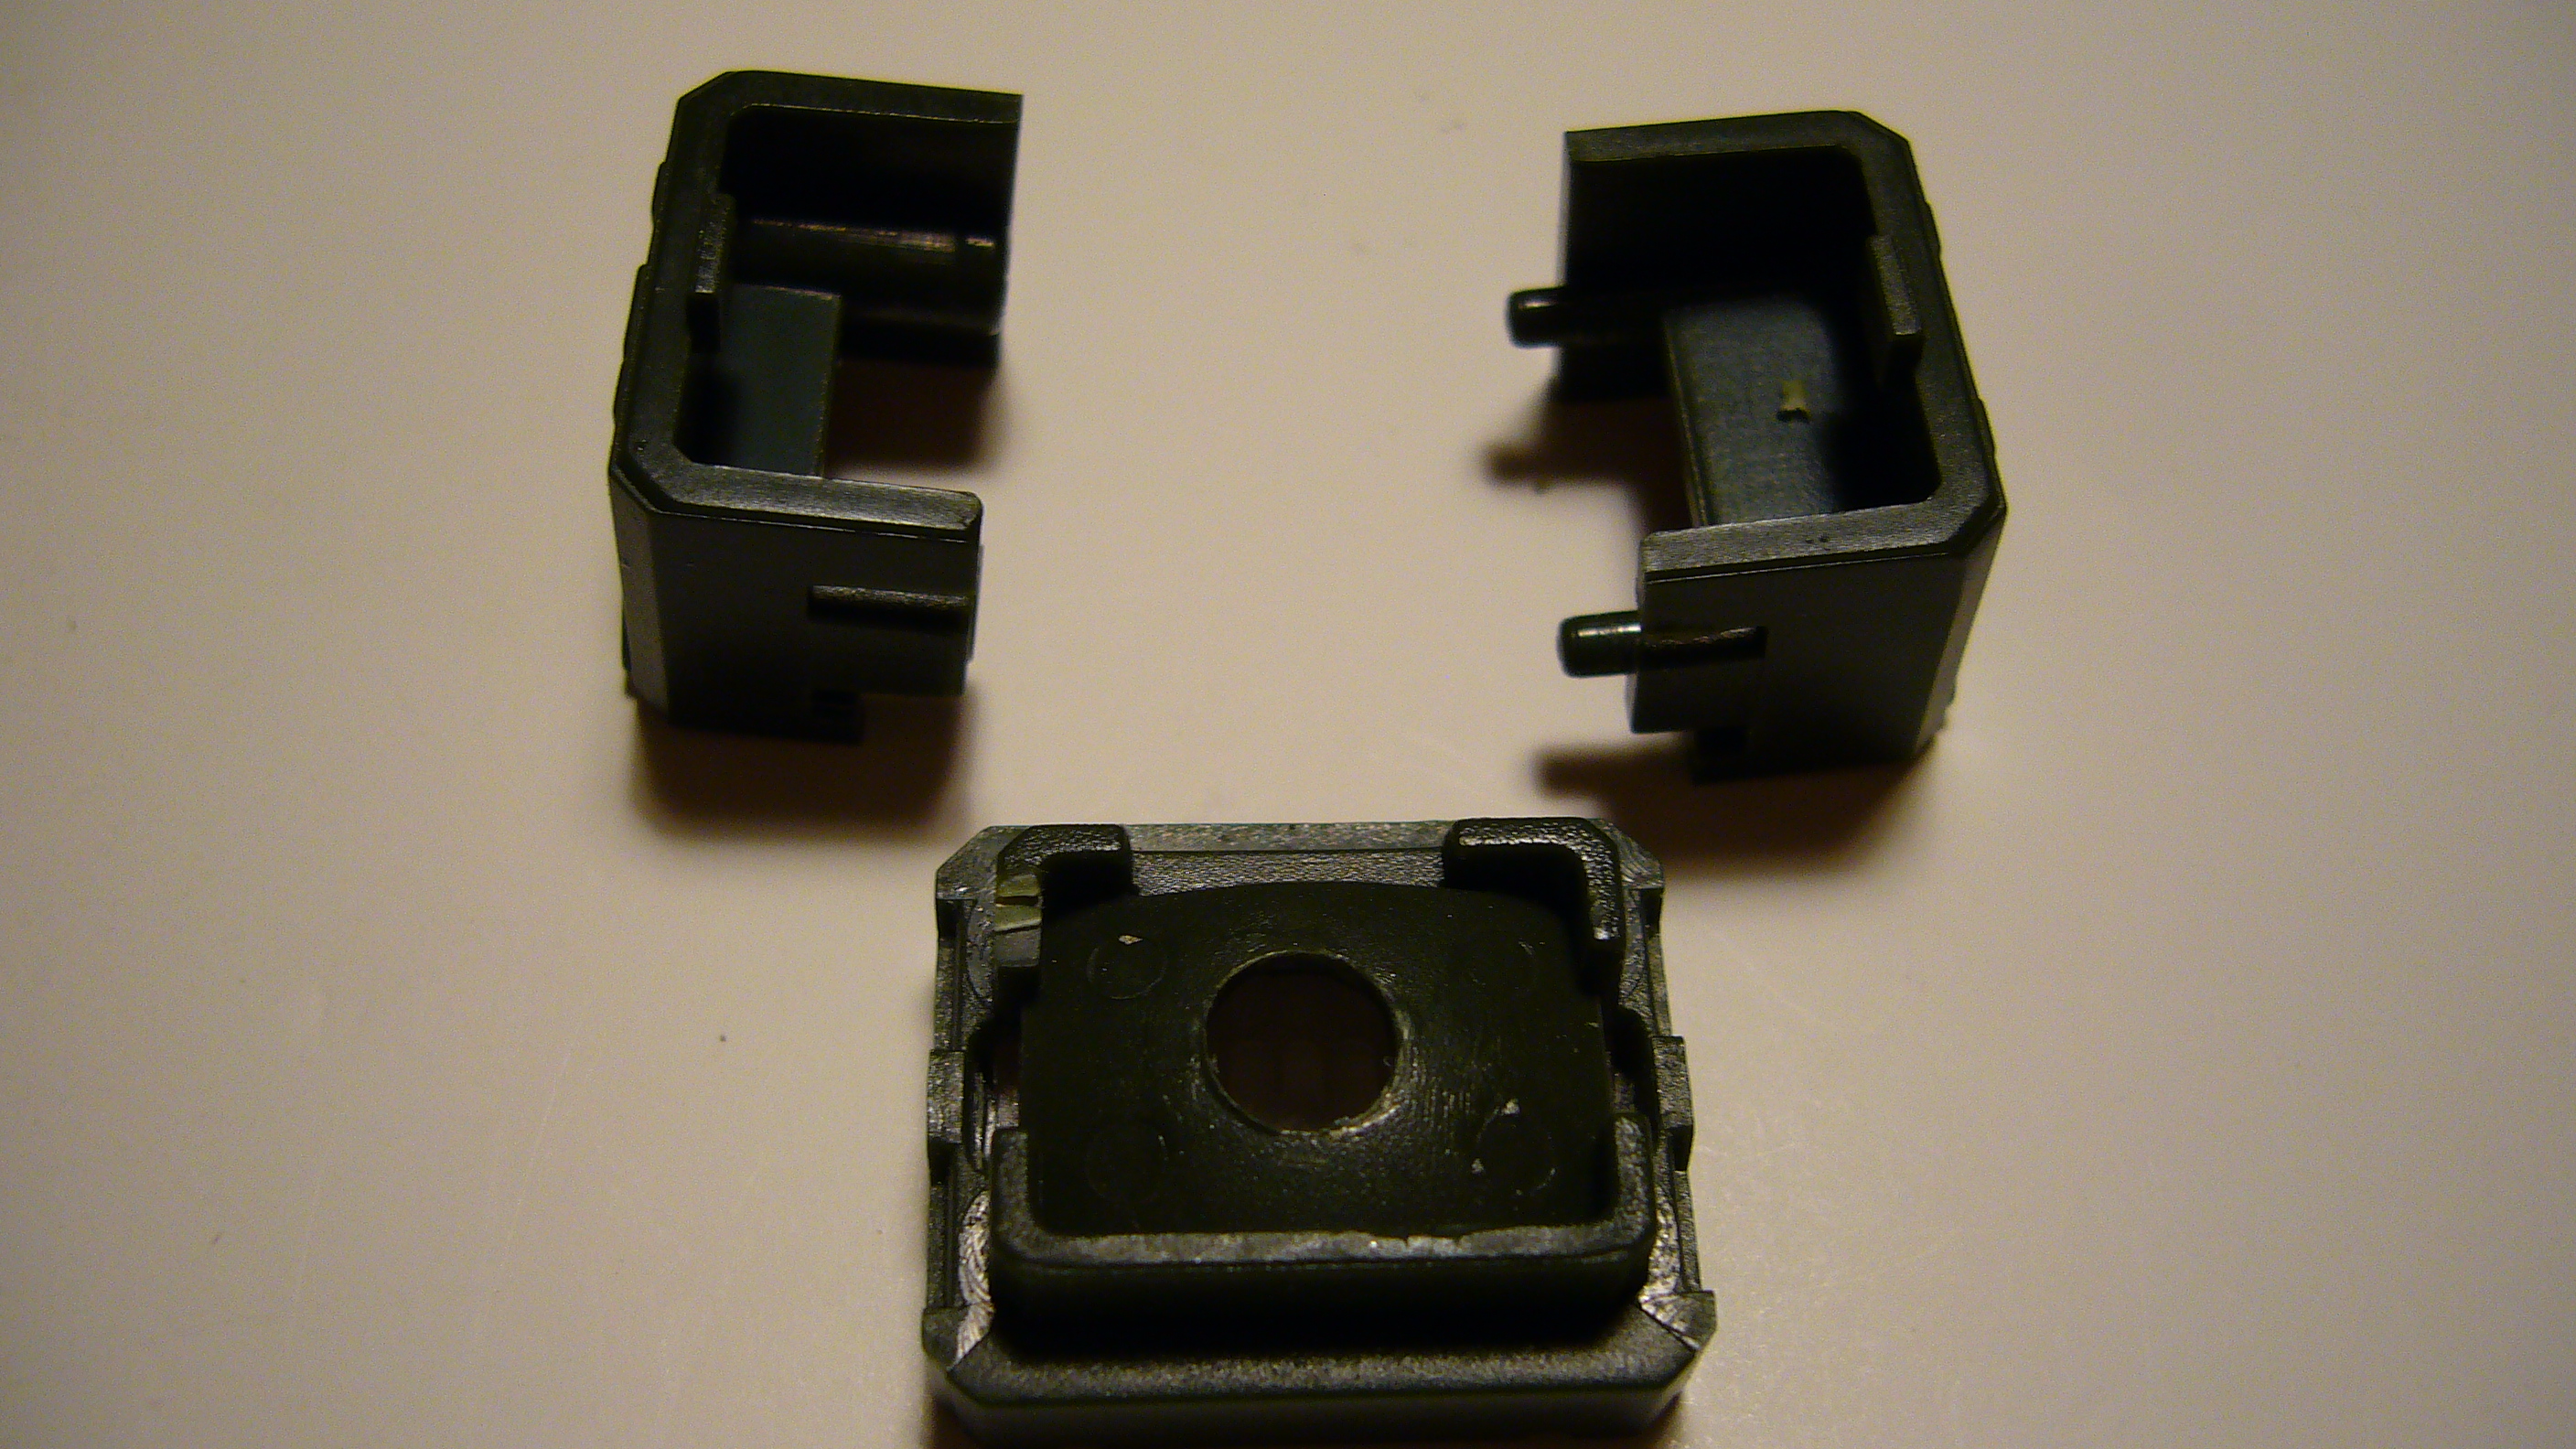
In the first steps I have decided to take apart the shoulder mounted light fixture. The
modification it is one I'm sure most would dream of doing themselves, that being the
installation of a white LED for a somewhat realistic addition to the hawk.


-
what no six dollar bacon guacamole burger? lol
-
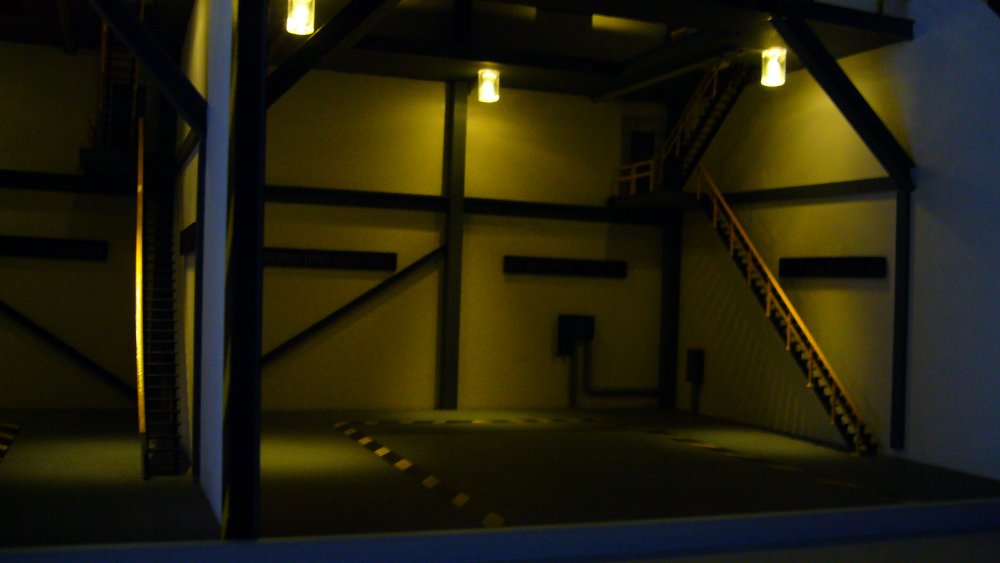
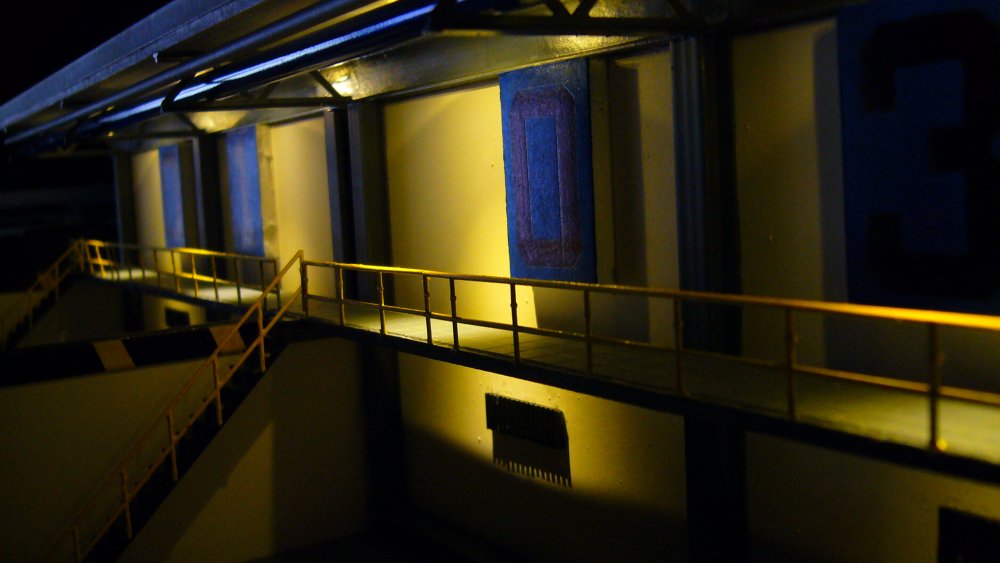
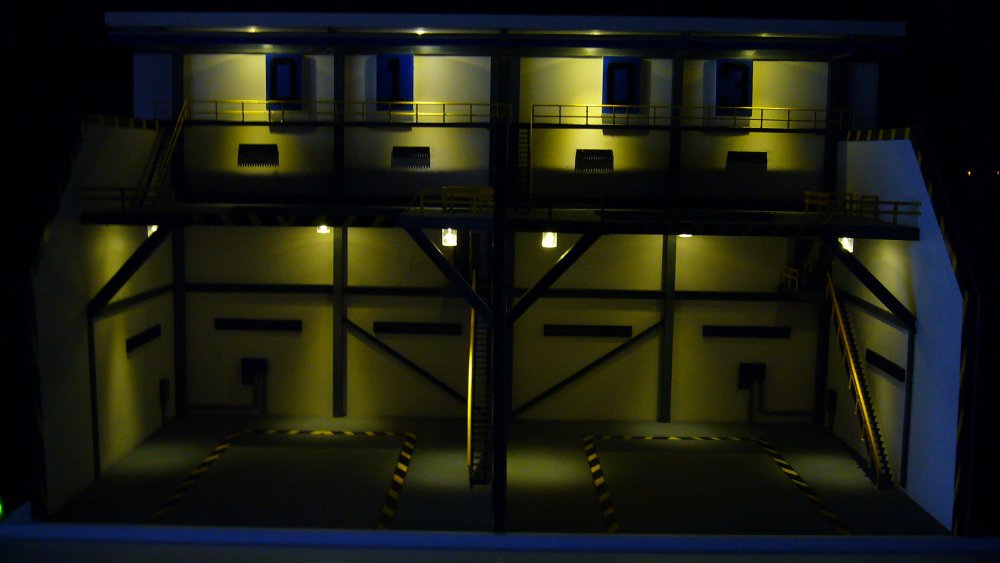
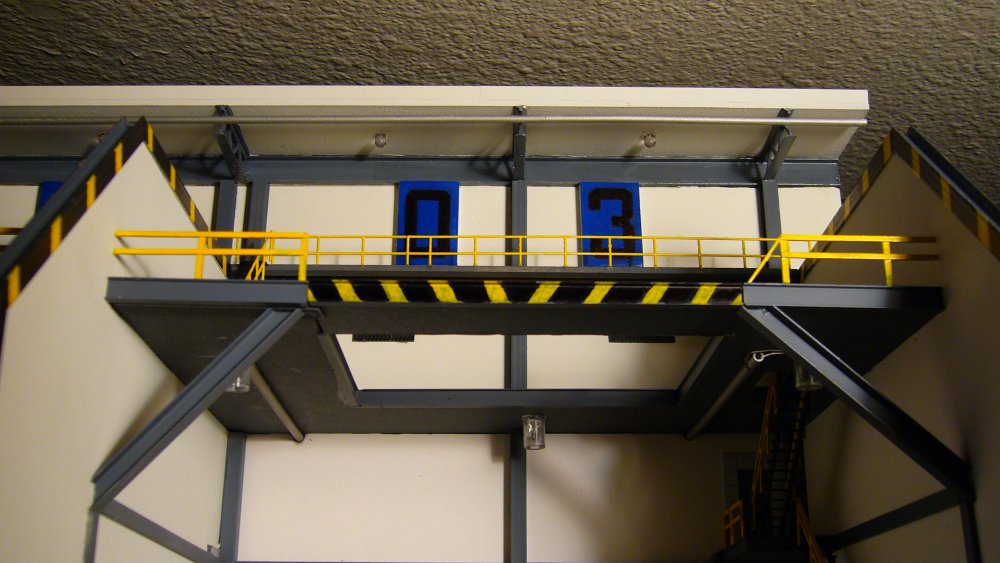
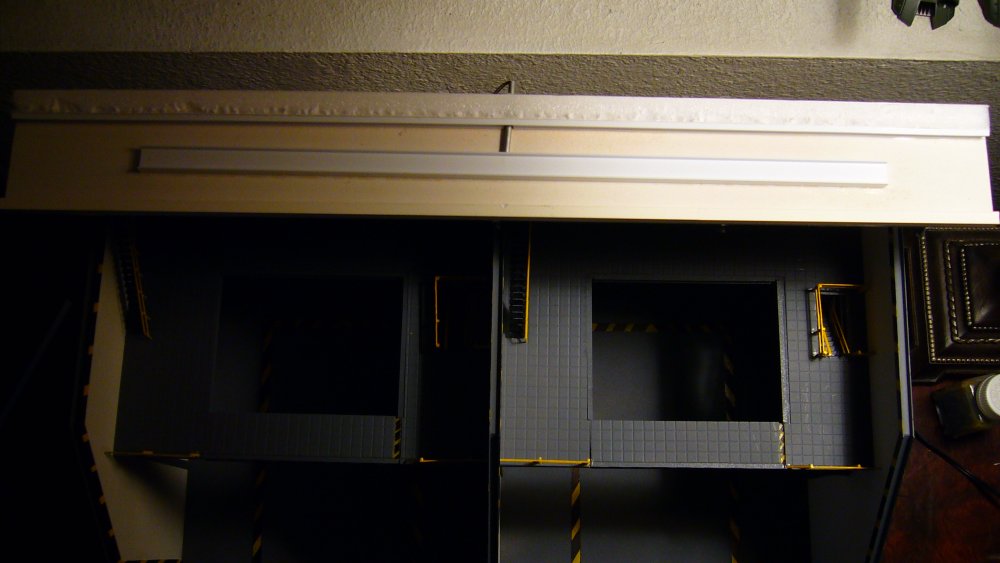
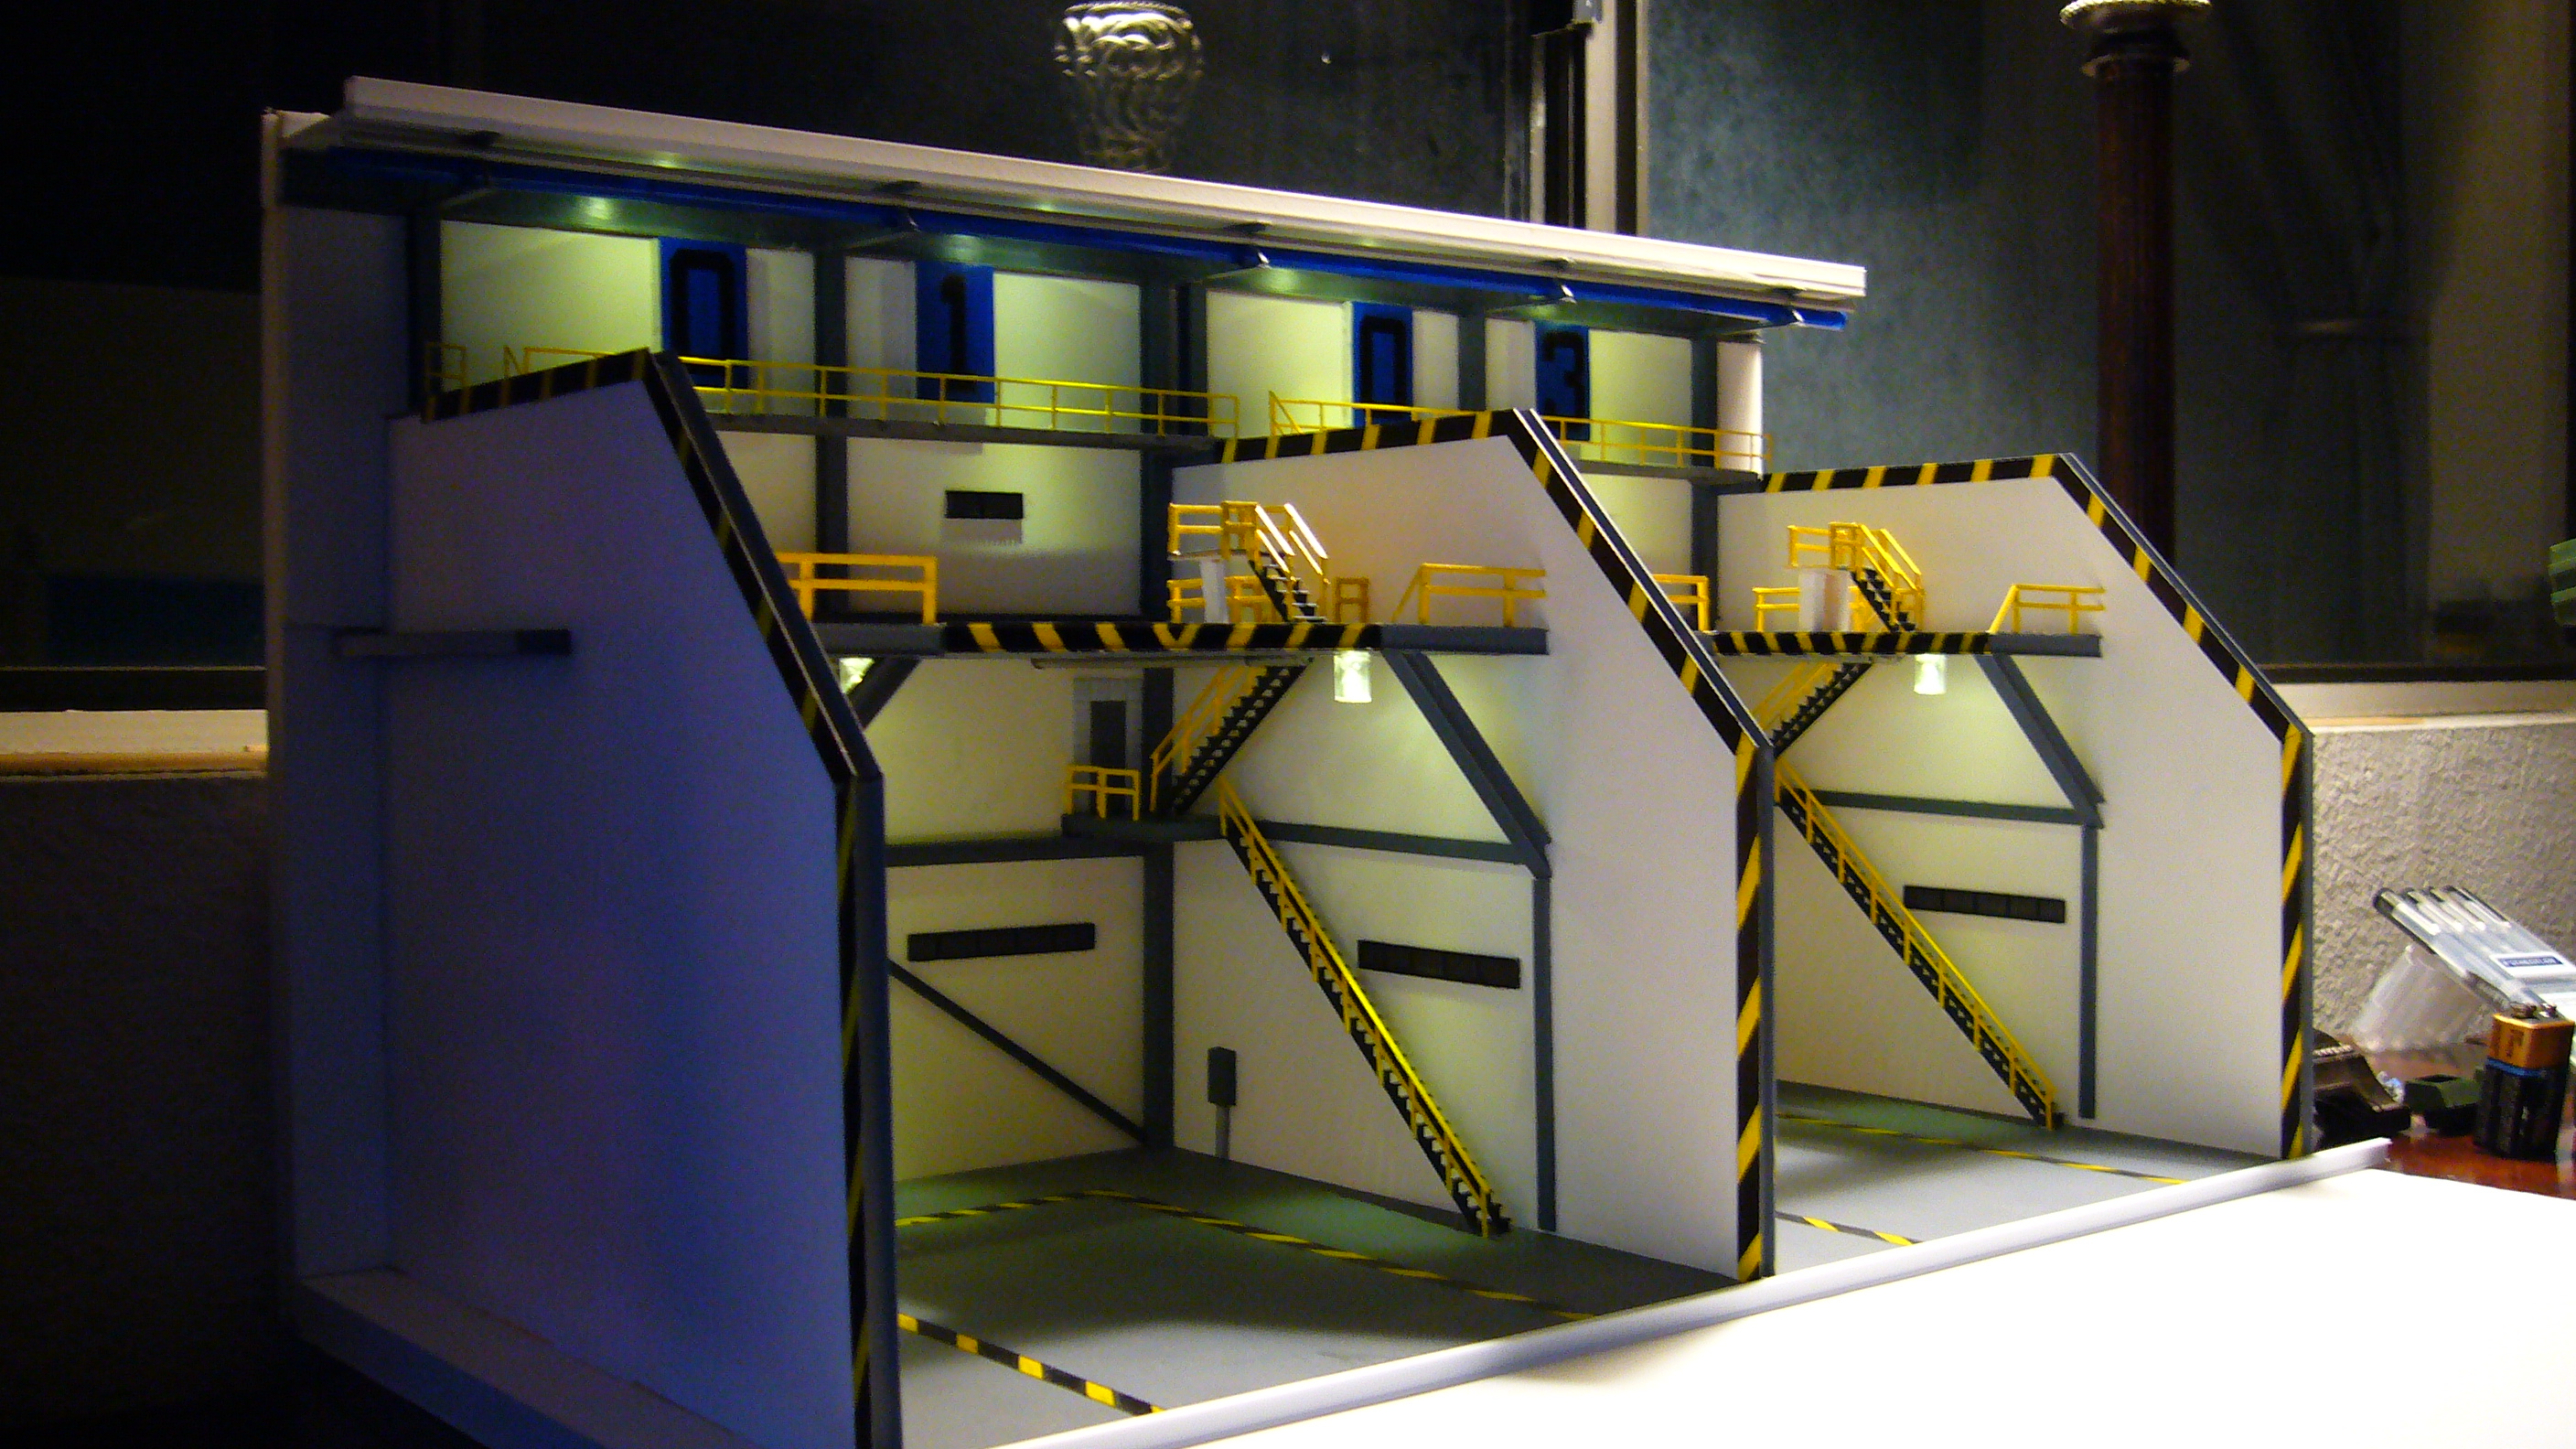
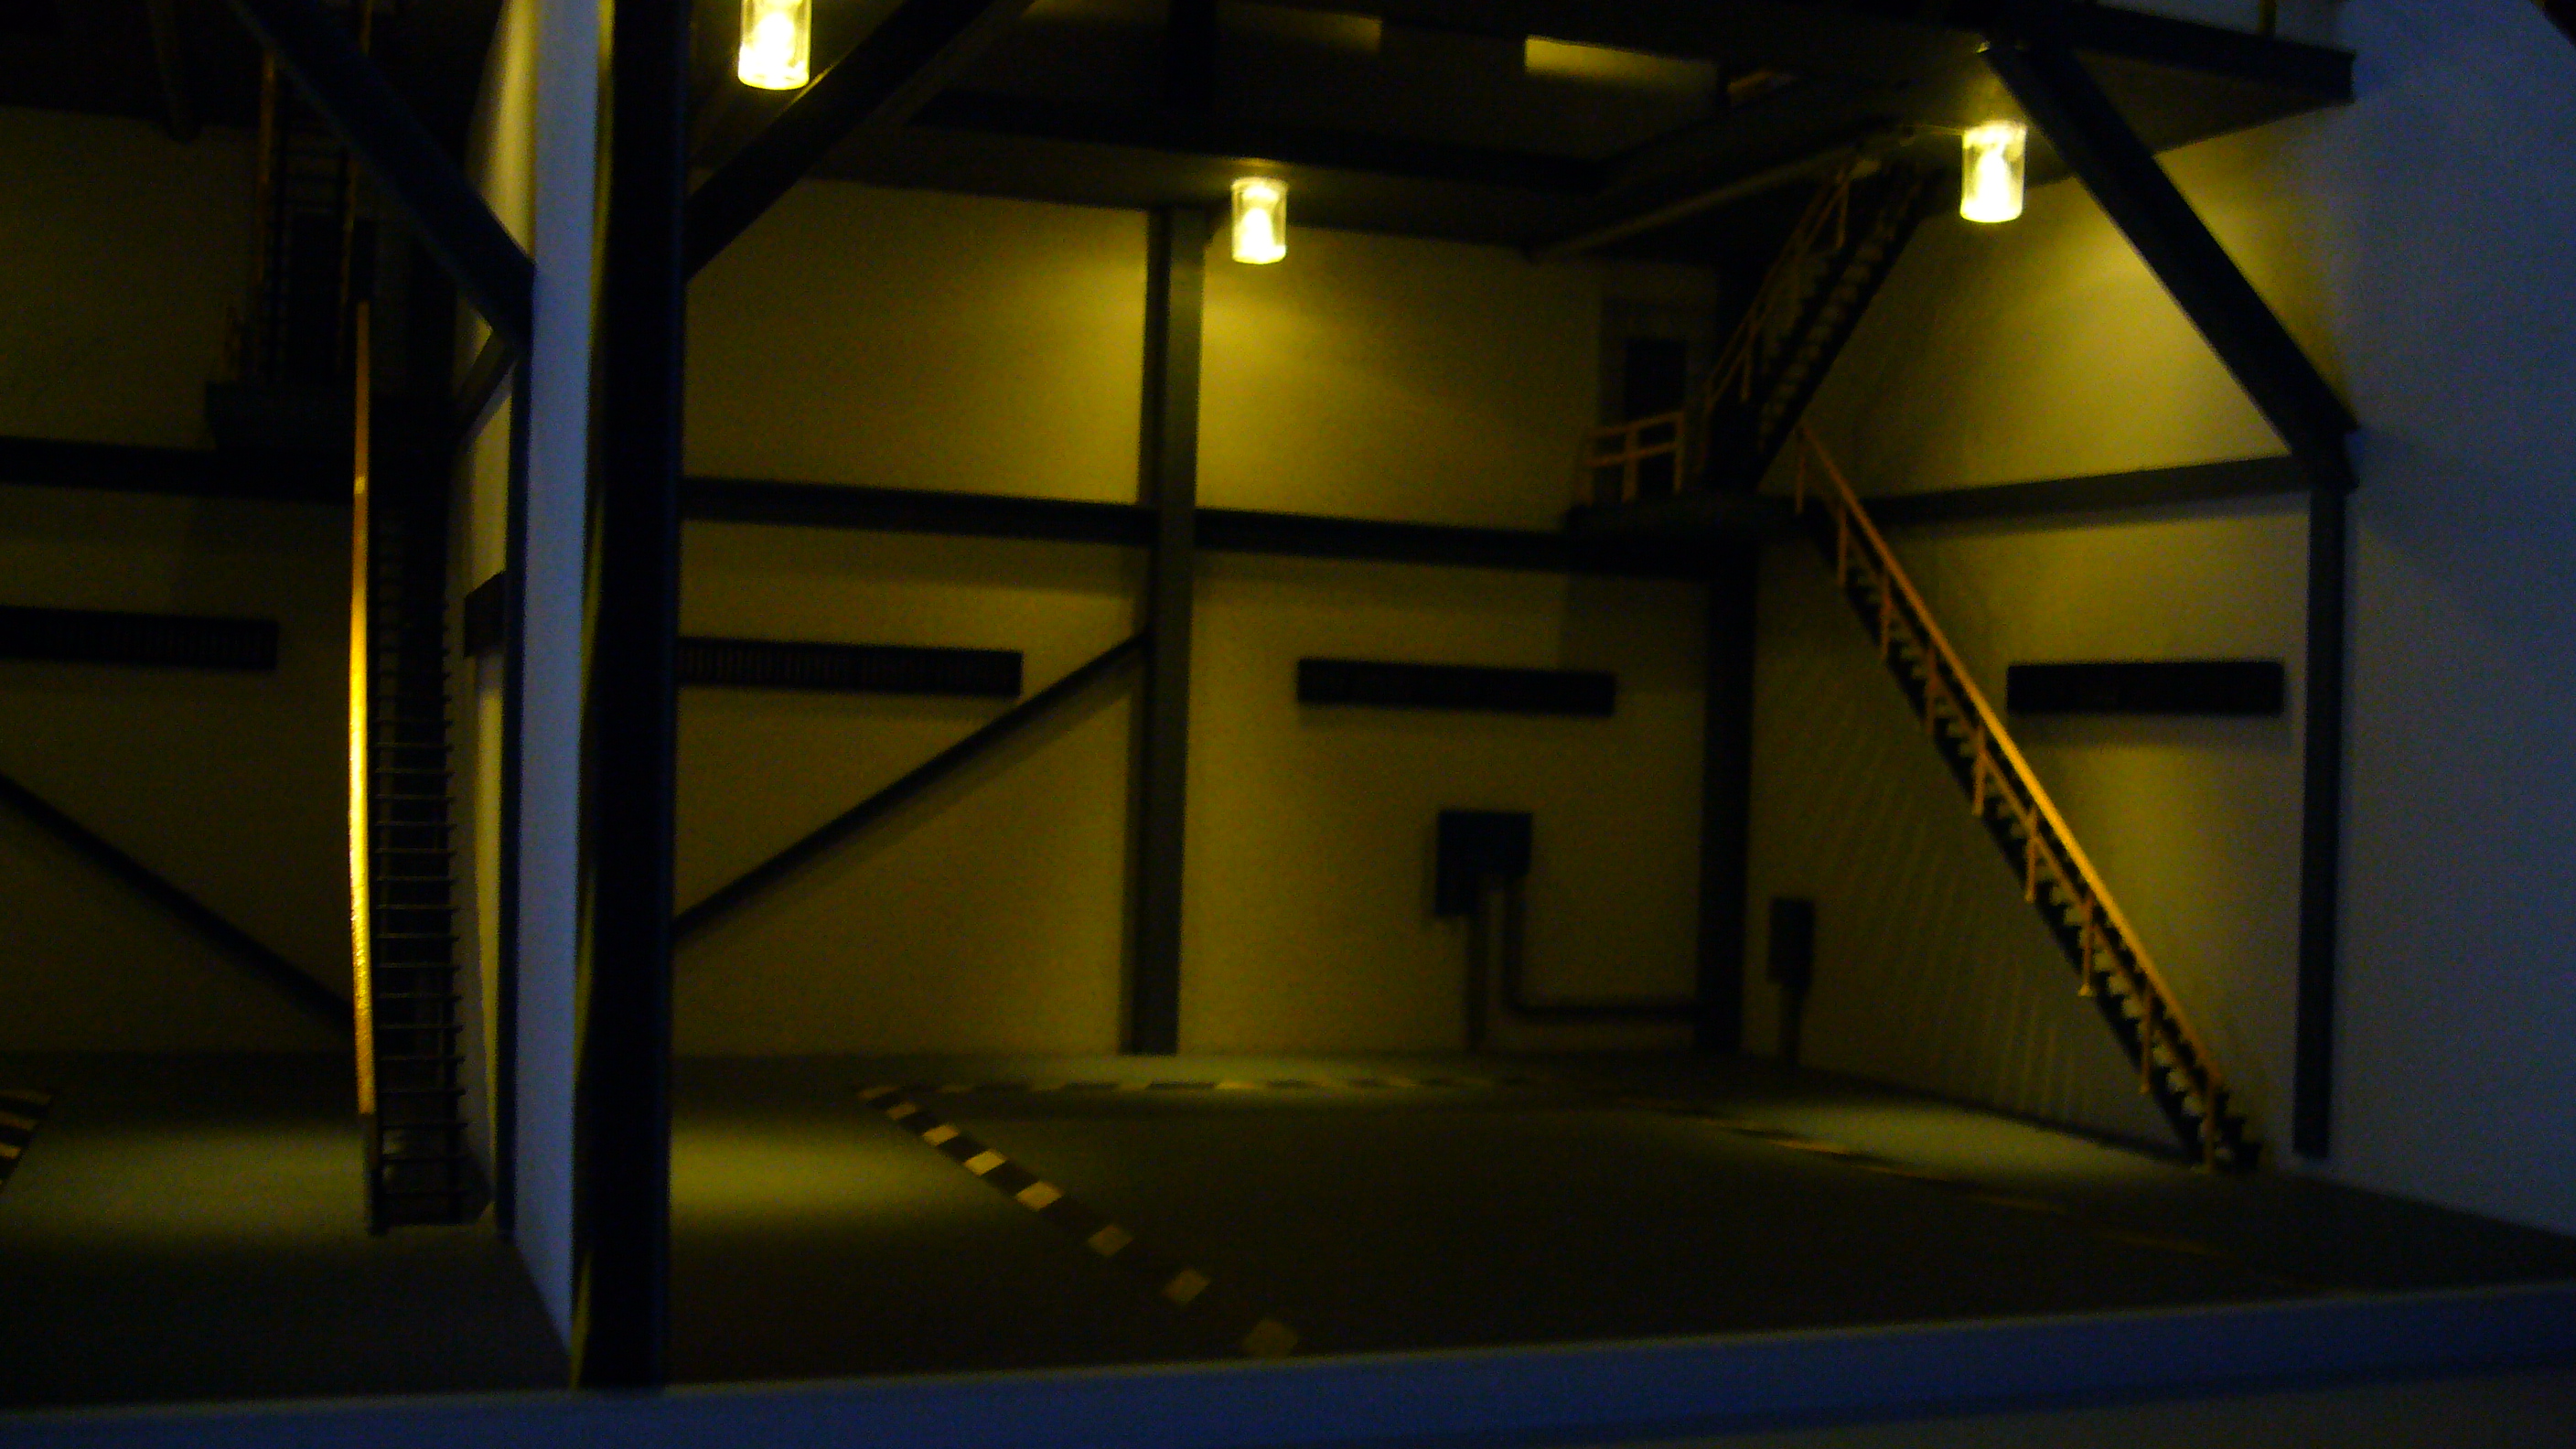
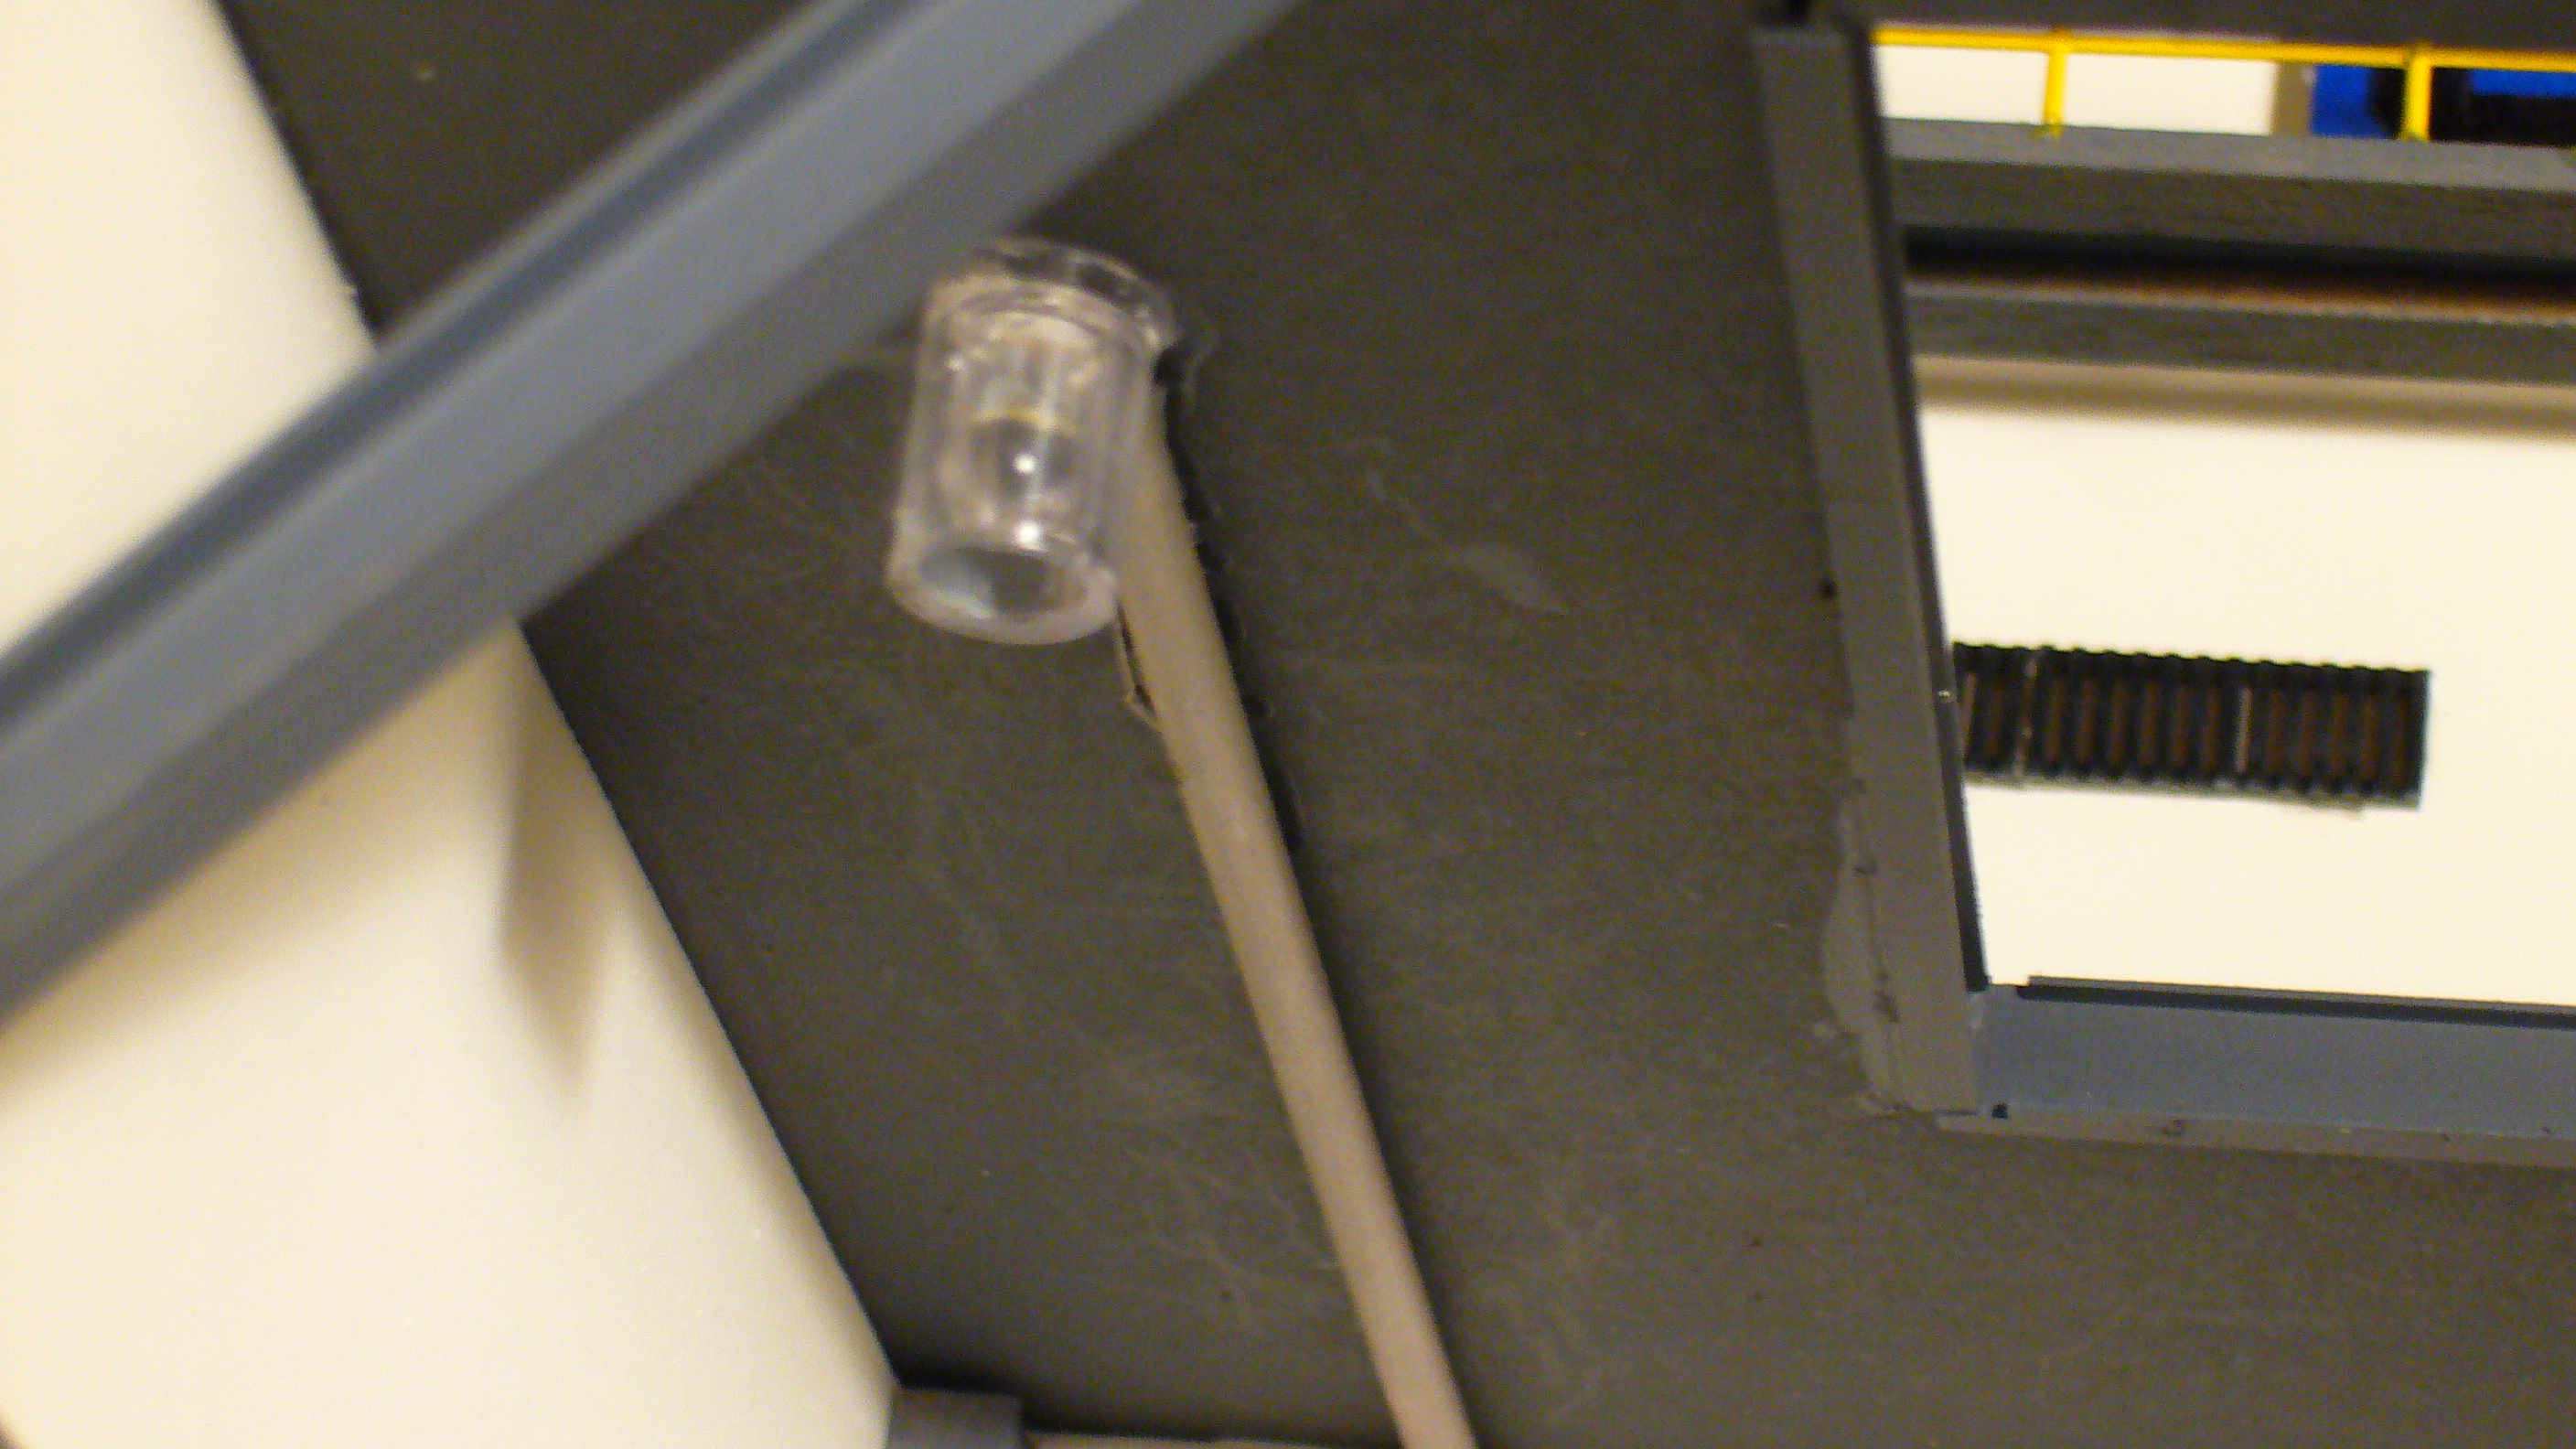
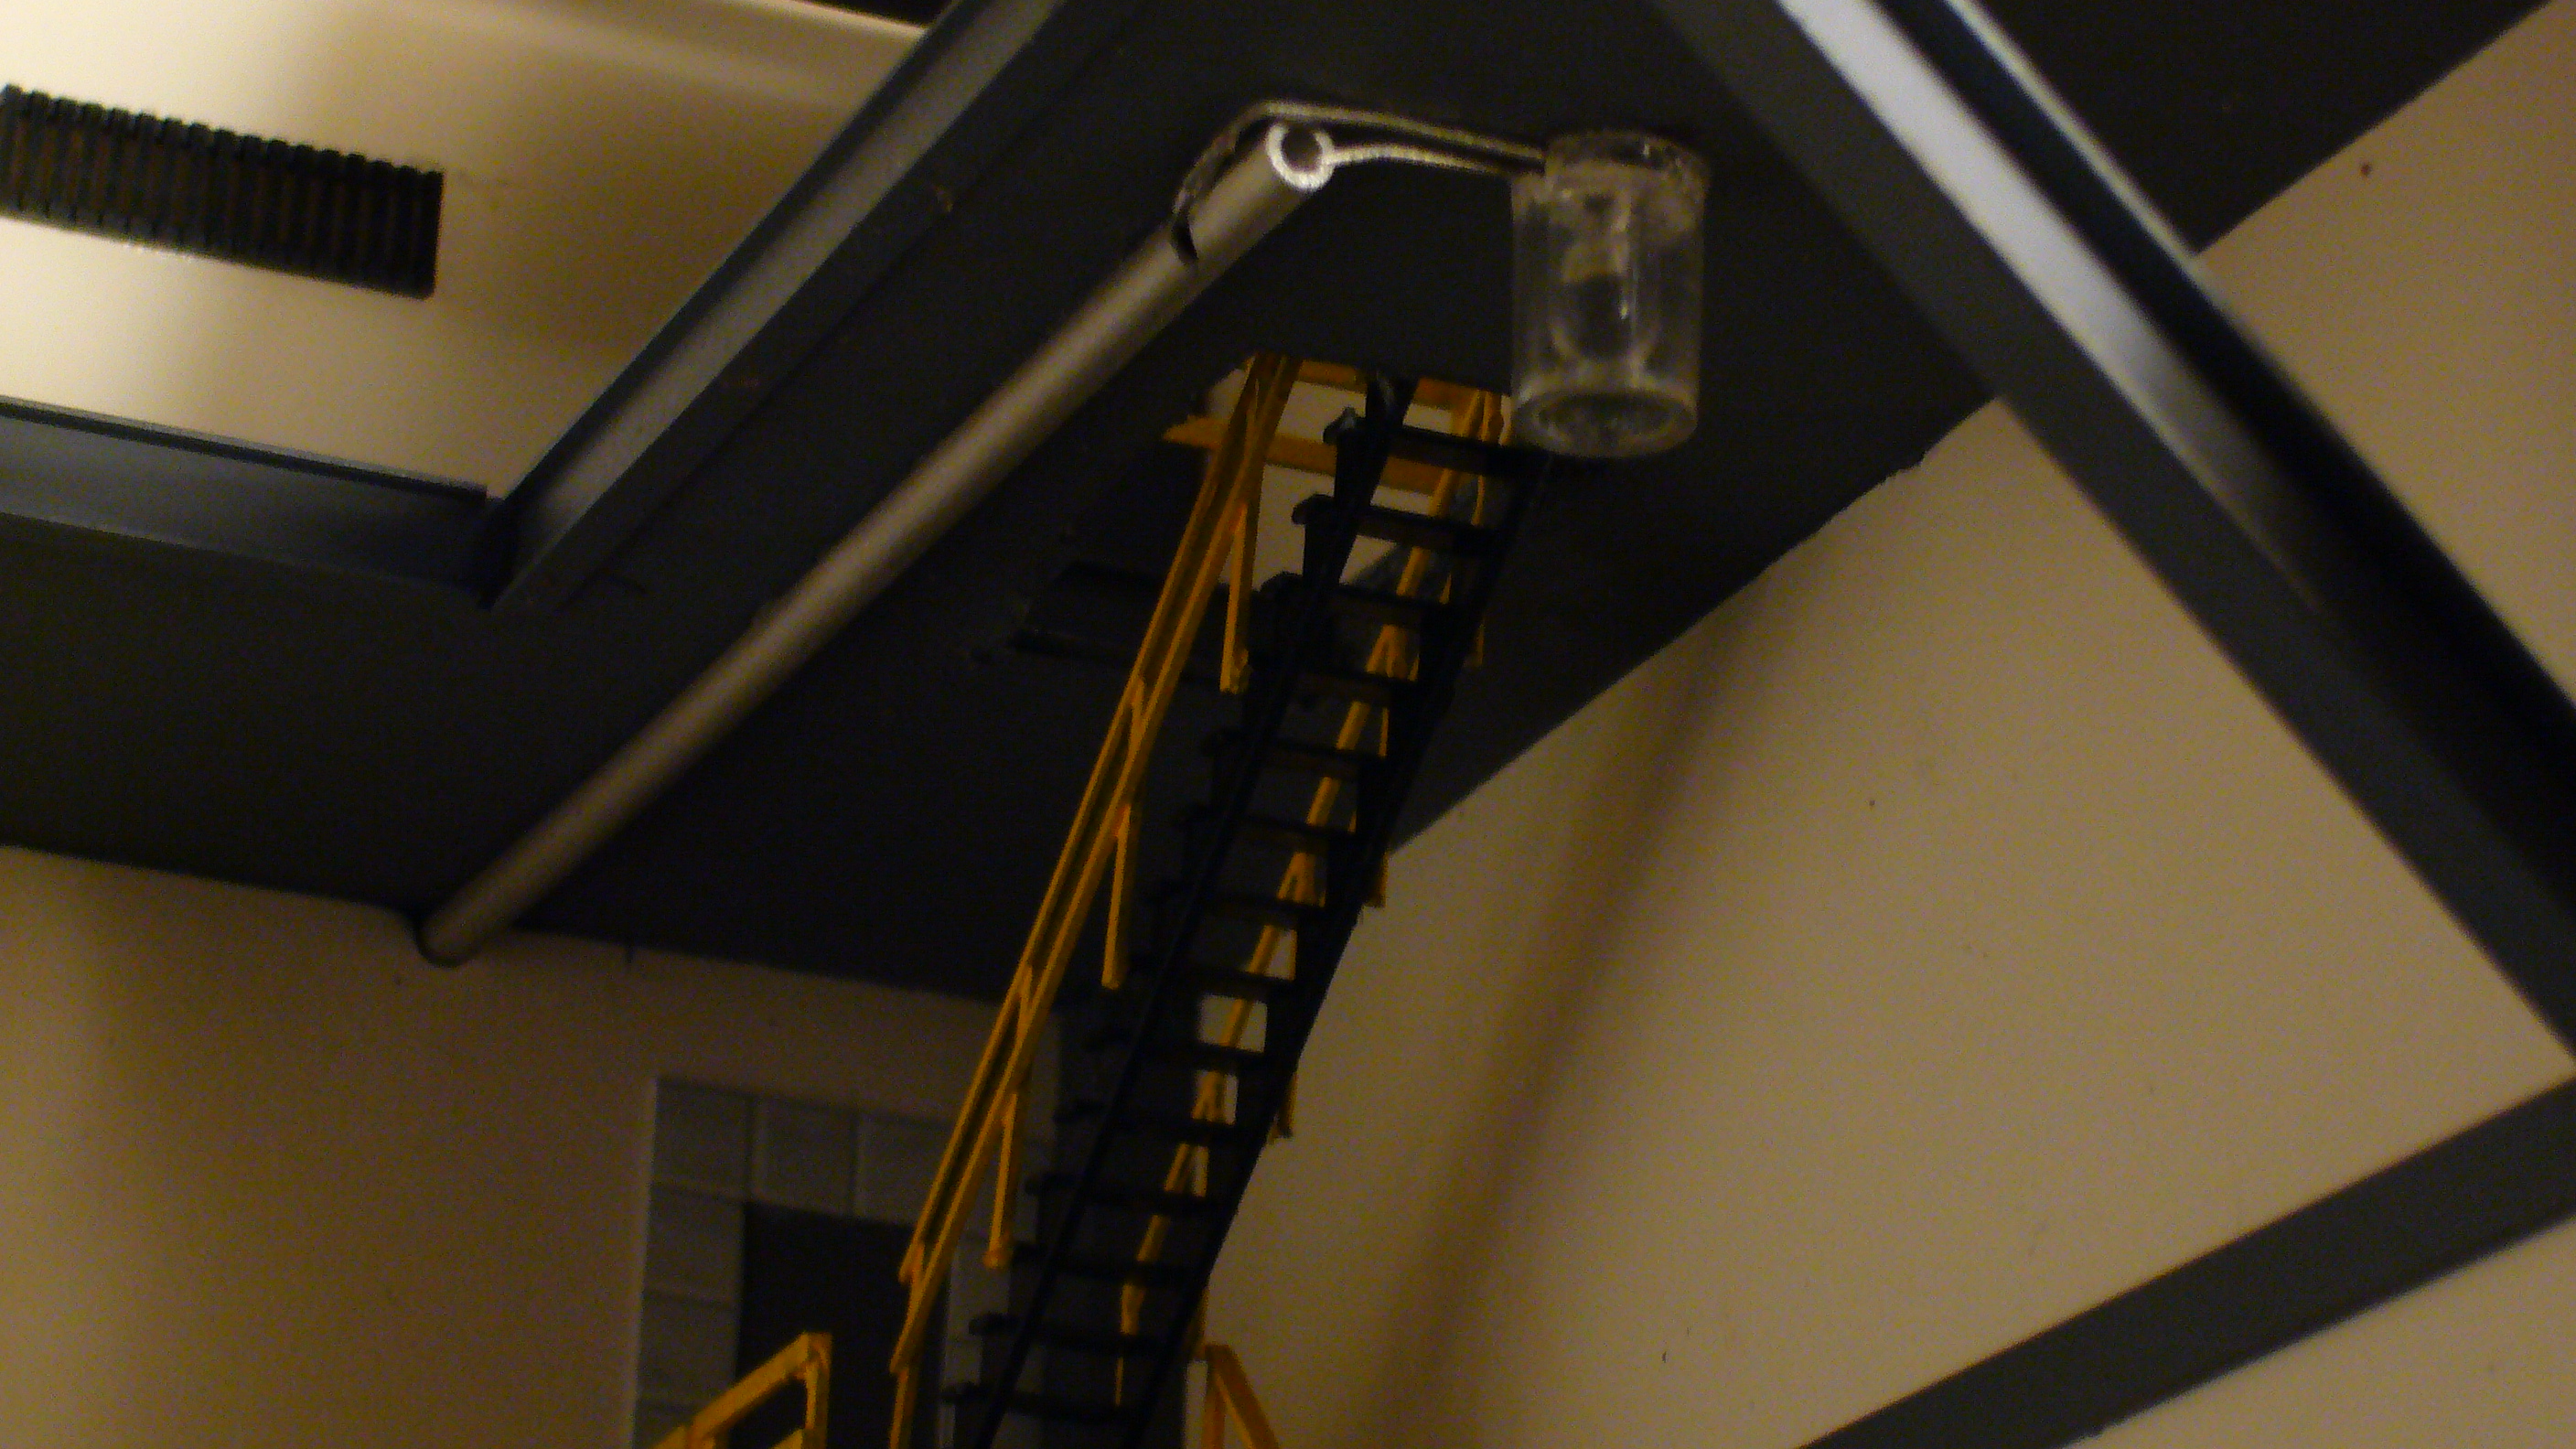
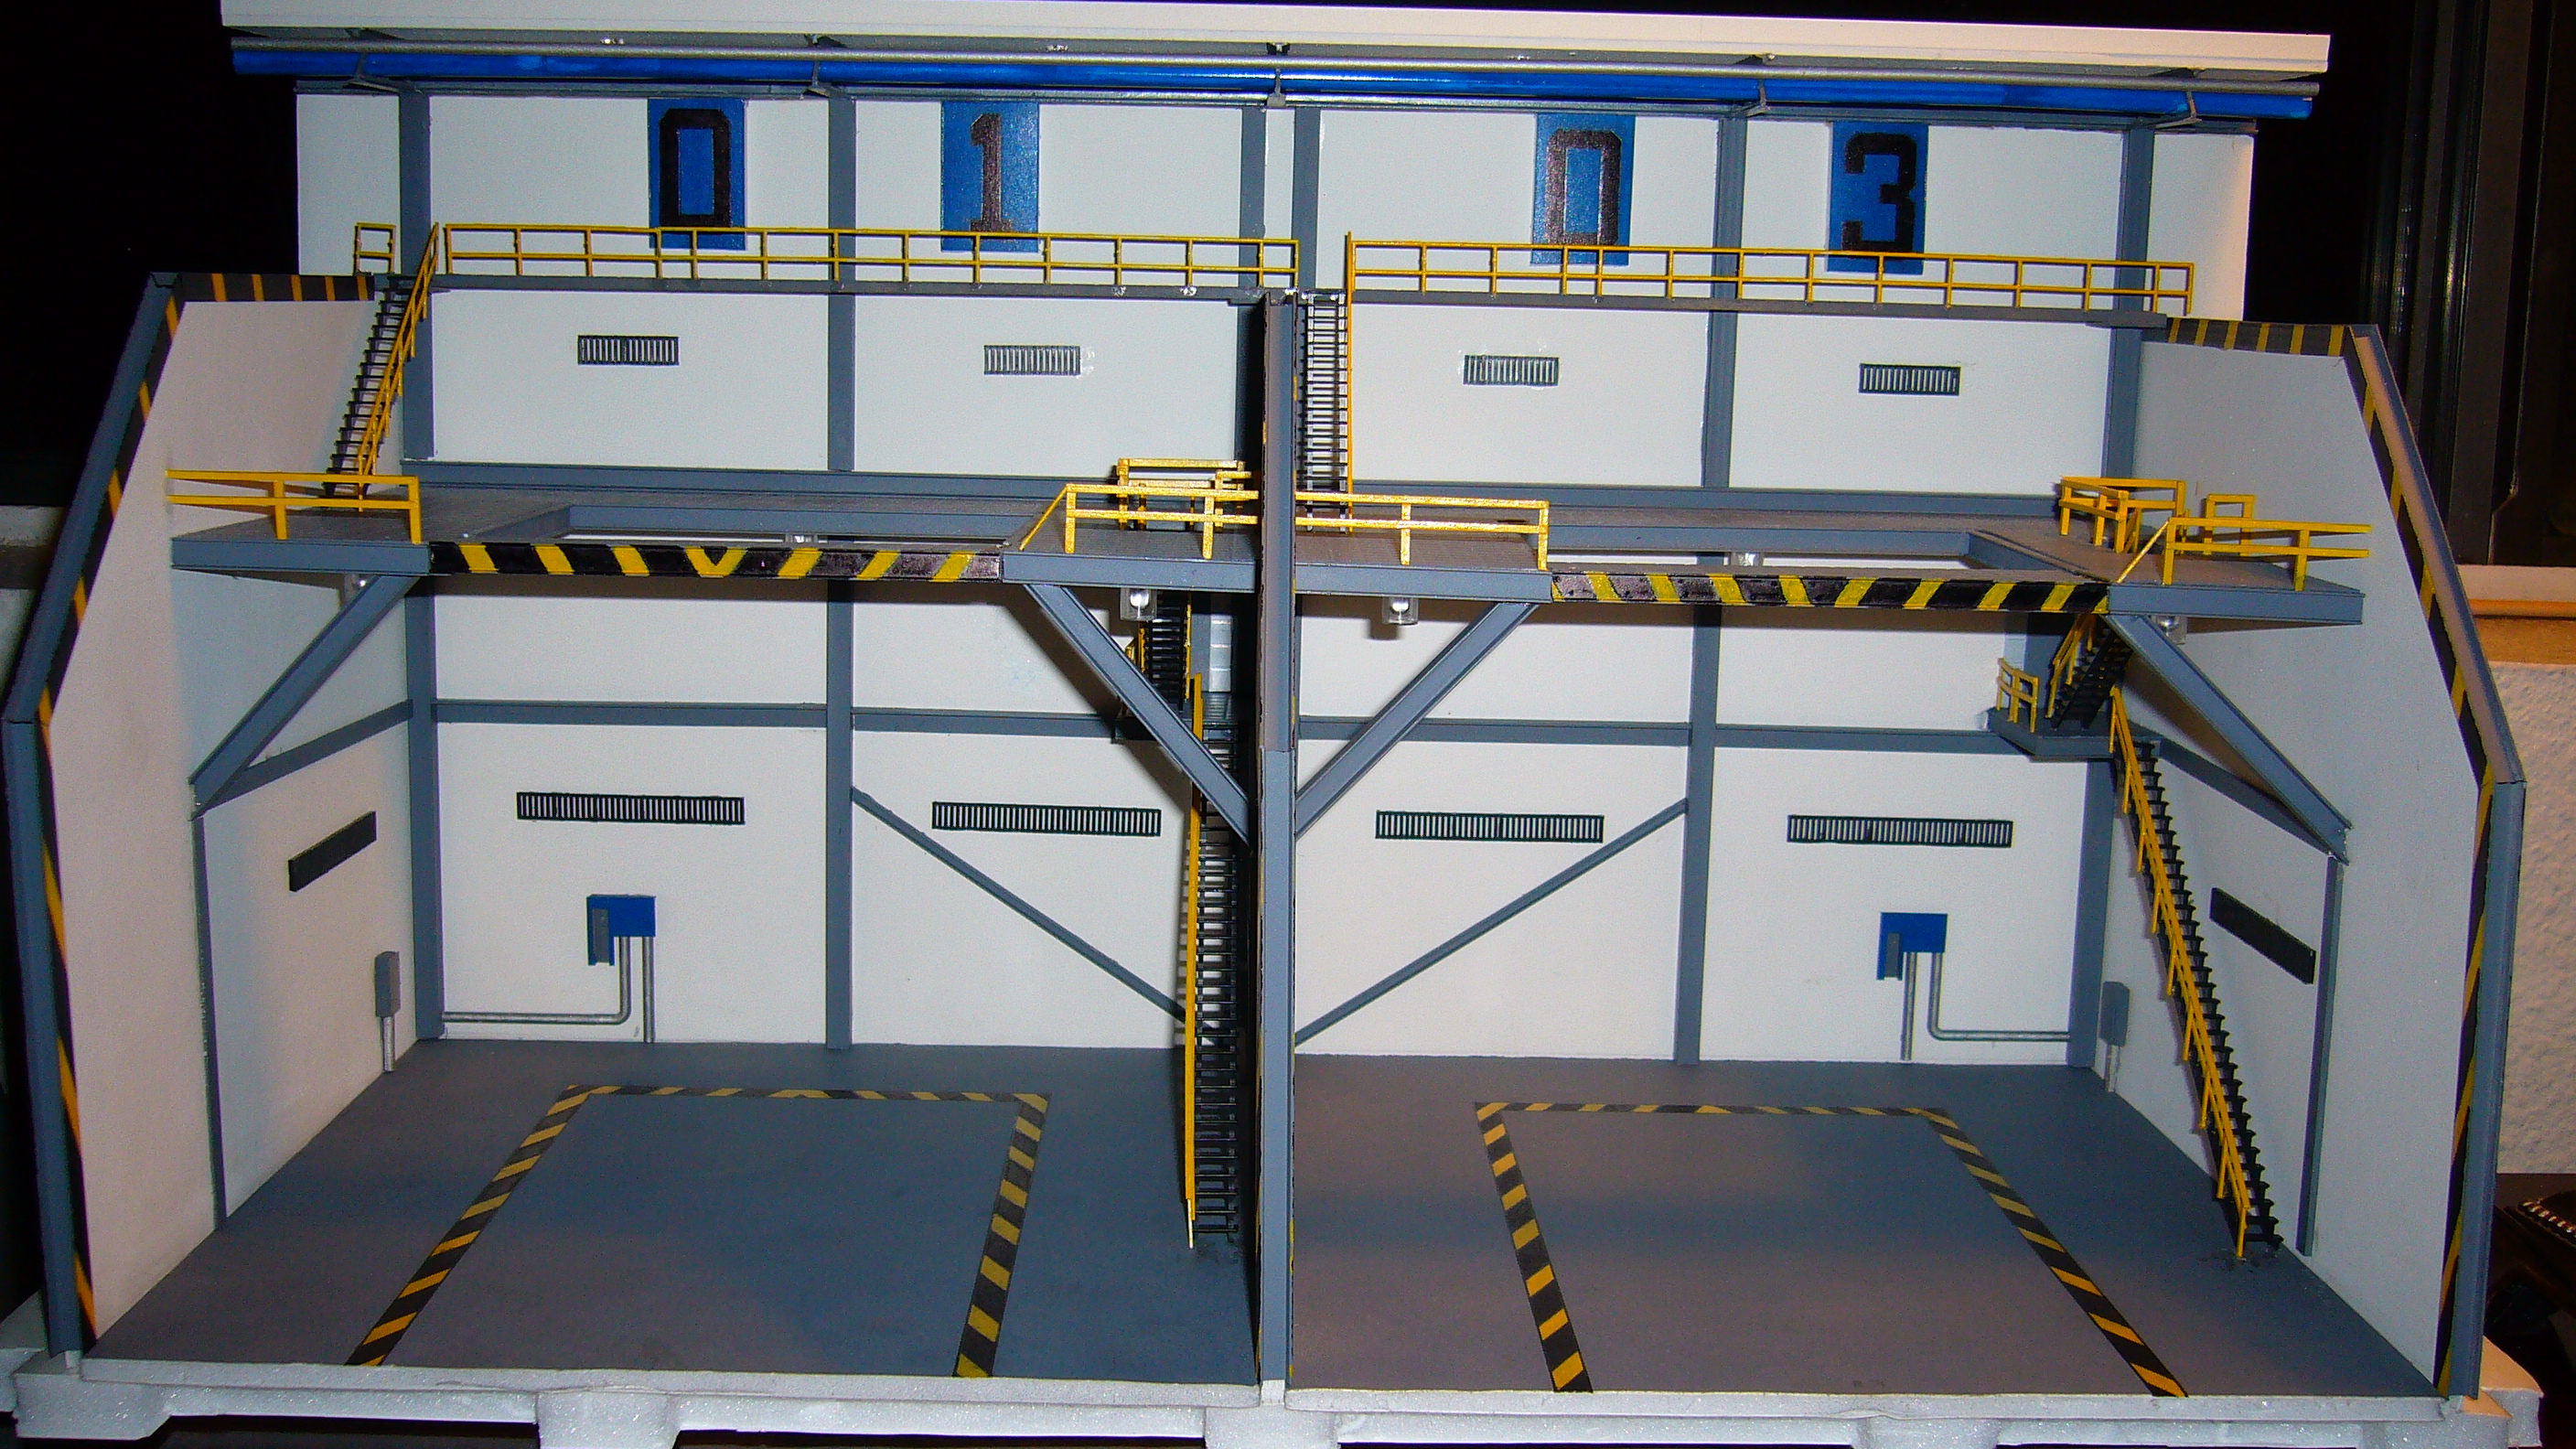
Update: currently working on installing mock lighting for the first floor of the hanger as well as a cross section view of the hanger ceiling structure.
In the first few pictures you will see the partial dissemblance of the hanger so as to show a better view of the lighting detail.
I used plastic tubing as mock electrical conduit and some clear plastic tubing cut to size to make up the lighting fixtures.
Views of the upper ceiling cross section can be seen in the second section of pictures. I used bass wood as a platform, with styrene
square tubing, and styrene trusses for the main structural supports. Styrene tubing was added later for detail of piping.
Also note you can see the requested blue and black hanger numbering as well. Last two pictures are of the frontal view, without
flash and last one is with flash.
And as always more pictures will come as progress is made.
Blue


-
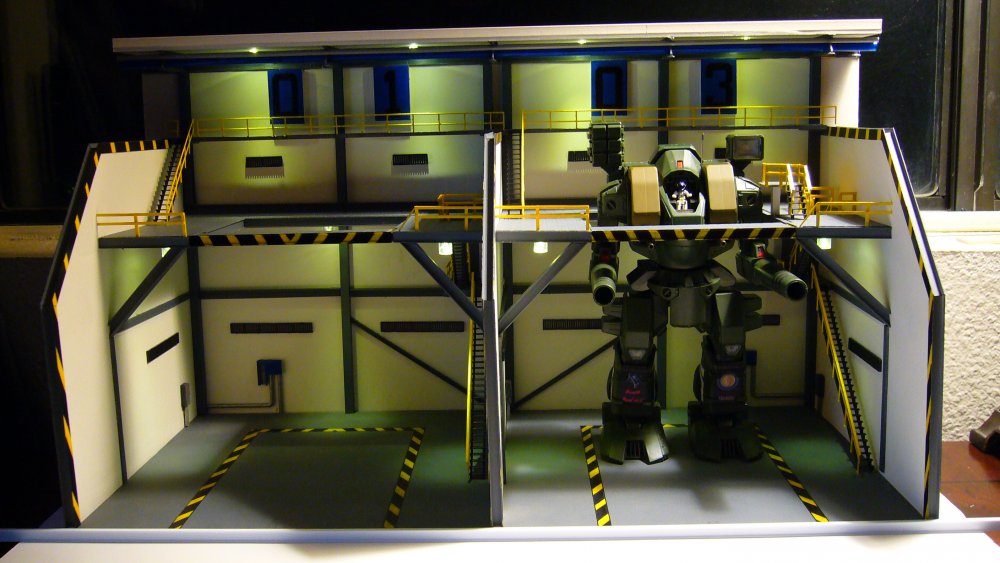
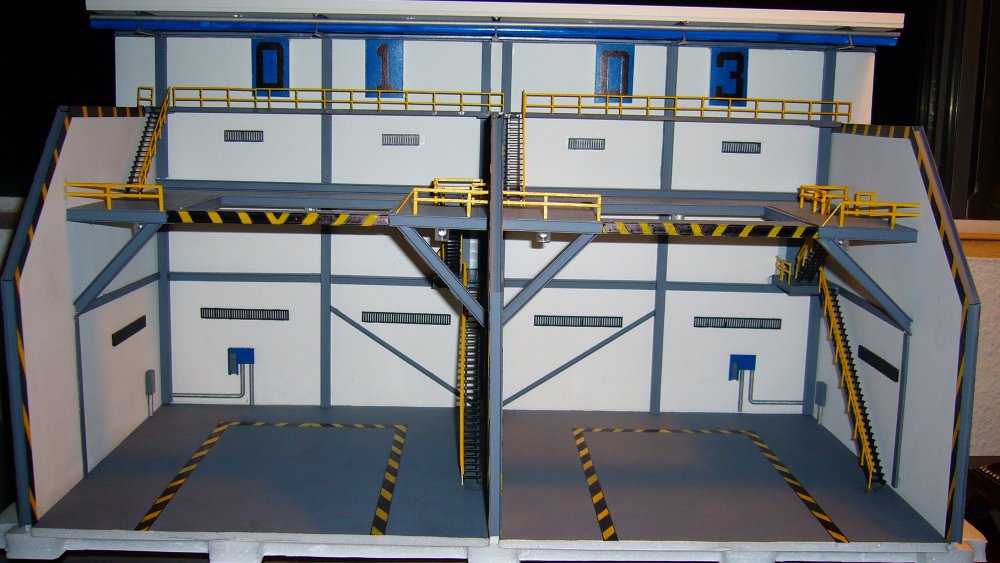
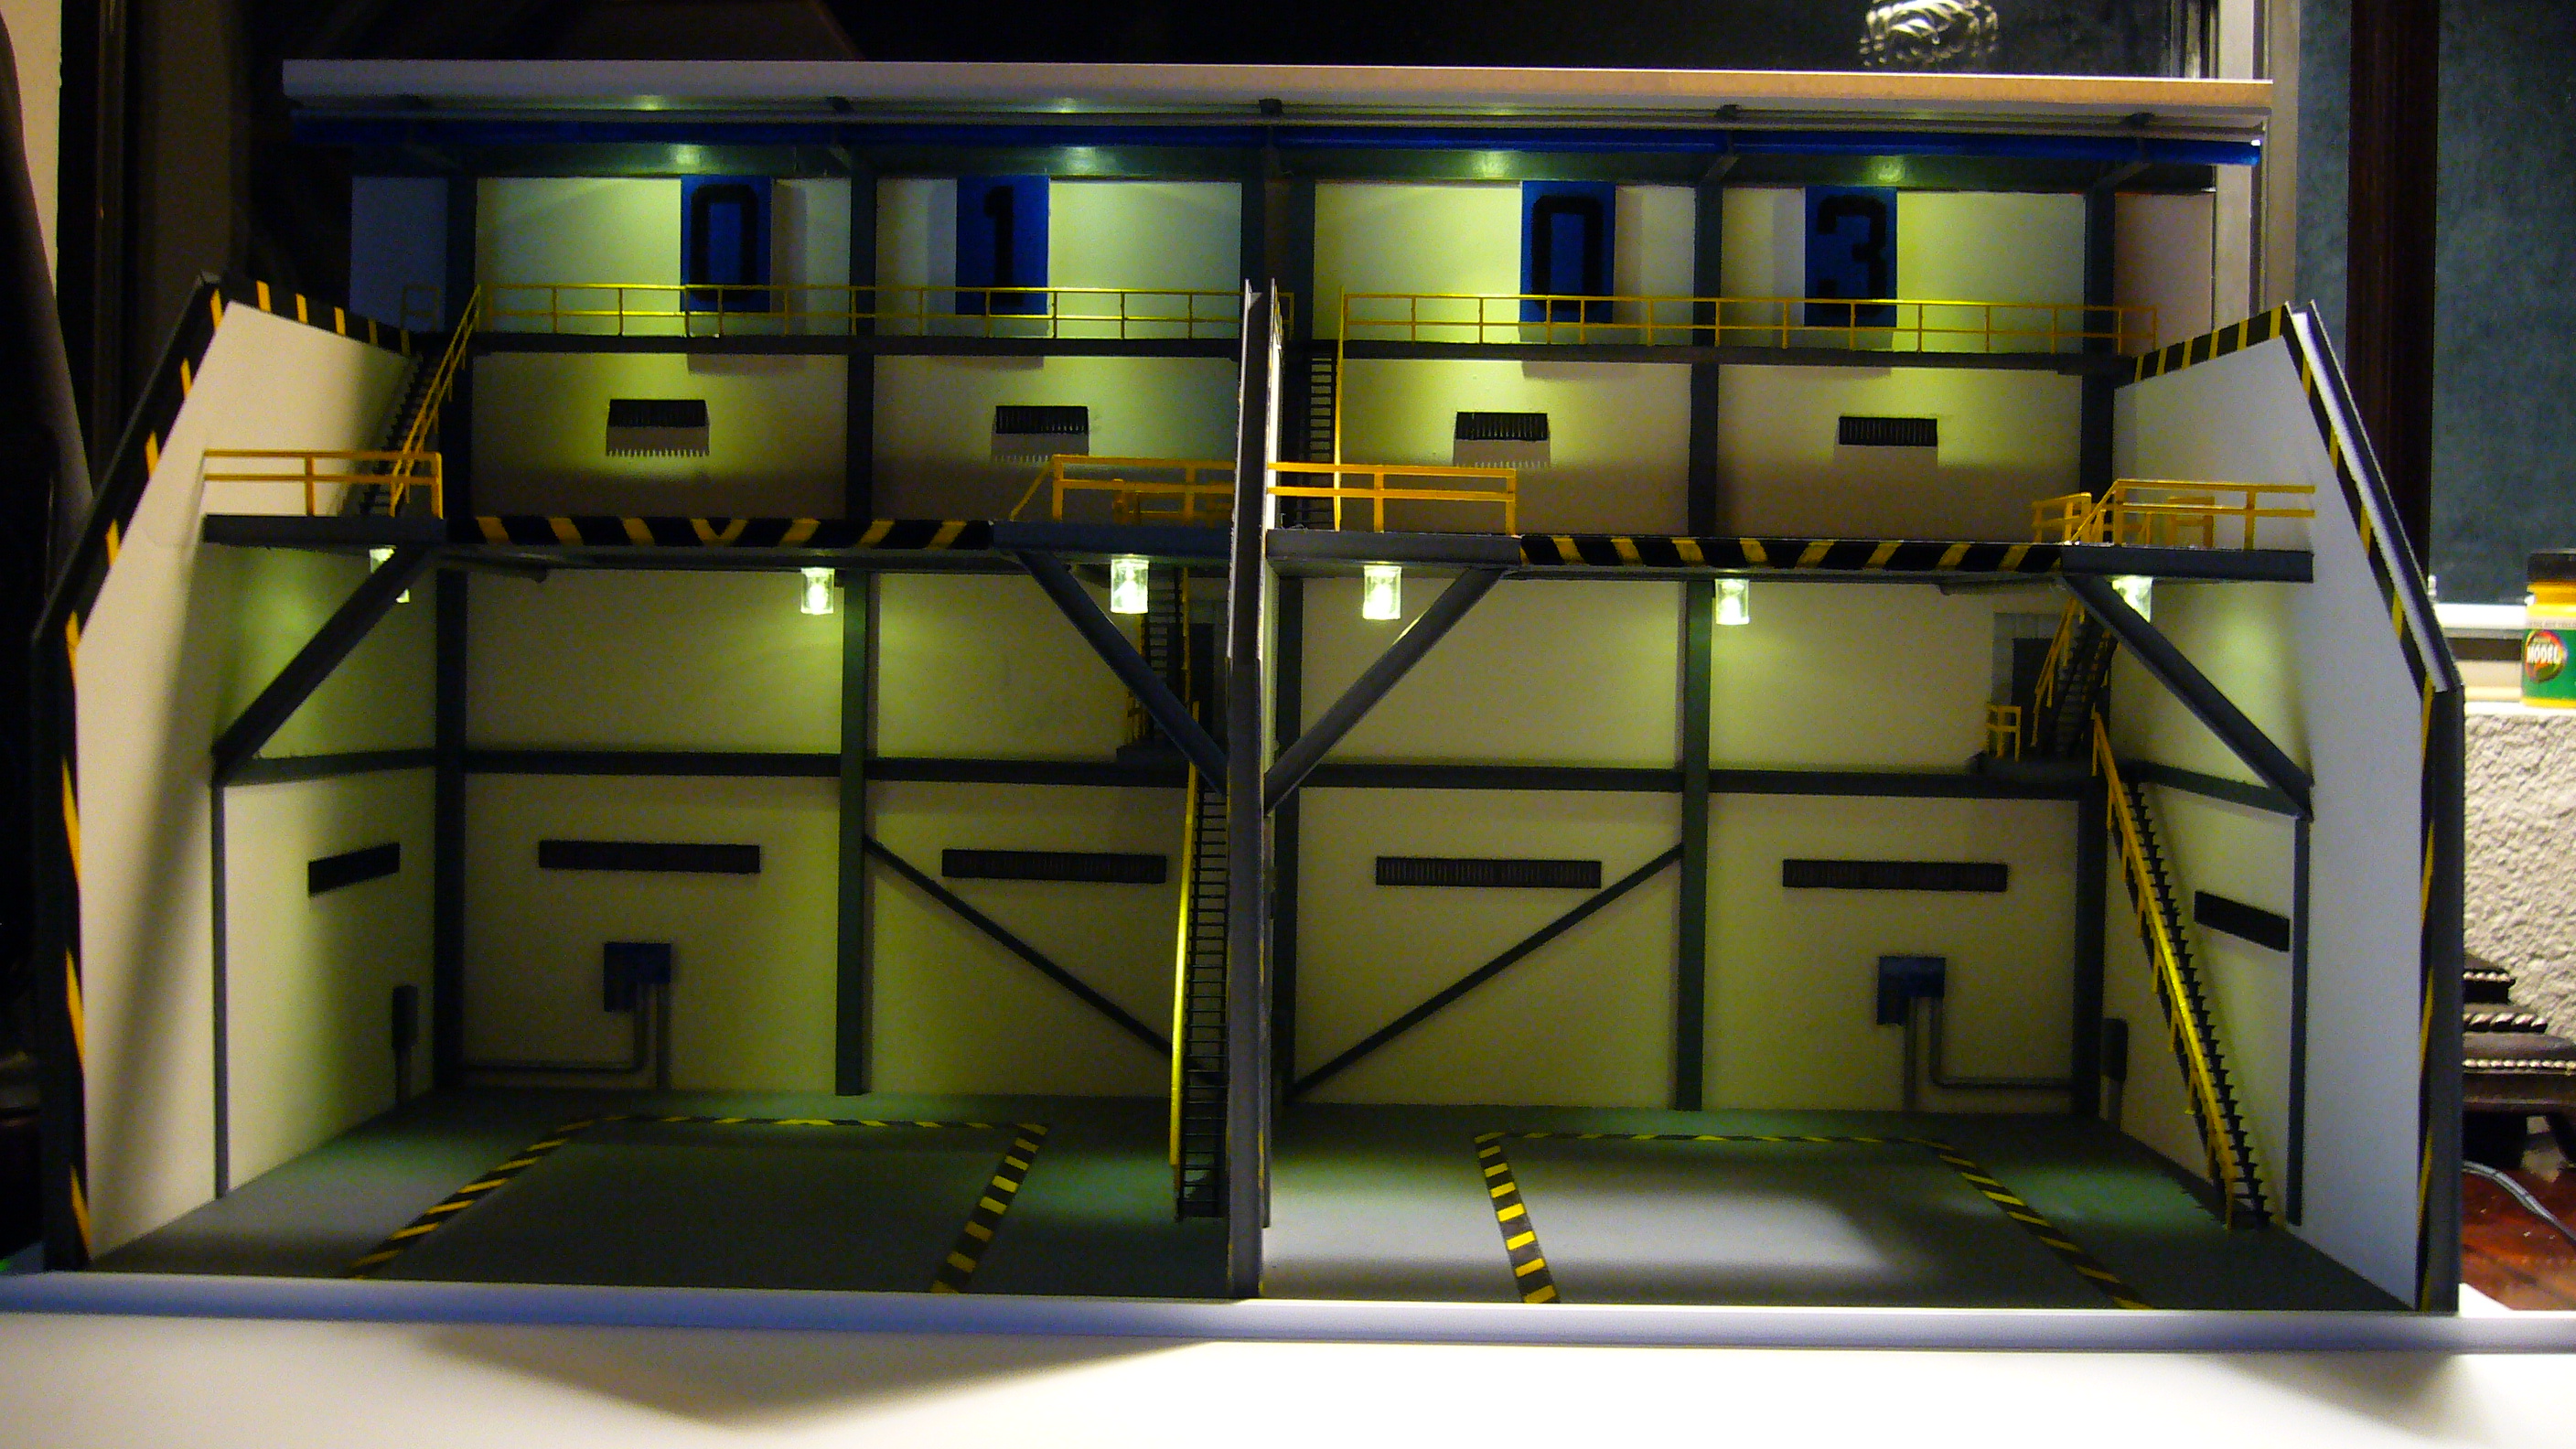
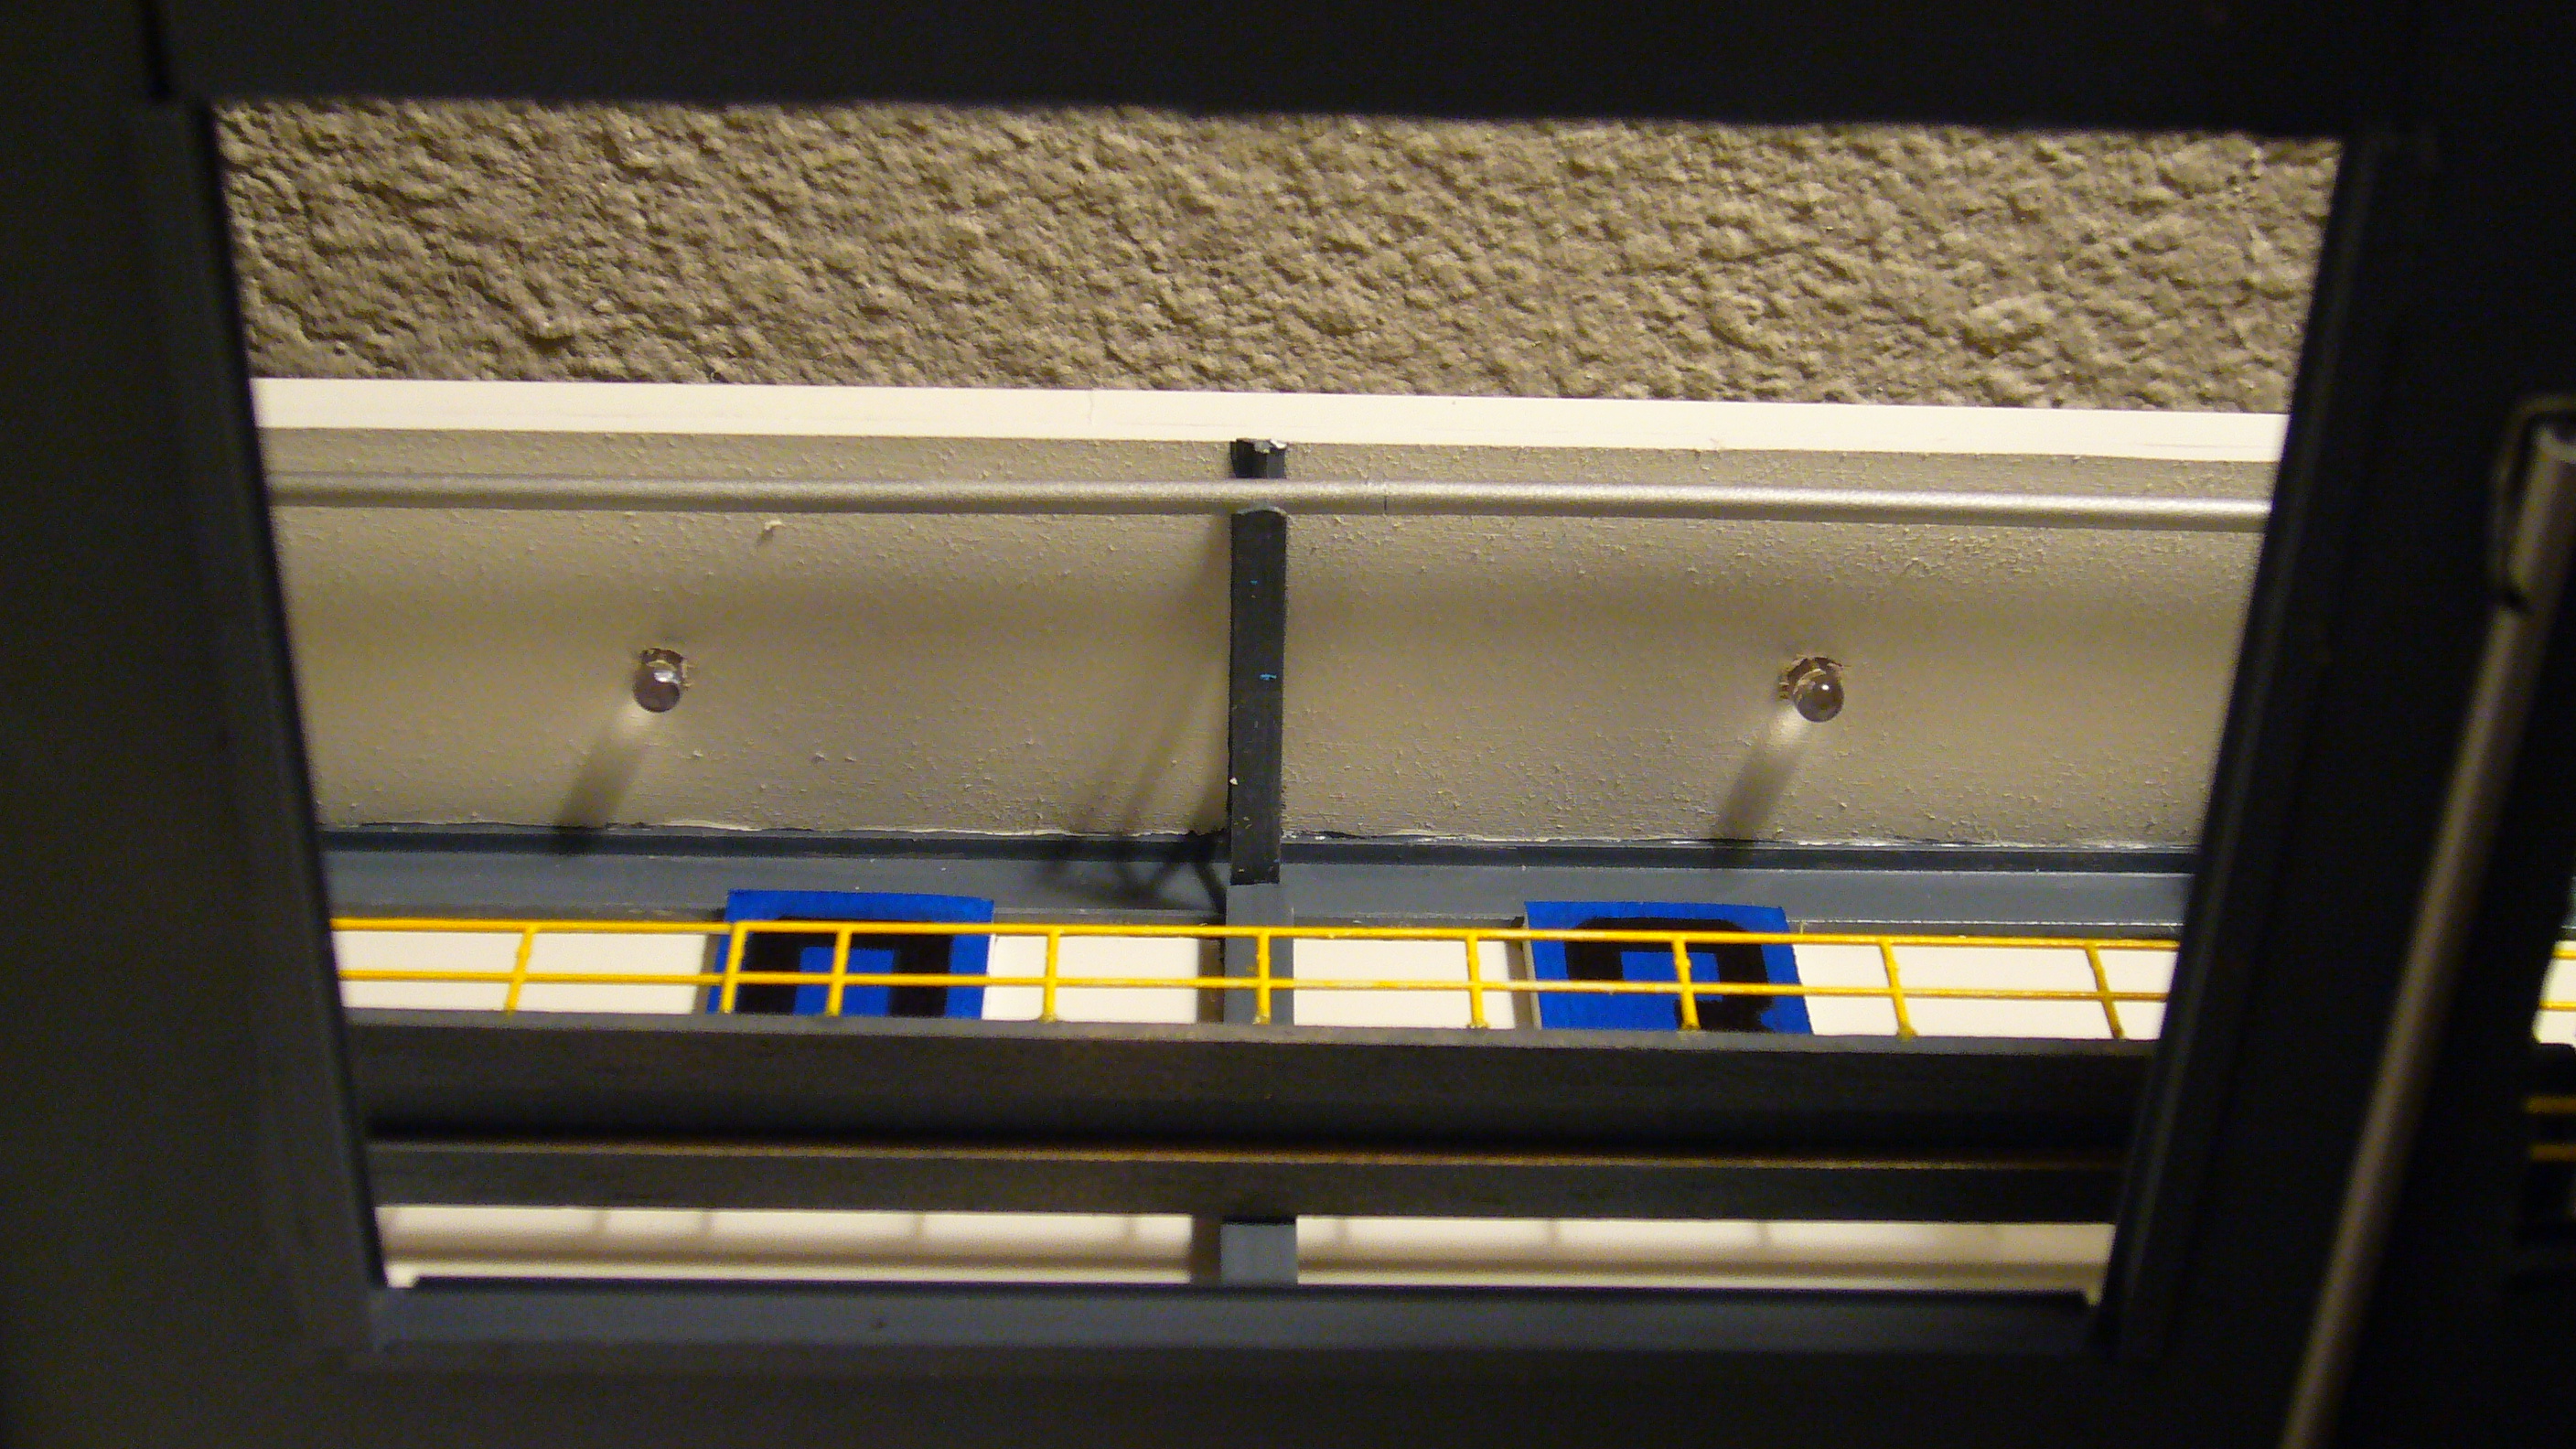
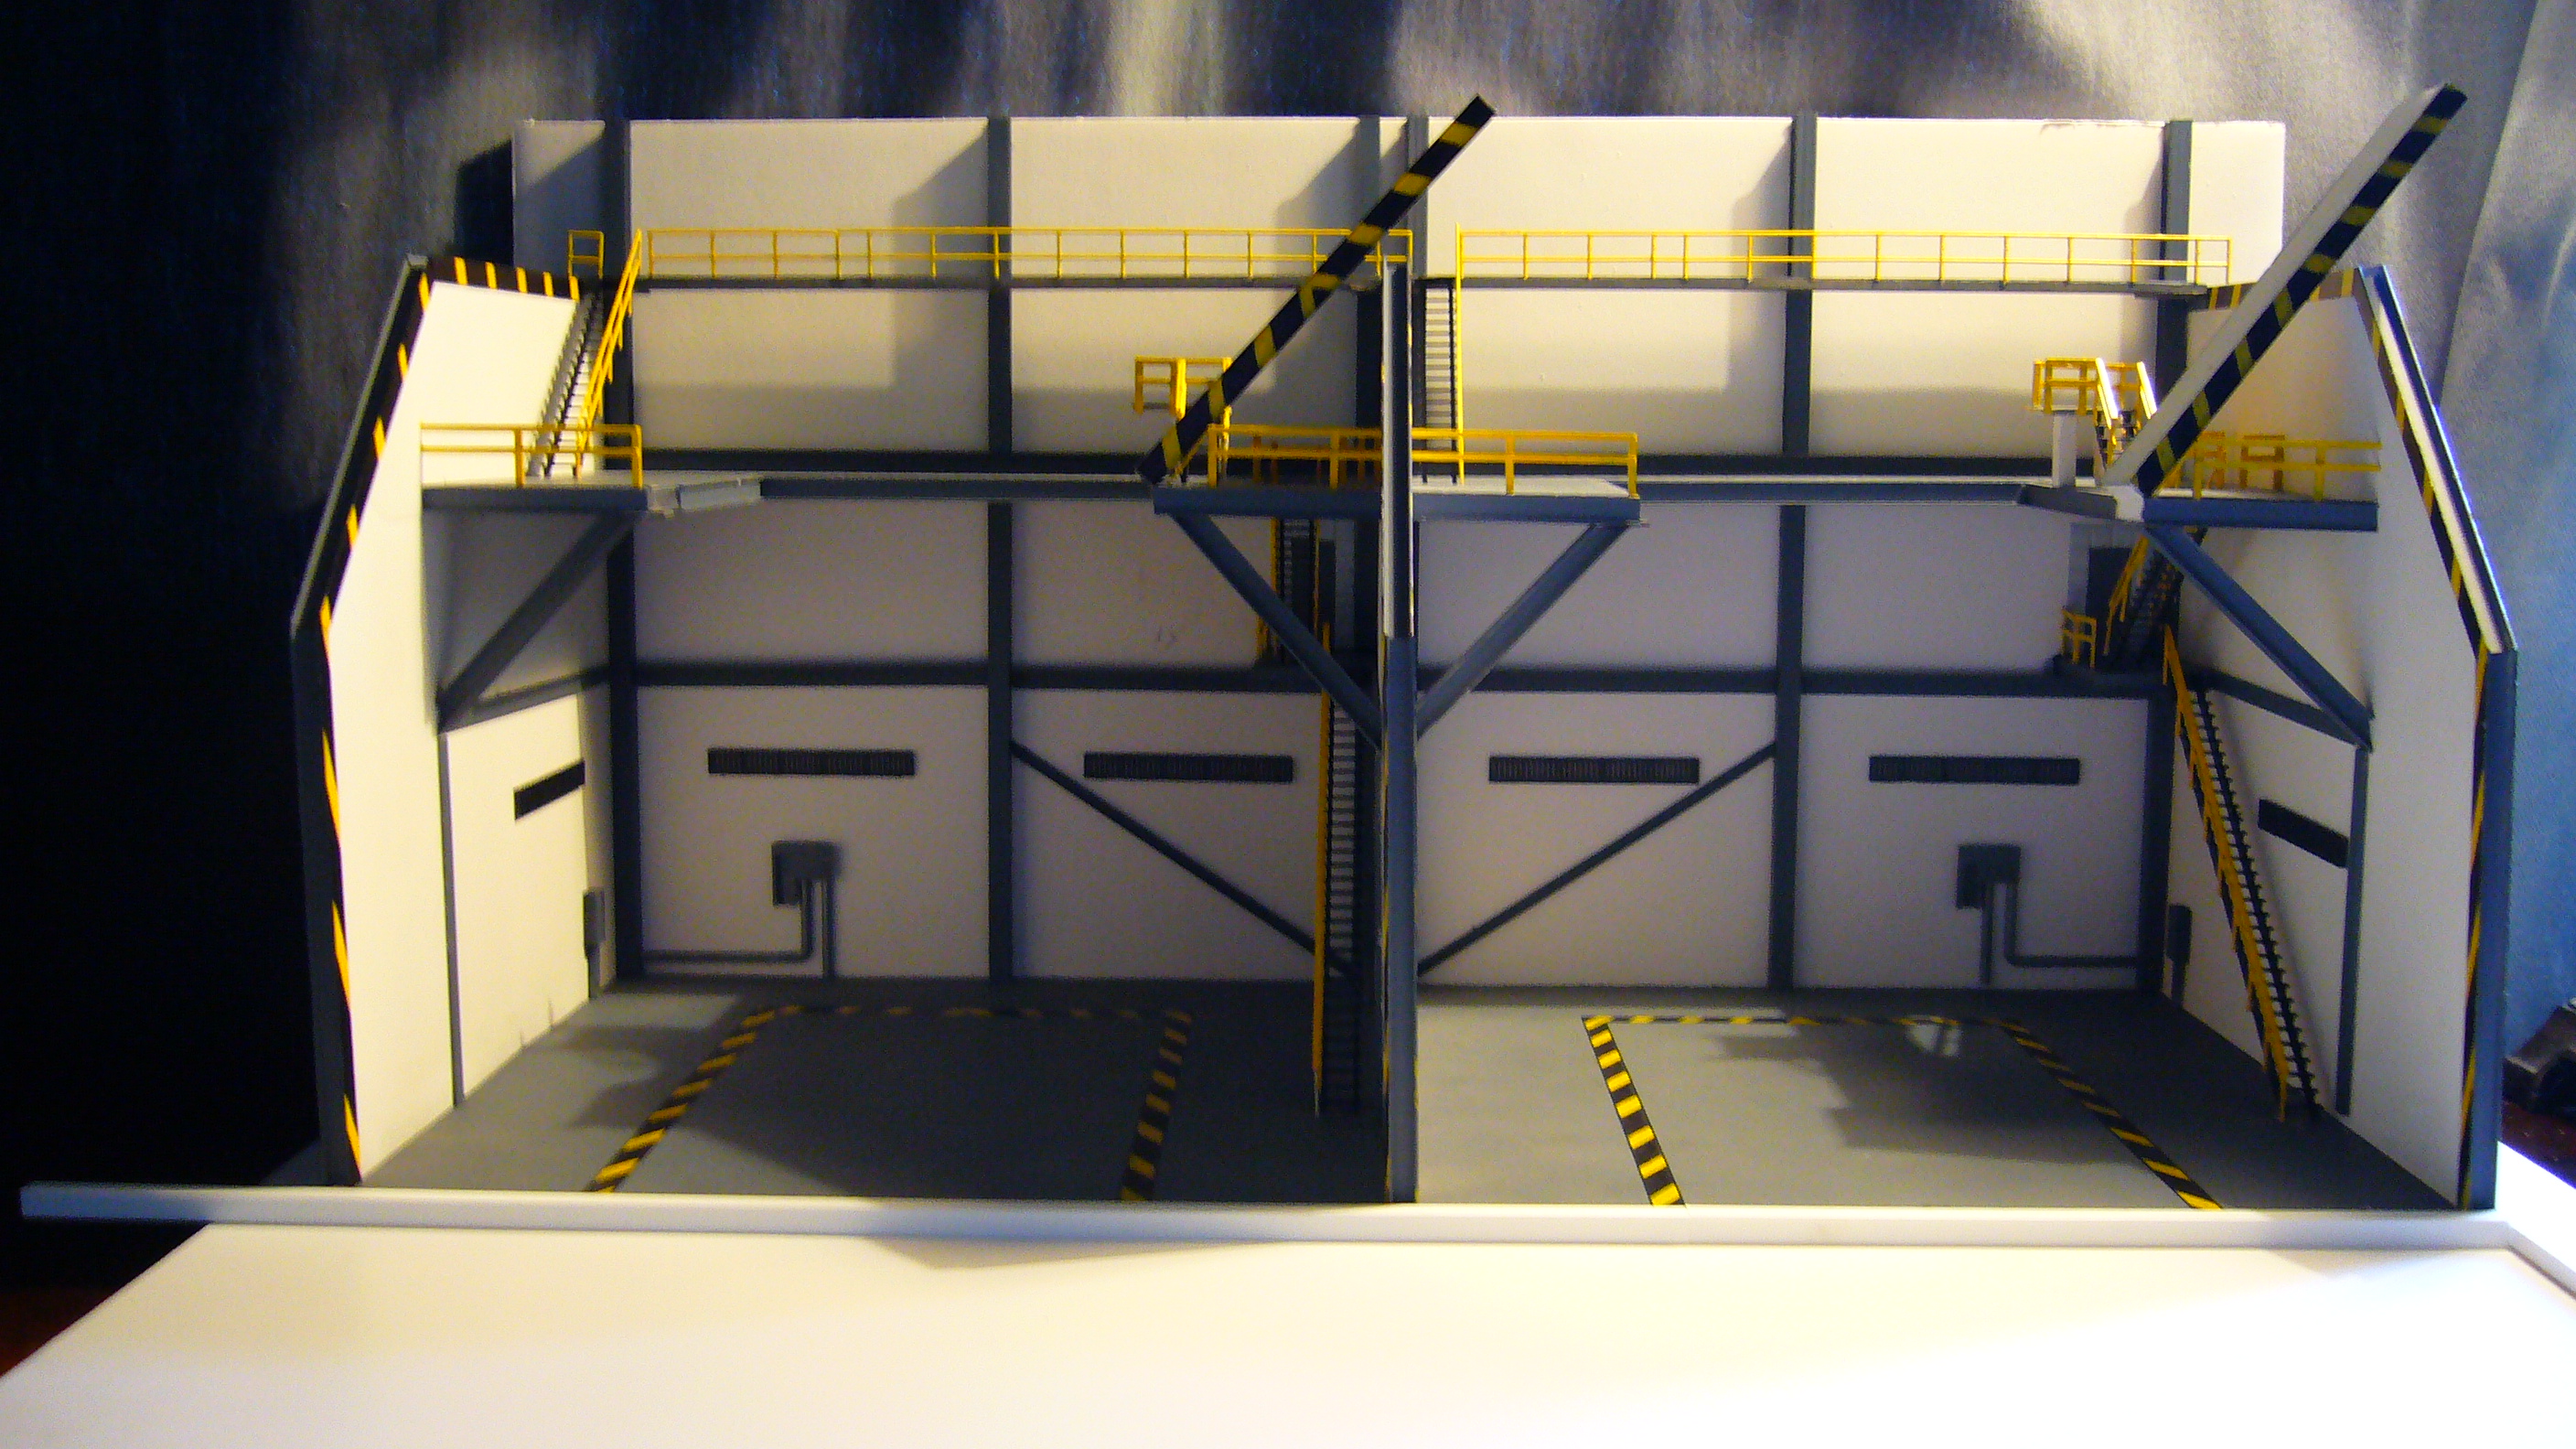
Hello again!!
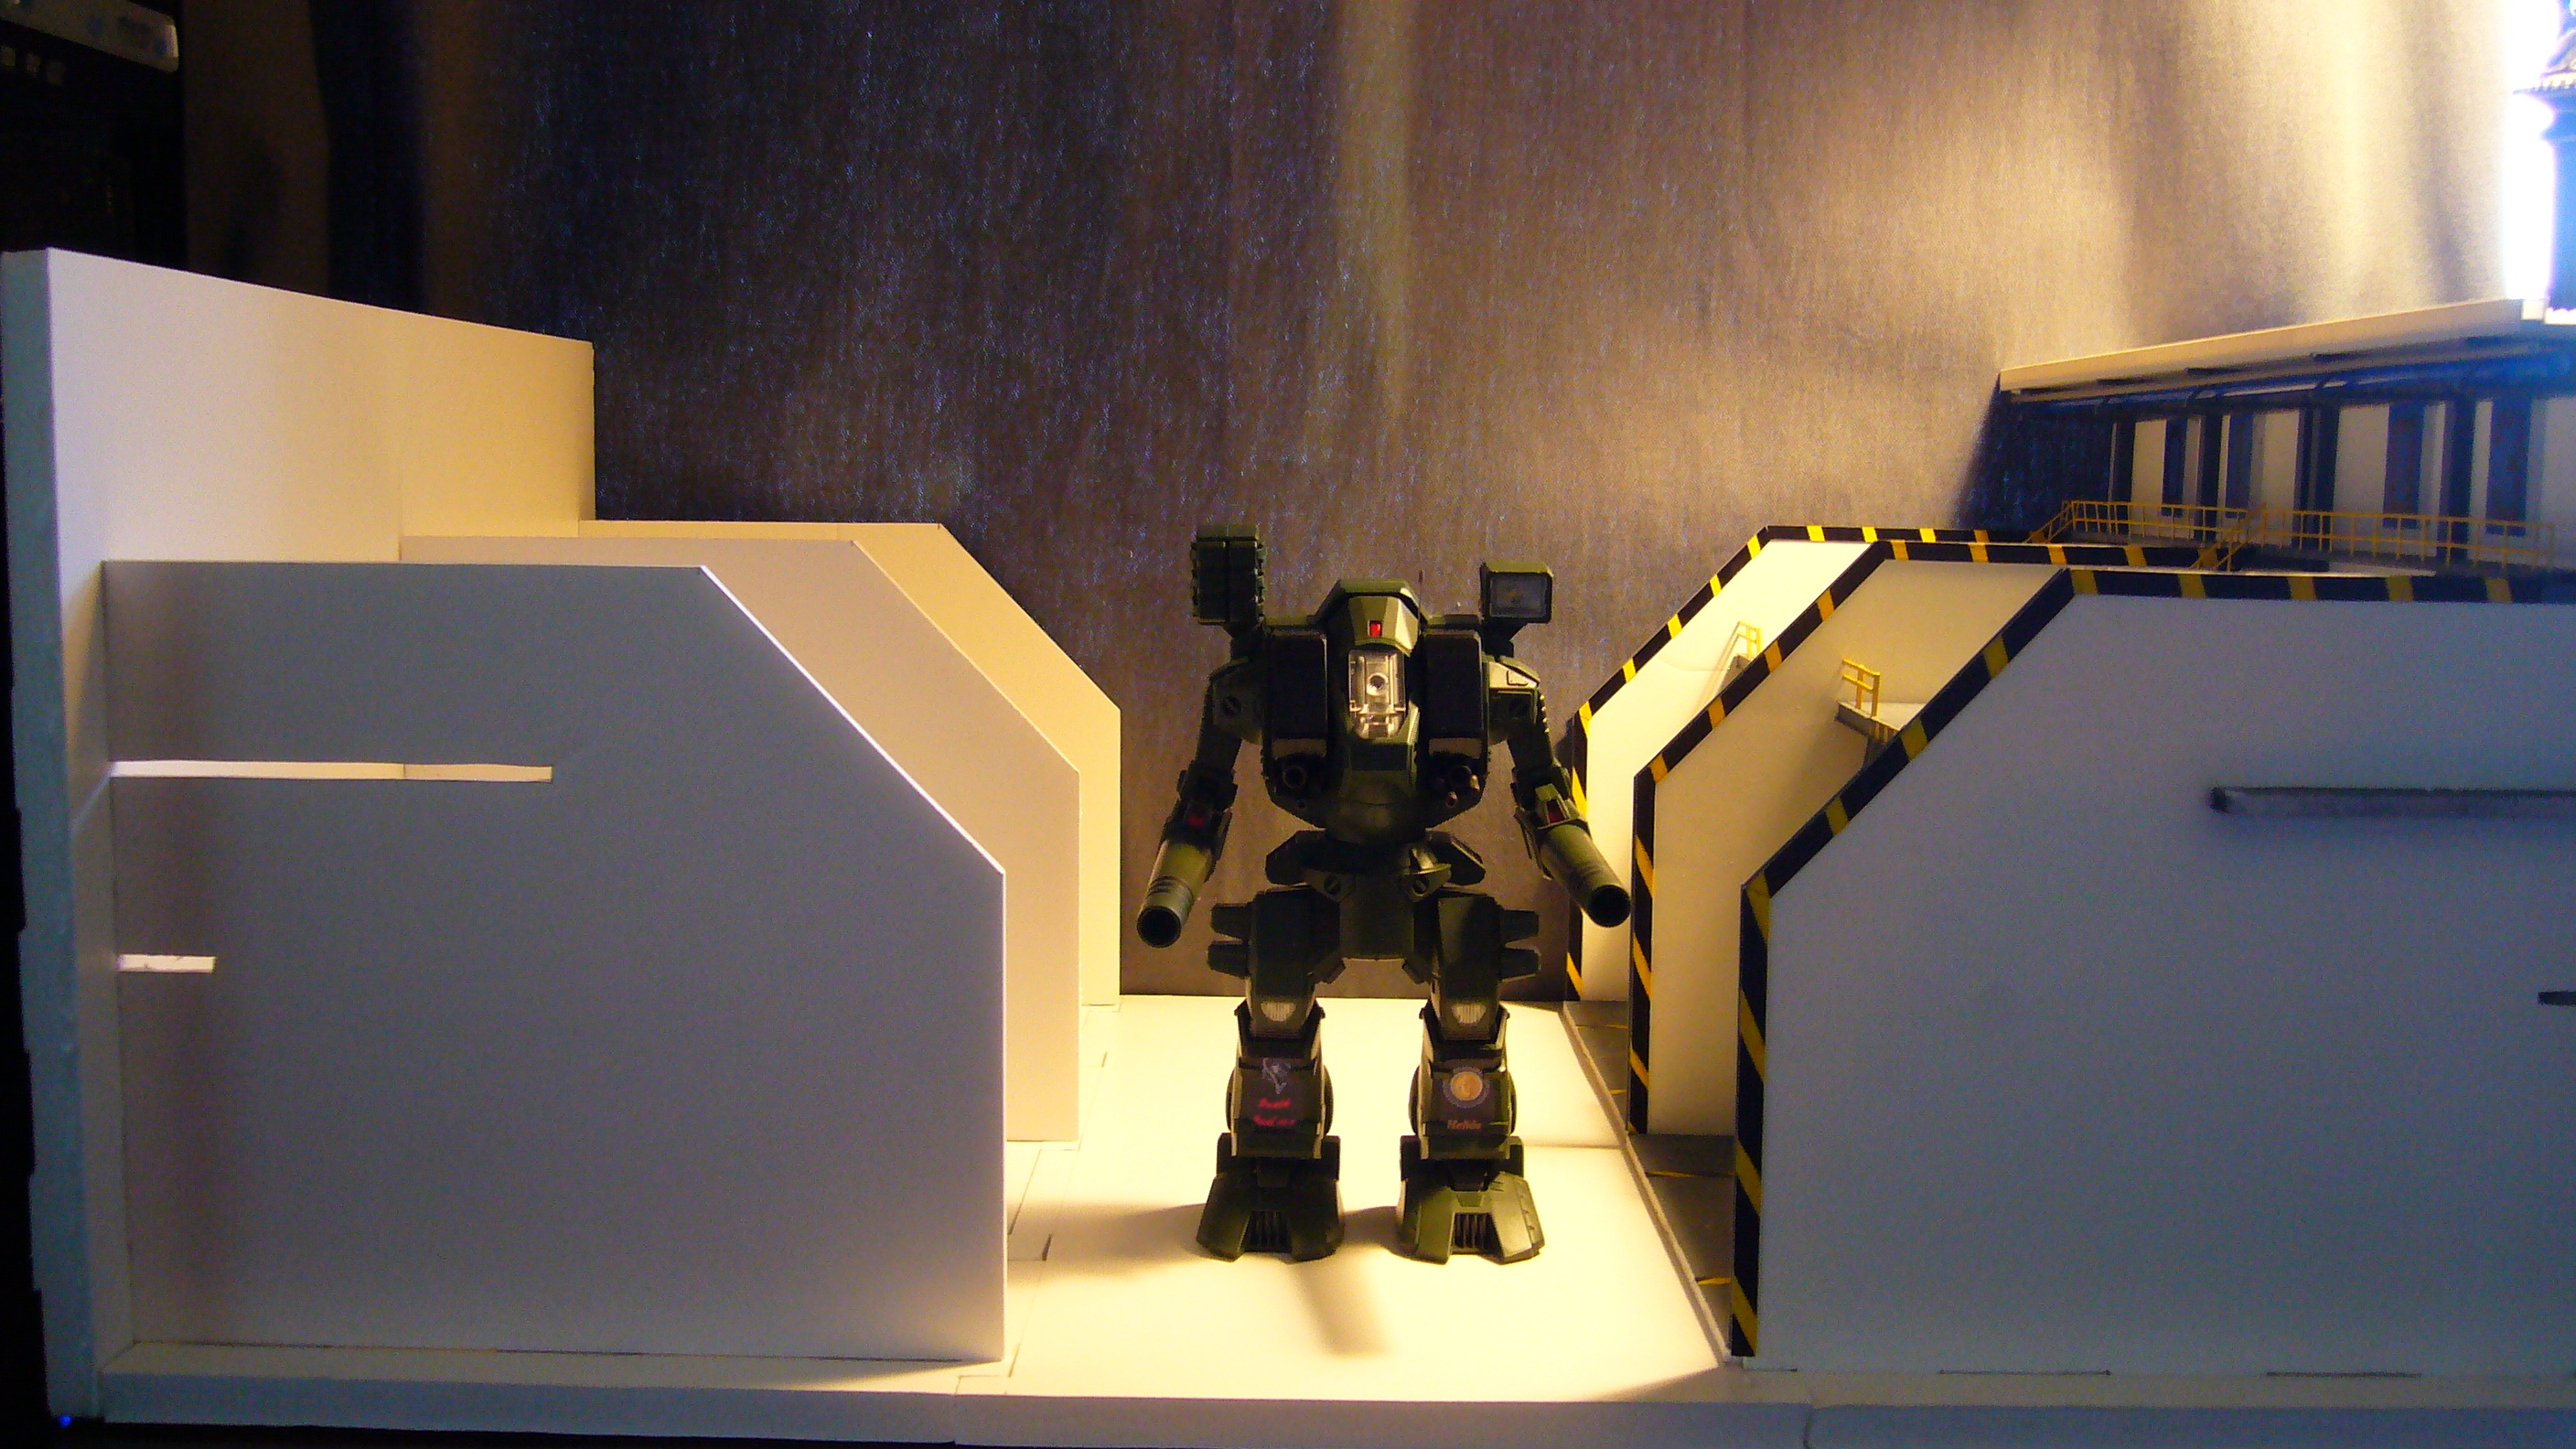
As promised I have returned with some more "eye candy" for your viewing pleasure

Below you will be able to see my progress on the Tomahawk hanger. In the next pictures you will
see added railings, more detail, and even a mock set up with a (non-painted) crew.
Also shown will be the limited but fully movable parts for entrance in and out of the repair bay.
These pictures are to bring you all up to par with the stage of the build so far.
As always, there is much more to come.
Kick back and enjoy for now and catch you all later,
Blue


-
Hey Yeti,
Thanks for the Info and be sure to check your PM box.

We will see what we can do to help with the inspiration.
Blue
-
PM sent
-
Hey Tundrayeti,
Its been some time since we chatted last but I was wondering if you had specific sizes you could do regarding your custom diorama panels.
If you could, please PM me the possibilities as well as the cost for said possible sizes.
Also was wondering if what you have applies to the decking only or if you have stuff that can be used as wall sections as well.
Thanks a bunch and look forward to hearing from you soon.
Blue


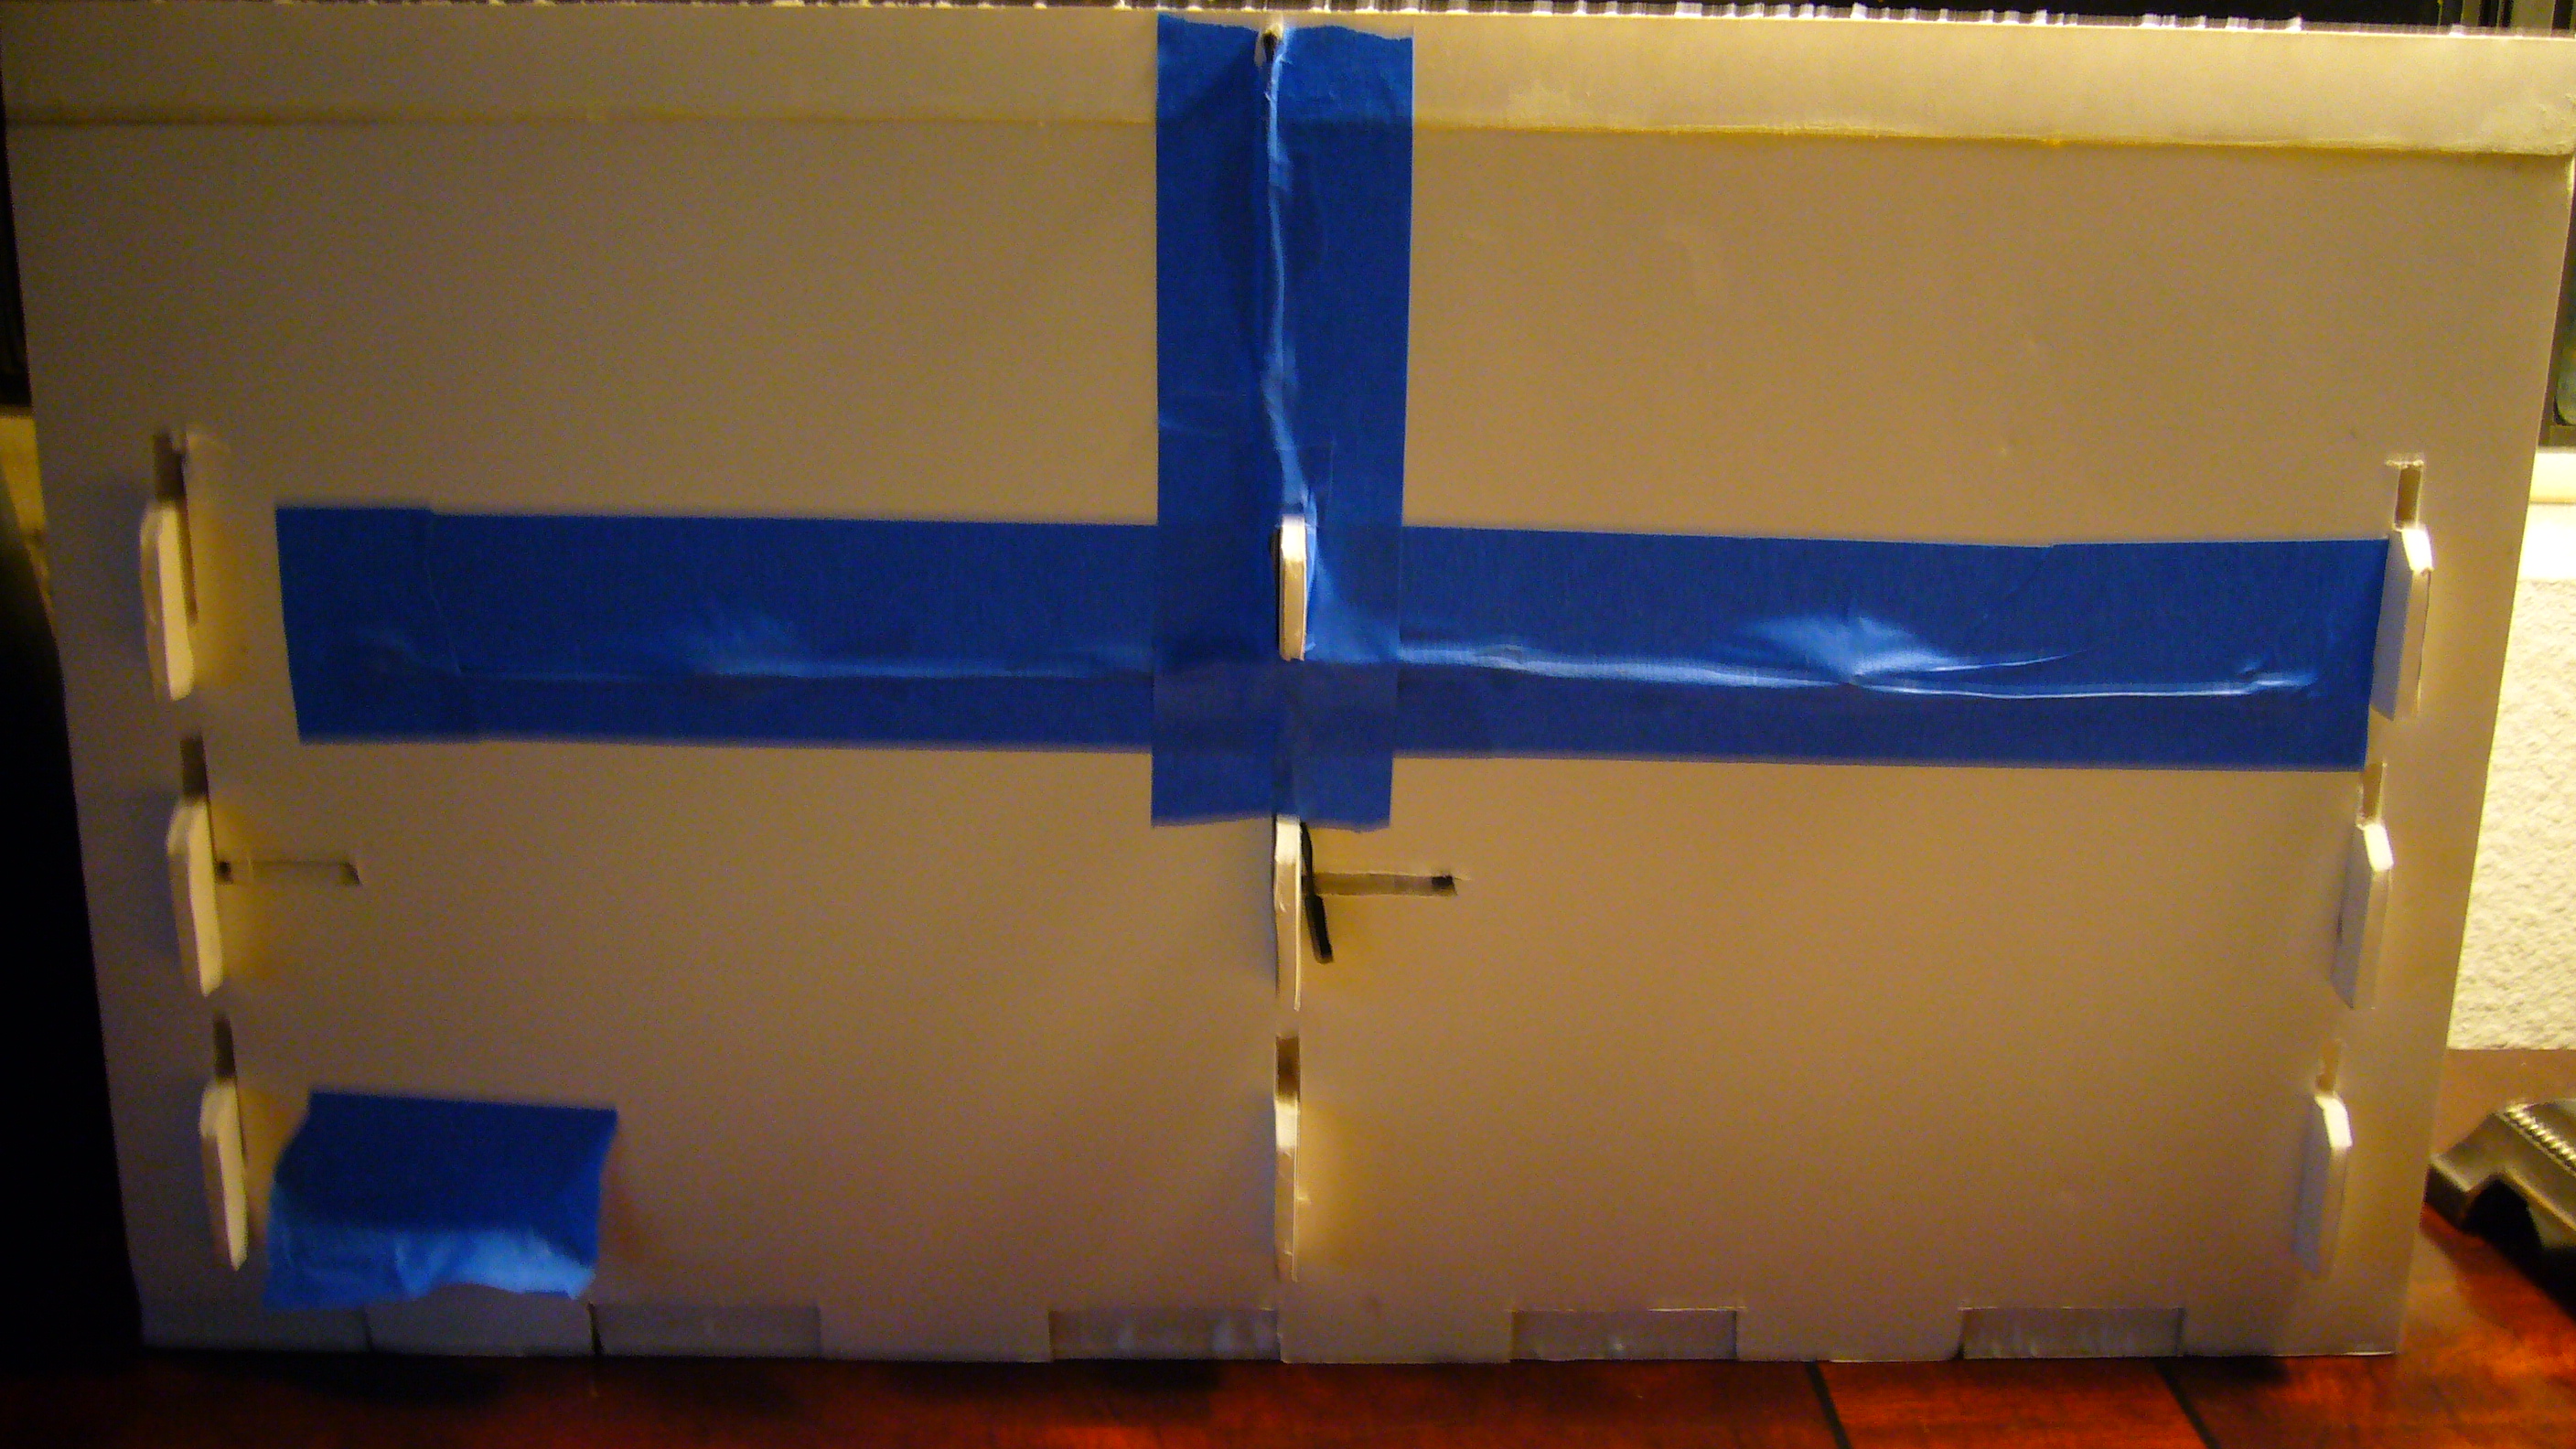


Primer paint, cheap or Tamiya?
in The Workshop!
Posted
Miriya....
I would suggest going the cheaper route IMO. I have been building an assortment of diorama's and to be honest one of the best primers I have found to work on virtually anything is a product called "Painters touch" by Rust-oleum. Its a wet or dry sandable primer that doesn't melt plastic, and drys fast. I've used it in every build so far, and also it provides a nice flat color too. (my 1/100 scale hanger was painted almost completely with this primer, and in the current "Tomahawk Hanger" build all the gray structure pieces as well as the base floor are painted with this same sandable primer.
This is just my suggestion but I know it has worked pretty good for my diorama's.
Blue