

Jung
-
Posts
381 -
Joined
-
Last visited
Content Type
Profiles
Forums
Events
Gallery
Posts posted by Jung
-
-
asdf
-
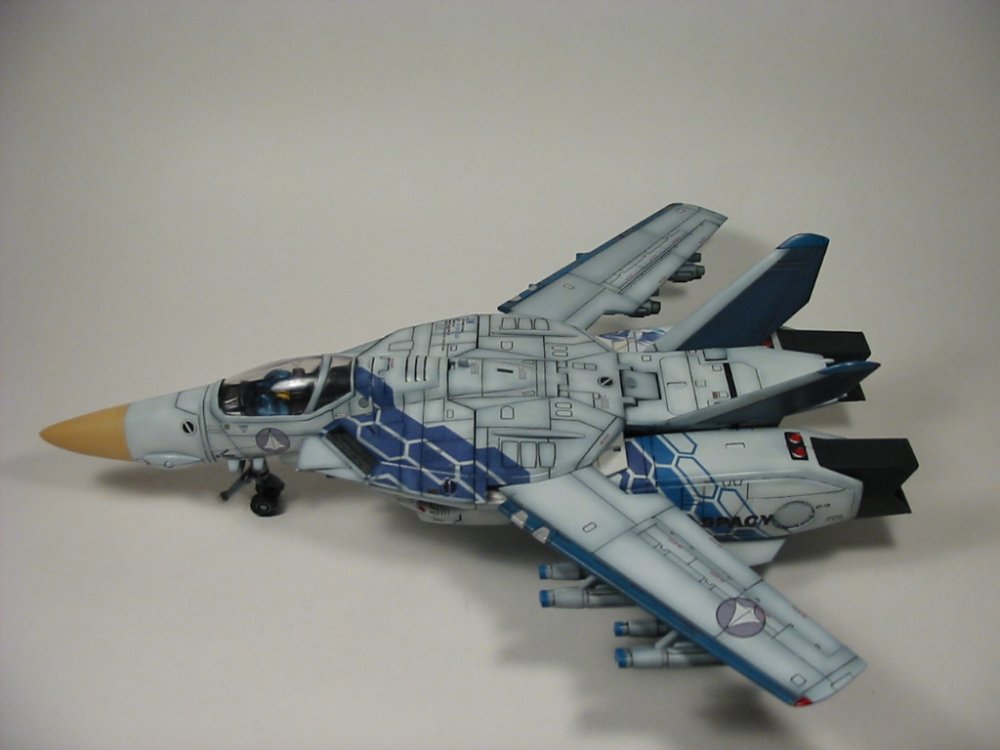
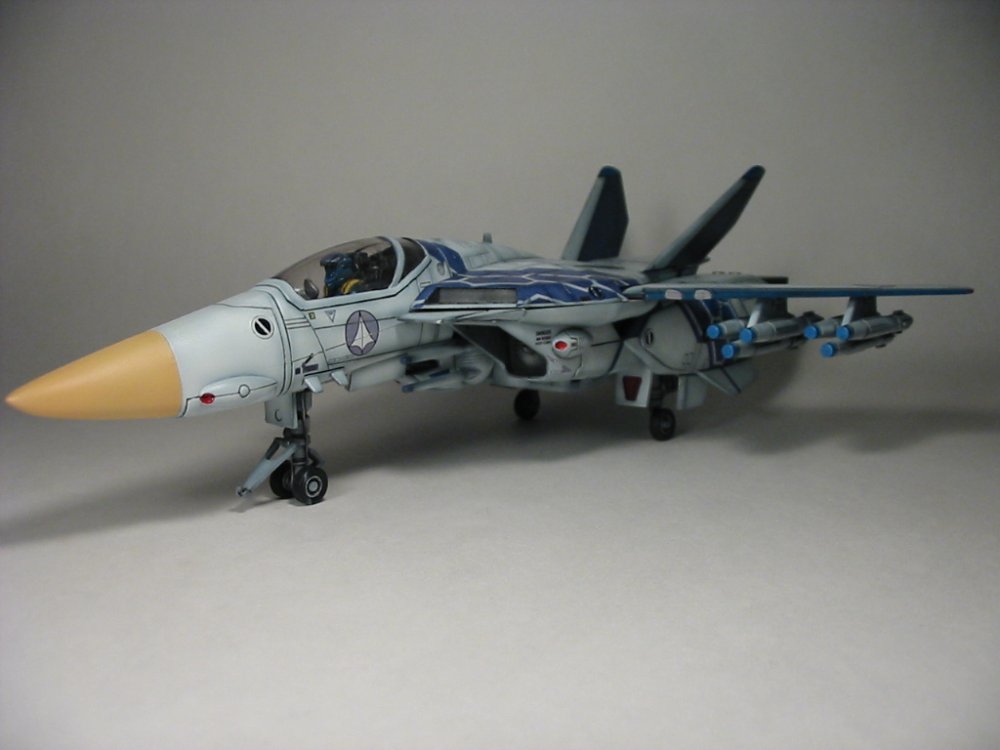
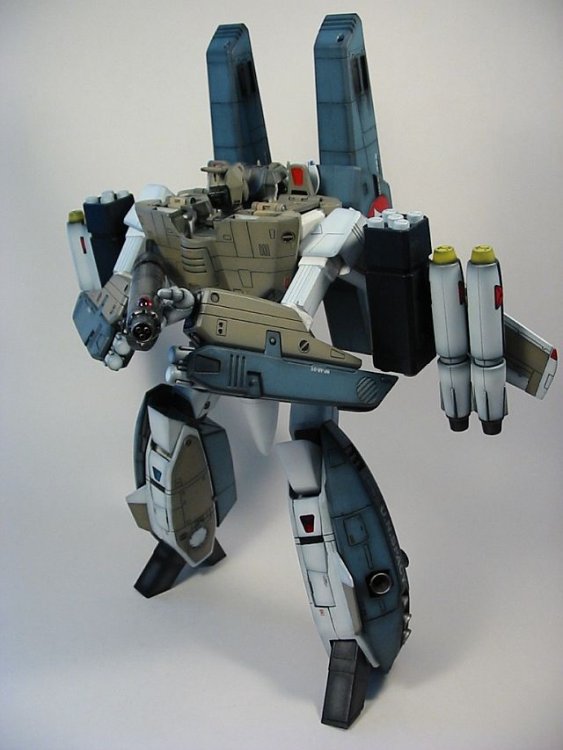
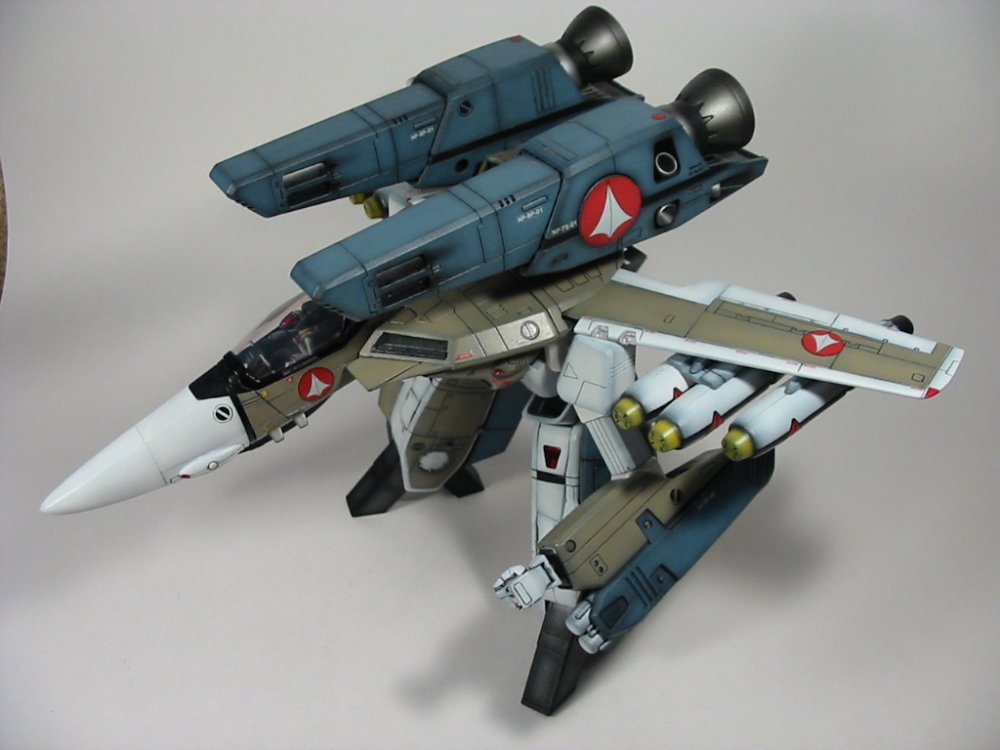
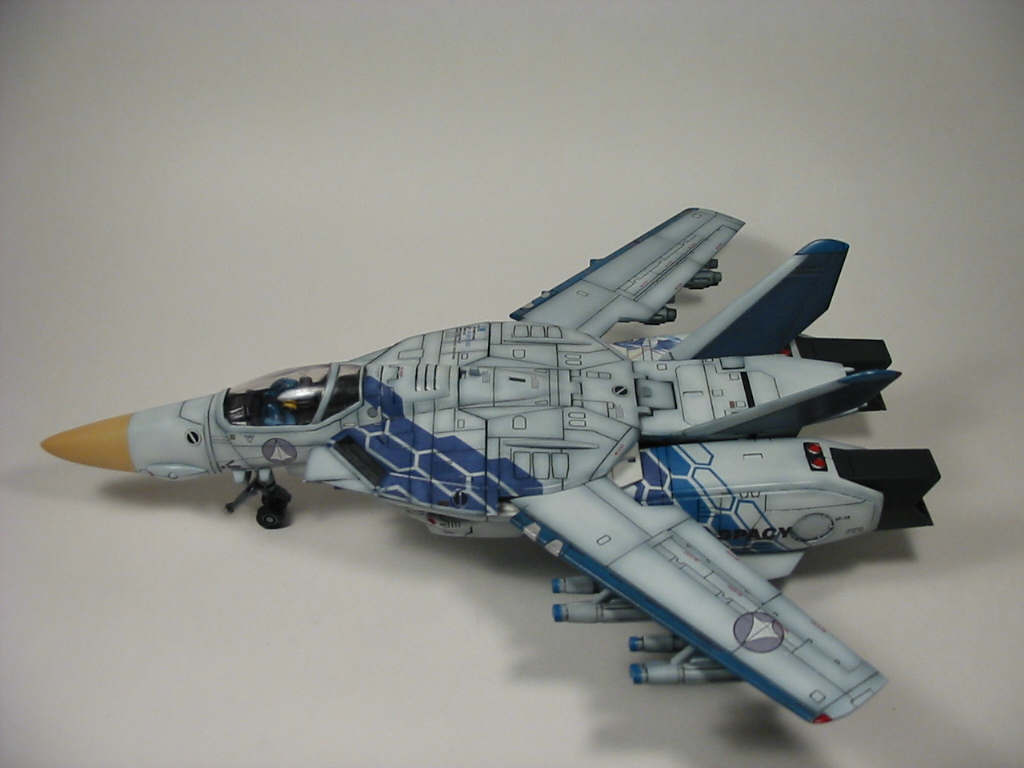
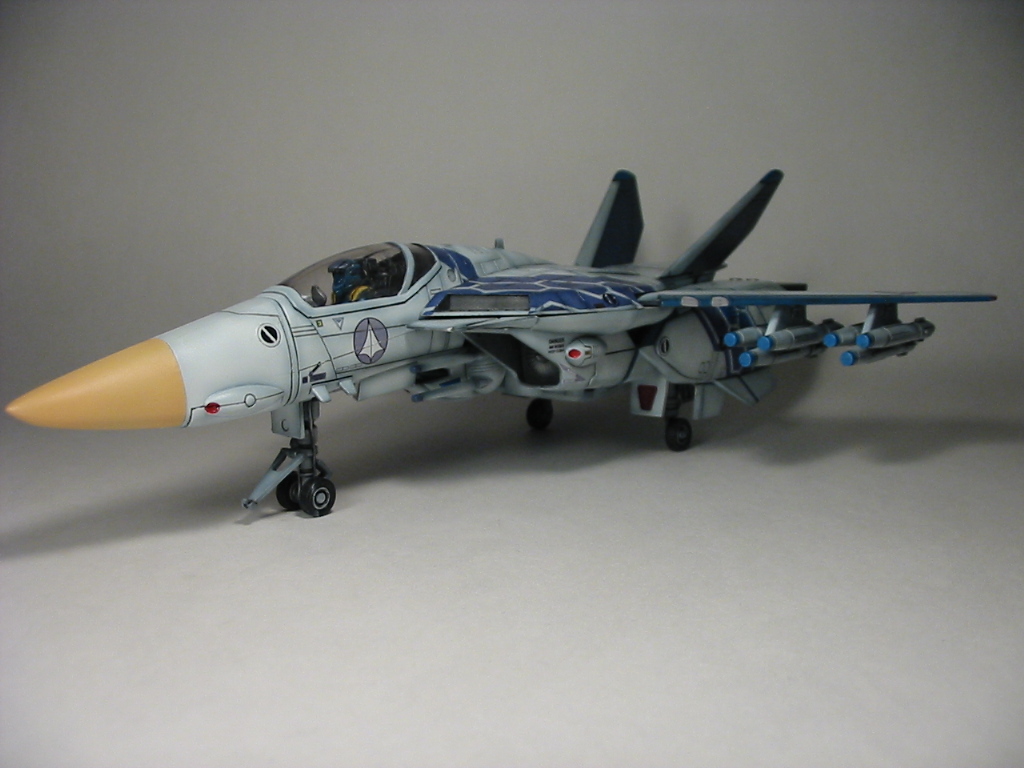
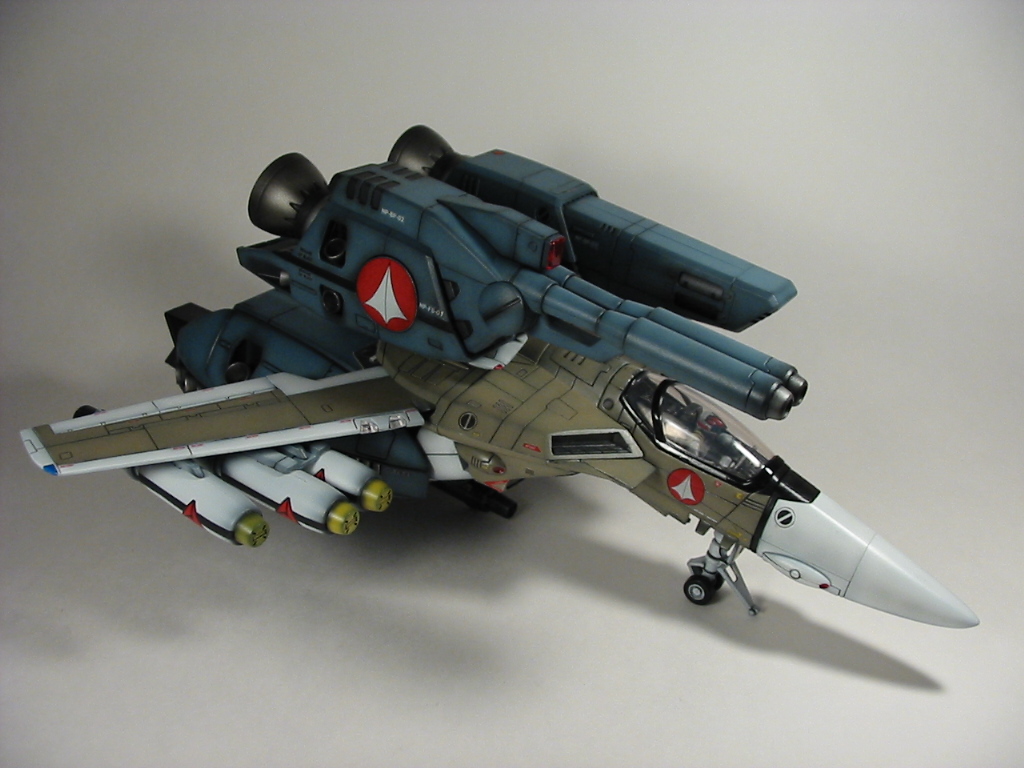
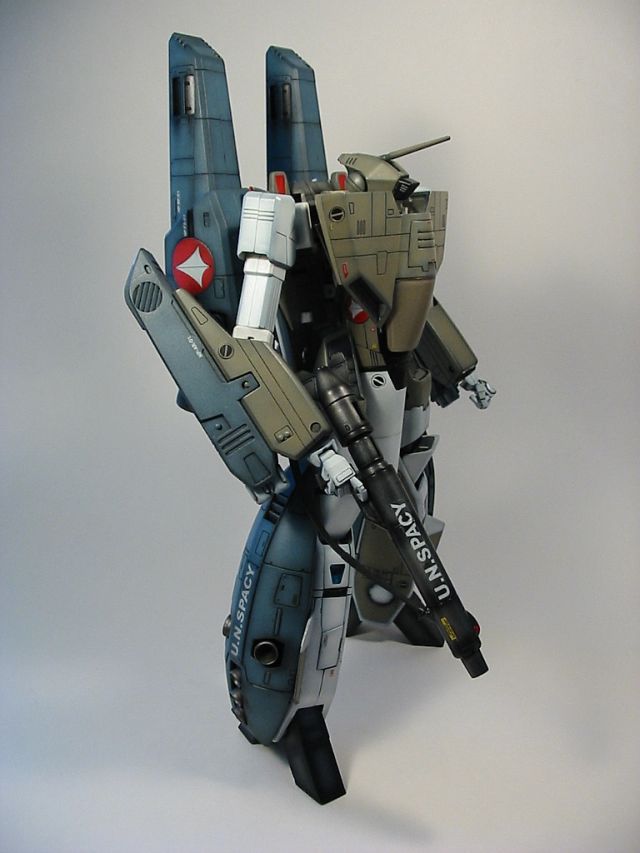
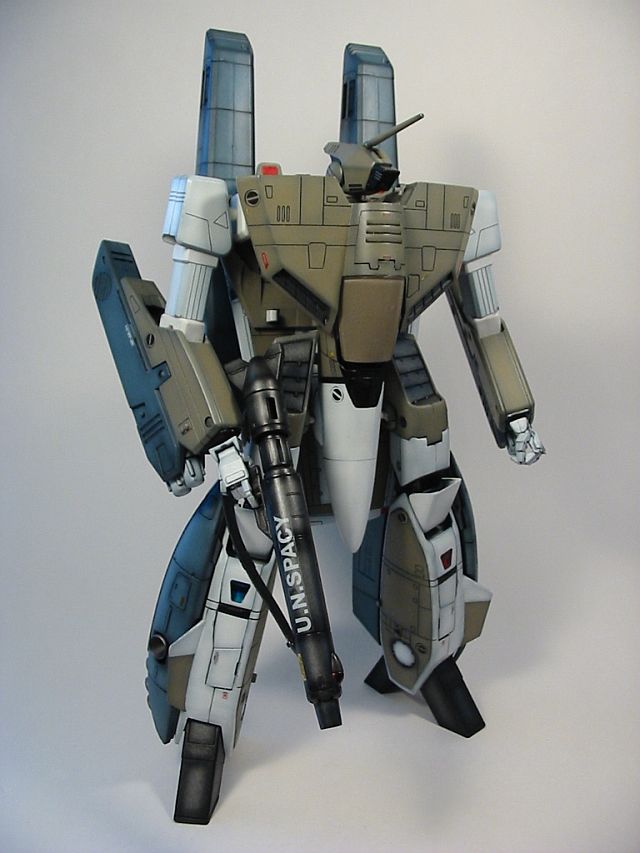
Here's my custom 1/48 Minmay Guard "Paris Act". Thanks to Devin for providing this great decal set!
Used a very dark grey basecoat this time, instead of the typical flat black, with flat white as the main colour. I decided to mask some areas (tail fins, blue trim on the wings, blue highlights on the leg, and the blue trim on the arms) rather than use the decals provided.
Decaling all those large decals took a lot time and patience. Probably went through half a bottle of decal softener capturing the details underneath.
I sealed the seams in the legs, arms, gunpod,head and nosecone. Damn nosecone seams splits though. It was either the force needed to remove the legs from battroid mode, or removeing the front landing gear....grrrrrrrrrrr.
 (sequence were battroid - gerwalk than fighter when I took the photos, you can see the sealed nosecone seams in the earlier modes)
Graham feel free to add these pics to the customs gallery.
This custom is already sold.
-
A less conventional method for clear paints is to add a bit to regular opague paints, this gives it a glowing effect. I know famous Japanese modeller Max Watanabe adds some clear blue to his flat white.
-
I use talcum powder
-
-"thinner" usually refers to paint thinner/varsol/turpentine, you're correct that this is strong stuff, and should be used minimally and carefully. First try rubbing alchohol or windex first to see if that removes the gundam marker. If you penned it recently the alchohol or windex should work.
-yep just unscrew it from the neck mount
-again avoid the "thinner", if you want an easy method that looks good, get yourself a bottle of acrylic paint (black, brown, grey etc..). Thin this to a ratio of around 1:1 wtih rubbing alchohol or windex. Brush this onto the panel lines or recesses, (works great inside the landing gear compartments). You don't need to be careful, you can "overpaint". Let this dry for (hour or overnight). Than use rags or q-tips soaked with some rubbing alchohol or windex and wipe. Wipe in the direction as if the plane were flying through the air.
-
looking incredible as usual, looking forward to the finished masterpiece!

-
I'll add to the list.
-Mini Files + steal brush - I use these a lot, great for sanding especially difficult to reach areas, use the steal brush to clean the files.
-Future floor polish(acrylic) - great/cheap gloss clear coat. Spray this through your air brush unthinned, glossy clear coat before applying decals. Dip your canopy, or other clear parts, to make it super clear. I've also added food colouring for painting clear parts (ex. visors, lights etc.). Add tamiya acrylic flat base (9:1, Future: flat base) for a semi-gloss finish.
-Decal setting and solvent/softing solution - used for waterslide decals, setting solution helps adhesion. The solvent/softing solution will soft the decals, this allows it to capture conform to the shape of curves and details (ex. panel lines) underneath. If you're planning on the MG custom, you definitely need to use some softening solution. I'm using testors brand (only brand available at my local hobby shop), but I hear Microset and Microsol are best.
-liquid mask - makes life easier to mask curves but you can live without it.
-
beautiful customs, I love your photos!
-
That looks great! You blended the MG decals onto the fast packs very nicely

-
Awesome! the white showing on the folded edges looks like drybrushing
-
I own a dremel, and I've only used the 1 and 2 speed setting, mainly just the 1. THe higher speeds (up to 5) are too scary for me
 It saves some time with rough work (cutting, drilling, rough sanding etc..) but impossible to use for any fine, detail work. So IMO if you're gonna use it mainly for model work, than rpms and torque isn't really important. If there's a big price difference I would go with the cheaper one, otherwise I would get the dremel cuz of their reputation.
 -
actually, I facing a great problem....
is the clear part of the cockit cover
when I decompose the parts, I broke it carelessly,
then use "AA" to repair it, but I so dirty to put some AA on the inside
so... it become foggy

can someone teach me how to polish clear part
make it clear again?
OR just simply go to "HOW TO" asking for ?
what is "AA"? super glue? If it's fogging caused by superglue, I've read ppl wipeing it off using ammonia. Windex should work aswell since it's ammonia based. You can also just dip it in Future which will clear the fogging and make it really clear. This all assuming "AA" is superglue

-
Excellent job on your tv max 1a!
Your canopy seems quite foggy though, are you familiar with Future floor polish , or whatever it's called in Asia, Singapore members should be able to tell you. Dip your canopy in the Future and it'll clear right up -
1024x768
-
My Next projects are Minmay guard Paris act and the 2 blue roses camo schemes.
For those interested in commissioning me, please pm me. thanks
-
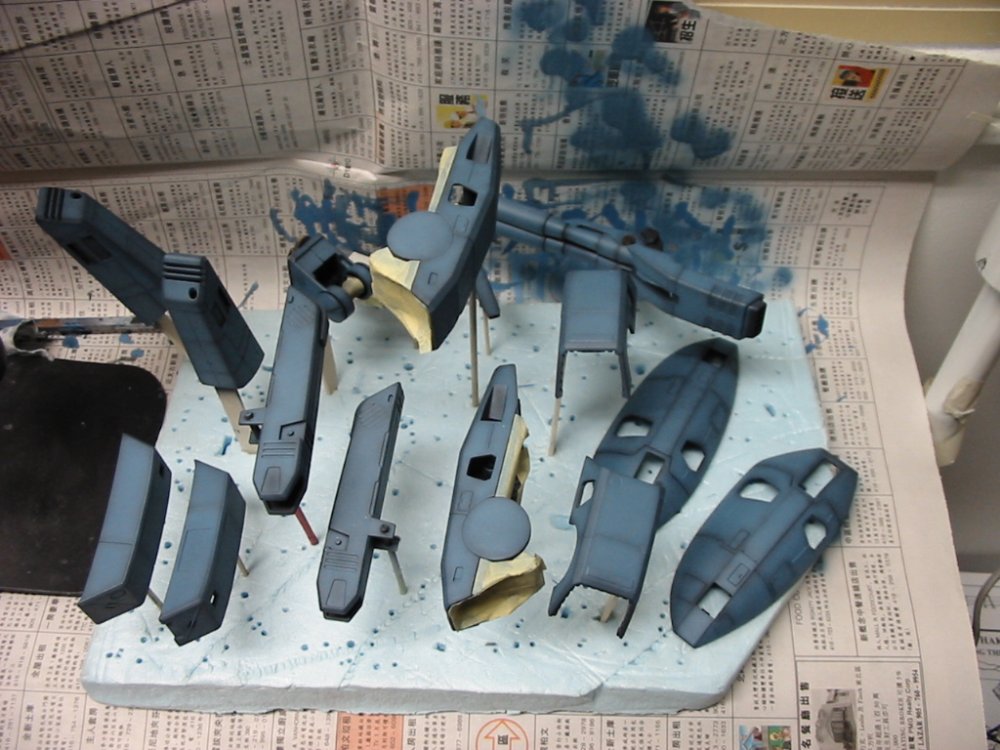
To get the shaded look (around panel lines and edges), I paint the whole pieces flat black. Let that dry, than for the blue (navy blue + dark/med grey), carefully spray leaving the areas around the panels/edges darker. Not the greatest pic, but you can see it on the leg armour pieces.
Just currious, you used Acrylics for the primary painting?
The main colours are enamels. Enamels are tougher and can handle the handling during transformation.
Here's the list of paints for the armour:
Hardware store spraypaints sprayed into paint bottles for the airbrush:
1) Main Blue is Navy Blue mixed with Medium/Dark(?) grey. Can't give you the ratio, just kept adding till I got the desired shade.
2)Flat Black and white
3)Chrome
Testors enamels(those small $1 bottles)
1)Fire Red for the booster lights(?)
Tamiya Acrylics:
1)Copper for the engine highlights
2)gunmetal for the dark areas of the strike canon and the "missile doors" of the booster fronts.
Future is used for the clear coating, and for the final Semi Gloss coat I mixed a 9:1 ratio of FUTURE to Tamiya acrylic flat base.
-
If you guys want a more realistic look, right after each panel line penned, use a q-tip or paper towel saoked with a bit of rubbing alchohol or windex and wipe till you get the fading you like. This gets rid of that "penned" look with solid lines.
-
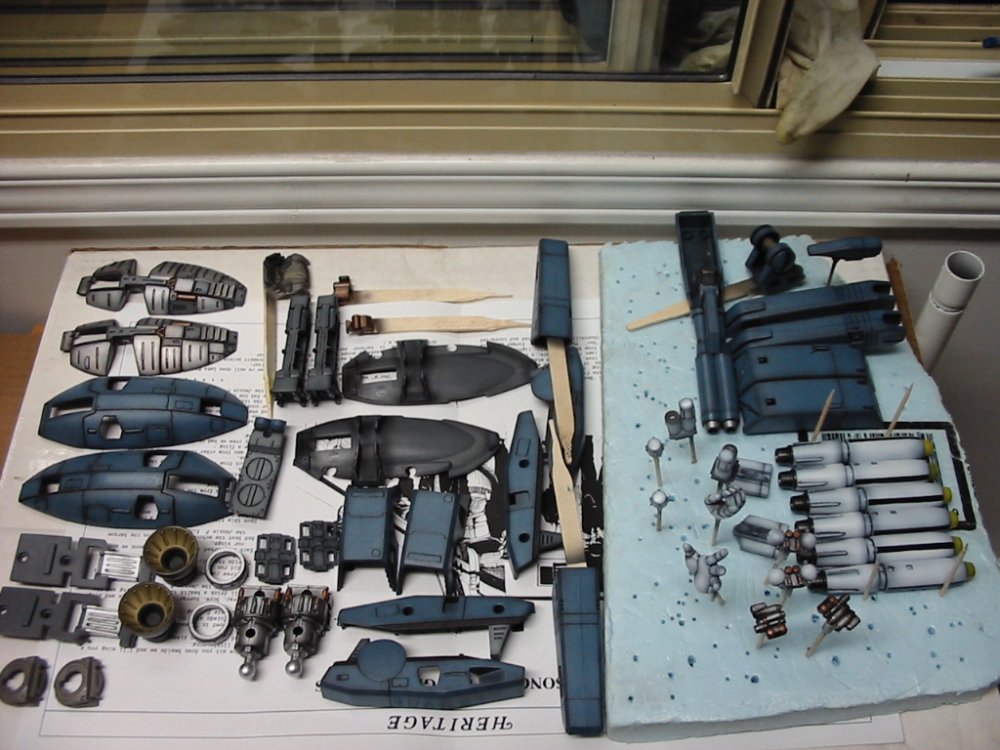
Sorry not gonna get too much into panel lines, it's covered so often in the modeling section that I'll just be repeating. I use enamels, dillute it using low odor varsol (around 70-30 thinner-paint). After paneling leave it overnight to dry. Than using a q-tip or towel soaked with a bit of the varsol, whipe off the excess. Here's a pic, before letting the panels dry overnight. This is all the pieces that comprise the FP set..
-
To get the shaded look (around panel lines and edges), I paint the whole pieces flat black. Let that dry, than for the blue (navy blue + dark/med grey), carefully spray leaving the areas around the panels/edges darker. Not the greatest pic, but you can see it on the leg armour pieces.
-
last one. Warmaker gets his strike!

-
asdfd
-
sdfsd

-
battroid

-
asdf


custom 1/48 MG "Paris Act"
in Toys
Posted
asdf