Rockhound
-
Posts
103 -
Joined
-
Last visited
Content Type
Profiles
Forums
Events
Gallery
Everything posted by Rockhound
-
New updates (again)... After seeing the blue in better light, I was pleased with the outcome. So once I was able to see it better, I hit all the painted parts with an ultra-gloss coat and waited 7 or so hours for it to dry. Then I started masking off the areas I needed to paint white on the wings, canards, and stabs. The thing with masking tape is, it might be too sticky. So I stuck it to my shirt a few times to get rid of most of that stickyness, but leaving just enough to adhere to a glossy surface. This prevents accidently pulling up some of the painted and coated surfaces. The pieces that need to be masked for blue paint, namely the legs and head, were done with a combination of masking sol and masking tape. This was done to the legs due to the uneven lines across the length of it. yes, I could of simply cut the masking tape into wavy sections, but what fun would that be? I'll hit the dark blue surfaces with a fine mist of white primer to lighten up the color. This keeps you from doing coat after coat of light gray and gets you a much more true color that's the same shade as the rest of the bottom surfaces.

-
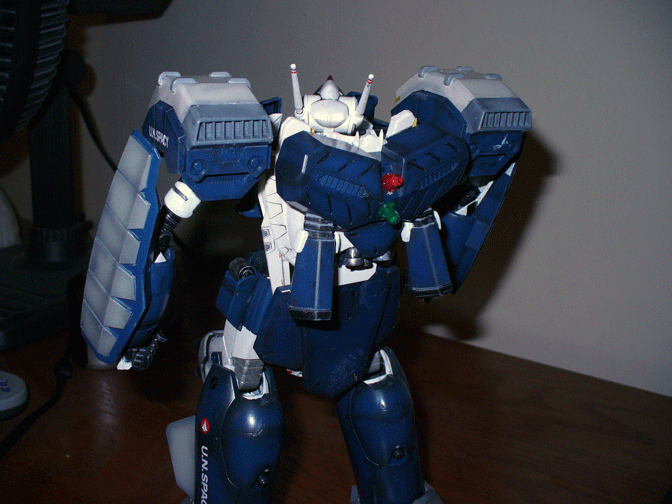
You're right HWR, it really does need an extra coat. Here's an updated picture with the new coat of blue and the light gray added to the white parts. I'm very happy with the light gray, but looks like I need yet ANOTHER coat of blue. ugh... maybe it's the camera. It looks extremely subtle in person, but once I take the photo the shading is glaring. Could be the lighting also. sigh Guess I'll throw some more blue on it. Good thing the panel lines are still deep. If it's not good after this last coat, oh well. I've already done like 7 passes on it. I think my problem was using enamel paints on the shading, then acrylic on the coats. It wasn't an issue when I did the gray/white paint. So, Rockhound's important tip of the day: WATCH WHEN USING ENAMELS FOR SHADING AND ACRYLICS FOR MAIN PAINTING! ...... I wanna start decalling already.
-
Oh yeah, forgot about the bottom side of the wings. Still gotta do them, and mask off the flaps for the white. Damn masking kills me everytime. Keeps me from doing my favorite part of a model... not the panel lining (I ALWAYS screw that up), but the decals. It's all about the decals baby!
-
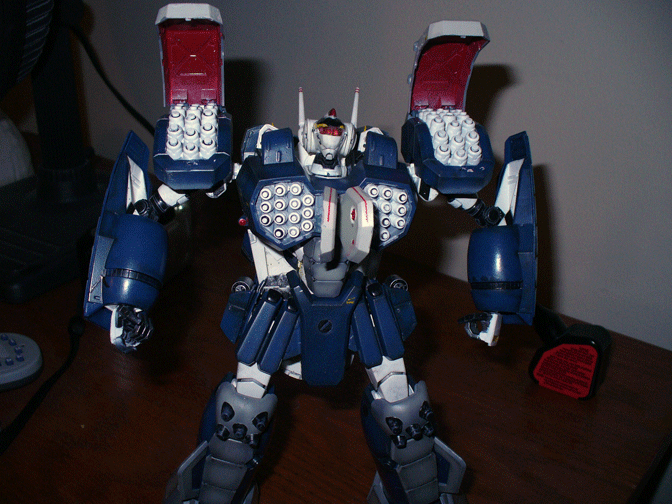
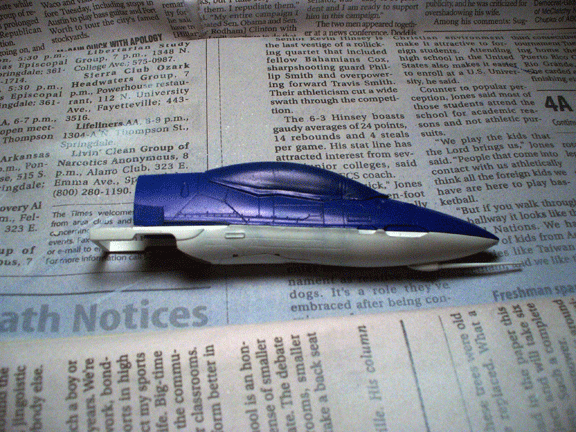
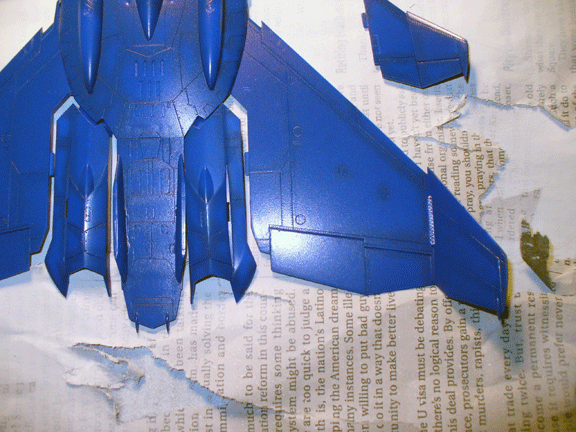
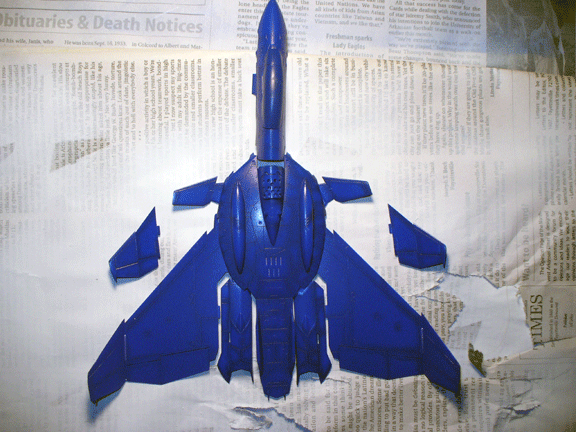
Update: Main color added! Here are some pictures with the blue and white main colors applied. When I was looking at them, they looked perfect. The pre-shading was subtle and the blue a a dark yet vibrant color. I wasn't too happy with the white, as it clashed way too much with the dark blue, so I plan to tone it down with some light gray like I said in a previous post. But the blue was perfect... Until I saw the photos. The pre-shading is still sticking out, even after four passes of acrylic paint! Must of used too much water. Guess I'll hit it with another coat. I also included a shot that had the bottom and top halves together to see the contrast of colors. Well, here ya go! To do next, add one more coat of blue, add a quick coat of light gray, apply gloss coat, start the metals paints for the feet, mozzles, gun, etc.

-
I love those dioramas! The hangar is pretty sweet, and the cityscape is awesome also. I love all the little details that were put into these, like the decals and the used shells at Max's feet. Shows just how much love is put into this subject. Edit, spelling
-
That's what I said.... hehehe
-
That Testor's bottle says Decal Set. That pretty much just softens up the decal, letting it settle into panels lines and such. As for sealing it, some people use Future Floor wax as it dries clear and thick, others use a semi-gloss coat spray. The main function of this, besides protecting the decal from wear and tear, is to get rid of the clear border that surrounds the color of the decal by creating a clear layer up to the height of the decal. At least, that sounds good to me...hehe.
-
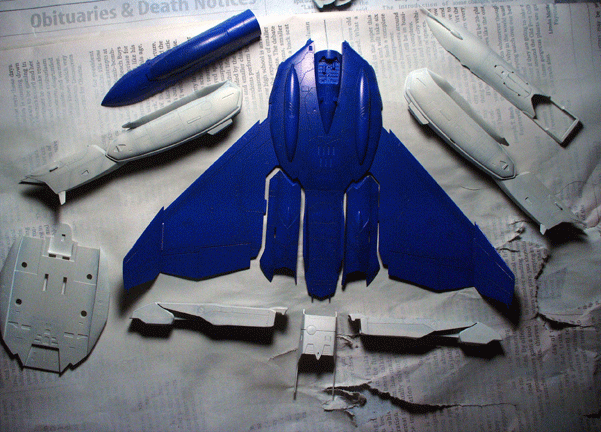
Yeah, I wasn't too happy about that baby blue they used, so I mixed some dark blue with some True Pearl Blue and got an awesome color out of that. When sprayed over the darken pre-shading, it came out perfect- the exact blue I wanted. And it contrasts the flat white bottom paint scheme nicely. I was going to use a light grayish-white, but the pure color of it just sold me. I might still try a gray/white since it's still a pretty light coat, but I'll try it on paper before I spray the model. Pics coming after I get back from classes tonight. Edit: Spelling
-
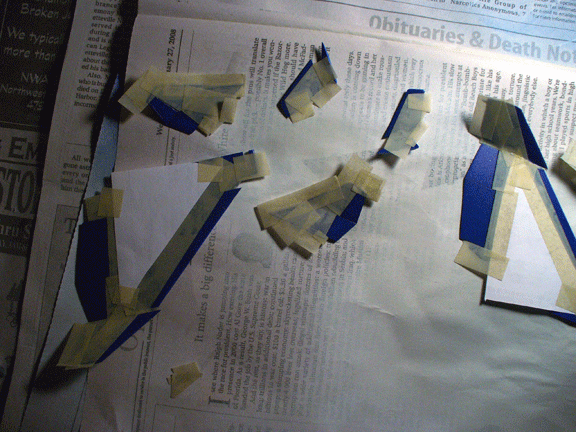
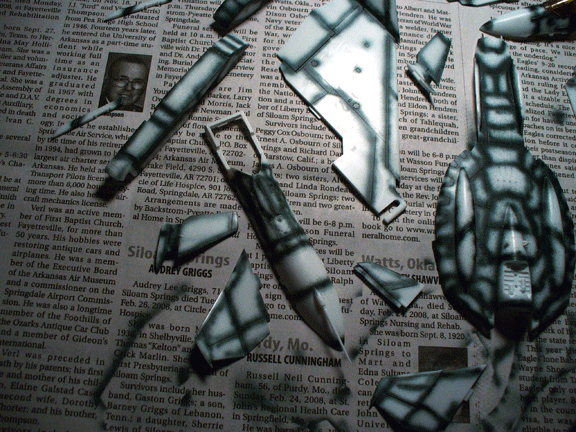
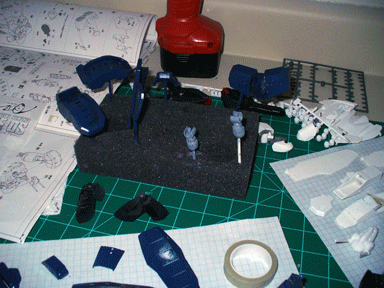
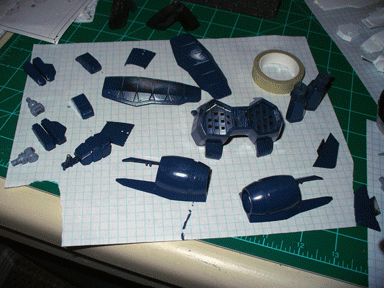
New update: Pre-shade paint applied! I mixed some black and dark gull gray to get a very, very, dark gray. This color is my primary pre-shade color to help accentuate the major panel lines and folding points. I kept my airbrush as close as I could to the part and pressed back gently on the trigger to let out a fine line. Every so often my finger would spasm and a big blot would come out, no biggy. Also, I had some extra splatter due to me not cleaning my airbrush well enough, but nothing serious. If anything it helps with a gradient effect when I start applying the main colors. I did all this WITHOUT using a primer first. To me, primers leave a dusty surface and will clog panel lines. With the pre-shade, you get straight to surface without having to deal with an extra paint layer, leaving your panel lines deeper. And since it's an already white mold, there's really no loss of sense of color (if that means anything.) Plus the extra splatter helps to act as a contact surface for the primary colors. And yes, I said all that to justify me forgetting to use primer... Here's some update pics. Now to let this dry overnight. Since not alot of paint was used, it's actually somewhat dry now. However, since I need to apply masking tape or masking sol to the legs I need to let it dry a little longer. But this leaves me with one question: Is it safe to apply the primary white coat, THEN use a gloss coat, THEN mask off the area to apply the primary blue coat, or will that kill the panel-lining step later (as well as paint contact on a glossy surface)? Thanks!


-
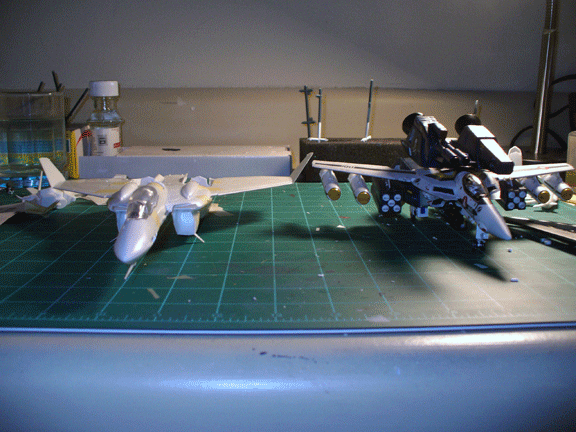
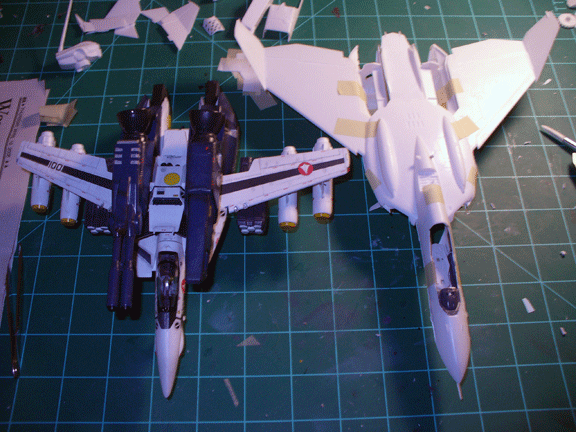
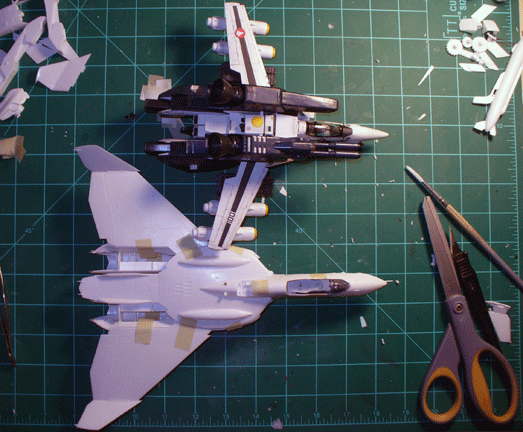
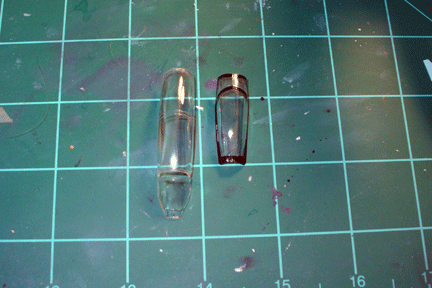
Thanks for the encouraging words! My VF-1S Strike was a fun build, haven't built one in, oh, 4 years or so. I needed the classic to restart my modeling. I made alot of mistakes on it, like leaving an black oil print on the nose and not seeing till after the semi-gloss coat. Plus, my verniers just came in tonight, and I ordered the wrong ones! Sigh. Anyways, I forgot to get some size comparison shots last night, so here they are! In this shot, we get an overall look at the difference. This overhead shot gives you a sense of length. This one gives you a sense of wingspan and height. The VF-0D obviously would be taller with deployed landing gear, but I don't think it would make up the difference with those fast packs on the VF-1S. And here is a shot of the canopies. Since the VF-0D is a two-seater, it's just naturally bigger. Plus, the future coat is applied. Enjoy!

-
True, so so true.
-
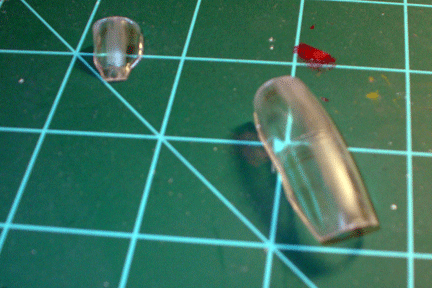
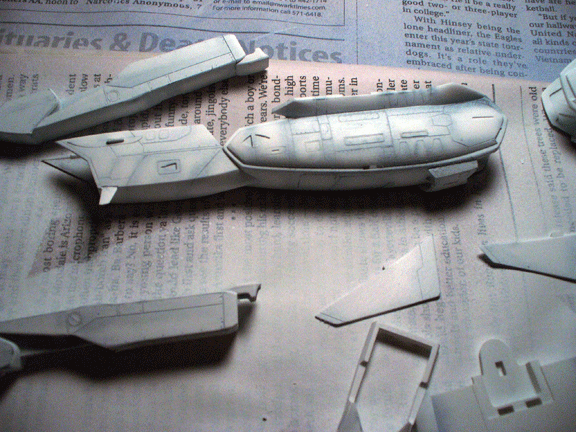
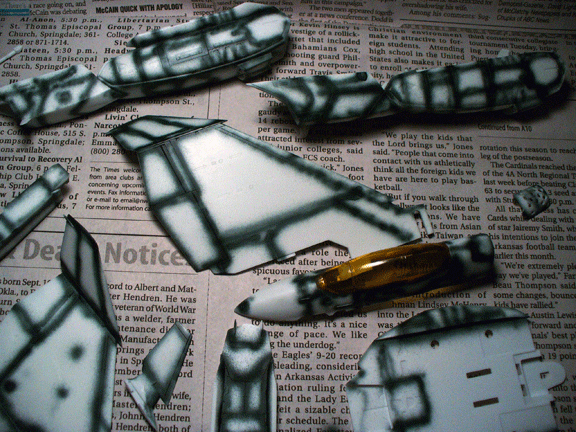
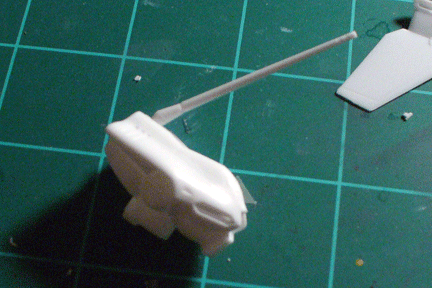
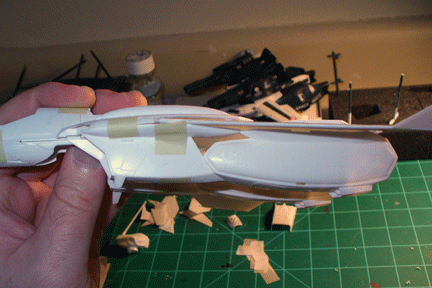
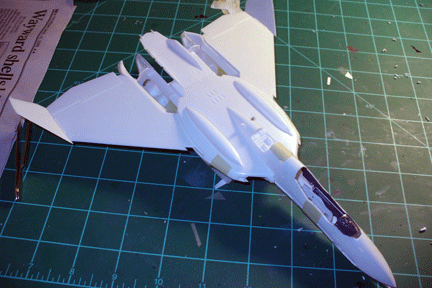
Today's updates: I finished the inside cockpit details. LESSON LEARNED: Do NOT use alot of MicroSol on the intrument decals and accidently leave them under a lamp. Your decals will curl up and become unsaveable. I heard this from someone who did that on accident. "He" wound up just painting a bright chrome silver over the panels and gently painted the raised surfaces black and used clear colors for the panel screens and little colored dots for buttons. After the aforementioned person "told" me that, I went on figure out how to best get the kit into sections for prime painting. Since the paint job is a matter of over/under and the manner of which the kit is built- primarily over/under instead of the VF-1s side/side construction, I decided to leave the nose section and the 2 pieces for the main body seperate. This prevents unnecessary masking, accidental overspray leaking underneath the mask, and provides for a much cleaner line. You can see the perfect seam down the center of the nose here. Here are the sections that will receive a metal-type paint such as that gunze chrome color stuff. Speaking of, where can I find that stuff in the U.S.? I have no idea where to get it. All my searches don't do much good. (Could have something to do with my lackluster search style.) Here is a dry-fit of the major pieces to get a sense of size and how the overall paint scheme will go. The top will be blue. The bottom will be white. The parts that need masking, legs, wings, stabs, head. The wings should be pretty easy, just do an over all white, then mask off the flaps to isolate the blue center. Or do the opposite, overall blue and mask off the inside to isolate the flaps. Since I have a tendency to accidently pull up whatever was masked due to tape, I might just cover the flaps and paint blue last. The painful masking will be the sides of the legs and the head. The legs do not mask in a straight line and do that whole "wavy" thing. The head is a pain just do to the shape. Also, I think the head looks a little the alien heads from Last Starfighter, albeit no buggly eyes. I did the sandpapered canopy thing. Since the VF-0D has a much larger canopy, the center seam just stares at you. So I GENTLY scraped the seam with the edge of an x-acto knife, then used a fine grit sandpaper with water to smooth it down, them and really, really fine sandpaper with water to further smooth it. You get that cloudy look when you're done, but once you just place the top of it in water it disappears. This means that once you apply the Future Floor Wax coat it too will make it disappear, forever. Honestly, who came up with the Future Floor Wax method anyways? An awesome idea, but how does one come to the conclusion to decide to use floor wax on a model canopy? This picture is PRE-FUTURE (possibly present? hahaha, sigh, bad joke.) And finally the airbrake. Using WM Cheng's VF-0S build-up, I too decided to drill the holes from the airbrake. My pin-vise didn't have drill bits big enough, so I broke out the powerdrill and found the smallest drill bit I could, roughly 0.15mm bigger than I wanted. But honestly, it came out better than I hoped. Just drill very, VERY slowly with very little pressure. The larger holes allow you to make out the internal paints and add some depth to an otherwise flat surface. Well, that's all for today. Tomorrow I'll be trying a new pre-shading technique I read about. Just sparying dark black lines across the panel seperations and then doing light overcoats of white and blue to make them more subtle. From what I've seen, it looks phenominal, and easier from what I was doing. Till then!


-
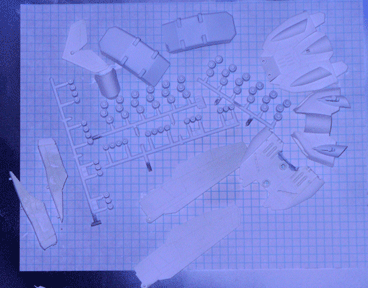
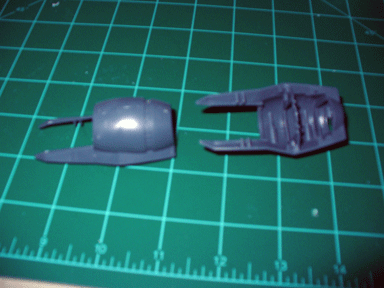
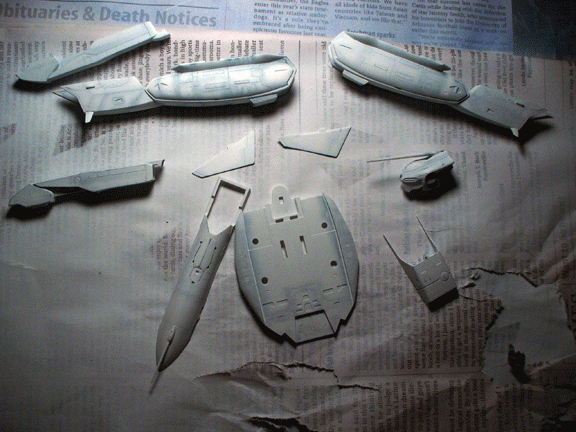
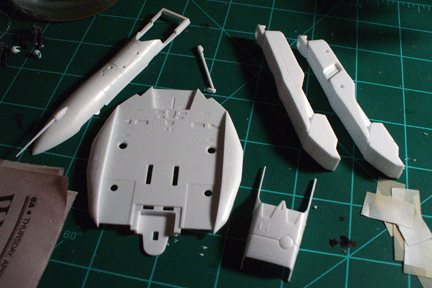
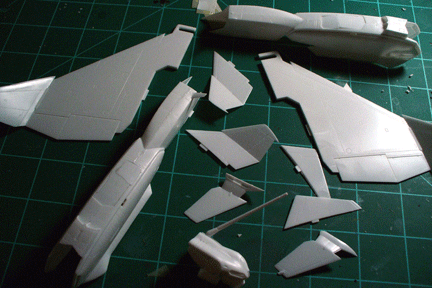
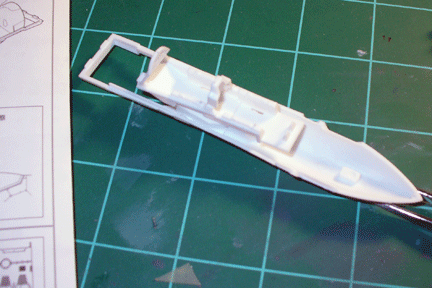
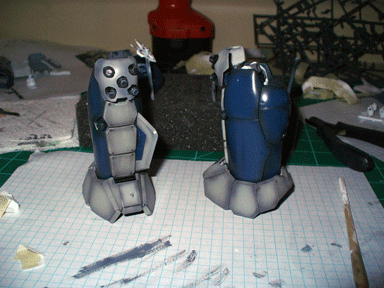
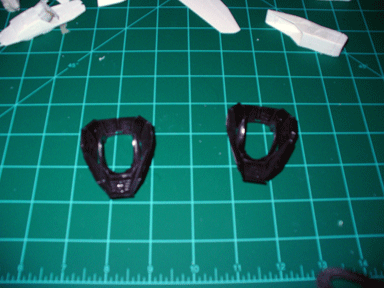
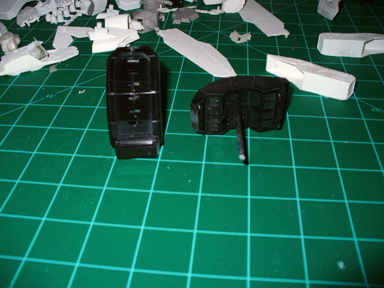
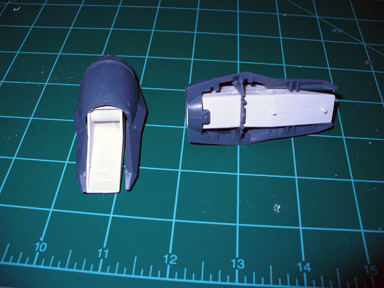
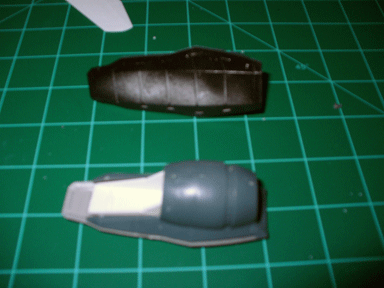
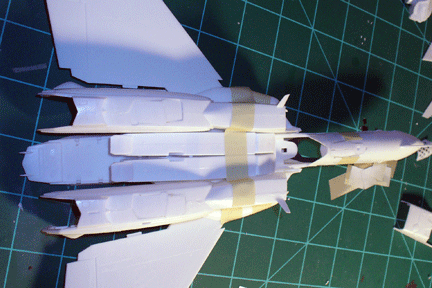
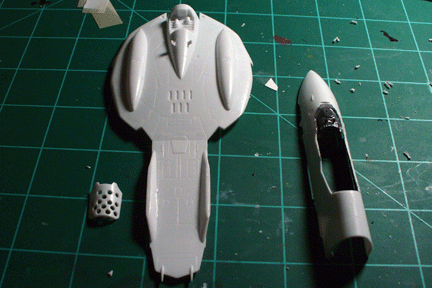
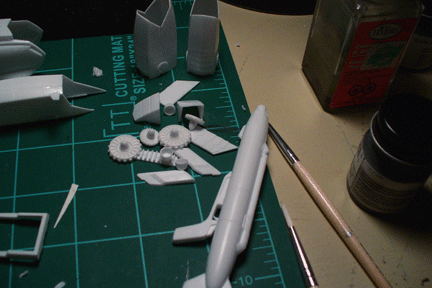
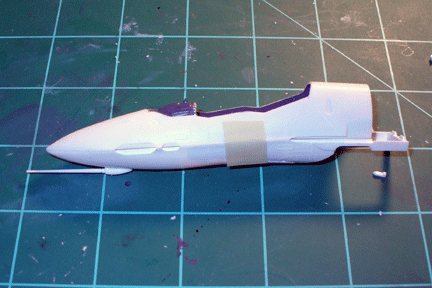
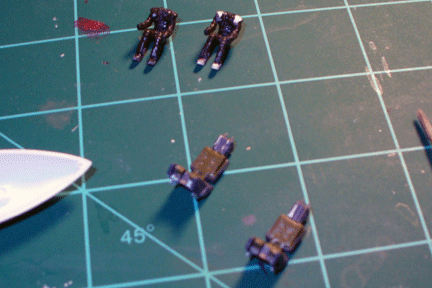
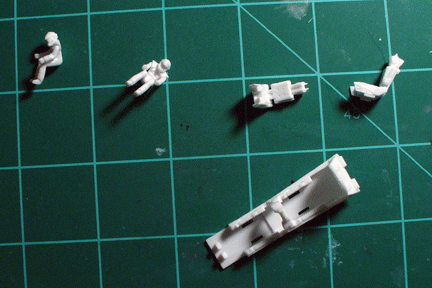
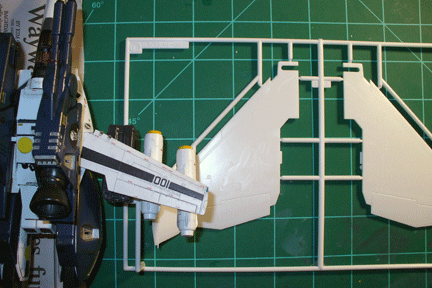
Evening modellers! Here's another exciting installment of "Rockhound's WIP thread: What to expect with minimal skill." This episode- The VF-0D. I've seen some completed pictures and they all look nice, but no building threads (Again, I could of missed one.) The kit breakdown. This kit is big, a tiny, little bigger than the VF-0S due to its wings and extended nose/cockpit area. Here's a shot of the wings compared to the VF-1S Strike I just finished. Here's the nose area. The VF-0D comes with a piece that allows you to keep the cockpit windshield-thing open, put since I used that for the cockpit on my VF-1S (didn't have any spare parts to manufacture one) I decided to keep the cockpit closed and in-flight. But not using this piece leaves a space in the back. You can see it in this picture. Here are the pilots and seats, unpainted. I decided to rip the heads off after looking at WM Cheng's VF-0S build-up to make it easier for a clean paint job. Here is the cockpit, unpainted, to test fit the seats/instrument panels/back section. You can see a better test fit in the previous picture. Here are the pilots and seats mostly painted. I didn't have any olive drab of brown to paint them, so I wound up mixing red, green, very light gray, blue, and yellow. It still came out a little dark in the picture, but it looks better in person. Maybe it will come out better tomorrow after it dries. Here is the nose section, with painted interior- dark gray. I painted the forward instruments, interior for the top section. And the interior and bulk of the bottom section. Anyways, that's what I did today. I'll do a few more things tomorrow then start studying all this week for finals. Till next time, Rockhound


-
Moscato Atmospheric Booster + Hasegawa Valkyrie 1:72
Rockhound replied to PetarB's topic in Model kits
That model is seven shades of awesome! Nice job! -
That's going to be one awesome looking jet when you're done with it. Even if the panel shading doesn't show through as intensely as in person, they are still visible. My battroid has wide areas to panel line so I was not able to get in-depth like you have. How are you able to panel shade so tightly without suffering from paint build-up??
-
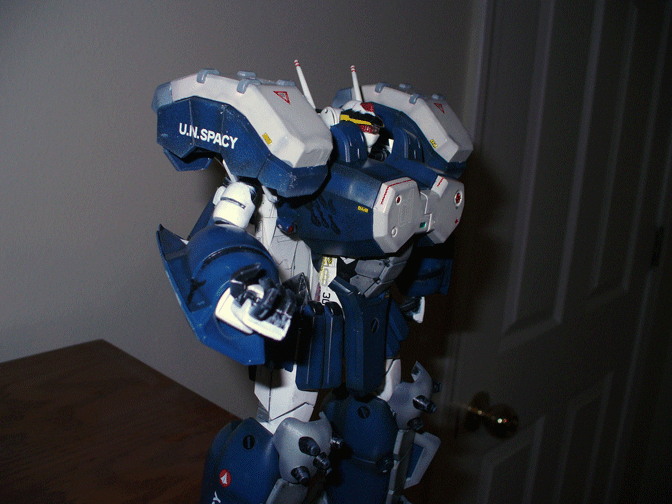
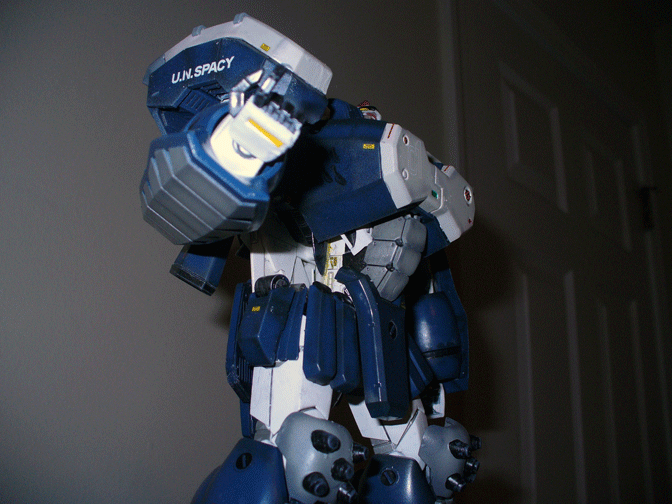
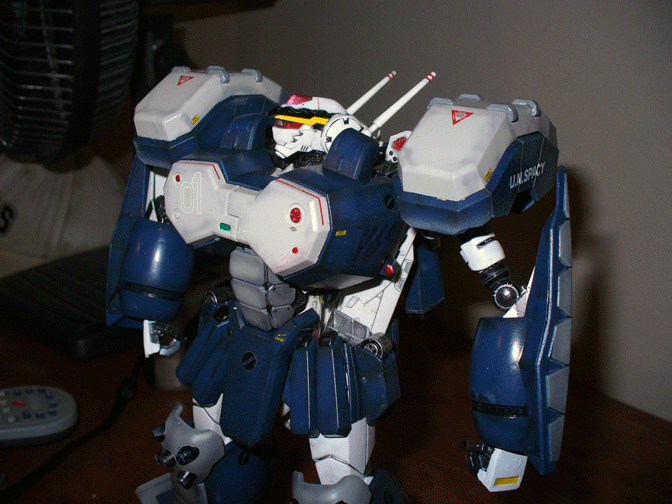
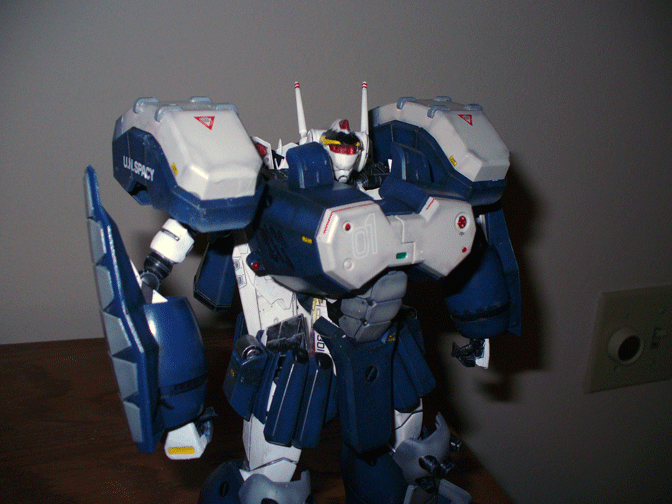
Hurray! Finished product. Thanks for following along. I hope maybe you learned something (much like what not to do, hehe.) Don't let this model intimidate you. It's just as fun to build as it is to look at. I learned a few things from this build myself and will take those lessons onto the next model, which I still need to decide on. I have the VF-1 super/strike, a VF-0S battloid (I hated how I had to hide the details with the armor), the VF-0S with Ghost/booster, VF-0D, or the YF-19. Prolly the VF-0D since I haven't found a build-up of that kit yet. Anyways, here are the photos! Hope you enjoy them! I need to get a better camera, ugh. Rockhound


-
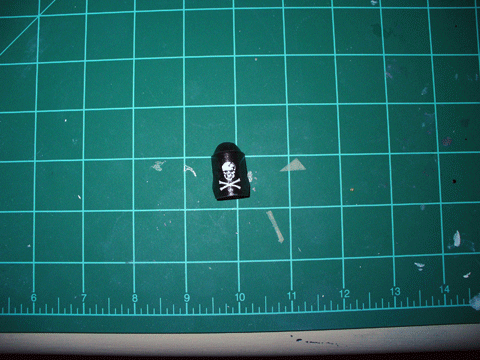
Update, again... This was done in the last 3 hours or so. Closeup of the wings. Nothng like seeing one of your little no step decals glide at an angle and not noticing it till AFTER you coat it... And I was too impatient and had to see what the arms looked like. I also applied the intake decals to the upper leg/intake area. And just for giggles, the cockpit skull that will be covered with armor. (I had to do it!)


-
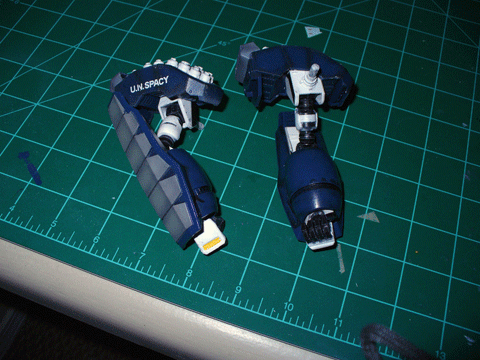
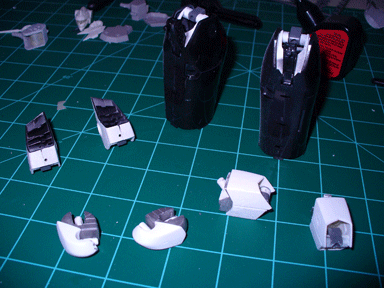
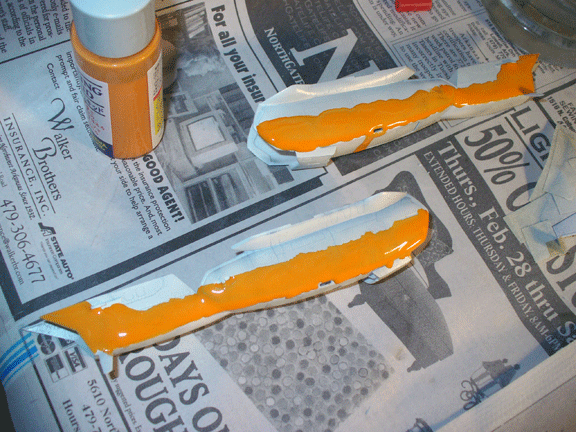
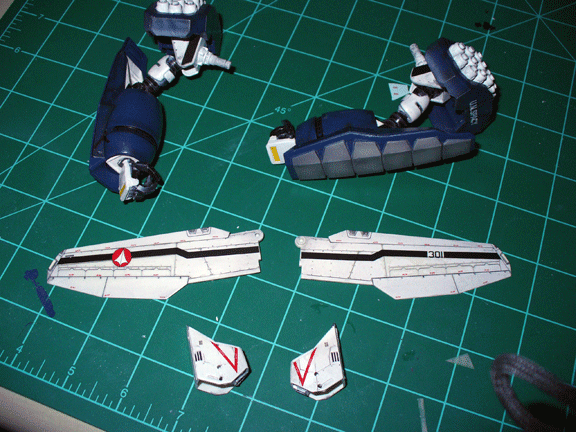
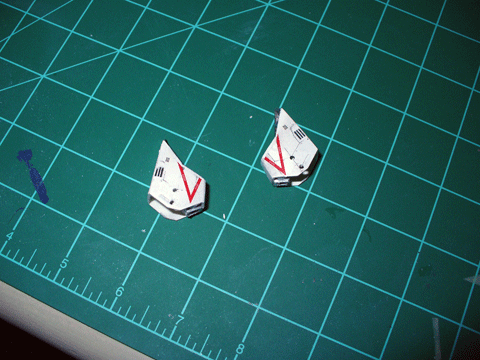
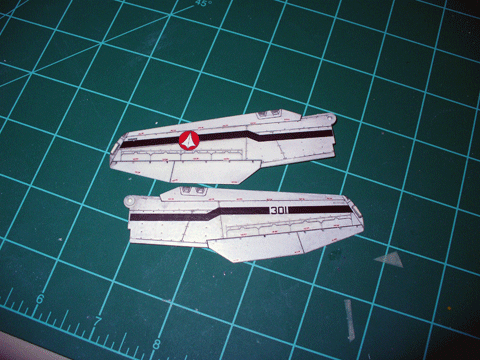
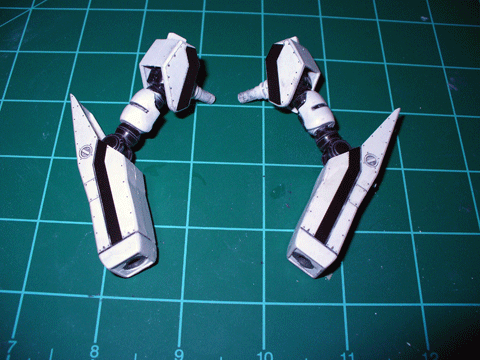
I decided to do some decalling tonight and finish off those pieces with one final semi-gloss coat. You can see the intricate detail of the arms in the last shot. I decided against using the socket decals on the forearms as the scribed socket was done well enough already and I didn't want to lose that detail. Here are some pieces still awating one final pass of paint, namely the black for the rear stabs and some chrome silver and a black metallizer pass for the rear engines and feet, and the red paint on the inside of the missile bays. Enjoy!


-
Macross Storm Attacker -Construction 1/8000 ~ 08021
Rockhound replied to LinusPoon's topic in The Workshop!
I love the SDF models. Always have. You did an awesome job with that piece. The way it floats above the base like that is impressive. Tip o' the Hat! -
Panel Lining time!!!!!!! I applied the glosscote and let it dry for the night. I was just going to smear the oil paint across everything then towel it off, but nothing was sticking inside the lines and rivets. So I did the old fashioned way: oil and thinner.The gloss lets the panel lining flow smoothly. I took some black oil paint and crushed it down in a mixing plate so I made a very thin cake layer of sorts. Then I added some low-odor thinner and mixed it really well so I got a good and black consistency. Then I took a decently pointed paint brush (clean!) and gently pressed it against the lines letting the thinner carry the paint throughout the lines. The rivets, oh man SOOOOOOOOOOO many rivets, were just a simple paint over with the brush. I'm normally a paitent man, but when it came to dotting every single rivet I started to go mad. Then I waited for roughly 10 to 15 minutes then got a cotton swab/Q-Tip and dipped it into the thiner. Then I brushed the q-tip across the piece removing the excess paint from the top. You'll get little black dots from where you used the brush to panel line, but these are easily removed with the q-tip. Now, if you're a messy person (much like myself), you might have loaded too much oil and have heavy black dots here and there. When you use the q-tip, it looks like you smear the black across the whole piece. DON'T PANIC! Use a paper towel and just rub off whatever the q-tip left behind. When you're done, you'll have smooth panel lines, good rivets, and maybe (just maybe unless you're me) you might have a heavily oiled wing. Just convince yourself that it's a very, very used plane/robot/tank/etc. When you're done with the lining/wiping/convincing, make sure you coat your pieces again. This time around I used a semi-gloss (mainly because I ran out of gloss, convinced it's what I wanted.) All I have left to do is a little detail work with the feet/engines and back boosters, missile bay covers, the missiles themselves, the clear pieces, decals, and one final semigloss coat after the decals. I decided to put the bottom part of the legs together as not much else needed to be done with them besides decals and one last coat. Here ya go! Now to wait, again. I hate waiting for things to dry.


-
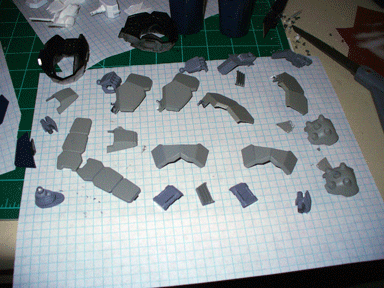
Panel shading applied to the gray armor pieces. Also applied a glosscote to help with the panel lining later. The blue will be done tomorrow.

-
Hola! Here's a new update. The major colors have been applied. Since I don't have access to the Tamiya and Alcad (sp?) paints, I had to resort to ModelMasters and Testor's Enamels. I found that Blue Angel's Blue was a pretty close match to the blue used in the kit instructions, as well as Light Sea Gray for the gray pieces. Now that the major colors are on, I'll do a bit of panel shading, then lock the layer in with some gloss or semi-gloss protectant. After that, I'll start applying the panel lines. Now, the usual way to do this is with oil paints and low-odor thinner. However, when I was bouilding my old valks, I simply smeared the oil paint onto the pieces, then quickly paper-towelled off the excess, leaving heavy but clean lines and rivets. Don't hold me to it though, I might wind up messing it up. I'll try it on a hidden section of the wing before doing it for real. Right now I just gotta try and not touch the model for a while. P.S. Warpaint, I saw your model and all I can say is you set the bar high. If mine comes out half as good as yours, I'll be happy. Till next time!
-
Thanks for the awesome replies. This model is turning out to be pretty fun. I agree with your observations Warpaint, the pieces included with the kit does allow you to remove the armor and swap in the original pieces. The only things I found I needed to add are the rubber caps for the feet, and possibly the forearms do to the pegs holding the larger armor piece. An original battroid kit would be ideal. I was also thinking about magnets. If done carefully, you could mod the armor by removing alot of the inside to let it mold over the original pieces. I'm not sure about the head swap though Excillon. I don't have any experience with other battroid kits as I mainly built the fighters such as the super/strike and YF-19. The head is built, I imagine, much like the normal kits and nothing was done to the head and neck specifically for the reactive armor kit (at least according to the instruction sheet and lack of extra head parts.) Hopefully someone can answer your question with more knowledge of this though. Again, thanks for the replies. I've got classes all day wednesday but thursday I should be able to finish up priming and start some actual painting.
-
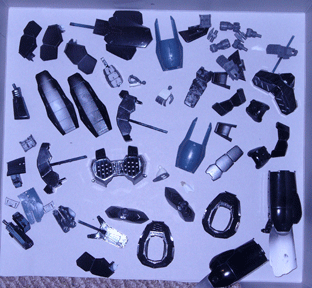
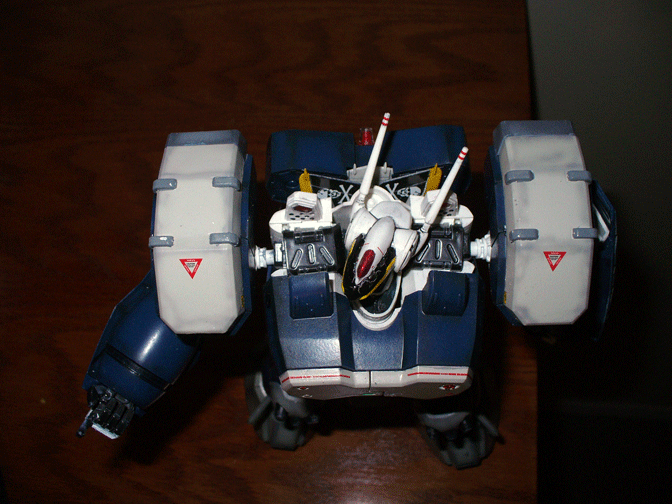
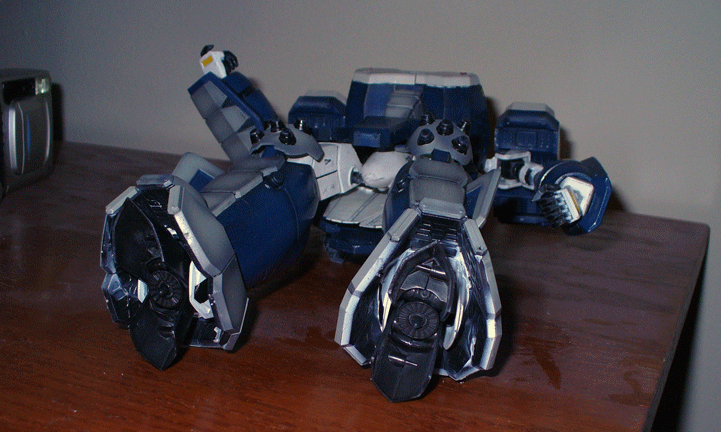
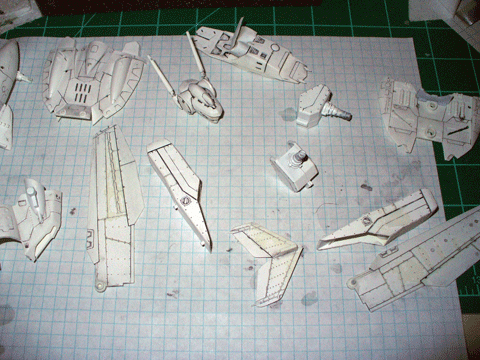
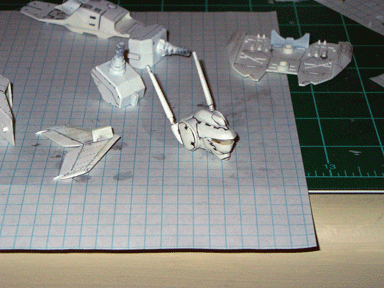
Some sections need to remain seperate for a while, namely the wings, missiles, and gray outer armored sections of the arms and legs. The wings need to be primed, painted, and decaled before attaching them to the body. This is due to the difficulty of reaching them later. The missiles need to stay off so the inside of the bays can be painted, as well as the missiles themselves. The gray outer sections of armor remain off since they will be painted a different color and there will be no need to sand down seams. This just makes it a bit easier. Another note is trying to build a model that can the armor removed and attached over and over. From what I've seen, it's not going to happen without ALOT of modding. The leg armor is hollow, so the legs aren't actually inside. Plus there are not enough rubber sockets to fill two pairs of legs. The chest is attached to specially molded pieces for this kit. The forearms have pegs that attach directly to the armor, so they cannot slide on and off. The shoulders are specially molded with pegs to hold the armor, so if you don't mind the bulge that would be the only piece that might be interchangable (haven't tried to dry fit yet, so this is uncertain.)
-
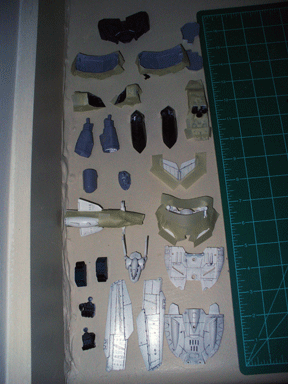
Evening everyone! I hope you're doing well. Anyways, like the title says this is my attempt to build the armored VF-0S and document step by step how I did it. Hopefully this might inspire you to build one, or maybe inspire me to do better. This is my first time trying to document something in-progress, so here it goes. If you see somethig that could be done better, please let me know. Any criticism is appreciated. Also, do to my location (college town in Arkansas), I don't have access to the awesome modelling gear that is needed and have to pretty much order everything online, so it'll be a while till this is finished. Anyways, on with the show! This kit is mostly a snap together kit, so be careful! I started my finding what I could put together and prime white, then find sections I could prime black. And this is what I came up with thus far. By using the instruction sheet, these sections were built first: 1, 2, 3, 4 (all upper leg sections). The lower leg was a bit tricky. I built the inside of part 6, primed and painted it white, then built the lower leg armor around it during part 7 of the instruction sheet. To prime the armored section, I placed an index card between the white part and the armor so i can prime it black. The sections around the feet I. I built the inside first, then primed it black. (Part 10) The feet:(Parts 12 and 13) I built the shoulders and cut some of the sprue to use as a holder so I don't mar the primer: (Part 56) The forearms are fairly tricky (Parts 53-55). The bracket that surrounds the forearm is VERY loose and hard to position without the armored sections. So instead of attaching the bracket directly to the forearm, I placed it inside the armor and glued the two halves together without placing it on the forearm. But I did not attach the large armored section to it yet. Most of the main sections are built. Using the instruction sheet, you can assemble 1-8, attaching the calf section in part 9, 10, 12-13, 15, attaching part G7 to A8 in part 16, 17-19, most of 20 (minus the clear pieces and neck), 21, 22, 24, 26, 27, the fornt section of part 28, 30-31, 32-36, 38, 40-41, 43-45, 47-48, part of 50 (minus missiles and clear pieces), 54, 56, 58 (minus hinges). So this is where I'm at so far. More to come!