

captain america
-
Posts
3465 -
Joined
-
Last visited
Content Type
Profiles
Forums
Events
Gallery
Posts posted by captain america
-
-
Captain's log: Thursday, May 25th
I wasn't expecting to make much progress this week, but it came out better than I thought. Unlike the 1/72 kit, which I treated like a non-transforming fighter, I want to take this kit in a direction which more fittingly exemplifies its tank-like design and feel. As such, I'm planning to forego details like rivets in favor of weld seams, but those details will come later.
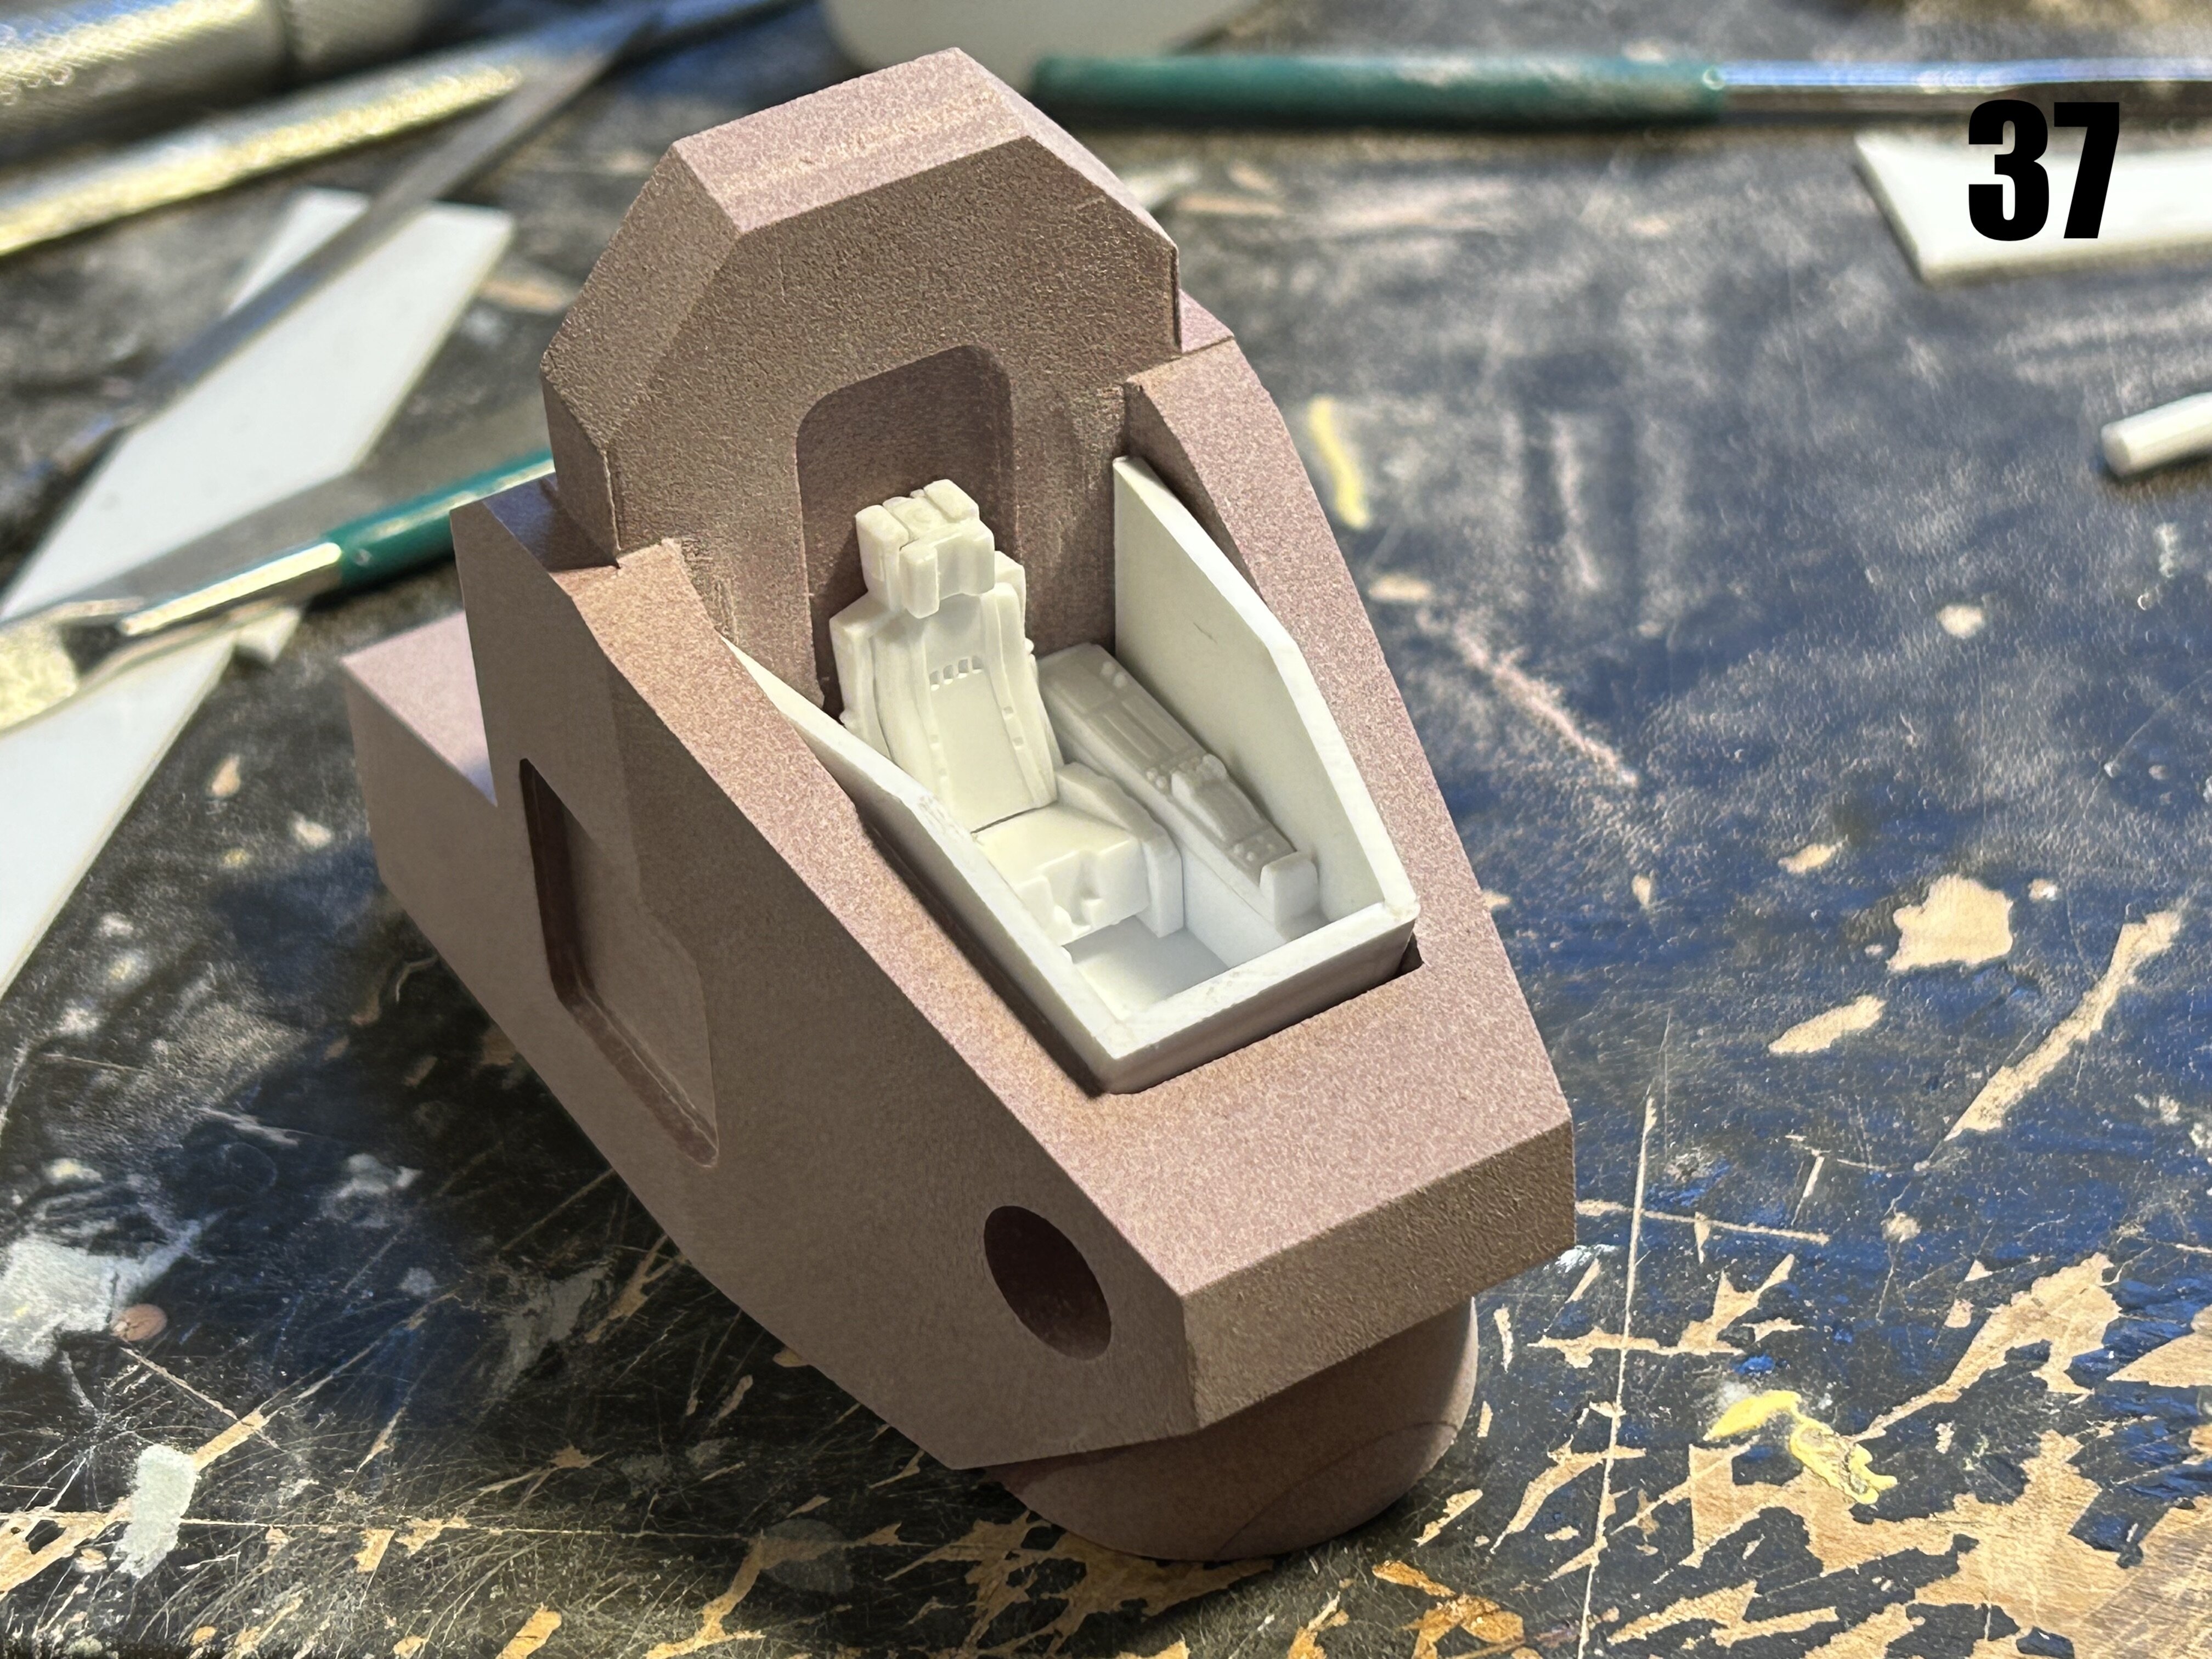
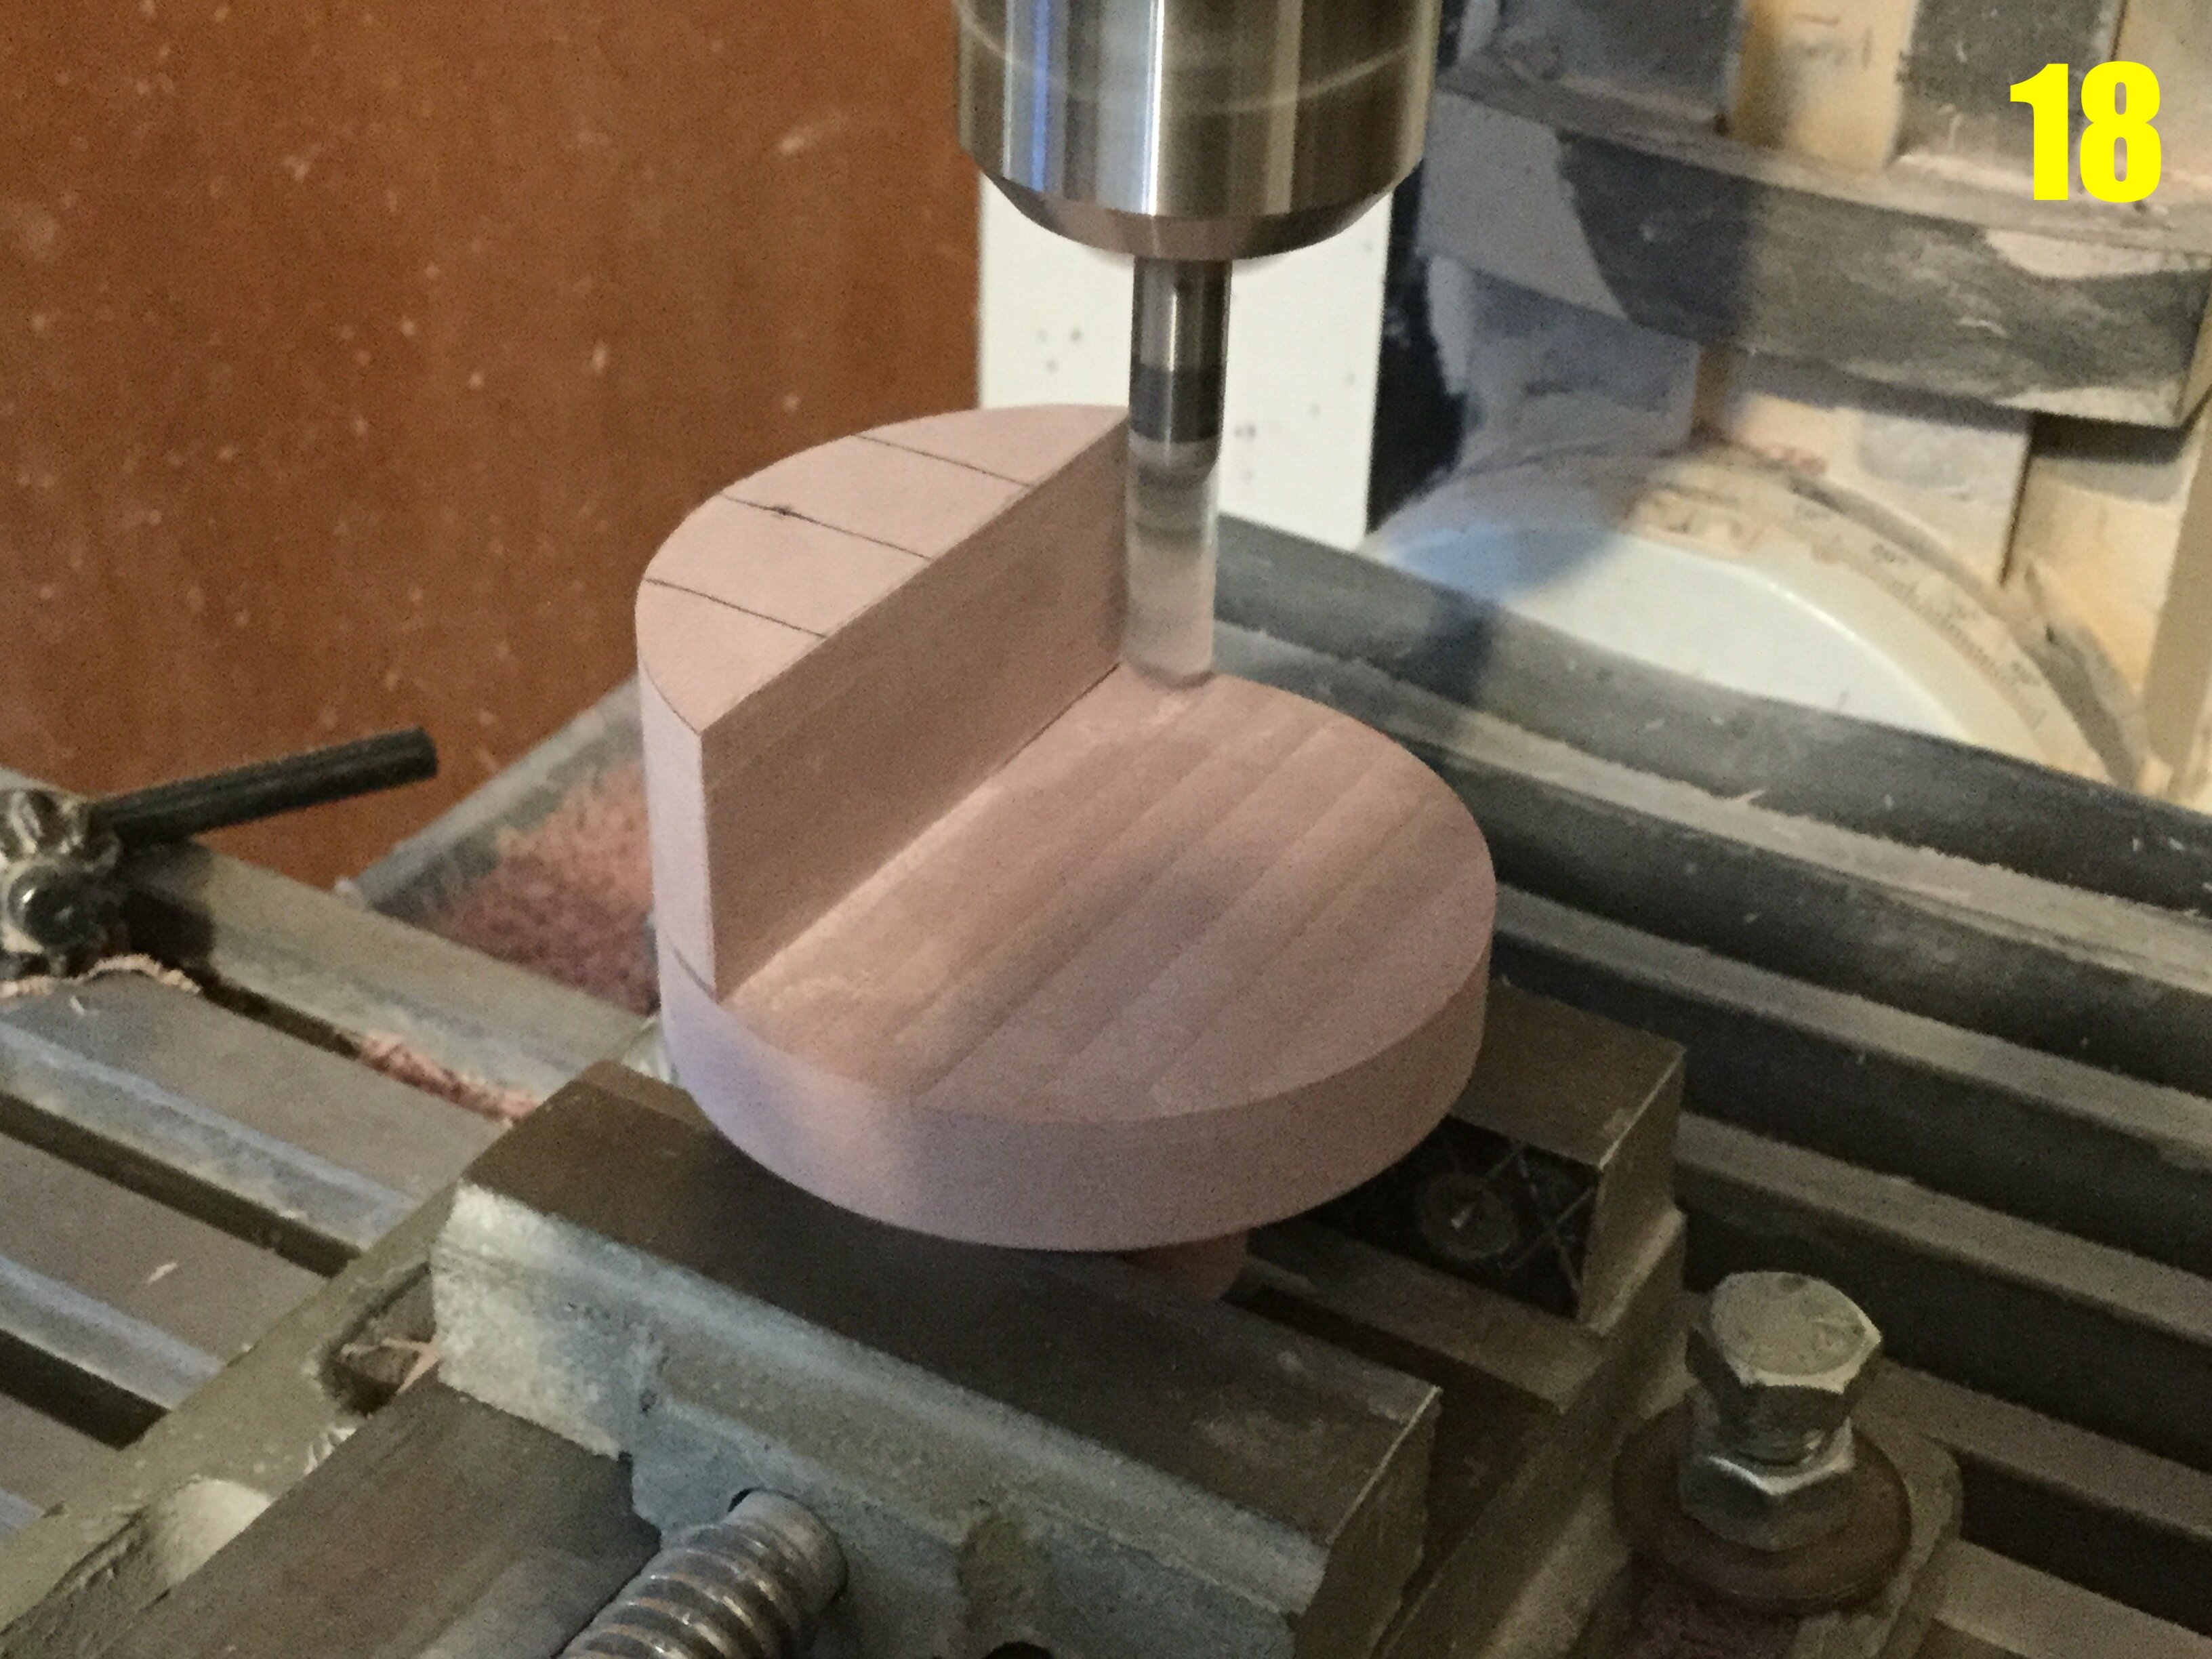
Pic 37: I used part of a VF-1J tub and seat, since I reckon the control system would be about the same. I then created an armored tub around it, which is faithful to the line-art. I also elected to move the pilot's seat lower into the chest cavity, and this for two reasons: it offers the pilot better protection, and he won't have a massive cannons mere inches from his ears!
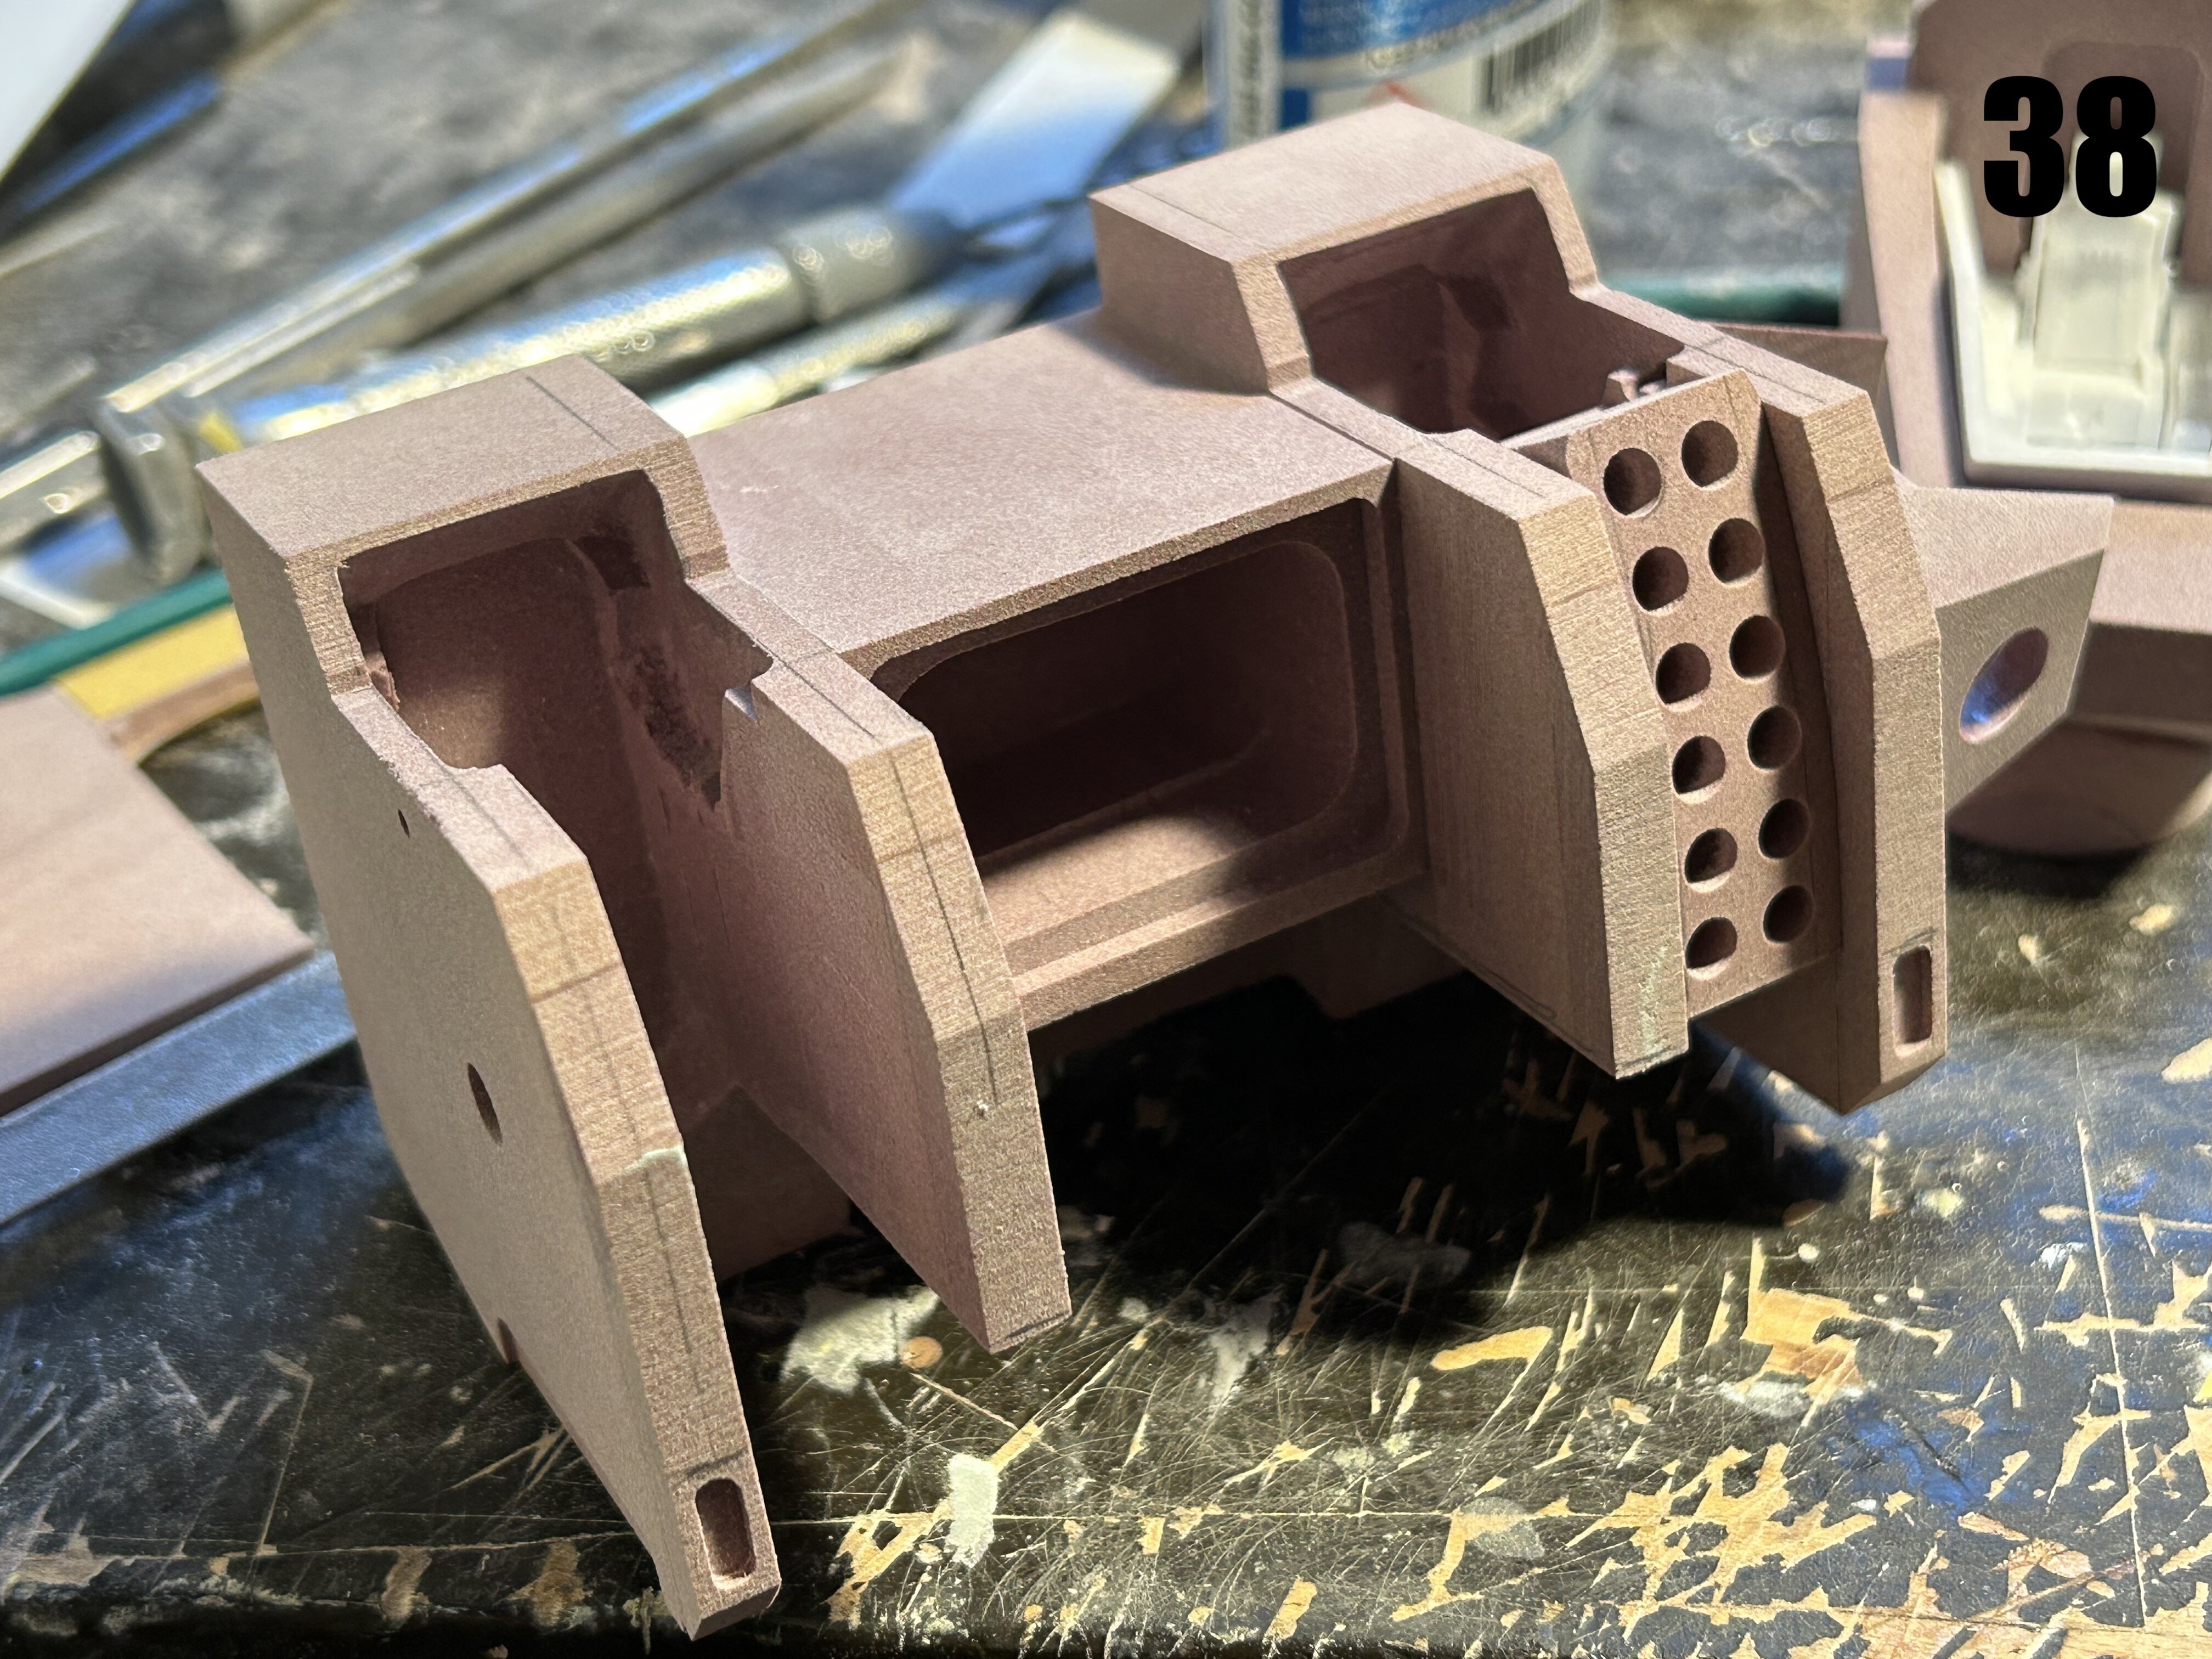
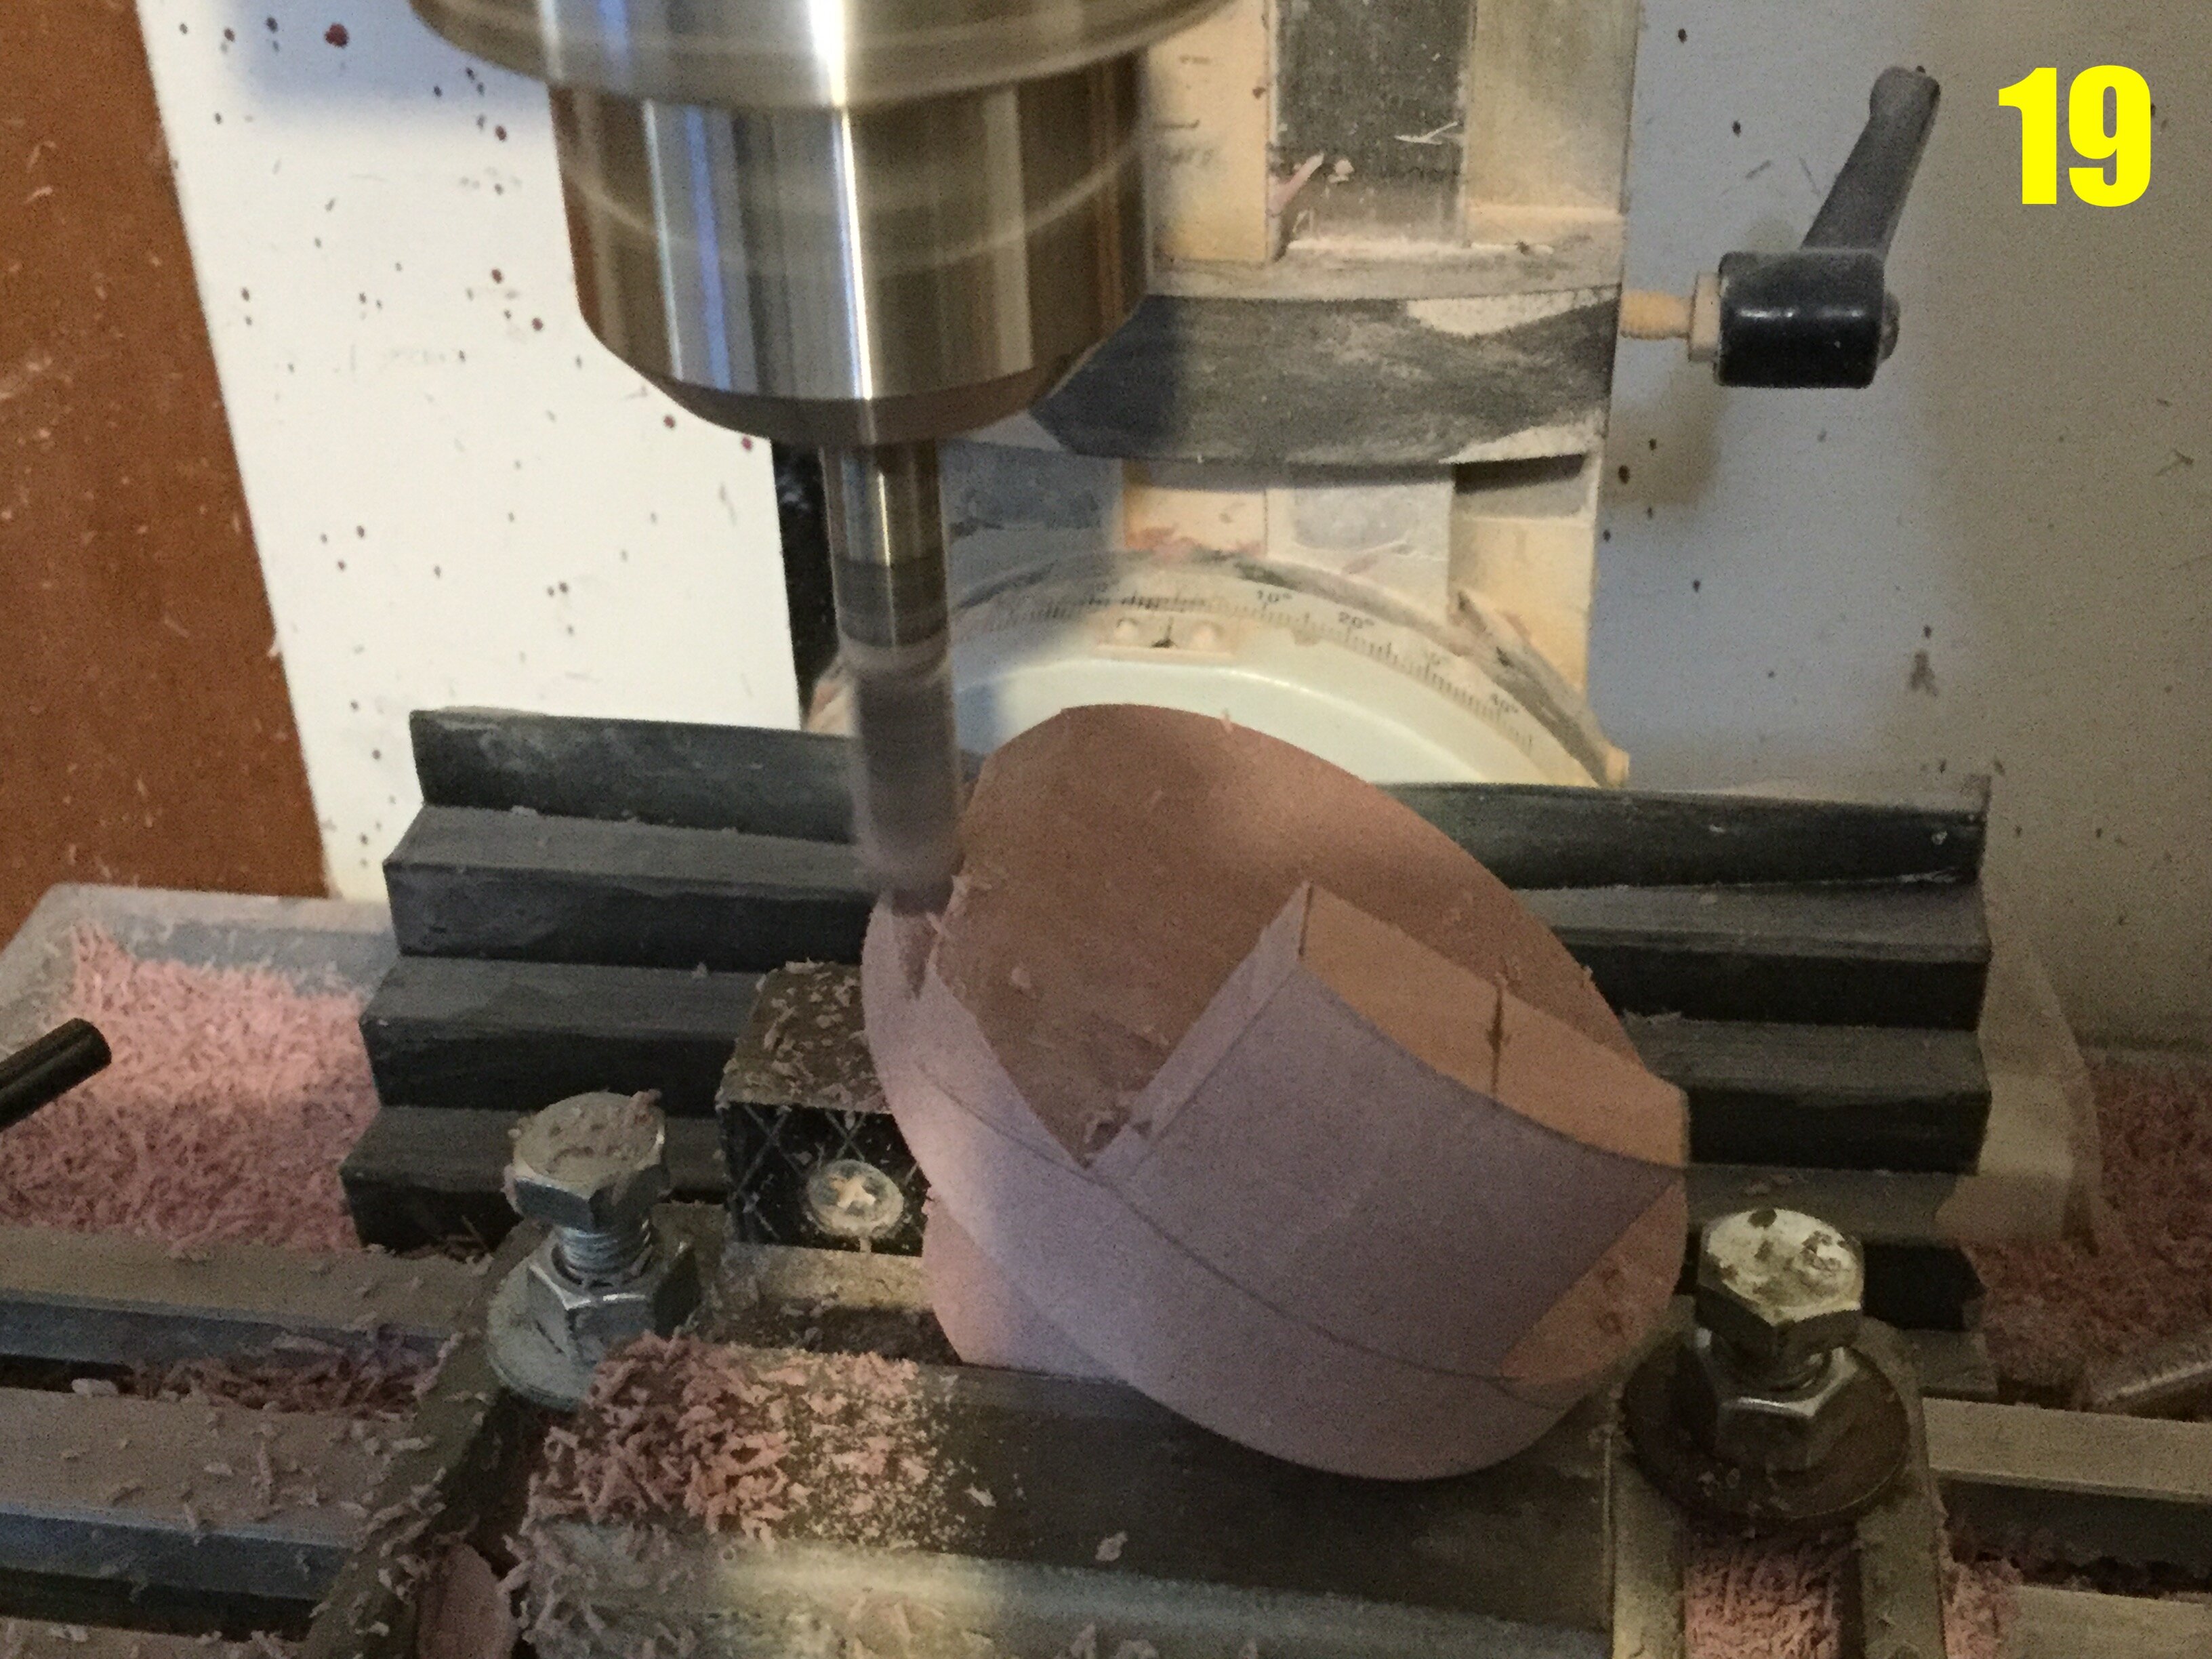
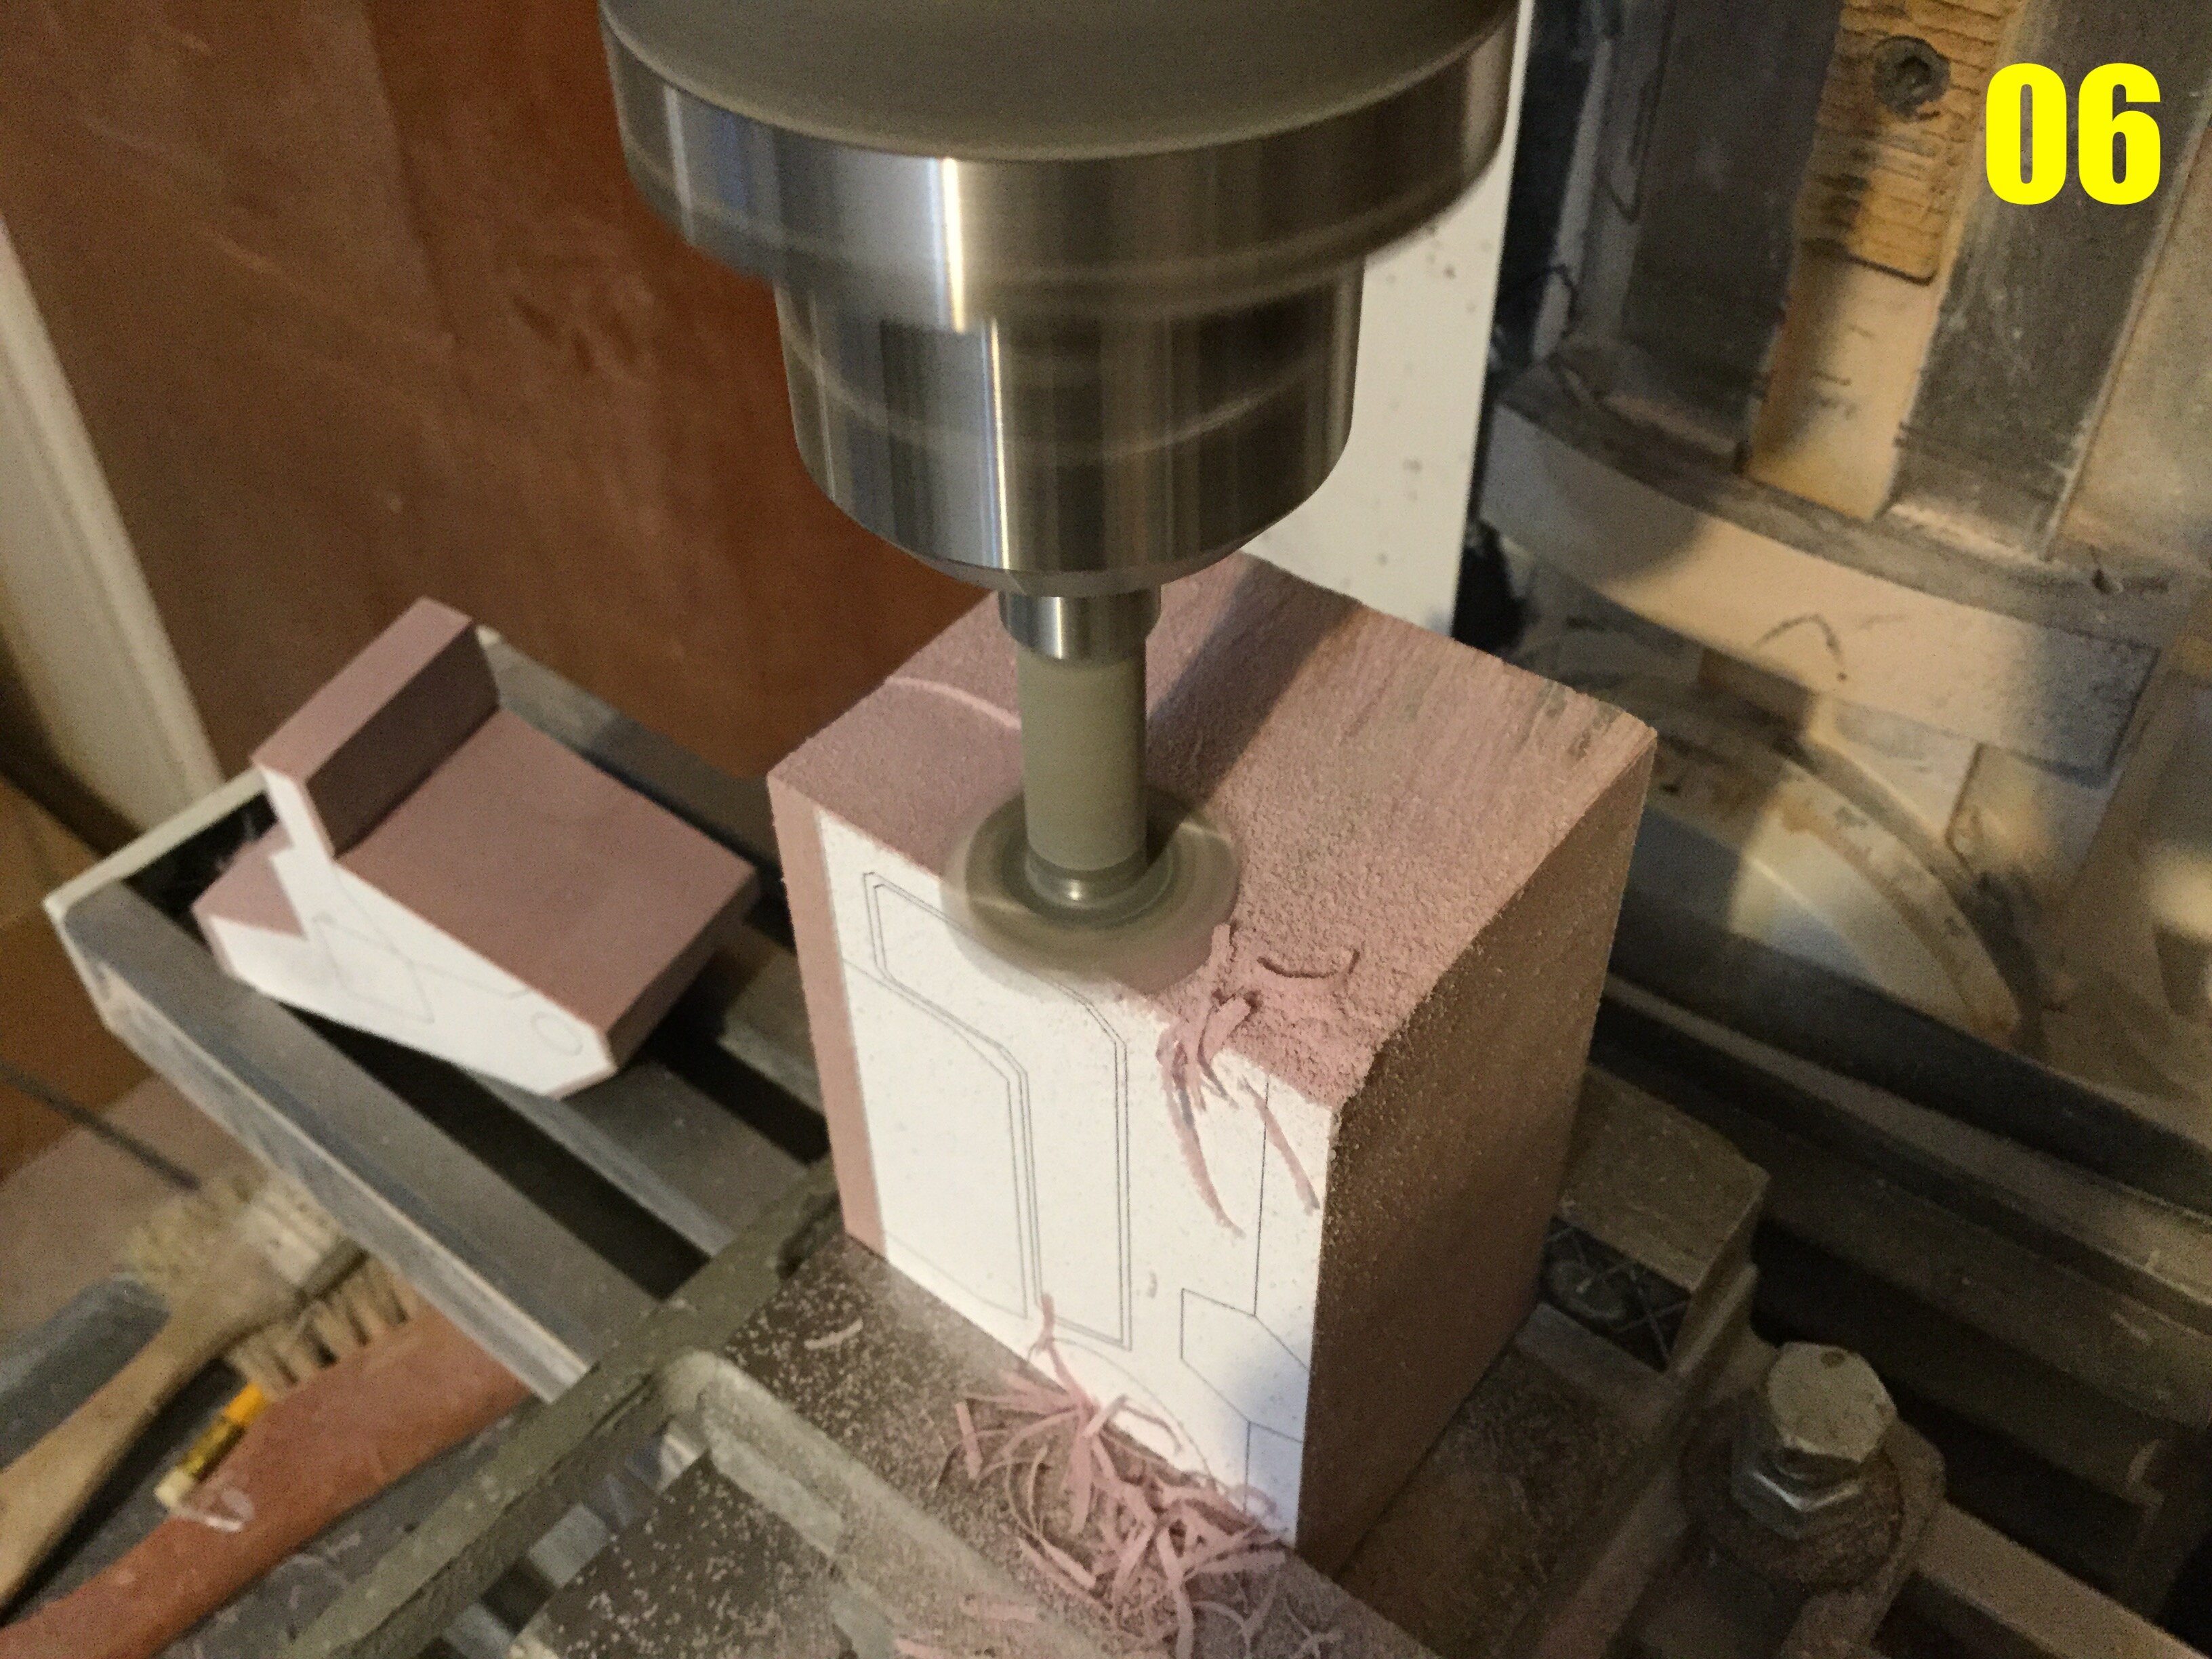
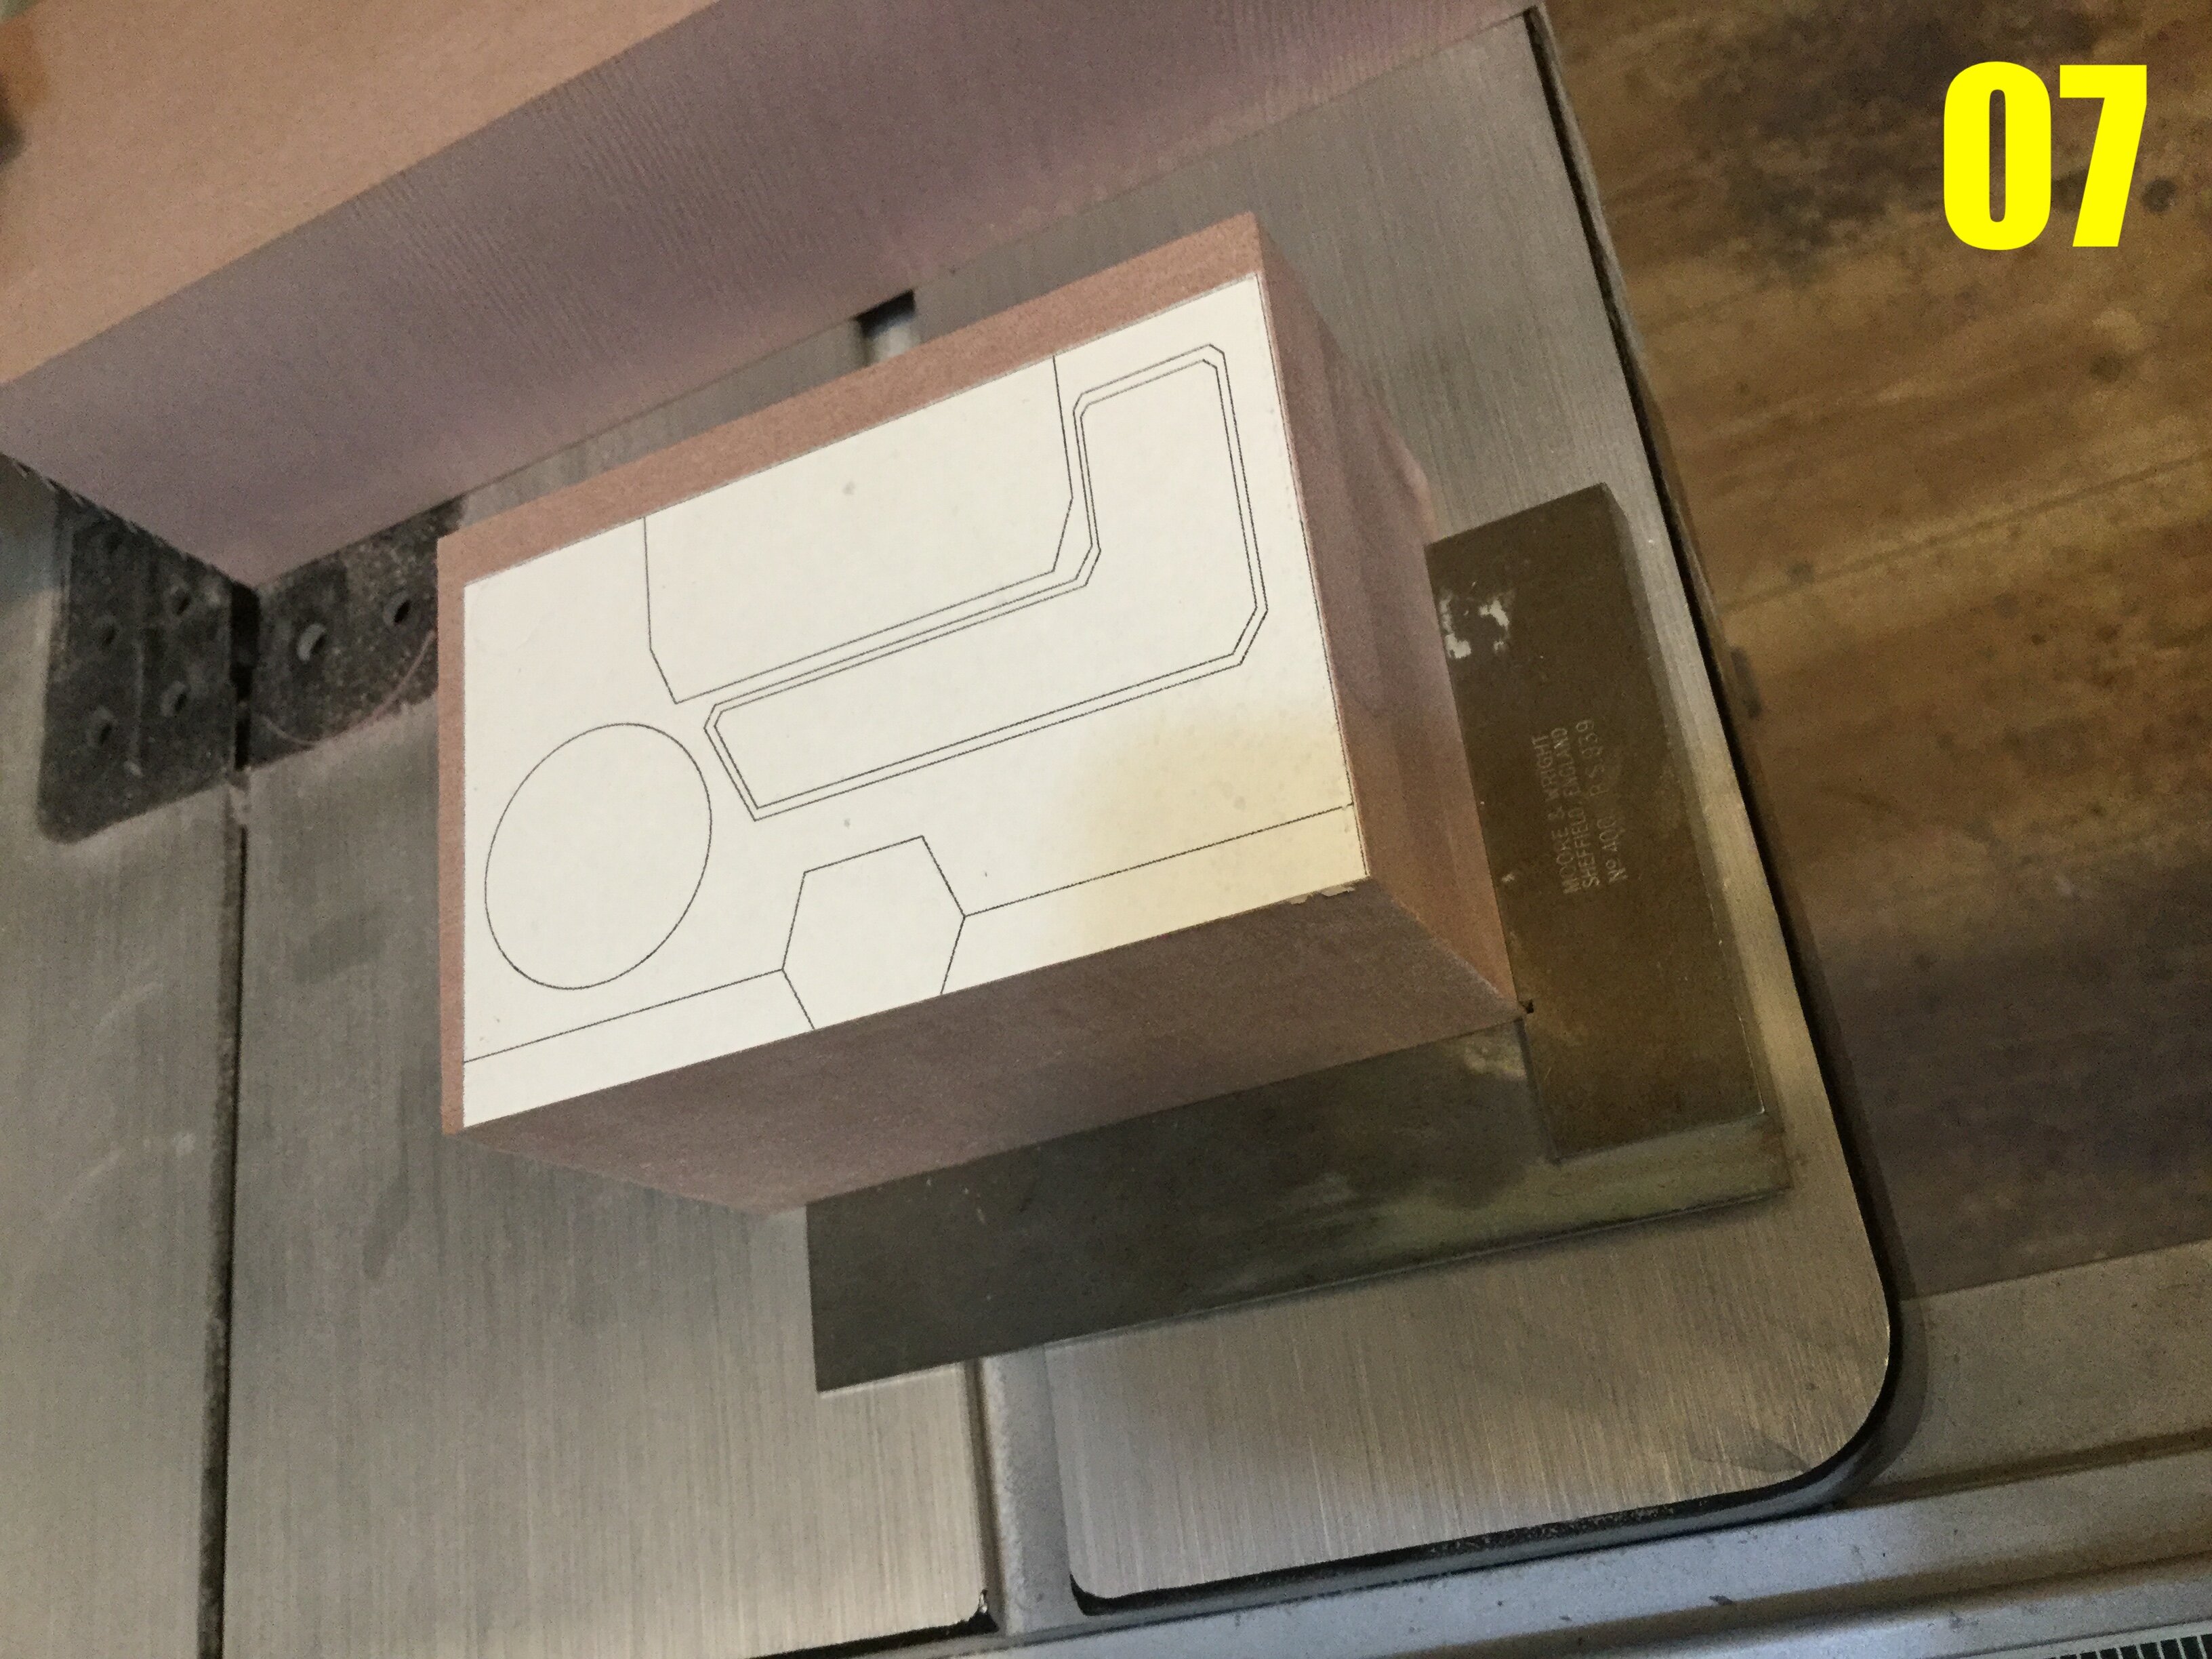
Pic 38: the main weapons pack is made modular to offer more building possibilities, but also creates some engineering challenges which may come back to bite me in the molding process. Also, the cavities in some places are so deep the milling shank can't reach, so I'll have to go and smooth-out some details with the Dremel.
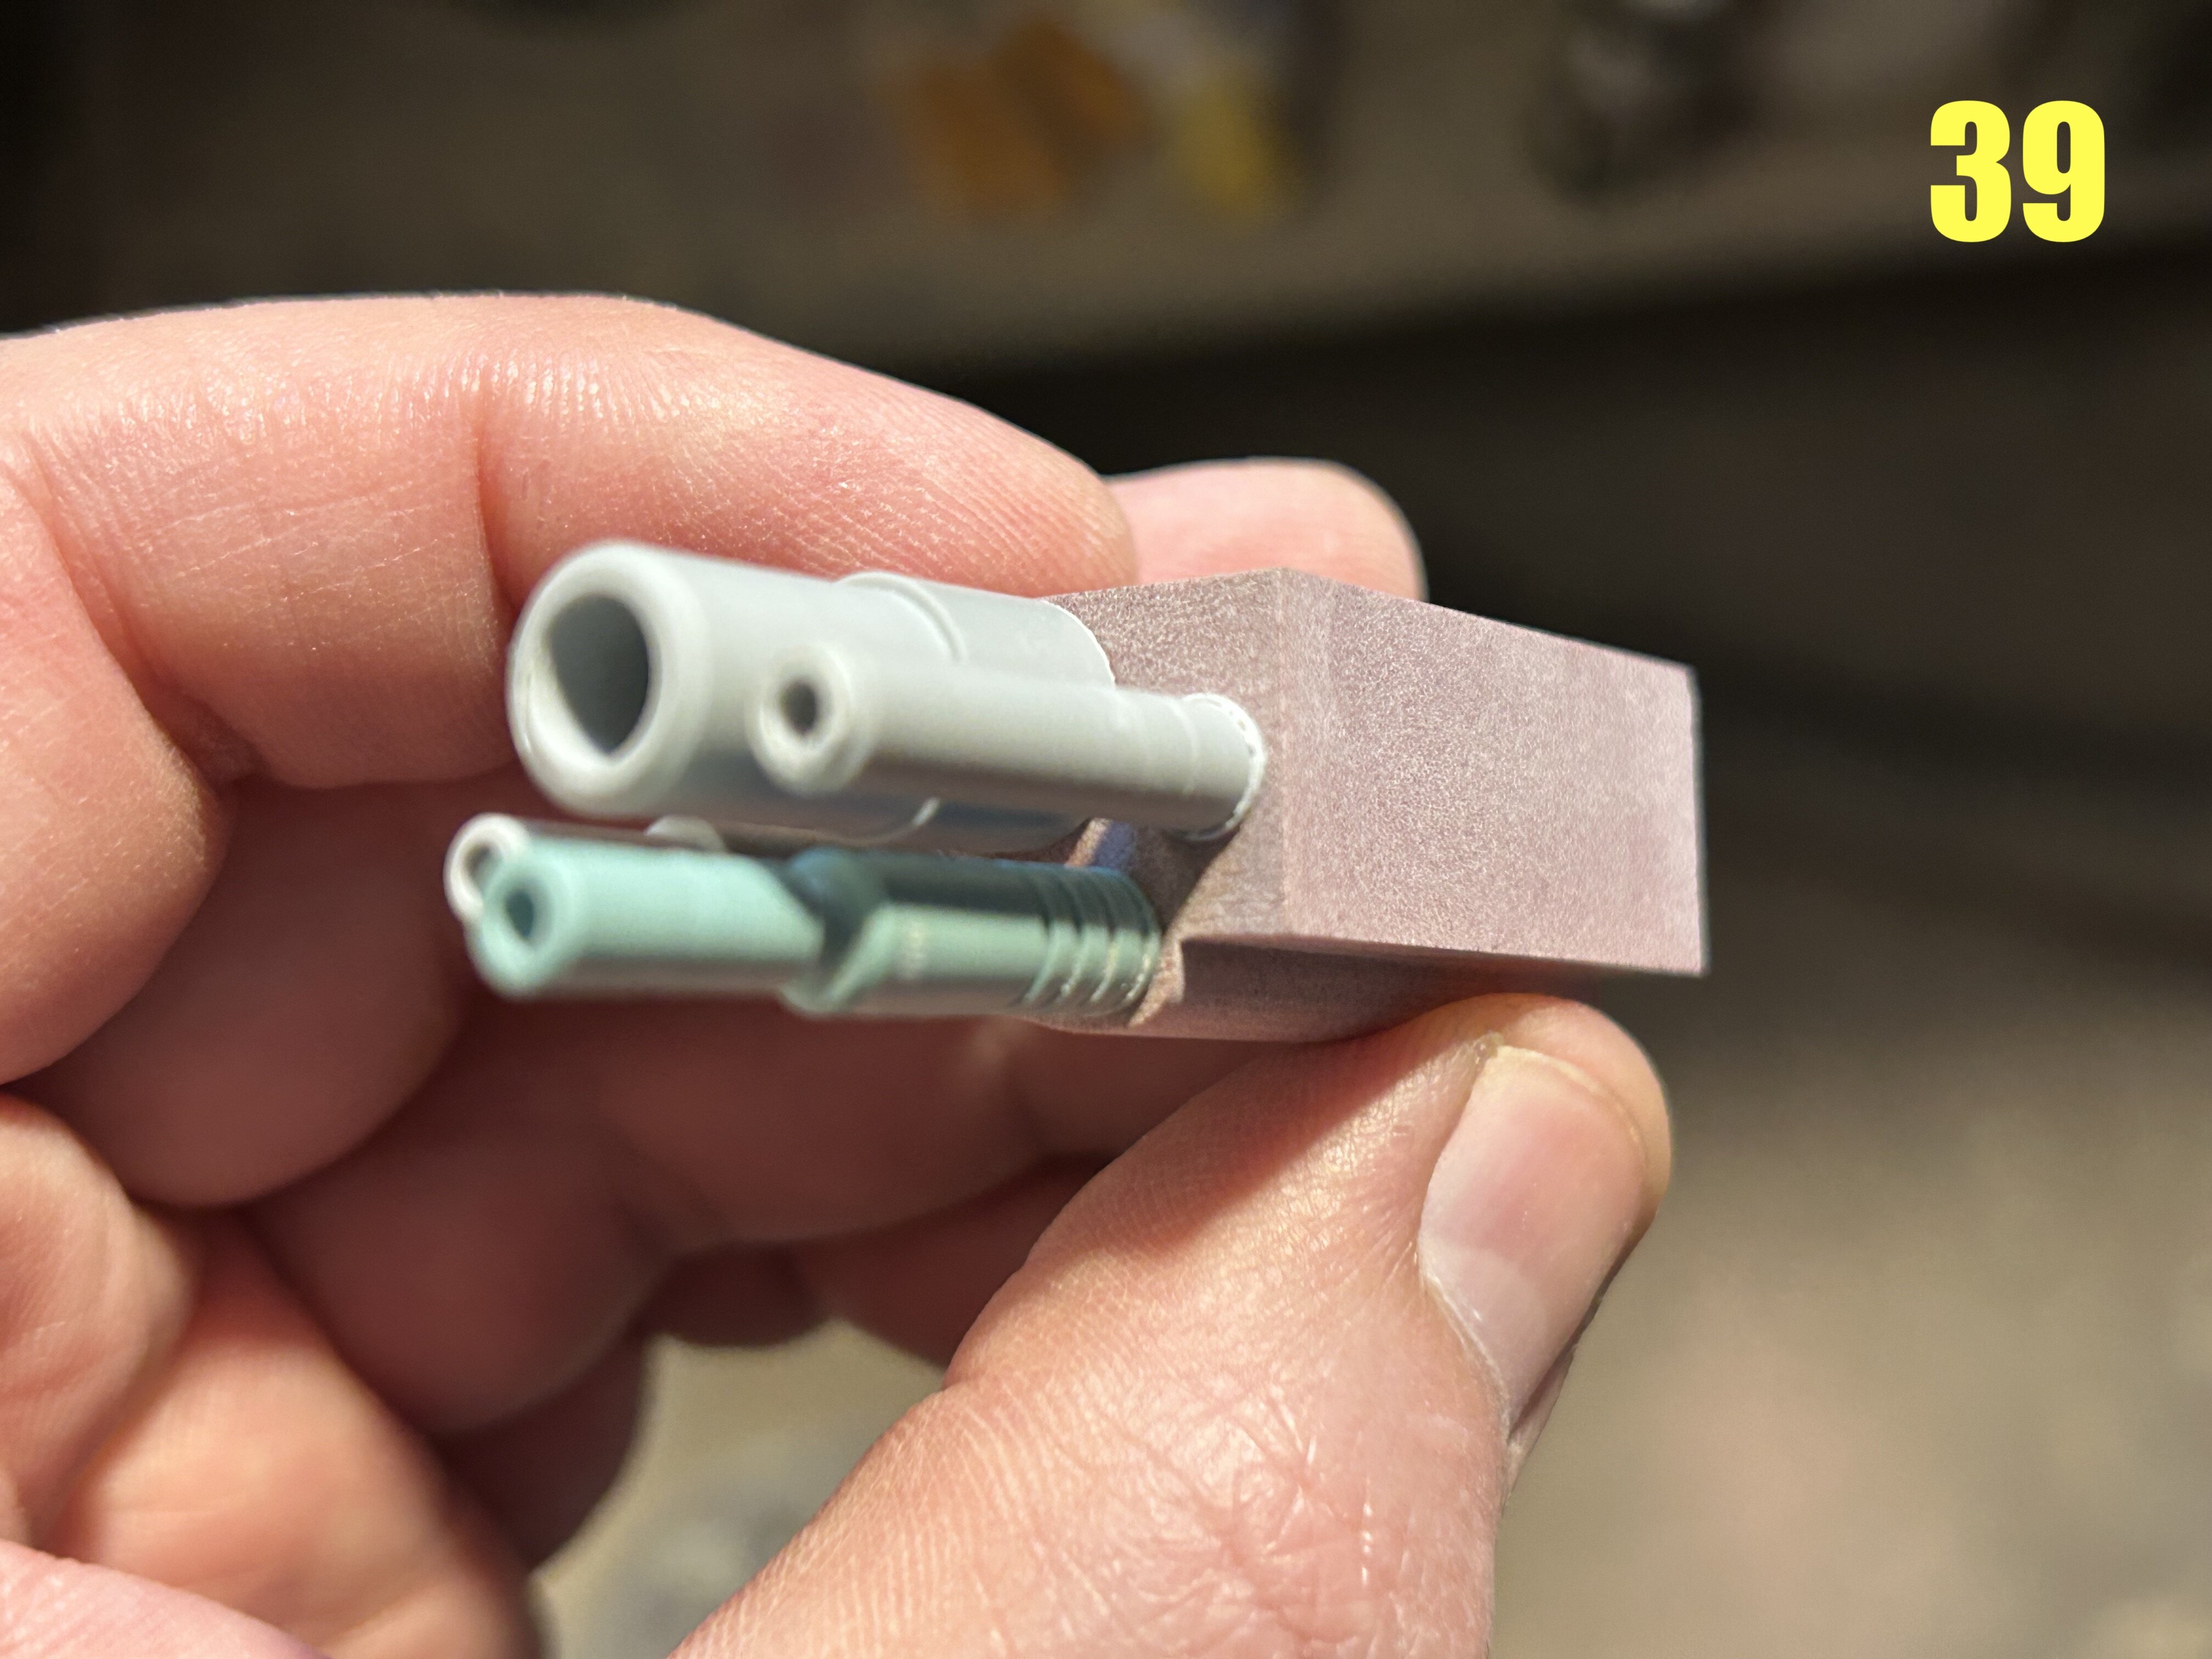
Pic 39: the quad-cannon underboob assembly coming along very nicely indeed. The smaller cannons were a bit of a bear to machine, but patience and persistence paid off.
Pic 40: all the missiles will be separate from their housings, so you'll be able to build Thomas with all missile slots filled, empty, and even with missiles in-flight with fins deployed.

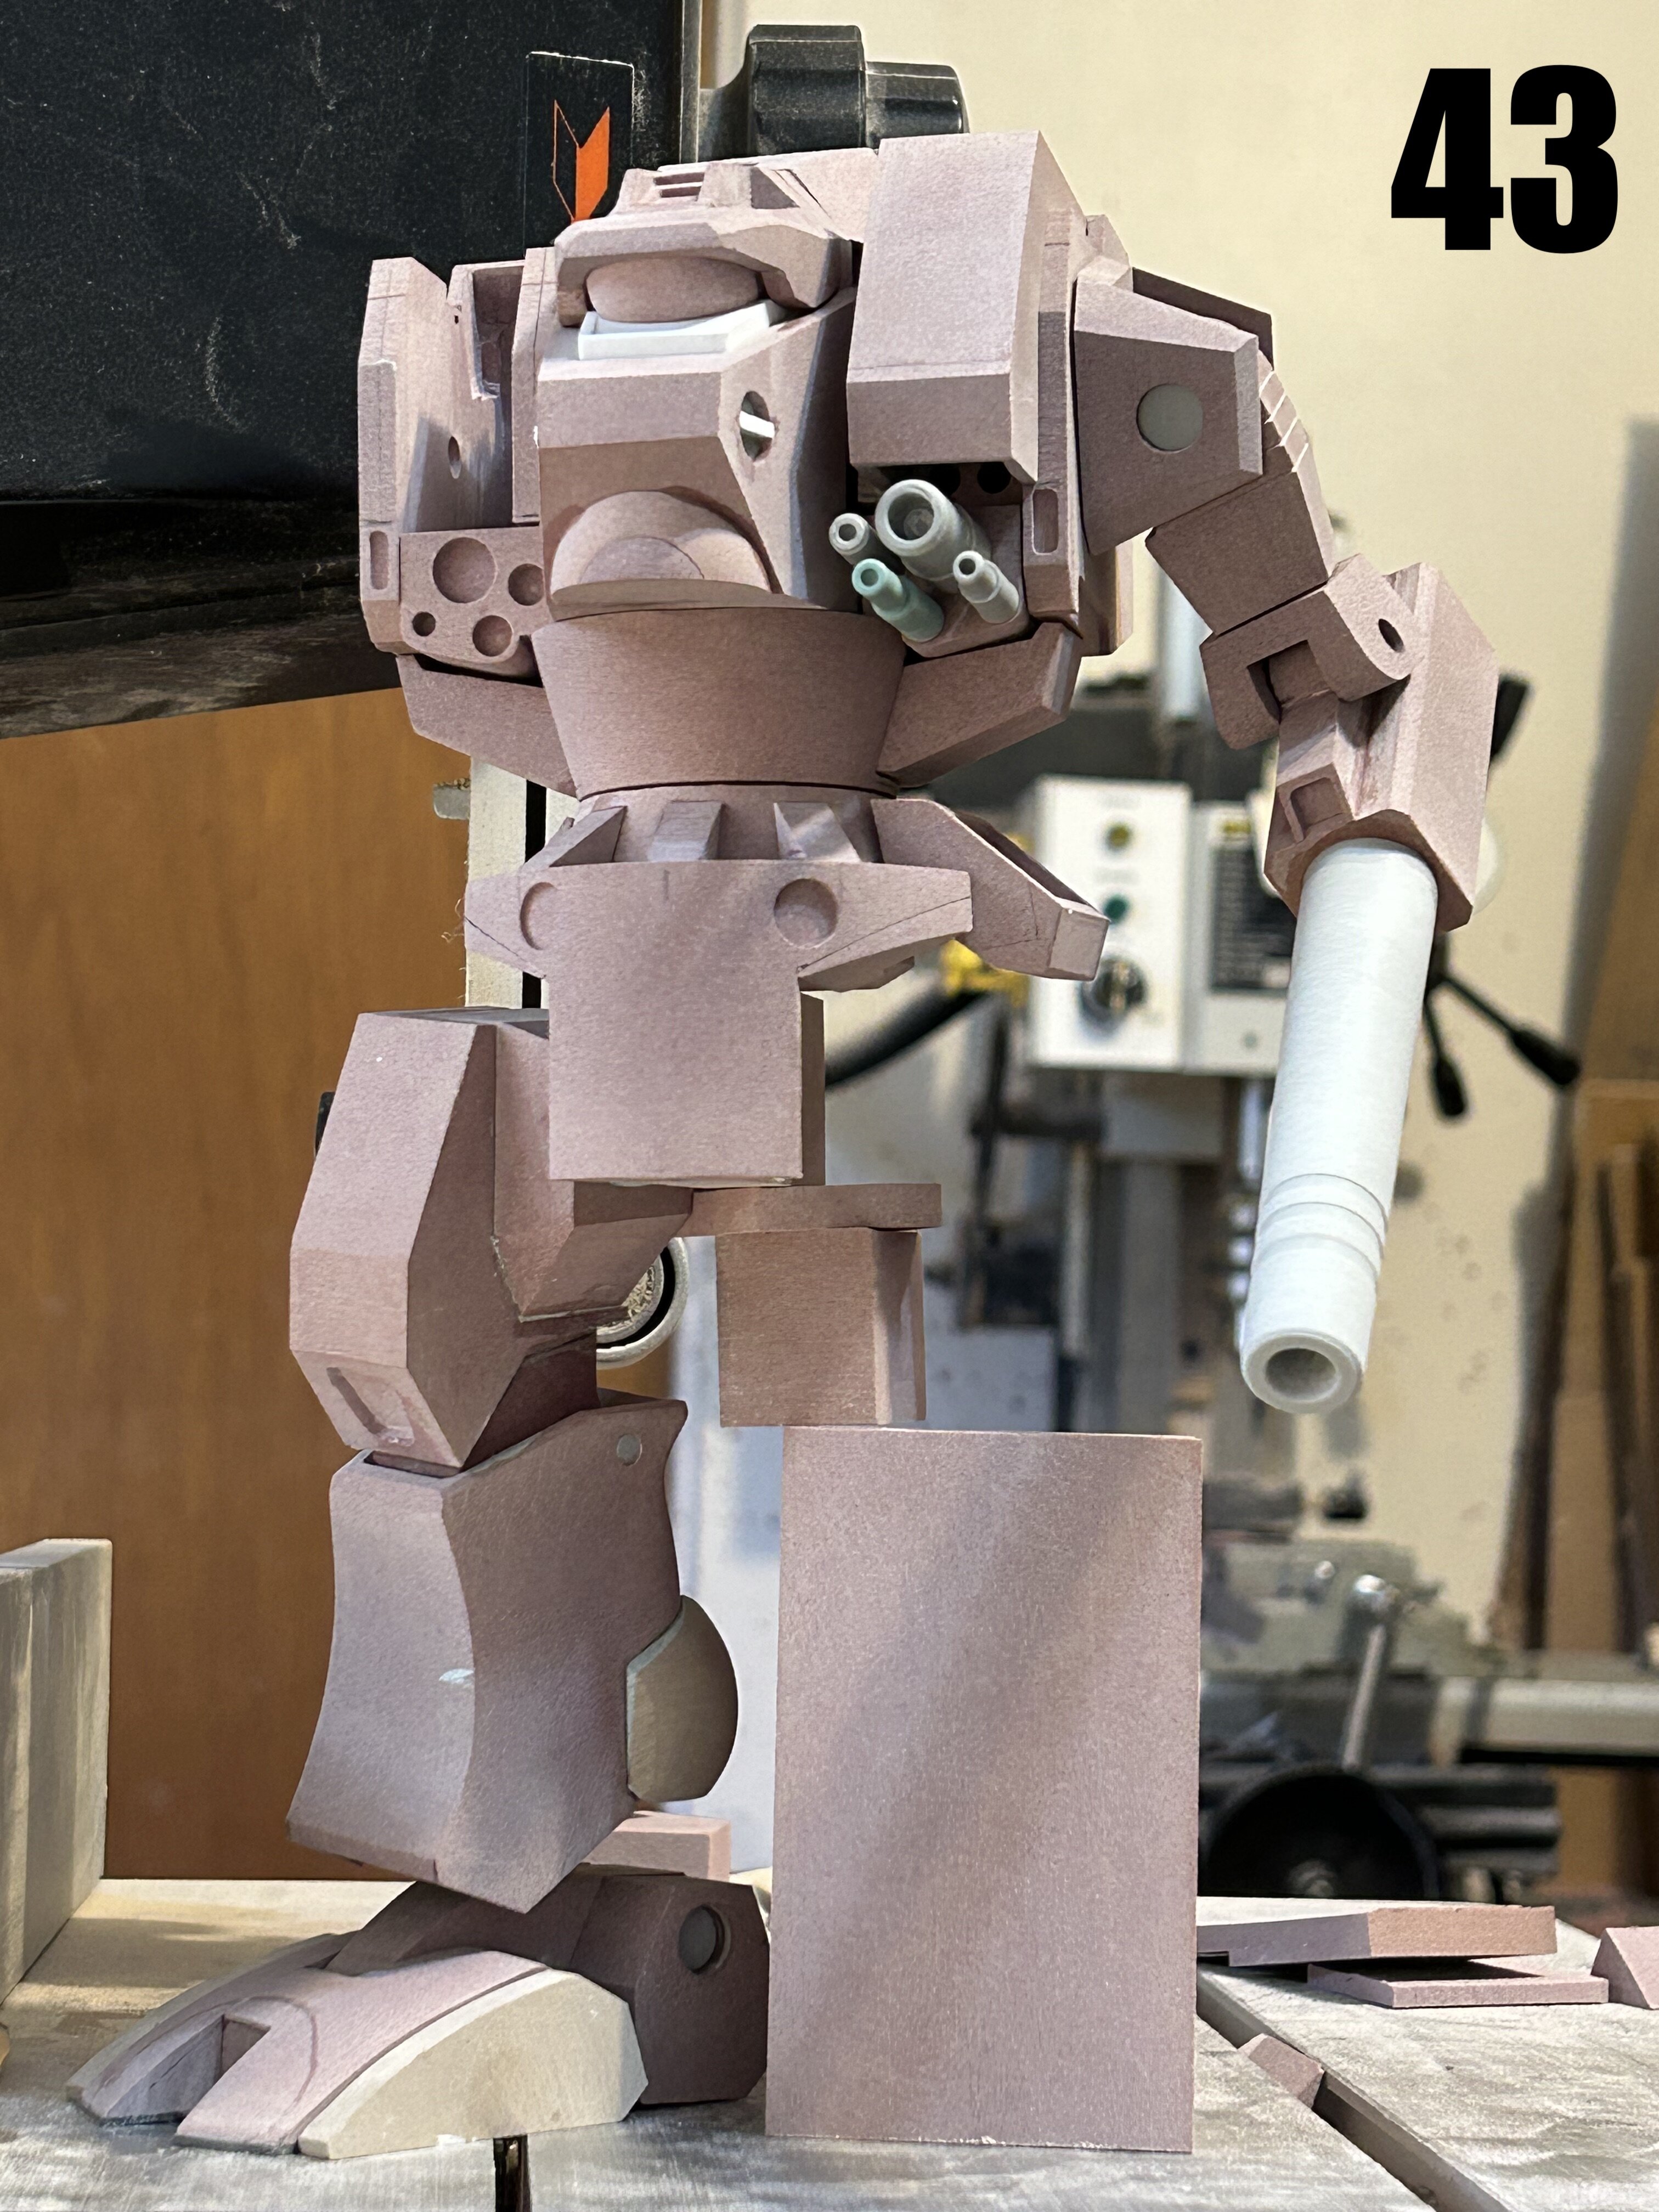
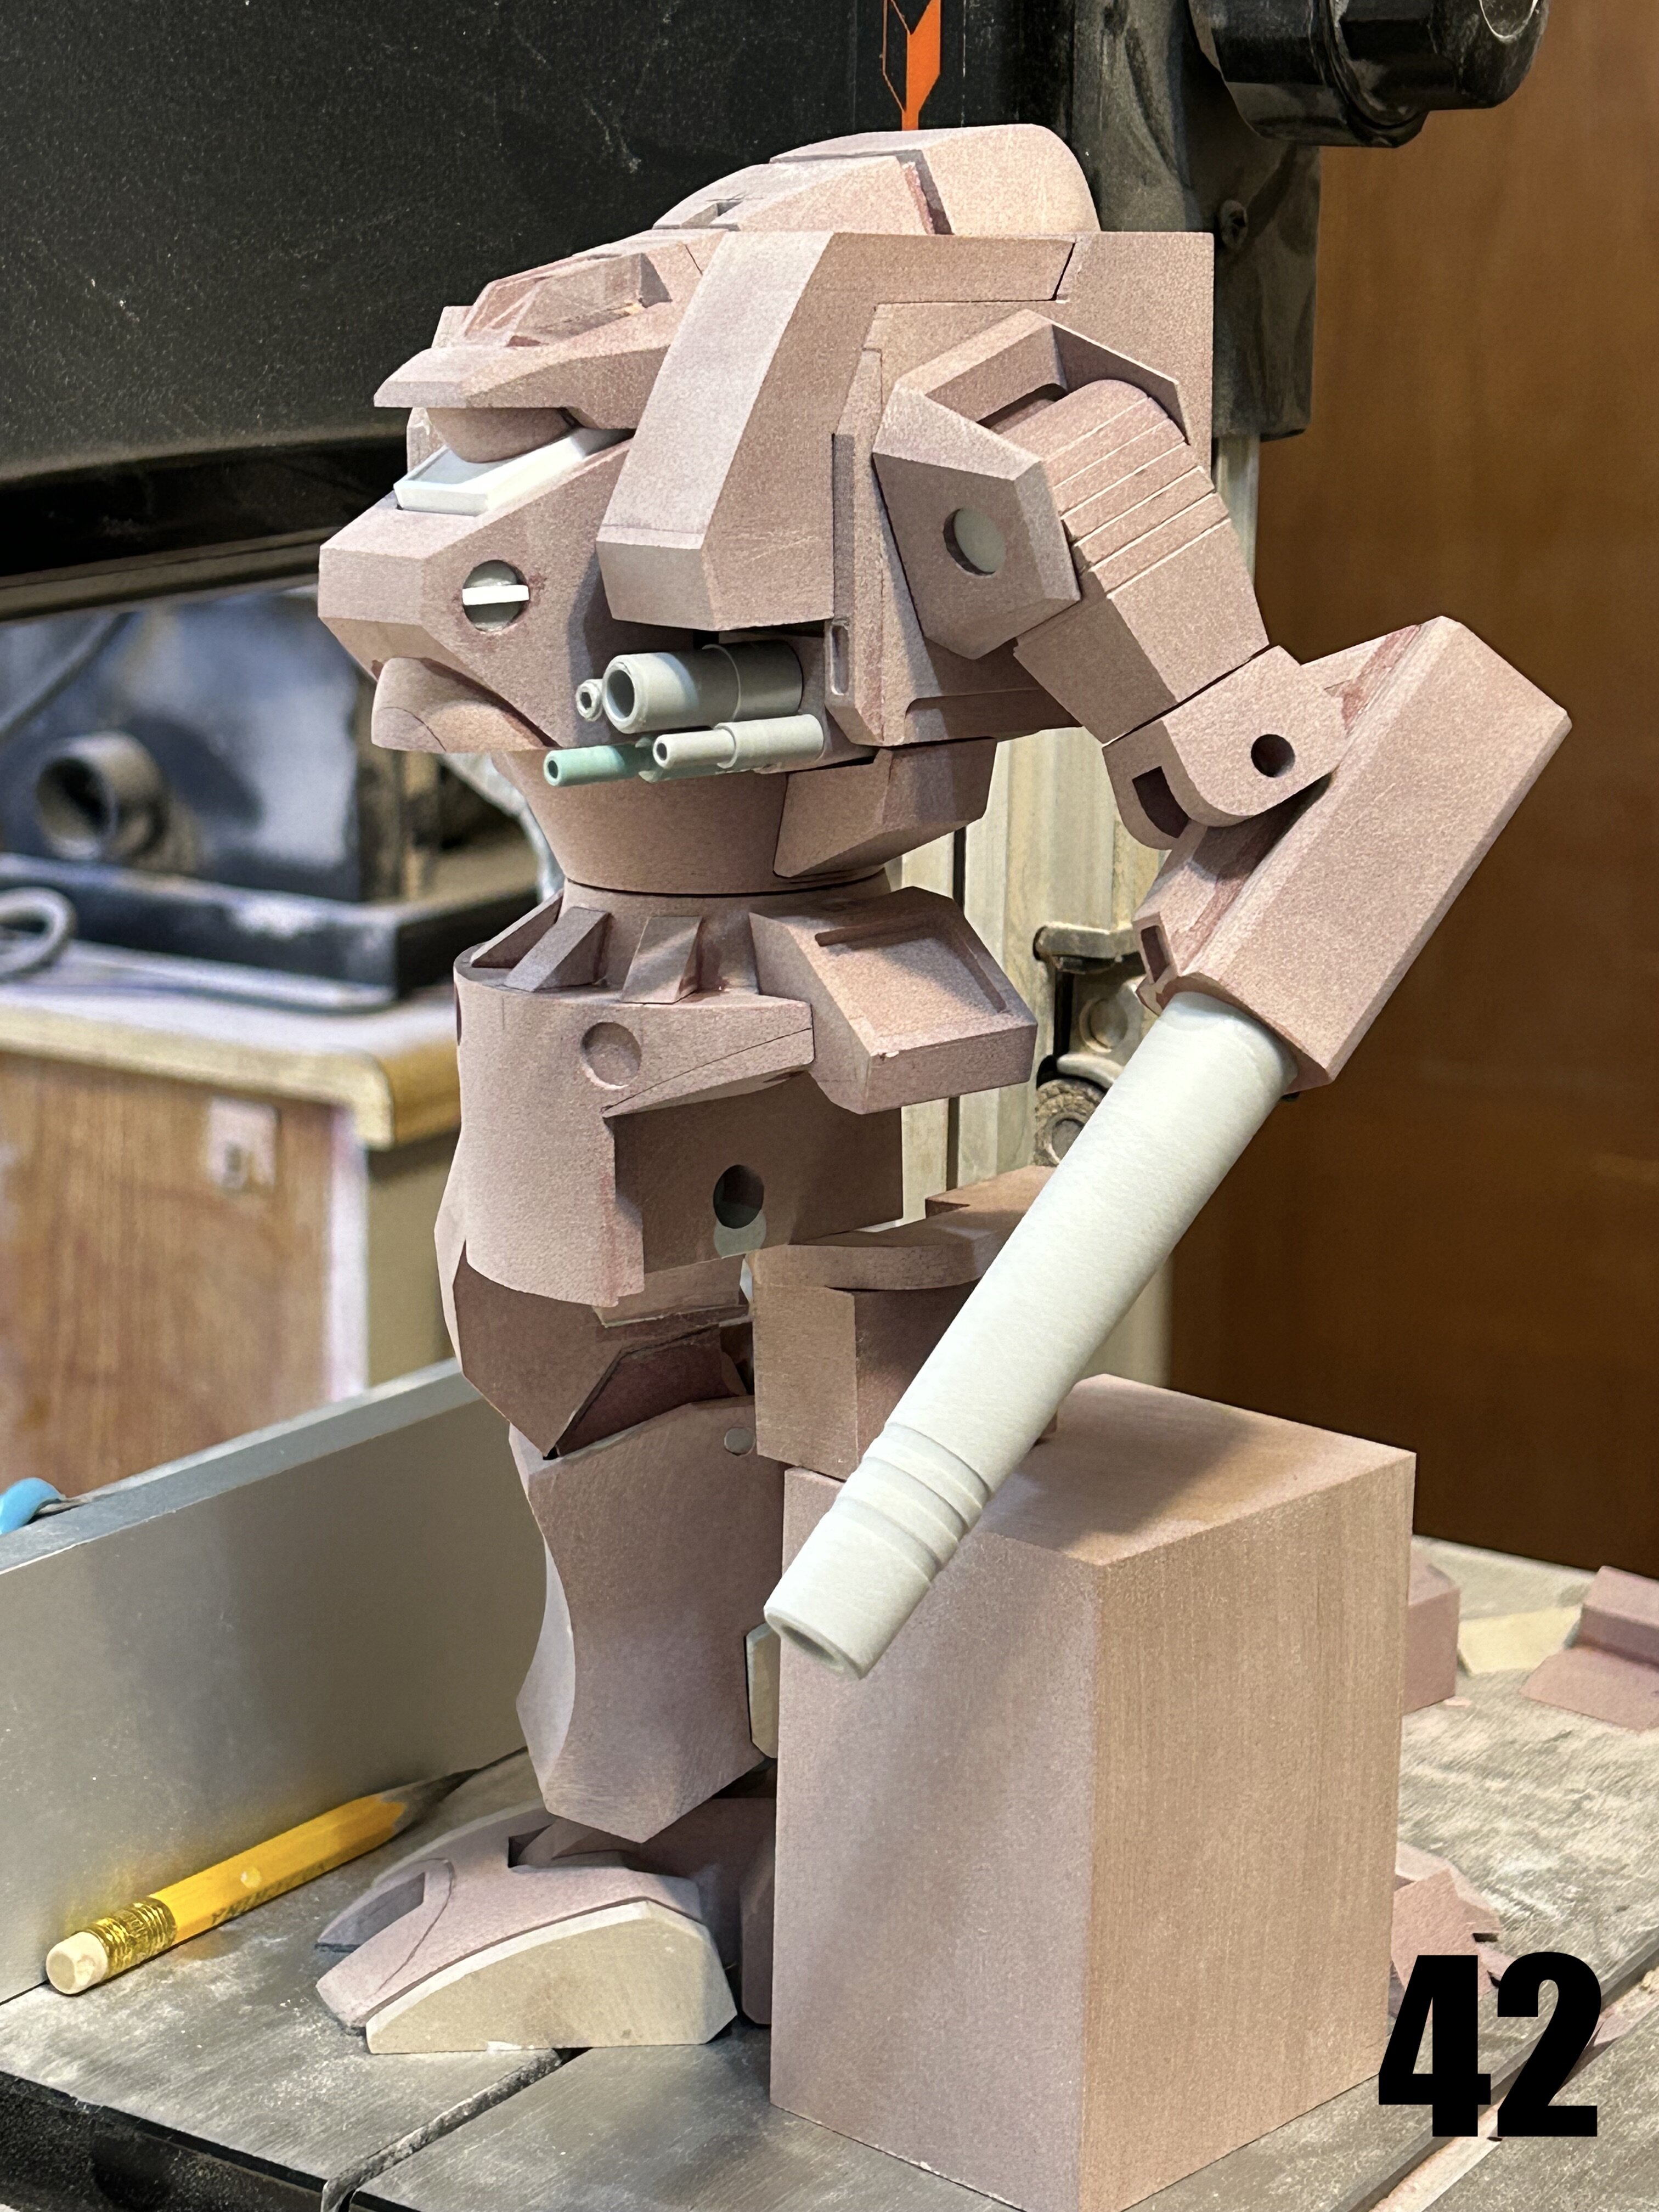
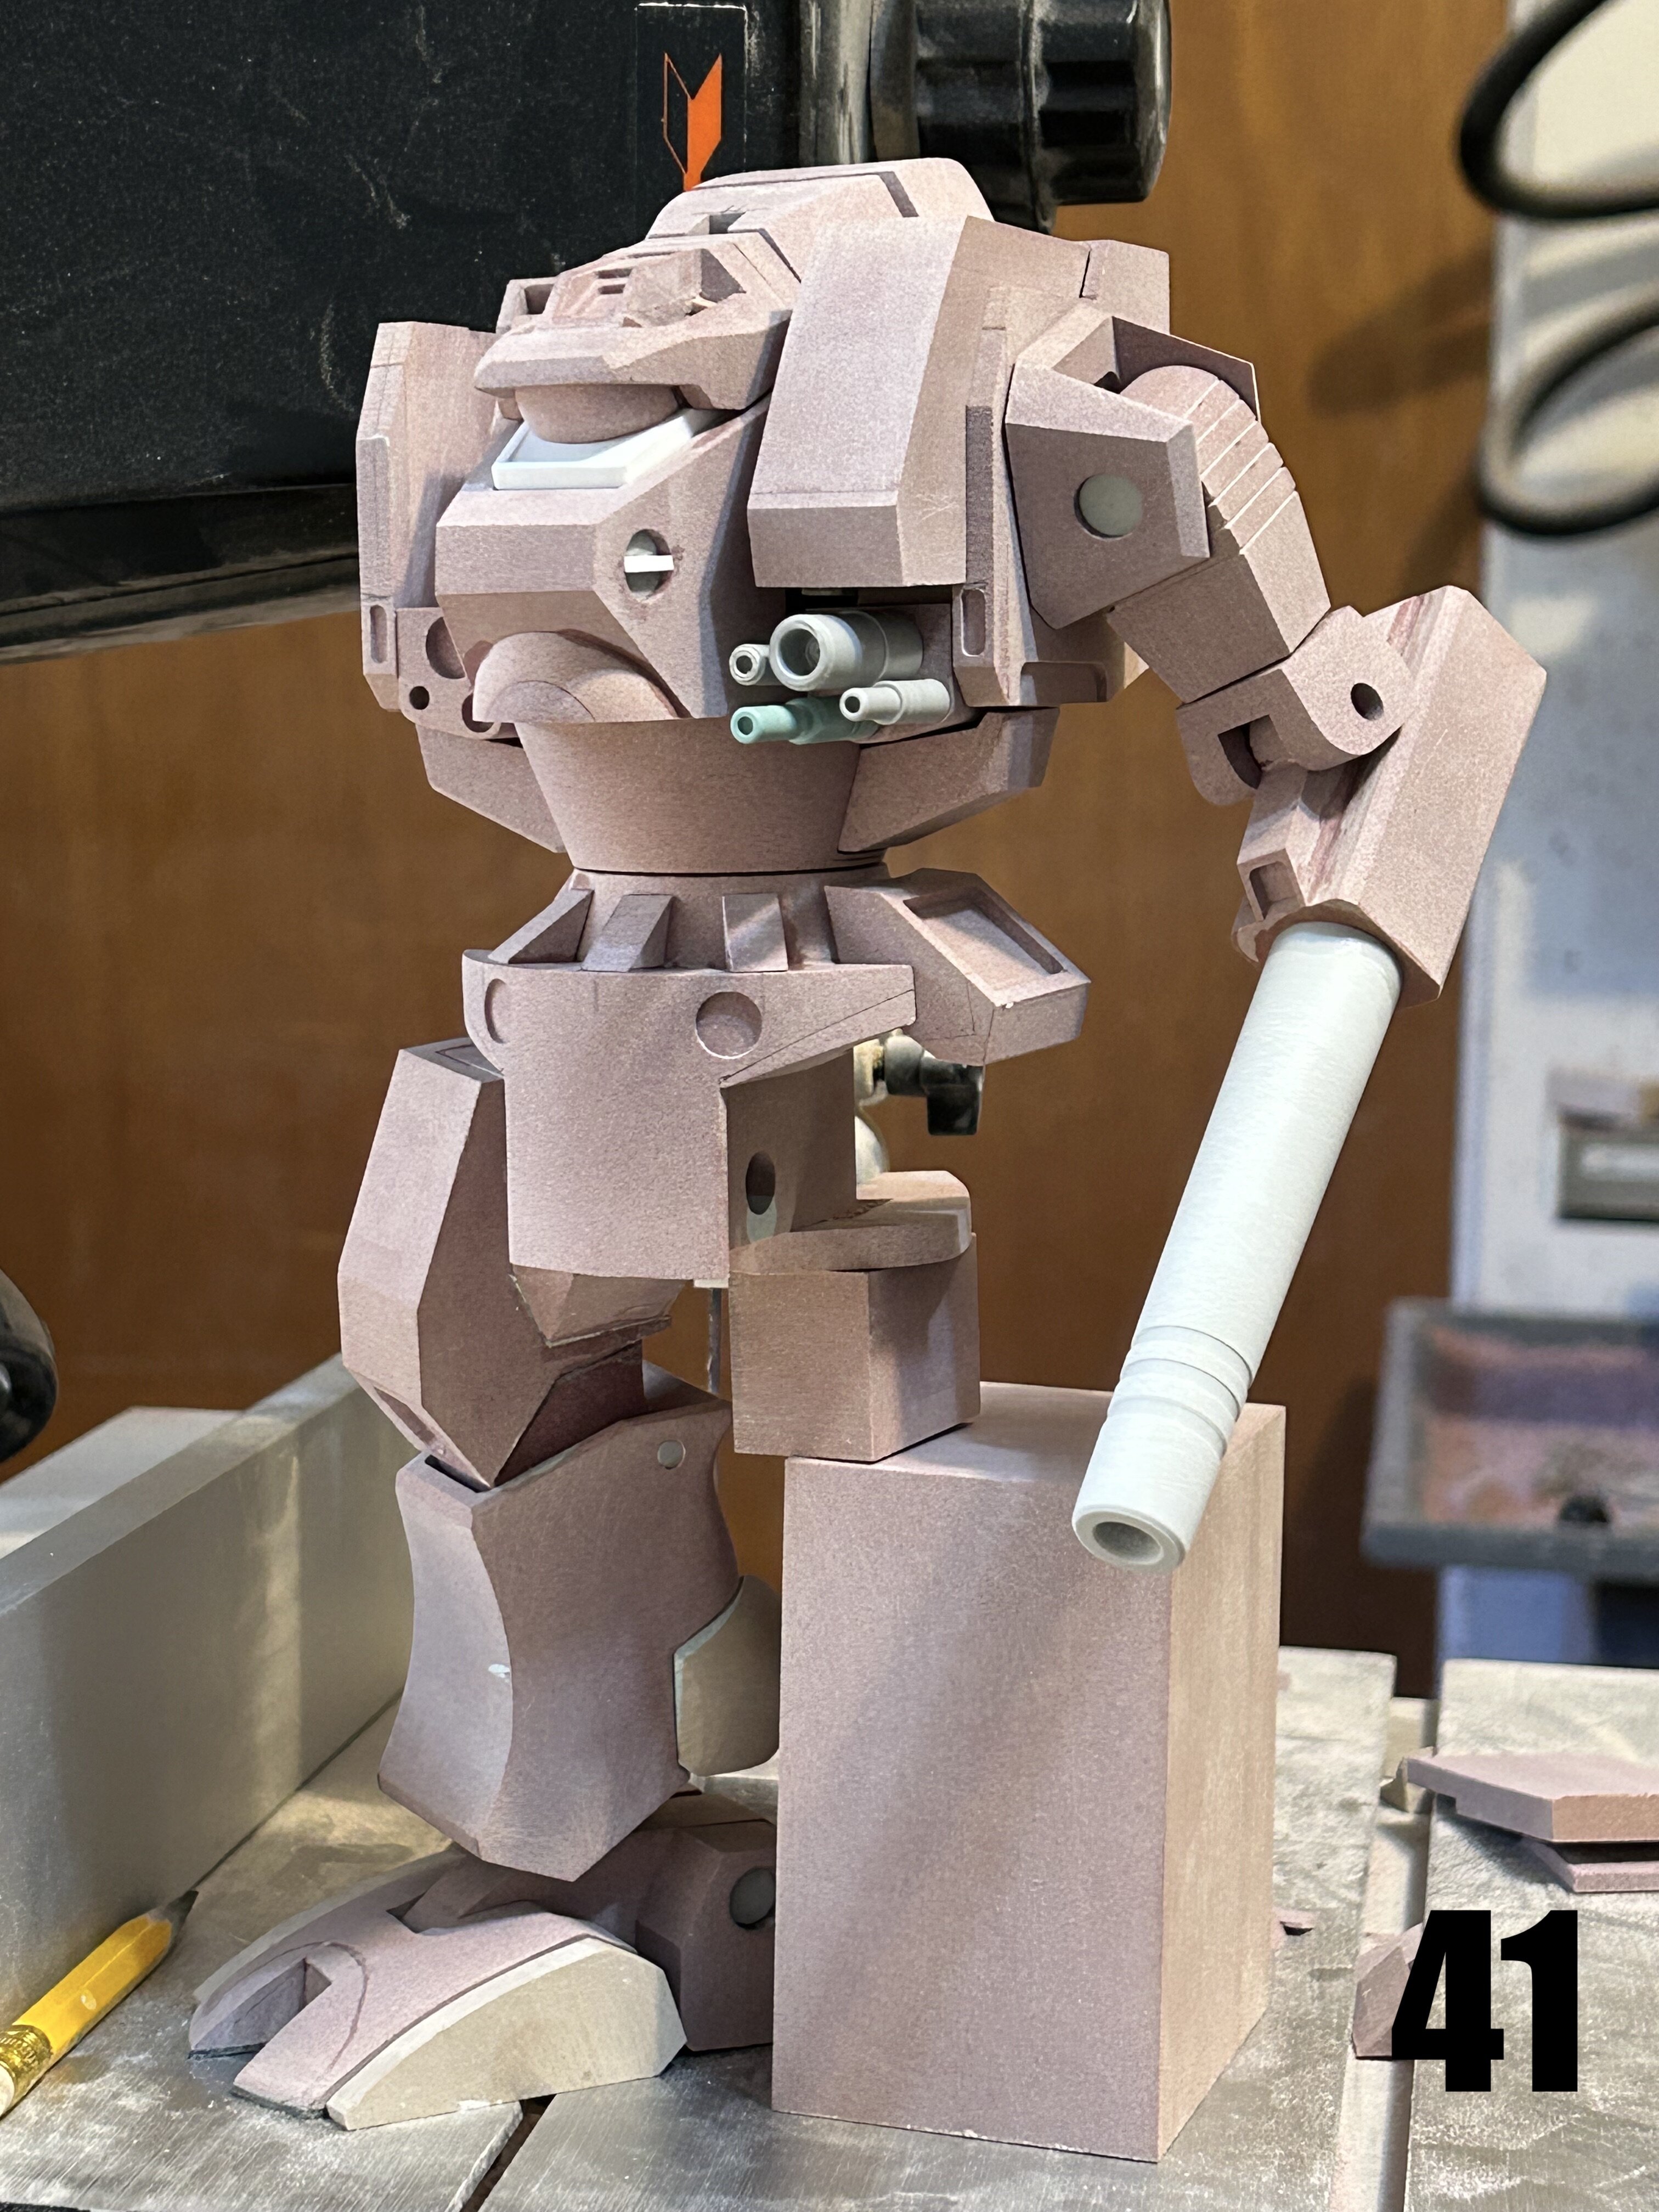
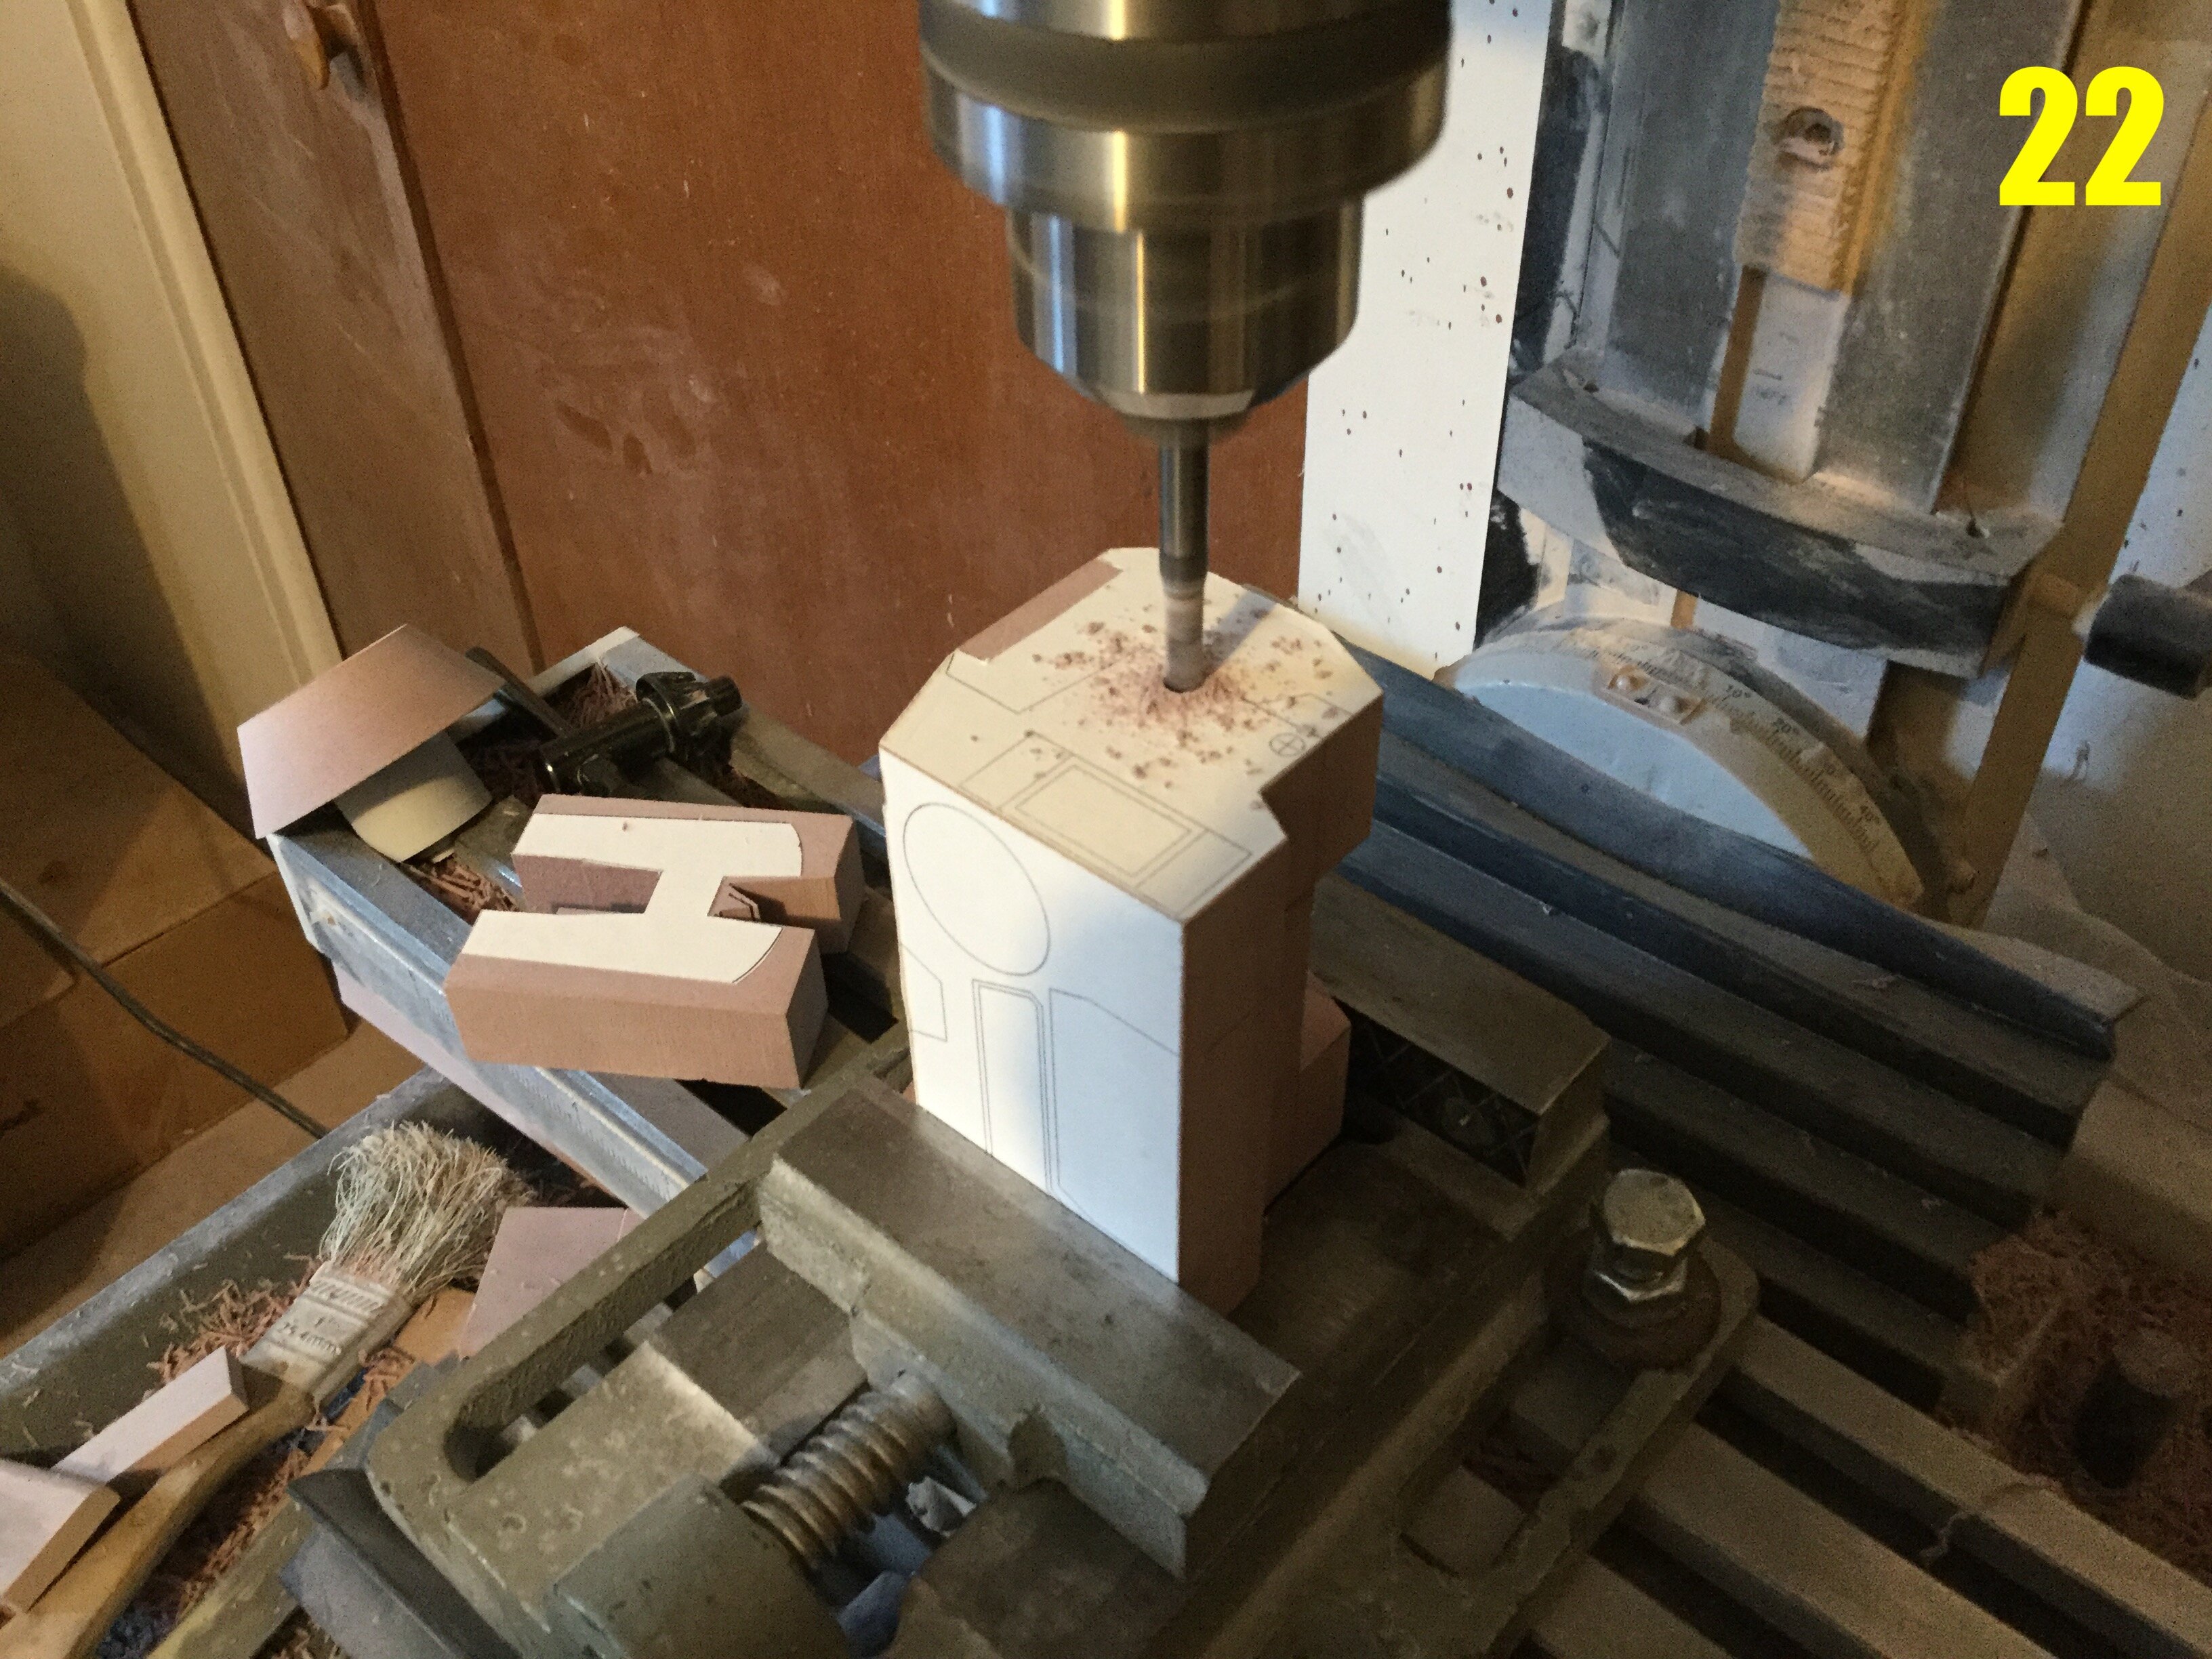
Pics 41-44 show the kit in its current state of finishing, looking considerably better than it did last week, and I'm happy to say that despite its massive size, the kit is quite sturdy and will have better range of motion than I anticipated, due to a last-minute engineering upgrade. More info in next week's update, so stay tuned!

-
Captain's Log: Thursday, May 18th, 2023.
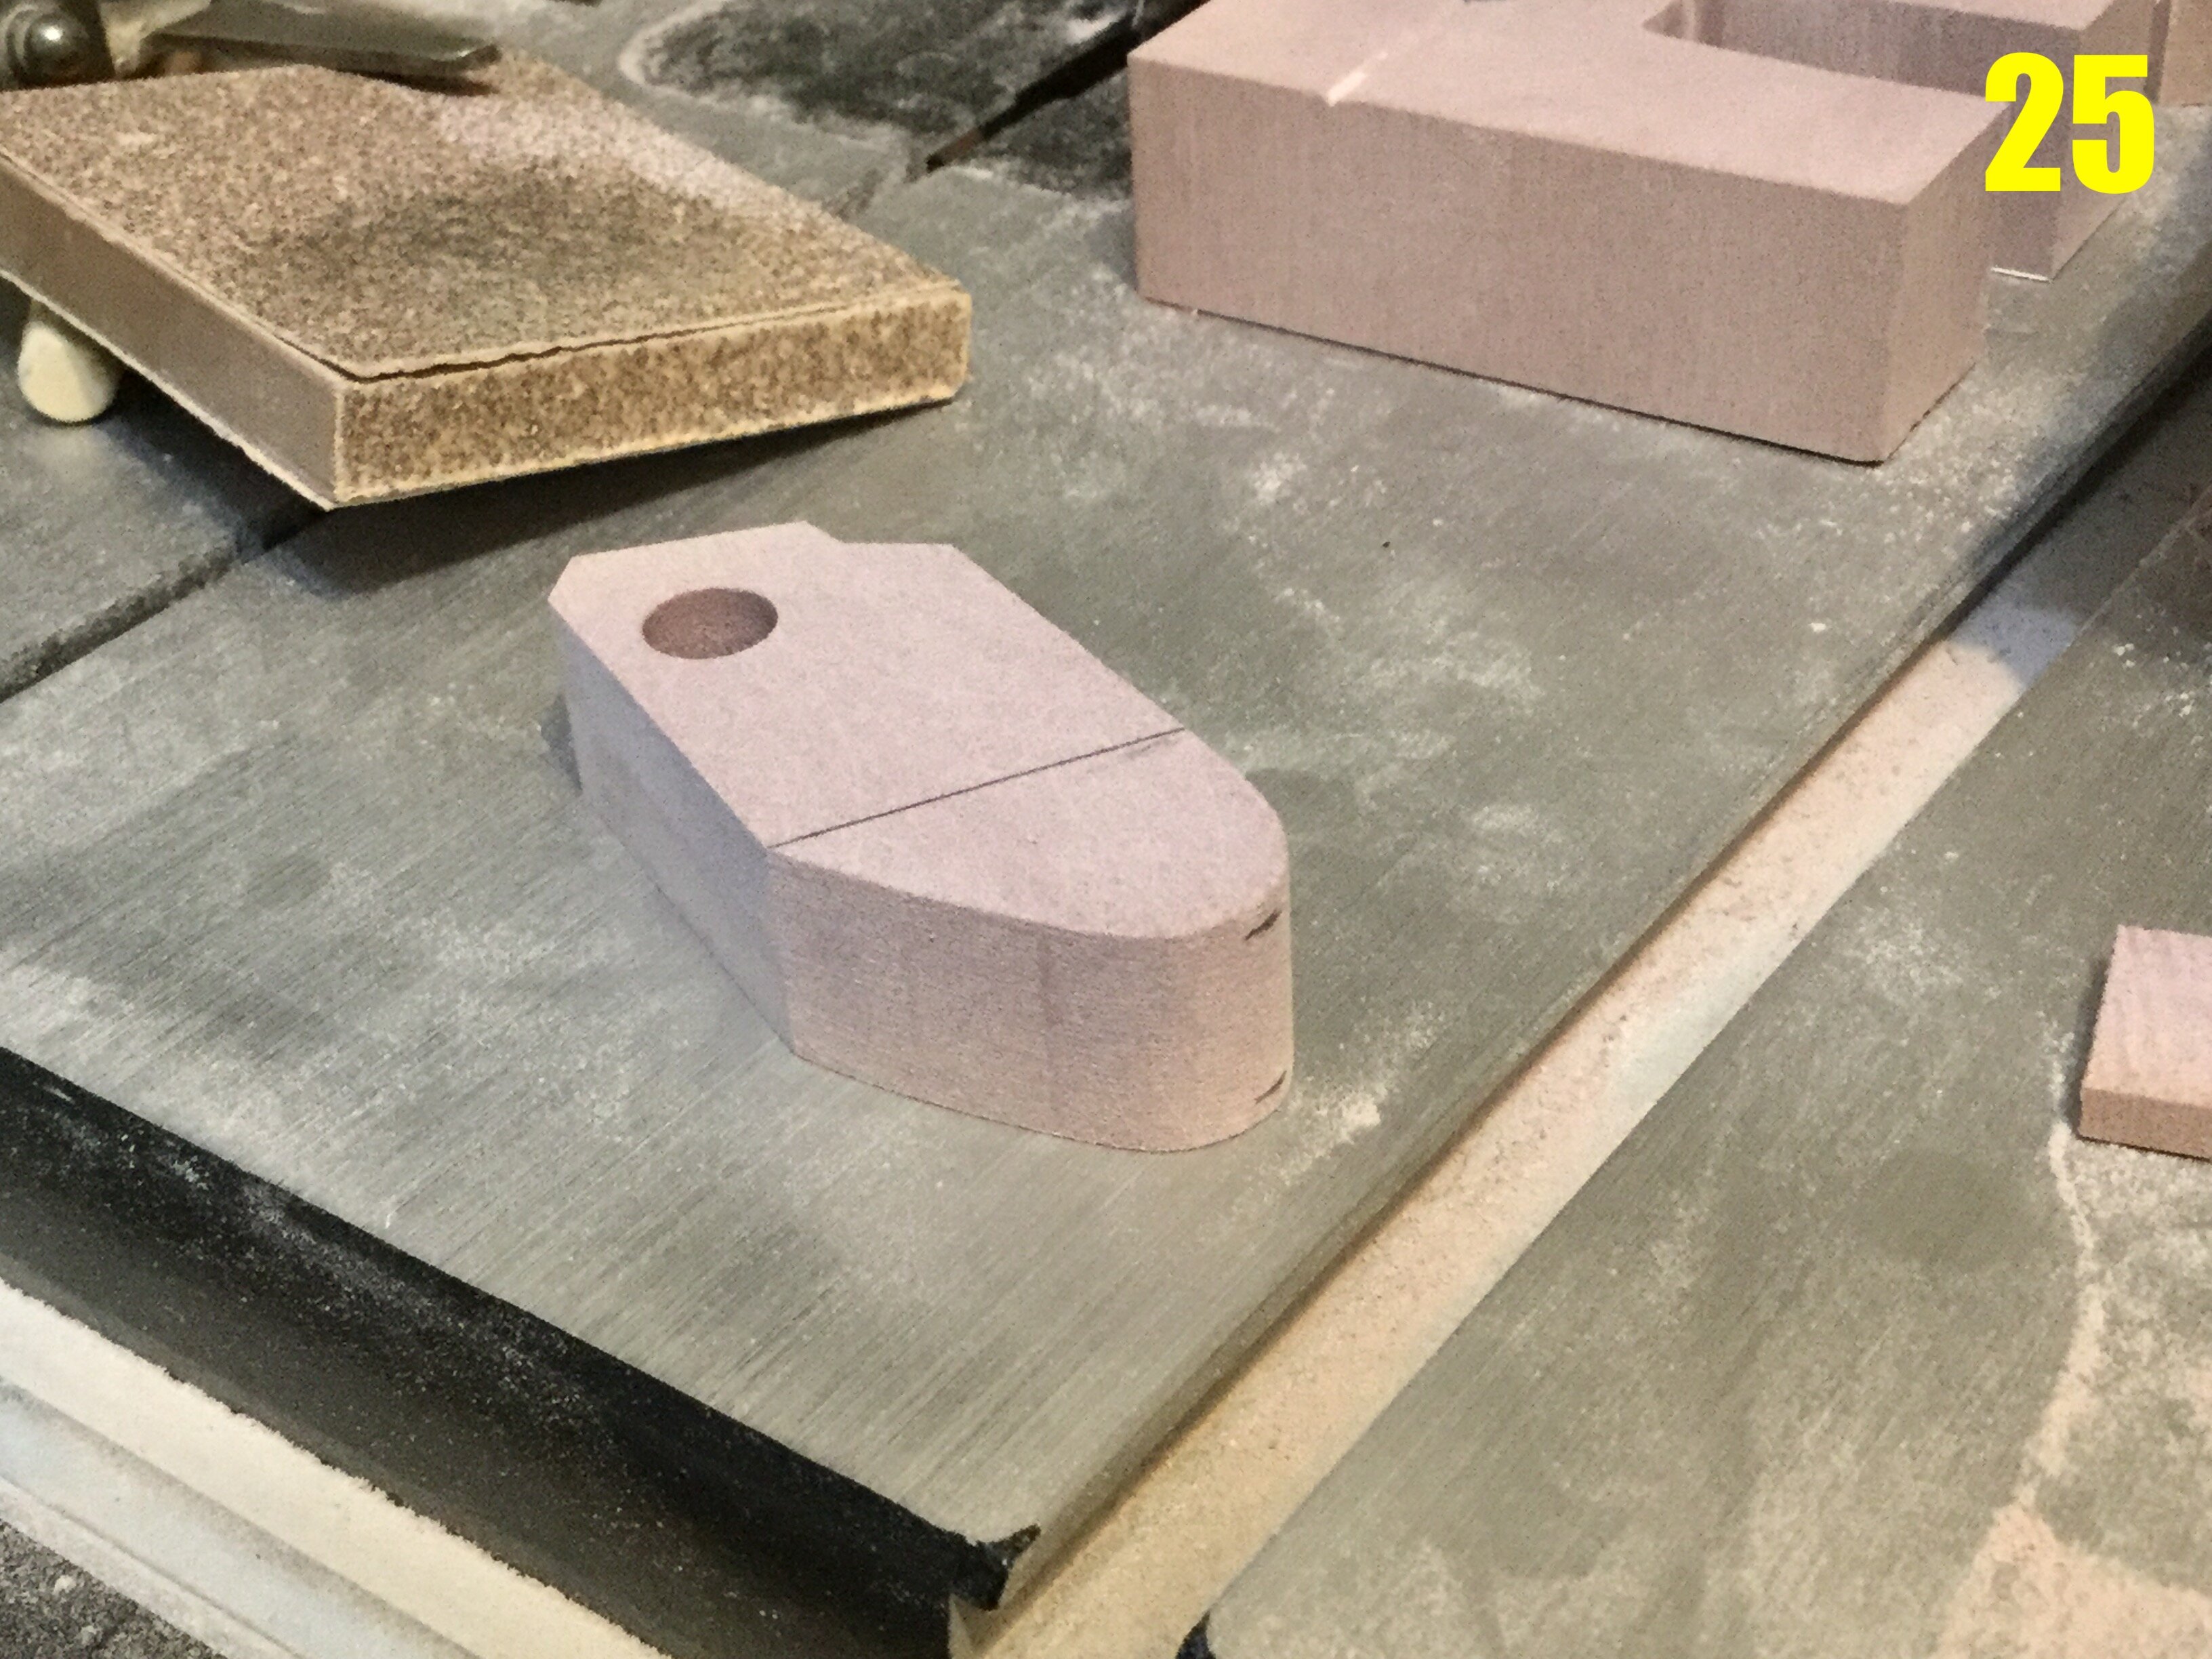
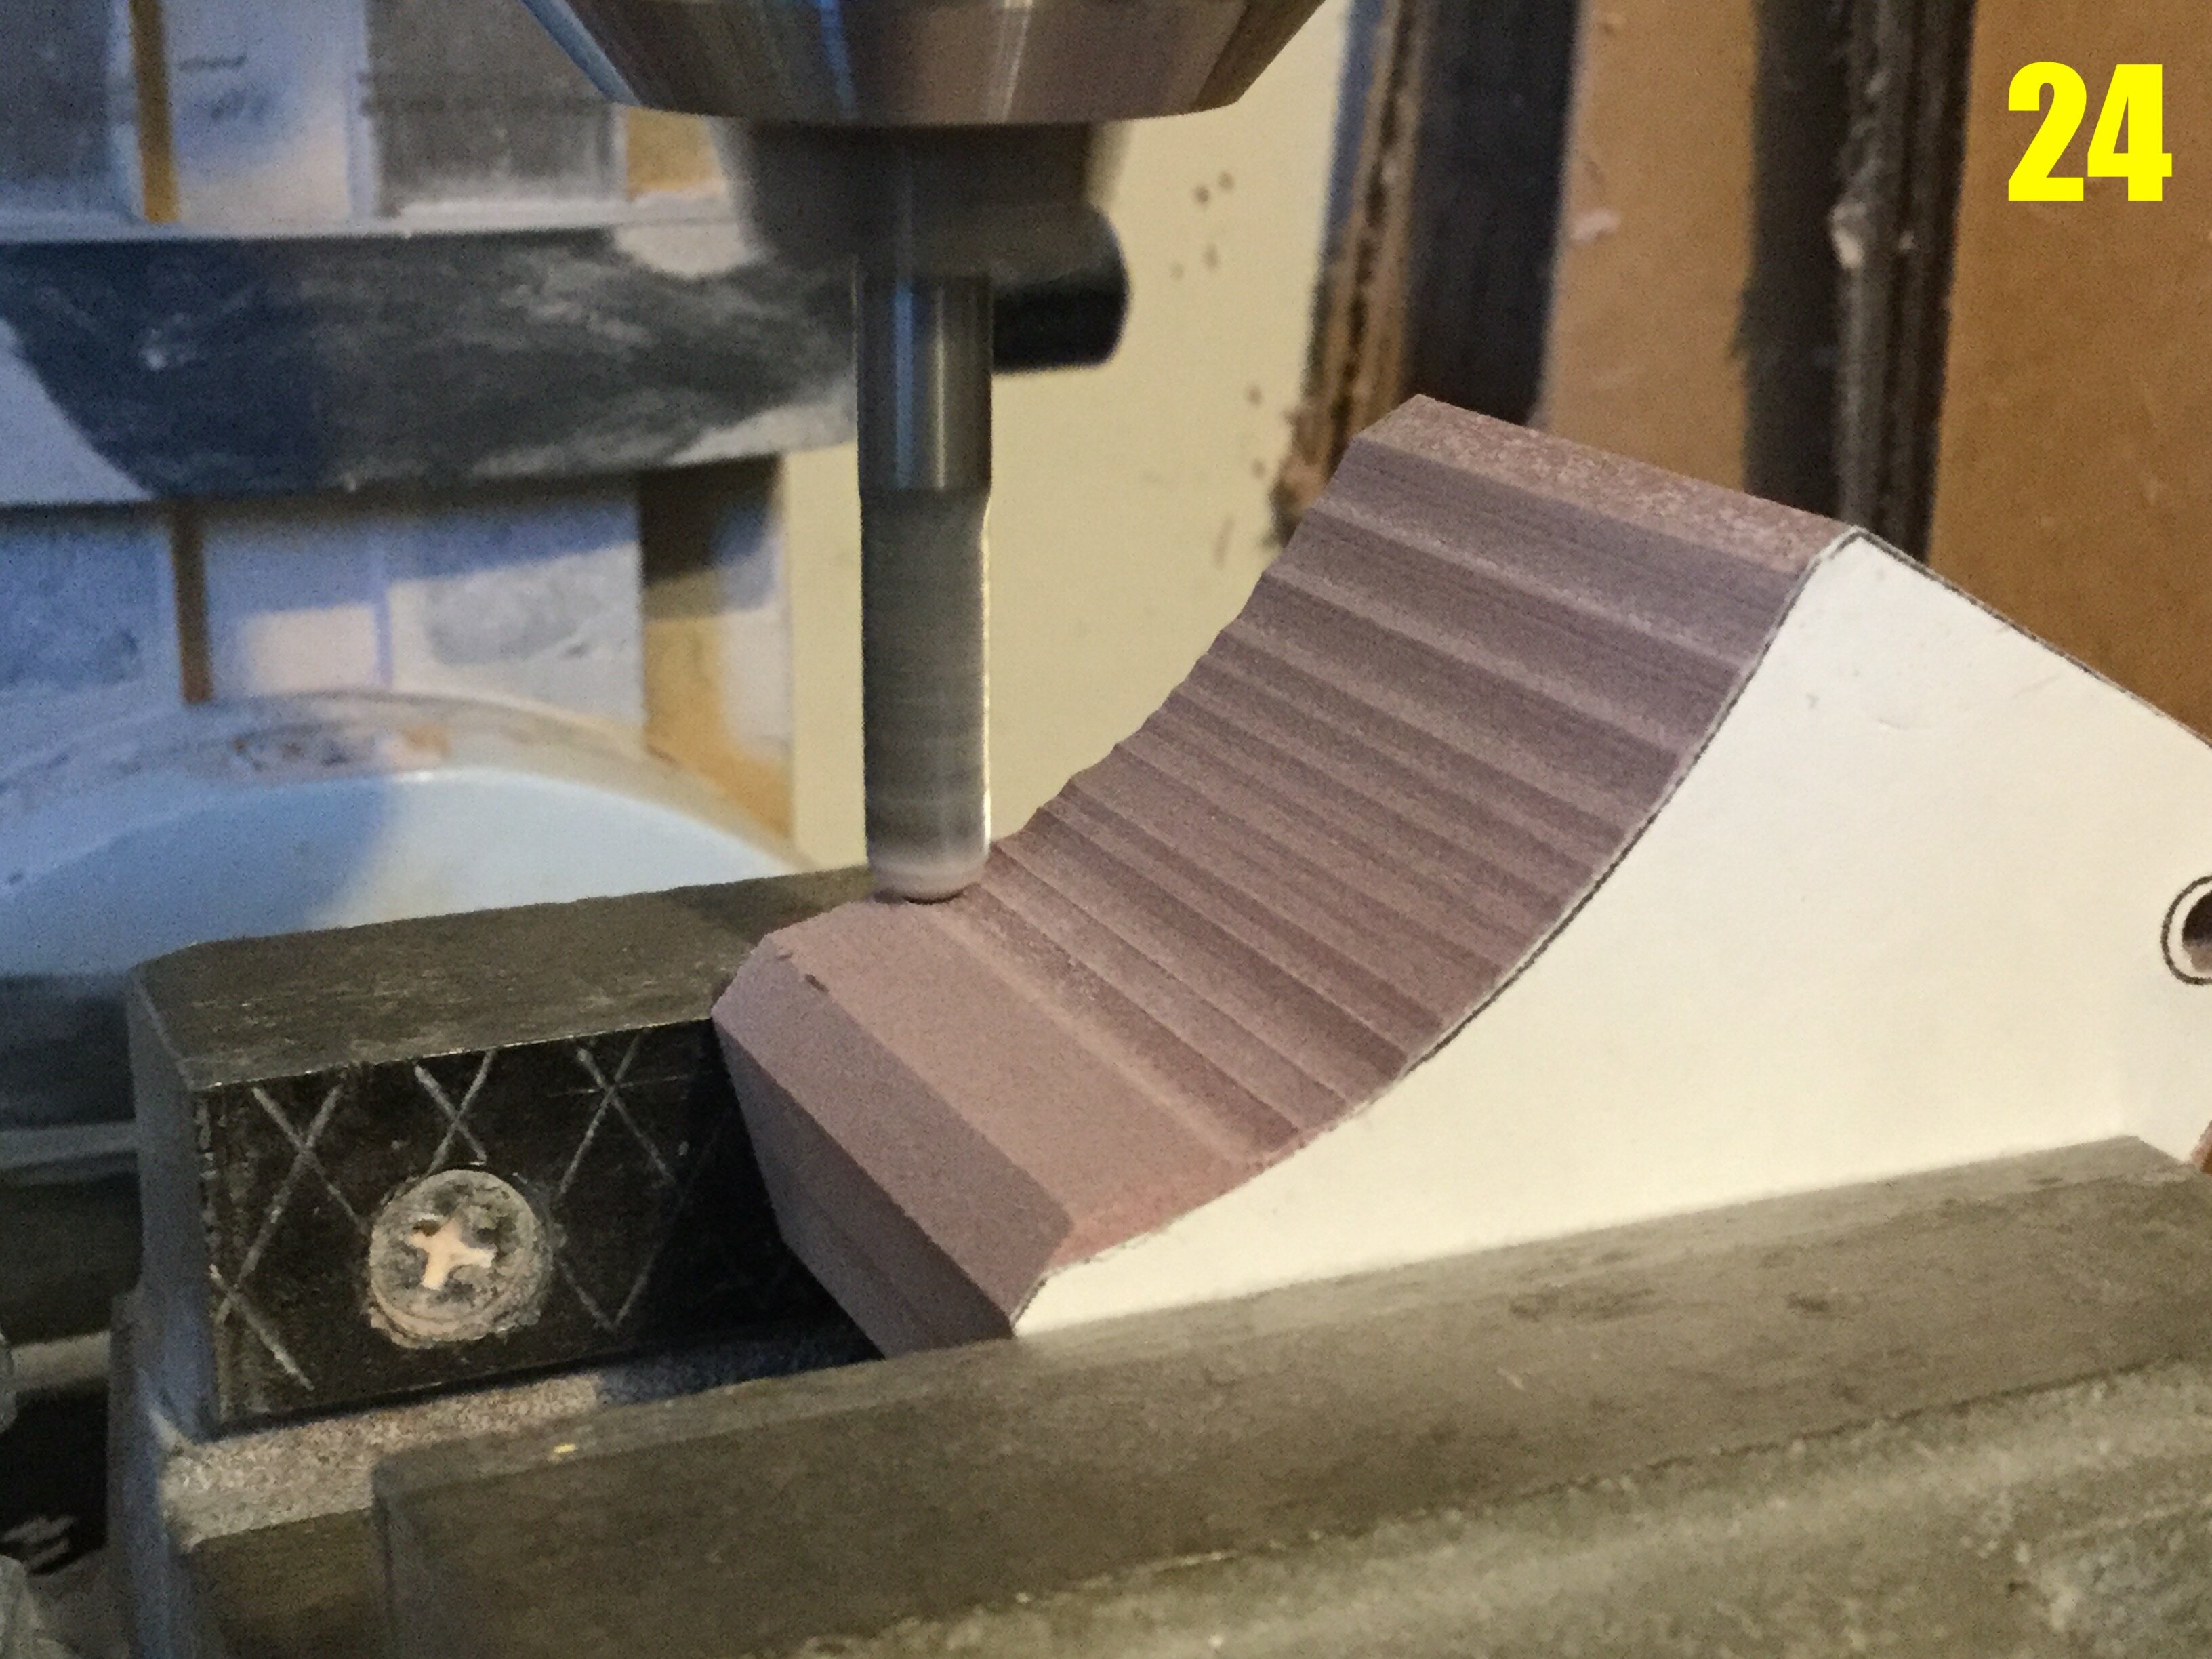
I'm going to begin with a quick tutorial on parts shaping. That is to say, the process which follows machining which you saw last week. Let's begin with a simple part like the ankle joint module, which is what we see in pic 25. You'll notice some penciled lines over the top and also at the edge, which is where I intend to create a deflection in the surface. These pencil lines will guide me in the shaping process.
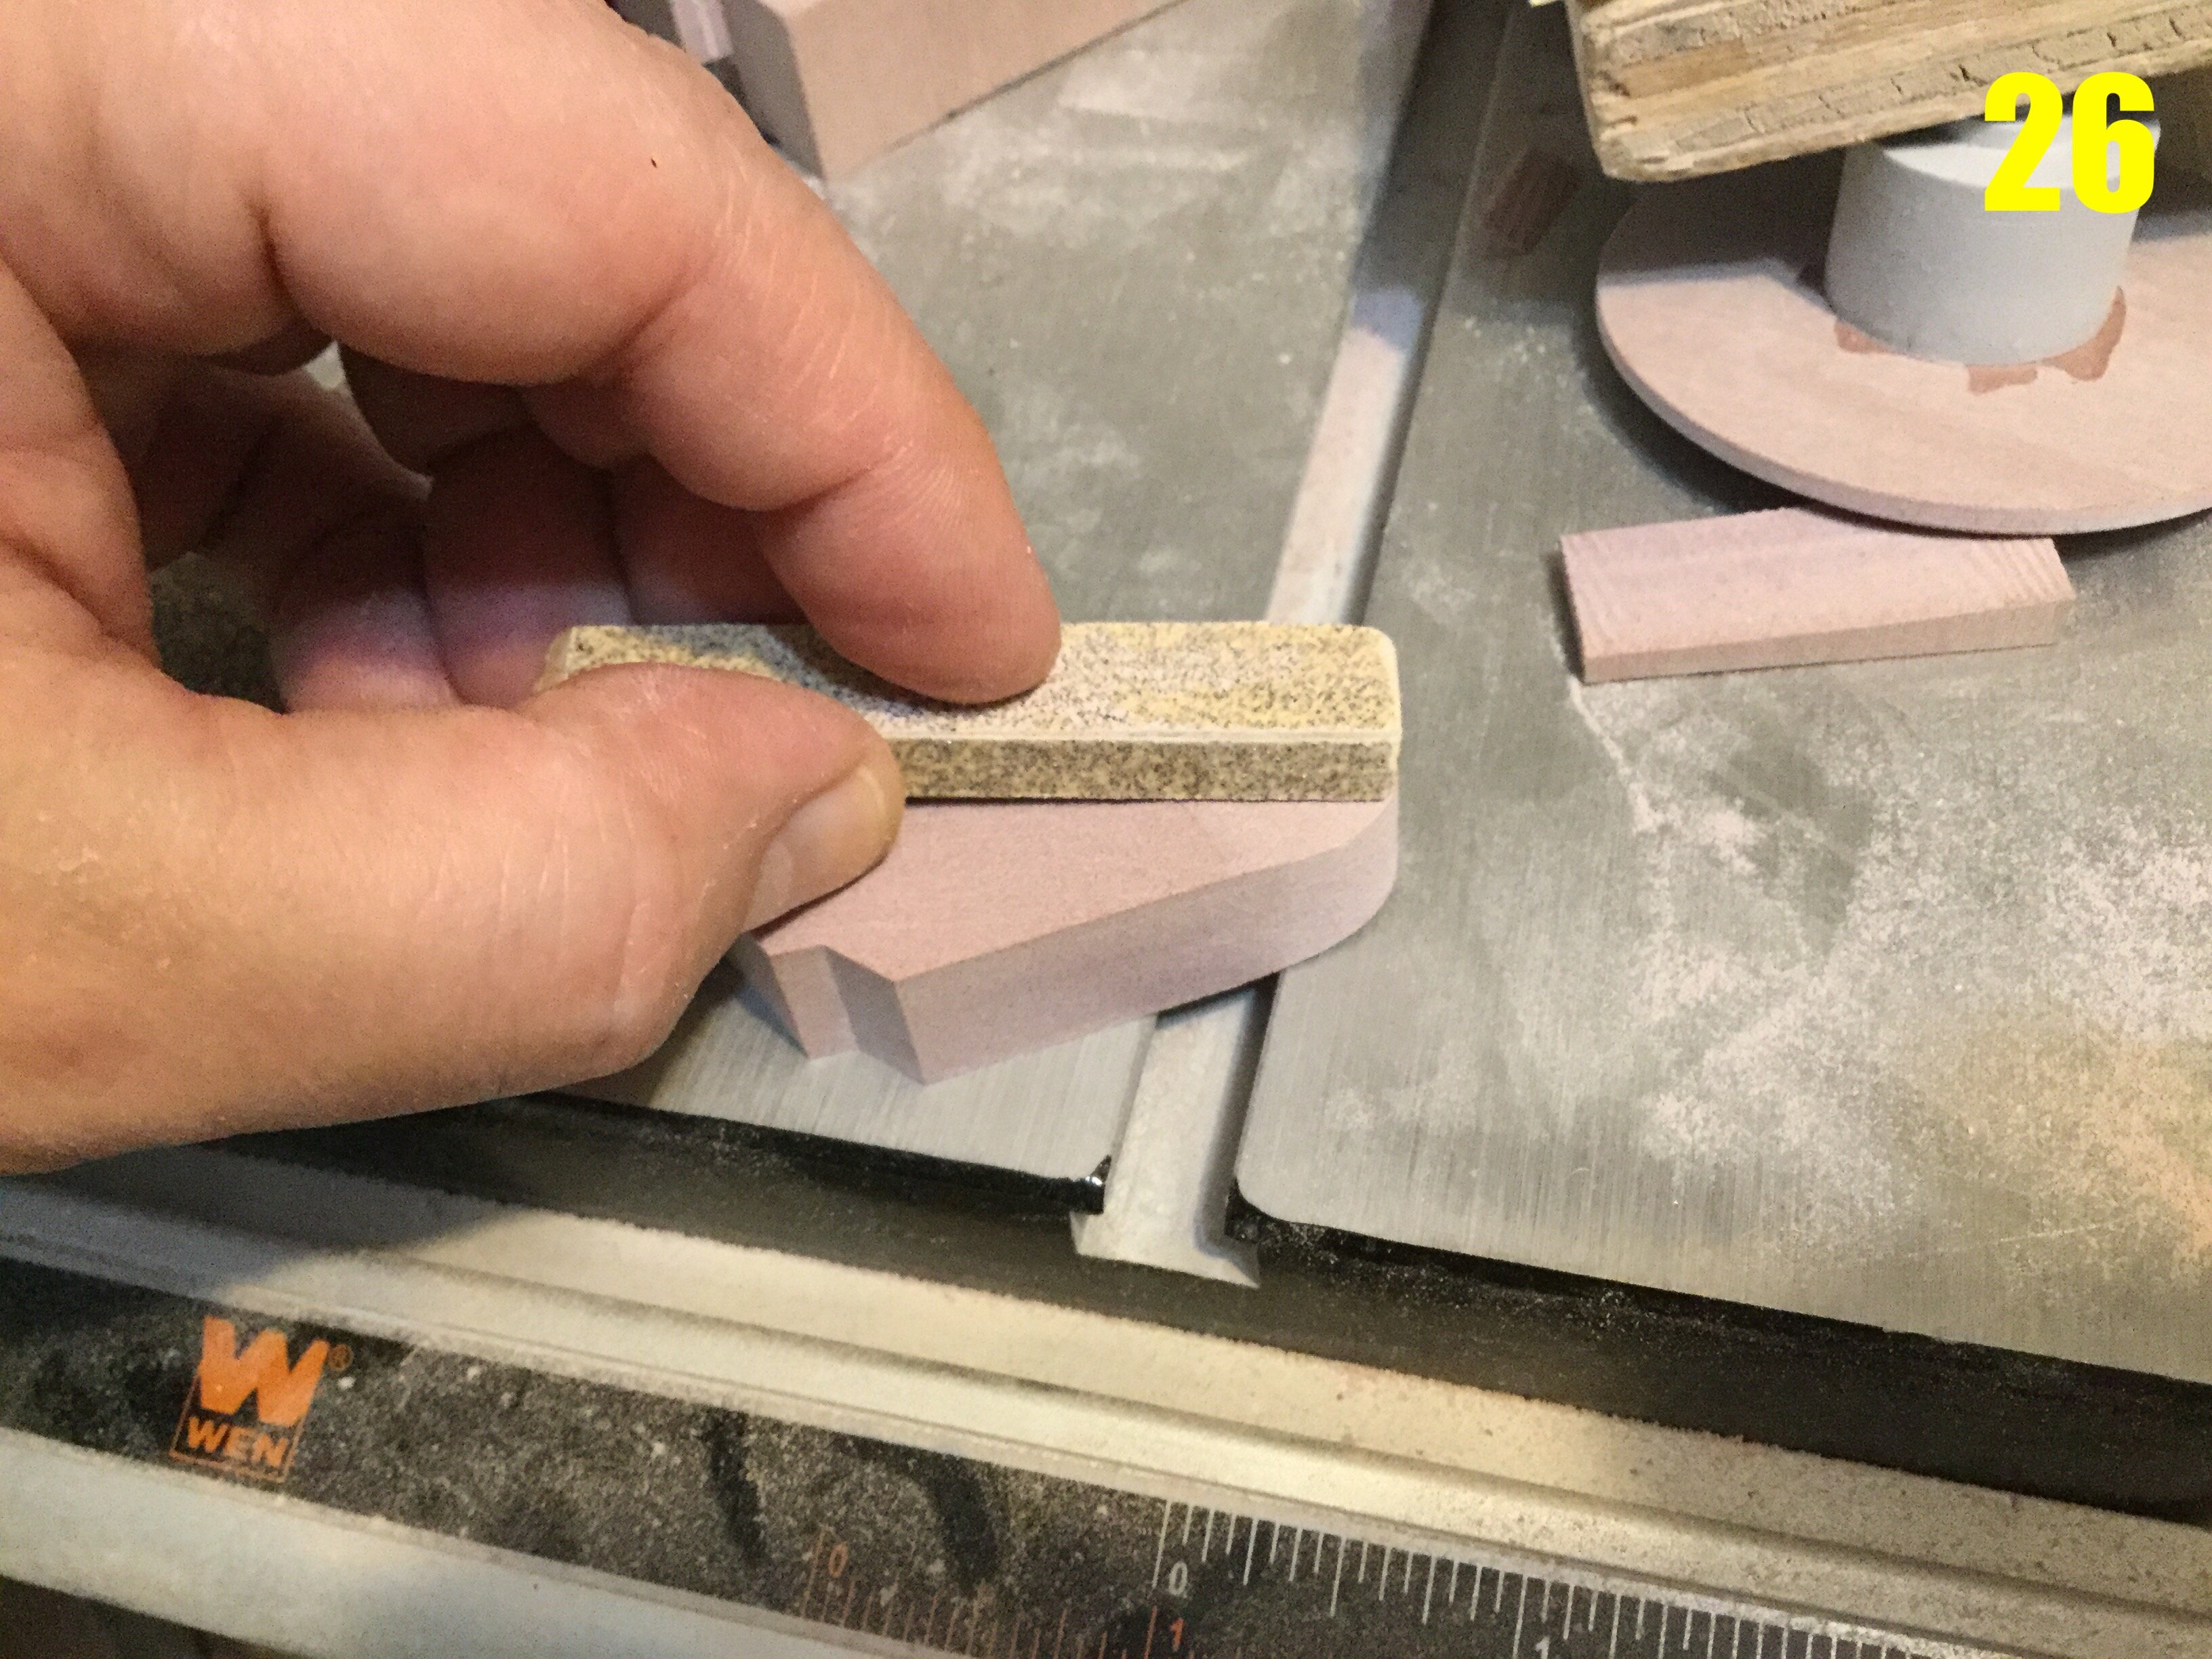
Pic 26: using some sanding blocks, I begin going over the part in the area I want to sand down. Take your time here and watch the lines, otherwise you may remove too much material.
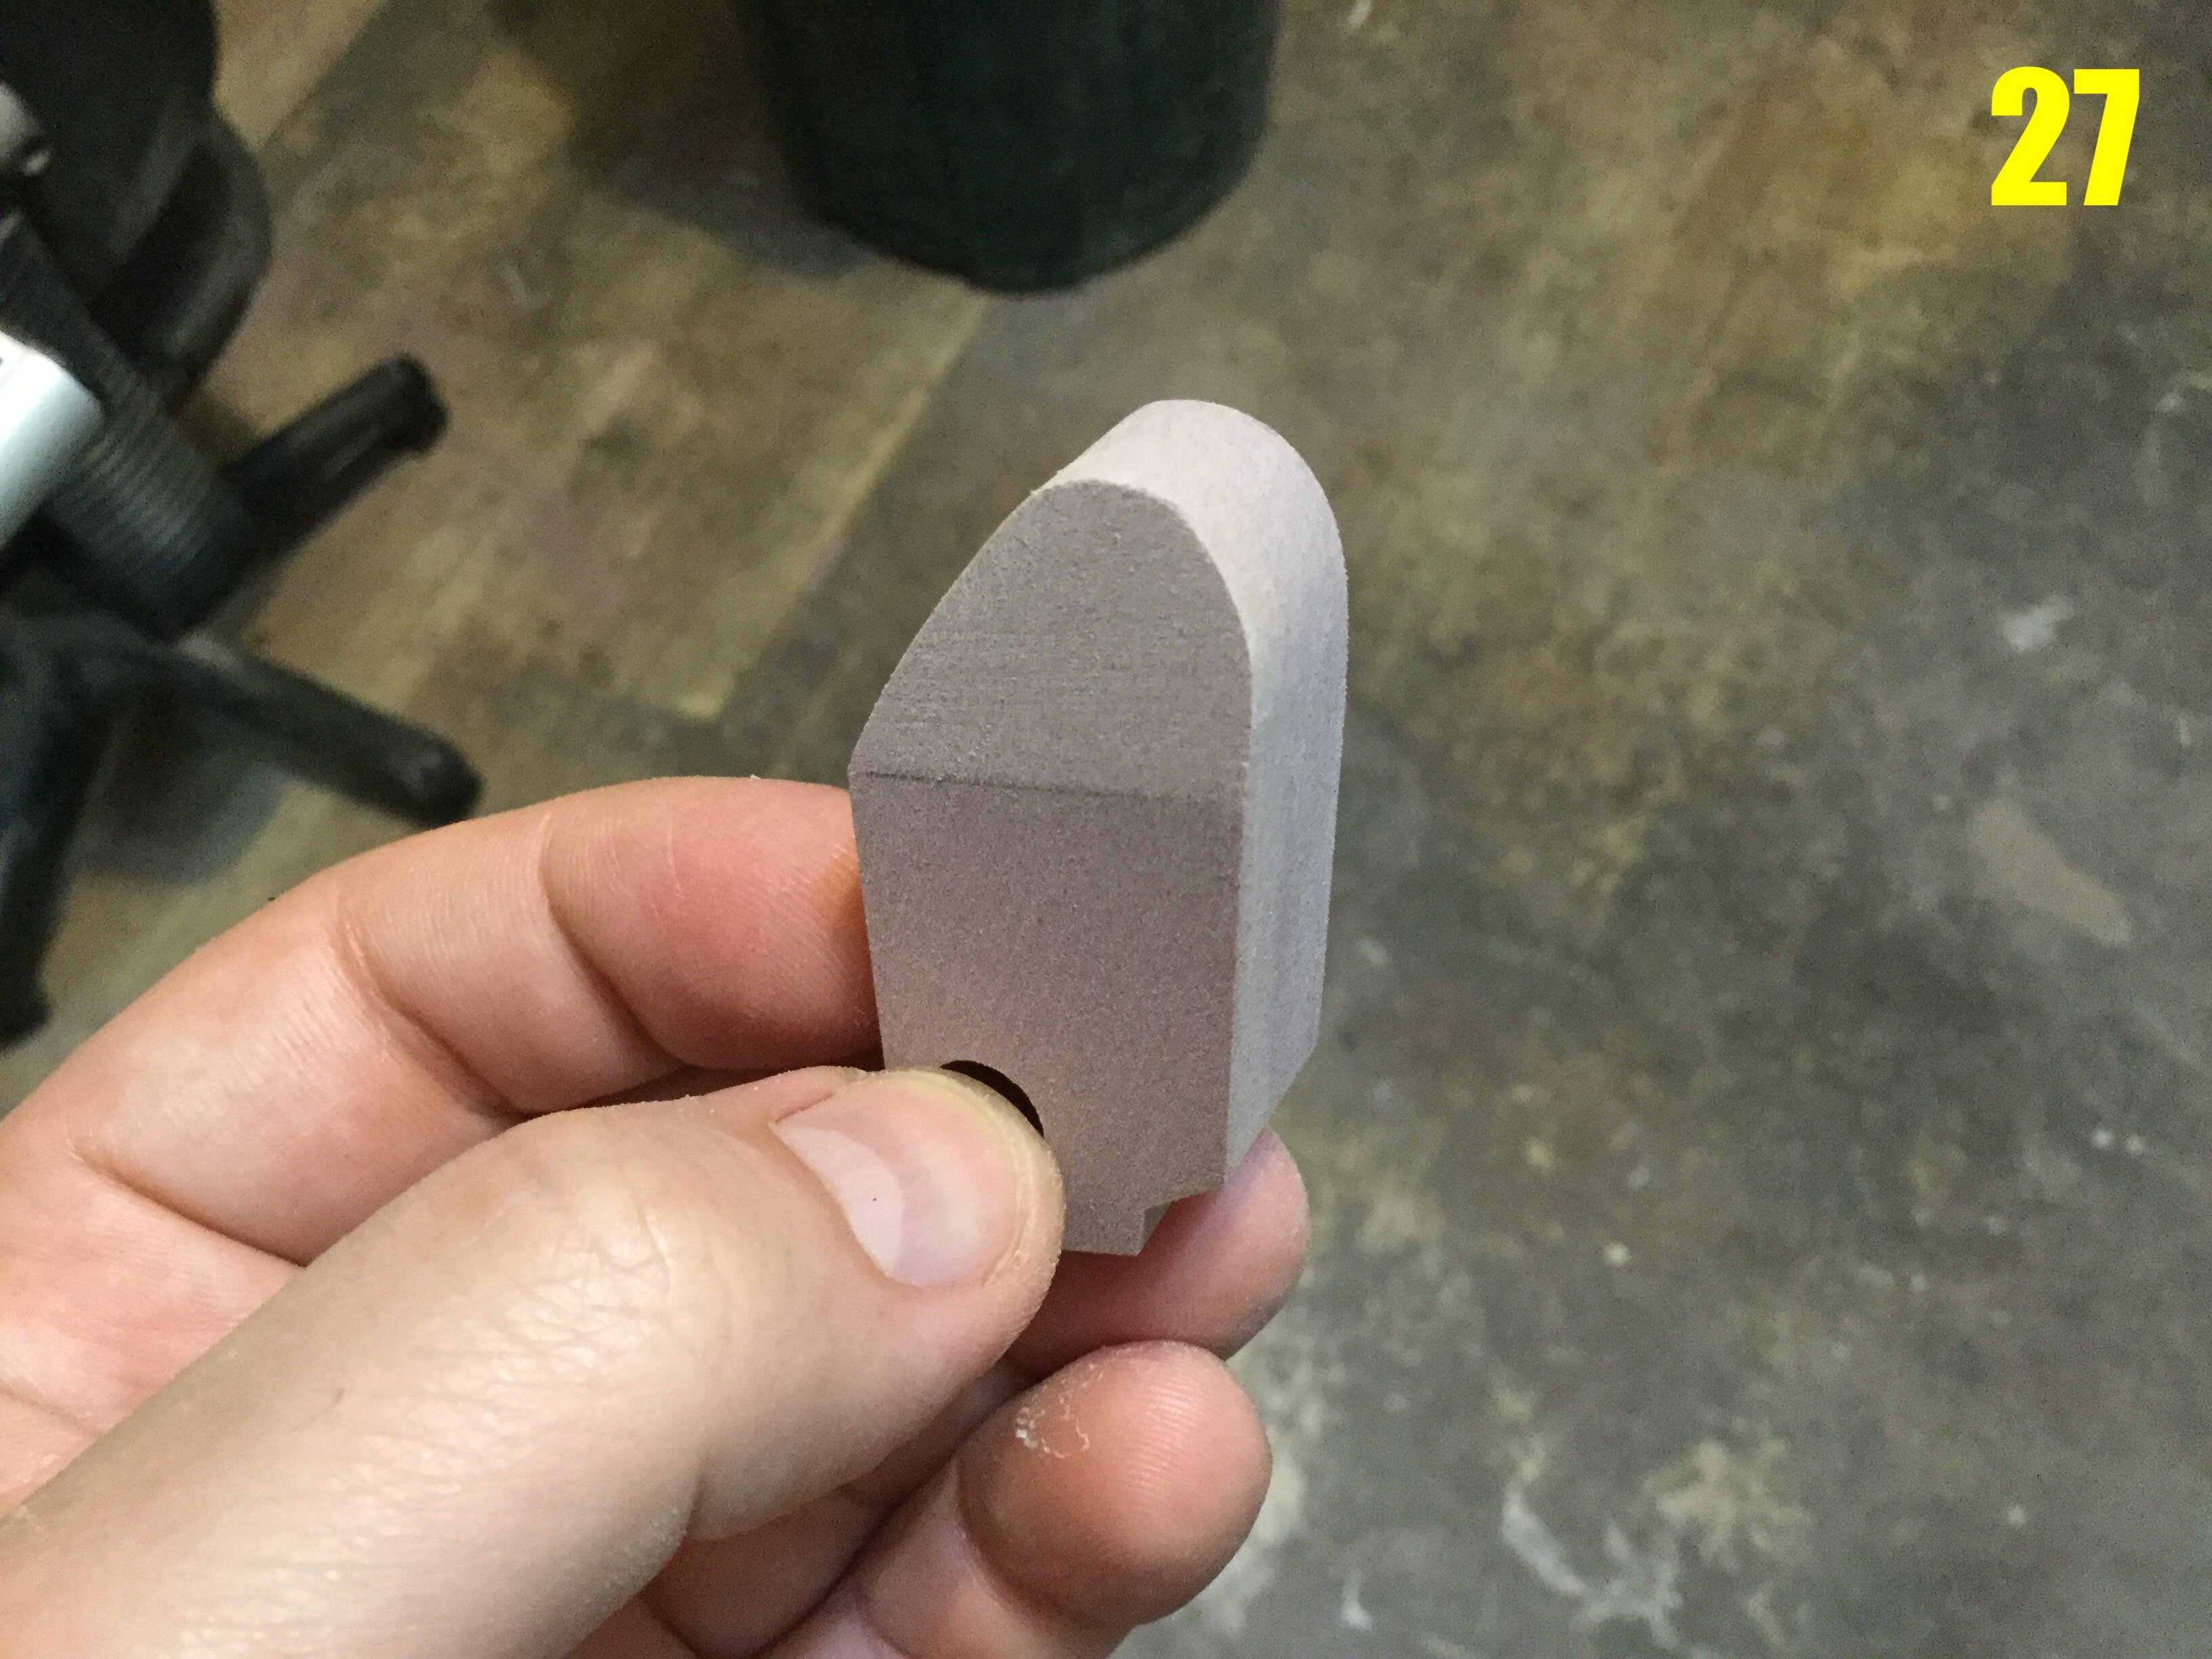
Pic 27 shows what I was going for. I can now smooth the piece down further with some finer (3-400 grit) sanding blocks for optimal finishing.
Pic 28: the next piece to work on is the foot. Starting from a square block, I very carefully remove some excess material with the band saw. I could have used the Dremel, but this is faster and makes much less dust. As you can see, I'm still leaving a good 3mm from the pencil line when I cut. This is because the band saw isn't precise, and it's easier to remove a little material at a time than have to putty and re-shape.

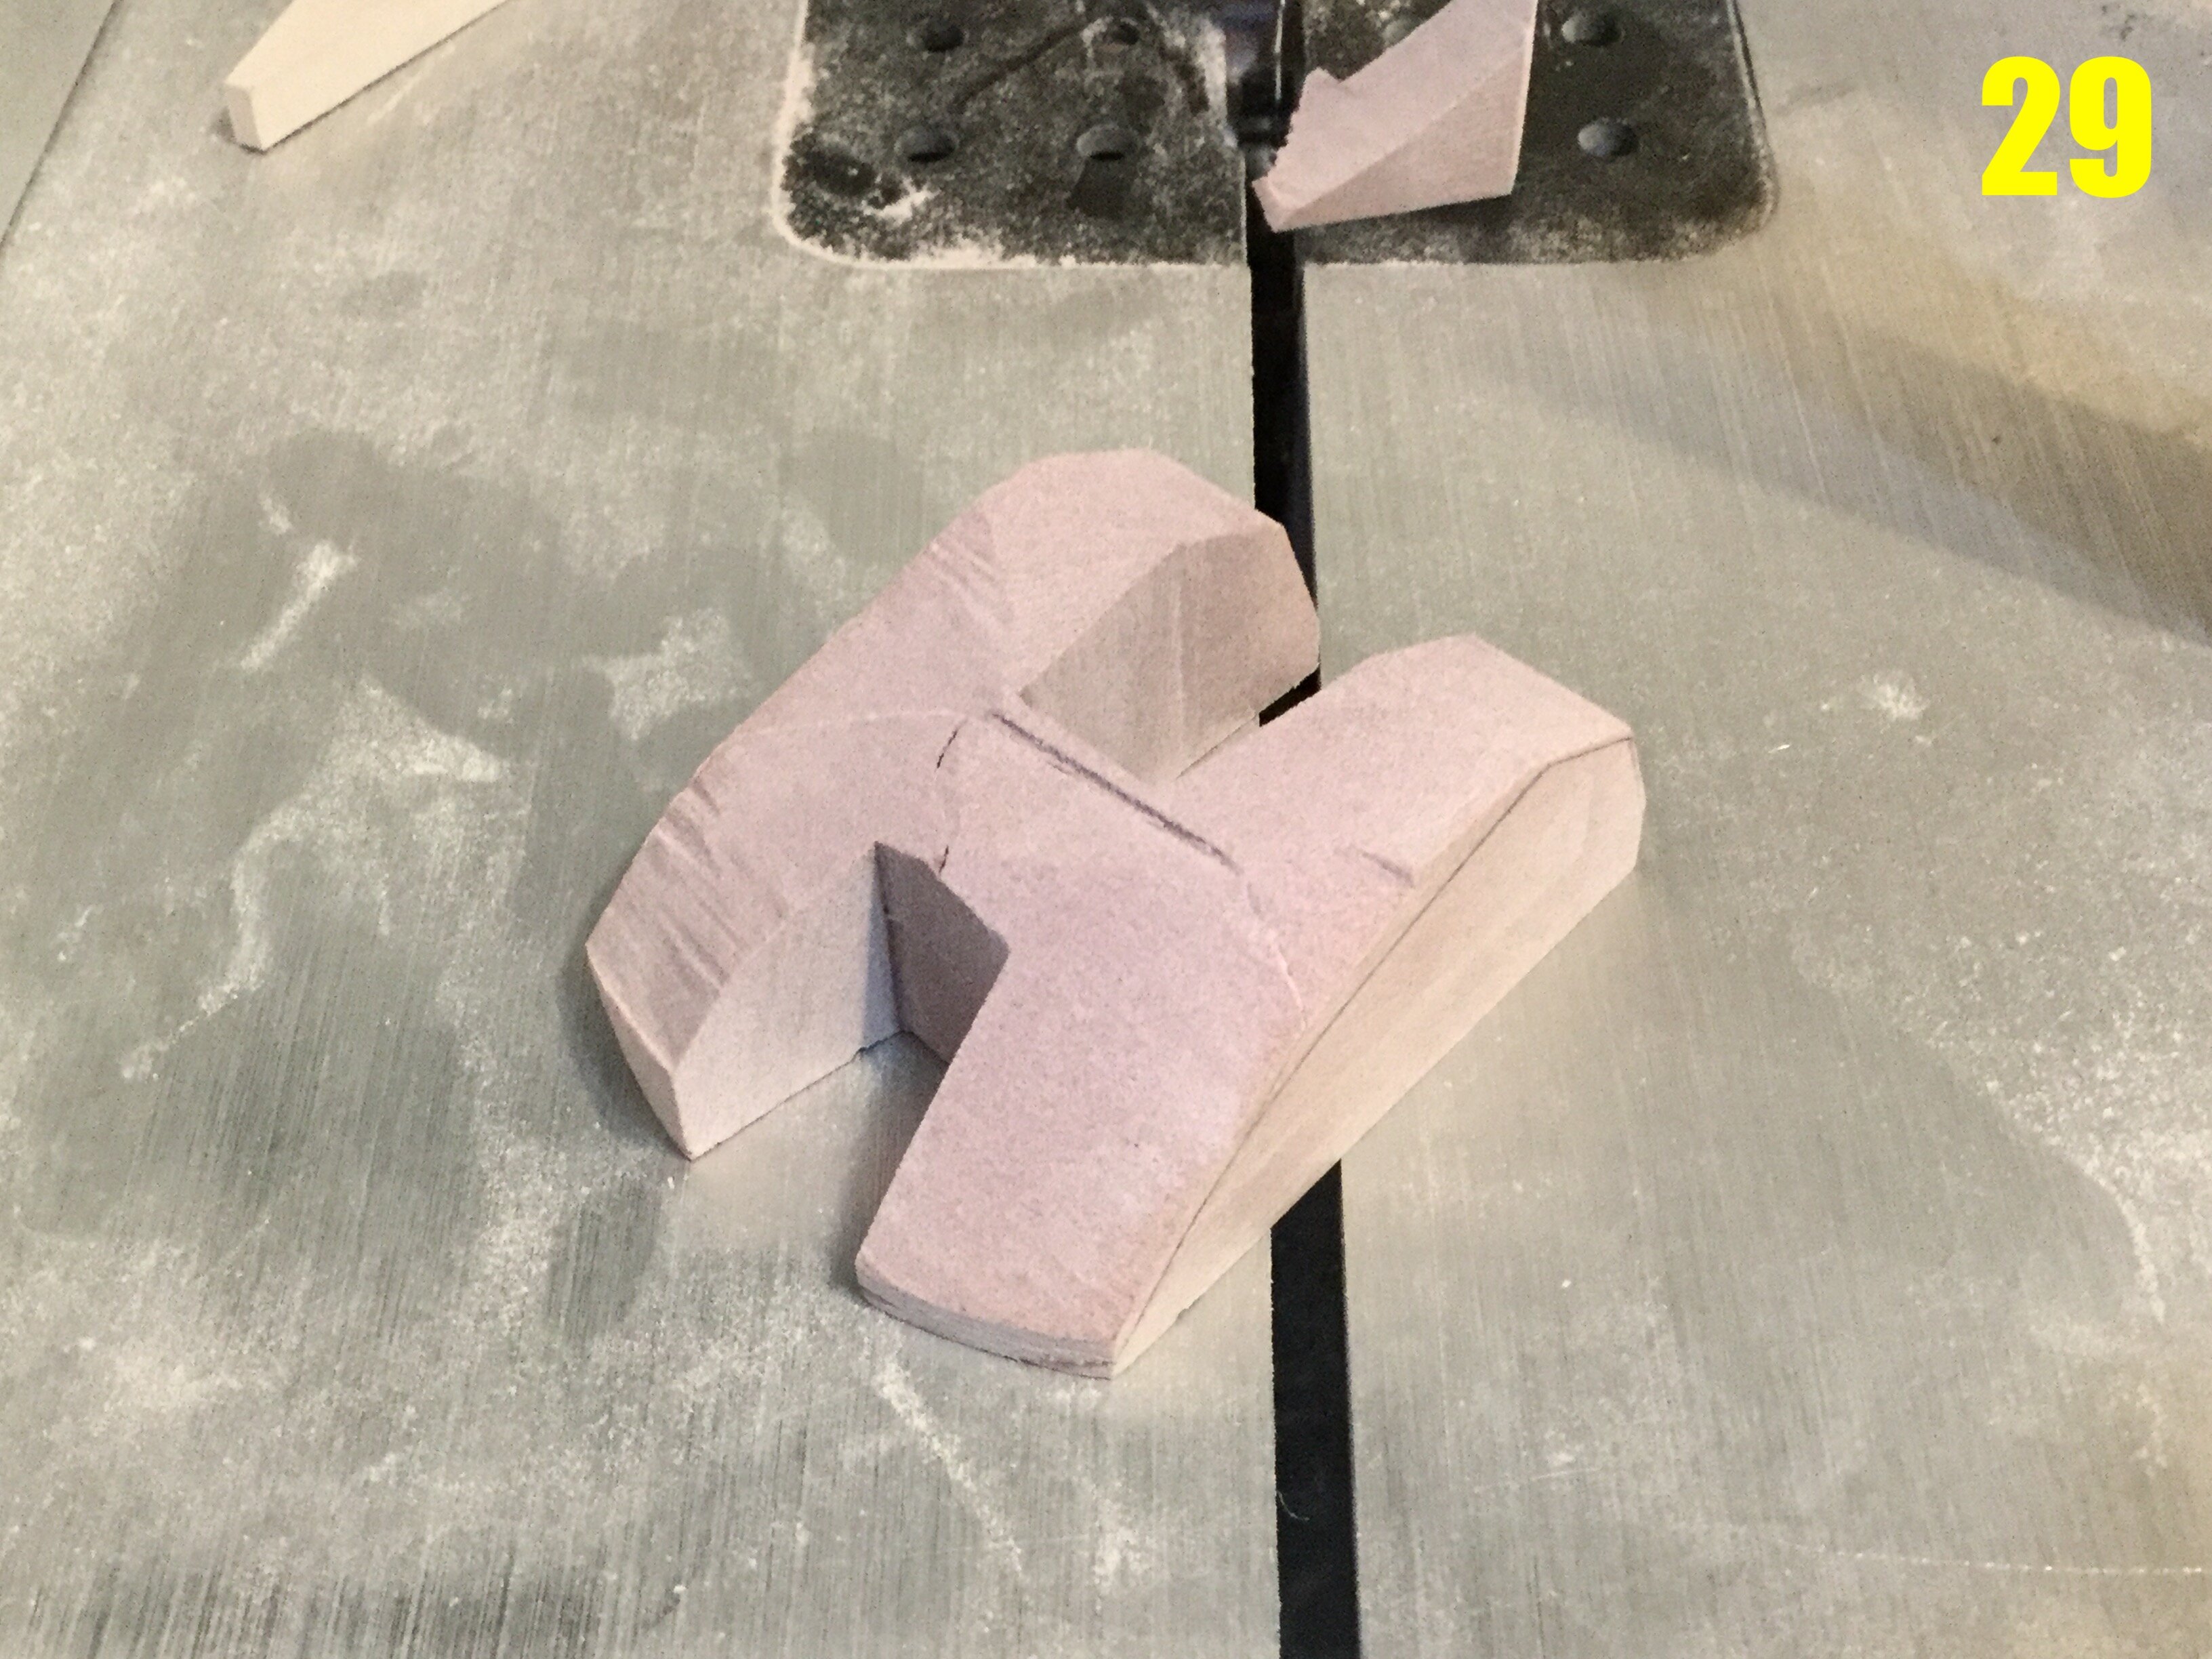
Pic 29: this is freshly hacked on the band saw.
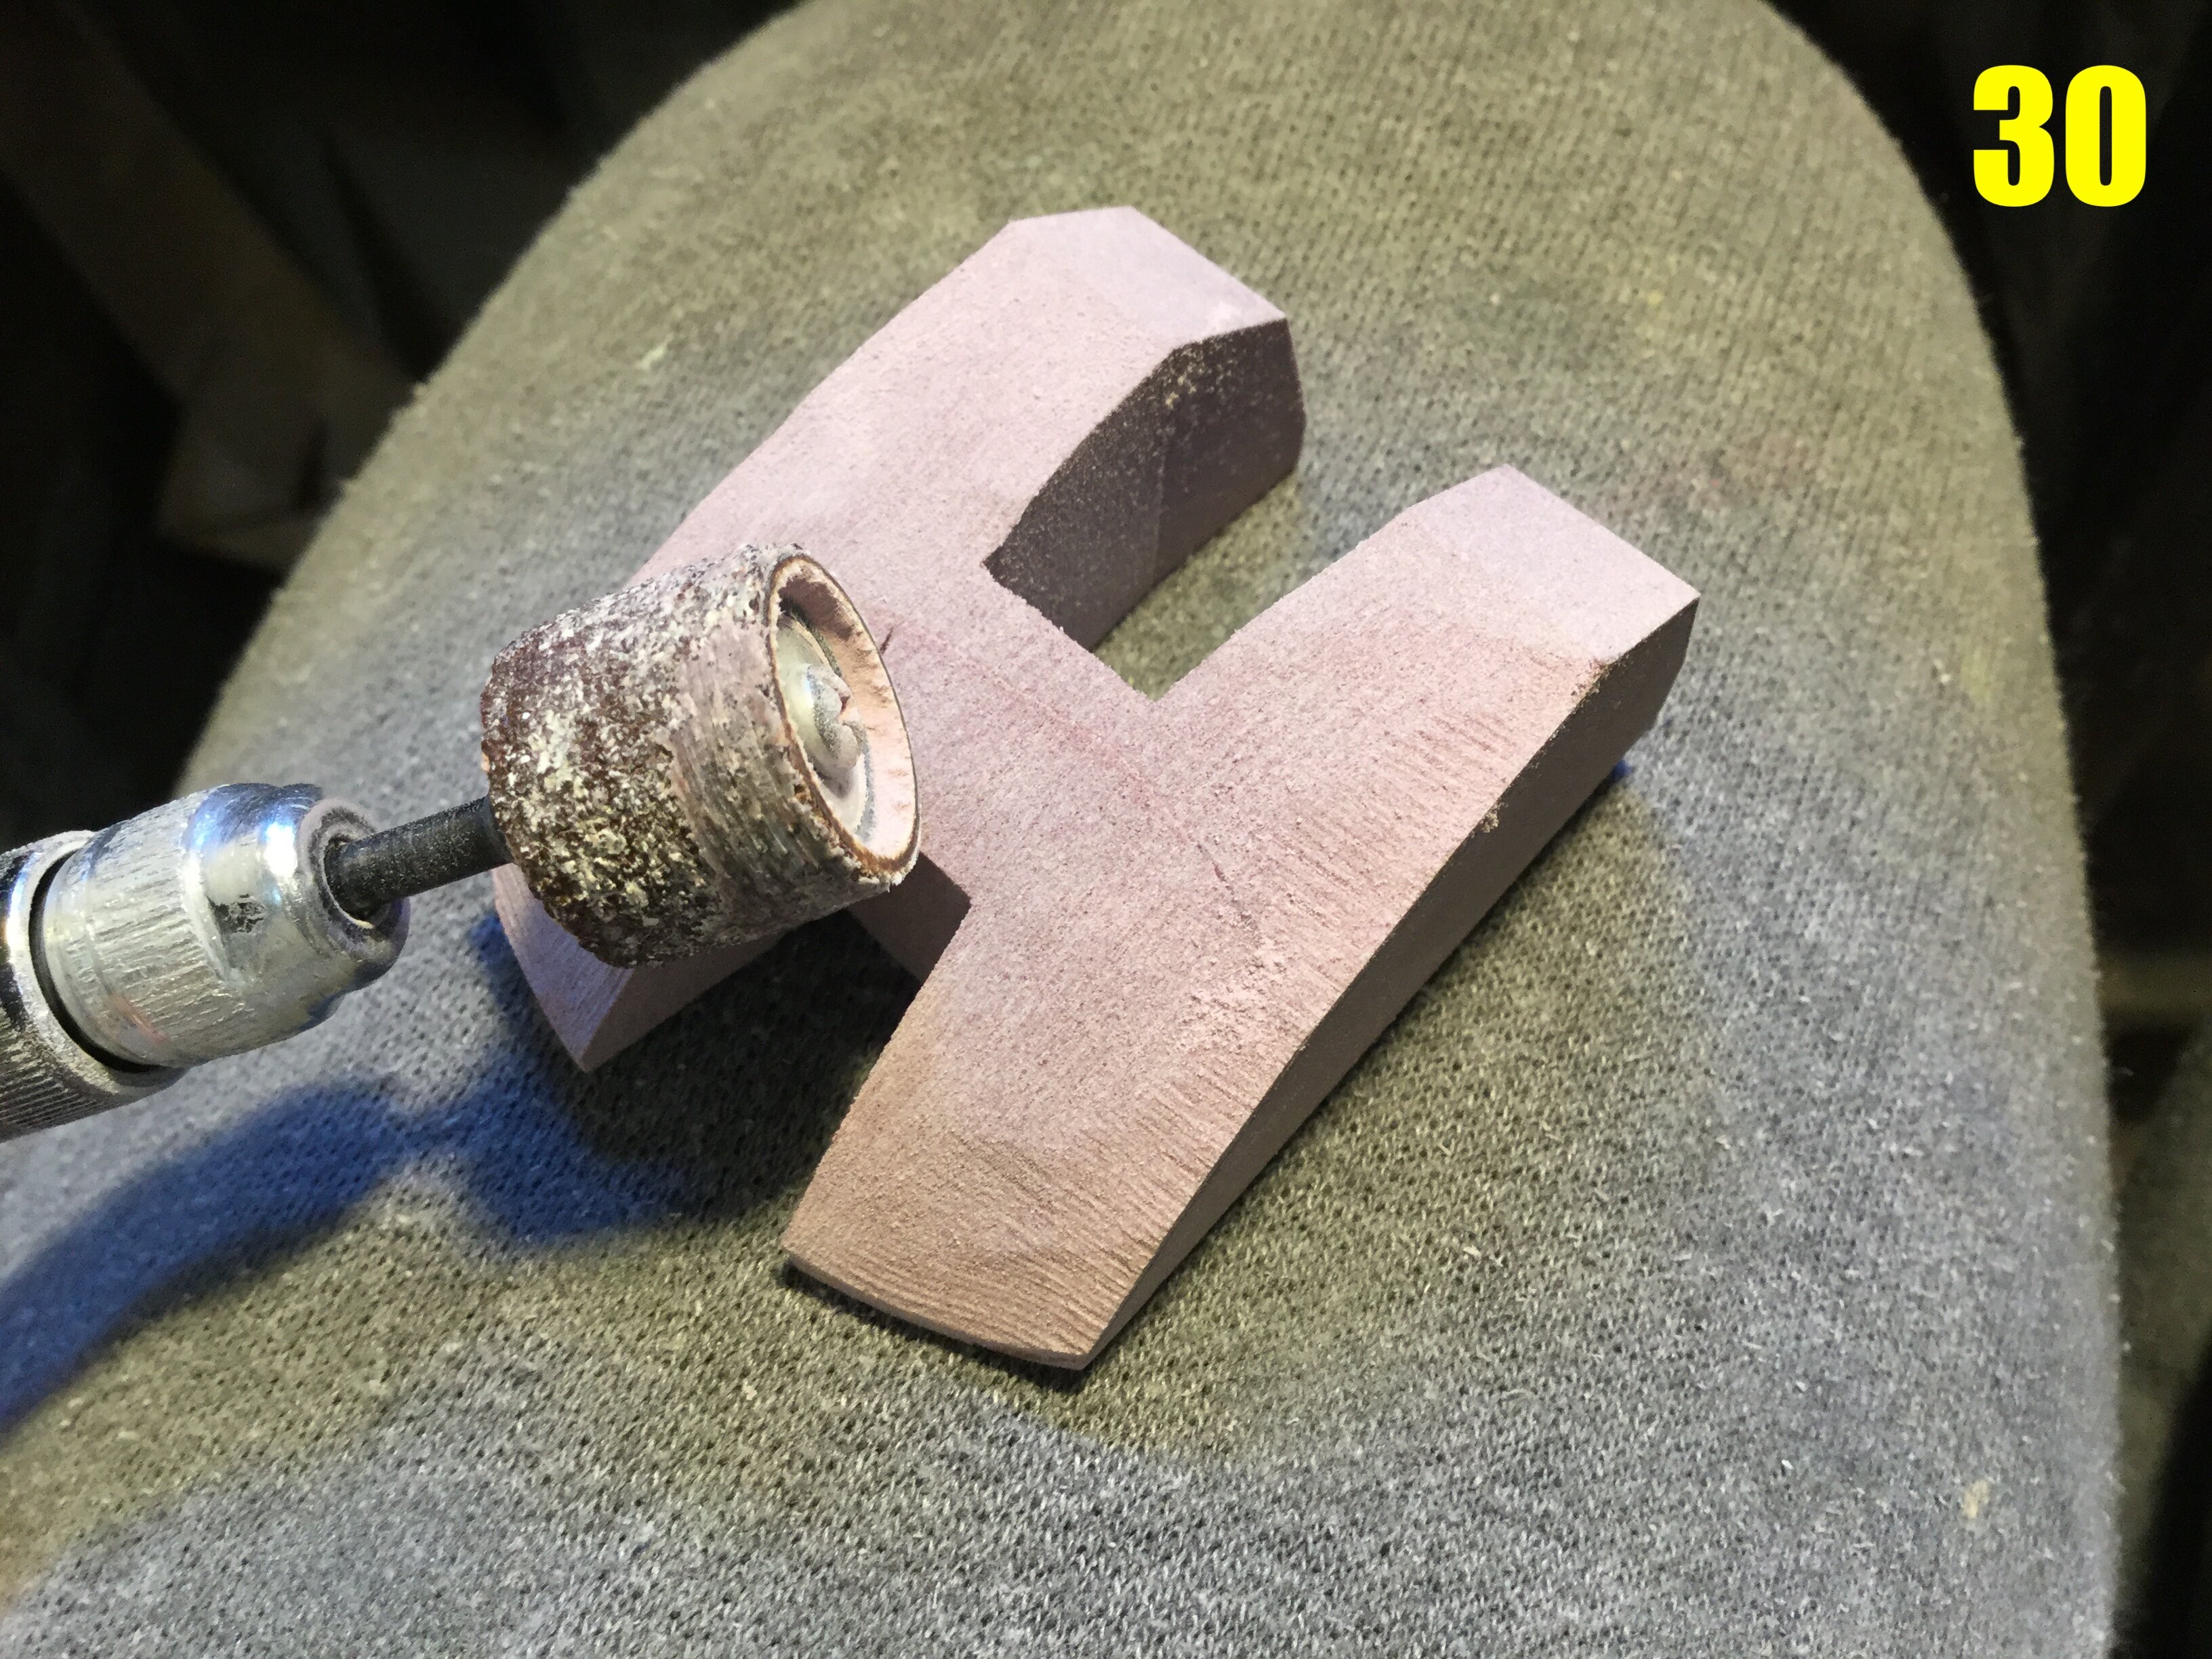
Pic 30: now I can take the Dremel and remove a bit more material, and simultaneously smooth out the odd angles.
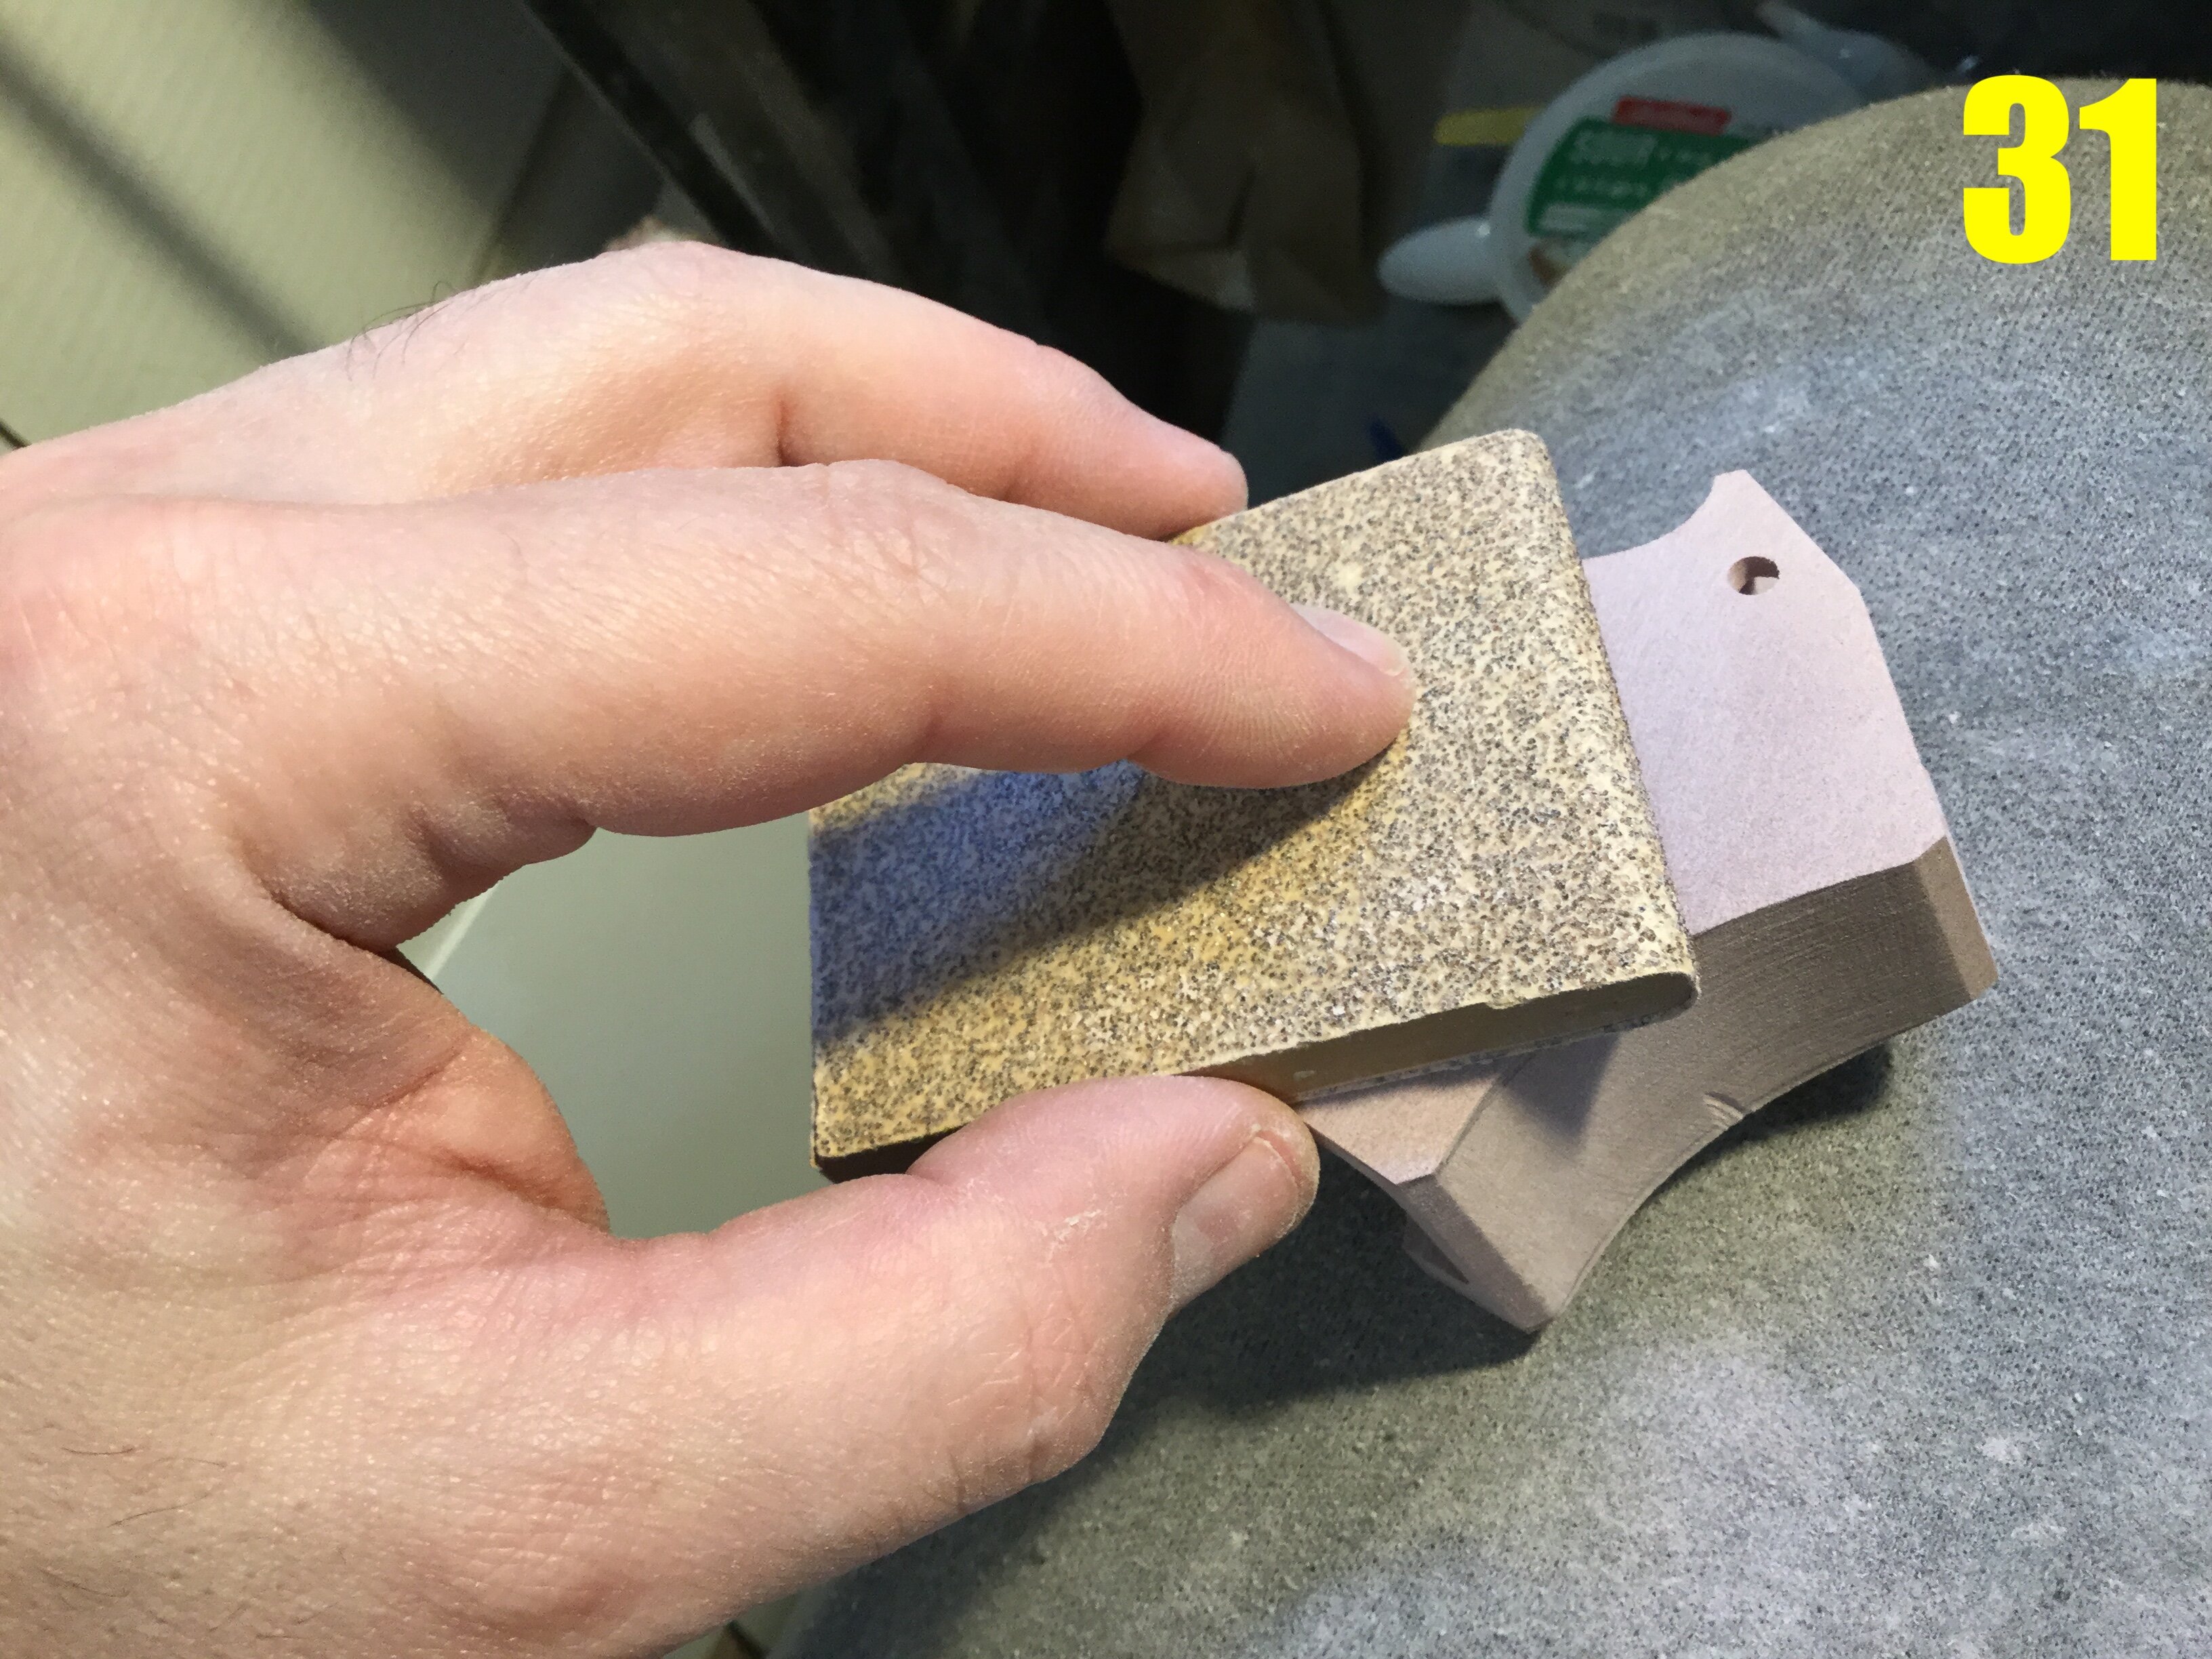
Pic 31: yet more block sanding. As you may have guessed, I make my own blocks using modelling board and 80-100 grit sandpaper. Because of the sheer amount of sanding I do, the sandpaper covering needs to be replaced every 2 projects or so.
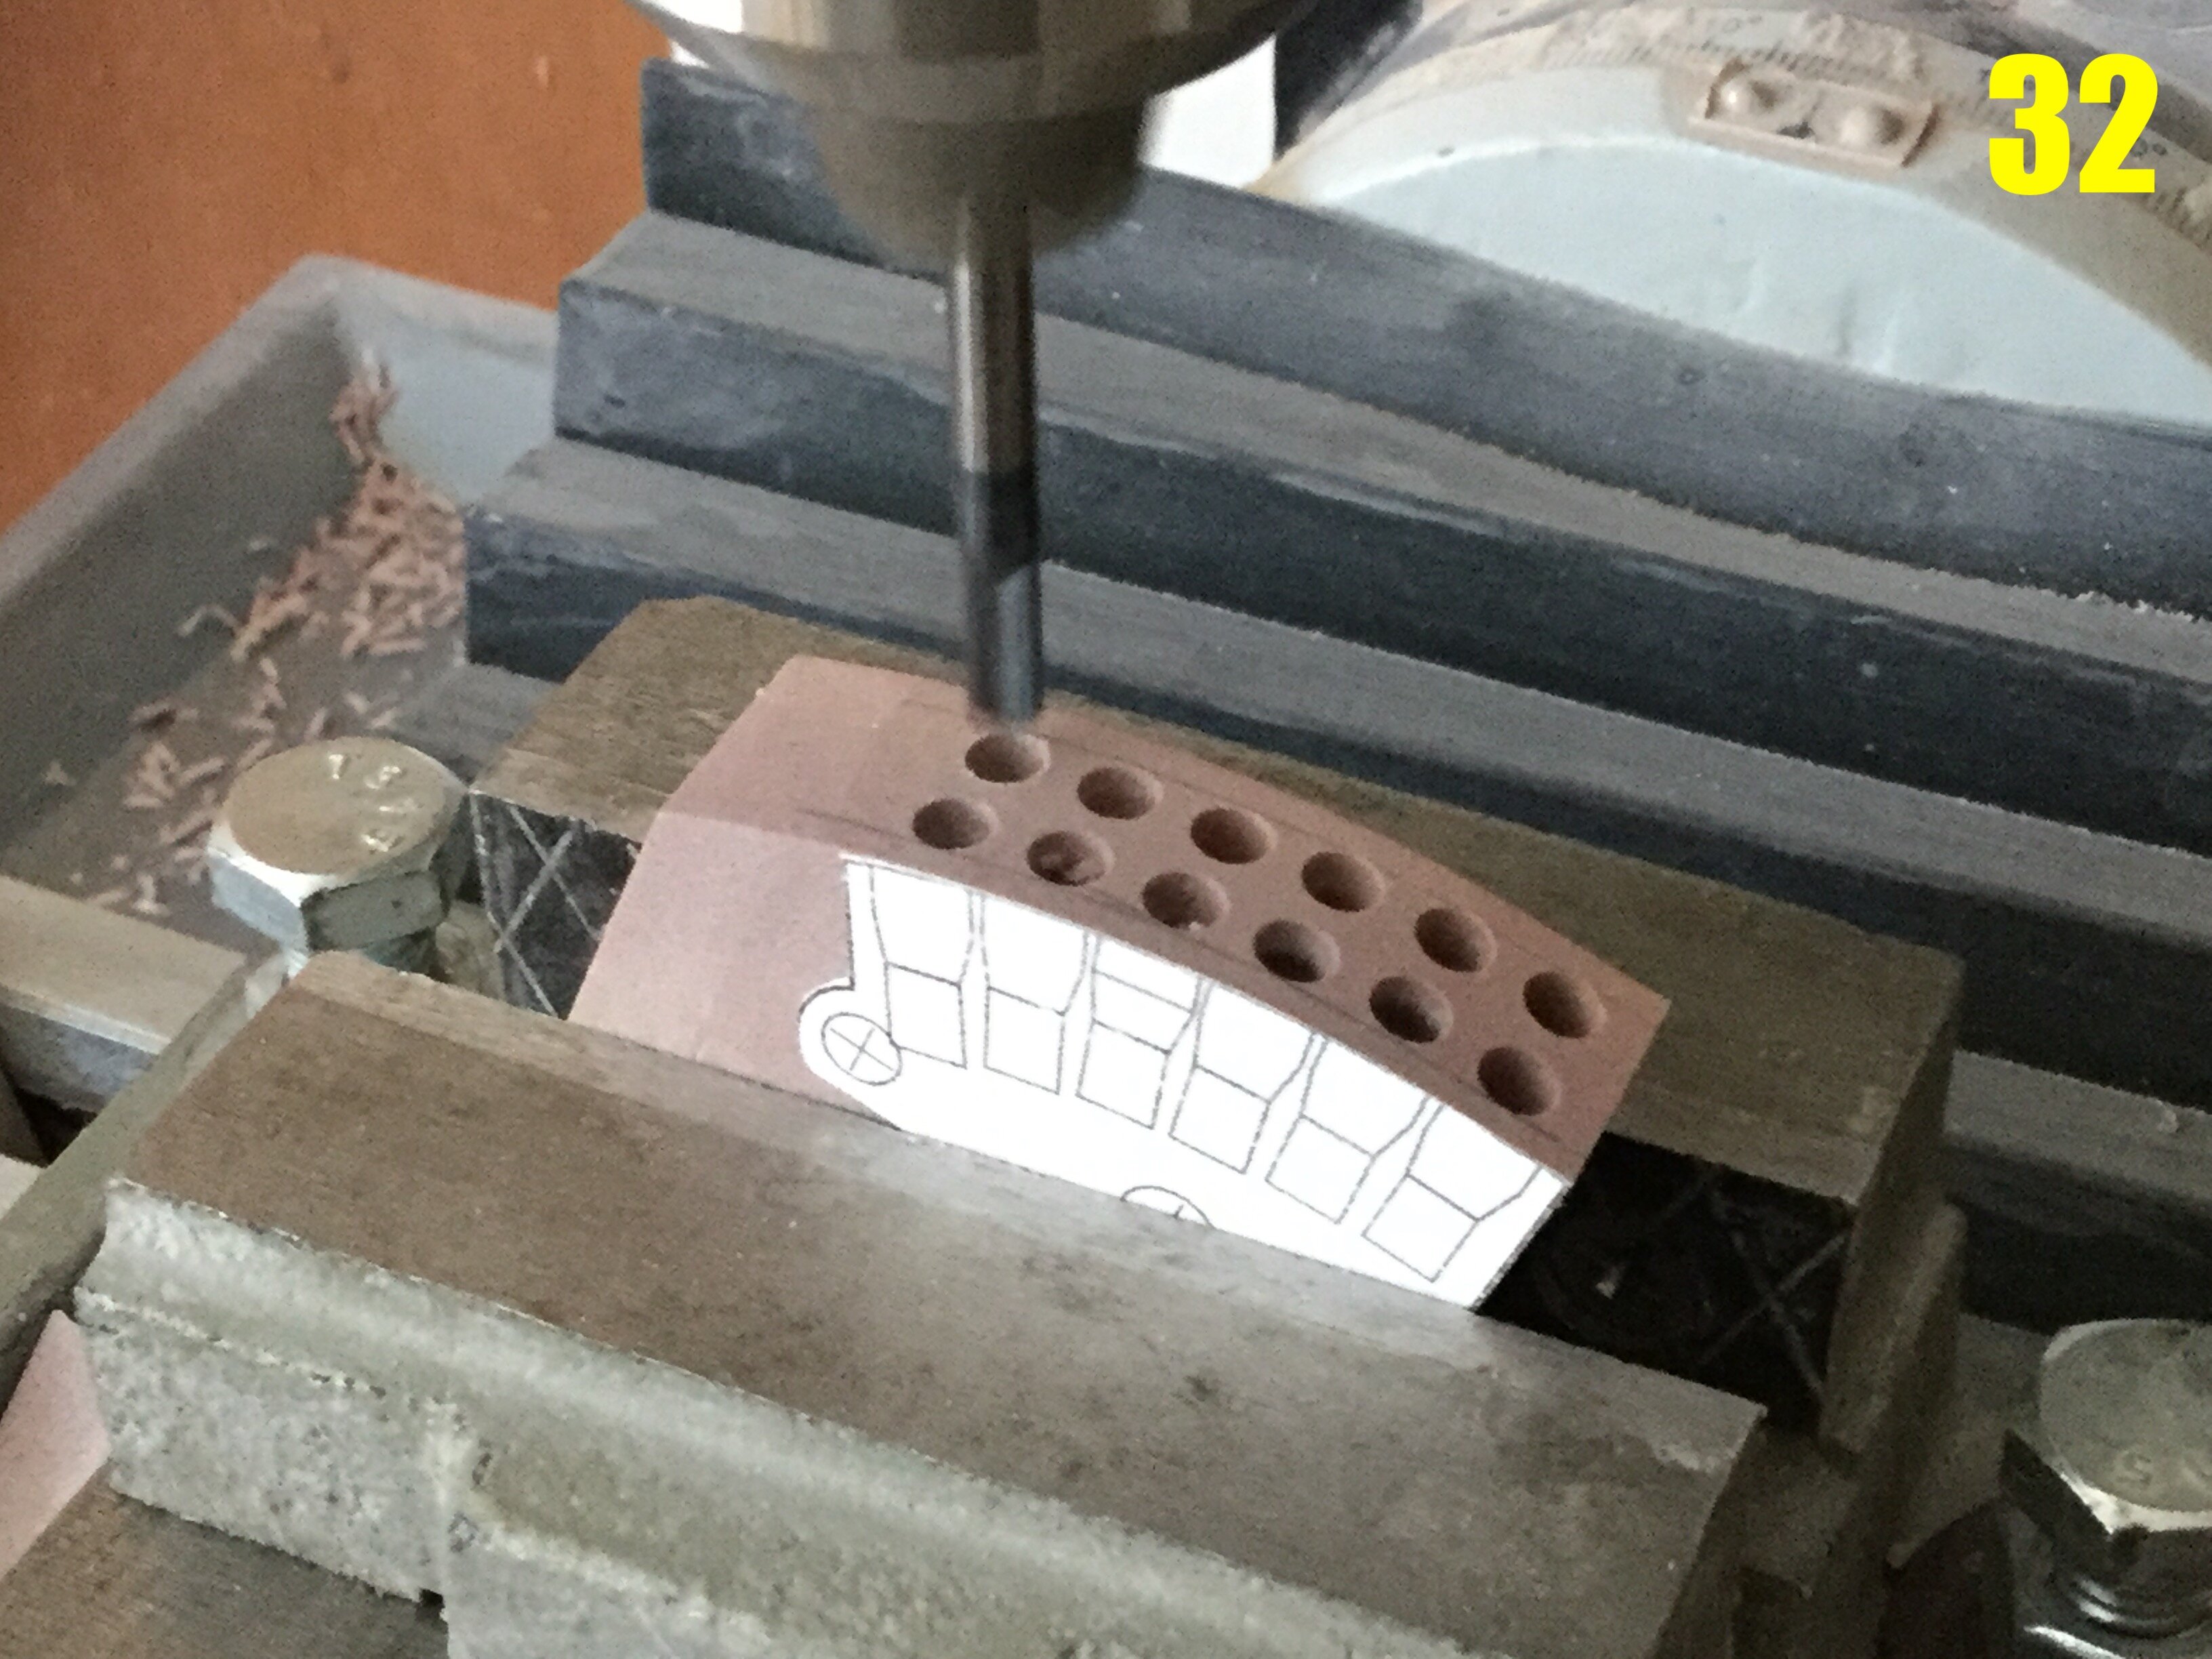
Pic 32: the shoulder missile housing. this is one component I was dreading, but the fabrication was much easier than I anticipated. Everything is eyeballed, yet everything lines up perfectly when I put it in the chest cavity.
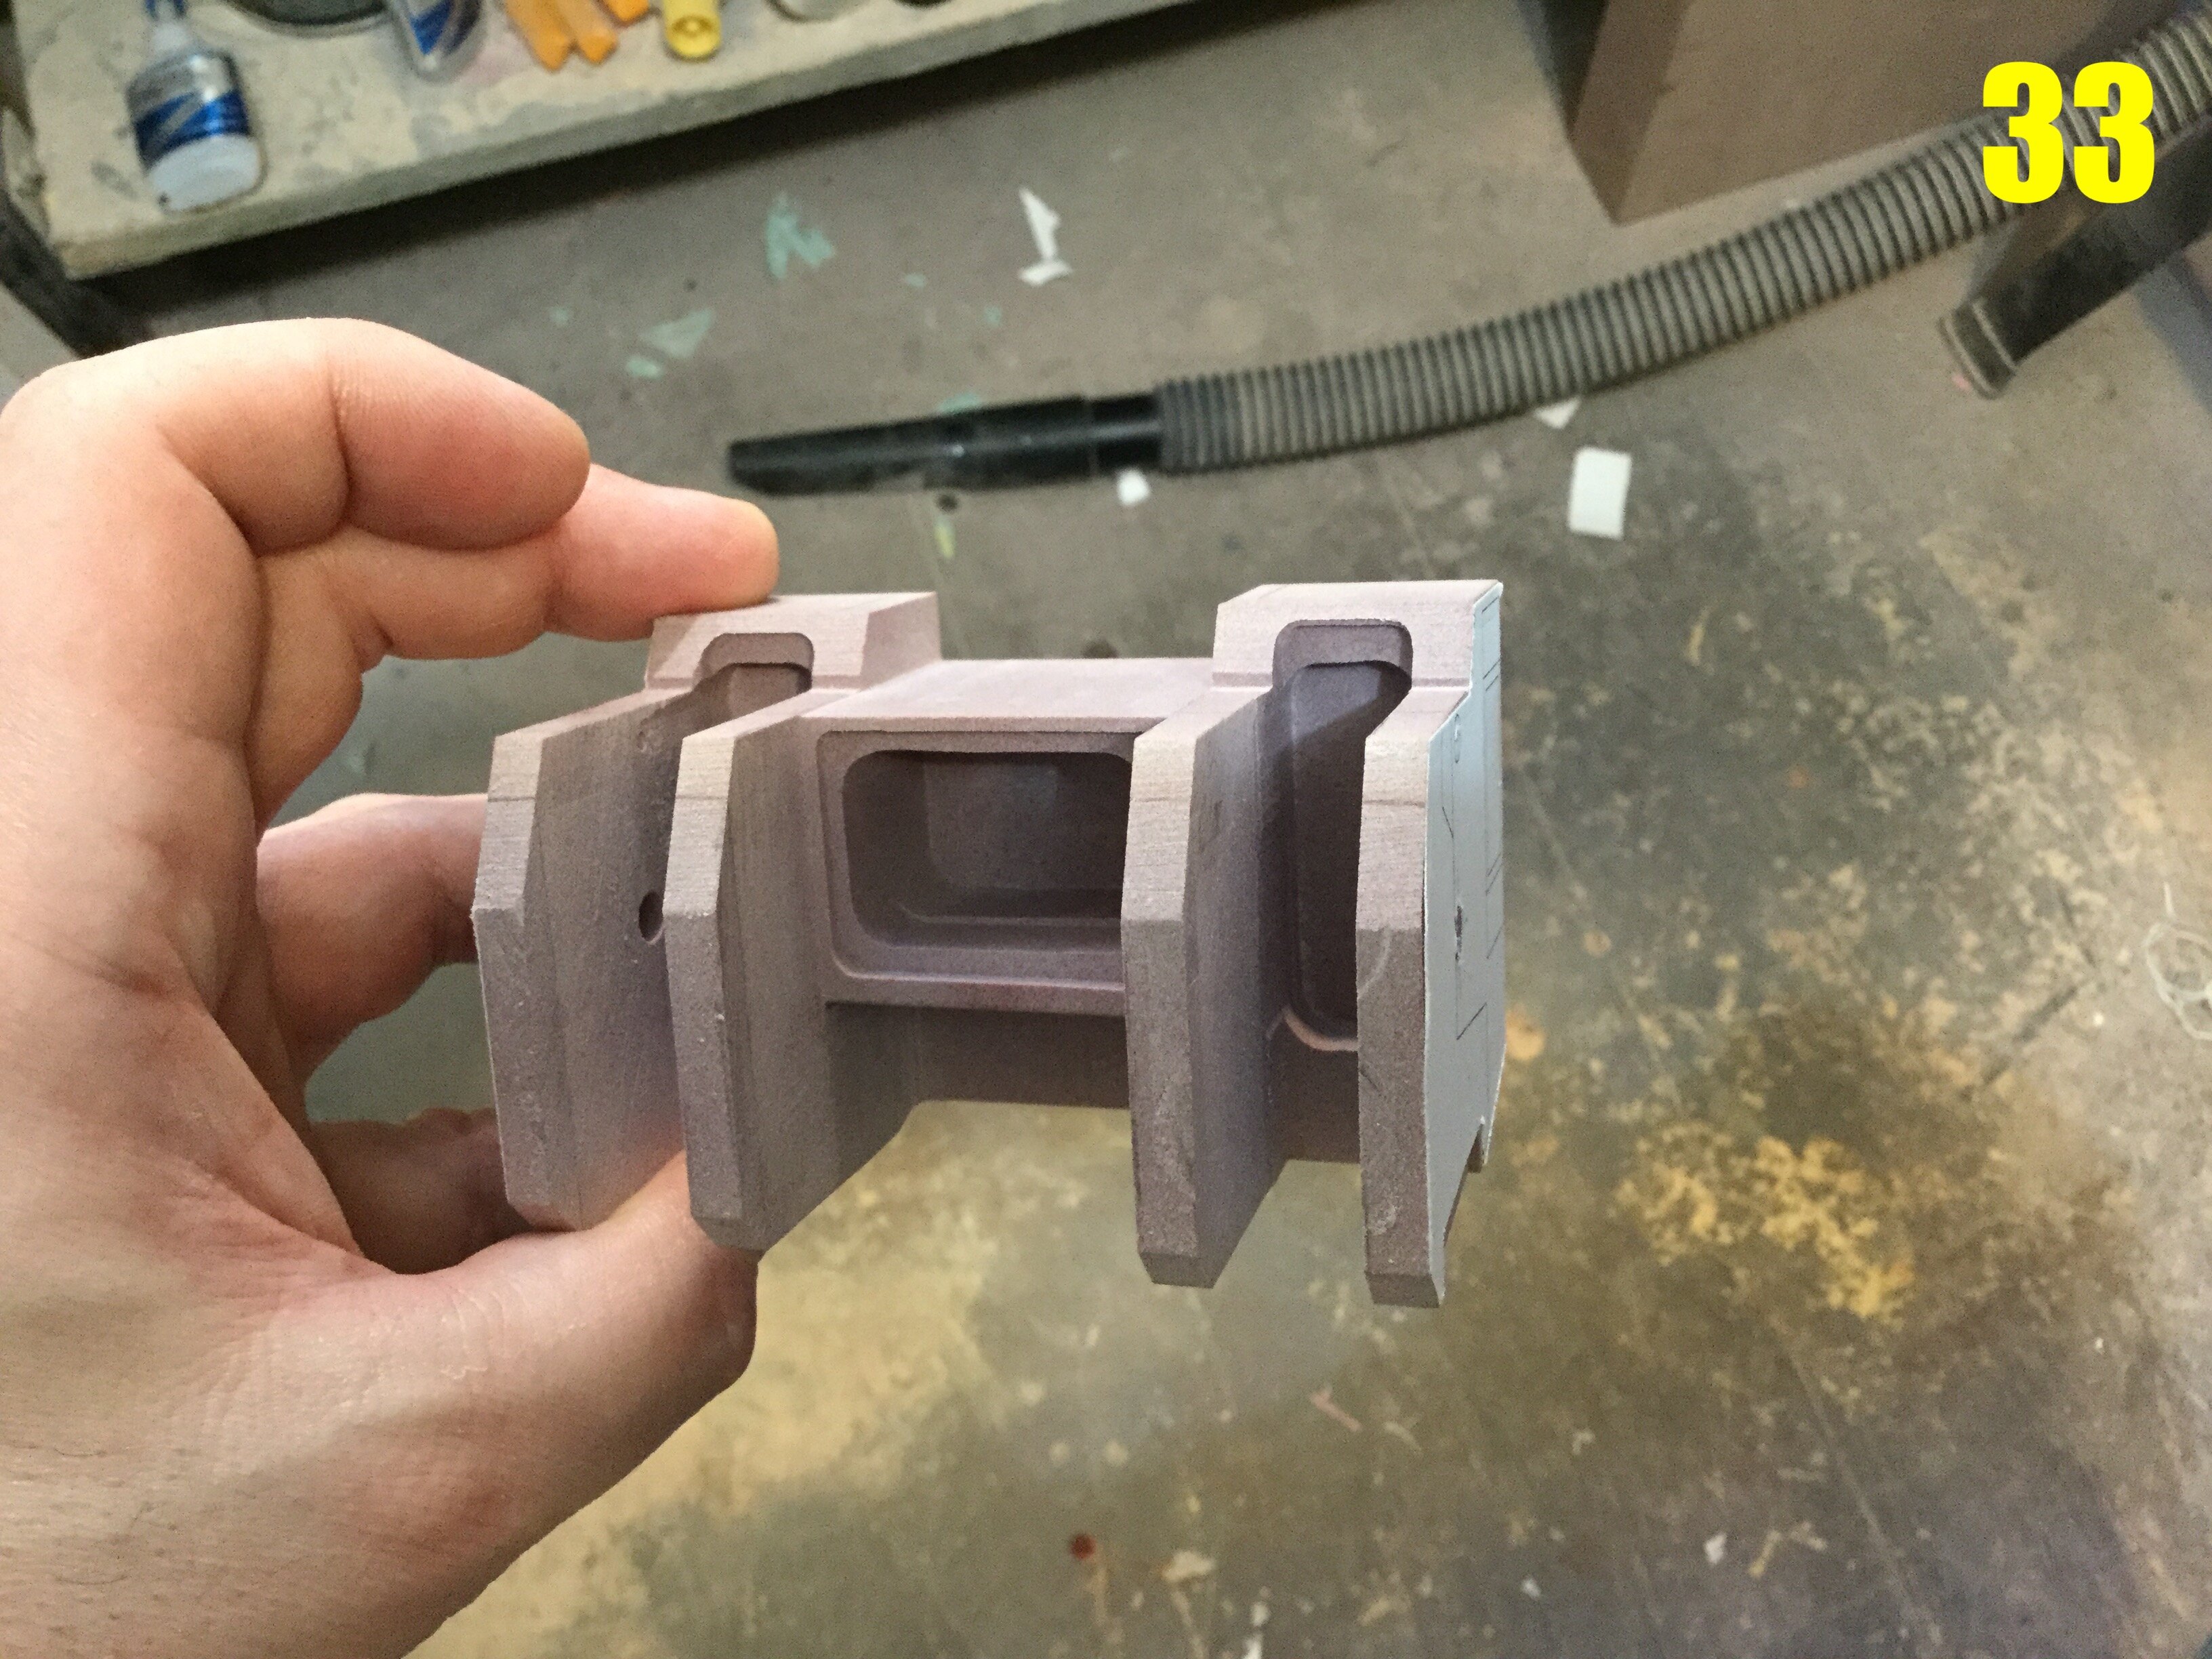
Pic 33: the main body/chest/back module, now with substantial amounts of material removed! In addition to cost-cutting, this also helps to keep the finished model as light as possible, while still retaining structural rigidity.
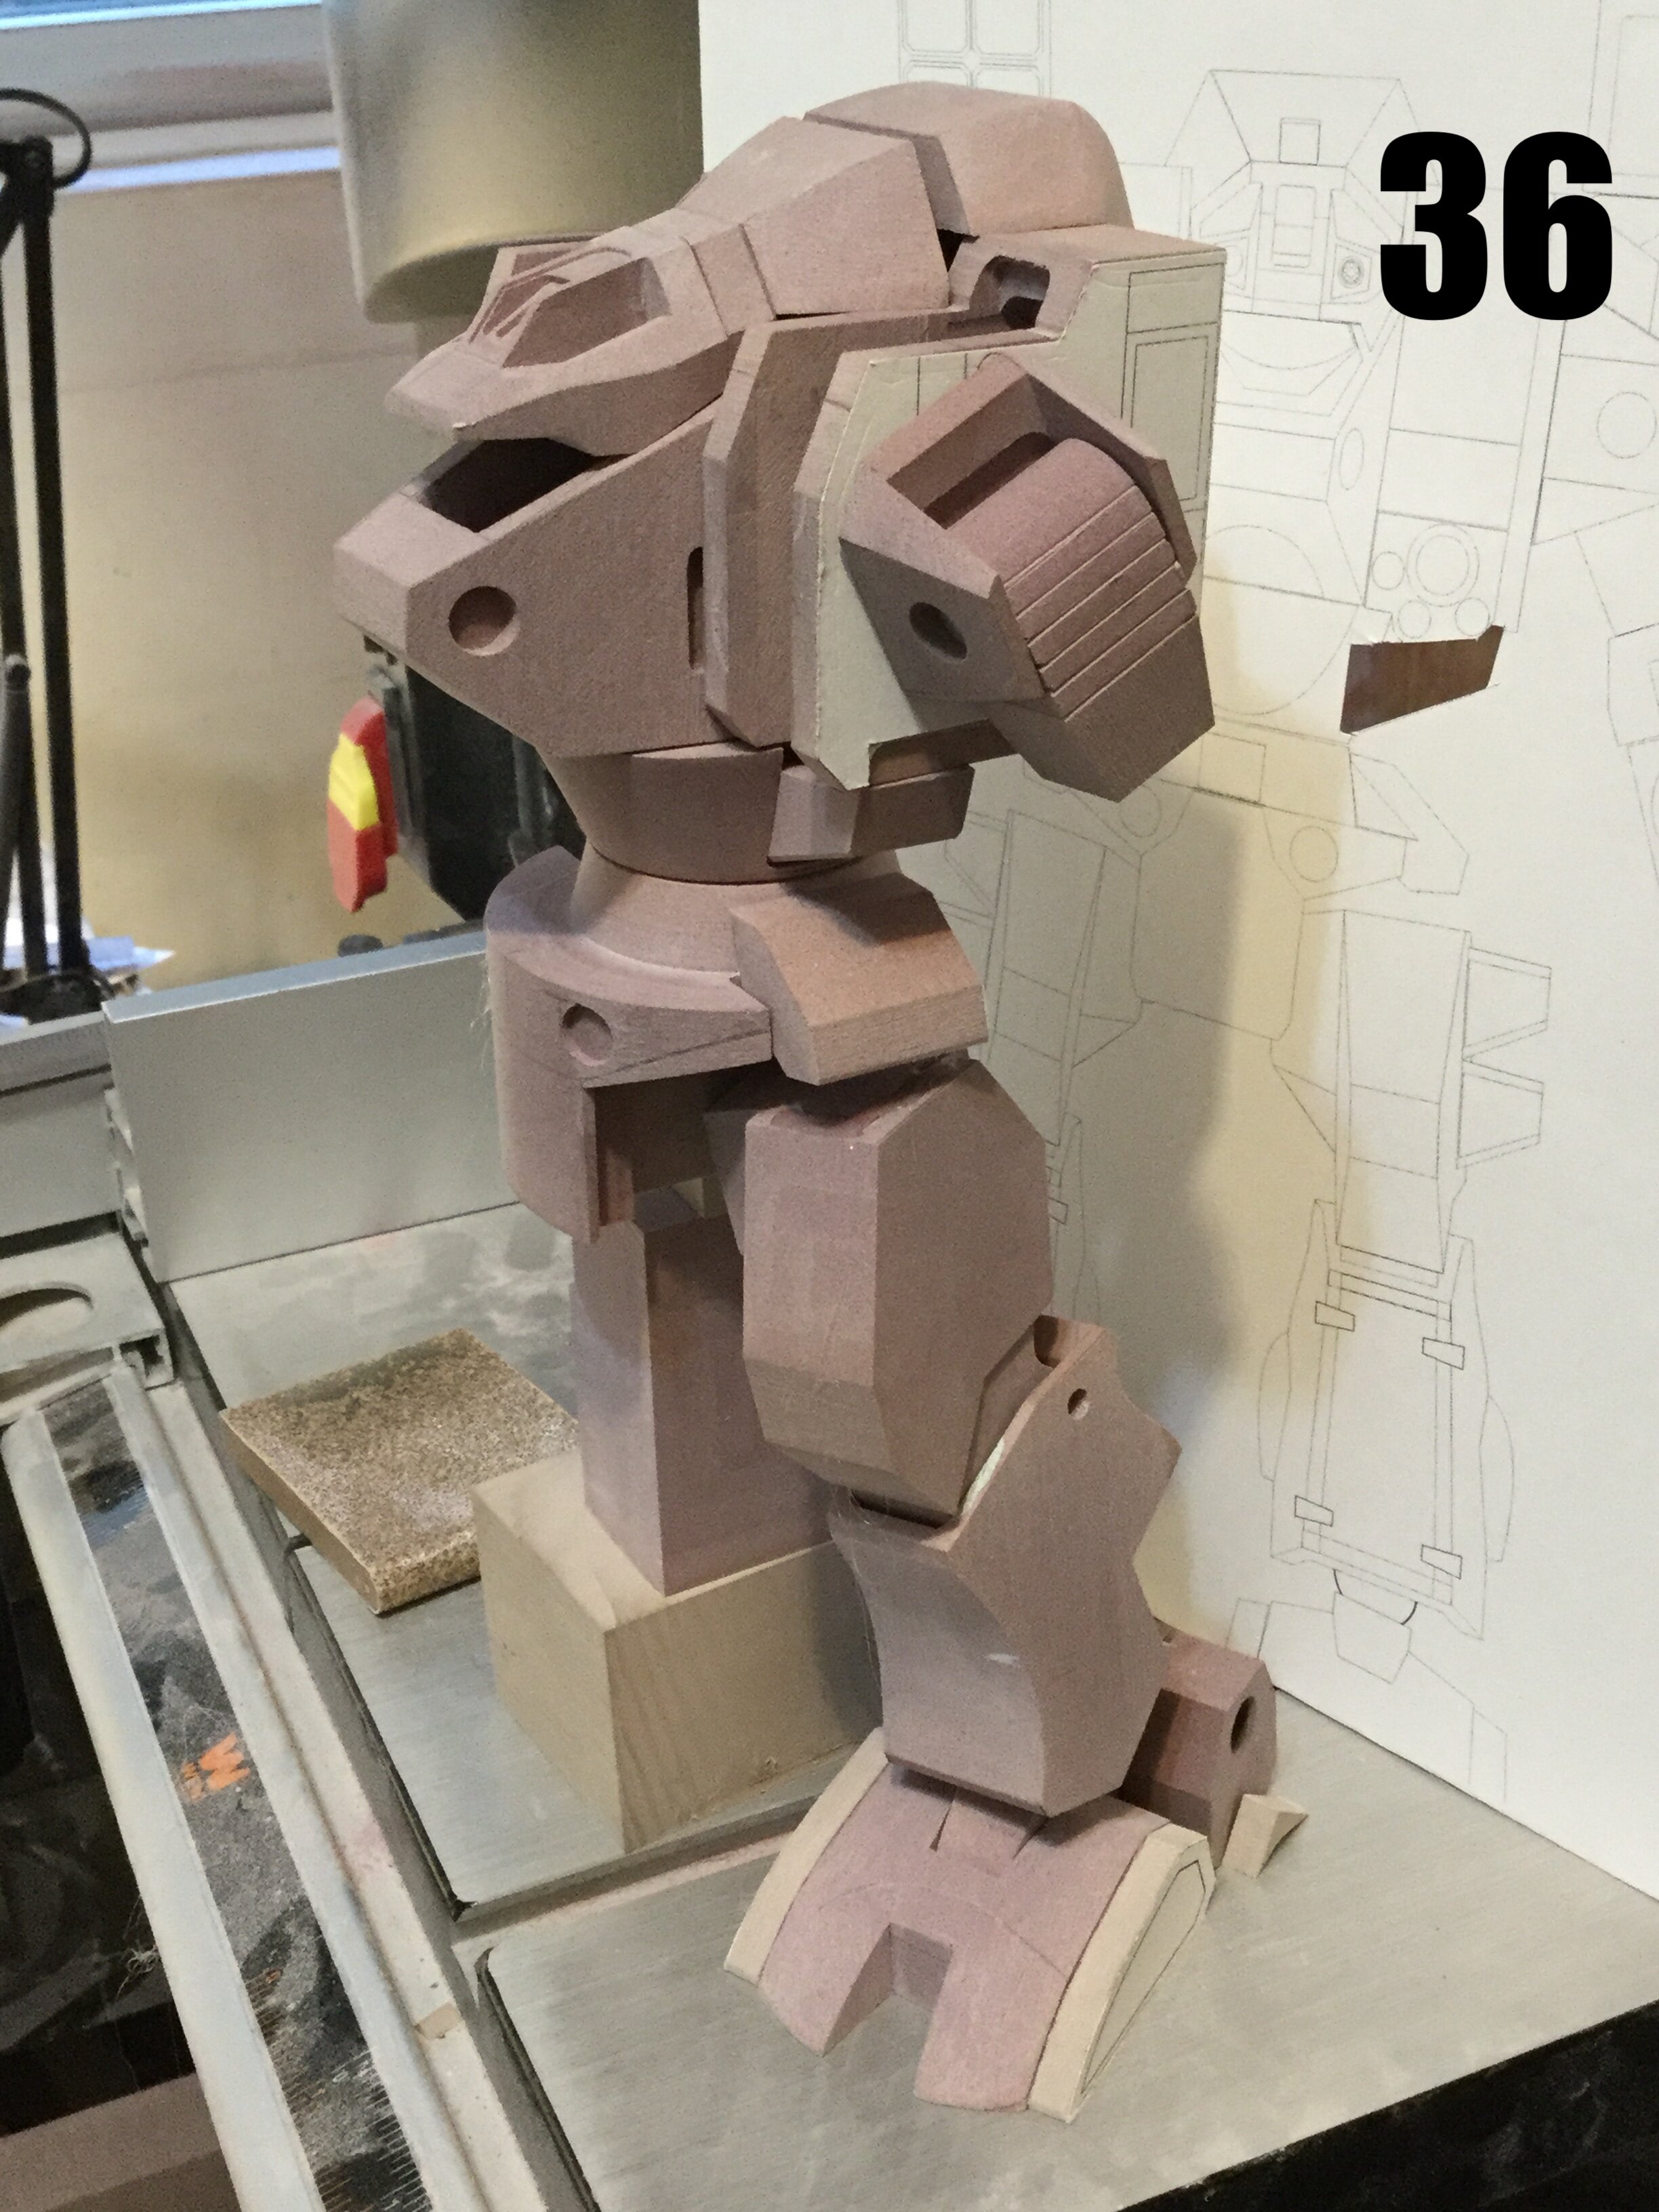
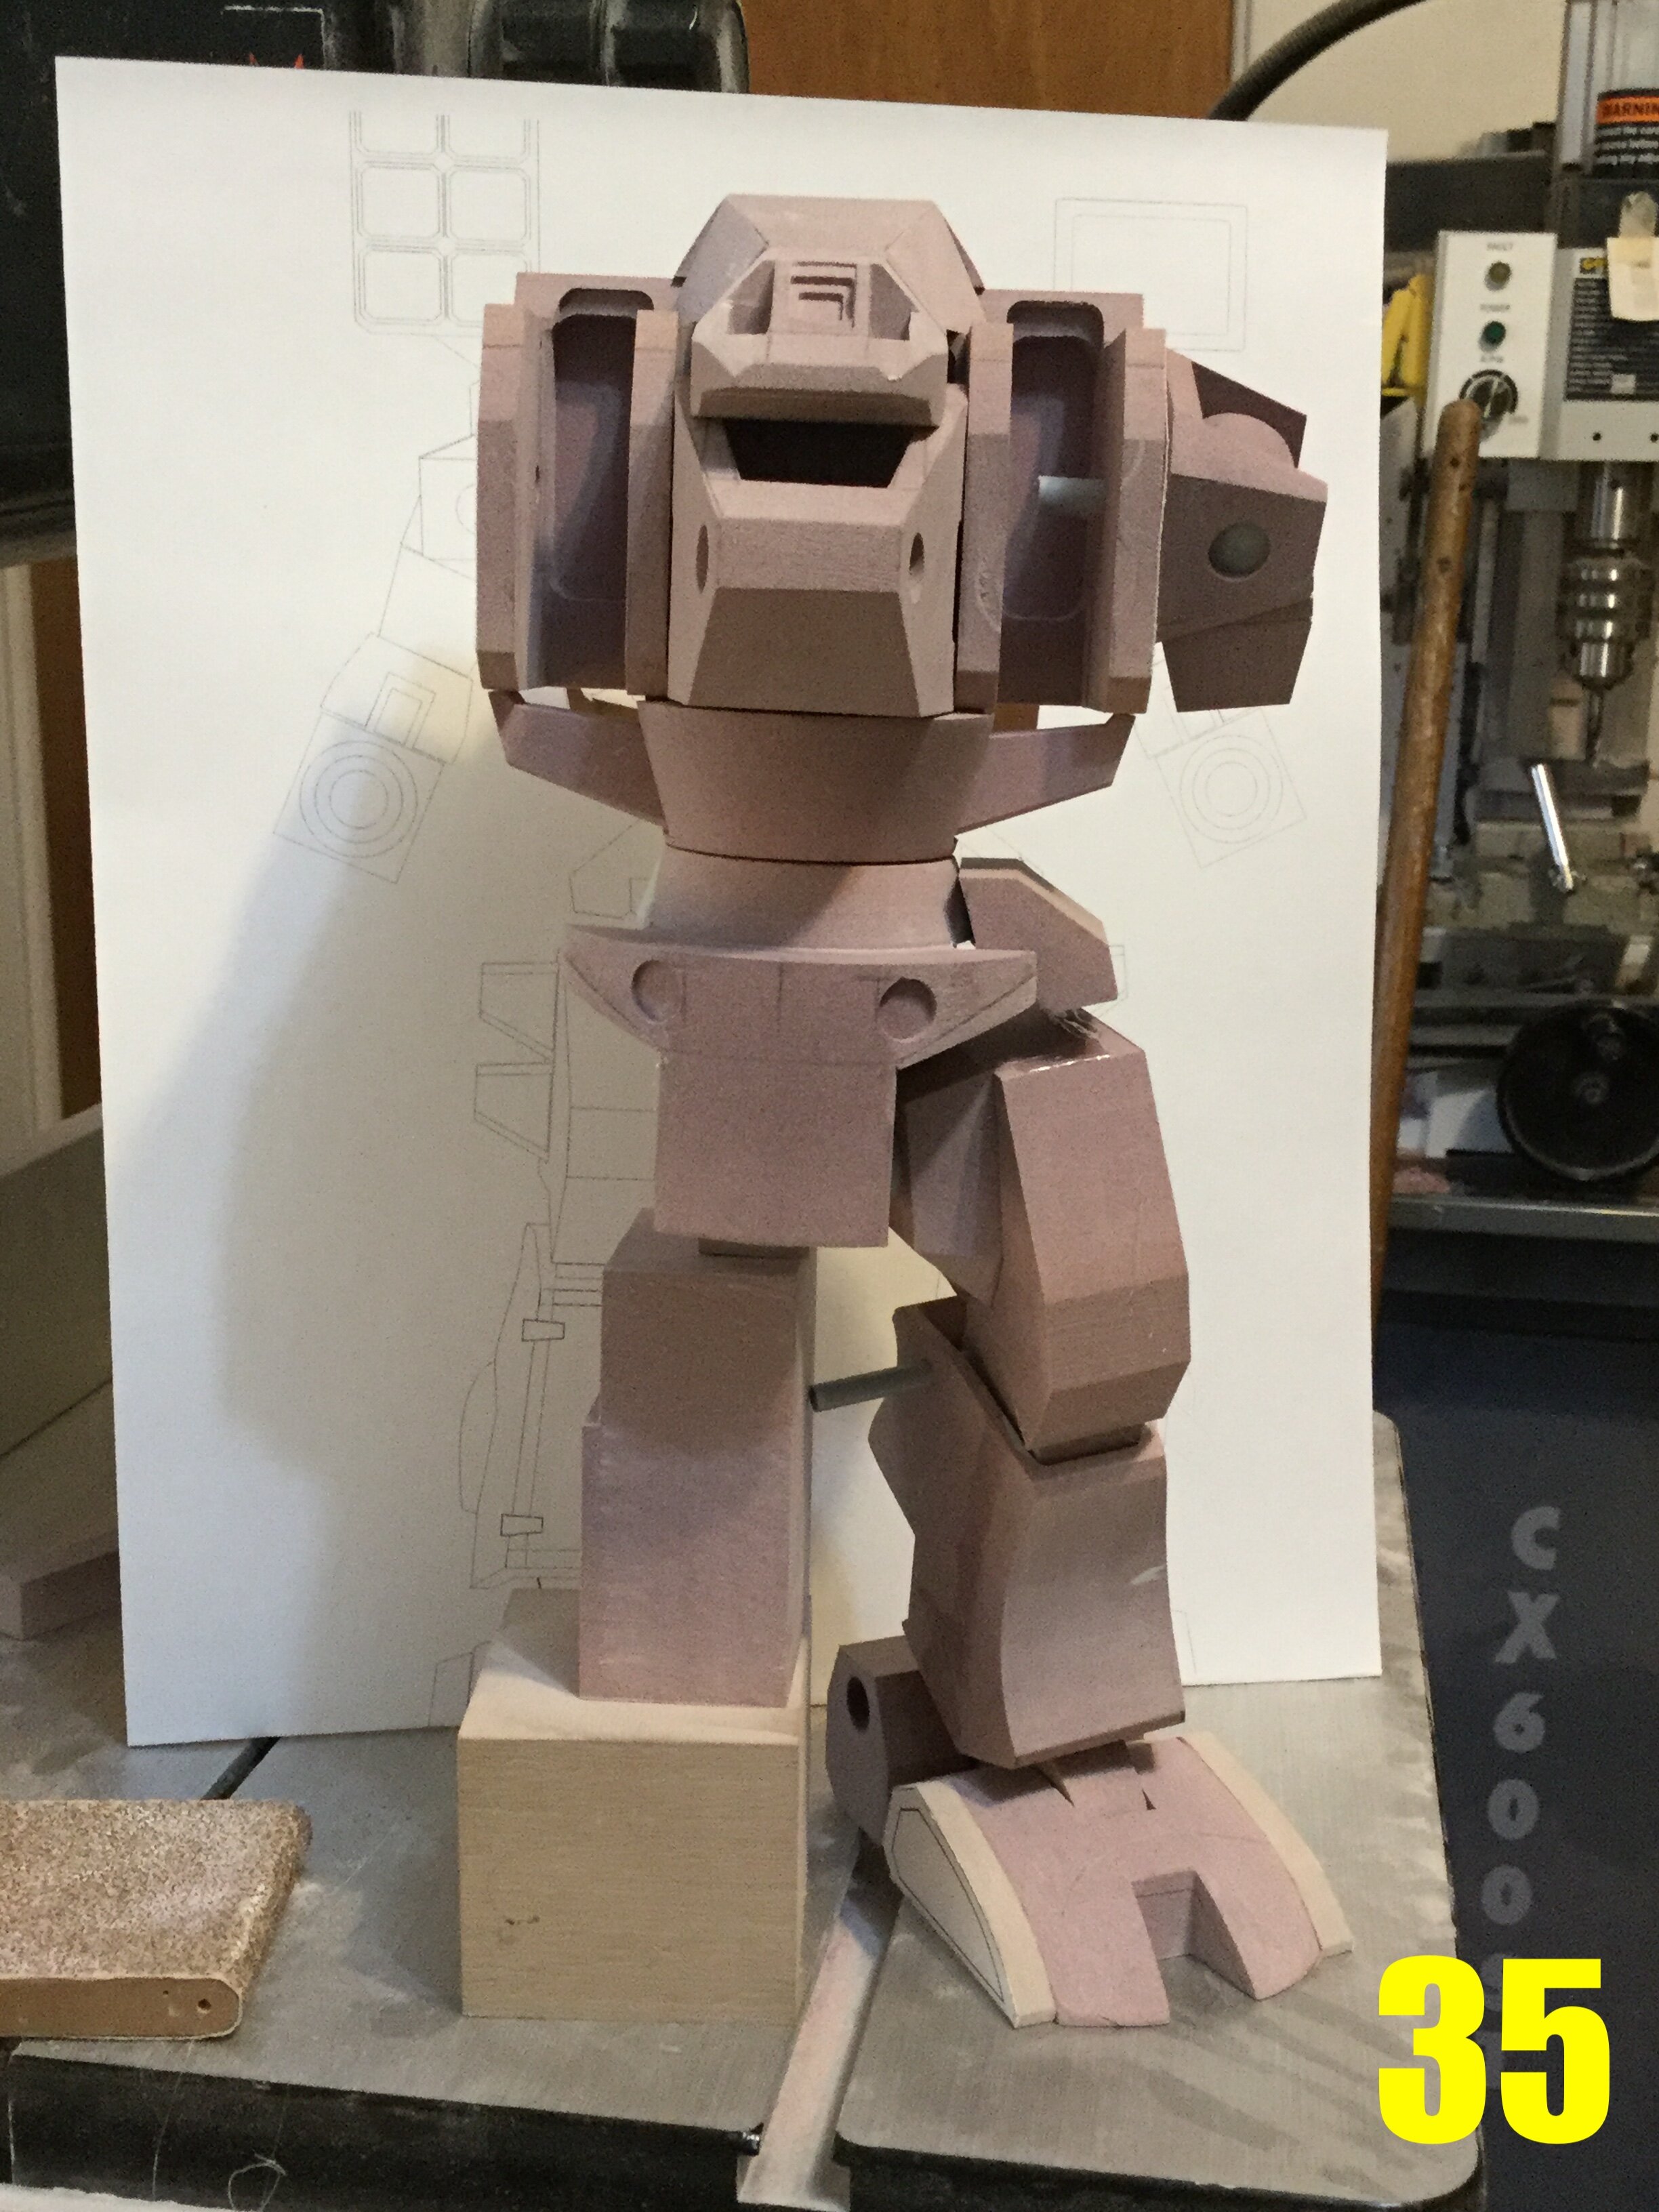
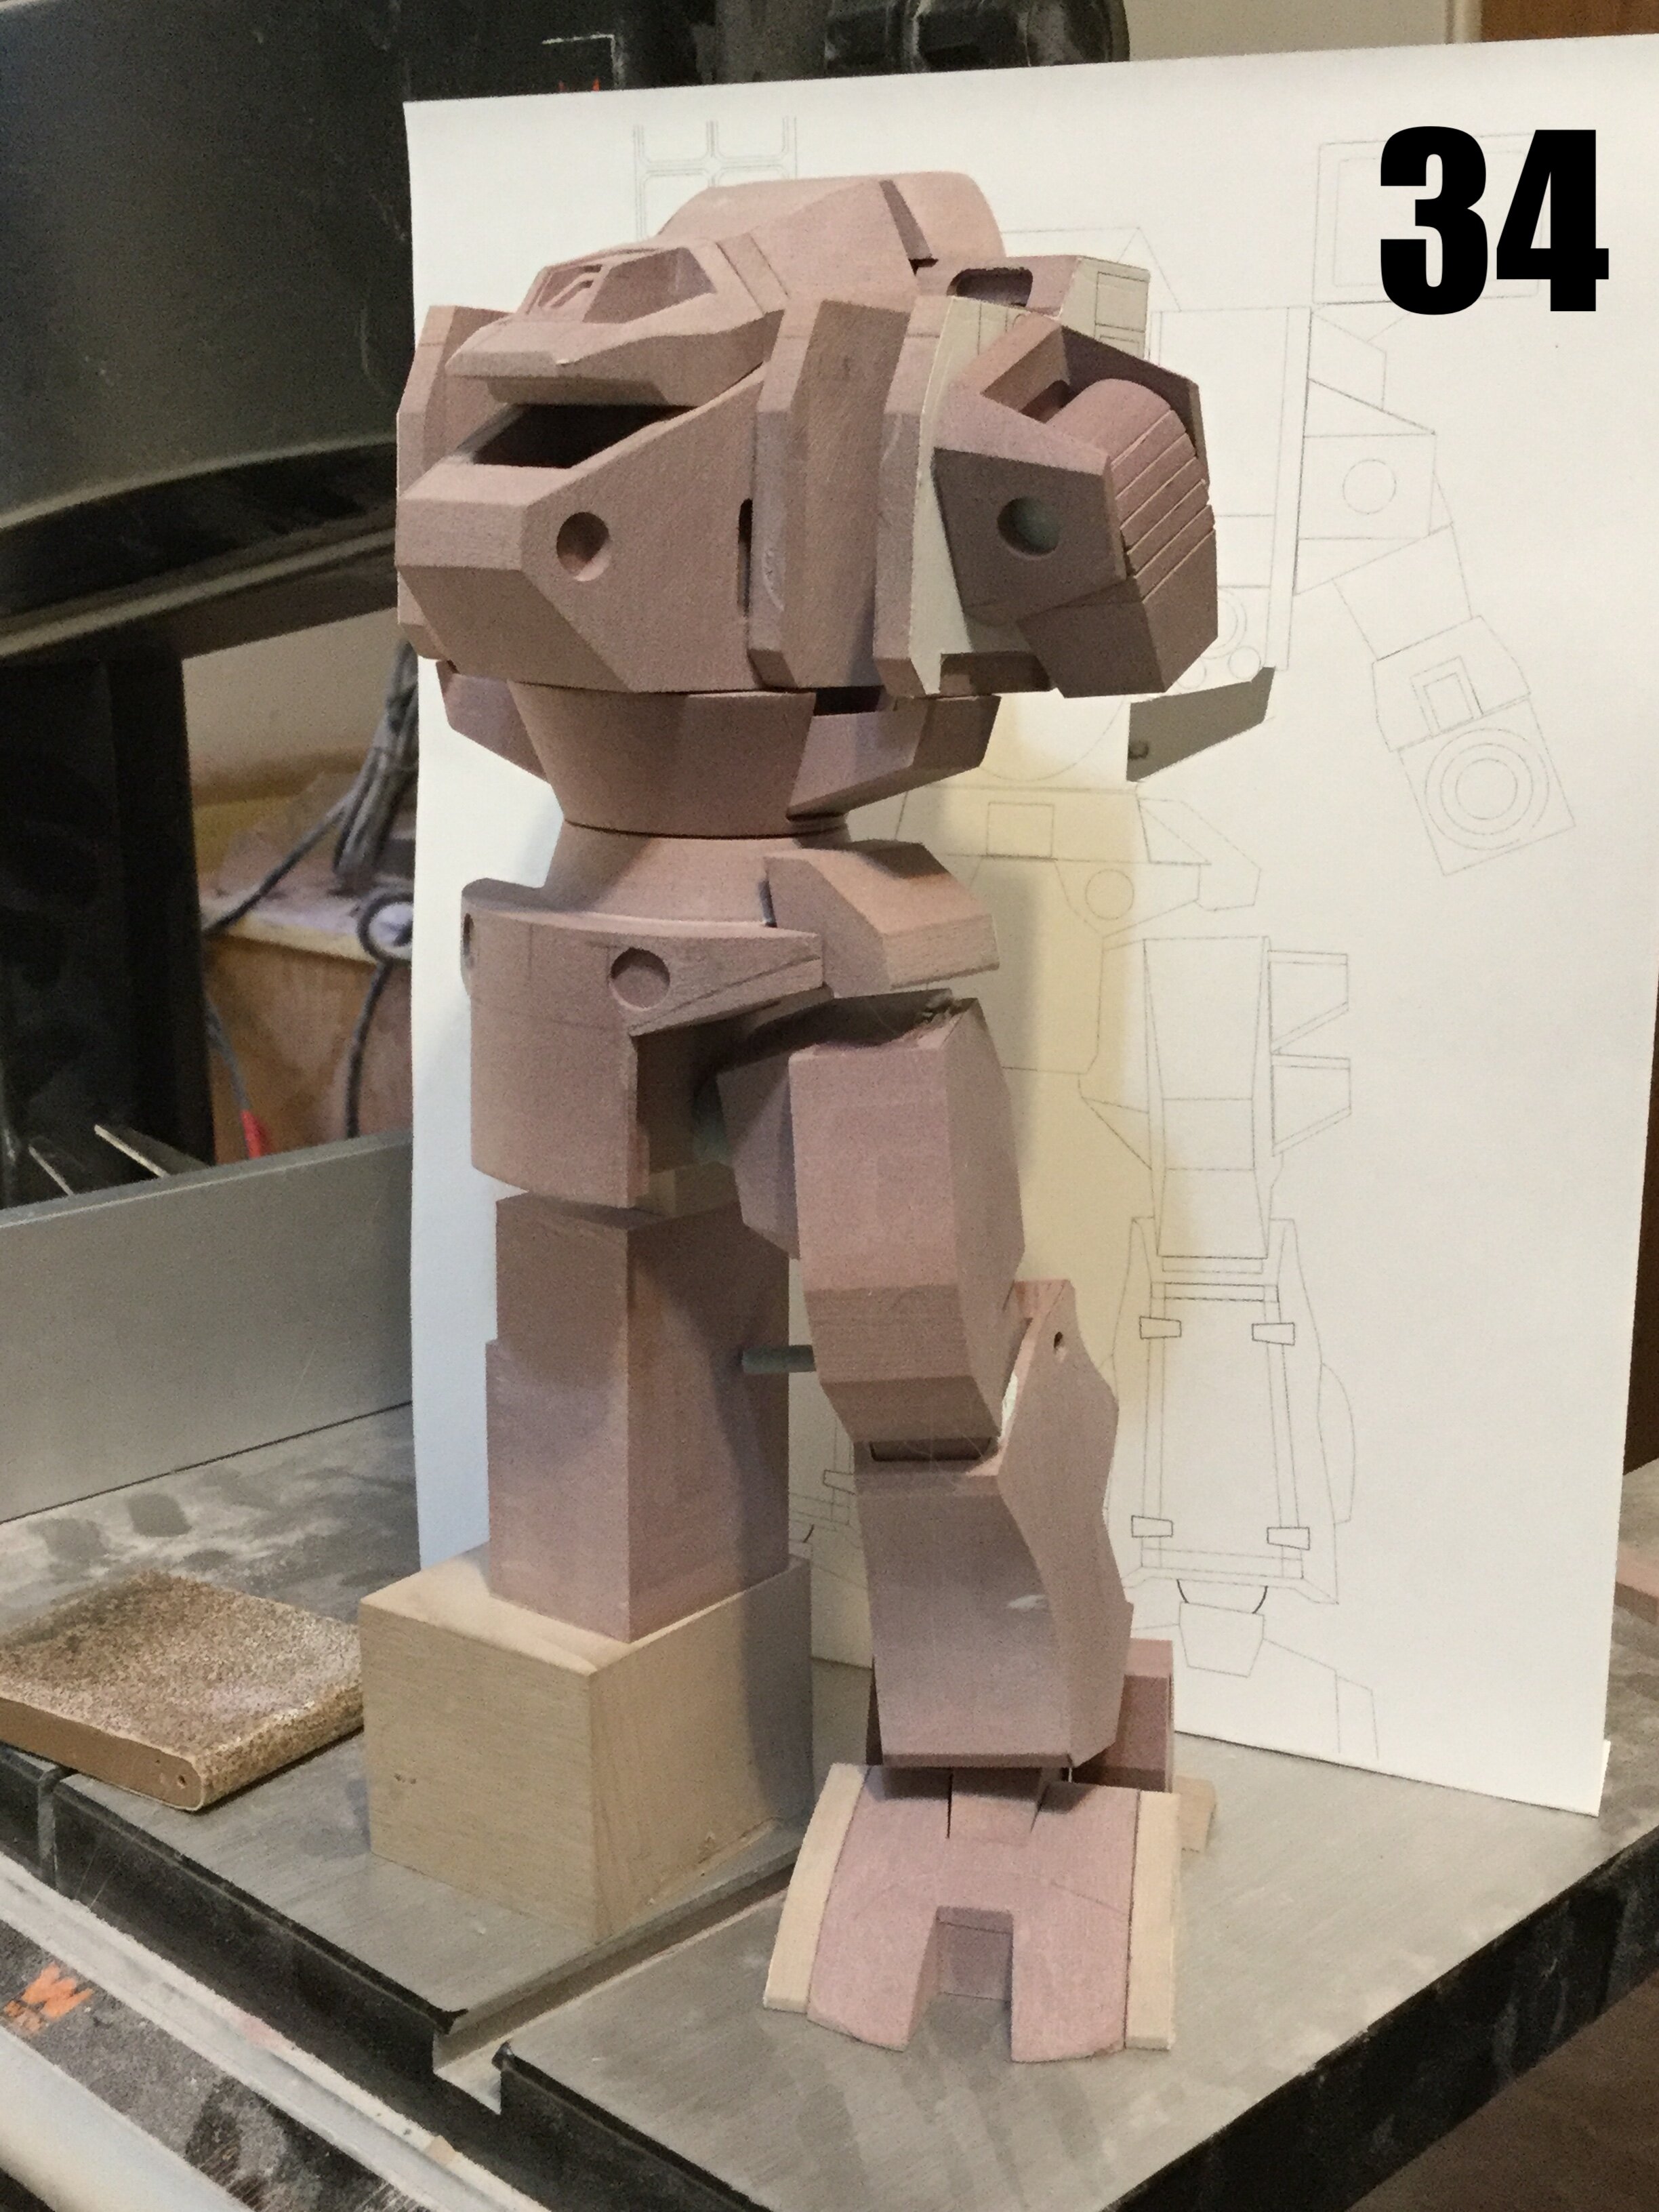
Pics 34-36: this is where I'm at right now, and it's coming along very well indeed. Pics don't quite convey how big this thing is, so next time I'll look into using a familiar object for size reference. Next week's update may tarry or be a bit underwhelming, so I ask forgiveness in advance.
-
1 hour ago, CoryHolmes said:
Awesome, as per usual. I've taken an interest in machining channels on YouTube, so I'm beginning to get an appreciation for just how much effort goes into making each piece just right.
Speaking of, I notice a distinct lack of your usual kvetching about how difficult it is to turn 2D anime designs into 3D objects. Is that because the original design is better thought-out, or are you just numb to that kind of minutiae by this point and accept it as par for the course? 😂
While there are always discrepancies in the various views, the Tomahawk is one of the better subjects in that respect. The knee joints are poorly thought out, but I can work with it. I have to add a few milimeters of clearance here and there to give better range of motion, but knowing that resin shrinks, it will be compensated for.
-
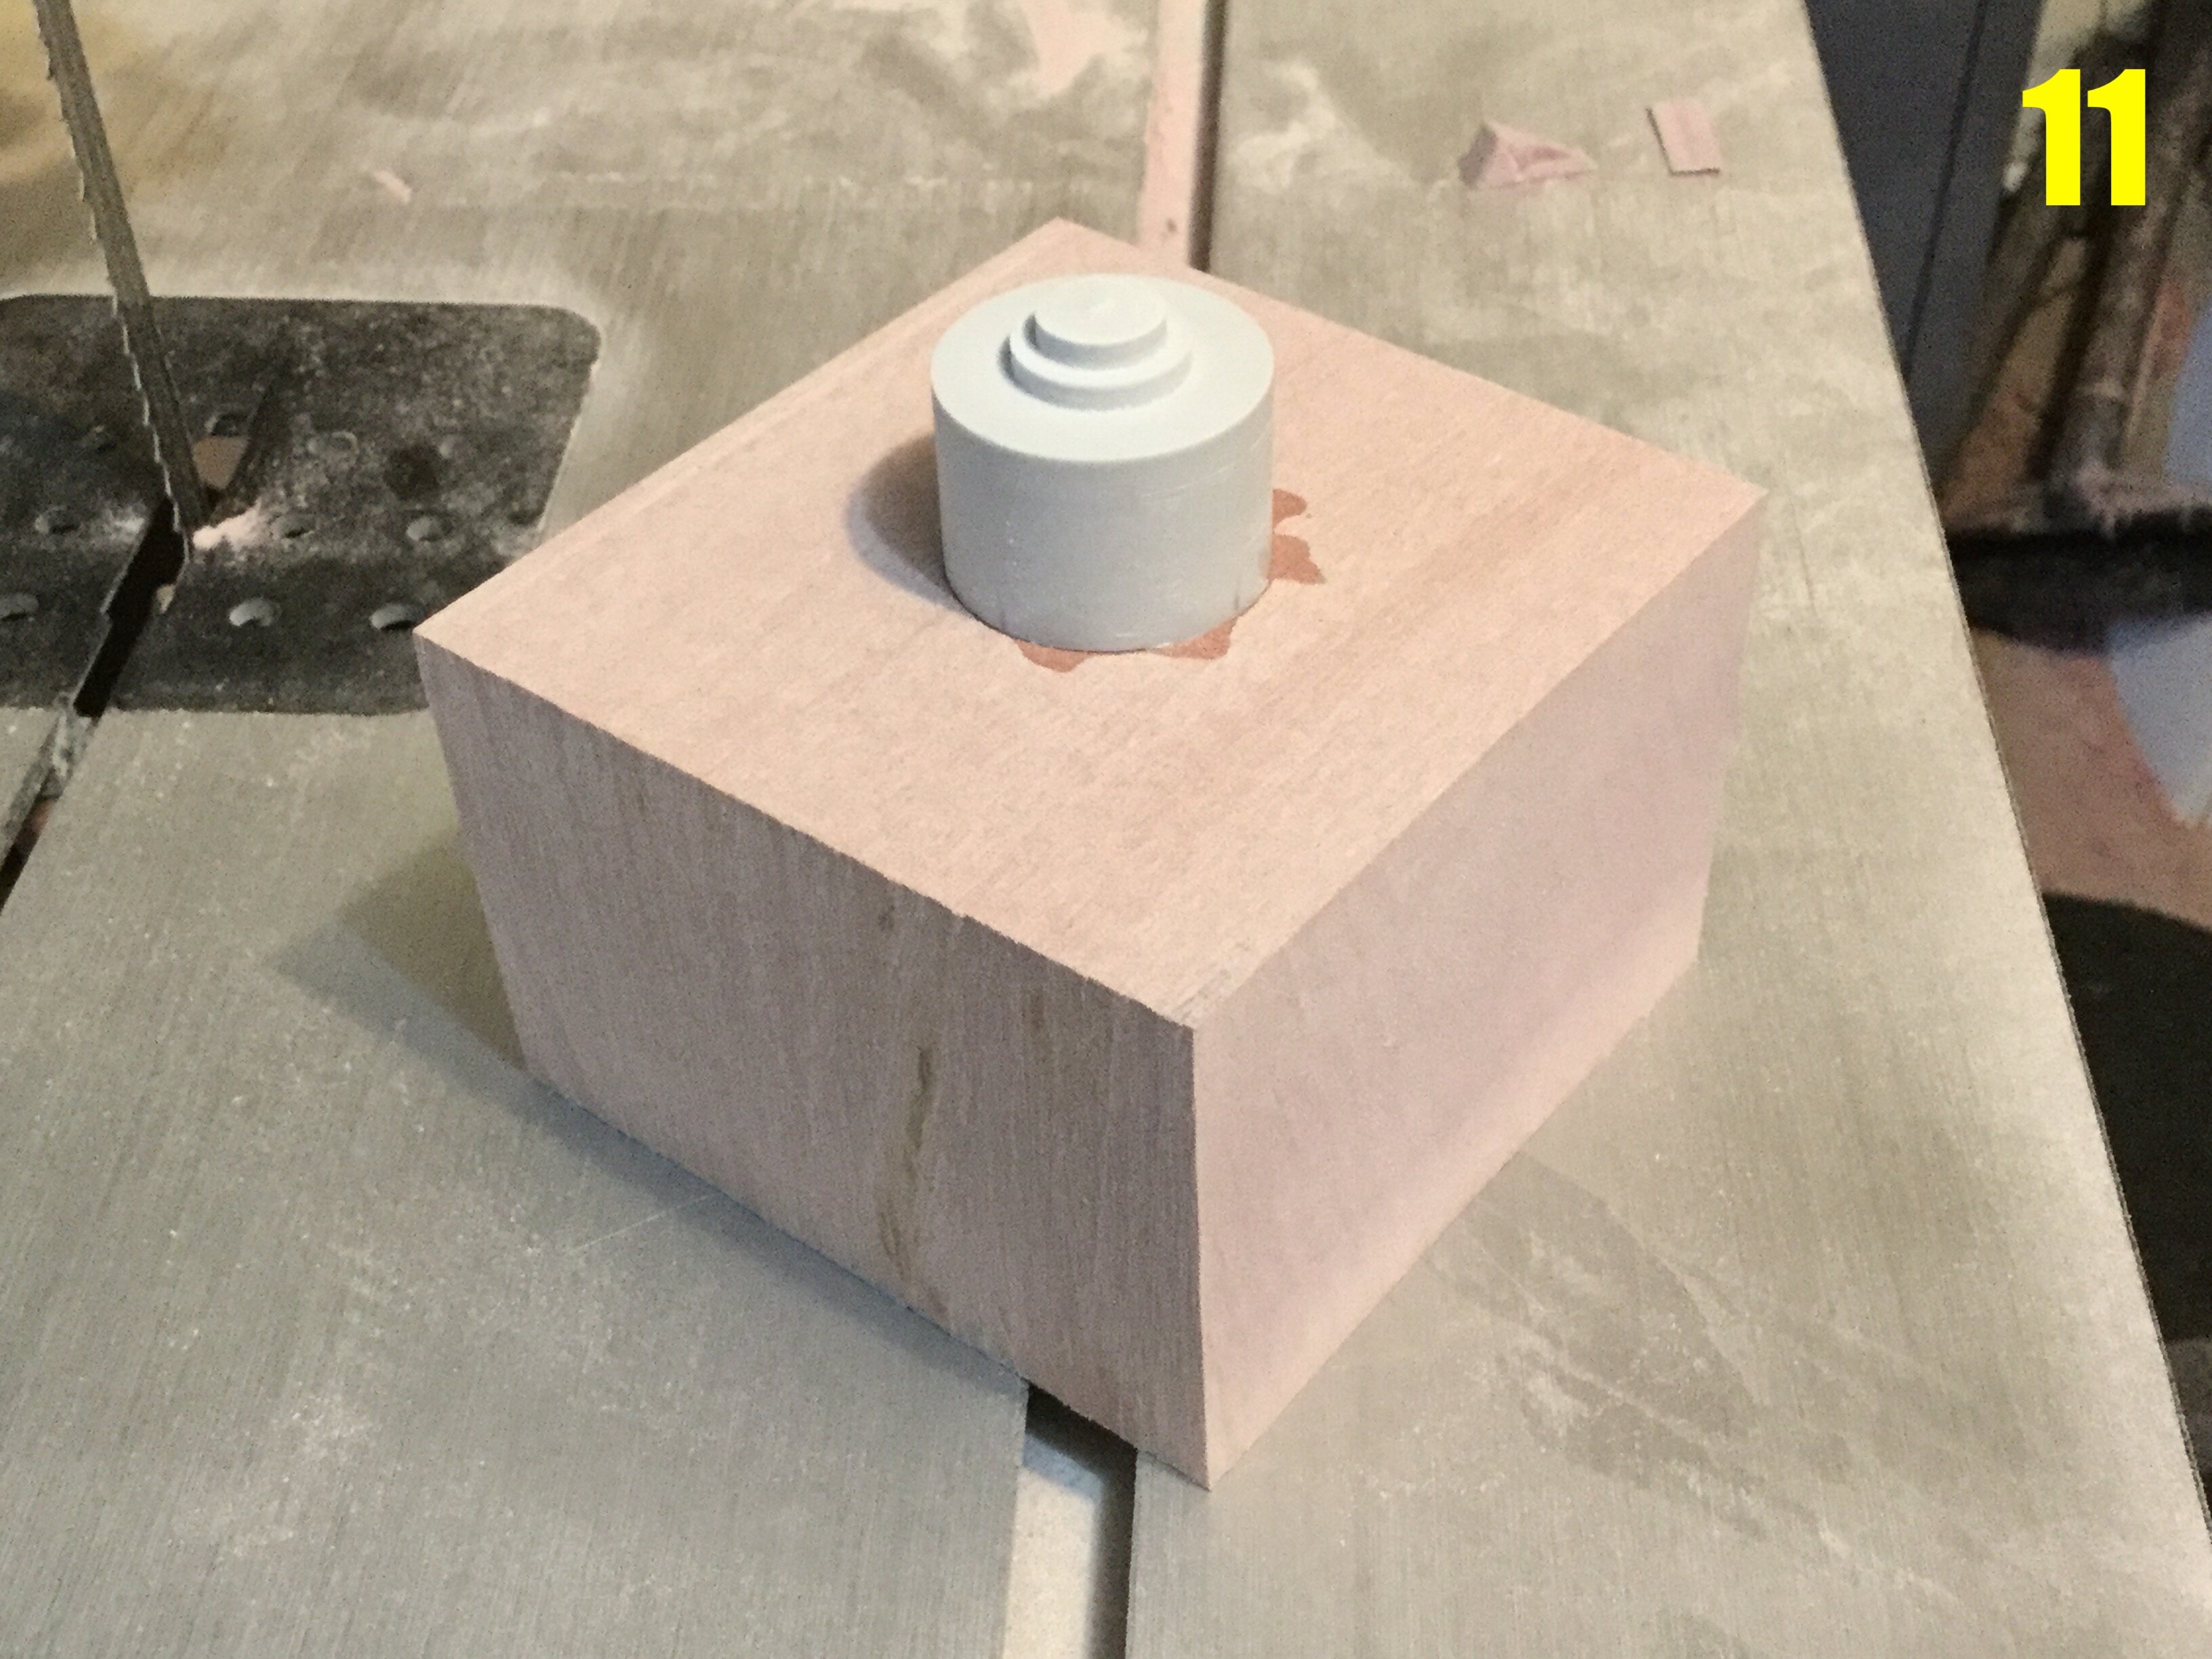
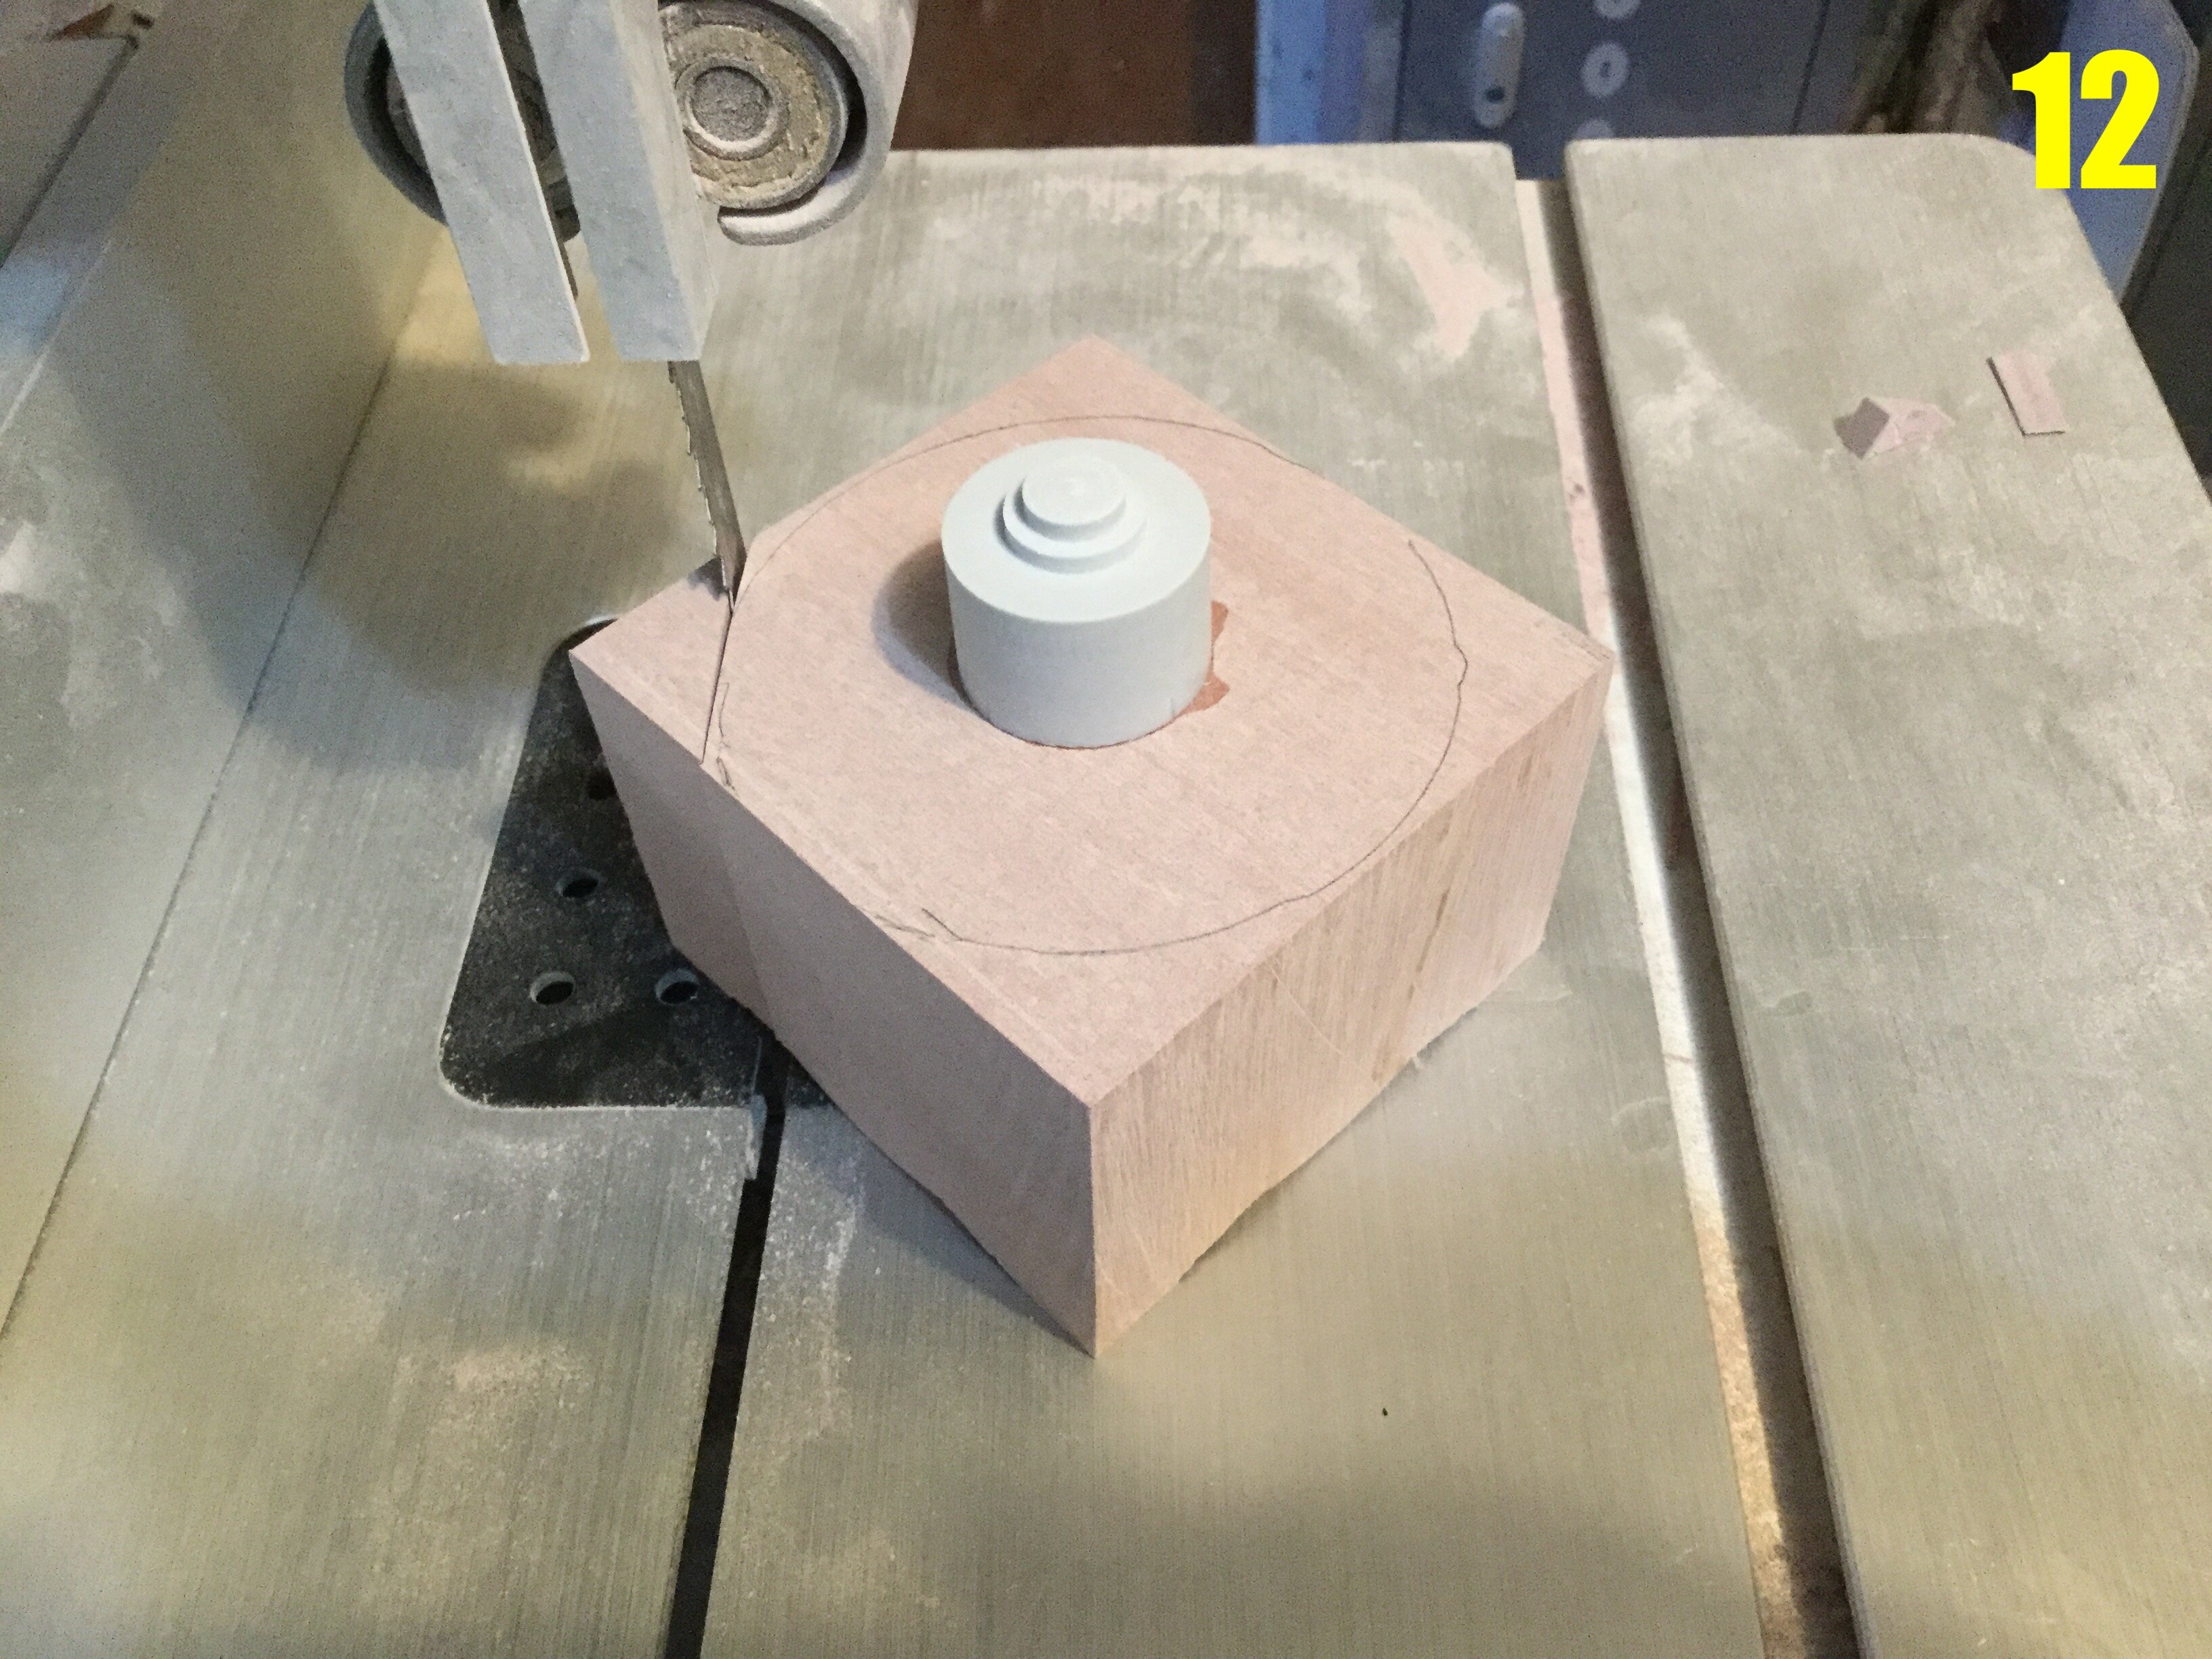
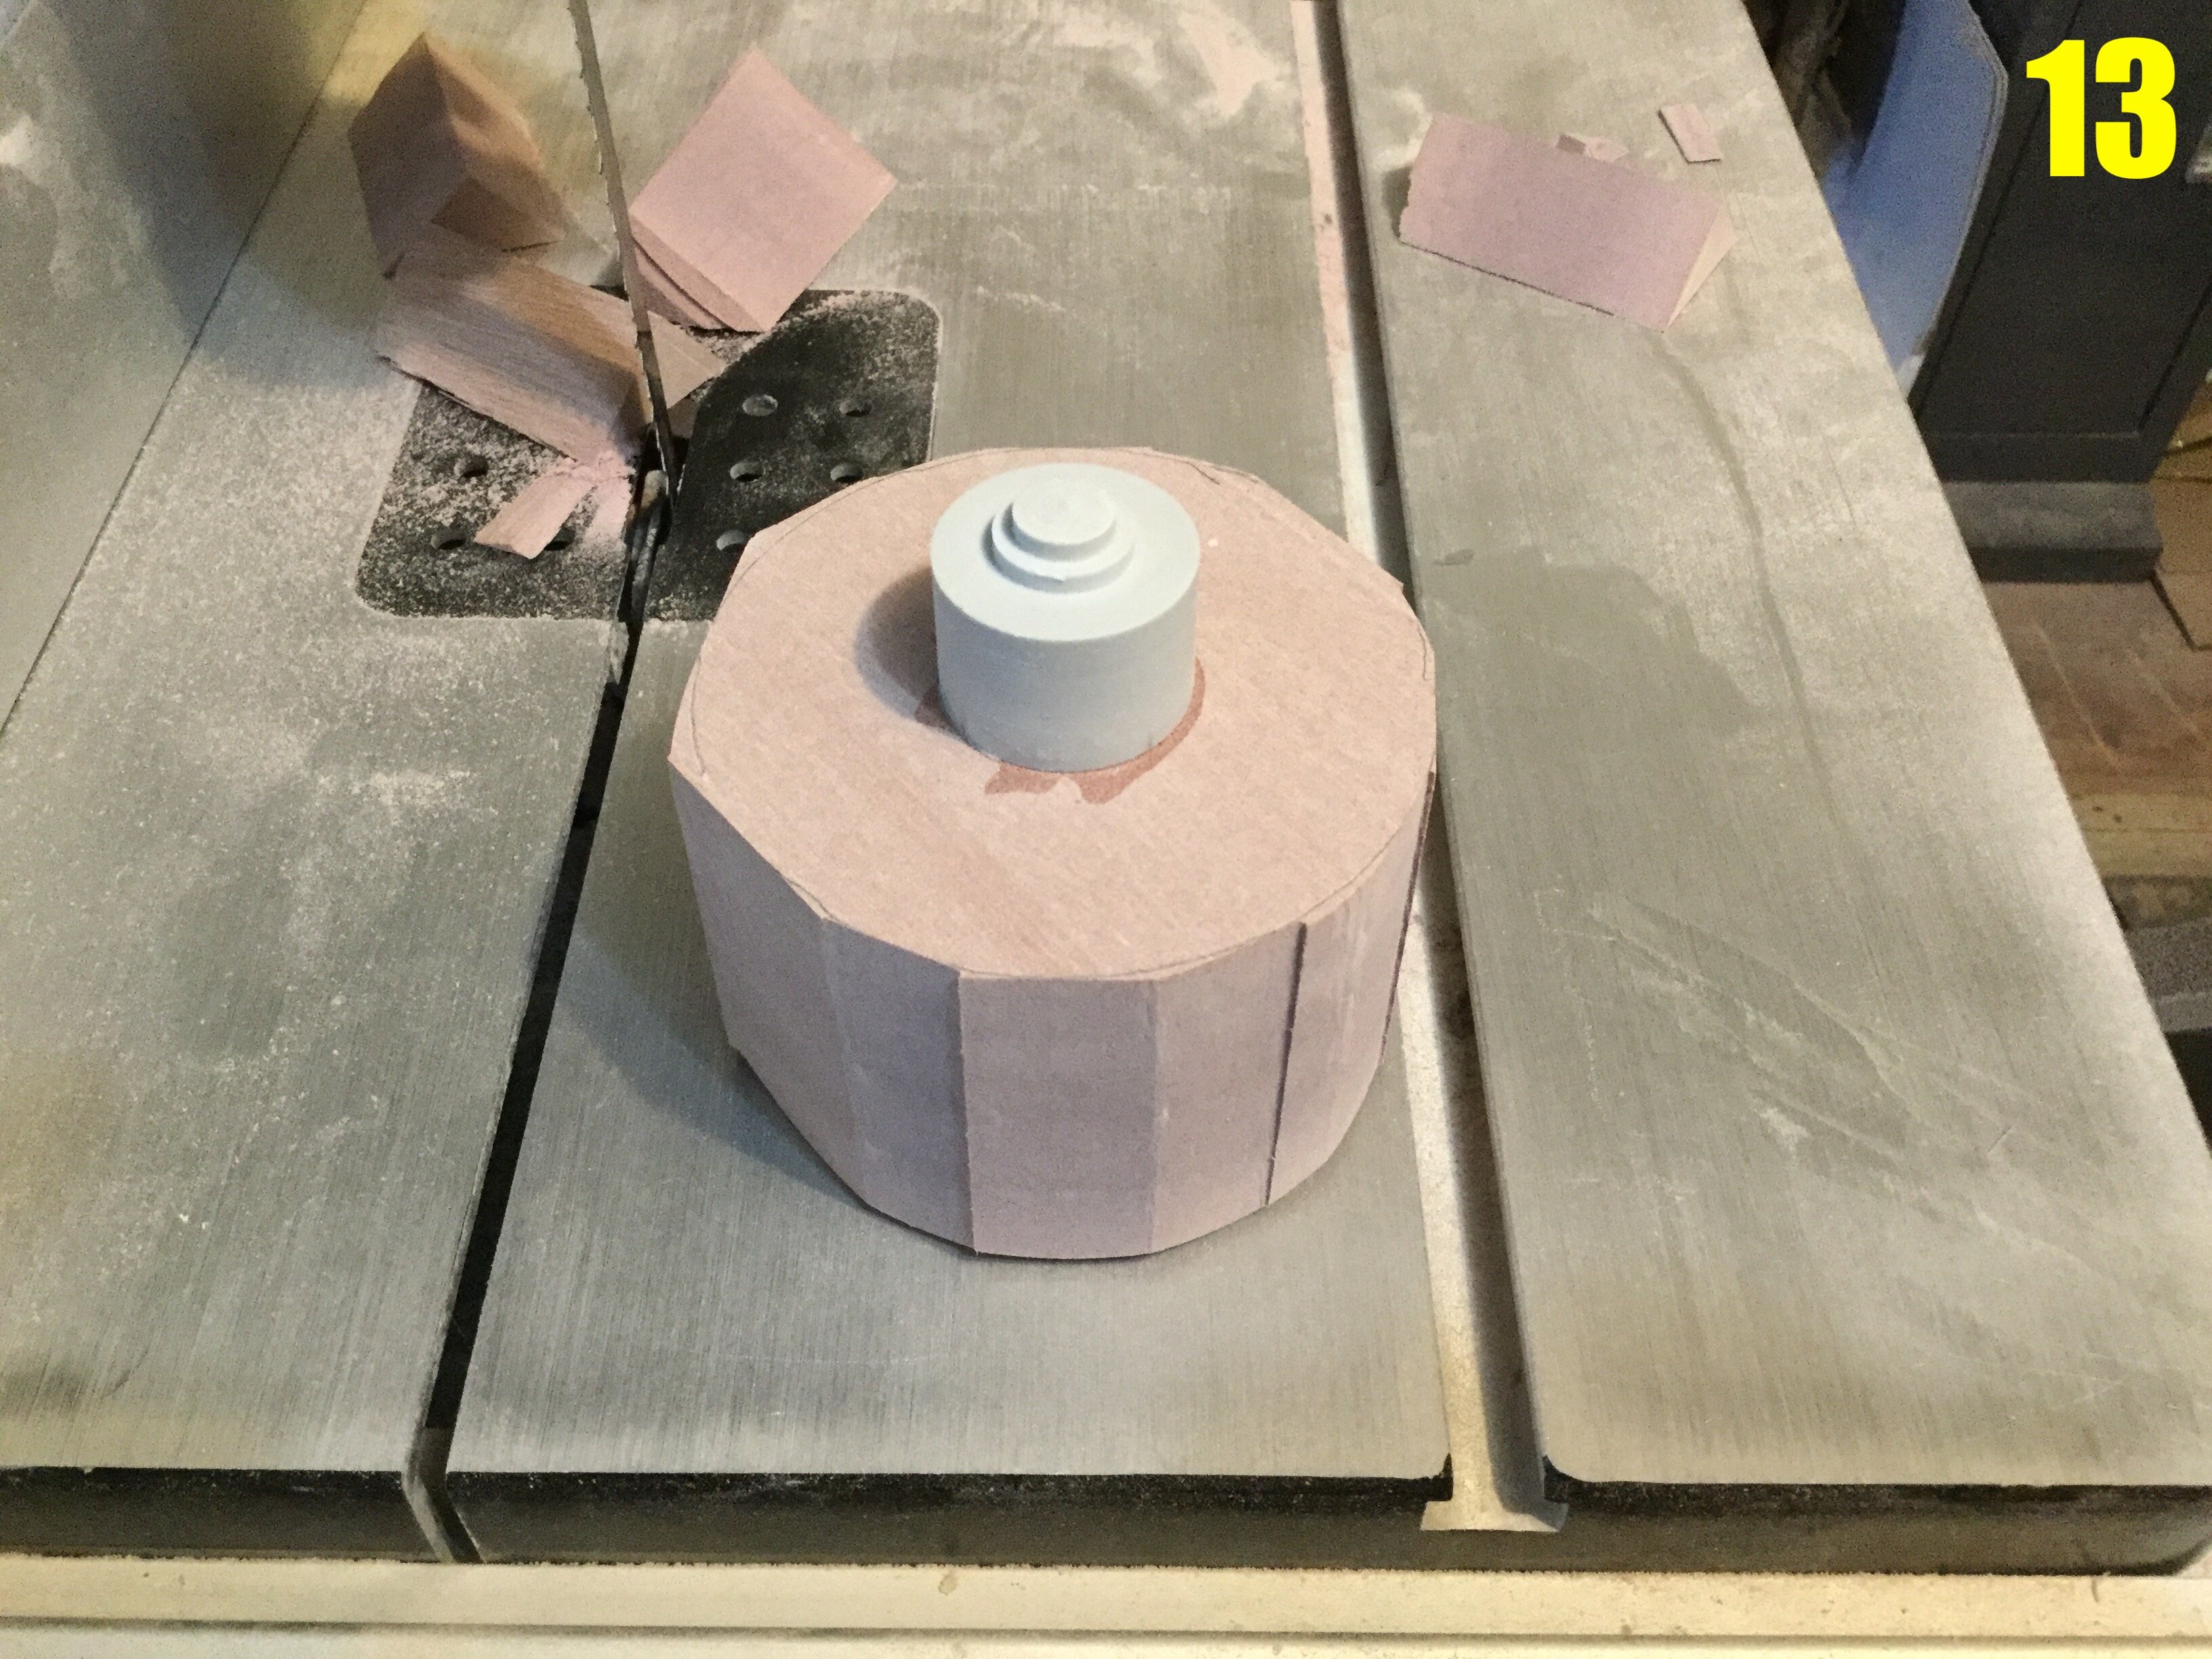
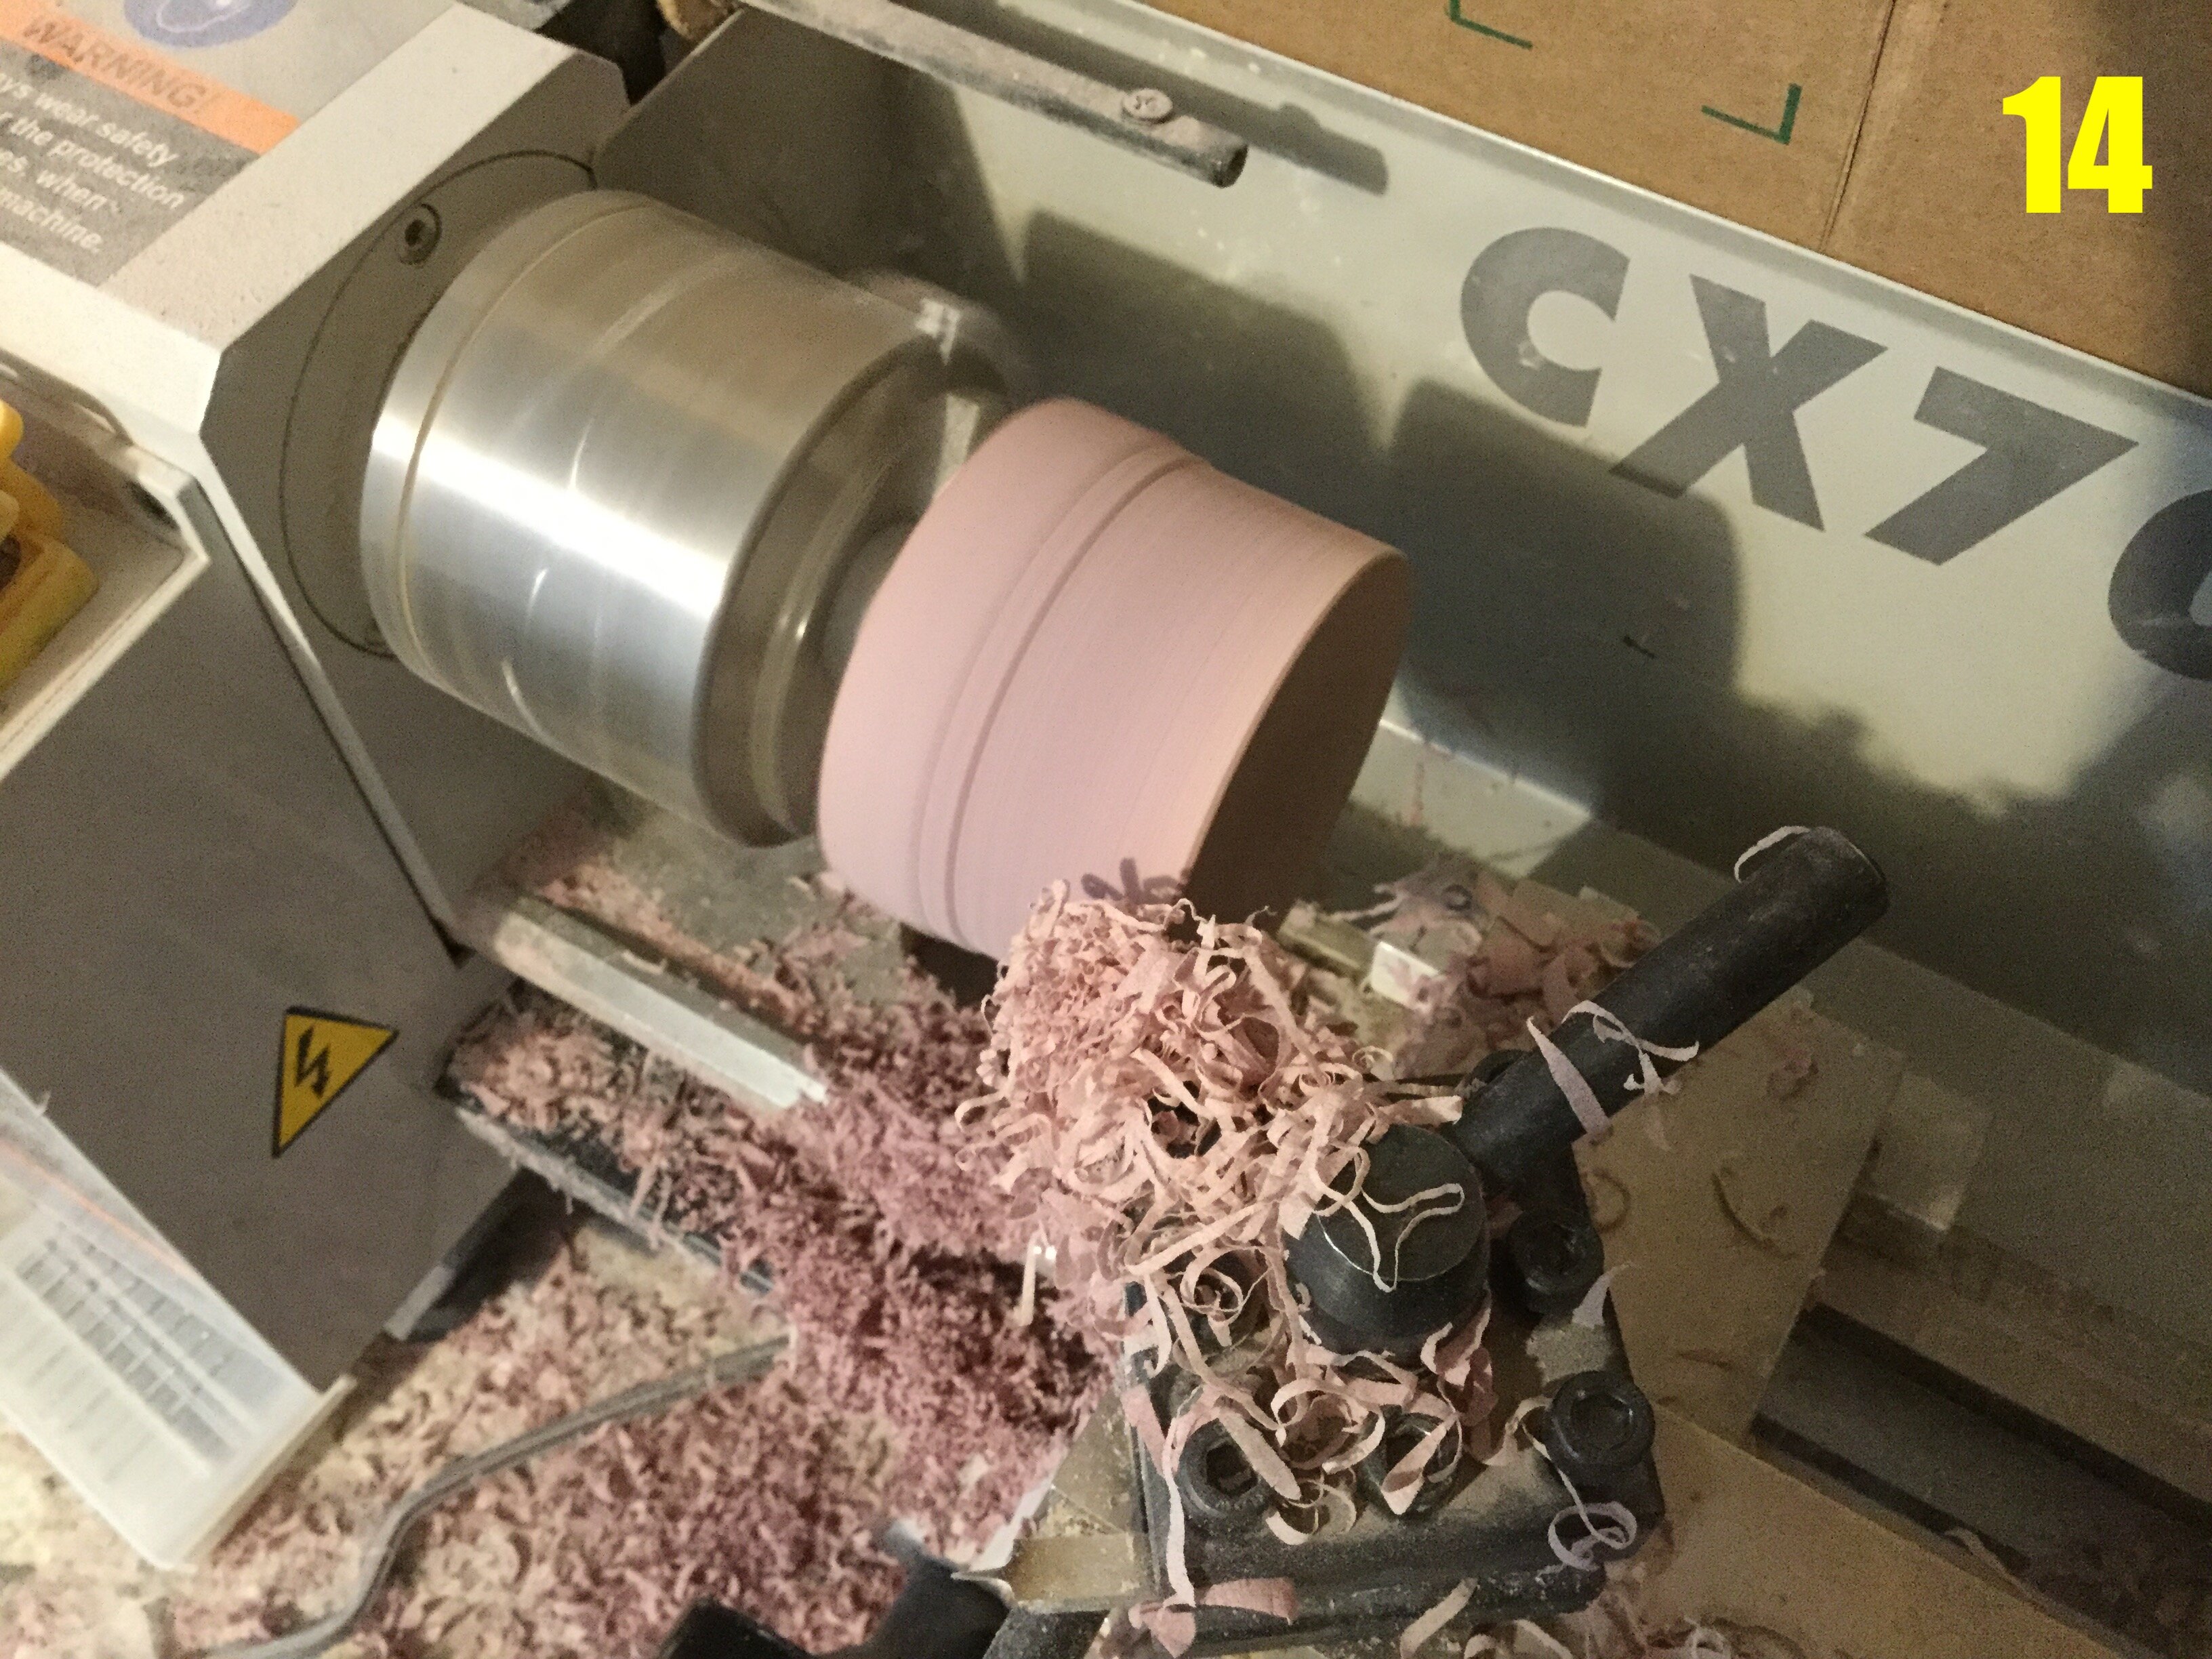
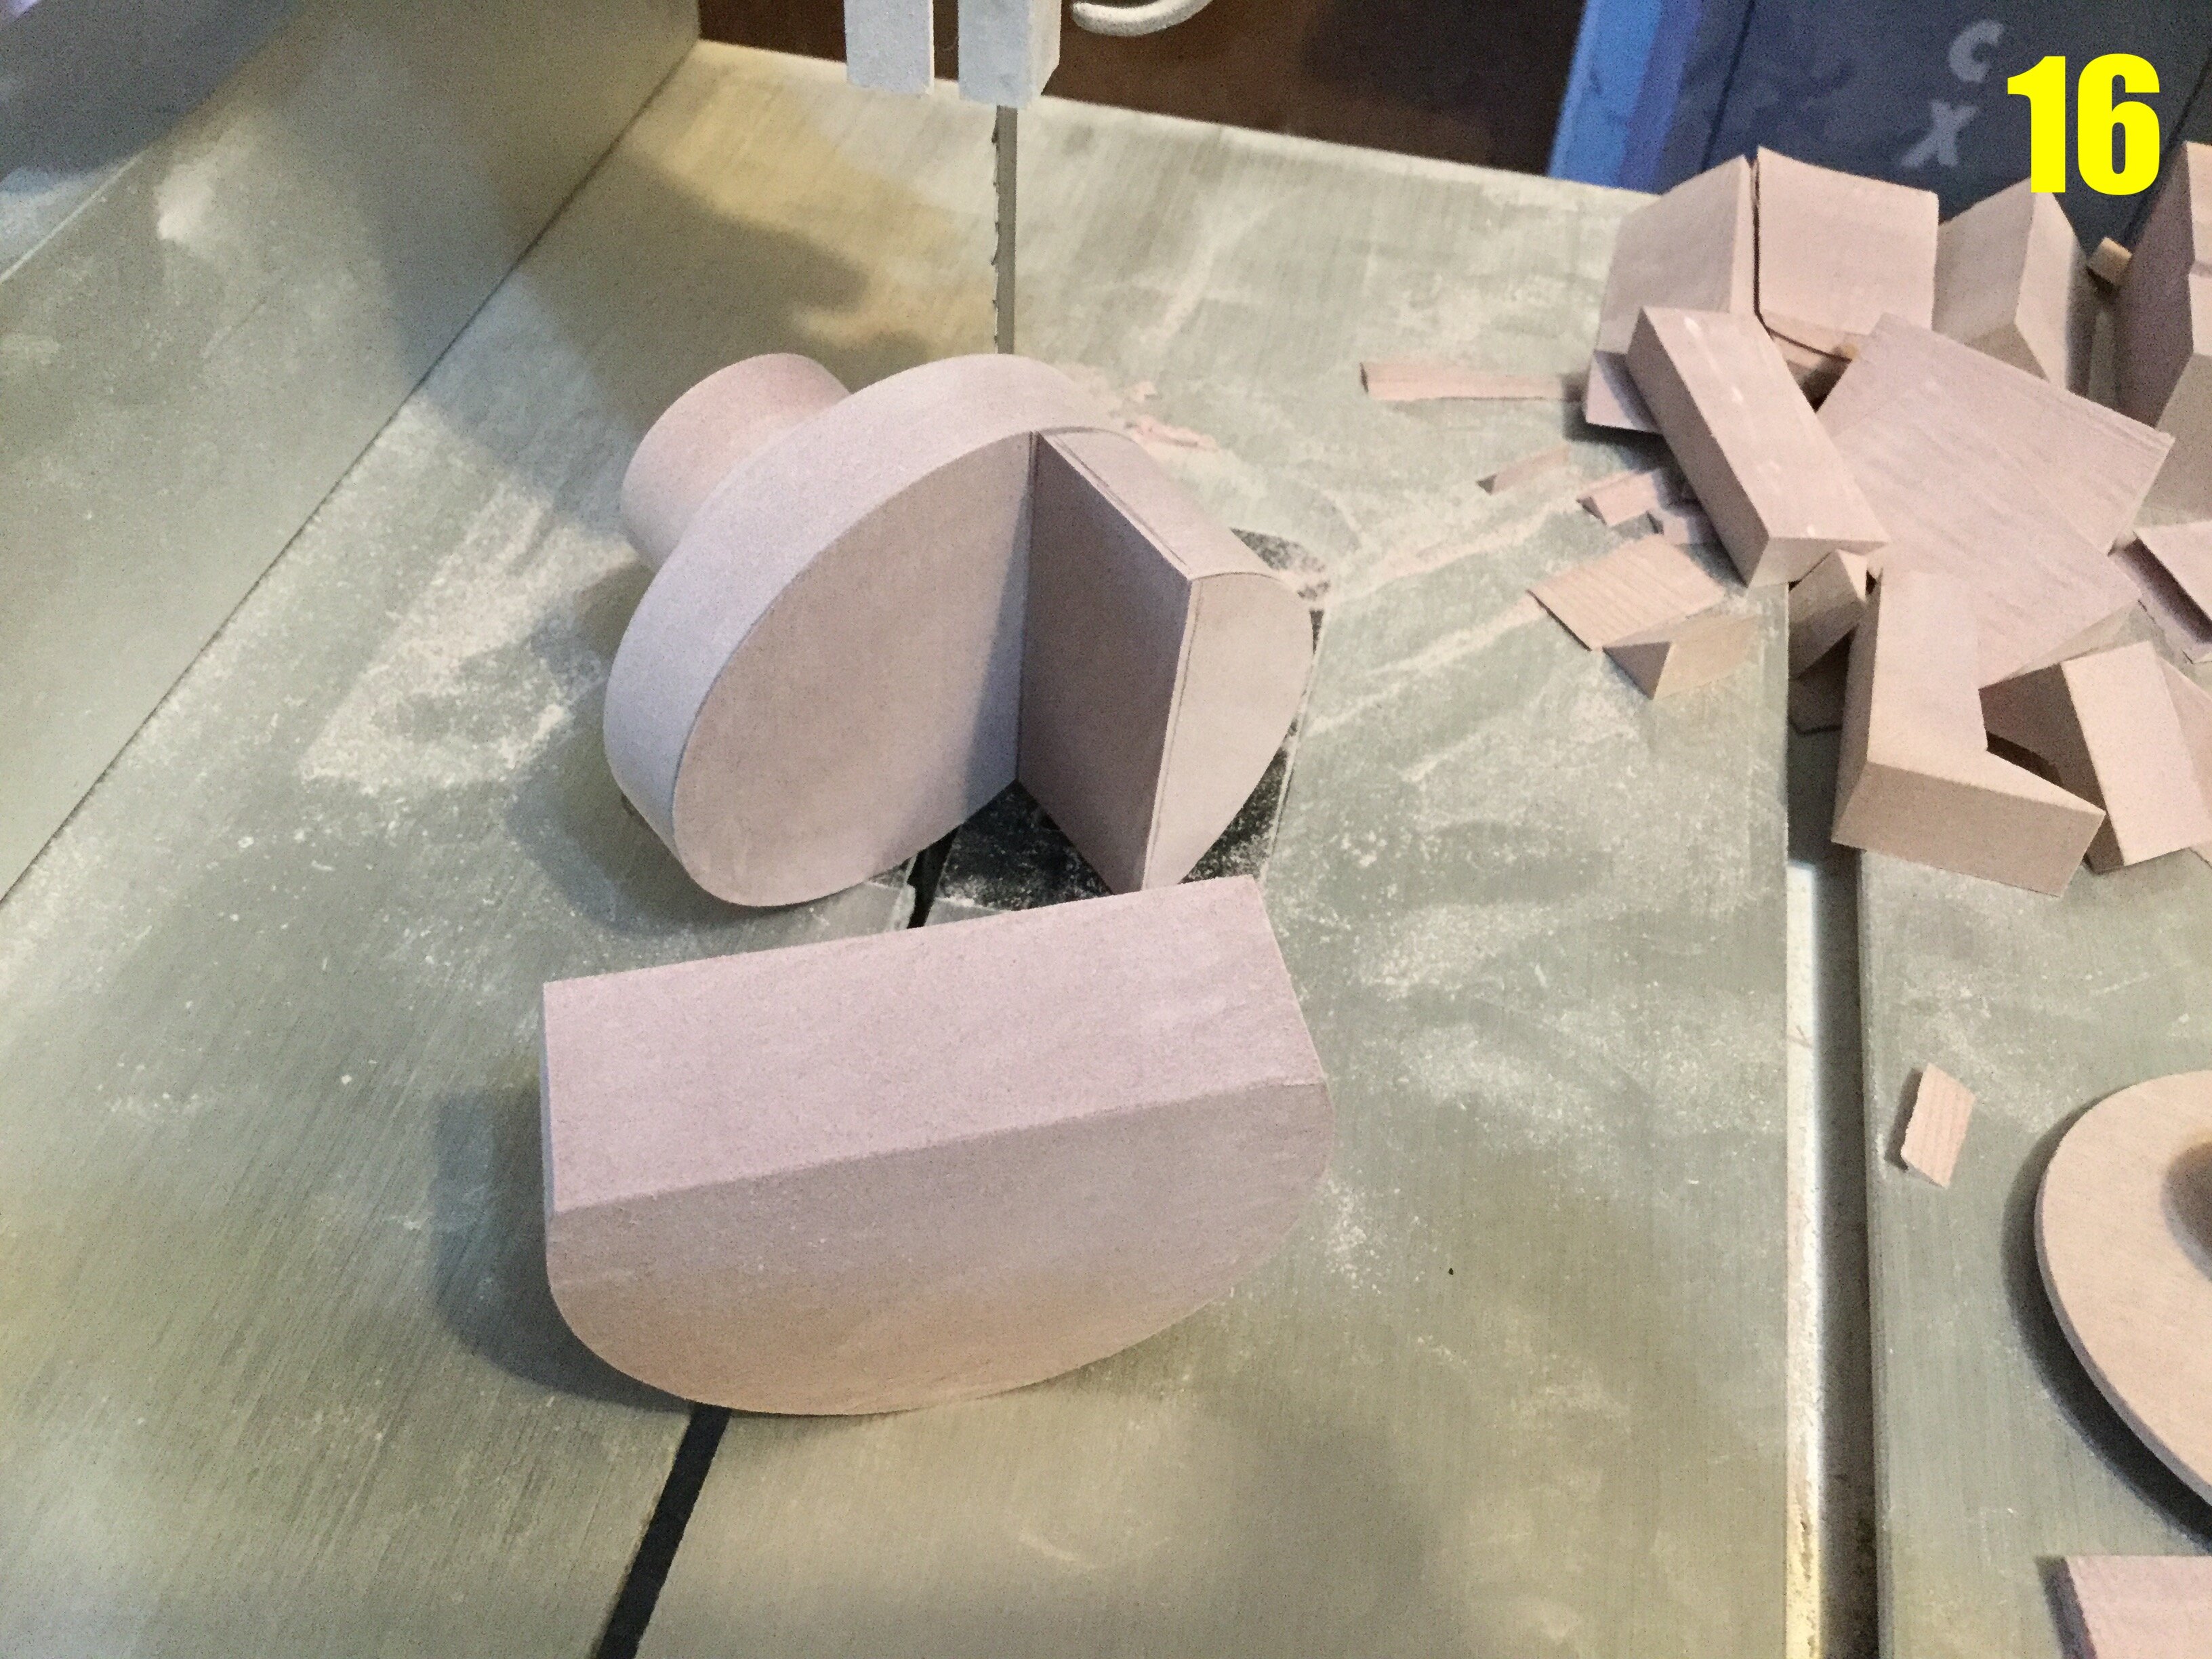
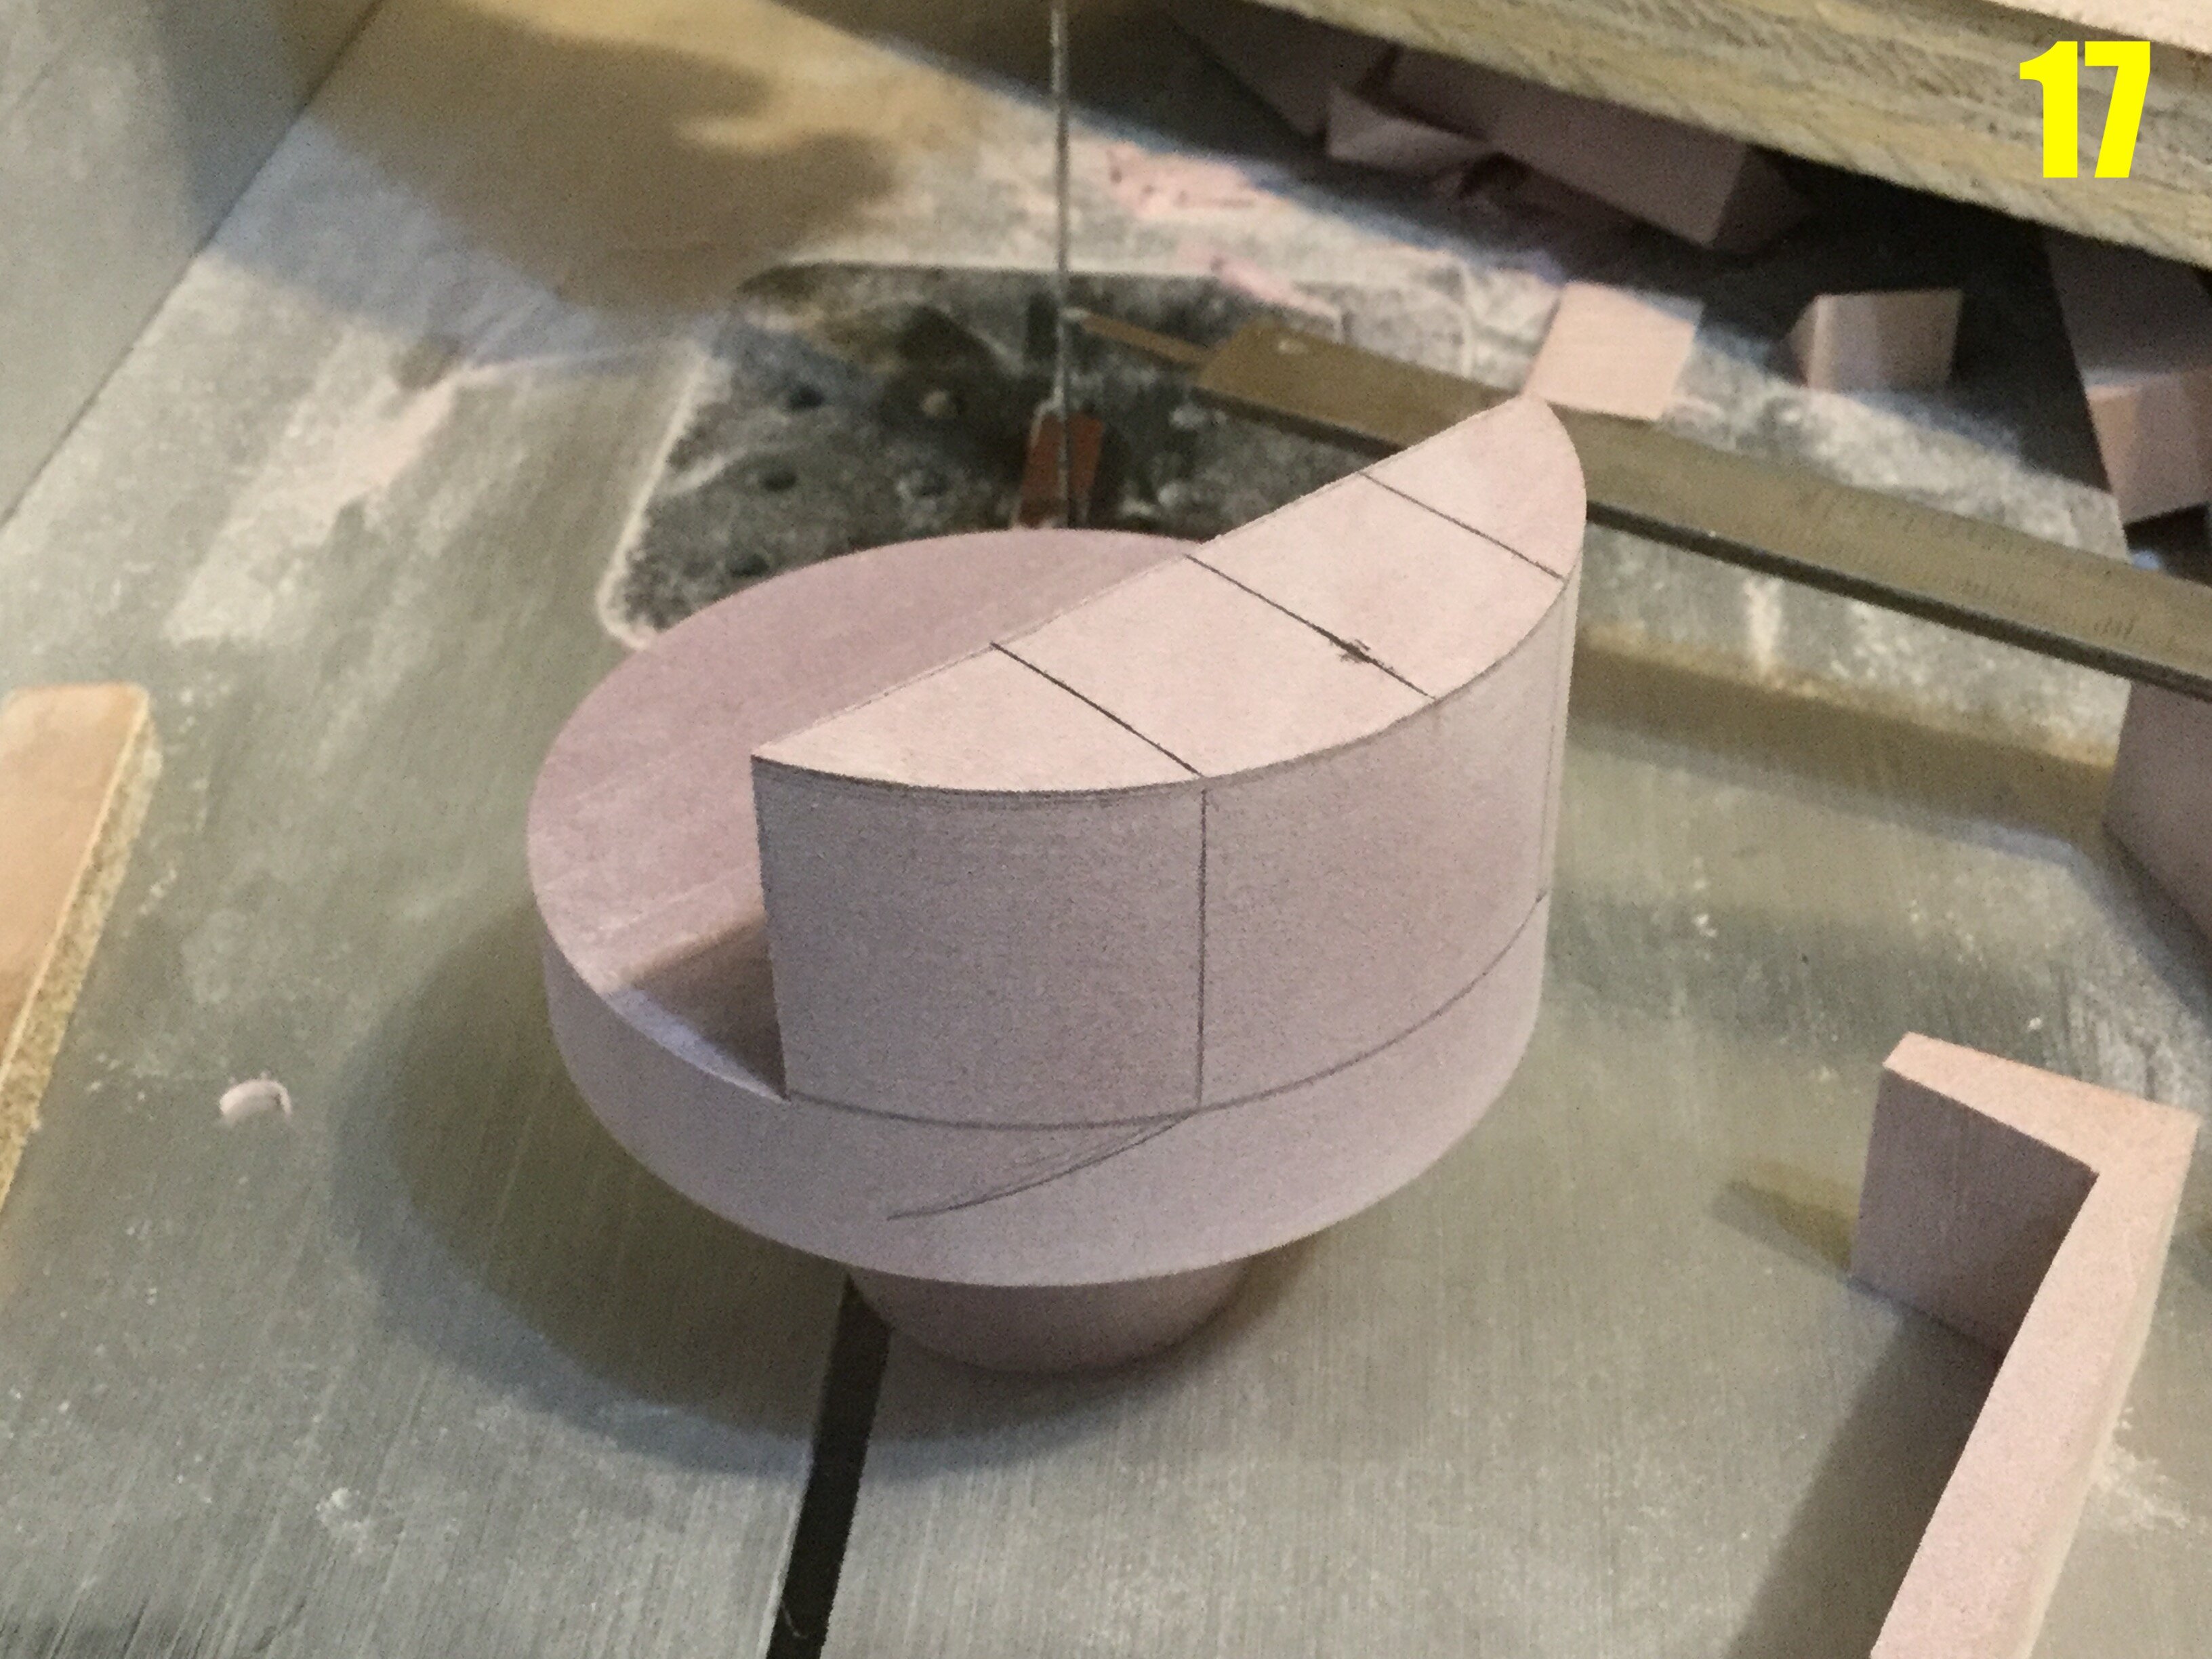
Captain's log: Thursday, May 11th, 2023Get ready, kids! I'm going to show you a wonderful hack for turning modelling board chunks on a lathe to make perfectly round parts. Composite materials are wonderful in that they can be worked more quickly and allow you to do things you'd never be able to get away with in metal—much like this little trick.Pic 11. I need to make the crotch module for Thomas Hawk, and because of it's largely cylindrical shape, I opted to turn it on the lathe. I first begin by chopping a slab of modelling board slightly larger than what I need. Then I attach a perfectly round mandrel using CA glue. That nub is what the chuck will grab onto when I turn the part. Let this dry thoroughly.Pic 12: using a crudely made compass with my caliper, I scribe a rough circle around the mandrel, then take the part to the band saw to remove as much excess material as possible.Pic 13: this is now adequate to mount on the lathe. It doesn't have to be perfect, just round-ish.Pic 14: now proceeding at slow speed, I use a small knife and remove a milimeter of material at a time. Resist the urge to go too fast, otherwise the pressure may cause the part to split from the mandrel, and damage your part in the process! Have a cleaning brush and your shop-vac handy, because this makes a dusty mess!Pic 15: I now have the part at the diameter I need, and have even added an extra piece on the right (using CA glue) which will allow the crotch to mate with the waist. That extra piece will also be needed for milling operations later. The pencil line at left is where I will saw the part off, separating it from the mandrel.Pic 16: once that's done, I pencil in the guide lines, then take the part back to the band saw to remove the excess material.Pic 17: yet more pencil lines are drawn so I know where to cut. But first, I need to smooth-out the rough texture left by the band saw, so...Pic 18: into the mill it goes! That round puck I added earlier on the lathe allows me to clamp the part securely for machining.Pic 19: Yet more milling. This was a tricky pass to set-up properly, and I'll have to get it right for both left and right sides.Pic 20: moving on to other components, here is the main body module in the center. This part, much like the crotch, will require many milling operations to be hollowed-out. Pencil lines are drawn, and then the milling fun will begin.Pic 21: another challenging part to make is the foot. Because I decided to add a taper to the ankle mating joint, it makes machining that much harder. Here I'm removing as much excess material with the band saw, proceeding in diagonal cuts, removing a little material at a time.Pic 22: before anything else, I take the main body block and drill-out the shoulder mounting points on both sides. The foot (left) and waist joint (far left are both waiting for their turn on the millPic 23: the shin armor being carved on the mill. Because of the complex, tapering shape this part will receive, I need to perform milling operations now, while the lateral sides of the block are still square.Pic 24: the curve on the shin armor is too tight for my rotary sander, so I use my milling machine like a crude CNC router, removing small amounts of material one pass at a time. Afterwards, I'll be able to sand that perfectly smooth by hand.It may not show in this update, but the masters are coming along very nicely. The fact that the parts are large means they require more time and effort to make than their 1/72 counterparts. Also, I made my own job more challenging for the sake of improving the aesthetics of the model. It'll pay off, just wait and see!


-
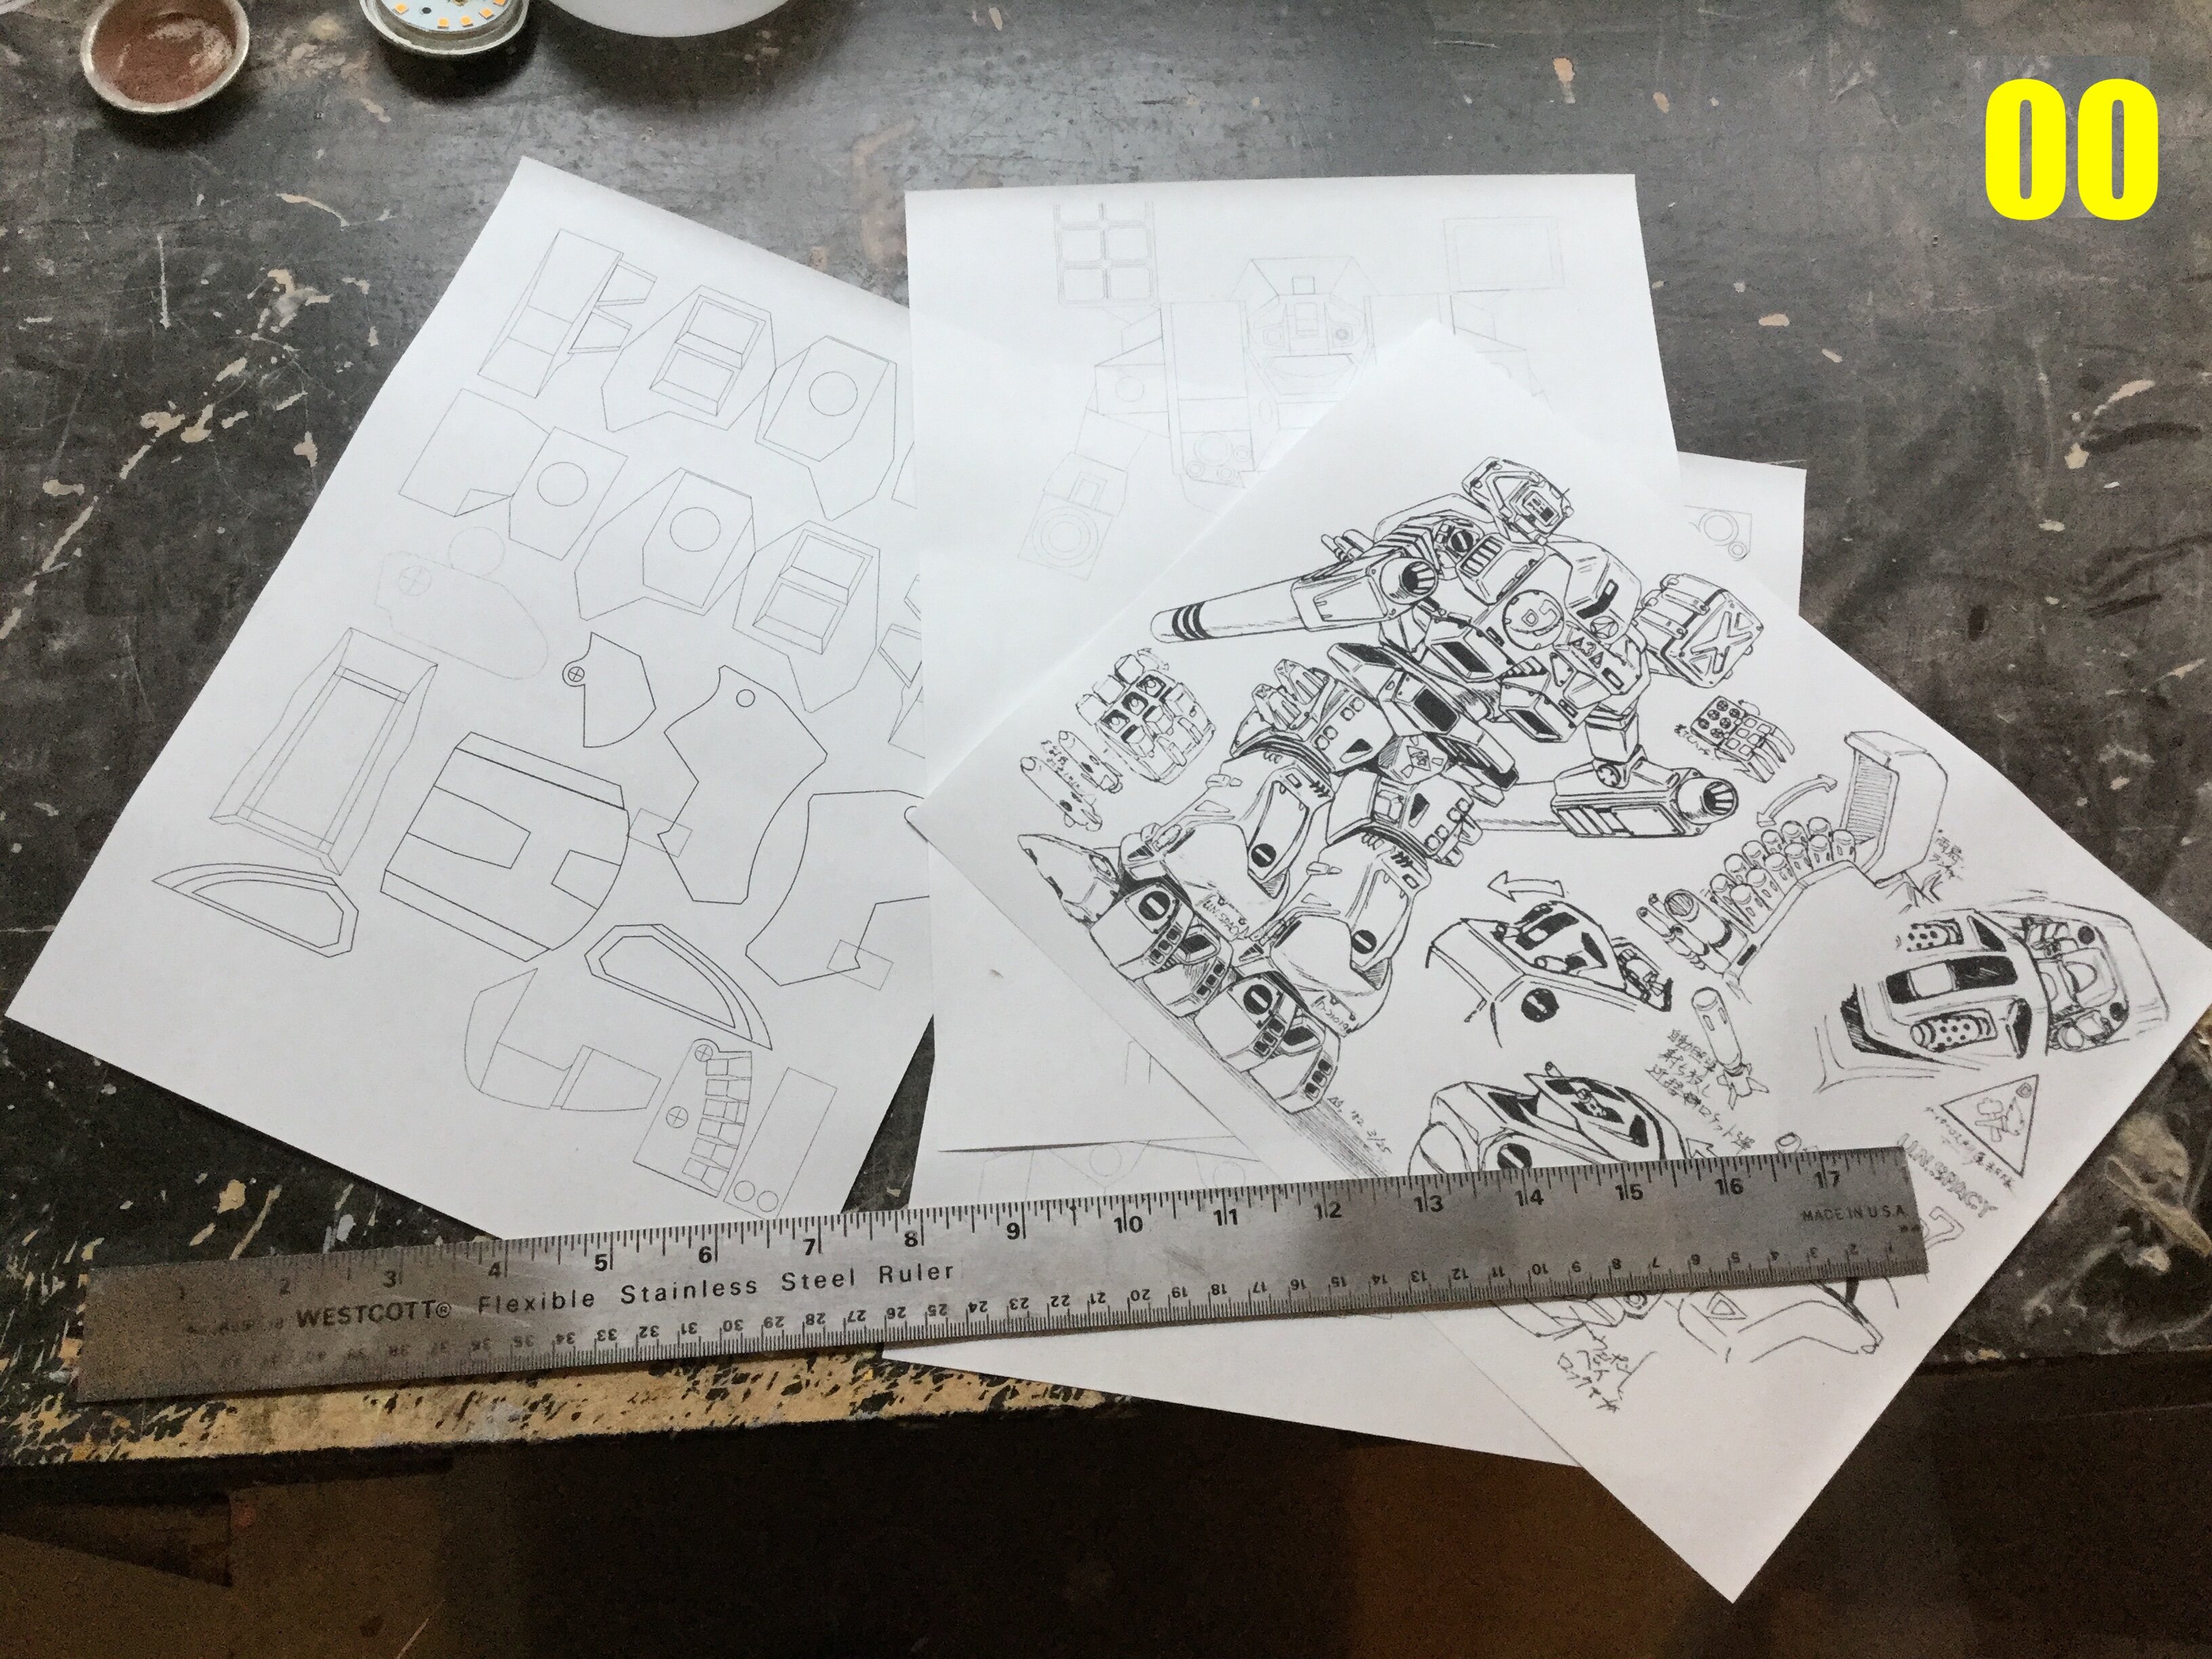
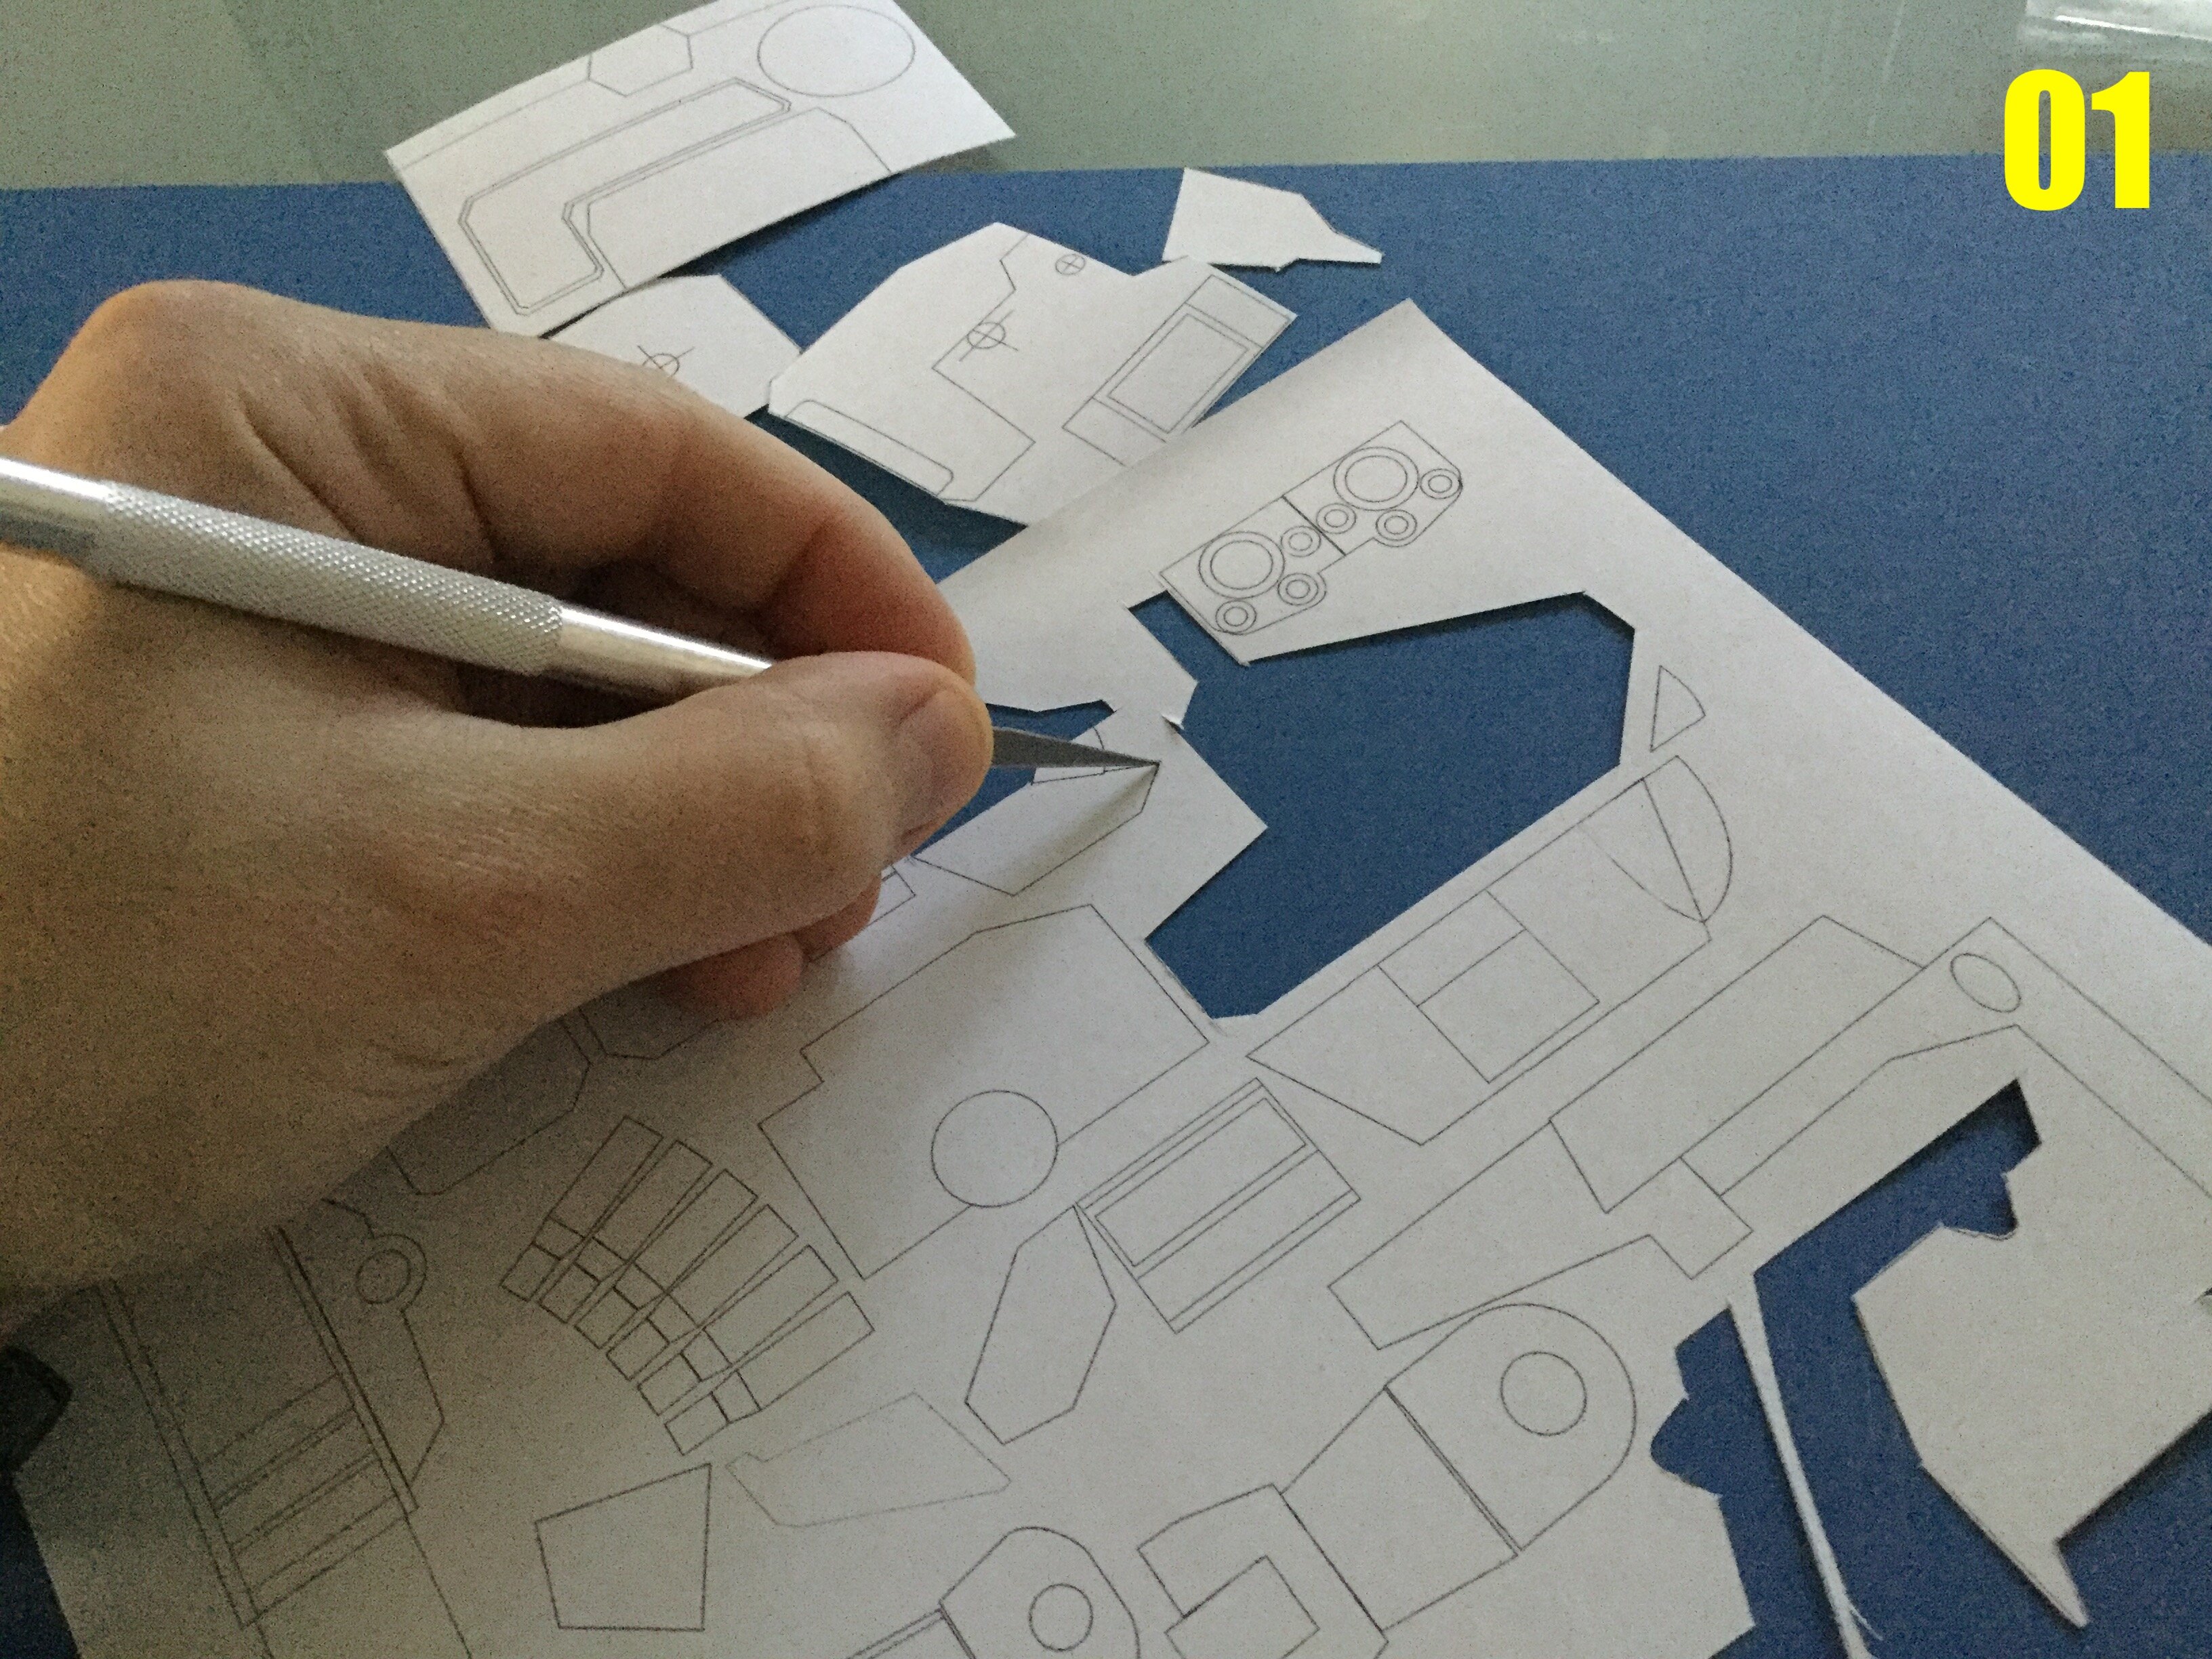
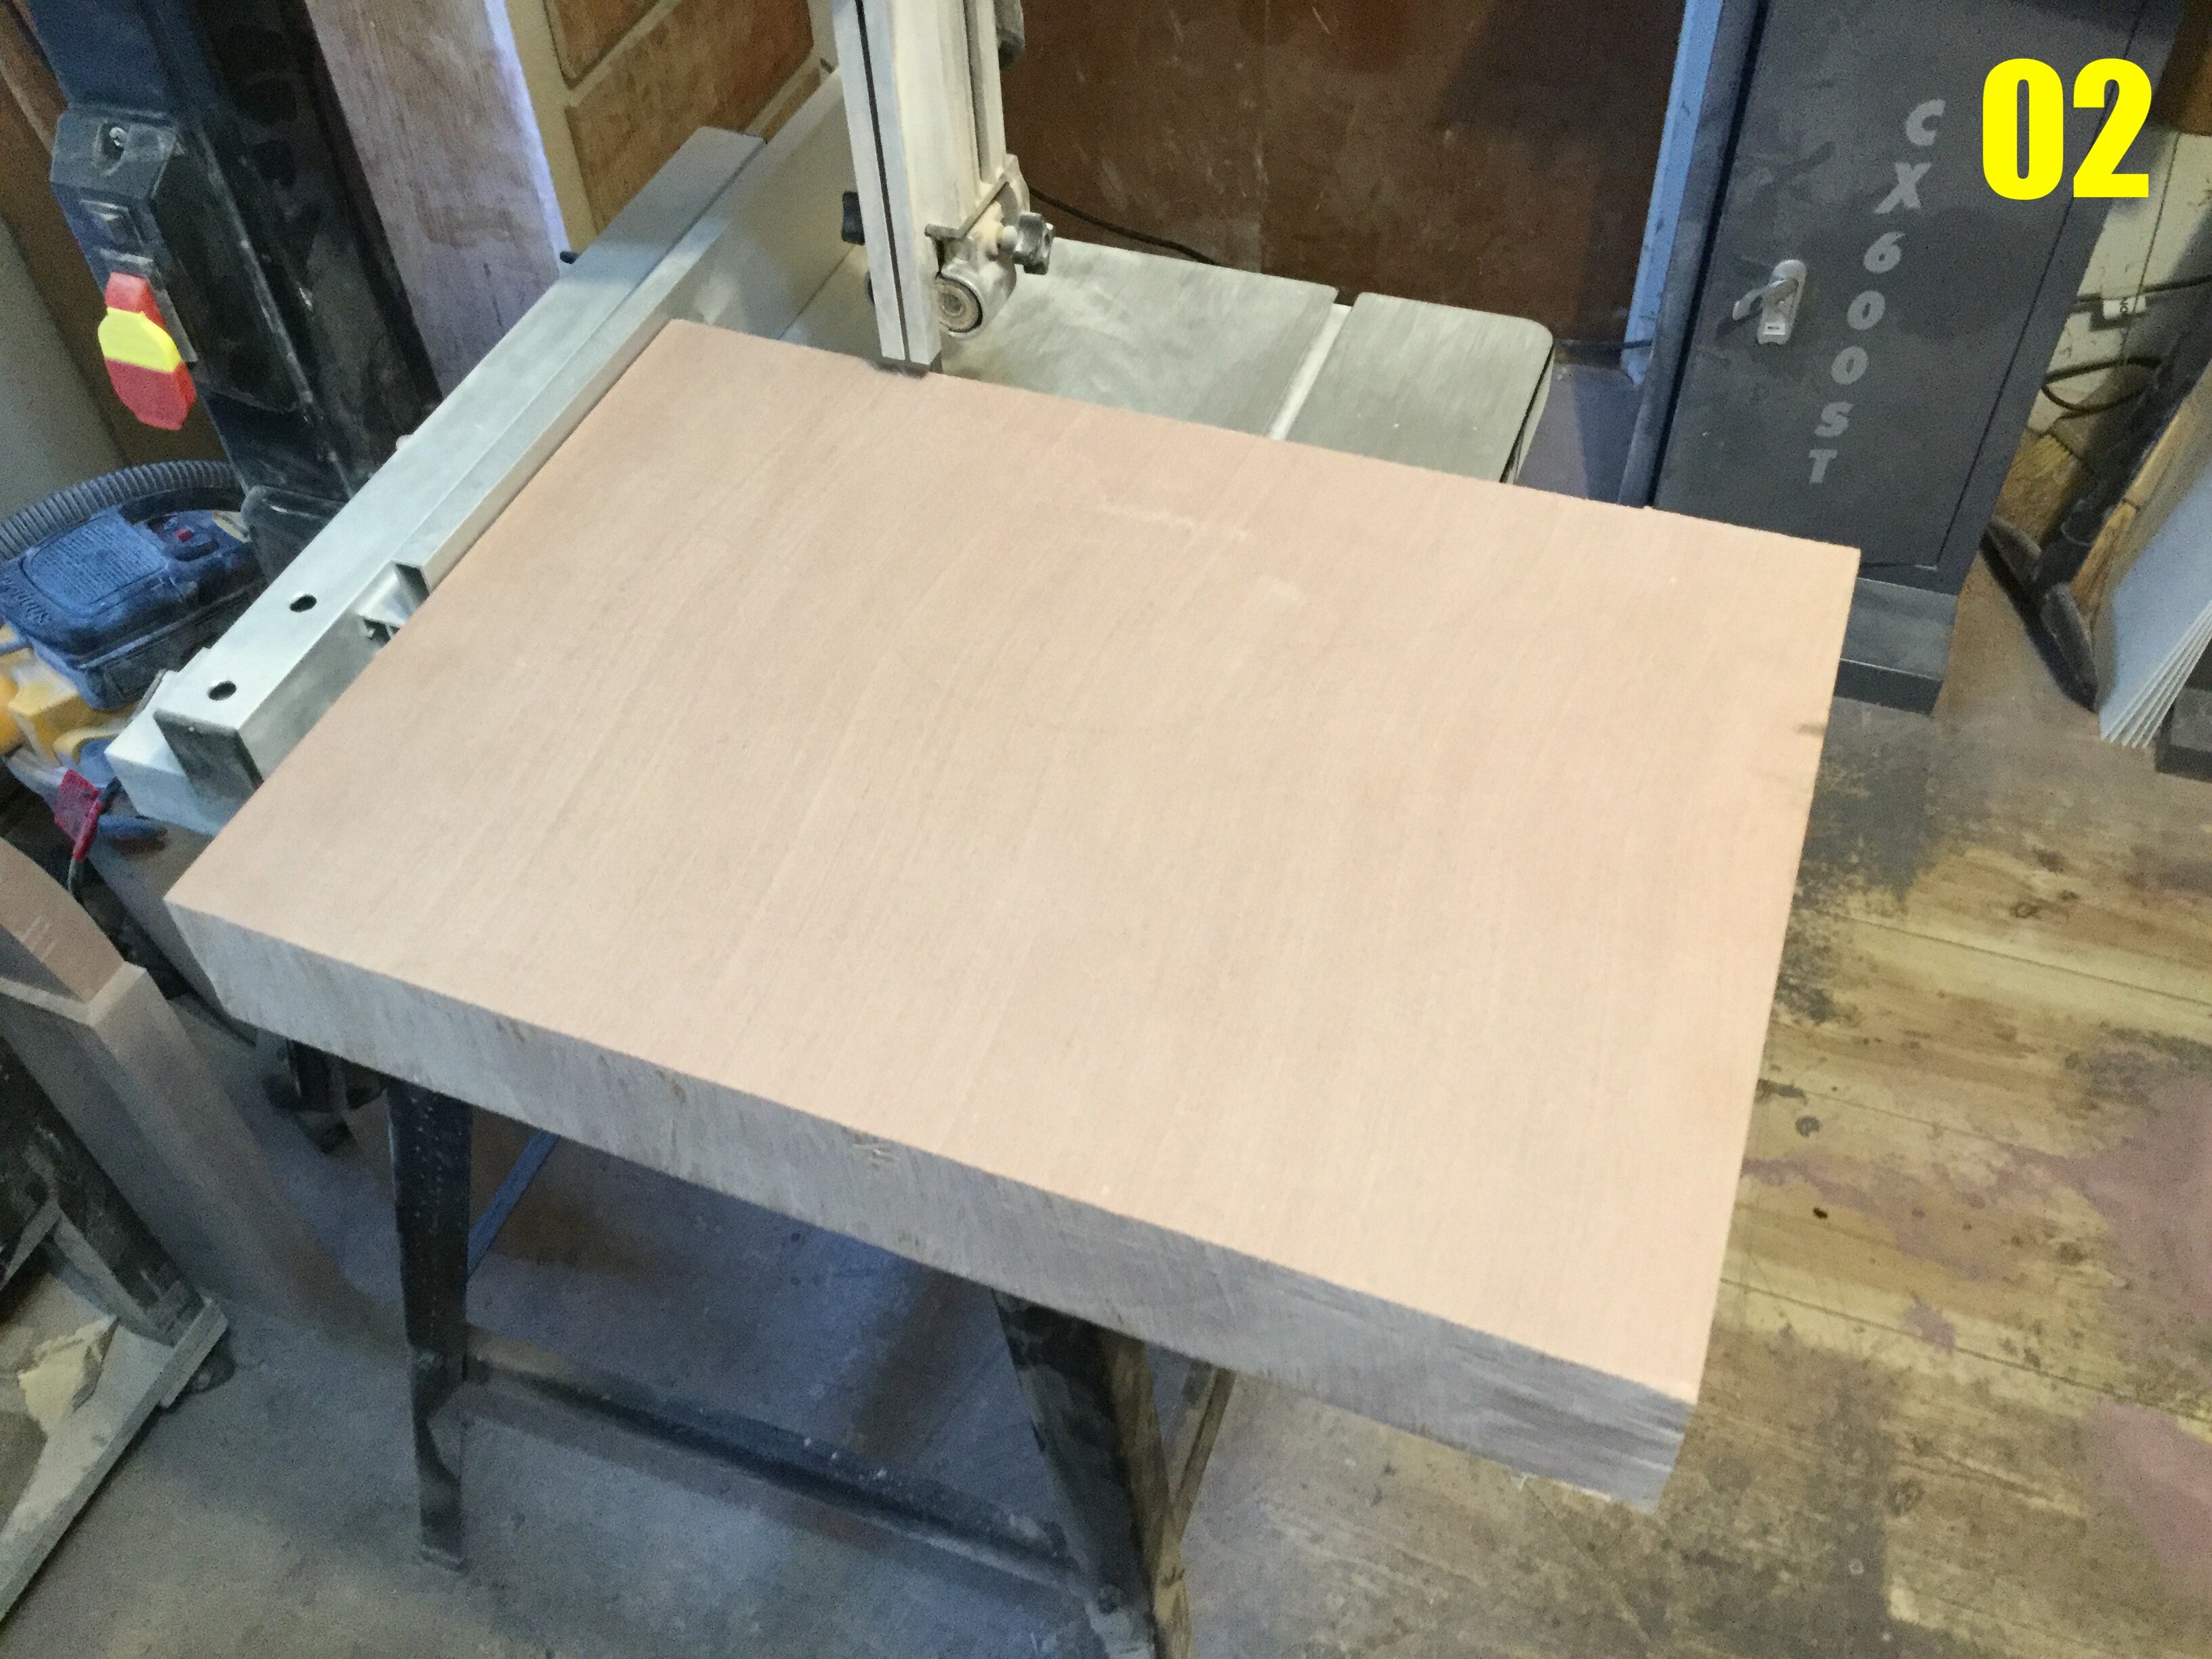
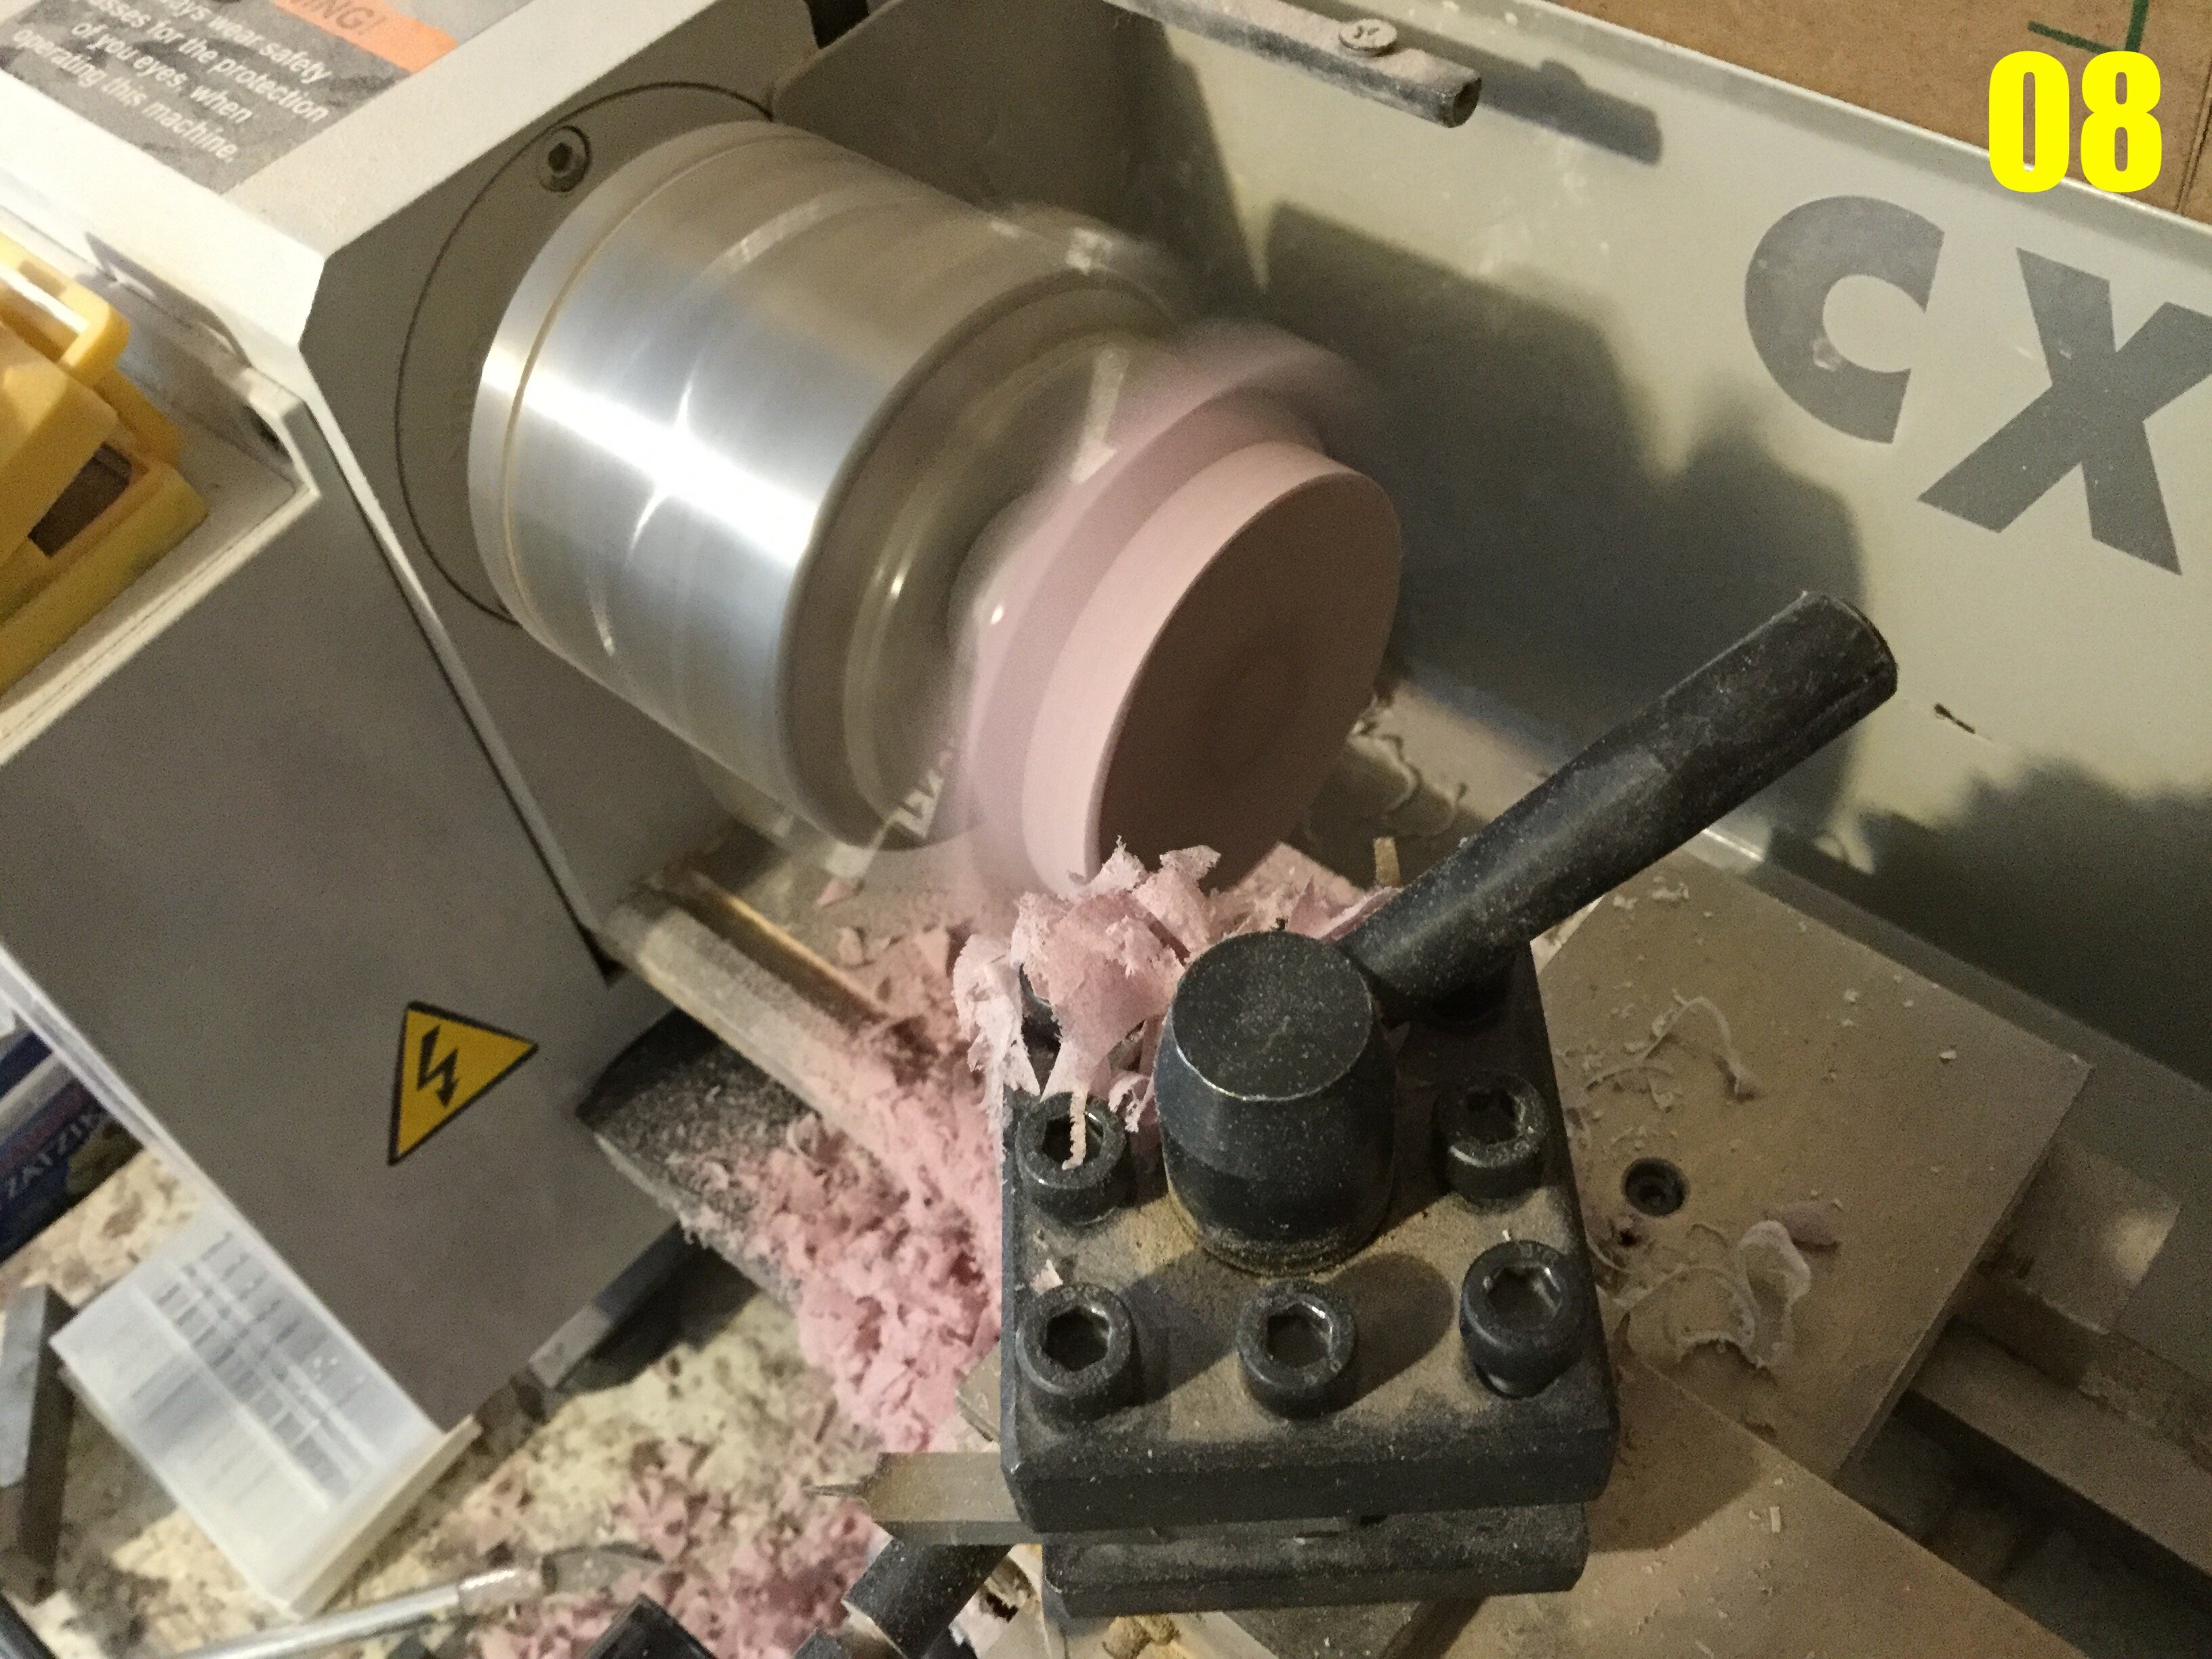
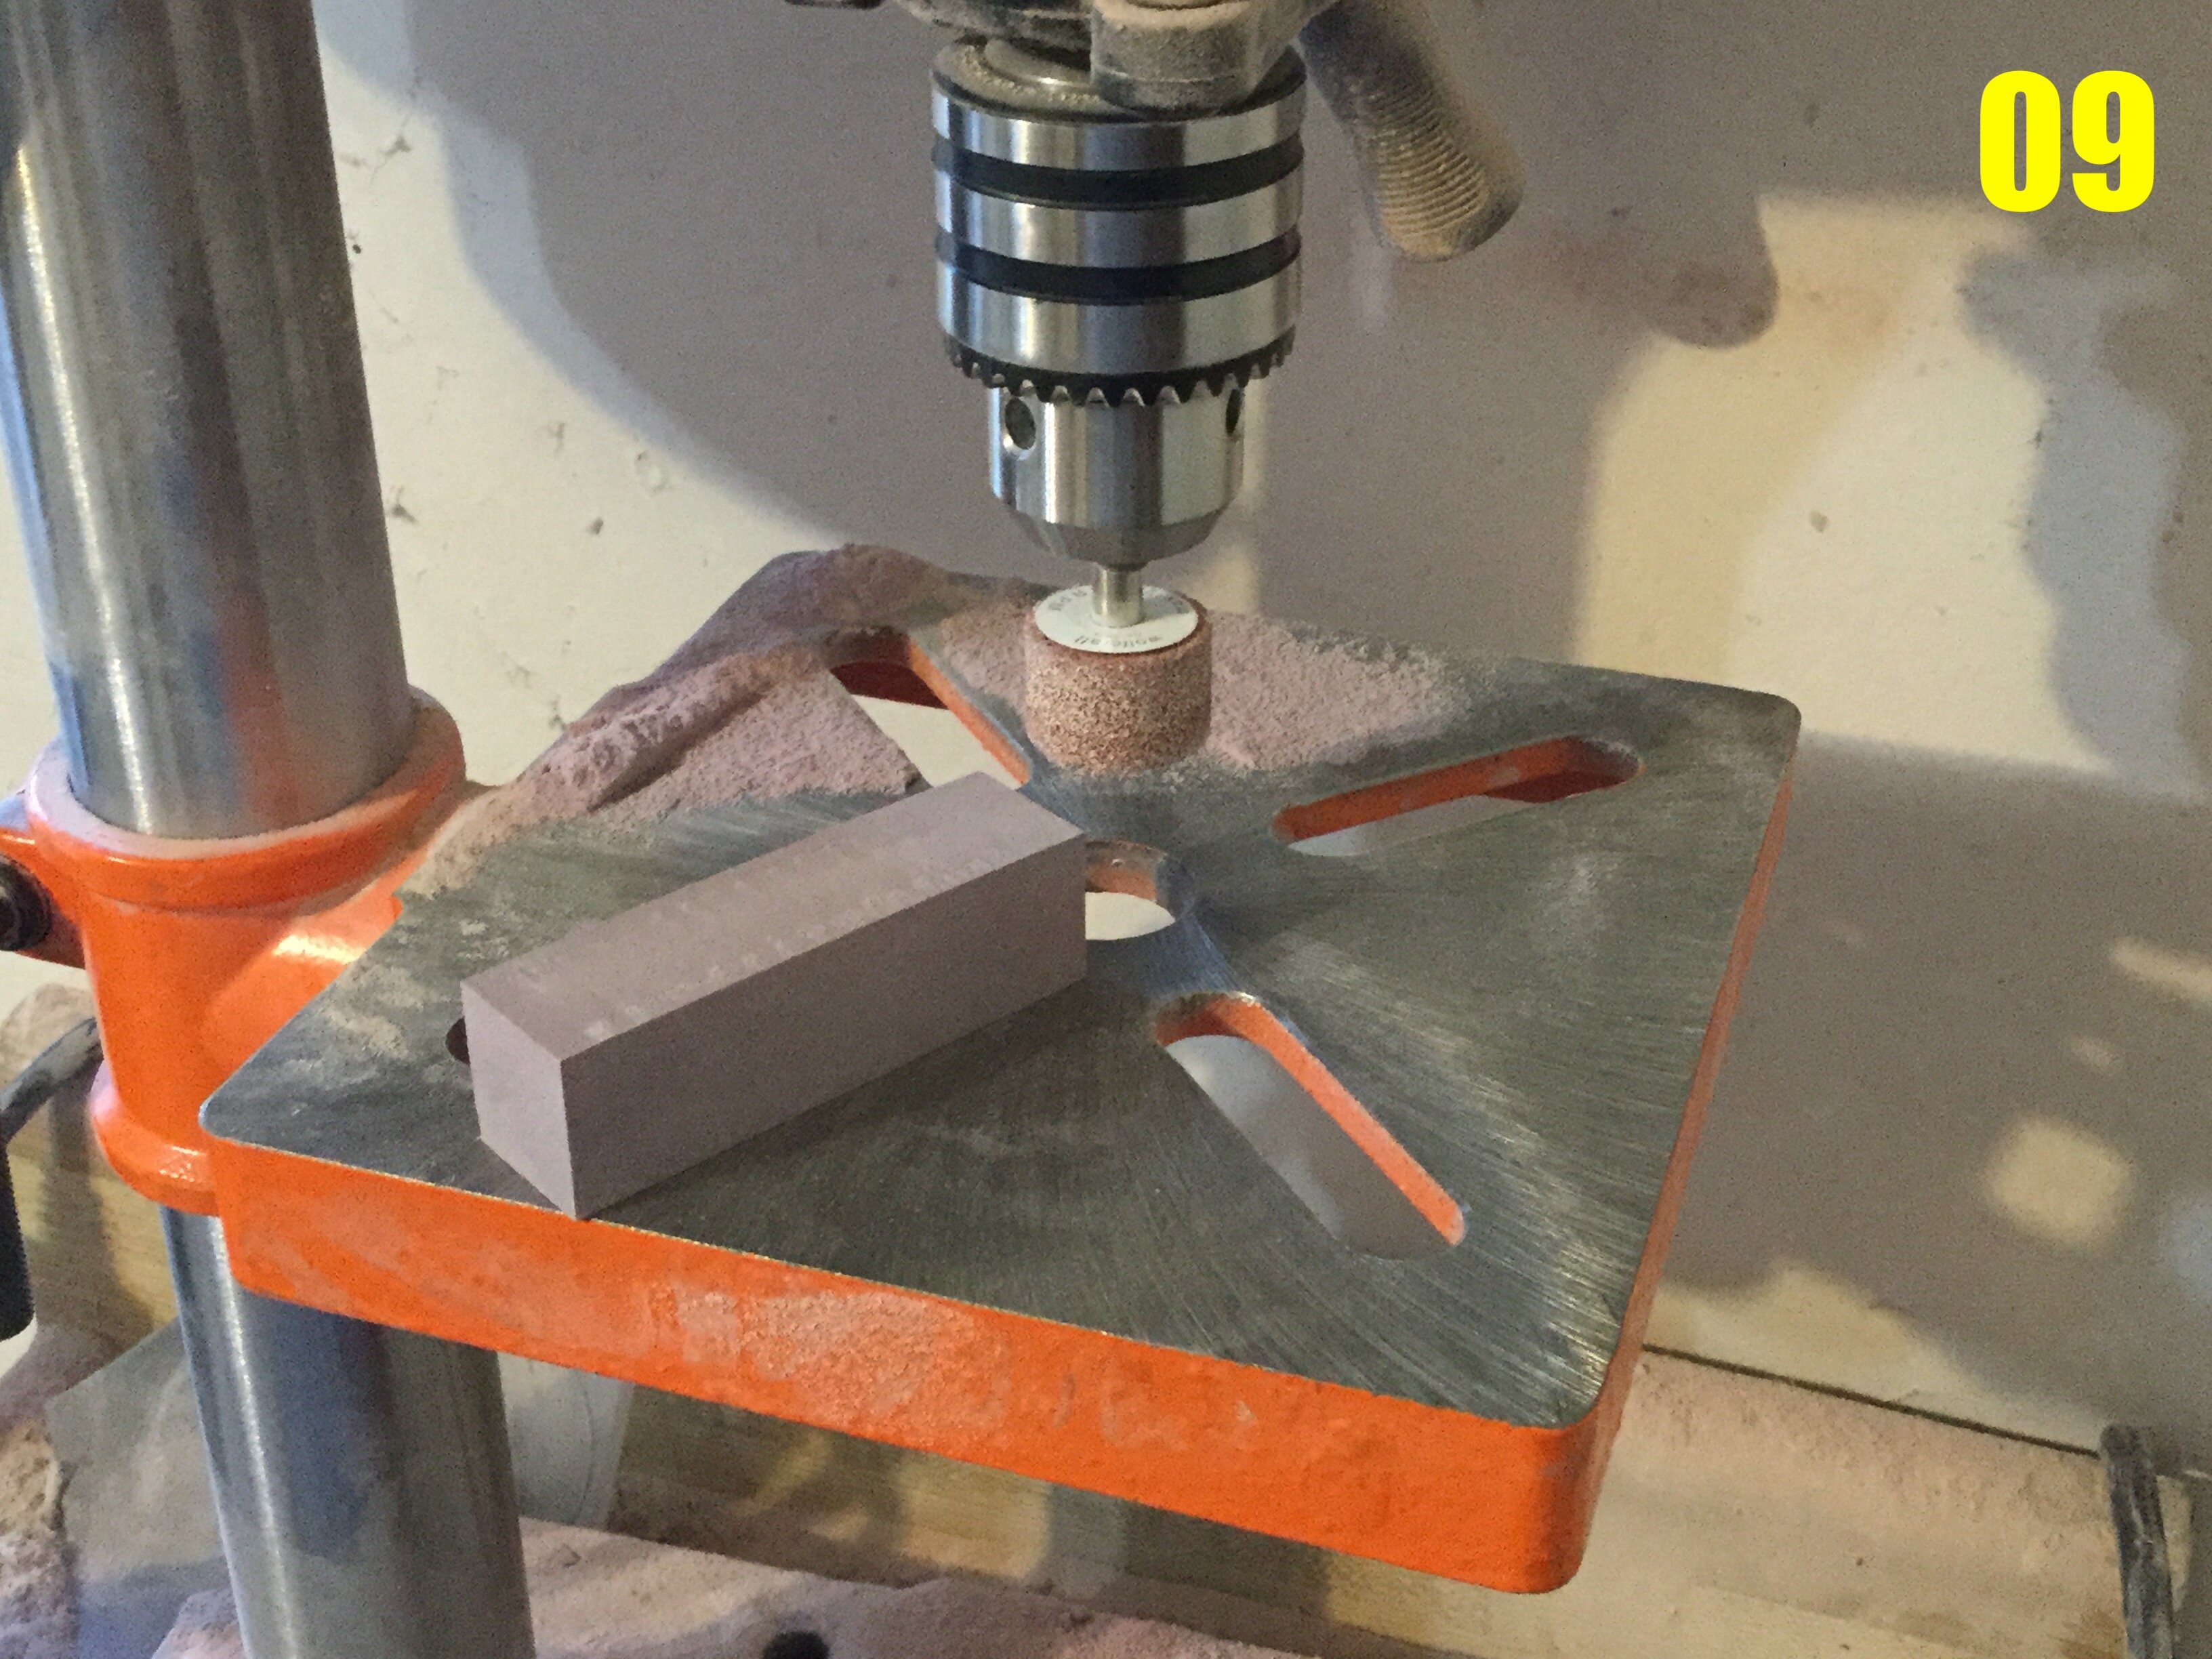
Captain's log: Thursday, May 4th, 2023It has begun! My silence over the last week was spent planning the build of this massive kit. While I was faithful to follow the front, profile and rear views on my 1/72 build all those years ago, I did something different this time: I took the ¾ view beauty shot of the Tomahawk which was used for the ARII box art, and back-engineered diagrams based off that. This resulted in some rather significant alterations which, in my opinion, will make for a much more aesthetically-pleasing model.For one, the chest sits higher, the arms are shorter and have smaller cannons. Also the legs are longer, giving Thomas a more elegant and less ape-like appearance.Pic 00: once all the diagrams have been made and re-checked, they're printed out at 1/48 scale, along with some line-art reference pics. The ruler gives you an indication of the size of the parts.Pic 01: now begins the tedious task of cutting out all the plots. By hand. Because crazy.Pic 02: the blocks of modelling board I had lying around weren't big enough to accommodate the plots for this kit, so I had to trim a new section from my slab of Ren-Shape. This will then need to be trimmed and milled into smaller, more manageable blocks.Pic 03: I first begin by trimming sections of modelling board on the band saw. I eyeballed the plots and cut sections larger than what I need.Pic 04: here I'm testing the plots for fit, and gluing the first plots to the board. Now I have to re-face the rough sides created by the band saw.Pic 05: because these are larger surfaces, I use a tool called a face end mill to create a perfectly flat surface.Pic 06: this is the main body/back module, and it's huge! The mill can not only create flat surfaces, it can create perfectly square angles when cutting.Pic 07: as I said, perfectly square! I use a pair of steel right angles to check my work, and with that first 90* angle made, all the other surfaces are child's play. I may do a tutorial on that next week.Pic 08: While it's not ideal, sometimes I have to turn Ren Shape parts on the lathe. There's a whole procedure behind this, and it's a hack that you just can't do with metal parts. The down-side, as you can see, is the awful mess it makes.Pic 09: when I need to create parallel surfaces, I will sometimes resort to the drill press grinder, just because it's quicker. Sometimes I have to use this method for larger blocks which won't fit in the jaws of my mill. The disadvantage with this method is it makes more fine dust.Pic 10: these are the heel modules. I create one, thick block, which I will then segment in two. This method ensures both left and right pieces are identical, with no fit problems.That's all for this week. Not the most exciting of updates, but there are just so many blocks to cut, and it's a very long process. Since next week will be more of the same, I'll offer up some useful machining techniques in the next update, so stay tuned!


-
First build update drops Thursday.

-
Almost 2/3 of payments received. I'll start the work as soon as the remaining members make their payments. In the meantime, I've begun the drafting process.
Also, does anyone have a Hasegawa 1/48 VF-1 pilot figure they'd be willing to part with? Please DM me.
-
Thomas Hawk is a go. I repeat: Thomas Hawk is a go! You can now send in your payments.
)")
-
On 4/11/2023 at 9:10 AM, tekering said:
You were without power for THREE DAYS? 😲
Three and a half days. Freezing rain accumulated on trees & power lines and caused them to collapse under the extra weight. Anyway, you should really get in on this project.
-
5 spots to fill. I'll let the project run until April 15th, a few days later than expected because the power went down for 3 days in my area and I haven't been able to reply to people in a timely manner.
-
9 spots to fill!☺️
-
10 minutes ago, Bolt said:
And i hope the master keeps pumping out more and more Macross, Mospeda and Southern Cross !
Before we go on asking for other things, maybe we should start by securing the orders needed for the current project. If you can, spread the word. I think I have a good enough history of consistency and excellence to warrant the investment.
-
On 1/27/2023 at 4:10 PM, Bolt said:
The Spartan seems to be the most difficult, of the SDFM Destroids, to translate into model form, IMO. I have yet to see one that actually looks good.
-
Great job, guys! Almost half the slots filled in less than 36 hours! You can really help the project succeed by sharing it with anyone you think would be interested.
-
11 hours ago, tekering said:
Instead, I humbly suggest you:
- Offer a 1:72 Monster to complete our Imai, Wave (or Moscato!) Destroid collections, or...
- Offer a 1:60 Phalanx or Spartan* for our Yamato or Arcadia collections, or...
- Offer a 1:83 Phalanx or Tomahawk for our HMR collections.
Filling any one of these holes in our displays would be preferable to creating a whole new (and much bigger) hole. 😅
*I'd spend $400+ on a new 1:60 Spartan in a heartbeat. Hikaru actually piloted one onscreen! 😃
-1/72 Monster: I highly doubt there are enough people willing to shell-out a grand on a kit, and then the hundreds it would cost to ship to various international destinations. Further, I don't think I'd even have the facilities to process something that large.
-1/60 Phalanx/Spartan: probably not a bad idea. Both of my 1/72 iterations were excellent, and I could certainly do something cool in 1/60.
-1/83 anything: oddball scale, doesn't interest me.
Ultimately, it's about numbers.
-
New proposal here:
-
Killed for lack of interest.
-
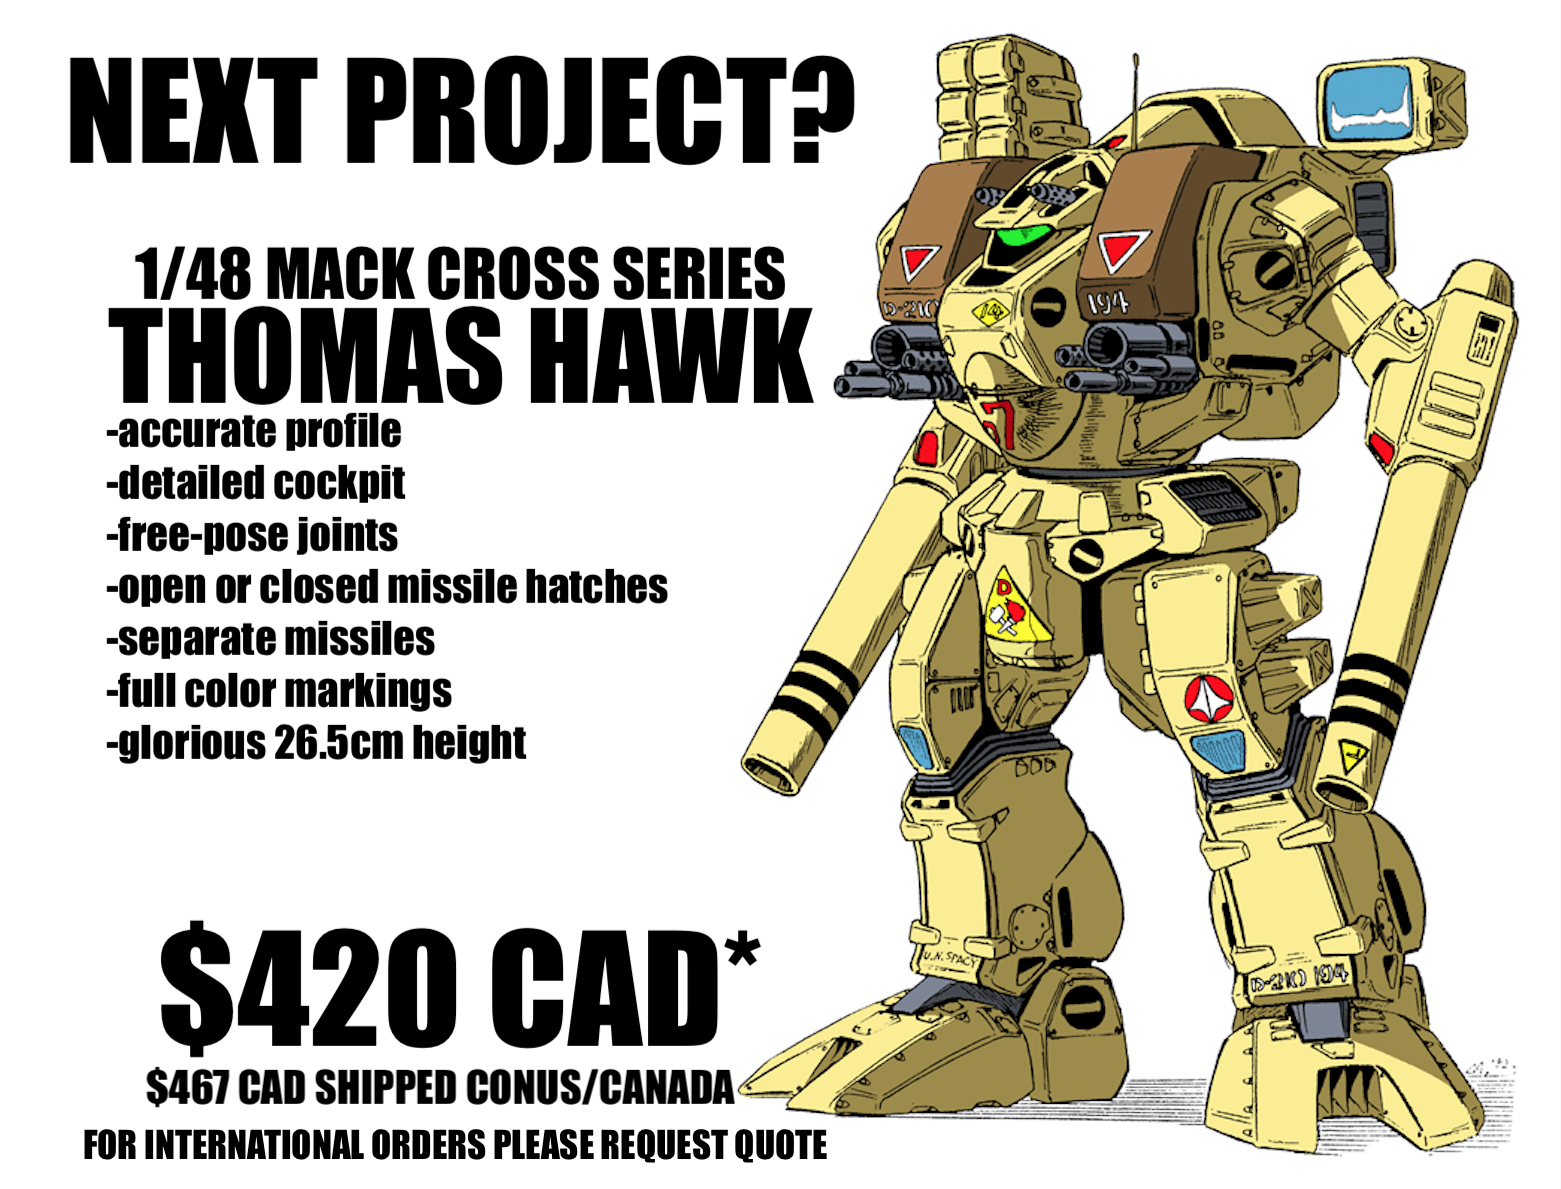
I'd like to propose the next Moscato Hobby Models project:1/48 DESTOROIIDO THOMAS HAWK***Conditional upon demand for at least 30 kits received before April 12***Please send a private message saying “I'M IN” if you want this kit; just posting in the thread will not will not be construed as intent to purchase.Features:-accurate profile-detailed cockpit-free-pose joints-open or closed missile hatches-separate missiles-full color markingsPrice is listed in the image. Shipping to Hawaii and international destinations will be quoted upon request.
-
Remember guys, only a private message for the kit counts as genuine interest.
-
1 minute ago, Phyrox said:
Would this be a scale-up of sorts for the smaller Ikazuchi you did years ago or a total rethink and re-sizing?
Also, and this probably isn't the place...but I'd kill for an Izumo that was in scale with that smaller Ikazuchi? Any possibility of one of those? Never been done has it?Total rethink and re-sizing.
-
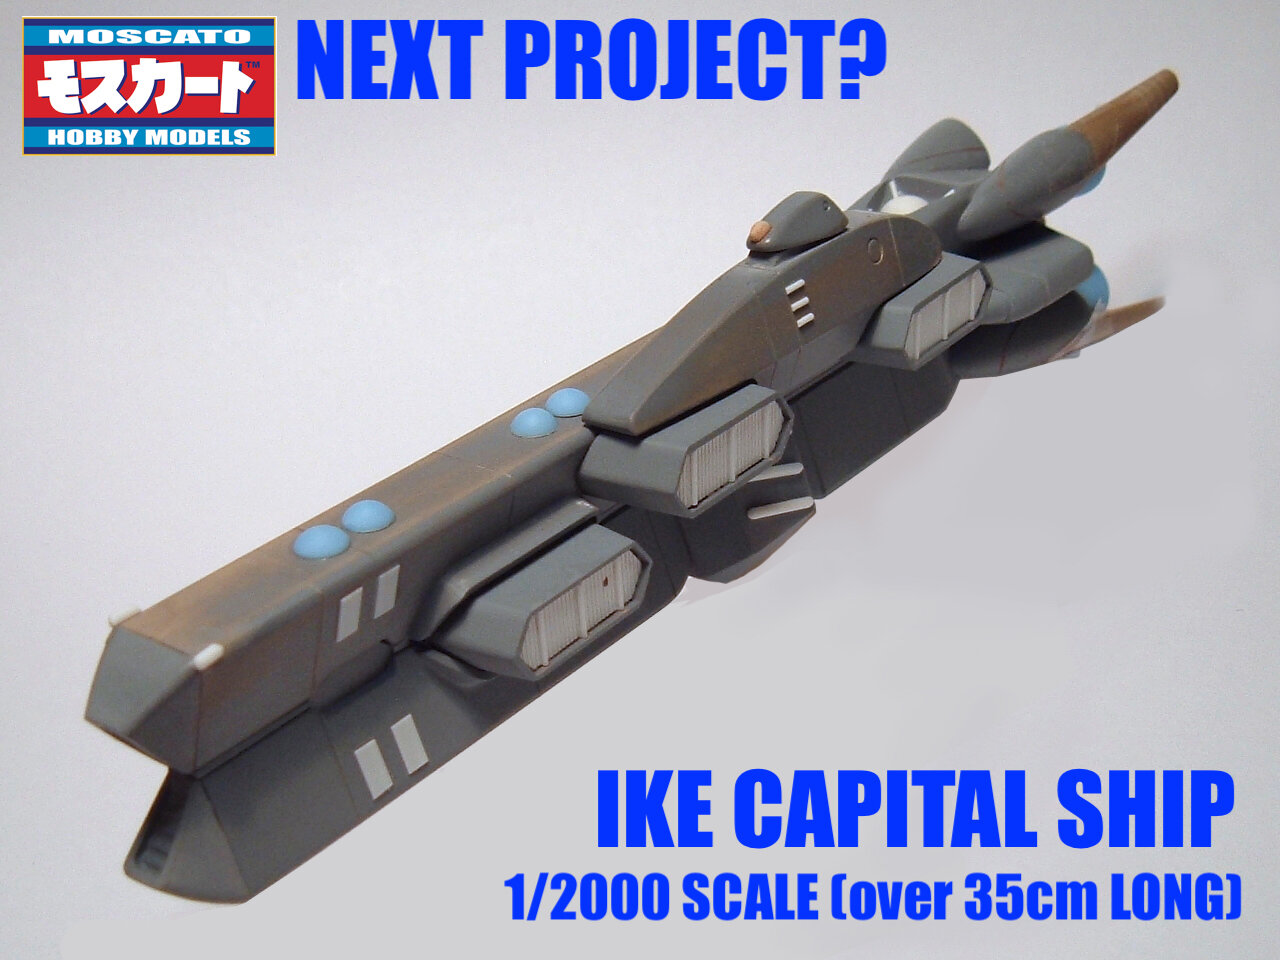
I'd like to propose the next Moscato Hobby Models resin kit: a 1/2000 Ikazuchi (hereafter Ike Capital Ship.) The kit would come in at a little over 35cm in length.
Kit features:
-positionable open or closed soldier launch bays (no removable soldiers!)
-included decal markings for 3 different ships
-positionable gun turrets
-translucent resin thrusters for easier lighting
Proposed kit price before shipping: $325 Canadian dollars
Kit price with shipping to Canada/US contiguous: $374 Canadian dollars
International shipping: see below
I need a minimum of 30 orders to proceed with the project, so I’ll leave this up until April 7th. To voice your acceptance of the project, send me a private message telling me:
-« I’m in! »
-how many kits you’d like
-if you’re not in the US or Canada, your shipping location, so I can calculate the shipping to you.
Posting in the thread/asing questions is cool, but will not be construed as intent to purchase.
If I don’t get sufficient interest by then, I’ll simply move to another project.
Aaaand we’re off!
-
Molds are thoroughly baked and done; castings are underway. ☺️
-
14 hours ago, Boobytrap said:
Finally got the body suit in. I'm still waiting on some upgrade parts so I'm in a bit of a holding pattern. Hopefully I won't have to wait too long as I have been having a lot of fun on this project.
Thats a very interesting body suit, it looks unusually shiny. Might you have a link to where you got it from? By the way, your progress on the figure is looking excellent!
-
On 2/10/2023 at 2:00 PM, captain america said:Looks like we have the 10 orders for the 1/350 Horizontal ship, so you can send in your payments starting now. I will wait until March 3rd at the latest to collect the payments for those 10 minimum orders. If by that time they haven't all been received, I will simply refund everyone who did pay and move on to another project.
MOSCATO 1/48 DESTROID TOMAHAWK?
in Model kits
Posted · Edited by captain america
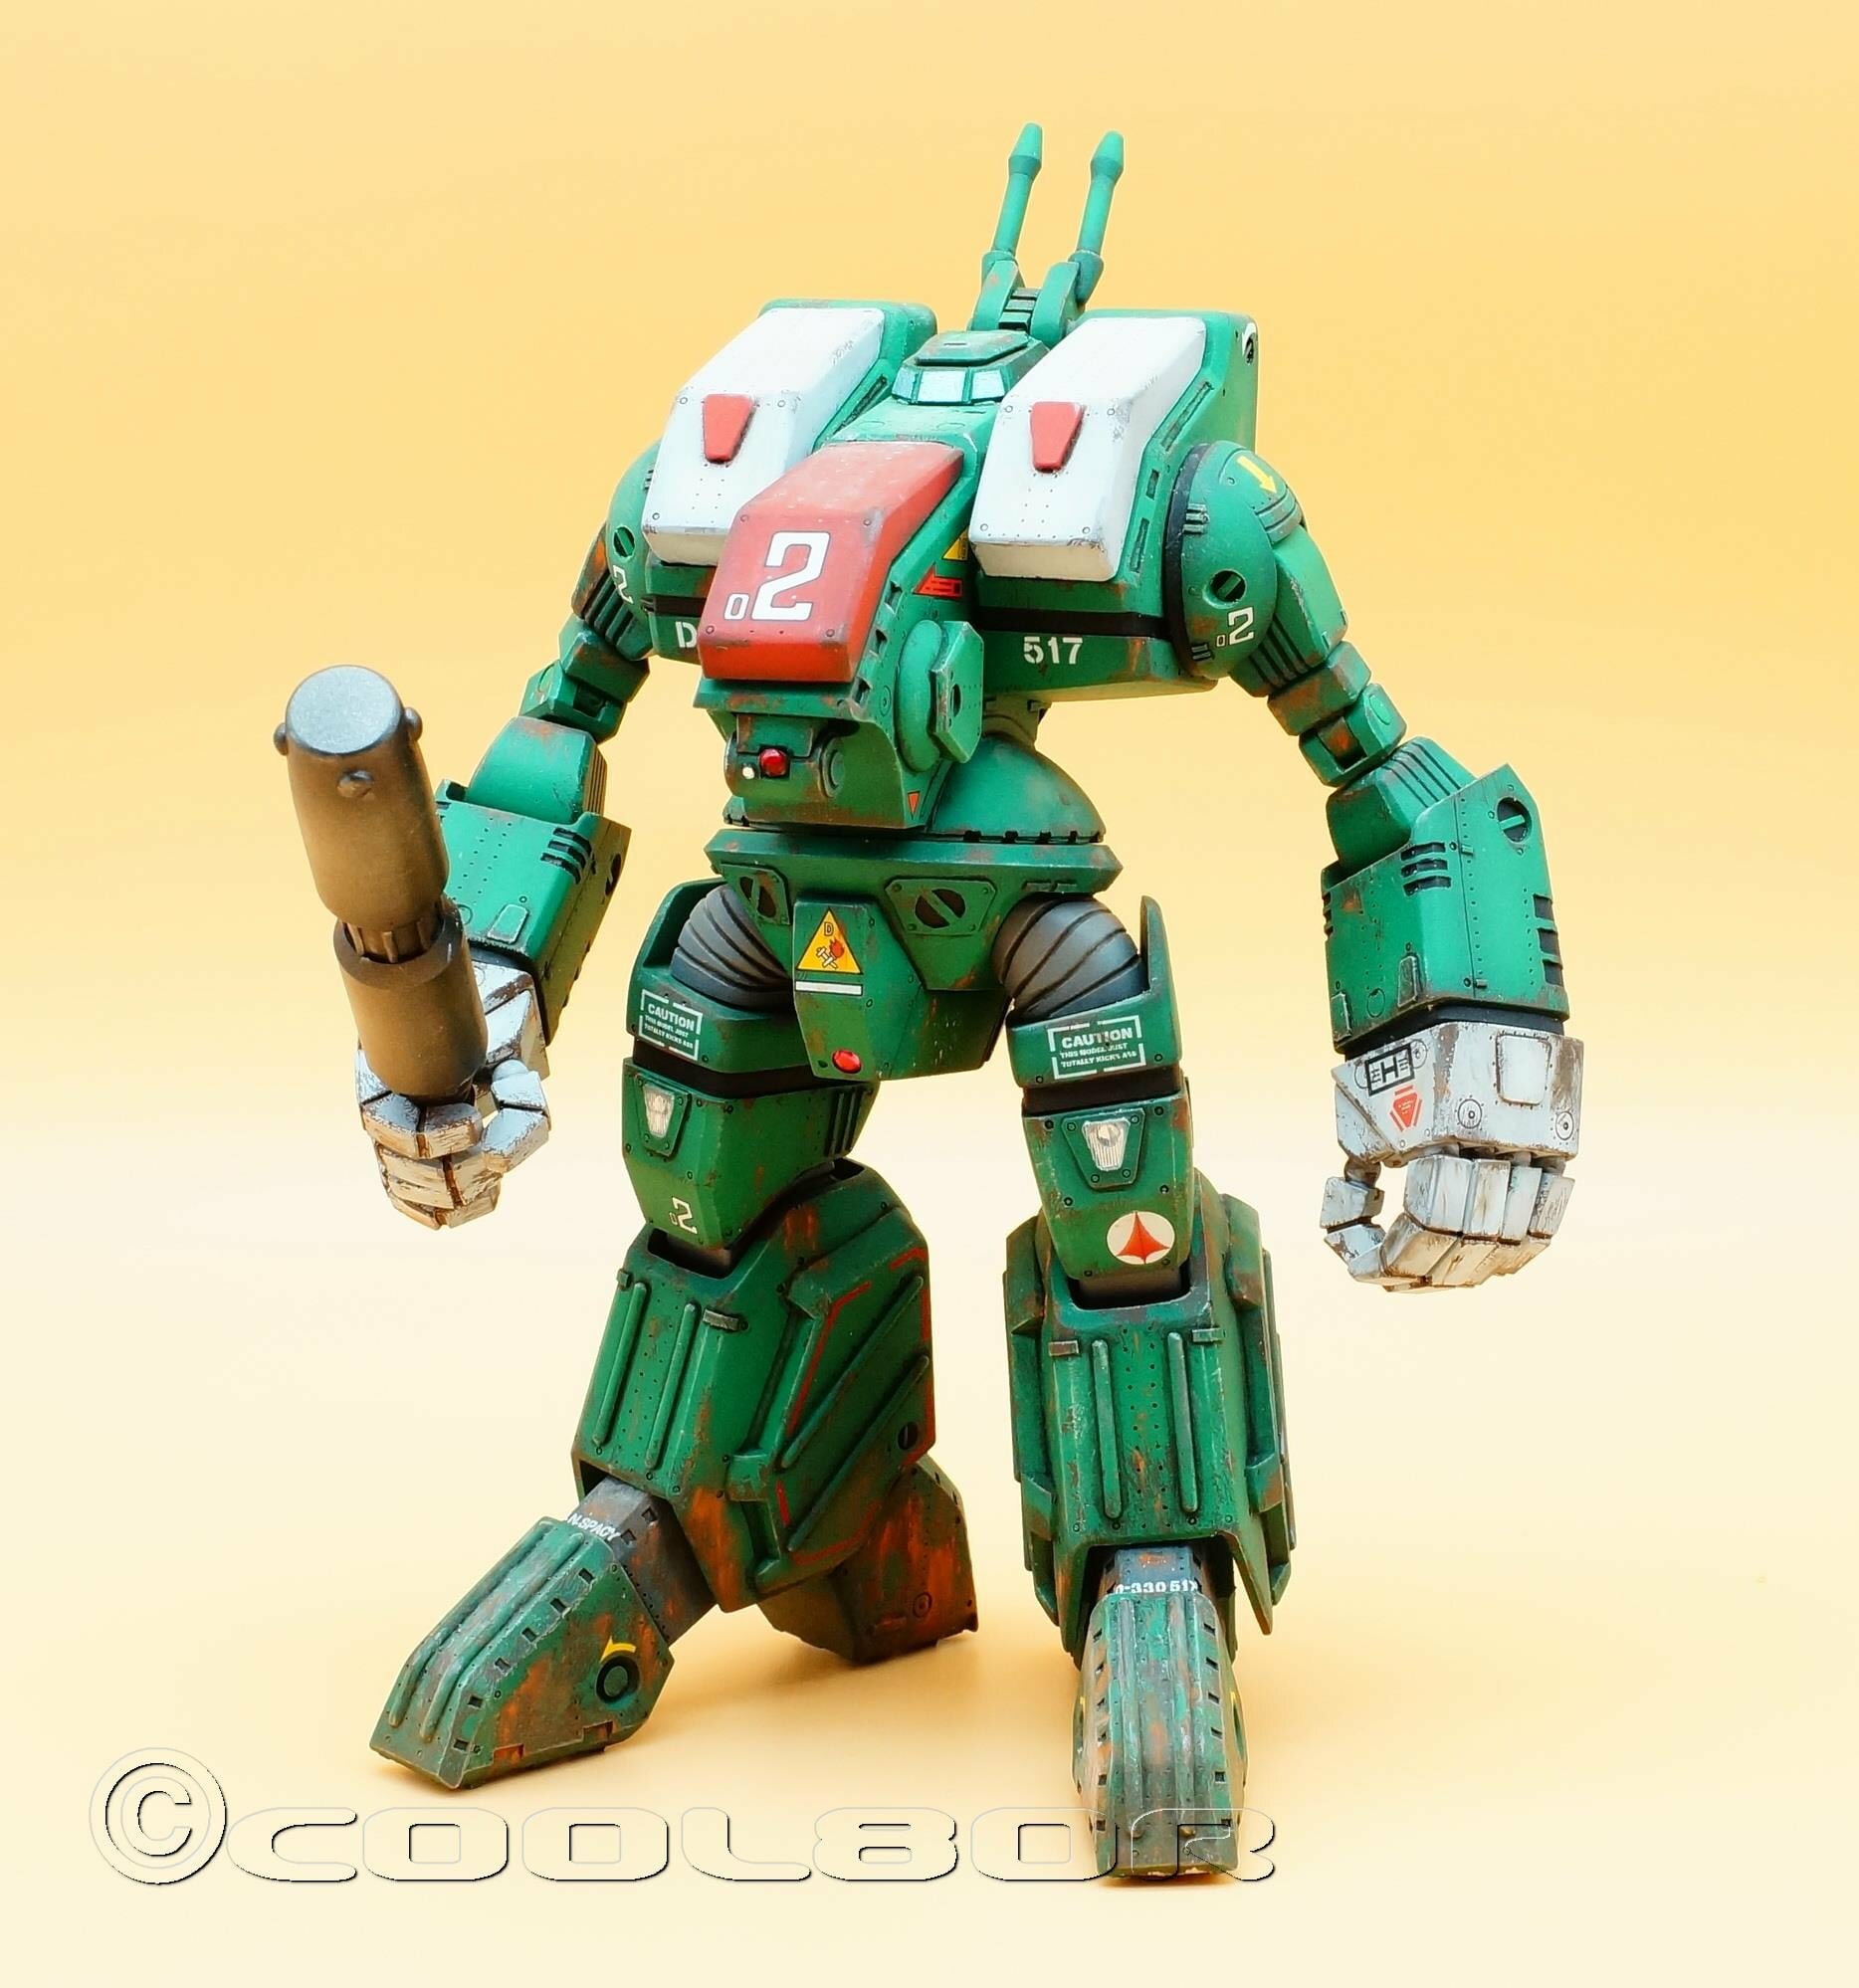
Captain's Log: Friday, June 2, 2023.
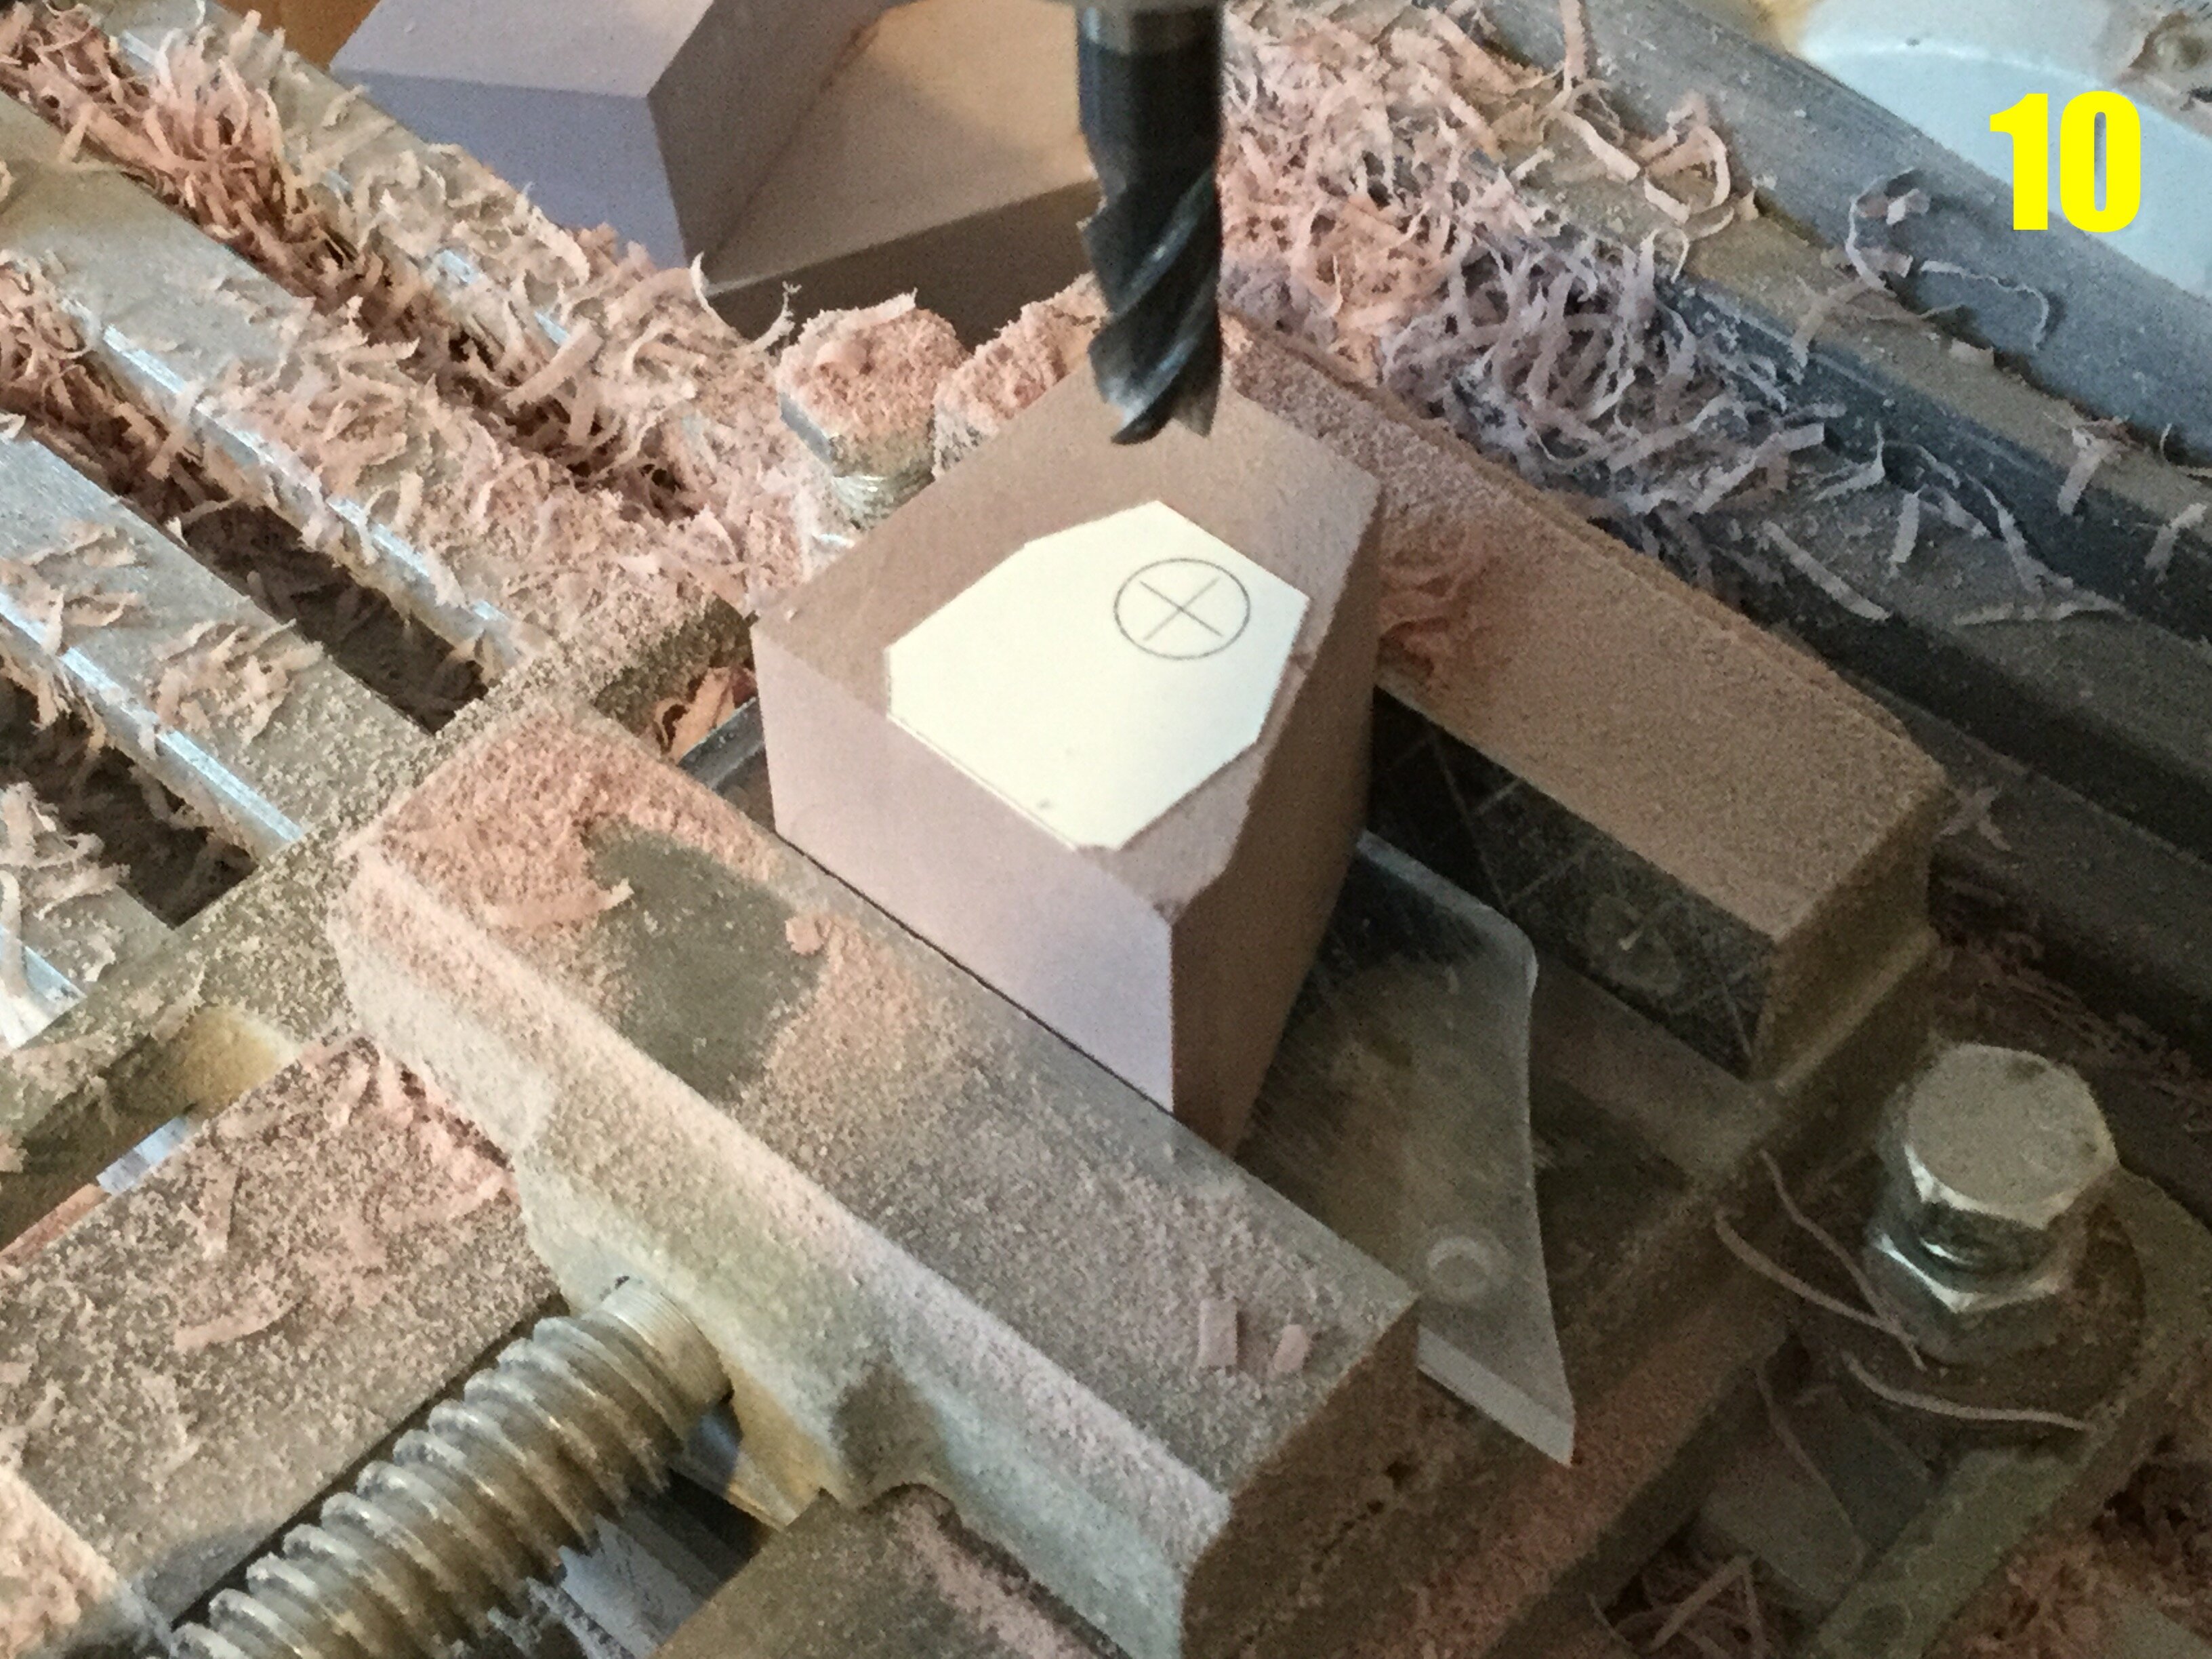
Today, in addition to showing you the progress of the master-patterns, I'm going to show you a technique for making recessed details, like vents, scoops and other thingamabobs which are impractical to sculpt manually. This is especially true for recessed details which need to be mirrored or duplicated exactly. In this case, it'll be the recessed triangle shapes on the bottom of the Tommy's shin armor.
If you look at pic 45, I begin by creating a buck of the desired shape using some modelling board. I make the part long enough so I can then split it in two so as to have identical, mirrored pieces. Using calipers and a sharp pencil, I calculate the positioning of the shapes and then holding the buck against the part, I simply trace its position on both sides.
Pic 46: taking a knife and a sharpened flat-blade screwdriver converted into a chisel, I begin carving the recess very carefully. You want the opening to allow the buck to fit inside, with barely 1/3 of a mm all around. Don't worry about the opening being perfect.
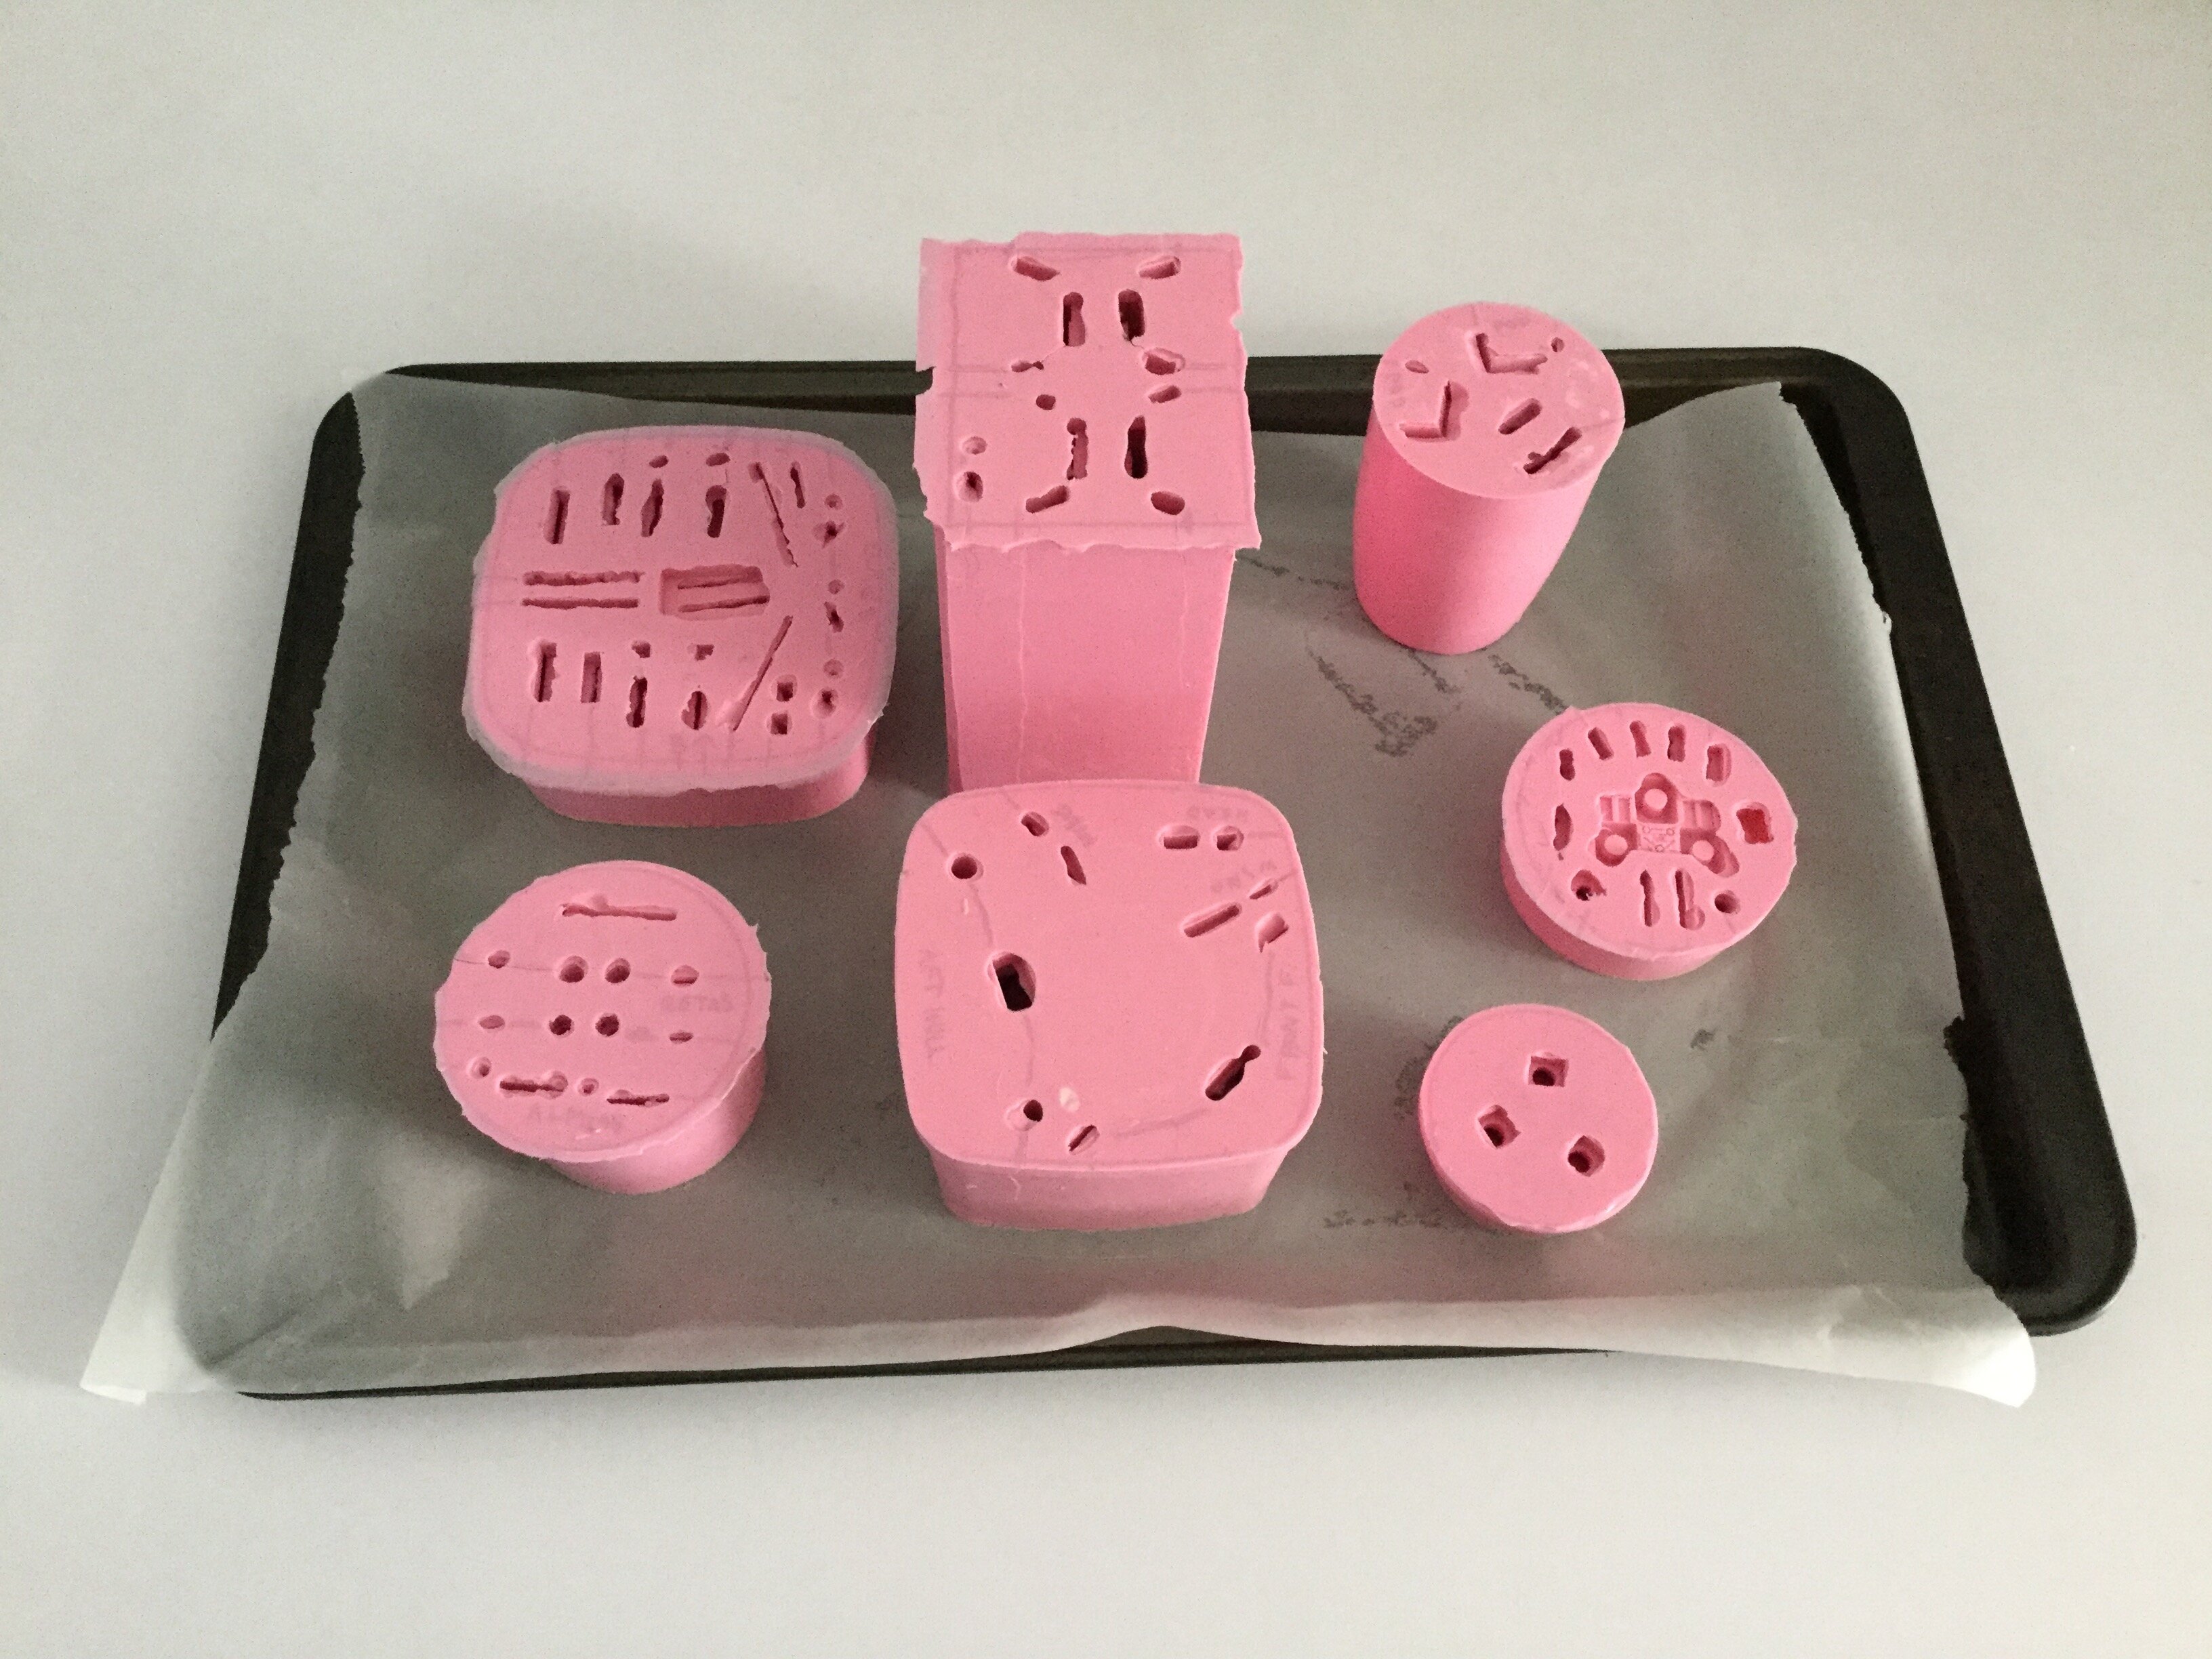
Pic 47: spray your bucks with a generous coat of mold release (in this case, Price-Driscoll Ultra 4). Now put these aside and mix your polyester putty and using a tool, generously dab some putty into the recesses and then press the bucks into place and wait.
Pic 48: as the putty begins to harden, it starts by becoming just a bit rubbery. This is when you very carefully and gently pull the bucks out, leaving a perfect imprint! Take note: this is a bit of a black art, as removing the buck too quickly will cause the putty to crumble and ruin the detail, whereas if you wait too long to extract, it may not come out at all, mold-release be damned!
Pic 49: let the putty harden a couple of hours, then sand away the excess. Voila!
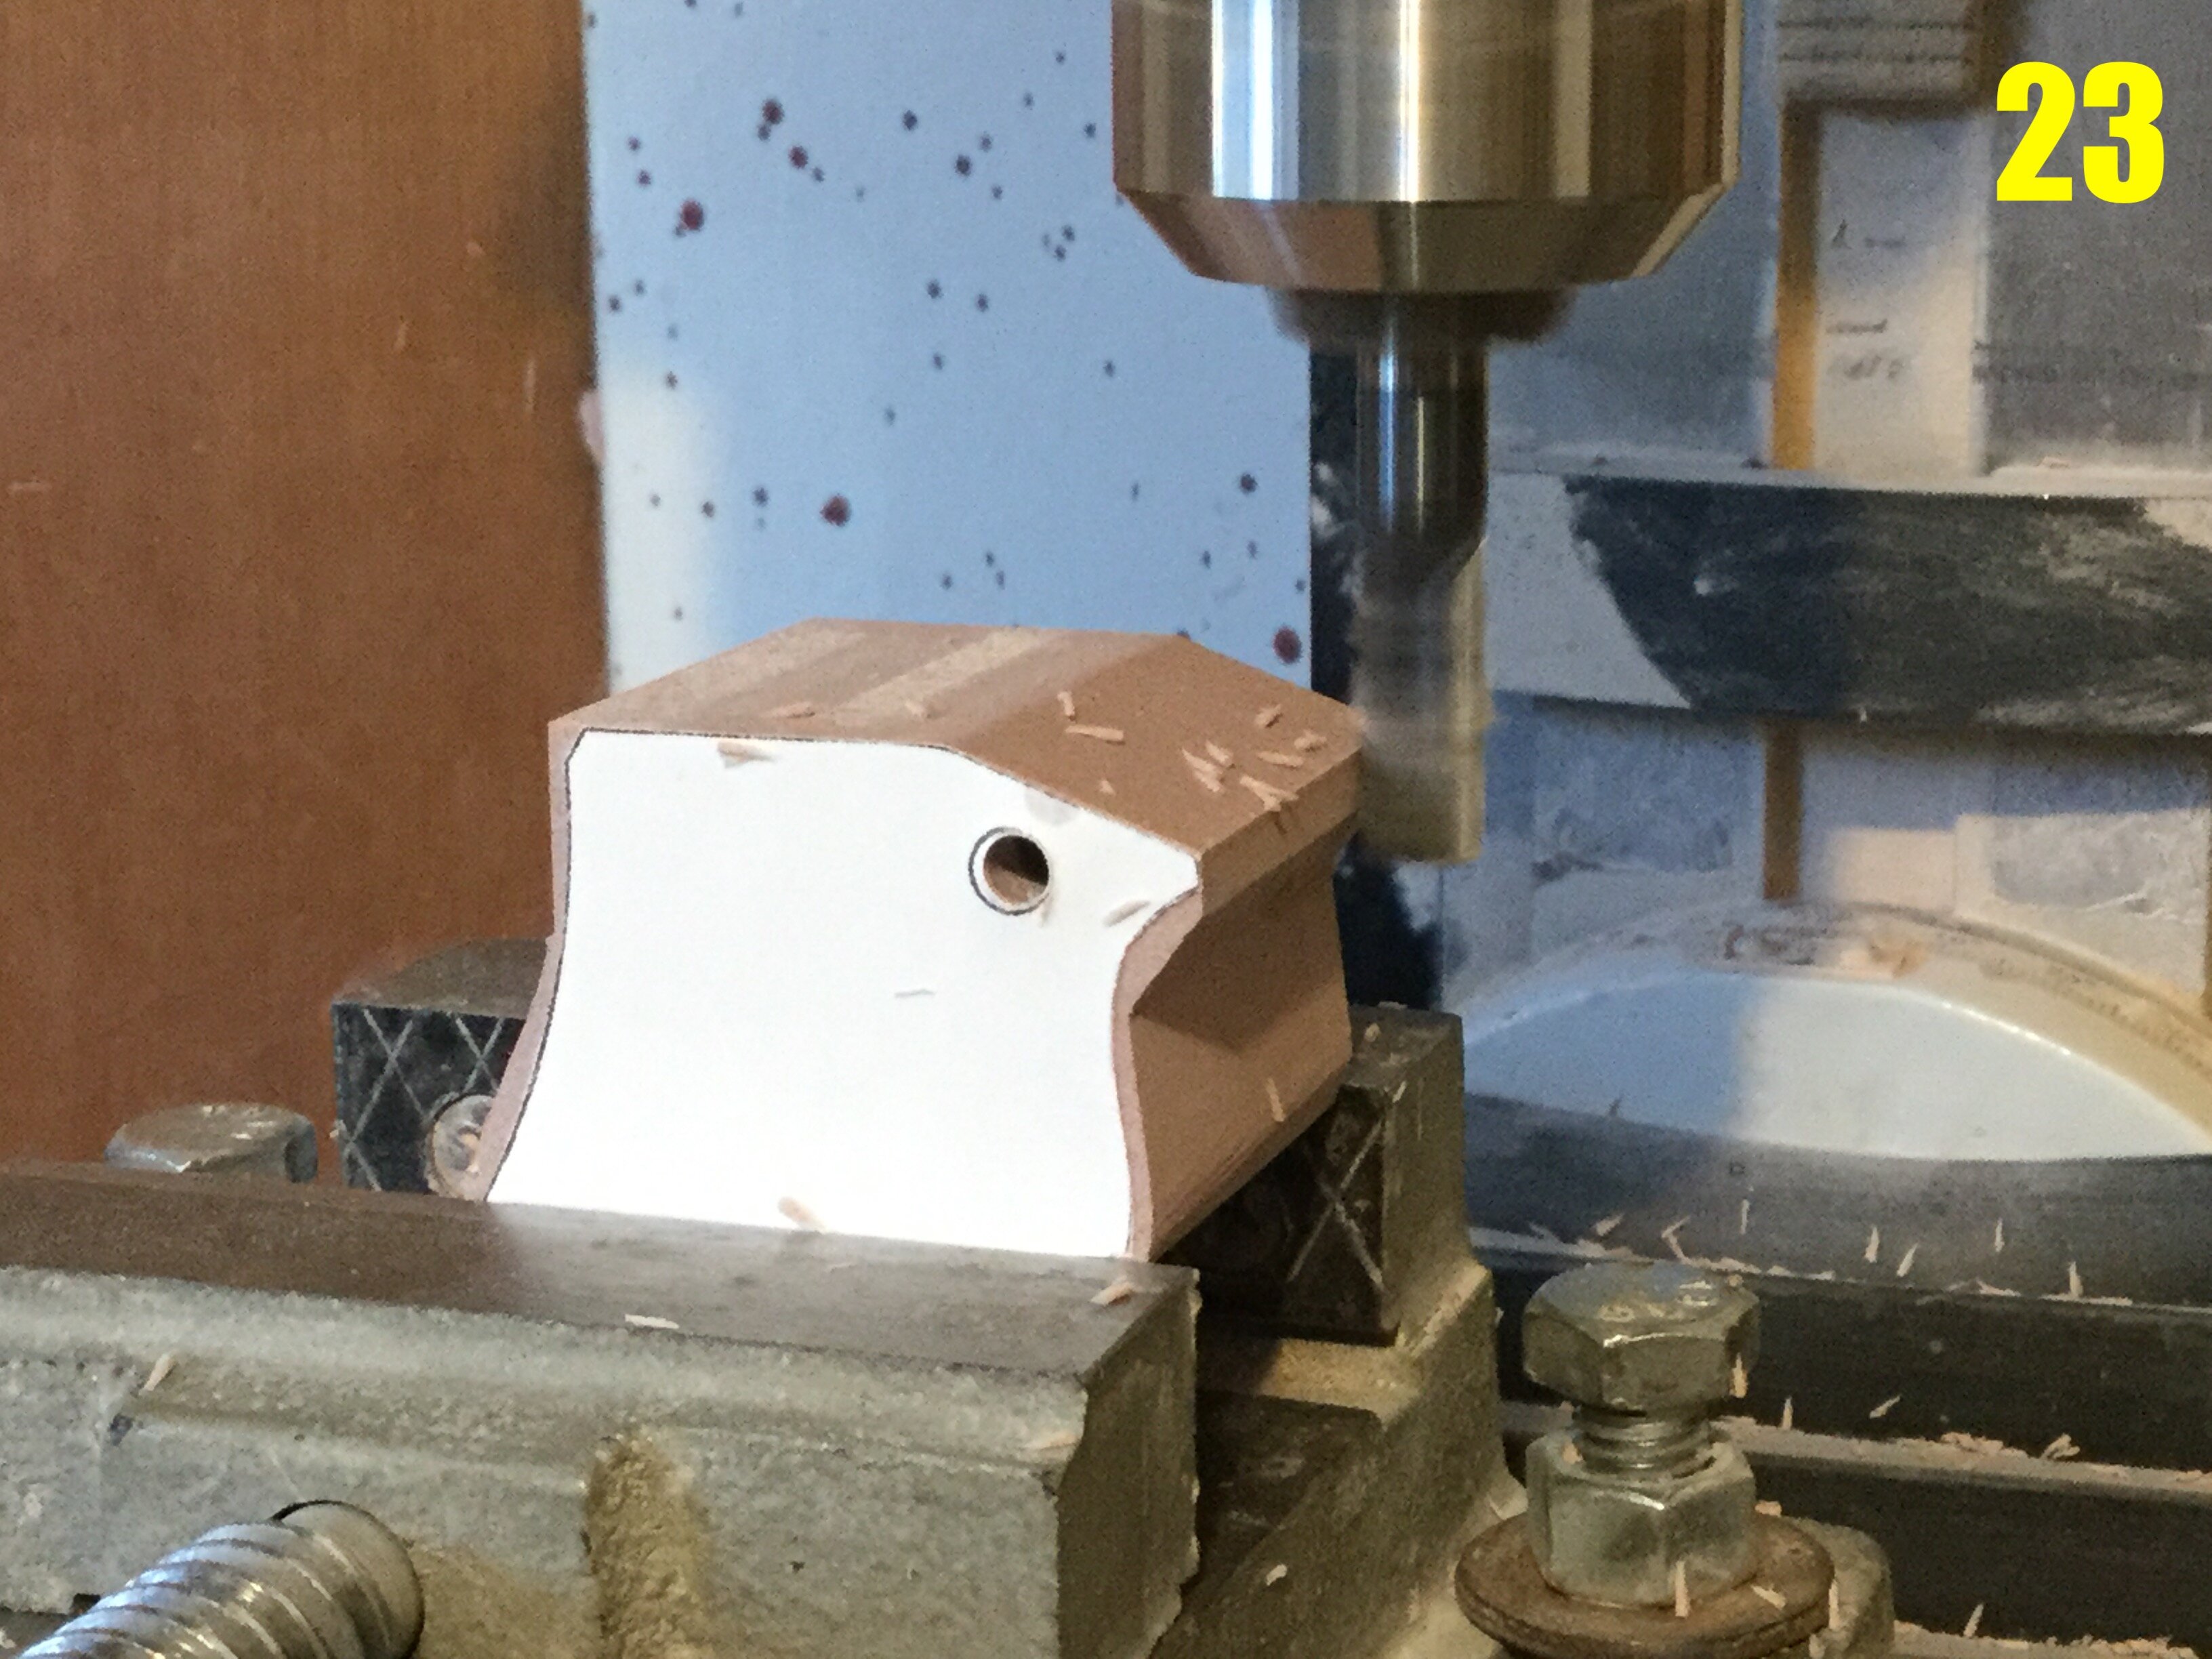
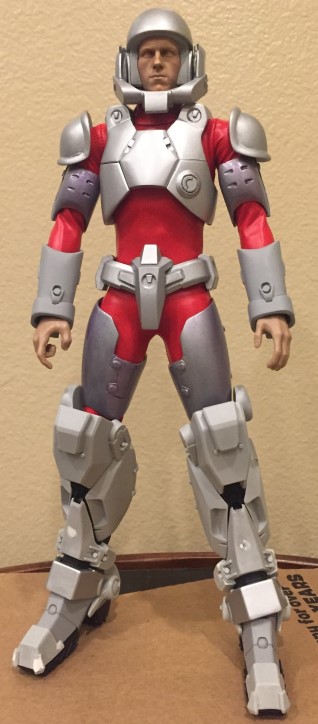
Pics 50-52 show the range of motion in the legs. The knee was a bit of a bear to create because it was poorly designed, but I made it work. The one concession is the hinge pin which will need to be inserted during the build and puttied over.
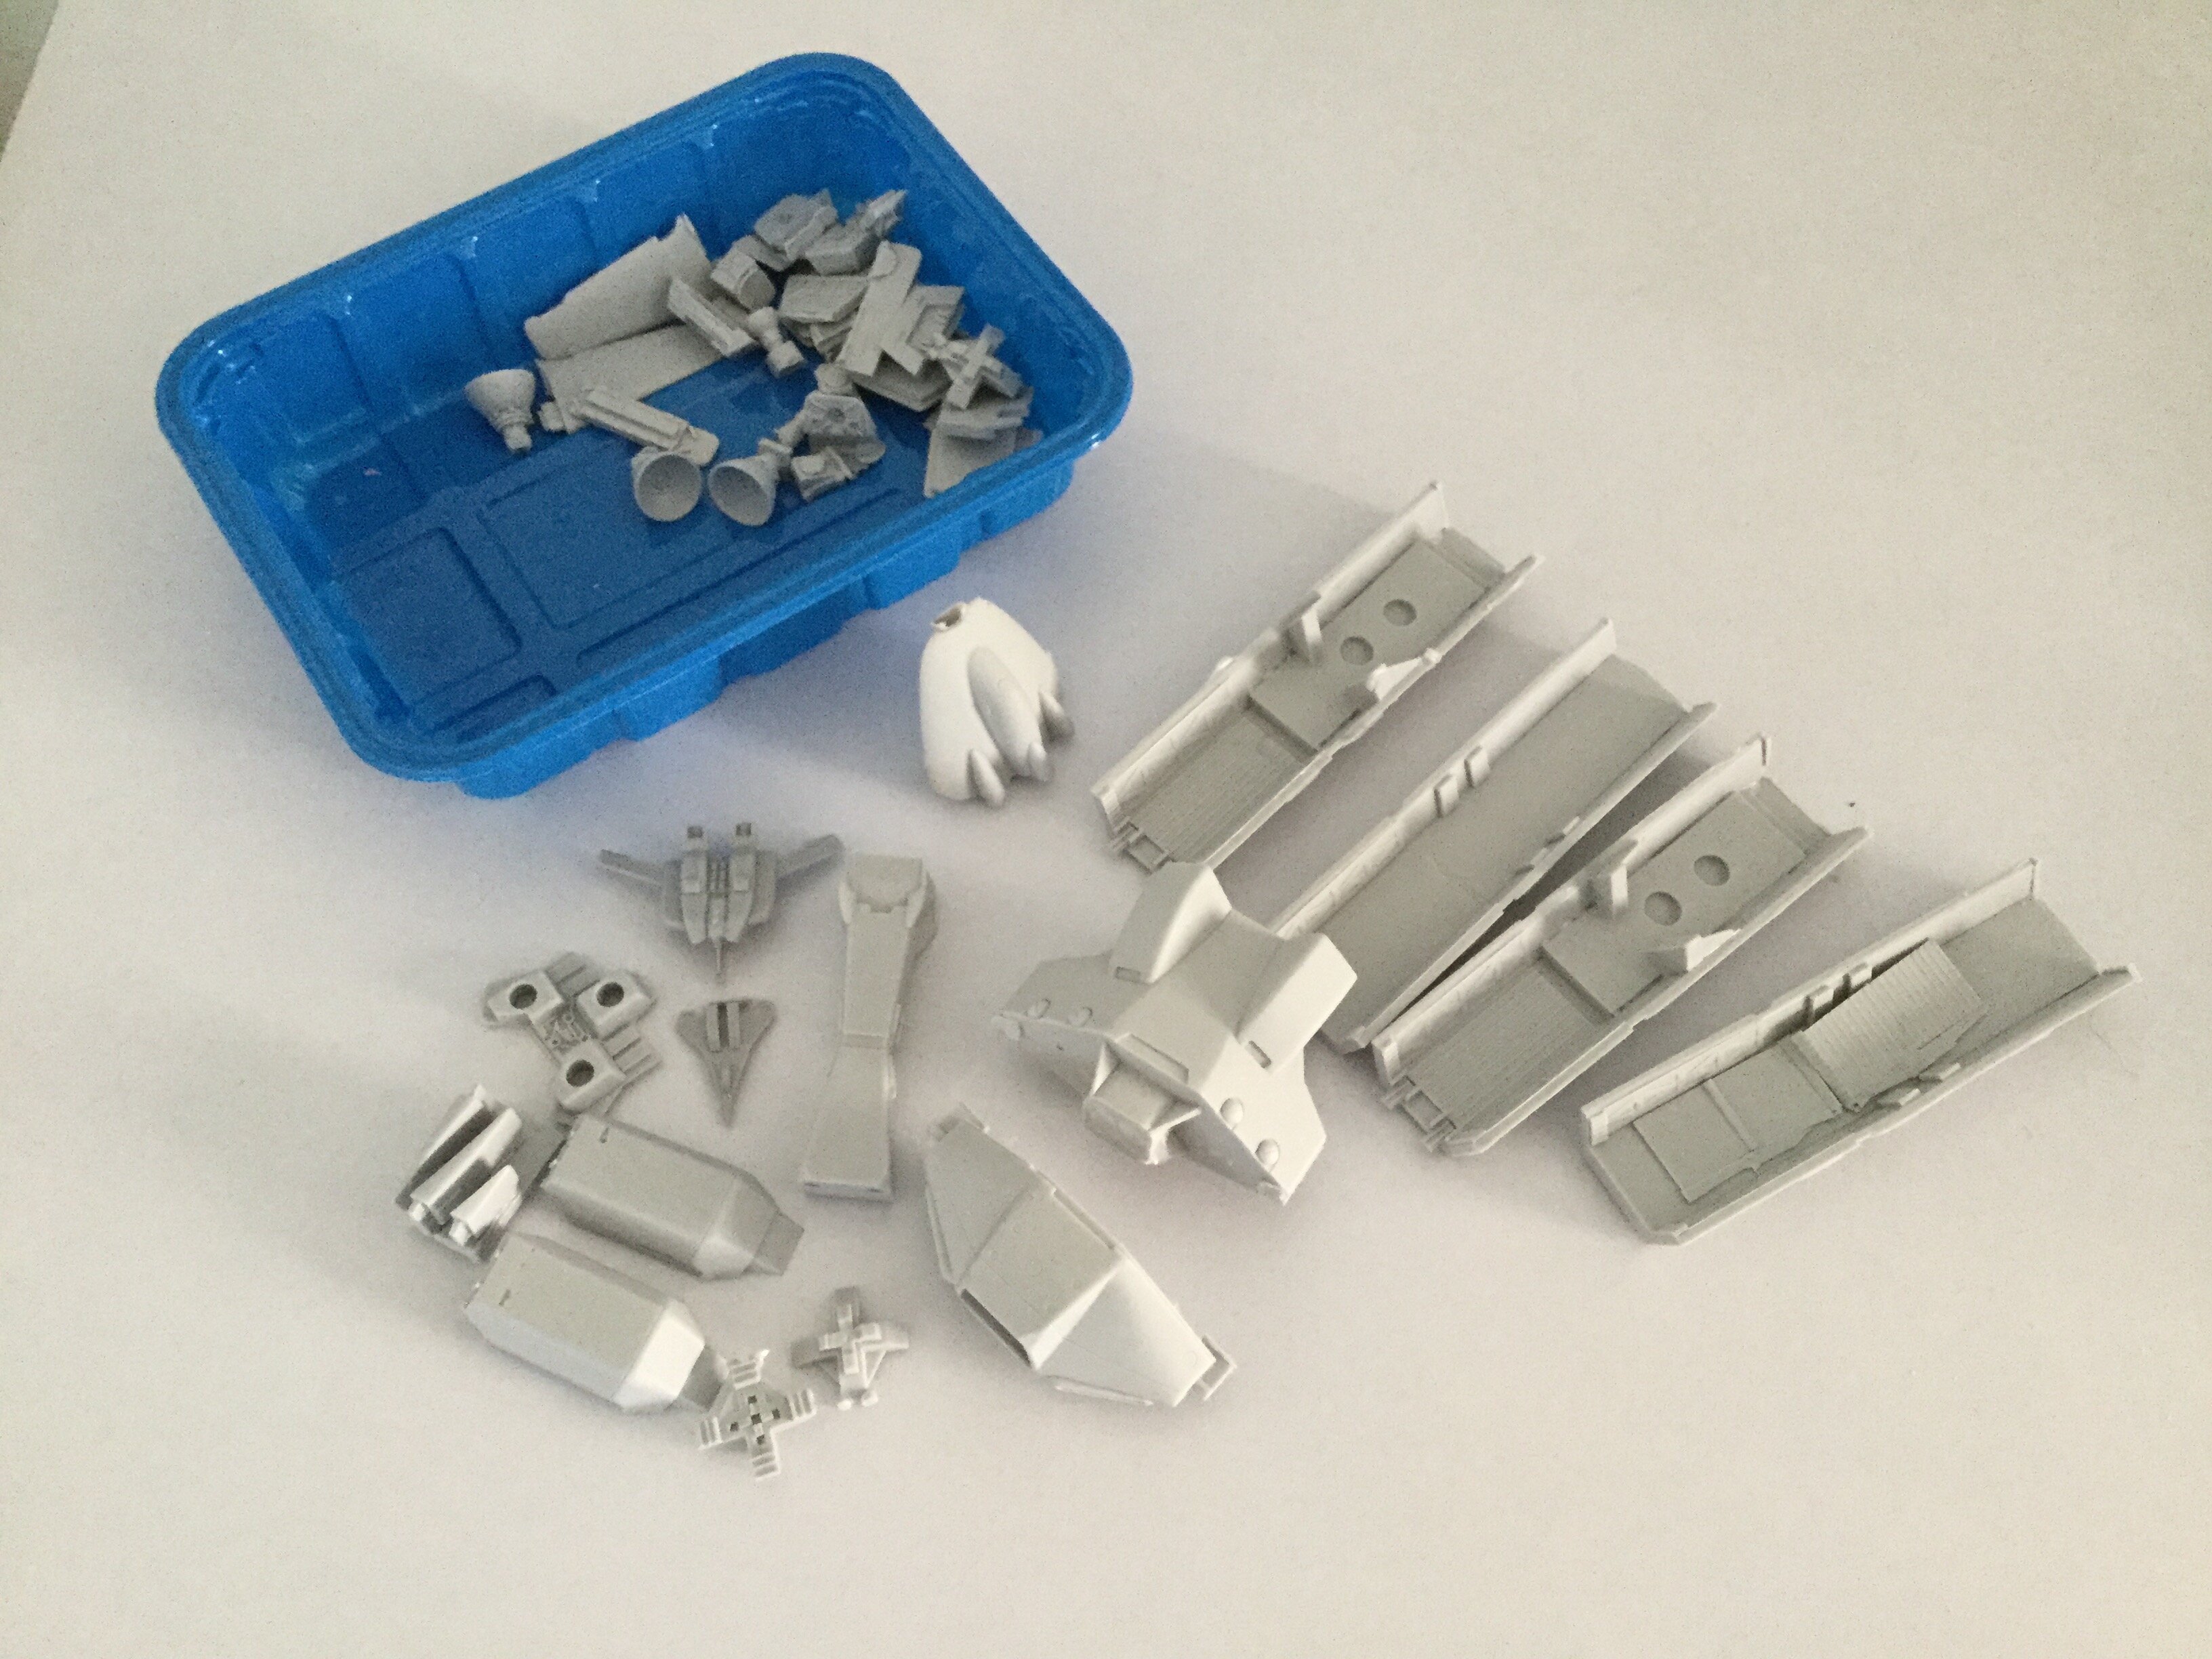
Pic 53 shows the main body module without its weapons pack. You'll have the option of displaying it this way if you wish
Pic 54: the open cockpit hatch, awaiting yet more details. I opted to have the cockpit hatch merely slide open, as opposed to slide-&-tilt, which just adds unneeded complexity and the sensors get in the way.
Pics 55-60: beauty shots! Mke no mistake, there's still lot of detailing needed, but even at this stage the model looks fantastic! I may forego next week's update in order to mold a few parts I need to complete some parts, but know that I'll be chugging right along behind the scenes.