Tage
-
Posts
194 -
Joined
-
Last visited
Content Type
Profiles
Forums
Events
Gallery
Everything posted by Tage
-
Yeah luckily we were insured and all that. Thanks arbit - it's been a steep learning curve but i do hope it gets in my timeline of a year. If it goes over, it goes over, but i think my girlfriend is getting sick of my ever growing boxes of backlog kits i need to get through too haha. Too many projects on the go!
-
Ah cool. Thanks. And sorry to hear that! I was broken into once a while ago too. They were interrupted from my flatmate trying to get in the house, but they did start off in my room. My PS3 was half unplugged! But pretty much all of my girlfriend's jewellery went among easy to grab laptops and other stuff... the oddest one was they grabbed my old ripped jean shorts... very odd. Anyway, we'd moved out when they tried coming back 2 weeks later!
-
ah even better! Thanks! Where on earth is that from actually? some animation book?
-
Yeah! That's the one. Thanks! Great reference! Looks like i'll have to do a pilot with and without Catsnake option. :-)
-
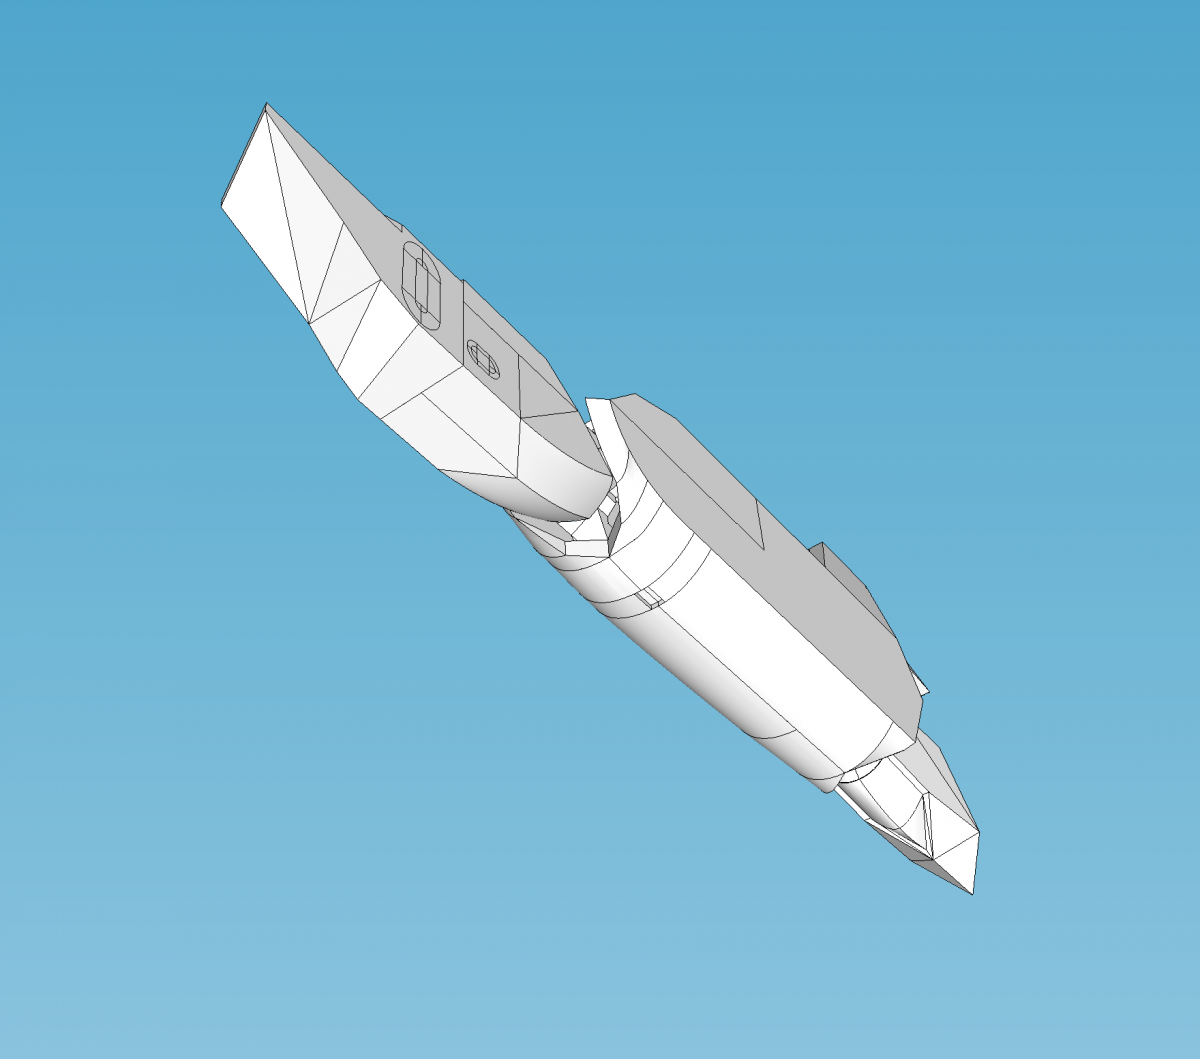
Soooo, this week have i have almost 'done' the legs. Just have to sort out a couple internal moving things, then make it fit the rest of the frame nice and snuggly. But as you can see, it's starting to take shape. Looking at these screen shots, i've probably just placed the legs a little bit too far forward, so he looks a little 'stubby' for now. I got too excited to see what it would look like all together haha. Anyway, you get the idea. Oh! Speaking of female pilots. I think the main character that used this Valk in Macross Dynamite 7 was a lady anyway, so i really should model the pilot from her. cheers guys :-)


-
Hah, yeah this is super cute. Nice work Xigfrid! Super cool.
-
Ah cool thanks Xigfrid! Yeah good idea on the model kits' pilots. I do have a few of those about as this project is causing a bit of a backlog of kits i have ready to get started on haha. And actually there is a couple high street 3D printing places around my work that have a few different printers in them that probably could do the Resin printing actually. I'll add that to my 'to-research' list haha.
-
Cool thanks guys! Just working on the feet now then a little bit of work on the lower leg part/ankle. Yeah i was thinking the same thing. I think i was going to have to end up changing it at some point as i've still got to do the rather difficult task of making the pilot, and also the cockpit display unit. So i think adding those in will force the canopy to bulge up. It will affect the clearance of the chest shield, but i know for now it'll actually be fine as long as i don't go overboard on the bulge. I was originally worried about just how bulbous the canopy that came with the S.H.E. kit was/is. So i think i've over compensated currently, as yeah, it does look a little too 'sleek'. It's on my rather extensive 'to-do' list haha. Cheers fellas.
-
Thanks for the support again, really chugging along with this project now. Just a quick one this week, probably about half way through all the leg parts:

-
Ah cool. I'd better get bidding! Thanks for the info!
-
Hey guys, just wondering how much a 1/60 VF-19 Kai Fire should be? cheeeeeeeeeers! :-)
-
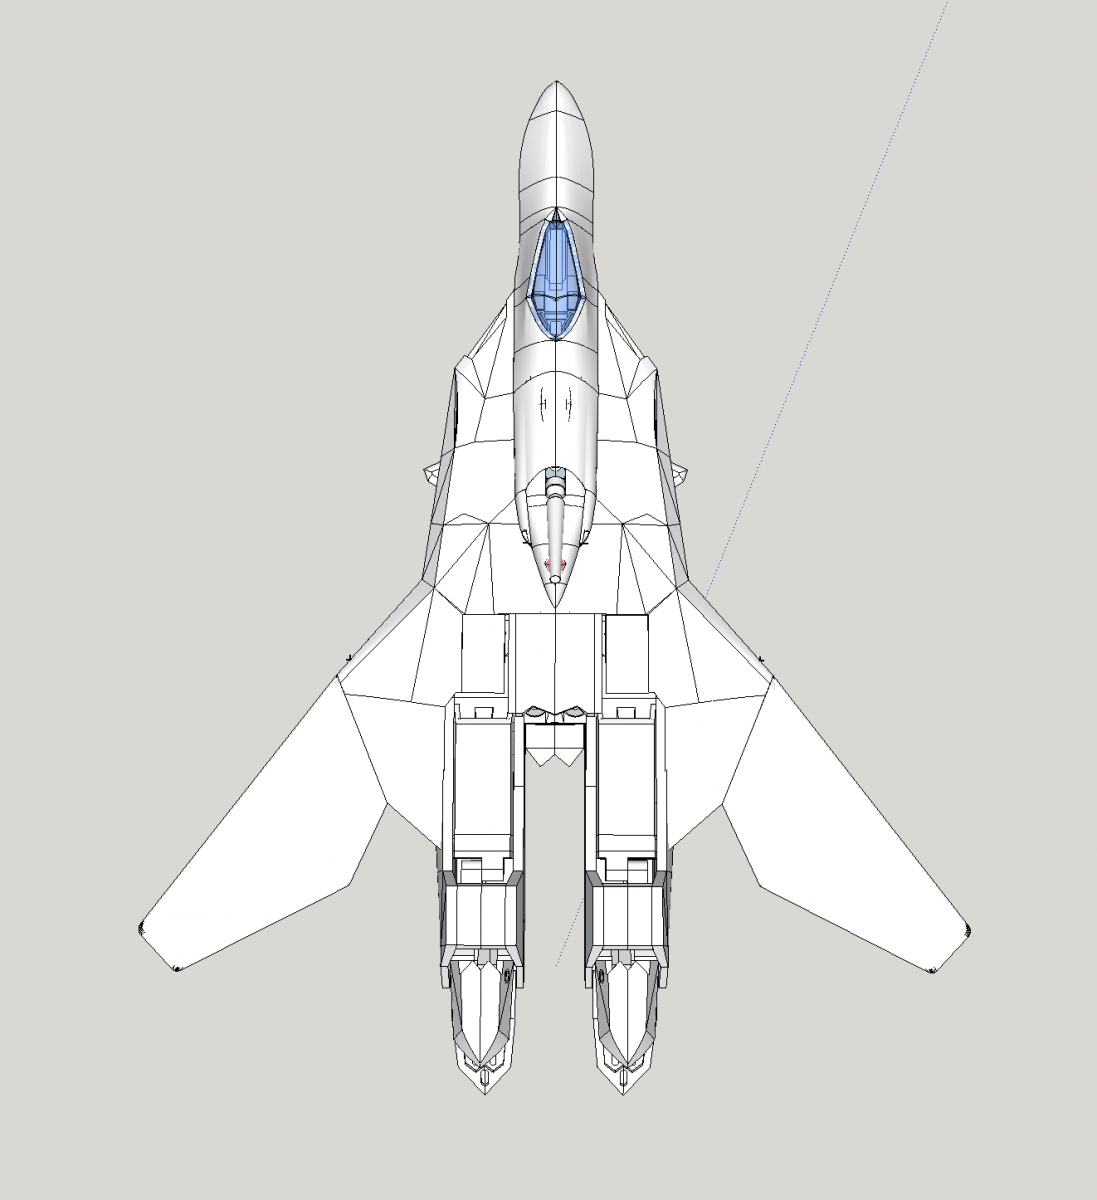
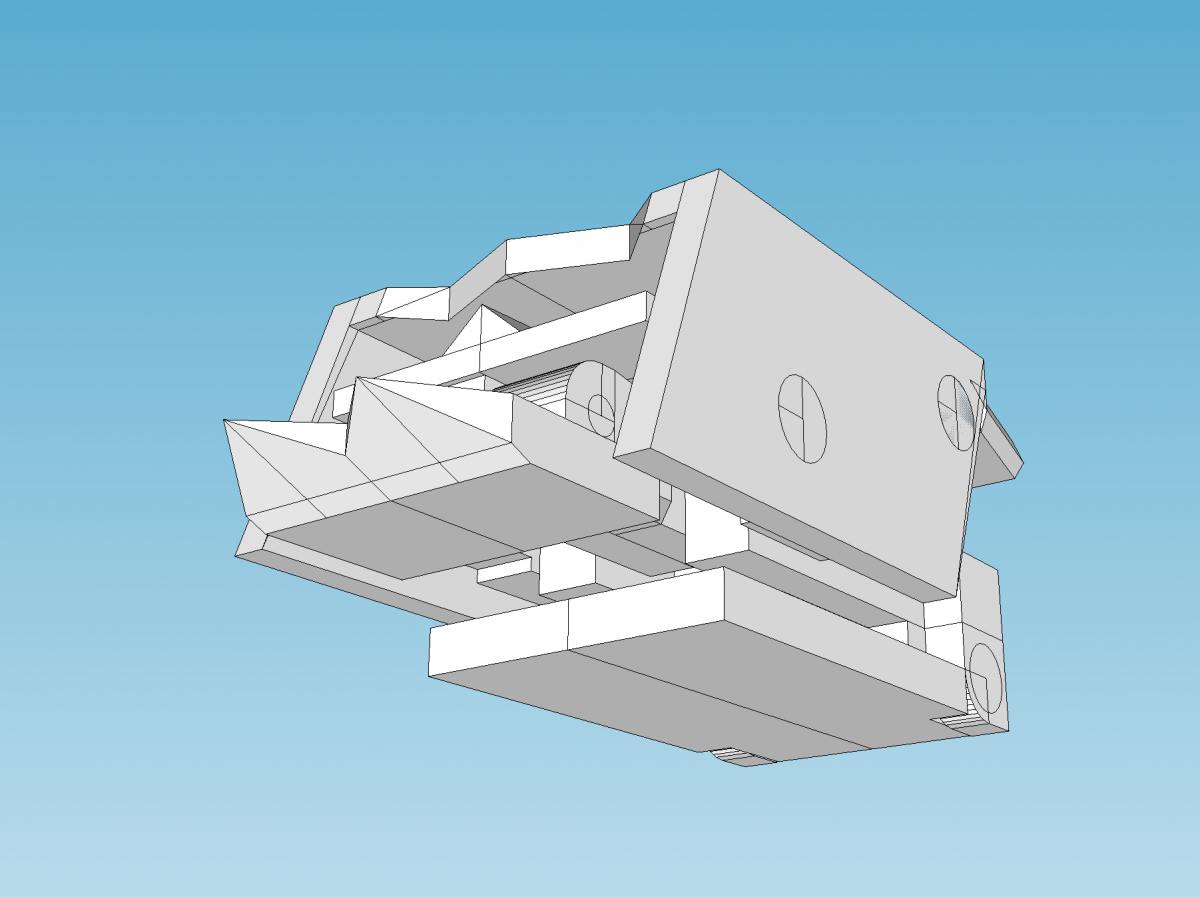
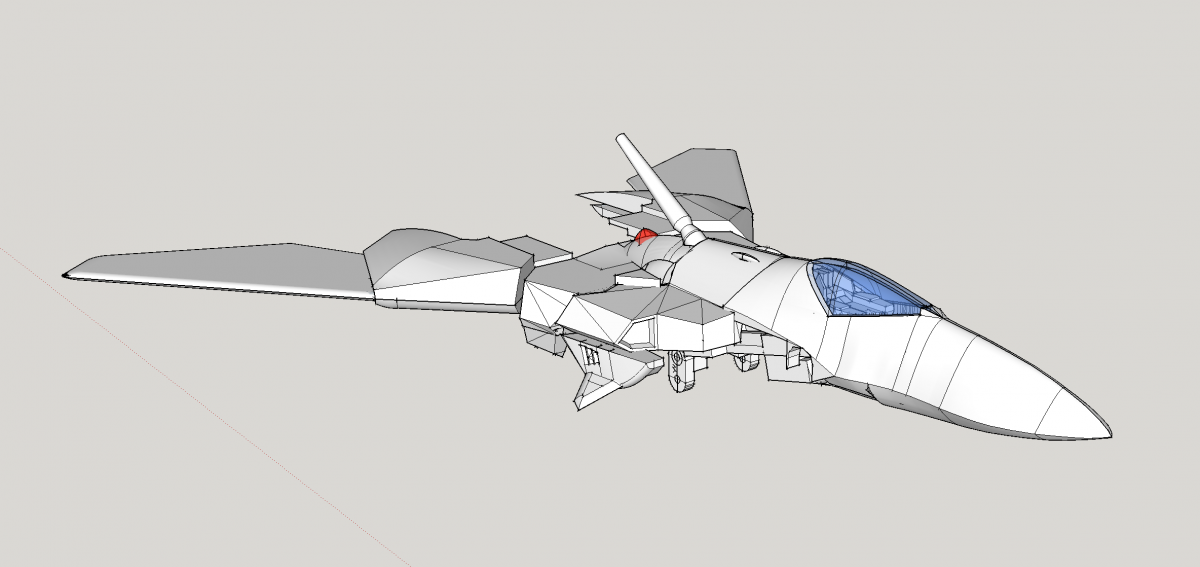
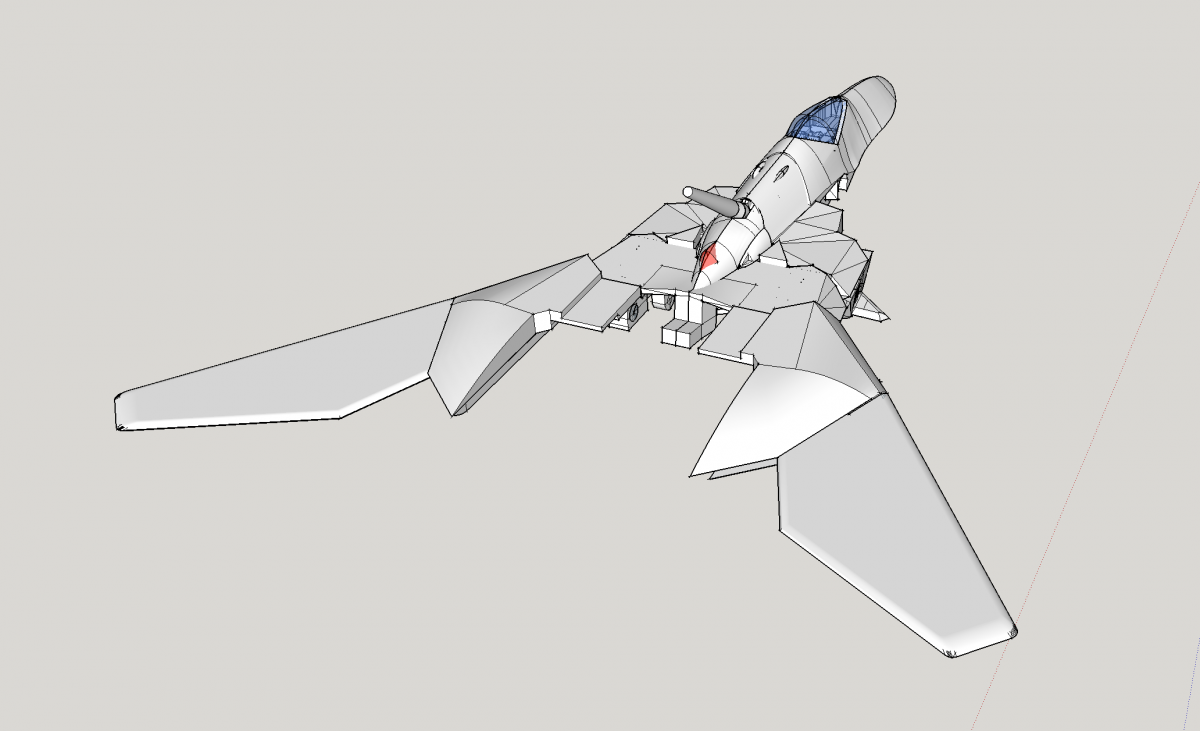
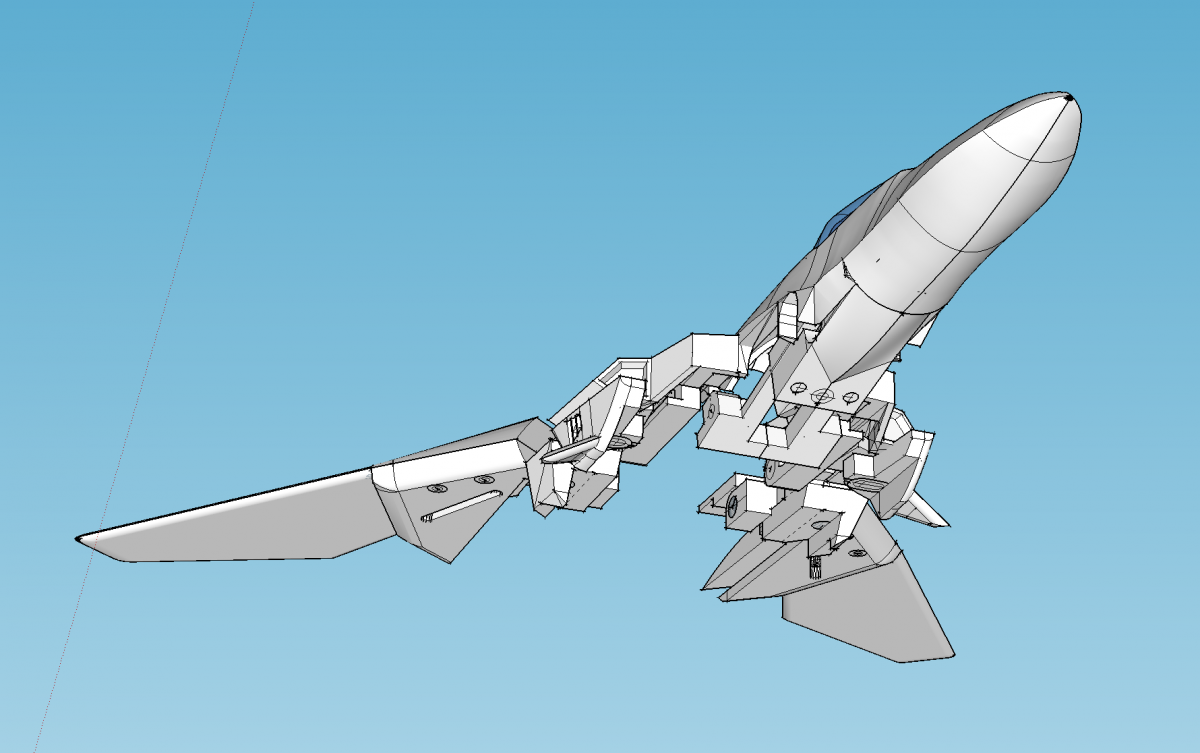
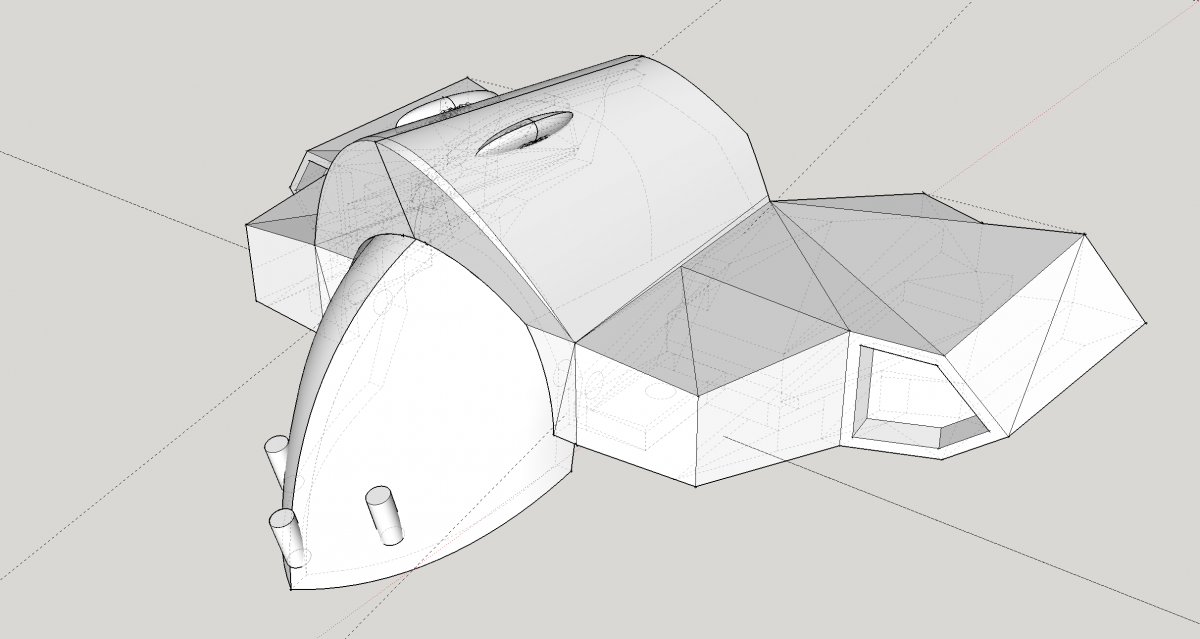
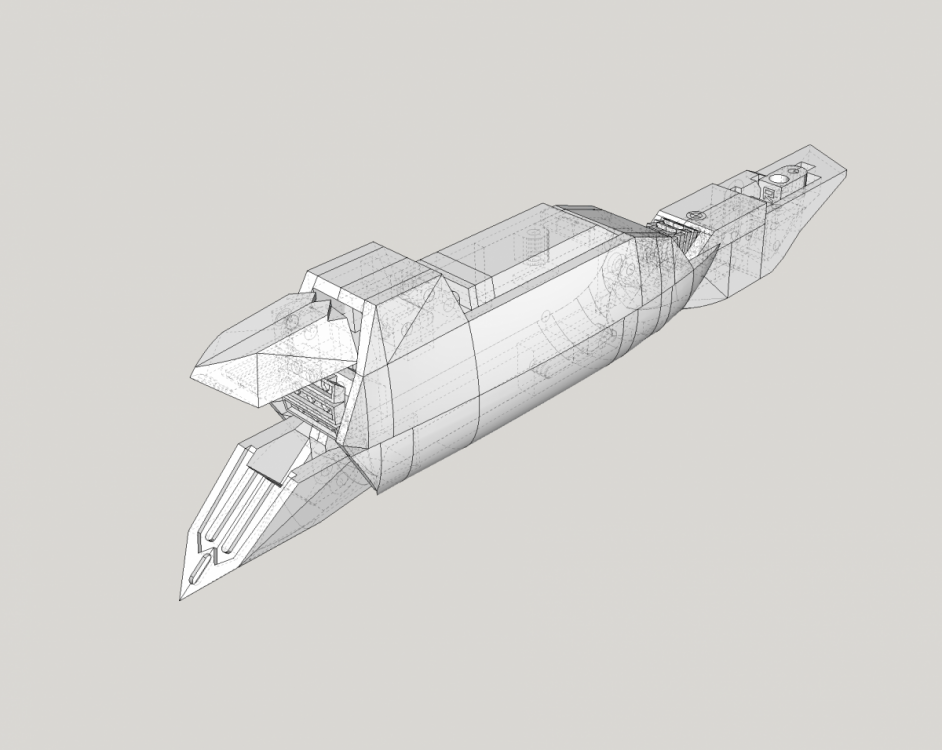
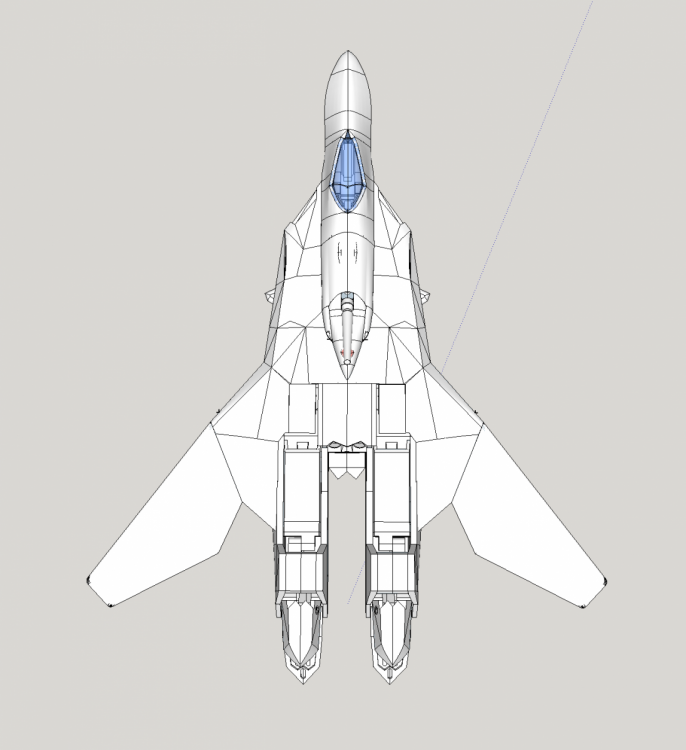
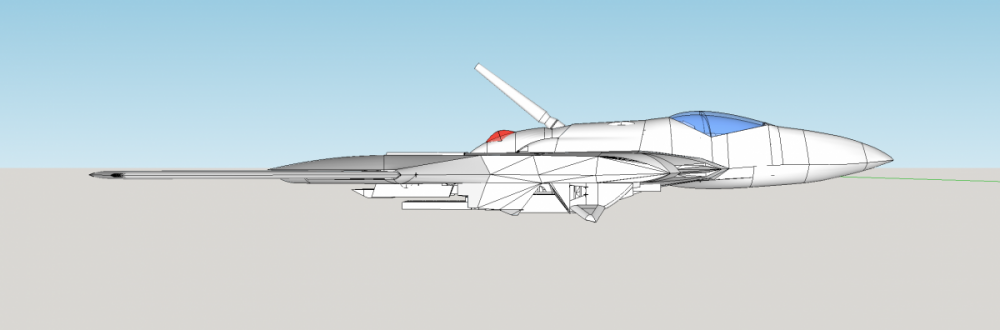
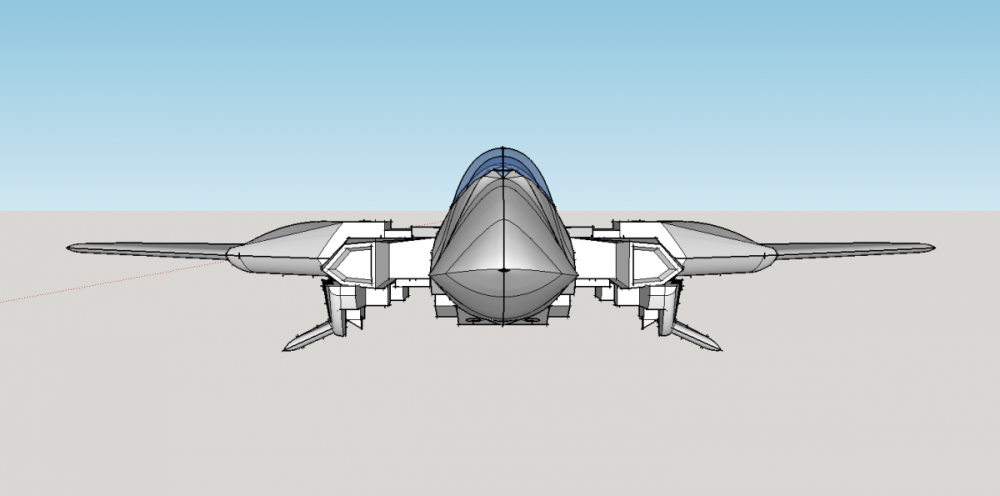
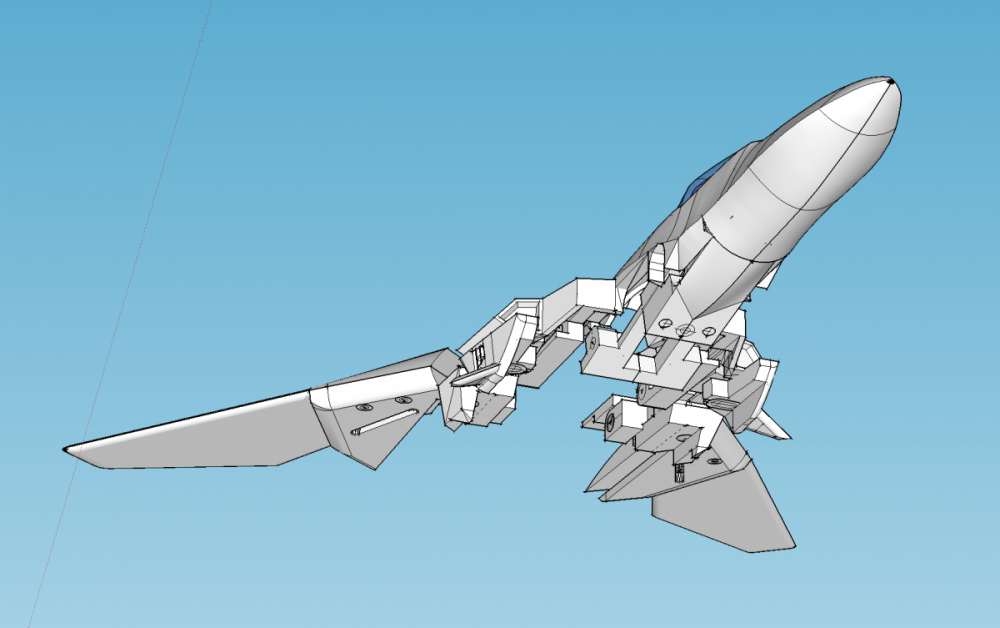
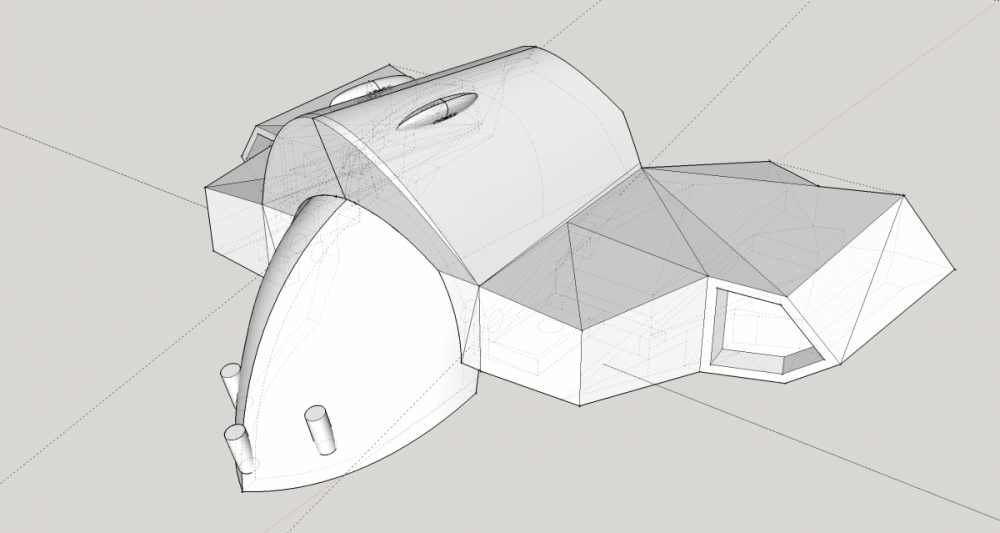
Hey guys! Been away at a wedding and a pitch for work - there was a 21 hour work day at one point! Anyway so mainly been working on what i've done previously and making sure things work mechanically mainly. So doesn't visually look too much different, but there's been a lot of work on it. Also been working on the backpack section: Here's a full under side to show how it's all working: You can see the space i'll have to fill in with the legs. :-) So next i just have to edit the back to fit into the backpack section a tiny tiny bit and then 'just' do the arms and legs. Also figured a way out i can make the wider ankles and cuffs an option for the 'G' version rather than doing a whole new leg and arm part. So essentially this is the 'B' version but with options to make it a 'G' version. I hope anyway. One slightly annoying thing i've noticed that i'm going to have to fix later – it seems the nose is pointing up juuuuust a touch: It should be an easy enough fix, but guhhh. :-S Thanks for the support both on here and via PM too! We'll get there in the end! :-)

-
Yeah so i'm finding I probably switch between the 2 views quite a bit. I probably end up spending around 60% of my time in perspective view and 40% in parallel projection... I do find I like to explore around an object i'm making, so the perspective view is a little bit easier/funner to use! Plus if i'm just holding the piece in my hand that i'm trying to copy, the perspective view matches the 'real world' if you know what i mean, so i can look at it and think 'oh good i'm getting this right' where the parallel projection view sometimes throws me off if i'm just reviewing the object. But yeah, defo been a few times (read 'a lot') where i've been in the perspective view and think i'm clicking a line to the correct axis/point i want and it ends up about 30 metres going the wrong way hah! Don't worry, I do know the arrow keys shortcut in Sketch Up – I just mess up sometimes (again, read 'a lot')
-
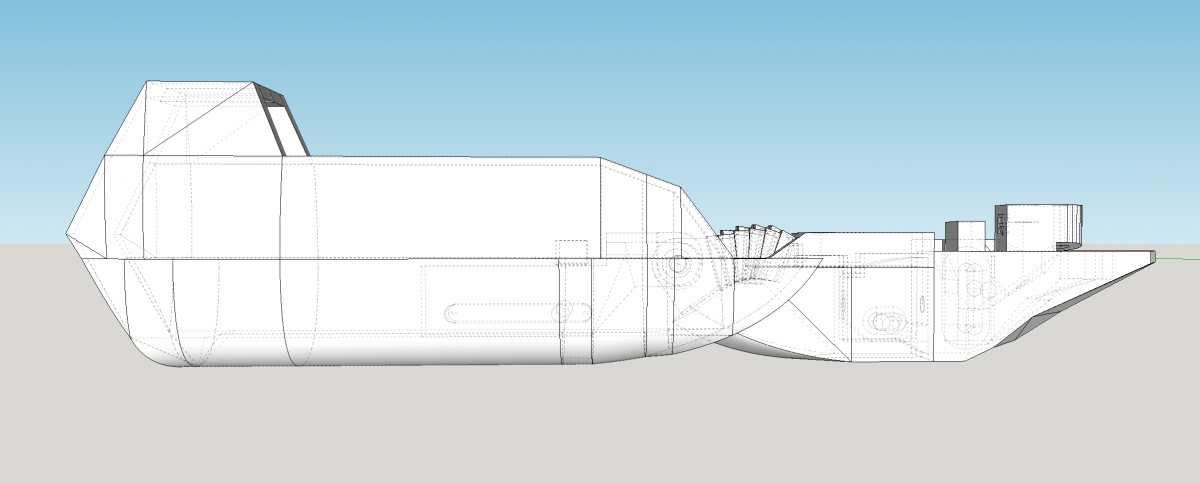
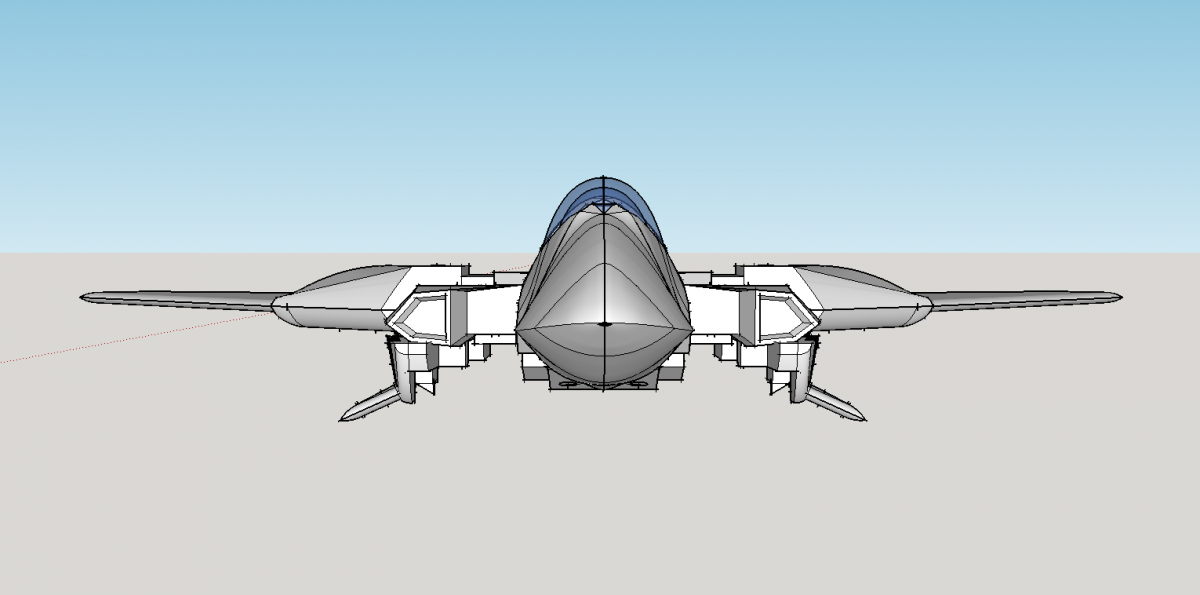
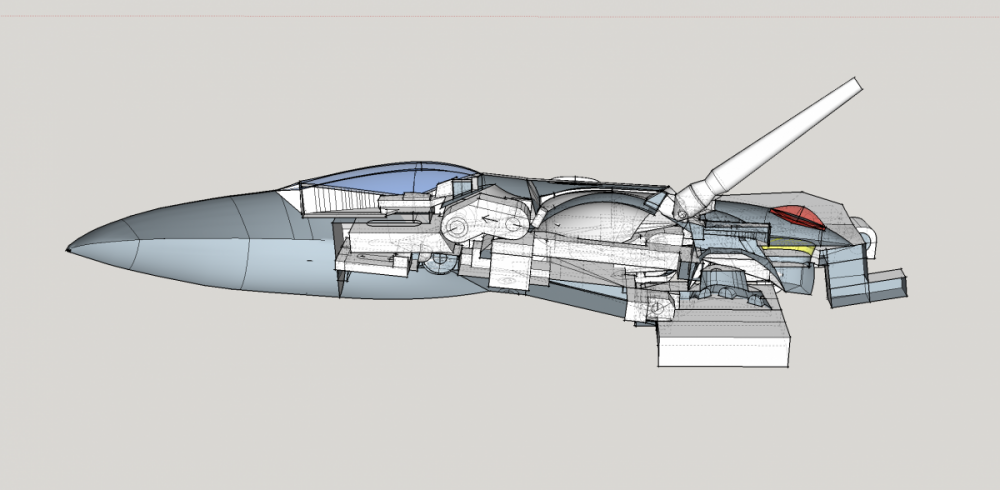
Hah, no worries Valhary! Yeah i'd love to be able to do all the versions! I hope i just get the first one done to a good enough standard that i feel like i can do all the other versions too! AND super packs! AND sound boosters! That would be the dream anyway. Also thanks for the support gwfalcon. This week i've just been cleaning up edges and mechanical things. The head and back are still a little off, but i'm getting there. Thought i'd take a screen shot of a split down the middle of everything to show some of the mechanical stuff going on. As you can see the neck is still way off - it's going into that bottom section by quite a bit. But it'll be easy enough to fix. Anyway - wish i knew to basically start at the nose and work backwards, building off of that, then each part following it, working slowly towards the tail. Rather than just building each part separately. Oh well, good to know that now than at the end if i had made ALL the parts individually. That would have been a real pain to fix. Slightly worried how this thing will look once it is transformed. But we'll see! Thanks again guys. :-)
-
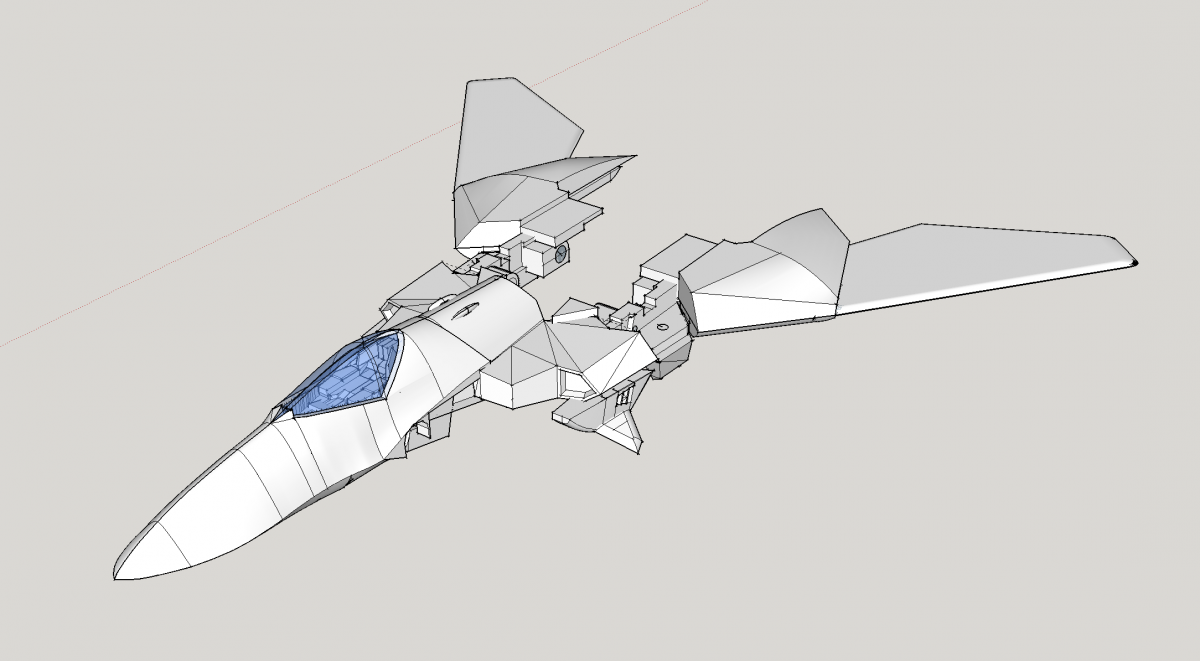
Cool man, yeah I totally agree on widening it. Also what i've been making is the 'B' version, while the 'G' version has the sleeker head style that you like, and actually i completely agree - looks way better! The 'G' version also seems to have some extra ankle and wrist parts. From what i can tell the 'B' version was in the M3 game on the Dreamcast, and the 'G' version was in Macross 7. I'll keep going on the 'B' version for now as that's really what i'm measuring off, but then just add these extra ankle and wrist parts after that. Oh! and the nose is slightly different in its detail. Thanks for the advice man! This week has basically been me making sure all the parts i've done so far work together. So far so good apart from the main chest piece which i've pretty much have to start from scratch. But with the help of the edges and angles on the other pieces has been ok so far. :-)
-
Xigfrid, this is amazing! You really do keep out doing yourself! Can't wait to see it in colour too.
-
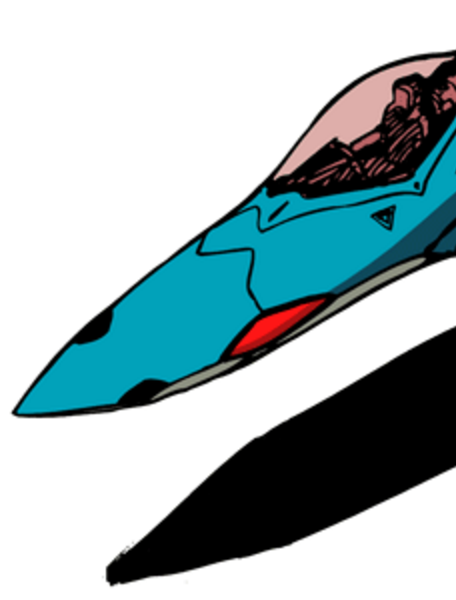
Hah, nice image! Yeah after sleeping on it, he does look a bit erm... crude? saying that, he does match fairly closely the original S.H.E. head sculpt. I'll do the rest of the model and then have a 'refinement' stage as i would really love to make his head a bit cooler/sleeker. He looks like a little upstart at the moment doesn't he? haha.
-
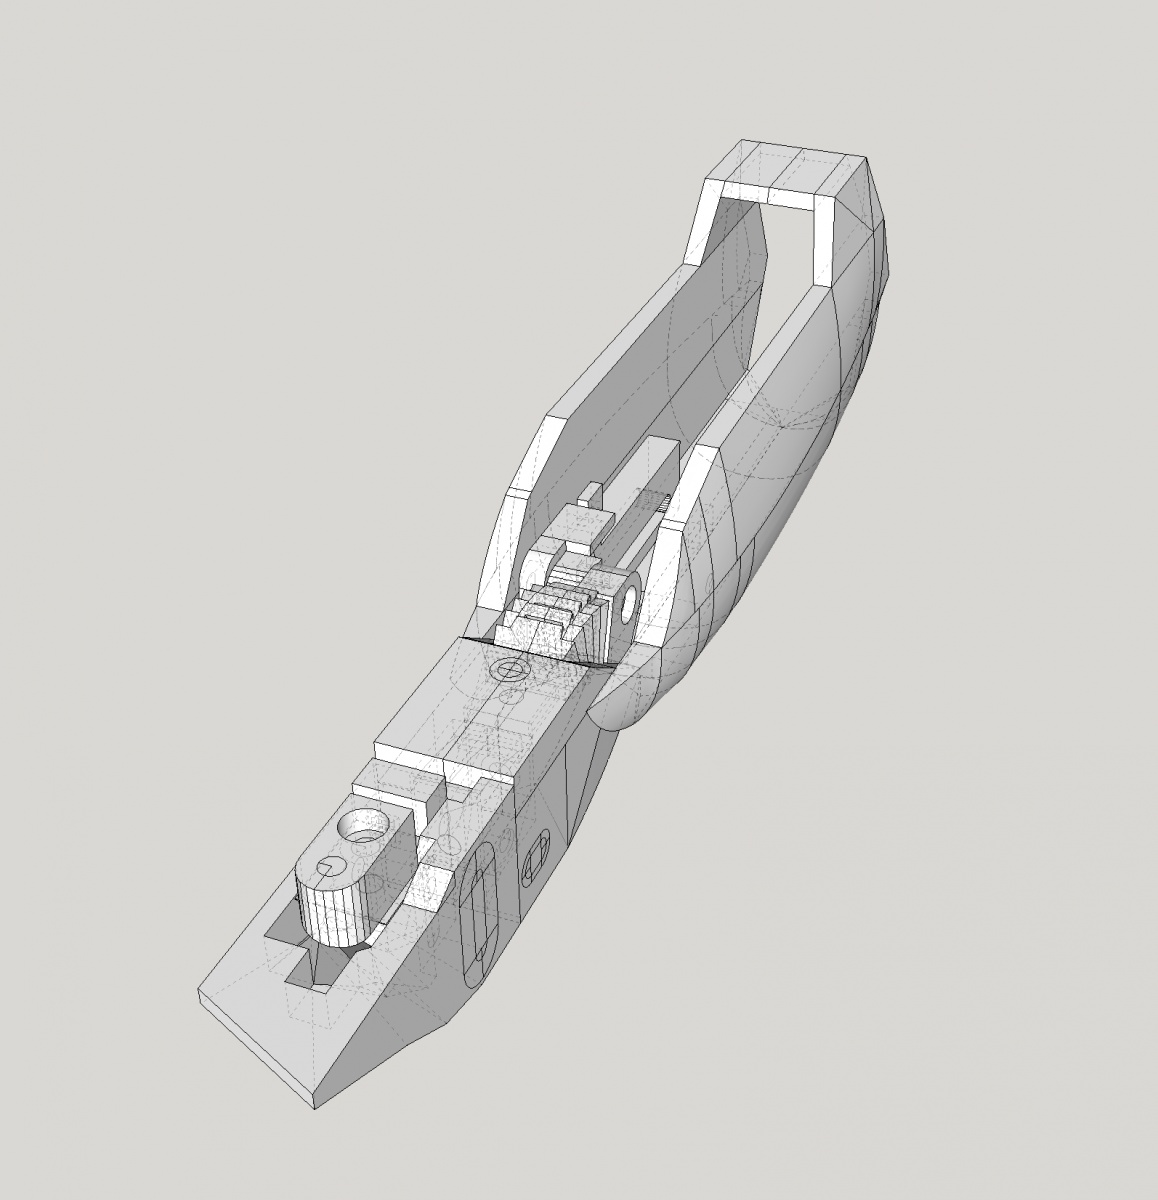
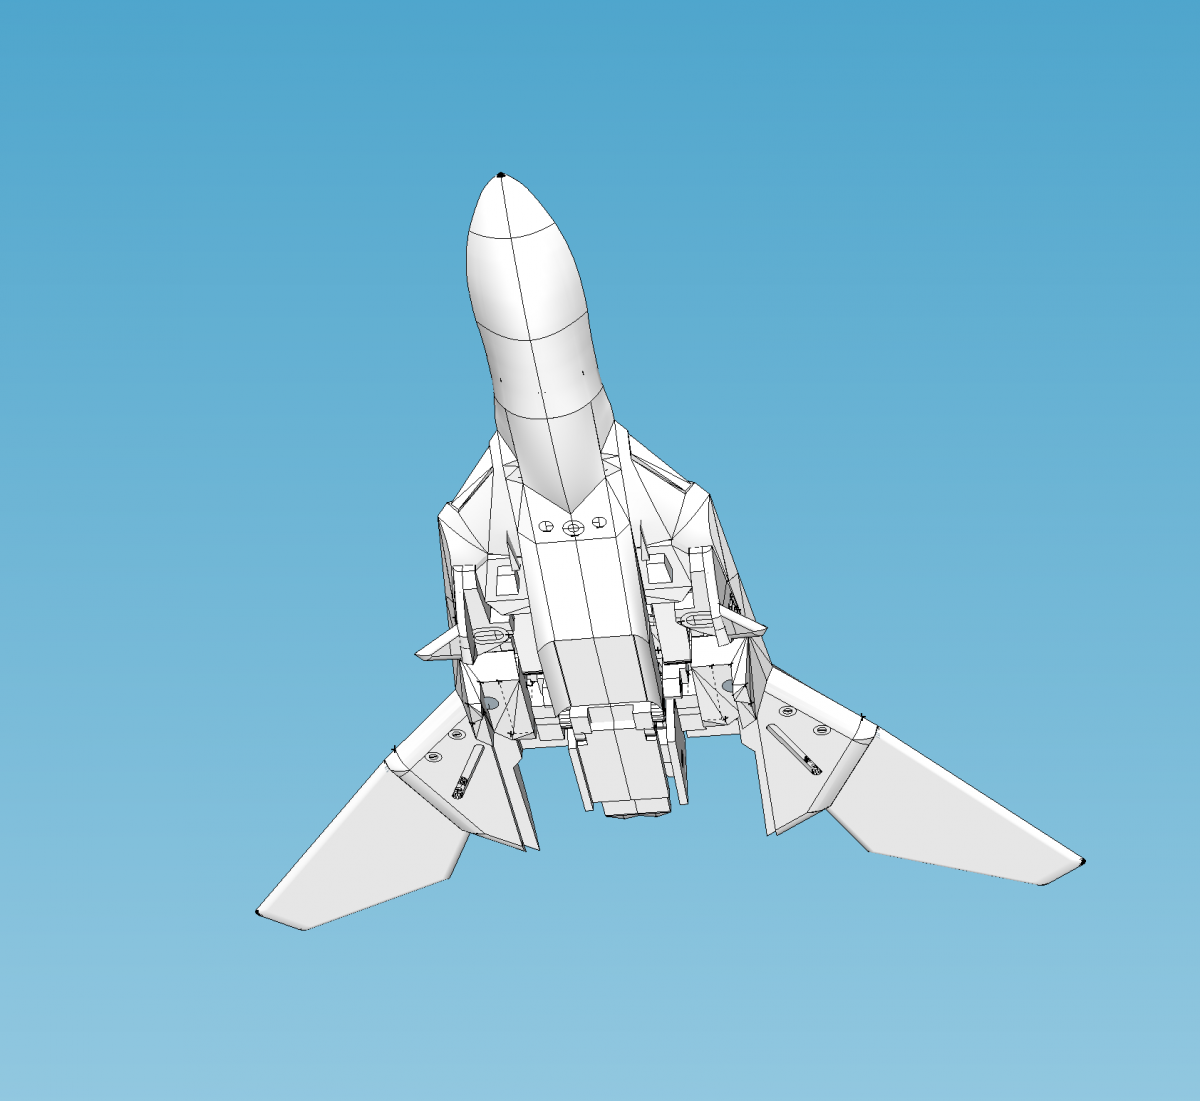
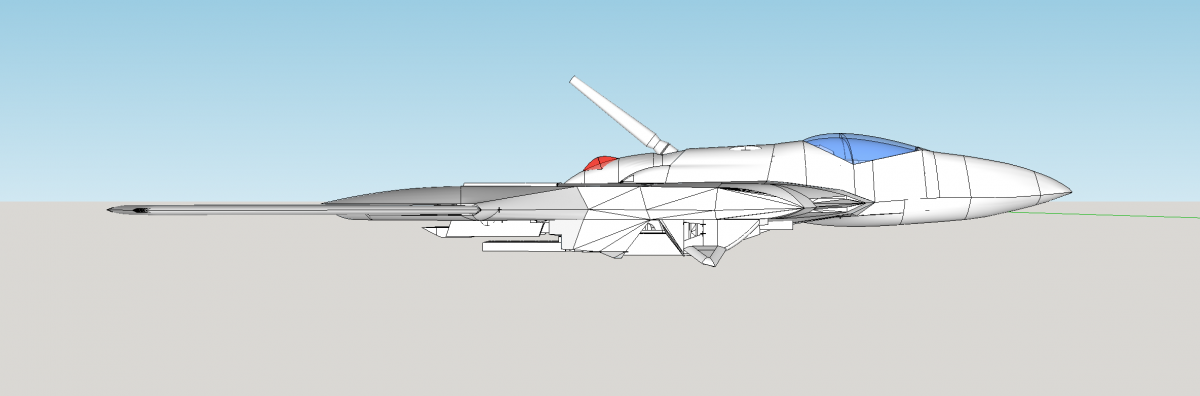
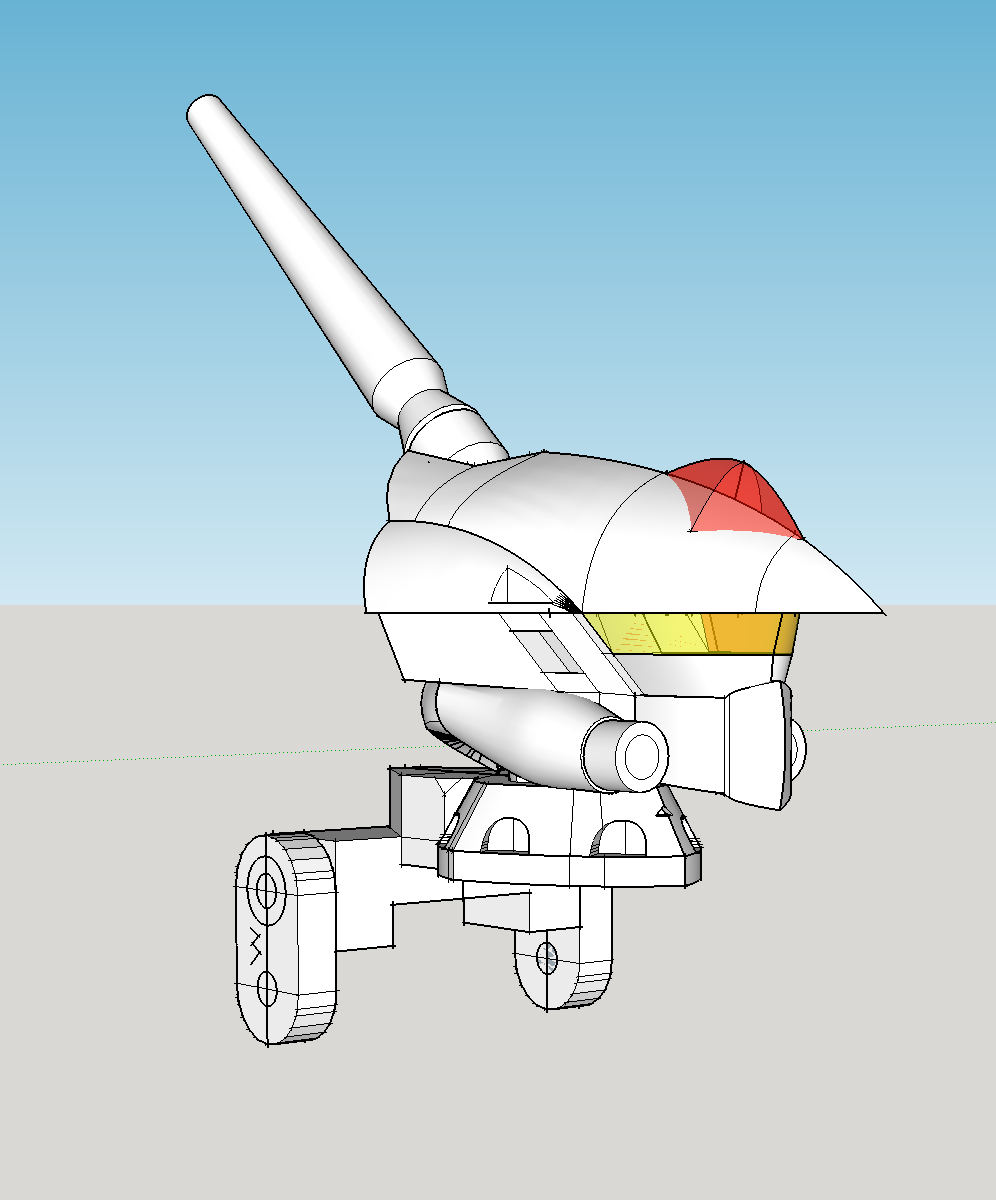
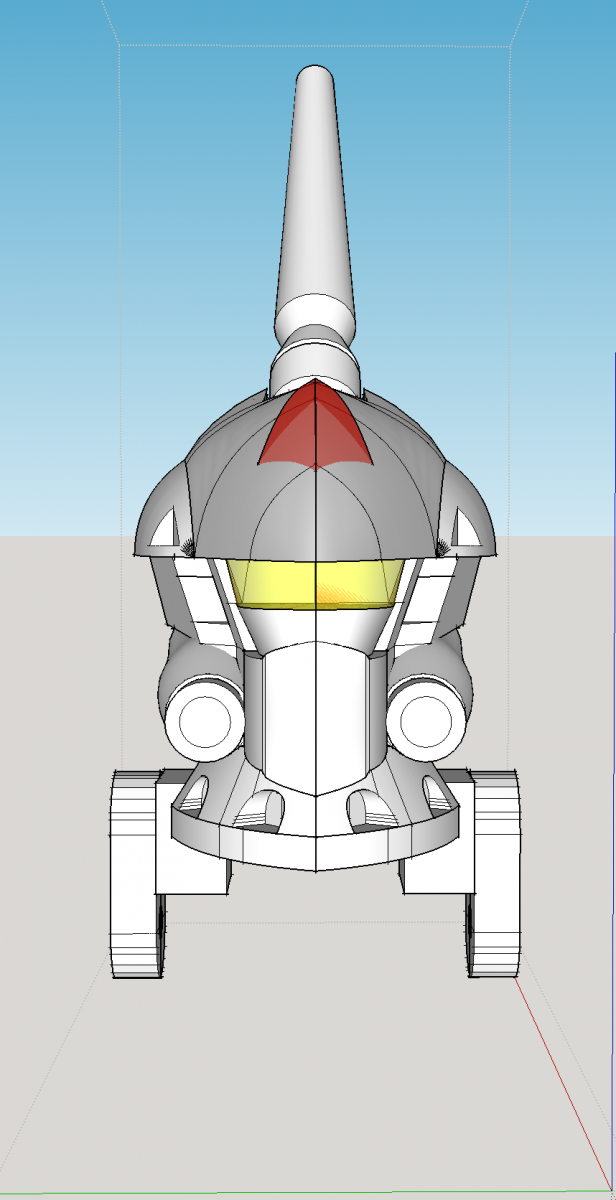
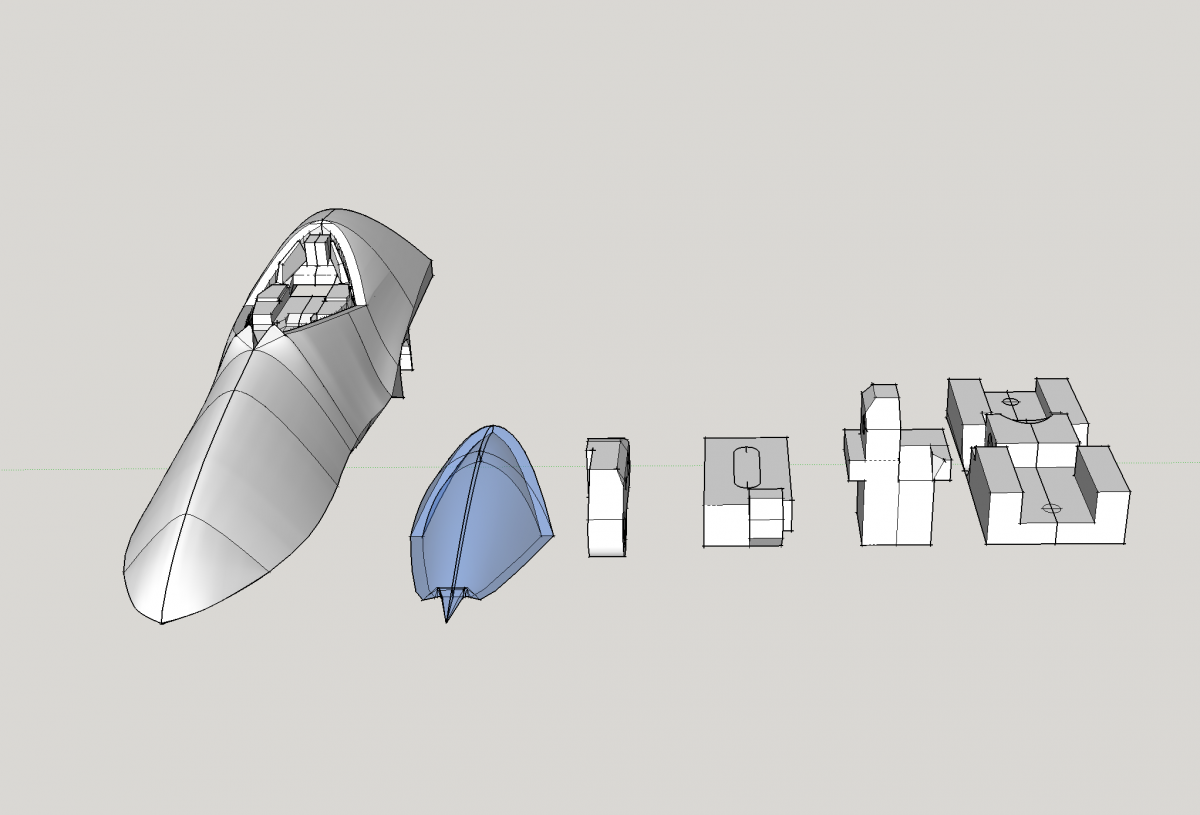
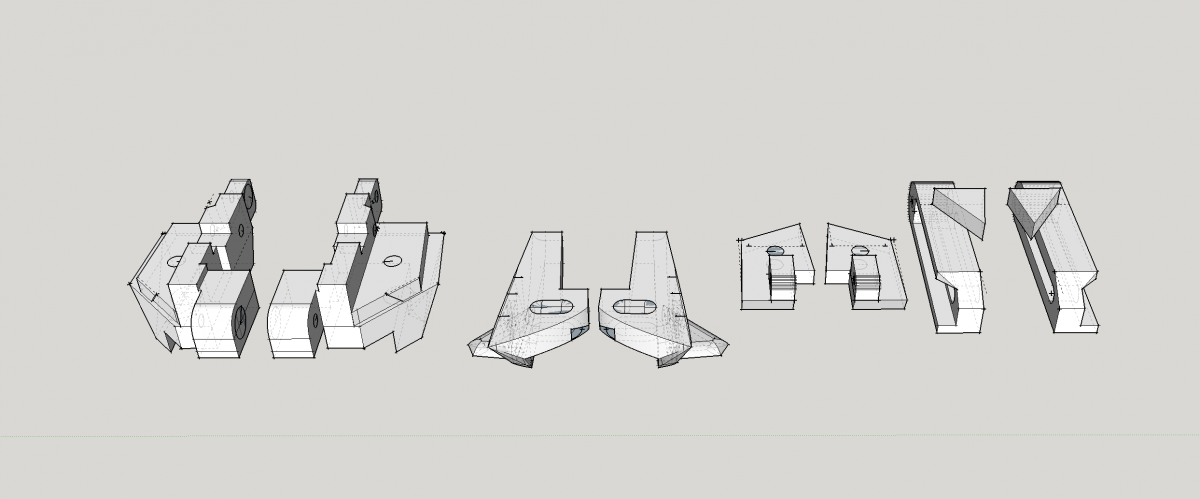
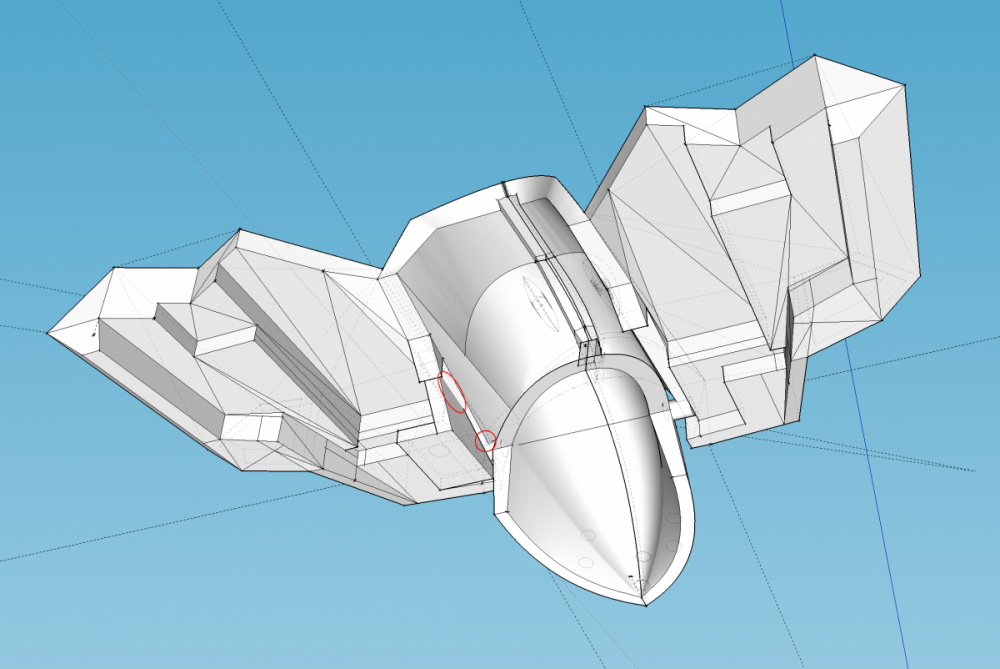
Hey guys, got heaps done this week. Then, when they come together make.... The head!! So so proud of this as it too long enough. Going to experiment with making clear parts for the eye and top of his head sections, so thought i'd make those pieces separate. Anyway, when they all come together they look sort of like this: So it's slowly coming together. Next step for now isn't as fun as what i've been doing - want to go back over everything i've done and make everything fit together a little nicer. Everything is there, just need to push and pull some parts to make things flush etc. Also I will start marking out where the panel lines are, and i'm thinking if i'm going to be playing around with some clear parts, i may as well make some for the parts either side of the nose section clear too for extra effect. The red bit here... See you next time!


-
This is really great! Can't wait to see more of your work :-)
-
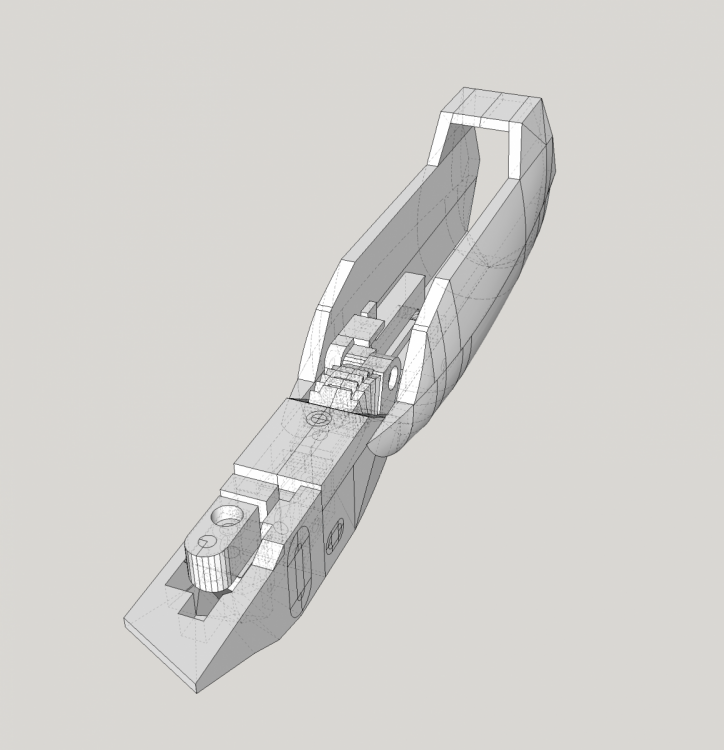
Hey guys! Sorry for no update last week, been a bit busy and then got a raspberry pi that has been keeping me a bit occupied! But here's where i'm at - Nose parts! So there are still a few parts that once they're together, are about 1 mm or so misaligned (maybe a couple are 2mm or more misaligned - lol) But i'm thinking i'll make a few more crucial body parts so i can fix all of those as a whole. Mainly as i'm worried if i change the parts i have at the moment to all work together, there may be a few extreme knock on effects on parts i haven't created yet that i'll have to go back and forth a bit to fix. Just want to minimize the amount of rework/fixing i do. But anyway! Slowly but surely getting there! Cheers! Have a good week!


-
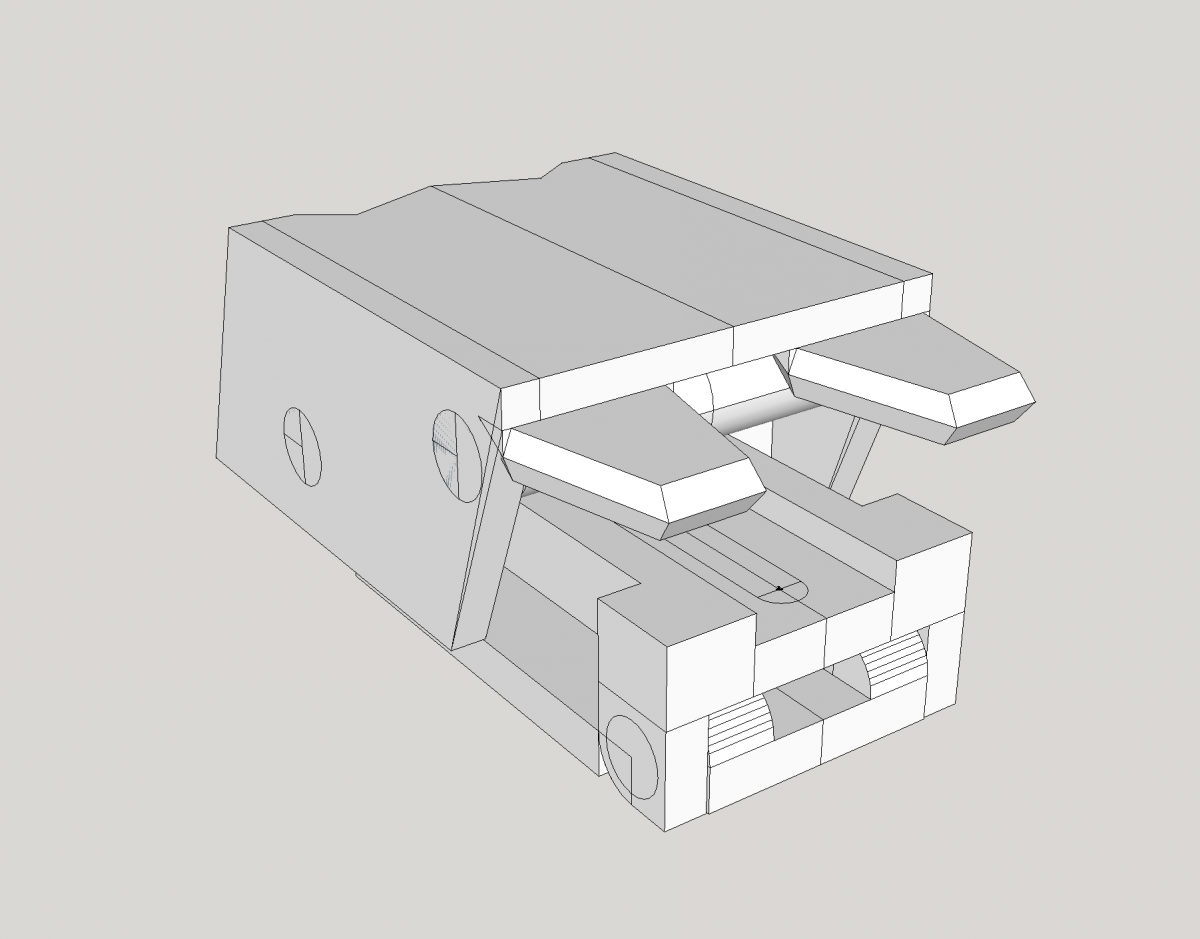
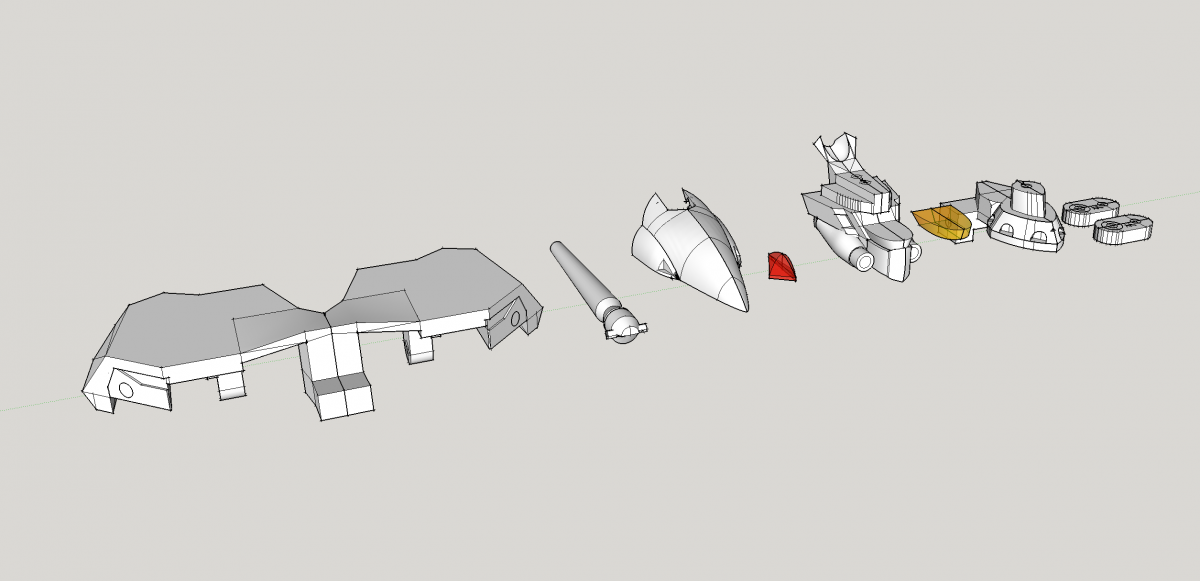
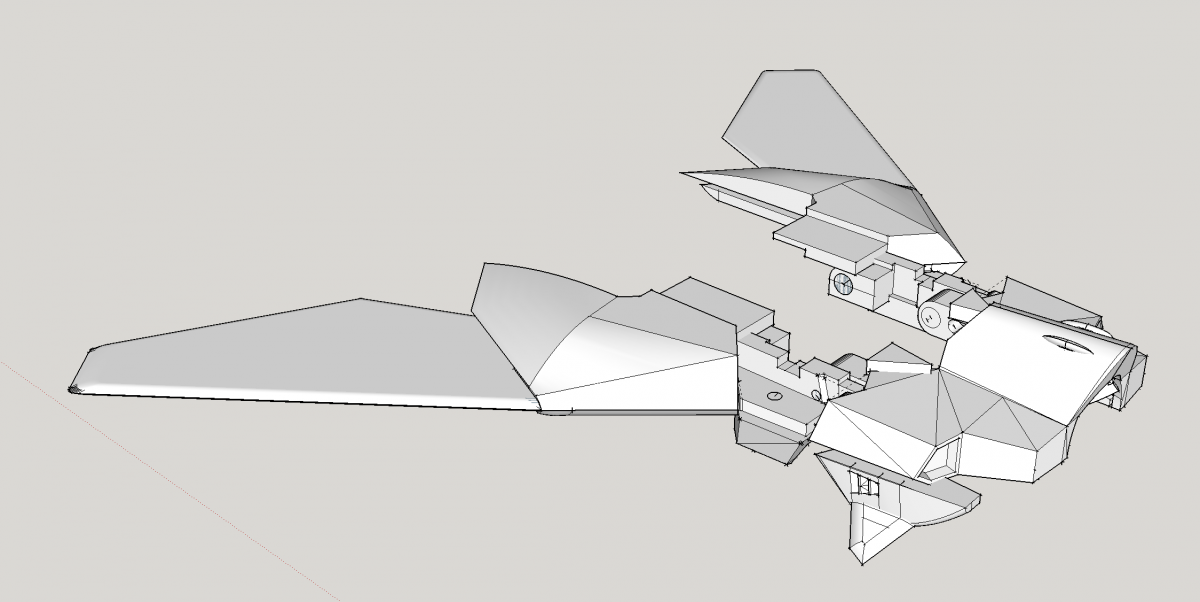
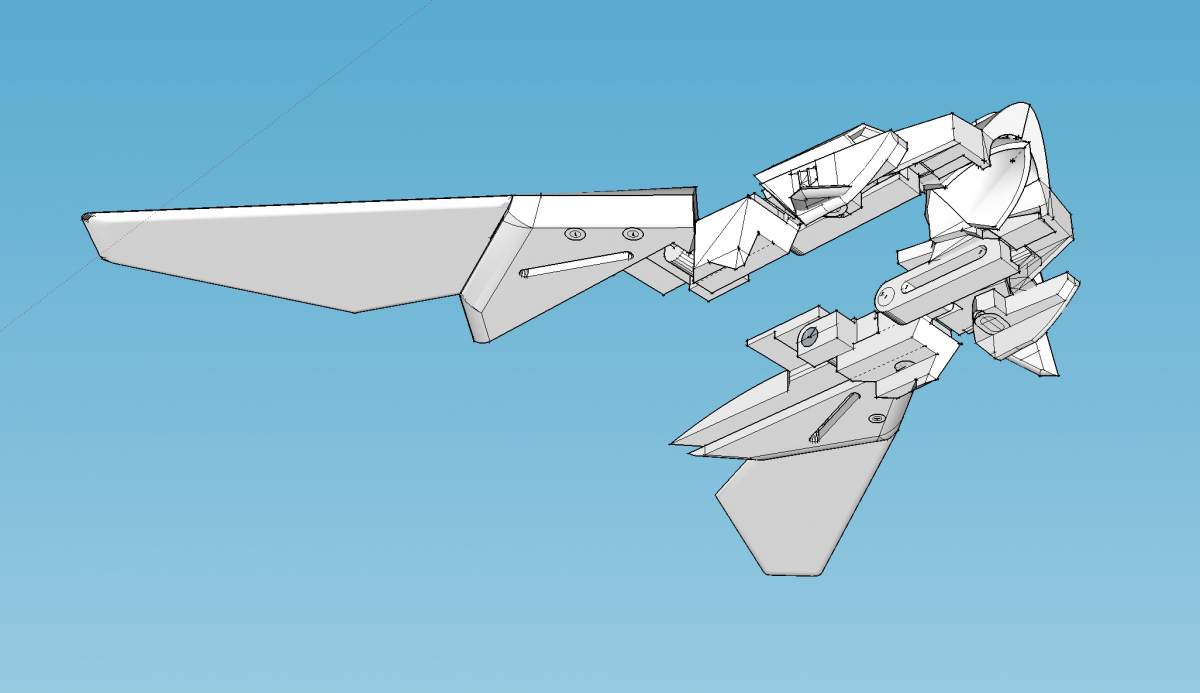
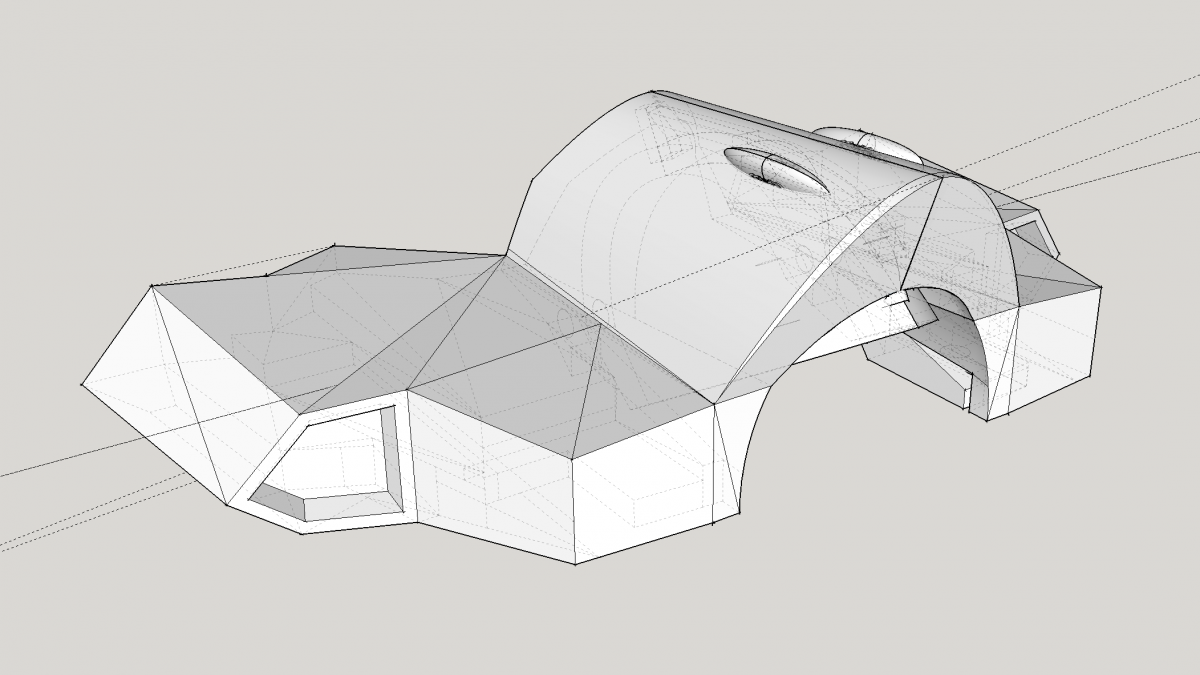
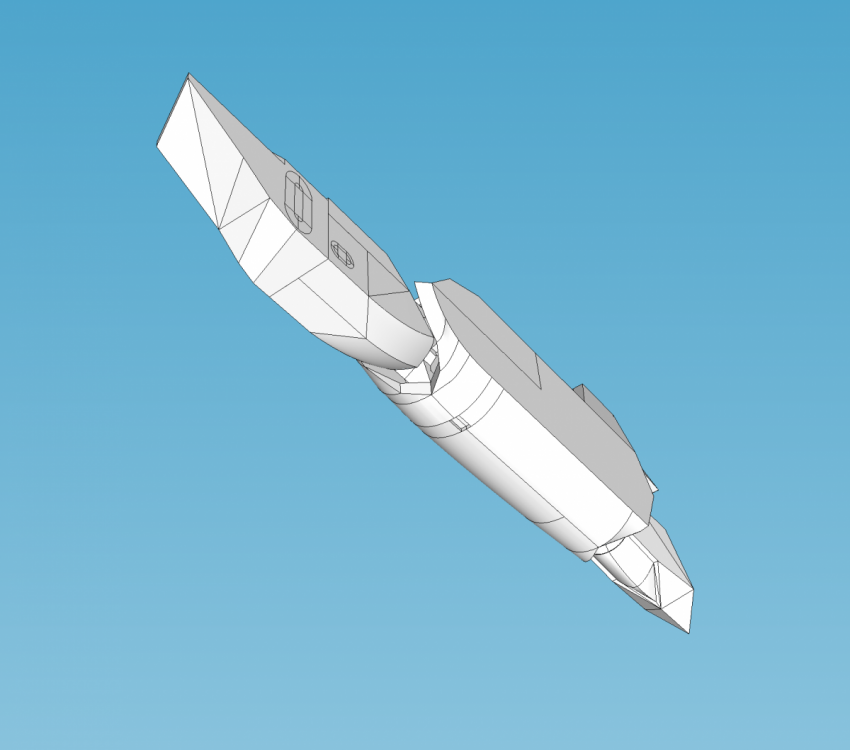
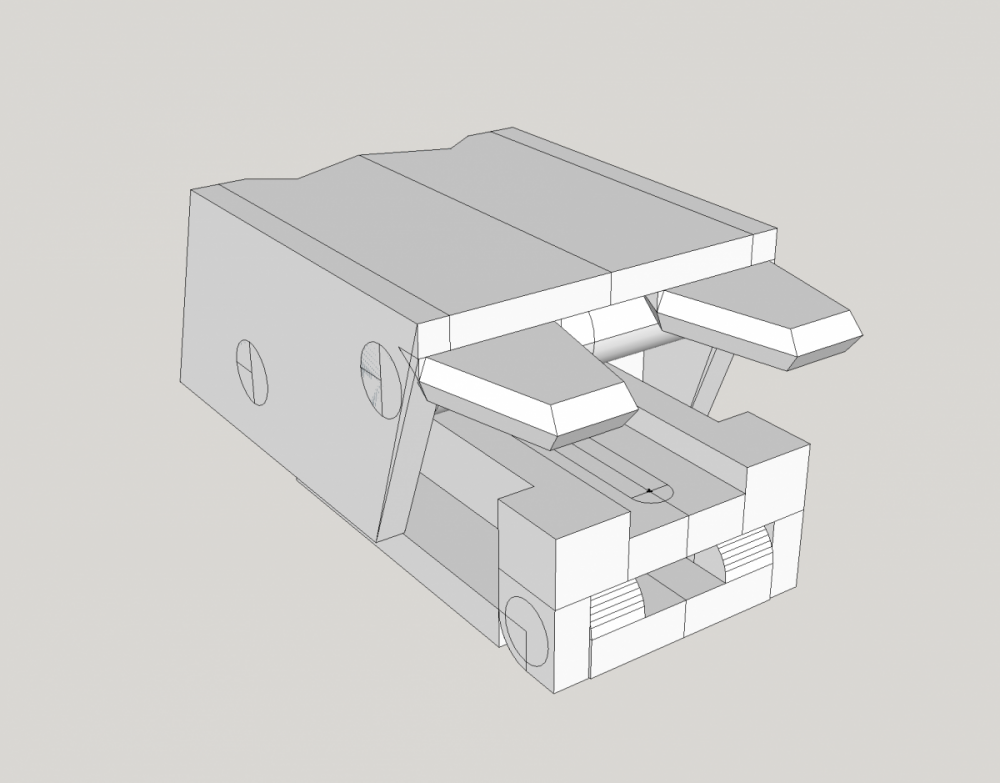
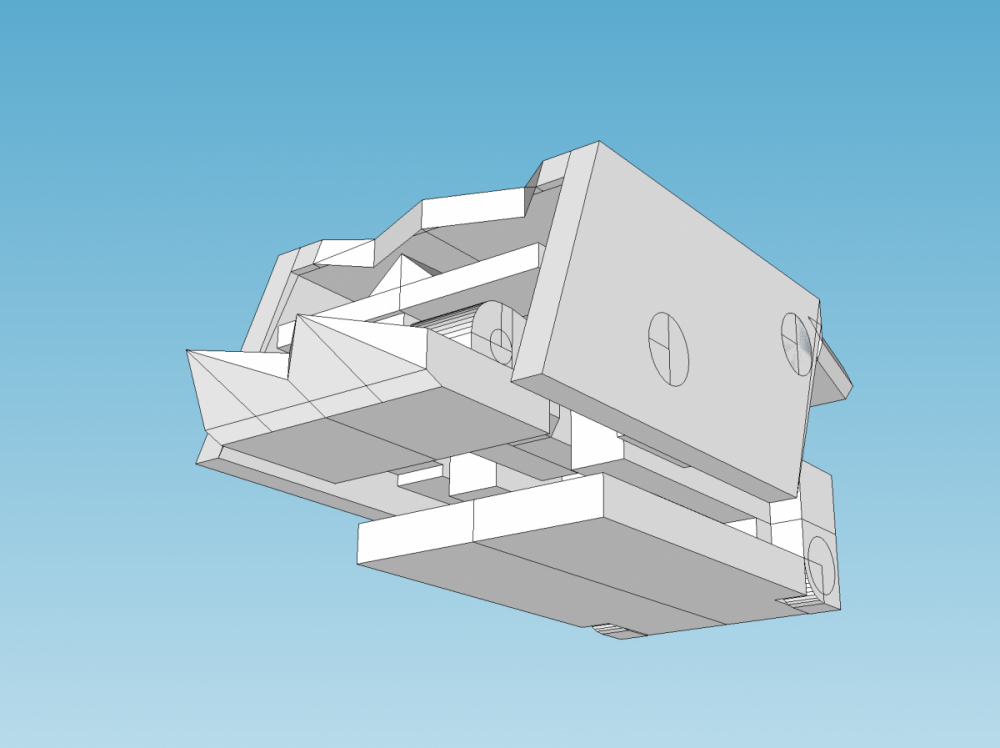
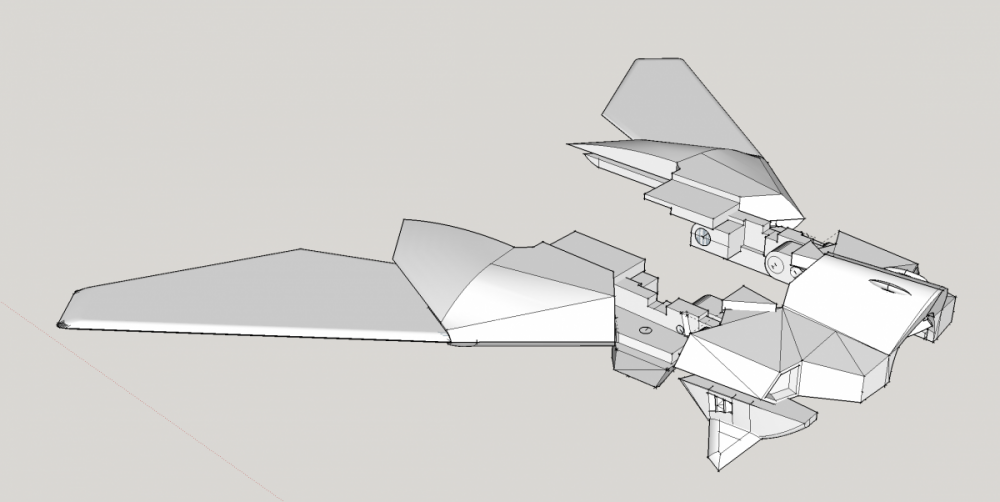
For this week's update, i've been working on some of the inner kibble pieces. But, all these parts join together to then attach the wing section to the body section... There is still quite a bit of work to be done on the new parts and the body so certain parts don't overlap one another in certain places which will probably be next week's work. But, he's slowly taking shape! Also did some maths and worked out how long he'll be in the end. The 'real life' length (nose to feet) of this guy is meant to be 14.03 meters (got that number from a few RPG and wiki type sites) and 1/60th of that is 23.38 cm. So about 7cm shorter than a 1/60 YF-19! Thanks for the sanding advice Xigfrid, I think i was getting a bit worked up about everything having to be perfect. And thanks for the clearance reference Jason. Also, thanks for the continued support from everyone too! Inspirational gifs are welcome!


-
Hah, that's quite the fleet you have there Xigfrid! And that's looking great too Mommar!
-
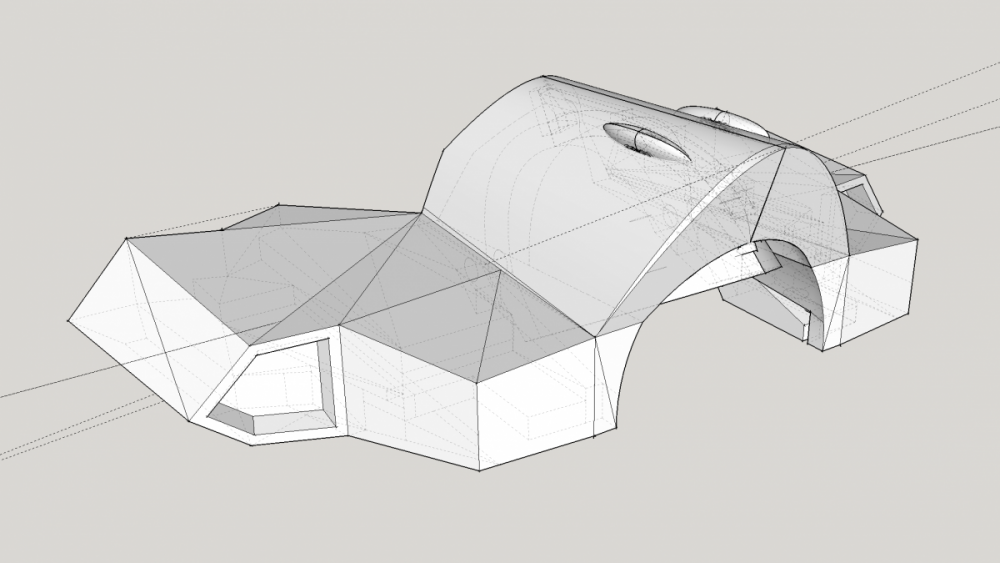
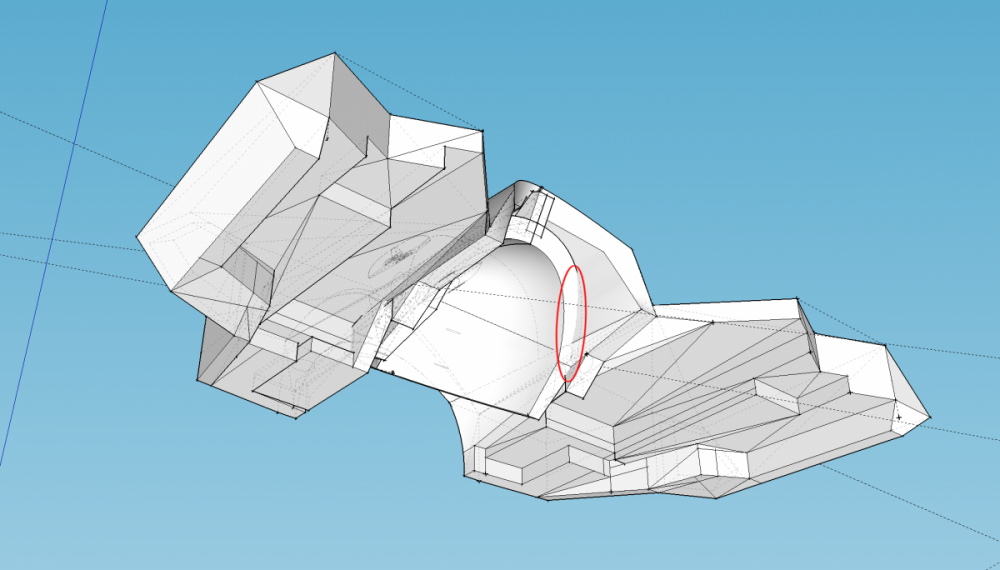
Hah - i'll try! there are 2 types aren't there! Ok so here's where i'm at at the end of this week... the main chest piece and heat shield/cockpit shield. I actually did the chest piece twice as i was finding it extra tricky, as there are a lot of funny angles and heights to get right, and i'm still not really there. There's still heaps to do but I figured since there is about another 4 parts i need to make that will interact with it, i'll fix everything up in one hit, rather than refine the chest now. The red circles in the screen grabs are where the heat shield is technically going into the chest part, so i'll have to check my measurements again, and probably widen the inner chest part to make room for things to move right. Anyway - so lesson i learnt this week is just to make the bloody part and fix it later. Nothing is going to fit first time when i put separate pieces together. Also the extra challenge i'm finding since this is a transformable bot, is checking the moving parts work. For instance making sure the heat shield has enough clearance room to move and turn smoothly without scratching its top on the chest piece or falling out - which happens enough on the actual model anyway! The next 4 parts i have to make look easy enough compared to these guys, so the next challenge after making them and making sure everything fits and moves correctly. Then after that i'll make sure they all join up with wing piece i did earlier. Easy................
-
wow yeah that looks amazing. nice work. Did you use a different silver/grey for that front side panel compared to the lower ones? or is that just the lighting? (either way, looks great)
-
Oh! So yeah for the panel lines, i'm planning on testing this wing piece where i'd simply draw out the lines on the mesh, but only offset and push them down into the model (actually making the panel lines) once i've up-scaled it. hopefully that won't create too many errors in the model mesh or anything. I'll let you know how that goes. cheers