
Mintox
-
Posts
439 -
Joined
-
Last visited
Content Type
Profiles
Forums
Events
Gallery
Posts posted by Mintox
-
-
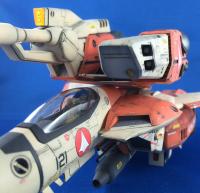
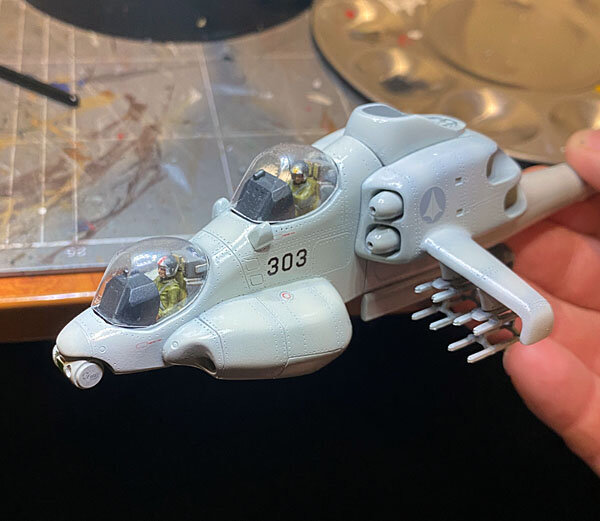
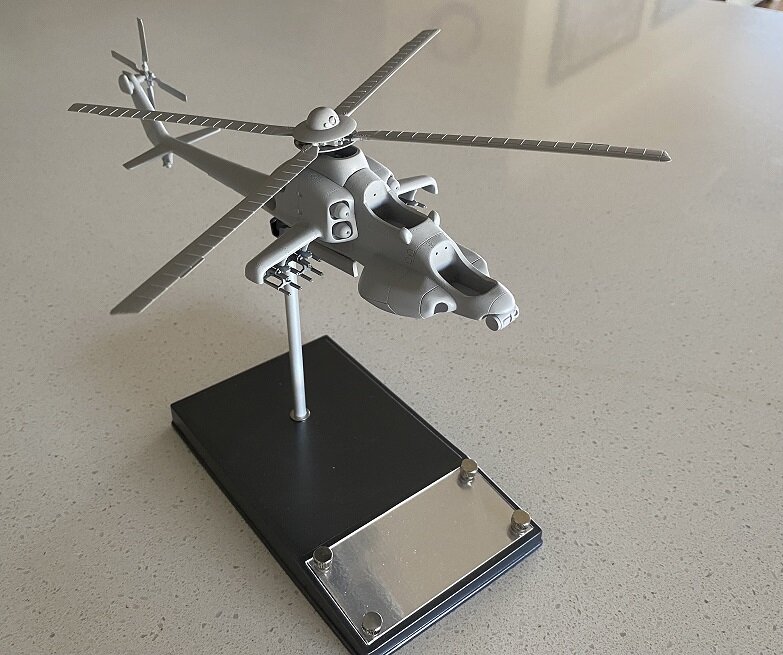
Probably the last in-build shot I will post. Im finished all the painting and decals and most of the weathering. The canopies will need a little more detail, most importantly a panel line across that large bar on the right of the canopy that contains the split for the canopy which isnt moulded in so I'll need to get creative. In this shot I havent done the top of the fuselage with a flat coat but that has been done along with attaching the missiles. Ill do post build shots soon.
-
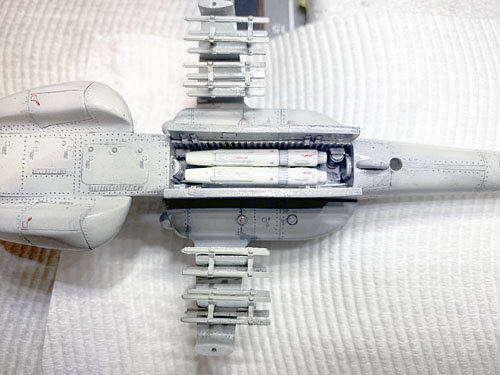
Im almost finished it. Here Im just fitting the missiles into the weapons bay.
Ill post more picts soon.
-
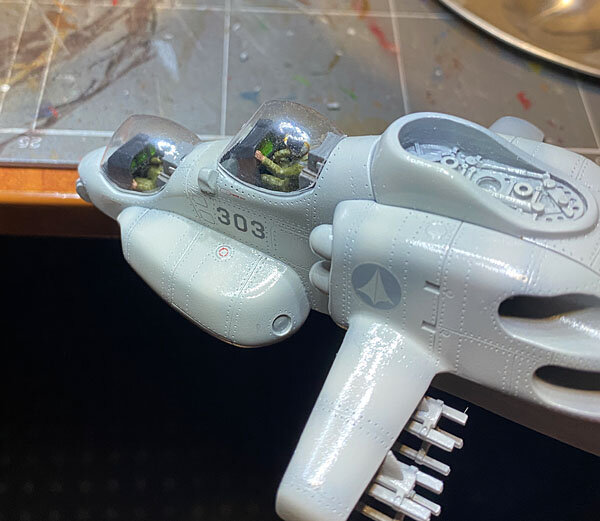
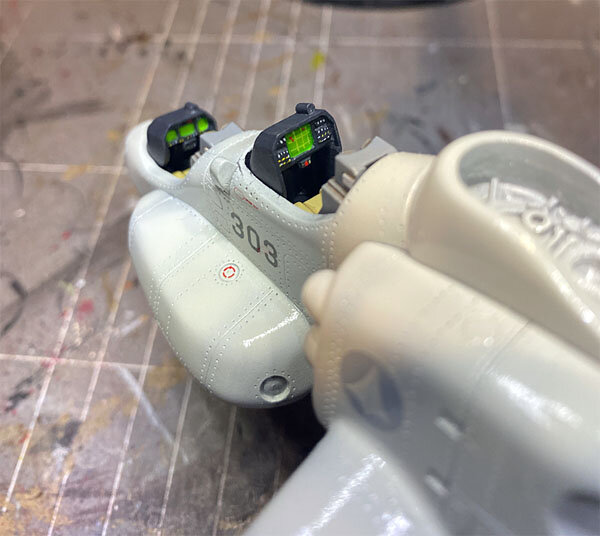
Cockpit is now finished. I have to polish the canopies to make them clearer and then mask and paint the canopy frames and eventually glue them on.
-
On 12/15/2021 at 9:08 AM, VF-1A Grunt said:
I ordered a couple sets of these in 1/72. The detail seems decent, but I haven’t had a chance to paint them yet to see how they turn out when finished. The male and female figure differences are so subtle in 1/72 that I’m pretty sure they’ll be indistinguishable once under a canopy. I’ll have to reserve final judgement until I get them painted. Regardless, I was glad to find TV pilots to man my Hasegawa fighters.
They look pretty good. Im in need of several 1/72 so Ill hop on over and order some.
-
19 hours ago, derex3592 said:
@Mintox at 46 I hear that! I pretty much have to do everything with my magnifiers nowadays! 1/350 ship models are going to be the death of me!

Amen to that. Everything I do at small scales is now with a magnifying glass/light. I cant paint small stuff without it!
-
4 minutes ago, derex3592 said:
Those pilots look great! I suck at figure painting, especially faces.
They were painful to paint. My eyes are getting too old for this crap (and scale!).
-
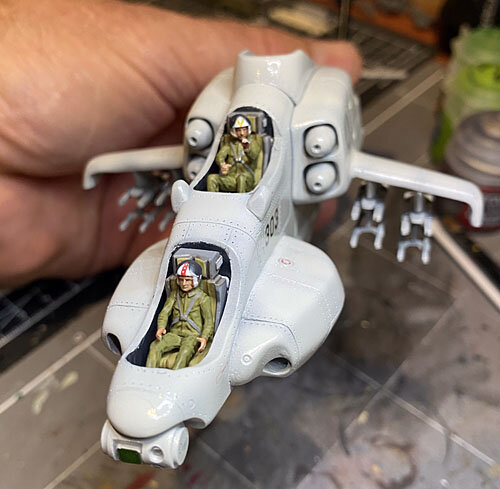
Pilots now finished. Im just messing around here seeing how they look and trying to get them seated right before I put the consoles in.
-
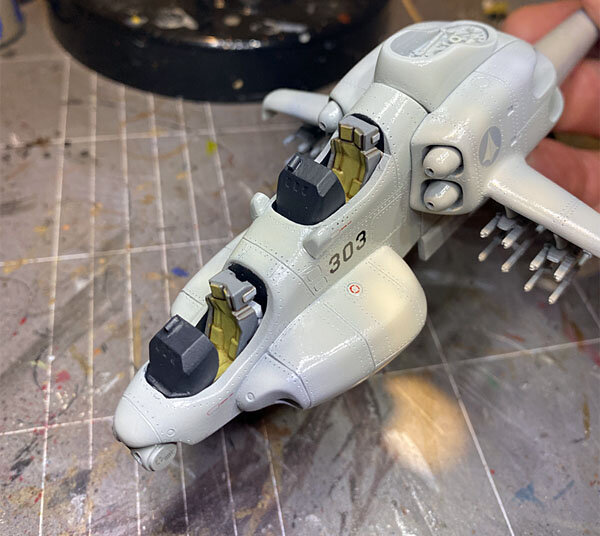
Making some progress again. Cockpit completed. Nothing here is glued. Ive also started the decal process and once completed Ill move on to weathering.
-
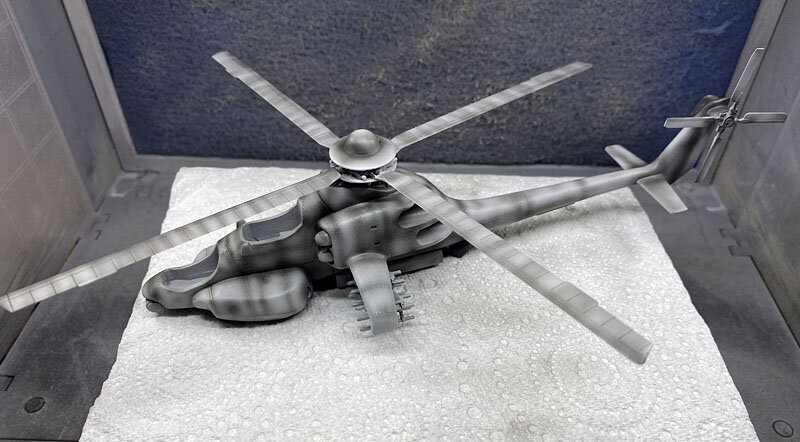
ok now weather isnt sucking so much in sunny Western Australia Ive been able to get out in to the workshop to continue painting. Here I putting on the final coat (gloss) of a light grey. Weathering and decals etc to come next. The panel shading looks very light but it is darker and more defined than what the images shows.
-
19 hours ago, coronadlux said:
I do have a 3d printer and a DYRL pilot I can print the helmet of.
Thanks for the offer. Ill need to check with the customer to see what they say before I commit.
-
On 10/3/2021 at 12:46 PM, coronadlux said:
Do you have macross heads for the pilots?
I do but Im not sure theyd look 'right' on these pilots. Plus Ive discovered 1/72 is a loose scale for figures.
-
Its been awhile since my last update but work and life in general have been taking priority. Now the weather is a little warmer Ive been able to start the painting. Here Im adding some shading on all the panel joins. Im using Mr Hobby Tire Black, a very dark grey colour but which looks black. Once this dries I'll start with the lighter grey colour, something similar to the US Marine Corp colours they use on their choppers. The customer has asked for the tail (vertical stabiliser) to be painted black with Skull Squadron livery.
-
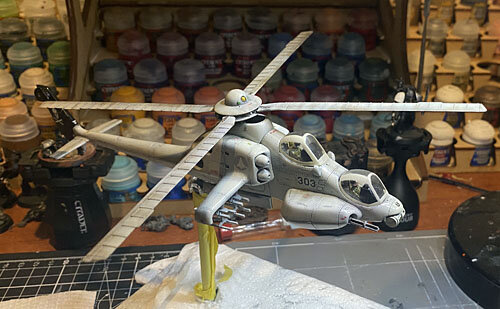
Final shots of the bird before I start painting it. The AGM racks are fitted and glued on as is the bomb bay doors.
-
29 minutes ago, coronadlux said:
I have the Moscato version. I really like his attention to detail. Wish I could have grabbed a lot of his older kits back in the day.
Tell me about it. His stuff is great. I did manage to get one of Johns 1/72 Tactical Pods. Great model.
-
On 8/21/2021 at 9:37 AM, sketchley said:
Books like Variable Fighter Master File claim that the Unified Forces only used NATO weapons. So, if you want to be 'authentic', there's that guideline.
However, I'd go with your gut instinct on what makes the Commanchero look more lethal. There's been no material that said the Commanchero wasn't used by the Anti Unification Alliance—not to mention that the Unified Forces have a history of using Anti Unification Alliance weaponry—so anything goes.
good advice. I have some 1/72 Bandai VF weapons winging their way to me so I'll do some fit outs and see what I think.
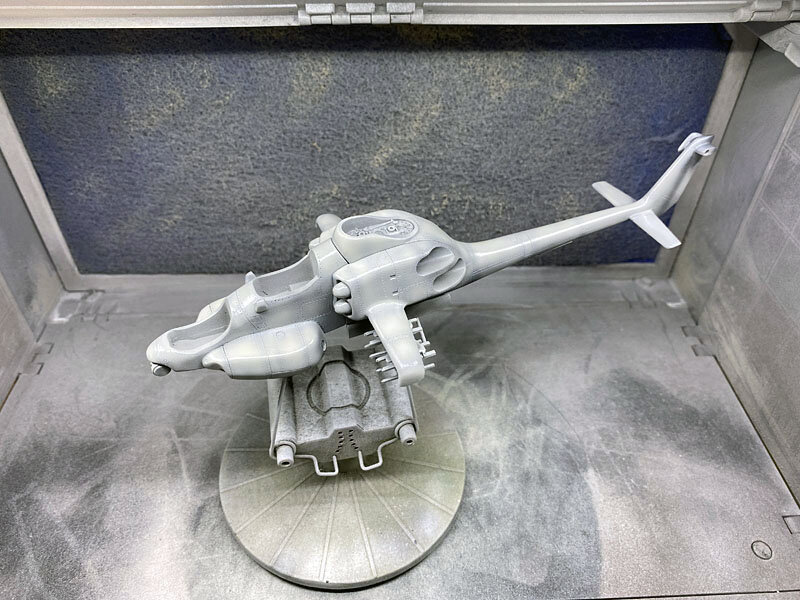
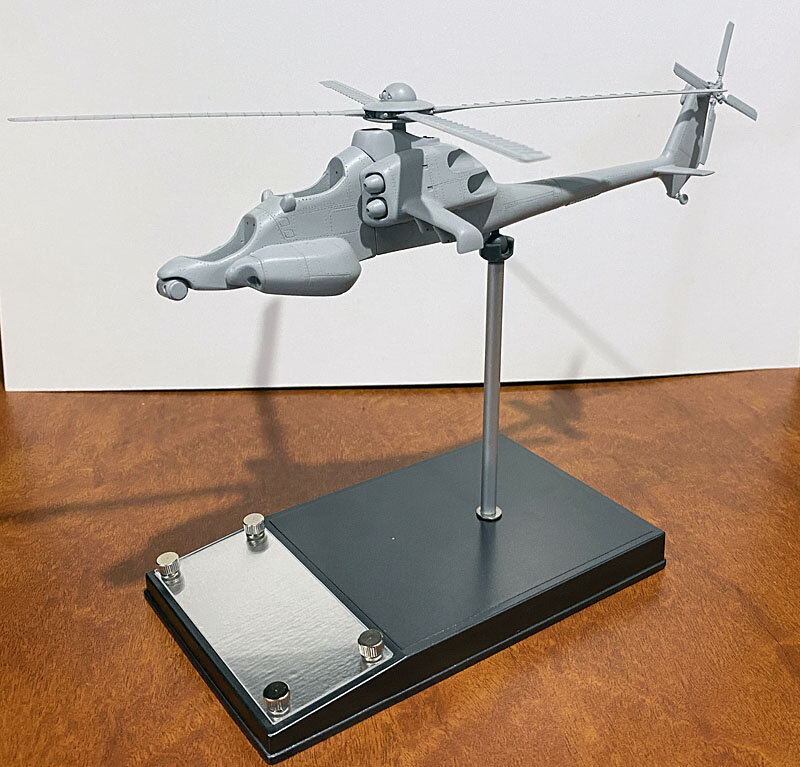
Update: Testing the custom stand the client has sent me to mount the Commanchero. This was a bit tricky because of the bomb bays being displayed opened I had little choice of places to mount the stand. Ideally in the exact center (inside the bomb bay) is the exact middle but since that is out I had two choices, immediately forward of the bomb bay or immediately aft of it. I chose aft as the weight tends to nose the model down looking more aggressive. Forward and it would want to tilt back. I may need to use super glue on the stand to set the angle as the weight of the model out strips the resistance of the ball joint on the top of the stand.
In this photo the whole model has been sprayed Tamiya Surface Primer Fine.
-
A question, what sort of weapons do people think would look good on the wing pylons? The kit ones are accurate to the line art but are all the same weapon, rocket pods. Im wanting to add some flare to it and have tried some of the Russian weapons from the Hinds. What about something like US Navy or Apache weapons? Should I stick to Hasegawa's 1/72 VF weapons for a more authentic Macross look?
-
Minor progress. Trying to shoehorn the pilots, seats and cockpit dashes was more challenging than I thought it was going to be. These are rough tests of how things will sit. I still need to sand a little here, grind a little off there, but so far they all fit.
-
First up, apologies for my rubbish photos. I'll attempt to rate each part out of 5, 1 being poor while 5 being excellent. My ratings will include things like accuracy, detail and fit. I will of course try to remain objective in my assessments. Let me know what you think.
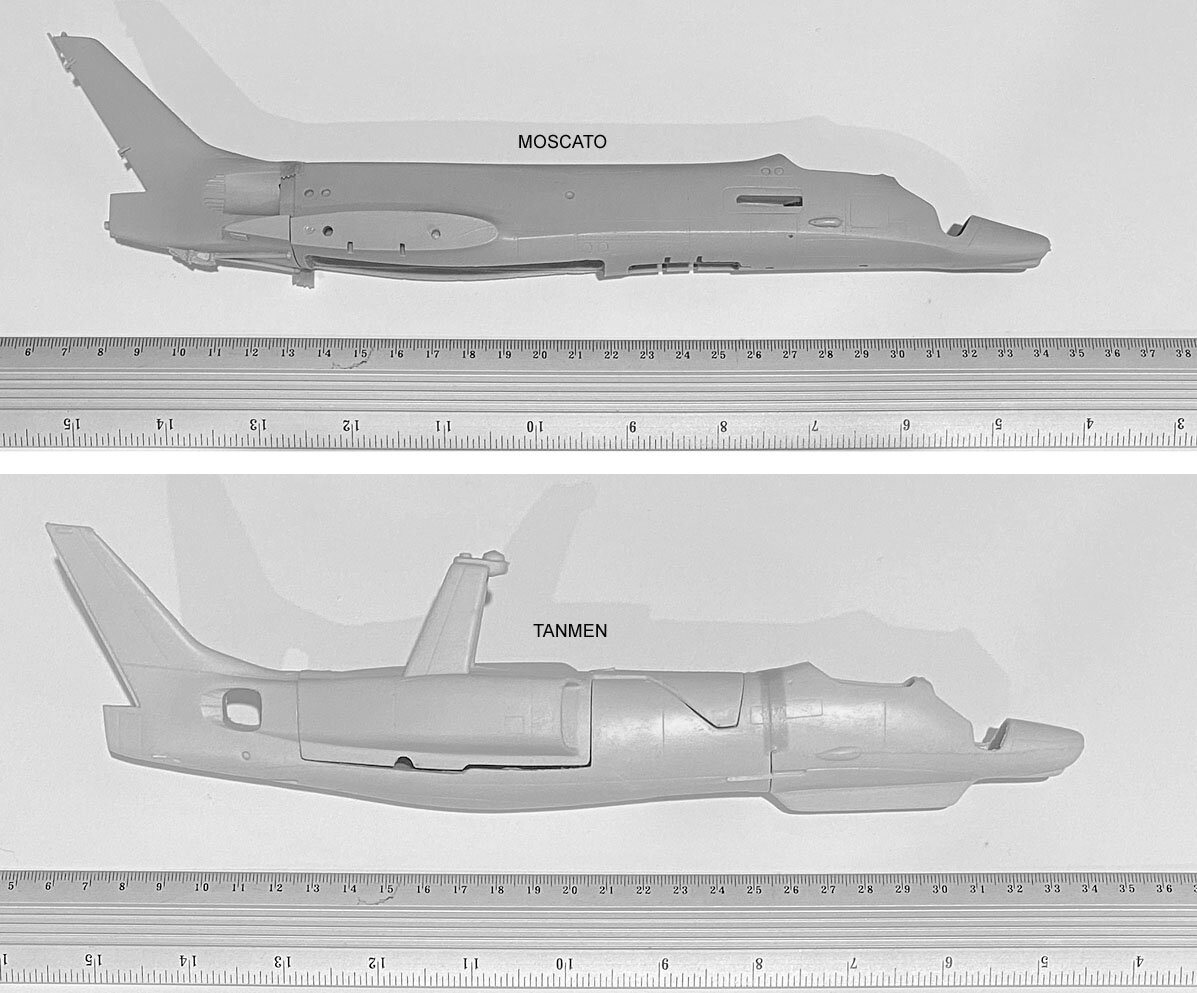
Fuselage Side View
Both kits are roughly the same length. The Moscato kit is sleeker from the side than the Tanmens, while the Tanmens has a more pronounced bulge on the belly.
The Moscato wing joins the side of the fuselage in a more traditional plastic kit style while the Tanmens wings have a rounded stub on the end of the wing that fits into the semi circular hole on the side of the fuselage. Having played with temporarily fitting the wings on both kits, the Tanmens would require more work to fit flush to the sides.
The Tanmens also has the upper part of the fuselage as a separate piece that includes the rotodome mount (missing the forward leg of the mount as I have removed it as it had cracked from its bottom mount so to avoid potentially damaging it more). Tanmens forwarded fuselage is a separate piece that is hollow and allows the cockpit 'plug' to be inserted before affixing the forward part to the main body.
The Moscato fuselage is one solid piece of resin with the tail being a separate part that plugs into the rear of the fuselage. The rotodome mount is also separate made up of two parts (not shown).The Tanmens engine intakes and engine housing are also part of the main fuselage and taper towards the rear while on the Moscato kit these parts are separate and are also of a uniform shape and length.
Other differences are:
- Tanmens doesn't include a refueling probe although the position for where it would mount is present. Moscato refueling probe is a separate part that will need to be glued into its mounting slot.
- The long, chin mounted side looking sensor is molded on the Tanmens while on the Moscato it is a separate part.
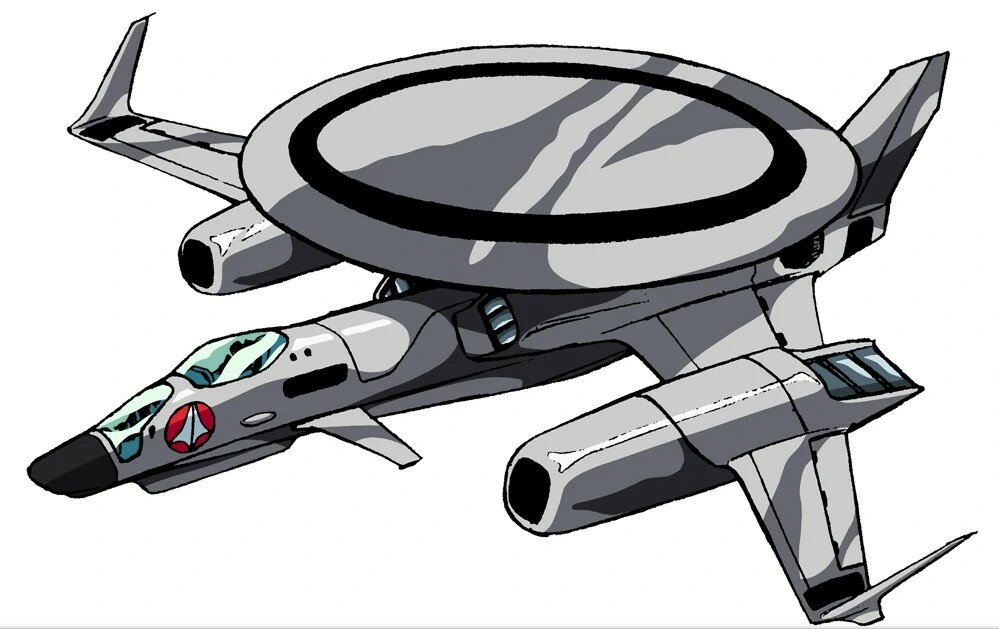
- The Tanmens has the join on the top of the fuselage behind the rear cockpit that looks like a large hatch as per the line art. Moscato kit is missing this detail. See the line art image below for reference.
- Fuselage exhaust ports differ slightly.
- The arrestor hook on the Moscato kit is molded on the rear bottom of the tail section. Tanmens is a separate part that neatly folds into a recess and is much longer than the Moscato one.
- The Moscato kit also has a nice crease that runs the length of the sides to the wing root. The Tanmens fuselage is an overall more rounded shape.
- Moscato cockpit is molded as two hollows that accept the separate cockpit instruments and seats. Cockpits of both kits seem to be very close in size and shape.
Ratings
- Moscato: 5 - I like the fact John did the crease along the sides. This is shown on the line art. Admittedly it could be interpreted to be a simple line on the fuselage side but I reckon he nailed it. John also added a lot of panel line detail, some of which you can see below.
- Tanmen: 4 - I like the fact they captured the hatch behind the second cockpit (its on the line art) and I think the engine housings are probably closer to the line art design. They loose a point on making the rotodome part of the fuselage as there is a nasty mold seam under the mount that will be a bitch to fix. (cant be seen in the photo below). Tanmen also molded the forward canards on the body but these have broken off the kit and will need to be replaced.
-
34 minutes ago, Thom said:
You got Slim and Chunky there!
Both look good though. Maybe do one as an 'A' model or another preceding the D variant? I never finished mine (yet) but I was doing it as a non-canon 'E' model with slight alterations.
Yeah I think ultimately the client wants both built. The Tanmen will be the first one off the rank but its interesting to compare them.
-
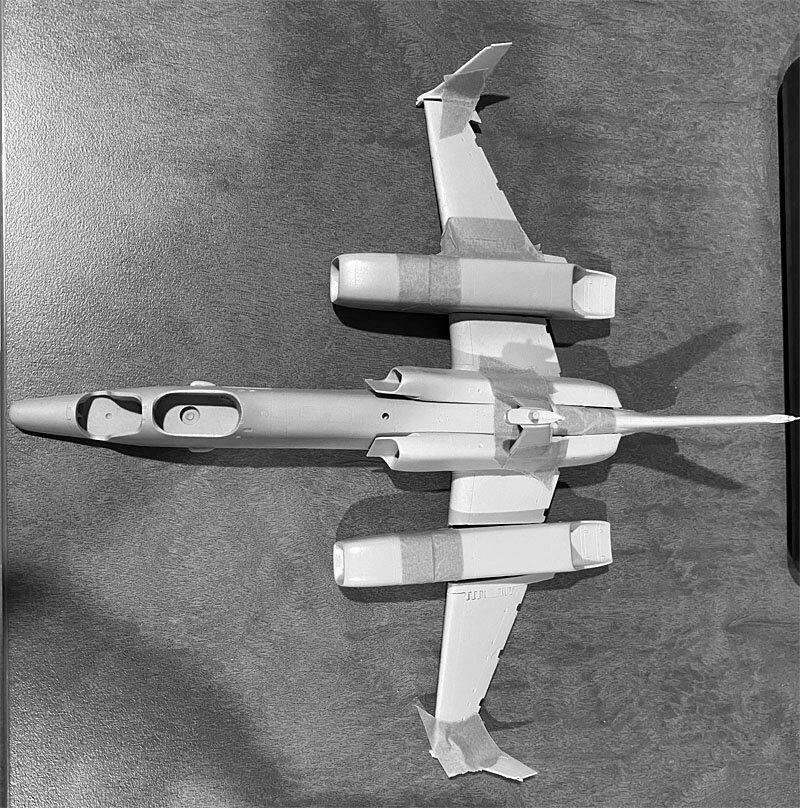
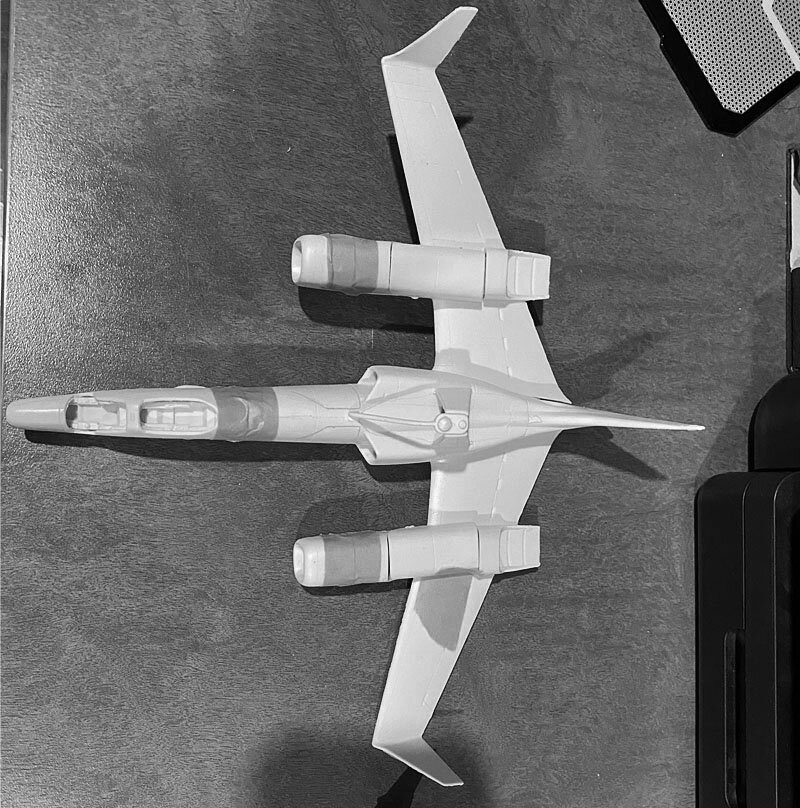
I haven't had much of a chance to sit down and do a parts comparison and breakdown on both kits as promised but its coming.
What I did get a chance to do is tape together quickly the basic parts of both kits to get an idea on their relative size to each other. They are very close in length to each other but where they differ is the Tenmans is slightly wider in the wings with a more pronounced outer wing sweep and the obvious taper on the fuselage engine housings as they go towards the back. The Tenman kit is the second image.
-
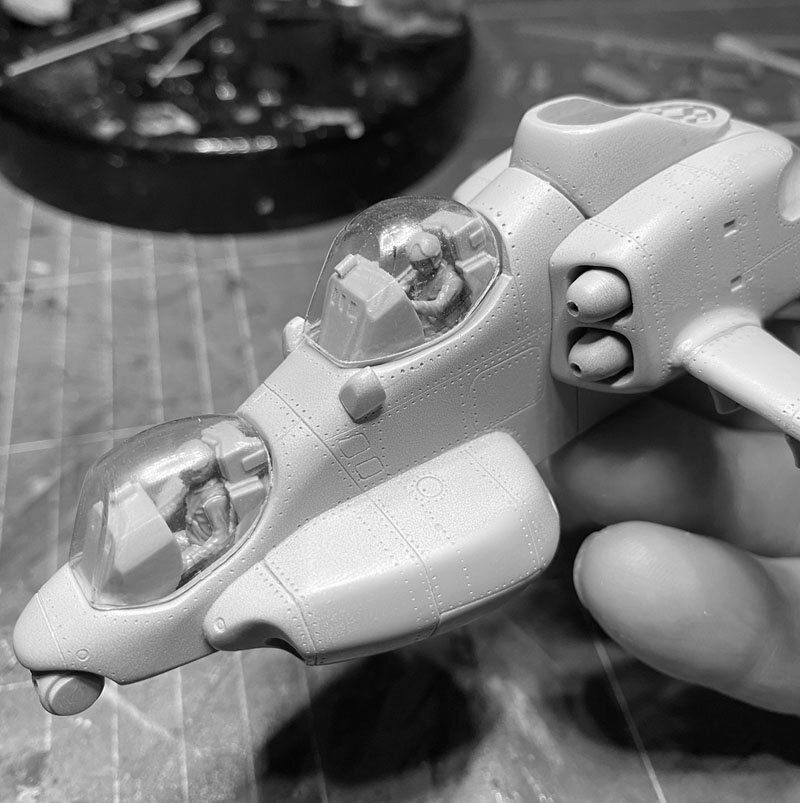
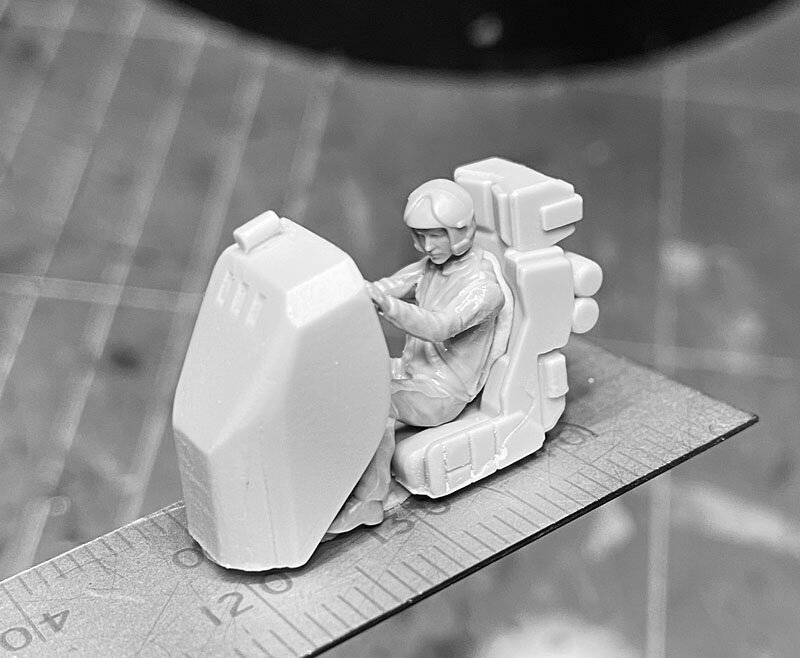
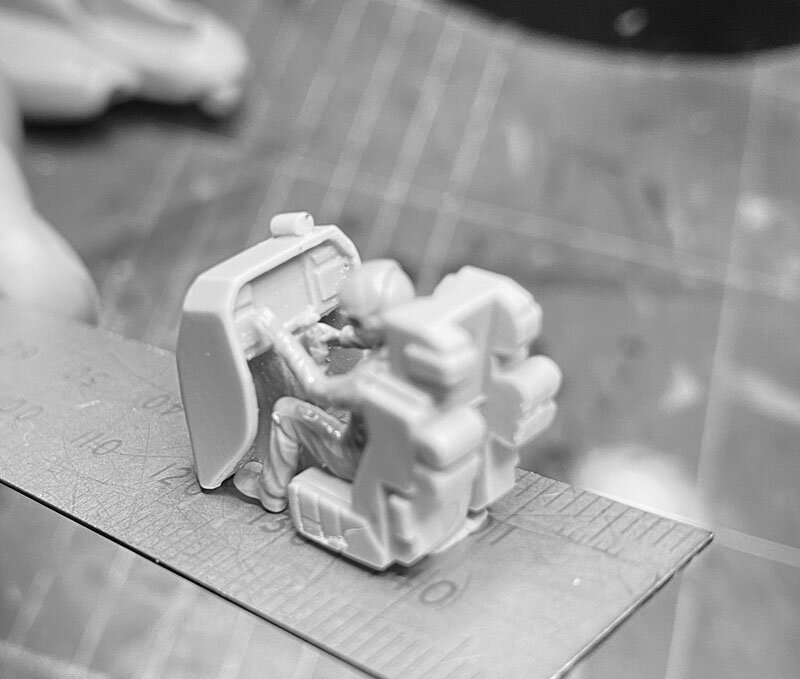
The Zvedza Hind came today and the pilots didn't disappoint. The actual kit itself is ok, for a 1/72 aircraft kit, but the pilots are something else. Not the normal blobs you normally get in most 1/72 kits, the pilots actually have really defined faces and hands, something sorely missing from the Hasegawa 1/72 kits.
The photos below are of the rear pilot. I've used bluetack to help position the pilot and get the arms into the pose I wanted. Much easier than putting it in the cockpit and trying to glue things. Check out the face on the pilot. HE. HAS. A. FACE. In 1/72!
-
7 hours ago, Thom said:
Awesoime! Will be nice seeing the comparison and going together.
Although a correction, I think it should be 'Lecon Prane.'
I didnt want to go all the way down that path!
-
In between waiting for some parts for the Commanchero, Ive decided to start and review the two Cats Eye kits the client has sent me to evaluate and build. One is the John Moscato kit and the other is from (in yellow resin) Tanmen.
I will do a proper parts breakdown comparison but the most obvious difference straightaway is the size of the rotodomes.
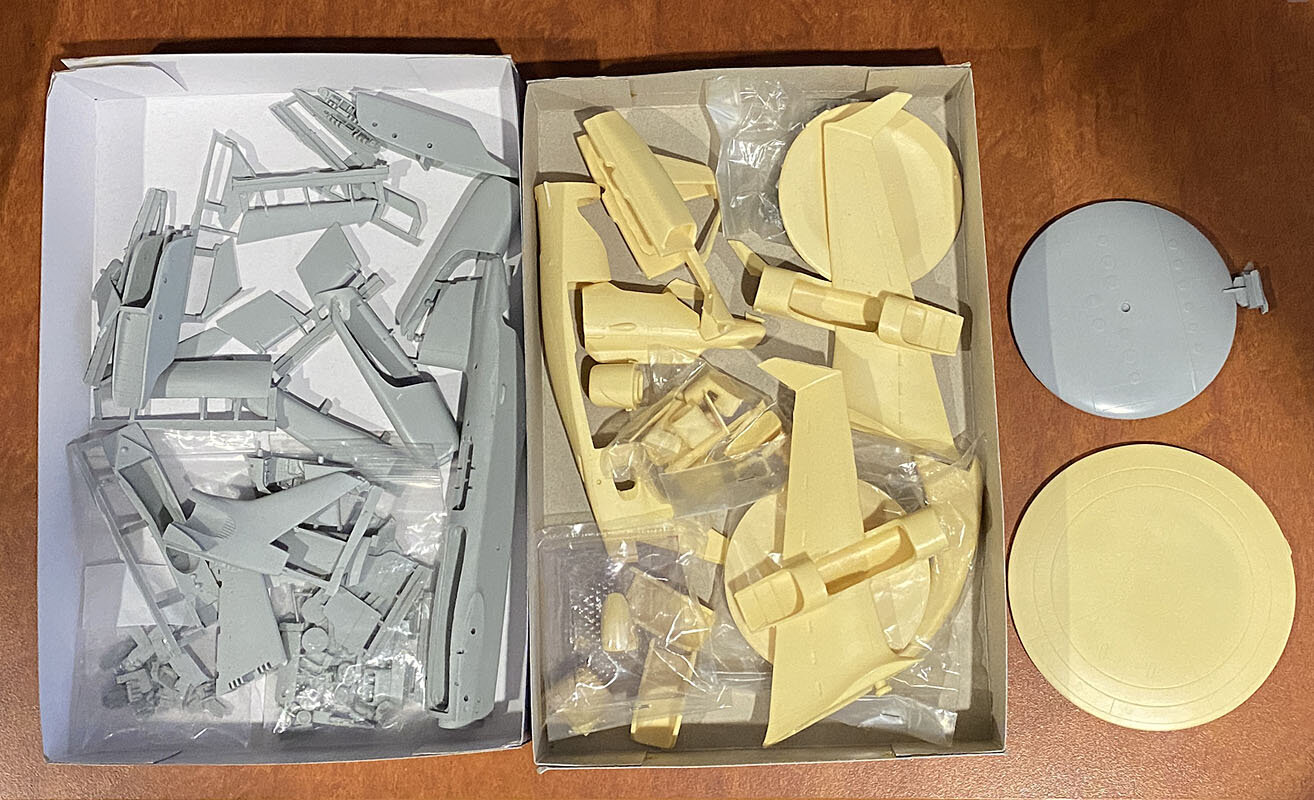
-
Looks bloody brilliant. Well done.
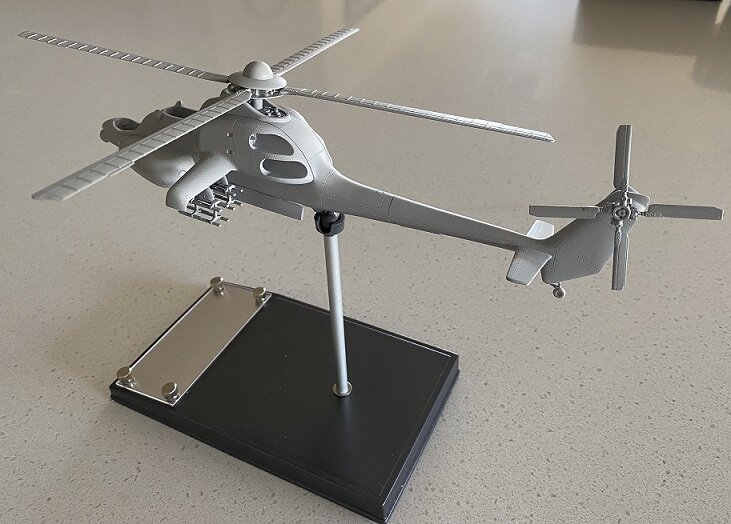
Moscato 1/72 XV Commanchero Gunship
in The Workshop!
Posted
UPDATE - It is finished and I'm taking photos of it now before I pack it up and send off to its new home. I'll post them here and on the Aussie Macross FB page.