
Salamander
-
Posts
310 -
Joined
-
Last visited
Content Type
Profiles
Forums
Events
Gallery
Posts posted by Salamander
-
-
On 09/08/2017 at 6:32 AM, Gabe Q said:
I think I have over 300. I've built like 10. Maybe if I live to 150 years old I'll build them all.
I know that feeling, except that (all subjects together) my tally currently stands at 623
 , plus about 200 built kits in a large display case.
For Macross, I have 19 kits I still have to build. Two 1/72 scale vinyl kits by Wave (VF-17 and Blazer Valk), two 1/72 Hasegawa fighter kits (VF-0D and VF-11B), four 1/72 Club-M/Yellow Submarine kits (VE-1, VF-4G, YF-21 and YF-19), Yellow Submarine 1/4000 SDF-1, and ten 1/100 Wave Battroid kits (Elgerzorene, Sound Force VF-17, VF-11 MAXL, VF-11D Jamming Birds, VF-17S/D with fast packs, VF-22S, VF-11B, YF-19, YF-21 (to be converted into Milia VF-22), YF-21 with fast packs). Unfortunately they're not really at the top of my stack of kits right now, but I think I might have taken pictures in the past. I'll try to find them.
-
3 hours ago, MechTech said:
I painted the 1/12 scale Misa figure for my daughter and Misa looked more like Little Orphan Annie eyes wise! I lost the decal sheet somehow. - MT
What I find hardest is finding proper brushes for painting eyes where I live. The ones I can find are either too soft or too hard, so my eyes end up looking way less sharp than what I can see Japanese modellers do. Finding brushes small enough for little details is pretty hard in general, even at scale model stores.
For the eyes themselves, I just follow an eye painting tutorial for the order of colors and details, and try to match what is shown in the kit instructions or on the box.
-
48 minutes ago, Kelsain said:
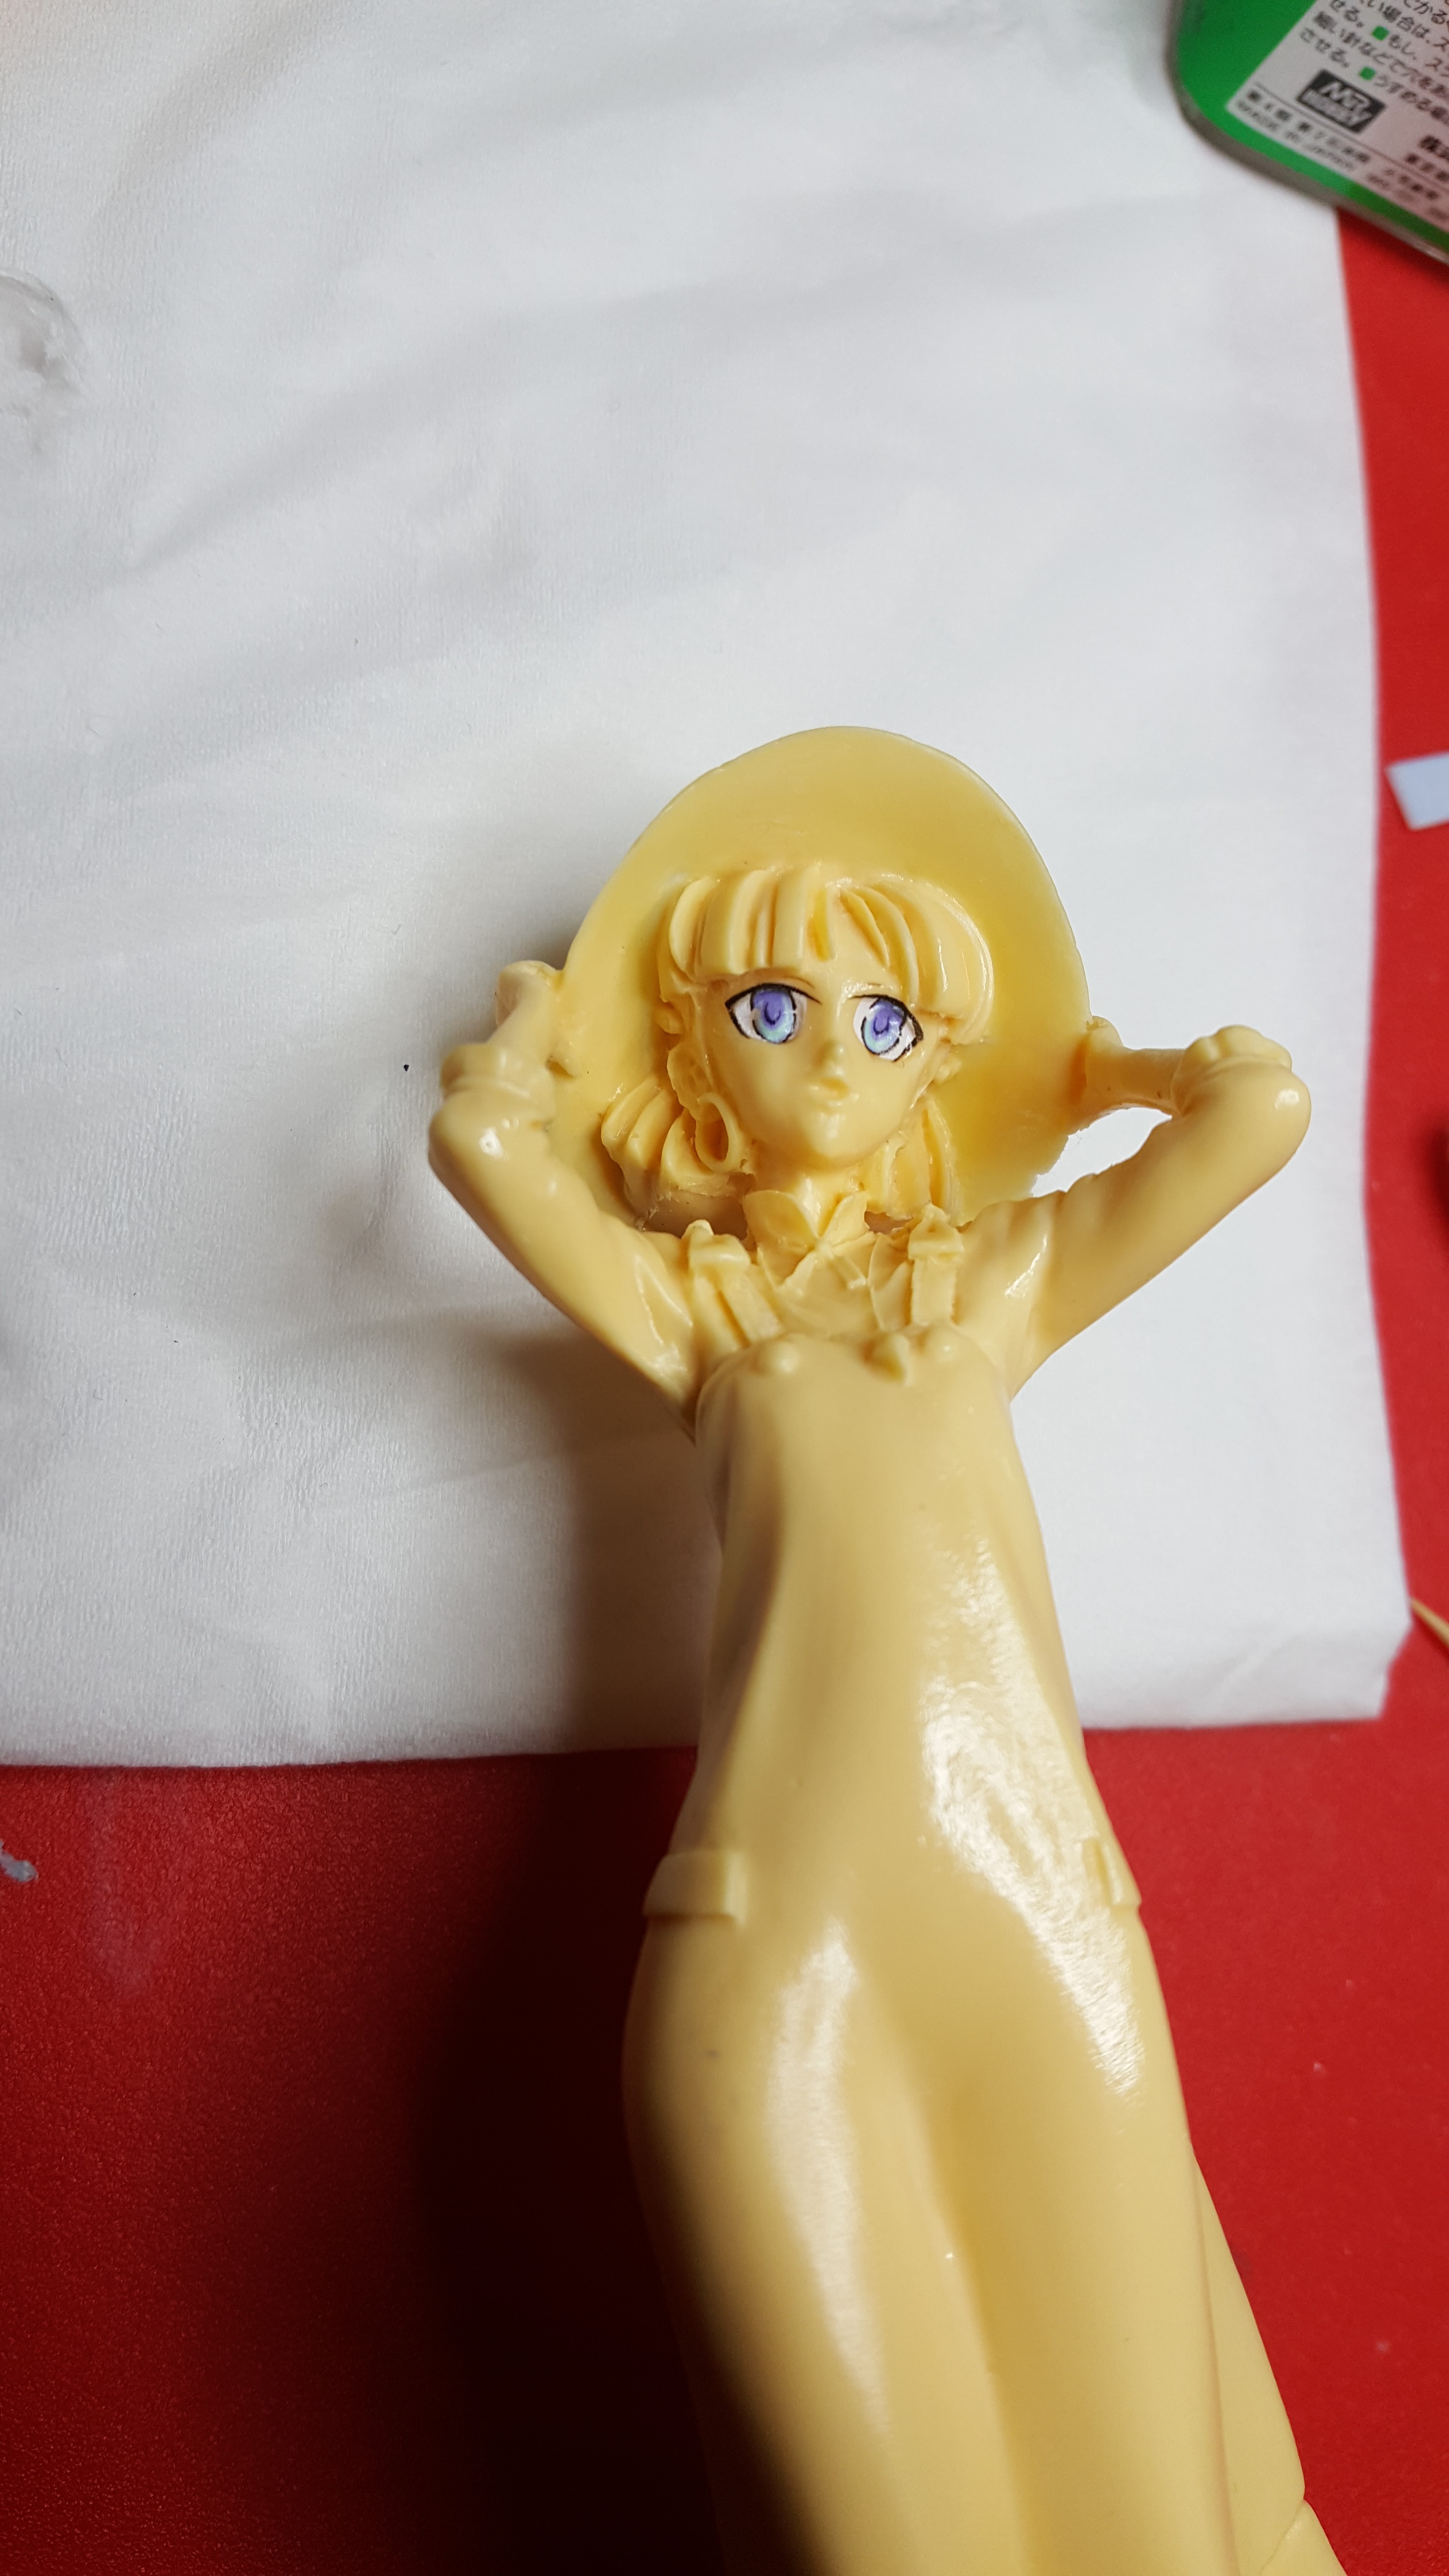
Wow, great eyes on Nausicaa! I have the 1/20 kit with Kai. Got pretty well along on him, but was discouraged by the face on the figure. Are those decals you're using?
Yeah, the ones from the kit. There's no way I'm going to paint anime eyes on a 1/20 scale figure (1/12 scale is the smallest I've gone for fully detailed eyes). The faces of the figures are possibly the worst thing of these kits, they make Nausicaa look about twice to thrice as old as she is supposed to be (although her bossom on this kit is also not that of a young girl
 ).
).
-
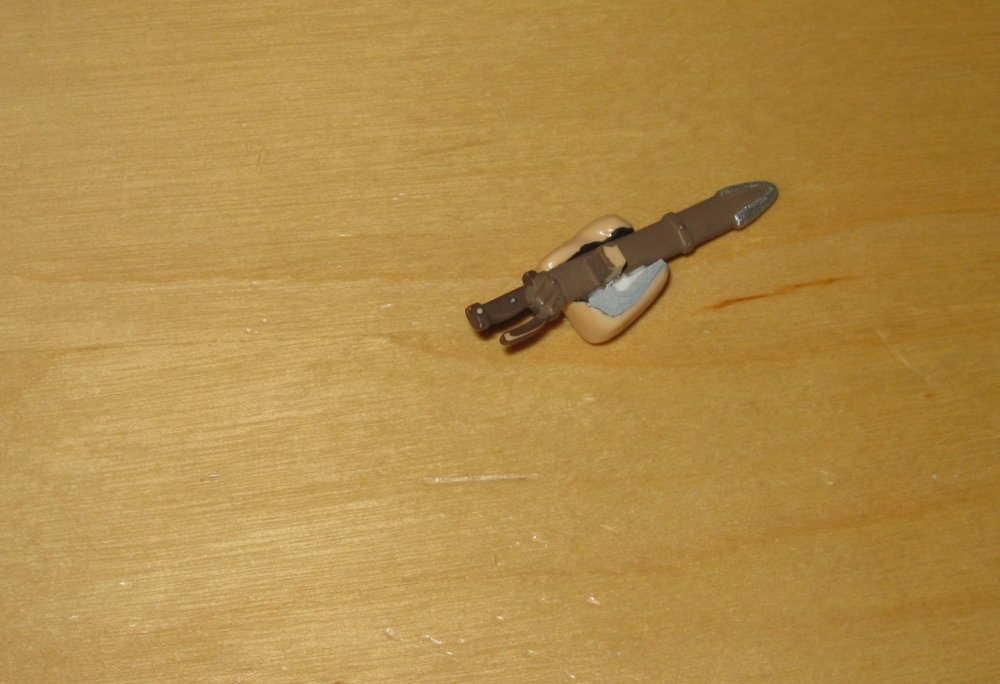
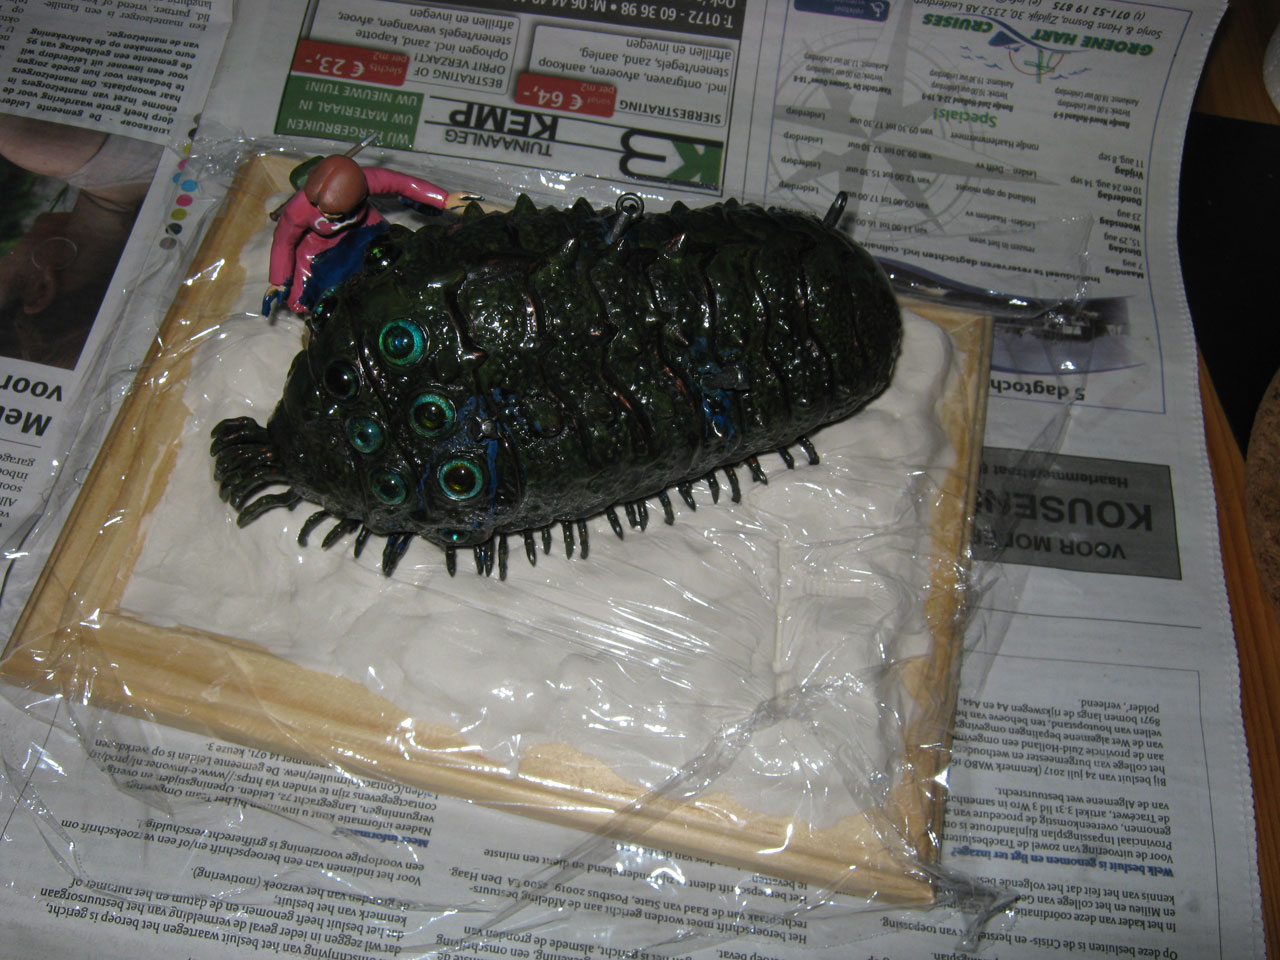
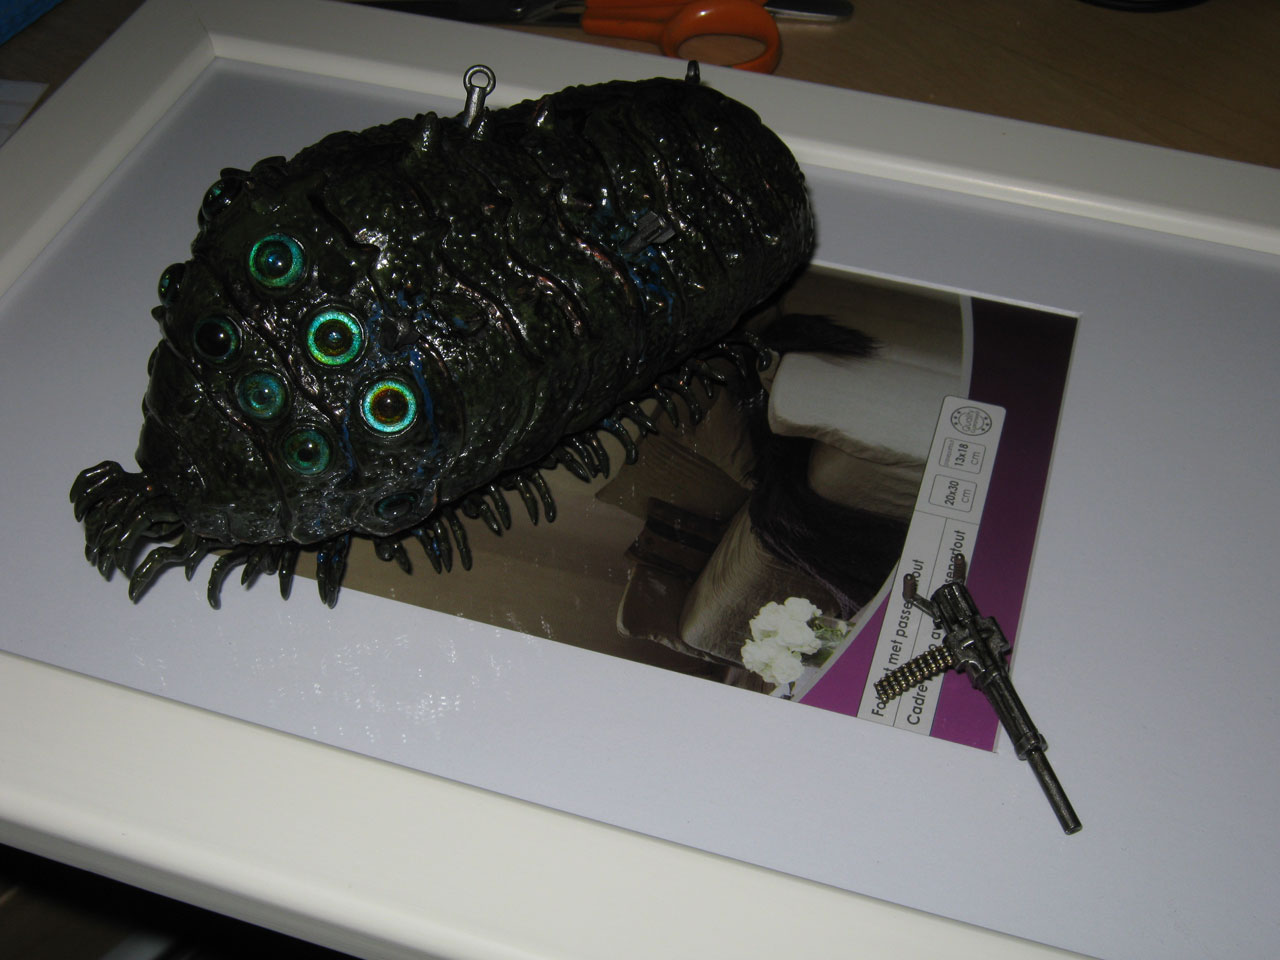
Going from faceless protagonist to Nausicaa
 :
:

And a better sized base:
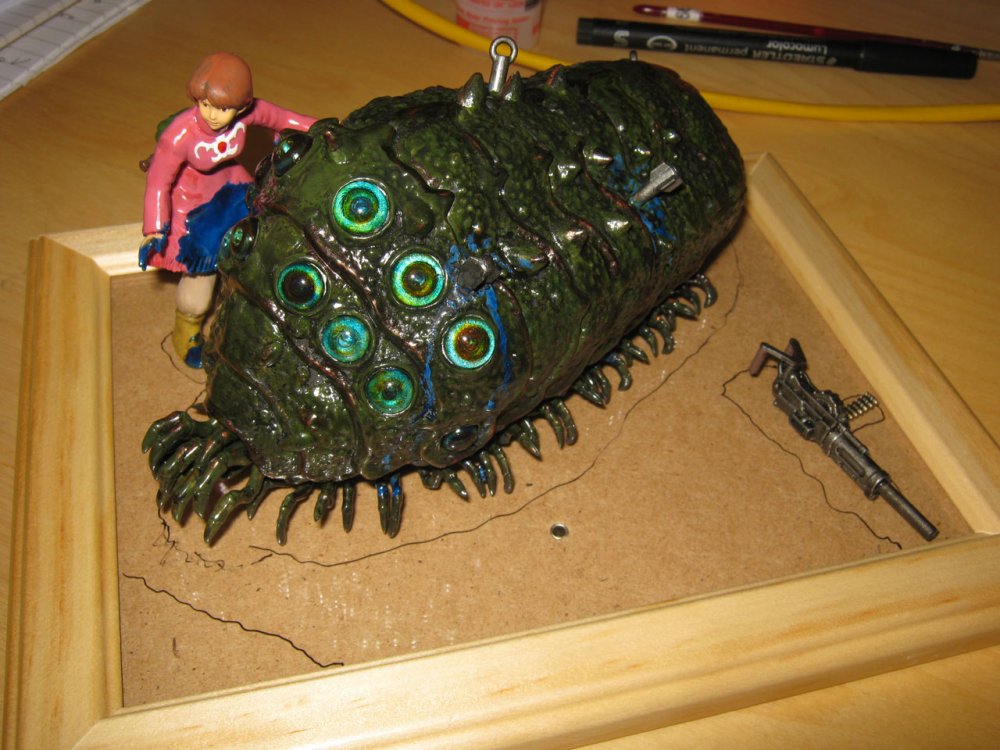
Gun on the right for composition's sake, even though it's shown on the left in the manga scene I will try to replicate.
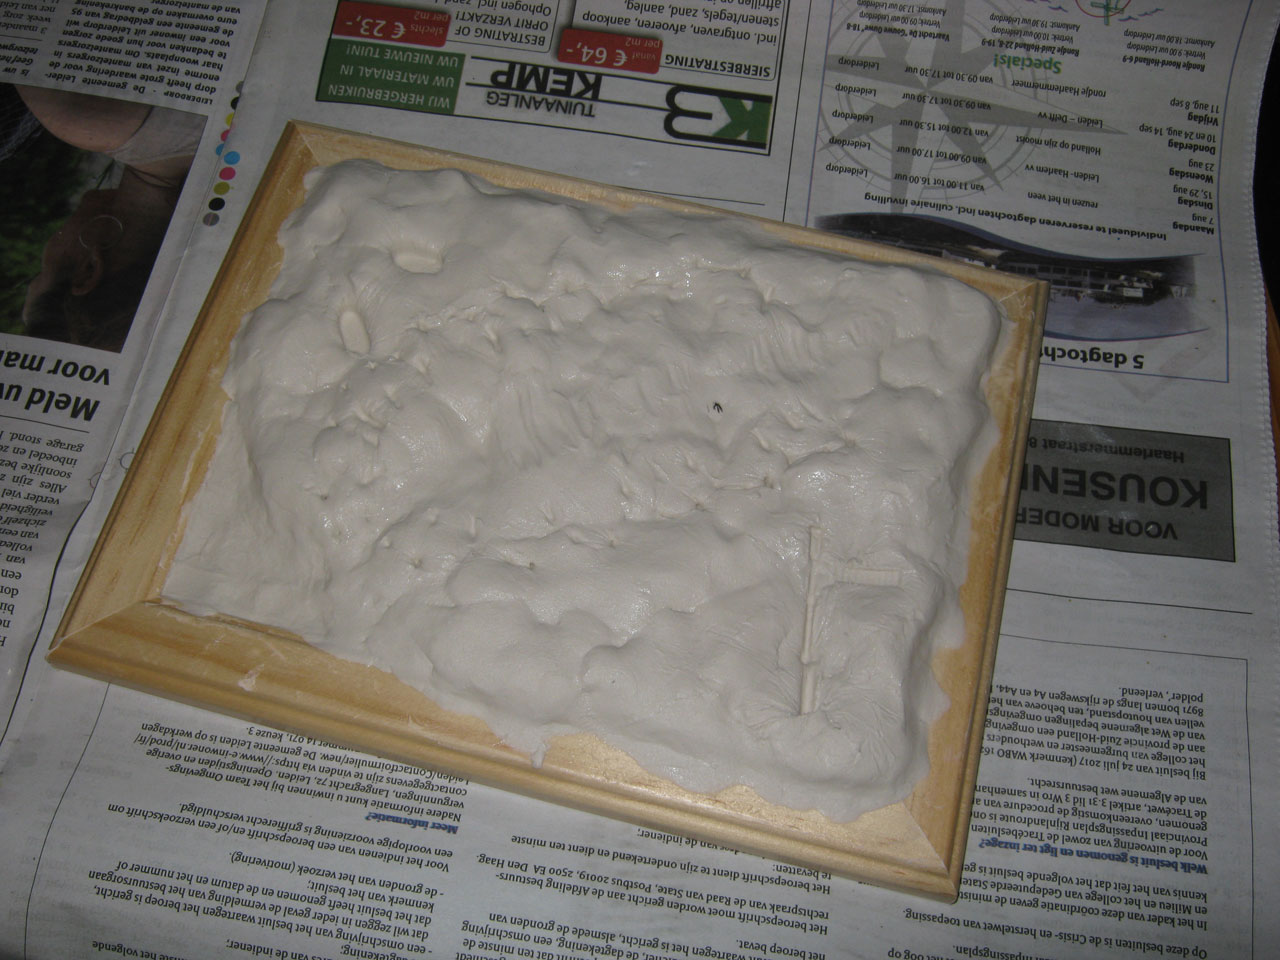
Some time back I had picked up some Padico Artista Formo water-based stone clay from a HLJ sale, which I will use to build up the base. It's easy to work with using hands and a small dish of water (to smoothe out edges). Then it's time for the cling-film trick:

Apply cling-film to (moisterized) clay, press items you want to mount on top of clay into clay. This will leave the imprints in the wet clay, while keeping your items clean. Remove cling-film afterwards:
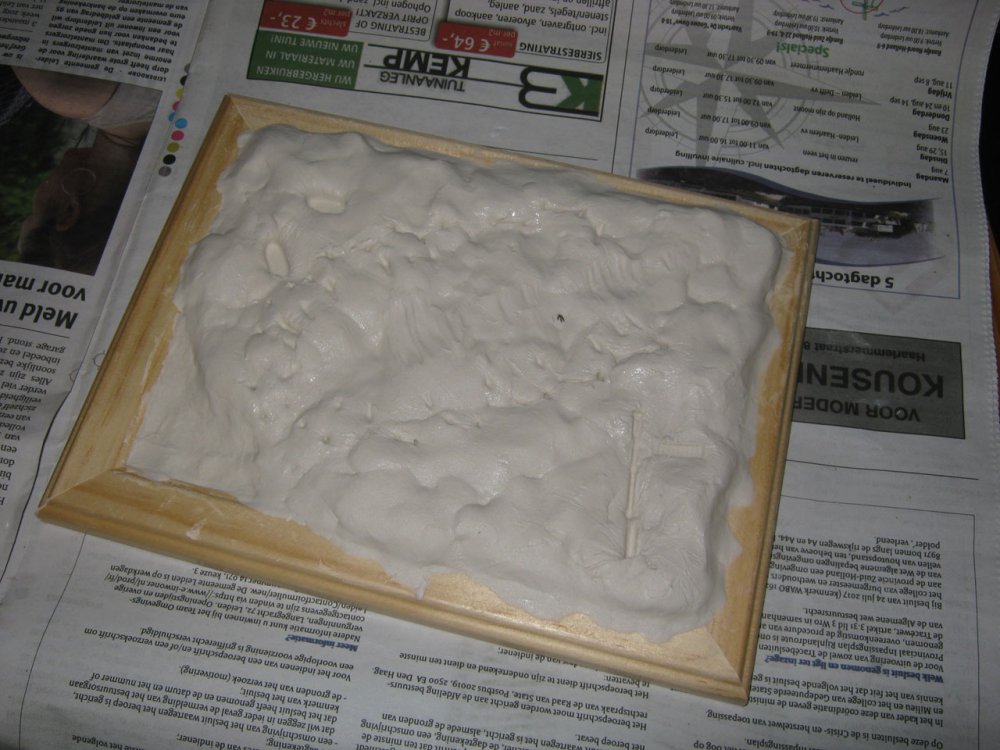
Then it's simply a matter of letting the clay dry for some time.
-
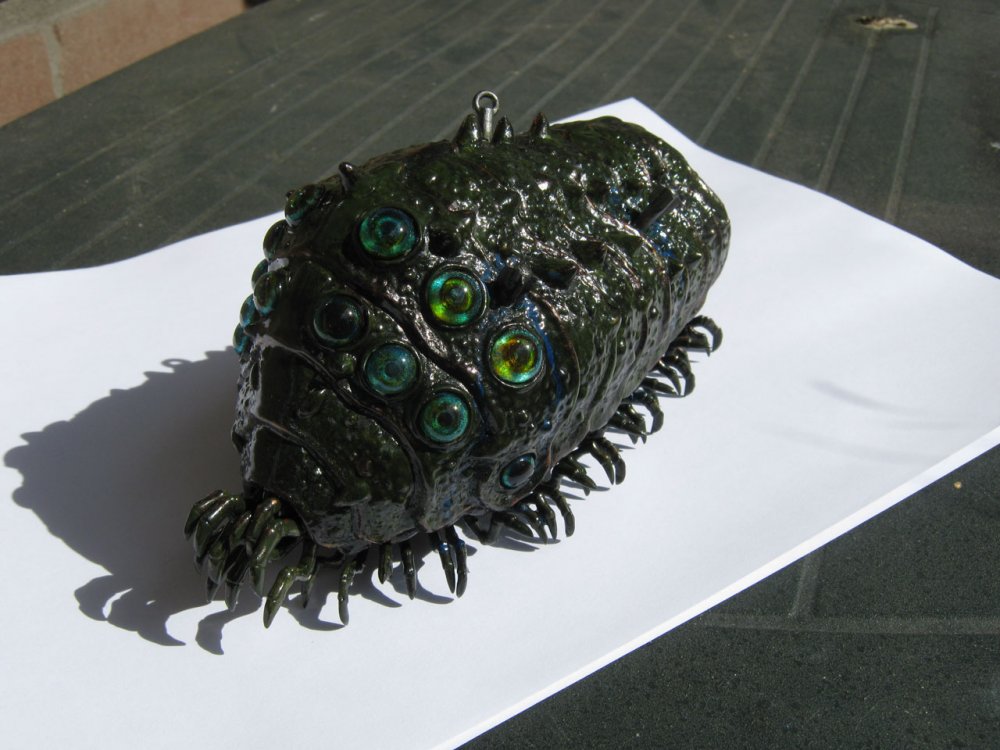
20 hours ago, electric indigo said:
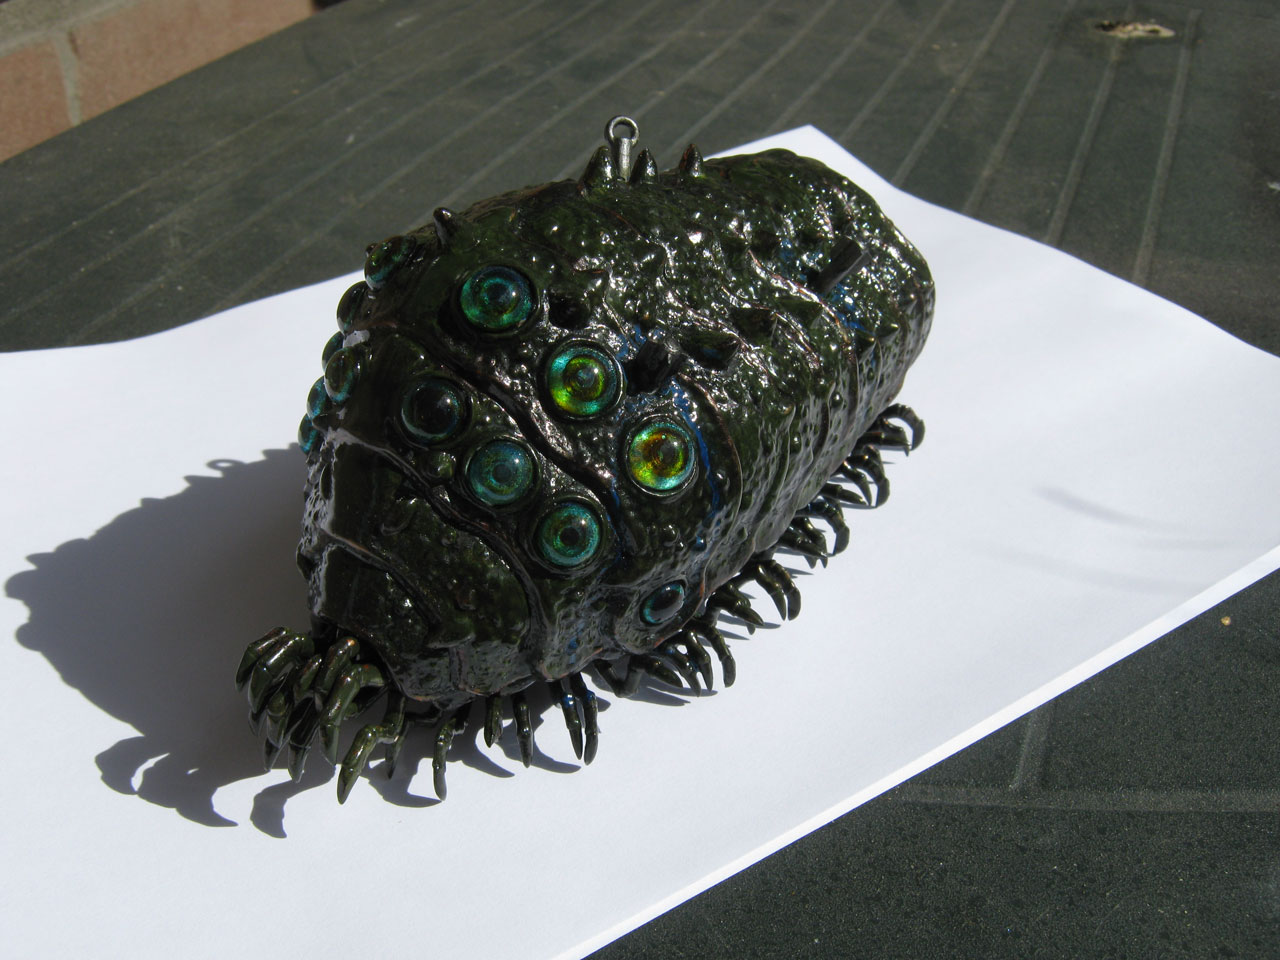
Can you take a picture of the Ohm without flash? I'm curious how the colors look in daylight.
Here you go, in some sunlight on my balcony:
Nausicaa's dress is being toned down with some semi-gloss clear, and I got myself started on another Nausicaa kit:
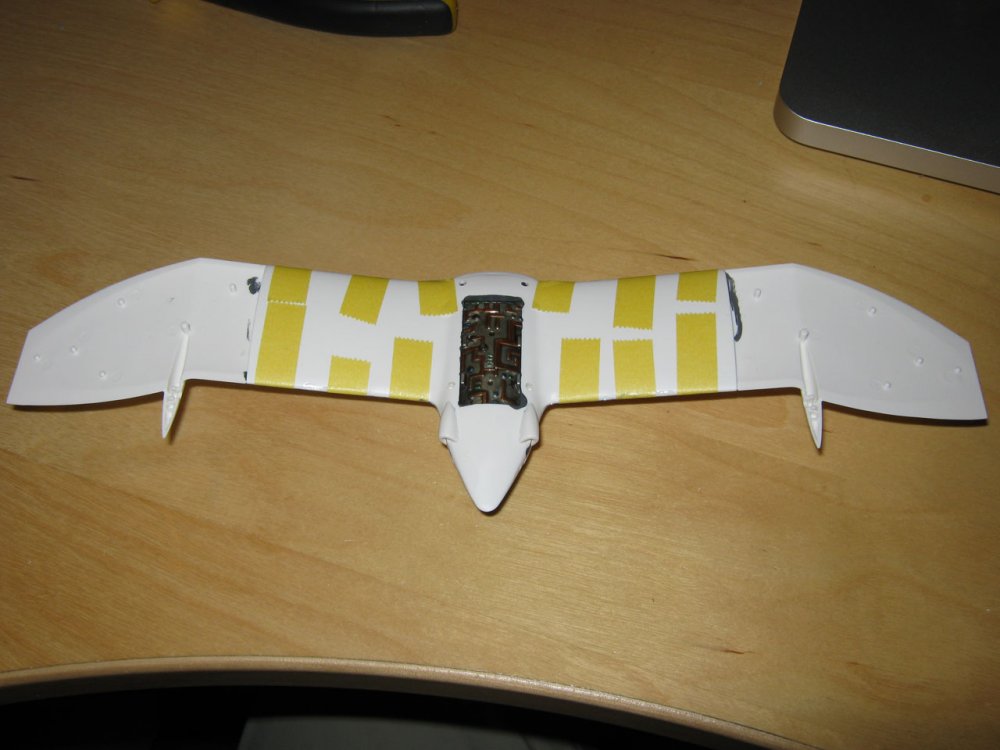
The engine and lower half of the wings went together just fine even with paint (figured the engine detail could look like an old circuit board ^_^), but the upper half of the wings simply don't want to snap in place nicely, which explains the tape to hold it together as the glue dries. Besides the obvious seams there are some dimples that will need filling.
-
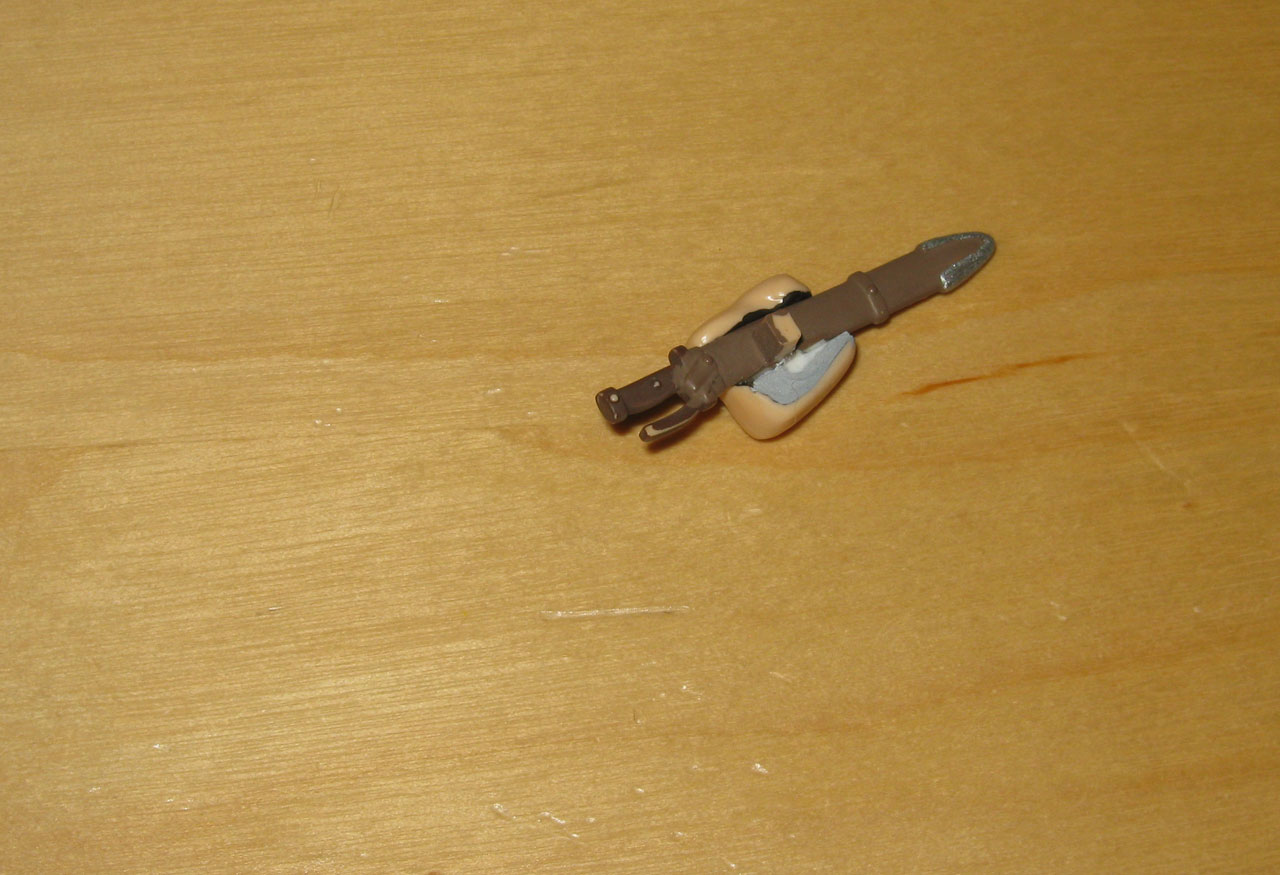
Th only thing I really modded on the Nausicaa with Ohm kit:
Filled the bottom part of Nausicaa's bag with plastic card and putty because otherwise it's possible to look into the bag from certain angles.
Testing a display base idea:
A bit large, as with Nausicaa herself mostly painted it would only take up half of the space available:
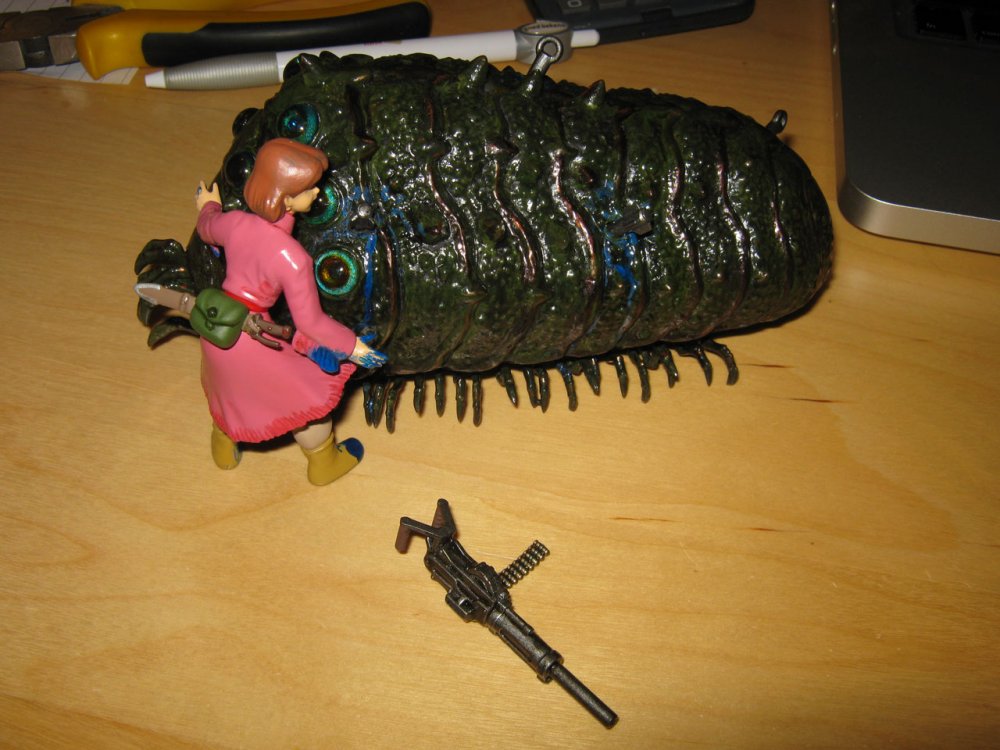
I really need to tone down the Ohmu blood on her dress and hands...
-
What scale is that? 1/4?

-
On 01/06/2017 at 3:41 PM, ivorysniper said:
Kei Nagase livery looks awesome !. Hopefully Hase reissues this one at some point. I missed the opportunity when it came out, but I'm not willing to pay for an overpriced kit.
Unfortunately Hasegawa usually doesn't reissue their older "Limited Edition" kits that fall under third party license schemes ("Special Edition" kits on the other hand do get reissued). Creative Works kits seem to be different, though...
One I know of is their Virtual-On Shadow Temjin kit, which got issued as a limited edition first, and then was reissued years later due to popular demand as a less-limited release. That one made me rage, because I had just paid a lot of money for the original limited kit when they announced the reissue...which also had no differences with the original release.
-
15 hours ago, captain america said:
-Sorry, that's incorrect. The Gakken kit was marketed and sold under Gakken packaging, is non-transformable and has different proportions (and completely different parts breakdown) to Imai's kit; they are as different as different can be.
-Also incorrect: the floppy arm mess of the "1/55" Toynami stems from the fact that they "borrowed" the arm design of the old IMAI kit. The kits were absolutely God-awful for this because the old polycaps/joints were crap. Also, the old IMAI kit suffered from stubby leg syndrome, which was corrected by Toynami/Aoshima when they adopted the design to make their toy. In fact, ALL of the modern Legioss toys beat the pants off the old IMAI kit for proportions AND durability, regardless of their respective QC issues.
The old 1/48 IMAI kit is still available relatively cheap, but unless you're going to glue all the joints fixed, it will be a posing nightmare. To make it even remotely posable you would have to overhaul all the joints and IMHO, is not worth the time and effort. Take it from the guy that built a half-dozen of these back in the day.
Ah, didn't know that
. Although I do wonder whether the box-art/design was done by the same people who did the box art/designs for Imai, because that's one of the reasons I assumed it was one of their kits sold under a different brand name (see mecha kits by LS).
With "toys" I meant compared to the old Gakken toys, especially the 1/35, which frankly is misproportioned in almost a comical way.
Can't say I've had problems with floppy joints on any of my Imai mecha kits (and I've built quite a few of them), but then I treat them as models, not action figures. If you want a "floppy mess", try building one of Fujimi's Yuusha kits (f'cking nightmare, I've build their Great Mightgaine and it was an absolute disaster). I'll take one of Imai's kits over that any day...
12 hours ago, dkev said:Hey Salamander
Now that looks really NICE!!!!!!! I see that you got rid of that that 'boxy" missile launcher which IMHO looked out of place. By the way, if you can remember how did you get such a great "red" color scheme?? Now I built this kit back in the 80s so I was probably using a brush to paint it. Hopefully with the equipment I have no it will look a bit better.
dkev
It's just hand-painted Tamiya gloss red and gloss white, both not thinned enough. The picture makes it look way better than it is.
-
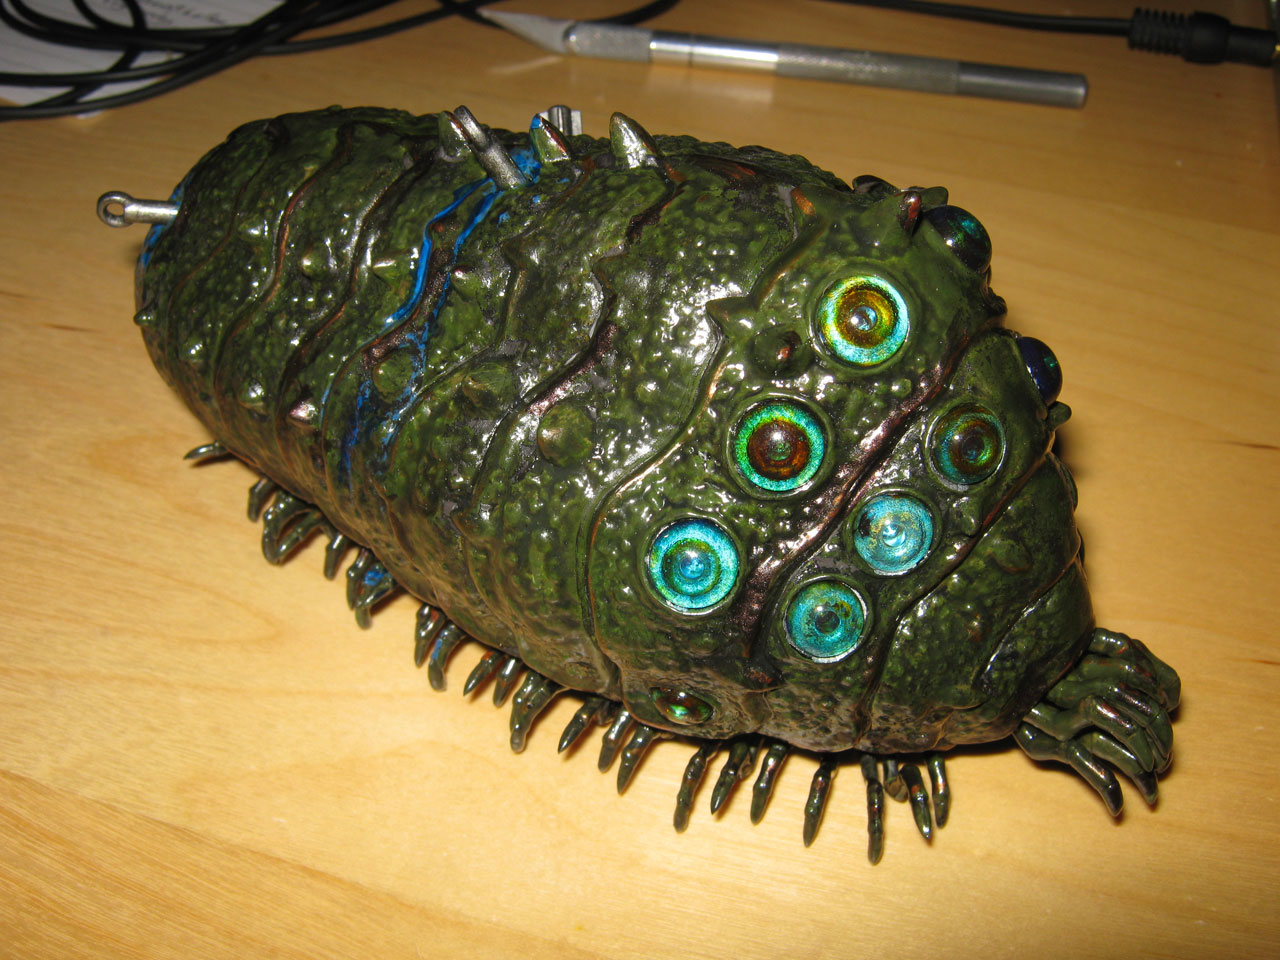
Ohm now with metallic highlights:

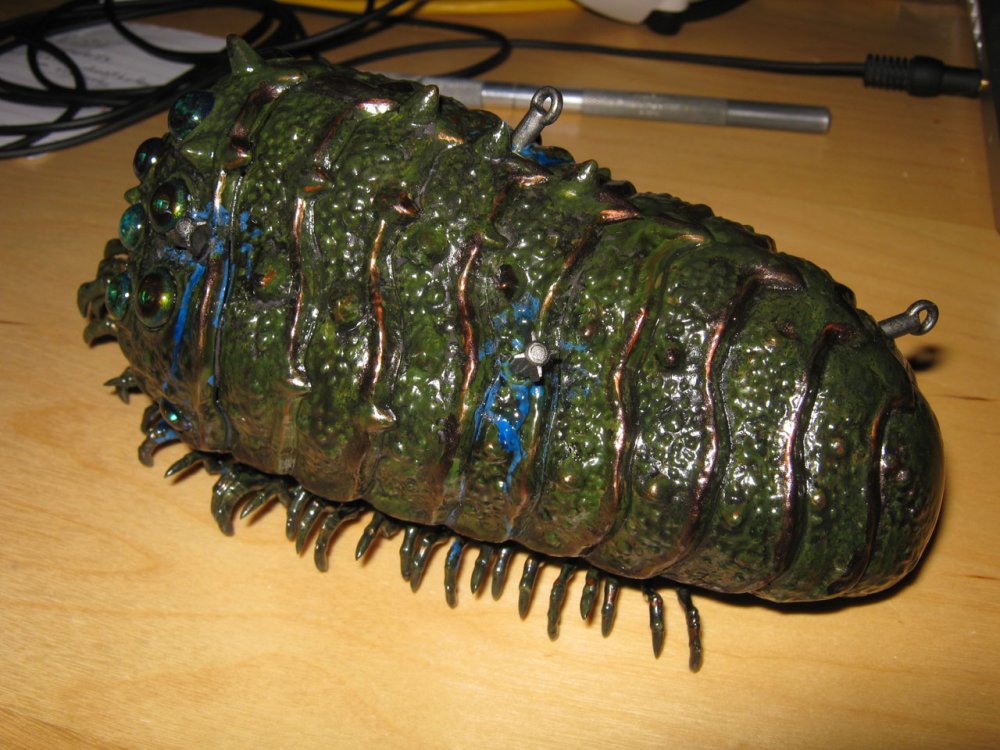

I let myself be inspired by various moths we have around here, which when you touch them leave behind a goldish-brown dust. Highlighted all the ridges and spikes with Tamiya copper and then toned it down with a thinned layer of Tamiya bronze. Depending on how much thinned down bronze was applied to the copper, more or less of the copper shines through (especially with my camera's flash).
Onto Nausicaa!
-
1 hour ago, dkev said:
So even though the box says GAKKEN on it it was "actually" made by Imai??? OooooooooooKay!!! You know I would go with the wave kit but then I would not be able to "pose" or "diorama" the kit to scale with the 1/48 Pinky Space Crab resin kit that I have. Now if there is a 1/72 scale space crab out there somewhere WHERE CAN I GET ONE??????
So I'm back to essentially square one; buy the Gakken (or whoever made the thing) 1/48 kit or just get down to the stash and pull the Monogram reboxed and rebranded Leader One (Legioss)!!!
Find a reissue of the kit by Imai. They've reissued it several times, the last of which was in the very late 1990s/early 2000s (after that they went bankrupt).
Pictures of mine in robot mode can be found here: http://www.silhouetteformula.net/models/mecha/mospeada/biglegioss.htm It's been about 15 years since I built that one...
-
The Mospeada kits were never made by Gakken, but by model company Imai.
Generally speaking, their single-mode 1/15 Ride Armours and 1/72 Legiosses are better proportioned and easier to build that their transformable 1/12 Ride Armours and 1/48 Legiosses.
The transformable Ride armours aren't too bad proportion-wise, but it's pretty much impossible to transform them without paint scraping (also, very fragile). The 1/48 Legioss has compromises proportion-wise (but still better than the toys), and is fairly easy to transform (except paint scraping). IIRC, it has metal retractable landing gear.
If you want detail, go with the non-transformable kits. If you have the money, go with Wave's Legioss kit for more detail.
-
On 15/05/2017 at 7:10 PM, no3Ljm said:
I don't think it will stand properly in Gerwalk mode just basing it the way the legs and feet are layout. It's fixed-pose so you will end up tipping the nosecone too just to make it stand ala-tripod.
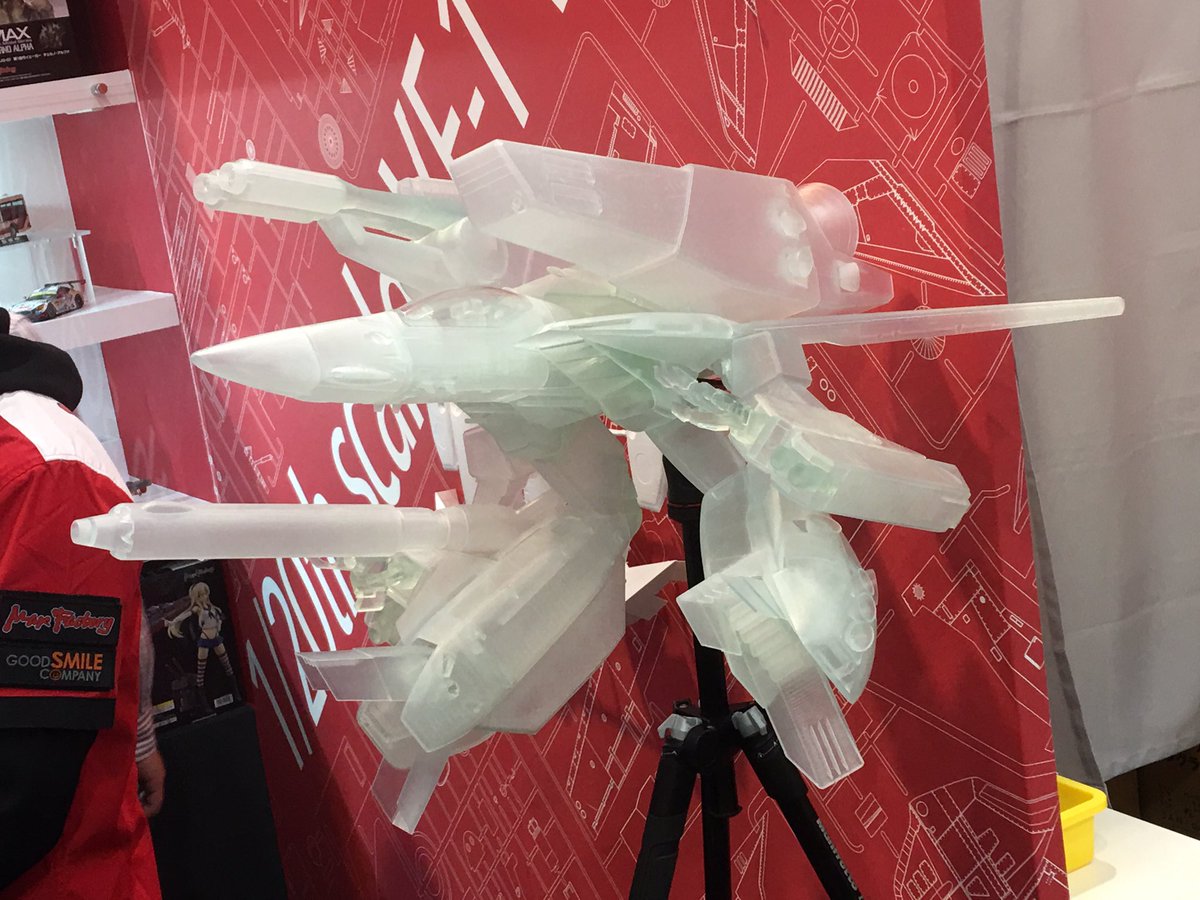
It's difficult to see, but it seems the feet have a single joint joining them to the legs. So perhaps it can stand with the feet folded back.
-
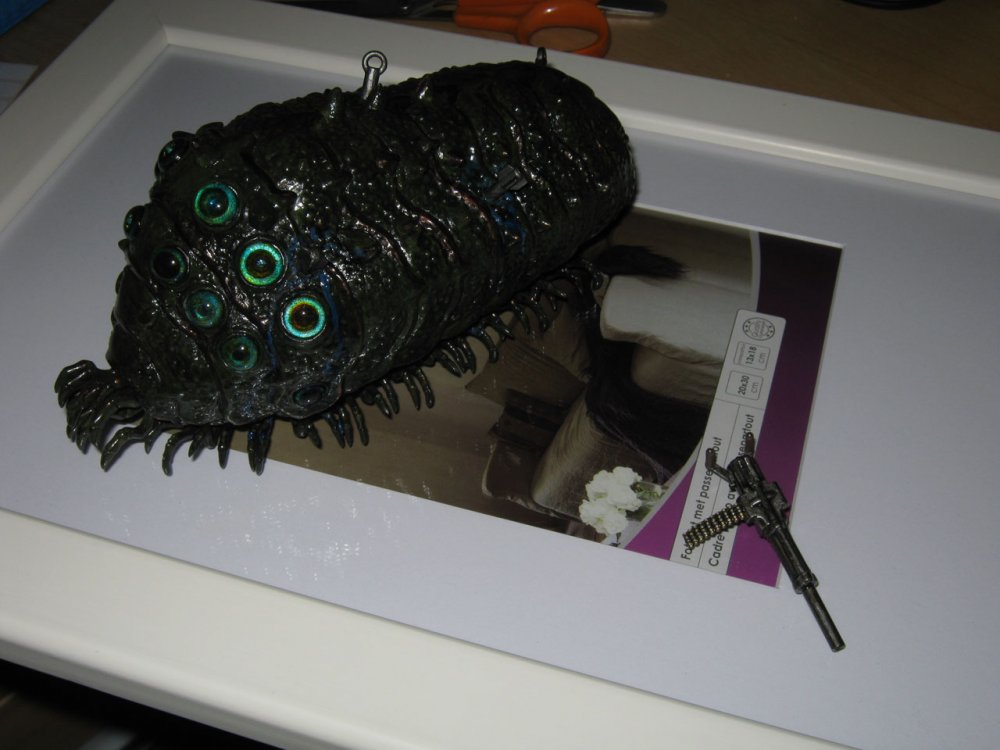
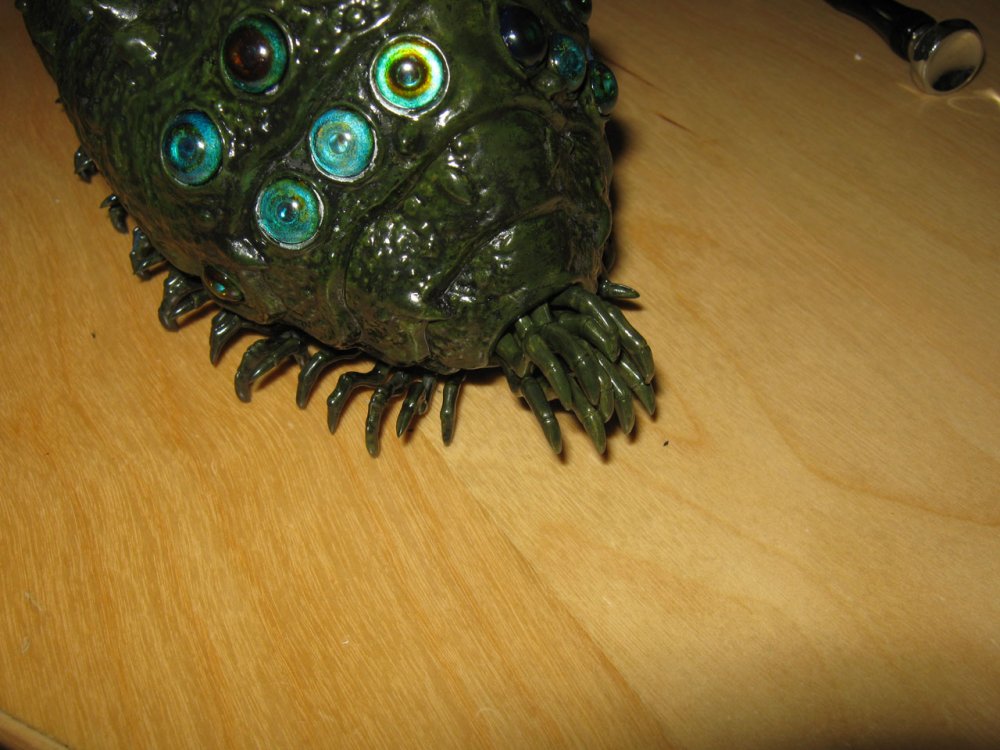
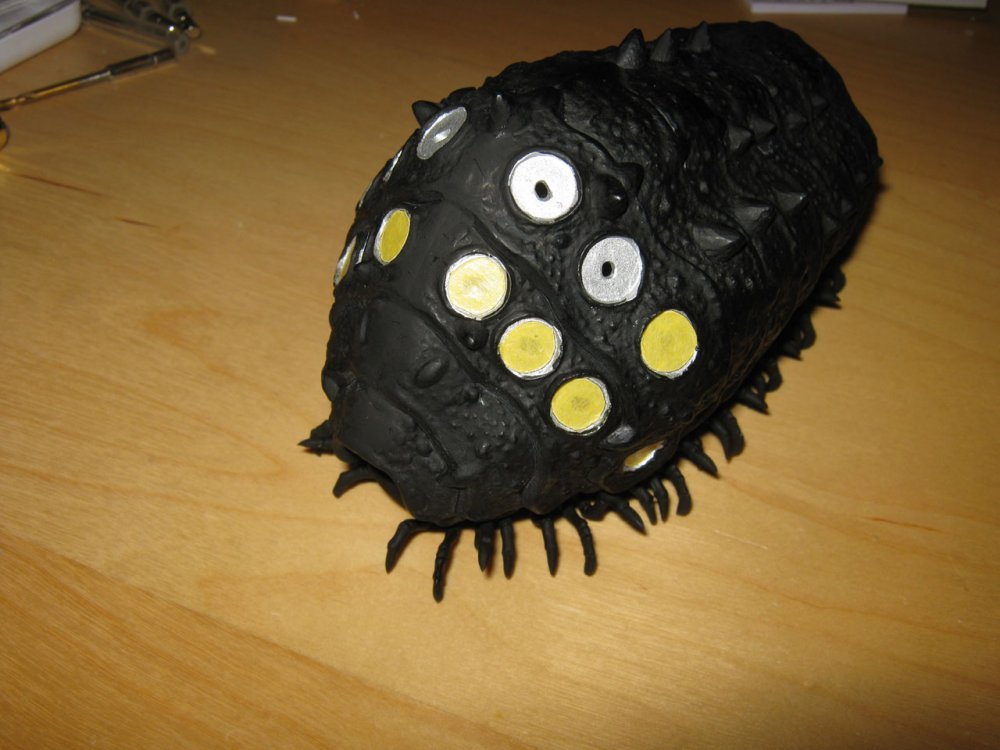
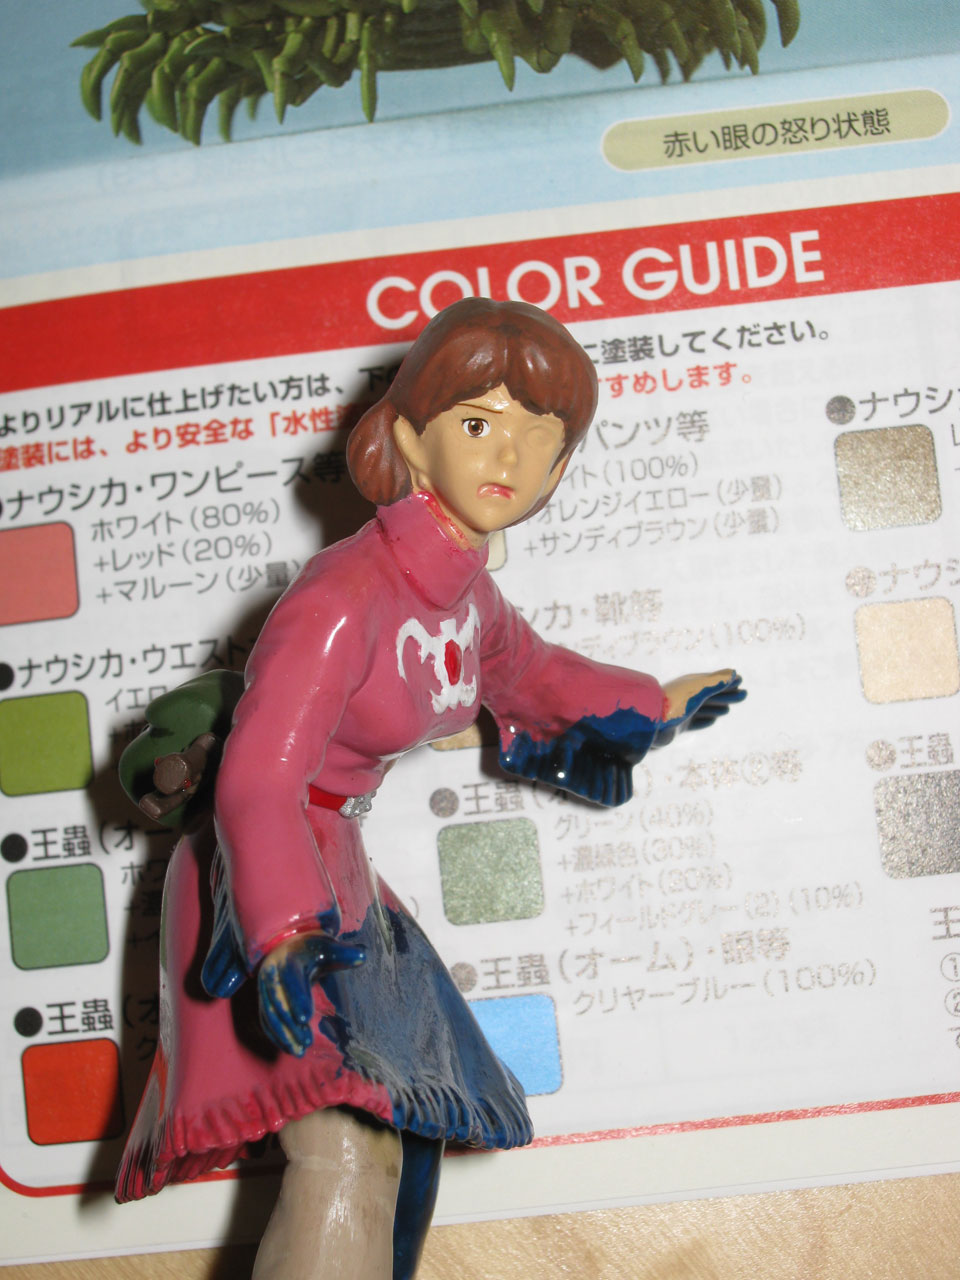
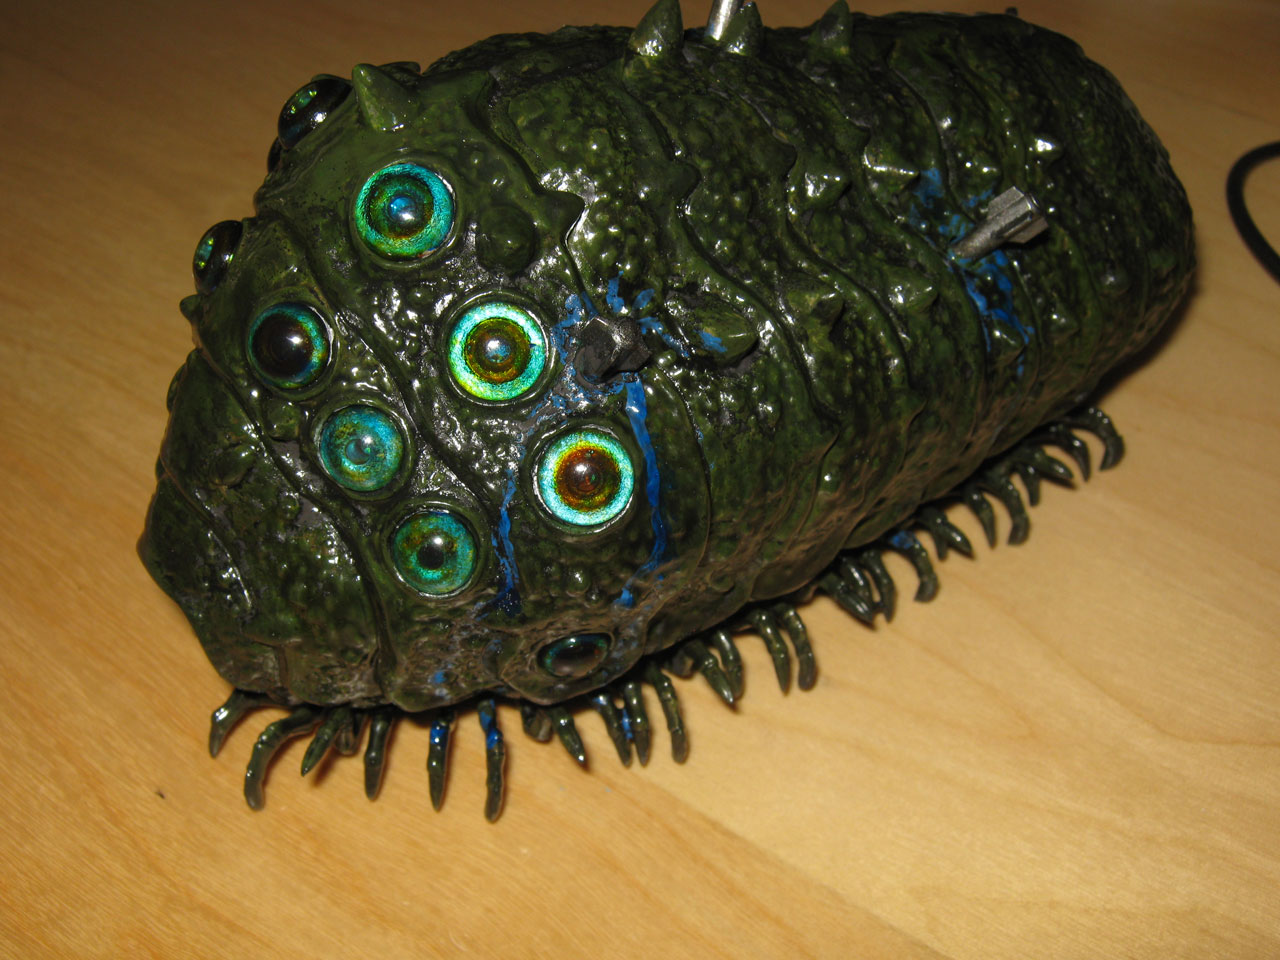
Projectiles painted, blood added, washes done, eye socket masking removed, eyes in place:

The camera flash brings out the aluminium background I used on the eye sockets, which combines nicely with how I painted the eye domes (clear orange + clear smoke light blue on the inside, clear blue on the outside). I's all a bit darker in normal light. I'm pretty psyched with how the eyes turned out - they look real
 . The different sized pupils and color differences are not a problem; the kit replicates the scene where Nausicaa's clothes are soiled by the dying Ohmu's blood after she calmed it down (eyes change from red to blue), and any creature with eyes with pupils will display uneven pupil sizes when dying. So this is more realistic.
(It's actually a bit strange Bandai chose to make the eyes similar to those found on vertebrates, considering the Ohmu's decidedly arthropod looks...)
Then I added the mouth tentacles:
Now to try arbit's suggestion for the metallic drybrushing...

-
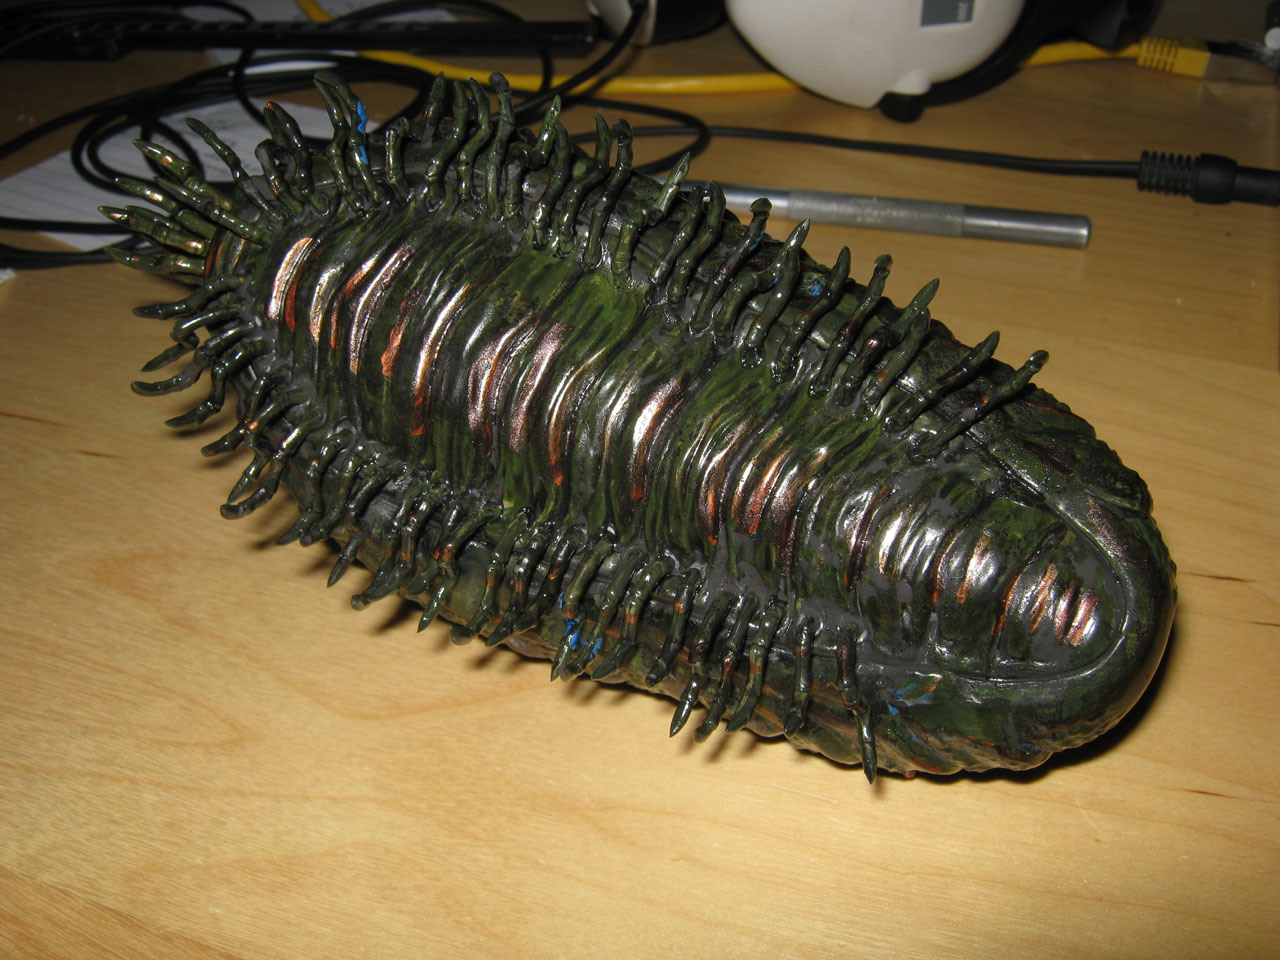
Base drybrushing finished + layer of Tamiya Smoke in guise of clearcoat before washes + missiles and harpoons inserted:
-
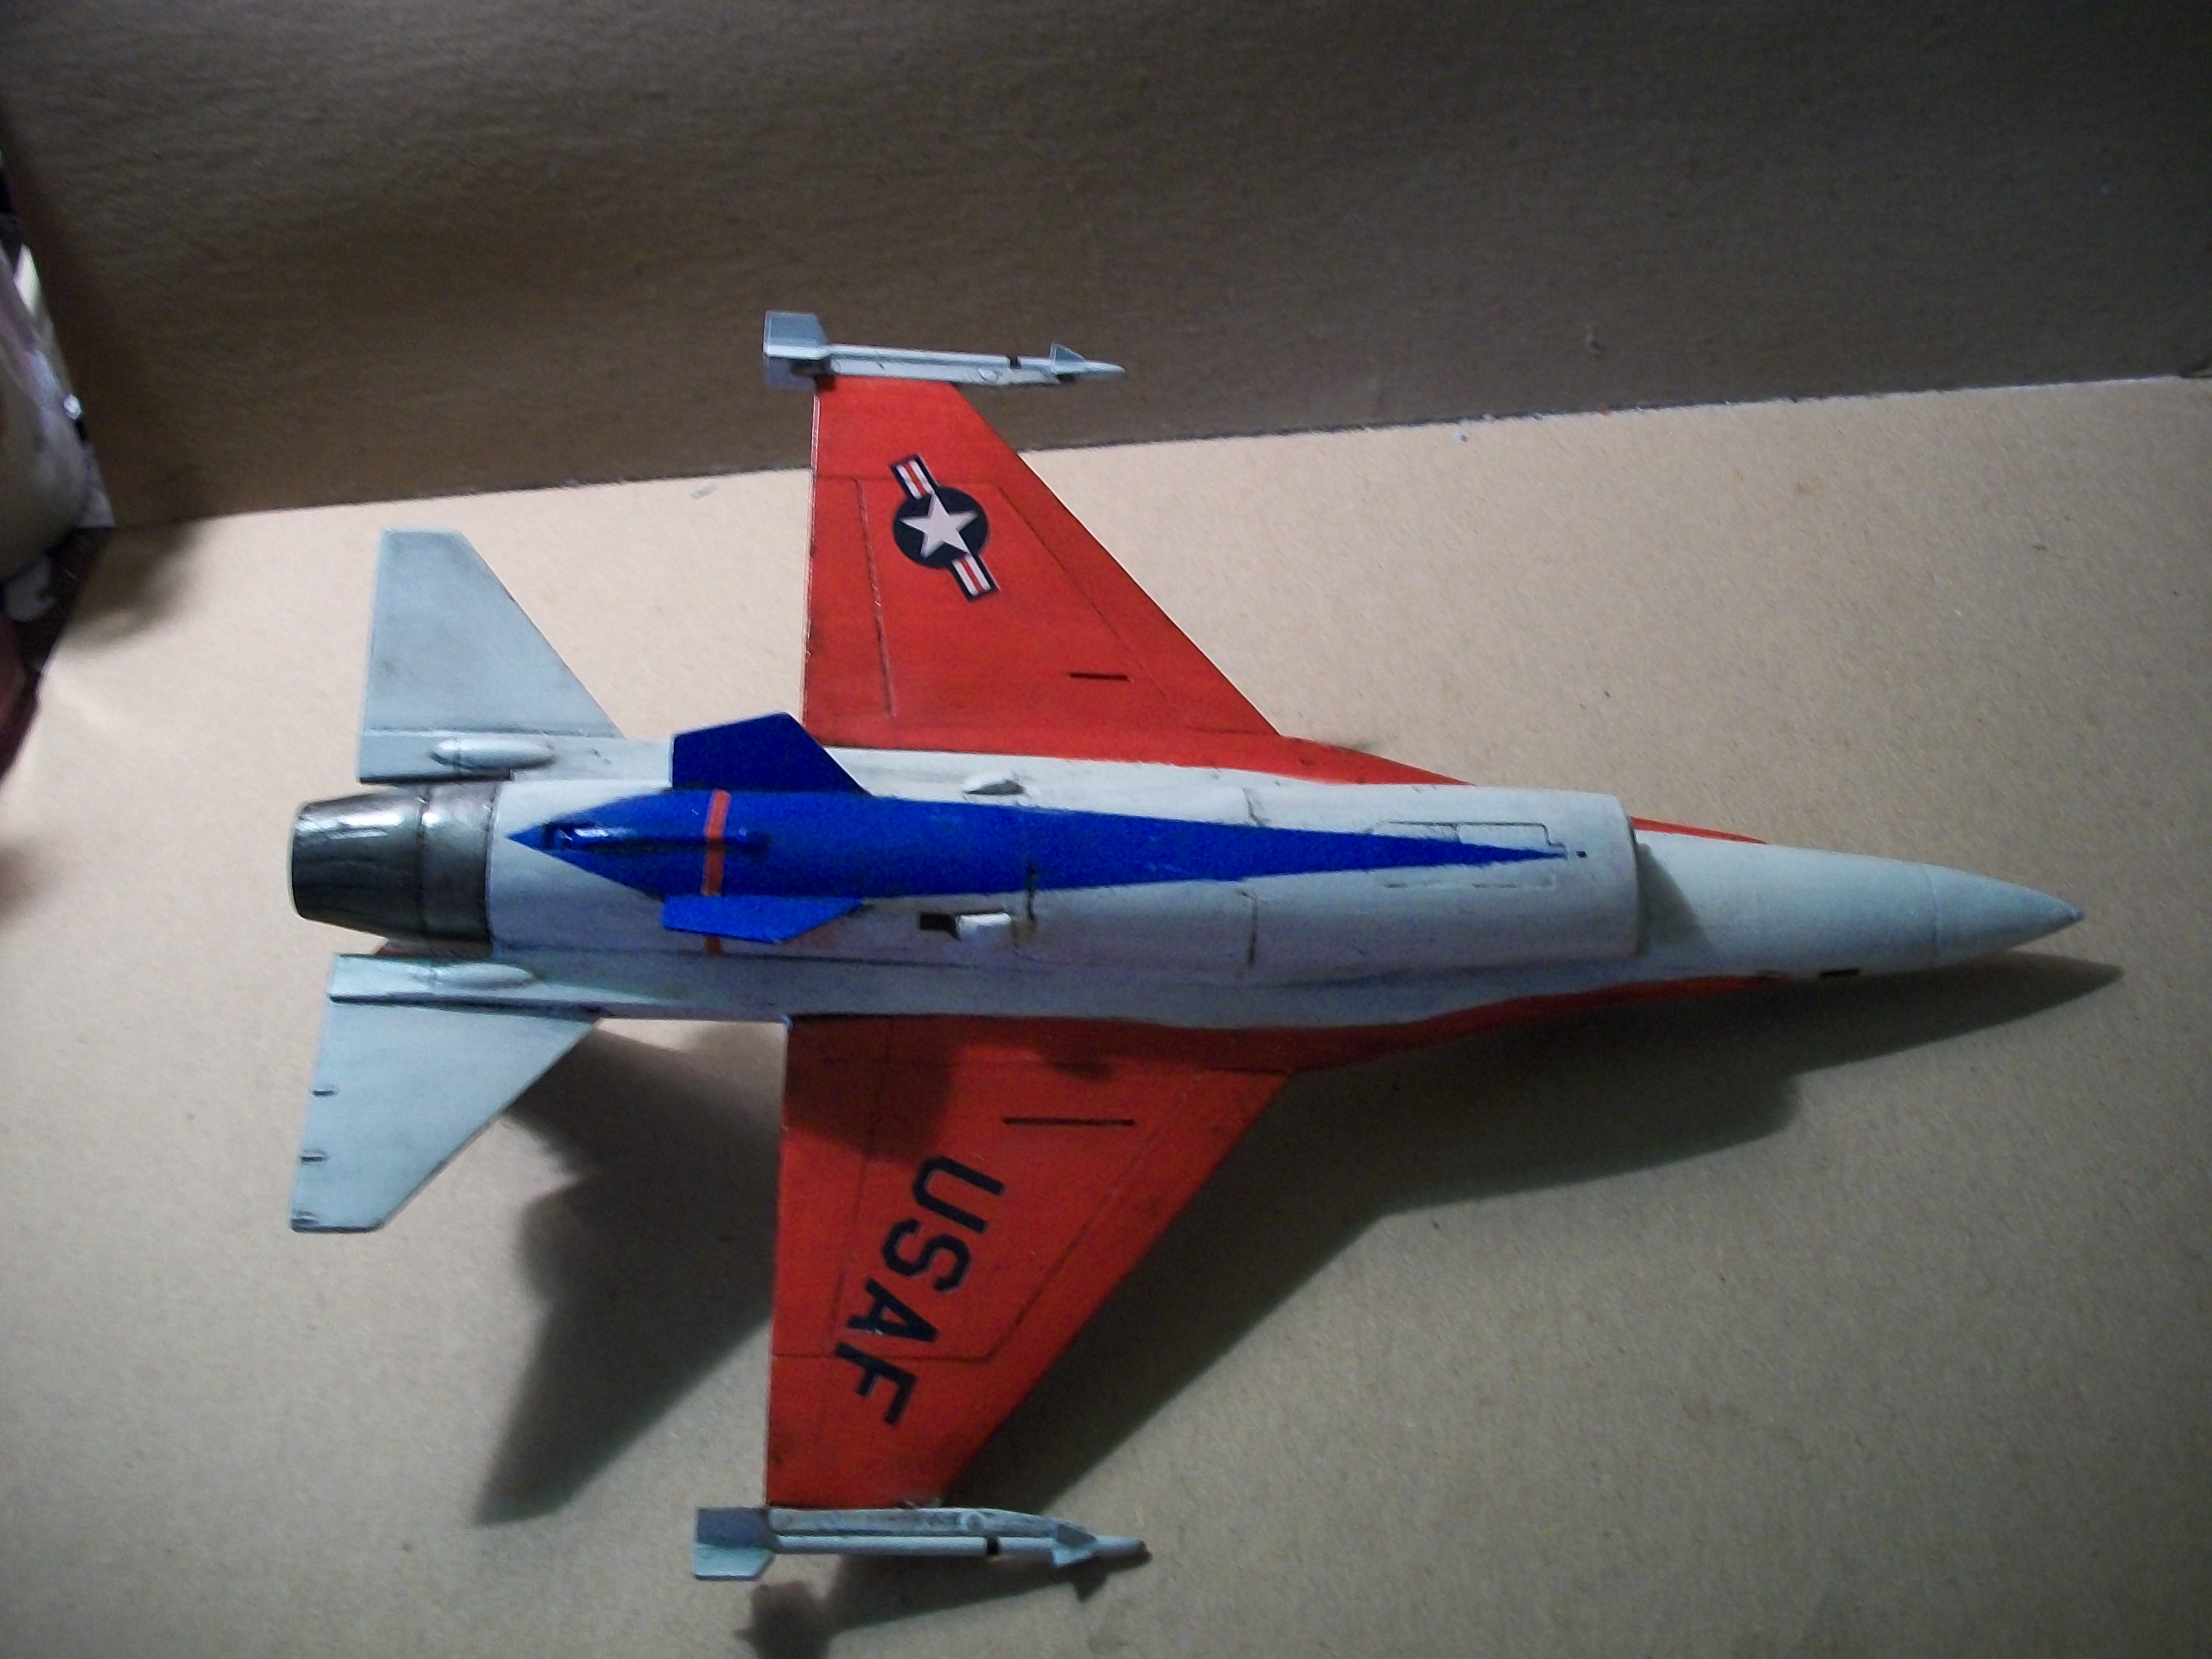
On 14/07/2017 at 10:35 AM, pengbuzz said:
My latest project: Monogram's 1/48 F-16-

Everything on the paint job before decals was hand-brushed, so it looks...well... streaky (not to mention a light wash that decided to be stubborn in it's removal phase!).
Red (and yellow
 ) are notoriously hard to get right when handbrushing them...even with a backing coat. I think it looks quite good.
-
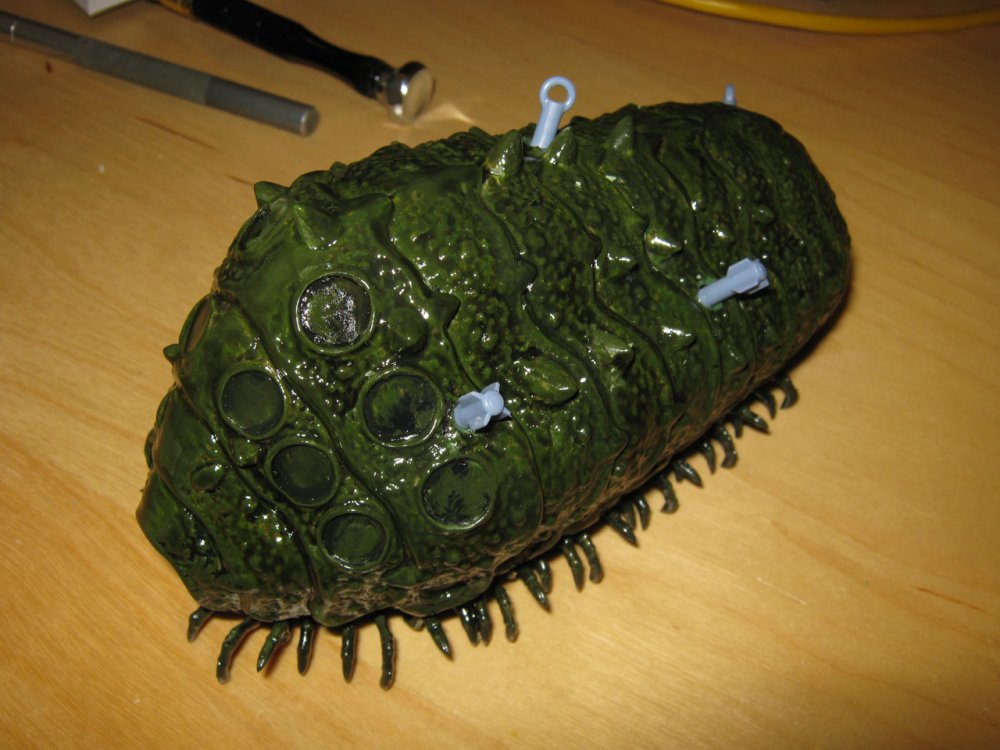
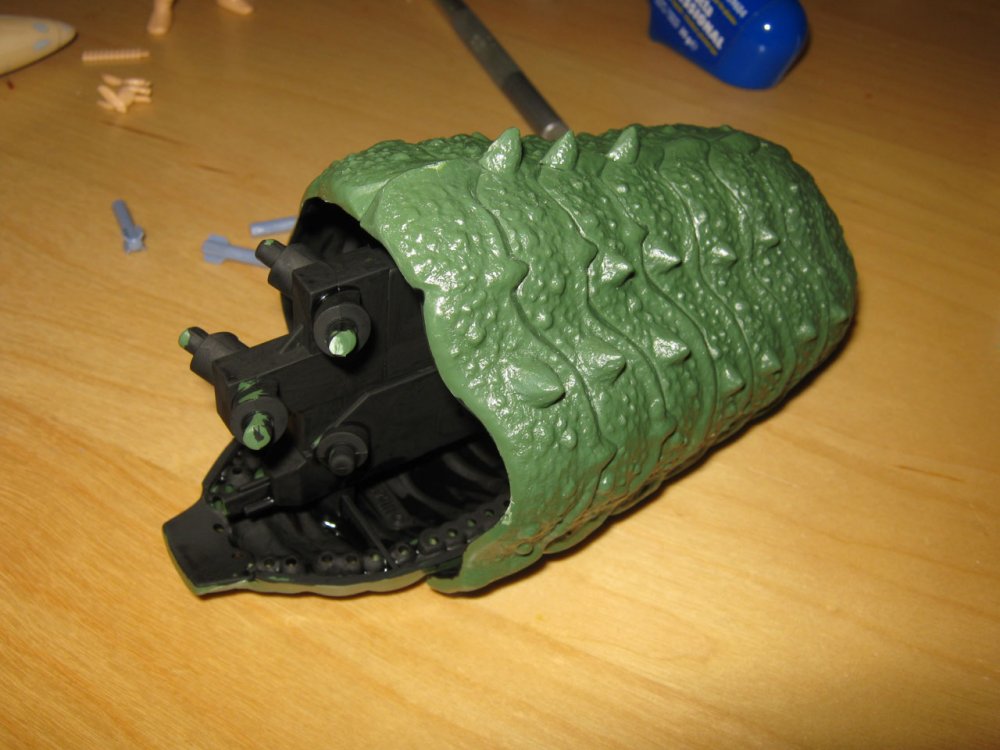
Ohm mostly assembled, then painted in flat black except for the eye emplacements, which were done in flat aluminium and then masked off:
Now to add some almost drybrushed layers of greens and browns on top of that...
-
I figured I'd take inspiration out of the Nausicaa with Kai build and would start my Nausicaa and Ohm kit ^_^:
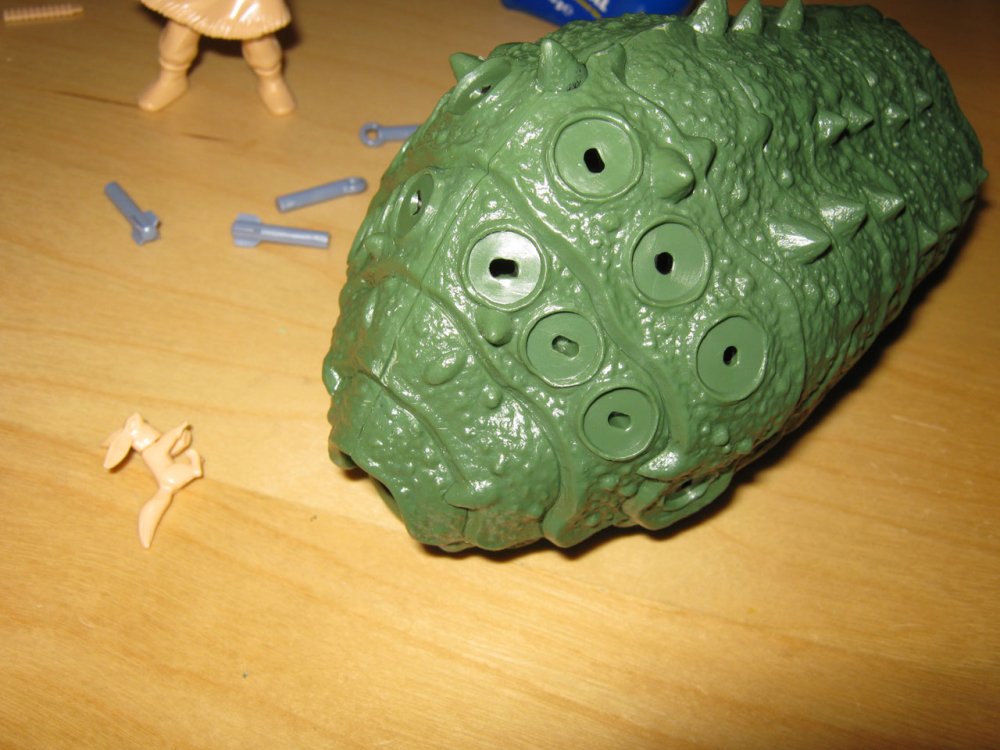
There's a nasty seam that runs right over the middle of the Ohm, but it seems to be doable with some Mr. Surfacer 500. What's less good is that Bandai chose to mold all of the legs in a flexible plastic that's pretty much impossible to clean up properly except by cutting into it...and the leg parts have some mold alignment issues
 As Bandai also hasn't included a base, I think I will make my own to try to replicate the scene of the Ohm on the beach so I can hide the legs a bit.
I also don't remember having these kind of fit issues on the included figure when I build the Nausicaa with Kai kit:
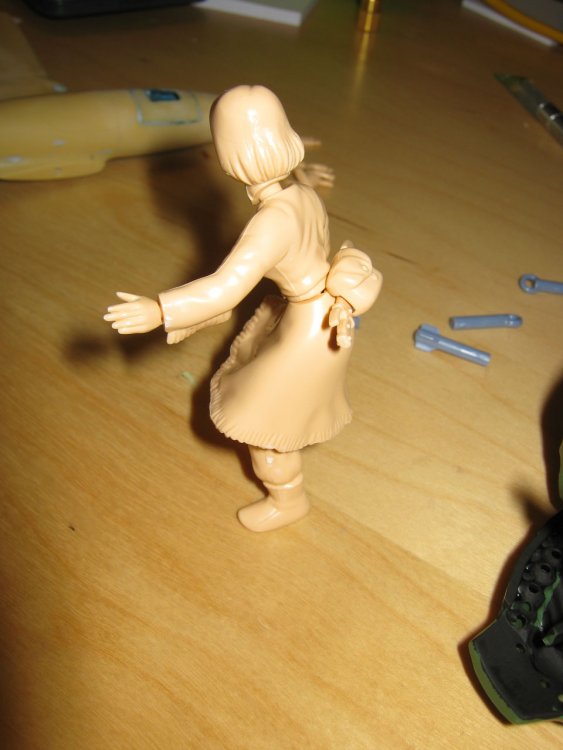
I had to shorten the neck and waist pegs by at least a mm to get a somewhat decent fit.
-
4 hours ago, Podtastic said:
Isn't that what Lord Yupa was riding in Nasicaa?

Nausicaa's one is called "Kai".
") Those Bandai kits are quite nice, even though the included Nausicaa figures look a bit too chubby in my opinion.
Those Bandai kits are quite nice, even though the included Nausicaa figures look a bit too chubby in my opinion.
-
On 25/06/2017 at 11:20 AM, pengbuzz said:
Mold began wearing out perhaps? I know those molds have a fairly limited lifespan, but not sure if that would affect the seams first or the detailing.
I've got a few Volks kits that have the exact same issue, and it probably isn't a worn out mold, but a badly aligned one, as the parts tend to be perfectly straight and flawless in other places, also right next to the affected area.
On 27/06/2017 at 11:37 PM, arbit said:Eye decal fit test looks good. These look about 10% too large, but I will take that over my neanderthal hand painting any day. The eyes are the most important and most difficult part of a figure. Without these decals, I would never even try it.

What scale are the figures? For figures larger than 1/10 scale I usually hand paint my eyes. You can exercise on a sheet of plastic, it's not particularly hard to paint decent eyes with a good tutorial (I used one found in an old issue of Hobby Japan, but there are also good ones to be found online). My main issue seems to be that the brushes used by Japanese figure painters are impossible to find where I live in Europe...(no sharp lines for me)
-
WF, WonderFest, Wonder Festival, I don't think there's much difference between those three. I've seen all three terms used to refer to the Japanese one, know there's a festival of the same name in the US, but if the name comes up on a European forum chances are the Japanese one(s*) are meant...
* Summer and Winter.
-
Regarding the AT-AT, were the joint parts made from ABS or similar plastic? Because that's known to react badly to enamel-based paints and fluids...
 also some other thinners can turn it brittle (IIRC, lighter fluid among others).
-
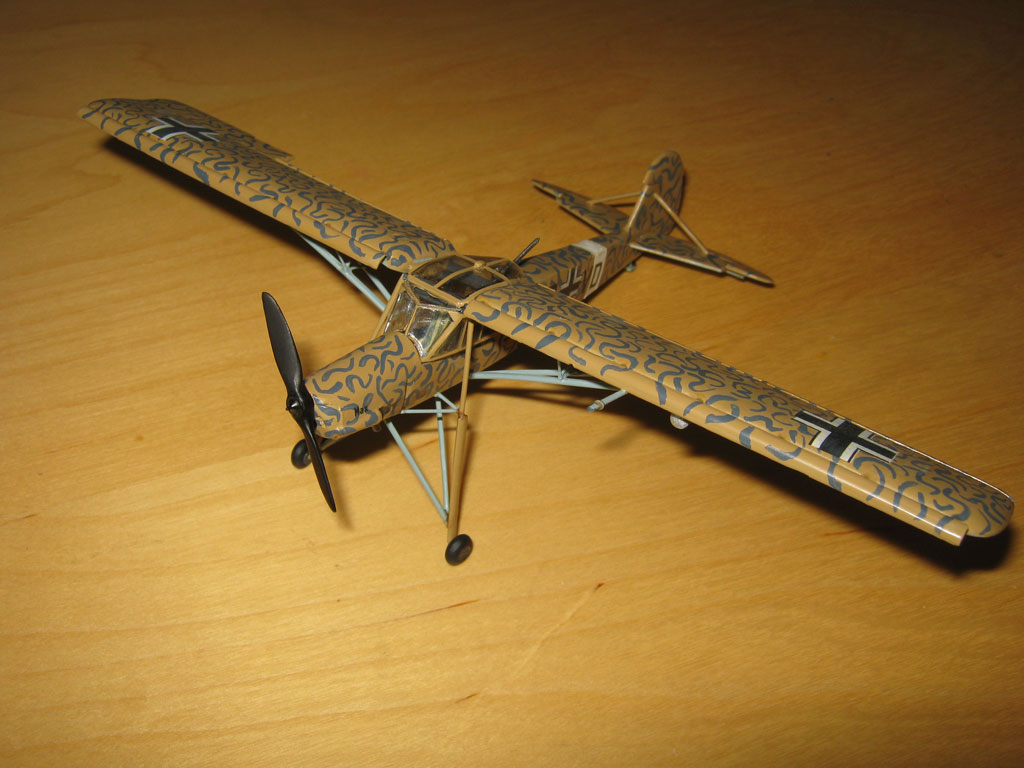
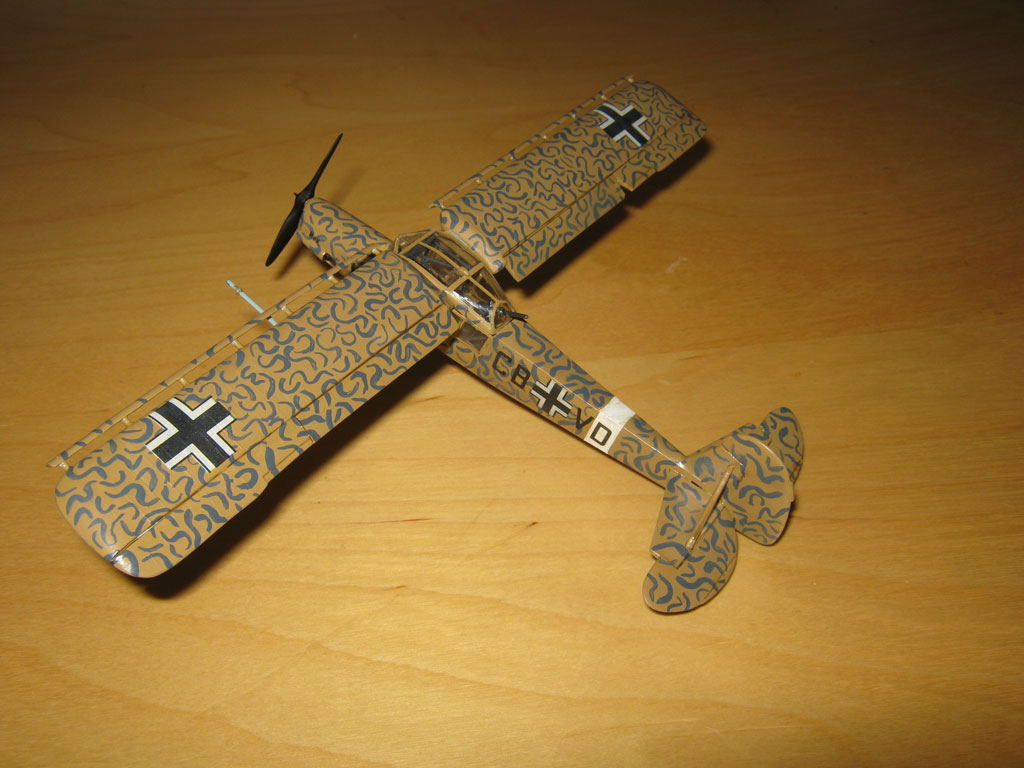
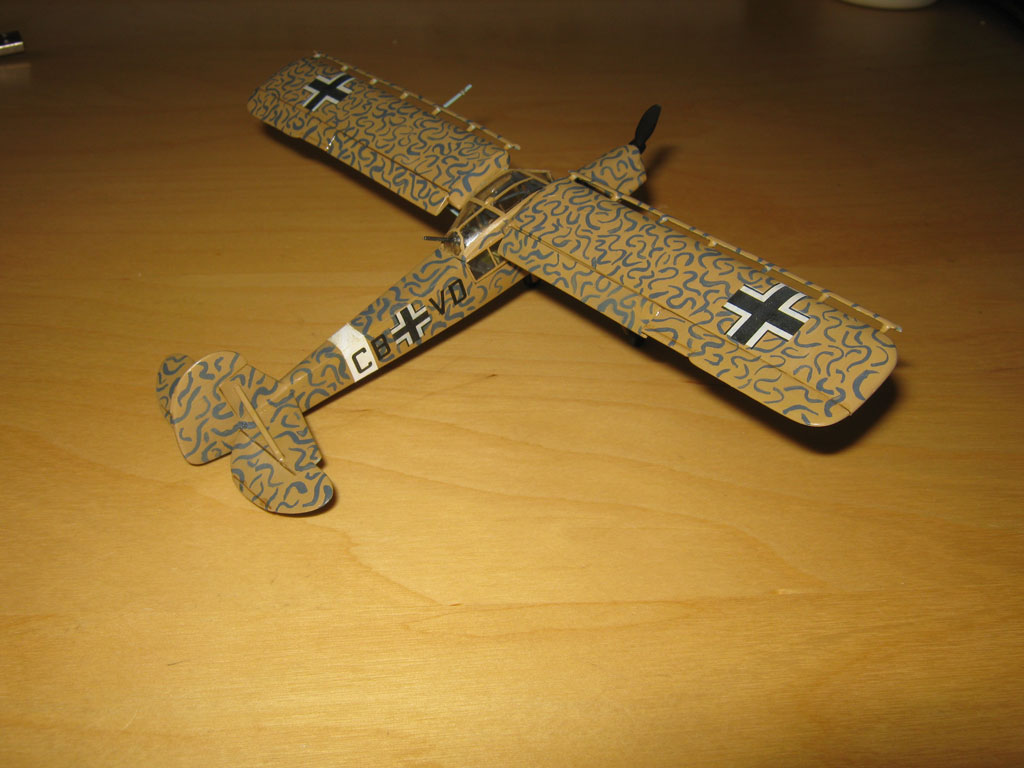
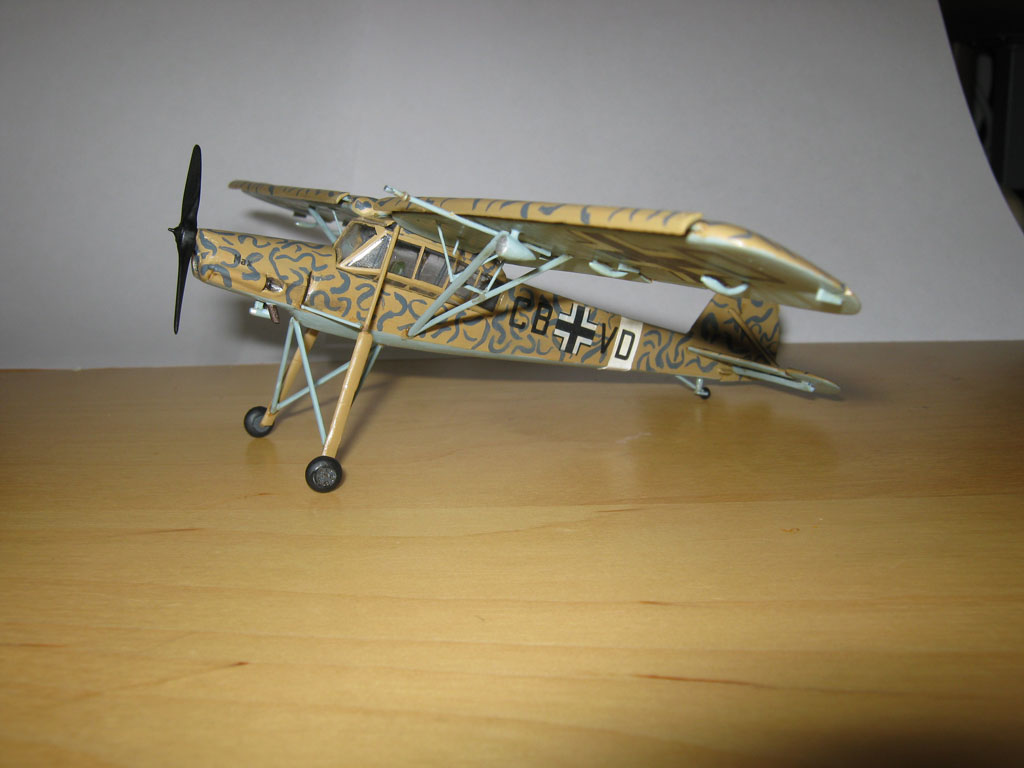
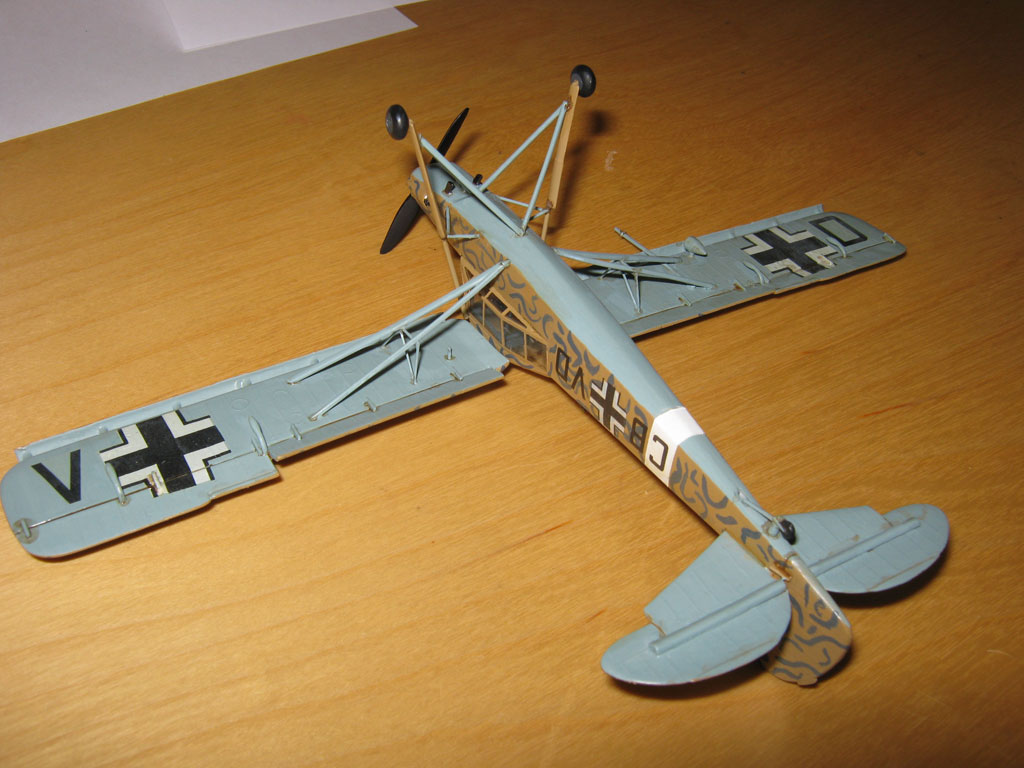
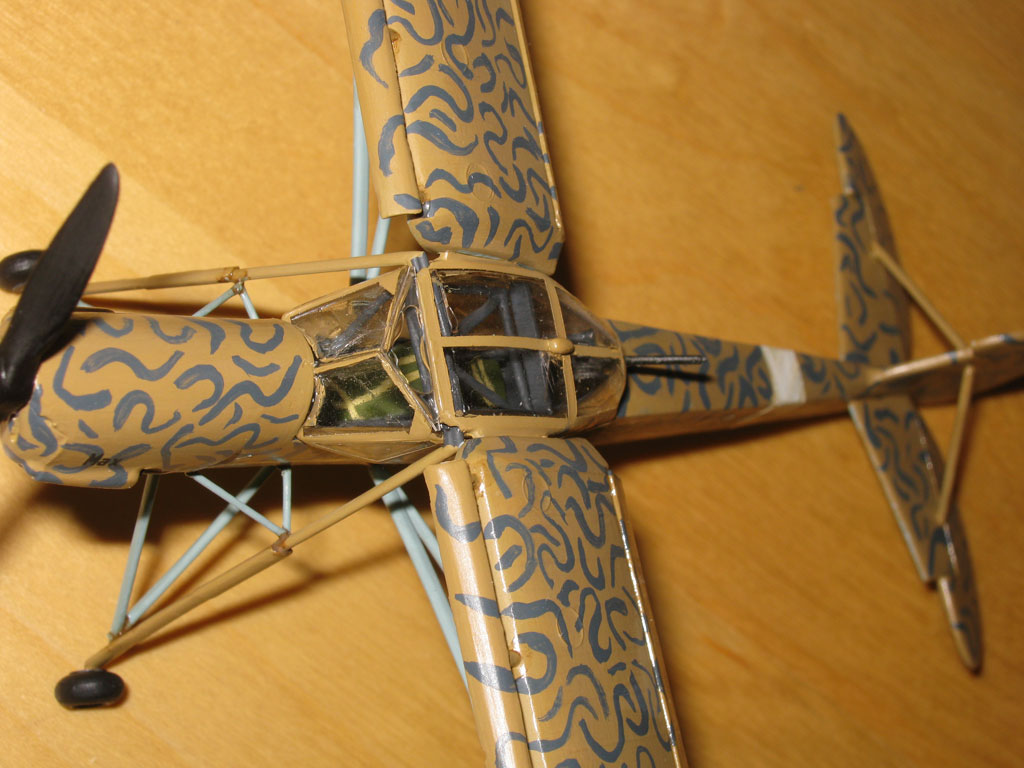
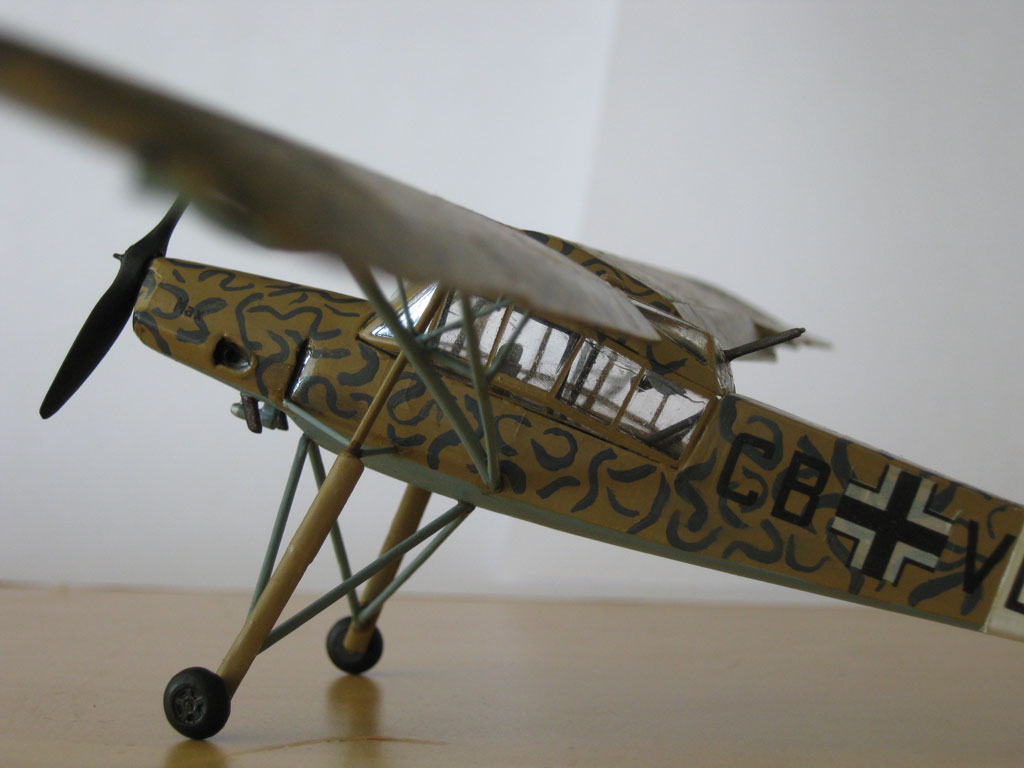
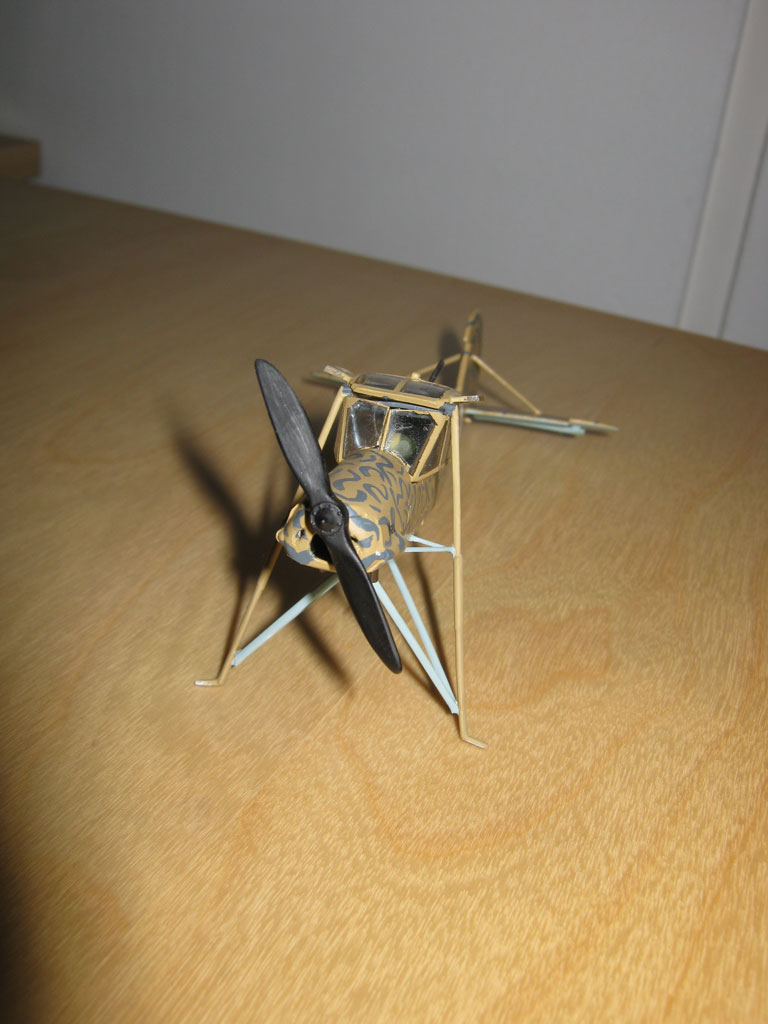
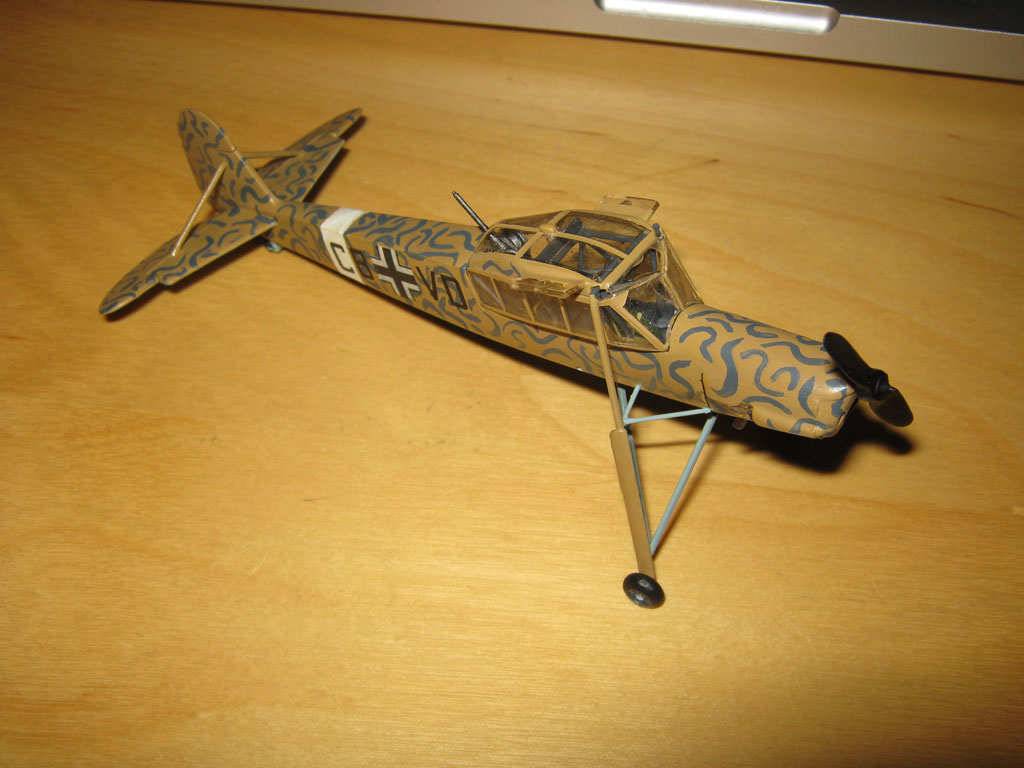
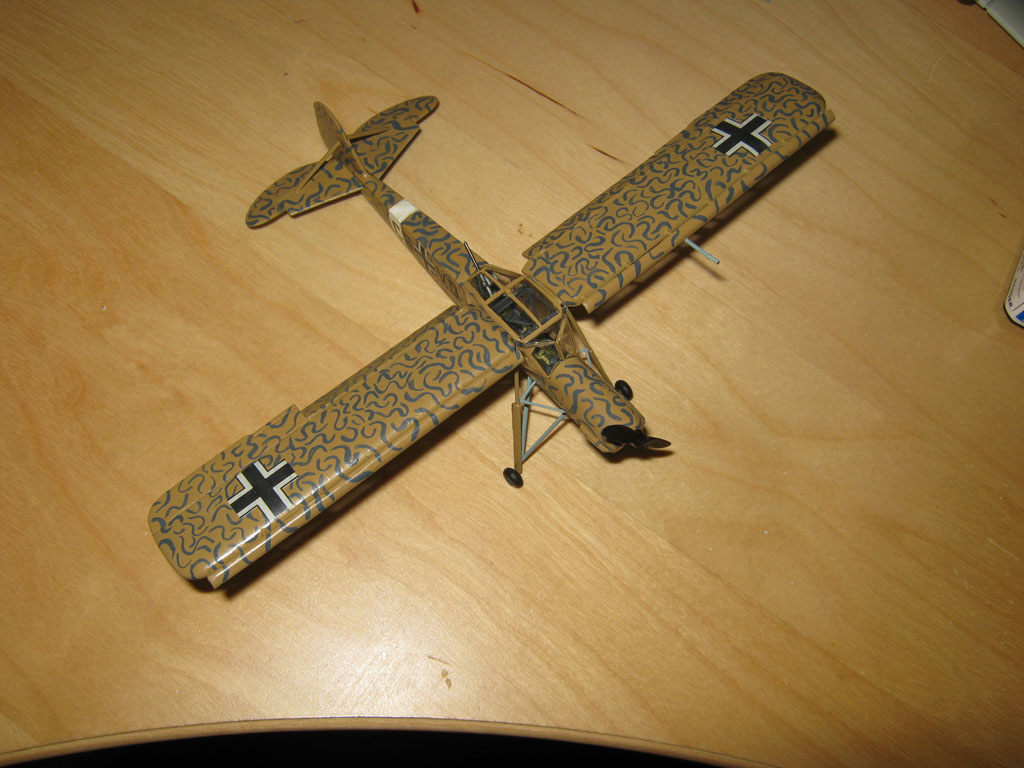
And the Fieseler Storch is done:


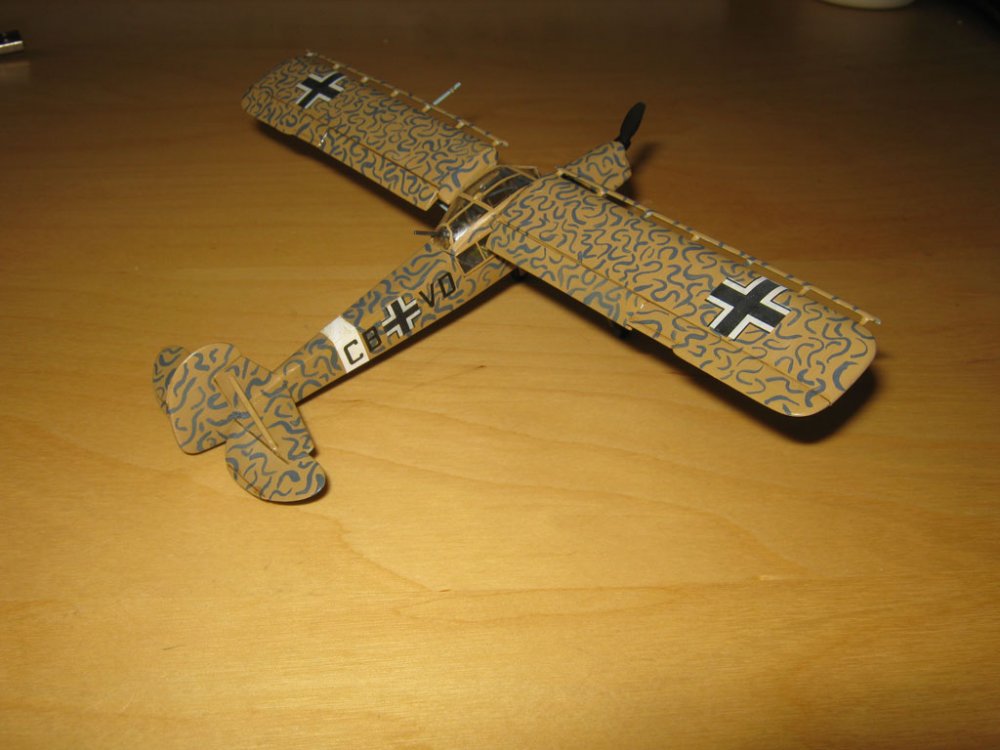


Of course the macro pictures show all of the bad stuff
 (the picture is about four times larger than the real thing).
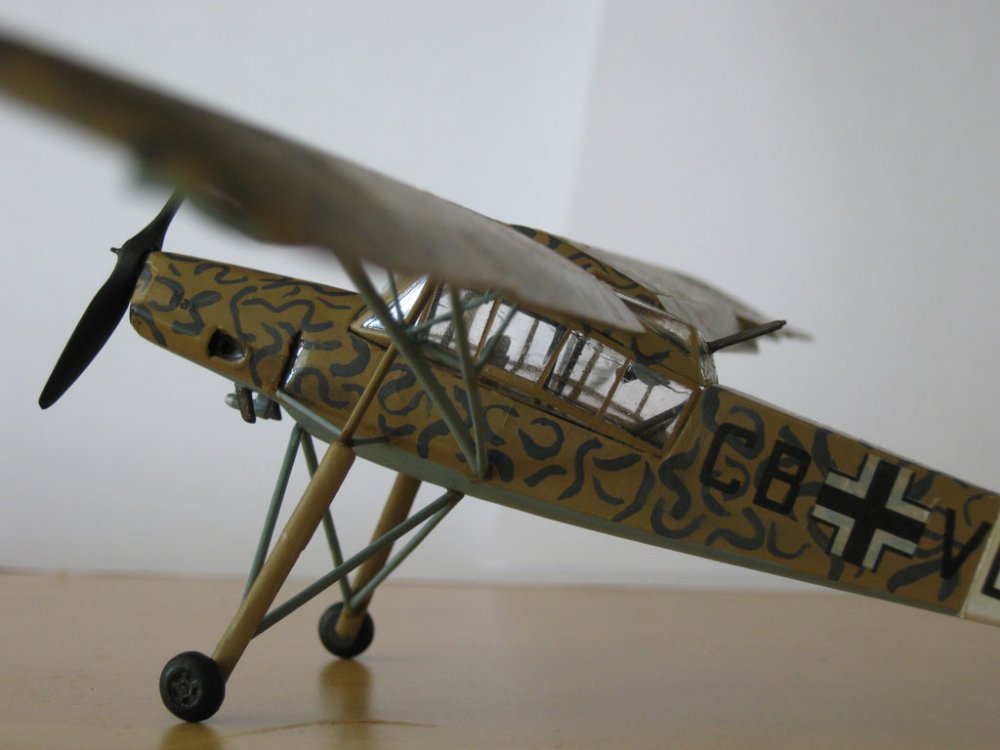
But I'm quite happy with how it turned out, considering it's a 40-50 year old kit. For me it was another milestone in scratchbuilding and painting.
-
Getting there...
Proppelor:

Wheels:

Wings:
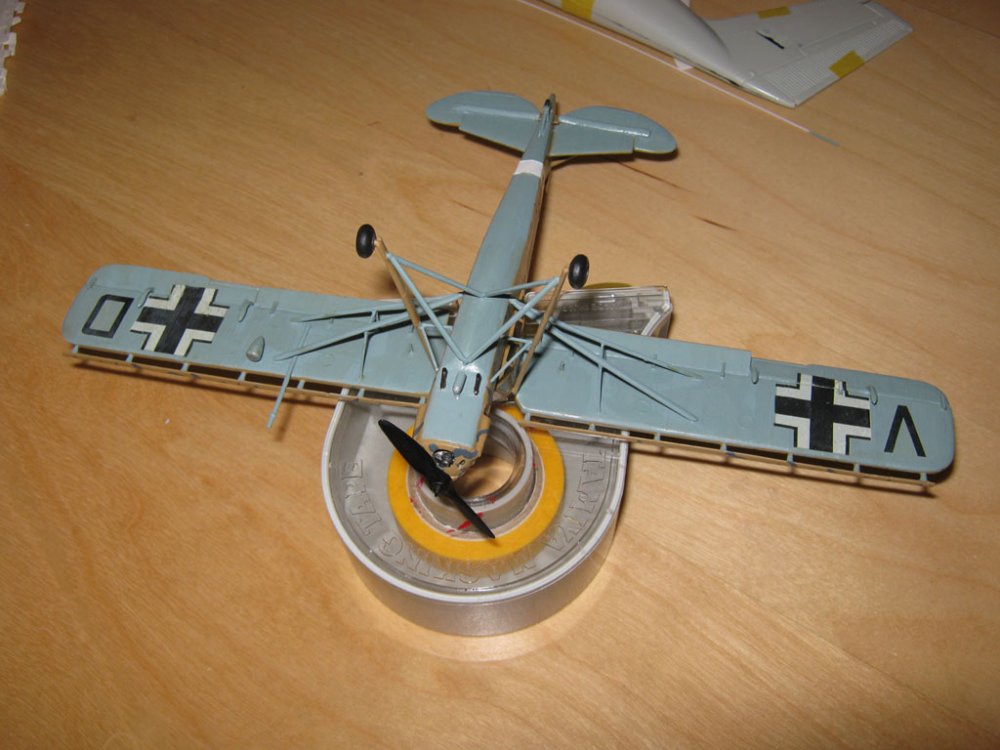
Almost done now.


Macross 1/72 Scale Complete List
in Model kits
Posted
I'm pretty sure the first Hasegawa Strike kit did indeed include 2 sets of the micro-missile launcher pod.
You could try searching www.1999.co.jp for the kits. They usually include pictures and scans of all of the kits they sell and have sold in their listings, including all parts and instruction sheets.