

UN_MARINE
-
Posts
903 -
Joined
-
Last visited
Content Type
Profiles
Forums
Events
Gallery
Posts posted by UN_MARINE
-
-
20 minutes ago, tekering said:
Dude, you work fast!*

Amazing to see your design become a reality... and so quickly, too!
* Your printer's no slouch, either.

Thanks!
I wanted to get it to this stage before work picks up in a couple of days - everything will get much slower from this point.
The printer and I have an understanding - I keep the models "print-friendly", and it doesn't have unscheduled catastrophic failures (often).

-
This guy's gonna need some serious elbow grease.


-
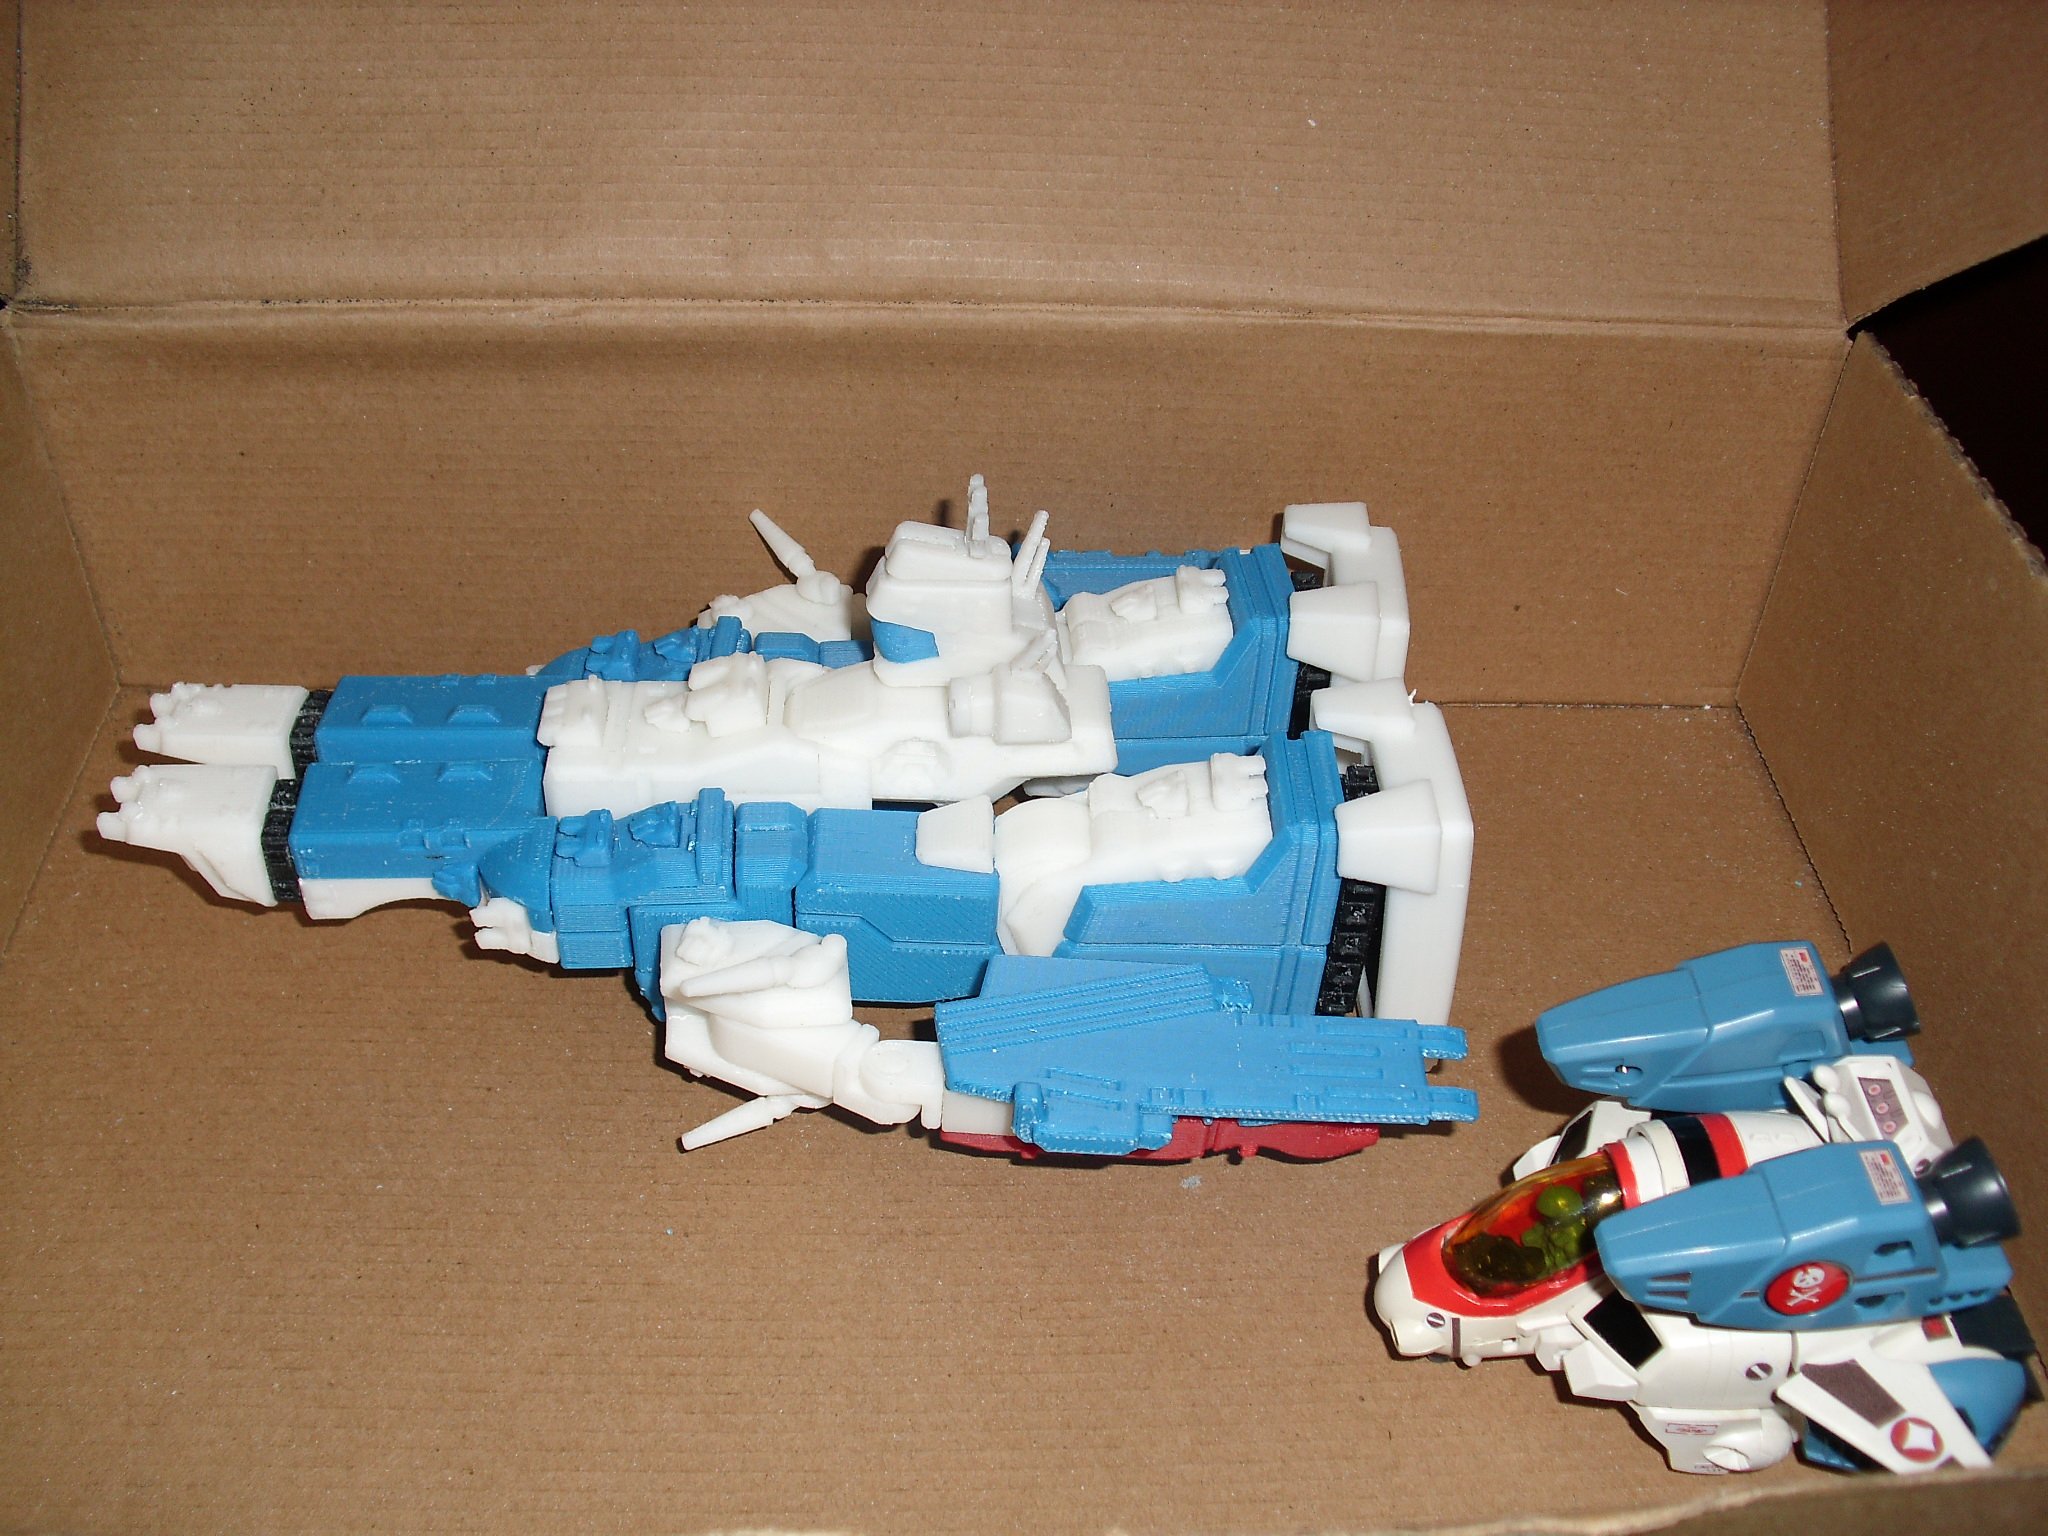
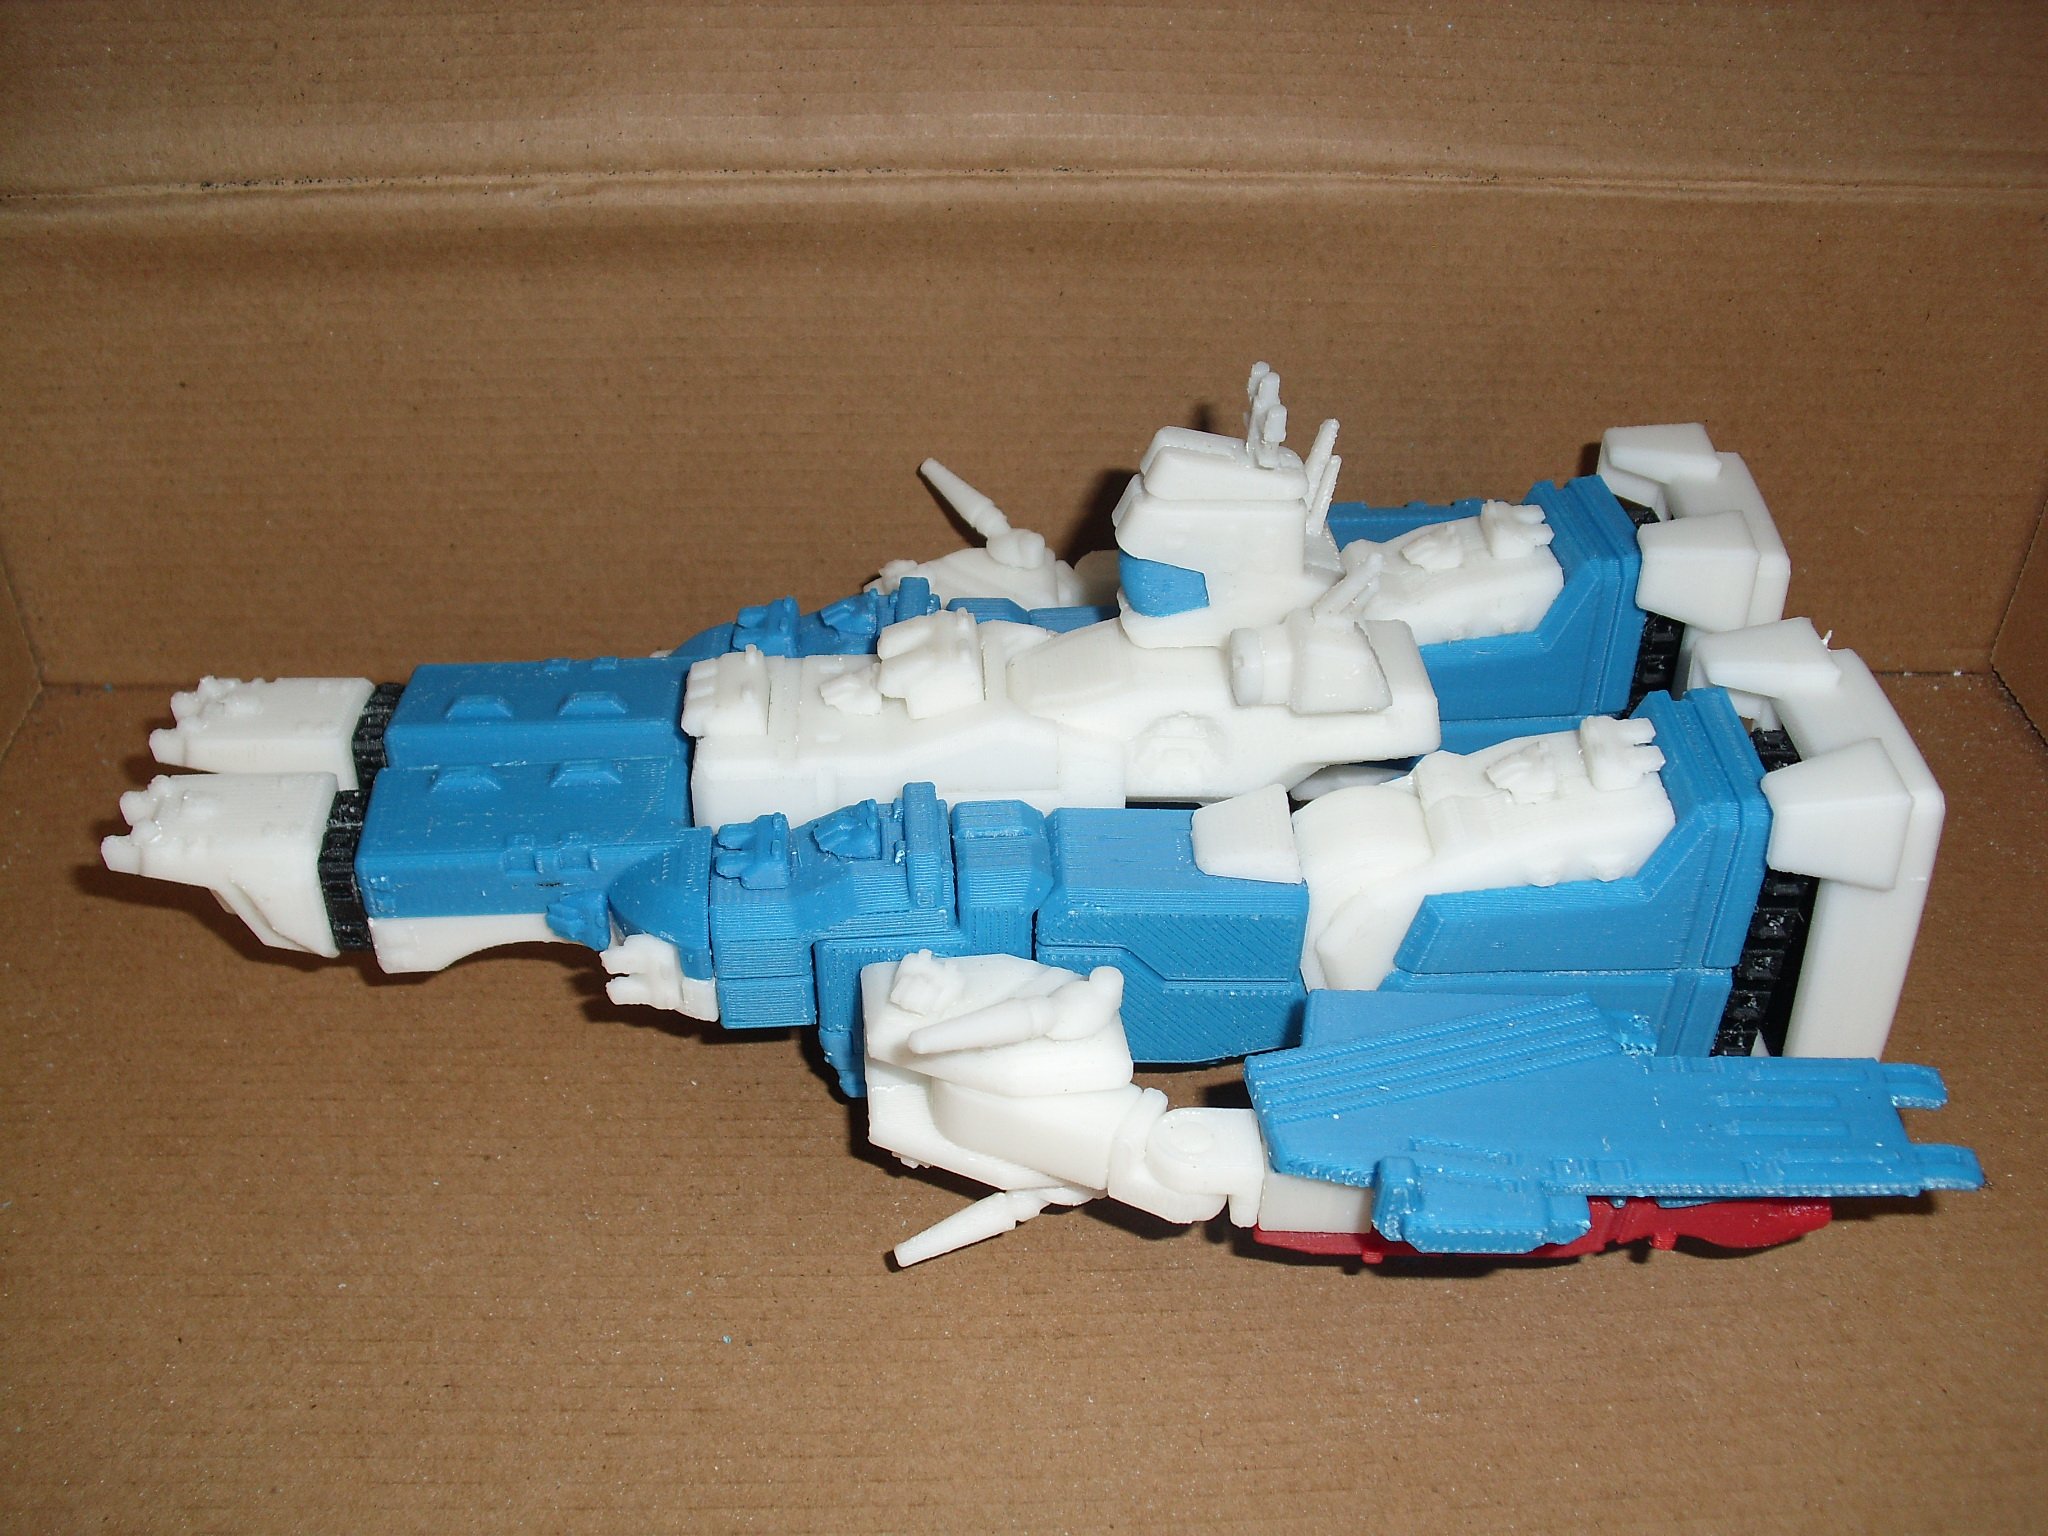
It's in 1 piece!
Slight fit issues due to shrinkage/warping, but nothing a truckload of sanding & putty can't fix.


-
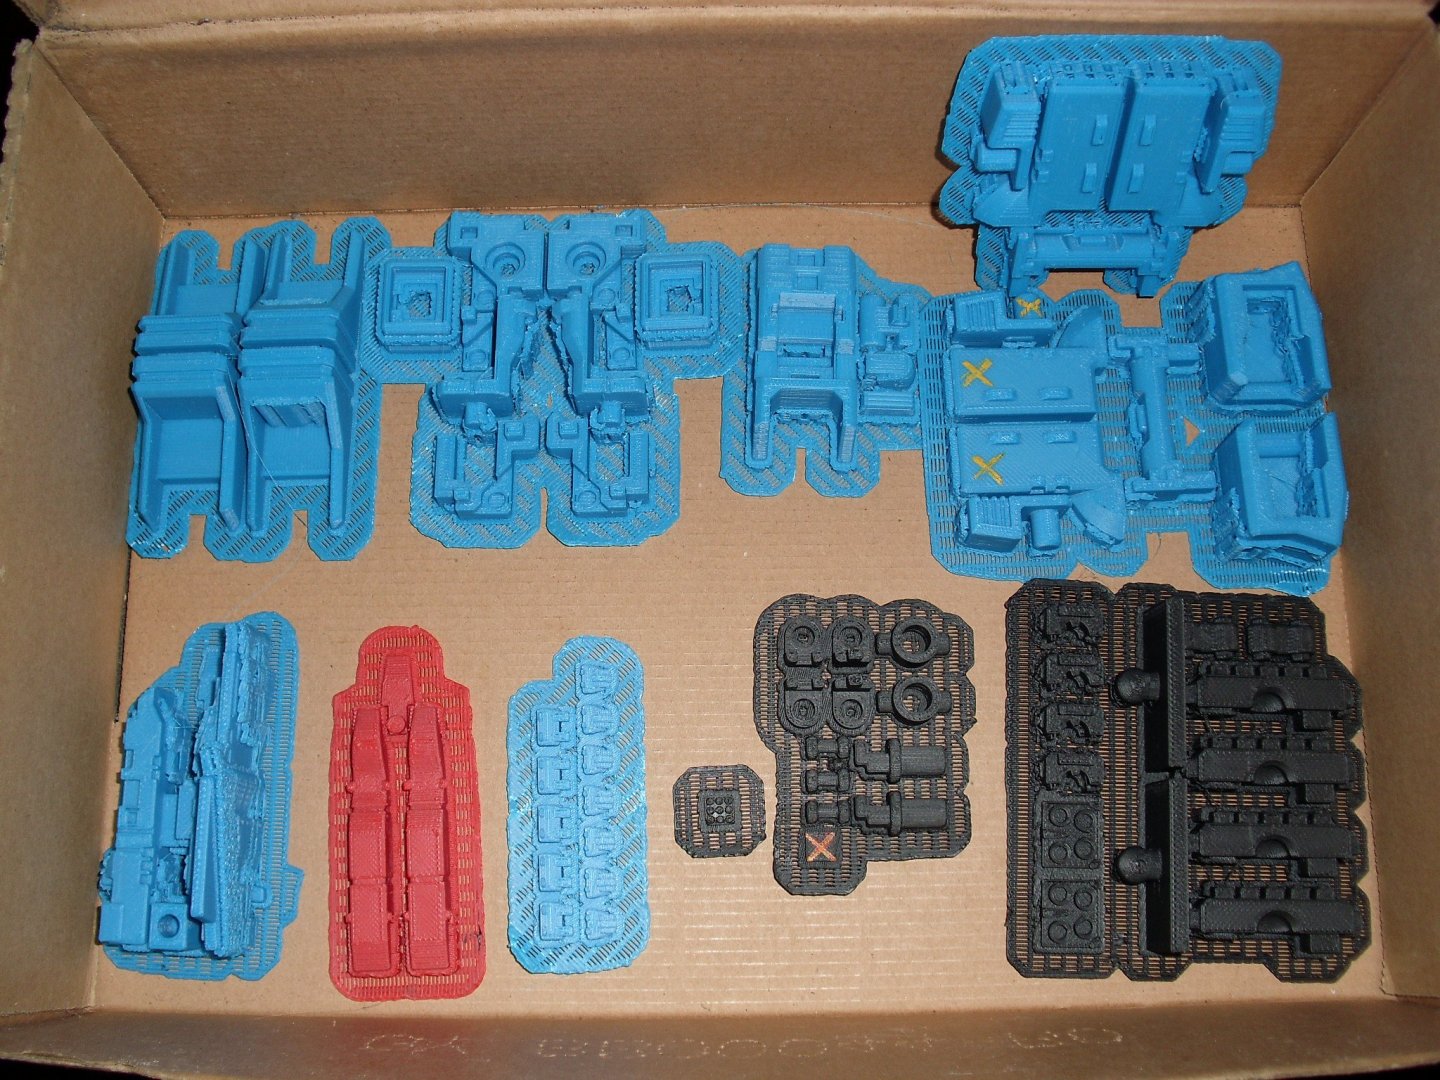
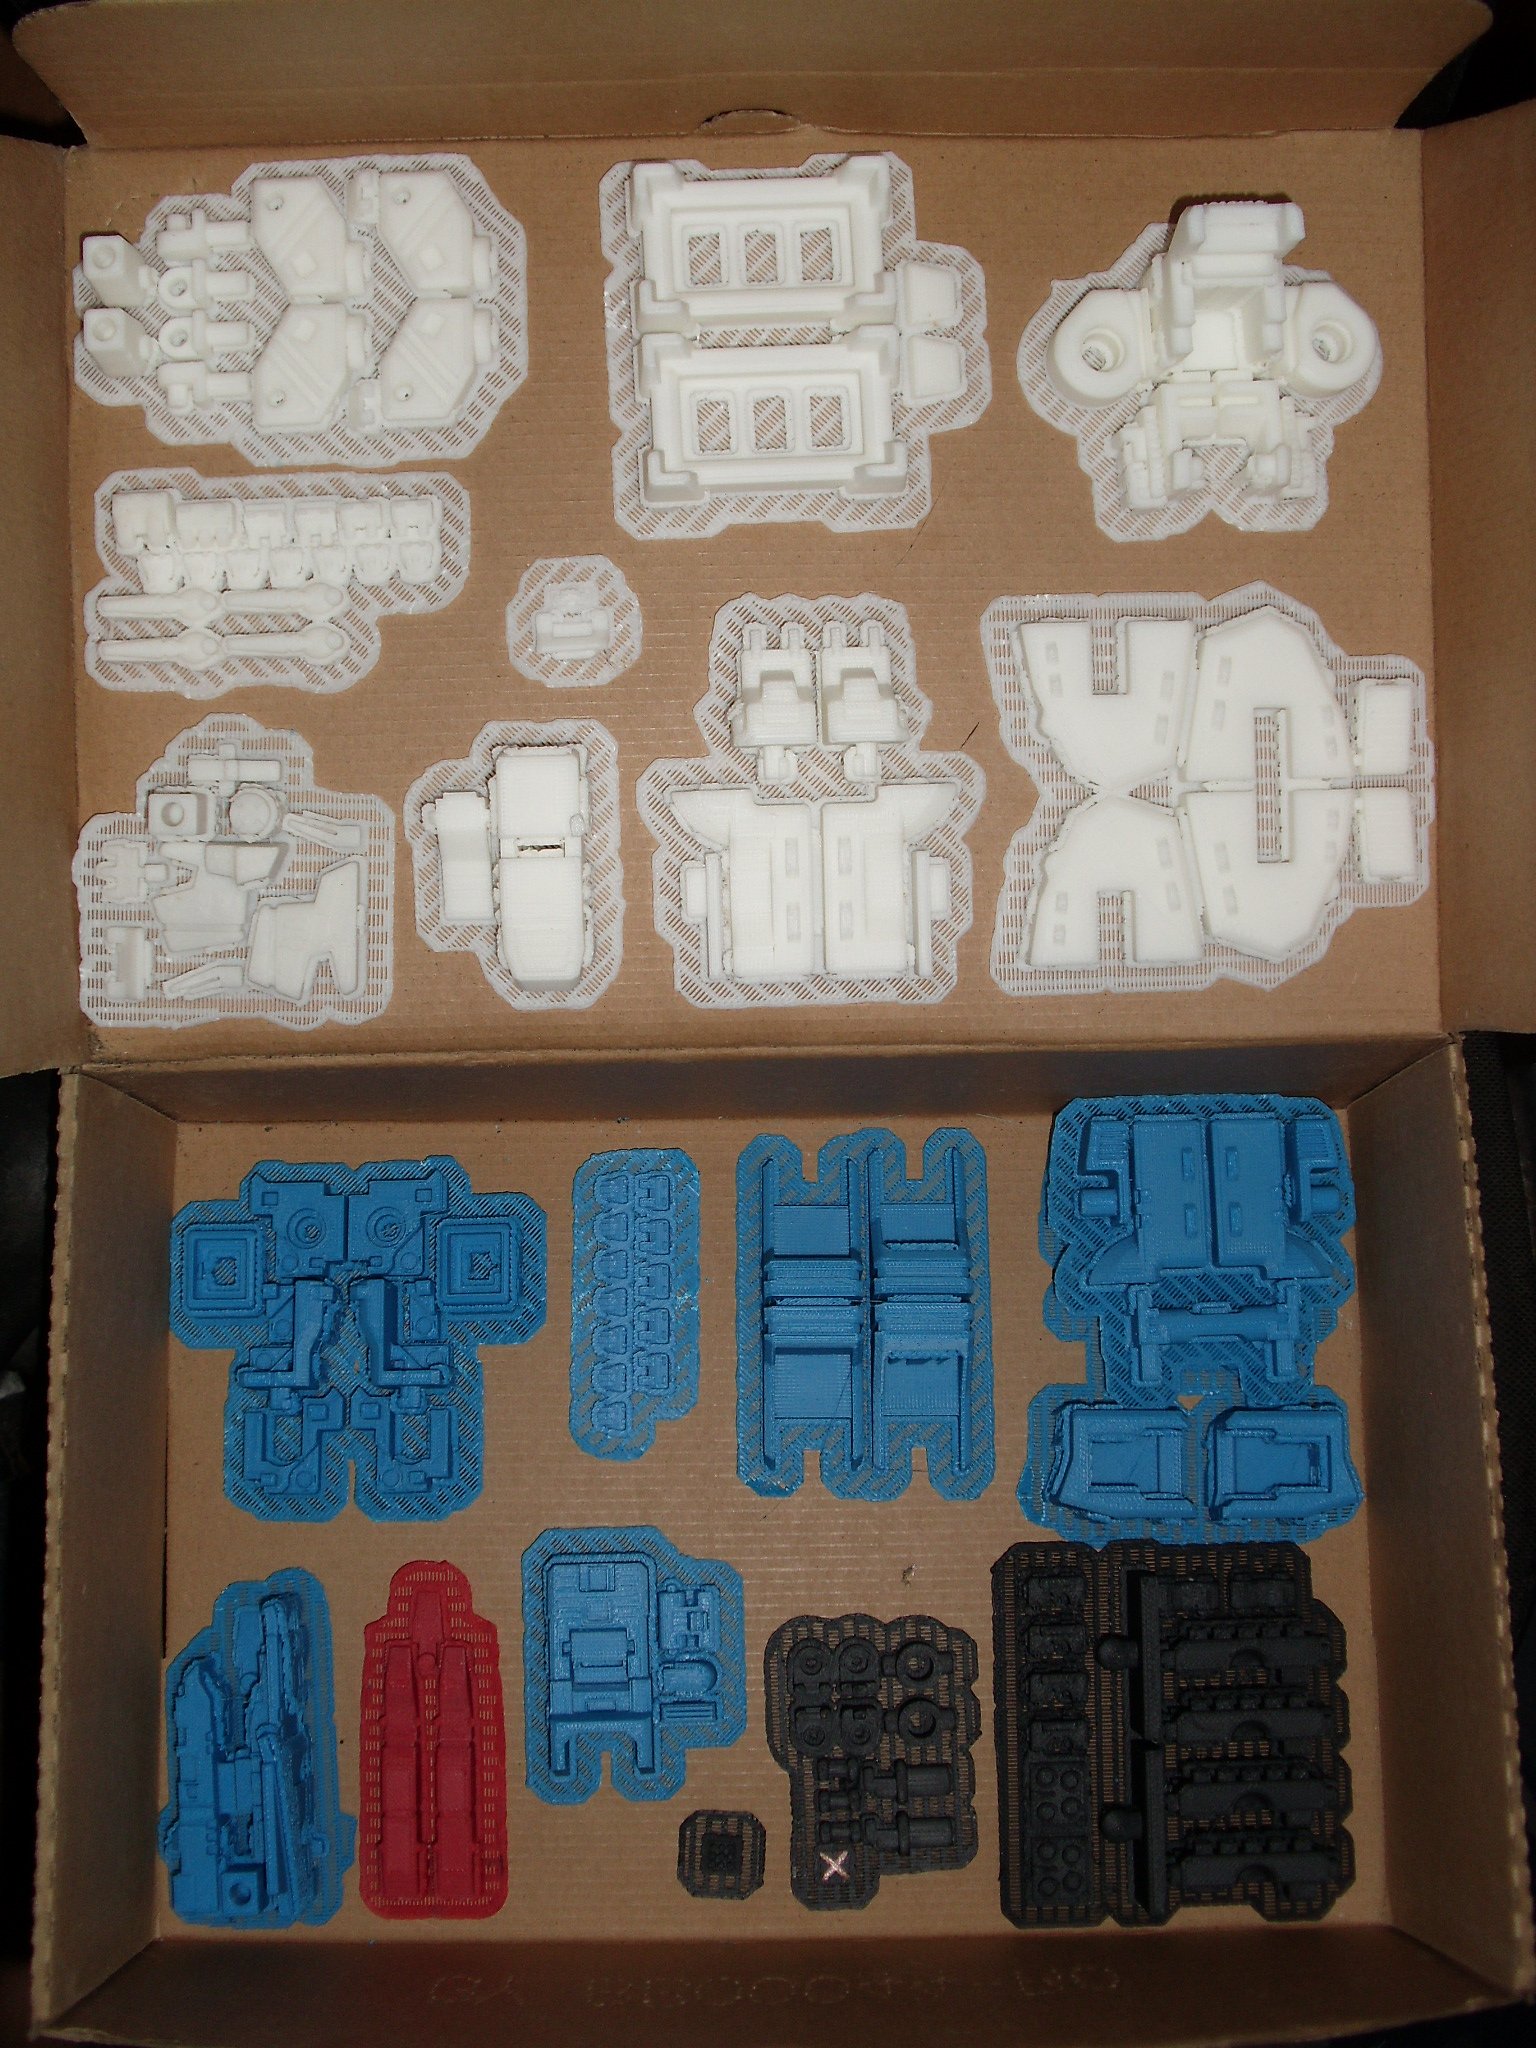
All the printing's done! I forgot about the control tower deck parts... so it's 17 sets total. It'll be assembly for the next few hours.
-
I ran into a similar issue a few prints ago, the nozzle was colliding on the taller parts, and the whole part would separate from the raft. I figured the part was too tall & thin, plus there were other parts printing along with it - eventually, the nozzle skipping from part to part would drag the other parts sideways.
I tend to avoid printing tall parts when necessary - sometimes I add shorter, wider objects to go with the print to help "anchor" the tall part with extra part/support material.
When I need a tall/long part, I just cut the model up to fit the bed diagonally.
Sometimes, I'm amazed at what this thing will & won't print haha.
-
10 hours ago, Chronocidal said:
I can't speak from experience, but any liquid resin printer is going to have a lot more upkeep and maintenance involved, just because of the nature of the material. I think you're also much more limited by size, since dealing with a multi-gallon tank of liquid resin is just onerous outside of an actual industrial setting.
Personally, I've always stuck with ABS, since the vast majority of my prints are intended for use in either model kits or toys, and I like sticking to materials at least mostly compatible with styrene.
Those prints look really good and clean, here's hoping they don't need a lot of cleanup!
Same reasons I'm holding off on a resin printer - I've dealt with resin at work before, and I'm not a fan.
The prints are decent from this printer, almost none of the horror on the Simplify3D print quality troubleshooting guide.
Kinda wish Pp3Dp/Tiertime didn't give up on upgrading the g-code. Cleanup's pretty standard - tons of sanding!
-
All the blue parts are done! I'll start running all the white parts tomorrow.
-
1 hour ago, coronadlux said:
That's a heck of a lot of parts, but it will make it more of a colored snap fit.
I have 2 printers, my work horse is a MP Mini Select my wife got me a few years ago. The other one is a 2 month old anycubic photon resin printer. I use this one for the smaller detailed stuff.
Yup, I was going for the snap kit approach. Easy to "share" & get the same results.
Those prints are fantastic! Maybe when this thing's done, you can model & print Valks + Destroids to scale!
I was considering a resin printer, but couldn't justify the utility costs - I only print stuff on occasion (or on a dare).
-
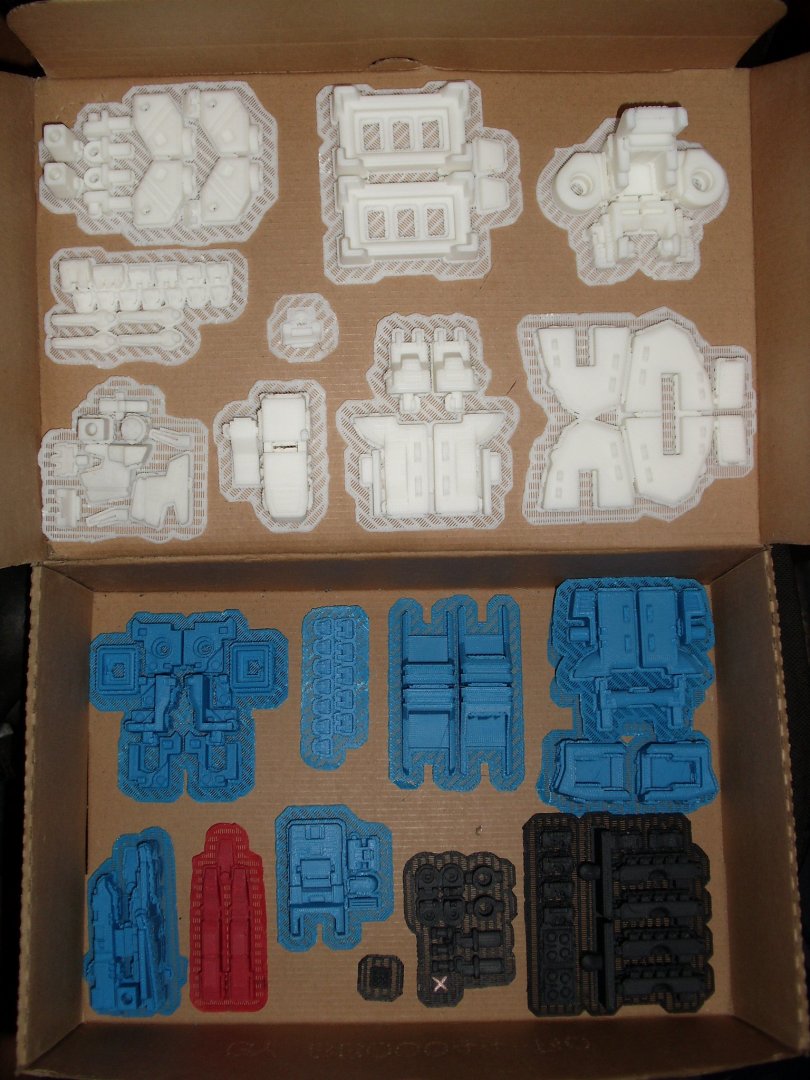
We're looking at 133 parts total, possibly 135 after improvements. It's a pretty substantial print: 16 sets, grouped in colors.
Here's the progress so far: 13 hours, 200 grams (and counting).
-
1 hour ago, Sanity is Optional said:
To get decent adhesion I've been using a heated bed with Kapton tape, and then roughing up the tape a bit with sandpaper. The heated bed itself is for ABS, so PLA just refuses to come off entirely unless I cover it up.
I have a friend who did the Kapton tape/glass bed mod, I'm not as "adventurous" with mods haha. I use ABS exclusively for this machine, it's predictable and requires less tweaking.
-
8 hours ago, Chronocidal said:
Aha, I recognize that printer!
I got a good pile of prints out of mine, but the bed translation did a number on a lot of my taller items, causing a lot of wobble and disjointed layers.
Do you use the included software? I've considered picking up Simplify3D, since I read it can do wonders with raft construction to make it easier to remove.
Model is looking great, I love seeing how designers break down their models into sets of parts for assembly.
This one's an Up! Plus 2, still going strong after 4 years. I'm still using the included software - it's not very smart, but you can't beat the plug & play user friendliness.
I heard good stuff about Simplify3D, but they don't support this printer.

Thanks! I think you're gonna like how this model's partitioned out! - I still need to do the layout work to make it a print-friendly .stl file.
7 hours ago, Xigfrid said:The model is great! A lot of talent there for sure
Thanks!
7 hours ago, Sanity is Optional said:I use Simplify3D at my work for the stuff we 3D print, the raft and separation work pretty well, and there's lots of available settings to tweak for it (solid layers below separation, distances both horizontal and vertical, etc...)
I've wanted to upgrade print software for a while, but the good ones don't support my printer.
I also tried a PEI bed conversion, but it was too finicky, so I had to switch back to the perforated boards.
I hit a sweet spot with the bed height, and removing prints is pretty hassle-free, while keeping good adhesion.
-
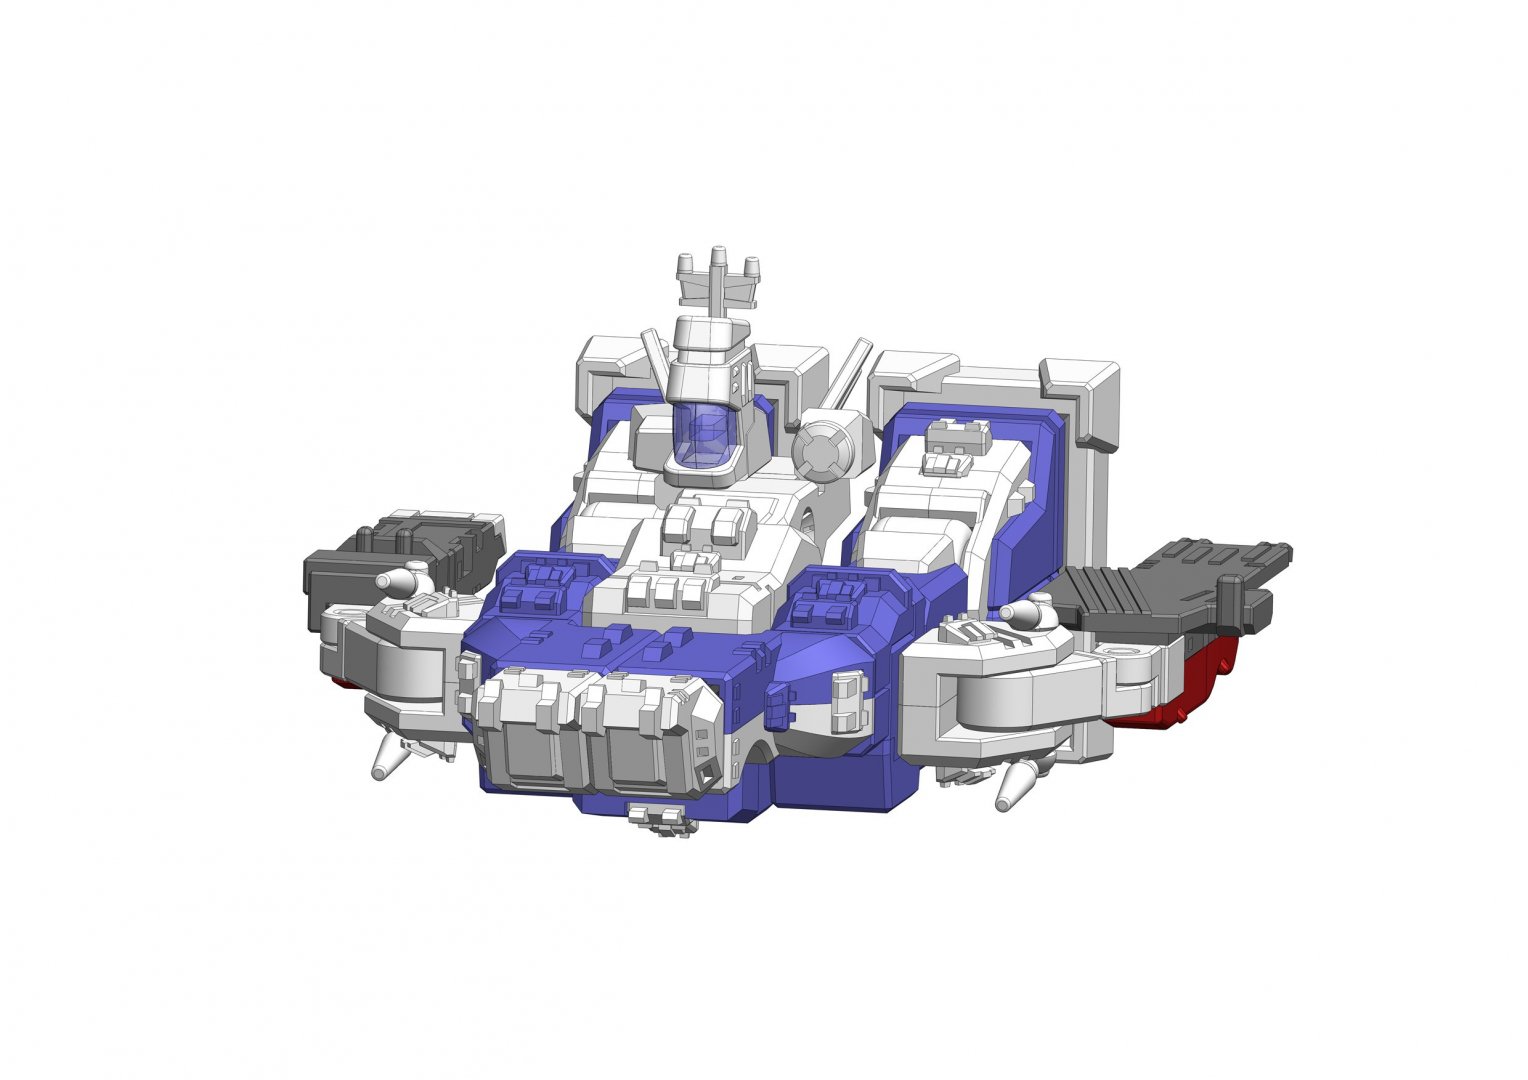
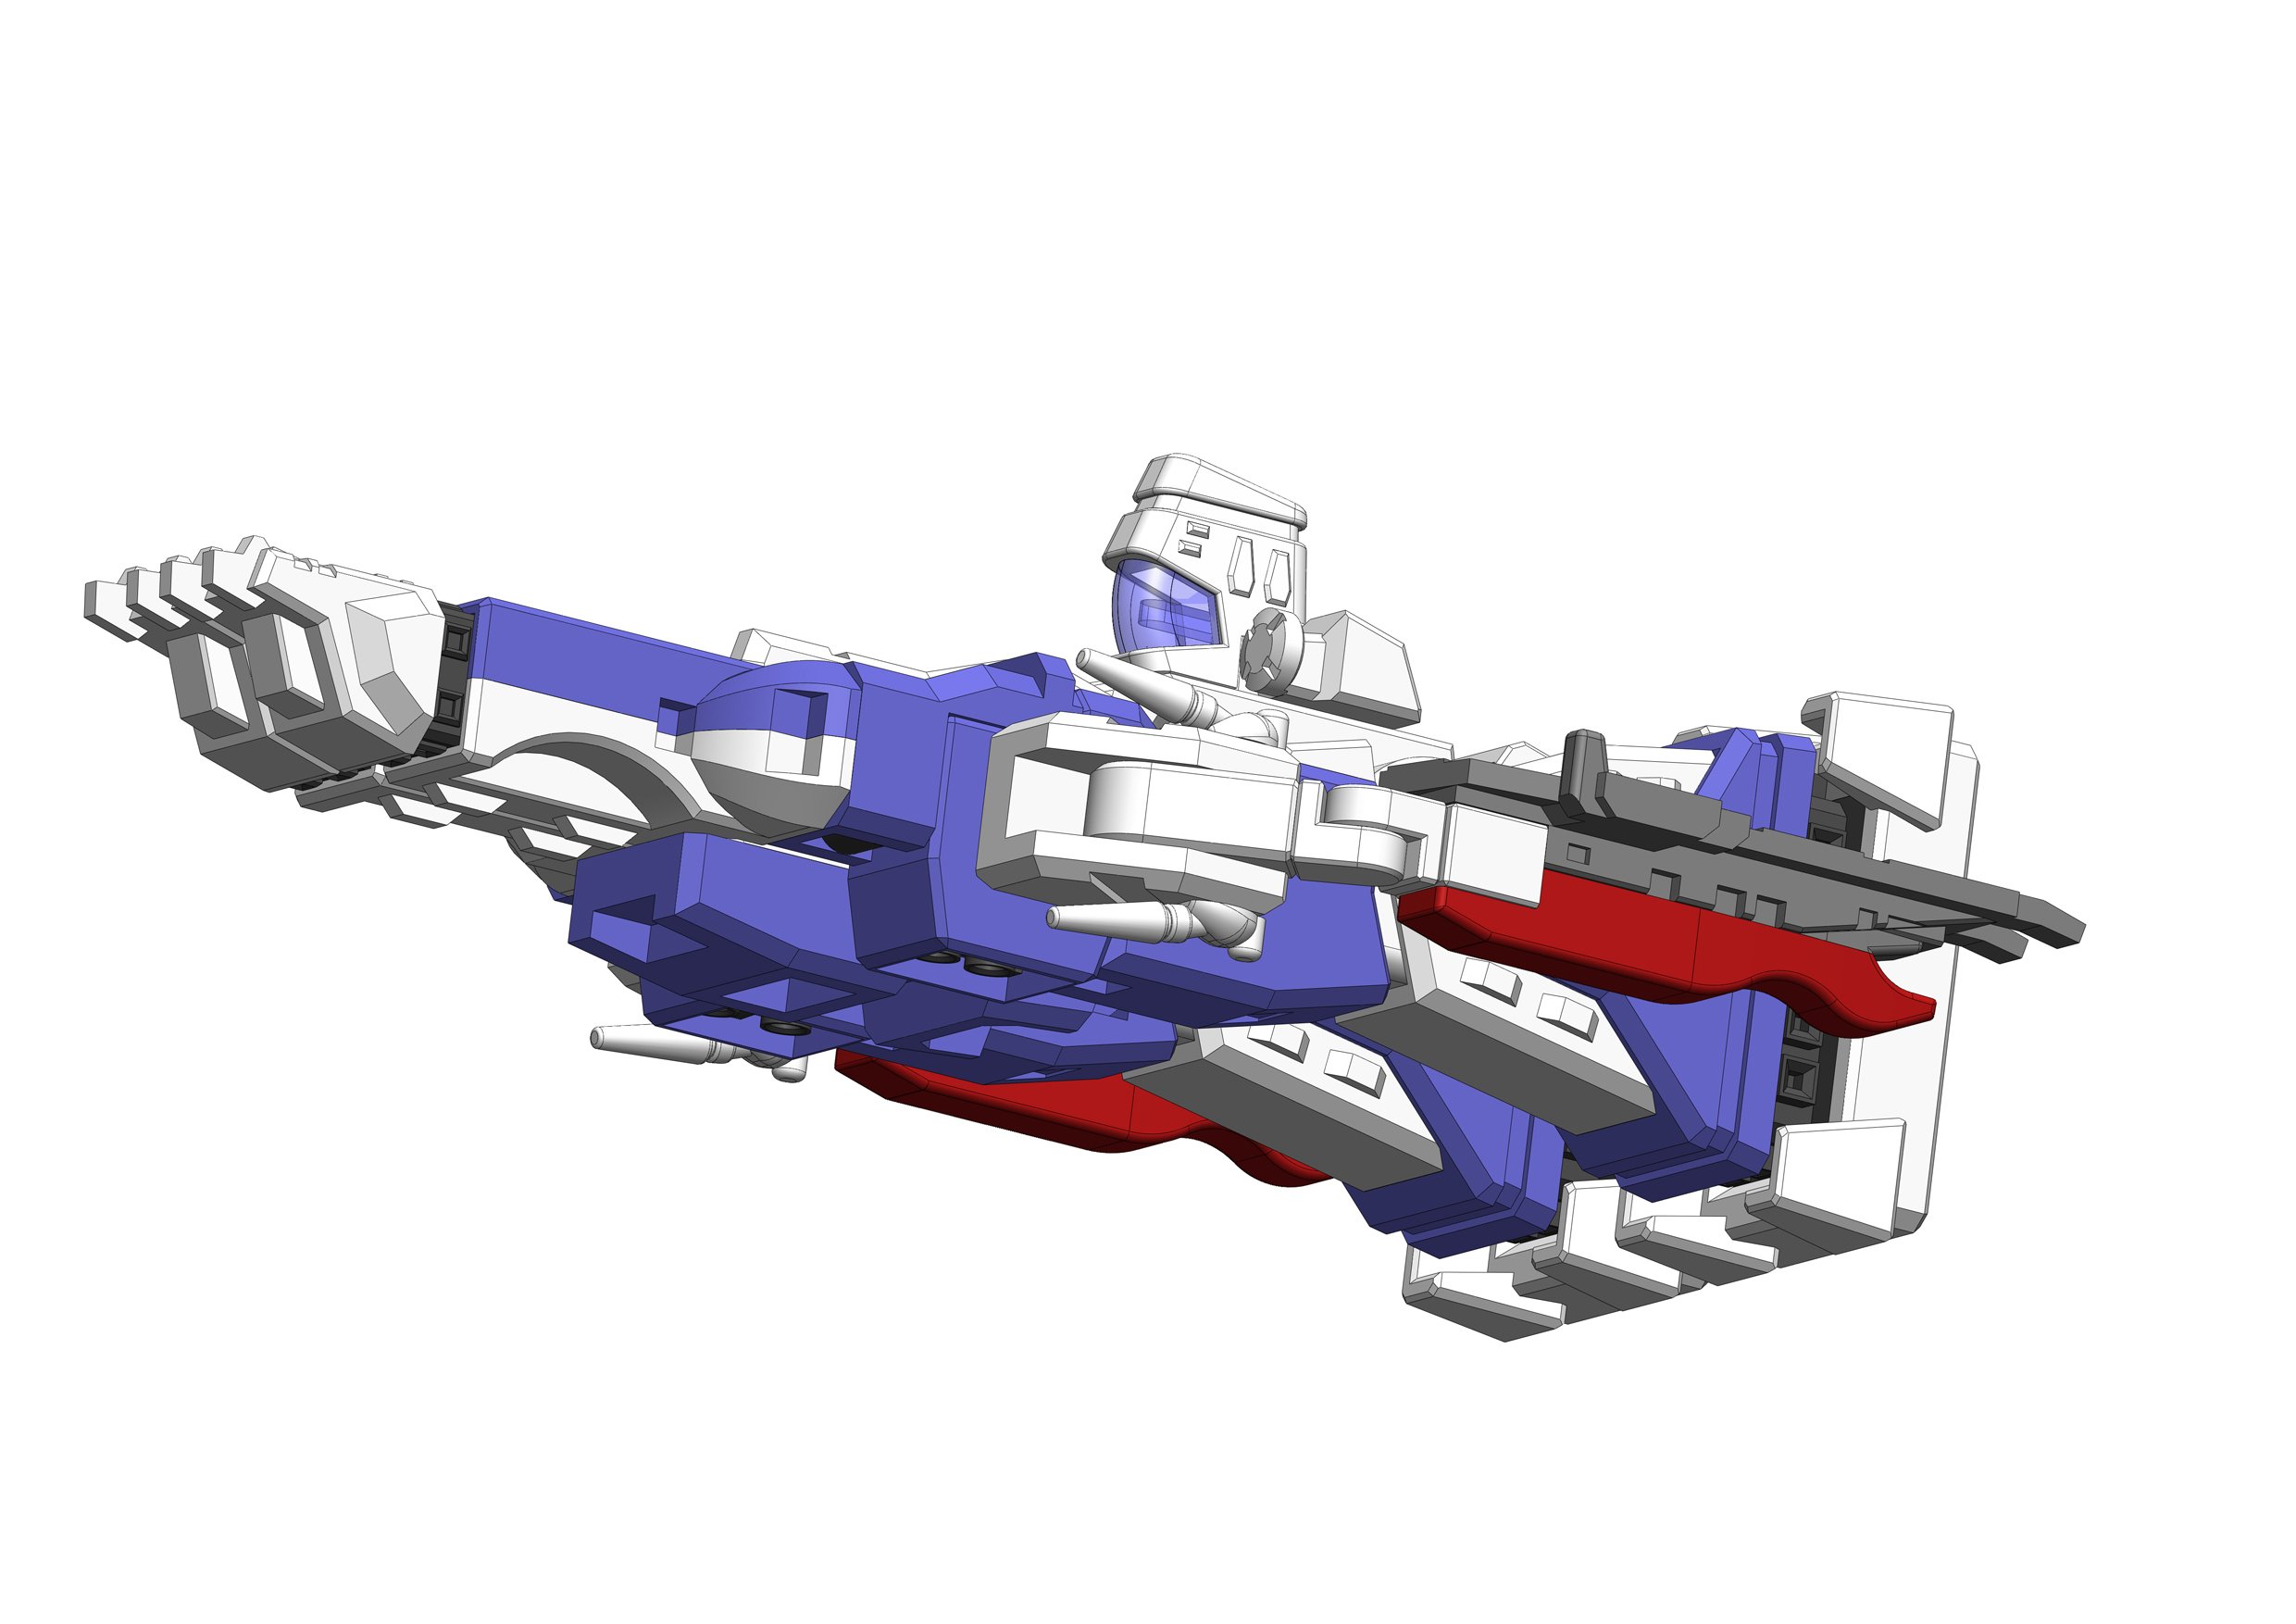
One more gimmick: retro landing gear!

-
14 hours ago, derex3592 said:
wow! awesome talent here!
Thanks!
3 hours ago, coronadlux said:Very co. This is a great build
Thanks!
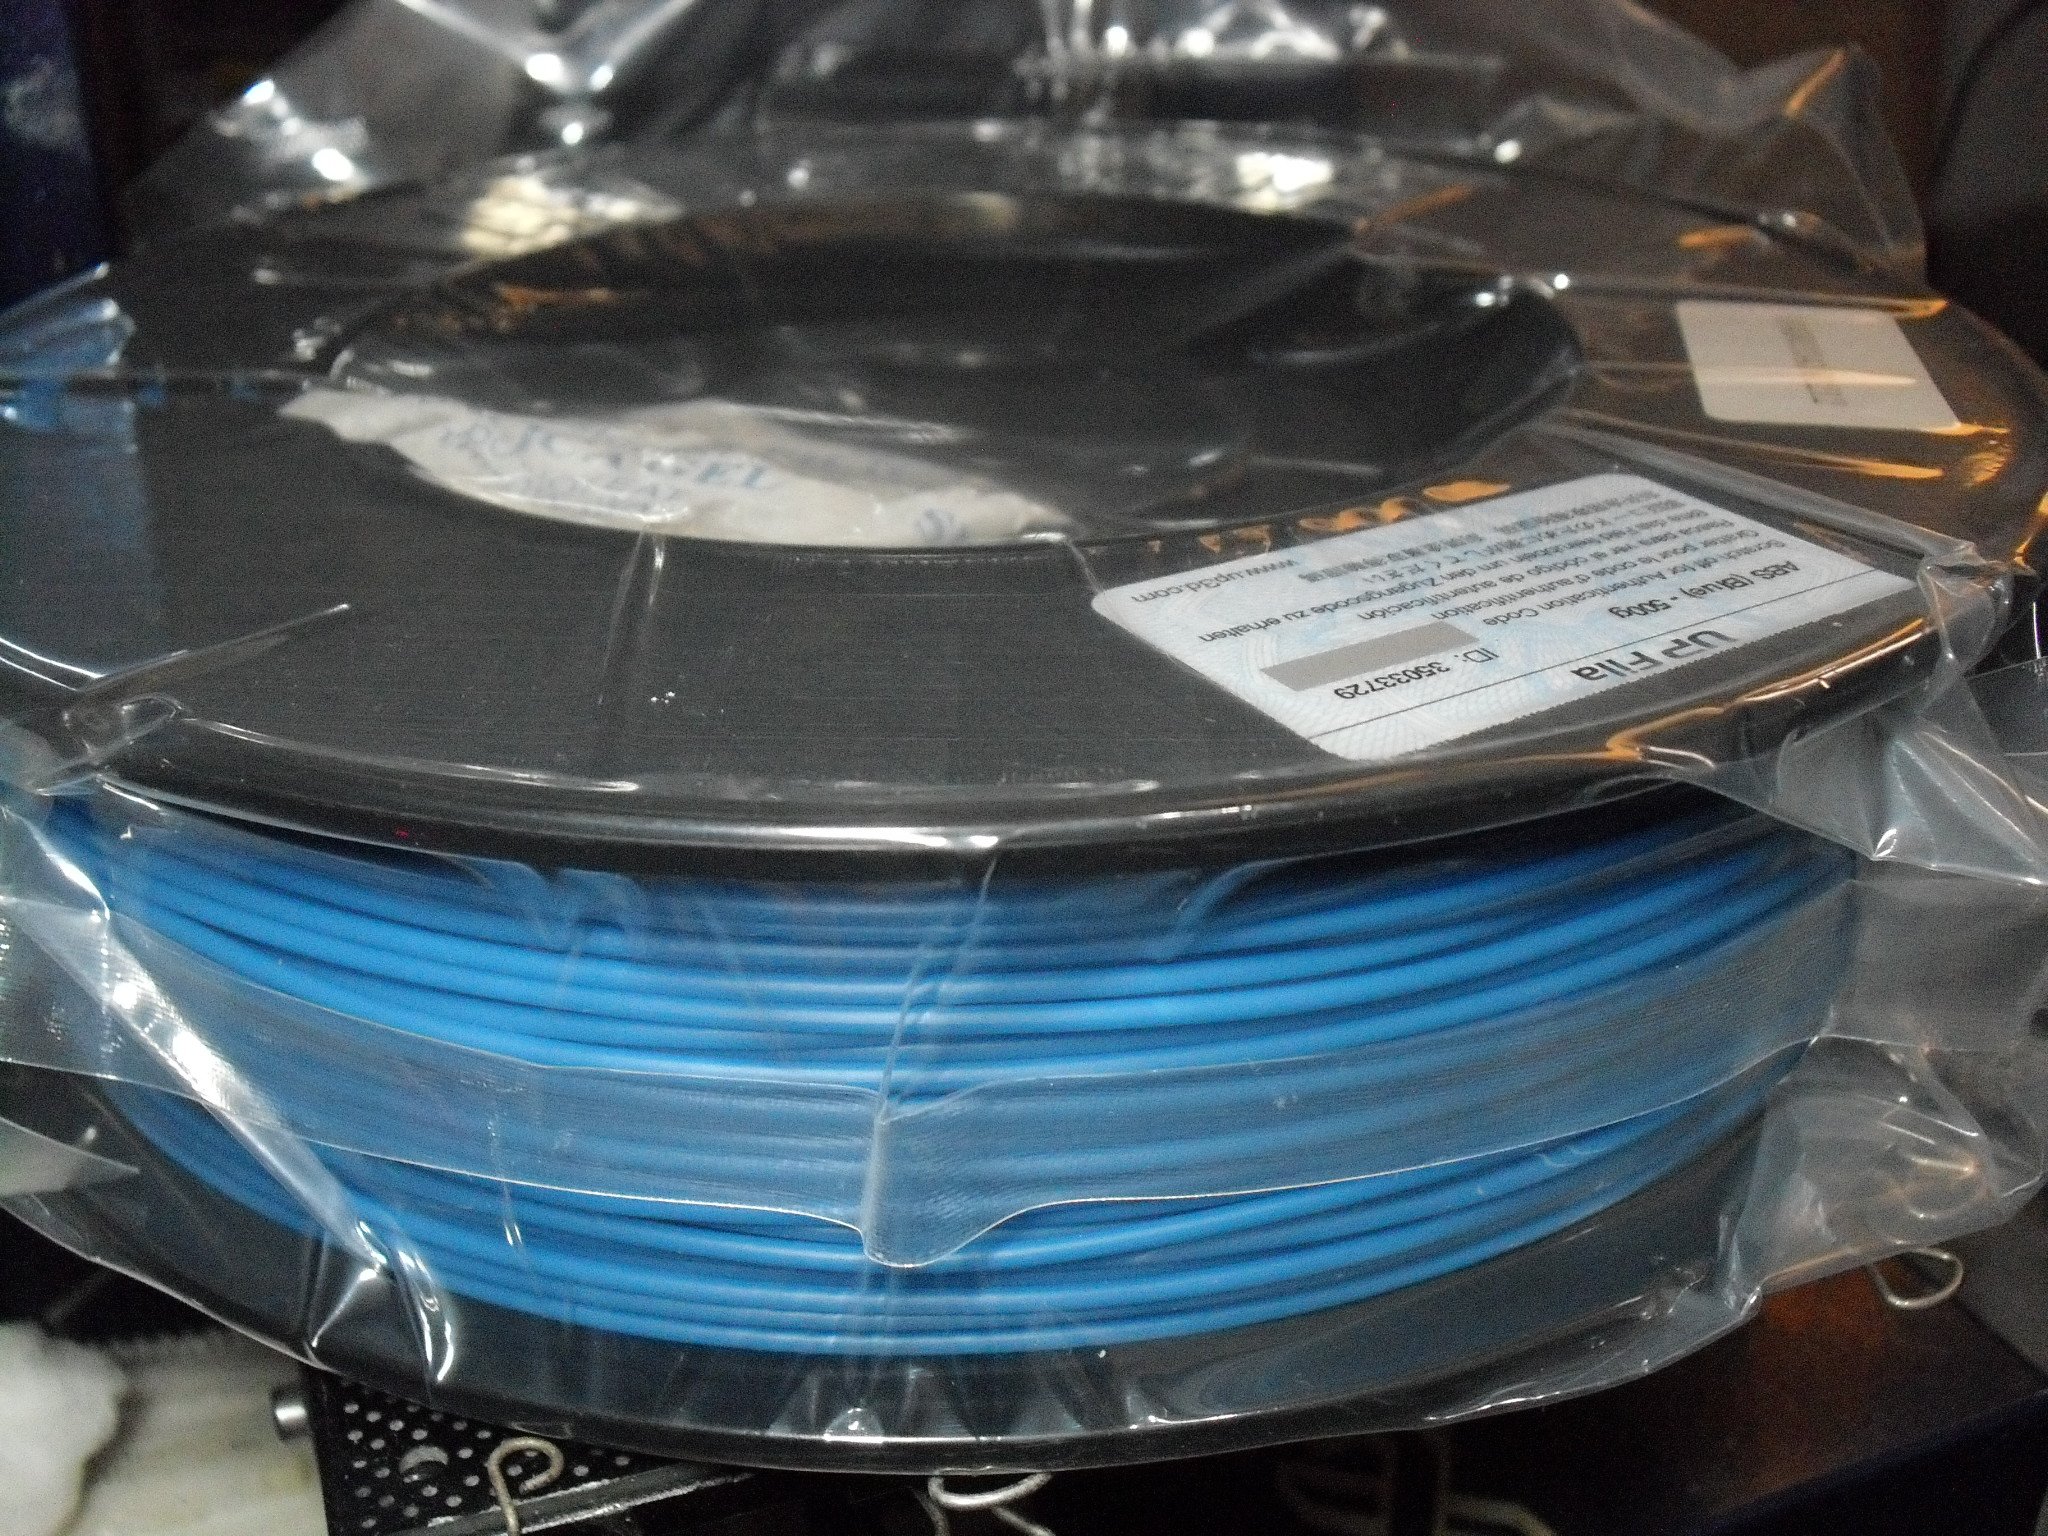
Gearing up for the test print! I wasn't expecting the filament color to be close to the "correct" tone of blue.

-
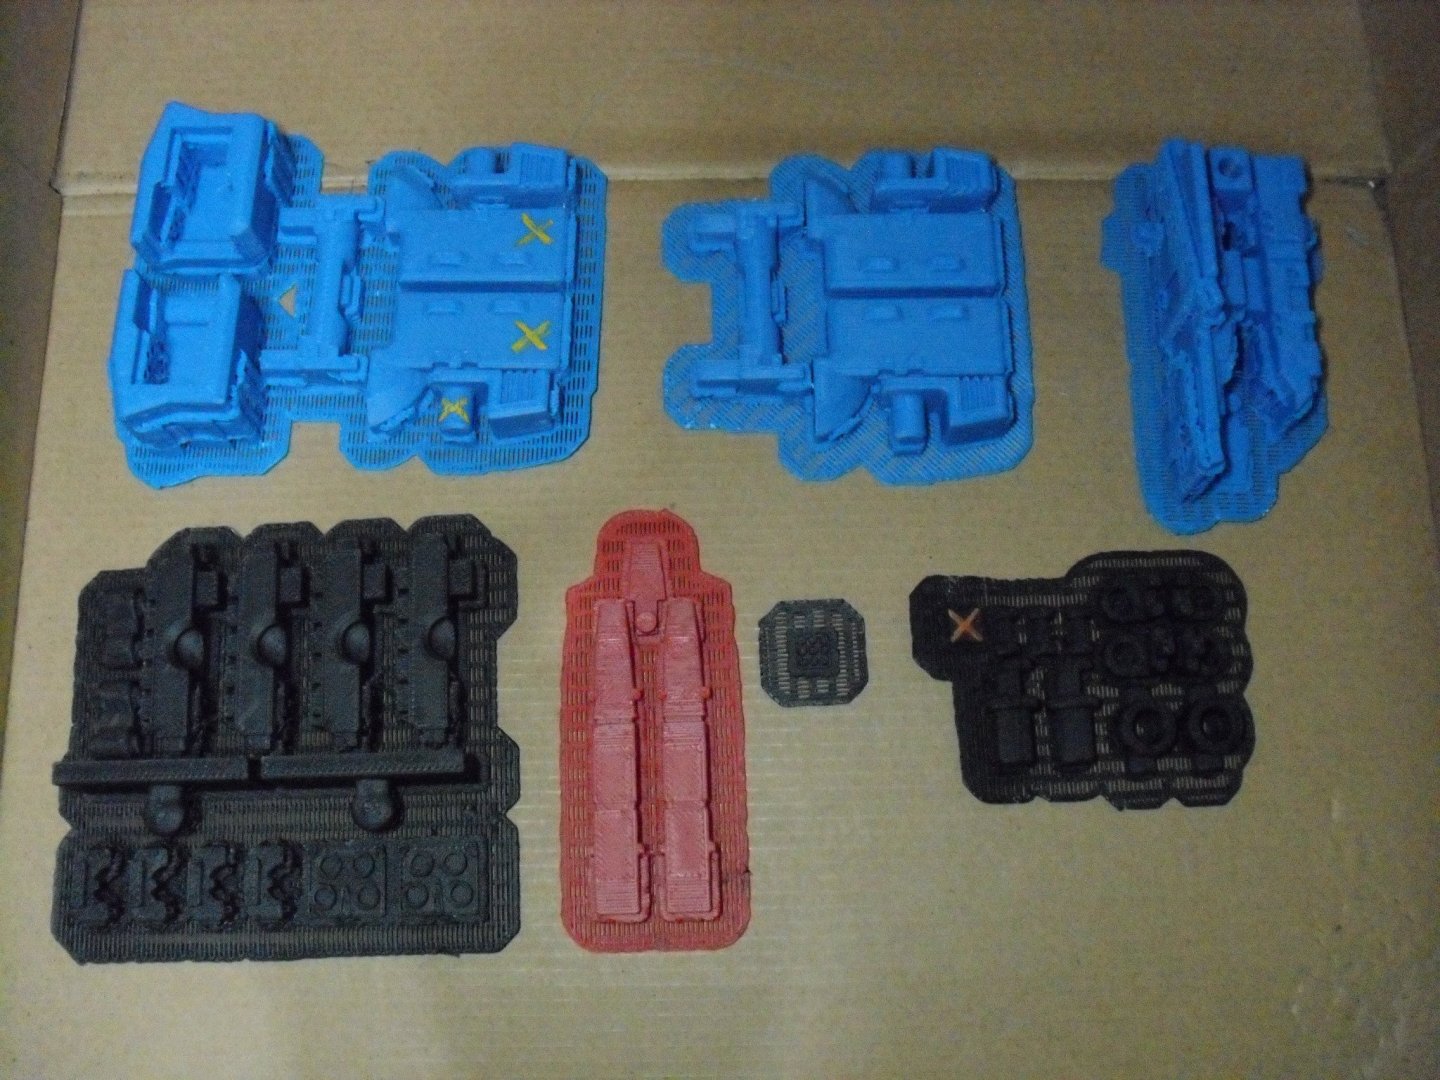
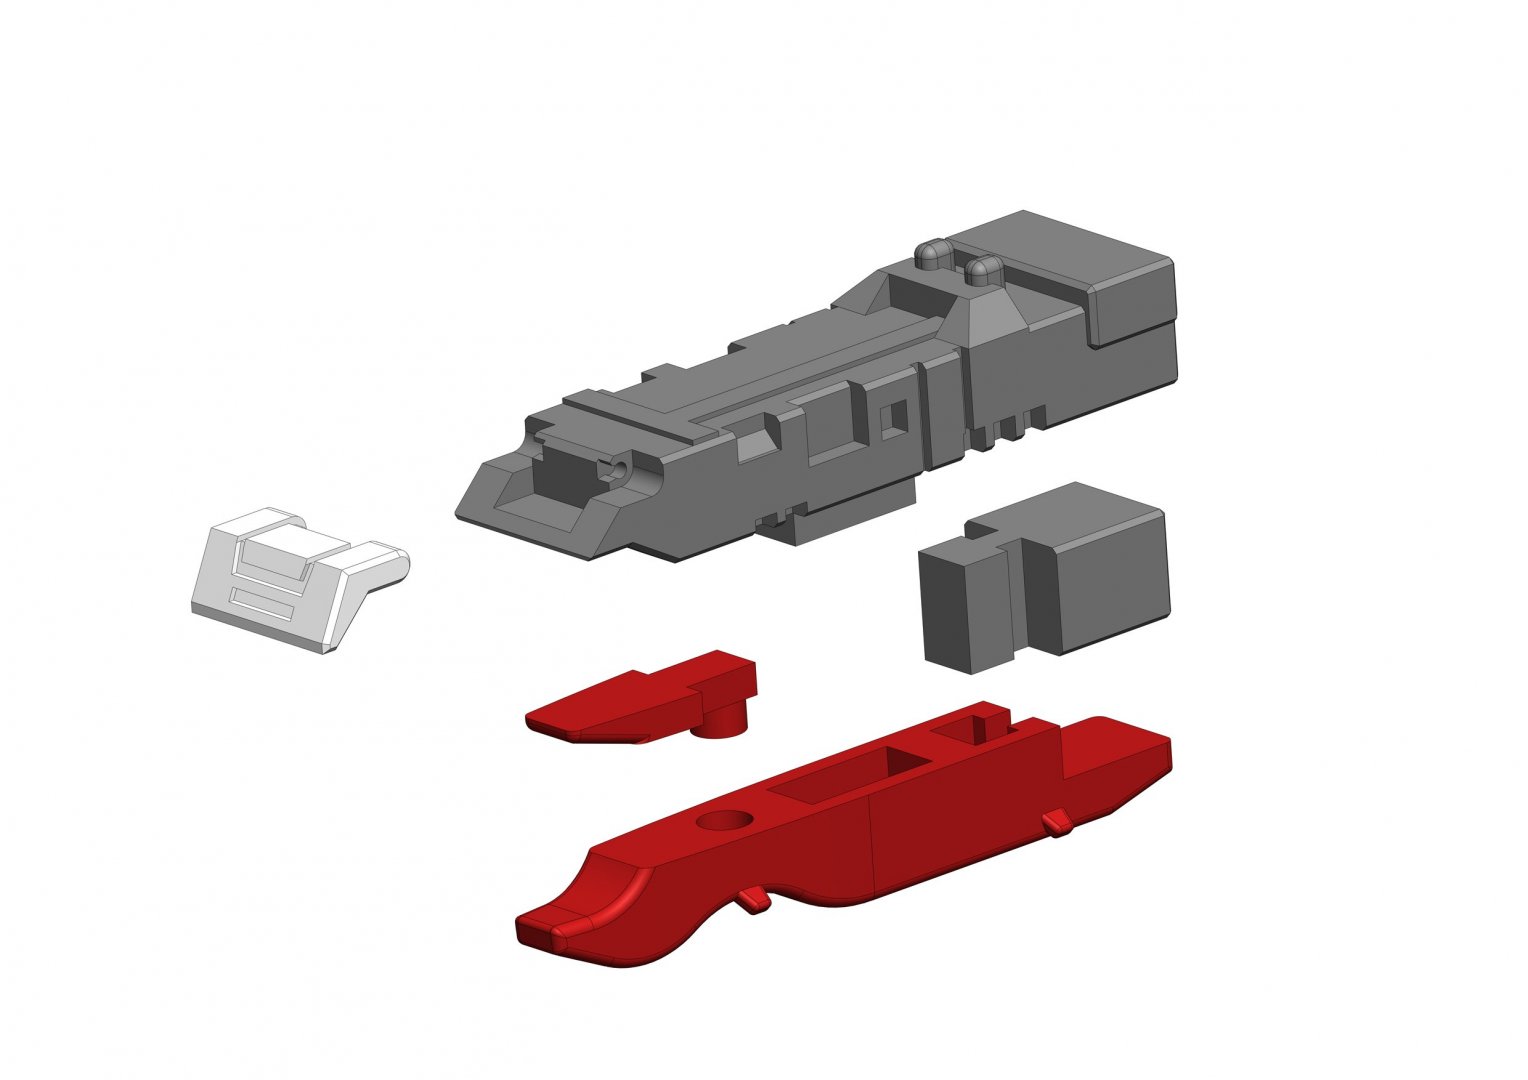
Here's what the parts separation looks like. As few parts as I can get away with, plus provisions for color separation.
Plus "fool-resistant" assembly, most of the parts will only go together in 1 way.

-
7 minutes ago, Sanity is Optional said:
Will it be pure snap-build, or will you put in some pins/rods for hinges?
I'm totally in to try printing one up.
I'd like to avoid extra pins & rods, although probably some glue in certain areas. We'll find out when I run the test print.
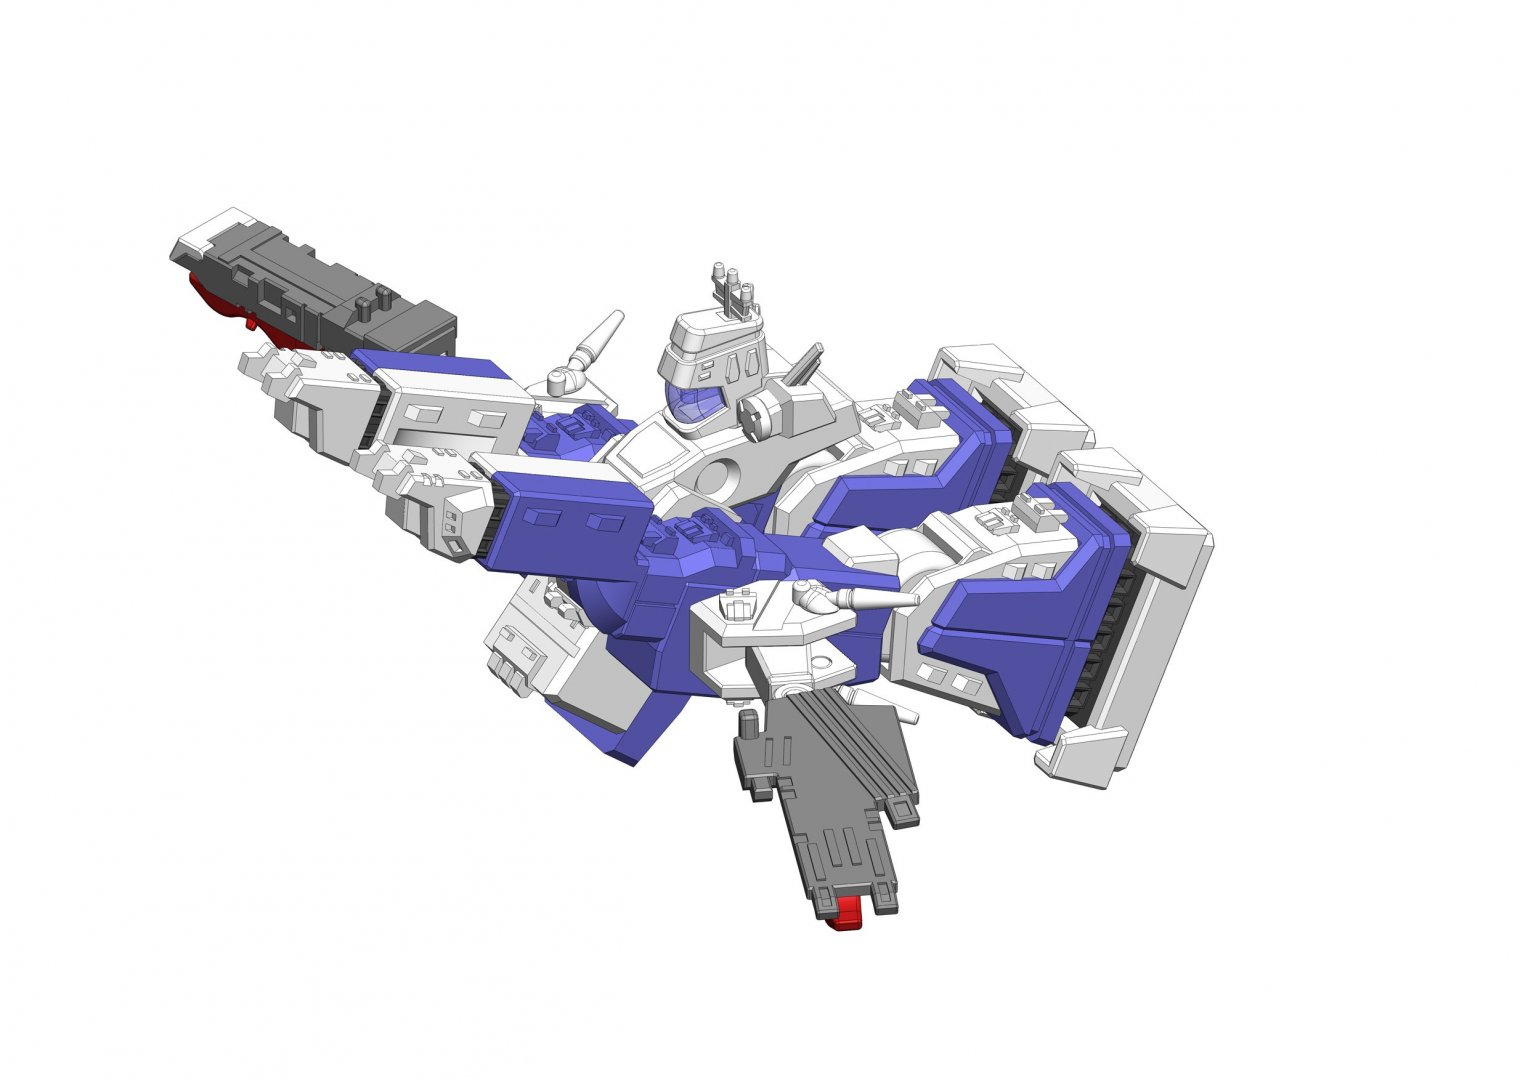
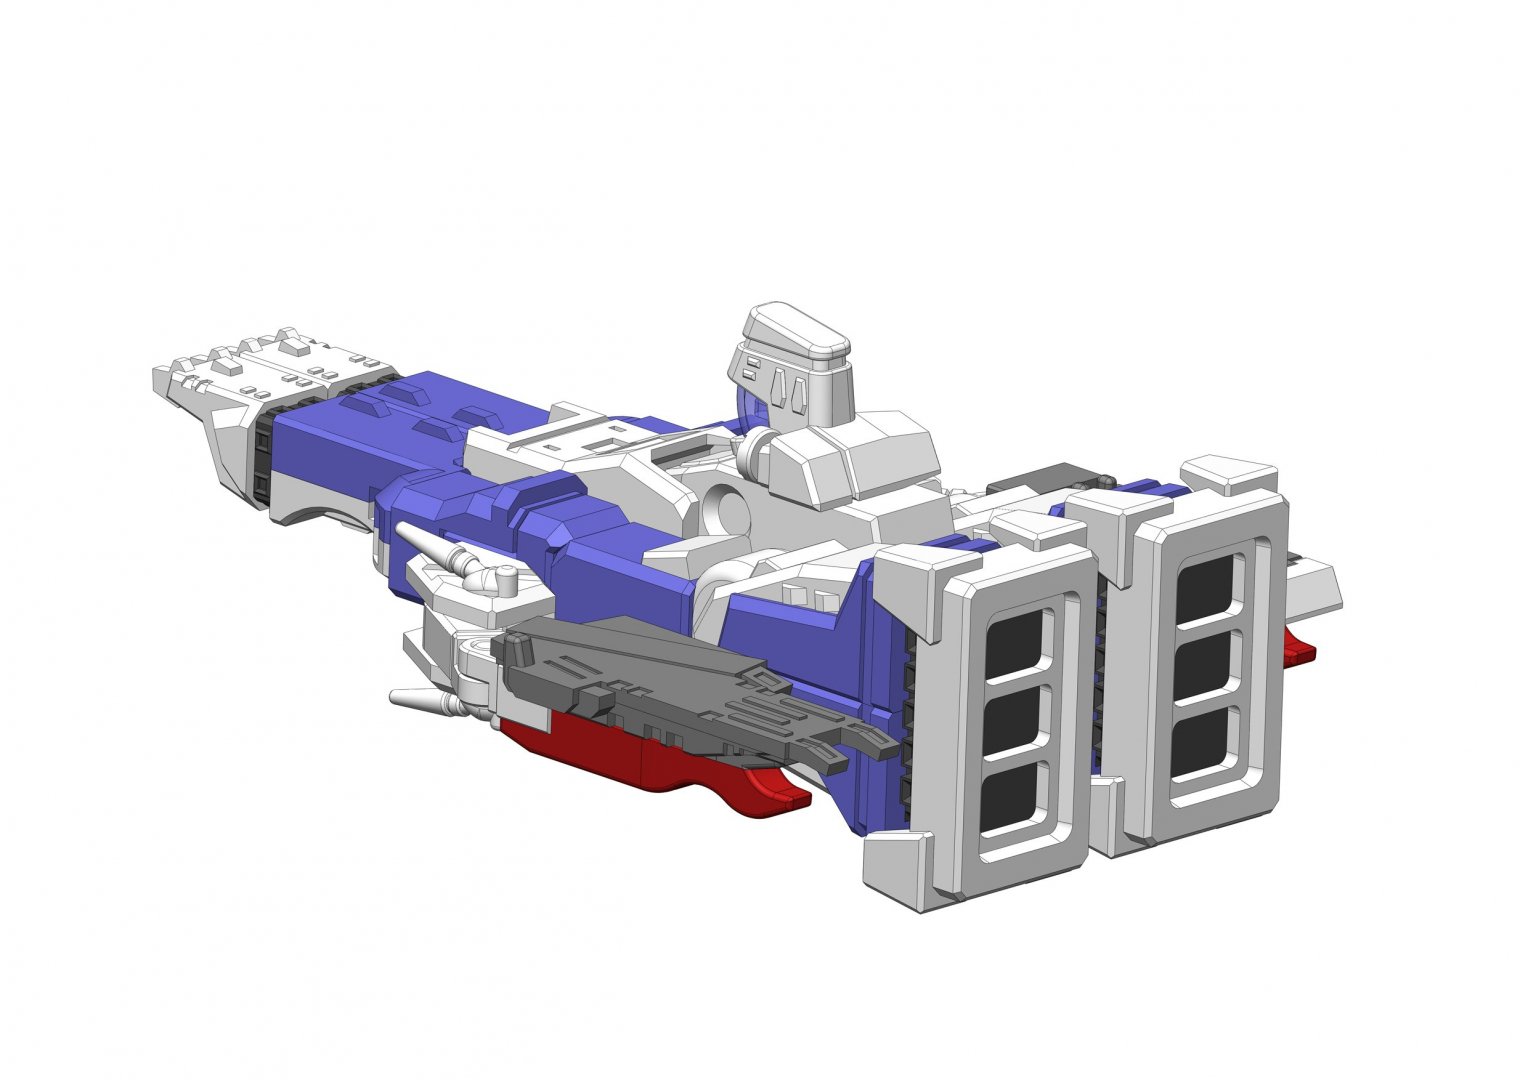
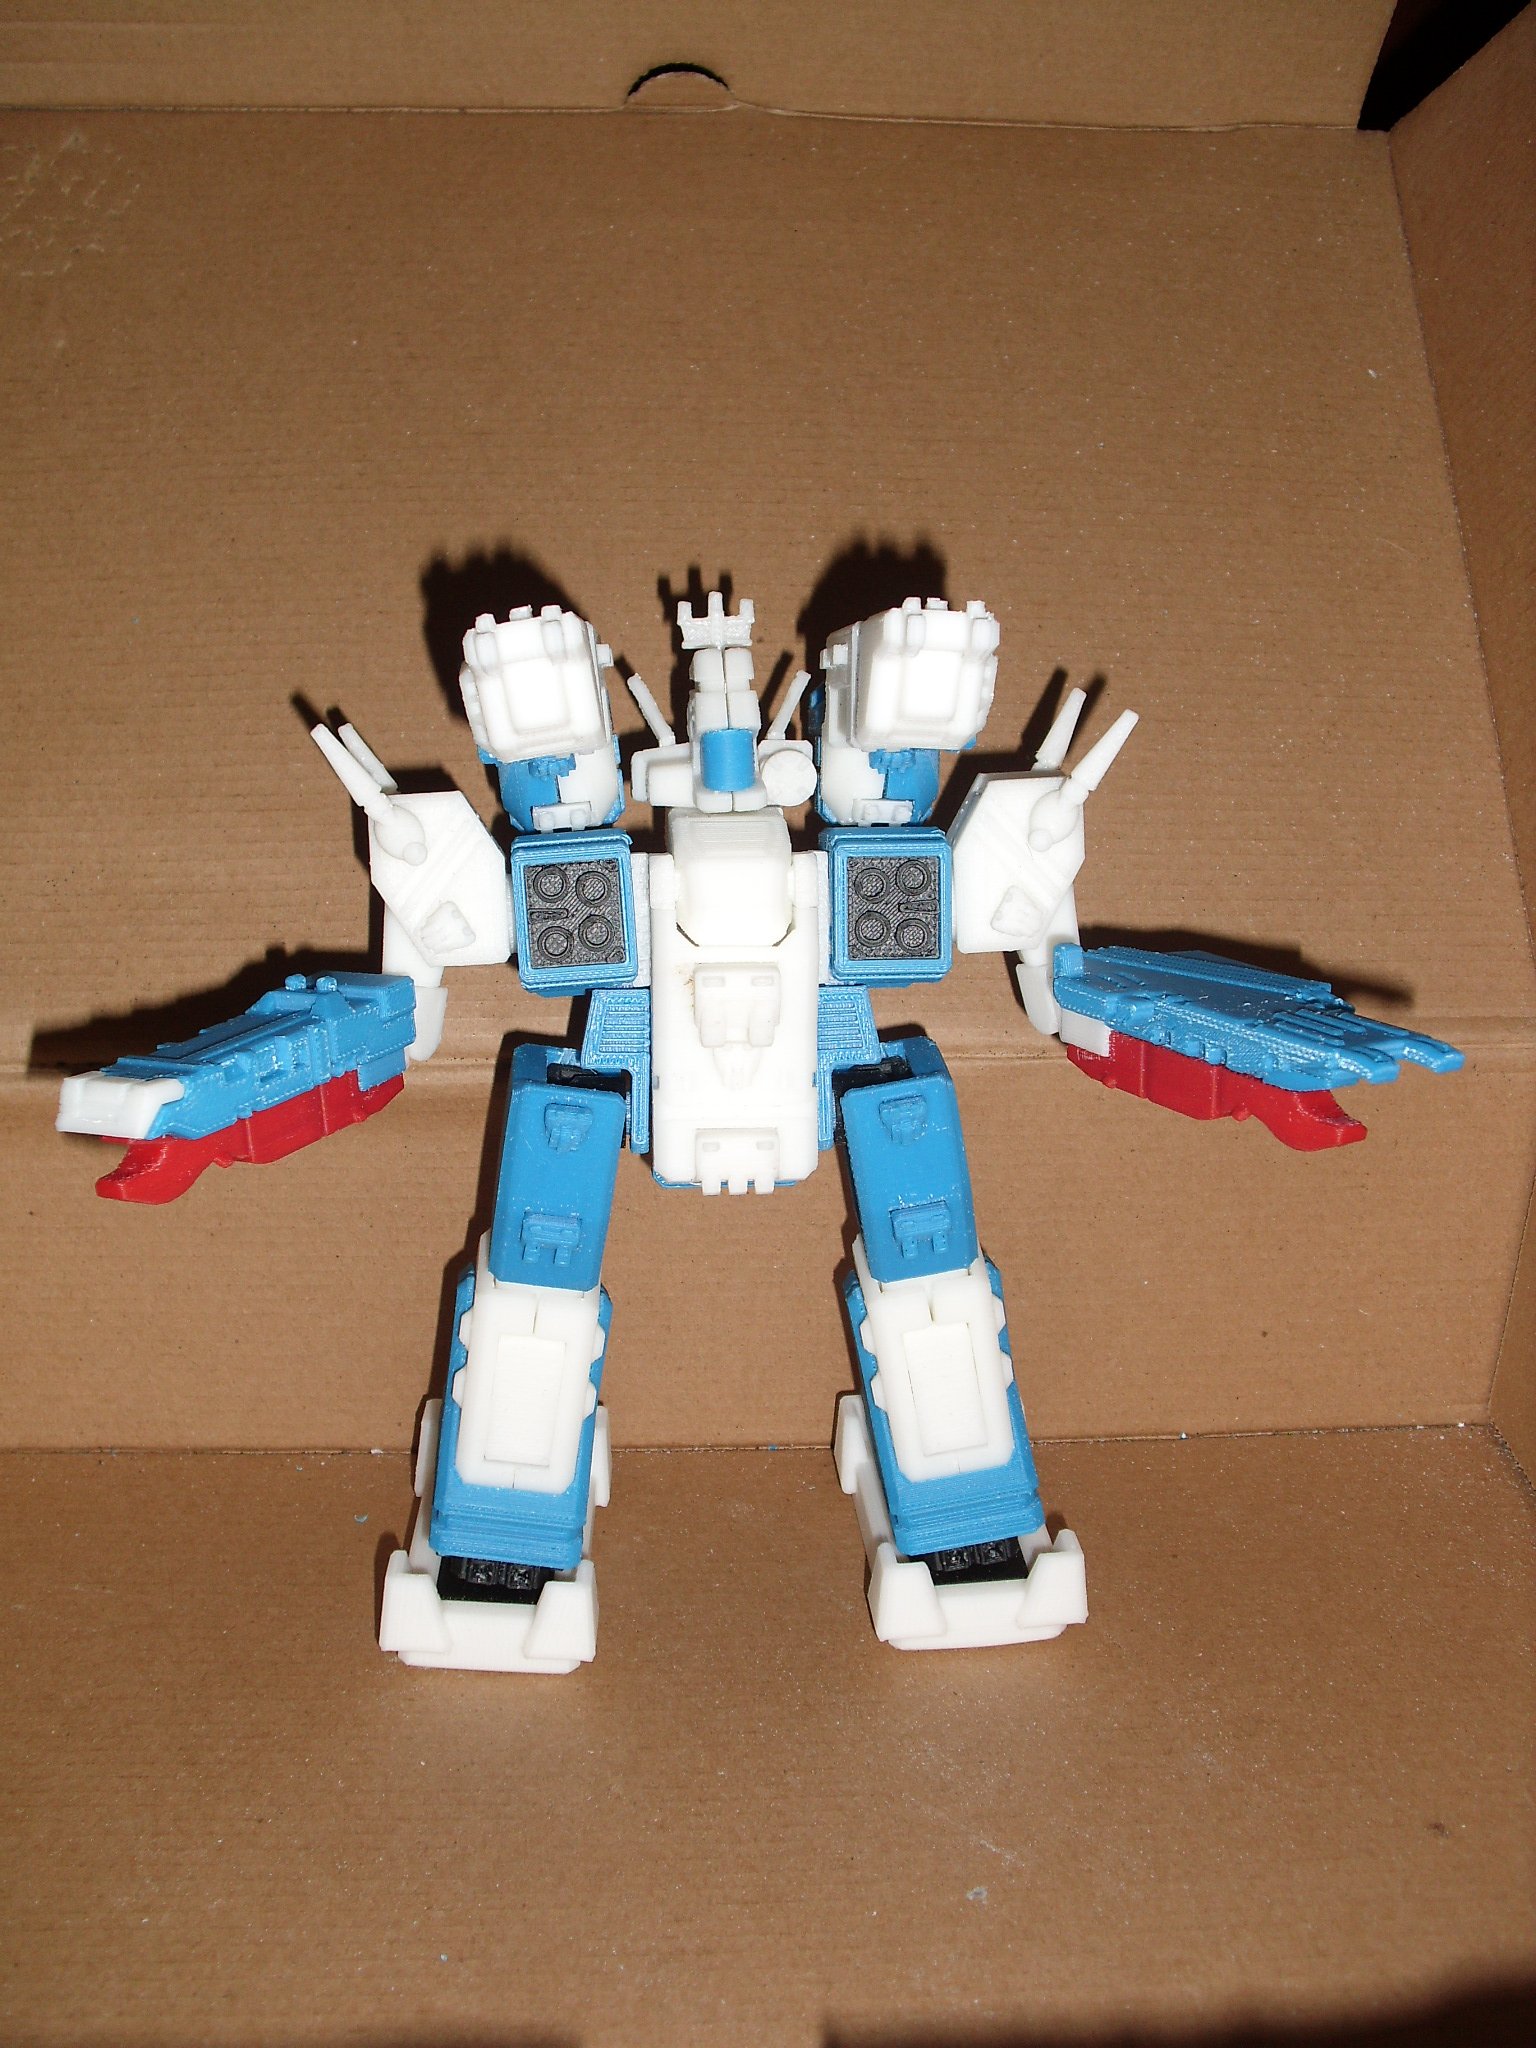
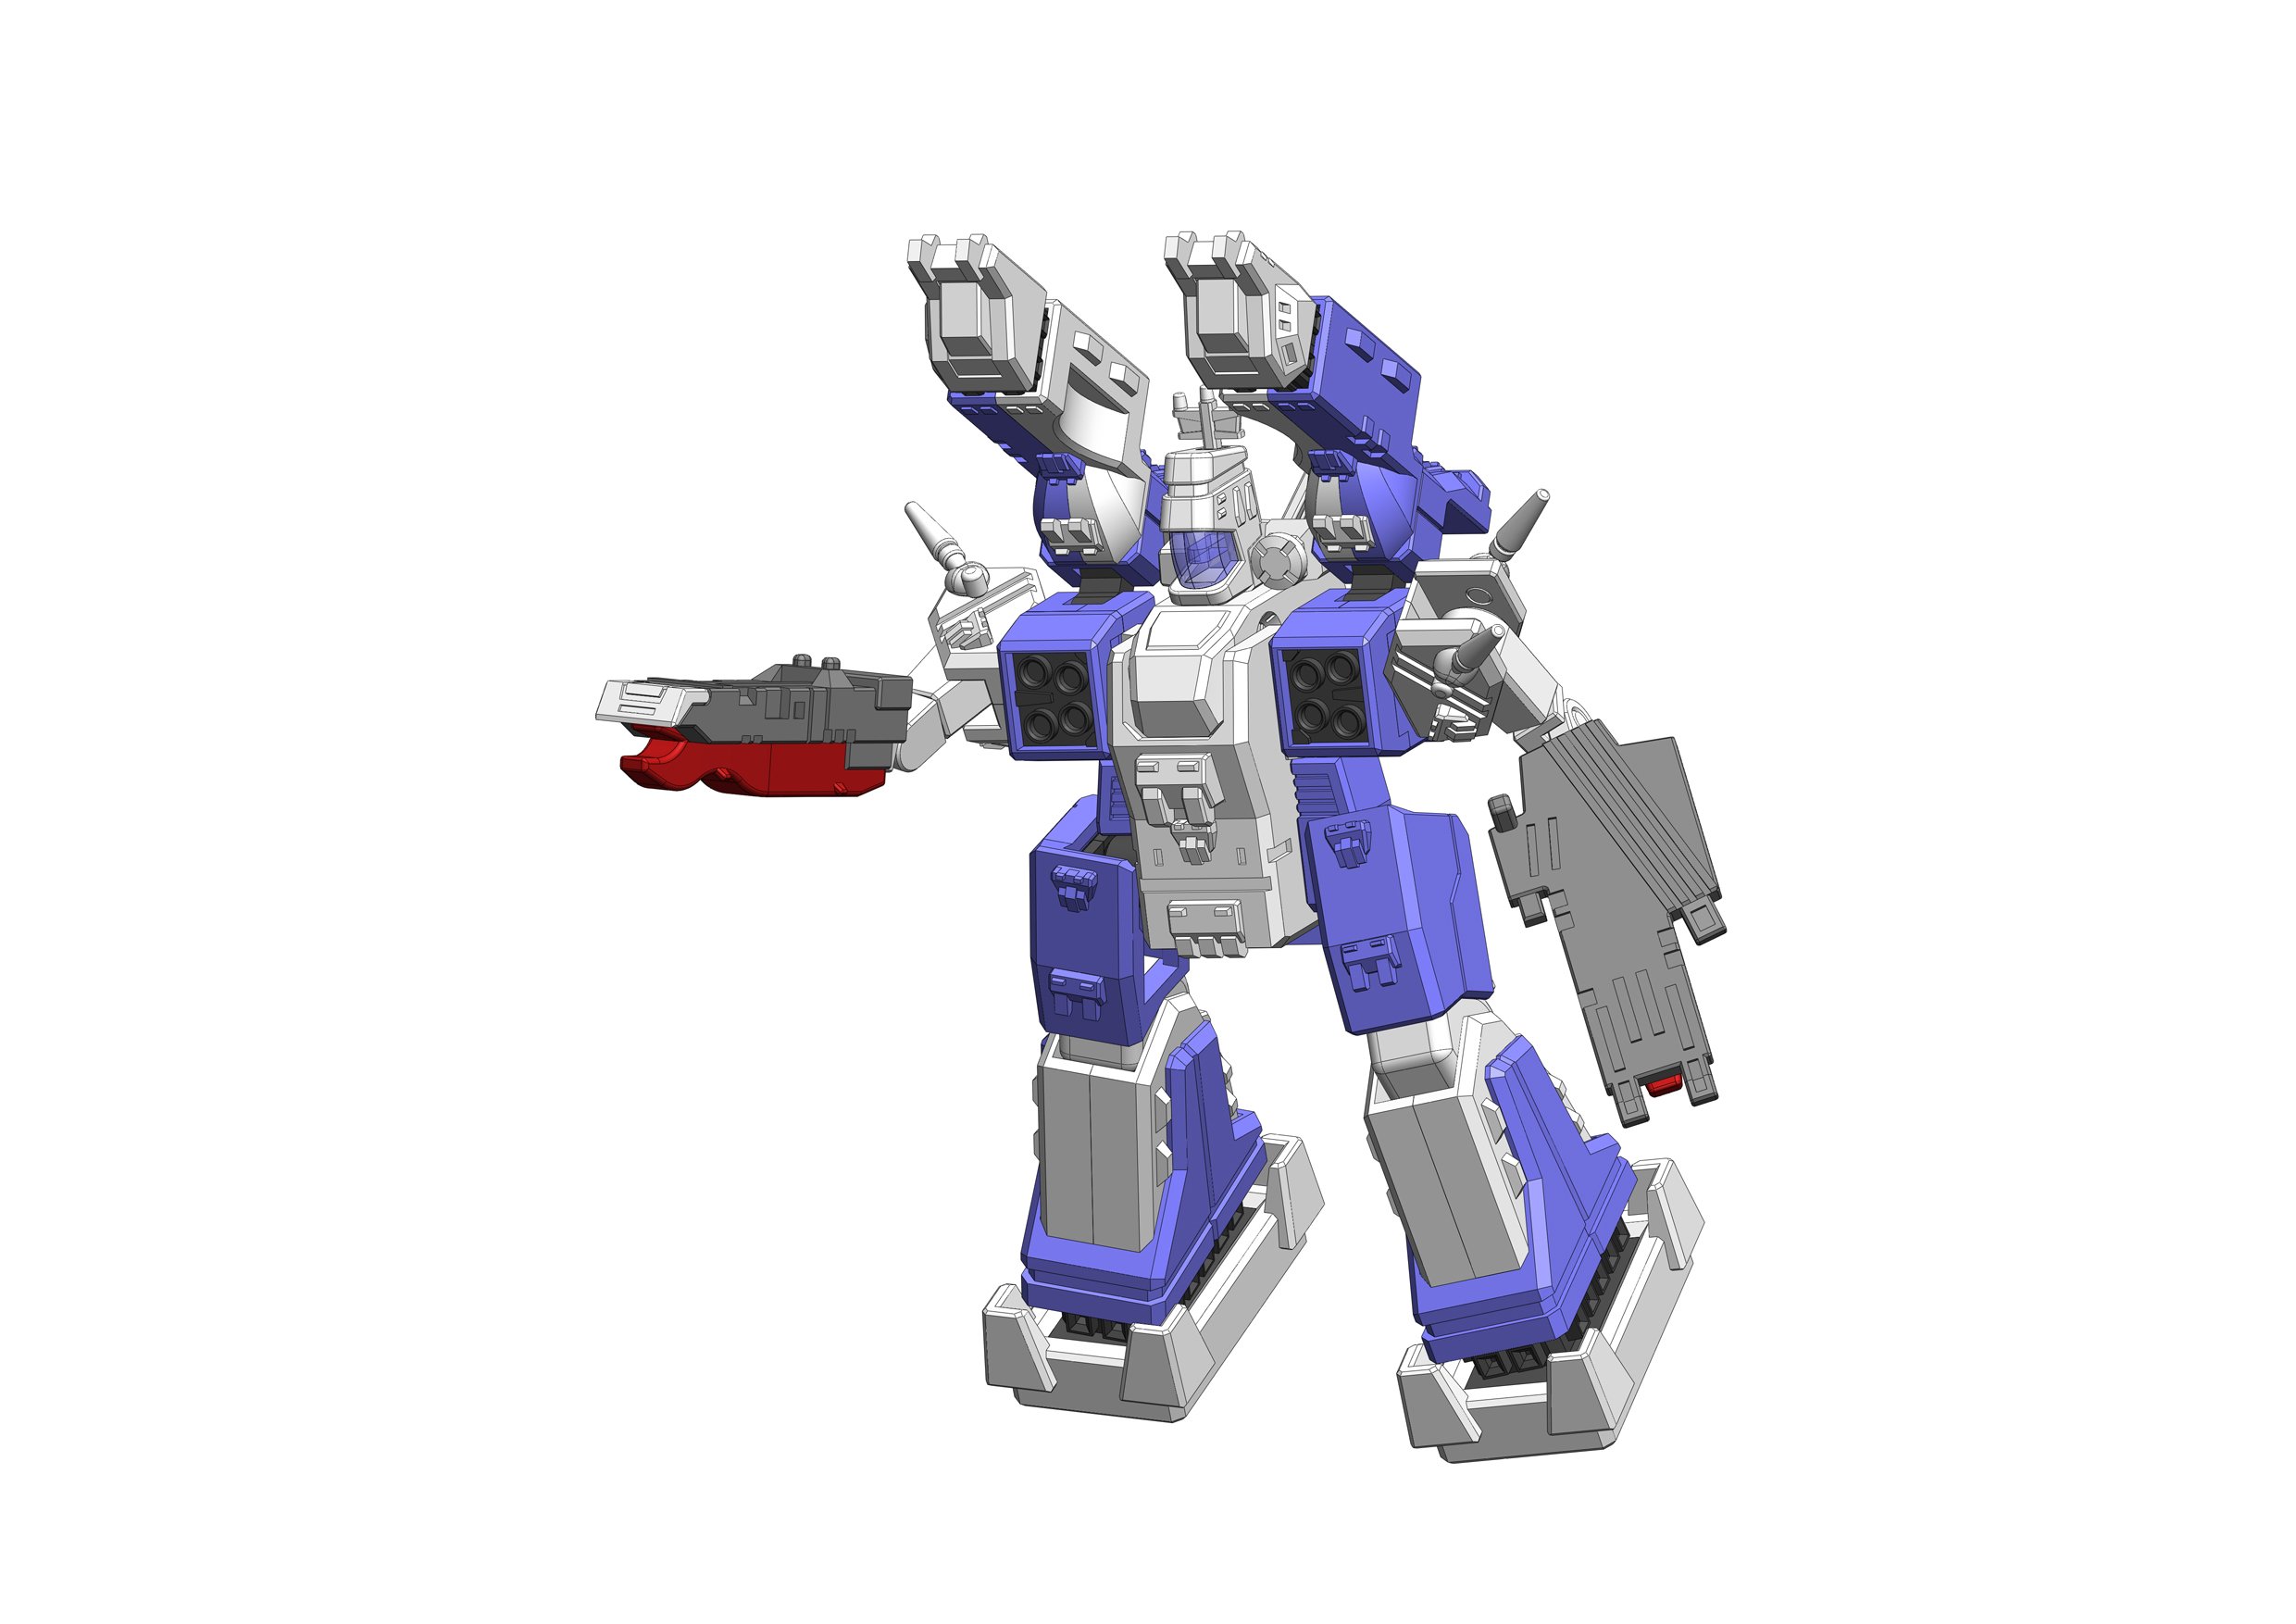
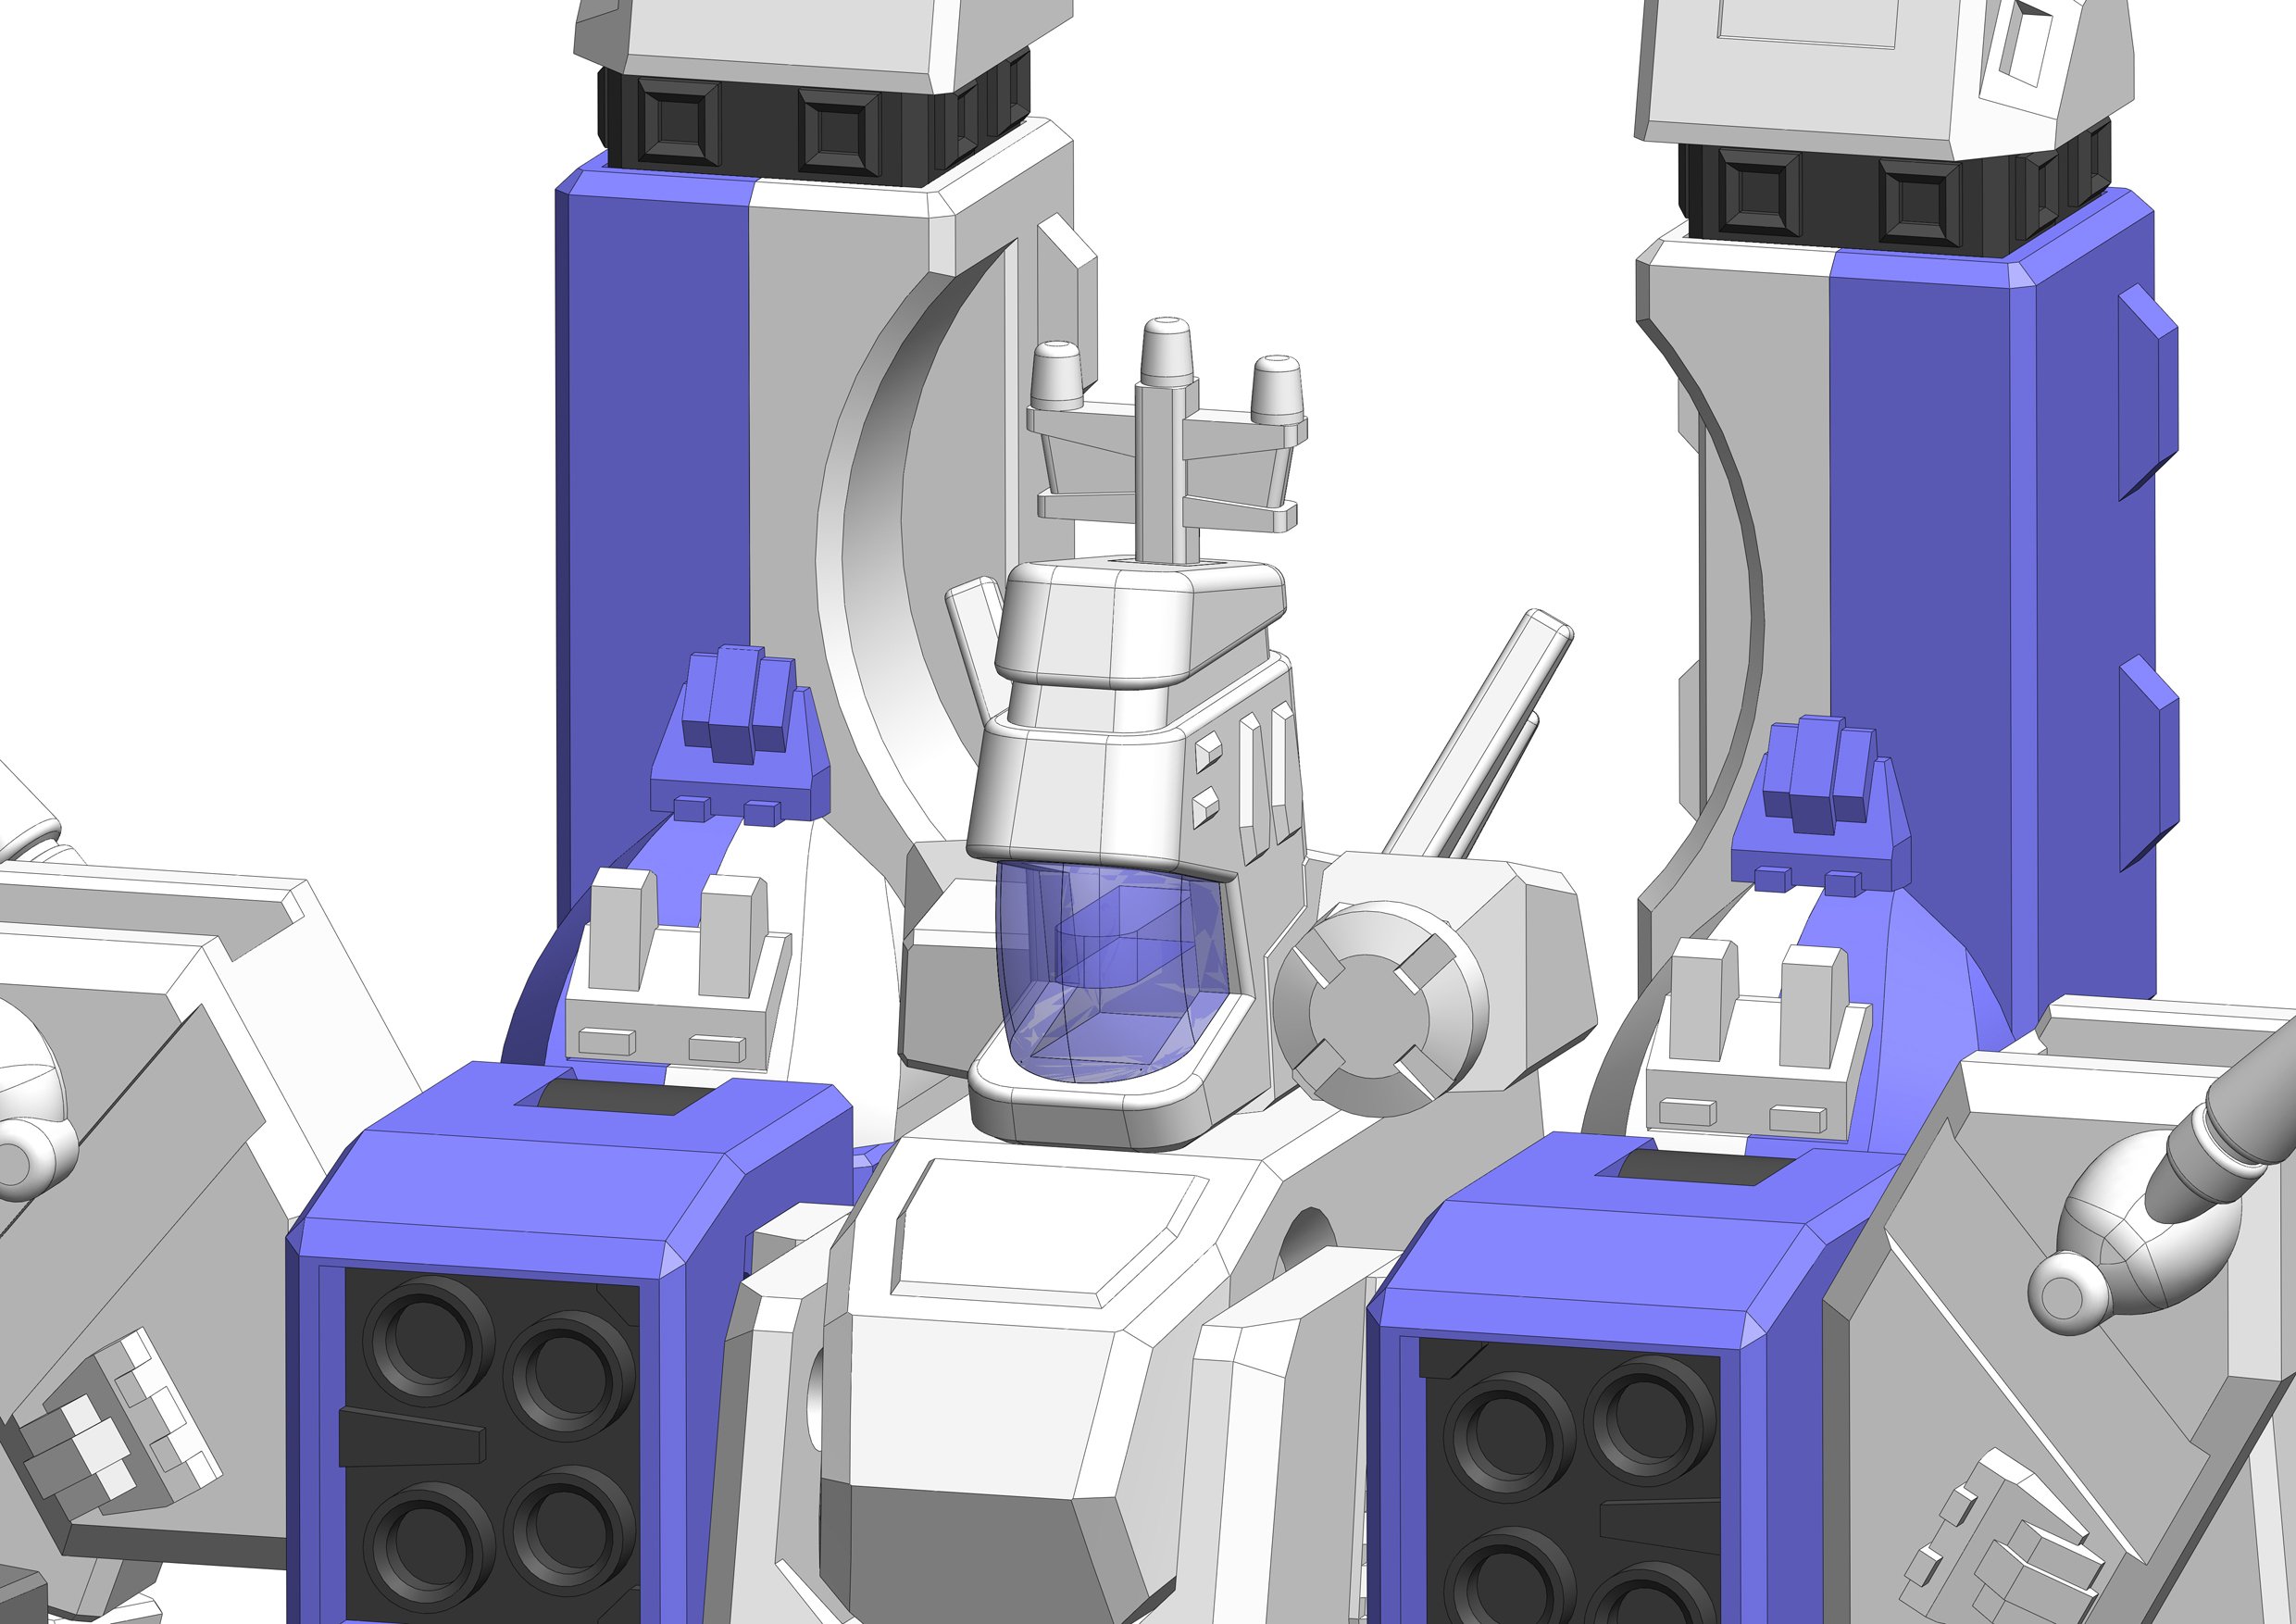
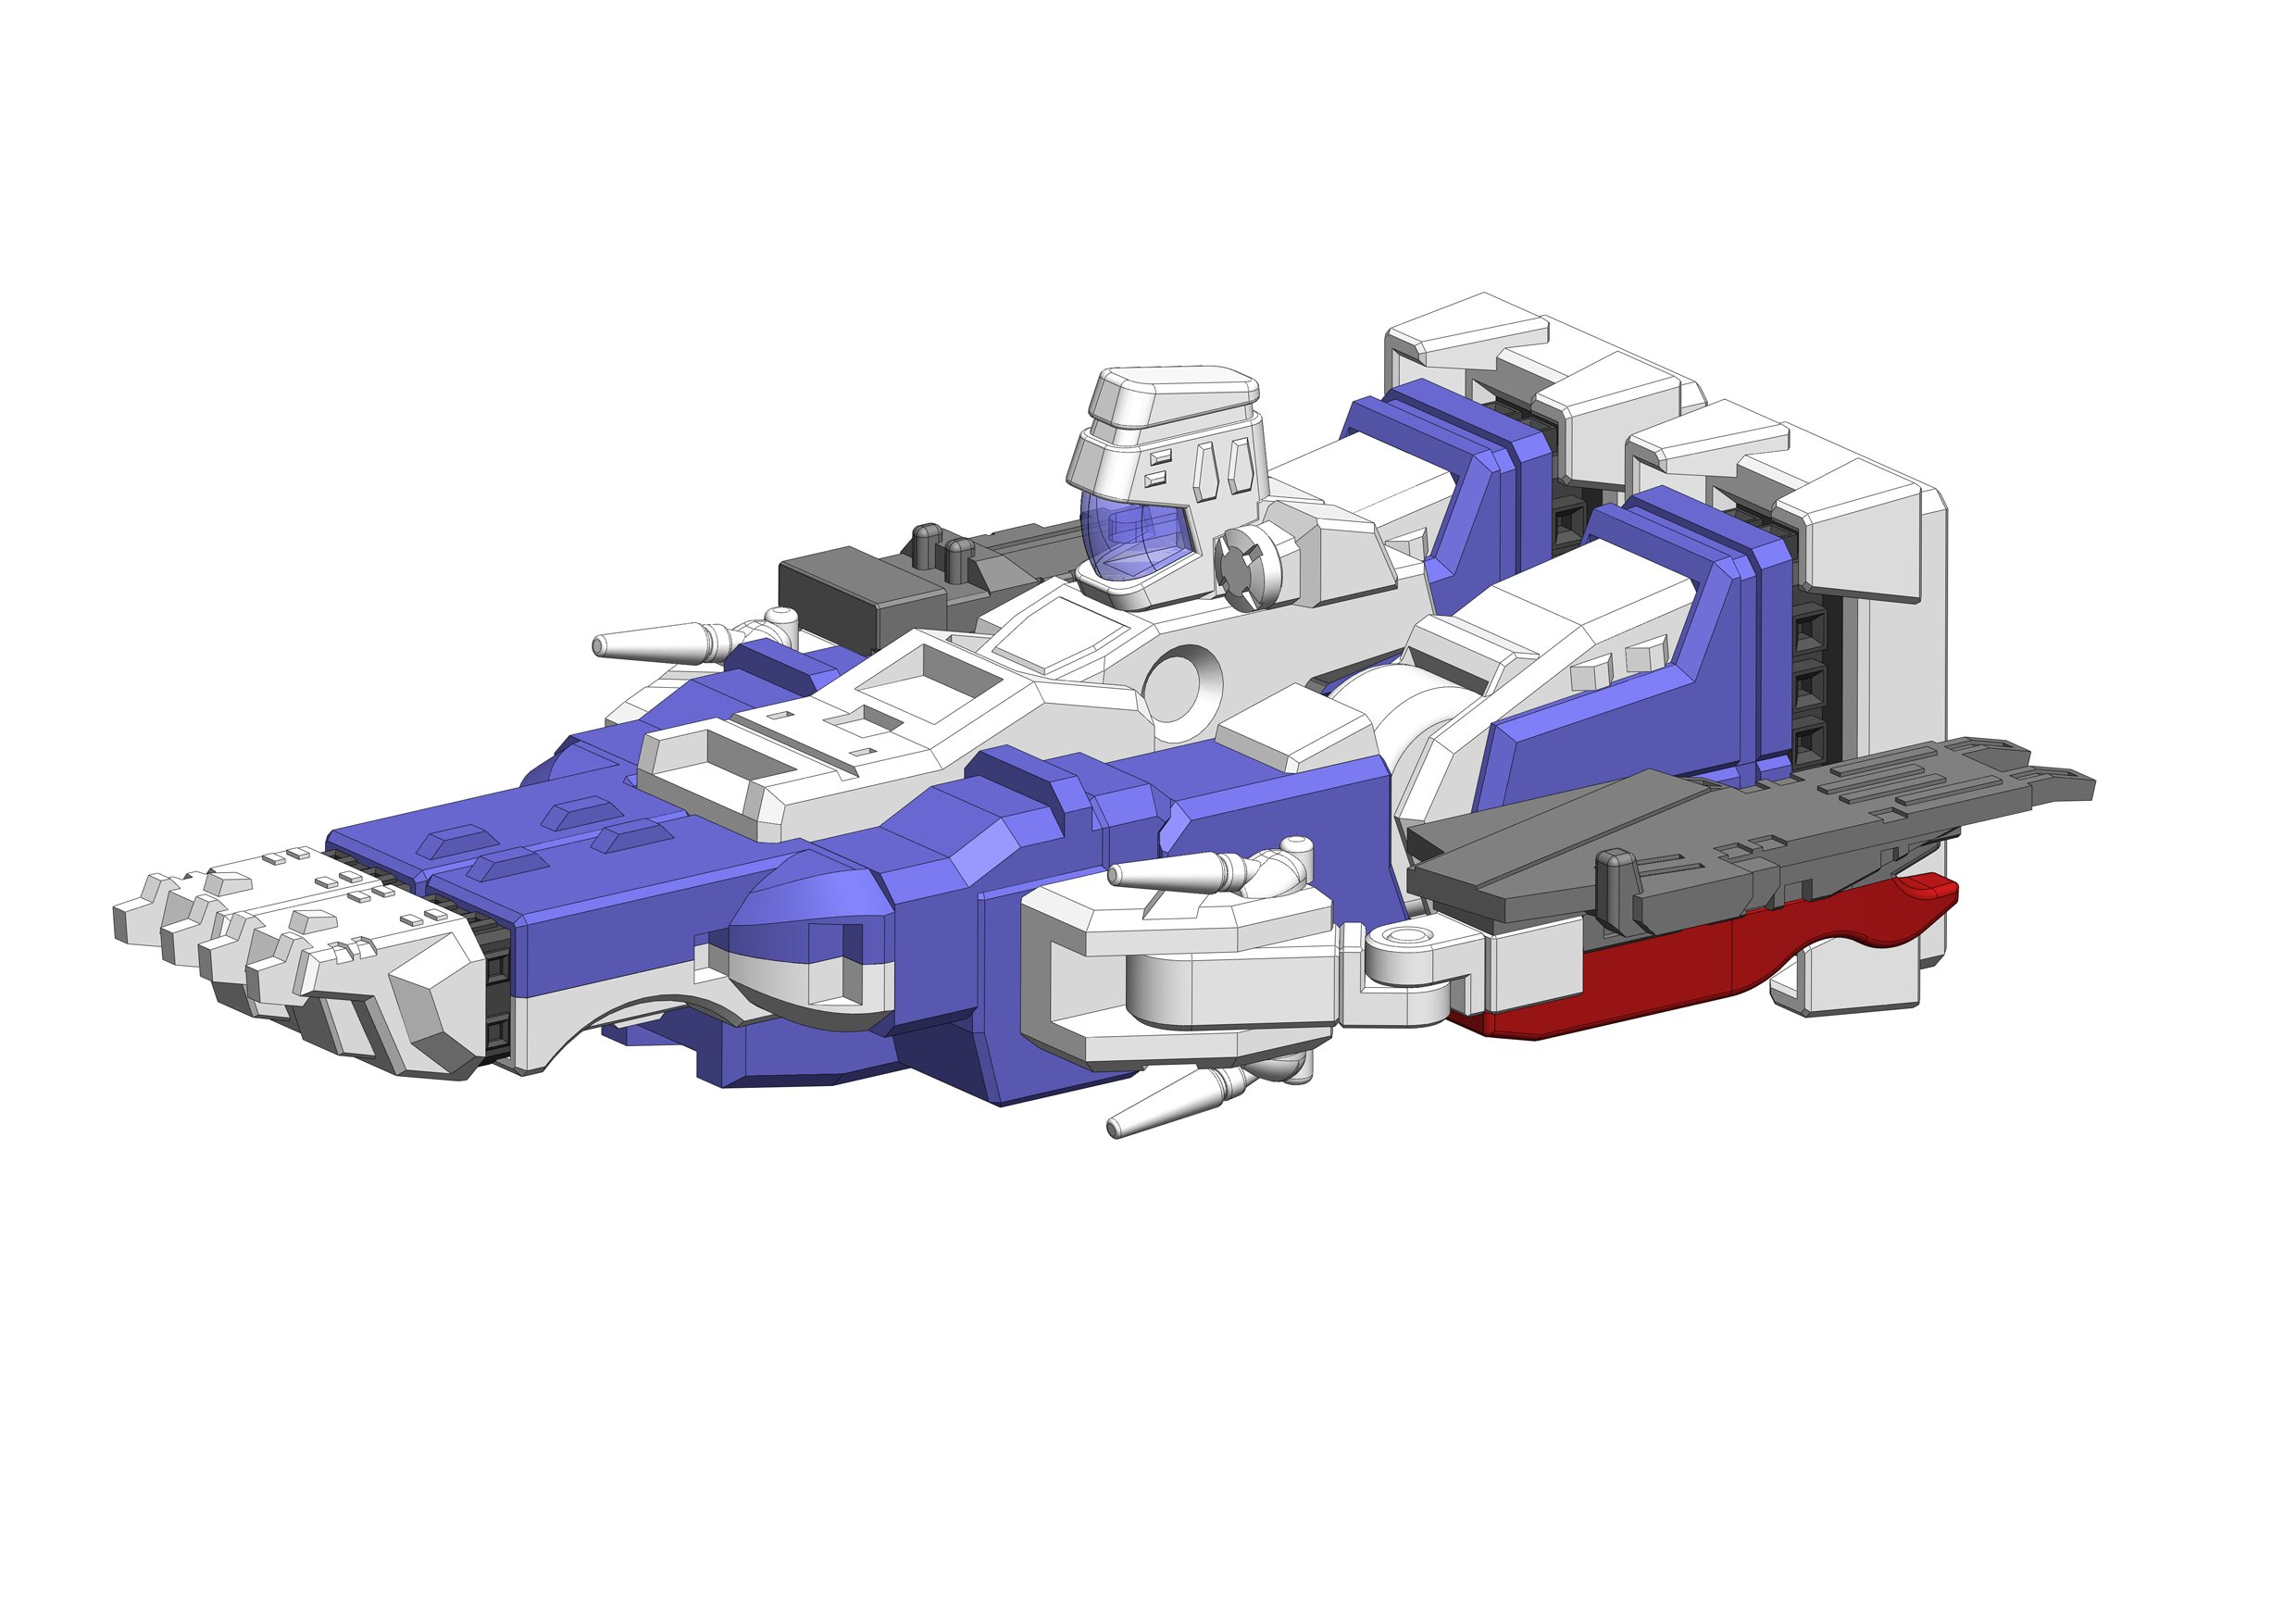
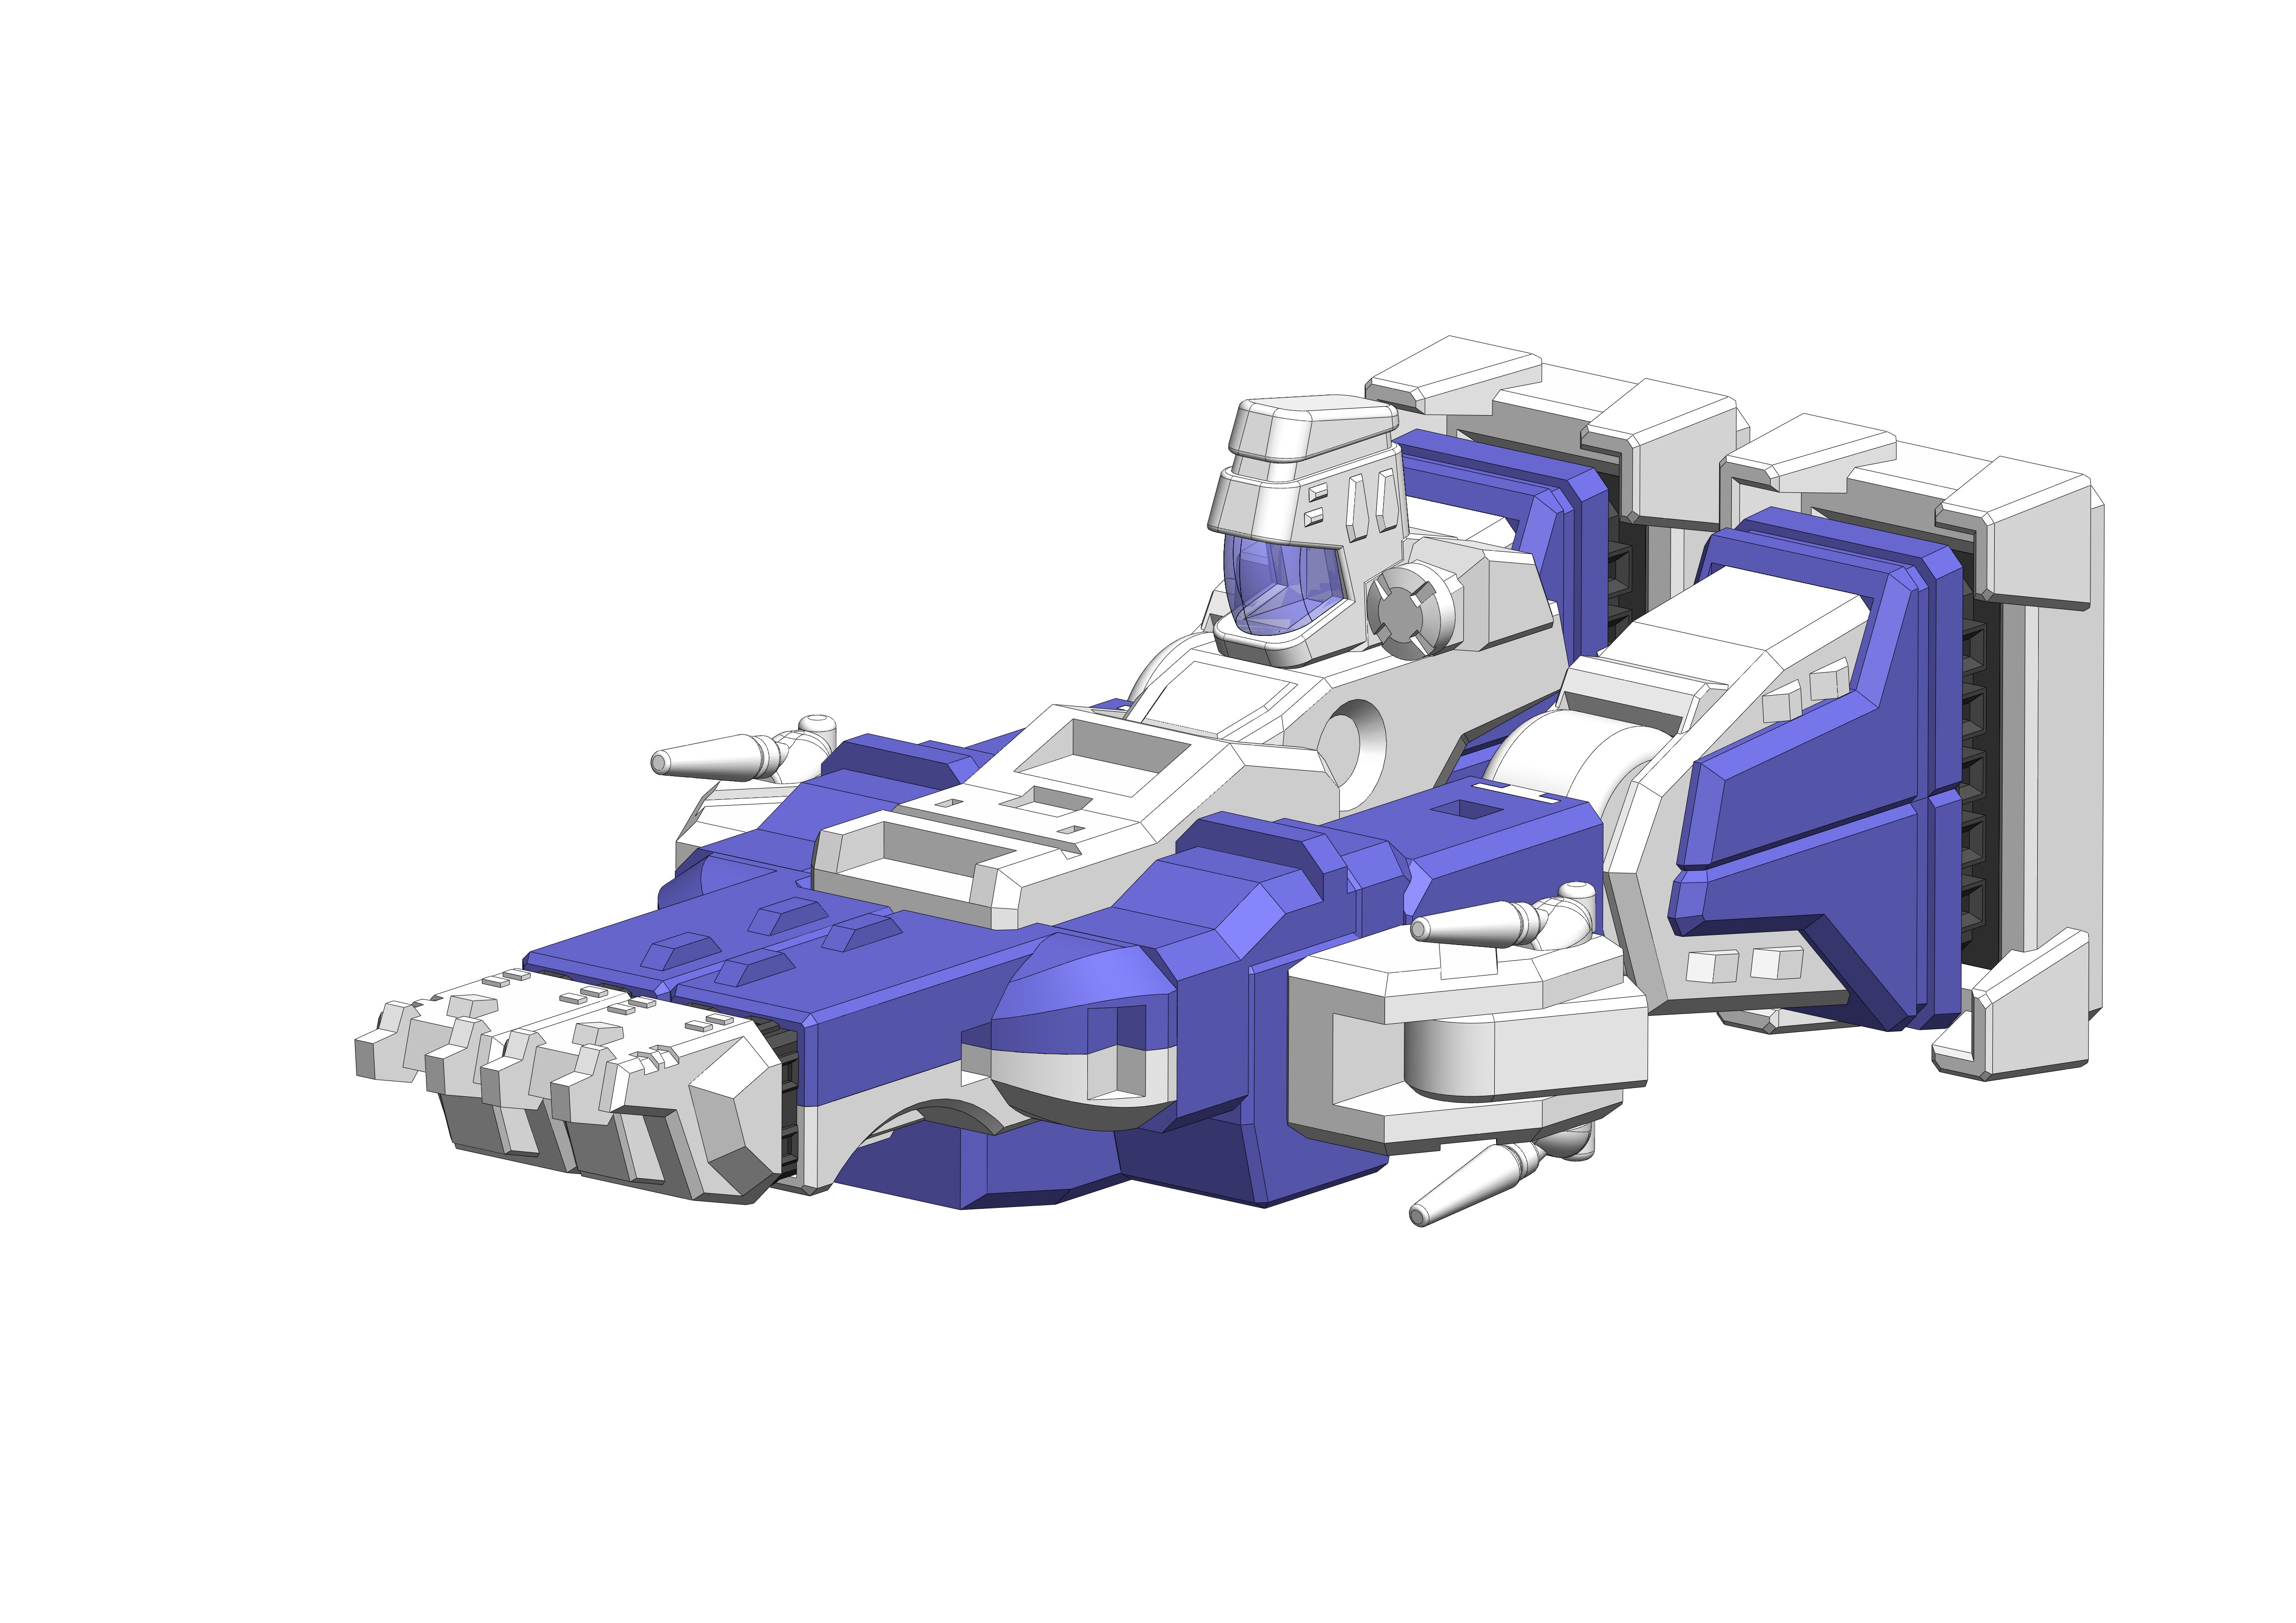
The final transformation part is in place, the control tower can now slide sideways via Takatoku-style block joint.
-
9 hours ago, MechTech said:
Awww - it's so cute -in a cool manly way! - MT
Thanks!
7 hours ago, Tage said:Love this! It's super cool.
Thanks!
2 hours ago, coronadlux said:This is awesome! Will STL or some sort if printable file be available?
Thanks! That's plan, I'm trying to build it so it doesn't need any extra bits after printing - in theory, it'll be a straight-from-print snap-build kit.
Working on splitting the parts for "print-friendliness" & snap-build feature. It's gonna have that distinct 80's toy vibe as an intended consequence/feature. 100+ parts so far.


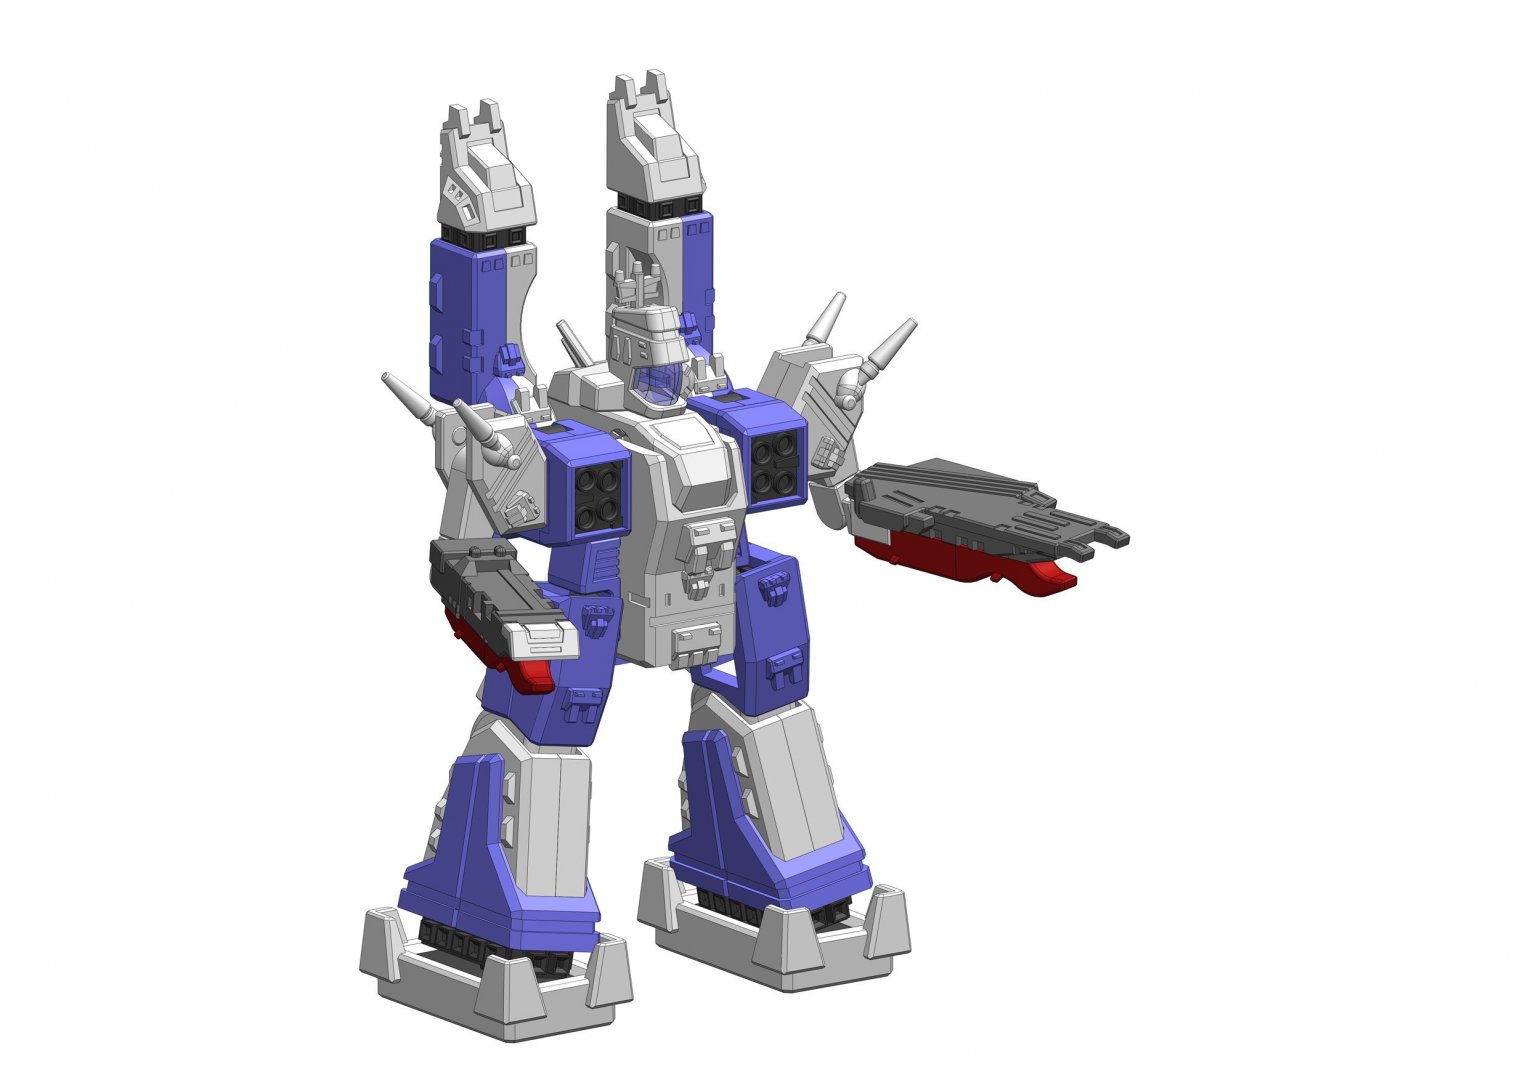
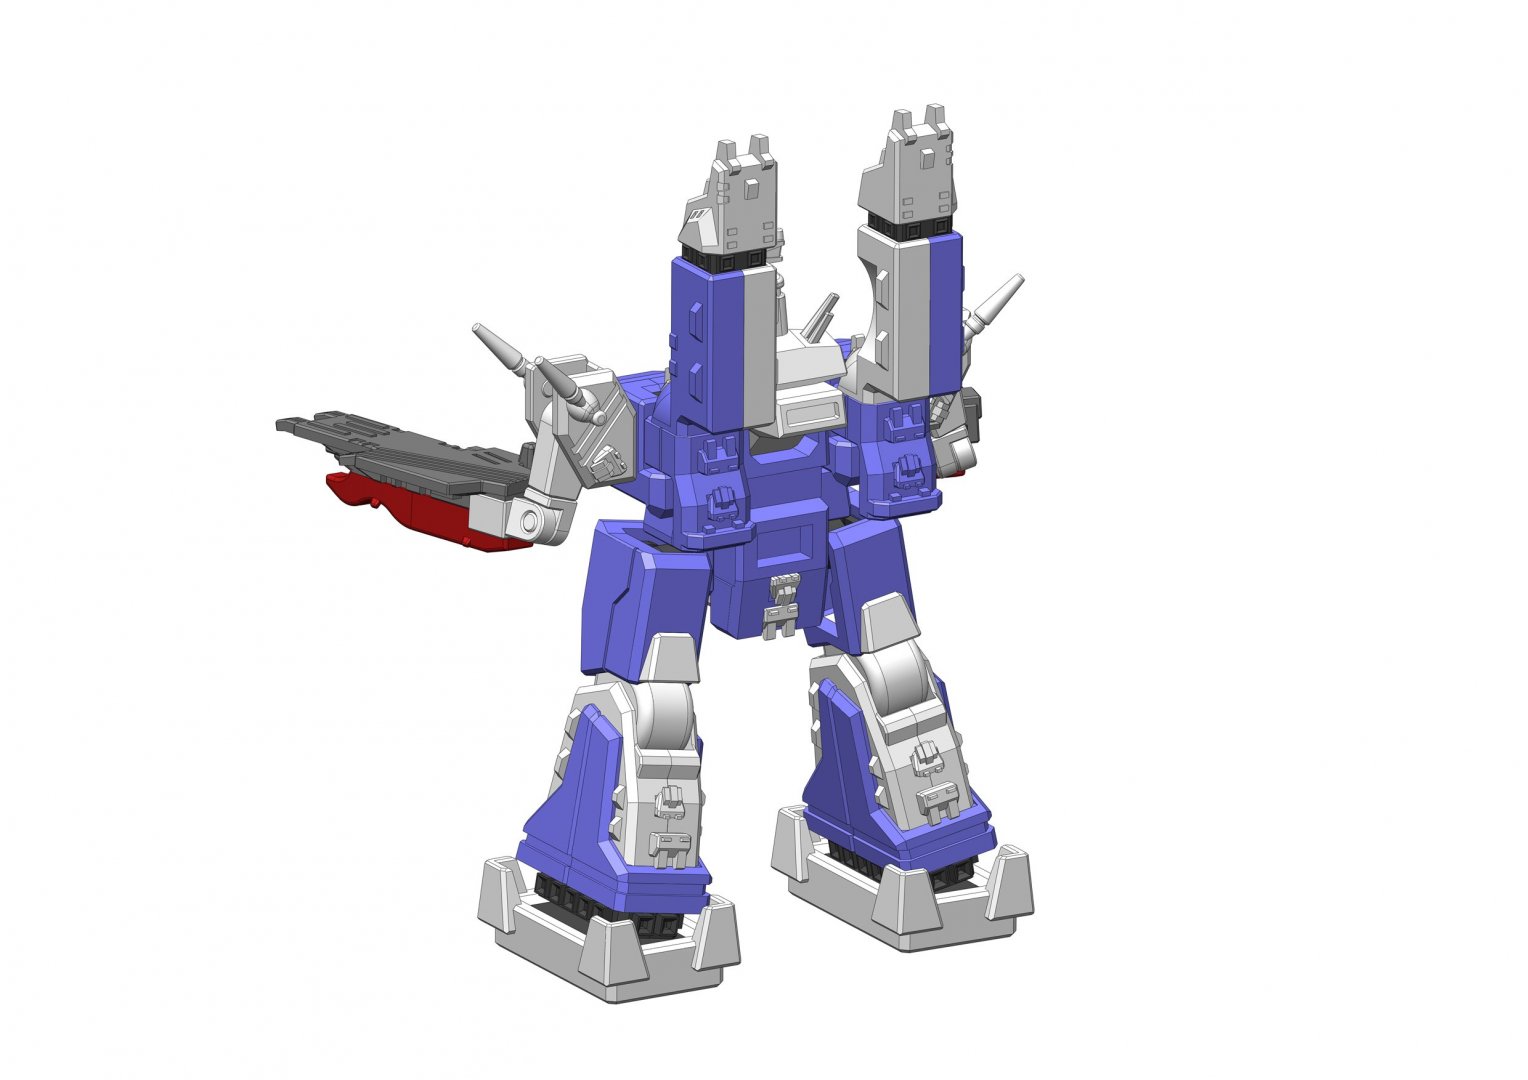
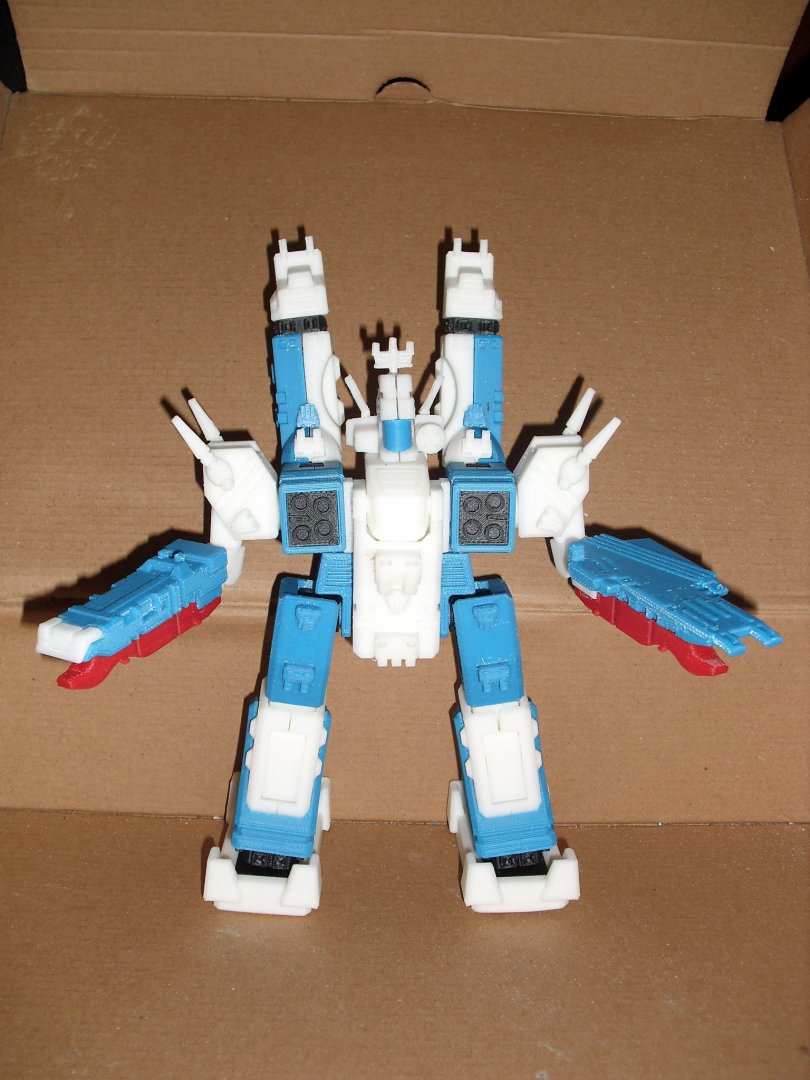
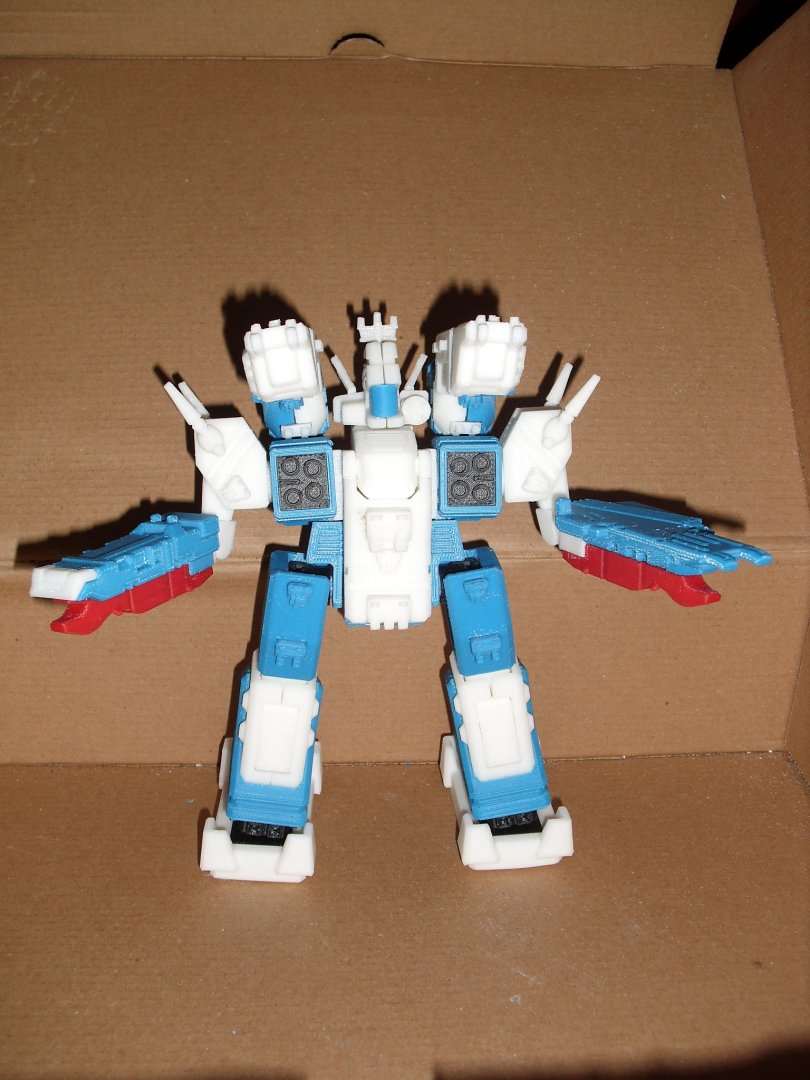
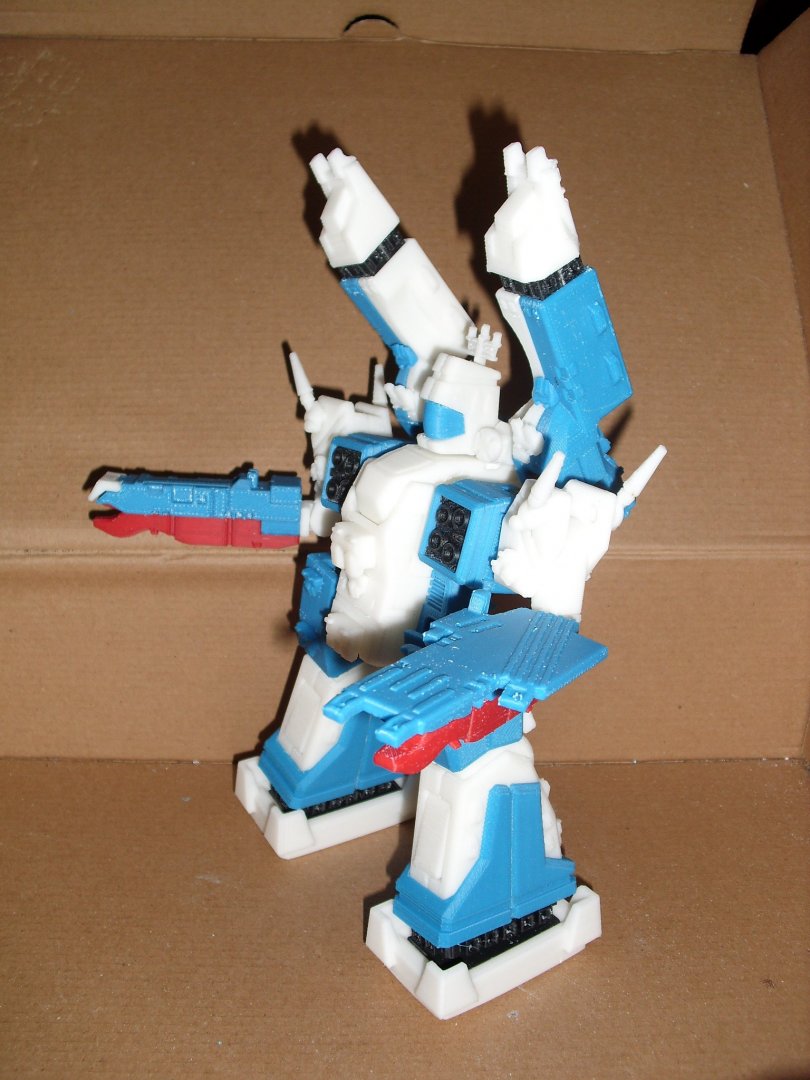
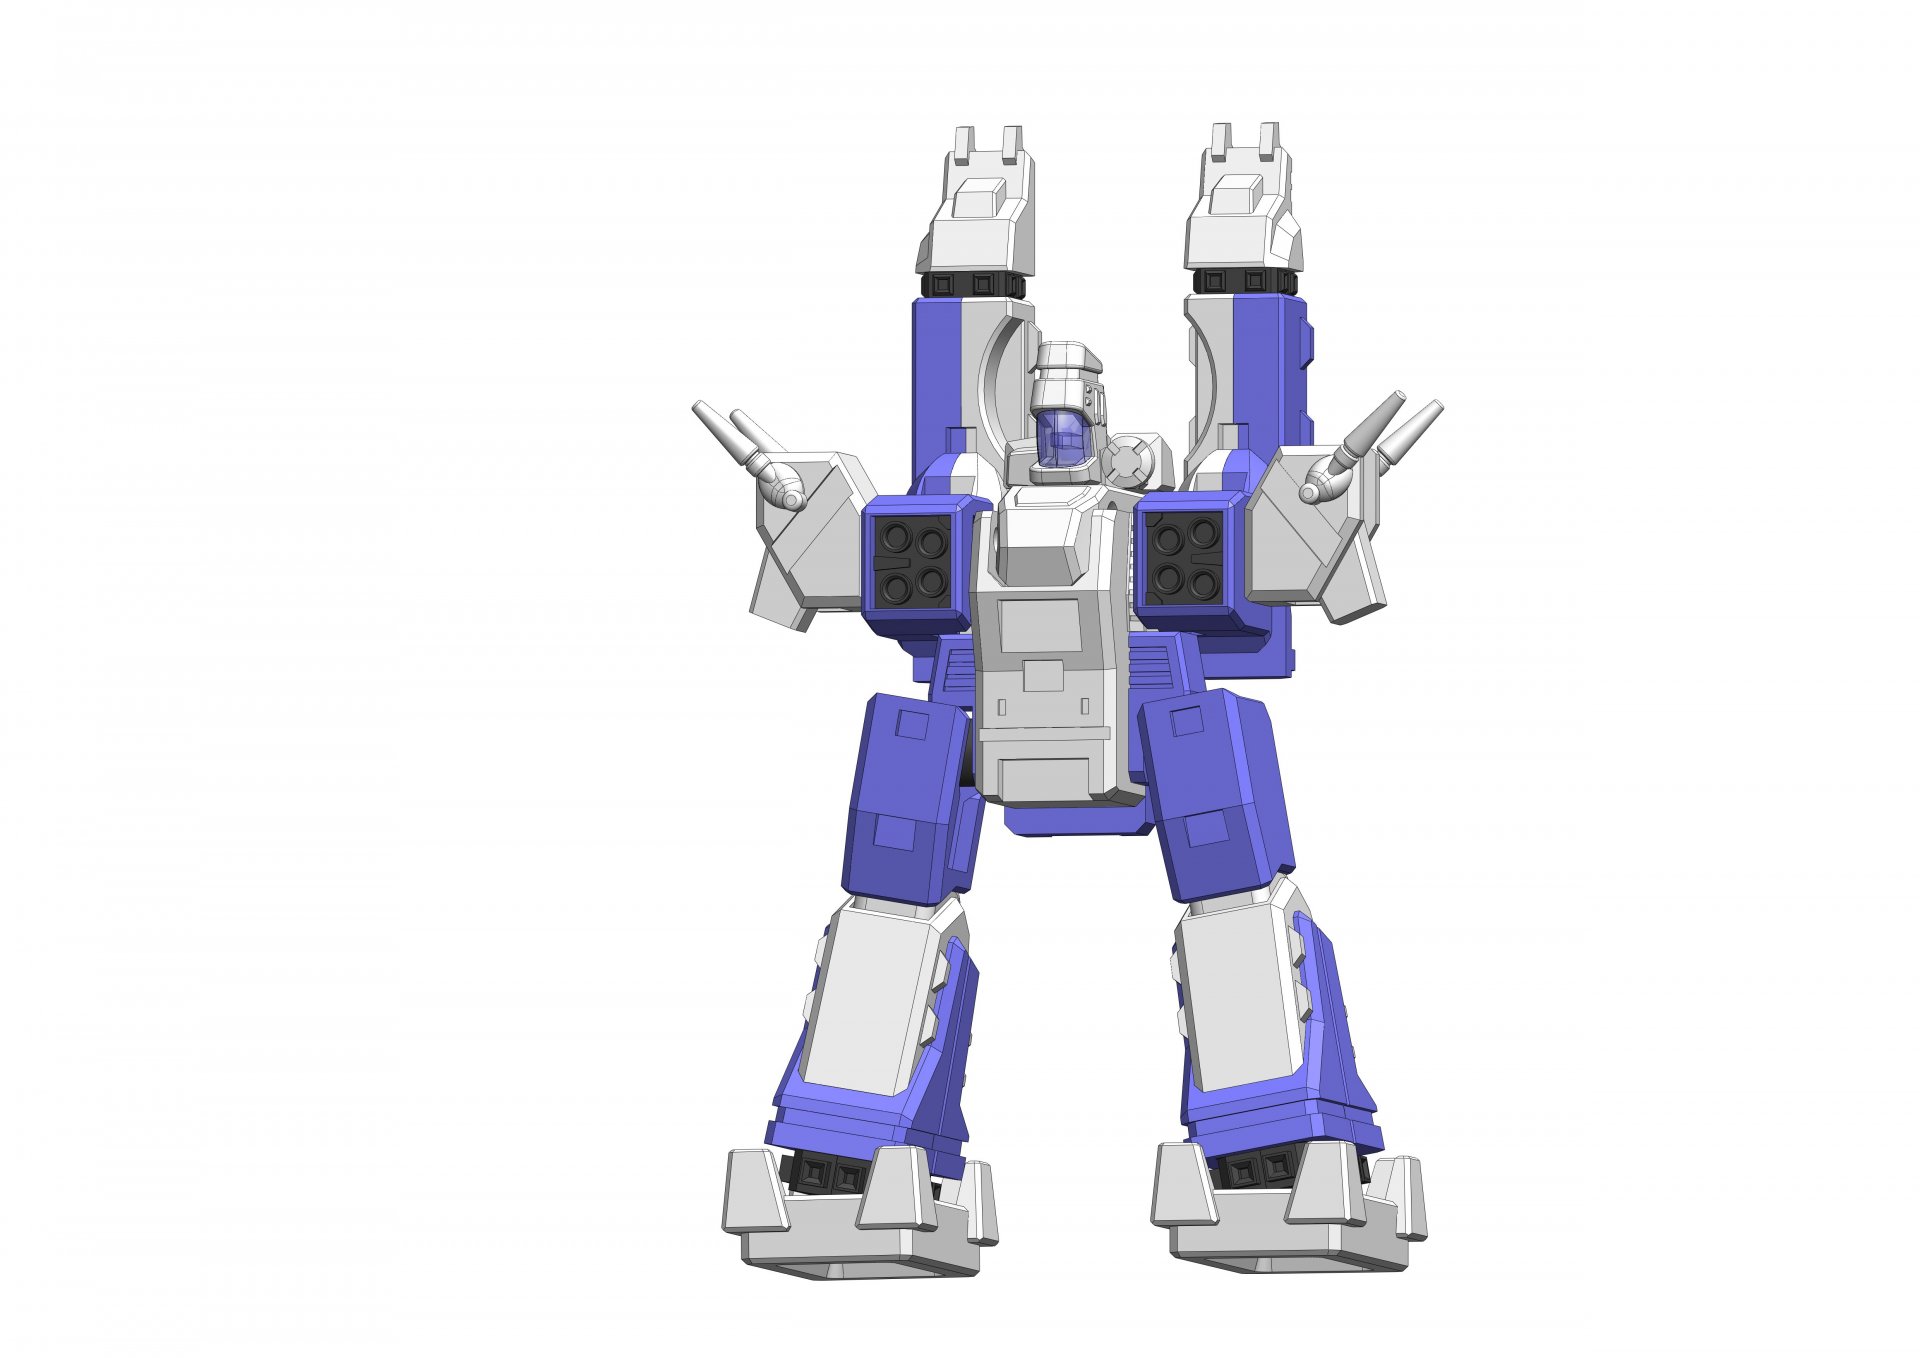
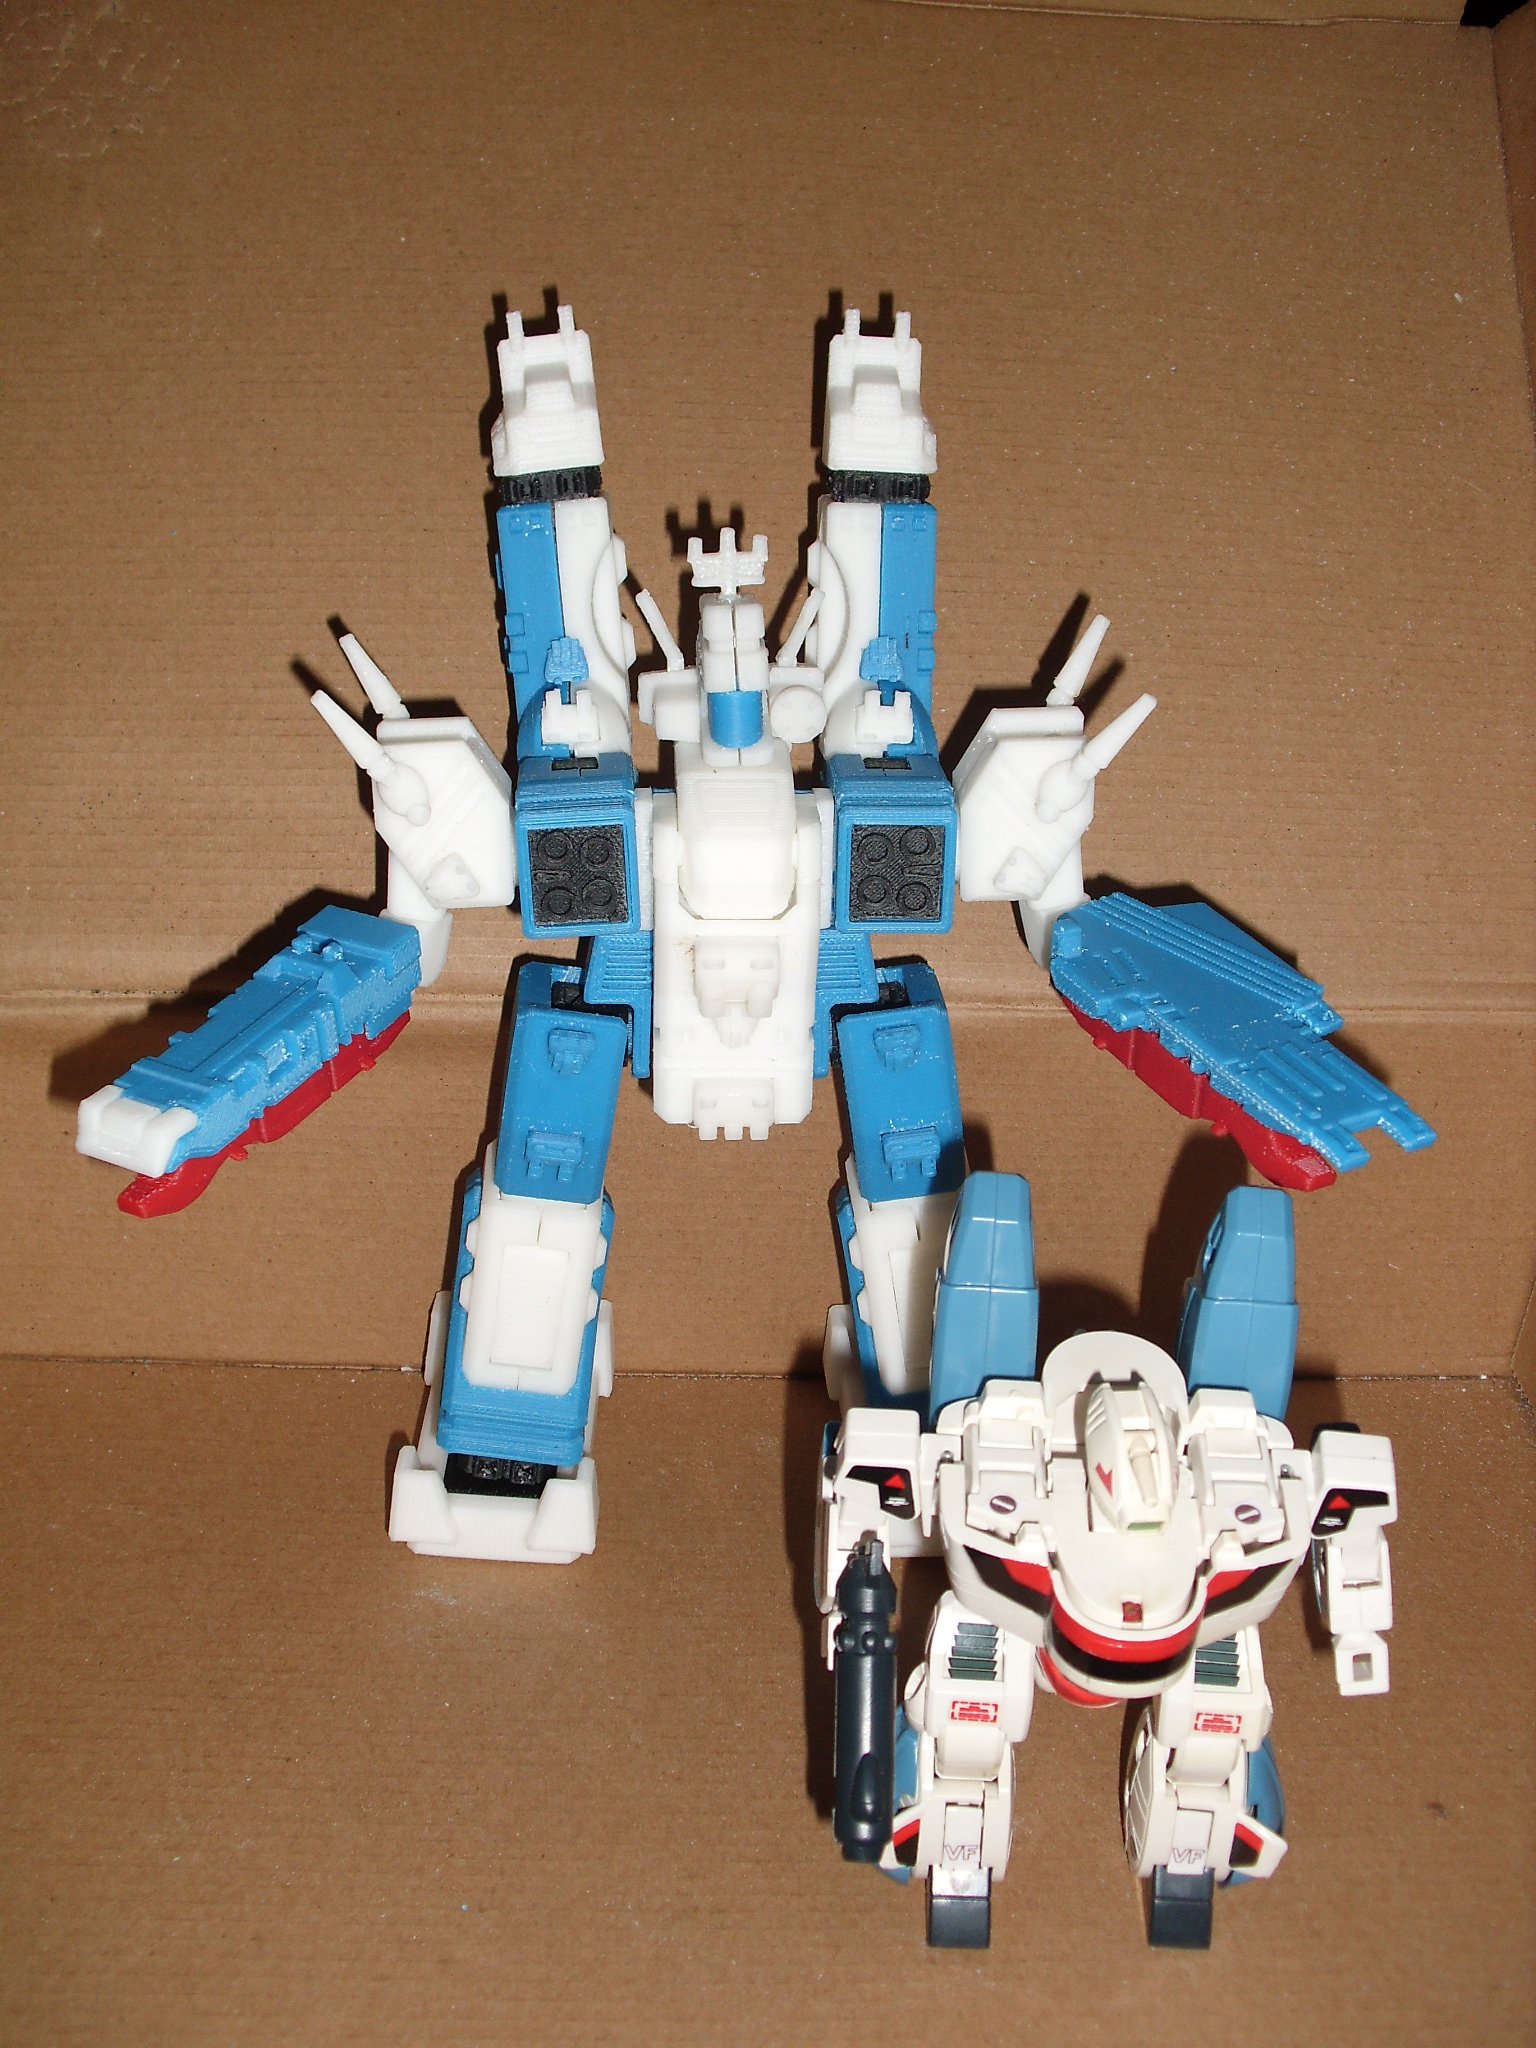
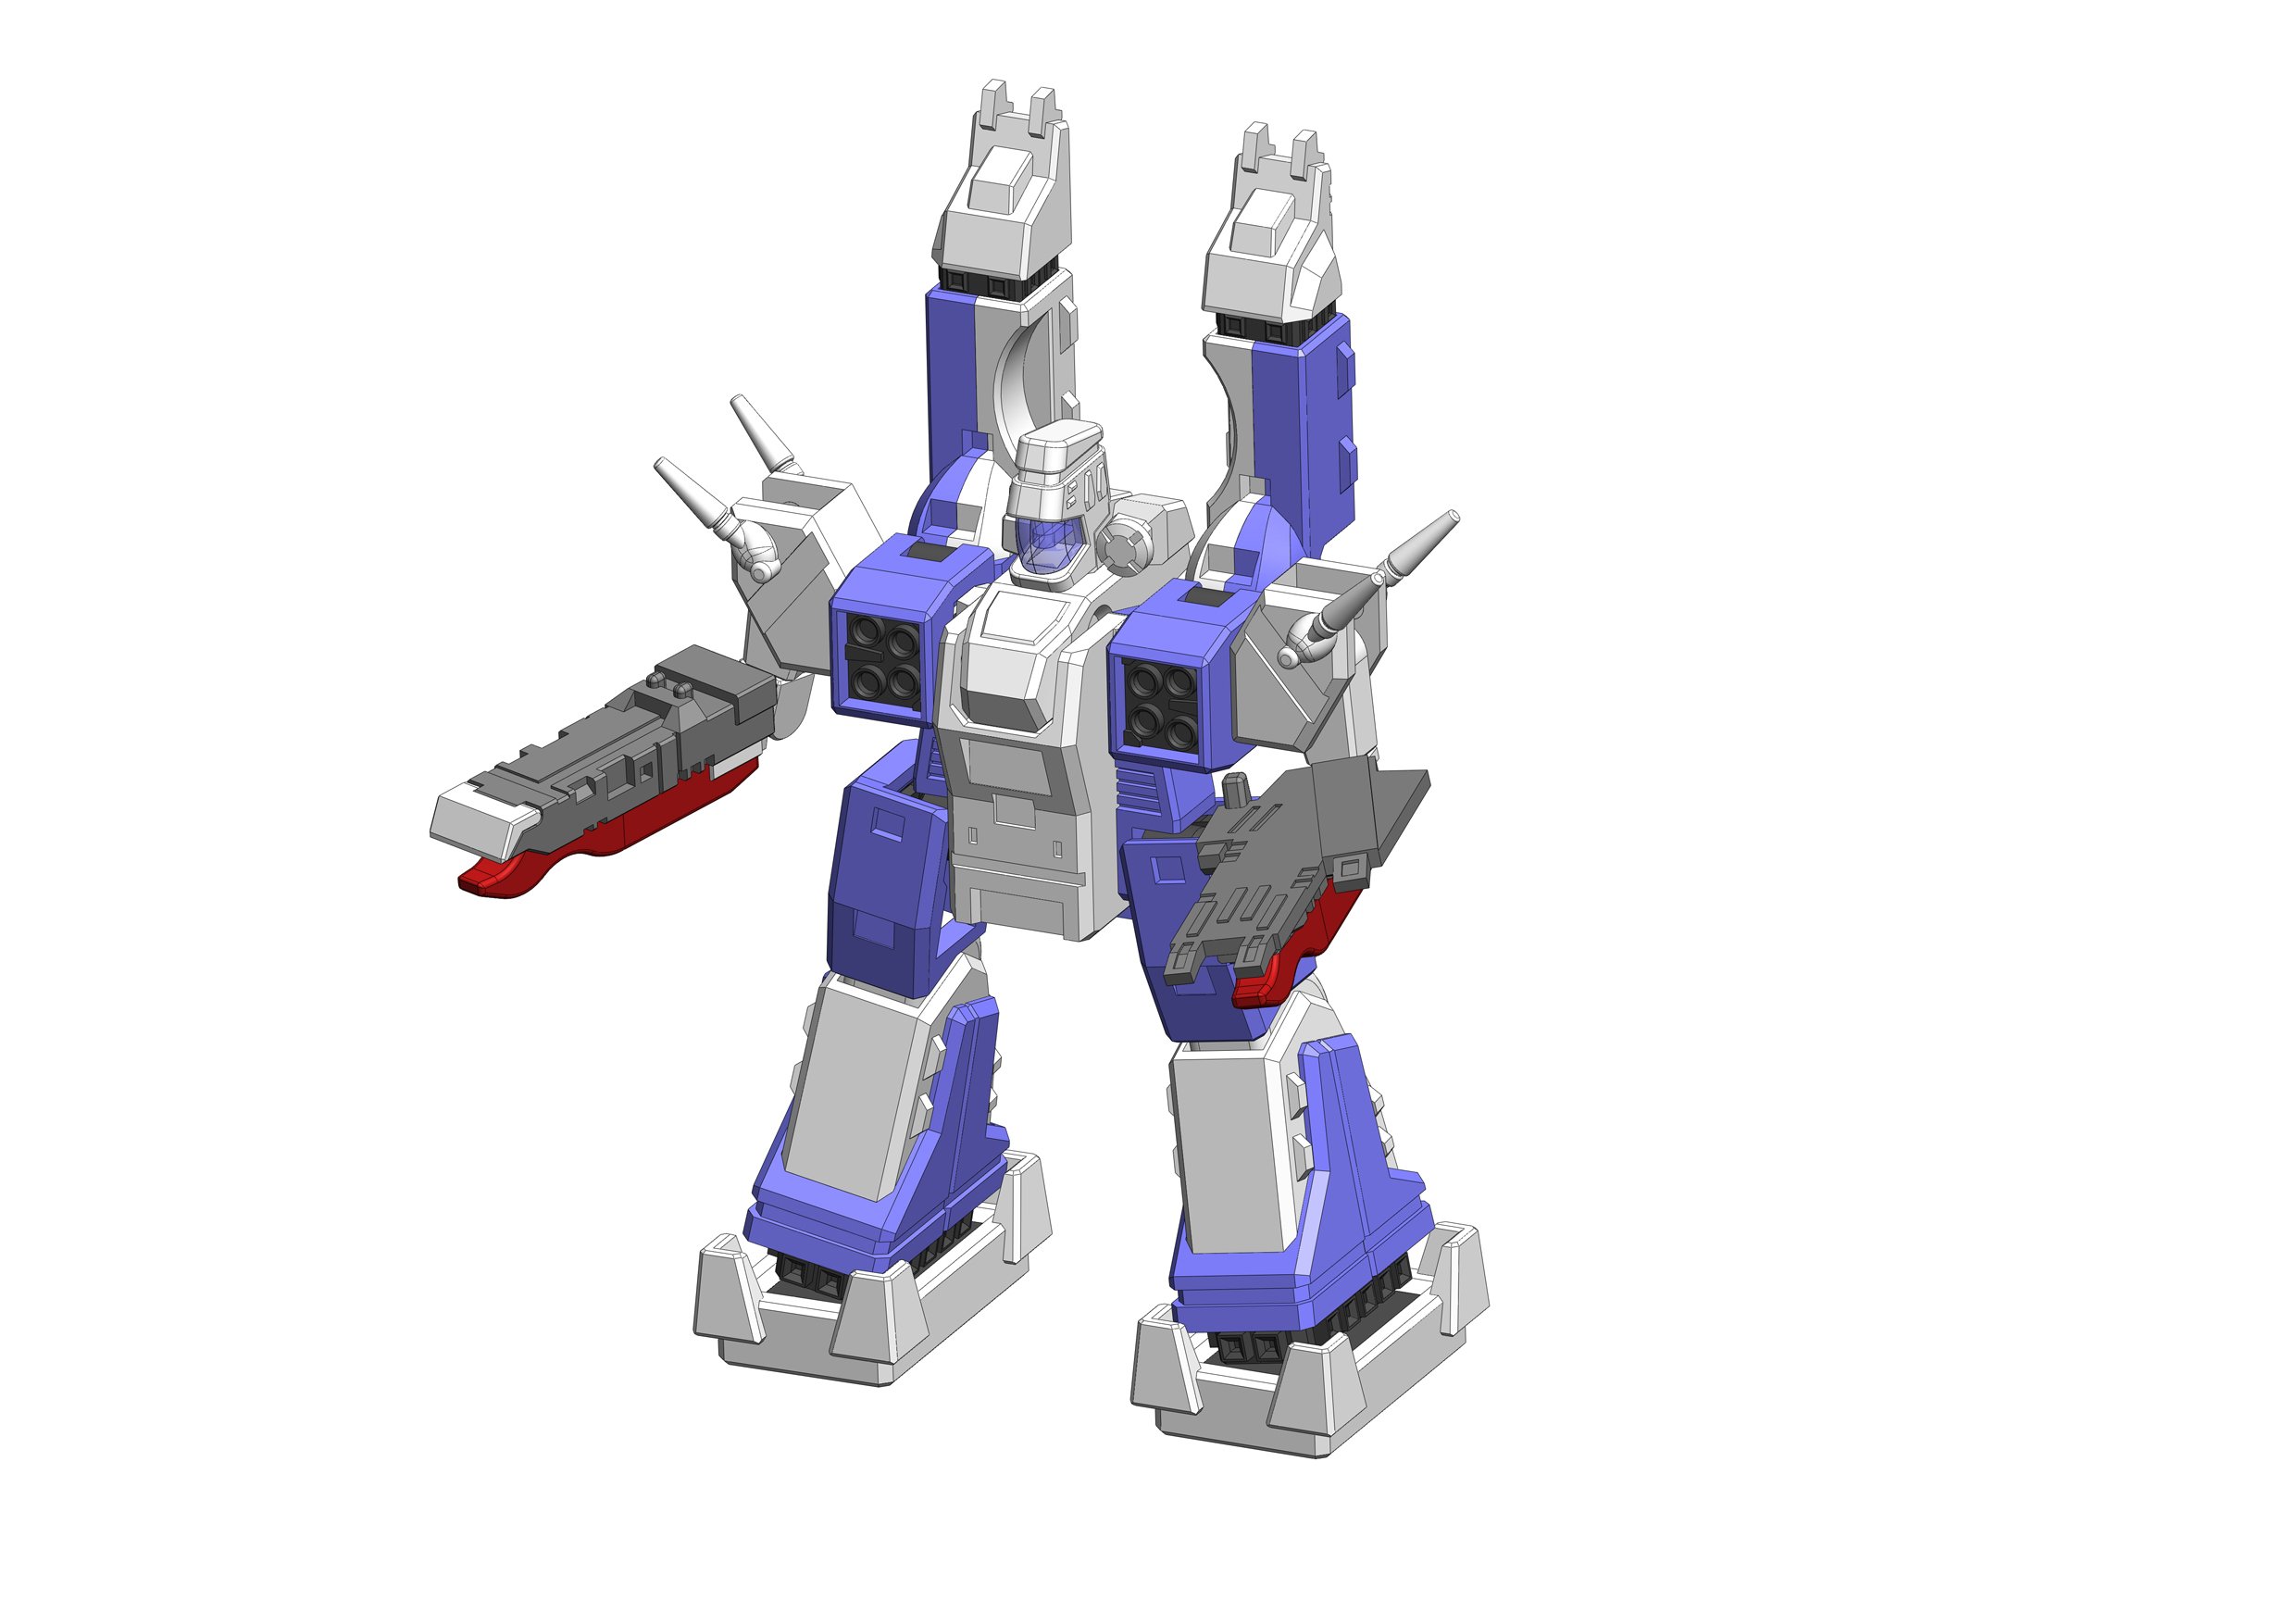
And it's (slightly) poseable. Daedalus Attack!

-
"Transformation alert!"
-
18 hours ago, jenius said:
It's adorbs!
Thanks!
15 hours ago, CHAVAKAISER said:
We'll find out soon if that's a viable option!
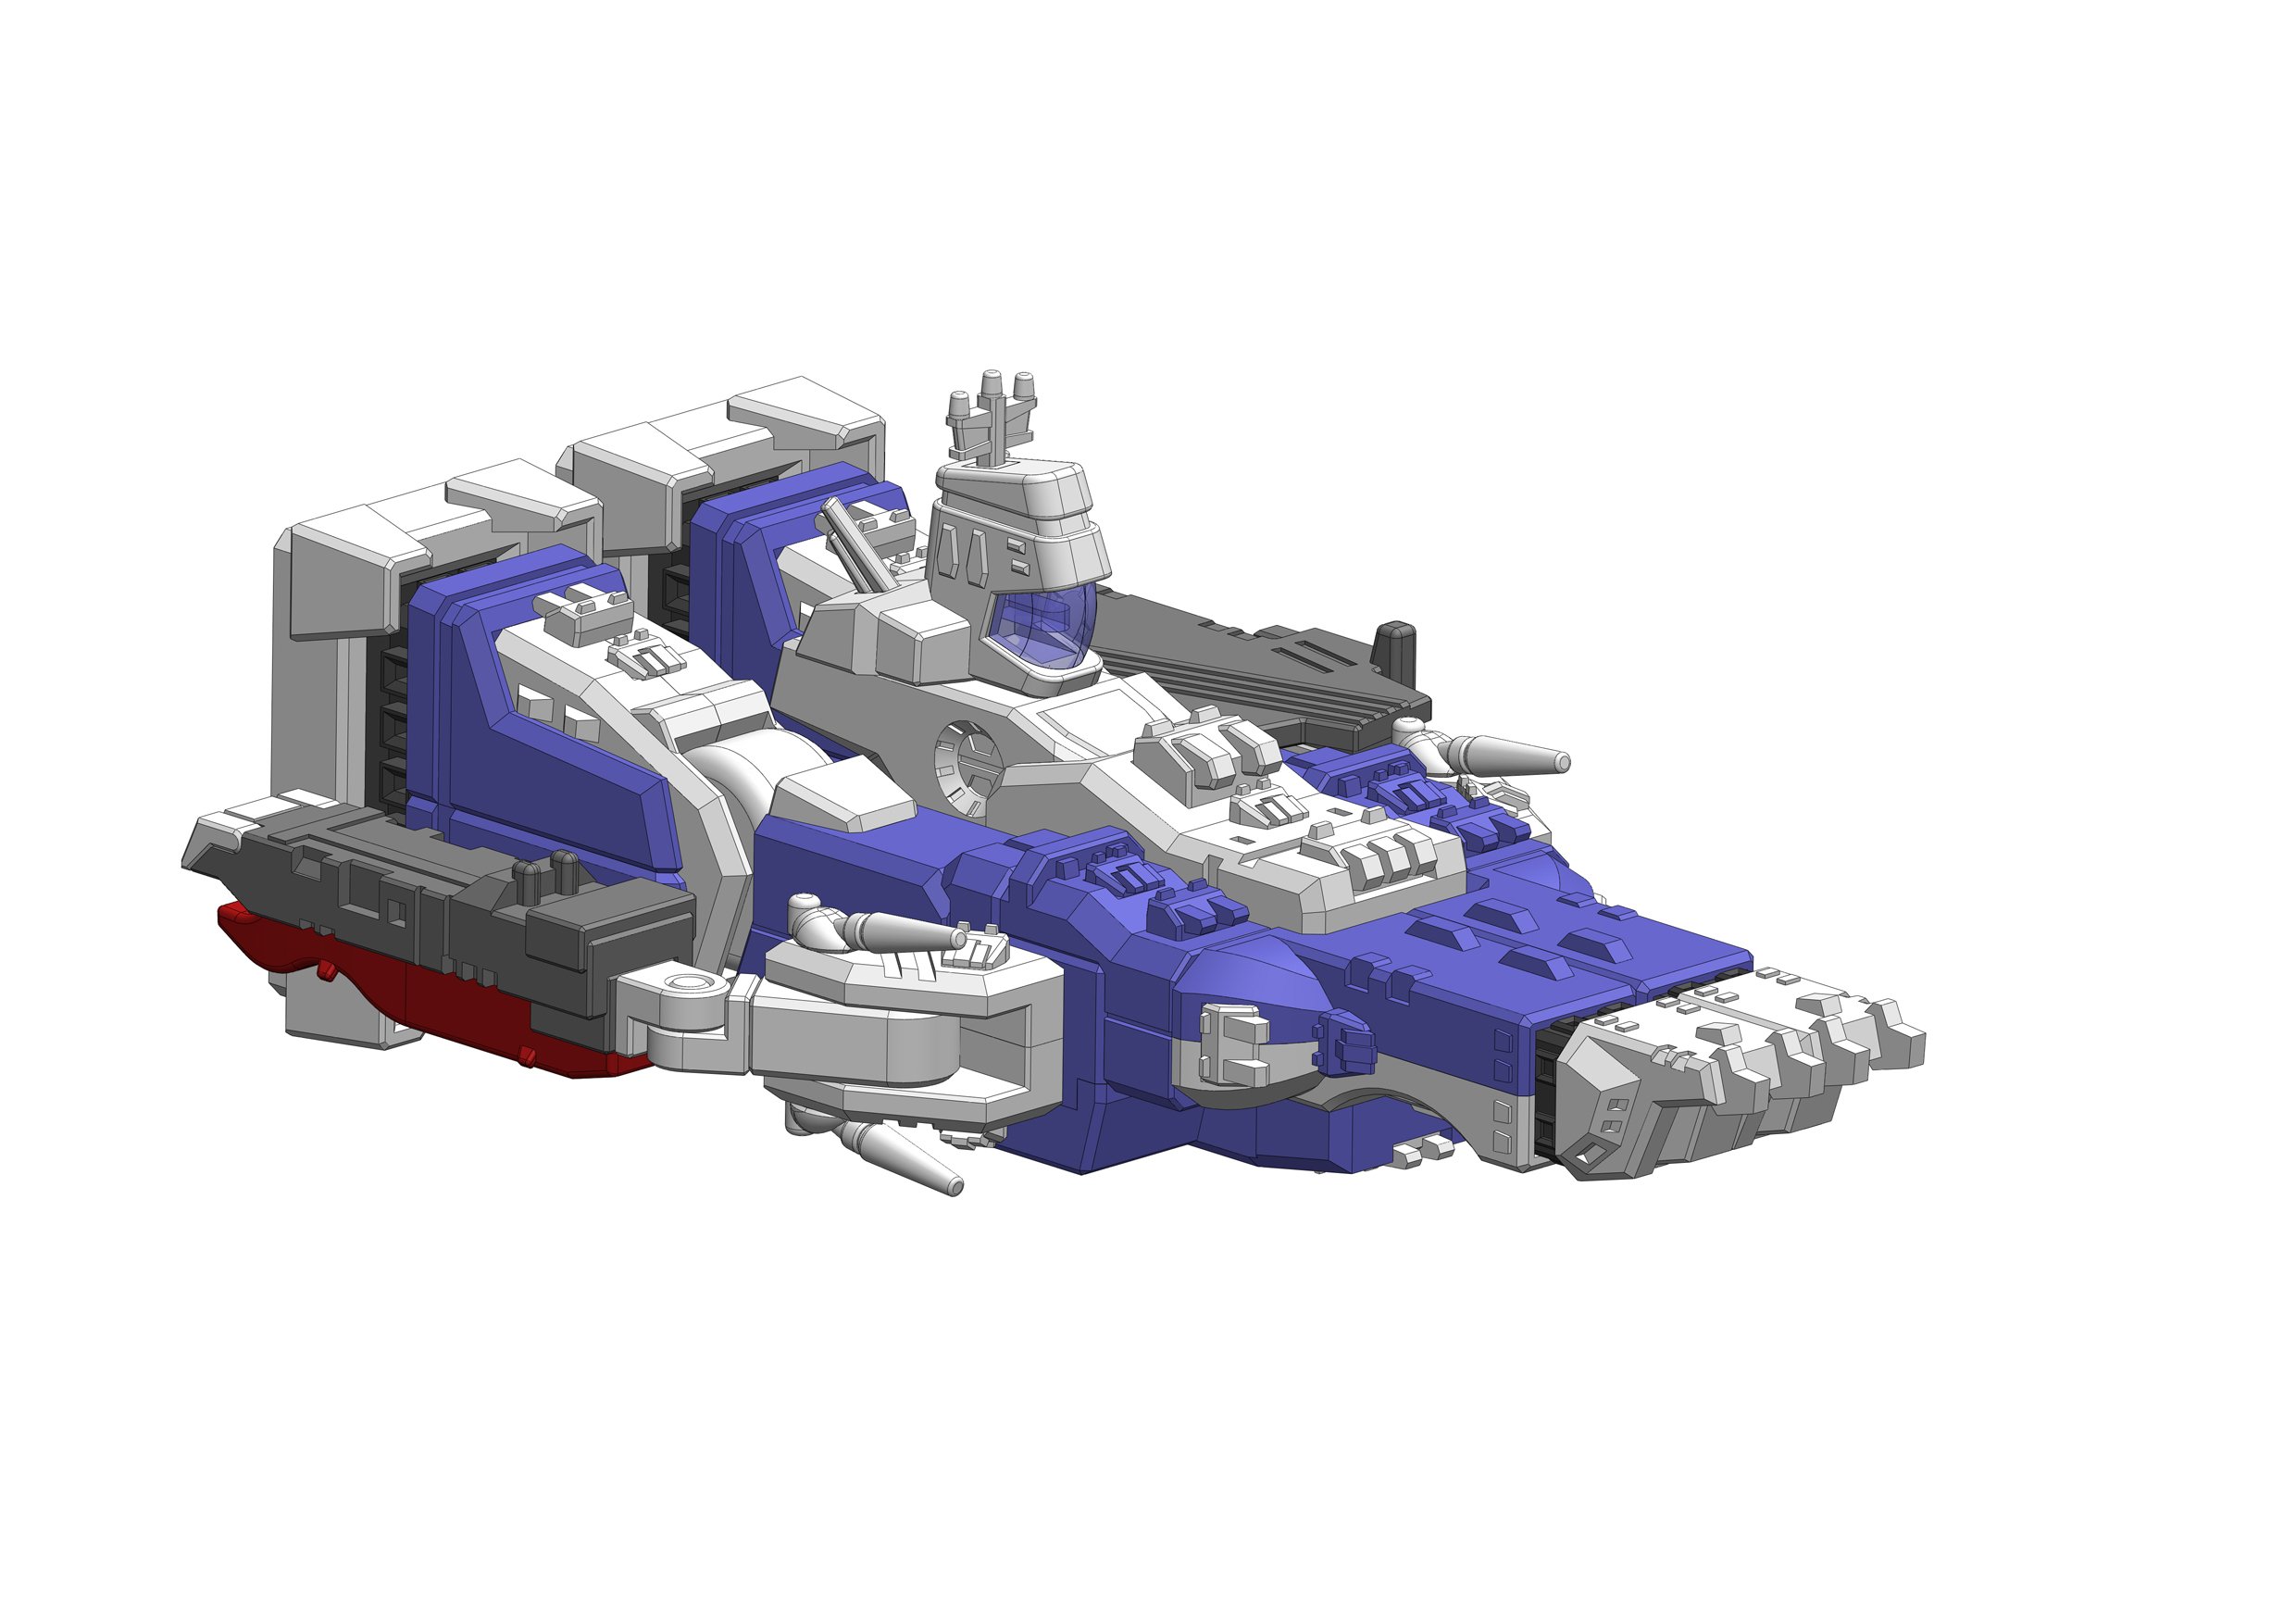
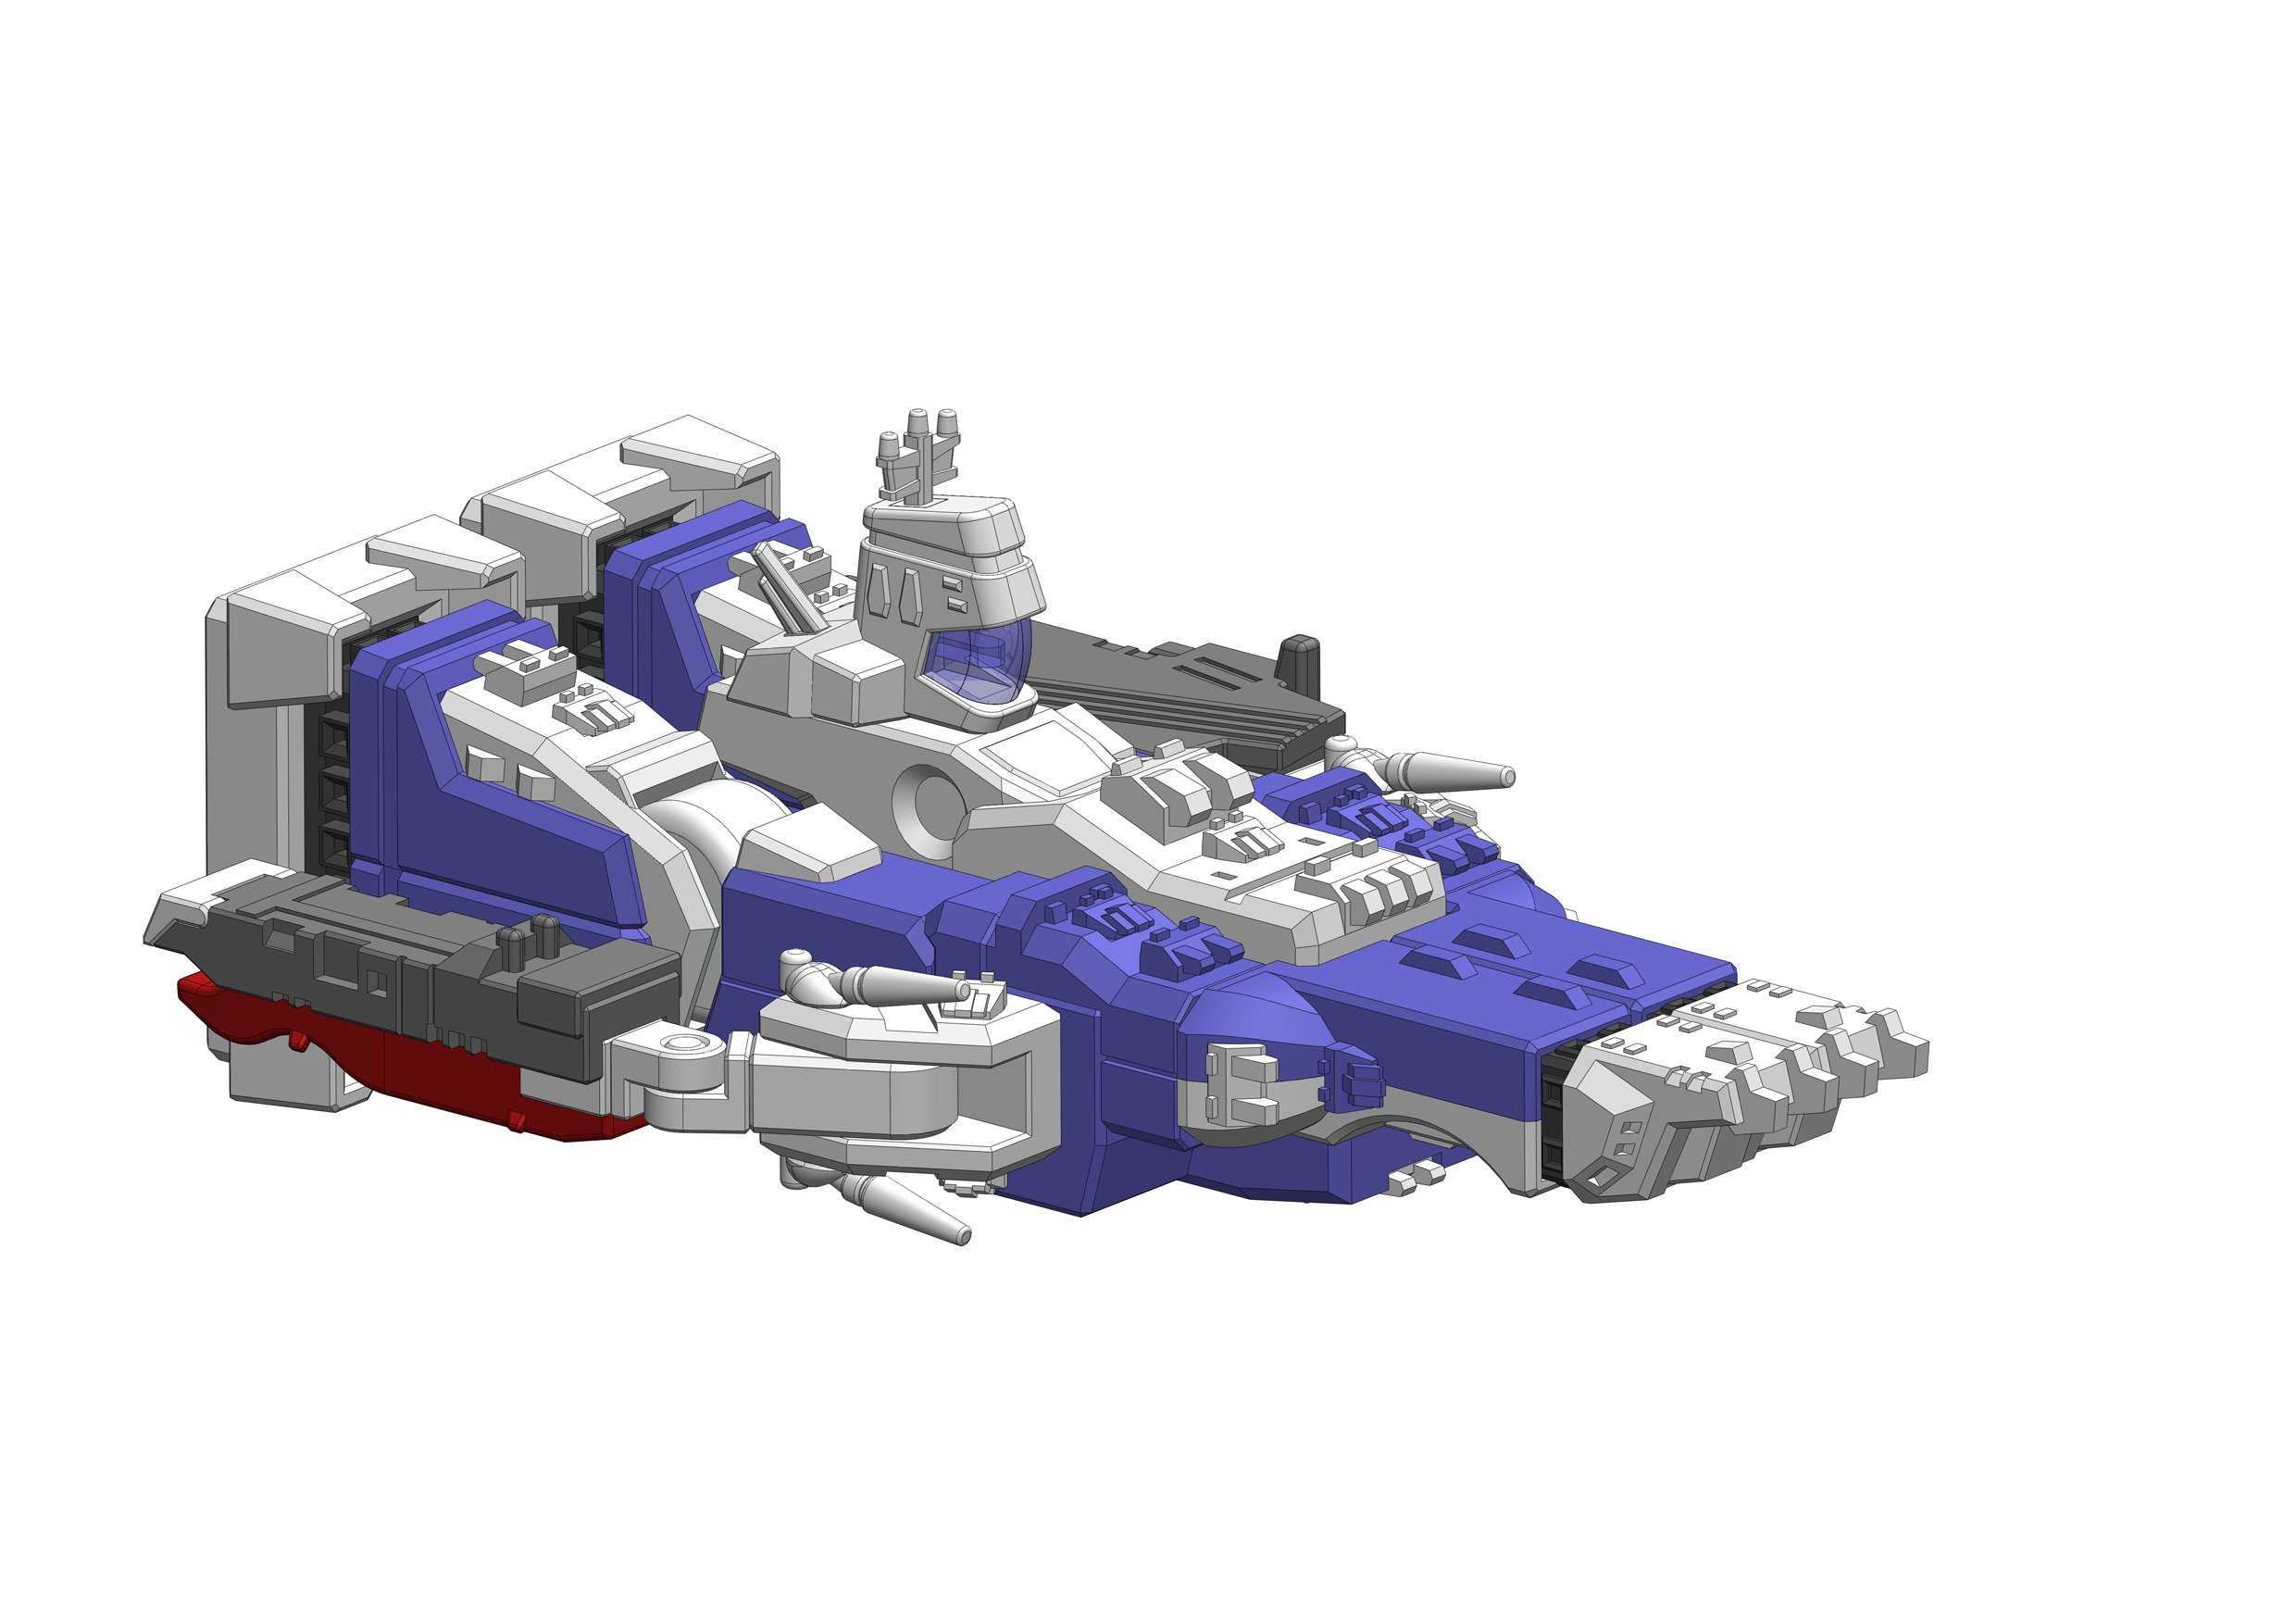
All the deck guns & antennas are in place! Just a little refinement & detail work to go.


-
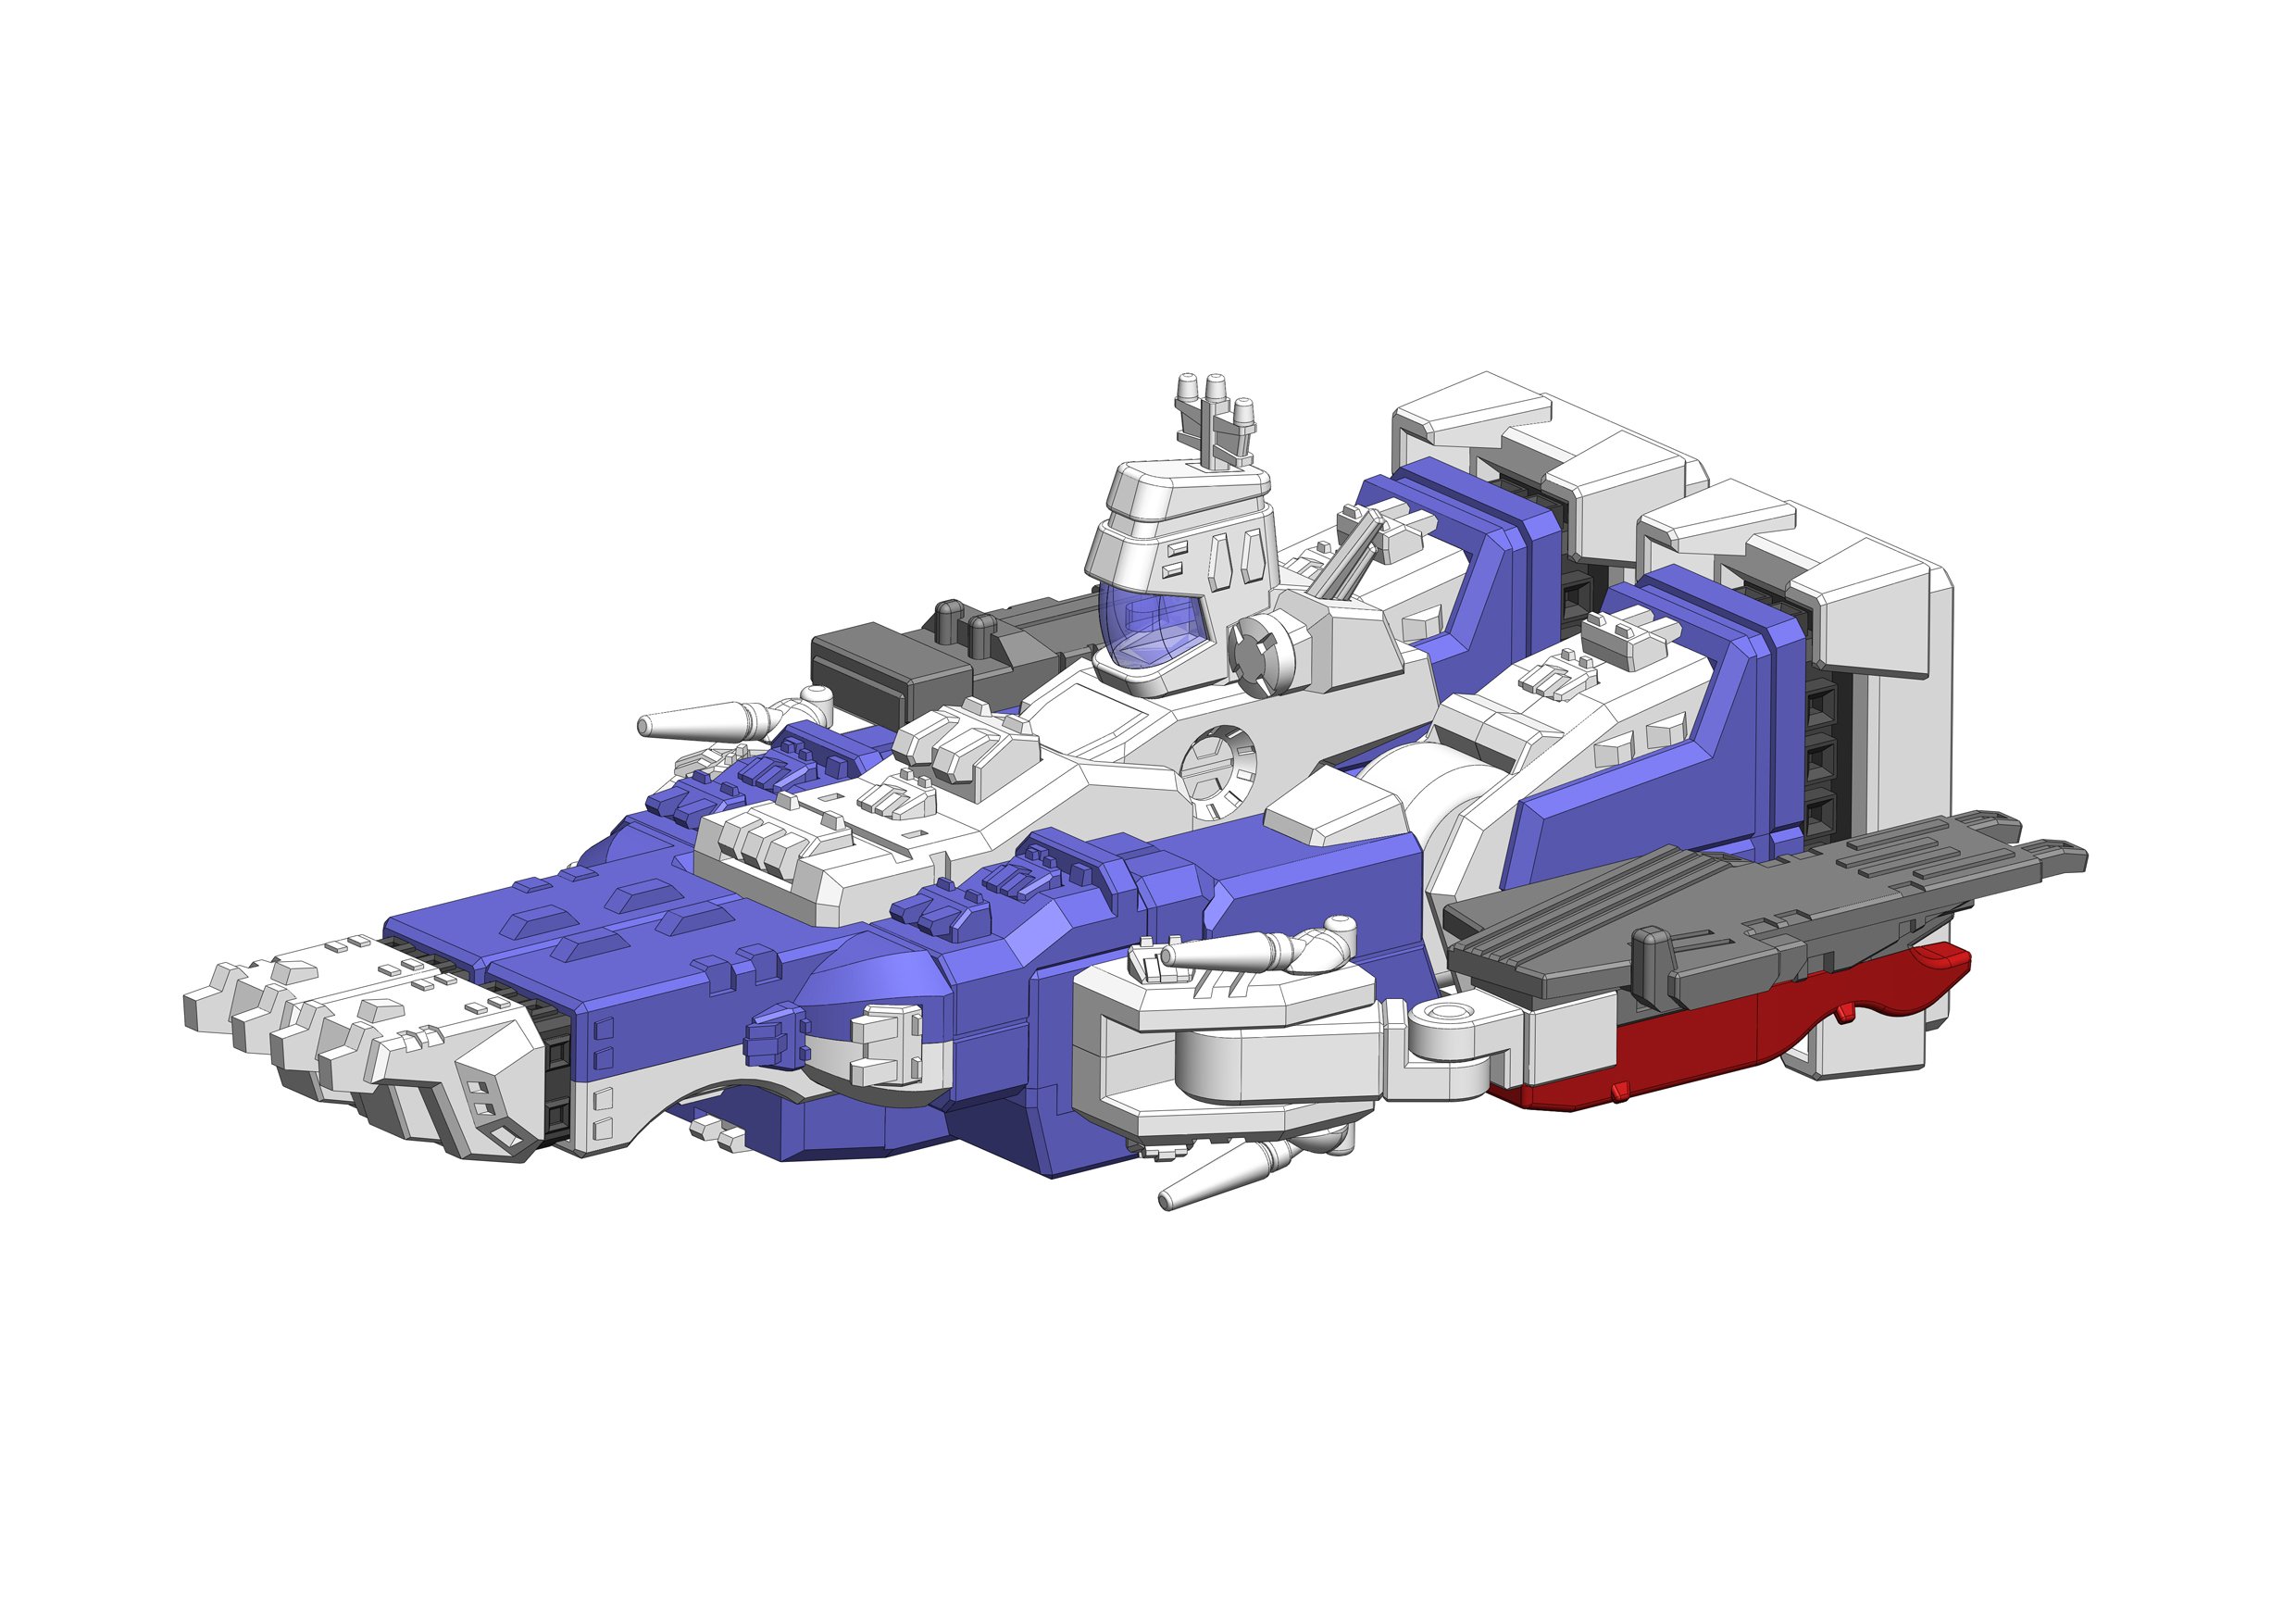
The Daedalus & Prometheus are done, just the deck guns & minor detailing left to go (plus parts-splitting for printing).


-
16 hours ago, Convectuoso said:
Looking great so far!
Thanks!
13 hours ago, mickyg said:Love it!
Thanks!
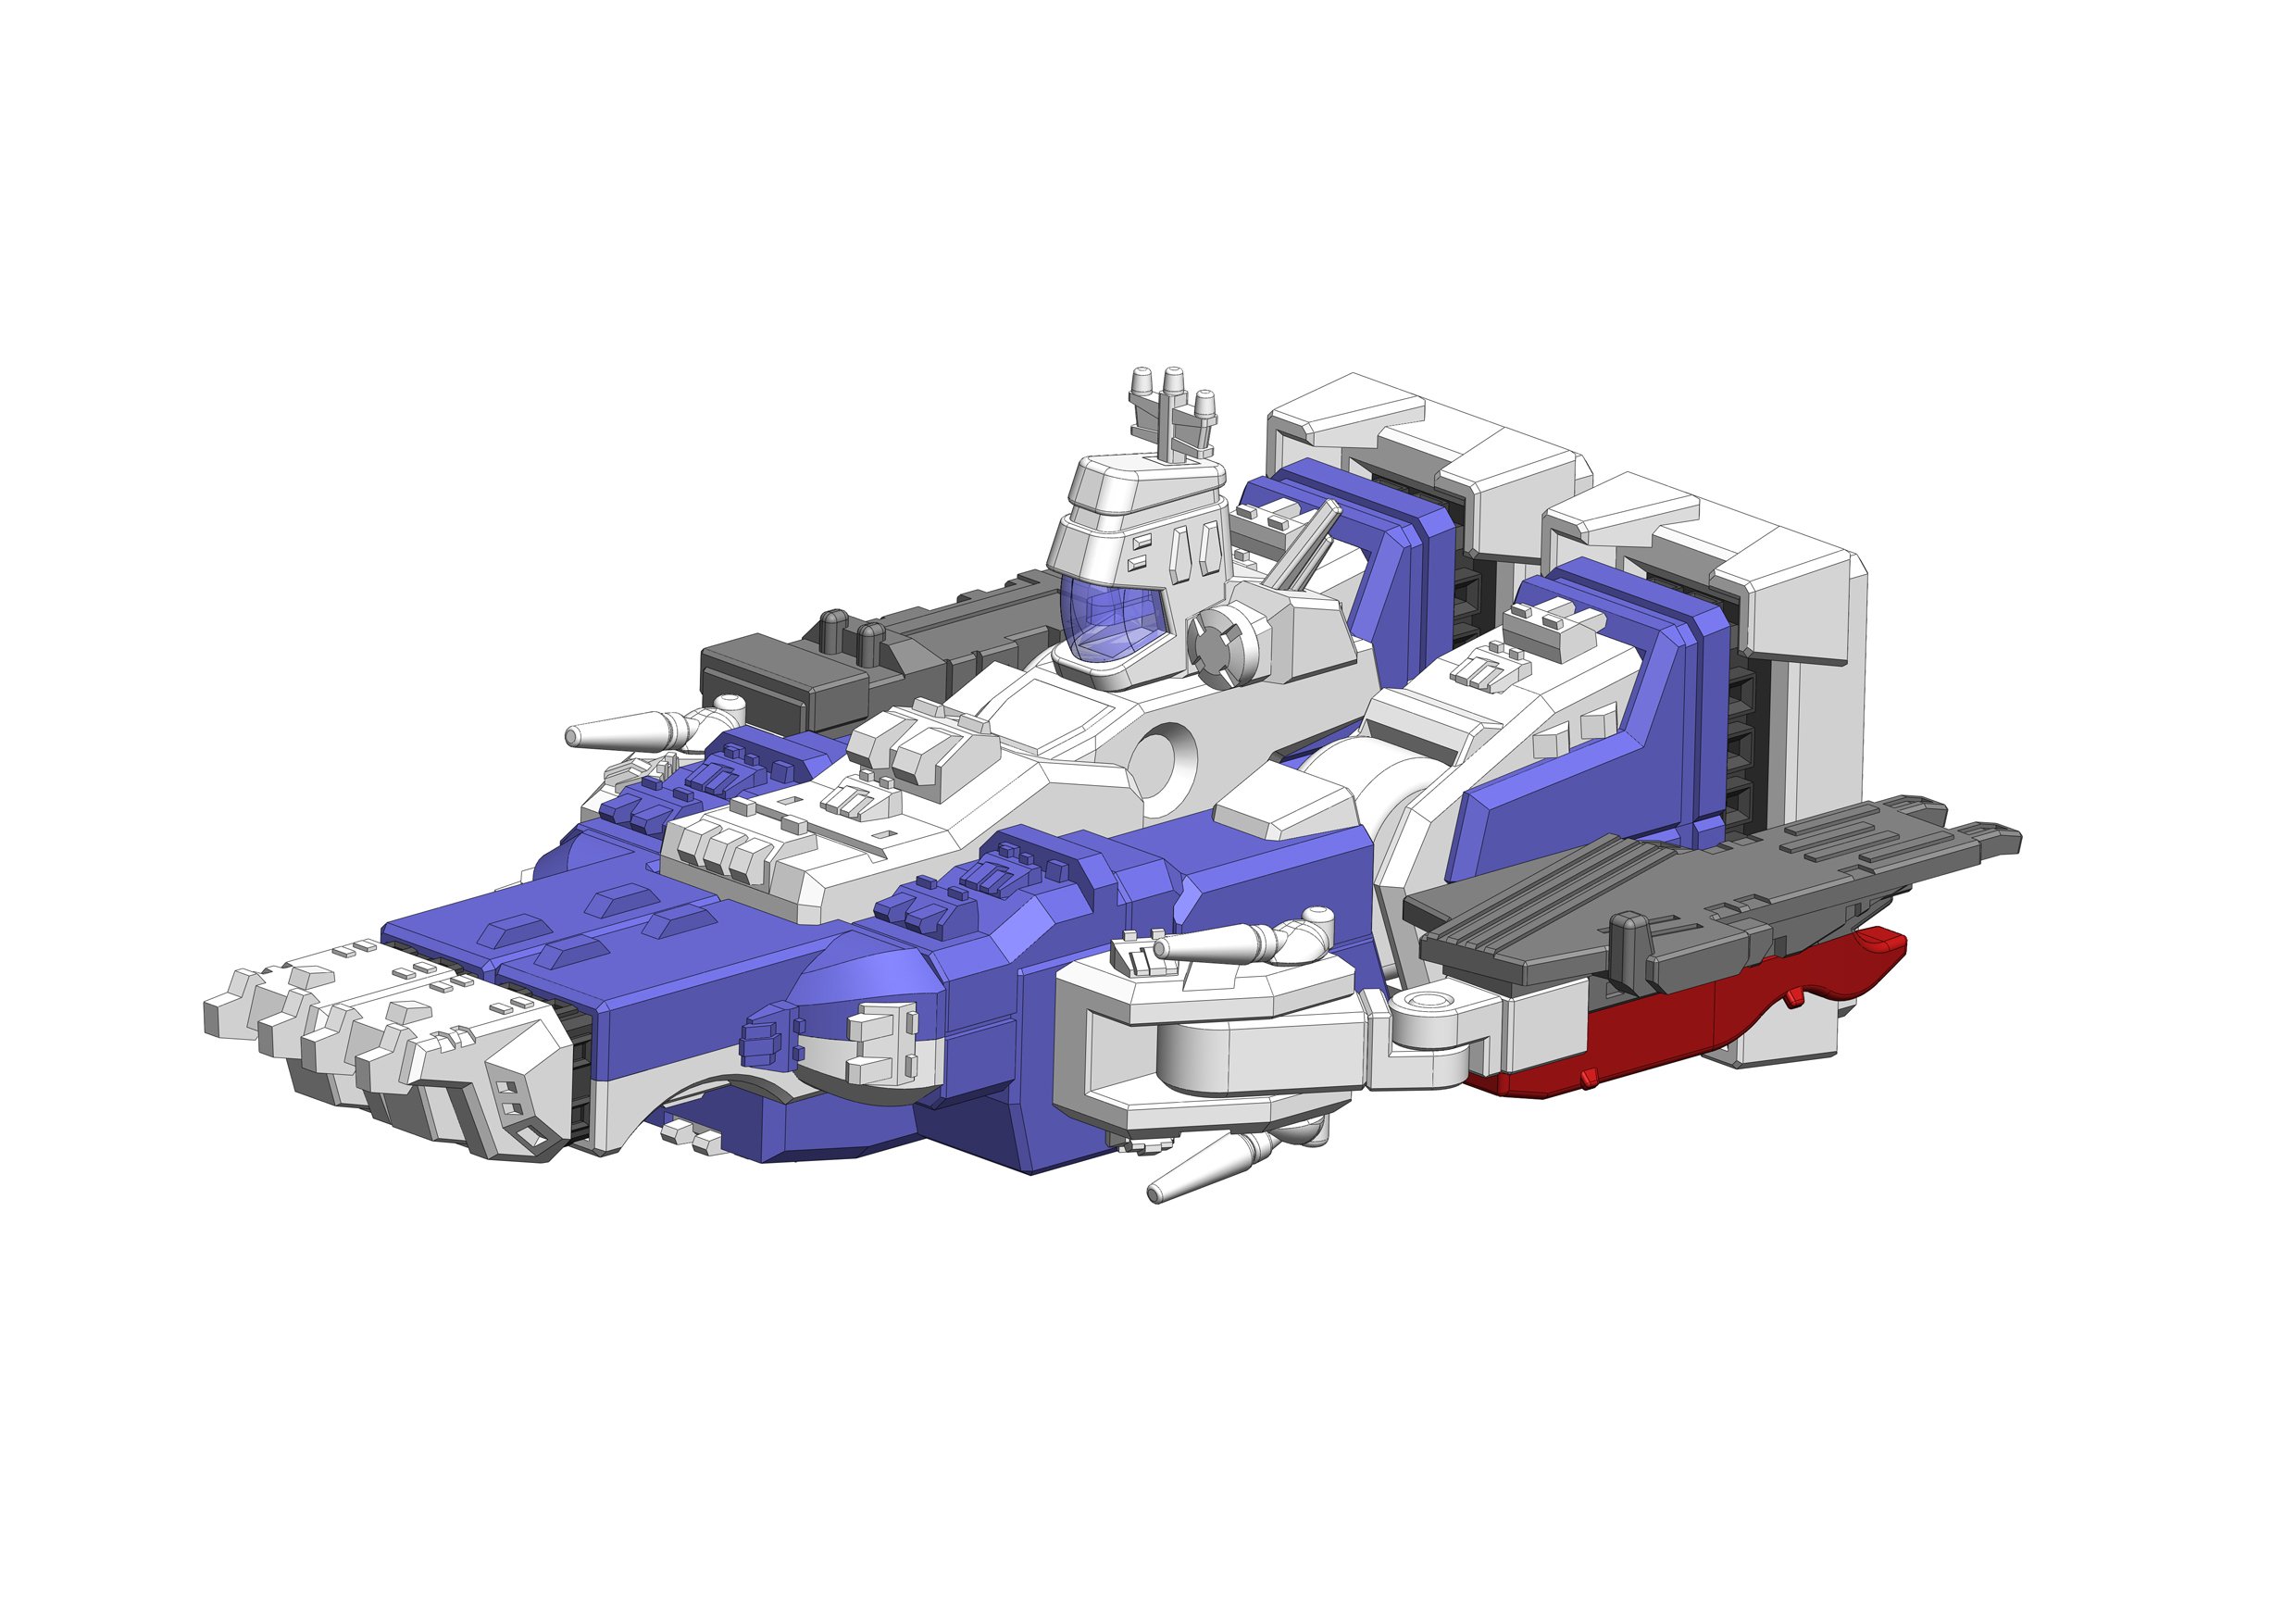
The main chunks are mostly done. The multiple cannons & antennas will be the last parts to model.
-
Hi guys, here's a little project you might like.
I'm about half-way done, just need to work on the carriers & miscellaneous details (gotta make that control tower split!).
It's designed as a snap-kit (and transformable). The model's just under 23cm tall in Storm Attacker mode.


C&C welcome.
-
Thanks!
-
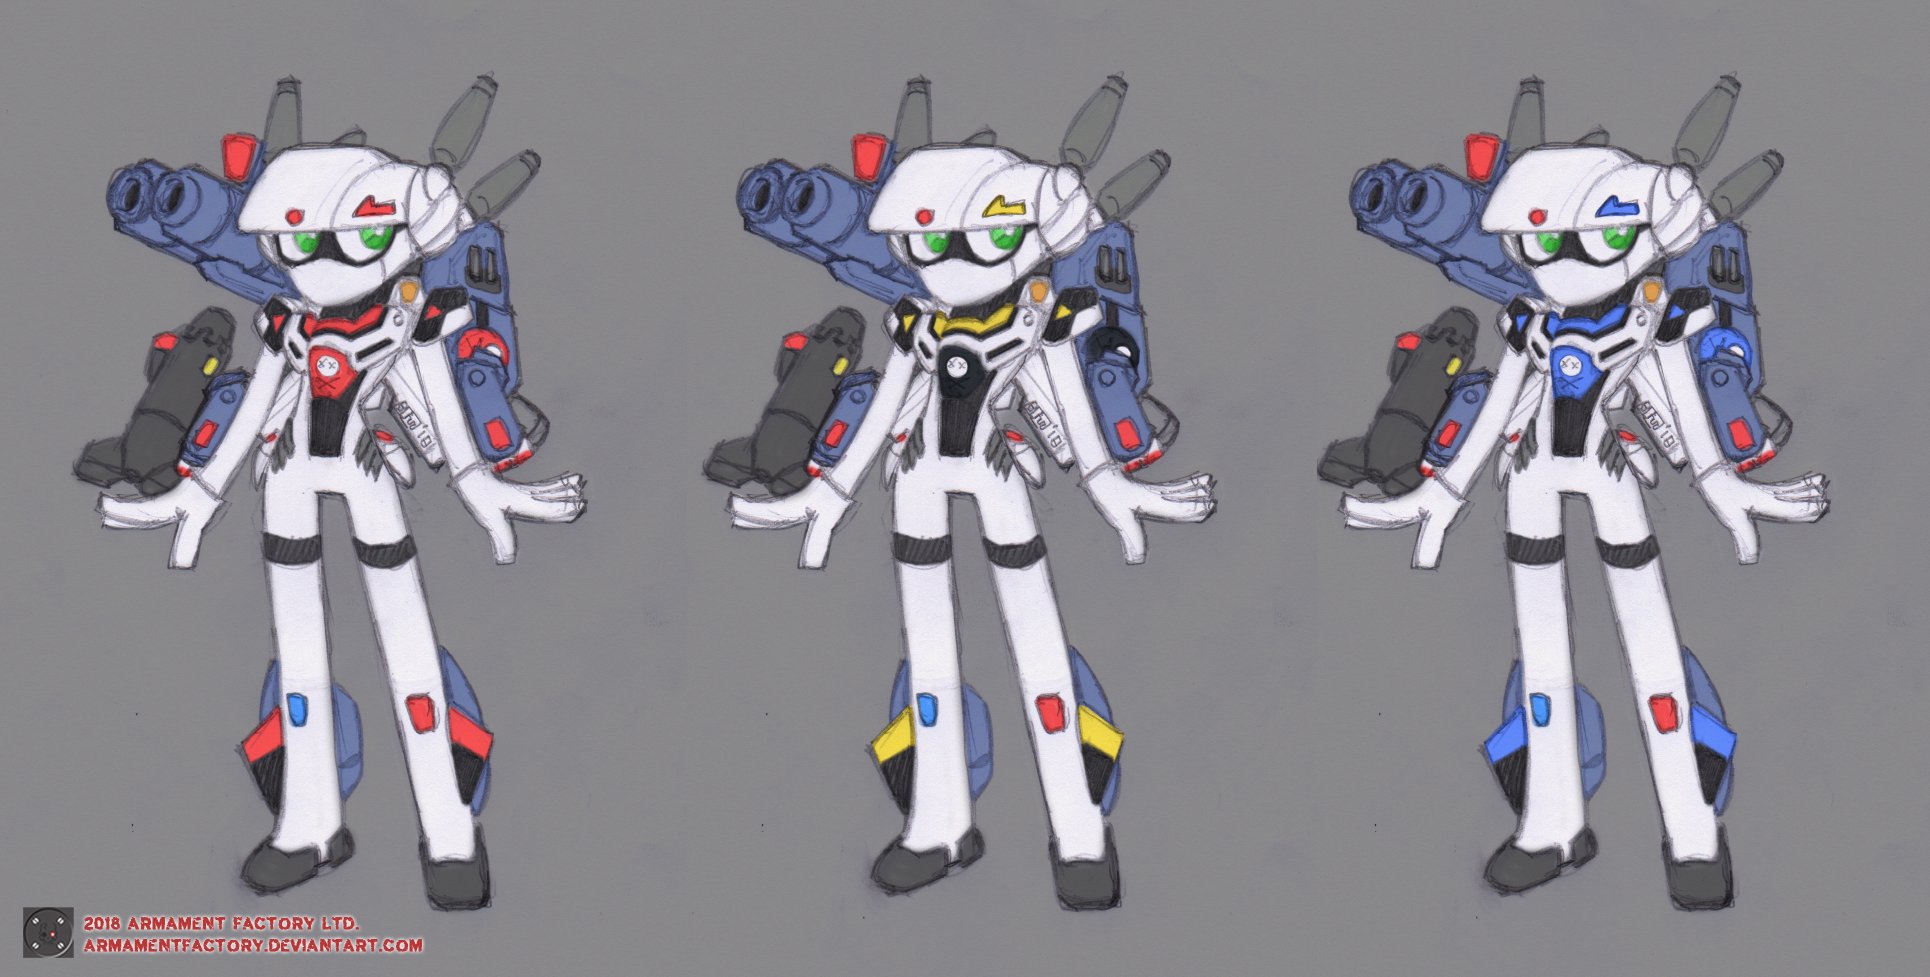
Hi Everybody! Here'a a different take on Valk-girl, I guess.
I should probably ink these.
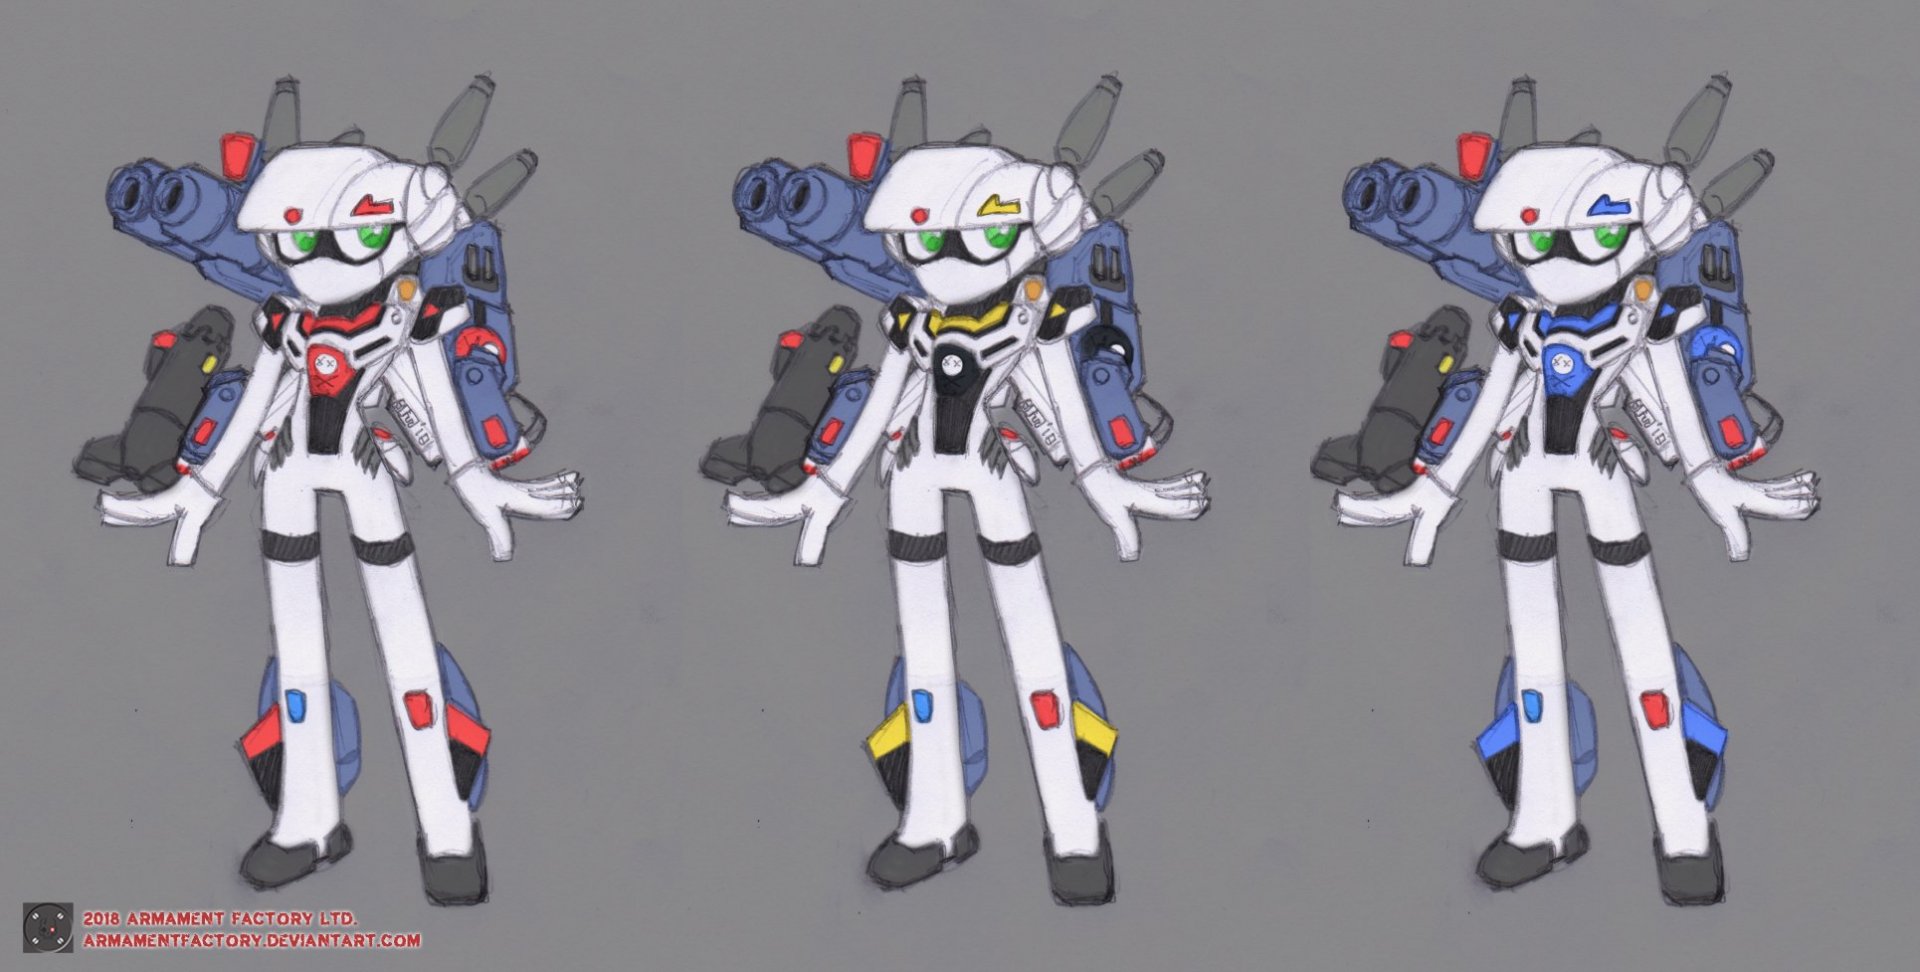

Thanks for looking!
-UN_M
-
10 hours ago, MechTech said:
UN Marine, what method are you going to use to clean up the bias on the printed parts? It's a big job, but I think your mod is coming along nicely!
Alright, be prepared to write down my secret paint formula.
1. Get a model in the right color already.
2. Build carefully without leaving any physical seems. Polish up the seems so they are as smooth as the surrounding plastic.
3. Clean and decal up your model. Use softener to make your decals hug the model.
3. Buy or mix (I mixed) a color that is matt and slightly darker than the plastic.
4. Splotch the paint on with a sponge or old sock. I'm high-tech - I used an old sock. Splotch heavily over the joints to cover them.
5. Wet the sock with isopropyl and splotch it out some more to spread around. Cover the decals a little with the thinned splotched paint.
6. Wipe the edges and wear areas off of any paint to simulate wear. Seal with a matt coating if you need to protect it.
7. Enjoy all the time and money you saved NOT priming and painting your model!
Still deciding if I want to matt clear coat this. It takes away depth from the "dirt." - MT
It'll be a rough road ahead, with tons of filler and sanding!
The large parts will be the worst of it, because of the print orientation - at least the small parts are a lot smoother (on the outside).
Thanks for the painting tips! - I always appreciate new and different ways of doing things!


SDF-1 3D Model + 3D Print [SD Machine Style]
in The Workshop!
Posted
Oh right... technical stuff:
Approximate print time is 31 hours on 0.25mm layer height, "loose" (75%?) infill. Roughly 470 grams of ABS.