
MechTech
-
Posts
4677 -
Joined
-
Last visited
Content Type
Profiles
Forums
Events
Gallery
Posts posted by MechTech
-
-
WM Cheng - I have to agree! Very PROFESSIONAL finish. And on everything that is tough to do. White, red and gray masking all together with flying surfaces - and - sharp lines! That is tough to do right. That totally sucks about the canopy though! Two choices, put it in a DARK room forever, or get out the razor blade. It looks like you glued down that canopy tight though. - MT
-
NZEOD - Now that's a set of suits I want in my wardrobe! They look great!
Convectuoso - Great color on the Tomahawk. - MT
-
Great finish and photos! Like everyone else said, perfect balance of both color and weathering. - MT
-
Derex - I guess it's drawing you in to work on NOW after all? The interior of that thing is going to look way better than what most people do to the outside at this rate!
Next assembly for the ship. 180 engraved dots all around the tubes. Any guesses? - MT
-
About vitamin D. Research shows you should have some exposure to natural sunlight for about 10 to 15 minutes a day. It is not just vitamin D, it helps your eyes too. In fact, recent research shows red light to help your eyes regenerate. Sitting inside all day also causes nearsightedness by your eyes not getting what they need. It kinda sucks. Too much sun breaks you down, not enough screws you up. Nothing is ever simple.

About yellowing. Your problem is not just UV light, you're breathing it in right now. Oxygen will also oxidize plastics without UV light. It's not as simple as keeping them in the dark, but sealed air tight. And that's not the only issue. You can still have issues because plastic formulations vary as much as there are types of cheese! Some plastic is cheap and just destabilizes with time. I've had the same problem with stuff kept in boxes, in the closet, smoke free house, and it still goes yellow. I've studied a lot on plastics and engineer a lot with them. Sometimes you just can't win.
Buy your your toy, enjoy the new toy smell, and then don't get your hopes up too high I'd say. - MT
-
That looks great! Yeah, bring on more photos. - MT
-
Thank you Macross Junkie, I appreciate it! I updated my last post in response to your post for WM Cheng. That is a great photo. It looks like the squadron all had that scheme, not just the CAG's plane. It is unusually clean for a Navy plane too! - MT
-
NZEOD - The male armor looks great! Painting that small is a lot of "fun."
WM Cheng - Thank you very much, I appreciate it! I love doing styrene work, so this is fun. This is still the same ship for the last two years or so! I've spent most of that time trying to make a cap cannon that works and looks right. Now I'm catching up on the actual ship. I actually volunteer doing graphics for the local naval air museum, but no models. No one would hire me because I don't have any experience
 Oh well, at least it's fun and not a job this way.
That Tomcat looks amazing! I wish the 1/32nd scale Revell kit I did in the 80's (with REAL rubber tires) looked like that! Same decals too. We used to joke that the Navy didn't know what aircraft soap was. Looking at the photos and Macross Junkies post after this, looks like they kept them clean. The photo below isn't even the CAG's plane, and it's clean! But the wheels wells and struts have some dirt on them.
Pengbuzz - Wouldn't it have been easier to feed that figure some 'roids?
 That is an AWESOME looking sculpt! I'm having 80's flash backs! "By the power of masking tape!!!"
Derex - Those look cool! Just don't forget the fruit bowl
") - MT
- MT
-
That's some awesome work! The hand does look beautiful - first time I think I ever said that
 It's funny how the thumb is almost as big as the 1/72 scale hand all by itself. What size hole goes through the fingers? I'm thinking maybe a screw to go through it? The screw head / bolt head may even add an aspect of detail. Just an idea, and you can tighten it too.
The ratchet joint looks great too! Two makes it much more positive - great for the load that will be placed on it. Great design and idea! Styrene is not very strong, but for this tiny guy, it worked. The advantage of subtractive machining is you clean your work as you go along vs additive processes where it may need further processing to erase the bias marks. But 3D printing has more advantages. That's why I need to get into it.
I'm thinking of going SLA printer for detail. The resins are usually acrylic based and so more brittle, but they are superior for detail, which is what I'll be shooting for.
I'm glad you were able to work on stuff while deployed. I brought my model stuff with me and never touched it! Just too busy doing other stuff. - MT
-
Looking good NZEOD! It's a good anime lookin' color.
It's time to get down to the nuts n bolts! I took a punch I made for large squares and drilled a tiny 1/16th inch hole in it. Punch a similar sized Allen wrench and you get bolt heads. They are actually two-sided. One side is narrow and the other larger. Came out weird. But as you can see, the same heads look like two different sizes when flipped over. Still more work to go on it... - MT
-
Lookin cool! - MT
-
Derex - The Death Star is looking great! That is a lot of detail crammed into such a small space.
Thank you guys. Hopefully the final turret comes out as planned. - MT
-
Cool! That looks like the upper-scale homes in the better part of the neighborhood
- MT
-
I like the finish! It looks great, congrats Jason!
-
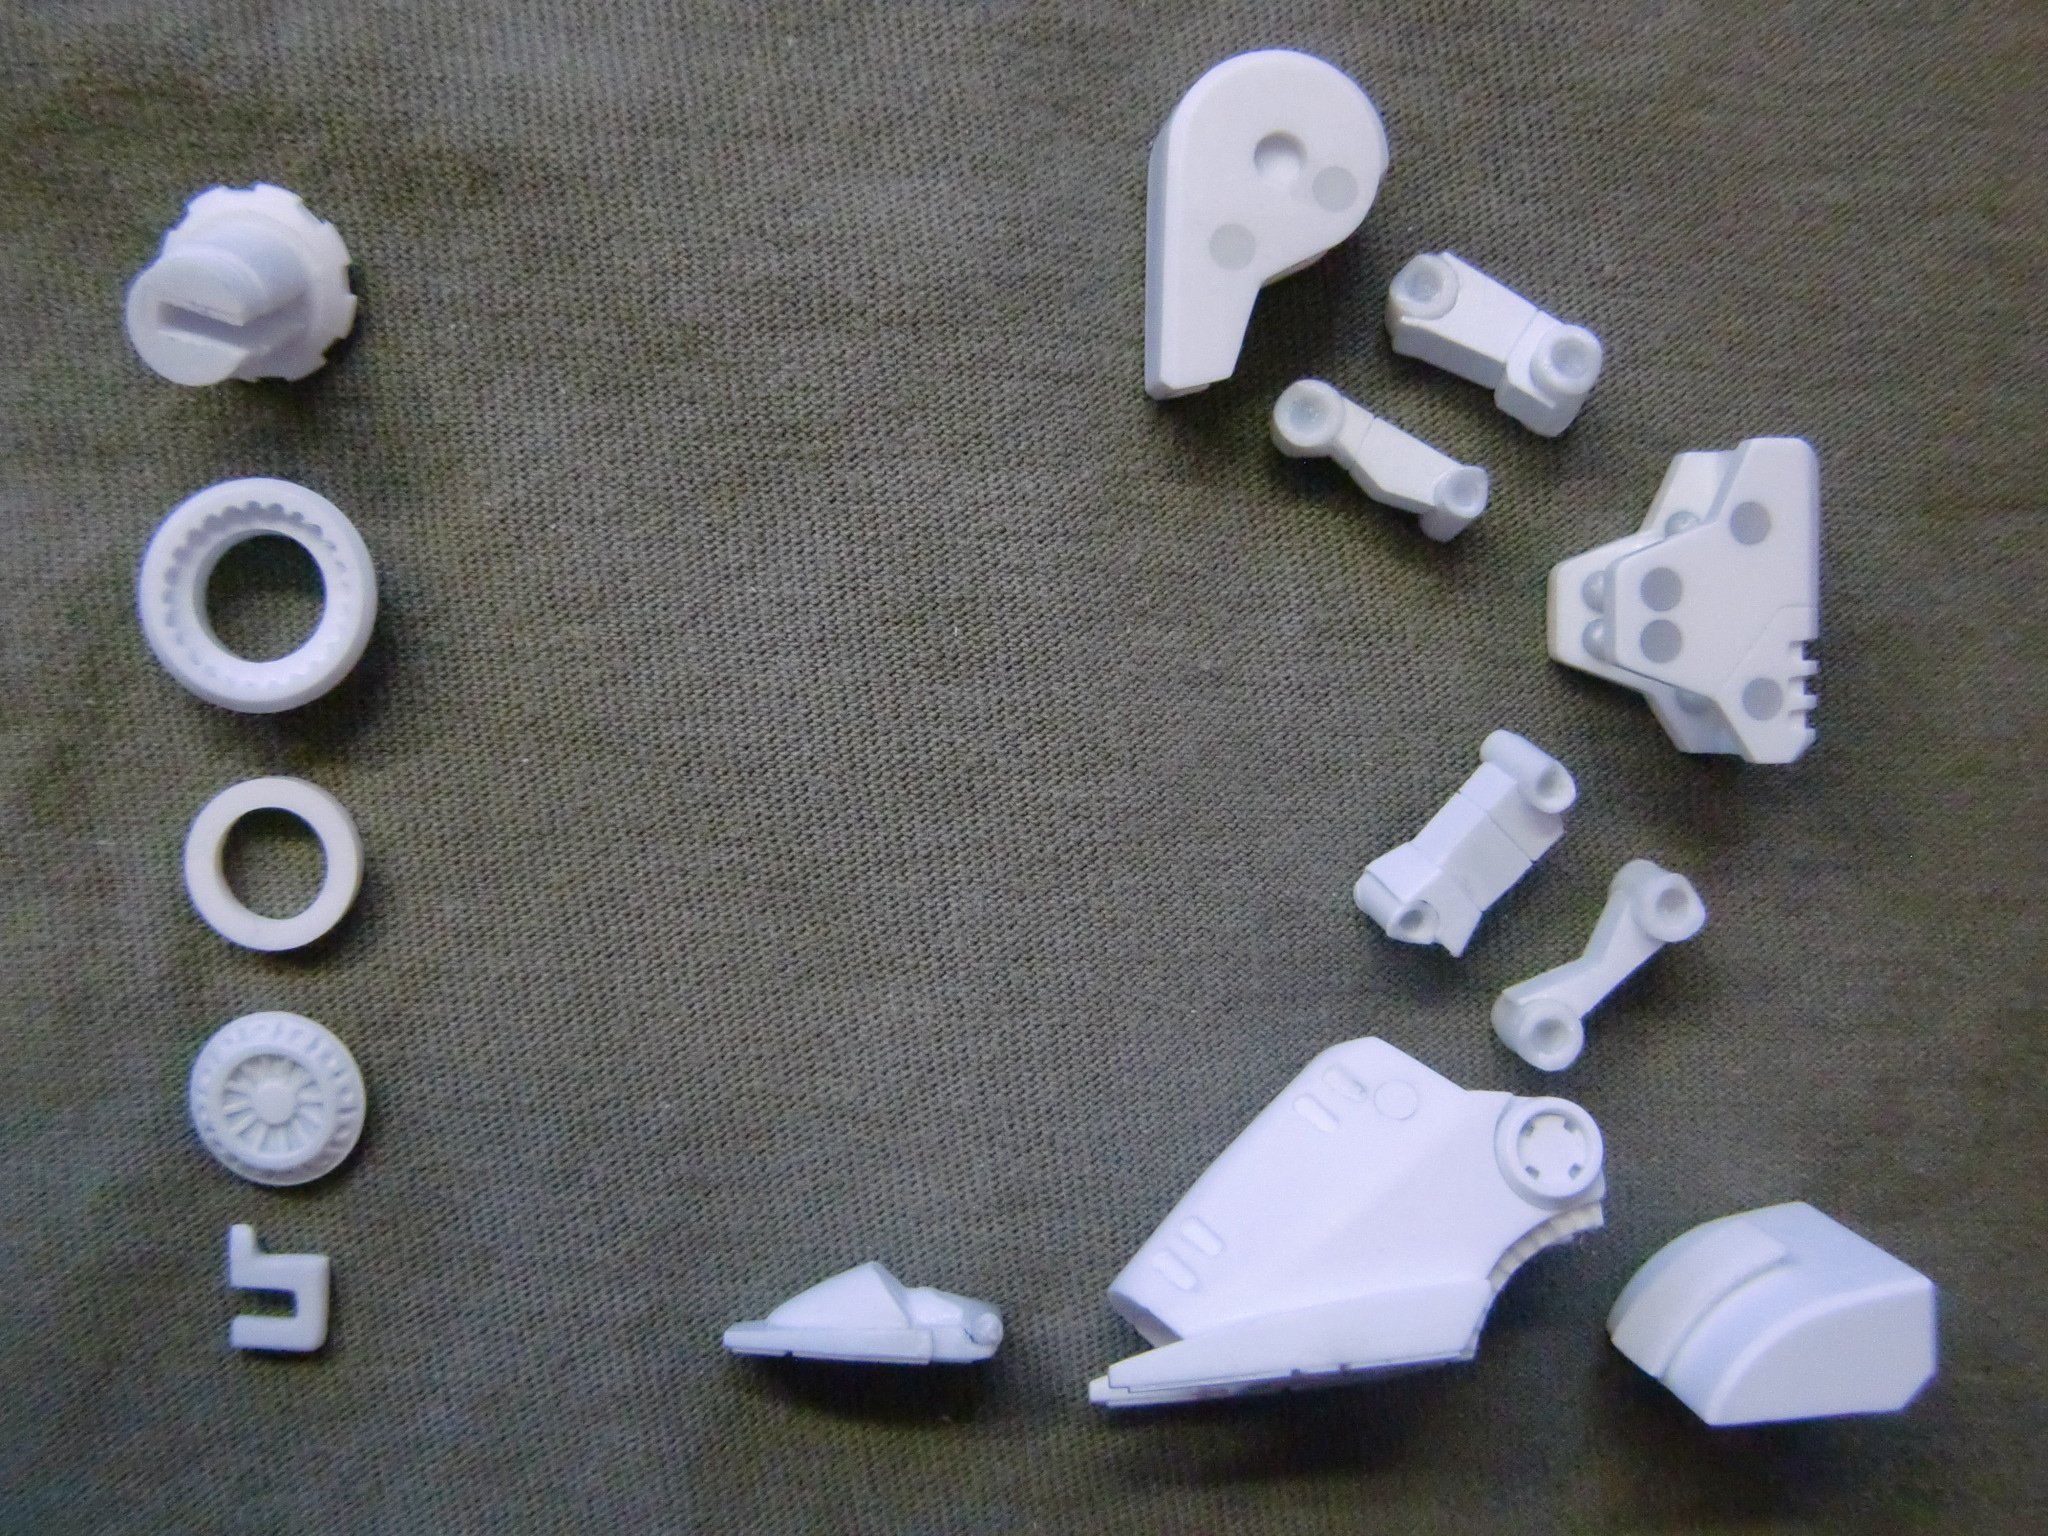
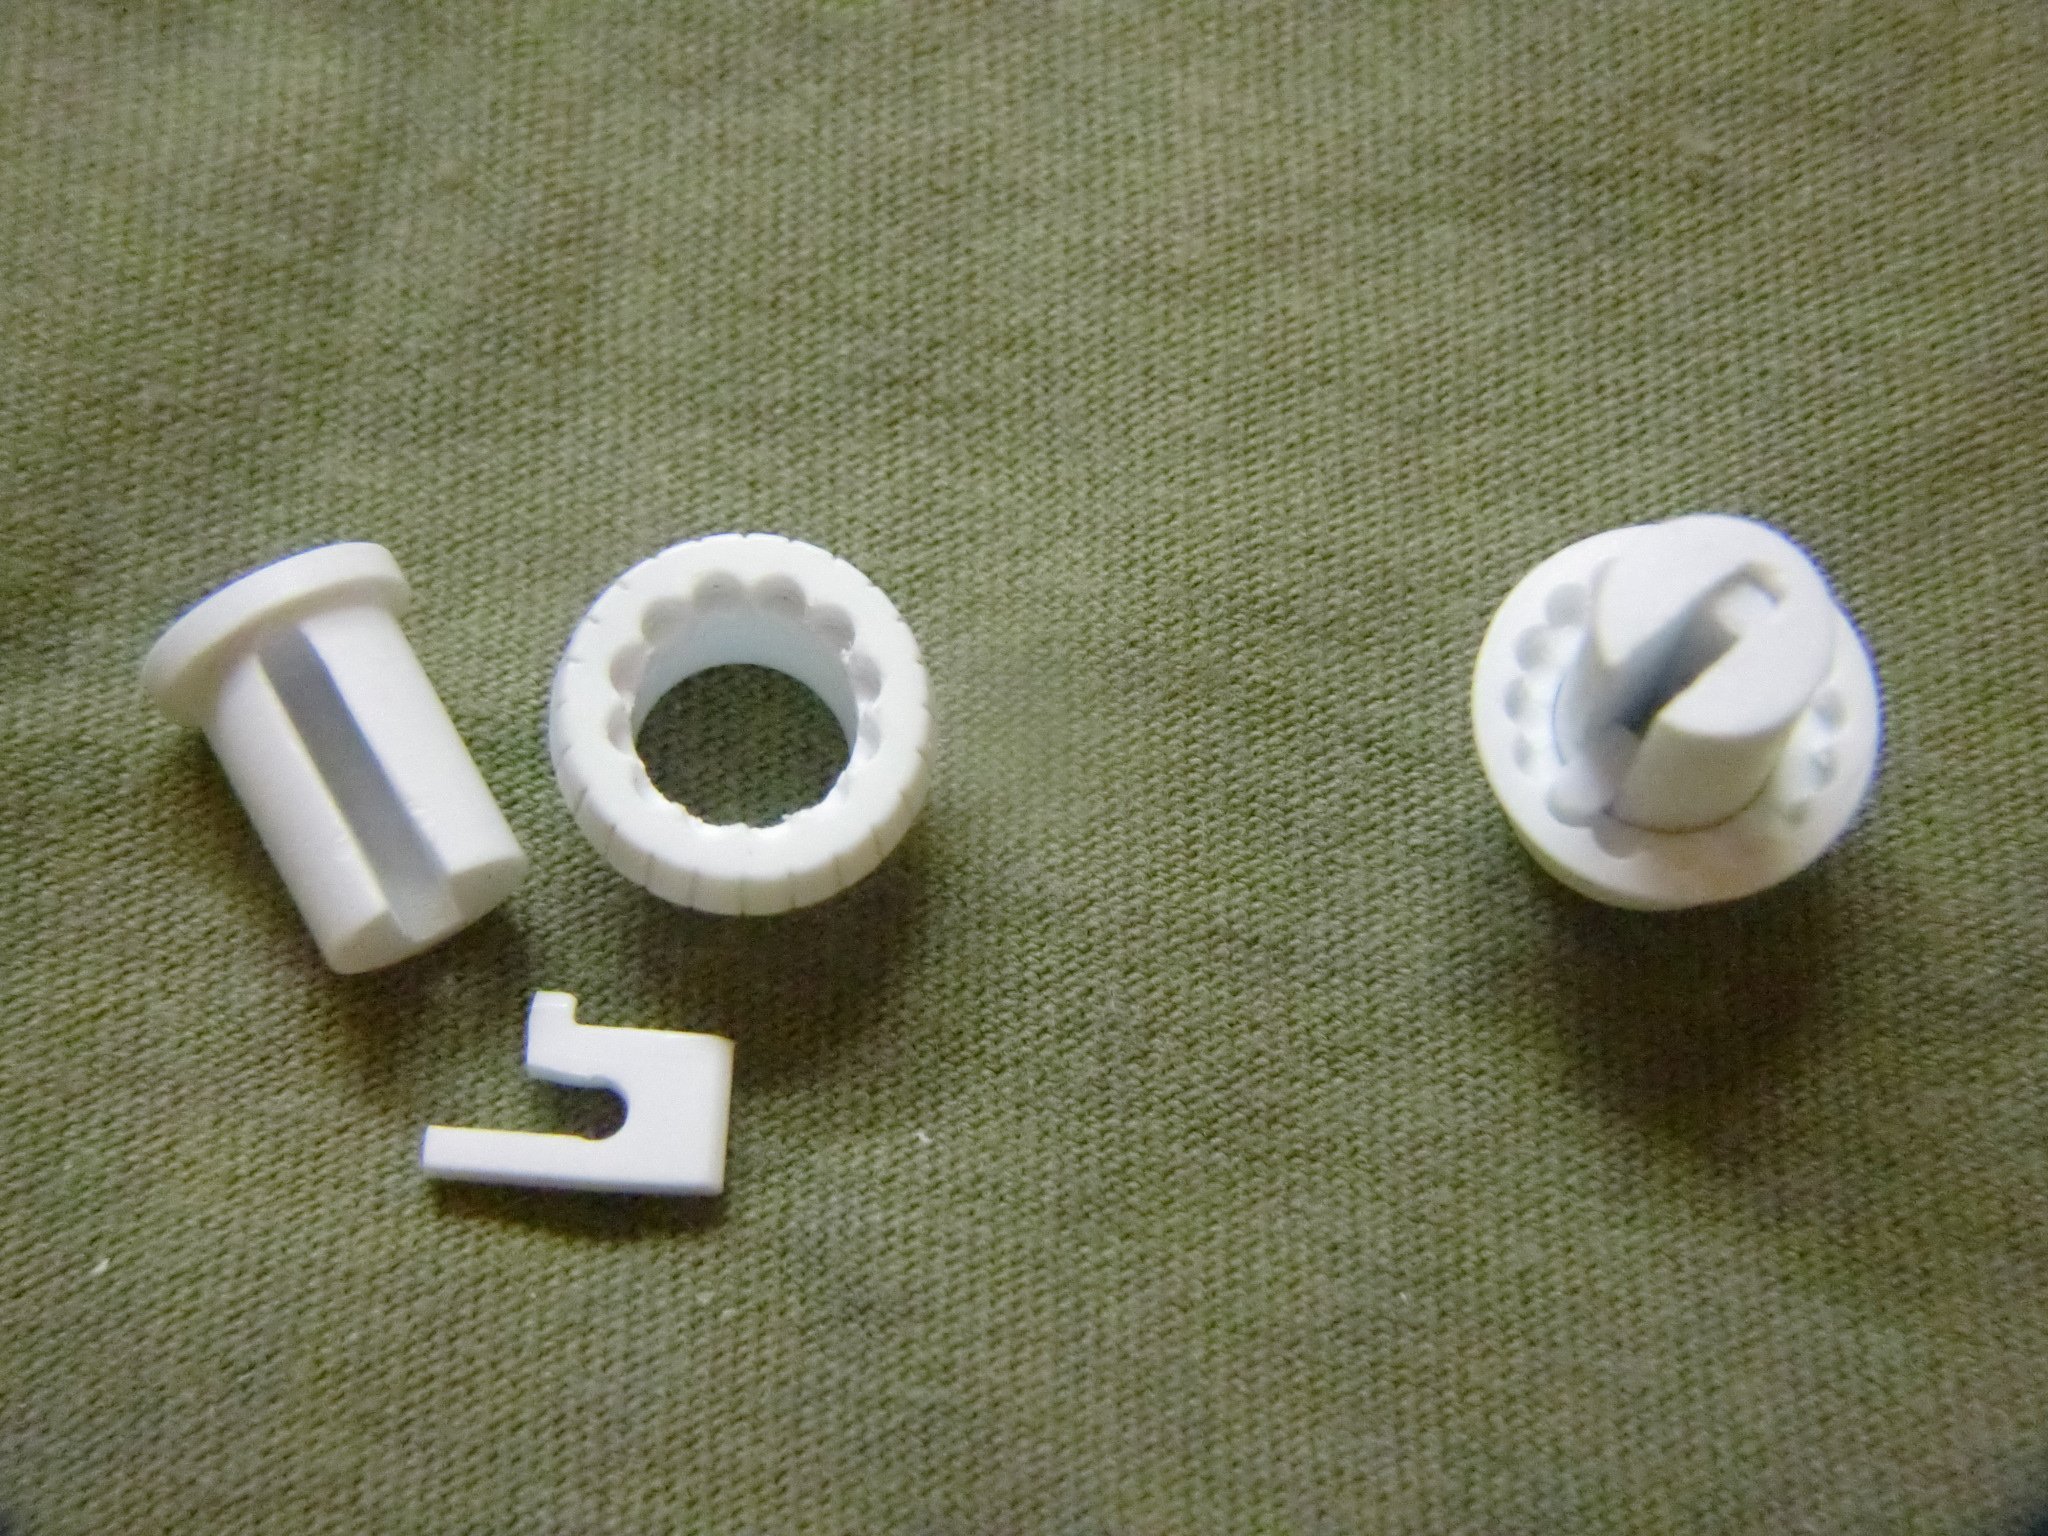
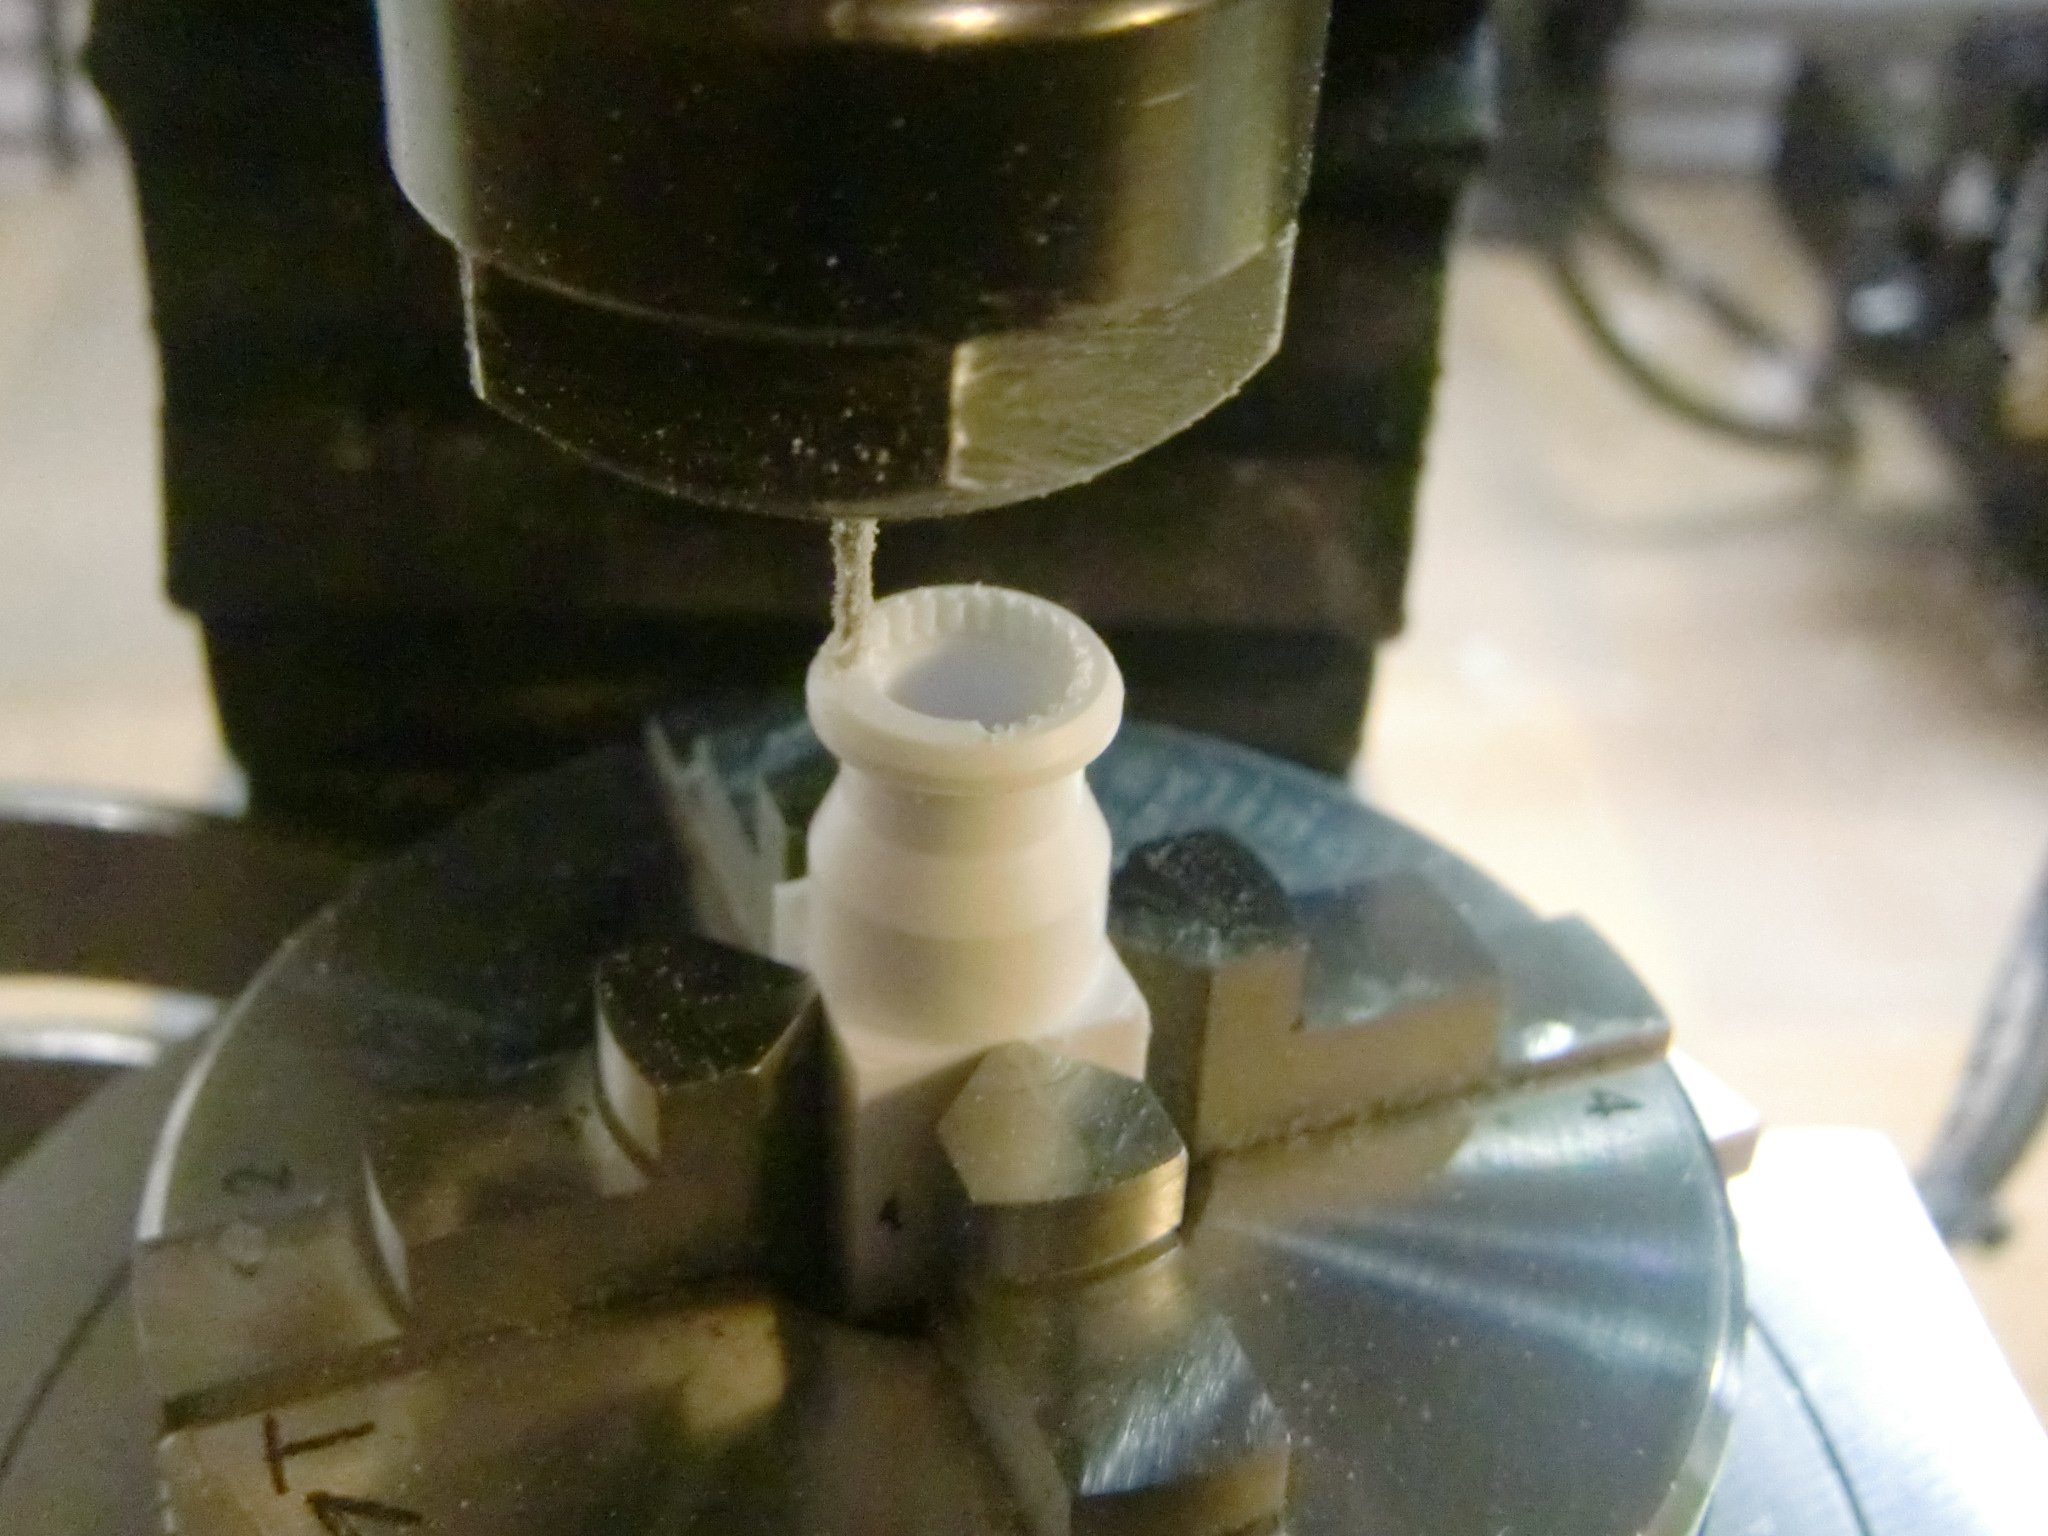
Here are some other shots that I hope help you out (they're originally from my build thread). Some of the same and different - but same idea- designs. It's a very simple design. Flanged ring has indents cut into flanged area. Slotted post goes into flanged ring. The "C" looking piece fits into the post and is the ratchet. The shape gives it spring while in the shaft. The post will probably need to be longer for your model. The last photo shows the indents being cut into the top part of the flange. The one here was for a smaller 1/350th model. I hope that helps you out! - MT
-
That's looking great!!! The only problem with life-size is you need to get them their own room!
- MT
-
WM Cheng - Looks just like it's on the hangar paint shop floor (minus wheels)! Nice-n-smooth finish too.
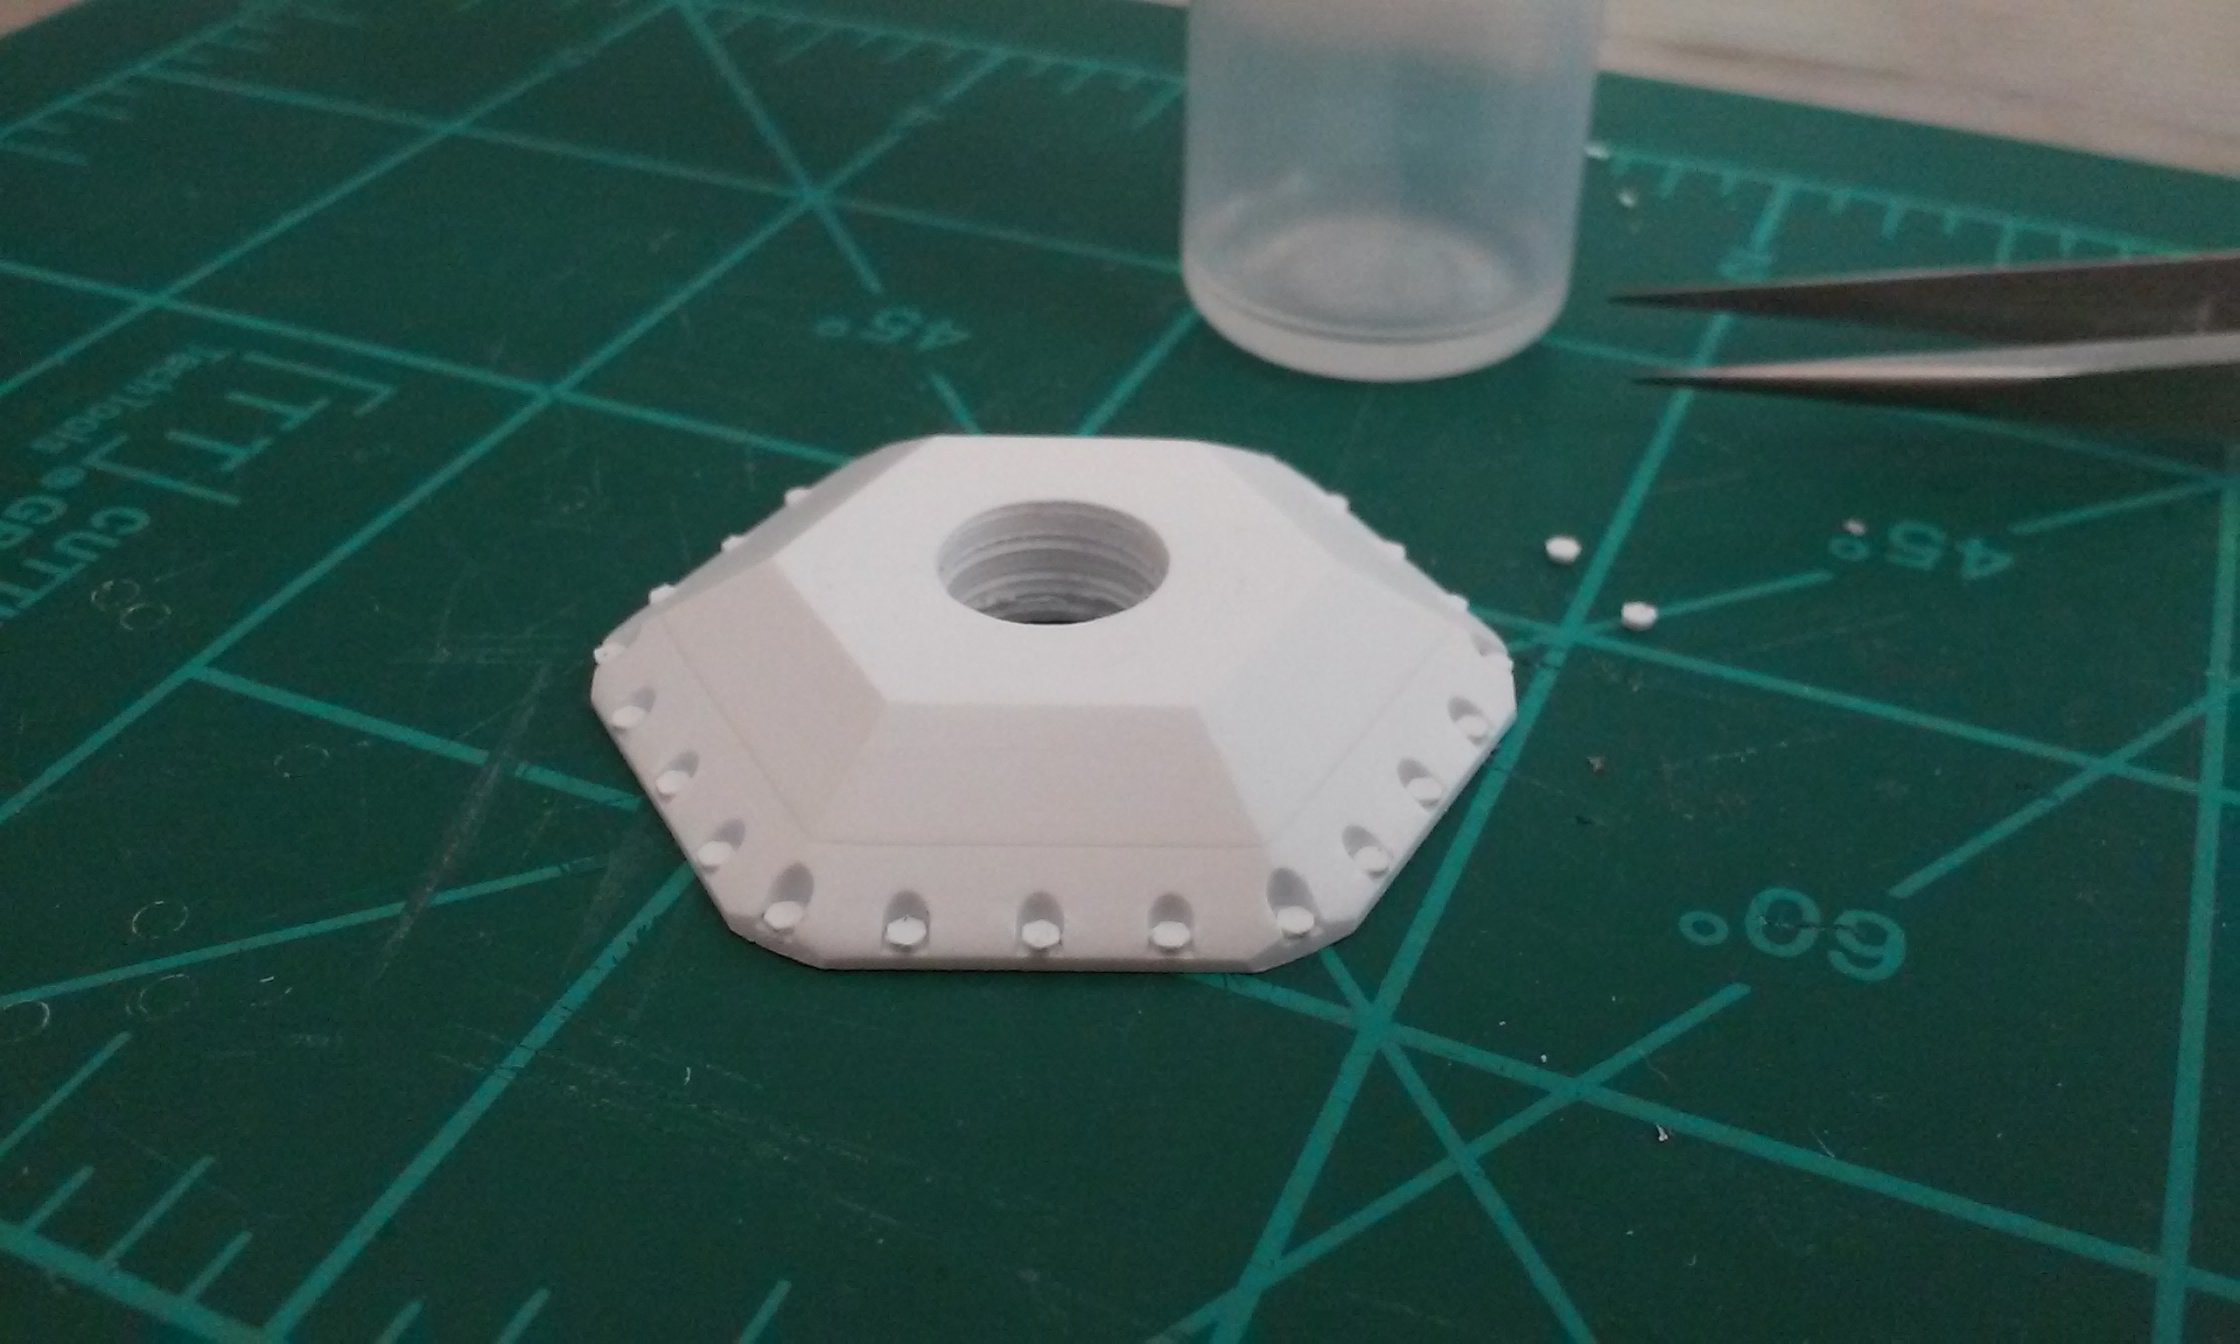
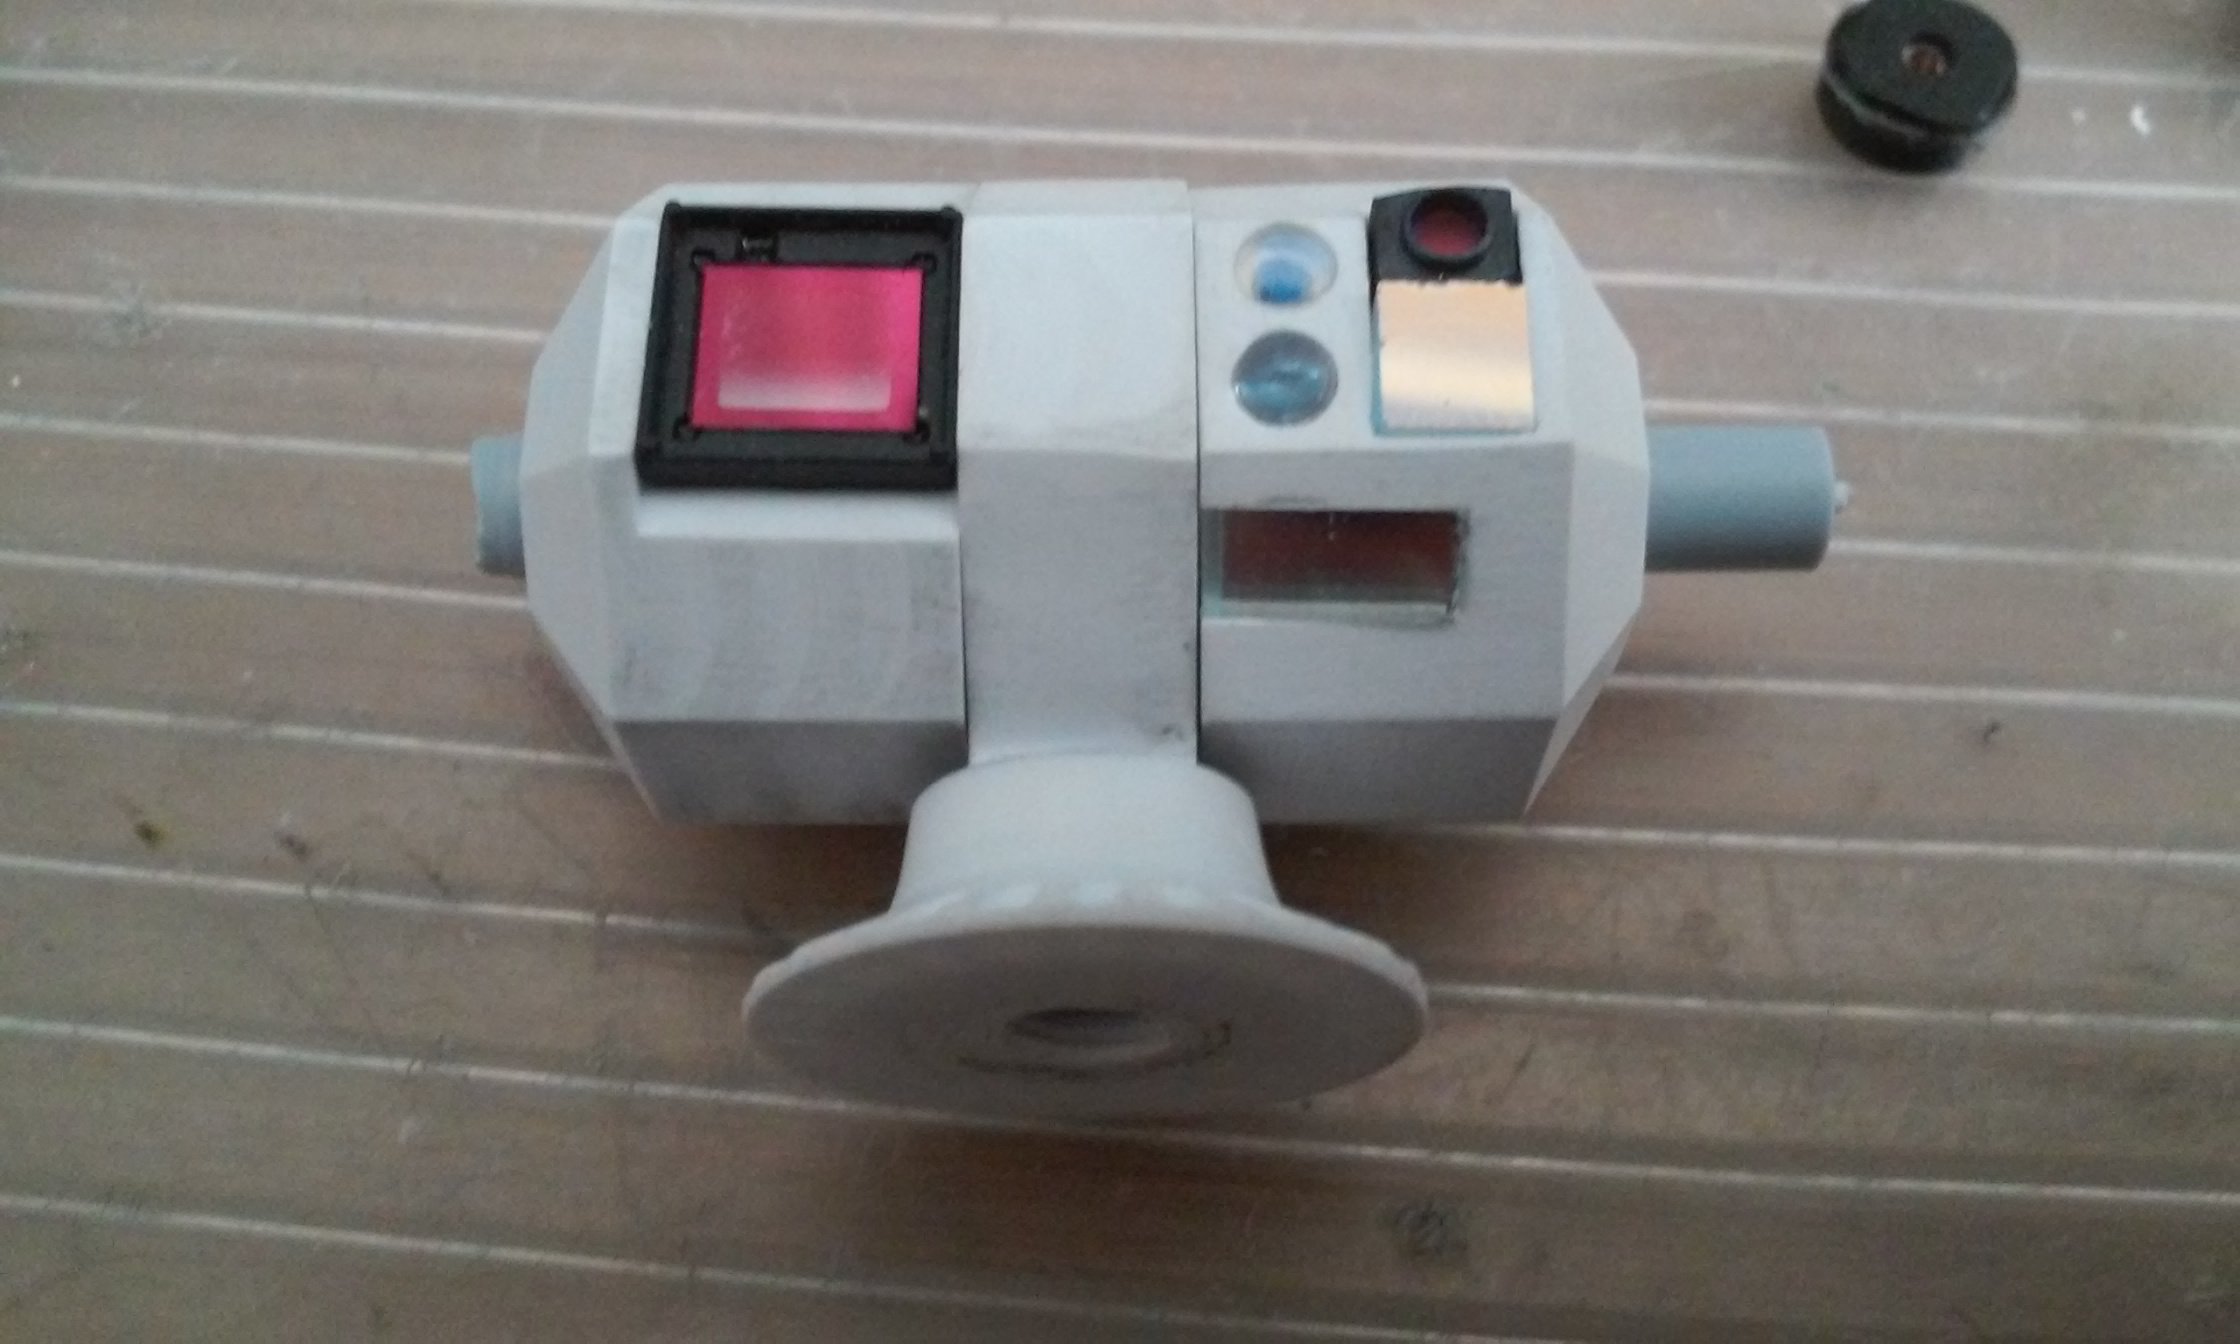
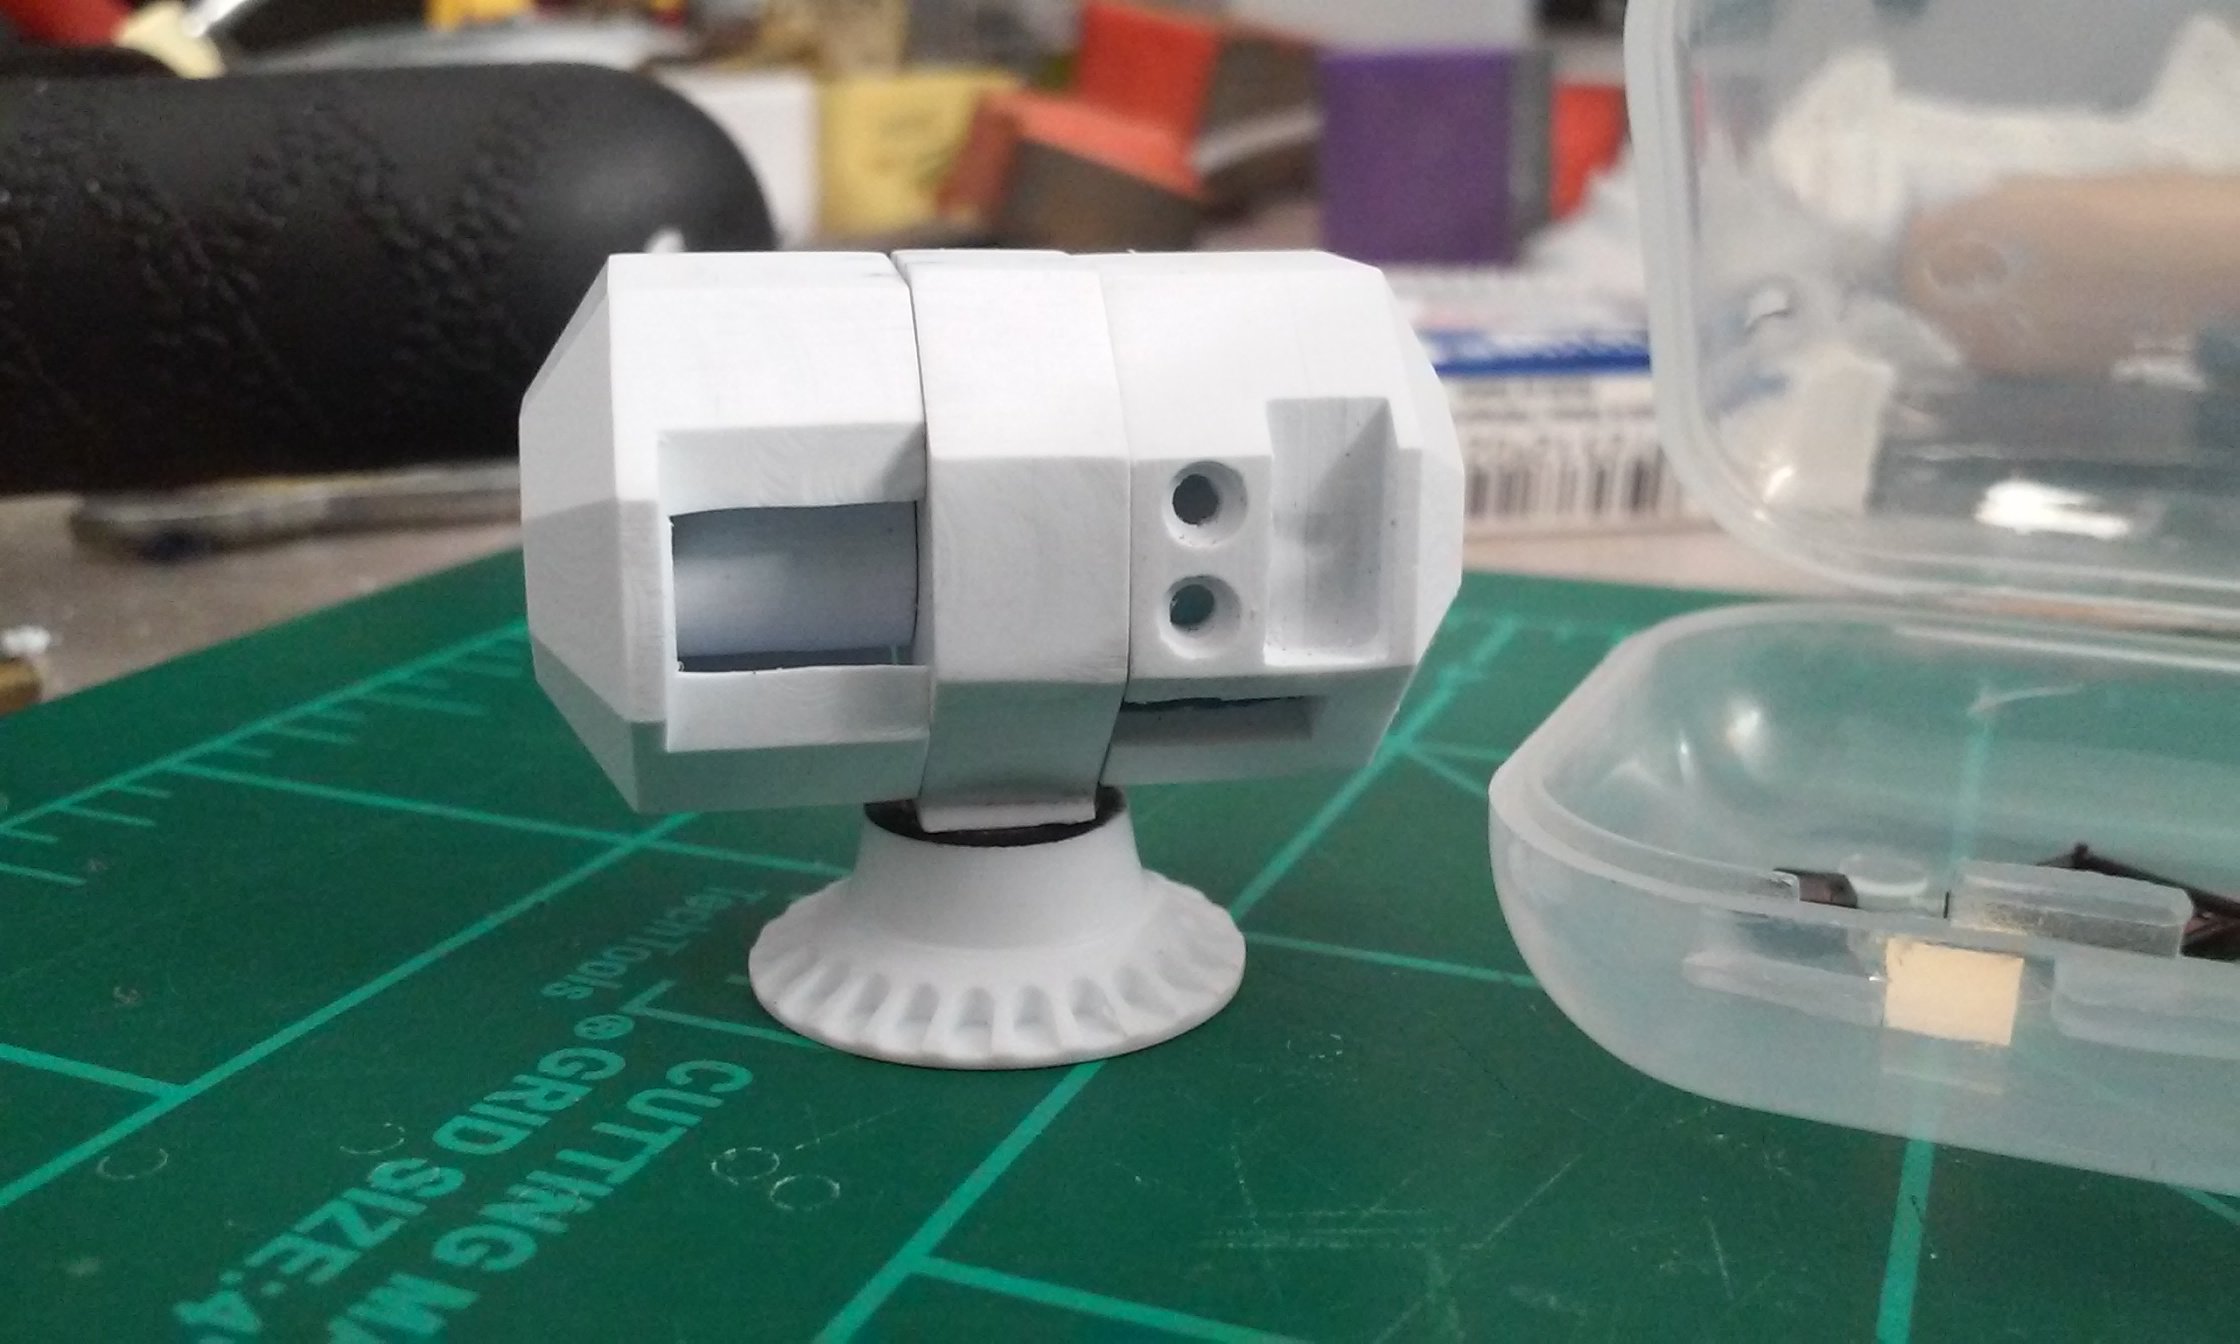
Working on my ship weapons systems, I thought, "Sharks with frickin' lasers" would be cool! But I thought some people might look down on that. Ill tempered, mutated sea bass, are hard to model in 1/72nd scale. So I built the Super-heating Automated Repulse & Kill System (ShARKS) turret instead. Does that sound like an anime acronym or what!
I started by carefully gluing 1/4" styrene pieces together to form rough blocks.
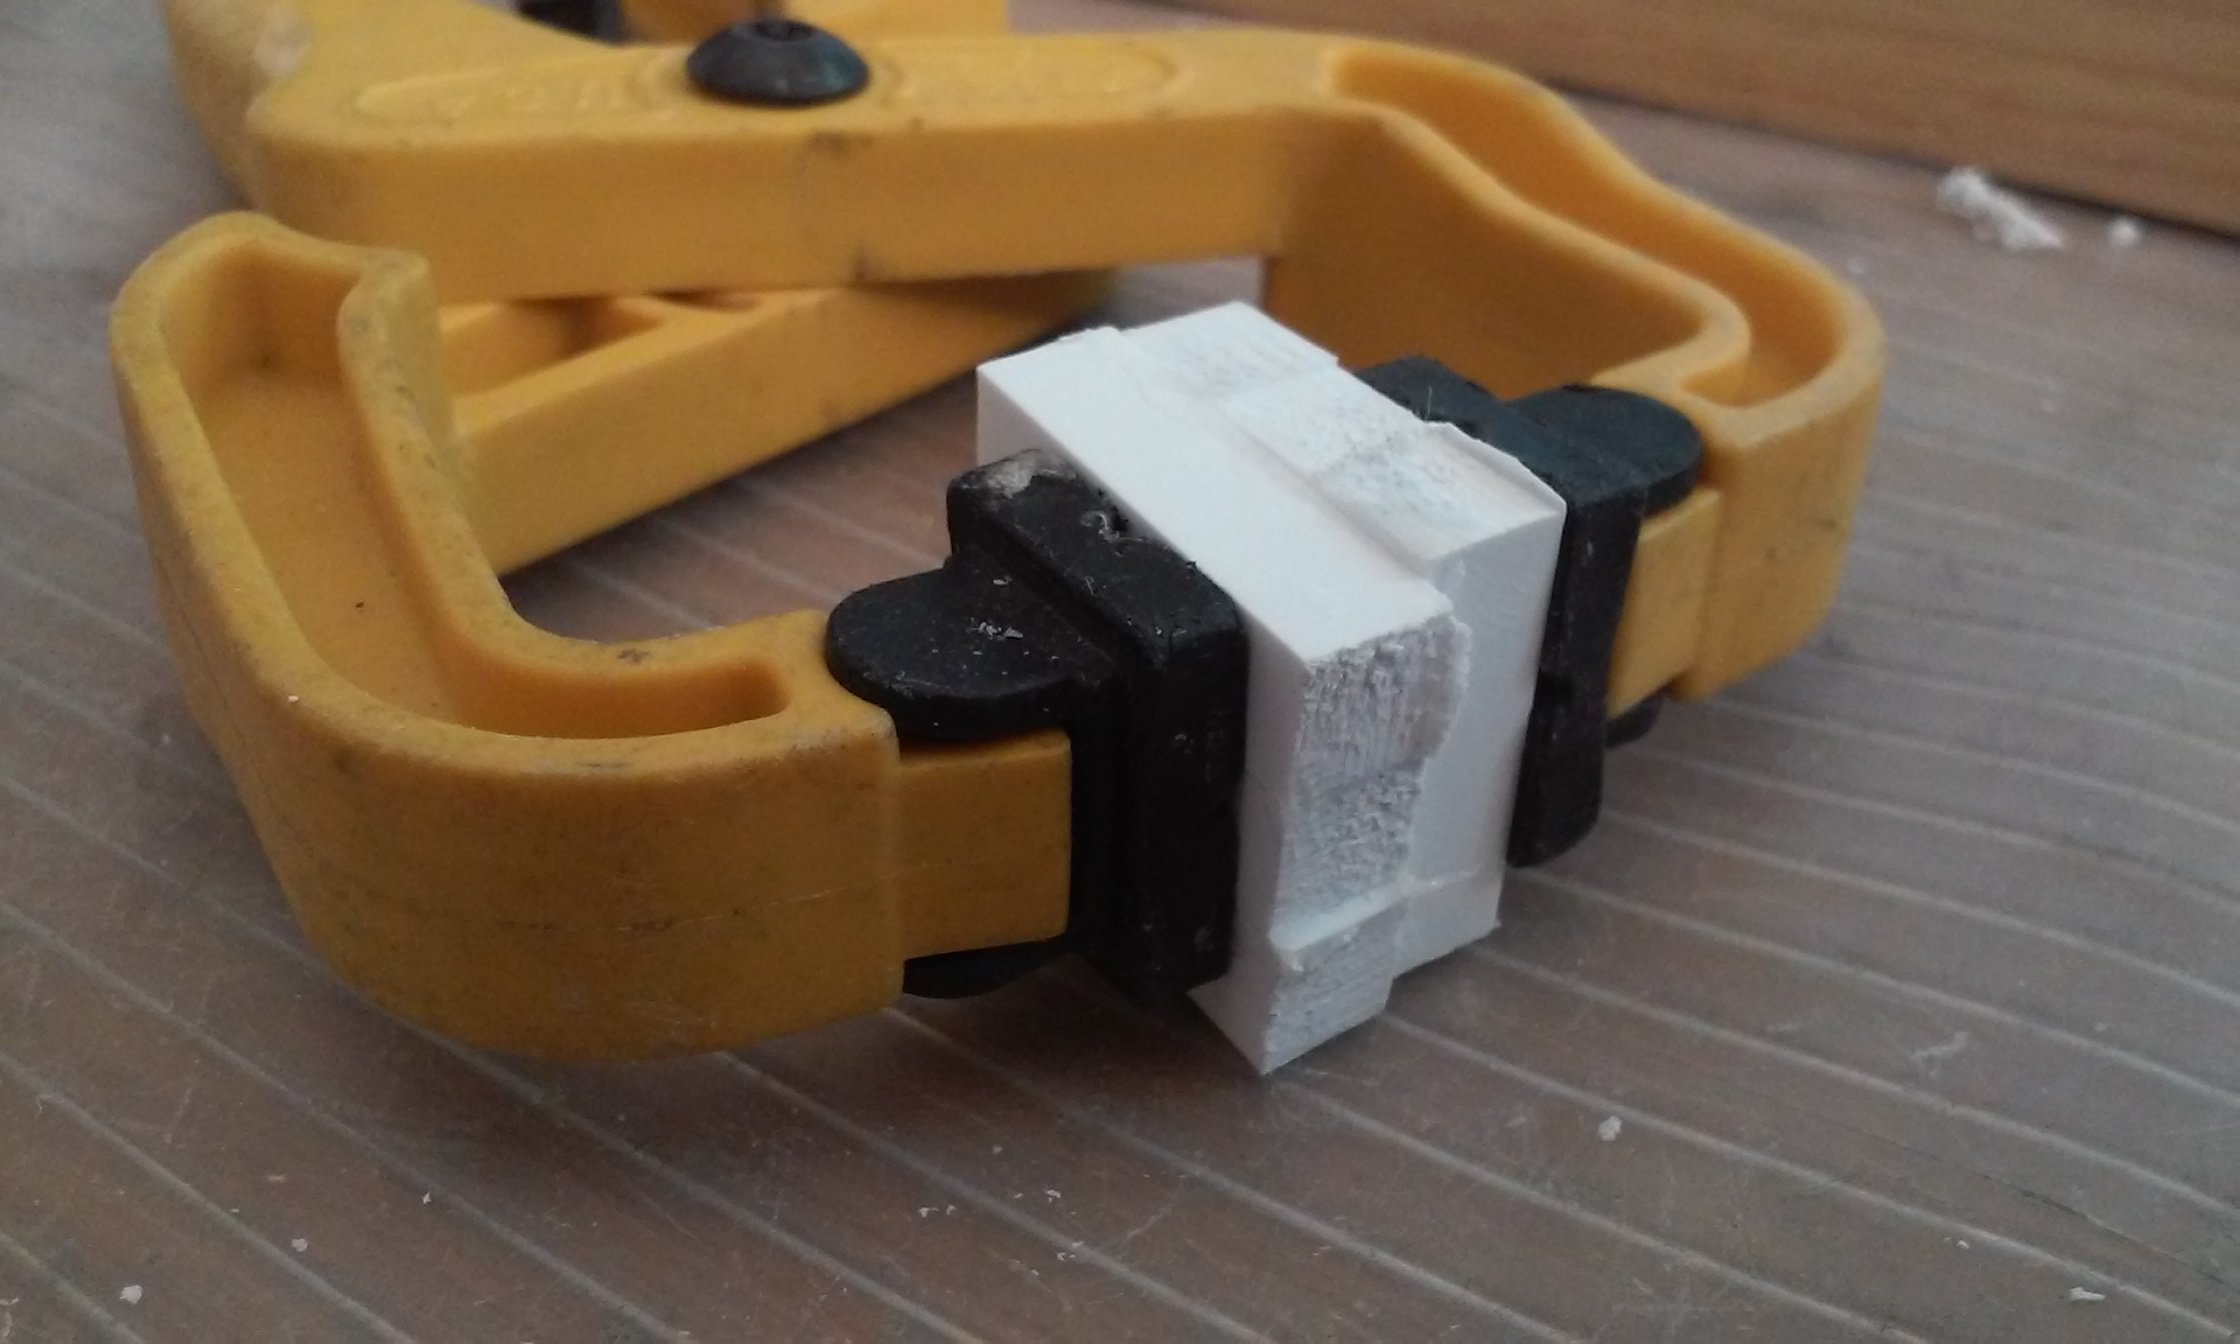
Then drilled a 5mm hole for a screw to go through and machined them on the mill. A rotary table and angle plate were used to rotate and index them 45 degrees (for eight sides).
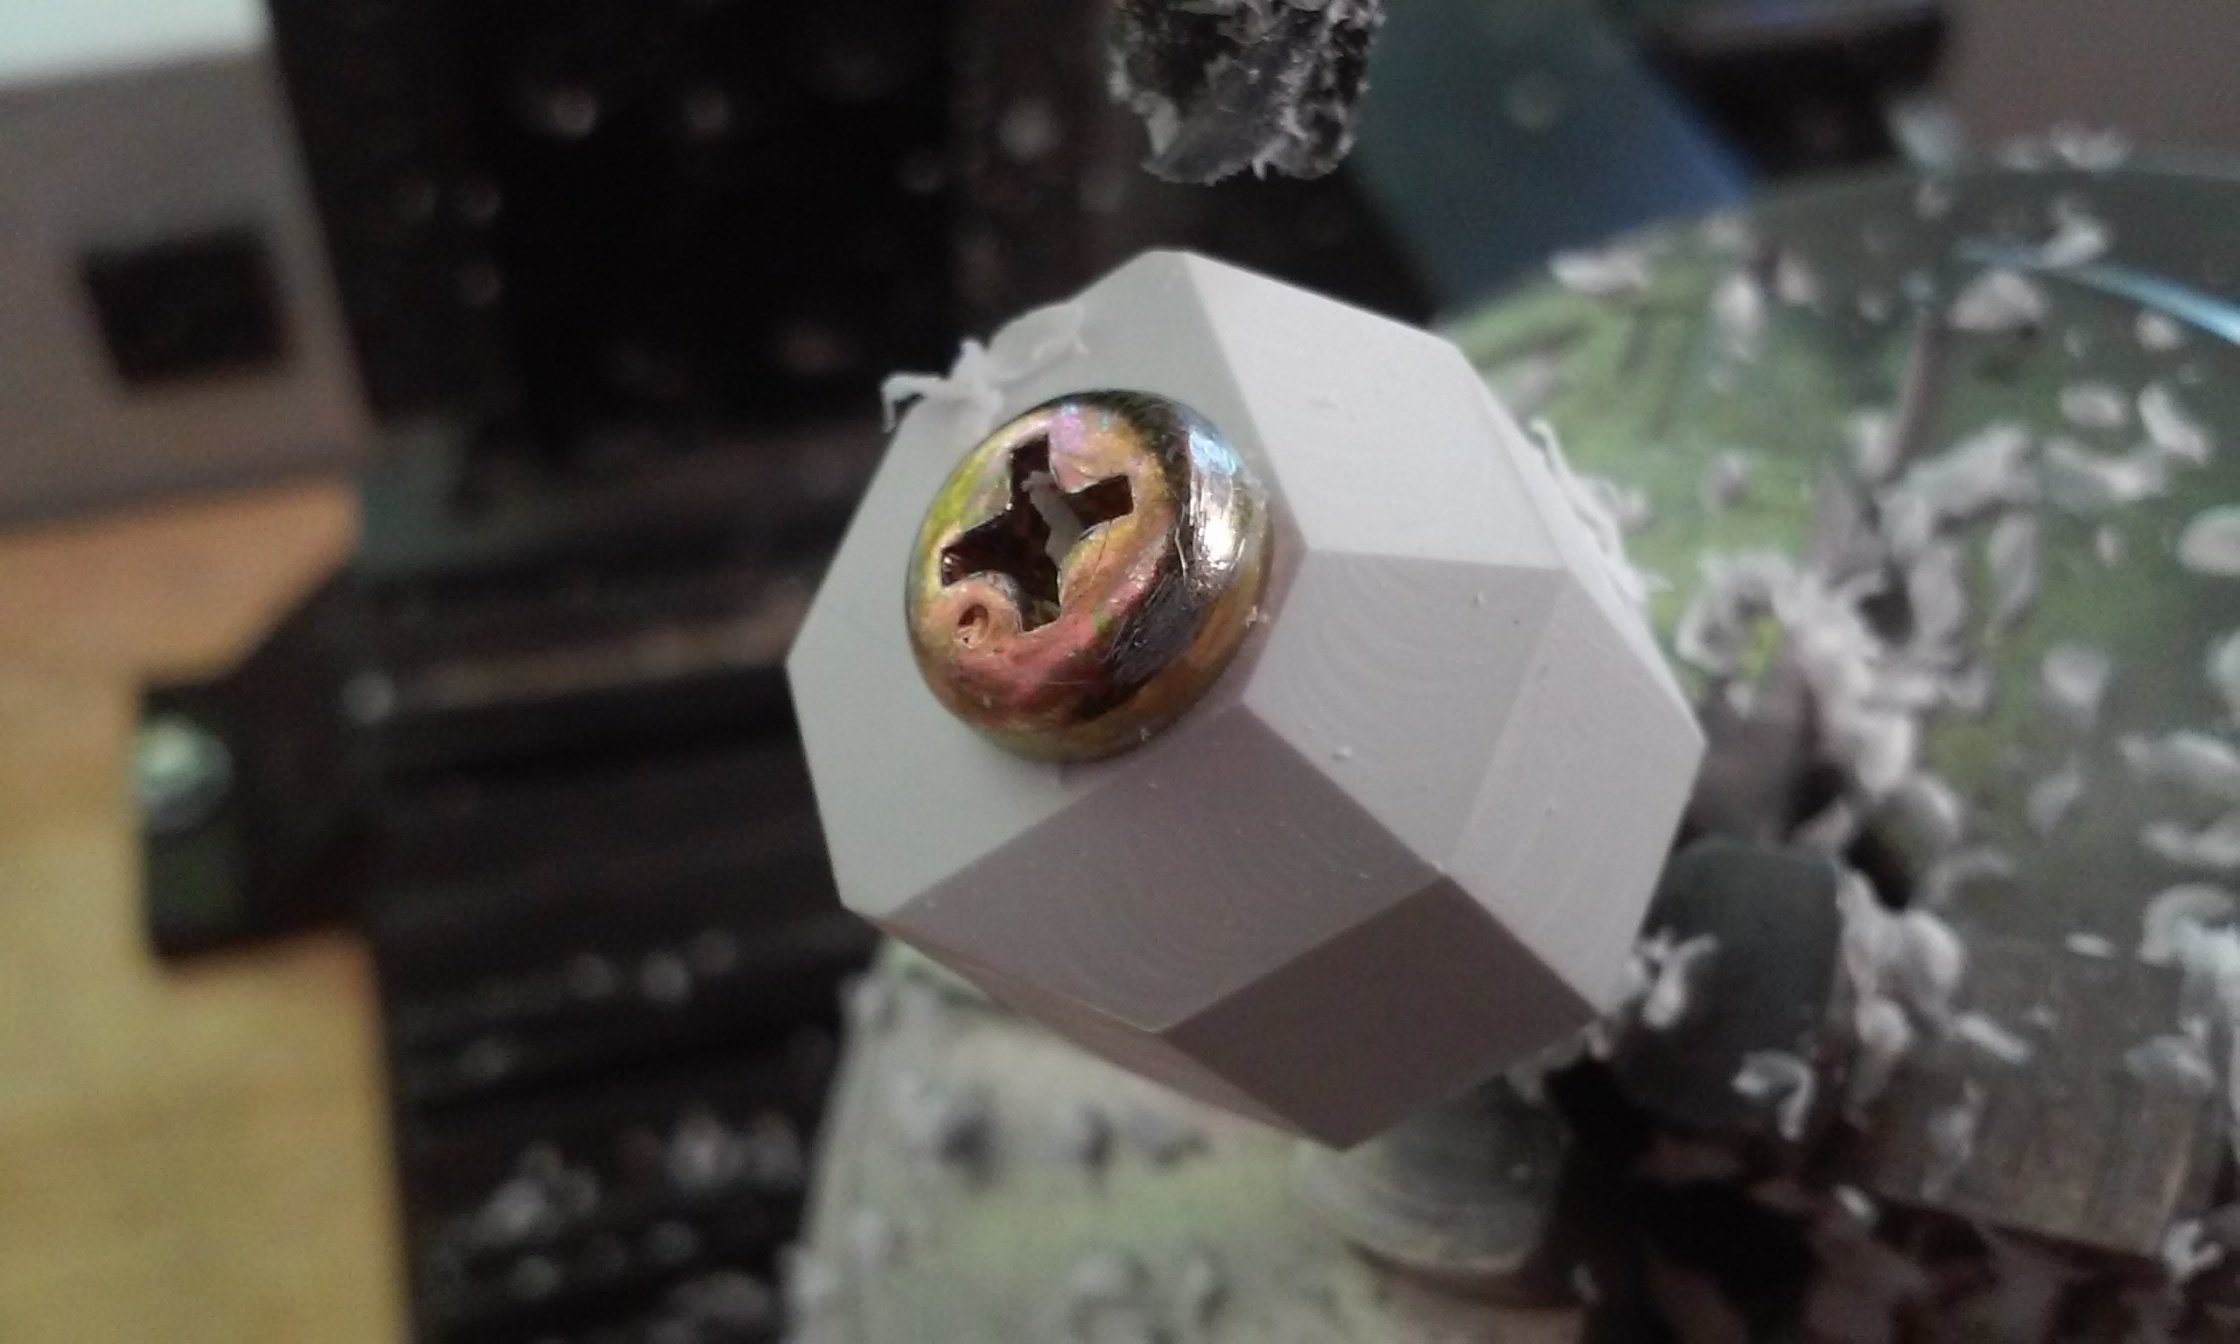
Holes and slots were machined-out to fit old, leftover PC parts used to add friction to the joints.
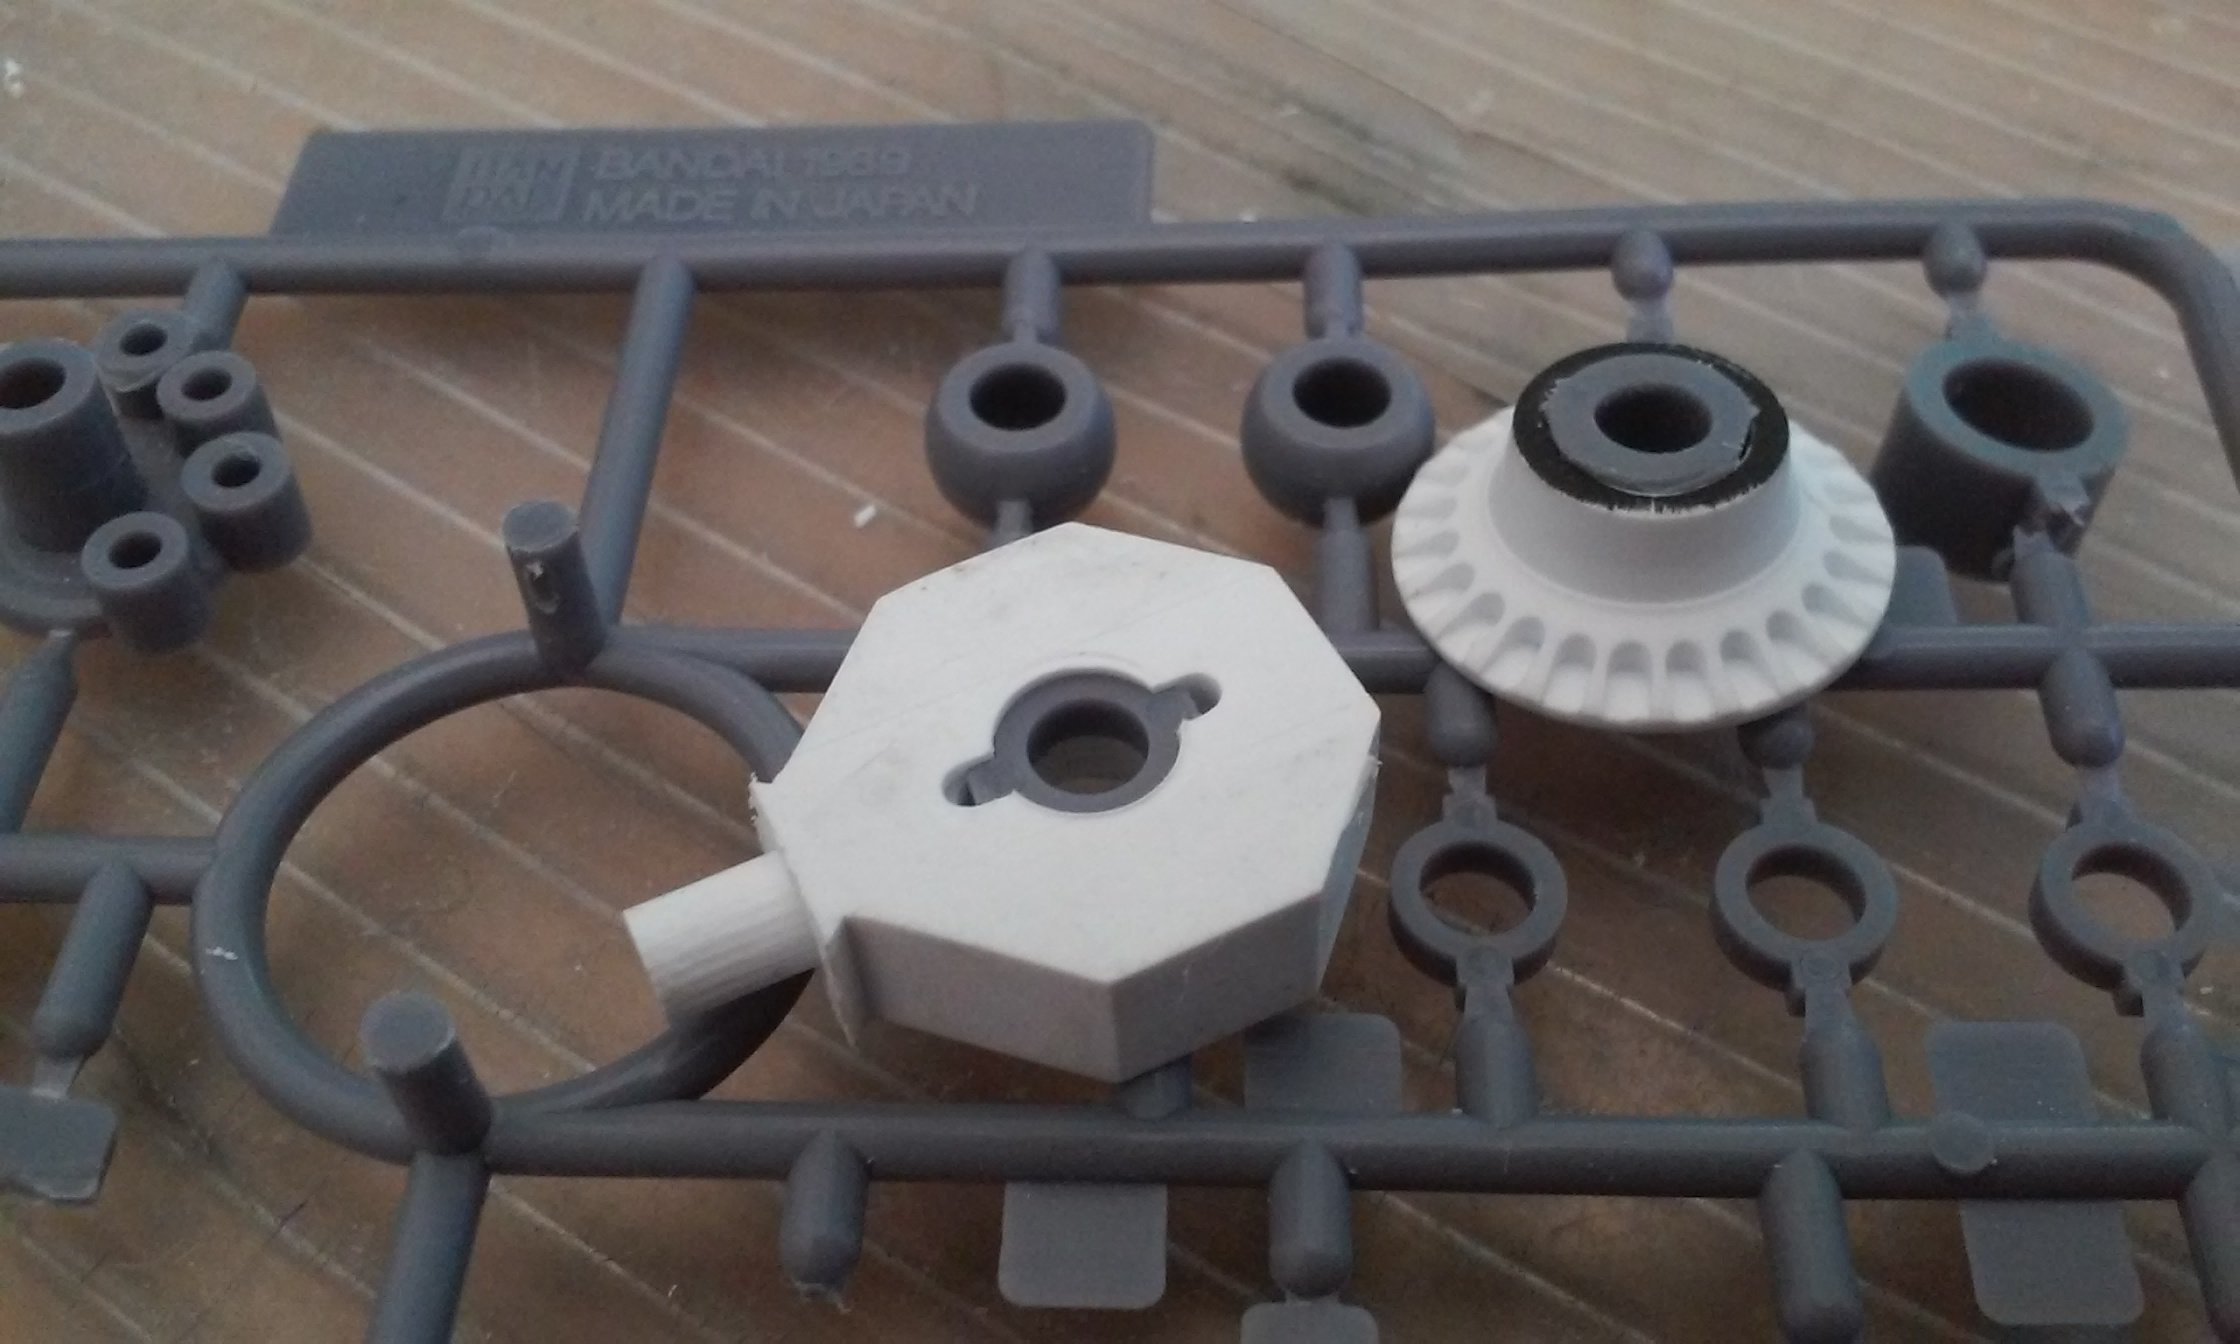
I took the optics out of a dead camera and CD player and saved the tiny bits because they looked cool. I knew I'd use them someday. Also shown are the completed parts that were hollowed out for weight and maybe LEDs.
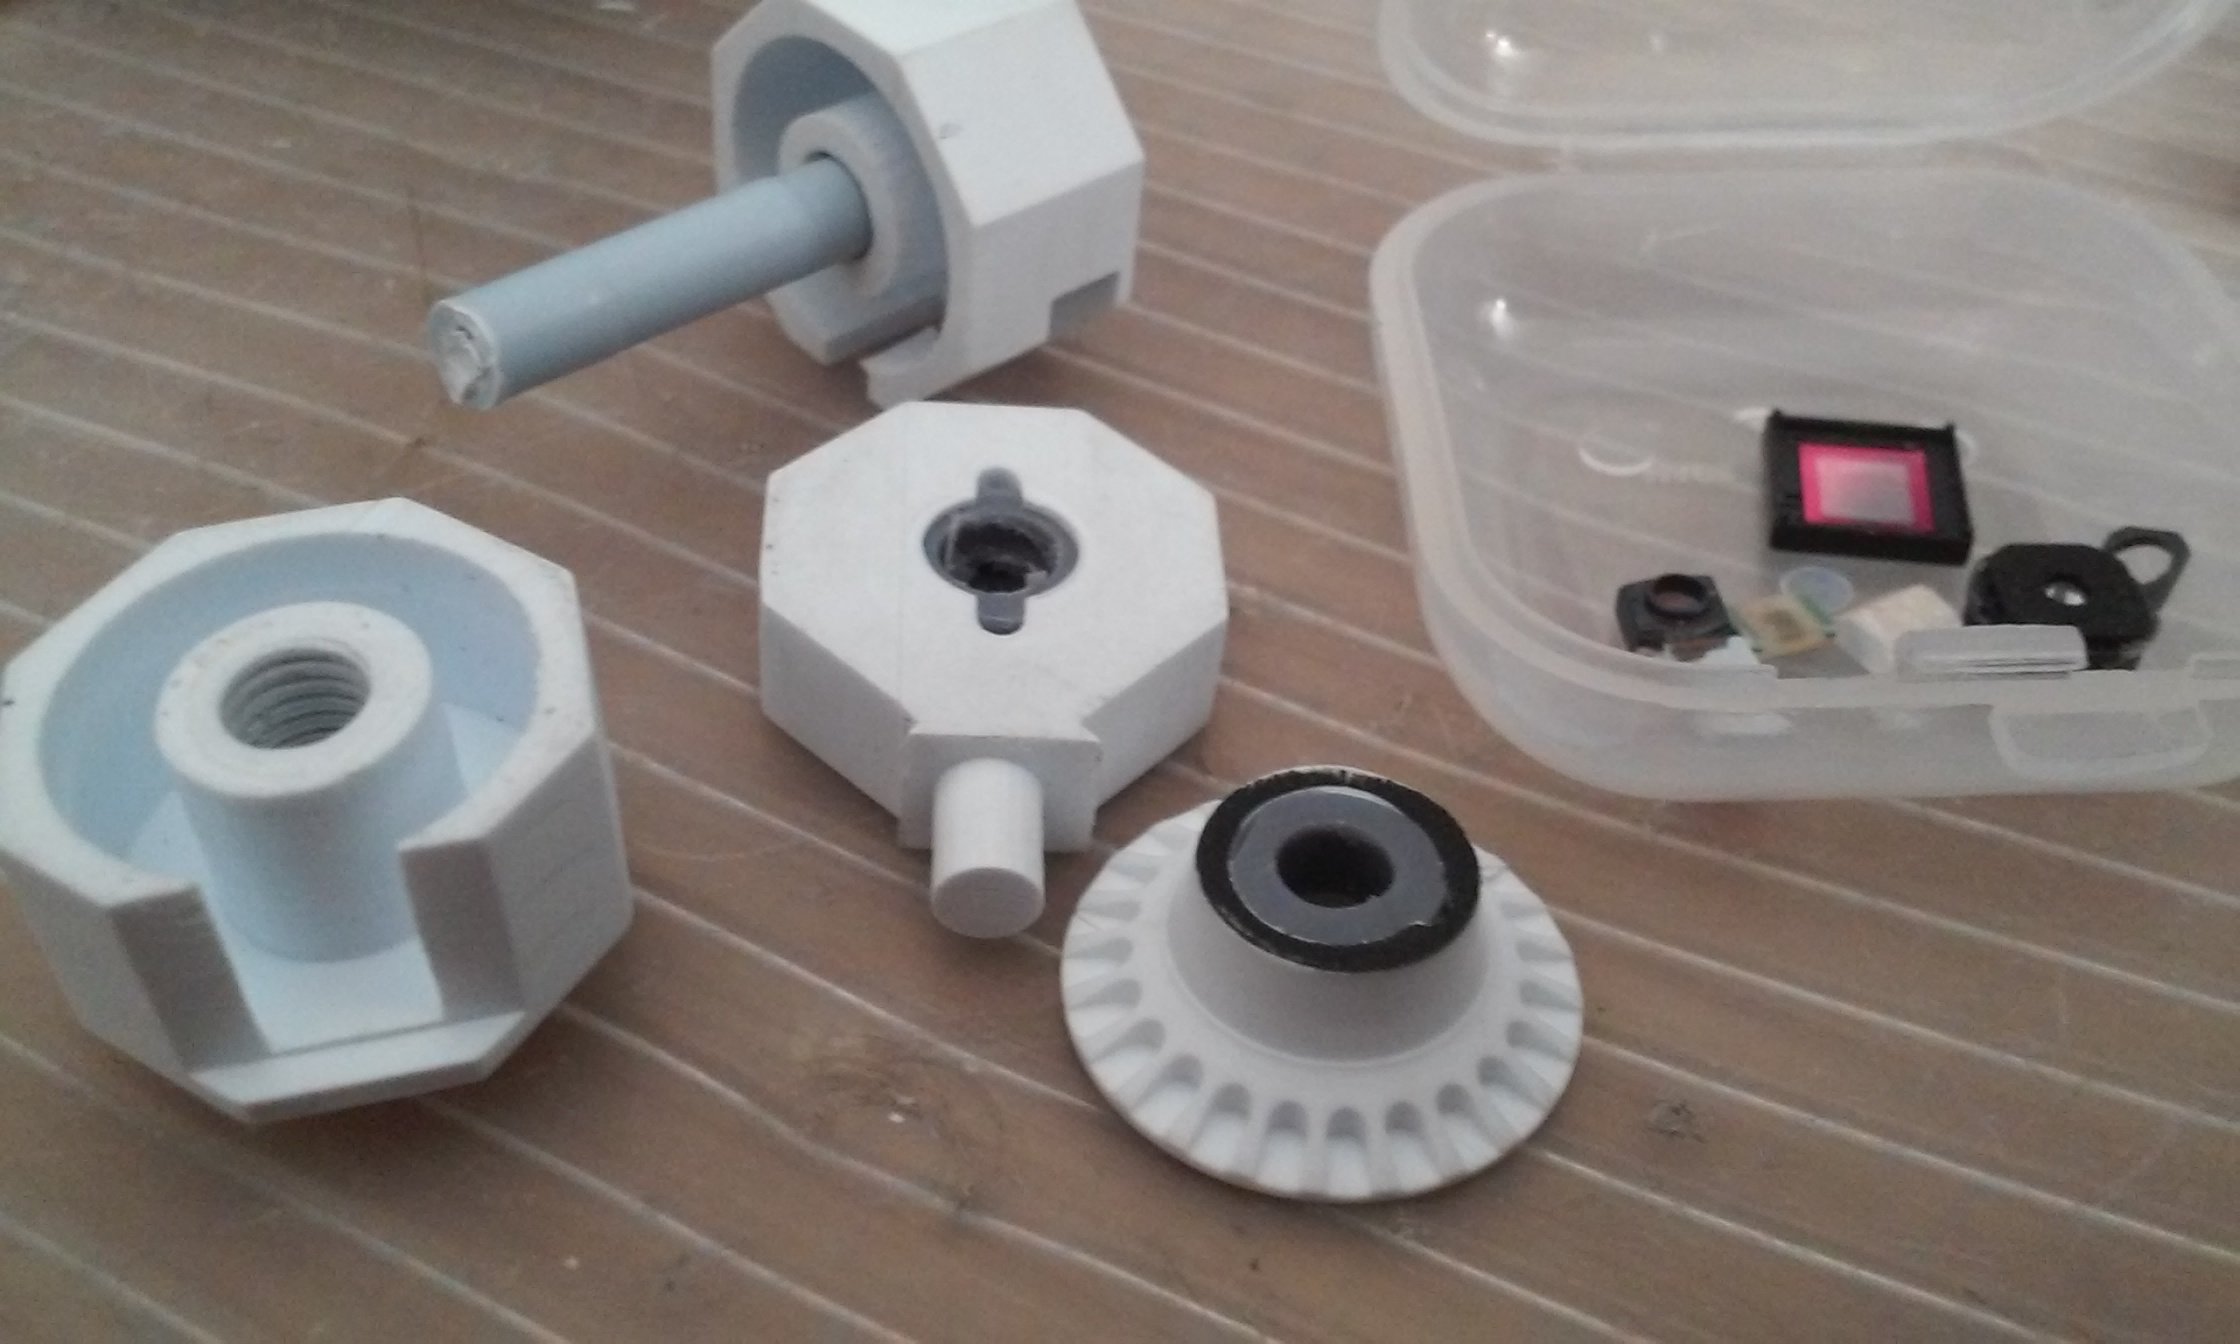
And final - VERY - LOOSELY - fit together assembly photos with the various lenses just sitting on top without glue to check fit. The optics have coatings giving them a realistic red or blue tint as the light glances off them - similar to the real laser optics. The kerf marks in the plastic are picking up oil from the machines showing dirt - and that I have more sanding to do! Thanks for checking in guys! - MT
-
Your PE work is looking great! Yeah, you GOTTA have good light and a magnifier or forget it! - MT
-
Derex - So you decided to not put it off after all? Cool. Yeah, you need to "replicate" a fruit bowl to put on the table!
NZEOD - So how do you like your printer? I'm thinking of getting one someday. - MT
-
Macross Junkie - Your weathering looks terrific! Nice choice of colors and hues of shading too!
Electric Indigo - Don't you hate getting that far and finding out major changes are needed!? Sorry about that. I would not lose those bombs. You did so much great work on them! - MT
-
My cats could pilot that sucker! I don't think they'd like the green stuff inside though
- MT
-
That looks cool! Especially when you think that those holes to see through aren't exactly very big. Your current light looks more realistic, like mercury vapor lights (all those orange lights you see when flying over cities). - MT
-
That's cool you did that to honor your father! Great build and great finish! I think you got just the right amount of weathering on there, especially for a Navy bird. - MT
-
Thanks Aztec. The parts are actually machined styrene pieces. They were designed to be cast from resin. The Monster is so heavy, I knew it needed ratchets to keep it upright. - MT
Model Kit Collection Show It Off!!!
in Model kits
Posted
You don't have enough cars Peter! Nice shelving! - MT