wm cheng
-
Posts
4336 -
Joined
-
Last visited
Content Type
Profiles
Forums
Events
Gallery
Everything posted by wm cheng
-
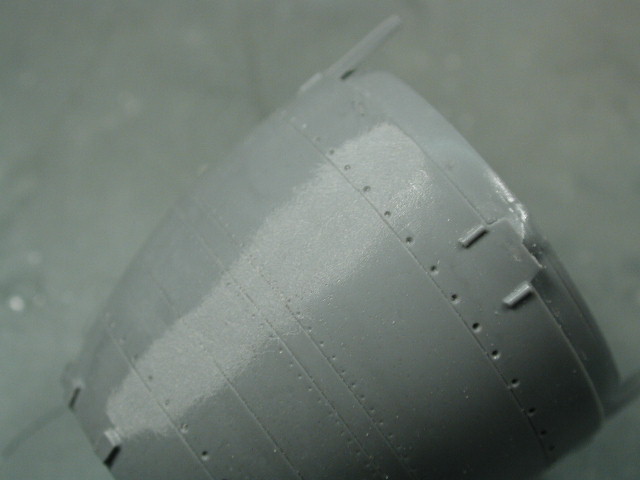
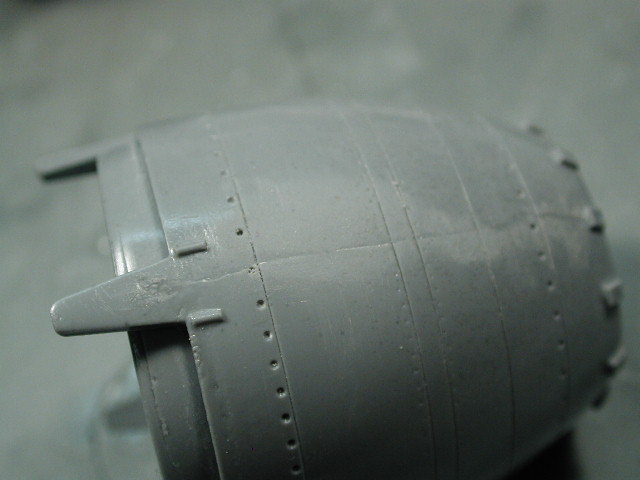
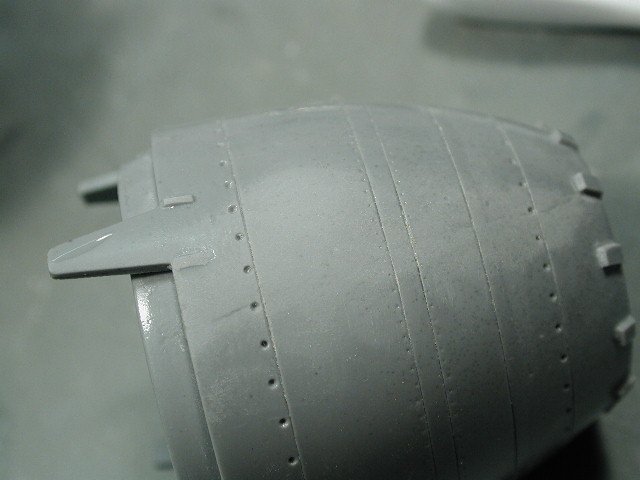
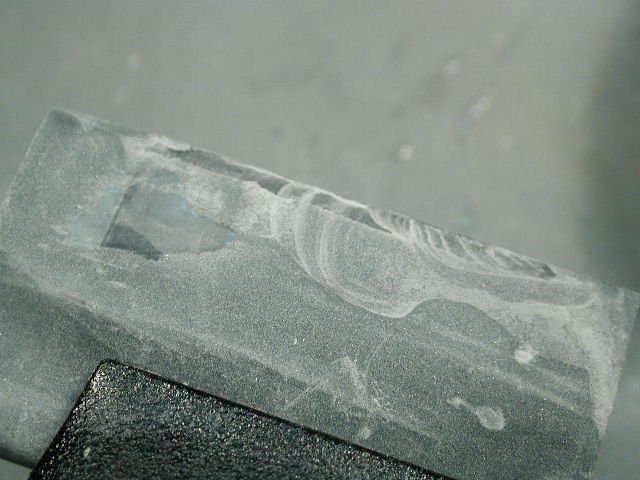
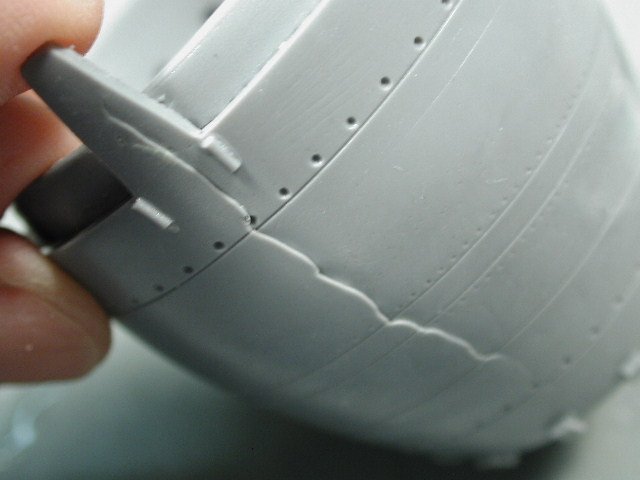
Ok, that's another thing to add to my next hobby store shopping list; Tamiya polyester putty (I assume its epoxy putty), Mr. Base White, and slow-cure gel crazy glue... At least now I think I'm on the right track with the sanding (I thought I wasted good money on this sander up till now...) so I switched to some industrial strength 50 grit diamond sandpaper instead of the sanding film - and finally it's working better on some of these bell seams. At least now I'm getting rid of the seams instead of my sandpaper tooth! I think I need to work my way back up the grit ladder to 200 to smooth out the rough sandpaper marks, and probably coat it with some Mr. Surfacer before the primer since I want to use the Alclad metalizer on the engine bells and they need to be absolutely flawless for the metal finish. You can see that the bell deformed from just me holding it with my fingers and thumb.

-
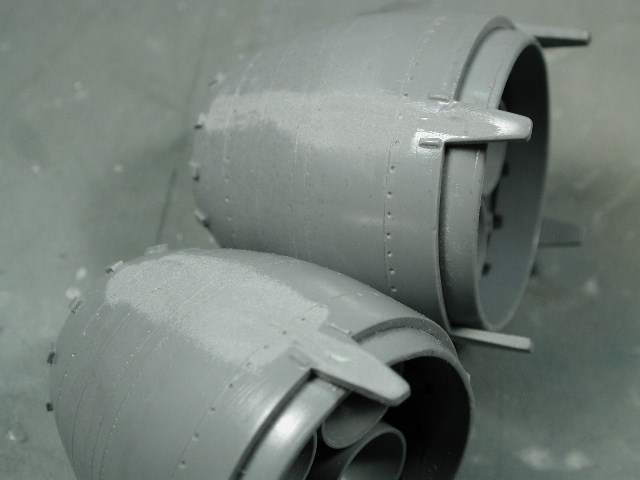
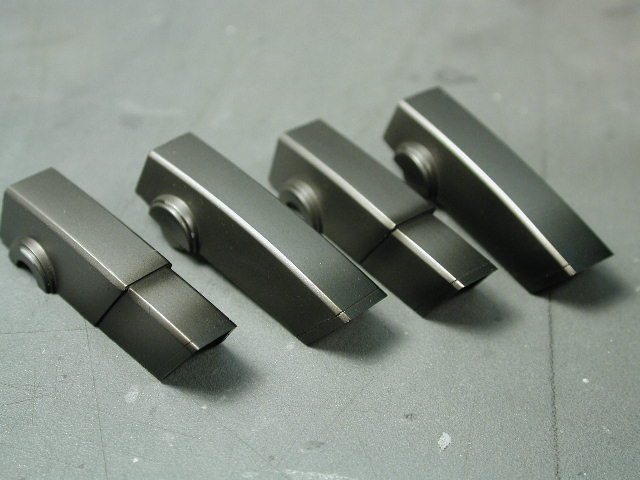
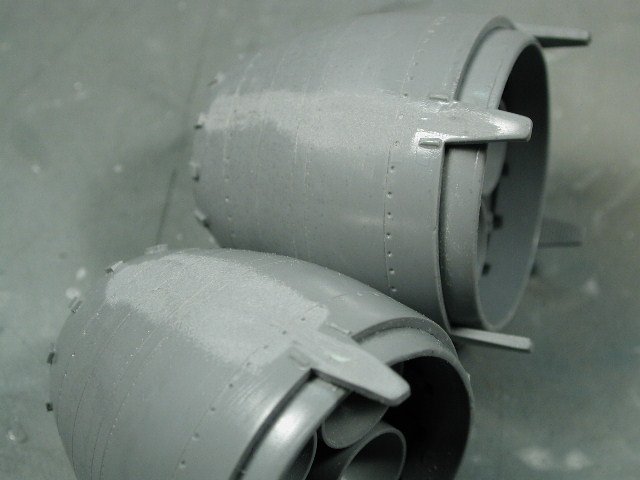
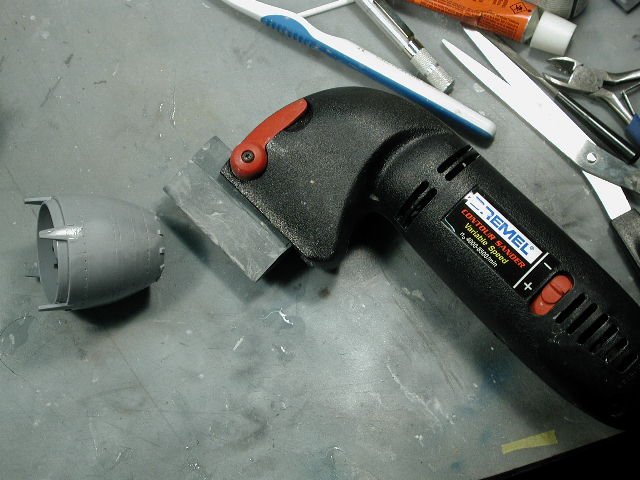
I'm curious, did I get a bad cast? What's the quality of the kits recieved by other MWers here? Did you guys also get these "grey" flexible material engine bells? Its wierd that some bits are so soft, while others so hard, like the 4 little engine fins - on one bell they are like gummy bears, on another bell, they were so hard and brittle that one broke off before I started even sanding it!! hmmm... Well, I finally remembered that I bought a dremel contour sander a while ago thinking that it would ease my sanding chores (I hate sanding the most out of any process in model making!) but I never used it since because even on the lowest setting, it ate through my styrene like butter. But with this crazy resin, it just might work. So I doned on the 100 grit sanding film and went to town on these bells. After quite a bit of work, its started to smooth out the seam - only after it wore away at my sanding film to the bare plastic!!
-
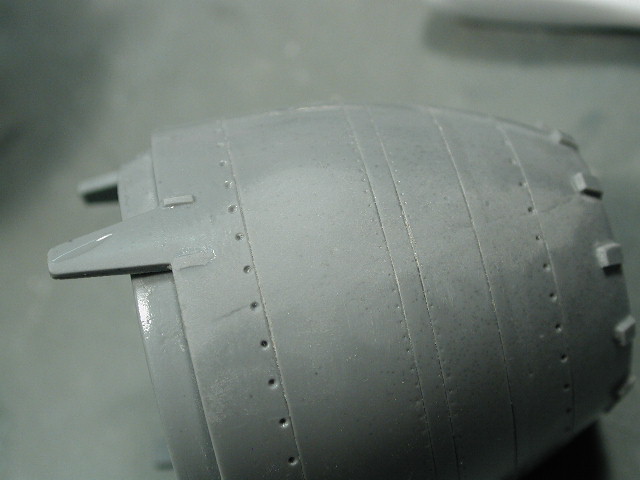
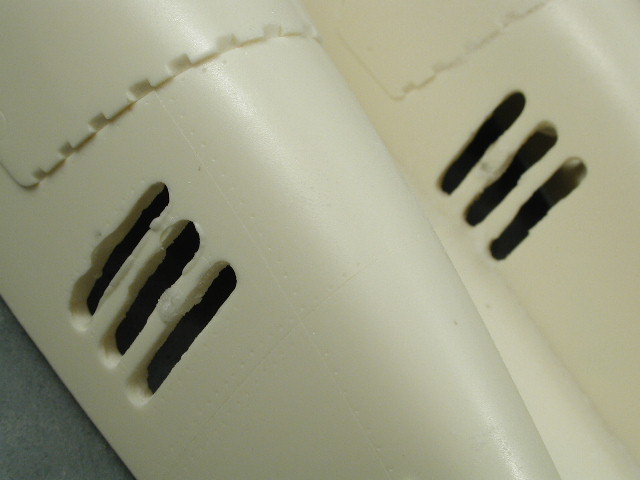
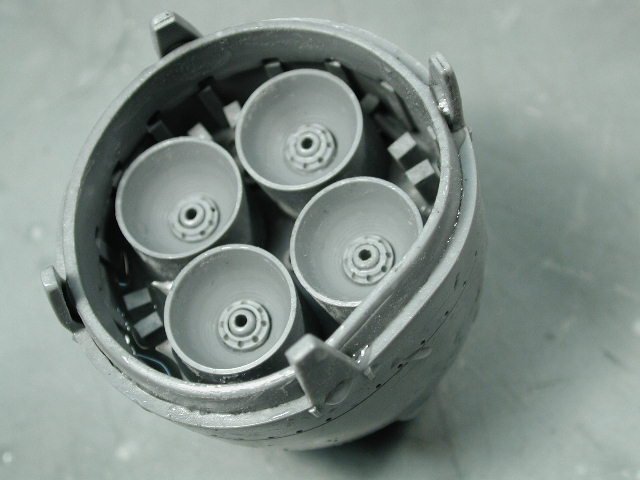
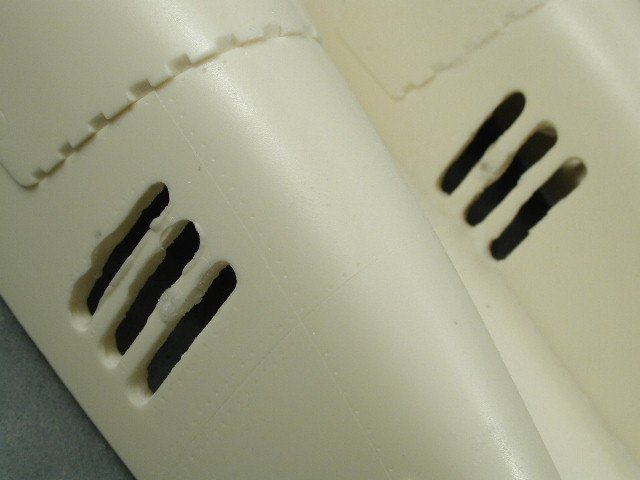
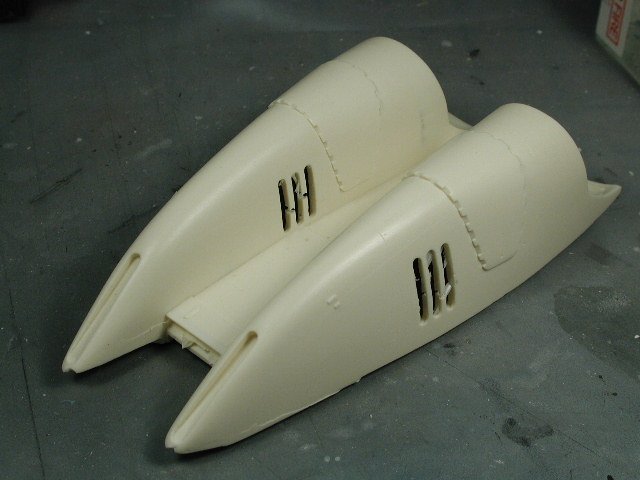
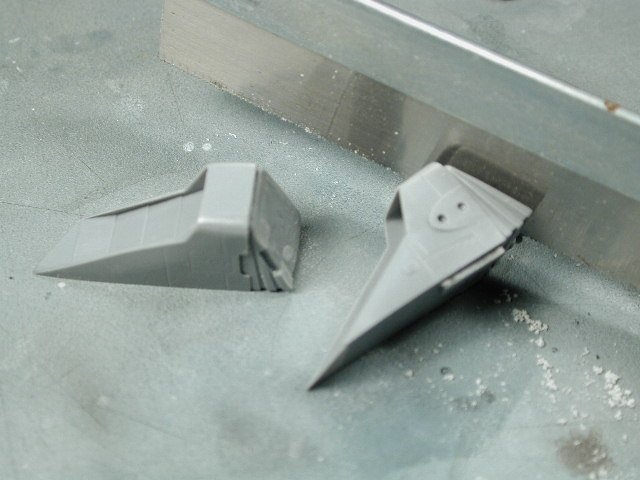
I'll leave the booster to cure for a little bit, the crazy glue is actually warm to the touch while curing, that's when I know I've used a lot to fill all the flaws. On to the engine bells! Man, I don't know what kind of resin these are made of, but its pretty wierd, some bits are quite soft and flexible, while others are a real *&$%$@#! to sand. These shots show some of the typical seams (2 each per bell) that I need to get rid off. Man, after so much sanding, I barely made a dent!! What are these things made of?! I've never delt with this material before. The entire engine bell deforms under the pressure of my hands holding it to sand, but the seam refuses to go away! I started to move down the grit ladder from 400-200-100 now...

-
Hey thanks for the tip NB4M, I'd have to look around for this slow-cure stuff next time I'm back at the hobby store. Ok, on to the tips, the reconstruction was actually too large to just pack with baking soda, I just did it in layers, applying crazy glue, then dipping it into baking soda, then applying crazy glue on top of that - and built it up in 4-5 layers till I filled it beyond the shape I want to file down to. The good thing about using crazy glue is that it dries almost instantly allow me to work on it right away - instead of letting the putty dry. You can see in this photo that the main central intake may take a bit of work trying to get those two resin sprue connections out of this crevice situation
-
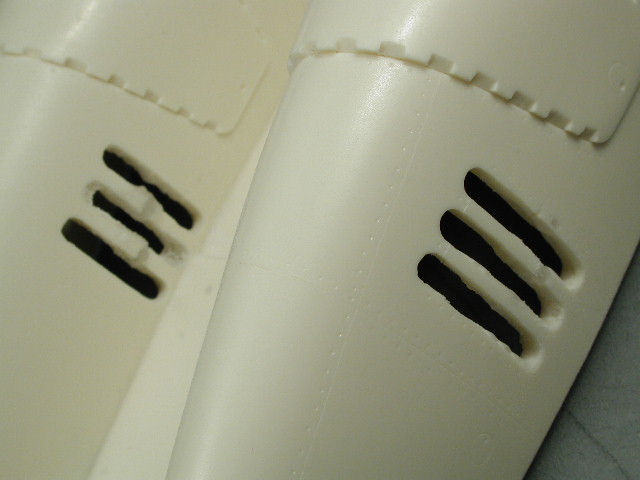
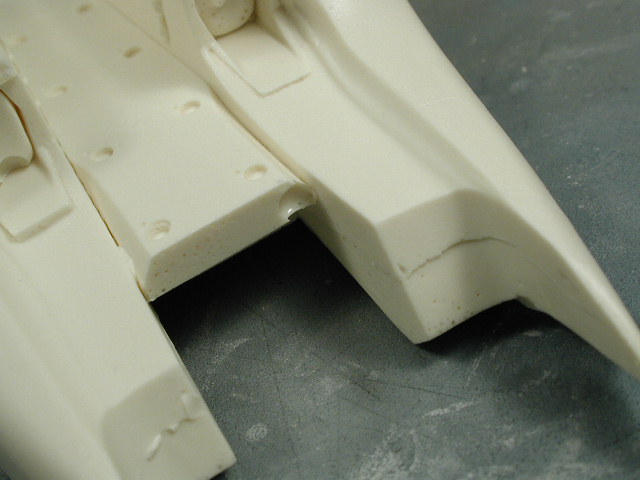
In these photos you can see the clear (milky clear) bits are filled with the crazy glue / baking soda mixture. I added a lot more excess than I needed so I could file away the extra crazy glue. I don't believe I could of used my traditional ways of filling here (although I haven't used epoxy putty yet) since these flaws are too large for Mr. Surfacer, and the resin in these tight cavities would not provide enough tooth for the regular Tamiya putty to adhere too. The regular Tamiya putty actually includes solvents in the mixture to slight melt the surrounding plastic to create a better bond too, the resin won't react this way, so the regular putty could just pop off and would not provide any strength for the delicate intermediary struts. As you can see the openings themselves are quite rough, I'd need to use my flat files for the sides and my round file for the tops and bottoms later on. I will allow these crazy glue fills to cure now.

-
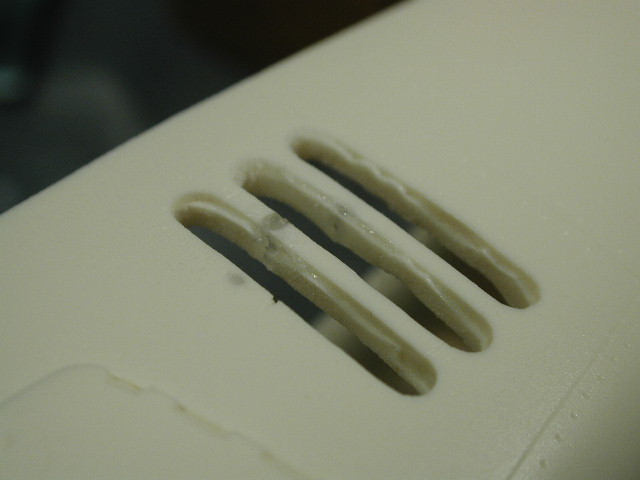
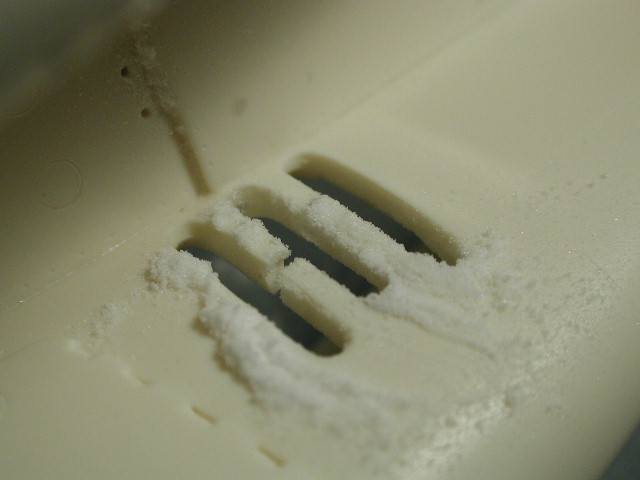
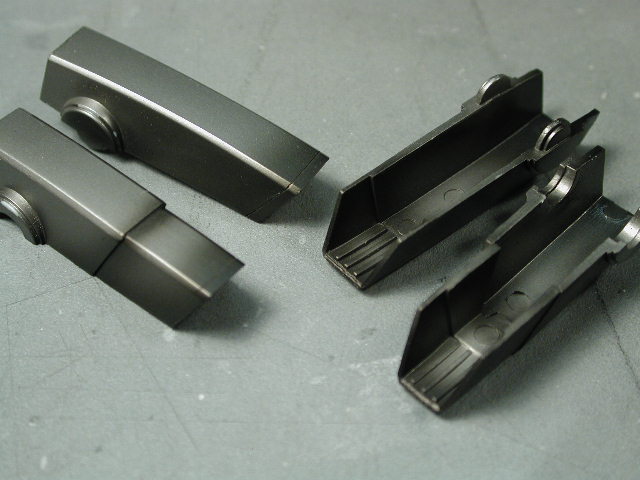
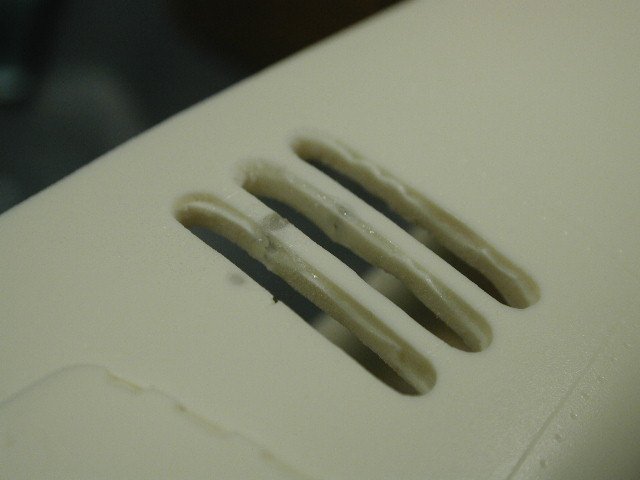
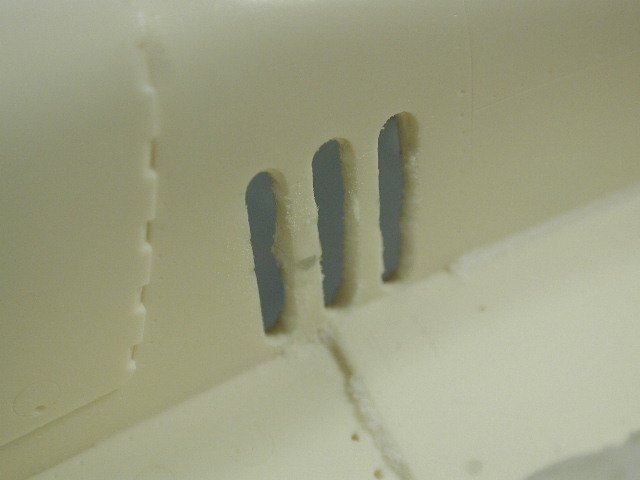
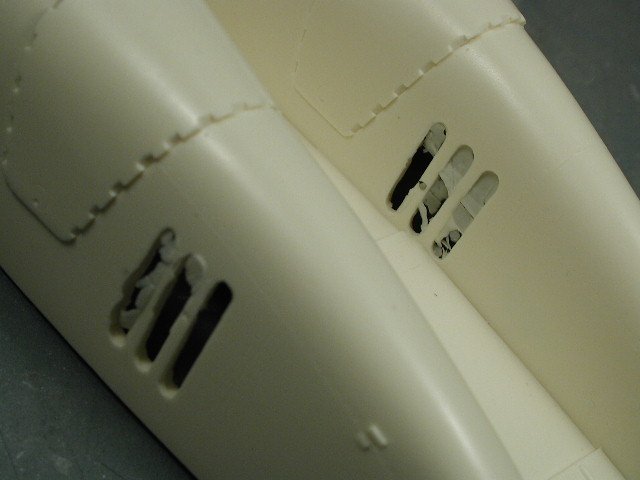
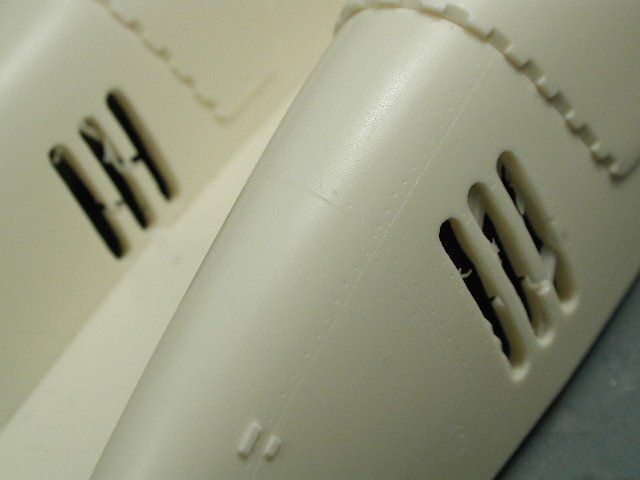
OK, that baking soda mixed with crazy glue idea to fill in certain areas was a complete bust! - failure. I don't get it, I tried mixing a bit of baking soda with the crazy glue in a plastic bowl, and the baking soda caused the crazy glue to instantly solidify - all I got was clumpy lumpy bits of dried crazy glue. I tried all different consistancies, but I couldn't make it work in the end. However, the crazy glue (as mentioned by Valkyrie before) is really hard - which in this case works to my advantage - I need to majorly reinforce those intermediary struts in the 3-slot vents before I can properly file them down to proper shape - otherwise they'd just snap while I was sanding them. So I tried to fill them with crazy glue, but the bubbles where actually too big to just fill in with crazy glue only, so I decided to add some baking soda to the holes, tried to pre-pack them with the soda, then added the crazy glue to the outside. This seemed to work, plus the struts were strong now (hopefully able to withstand the sanding and shaping by the files)

-
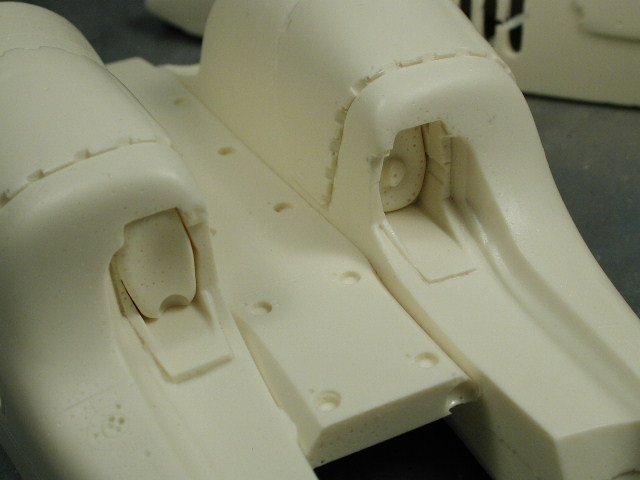
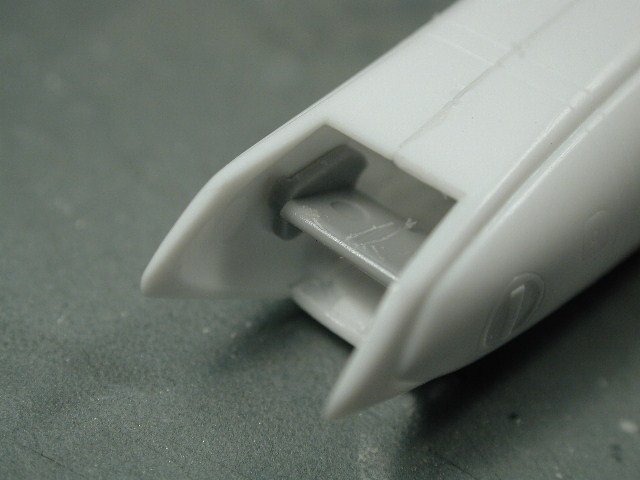
I would need to drill out these leg/engine ports to allow the legs feet tips of the Valkyrie to slip in.
-
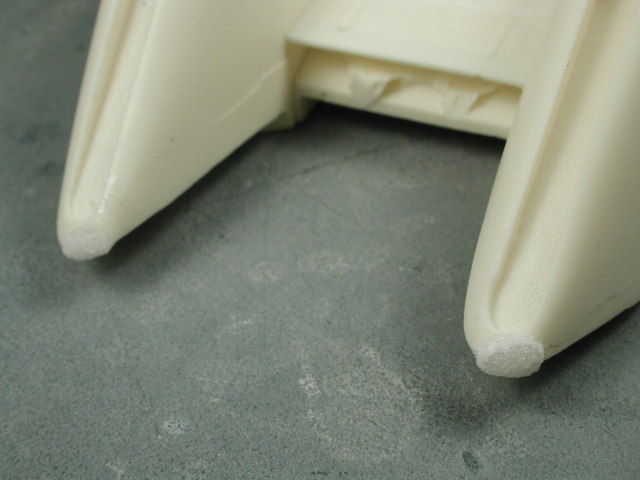
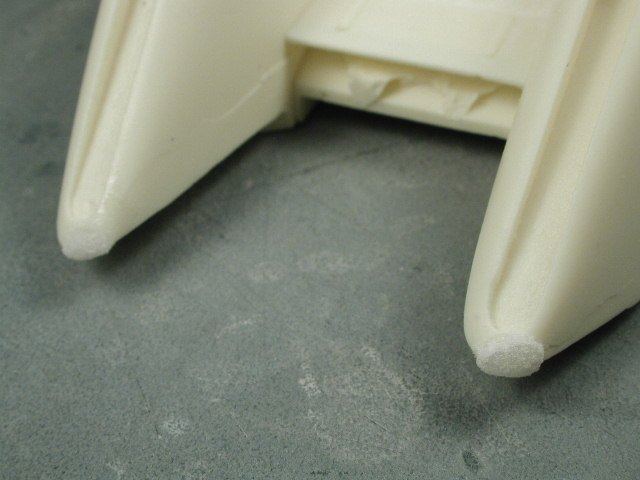
OK, 3 hours later and not much is happening - either this is a bad day... or this is where the "real" work begins... Starting on the actual resin booster kit itself - now I'm going over it with a fine tooth comb to visually inspect it for flaws and work to be done (intead of the blinded gee Wow! filled with glee that someone actually finally tackled one of my favourite subject mechs) and there are indeed some work to do (even though the Captn' did a fantastic job sculpting this baby, the casting leaves quite a bit of clean up work. My particular cast has bubbles which break every intermediary struct within the 3-slot vents (which makes them very weak). Secondly, there was a bubble on both tips of the forward booster where it mates to the top of the Valkyrie, which needs to be filled, shaped and re-contoured to match. Aside from various seam lines, the forward intake is going to be a bit of a surgical clean-up too, since the yellow resin is quite hard and brittle compared to the white stuff. Maybe I've been away from resin kits and have been spoiled by beautiful Platz white resin or Hasegawa styrene for too long, but all this work is a bit surprising.


-
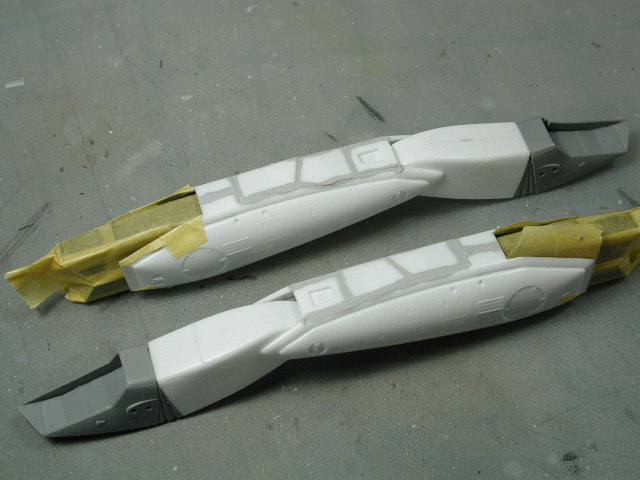
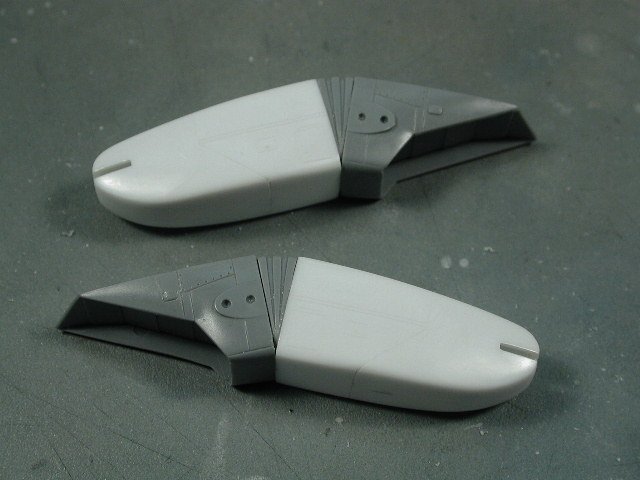
Hey everybody, I'm back for the whole day today... Hope to make some real progress... Yes I've sanded smooth the gear doors, but there are still panel seams between the doors and fuselage, I think its more important to make it look smooth and consistent first, then re-etch the panel lines if necessary, or even draw them in with a thin pencil to be sealed by a clear coat later. Thanks for the tip on the Mr. Base White, I'll look for it when I get to a hobby store next. I'll still try the baking soda and crazy glue thing, I think the baking soda makes the crazy glue less hard - just wanted to learn a new thing or two. If it doesn't work, I'll use my old Tamiya putty, and I'll still use Mr. Surfacer for the small bubble stuff. But when I post the pictures, you'll see my booster requires a little more re-construction than just seam filling.
-
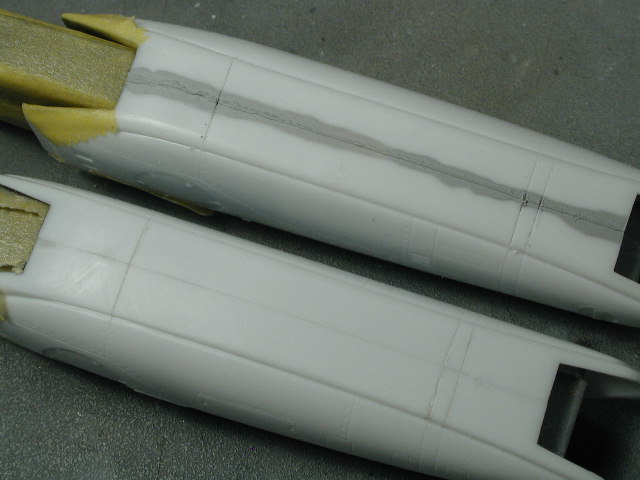
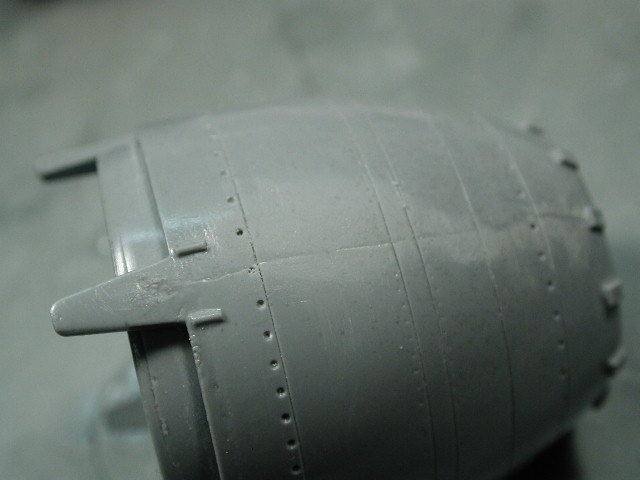
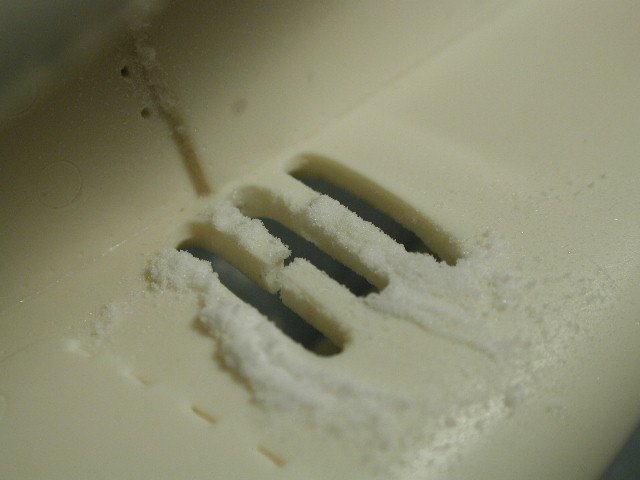
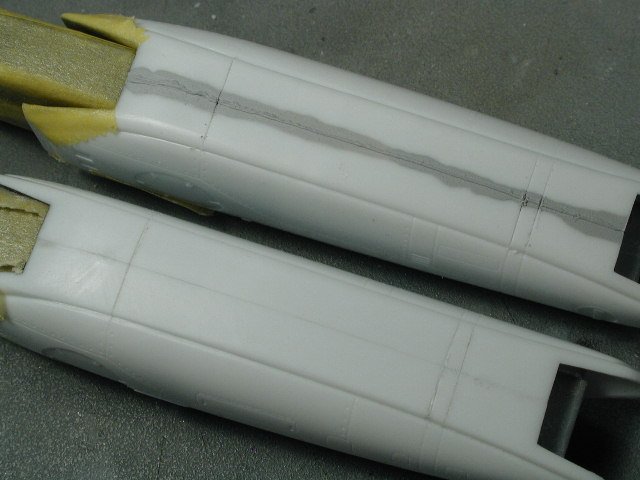
A close up showing the before and after of the sanding. You'll notice that there isn't much Mr. Surfacer left after sanding. It serves as a kind of marker to know how far I've sanded down to. I think I might paint a coat of Mr. Surfacer 1000 over the seams again to make sure - I hate to find out that I didn't sand long enough when I start painting - plus since this will be white plane, I intend to skip the priming stage on the Hasegawa kit (however I will prime the resin boosters). Anyone with any tips on filling resin part gaps with crazy glue and baking soda - I've been told that's the easiest way to go for minor bubbles and such, but I've never actually done it before. Any help or suggestions or links would be appreciated - do I add the baking soda to the crazy glue on the part, or pack the part with baking soda then add the crazy glue or do I mix up the mixture on a card somewhere to apply with a toothpick?? I'll experiment on the boosters and show pictures when I get to that stage - which is next...

-
Didn't get much modelling in... argh... The comet is great, and you want a bit of abrasion to rough up the surface to give it some tooth for the paint to adhere to - sometimes the resin is just too smooth. I just used the regular orange tubed testors stuff (although I've been meaning to try some of the newer stuff like Tenax) but not the slow acting testors stuff, that's awful. I find the tubes stuff really strong and fills gaps really well. After the legs have been glued together - trying to get the rear gear doors properly aligned, I then painted some Mr. Surfacer 500 on all the seams to make them a little more uniformed and fill any little remaining holes.
-
Great news, what about that comment about Ace Combat designs (I love any and all sleek aircraft designs!! ) I clicked on your link, but didn't get anything... Is Hasegawa branching out into other fictional aircrafts?! How about Yukikaze?
-
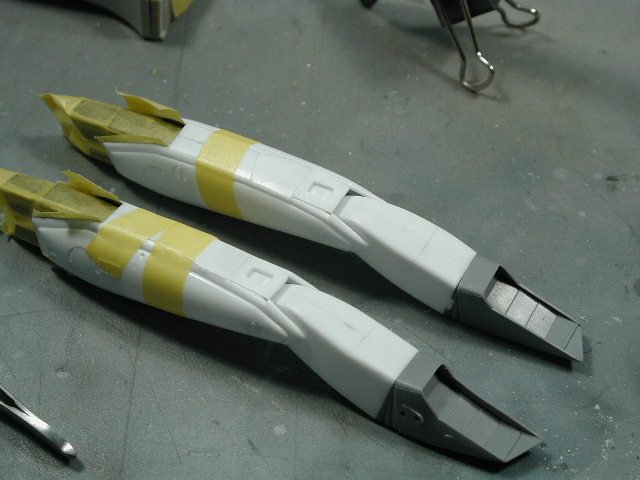
The legs are now together, again I used tube cement for strength and I used enough so that it oozed out the seems so I can sand them down later. I also used the tape to keep the pieces together and the gear doors properly aligned. Now remember to glue in the forward gear doors (the piece with the blue/red light) it required a bit of additional sanding around the edges to fit into the leg properly.
-
Make sure when you glue the legs together you don't miss this crutial piece (since its inclusion is only on the Super Valkyrie's Hasegawa instructions) - it was nice that the Captn' included a resin substitute for us. This allows the thighs to attach the legs at the proper bend angle at the knees. It would help that one has built a super Valkyrie before embarking on this kit (even though we are just using a regular Valkyrie fighter kit to make this).
-
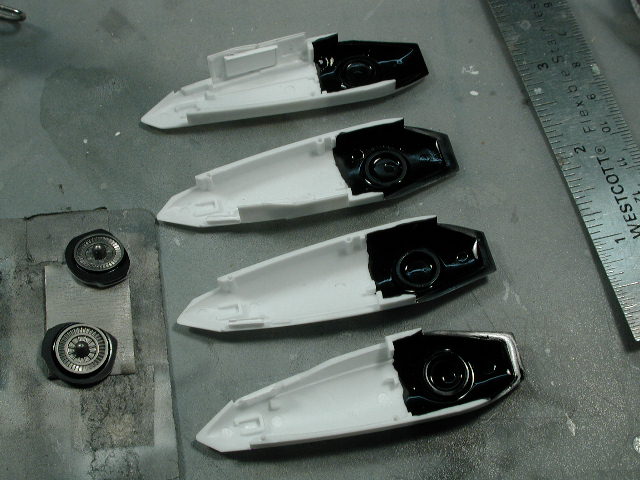
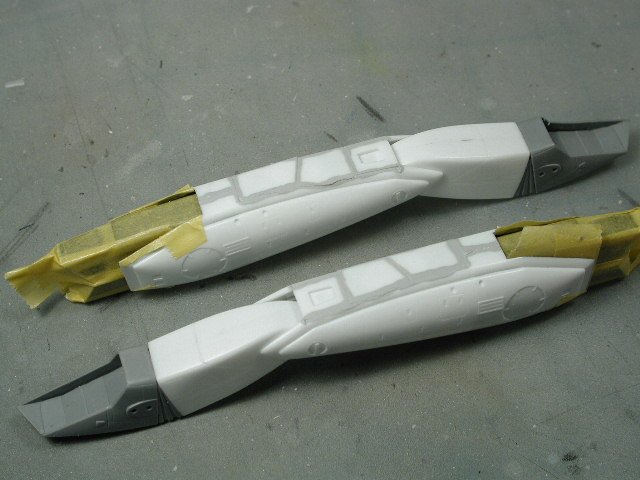
Before gluing the leg halves together, I thought I'd be smart and mask the black portions and the feet/nozzles off first. It is possible to mask all this after you glue it together (which is what I've been doing up till now) but I think this make a bit more sense.

-
Now to glue the resin intakes to the thigh part. I used crazy glue for this bond, regular styrene cement wouldn't work due to the disimilar materials being bonded. Fortunately, the Captn' provided us with the "Super" parts needed to bend the legs/engines at the knees without having to purchase a Super Valkyrie to make with this Booster. He even assembled them for us, unfortunately, he missed a few injection pins holes on the inside of the intakes, which is a real pain to sand out after the intakes have already been assembled (so being the lazy sod I am, I left them)
-
Best way to trim off the excess resin sprue is with an exacto razor saw
-
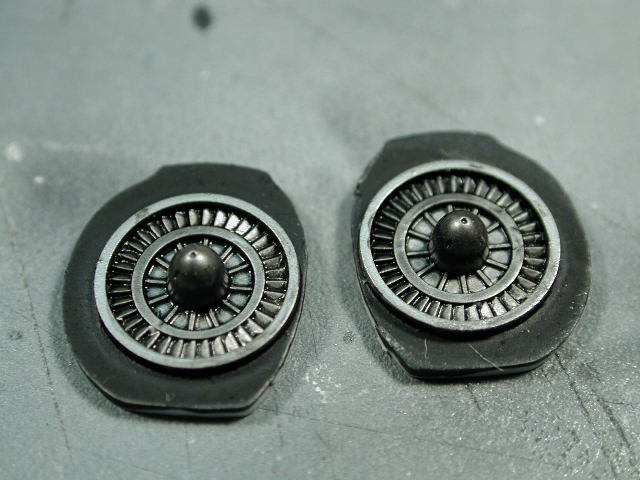
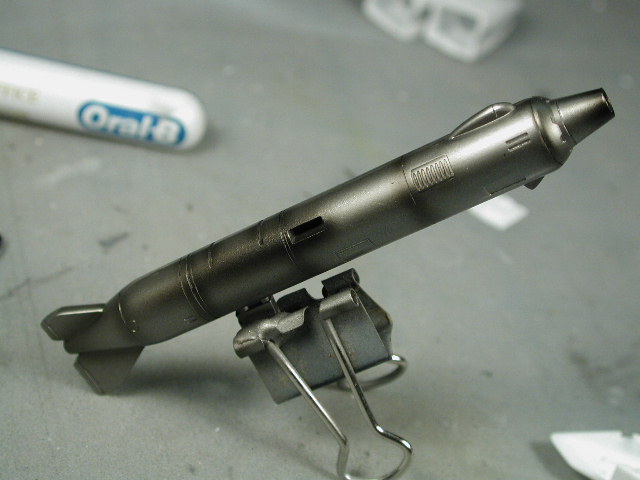
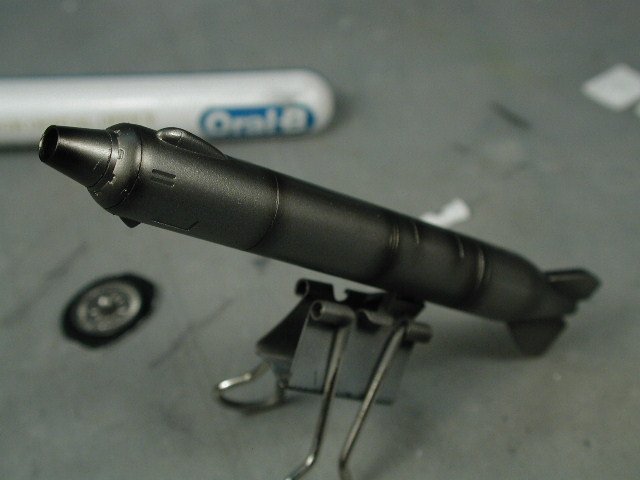
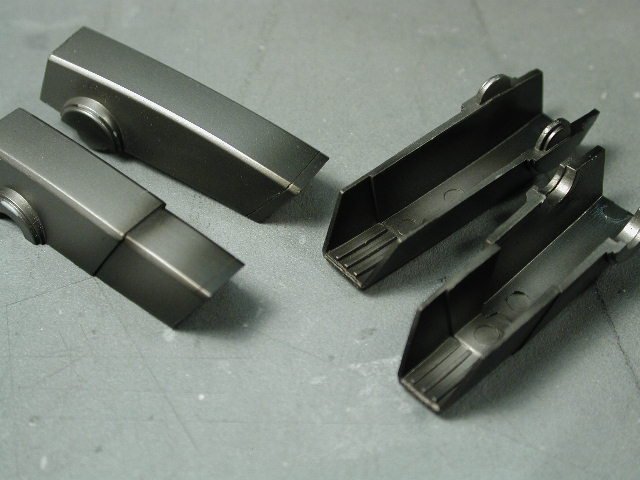
The afterburners now gets a thinned down flat black wash to pick out the raised details. (You'll hardly see this unless you are looking right into the tailcone with a strong light)

-
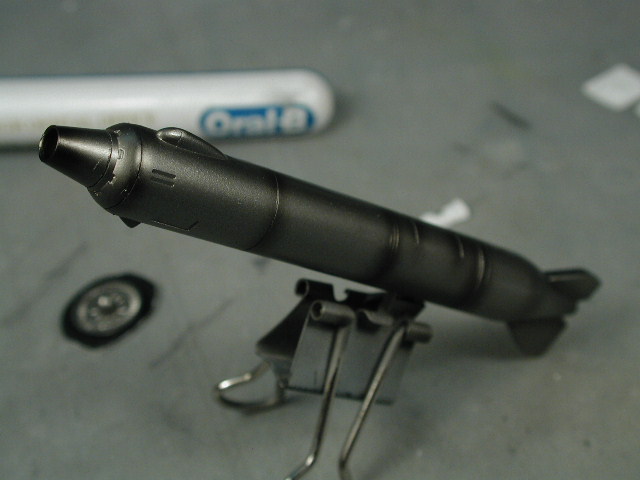
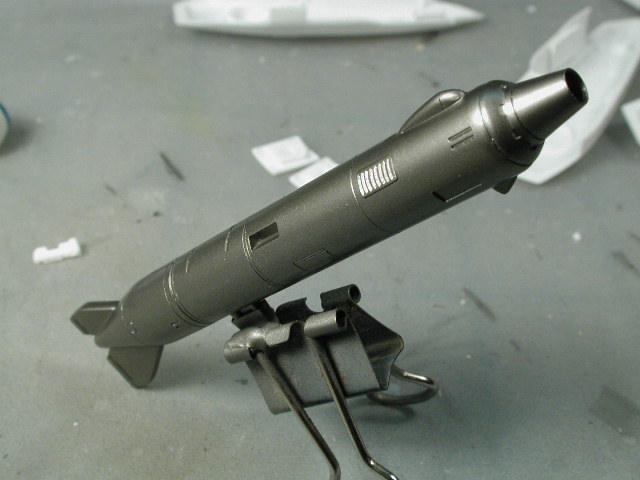
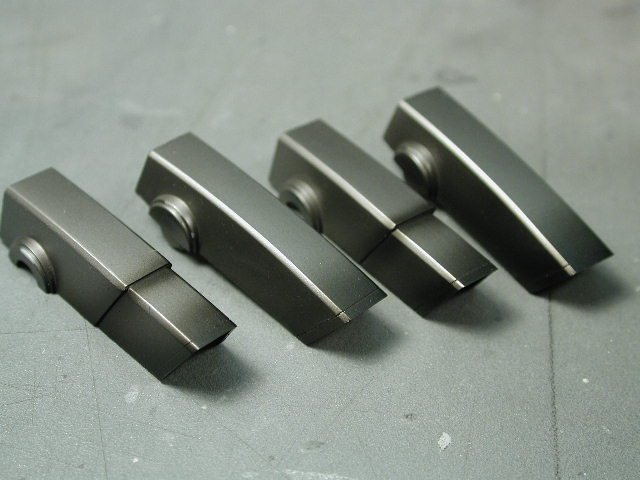
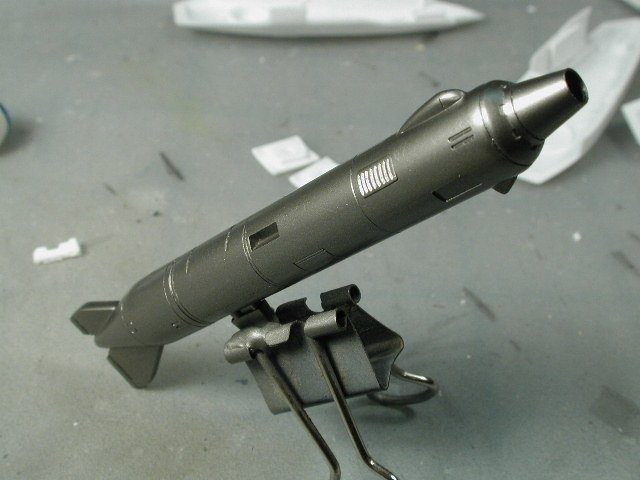
I aged the gunpod the same way (yes I choose steel instead of the grey cause I thought it was cooler). This is before a black oil wash to pick out the panel lines and vents.

-
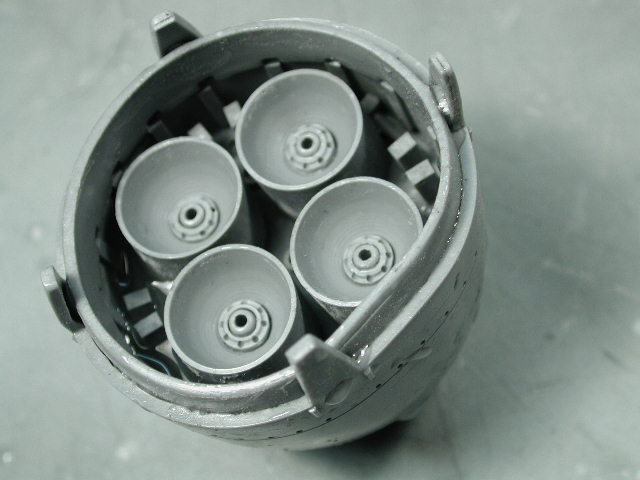
Here I tried the "Exhaust" colour from Alclad - I like it a lot, usually I do it with a very thin coat of flat black, but I have to clear coat seal that in, since the light dusting of black is easily scratched or pulled off with tape. But this Alclad colour adheres to the undercoat of steel much better, plus its slightly browny, bronze metallic in itself - much more convincing as burnt metal! I tried to spray where I think whe parts look best burnt, mostly around the tips and that joint - becareful not to over do it, its nice to see the differences in the metal finishes. Don't worry about the injector pins inside the cans - you'll never see them. The good thing about building a few of these Valkyries is that you learn where to cut corners
-
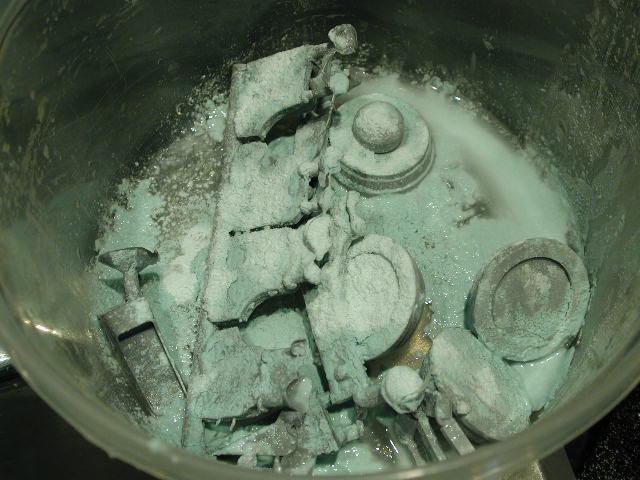
Thanks for tuning in... I take my photos with an old Nikon 990 digital, on macro mode with as small of an aperature (high F-number) as lighting permits. I try to get in tight, and this digital allows me to get within 2cm of the subject. Lots and lots of scrubbing, mostly with Comet and a toothbrush, then some detergent to get it all off during rinsing. Its very important to always scrub all resin kits, there are always release agents to help the resin "pop" off the molds that will resist paints or worst, interact with the paint coat years afterwards.


-
Sputtering is not indicative of paint consistency, its a pressure problem (or misaligned needle/nozzle assembly). In fact, airbrushes are happiest spray extremely thin inks, the consistency of alcohol. But one must balance the viscosity of the medium with its ability to cover. What PSI are you spraying at? For metallics (Alcad) I spray at 15psi, for Tamiya Acrylics, I spray at 20-25psi.
-
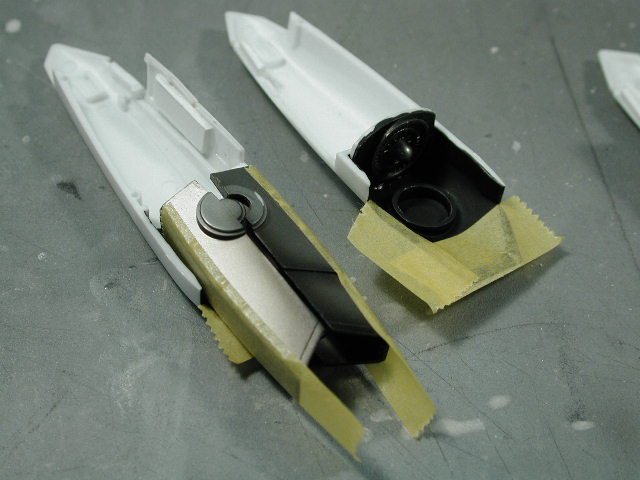
Here I hand brushed the rear exposed portions of the leg in flat black (the gloss is because I took the picture before the paint dried) When assembled it will help with the illusion of depth when looking from behind and seeing around the leg portion of the nozzle. I am spending time here since I plan of being able to separate the Valkyrie from the booster - I suppose you can skip some of these steps if the Valkyrie never leaves the booster since you won't be able to look up the tailpipe if its got its leg stuck in the booster.

-
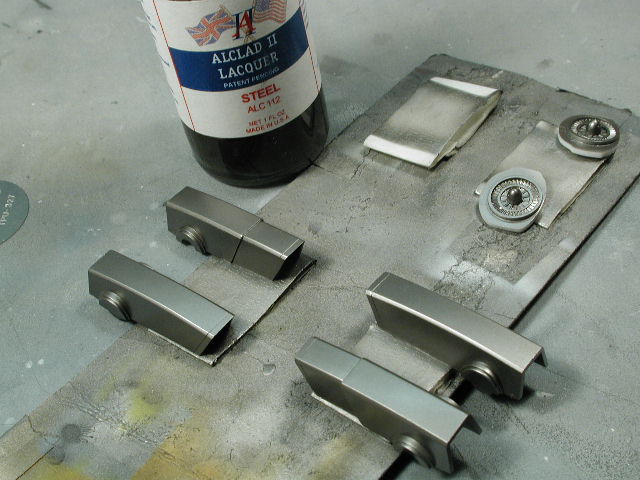
The Alcad Steel works wonders on the gunpod! I've also got a different shade of Alcad called Jet Exhaust - it looks like burnt iron. Which I'll try later on when this coat of steel dries - I'll use it to shade the tips of the nozzles.
-
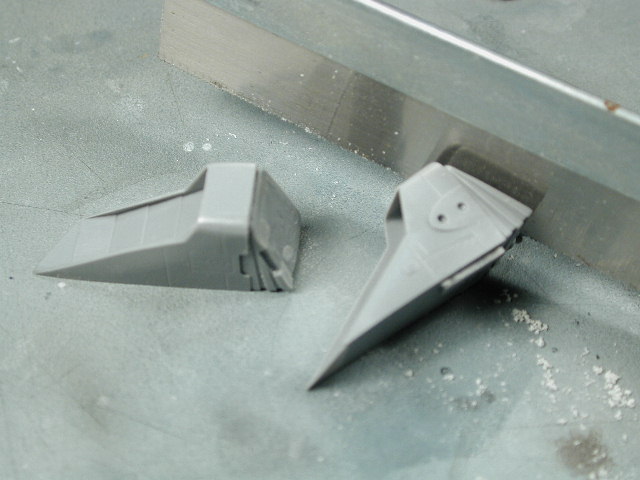
Ok, enough preaching (modelling is already a dying hobby, we don't want our modellers to be dying themselves!) Here's a shot of the foot/nozzles, make sure to carefully sand the sprue attachment points with a fine 600 grit paper, these Alclad metalizers are very unforgiving and any scratches and blemishes telegraph through.