
leading edge
-
Posts
436 -
Joined
-
Last visited
Content Type
Profiles
Forums
Events
Gallery
Posts posted by leading edge
-
-
Hey Cool8er, I'm excited to see your build up... your stuff is pretty gold. Quick question; why didn't you use a resin saw for cutting those pieces? Using the dremel just seemed to make more of a mess than its worth.
I have that dremmel I don't use it often because I don't want to have to correct mistakes in the surface , you have no prob with yours good work. Are you planning to make your own decals or is there already a set that comes with this kit?
-
This topic is about modeling innovations and refinements which can benefit the Macross World Forums' Building/Customizing Macross Models & Toys and to promote an free exchange of ideas between talented builders and their creations. I hope to generate discussions and tips on how to make our models the very best they can be.
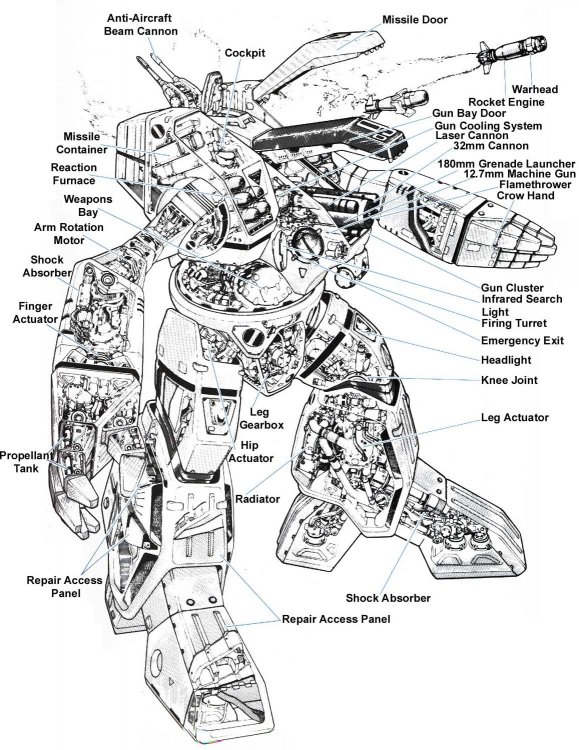
To start the things off I've got an idea to improve the rapid fabrication of parts without the aid of expensive tools. Templates schematic view, top, front view. these include the basic dimensions of almost any object. 1st draw out image via your computer or photoshop then approximate an image three different ways top, front, and schematic view. these will give the basic dimensions needed to create a simple object. Here are a few examples. the destroid shows the basic dimensions necessary to make a simple "cutout" shape. When I make anything I tend to use my jeweler's calipers and a standard 12 inch ruler to measure and test the size of parts I need to replace or make. As you can see after cutting the shape you eliminate at least 60% of the work you need to do to finish a piece. The anything left is to shape an polish the piece to make sure the details are all there" (I tend to use either foam styrene or Industrial clays to finish and shape a piece)

-
im in thats the detail that the vf 22s needs to be perfect

that canopy looks good and it's great to see you pushing ahead these projects can get a little discourging sometimes. I love it do you have a website to check out more of your work possible tutorial on the forums?
-
Thank you, now I'm felling better for have bought it

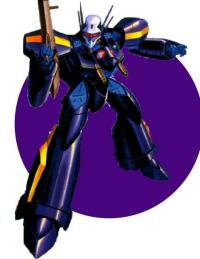
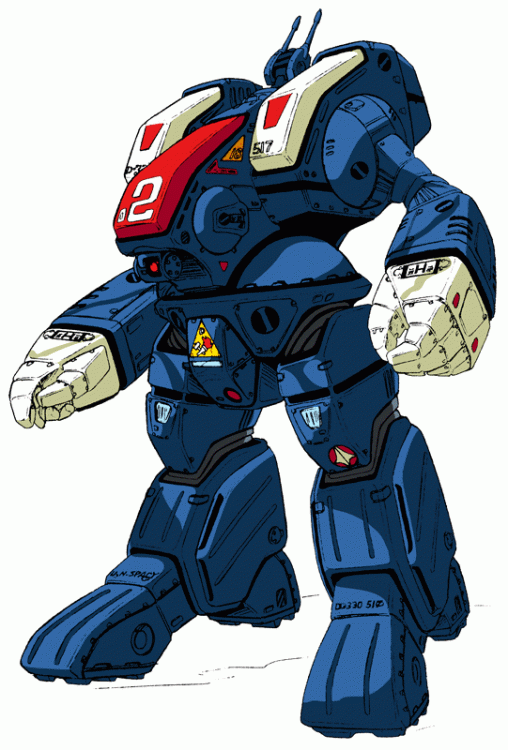
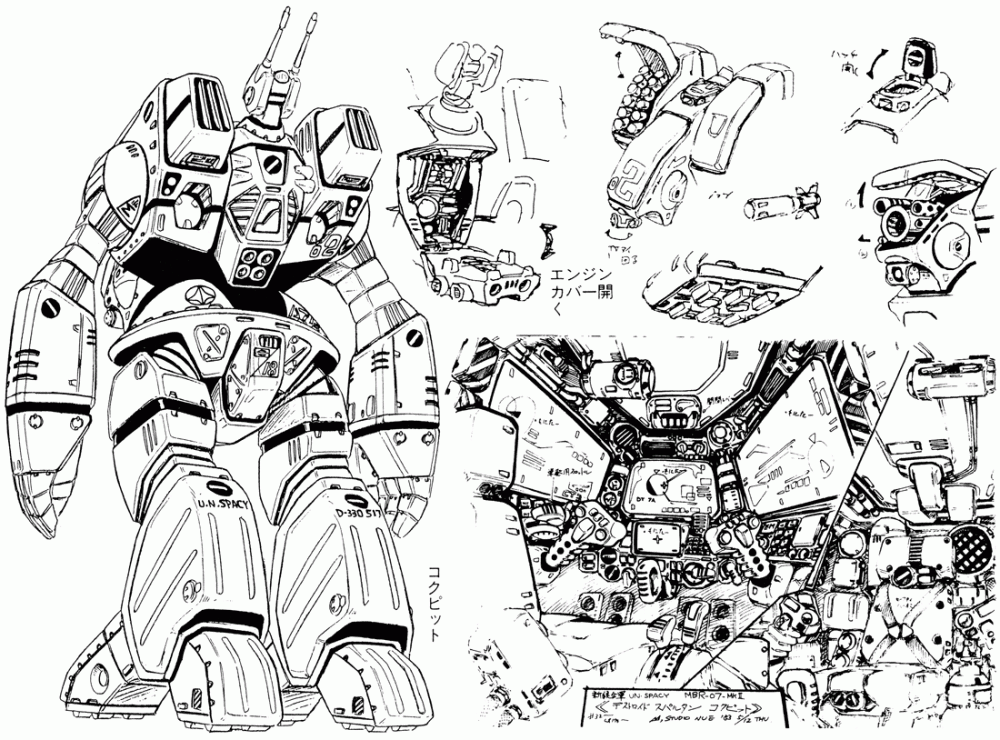
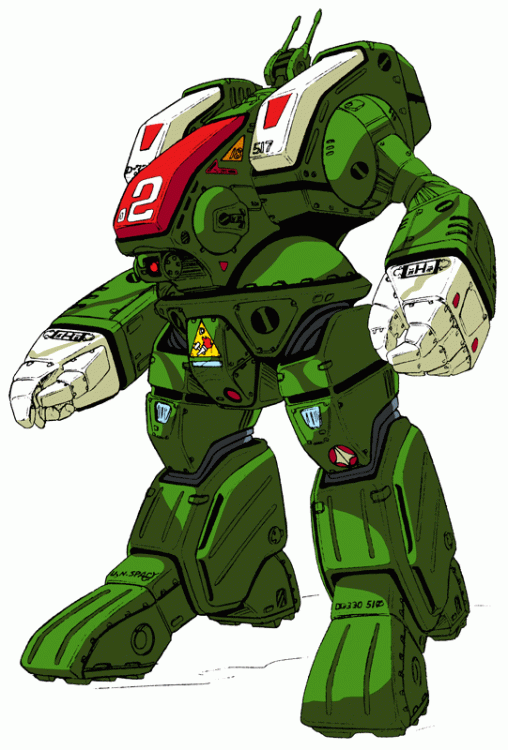
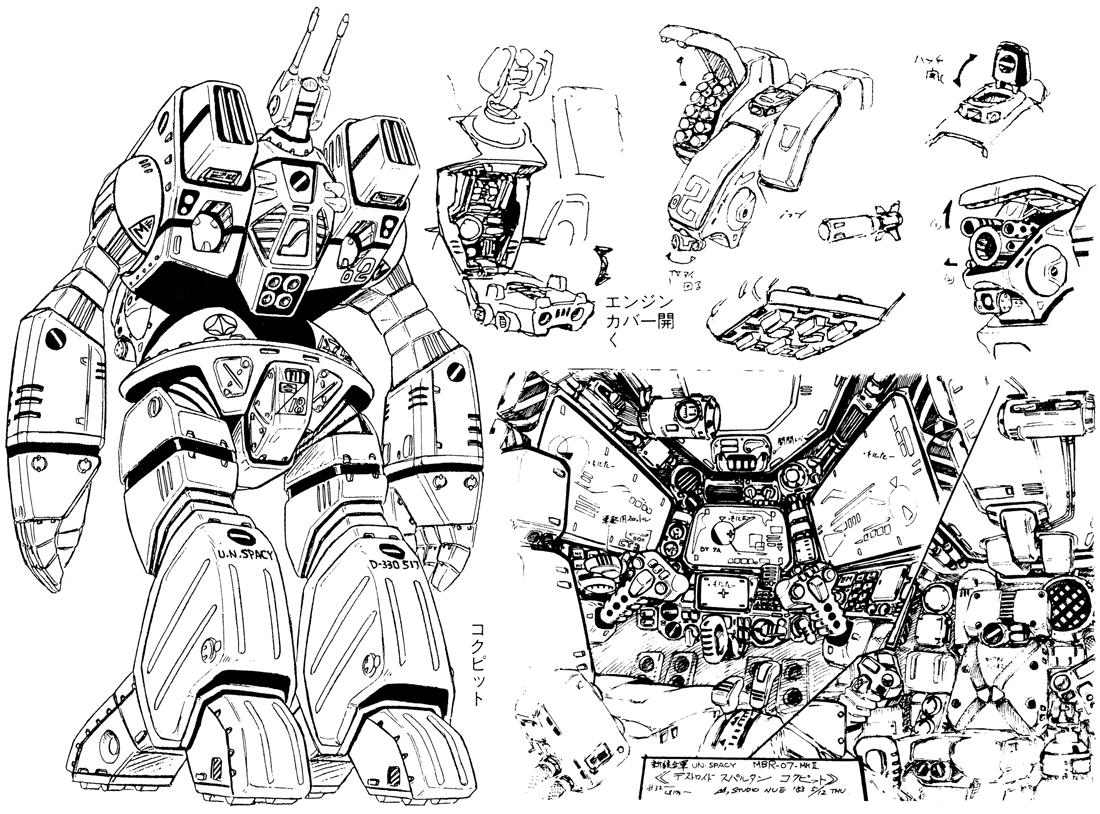
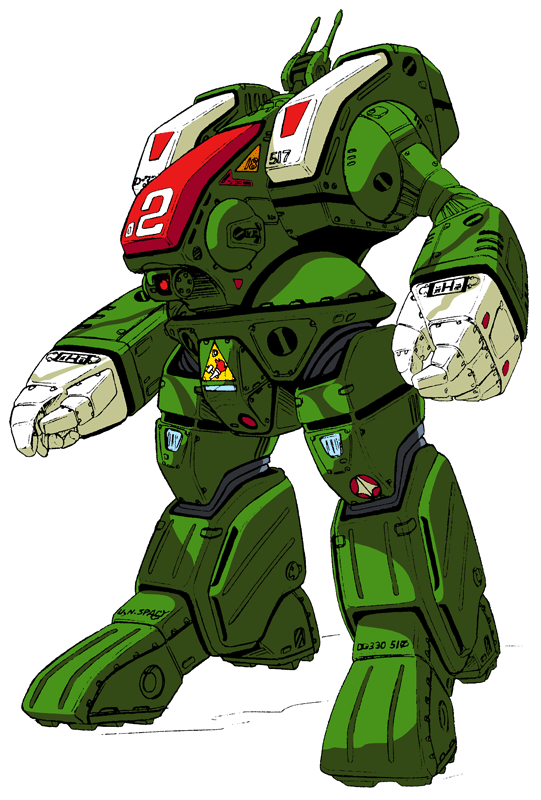
I vote spartan Destroids get little respect and are still cool regardless I vote for the spartan. Besides there is no transforming and a lot of gundam kits these days you can bash to build it. also here is some awesome reference for the model should you build it.

-
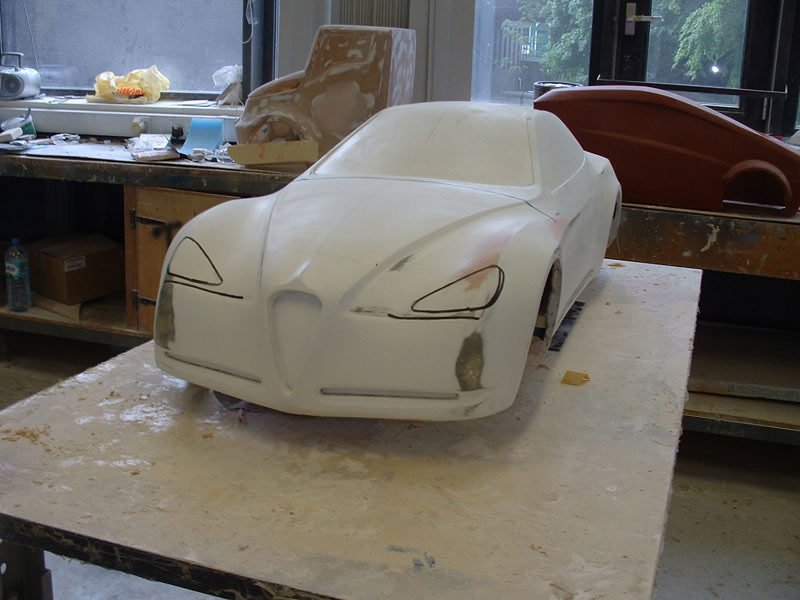
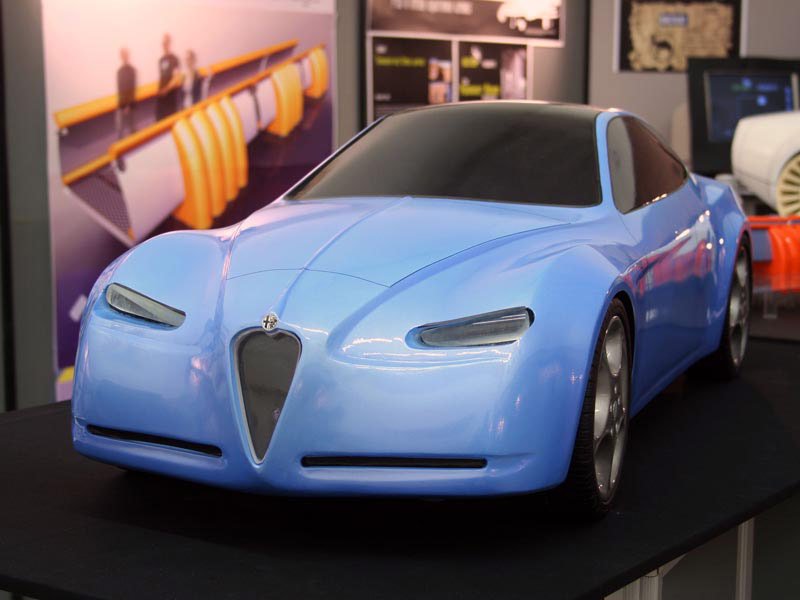
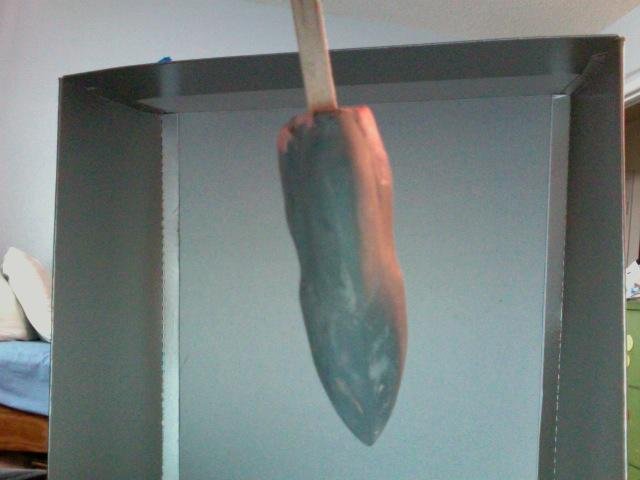
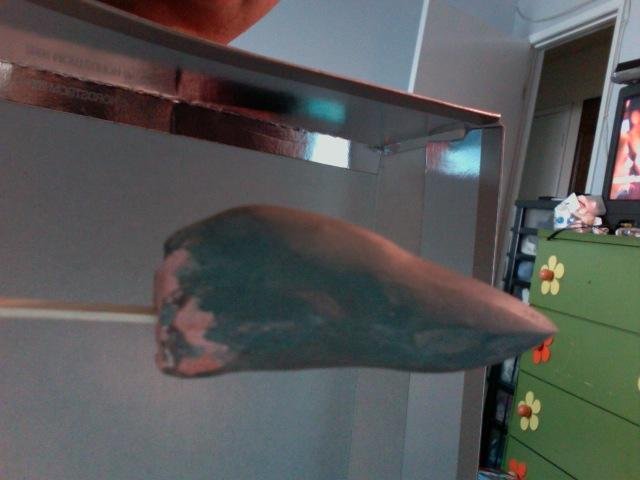
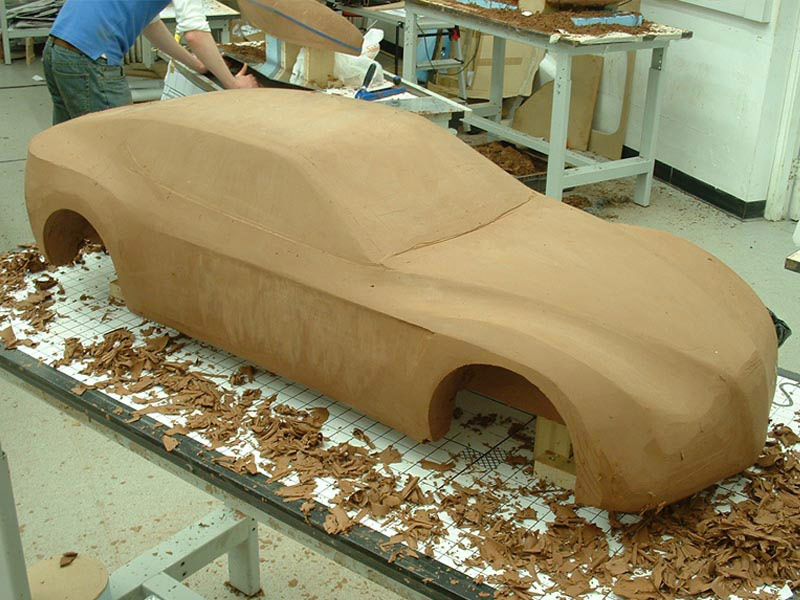
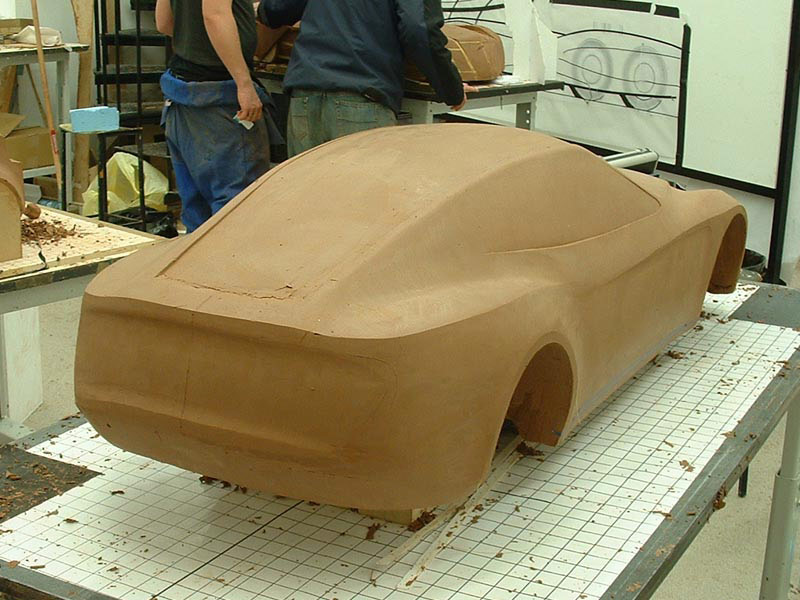
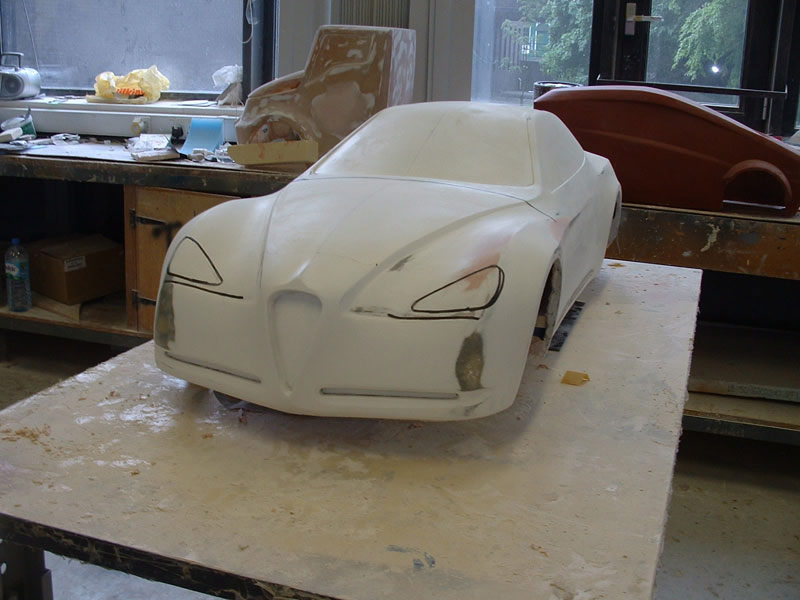
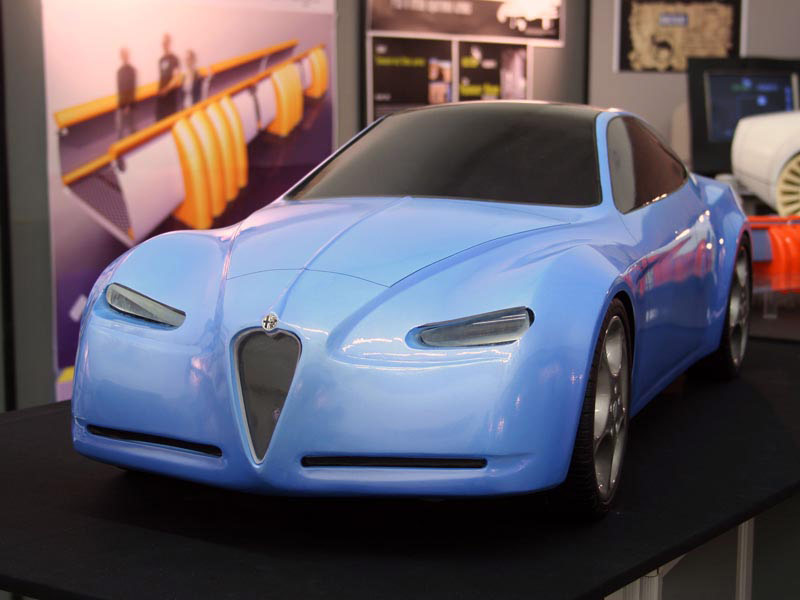
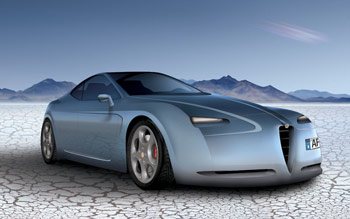
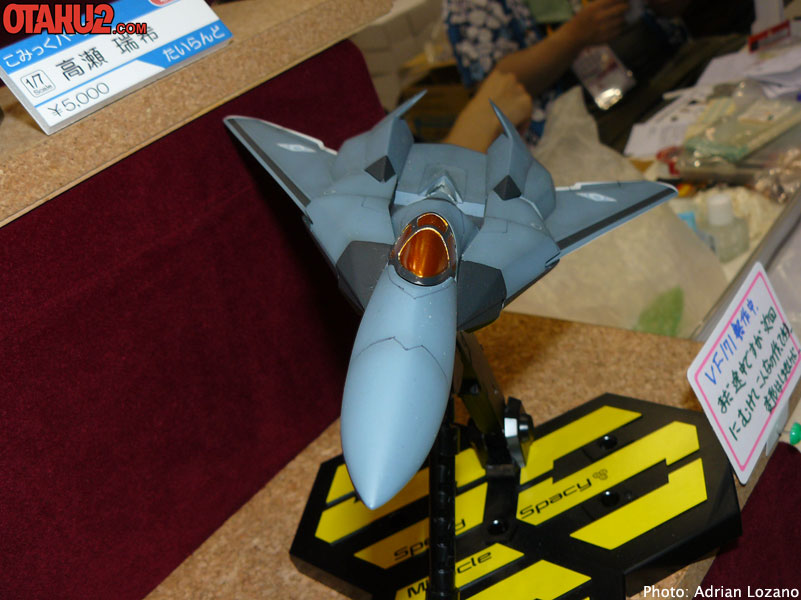
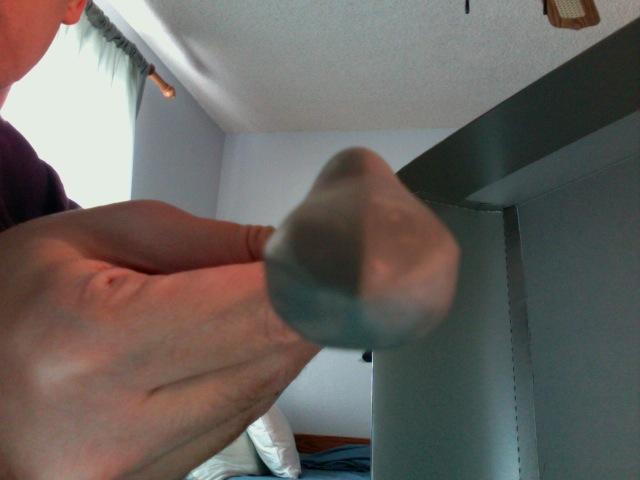
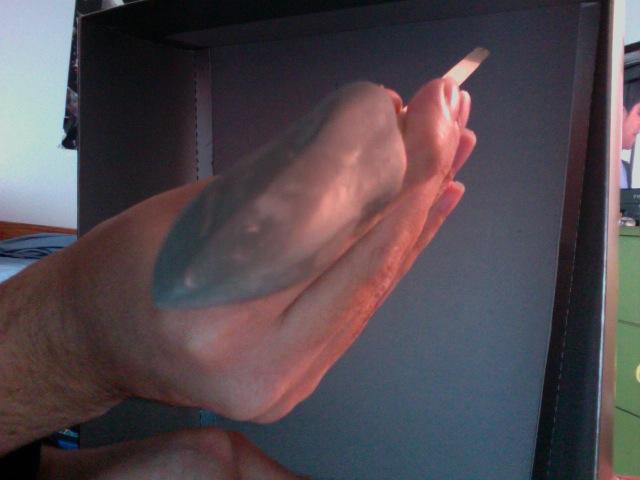
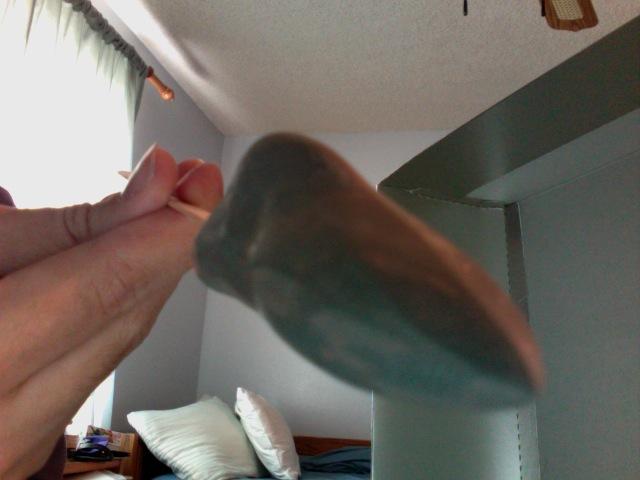
Update: The recent developement on this project is going slower due to my funds being used up and poor finances at the moment I will continue to use everything at my disposal to make this craft. One Idea that is great is using industrial clay to model the body. I tried my latest attempt at making the plane mode of the VF-171 but wasn't able to get the detail I wanted also the time it takes to shape foam this way is very difficult. I 've decided to go a new direction templates which cut clay or foam quickly. there are three side that you generally use to make an object complete and that is to 1st the profile the top view and the front view. Having a template for each dimension ensures the completeness of shape and form. Sadly there is such little info on this model I have to either make it up or simulate it on my computer physically. I chose to make it up since although a cad program is great I want o focus on some info I can input at the moment and a clay model with a little detail will be good. Here as always are some site for reference.z
http://www.carbodydesign.com/detail.php?id=828
http://masseydesign.wordpress.com/2009/02/25/industrial-clay-modelling-workshop/
http://www.idc.iitb.ac.in/about/studios-clay.html
http://www.garieinternational.com.sg/clay/shop/fimo_faberclay.htm
http://www.carbodydesign.com/archive/2006/06/16-alfa-romeo-villa-d-este-design-story/ -I shows how they made a model of a concept car
examples: these are some methods I am considering for the VF-171 EX


-
I see a couple people mentioned EL wire. Have you looked into EL sheets? you can cut them to whatever shape you like, i'm not sure how small you can get with them and you will have to use an inverter. Check into it and see.
Update on Lighting know it's been a while here is a few more ideas and any comment or criticism is welcome.
http://www.starshipmodeler.com/tech/cj_blink.htm-lighting effects
http://www.starshipmodeler.com/tech/pa_flash.htm
http://www.starshipmodeler.com/tech/pa_deluxe8.htm
http://culttvman.com/main/?p=3712- internal lighting
-
-
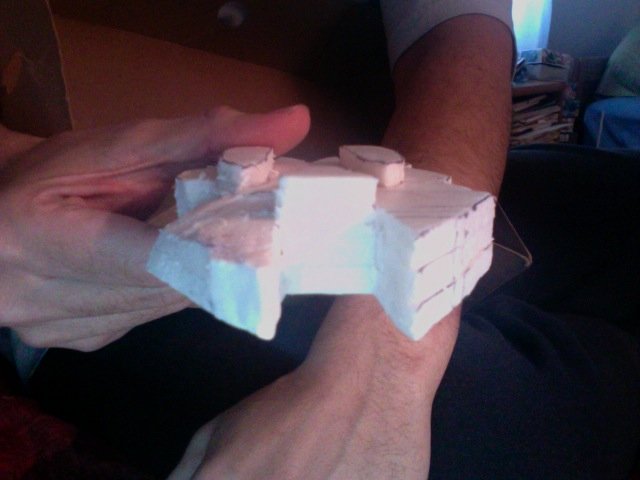
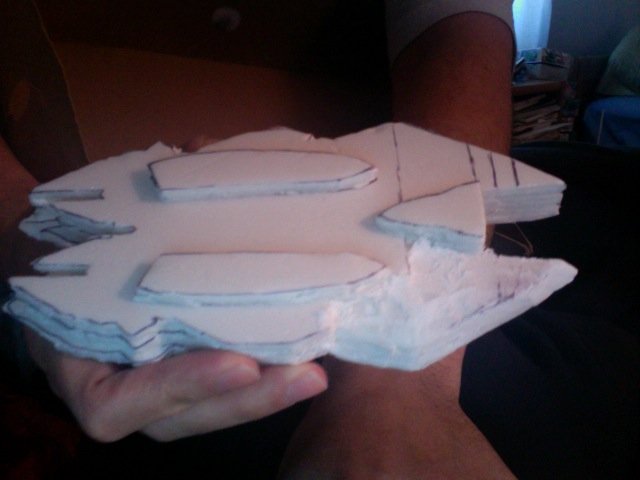
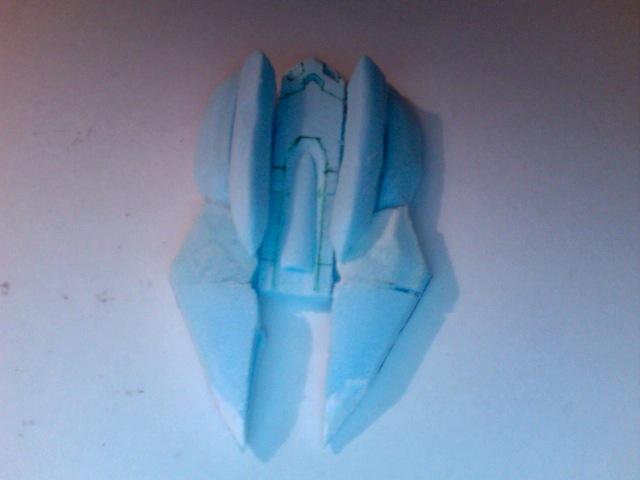
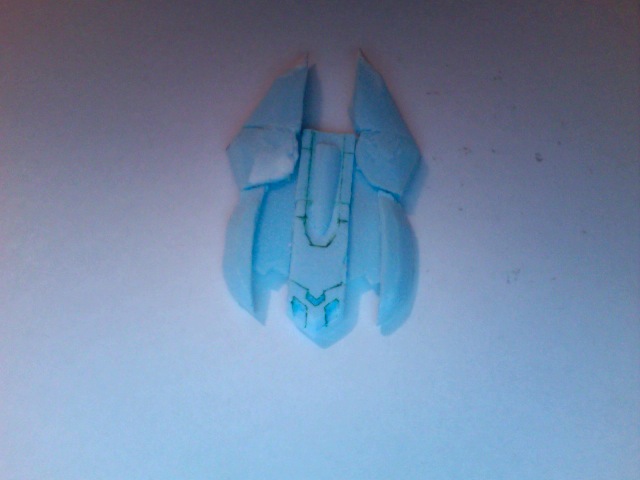
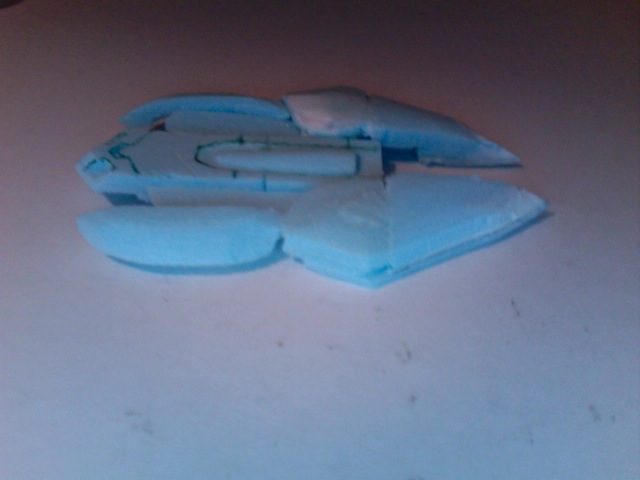
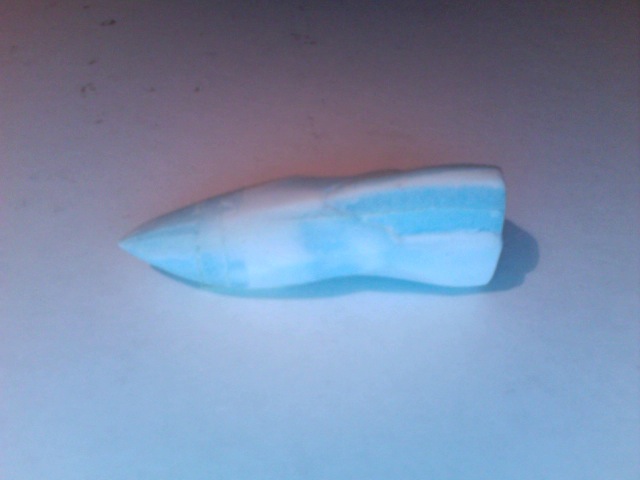
Deleted pics from last post needed a better body not flexible to detailed modification here are a few ideas and new techniques I have been using.
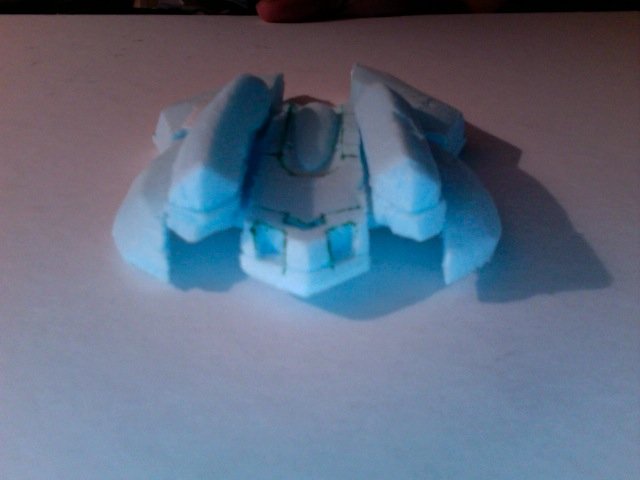
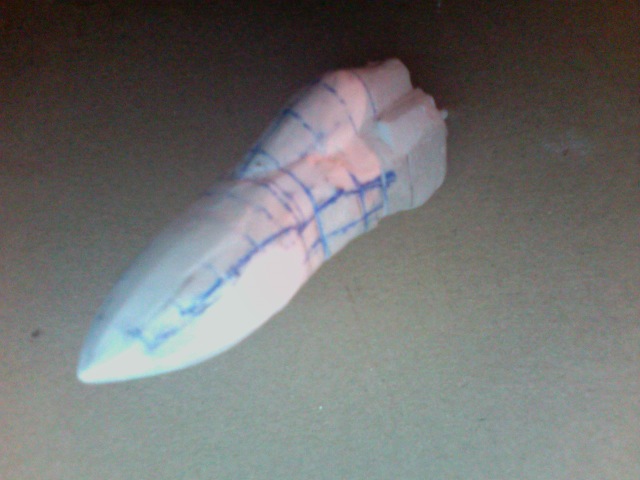
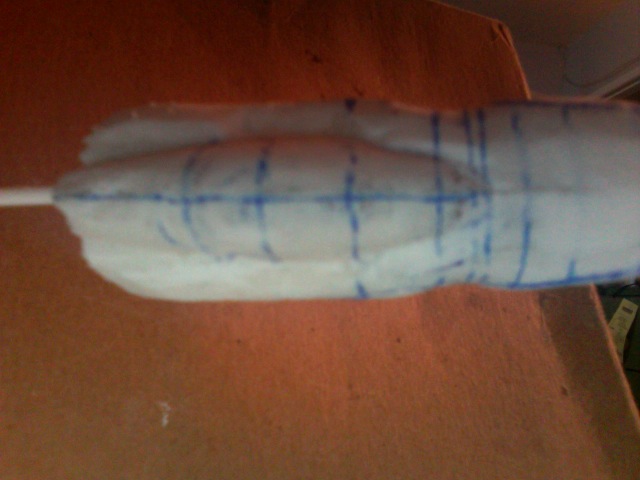
the first three are of the body which I'm adding more detail and shape to
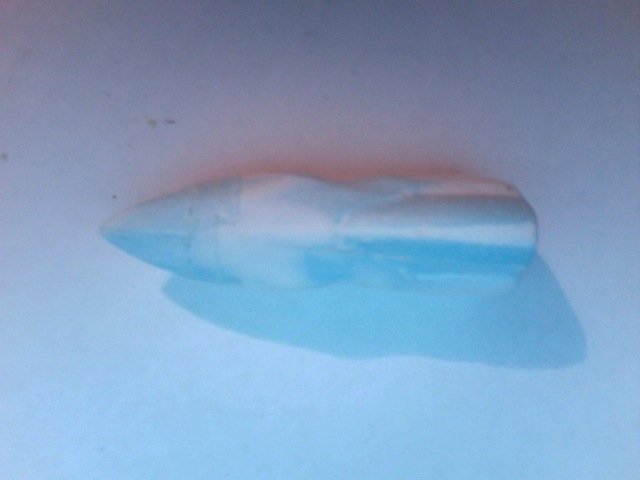
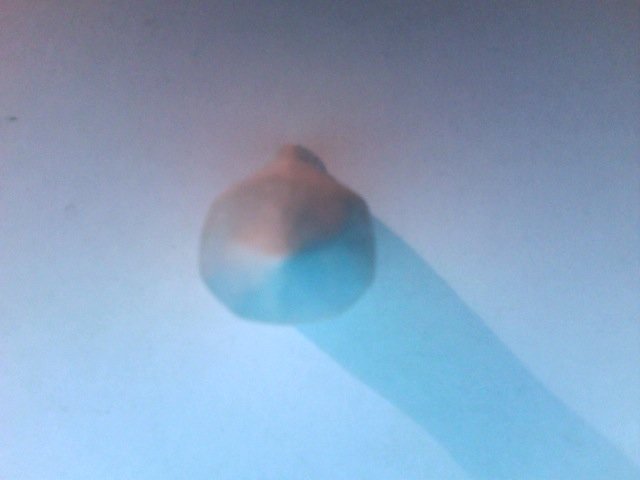
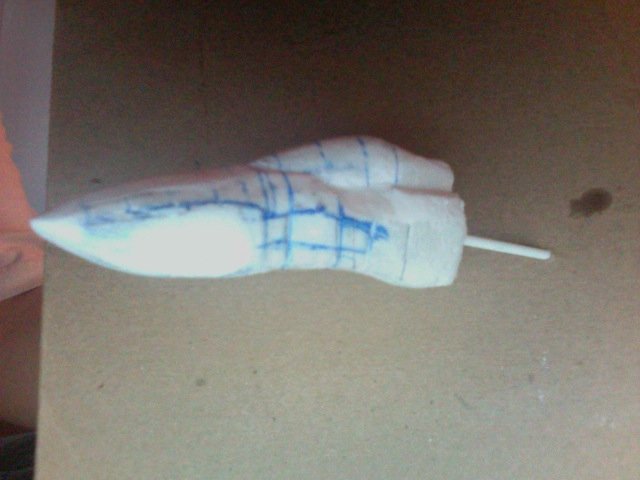
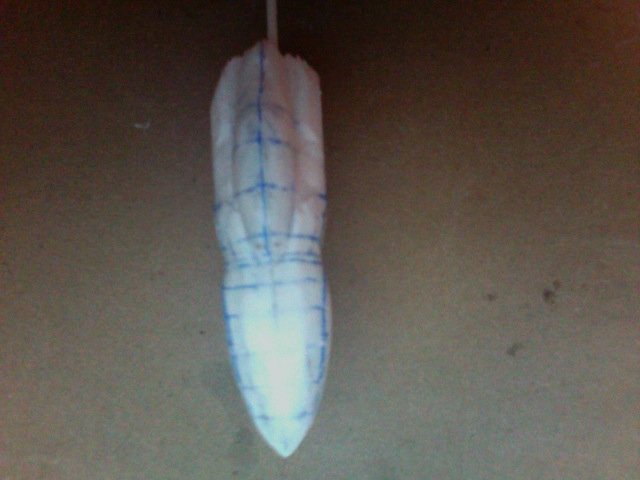
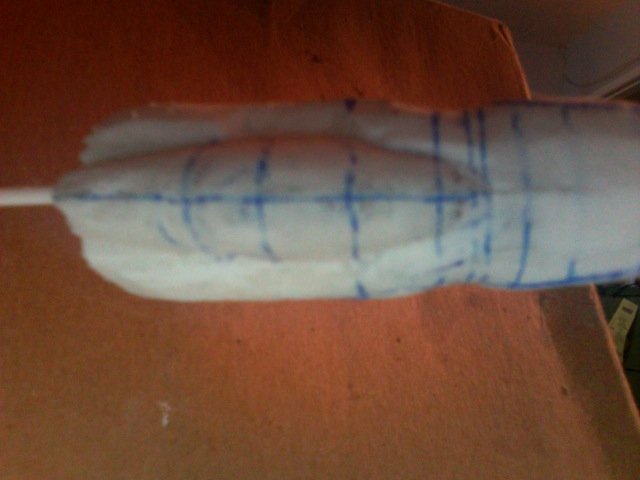
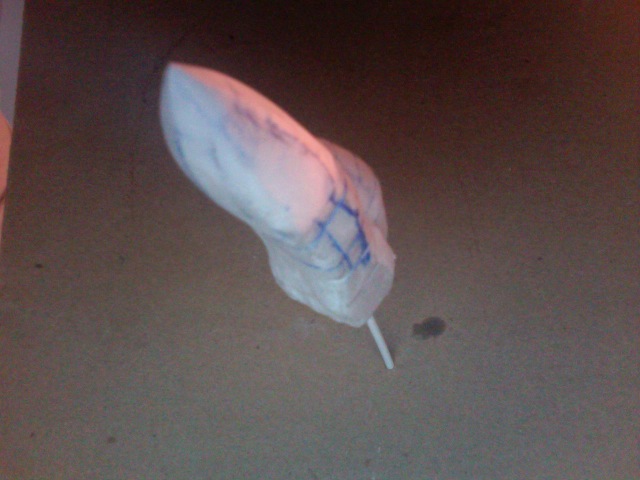
the last ones are an improved nose cone decided the second one was too disproportional need one that also had a better accuracy blue styrafoam is just better.
Here are a few improved body and nose cone updated will proceed as soon as I have them.
sorry for the double post oops!


-
Dude you have just scratched the surface on this. If you really want some thing perfected you go so far as making test color sheets then you have to apply them to the surface the only trouble is that some of the decal paper isn't very strong and you tend to get scratches on your decals. Personnally I've opted to try a dry transfer process an art teacher taught me as an alternative for the easy decals( rescue and U.N. Spacey kite symbol). Just take some matte medium( found at local Aaron brothers/ Michaels and print and image on a piece of paper with vellum ( now remember this isn't perfect but it can save a little time if your sick of decals) feed into the printer it should partially absorb the image if on a high quality level. remember to reverse and size image to specification then paint an area of the model with matte medium wait a little till sticky keep it even or the image will warp. The medium should be sticky yet solid not too wet or it will run also it you use gesso on a white surface it will enhance the properties of this process.I didn't realize how much work was involved in the decal making and customizing them process, but I have managed to get most of them to fit properly. Tomorrow I will have pics of all the lower leg pieces that I did over today, and of the updated heat shield work. I started tapering the wings and should have those done by tomorrow as well. Lots of pics will be here tomorrow. The colors are light blue and purple, and so far, it's coming out nice. Aside from the decals, it's a very conservative custom, but one that will make it unique enough. -
tiTrue... you need to get at least above 60 Hz for people to really not notice. There's another vendor, EL Wire Online, that says it's power packs are adjustable for frequency and voltage output, which could solve that problem. In any case, if you wanted to mix EL wire with other sources, you'd have to either adapt the EL wire power pack to serve both the wire and the other output, use a second source, or design your own.I tried talking to a cellphone vendor in my local mall the lighting effects on some of these cell phones use a timing circuit much like the ones found on Christmas lights. I've been trying to find the smallest one for some projects. One problem I'm finding is the size of the battery is hampering my models and have to be built in a stand or display. The only way I found to eliminate this problem is to use watch battteries and watch parts that way there is a place for the battery pack. About two lithium batteries will do for a medium size watch. I have yet to try the timing circuit and hook it up to the formation lights I'm working on (cant seem to get them to blink right).
http://www.rcuniverse.com/forum/m_9313373/.../tm.htm#9330665 I'll try the method mentioned in this article and make adjustments as necessary.
http://ledz.com/?p=zz.led.resistor.calculator ( this is for calculating LED resistors.)
http://www.rc-cam.com/navlight.htm ( formation lights)
-
This is a discussion for the use of lighting effects and internal detail of models. I've collected some data on the subject which I feel will make a model look that much more authentic. I specifically want to focus on the finishing touches( sensors, camera, exaust, control panel lighting, and exterior color). One such effect would be the electroluminescence found inthe display panels of cars. I find it fascinating yet is it possible to use instead of an LED? I just read the article in wikipedia and it is a promising novel approach to making the lighting "softer" LED's can give great effect bur I'm looking for a glow to the display even on a transparent piece say the HUD. Any ideas would be welcome.
http://en.wikipedia.org/wiki/Electroluminescence
here is a comparison with the DRYL display and a real electroluminescence panel.

-
Update been dividing time to get some work done. Sorry it's been a while the update is going to be quick I'll have to take some better pics later I need to smooth down the nose cone felt it was too fat and lacked dimension so I reworked the areas with some foam putty and reinforce the nose cone with a tooth pick to keep the point solid( foam is useful but too dentable sometimes. here are the updated pics still working on the body. Please and comments are welcomeA solid start there - looking forwards to more. -
Hello all
Just got poisoned into collecting macross recently. Decided to start off with a frontier kit. Probably a DX or Yamato later on

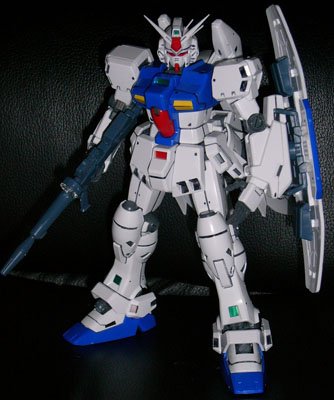
Some 1/72 macross Frontier kits are on sale at HLJ at the moment so I got myself a VF-27!!!
 on its way at the moment
I have been snap fitting Master Grade gundams for the past few years. Just normal snap fit, dry decal application, minor painting using gundam markers and panel lining. Nothing extravagant to the extent of using paints and air brushes. Guess I will be doing the same with this macross kit with the exception of trying out water slide decals

Was wondering if some of the great modelers out there could drop me a tip or two? I saw this review of the VF-27 and it looks awesome!!
http://schizophonic9.com/vf27.html
Well I don't expect to achieve that result with the current experience I have but something decent would be nice. I plan to apply as many water-slide decals as possible (just hate the stickers..... they peel off especially on uneven surfaces after some time
 ) . Since its my first time, would it be necessary to get a mark setter and mark softer for the decals?
Oh and regarding top-coat, the VF-27 in pictures of the review look a little shiny. Could he have probably used Semi-gloss? Or would matt make the kit look nicer.
Hope to hear from you guys. Cheers from UK
The best I can tell you about what I saw is the plane battroid and gerwalk are all sanded down going from a course grit of sand paper and carefully cutting of the pieces from the sprues. There weren't and visible seams and each area on the body seem to fit well so there maybe some puttying to bolster or improve the sharpness of the lines. You can of course do this by sanding with fine sand paper. The color was really vivid yet it was done with a primer possibly Tamiya spray primer? I'm not sure. The colors seem to go from darker and opaque to a more translucent color to bolster a pristine finish. The surface I don't think was buffed using a buffing tool but it can be done and if you use cosmetic buffing tools. I've found that some of my better work comes when I either use a cosmetic tool or a retrofitted tool from a hobby store. If you want to make the gamma I would mix some colors in photoshop or check the colors of The Lucifer Gamma at a local hobby store. Oh. If you want a matte or semigloss finish to your liking use a double action airbrush and test the misture of matte to gloss so the proper finish on your craft can be applied. It adds a final touch which makes your finished model that much more satisfying.
-
This should be pinned in Important Topics! Let's not 'lose' it!
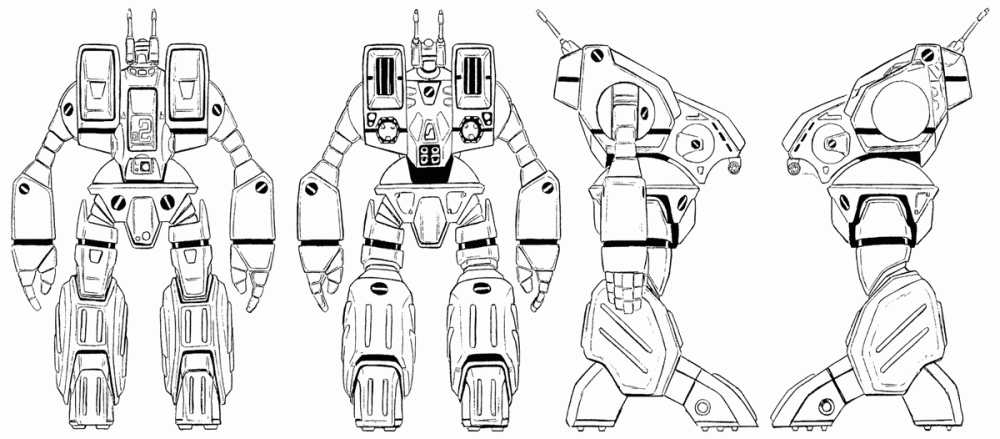
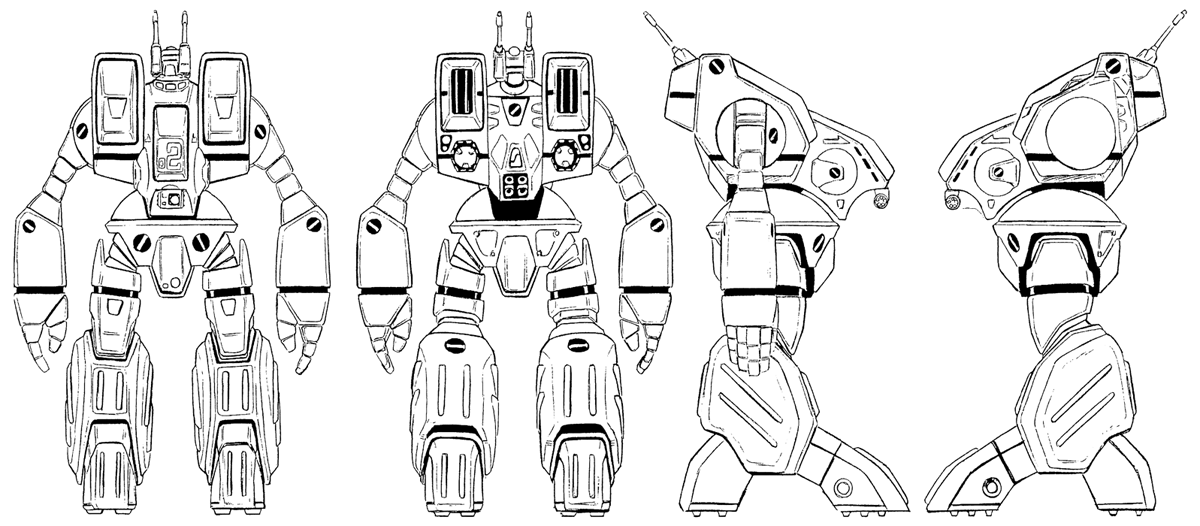
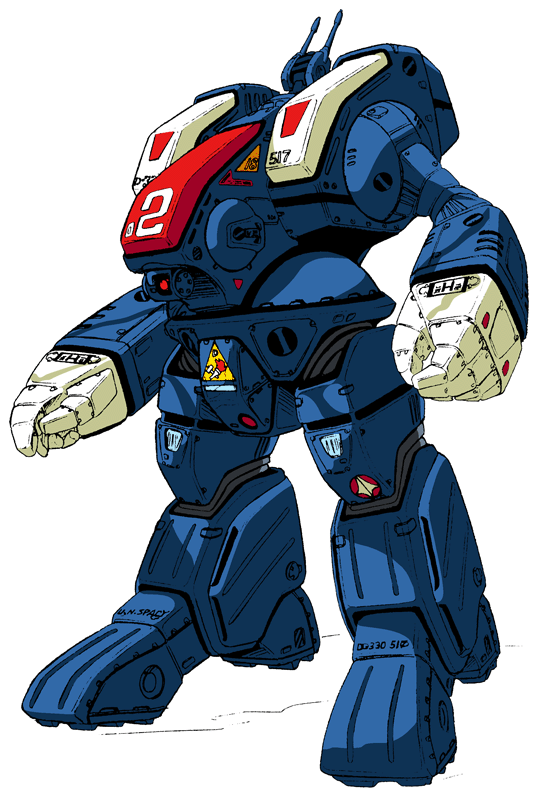
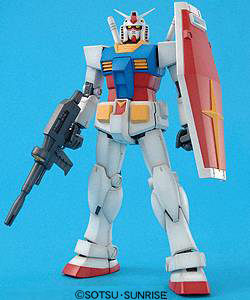
The crusader's shoulders depending on if you want to do the mod yourself could be taken from either a master grade Gudam kit possibly the RX-78-2 versions older is better. The head can be for the attachments modded using a combination of styrene sheetes an ABS, and milliput putty. The chest looks like you could take it from the the RX-78 denborium stamen because of that boxy look much less needed modding. The legs look as though you could take an existing VF-11's legs and add some mass to give them a rounder edge. Depending on how you will want articulation you could alway use a Hasagawa Batroid's legs either way parts could be taen from the Macrosss 7 VF-11 and used in some way to suppliment the feet. here are some images of the kits I have suggested for modification.

-
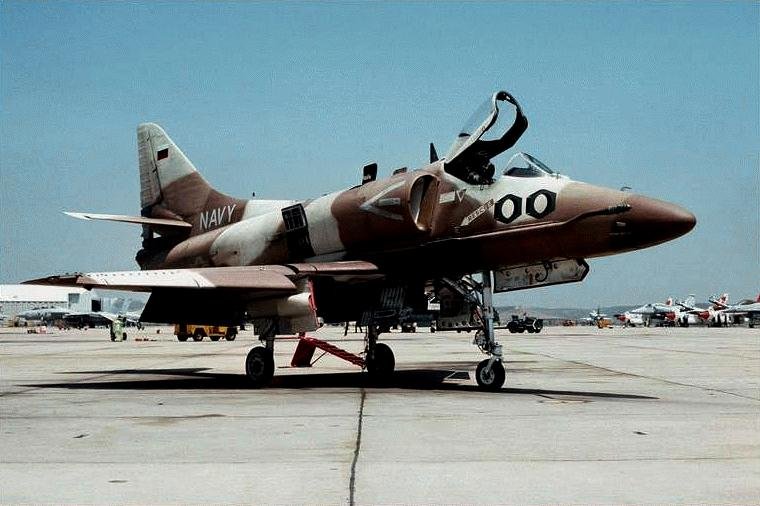
First the front landing gear looks for the front to be similar to the A-4 Skyhawk front landing gear and the two rear undercarriage wheeels look like a Mitsubishi Zero's landing gear I think I have pictures for both. Specificly a 6AMM Mitsubishi Zero Sen X-133 partOne additional note.I have a feeling that model is very tail heavy. You might have to put some ballast in the nose.


-
So cool I'm doing something similar any thoughts on how your going to add the landing gear been having trouble finding screen shots or data on what the VF-171 landing gear looks like.
-
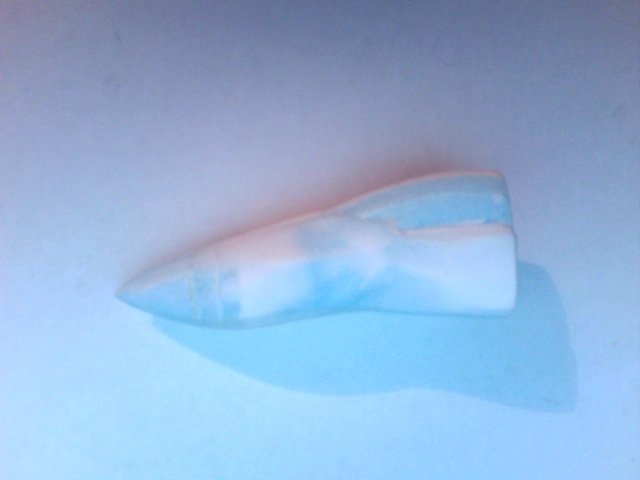
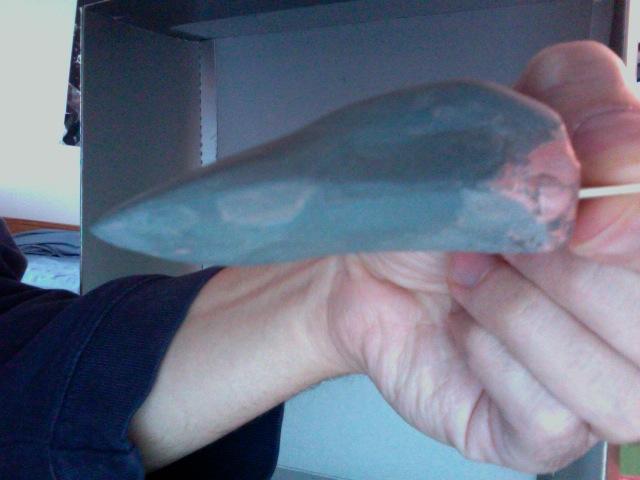
Me Too. Here is an update sorry it took so long going to school and work just eat a lot of time away from my project. This time I tried a number of new things to me that my local hobby shop(Valuecraft )suggested. The nose cone is ade with a dense lighter styrafoam found to makeplanes and foam aircraft. It is essentially the same except it has smaller pores and the material holds up to sanding and can be cut precise enough with little effort. I used foam putty Subterrain it works well when filling in craks or making areas sharper. I made another nose cone and am currently working on the body. I'm up to about 25% of the plane part of theproject at present. Here are a few updated images.Exactly my point.


-
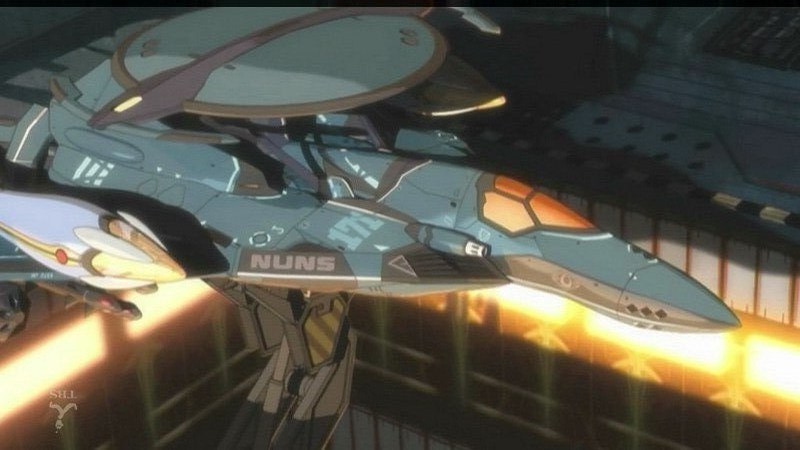
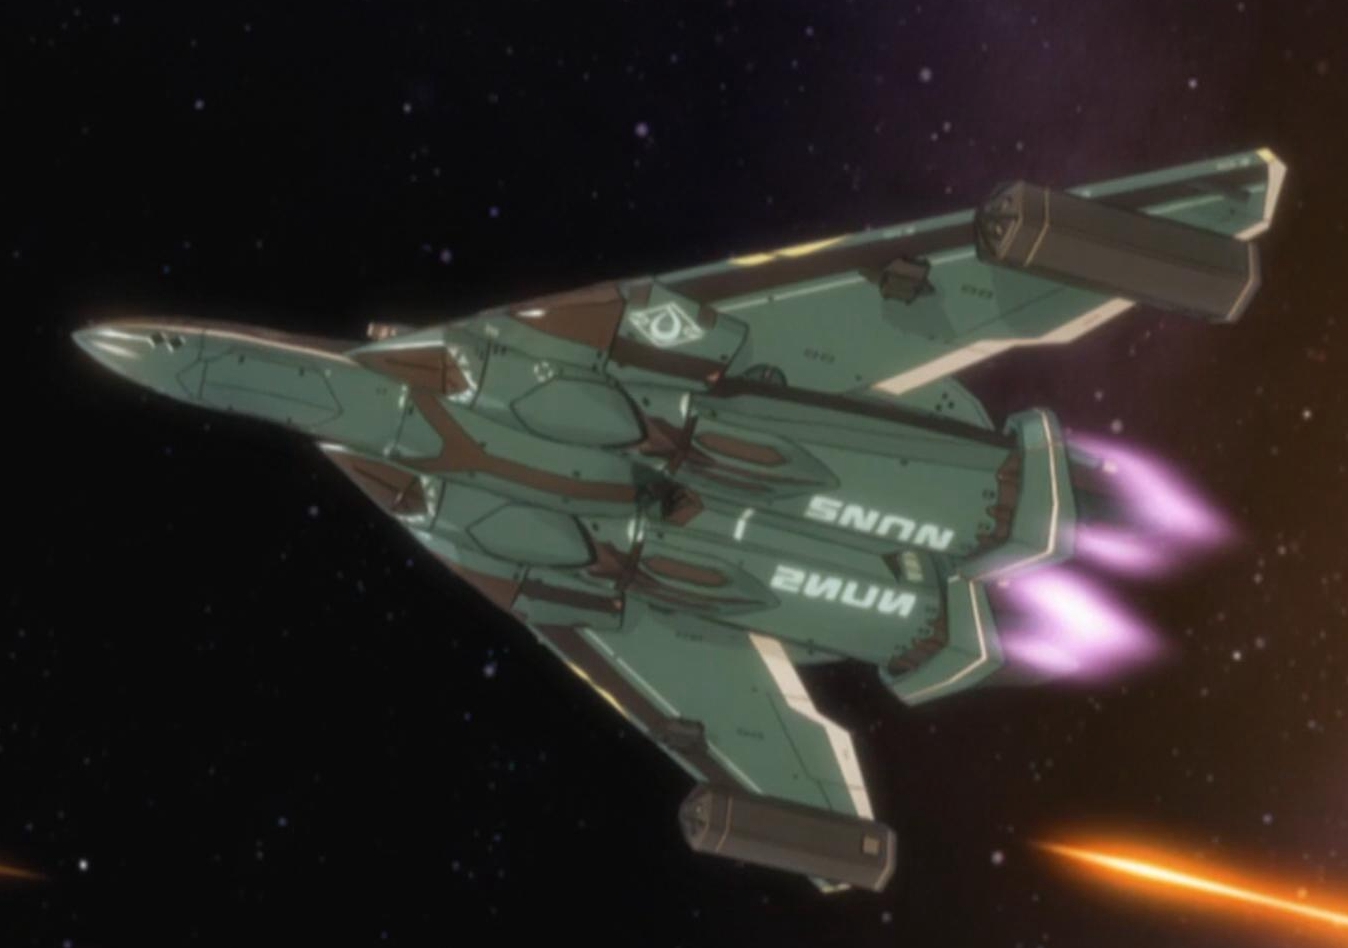
Are you going to use the NUNs Insignia or are you using the original UN Spacy "kite" insignia. If neither will it be a real world looking aircraft. I kinda like the idea of a UN spacy aircraft that isn't a valkyrie. It gives it a Macross Zero feel like the F-14 were given.I was thinking the same thing. -
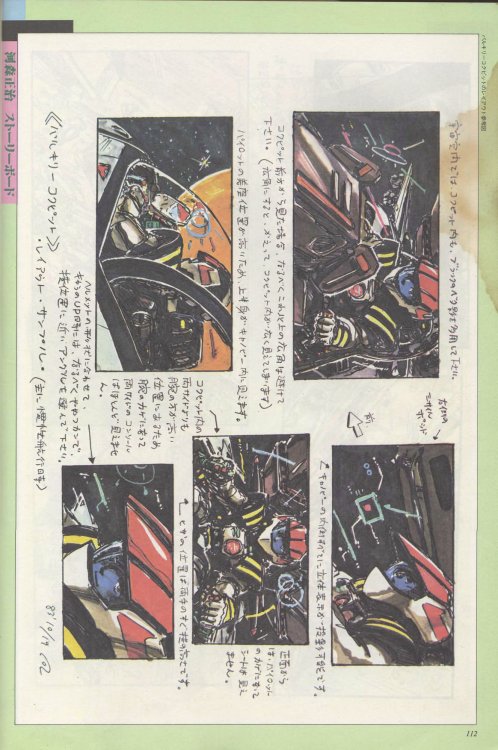
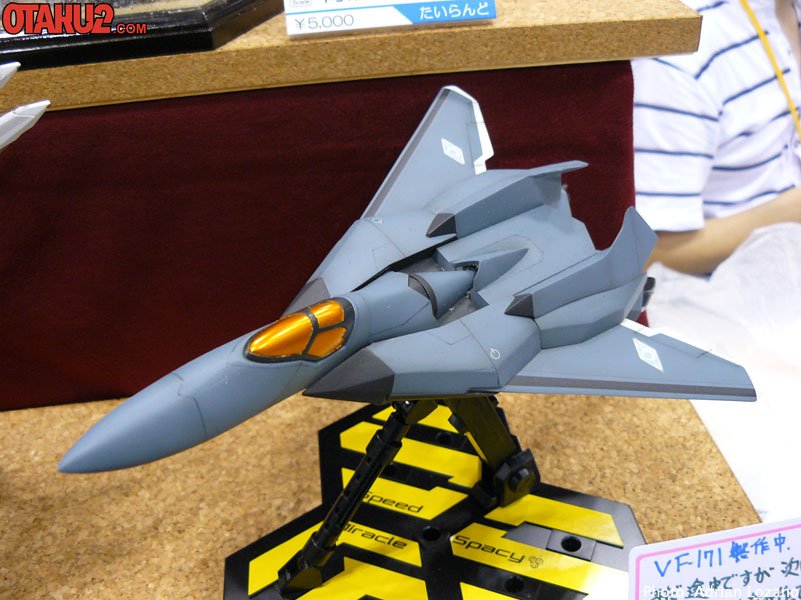
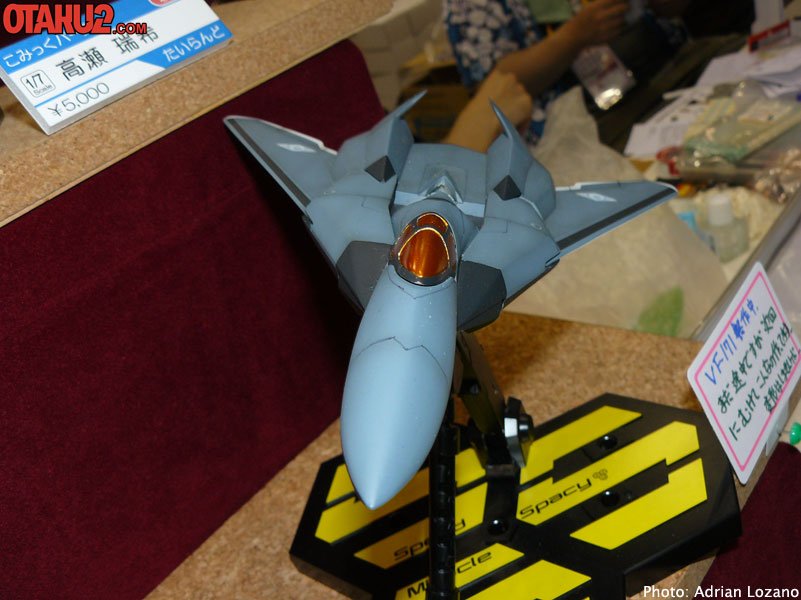
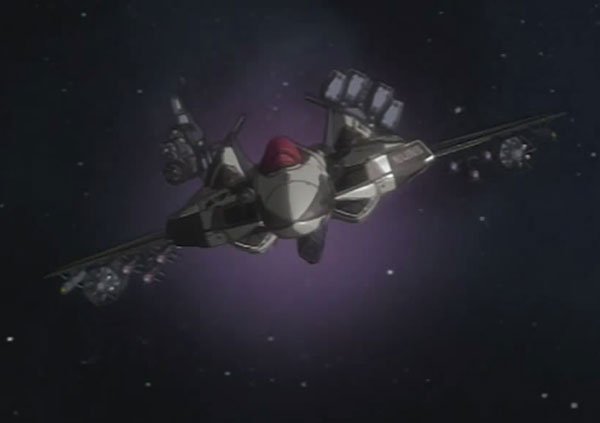
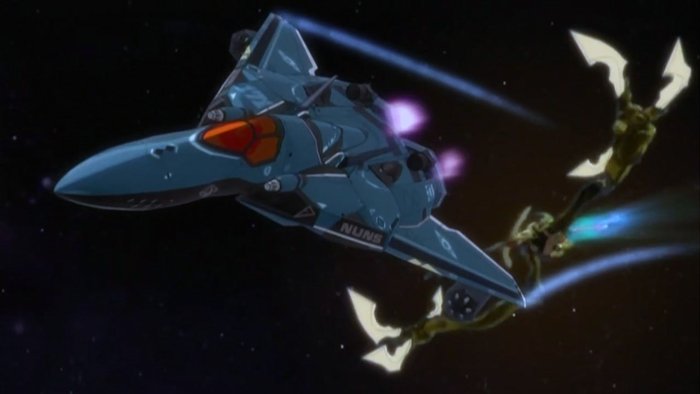
Sorry for the delay of this post I needed to get some work done on the update but was delayed because I worked longer than I thought. I apologize and will have the latest on this model and it's updates. At the moment I'm working on the finish which I've made at least three derivatives of Mech Tech's acrylic solution. The first was made of 3 parts terracotta clay 2 parts talcum powder and I part acrylic. I use this to give a general shape over recently sanded and shaped styrafoam. Depending on the amount for making the surface smoothe you need to keep it in a container and kep it from being exposed to air. the second solution is one made of more acrylic which I use to give the sculpt definition it is made using all the same mixture above except once dry I add a watersoluble laquer on the surface and let dry for about 1hr.- 1hr. 1/2 this is what I like to call surface definer. The third and final coat of the acrylic solution is a thinned down laquer 1 part talcum powder very small and 1 part light body acrylic paint. Make sure the paint is light and not a heavy body because you need to apply it to hailine cracks then sand with a 900 grit sand paper. A soon as I'm able I will update this posting with some pictures.I blame Machida!here is a view thought of the transforming sequence of VF-171:

-
One word awsome to add another would be pointless because this is off-the wall-good man. How did you get the wheathering to look so good? Graphite rubbing thinned paint, airbrush? Because that is professional looking man.fantastic work amigo!!! nice weathering effect... -
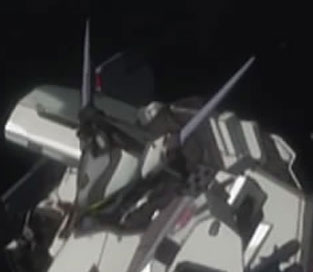
This is only a minor update which will show some reference of the model I'm working on. Right now working on a bottom schematic image for the VF-171EX. Also looking for images presently which show where the landing gear is. I have a few hanger screenshots and will be posted soon. here are a few VF-171images gathered around I'm planning to use them in refining the shape of the canopy and nose cone of the VF-171 EX. the VF-25 images have the same canopy except for the rear panel is a bit smaller otherwise it's identical to the VF-171 EX. I also included some screenshots from http://www.macrossroleplay.org/Sketchley/S...171/VF171EX.htm and various screenshots collected or taken from my collection of Macross Frontier episodes. The VF-171 model was found with a google search and seems to be a scratch build as well.i hope that u wud do this in 1/72 scale and mass produce this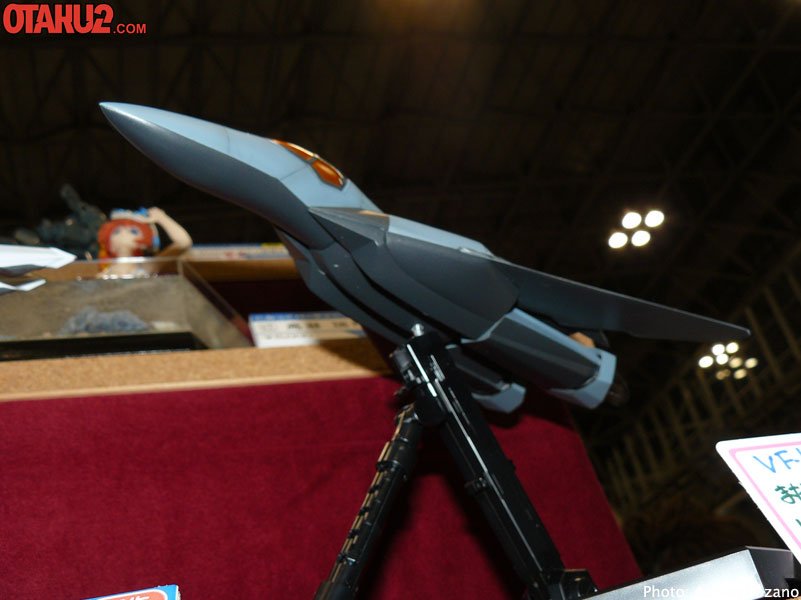


-
thanks dude. I was wondering if the size was too much but I guess it isn't. thanks for the input.Nice start Is it going to be in any particular scale? For a scratchbuild, I'd almost say go for 1/48, just to give yourself room for the internals. You could reduce it down later, but starting larger will give you a lot more room to work with when you start experimenting with the transformation mechanism.
 -
Yes eventually it will the structure at this point is just for shape so I can either make a resin cast of this particular model. I plan to cast this twice once for so I can detail and work out the mechanics and the second to refine the internal structure so it can house possibly electronic lighting. Also I hope to try out a electronic auto transformation system on this model. I know I have high hopes but I would like to try as much as I can to make this a unique build. Thakns Jasonc for the interest hope to hear from you some more.Will this be transformable? So far, just the fact that you have actually started the scratchbuild is awesome. Great work. Can't wait to see more.If you are wondering why I answered this first it was because I was going to edit my previous post sorry if only on question was answered?
-
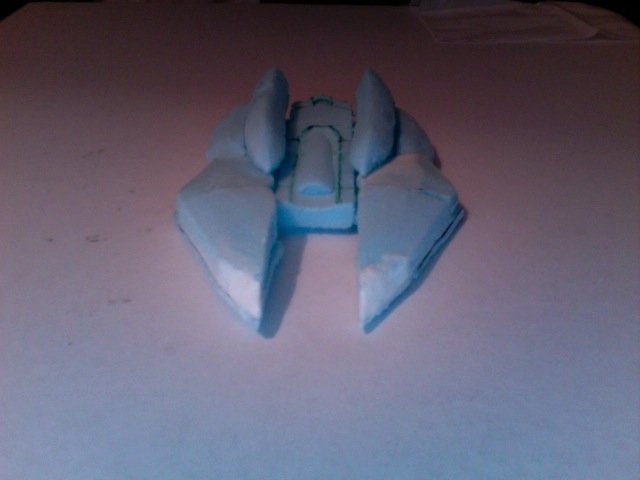
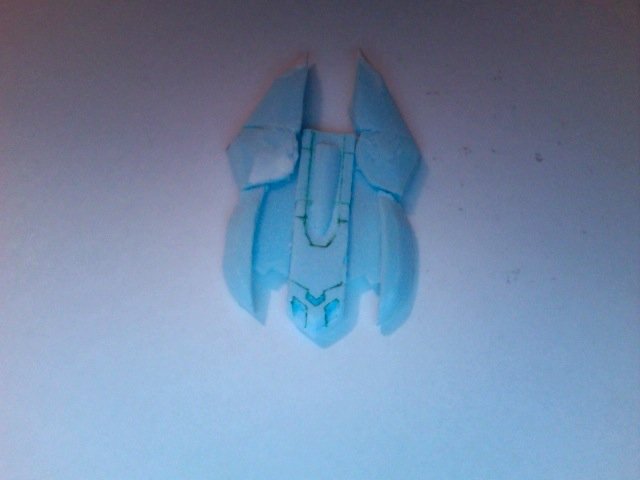
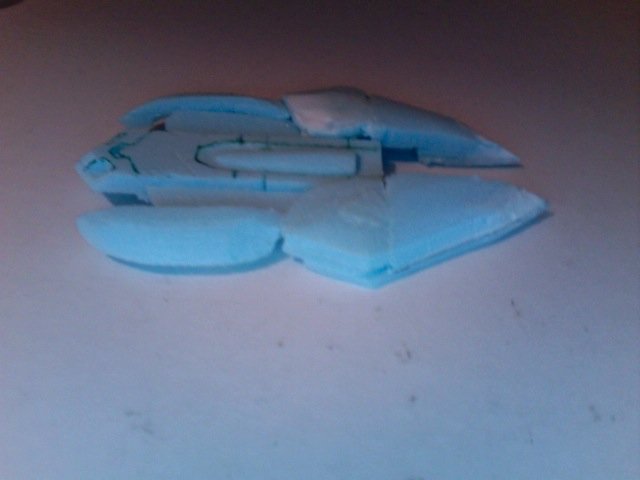
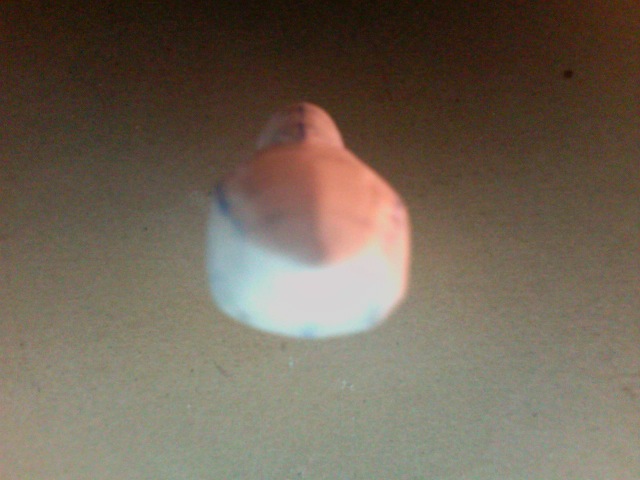
these are the latest images of my progress. They are made of blue styrene foam terracotta talcum powder and acrylic paint. A mixture which Mech_Tech made me aware of. These are still just a work in progress I just started this week and have spent 8hrs getting the shape. With so little info I've tried to fill in the gaps. As always if anyone has any Ideas I'm open for discussion. I used a fish bone structure to make shaping easier placing terracotta in between the structure after ward taking a brush pasting a thick coat over the whole body of the nose cone. I carefully sanded and the surface to give it shape. The final step was to add gray paint treated with talcum powder a little clay to add a very defined look to the surface. I feel there 's good progress so I hope to have another update by next week.If you've got the ability to build a prototype in some sort of computer CAD or graphics program, I'd definitely recommend it. It's not impossible to do without it, but a computer model (depending on how it's built) will let you play with the transformation and mechanism to make sure everything fits together before you ever start building the parts.


Scratch Building/Model Modification Archive Thread
in The Workshop!
Posted · Edited by leading edge
If the joint i strong you could is carefully measure the part and use a trick I used to do on older kits like the old macross Arii batroid models, 1st you take a piece on plastic from the kit or fine shavings, possibly some cellophane and fill the small excess space with non abrasive material. First you measure how much is missing If the joint is just unable to hold the weight consider joint reconstruction or save yourself some time and simply fill the joint with some fine non abrasive material that will create pressure in the joint. I stay away from chemical fillers instead try freezer cellophane the kind used to wrap food up( remember use no glue if possible). or simple get a tight smooth fit without the hassle of butchering the kit. As a rule if it's tight is damaging the joint if it is finger tight( able to move with only a little push)then you aren't damaging the joint.