20max20
-
Posts
43 -
Joined
-
Last visited
Content Type
Profiles
Forums
Events
Gallery
Everything posted by 20max20
-
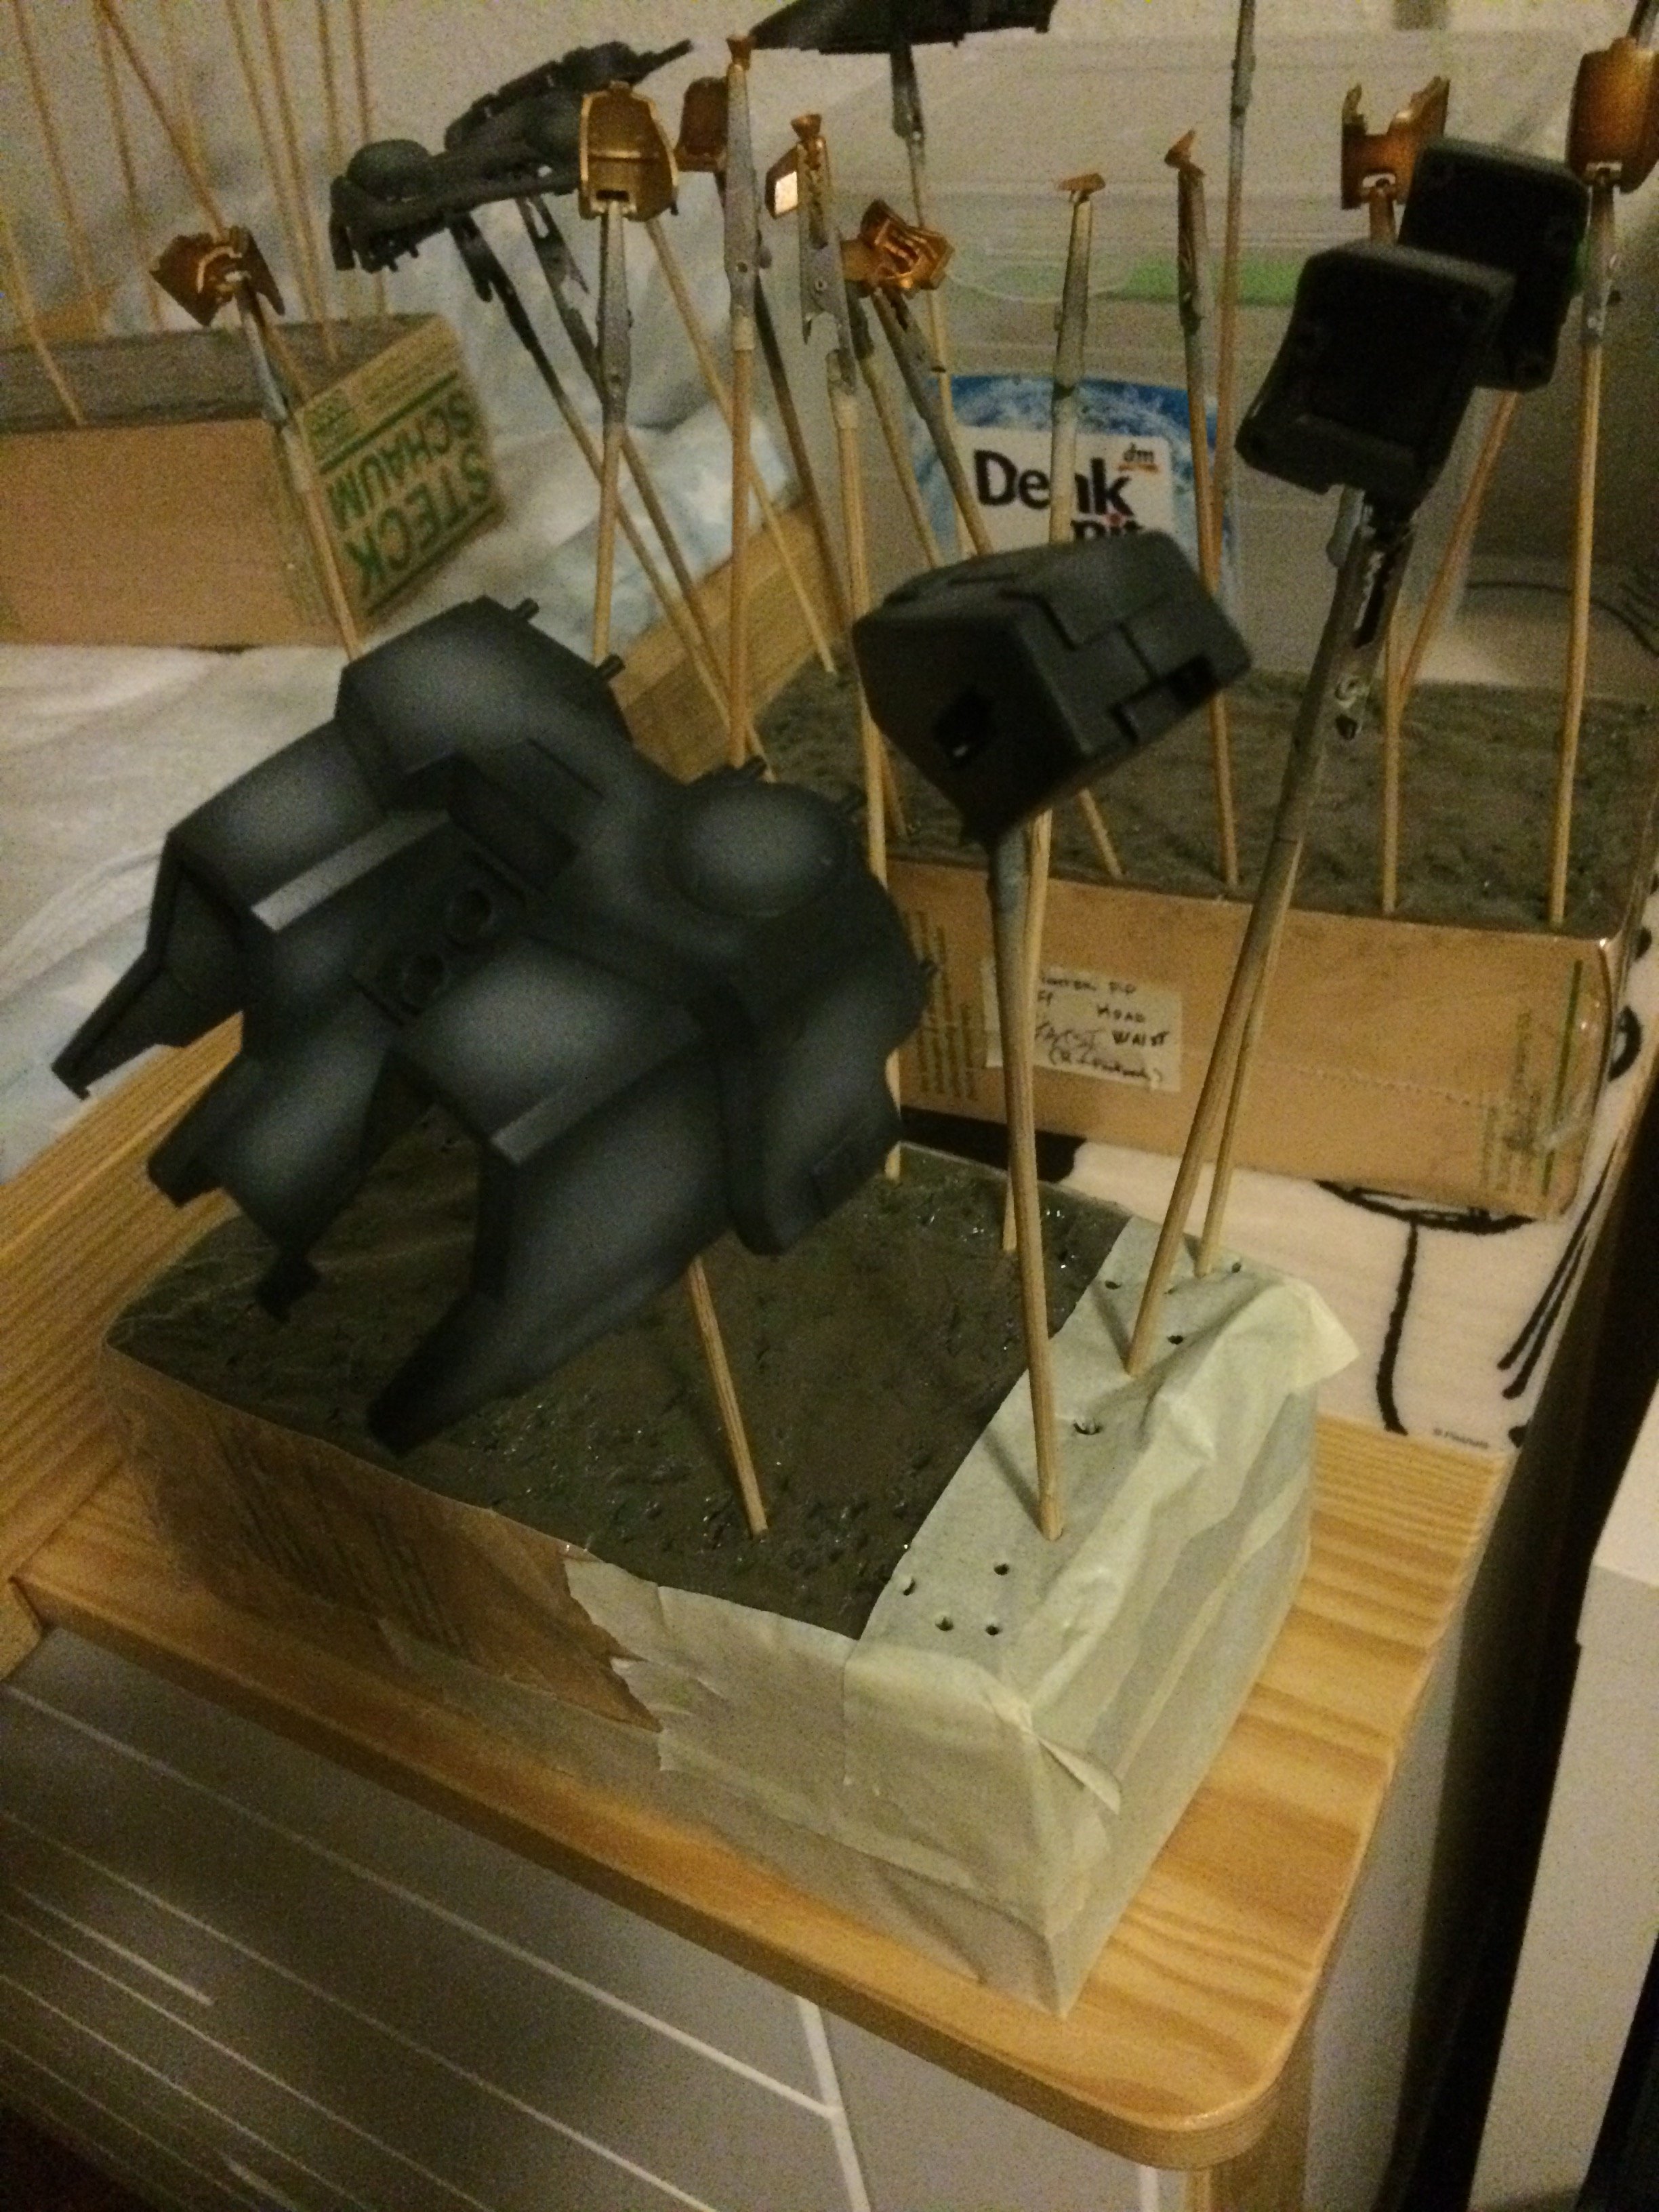
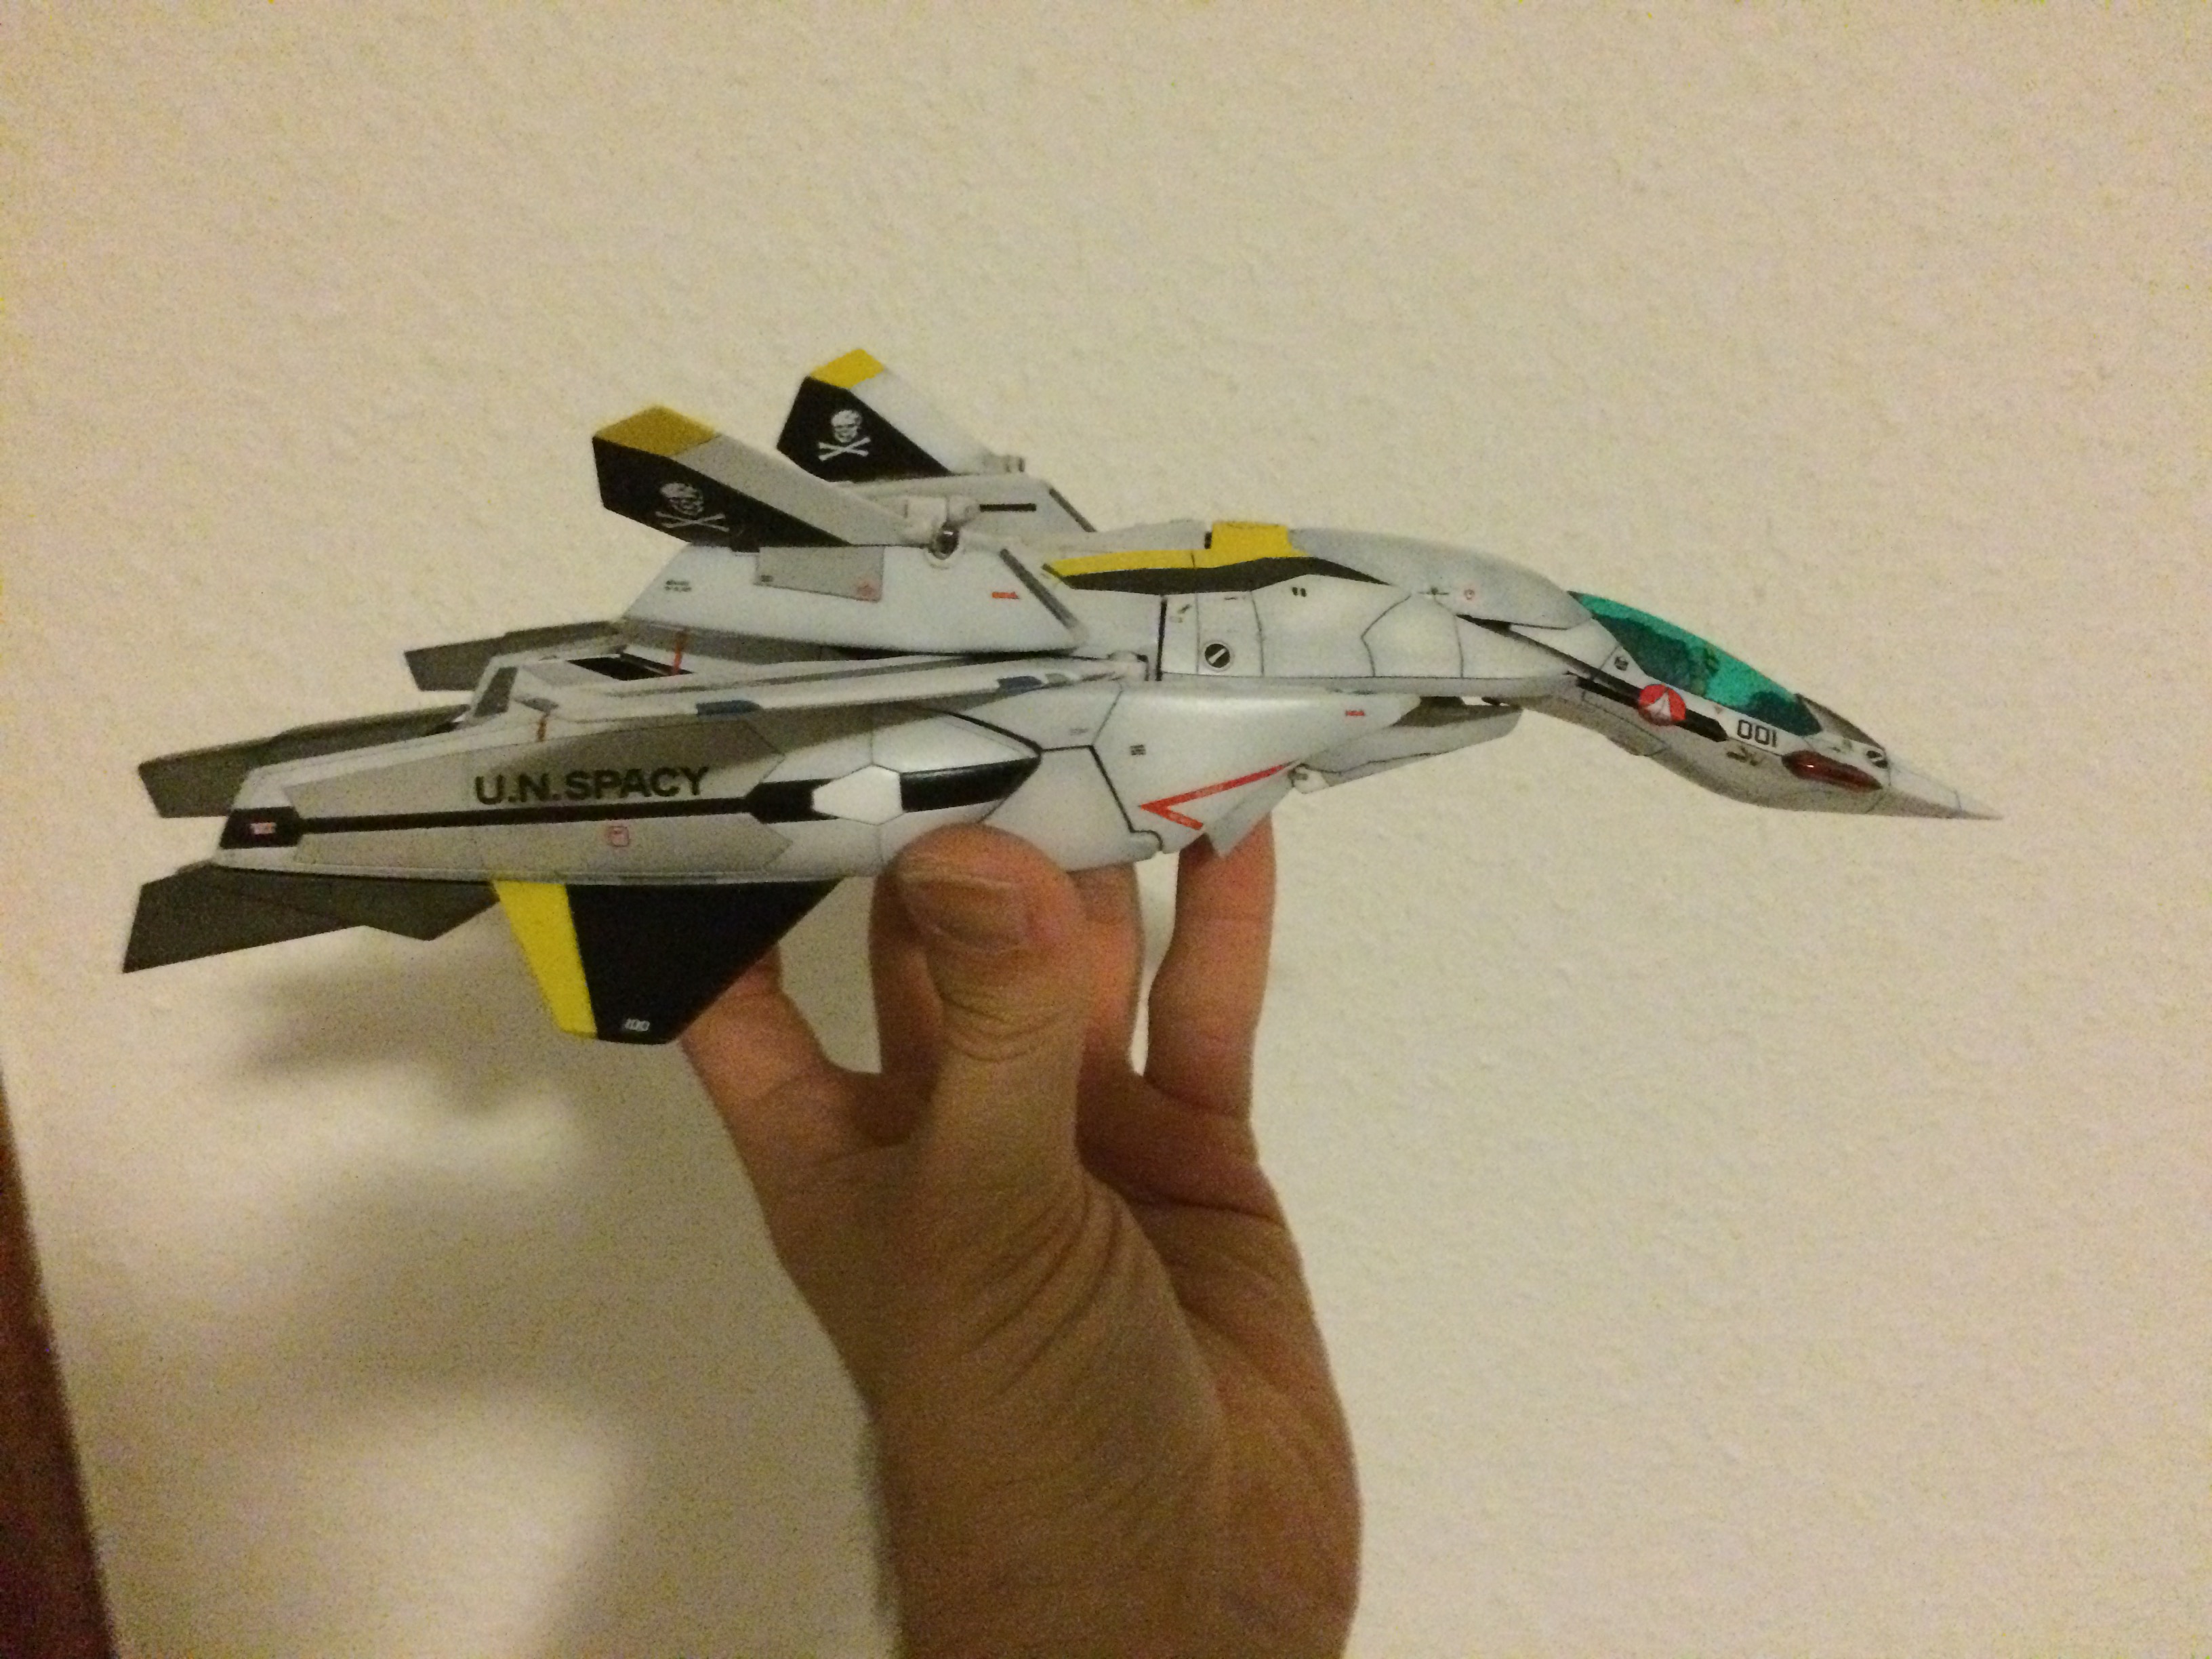
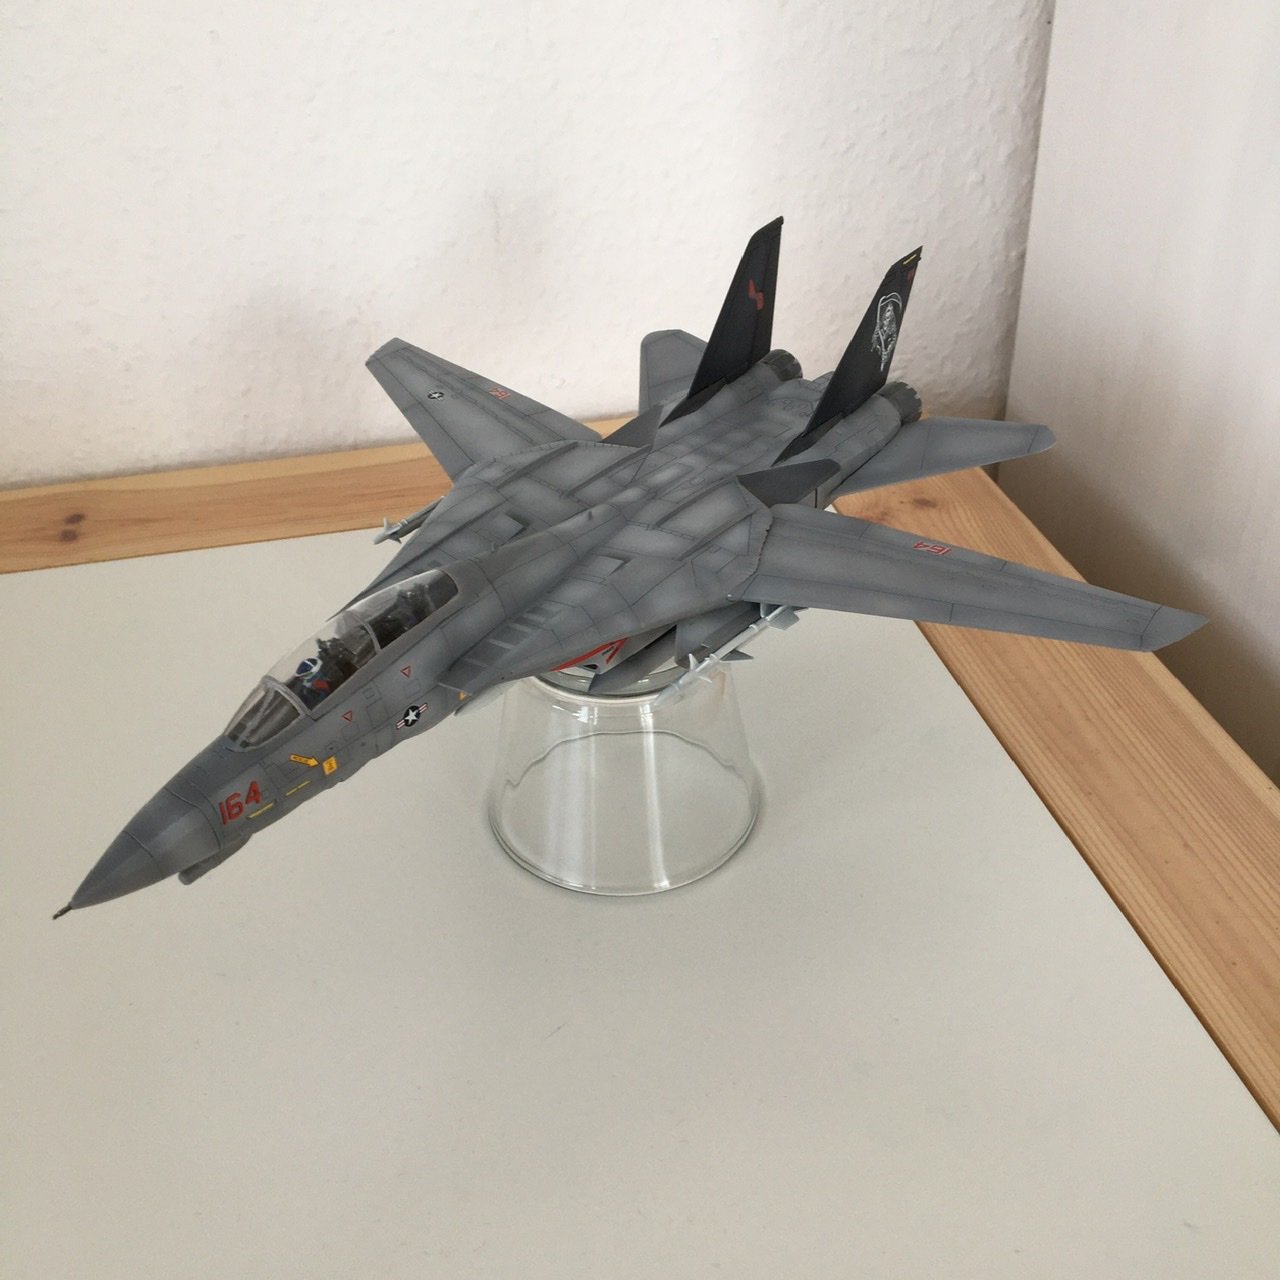
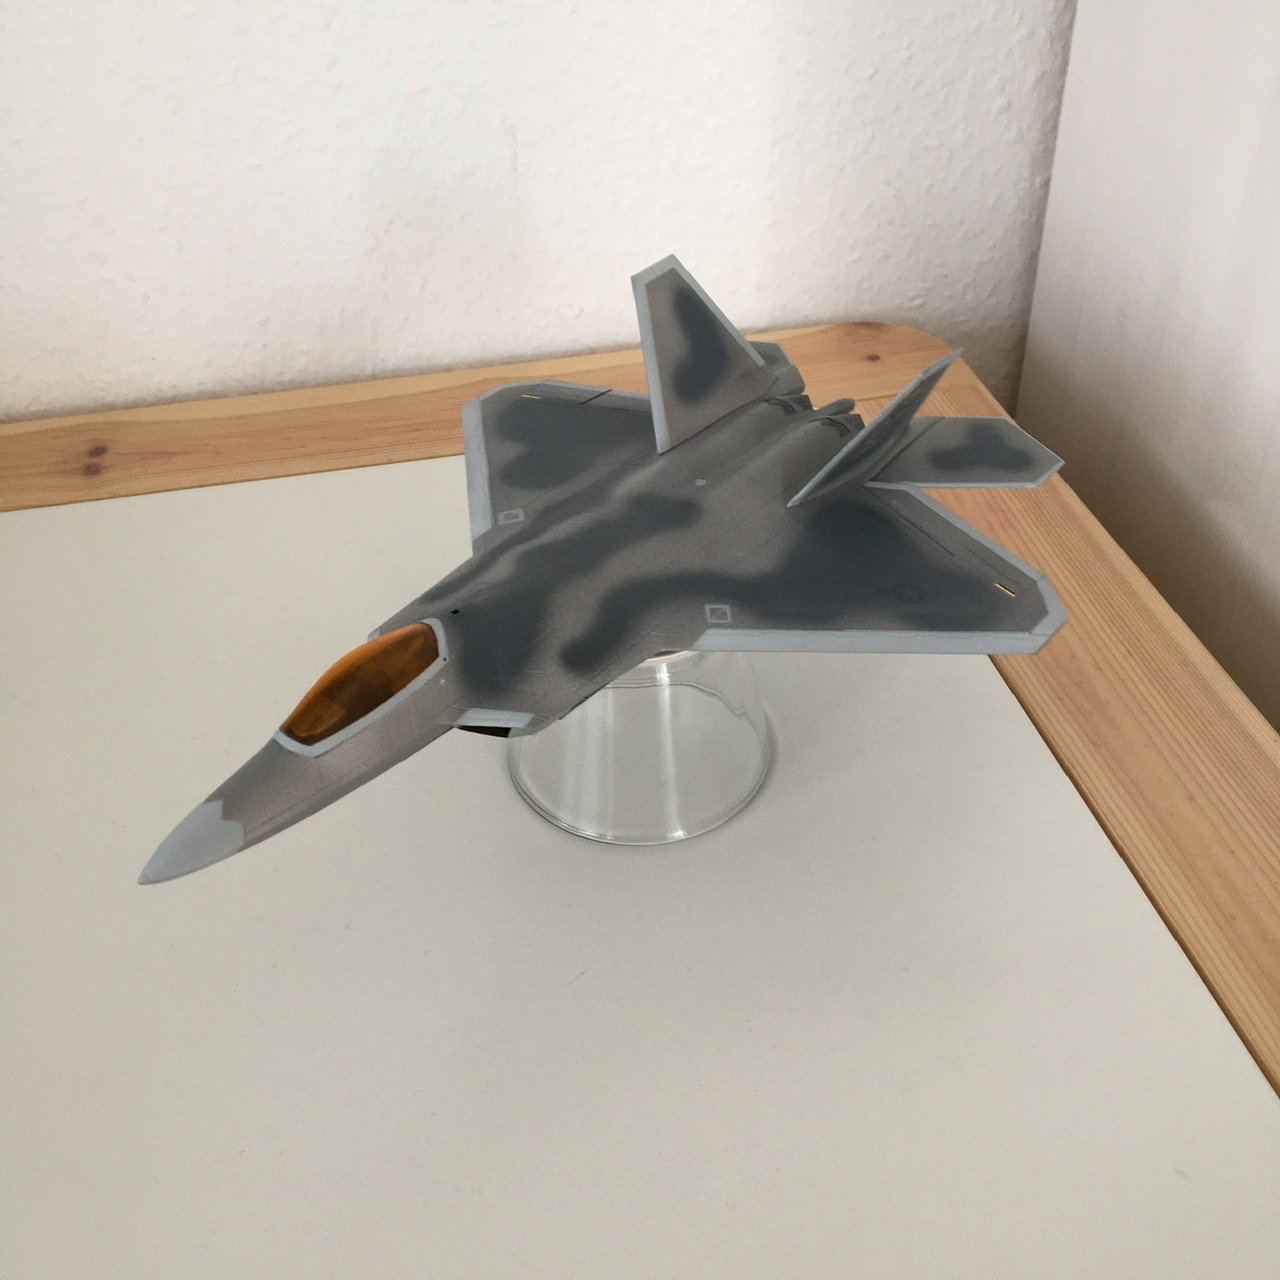
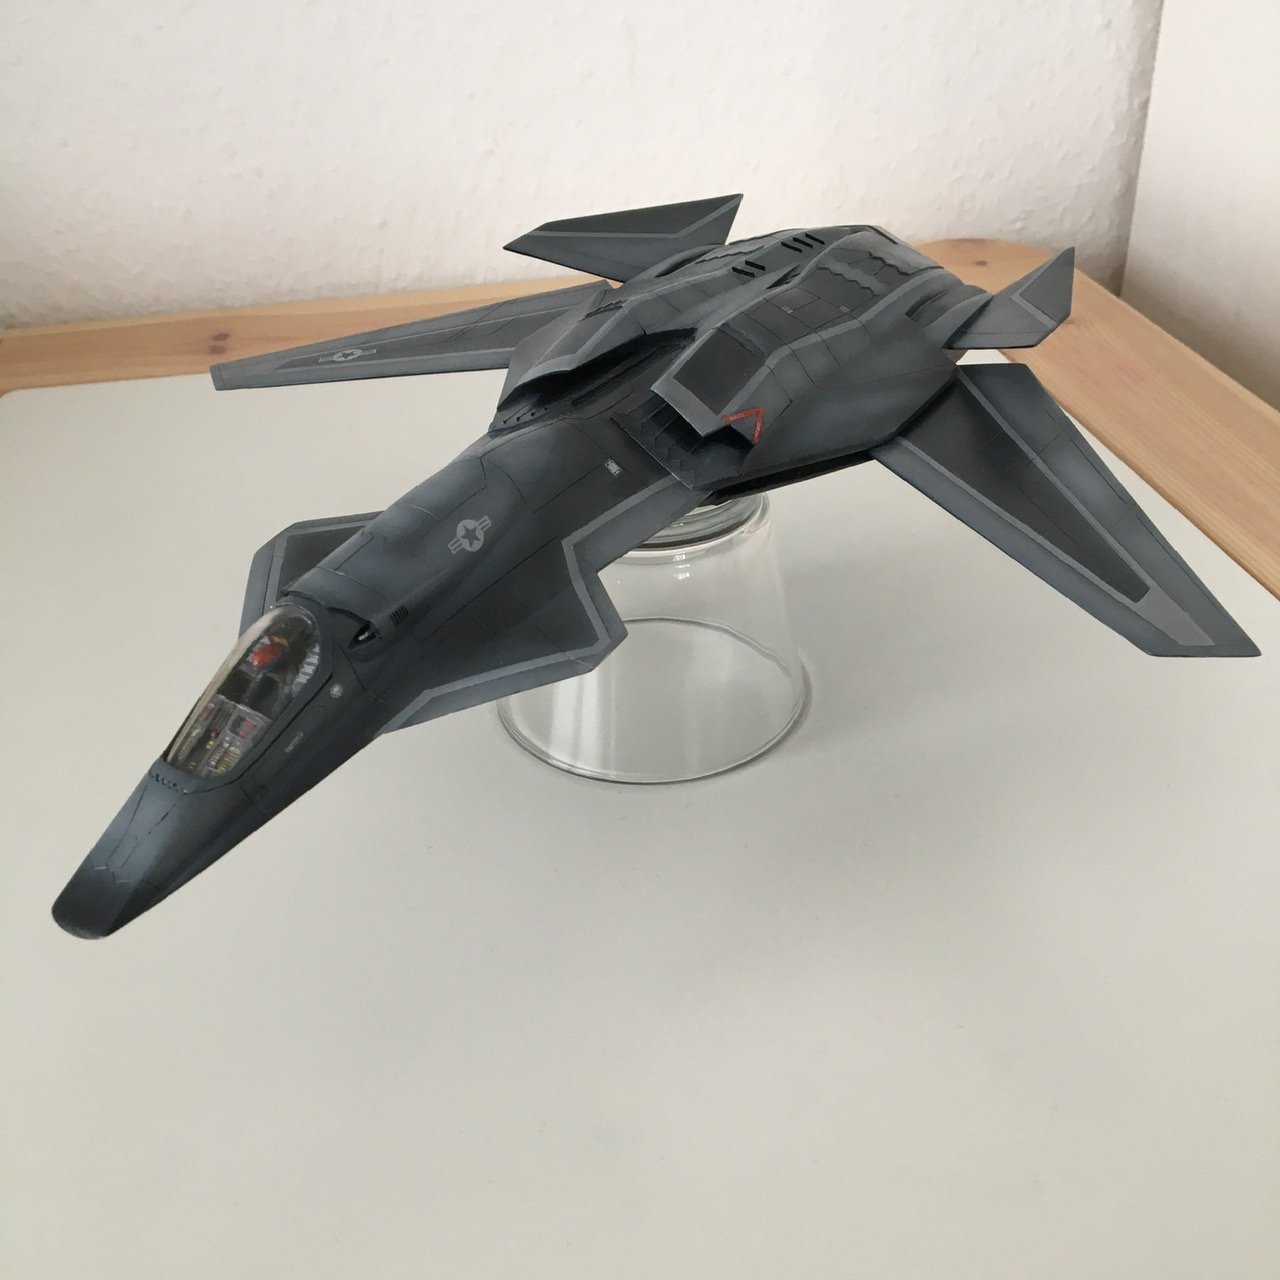
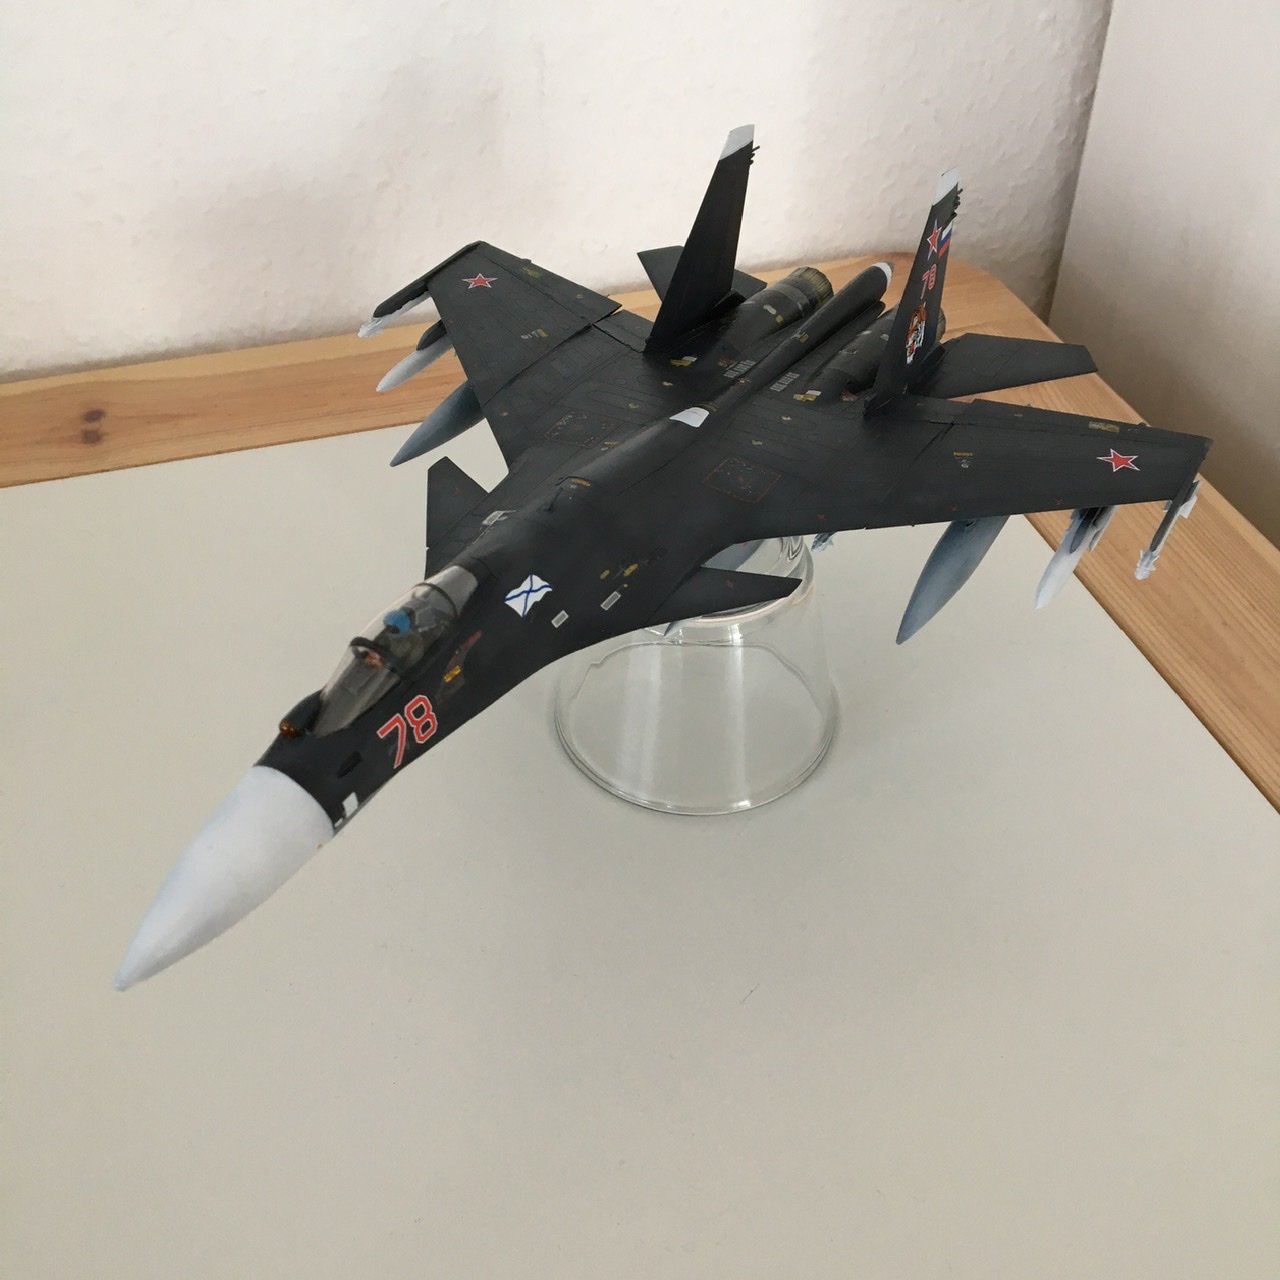
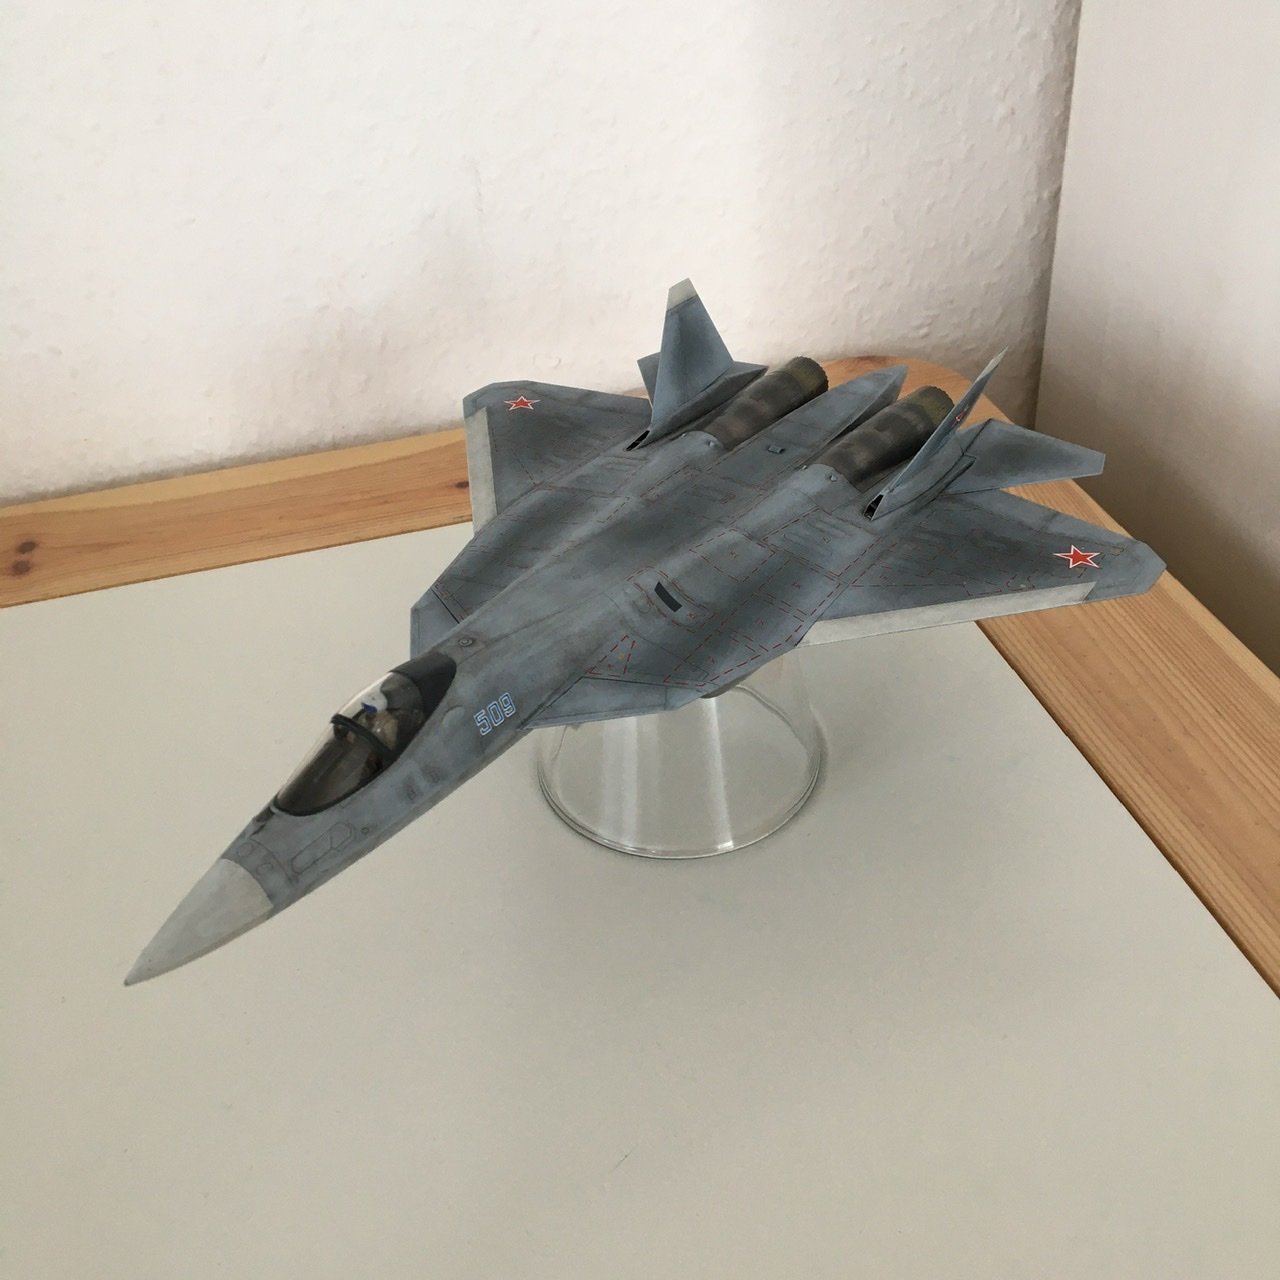
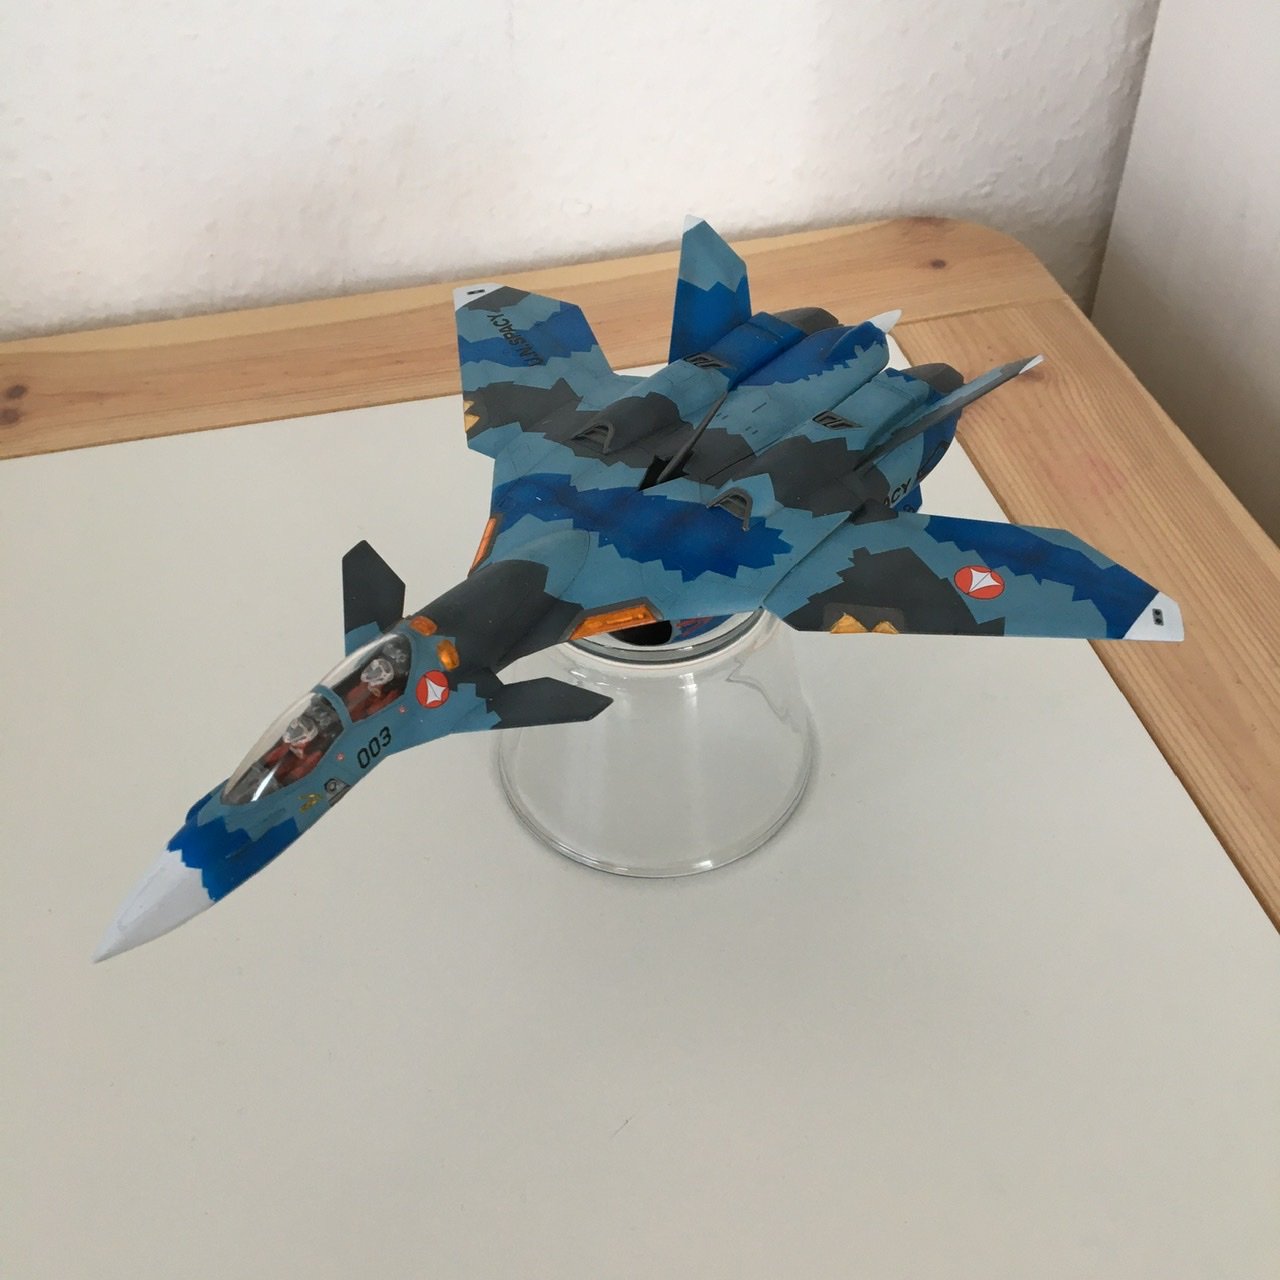
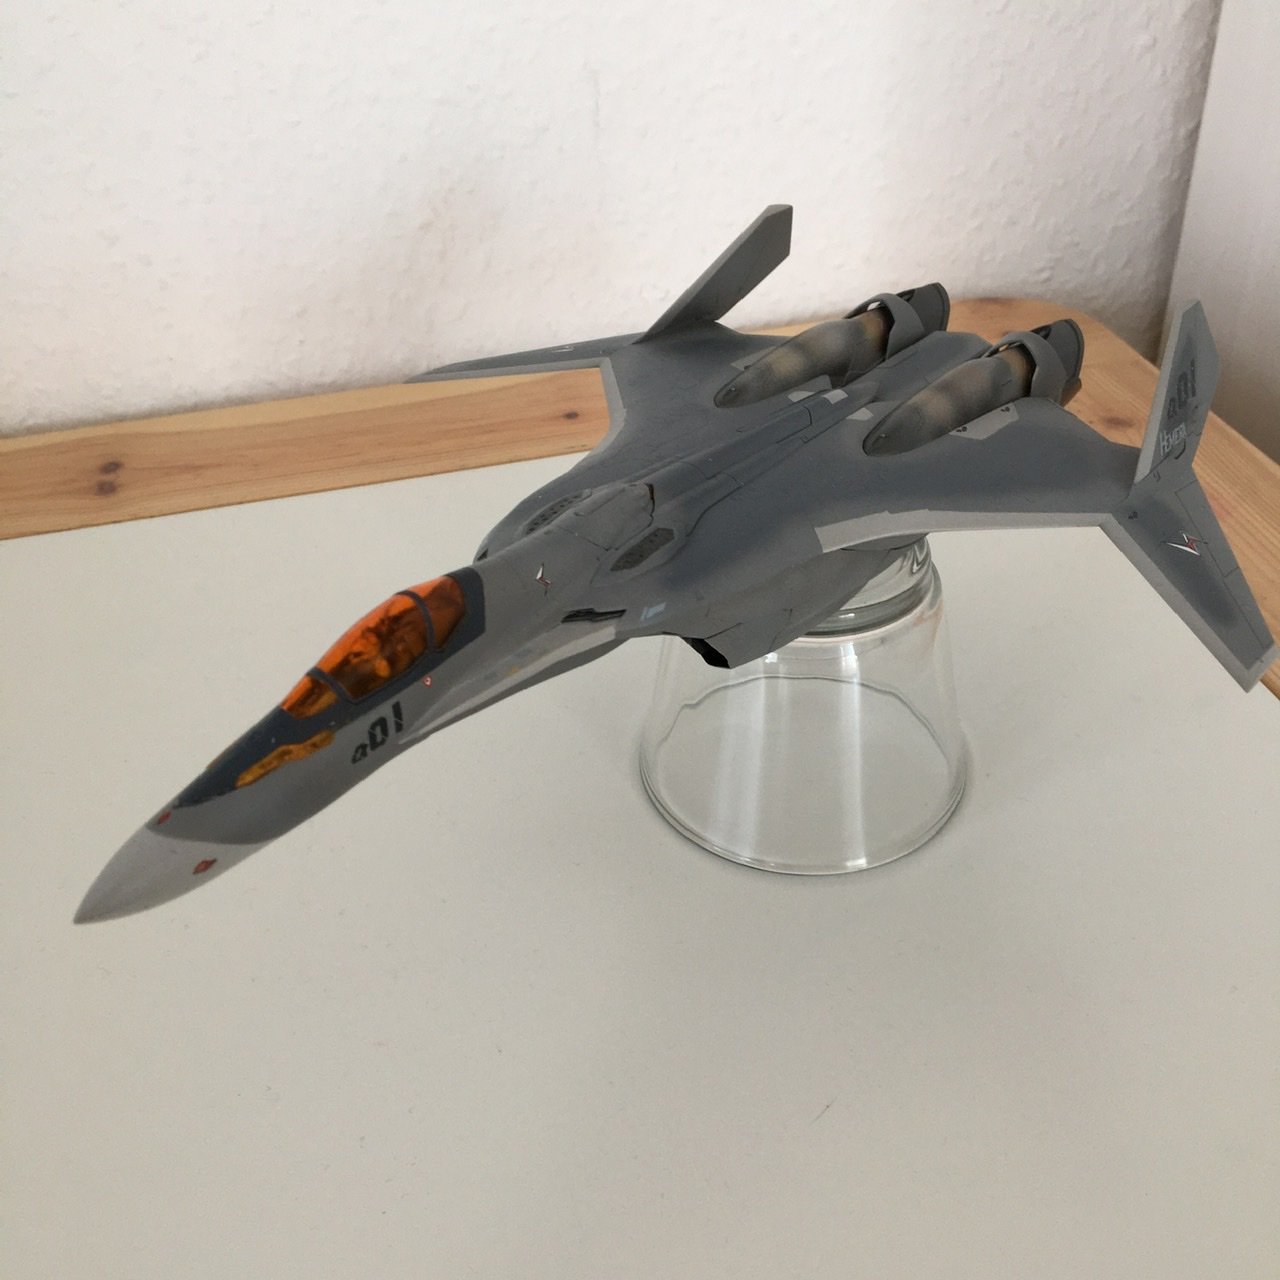
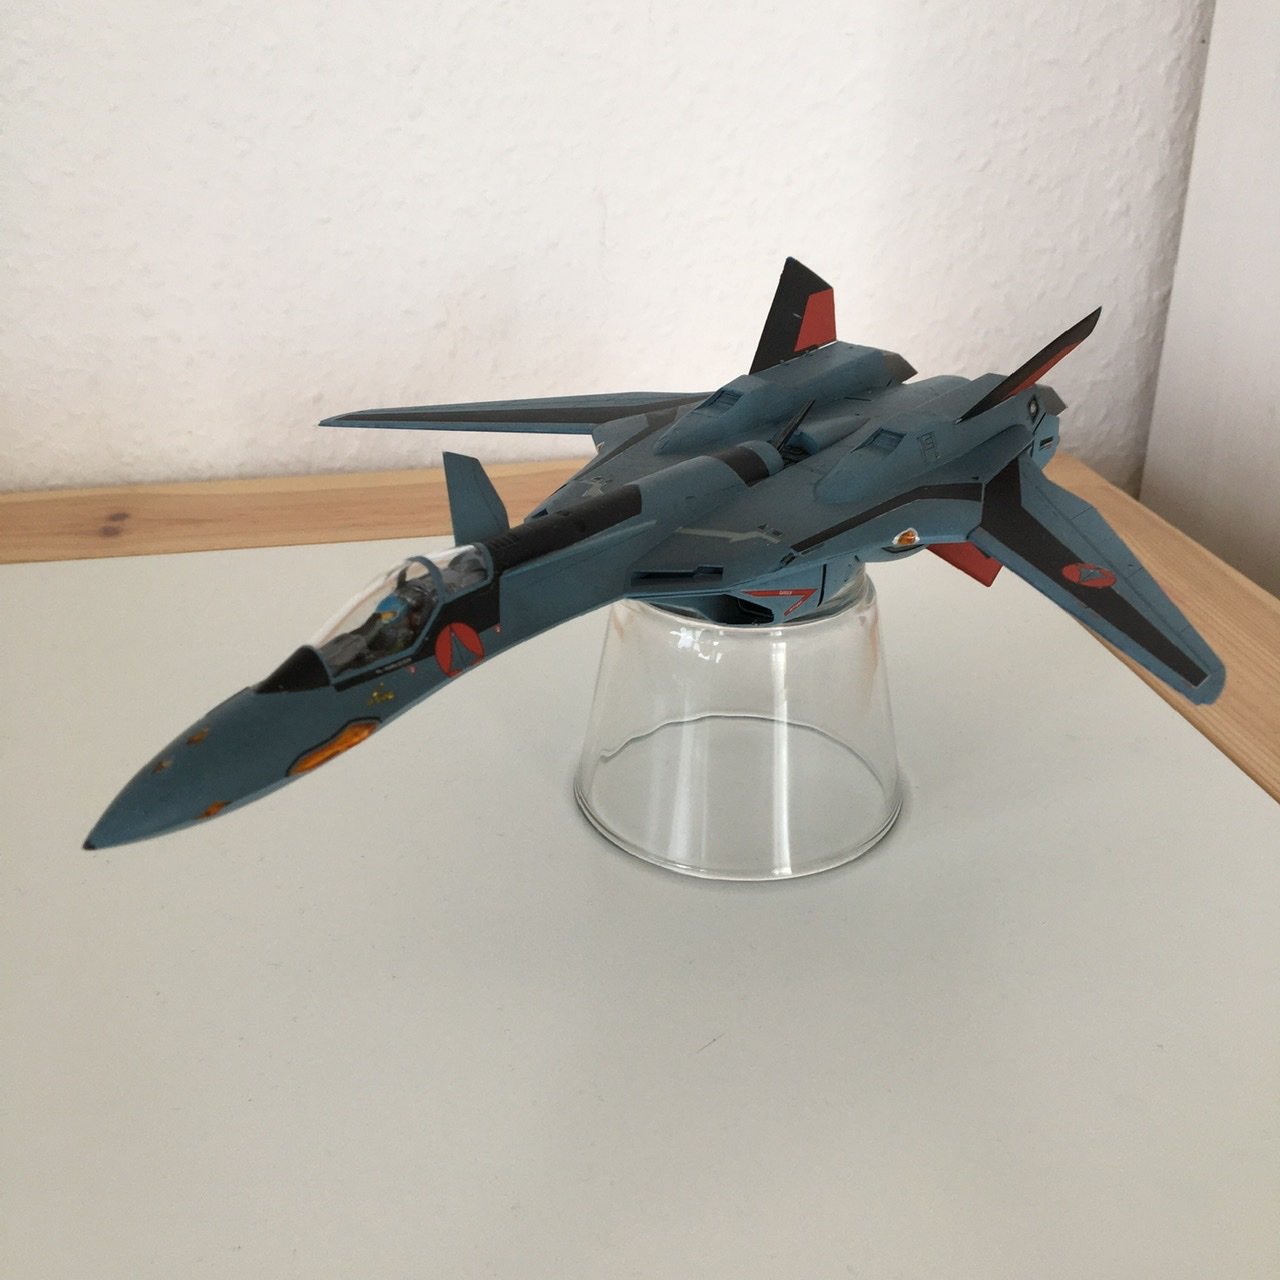
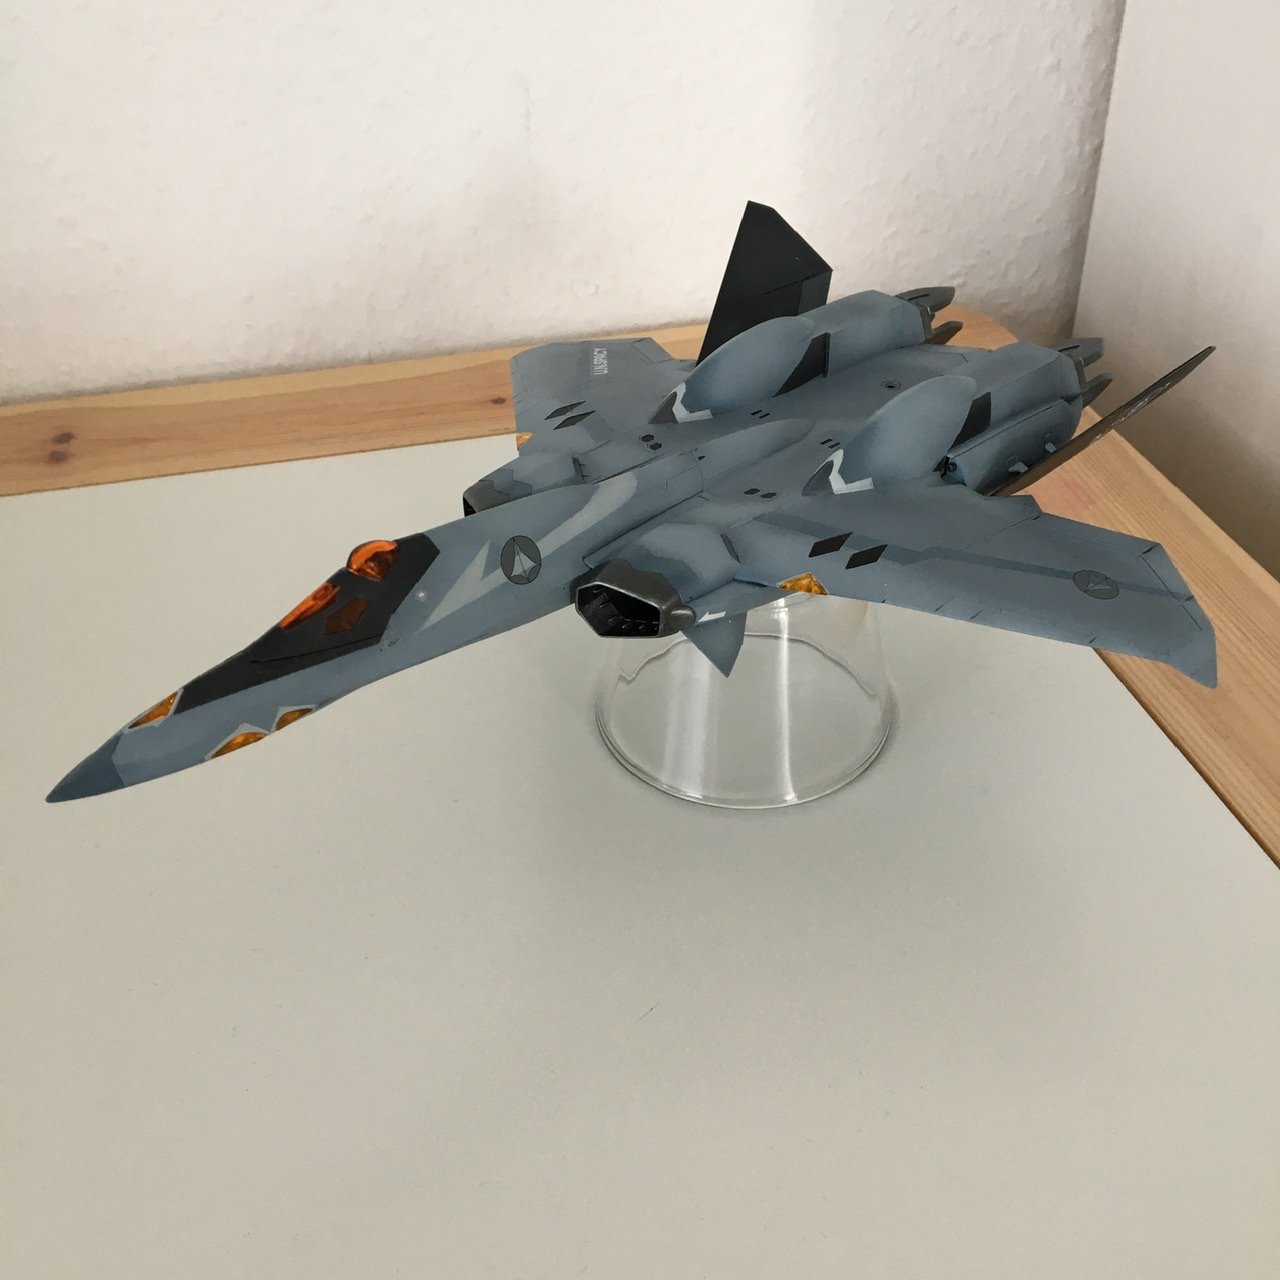
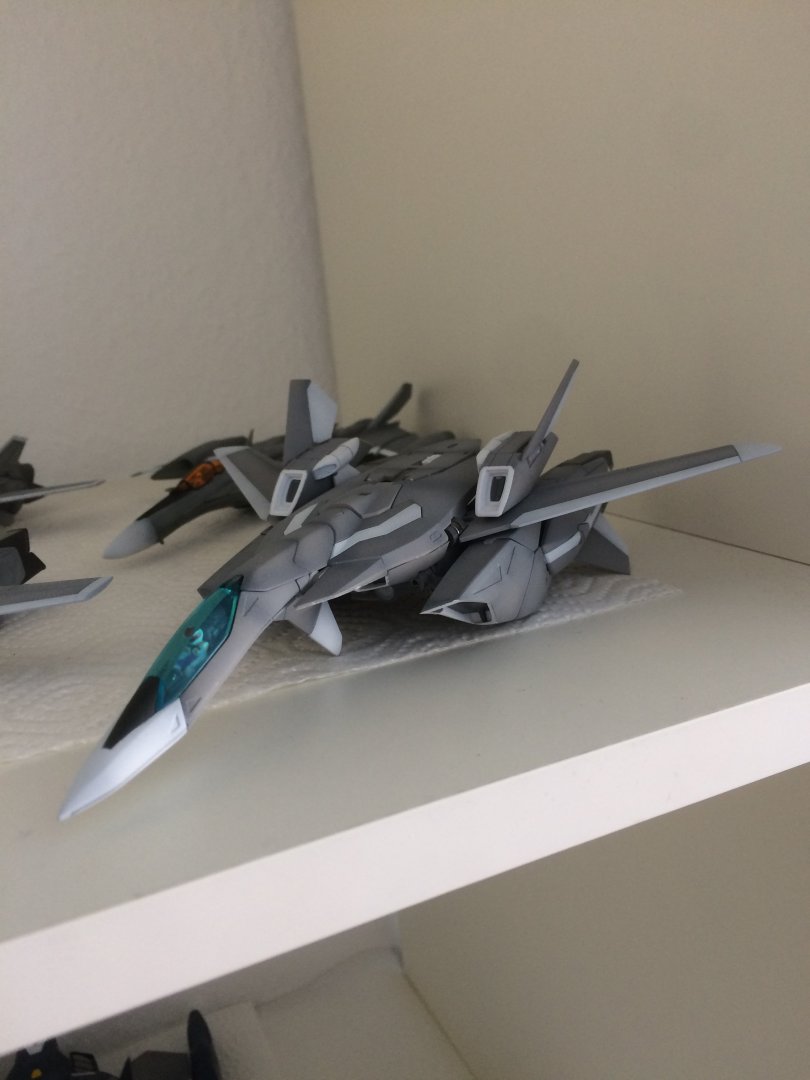
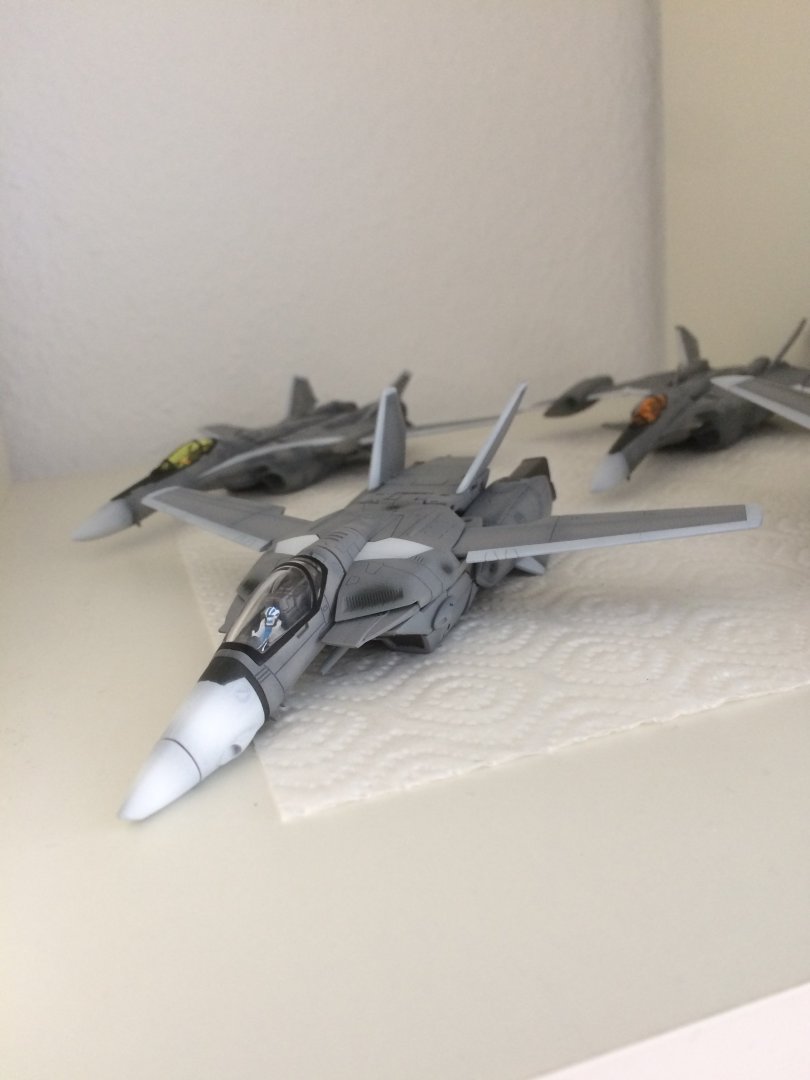
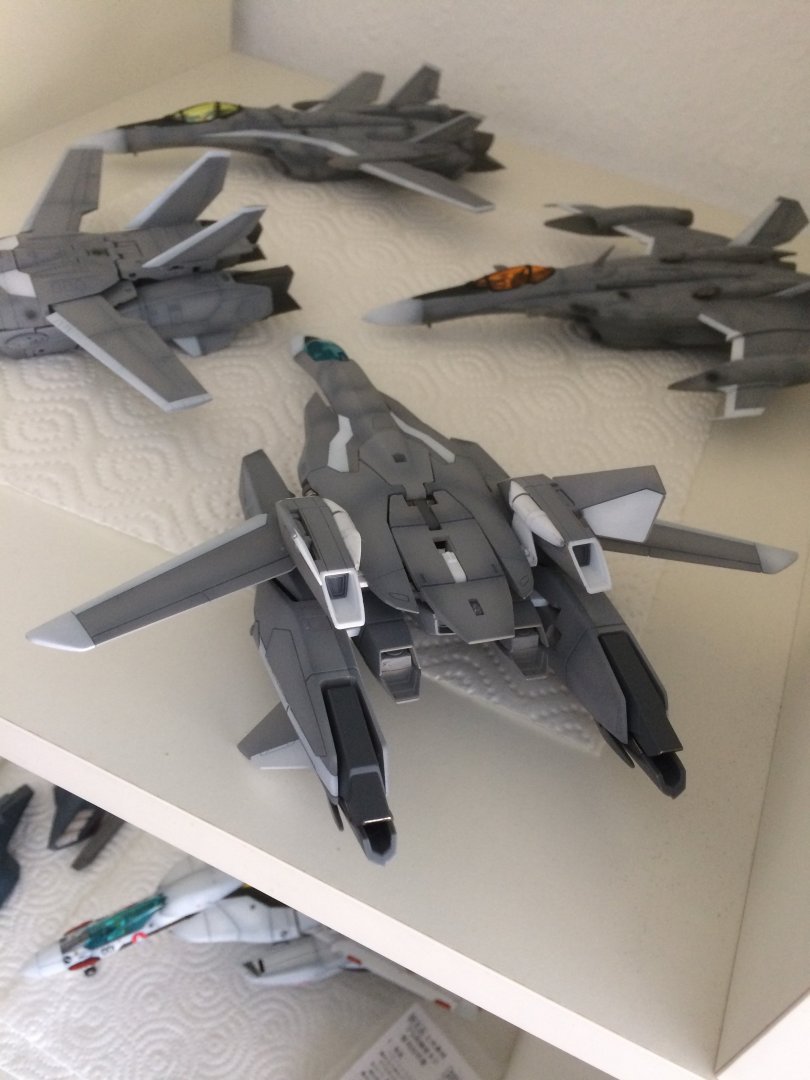
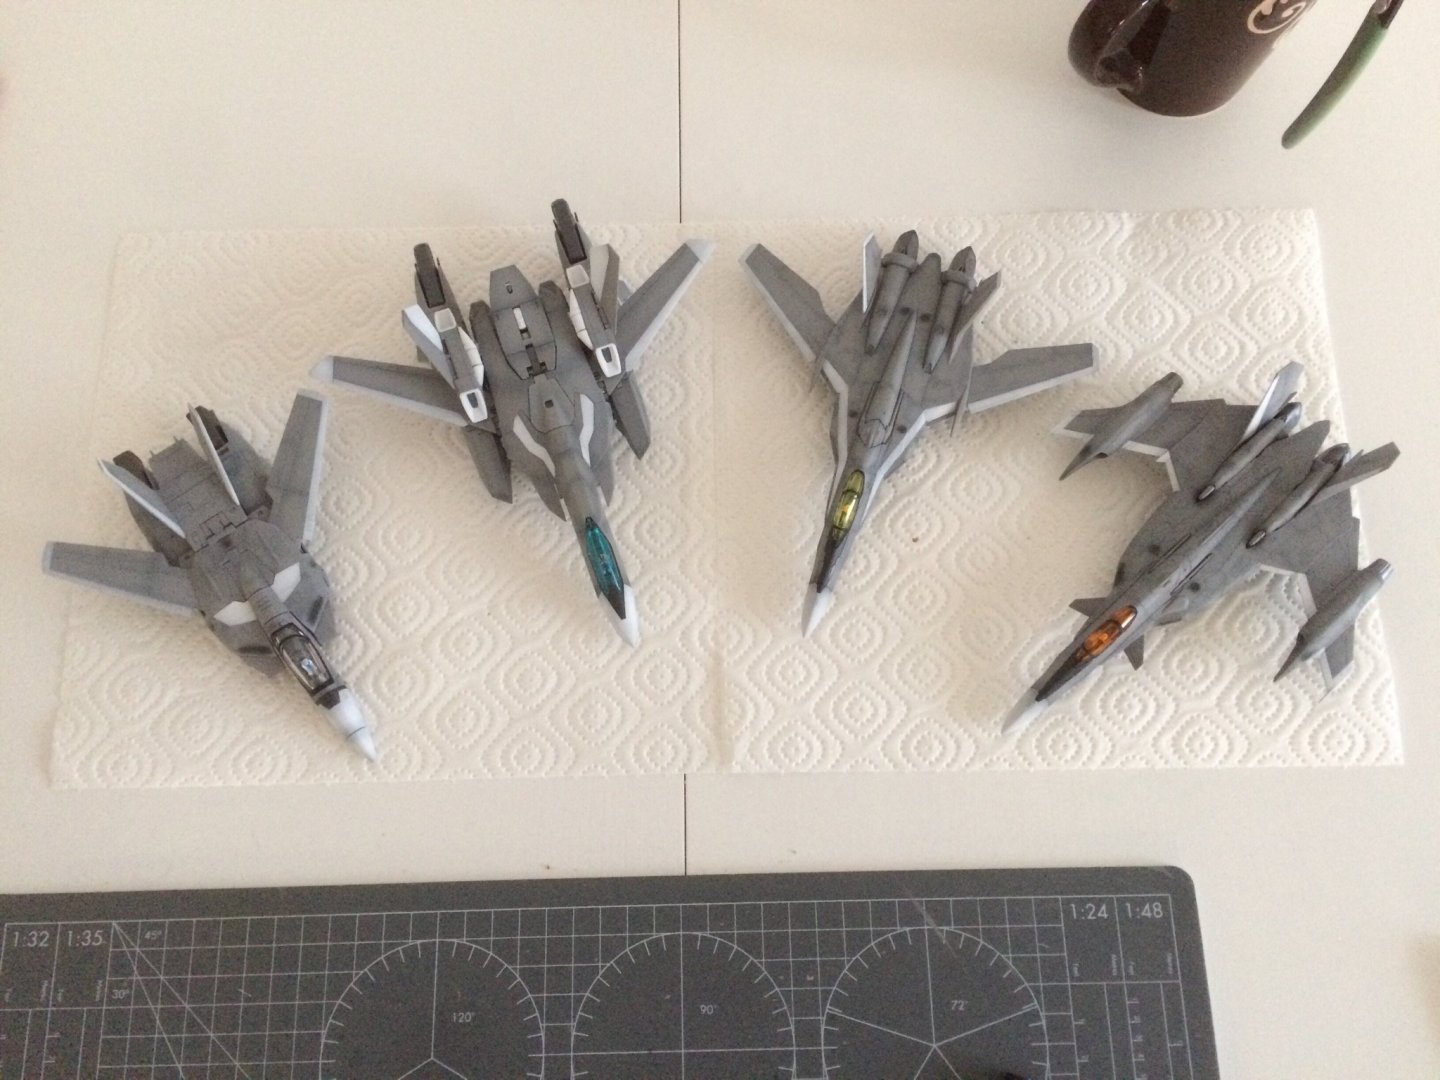
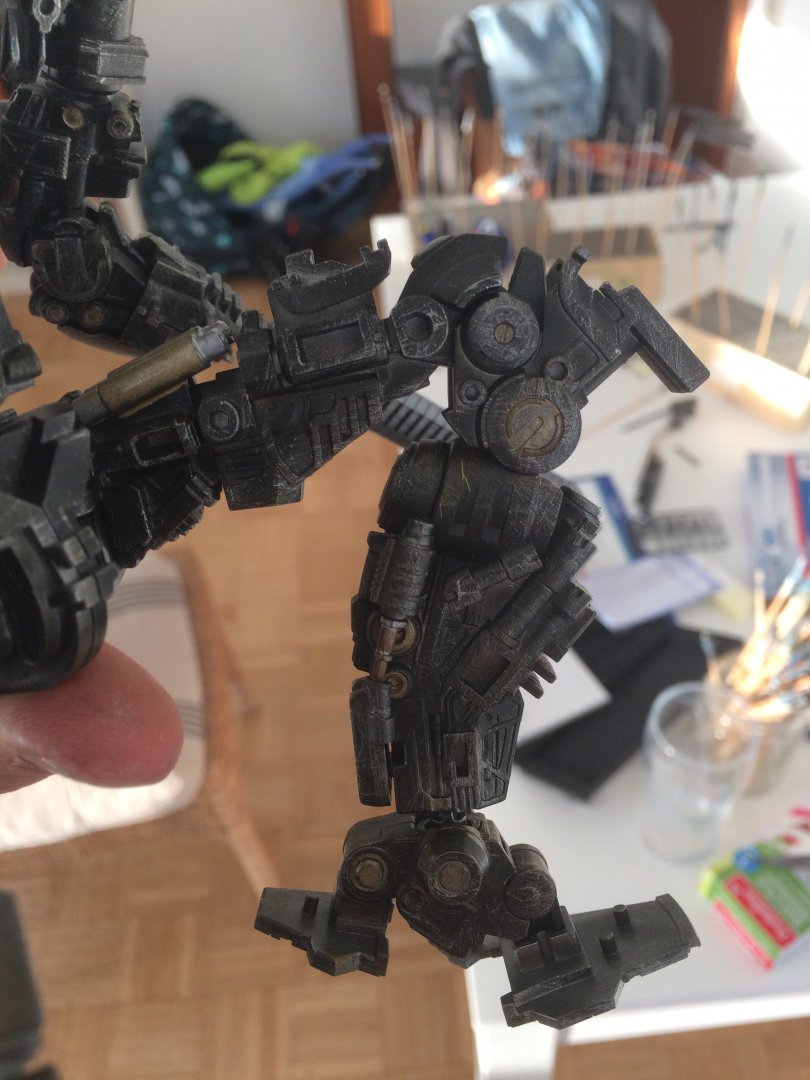
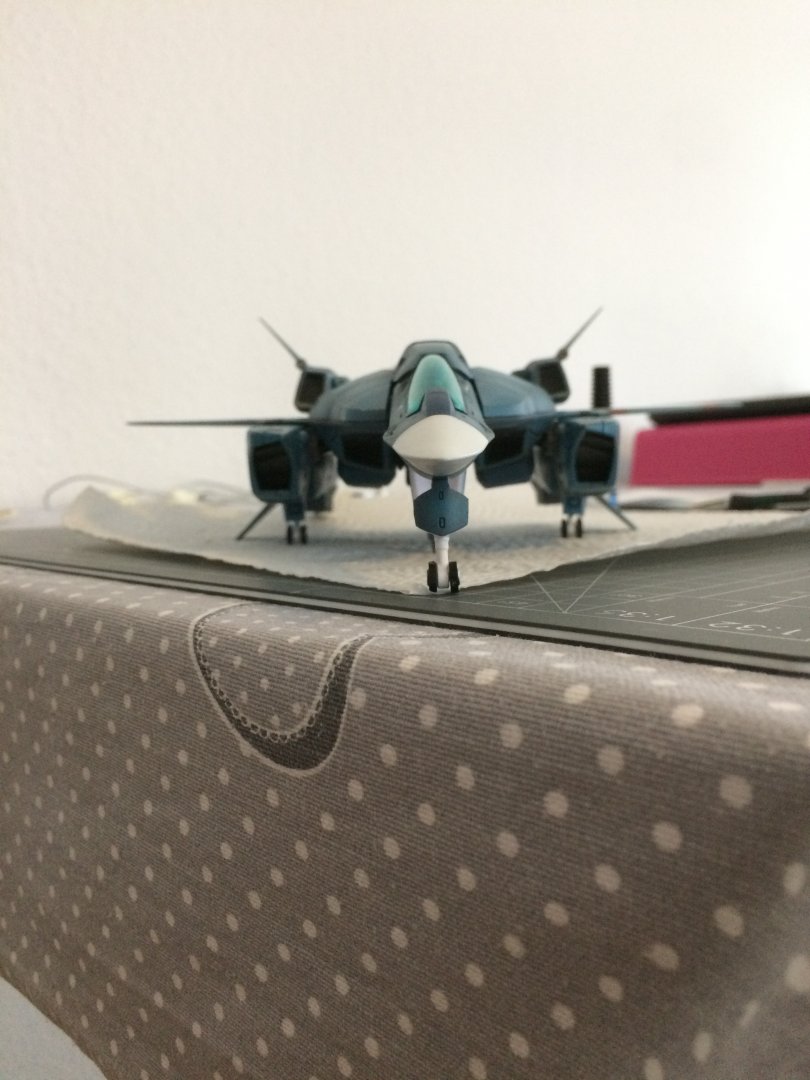
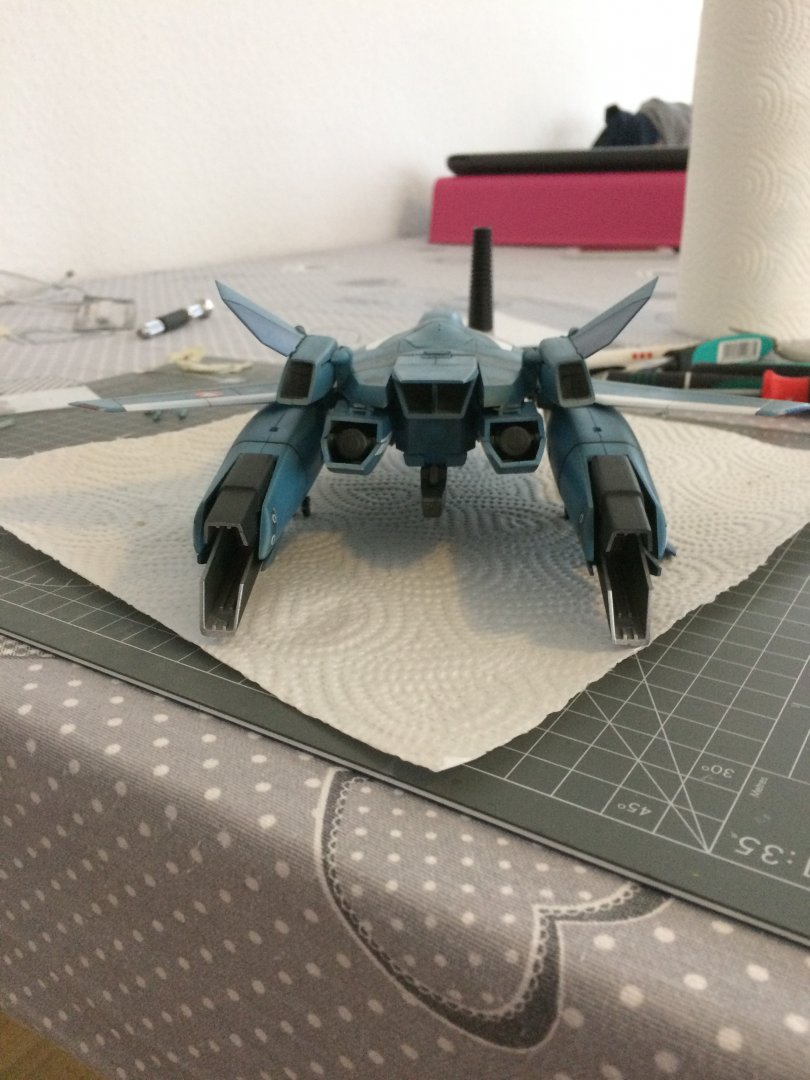
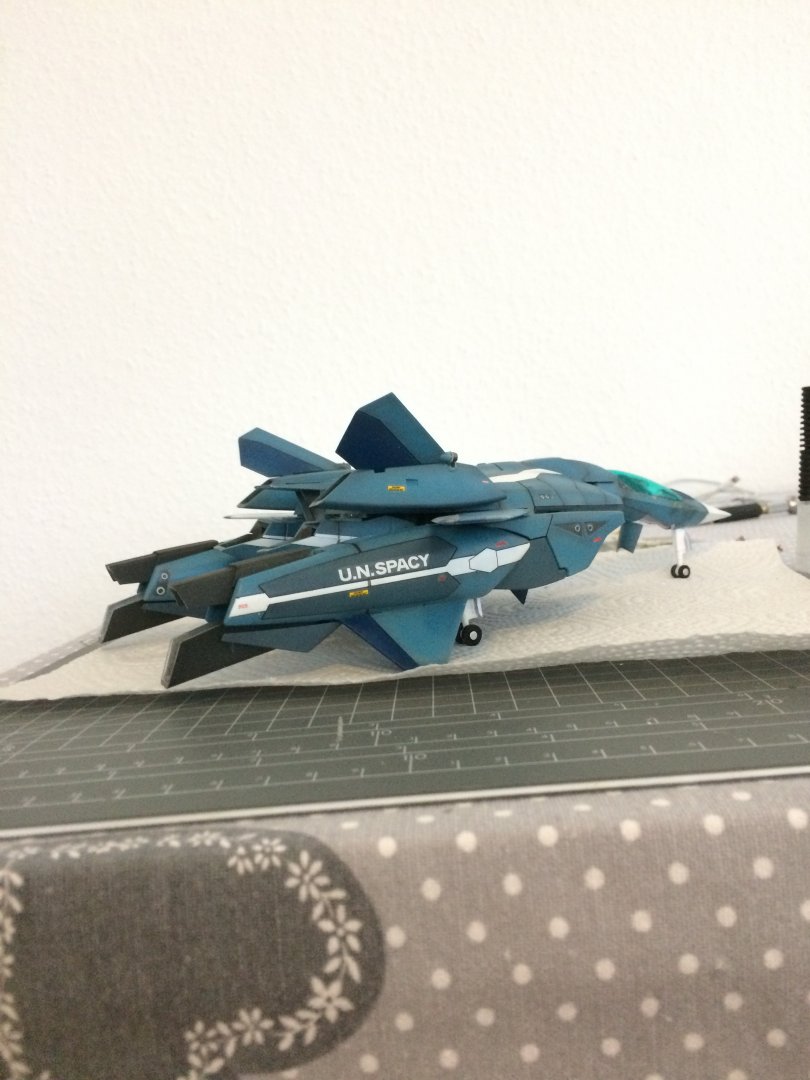
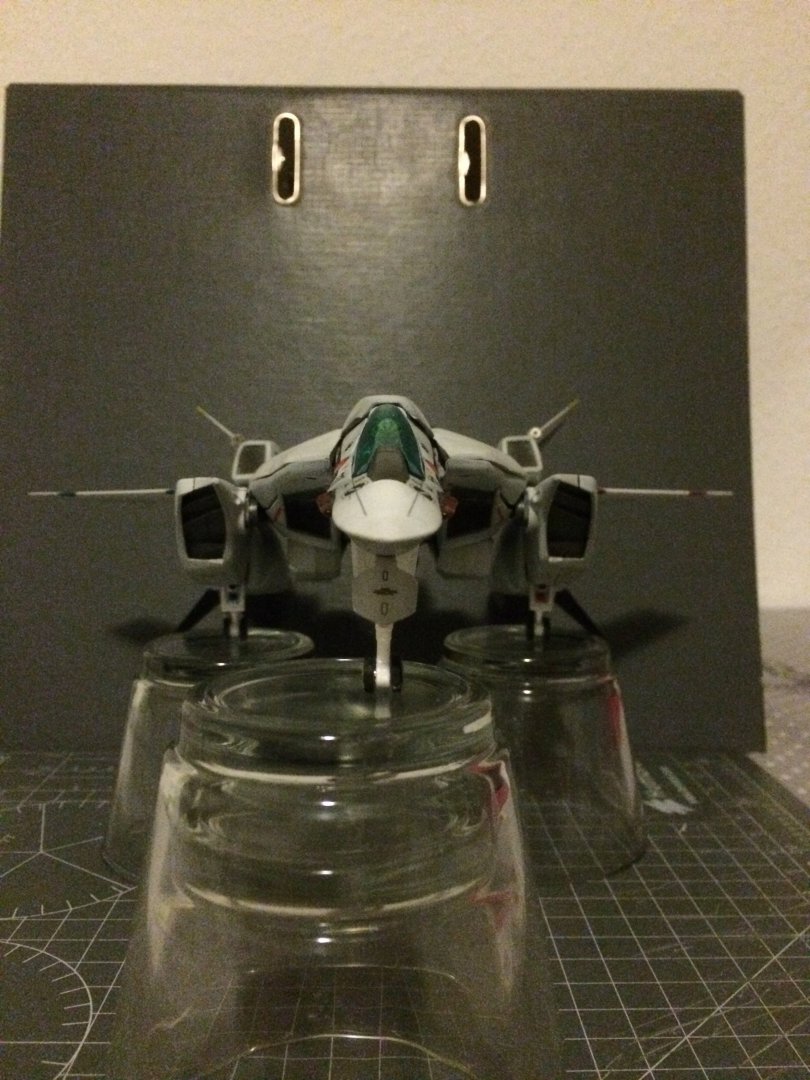
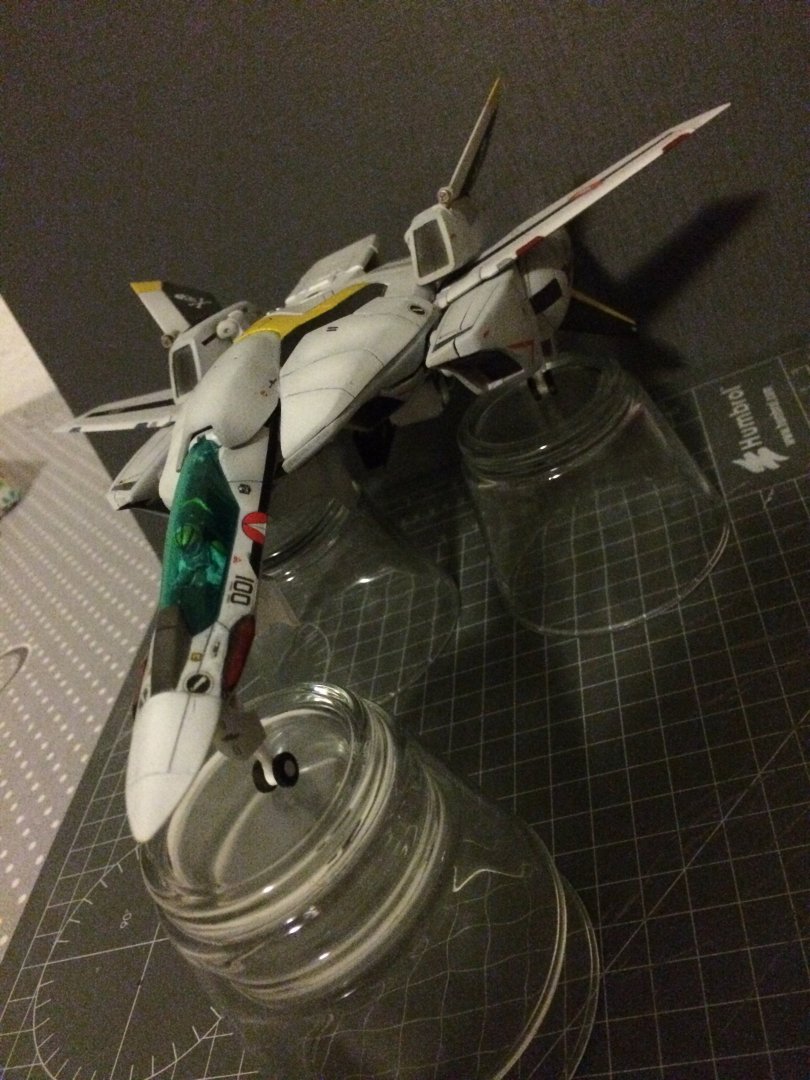
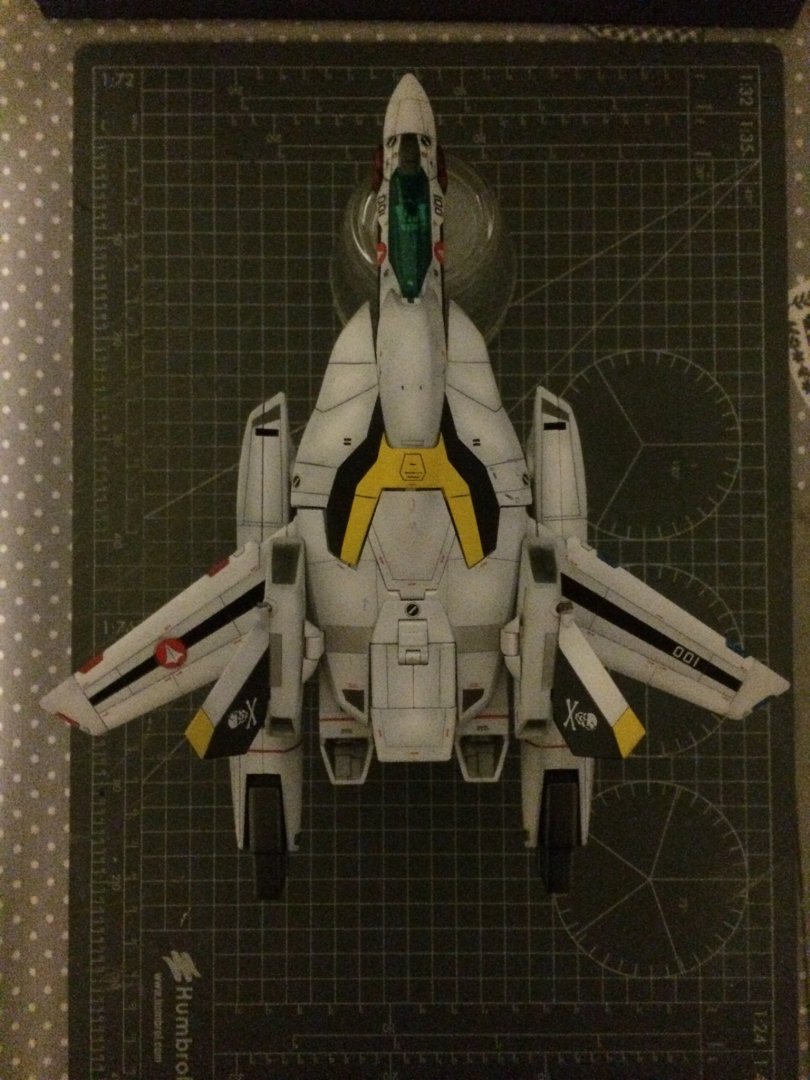
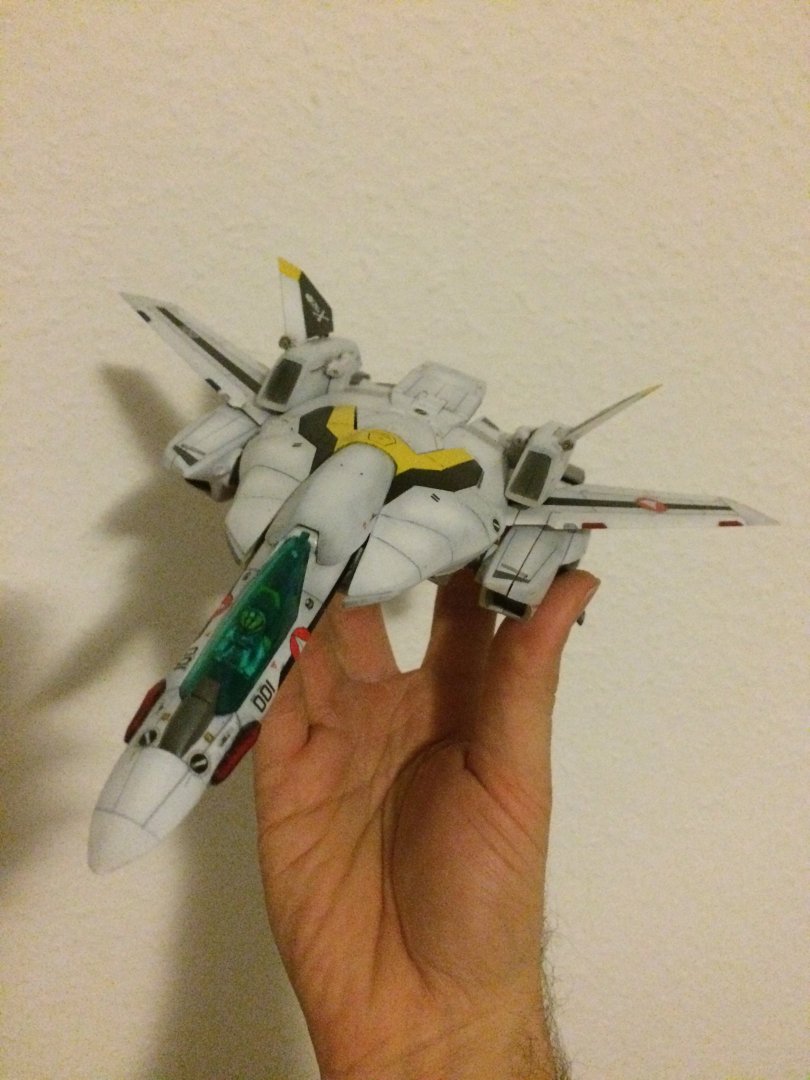
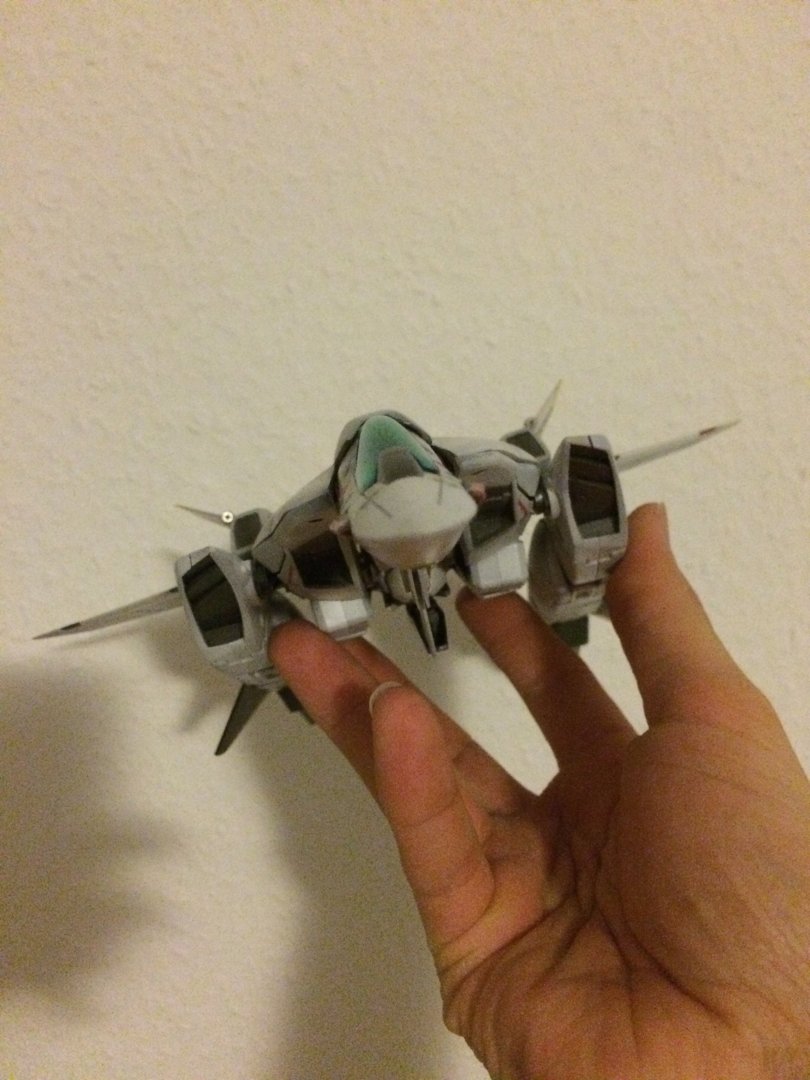
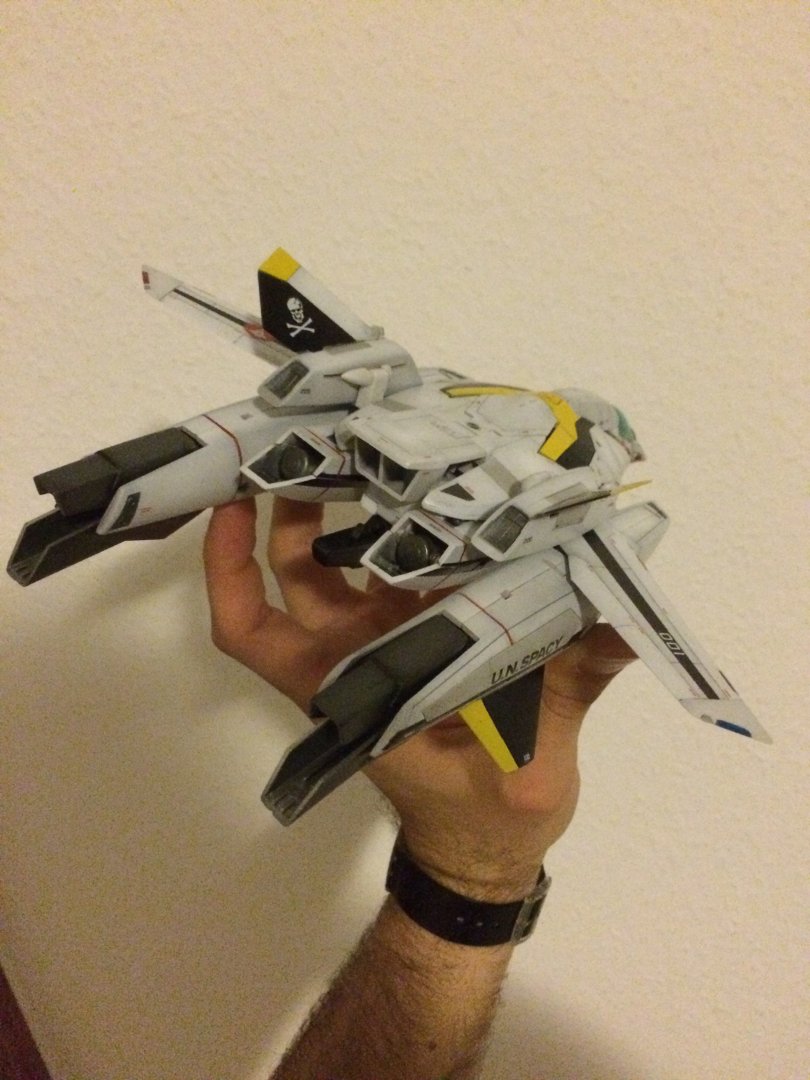
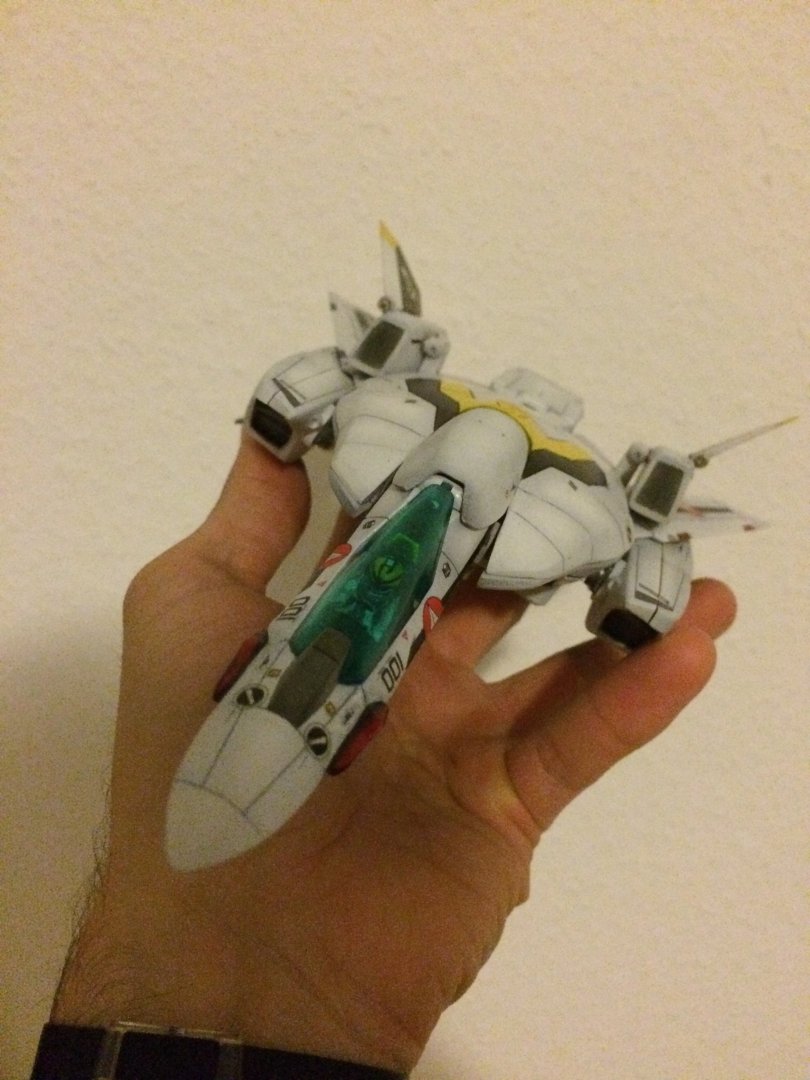
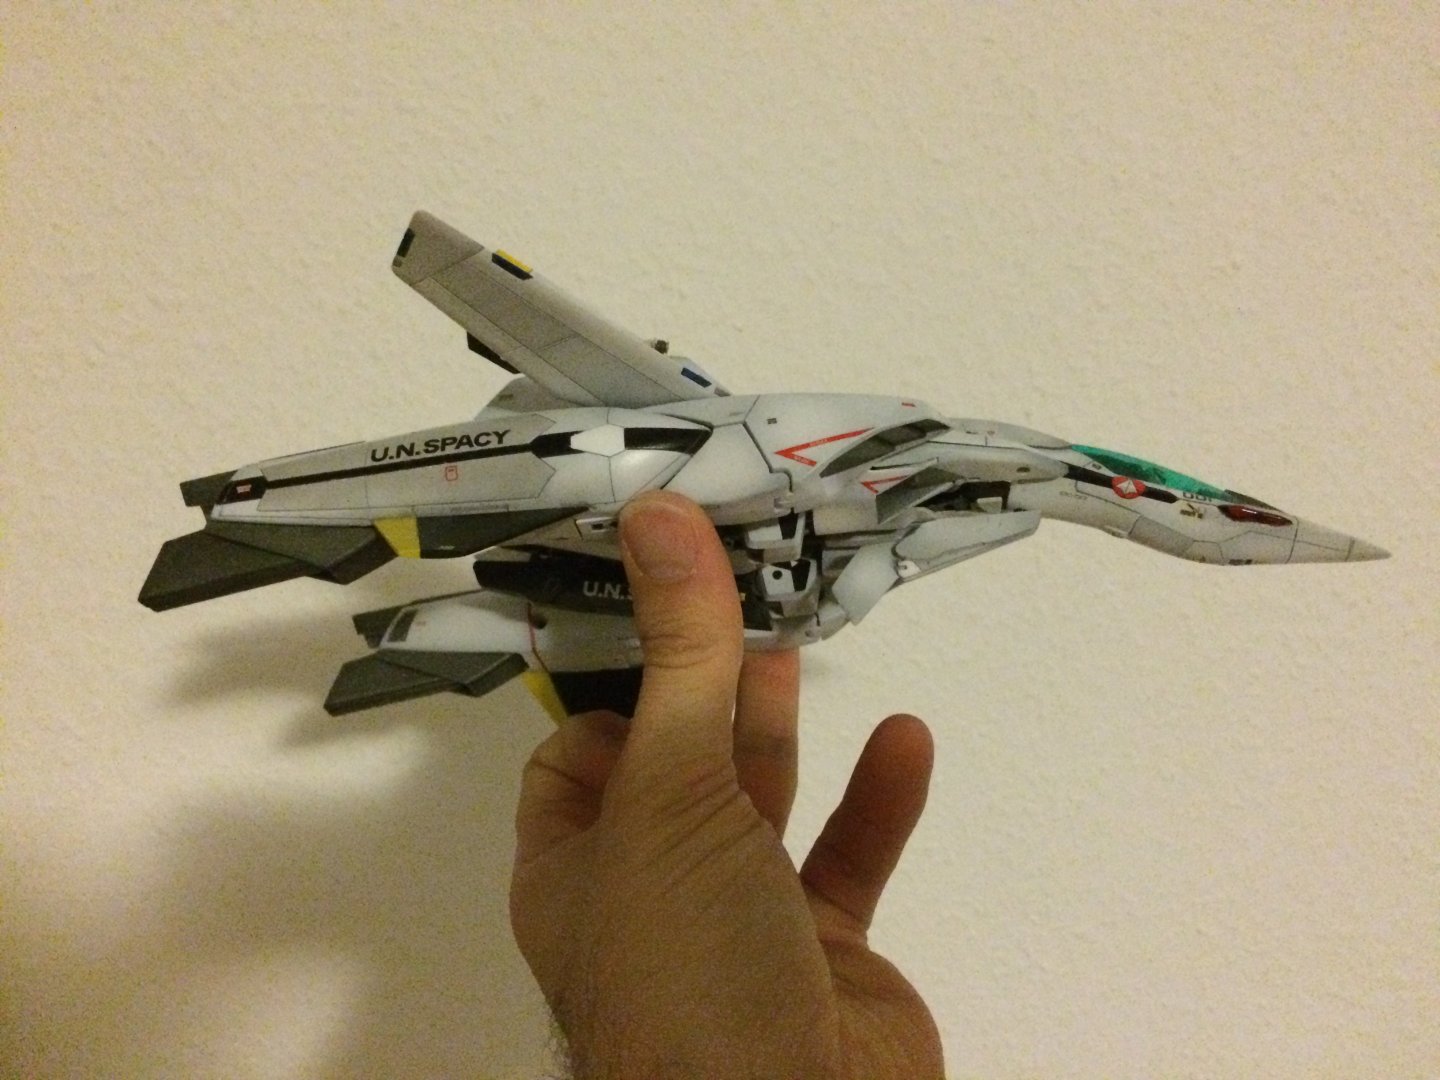
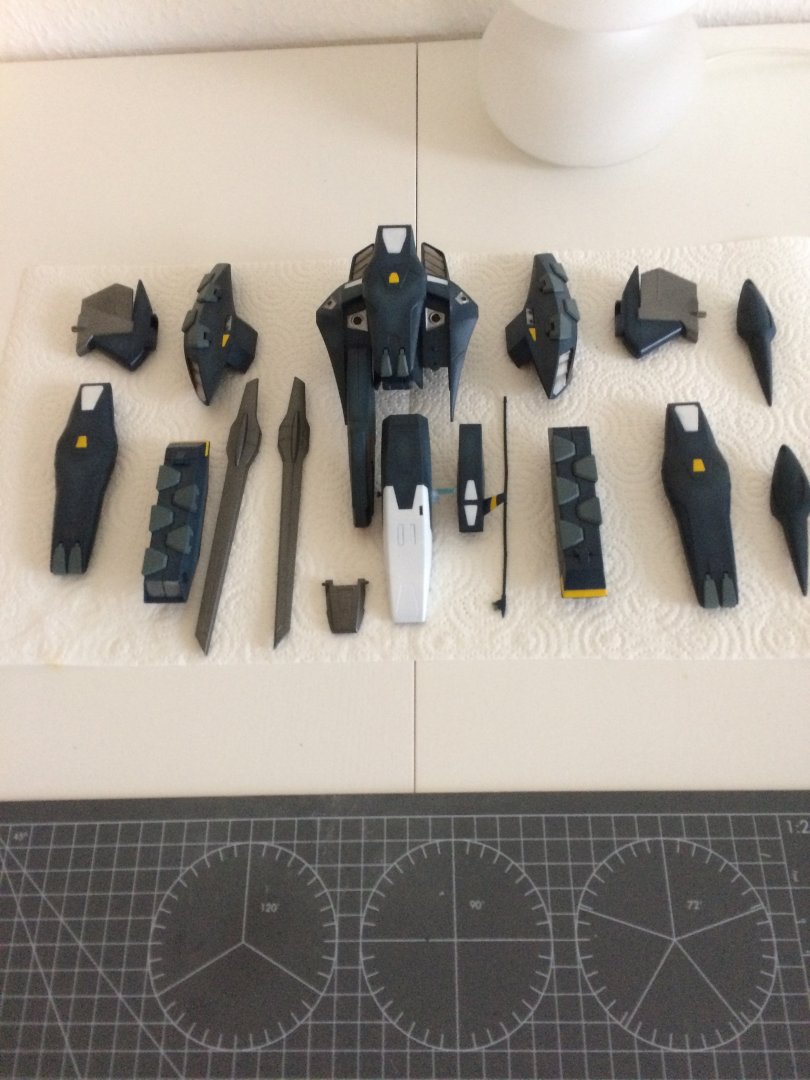
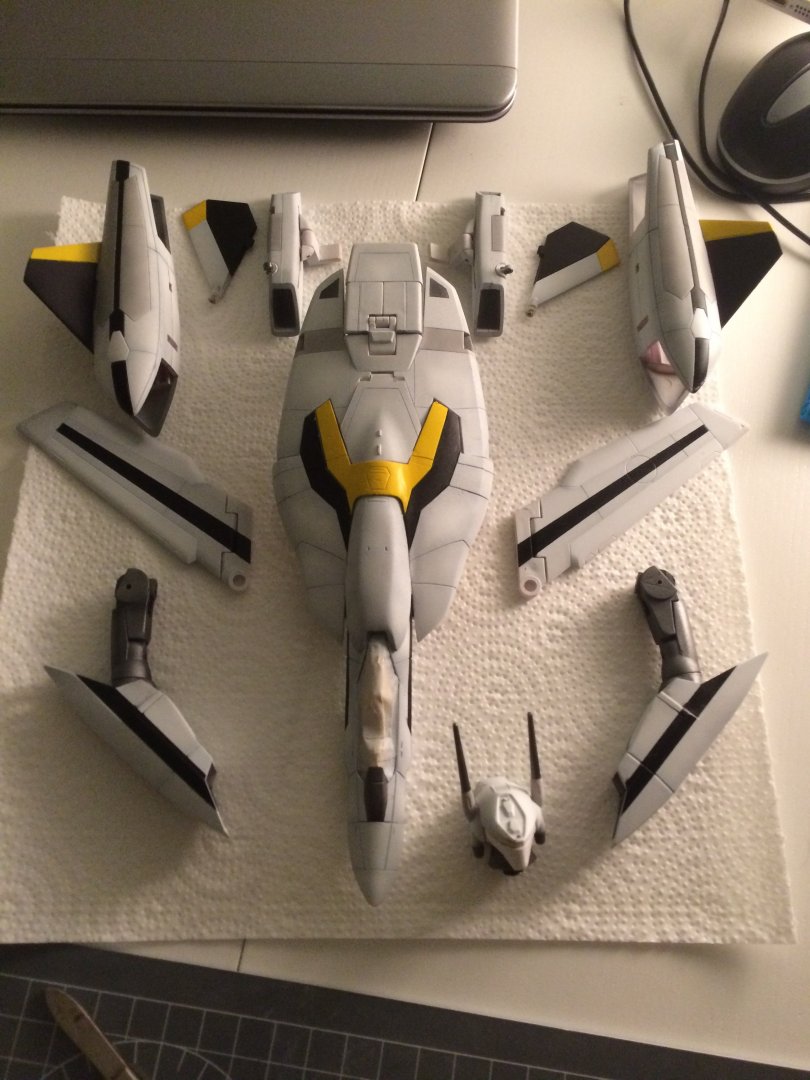
Had some models on my workbench last few months. Did some experiments with different paints and techniques I never used before. Still decals are not my friend :( sorry for crap phone camera pics. Hope you enjoy!
-
Same here, got one at HLJ and can’t believe it. I’m considering going to my boss and ask for a salary increase...this seems to be my “anything can happen” day...
- 20137 replies
-
- 1
-

-
- macross delta
- vf-31 siegfried
- (and 4 more)
-
that's so beautiful...and so white! Mine already started yellowing :/
-
@valhary, unfortunately I did not put a guide together other than the pictures here. Are you planning to do the whole mod or just replace the old intake with the new one?
-
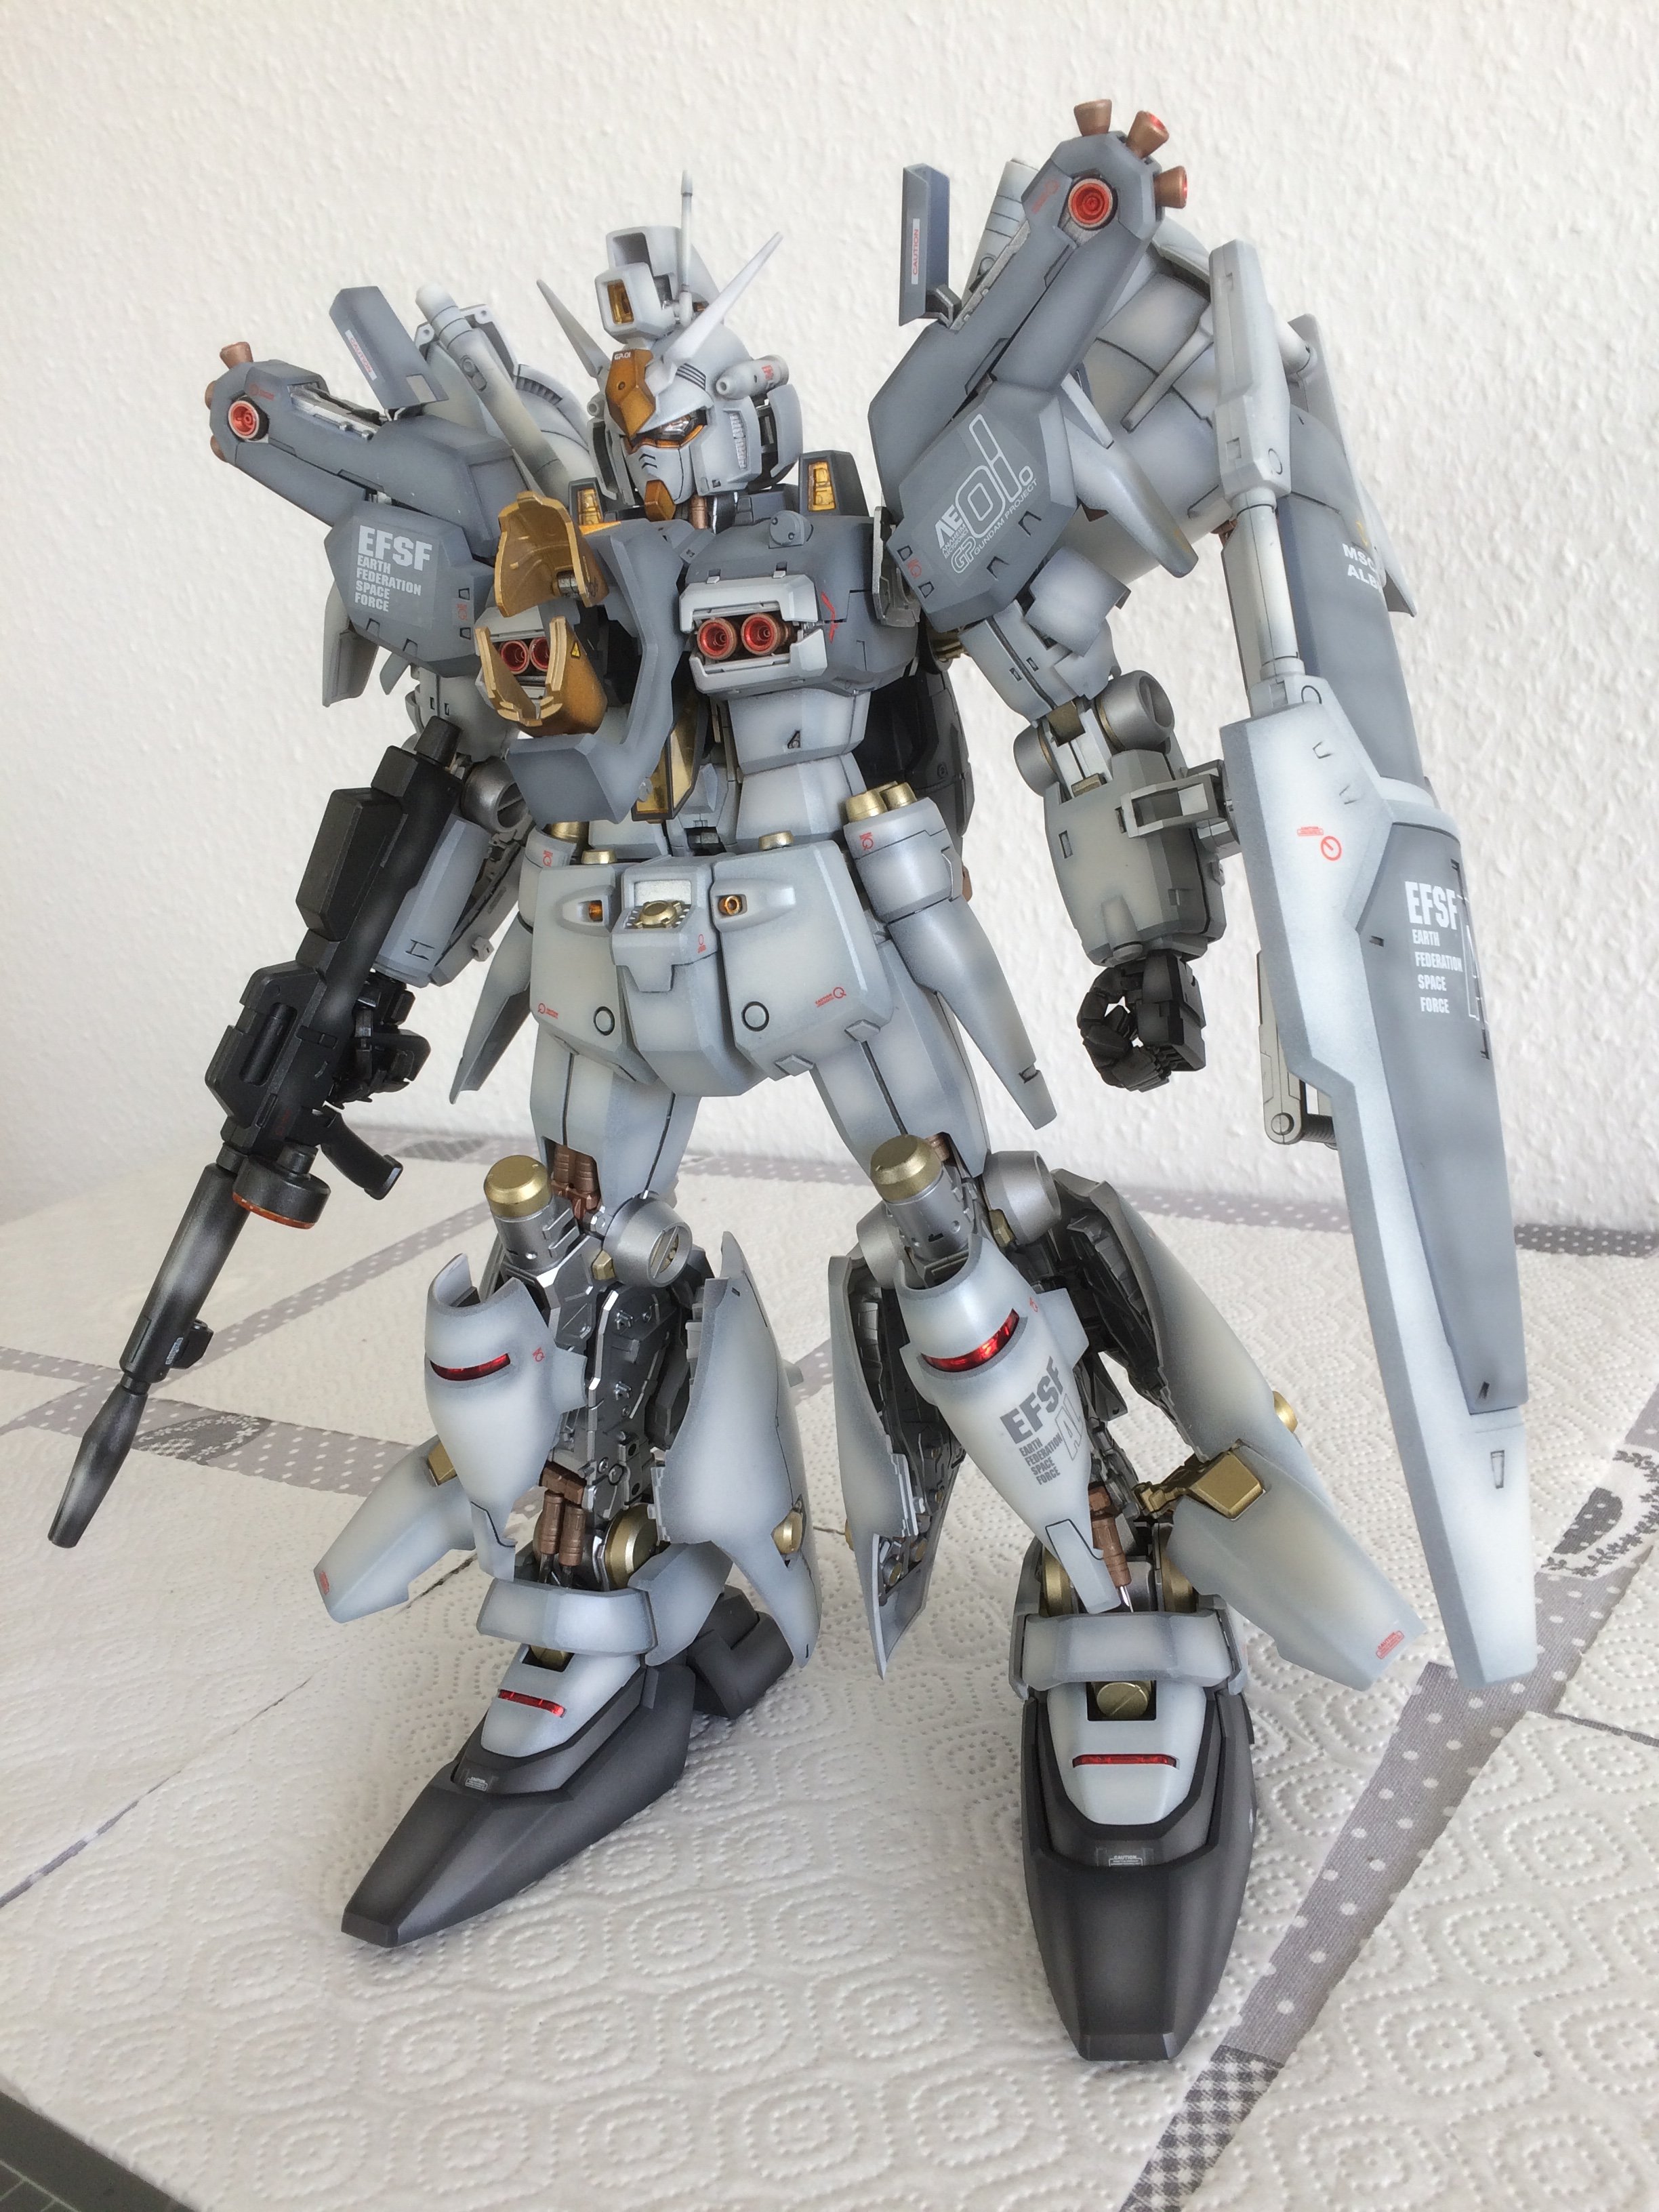
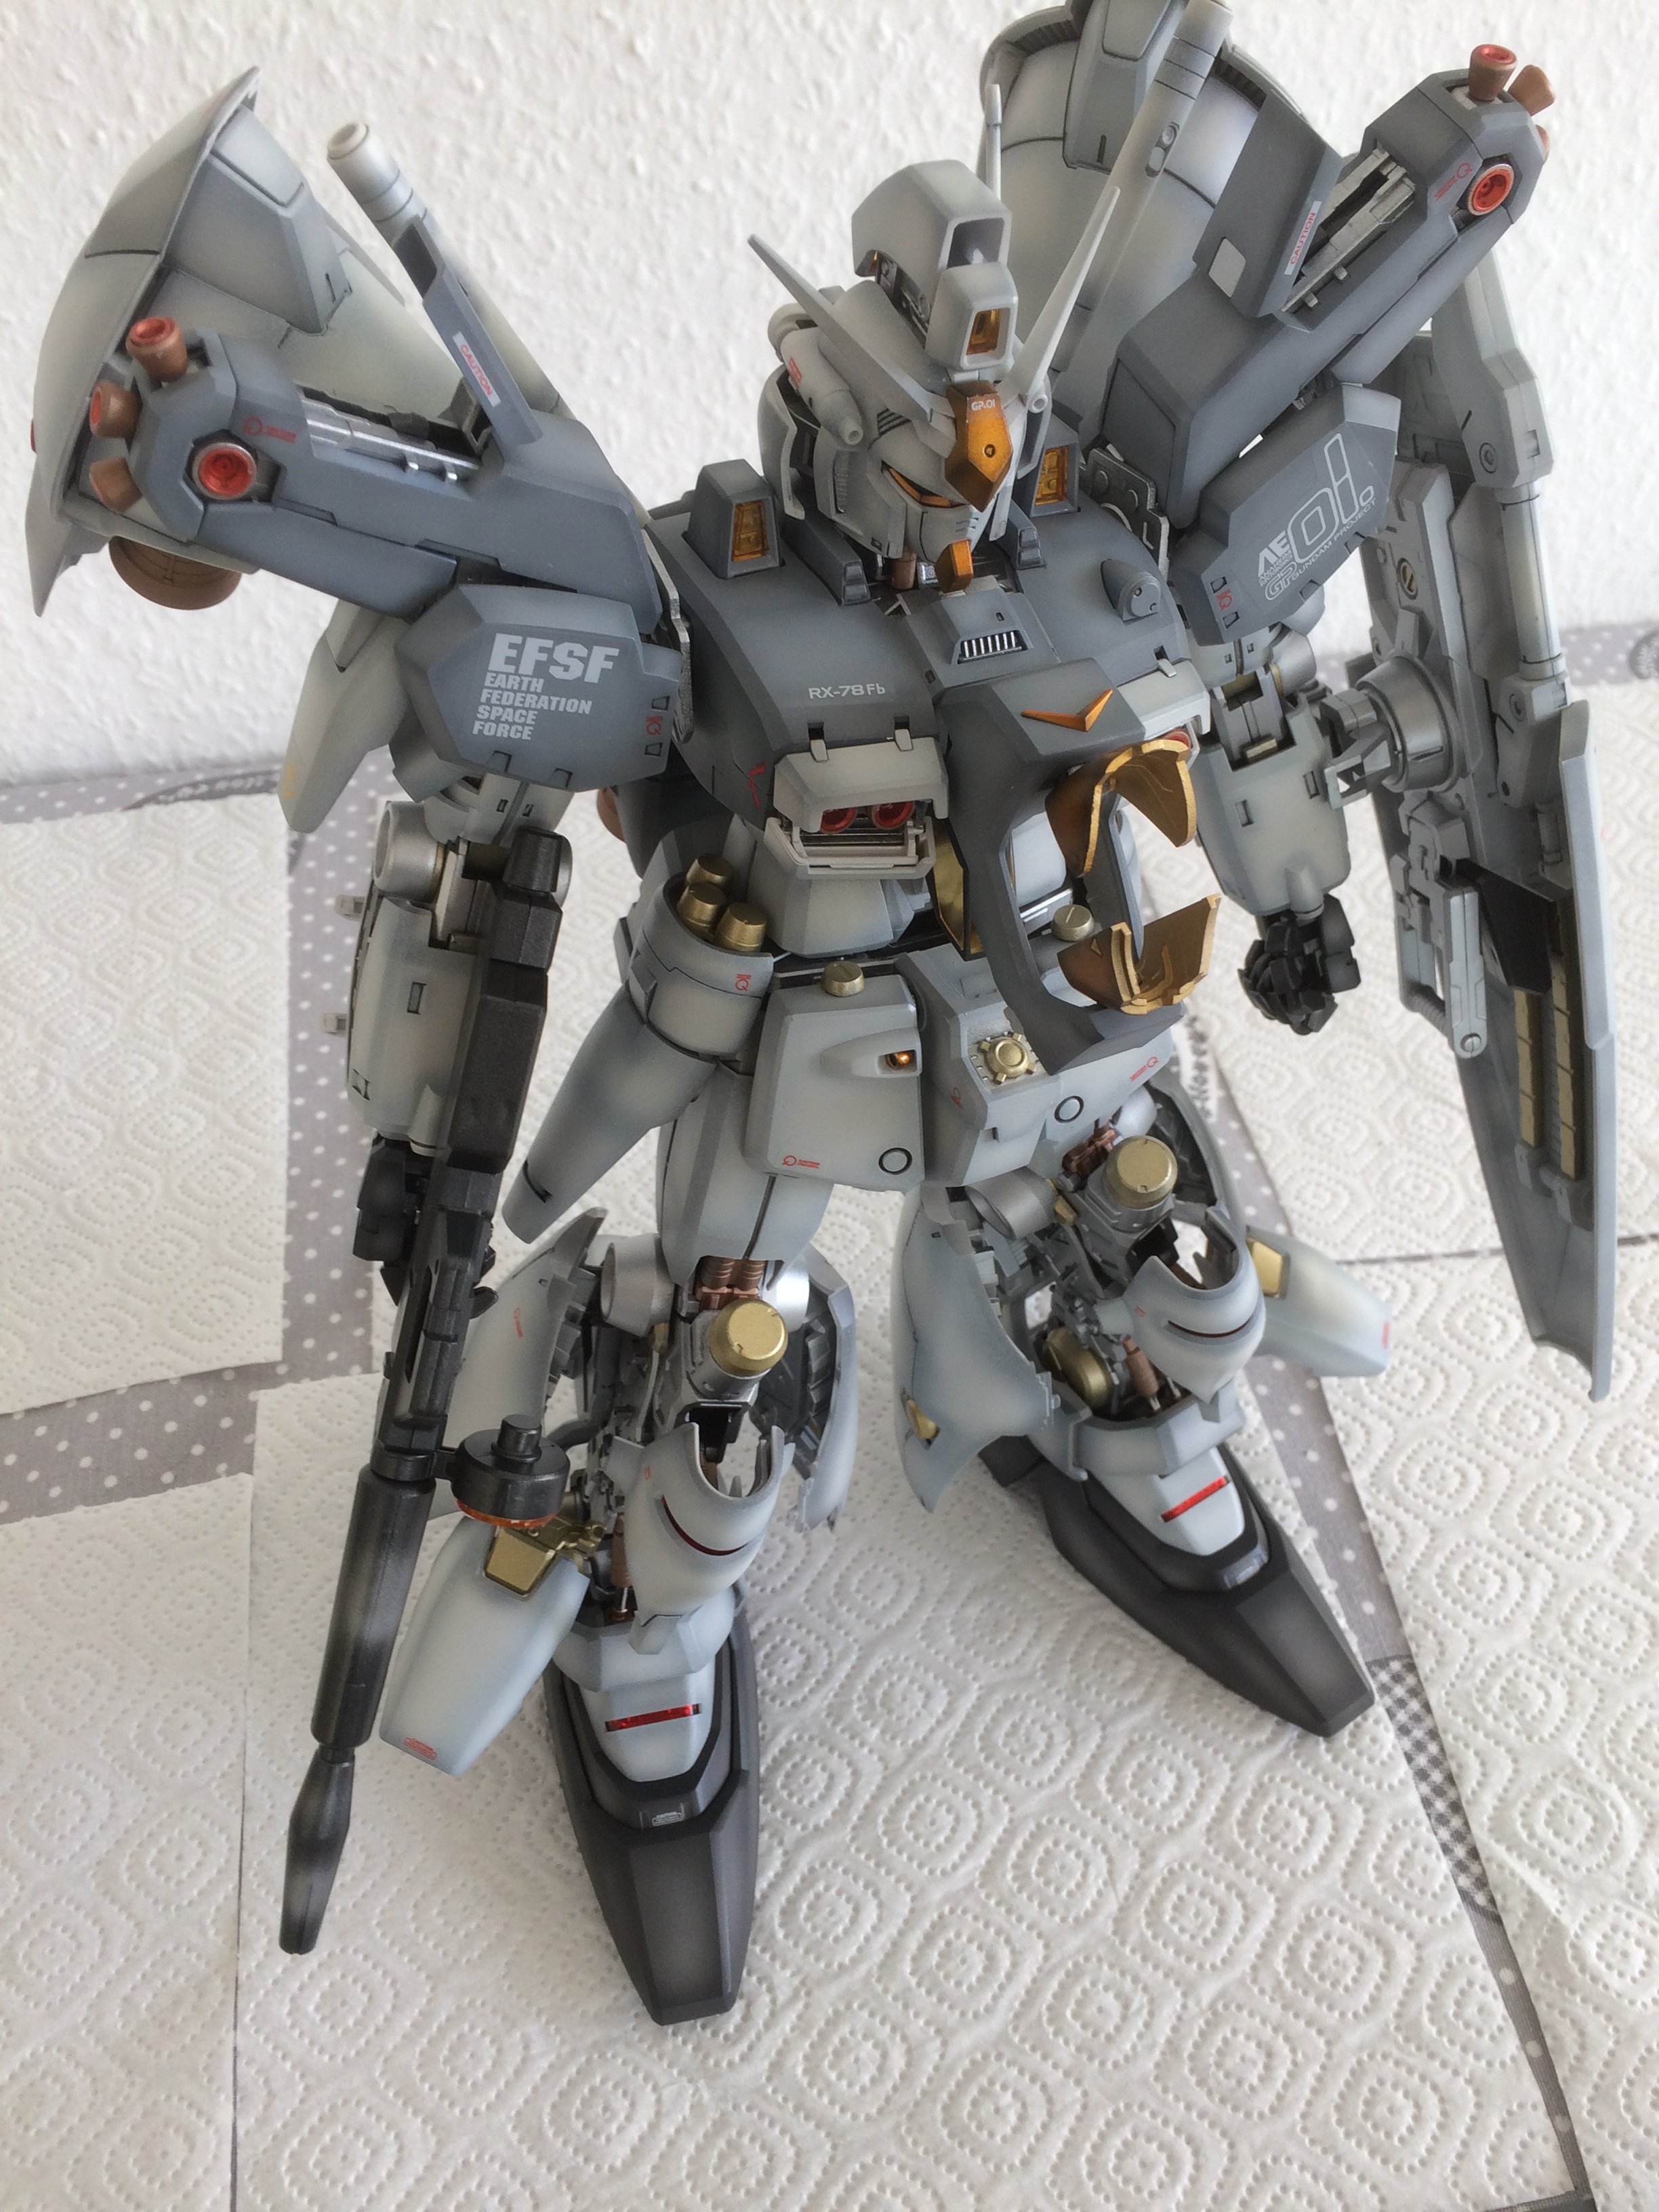
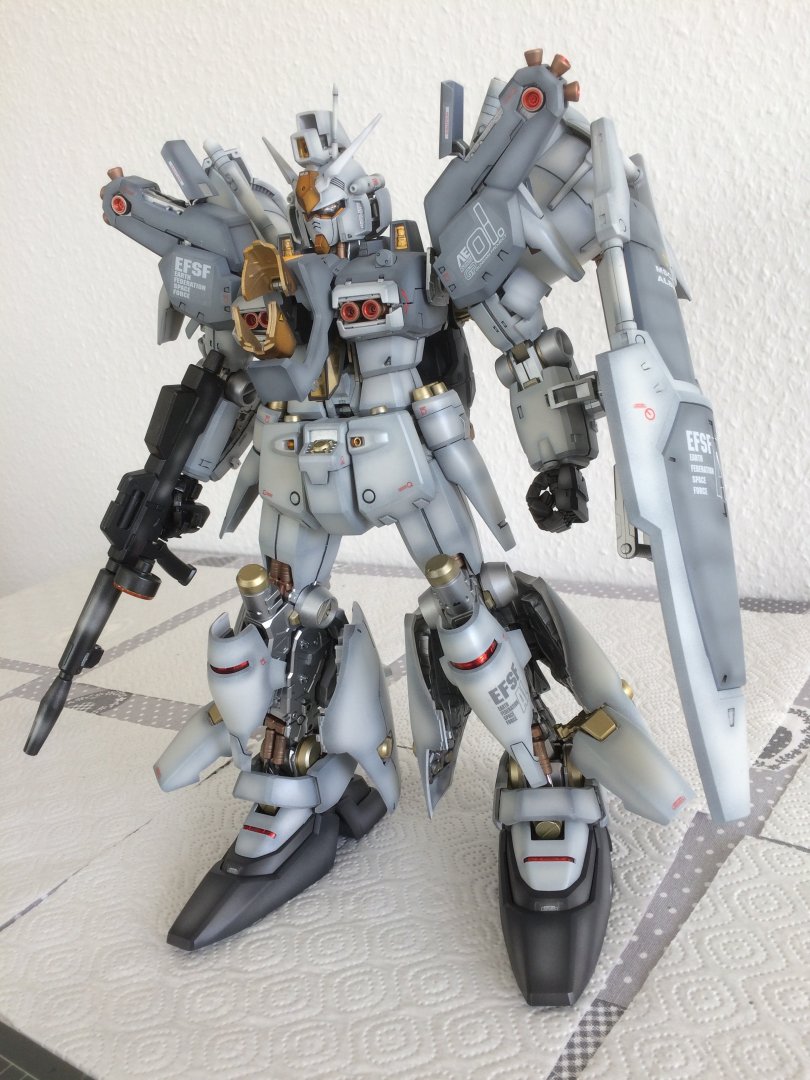
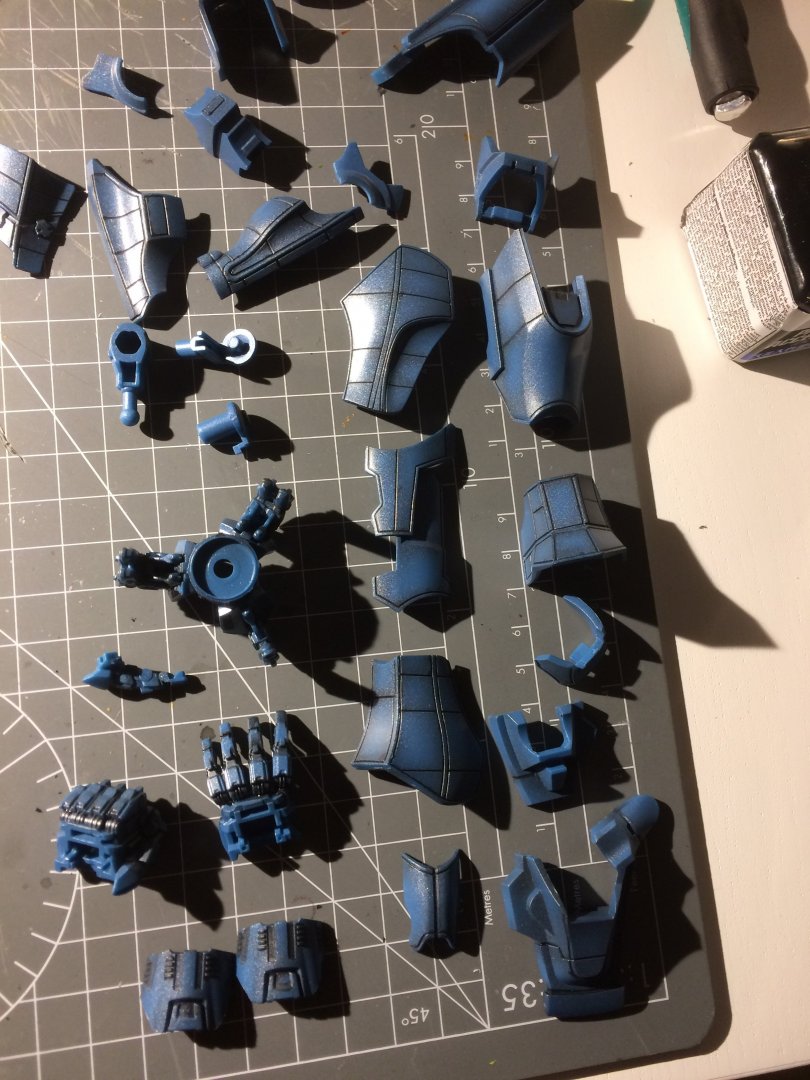
Finally got the PG Gundam GP01 completed! Quite happy with the color schem too...I’m quite bored by the white/blue/red classic and tried something more “space like”. Hope you like it!


-
Started working on Gundam GP01 PG. this kit has a ridiculous number of pieces...


-
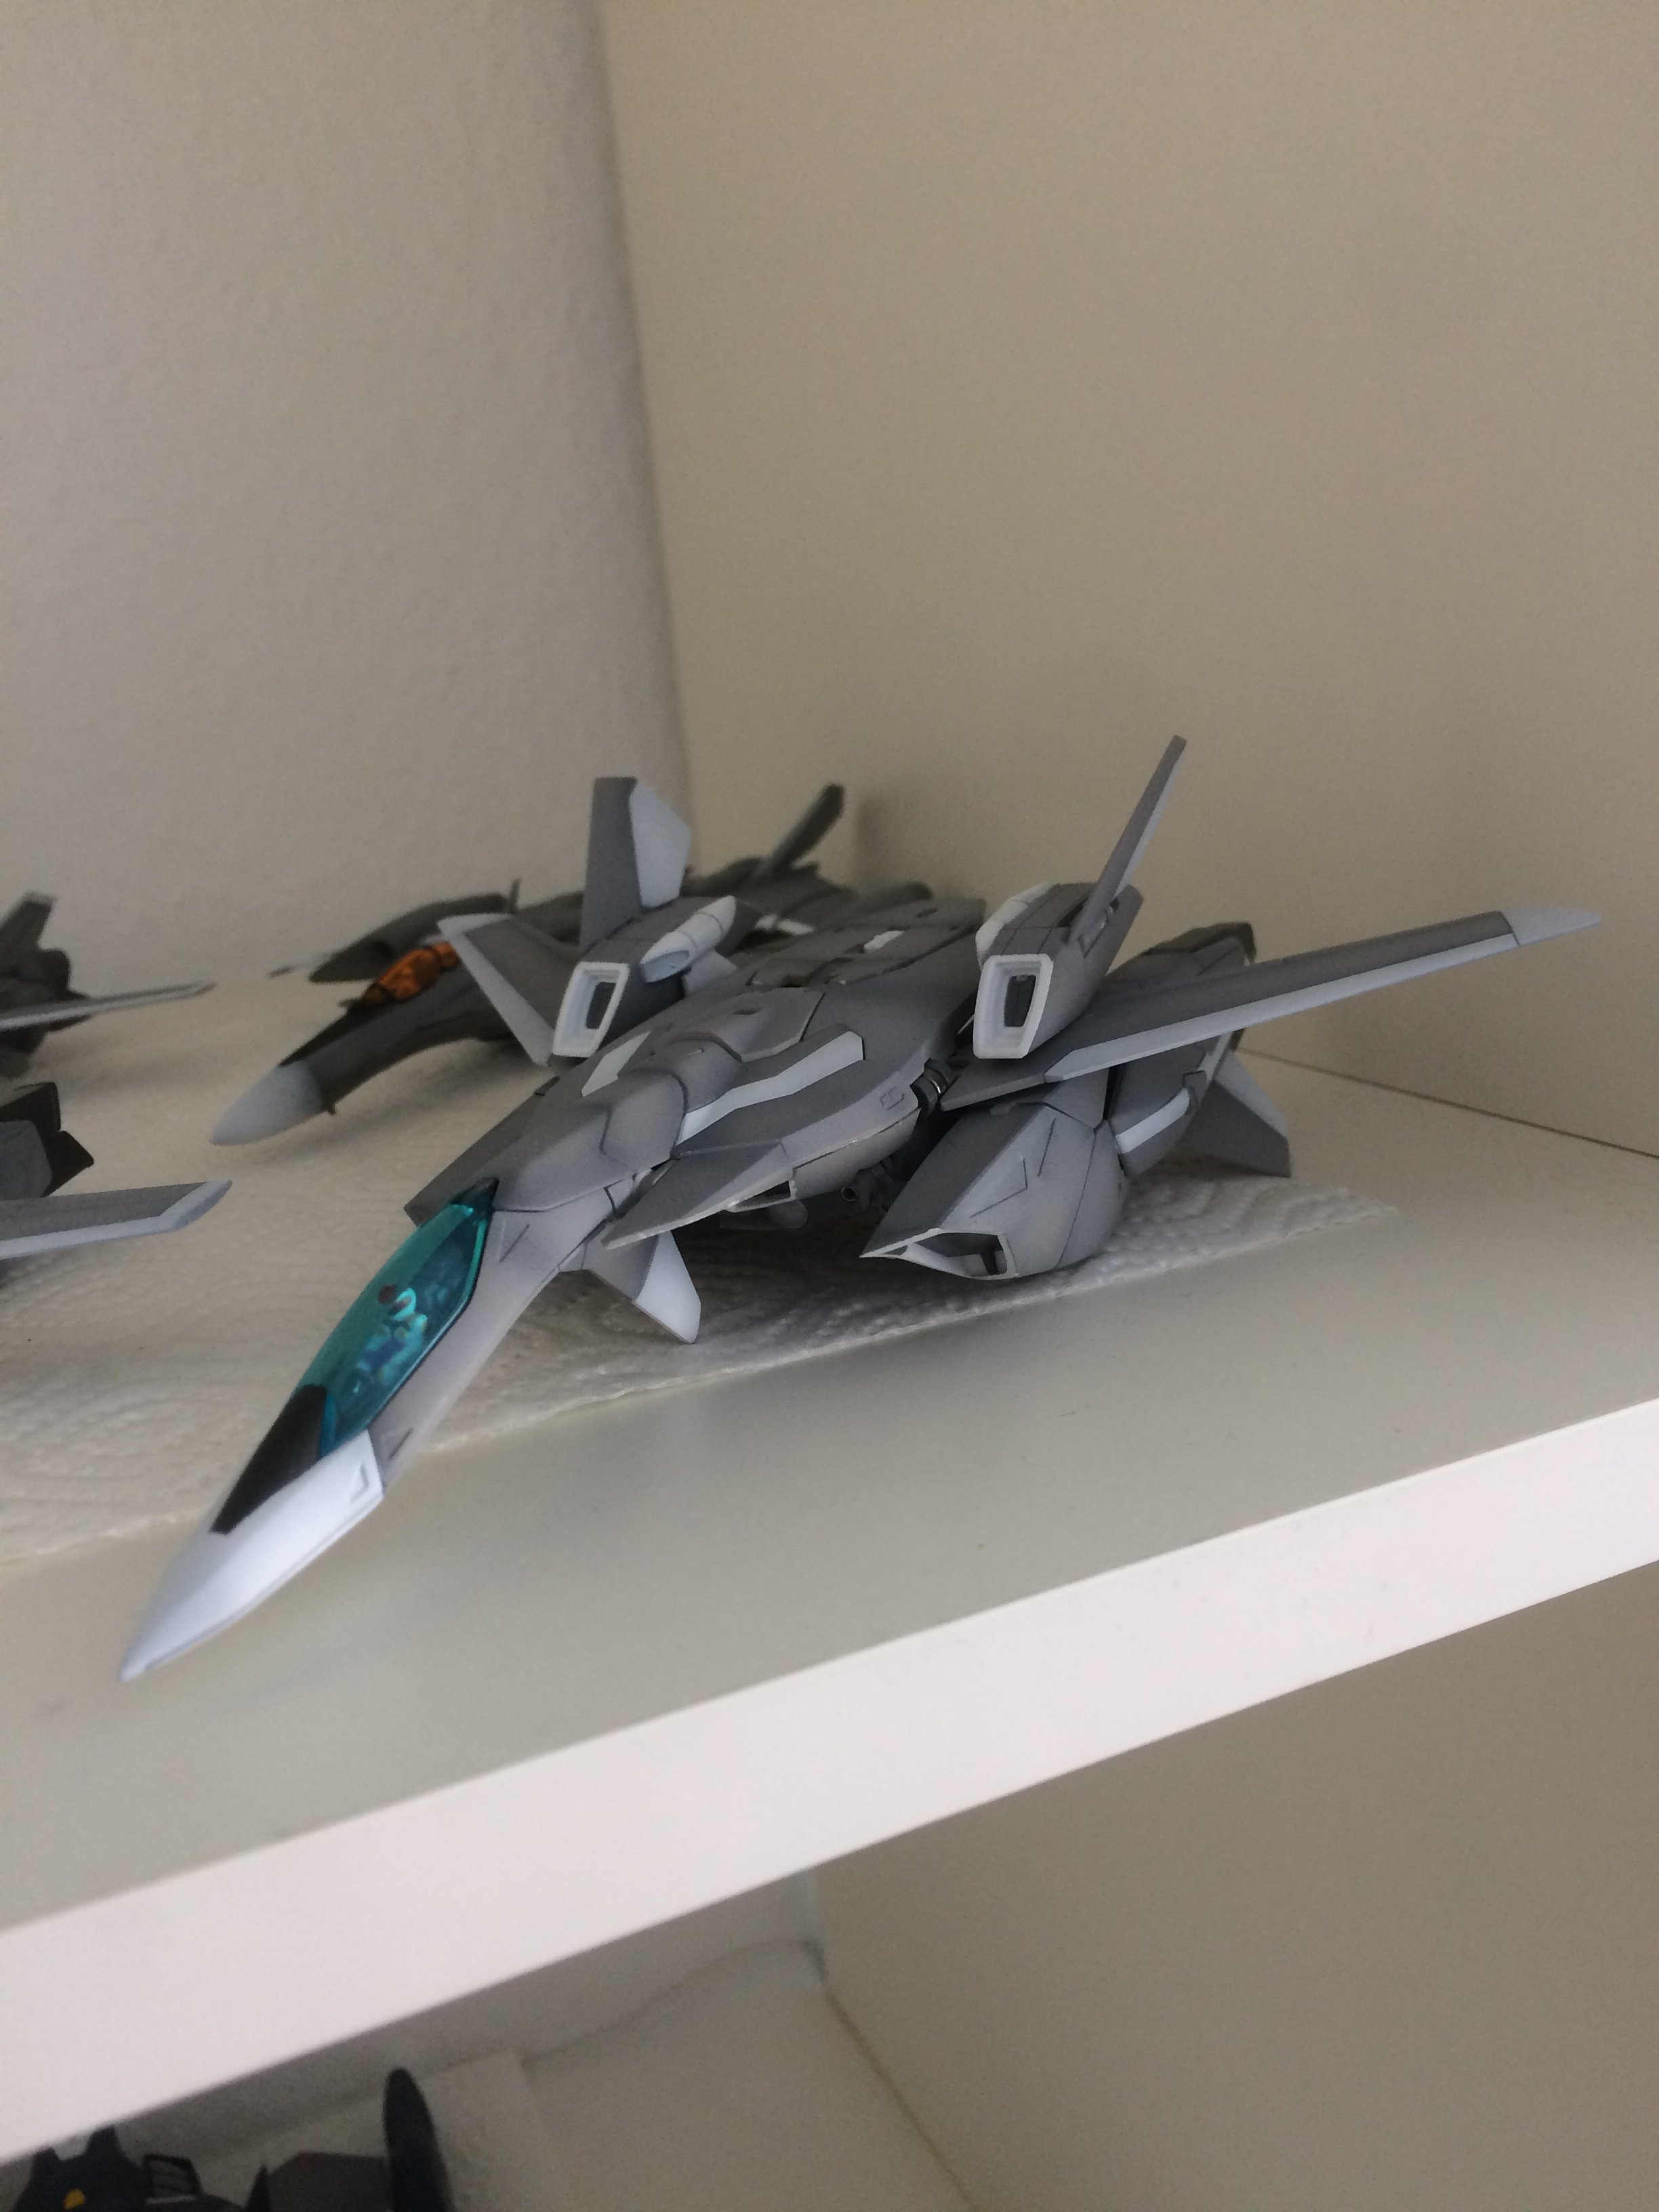
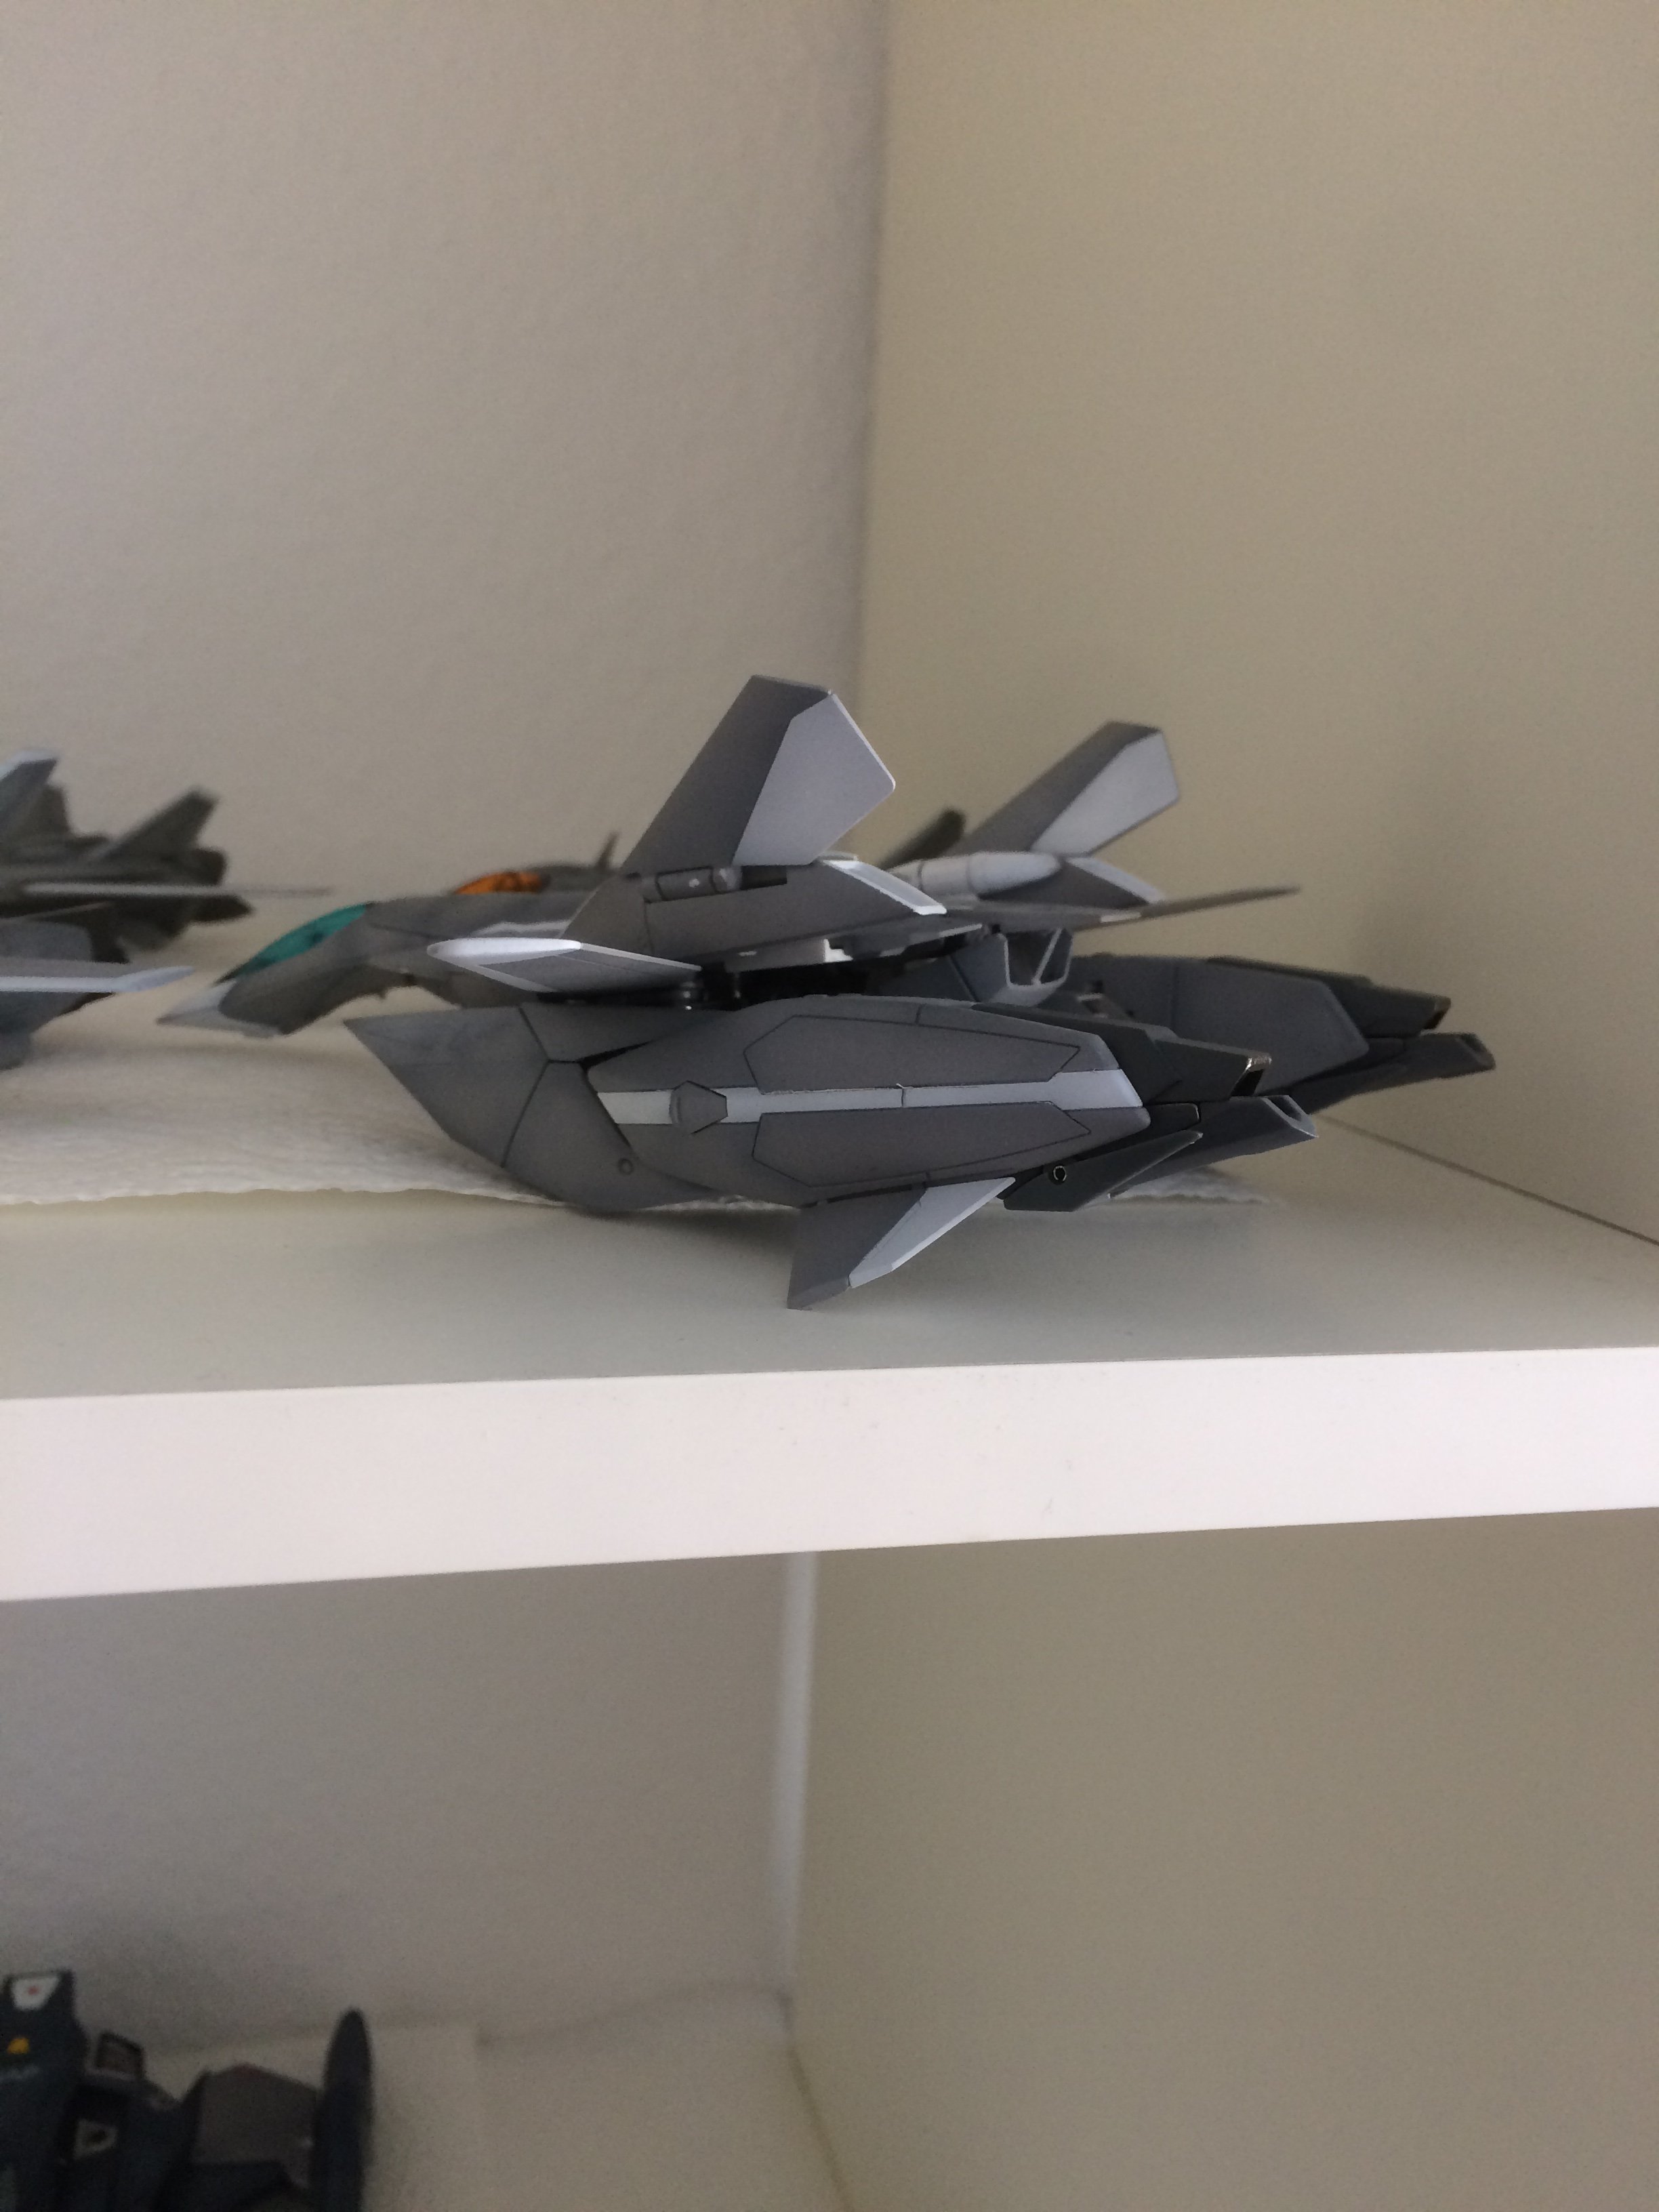
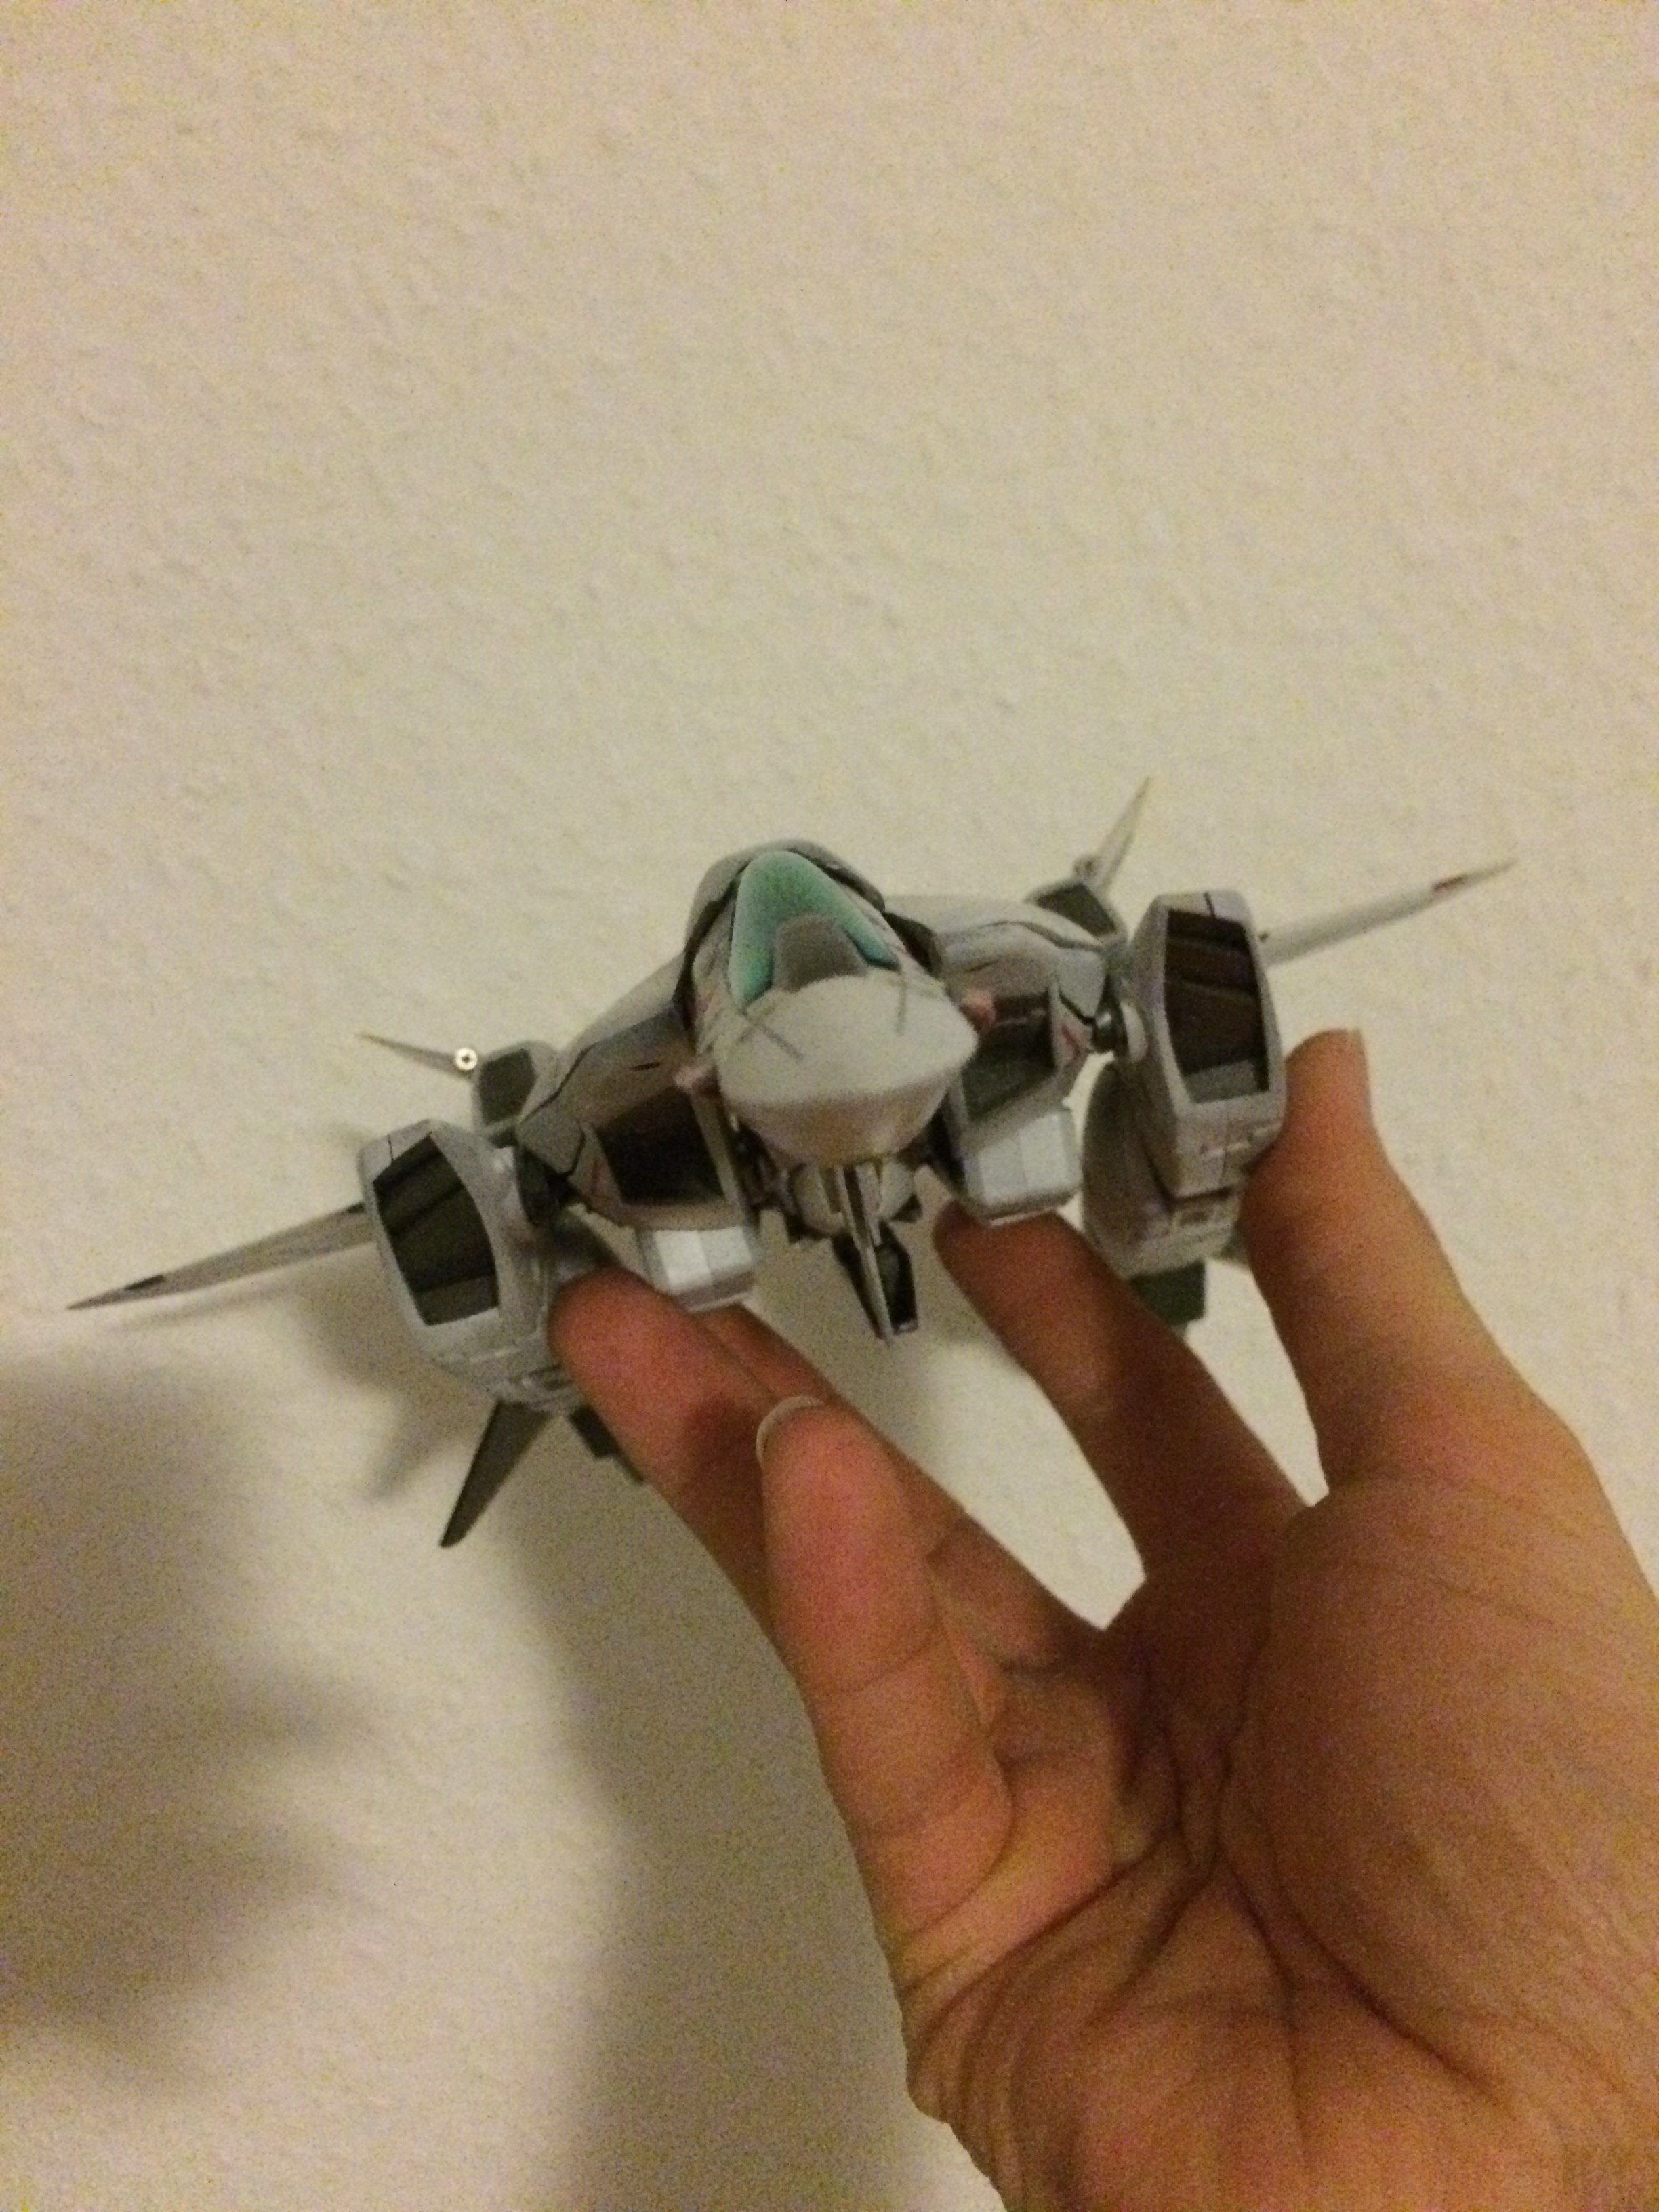
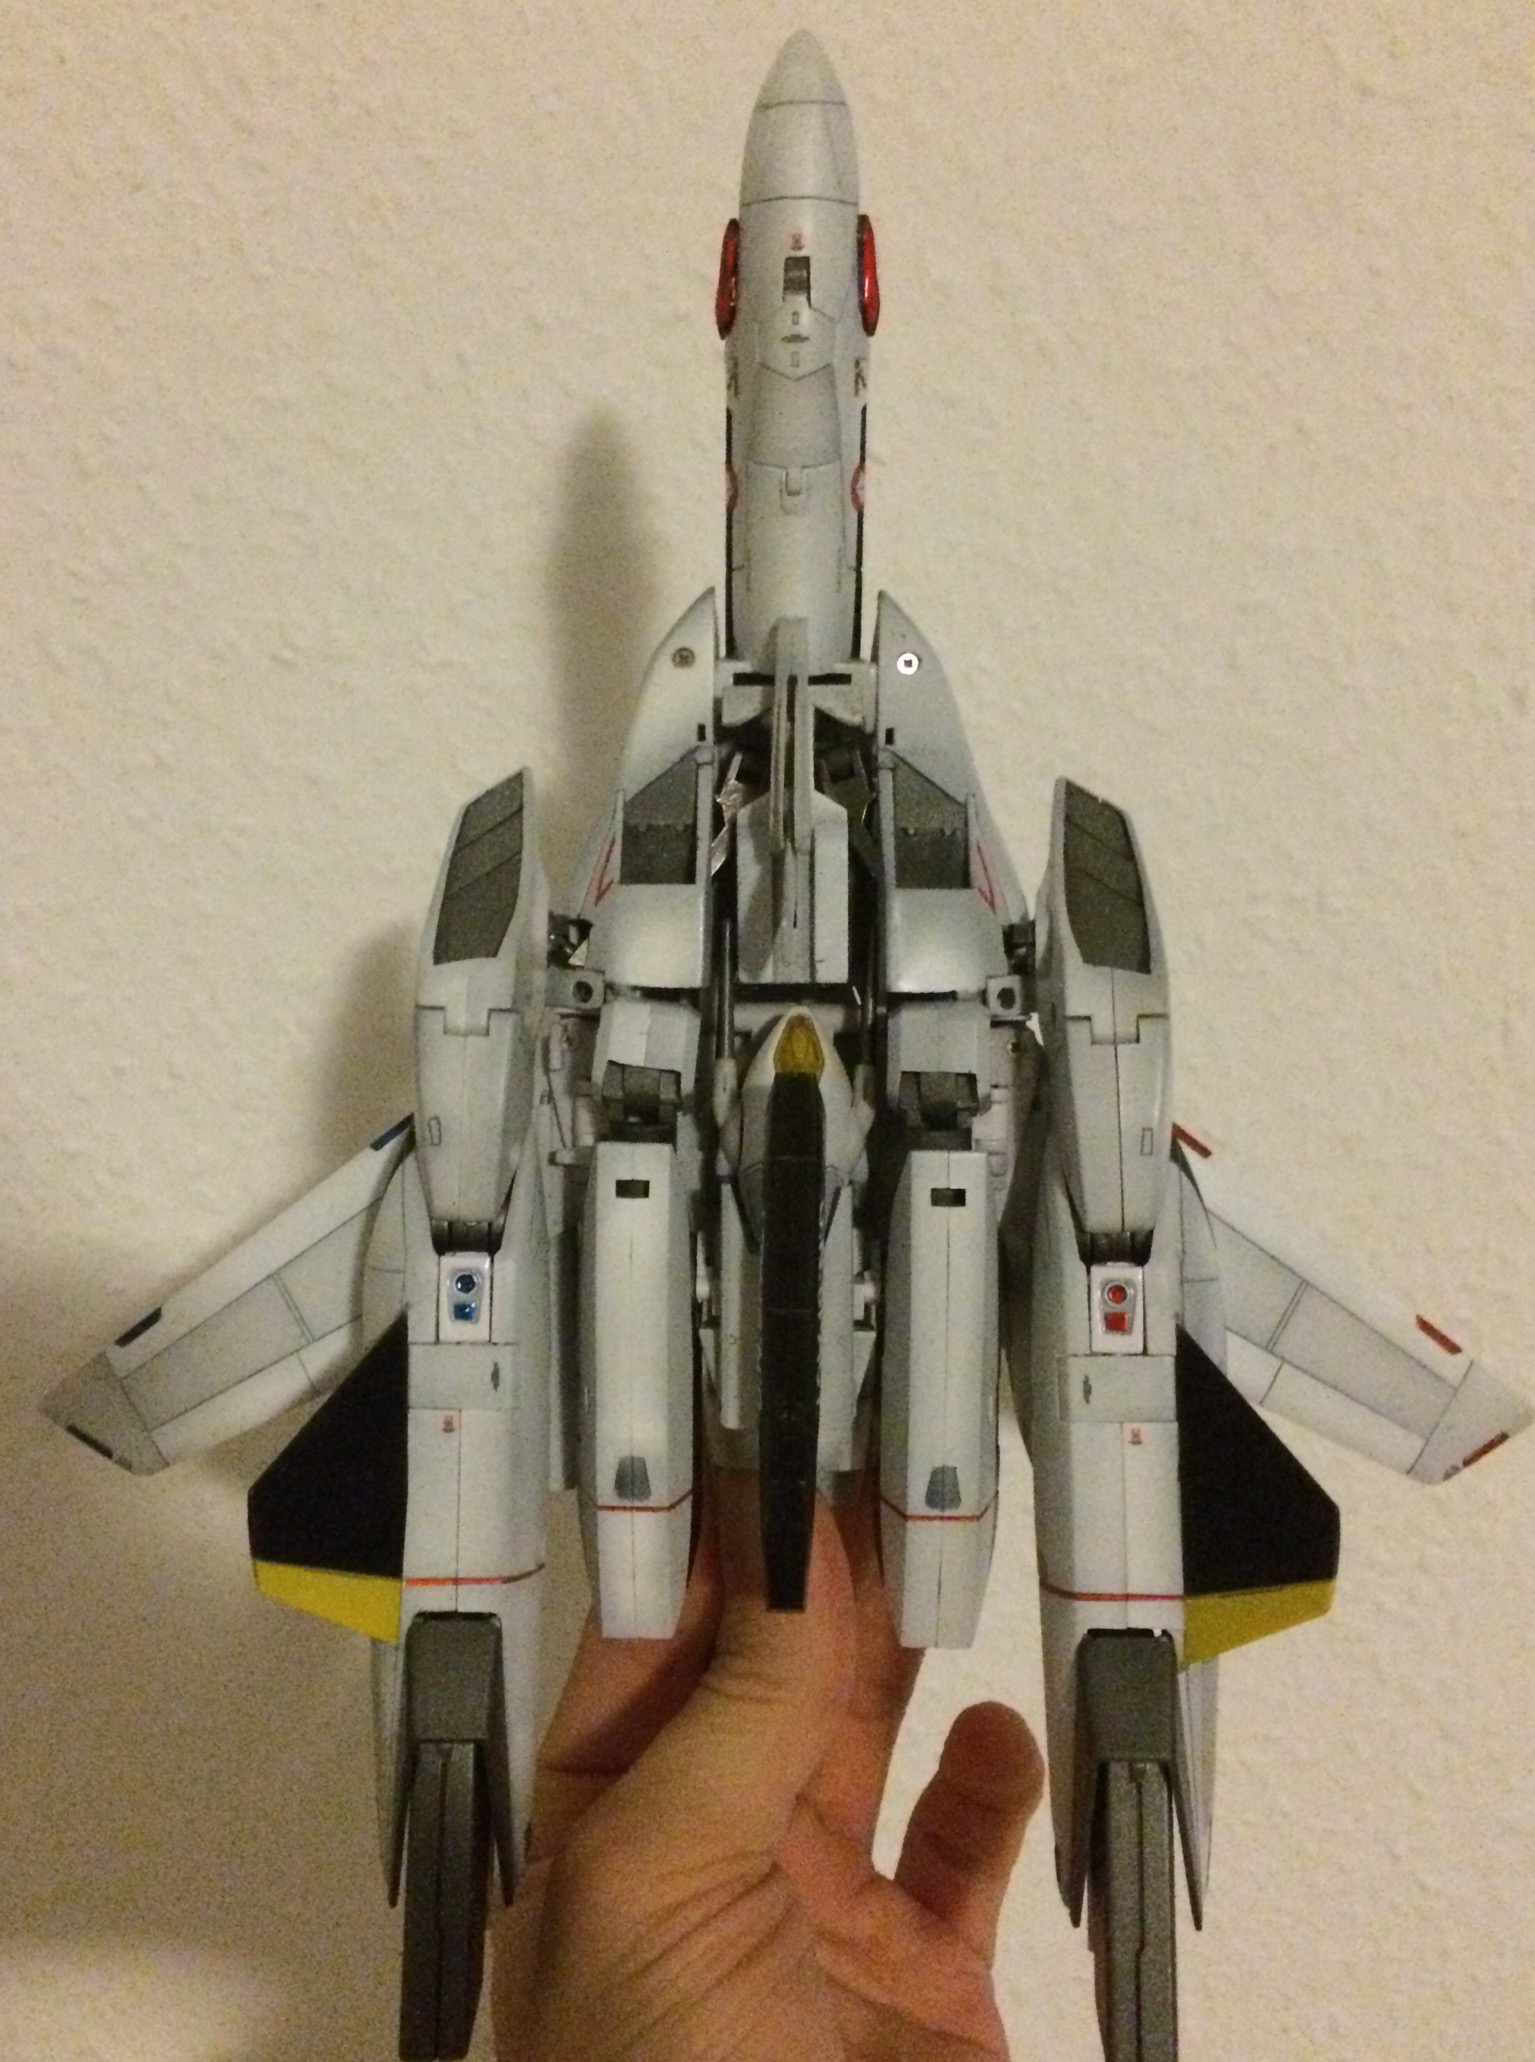
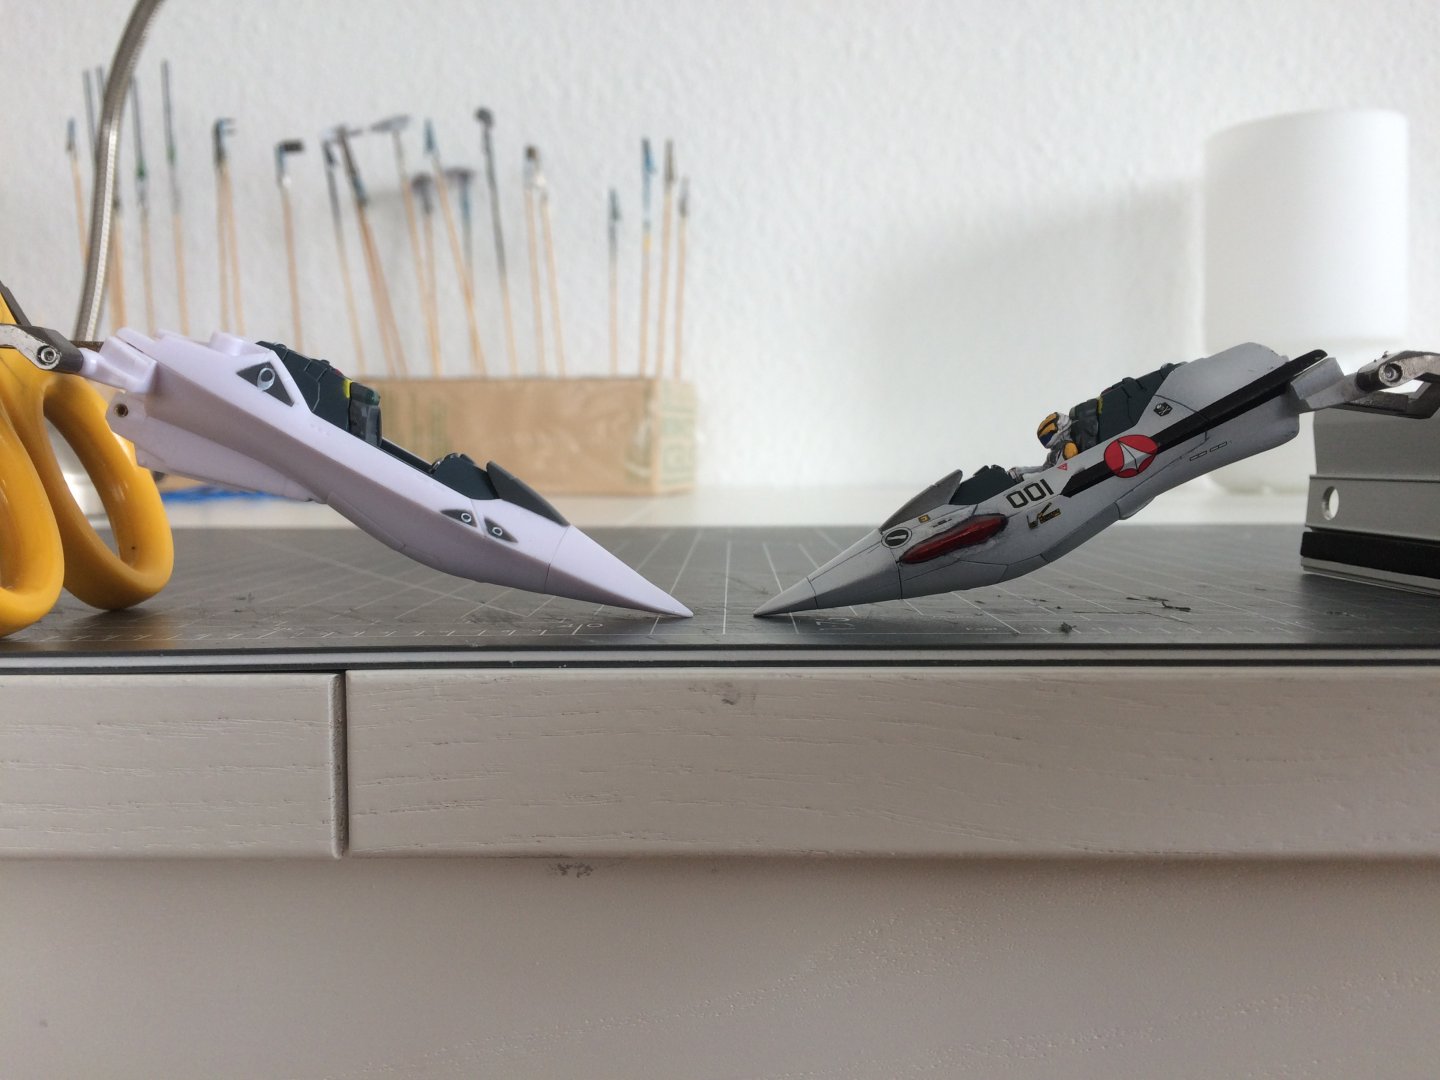
Both the VF-1j and the VF-2ss are from the HMR line, few more shots (I’m really not good with photos).

-
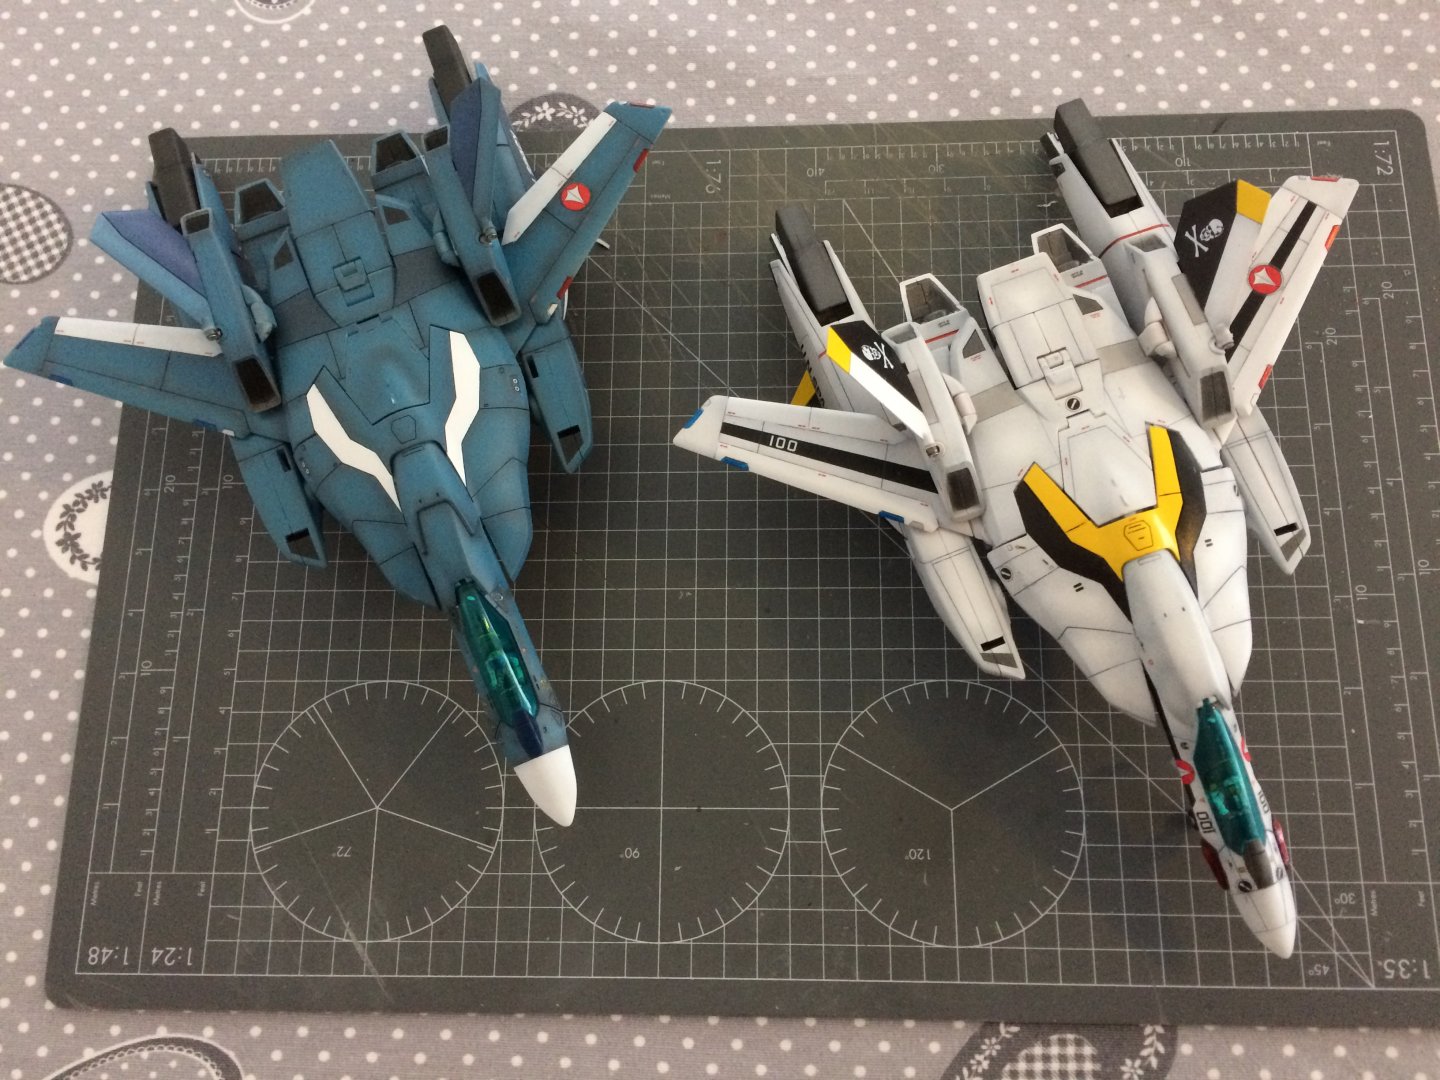
Finally got some time to work on these. It’s been a while I wanted to try some “real” color schemes on valks. Not a fan of small scales but it was fun.
-
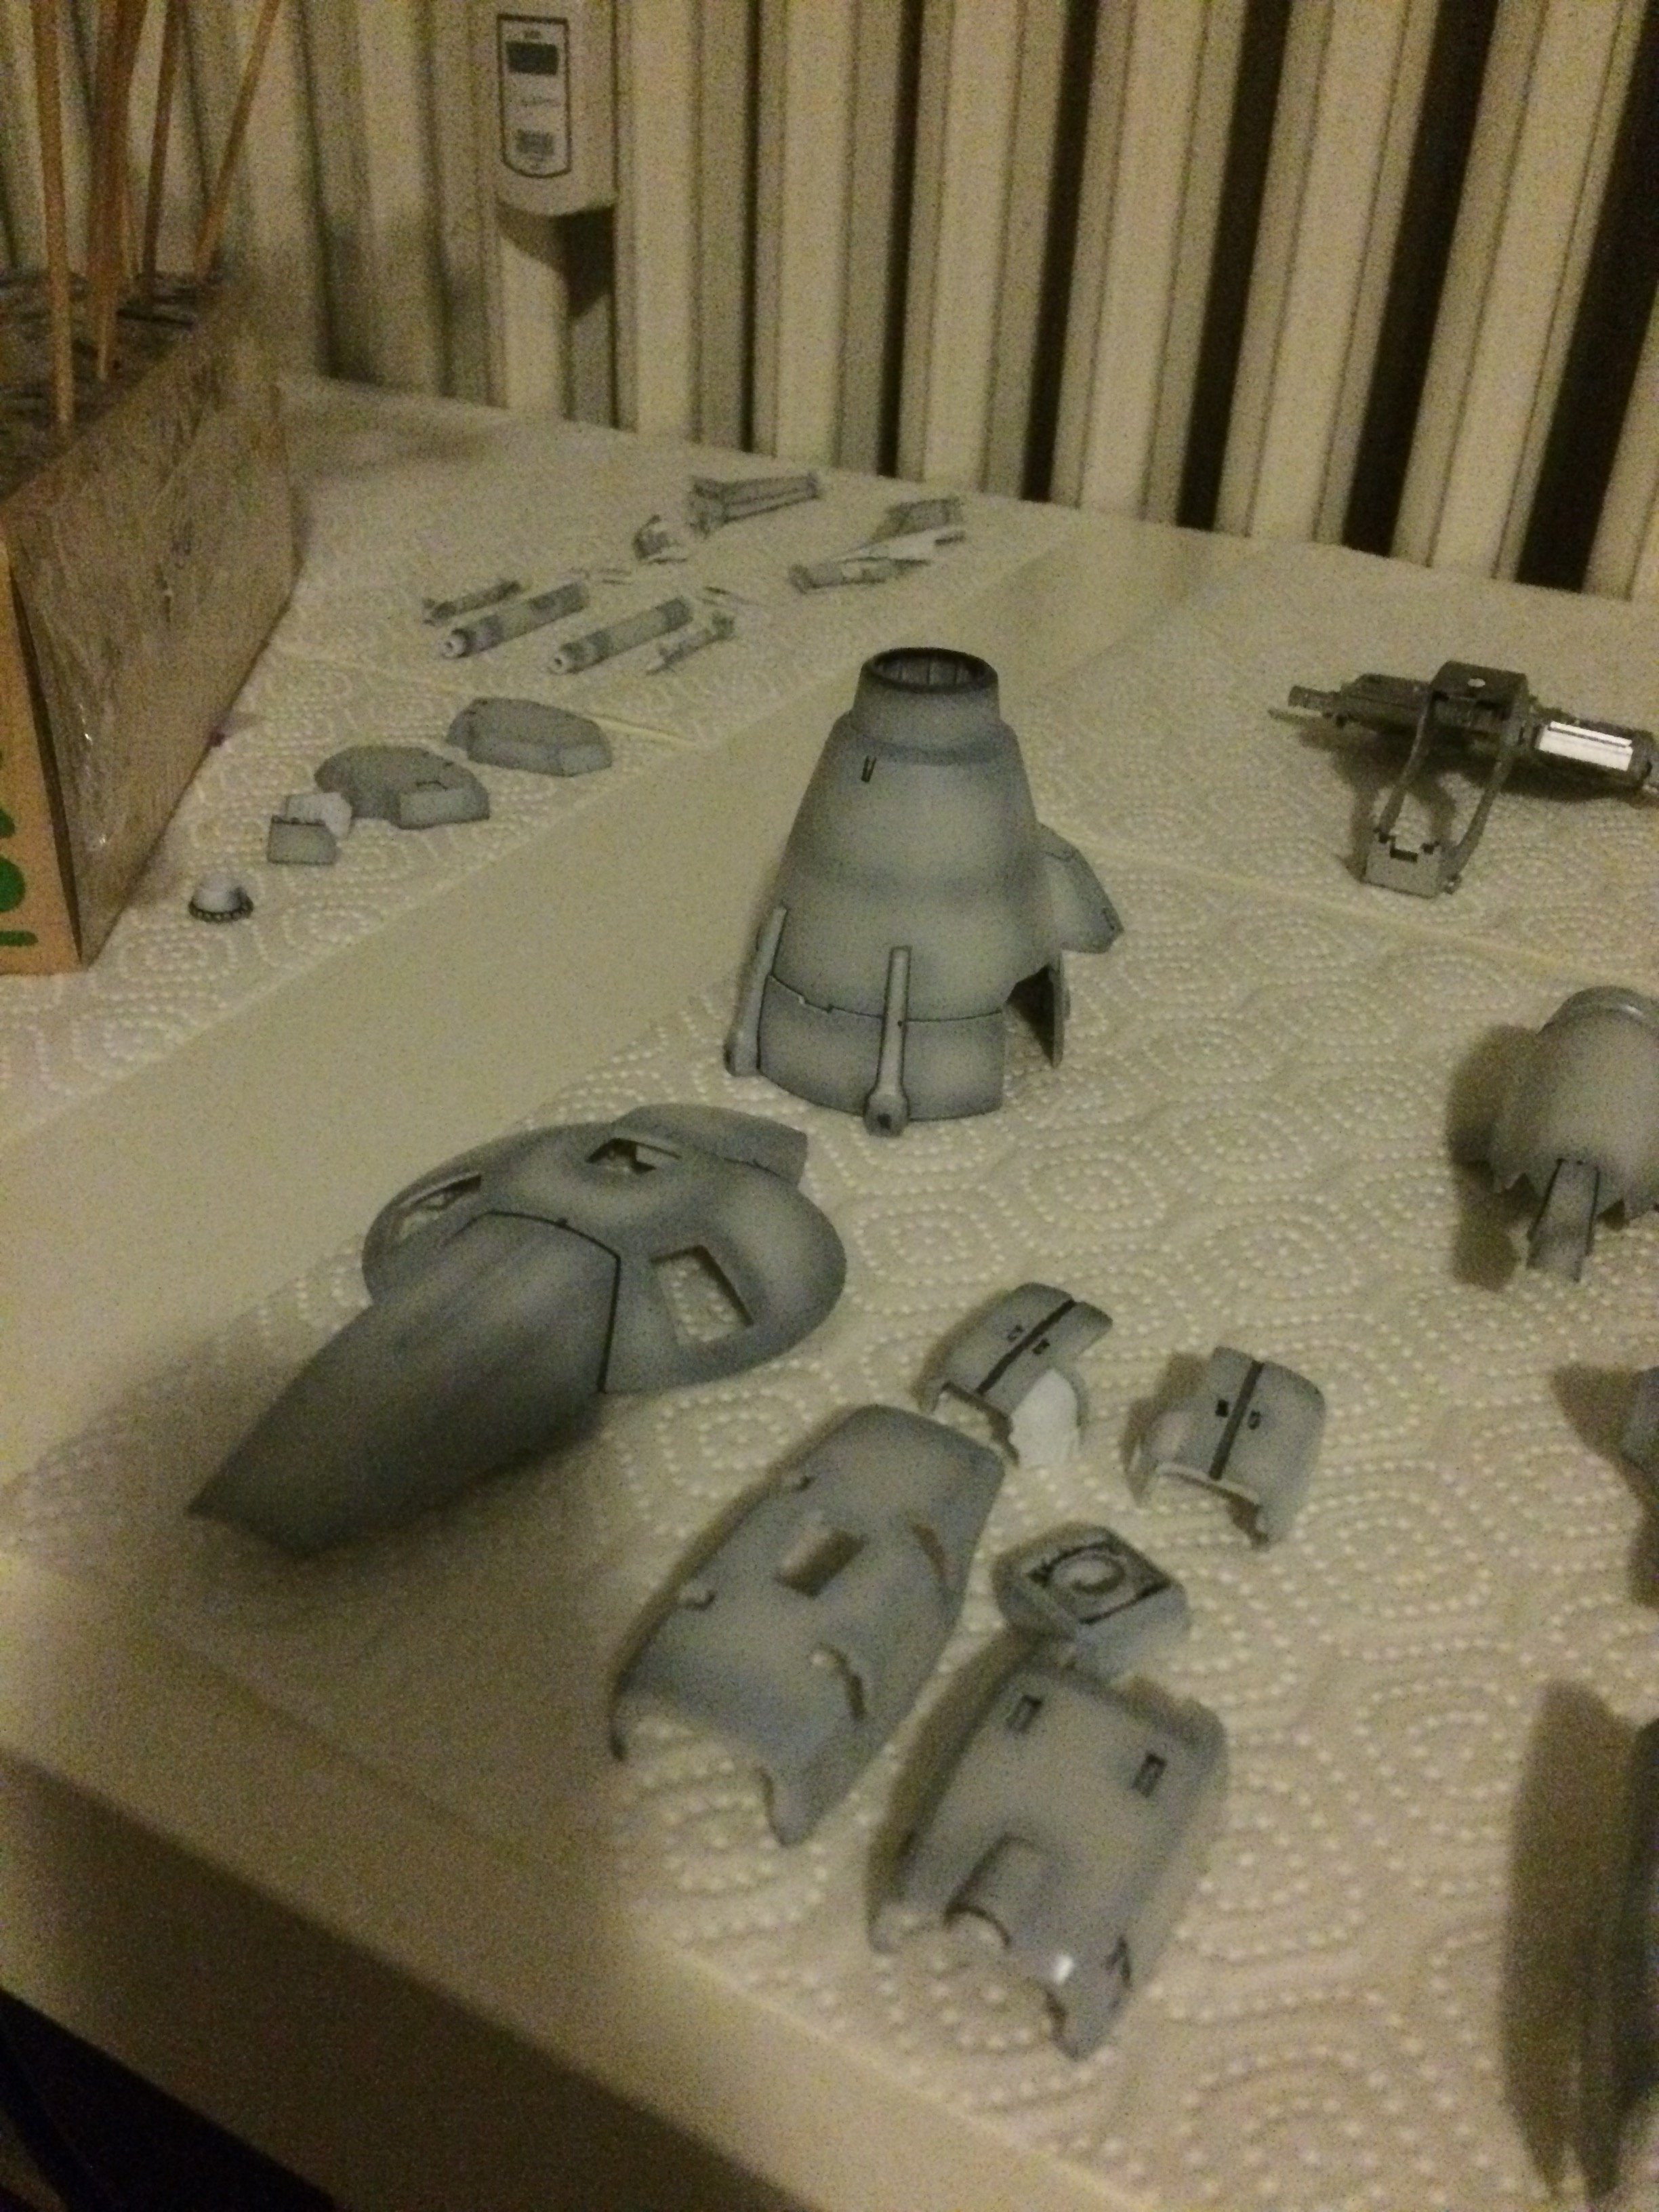
thanks! I used tamiya acrylic (with airbrush) as well as the tamiya weathering set (rust and oil stain). For the inner frame I followed this process: 1 - all painted with a generous layer of chrome alluminium 2 - very very super thin layer of a mixture of flat black and nato black 3 - hadbrush detailing with silver, goald leaf and copper colours 4 - all pieces gently passed with a) toothbrush and b) a brush whith metal for shoes to randomly "scratch" the black layer and expose the chrome 5 - weathering with rust and oil stain powders 6 - sealing with Future top coat the armor is more a normal black preshading, colour and then enamel wash proces.
-
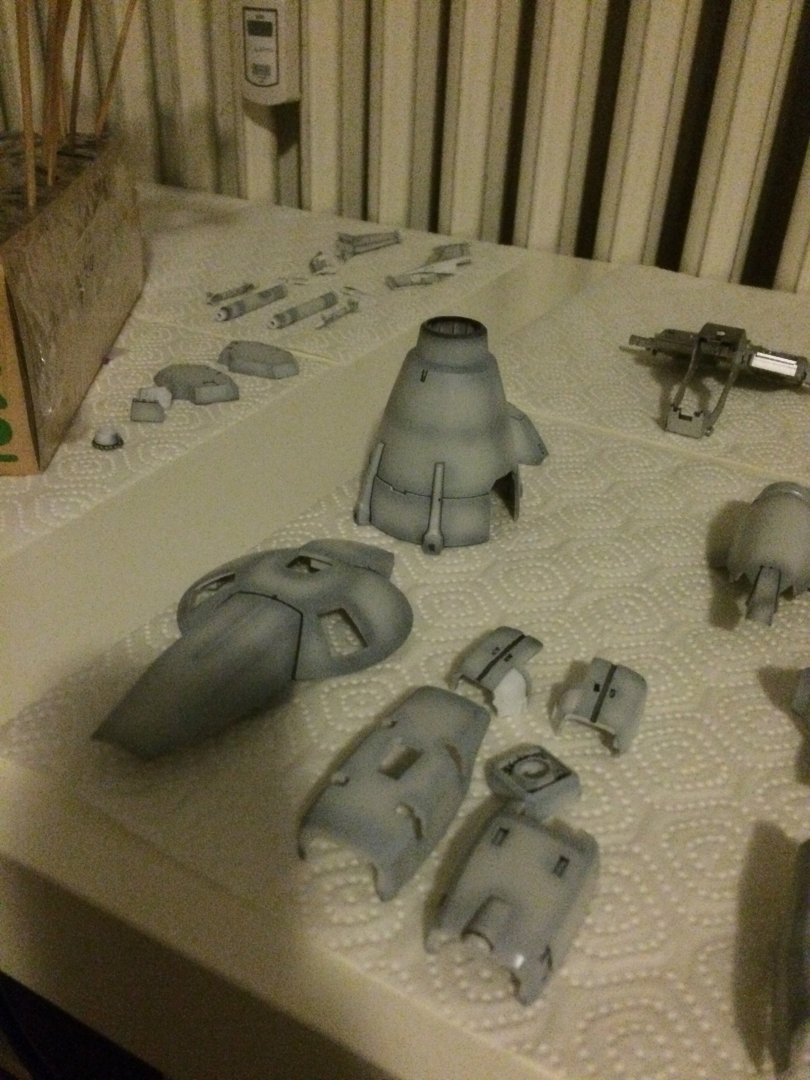
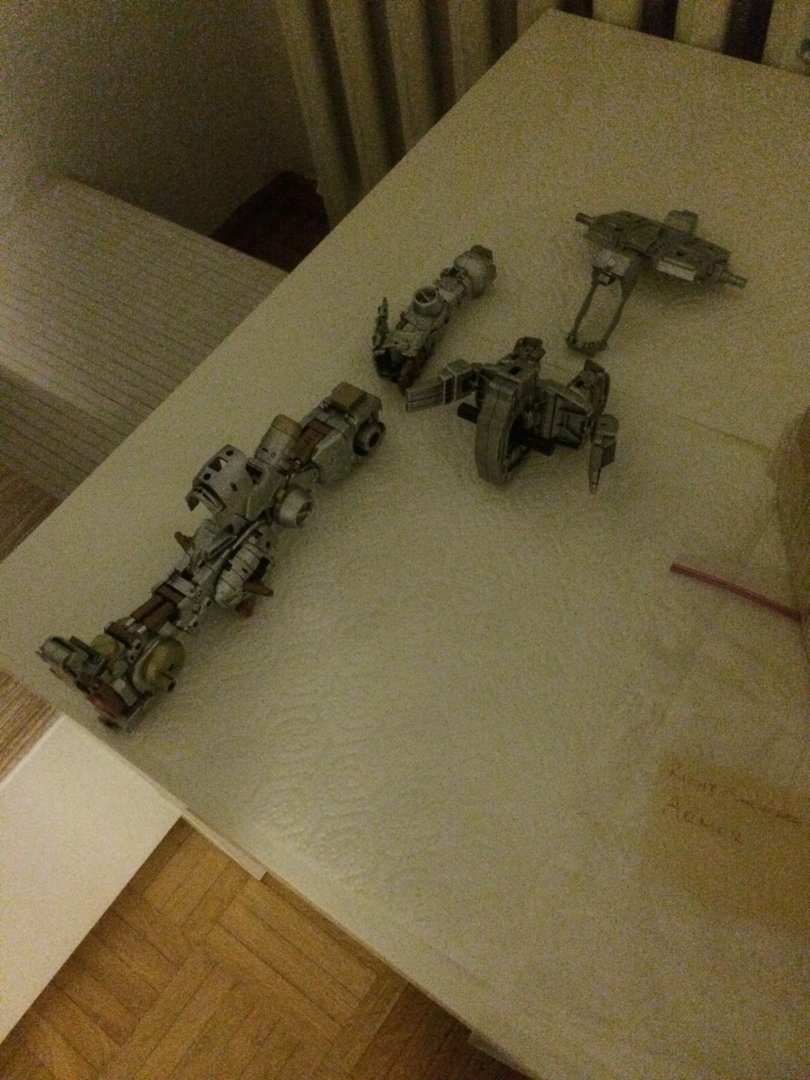
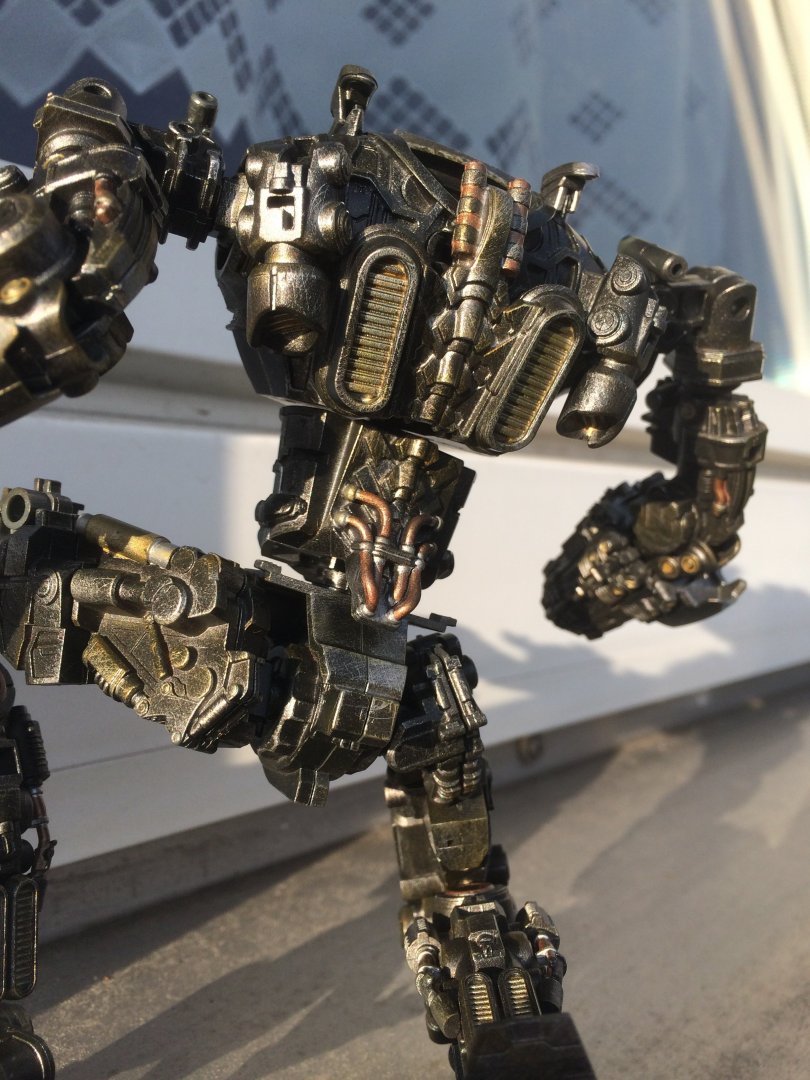
Having some fun trying new (to me) weathering techniques on plamax gypsy danger. It was quite complex to get the intended coloring for the armor but I’m happy with the resilt
-
thanks a lot guys! I'm far from being good enough to take commissions but I try my best I really hope we will have soon a good toy of this design, maybe from Bandai. It is really nice and IT CAN BE DONE! Anyway, back to today's update, as expected the part forming mod used for the Max custom is not only much faster, but also looks slimmer in fighter mode. In summary the mod consist in: BODY MOD - remove completely the piece that is the mechanism for the shoulder transformation as well as the blocking piece for the wings. Cut away all and just leave the remaining piece necessary to clip the metal bar of the legs in battroid mode. Carefully mark where the arms would connect if directly attached (shoulder joint) and place a good magnets there. Same near the end of the body (identical as for the Roy mod). backpack tail shortened strainght. ARMS MOD - dirll in the hole for the screw (shoulder joint) and add the magnet. Magnet added also near the wrist (same as Roy mod but no epoxy putty modelling) NOSECONE MOD - same as the Roy mod (so removal of the fin, epoxy putty and then magnet) INTAKE MOD + LEG REPOSITIONING - same as the Roy mod. Pictures of the assembled bird, you can see that the arms are sitting even closer to the body now, almost at the same level as the ending of the new designed air intake. Even if I prefer the overall proportion of the Roy better, I have to say I really like also this one. If I will ever decide to do another one, I'll do this mod. Both together for comparison. Next stepi s to sand down the connection points for the SAP (so the paint job will not be totally destroied...just a little bit ) and dress them up!


-
thanks, yes the Roy is still perfect transformation, the Max version (will assemble it soon) instead has the arms partforming (but potentially will look better than the Roy and the mod is only around 5 hours of work).
-
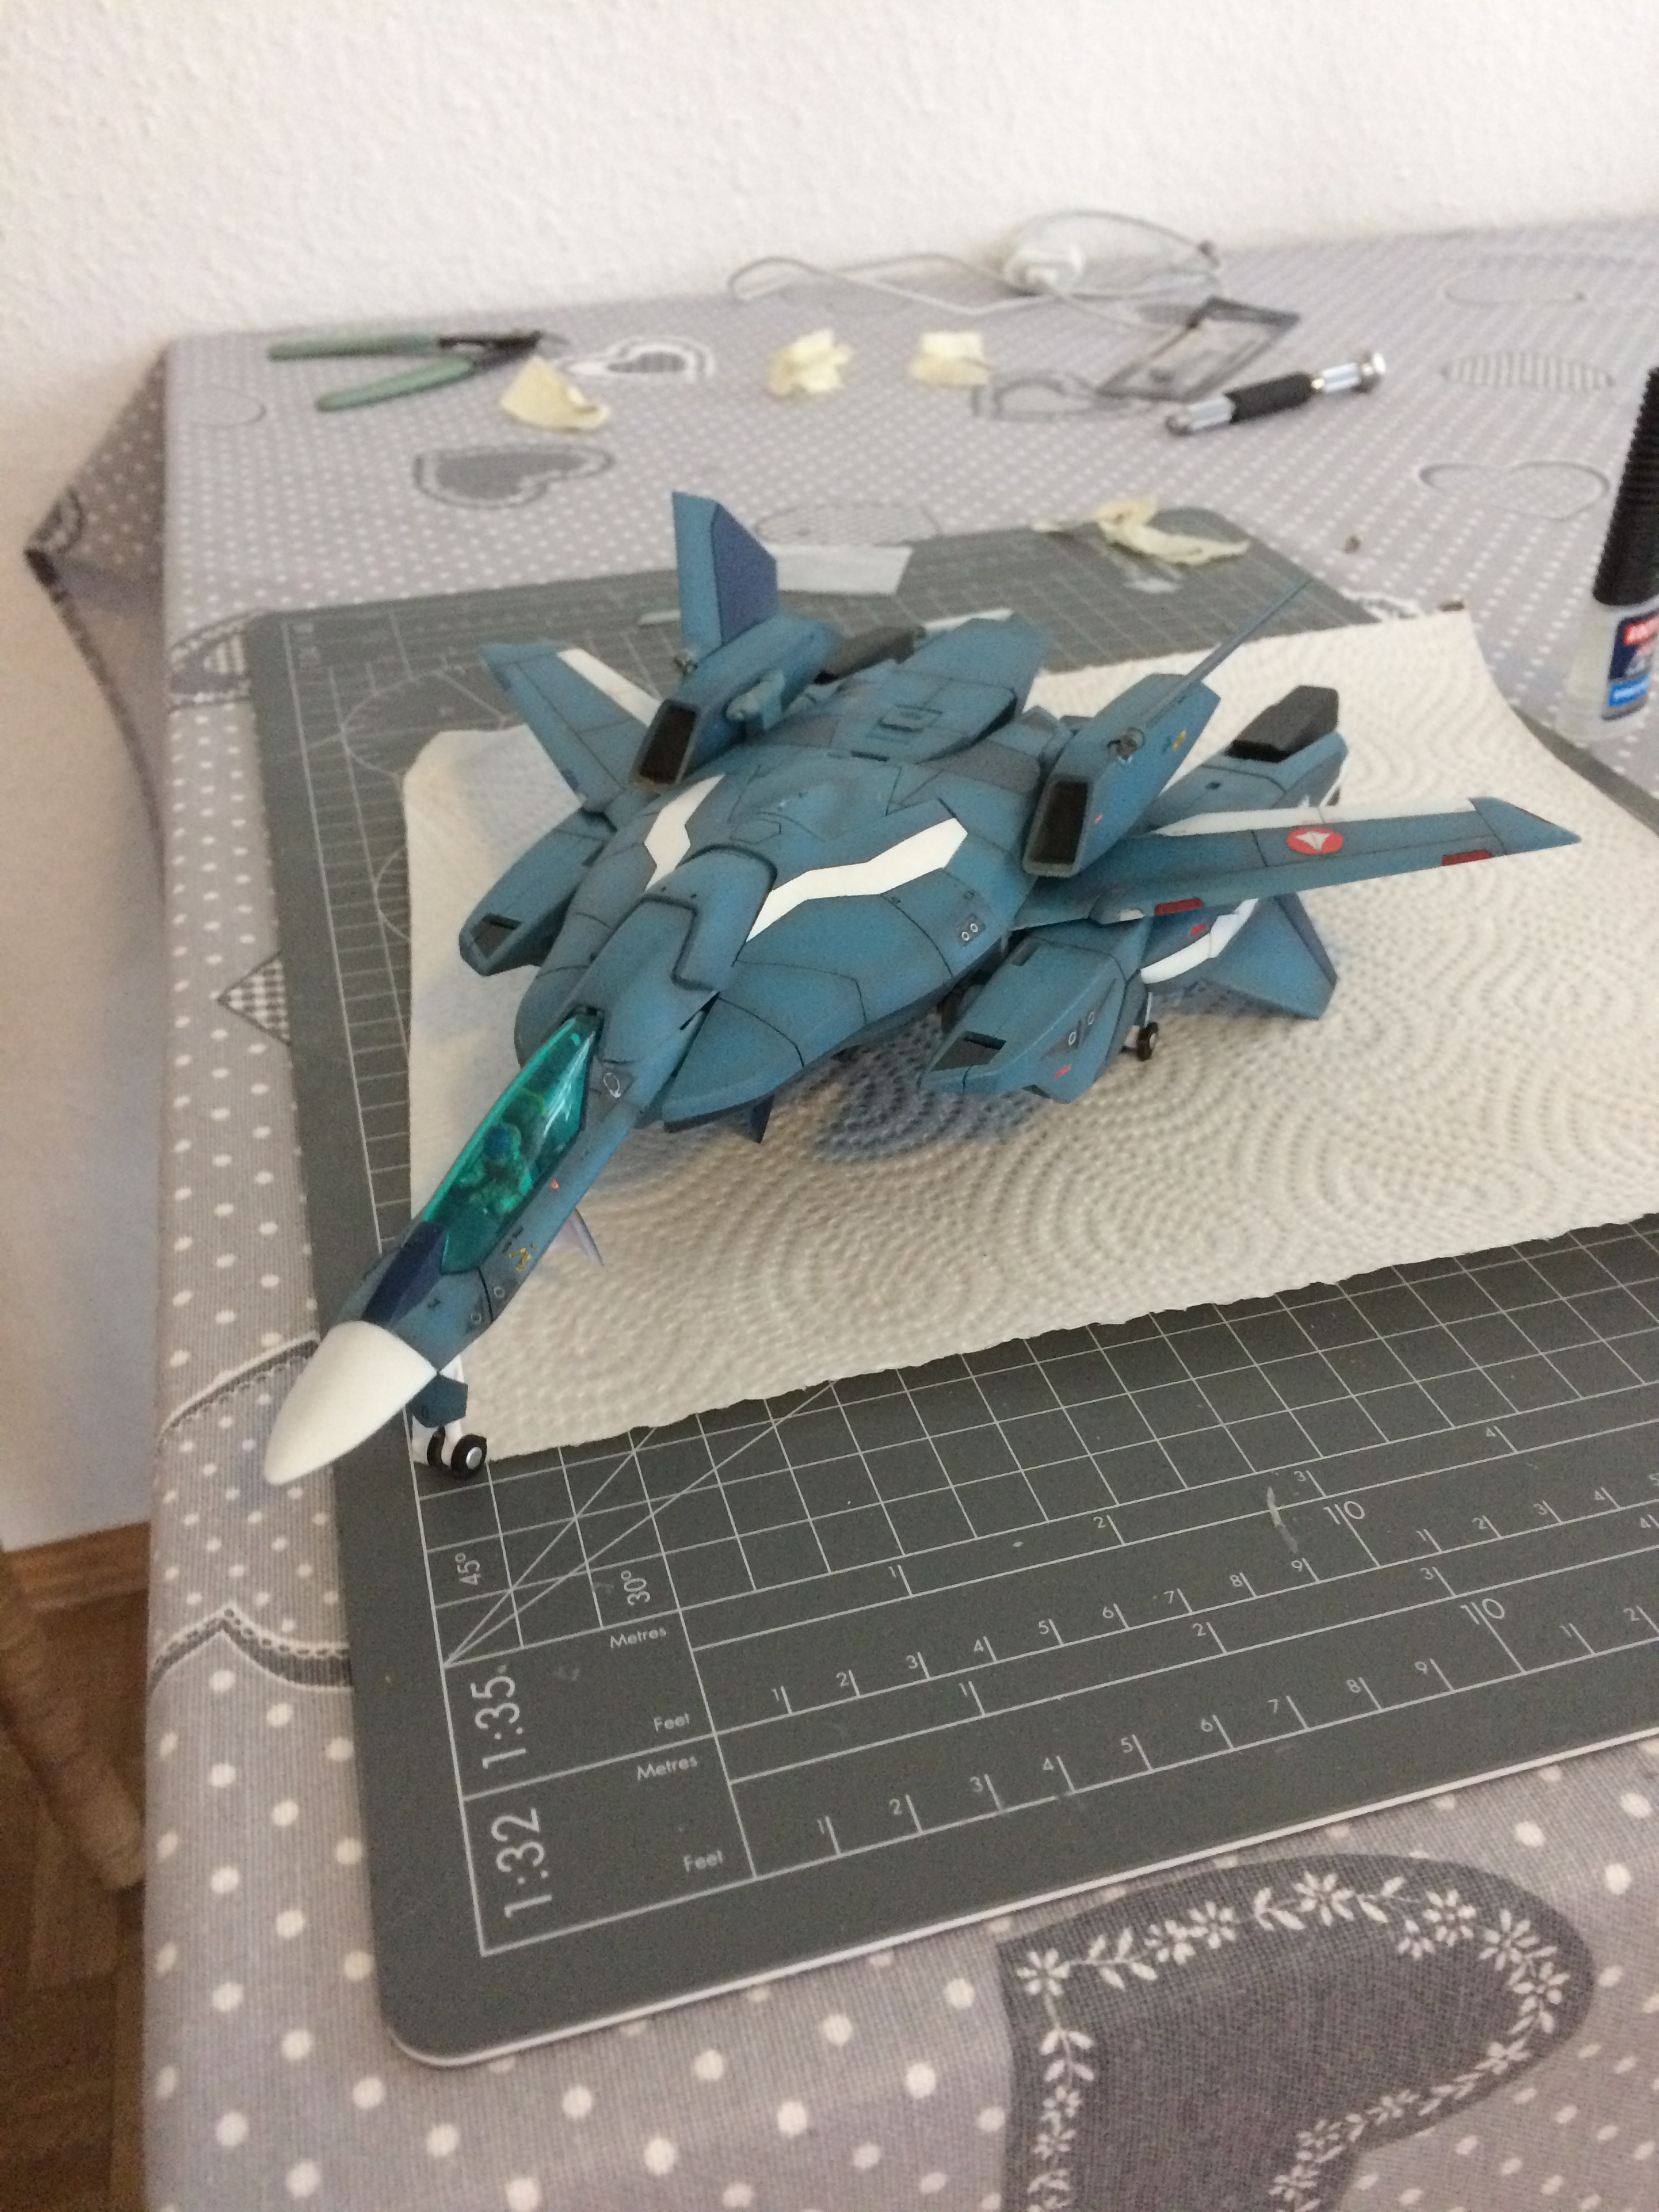
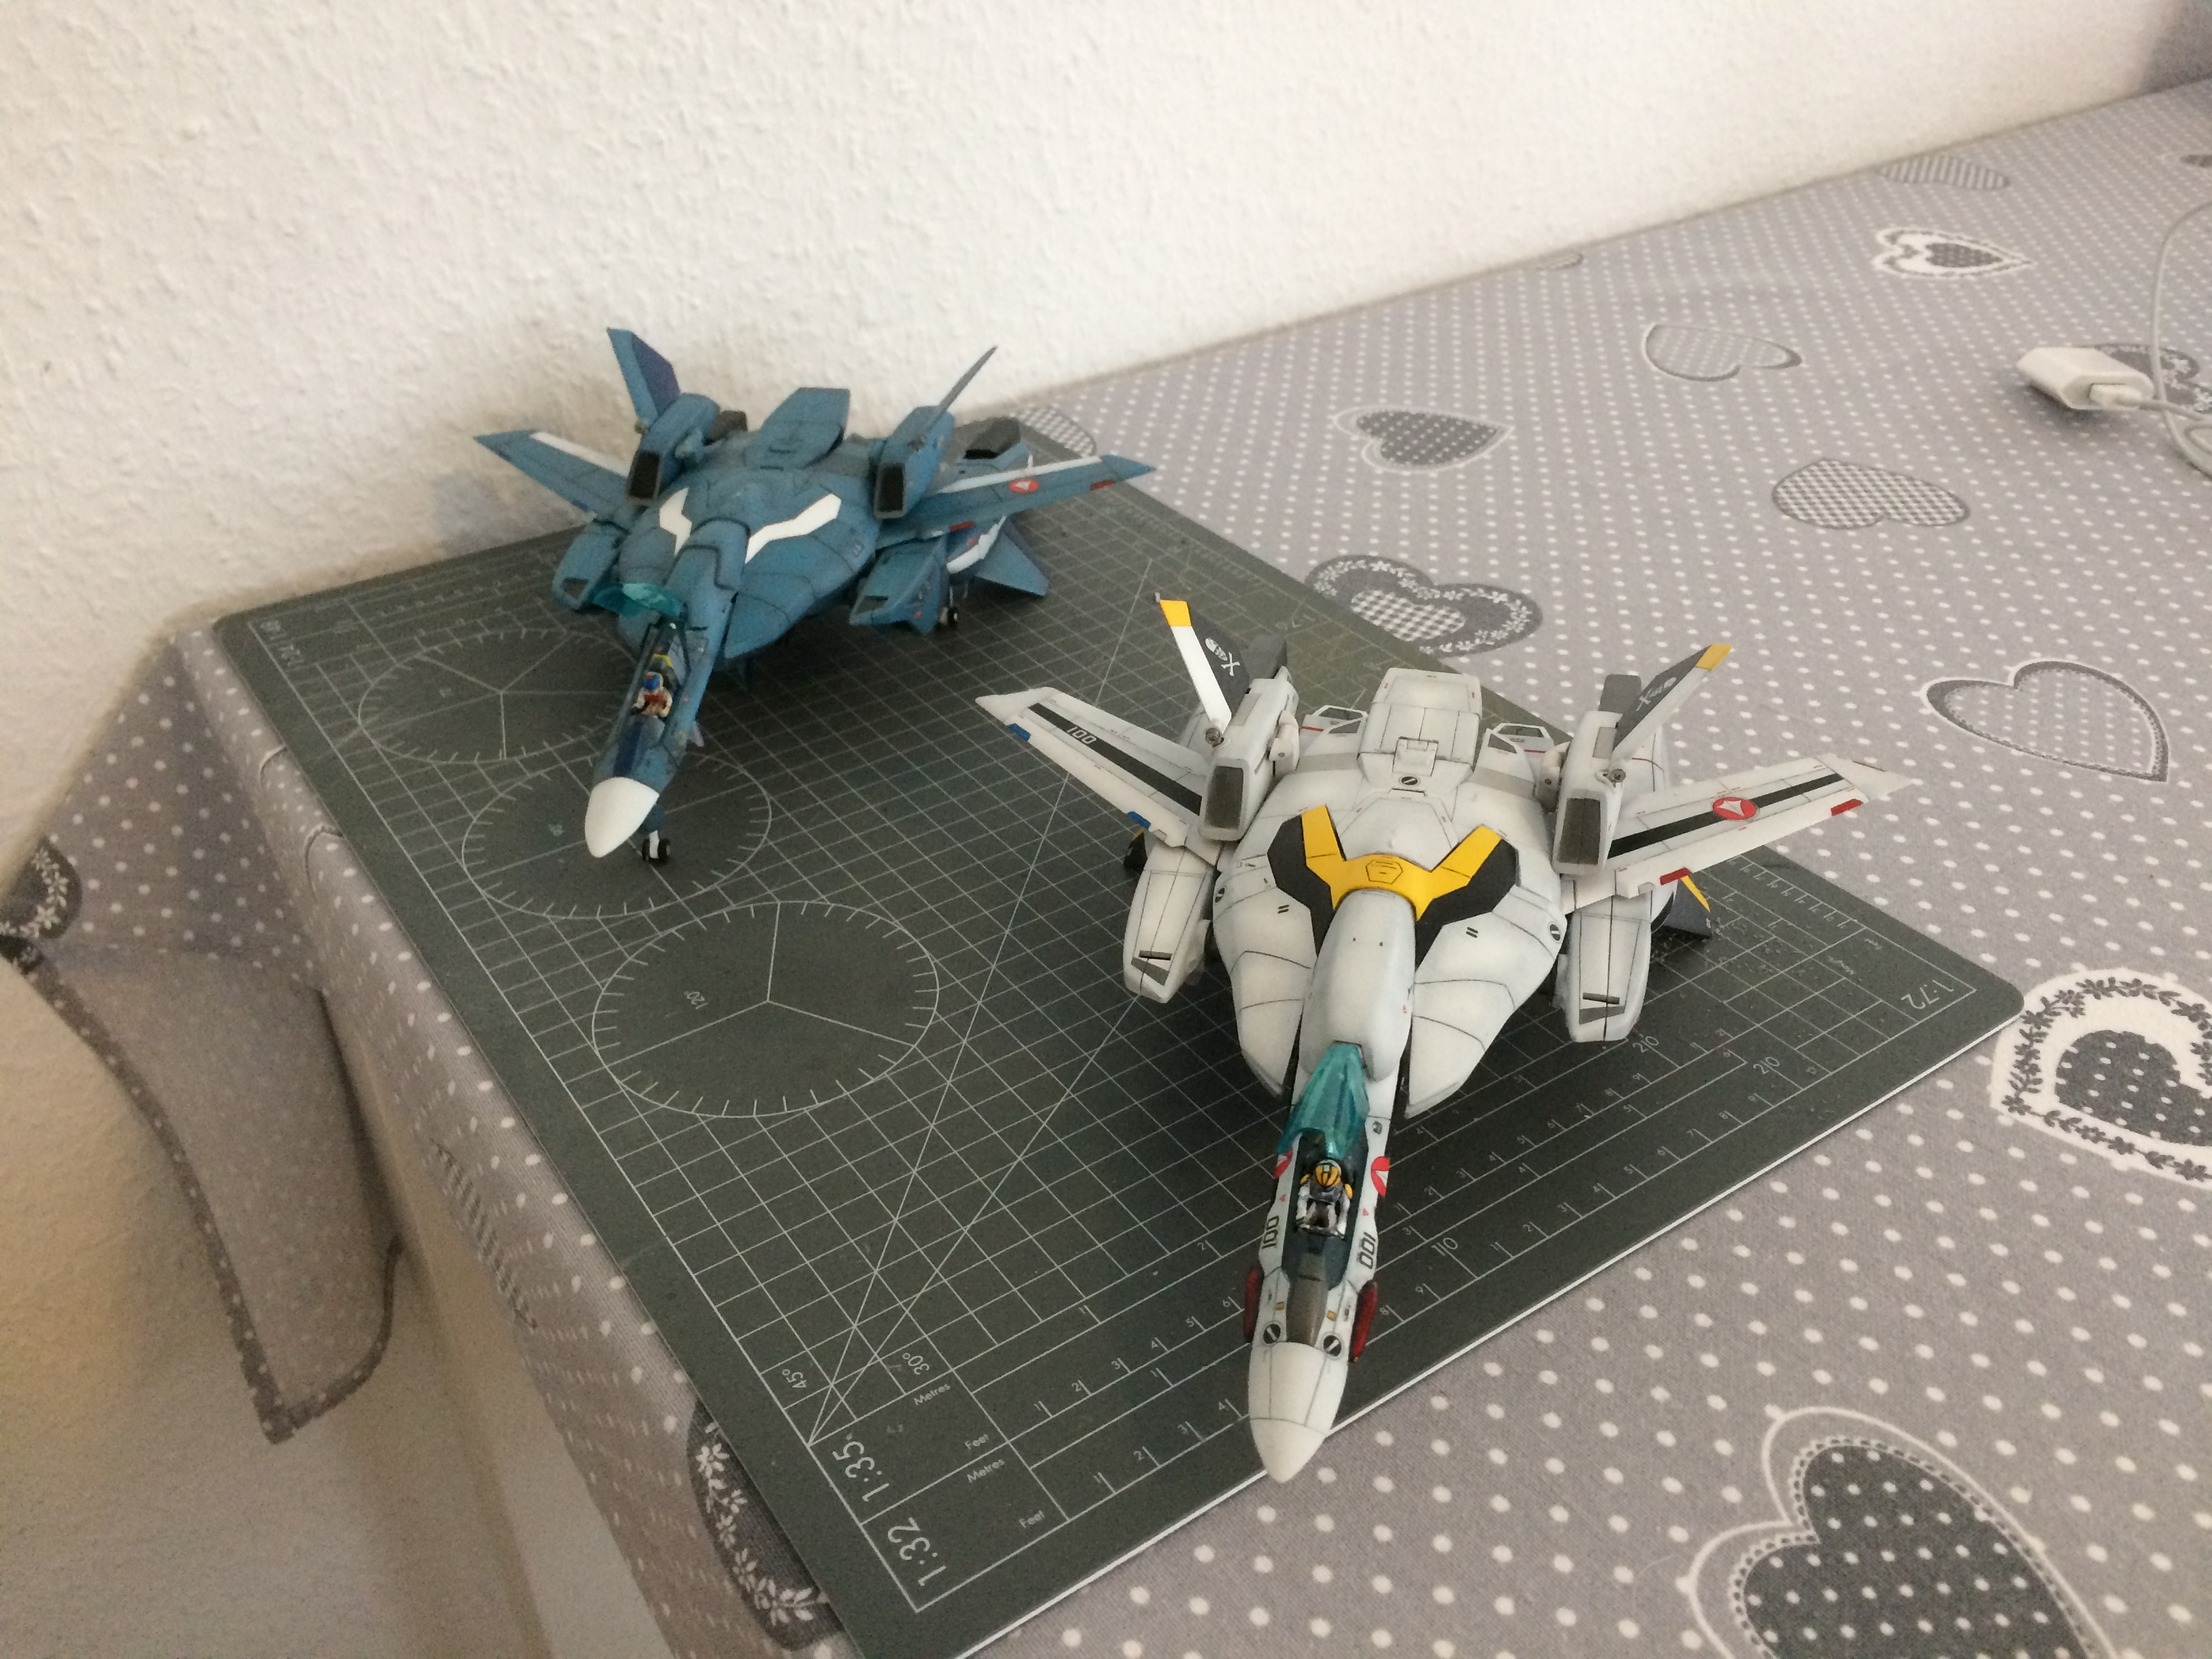
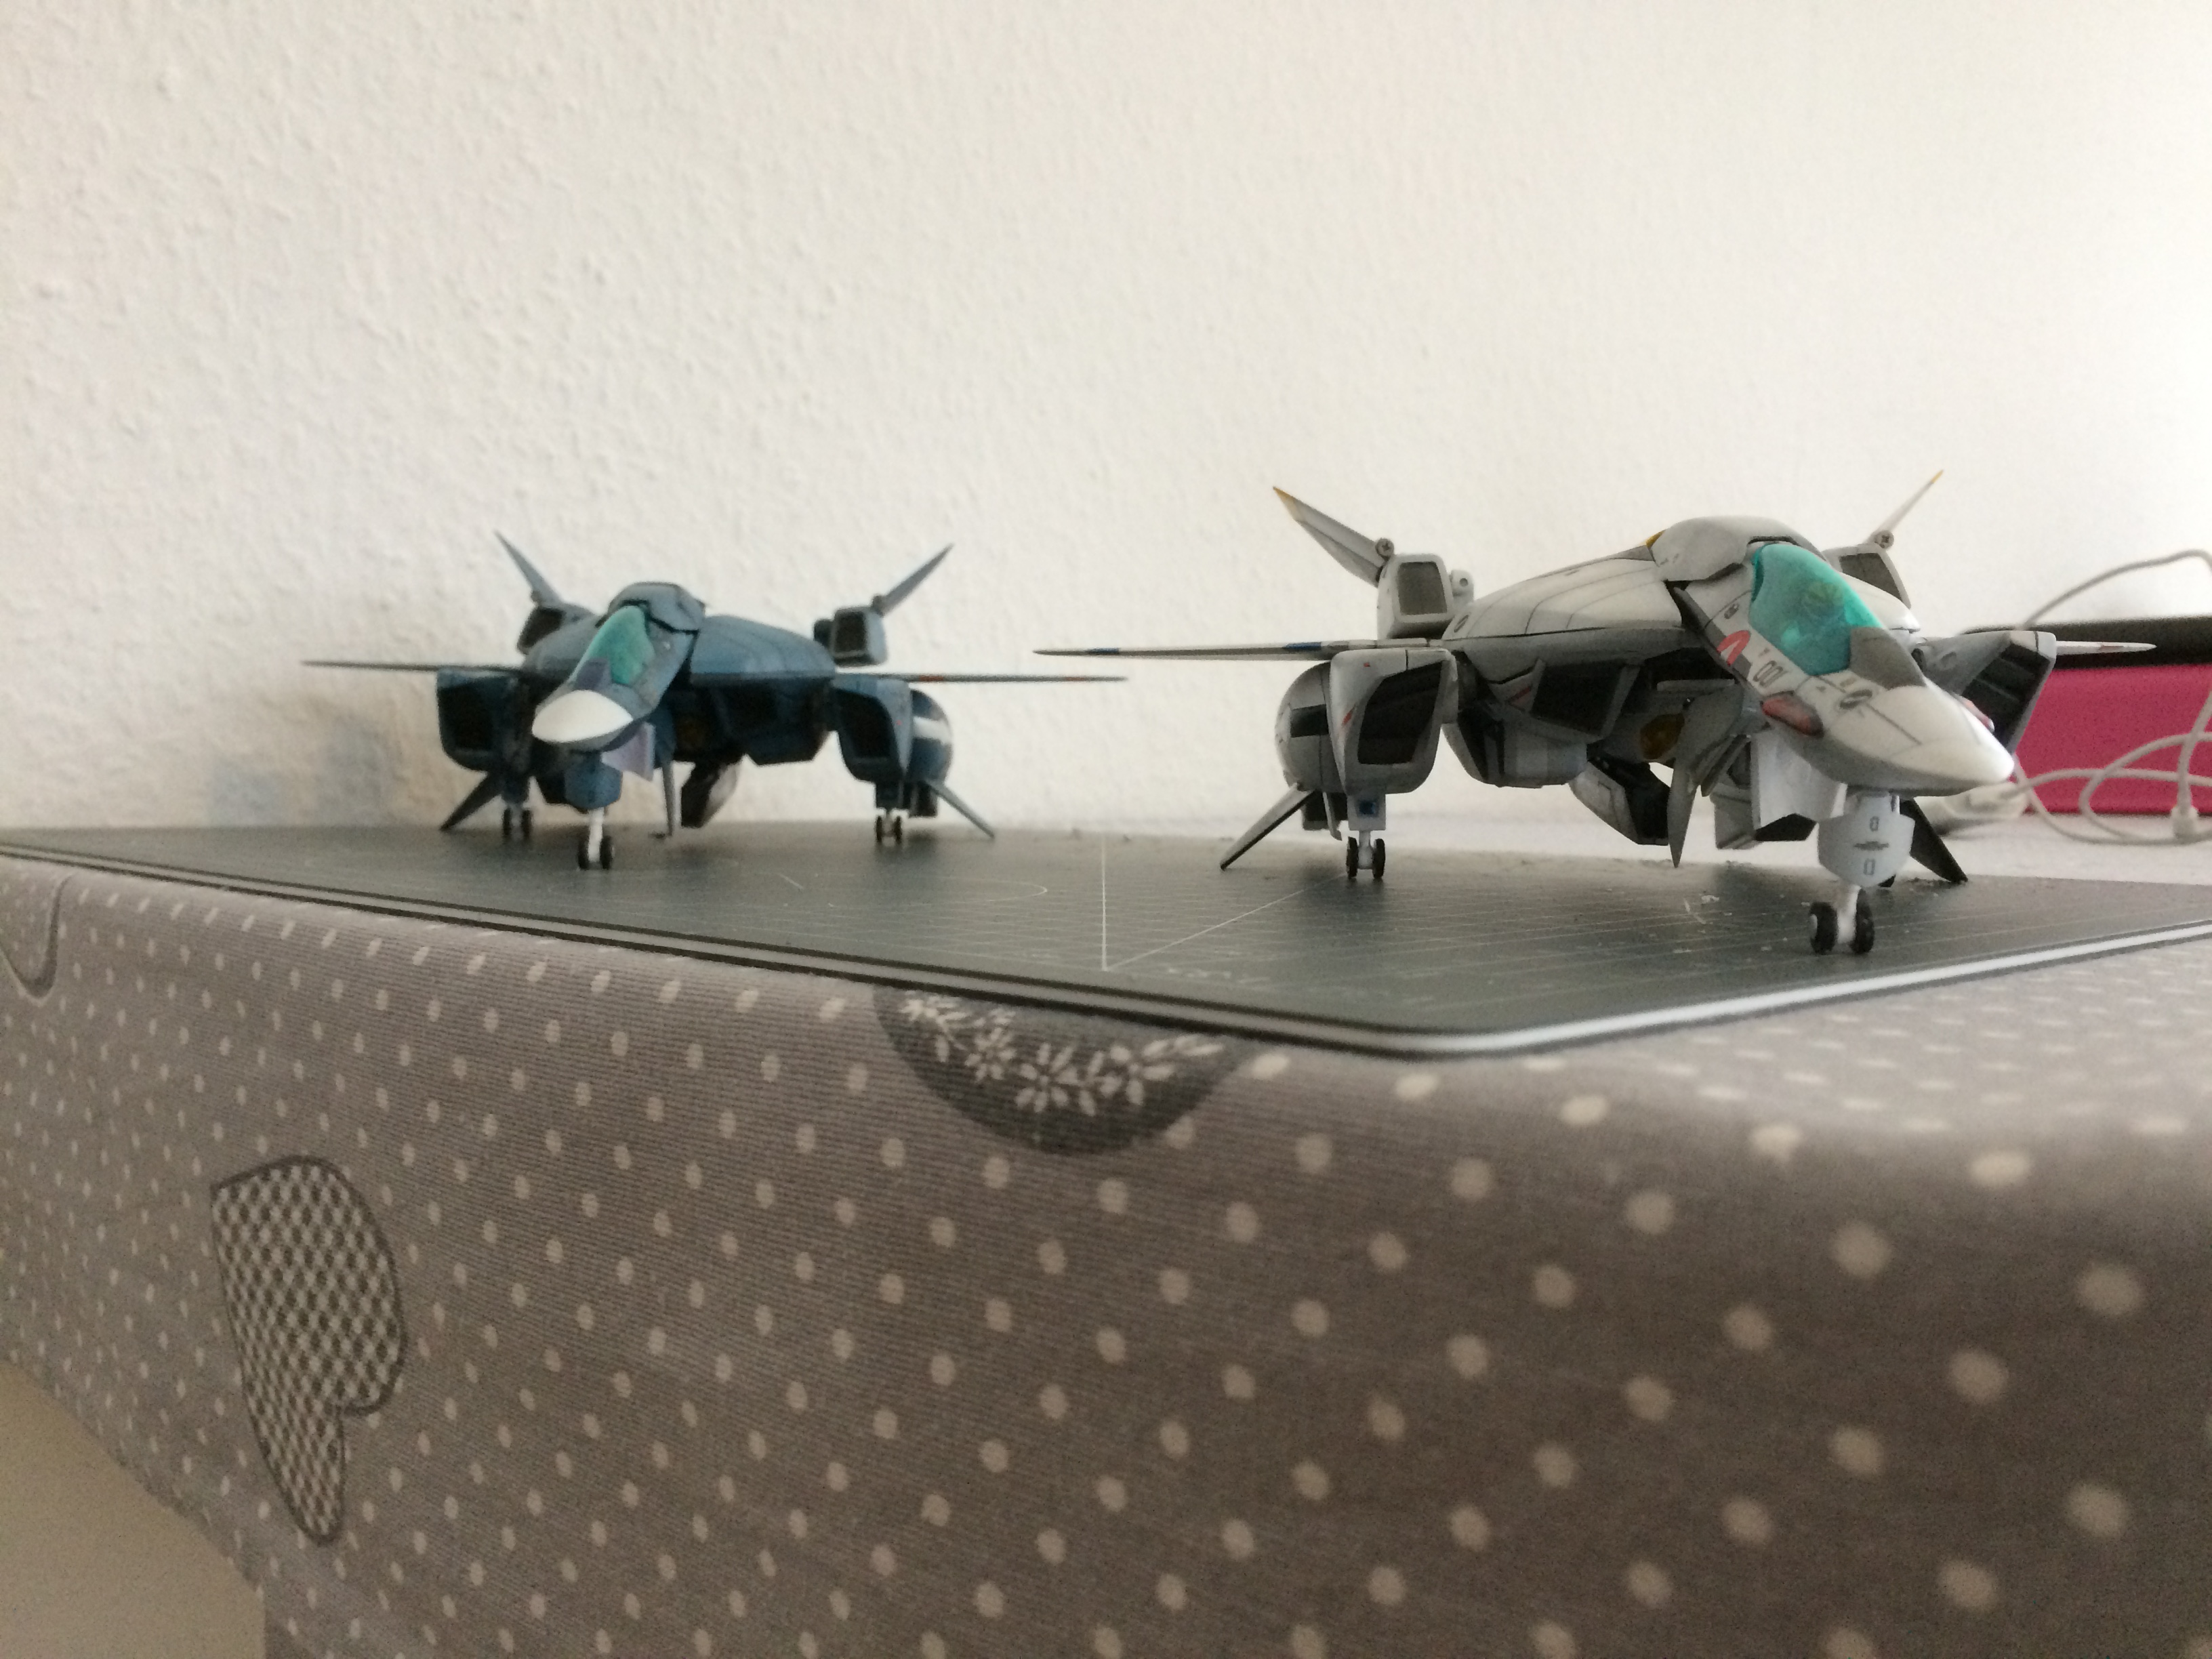
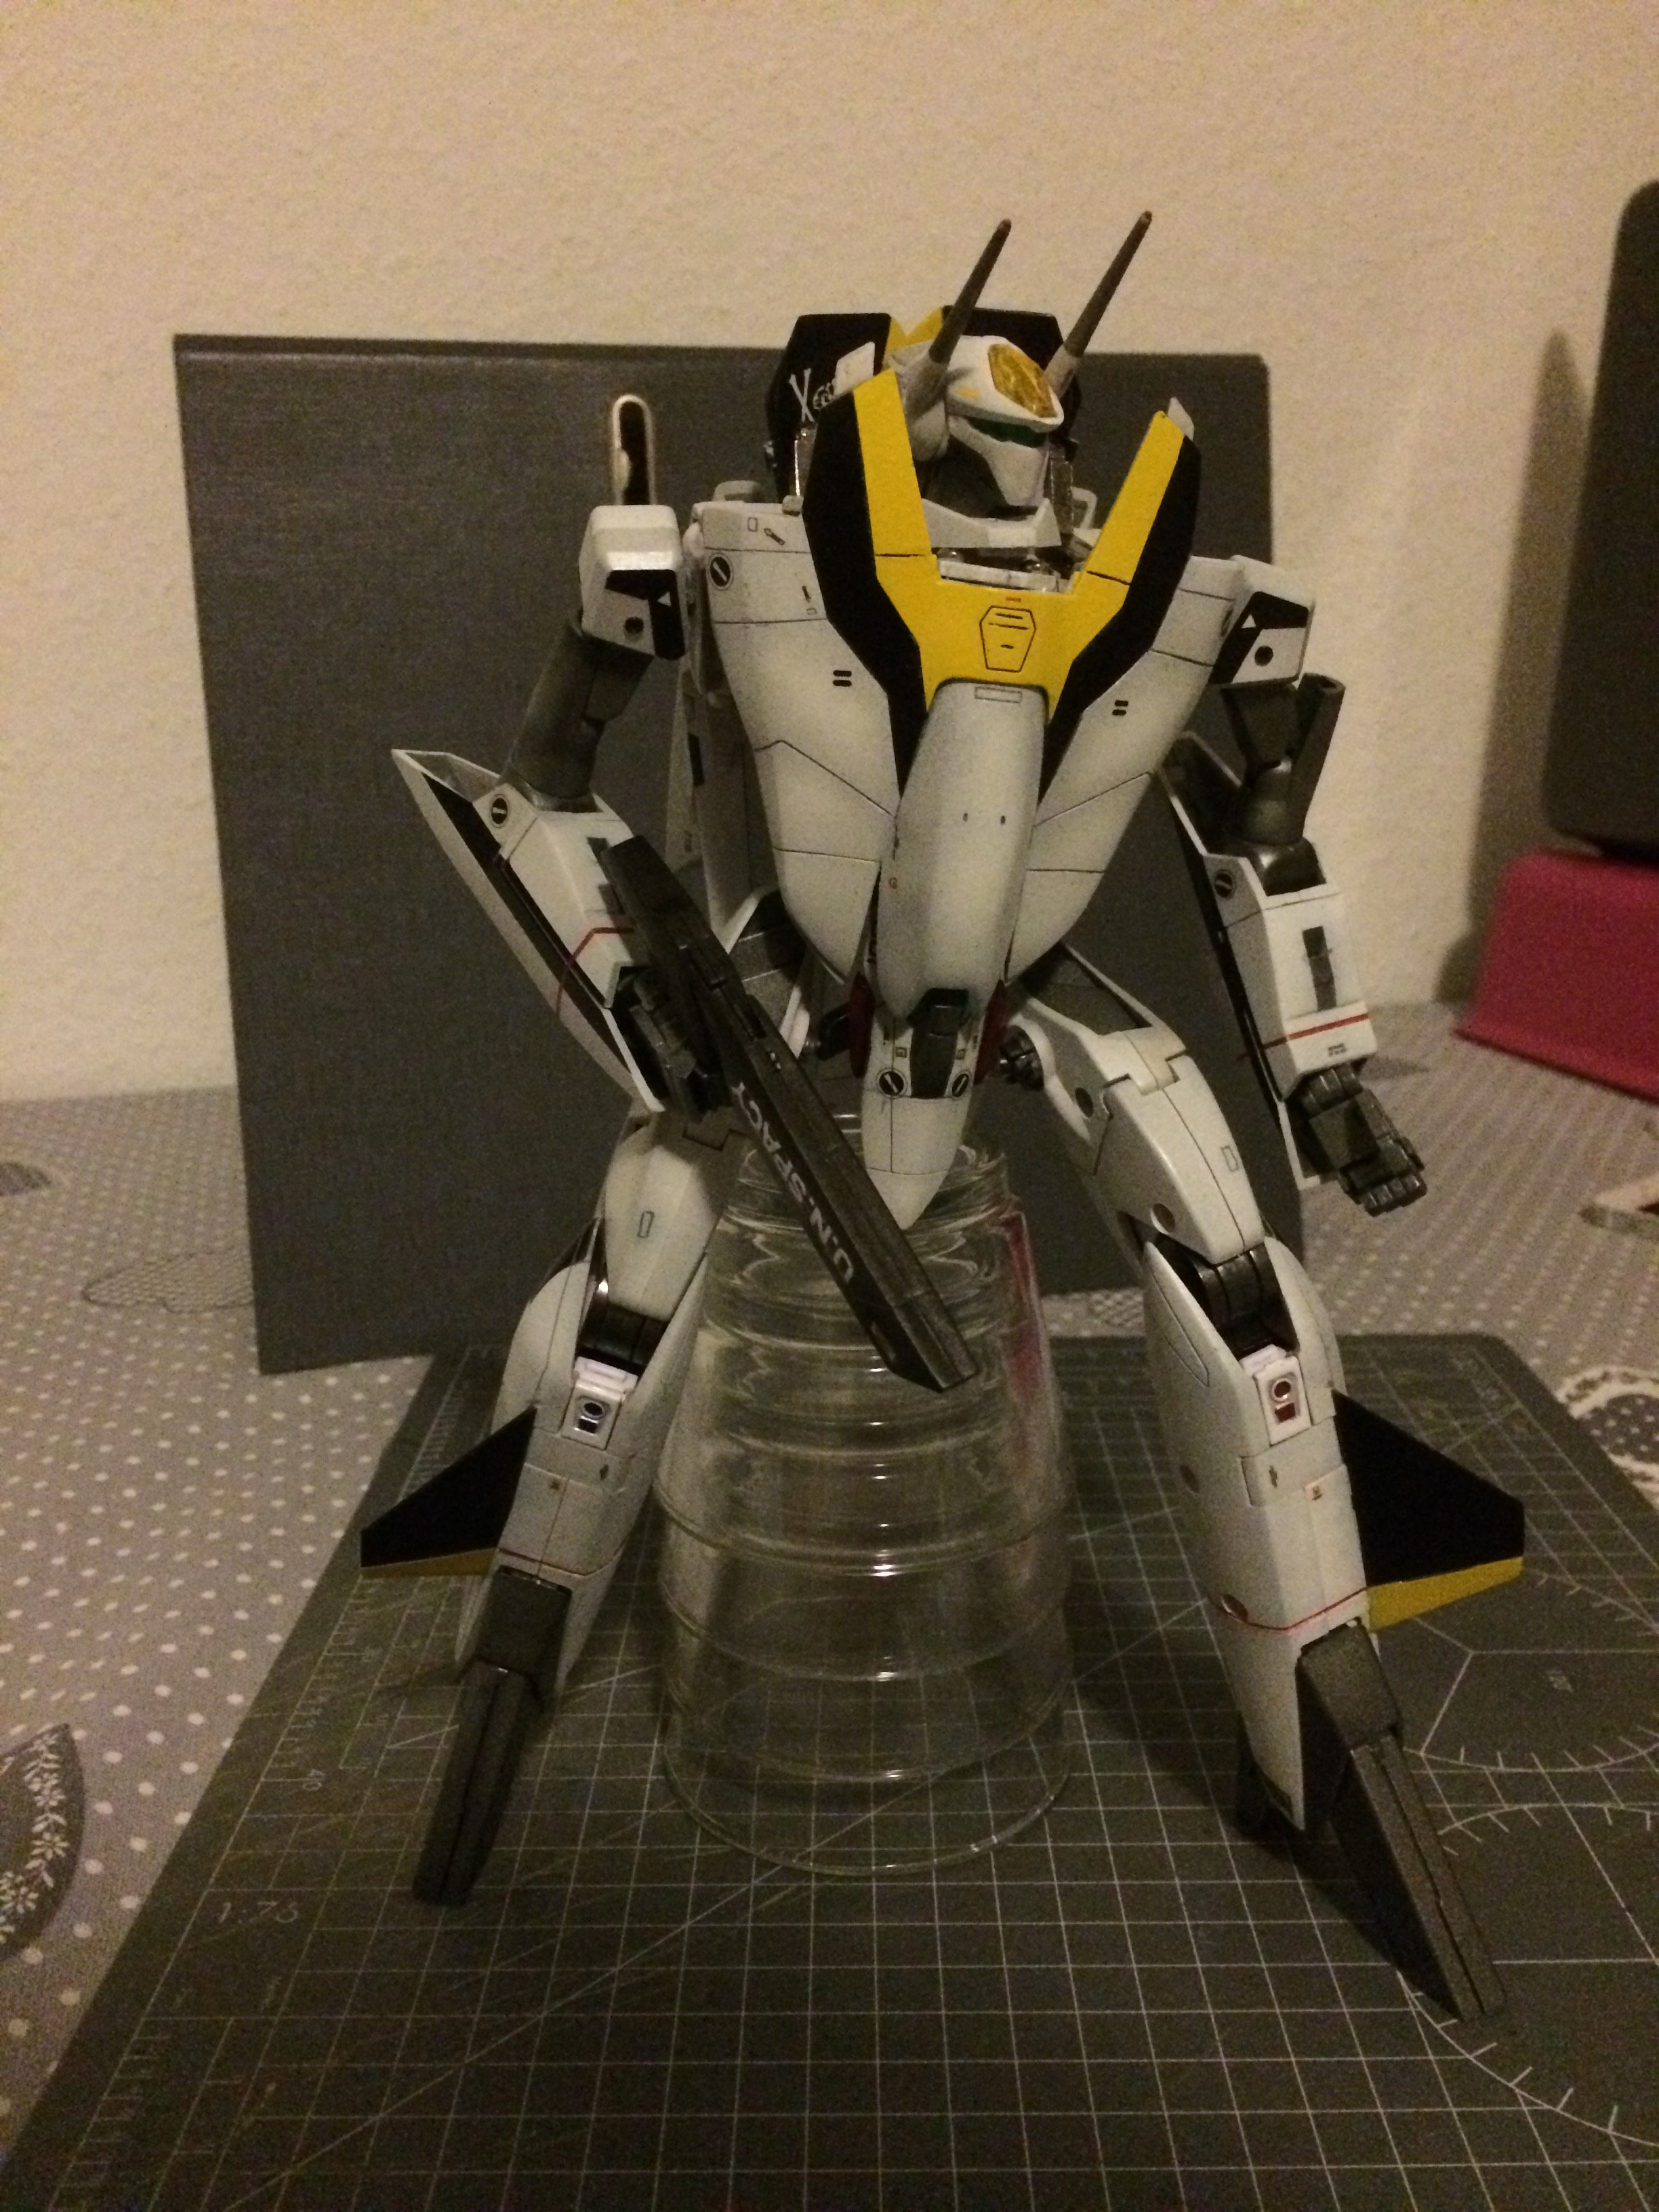
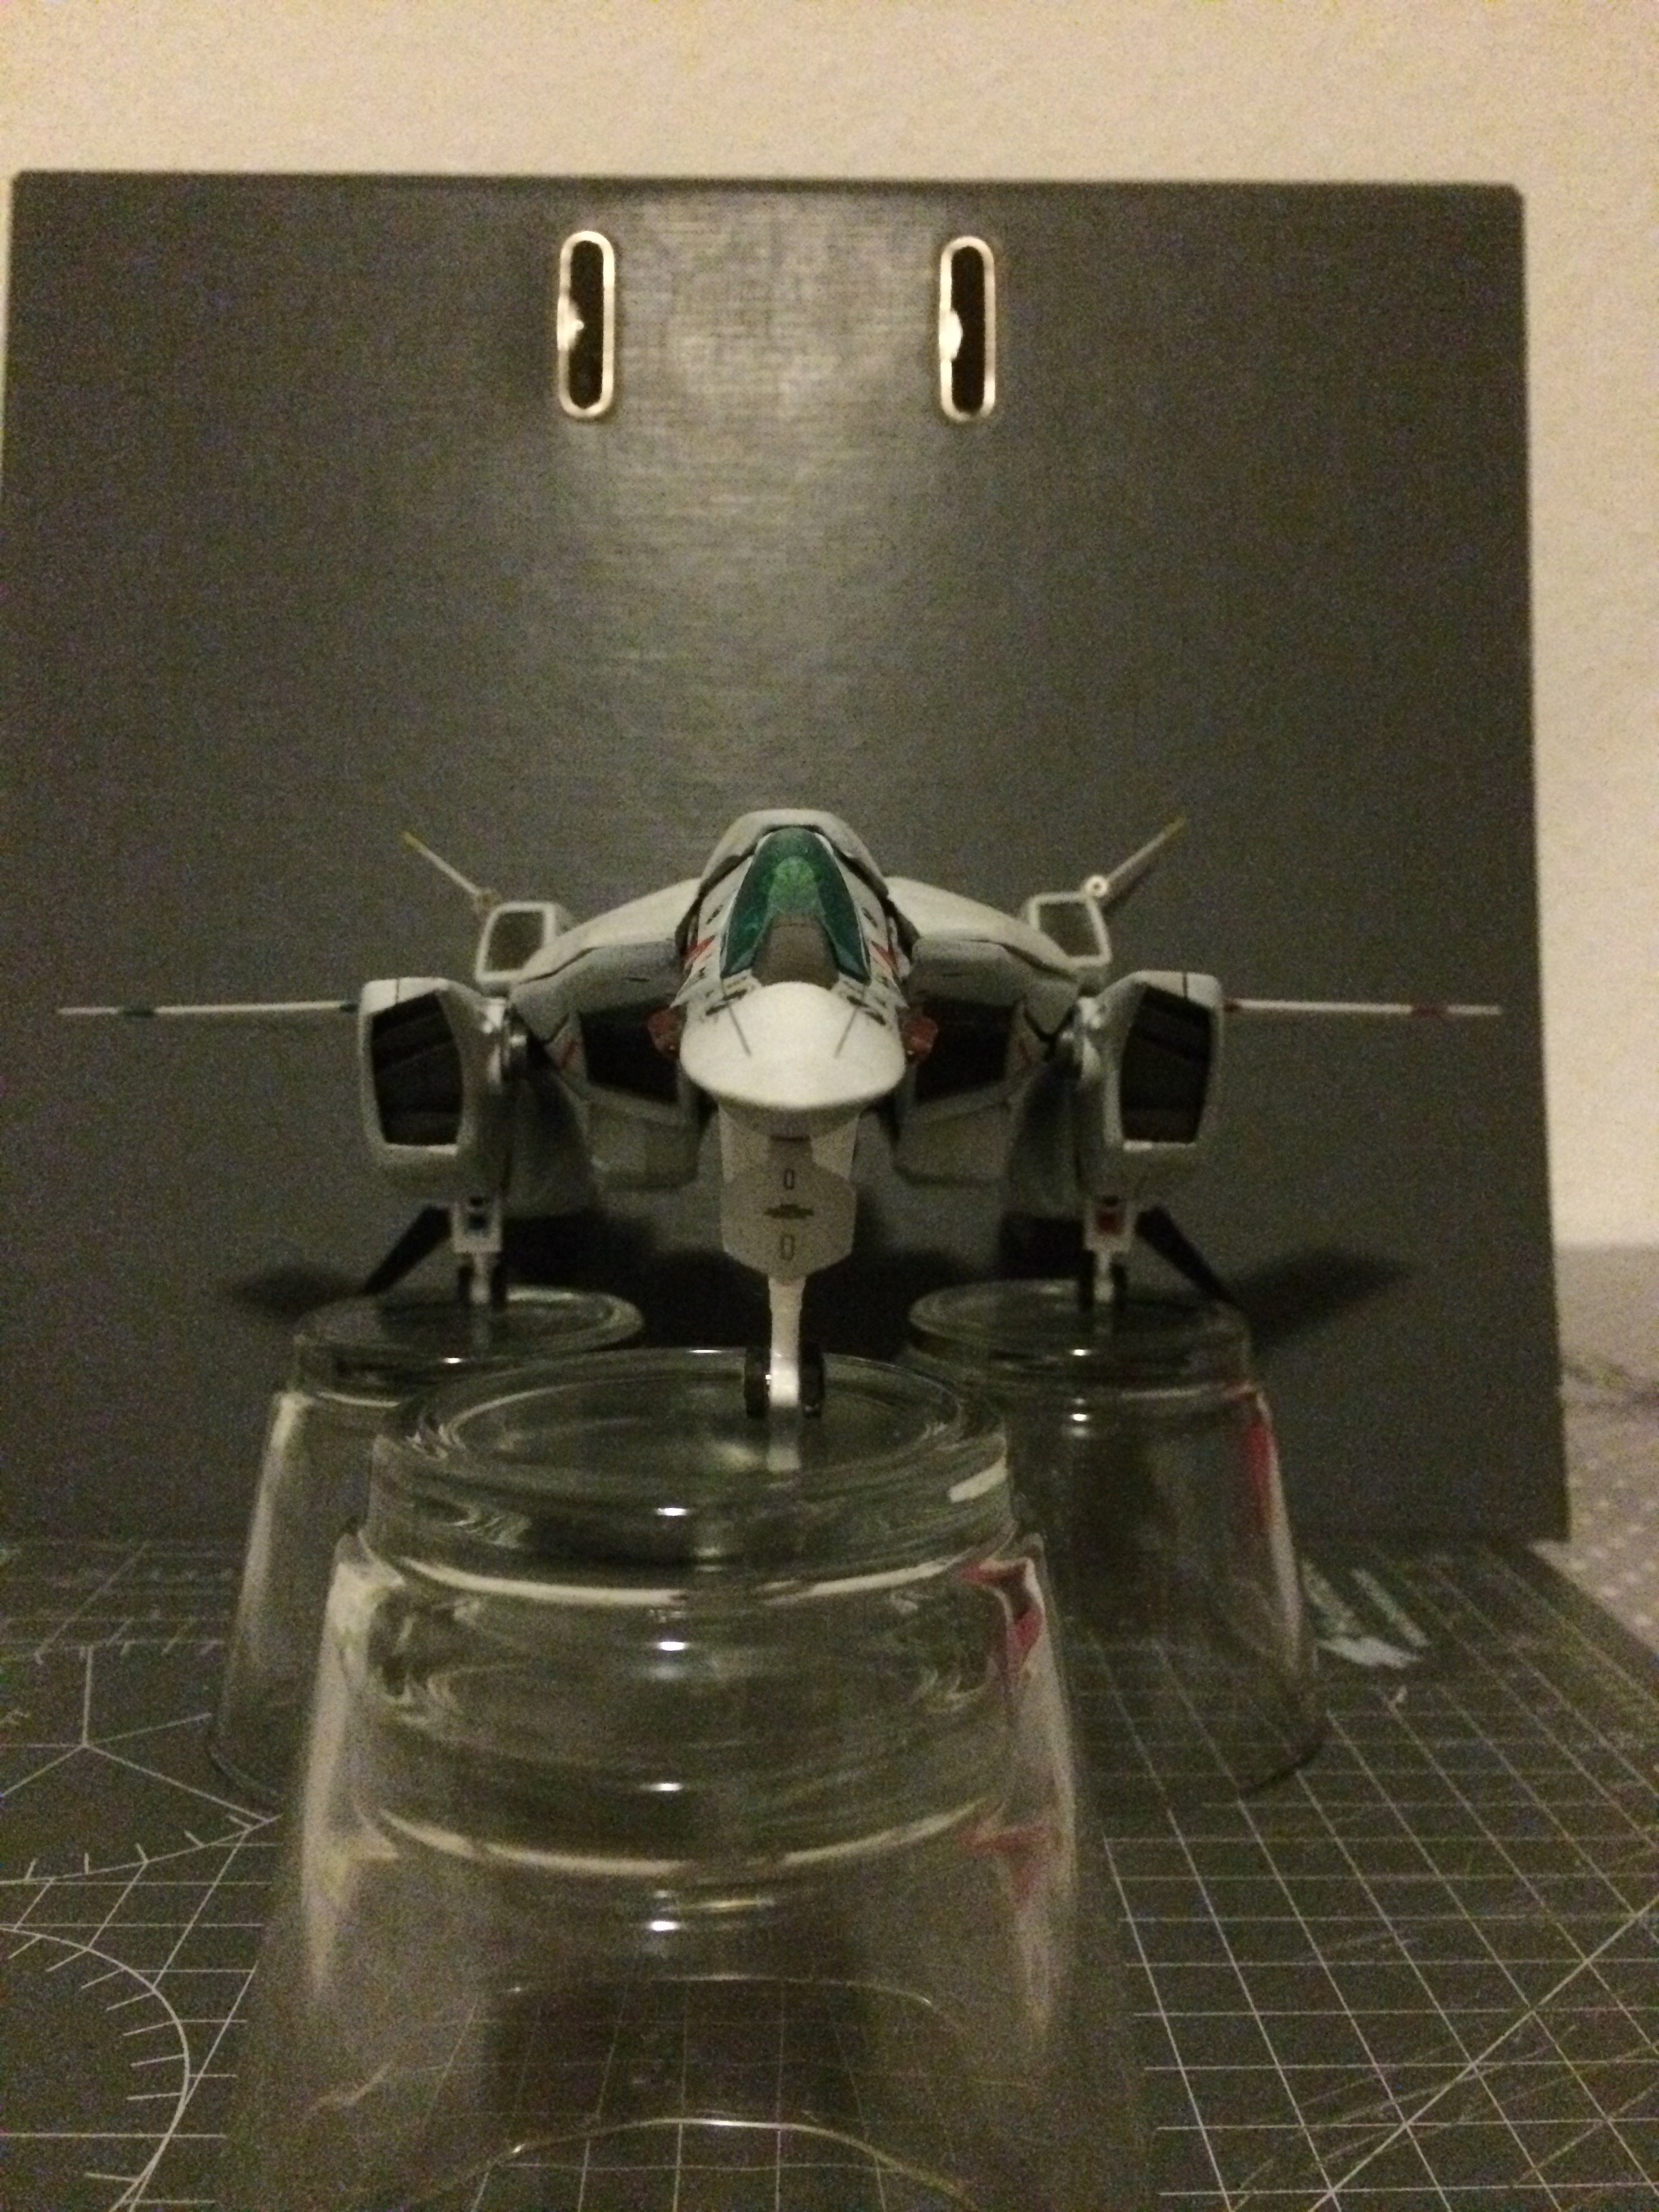
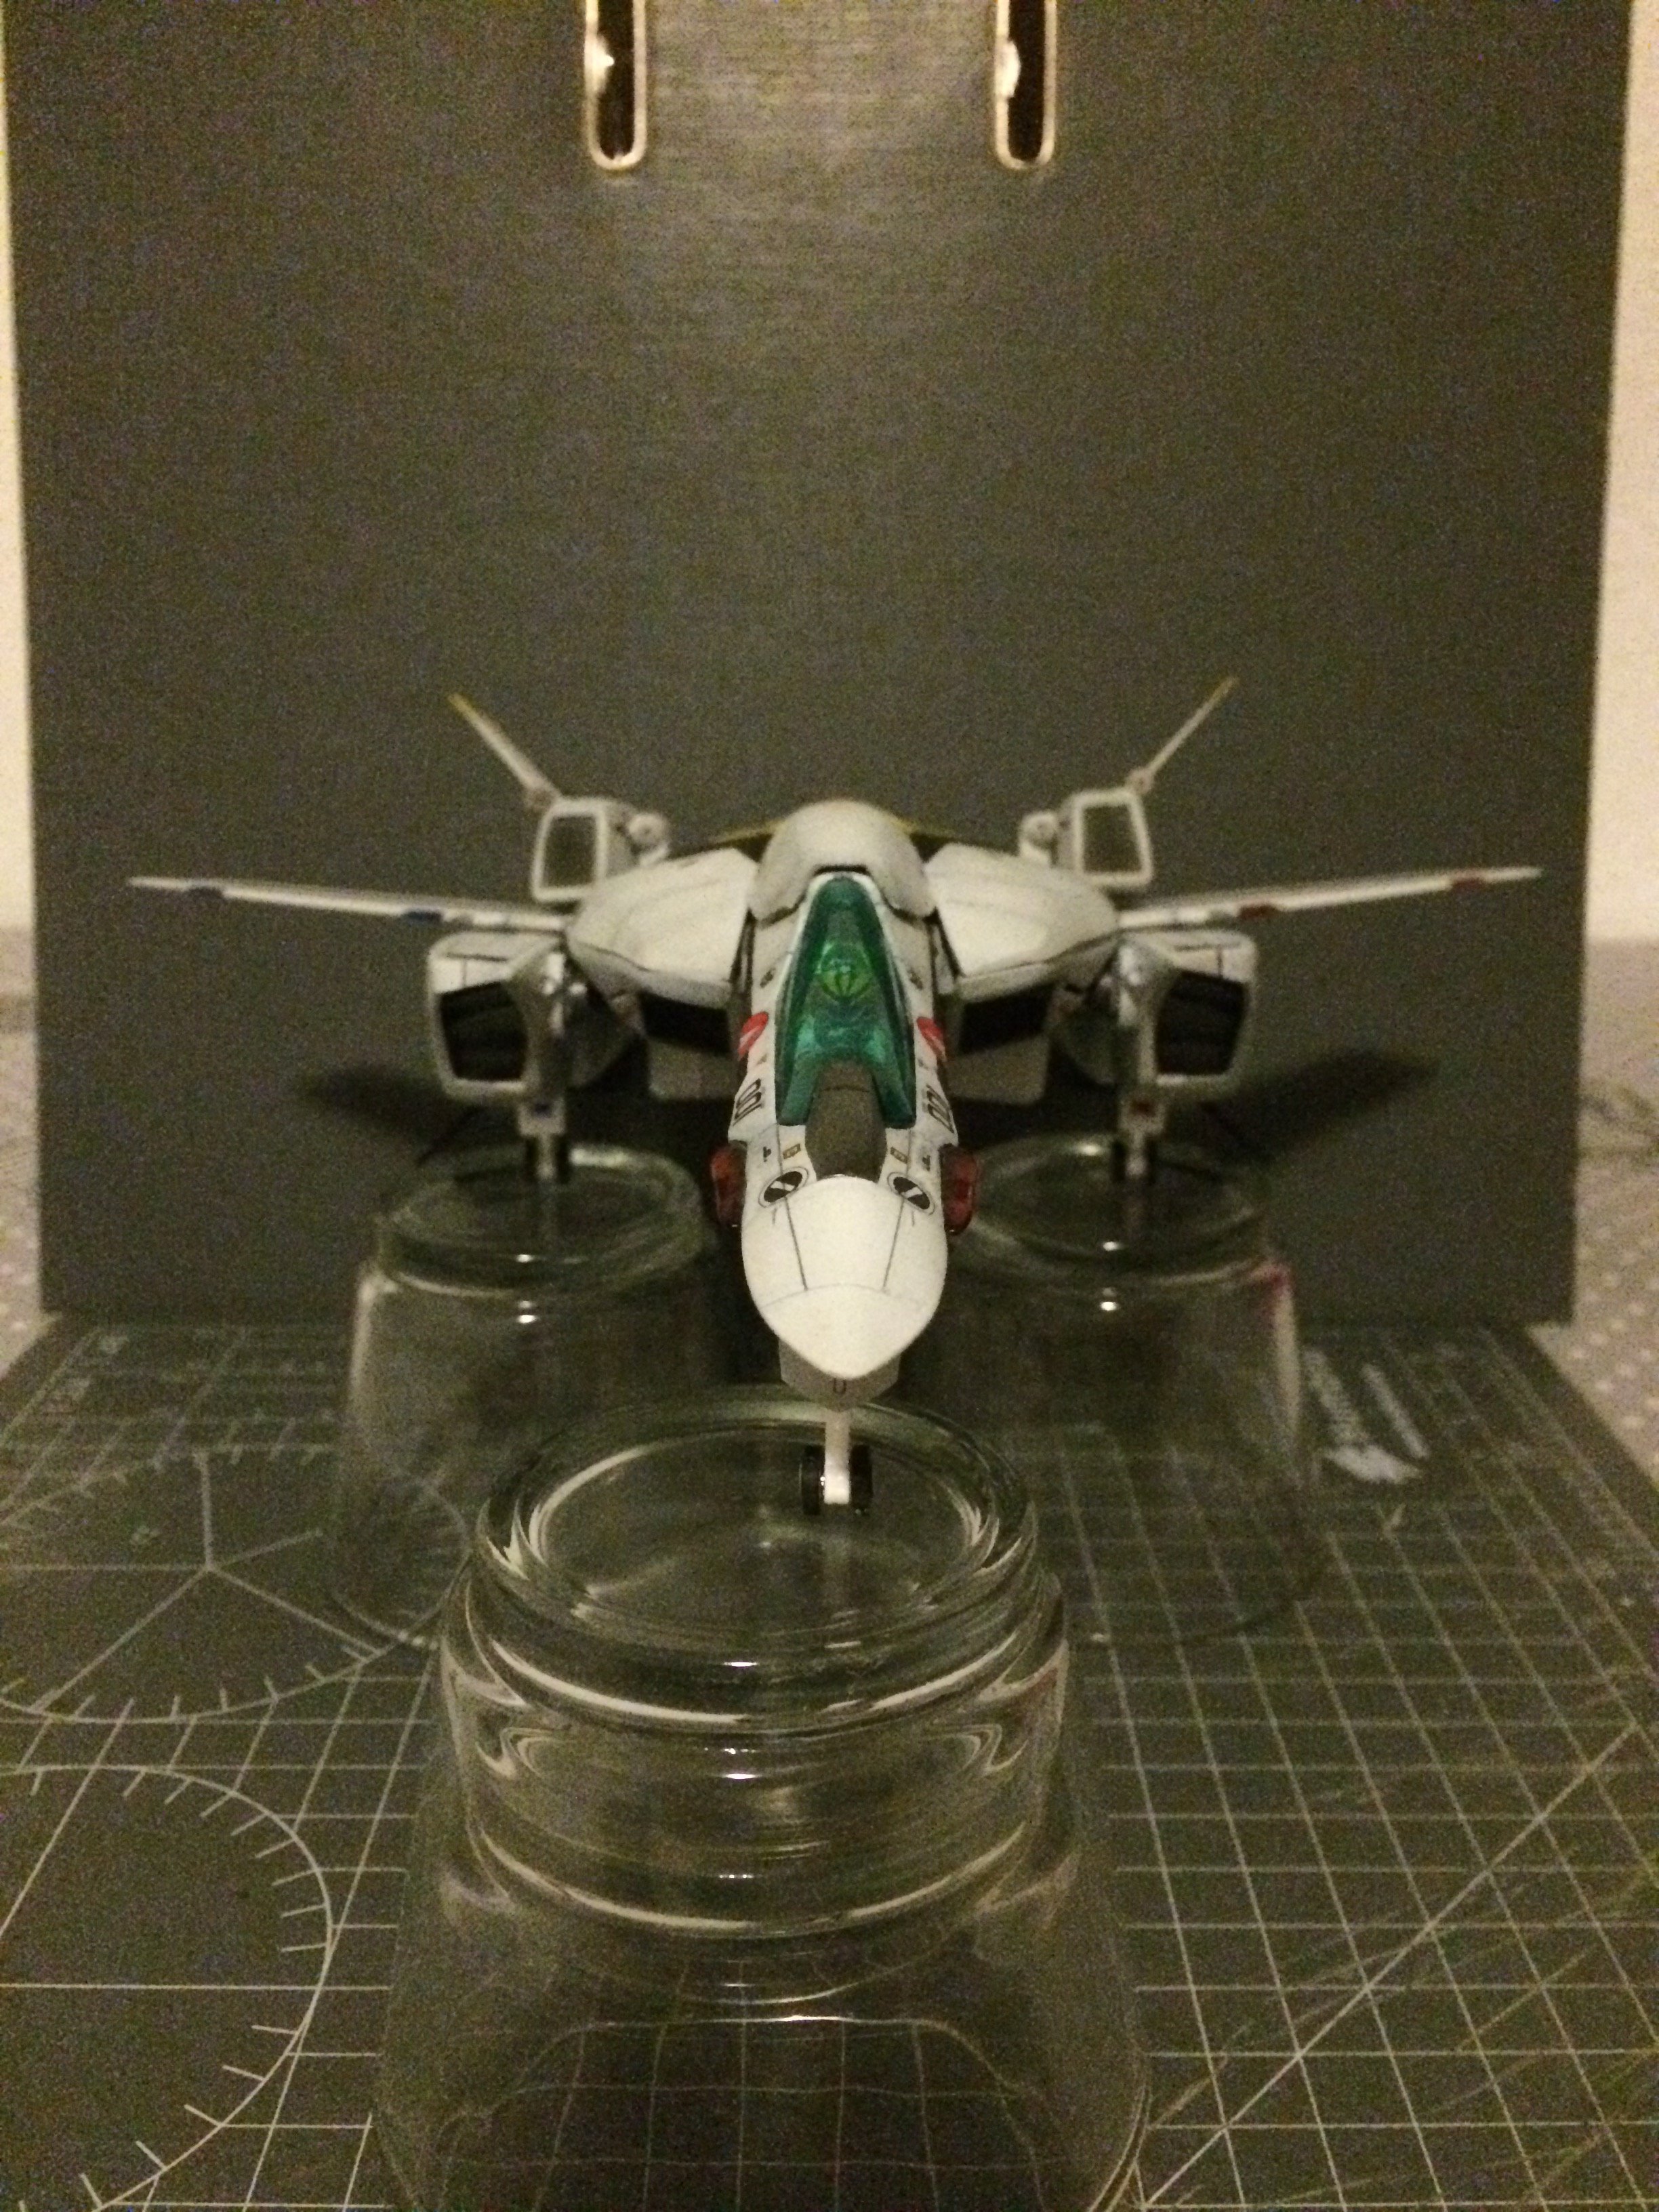
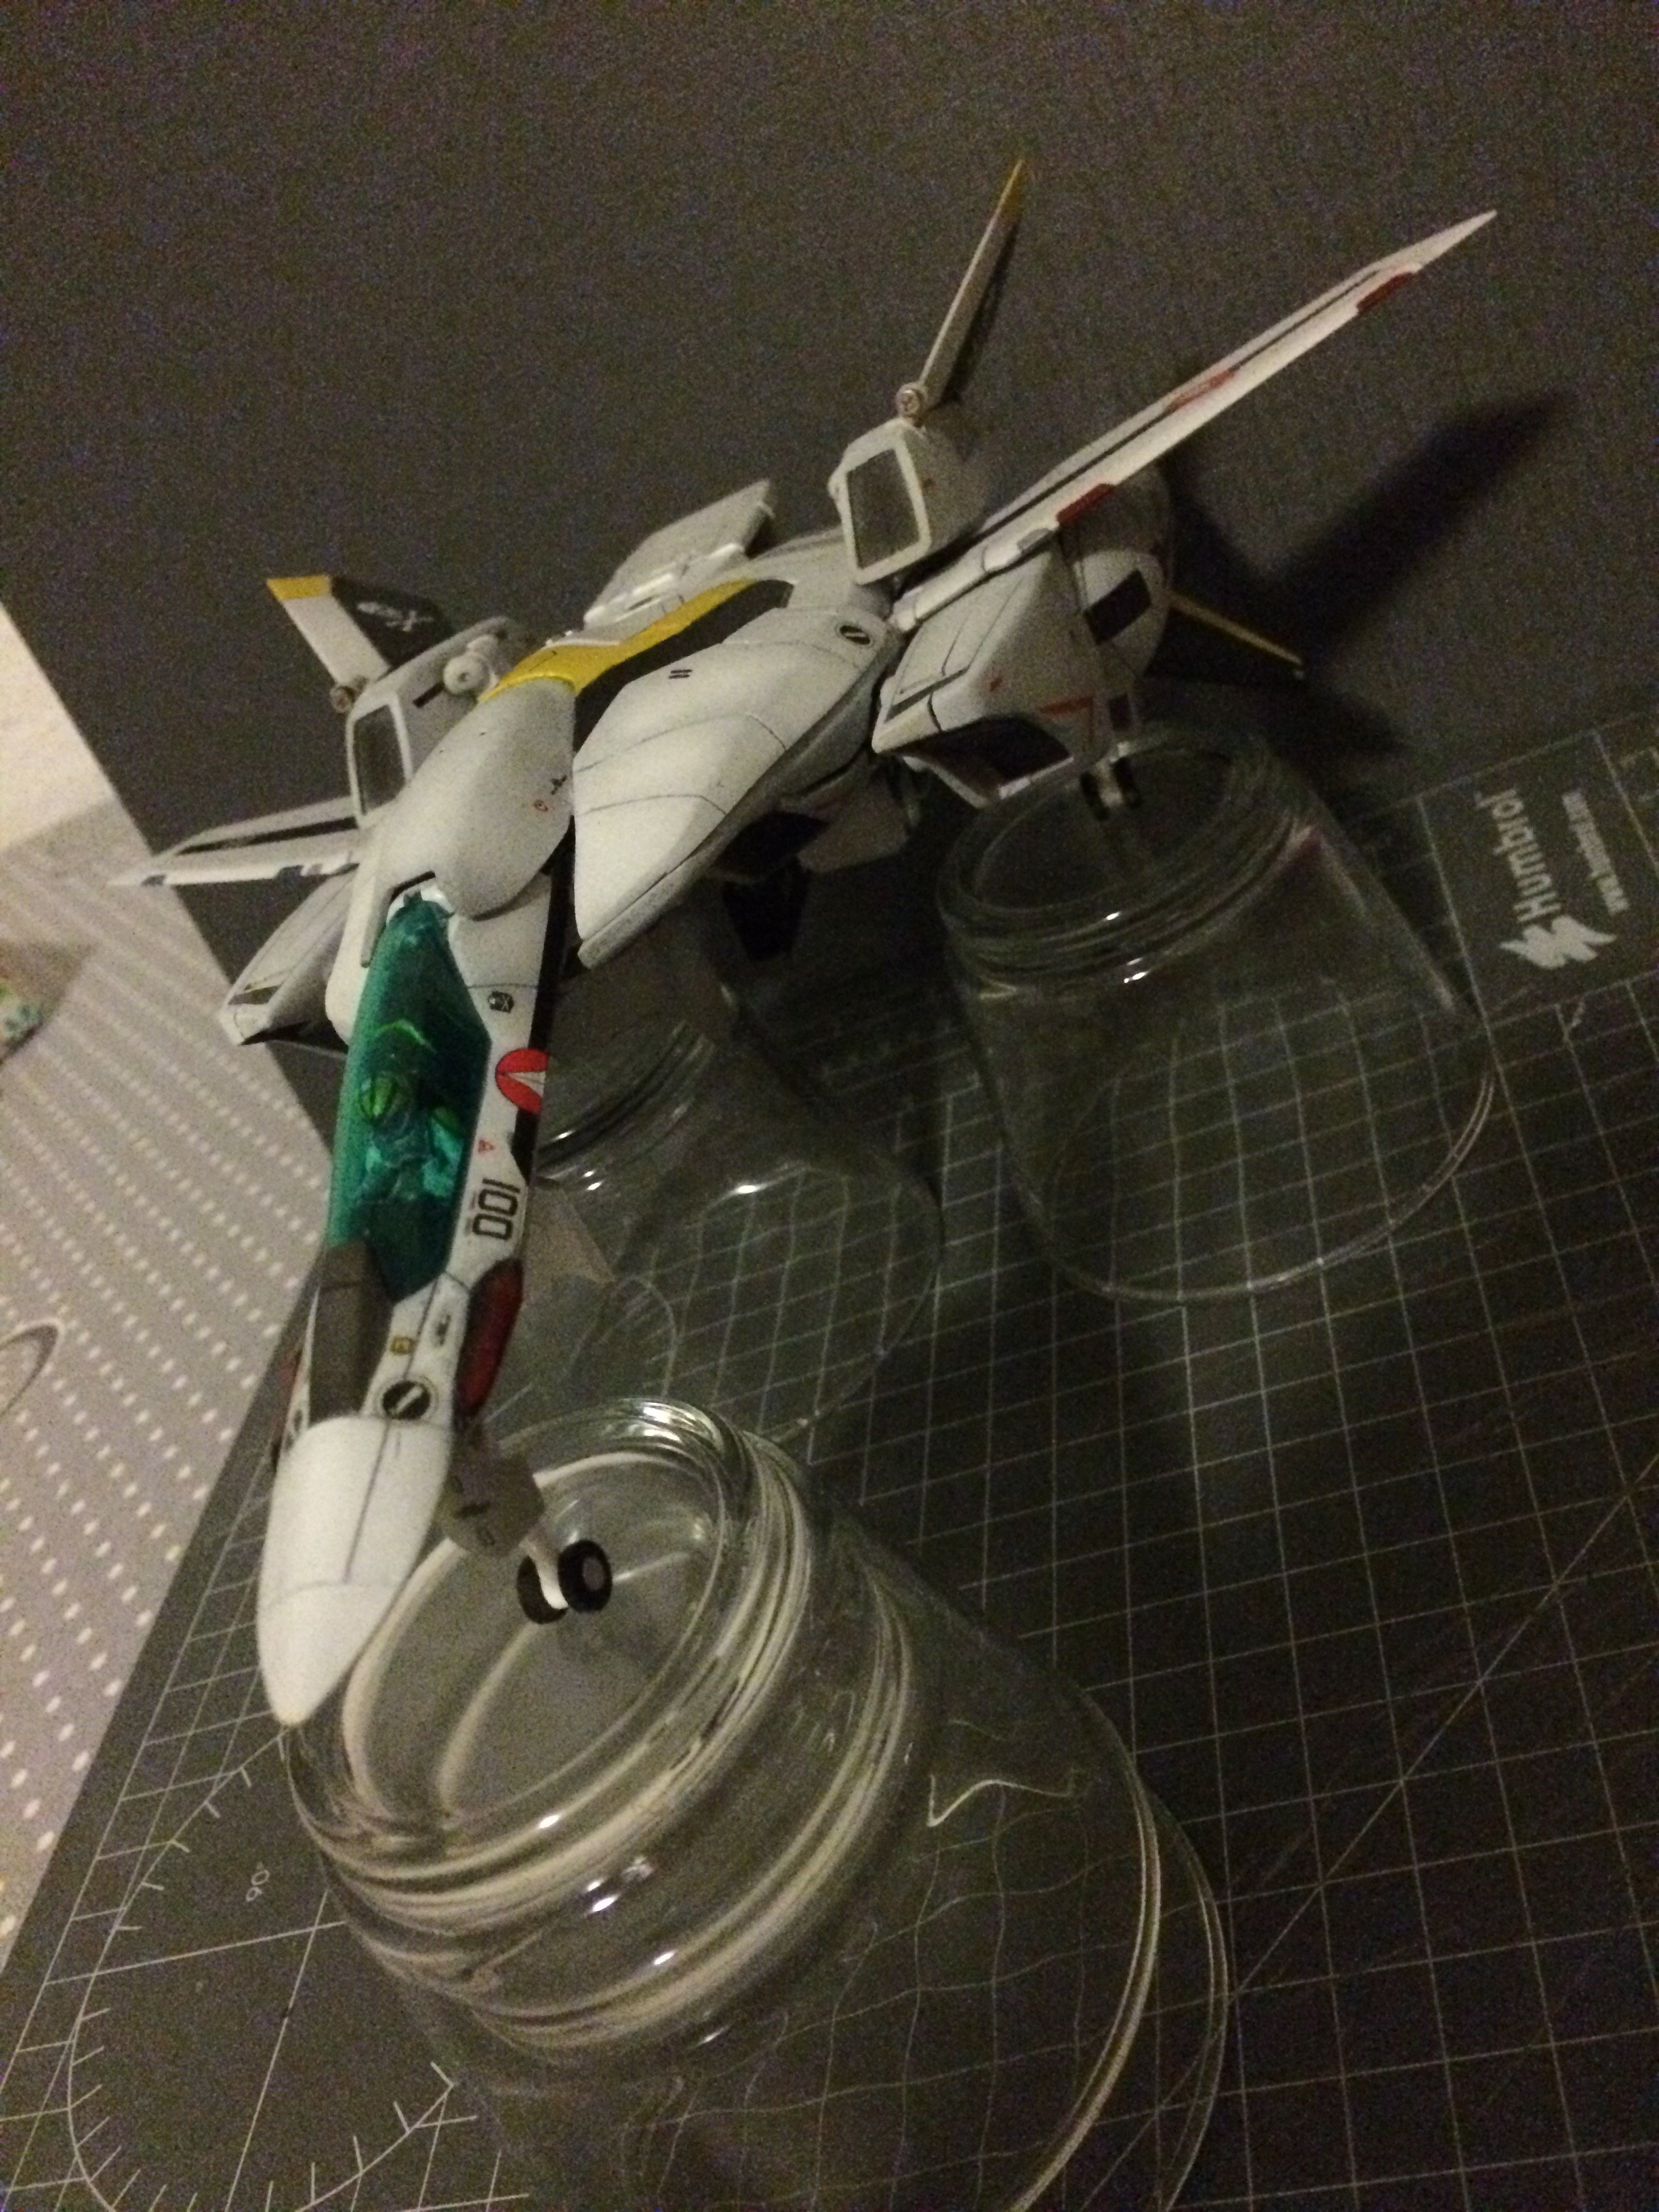
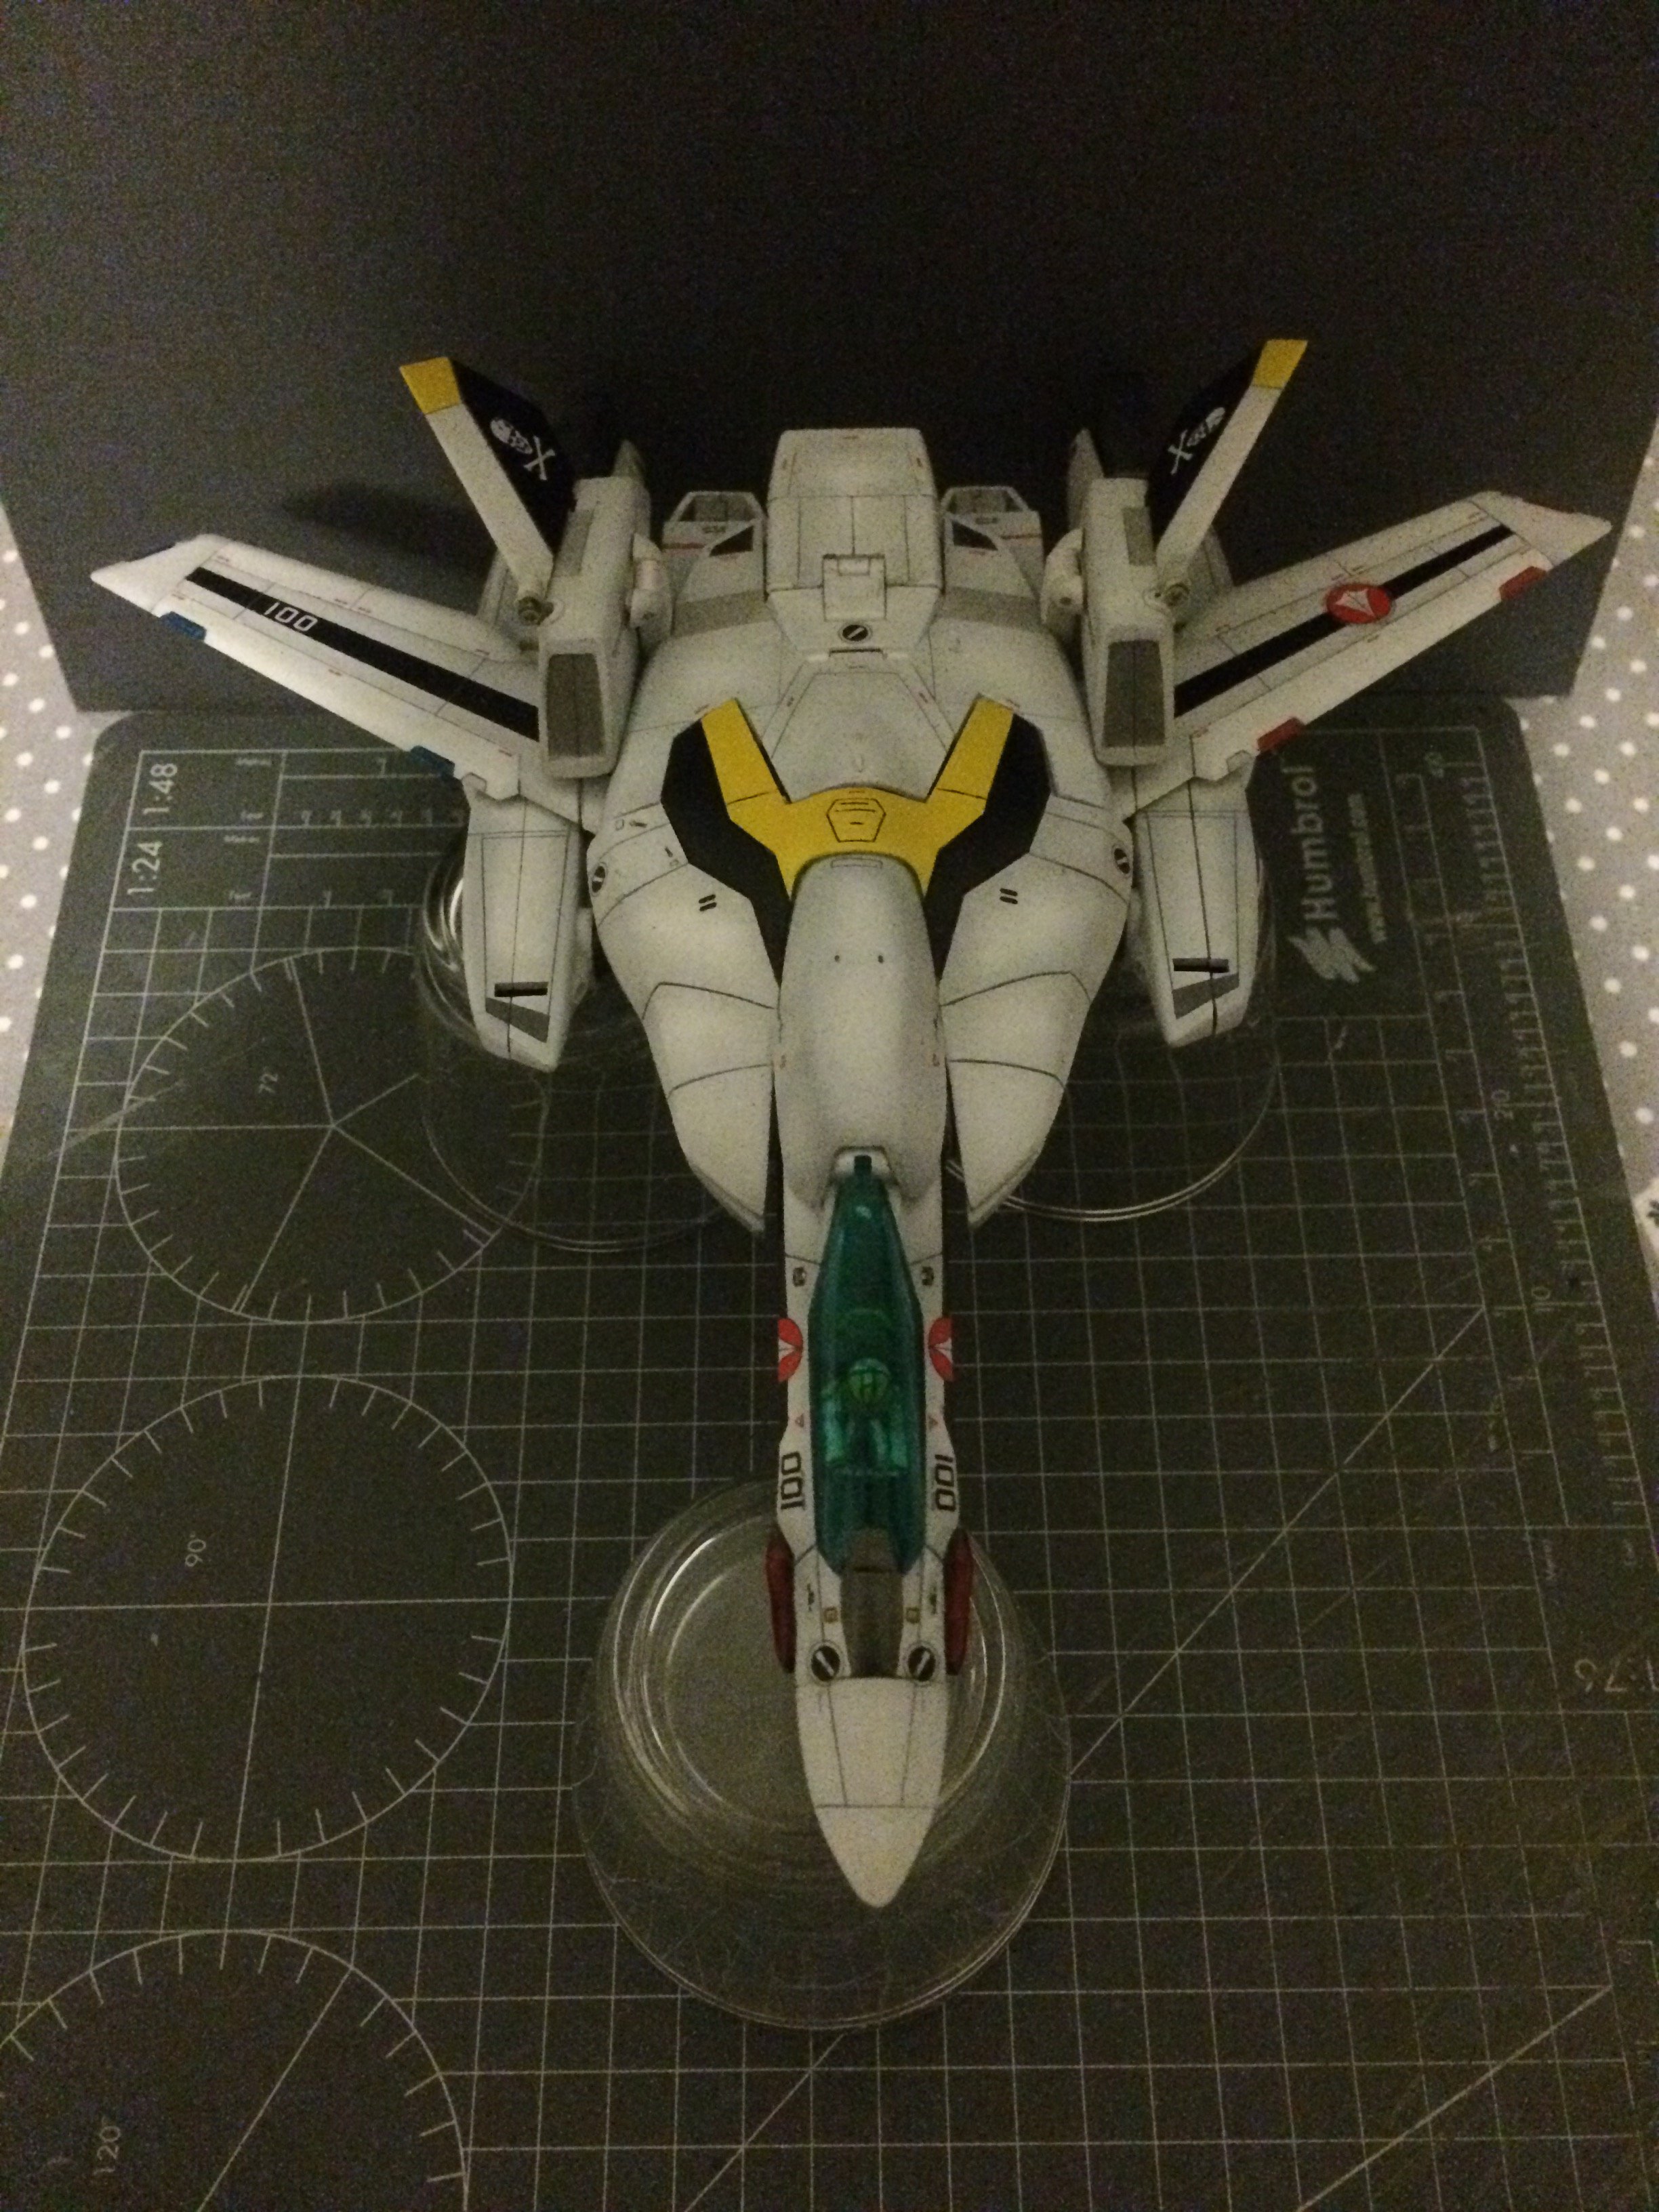
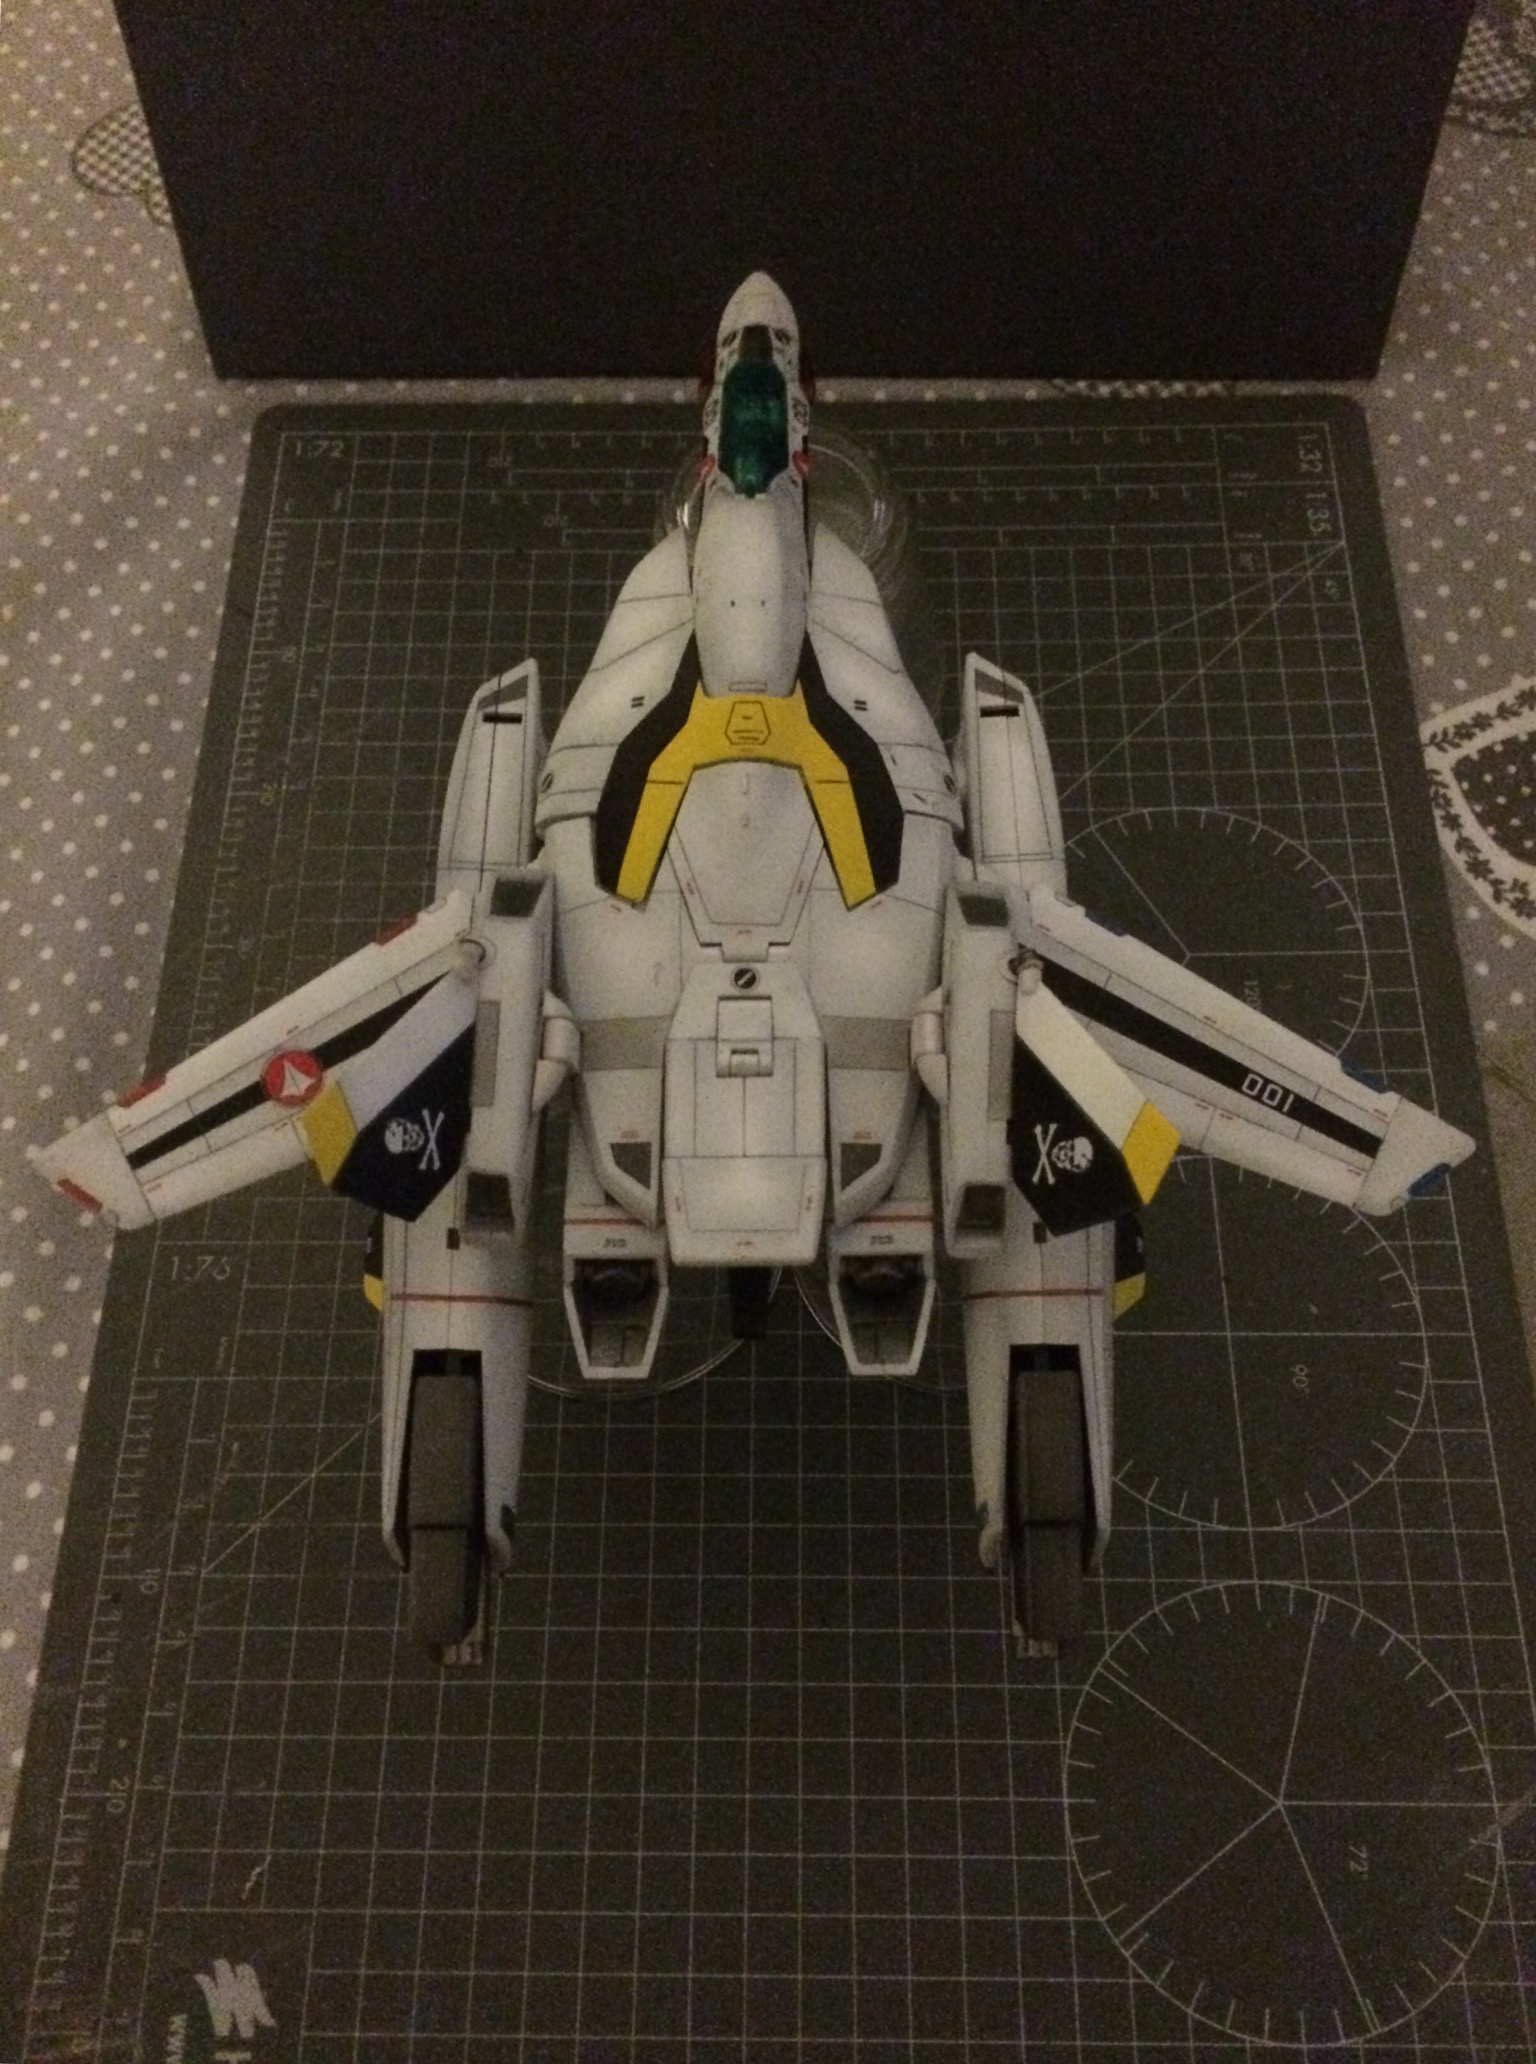
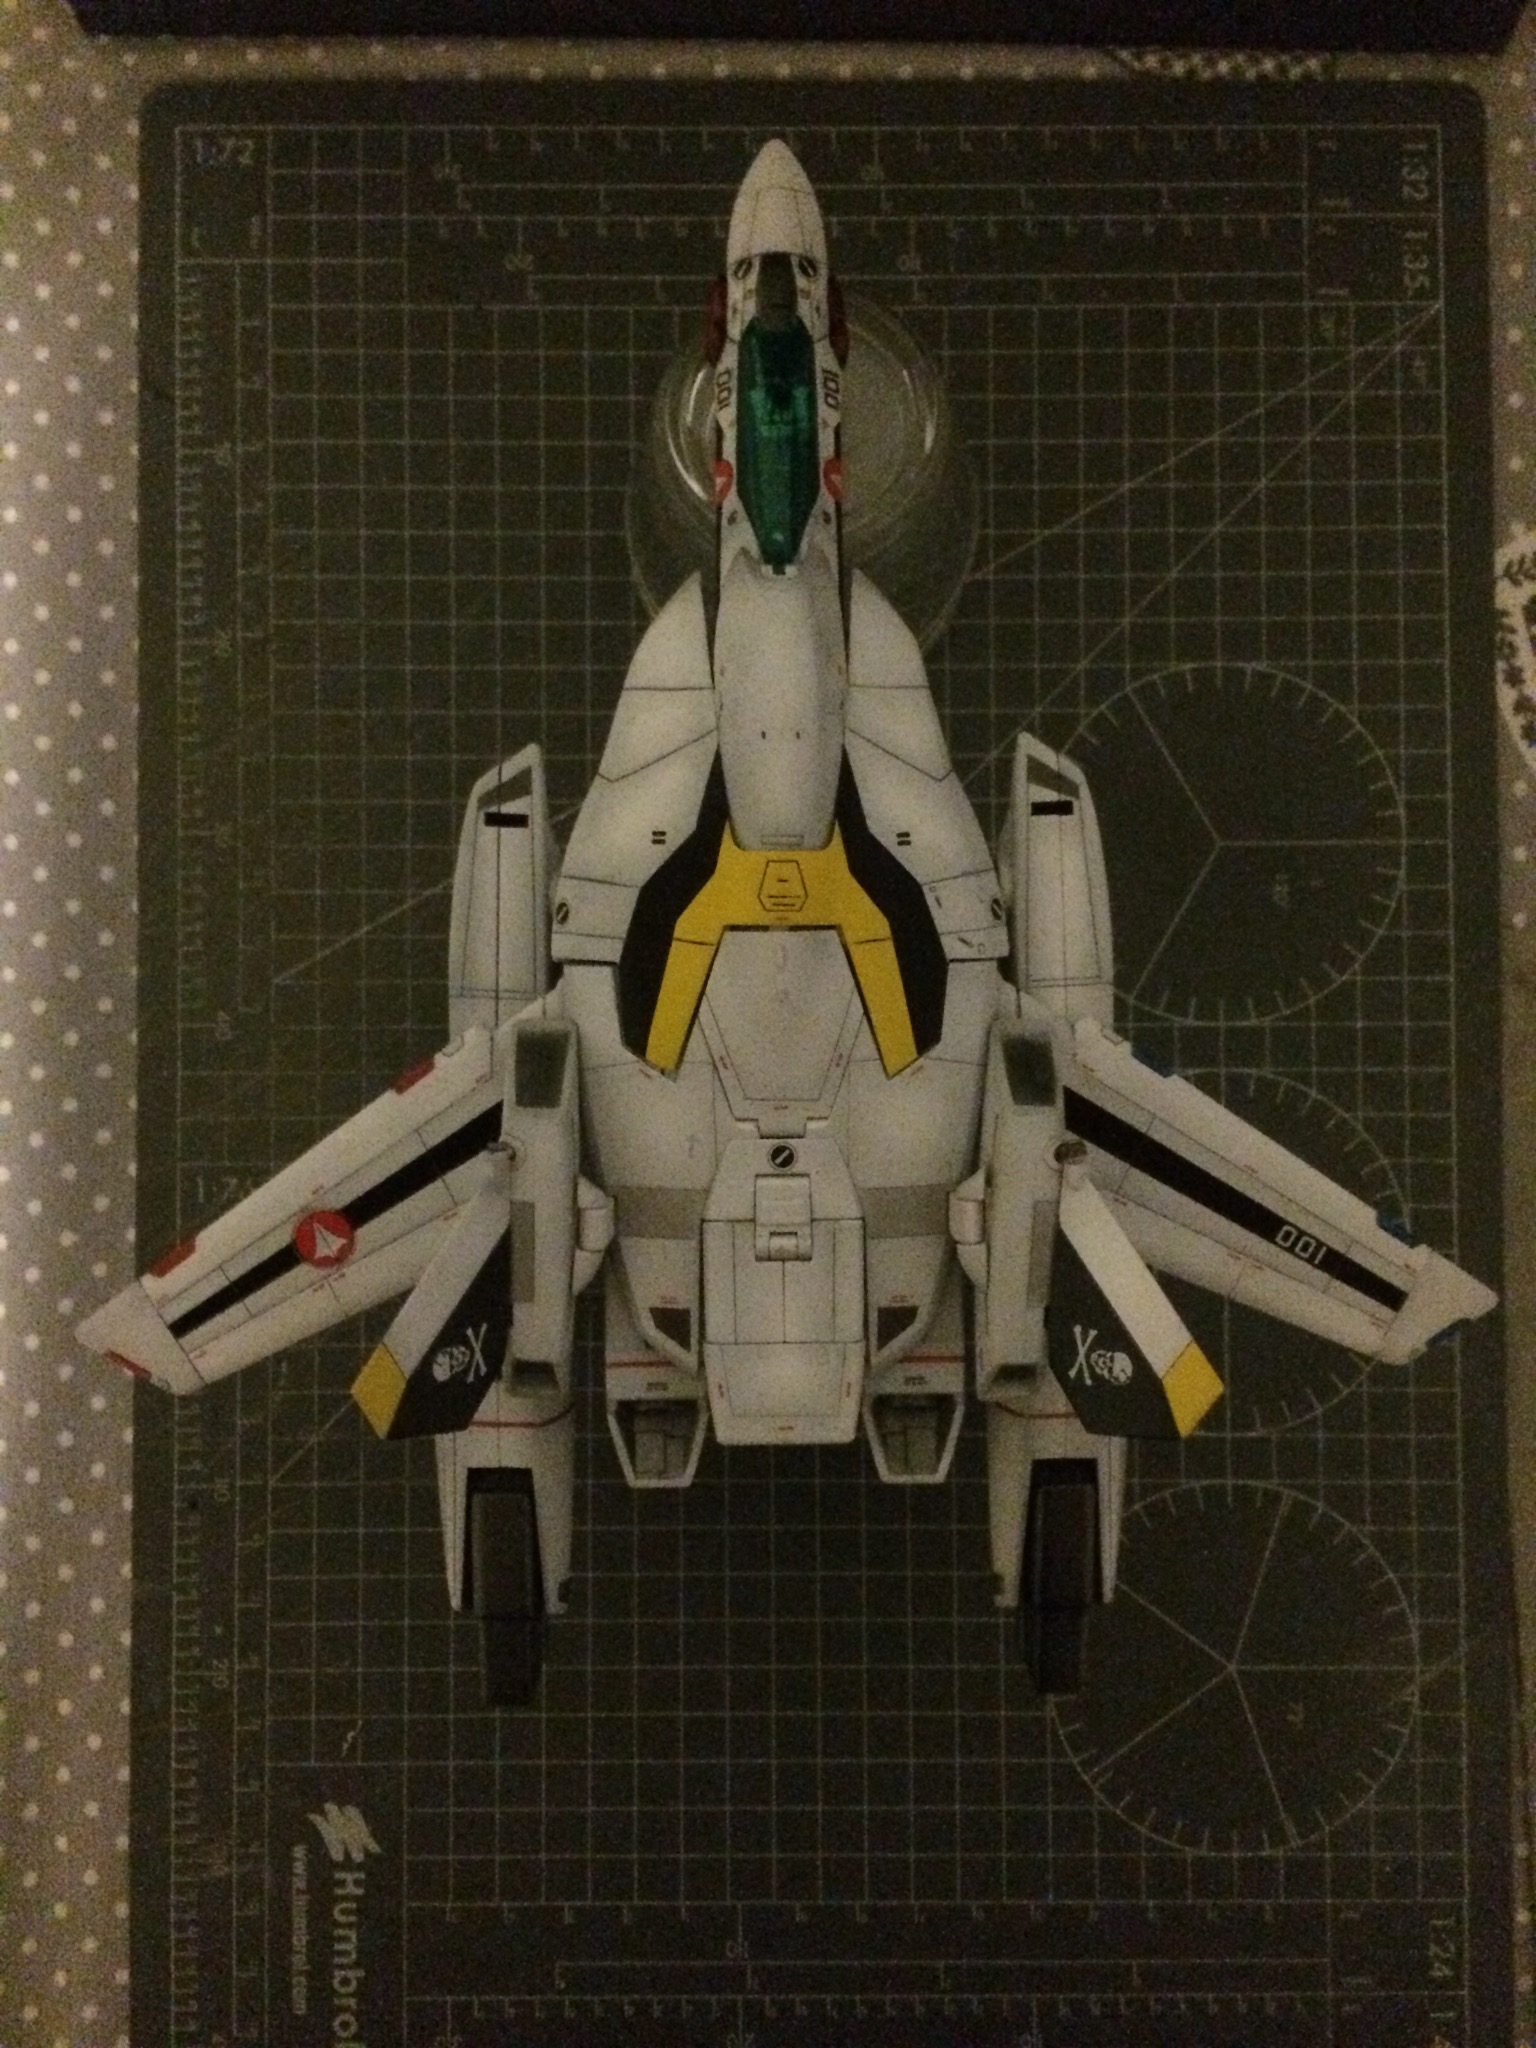
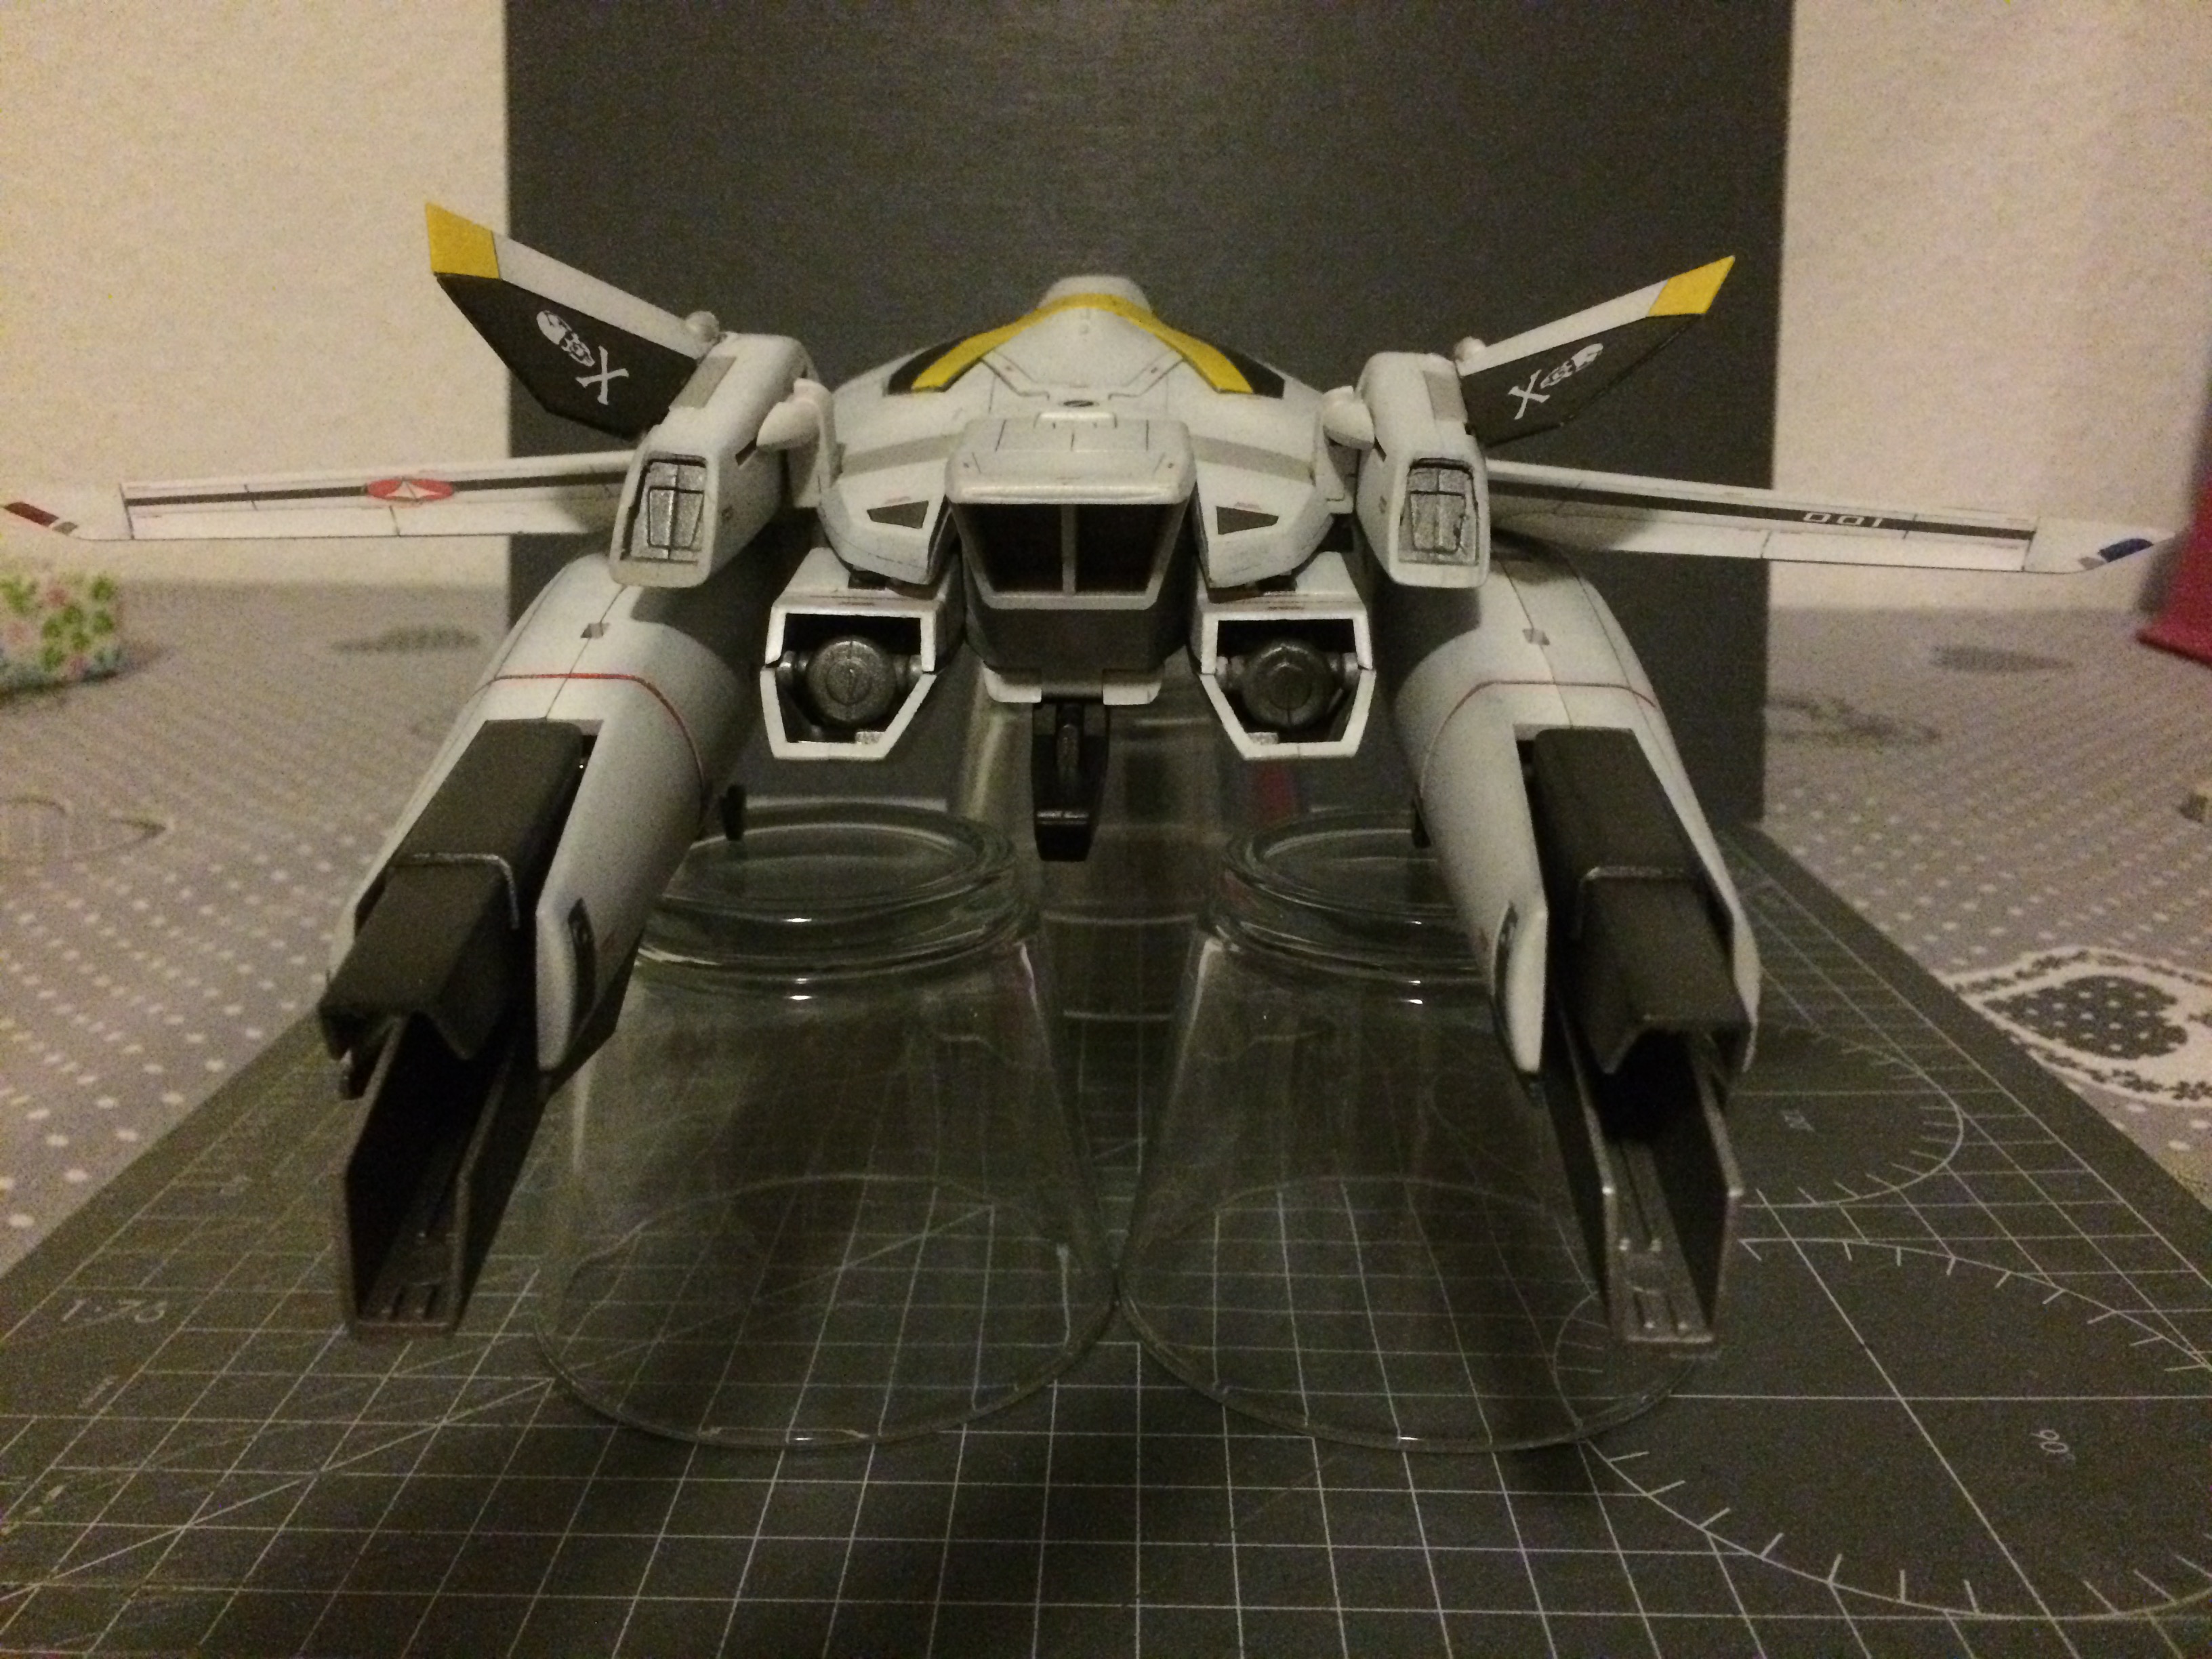
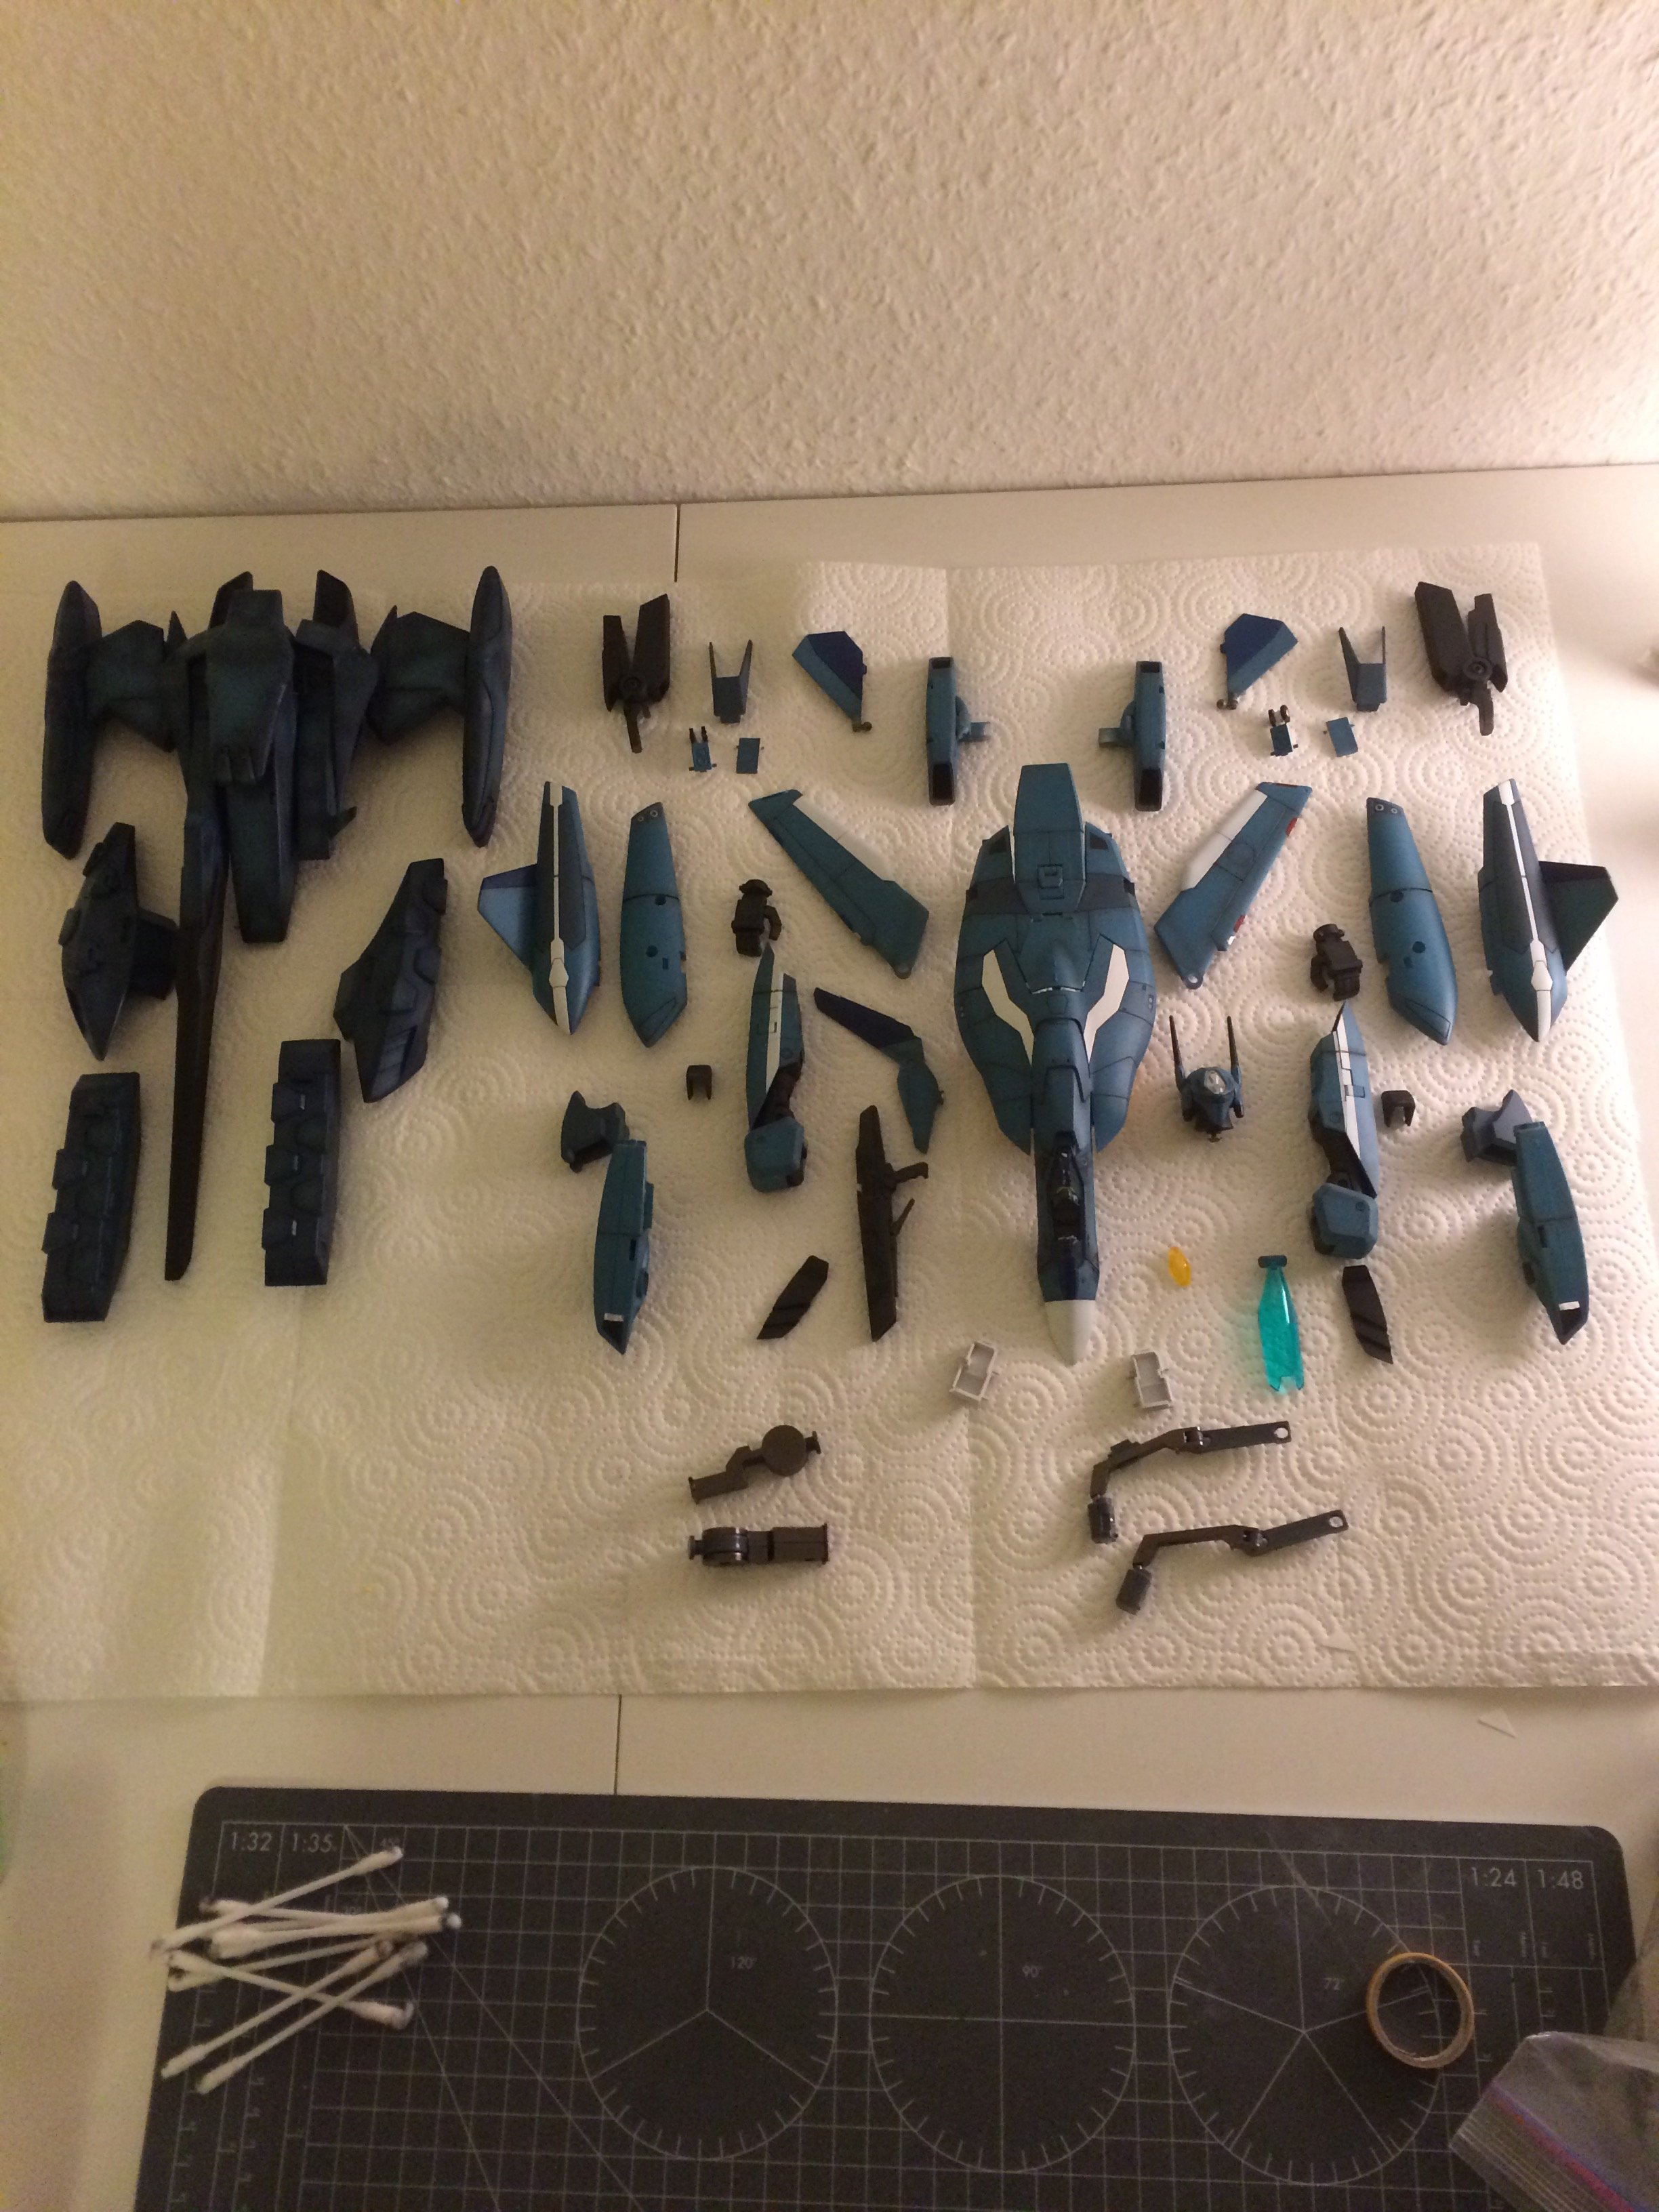
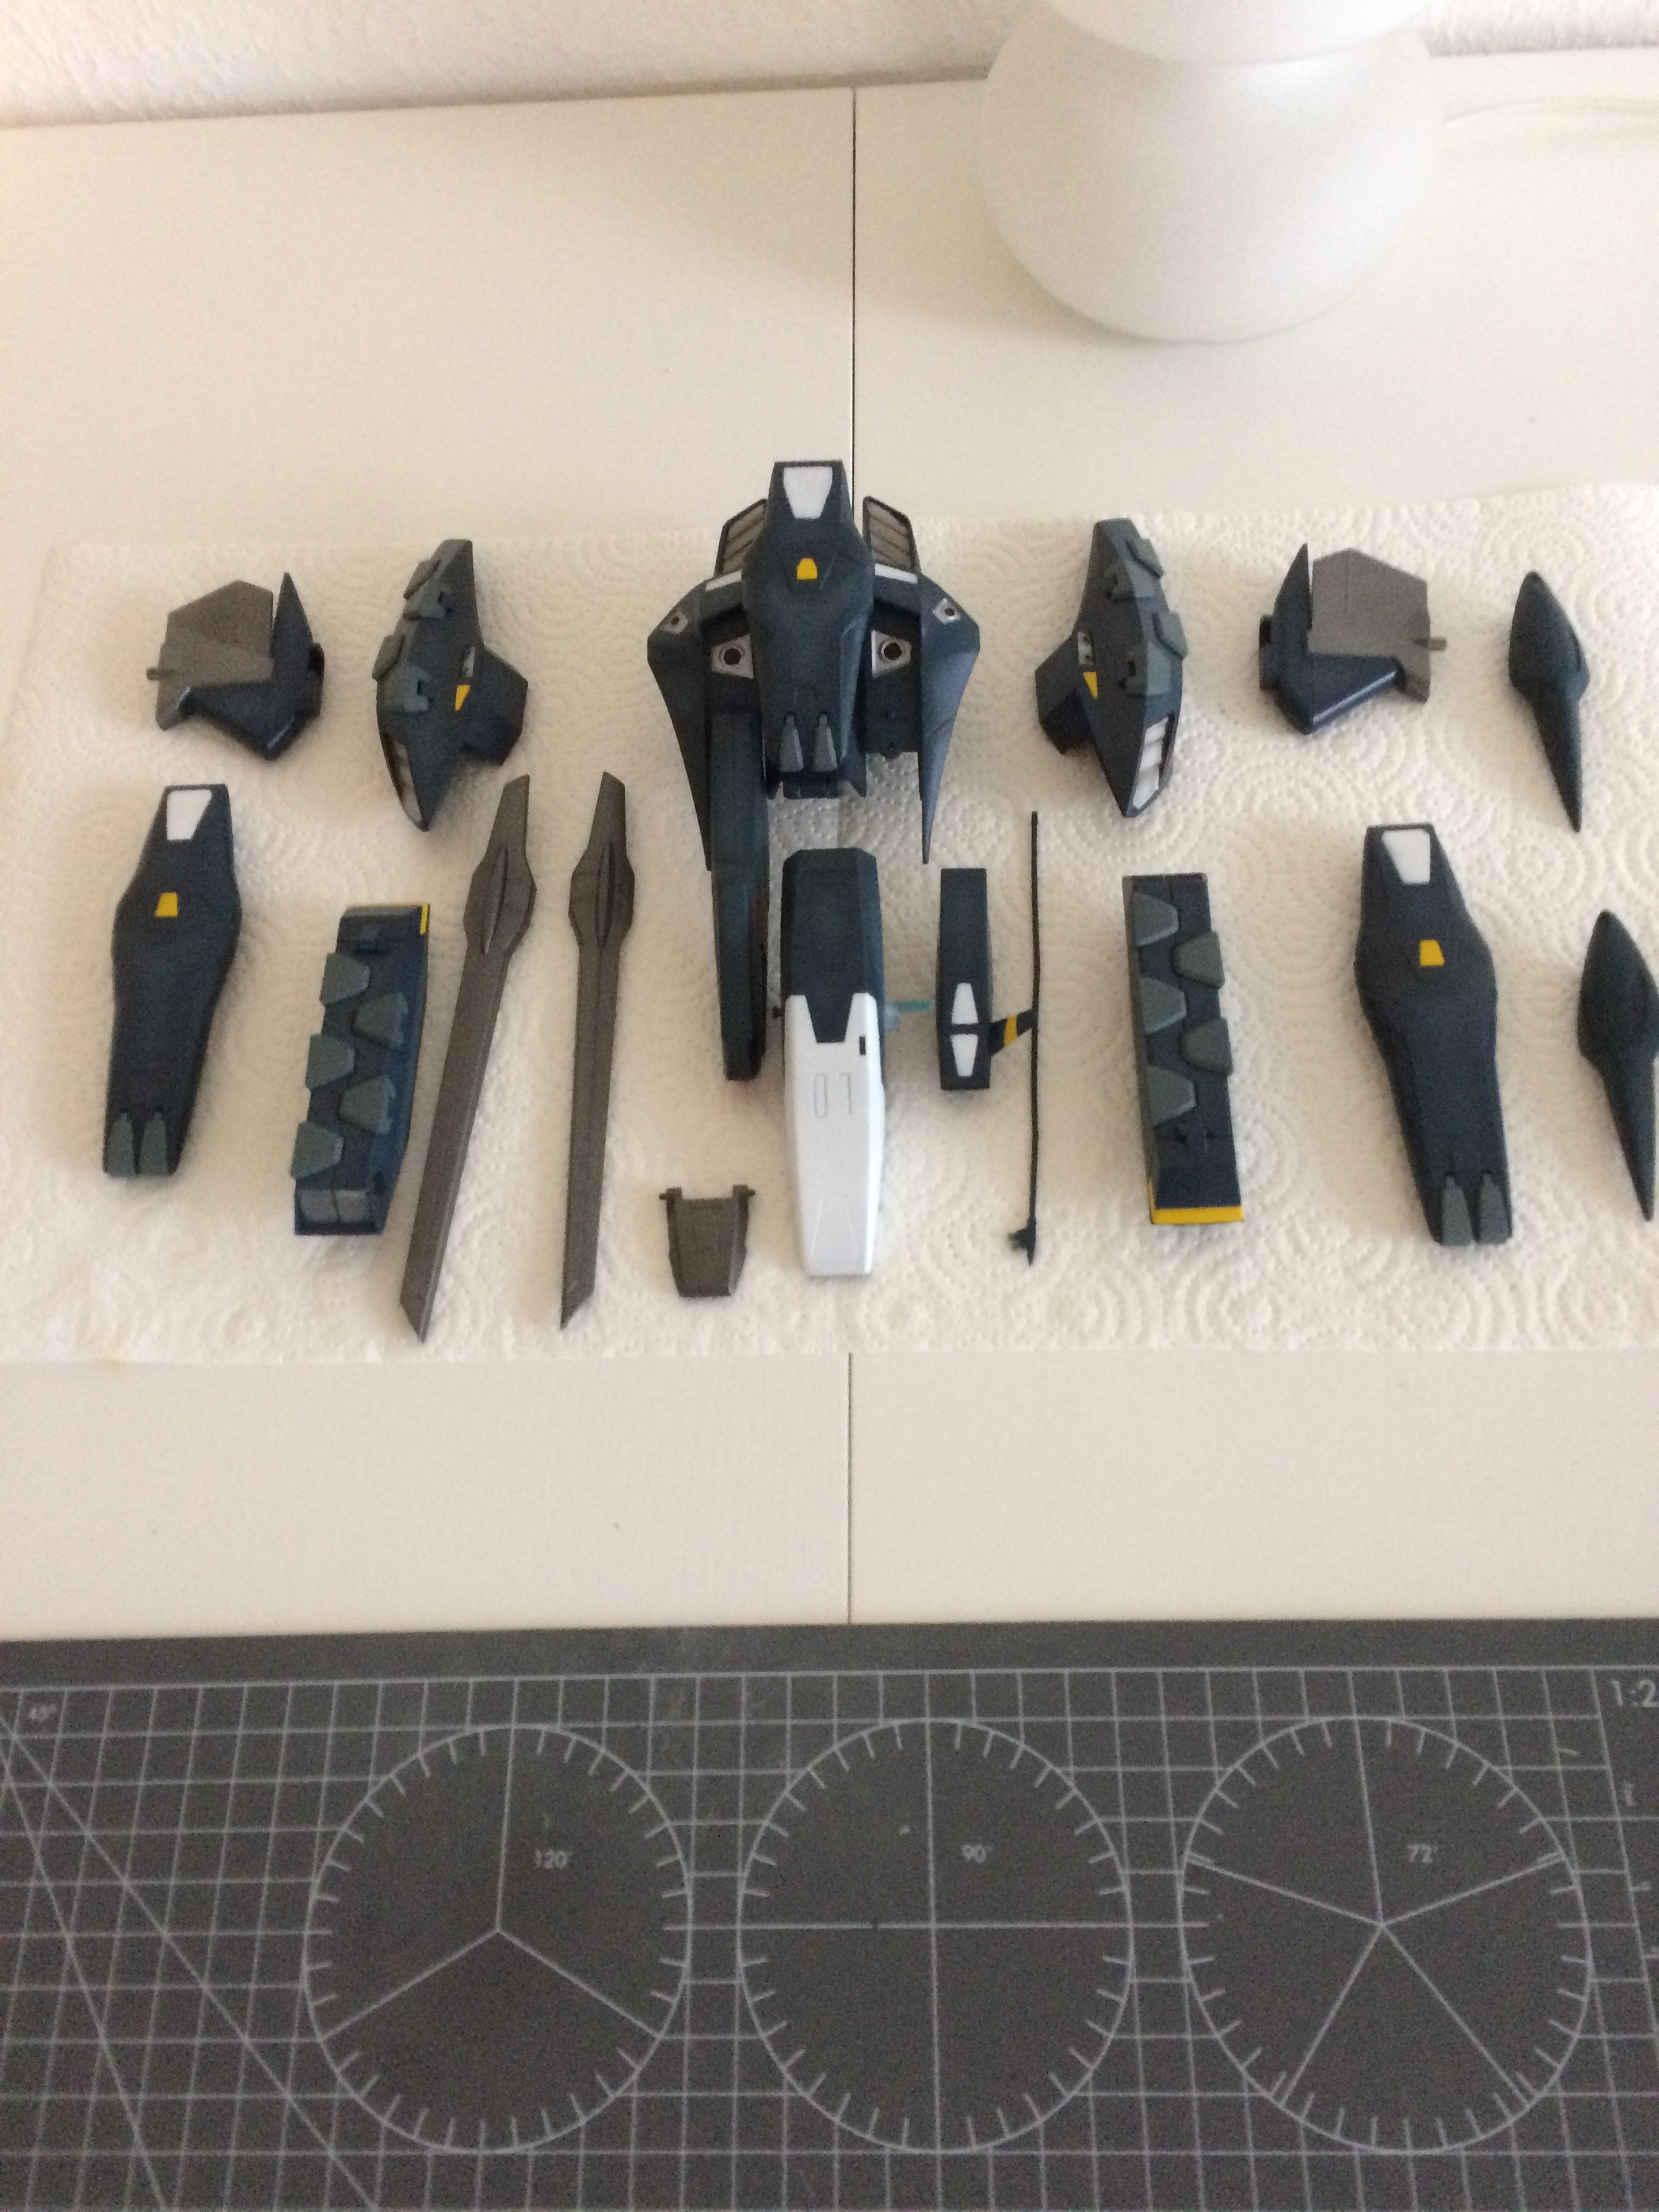
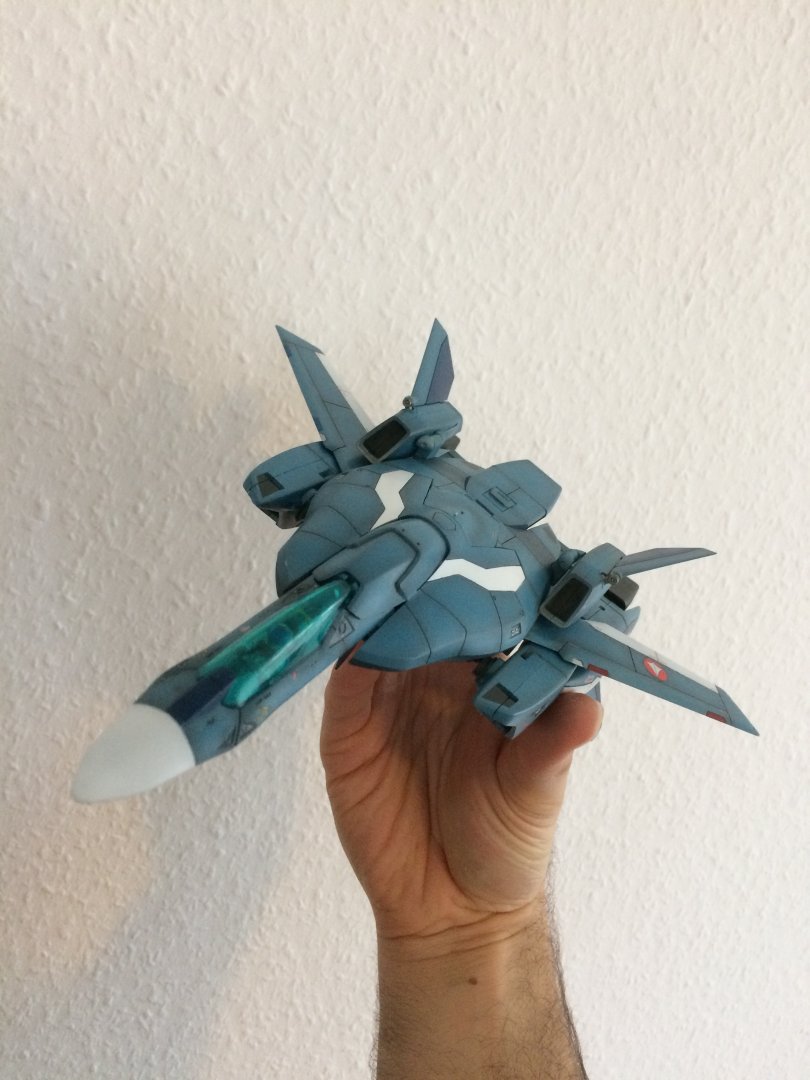
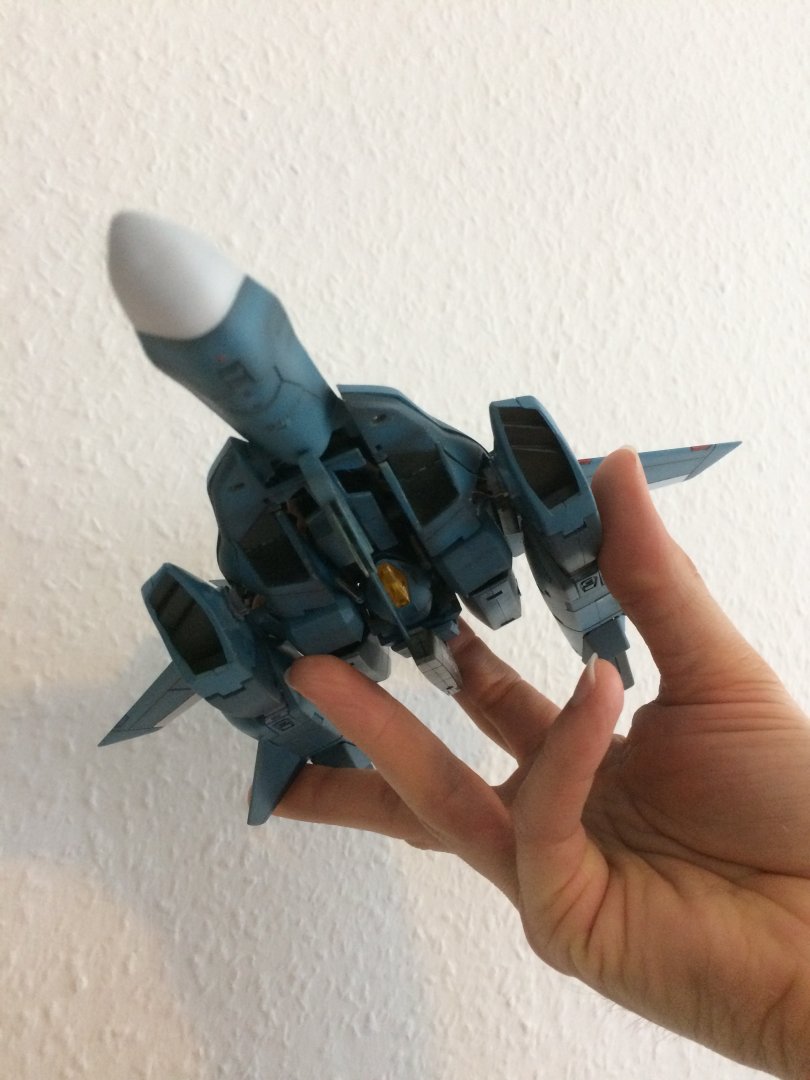
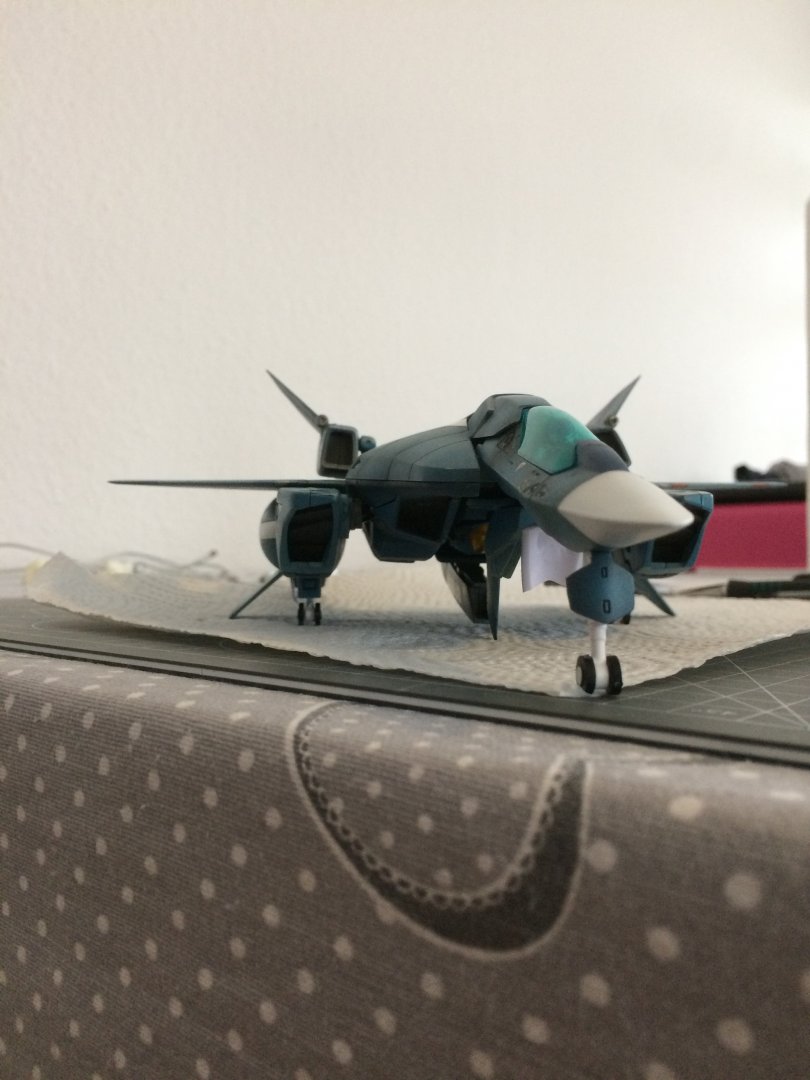
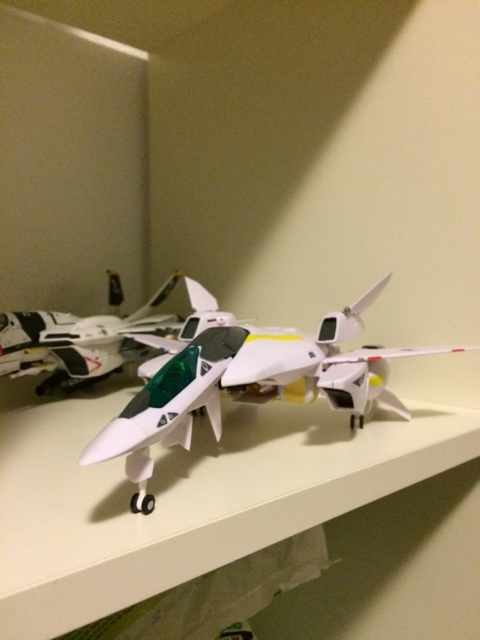
Finally assembled. I’m really bad In taking pictures, looks better live. first and last time in battroid just for you guys: back to fighter mode, different angles. Front: Back: Top: Front Side: ...and having fun during the first swooooshhhh! ...faster hope you like it, it’s been a fun project


-
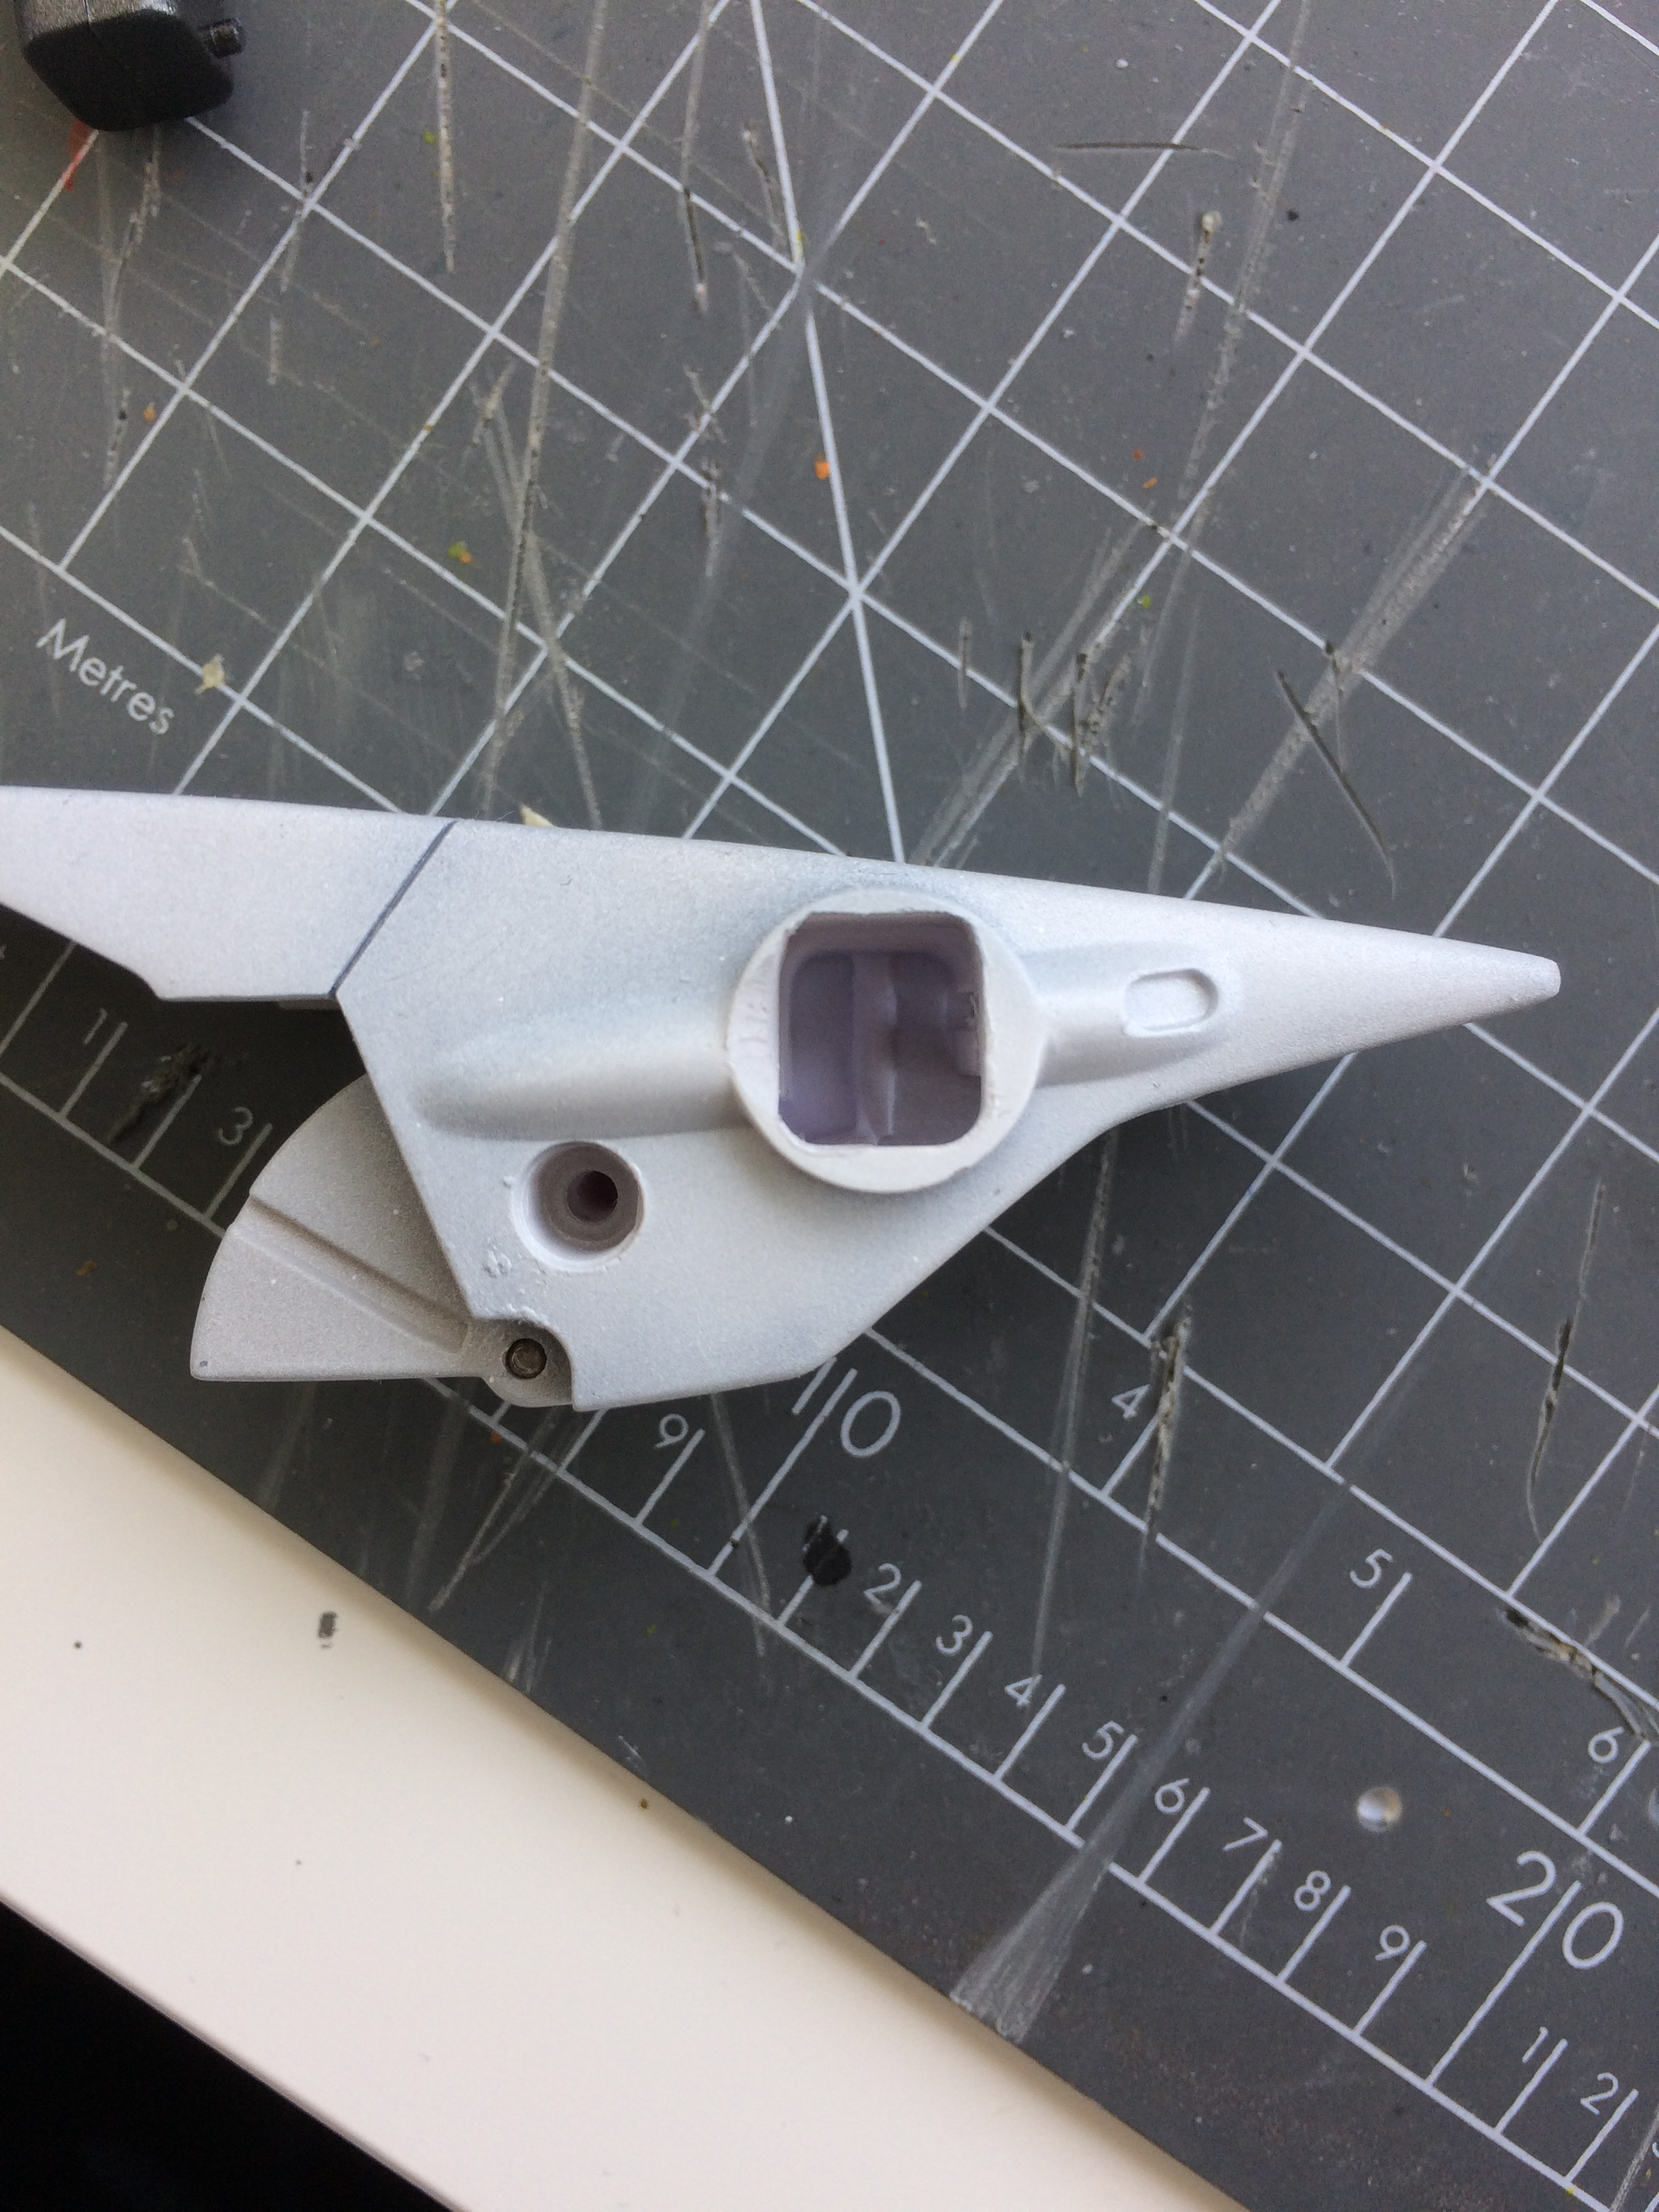
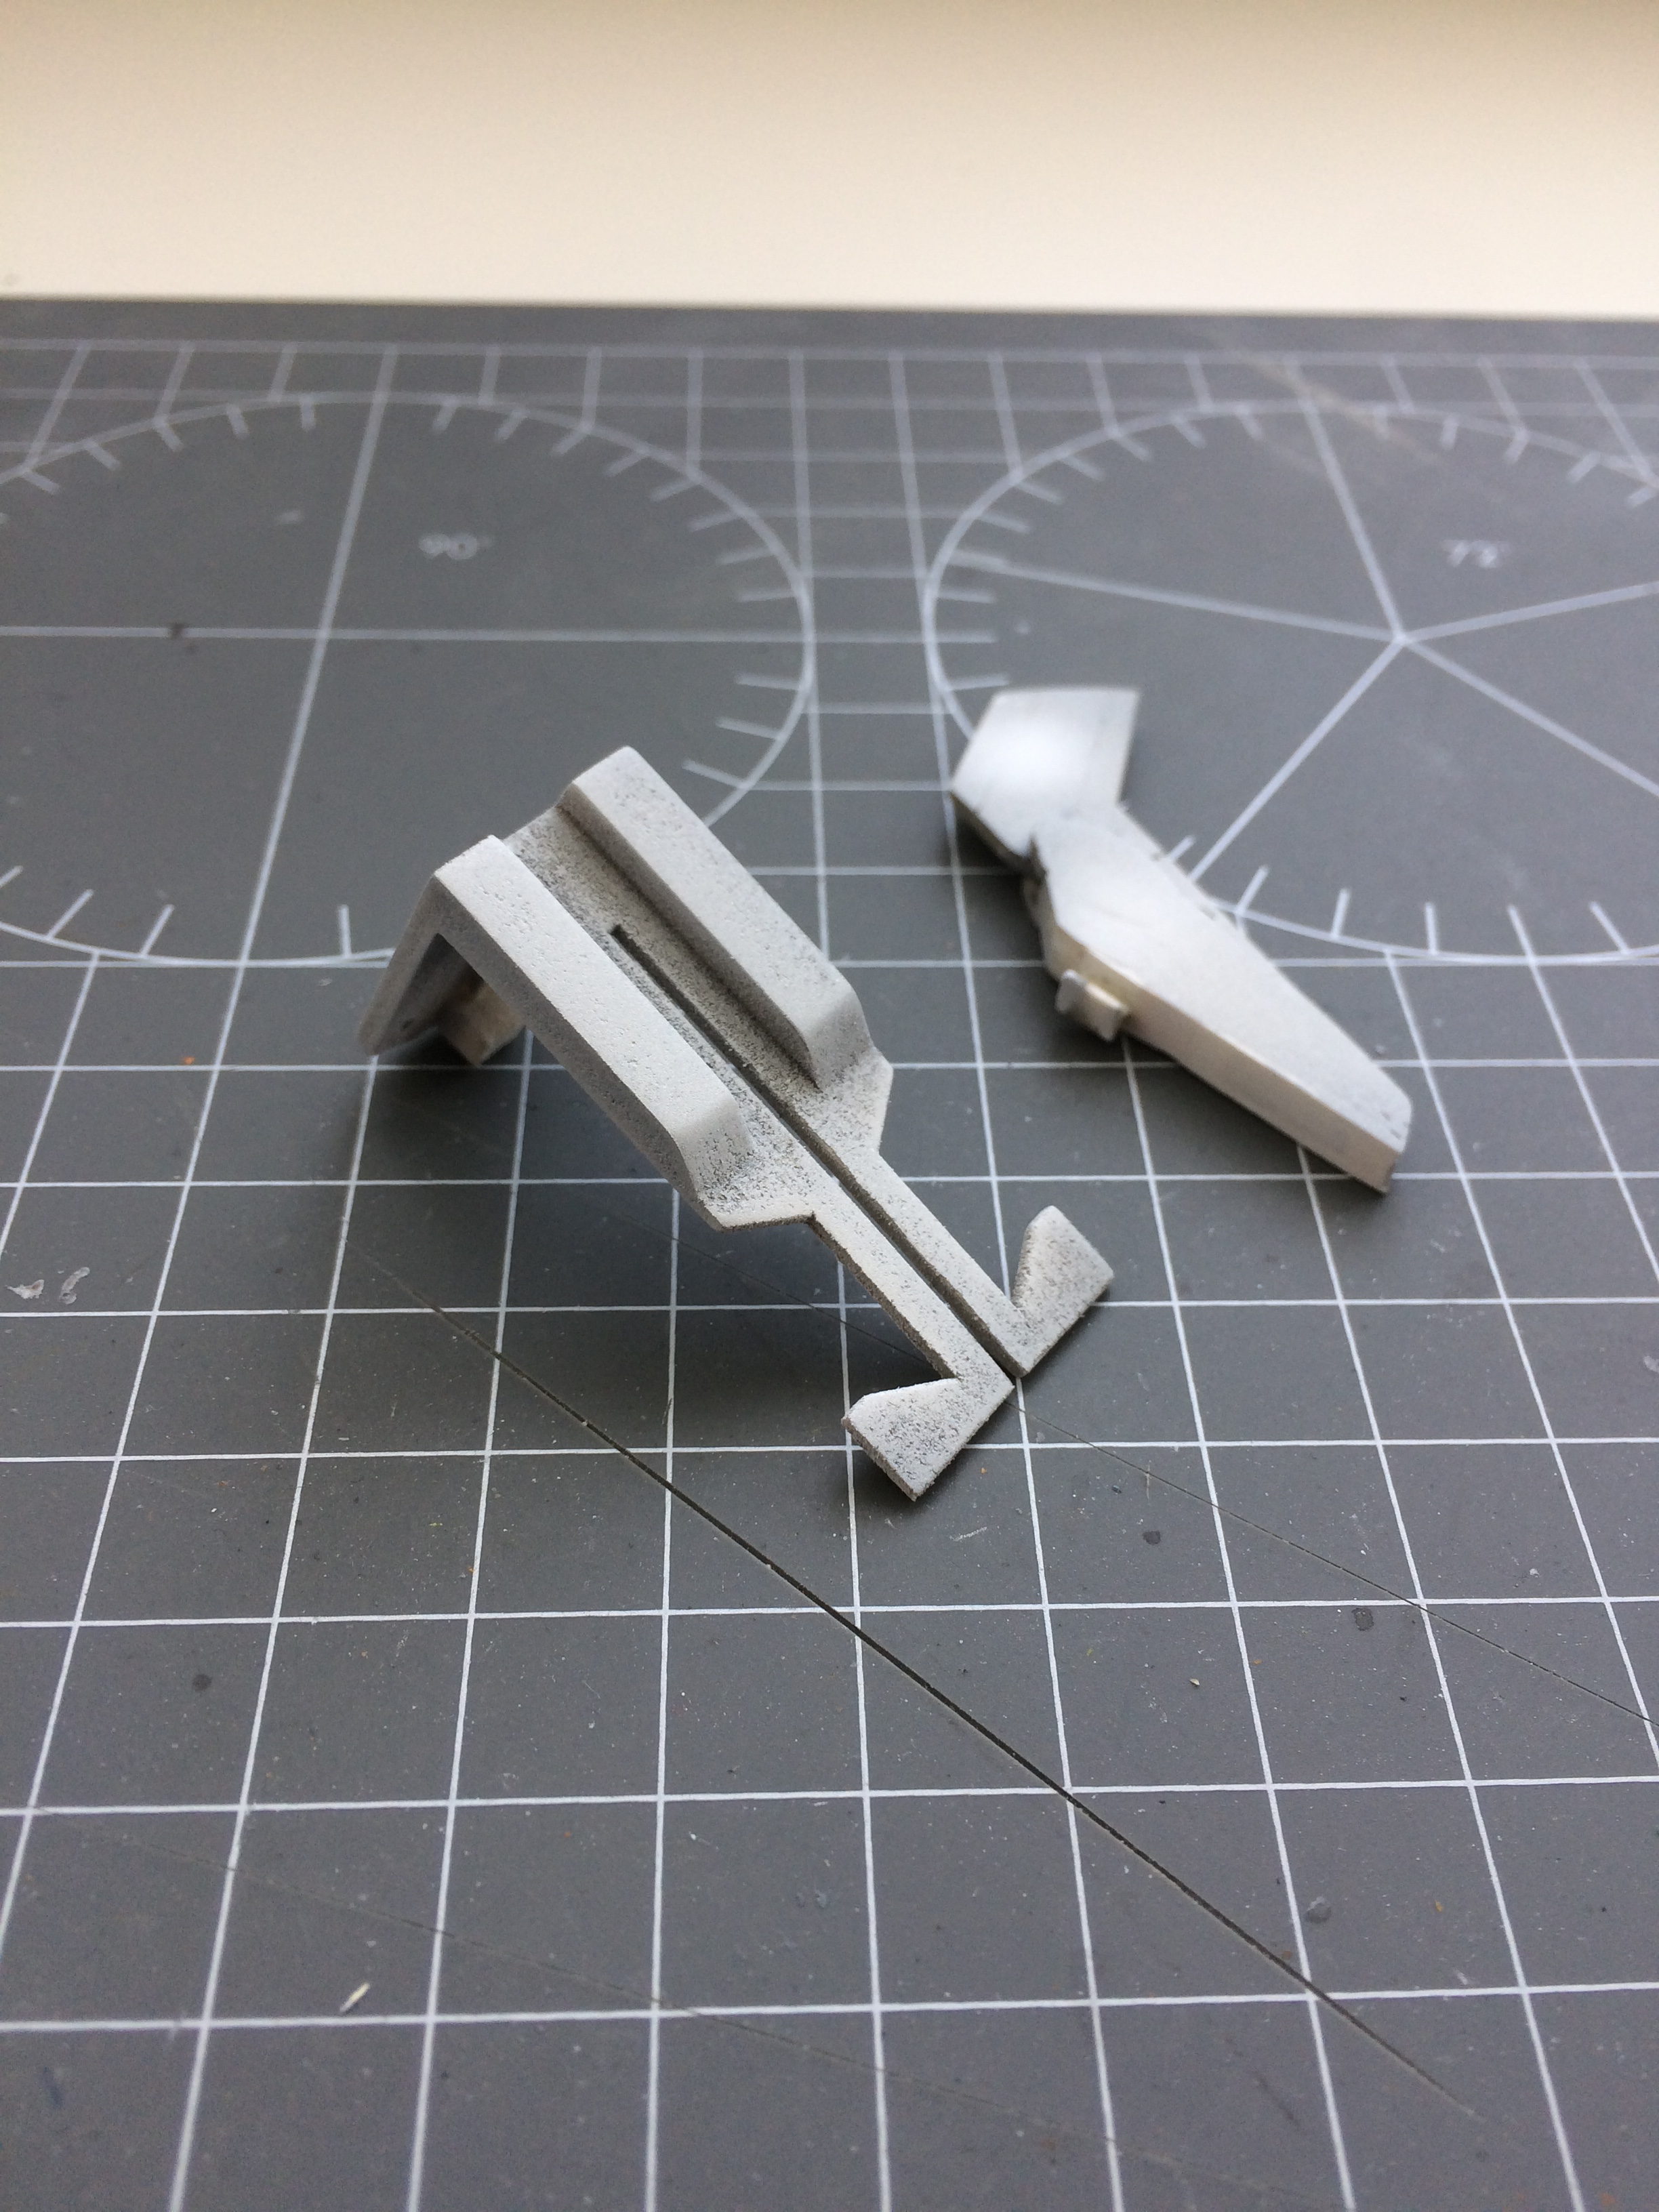
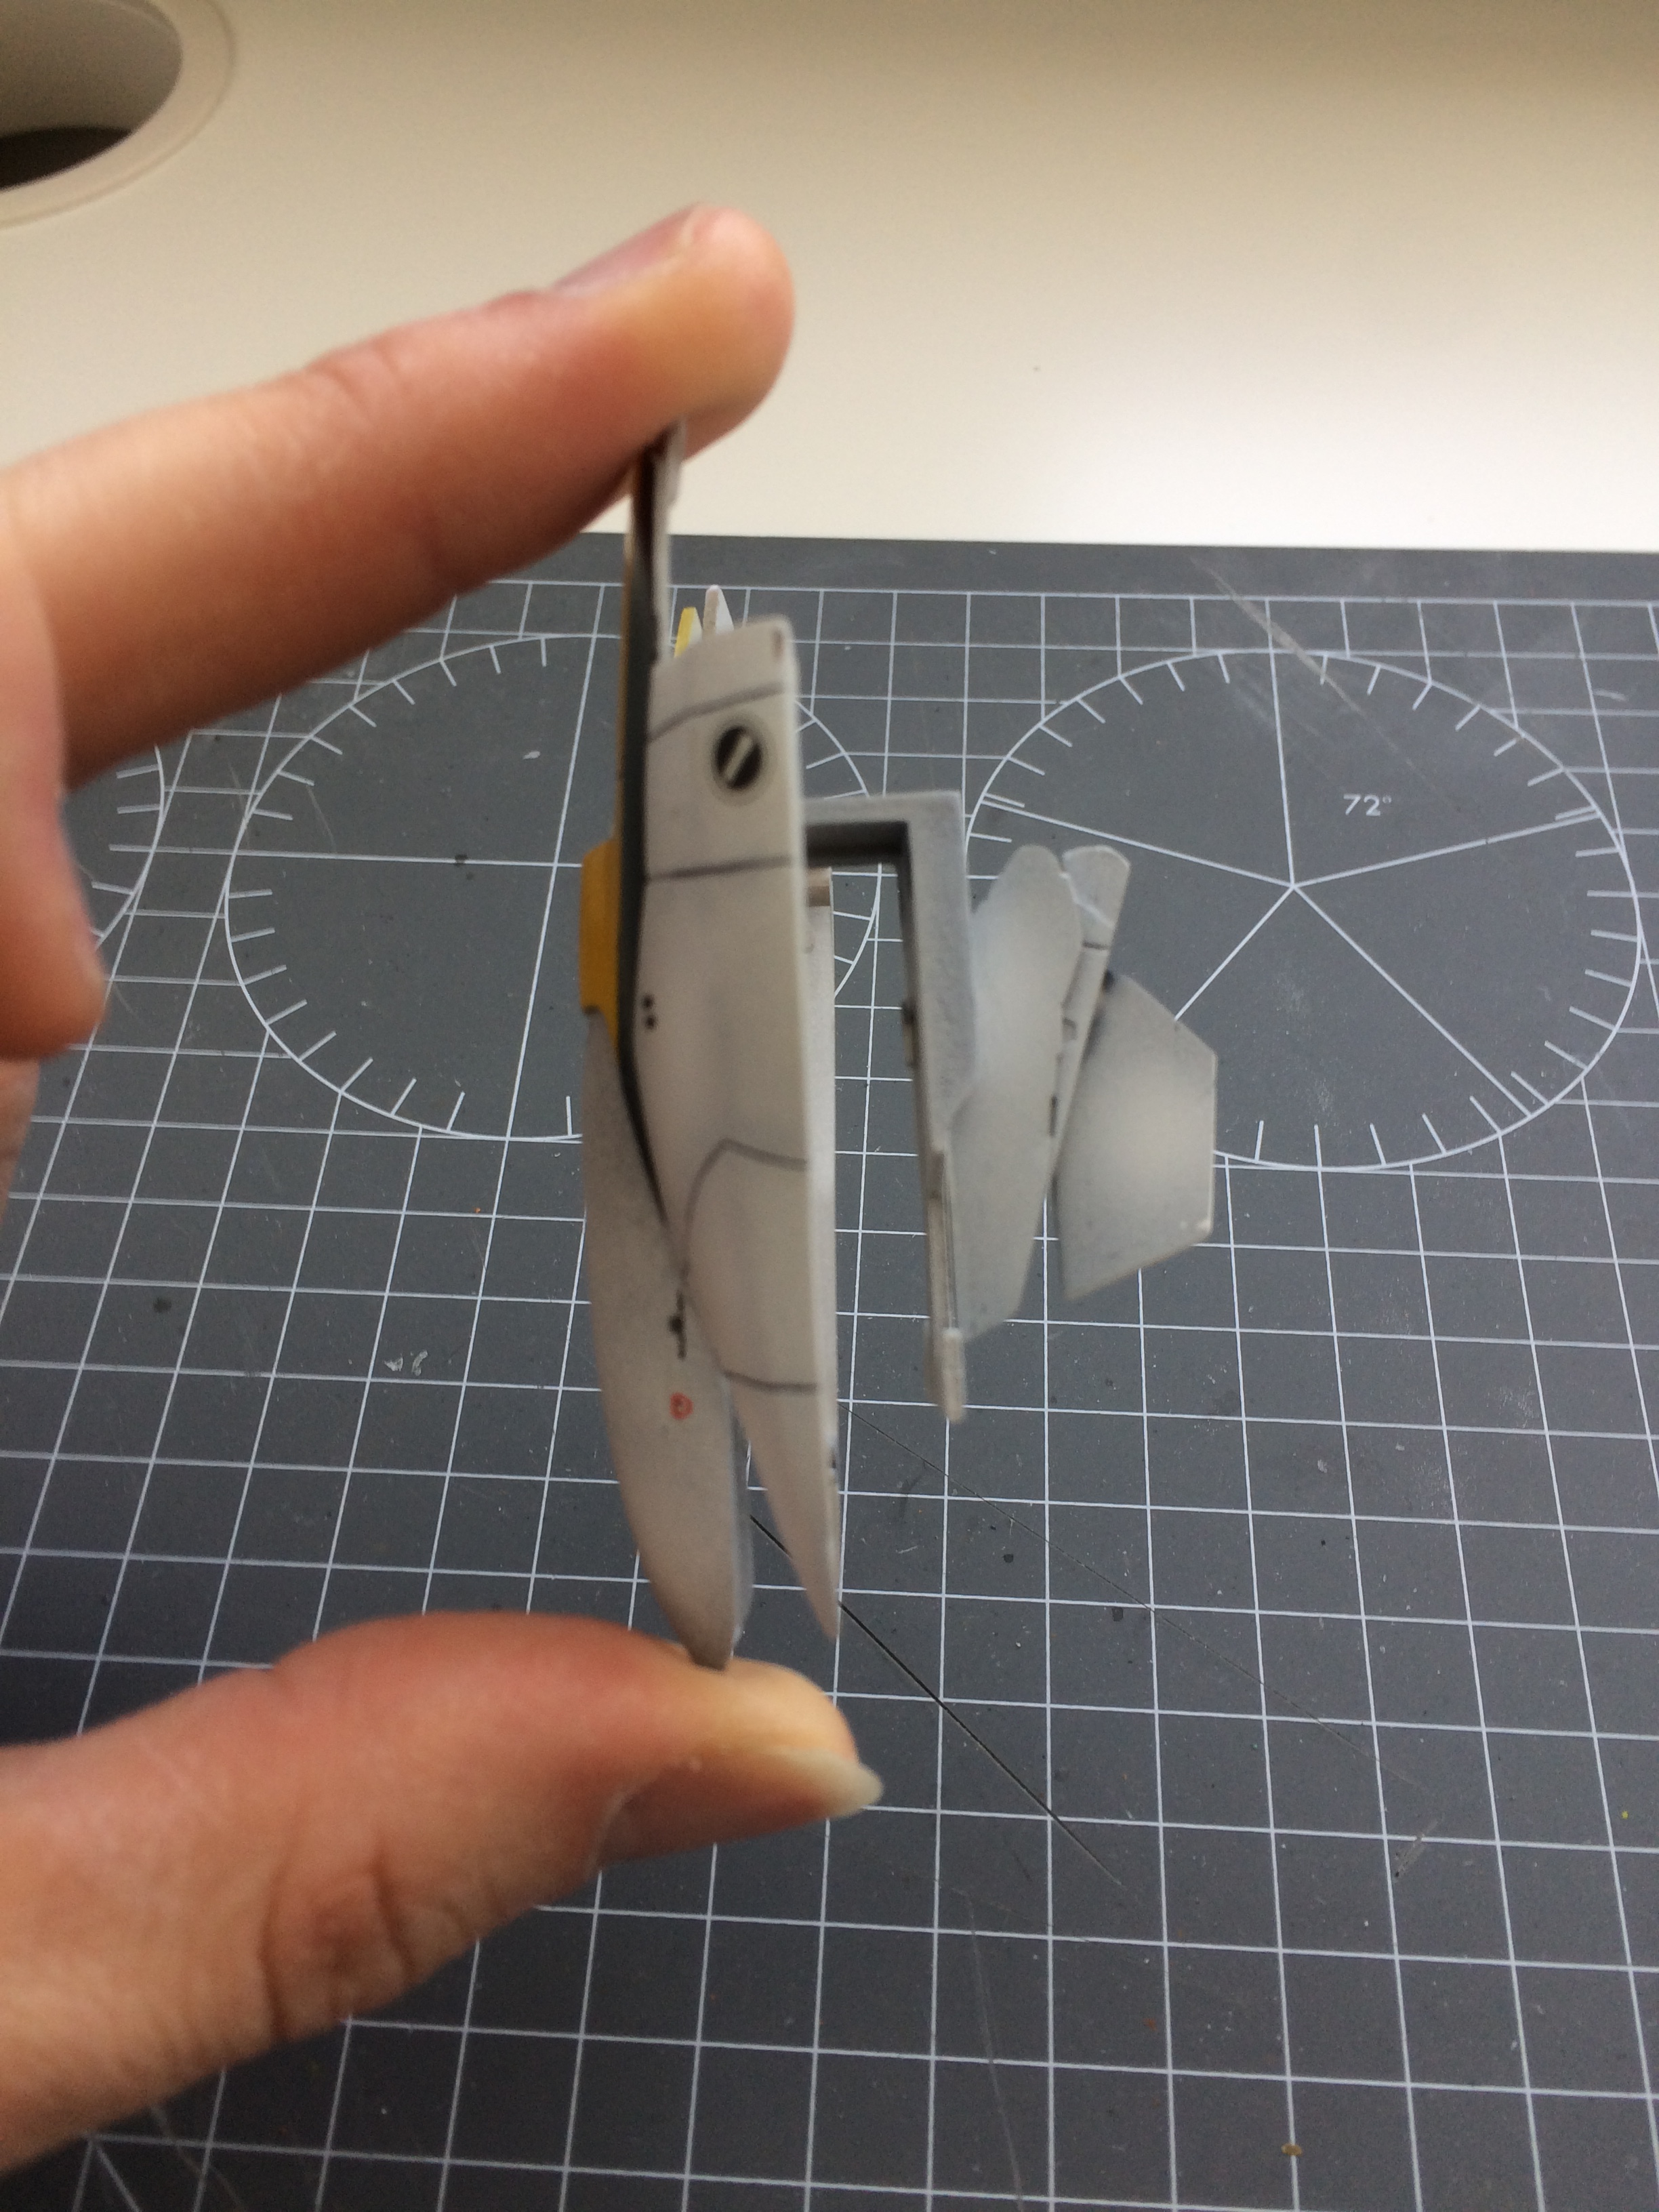
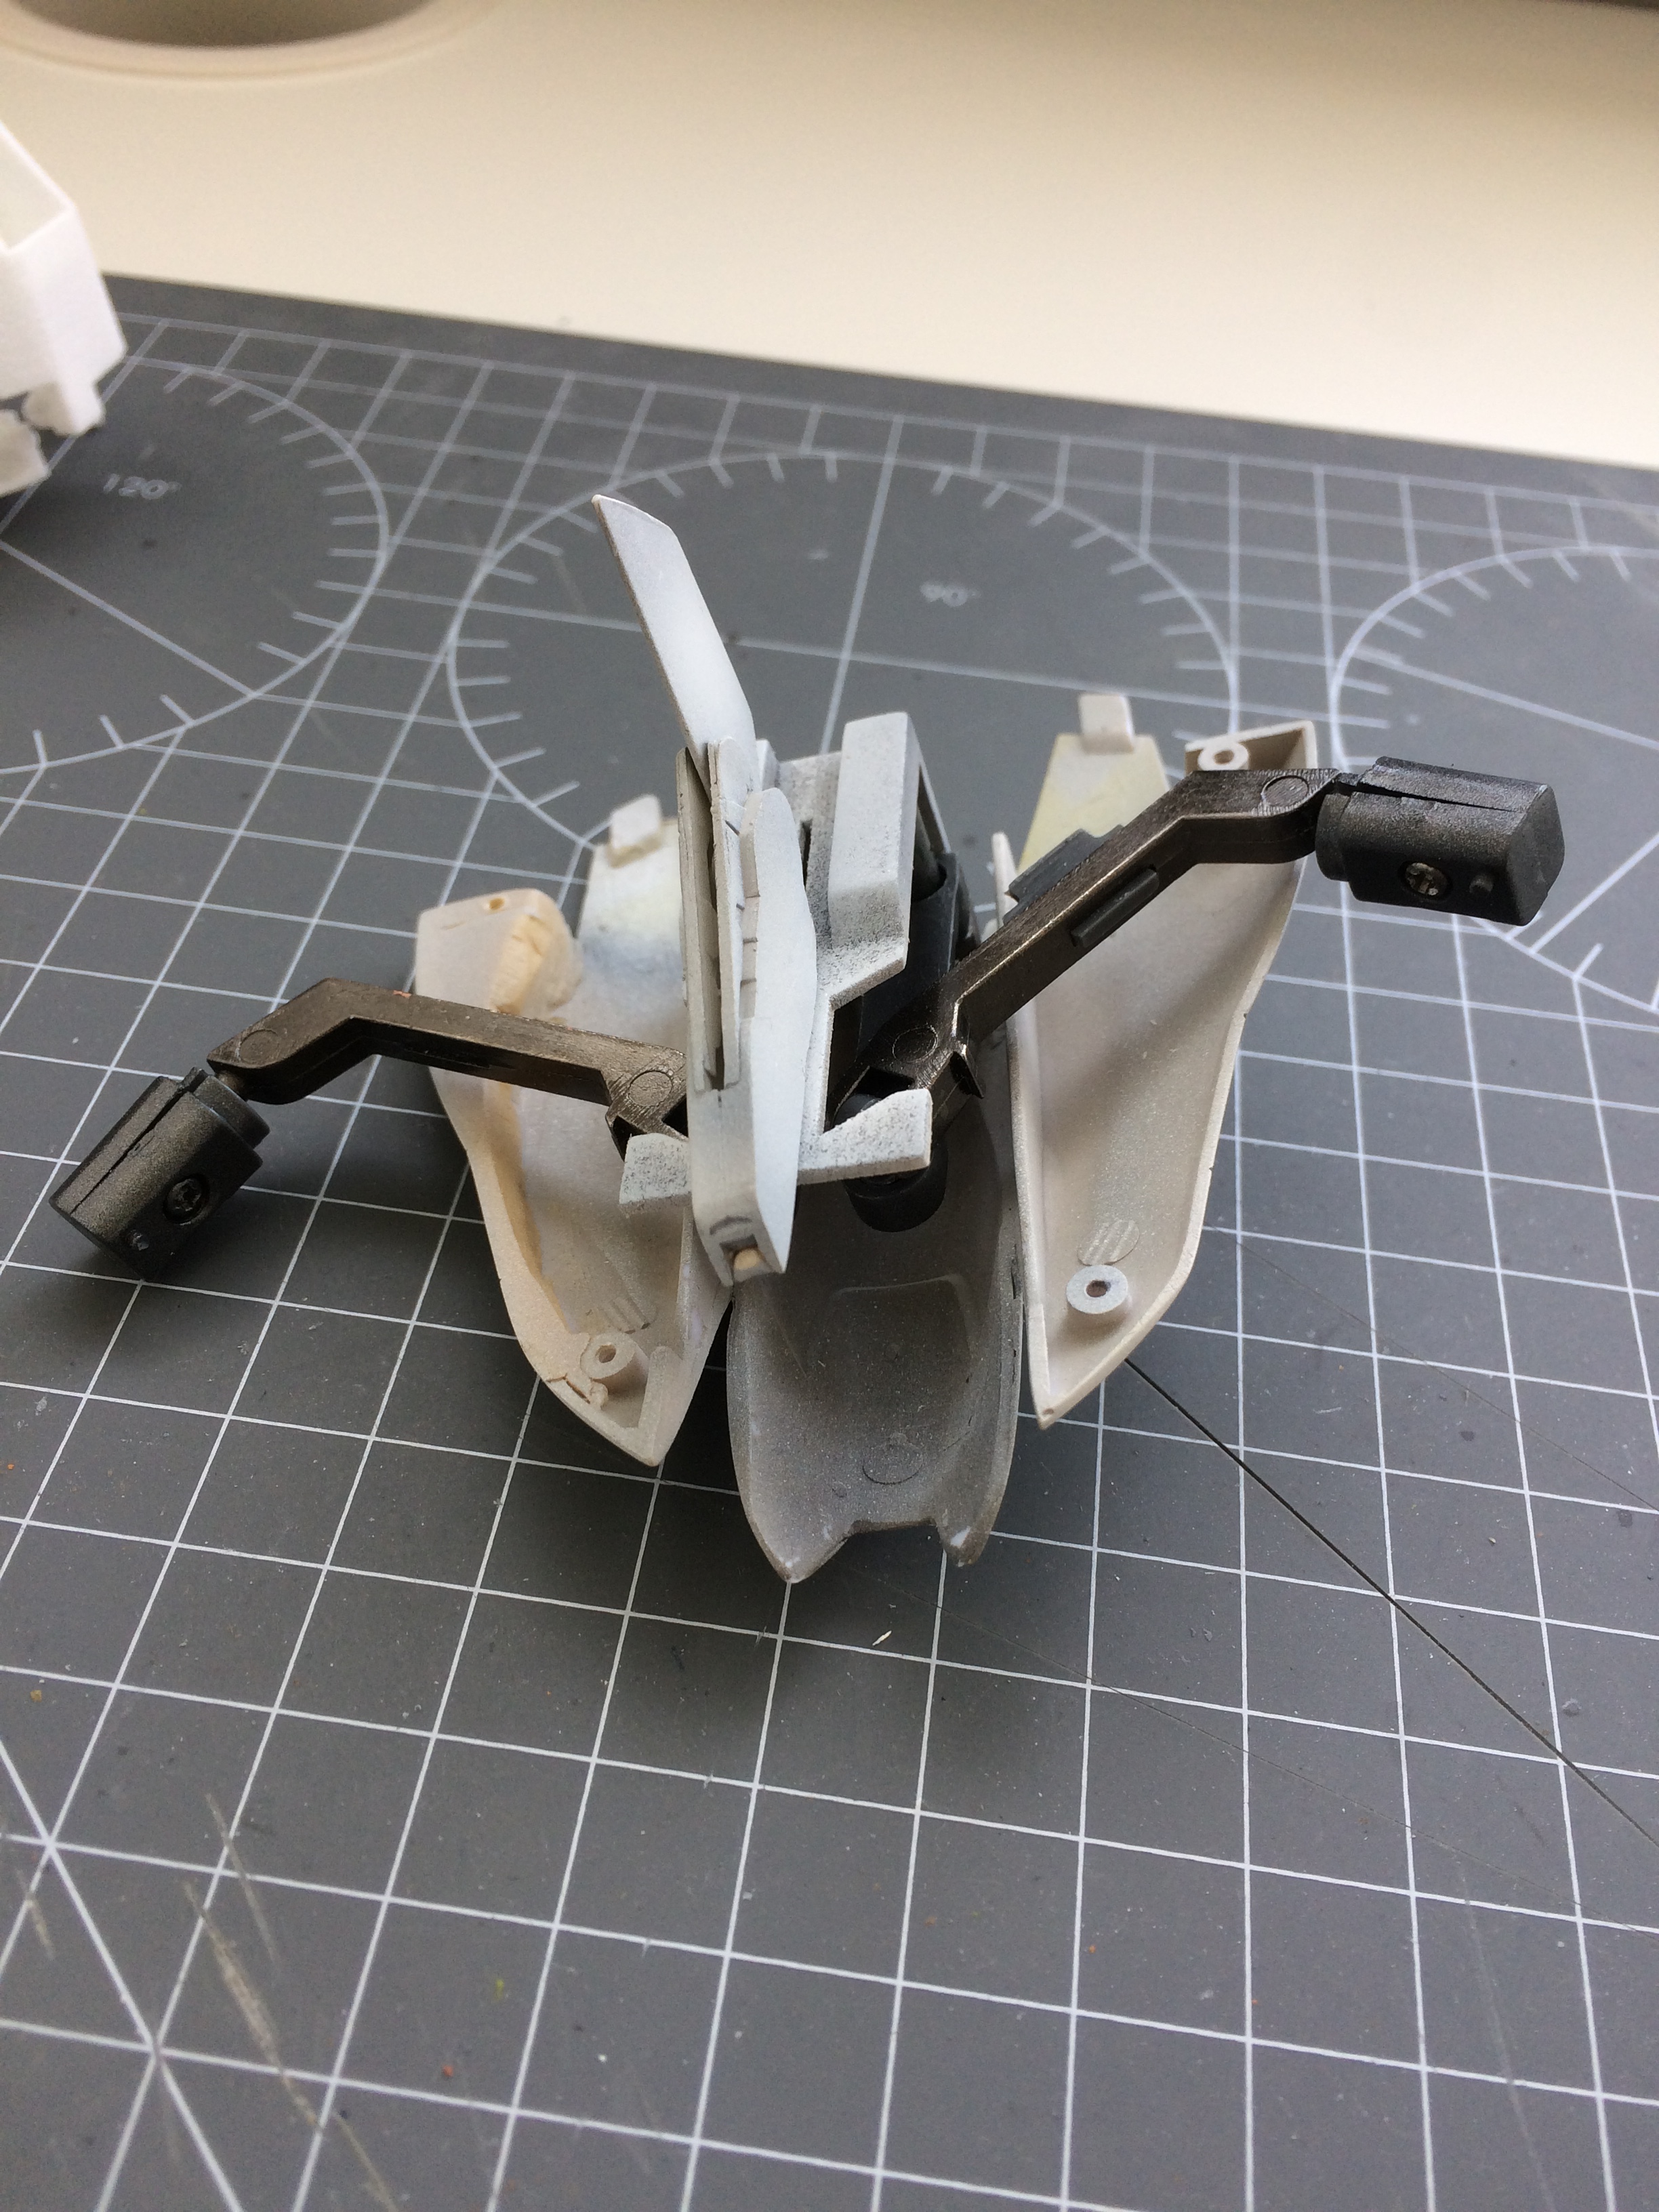
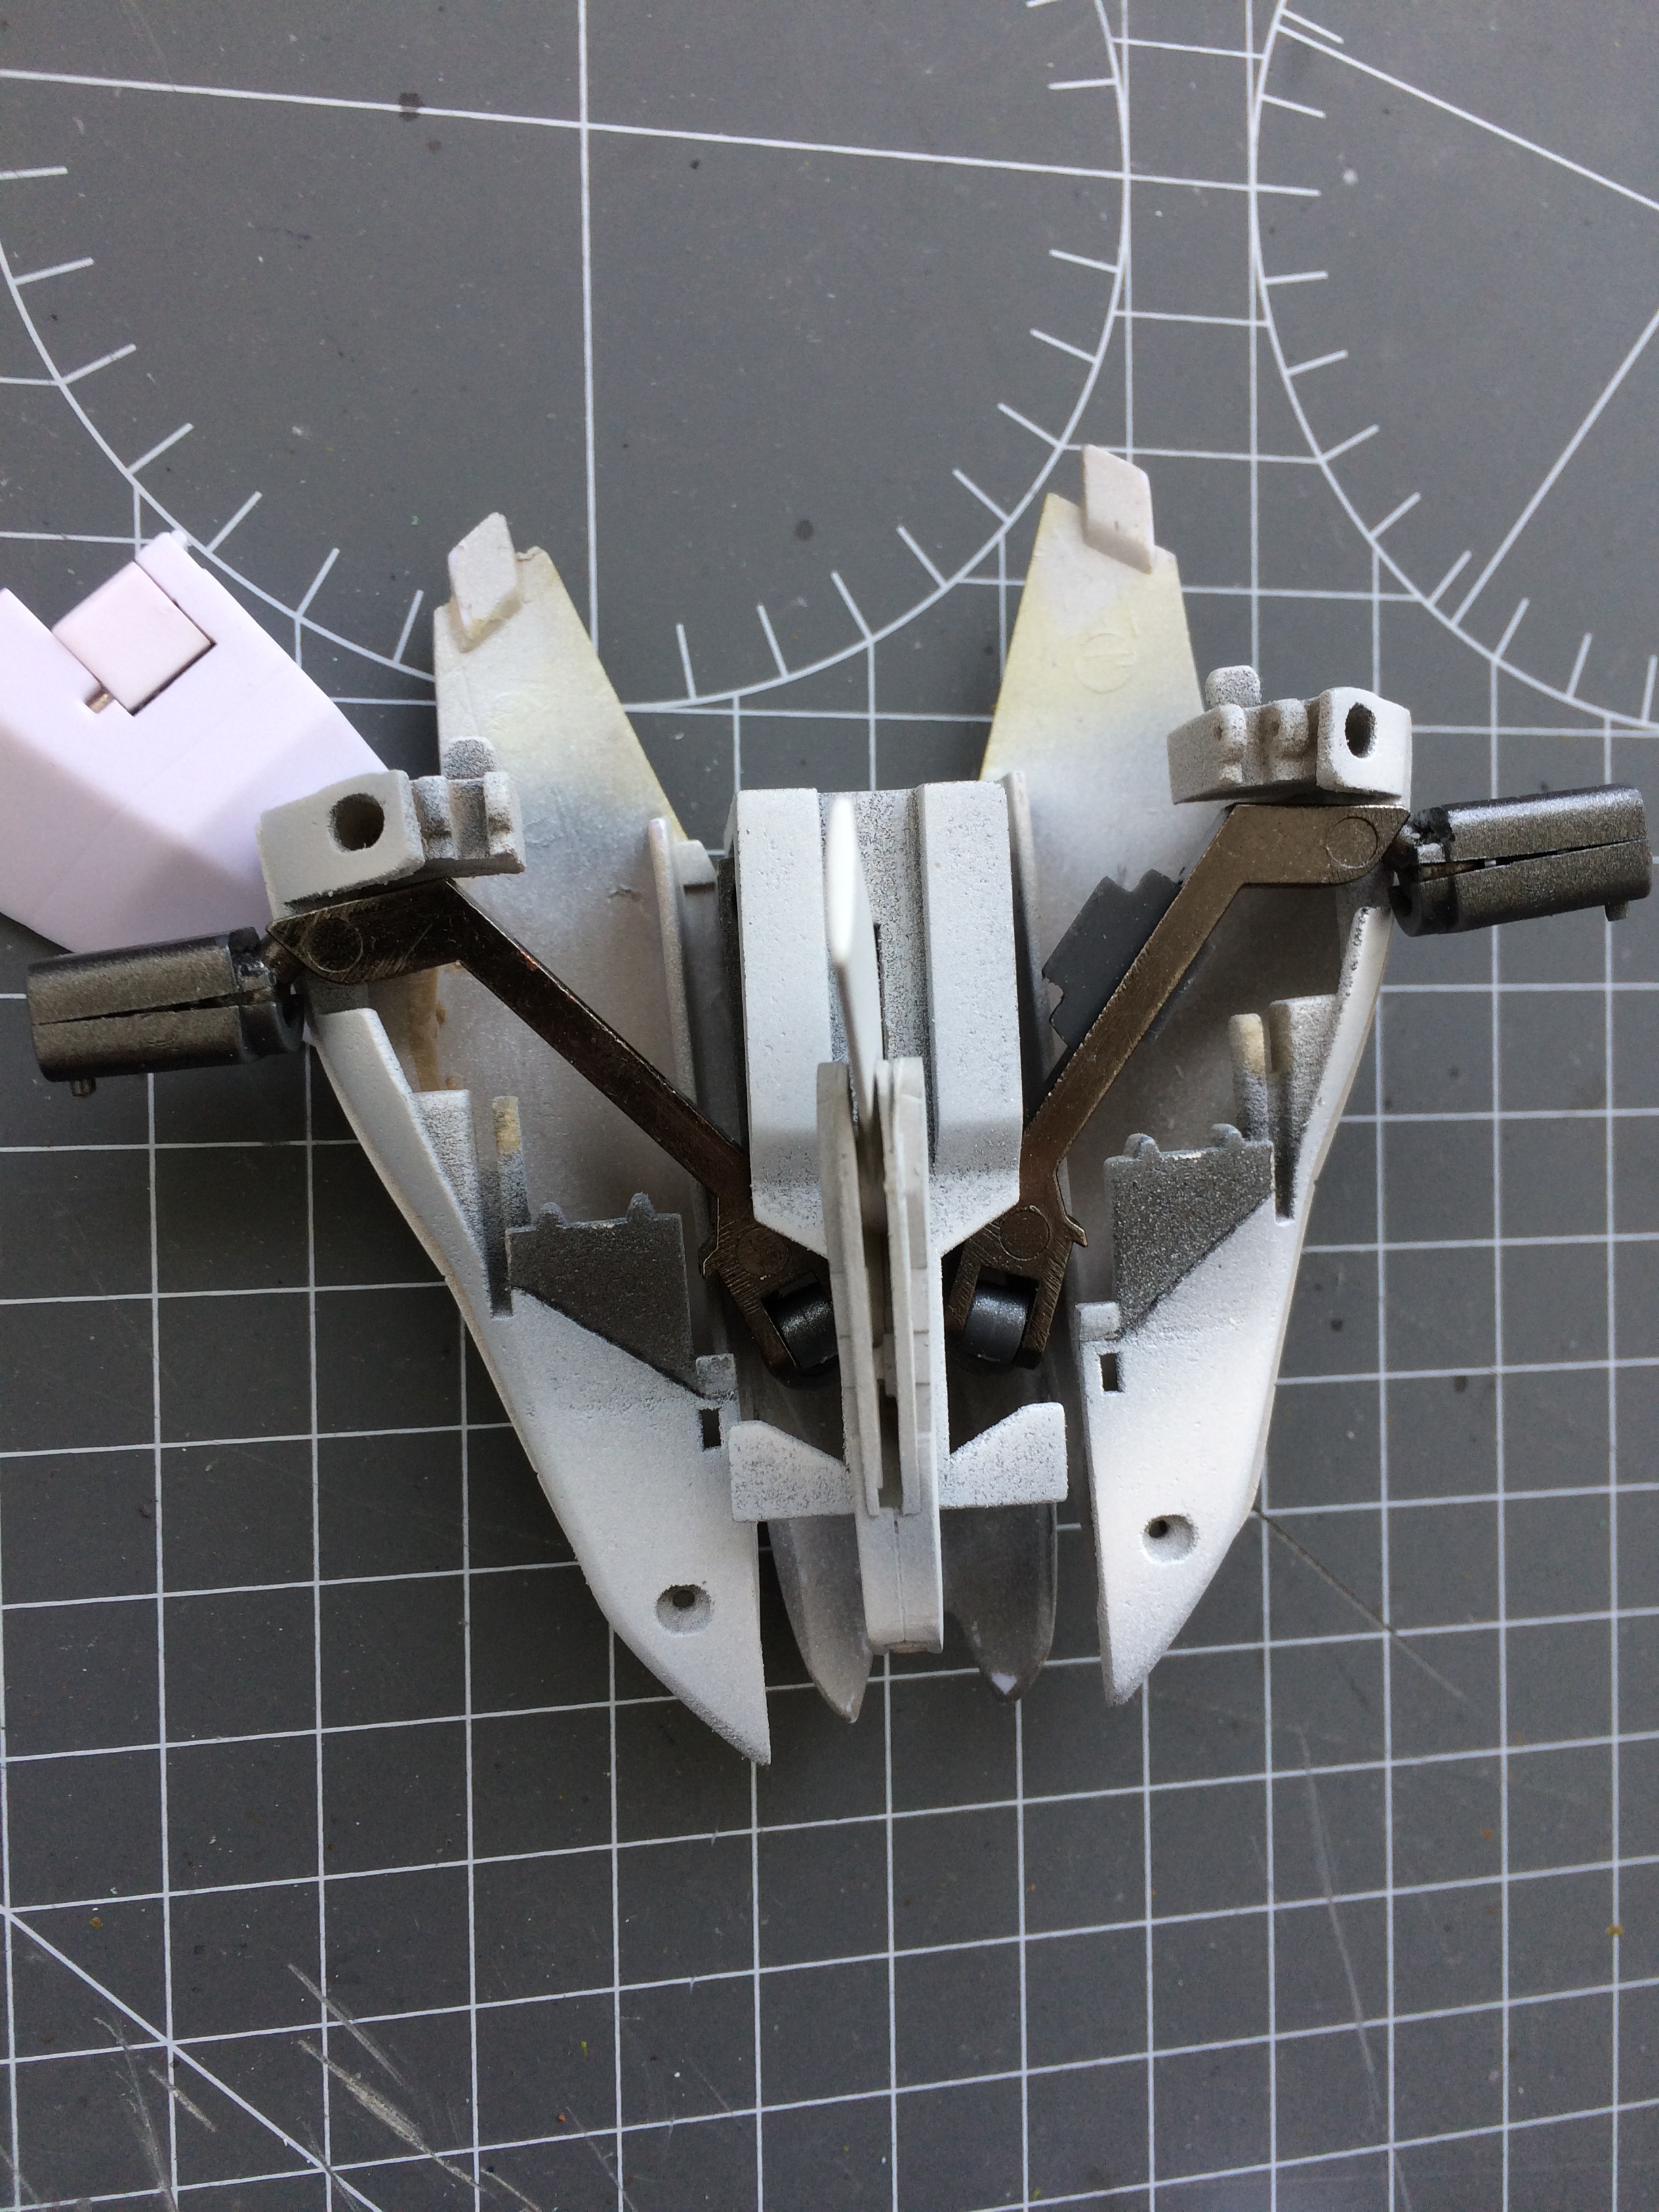
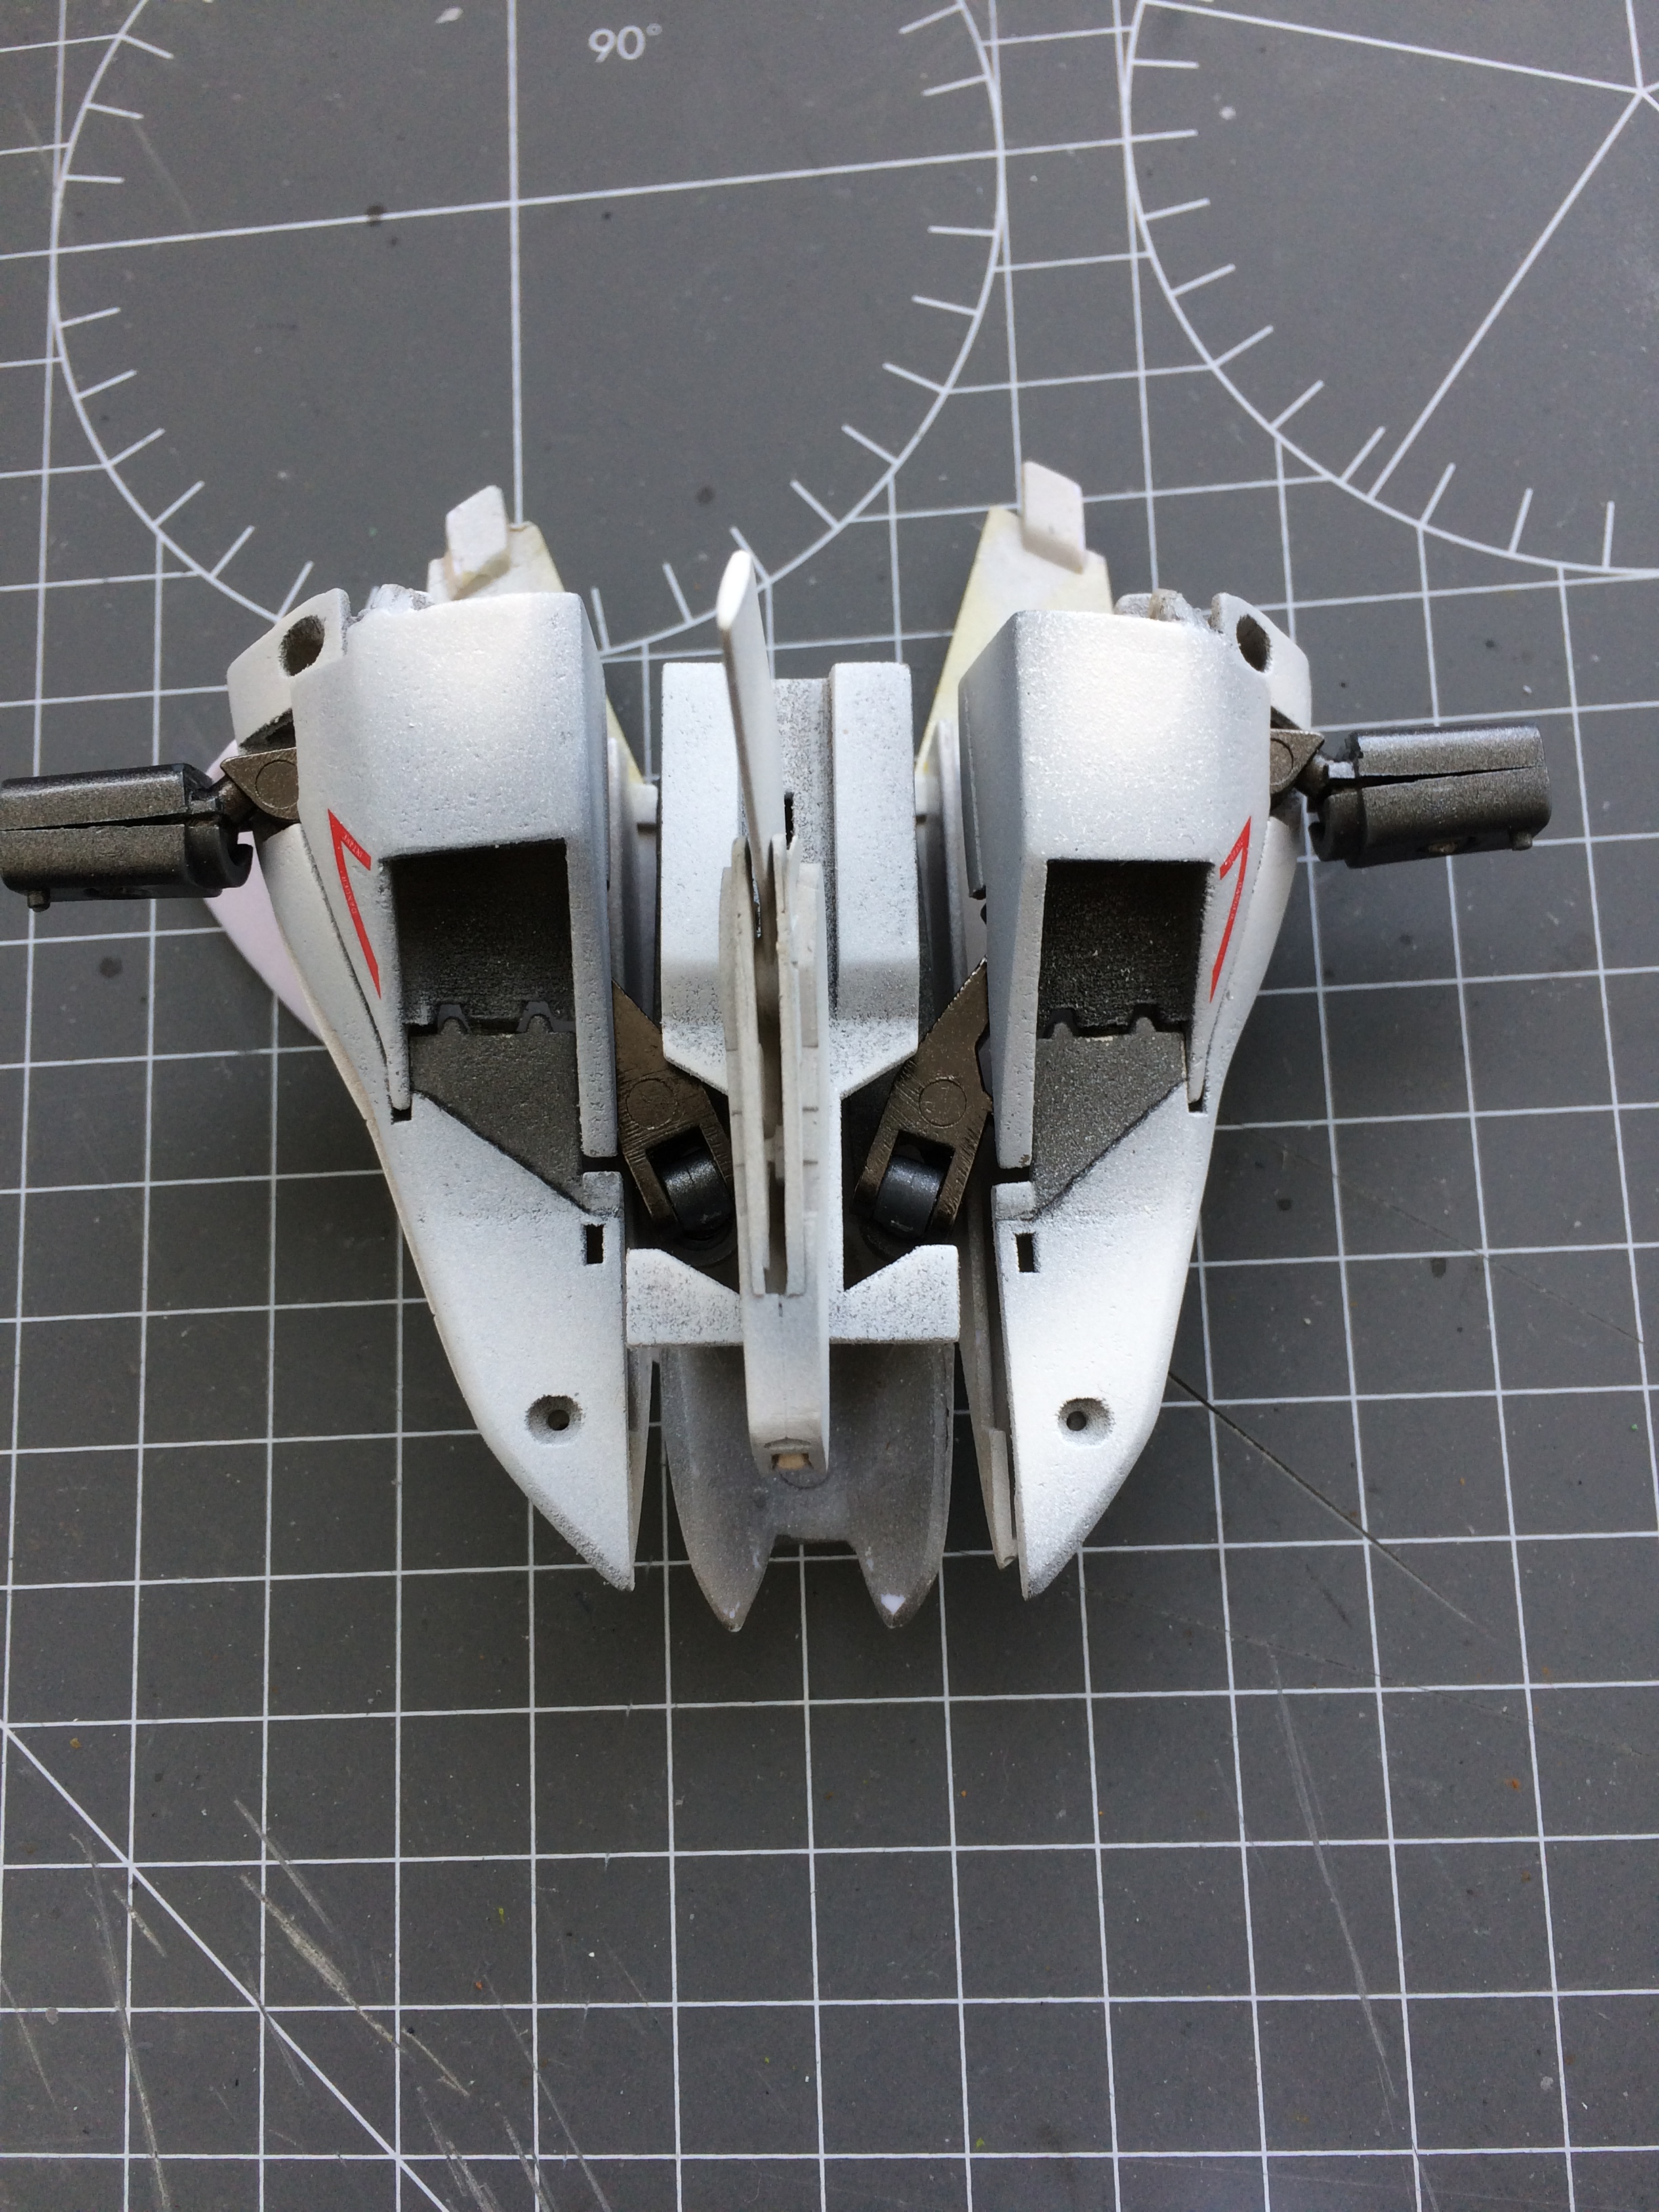
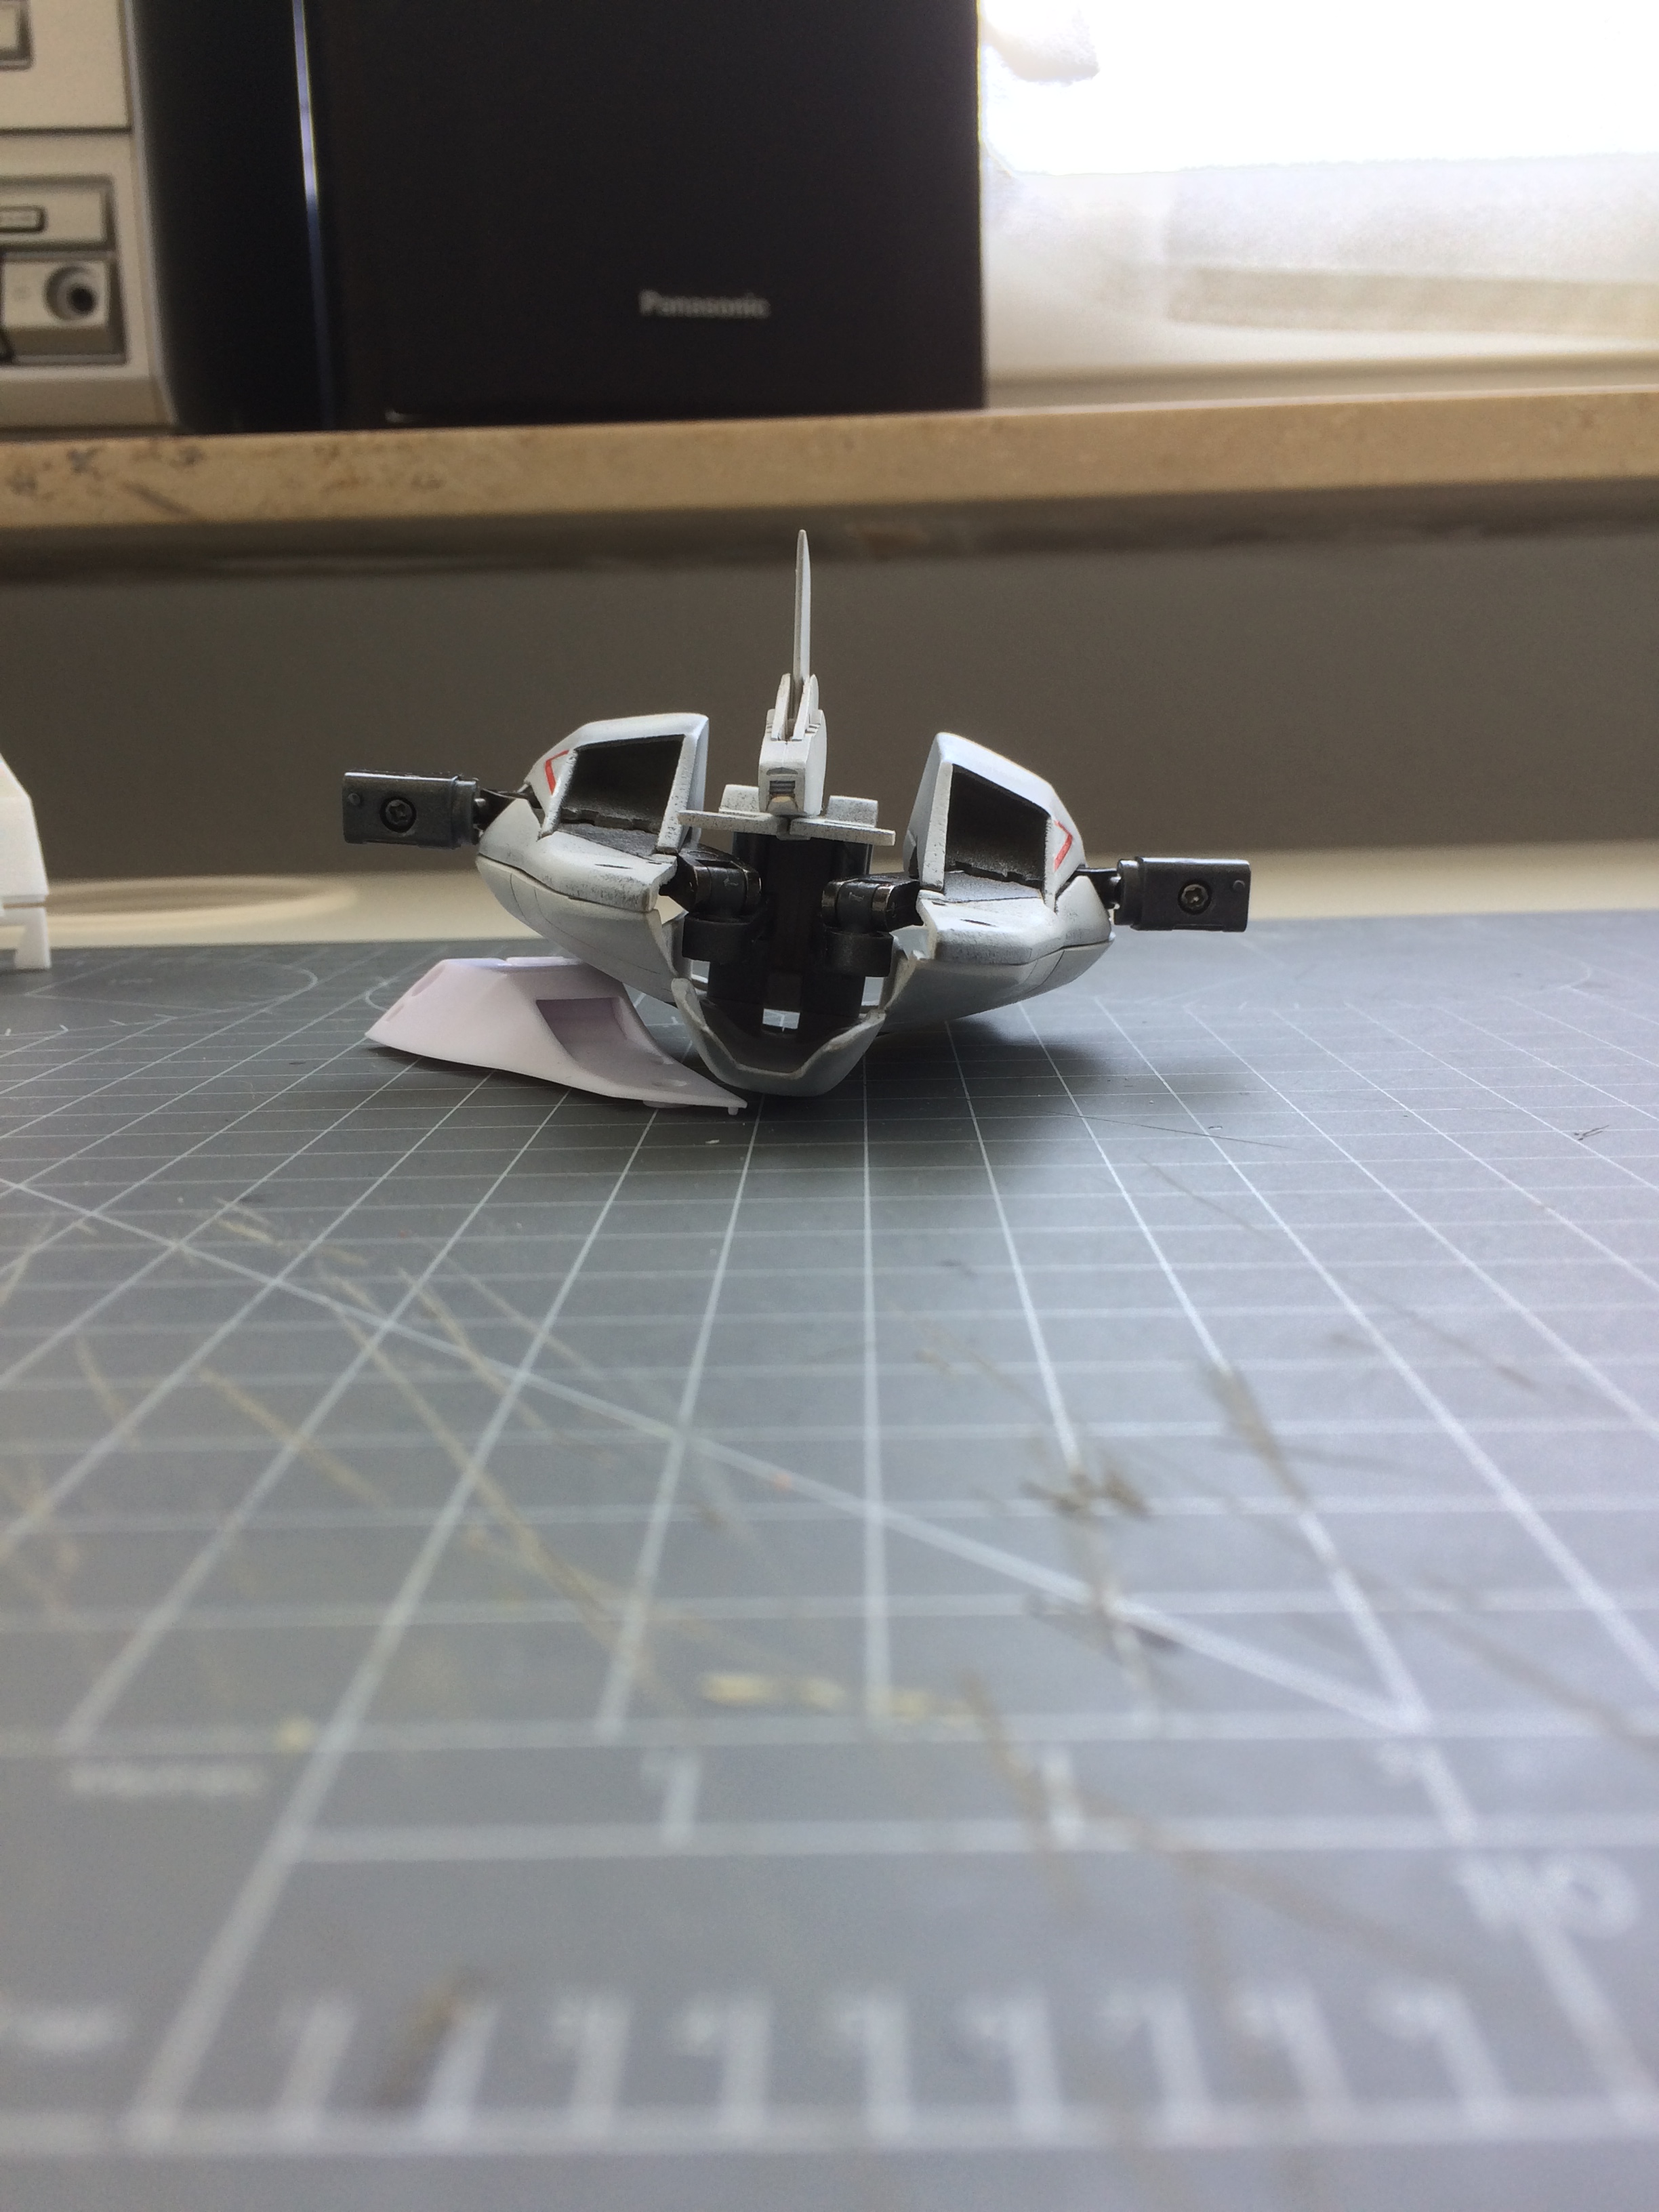
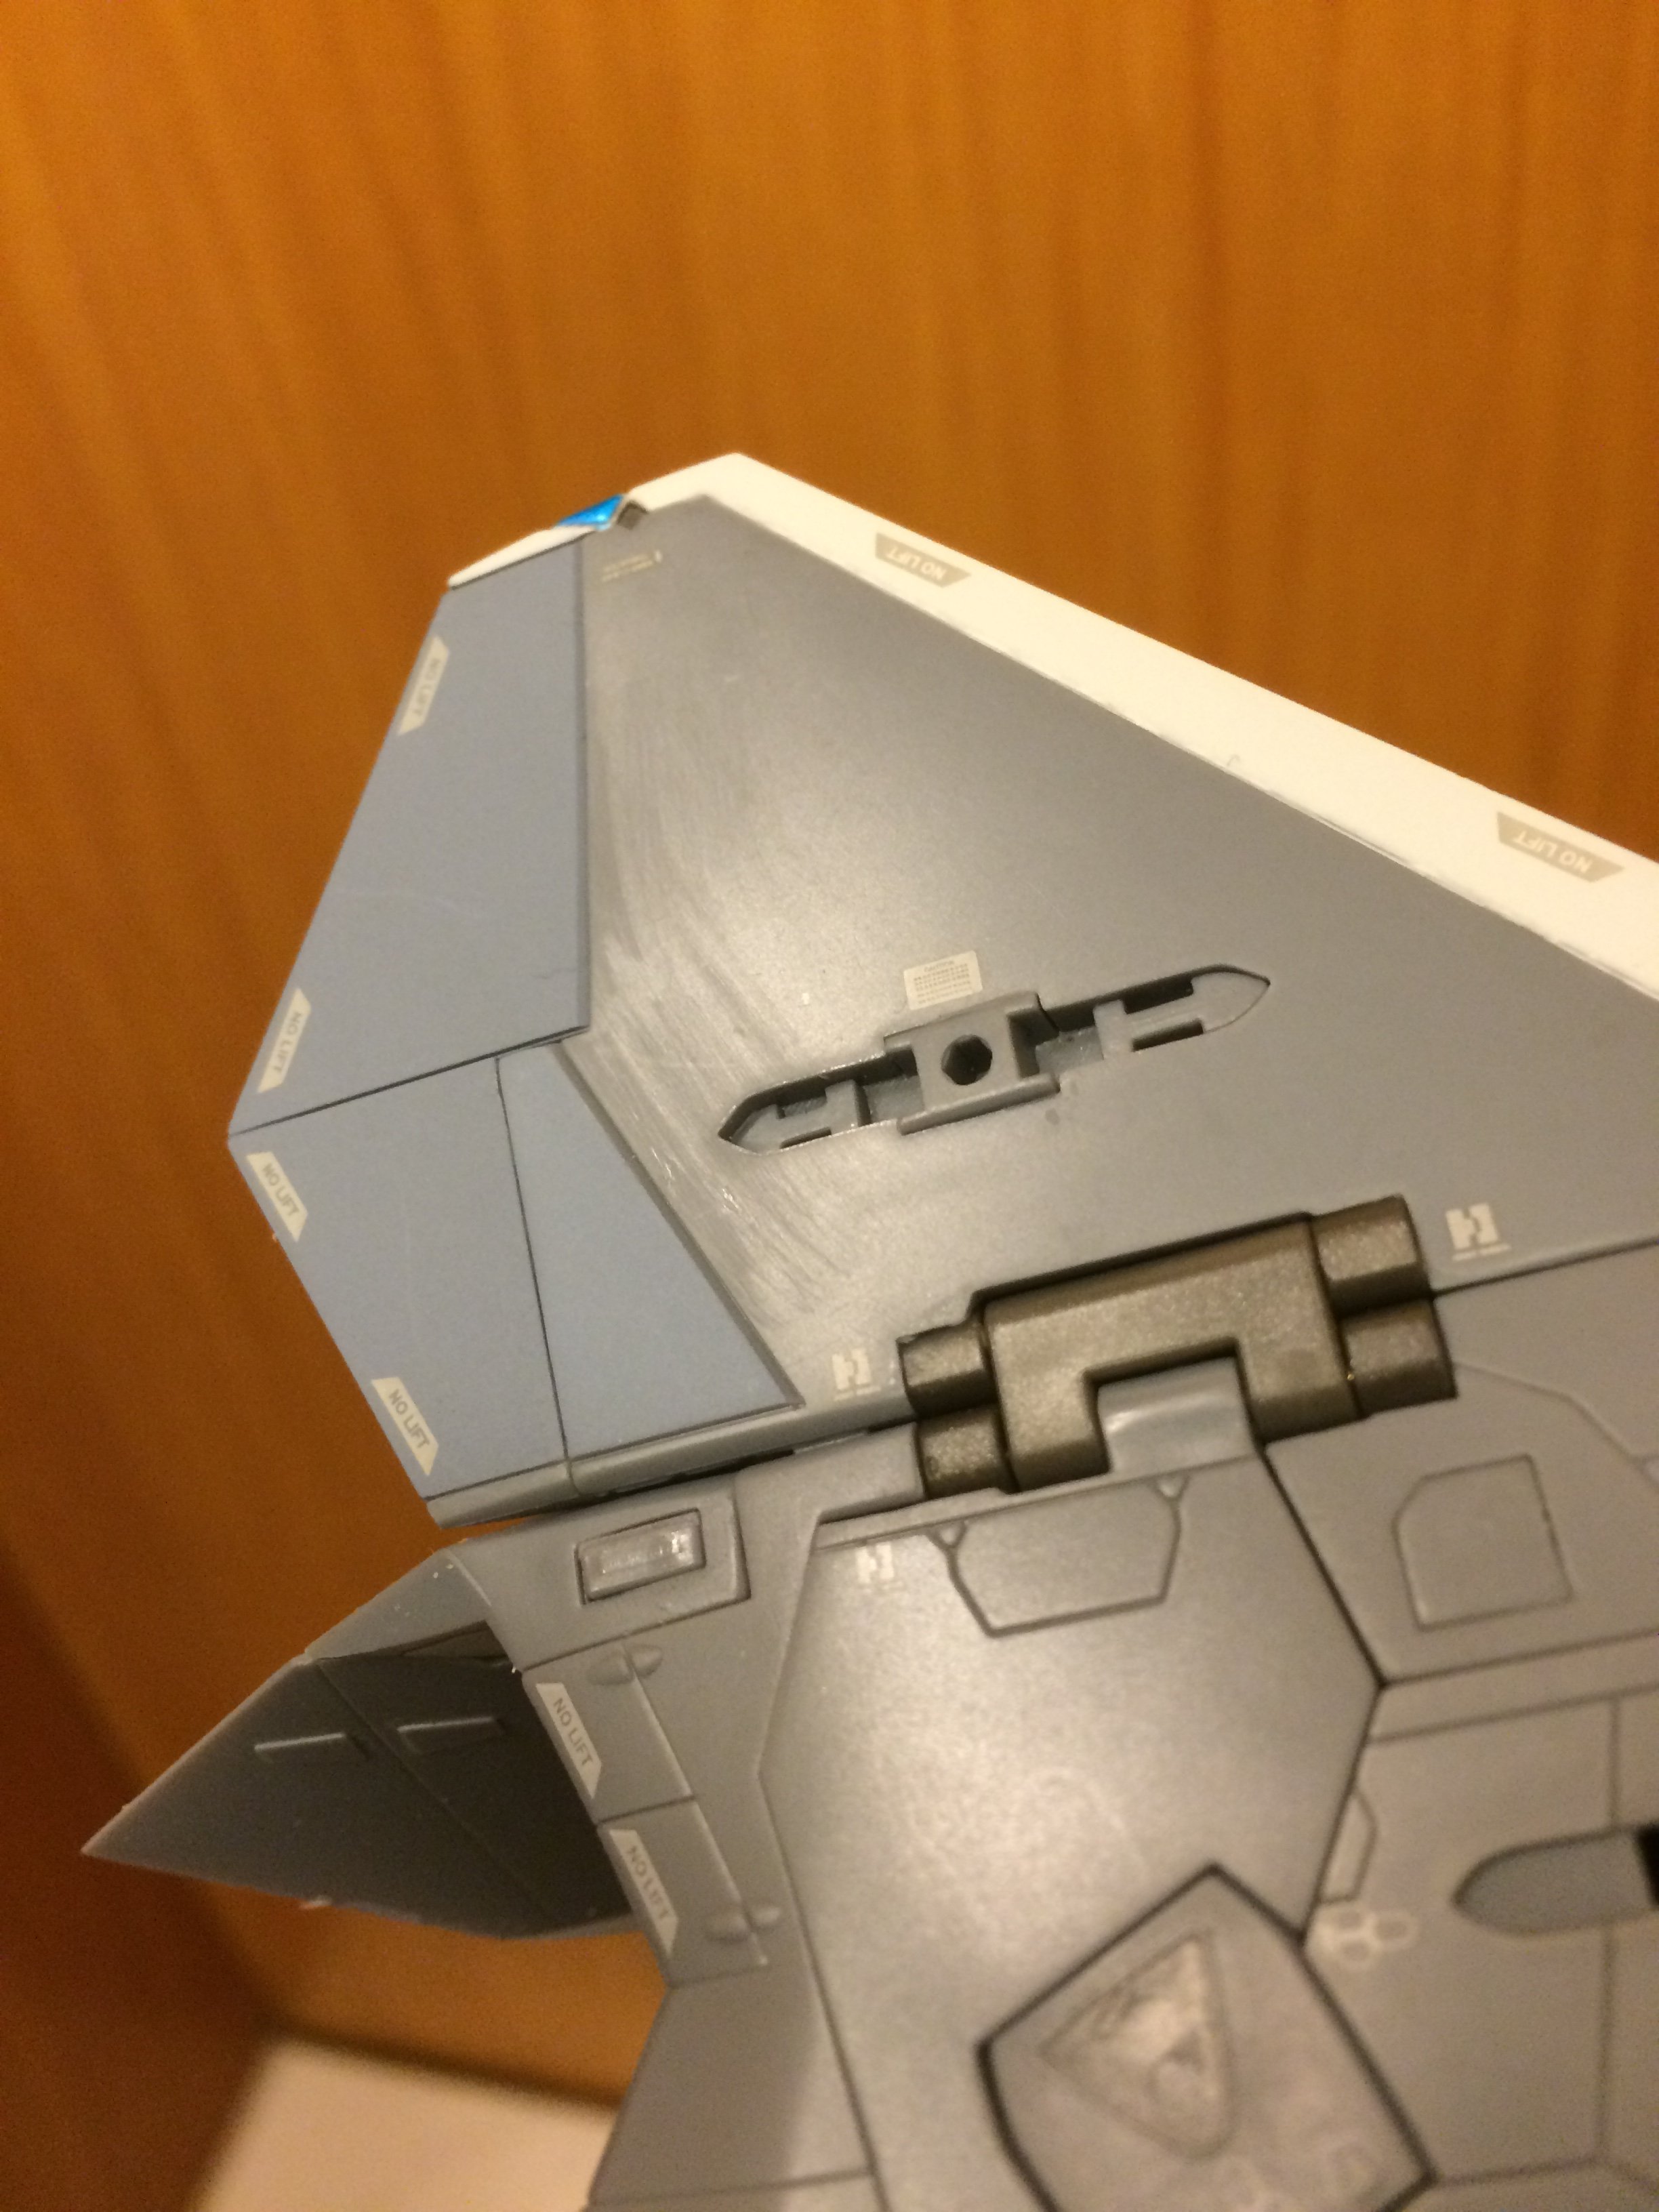
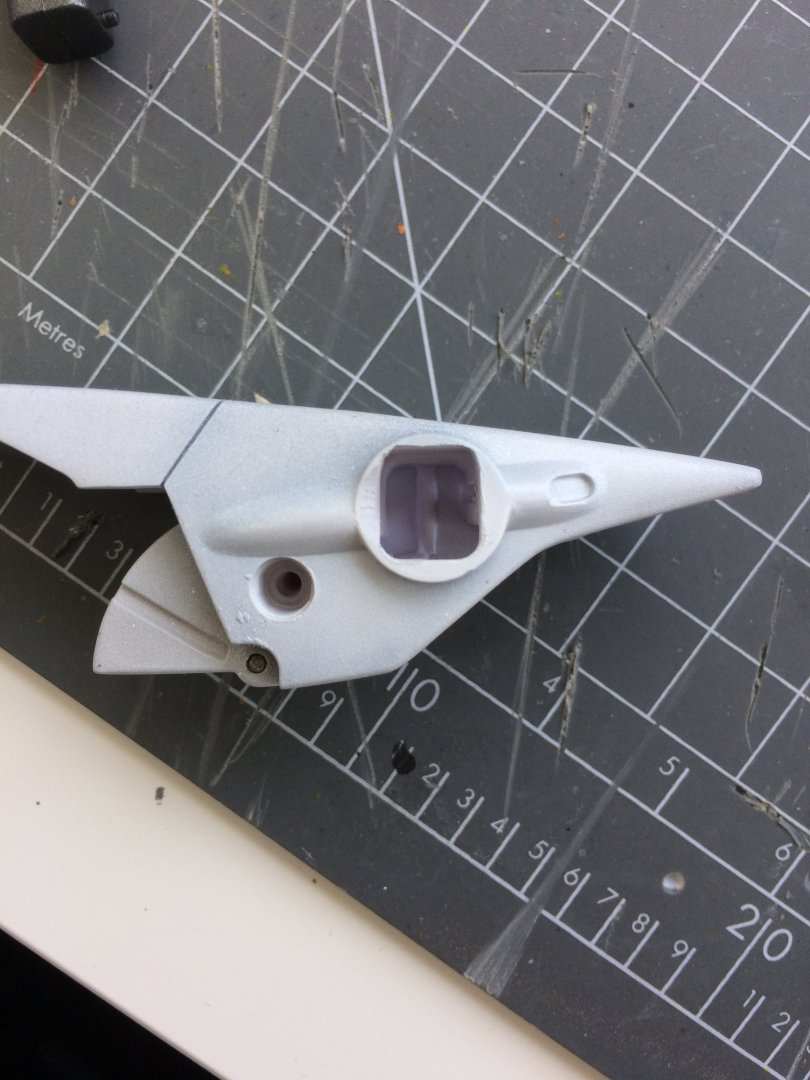
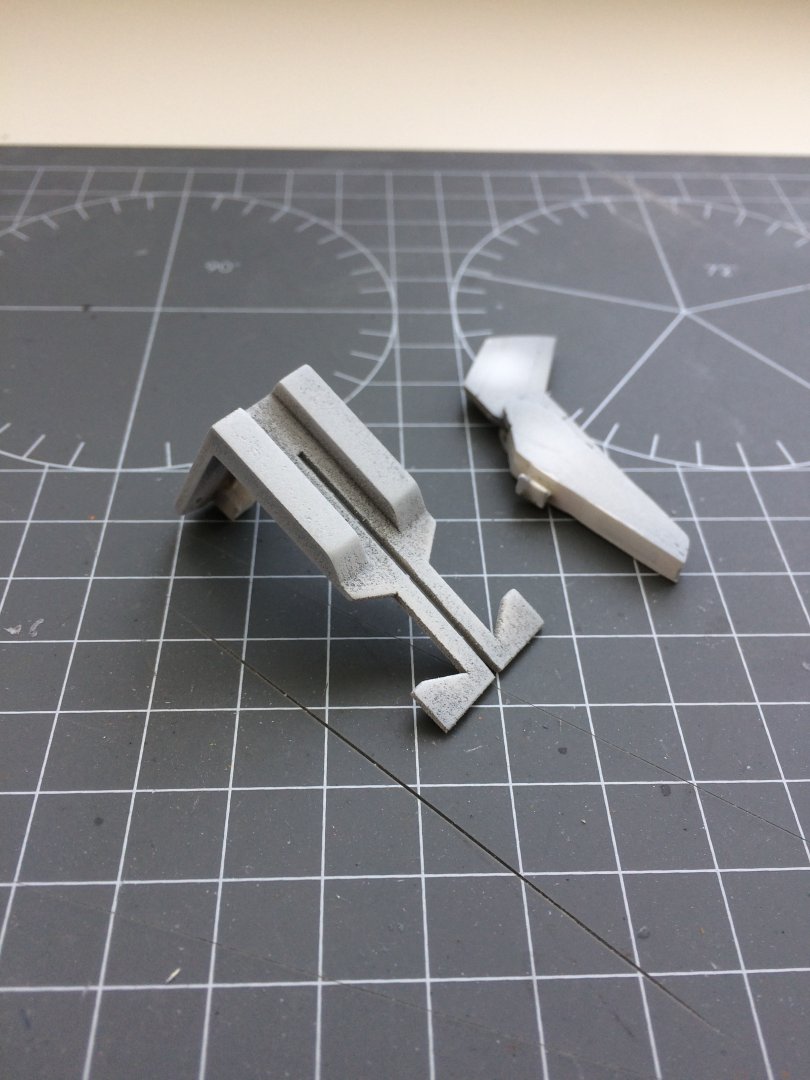
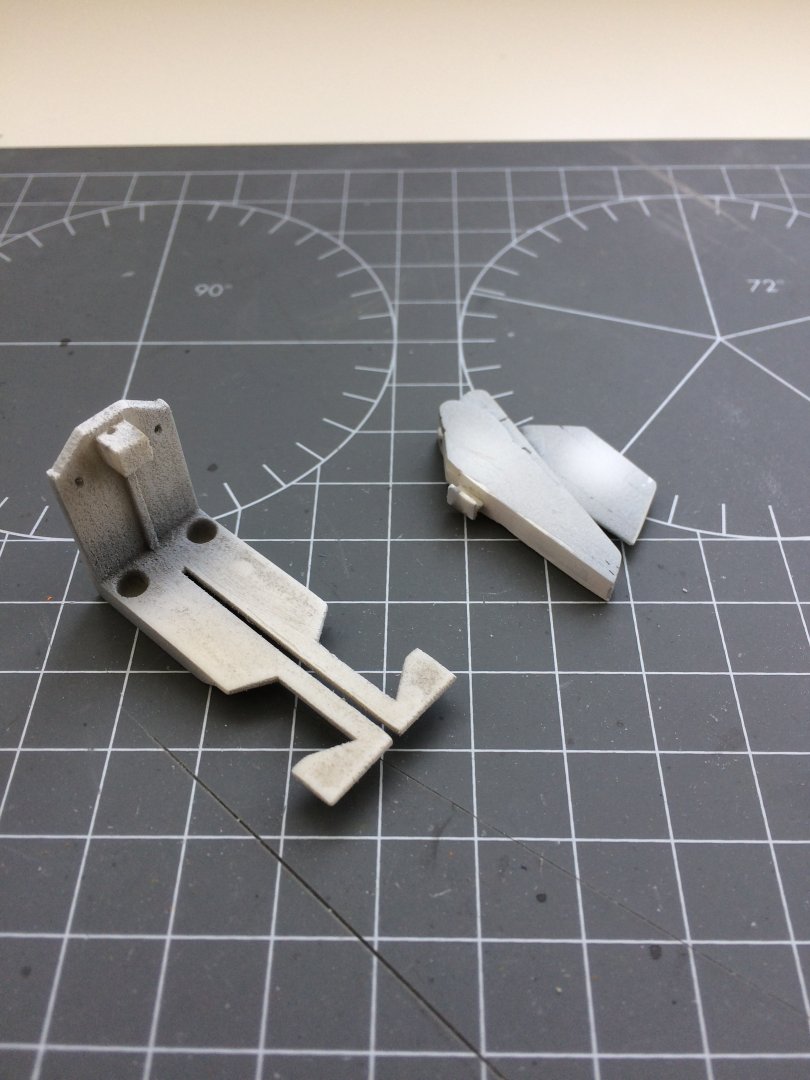
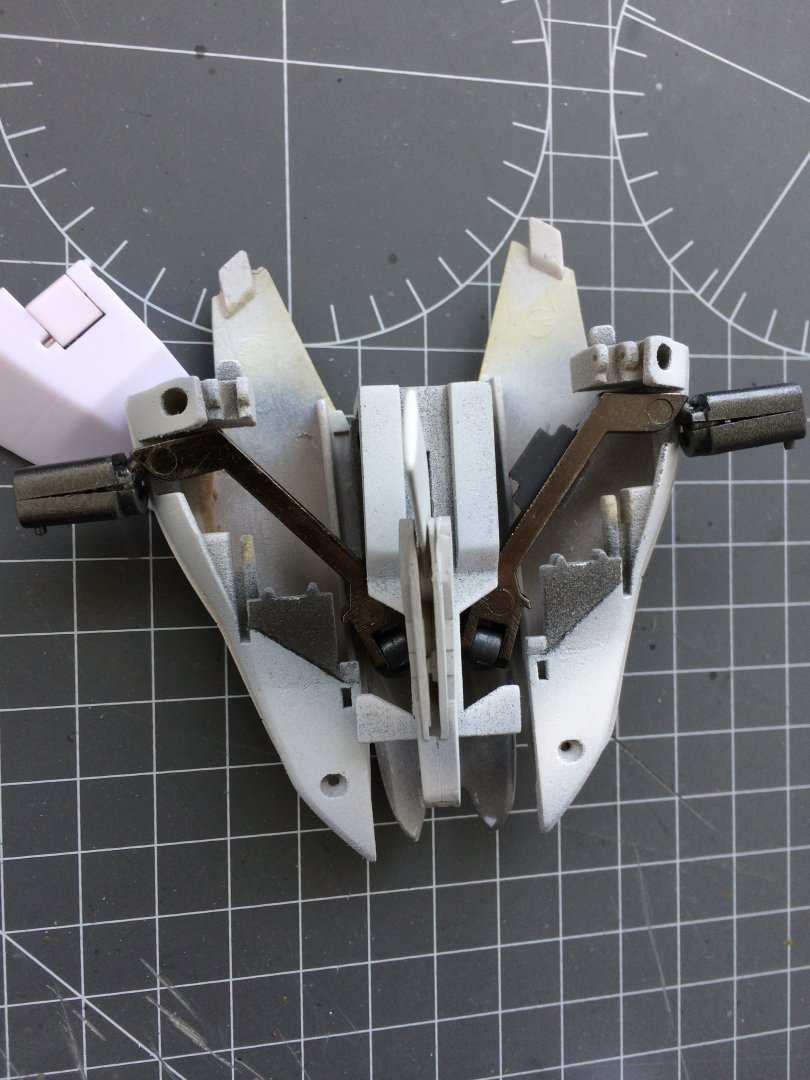
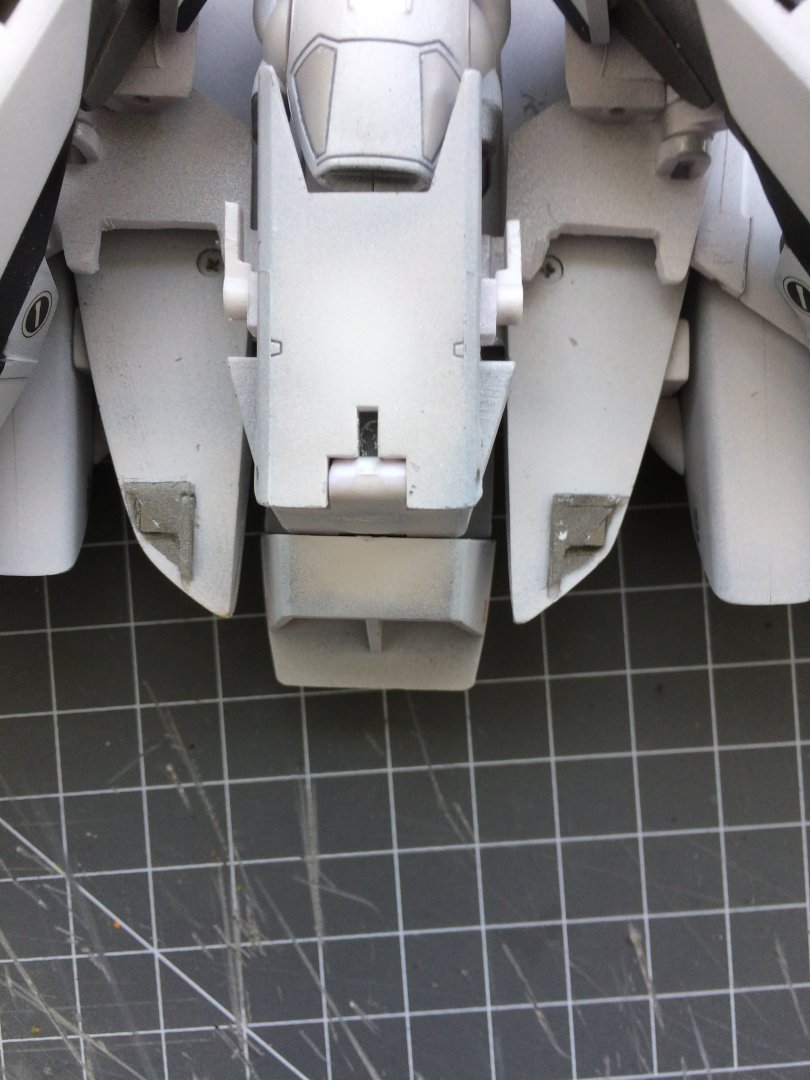
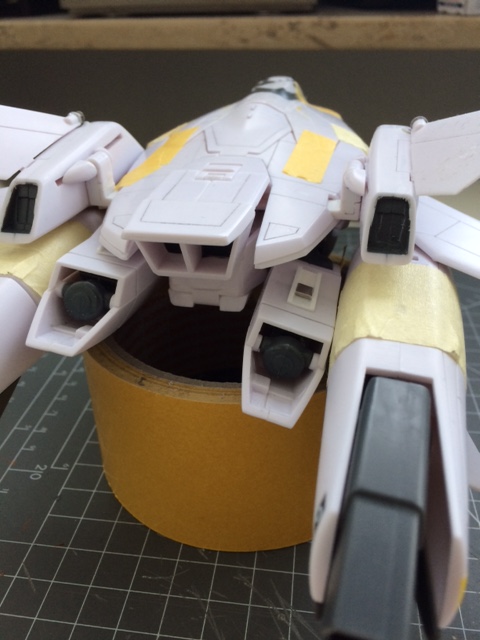
and now the last set of mods regarding the repositionin of the legs and in general the under part of the front of the fighter. First of all, thanks a lot @Xigfrid that helped me out with the 3D design of the new pieces, really great member of the forum with true passion for macross stuff! - Leg joint The housing for the metal bar needs to be modified to allow a good range of movement so that the legs can be positioned parallel (by removing a part of the housing for the ball joint) and separate (by enlarging the opening in the leg intake part so) from the body. - New ventral fin system a) New fin (based on gundam build parts - wings) crafted with a T shaped pin that allows it to move along a opening and incorporated magnets to lock to the nosecone in fighter mode b) New 3D printed piece cointaining i) the opening to funcion as a rail for the fin and ii) the round holes to fix one side of the tubes for the new leg transformation system pics in fighter and battroid mode positions - NEW INTAKES this is the key part of the mod, withouth @Xigfrid it wouldn't have been possible to make it! new 3D printed air intakes that can open and allow the metal bar to be positioned inside them, not under. Some pictures: the new pieces are also thiker (with a bigger intake) than the original, so the shoulders will look less "pending under the body" and instead more integrated in the design in fighter mode a summary of the building sequence: 1) add the tubes (leg attachment will be periscopic) 2) insert the legs and block them with the fin system piece 3) attach the main piece of the new intake and then the closure upside down front view of how it should look what do you think? slowly and carefully assembling the all thing now checking that all is ok, next update complete pictures! Cheers, Max


-
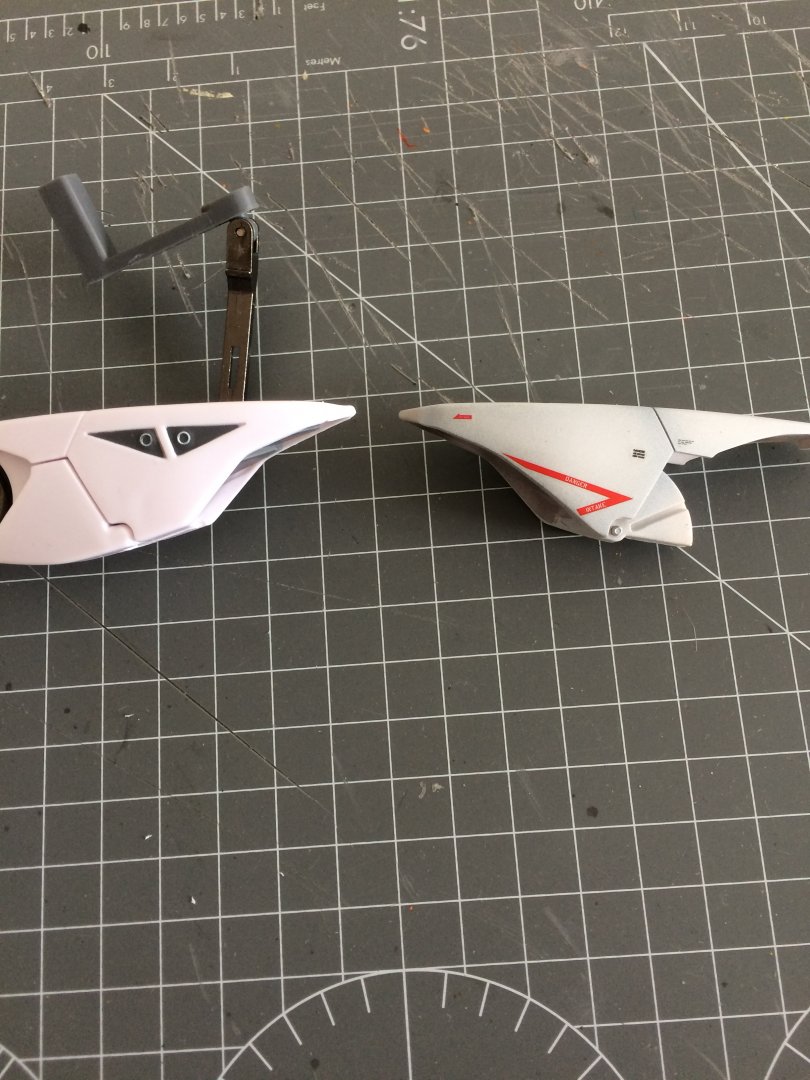
...more details on the Roy mod. - Chest Piece part 2 I forgot to mention, as the body was sanded down 1.5 mm, also the chest piece is sanded down: - Body part 3 added magnets to connect better the arms in fighter mode - Nosecone part 2 added magnets that will connect with the moovable ventral fin

-
Thanks, it will take still some time to finalize the new body-intake pieces that allow the repositioning of the legs. In the meantime, I’ve nodded the other VF-2ss. Less time consuming but will be part-former. Detail to come, for now a preview...Max!
-
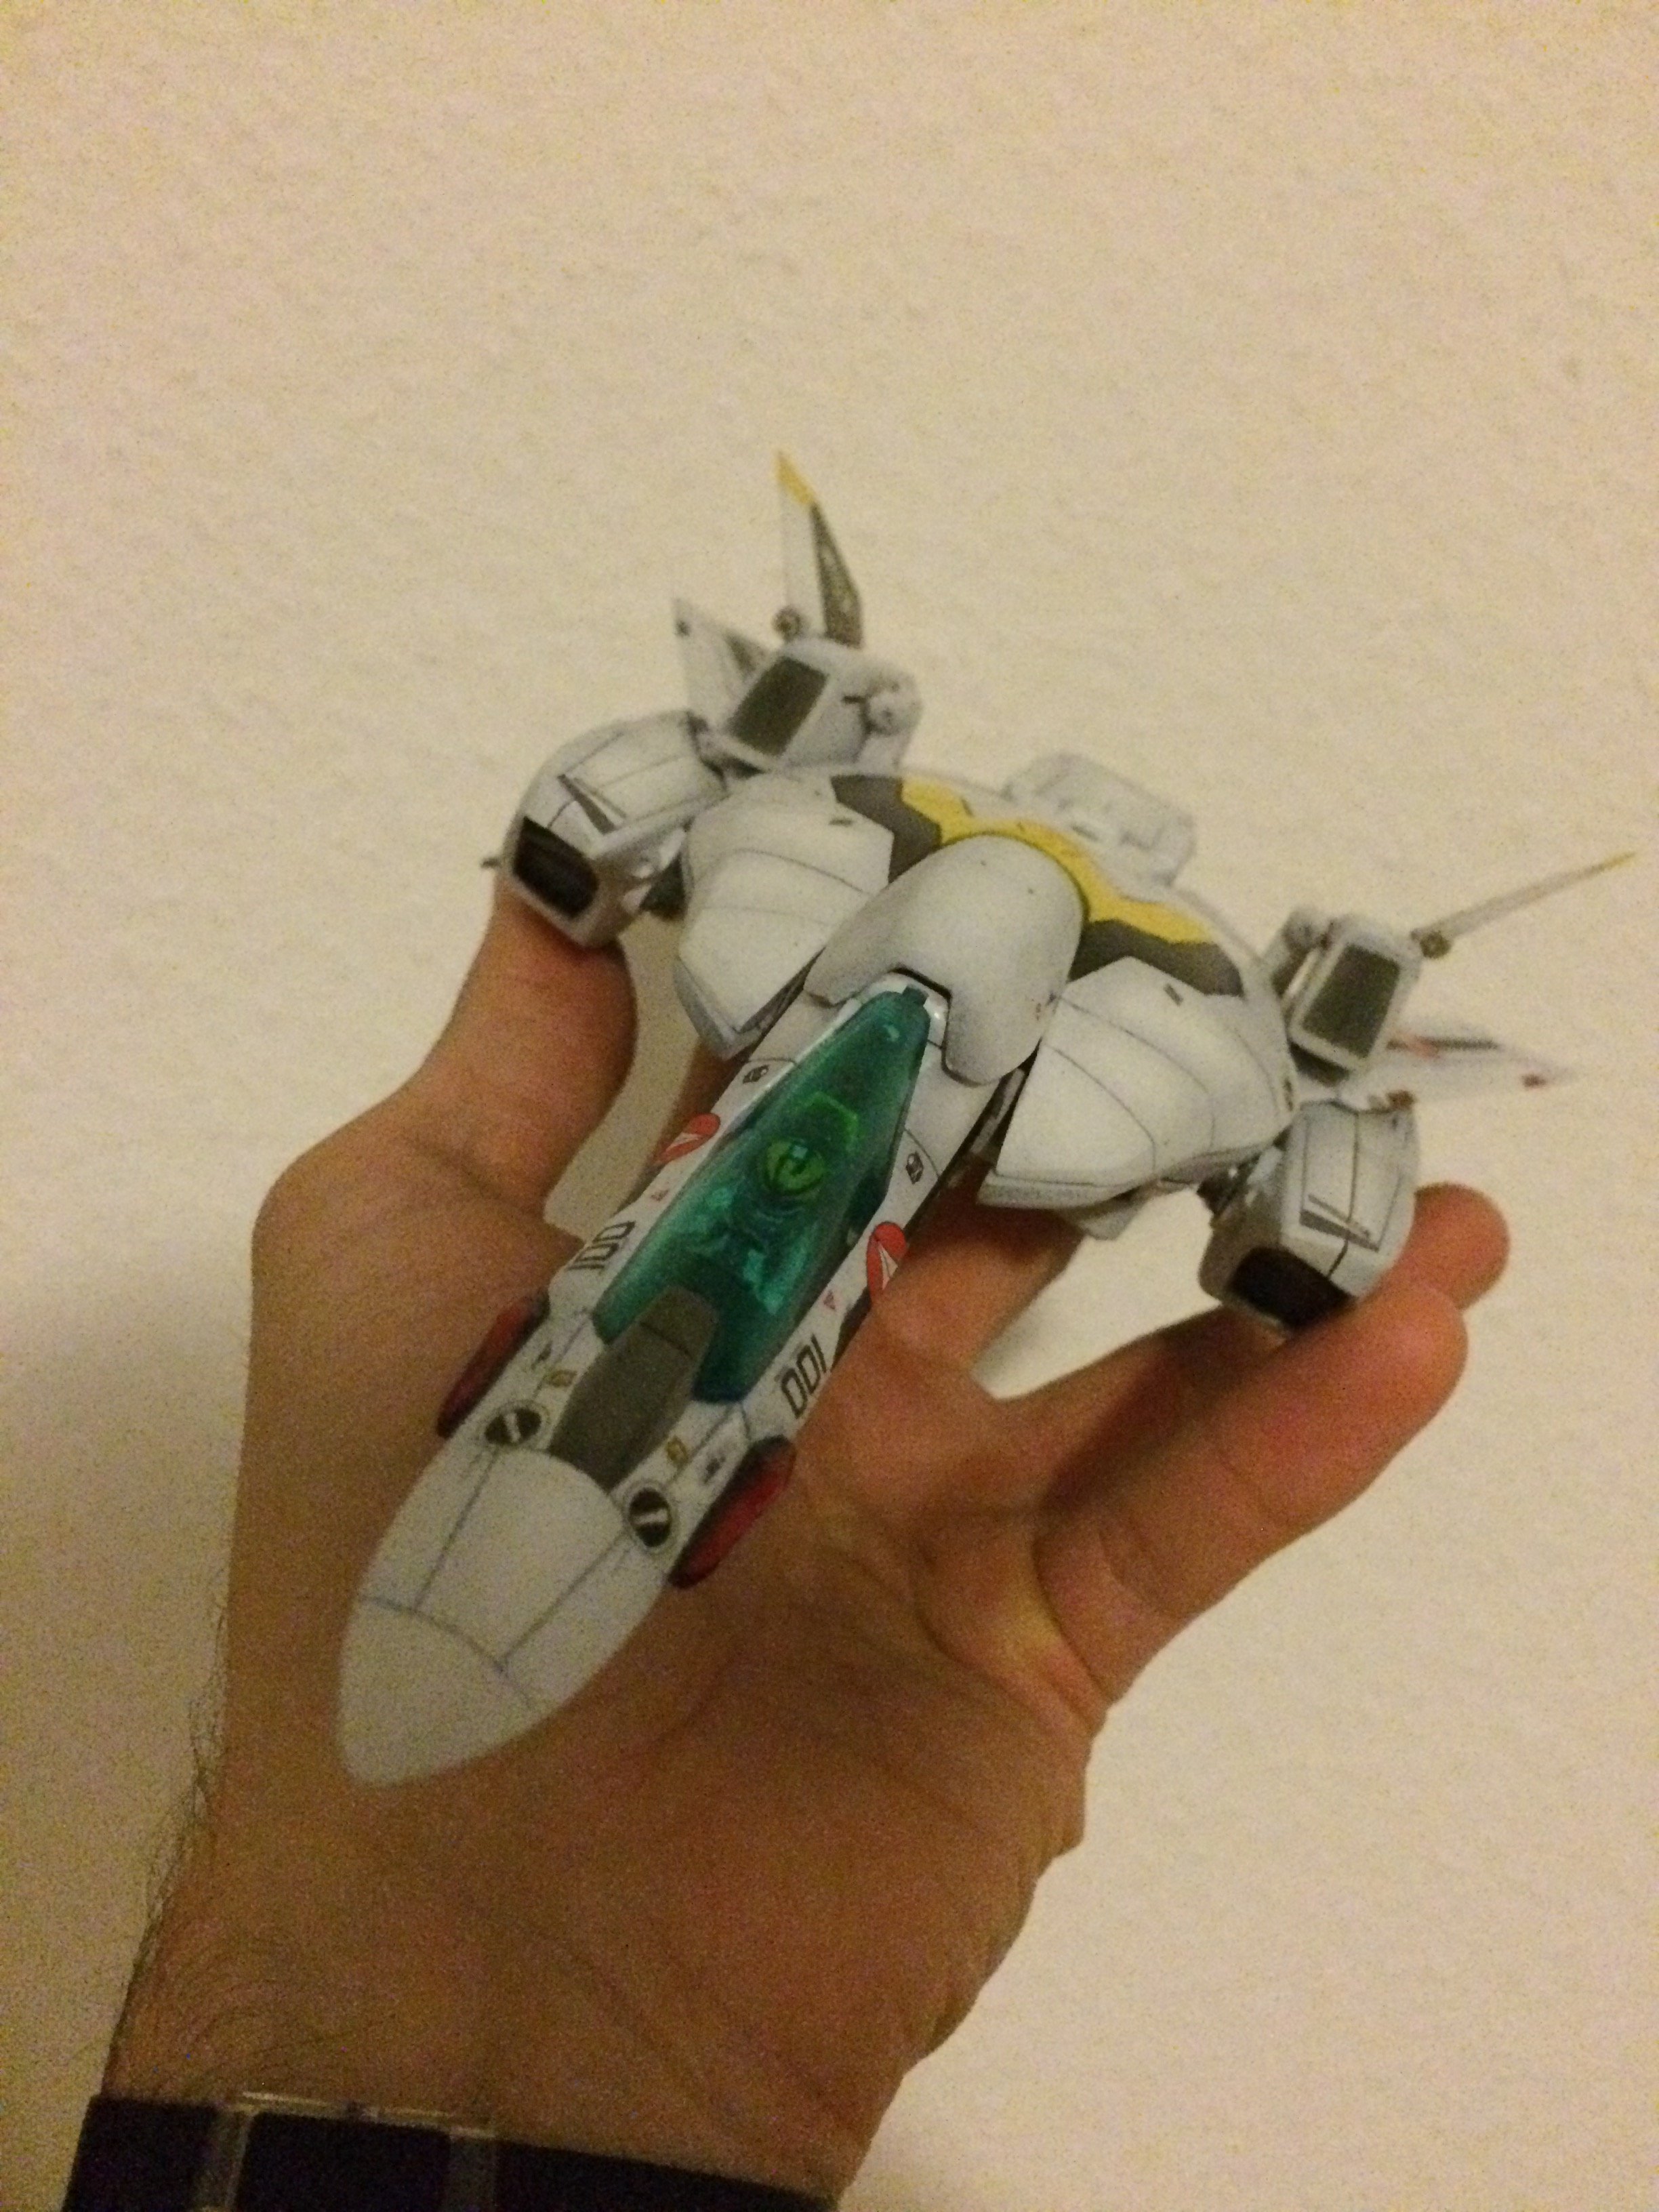
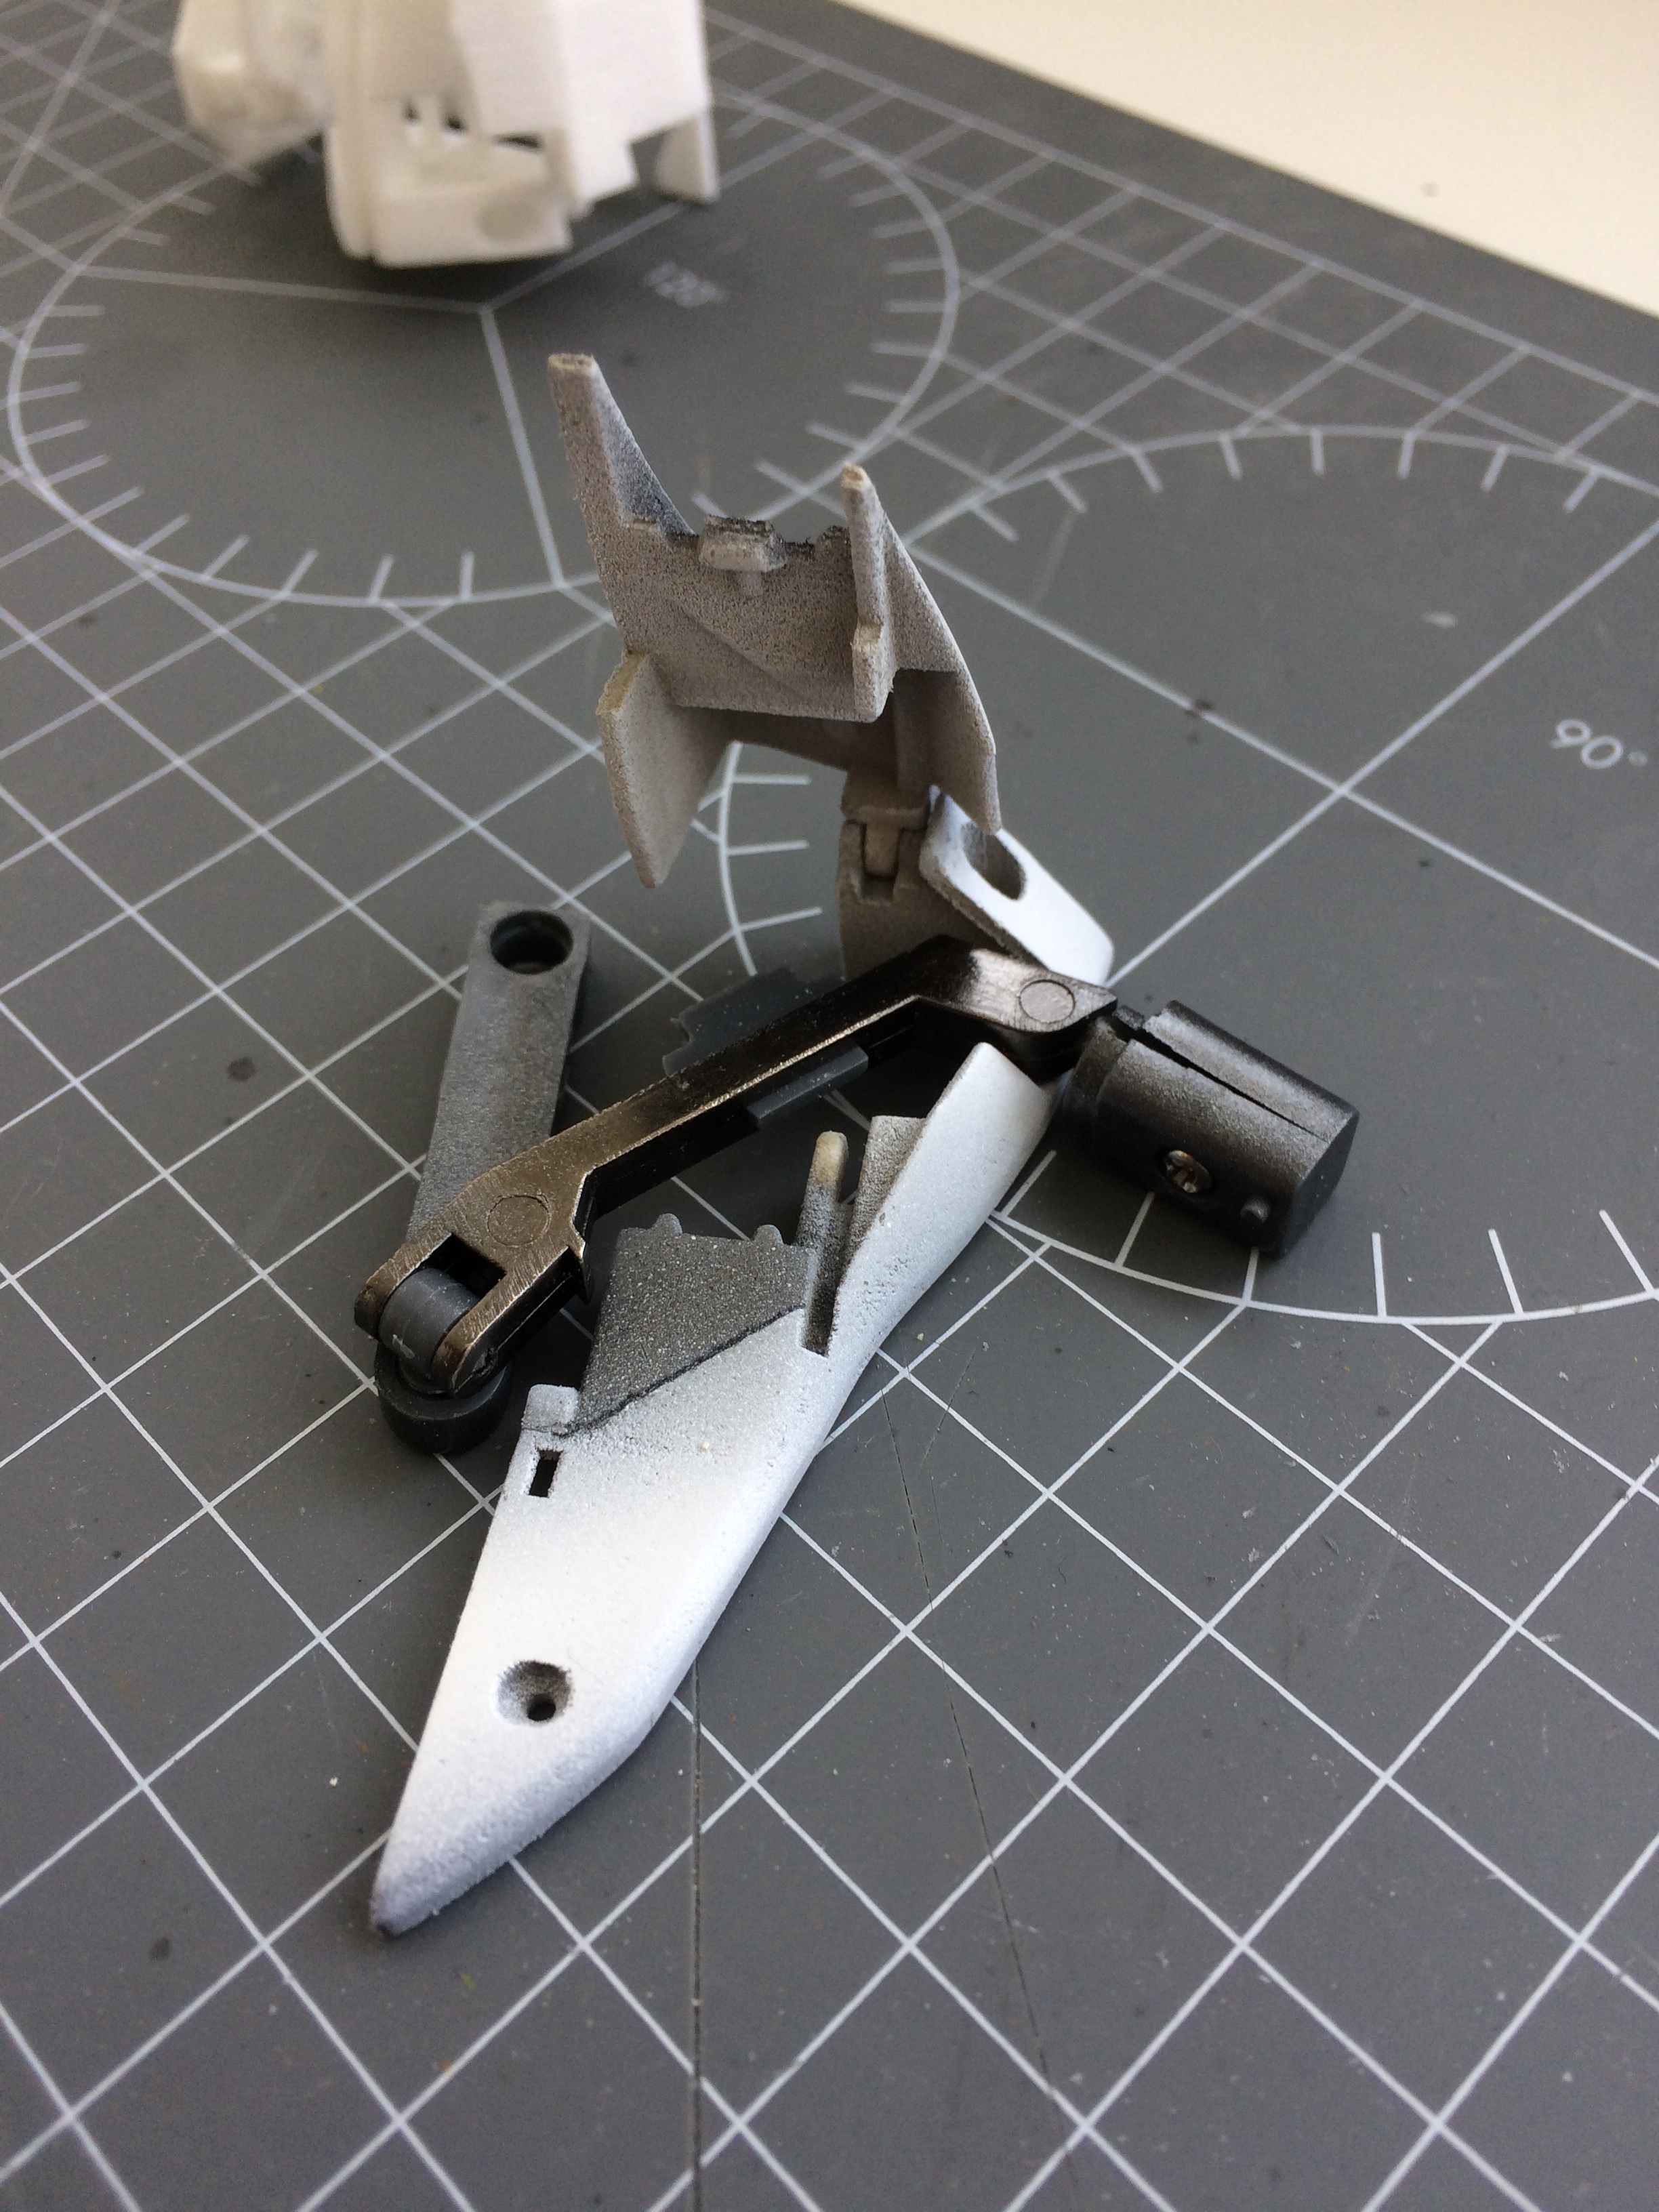
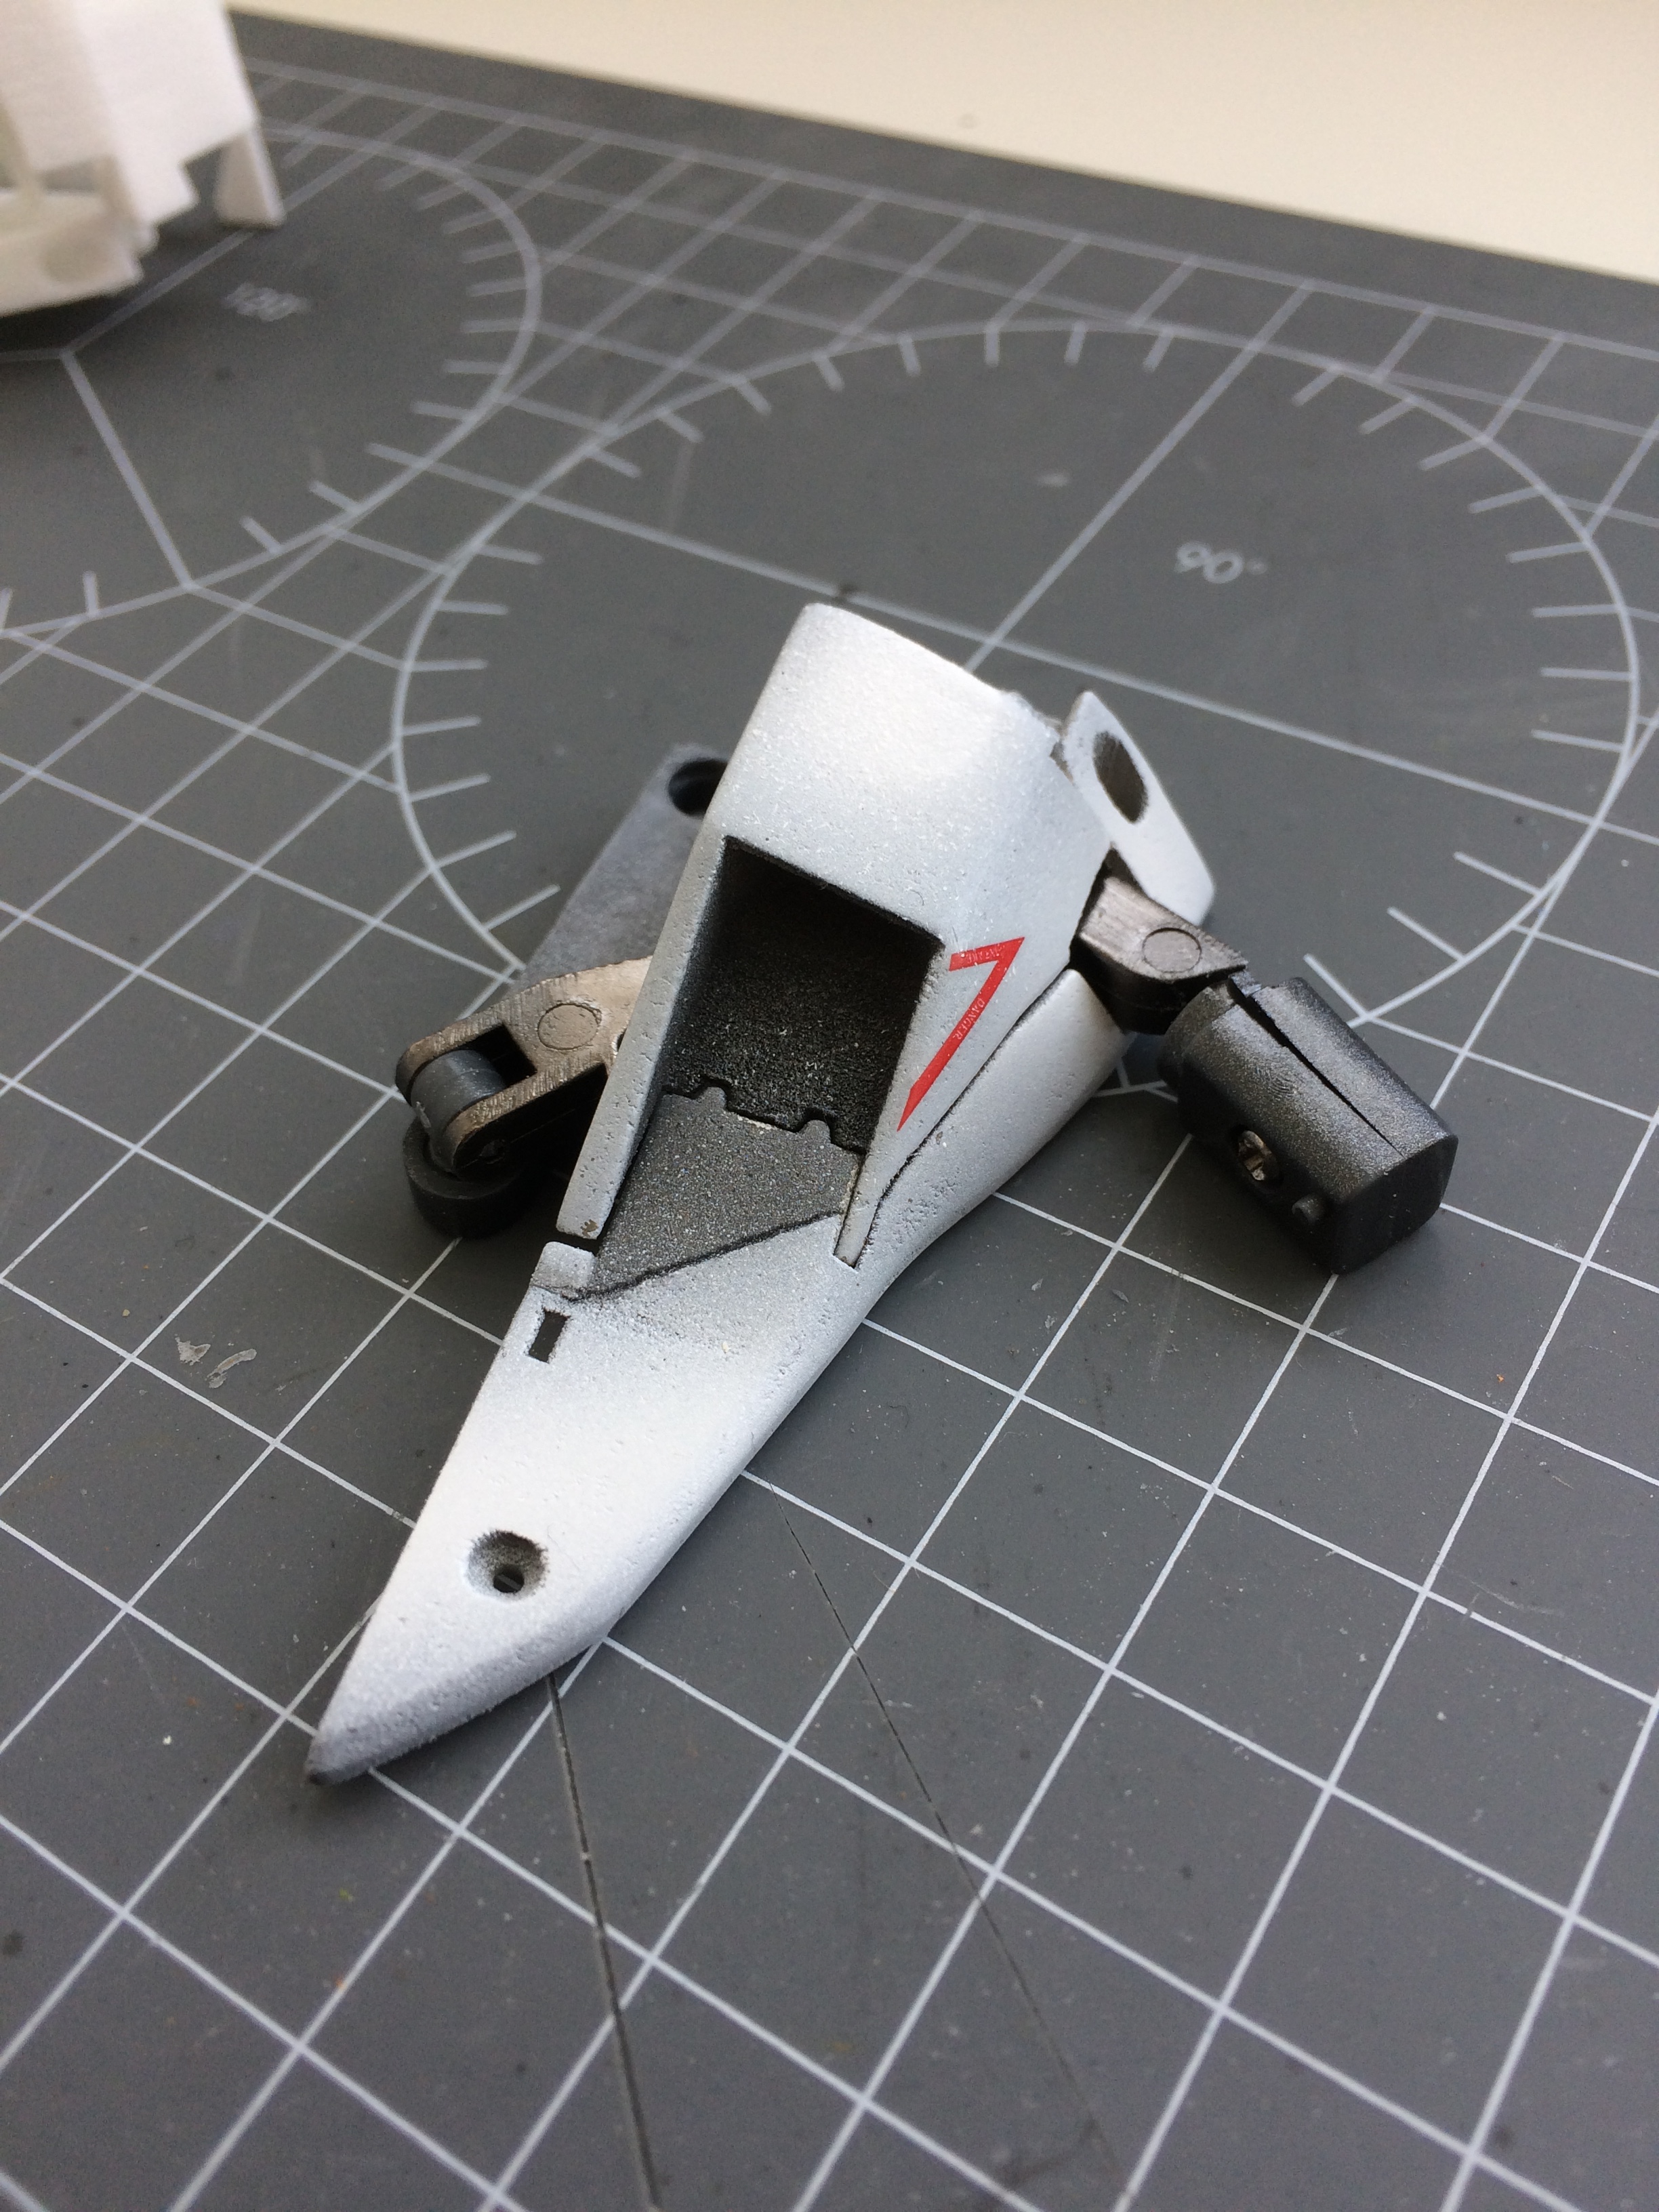
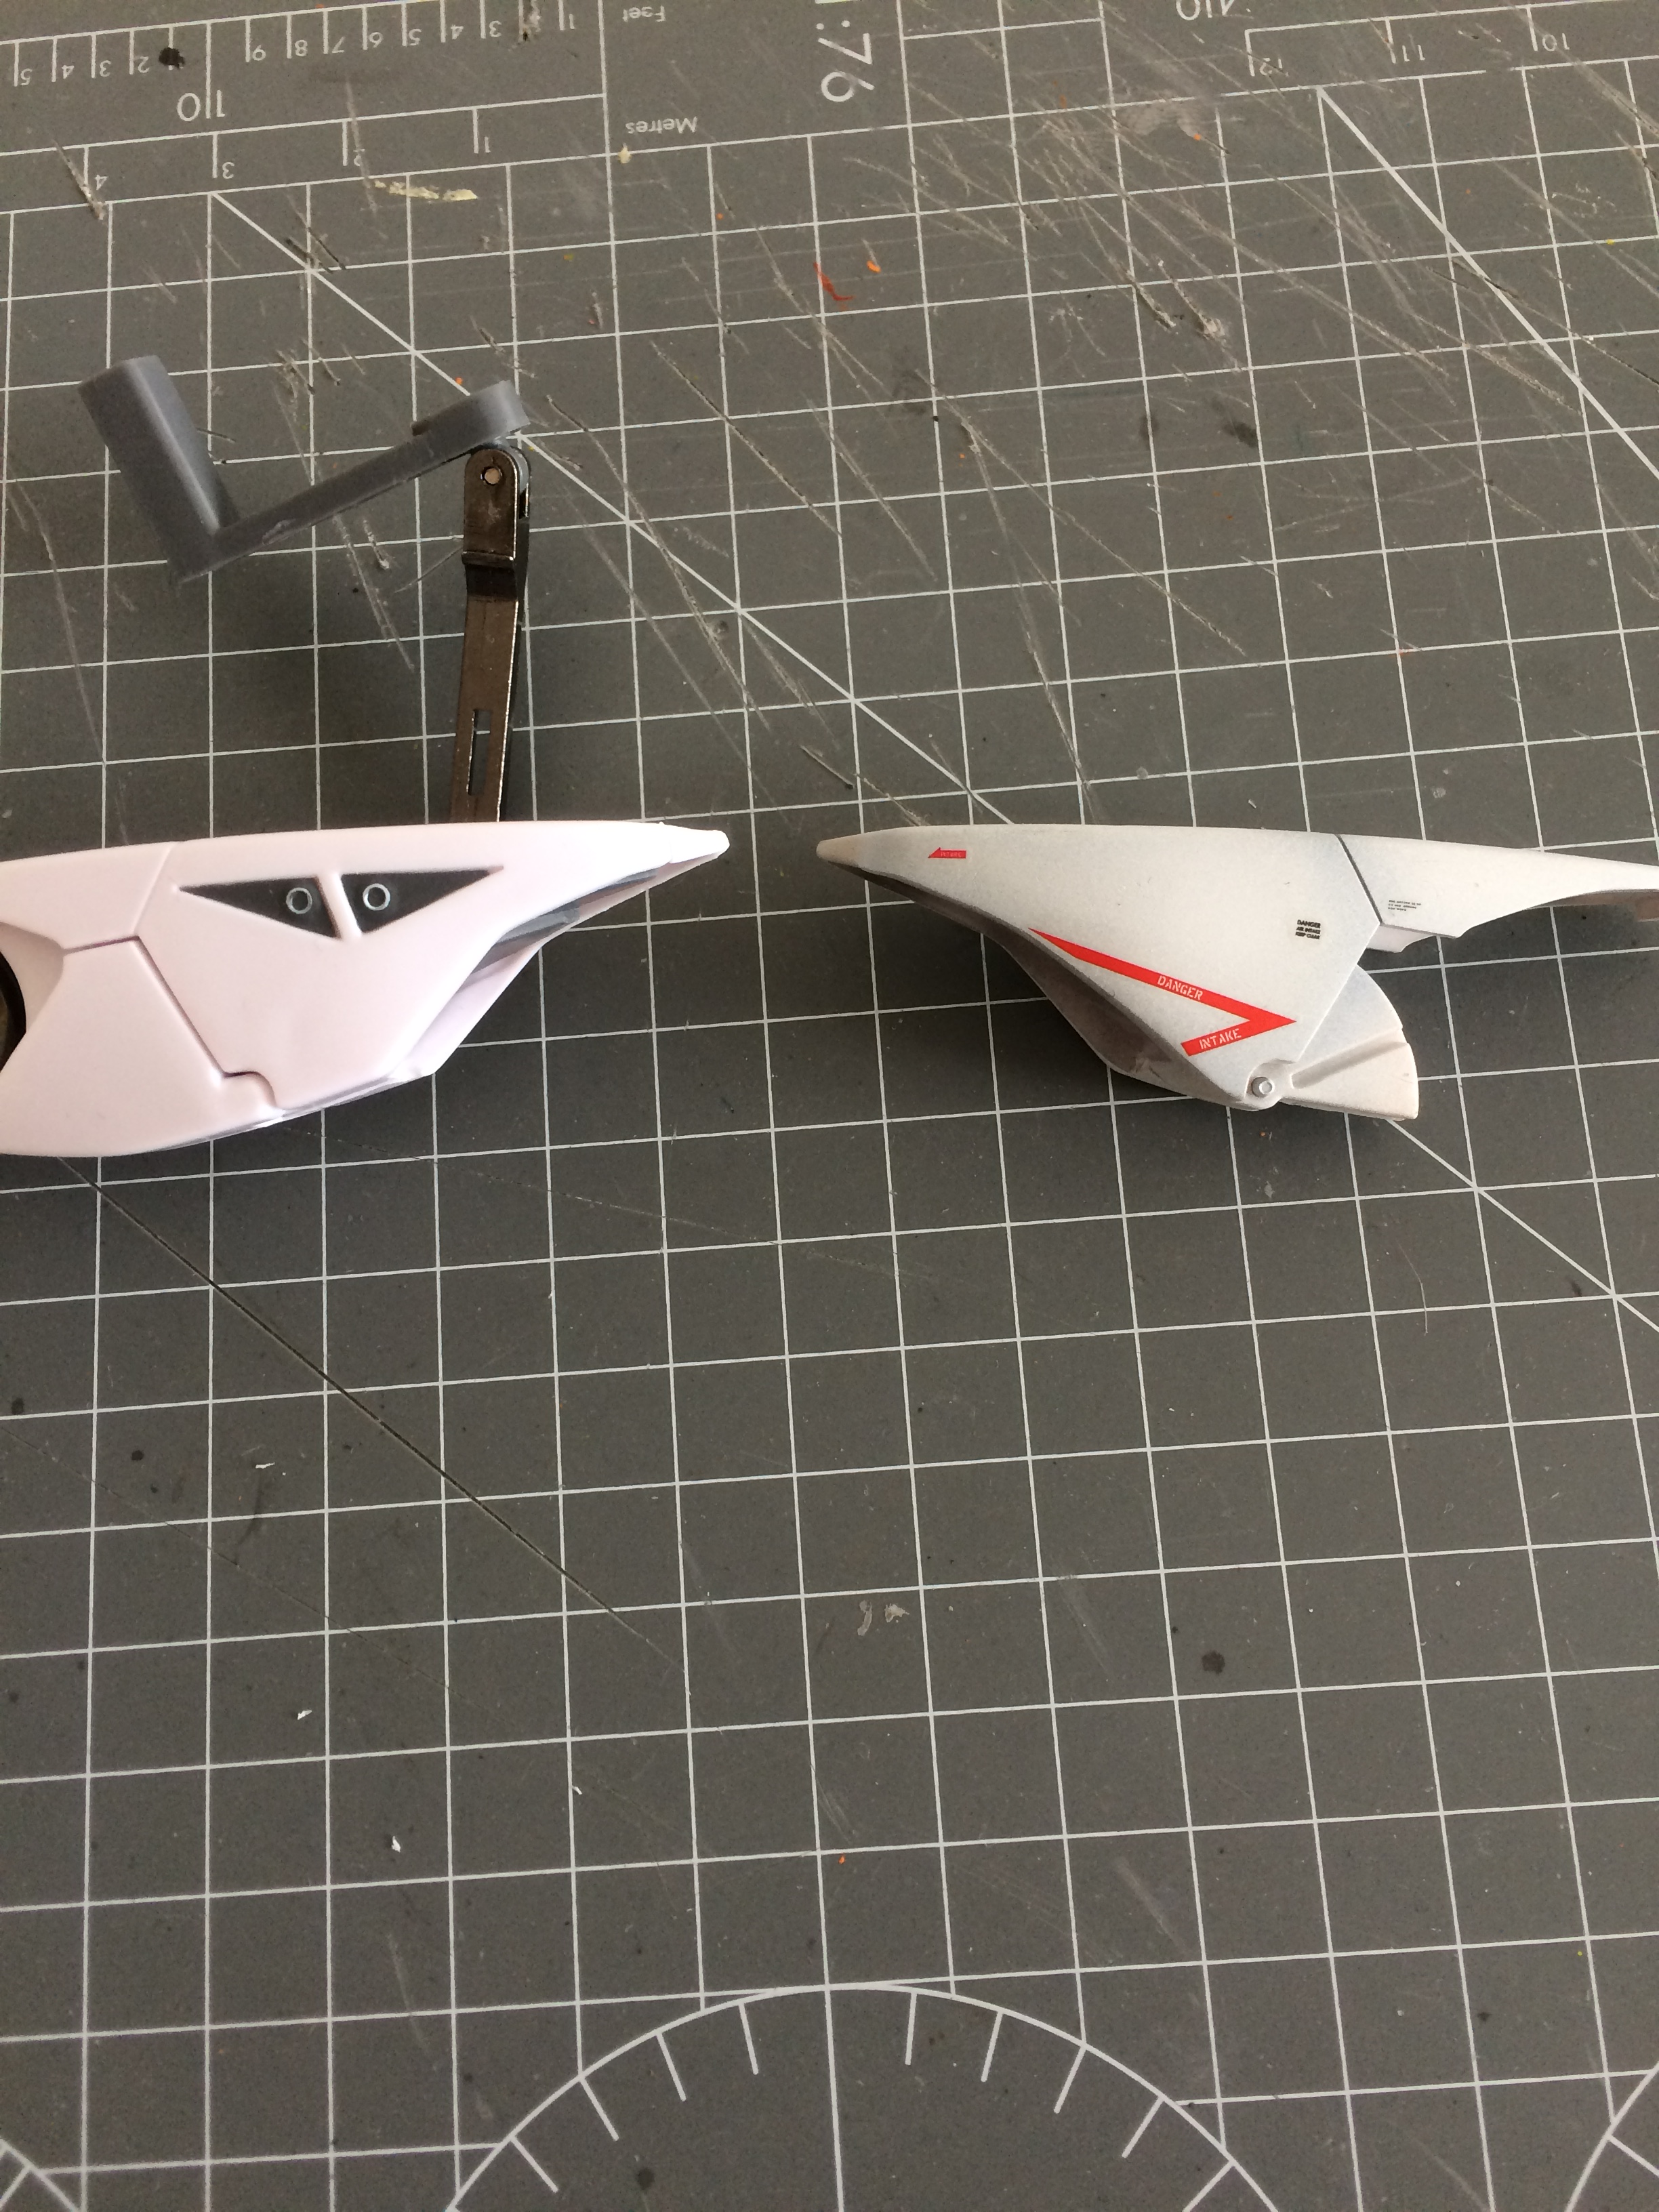
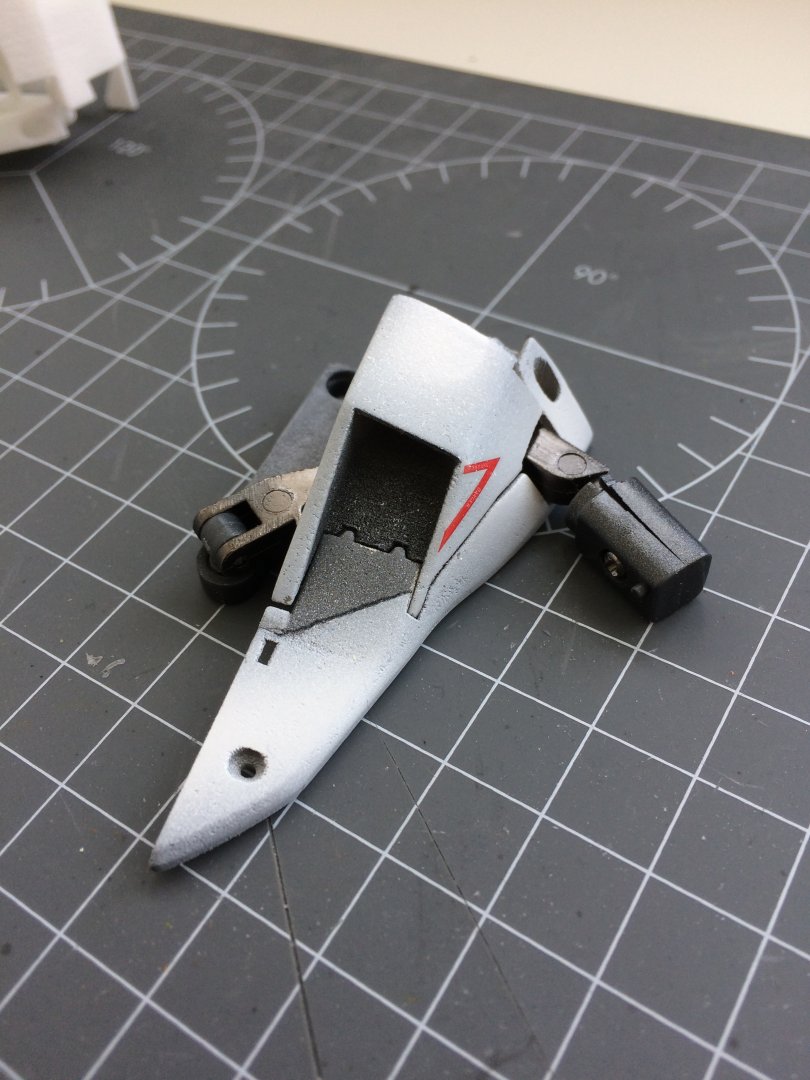
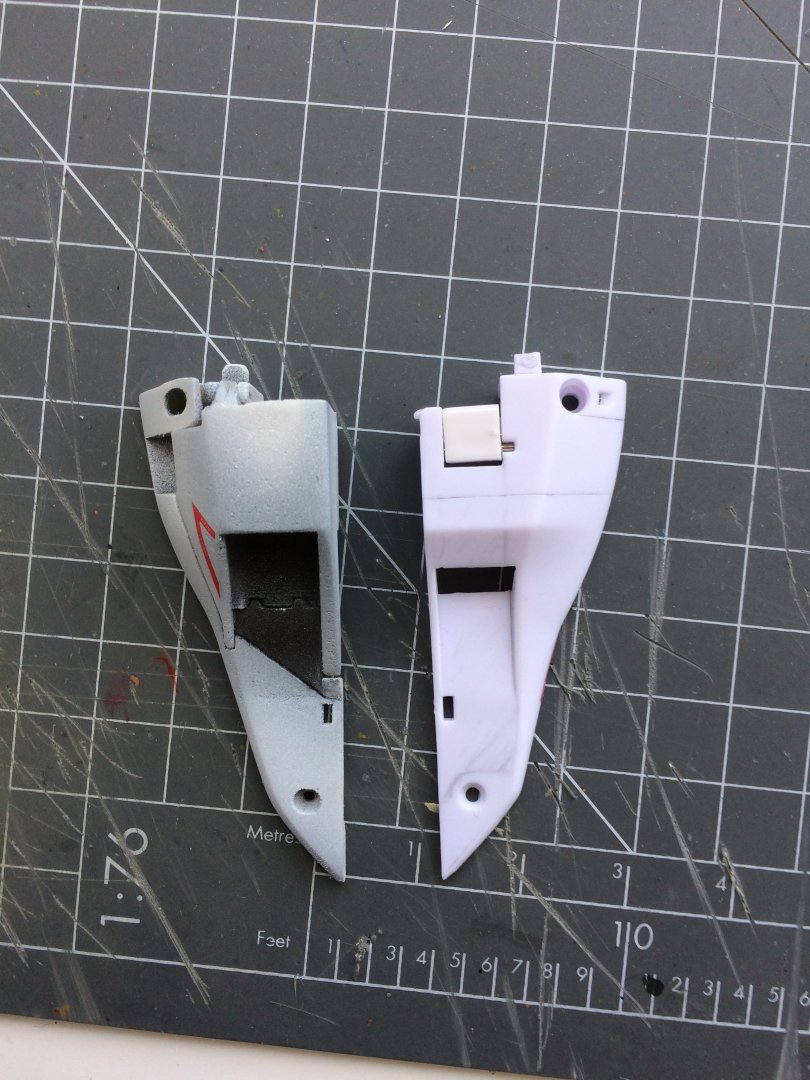
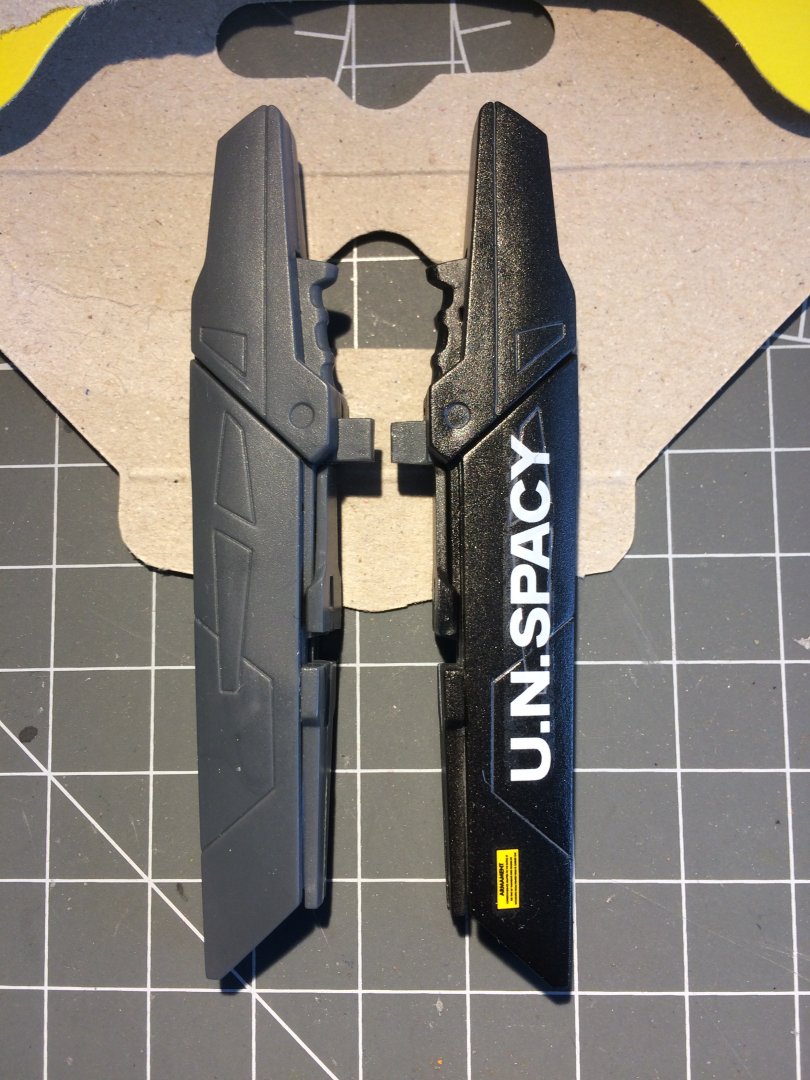
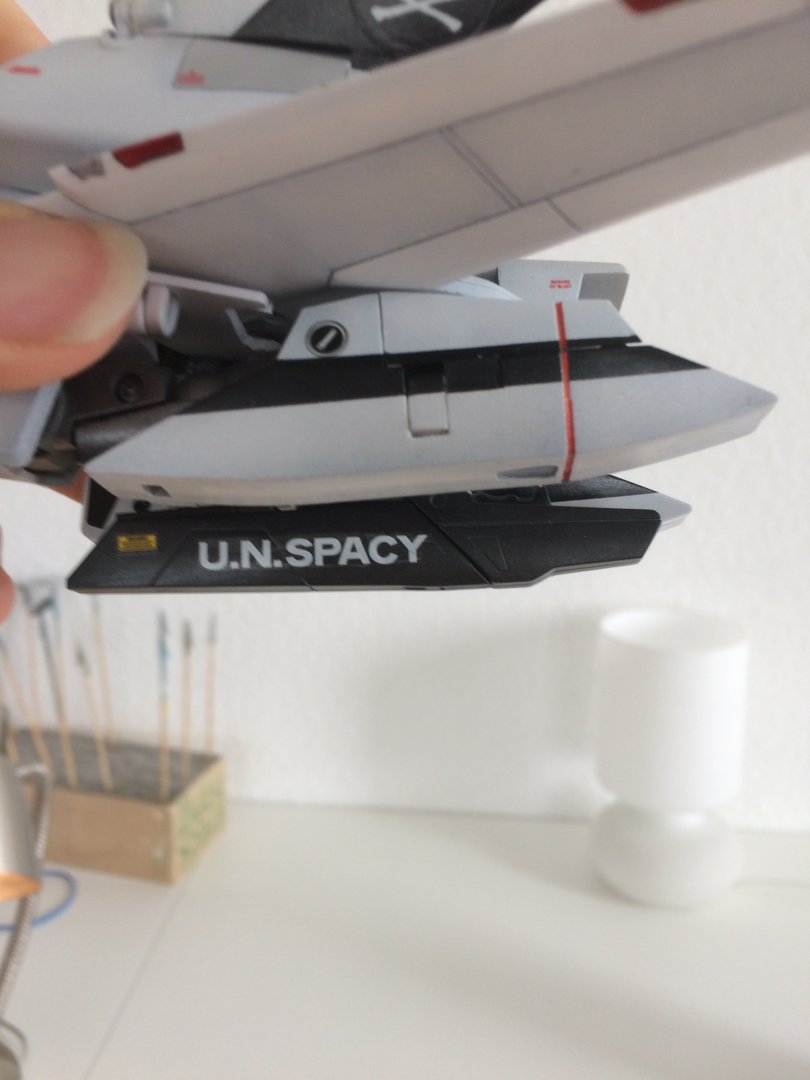
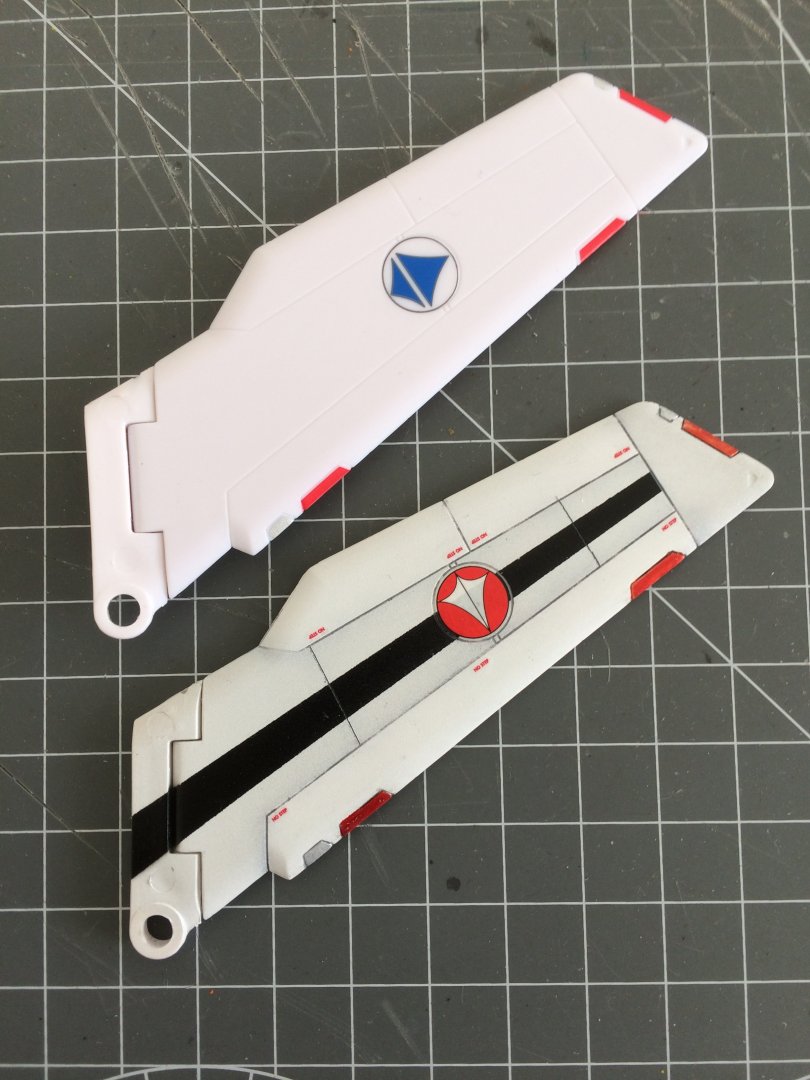
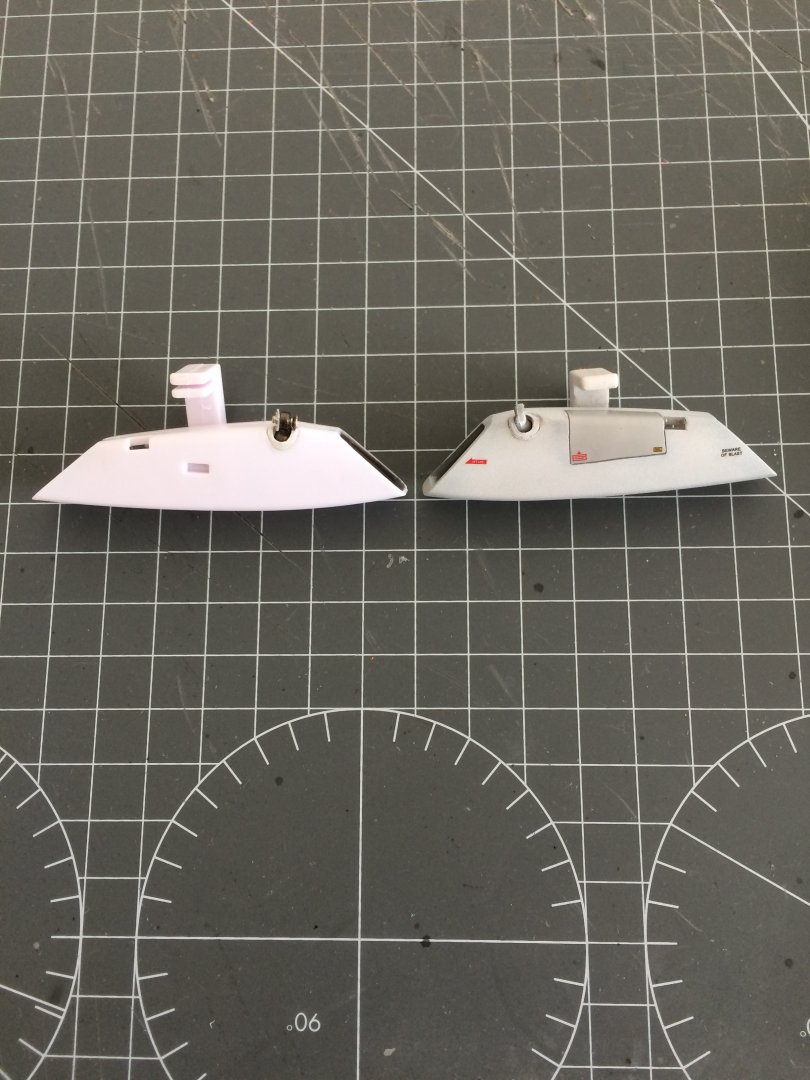
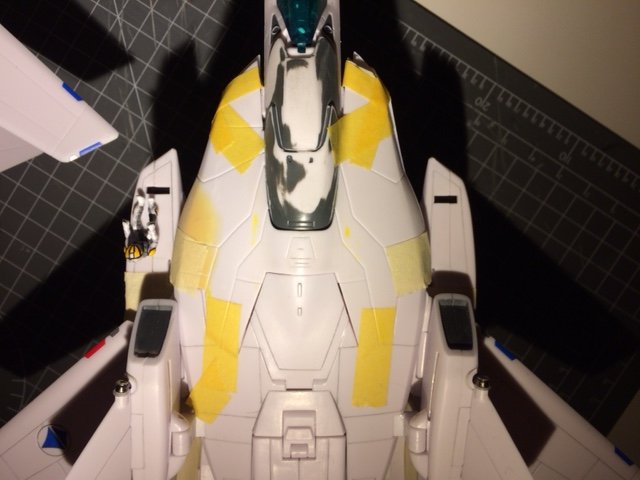
...continue... - Vertical Stabilizer Added panel line to be able to have a 2-colors color scheme - Gunpod Attaching peg sanded down so that it cansecurely attach to the backpack while in figther mode - Nosecone ventral fin removed, remaining gap filled with epoxy putty.Also here, removed the trusters, fill with epoxy putty and added macross screws. New panel lines and sides carved to be able to allocate red clear visors (from hasegawa yf-19 kit) as the vf-0s (i love the red visor). Epoxy putty also used to fill the back of the nosecone so minimal gap will be perceived against the heat shield while in figthermode. Pilot recoloured. that's all for now cheers!
-
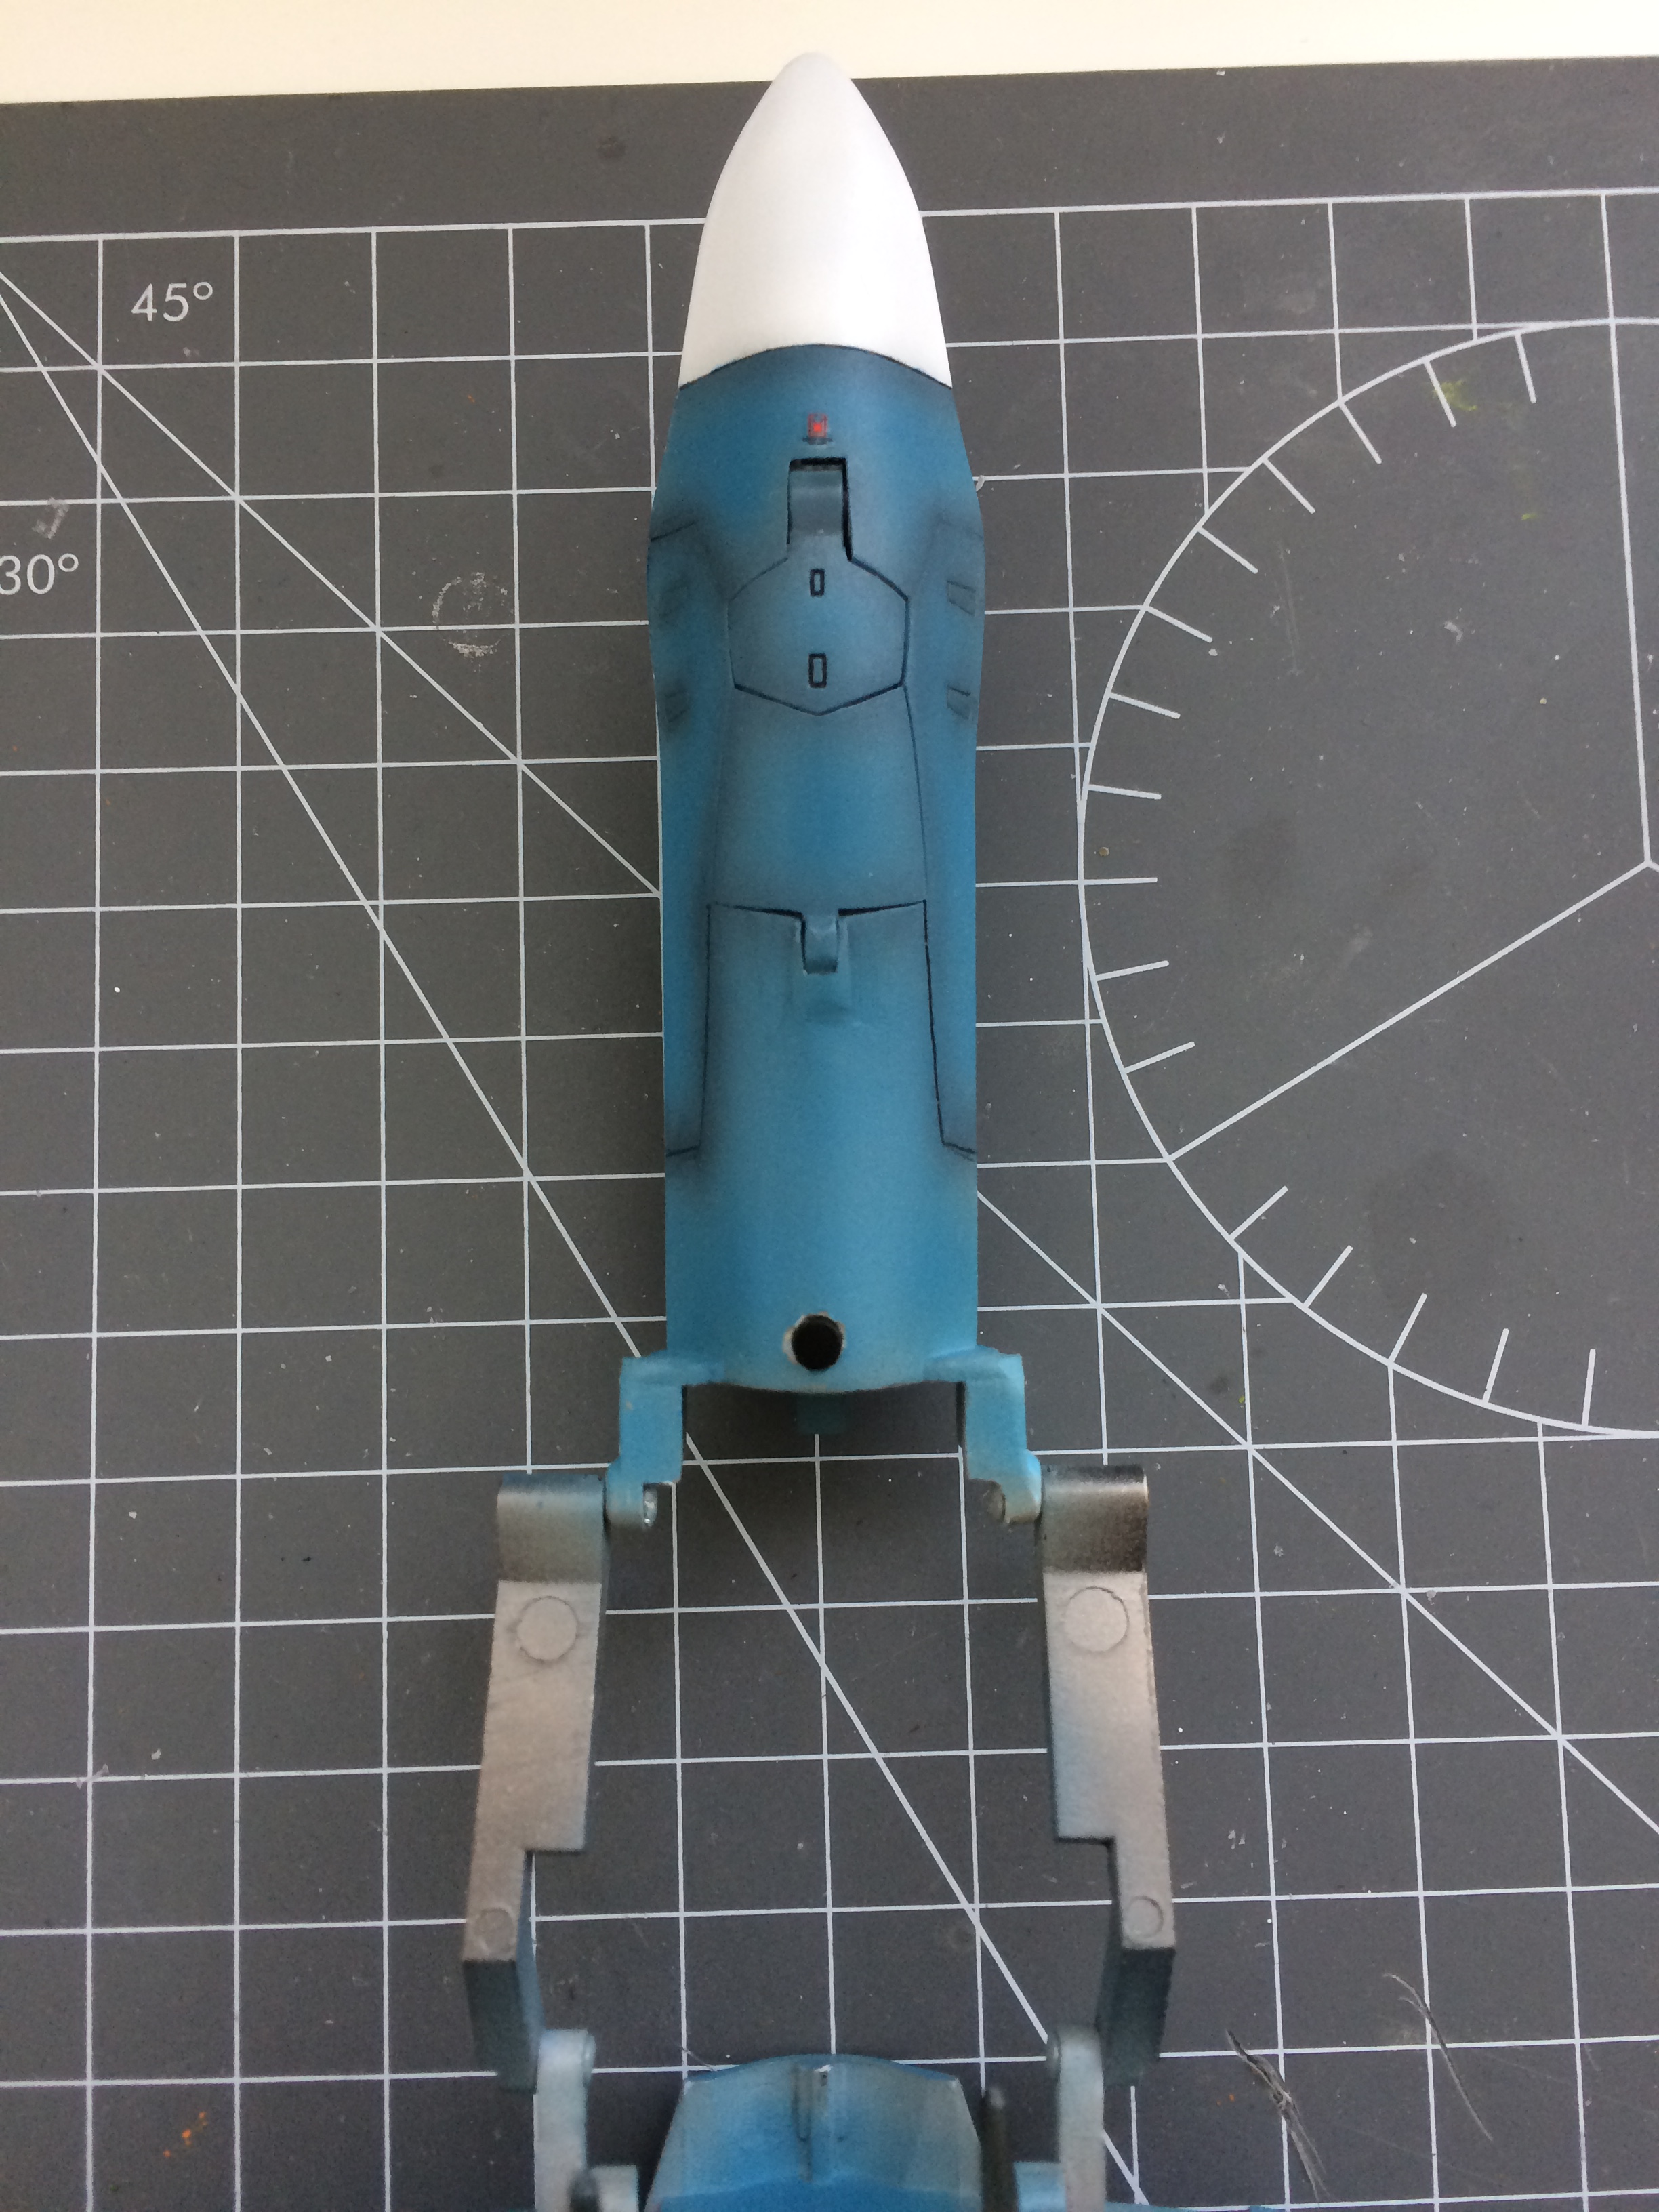
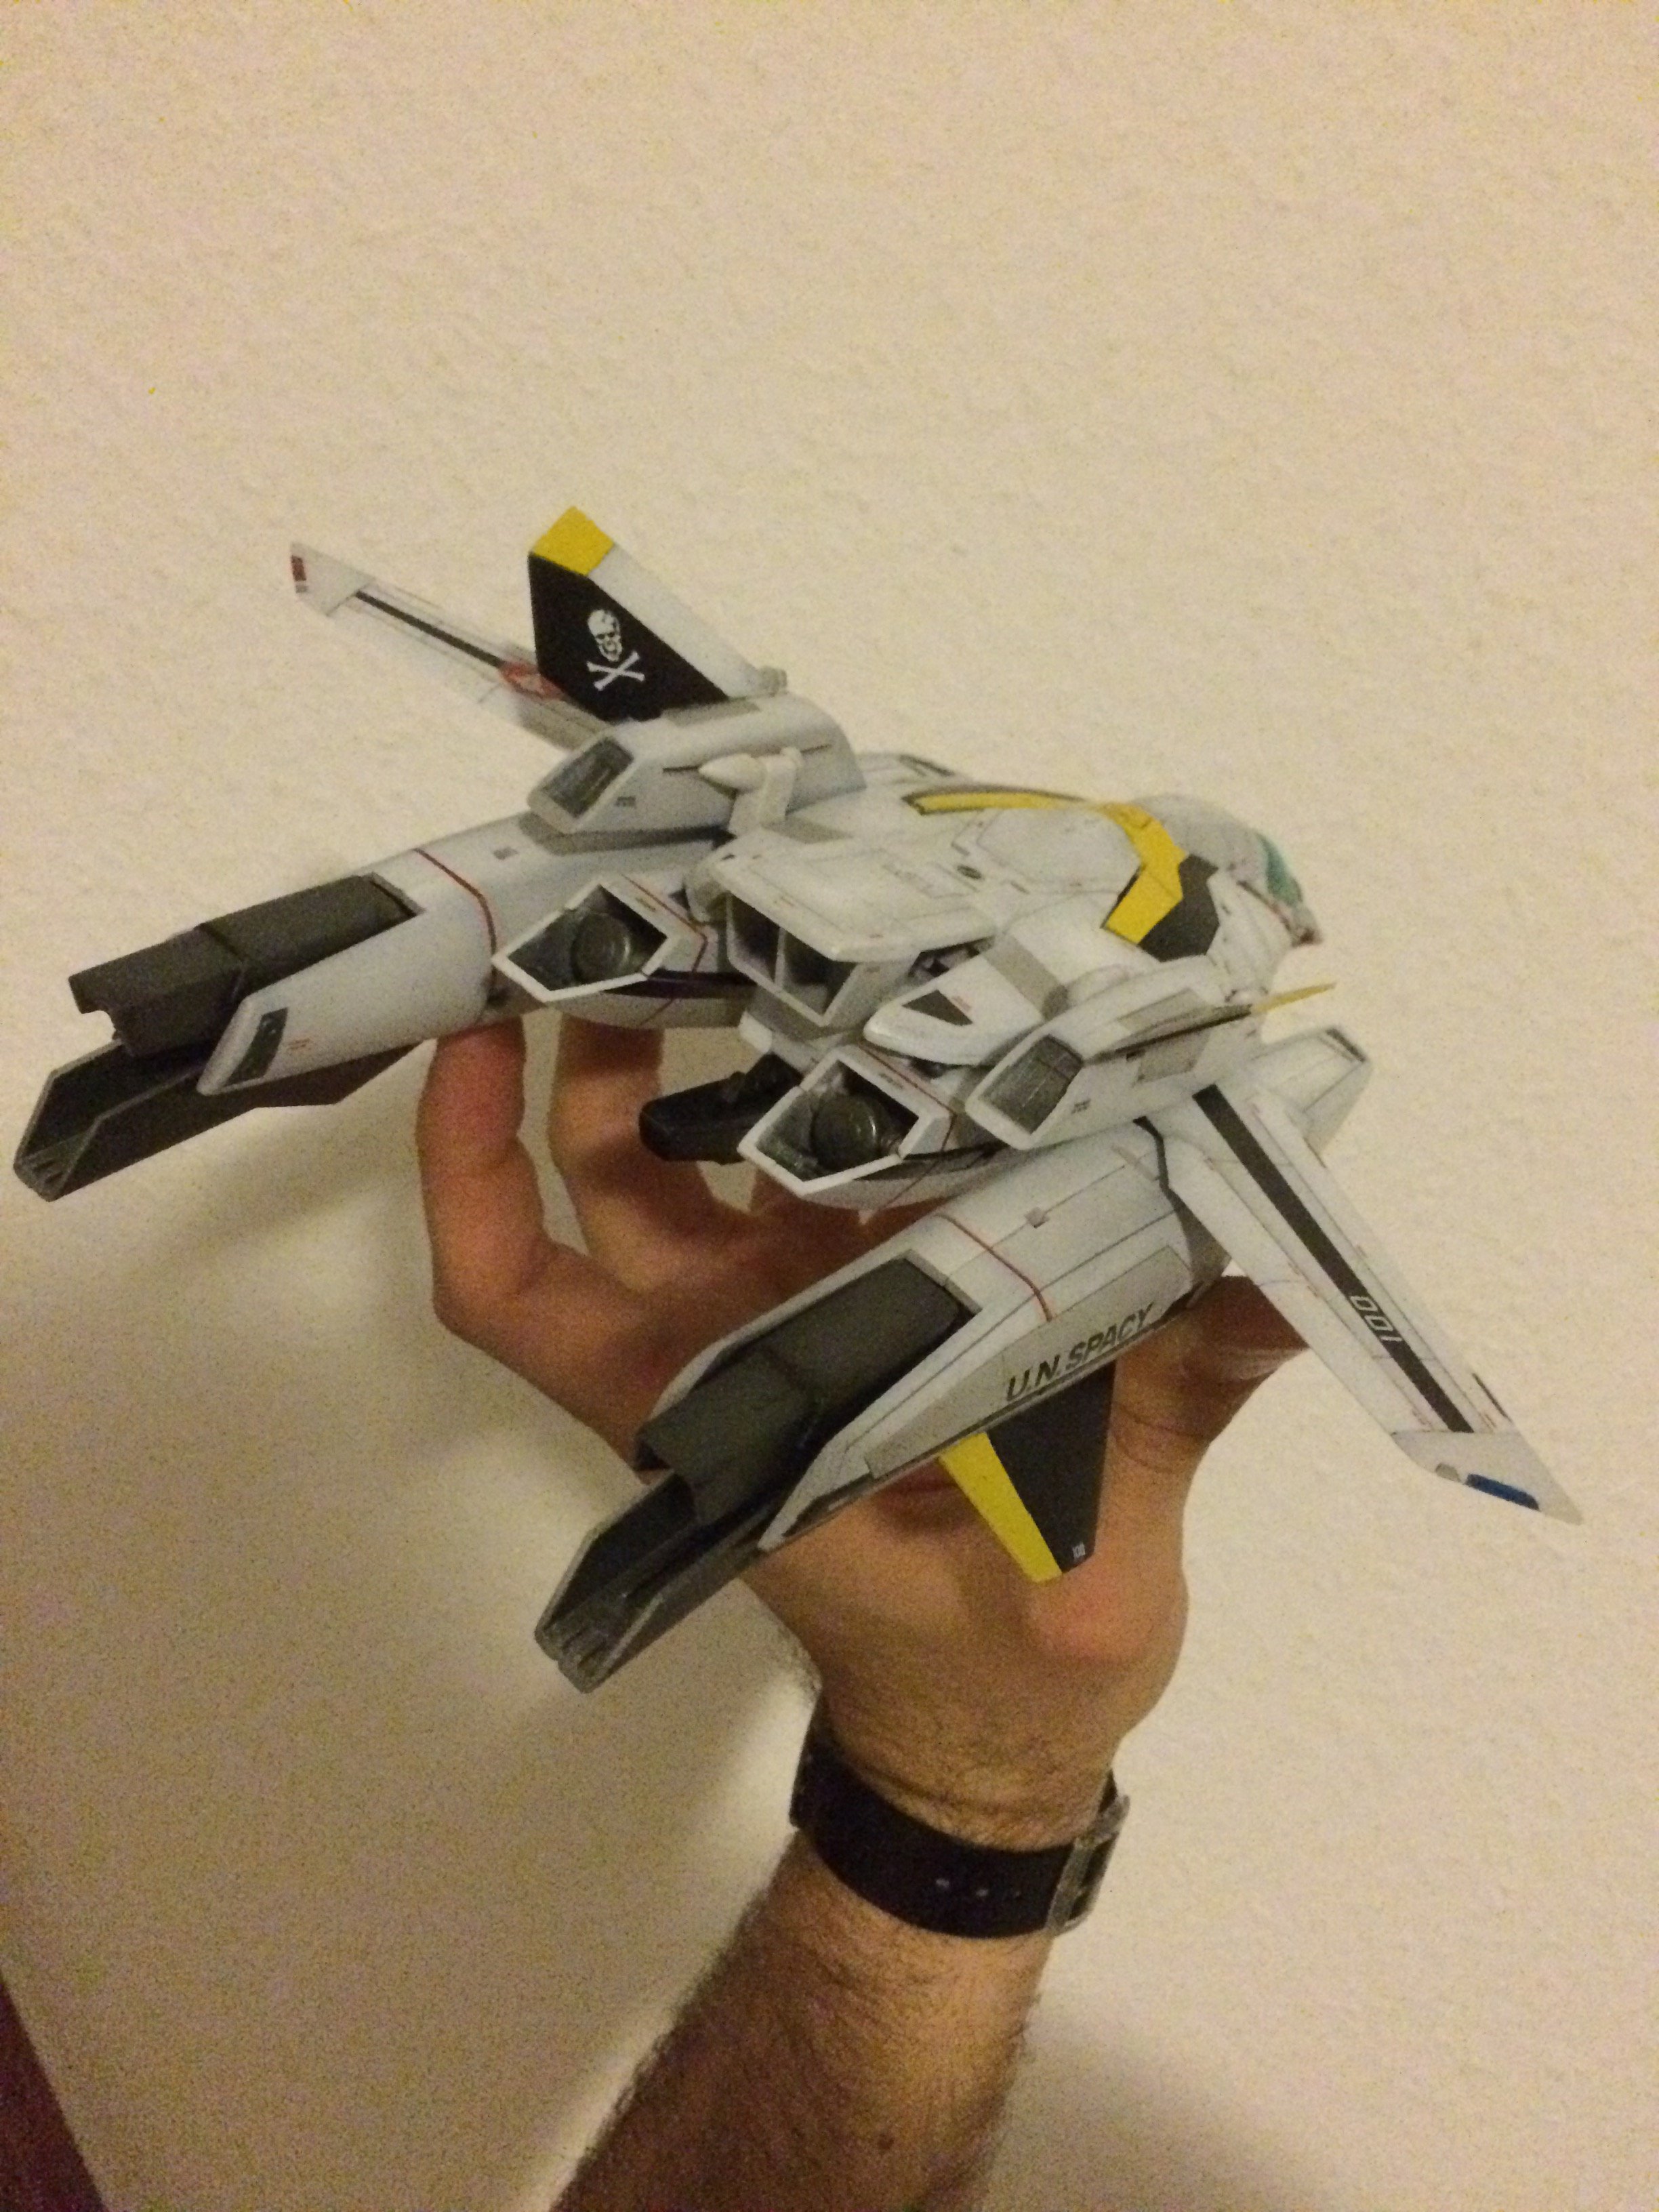
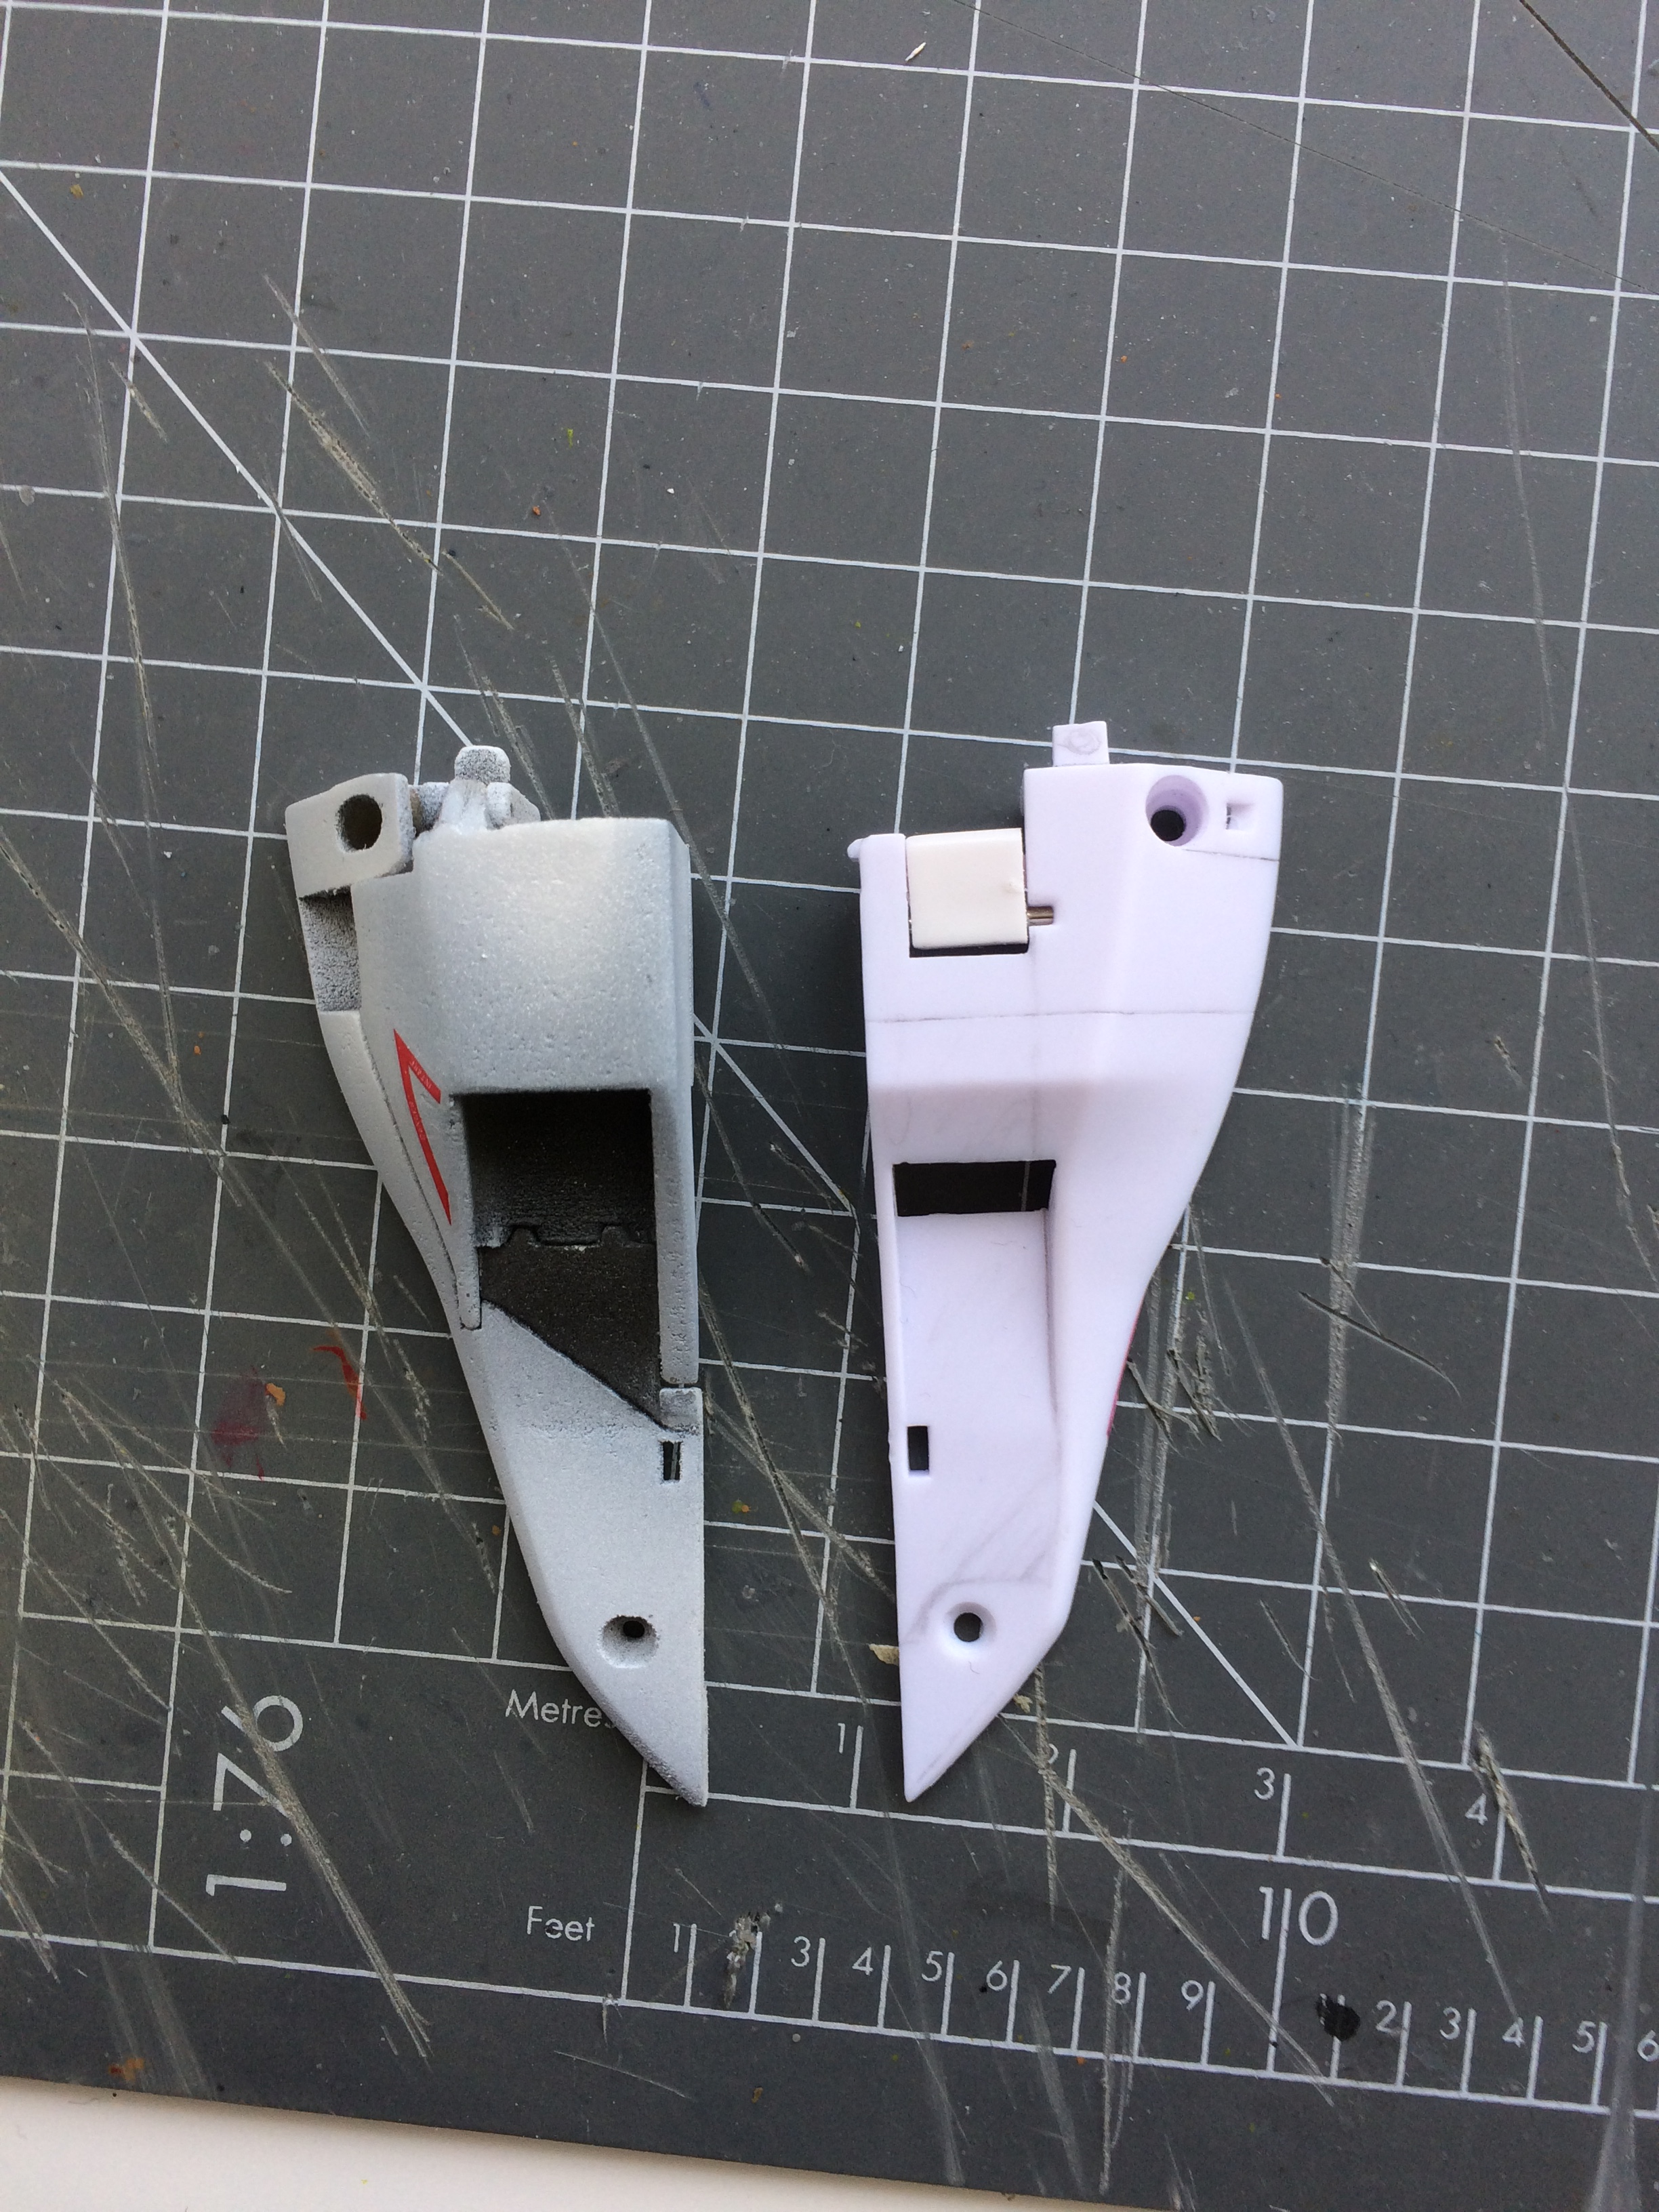
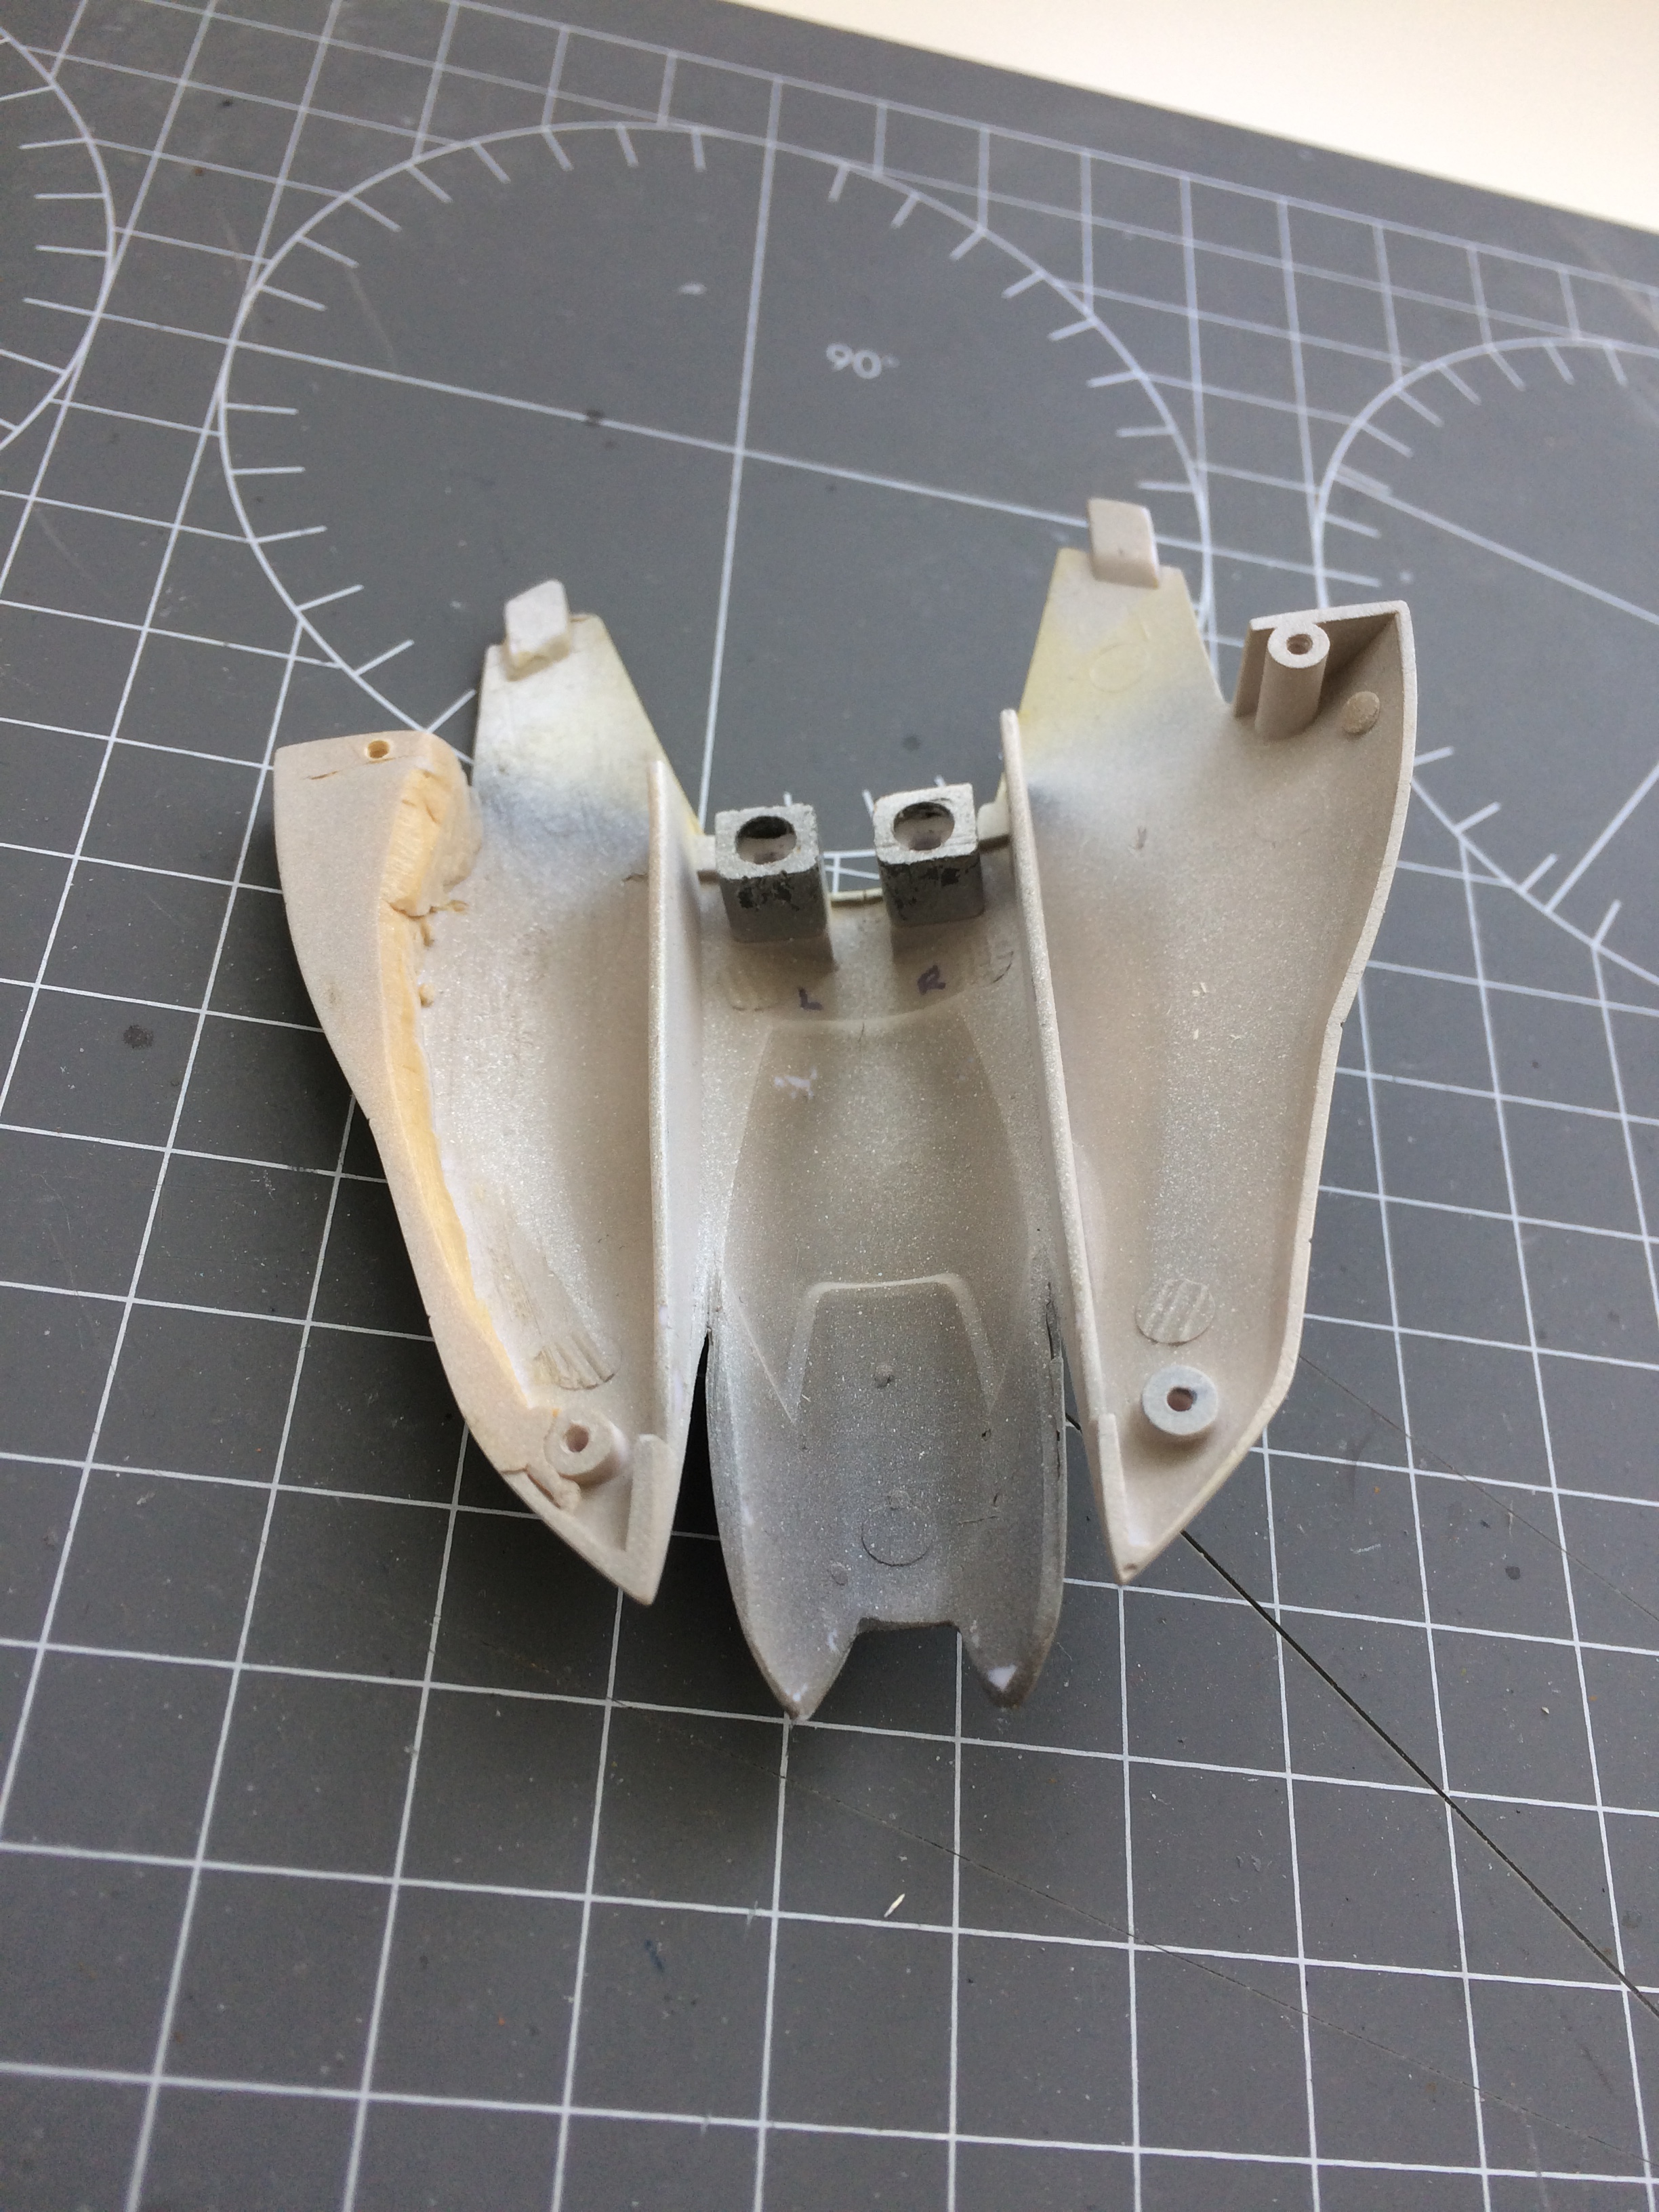
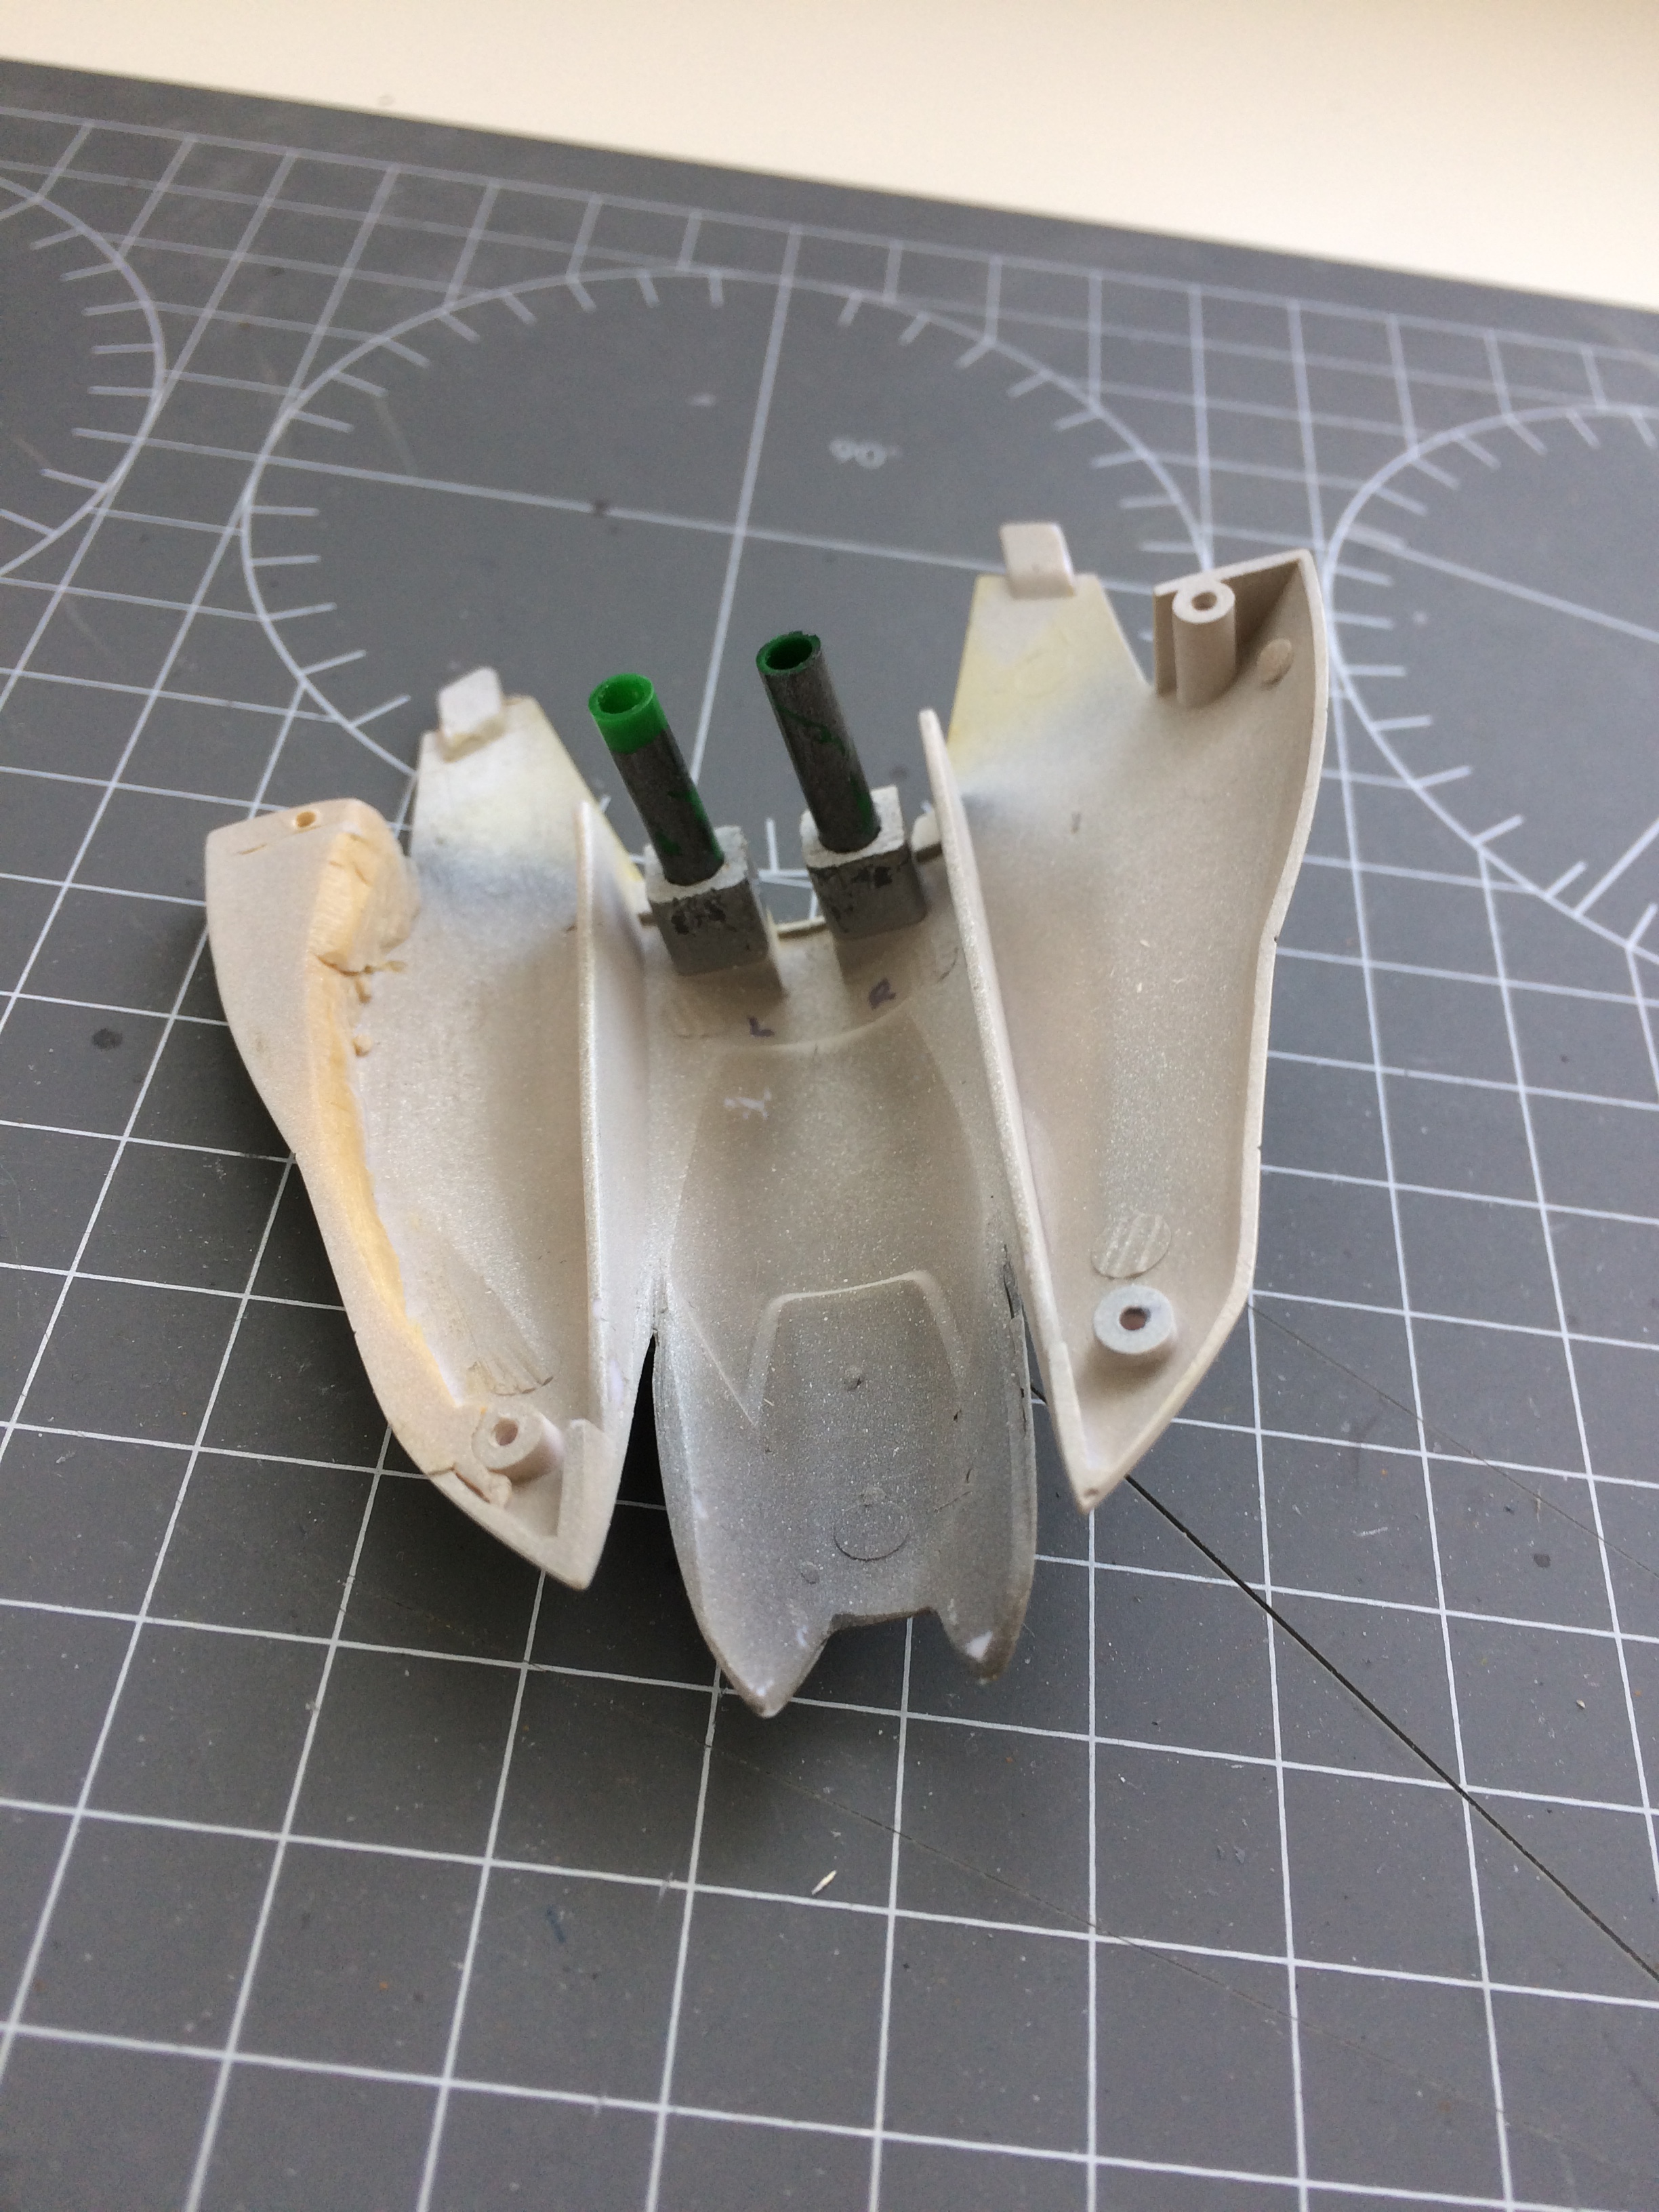
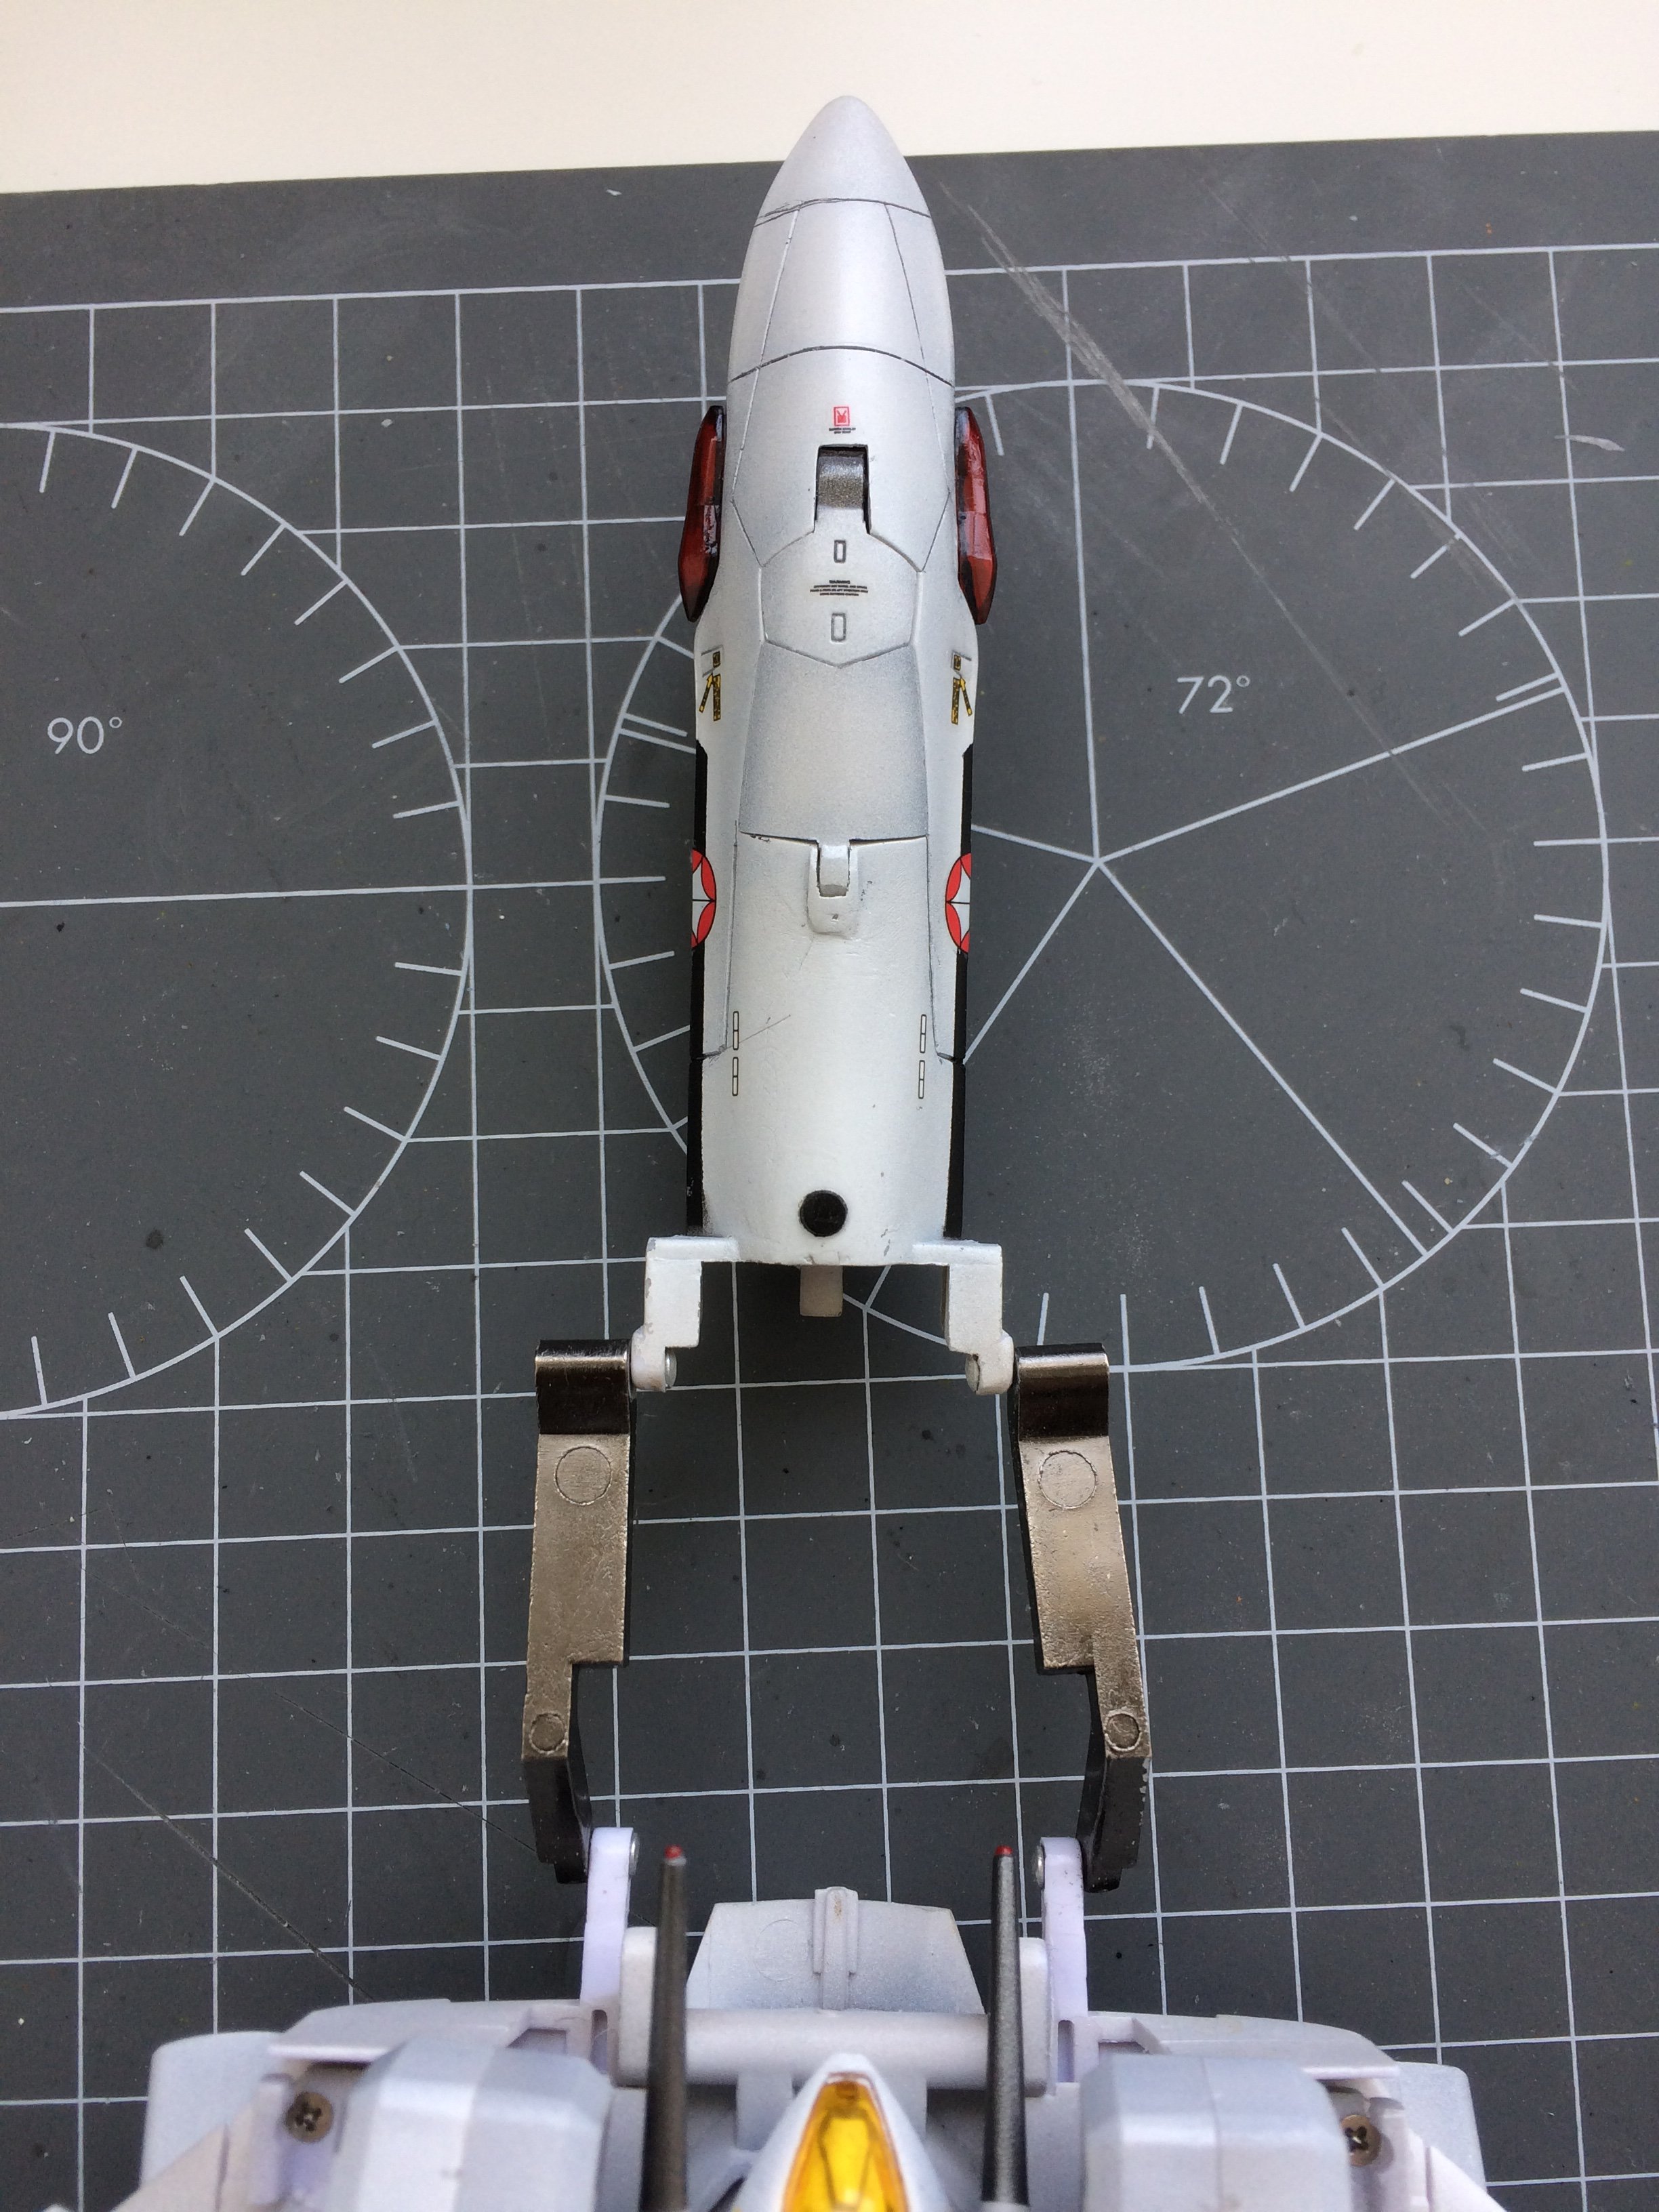
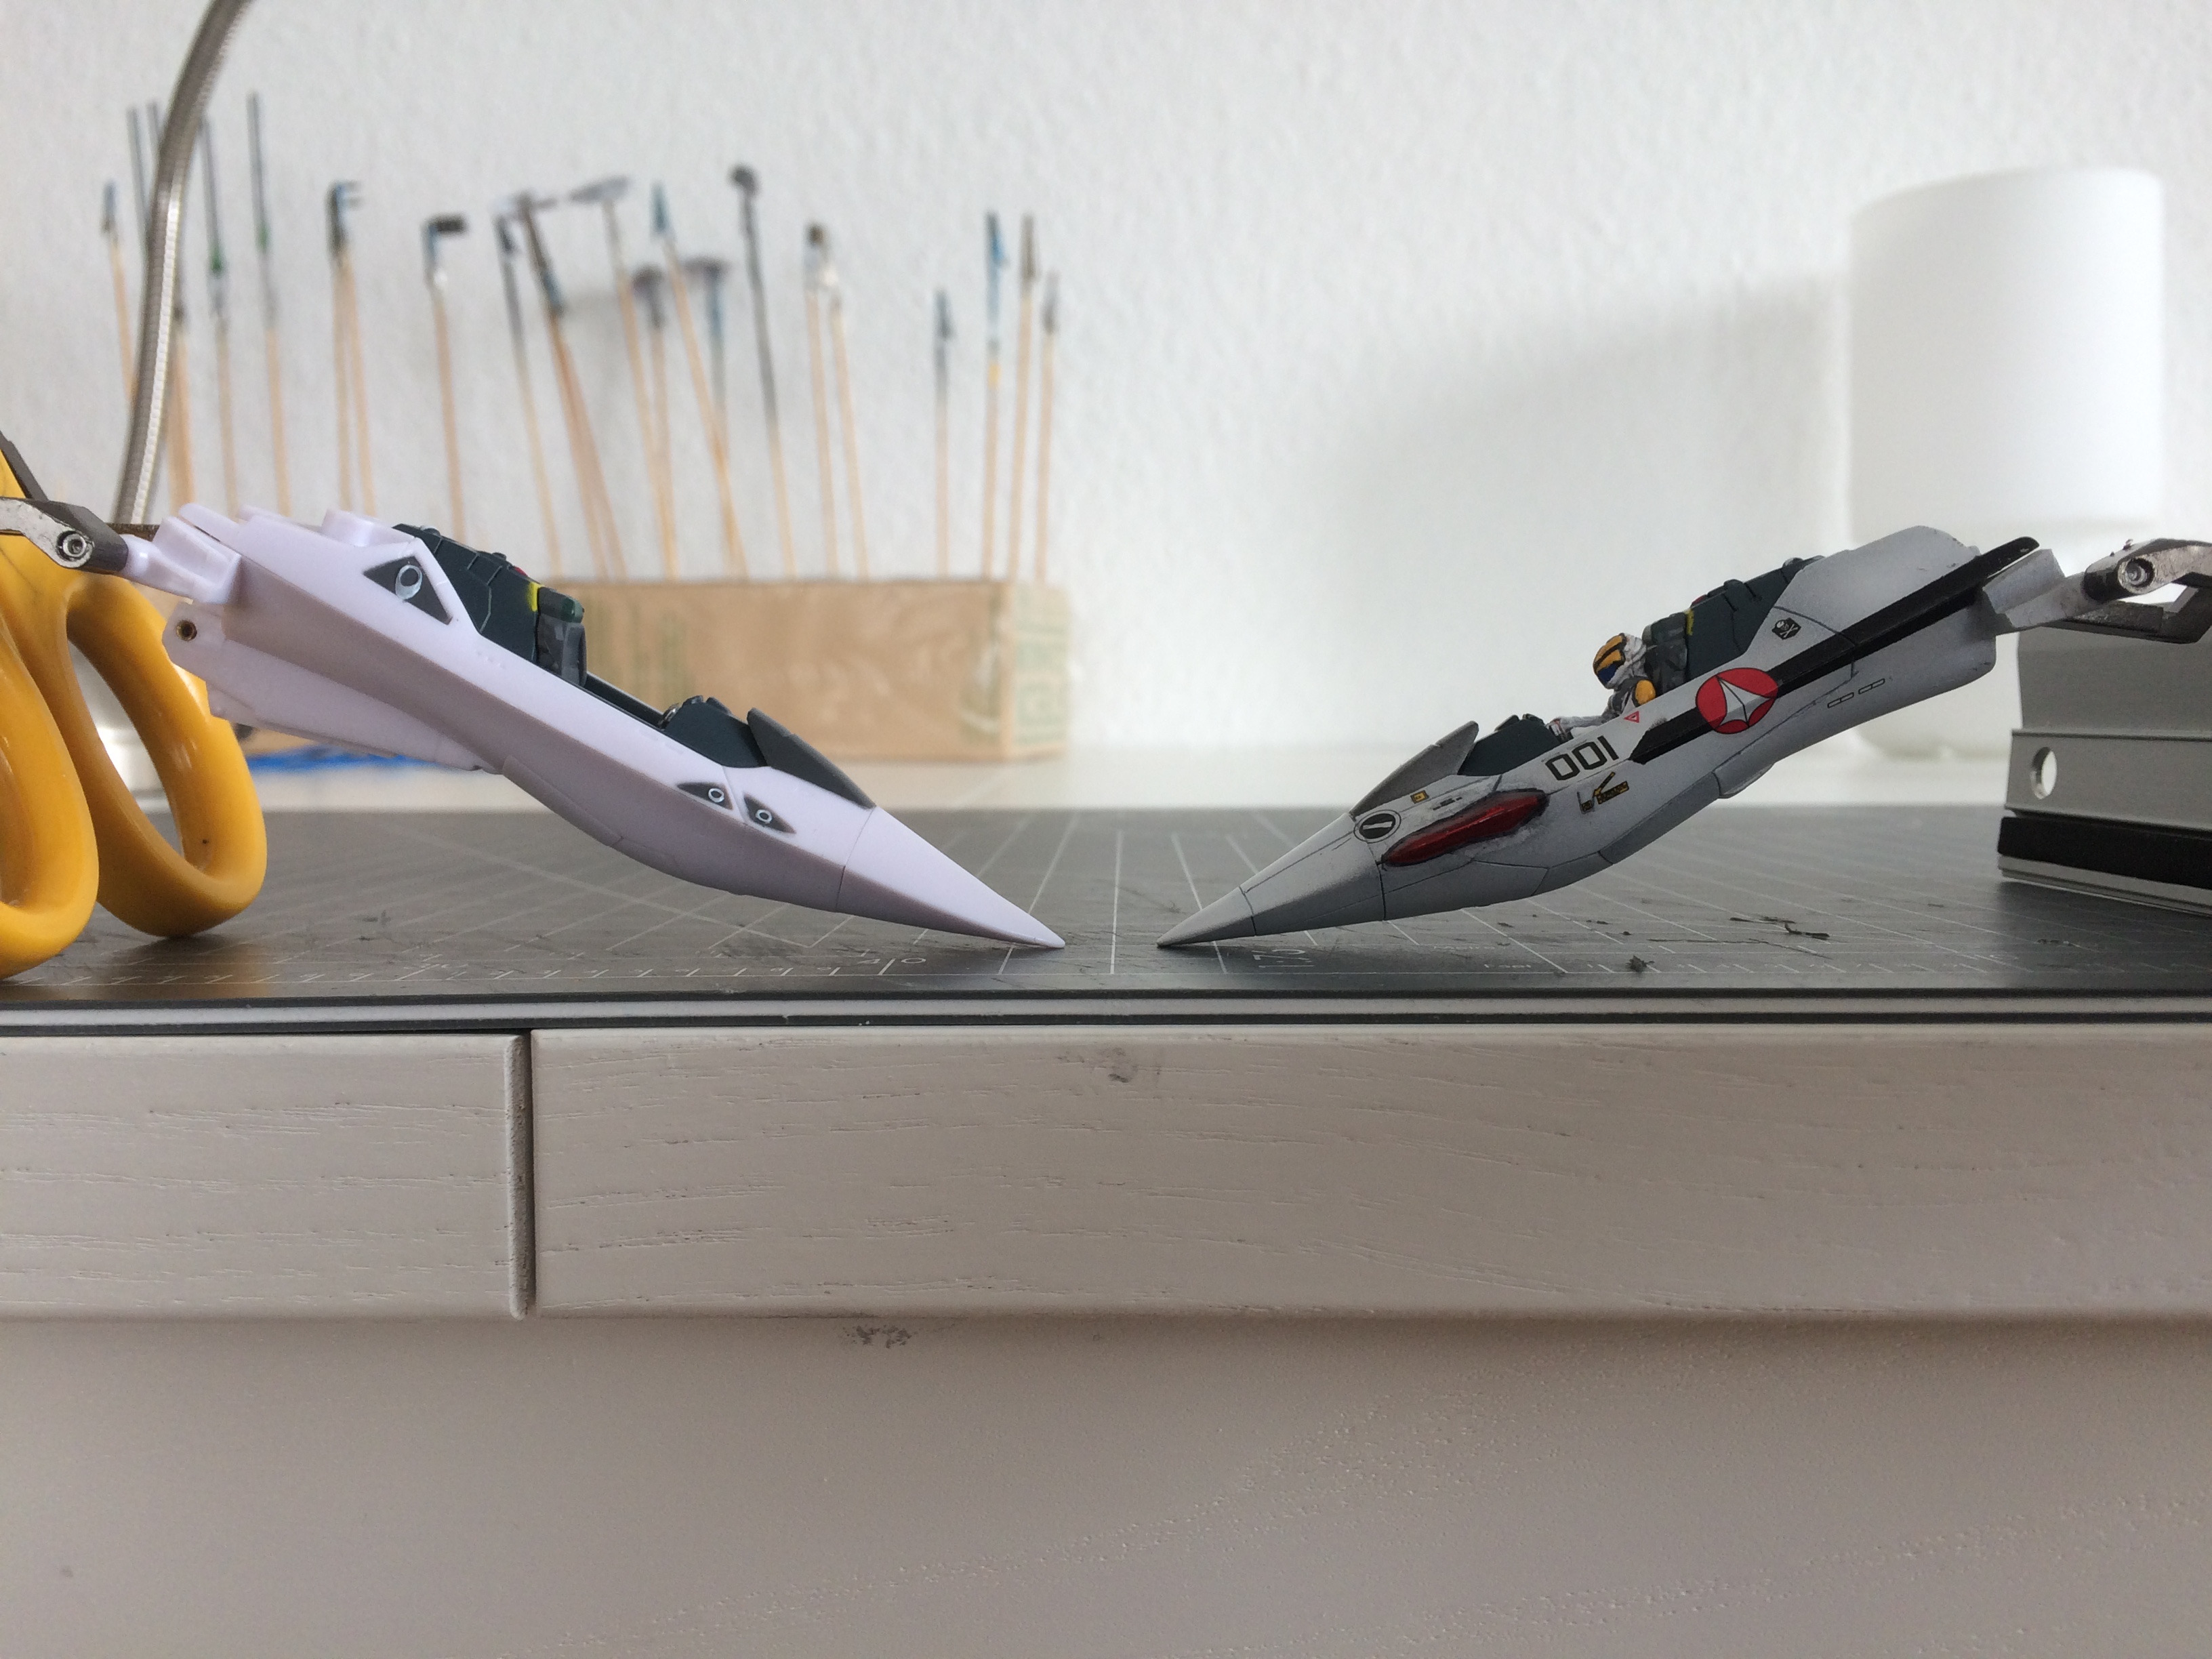
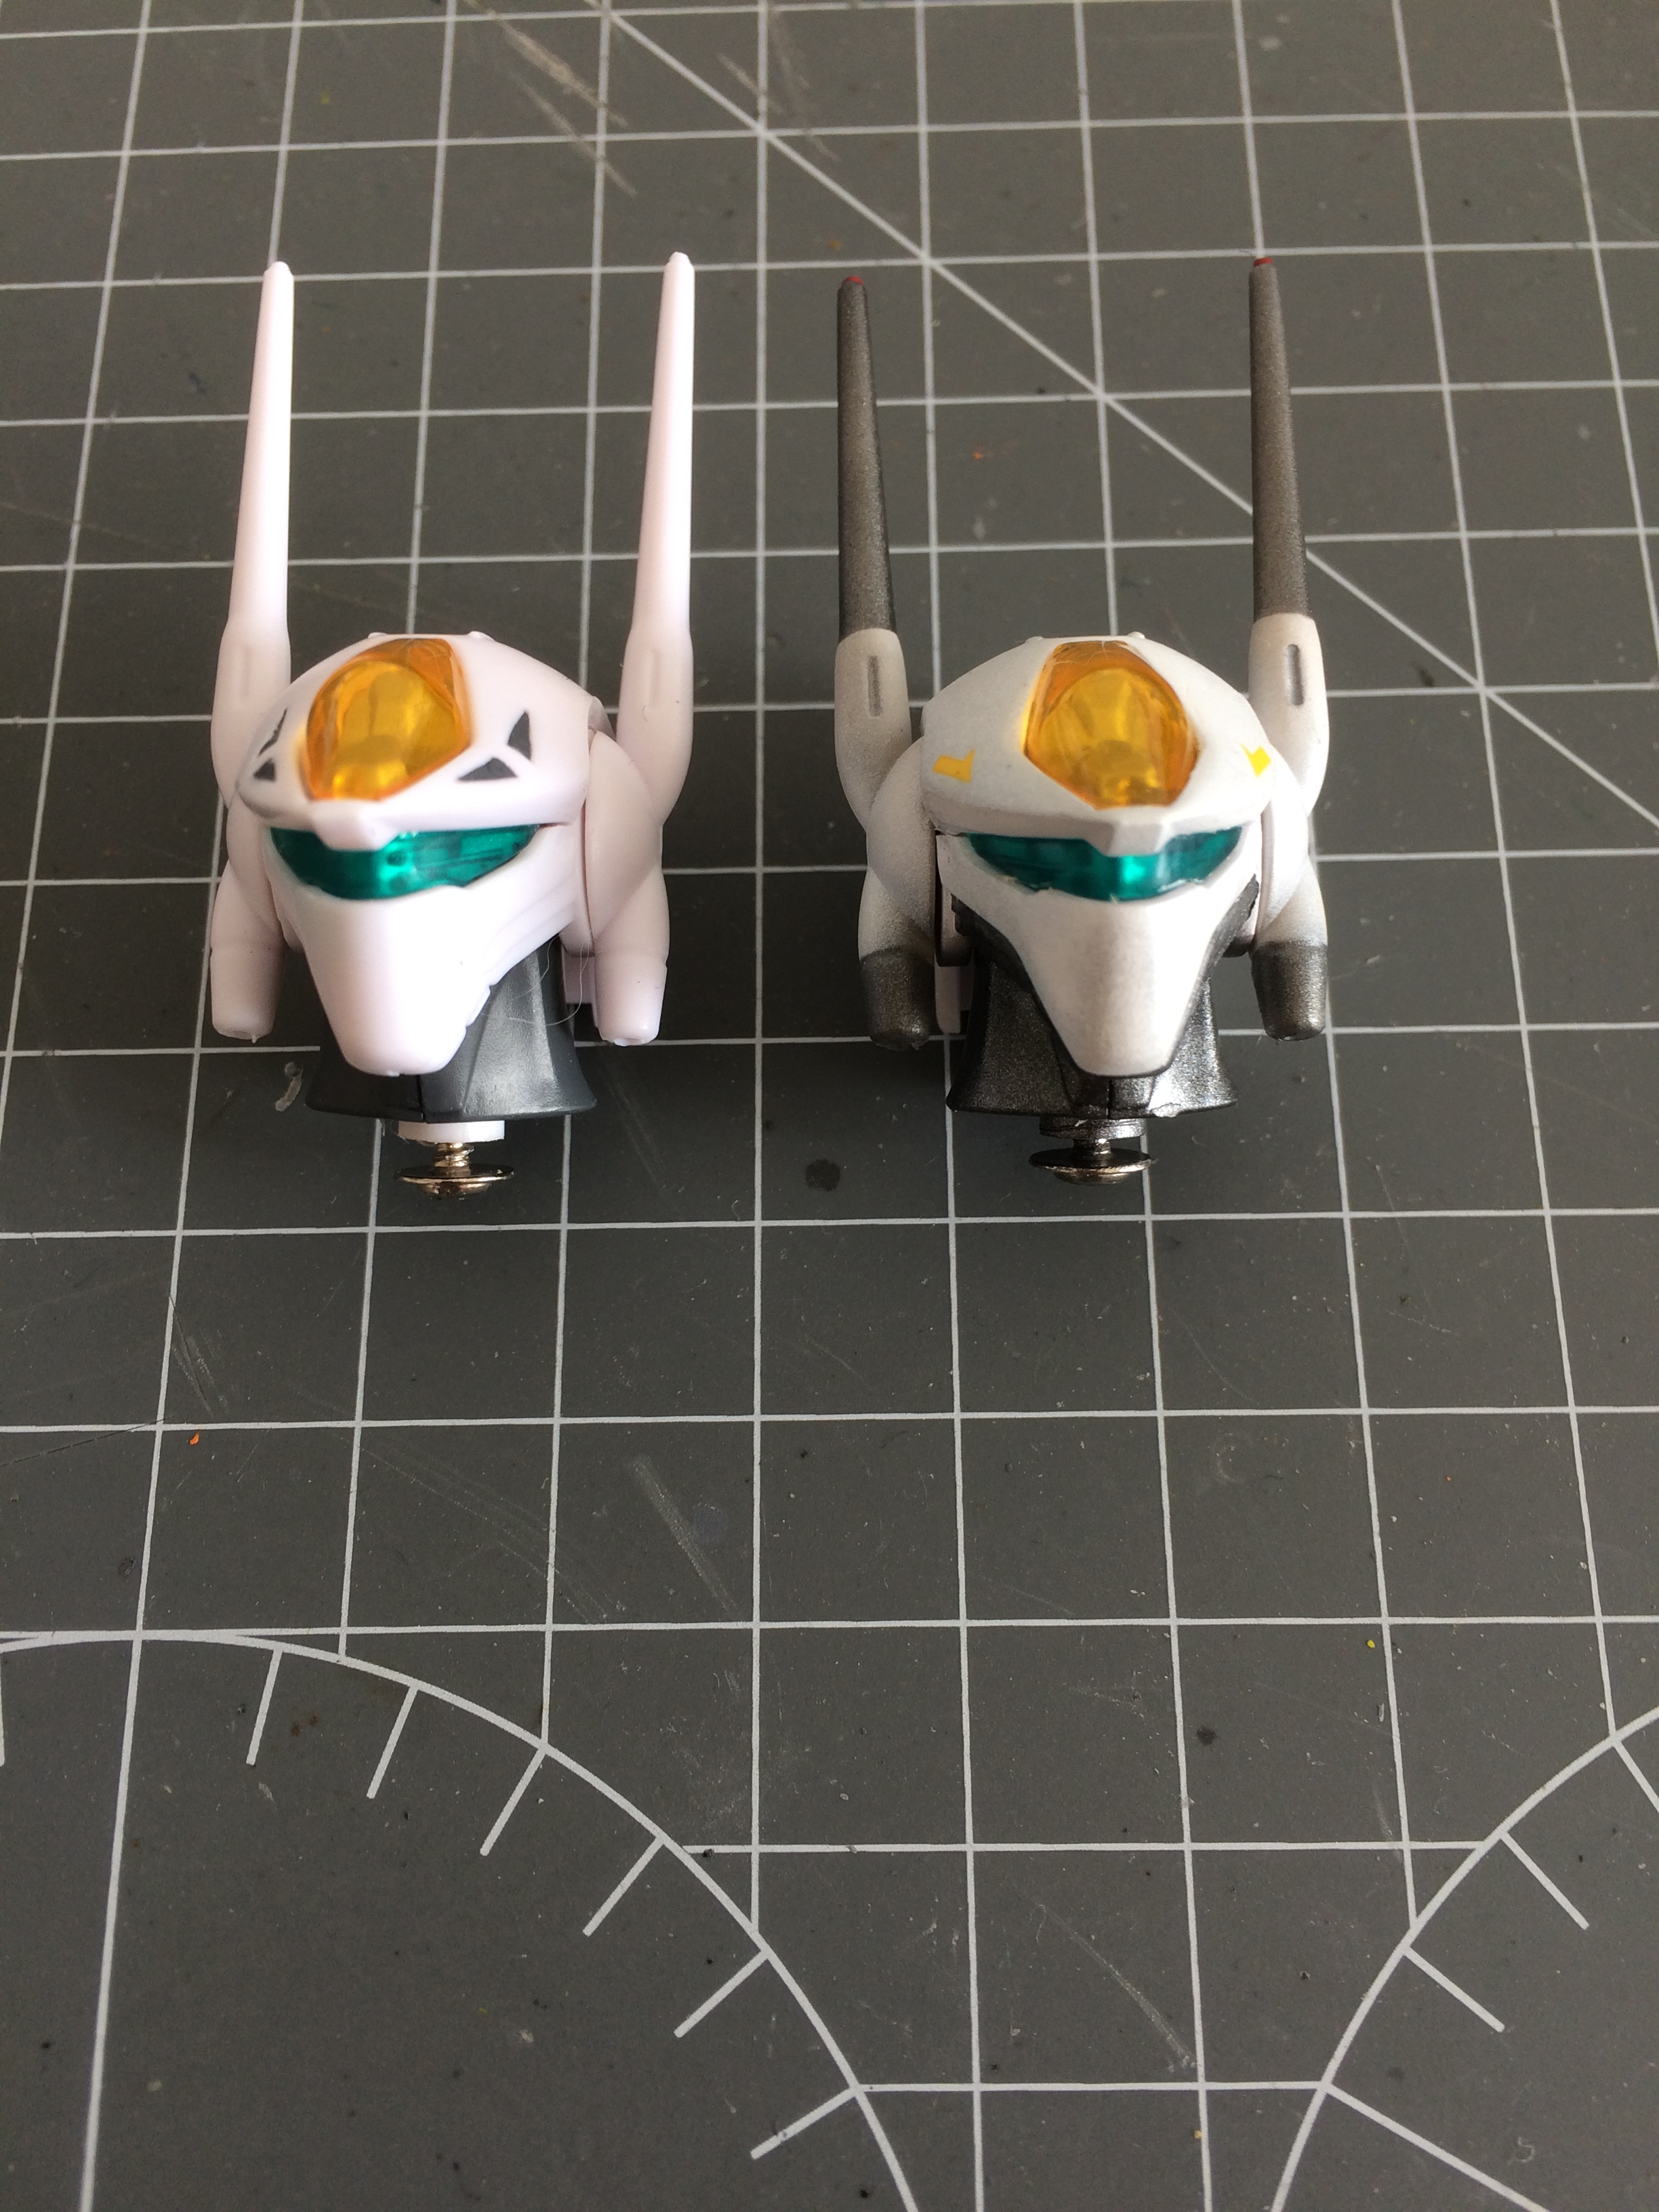
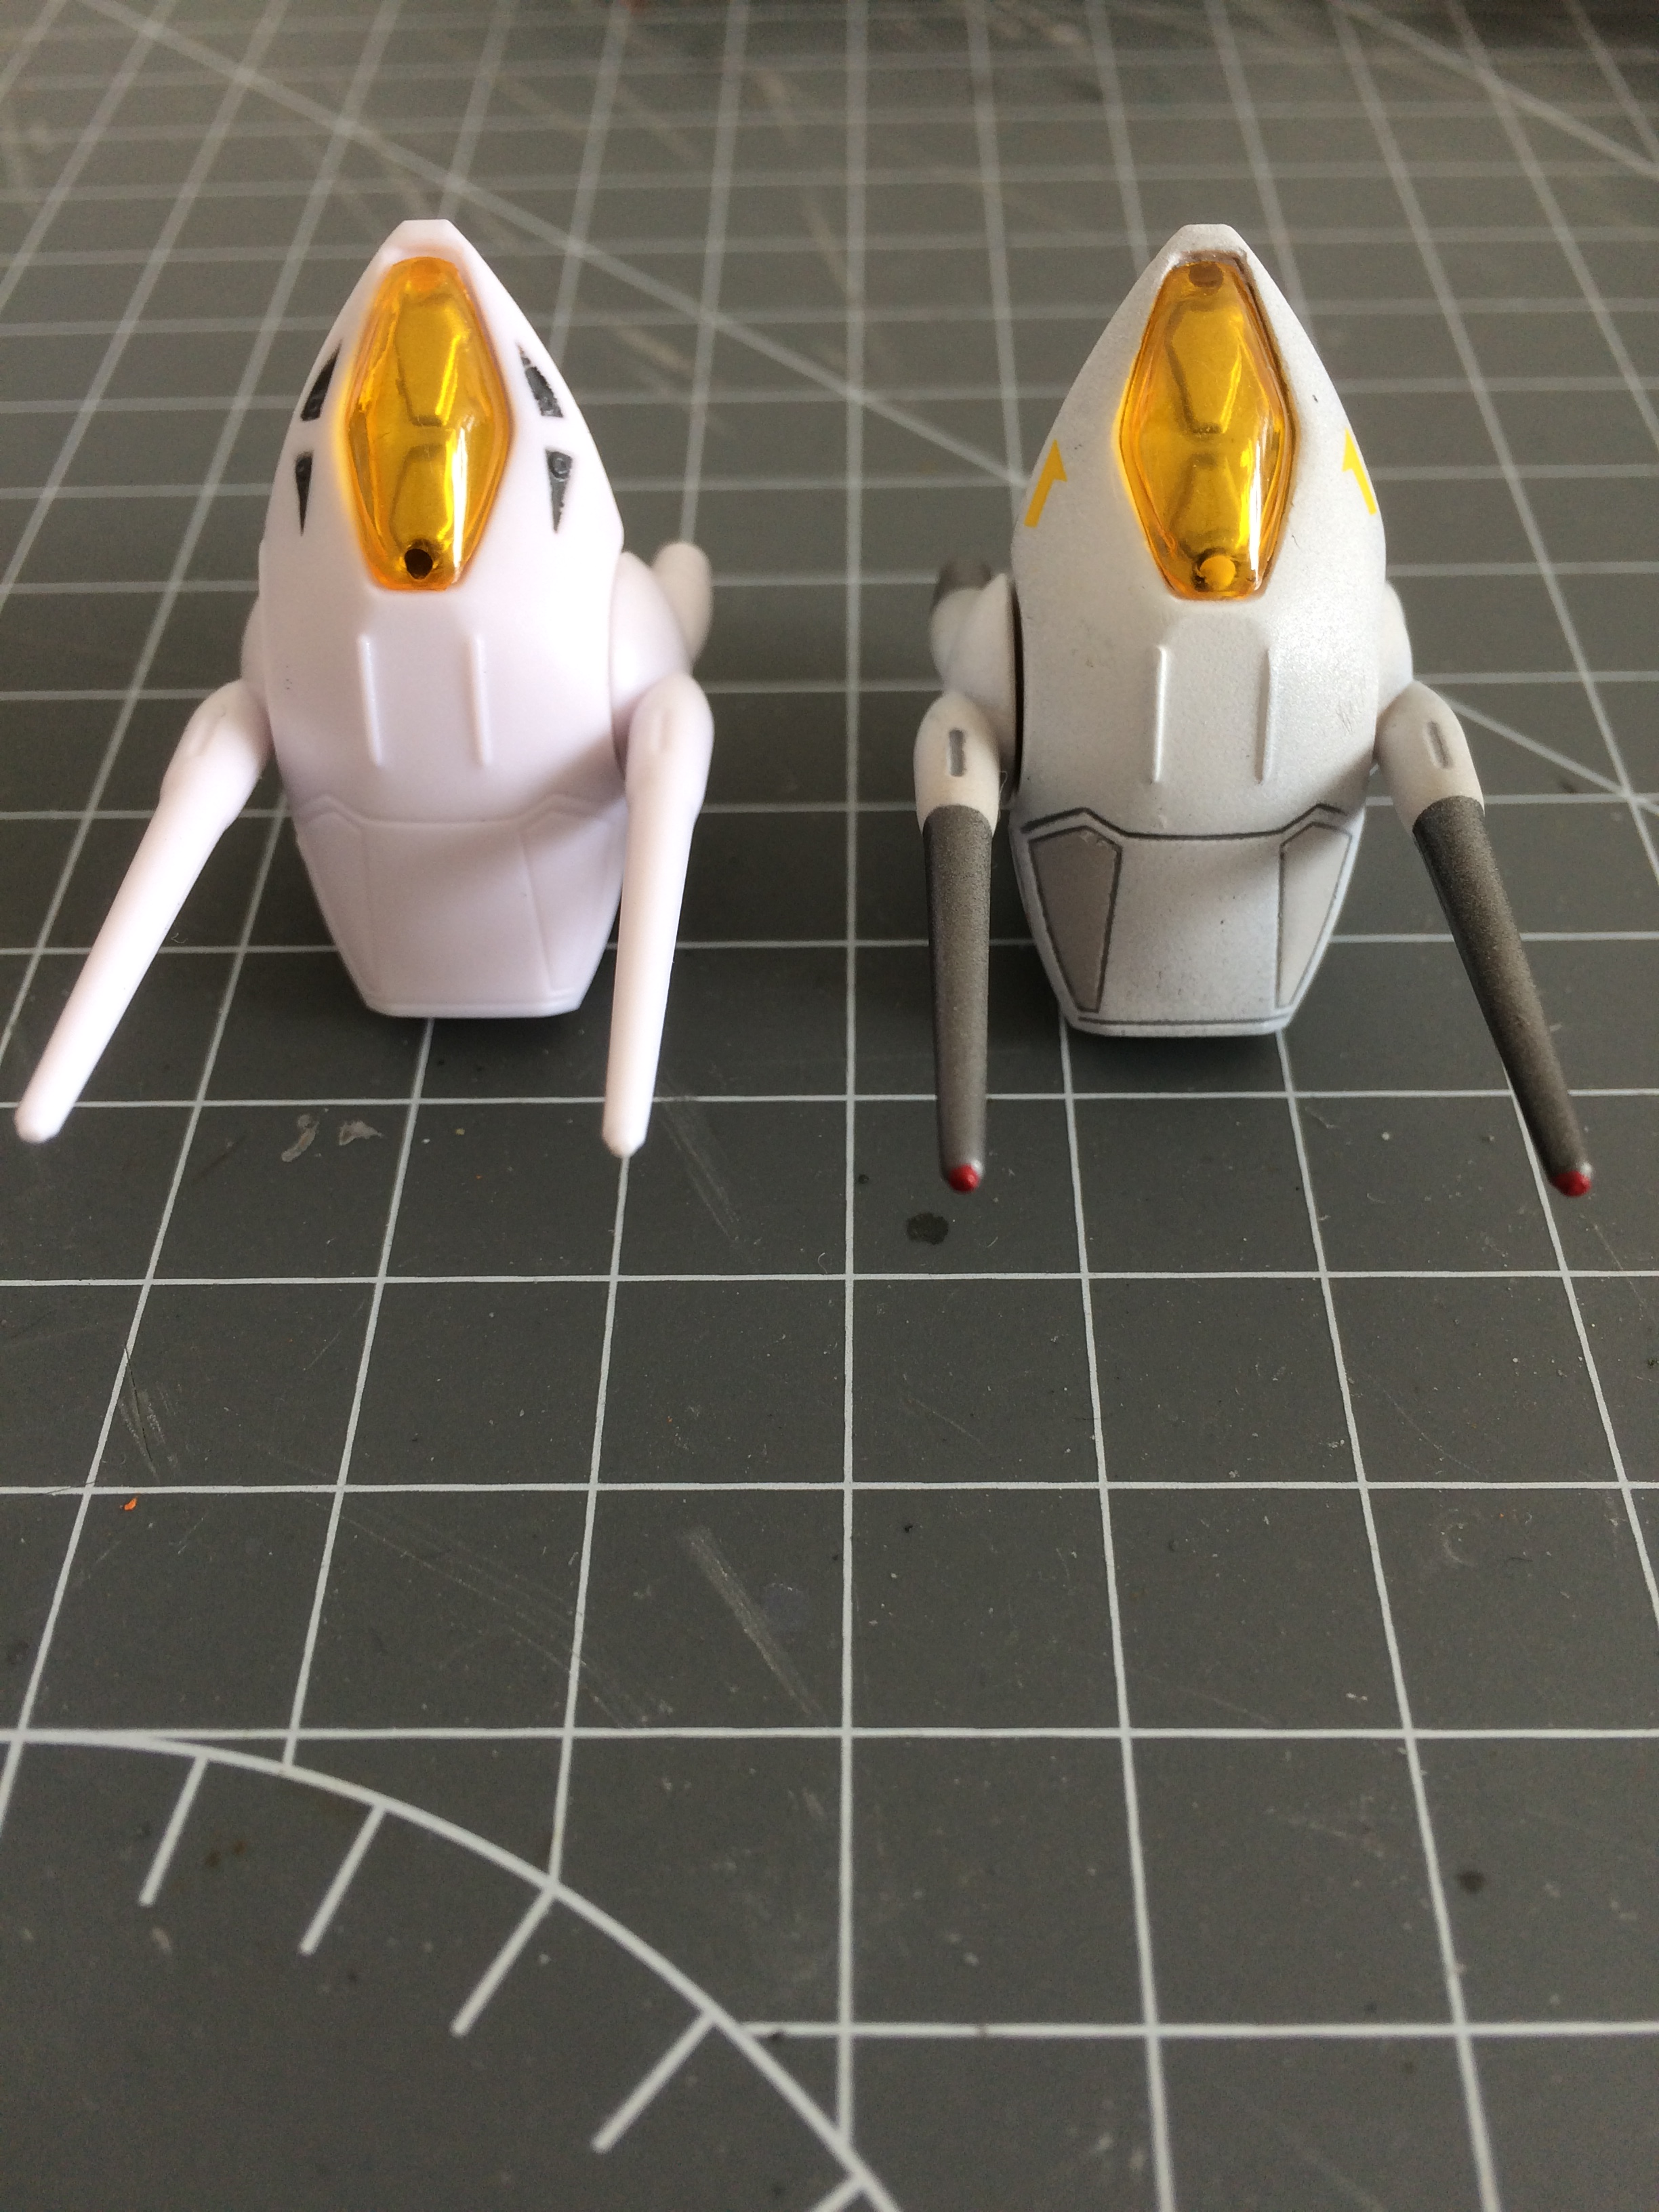
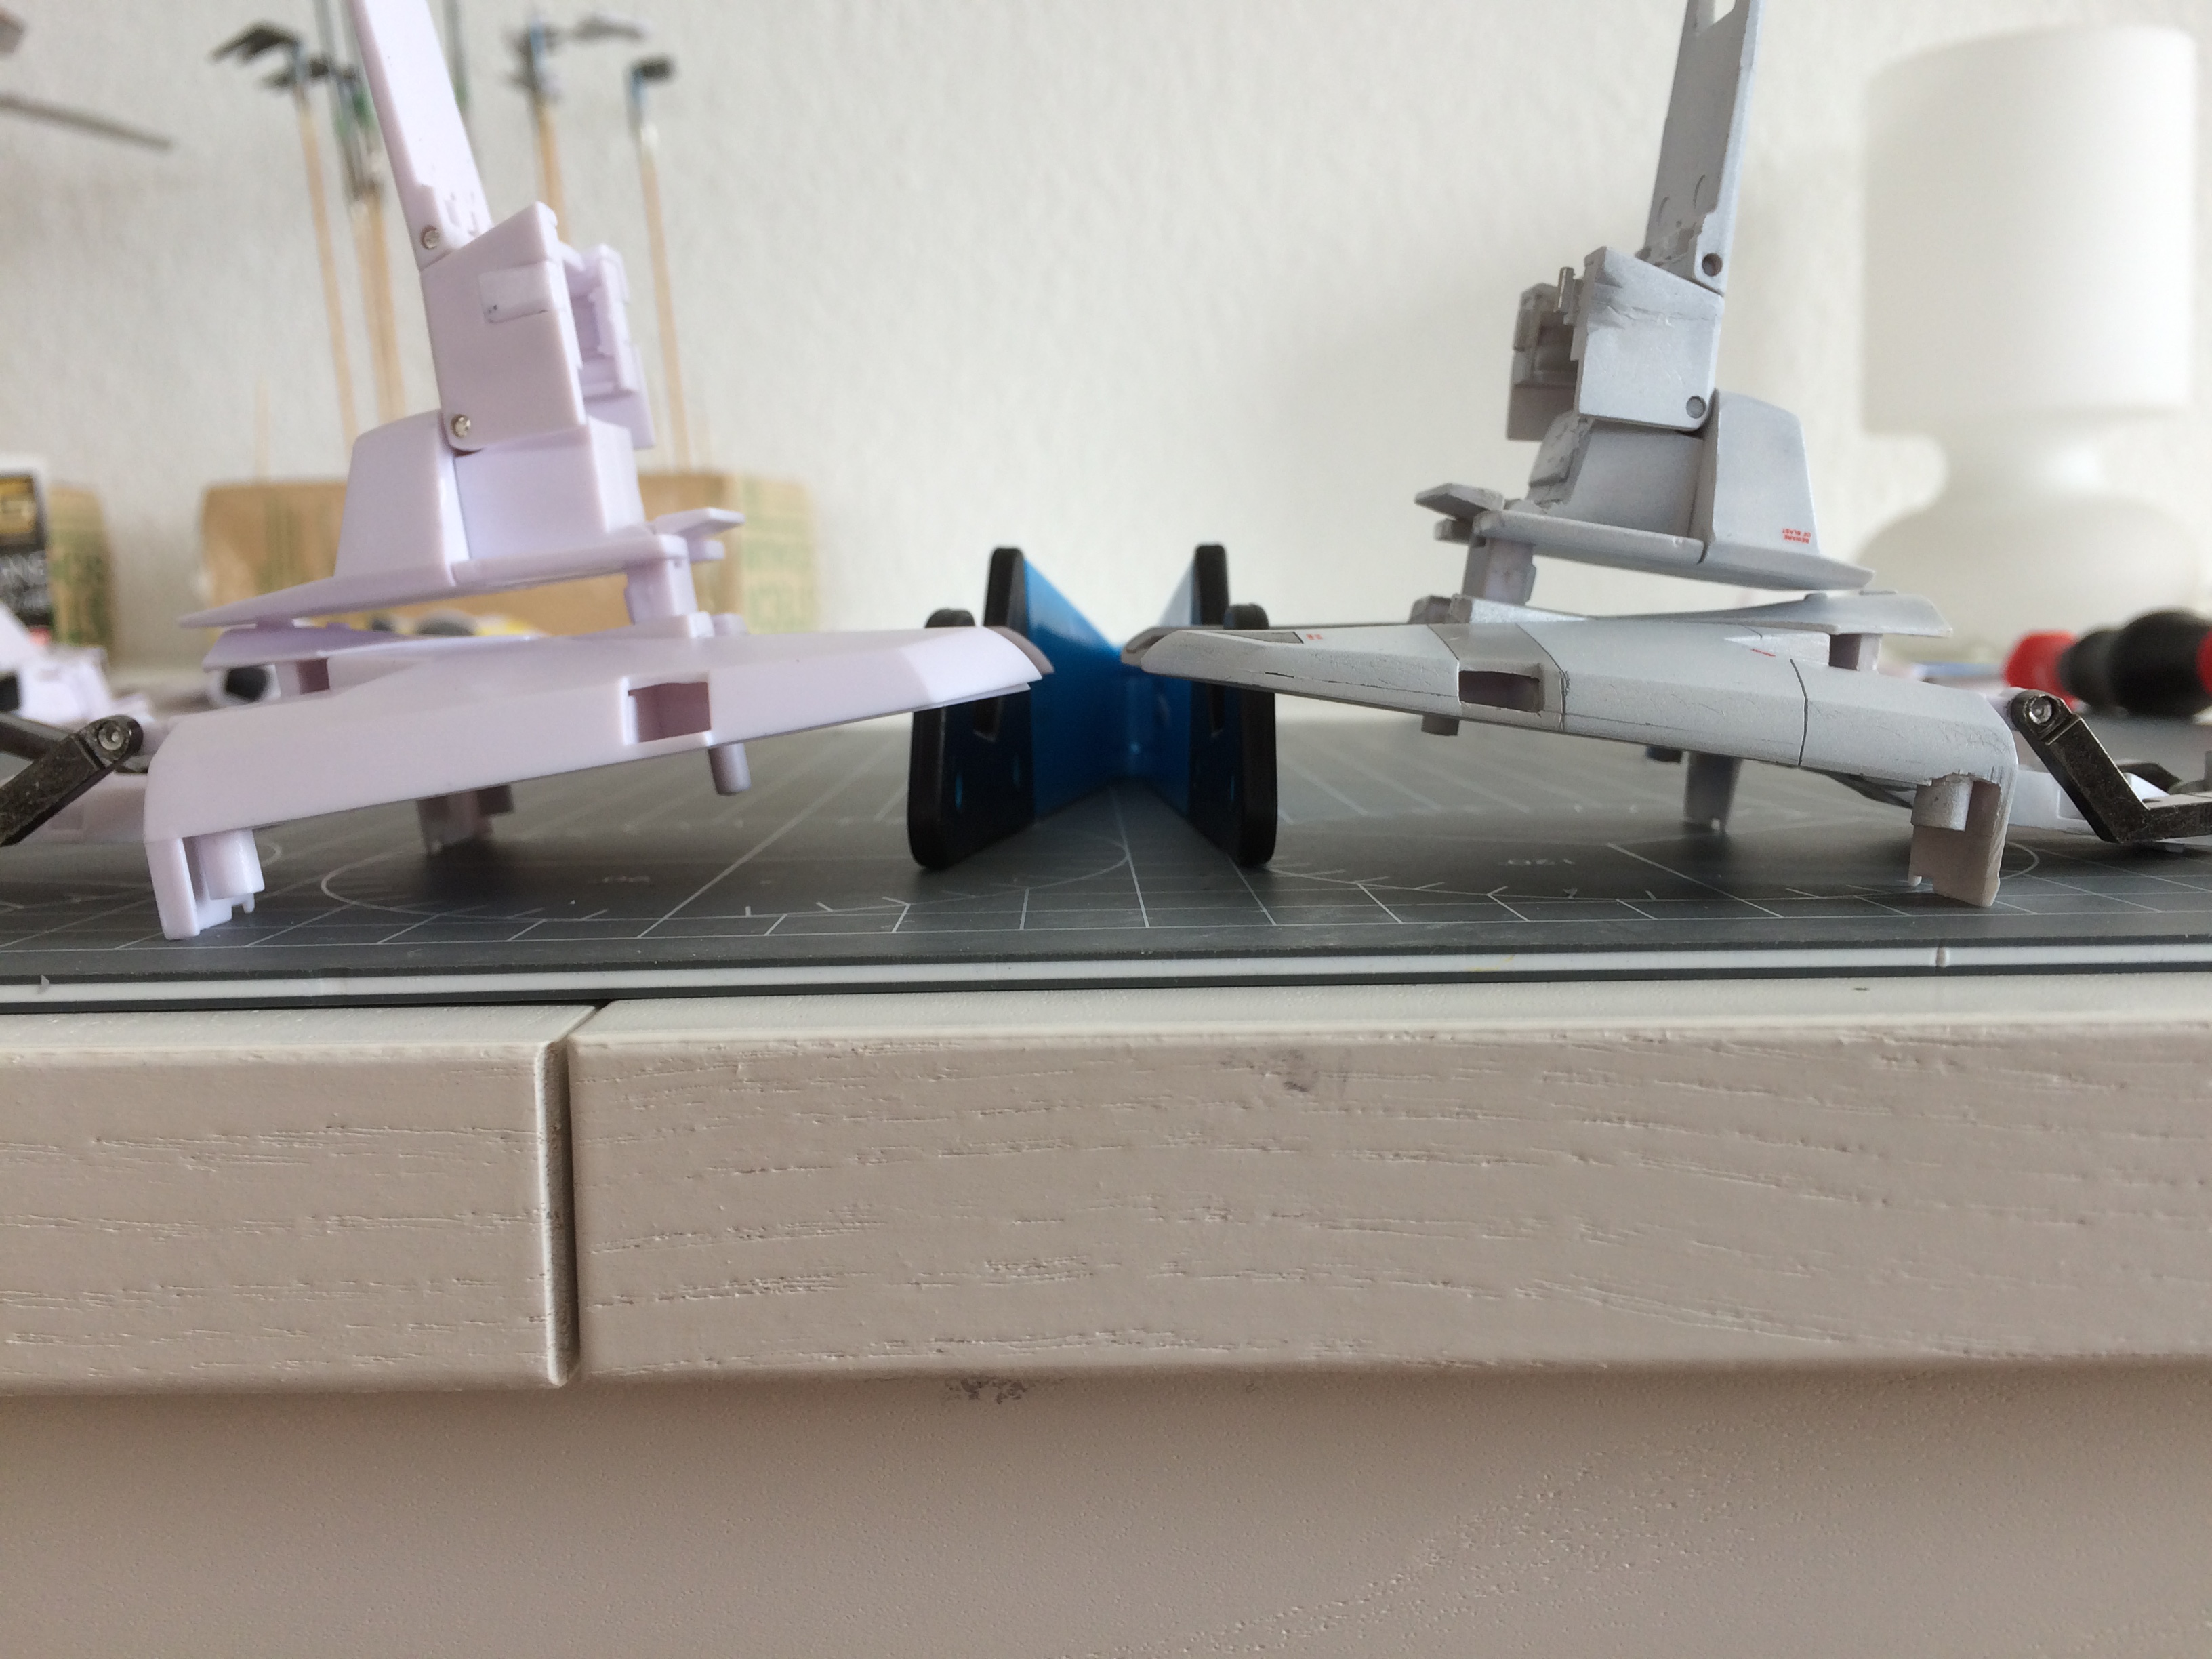
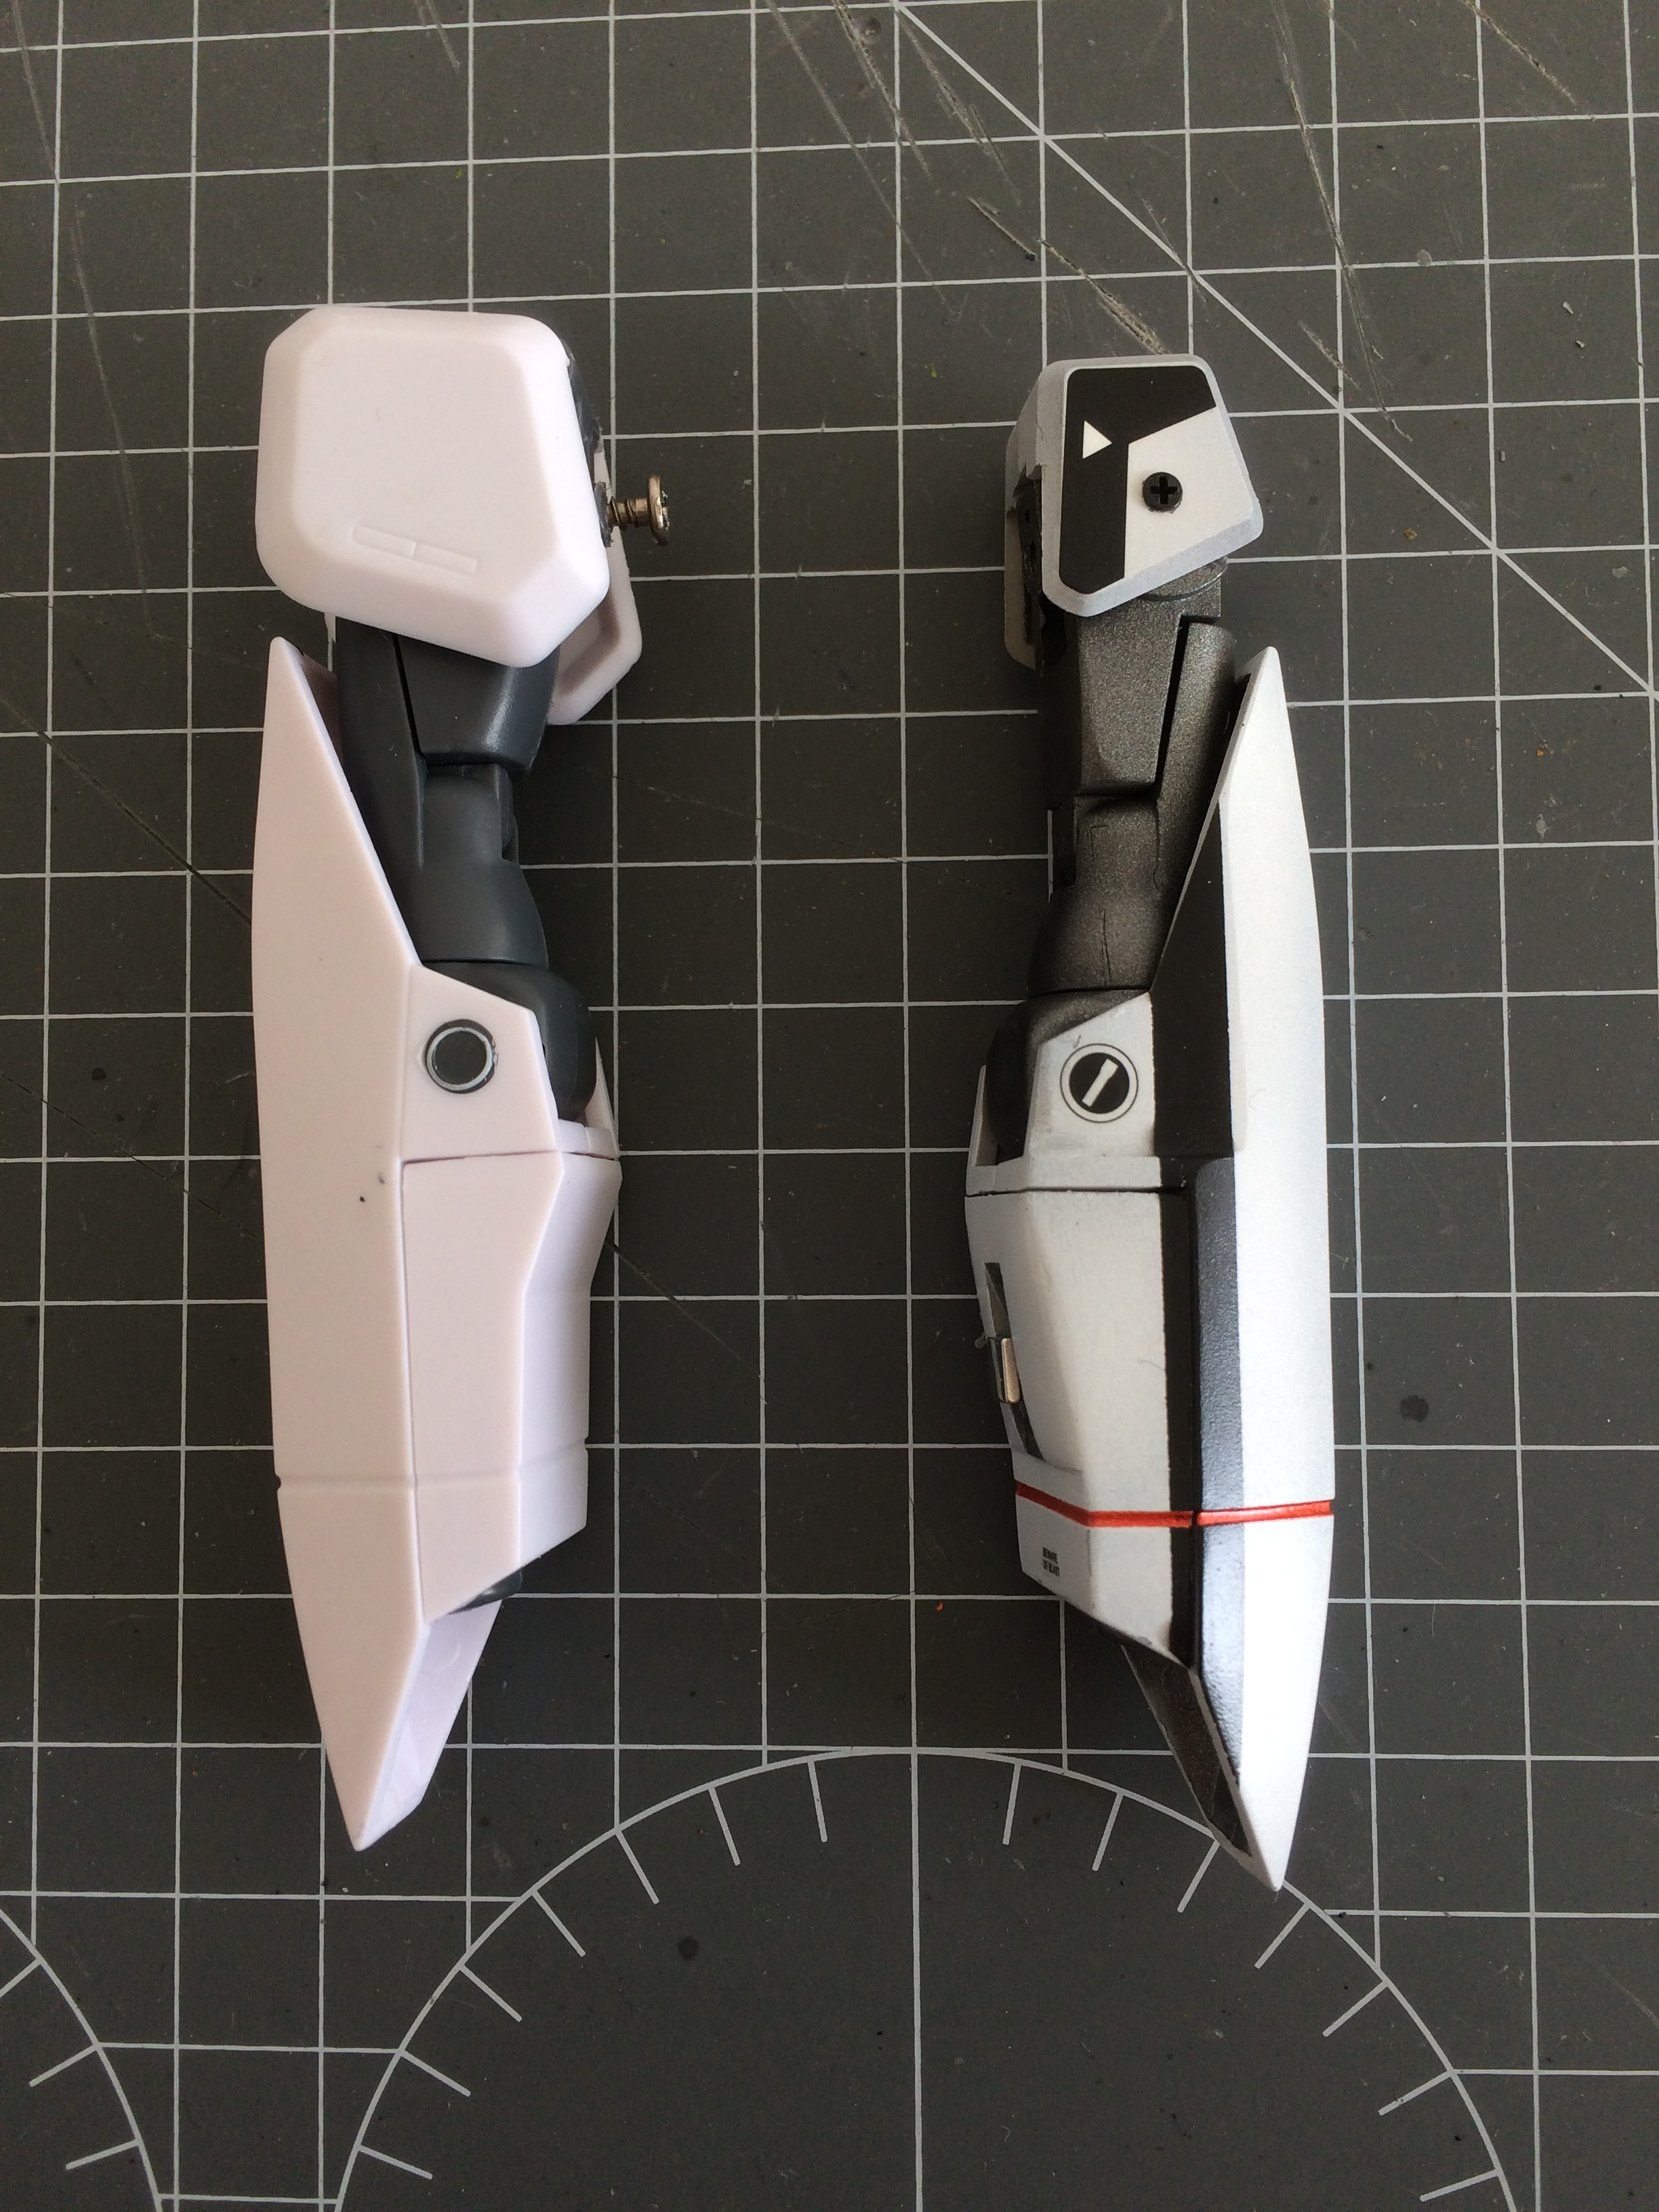
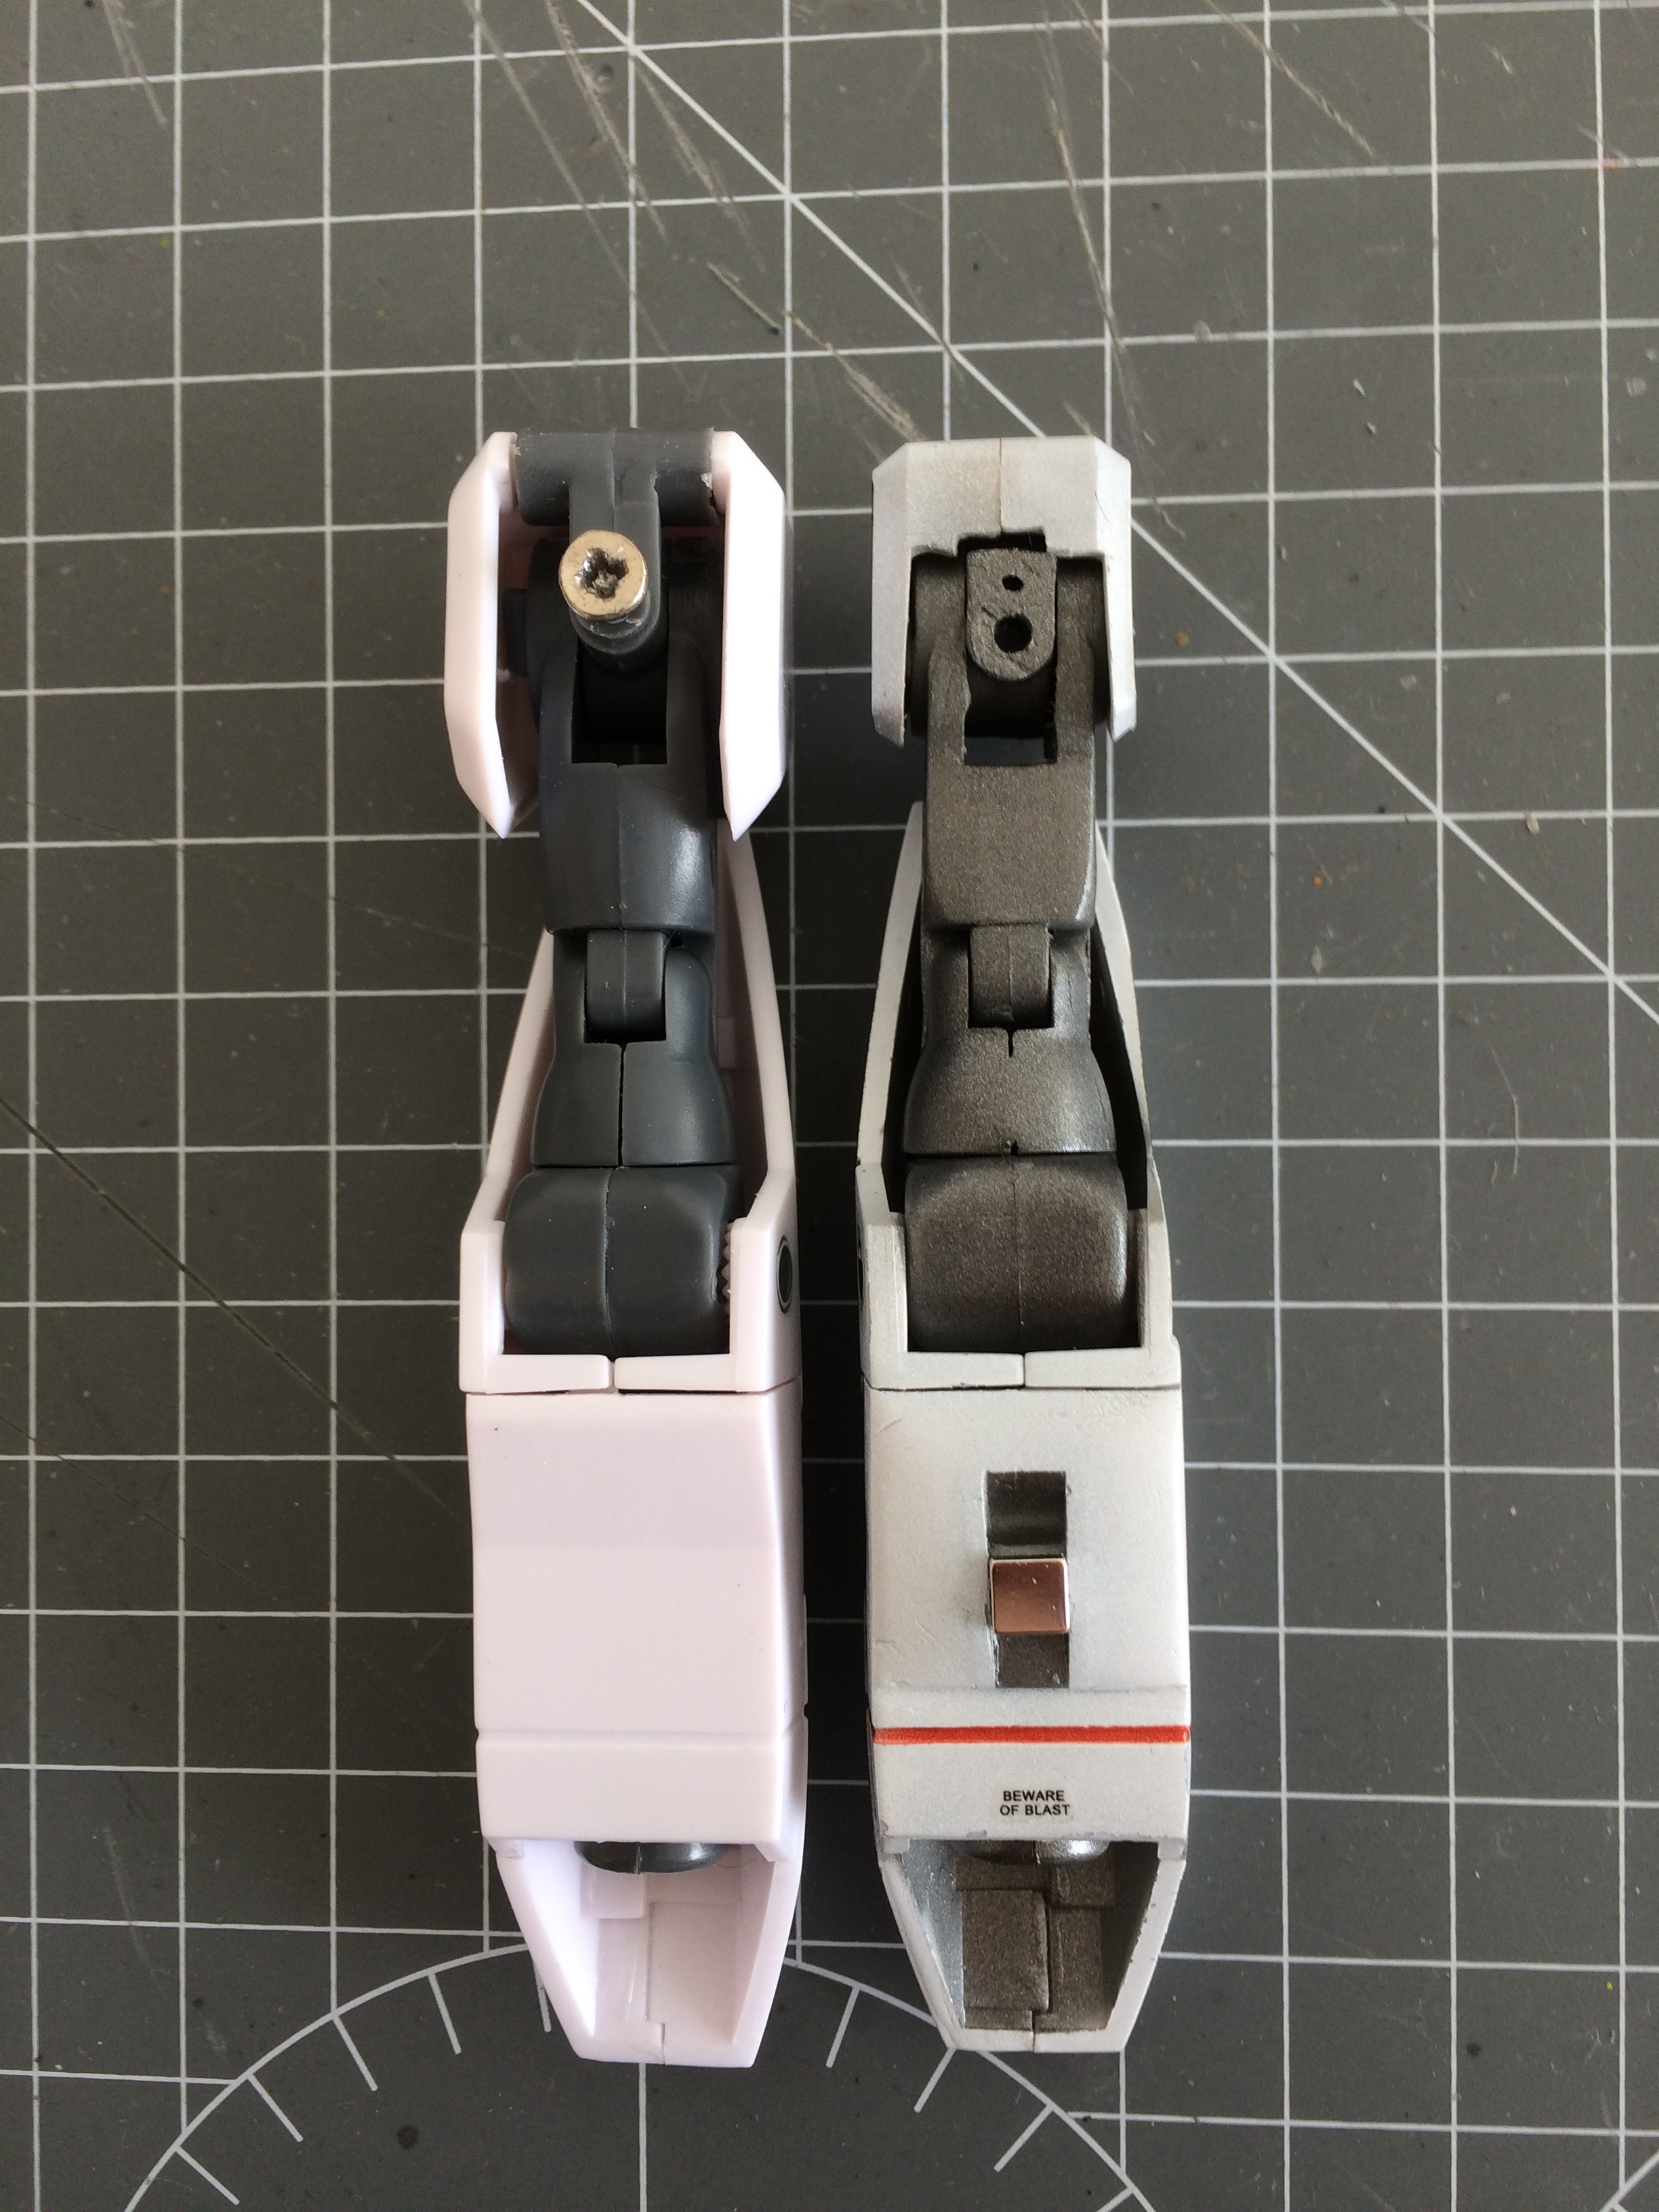
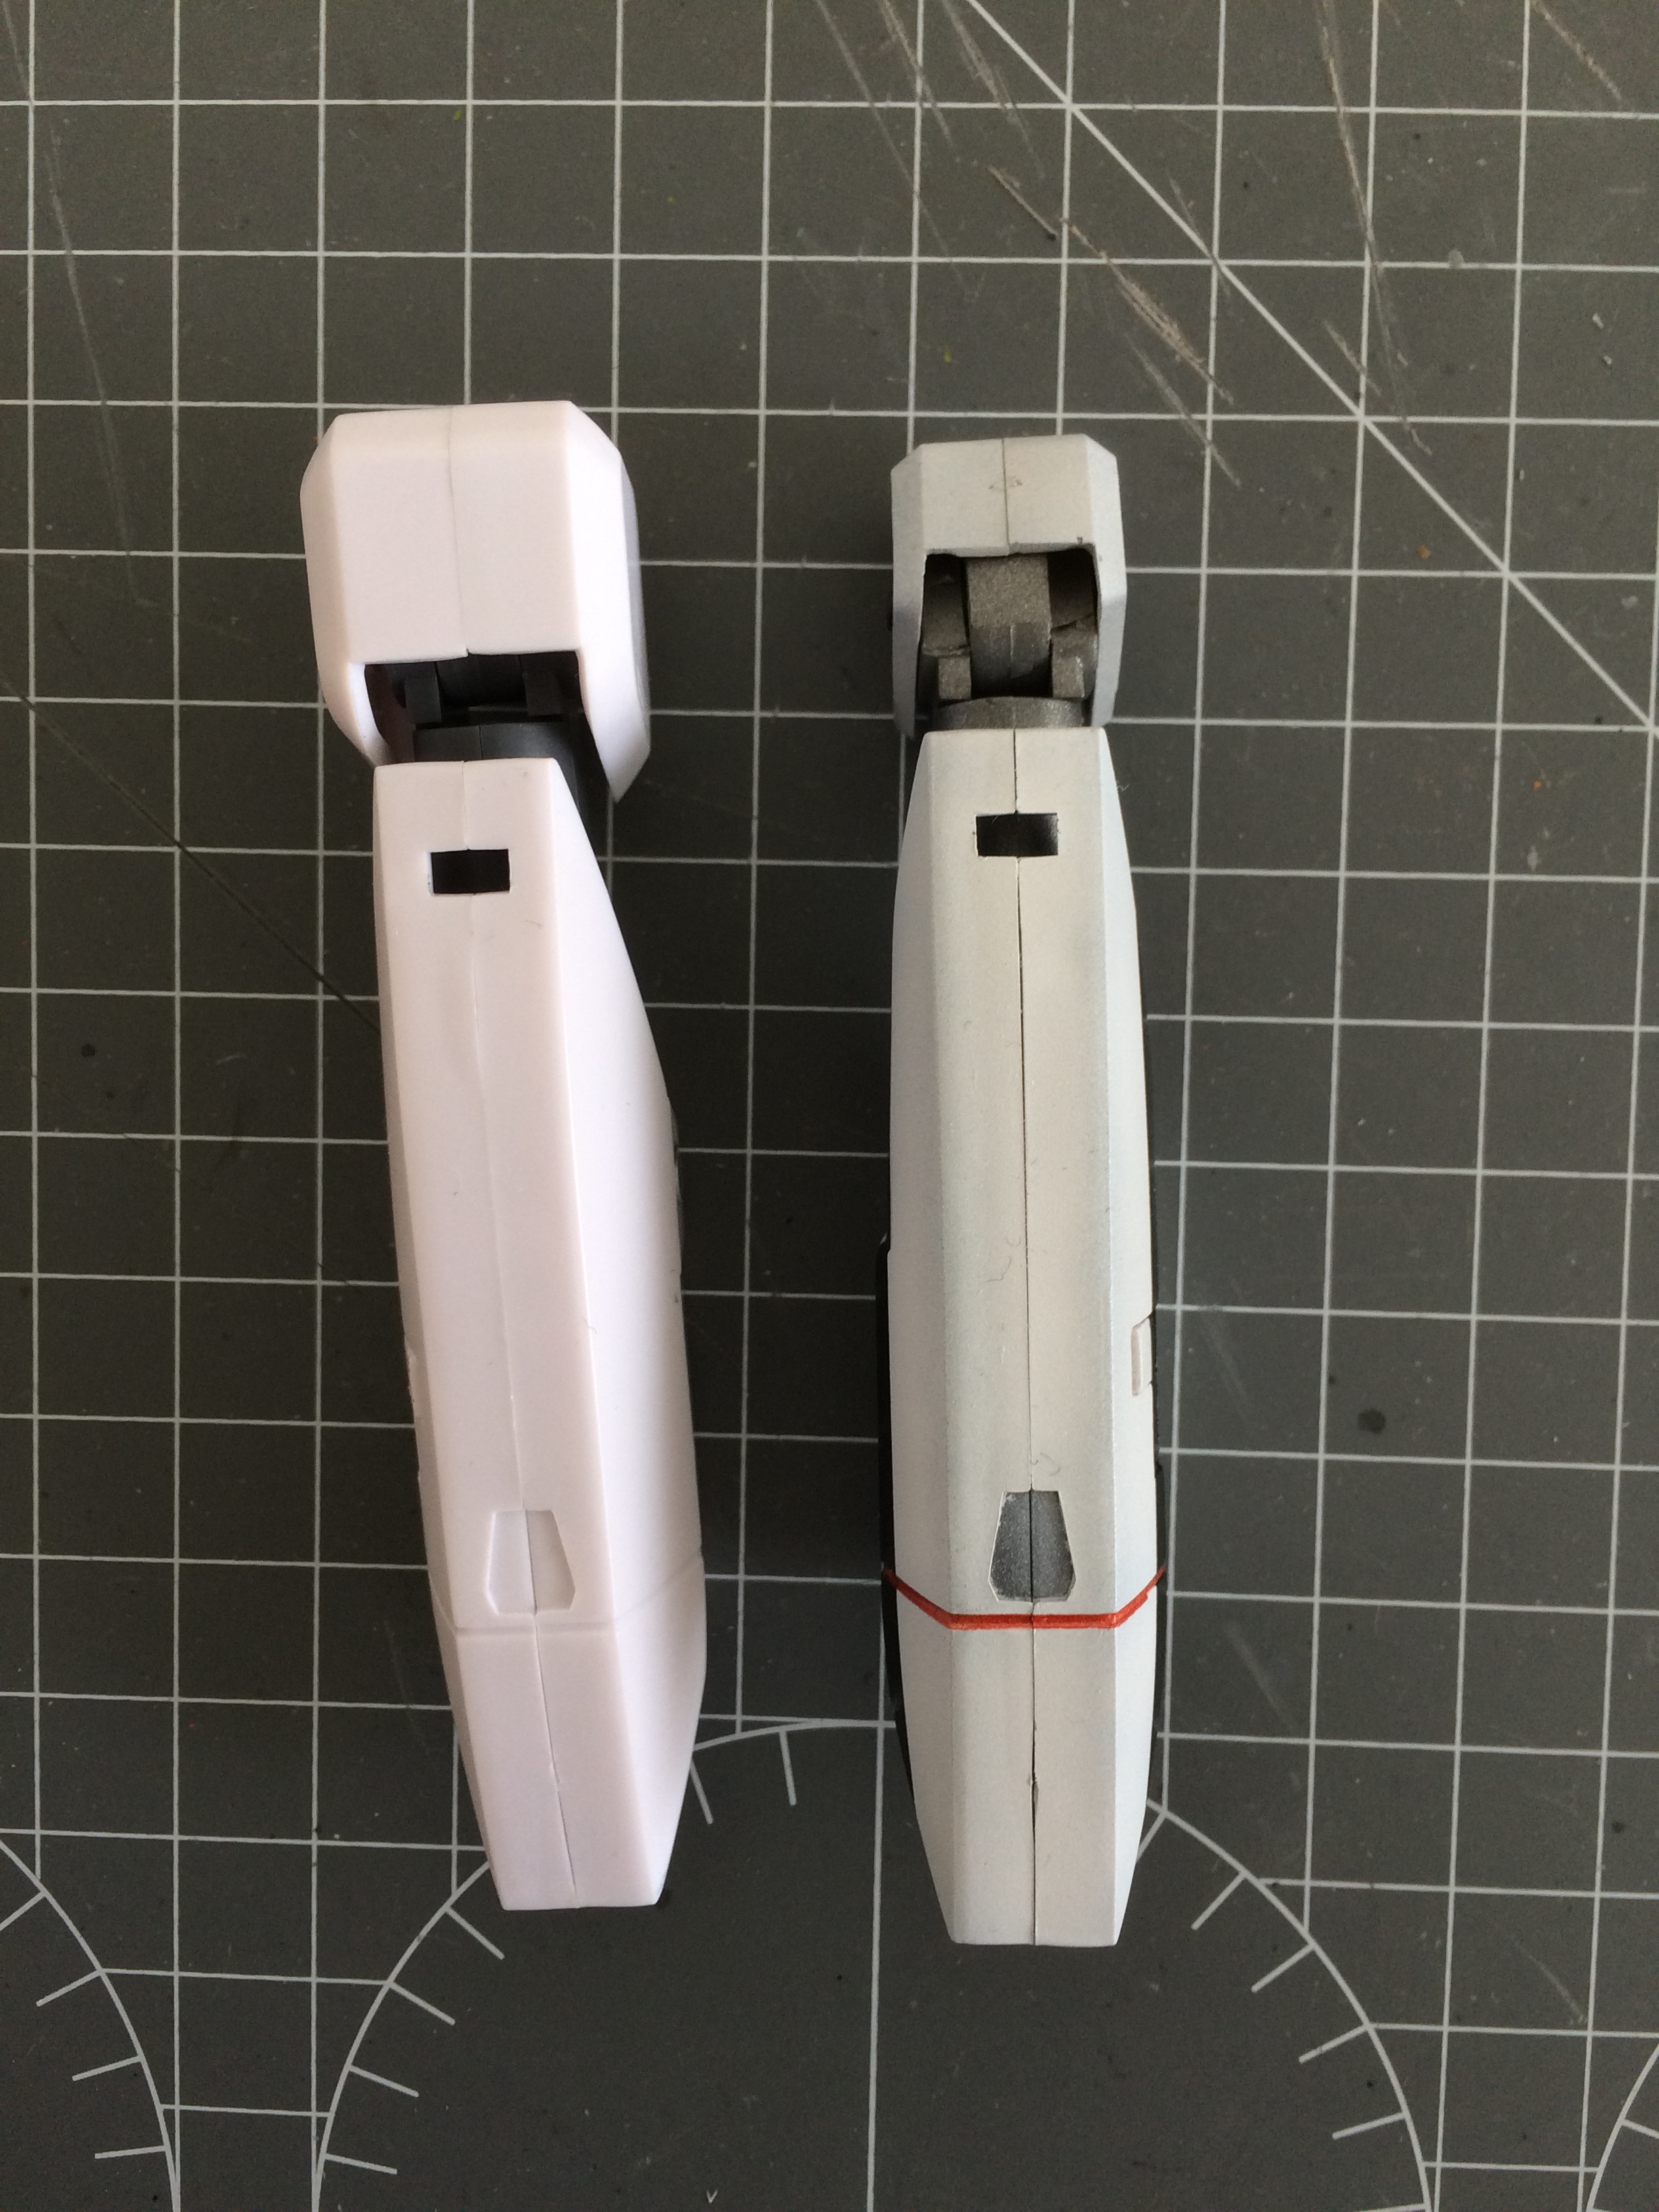
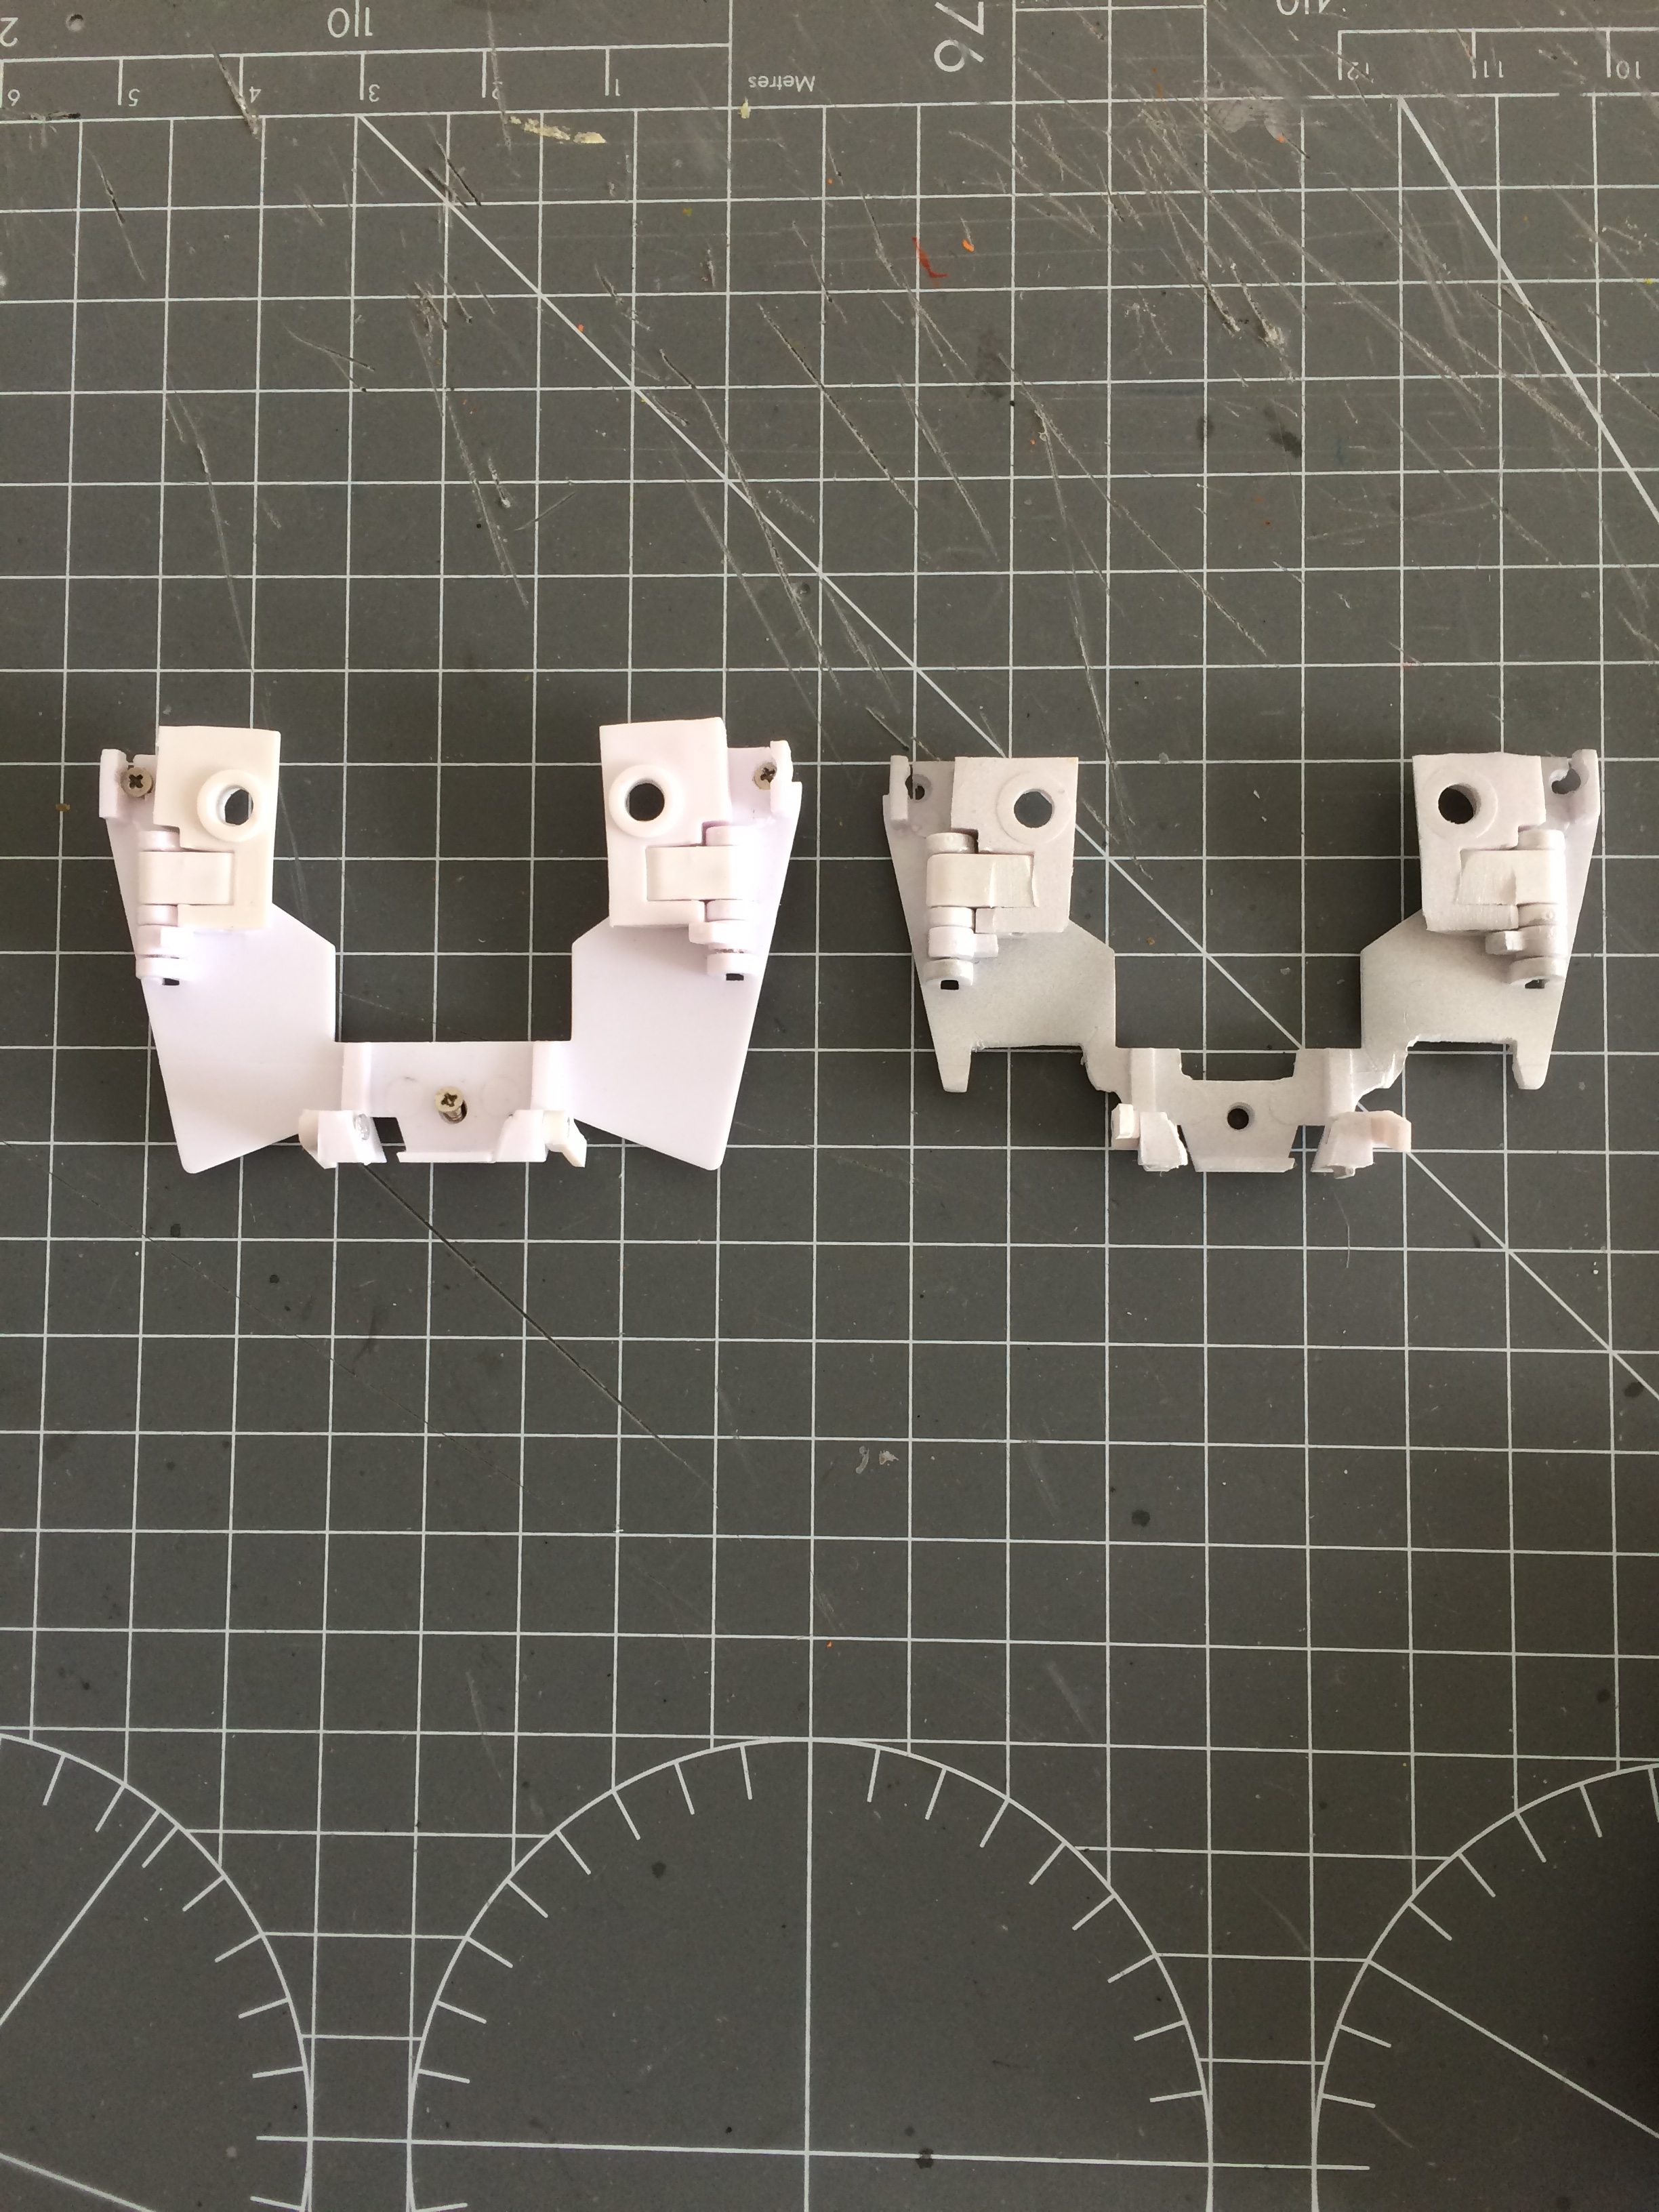
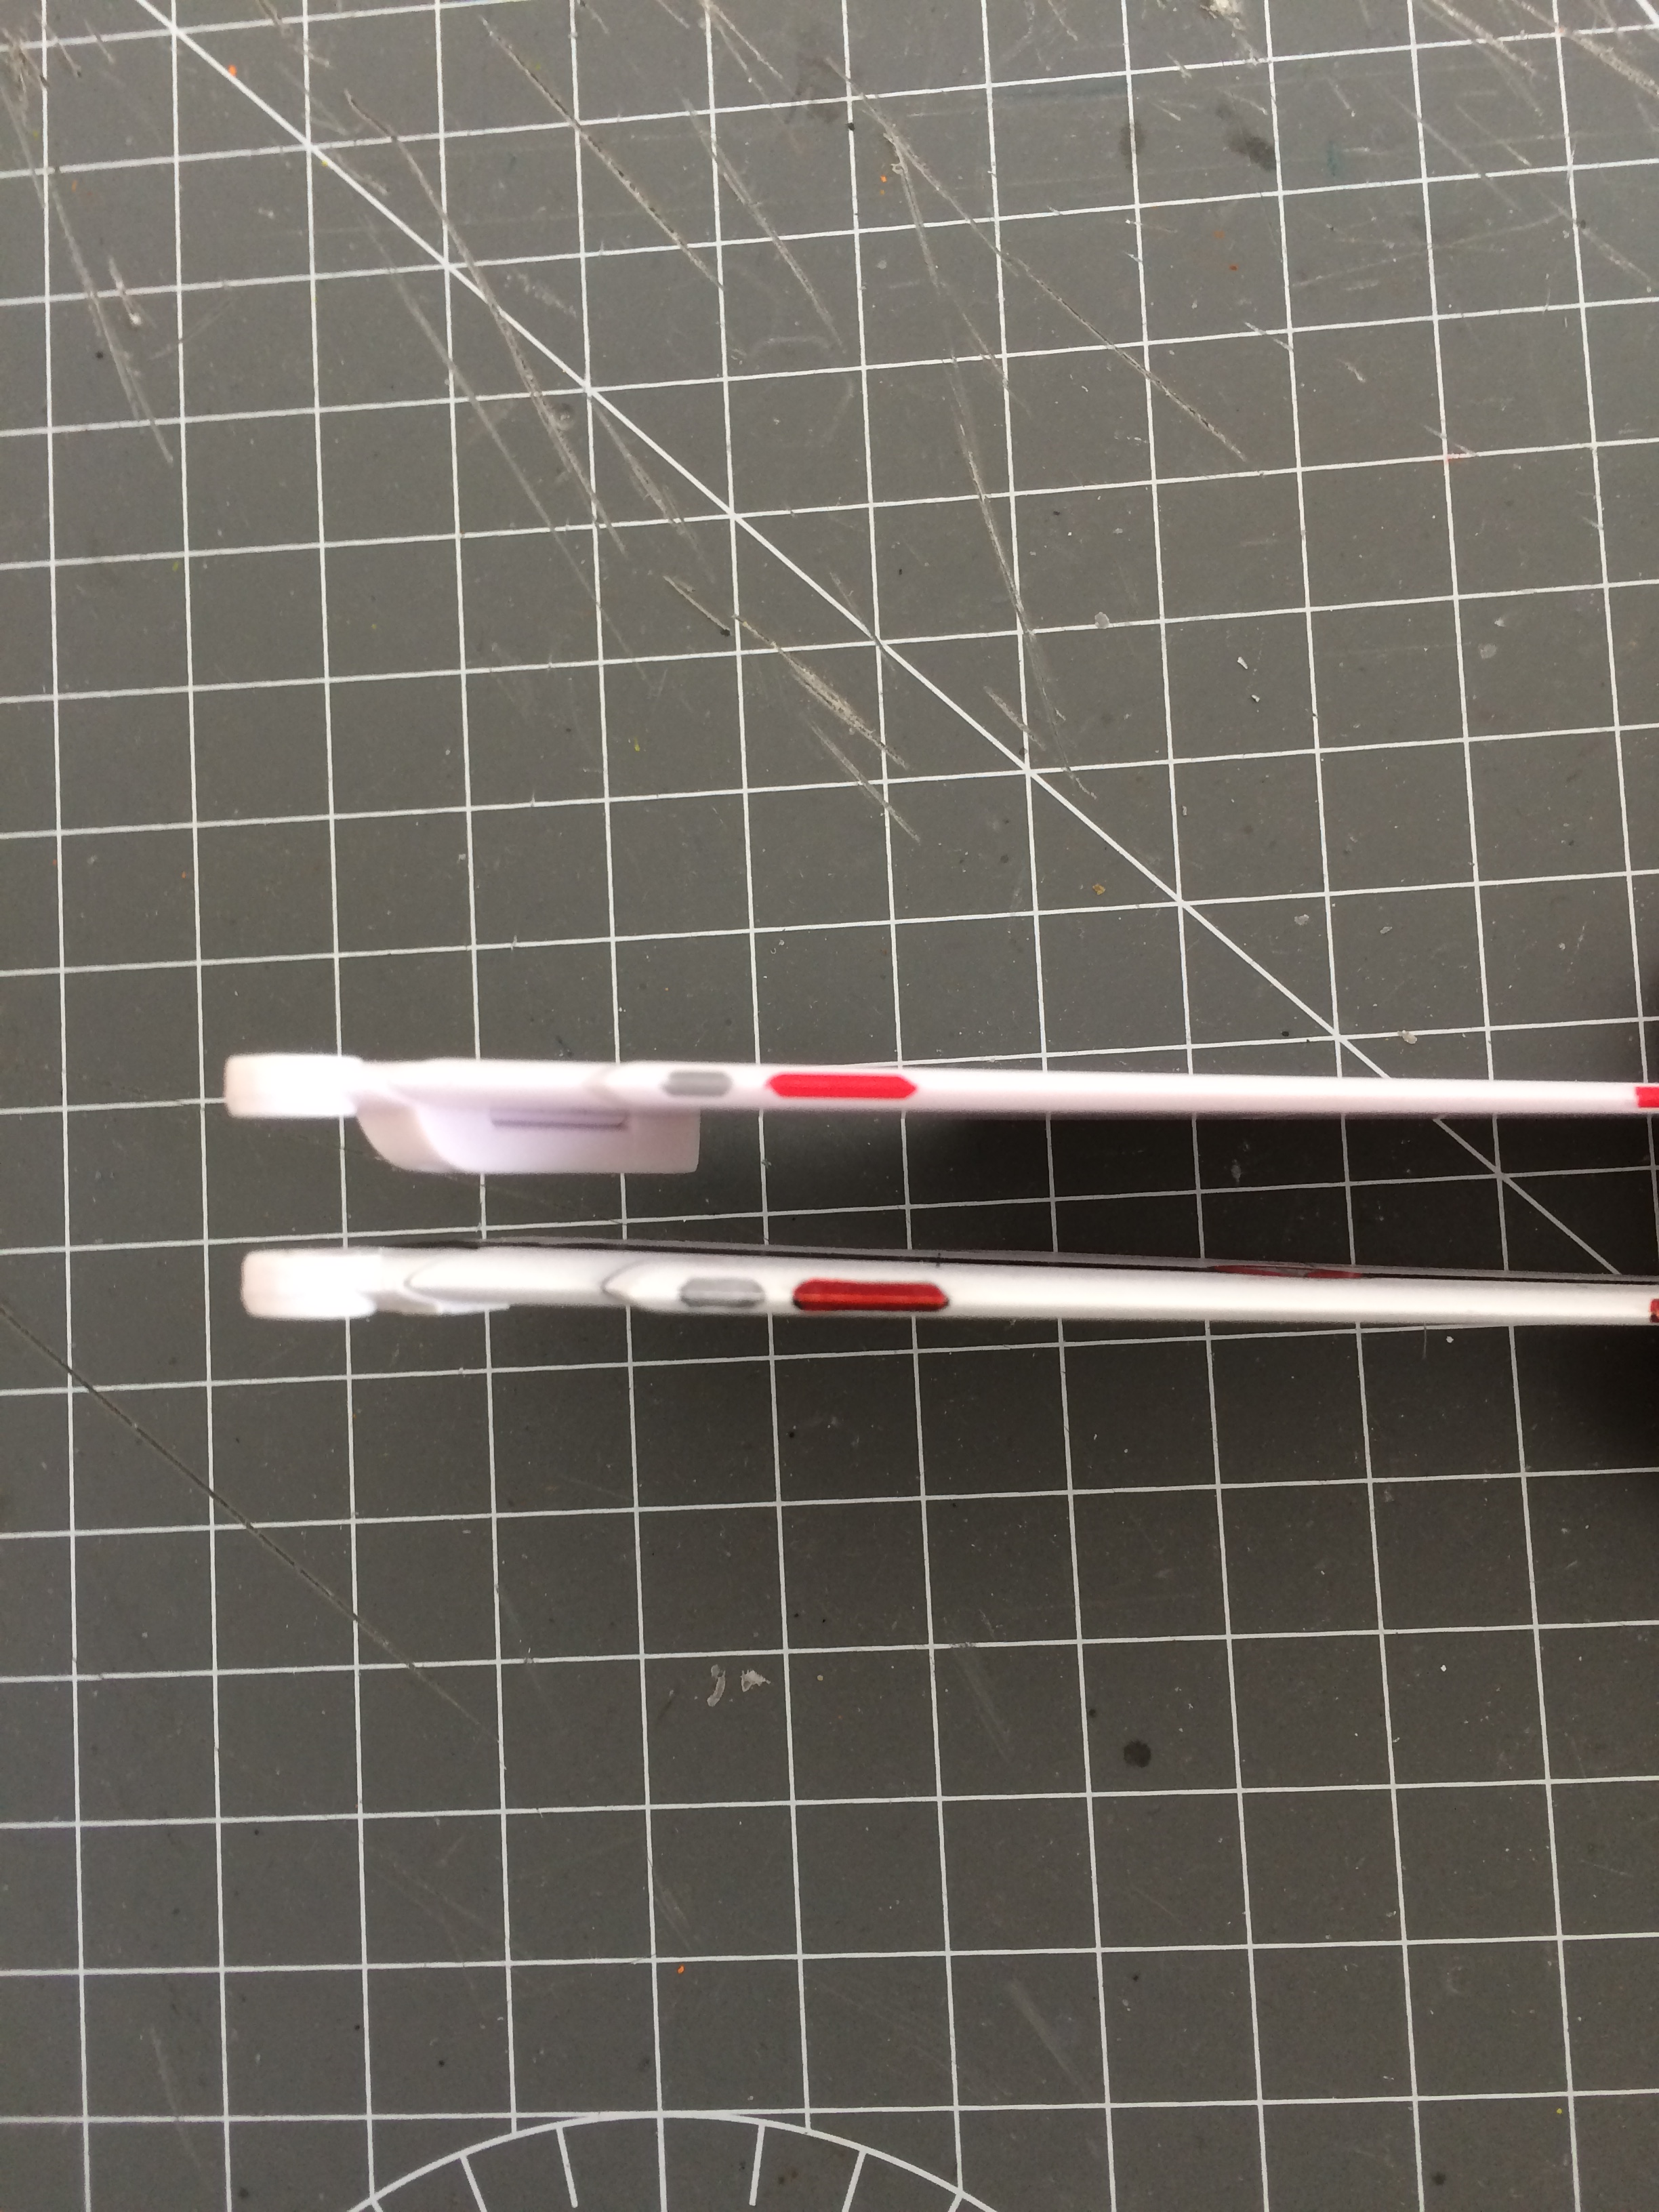
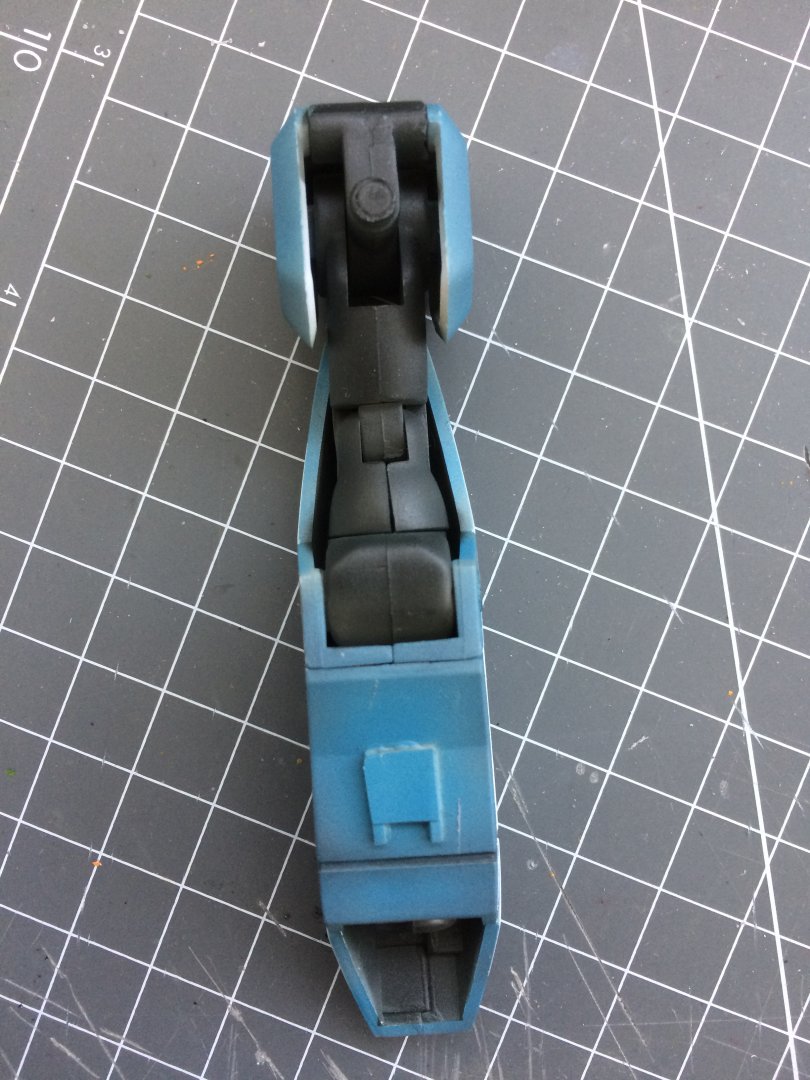
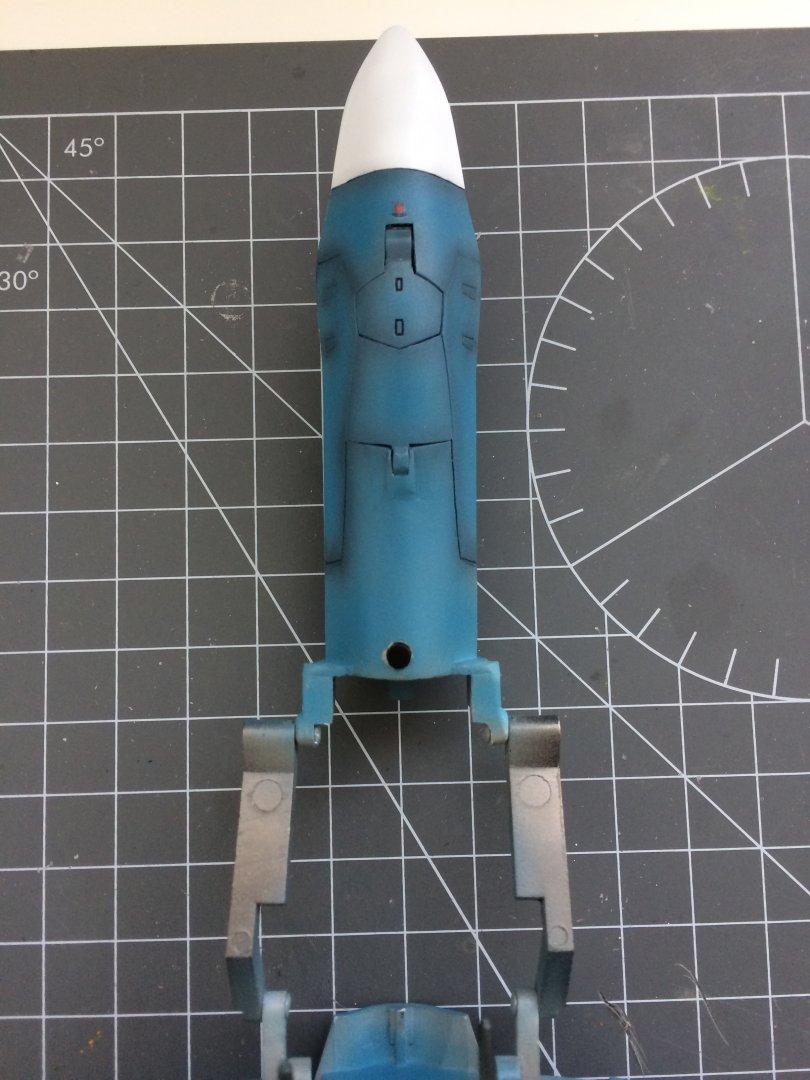
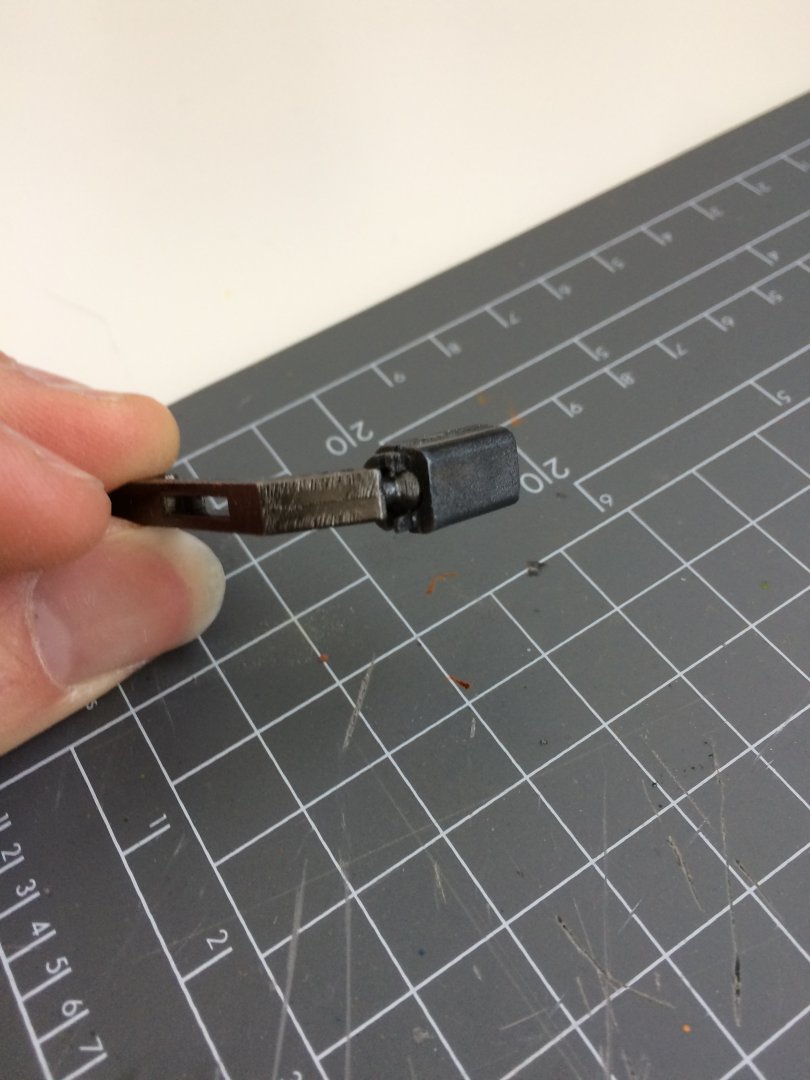
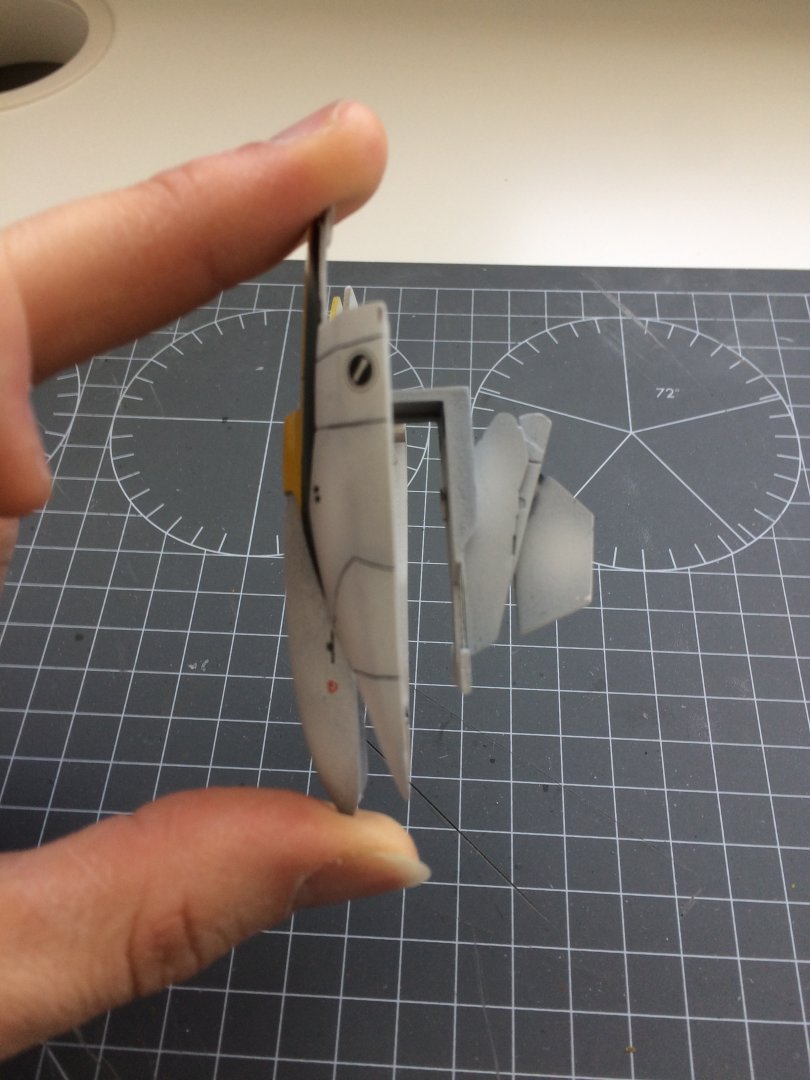
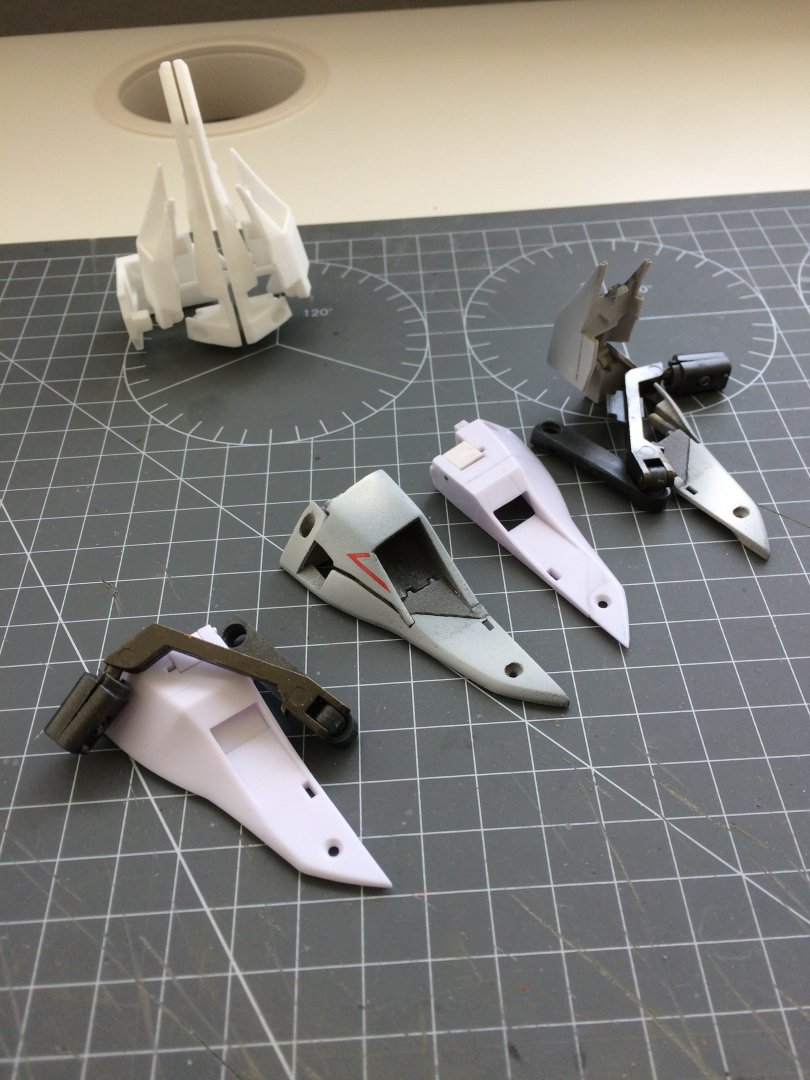
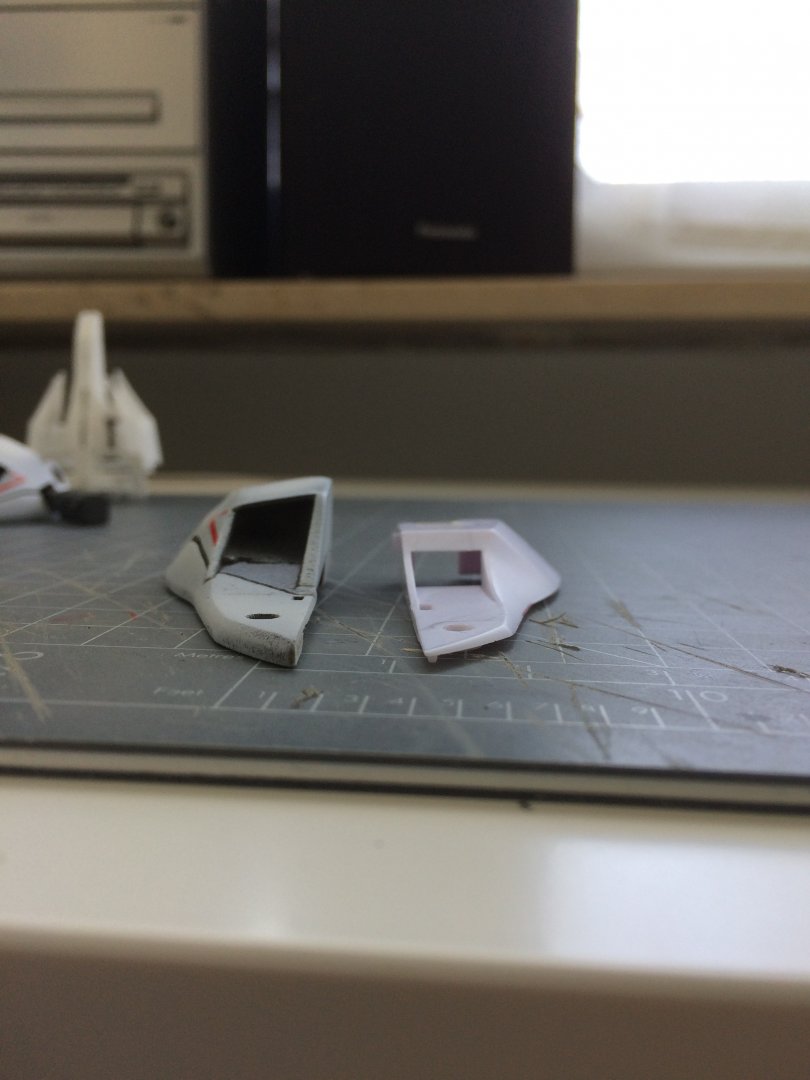
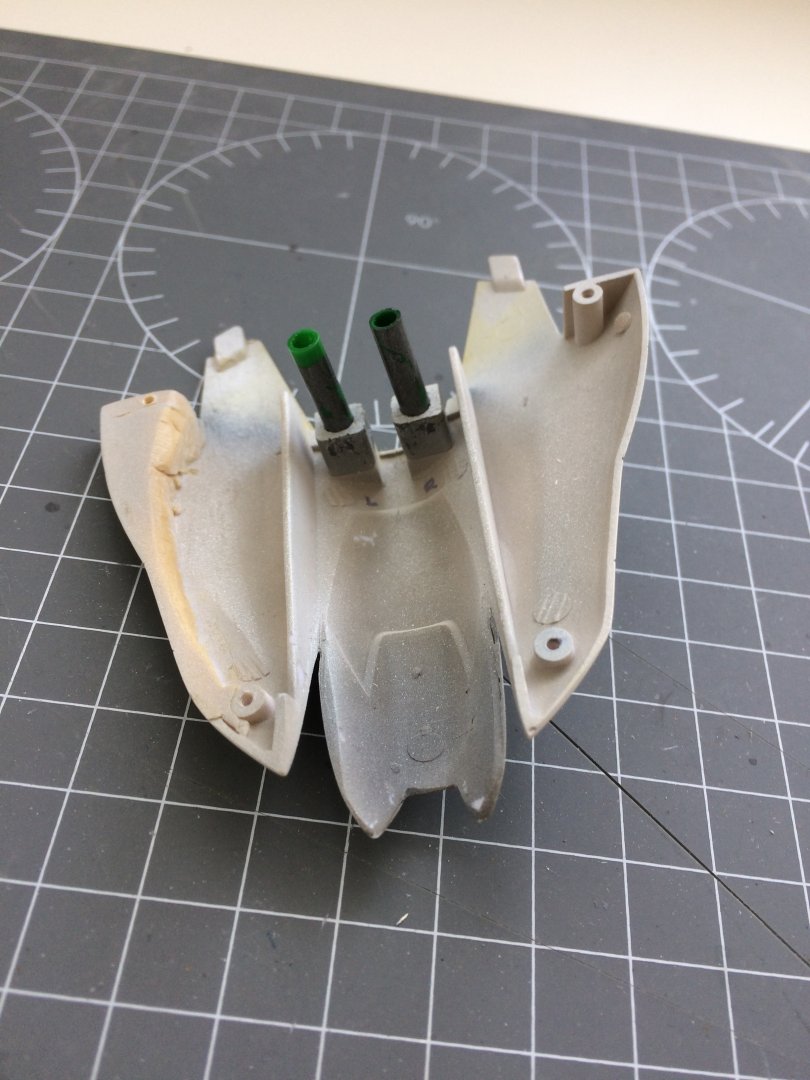
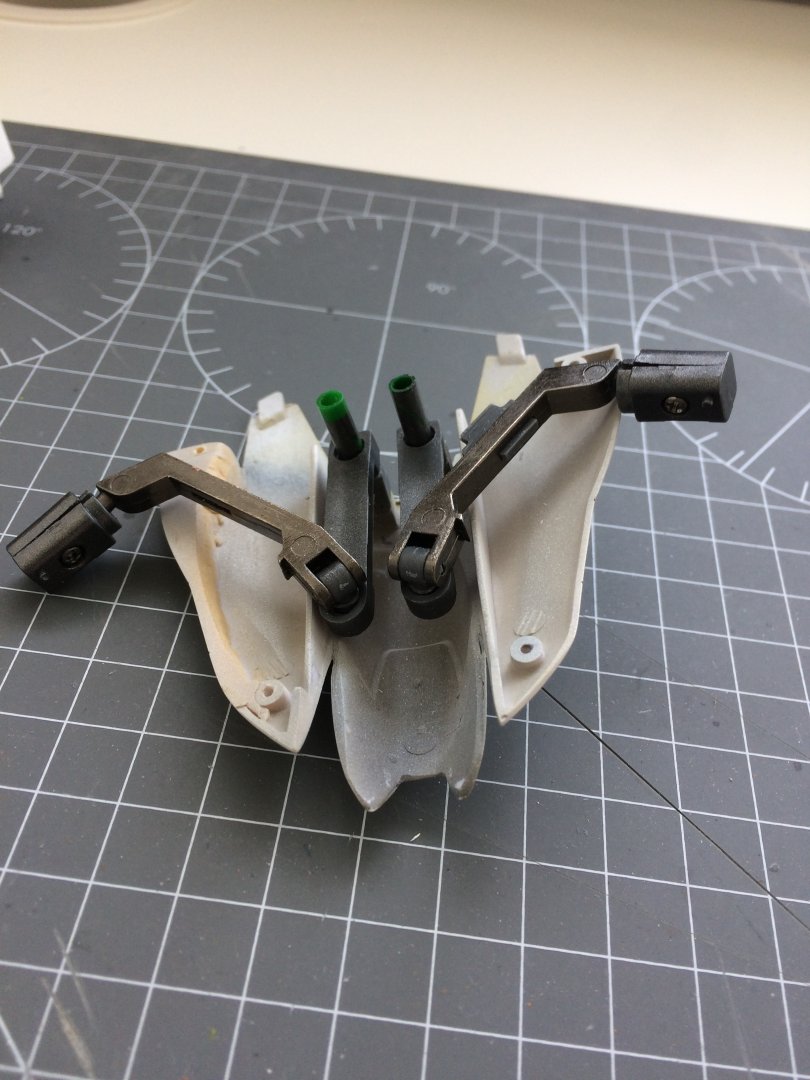
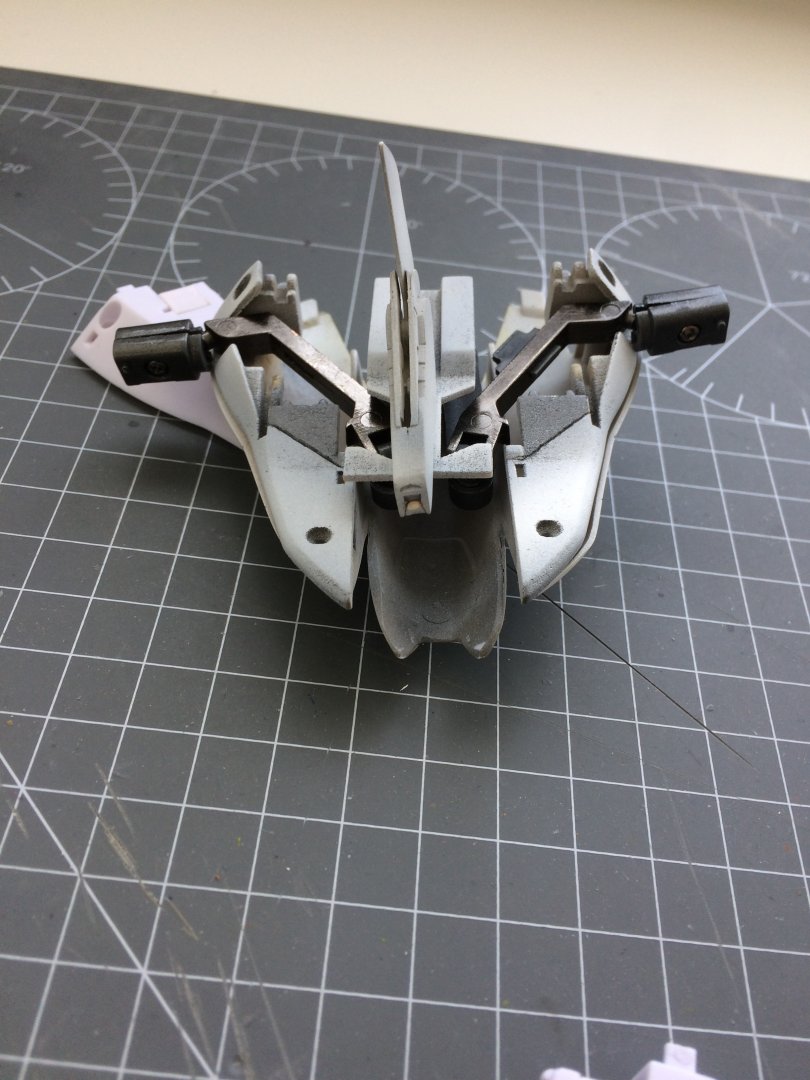
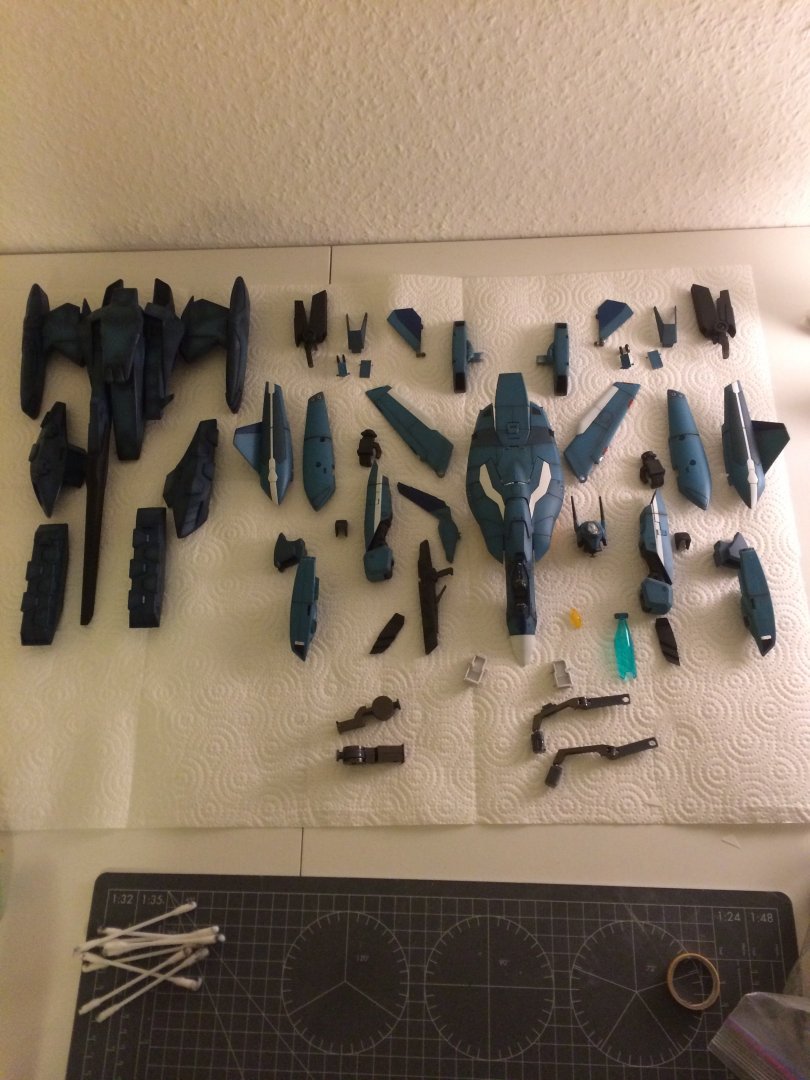
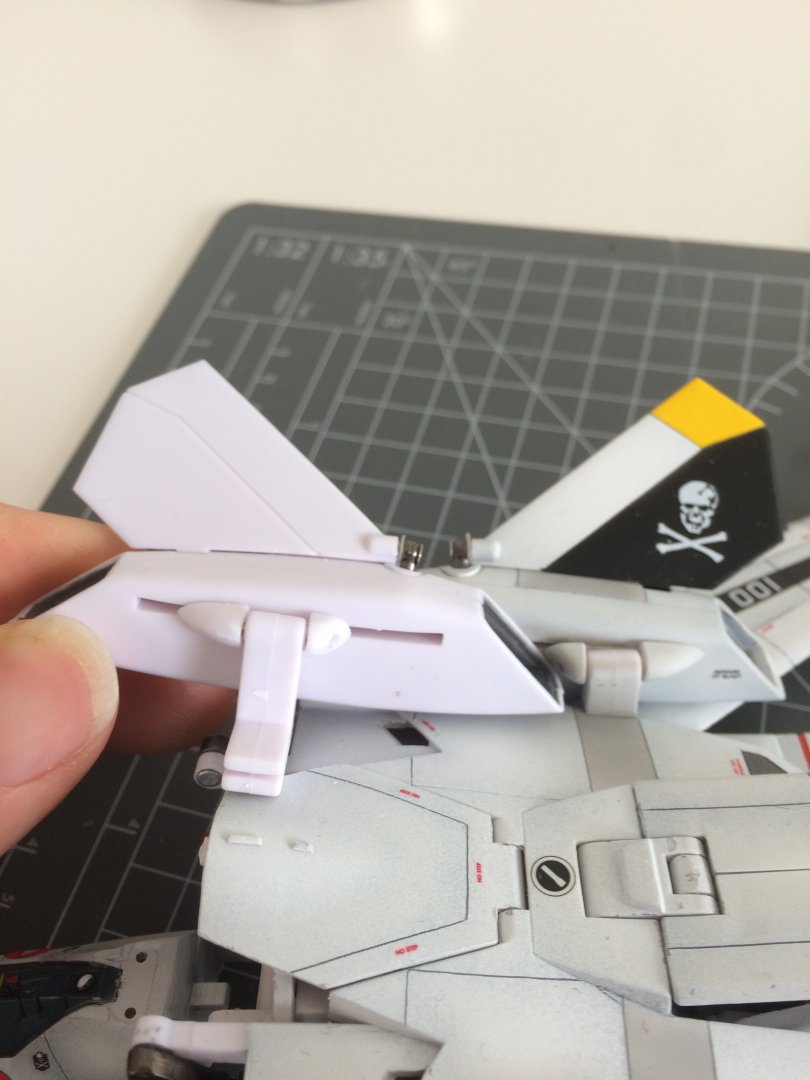
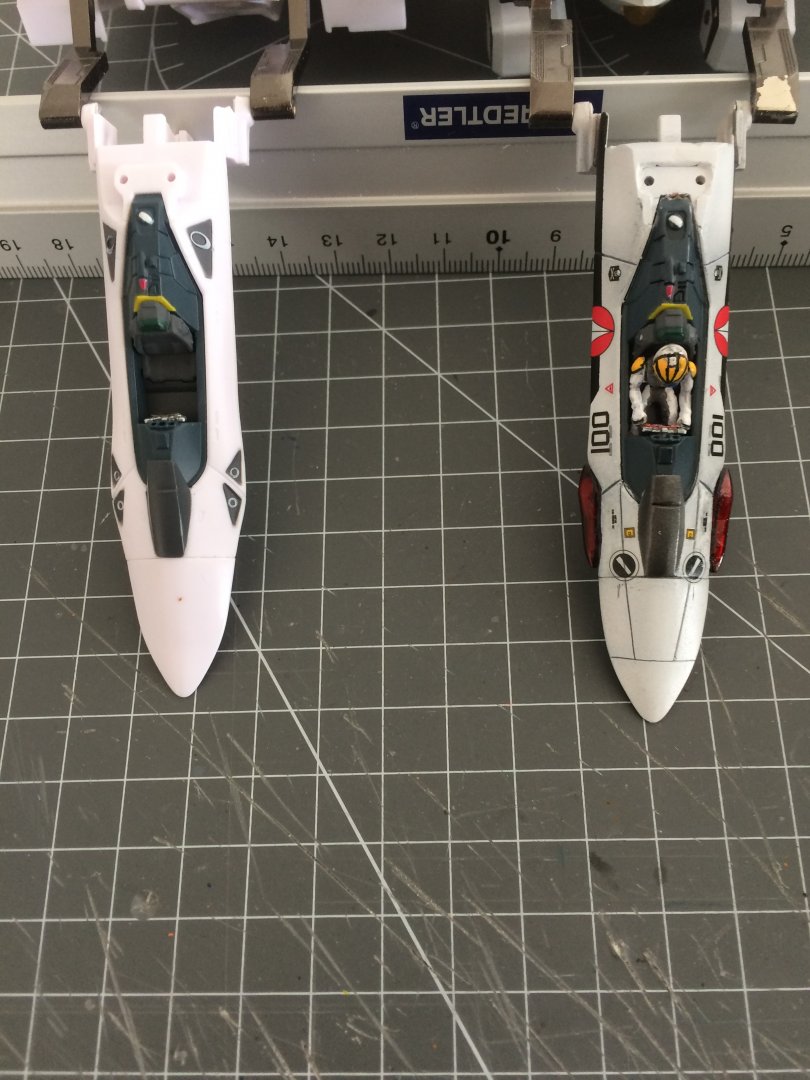
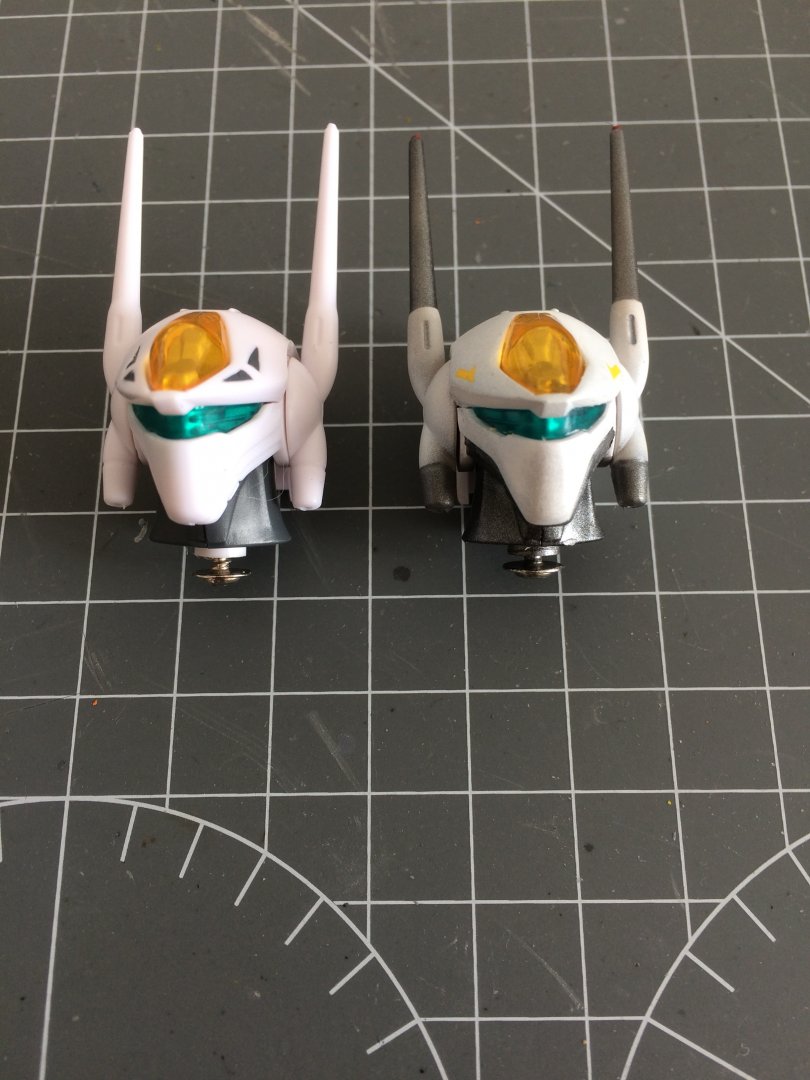
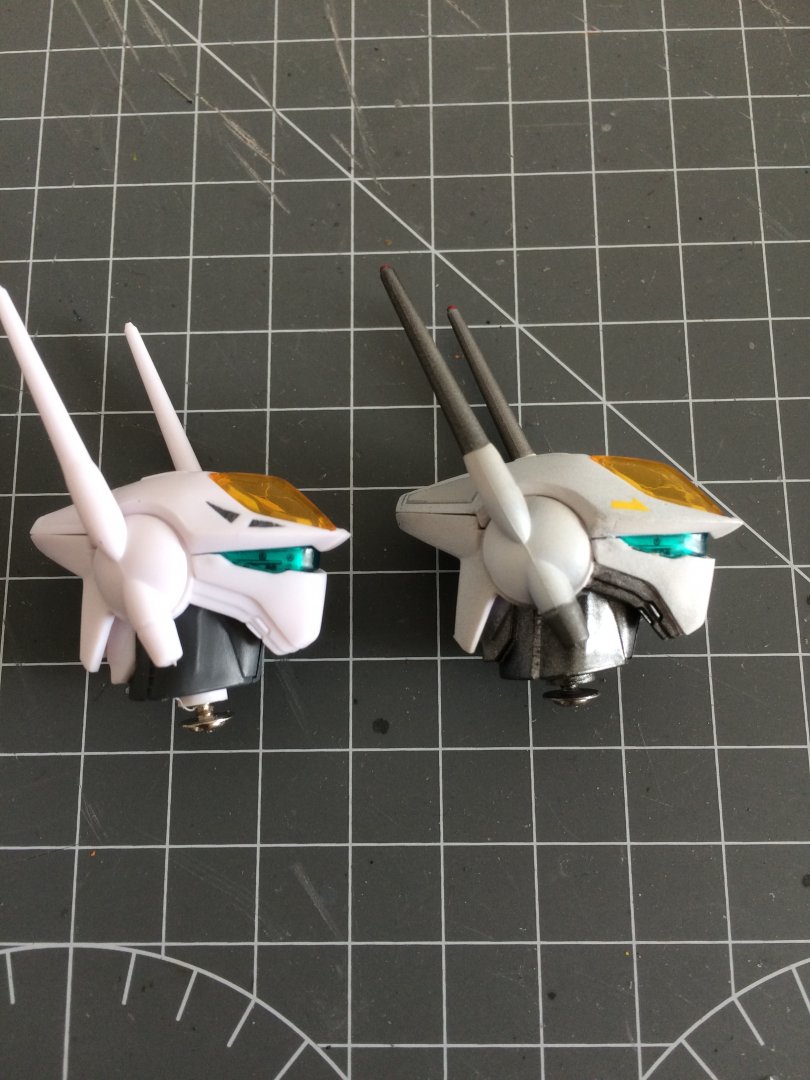
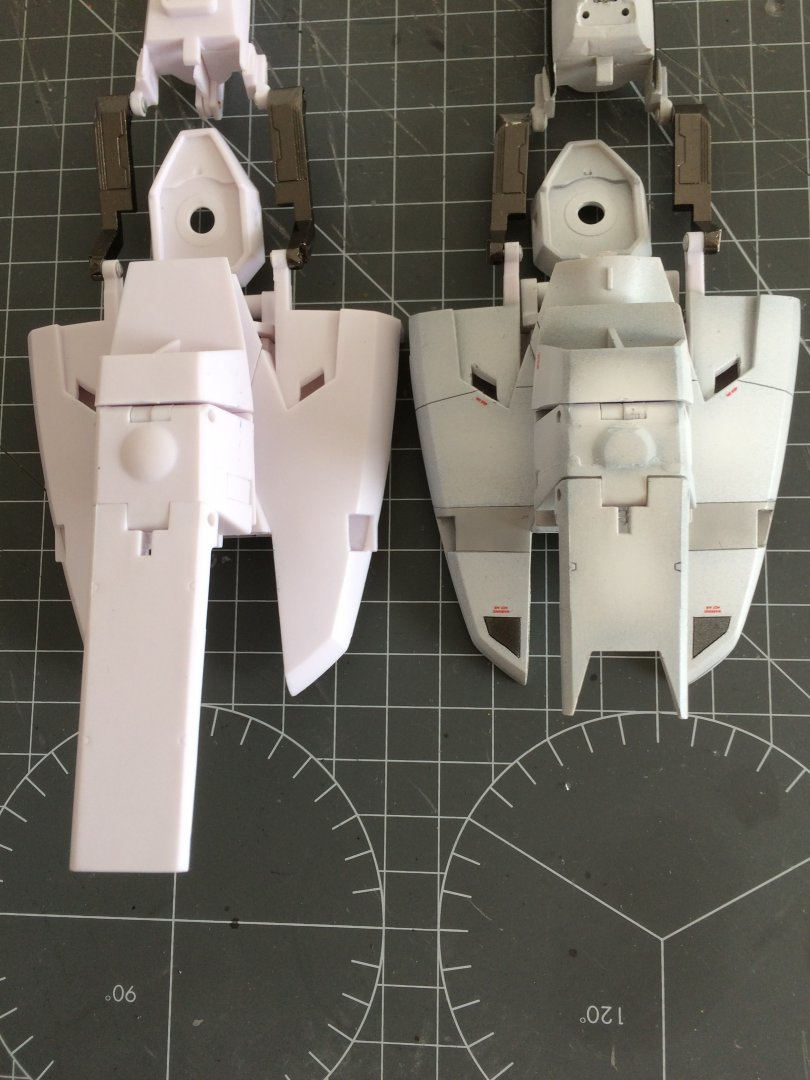
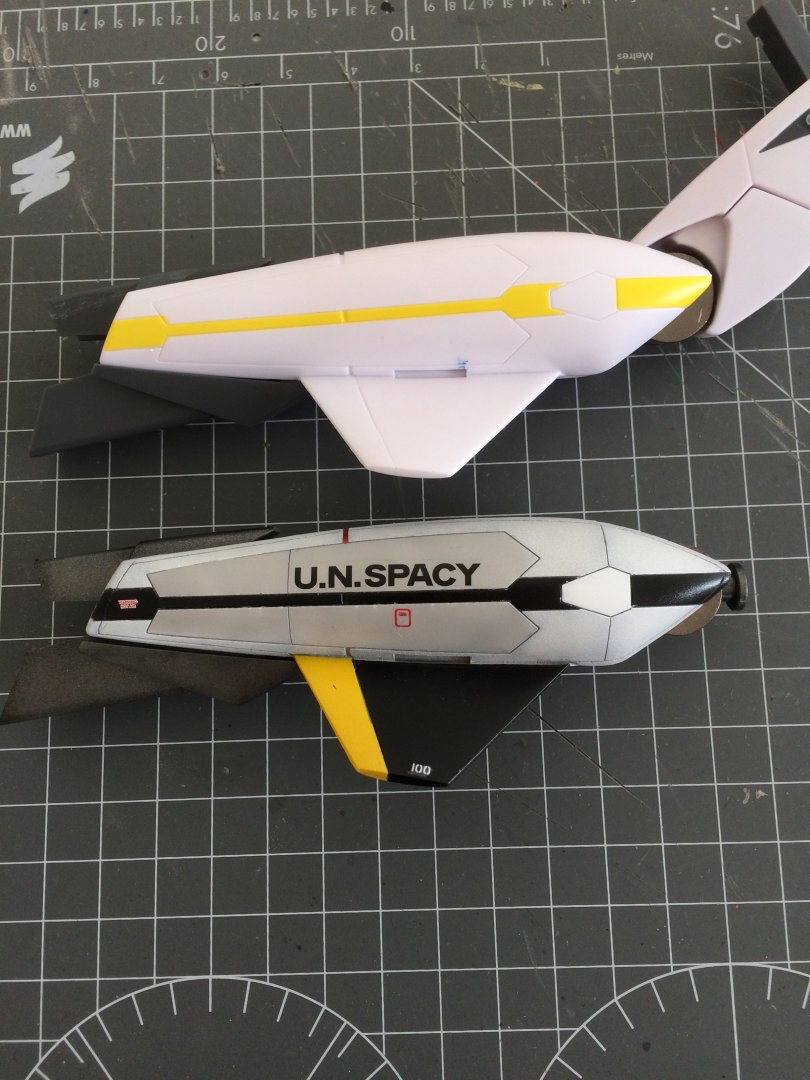
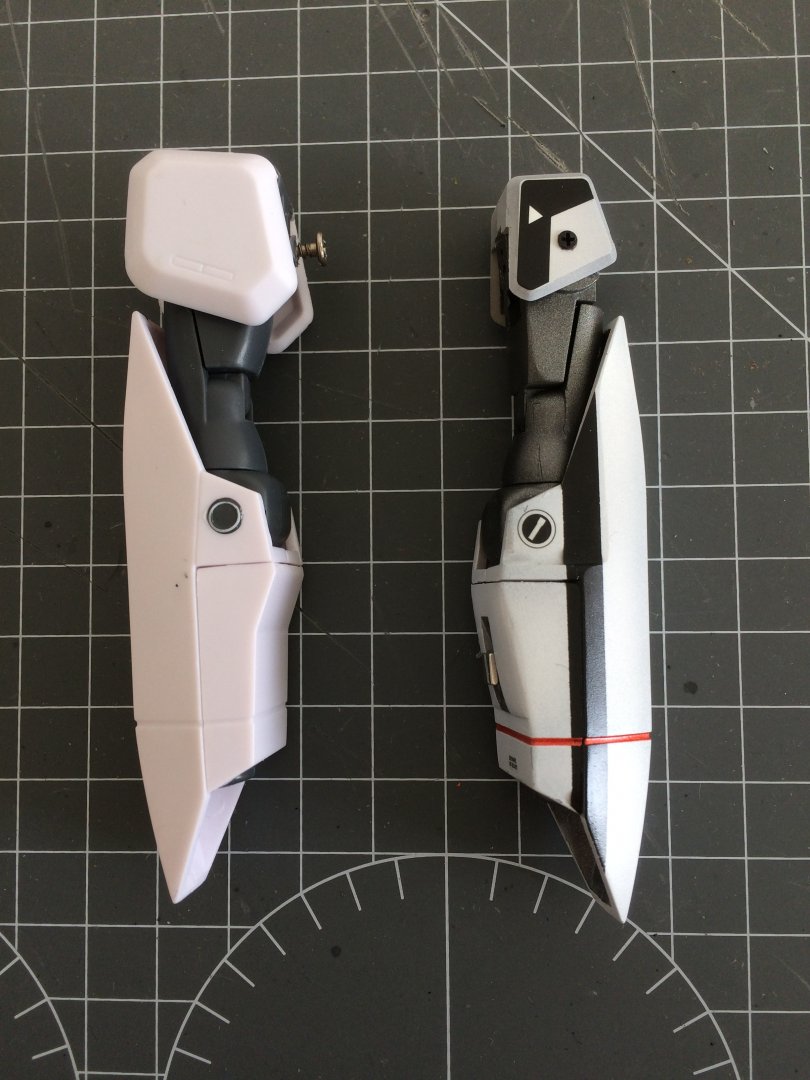
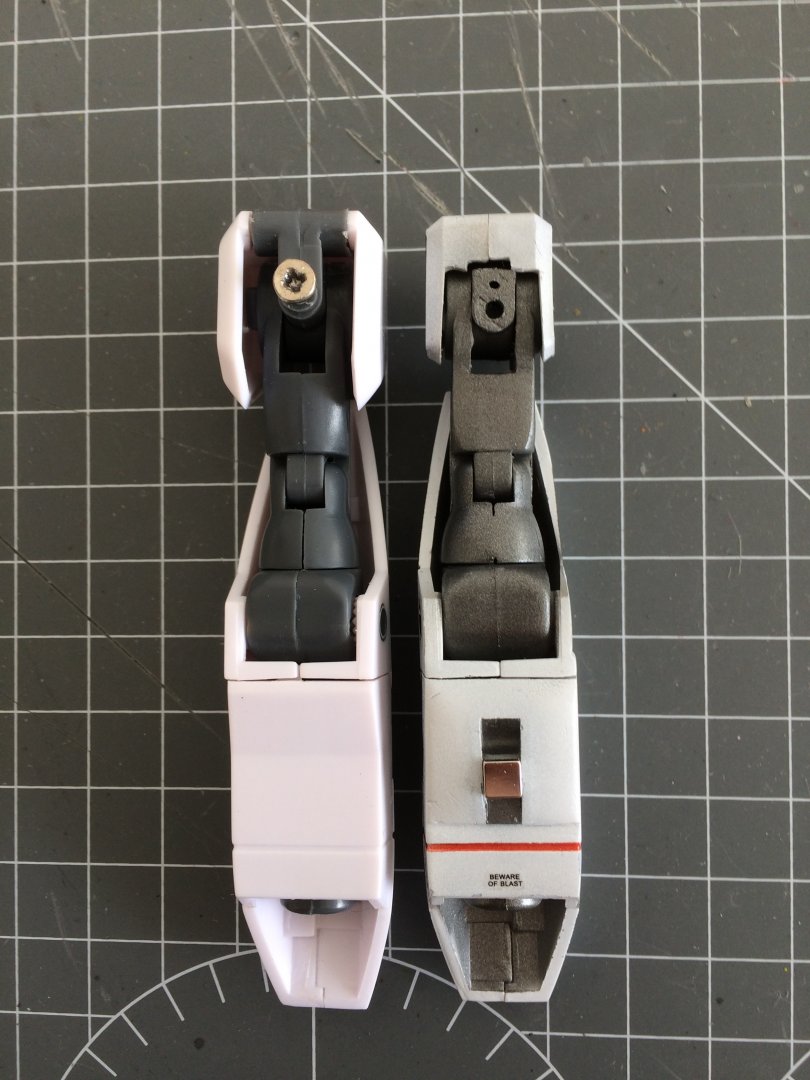
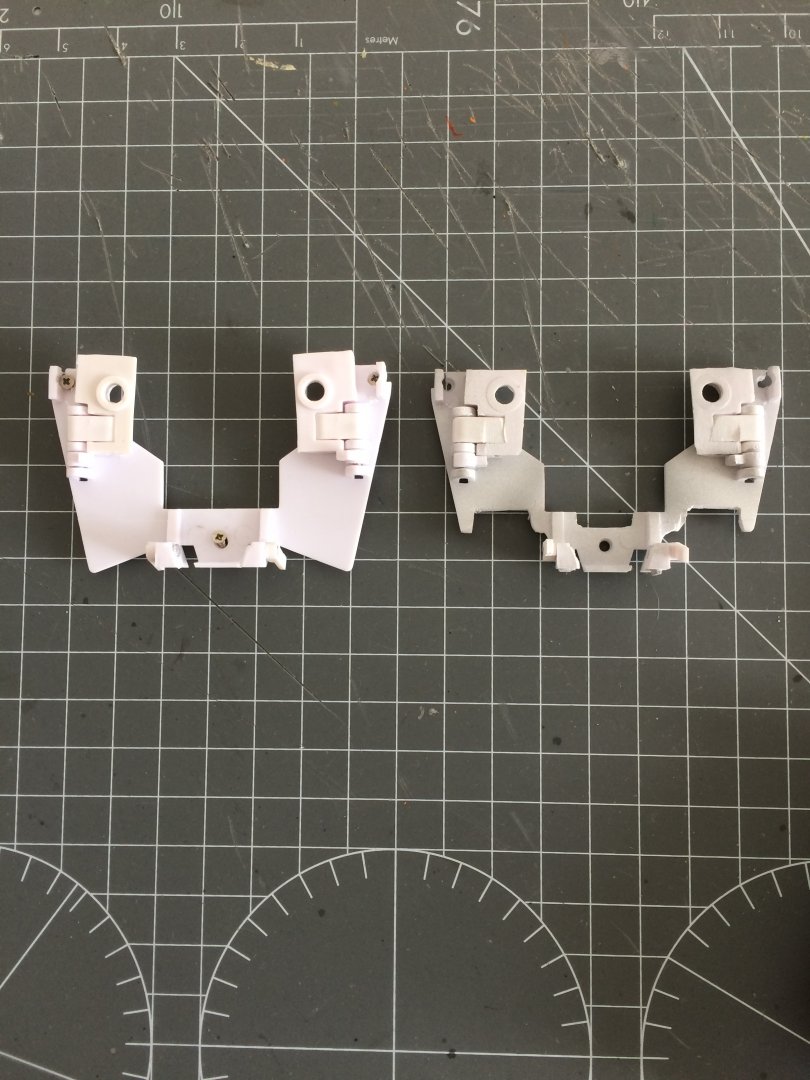
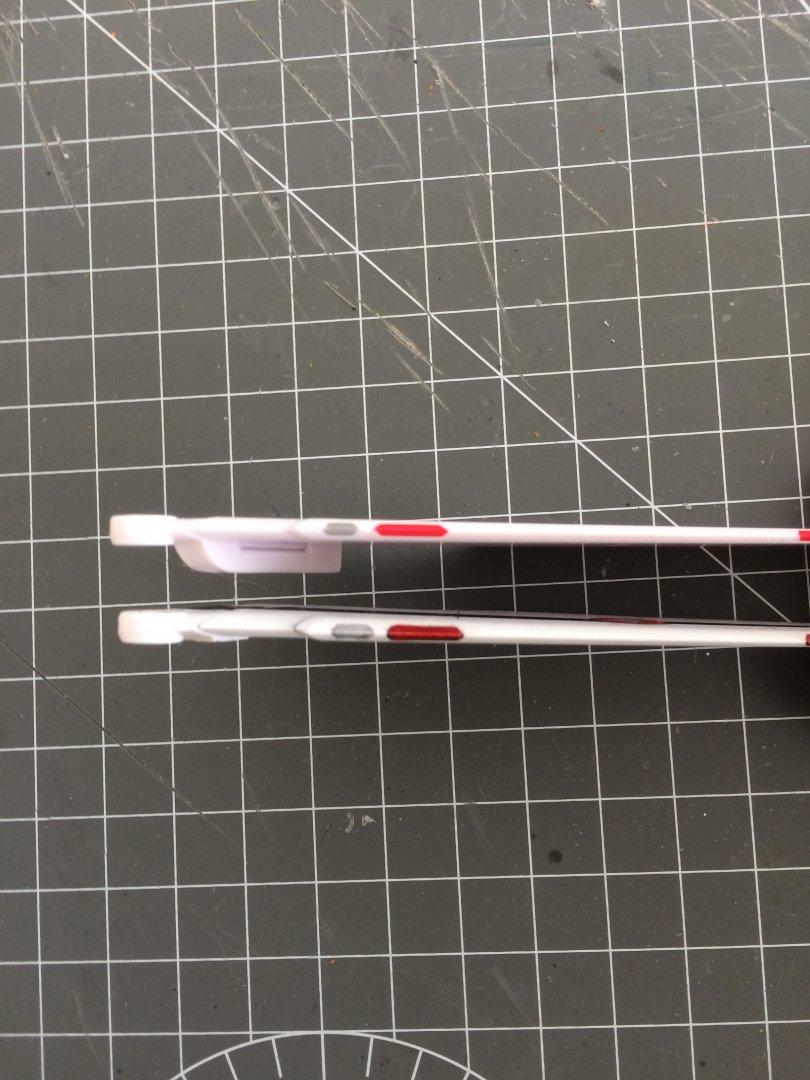
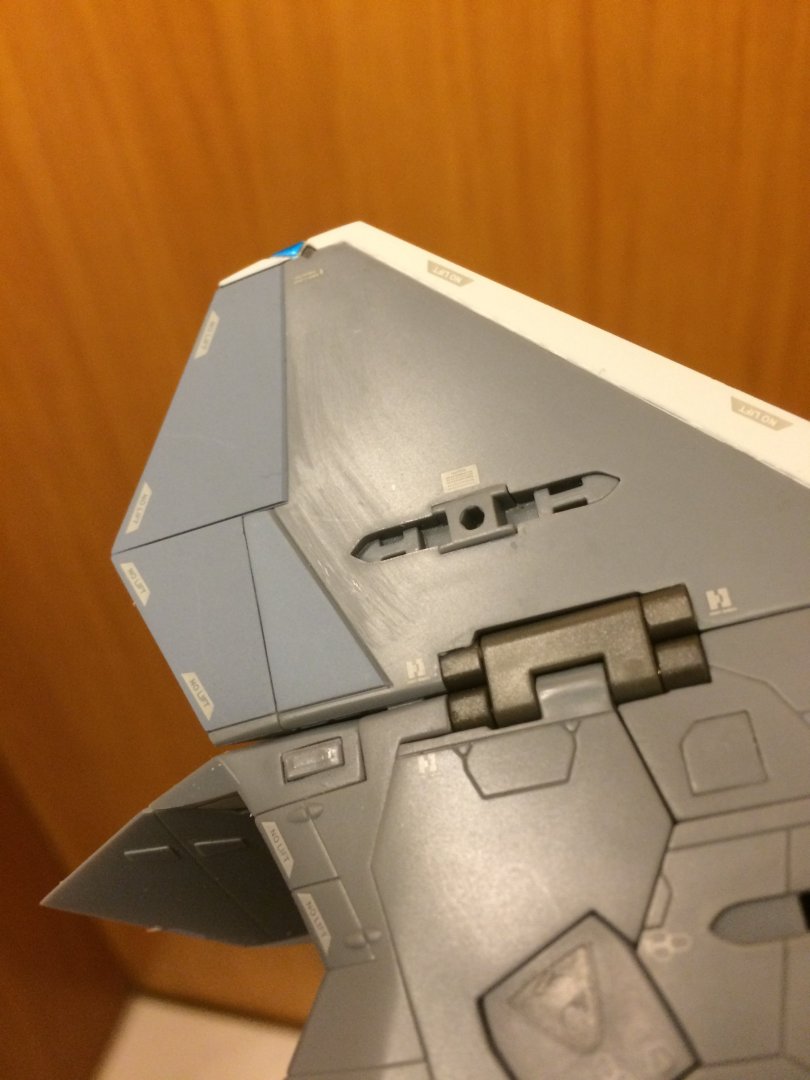
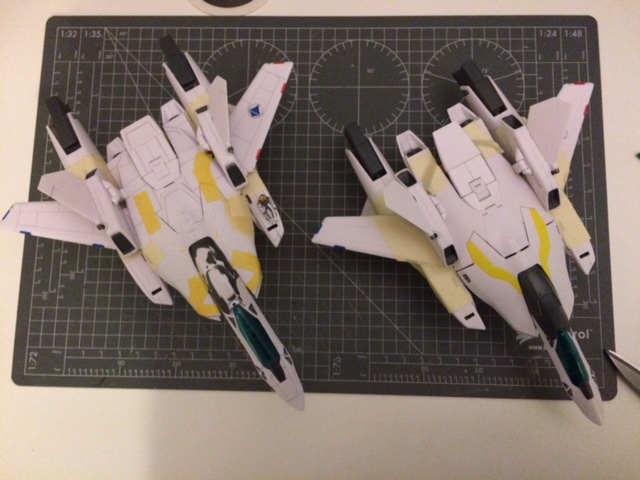
Hi Guys, thanks a lot! So I'm slowly wrapping up this project, hope to finish in the next couple of weeks, and I want to recap the mods done so if any other want to mod their ET VF-2ss there is a detailed reference. Included in the pics below also the original toy. I'm doing a Roy colour scheme with a DYRL vibe so not all the steps are needed. I apologize for the long and heavy post, hope it is ok for the moderators. 1 - Head Remove the small thrusters, fill with epoxy putty and recolor the face to give a slimmer profile. 2 - Backpack made shorter removing also the central part (full section with the pegs is gone, also the inside needs to be partially removed to allow the backpack to be able to close for battroid mode). Tail re-shaped to match the profile of the head. - Body All sanded 1.5 mm to make it look slimmer, same for various pegs. The internal cover now sits over and not inside as before. - Lower Leg Added panel lines. - Arms and Shoulders Completely new shoulder (based on Hasegawa battroid kit, the screw allows rotation) armor and the shoulder joint cutted down to minimum. Upper arm sanded more flat and filled with epoyz putty. Lower arm sanded in the front part (the one that is on the inside side in fighter mode) near the elbow to accomodate the backpack as they will sit higher close to the body. added magnets to lock to the body and around epoxy putty to make a more natural profile. Added macross screw for DYRL vibe. - Body part 2 massively redesigned connection piece body-arms to allow new position. Shoulder attaching point sanded and cutted to do not crush against the chest piece and body intakes. - Chest piece Added panel lines, removed thrusters and filled with epoxy putty, shield made a 1 piece with epoxy putty, added macross screws. - Wings Sanded to be flat and panel lines added. - Dorsal Boosters Intake and exaust cutted to make them shorter. Connection piece cutted and reglued to be able to enter in the hole in the body (after the mod it is less wide) and have the boosters closed to the body. Added detail. - Leg Intake Again, removed the thrusters and filled with epoxy putty, as well as other holes. Added details ad per lineart. That's all for now, tomorrow I should be able to post the nosecone. Cheers!


-
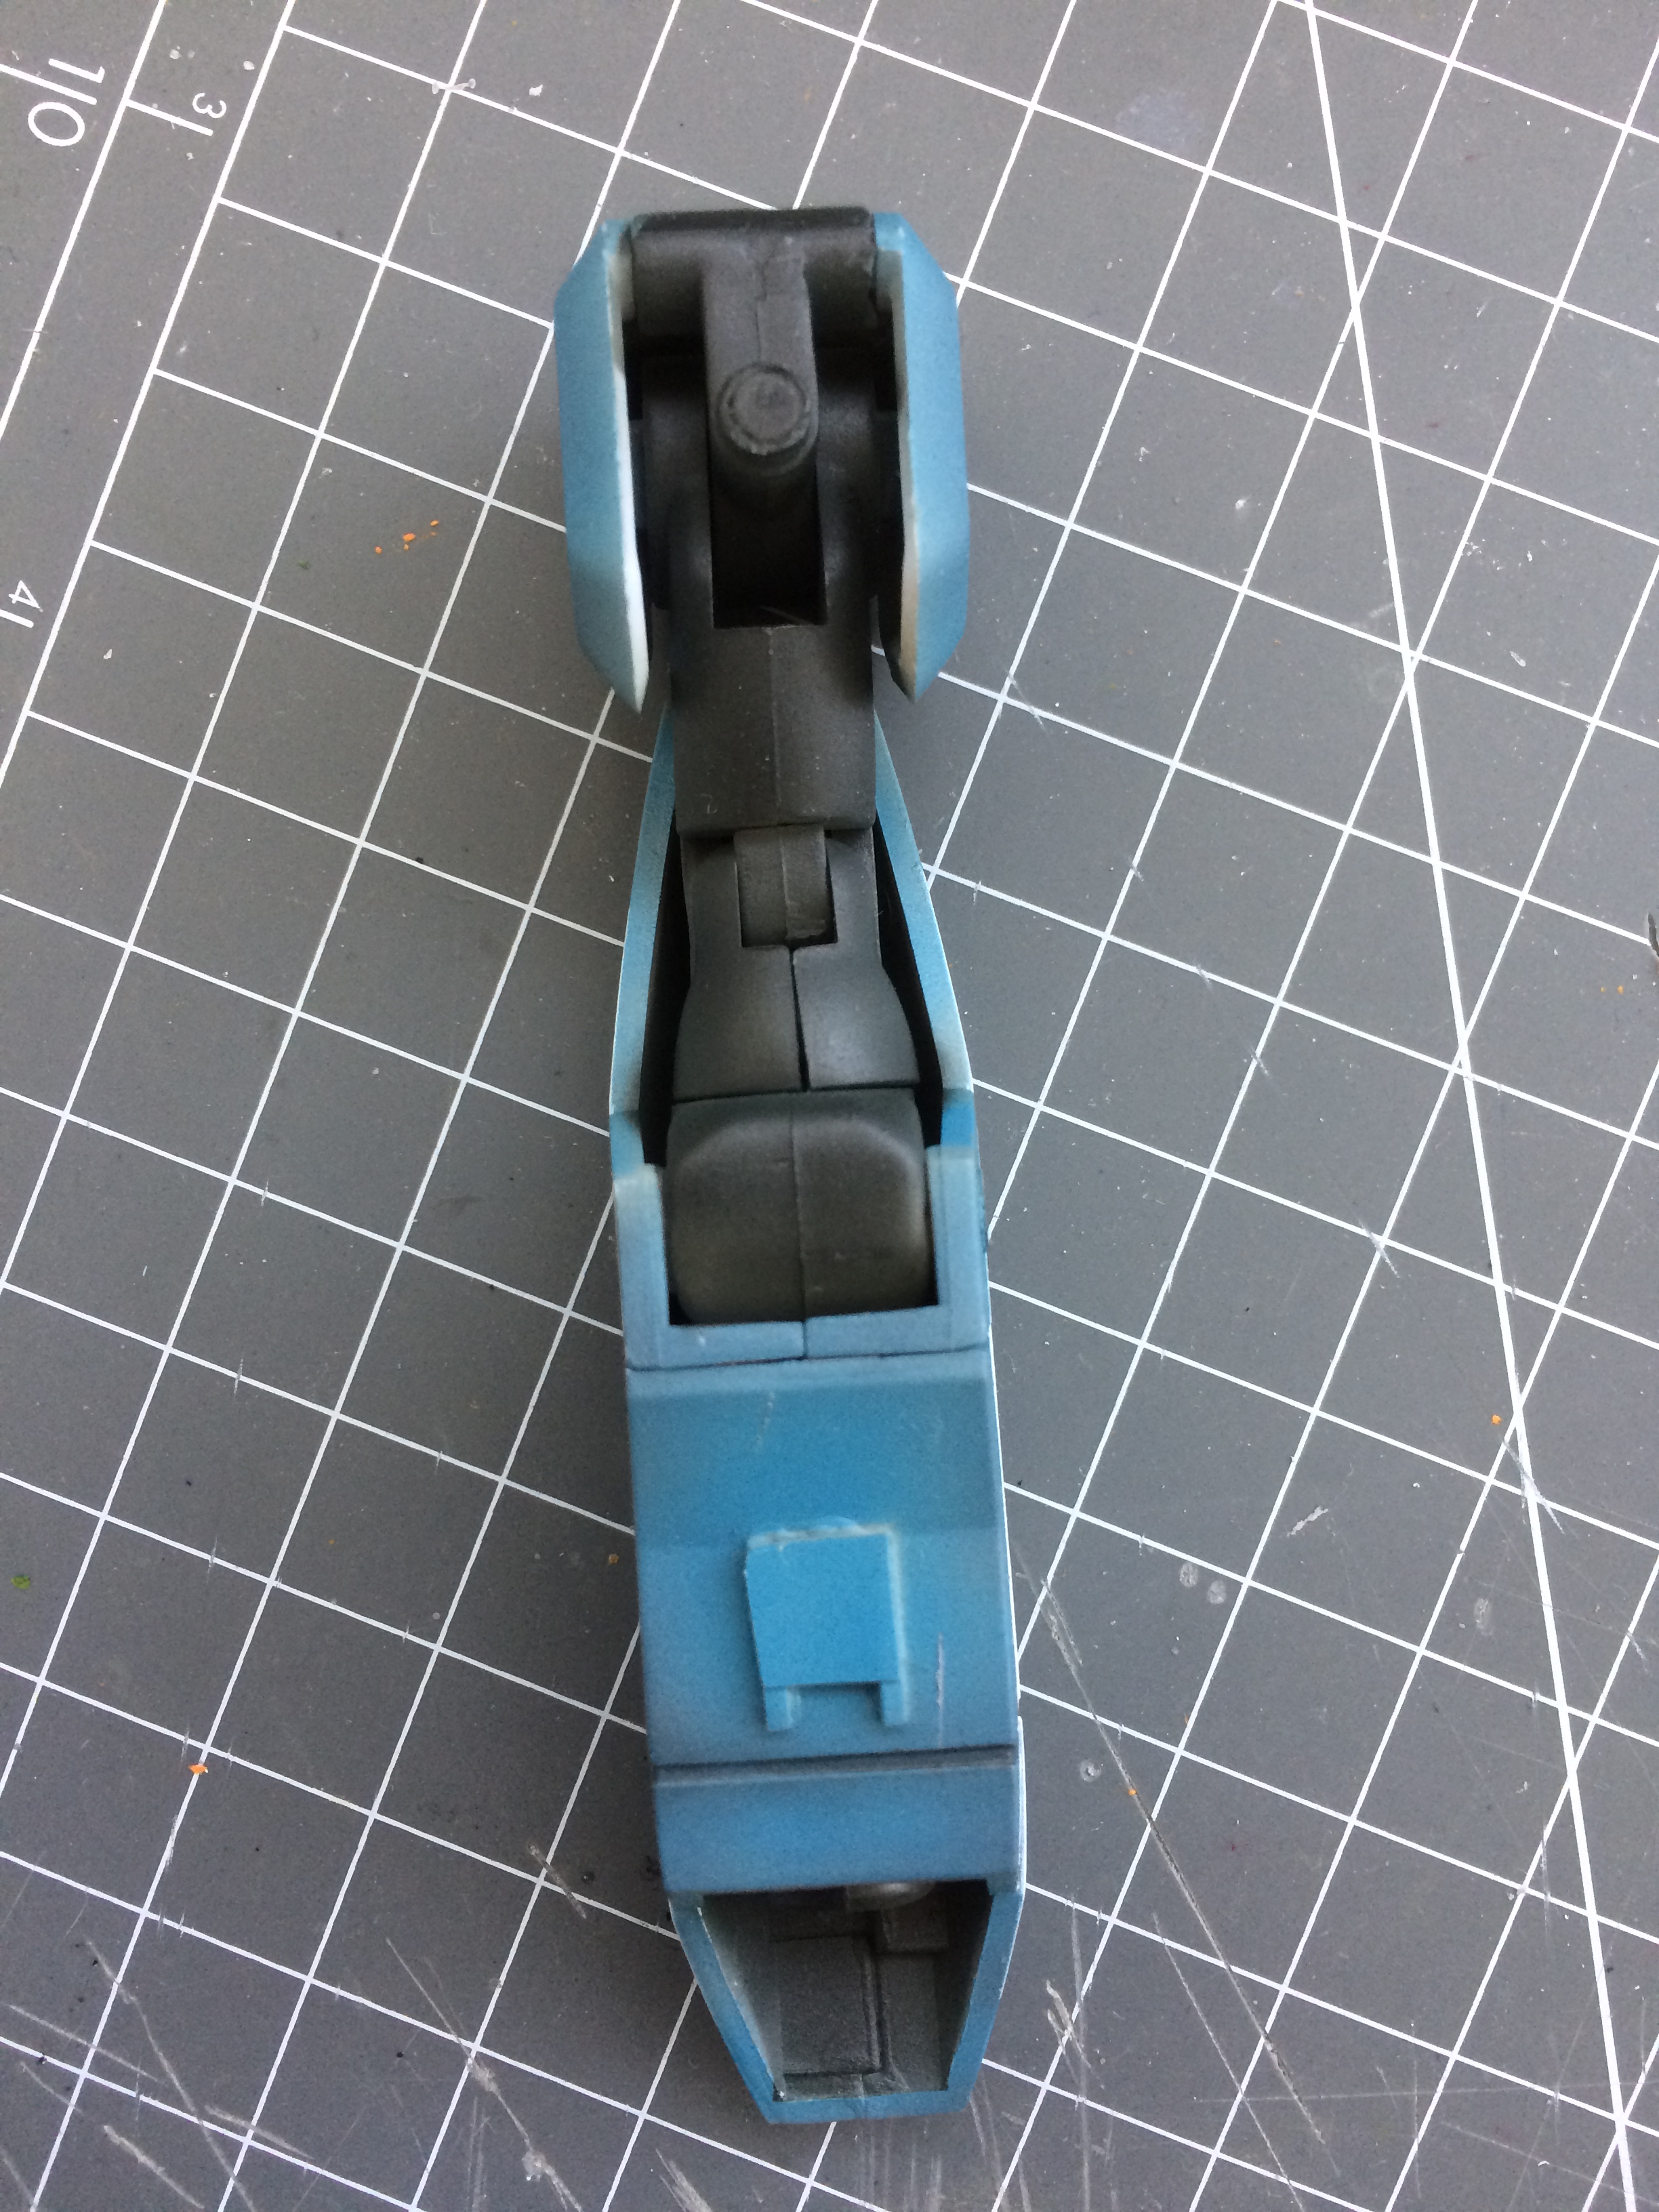
Thanks a lot guys! Some SAP love...
-
Small update while still working on the repositioning of the legs...
-
I received my 31A from NY today. Interesting to notice a QA issue due probably to poor coloring (maybe they were really producing in a rush?) and then relative attempt to fix. guess not wise to ask for replacement :/ not big deal, I had really hard time to get it on camera as it is barely noticeable. a part from this...seriously...this bird is ridiculously cool. Bandai HAS to release more! Come on Bandai, put a 02 mark on it and give it to us all! We’d probably be ok even with the frozen canopy...
-
So I checked my order history on NY and I placed the order 06 Oct at 20:24 EU time, payment completed 23:53, I’m apparently rank 02. Hope this helps to understand the order they are following...if any? Hopefully we will all have our copies eventually.
-
So I got shipping notification from NY today for my 31a. Maybe they got an additional delivery?
-
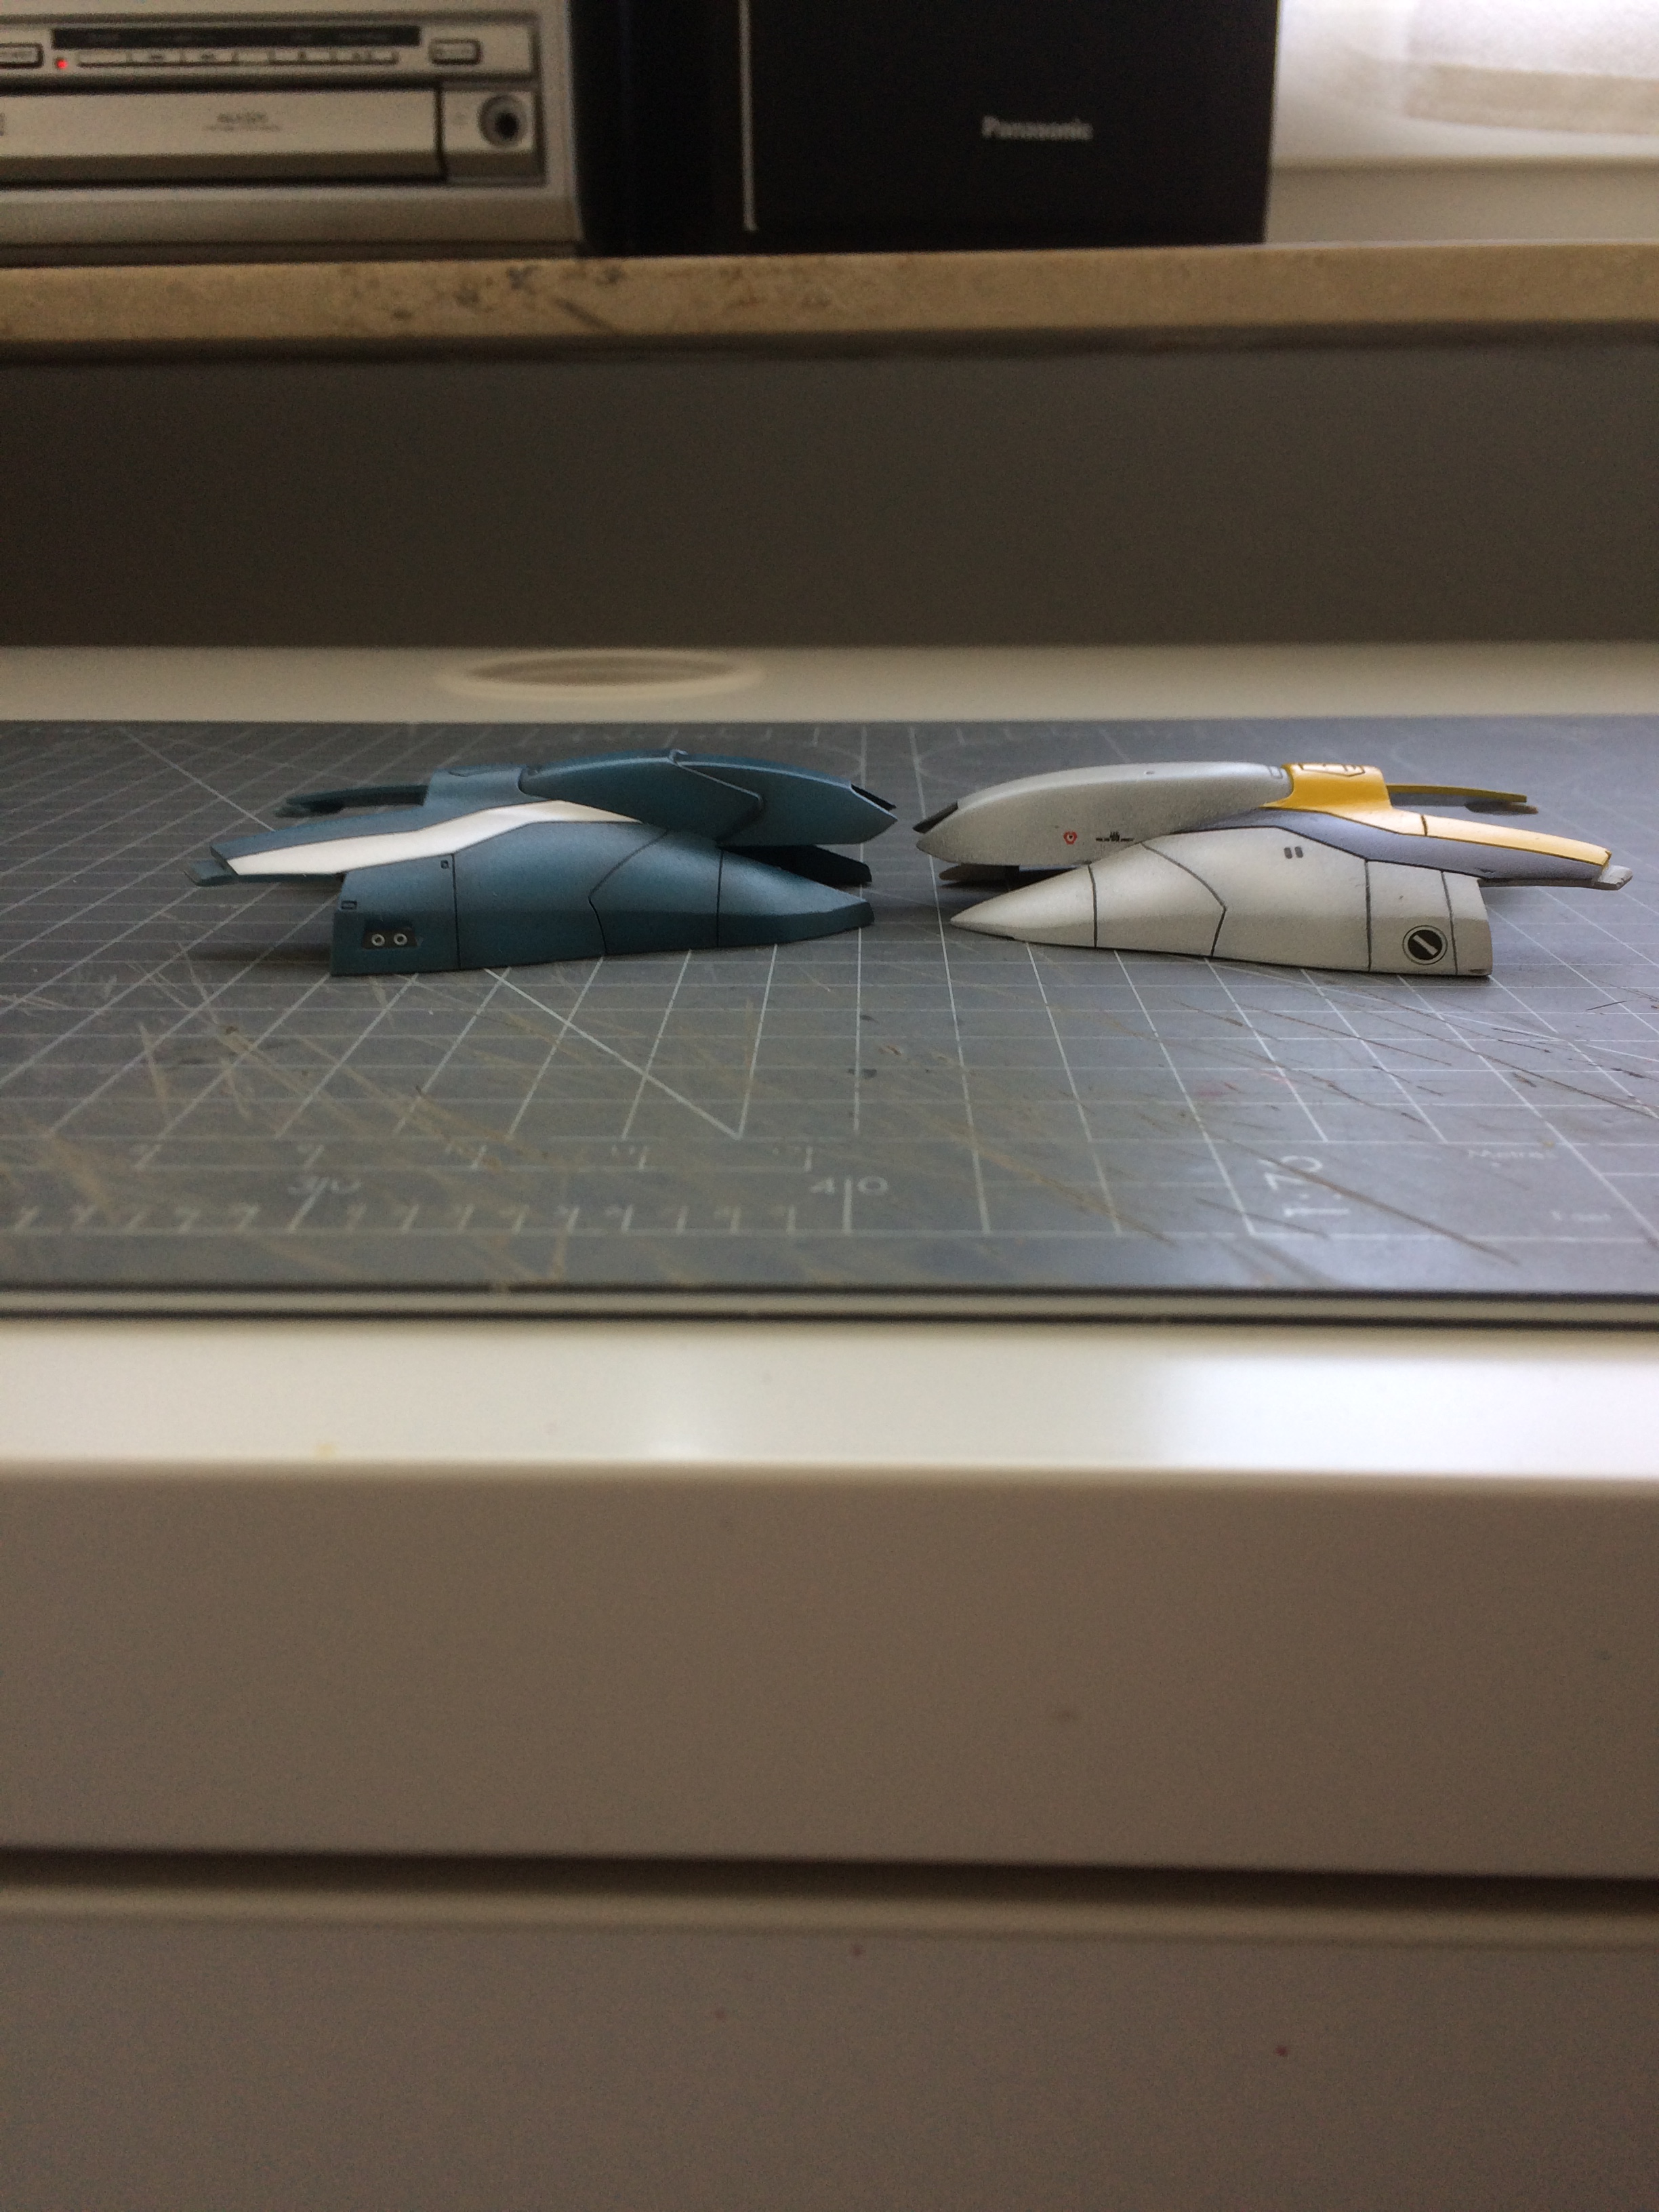
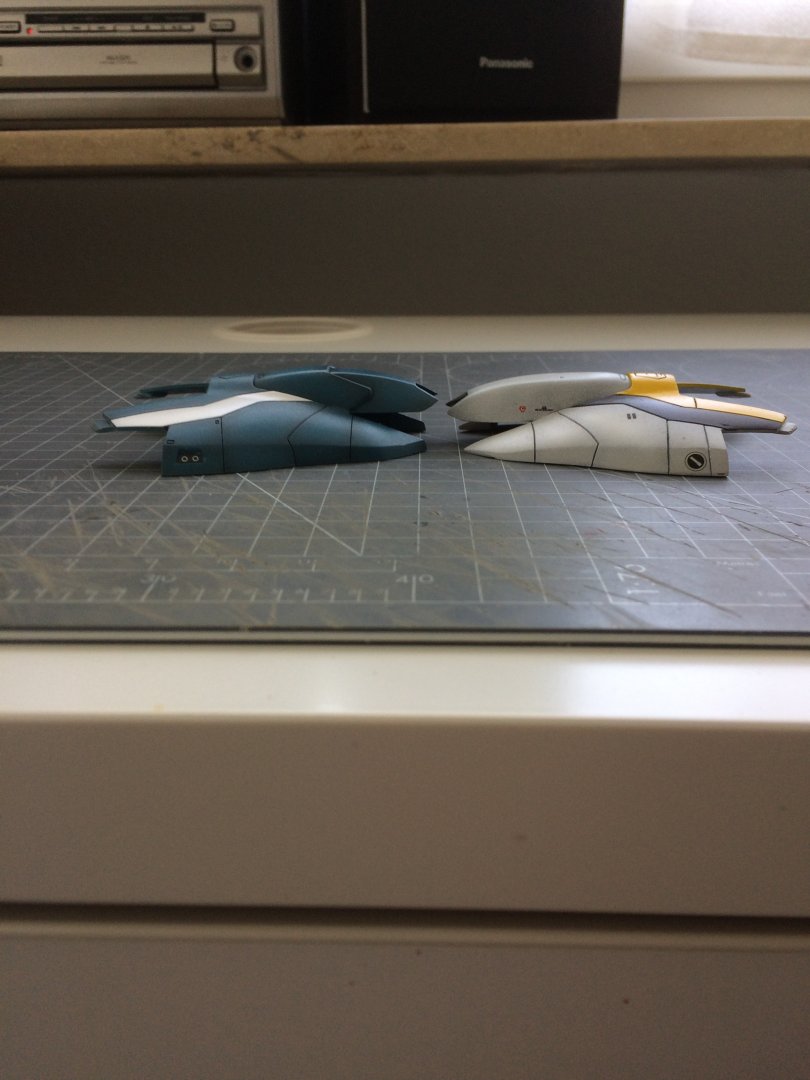
Well probably they are no variable wings in fighter mode then, so they could be used to add an additional connection point for the legs to secure them in place. So I finally have been able to finalize the "rescue plan" of the wrapped chest piece. Working with BlueStuff has been very easy, I liked it, and worked very well with epoxy putty, just needed some time of sanding and the job was done. I also took the time to paint the pilot in a Roy fashion I also worked on the arms, adding some magnets that will connect with the body to lock them in place more securely. Mod not done finalized yet (needs some sanding and putty), I think about them as additional air intake/exhaust... Finally I had also time to work on the other VF-2ss to see if the concept works. Topline: 1 - Remove completely the plastic piece that makes the arms move from fighter to GW/BT mode, and instead use magnets to make them attach directly on the underside of the main body 2 - disconnect the legs from the metal swing bars, replace the leg connection with a ball joint housing (so snap on/off with the metal swing bars ball), and add magnets to make them attach to the main air intakes on the body (attachment points that will be sued for the arms in GW and BT mode) The concept works and the fighter mode looks slimmer already (the dorsal booster needs to be modded to be sitting on the wings). With this mod, however, the arms end coming out too much from the back of the plane, and it doesn´t look as compact as with the current modification I did. See comparison, left old, right new: Not sure what I think about it, but they look cool together! Also, had some fun trying the Roy paint schemes I had in mind

-
Thanks, still lot to do but I’m quite confident I’ll get it done. Busy weeks recently so progresses are very small. I have been working on the concept for the new attachment of the legs and I am not able to find an answer to what looks like a simple question: is the VF-2ss supposed to have variable swept wings while in fighter mode? I feel like the answer is yes looking at the eesign, but every image I found online shows the wing in a single position only...