
SDF-ONE
-
Posts
101 -
Joined
-
Last visited
Content Type
Profiles
Forums
Events
Gallery
Posts posted by SDF-ONE
-
-
Wow, those legs look damn sexy! Normally I am not a fan of metallics, but this two color combination really adds depth to the mechanics. I like the grey panelization as well. It would be almost a shame to add decals on top of it.
-
where do you get to buy the joints for this one? i wonder
It could be one of those joints from the Kotobukiya Modeling Support Goods. You can find the exact dimensions of the joints on their website: http://www.kotobukiya.co.jp/item/page/parts/index_poly.shtml
You can buy them at most Japanese online stores such as HLJ and Hobby Search. There are also other brands such as Yellow Submarine and Wave that have joints in their assortment.
-
...I'm still waiting for Wizartar's review. WHAT a tease.
Wait no longer, here it is.
Edit: Ehm... edwin3060 already pointed it out.
-
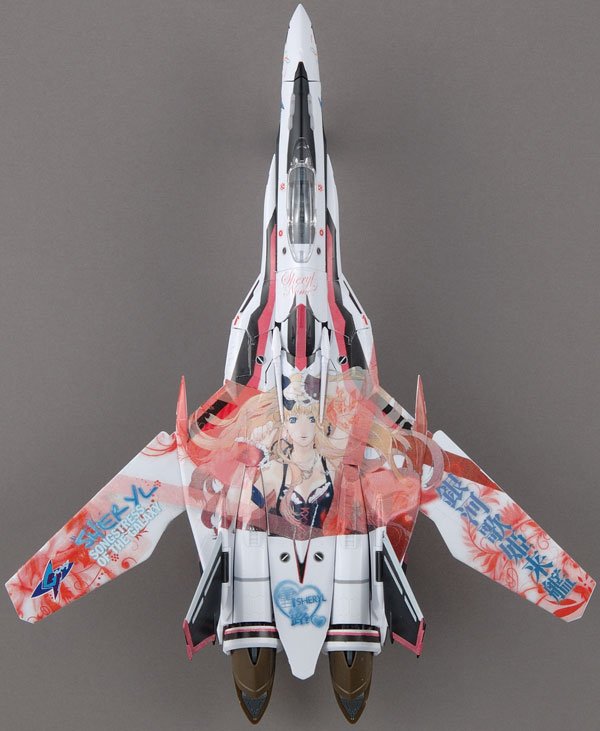
That is going to require a lot of softner to get these decals right, especially on the tips of the wing gloves (those pointy things) and on the top part of the calves. Also the Sheryl decal on the chest will be upside down in battroid mode if you do it this way.
-
The neck mod looks good and simple.
Does anybody know which (if any) Revoltech toys come with the correct color double joint to use for the VF-25S neck.
Will pick up the Revoltech to canabalise for the joint, once I know which one.
Graham
I know that the movie versions of the Evangelion Revoltechs have an extra double joint that is solely used for the stand. So then you wouldn't even have to cannibalize the figures themselves. Note that these are the movie versions (Rebuild of Evangelion). The other Evangelion Revoltechs still use single joints.
http://www.happinetonline.com/home/07/imag...6011340_i06.jpg
http://www.happinetonline.com/home/07/imag...6011098_i10.jpg
-
There's two different neck pieces? Wait why on earth would there be two of them? So does one of them actually lock into something in battloid mode?...well there are two collar pieces which to this day I am still curious about...
The answer is simple really. One neck piece is for Alto, the other is for Ozma. The Ozma neck piece seems like a last minute addition to the runner. Perhaps they initially thought Ozma could use the same neck piece, but it apparently needs a little more space. Creating molds is very expensive that is why they try to reuse runners as much as they can (that is also why they release numerous color variations).
-
Hi SDF-ONE,
a friend of mine is building the VF-25 in the same time. We will certainly take some pictures of the two side by side once finished.
Many thanks for the link.
Regards,
Rv
Cool!
I spotted your reference to "Tintin" RG.

-
Keep up the good work Hervé!
This model is on my wish list, so I will follow this thread closely. I was wondering if you by any chance have a VF-25 kit as well? I would really like to see those two kits next to each other. They should be about the same size, right?
By the way, here's a really nice build of the VF-0A. Good for inspiration.
http://super32x.com/category/charactormode...ttroid_hasegawa
-
There is just something weird about it.
Its right arm and leg are missing. That is it.
-
-
Hi Pete
Yes, the kits are completely snap fit. No cement required. They are practically MG in terms of complexity and number of parts. No paint is needed, apart perhaps for the canopy frame. You could do it with a marker if you have a steady hand. It will take a good few hours to assemble them. Don't rush it. Spread it out over a couple of days and you will have a great looking valk. I can recommend taking a look at Dalong's website. He takes tons of pictures. You can also take a look at the instructions and parts to familiarize yourself with them (follow the information link at the top of the page). He builds them without painting them and without modifying them, so WYSIWYG. He only applied the stickers and did the panel lining. At the bottom of the pages you can also see what the kits look like without stickers and panel lining.
-
Seriously - judging from these pictures - this thing is a disgrace.
It still has ALL the flaws from the prototype (with the possible exception of the Urkel ankles) and then adds a few more. What the hell? The real deal breaker is that it is out of scale. Just compare the size of the pilots. This thing reeks of incompetence and I will definitely NOT buy any of this series.
Shame on you Bandai.
-
why is Kawamori holding the valk with both arms ??
I guess it is REALLY heavy. That must mean the frame is made from solid metal...

-
Model Proshop Exclusive 1/72 VF-25F Clear version
http://hk.myblog.yahoo.com/iam-cybergundam/article?mid=17818
Exclusive...

Luckily I preferred it with the regular gray frame. So, that's one reason for me not to get it.
-
I never thought I would say this, but Klans boobs need to sag a bit more than the current mold. Torpedo boobs ahoy.
Theres no curve at all, there seems to be a 90° angle and then straight the rest of the way.
Gimmick - swappable zero G boobs!
-
Well, there's the VF-171 Super pack to consider so thats at least 2 releases. Plus custom alto colours, thats 3.
Plus Luca's version makes 4.

-
Now that you mention it - is that it?
No, that's the 1/72 custom kit shown in Model Graphix of January 2009. On the modeler's website there are a few more pictures. Not sure if he's going to sell the cast offs.
http://mokei.cocolog-nifty.com/blog/2008/11/1129-bf61.html
I think edwin3060 is referring to the Bandai VF100's series. The VF-4 is included on the poster. Thread here:
-
is the model kit easy to take apart again just in case you want to paint or add some detail?
Yes, I assembled and disassembled the kit to get familiar with it. The only parts that I found that had a tight fit were the wing gloves and the feet (the inner and outer parts of the thrusters). For the wing gloves I partially cut off the pegs diagonally. For the feet I did not bother and simply painted them in one color (yep lazy).
-
Hell some of my Yamatos even broke unintentionally.
I don't think anyone on this forum ever broke their Yamato intentionally...
Unless they desperately wanted to contribute to the My-Damn-Yamato-Broke-Already thread. -
I stumbled upon some unadulterated VF-25F mecha p0rn. This model was auctioned a while ago for a measly ¥52,000.

The VF-25F gallery: http://npgpm.web.fc2.com/vf25f.htm
His other works: http://npgpm.web.fc2.com/gallery.htm
-
ルカが操るゴースト3機付属。ゴースト専用のスタンドも付属!
Luca manipulate the machine comes with three ghosts. Ghost comes with a dedicated stand!
Ok, thanks.
It has been added to HLJ for Febuary 2009 and on Rainbowten it's January 2009...
...so that's probably going to be a late January.
-
Does it really say that it comes with the SMS stand as well? Or does it only come with the smaller stand-arms for the ghosts? Paying ¥1300 more for 3 ghosts and a stand would be a real steal.
-
As I wrote a few pages back, it's most likely a necessity caused by the need to make the legs spread in the now de rigueur Y-stance. You'll notice that the 1/72 model (which has the hips in the correct position) can't make the Y-stance.
Not sure what you mean. Is this the Y-stance? On the model the joints can slide out to provide more space for the intakes. No high tech solution. Just a peg and a hole.

edit: hotlinks to pics did not work
-
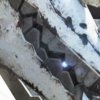
I painted the inside face of the visor with the Tamiya Clr. Green, right out of the bottle with a no. 3 detail brush. To get a 'light' effect, I pasted on 1/16" strips of Model Master Ultra Thin Krome Foil (#50637C) over the black plastic part where the visor snaps onto. That way it will reflect light back out and glow. Very fussy detail but it gives a nice effect.
And it was reading some of your posts that I made sure the chin is painted. I would've missed that detail no matter how many times I watch the show. Cheers!
That's a good trick. I did the same on mine now, but I cut off a tiny strip of the foil sticker sheet instead.
Also Dalong has posted his extensive review of Ozuma (or is it Ozma?). I noticed that the bottom of the fighter mode is a bit messy with the gray-white color scheme. I will probably paint the bottom of the wings white as well.


Official Bandai 1/72 Scale Macross Frontier Model Kit Thread Ver.2
in Hall Of The Super Topics
Posted
Apparently the Sheryl decal will also be included in the RVF-25, VF-25F Super and the VF-25F Clear! So you don't have to buy an Alto or Ozma re-release if you already own one of these.
Source:
http://ngeekhiong.blogspot.com/2009/01/she...-for-5-172.html