-
Posts
3540 -
Joined
-
Last visited
Content Type
Profiles
Forums
Events
Gallery
Posts posted by captain america
-
-
Just an FYI, guys: In the last few days I've found myself mostly unable to access my own Failbook page. They have this SEE OUR NEW FEATURES popup window that is totally unclickable. I was able to act quick enough to disable it today, but the writing is on the wall, so this will be my default place to post until I can set up my own blog or something. Far, far from failbook. The work on the sled is actually further ahead than what I posted yesterday. Getting LLOYD into position was a bit of a PITA, but wait until you see this thing mocked-up. Dreamy!!

-
Captain’s log: Wednesday, March 24th.
Now that LLOYD is done, I can turn my attention to tackling his airborne conveyance. While some among you may consider the sled to be an after-thought project, I can assure you that it isn’t. In fact, it’s very much its own modelling project, with this portion being even more complex than the 1/350 landing frigate, and much, much larger! And while we’re on that point, allow me to illustrate why this project is such a challenging clusterscrew!
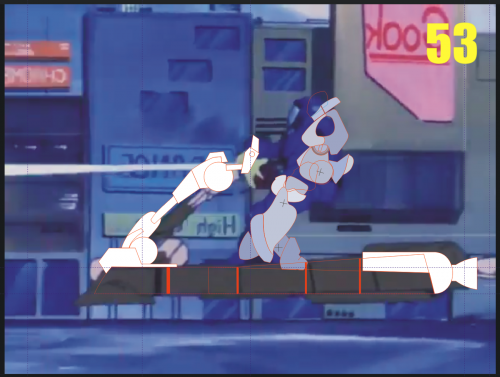
In image 53, we see a screen capture of a BIO LLOYD atop its hover sled, which I used as a rough standard to calculate the proper size of the sled platform. This also mirrors what I’ve found in the original line-art. You’ll notice that I layed my technical drawings over the image, and even made the sled a tad smaller than the control image.
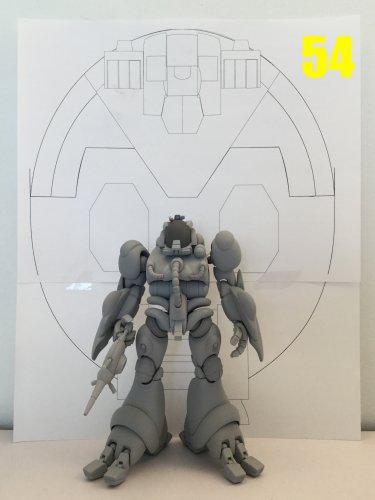
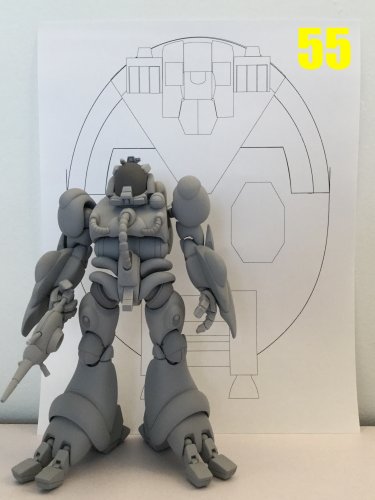
Now turn to image 54: this illustrates the plan view of the sled platform in relation to LLOYD.—and bear in mind that I undersized it! That sled would be so big that a small family of BIO LLOYDS could pitch a tent over it and live inside it!! Clearly this is absurd, so I went back and fiddled with the dimensions… Which leads us to image 55. The sled platform is now as wide as LLOYD is tall. Still large, but more sensible in scale and proportion to carry one fighting unit.
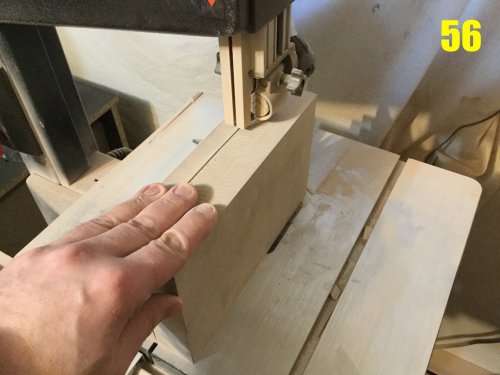
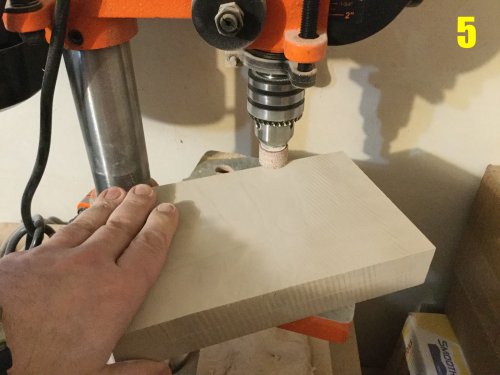
With all that nonsense out of the way, I can start cutting modelling board, ad so that’s what I do. In pic 56, I’m slicing through almost 20cm of material, which is no simple task! In fact, it took me almost 6 minutes to make just one slice in the material, for fear of putting too much pressure on the saw blade. Once I got my two slices, I needed to clean and even-out the surface to make both slices identical, but the plates are so large and flat that they can’t be securely clamped to the milling machine, so I used the drill-press and trusty grinding stone in pic 57.
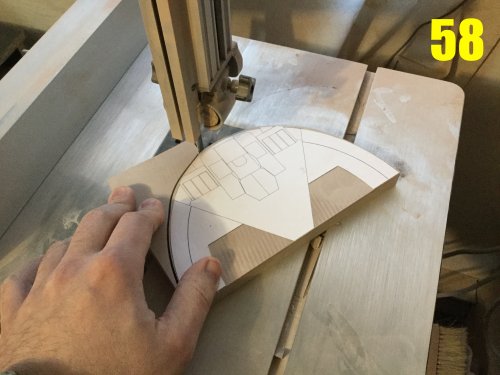
With the surfaces now equalized, I was able to attach paper templates and trim away the excess material, which is shown in pic 58.
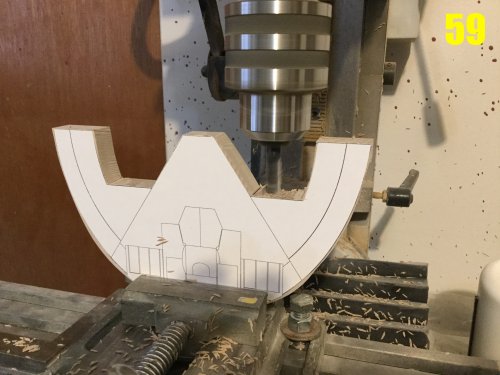
Pic 59: the very awkward and difficult sawtooth partition being machined, but just barely. Their combination of depth, irregular angles and curvatures meant that I could only do part of it on the mill; the rest had to be done manually.
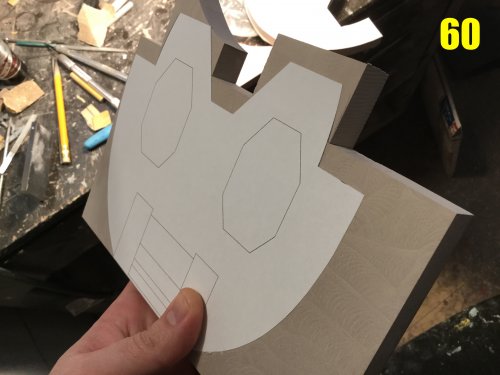
Pic 60: the aft portion of the sled is even longer! So long that I needed to recycle the cutaway scraps from the front to make a part large enough to match the paper pattern.
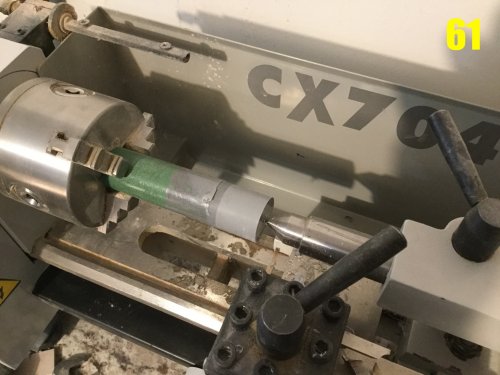
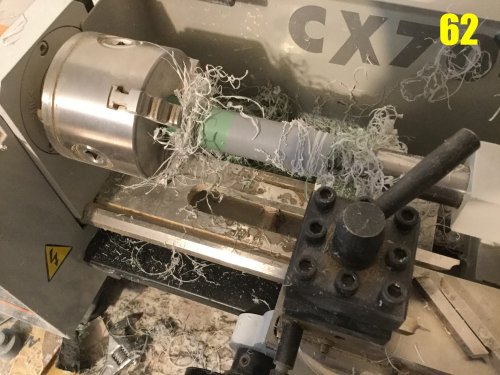
Pic 61: wat my lathe work station looks like when I start. Pic 62 is what it looks like after just 5 minutes!
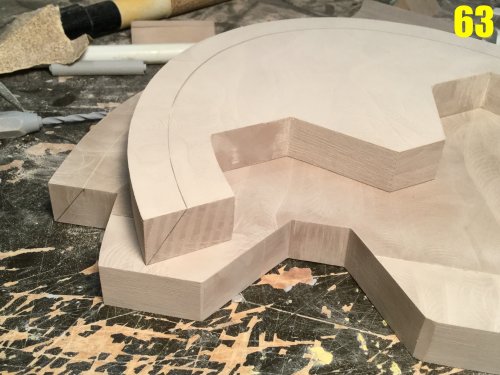
Pic 63: the sled platform parts are now keyed and penciled so that I can Dremel the beveled edge all around.
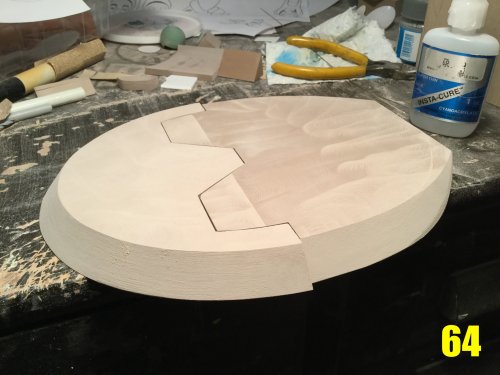
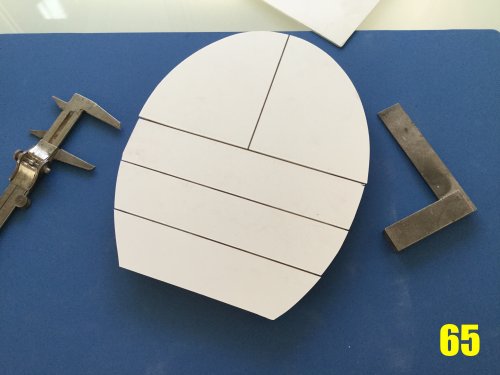
Pic 64: beveled edge complete! I intentionally made the platform a little thinner than it should be, so that I could use styrene sheet to build-up the rest (see pic 65). This was necessary in order to reproduce the different elevations of the platform, as well as the cross-section segments…. Which obviously don’t align with the upper surface. Screw you, Studio Ammonite!!
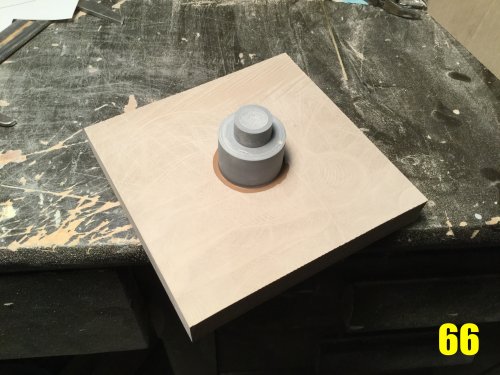
Pic 66: the saucer shapes on the bottom of the hull are quite large in diameter, larger than any of the bar stock I have. Therefore, I will do something you probably shouldn’t without adult supervision: jerry-rig something that’s just barely safe to machine. In this case, a large Renshape slab CA-glued to a resin mandrel so that I can turn it.
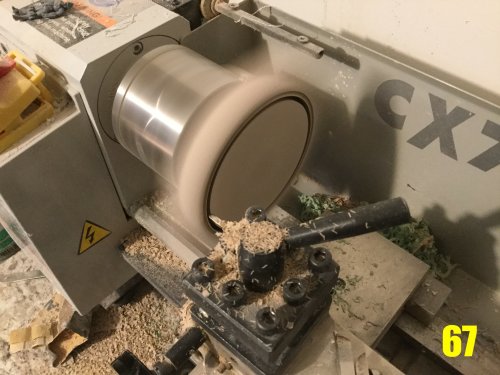
Pic 67: white-knuckle time! This is something I’d NEVER, EVER do with metal, but modelling board is relatively easy to cut and more-or-less forgiving. I had to monitor my speed very carefully because of the vibration induced when cutting such an unsupported shape, but the operation was successful! More pics of my death-defying antics to come next week, so stay tuned!
-
11 hours ago, CoryHolmes said:
When it comes to those little fiddly bits, were you able to carve out one master and then modify the individuals as needed, or did you need to sculpt each one by themselves?
Depends on the part. Some parts had to be sculpted molded, cast, and then modified (chest, thighs, toes, etc.), others needed to be full scratch (heads, pistols, back blobs) because they were just so different.
-
-
8 hours ago, Tober said:
People watched it!?

Several times. Sometimes frame by frame... And enjoyed it!

-
1 minute ago, CoryHolmes said:
B... but that would require having a scale-correct Spartas to be crushed...

How do you recommend painting this kit? I didn't realize just how many teeny tiny little pieces are in it until your photo!
If you go to the Moscatohobbymodels page on Facebook and scroll down my timeline (November to early January), I did a full build tutorial for my 1/48 M-72B Gabriel kit, which is similar enough to the BIO LLOYD, albeit slightly smaller. In it I go through the building process, puttying, posing, pinning, painting. That's a good start to help you along with your eventual build.
-
3 minutes ago, Tober said:
Great work Capt'!

Do you have any interest in doing the other Bioroid variants?

Like the Biopsycher?
-
29 minutes ago, tekering said:
Okay, admittedly -- based on your previous work -- I might've had unreasonably high expectations for this kit, but...

...you've nonetheless exceeded my expectations by a considerable margin!

This has got to be your finest work yet.

Now I'm starting to regret only ordering three...

Thanks Ted, that means a lot! Despite being a jellybean nightmare, I've been thoroughly enjoying myself and the challenge the source material posed. Just understand that it's not over yet, I still need to complete the sled and adjust it so that it and BIO LLOYD fuse into a synergistic, Spartas-crushing machine!
And if, at that later time you decide that you might want to acquire more LLOYDs, just LMK and if I can get an extra 10-12 orders, I'll make new molds. I'm tempted to make the (potential) second run more selective, in that you'd be able to get just the parts for one version, and the sled as an option.
-
Bam!
Red (SATAN CLAWS) and blue (BIG BOI BLUE) versions shown. Please forgive the few minor details that aren't proper to the blue version (toes, codpiece, placement of the hose) since this baby's just holding with hot glue. Preliminary work has already begun on the sled, so you'll get to see some progress on that next week.
-
Tonight, 8pm.
-
On 3/12/2021 at 9:32 PM, CoryHolmes said:
I played around with vac-forming at technical college. It was fun! Injection moulding was more fun, though
 Would vac-forming be of use to your kit-making?
Possibly. Large, thin hulls and fuselages are impractical to cast in resin. I was looking to source a machine right as Covid was hitting, and I think it put the supplier out of business, so back to square one.
-
16 hours ago, CoryHolmes said:
My bad, when he said "it's expensive" I mis-remembered it as "rare to find".

I guess expensive is relative. If a large plank costs 700 bucks and lasts 7 years, I consider that bloody cheap. My time/labor is by far the "costliest" part of a project. I use quotes because anyone who has ever tried to contract these types of projects understands that the guys who charge the most usually cost the least in the long run. The biggest money-pits and time-wasters are the jobbers that'll do it for a "good price" as a sideline.
Thanks for posting that video! Just another reminder that I need to find a vac-forming machine.
-
8 hours ago, CoryHolmes said:
I was told that modelling board (Renshape???) is increasingly hard to come by. Do you have to ration what you use for a project?
Increasingly hard to come by according to whom? I buy a 2" by 16" by 60" plank once every 7-10 years, so I can't say I've noticed.
I don't ration, but I try to work-out what types of materials and construction methods(s) are best suited to the shape or part I'm making. I re-use a lot of small Renshape pieces simply because I have so many, and it's faster than working from a large slab.
-
7 hours ago, CoryHolmes said:
On those really bulbous shapes, was it hard to find a parting line that didn't have an undercut? Or is that not much of a problem with your pink goo?
Undercuts are almost everywhere on my parts, but the beauty of silicone rubber is that it stretches. The bigger problem is twofold:
-I often get really ambitious with sculpting, often creating parts that have cavities at either end (like the thigh or the shin armor) and that can very easily lead to trapped air, which in turn leads to extra pockets of resin that need to be de-burred by the modeler. Thankfully, I've developed some hacks to remedy that problem in 97% of cases
-then comes the issue of where do I place the mold partitions and gates so as to give the modeler the least amount of grief, while still making sure that the part will mold properly? Many times you will see mold lines on primary surfaces, and this is by design: I'd rather have the modeler repair a relatively even, undetailed surface that's easy to sand, rather than try to hide the parting line and put it in an area that can affect fine detail, or worse, on a mating surface that will alter how parts fit together.
Making molds is a bit like playing chess in your head, in that you have to anticipate things 2, 3, 4 steps ahead to avoid problems down the line.
-
Captain’s Log: March 10th, 2021.
After my ‘eventful’ mold-making experience from last week, I’m happy to say that things are now back to normal. Further, all the masters for the BIO-LLOYD figure are now complete, and once I get these next few molds out of the way, I’ll be able to dedicate myself to the completion of the hover-sled.
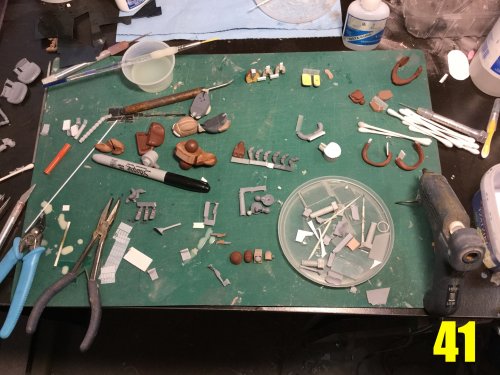
To say that this project is an exercise in tediousness and patience is to state the obvious. Pic 41 shows my molding station, and all the fingers, tiny bloobs, pitot thingies, and other bits that need to be molded. The extra effort comes from not only the addition of all those tiny bits, but then those bits have to be molded, cast, and then modified to suit LLOYD’s different variants, as we will see soon enough.
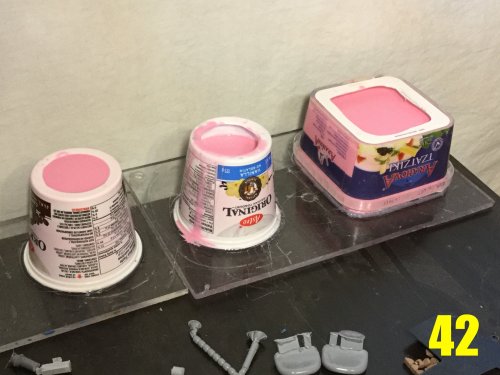
Pic 42: good ol’ trustworthy pink mold silicone is back!
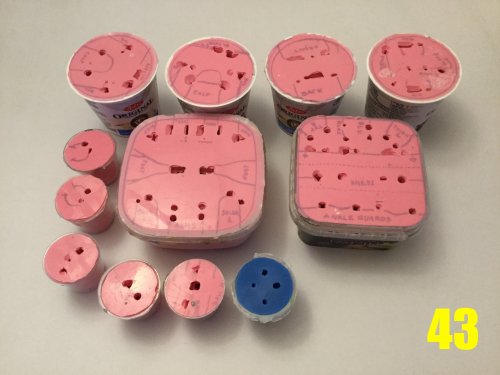
Pic 43: believe it or not, this is only about 3/4 of all the molds needed—JUST FOR THE MECHA! Blasters, hands, visor domes and sled parts not included.
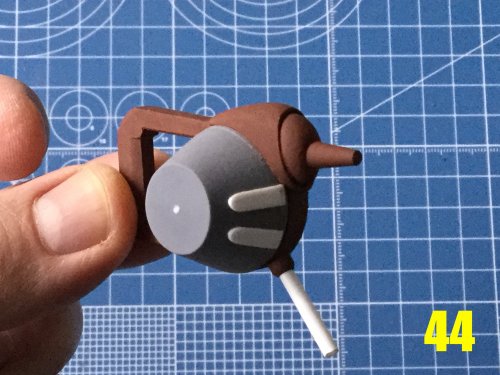
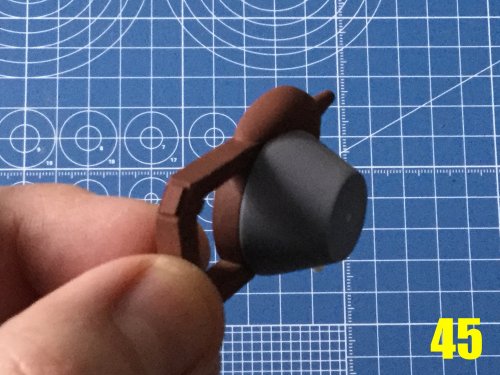
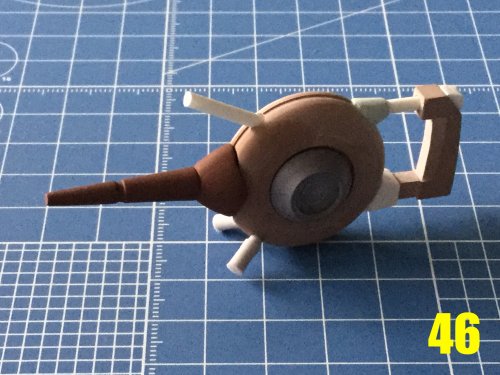
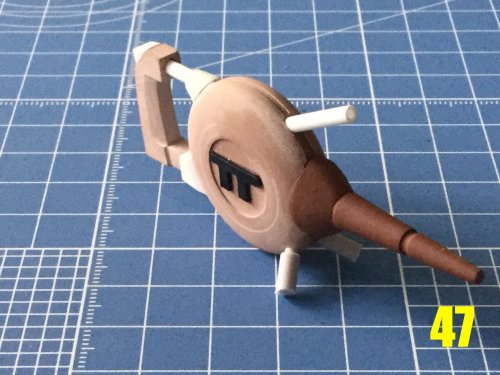
Speaking of blasters, pics 44 and 45 show the drum weapon masters, while 46 and 47 show the weapon used by Seifreet’s unit (hereafter refered to as SATAN CLAWS.)
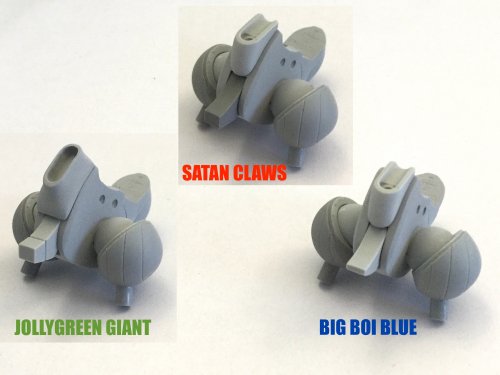
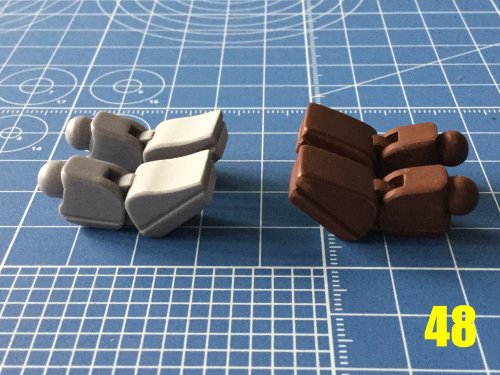
Now back to the BIO-LLOYD variations, you can see the different toes required in pic 48. Based on the soure material, the toes for the blue unit have a different slope than for the other two versions, so I had to make those. Could I have chalked-up the differences to variations in the penmanship of the illustrator? Probably, but it they looked sufficiently different to me, and I wasn’t about to cut corners.
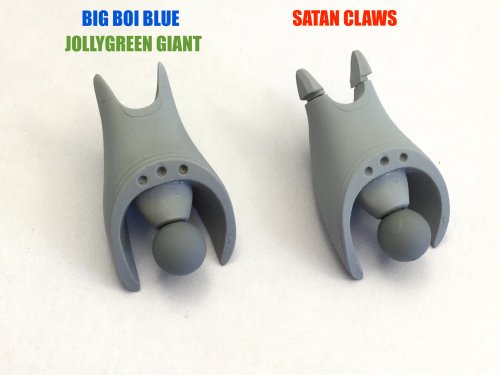
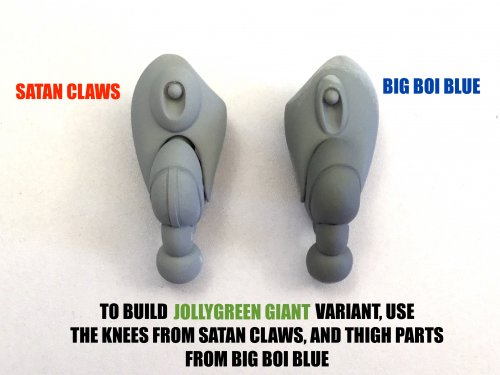
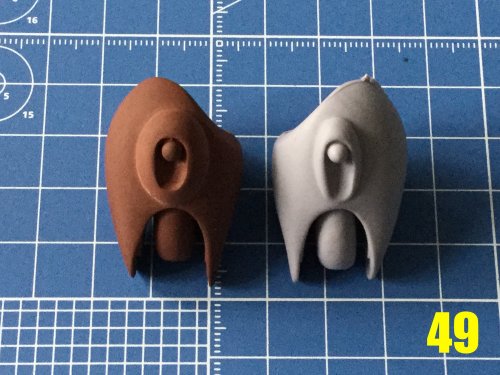
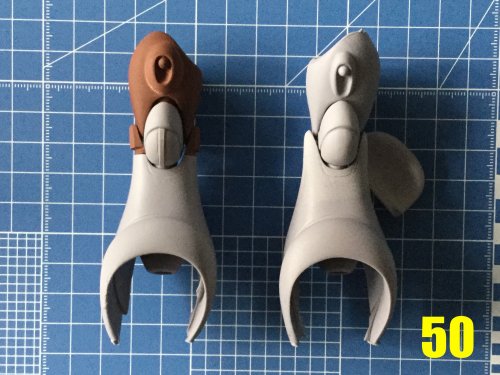
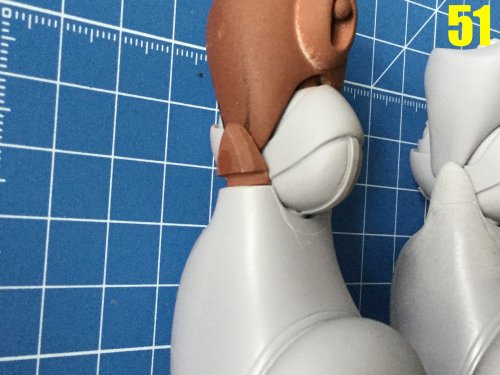
Same goes for the thighs in pic 49. On the left is the SATAN CLAWS version, which has a different blob on it than the other two variants. In pic 50, you can see that the thigh, knee, and even the upper part of the shin armor is different on the SATAN CLAWS variant. For the latter modification, you can simply trim the ‘ears’ on the shin and glue the variant parts as shown in pic 51.
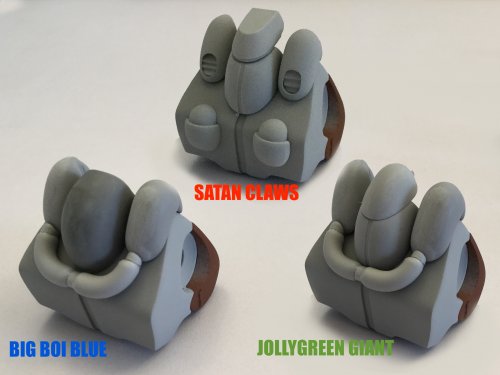
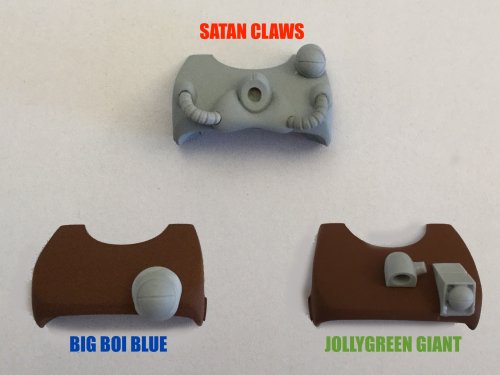
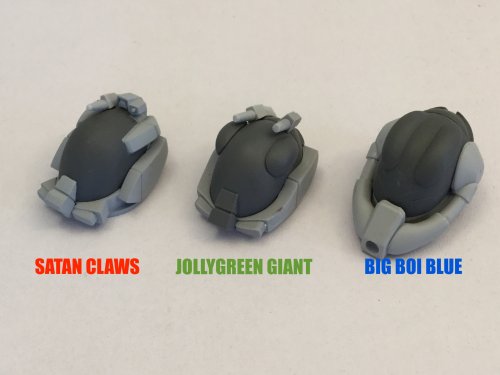
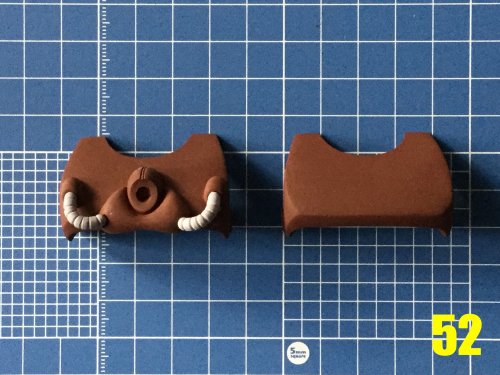
The chest module is no exception, as you can see in pic 52. Once again, SATAN CLAWS variant is on the left. The other two variants are simple enough that you need only glue the appropriate blobs in place. You have NO IDEA how utterly tedious and despair-inducing it was to machine those little hoses!
For next week, it’s my intention to have one fully cast kit mocked-up so that you can see LLOYD in all his splendor. Wish me luck!
-
It's really not such a bad series. I re-watched it to get as many screen references for the Zor mecha as possible, and despite its many truck-sized plot holes, they aren't much worse than what you'd find in other TV serials of the time, including MOSPEADA. As a toy/mecha-crazed kid I didn't care for it so much, but as an adult I find the lack of heavy mecha emphasis more appealing. It's no Dougram, but not nearly as dull as teenager-me remembered it.
-
1 hour ago, Seto Kaiba said:
Glorie is a barren wasteland being dragged kicking and screaming out of a nuclear winter by terraforming, it has a one world gov't and only a few actual cities, and is sparsely populated. It's not even clear why Glorie has a standing army at all since humanity hadn't encountered any aliens at all and there weren't any rival nations to fight with either. There's no catalyst for drama there until the Zor show up... and the same is true of the Robotech adaptation.
Depends on what sort of events may have transpired pre-Gloire. Humanity isn't renown for its long periods of warless tranquility. The newly-colonized planet you're on is a borderline hostile wasteland, your homeworld is faaaaar away and may take a long time to send help if something goes pear-shaped, or may not be able to send help at all, so it actually makes sense to have an important segment of the population be of fighting standard. The pseudo-alien Zor may not have been an anticipated threat, but that doesn't preclude the possibility of other renegade humans/pirates (from earth, Liberté, etc.) coming to the colony and causing trouble.
-
7 hours ago, Podtastic said:
I never understood the "evolution" of the Zor Bioroids. The versions we see earlier in the series (red, blue, green) look more advanced than the later ones. I don't even remember this grape-flavored version from the anime.
-
Captain’s log supplemental: March 1st.
I was hoping to have a more elaborate update on Wednesday, but a molding accident dashed that hope and put me a few days behind. While no permanent damage was done, it did reveal some interesting shortcomings in the new Mold Star 30 material I employed.
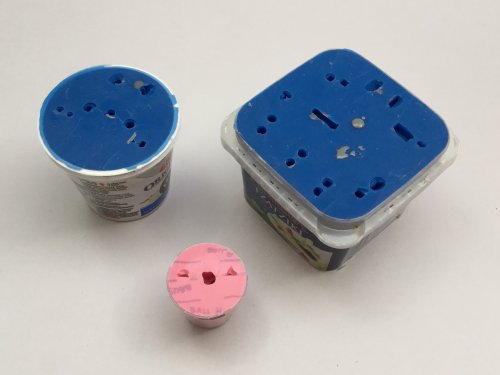
In Pic 01, you’ll see the « new » blue Mold Star 30 material, and the pink mold uses the trusty Mold Max 30 compound. With the old pink stuff, I was able to scribble notes and cut guides on the plexiglass, and it would imprint onto the silicone, allowing me to see where I needed to slice the molds open. Pretty useful, right?
Well for whatever reason, this does not work with the Mold Star matrix, so de-molding was a, shall we say, rather white-knuckle experience. No sweat, I’m good at improv… But then the ugly side of the material came to light: even though it’s platinum-cured, it still reacts with anything that has sulfer in it.
Short version: the mold material reacted to the primer.
…
THE PRIMER!!
ARE YOU F*C#ING SH*TTING ME?!?!?!
…
It’s OK, I’m calm, I’m calm…
So in light of this « interesting » development, I figured I’d share a mold fail for educational purposes.
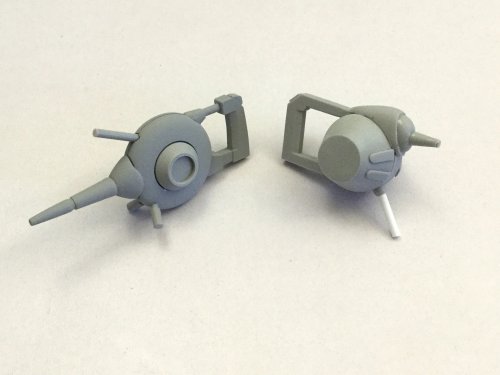
In pic 02, you can see what the failed mold castings look like: interesting effect, but hardly wanted. A thin layer of silicone on the surface of the part remained gooey, creating a burnt/melted surface texture. There are other issues with the cured properties of the silicone that make it a bad choice for this sort of project which I won’t bore you with. As such, I’ll have to postpone some of the molds a couple of days while new material is shipped to me.
The good news: none of the masters were damaged, and the other molds were actually successful, and resu
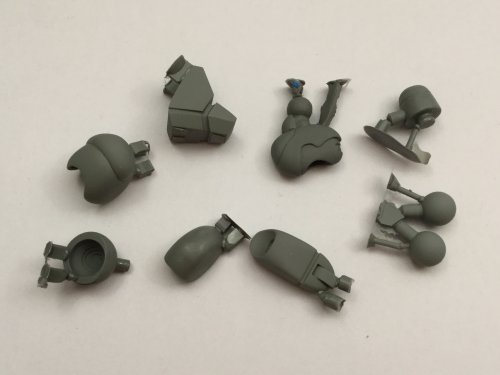
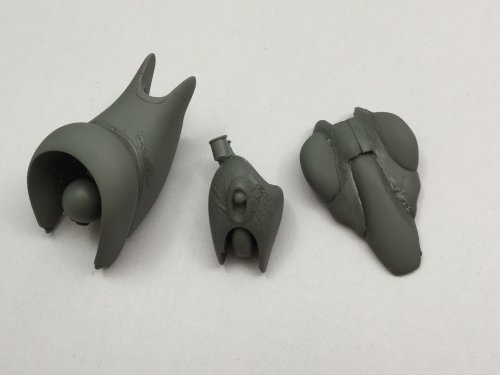
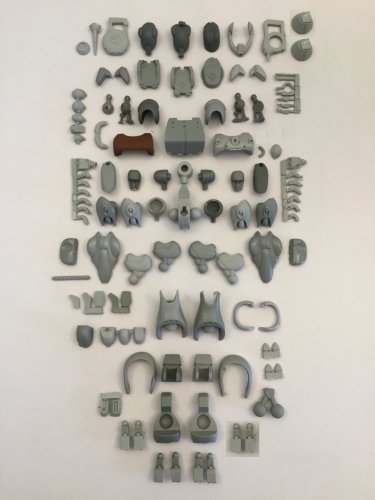
lted in some excellent cast parts, which you can see in pic 03. I was hoping to use these castings to show you a full-body mock-up of BIO LLOYD, but that’ll have to wait at least a week. It may end up being for the bast: I’ll use that extra time to work on the pistols so that I can finalize the hands and perfectly taylor them to their respetive weapons. That way, you’ll have even more eye-candy.
My sincere apologies for the delay, and thank you once again for your support and continued patience.
-
-
2 hours ago, tekering said:
Perhaps we should start a Kickstarter campaign...
Only if you want HG to put an end to my kit-making.
-
16 hours ago, Protoman said:
Not sure if this warrants a separate thread. But could anyone point me in the direction of where I could commission the build of a Hovertank in the robot mode? It's always been one of my favorite mecha and the Matchbox just doesn't do it for me.
Hahahahahahaha!!!!!!
Just kidding. If you want something done from scratch, and done remotely properly, expect to pay mid four figures and upward.
-Good and fast won't be cheap
-Cheap and fast won't be good
-Good and cheap won't be fast
-
7 hours ago, tekering said:
I've been experimenting with a three-shade blend, actually, using a layering technique I picked up from my Japanese friends:
Over a flat black base coat, a couple layers of semi-gloss green are sprayed over the surface, with more even coverage over the raised surfaces and less coverage in the recessed areas, suggesting a subtle gradation in color. Thinner coats of a slightly lighter green are then sprayed over the most prominent areas, further enhancing the gradation effect and achieving the desired primary color. It's not as high-contrast as the popular "cel-shaded" look, but it involves a similar combination of colors to achieve a more dynamic finish.
That depends on your source of reference...

The more research I do, the more inconsistency I find.

It's easier to determine the right colors for Mospeada mecha because of the wealth of reference material available, including the high-definition Japanese transfers; like Macross, the Blu-rays are definitive.
Unfortunately, there's nothing as reliable for Southern Cross, as the best DVD transfers are nearly two decades old... and they were low-contrast 16mm masters to begin with. What's worse, ADV's DVDs show the same heavy blue tint that plagued their Mospeada releases, so the colors are way off.
The green Bioroid is a particular challenge, since there's very little published art and no official merchandise to refer to, either; despite their age, I suppose the original Southern Cross TV broadcasts are the best color reference we have to work with.

I see what you mean! The green color probably looks different in different scenes as well. I was watching episode 7 or 8 online where they've got Greenie on an autopsy table, and it looked like a rather deep but bright green, much like the '87 VHS release colors. To be fair, even your Gosu looks like a different shade between the scale comparison pic and the recent ones you just posted, so I guess we'll just have to wing it.
-


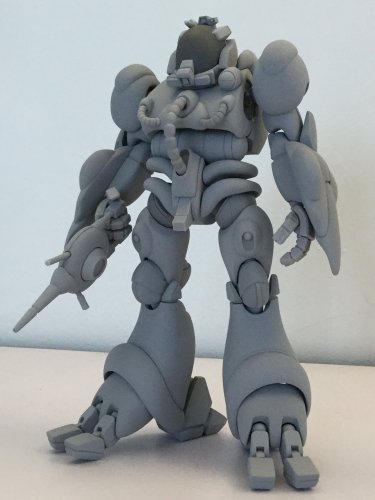
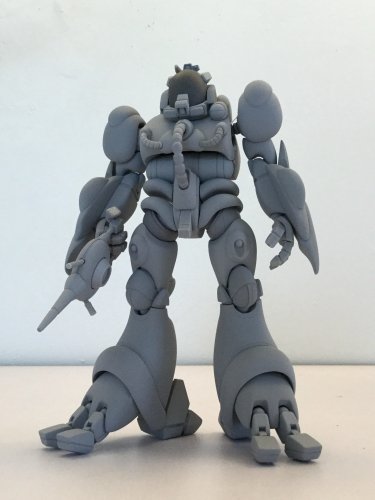
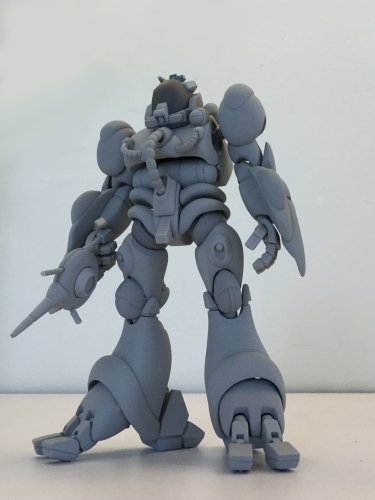
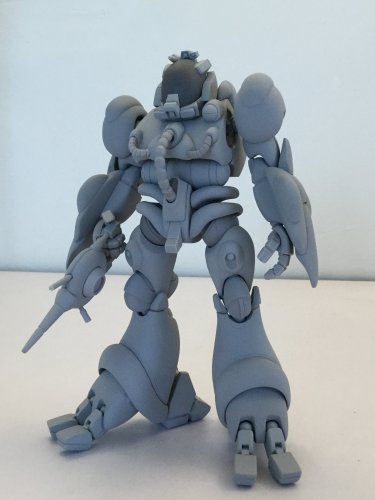
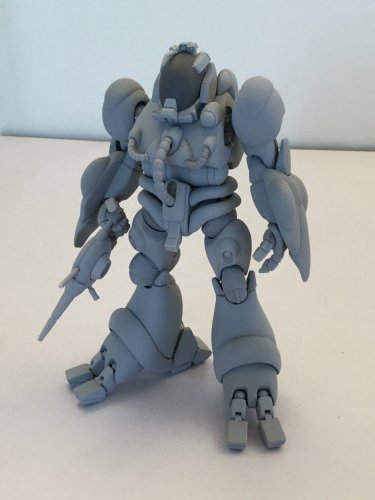
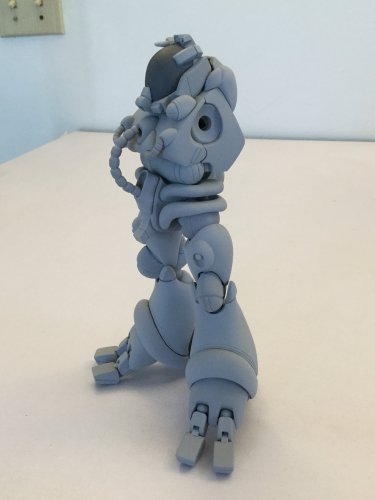
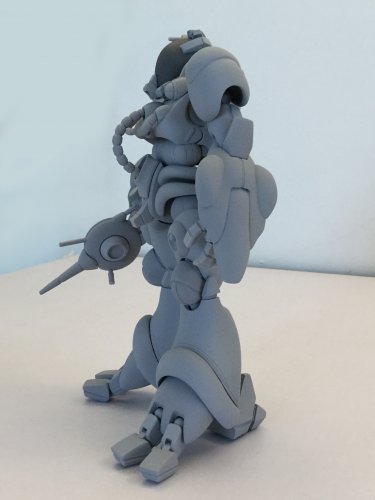
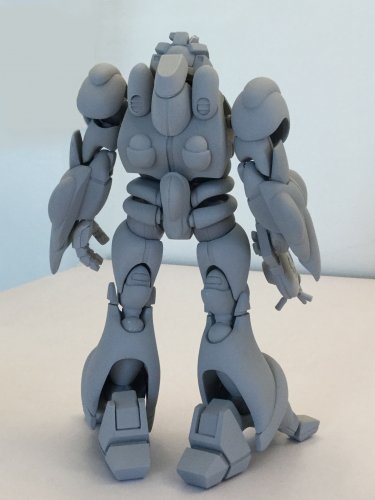
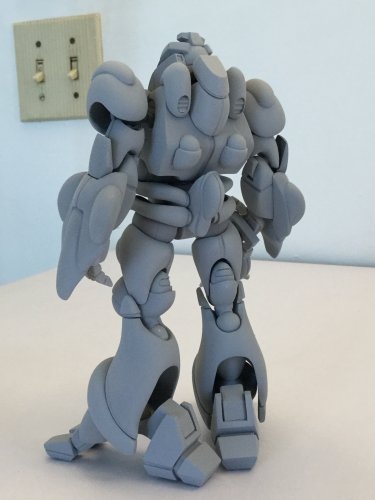
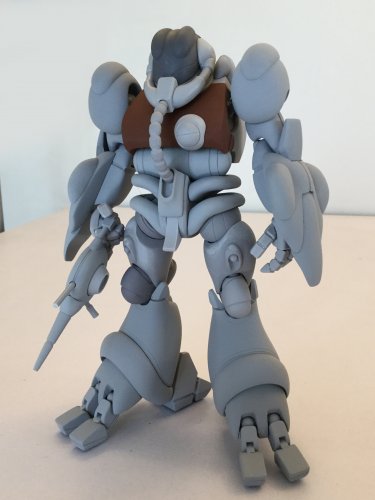
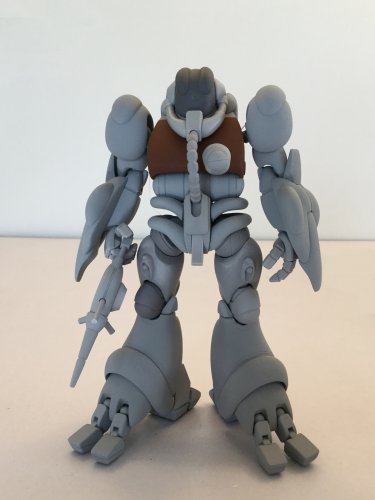
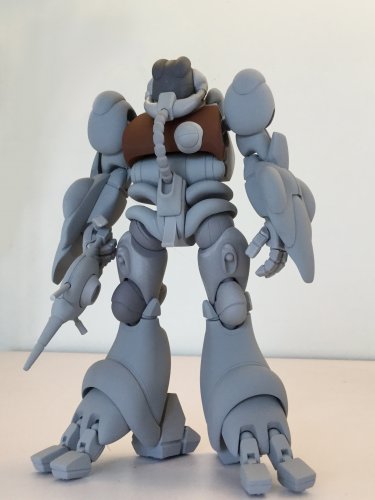
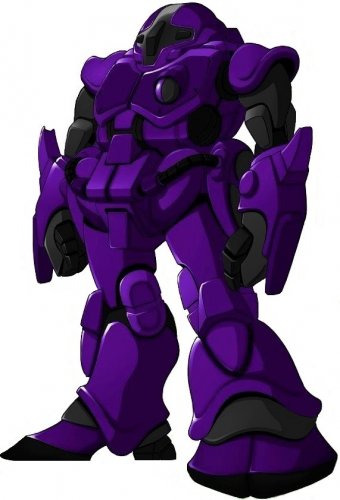


1/48 SOUTHERN CROSS BIOROID
in Anime or Science Fiction
Posted
Captain’s log: March 31st, 2021.
Work on the hover-sled continues unabated. One of the oddest and trickiest parts of the design is the front dash/bumper/control column housing, mostly because it uses some very wonky geometry that someone could only come up with by freehand sketching. Fair enough!
Pic 68 shows preliminary construction on this part, and me machining as much as I can before going manual on it.
Pic 69: the aft portions of the sled that hold the (thrust?) nozzles. I needed these to be symmetrical and perfect, so I made and machined them both at the same time.
In pic 70, you can start to see the front fairing being fleshed-out. I had to cobble it together with many sub-assemblies, which are now being fit-adjusted t the sled with putty. Same goes for the control arm in pic 71.
The aft portion of the sled saucer has these sidewalls that taper upward. There was no point trying to make these from modelling board, as styrene sheet is far easier and more pliable. Of course, because the whole edge is both beveled and curved, you can’t just apply any old piece of styrene, because it won’t fit. Studio Ammonite sticks it to me from the great beyond yet again… Thankfully, I’m not that easily stumped. Using some masking tape, I carefully segmented it to follow the taper of the saucer to create a tape template, which is what you see in pic 72. The tape is then used to cut the styrene winglets, which is what you see in pic 73. That covers the inner layer, but the outer layer has those vertical slits that are prominent throughout the saucer, so I had to mark, cut, and then strategically place those outer styrene layers over the base layer.
The result is what you see in pics 74-76. Human scale comparison provided by the enigmatic 1/48 Marie Angel. The hover-sled is now 95% done; just a few little details to add before I can commence molding this monstrosity.
Alright, so now you’re asking yourselves just how well LLOYD fits onto his sled. Well I saved the best part for last, so that you can judge for yourselves. Bear in mind that LLOYD is being propped-up with a screwdriver up his corn chute, because the kit hasn’t been pinned. That said, I think he looks bloody epic!
It’s hard to see in these pics, but LLOYD has both ab-crunch and waist-swivel features, which were necessary to allow the proper reclined stance on the sled. Unlike the animation, which just drew its various limbs squished to achieve a desired pose, I had no such luxury; I actually had to make everything work. Hard part’s almost over, so next week I go back to mold-prep. Stay tuned!