
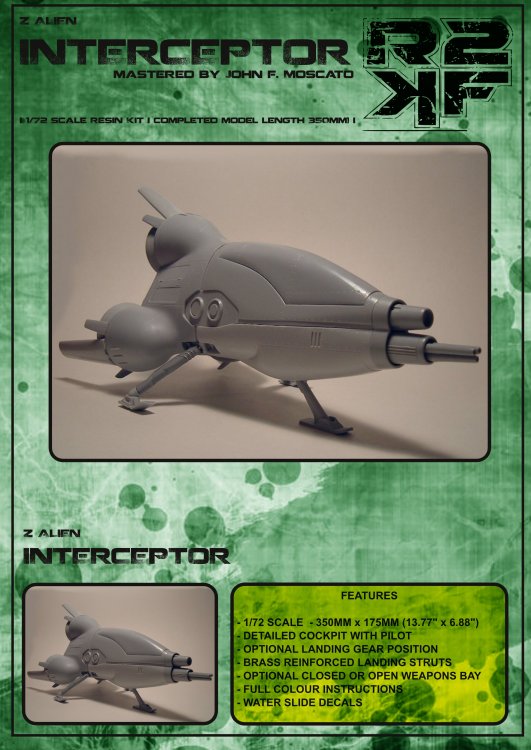
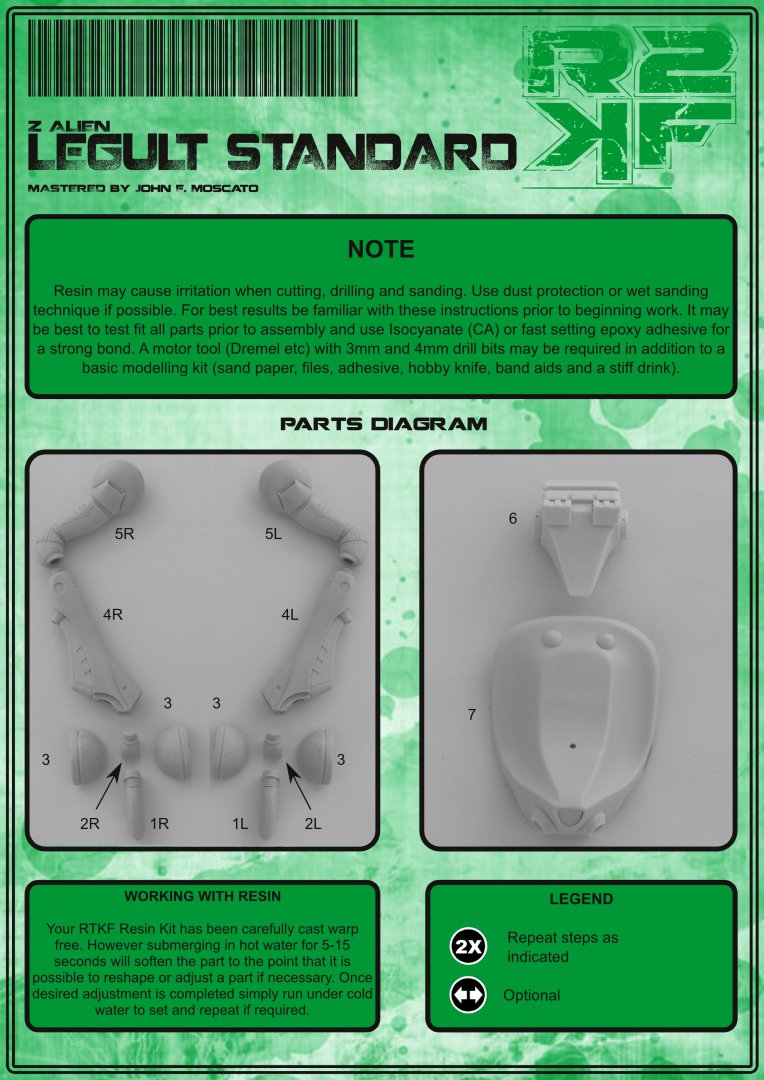
Return To Kit Form
-
Posts
360 -
Joined
-
Last visited
Content Type
Profiles
Forums
Events
Gallery
Posts posted by Return To Kit Form
-
-
58 minutes ago, NZEOD said:
be getting hold of you shortly...
Let me know which ones you are interested in and I'll put them aside.

-
20 hours ago, arbit said:
Hi there RTK. Thats a fantastic scheme. Im zooming in on it, and its insane.
Cheers Arbit - I think I took a few years off doing that one. And it was a compromise considering I originally wanted a hex pattern

-
Pengbuzz that is some great work with tape their my friend. I think your bananas for even tryingit - but keep up the good work!
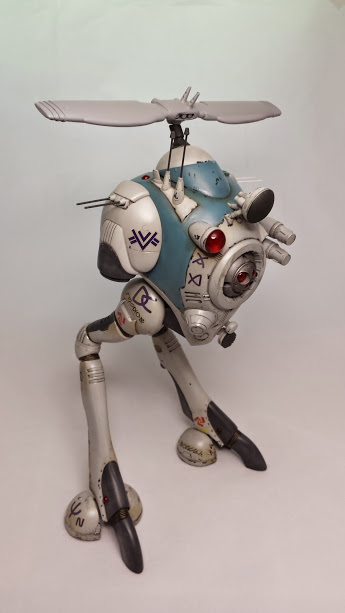
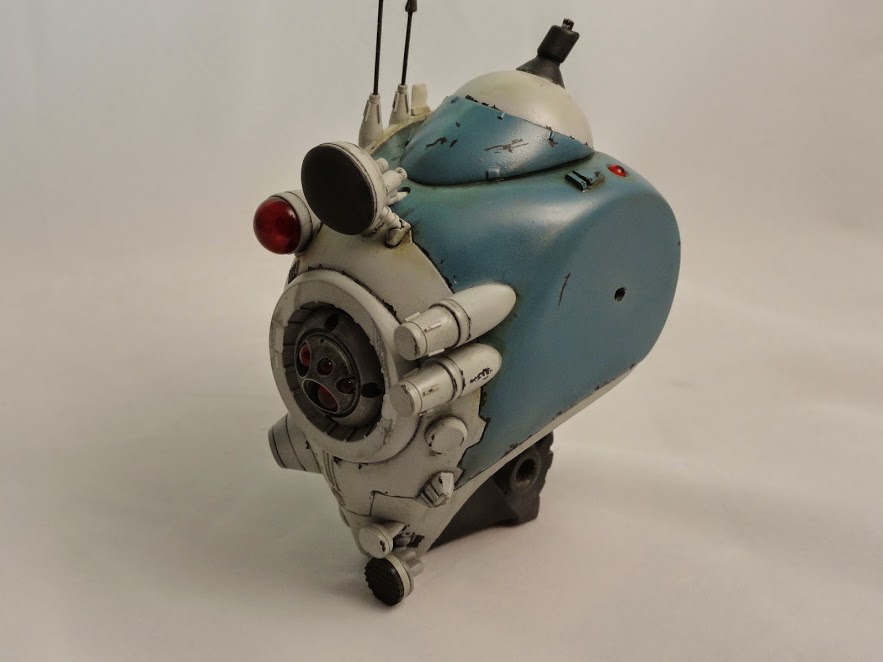
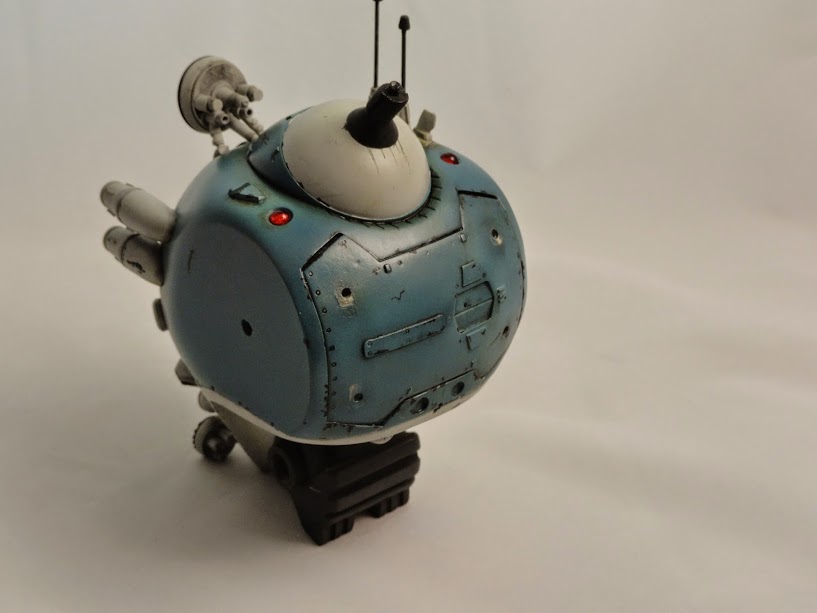
BTW I decided to dust of this old thing and get it finished:
-
19 hours ago, Kelsain said:
That blue looks great, RTKF!
Cheers Kelsain, it's a custom mix of Tamiya acrylics (quantities in ml):
XF-18 = 2.5
XF-80 = 1.25
X-2 = 3.5
XF-8 = 2
XF-3 = 1
10 hours ago, spanner said:I'm sure it will! I can't stop staring at it! Better be careful and not pay it too much attention or else the gf will start getting jealous of it! LOL!

Ha ha just tell her to get her own honey smacks
")
-
Cool I hope it brings a smike for years to come.

Btw I updated the thread title and I'll put all my Legult builds here. Ive already started on the next one!
-
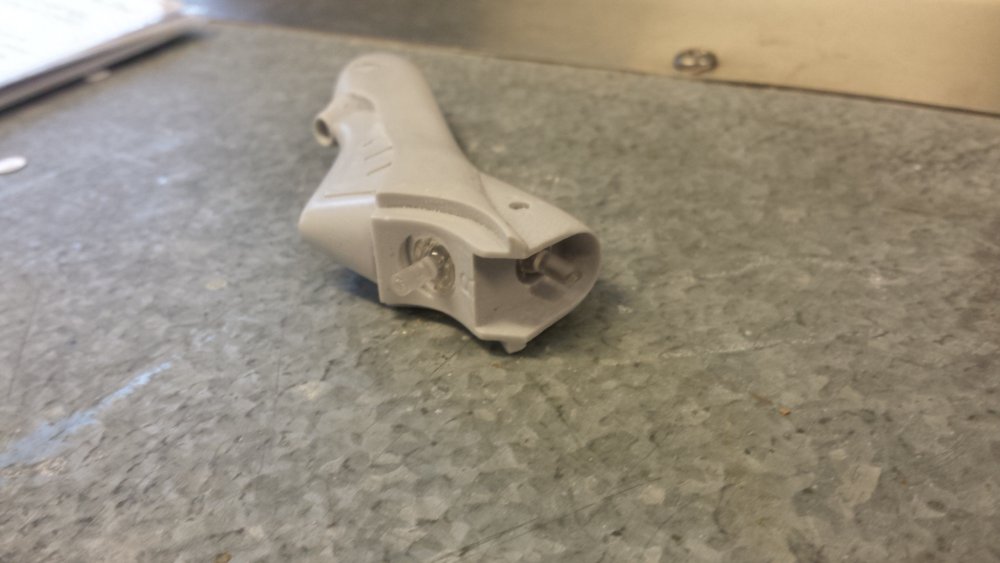
I have a new found love for these old kits although these days they are not easy to come by. The only sore point for me is the nose which is why I am making a resin replacement available soon for anyone that wants to update their old kit.
Nice clean work on the build so far. Are you brush painting this one?
-
Thanks guys
-
Thanks Spanner it was a blast building it. Now I just have to get one and build one for myself along with it's brothers.
I delayed updating the thread here because I was pressed for time and chose sleep over forum updates, so here is the catch up:
After sparaying a test patch I was happy with the colour and it look great under a coat of Tamiya semi gloss clear:
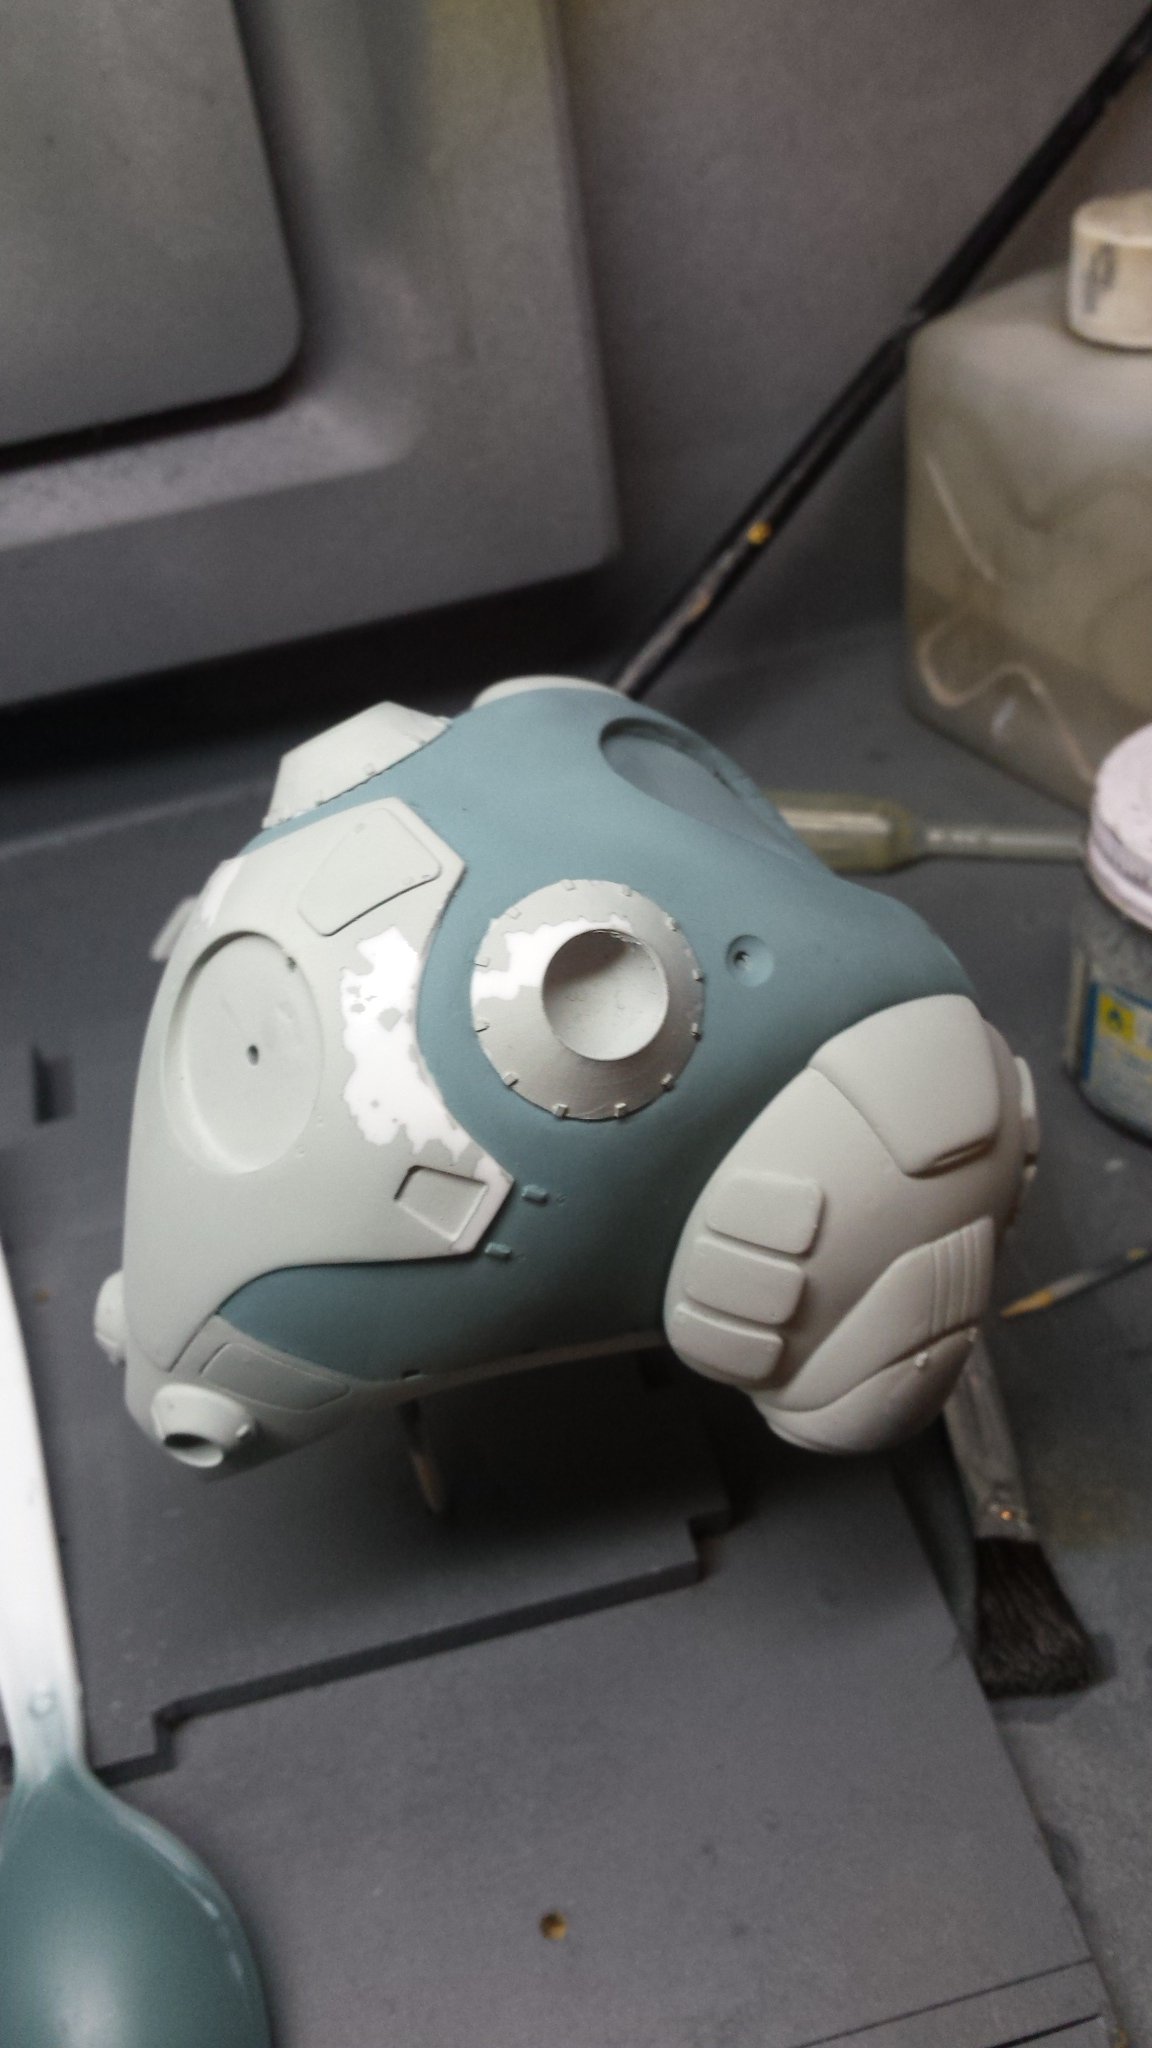
So after a quick shot of primer I sprayed the base coat and the grey. Unfortunately something went wrong and the paint lifted when I peeled of the masking tape.

This issue repeated itself all over the kit so I had to strip the lot back and start again. It was pretty demoralising but hey you just have to crack on right? In the end I am pretty sure that I missed a step and didn't clean all the mould release off and give the surface a nice tooth with a scrub of cleanser.
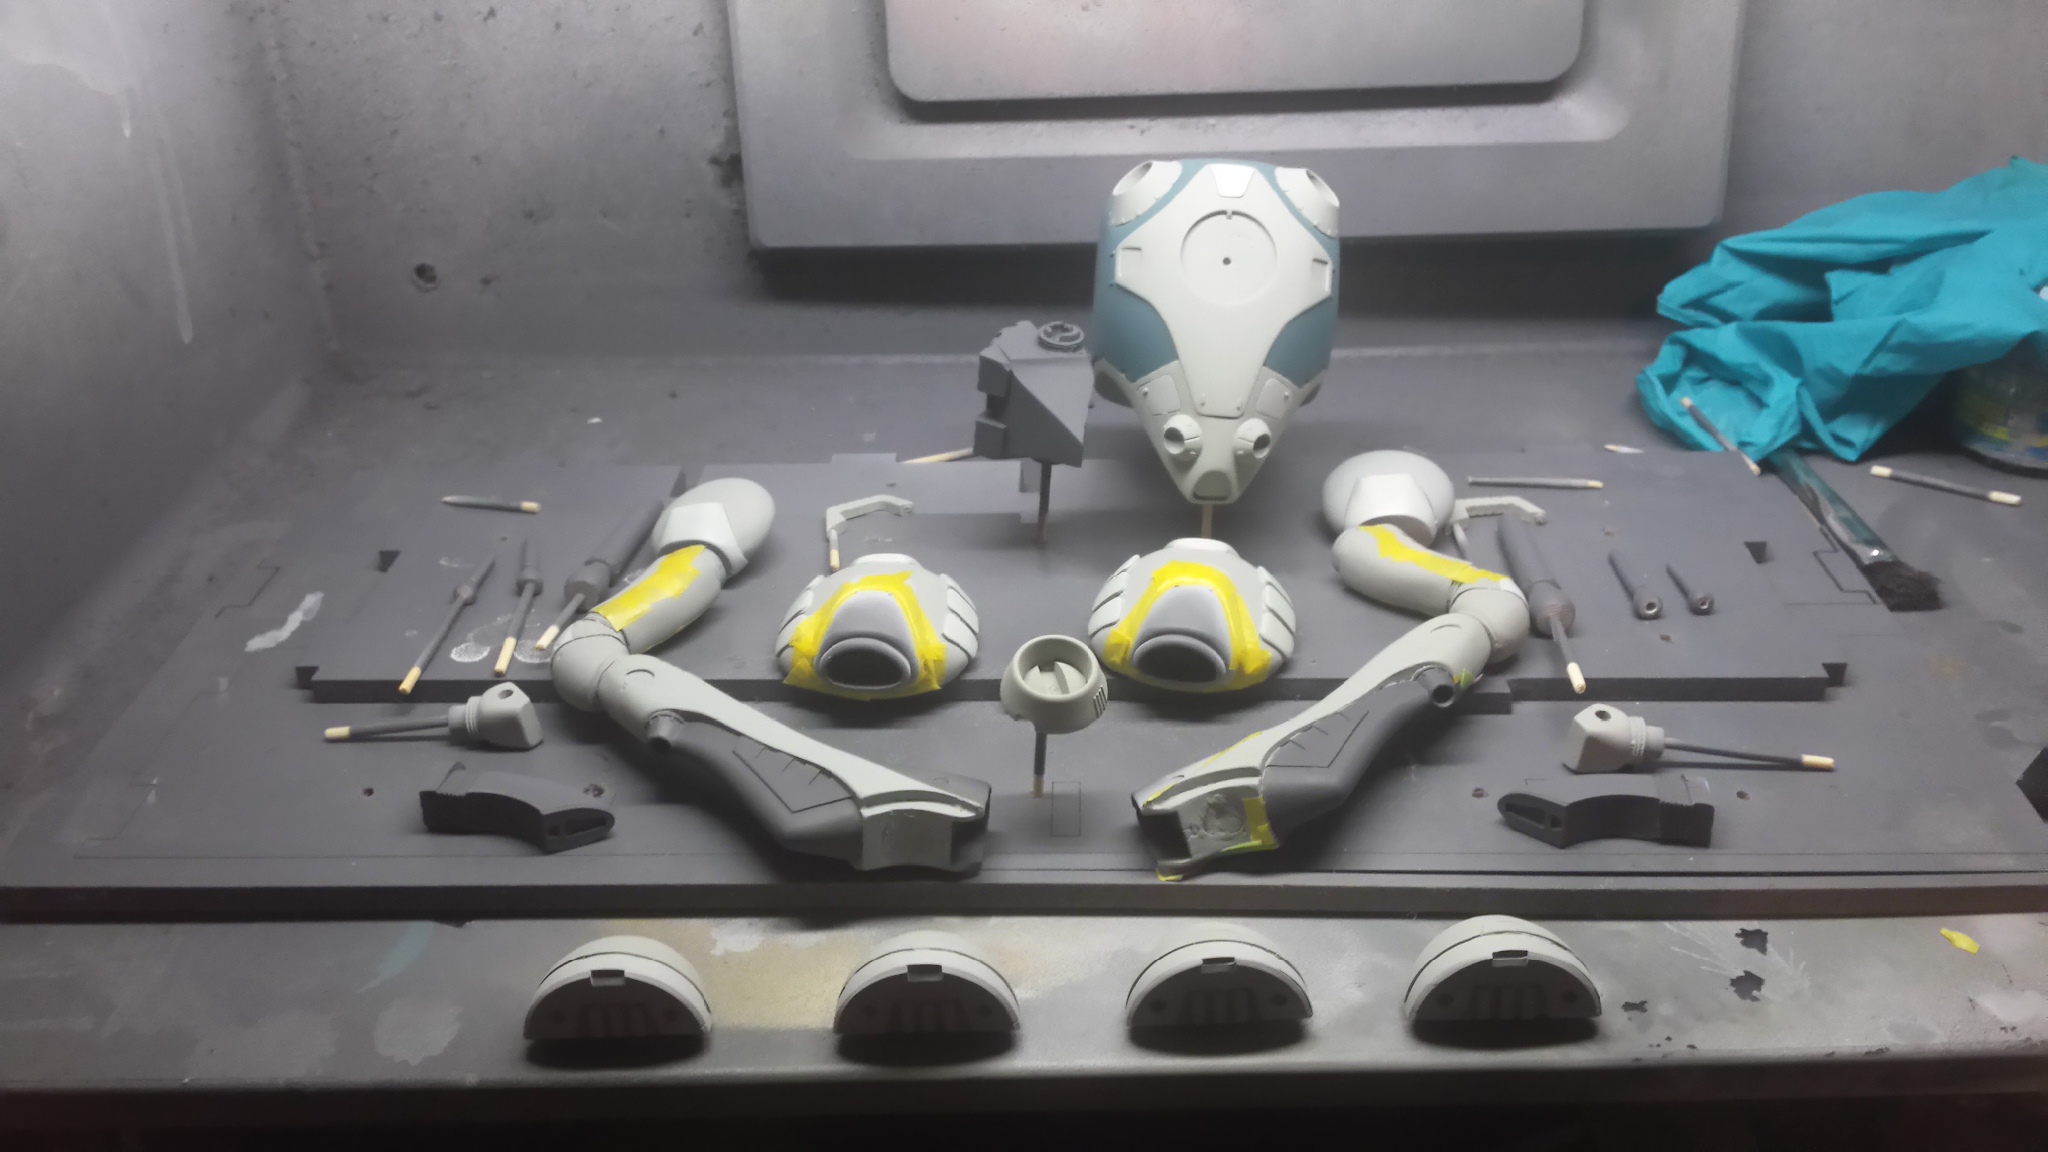
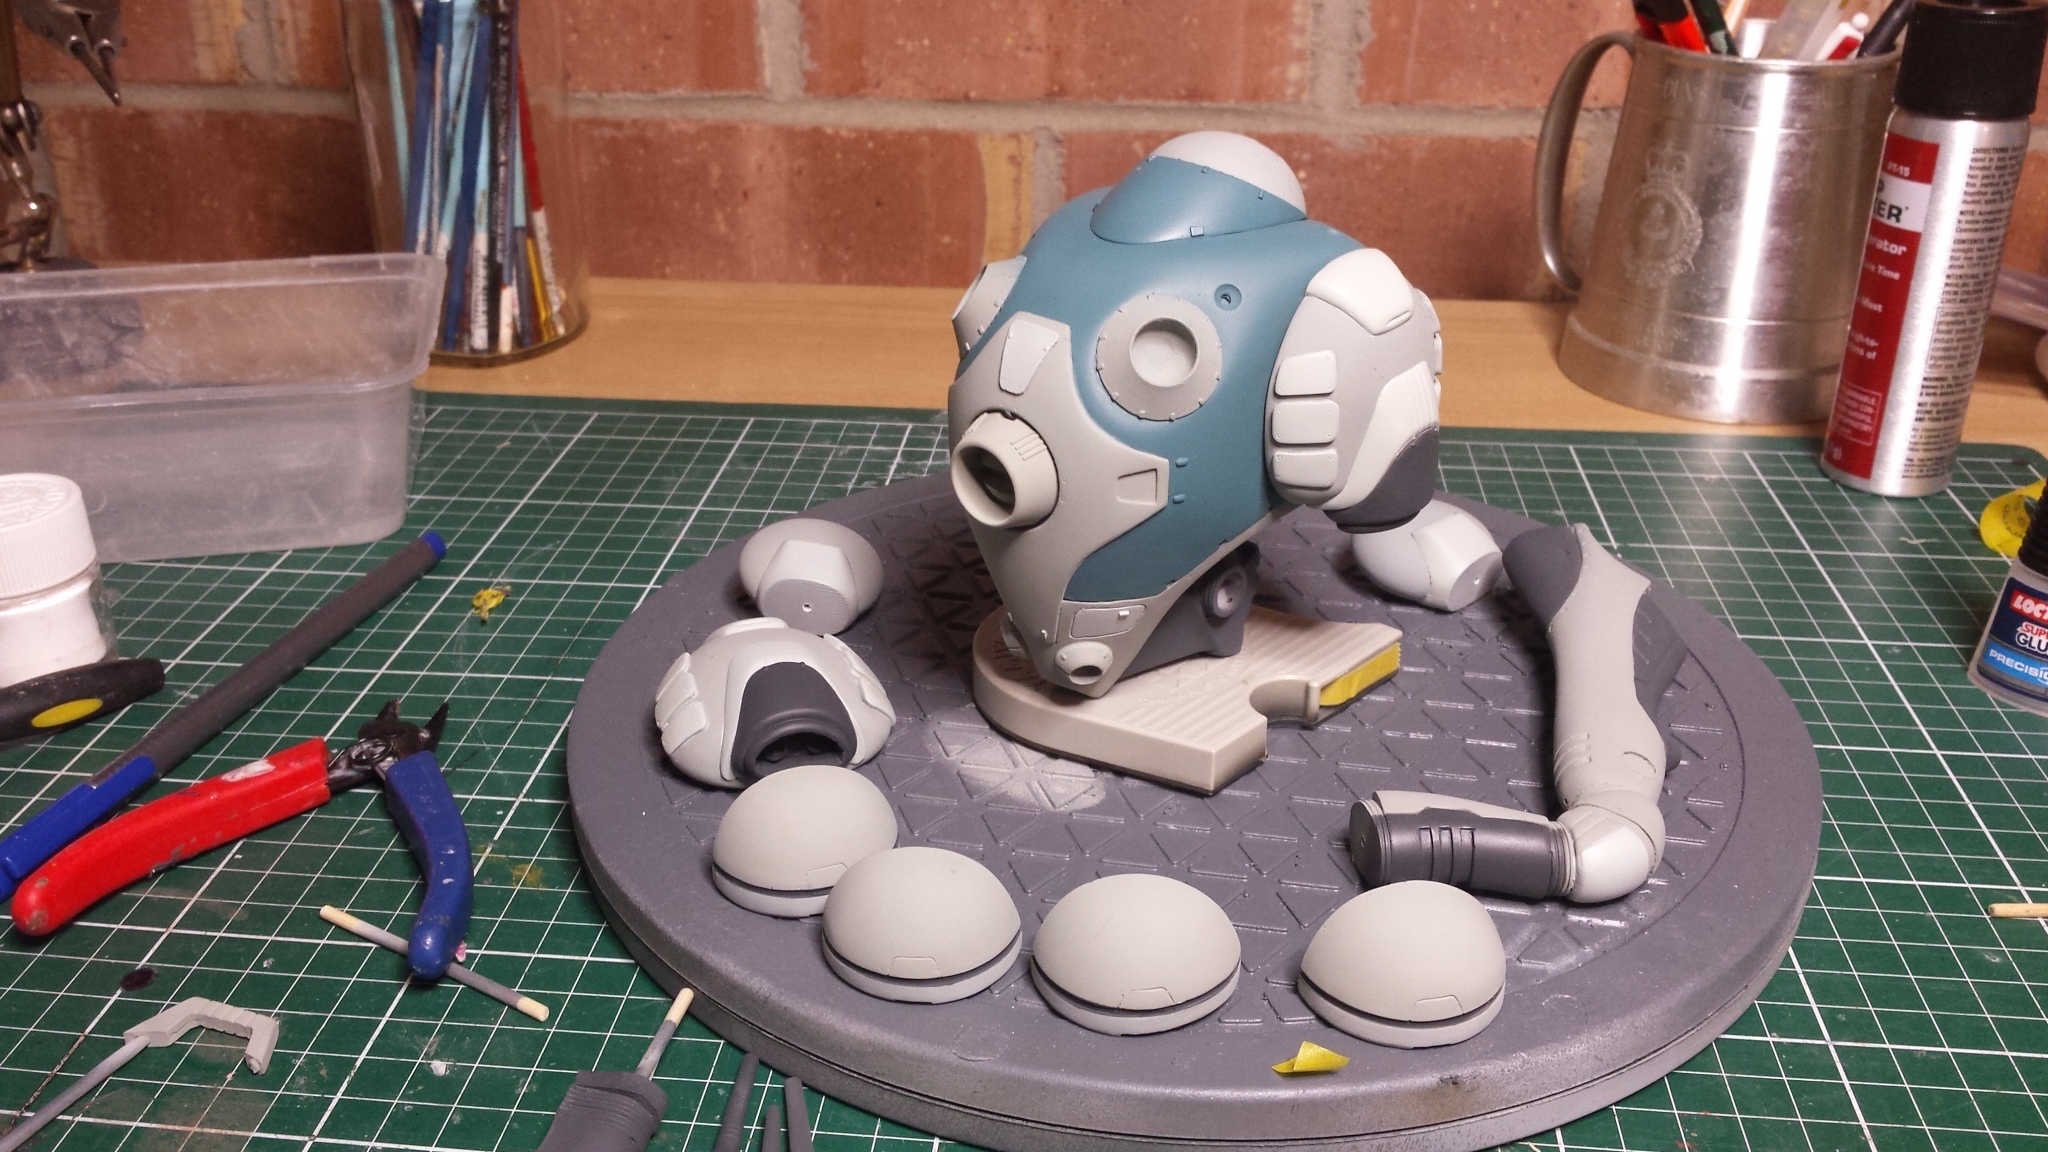
A couple of days later I was back at this stage:


And things were looking pretty good
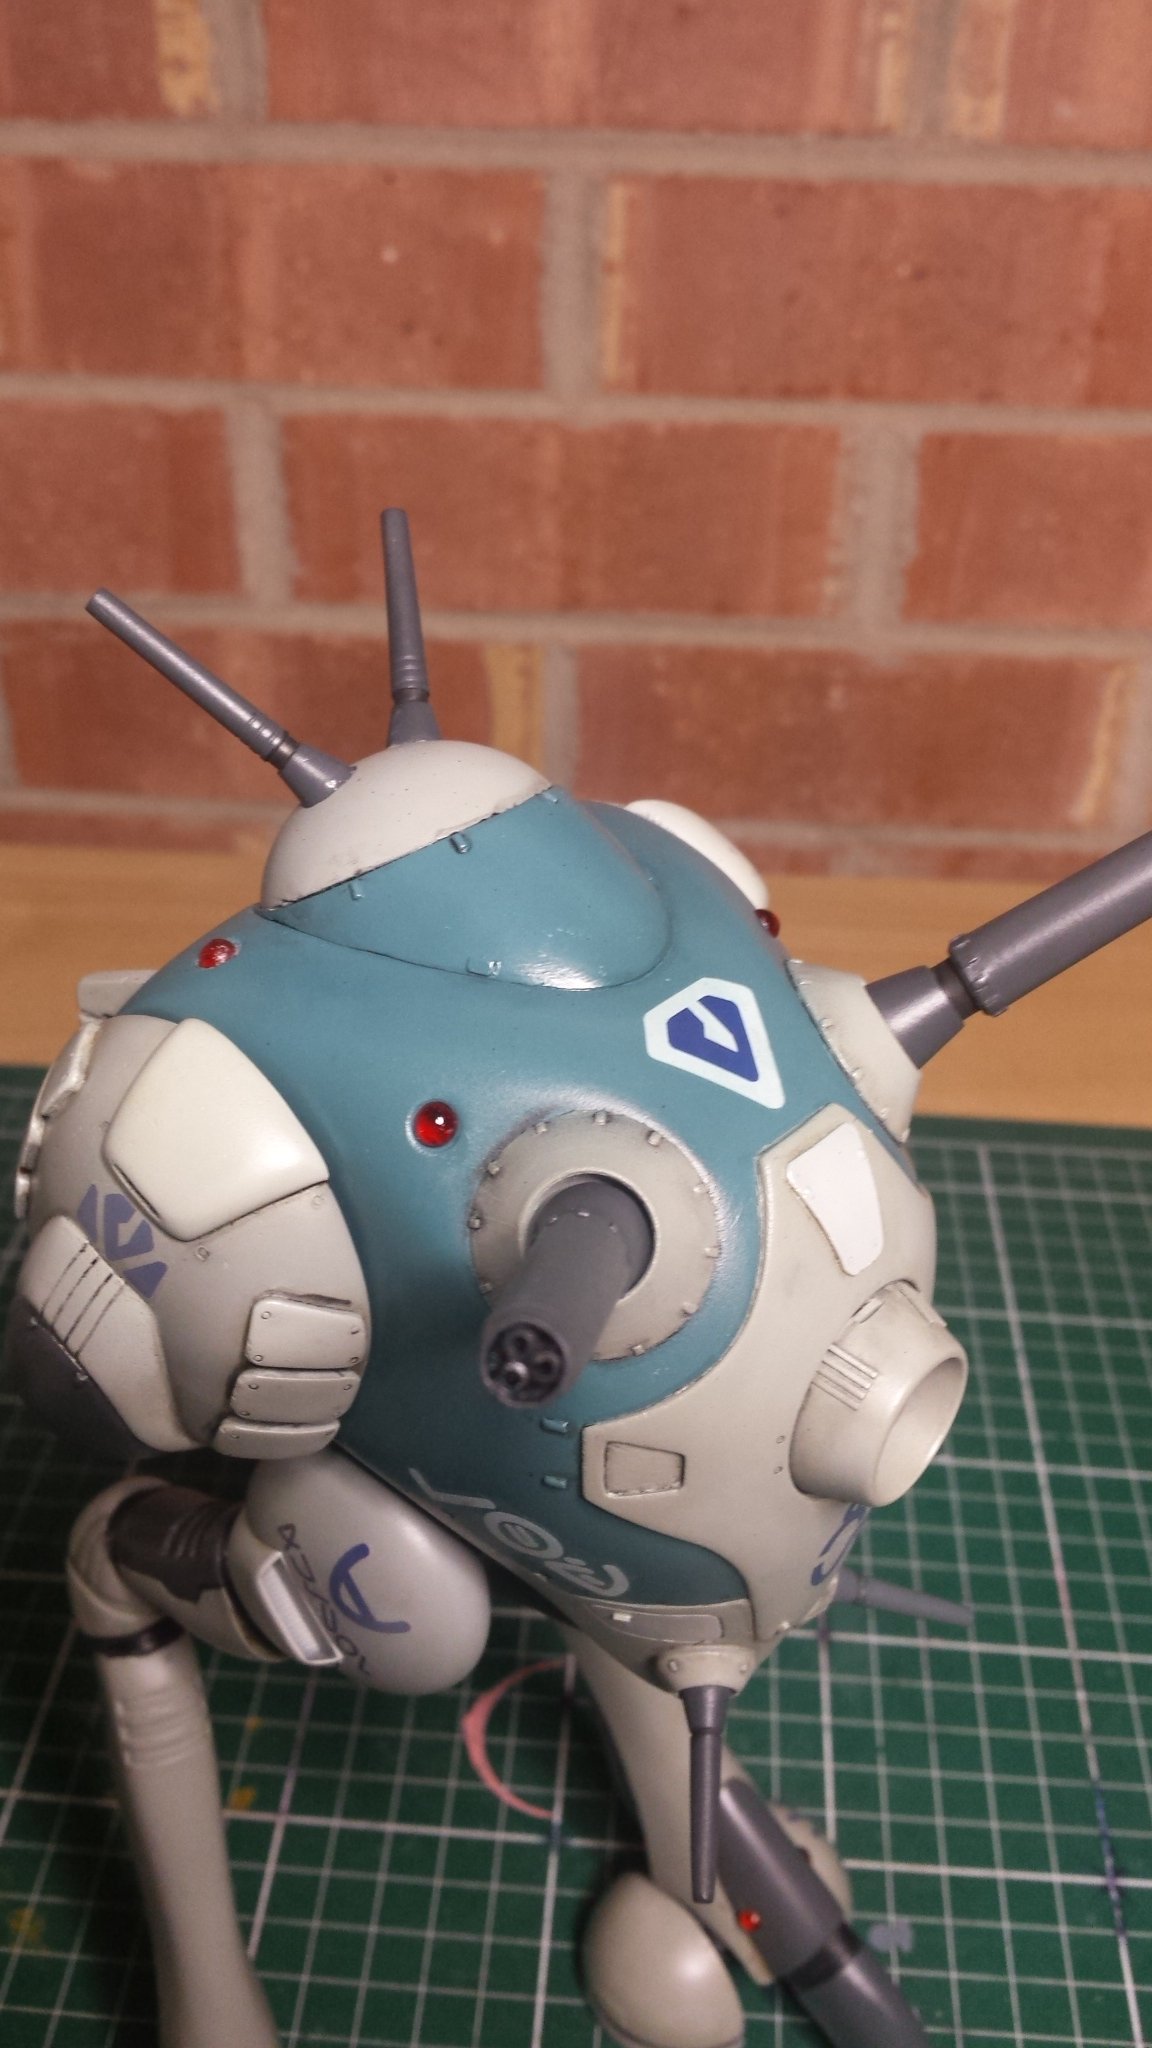
After that it was just a matter adding the decals and putting the time in decolourising and applying a subtle oil paint shading.
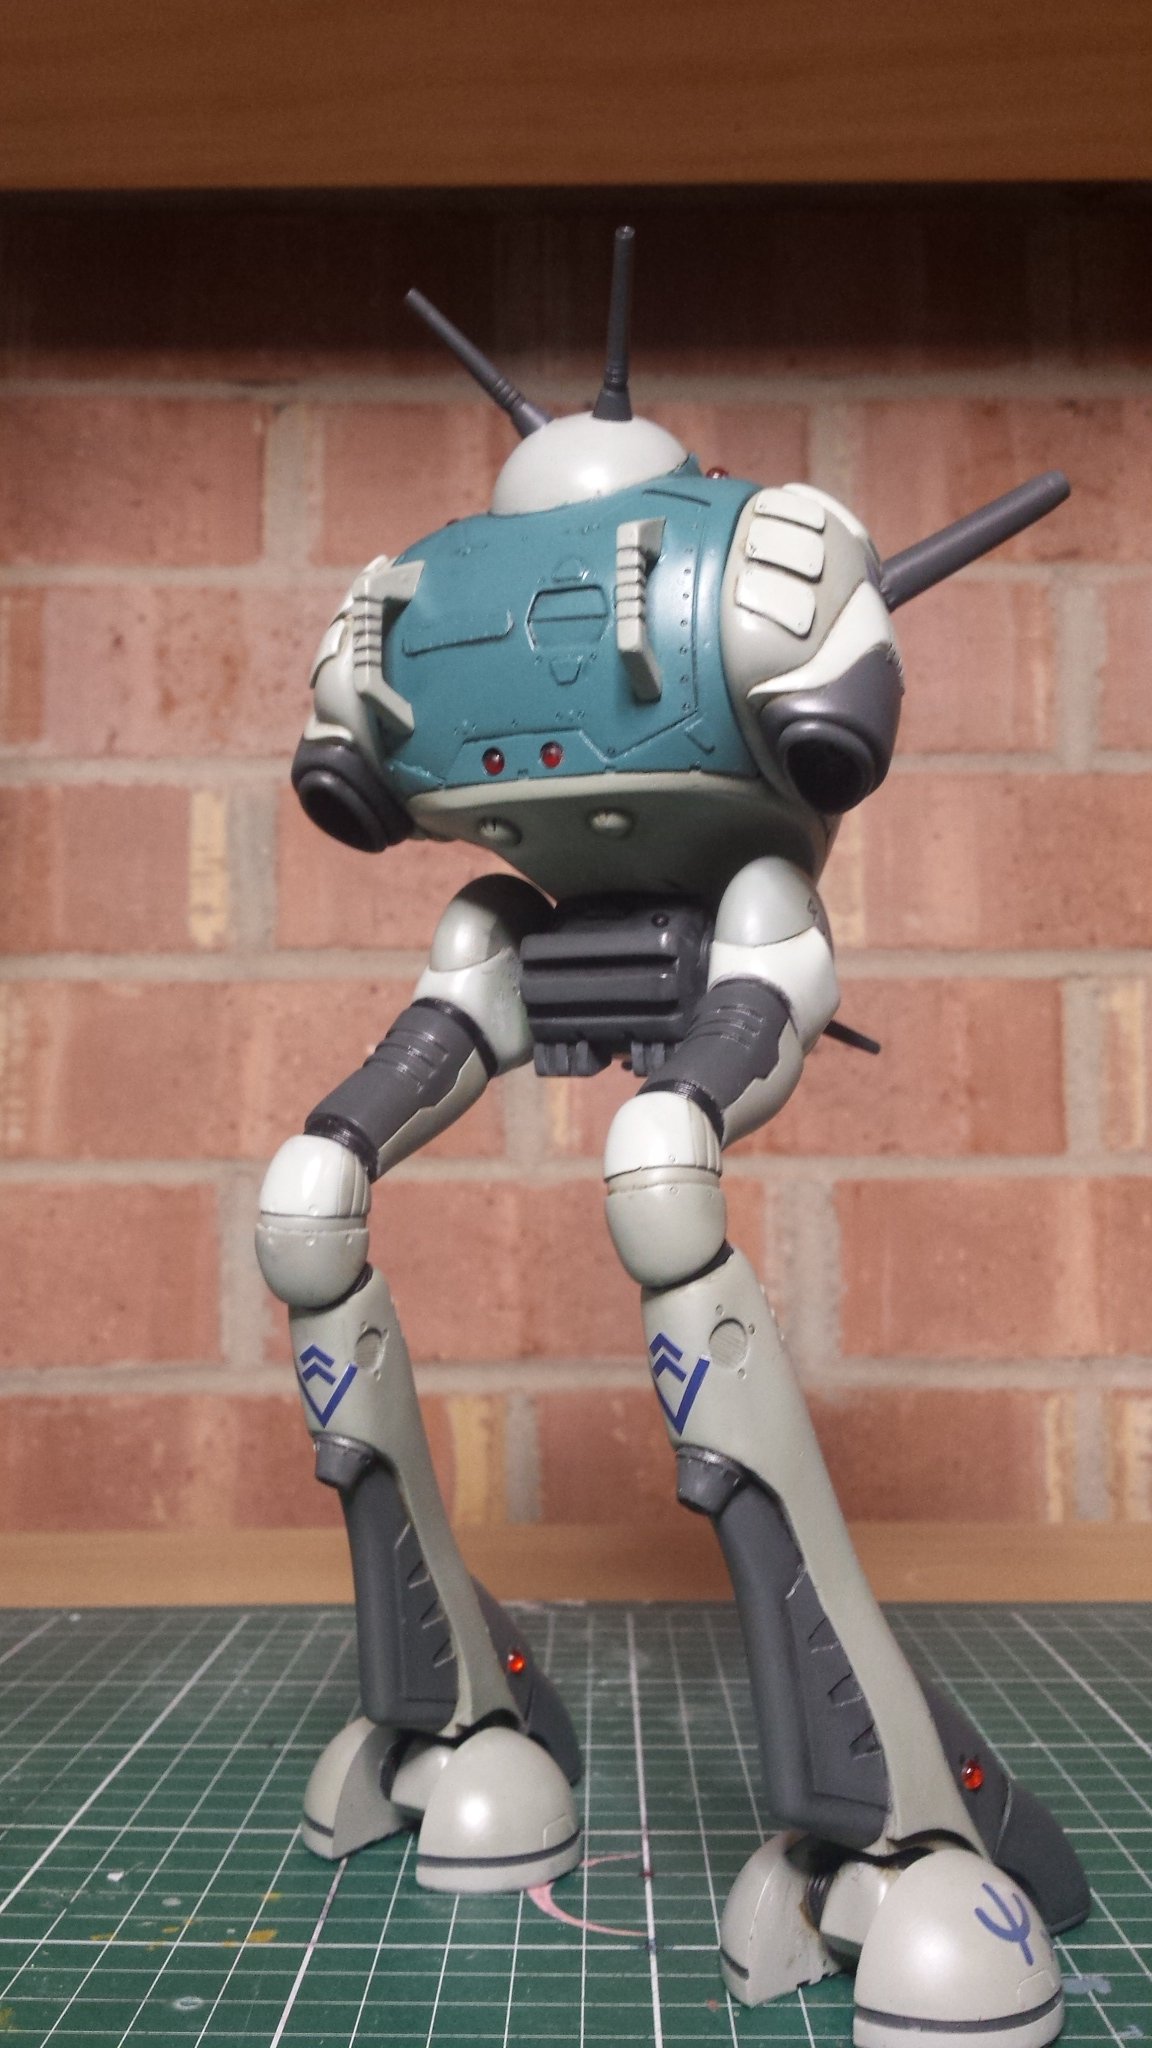
End result:
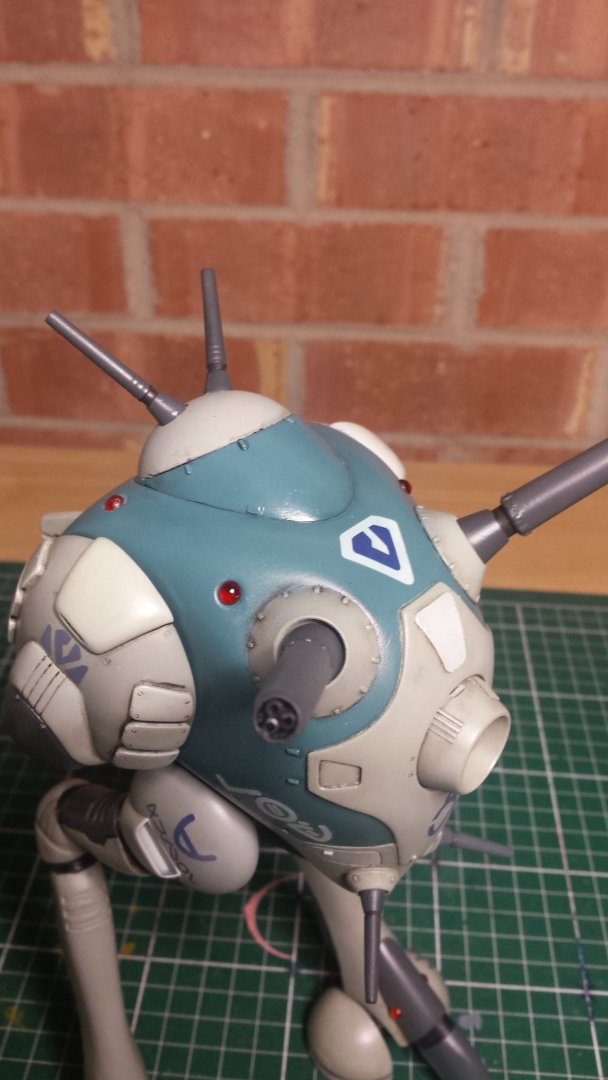
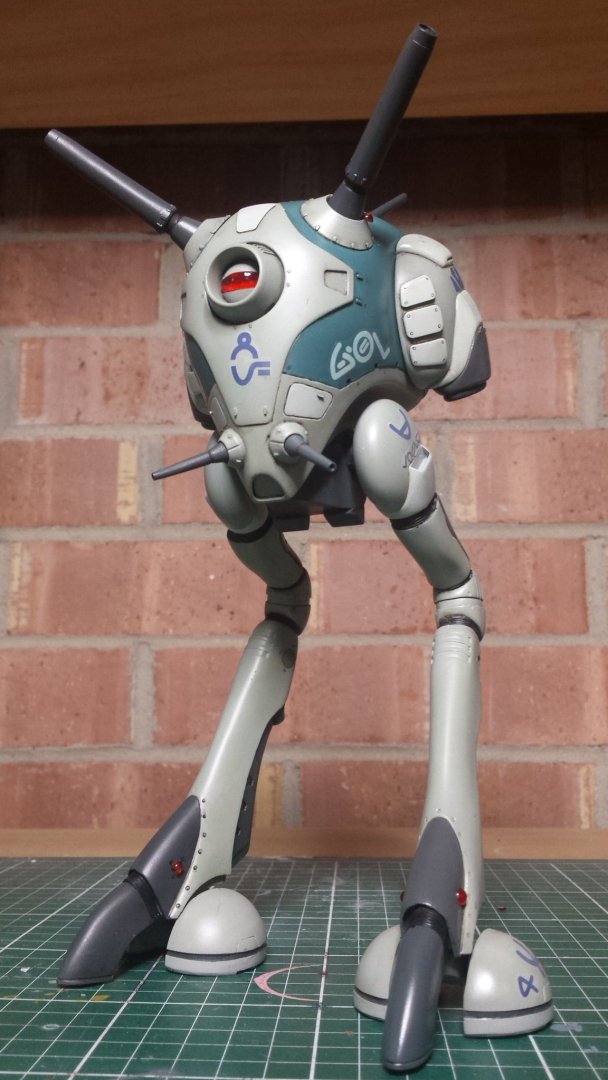

Unfortunately I didn't have to take and good shots on a clean background but that is okay - I'll just build another
)")
-
Bump for updated first post - we are shipping now!
-
Thanks Guys, haha that Inbit cracks me up
No progress this week as I wrap up thing for the kits to go out in the next week or so. Then I'll get some time at the paint booth again...
-
Grayson that has to be the most complete model collection I have ever seen (and I think you would have to travel pretty far to beat it) Are you building much these days?
-
Thanks David we try our best
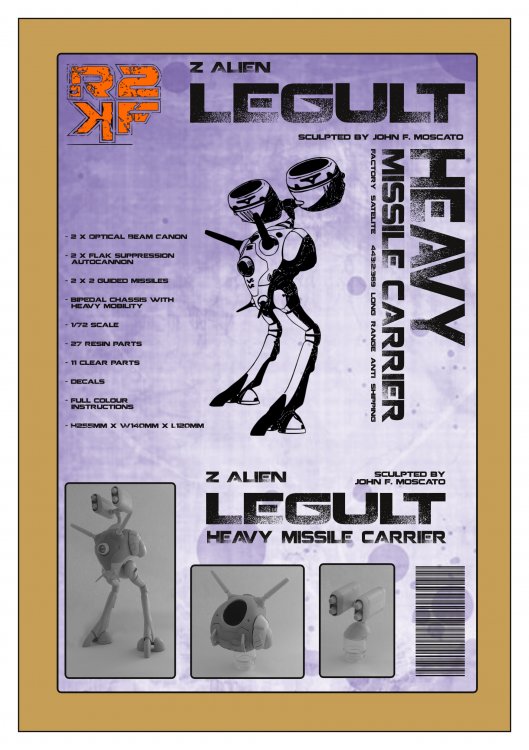
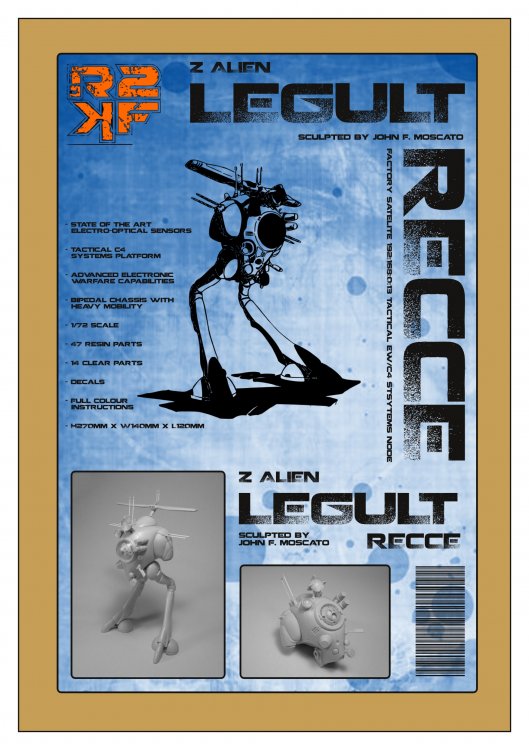
Here are some the Legult box labels and the one from the Interceptor:


-
Haha I see a lot "What I want Hasegawa to do next" rather than What WILL Hasegawa do next."
You gotta thinkbang-for-buck profit wise. The VF-1D battroid has merit as I think there would be only a handful of parts to be tooled up for it.
-
Since they are halfway there I would expect a VF-25 with Armoured Pack
-
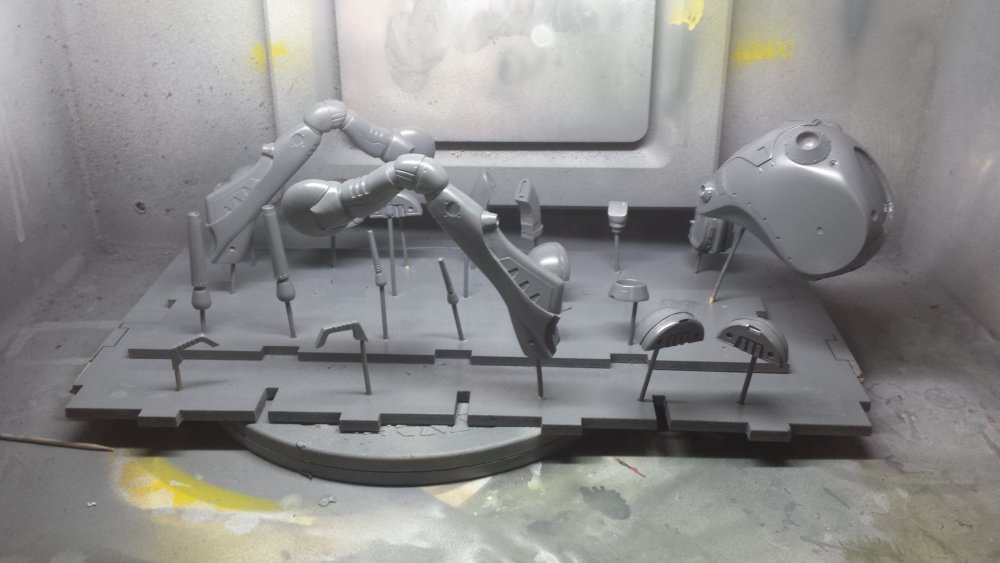
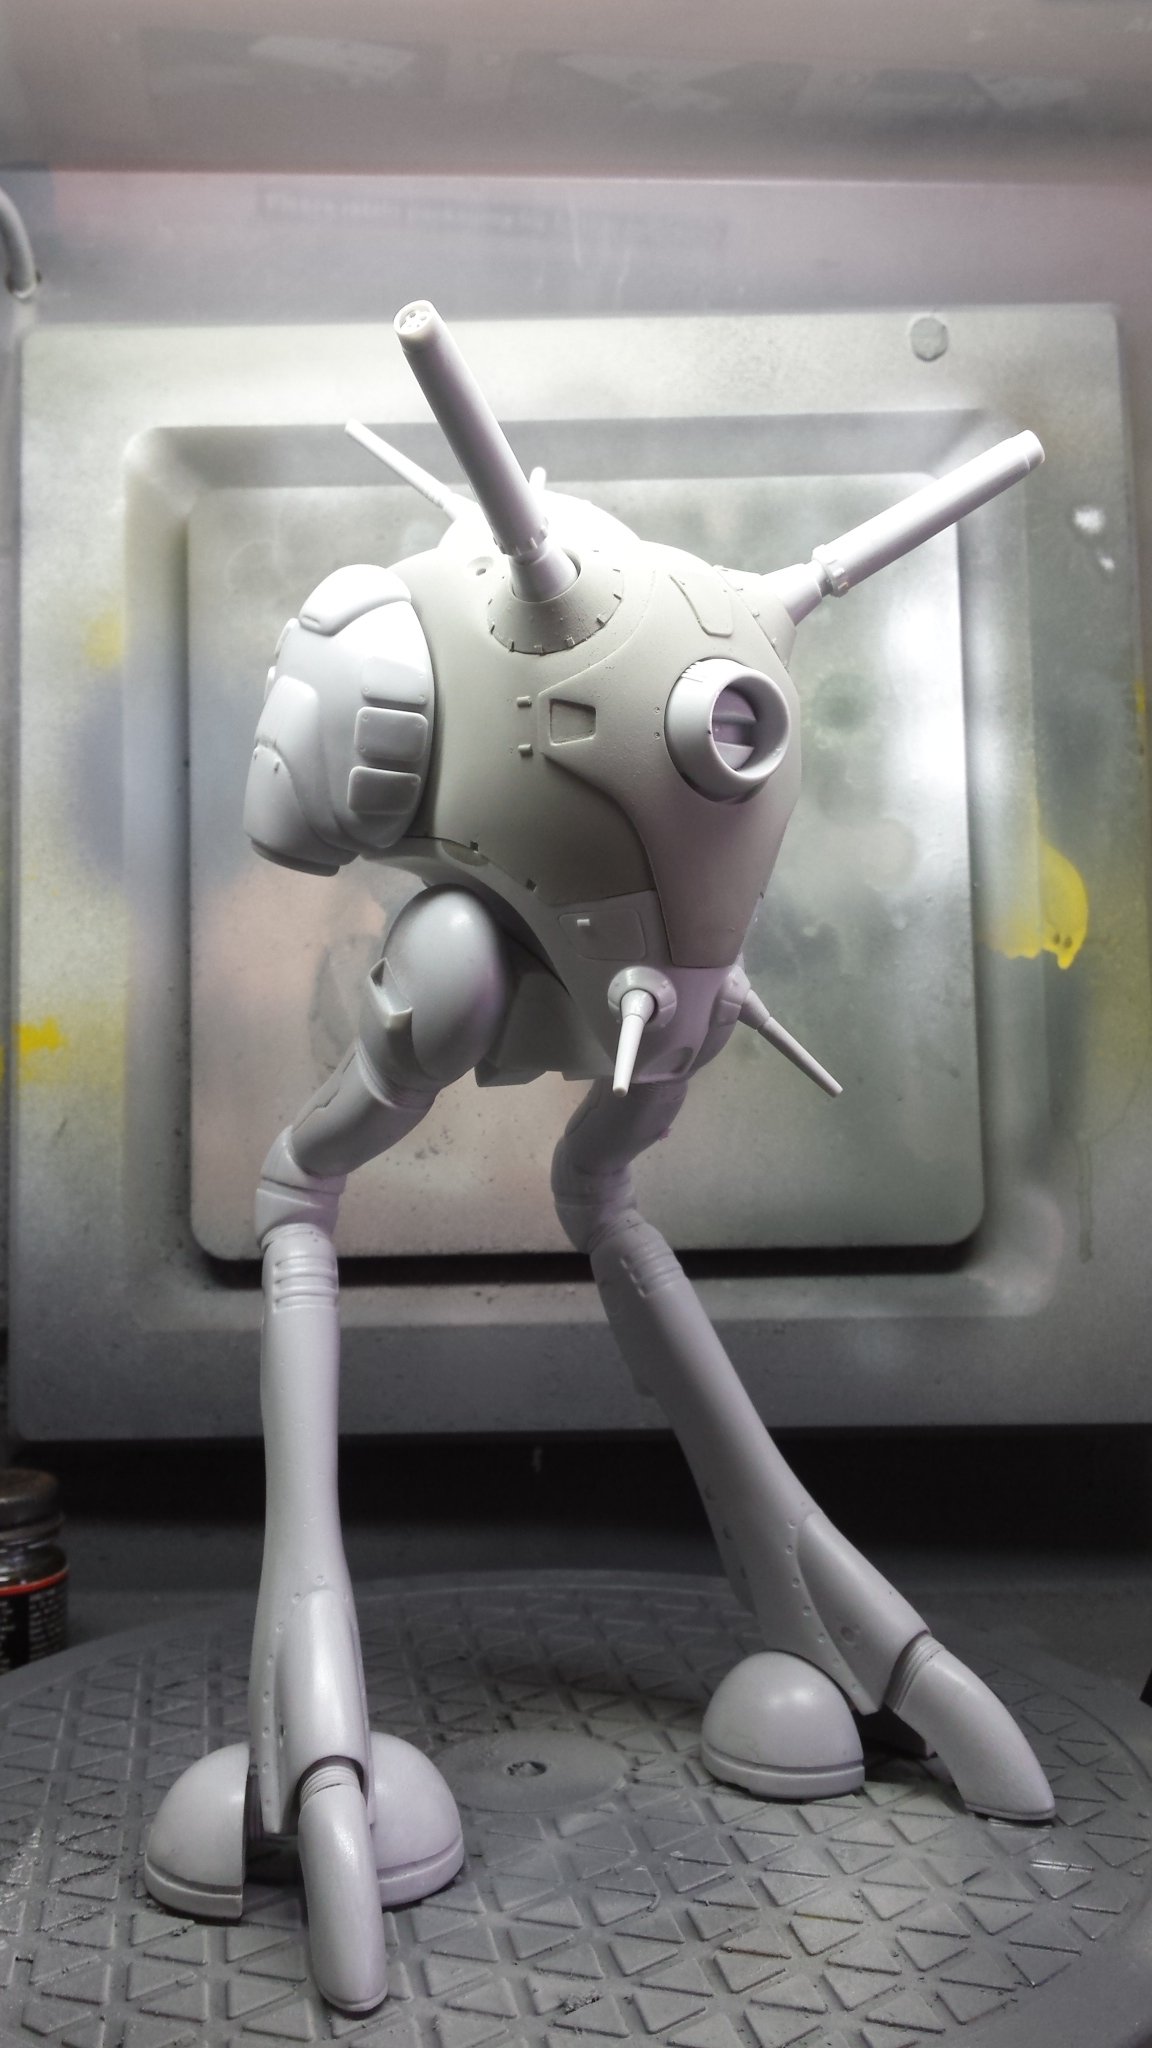
Finally in primer. I picked a few spots that need attention then I can start laying down colour
-
12 hours ago, wmkjr said:
Not really. Everyone is probably waiting for the finished build to comment. Plus they are waiting in the shadows for the next build update.
Ah cool. Is it just me or is the model section a lot quieter than it used to be (as in a few years ago)?
3 hours ago, big F said:We're watchin!!
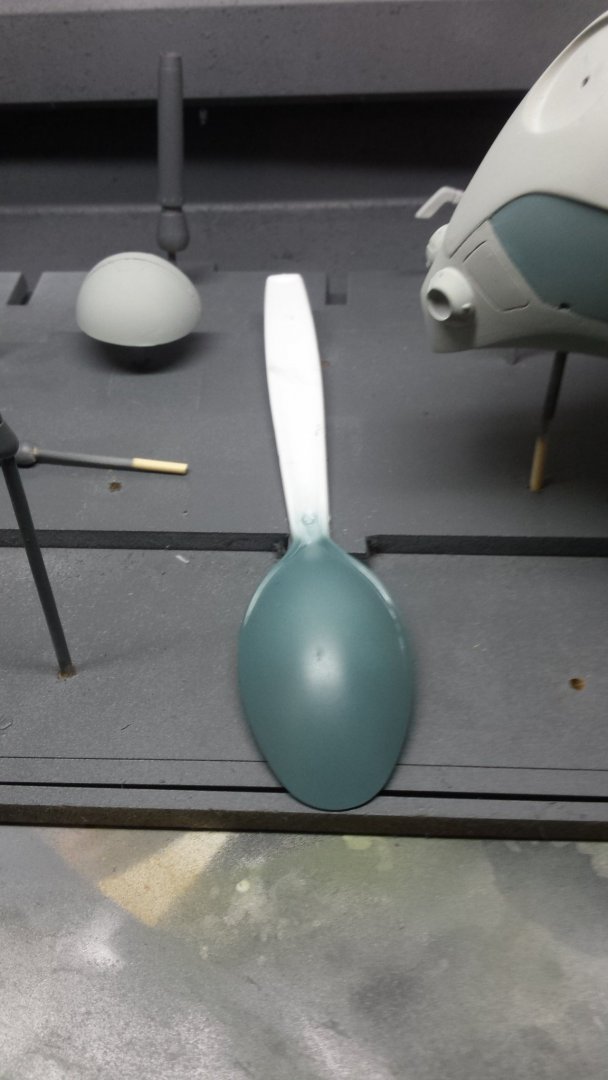
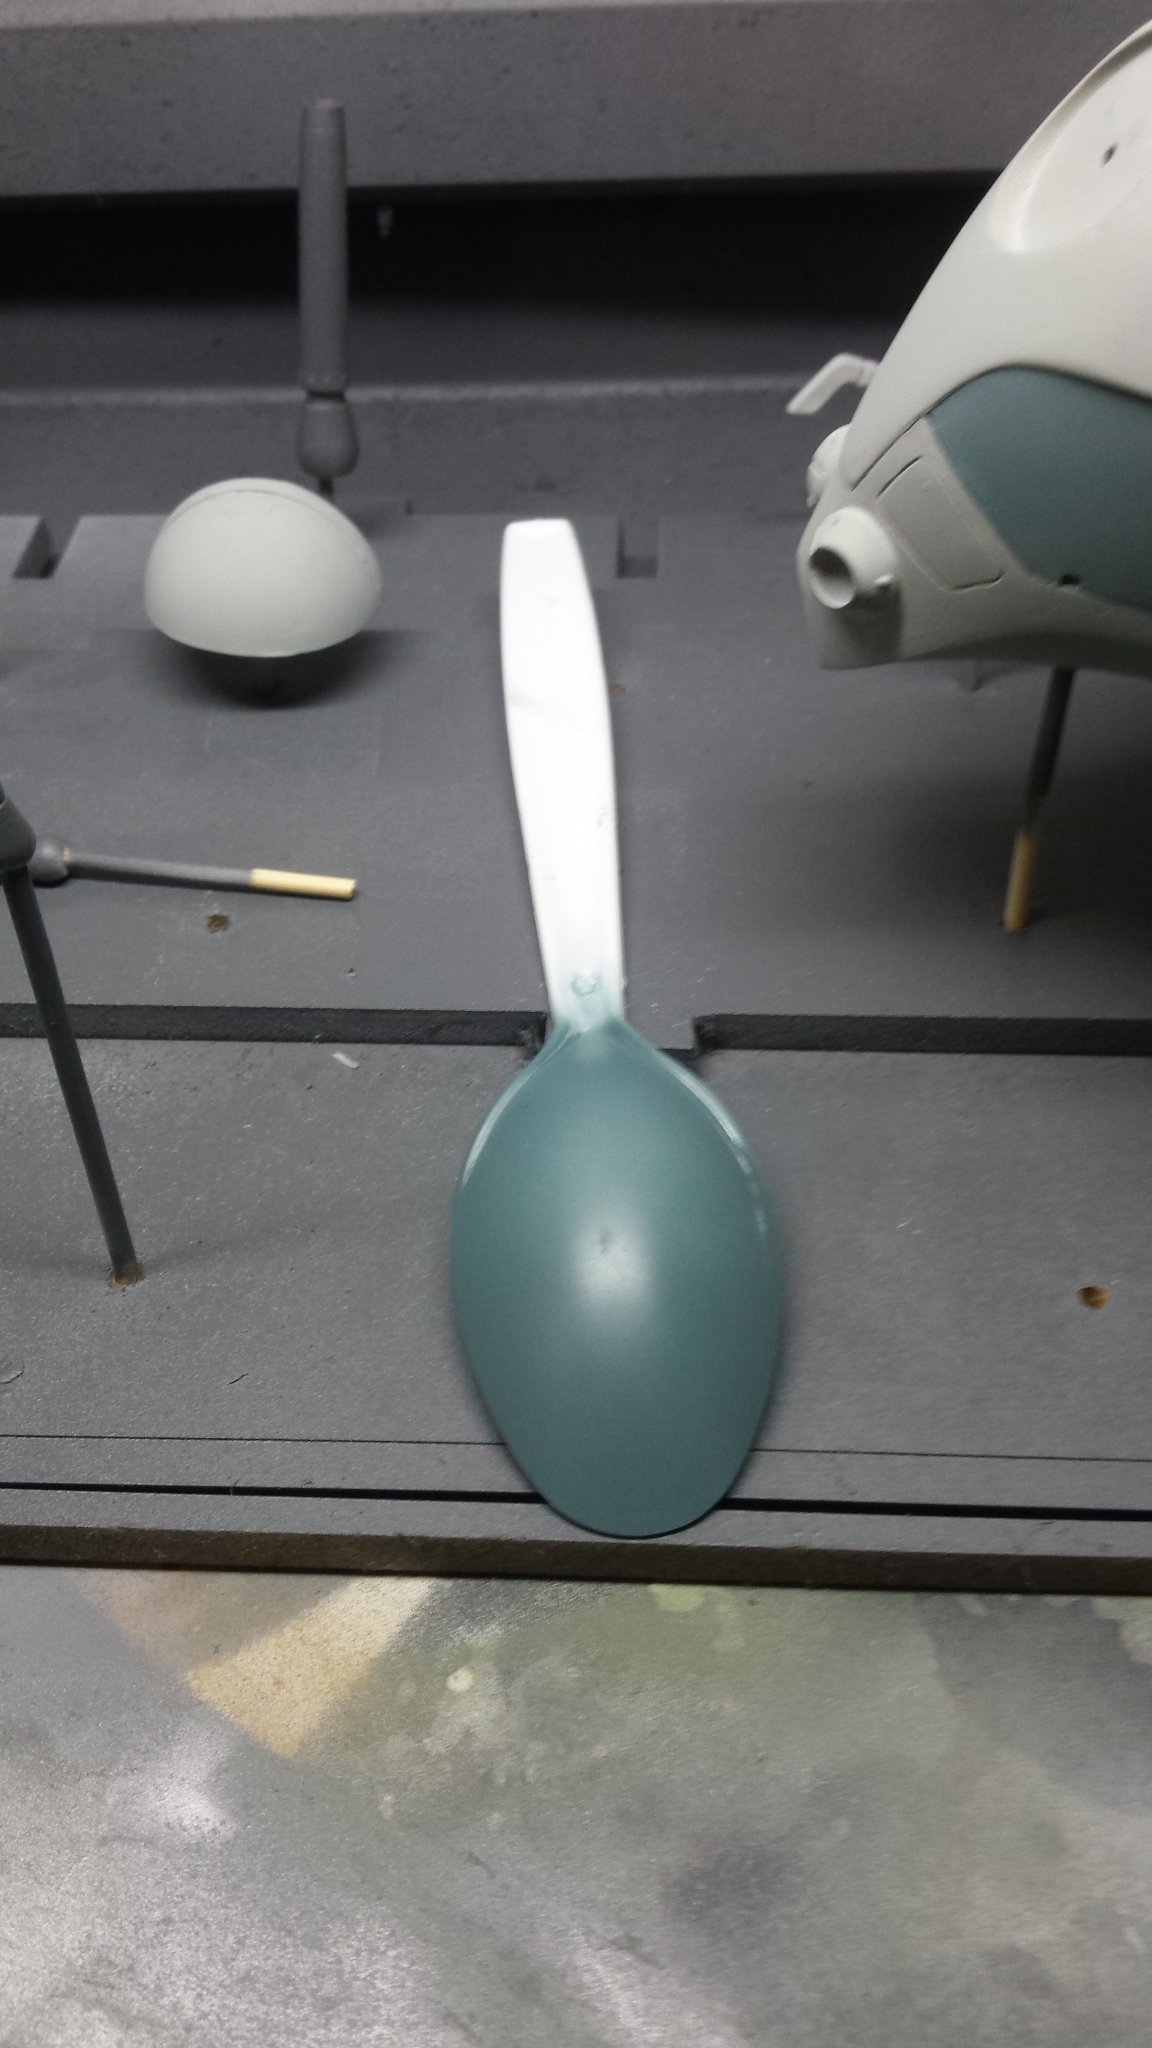
That being the case I need an opinion on this paint I mixed up. Too green? I'm two minds about it myself so maybe I should wait until I can spray a test.
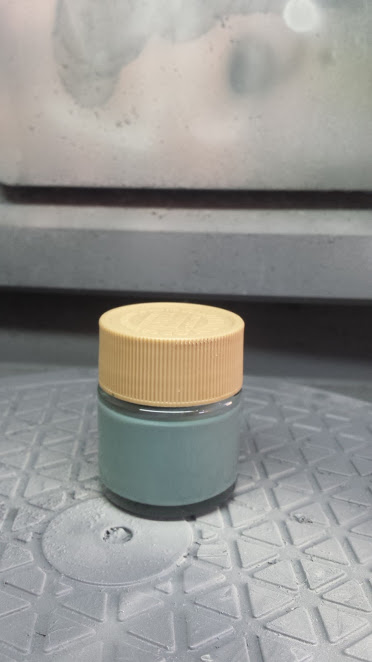
Actually it looks a lot more blue in person
-
IS it a bad sign when you are the only one posting in your own thread? Oh well I never was one to get the hint...
In the meantime I sorted out these parts for painting. A drill bit, skewers and some scrap MDF will do the job nicely

-
21 hours ago, Convectuoso said:
Awesome job
Thanks Convestuoso, but I think you might have been a bit quick on the trigger...
Despite everything I couldn't get the ball joints to work properly. The kit is too tall and too heavy and the joints are just not tight enough. The overall assembly is just too rickety and fidgety. I'll replace all the bits that were permanently modified and built this as a static kit.
No new pictures unfortunately as it is just more of the same.
10 hours ago, Jinnai said:Waiting patiently for mine! I was lucky to notice the pre order on facebook when I did.
Nice! Your kits are sitting in the cupboard right now waiting for me to finish the instructions and for the decals to arrive. He better hurry up as the end of August is not far away
-
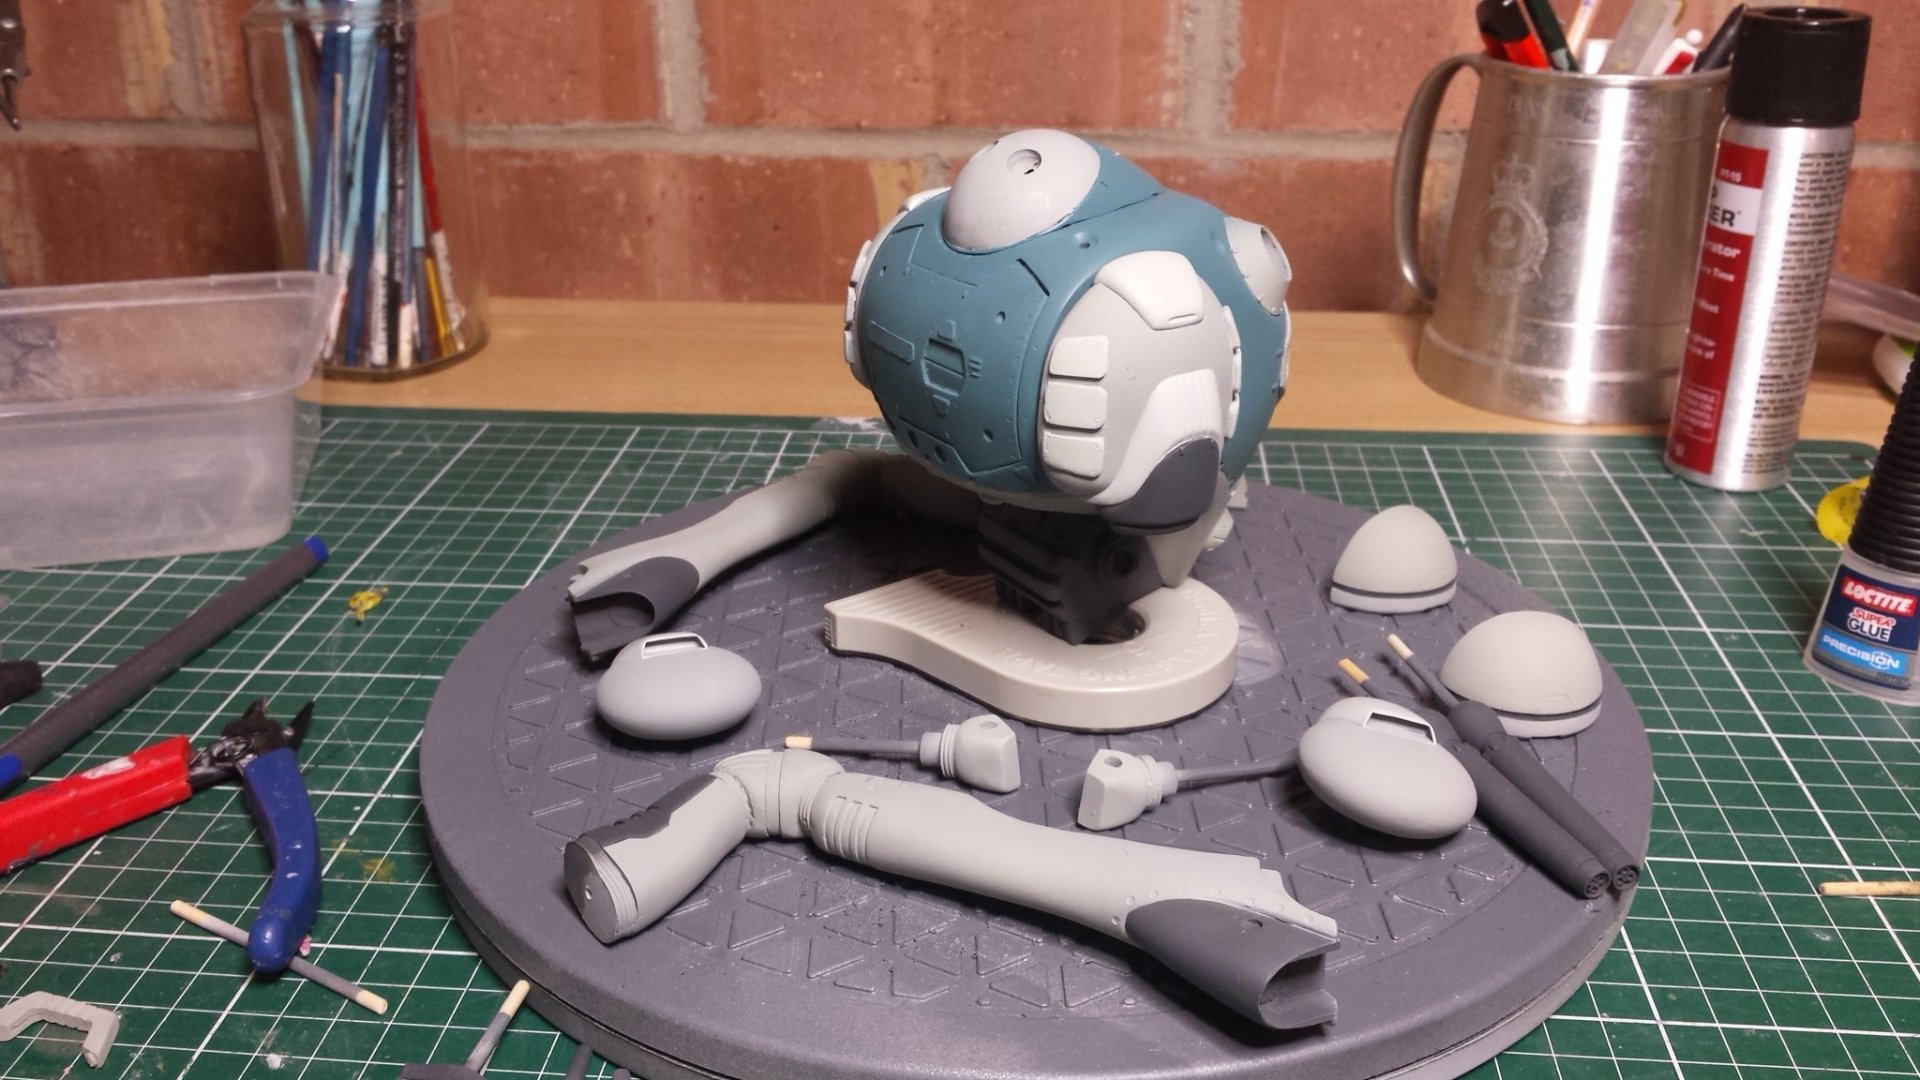
 I was hoping to have this in primer by now but since this is being built for a toy collector I thought that I had better add some articulation. Ball joints have been added to the guns, toes, ankles, hips and the thrusters and knees can swivel.
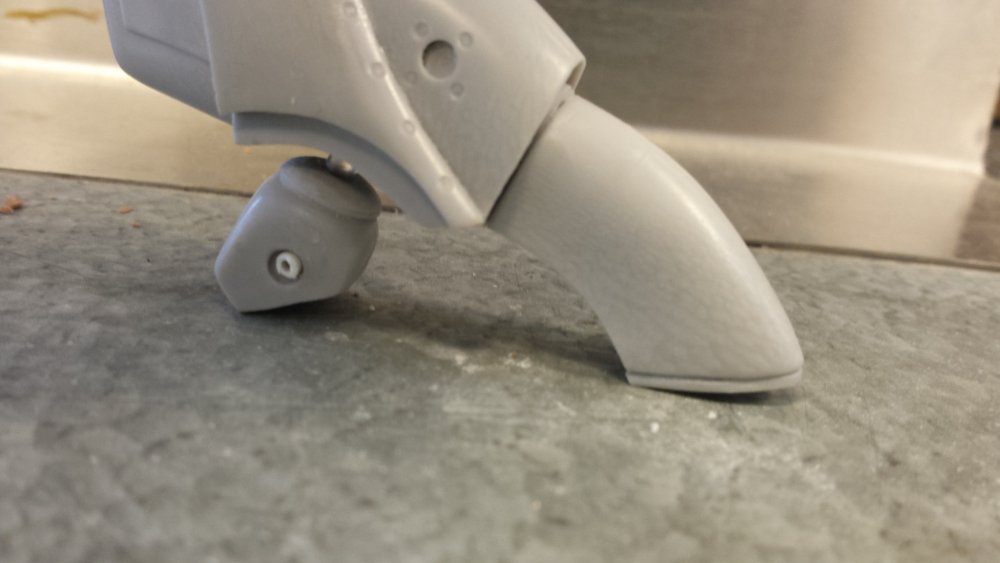
For nowhereis a pic of the toe and ankle setup
-
23 minutes ago, big F said:
If by some chance some spare resin fell into those pattern moulds, I along with quite a few others would part with cash for the results
Lucky for you about 10kg of resin fell into those moulds:
Cheers,
Brett
-
G'day plastic hackers and resin bashers!
Man am I glad to be back and I thought I would share this commission build for one of the board members. But a quick history on the kit first.
About 10 years ago Captain America sculpted his first Tactical pod complete with interior. It was a thing of beaty and blew away the old Imai/Bandai plastic kit which was prett scarce at the time (as well as scaling out at around 1/100 if I remember correctly). With the first run sold out the good Captain went on to produce the rest of the line up with several reissues over time.
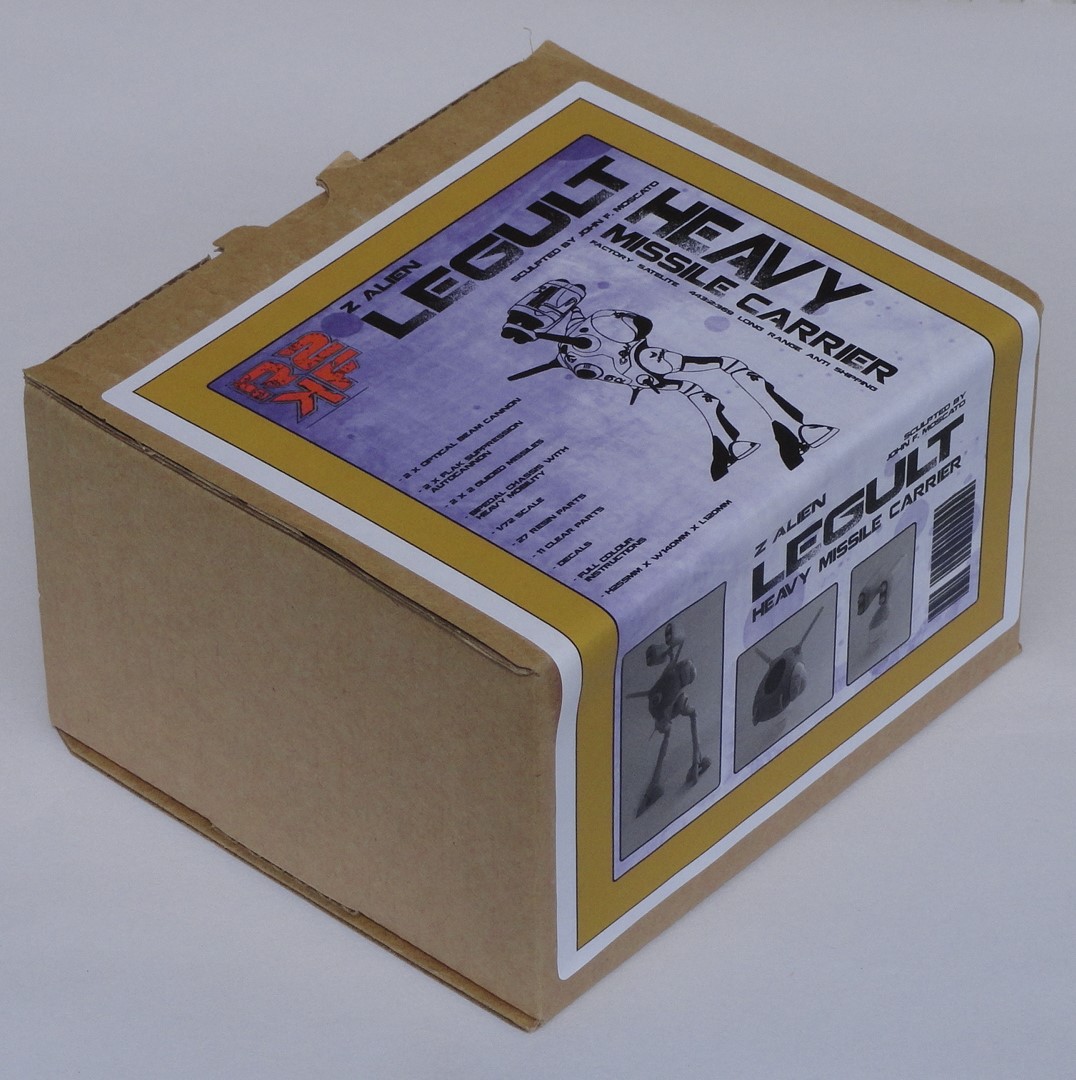
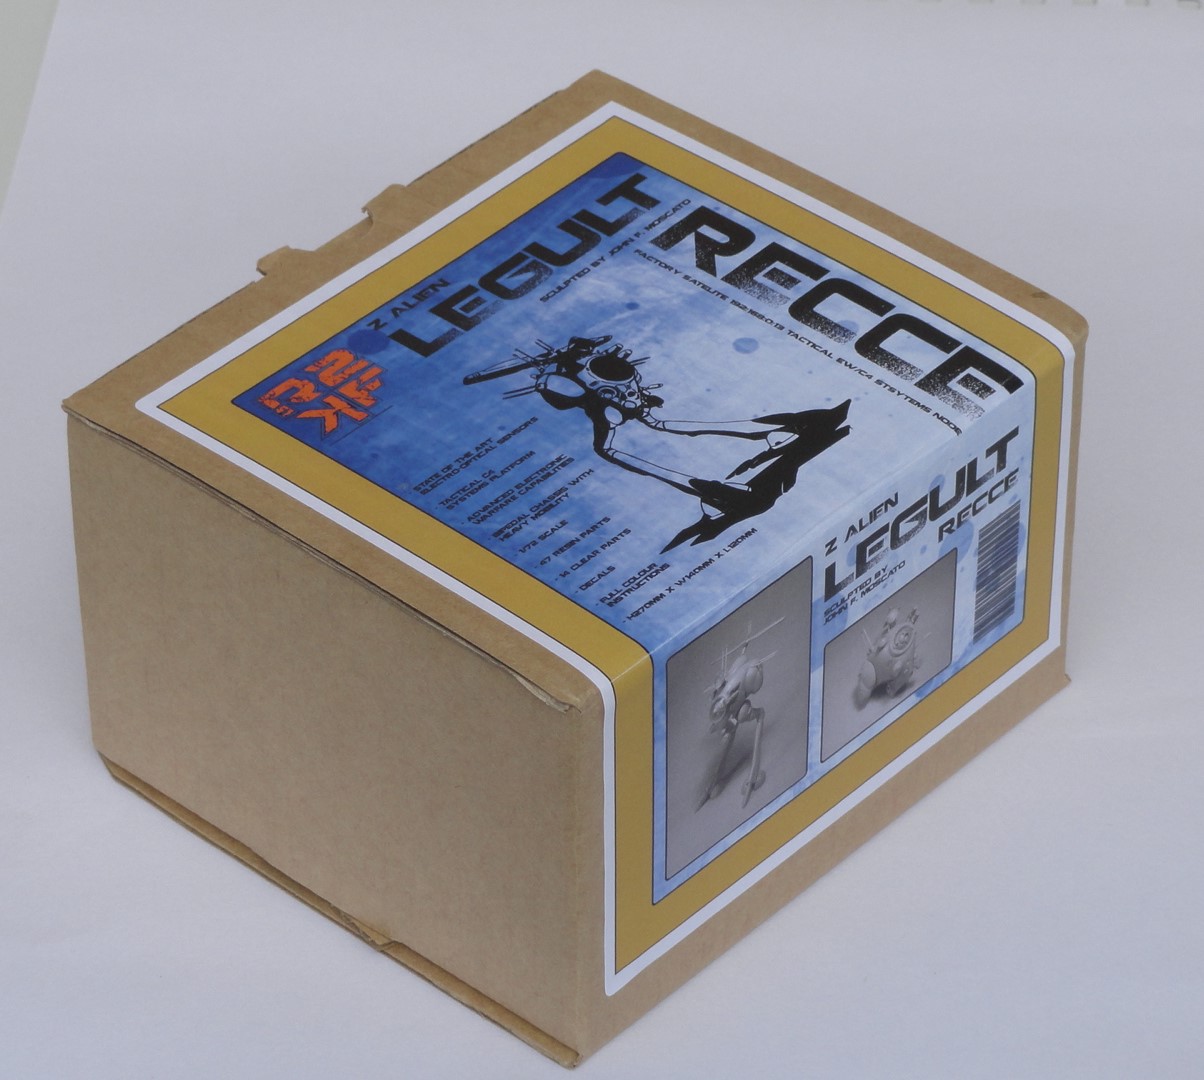
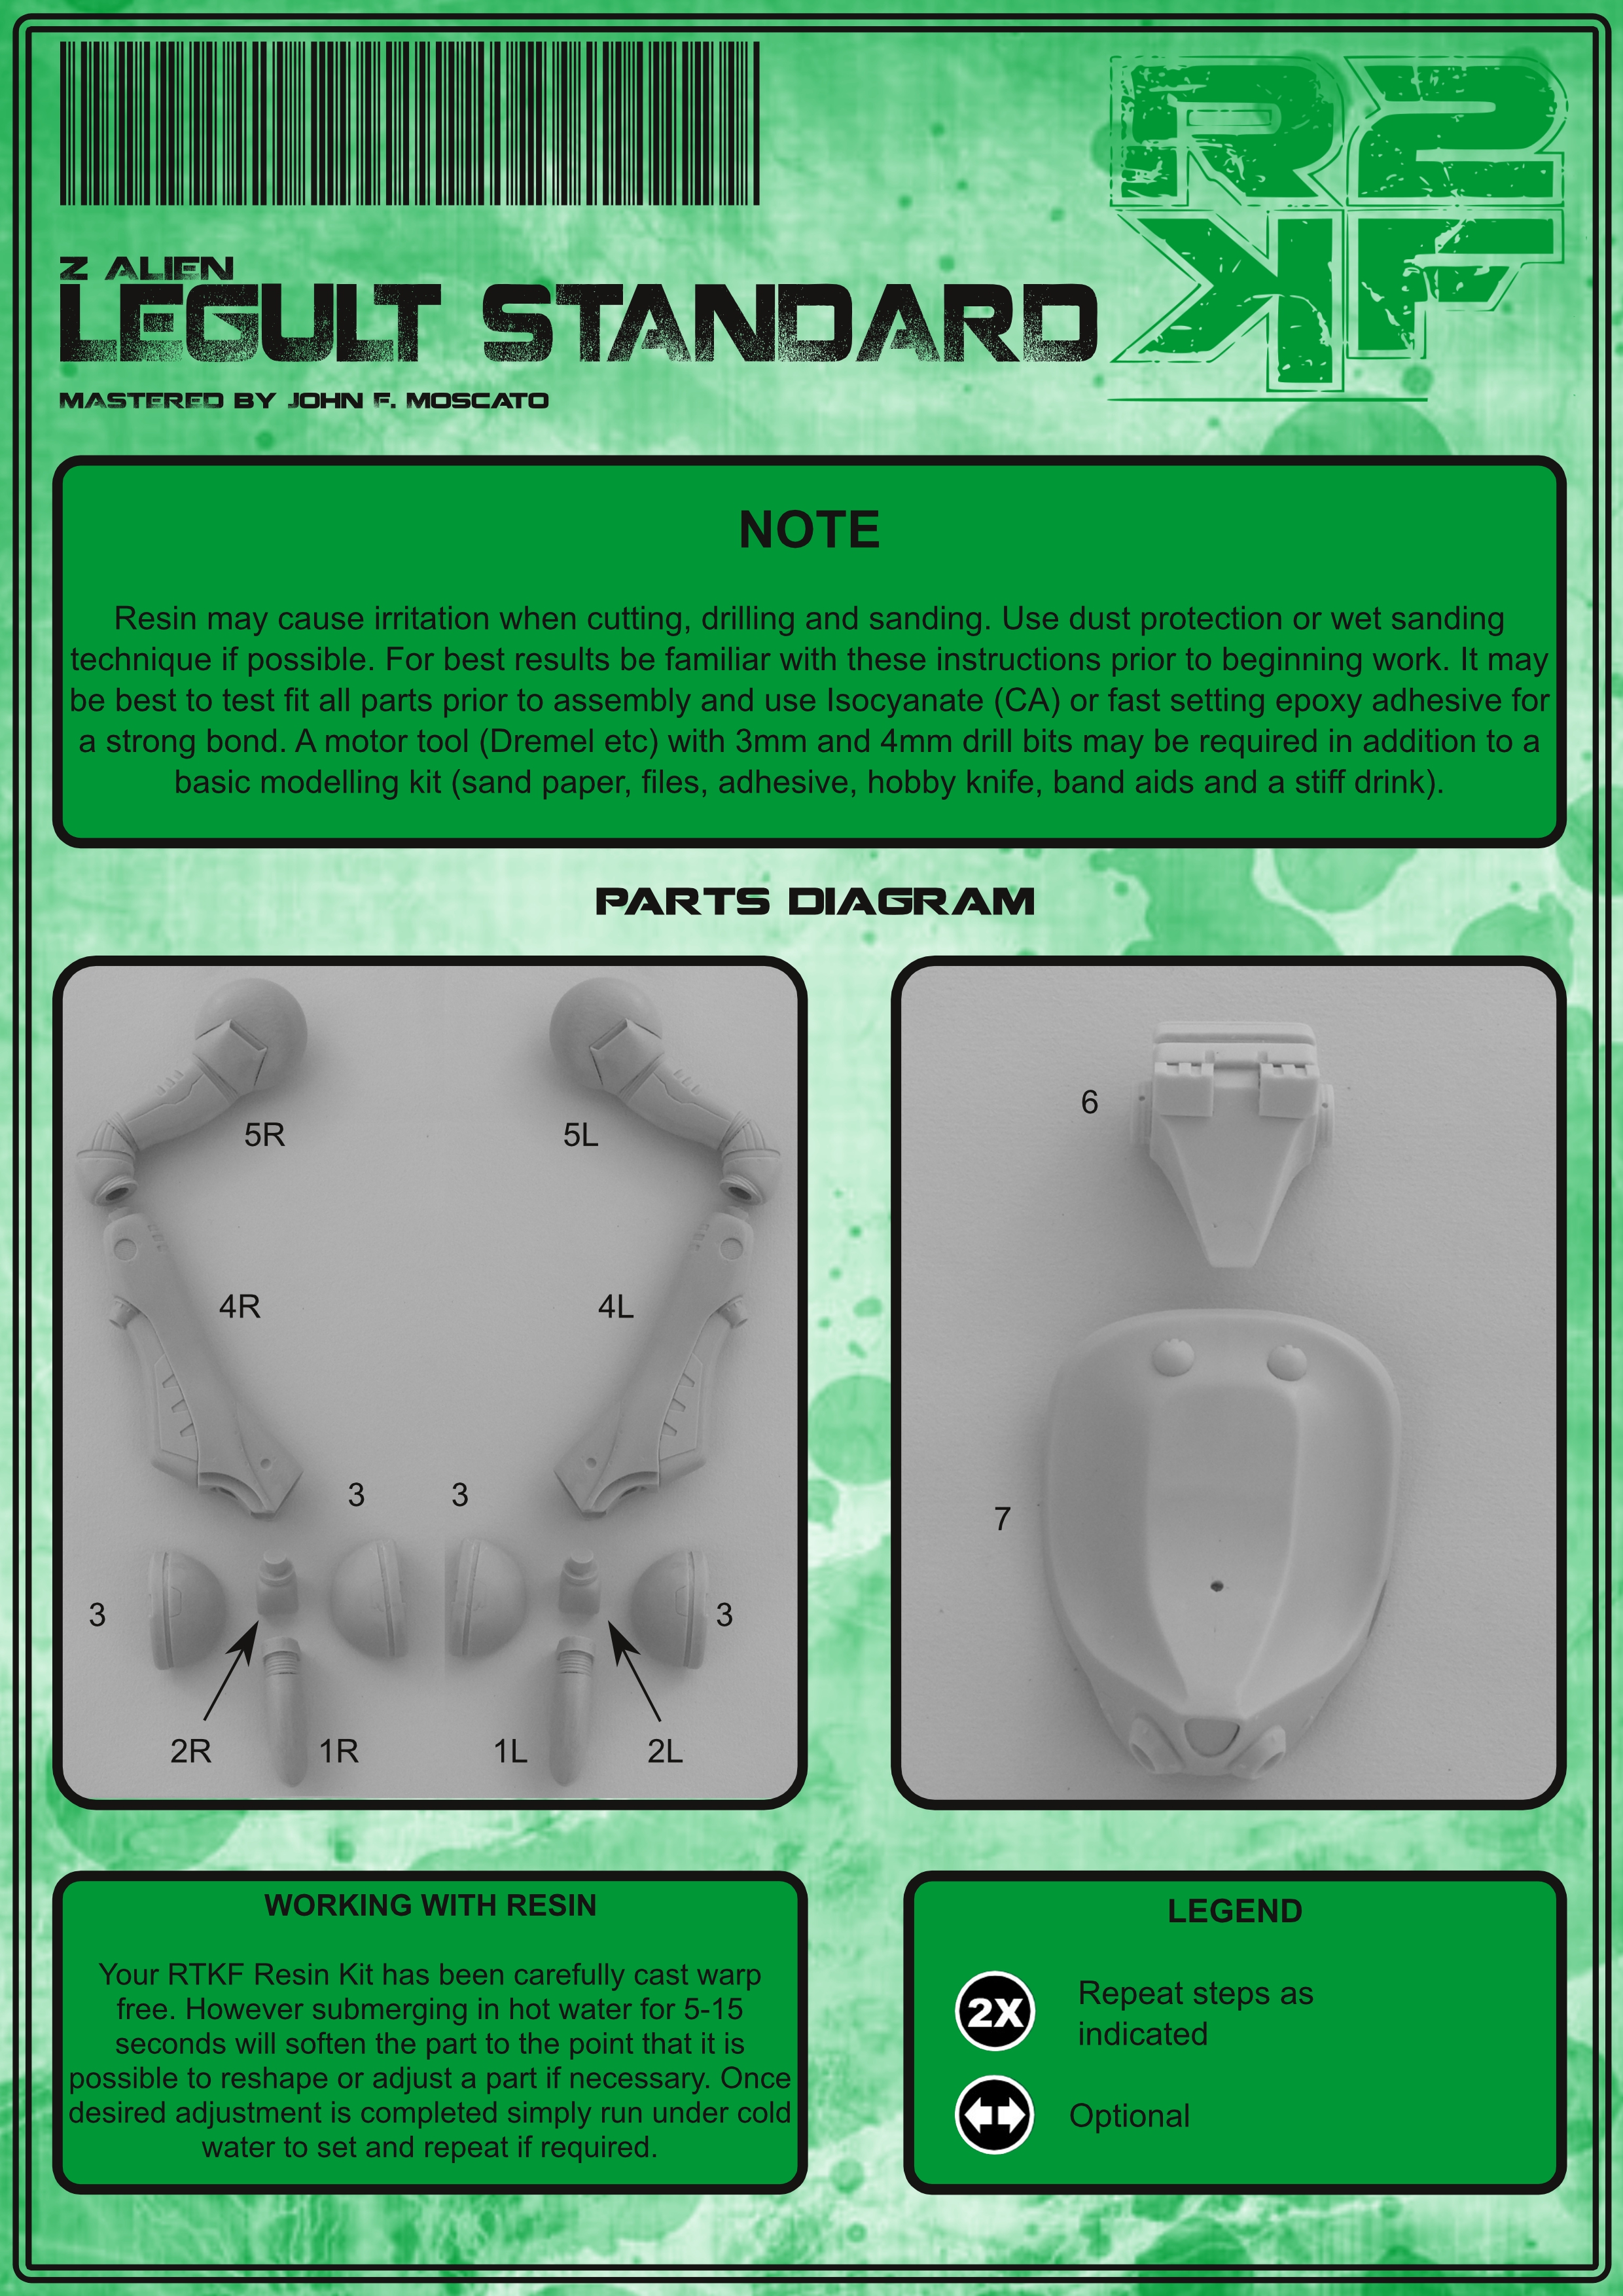
In late 2015 I negotiated with the Captain to buy a number of Patterns, with the "Legults" being one of them. We have been working on reissuing them this year and are currently waiting on decals before we can ship everything out.
The Build:
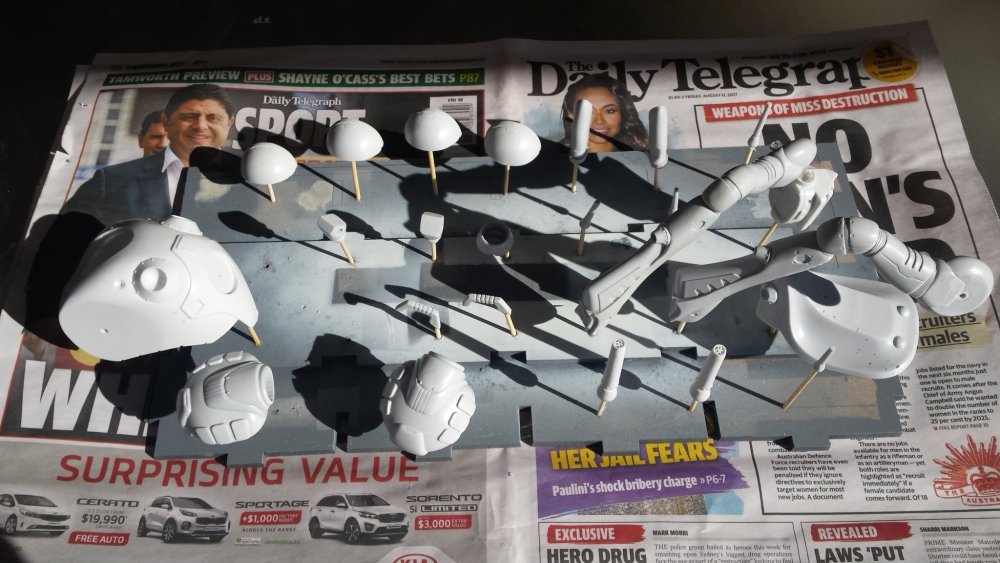
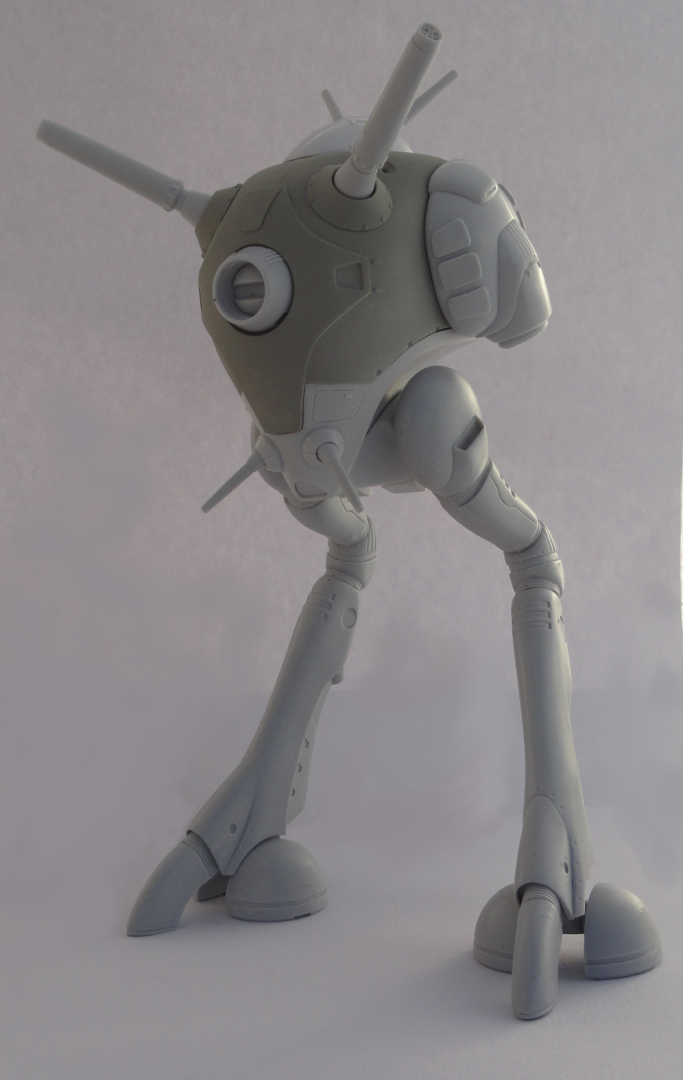
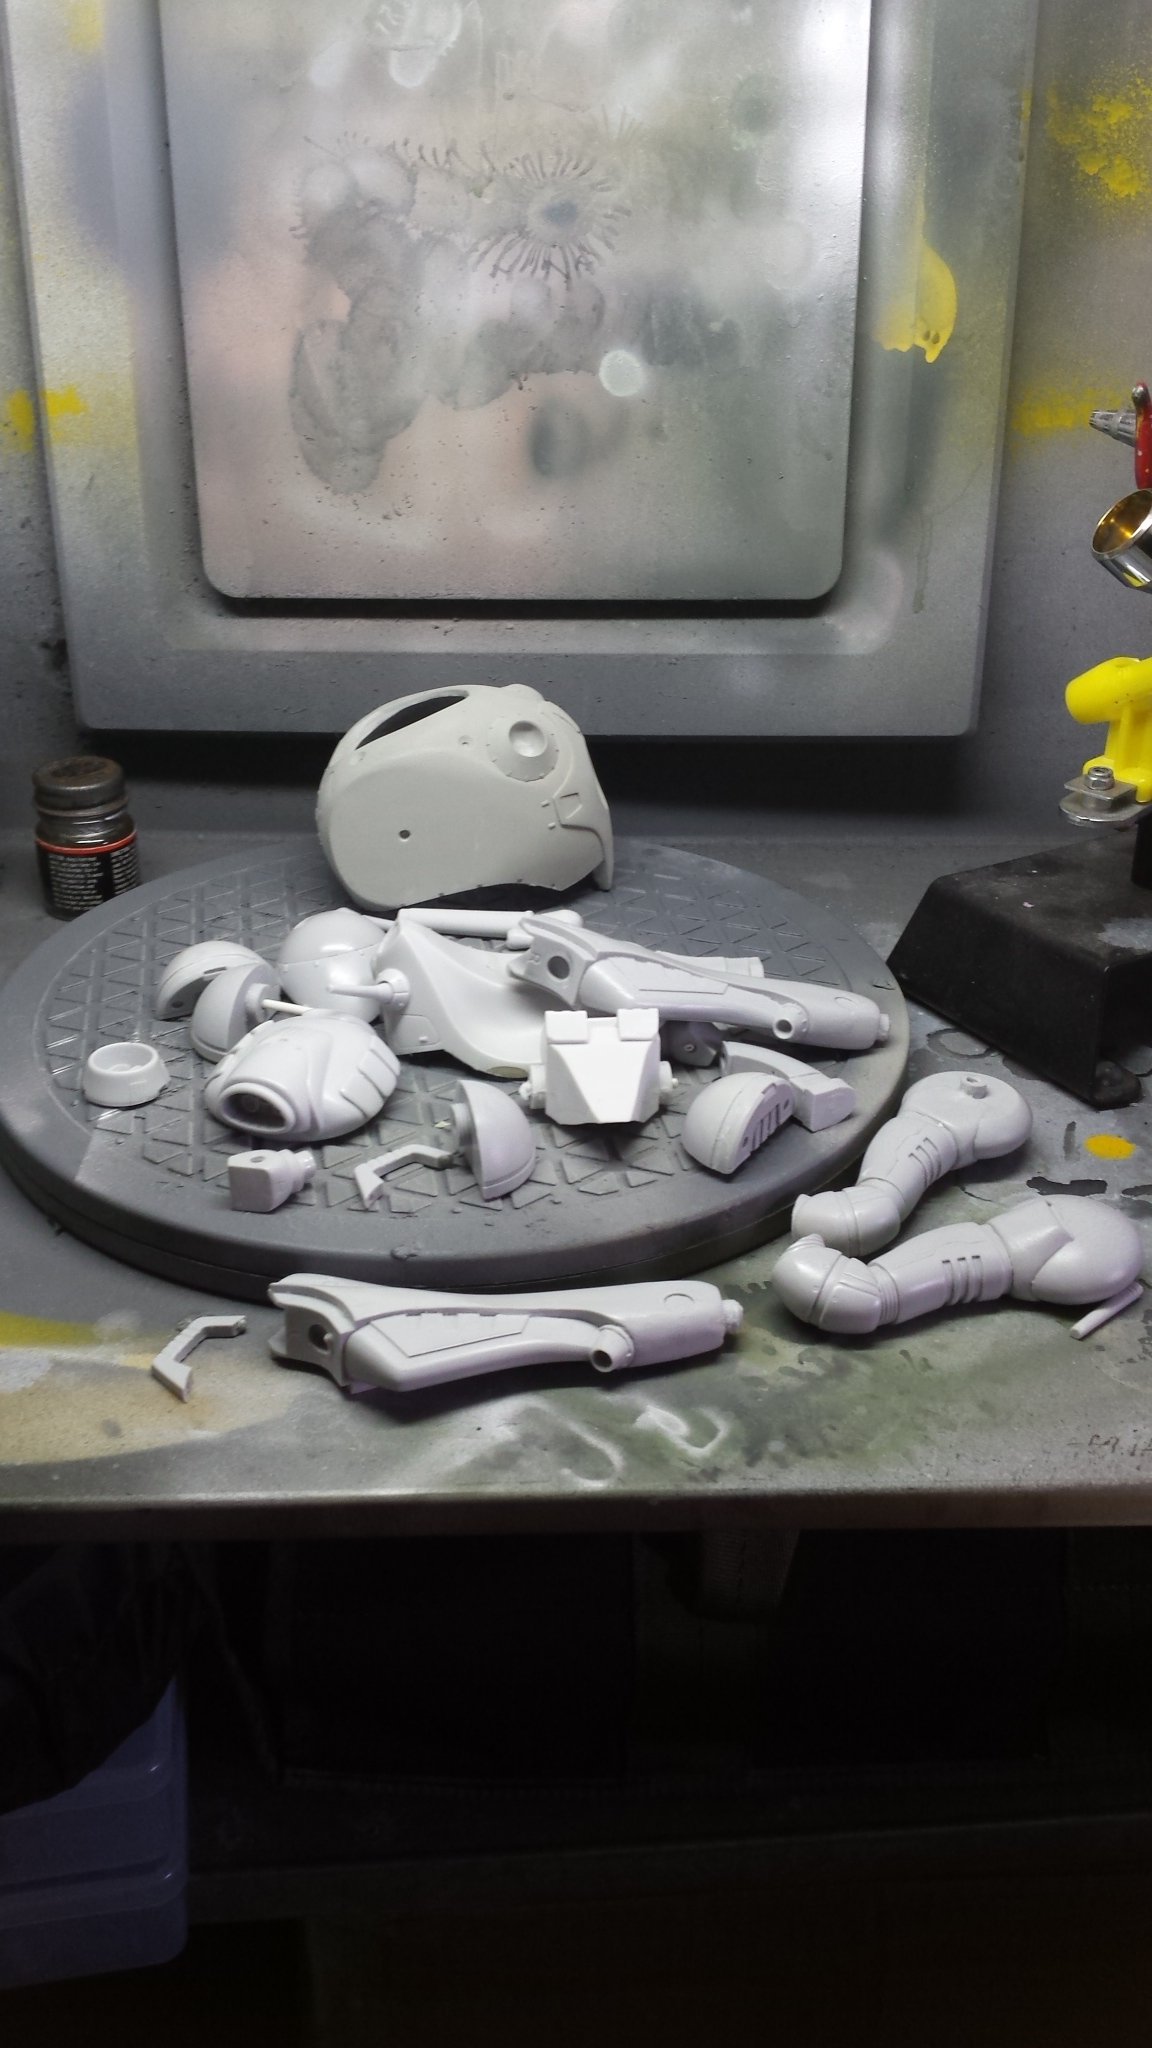
This particular kit is being traded away in a deal to a toy collector as an assembled and painted example ready for display. I have already completed cleanup of the parts so that I could take some imagery for the new instructions I am compiling and tacked it together enough to get some photos. Here is what it looked like when I started today:
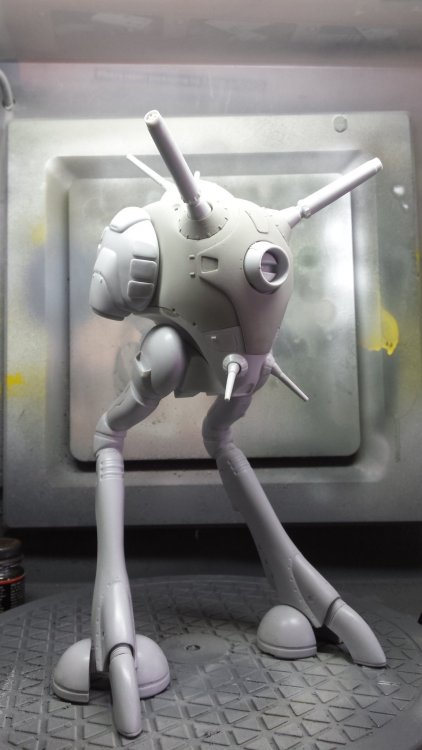
And here is what is looked like a few minutes later:

I'll be going back and fixing up a few blemished and getting it all in primer of the next couple of day so keep your eyes peeled
Cheers until next time,
Brett T
-
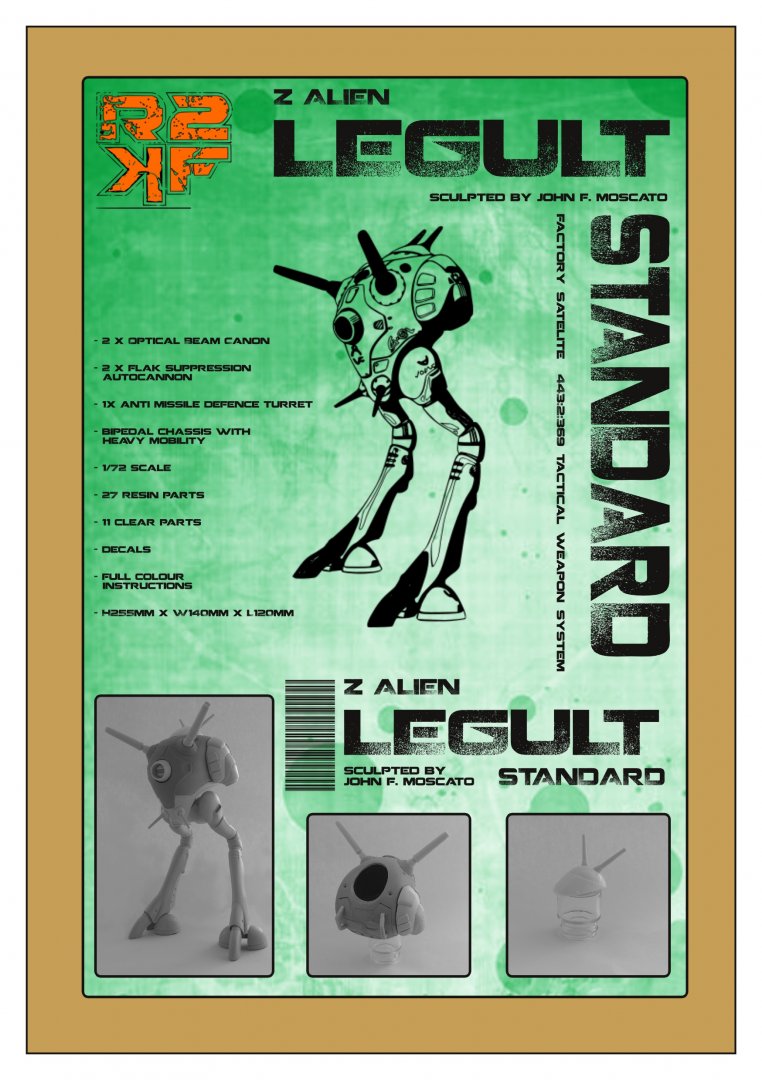
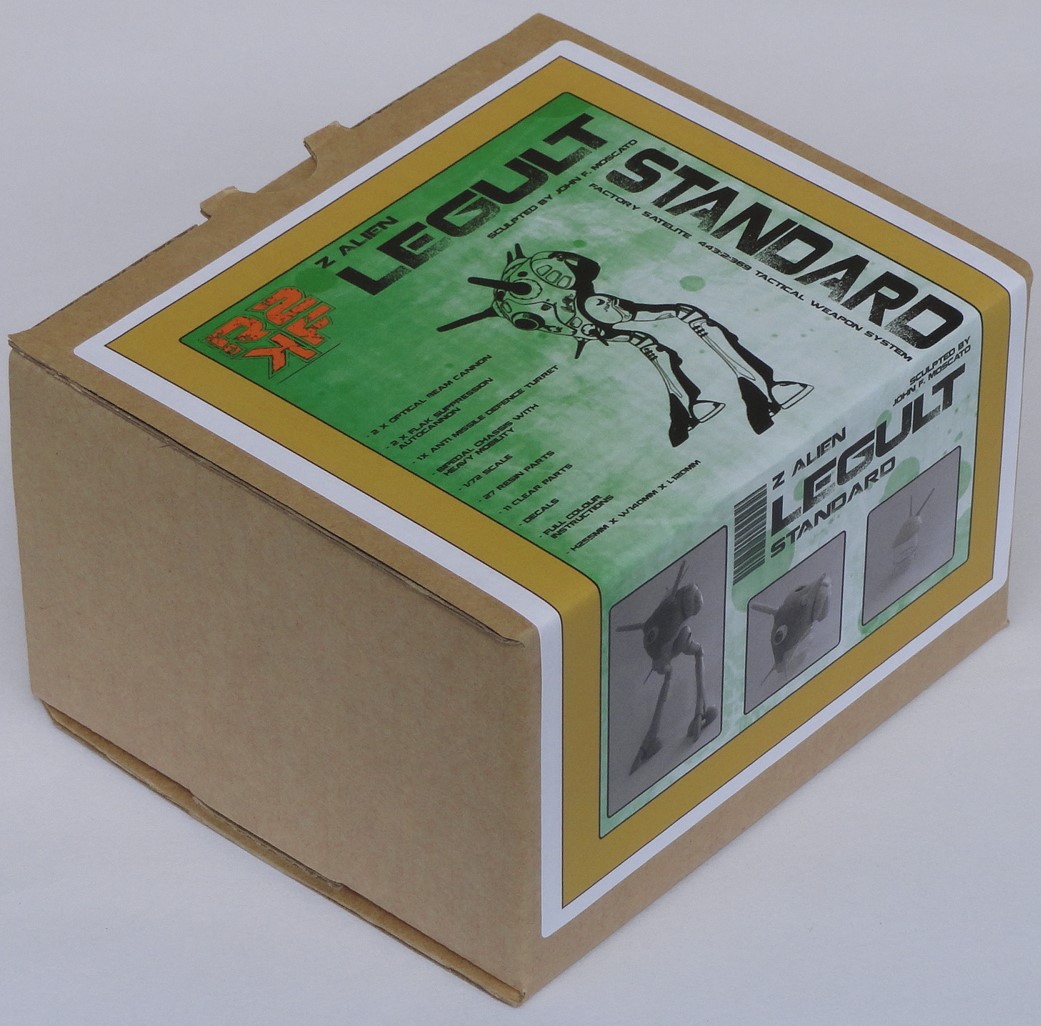
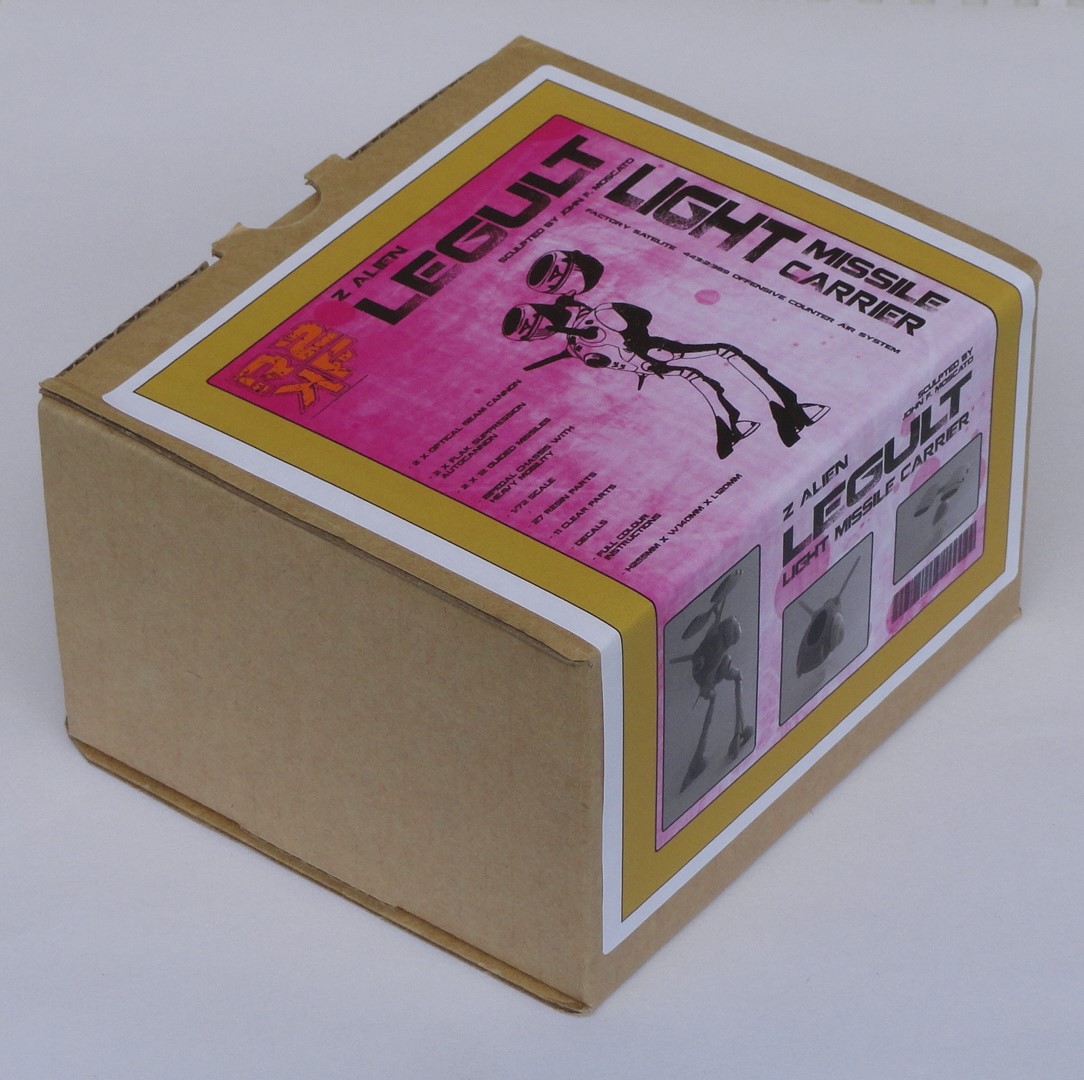
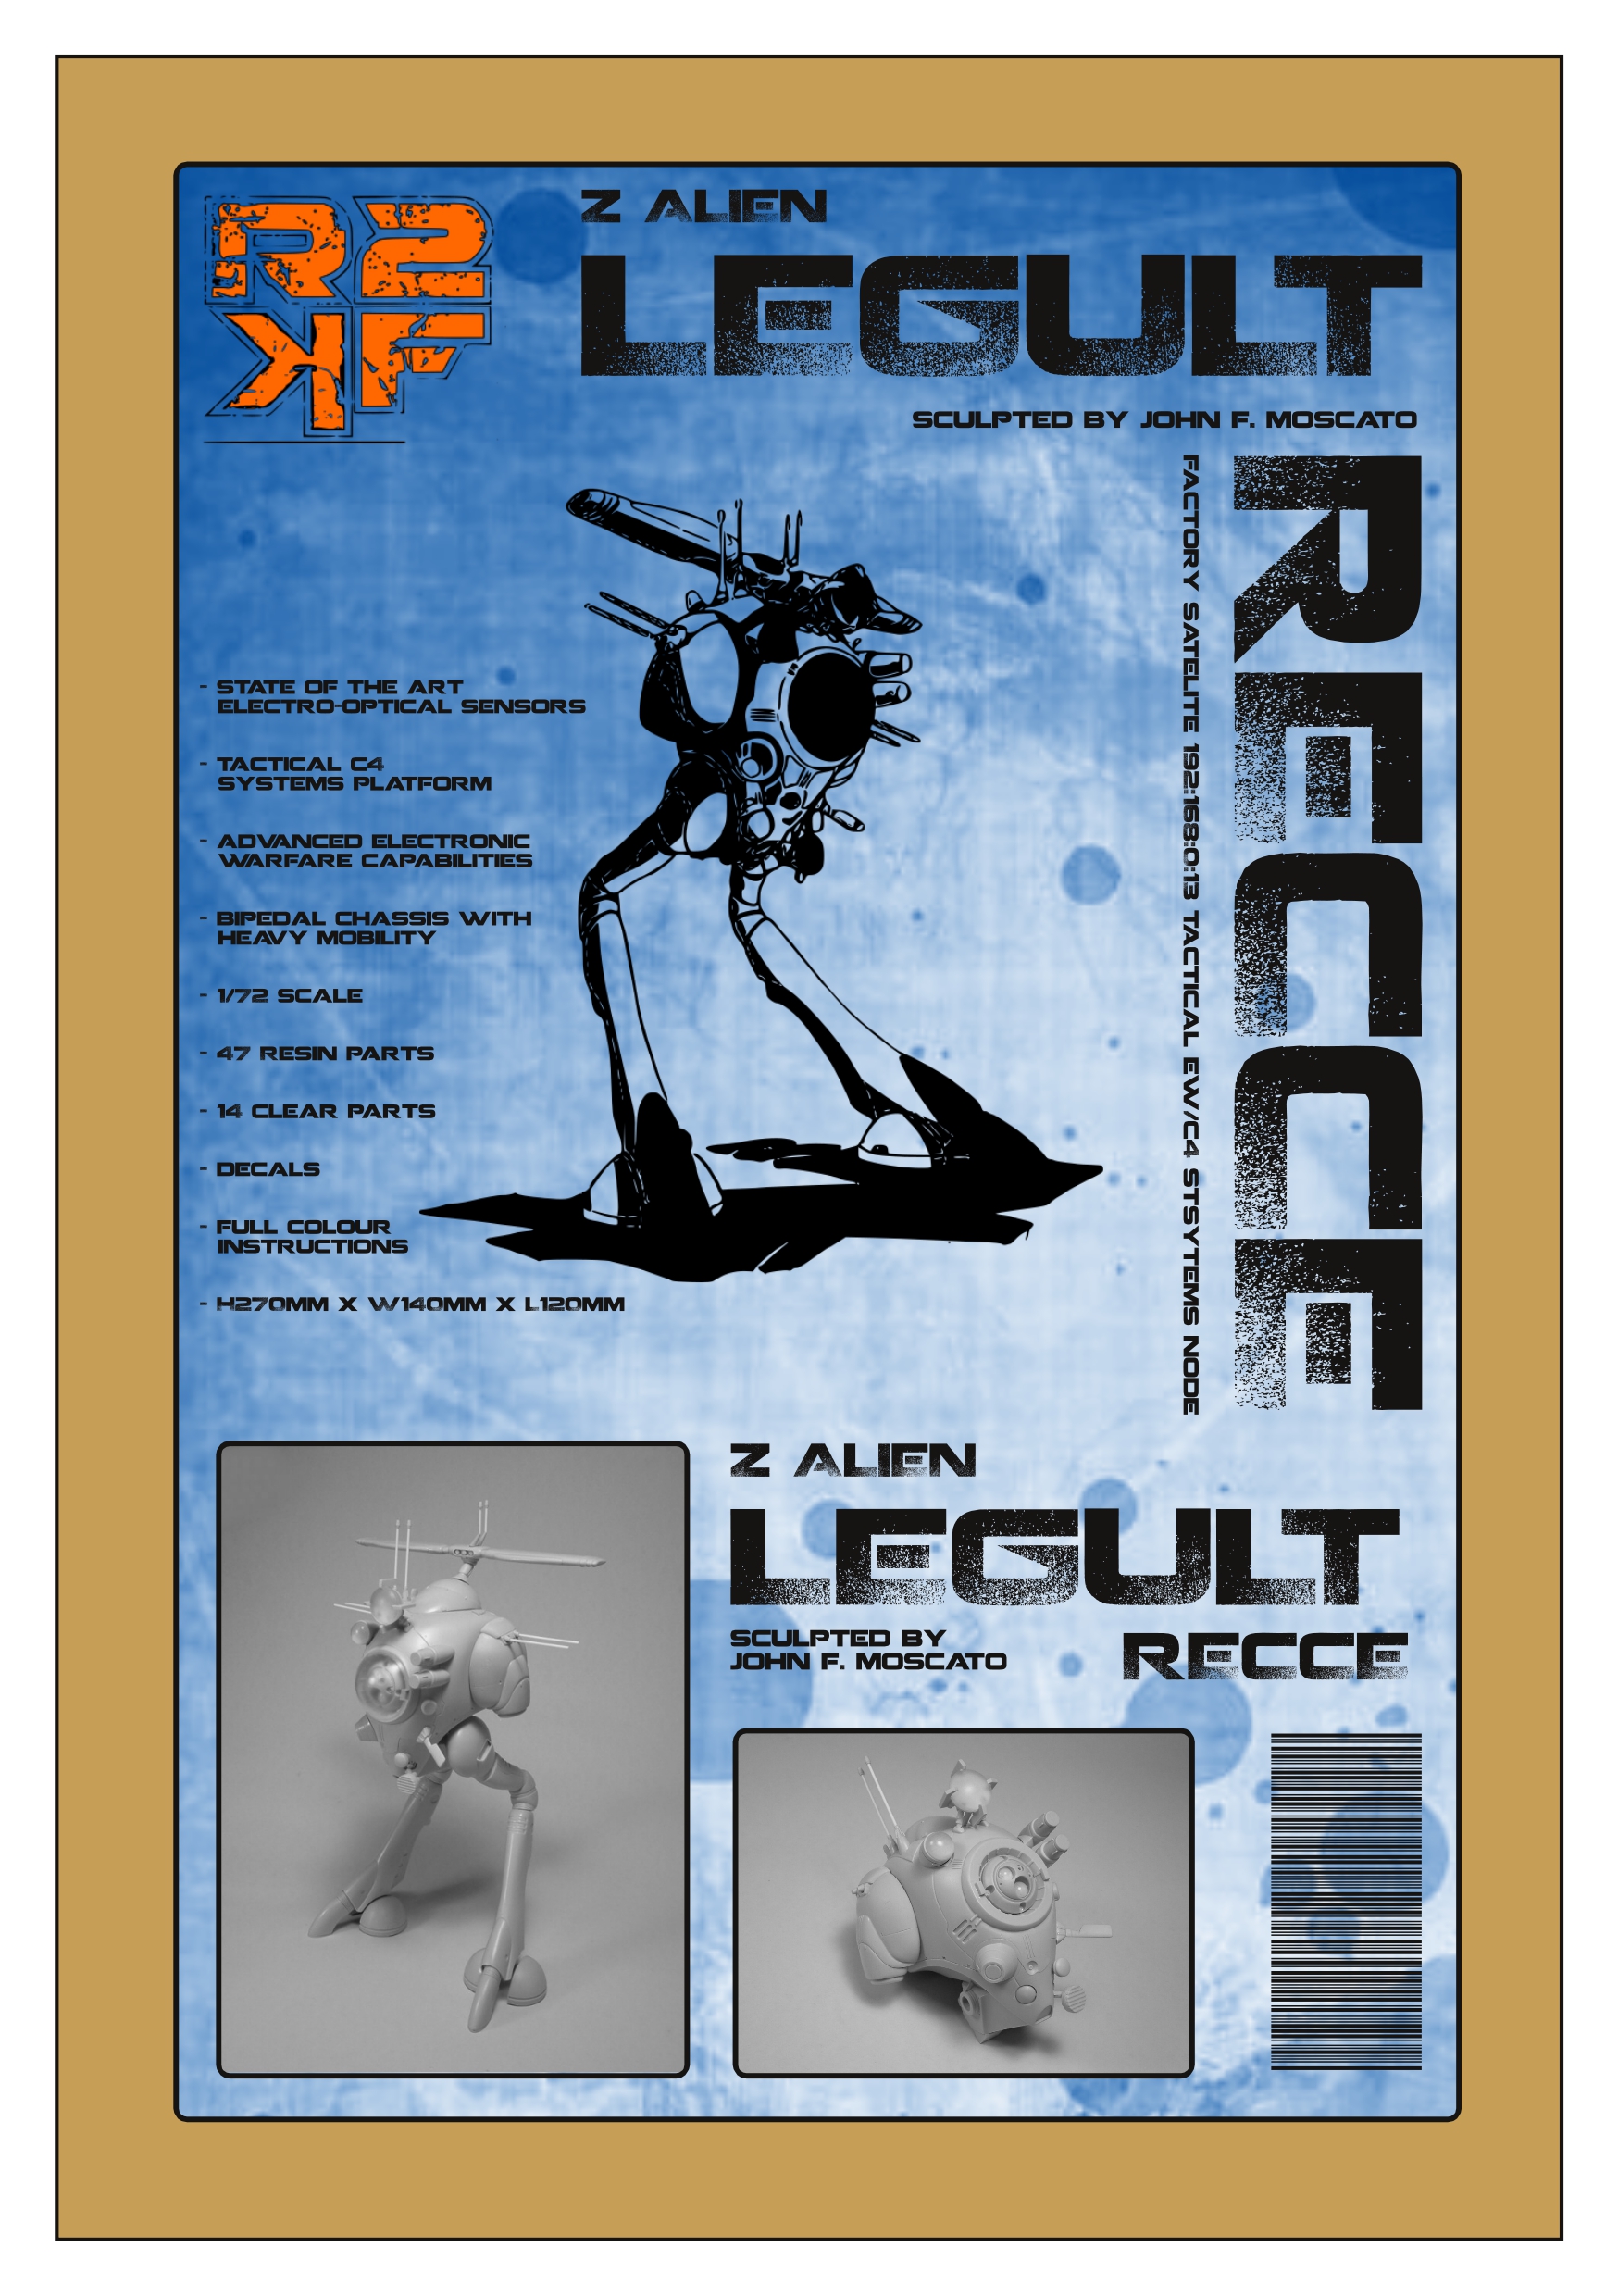
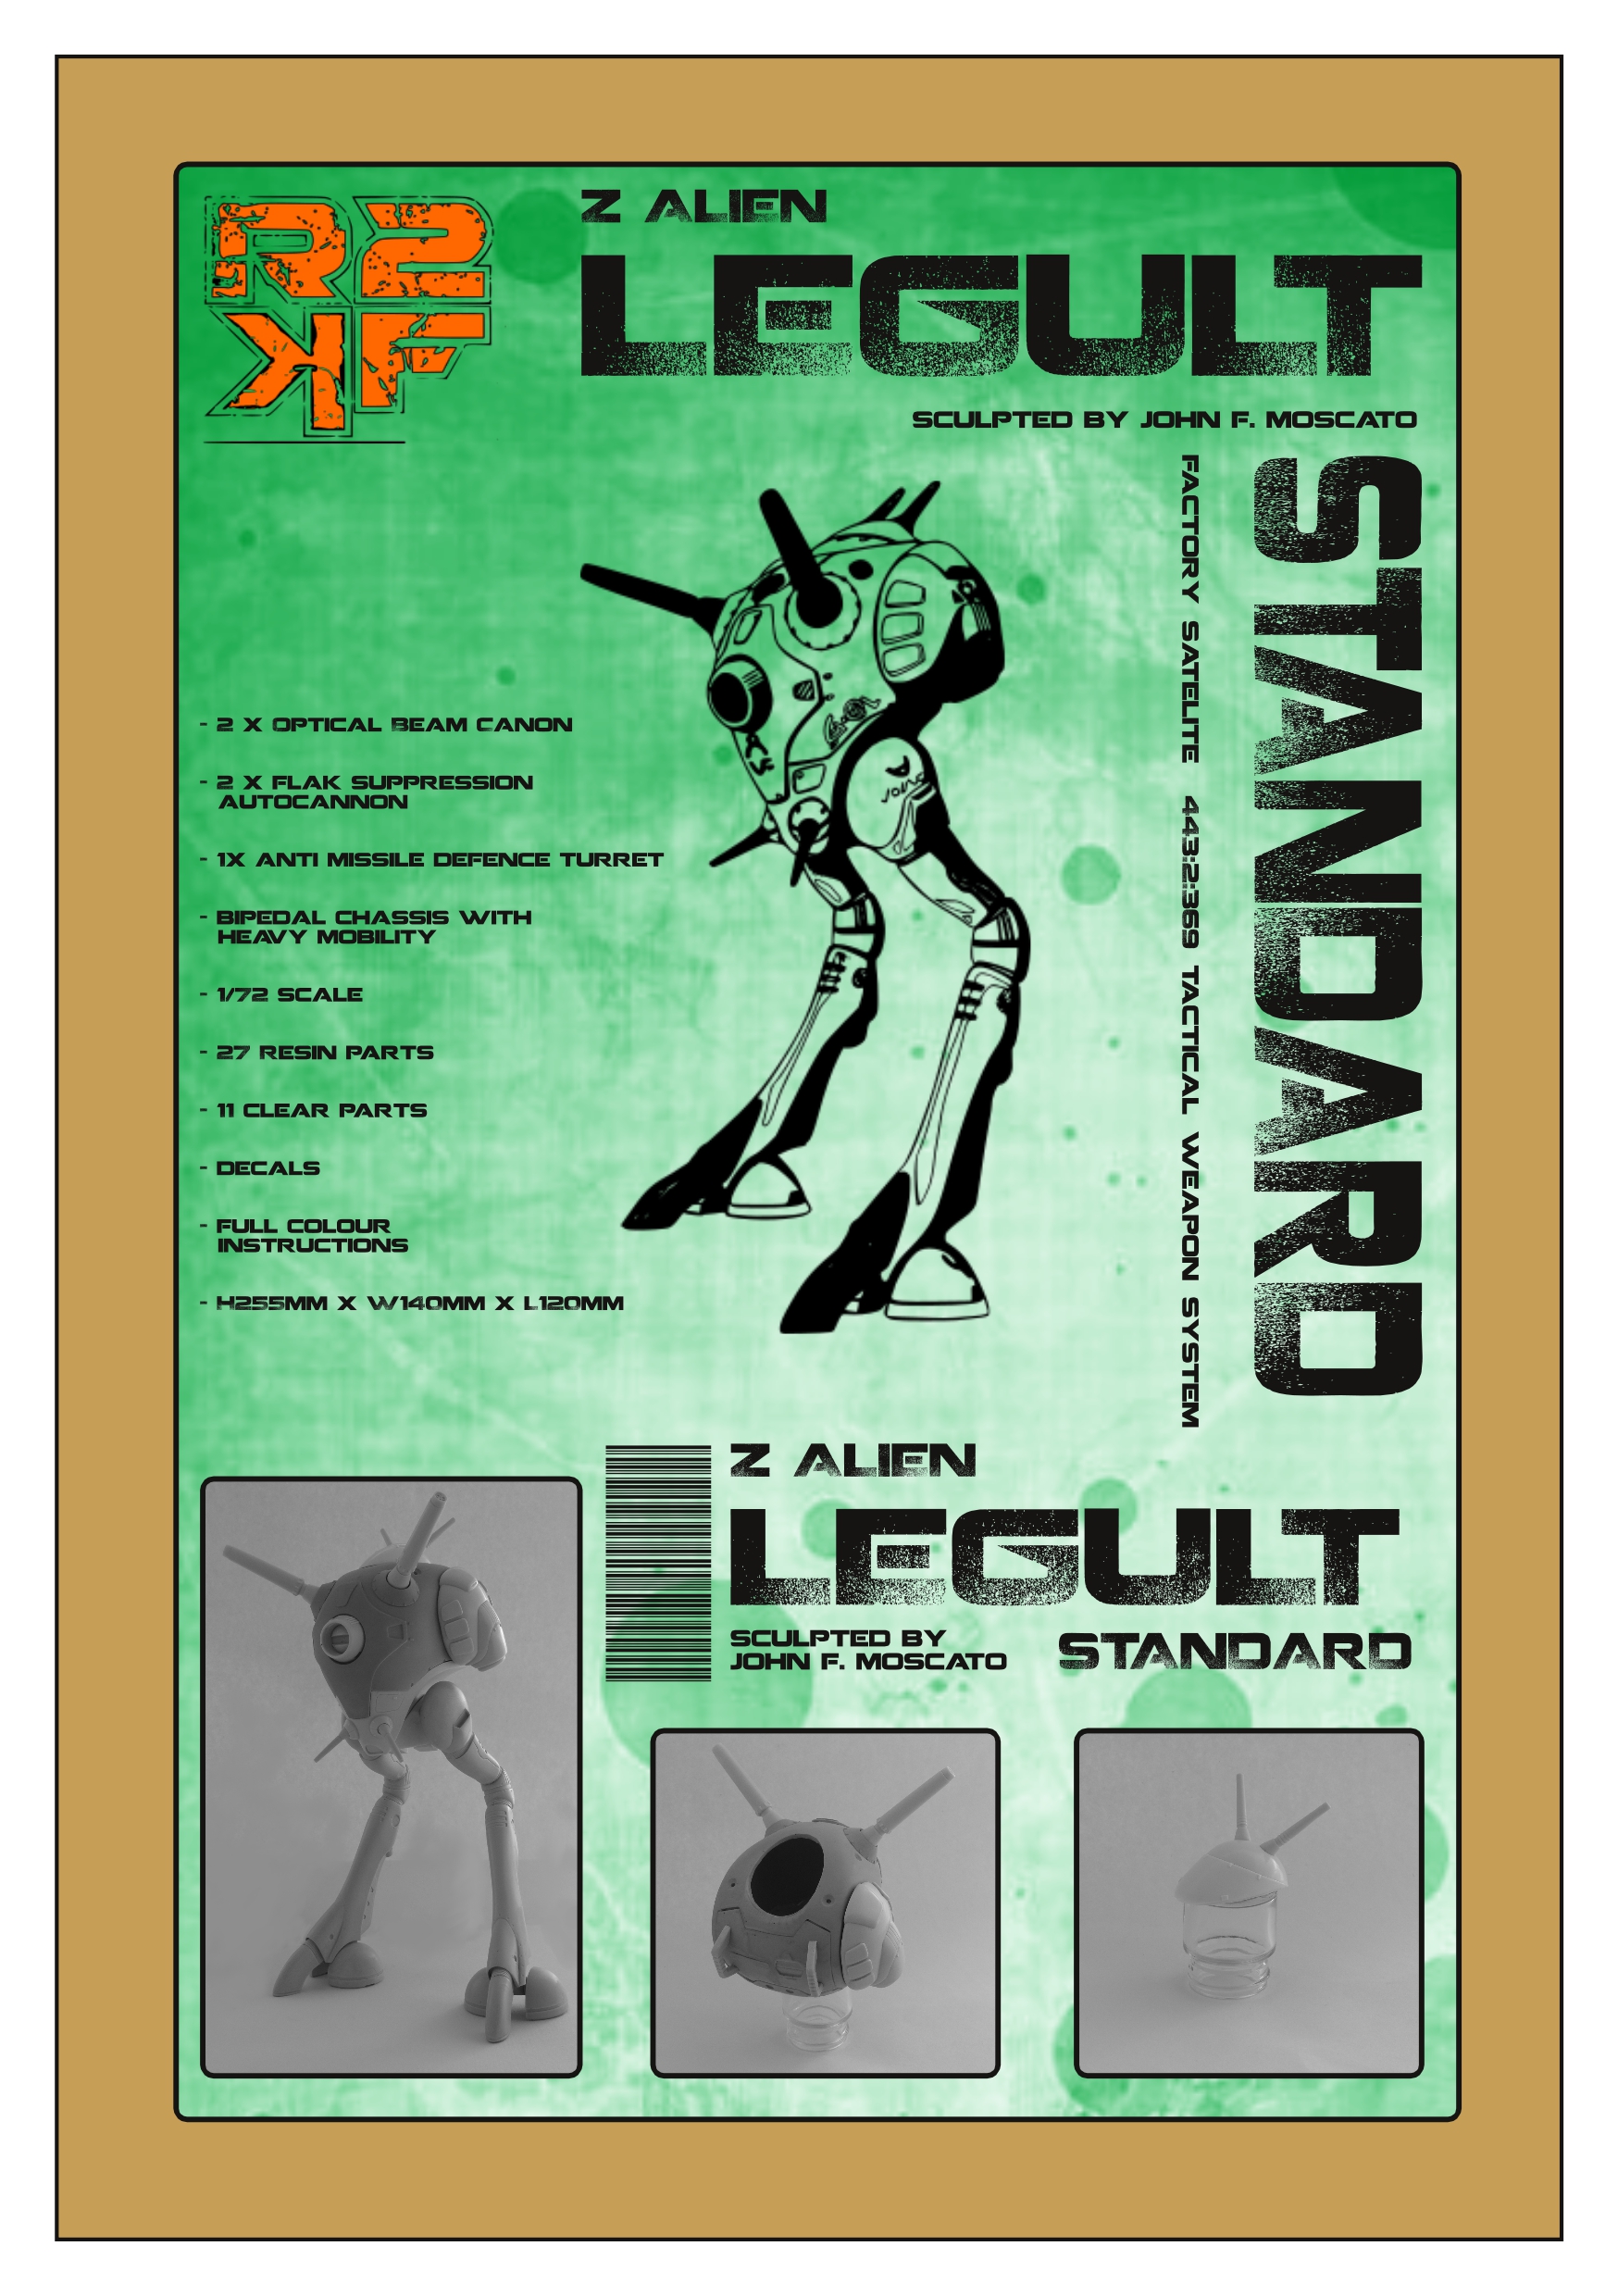
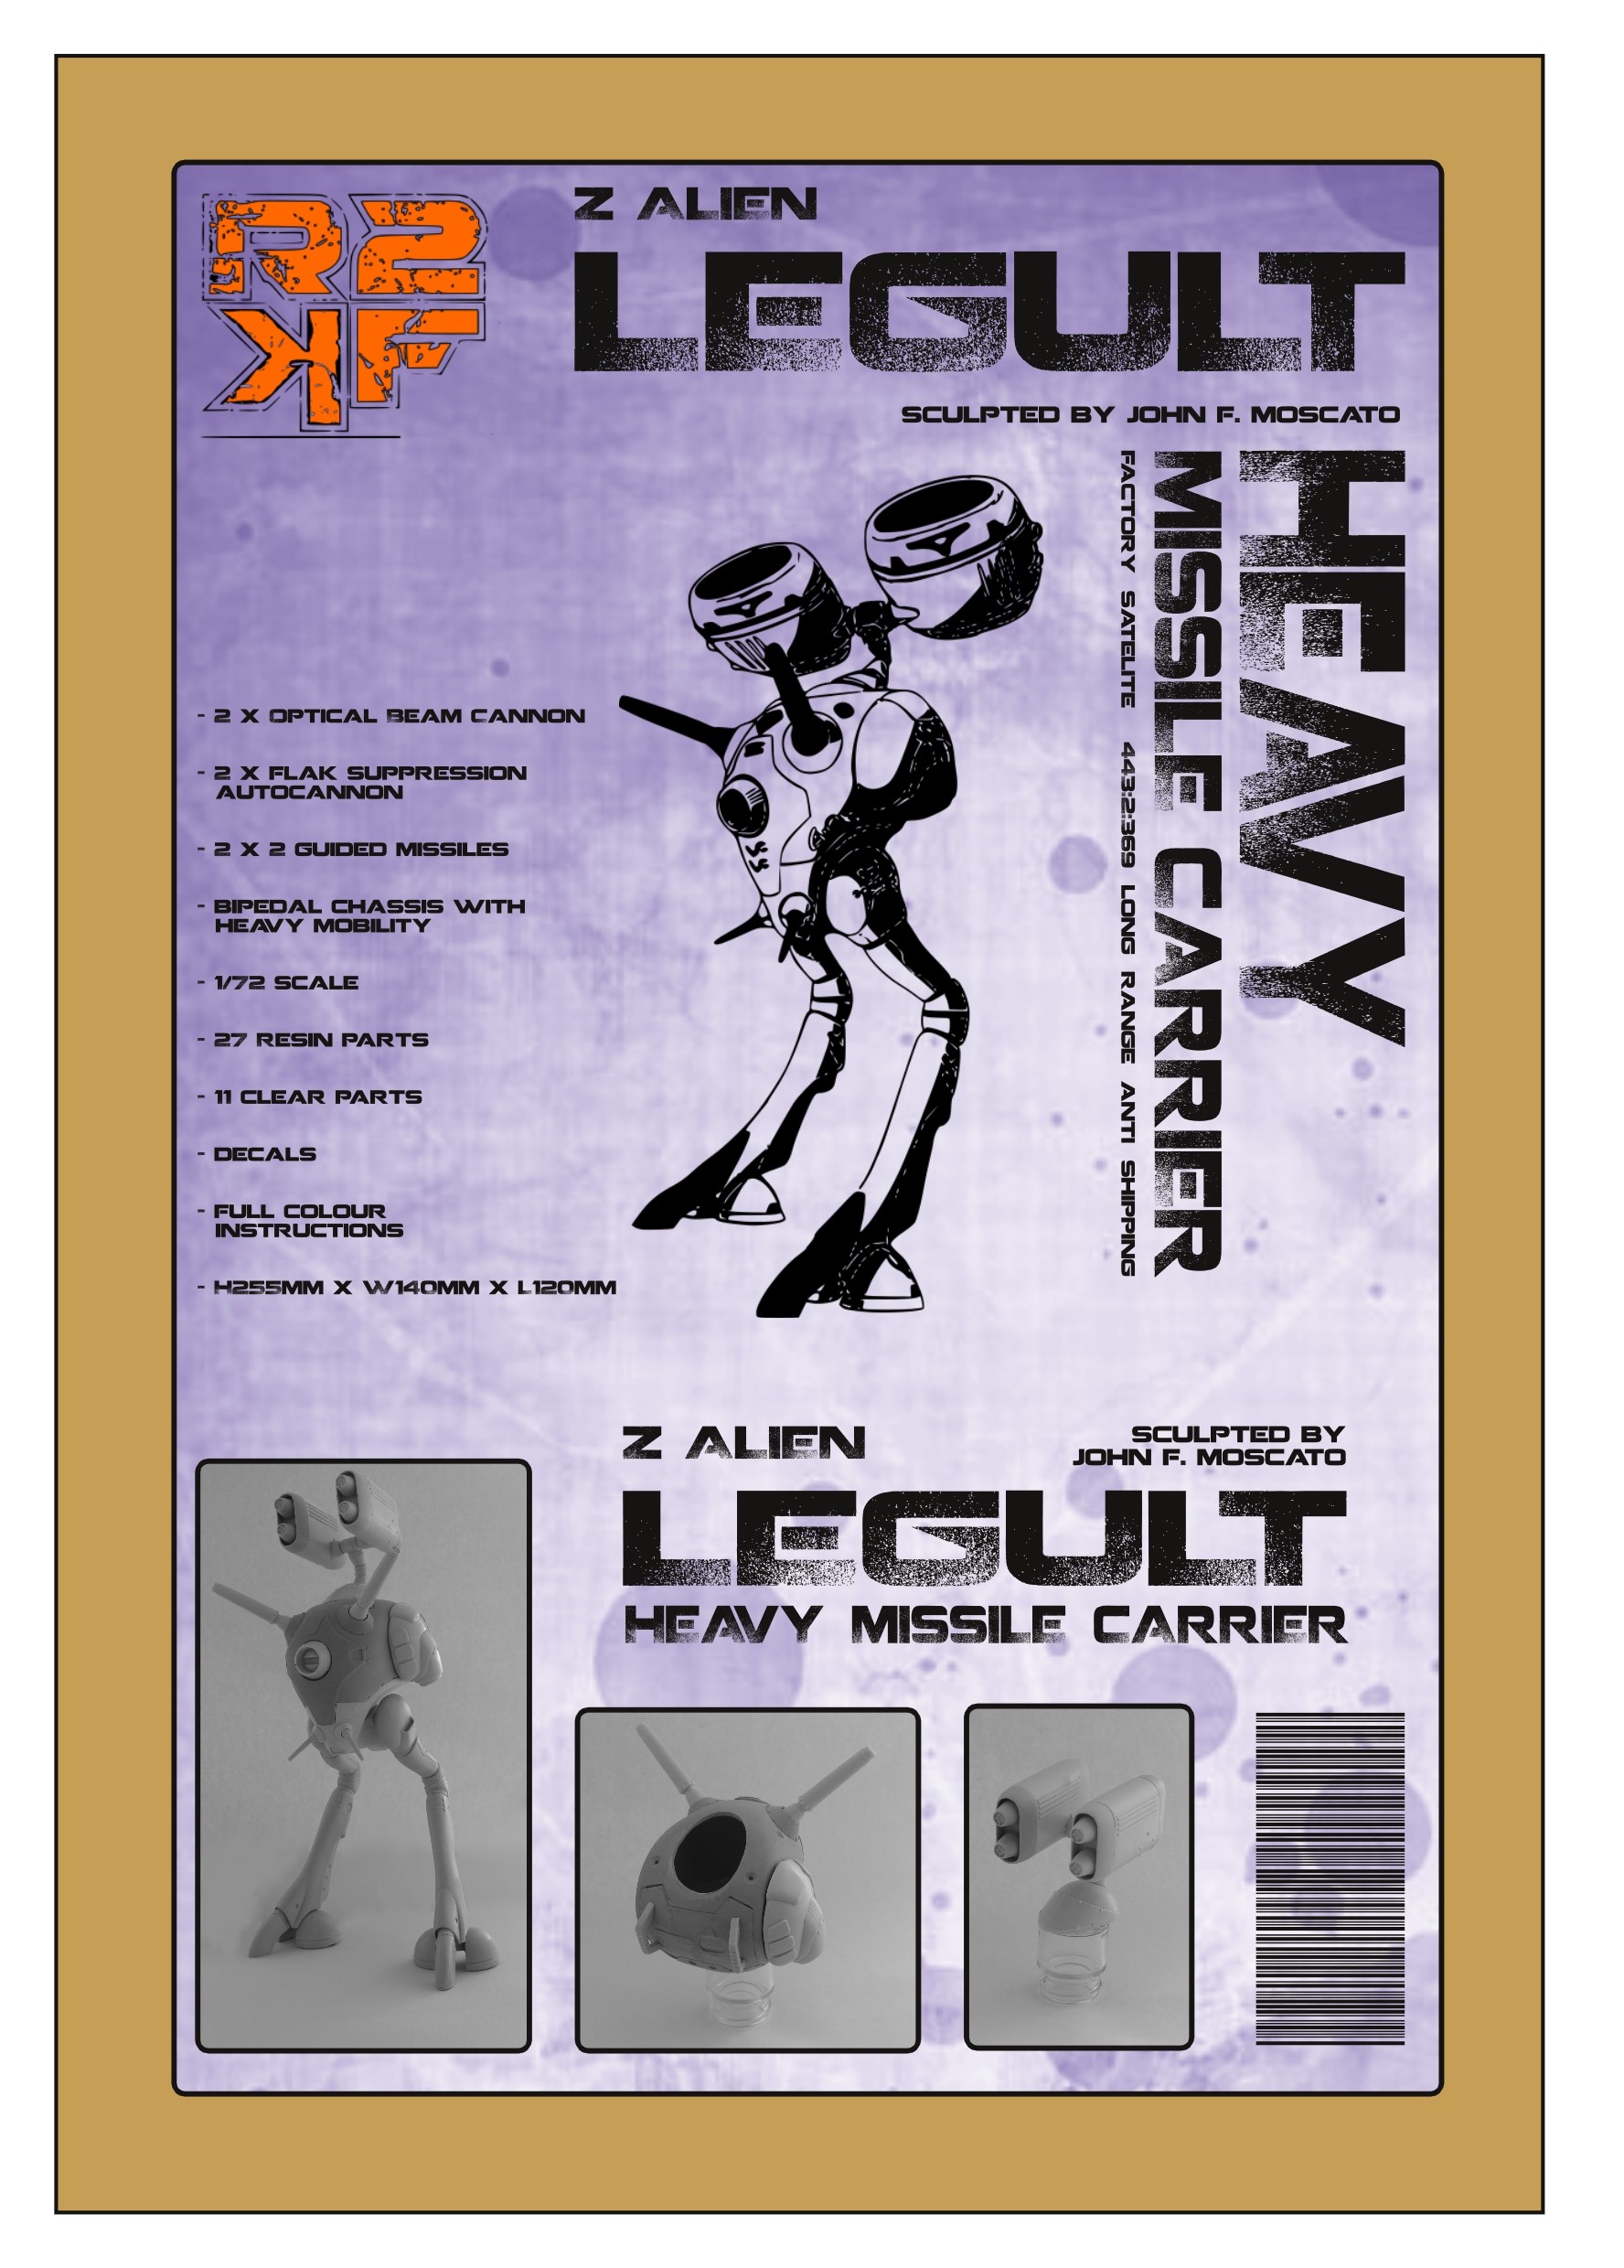
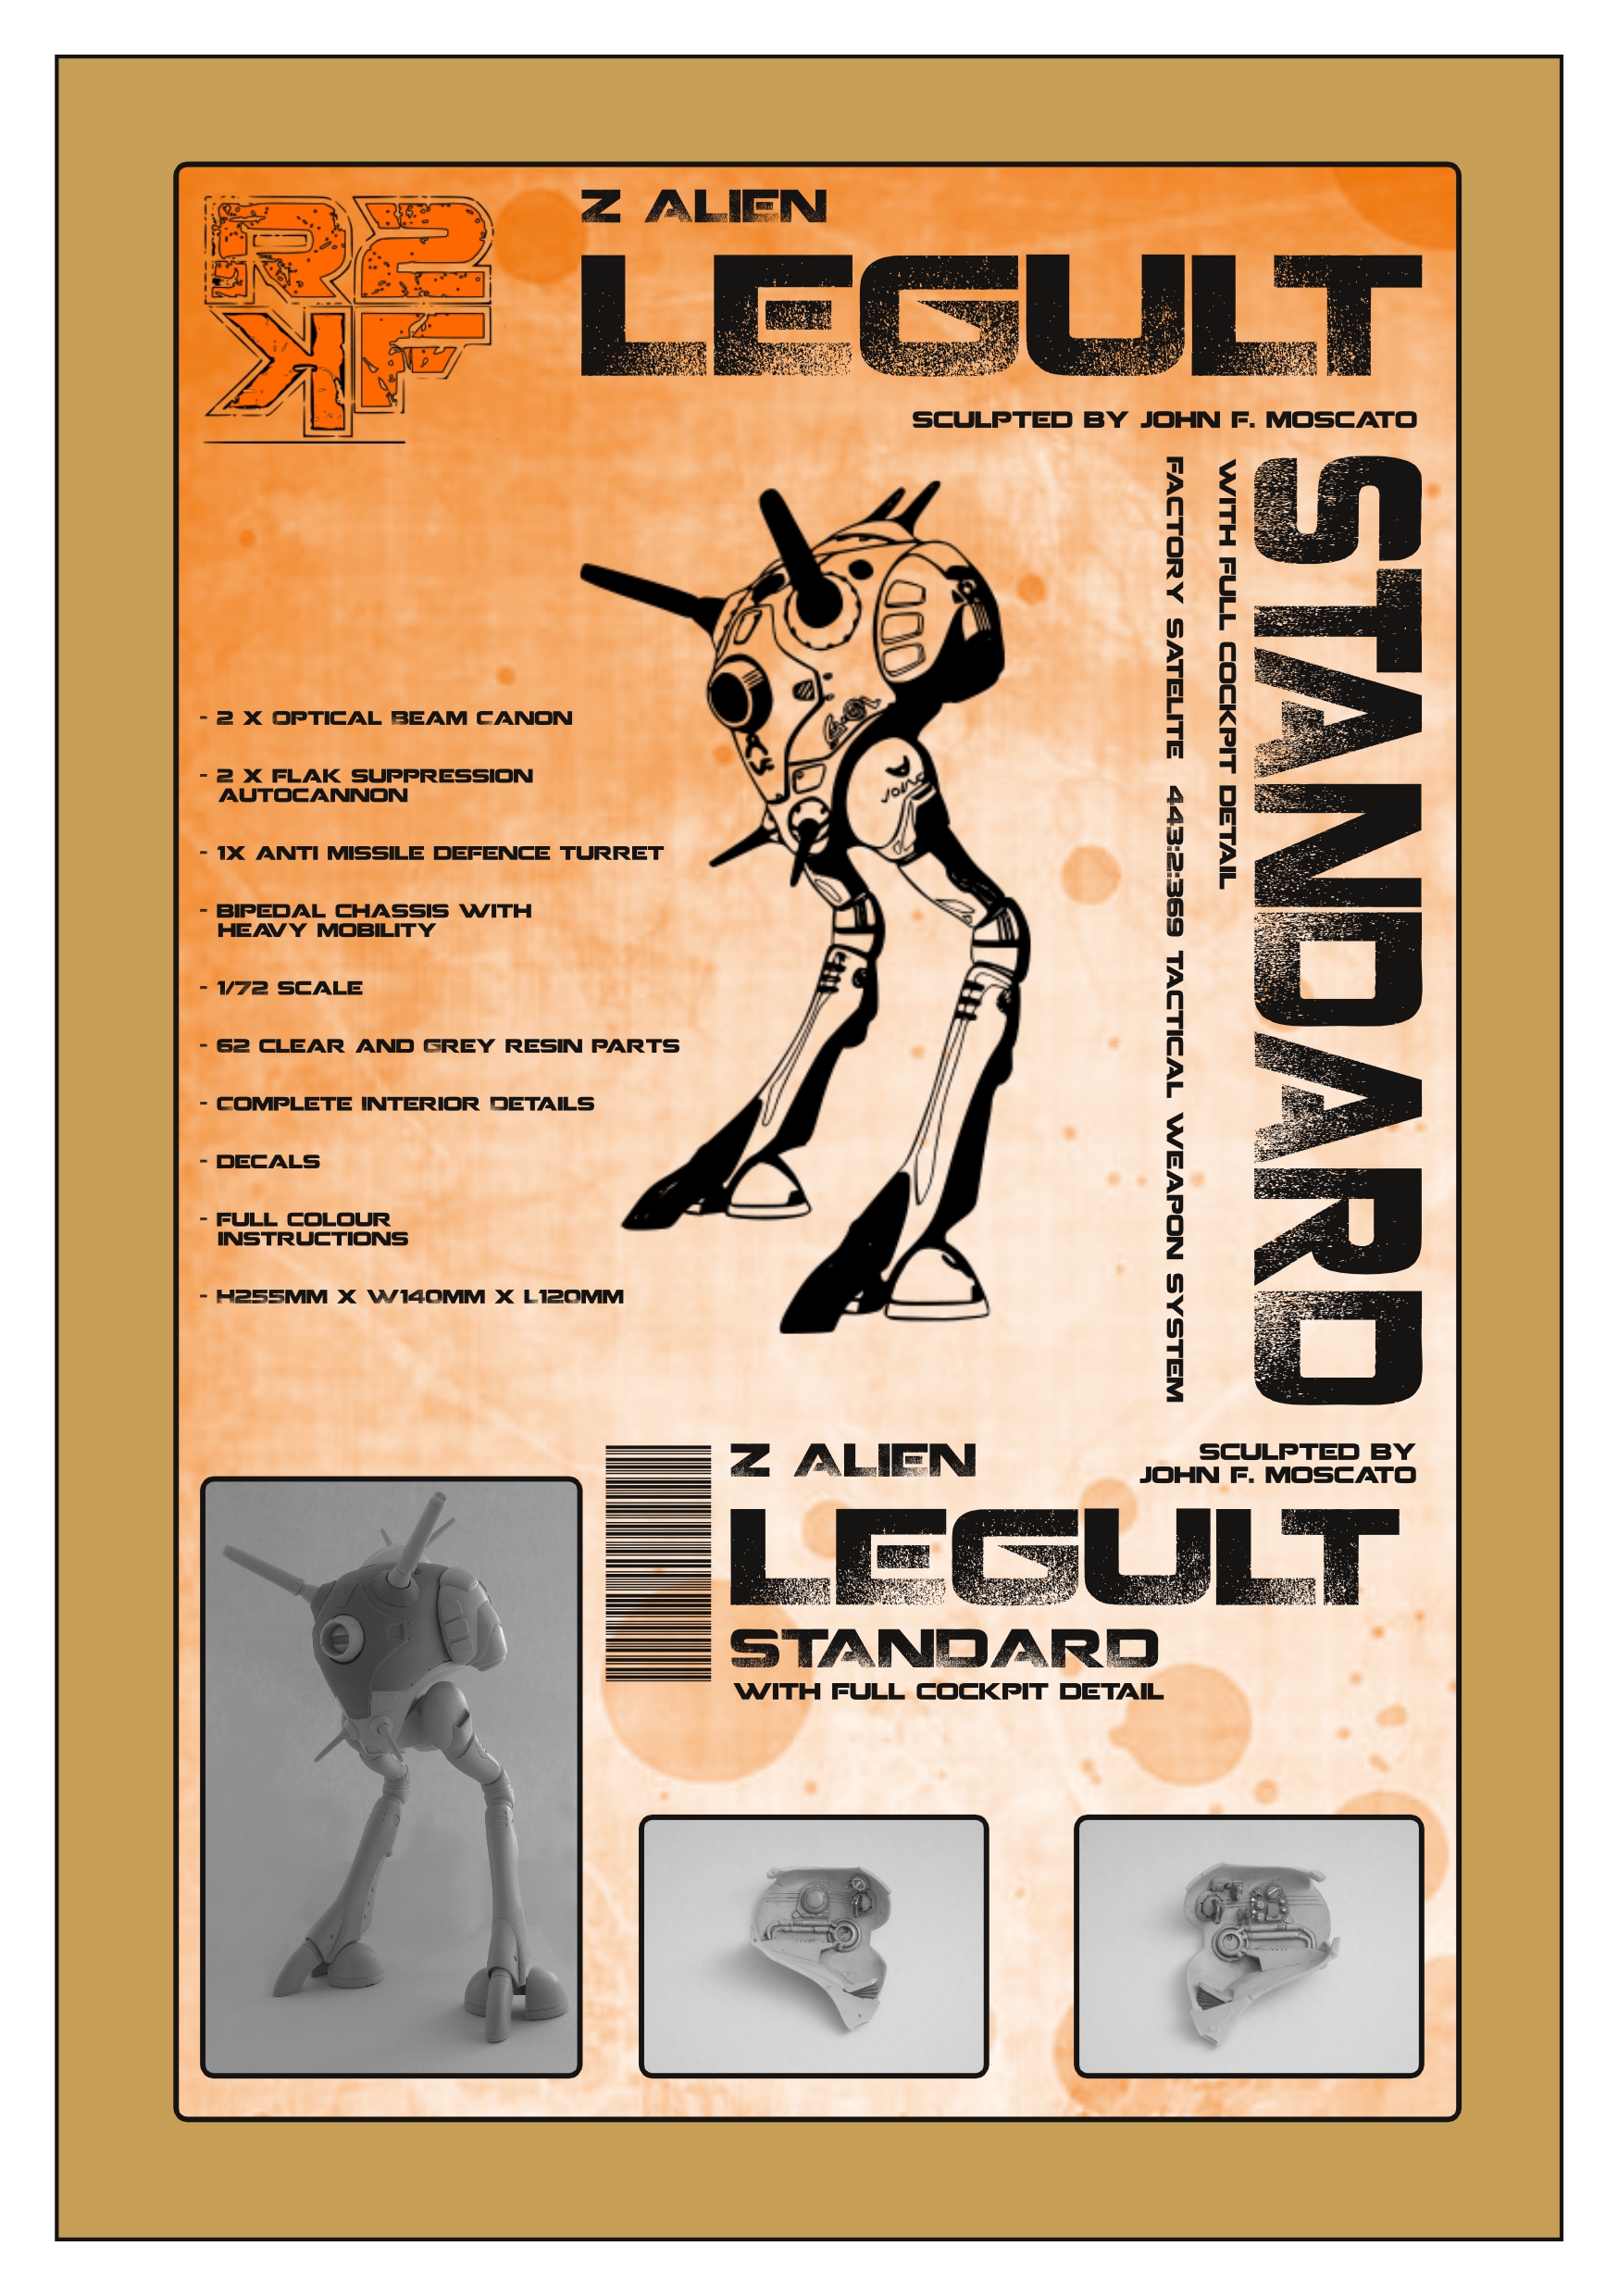
Good News! We have released Captain America's 1/72 Battle Pod's under our own label after purchasing the patterns earlier this year. All kits are full resin kits + clear parts, decals and full colour instructions. All prices below are in Australian Dollars + shipping costs:
Standard Version - AUD $132.00
Standard Version (With Full Cockpit Detail) - AUD $159.00
Light Missile Carrier - AUD $159.00
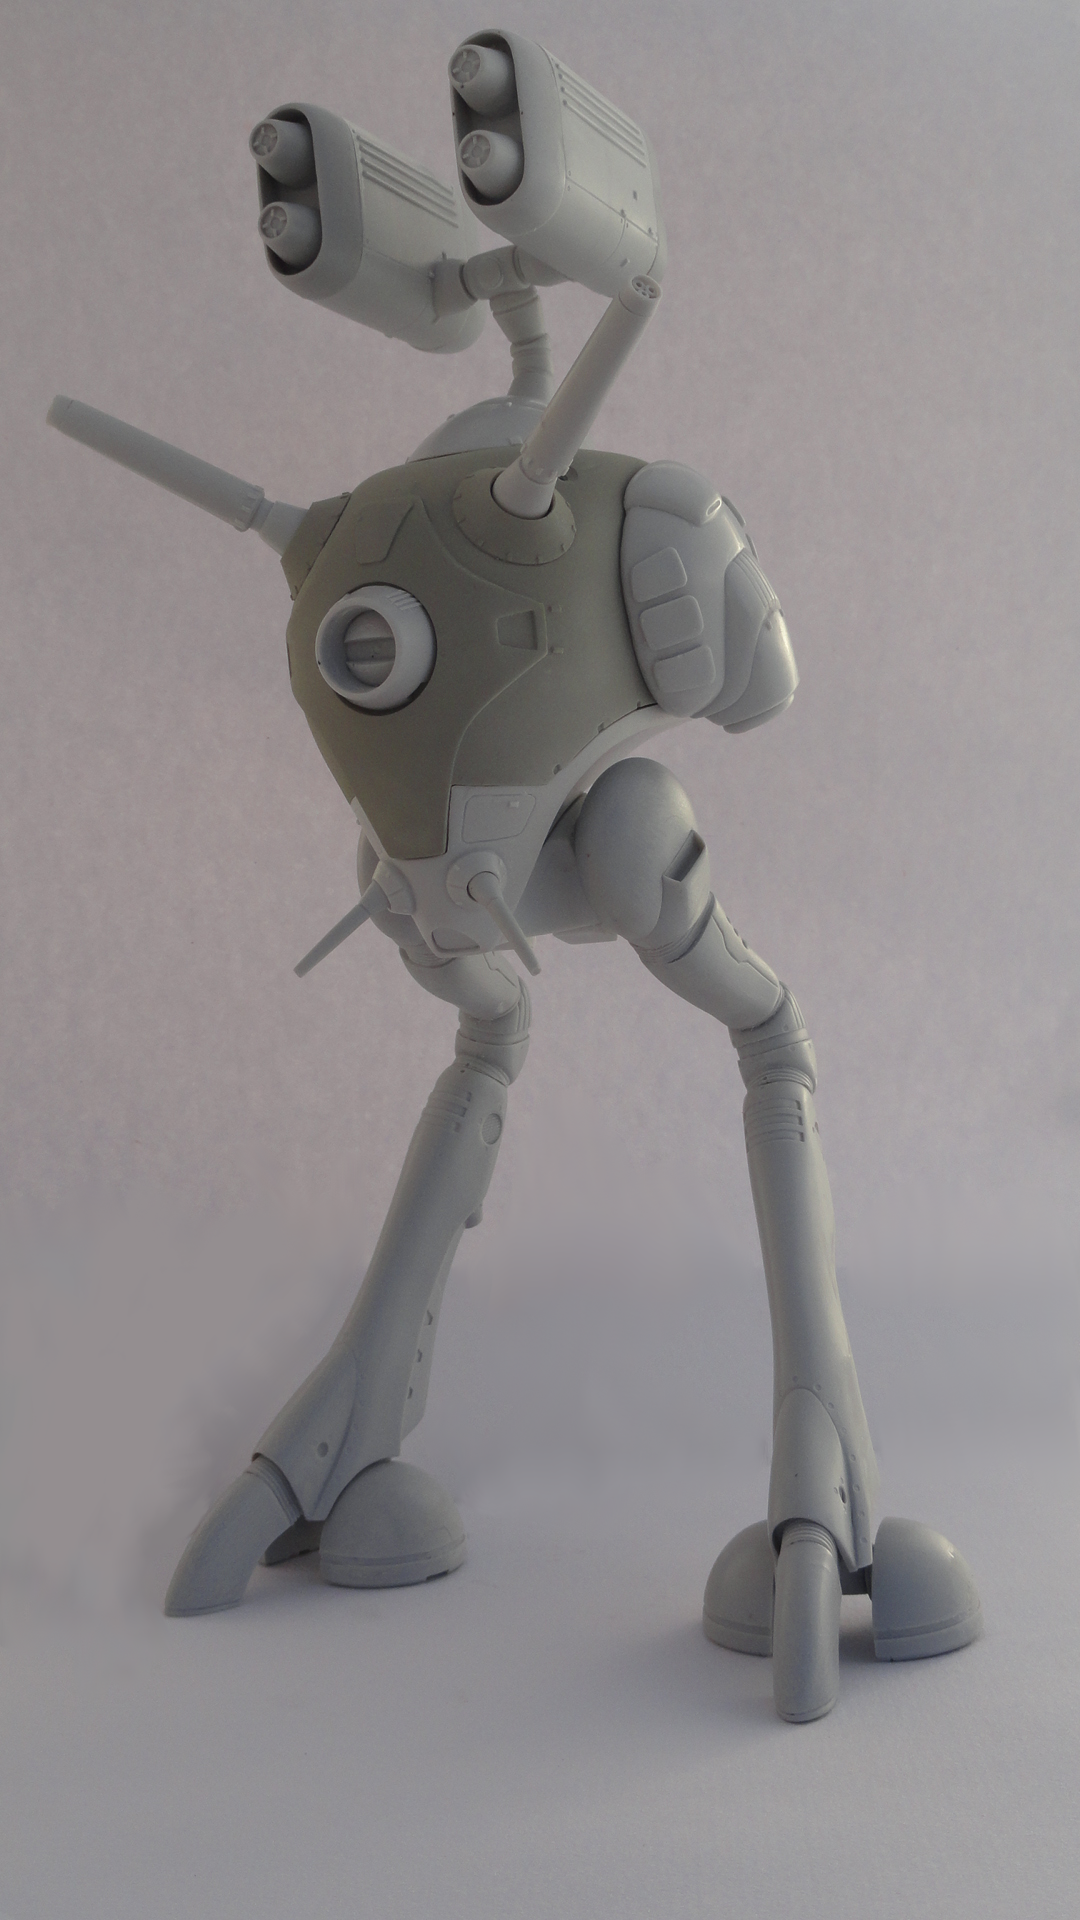
Heavy Missile Carrier - AUD $159.00
Recce - AUD 159.00
These prices are pretty close to what the cost was at release and the US - AUD exchange rate makes it a pretty good buy for international customers. At the moment all casting is complete and we are just waiting on decals to arrive from the printers.
Standard Version (RTKF Casts)
Light Missile Carrier Version (RTKF Casts):

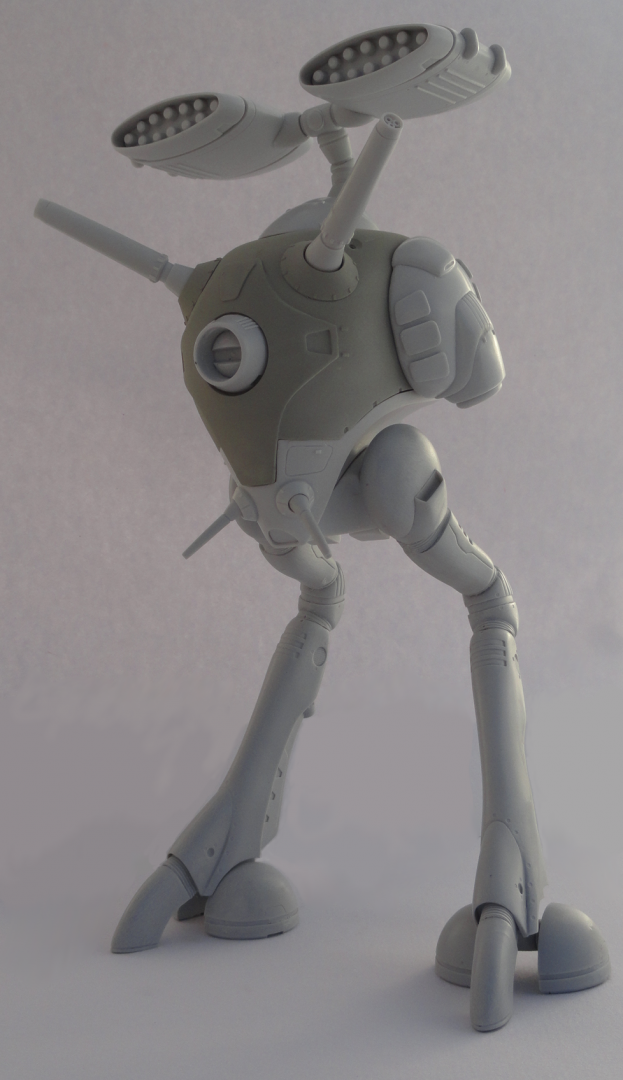
Heavy Missile Version (RTKF Casts):


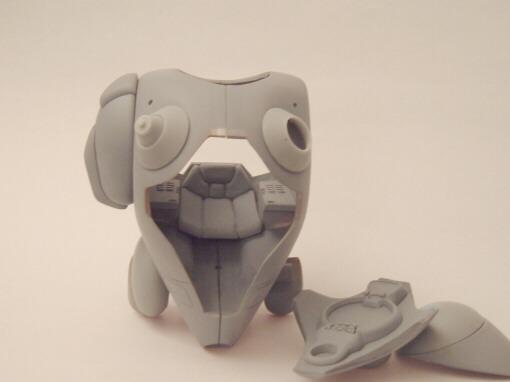
Cockpit Version (Photos Courtesy of Captain America):


Recce Version (Build by RTKF):

If you are interested the PM us here or hit up at returntokitform@gmail.com or https://www.facebook.com/Returntokitform/
Cheers,
Brett and Chrissy
-
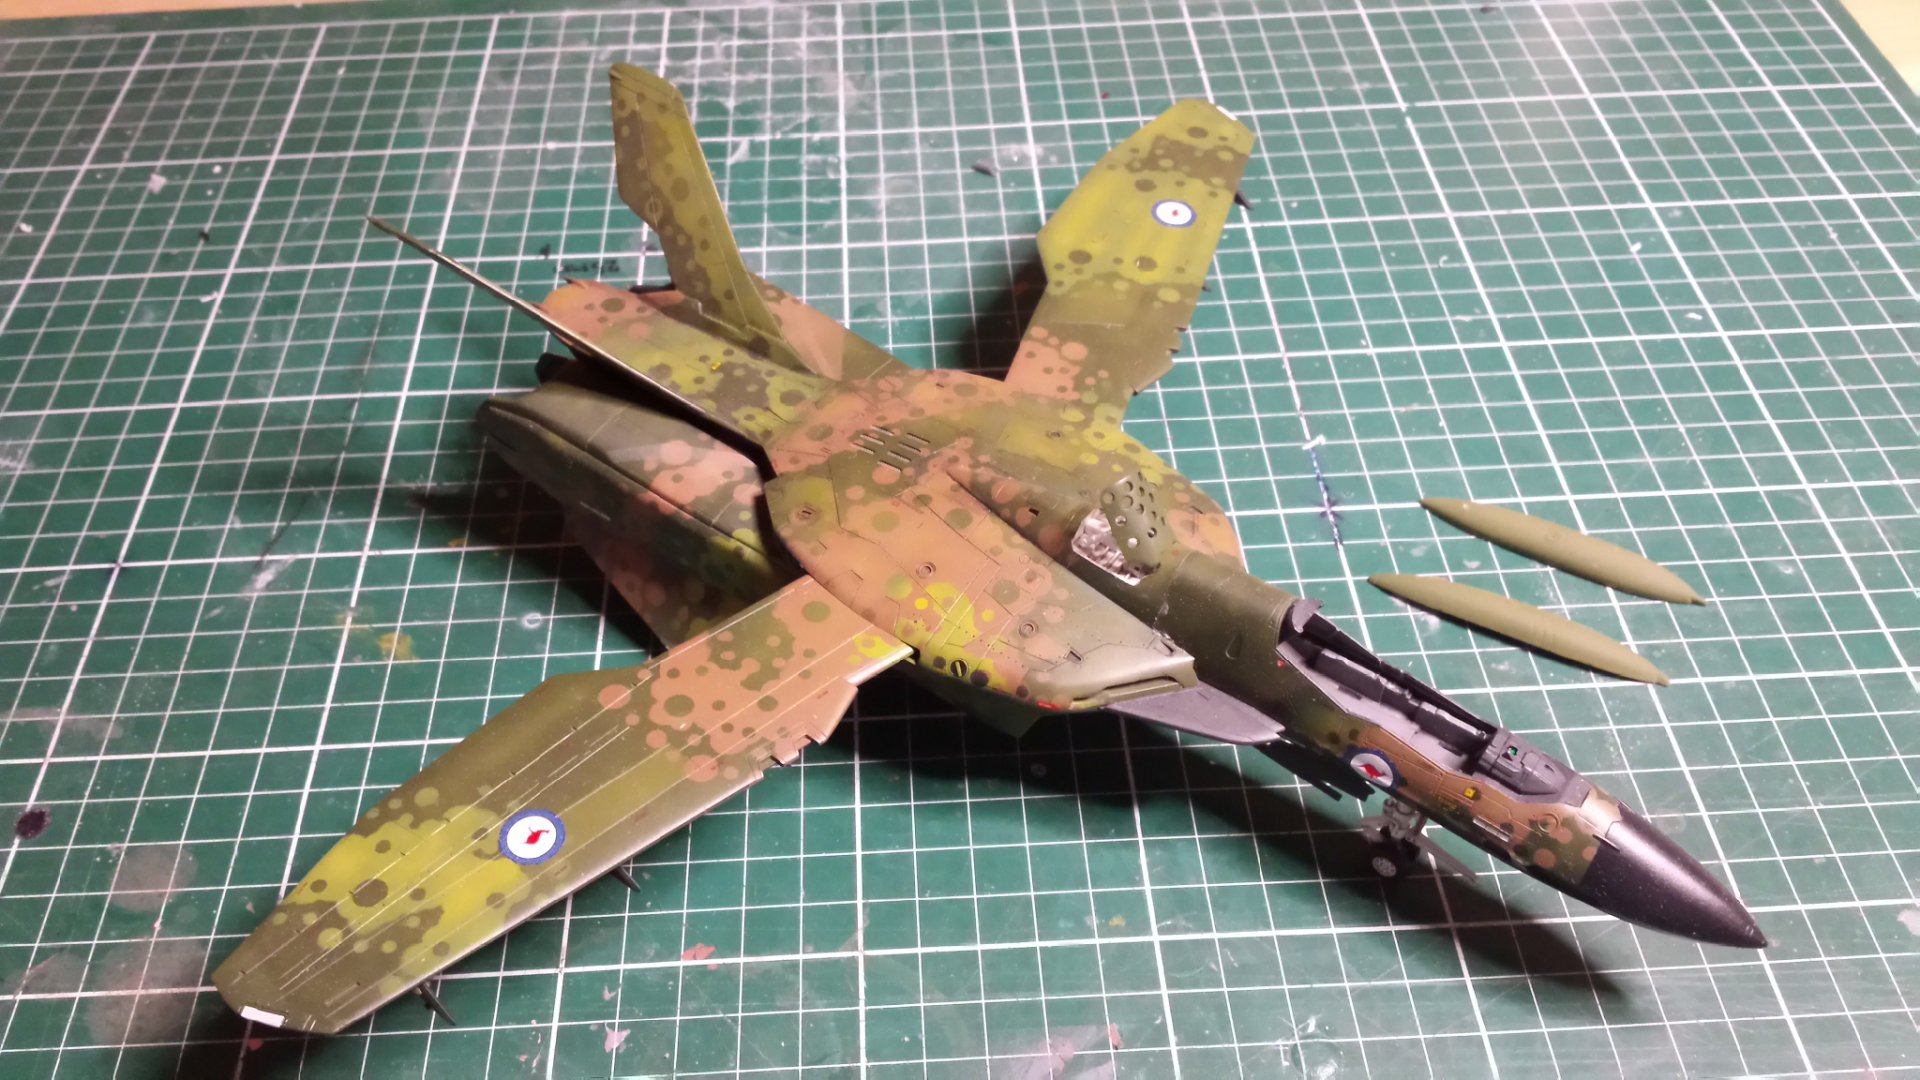
Awesome work on the Viggen camouflage
-
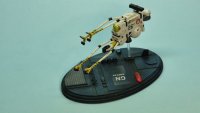
Bump for a good seller


RTKF 1/72 "Legult" Build Ups
in The Workshop!
Posted
Thanks MT!
No new progress yet - have been too busy casting and working on the Gnerl build