Quagga
-
Posts
89 -
Joined
-
Last visited
Content Type
Profiles
Forums
Events
Gallery
Everything posted by Quagga
-
1/72 Hasegawa vs 1/100 Wave Battroid (from a Gundam perspective)
Quagga replied to Quagga's topic in The Workshop!
Thanks for the advice modelglue! I've since procured some cheap models on which to practise before attacking my battroids with the Dremel. I've been trawling the internet and I haven't found too many shops with either the Wave or Hasegawa battroid in stock. I hope that this is simply due to the holiday buying frenzy and not a permanent situation As far as my own battroids are concerned, I hope to finish building both over the coming weeks and to conclude my comparison (you know, from a Gundam perspective ). After the completing the initial dry build, I plan to shift gears and take things quite a bit slower: I first need to learn some new skills and invest in equipment in order to do them justice. As you might gather, I'm back to being hooked on model-building, following a twenty year break spanning ages 16 to 36. Is this an early sign of an oncoming mid-life crisis? -
Since the painting set-up, i.e. airbrush + compressor + some sort of a home-brewed booth, is by far the biggest modelling investment, I'm going to follow this bit of advice. THANKS I'm a bit late, but happy new years Macross World!
-
Would the Revell 39199 set with compressor @ €100 be OK to start with? For example: http://www.modelbouwbloemendaal.nl/index.php?item=revell-39199-basic-set-with-compressor&action=article&group_id=10000536&aid=48260〈=en Or would I be better off with something like a Iwata Neo and a second-hand compressor? My LHS has the Revell and provides good support...
-
1/72 Hasegawa vs 1/100 Wave Battroid (from a Gundam perspective)
Quagga replied to Quagga's topic in The Workshop!
Live and learn! OK, last question before I try and do something productive on my last work day of 2014: Can anyone point me in the direction of a tutorial on space weathering? I'm also looking for (and not finding) reference pics of damaged mechs... Valkyries would be awesome, but anything would do. I'm in the process of re-watching the Western adaptation of Macross ( ) and I'm looking out for scenes where damage occur. The obvious scene would be the first episode where the arm holding Minmay is shot off, but I'd prefer my model to be sporting all its limbs... I've watched international scale modeller's series on model airplanes (see youtube) and Steezy's Gundam weathering video (also on YT) and I'm working through WM Cheng's excellent step-by-step guides. I'd like to go for a well-worn and dirty look, possibly adding some scrapes and/or battle damage if I'm feeling brave. -
1/72 Hasegawa vs 1/100 Wave Battroid (from a Gundam perspective)
Quagga replied to Quagga's topic in The Workshop!
Sounds good! What do you guys use for extraction? I plan to paint in room already fitted with an air outlet for the tumble-drier. There is a second pipe that is currently blanked off. I imagine myself spraying towards a ventilator blowing into the outlet, while wearing some sort of gas mask... @chyll2 Please explain for the benefit of this n00b -
1/72 Hasegawa vs 1/100 Wave Battroid (from a Gundam perspective)
Quagga replied to Quagga's topic in The Workshop!
Ah, thanks for the tip! I've checked out your link and it looks very interesting. I did not see any reference to the chemical base of the wash though... Sticking with the beginners' thread terminology: how "hot" or "cold" is this wash? I have a colleague, who is an experienced modeller, and he advised me to try "Vallejo Air" paints, which are apparently "polyurethane / water based". If I understood your post (in the beginners thread) correctly this is would be a relatively "cool" paint... -
1/72 Hasegawa vs 1/100 Wave Battroid (from a Gundam perspective)
Quagga replied to Quagga's topic in The Workshop!
Hi Jefuemon! I appreciate you (and other experienced modellers) chiming in Your example looks nice and dirty! If you don't mind me asking: how did you get that finish? I've been reading up in the Beginner's Model Building Construction BASICS thread and my guess is that you've used some kind of a "wash" to pick out the panel lines..? I've been pondering how I should finish my models: I'm a bit hesitant in investing wads of cash into an airbrush, compressor and extractor setup, though it certainly seems like the best option. I'm keeping an eye on my local second-hand market though. -
1/72 Hasegawa vs 1/100 Wave Battroid (from a Gundam perspective)
Quagga replied to Quagga's topic in The Workshop!
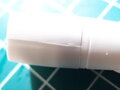
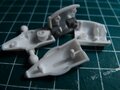
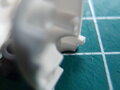
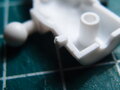
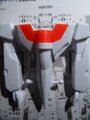
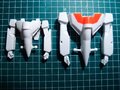
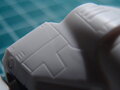
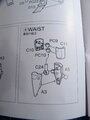
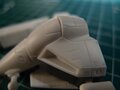
Hi Guys! Tonight it was the turn of the Hasegawa´s nose / waist. In contrast to the Wave battroid, who's hip joints are molded as part of the "fuselage", Hasegawa saw fit to use a separate part, one that felt pleasingly hefty. All the bits felt and looked good and went together precisely, without any need for sanding besides the nubs. Sadly I got too enthusiastic with the Stanley knife and damaged the nose Looks better in real life, but I don't know how good it will look once painted... I've resigned myself to second round of sanding (and a first of filling) The work of a n00b. Looks good from far, but far from good. It is amazing how precisely these little bits of plastic fit together. Treat the little tabs on the hip joint cover (B6) with care! We're getting there...! As it turned out, the little polycapped plastic bits I was concerned about, are not much more than guides. I guess they were supposed to hold the waist / nose firmly to the torso, but mine aren't doing much. It feels as if the lower body might drop off at any moment! Perhaps I should give the waist a firmer push, it certainly looks as if something should go "click", but I don't dare to apply much force. I'll take another look tomorrow The size difference is considerable, not to mention design and level of detail Hasegawa's detailing is awesome. Very shallow, but pin sharp. Any coat of paint will have to be very thin... It also appears to be as fragile as its reputation suggests. I've never heard anyone criticize a model aircraft for lack of durability: I guess you need to apply the same criteria when judging the Hasegawa. That Wave can't compete with Hasegawa on level of detail is certainly understandable, given the scale difference. Wave make up for it by having deeper panel lines, which gives their battroid more of a anime look IMO. The Wave feels totally different, closer to the Gundam than the Hasegawa in fact. I also expect the 1/100 Valkyrie to end up very close in size to a 1/144 Gundam (with a 1/100 Gundam almost 50% taller). To someone who doesn't know any better, this would look better in a mixed display. I must be close to half-way through assembling the (basic) models and judging by my original criteria, the Wave is ahead. -
From the album: Hasegawa VS Wave VS Gundam
-
-
-
From the album: Hasegawa VS Wave VS Gundam
-

From the album: Hasegawa VS Wave VS Gundam
-

From the album: Hasegawa VS Wave VS Gundam
-
From the album: Hasegawa VS Wave VS Gundam
-
From the album: Hasegawa VS Wave VS Gundam
-
From the album: Hasegawa VS Wave VS Gundam
-

From the album: Hasegawa VS Wave VS Gundam
-
From the album: Hasegawa VS Wave VS Gundam
-
1/72 Hasegawa vs 1/100 Wave Battroid (from a Gundam perspective)
Quagga replied to Quagga's topic in The Workshop!
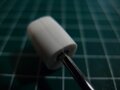
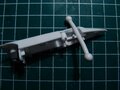
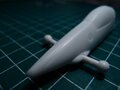
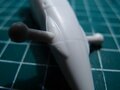
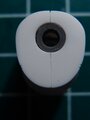
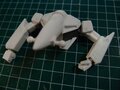
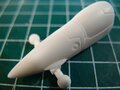
And we´re back to Wave! I briefly considered assembling the legs first, but a look at all the little parts was enough to convince me to stick with the announced program. Doesn't look very hard, but I'm slightly wary after last night Snip snip snip and we're ready to go! Nubs are often placed out of sight This positioning makes cleaning them up much quicker and easier This looks pretty sturdy, certainly if you consider the size of the model One of the polycaps proved imperfectly cast and required some careful trimming to fit This tip I got from a Gundam book. The book was in Japanese but I thought I saw a picture suggesting you support a polycap from inside when called for Close-up the fit isn't perfect, but it looks and feels pretty darned decent The waist assembled If anything is getting filler... Or perhaps not as it turns out this isn't really visible when assembled Please learn from my mistakes and don't bend your battroid too far over backwards: it gets stuck Why didn't they just center the pin? Just as well I'm not planning any poses with the waist rotated 90 degrees Ladies and Gentleman: GERWALK mode! -
From the album: Hasegawa VS Wave VS Gundam
-
From the album: Hasegawa VS Wave VS Gundam
-
From the album: Hasegawa VS Wave VS Gundam
-

From the album: Hasegawa VS Wave VS Gundam
-
From the album: Hasegawa VS Wave VS Gundam
-
From the album: Hasegawa VS Wave VS Gundam