
Jarrod
-
Posts
162 -
Joined
-
Last visited
Content Type
Profiles
Forums
Events
Gallery
Posts posted by Jarrod
-
-
Thanks for the idea anyway. I ended up finding Martha Stewart transparent glass paint in orchid purple, so I ordered a bottle and am going to try that out. It's water based so hopefully it will mix with Future. Pretty expensive for a single bottle though. You'd think she was bottling unicorn piss or something.
Have you tried the various Model Master purple pearls? There's Purple Pearl and Grape Pearl, they both have a metallic finish, and are semi-translucent. They are what I use when I need clear purple
-
I know this is a long shot, but anyone got an extra they don't need? Maybe one from that old broken Ver. 1 25G?
PM me if you got one to get rid of.
-
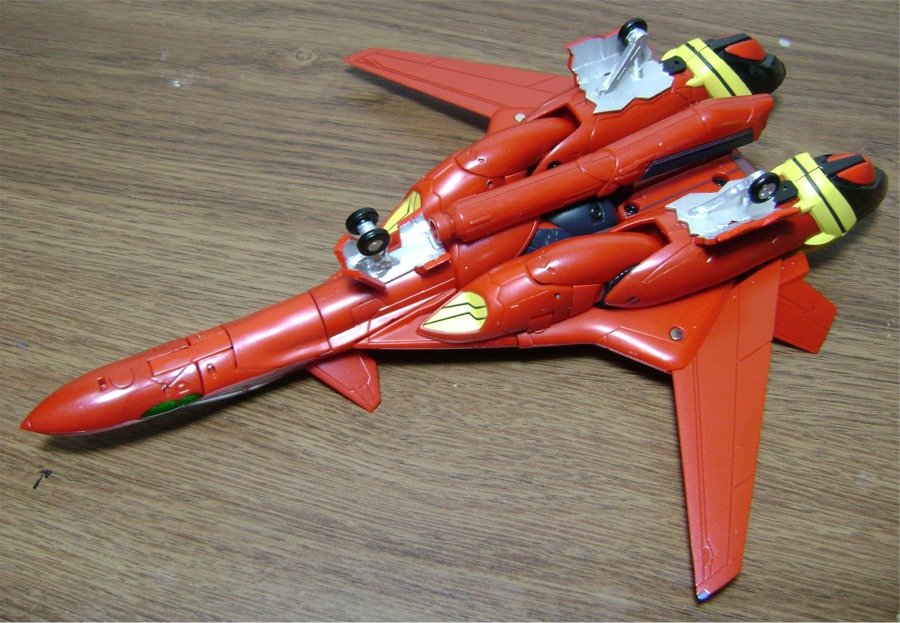
Well, I was very excited today when I got home to my Alto YF-29, and more importantly: MY VF-25 OZMA!
Oh FINALLY a complete skull Squadron. Bought from mandarake so She's second hand. Little dusty.. nothing dramatic. Some small scuffs; thats fine i can live with that. Joints a little loose, but better than i expected, so thats fine. Head lasers loose, but then i hear thats a thing with all of them; a little tape fixed it. The Skull symbol is crisp and clear, Ozma and Ranka there...... i'll just get the gunpod into his hand and.

Well..... Frakk. Just.... Goddamn.. DAMN IT! There's even a little bit of glue where someone tried to fix it.
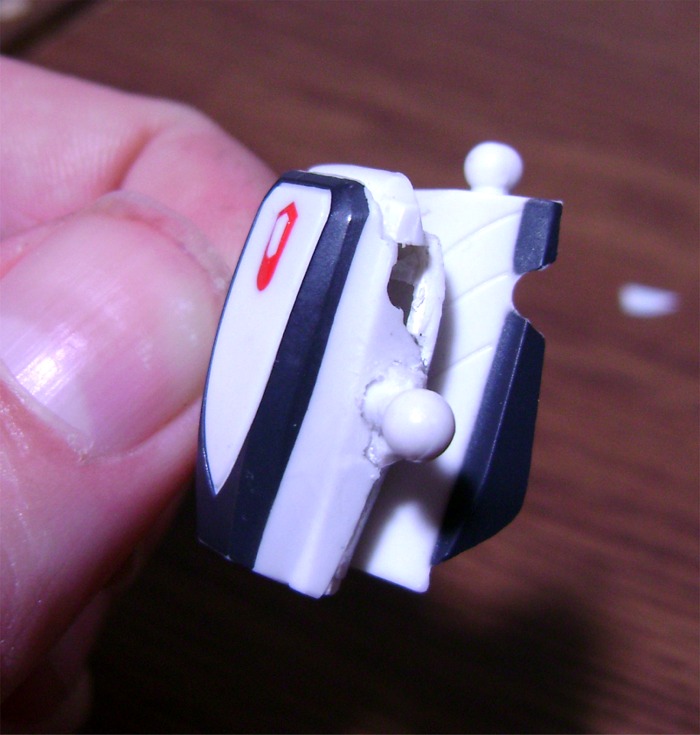
So yeah, busted Gunpod
 Dunno how i can fix that. i couldn't even get the gun apart enough to try.
 Such a bummer.
This same thing happened to my Alto's Gunpod. I was just opening it up one day, and it snapped pretty much in the exact same spot. I built a new clip end out of some styrene bits. It's not quite as snug as brand new, but it's secure, and works.
Jarrod
-
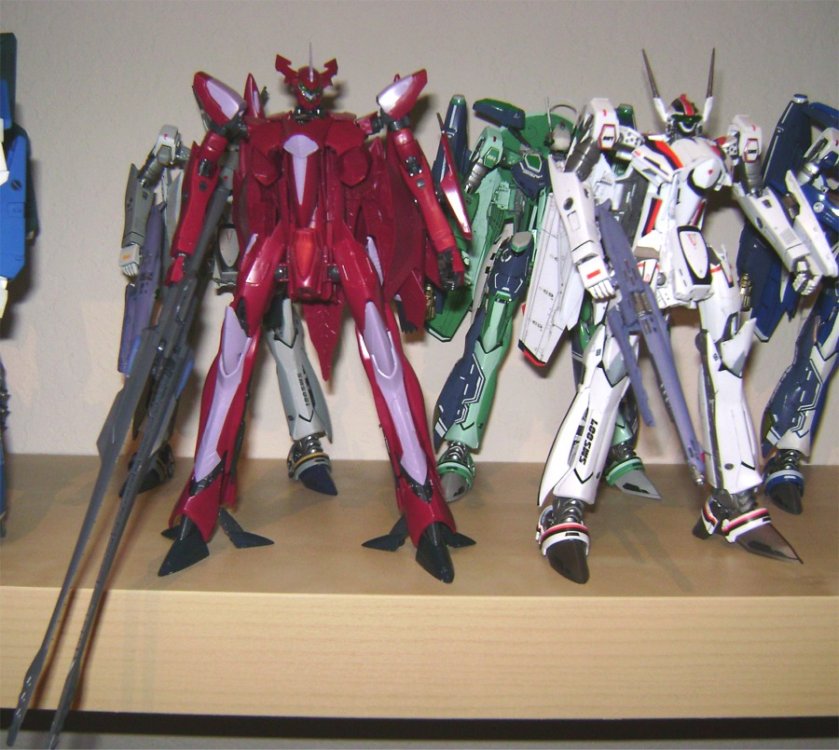
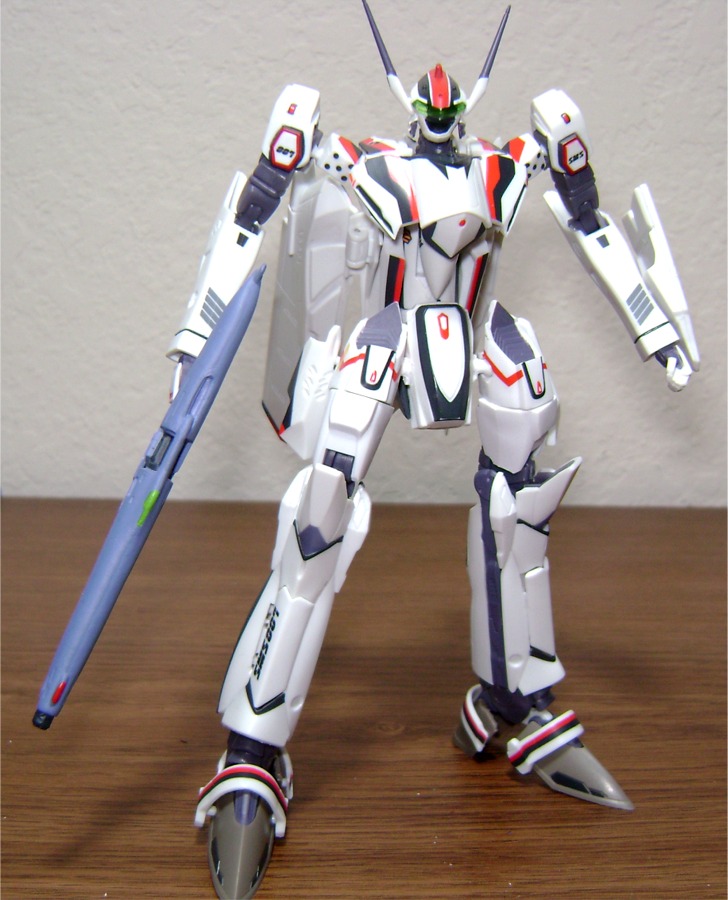
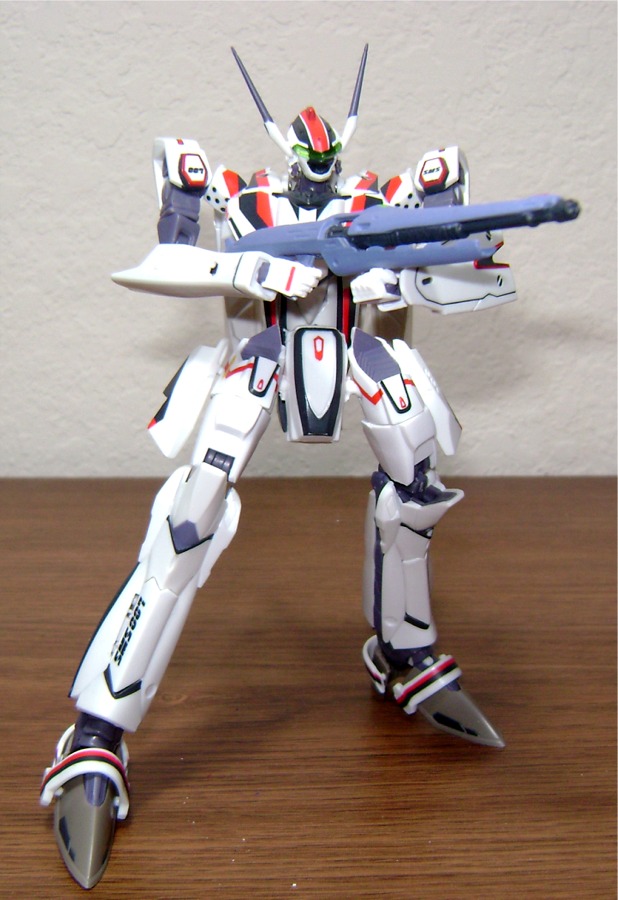
Wow...been a while since I posted here, but after getting my new VF-25, I felt I had too.
This thing is perfect! Sculpt is magnificent, transformation is intuitive, everything has "place" even if it doesn't actually "lock." The fact that I don't have to remove ANYTHING, even swap a hand, for transformation is so, so refreshing.
Now, I love my 1/72 Vf-25 kits, and I thought for sure there would never be a toy that could match it in terms of detail, sculpt, and proportions, but damn I was wrong! Of course, it doesnt hurt that this new version really feels and looks like an upscaled, sturdy version of the kit. They share ALOT in common.
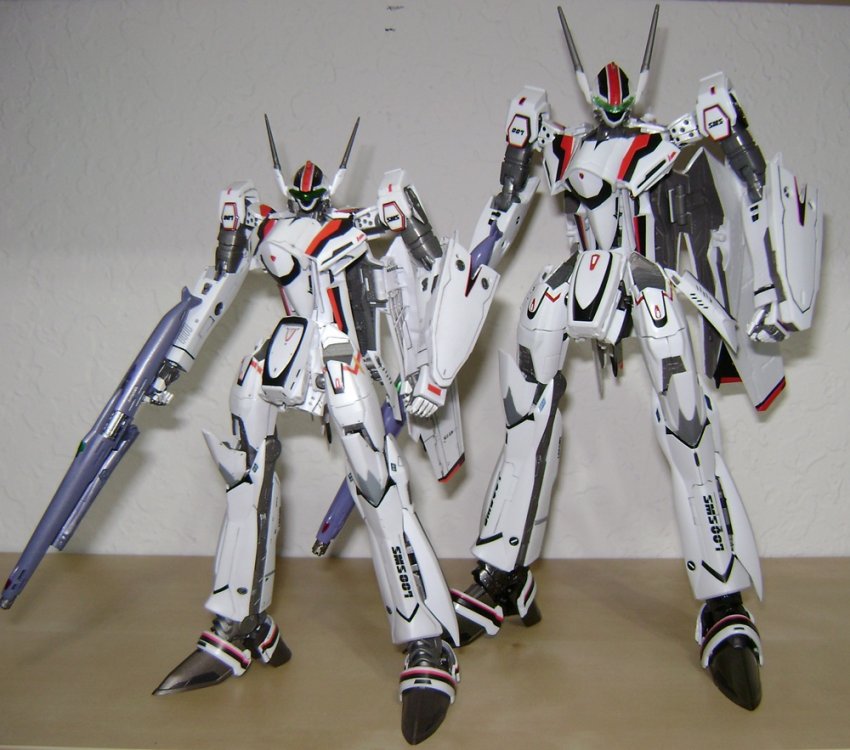
But the kit is just that, a model kit. Sure it's transformable and poseble, but it's definitely not made for heavy play. The DX toy is definitely a TOY, its rough and sturdy, and awesome:)
I think the DX actually has better proportions than the kit, seeing them in hand side by side too. I think the most impressive is the more accurate/longer neck and the narrower head. But being able to really angle out the little hip wing root things is great too.
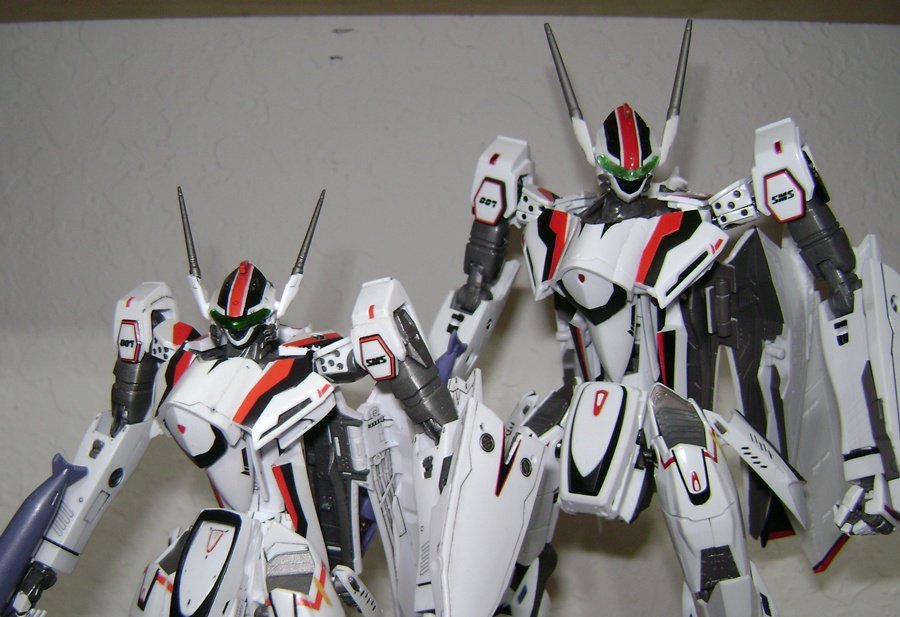
I sold my V1 DX a few weeks ago to help fund this guy, and I kinda feel bad that I actually got $90 for it...this new one is so unbelievably better, and it comes with a stand! Well worth the money.
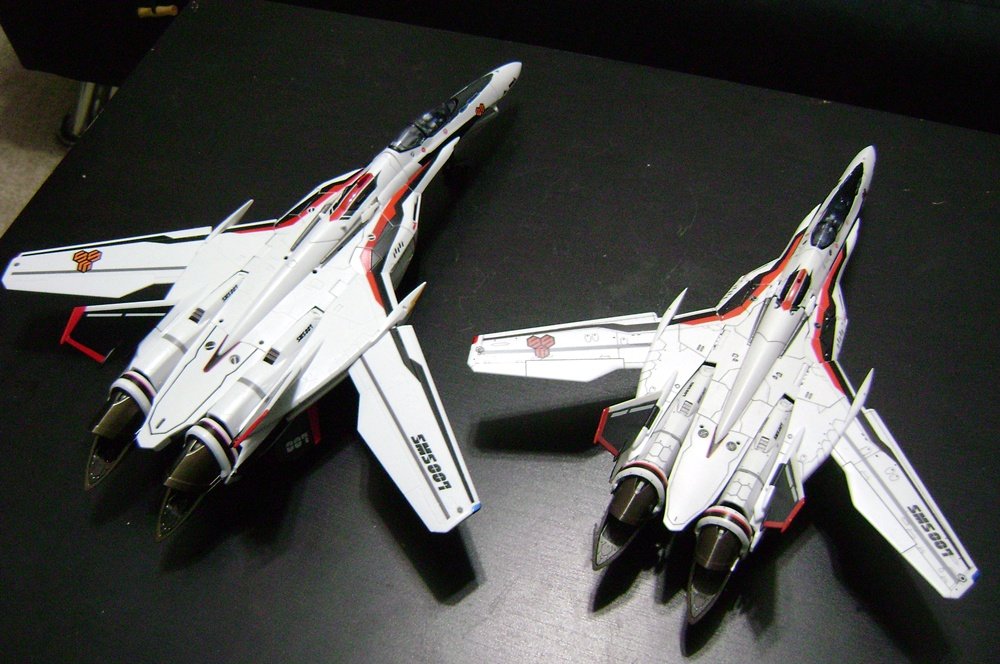
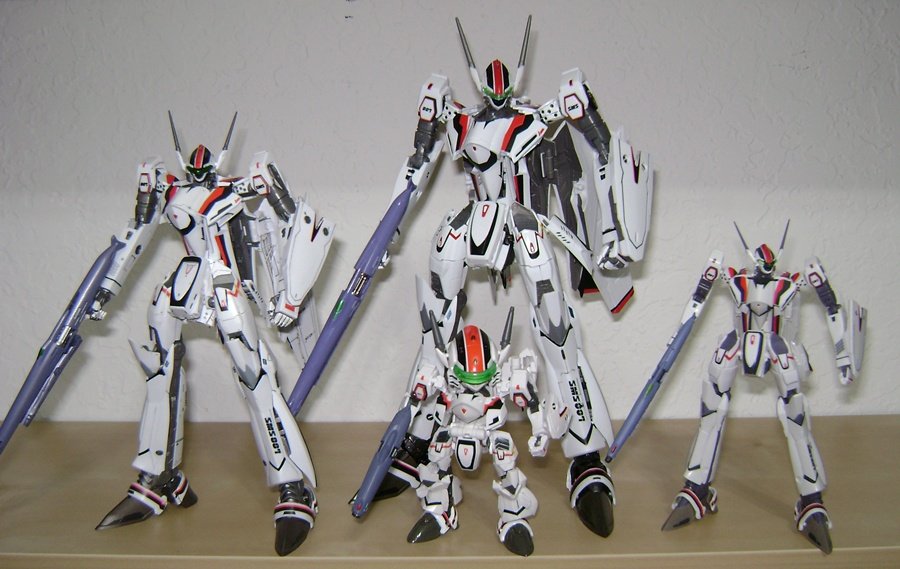
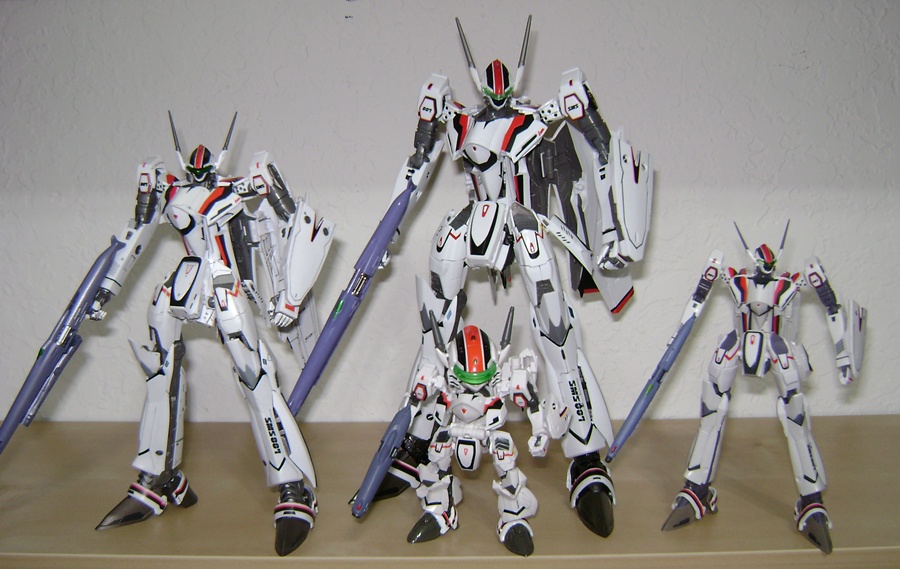
Oh, and just for fun, some shots with my (modded) VF100s and SD VF-25 as well.
-
Jarrod, what did you use to make the attachment strut for the gunpod?
Looking to do a similar modification for the Hi-Metal VF-19S Blazer Valks gunpod.
Graham
Just a piece of styrene strip. I just happened to have a size that fit perfectly and securely into that little triangle gap where the arms meet. Of course I also had to cut away the gunpod to fit the countours of the VF-19 underbelly.
-
Pretty impressive

So what you're saying is that instead of buying the exclusive set, we should just buy 2 VF-19s. =P
Haha...well, the add-on set would probably be best for those who don't happen to have a free broken extra

Really excellent work Jarrod.
Graham
Thanks!
-
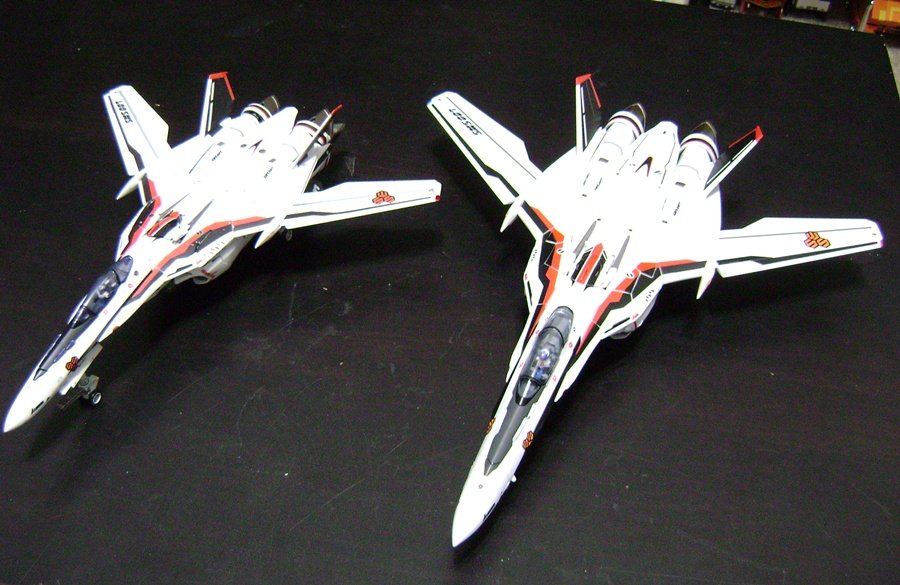
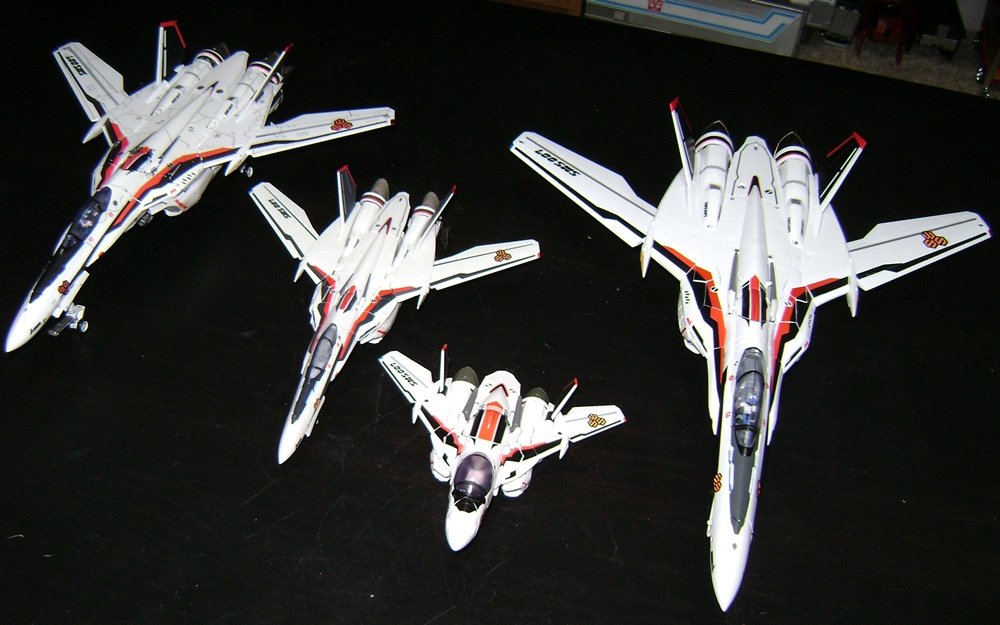
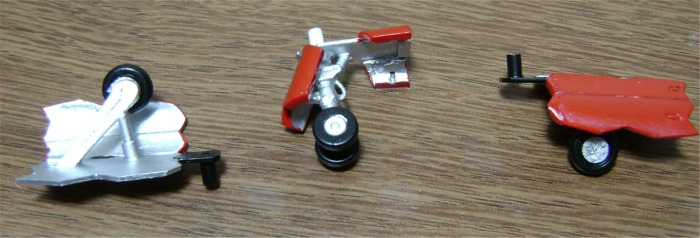
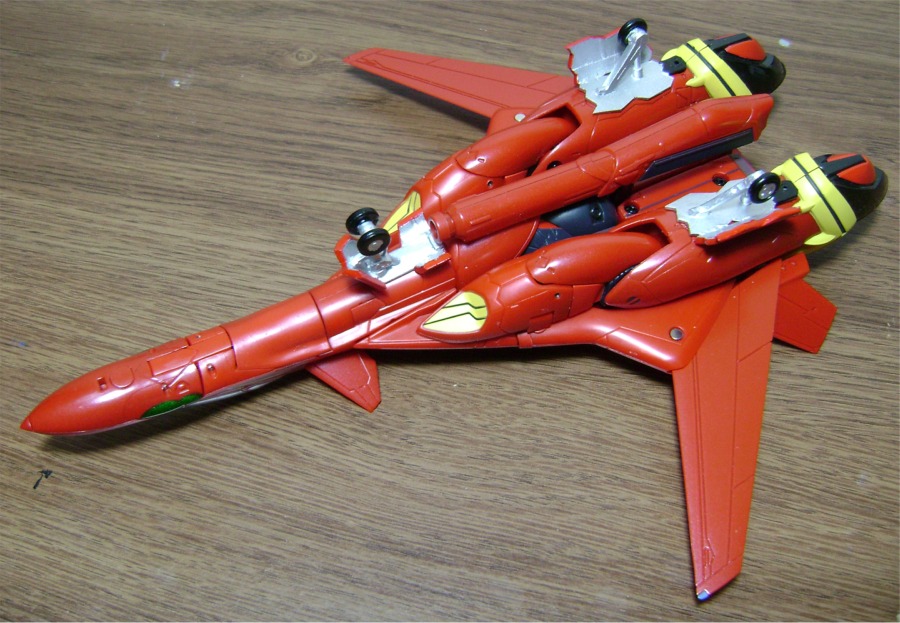
So way back when this thing was first released I was (un)lucky enough to recieve my first Fire Valk broken, but AmiAmi kindly sent a brand new replacement, and I got to keep the broken one. So I did the appropriate thing, and hacked it up!
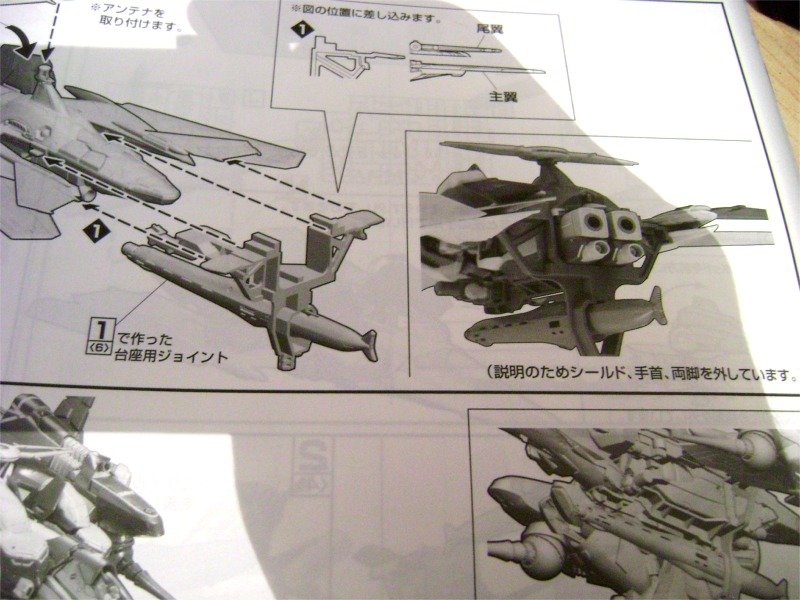
First thing I did was modify the second gunpod to store in Fighter mode.
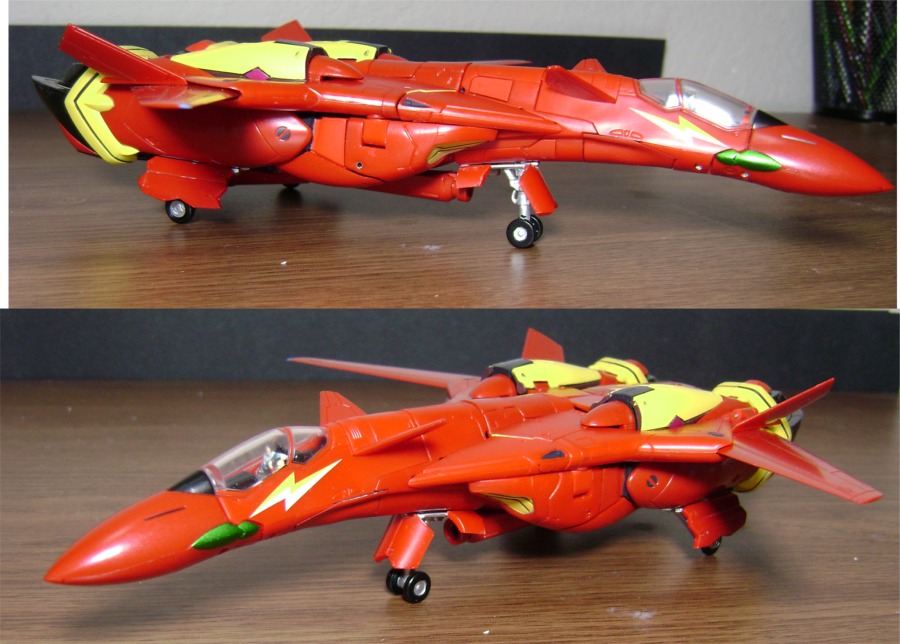
Then I cut out the landing gear doors from the broken one, and built some add on gear for the intact VF-19. I used the old 1/100 Bandai kit for the front strut and all wheels, and built the rear struts out of styrene. I followed the Add-on pack design where the deployed gear just sit over the closed doors, but I also drilled some holes and added pegs so they'd actually attach. In hindsight, I should have drilled the nose gear hole further back...my VF-19 now has a bellybutton in battroid mode:) They're not terribly detailed, but hey, they're landing gear!

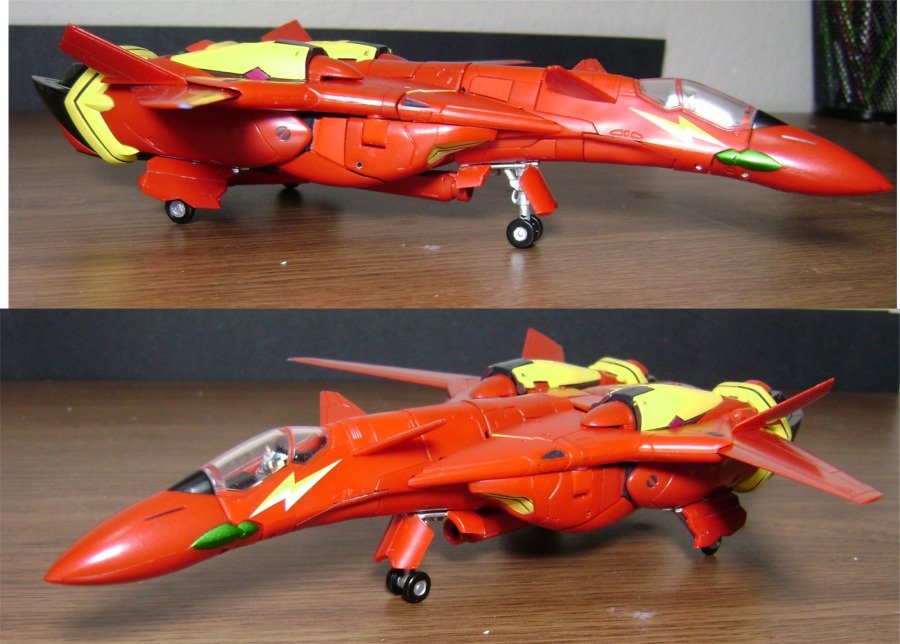
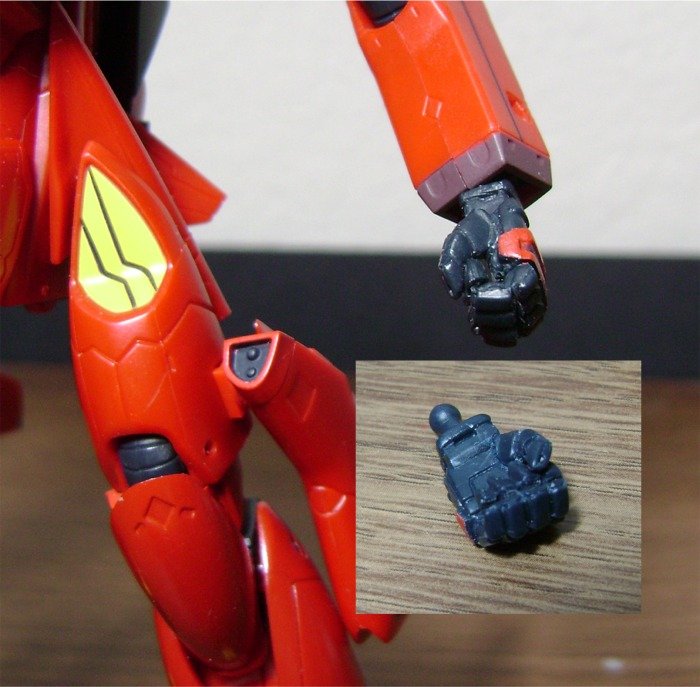
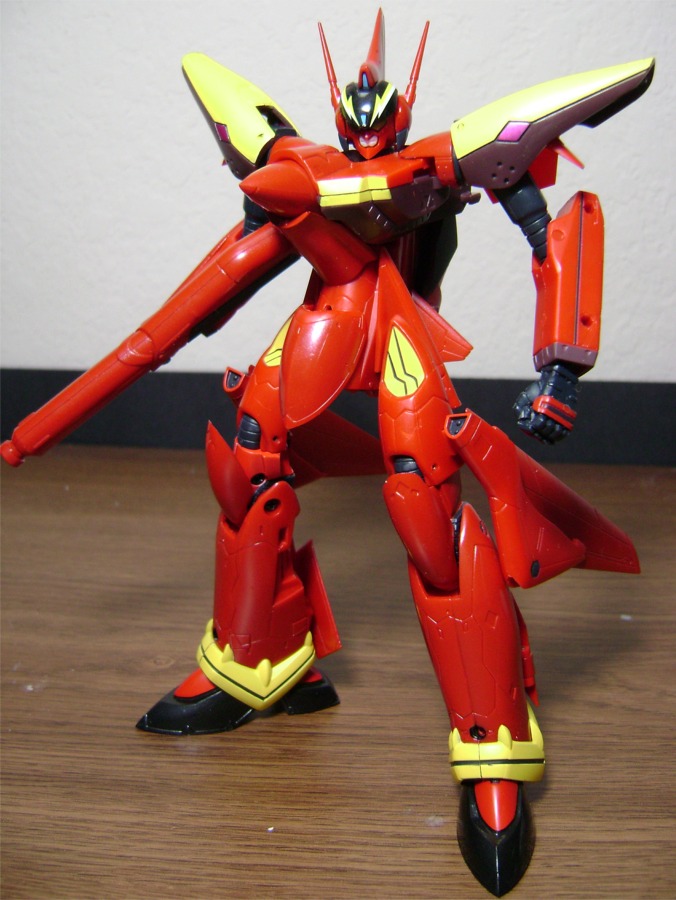
Lastly, I cut up the extra left hand and rebuilt it into a fist.

Ha! Take that over-priced Tamashii-exclusive add on set!
-
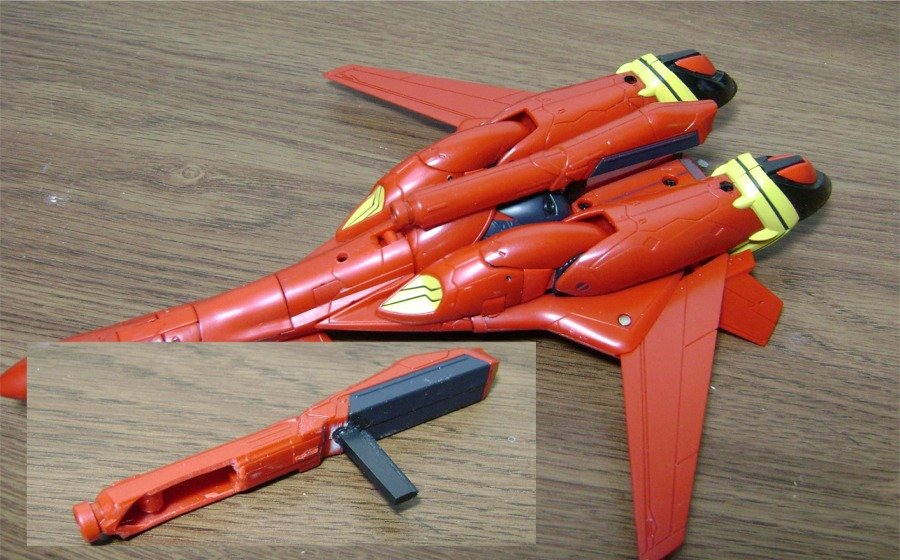
Jarrod, what kid of glue did you use? I was thinking about doing the same thing but was concerned that once cutt off, the structural integrity is hardly reestablished with simple gluing. I fear the ball joints will just keep detaching from the crotch and stay on the legs everytime I want to put it back in fighter mode
EDIT> clarity
I used the kind of super glue you get at the hobby shop. I reinforced them from the inside with some styrene, and even drilled holes and inserted some metal pins pins through them from complete stability.
-
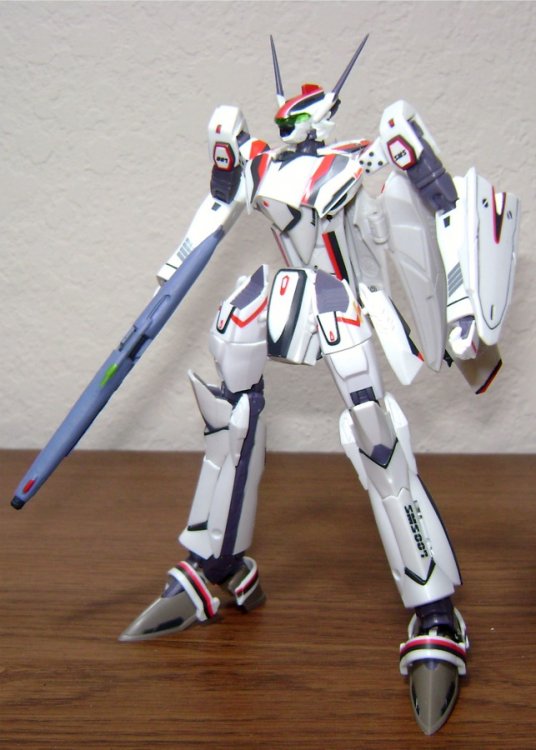
Hi! May I ask how did you lower the hips? Here is how I did to mine:nice job, the new hips look great!
This figure is my least favorite valk purchase but it looks great in battroid mode with this modification. How did you do that?
I just cut off the ball joints, and attached them lower. Wow, the closeup makes it look a lot messier than it is!

-
Picked up VF-25F for about $25 off last week, and I ended up liking it a LOT more than I thought I would. The parts swapping suprisingly doesnt bother me that much, and I love the proportions in Battroid. It's fun, and its palm-sized. I'm not worried about breaking anything or ruining any decals and paint or having to massage everything in perfect alignment like I am with my kits(although, the kits are still #1 to me). Nor do I curse it's Battroid proportions, landing gear, rub off paint...etc like I do my DX.
Of course, it could also be that I only paid $25 for it, and wasn't expecting much...hell I just wanted a 1/100 VF-25 to go with my VB-6. That said, it definitely does have its shortcomings, while the parts swapping doesn't bother me as much, it sure looks like MUCH less should have been nessacary. Fighter mode could have been better too, legs too low, no pilot. When half the toy is parts swapping, there really shouldnt be so many sacrifices.
Oh, and I lowered the hips in Battroid mode, makes it look like a totally different toy! That might sway my opinion some:)


-
Finally, some semi decent photo's of the DX scale "Alto", its huge!
http://alma.skr.jp/mtblog/archives/2010/02...html#entrytitle
Those swing bars are really ugly...but overall, I think I'd pick one up for a decent price. Oh, and apparently, there's kits too:
http://item.taobao.com/auction/item_detail....jhtml?cm_cat=0
And lastly ( I dont think theres a link in this thread at least), here's a small gallery of some of the 3 different smaller versions:
http://www.actionfigurechecklist.com/Image...rwiz/Astro_Plan
Looks like the medium size is spring activated transformations. And make sure you click on the "Packaging" folder right above the pics to see, well, the packaging.
Jarrod
-
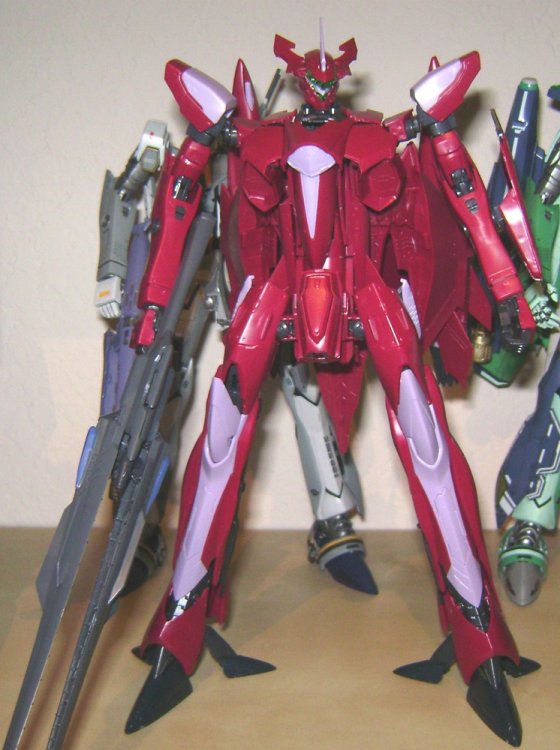
It's Tamiya mica red. I didn't even know it was metallic till after I tested it; I thought it was just dark red. Got lucky.

Hey I have you to thank for this, for pointing out the glaring inaccuracies on the face and showing that a gloss finish actually looks nice on Brera's unit, seeing as how I'm having a severe shortage of semi-gloss coat atm.
I noticed you painted the head accurately. And dammit, I want to paint mine that red now! I'm such a sucker for metallics and that looks REALLY good on the 27. Oh well....
-
Oh, I really like that red! What color is it?
-
Hey Jarrod or anyone else who's worked on the VF-27 kit, did you guys notice that the panel lines (apart from the wings) seem a lot more shallow than the VF-25 kits? I'm having a harder time getting a wash to fill in the lines. Of course it could just be that the paint I'm using managed to partially fill in the lines (the high gloss doesn't help)... I can't actually remember what the bare plastic was like.

I thought the same thing. Figured I must have sprayed the paint on thicker than I thought. Maybe they were really shallow to begin with.
-
Hey, Jarrod, when you paint these, do you paint them before or after being assembled. Any time I've tried to paint a transforming model before being assembled, it ends up changing the sizes of critical holes and destorying it's ability to transform.
Can I get away with just doing a coat of Red Primer on the pieces unassembled with the VF-27 and still have a chance that everything is going to fit together?
Well, I totally assemble the kit first, then disasseble it into smaller sub assemblies for painting. Any parts I feel may present a problem with paint, I just don't paint. For example, the smaller hinges in the shoulder assembly, a few joints in the waist area, and I paint the elbows and knees already assembed. That said I've had no problems with any of my 5 VF-25's or the VF-27 after painting.
-
Ok, might be an impossible task, but I'm curious.. has anyone managed to make a super VF-25 with removable armor?
I just got a super Alto, and I'm relieved that all the parts are there for a regular VF-25, but I can't decide whether to build it as a super or not. I'd love to make it so you could remove it, but it looks like the parts won't allow it.
The only real problem looks like the legs, since the super version replaces several of the leg panels from the normal kit. The chest and backplate armor look like add-on pieces, and the boosters obviously just snap over the wings, but the entire leg assembly is different for the super.
Heh.. anyone got a spare pair of VF-25 legs they'd like to sell?
I've got my Alto, Luca, and Michael all set up to have removable Super Armor. It's tedious, but just don't glue any of those parts on (not like they really need it) and you can can pull the parts off and replace them. There's a few key areas of concern tho: First the decals that wrap around the upper thigh/intake area. I very carefully cut them at the seperation joint, and applied a liberal amount of clearcoat at the edges to keep them intact.
Second, the flip up crotch panel. This area requires major dissassembly if you want to swap out all the parts. I however only swap out the flip up panel and top cover, since I glued most of that area together for stability. I ended up cutting little grooves into the internal grey piece to allow the panel to pop out(does that make sense?). Then I had to trim the upper corners of the panel a bit so it would fold into the stock waist parts. It sounds more complicated than it really is:)
Third,and trickiest, the sheild attachement. I drilled two holes into the regular shield, exactly where the pegs are on the sheild peice included with the Super Parts. Then I put pegs into the holes on the Super Parts shield armor, so now the armor part just pegs into the orginal shield. It's not the prettiest solution, with two holes now visible in non-Super mode, bur they're small and forgivable. Or of course, you can just paint the shield piece included in the Super parts, and disassemble the shield and reassemble it for either mode.
Jarrod
-
Looks fantastic Jarrod! A real inspiration to get mine done (just gotta finish my 25G first!).
You've answered my question about the canopy - I love the clear green poking through and can't imagine doing it any other way. Any tips? It looks like it'll be pretty tedious. Also, your colour matching looks great - did you follow the recommended guide on the box?
Yeah, the canopy was a bit tedious. I painted the body color on it first, after masking off the rest first of course. Then I very carefully cut the green bits out of the decals with a very sharp xacto blade. The decals weren't a perfect fit, so there was some paint touchups.
I didn't follow the paint guide at all...I use only Model Master or Tamiya acrylics, both brands which don't really have the same color lineup that Bandai uses (I think their colors are Gunze Sangyo Mr Color?) However for the main body color I did start with actual Mr Color Wine Red that the instructions call for (the hobby shop I shop has a very dwindling supply of Mr color), and mixed it with some MM Napoleonic Purple, a bit of white, and some Kandy Scarlett to get the color I wanted. For the Lavender I started with Napoleonic Purple, added some white, and kept adding small amounts of Gull Grey until it matched the decals perfectly. The darker maroon is the main color with a bit more tamiya Purple and black mixed in.
-
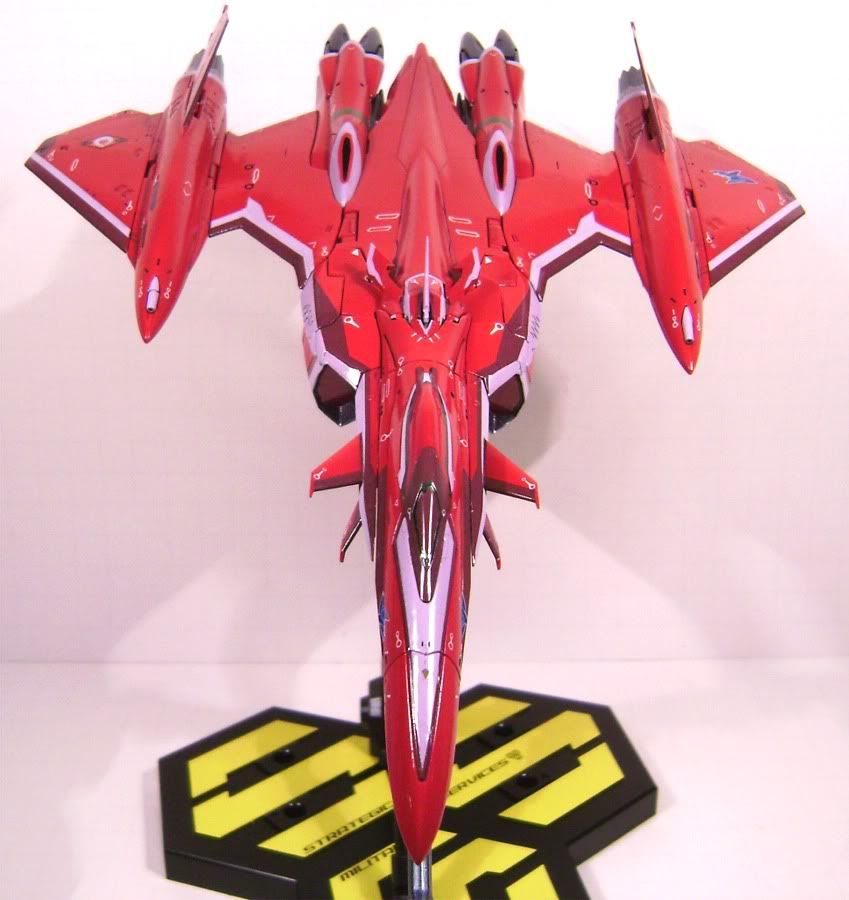
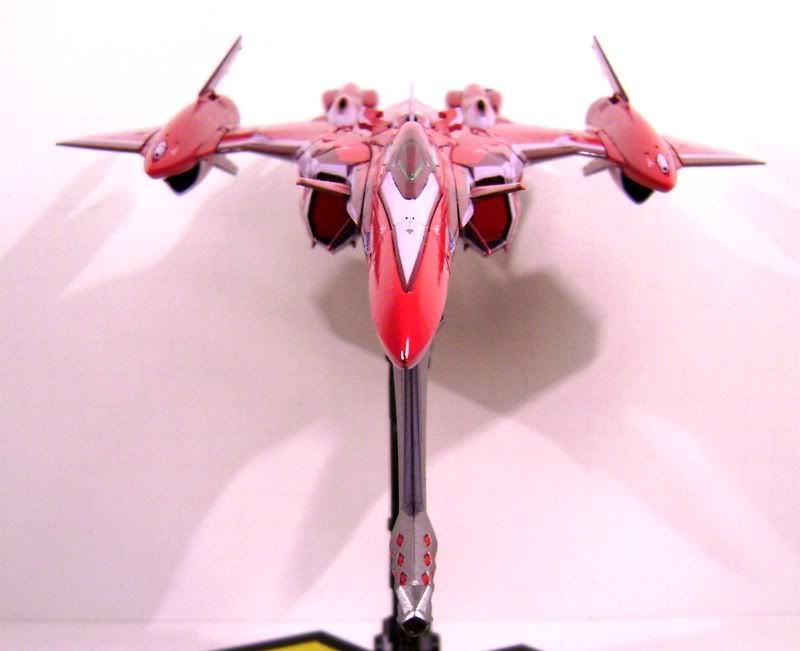
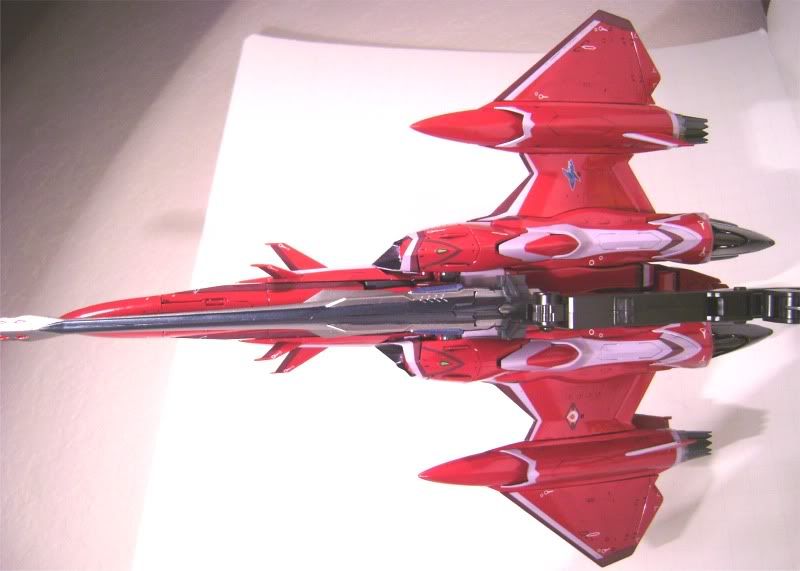
One last one. And sorry, no Gerwalk mode..just not a fan. Never even transformed into G mode.
Jarrod
-
More:
EDIT Forgot to mention! The first 4 pics show the Battroid with the transformation-friendly smaller chest panel, and without the add-on neck piece. The rest of the pics show the larger panel and neck piece added

-
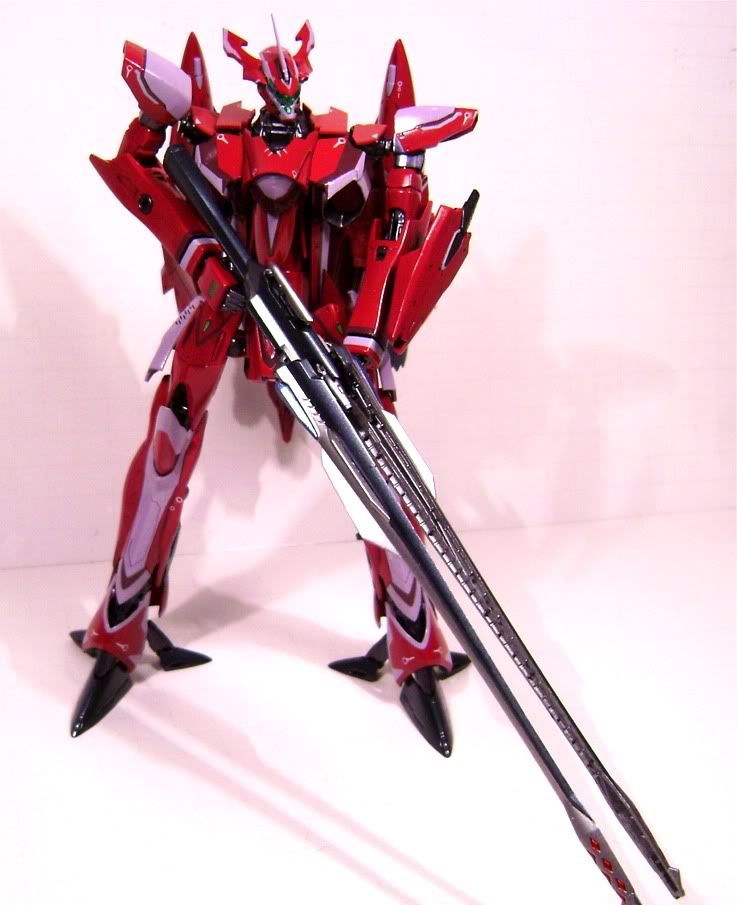
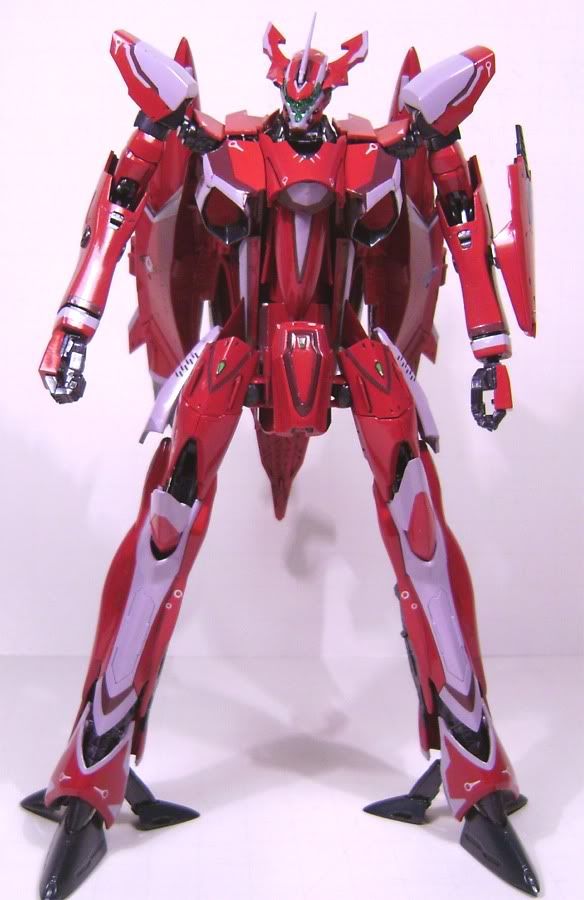
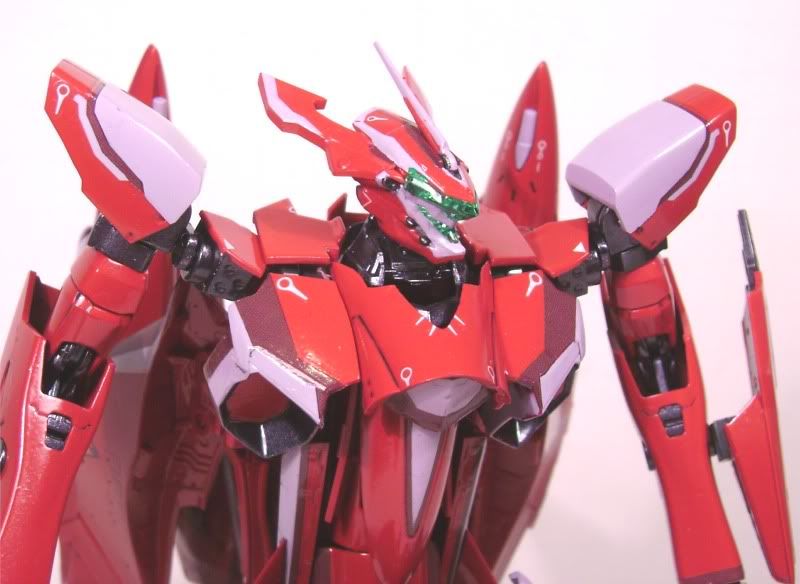
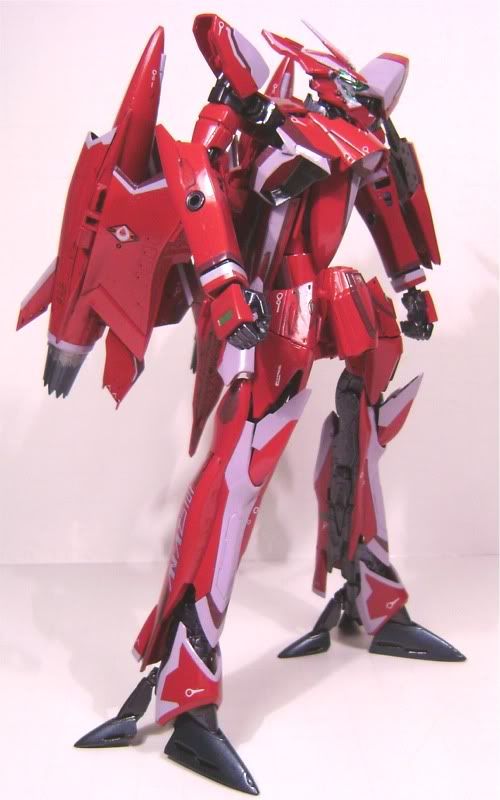
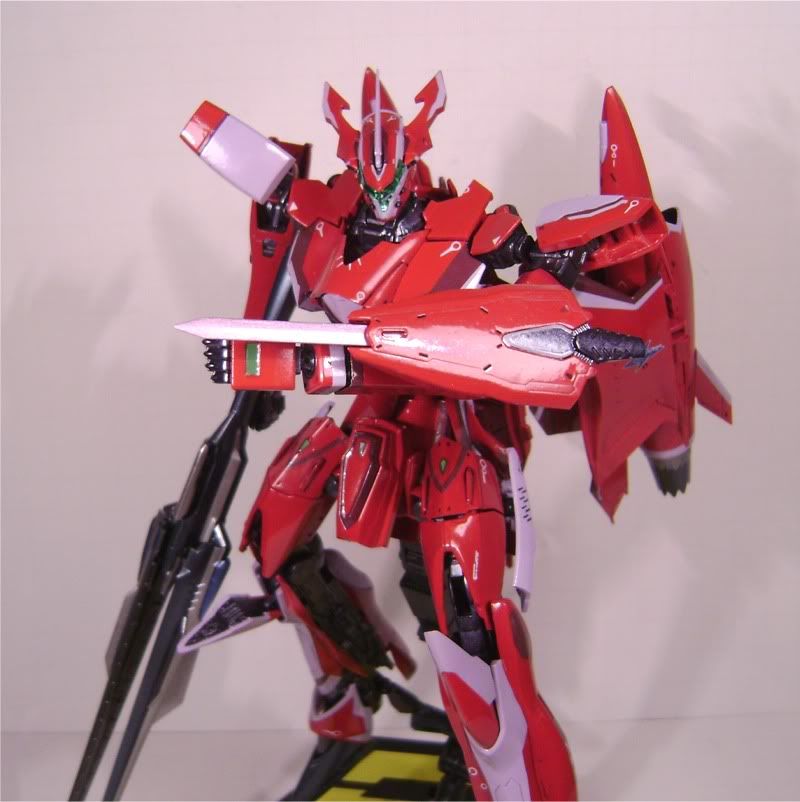
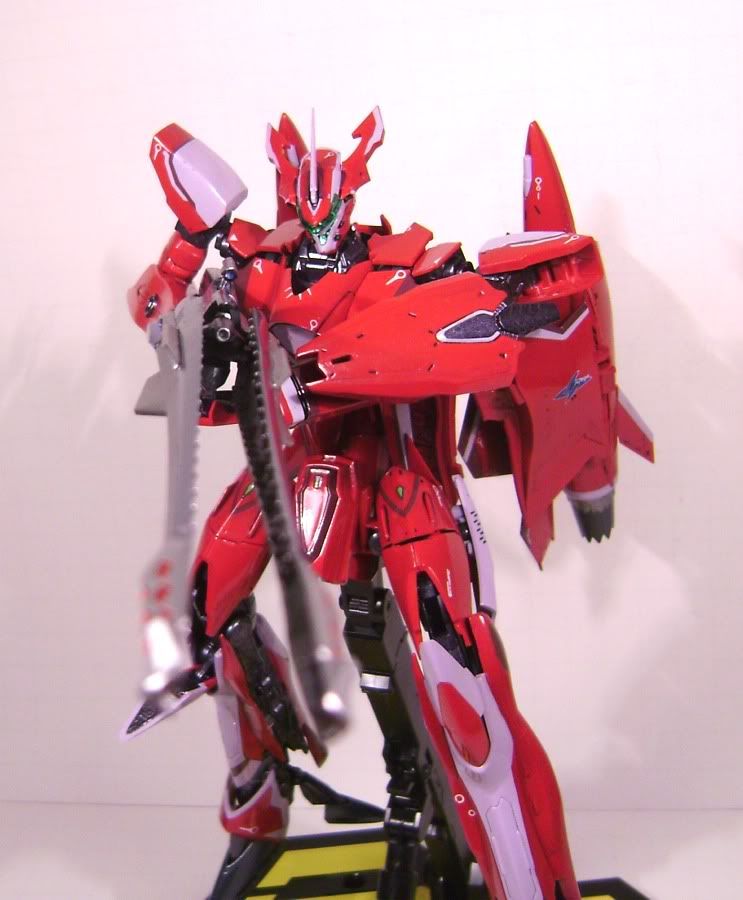
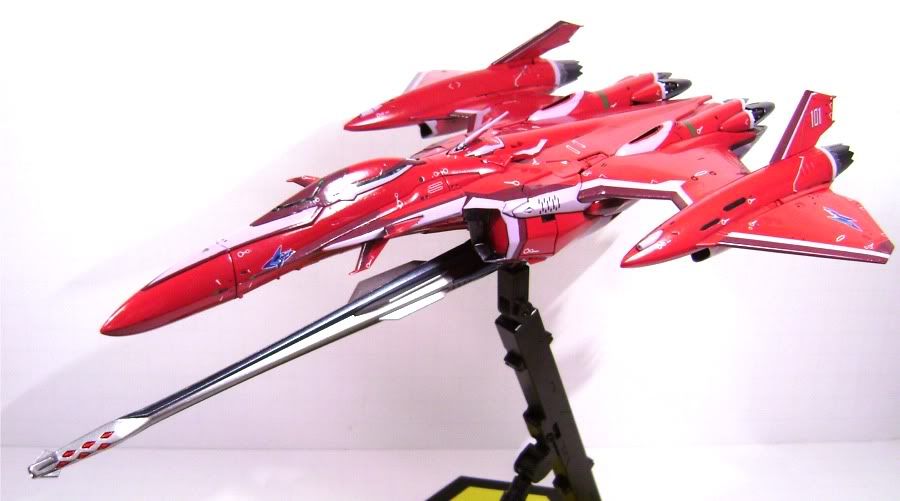
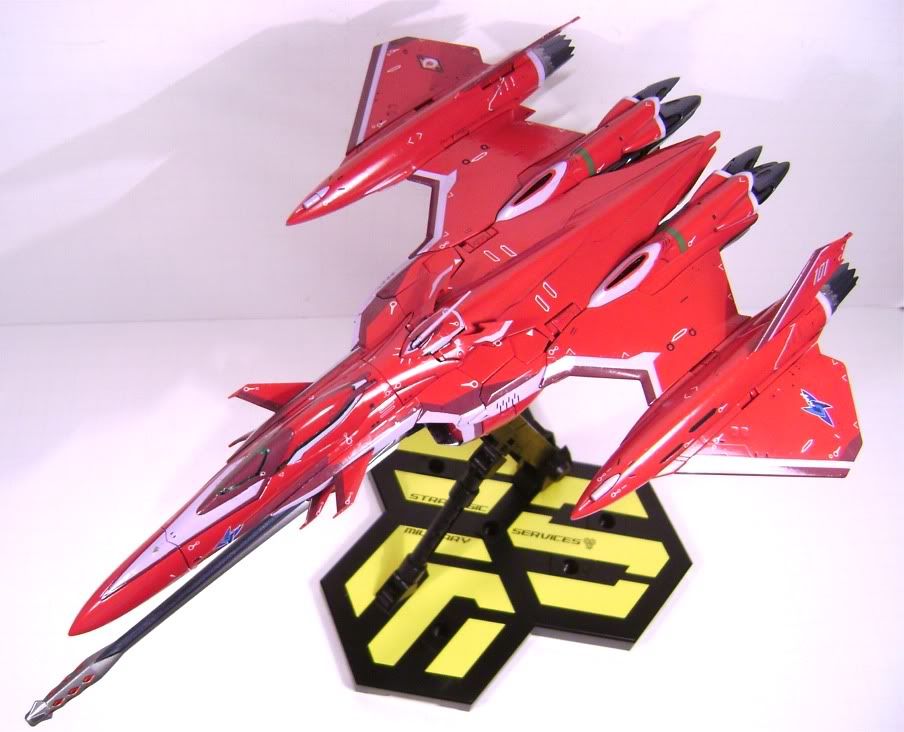
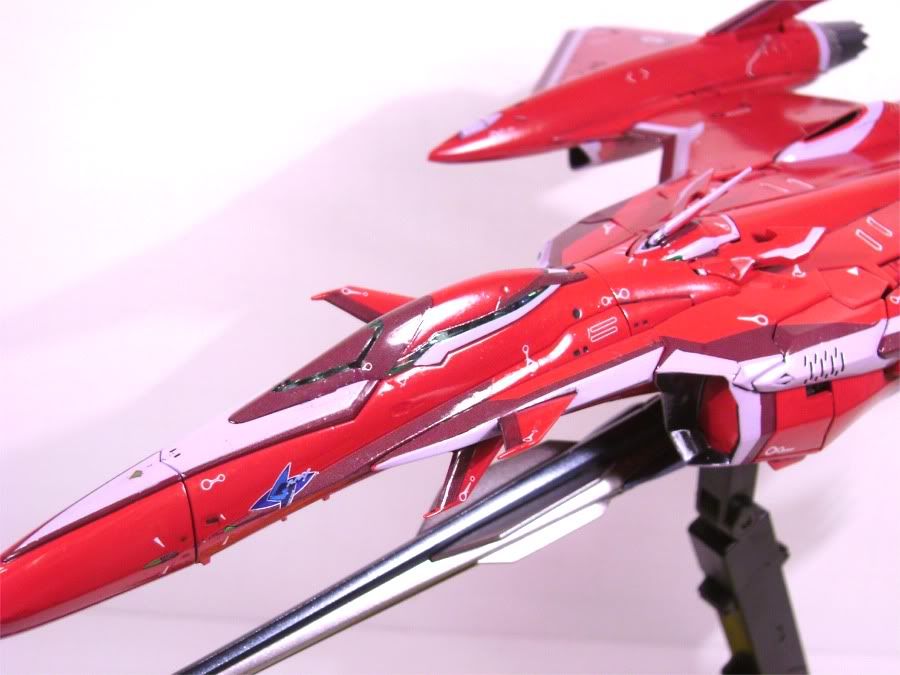
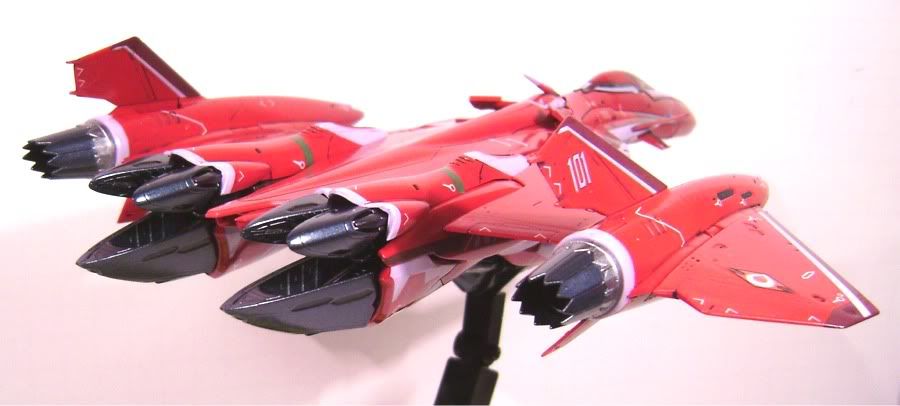
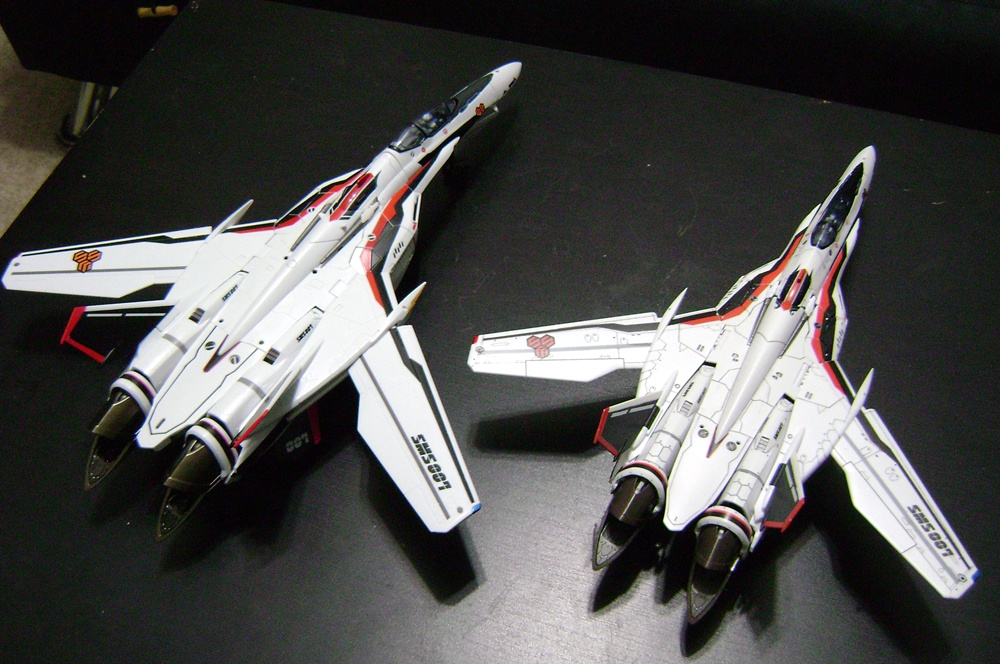
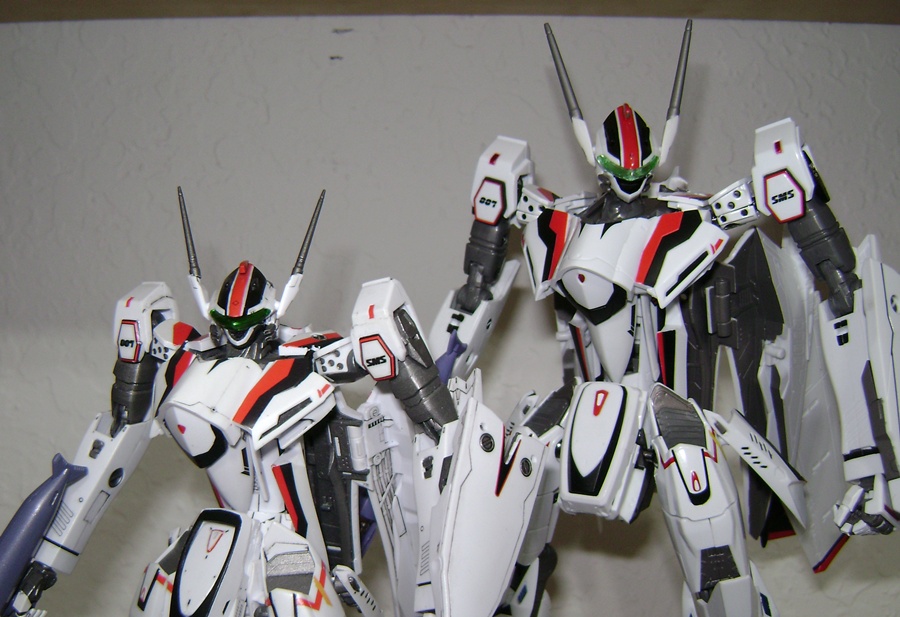
Finished my VF-27 the other day, fully painted and decaled. The main color is fully painted, the lavender is half paint, half decals, and the darker maroon is decals with small painted details and touchups. I gave this one a gloss coat, just seemed more appropriate somehow.
There's three different metallics used, the dark, purple tinted grey used for the main mechanics, the blue gunmetal used for the feet, thrusters and gun, and finally the lighter gunmetal used for the gun and thruster rings.
I used the clear green canopy, painted the rear half, and used decals for the rest, with the green parts cut out.
Oh, and just like Alto's VF-25, Bandai got the head coloring off in the booklet and paint guide. I've painted mine like the animation model, with more lavender on the chin, and with the tops of "vents" on the sides of the head painted in the main body color.
Anyway, on with the pics:
-
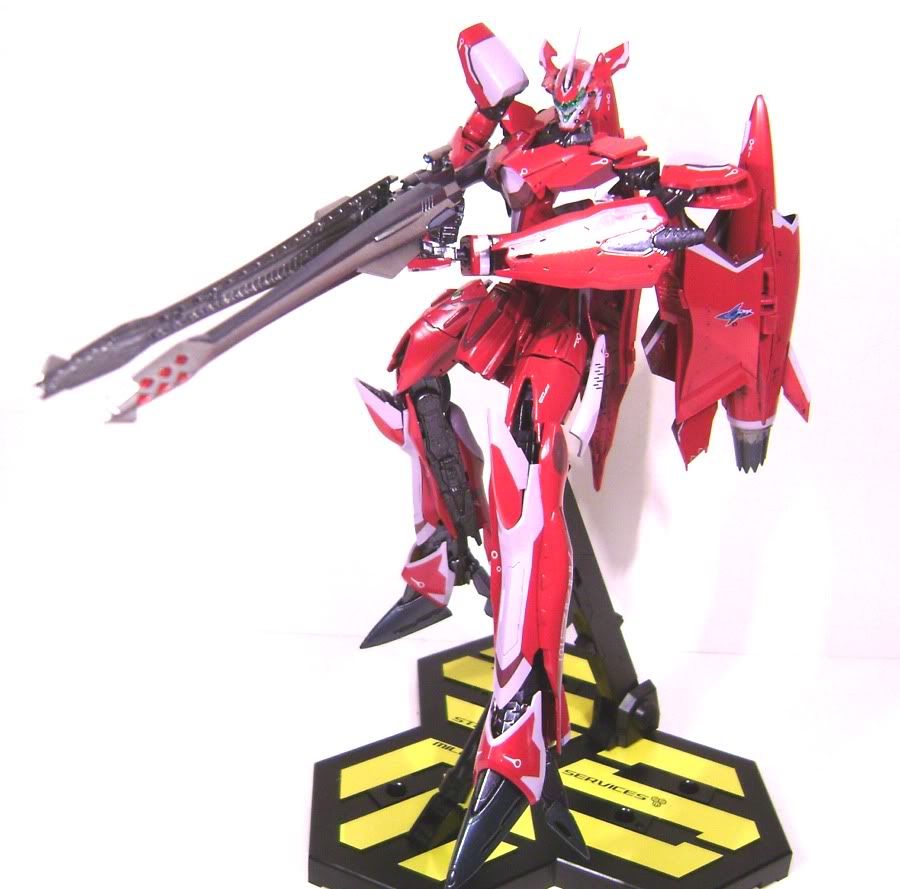
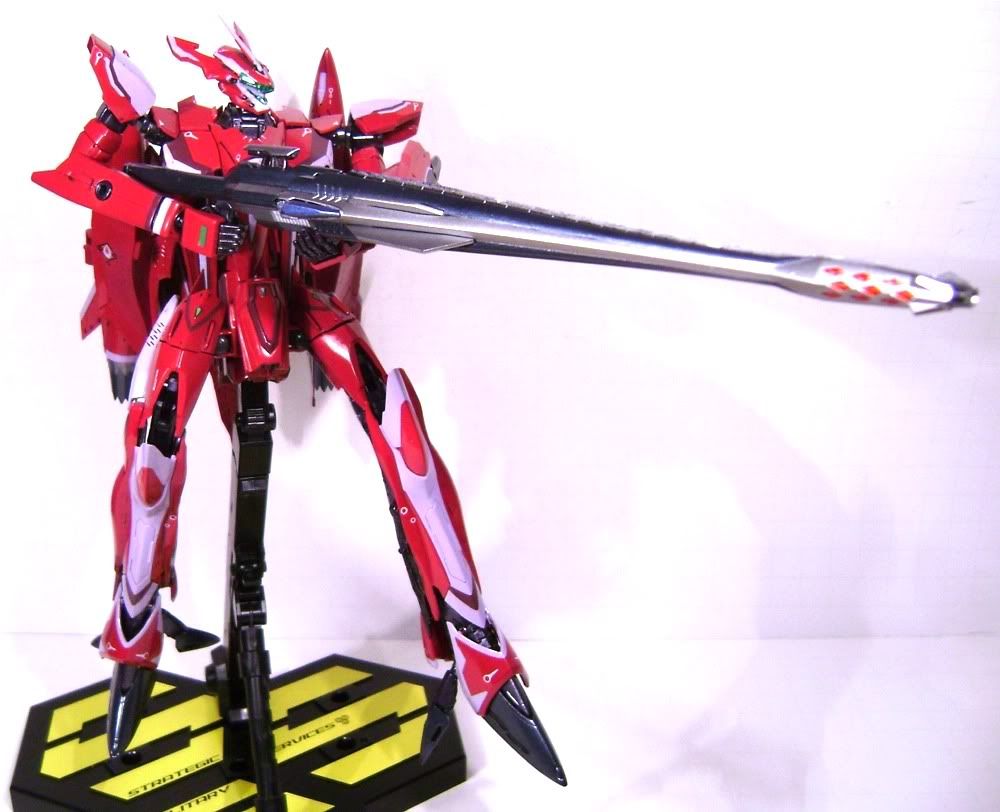
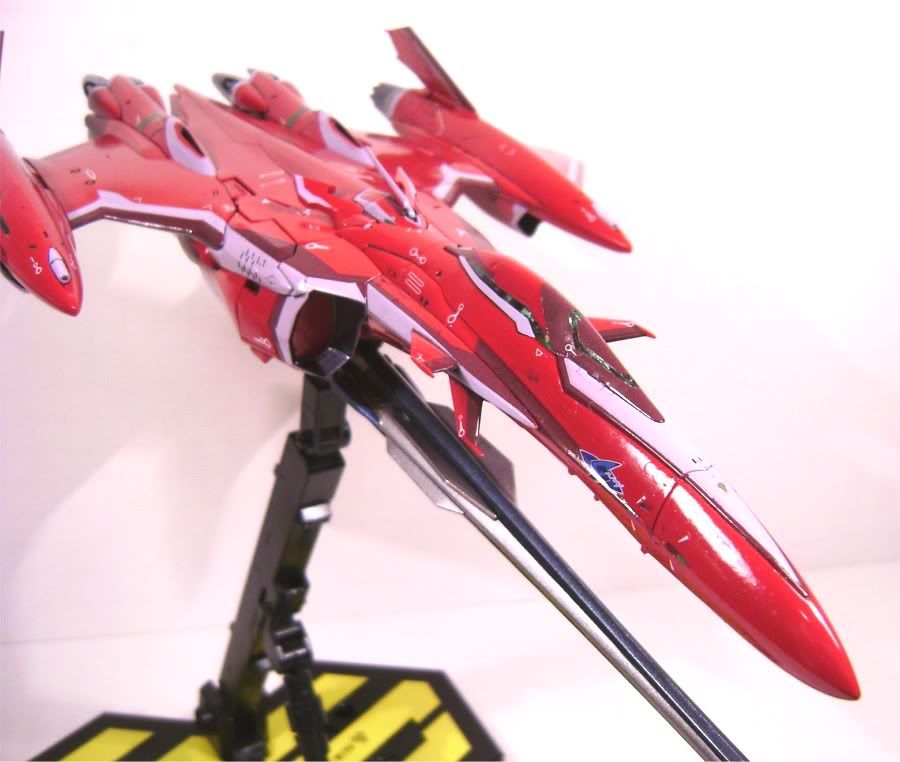
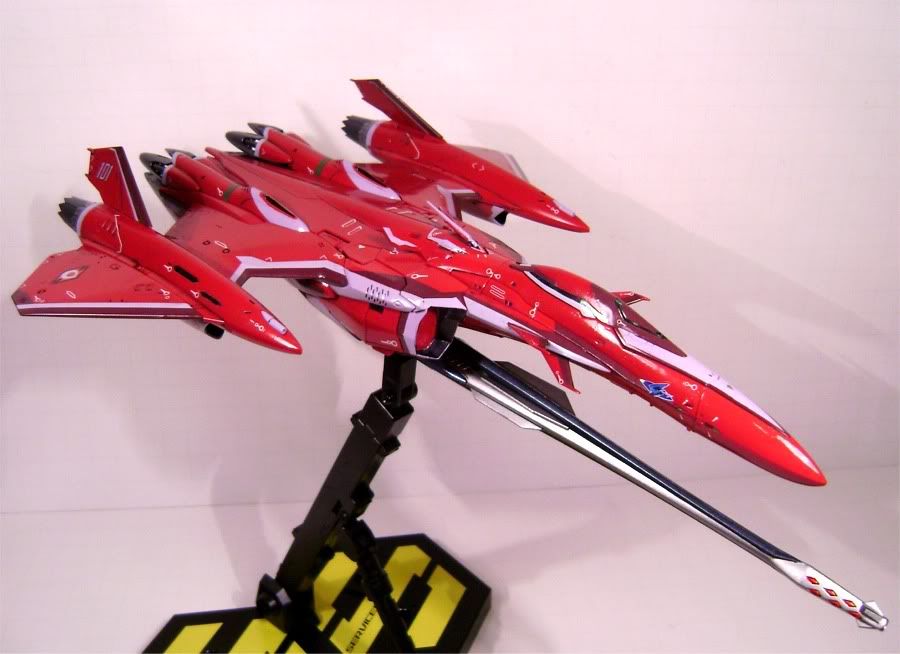
Built the gunpod, it is quite large. Holds closed very nicely, and moves open smoothly on two sets of hinges. Very nice.
Here's some quick straight assembly images of battroid mode. And sturdy, locked wings! Oh, and btw, that's with the smaller, transformation friendly chest plate, its about half the length of the optional one. There's also an optional plate to cover a gap in the neck that I have also not used.

-
Got my VF-27 yesterday and quickly snapped it together...gonna be a few weeks until I can paint it tho:( Altogther it builds pretty similar to the VF-25, but with enough differences to not make building it boring. And overall, I think it's definitely an improvement over the Messiah. Some points to note:
Pros:
-Fighter mode is SOLID! The hips tab into the intakes, the legs tab into the backplate, and the wings tab into legs. The arms hold in alot better too.
-Wings actually lock in the folded up position in battroid, so no floppy wings.
-Neck/head mechanism is just smoother and works better, and it locks firmly into place.
-The hip/waist connection for Battroid is now a strudy, securing hook instead of the the fragile tab.
-Waist flap-thingy is works alot better, and stays fully deployed.
-No trying to tint the damn canopy!!!
Cons:
-Same stupid falling off front landing gear doors.
-The shoulders do indeed look just as undersized in person, and I do feel the chest is too wide as well.
-Lots of tiny decals...ugh.
Havent' built the gunpod yet, but it looks huge!
-
That's cool but not the one I was thinking of. The one I was thinking of had pretty close to line art accurate leg transformation and was painted grey and white.
Chris
Thats mine! Link should be in my sig.
Jarrod
-
so the locking tabs are molded into the armor parts and not the base model parts, right?
I mean, if I were to assemble this model without armor, then I'd get the same model as the initial basic VF-25S release?
Yep, the VF-25 is still the same old kit, all the locking stuff is on the armor
ya... another question jarrod,does it have any tabs to hold the wings and back in gerwalk mode?
It has one of those giant ugly support peices to hold the wings up in gerwalk. Theres a pic below.
Heh. Just looking at the second pic again and I realised those weird looking things with tabs sticking out of the back are the unfinished feet..........LOL!Graham
Yep, I discovered on my first Alto that disassembling those parts for painting was a nightmare, so I just leave them off untill they're painted.
I wonder how much of a natural armored gerwalk pose it can do. So far the pictures doesn't show like it can do much of an A-stance in gerwalk mode.From what I can tell, it should still have the same range of movement in the legs as an un-armored one, but I haven't tried that mode yet...I'll let you know once I try.


Mw Straight Shooters List
in For Sale & Trade
Posted
Purchased some VF-17 Super Packs from Kurisama. They arrived very well packed, and were in perfect condition.