bry
-
Posts
41 -
Joined
-
Last visited
Content Type
Profiles
Forums
Events
Gallery
Everything posted by bry
-
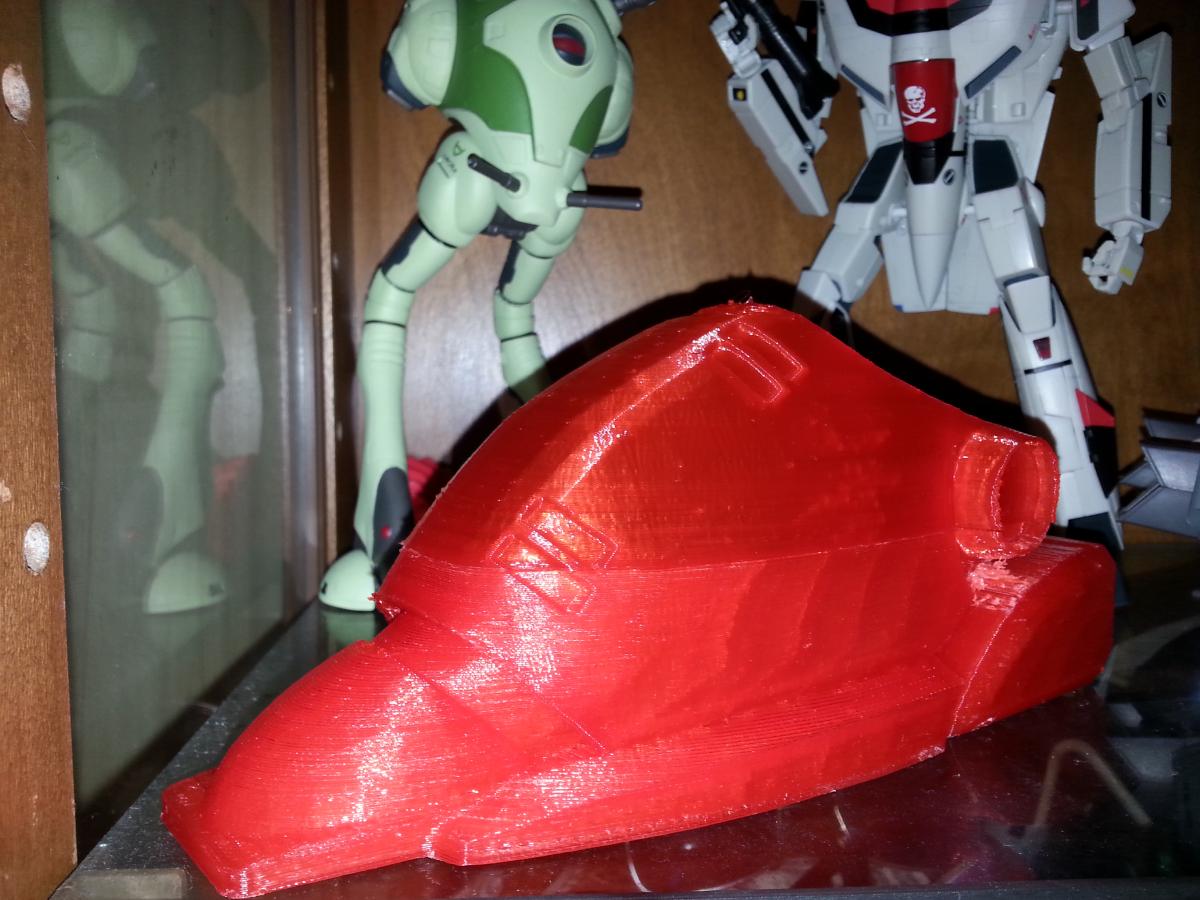
The model came from Google Sketchup 3D Warehouse. The actual modeling is top-notch, but sketchup does not export good geometries for 3D printing, and the original model was not geared toward printing or articulation so a lot of fixing has been necessary. I've been printing most of these parts of a rostock delta printer, but will be printing from an older prusa while the delta is under maintenance.

-
OK, got a little done. Fit isn't quite right, so the "knee" is loose and I'll need to split the difference in tolerances between the last piece was and this latest one. Started shopping paints, and think I'll go with the classic olive drab green. I'm conflicted on whether I'll go with the "eye" graphic on the nose or the tiger mouth though. Leaning to the eye for more accuracy, though, as this is a classic Monster and not the variable Koenig.


-
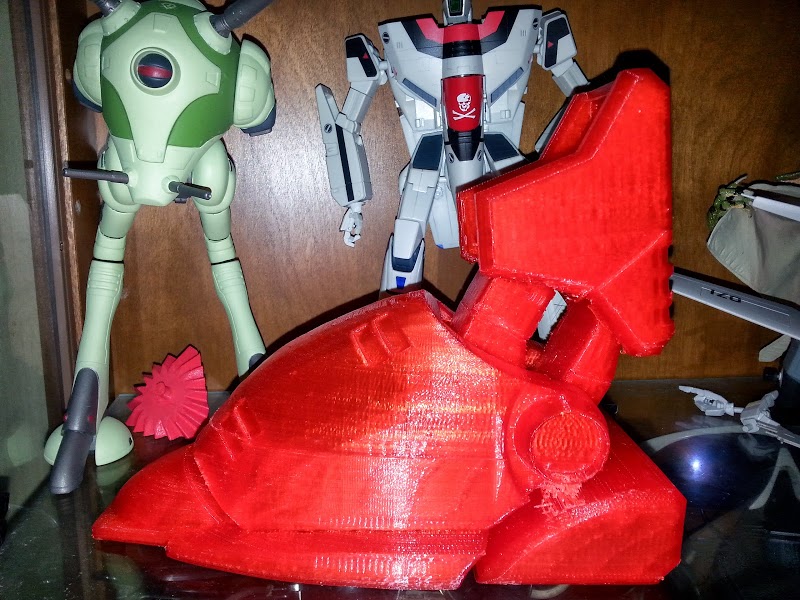
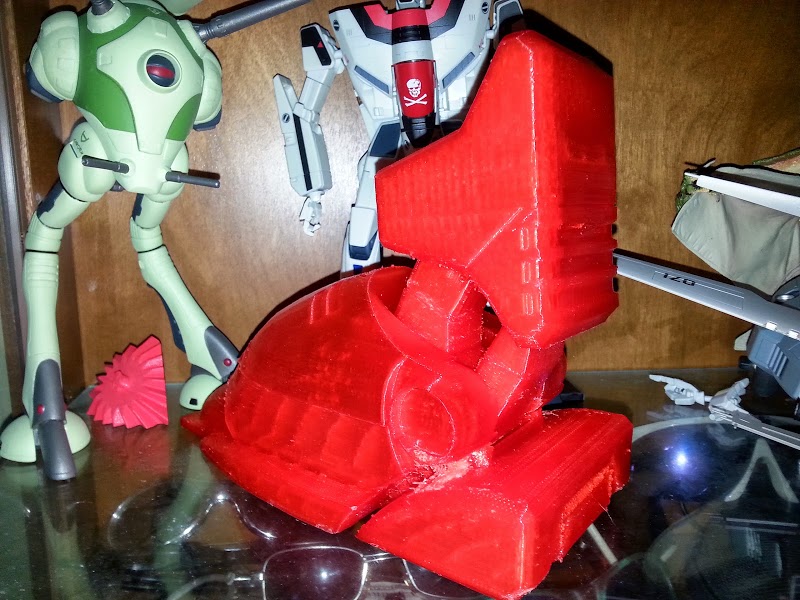
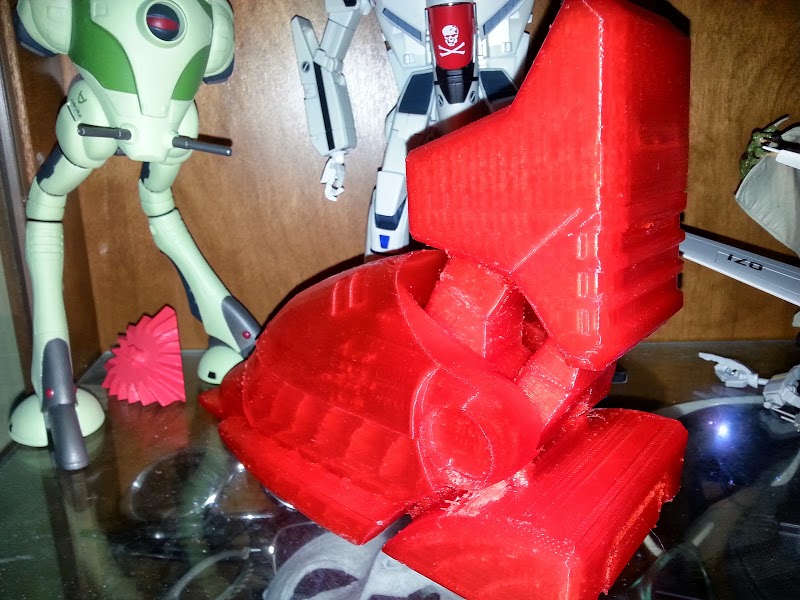
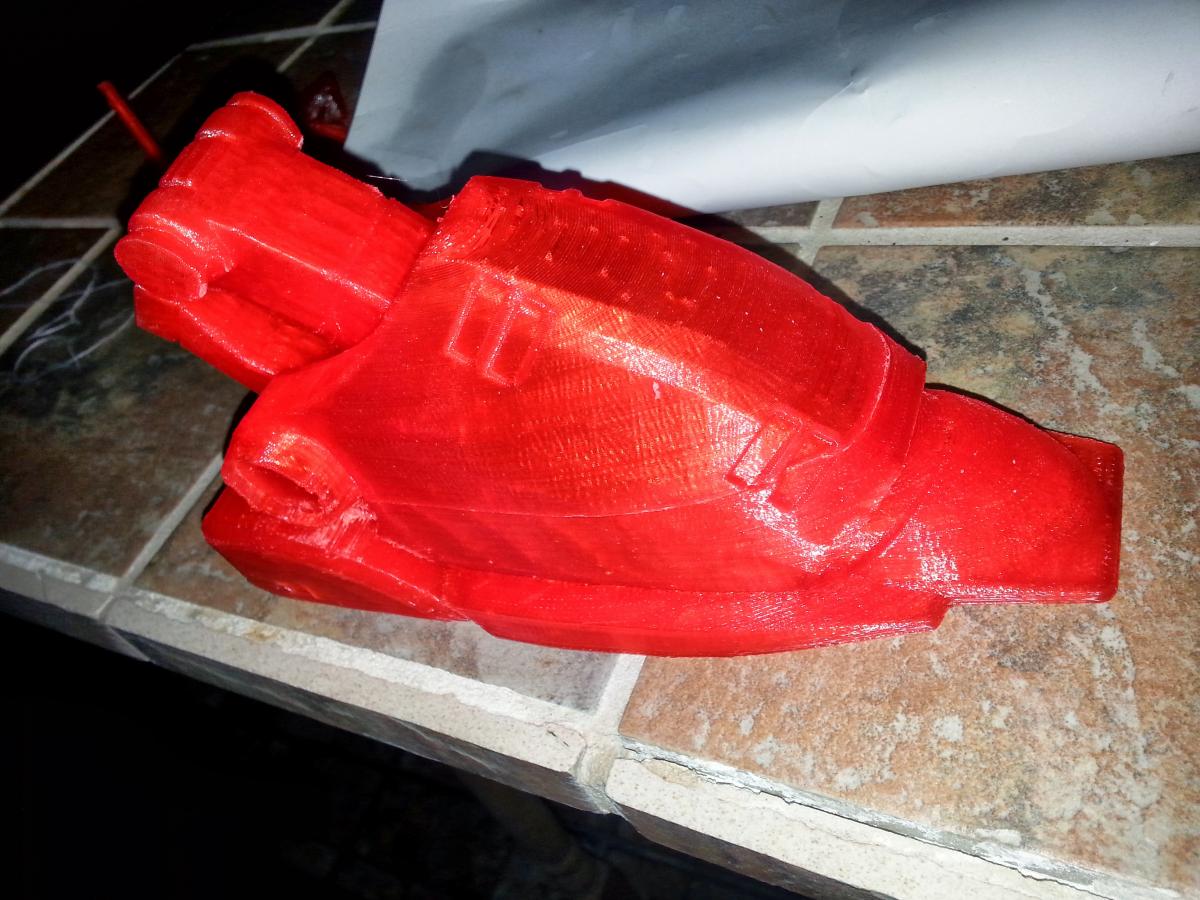
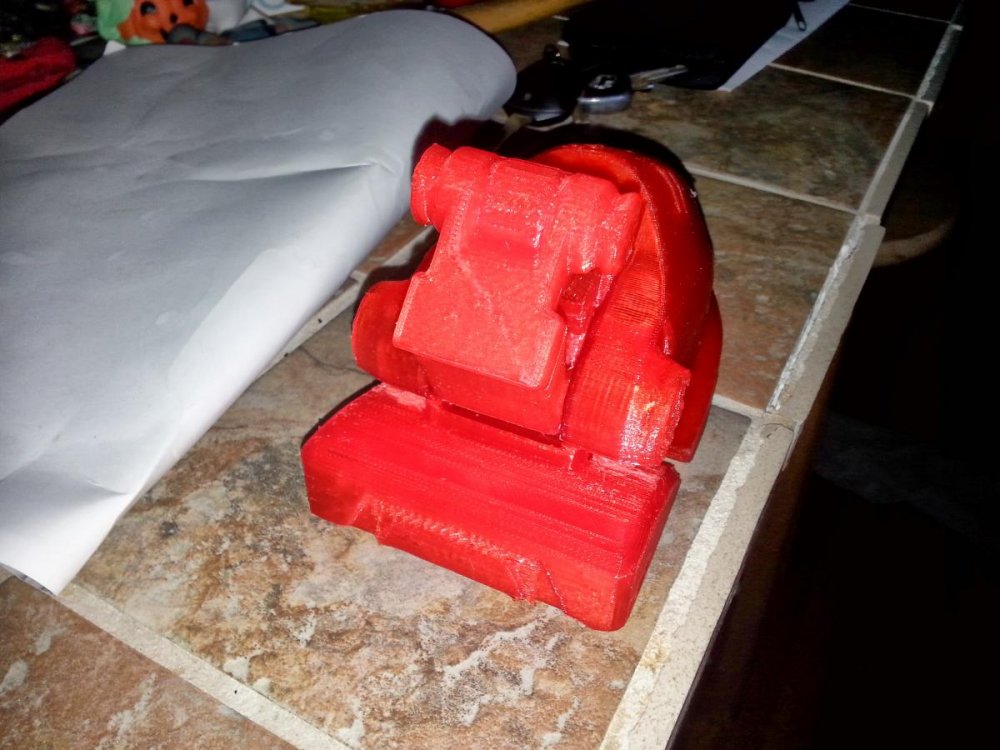
That's what I was thinking, but I made it too tight and now it pops out of place at the ankle hinge rather than running in the groove, and just getting it into place is an exercise in careful application of force without breaking anything. It may not be as heavy as expected. The right foot lower portion is only 10% solid, and the upper is a completely hollow shell... both were too weak which lead to some errors, and I actually poked a hole in the foot with a finger by accident. The left foot was printed as 1-piece and is 25% solid inside, as is the ankle - and both are substantially stronger that the first foot but not that much more heavy. Of course, there's still a *lot* more monster yet to be piled onto these parts. ***EDIT*** I was hoping to get one part posted per day, but my printer chose to melt down last night and it looks like it may have fried the motherboard, which will cost me several hundred dollars to fix... so I'll get a bit ahead on the modeling for now but more pics of finished pieces are on hold for at least a few days.
-
Right ankle done. Not happy with the fit and articulation is limited, so I'm going to redesign this a bit. It's too tight which makes it difficult to swivel in the joint, and getting it into place was difficult so I'm going to redesign the foot to make ankle installation better. Seeing this snap into place also gave me an idea for the rest of the joints, so hopefully the rest will just click into their sockets and articulate without as much friction.


-
If it turns out OK I could probably make a few extra. It's not difficult to hit "print" again once the model is proven to work. I've already refined the model a good amount; the right foot didn't print all that well and had to be split into halves, and if you look closely there are errors all over from support material and the top is essentially collapsing in on itself. The left foot printed perfectly and in 1 piece, so it's definitely getting better. I'll probably reprint the right foot just to have both looking perfect... unfortunately I broke the glass build plate pulling the last foot off (stuck really well: should have just froze it off) so no more big pieces until the replacement arrives; gotta print on half a build plate for now.
-
I'll keep posting as the build progresses. Lower legs are next; I'm working my way up.

-
The feet are PLA as the model doesn't need to be that strong and PLA prints fastest, plus it smells like waffles. I'll probably do most of the rest in PLA as well but was entertaining the notion of making the joints in nylon instead, for wear resistance and flexibility.
-
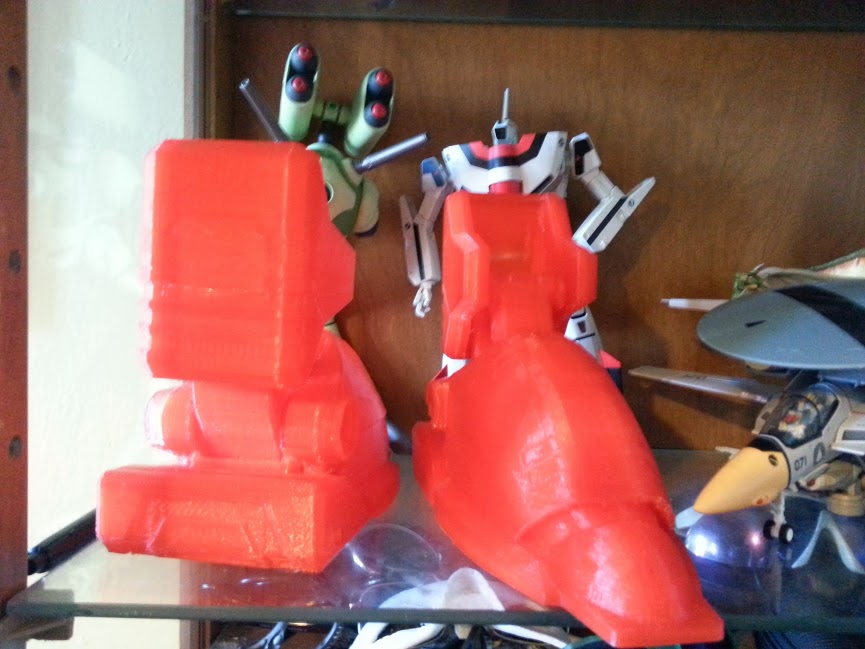
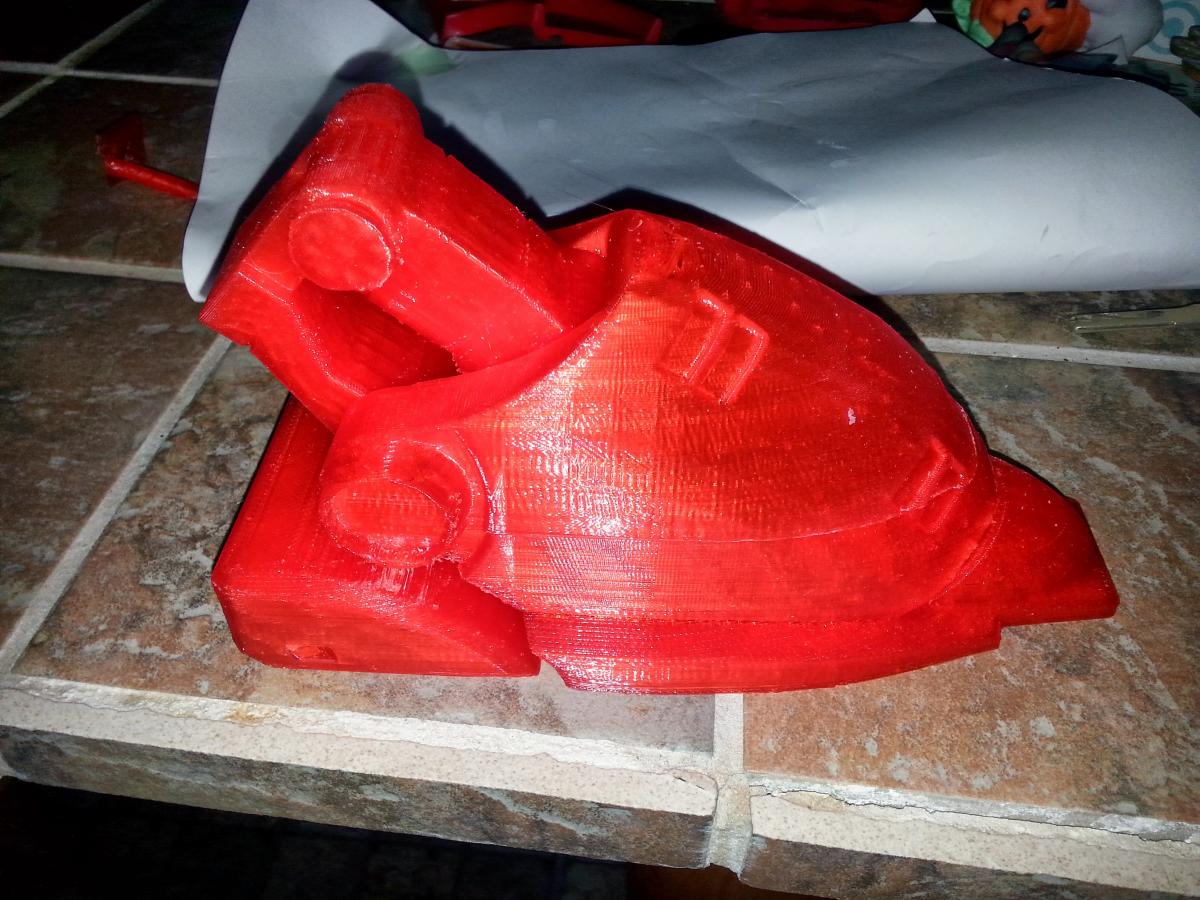
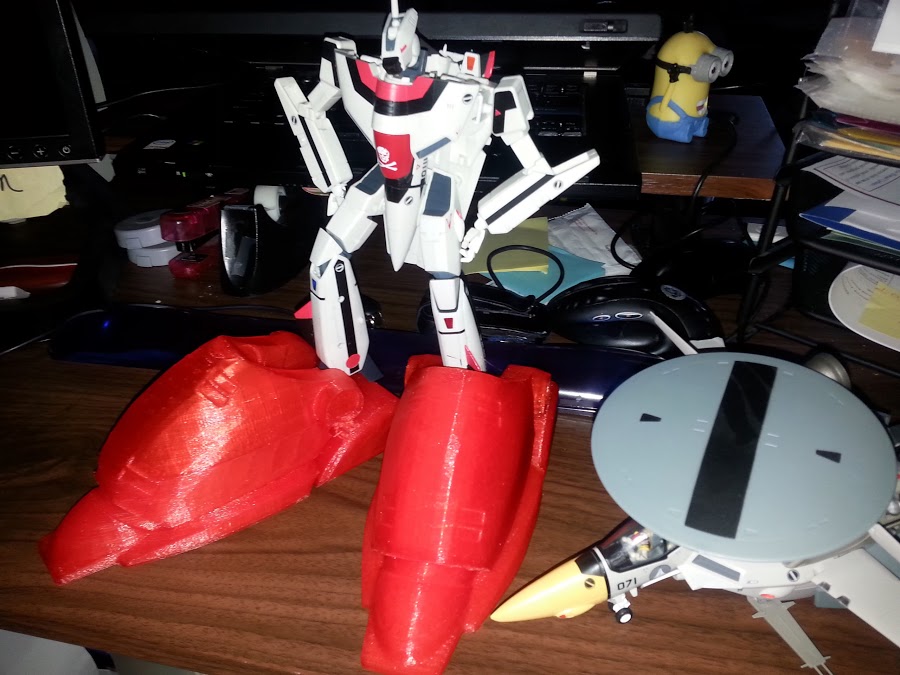
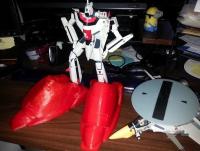
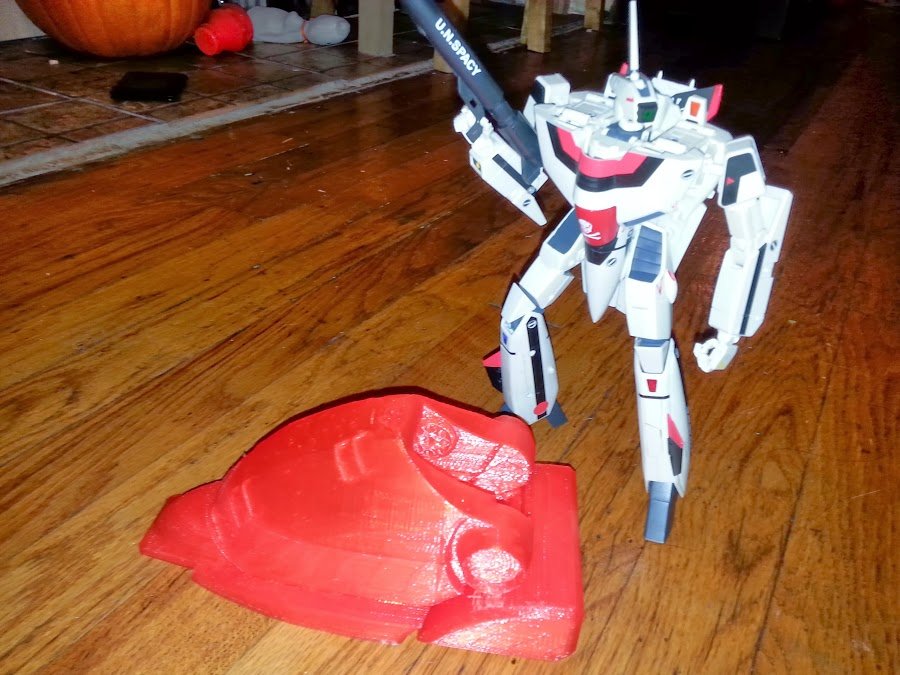
Yep, I'm trying out a Monster in 1/60. Left foot is printing as I type this. I still have to get most of the upper body finished up; I started with a decent model but want to make it articulated. I really had no idea how huge they were until I saw the first few layers go down. I just scaled the whole model to full-size spec and then divided by 60, but there's a huge difference between seeing some numbers on your screen and actually looking at the finished print. All done she'll be 15" tall and more than 2 feet from cannon to back.
-
Started a 1/60 custom... so far only the right foot is done, but that alone is almost as big as a 1/60 valk! I'm going to have to find someplace bigger to display this thing.

-
Objet does a great job with clear but nobody has one in their home. For the UP! you can print & sand the body and it'll turn out great, but the clear parts should be molded in clear resin. Use http://www.thingiverse.com/thing:31581 to generate an easy to use mold (sand it smooth before casting) and you'll have great clear parts. As has been said, the "clear" filament for home fdm printers isn't actually clear at all. You'll get decent light transmissivity for projects that need lights to shine through, but they're far from transparent. EXO - have you ordered FUD from Shapeways lately? Is it transparent like their promo photos now at least? The only time I tried it was on the initial release and it was bright yellow and only slightly translucent at best.
-
Yamato 1/60 VF-1 (VE-1): what kind of glue is most appropriate?
bry replied to regult's topic in Model kits
Yep, nail polish remover. It works like superglue on ABS, and leaves no residue. I don't know if the valk uses ABS, but worth a try anyway. I use acetone as a glue and smoothing agent for 3D prints made from ABS. Also works to repair car bumpers (many are ABS plastic). Careful with the fumes, acetone is pretty nasty stuff. -
Yamato 1/60 VF-1 (VE-1): what kind of glue is most appropriate?
bry replied to regult's topic in Model kits
If you have not yet fixed this, I have a suggestion: Assuming the part is ABS plastic (I have not confirmed this) try coating the broken edges in a dab of acetone and then hold them together to set. If the part is ABS, this will let you set the part permanently without using any glue at all; the edges will simply bond together and re-form as a single piece. ABS plastic will completely dissolve if left in a puddle of acetone so use it very sparingly.