capital_jay
-
Posts
6 -
Joined
-
Last visited
Content Type
Profiles
Forums
Events
Gallery
Everything posted by capital_jay
-
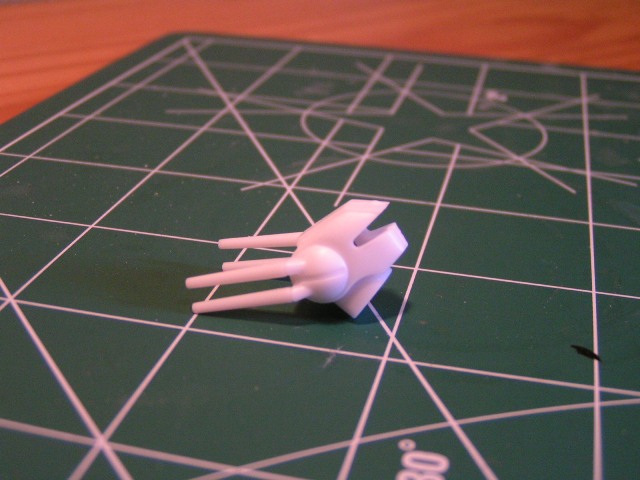
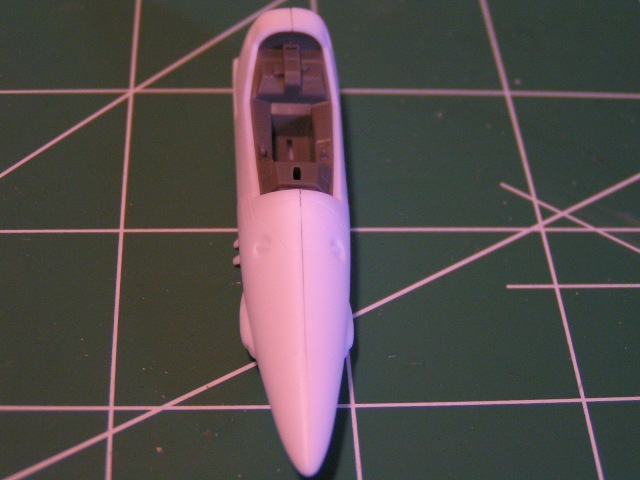
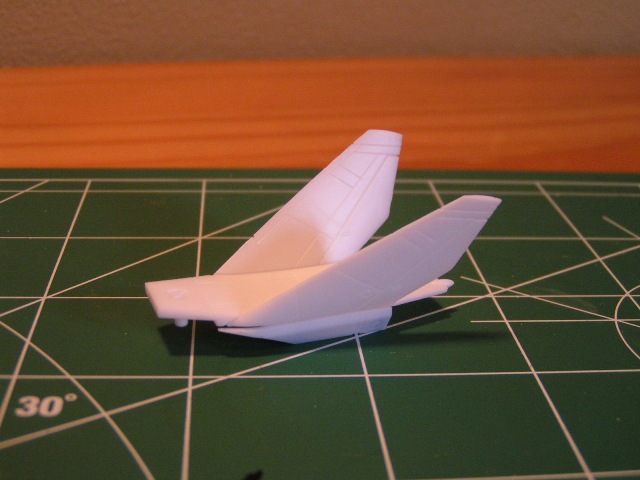
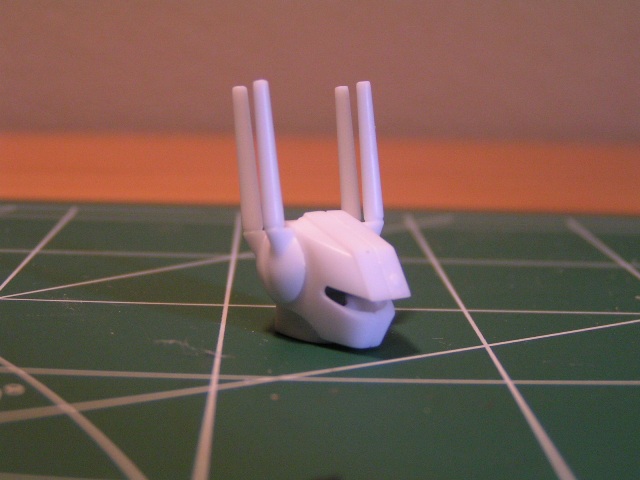
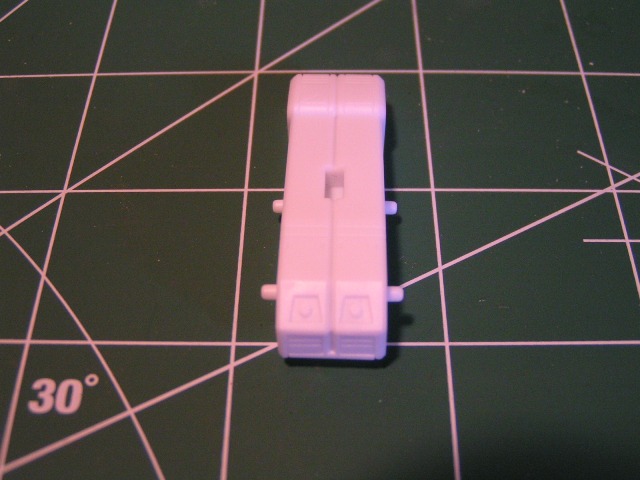
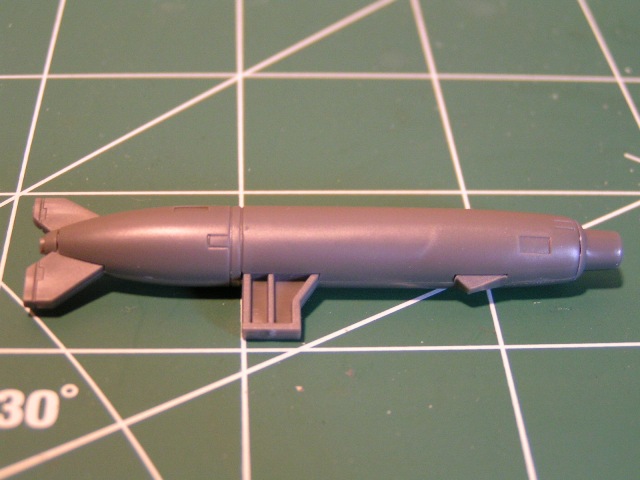
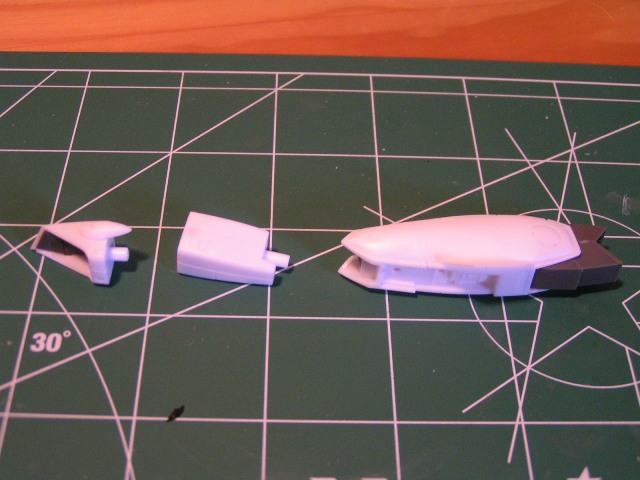
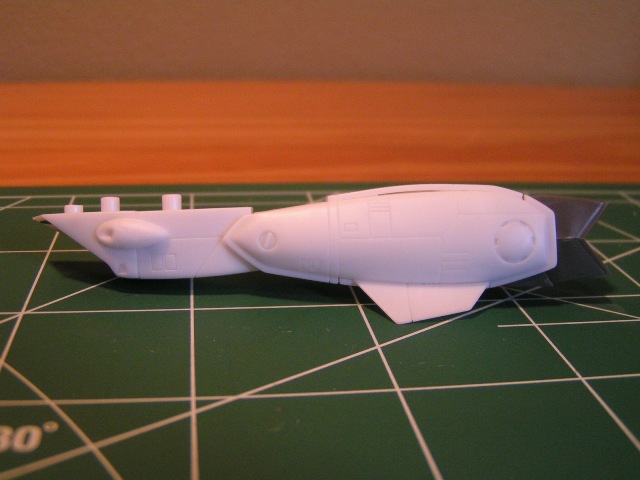
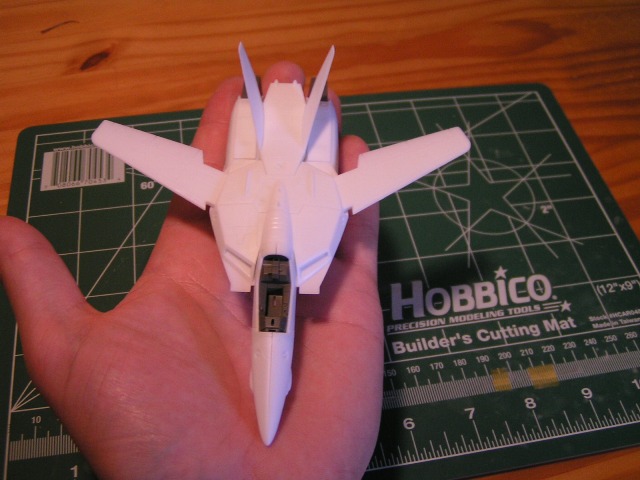
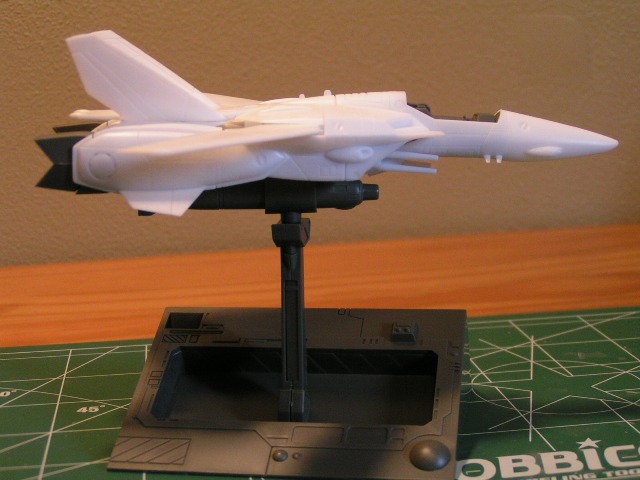
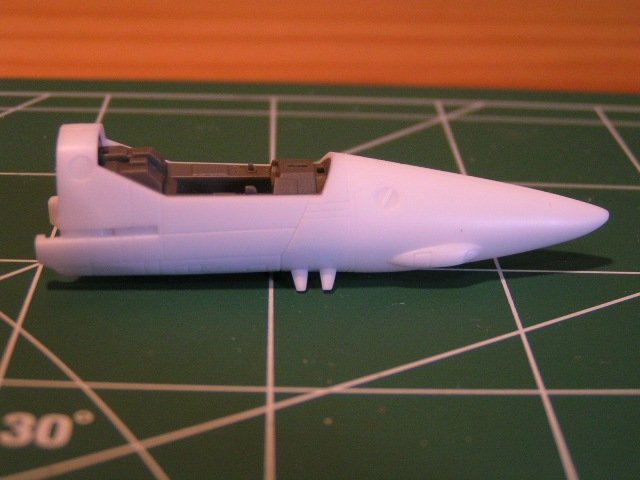
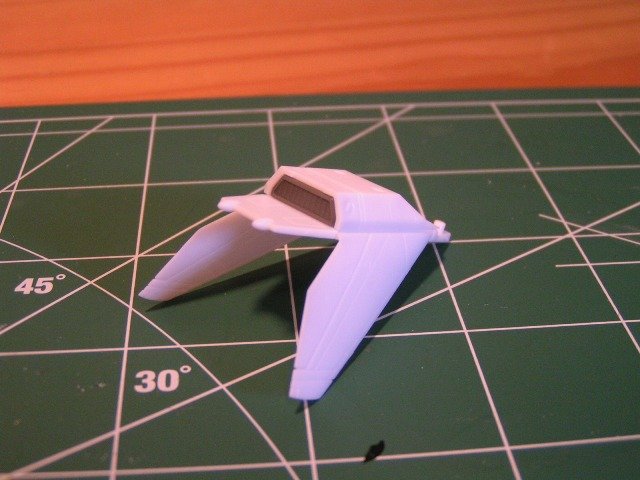
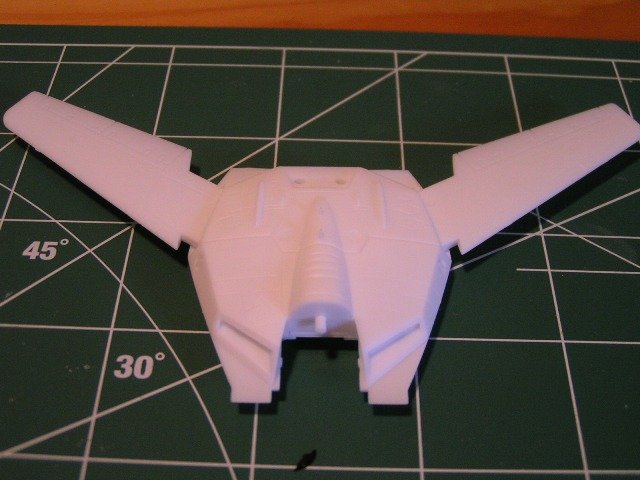
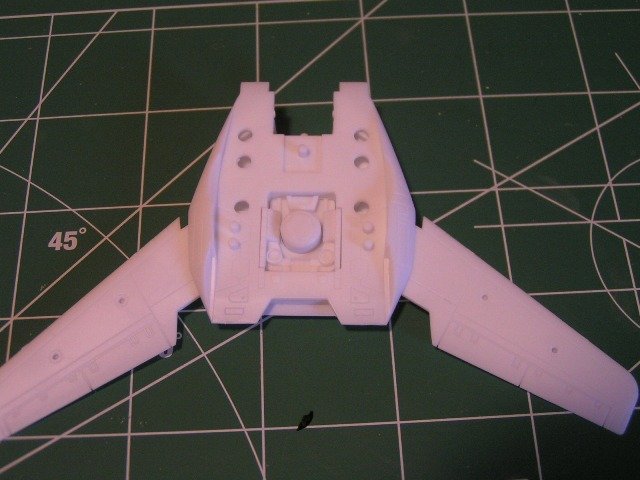
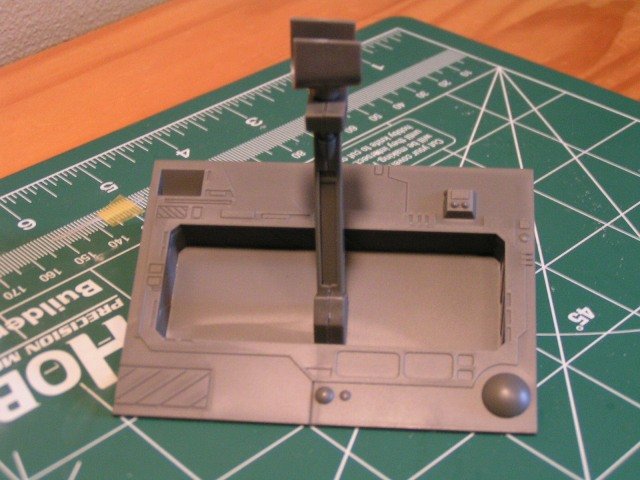
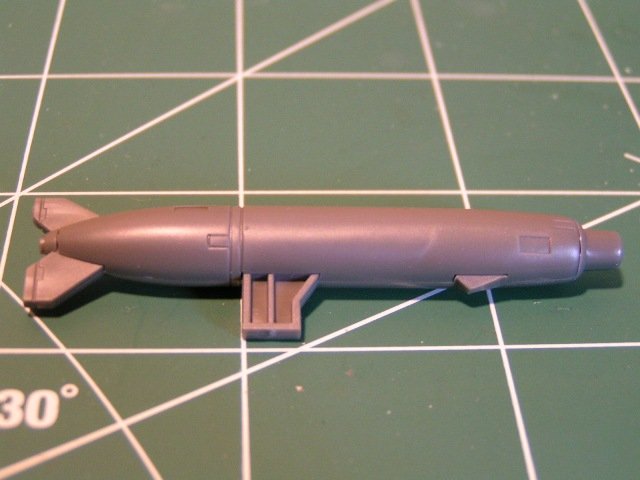
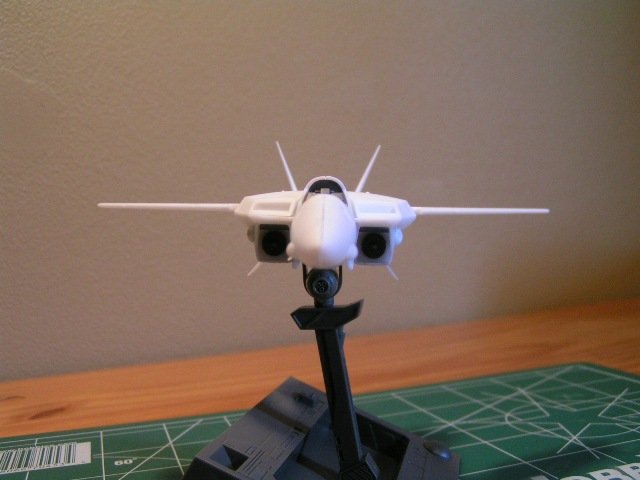
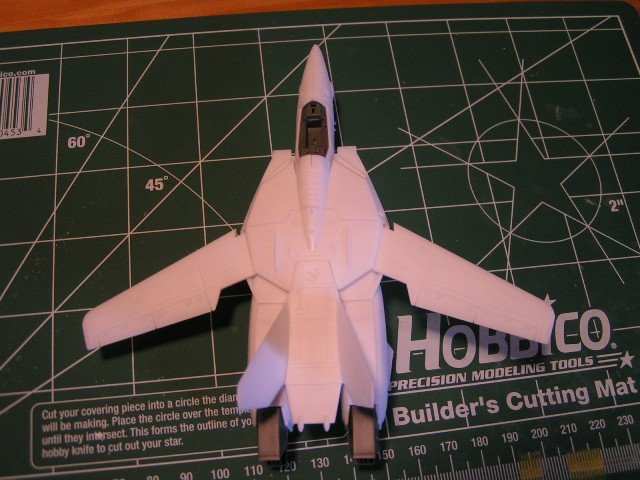
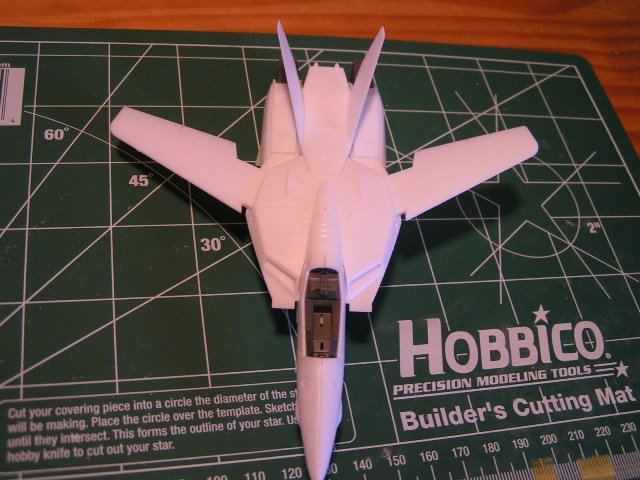
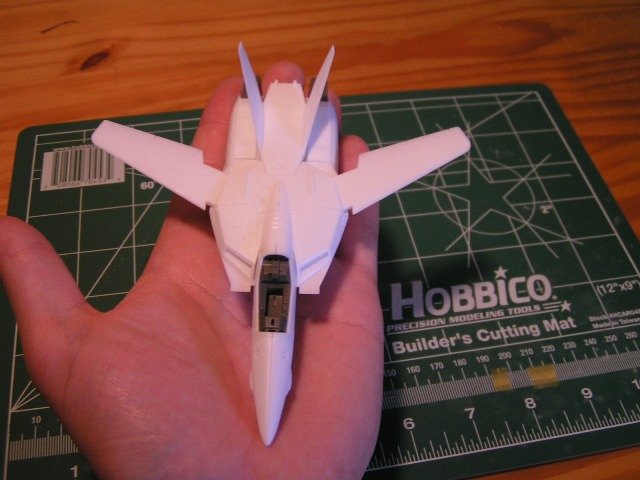
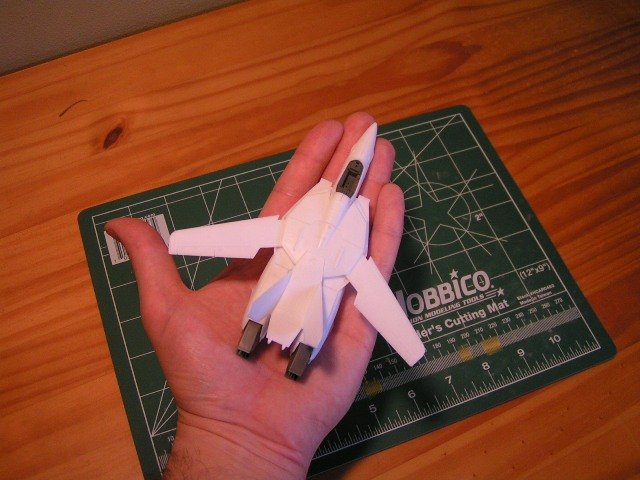
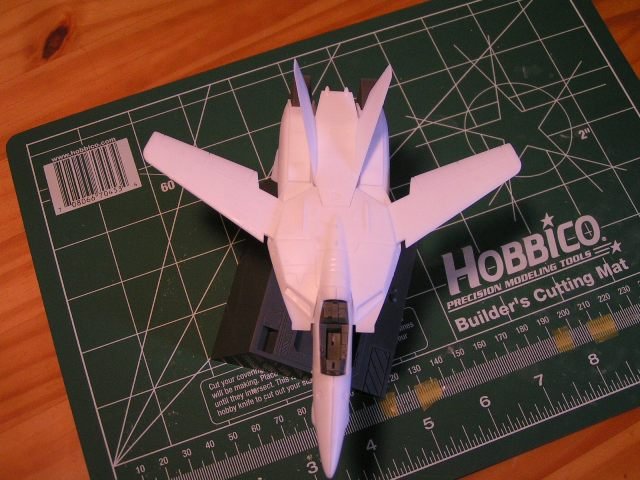
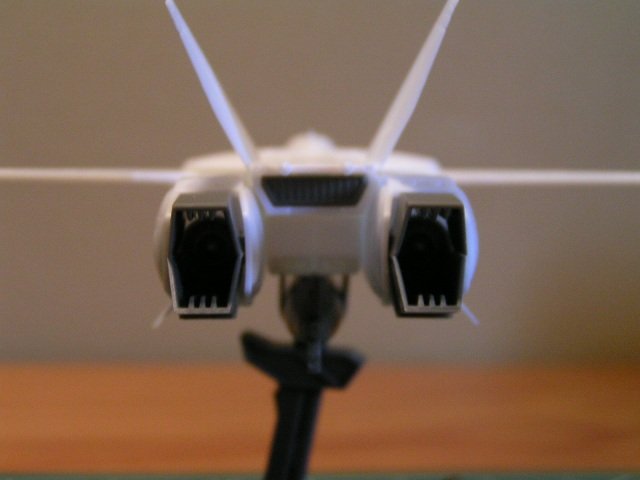
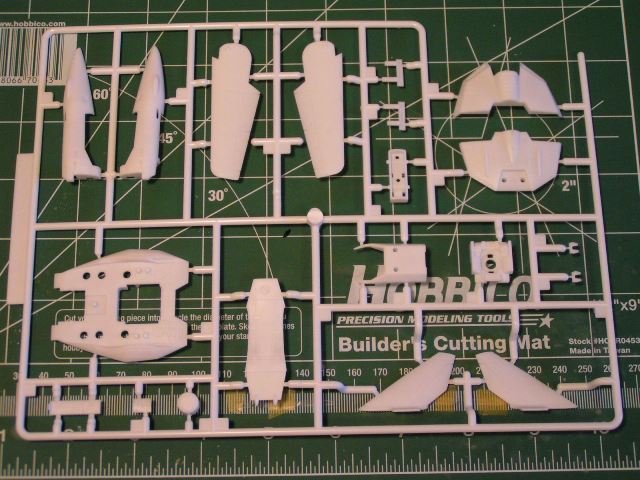
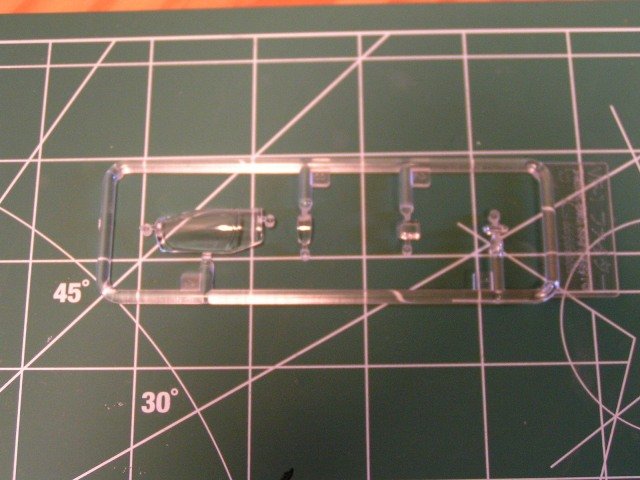
Okay, got these kits snapped together and let me just say, these little guys are AWESOME! Everything fits really well, details are great, but not overdone, and almost all of the small assemblies are really intuitive on how they go together and combine into the whole. Lets start with fighter mode again: First tho, I was really impressed with the attachment points of the pieces to the sprues wherever possible the gates are attached to the inside of the part, rather than on the outside, which would help to eliminate damage to the exposed surface of the part. The instructions start with the nose section, which consists of two halves that go around a fairly detailed cockpit. The cockpit is made up of 3 pieces, the main tub, the ejection seat and a separate instrument panel/glareshield. There is a decal for the instrument panel and there are some small control details on the side consoles of the cockpit tub. Overall, very nice. The figure included is made up of 4 parts: body, head and 2 arms. As mentioned before, it is Focker in his DYRL flightsuit, which looks decent in this scale, but I will be modifiying him slightly to the TV version. As you can see, I have not assembled most of the small cockpit parts at this time, but you get the idea. Another cool feature is the polycap at the back of the nose section that attaches it to the main fuselage. There is also a nose landing gear bay that is installed under the cockpit. on the exterior, the two antennas on either side of the nose are attached separately. The canopy is a clear piece, with the frame nicely outlined. I have not decided whether i want to tint it blue as suggested or leave it clear yet, any suggestions would be appriciated Moving on to the fuselage, there is a main support piece on which the "chest" piece is attached to the front, and the "back" piece connects it to the wings. Underneath the "back" piece are a couple of nice mechanical bits that sandwich a polycap into place. This part will come into play for the Gerwalk mode later... The tail assembly, as well as the Valk's head are attached to the fuselage section. The tail section is unfortunately held on by plastic-on-plastic connection to the fuselage, but feels pretty secure. Once on it takes some (careful) wriggling to get it out again. The thrusters in the front and the vents in the back are seperate pieces. The head is built around a polycap piece that connects it to the body as well as allowing the head turrets to pivot freely (unlike the Hasegawa version). The visor sensor is provided as a clear part (not shown). On to the legs...I dont think I mentioned before, but Wave includes the option to model the intake covers opened or closed, which is a nice touch. Not sure yet what I will do in the end, but for now I snapped it together opened. Again, all of the leg parts are intended to be built seperately and then connected via polycaps on final assembly. Part of this I'm sure is for the Gerwalk conversion, but it makes it easier in the long run... The "thigh" is just two parts together around a polycap, while the main leg part is a little more involved. The two sides clamp on the exhaust nozzles/feet which is unfortunate unless you mind masking, or making minor modifications, not sure which I will do yet. The top of the leg is a seperate piece, which should eliminate the majoratiy of the seam issues there. The lower stabilizer fin is molded as part of the bottom of the leg which will blend into the main gear doors. Once completed, all the parts simply slide together on the polycaps...very nice! The gunpod is molded in 3 pieces, 2 halves with the barrel bieng a seperate piece. Then finally is the stand, which is supposed to replicate the side of the Macross, or one of the ARMD's from DYRL along with a launch arm or some kind of mechanical extention from the base. The detail is pretty good, with scribed lines to mark not only mechanical details but also the yellow and black warning stripes along the sides. This part looks VERY cool, and in my opinion is not included in enough modern kits. Aircraft or sci-fi, it is REALLy nice to have stand to display the kit. That being said, the support on the figher mode SUCKS. Basically it is supposed to balance the Valk by the gunpod. It allows for some left/right "yaw" posability, and if you're careful, you can "bank"it slightly, as long as you have it balanced properly. Otherwise, dont display this guy on too high a shelf or prepare to be looking for lost pieces when it falls and explodes. I will definately be modifying the attachment, cuz I think the base is neat looking, but the support will just not do. The arms are a simple one-piece affair with an attachment point in the middle for the gunpod, as well as pegs on the side to connect to the legs and on the bottom to connect to the tail/backpack. Once everything is put together, it makes a very nice looking (little) Valkyrie! A little perspective on the size...a Valk in the palm of your hand! On the base: *As a side note, the kit includes 12 missiles and pylons for them to attach to the wings that I have not shown. Overall detail is good and it looks like they will just snap into the wings, allowing them to be poseable with the wing sweep. As you can see, it builds into quite a nice little model! In my opinion the size is just perfect, not having a lot of extra space for kits. The detail is great for the scale, not too over-done but still looks good. And (in my opinion) the proportions look spot on. There are a few improvements that can be made, but I will do the full pro's and con's list at the end of the review. Up next will be the snap build of the Battroid, thanks for looking and stay tuned... PS, wow, just realized how LONG this thing is becoming. If this is becoming too drawn out or taking up too much space, let me know and I will cut it back.


-
Hey thanks a lot! Yeah, the Wave kits are new to me, but I have to say, they are somewhere between the two quality wise, its almost like a really good Hasegawa kit, with Bandai ease of construction. Personally, I LOVE the scale, they are really striking me as the perfect size for a highly detailed display that takes up minimal space. I'm really excited (and hopeful) to see where Wave takes this line. Thanks for the support, hopefully I will have more up soon...
-
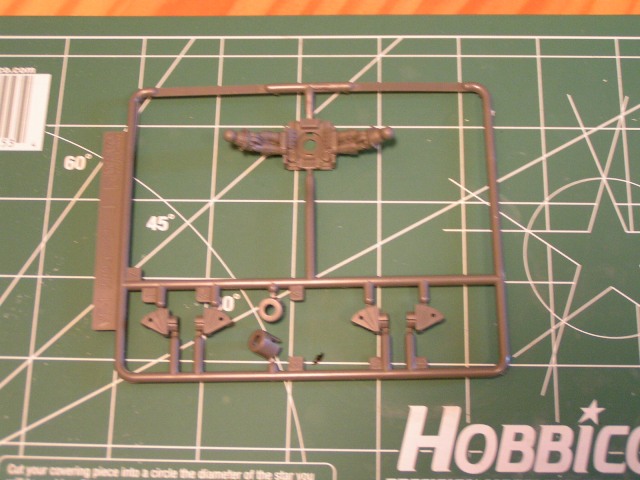
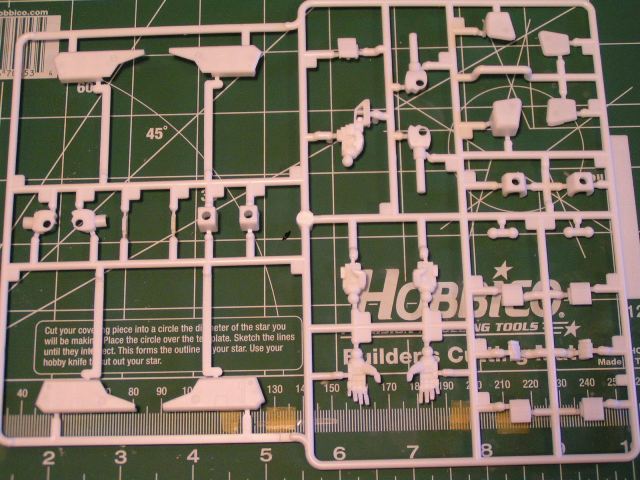
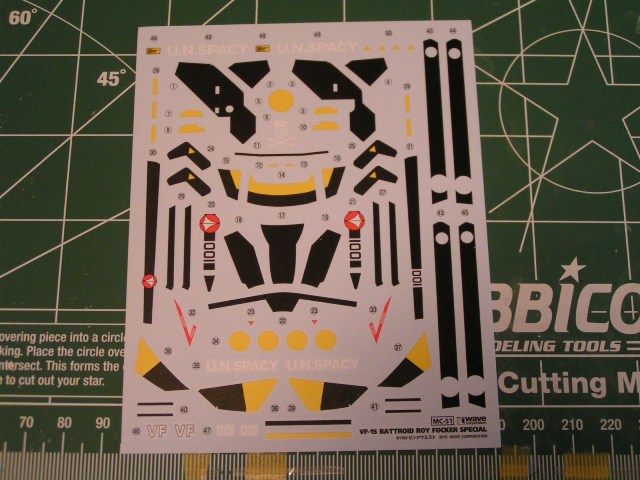
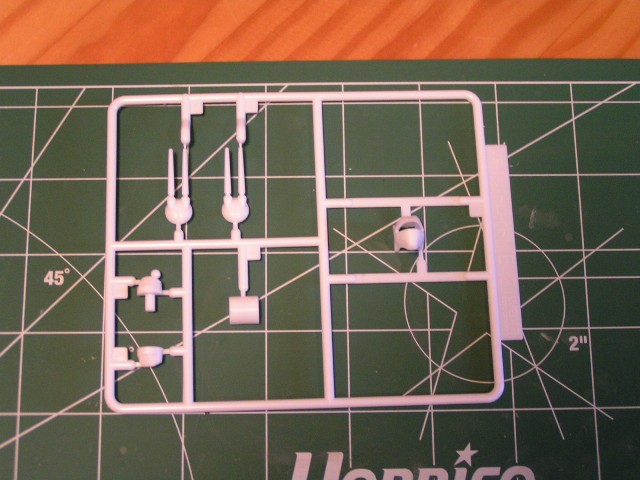
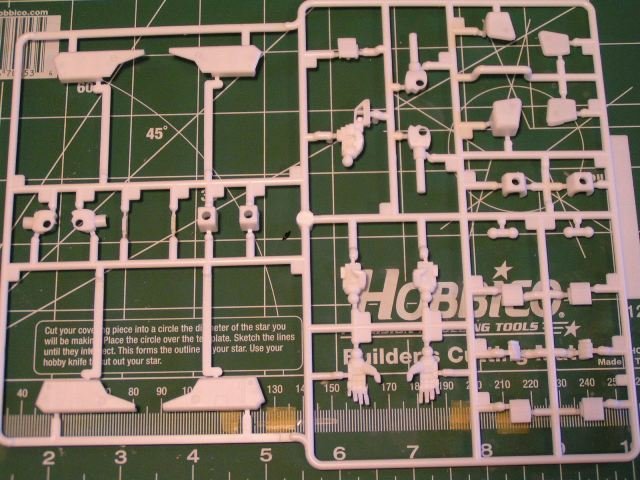
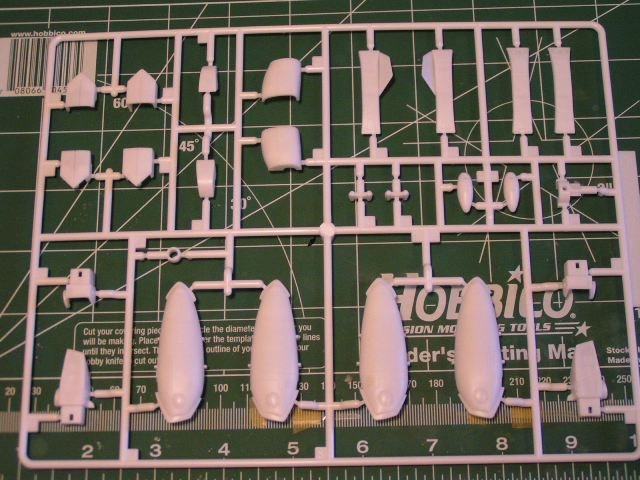
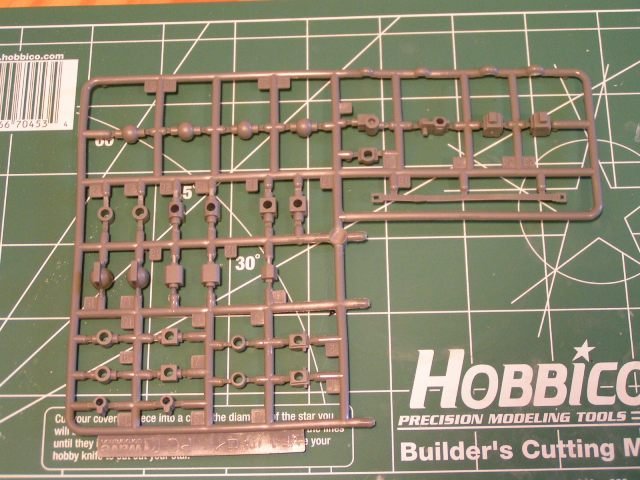
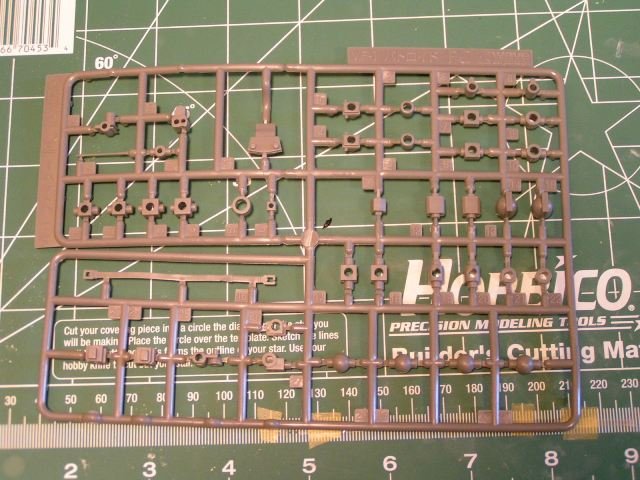
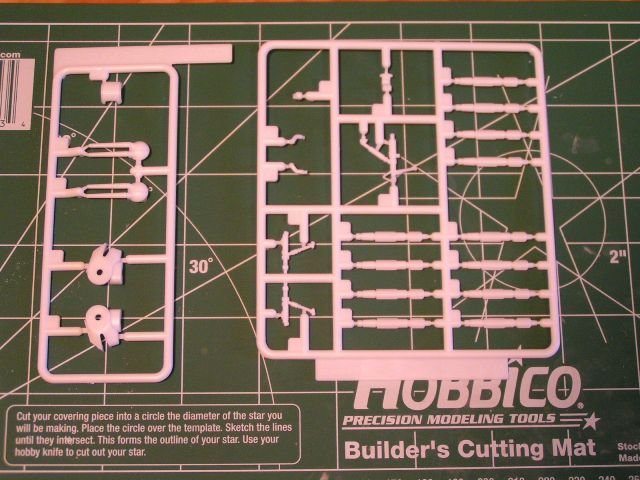
Ok, so here goes with the Battroid... Runners: Decals: Polycaps: And the last runner with the parts for Gerwalk: Again, all the details look great. There are 5 interchangeable hands, two open palm, two fist and on holding the grip of the gunpod. Strap for the gunpod is made of polycap material, which seems like a cool idea. I really like the idea of being able to convert the two kits to Gerwalk, and the one additional runner for that looks like it includes some good mechanical details. Decals are very similar to fighter mode, but there are a few markings that are missing from that mode, as well as a few extras for this one. Mostly looks like a good match though. Just like before all of the black/yellow markings are given as decals, including 3 for the heat shield. Again, overall this kit looks really cool. I am really excited to start working on these! Next time will be a straight build-up of everything snapped together to see how it looks, as well as some comparisons between the components of the two kits. Stay tuned...


-
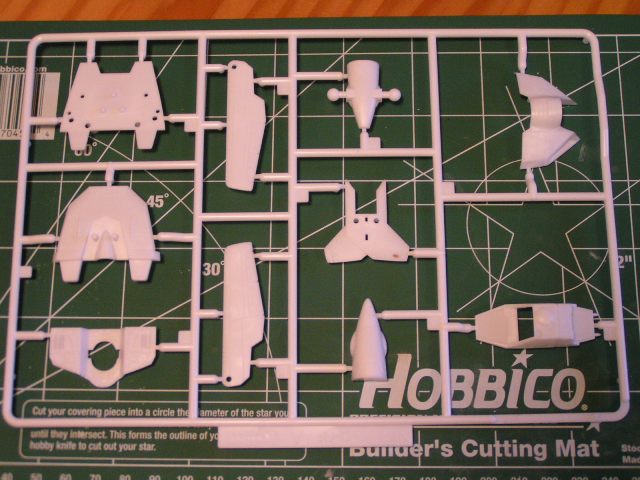
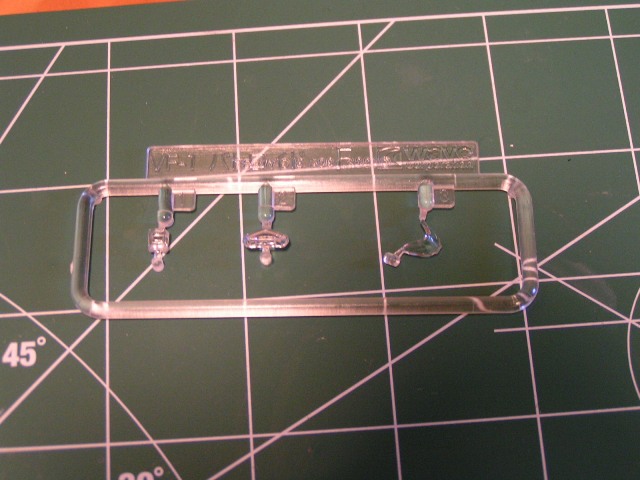
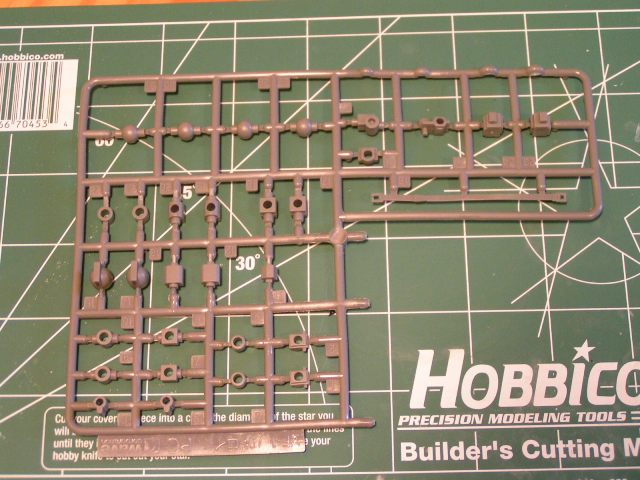
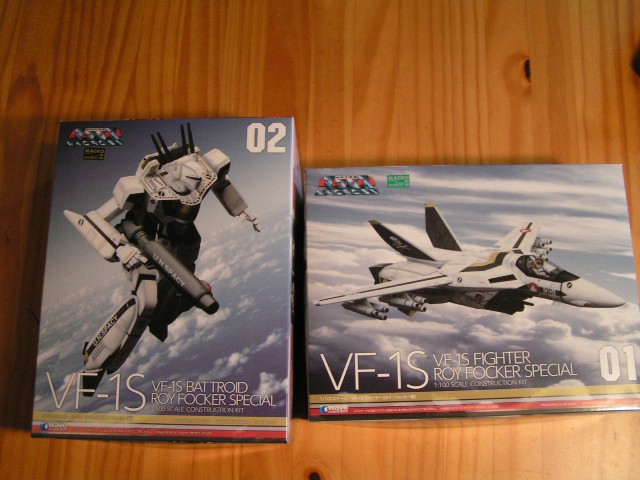
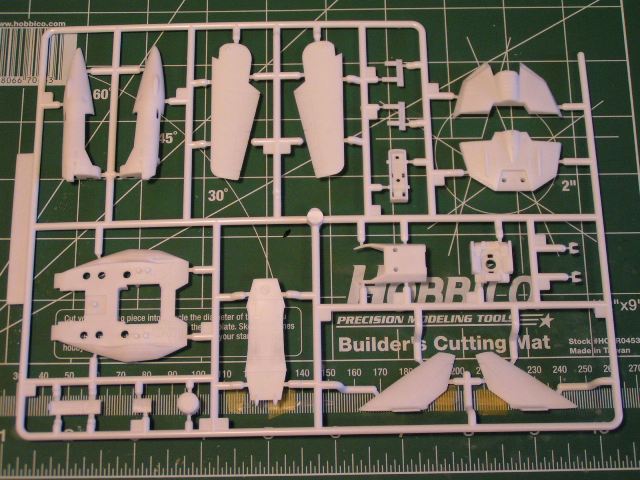
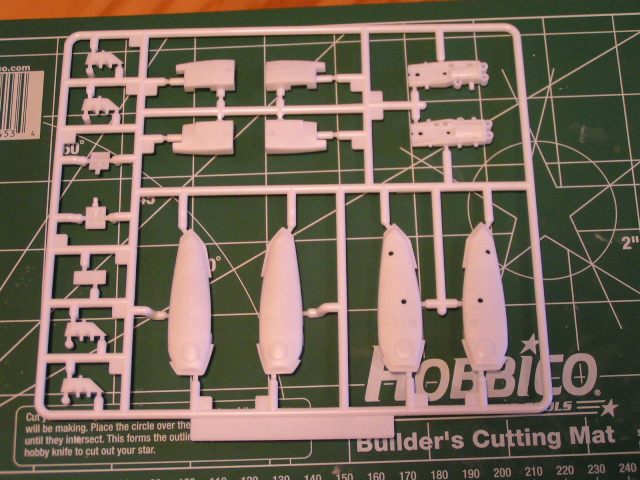
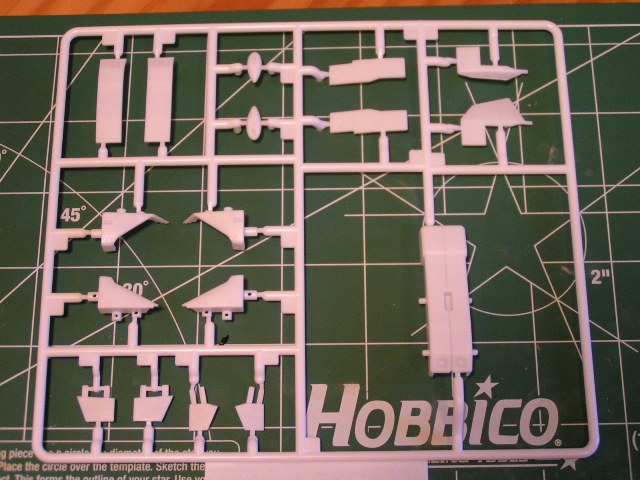
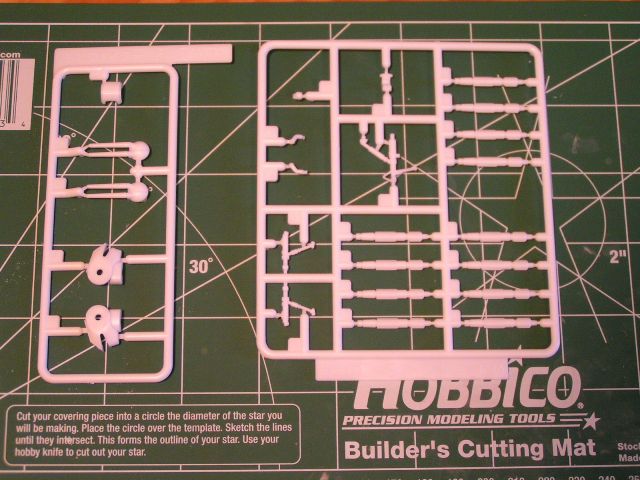
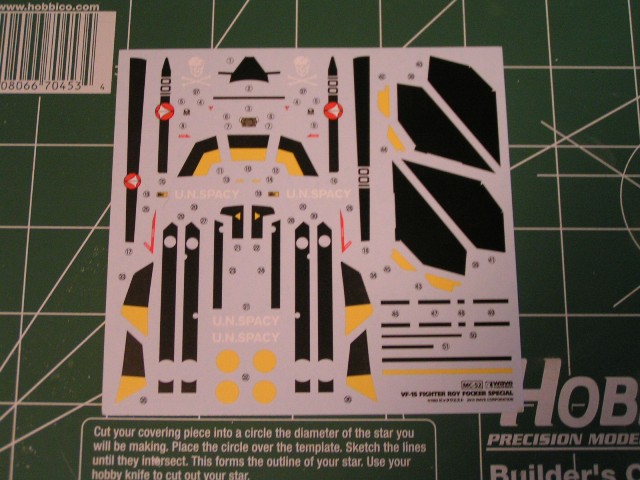
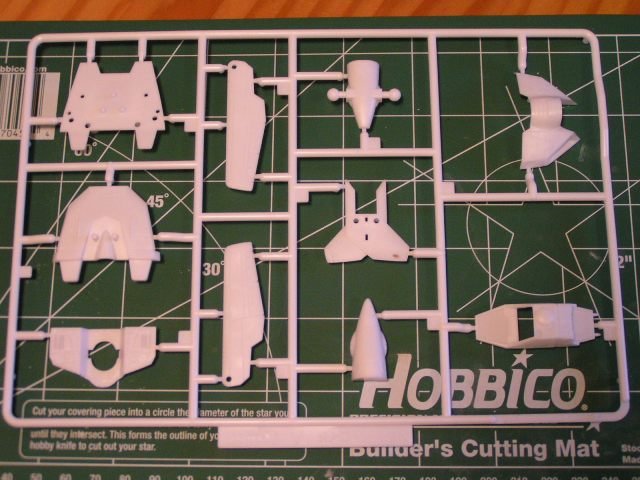
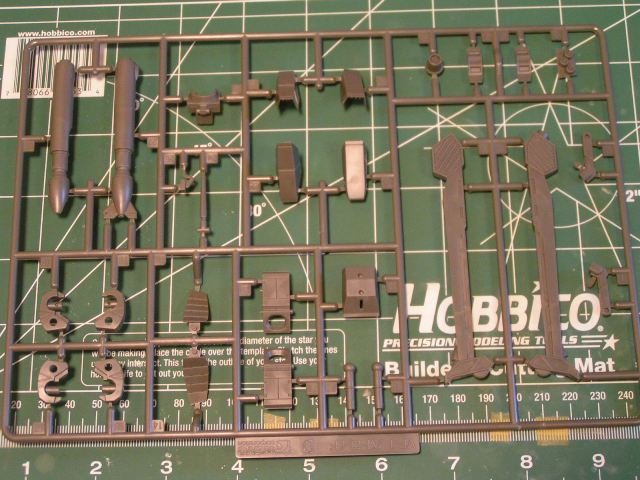
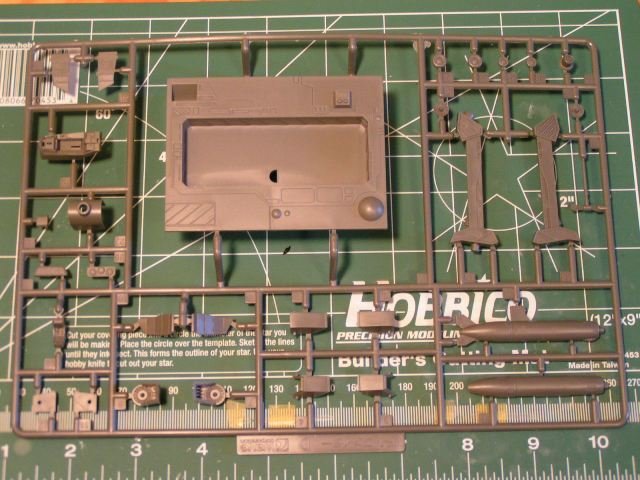
Hi everyone, I have been lurking on here for a long time and decided to finally contribute. I was really excited about these kits and am kind of surprised to see that there hasn't been much interest in them on these boards. Anyway, the plan here is to do a review of the two kits as well as some comparisons, then eventually do a build-up in the spirit of Master Cheng's old step-by-steps. We will see how that part works out though... So here are the two kits: Wave's 1/100 VF-1S Valkyrie and Battroid in Roy Focker markings. Lets start with the Valkyrie. First the runners: The polycaps: And the Decals: The parts are all crisply molded with almost no flash. There is a lot of surface detail on all the parts. Panel lines are not over-done but may be a little large. Some primer should help that though so its not really a big deal. There is a display base included with good mechanical details, but it looks like it just props the valk on its gunpod so it might not be the most sturdy base. Landing gear is also included, so you can assemble it wheels up or down, and it looks like it might even be interchangeable, so that is a cool feature. Decals look pretty good, well printed with all the markings being provided. There are a few warning signs and arrows, but not over-done which is probably good for this little scale. Not sure if it shows up in the photo or not, but there are tiny name decals, two that say "Pilot R. Focker" and two that say "Pilot Major R. Focker." The printing is tiny but legible, so thats nice. As you may or may not know, these kits are designed to combine together to make the Gerwalk mode. The polycaps include the full set for the fighter and Battroid modes, as well as the Gerwalk included in this kit. Overall first impressions: this thing looks great! The scale is kind of small, but to me it seems perfect. Not too big, but still enough to look really good and have good detail. One thing is that this is the DYRL version of Focker's Valkyrie, as indicated by the pilot figure and the yellow arrows on the head. I will be building these as the TV version, so I will have to make a few minor corrections. So thats all I can think of for this one, next up will be the Battroid. Hope you guys enjoy this as it goes. Feel free to ask any questions and I will try to answer as best I can!


-
What they should do is release a Roy TV version (I think that the black anti-glare panel in front of the cockpit is different in the movie version) and then release TV FAST packs with the Hikaru pilot figure included. I would definately get that combo.
-
The black box with the number in it is for Gunze Sanyo Mr. Color paints. The other box is for Gunze acrylic colors. You can get them from Rainbow Ten or Hobby World. Gundamshop also has the aquious colors. Hope that helps.