

Jinnai
-
Posts
141 -
Joined
-
Last visited
Content Type
Profiles
Forums
Events
Gallery
Posts posted by Jinnai
-
-
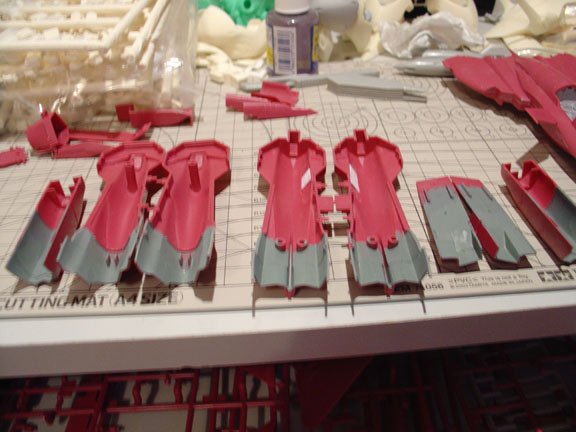
Here I've done some pre-painting onto the bare plastic, in areas that'll be harder to reach when I've started more gluing. These are the intakes and the legs.
I've done a lot of dry fitting with this while waiting for parts of the cockpit to dry, and I found that nearly all of the injector marks are covered by other parts, so I didn't need to fill them. Those that do need to be filled I'll do when I cover the inside seams with Mr. Surfacer, and sand back them. Then reapply the paint.
I used Tamiya XF-25 (Light Sea Grey) for this, as it contrasted well with the purple I've pre-mixed for the base coat of the fighter.
-
Two more updates, and that'll probably be it for the night.. but then again, I have an itch to keep building, and right now it's not going away, despite how often I'm scratching..
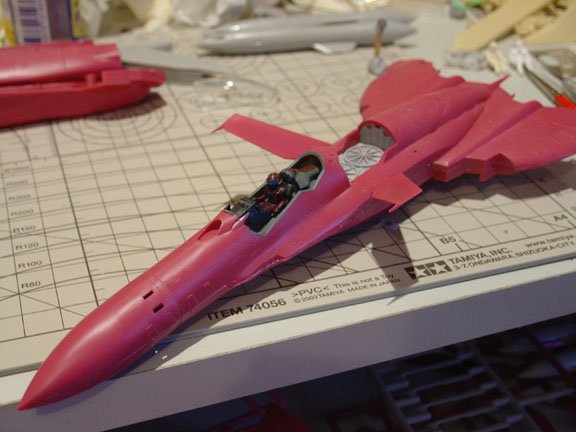
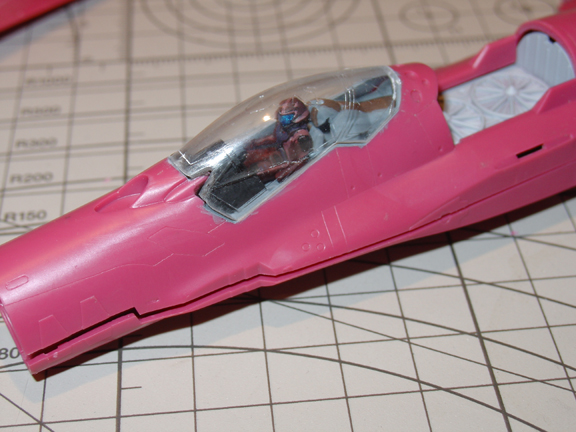
Seriously, this photo doesn't give the size of the kit justice. This is one huge bird. I think I'll have to pull my VF-0S out of the cupboard for one last shot, just for a size comparison. Maybe a VF-1 also..
But here she is again, most of the preassembly for this part of the fuselage is done. Next will be to start sanding down seams, and applying Mr. Surfacer for spot checks. I used to be an avid Tamiya Putty user, but about 8 months ago I realised just how good Mr. Surfacer 500 was for puttying reasons, and easier to use. So now I use that exclusively.
-
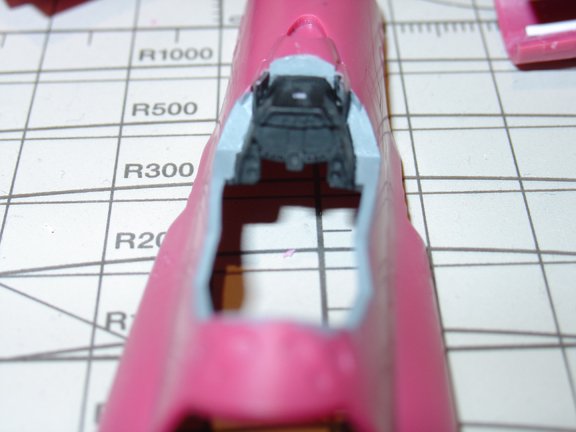
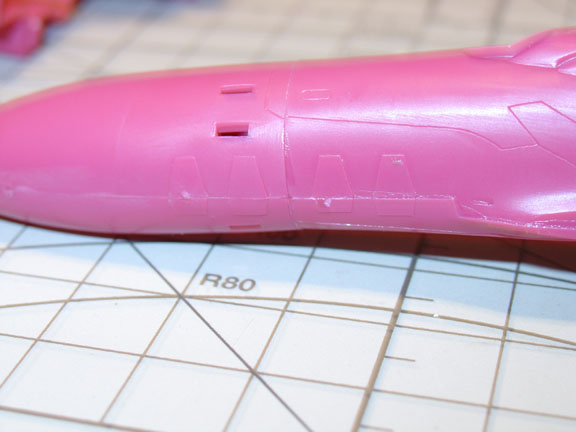
So the next step was to start assembling the body of the kit. I already had the nosecone glued together to help keep the nose landing gear flush, however either I did something wrong, or the kit was engineered slightly badly, but there's a rather large size difference between the nose and the fuselage.
It's about 0.5-1mm deep, and either fill it with a lot of putty, or sand it back so the nose is flush. The thing that scares me is the raised panels on either side. If I accidently sand them down, I might be able to remake them using sheet styrene, but that's unnessesary if I'm careful.
More to come.

-
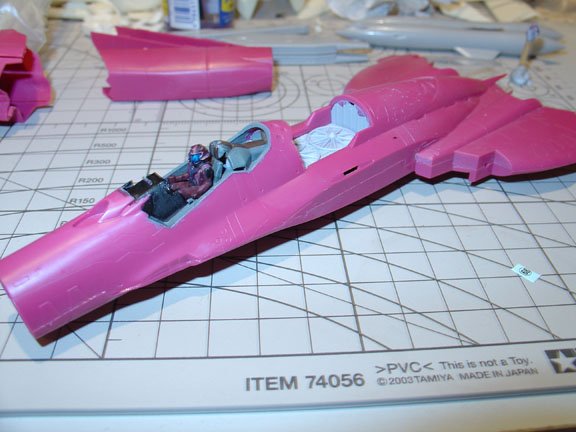
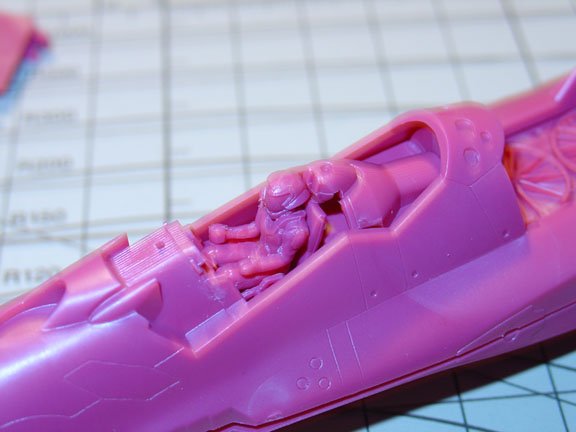
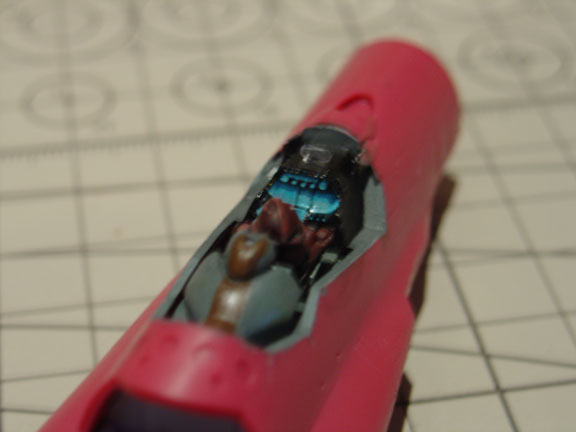
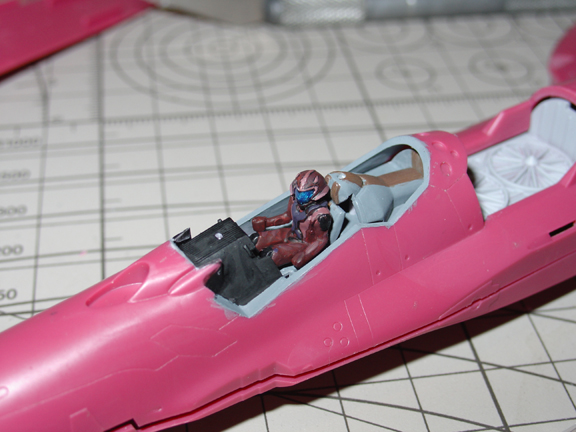
Another beauty shot, straight into the cockpit, showing the instrument panel and the HUD.

-
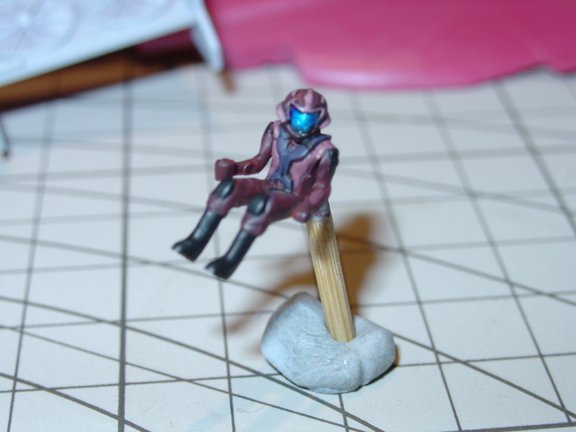
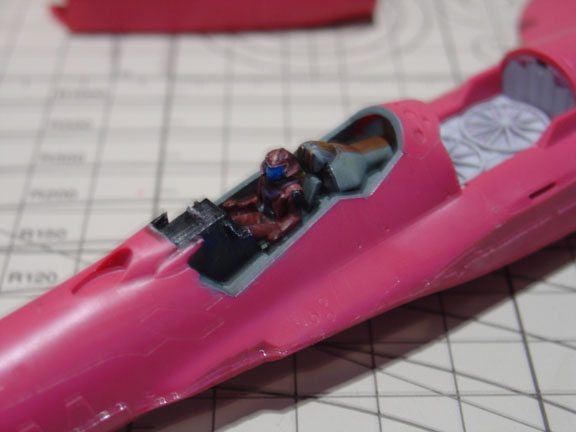
Shown in place is Nora, sitting in the cockpit, looking for that elusive VF-0D..
I say give it til October!

-
So with the cockpit complete (I can add the decals later), it was time to finally seal her up between the fuselage pieces.
My method of gluing usually involves putting down an excess layer on one half, then I'll put the parts together and squeeze, so excess melted plastic will ooze out. That way, I can sand down to begin with, and if I've done it correctly, I won't need to putty, or reduce the need to putty.
-
And once again, disaster struck. With the right hand side mirror, I lost that one to the same problem that occured in the previous step.
This 2nd kit of mine will be short some decals. Might have to sell it to my mate to make a Battroid.

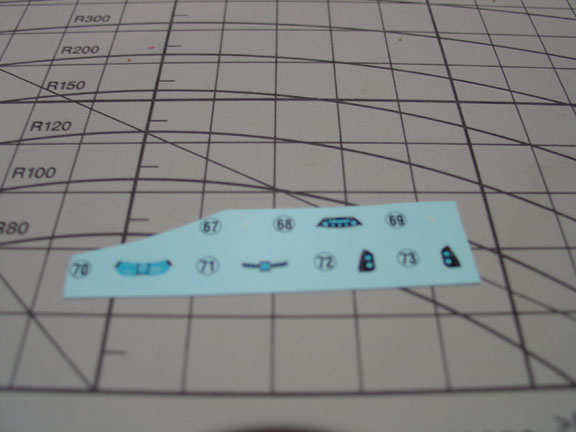
Here's the instrument panel decaled, minus the two that.. were KIA.


-
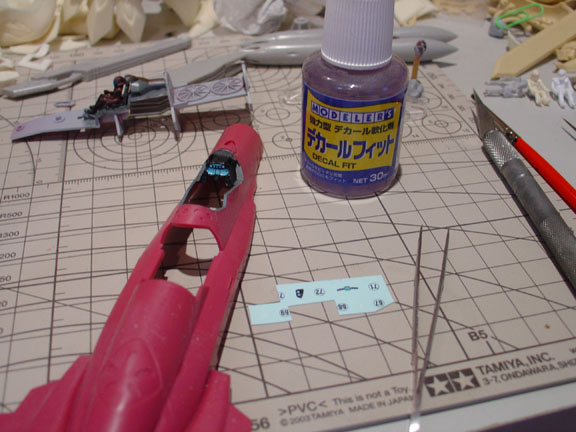
And sure enough.. disaster did strike. While I was applying the decal for the lower right hand side near Nora's leg, I put on my decal set (shown in the image) however, the decal wasn't quite attached to the surface of the kit, and stuck to the brush that had my decal solvent on it.
By the time I got it off, it had disintergrated.
No major loss, as I still have 2 SV-51 kits of my own to arrive, so I'll just steal the decal from there.

-
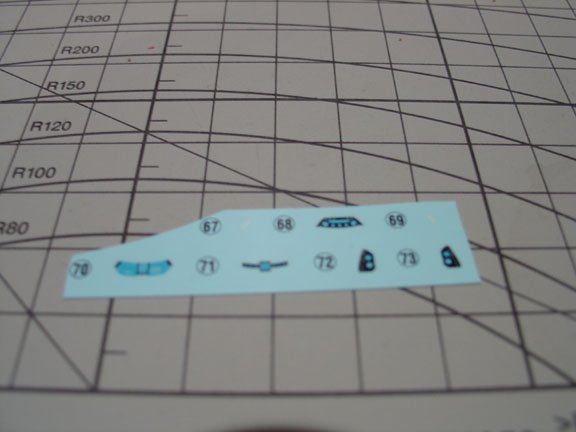
And here are the decals used to put over the instrument panel. Something that scares me about this is the fact that the mirrors are small and single parts, and the whole panel is broken up into smaller pieces. It should be ok though.. I hope.
-
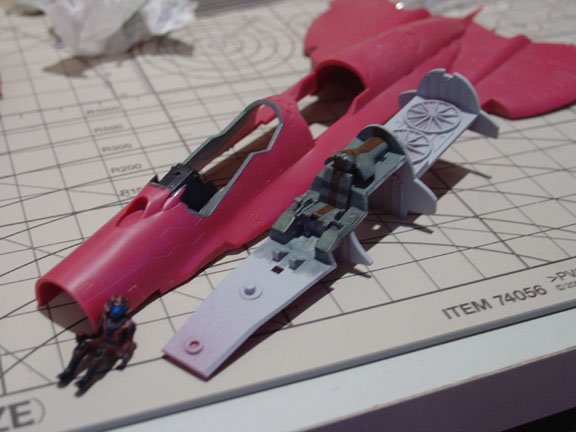
With the cockpit completed in my opinion, the next natural step was to finally glue Nora into place. The past couple of steps seemed to have taken forever, but then I reminded myself that I still have the main body to be painted.. which will take far longer than just doing the cockpit.
-
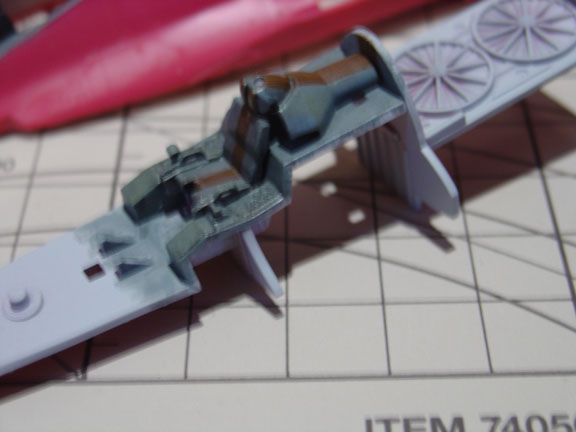
I then lightly drybrushed the original grey I used (Tamiya XF-66) over the top after wiping away excess wash. As not much is seen after applying the canopy, I kept it as basic as possible.

-
Another update. Thank god for the Easter long weekend, and the fact I'm on two weeks holidays from work.
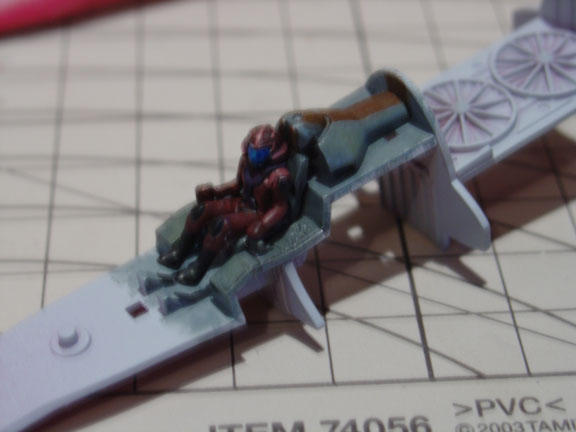
I put a thin black oil wash over the cockpit, to enhance a little bit of detail and put a bit of depth into the colour. It turned out exactly how I wanted it. I still need to finish the ejection seat handles and attach them.
-
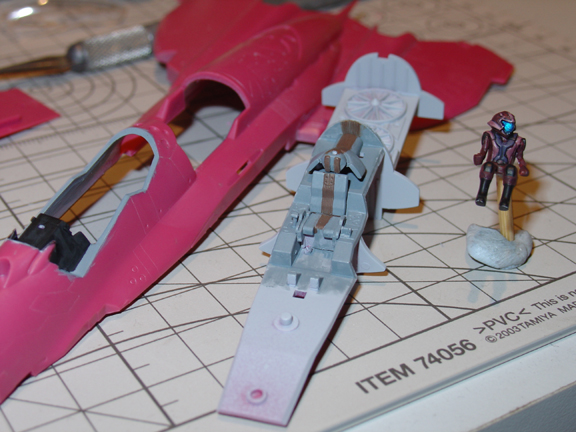
One last little picture before I call it quits for the night:
From left to right: DYRL Weapons Set, YF-19, VF-0S and Nora.
Missing: Guld (as I've seemed to misplace him and I have no idea where he is.. probably in one of my 8 drawers full of bits, sprues and parts), Max/Miria (VF-22S, kit is still in bags.. ain't touching it for a while)
-
While still waiting, I thought I'd work on some other little parts for extra detail and such.
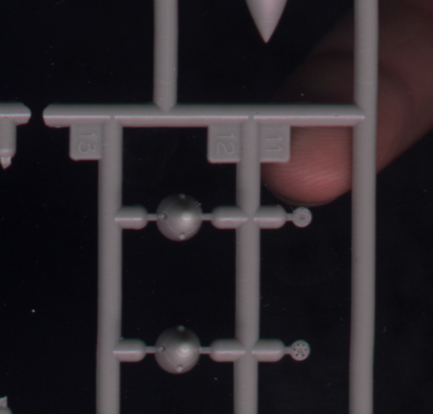
I took my microdrill bit which is about a 0.3mm bit, and drilled out the holes on the machine guns. The kit part has detail, but they're very shallow and small barrels, I thought the hole on the barrel could be enlarged, just to make it look a bit more realistic.
Unfortunately my camera was having a hard time focusing on the part (I still haven't figured out how to disable my auto-focus and create new manual focus settings.. my camera has that option, but I haven't had time to play around that much) so I threw the sprue on the scanner. And that still didn't work well, but you CAN see it... even if just barely. My index finger is there for size comparison.

-
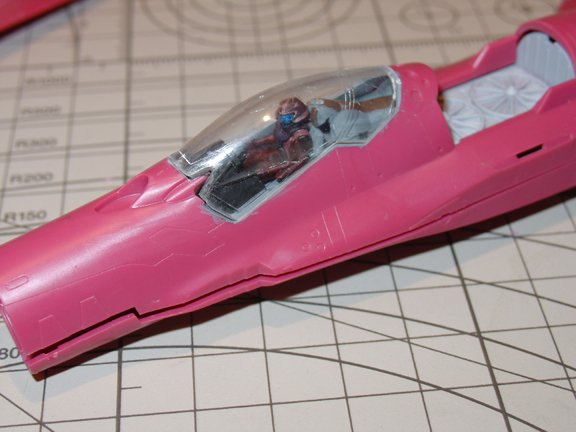
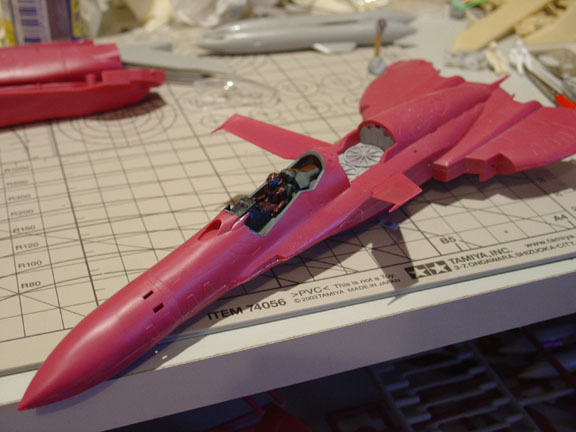
Canopy added. It's a shame that most of the cockpit is obscured when the canopy is attached. Especially with some of the hard work put into painting it.
But.. I'm proud because I know it's there. It's a detail I couldn't overlook.
-
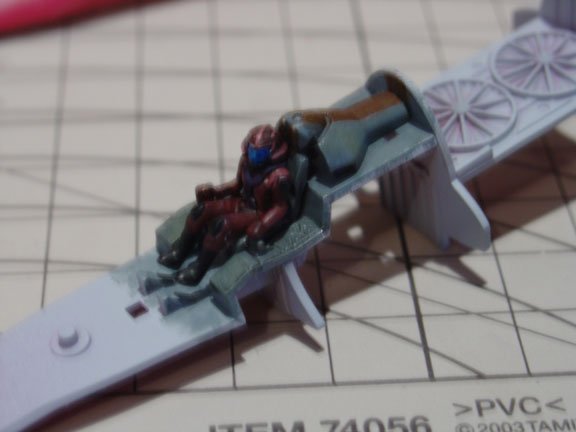
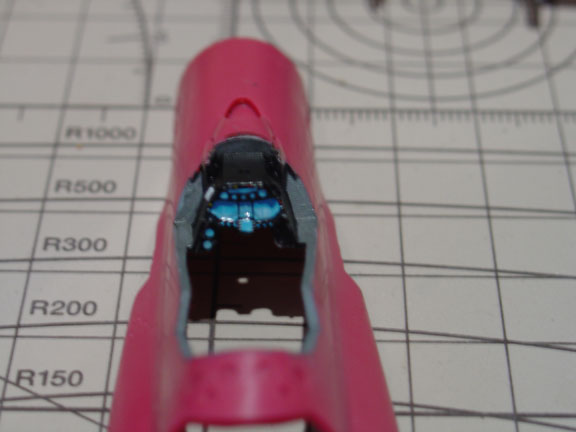
One (dry) assembled cockpit. I like this picture mainly because it shows Nora looking of to the side really clearly, like in OVA 3.
Where's that VF-0D...

-
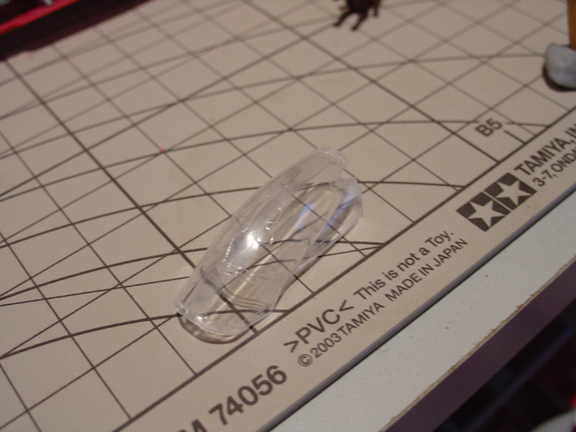
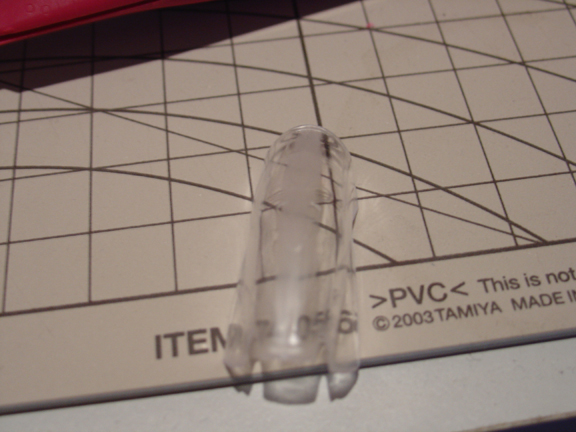
One polished canopy, awaiting the future dip. I need to give it a quick clean beforehand, so I remove any fingerprints and left over polishing compound before the future seals up the canopy.

-
So as I wait for my mate to finish work so I can get my oil paints back, I thought I'd continue working on the cockpit by sanding the seam line down on the middle of the canopy.
I was stoked when the YF-19 and YF-21 came out, eliminating that seam line down the middle of the clear canopies. When the VF-0S came out, and the seam was reinserted, I was saddened. Hoping that they'd make a difference for the SV-51 considering there is that watermark-like design on the canopy, I was saddened again when the seam was there.
This was wetsanded back, starting from 600 grit, through to 1000, 1200, 1500 and finished with 2000. If I had finer grades, I'd keep going all the way through, but unfortunately I don't have access to such products. Although I'd get them in a heart beat if I could.
Next step from here is polishing, then the future dip.

-
Please forgive the blurriness of these next two images.. I'm still playing with my camera.
Shown here is a beauty shot straight down the nose, showing the instrument panel of the cockpit. Awaiting the inevitable oil wash, and decaling. Hasegawa created 4 decals for the panel alone, plus two smaller ones for the mirrors on the side.
If only they did a HUD decal like on the VF-0S.

Stamen: STFU.
-
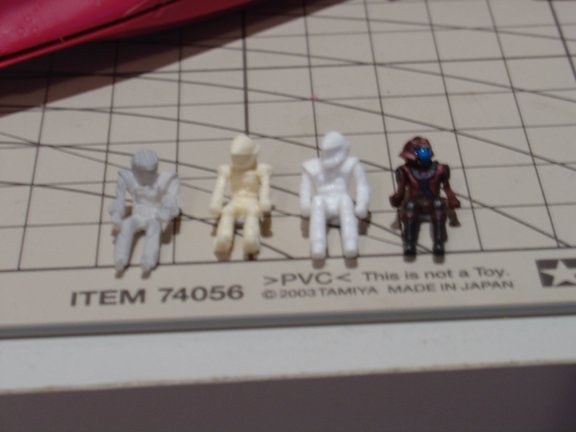
Nora was.. interesting to paint. Instead of using Tamiya, I sat back and made some small custom mixes from my Citadel paints, because I'm more used to using them for fine detail. (I've been painting miniatures for 13 years now).
The flightsuit was followed from the same paint ratios called out on the instructions, while the trims around the helmet and the straps I added a bit more colour too.
The boots, shoulder pads and knee pads called for a black/grey, but from watching the anime I decided just to stick to using a pure black, as grey seemed to not have that much of an effect on a primarily reddish suit.
Also, the instructions said to paint the bottom of the feet pink, but.. you can't see them when she's sitting in the cockpit, so why bother?
The visor was Tamiya Chrome Silver, covered with Clear Blue.
-
Time for an update.
Shown here are the main cockpit pieces and Nora, with base coats down. I'm getting myself prepared to flood the cockpit with a black oil wash (I need to retrive my oil paints from a mate), then I'll decal the instrument panel and seal her up.
After washing I'll drybrush a slightly lighter grey over the top of bring out definition, and do some minor fixups that my camera just made apparant.

-
PS----fill the legs with weight. Lots of it. Like, solid lead from the feet to the thighs. Unless you've got the perfect stand to hold it.
Plaster of paris is better. If it has a head, don't glue the head on and pour the plaster in before painting.
Not only will it give you a solid kit that won't fall over, but it'll stop the inevitable warping that occurs in summer heat.
-
Aurora-7: My friend wants this painted original colours, although personally I like what someone did with the blue and yellow stripes in the SV-51 thread over at models. Quite nice.
David: The YF-21, because of the location of the landing gear, and how hasegawa designed the kit, means that you can just slot the door onto the underside of the kit. Simple, easy, effective. The nose gear is a bit harder, but nothing too major.
Chronocidal: I toyed with the idea of cutting out the gear well on the YF-19, but in the end I ended up making a sheet styrene stack to put on the underside. I also toyed with the idea of filling the well with epoxy putty, however that'd make the nose too front heavy, and if you didn't weight the legs down, even with gear down it'd tip forward. I'm not happy with how I raised the landing gear on my YF-19. I really need to fix it up.
Stamen: STFU.
-
These shots should appease our friend for the time being, don't you think?
I hope you would cover some necessities, such as ejector pin marks and whatnots on the gear doors and gear bays. Granted, you won't have to worry about that, but you're taking the easy way out, so :-P
Should I understand that this kit is far superior in quality than the VF-0S joke?
It had better appease him, otherwise I'll keep the kit. =p
As for the inside of the gear doors, each door has the standard 2 hasegawa sinkholes that need to be filled. For the leg gears, there are several shallow sinkholes that need to be filled, on the nose gear (under the cockpit), there are 5 that may be difficult to fill.
I'll take a photo later.


1/72 Hasegawa SV-51 Step-by-step
in The Workshop!
Posted
Last two photos for the night.
I just had to take a photo of this. Seriously, no wonder Nora loves fighting in this thing.