

jemC
-
Posts
31 -
Joined
-
Last visited
Content Type
Profiles
Forums
Events
Gallery
Posts posted by jemC
-
-
14 minutes ago, Alphahorizon said:
That price will be the low end once some of the regular retailers list them for a second time. I went with them as well. Slept good to.
I've not used them before but I saw on the forum of some historical purchases that said that they're ok before I drop the money down
-
Just got mine from Luna at a much higher price

-
45 minutes ago, Anasazi37 said:
A non-transformable valk would be an odd move, given how much Bandai has invested in making transformable ones. What they displayed a few months ago was armor on transforming Hikaru 1J, Max 1J, and Roy 1S valks. Bandai has three options for how they could release the armor (assuming they will):
- Release the armor as an accessory for the VF-1J Hikaru we got two years ago
- Reissue the VF-1J Hikaru, then release the armor as an accessory that will work with either one
- Package the armor with a VF-1J Hikaru reissue (what was done for the Hi-Metal R line)
Given how Bandai is, I suspect it will most probably be 3.
-
3 hours ago, betocc said:
Used item at Mandarake is usually an Excellent condition item unless they specifically mention an issue with the figure. If you don't care about the open box then it is a great deal, I have seen a couple of times the 20k price.
Yes. I ordered my 1J recently. Mandarake said box damage but when I received it, only a small nick on the opening flap that I don't really mind.
But to fussy collectors who want perfect boxes, then they will say that it is badly damage.
-
1 hour ago, CzarAlko said:
Also Mykombini still shows as still available
There's a "This product is no longer in stock" now.
-
6 hours ago, jenius said:
Review is finally done!
Just finished your review.
Didn't have the v1 version. So didn't know that the joints were so bad.
Good job Jenius
-
7 hours ago, jenius said:
He specifically calls out "the reissue YF-29" which would imply that the first release YF-29 was the original... but that makes no sense because the complaints seem to contrast the YF-29 with a different vehicle entirely, presumably the VF-1. Had the "Behold" been followed by a picture of a VF-1, it sure would have helped.
@twich, I'm working on it now.
Didn't know it was u but I had been following your youtube channel, specifically as to how to transform the toys
")
Thanks for that.
-
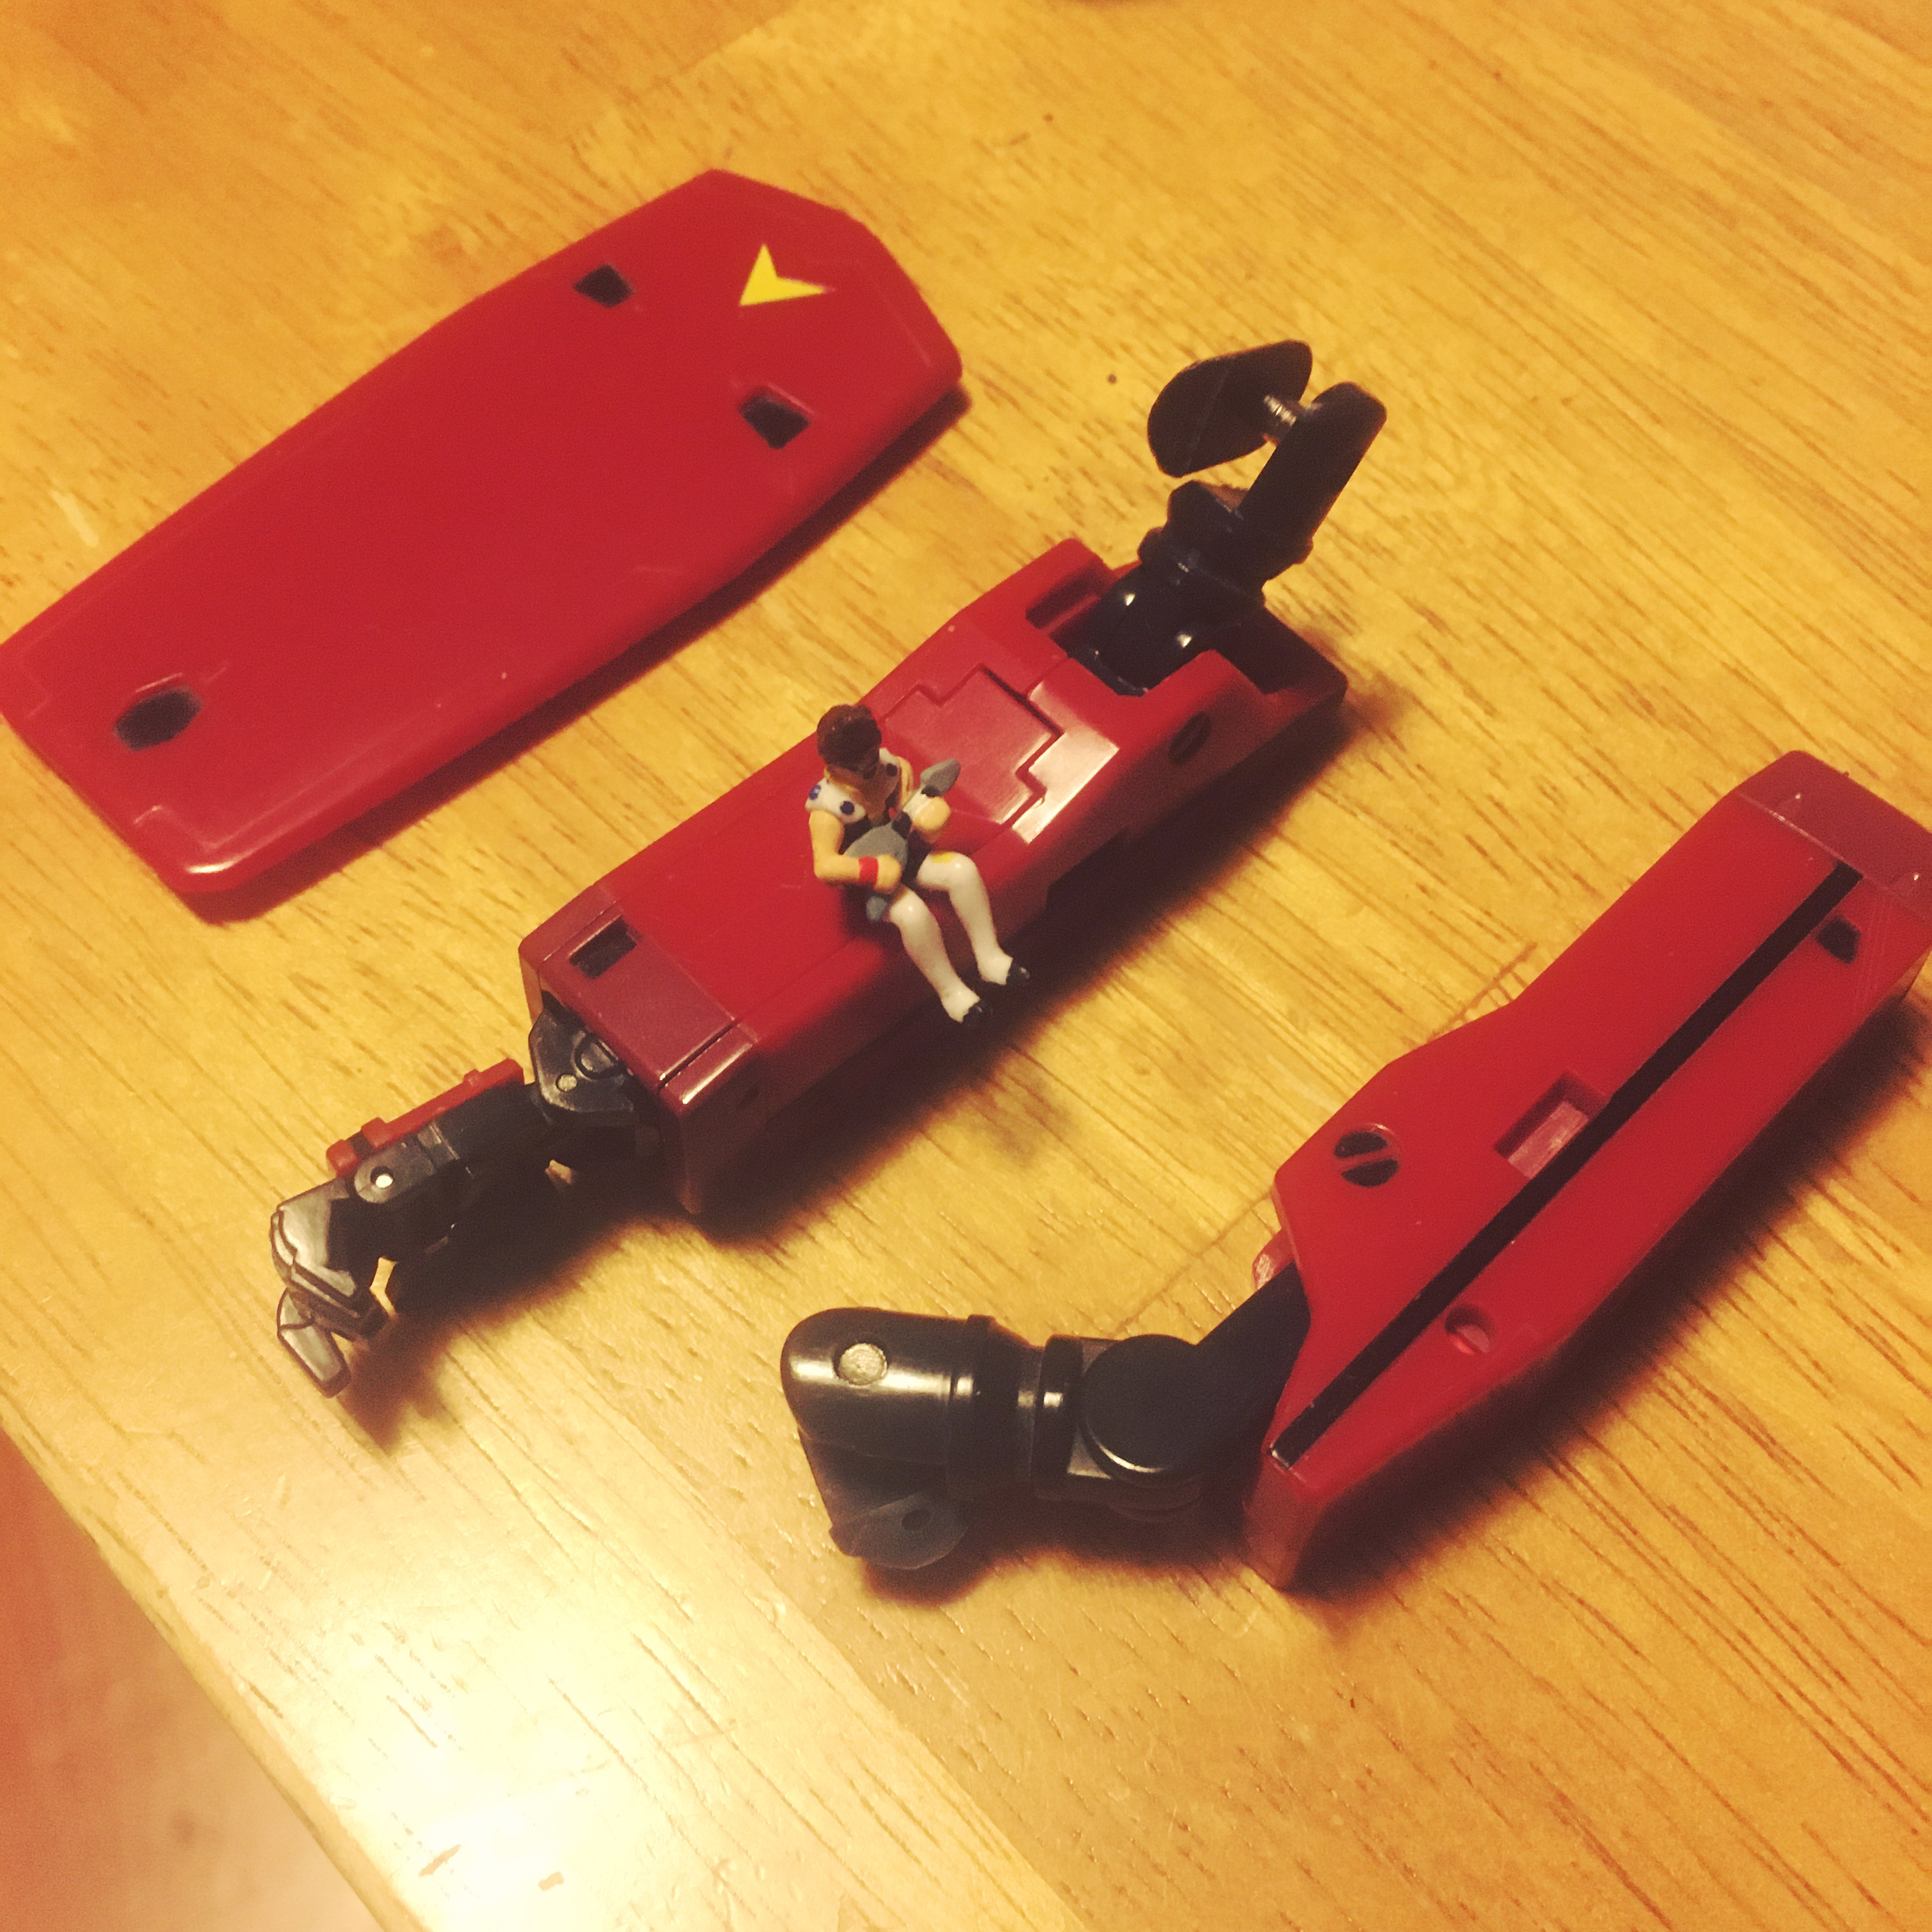
Finally managed to find some time to transform the plane. Not too impress especially on the arms. The L bars are so freaking stiff that I can't push them back into their proper positions and when I exert force, I scratched some of the paint

This is exactly the same problem as Ozma transformation but at least the arms were not so tight!
-
12 hours ago, UN Spacy said:
Guess my 2011 version had a good run.
Plastic durability strikes yet again.

This is exactly what happened to mine when I bought a 2nd hand VF-19
-
I am still sourcing for a brass pin. I can't find any online or in my area.
Will those paper clips work?
-
This guy from China is also having issue with the shoulder joint. See 17:00
-
2 hours ago, borgified said:
Where is Alto's 171EX?? You got to have that one otherwise your shelf is not complete...

agree. You need the 171EX to complete the shelf
-
Finally received mine from Amazon jp. love the matt finish.
One thing with the head lasers, there's a groove for them but because the head lasers are straight up, they don't fit into those grooves.
But everything is tight. Maybe too tight. Till now, I couldn't even open the canopy
-
12 hours ago, OzmaLee74 said:
The link I posted for Amazon.JP now shows ¥27500 + ¥2444 DHL shipping but drops to ¥25000 + ¥2444 shipped to the US if anyone’s still looking for one.
DX Chogokin Macross F - Sayonarano Tsubasa YF-29 Durandal Valkyrie (Saotome Alto Model) Full Set Pack Approx. 8.7 inches (220 mm), ABS & PVC & Die-Cast Painted Action Figure https://www.amazon.co.jp/dp/B0897ZW6HZ/ref=cm_sw_r_cp_api_i_oHfKFbJEFG6VZ?_encoding=UTF8&psc=1
Thanks!
Made an order. Now waiting for it to arrive within 7 days
-
My order did not get fulfilled. Sad.
-
extremely impressive final model and thumbs up for the step by step work that was done.
-
6 hours ago, slide said:
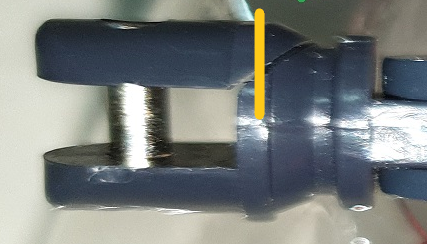
I would use 1, maybe 2 pins if you have the physical space at a right angle to the part itself. normally I would recommend 90o to the break, but that'd make this even more complex/difficult
something like this:


*this is dependent on the internal structure of the joint, of which I'm completely unaware, but if it's just a plastic-only part of the joint, I would use epoxy and 2 pins [because I'm type-A, and using two will give you extra stability to the repair] in the yellow locations above.
this will keep the pins away from any actual moving portion or negative spaces required for mobility.
if you do not have a vice and some kind of drill-press, then doing it this way will be extremely difficult to get correct and not slip and mar/break the joint up even worse
Order of operations in my head:
- A LIGHT scuffing with some sandpaper to the break itself will help give the epoxy something [texture] to bite onto and will hold better. Epoxy the broken joint-flange into place, making sure it's as square and tight as possible. let the epoxy dry. *note* you can stop at this point and test-out the joint's function/strength if you like. maybe you won't even need to pin it, but I suspect you will.
- I would then put the joint in a vice, and mark-out then drill the two pin-holes. I don't know if going all the way through is necessary, but I'd sink the pins at least half-way into the joint. The more 'meat' of the broken flange you can use, the better IMO
- Trim the pins so they are just a little bit countersunk into their holes [ever so slightly recessed] then drench the pins in epoxy, place them into the joint, and wipe off the excess. This should have the benefit of sealing the pins in all in one fell swoop.
- now you can fill/sand/paint if you feel you need to.
Once you've reached step 2, feel free to modify the angle of your pins if you like, perhaps perpendicular to the break itself would be best from a mechanical strength standpoint... but I'm not an engineer, I just play one in my hobbyroom!

WARNING: doing it my way will further damage the part before you make it better!! and stands a reasonable chance of outright failure!
I'm fully aware that doing it my way is NOT going to leave it pretty without additional work [filling, sanding, painting] and you need to know that too, before you start
But as a model-builder, that's how my brain immediately tackled the problem.
Shy of machining yourself a new piece, this is the most sturdy/long-lasting repair I can think to make.
My method may prove to be overkill, but overkill is under-rated and if you play with her at all, I would not trust an epoxy-only bond for any appreciable force on a repair surface-area of that size.
Hope this either helps, or inspires a better/simpler solution. I like to overthink things like this so TIFWIW

Good luck!
wow! Thanks slide for the detailed explanation.
Everything you said makes complete sense and well noted on the warning.
I'll seriously consider your suggestions and once I've some free time, I will look to work on it.
-
5 hours ago, arbit said:
You can do anything. I also have no electronics or computer skills. It takes some simple tutorials and some help from MW members. But you need a lot of love.
Check out my step by step thread, and feel free to ask questions.
cool. thanks and will have a look.
-
I wished I have the talent to do something like this but I sucks at electronics or diorama building works. this is really an impressive piece.
-
This is impressive and I wondered how long the person took to complete this.
-
9 hours ago, slide said:
From a modeler's perspective:
I would drill 2 holes and pin each broken piece in place with some brass rod addition to even the epoxy.
I suggest you DEFINITELY pin it if you're going to try CA of any kind. Zap-a-gap should work as well as any other CA [crazy glue].
Pinning it may be time/trouble spent, but those breaks look like they could do with the extra re-enforcement, and I would expect a CA repair-job to crack under any appreciable stress.
Good luck with your fix!
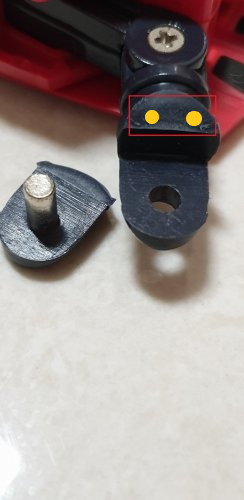
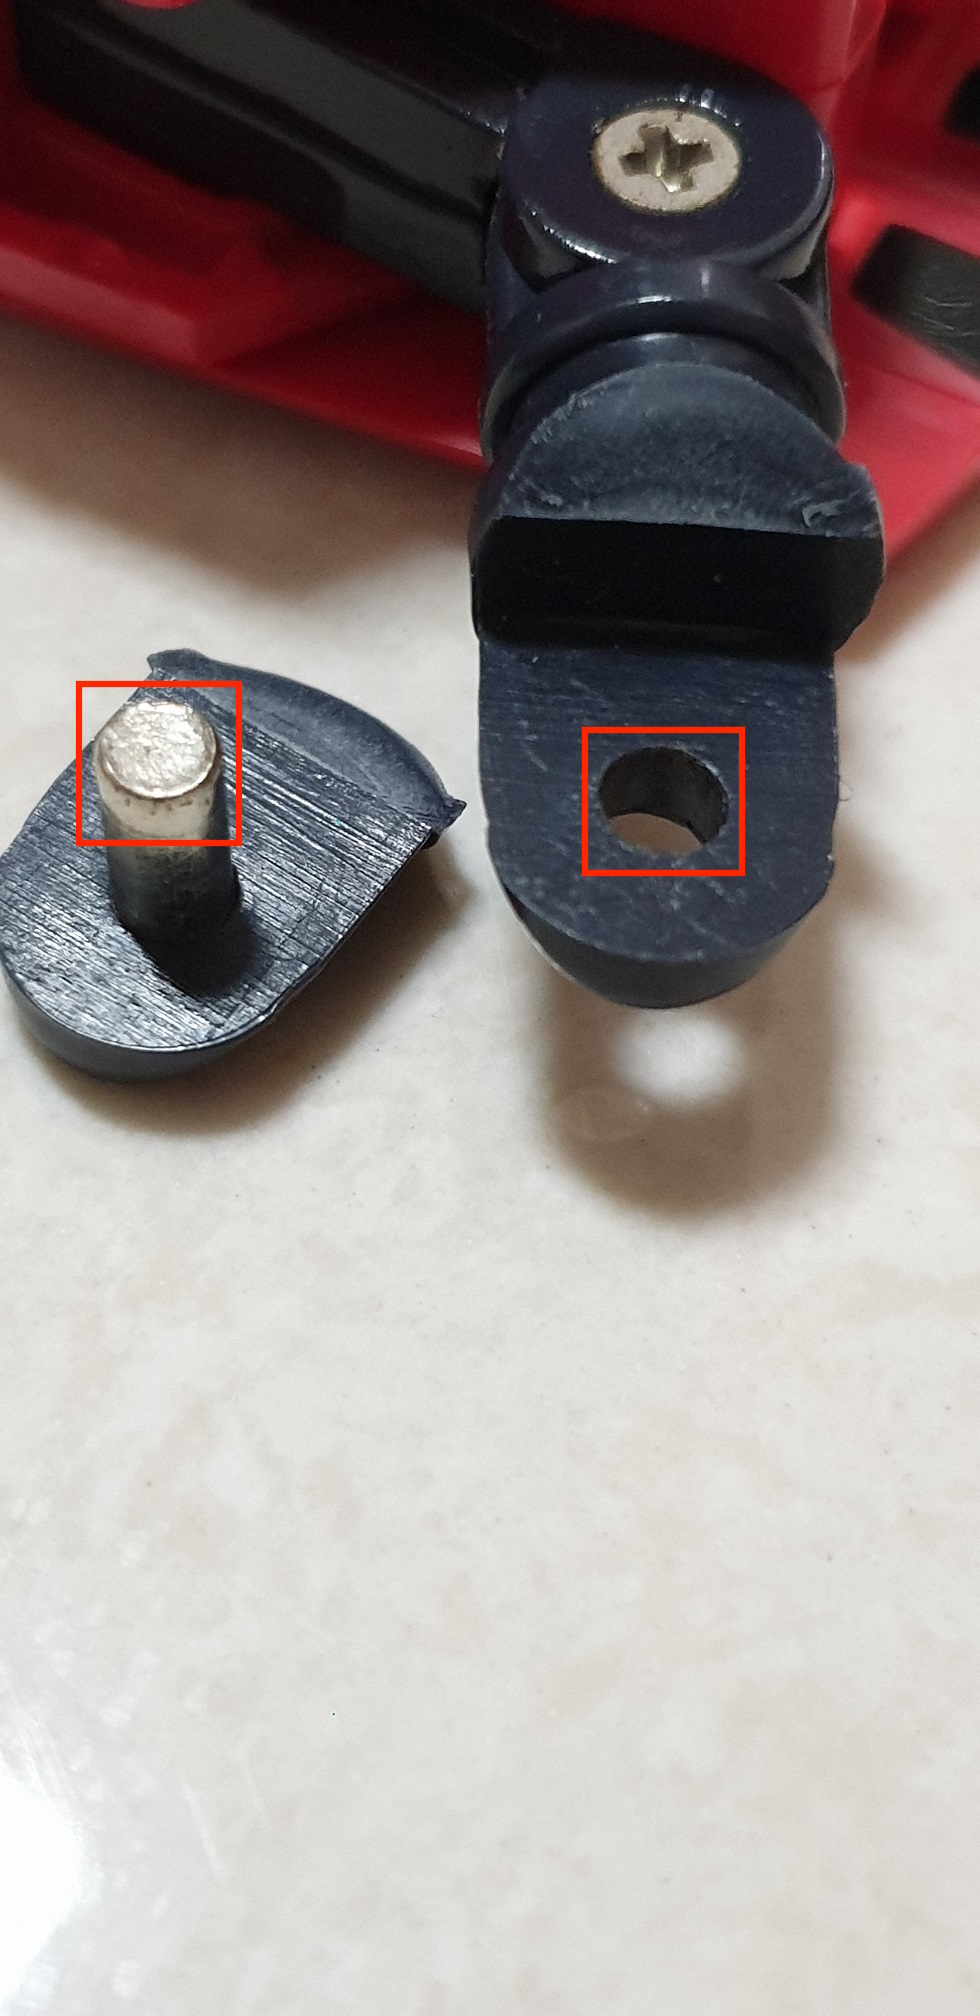
Hi Slide
Can I assume that you would recommend a pin to be drilled in the middle here?

The breakage is in an slanted position and when the shiny metal pin in the picture goes through the hole in the arm, it would be in an awkward position to have the additional pin.

Any solution for that?
-
11 minutes ago, Sanity is Optional said:
I'd expect anything you do to be more functional than aesthetic.
Personally I'd search for a good 3M A+B epoxy, one that will work with both plastic and metal, and has a low viscosity with a n appropriate set time (5-30min range?).
Might want a higher viscosity if there's a large gap between the metal pin and the hole, and if so check what the maximum bond thickness is.
Or just use some crazy glue and see if it falls apart again. I spend far too long researching appropriate glues for things at work...
[edit] This stuff seems like it'd do the job: https://www.mcmaster.com/74765A22/
Clear superglue, begins curing in 15sec, and full harden in 24 hours. Low viscosity, high maximum bond thickness. Bonds to most plastics and metals.
Thanks mate.
I'll have a look at both 3M A+B epoxy and mcmaster.
-
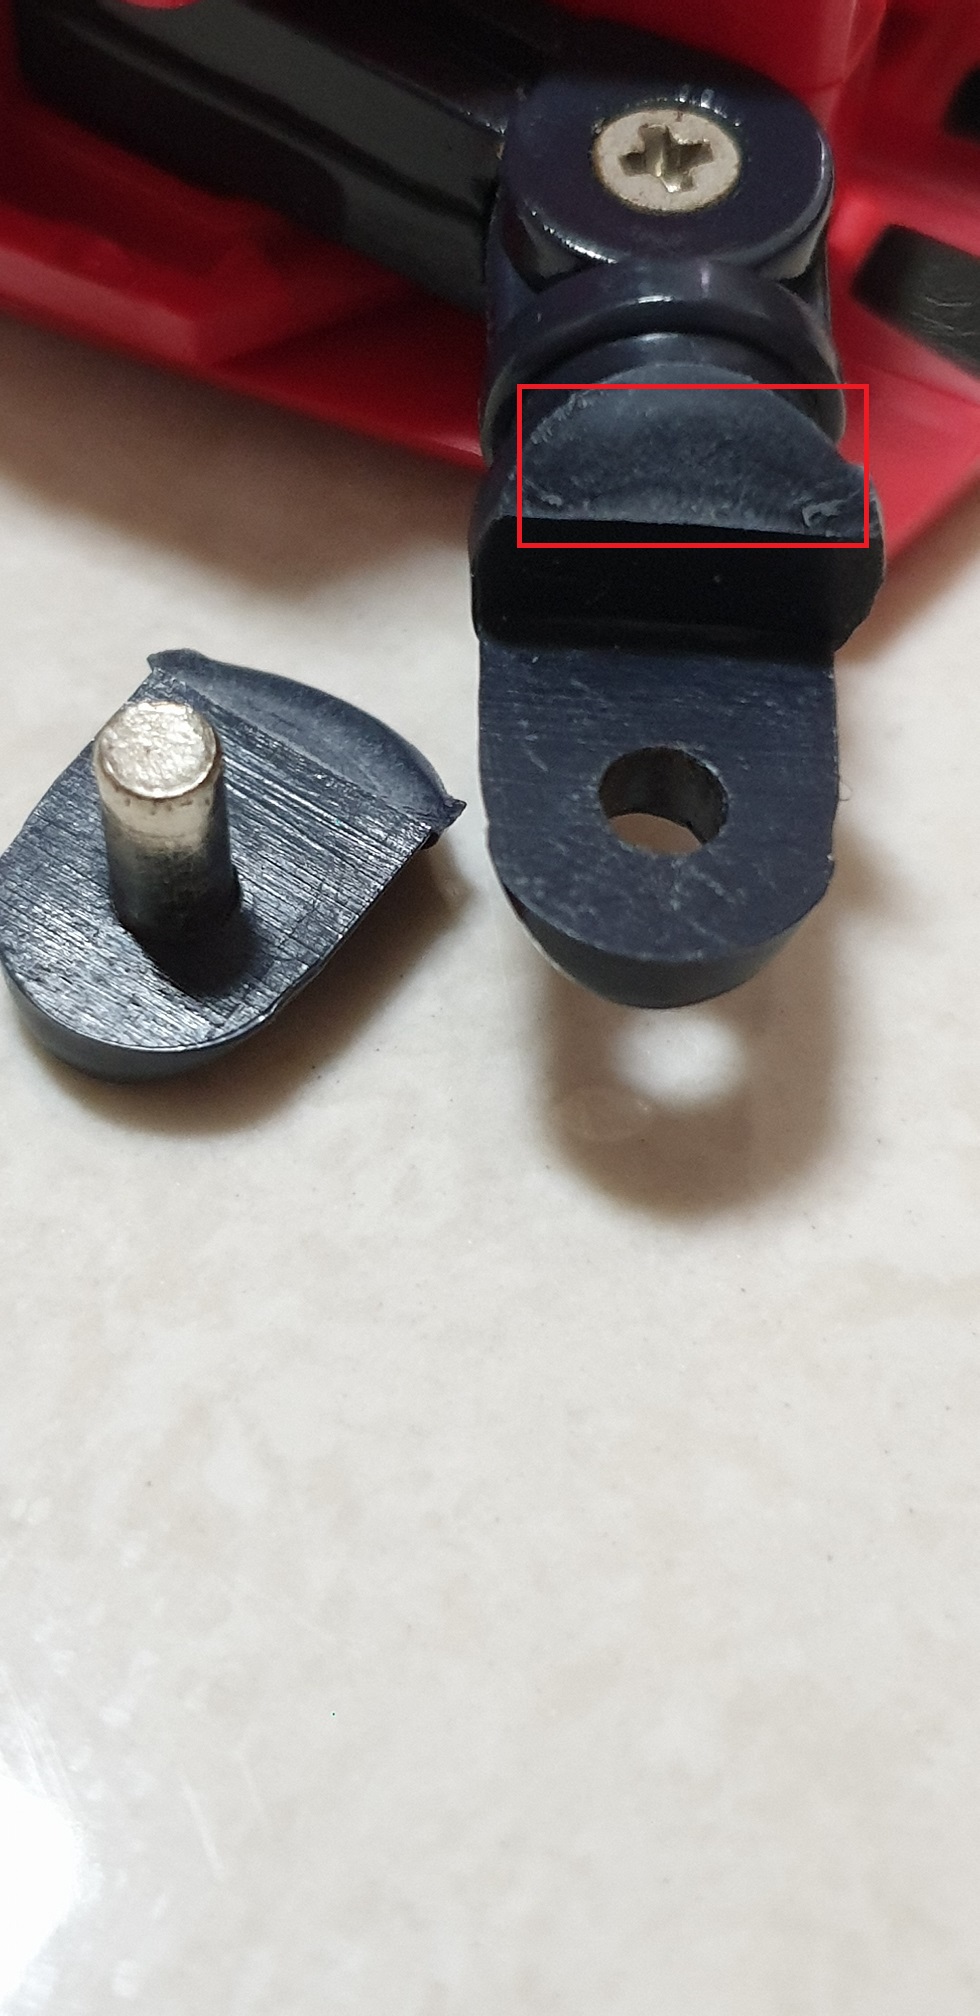
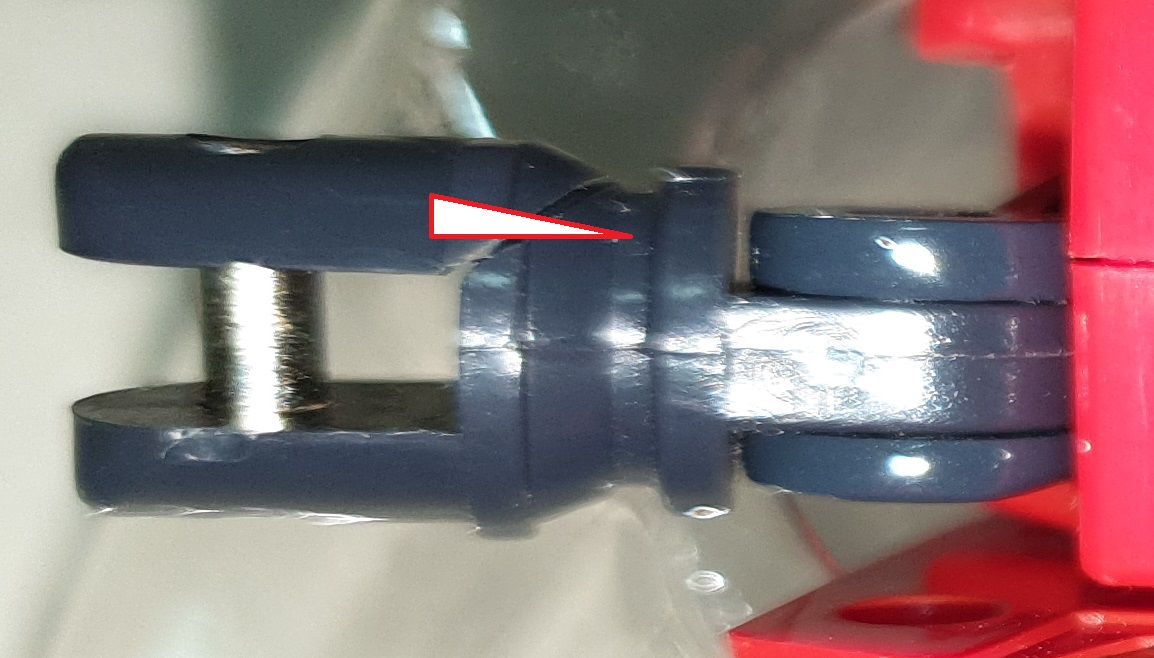
13 minutes ago, Sanity is Optional said:
So you see the pin that's already there, that goes from one side of the broken part to the other?

Glue it in on the other end, it'll help distribute the force across both sides, rather than just the side the pin's attached to.
As a mechanical engineer, the reason those both failed in the exact same way is that the force from the arm is concentrated on only one side of the hinge, specifically at the squared interior corner where it broke. There's a reason why putting a small radius in is a good idea.
I see what you mean.
So, I'll just glue on the breakage point as well as the other side of the pin.
It's something I've never thought of. Good point.
Any idea if Zap A Gap works for this?
Will it causes the white fogging issues on these plastic parts?
-
21 minutes ago, Sanity is Optional said:
If you do glue it back together, I'd also glue the metal peg into the opposite side to help carry part of the load.
Could you help to explain a little more as to which opposite side?
Also, I just had a look again, a metal insert might not be possible. the area seemed too small.
Bandai DX GBP Armor Set and VF-1J Armored Valkyrie
in Toys
Posted
I received mine from Luna yesterday