Cesar Enrique
-
Posts
164 -
Joined
-
Last visited
Content Type
Profiles
Forums
Events
Gallery
Everything posted by Cesar Enrique
-
¿How can you print the white marking decals? My inkjet printer (and almost all inkjet printers I know) doesn´t print in white, nor even have programation for printing white.
-
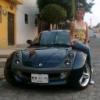
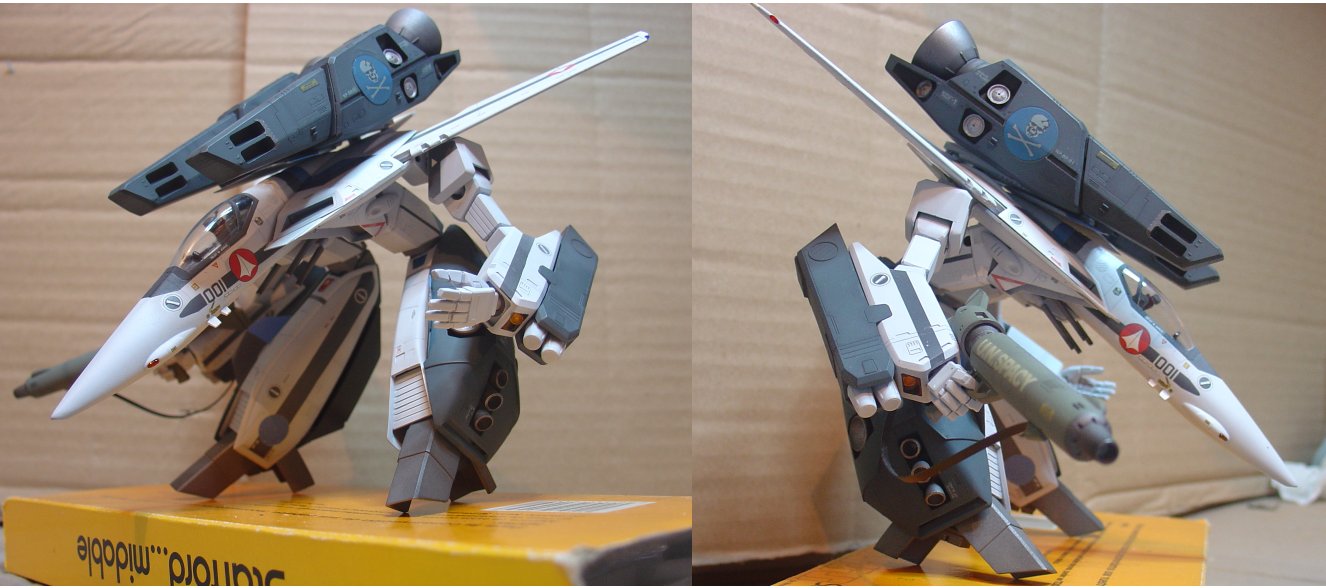
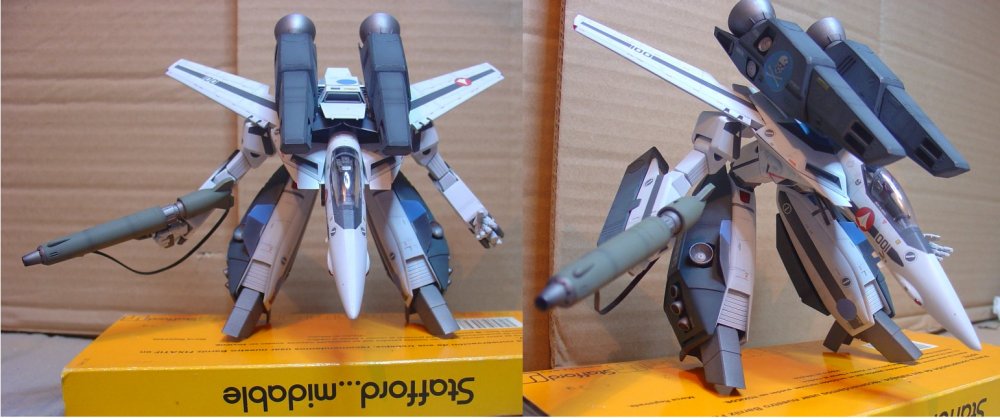
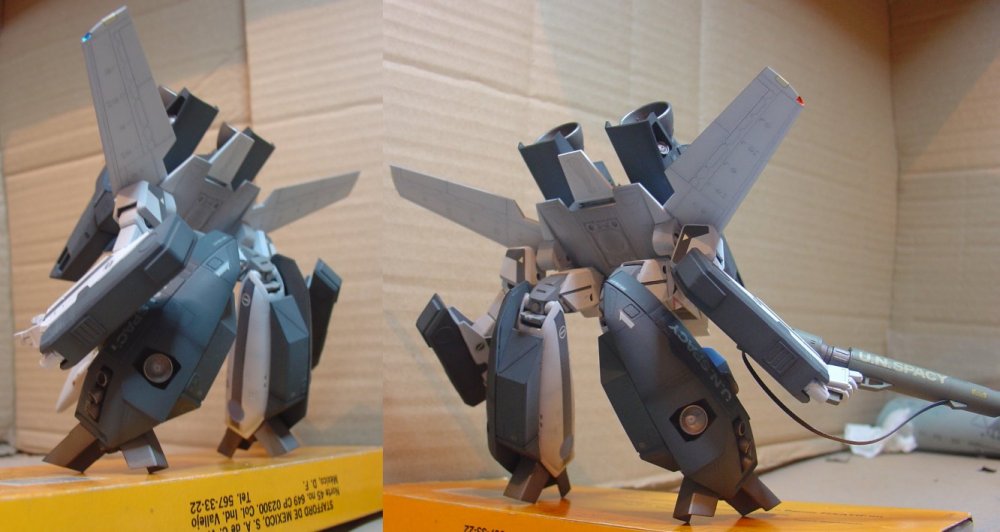
Hi again, After 2 weeks of work the job is done, it was very tired, many decals and many parts. But I liked the result. "Leading edge", I am sorry for the delay, I asume you are refering to the knee, you have to avoid the part that covers the knee so the leg can turn to the outsides of the robot, you can cut it (modify it to let the joint still turning "left and right") and glue it in place, but I decided not to add this part, at least for, in the actual position of the robot, the knee is hard to see, I will make it a base and the nose will be higher, so legs will be more straigh and the knee will be visible, that´s when I will add the modified knee part. I am doing a scrat build arm made from the kit sprues and a rectangle styrene to hold the robot in the air and pose it more nicely, I will add a wood base also, and I will also do an add to the back of the shoulders with the landing gears and probably with styrene, to give a nice aparent mechanical function to the retractable arms under the fuselage. The kit was painted with acrylic Tamiya paints, base was light gray, preshaded with black, white on the top for the craft itself and a combination of medium blue and sea blue for the fast and strike packs, a clear coat of acrylic gloss gunze sangyo, added decals and sealed them, then added a thin layer of white to blend decals to the body as I don´t like they was very saturated in colour, and to strike and fast packs I added a thin layer of the mixed paint also blending the decals, and finally a coat of gunze sangyo flat clear...I would not recommend this kind of flat as it looks like it has no clear coat...hehehe, I guess I will use semi gloss next time for finishing. I have to say I am in totally love with the result, I just love vf-1 gerwalk modes, Yamatos 1/60 v2 and 1/48 are nice, but I preffer the detail and quality of the scale models. I didn´t added panel lining for this one. Next projects: VF-0s hasegawa 1/72 half gerwalk mode (in chicken mode...leggs down, but not the arms) VF-0D gerwalk... ...I still have to figure out how to make the legg and arms convertion for the vf-0, I found a Jap magazine about this, but it is not clear, and pics are not enhough, if any of you guys ca help me with this one, I will appreciate it and make a step by step. Here is the completed model as for now:

-
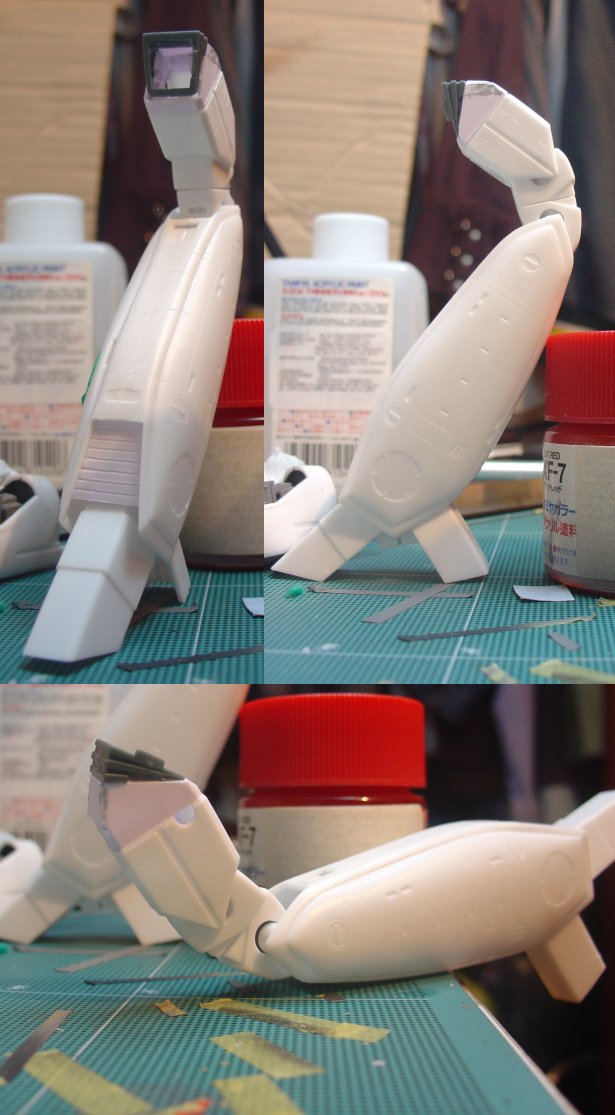
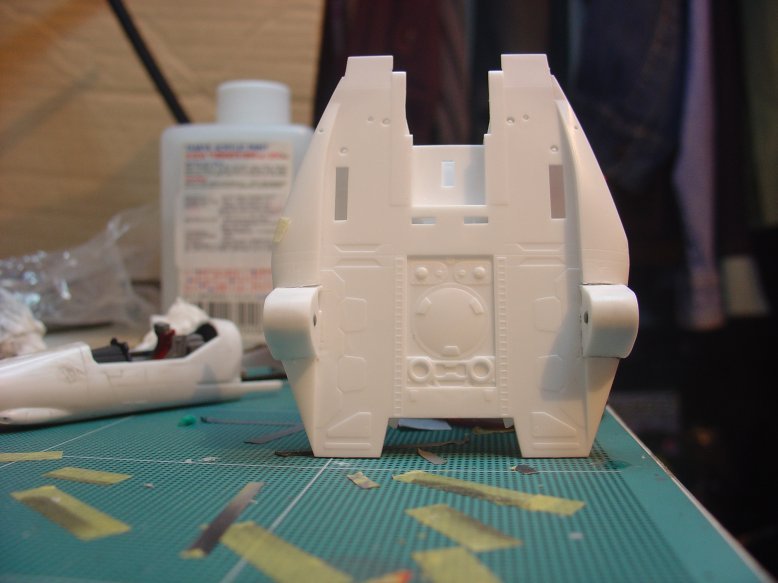
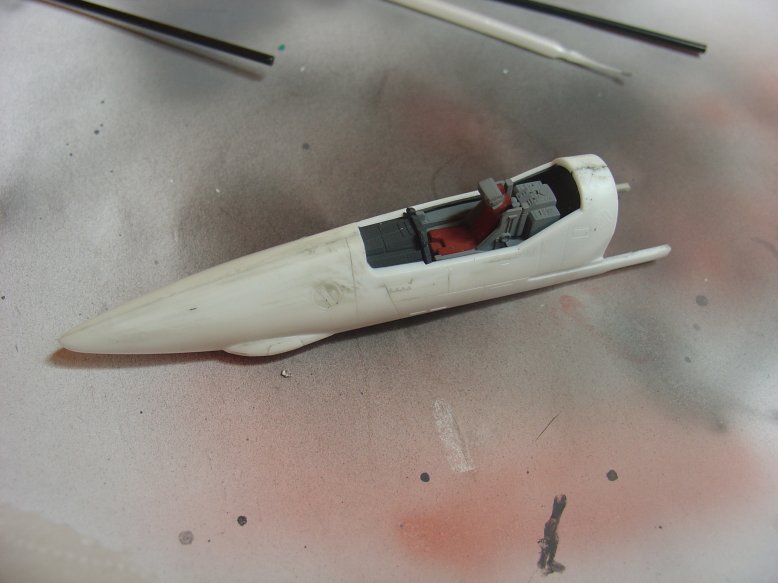
I have made cutting and convertion on shoulders to attach the battroid arms to the body of the fighter mode, some little pieces of sprue were used, they are ready to receive arms and be placed on fuselage: I have also made some modifications on the legs, I cut upper legg pieces and added some scratchbuild with a 1.5 mm styrene sheet, also, both "feet" were modified to give the leg a "chicken" position, this modification created a big empty space in the front of the leg, so I used the same solution that is depicted on a page of one of the hasegawa gerwalk convertion magazines... with another styrene sheet (with some panel scribe)I covered this space, I have to say I like it...I know this piece is not a real part of the original valk design, but hey!! this bird belongs to MY army so it will have what ever I want!!! hehehehe. I finished the cockpit, I will just add some dark washing, but I did a mistake, when I glued the back of the seat, I didn´t realized I accidentally pushed it to the front with my finger, so it is too inclined to the front, I guess this Valk model has a RED adapted "car seat", I think the original one was ejected accidentally and now it is on the bottom of a swamp or somewhere...


-
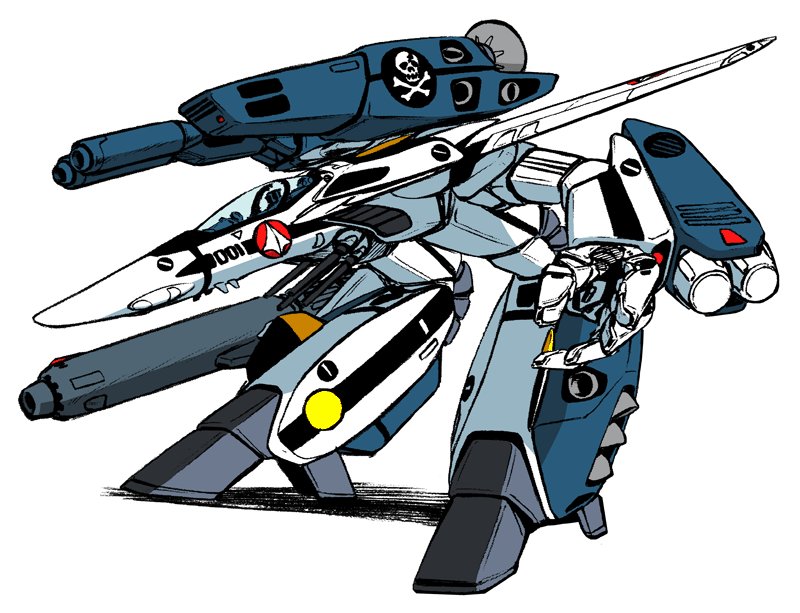
----> There is an error on the subtitle, it should say "Strike Battroid + Strike Valk = Strike Gerwalk" <---- Dear Macross World comrades, I am pleased to open my very first building and customizing topic on MWF. I am a Gerwalk Lover, I am a Lover of Hasegawa kits also, unfortunately Hasegawa has never come up with gerwalk kits, so I did my research and found scans of some Japanese magazines to make a Hase convertion here on Macross World web page (thank you), I do not understand the text, and Images are not so clear by themselves, I guess text describes them very well, but I had to figure out how to do convertions following the images and watching phisically the kits pieces. Here are the victims: And here is my goal: So let´s begin with a little description about what I am doing. P.S. I am sorry, this will not be a "step by step" because I already finished convertions.

-
Very nice!! I love build up progress threads when they are tuning up the kits with third party brands, I can recognice kotobukiya vernier nozzles??? Wich model? 113, 109? Are you going to use the stock canopy or a replacement? Keep going!!
-
Hi...I just received 2 vf-2ss kits and I found out it´s canopy its...frosted!! I can´t use this, that´s how I got this thread...but I think I´m late. Is there any chance you are going to release more of this?
-
Oh, also a PE for the new hasegawa vf-1 1/48 would be great
-
I just saw your PE posts, i got amazed by the detail of your work. I will be a fan/client of yours now. I have some questions: 1.- Do you still have available the macross frontier 1/72 vf PE kits? or... 2.-... if they are sold out, are going to make a new preorder? ( if so, how much orders do you need to make a new batch?) 3.- Are you going to make PE kits for the Vf-1 1/72 hasegawa normal and strike valks? Adding a new mod on the parts to change a little the vf-1s would be NICE. Thank you in advance.