Ratatarse
-
Posts
58 -
Joined
-
Last visited
Content Type
Profiles
Forums
Events
Gallery
Everything posted by Ratatarse
-
Thanks Made in one week, no 24/24 nor 7/7... I would say, about 48h of real work, not more, all inclusive
-
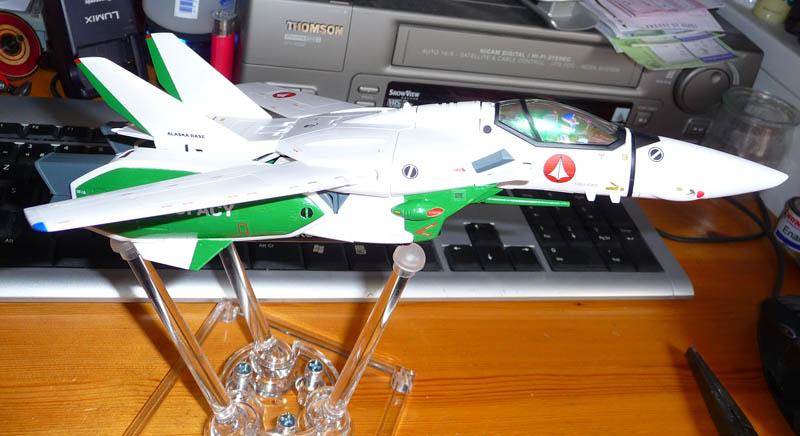
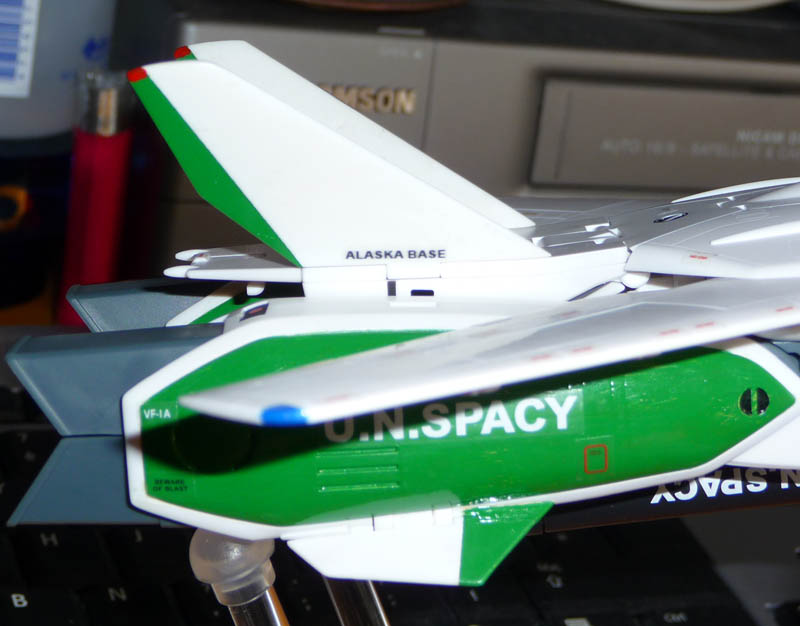
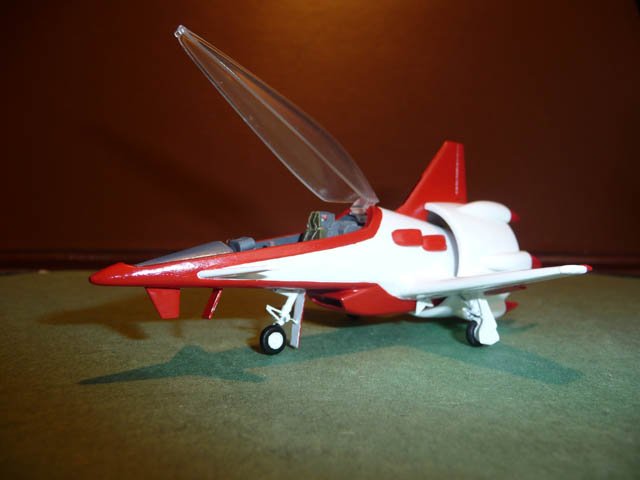
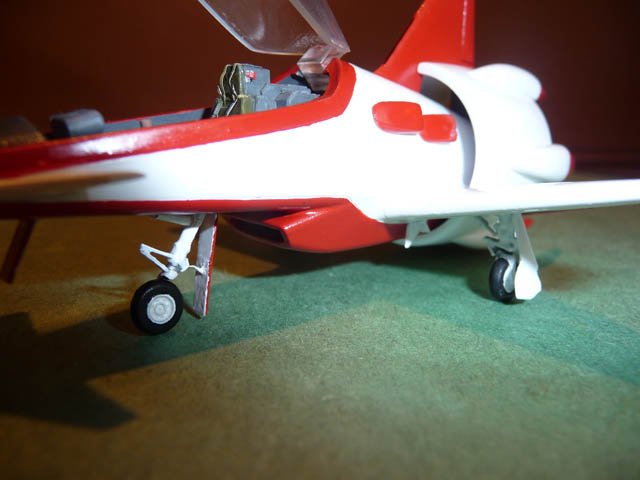
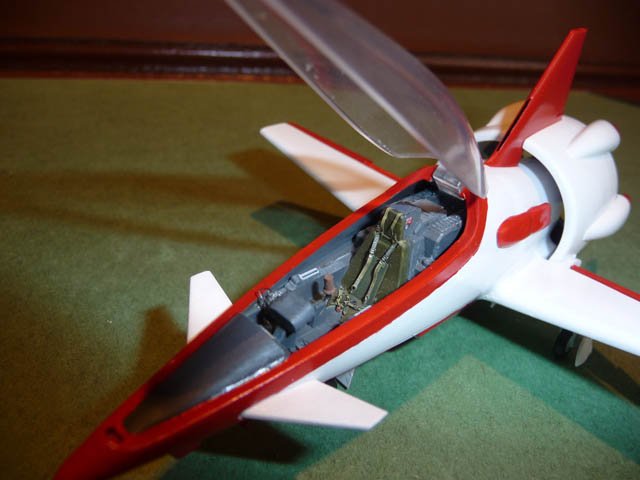
A day after the VF-1T (followed the day after by a panel lining on a friend's VF-1S 1/48), I made this little repaint of VF-1A TV to match the Alaska Base one, as seen in Macross during Earth Return episode. You can see it now : Personal Alaska Base Decals, as I've done for my VF-1T (and for my friend's Nylcbv VF-1A 10 Thunderbolt III) Basis is a VF-1A TV Kakizaki, different scheme on tail fins& shoulders Paint is handbrush as all other customs I made


-
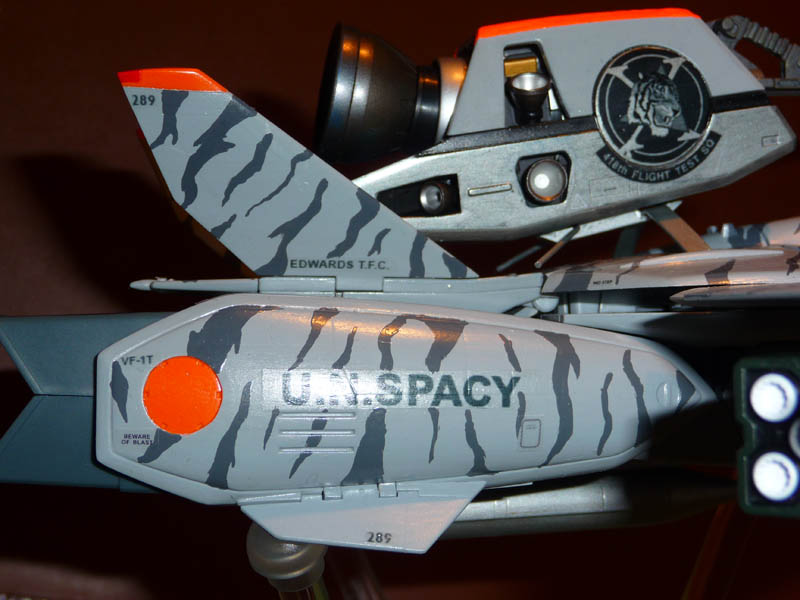
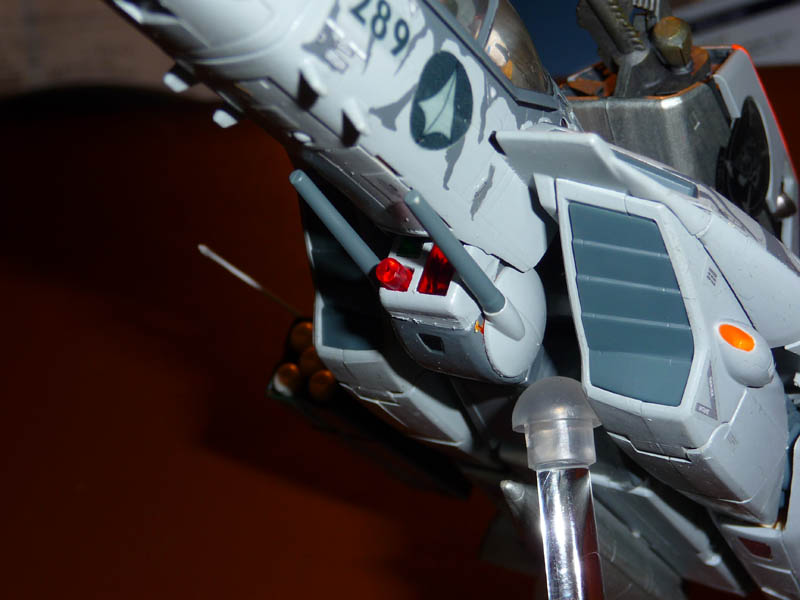
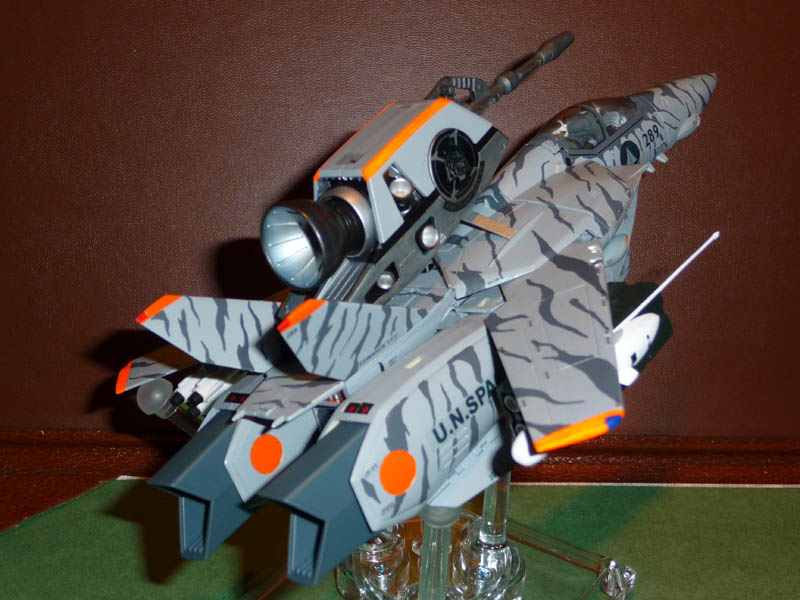
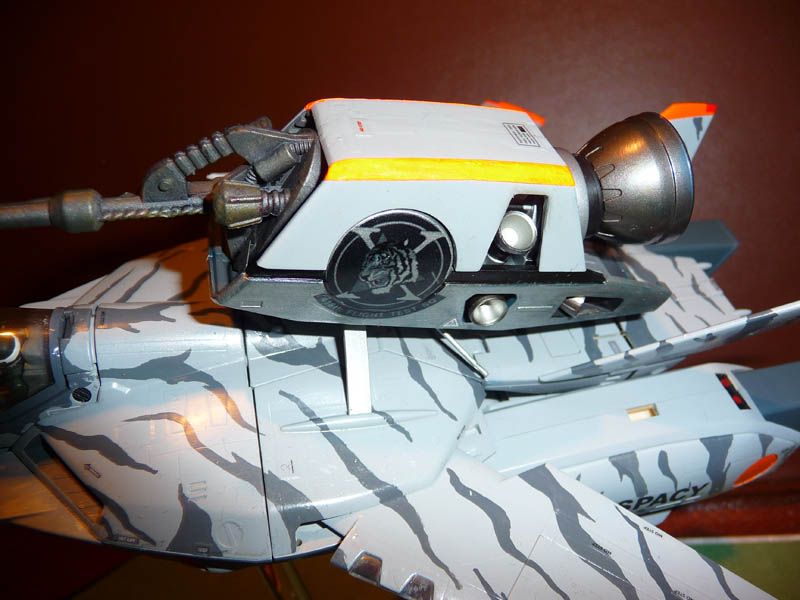
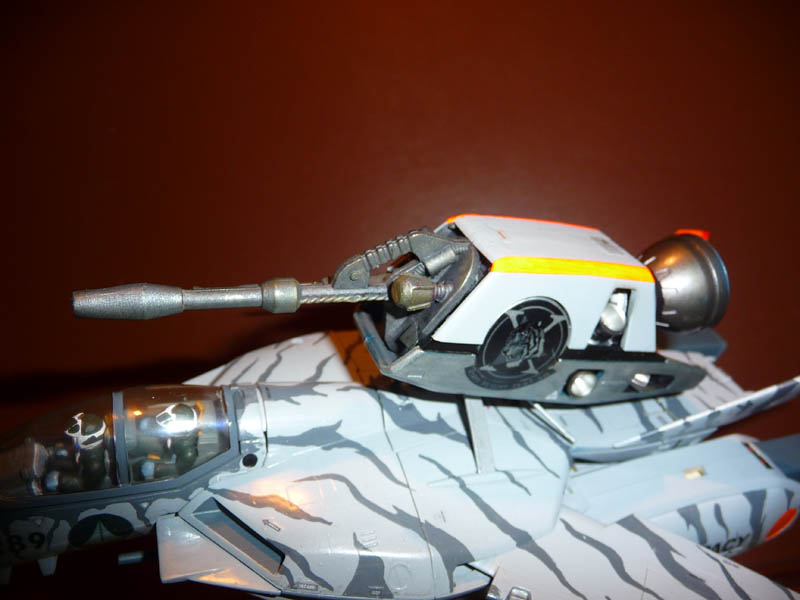
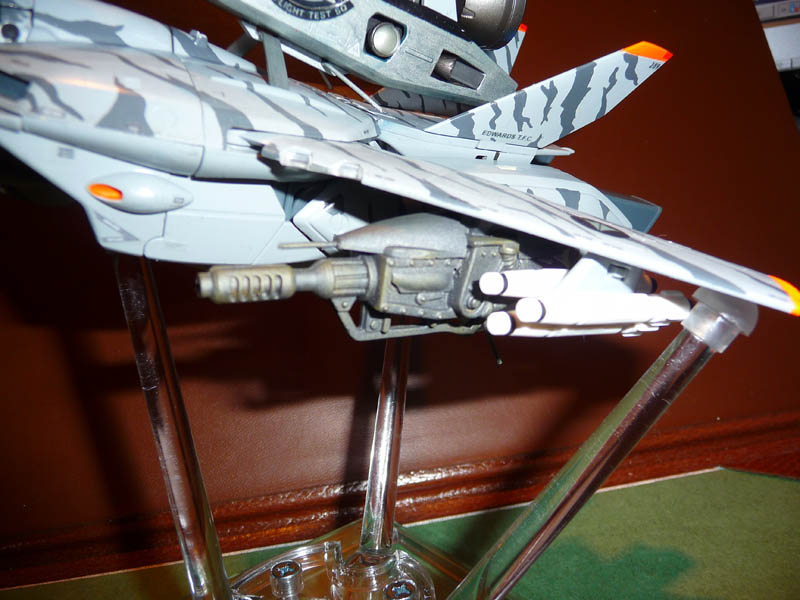
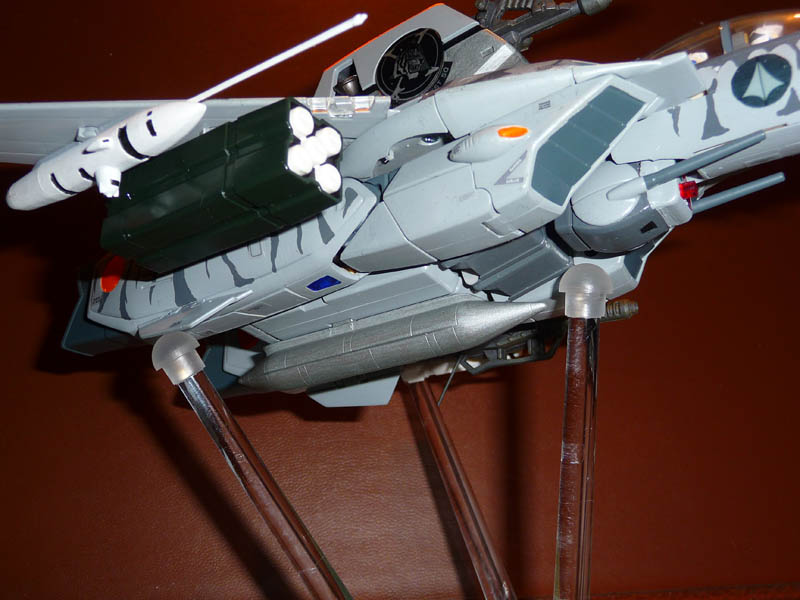
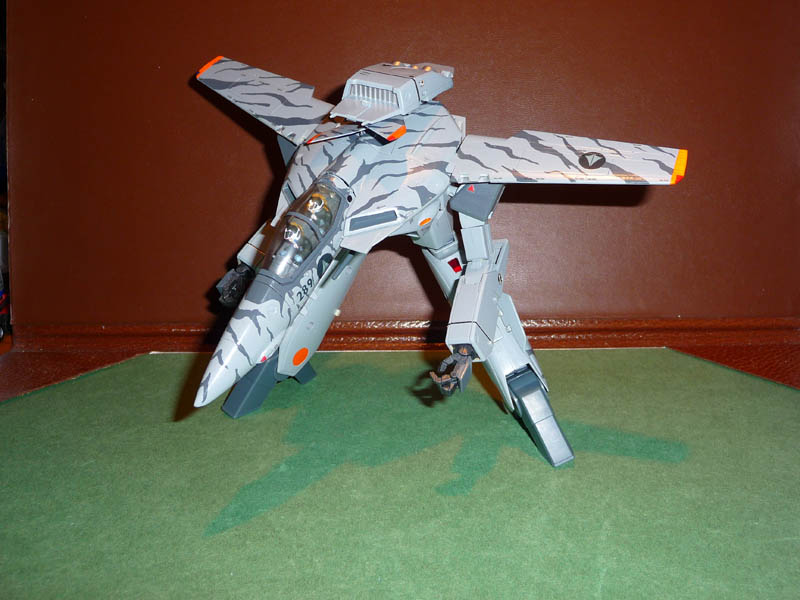
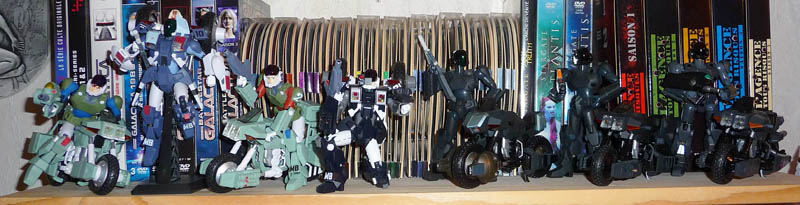
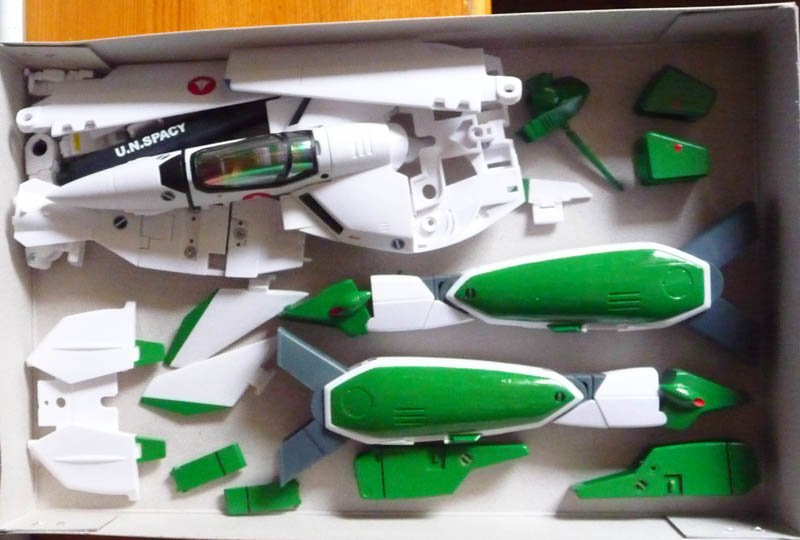
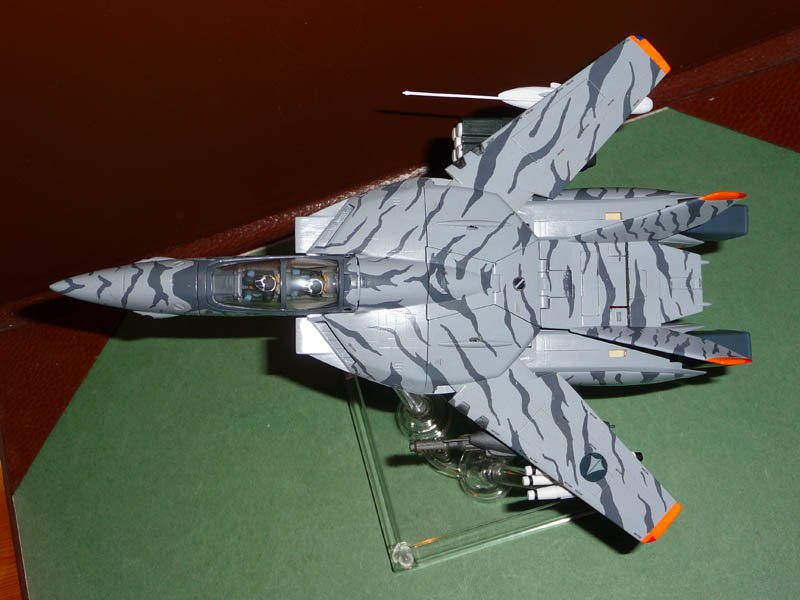
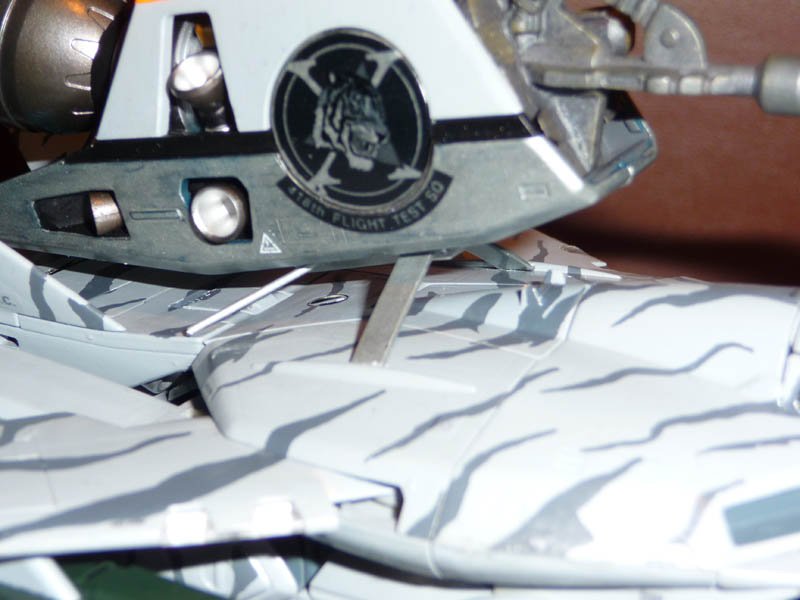
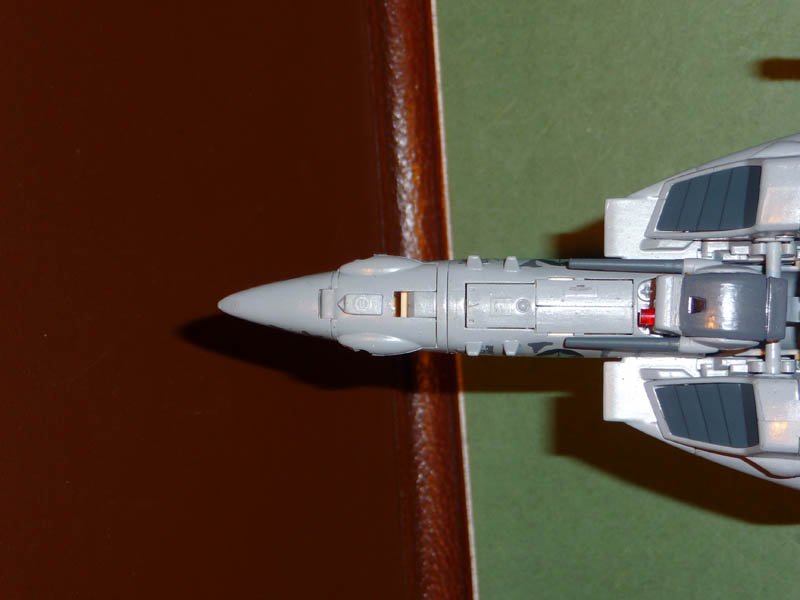
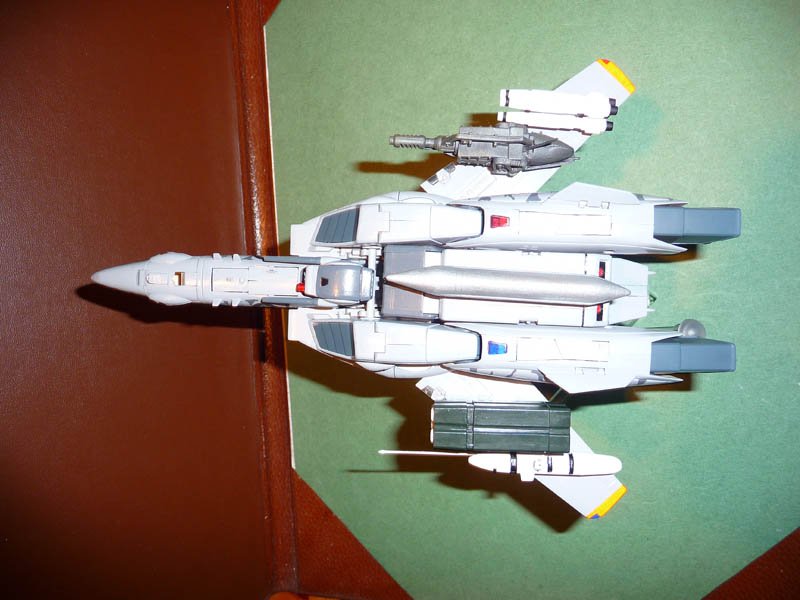
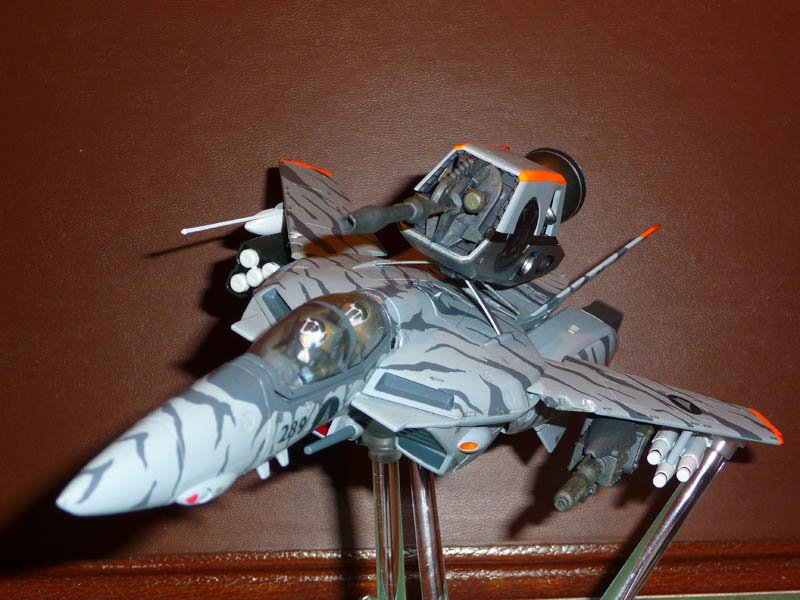
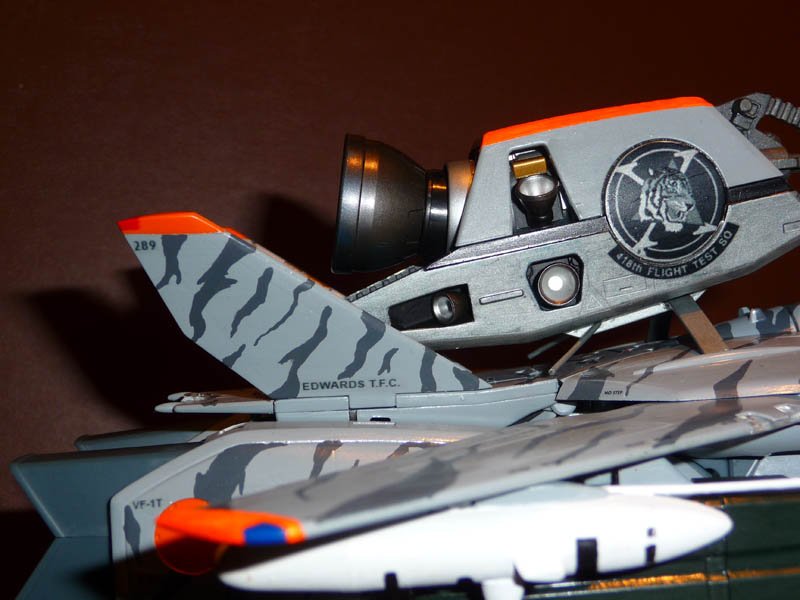
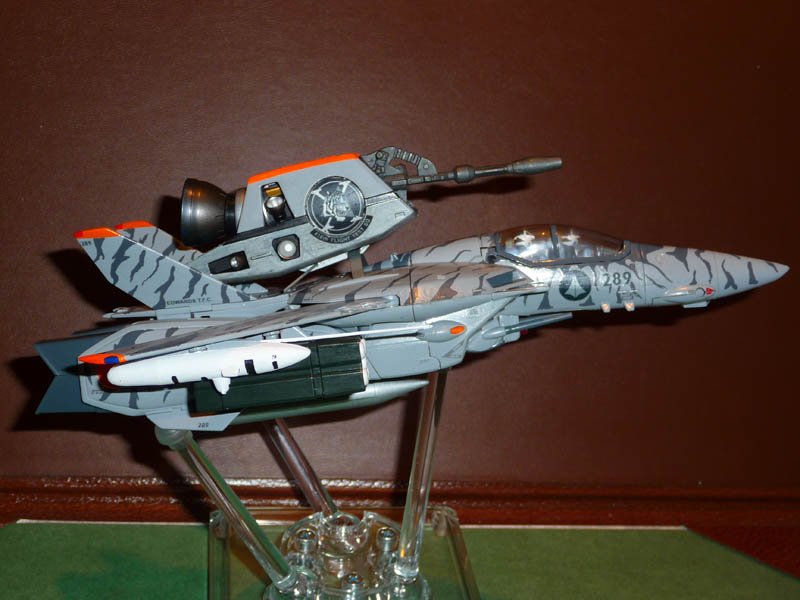
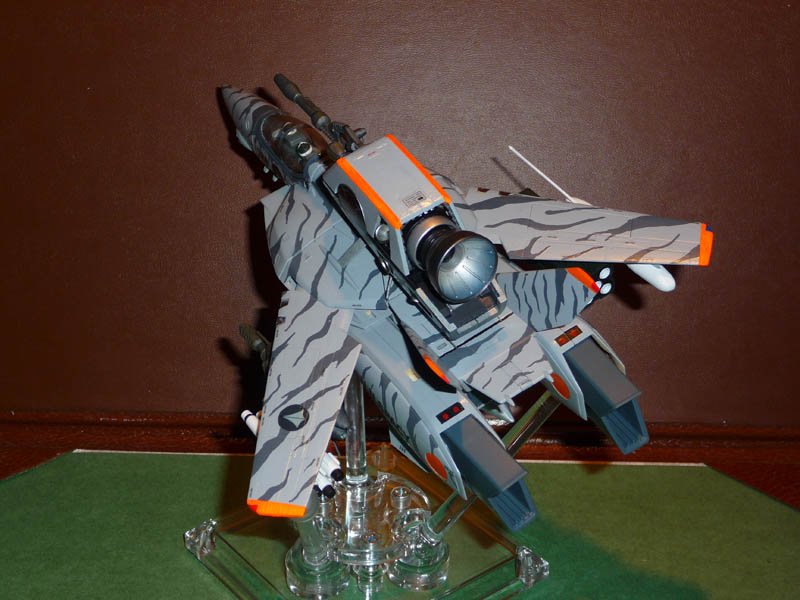
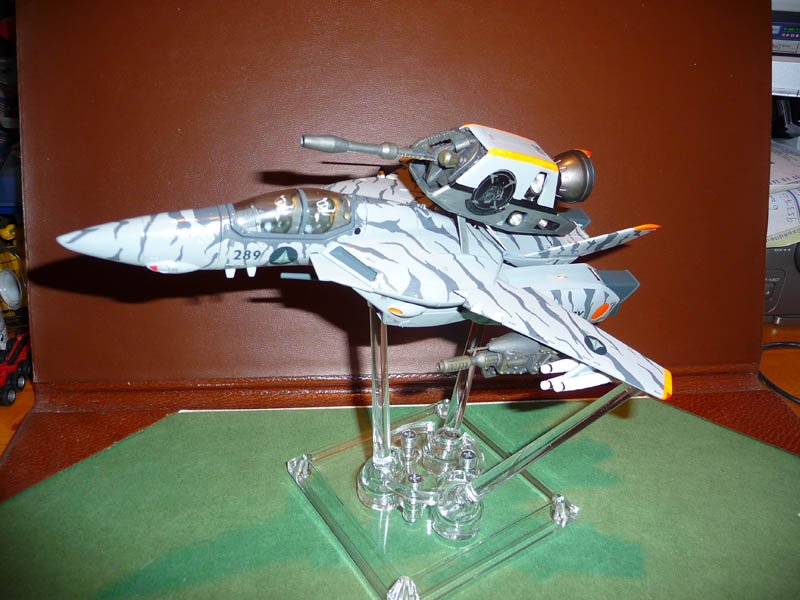
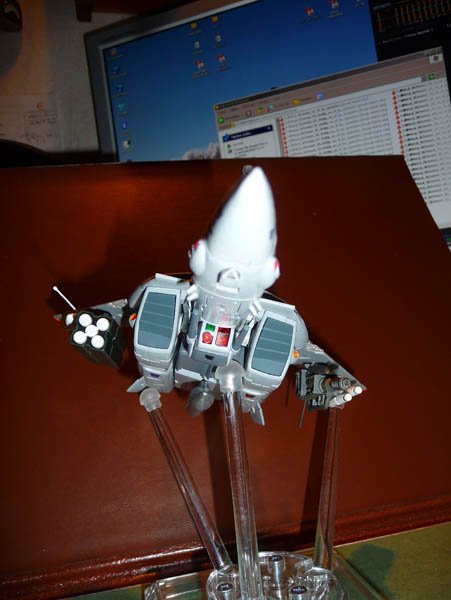
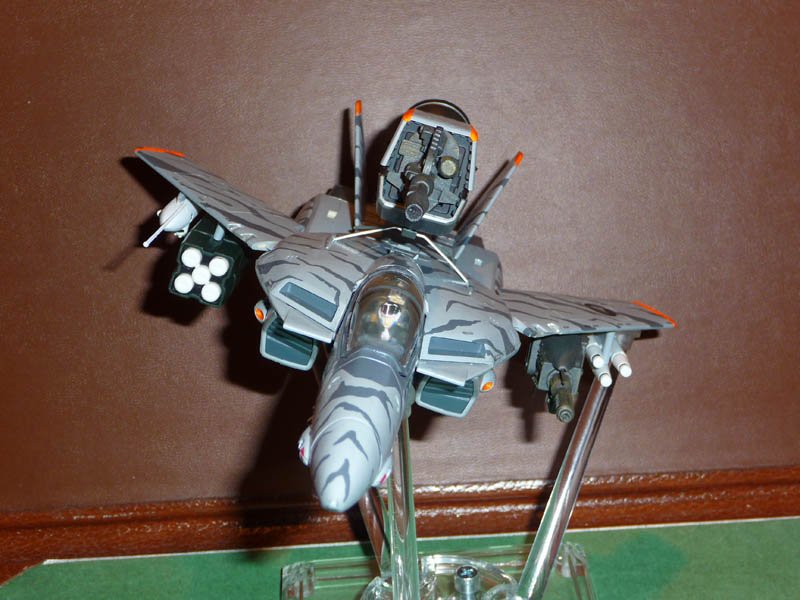
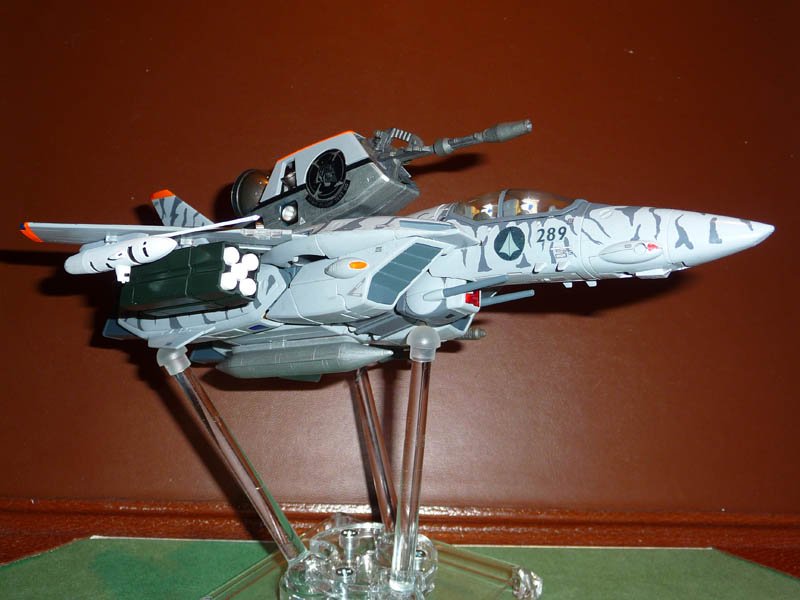
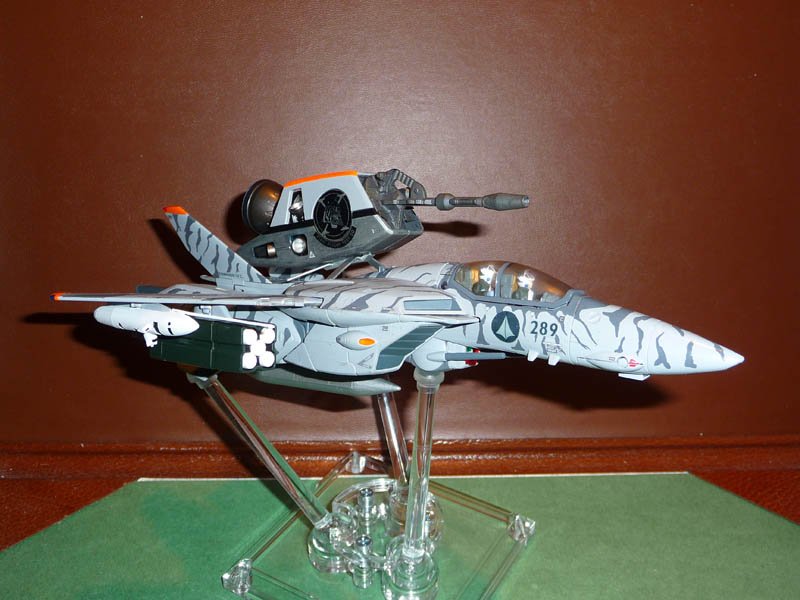
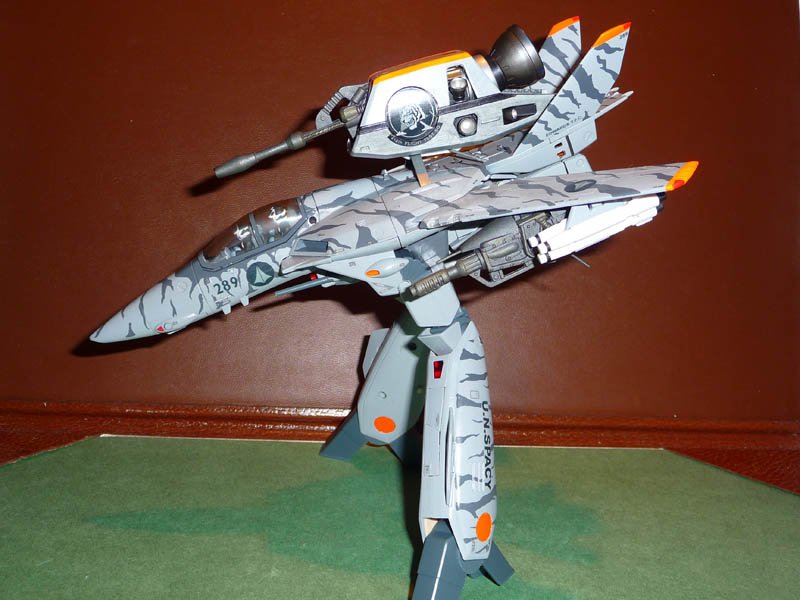
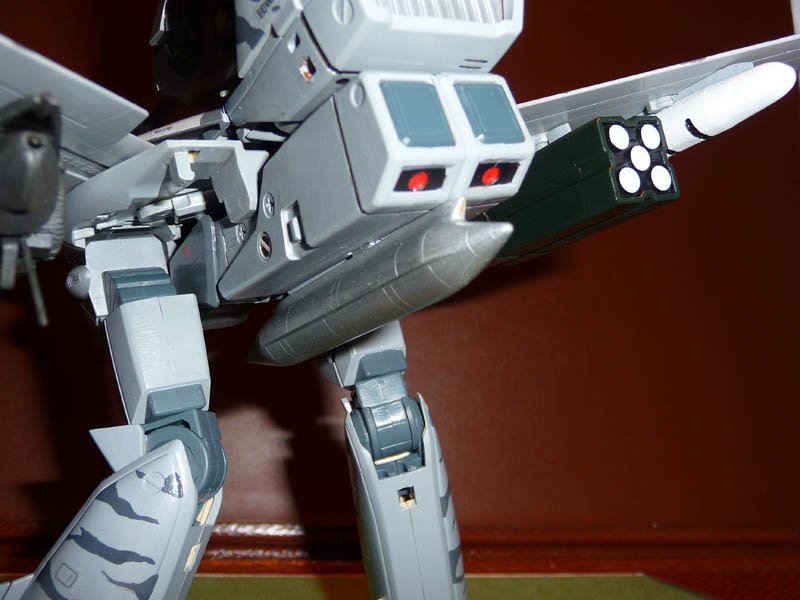
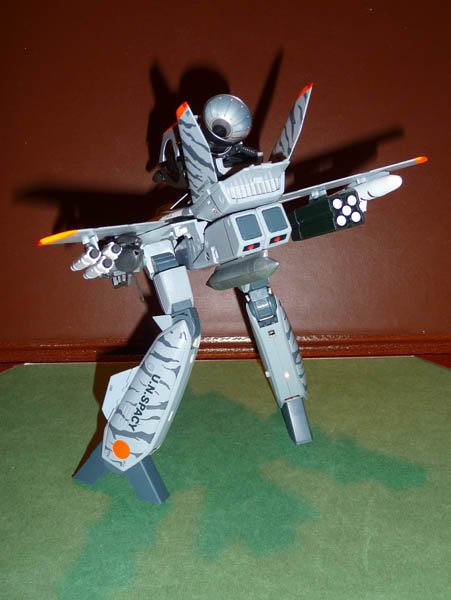
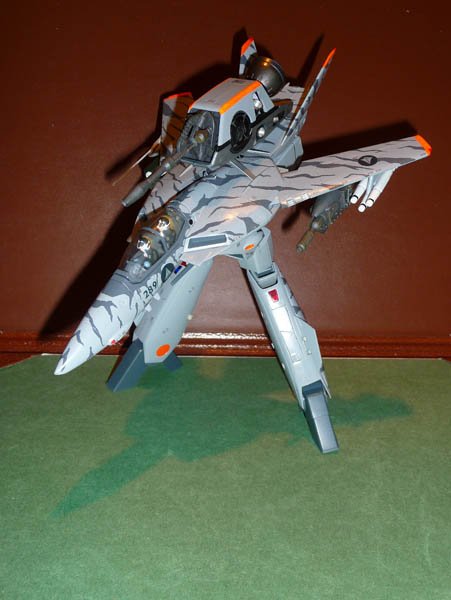
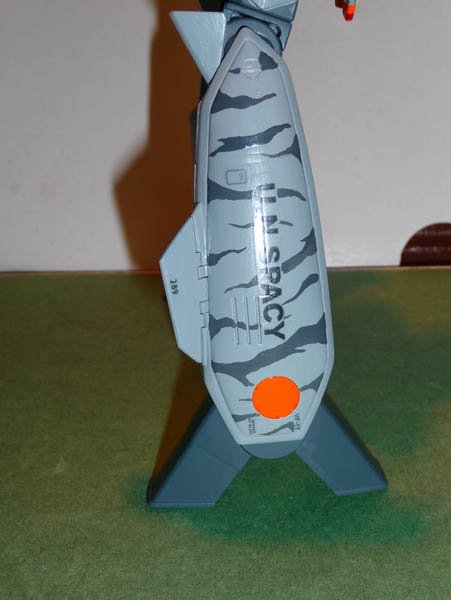
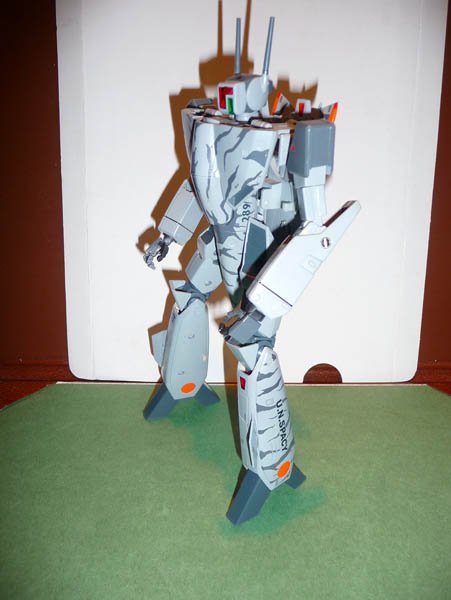
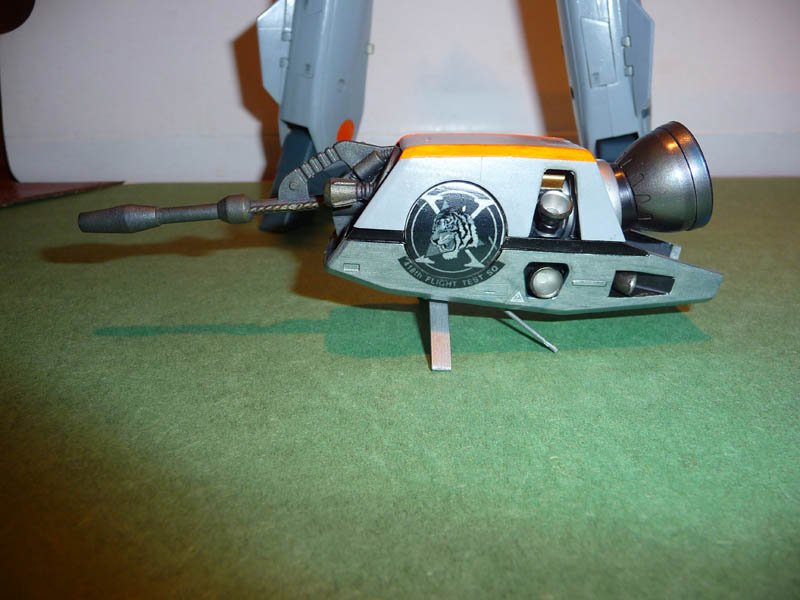
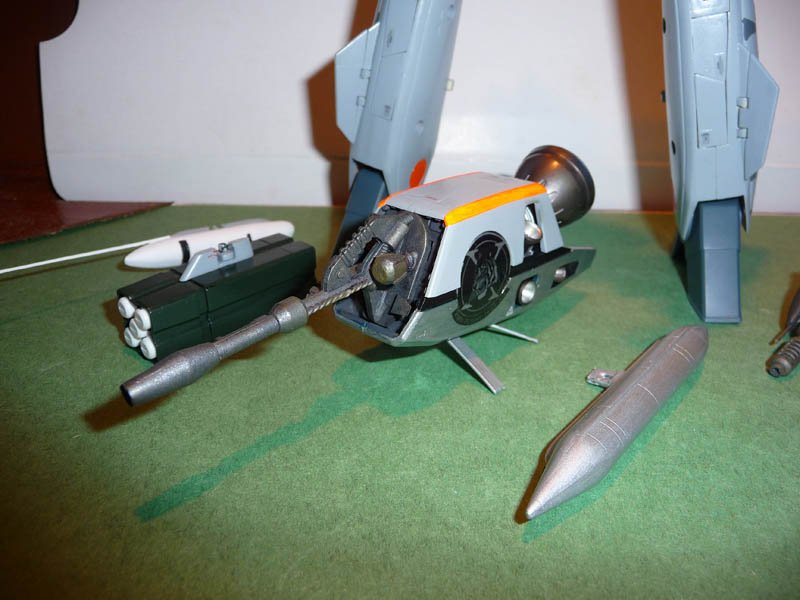
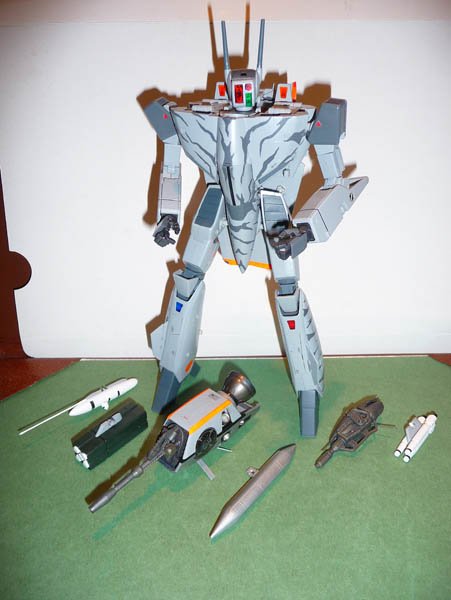
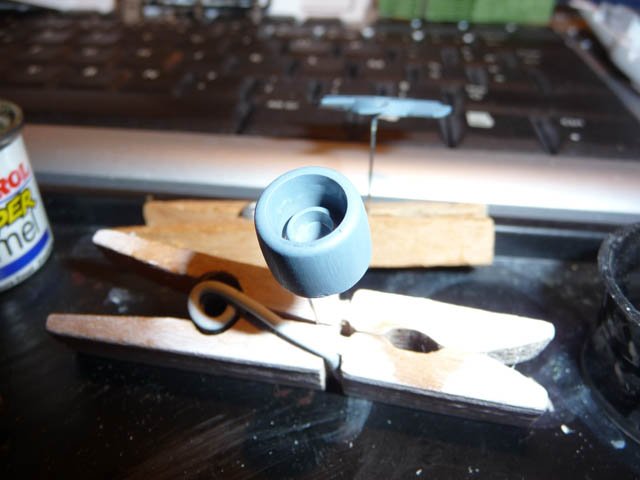
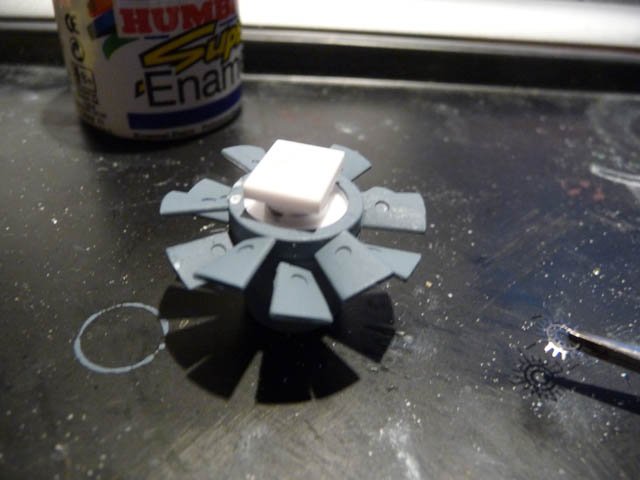
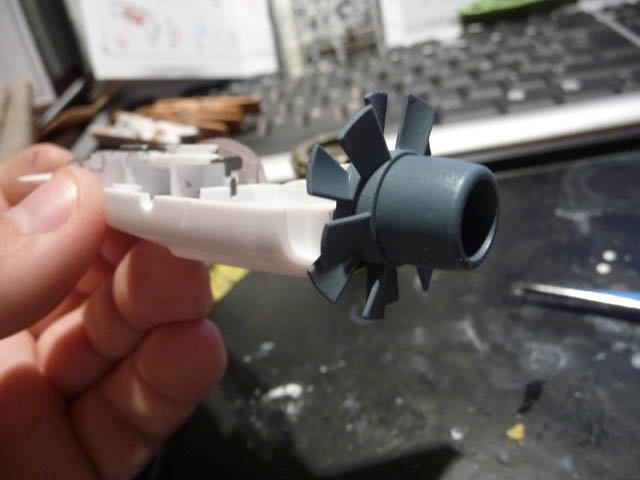
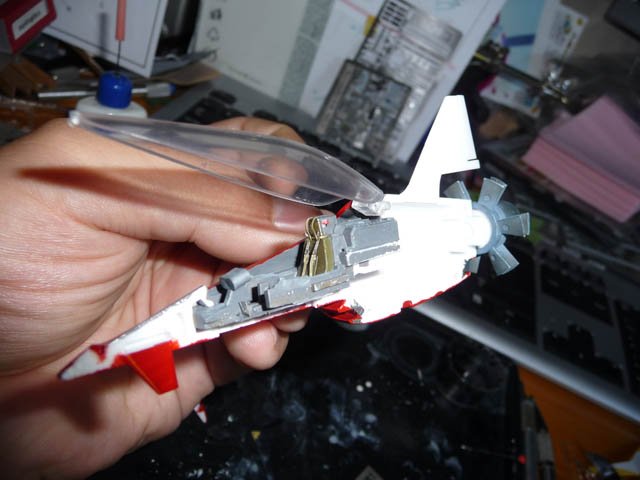
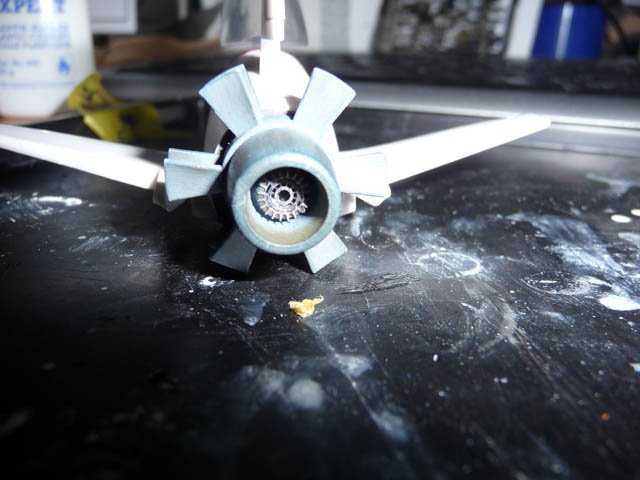
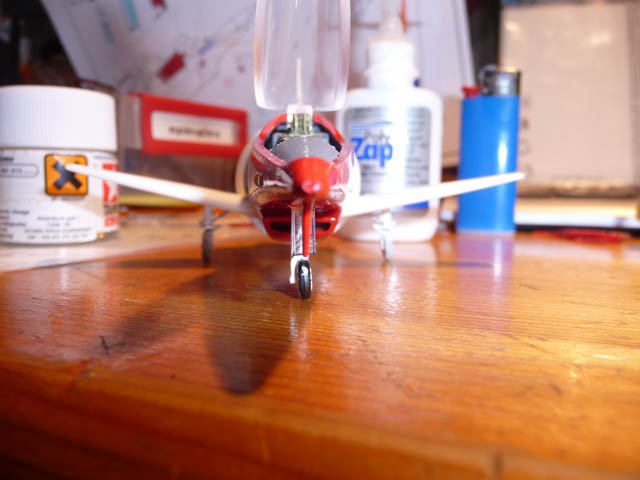
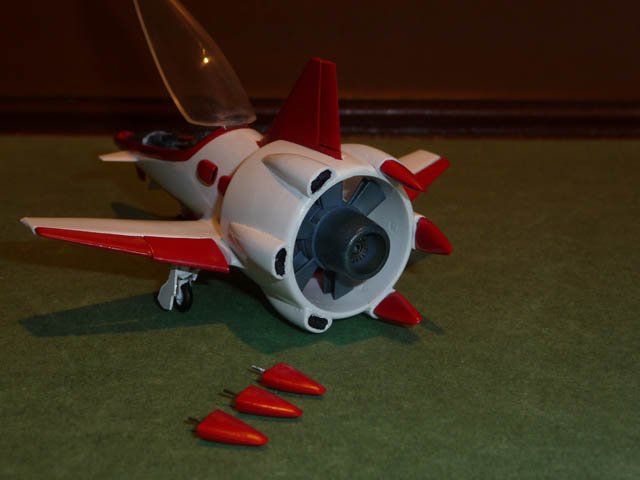
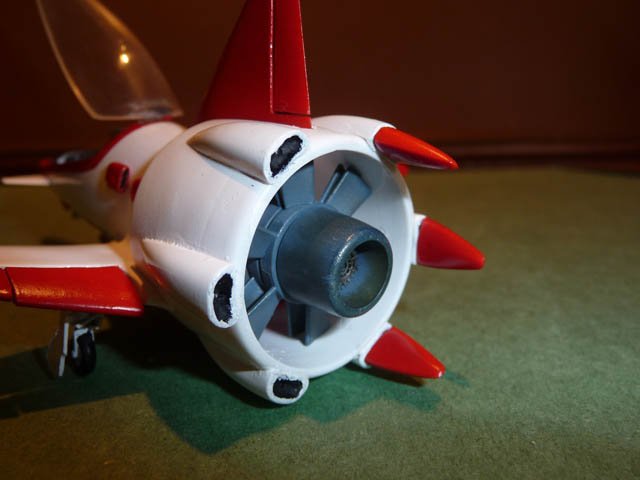
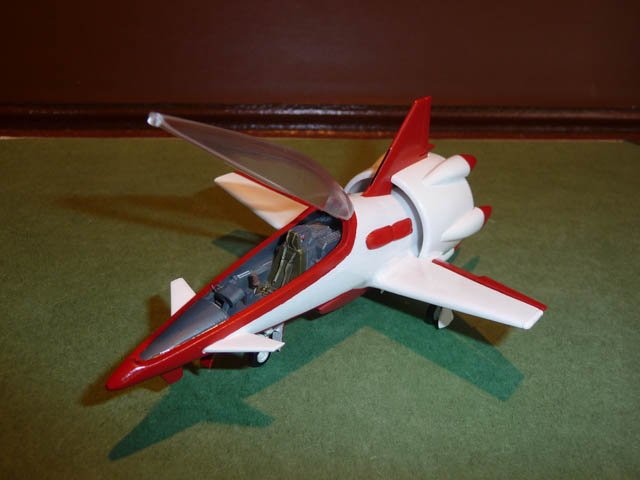
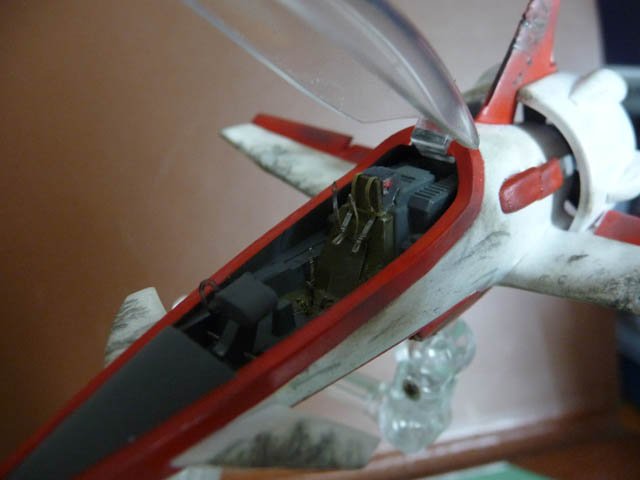
Following my VF-1Z and during makeover of the Nemesis ultimate soldier, this is a small custom I made 2 weeks ago... followed by another one based on VF-1A TV A weapons program as the VF-X has necessarily its program of testing, evaluation and development of weapons. This was attributed to the 418th squadron flight test, the "Tigers", based at EdwardsT.F.C. An aircraft was specially designed to analyze the results and arms, the flight parameters, designating targets. This is the VF-1T (T for Tactics). It carries a laser designator and a FLIR on the nose for monitoring field assets, a laser optometer in the head, and an engineer on second seat : yes, it is a two-seater CUSTOM He was armed with : - An ultra maneuvrable monobooster HMB, fitted with an automated laser pulses with presence detector, which, coupled with the double barrel will became the dual strike cannon; - A basket of micromissiles wich will become standard on VF-1 - A rack of 3 Missile, which also have become a standard armament on VF-1 - A high velocity automated airborne cannon, to be modified and adapted on the chest of Tomahawks, here in its airborne prototype - A pod information TTSR improved to collect data from fire and flight during shooting tests - A belly fuel tank giving the necessary autonomy to the device, due to the use exclusively in the atmosphere with booster, in place of the gunpod wich was not planned yet. This device maintains, however, the offensive qualities of the YF-1D which it is derived from. But ... you may want to see it, no ? - Fighter Mode Focusing on Specific Equipment made for this version : 418th Center Booster Specific VF-1T Head VF-1T, Edwards T.F.C. Belly view Laser + FLIR under nose cone Needed to drill into the back of the valk to put removable booster fixations Without Center Booster, please see the Tigers 289, all paint is made with handbrush, NO airbrush nor spray paint ! - Gerwalk mode - Battroid mode Head Detail Leg detail Armament detail And then, the day after, I made the Alaska Base VF-1A you can see in an other topic, just hottest


-
Thanks ! I've done 2 other pure custom since that, but doesn't want to share here. One is an alaska base VF1A, the other is a VF-1T based on the VF-1D with radical different head face, and unique equipment. Made also a panel lining on a 1/48 Super S of a friend... quickly done. I'm still working on my Nemesis, too.
-
not so dramatic, as there is no pro here apart from us I should go running now, I think
-
> SchizophrenicMC : I have no need of carrier crew to guide me... because, when the zentradi starships are blowing up behind me, the whole carrier see me > Dédé Ivanov : No, the nemesis is NOT a yellowing QR... it's a Ratatarse's QR, with overwhelming weaponry and no stealthy ability... more "glow in the dark" than "stealthy
-
Thanks Pals 'Workin' on his nemesis right now !
-
I still don't know if its name "monster" is due to the matchbox molds version (exception made of customizing work, Mr B ) or if it is because it has dark green cannons
-
Awesome work too my friend ! ITF for all others Comme Bach, Motard ou Bête-Au-Vent, here we come for the symphony
-
Hihi knowing your skill it would be great, I'm waiting I want a SDF1 like yours...
-
> Excillon : 1 : THE GBP is too heavy for an ambush device and too low for high-efficiency combat with gatlings. The GBP is for missiles only, has it is armored only because if the first shot doesn't take the enemy down, it must have to be THE target of enemy fire. The gatlings provide nonsense firepower, the third booster provides high speed to take over enemies and fire from multiple positions in short times. 2 : As SchizophrenicMC said, it's a Z because of duties he is made for. As the S head was the most powerful head available, it was naturally put on the Destroyer version. VF-1D already exist, so the Destroyer became Zerstörer, German word for Destroyer. And Z is the end of alfabet, the last evolution of VF-1 > honkhet : I needed a flash to teke those picture, as it was during nightime I finished this custom, and those are the first shots. Other will be taken, in daytime, right sunny weather, within my collection > Max Jenius & SchizophrenicMC : I had the idea to paint it in silver & black Ferris Scheme (for those who don't know ferris schemes, look on google ), other paint colors could be great too... BUT you don't make ambushes in deeper space with an italian horn, except for Ice Trucks So I did the darkest scheme, with the minimum low vis markings... and even it's the sheme is boring, it's classy... And I don't mean anything stupid when saying USAF was the first all-black planes user in the world... As the SR71s, The U2s, the nightfighter of Korean War and Vietnam war, the F117, etc. Designed to be stealthy in the night... so you got it, the Z is stealthy in outer space > nylcbv : Stiouuuuuuuuuuuuuuuuuupid Mouhahahahahahaha > All other not mentionned : Thanks for looking
-
Glaug is little target, I prefer let it to normal pilots for their training
-
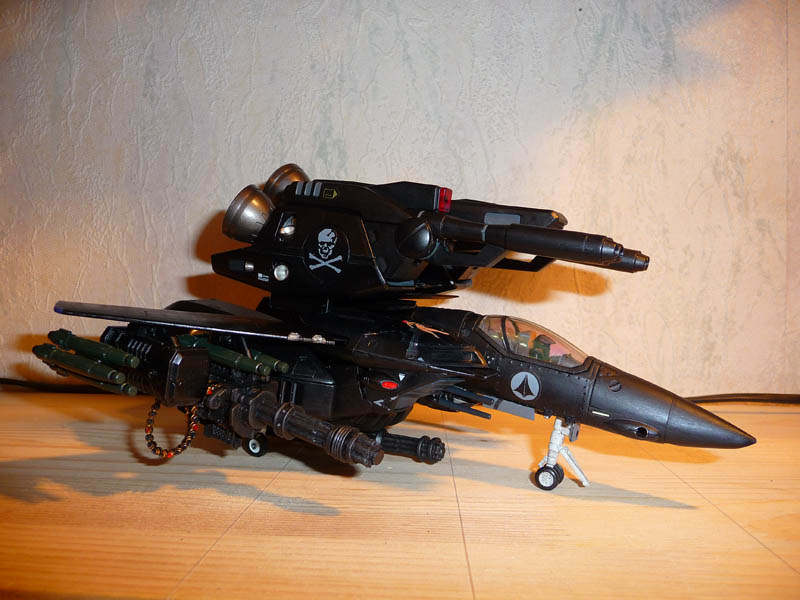
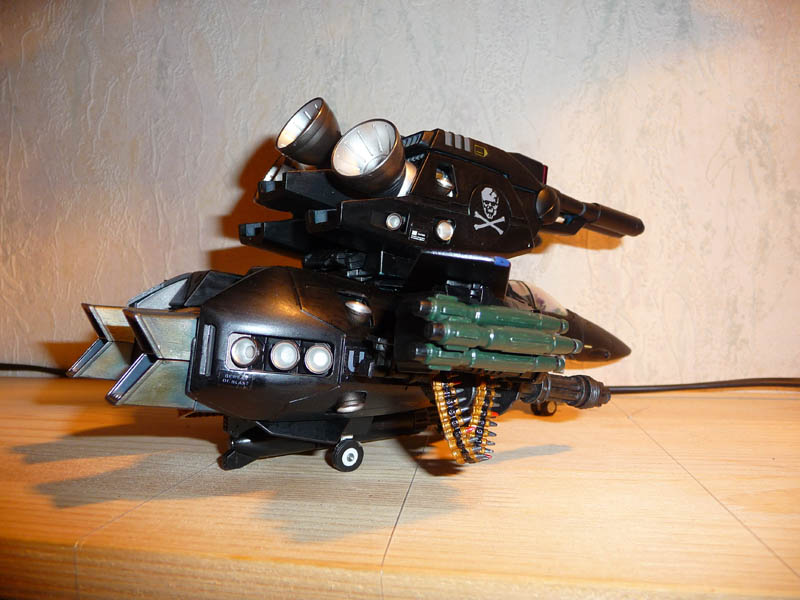
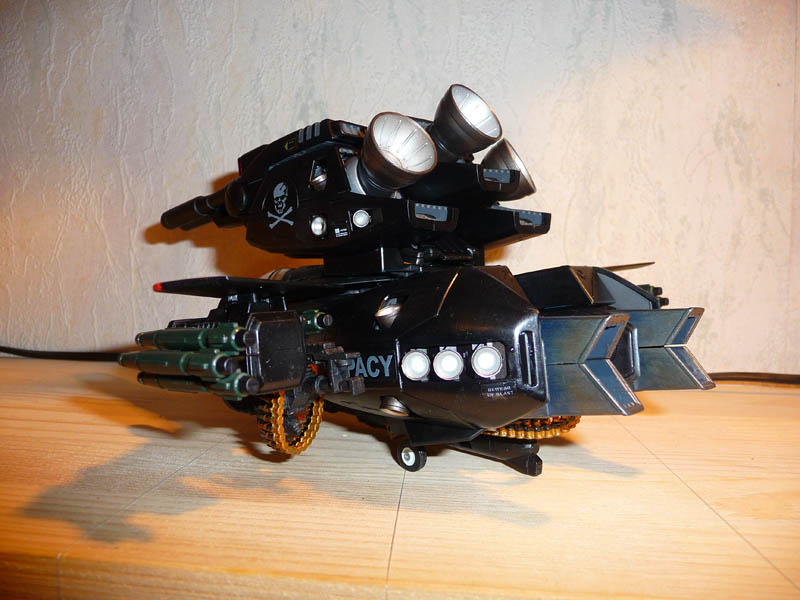
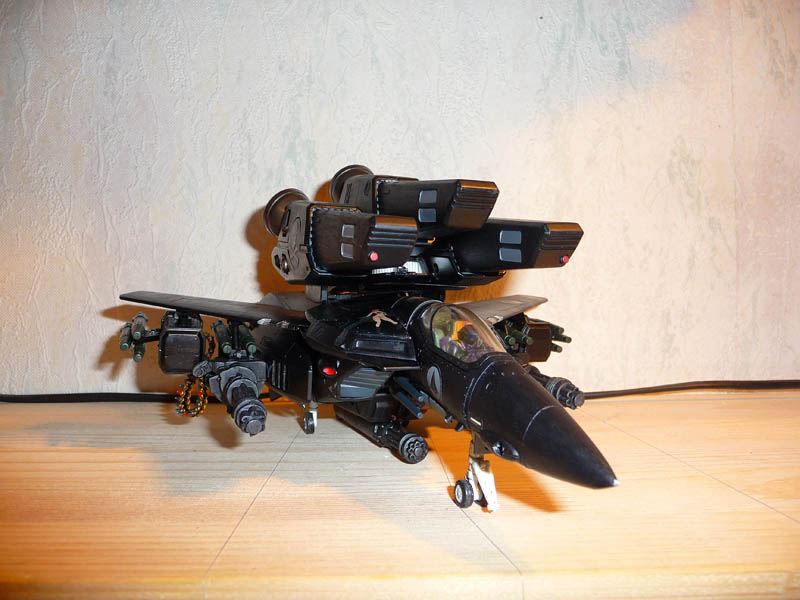
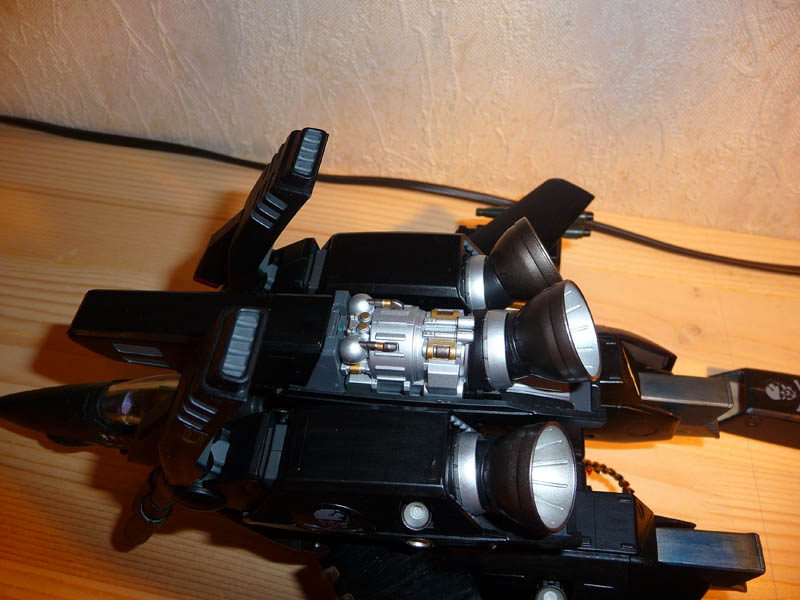
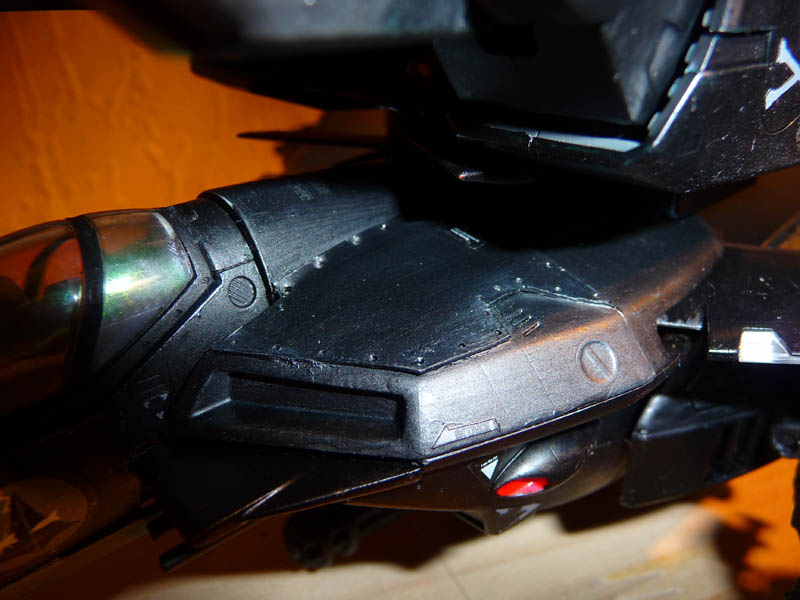
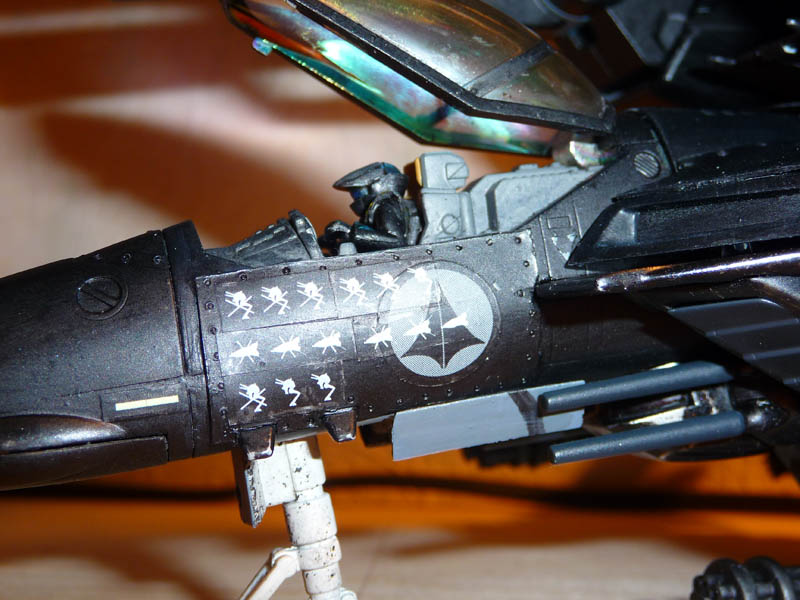
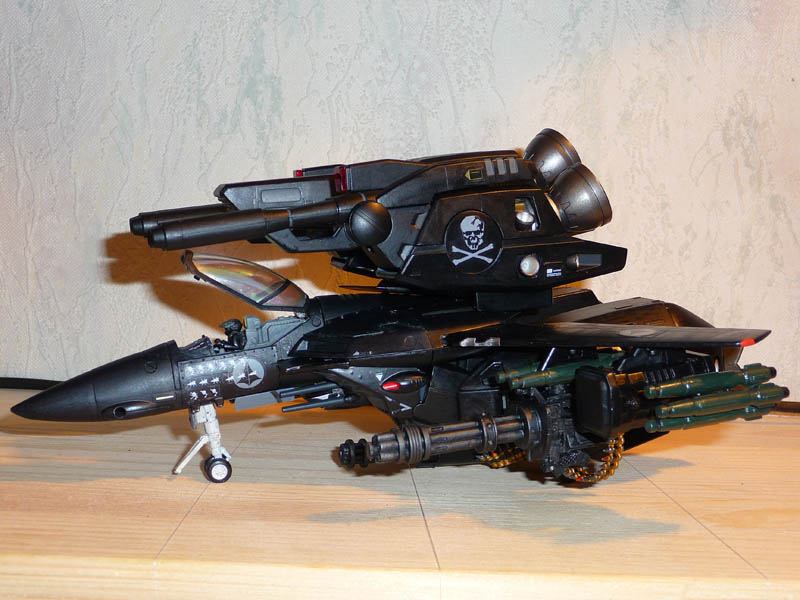
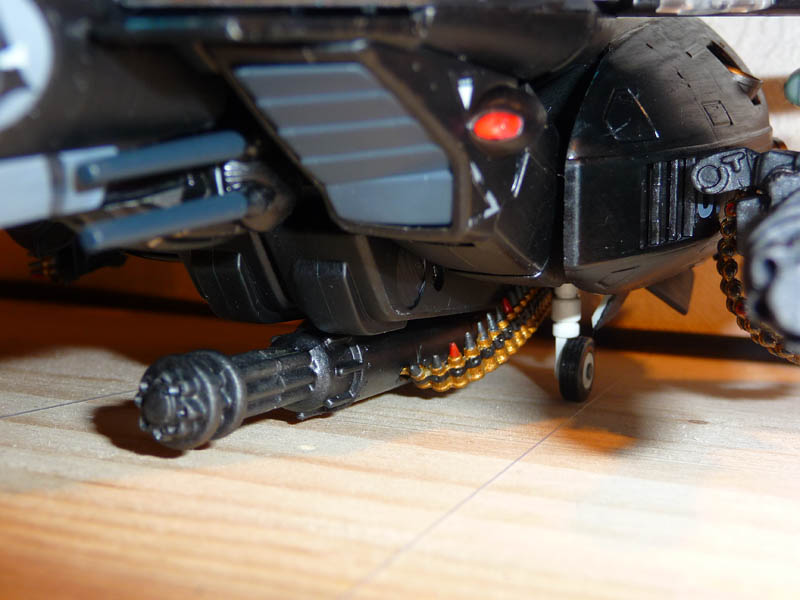
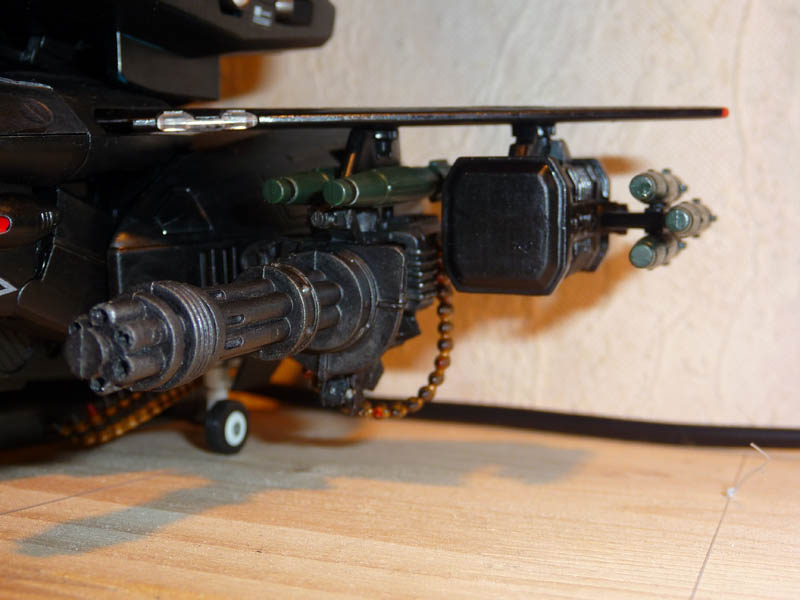
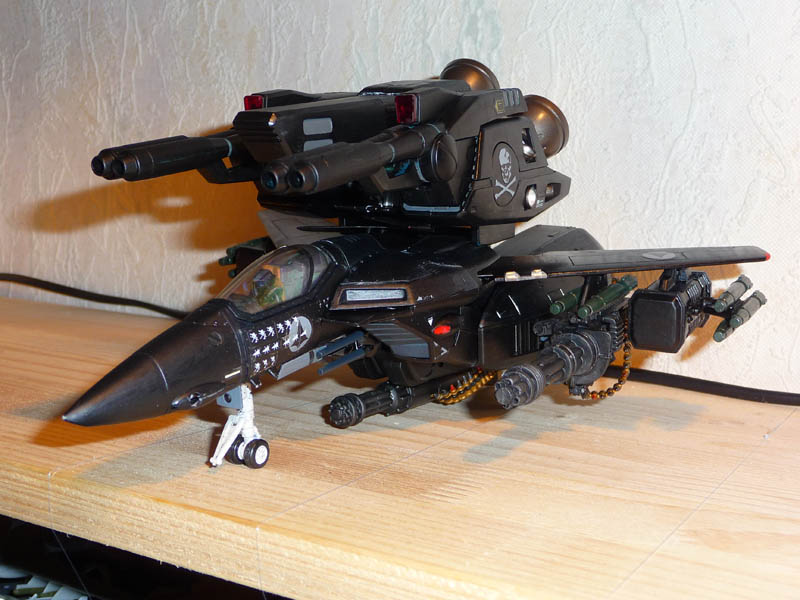
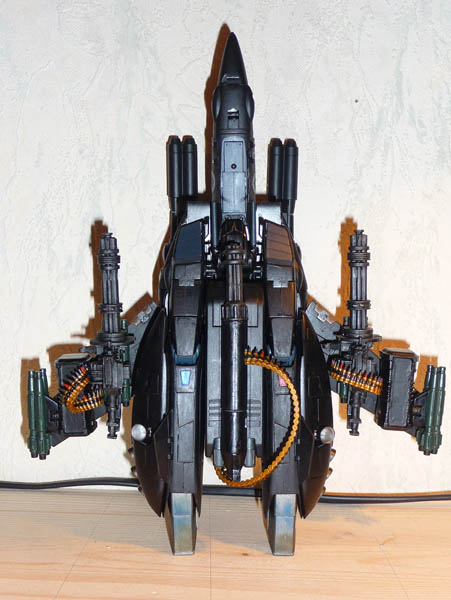
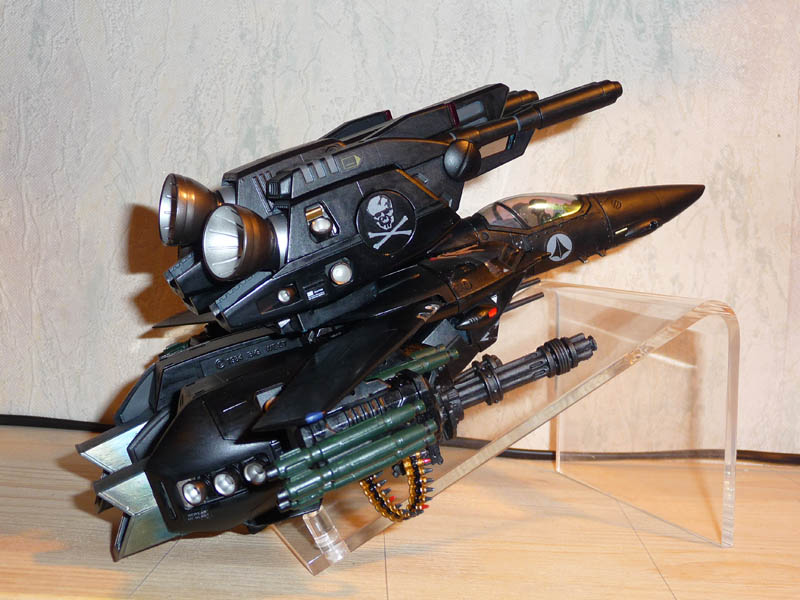
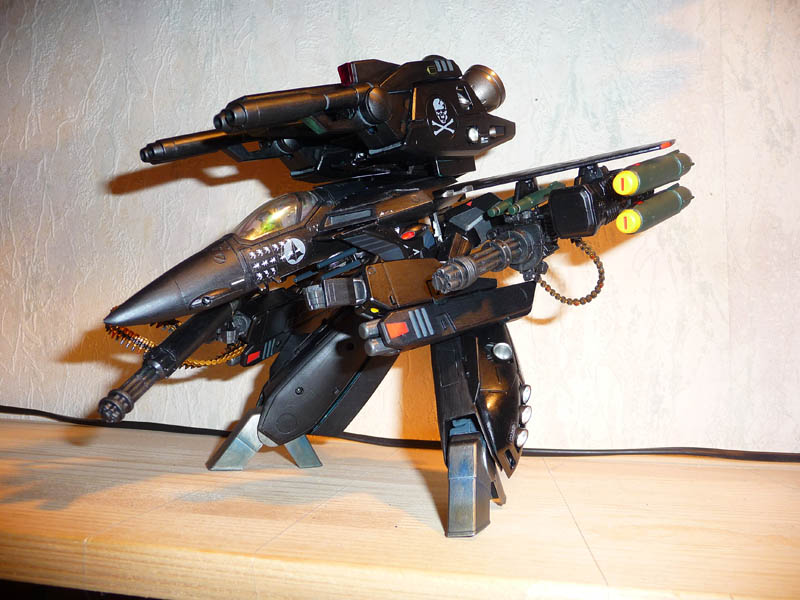
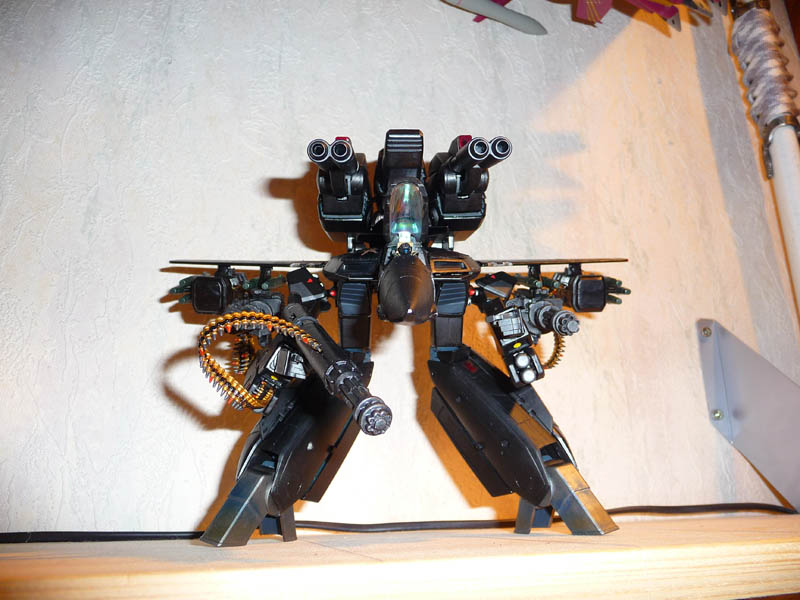
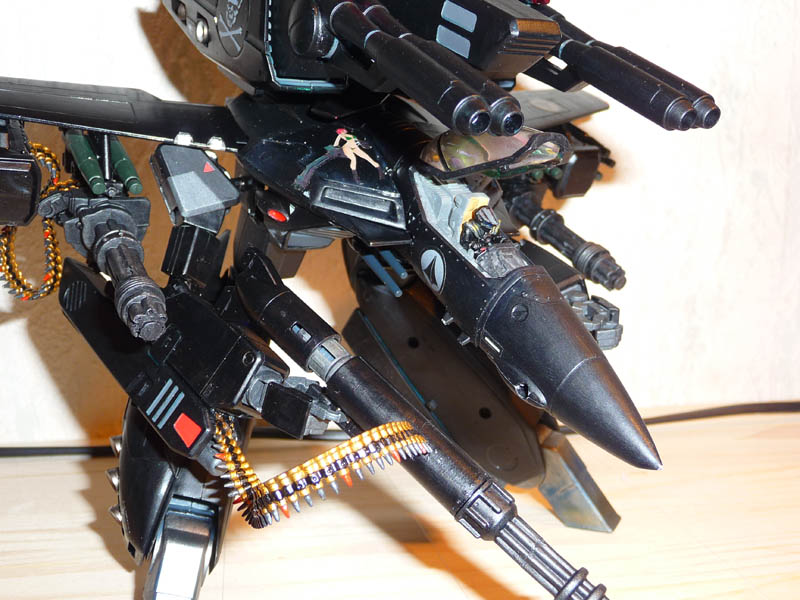
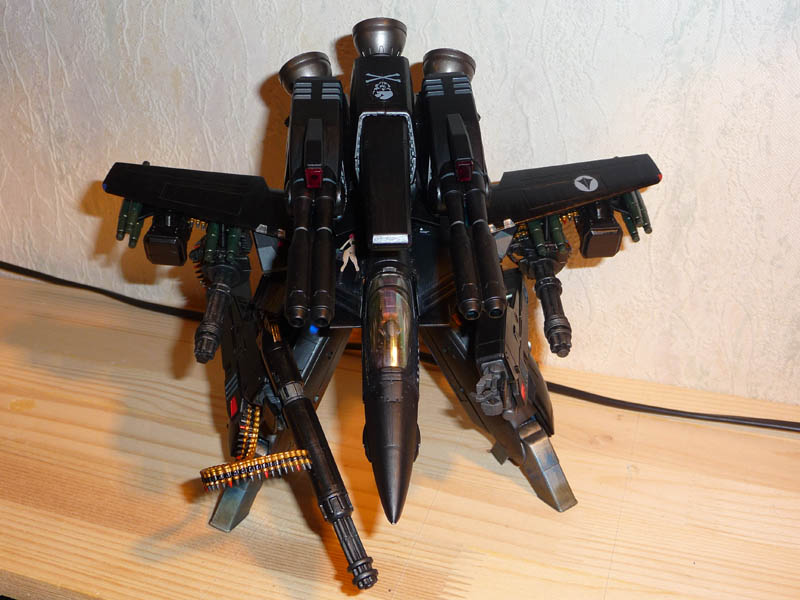
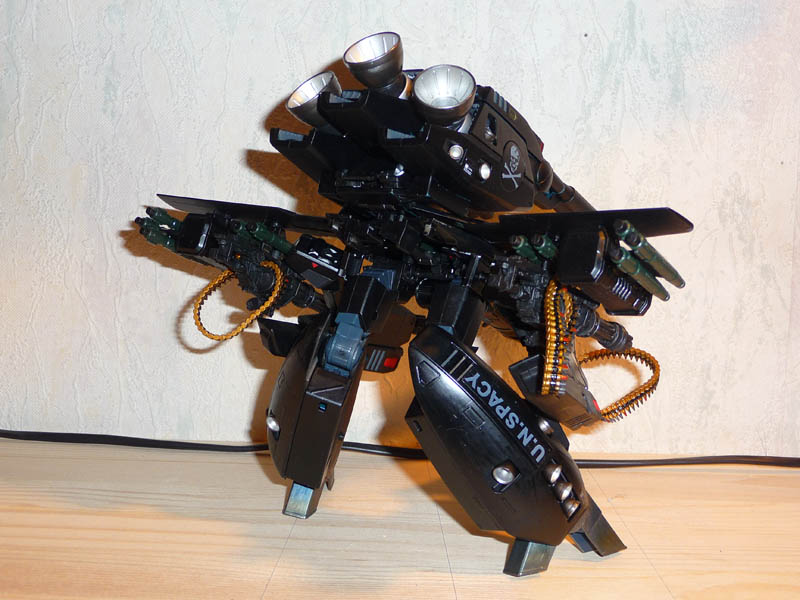
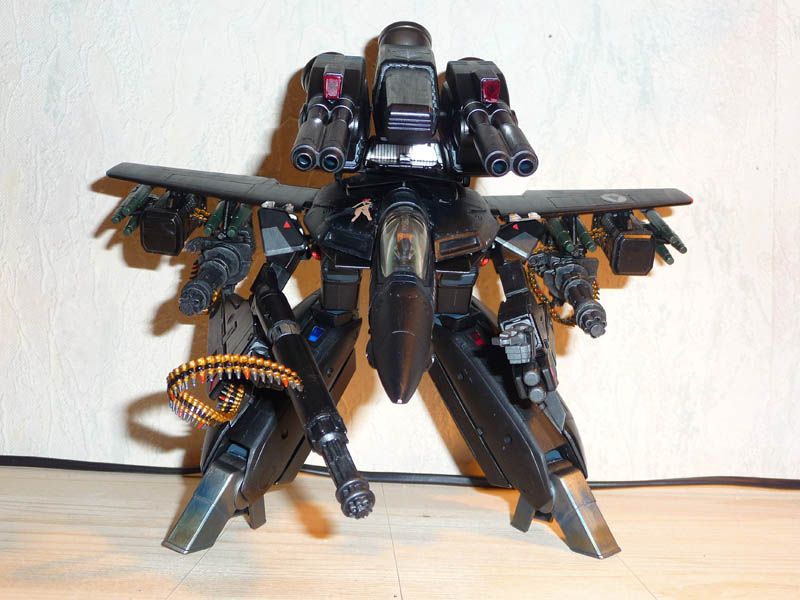
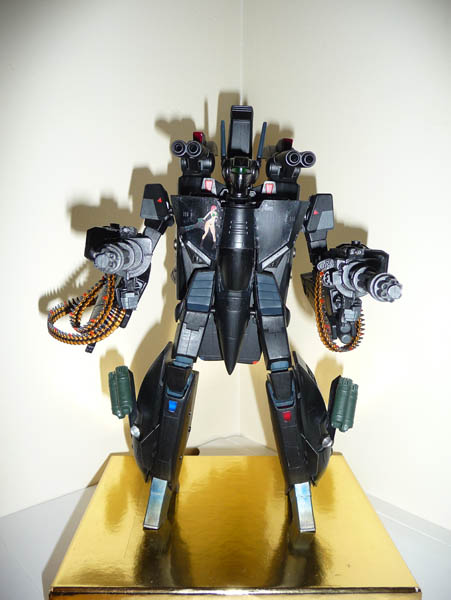
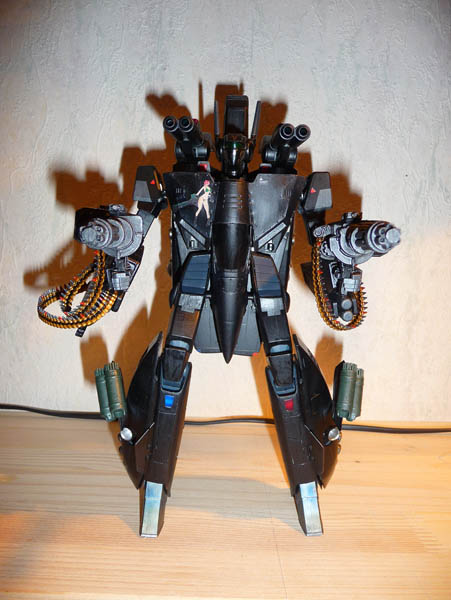
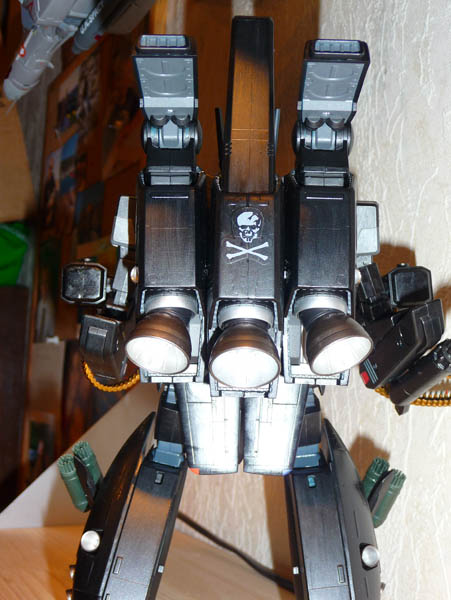
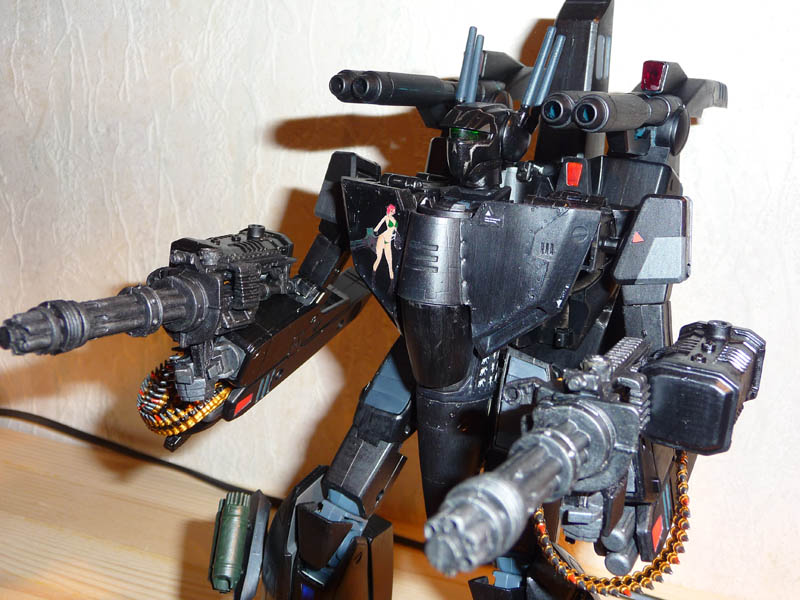
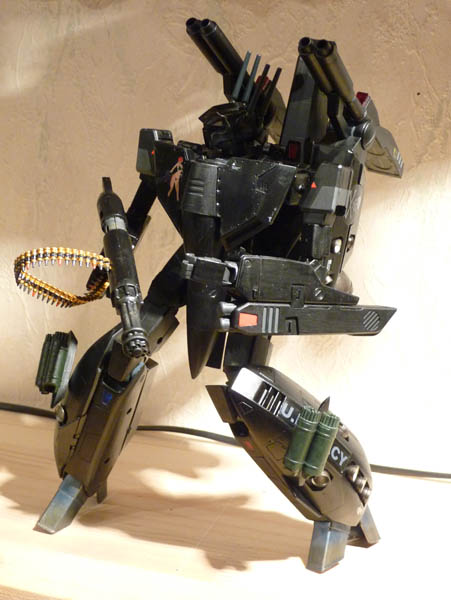
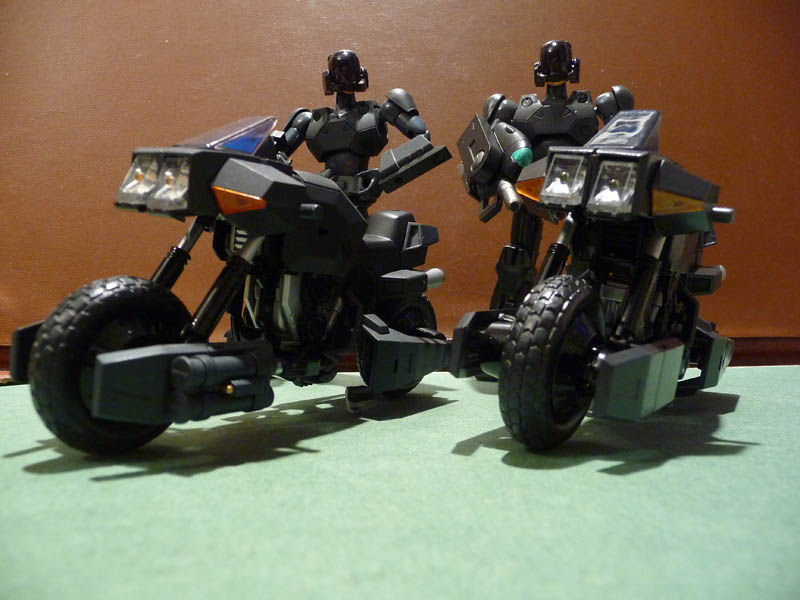
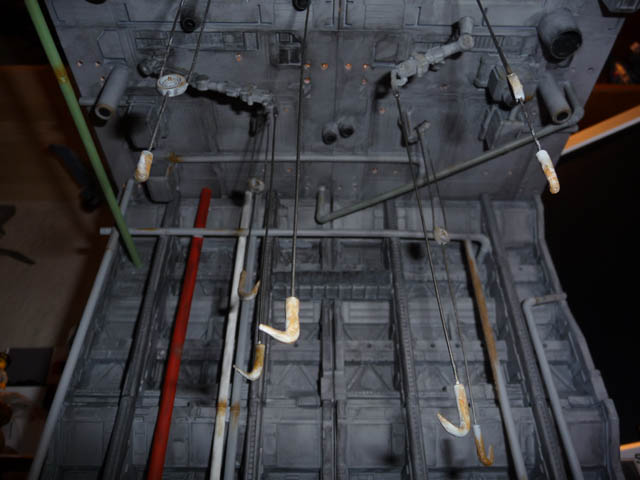
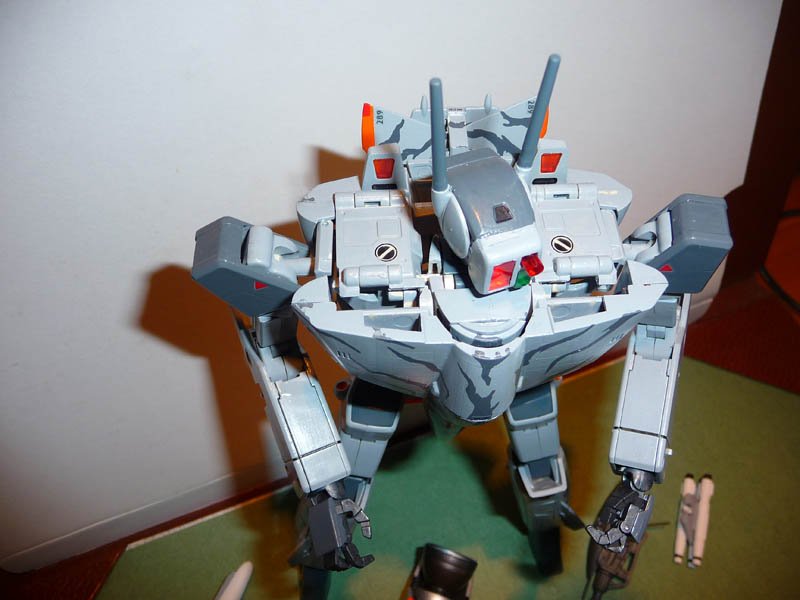
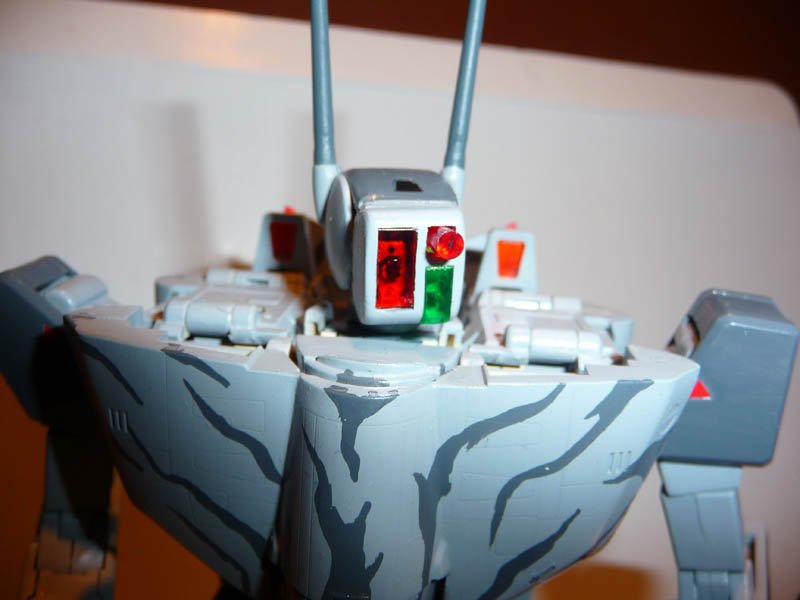
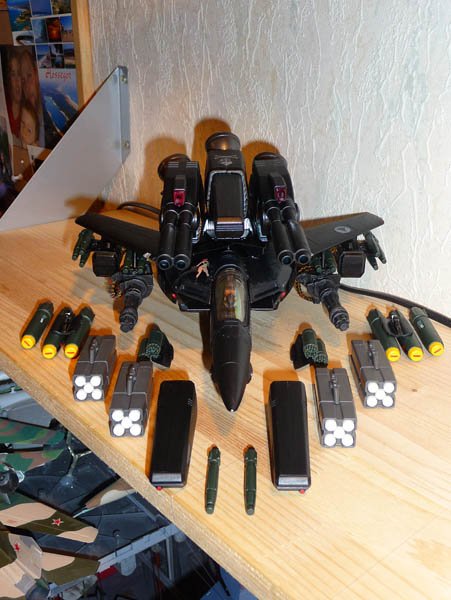
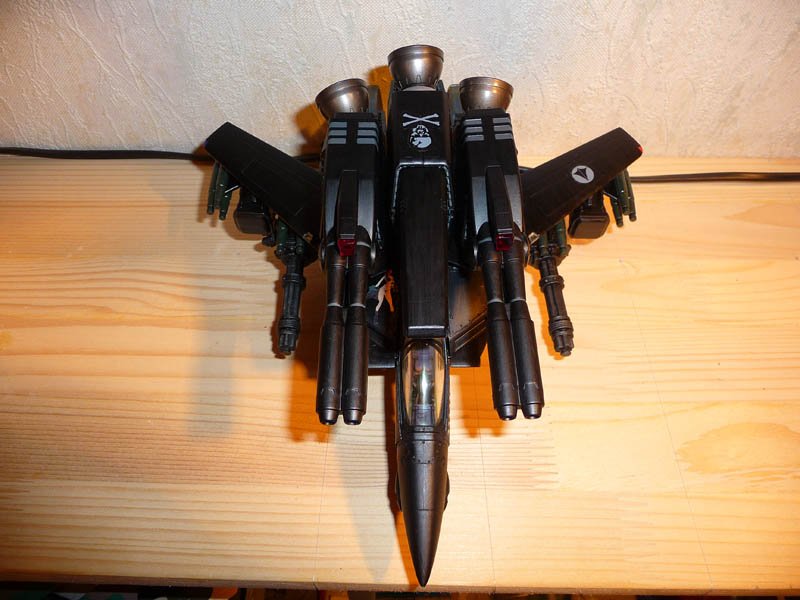
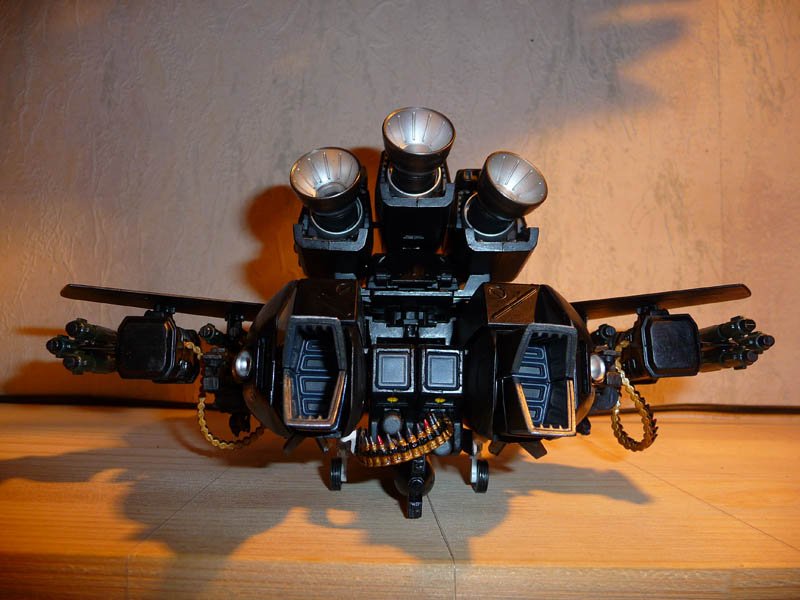
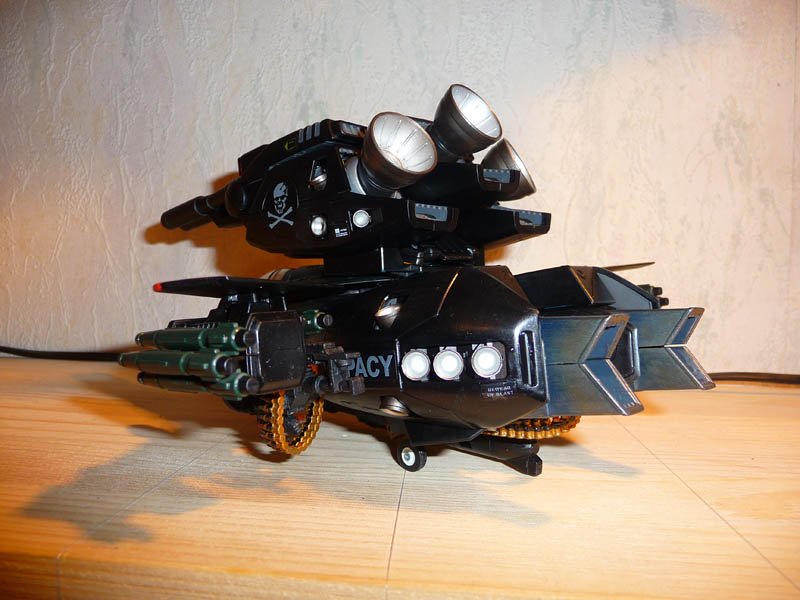
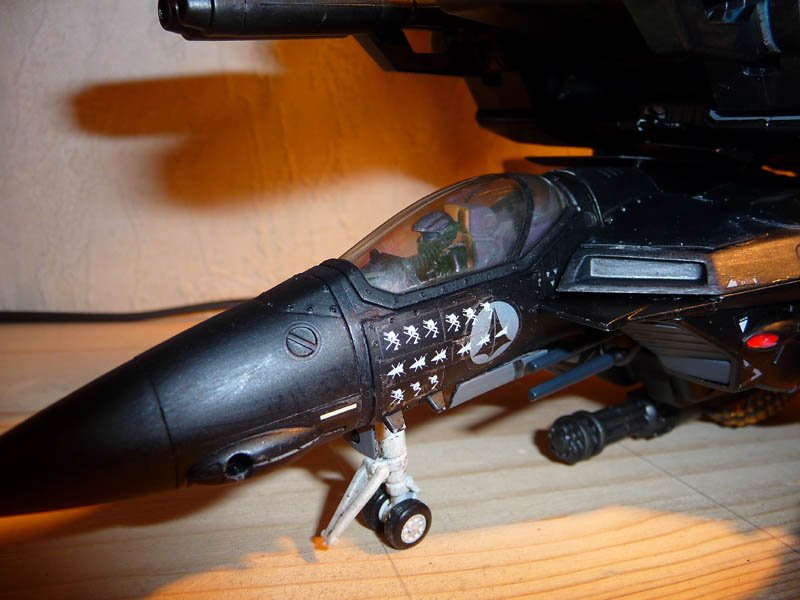
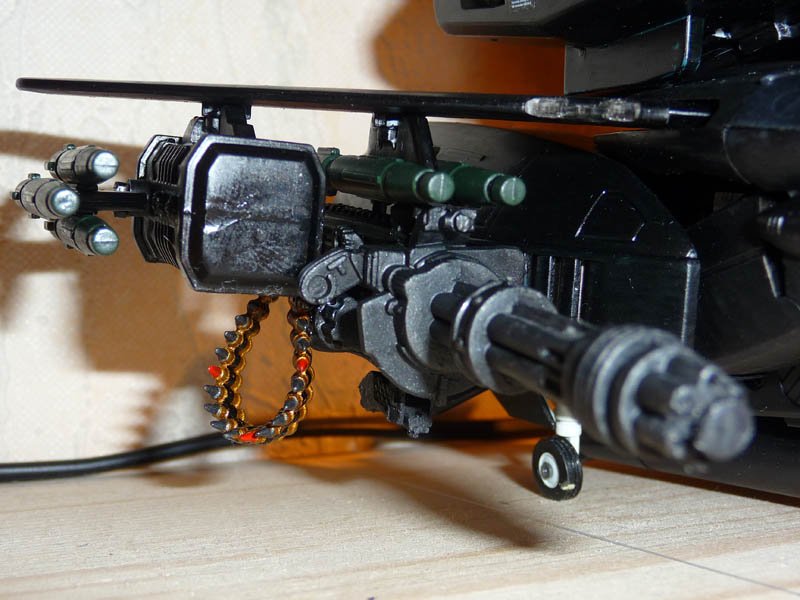
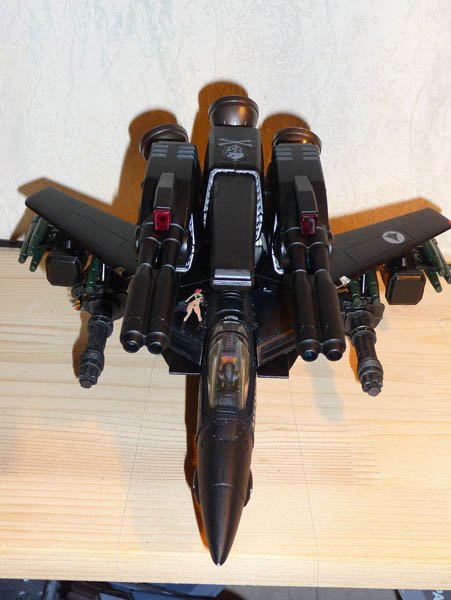
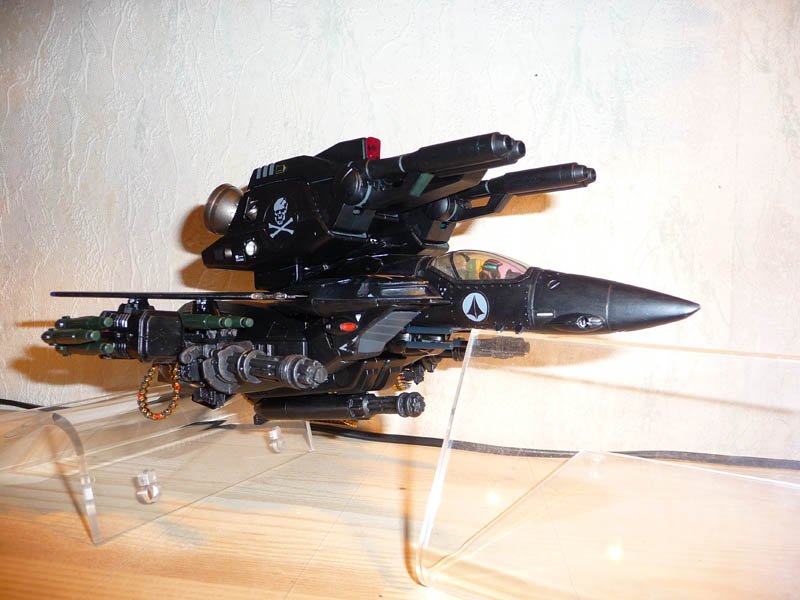
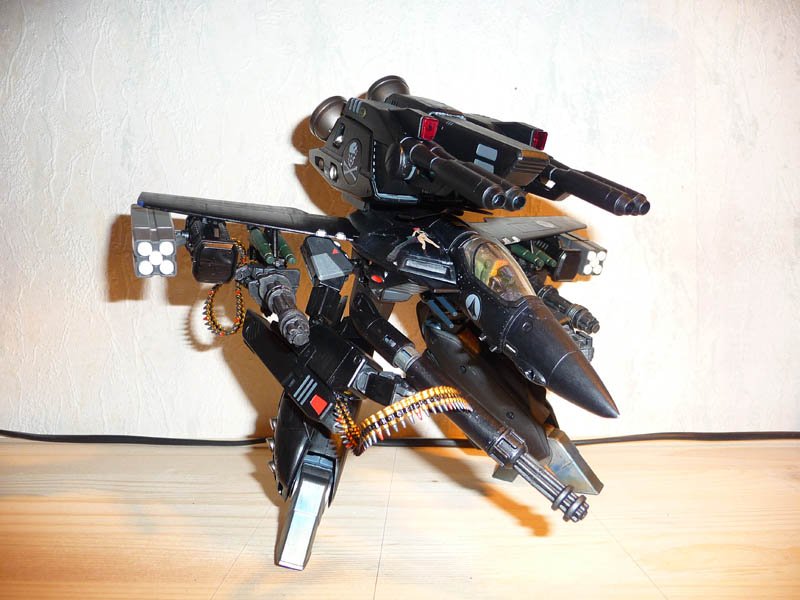
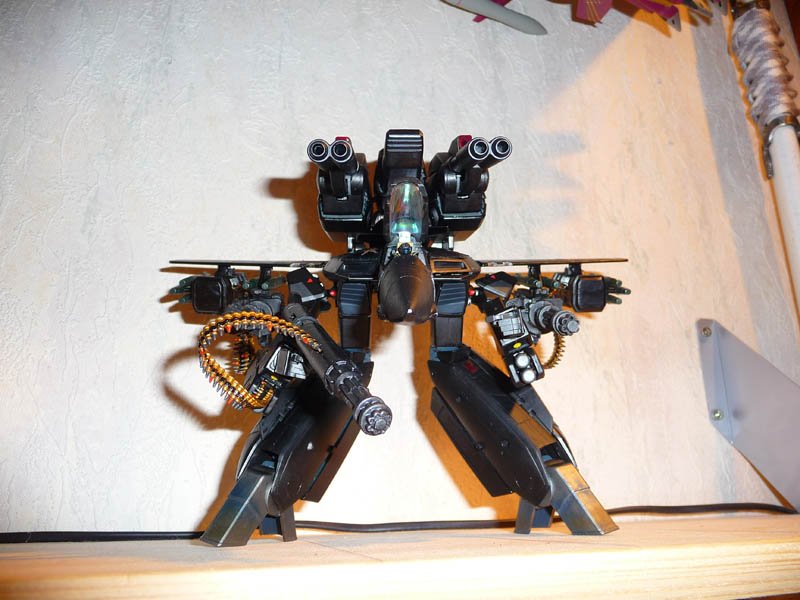
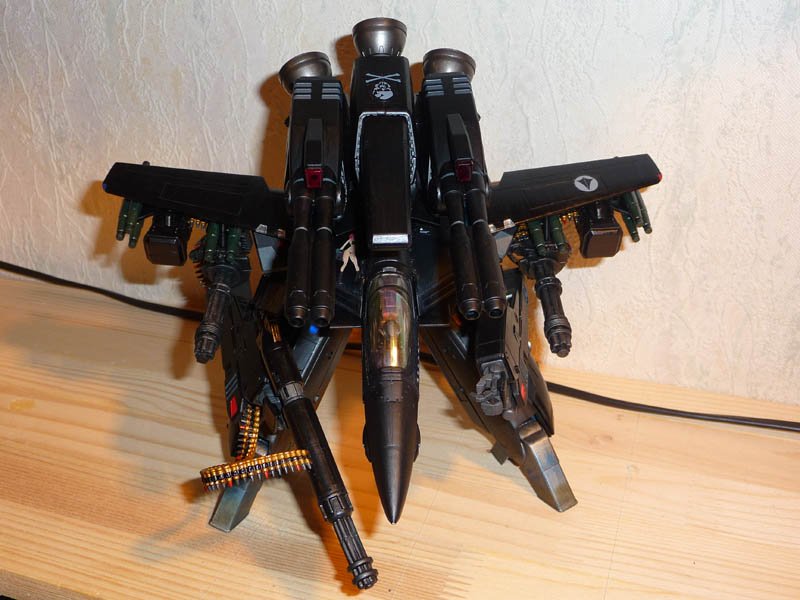
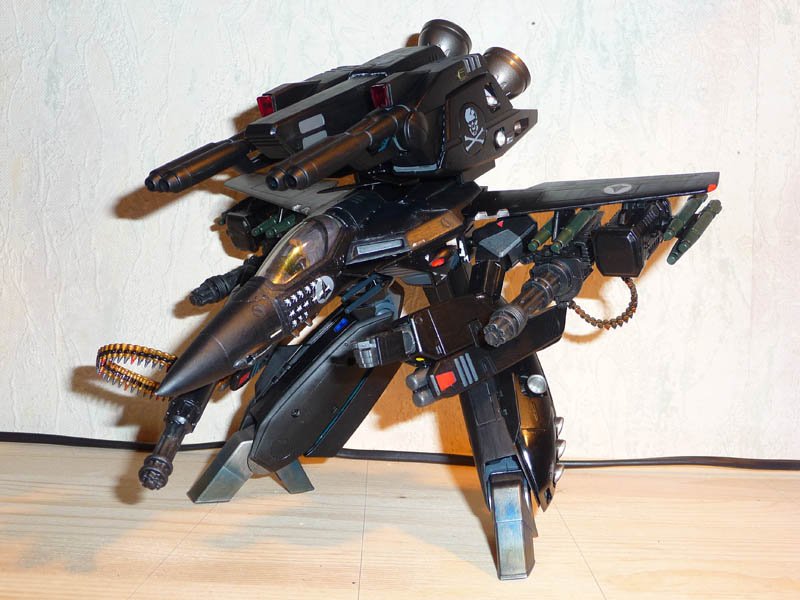
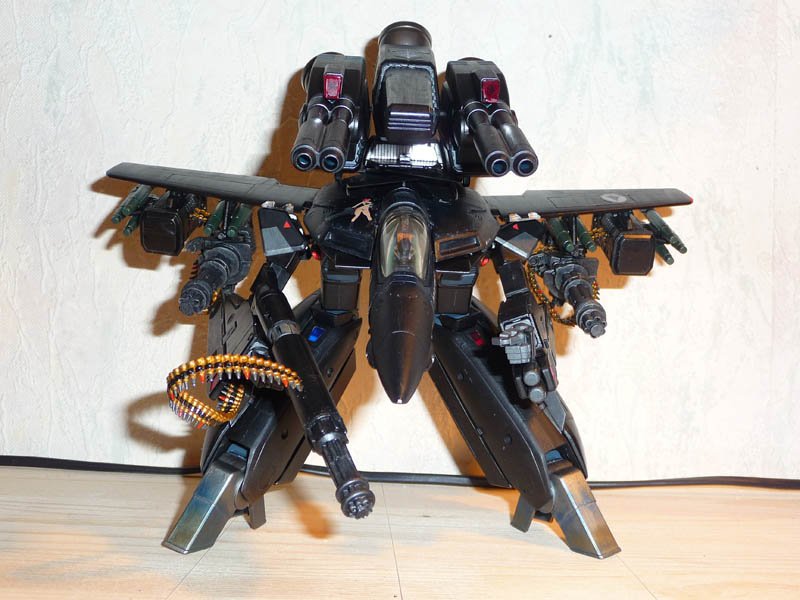
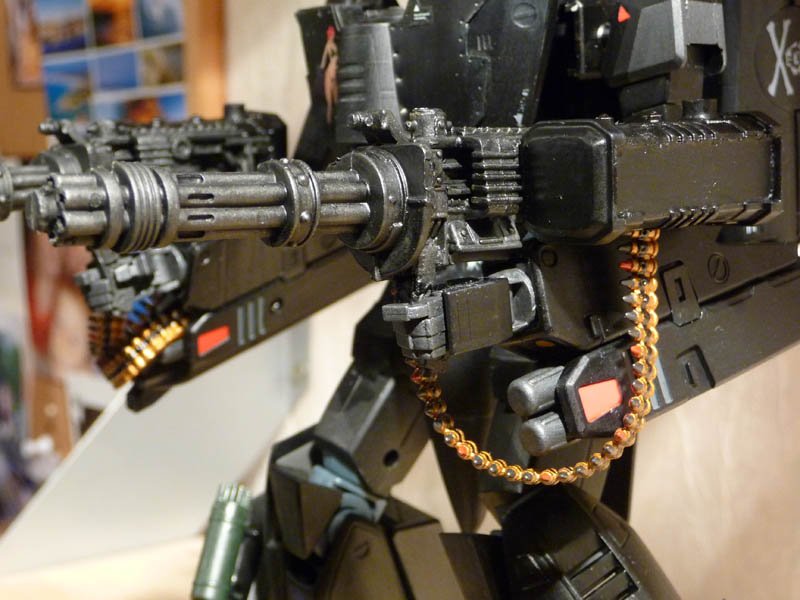
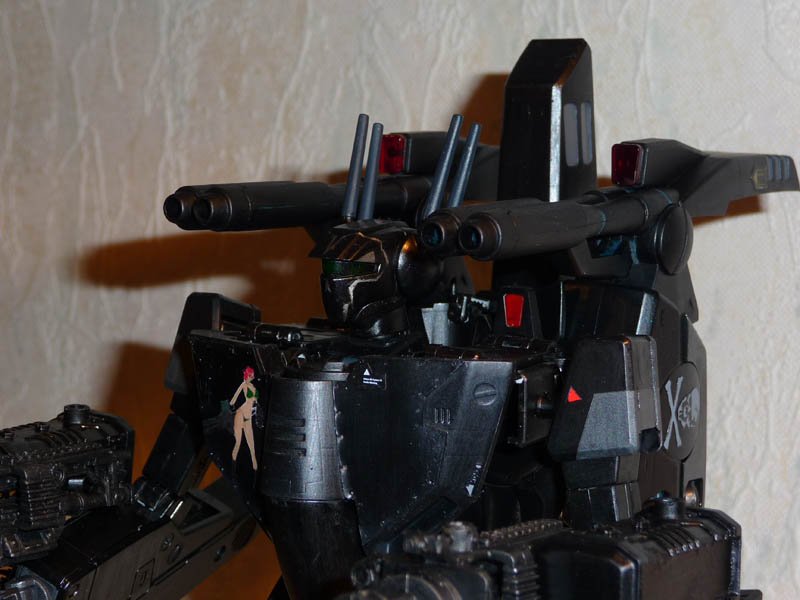
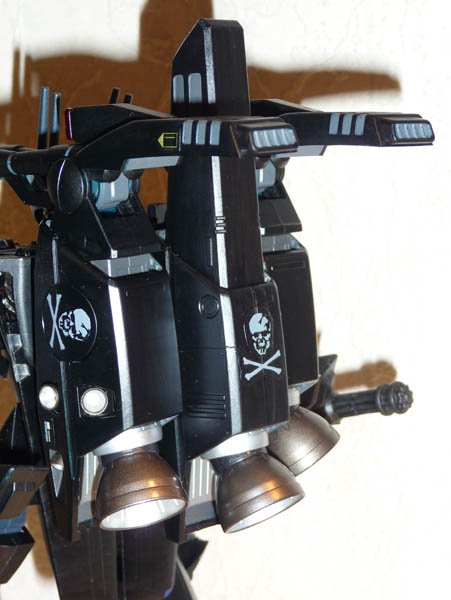
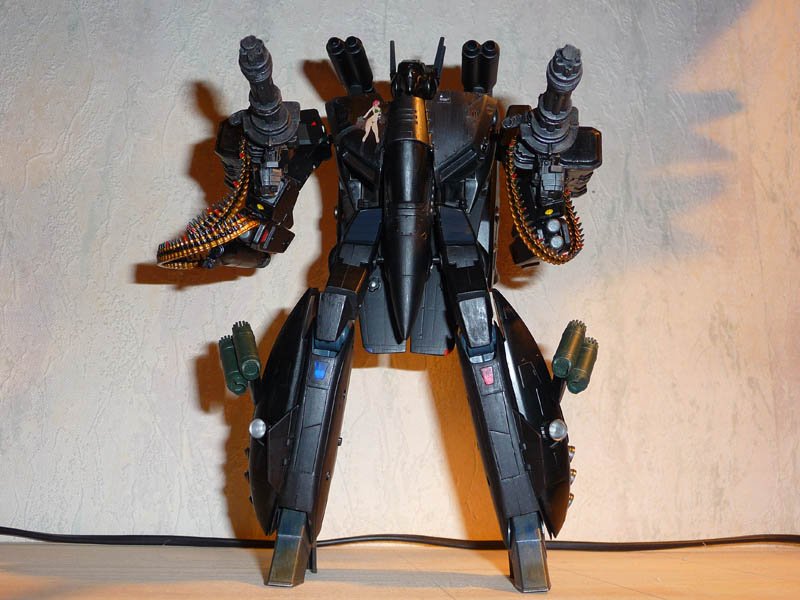
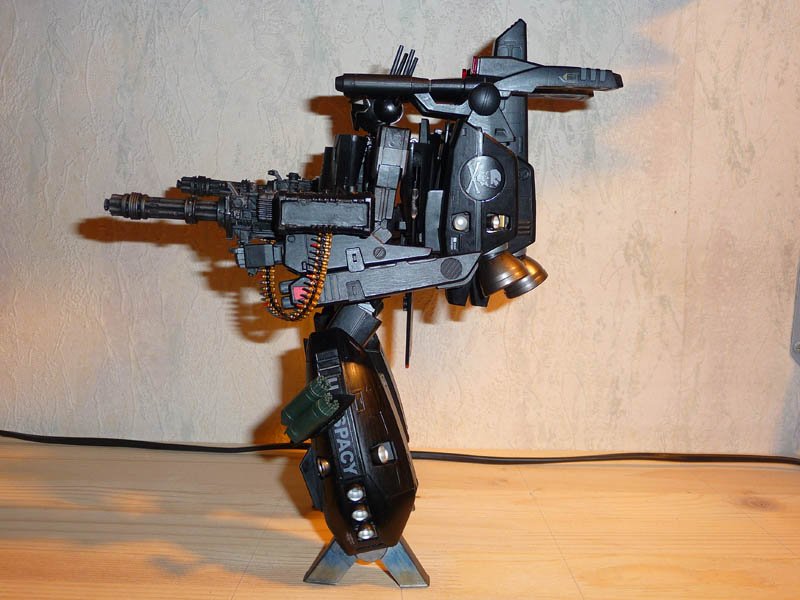
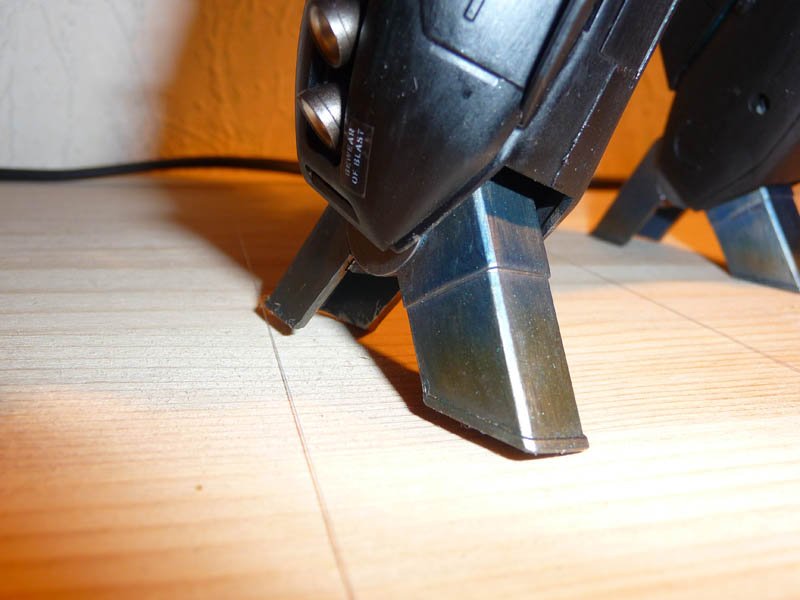
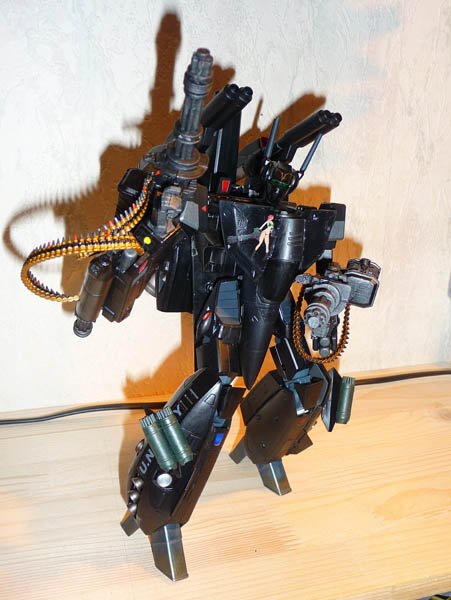
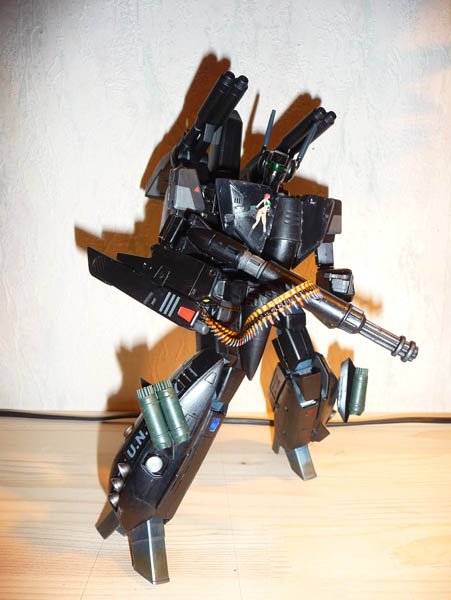
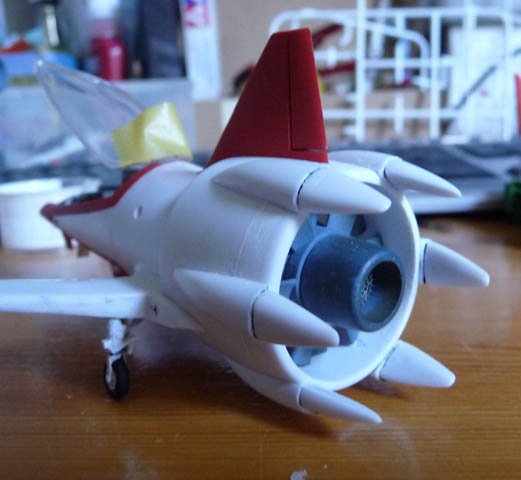
You never wondered how the Skull Squadron has received acclaim and won many victories? An ace acts and prepares the ground for the Skull Squadron, and he is the Ratatarse. But his gear is not ordinary. It is the fruit of bitter experience of fighting conducted within Zentradii vessels, close to enemy units and soldiers threatening the SDF-1. Heavy Fighter inspired by his ancestors of the second world war, this unique unit is the VF-1Z (Z for Zerstörer, destroyer), devices used to attack and eradicate the enemy air forces, with devastating firepower and additional shielding to protect them. The major problem of the VF-1, whether A, J or S, is the meager firepower available. I must resolve this problem. For that, the VF-1Z was given: - Two HRS engine boosted to 135% compared to a standard VF-1 - A standard Howard Gunpod GU55 55mm, modified by the addition of a FSM Gatling of eight cylinders with high-velocity bullets in reserve in a modified arm Fp - A TSSP (Triple Super Strike Pack) giving an unprecedented firepower (two double strike canons and a pack or three micromissiles pack) and acceleration out of the ordinary for an aircraft of this class, with standard components on FP forearms and legs - Two Gatling type HVBFG (High Velocity Big Firing Gun) from 0mm carried under the wings on pylons standard with folding butt for main armament mode Battroid the GU55G becoming a weapon of last resort - Two ammunition container for enough of 5 minutes firing per HVBFG, each supporting a rack cabinet with lateral standard VF-1 ammunition fixation - ADARM (Additional Armor) 10cm thick, riveted to the sides of the cockpit and on the breastplate of Battroid to better protect the pilot and main computers against class 1, 2 and 3 impacts - Two pylon supporting on each leg 2 RSM with 20 units each, 8 refills per unit rocket HVAAR (High Velocity Armor Anti Rocket) when it is not equipped with HVBFG Operating in the shadow of outer space to surprise the enemy formations, my valkyrie is painted in black. Marking is minimal, some lights concealed position to ensure discretion to my attacks. A false cockpit is painted under my airplane to deceive the enemy in dogfight, the devastating firepower of my unit has made a much skilled pilot from the earth of Belgie to call me: Devastatarse My specialty? Look at my victories and you will know ... crushing Zentradii !!


-

Yamato 1/60 Fan Racer - upgraded model diorama
Ratatarse replied to Ratatarse's topic in The Workshop!
Need to do better anyone ? lol that's possible for sure, but... jusr try it ! -
Yamato 1/60 Fan Racer - upgraded model crashed diorama
Ratatarse replied to Ratatarse's topic in The Workshop!
Thab=nks you guys I'm working on another custom by now... preview finishing end of week... the VF-1Z... heavy destroyer LOL You'll see... if I want to -
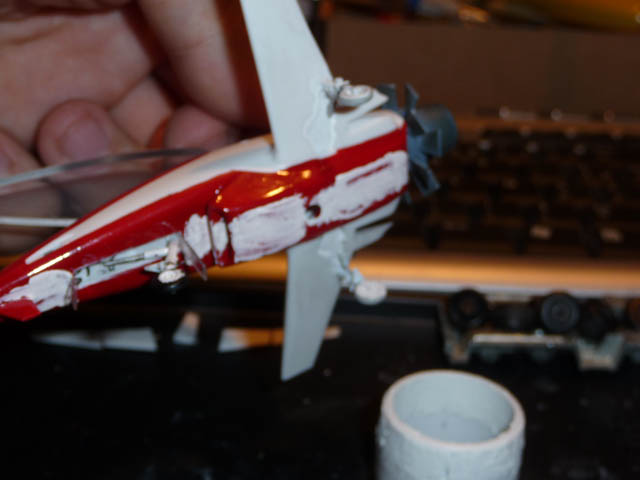
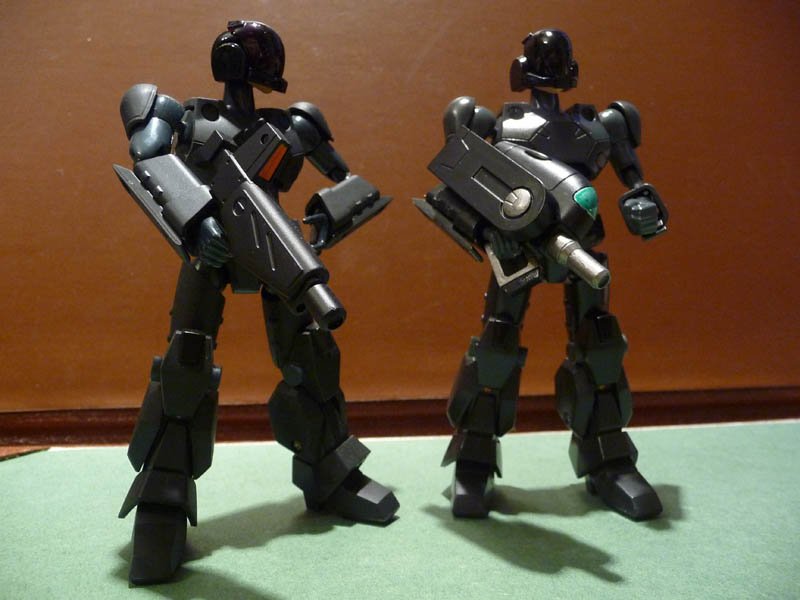
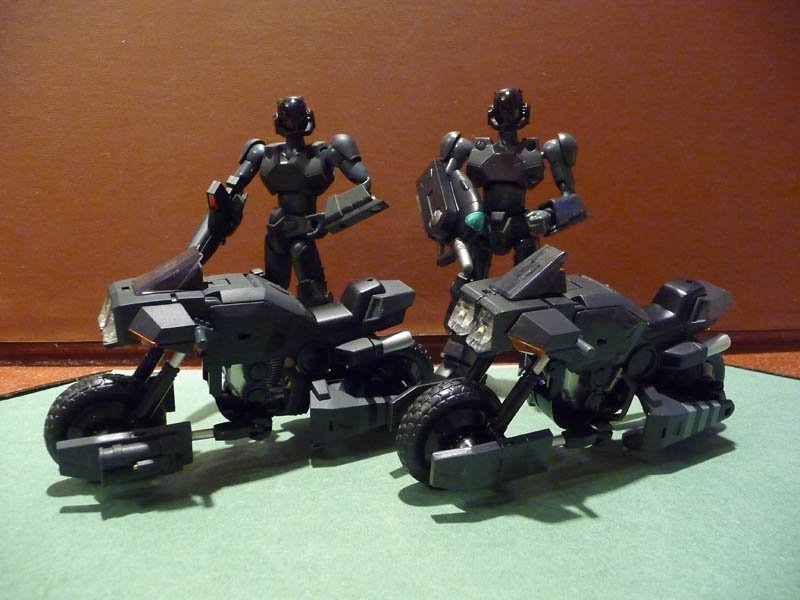
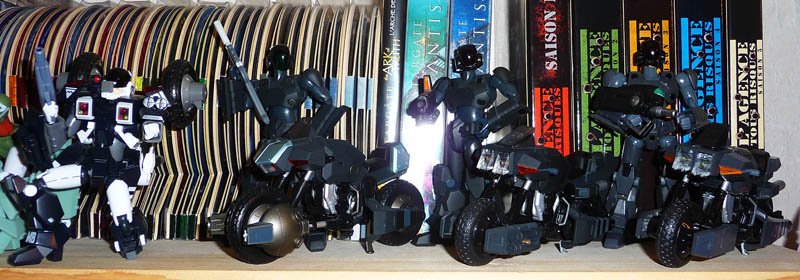
Hi there For this Genesis Climber Mospeada Custom I've done during my summer holidays, I inspired myself by the rare Megahouse Dark & Black Ride Armors I already got in my collection. This is the result, the color is custom as it is not a known color, so I melt some paints to get this one... I would try better but I'm almost satisfied by now. I shot it posed with Black VR052 from Megahouse, after you've got it at the right end of the collection, with the other Megahouse Mospeada items. The custom is at the right, don't mistake


-
Thanks ! I know that, but it's the only RT I got in my vf-1 collection... and I was bored of all this white with color stripes or blue, red and light brown valks in my v1 part of collection... so I choose to be sacrified and post it there anyway
-
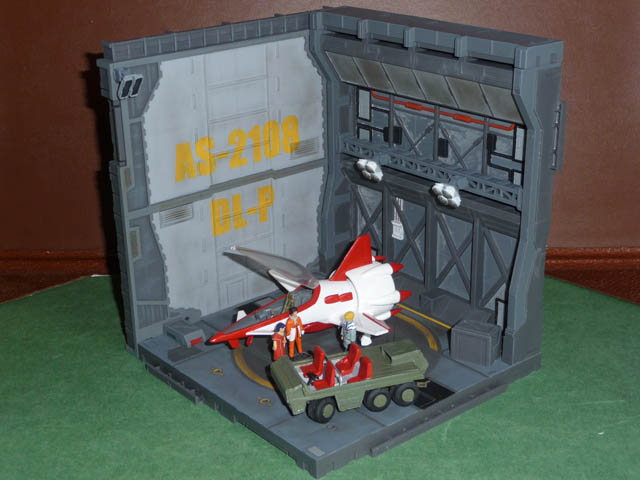
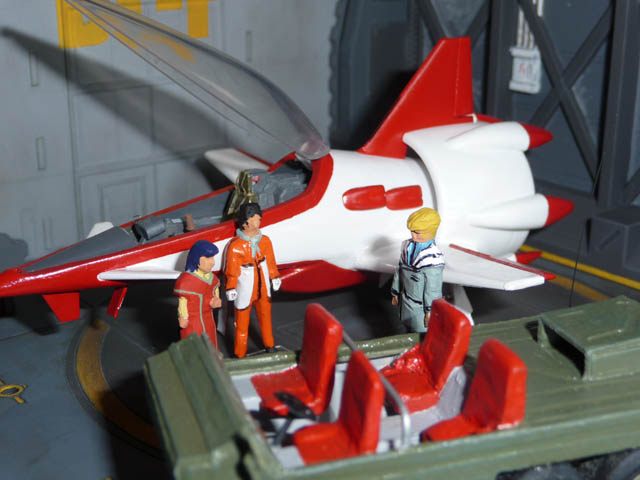
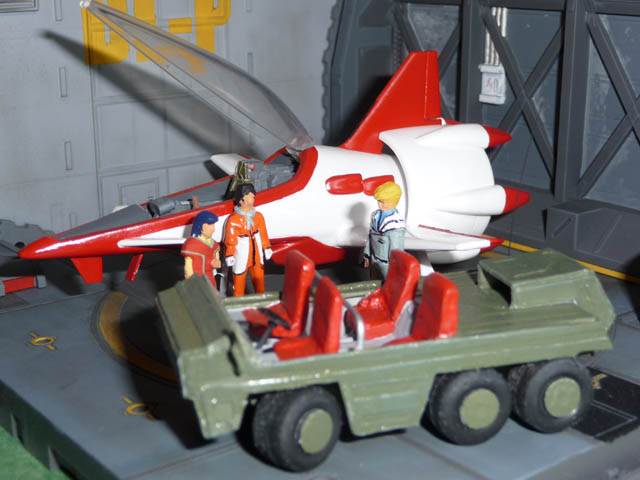
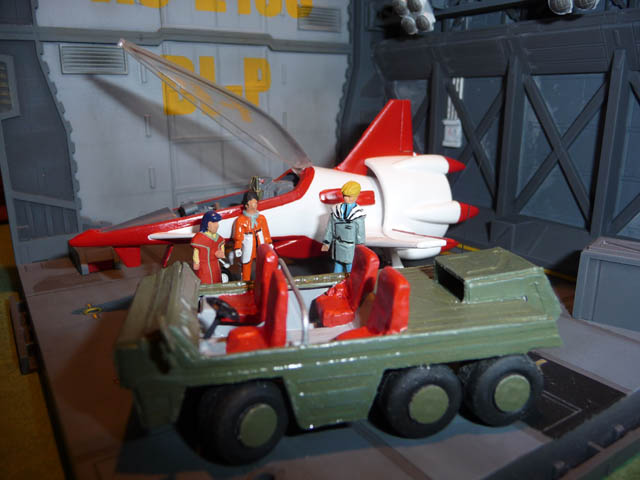
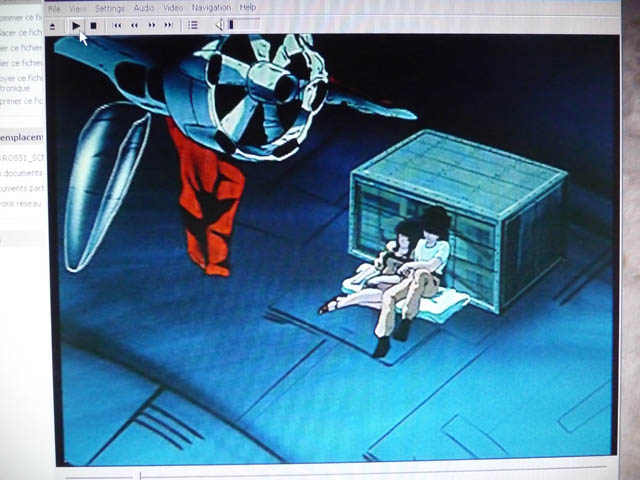
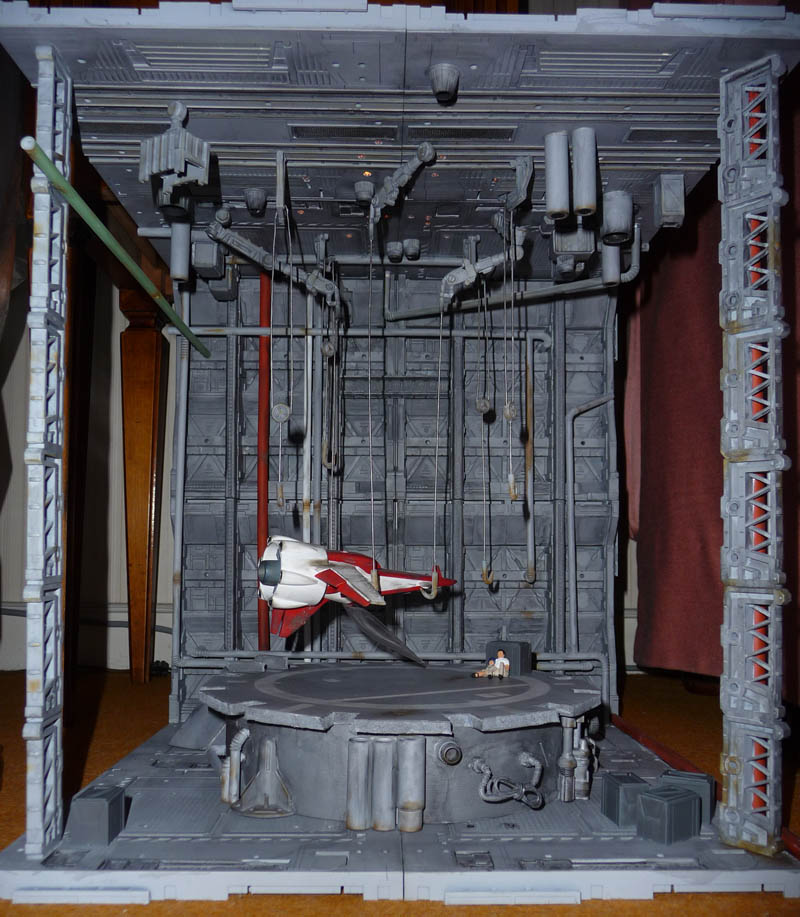
Hi there ! EXO shows me the way, and as I see, my friend has posted my dioramas here You can check the other page here on MW where I posted all the stuff about those Fan Racer, including a step by step Diorama landing Diorama crashed Fan Racer step by step To answer to your question, it's 12inch x 12inch for the base, x 14 inch tall
-
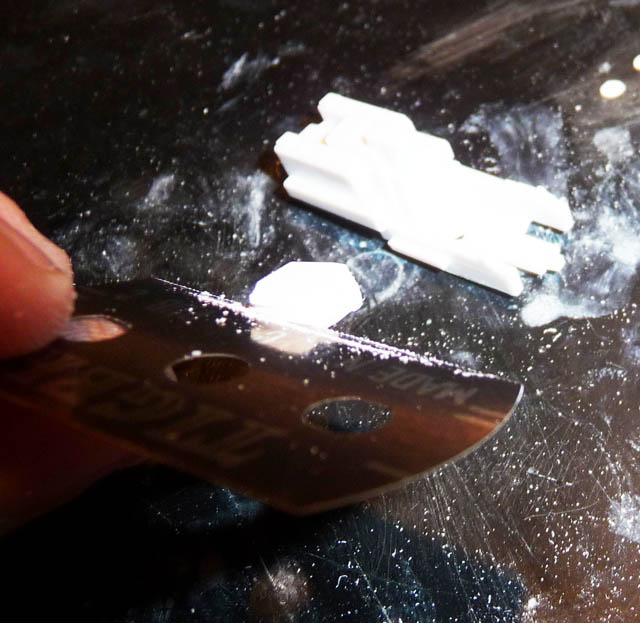
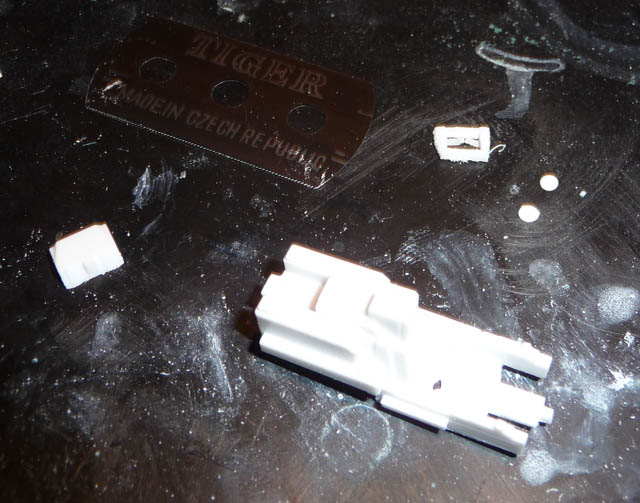
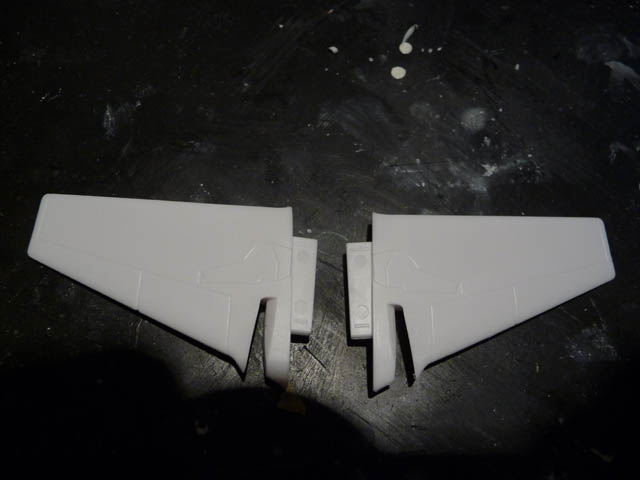
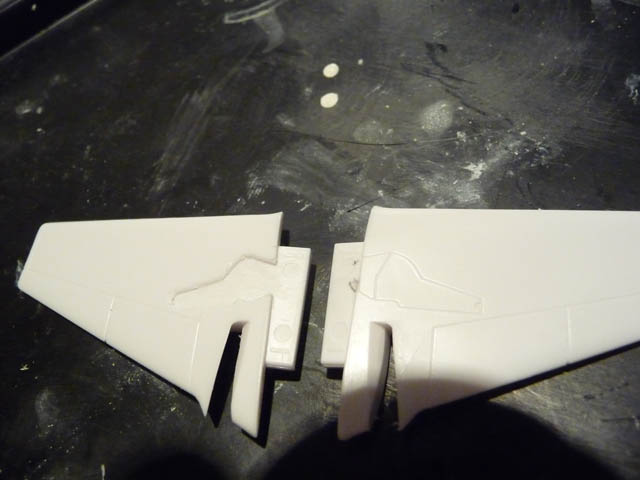
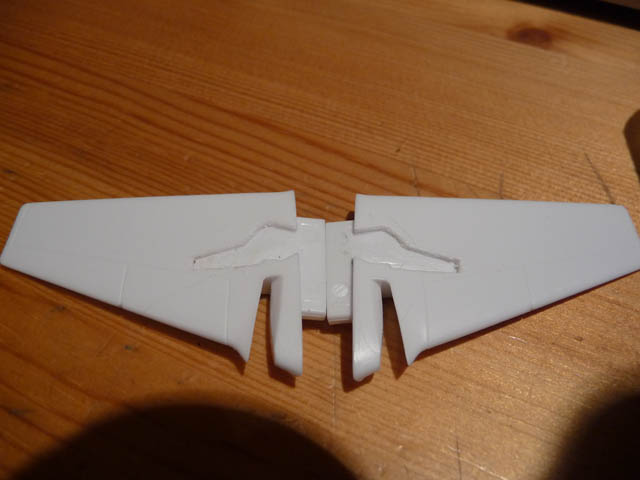
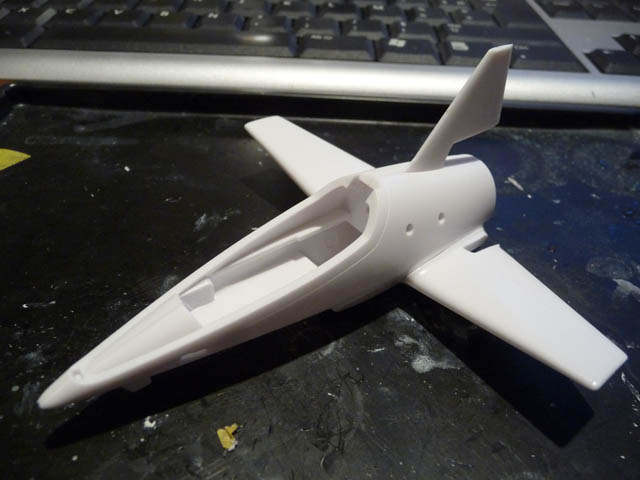
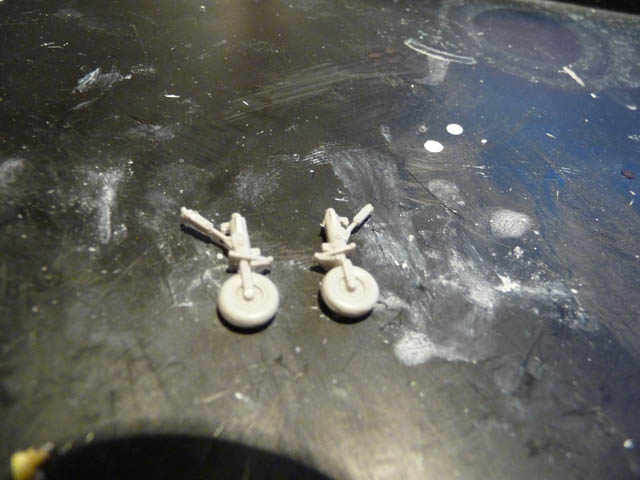
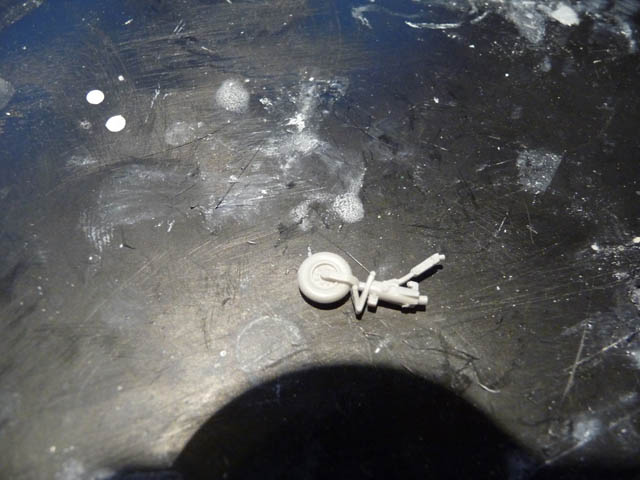
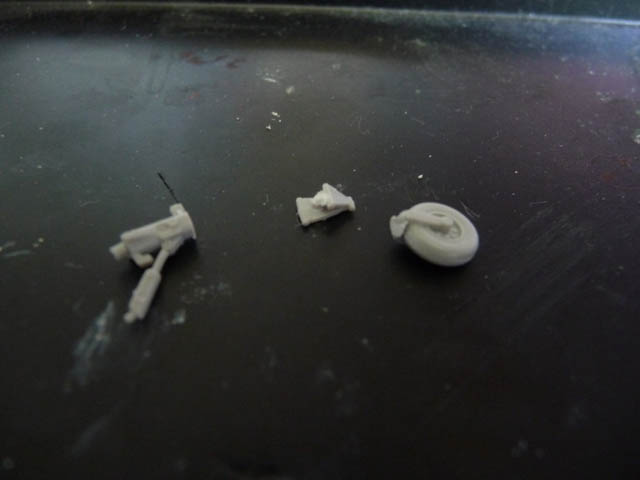
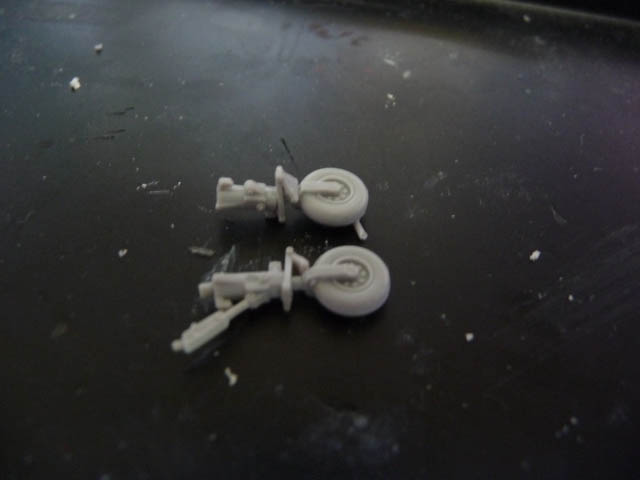
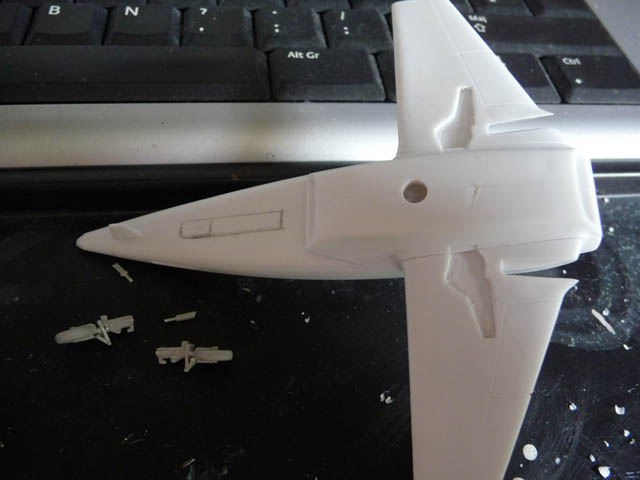
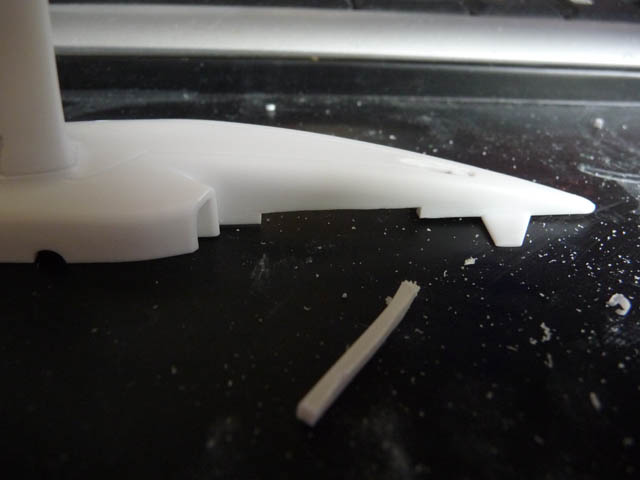
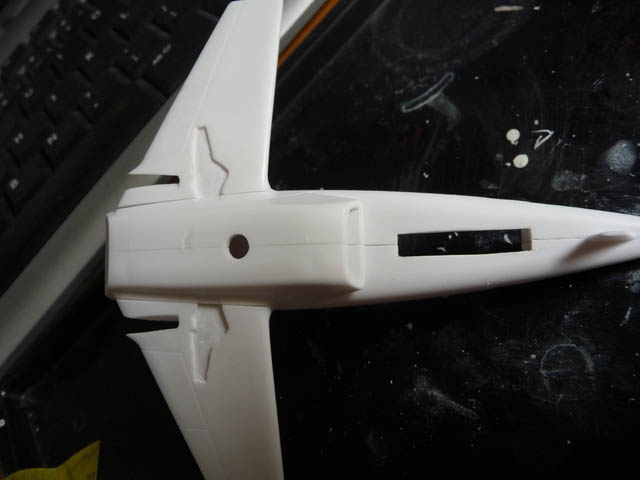
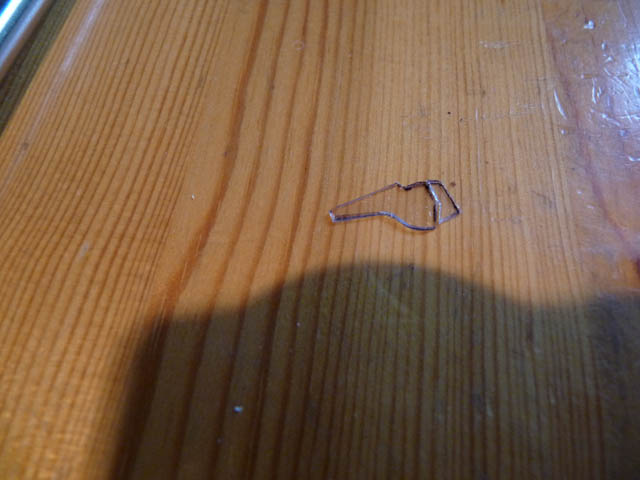
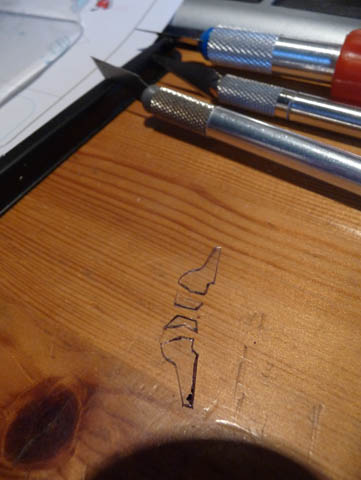
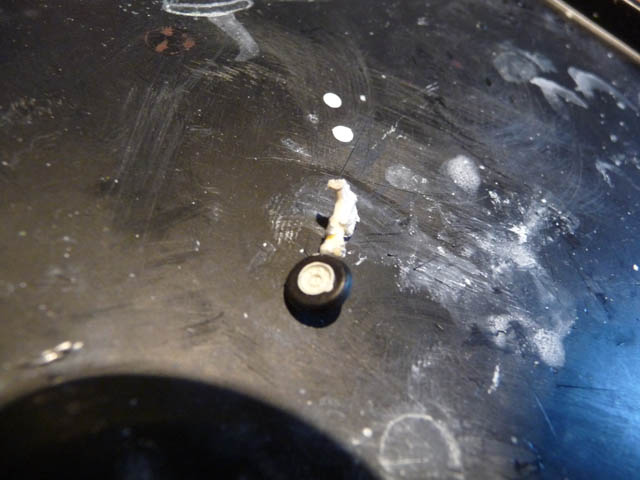
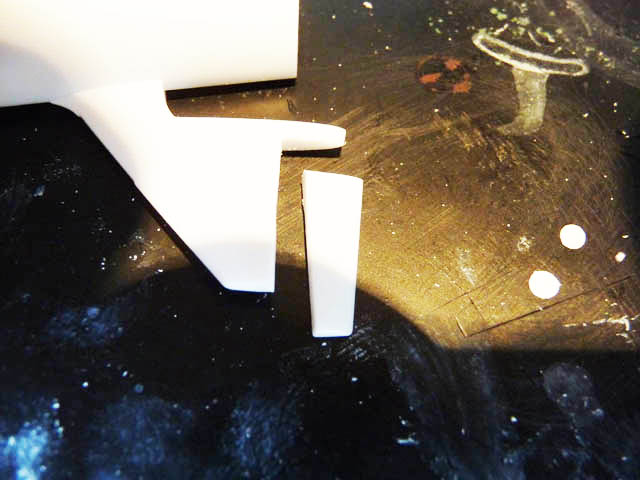
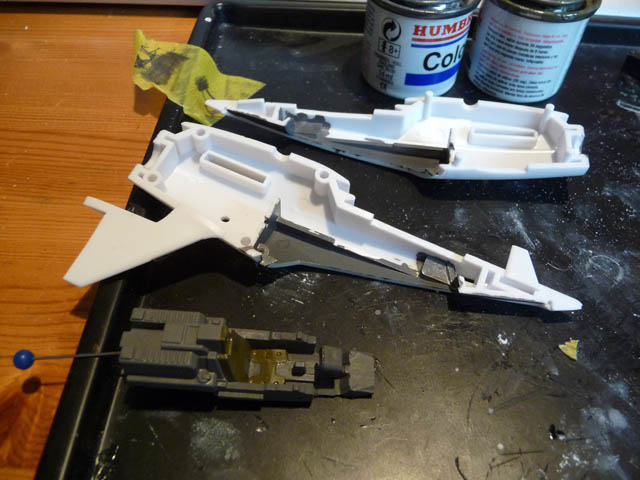
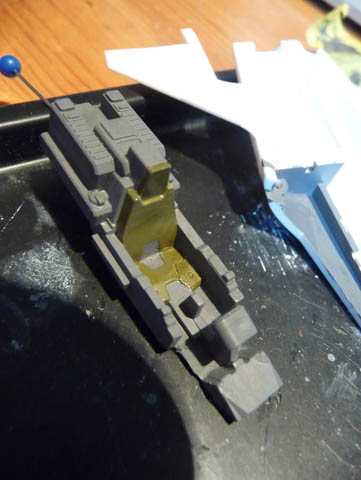
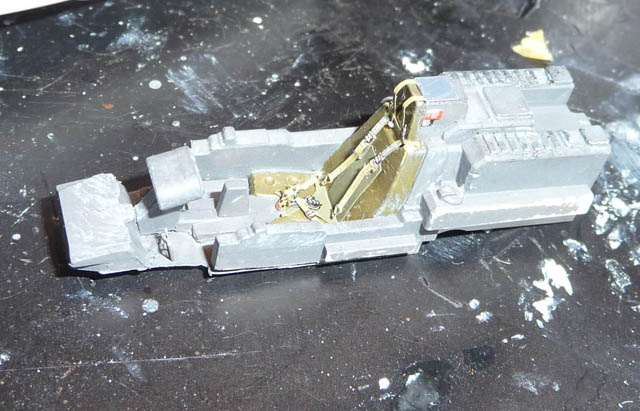
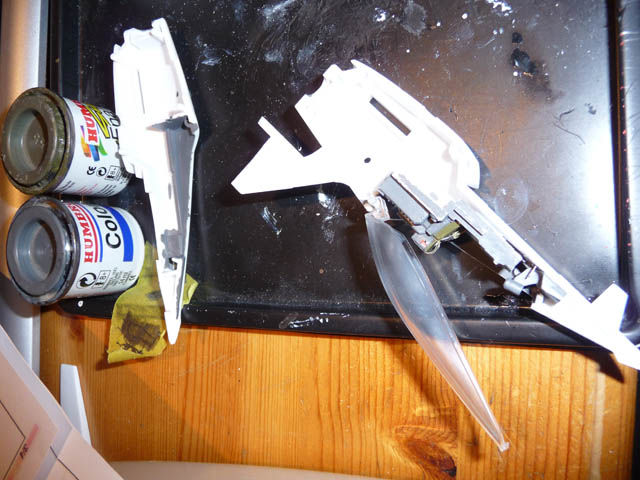
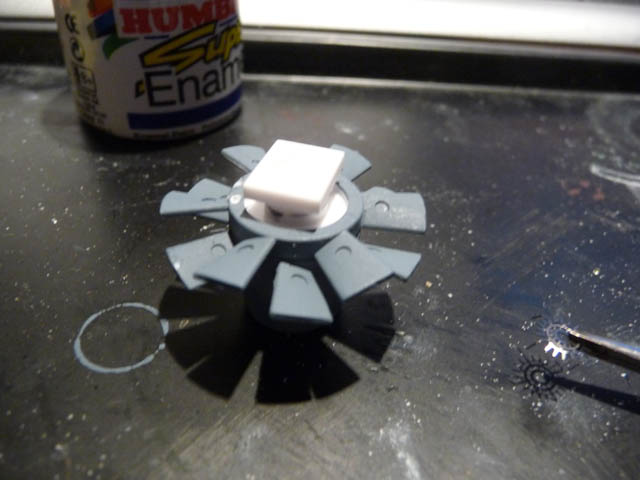
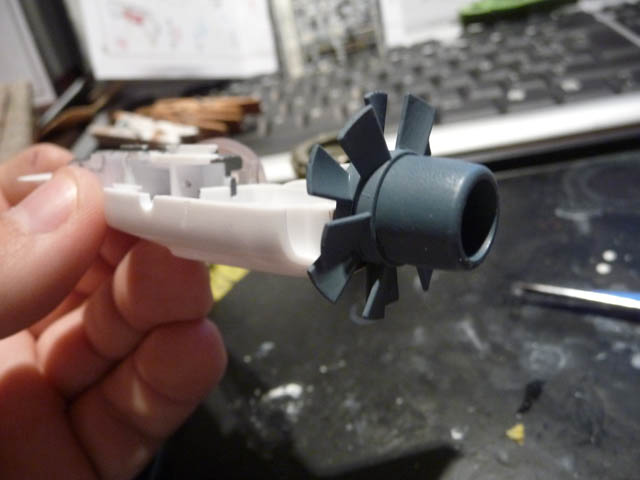
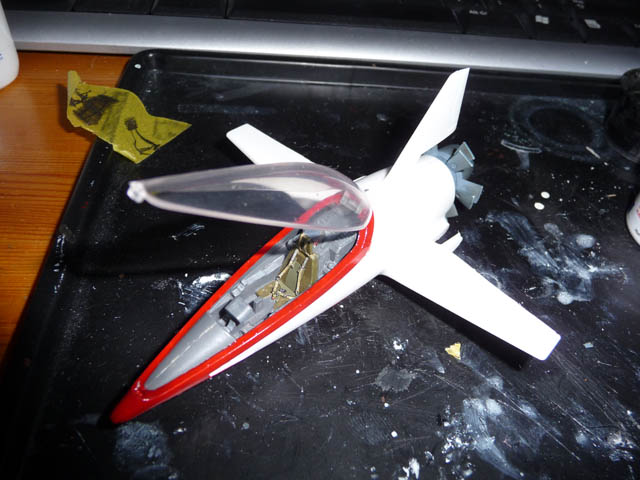
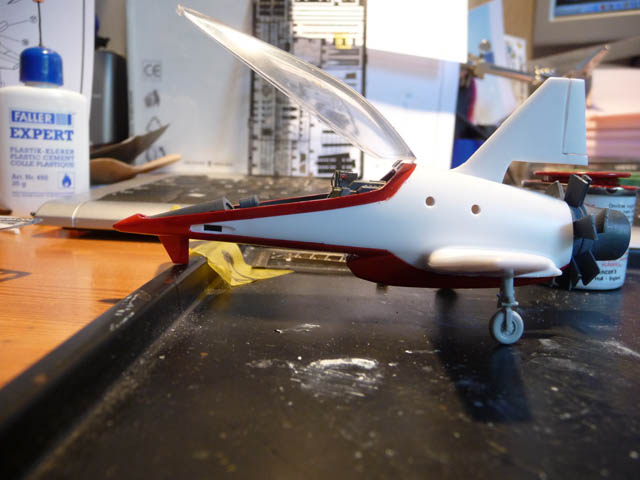
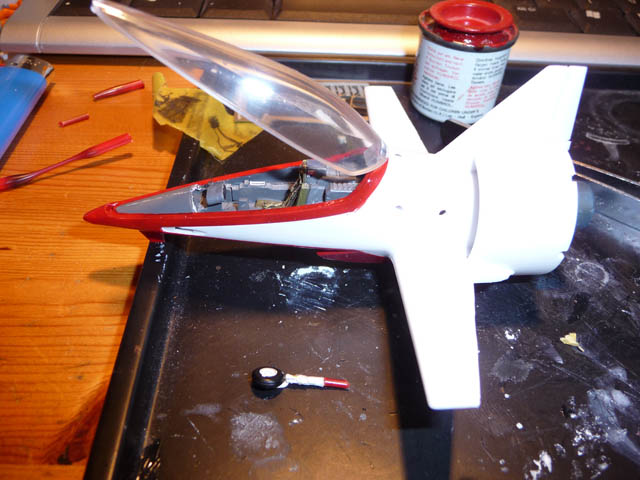
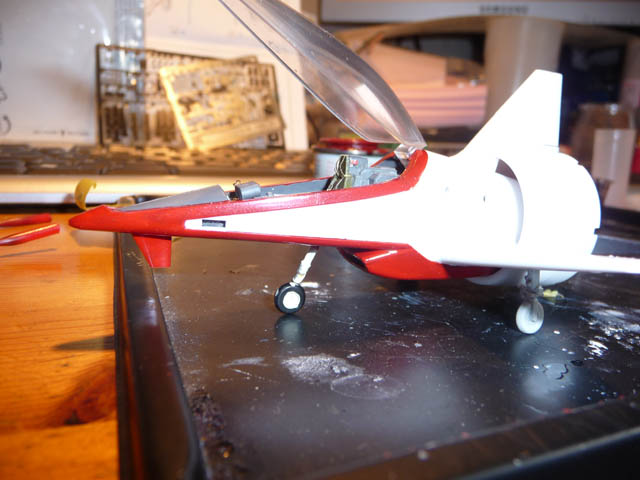
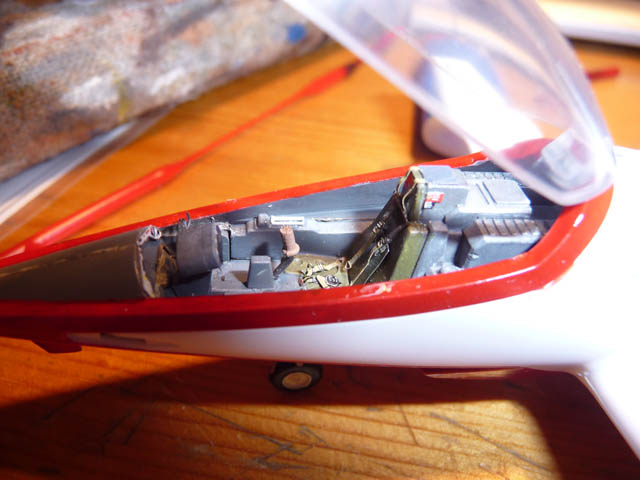
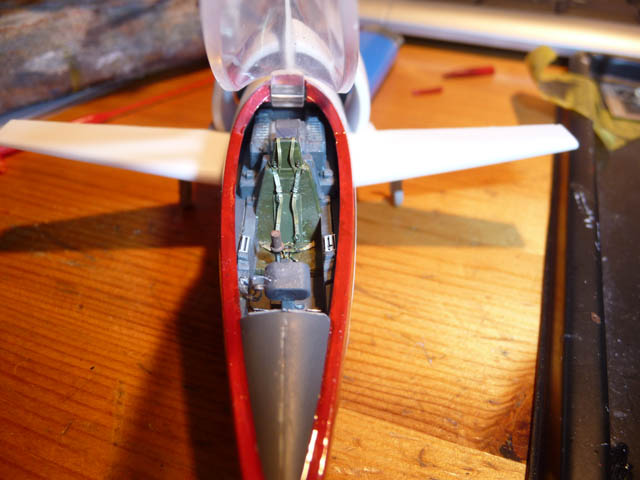
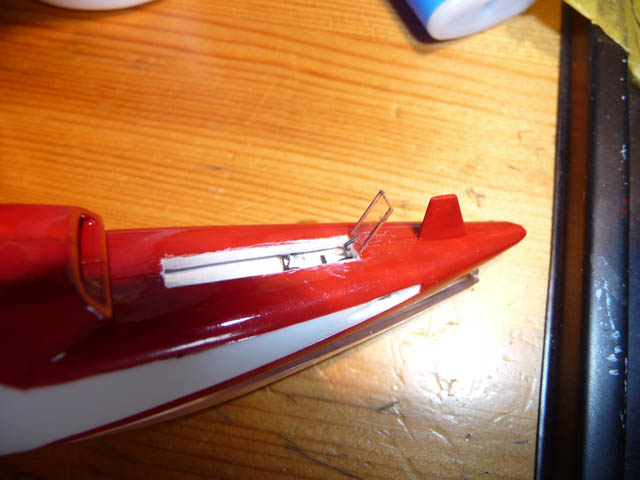
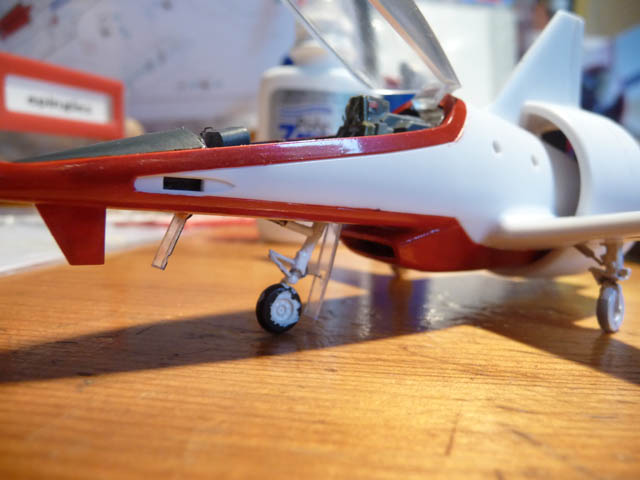
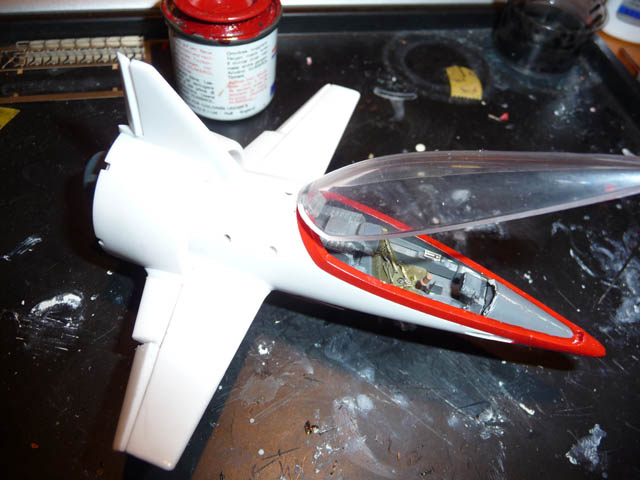
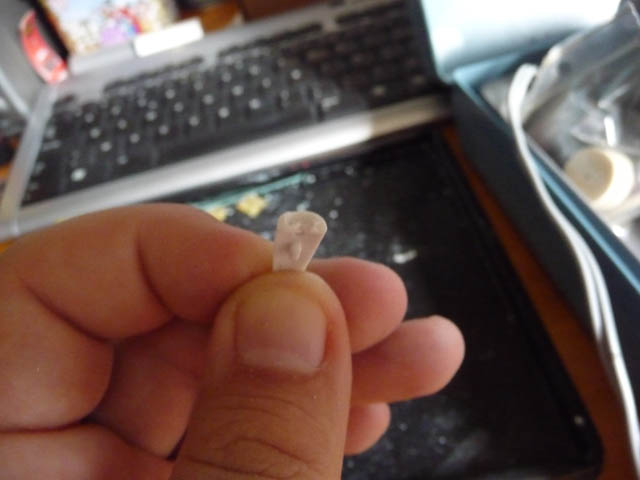
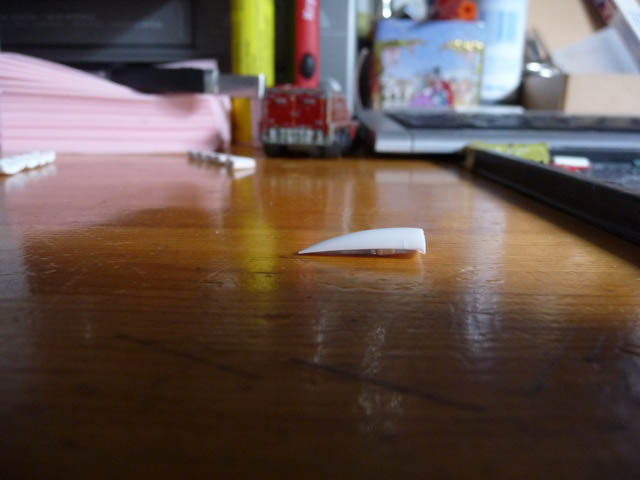
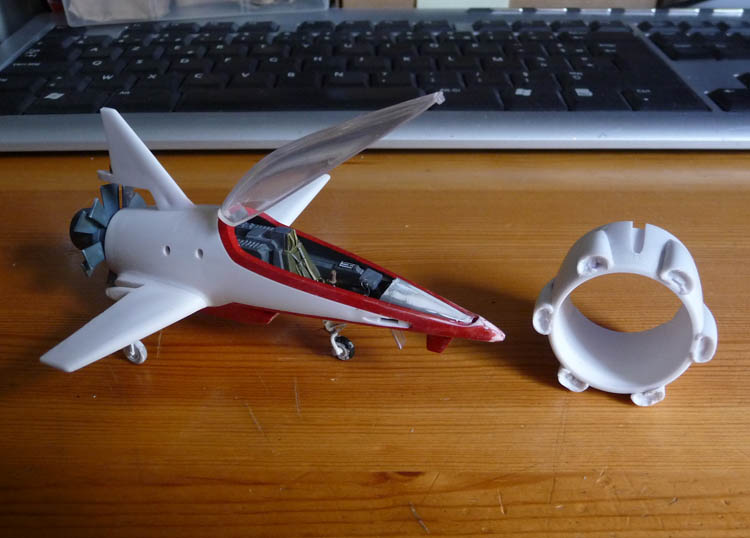
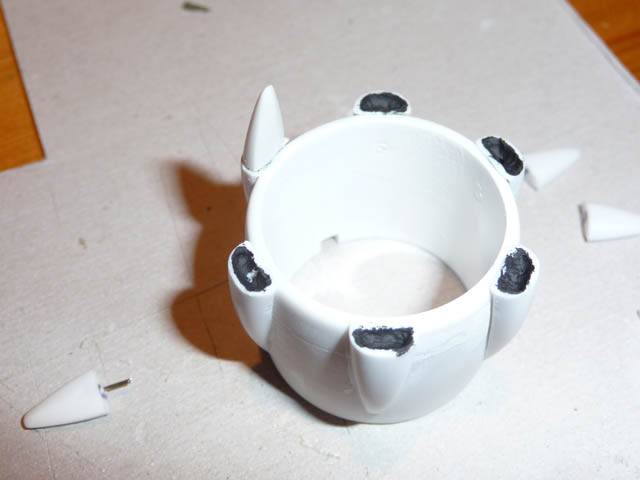
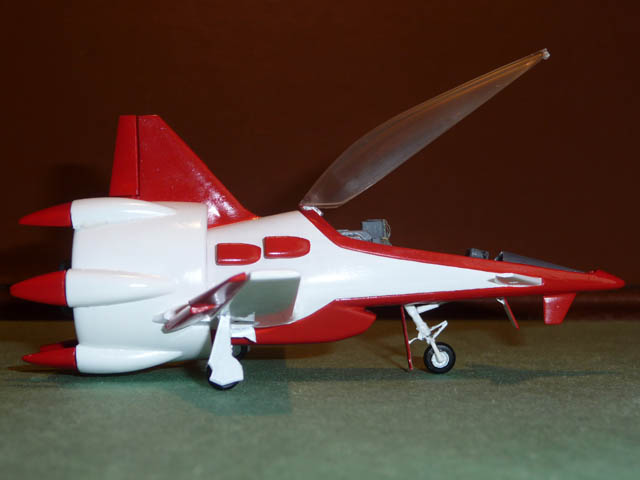
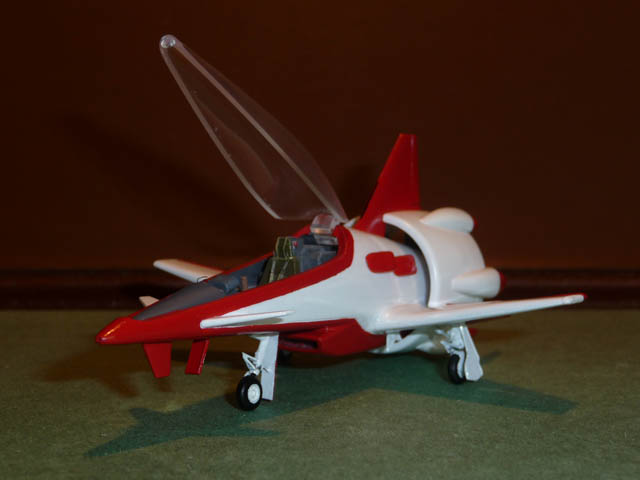
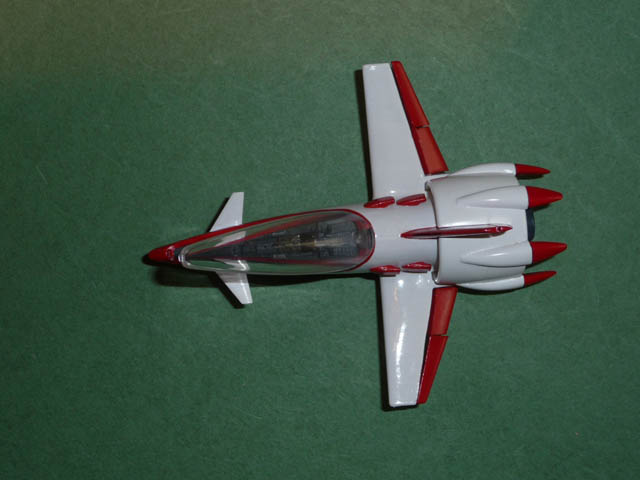
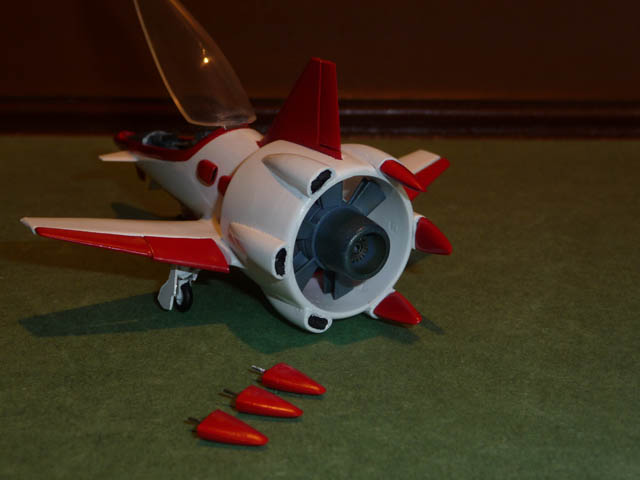
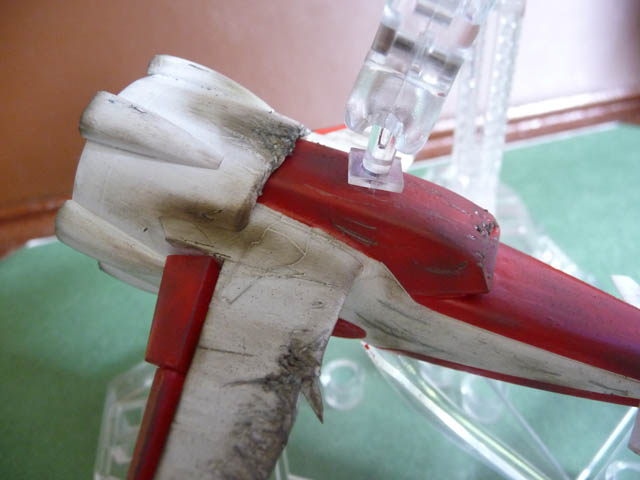
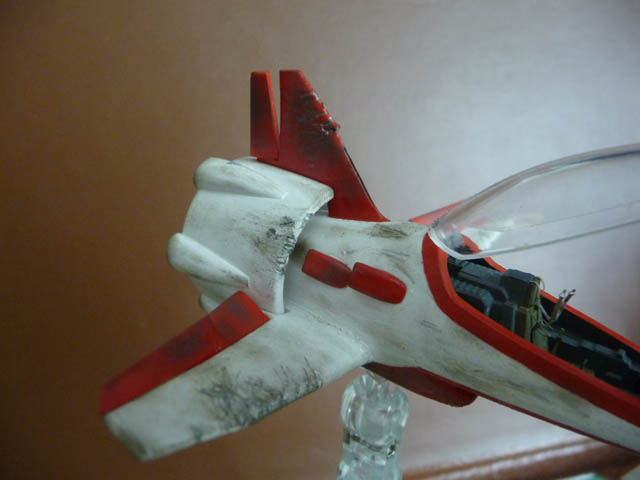
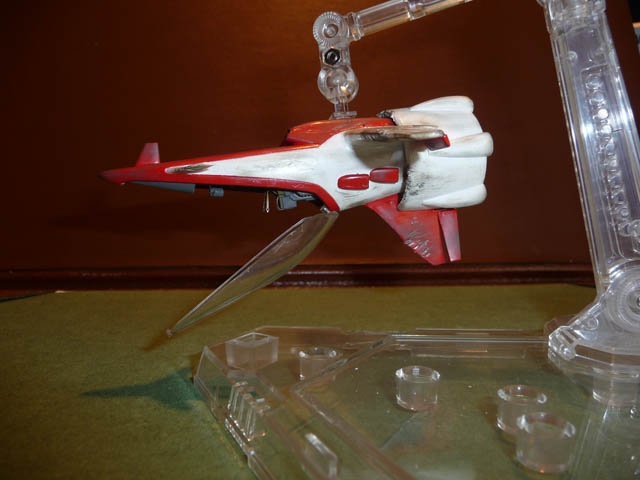
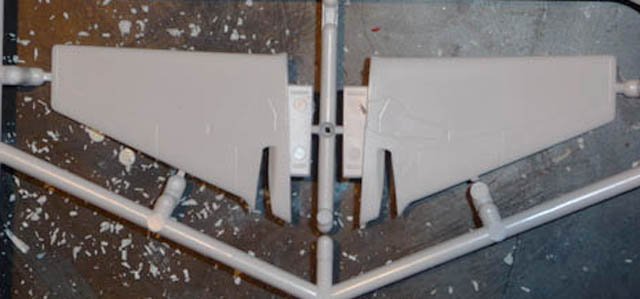
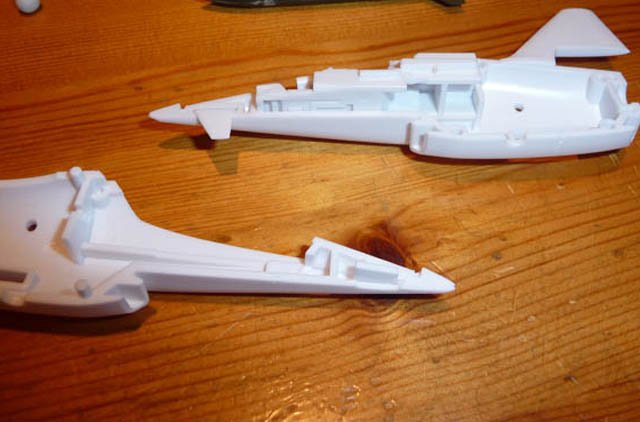
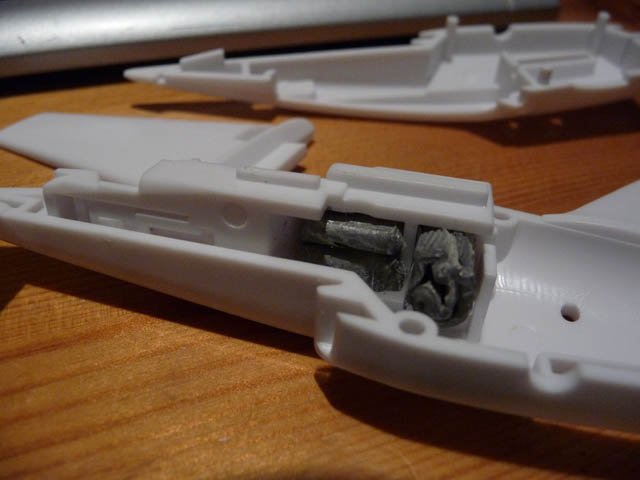
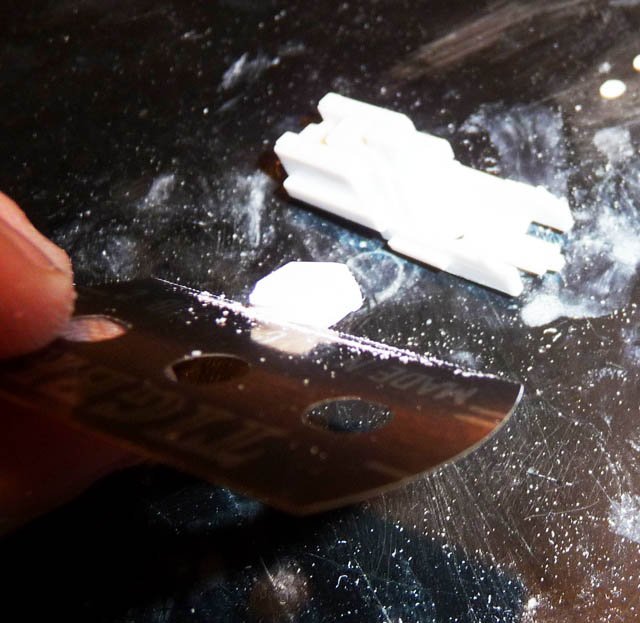
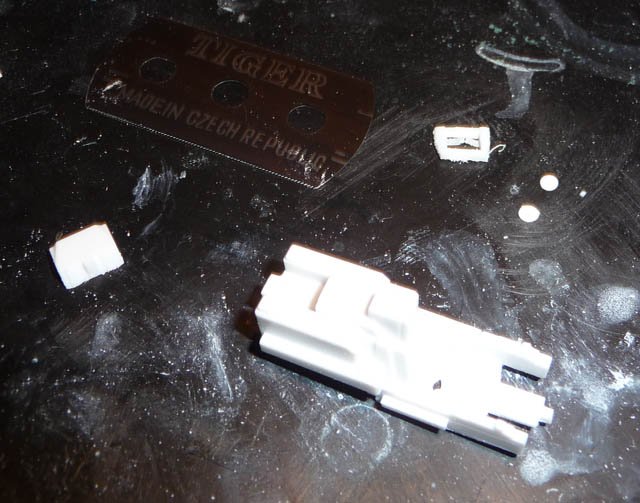
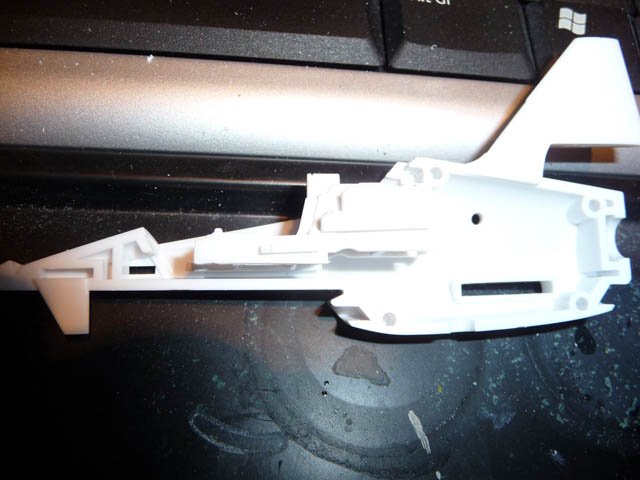
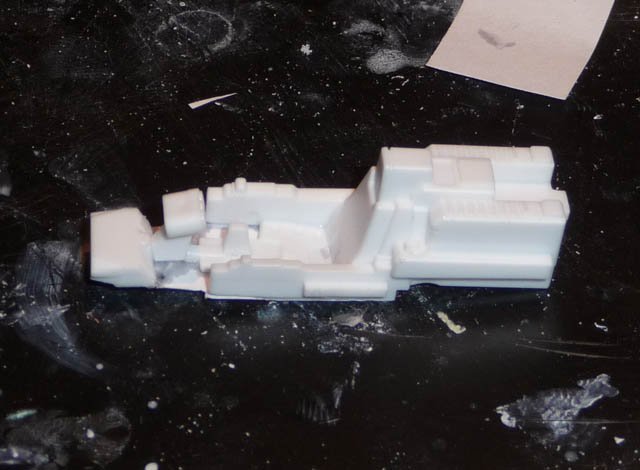
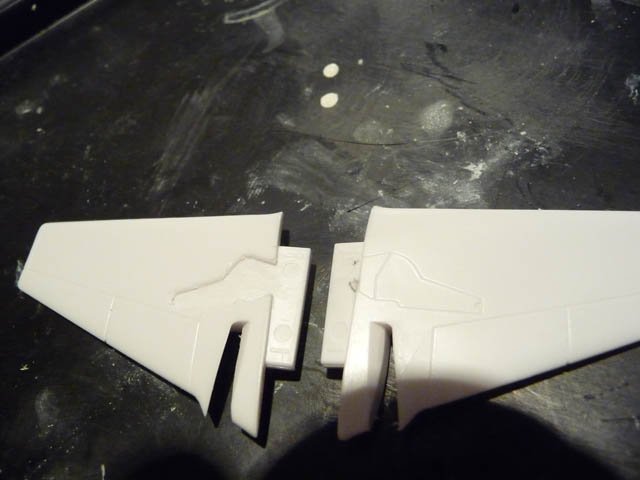
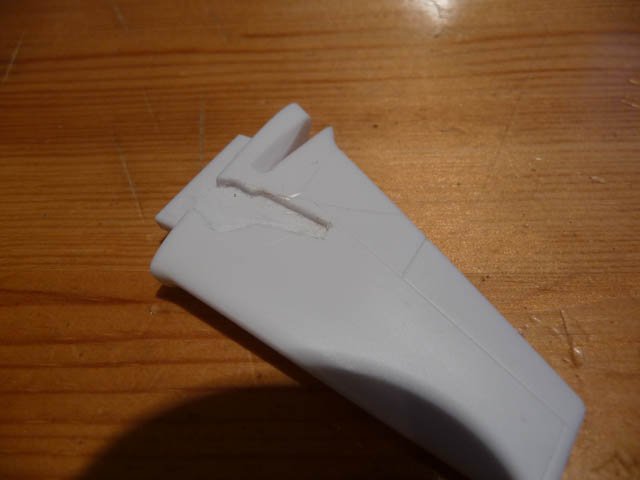
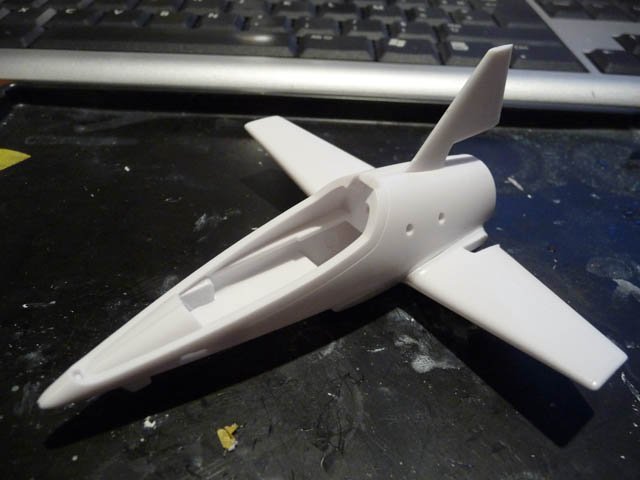
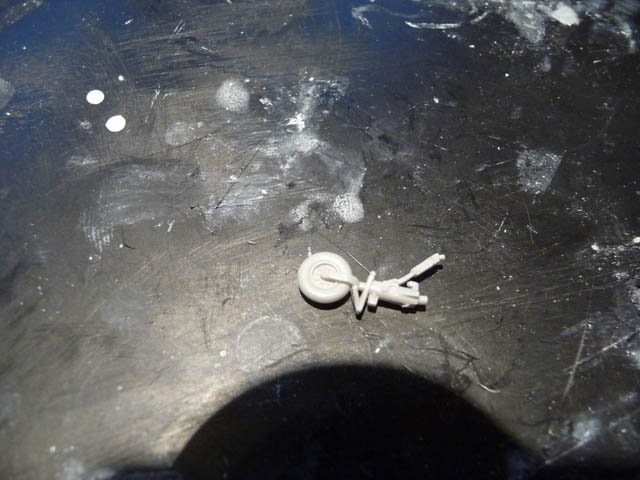
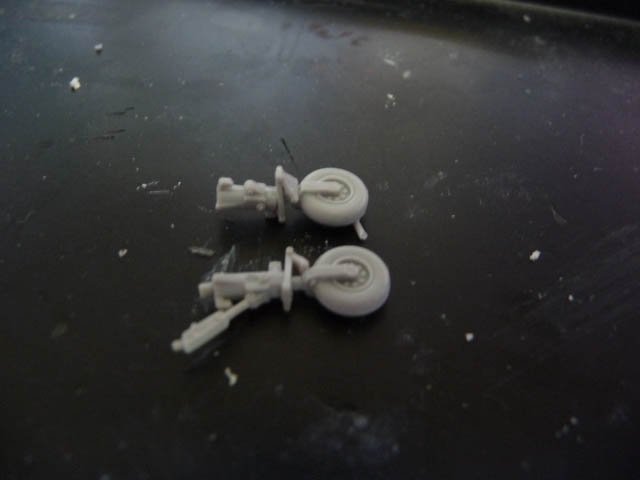
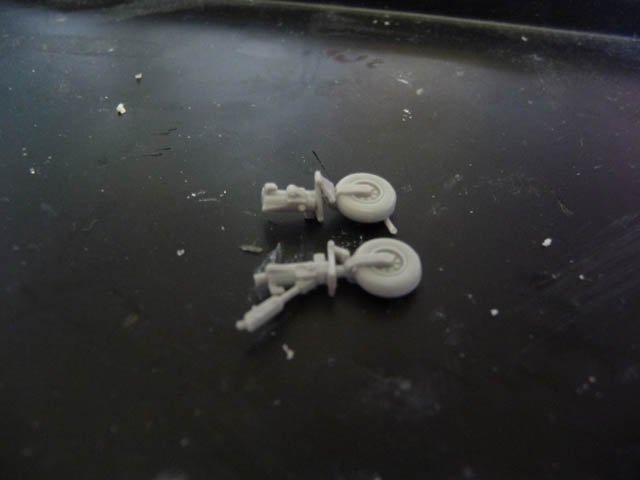
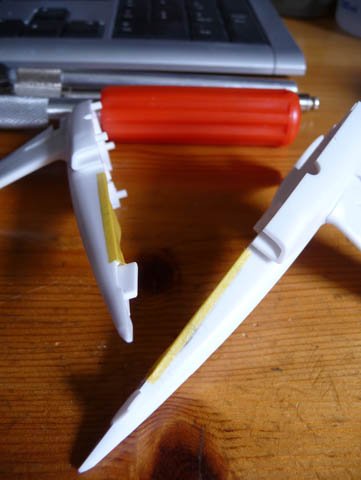
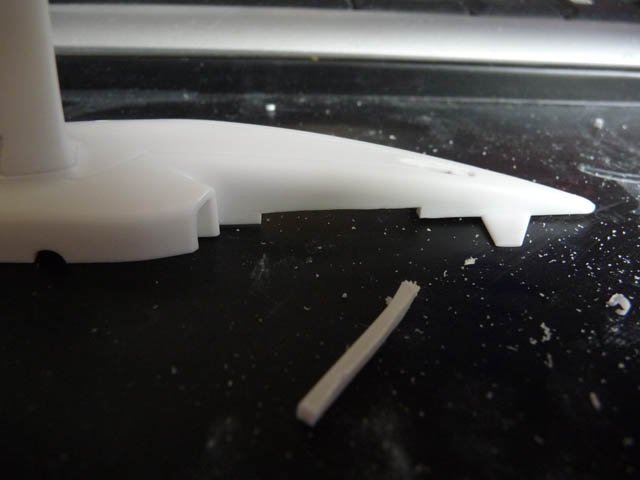
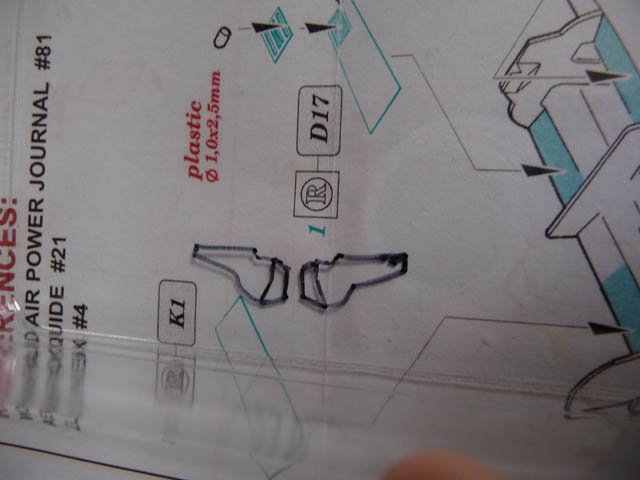
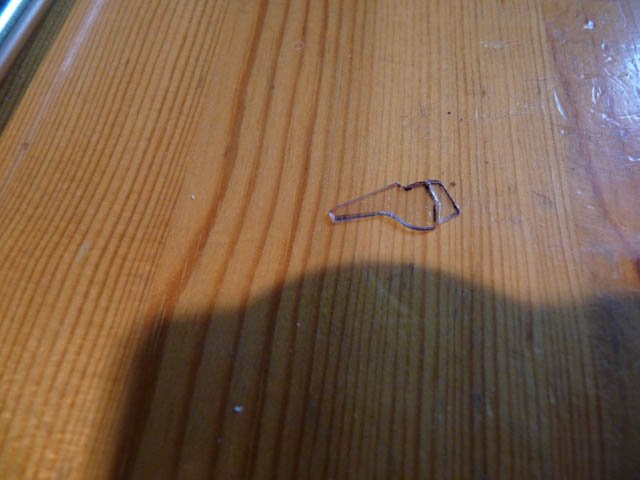
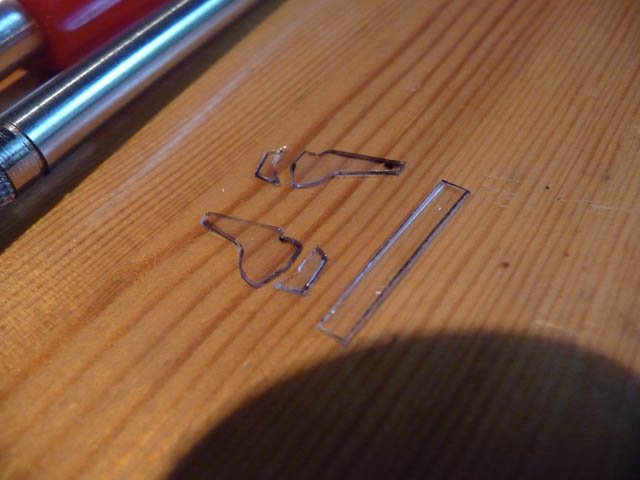
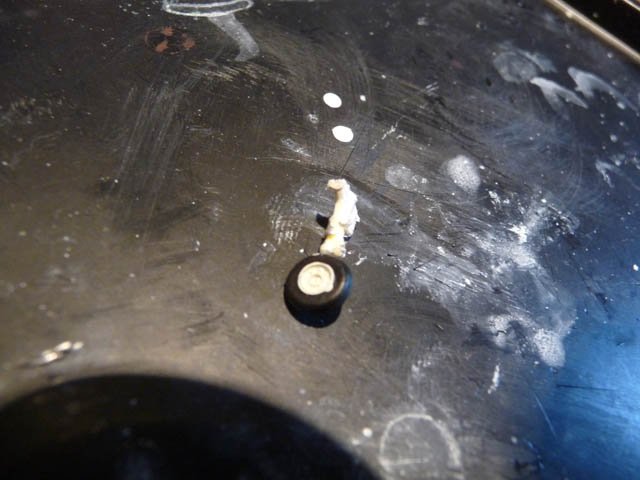
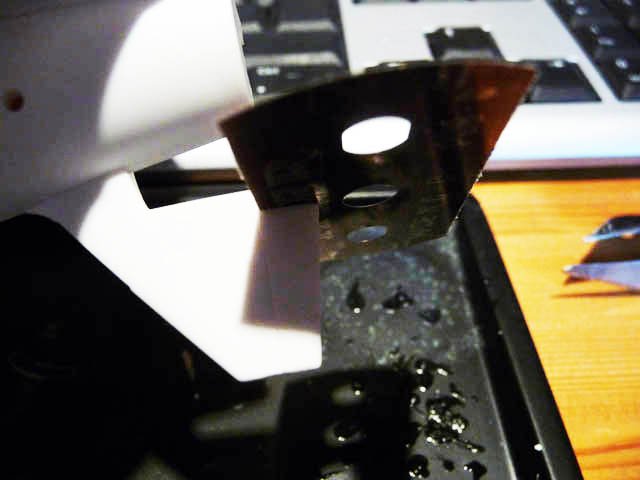
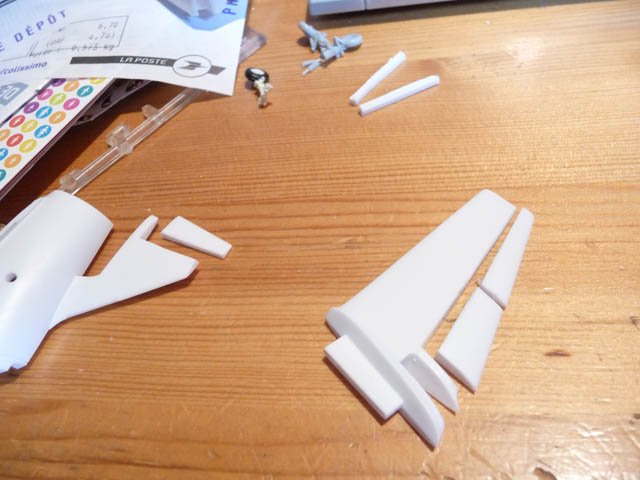
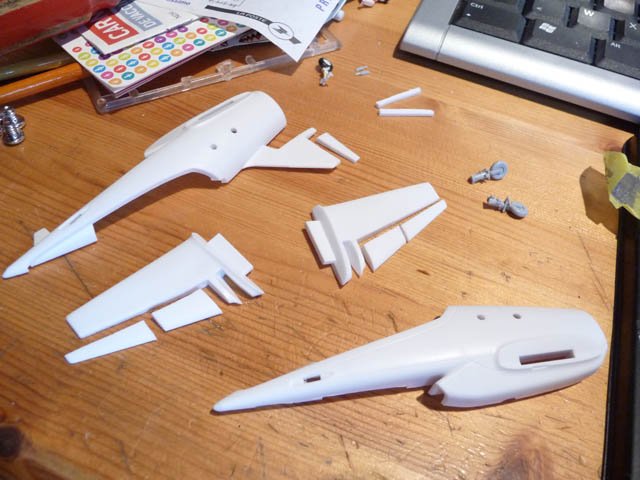
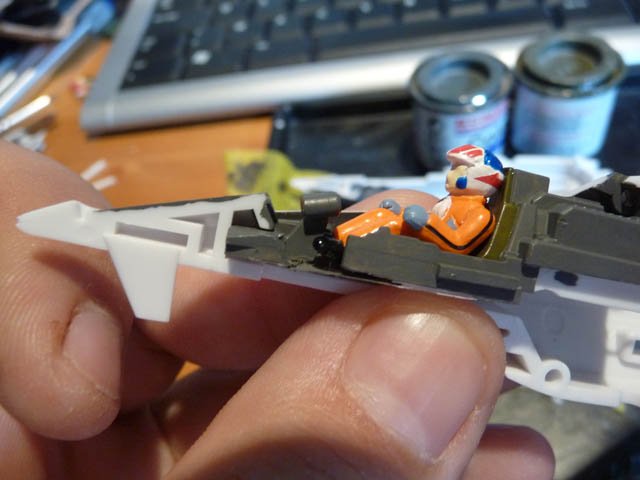
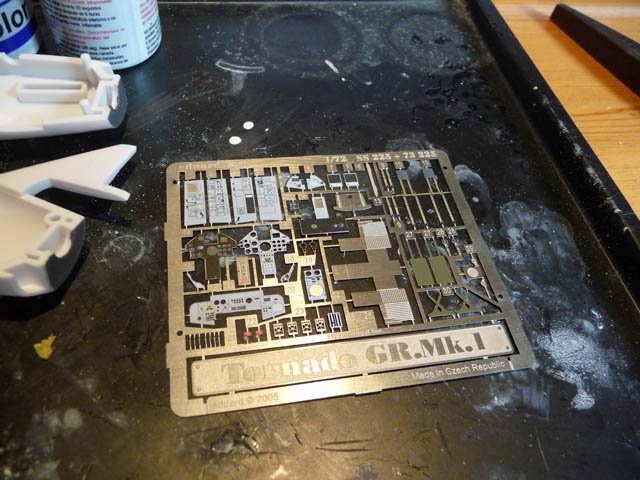
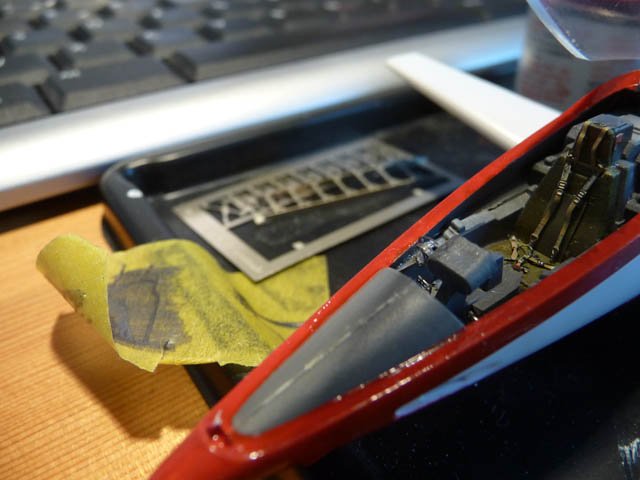
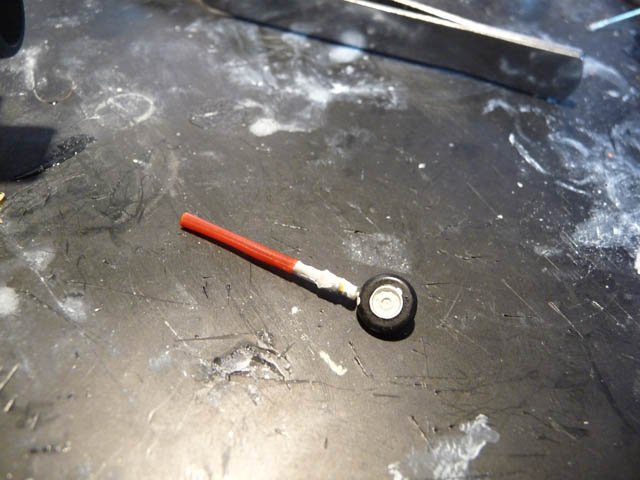
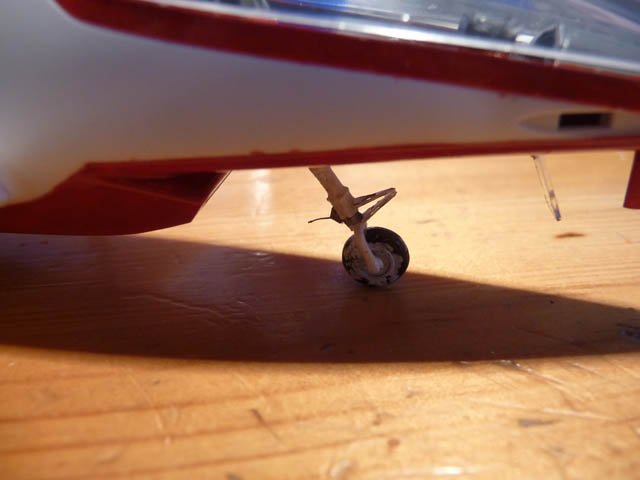
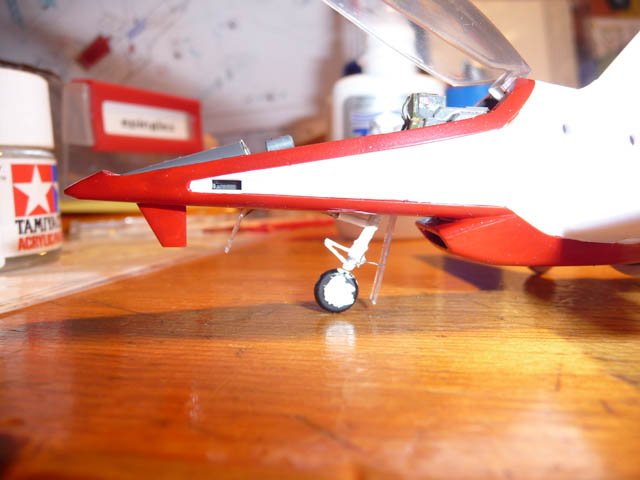
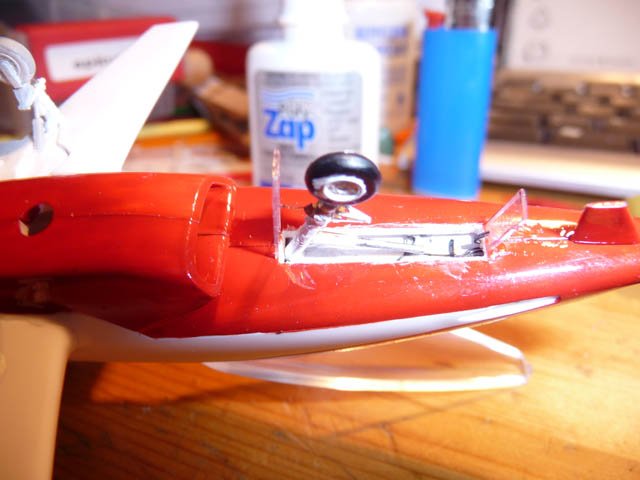
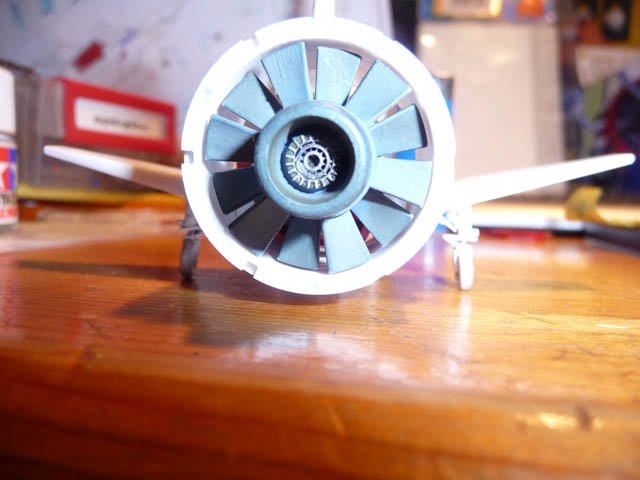
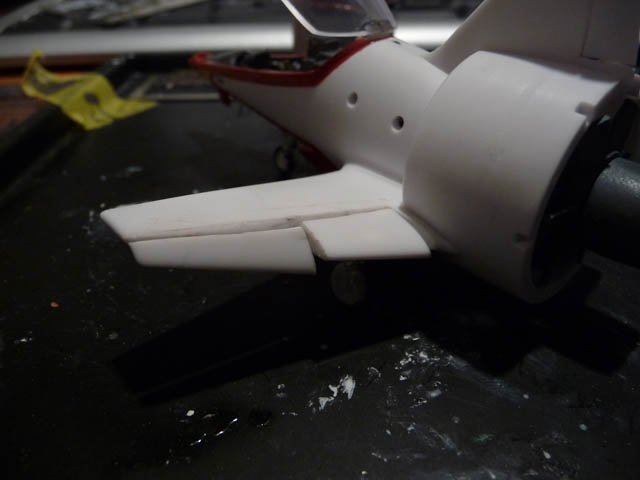
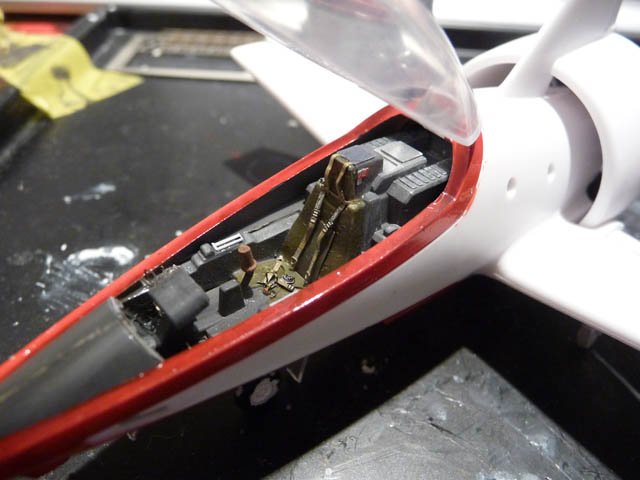
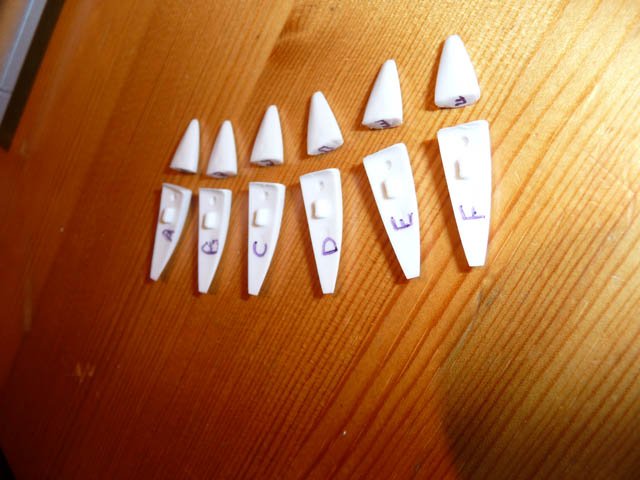
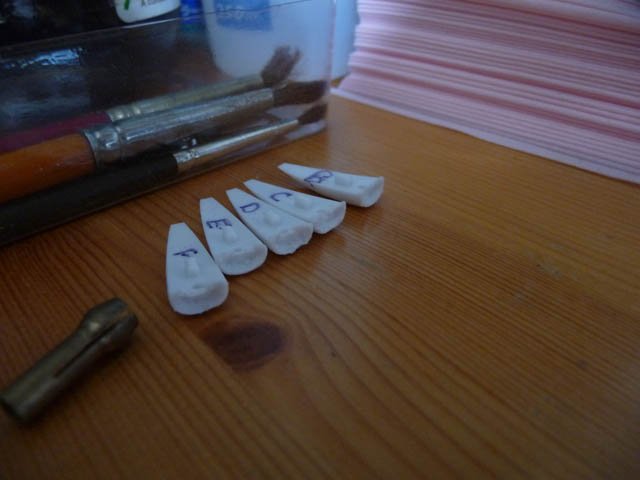
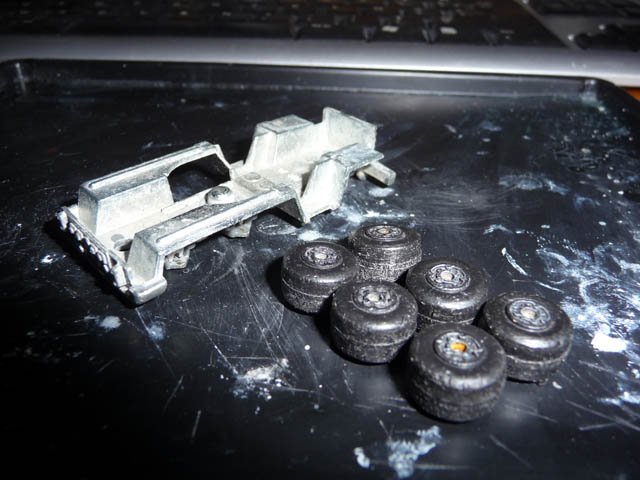
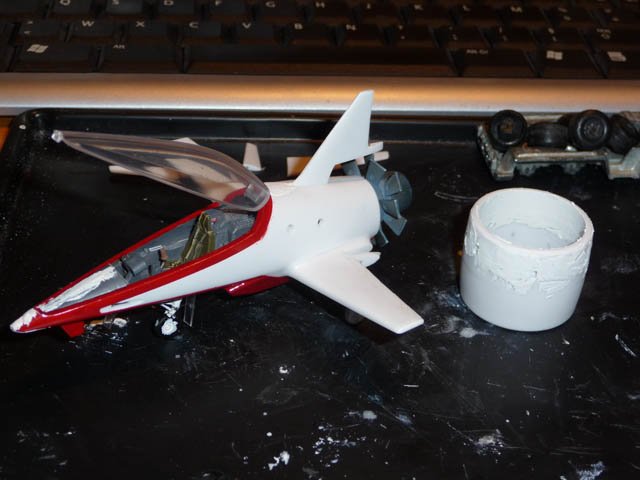
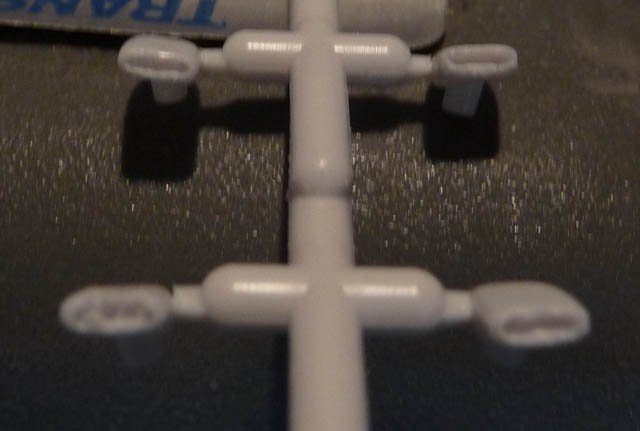
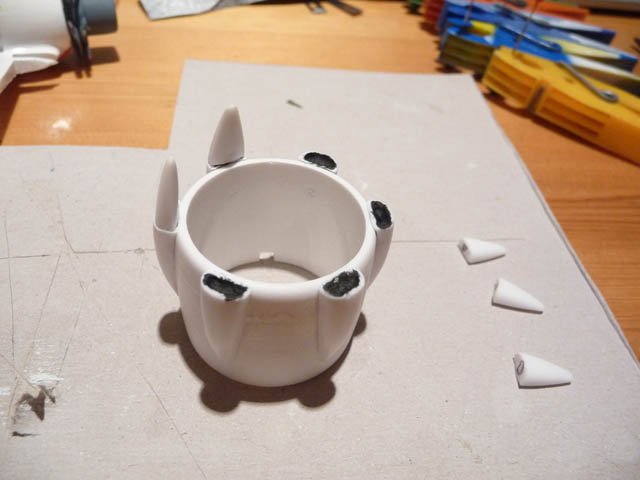
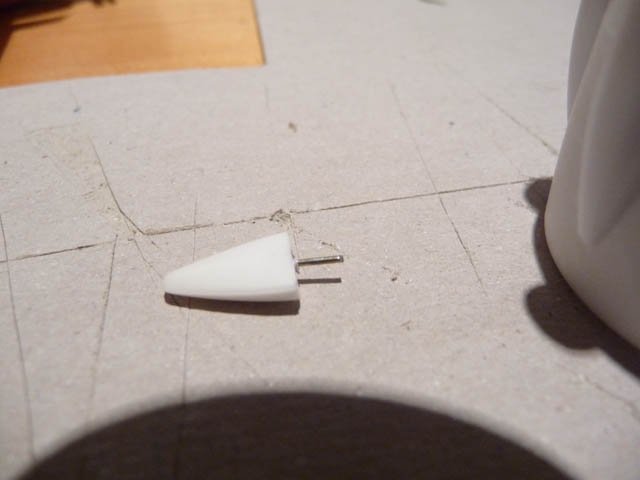
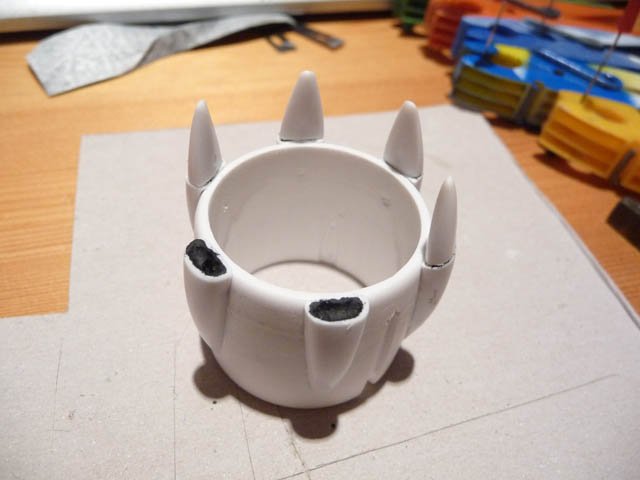
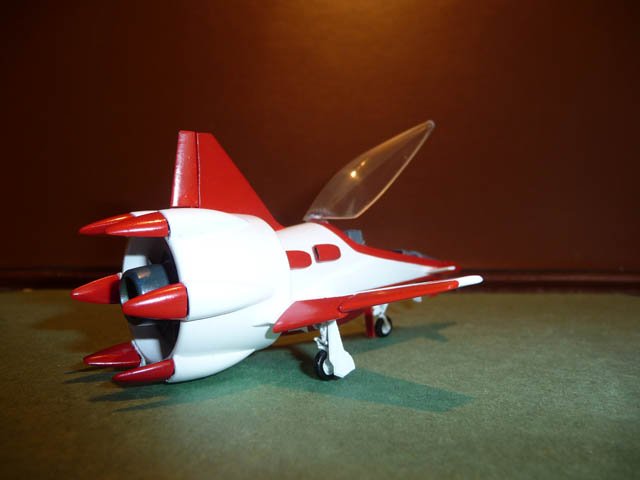
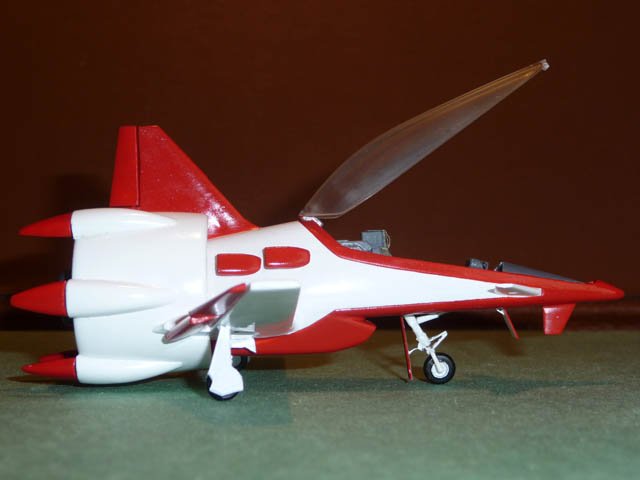
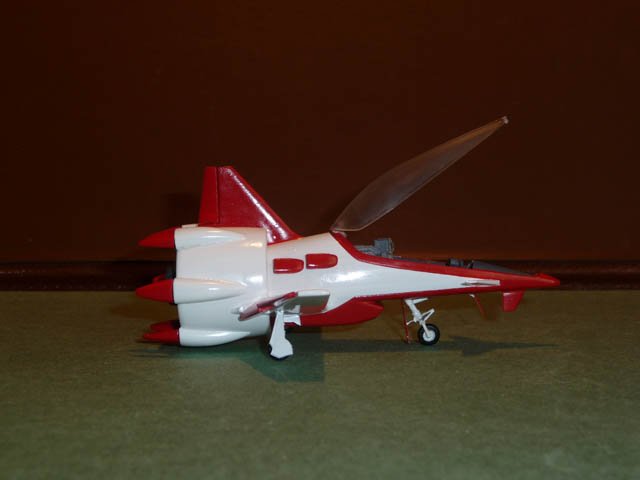
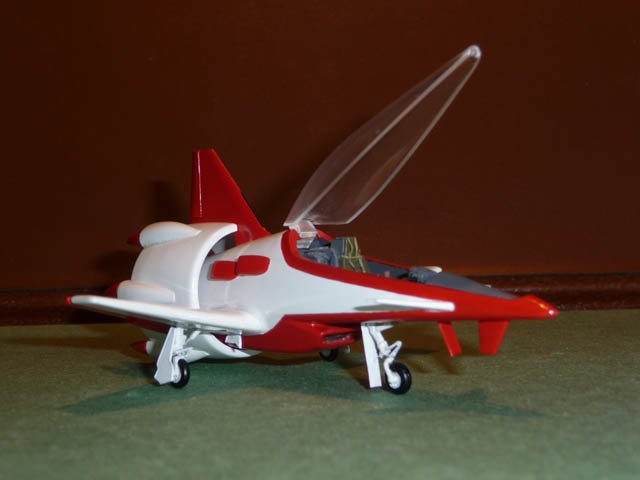
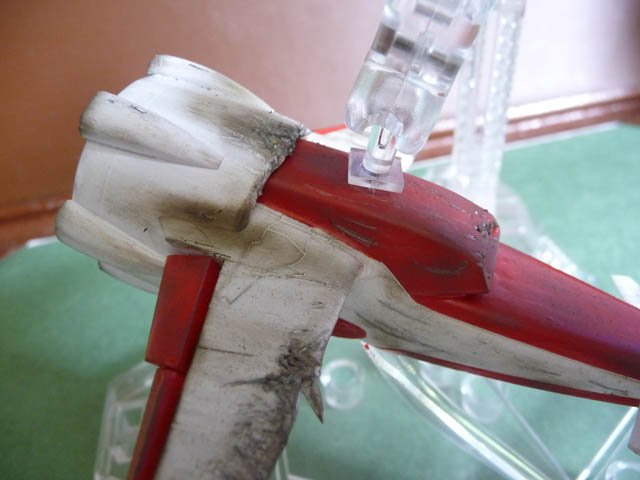
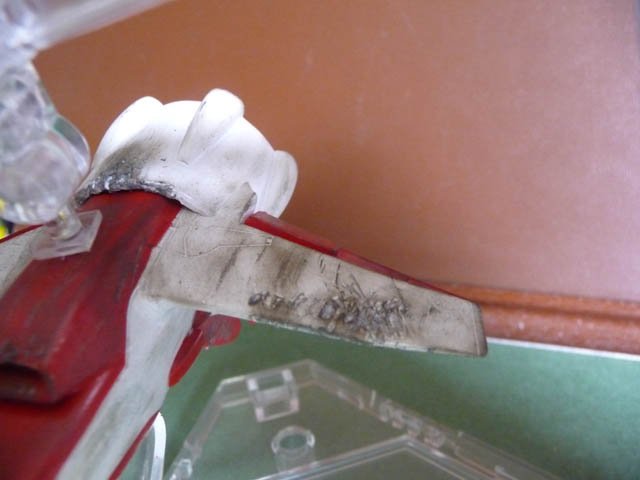
As I promised it, this is my step-by-step Fan Racer I put in my diorama. The Fan Racer I put in the crashed diorama has no landing gear created, but all the other modifications I made on this one are also on it I let you imagine the work it was 1/ no landing gear, so create it ! - beginning with that material : one piece molded wing with no landing gear reservation... and not enough room for the tricycle wheel under the cockpit... all is beginning so well with this model kit however, the weighting will fit in the plastic to get the plane on the 3 wheels and not on his ass ! - in red, the not kept surfaces of the cockpit, wich will be cut, then, I have taken out almost 1 millimeter is height to have enough room for the front gear : - for assembly, just glued with a paper sheet witch replace the cockpit floor, when painted it's as the real part : - create the reservation for landing gear in the wings with modelist knife (exacto blade) : - main assembly tryout : - creating the landing gear : I was helped by my other model kits : I took 2 nose wheels of Italeri F-5B Fighter (wich are unused in the kit but available) as main landing gear basis because wheel diameter and overall length was exactly what I needed, but it has to be modified : - See between original and modified (the small part will be put in place later) : - Before final fuselage assembly, drawing of the front gear doors, and cutting with saw : - drawing, by transparency, the main gear doors on plastic card, and cutting : - I found out my front gear basis : a front wheel of 1/72 F16 Italeri 2/ make those flaps spare ! - cutting the flaps with saw : 3/ to assemble the plane, must paint cockpit and rear fan ! - painting of cockpit, accessorising it, making the same on the rear fan, as the front wheel can't be mesured without having the plane "inflight" line : - Tryout with VT102's Hikaru pilot figure : doesn't reach the rudder pedal... - For accessorising the cockpit, I took Eduard Tornado GR1 Photo etched parts set, as I wanted to do 2 fan racers and the GR1 is twin seater, with good big seats as you will see later, I was right to think at that aircraft ! - Wasn't right ? it fits perfectly the seat - prepainted and definitively assembled fuselage : 4/ make the front landing gear ! - inflight line as main gear has been glued, it's possible to mesure how long would be the front gear : - test of scale with destroids... 5/ detailling the cockpit and gears ! - made a joystick as seen in the anime and picked up parts in Tornado PE to give life to my landing gear : - test with rear fan cover : 6/ make those spare flaps move ! - I took pins to make axles, and I have made those flaps move : 6/ spare, make removable rear boosters cones ! - I wanted to make the rear cones of the booster removable... must have cut, dig them, then put an axle and youhouuuu that's done 6/ final assembly ! - Put putty on the parts junctions, to get good result : - after, it's like that : - let's dig the axhaust pipes : 7/ final paint & result ! - just have a look... What do you think of this Fan Racer ? Slighly better than original box or not ? :wink:


-
Yamato 1/60 Fan Racer - upgraded model diorama
Ratatarse replied to Ratatarse's topic in The Workshop!
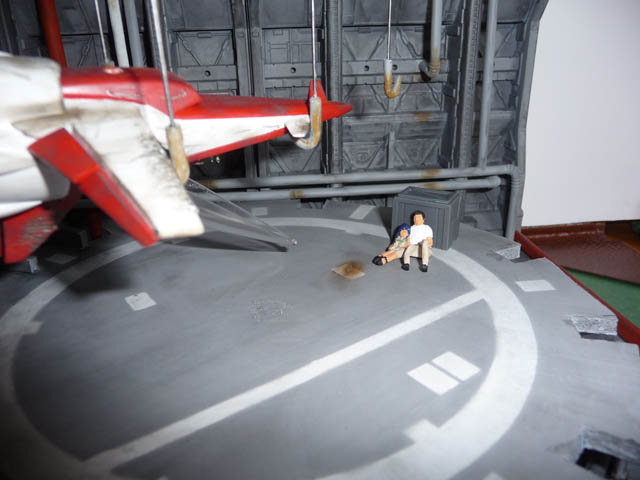
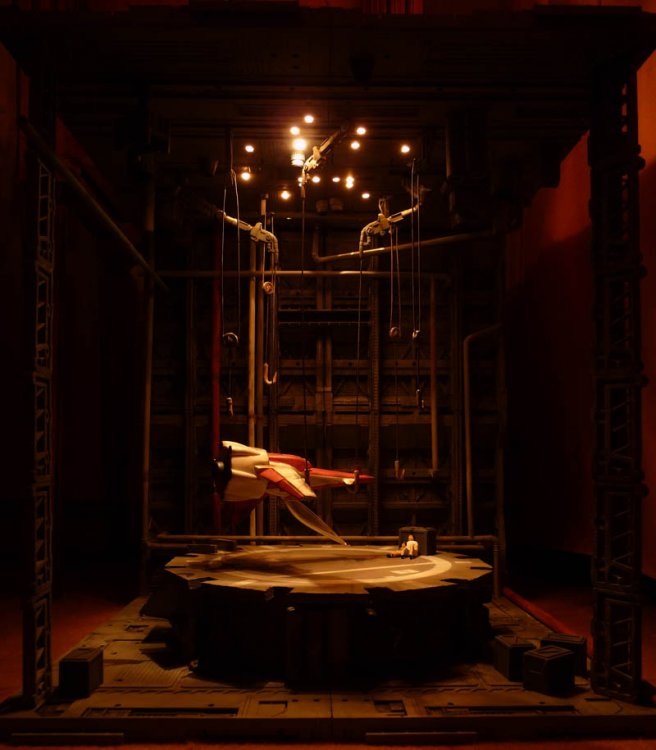
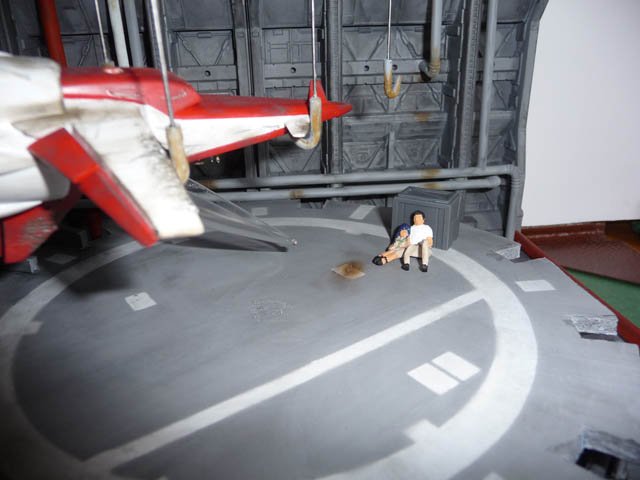
Sooooooooo I recovered my hdd the diorama is just here now (I've put a step-by-step topic) : - The scene I wanted to reproduce : - The final result : With highly upgraded Fan Racer Model Kit (step-by-step here) and scratched Roy Focker, Hikaru and Minmey figures and scratched Roy's Personnal Carrier Diorama Base : Kotobuyika's mechanical chain bases, for walls, land and accessories.


-
Yamato 1/60 Fan Racer - upgraded model crashed diorama
Ratatarse replied to Ratatarse's topic in The Workshop!
Thanks Here are the pics : - The scene I wanted to reproduce : - The final result : LED-lighted in complete night black, or with flash to see all details. Scratched some accessories and podium. - Crashed Fan Racer details : detailled cockpit with photo-etched parts from 1/72 Tornado GR1, separate the flaps, separate the rear booster cones, scartched the model kit and hand-painted. - Diorama details : To respect the irregularity of the "butchers" as seen in the video I made them non-regular, a lot of details are scartched-made


-
Excellent effect ! As our budie said, the darker armor makes more agressive on this valk And I saw I am not the only one to not use airbrush, greetings for the fluid paint !
-
Yamato 1/60 Fan Racer - upgraded model diorama
Ratatarse replied to Ratatarse's topic in The Workshop!
Wow, I didn't knew my friend nylcbv has posted on my dioramas let me reach my other images to put some details here as I get them Thanks Exo ! other customs are on the way, for sure -
Hi MaveRick ! Still astonished by your job, as I said on RC... Please, teach me
-
Yamato 1/60 Fan Racer - upgraded model diorama
Ratatarse replied to Ratatarse's topic in The Workshop!
I will post images here, of the model upgraded and the diorama, as I get back the images of my broken hdd ! Everybody said I was fool to do the numerous modifications to the original and very rare model kit LOL