

sc_planet
-
Posts
35 -
Joined
-
Last visited
Content Type
Profiles
Forums
Events
Gallery
Posts posted by sc_planet
-
-
Thanks to a friend who passed me the resin kit of seventh moon. The last picture is from internet. Someone is selling this kit in yahoo.co.jp at the price of 48K.

-
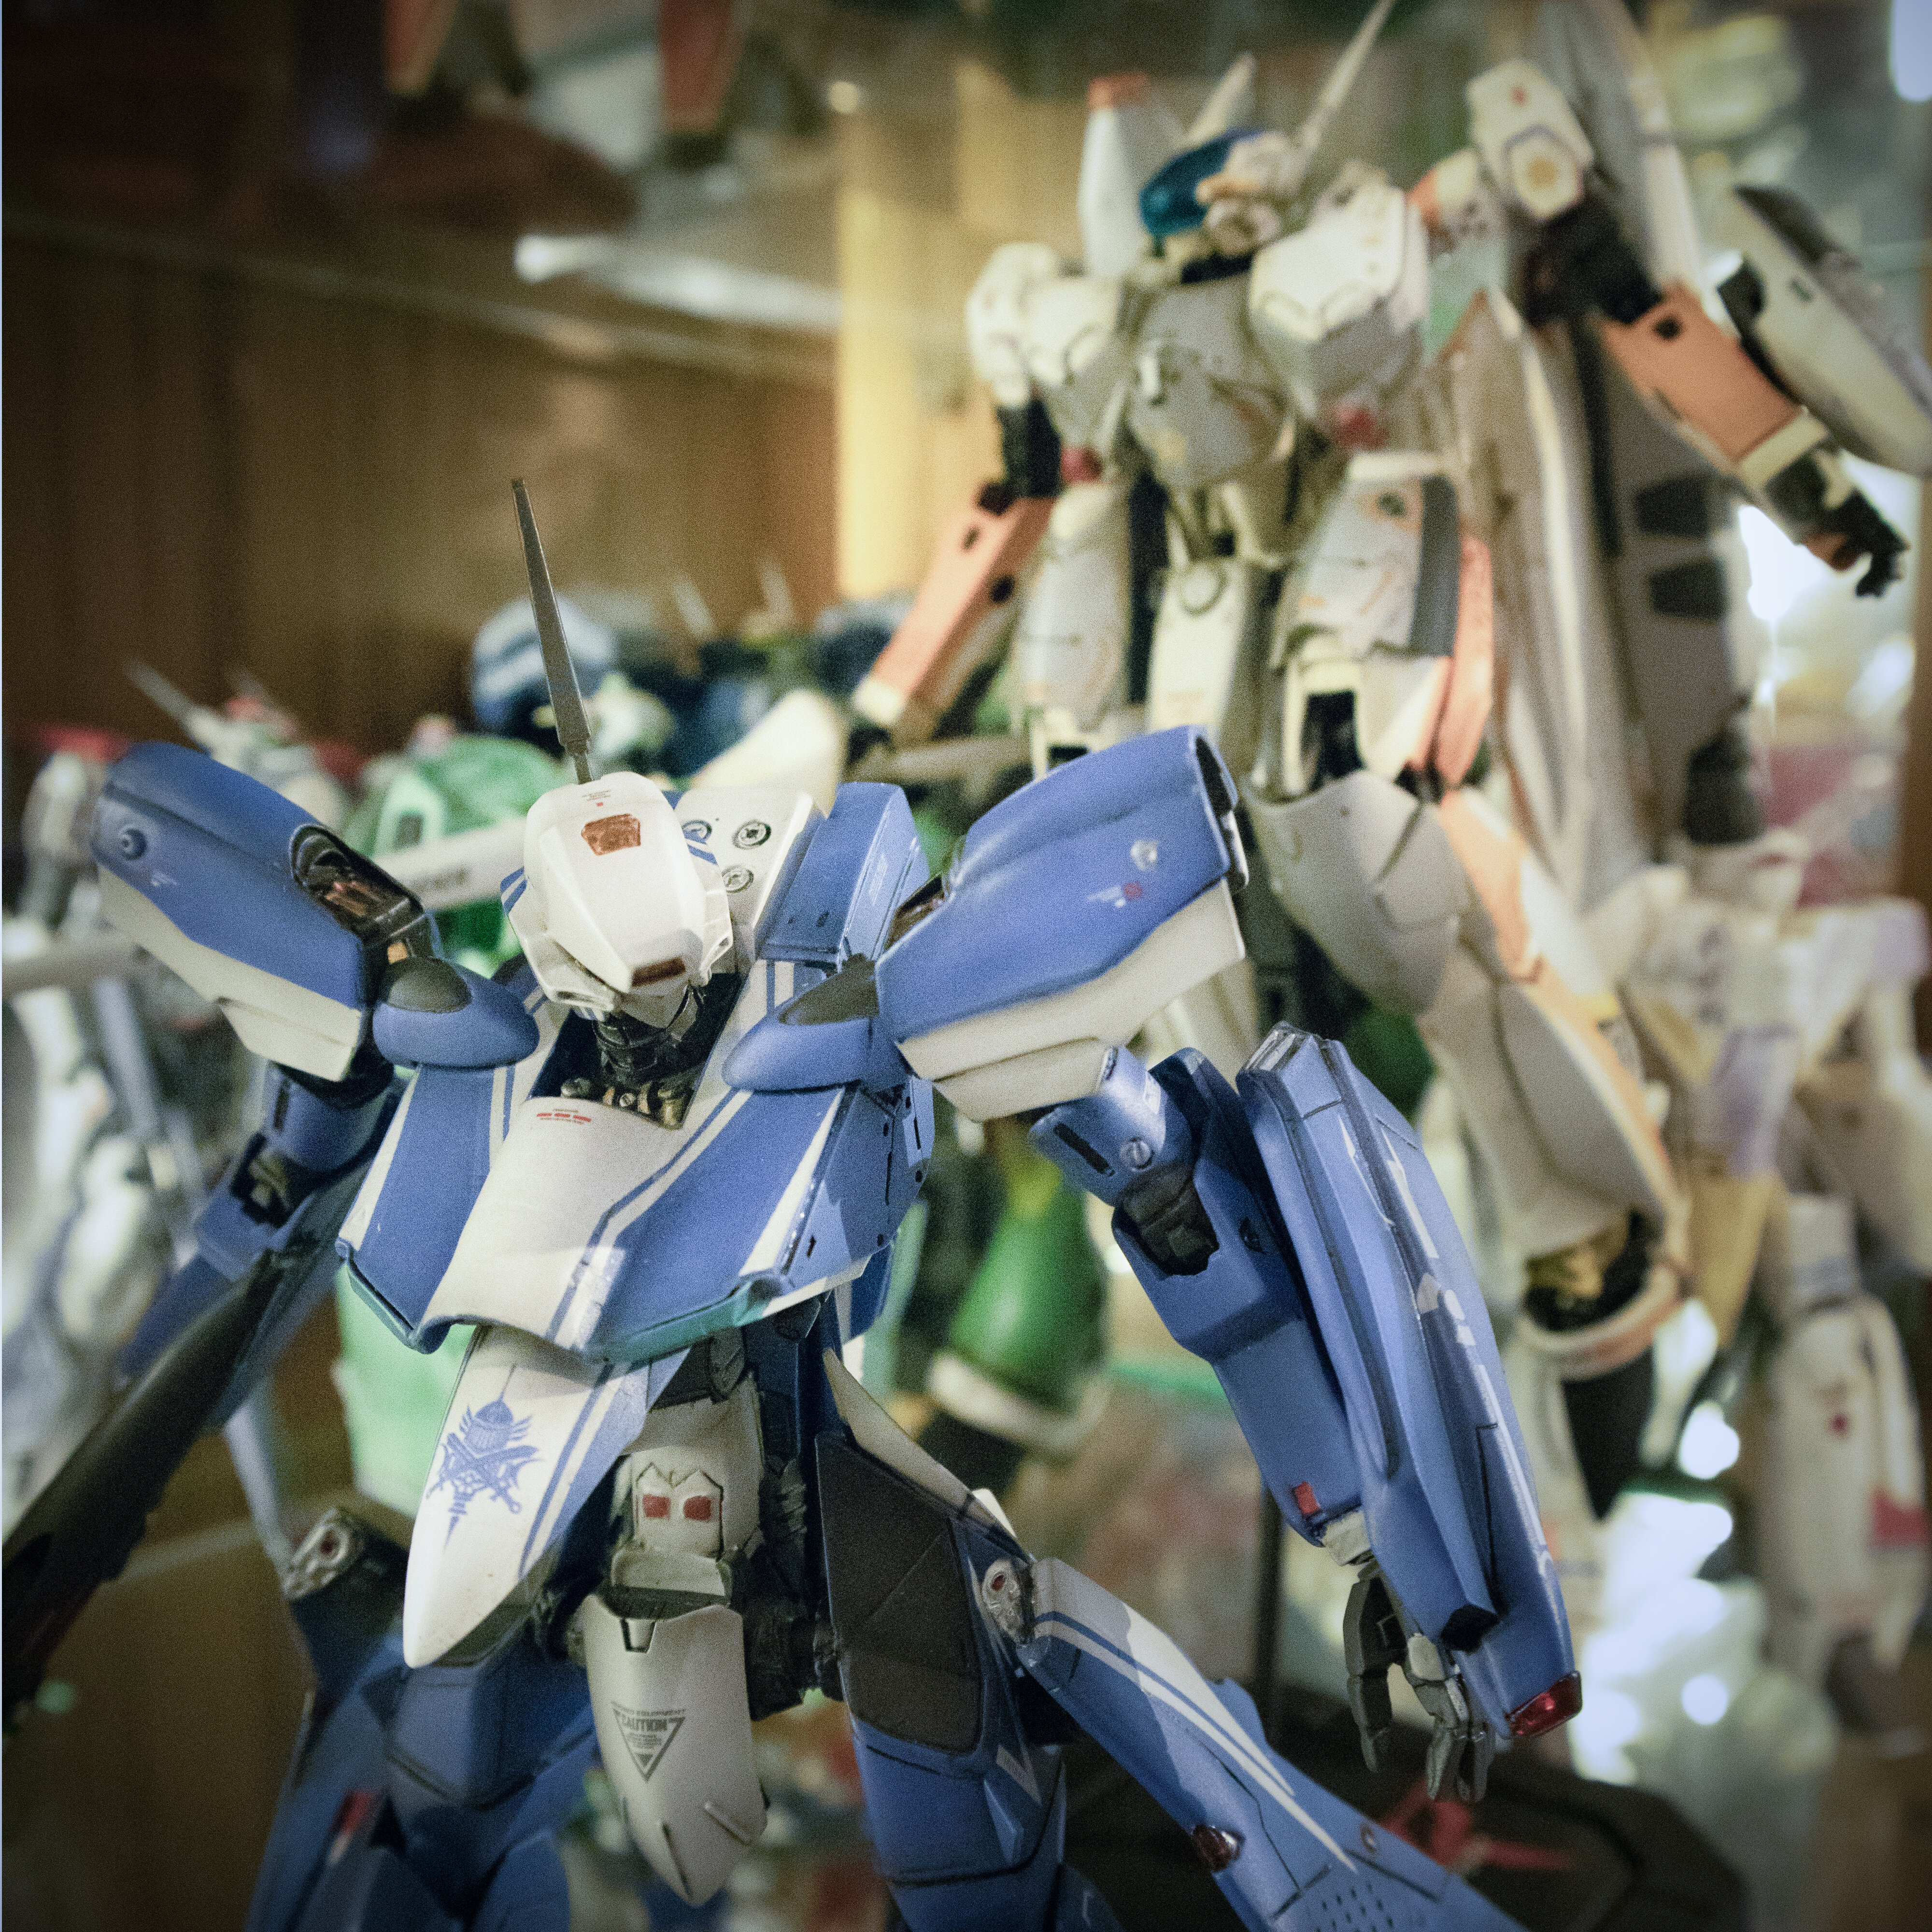
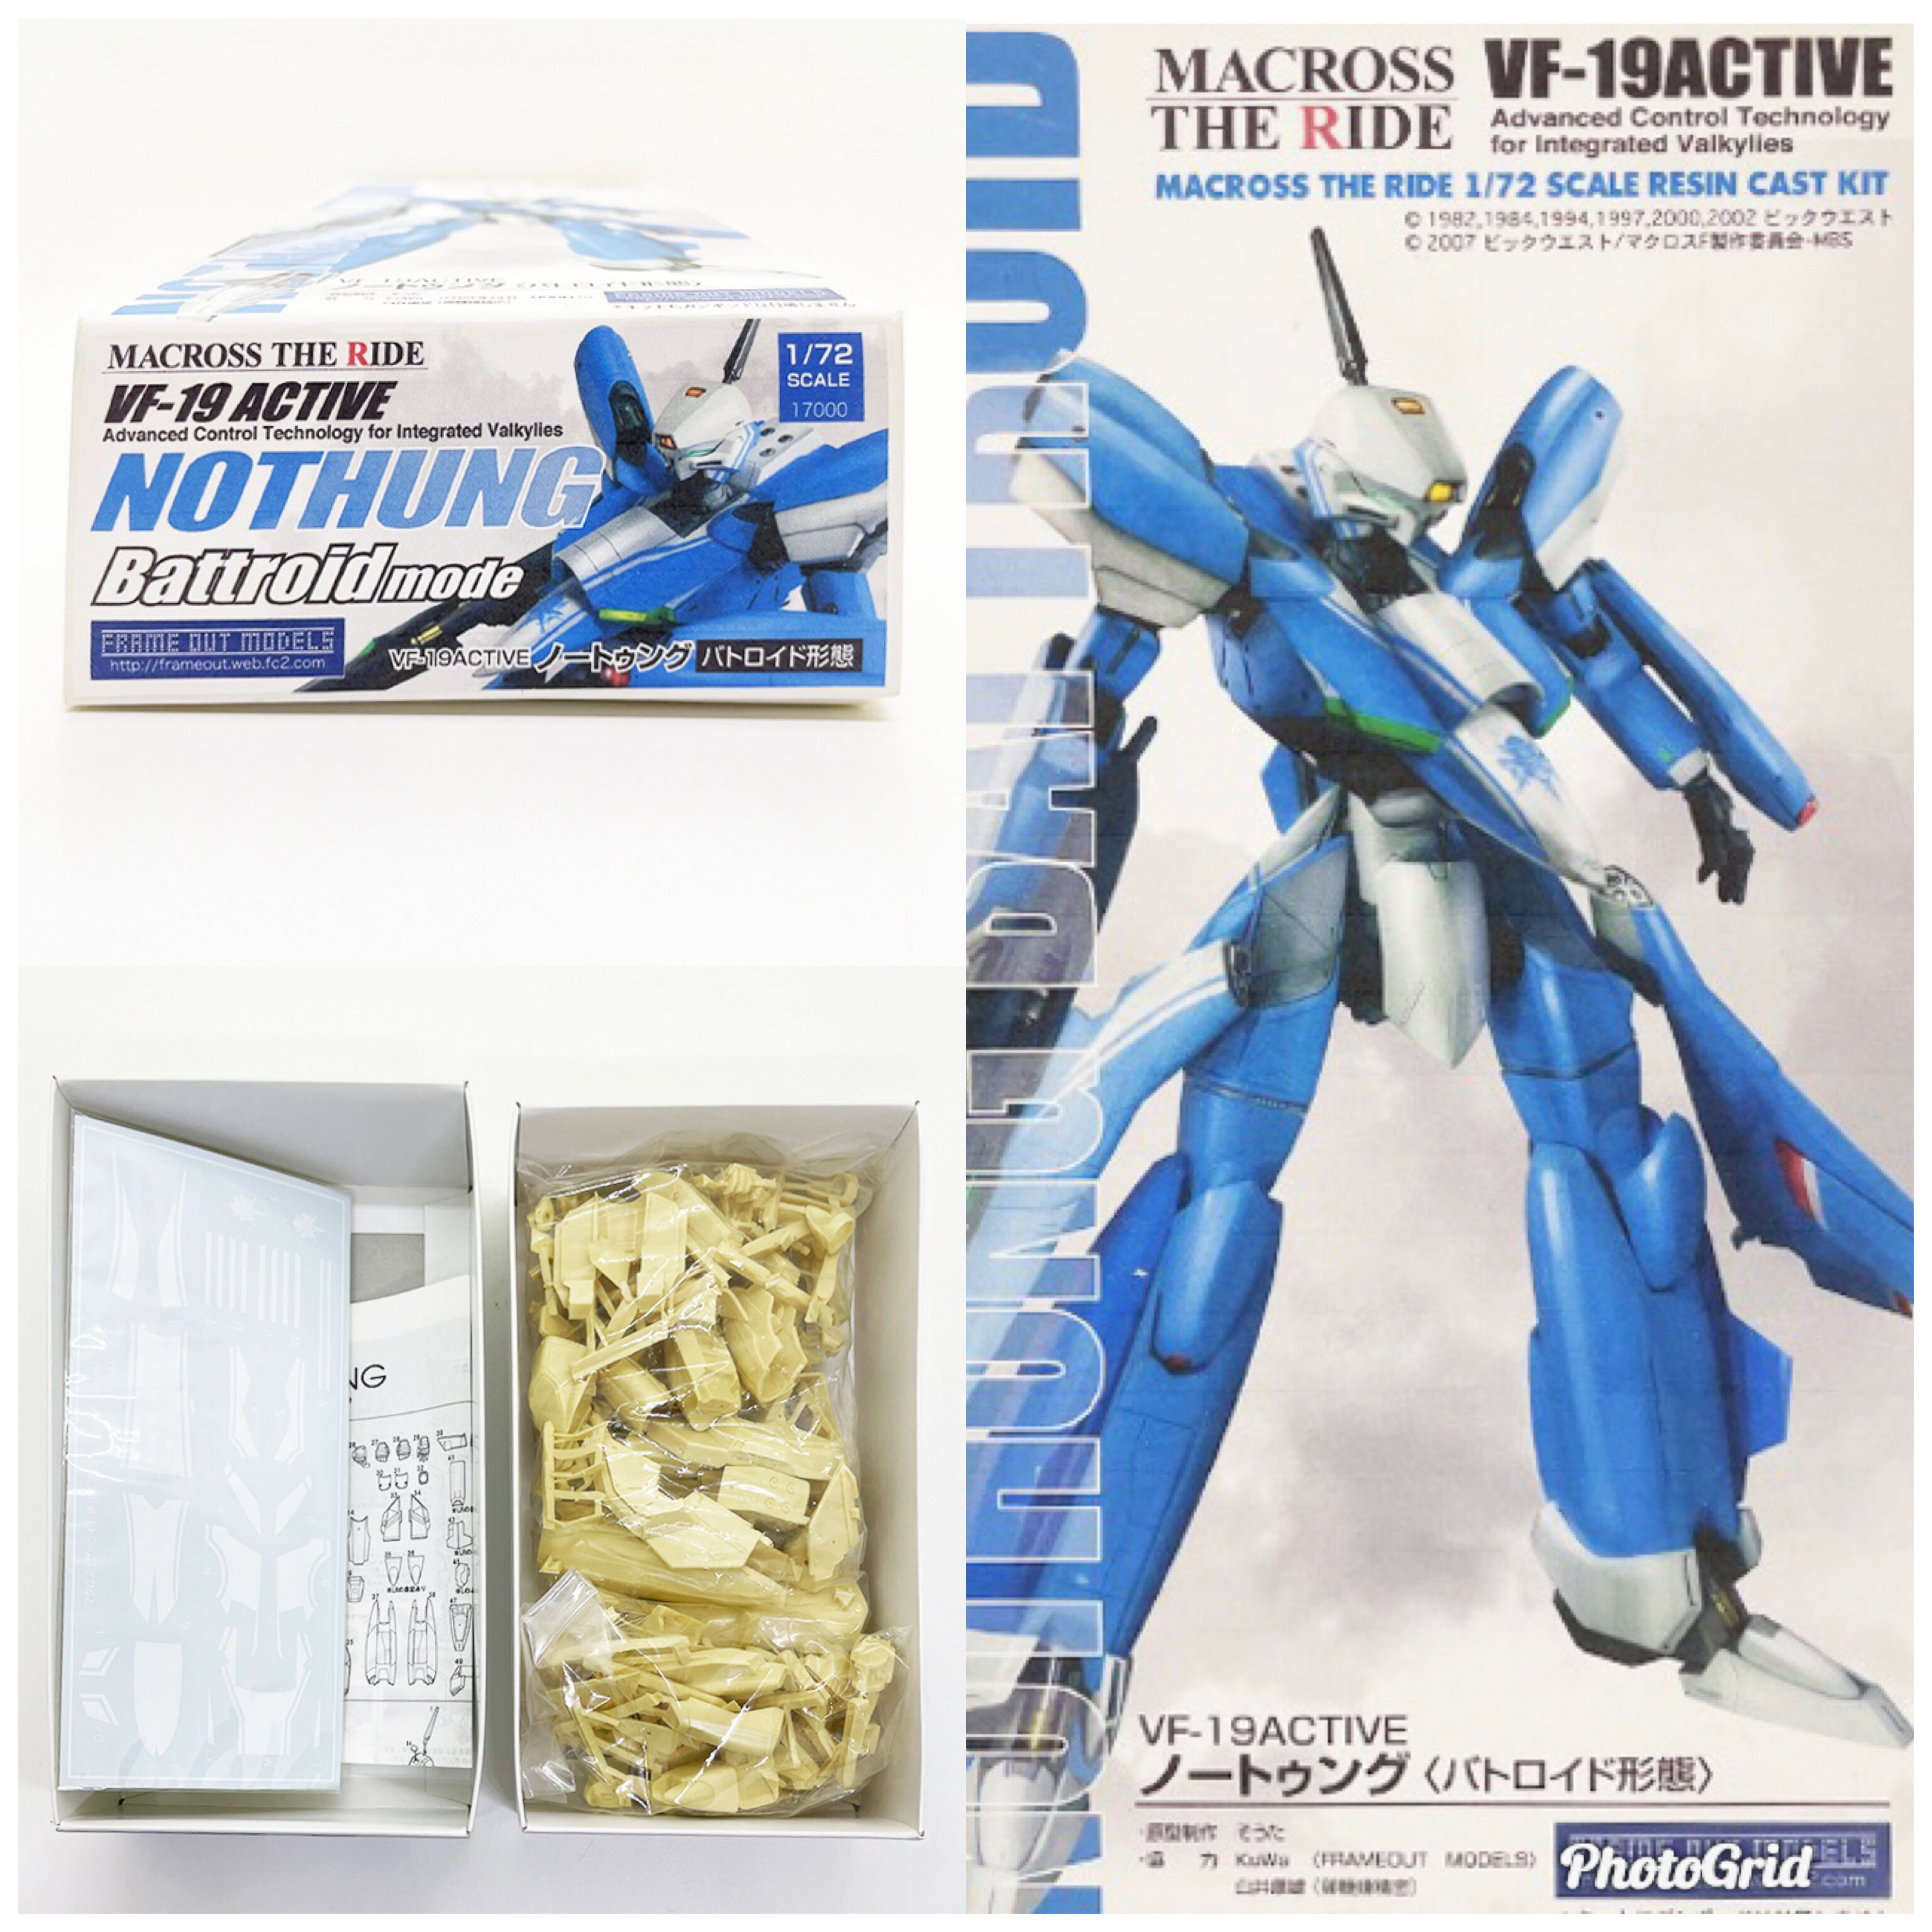
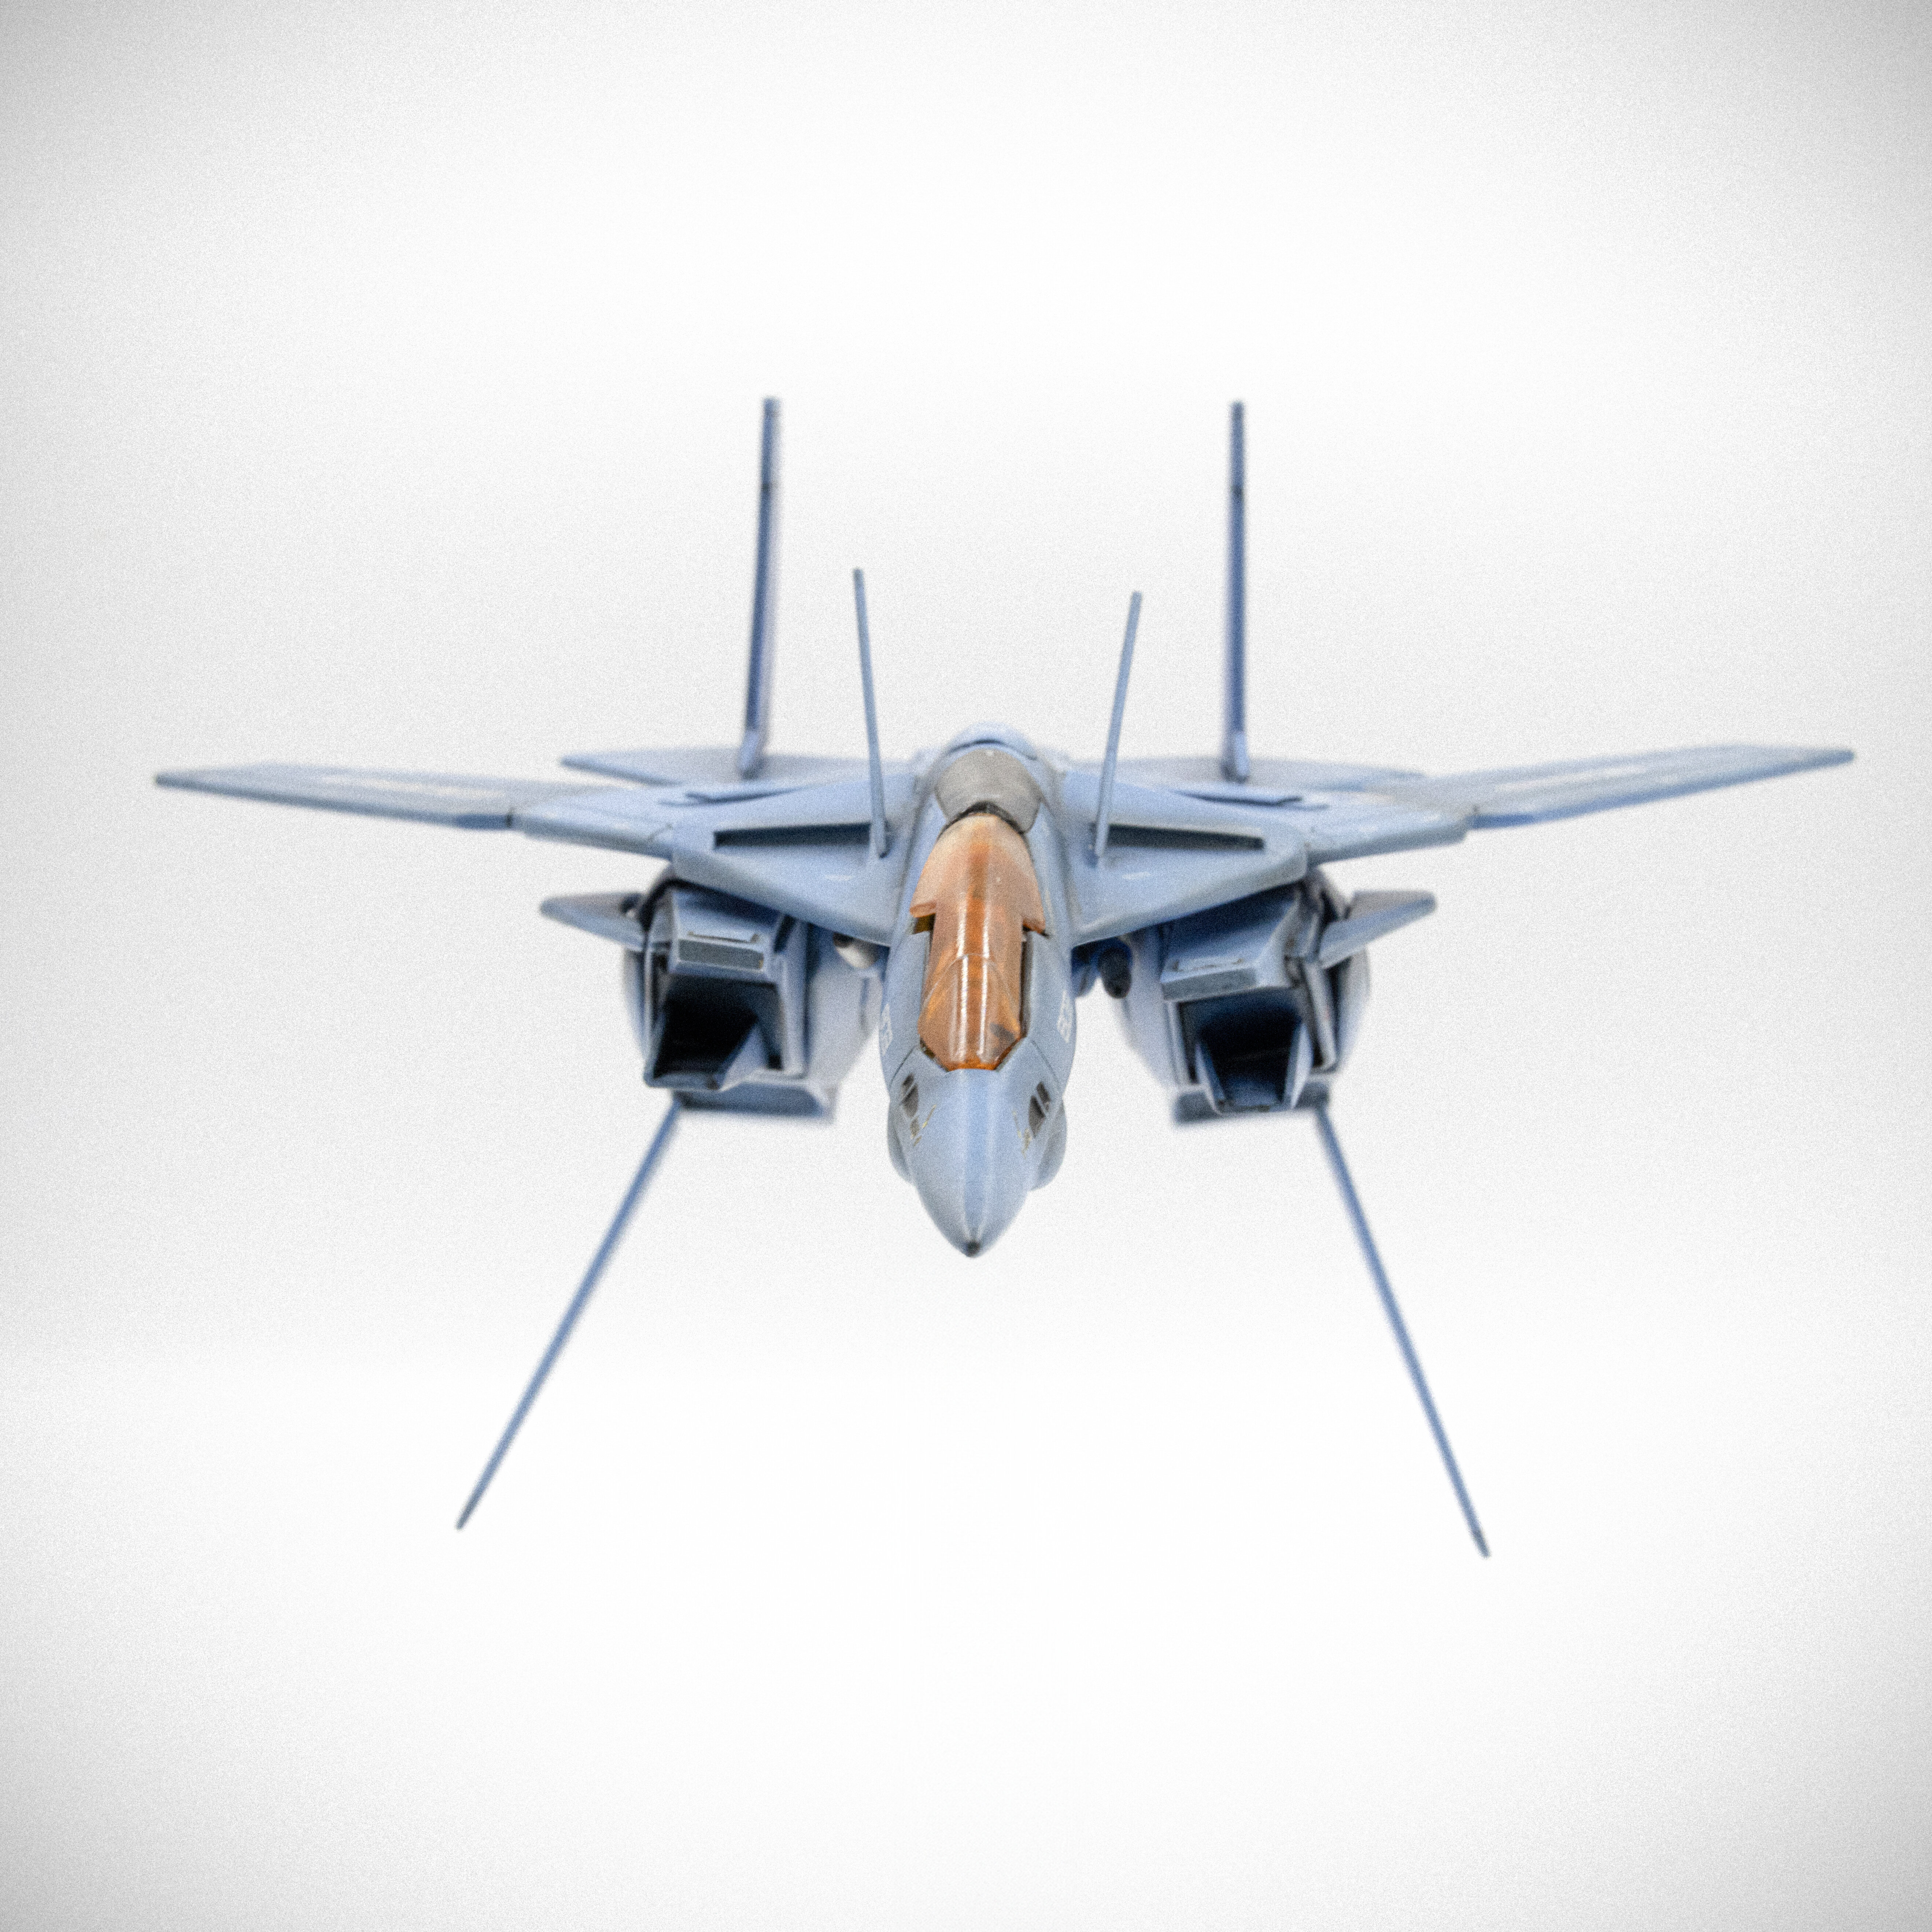
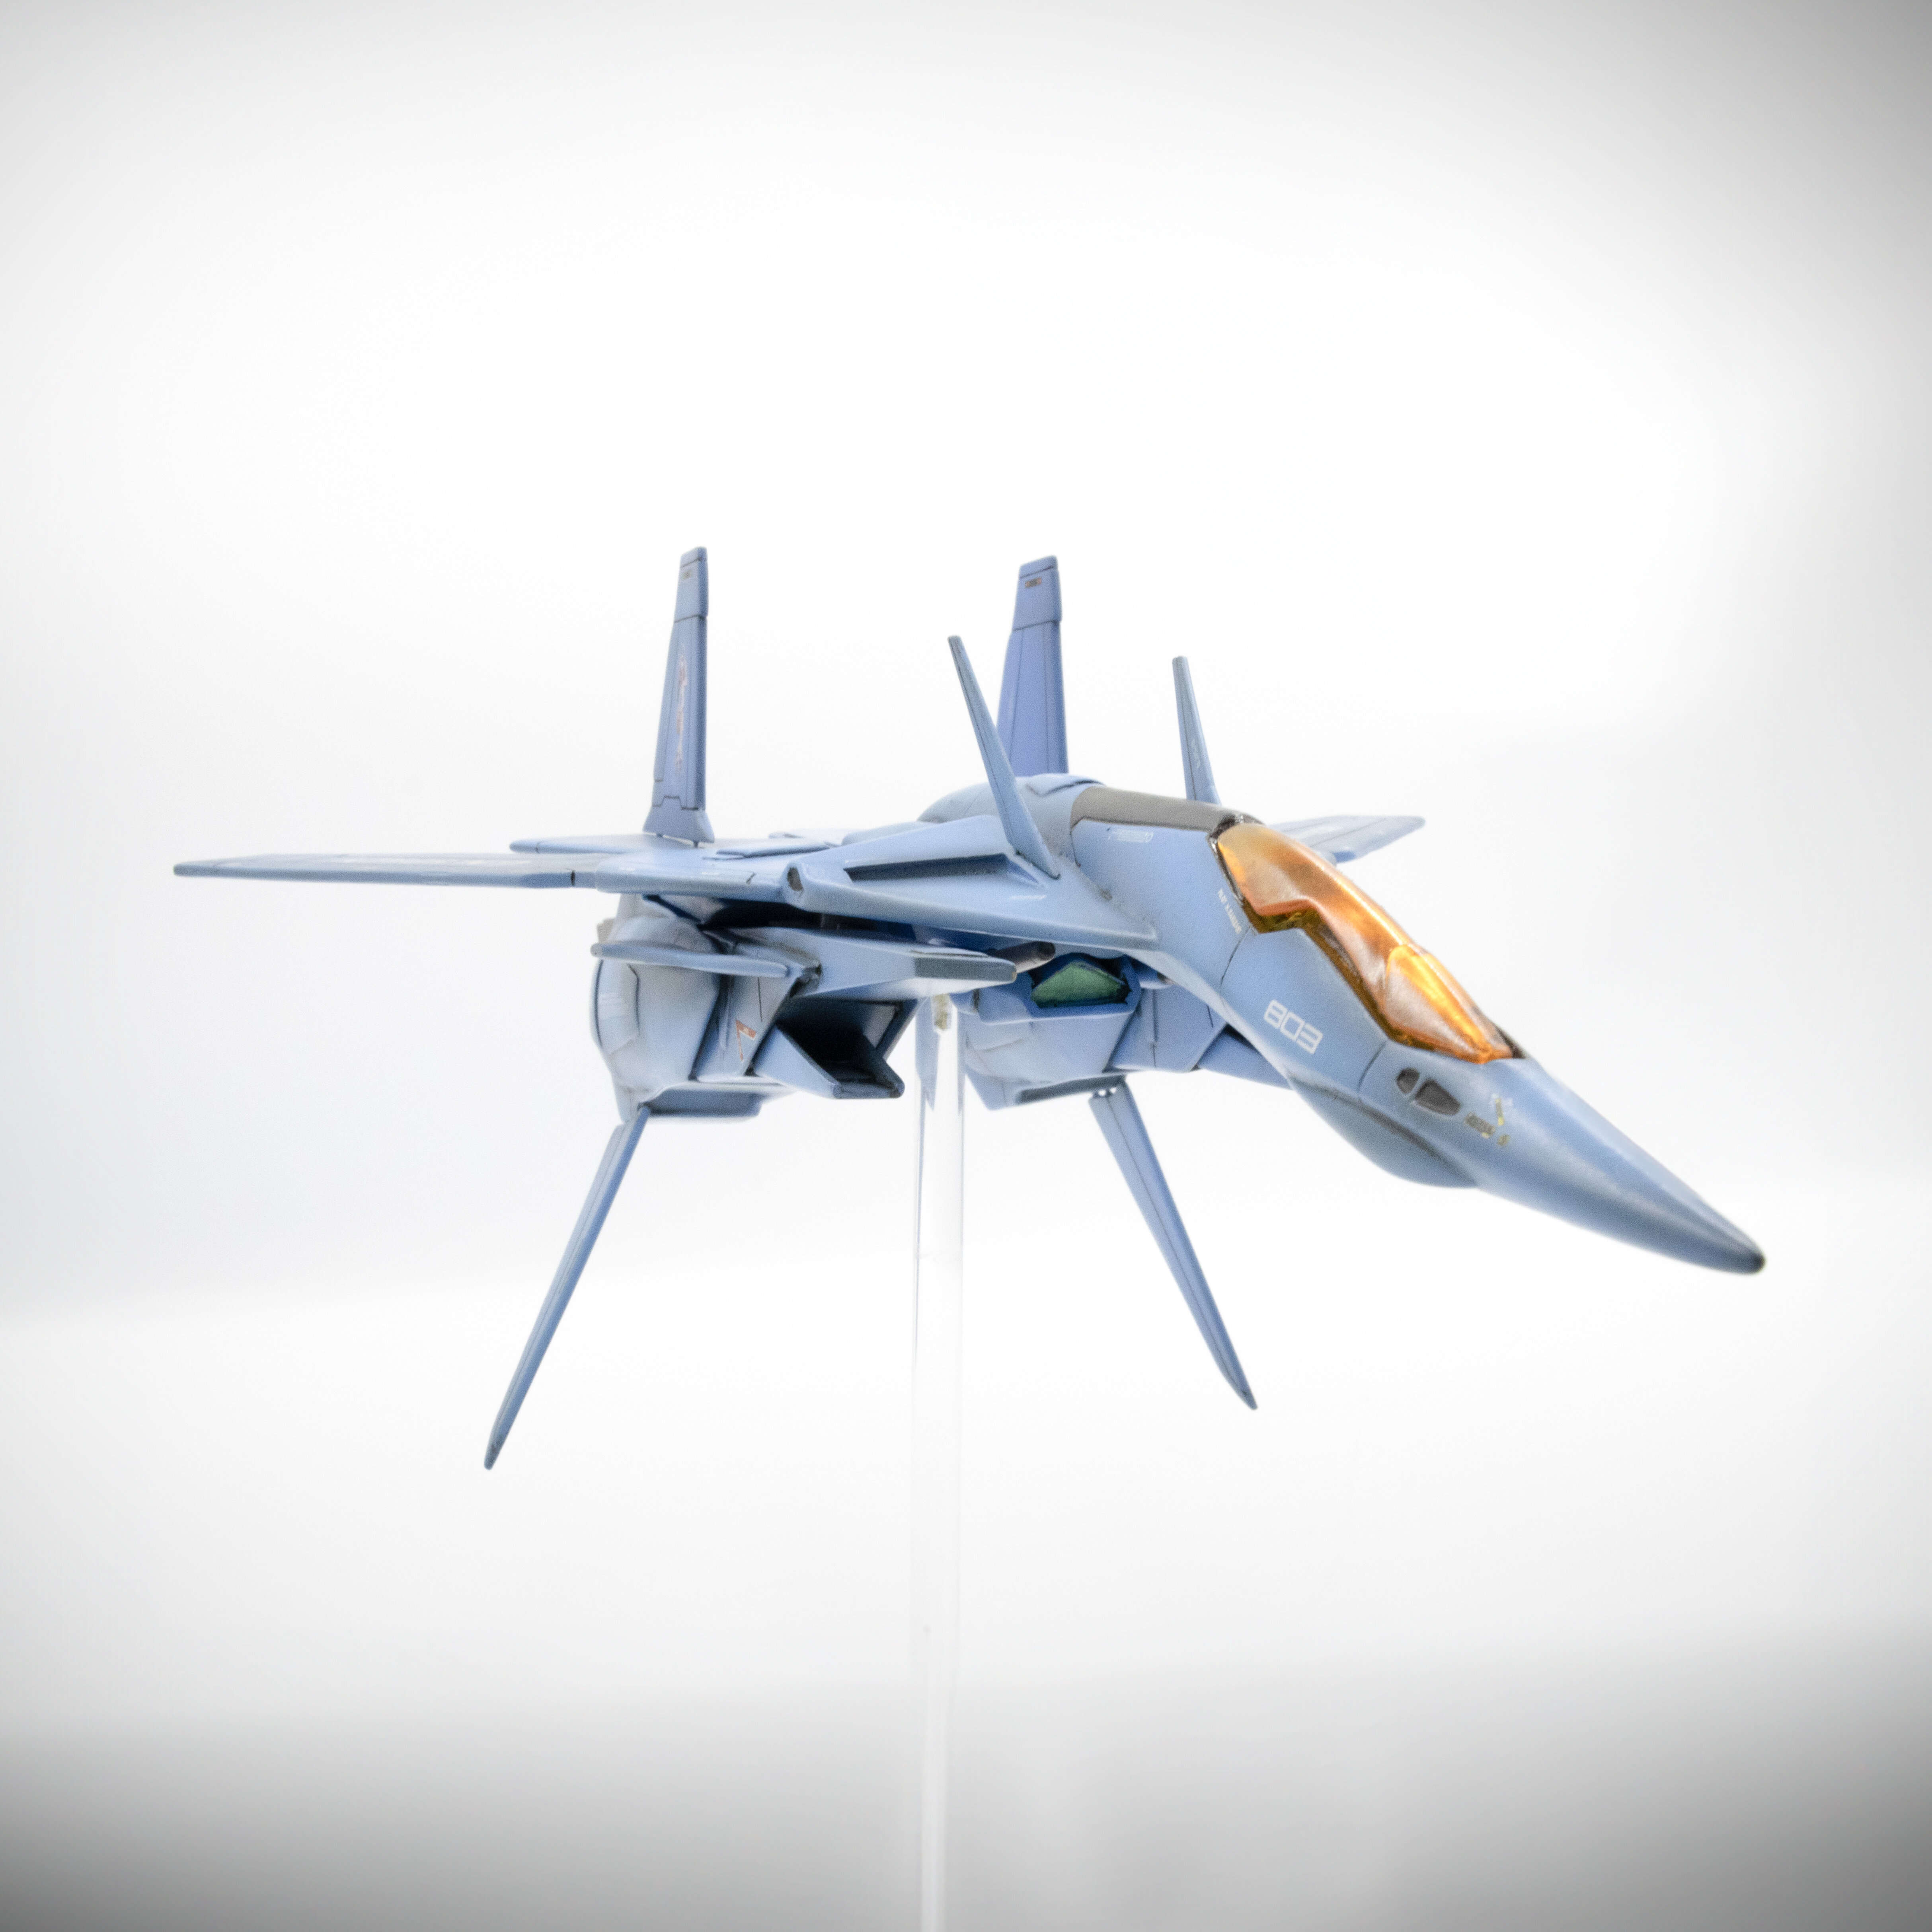
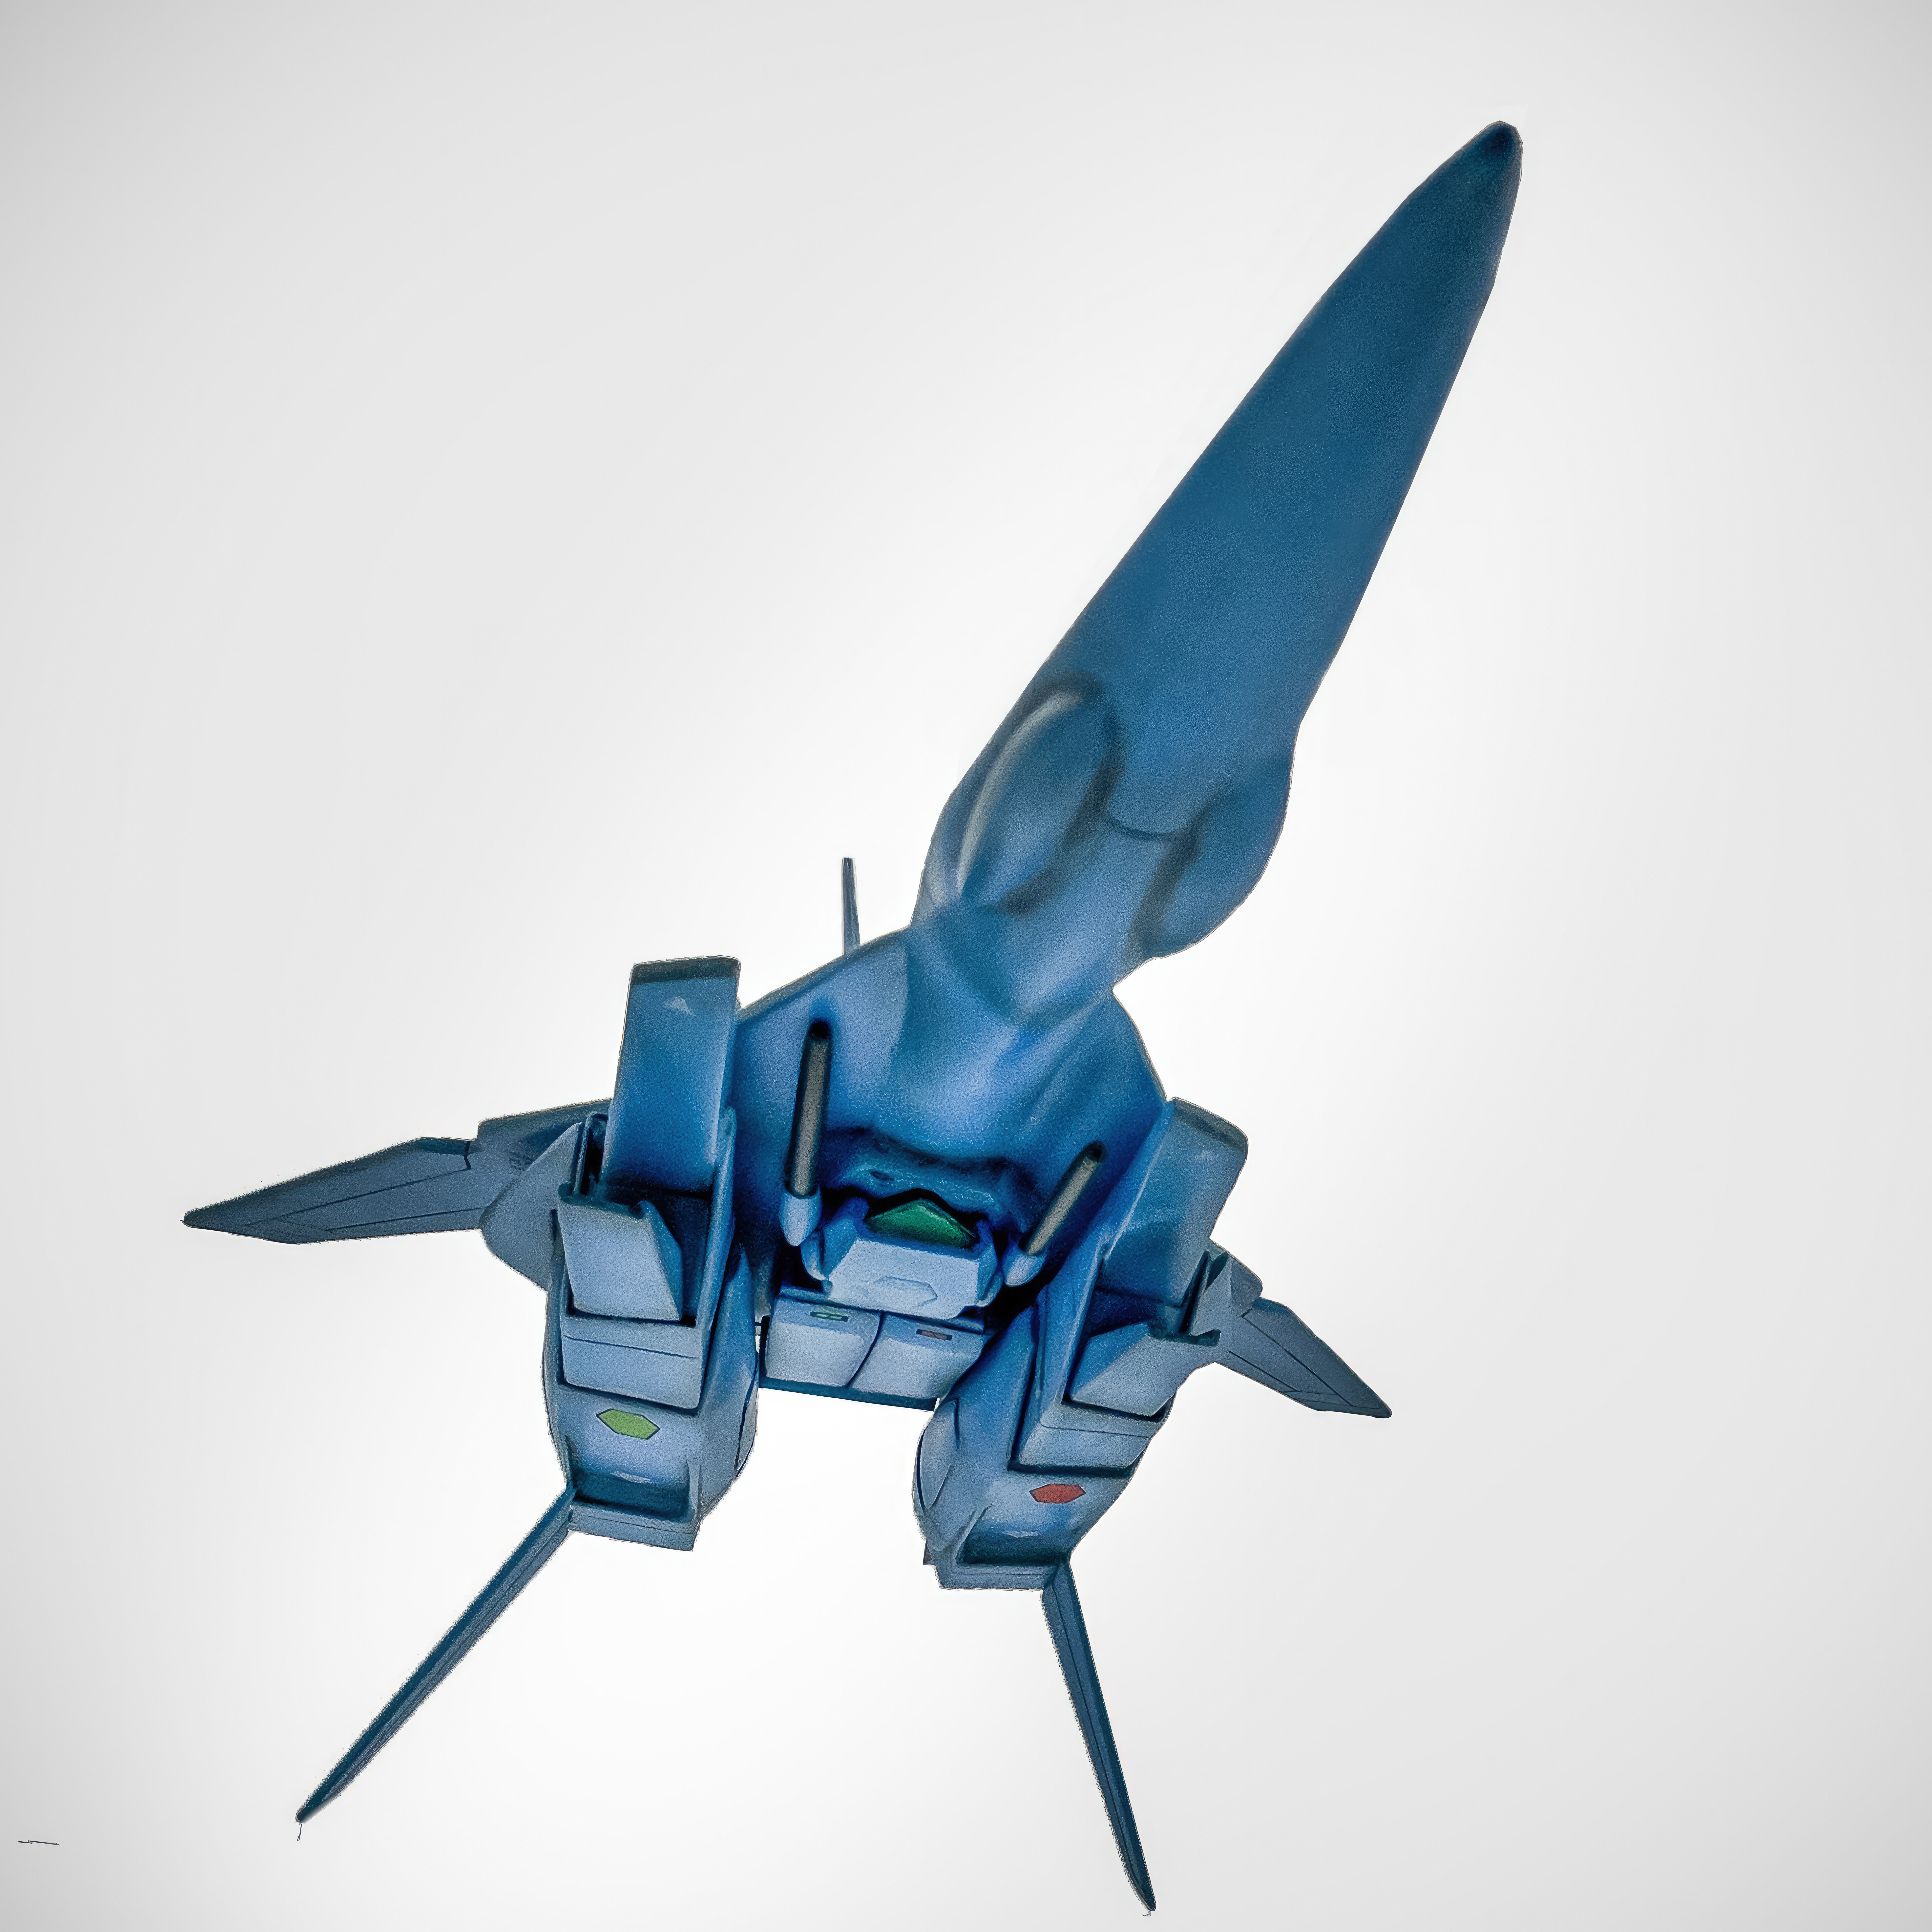
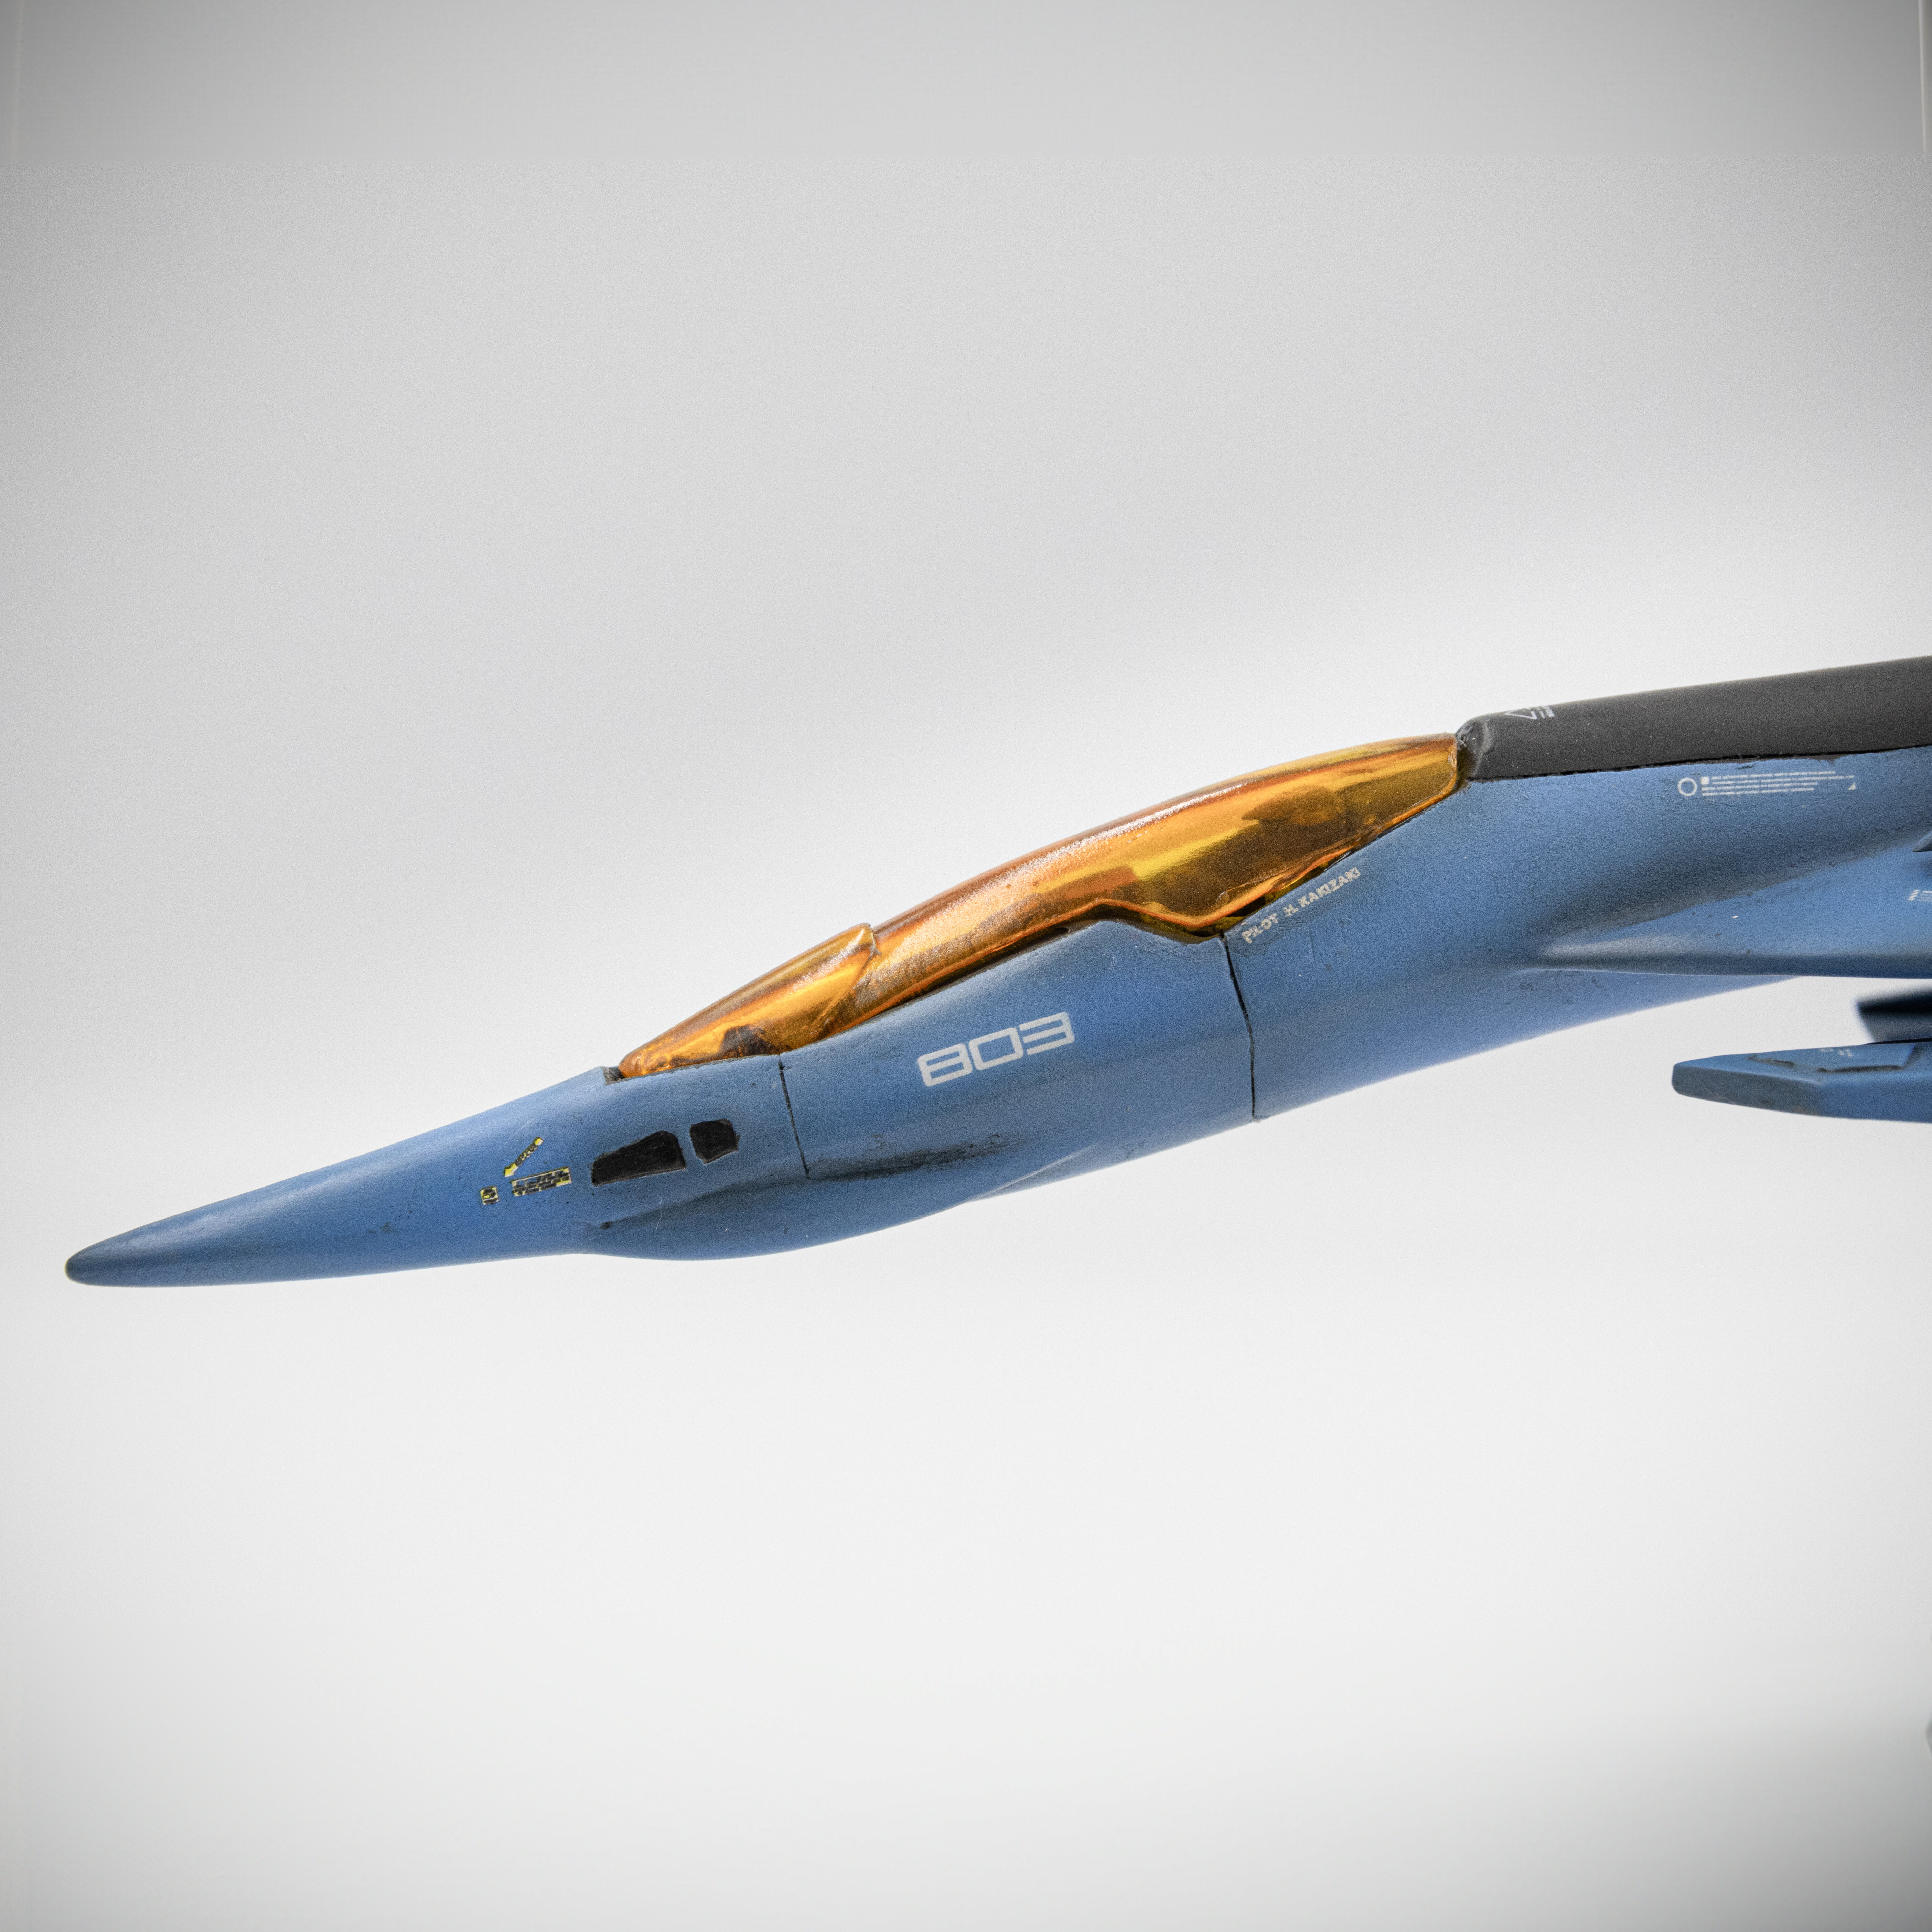
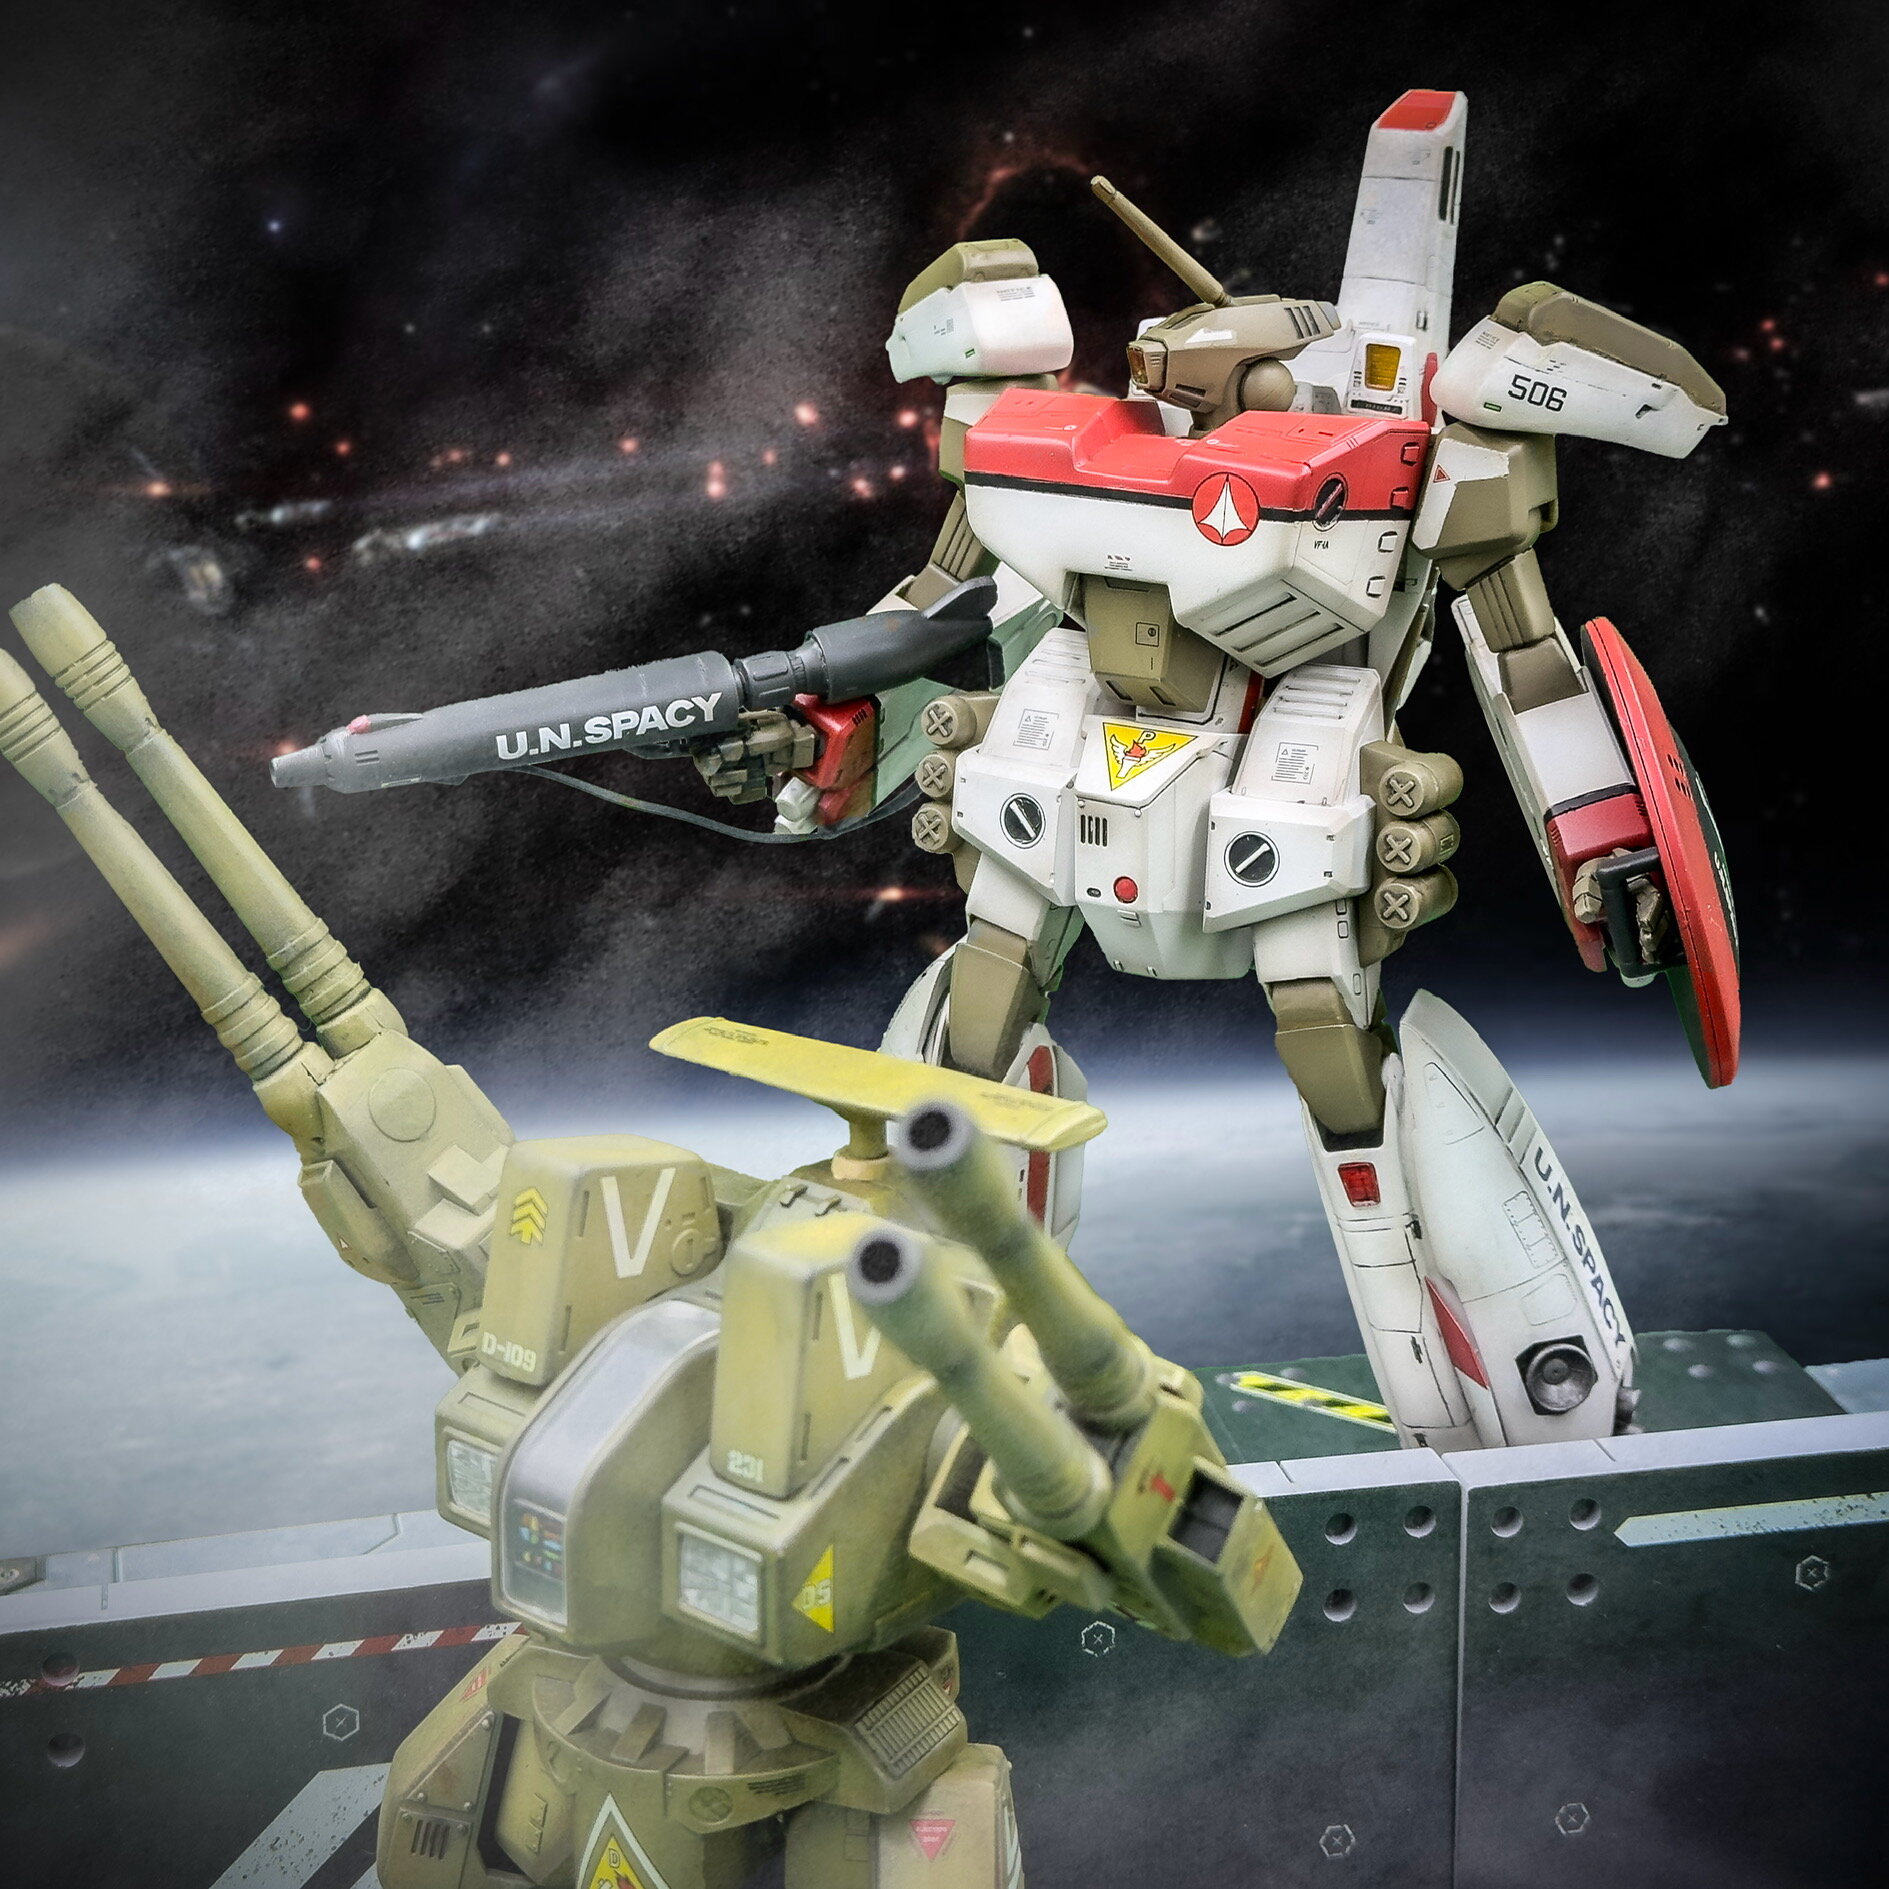
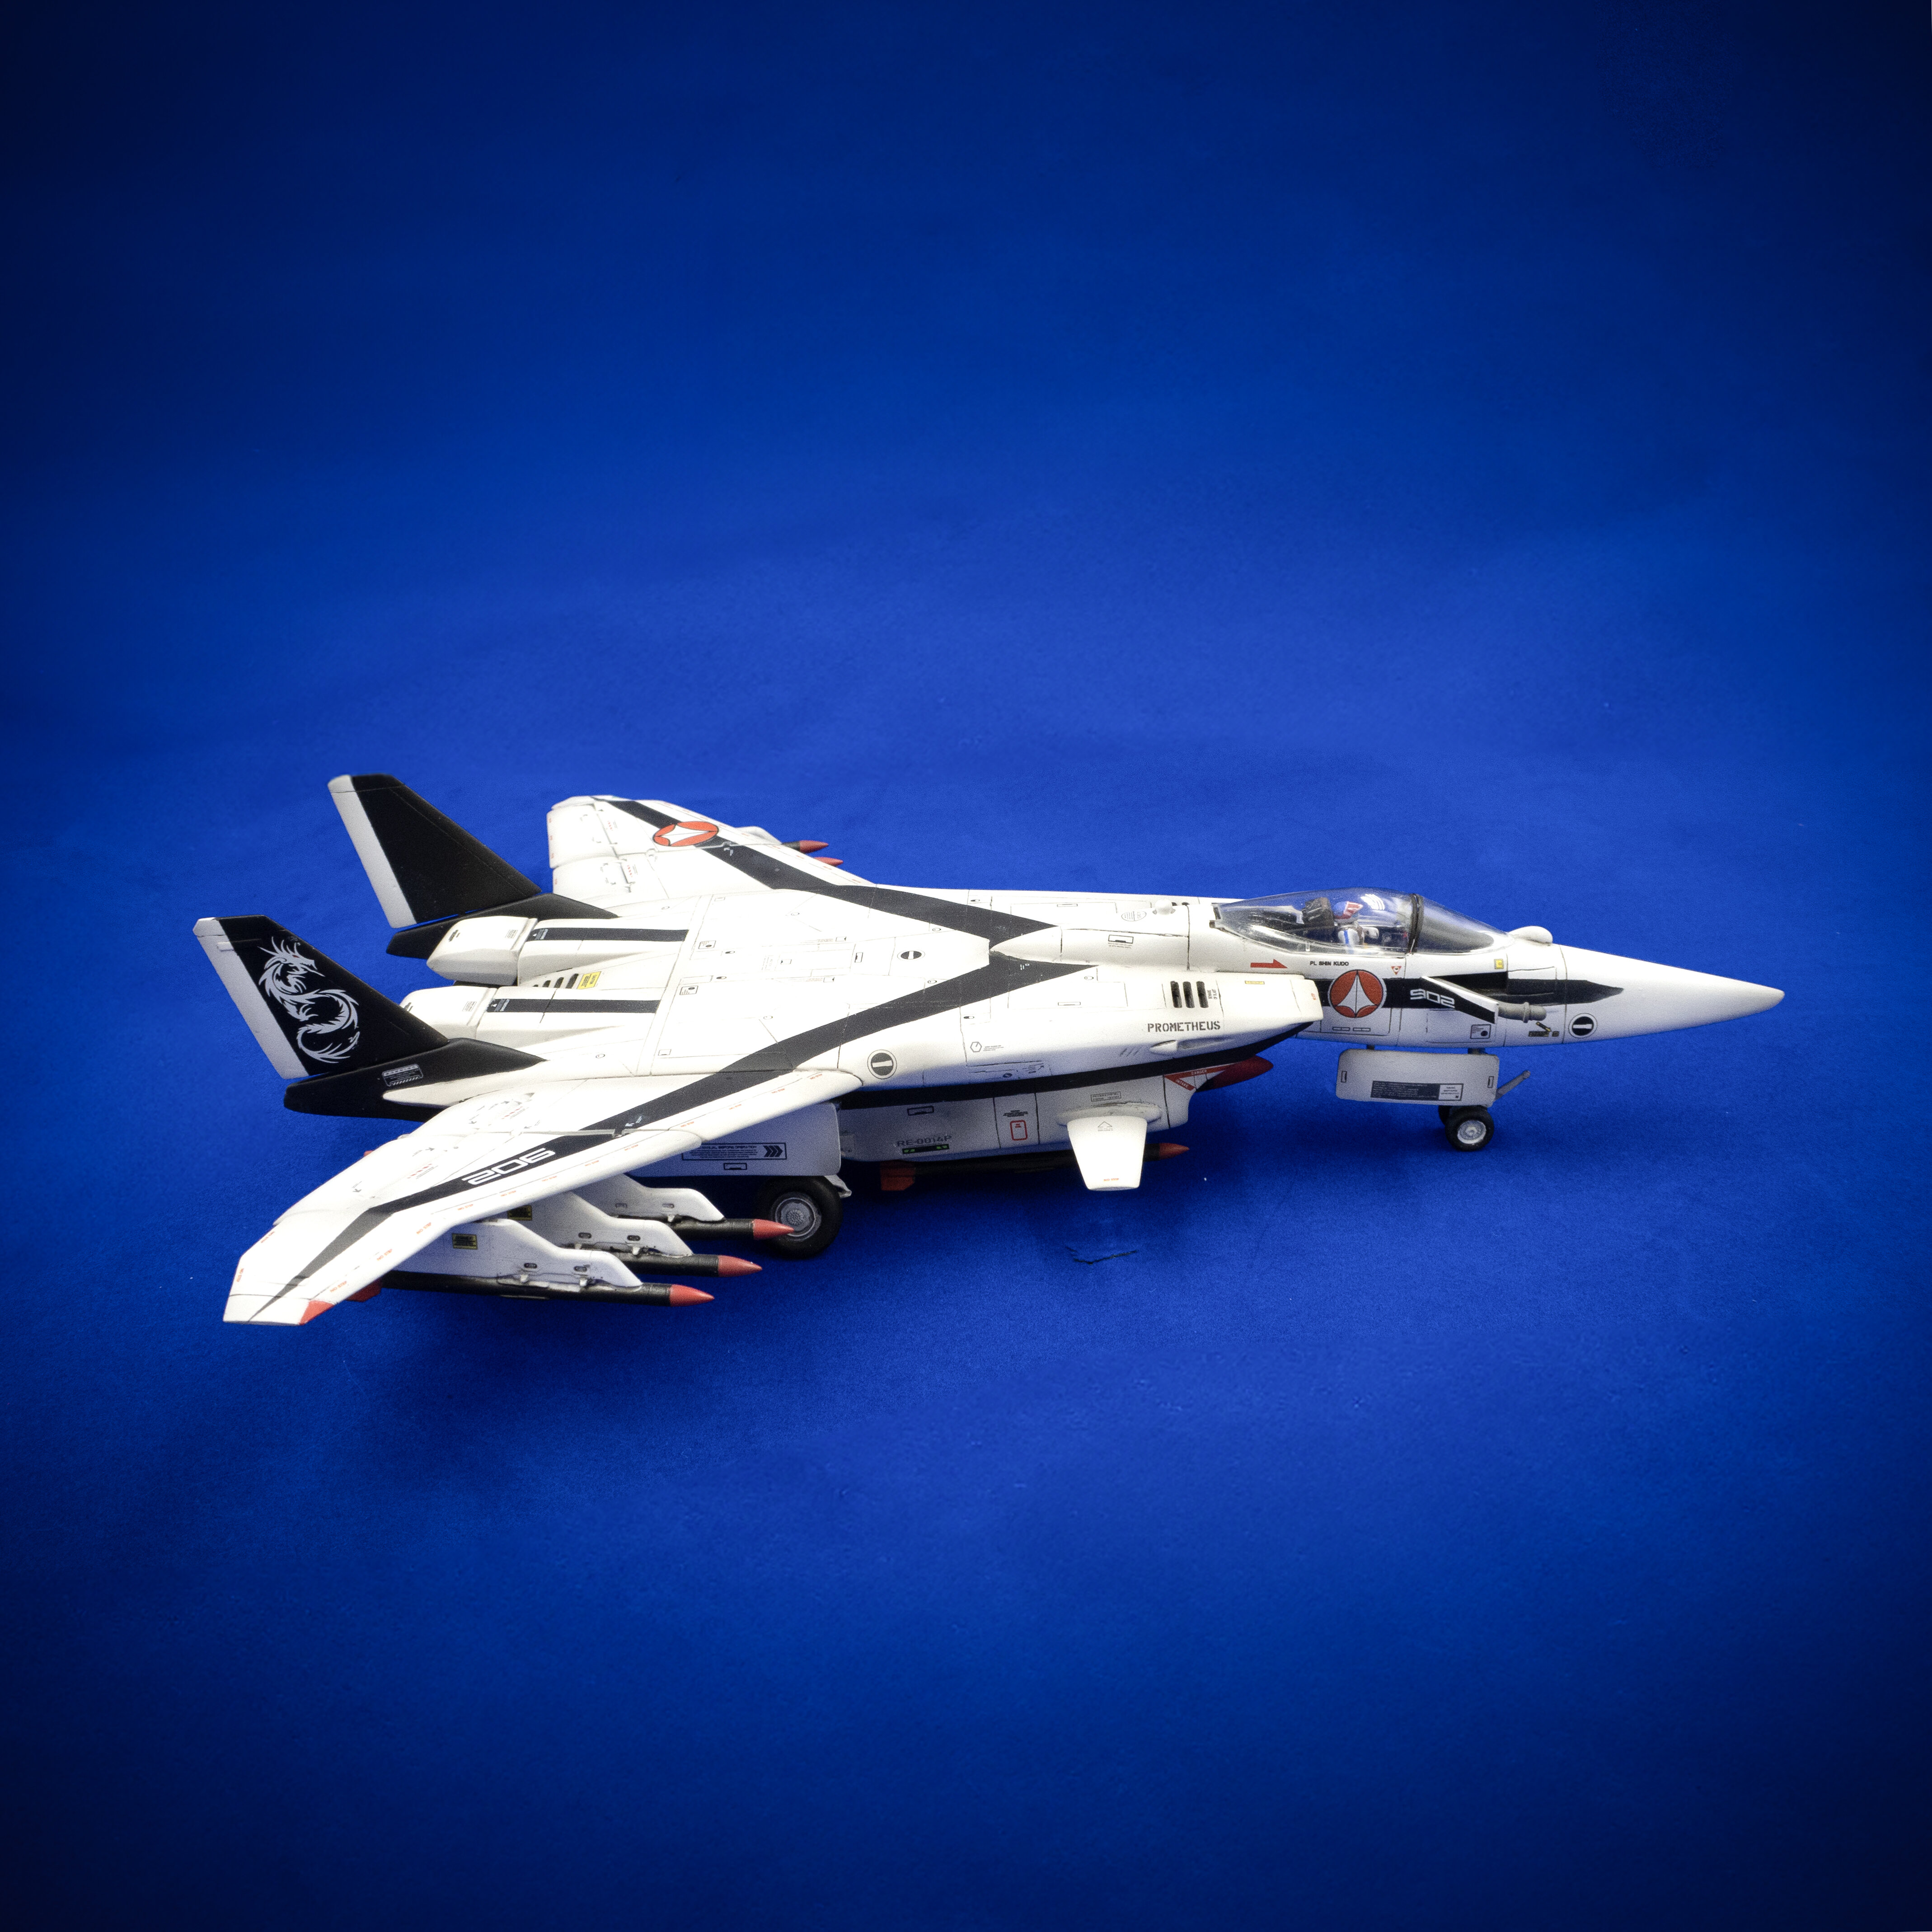
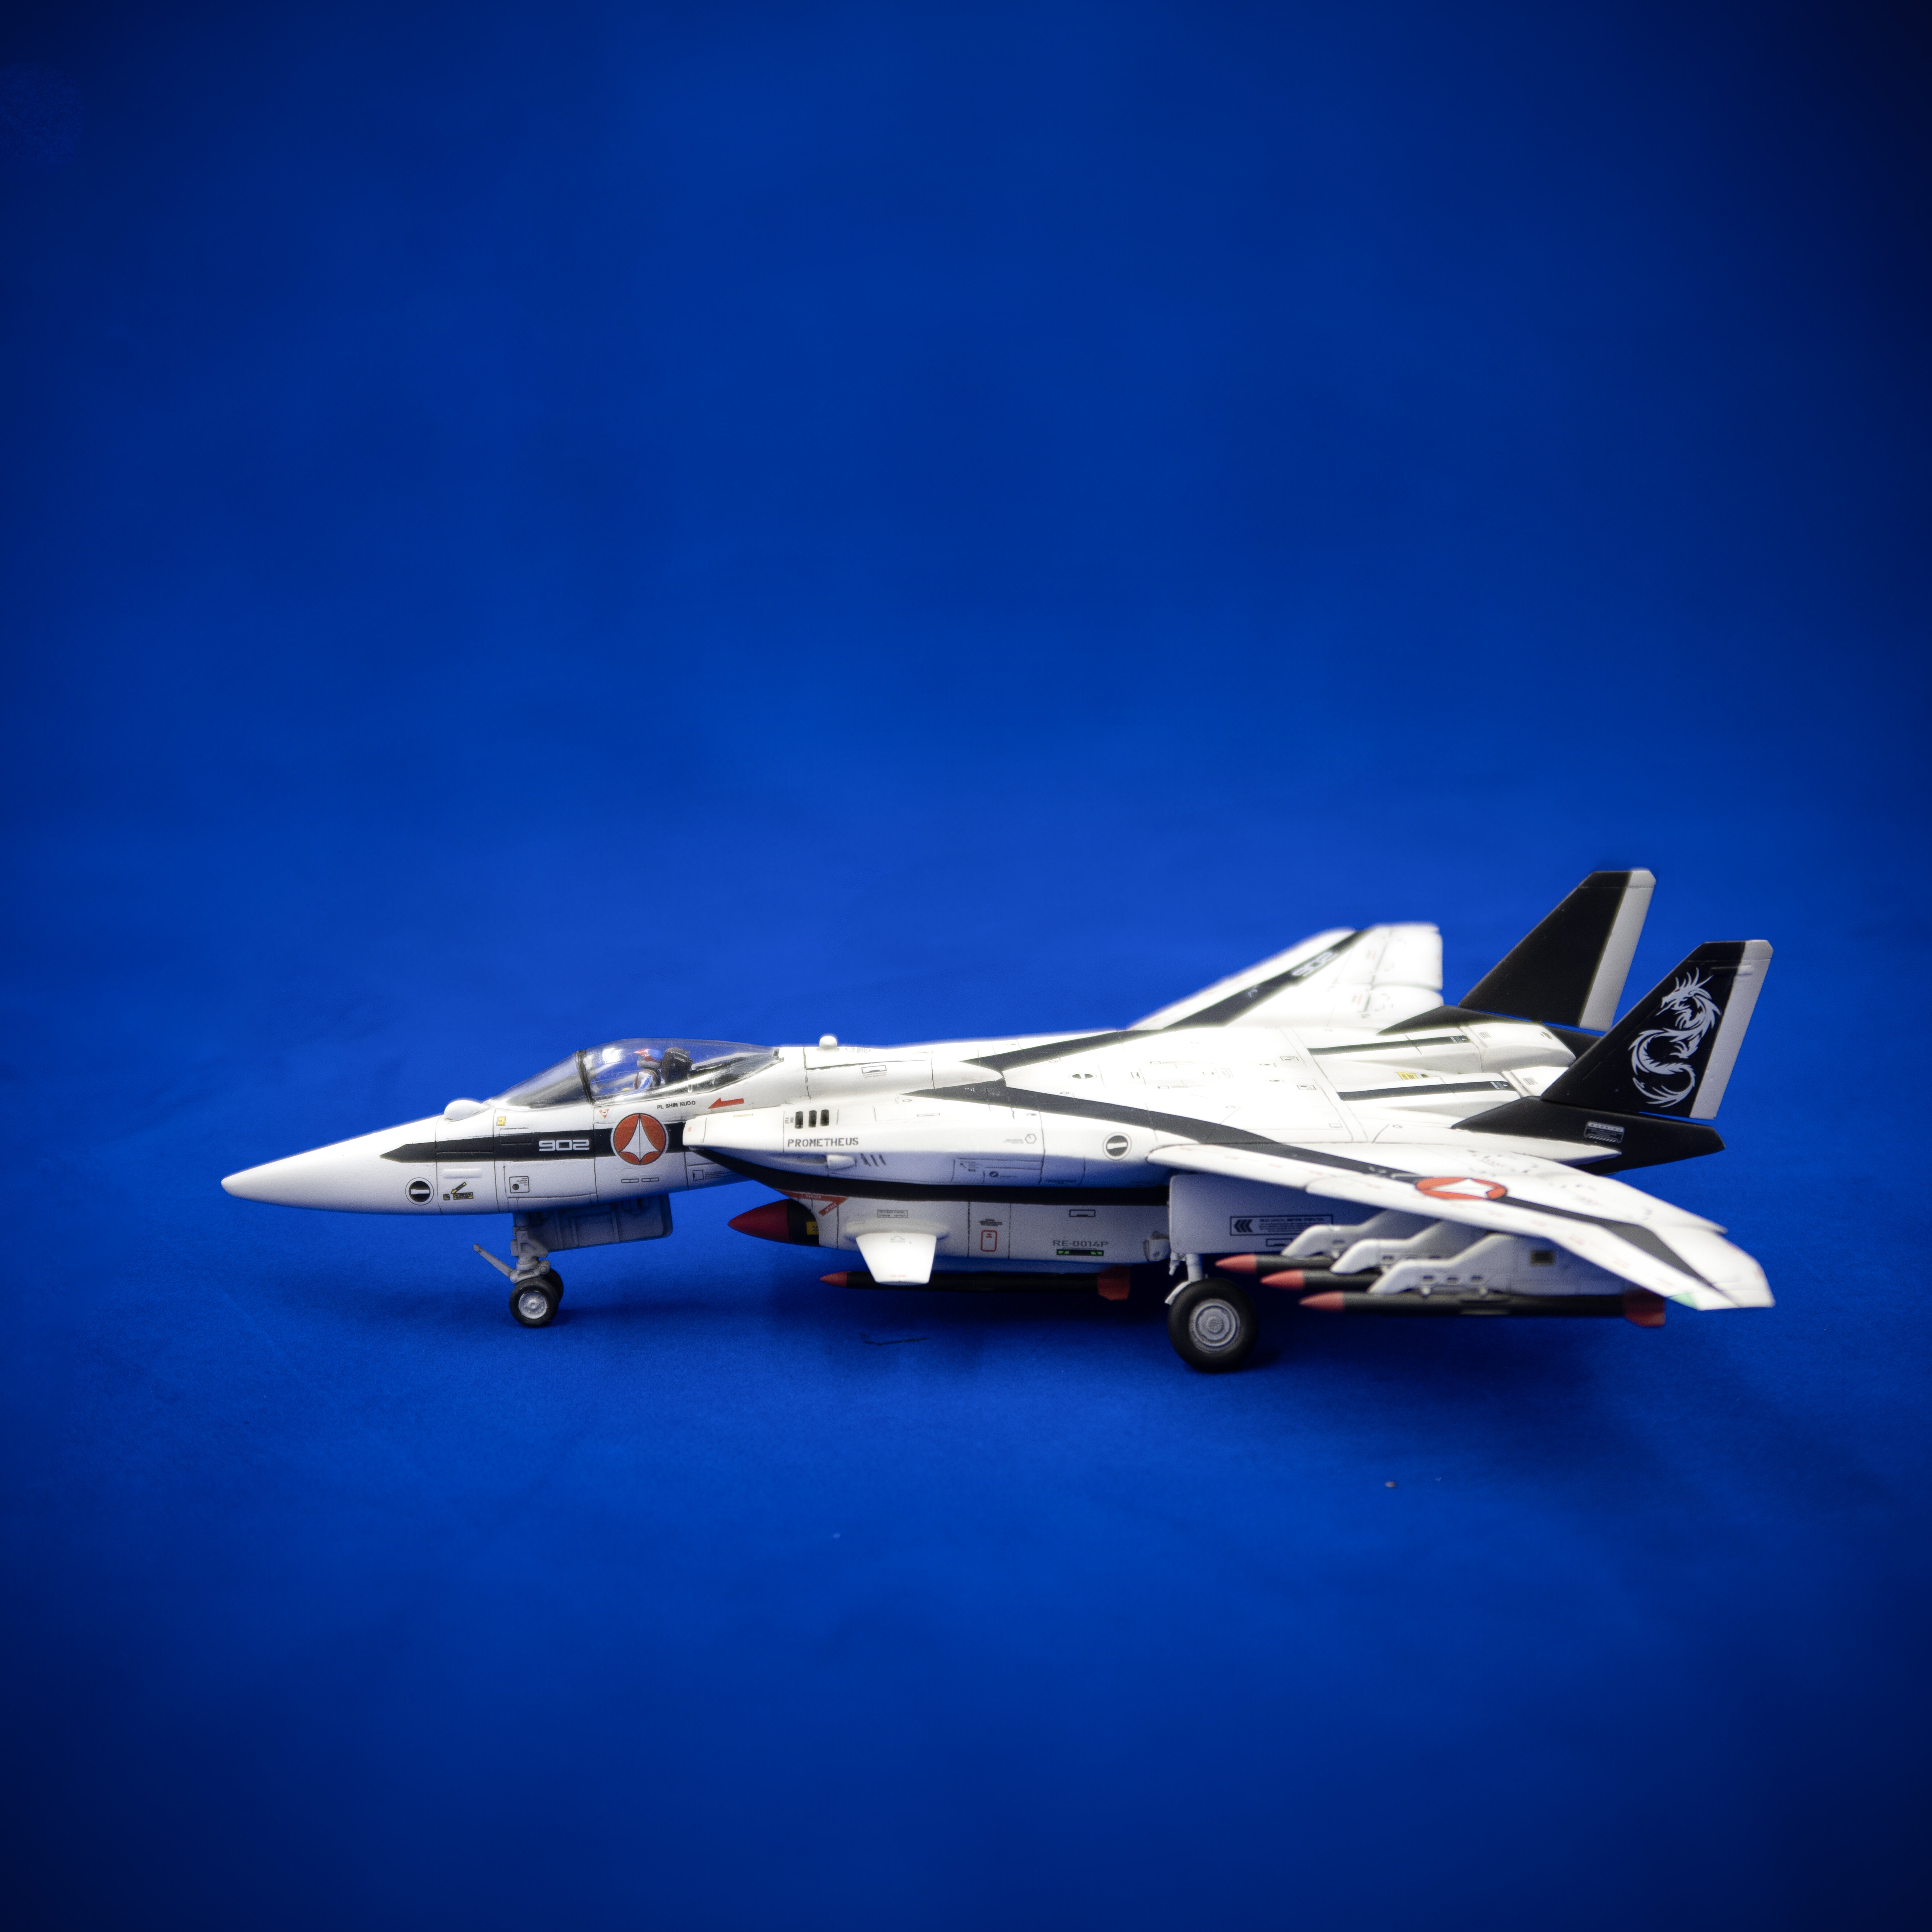
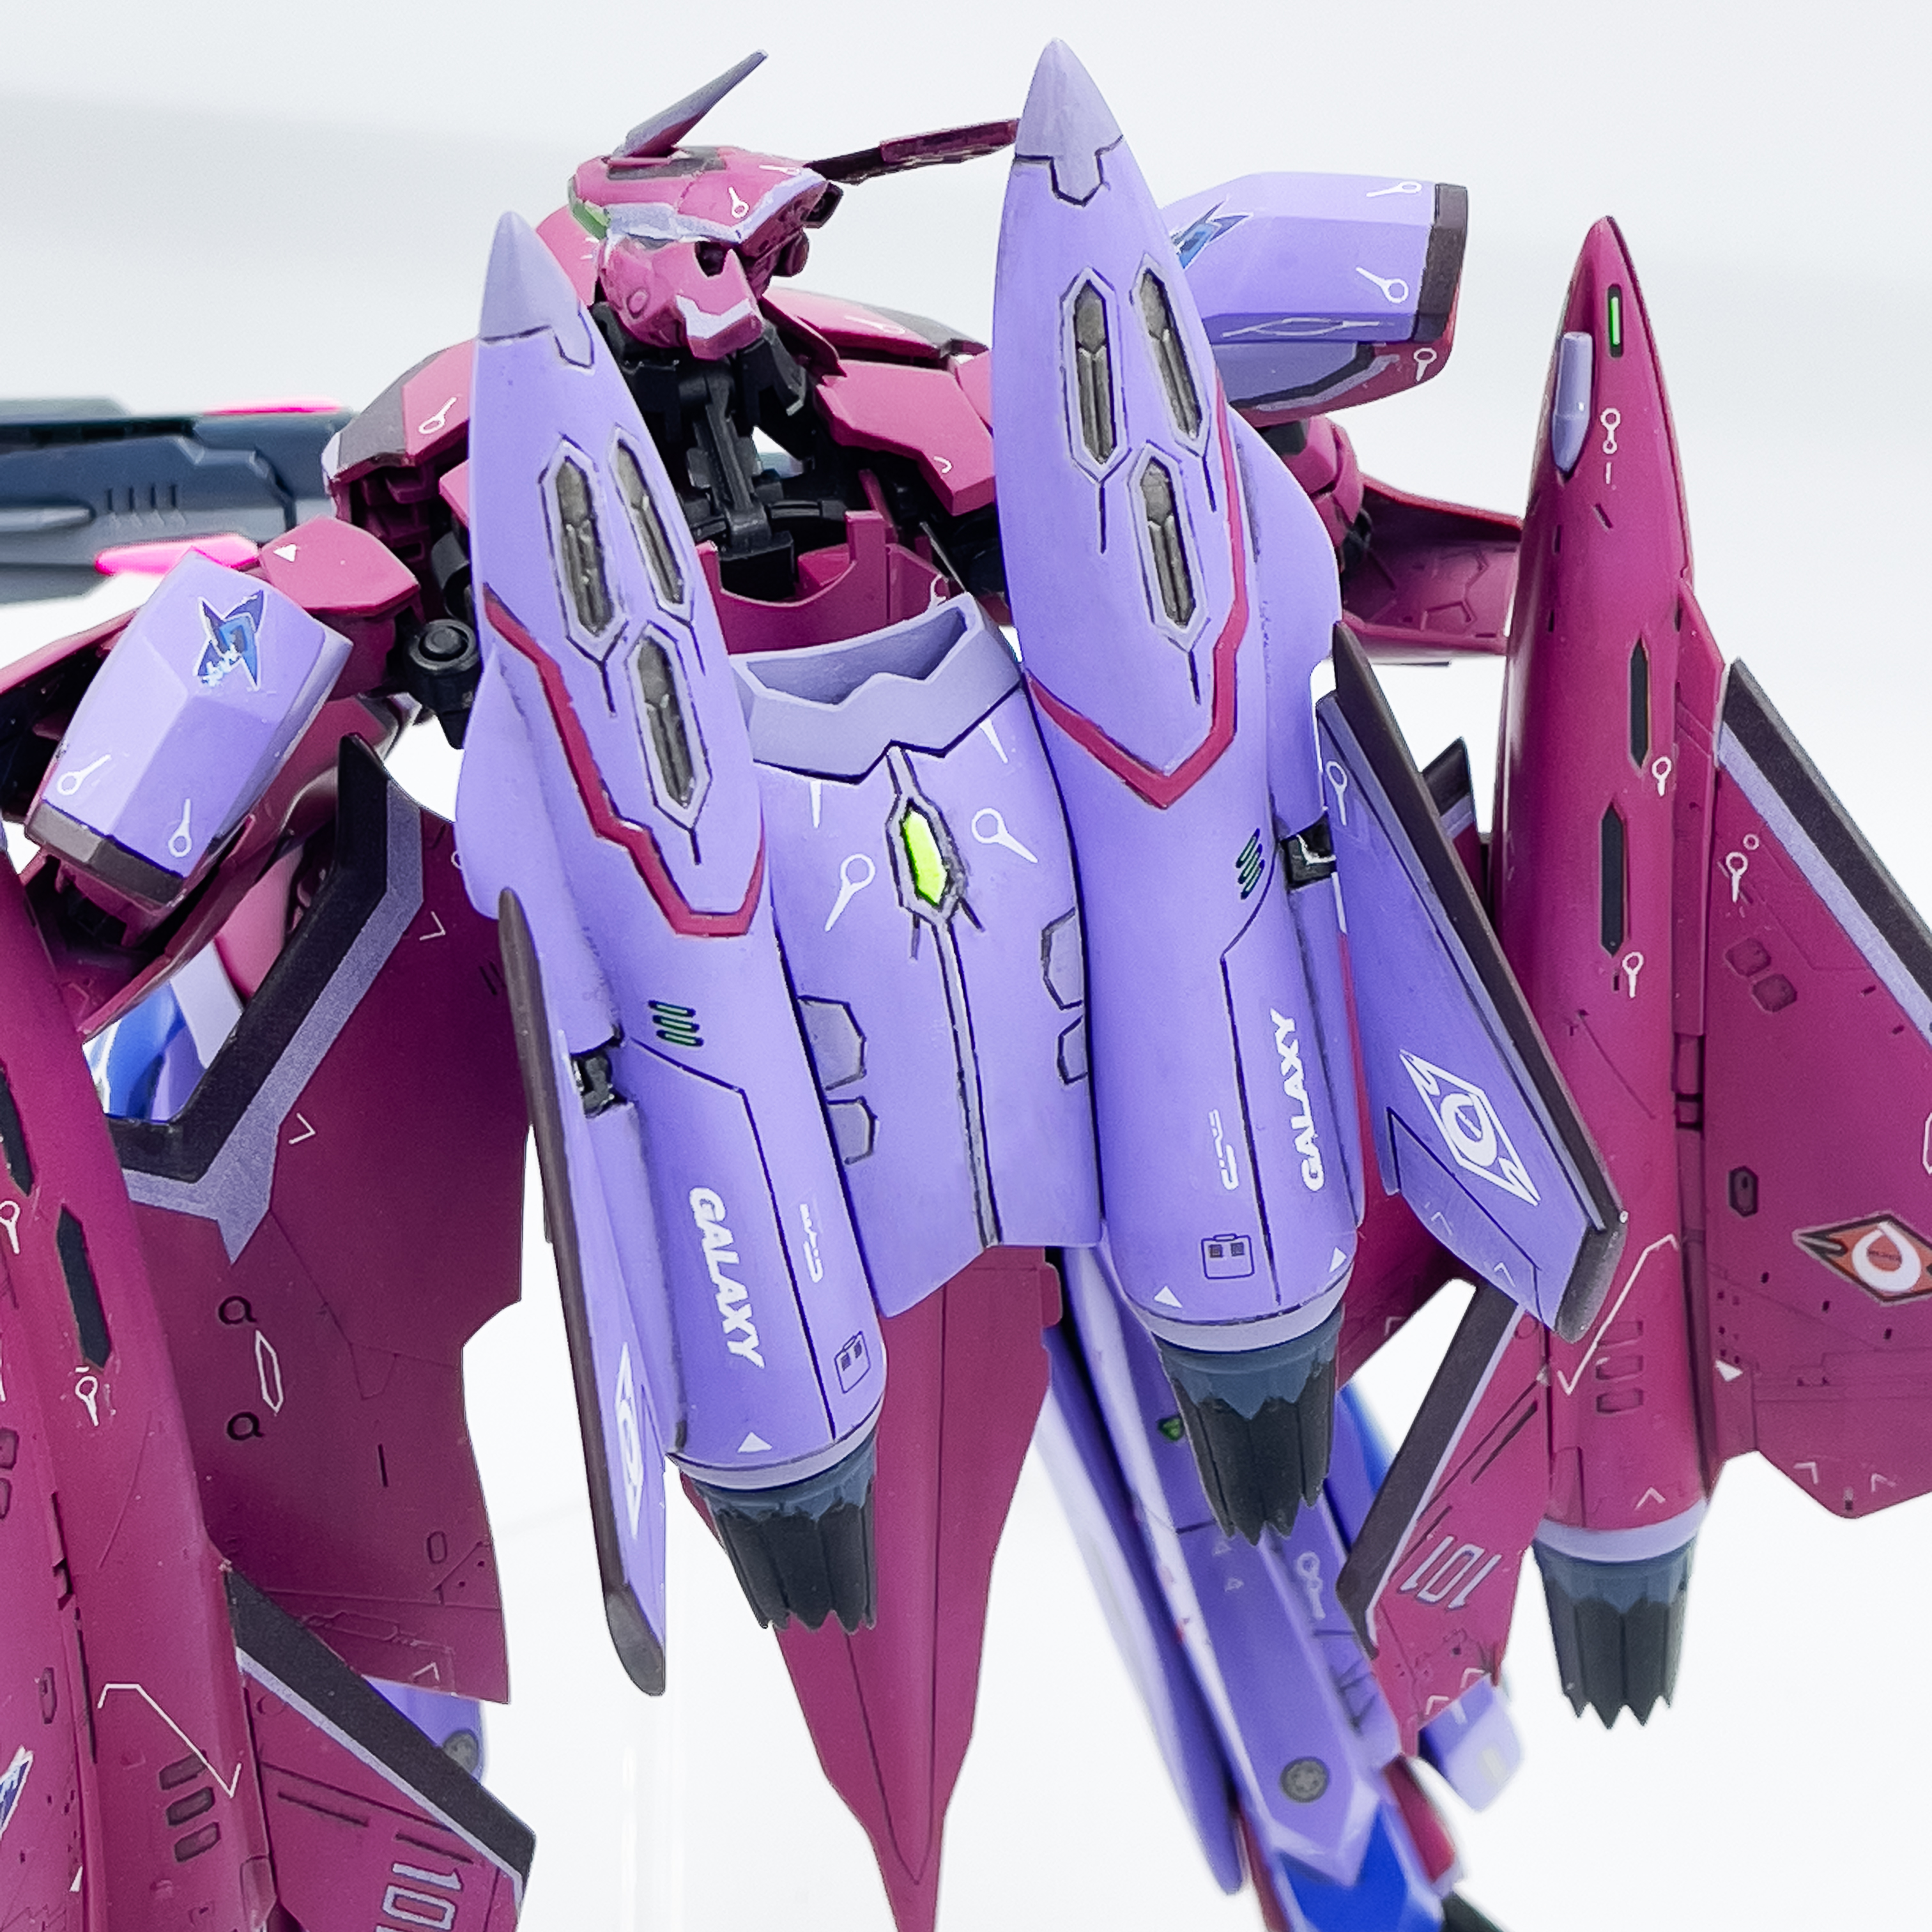
The last completed project in 2024, VF-19Active in Macross the Ride.
(a) special thanks to a collector whi helped to arrange a scanned version of the decal so that I can draw the decal and arrange the printing
(b) joint was a problem as the required joint balls were not available. Finally used copper stick to extend some commonly used joint ball
(c) Special thanks to Gundamplus 勇Sir創意教室 for the guidance and help


-
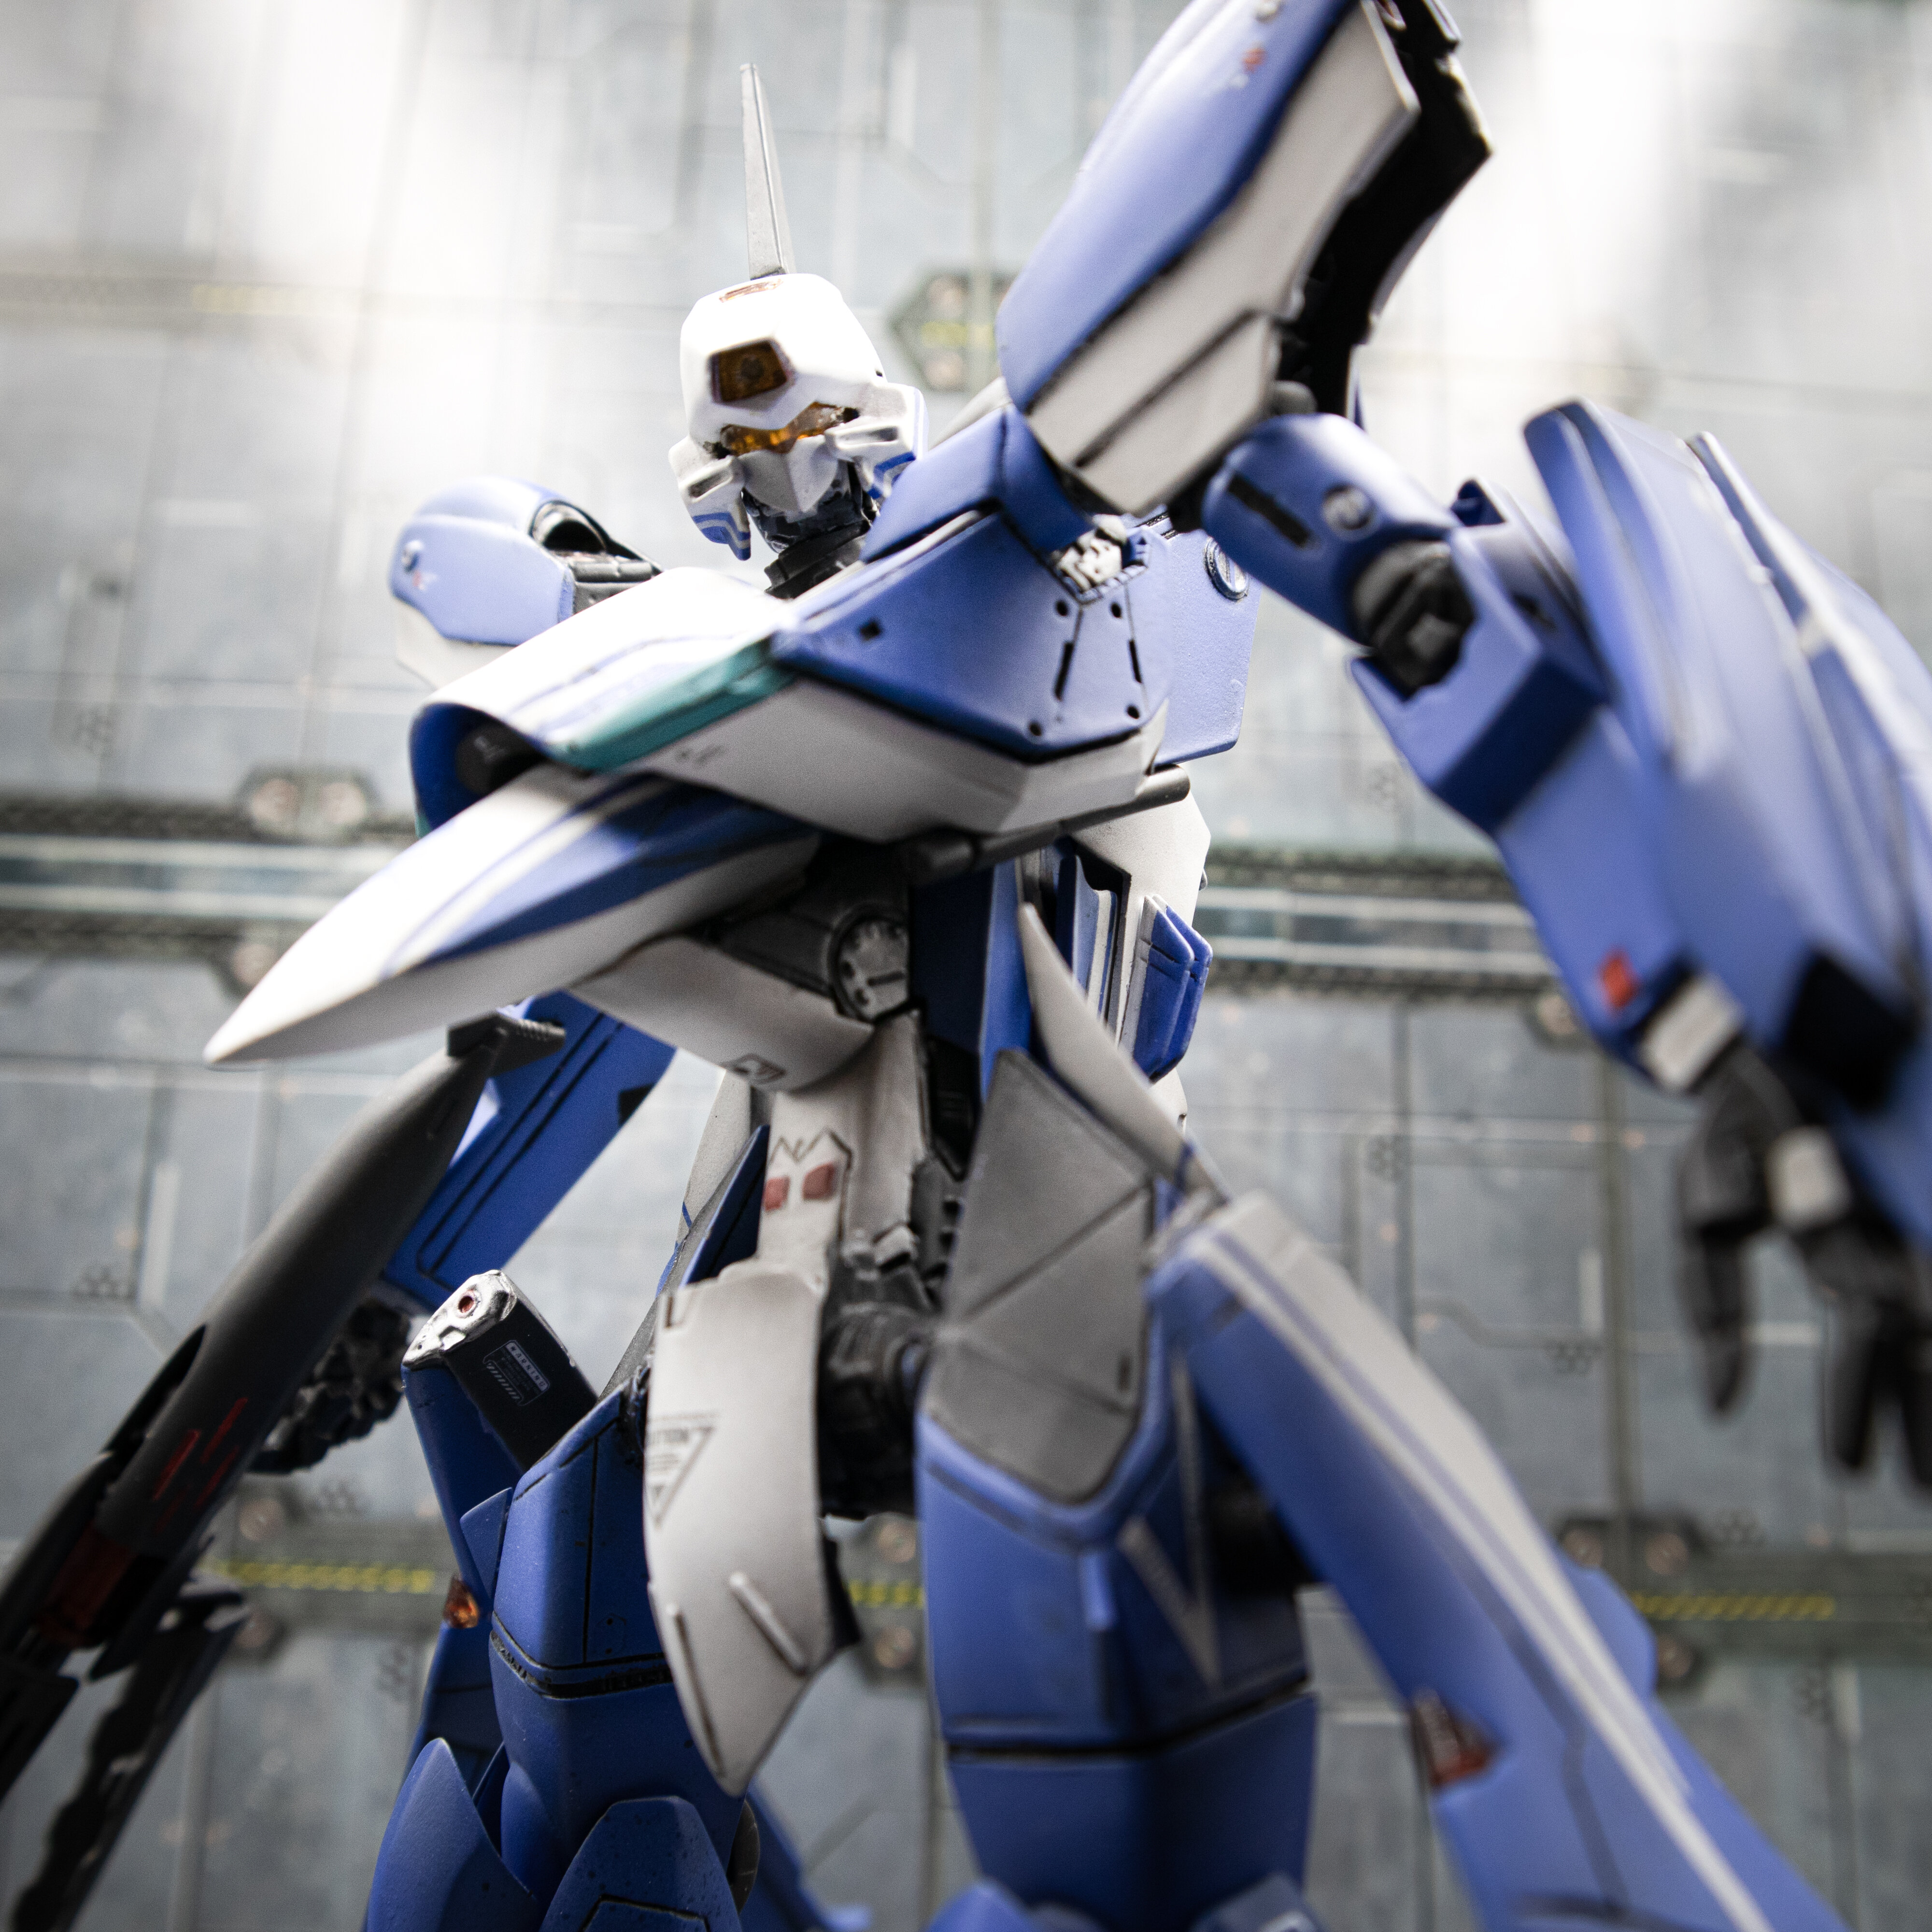
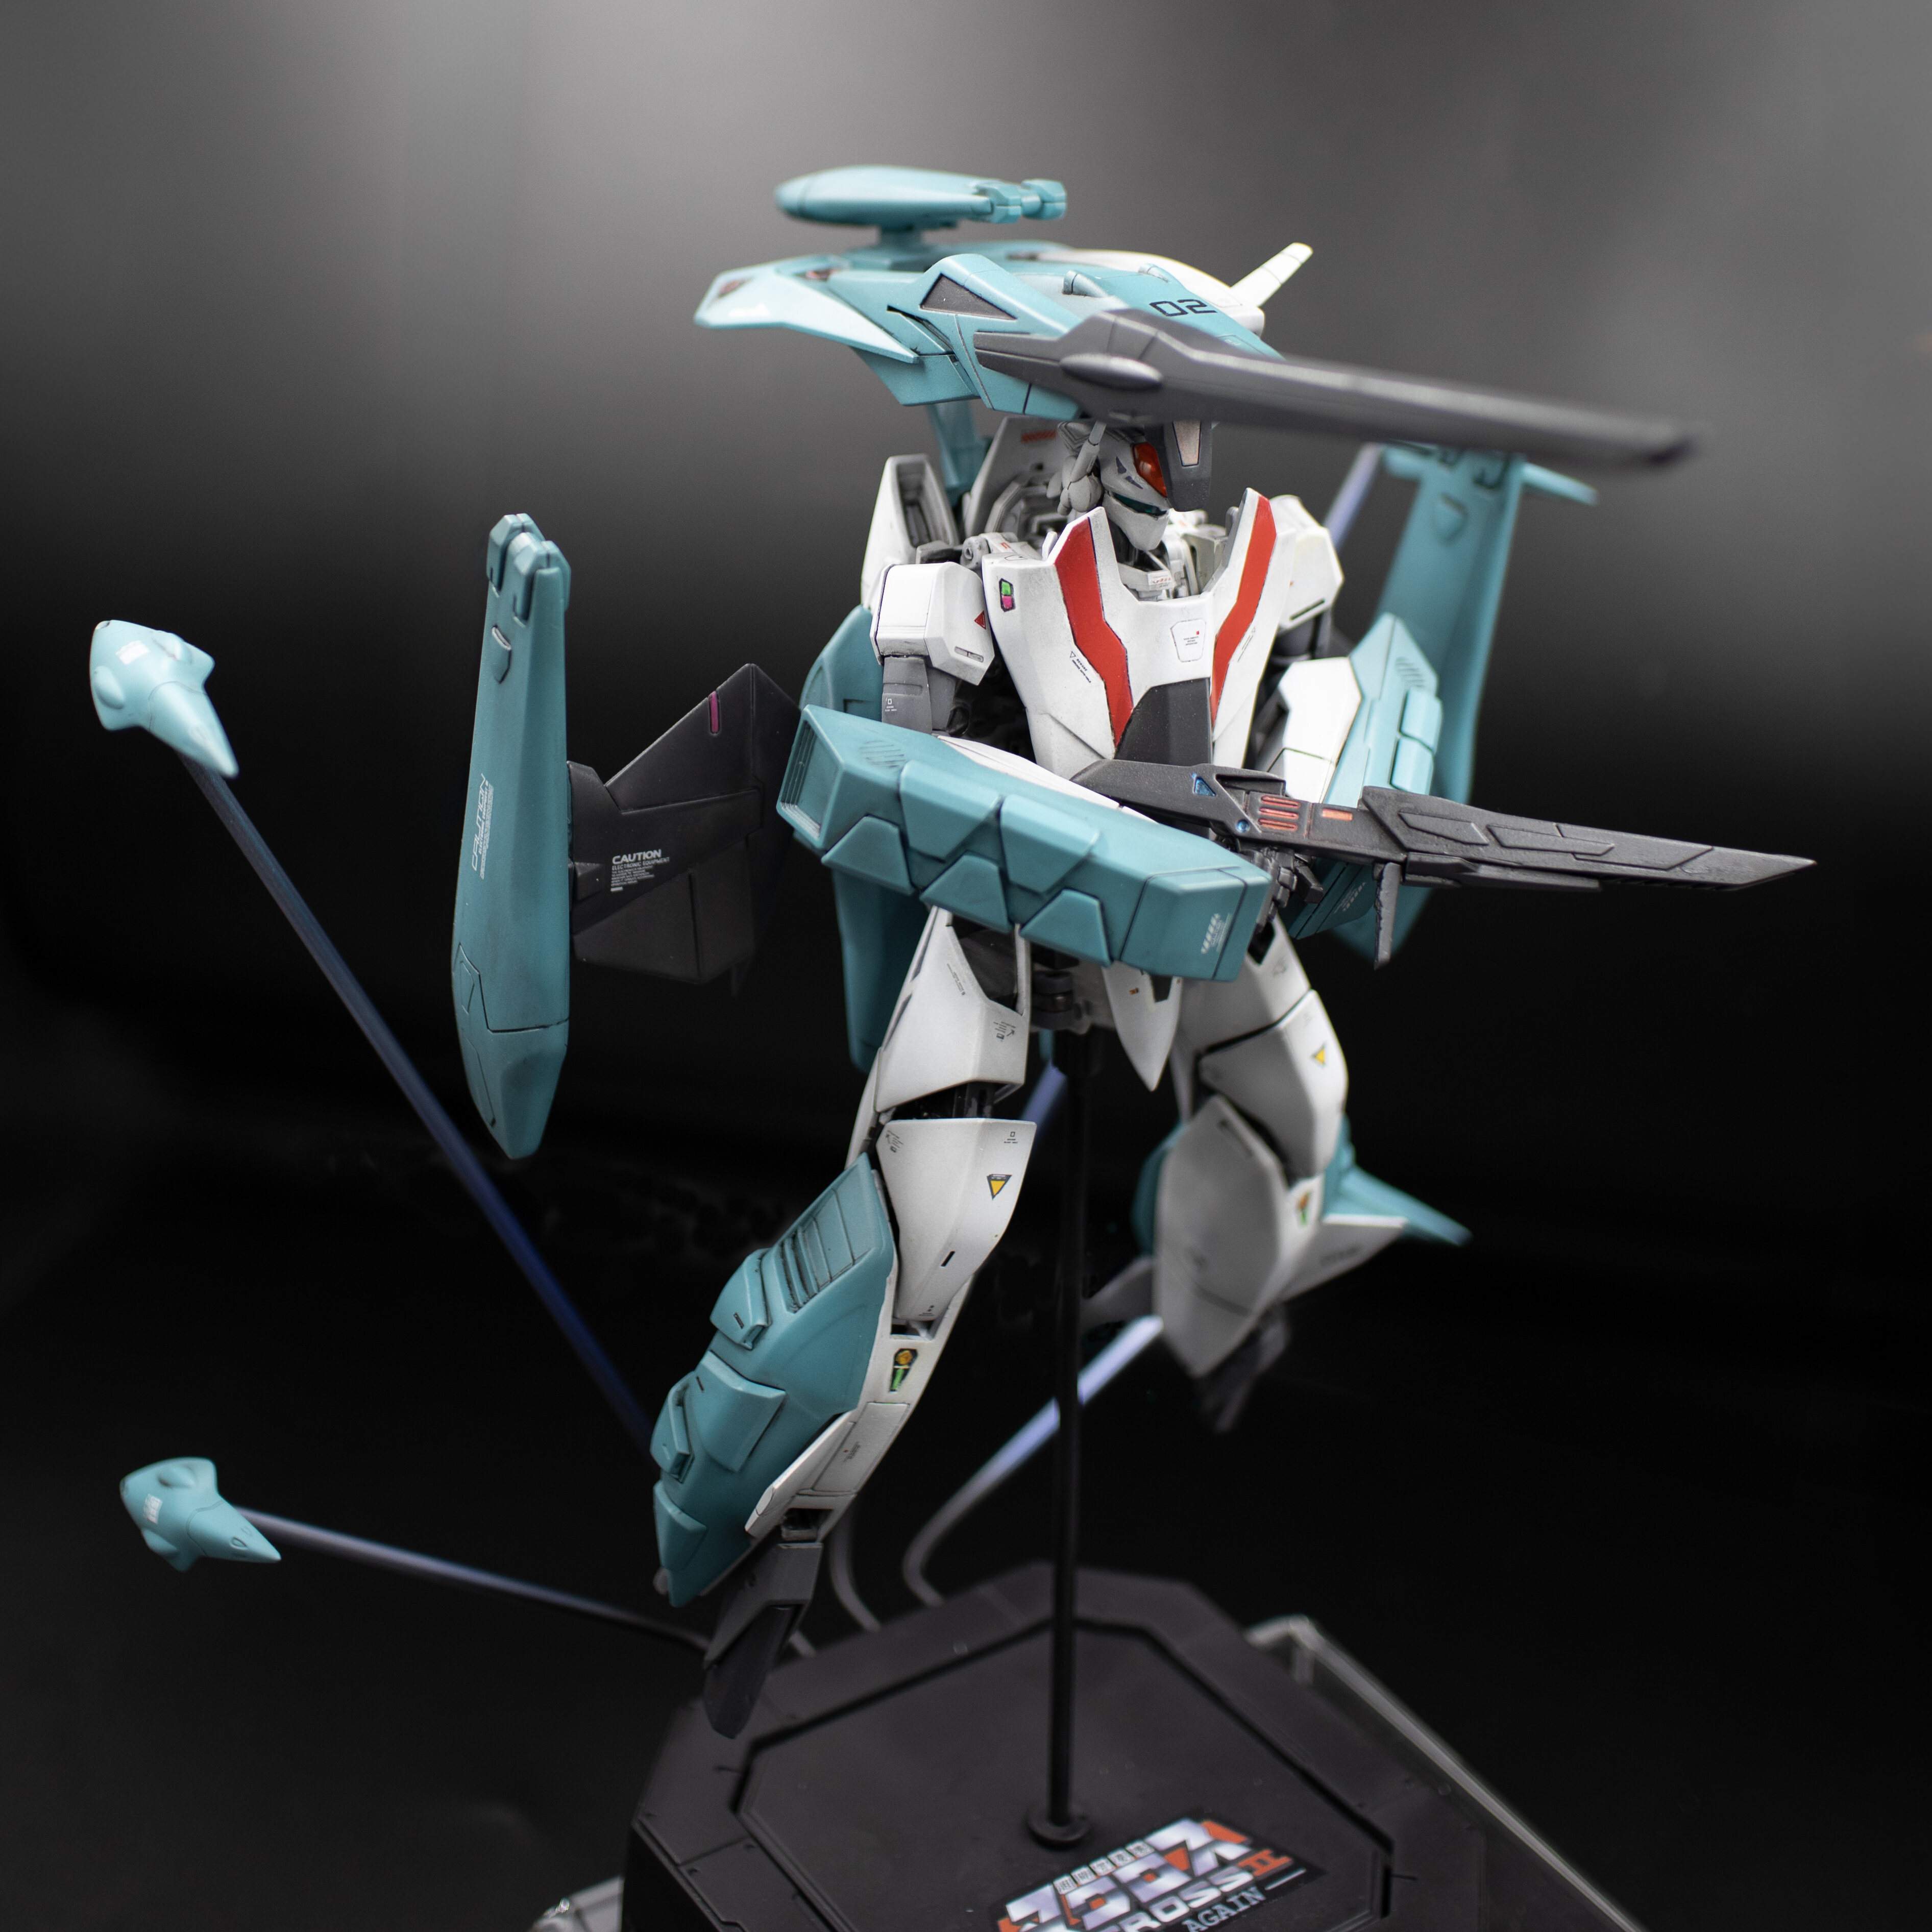
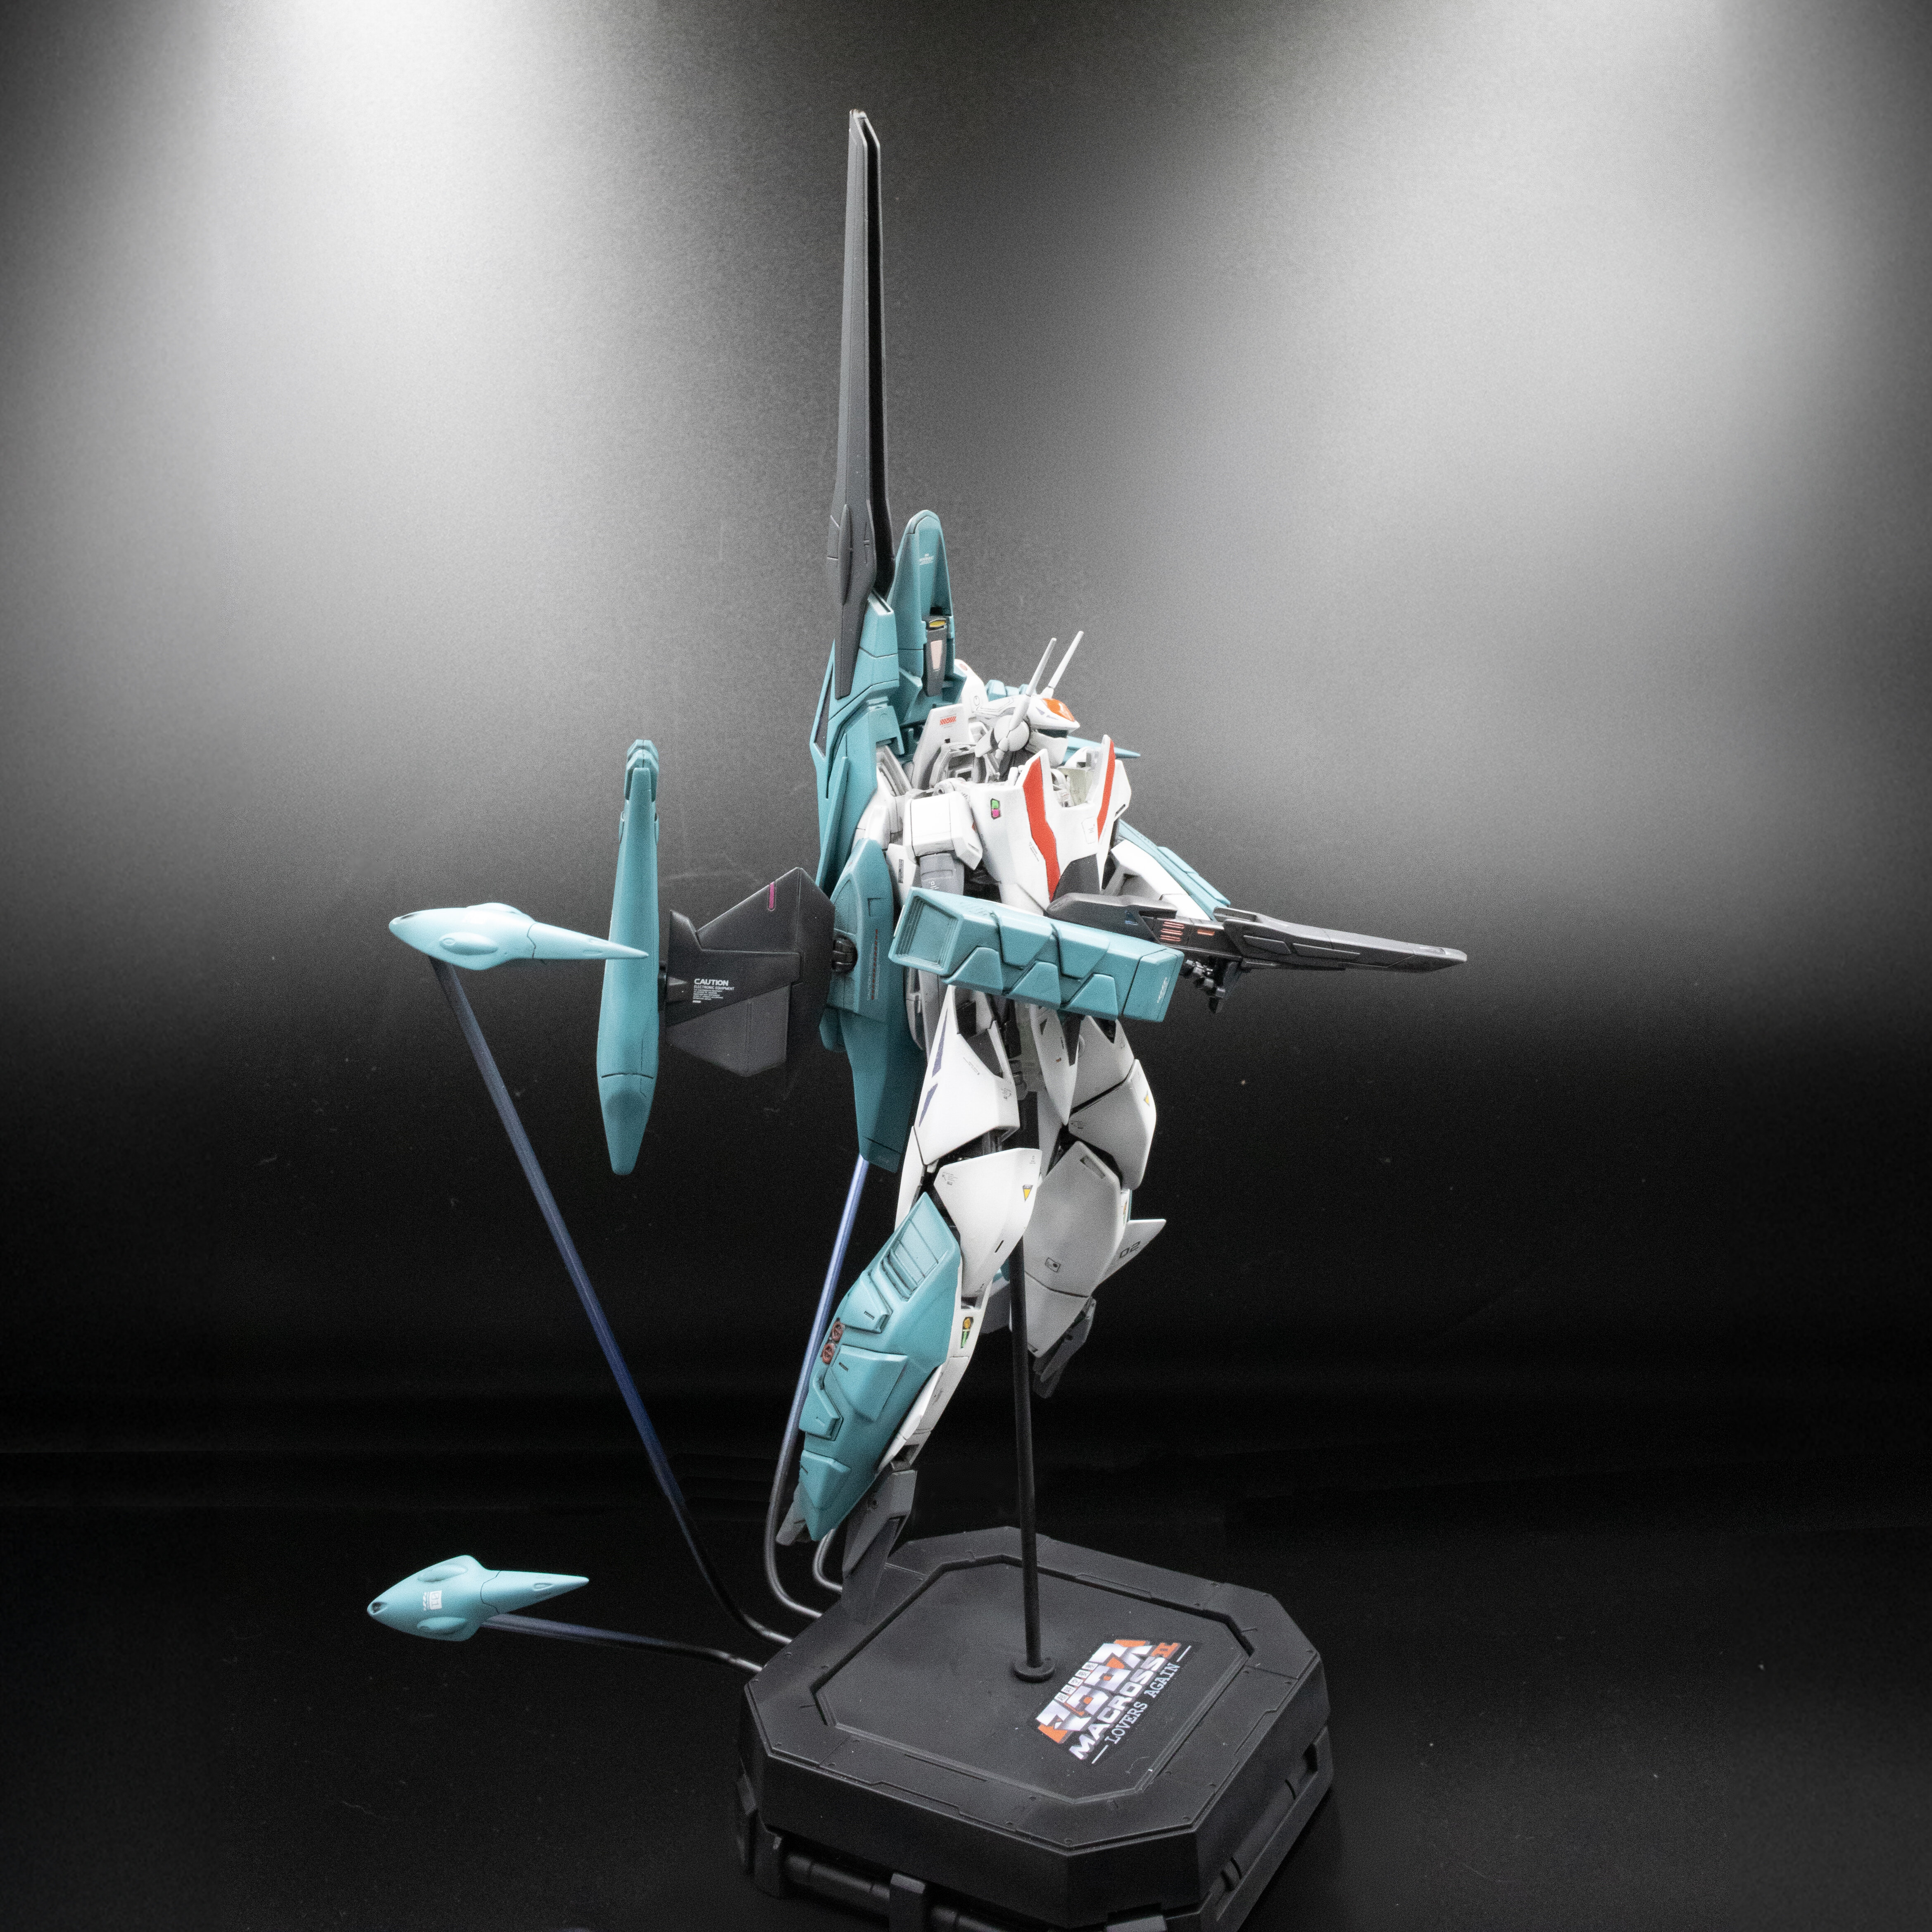
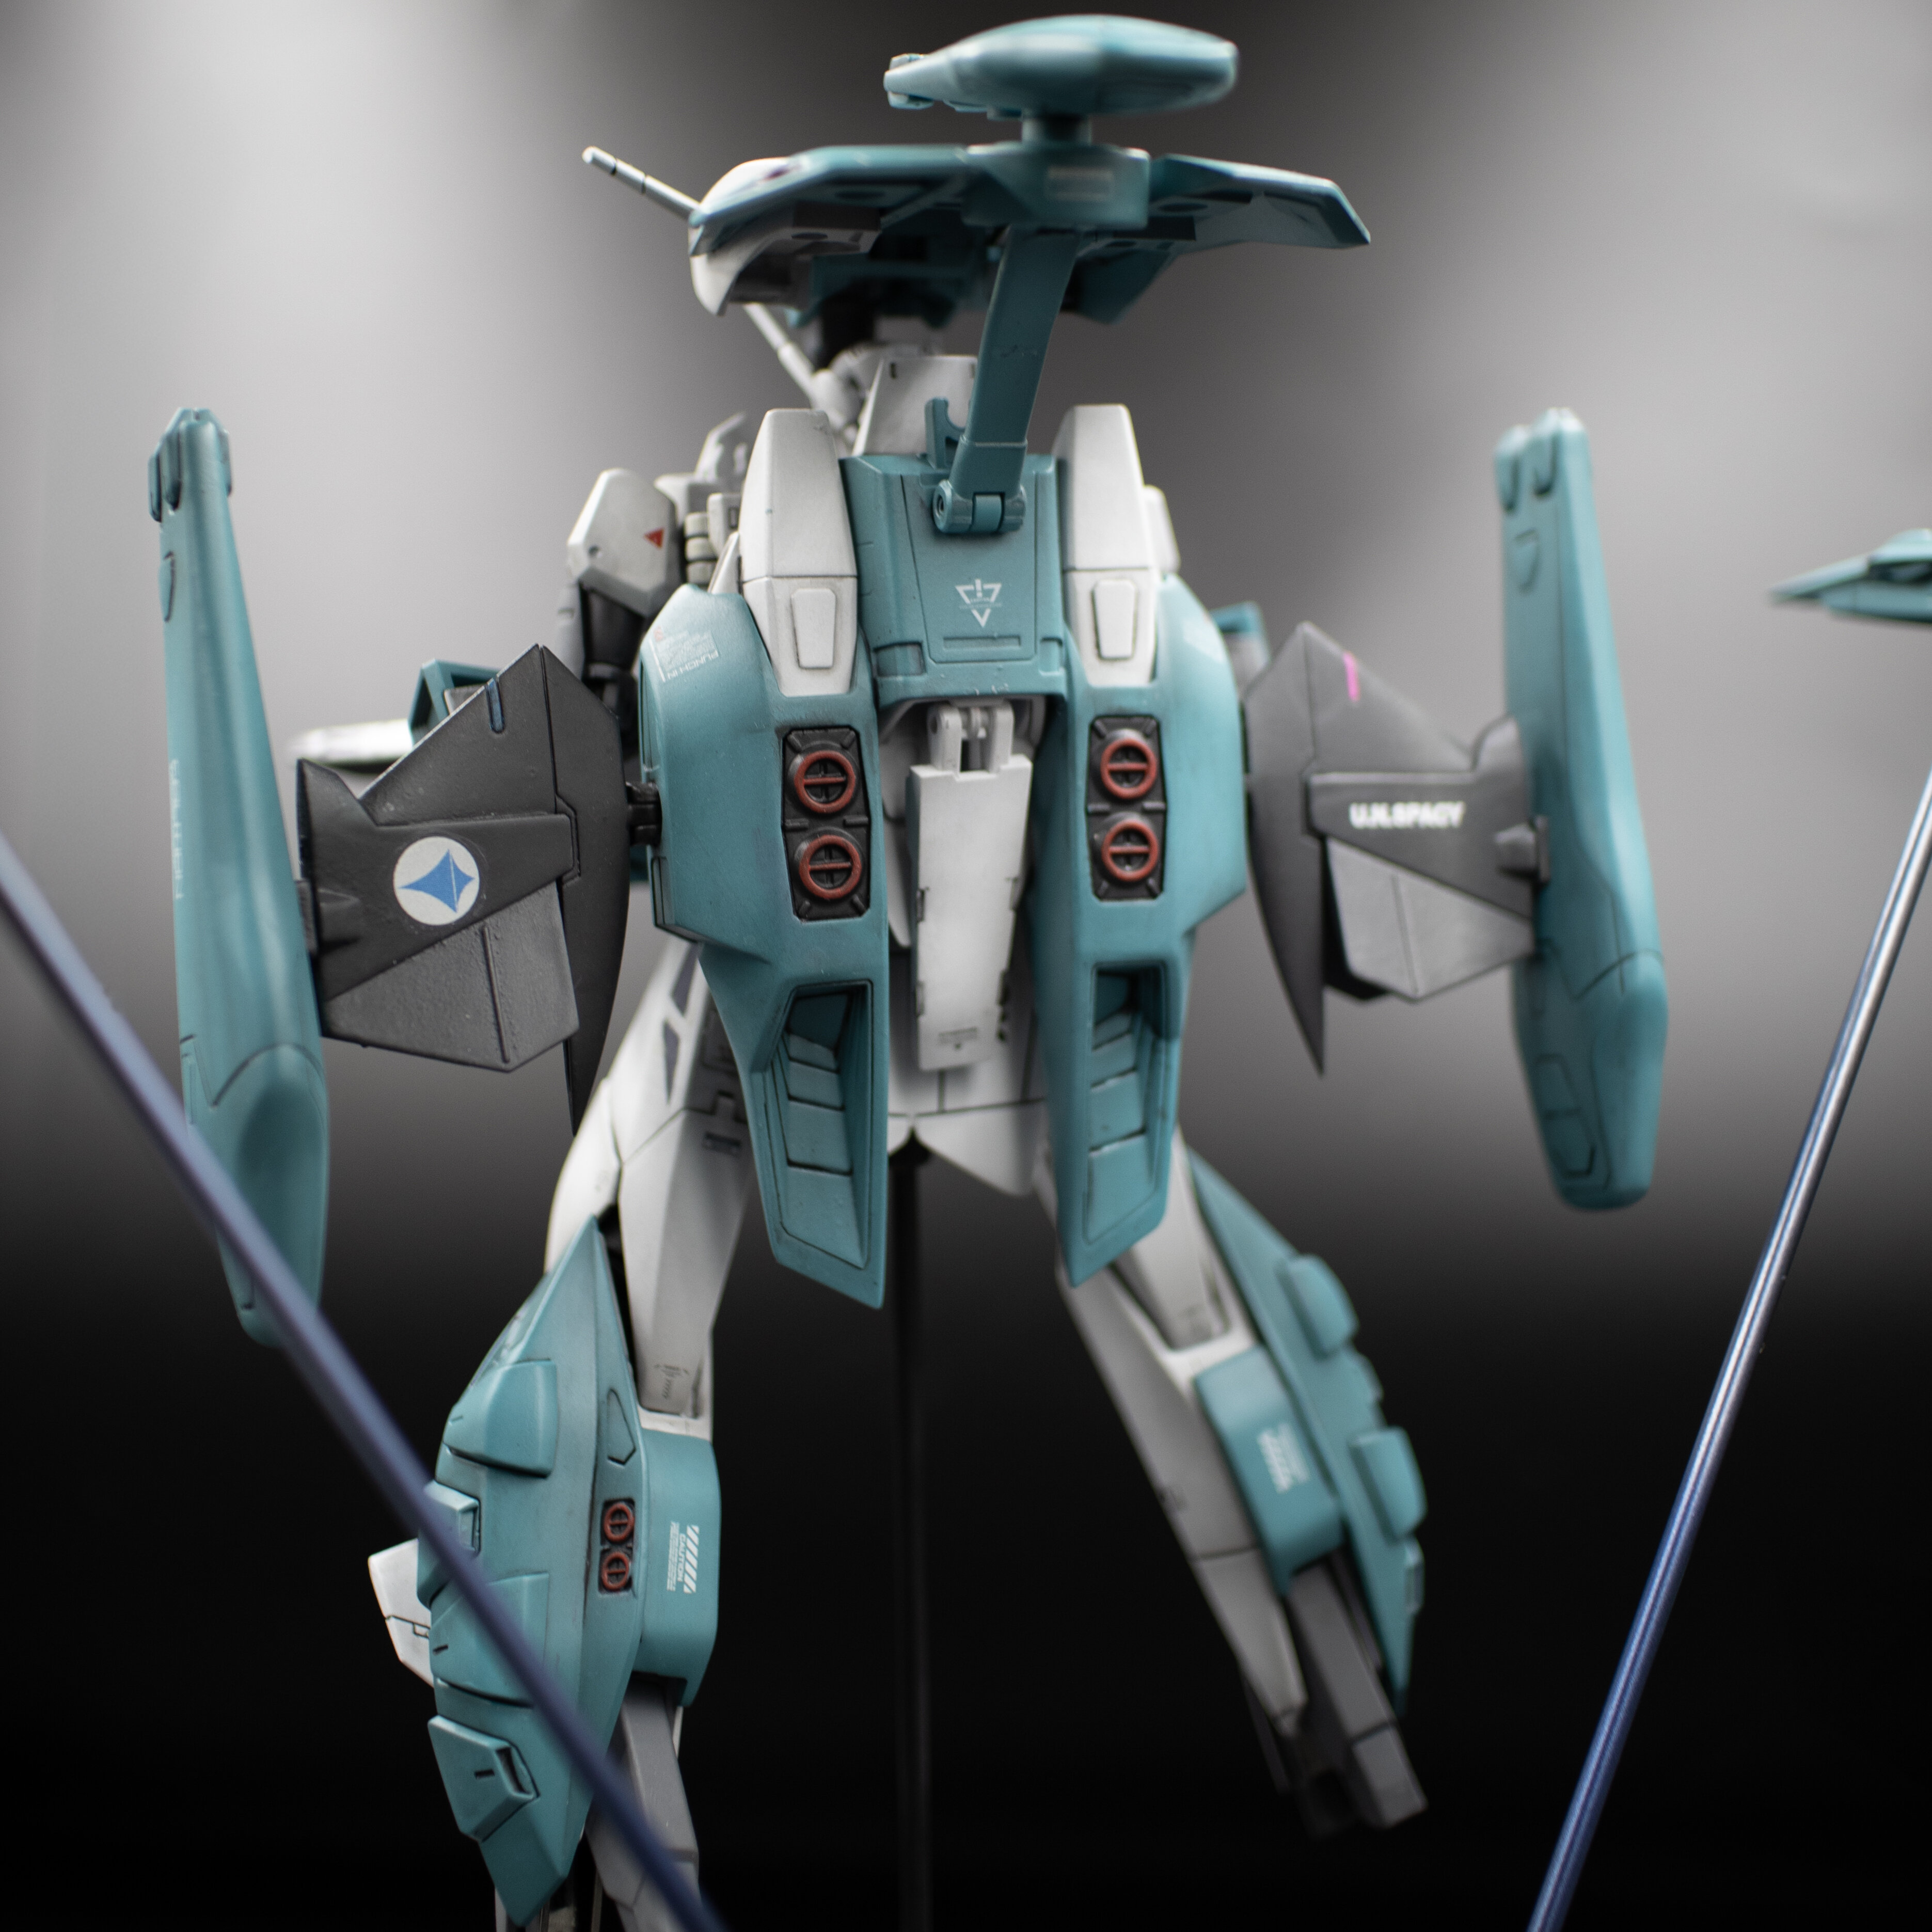
Repaint from Hi-Metal R VF-2SS. This looks much bette than the 1/100 model.


-
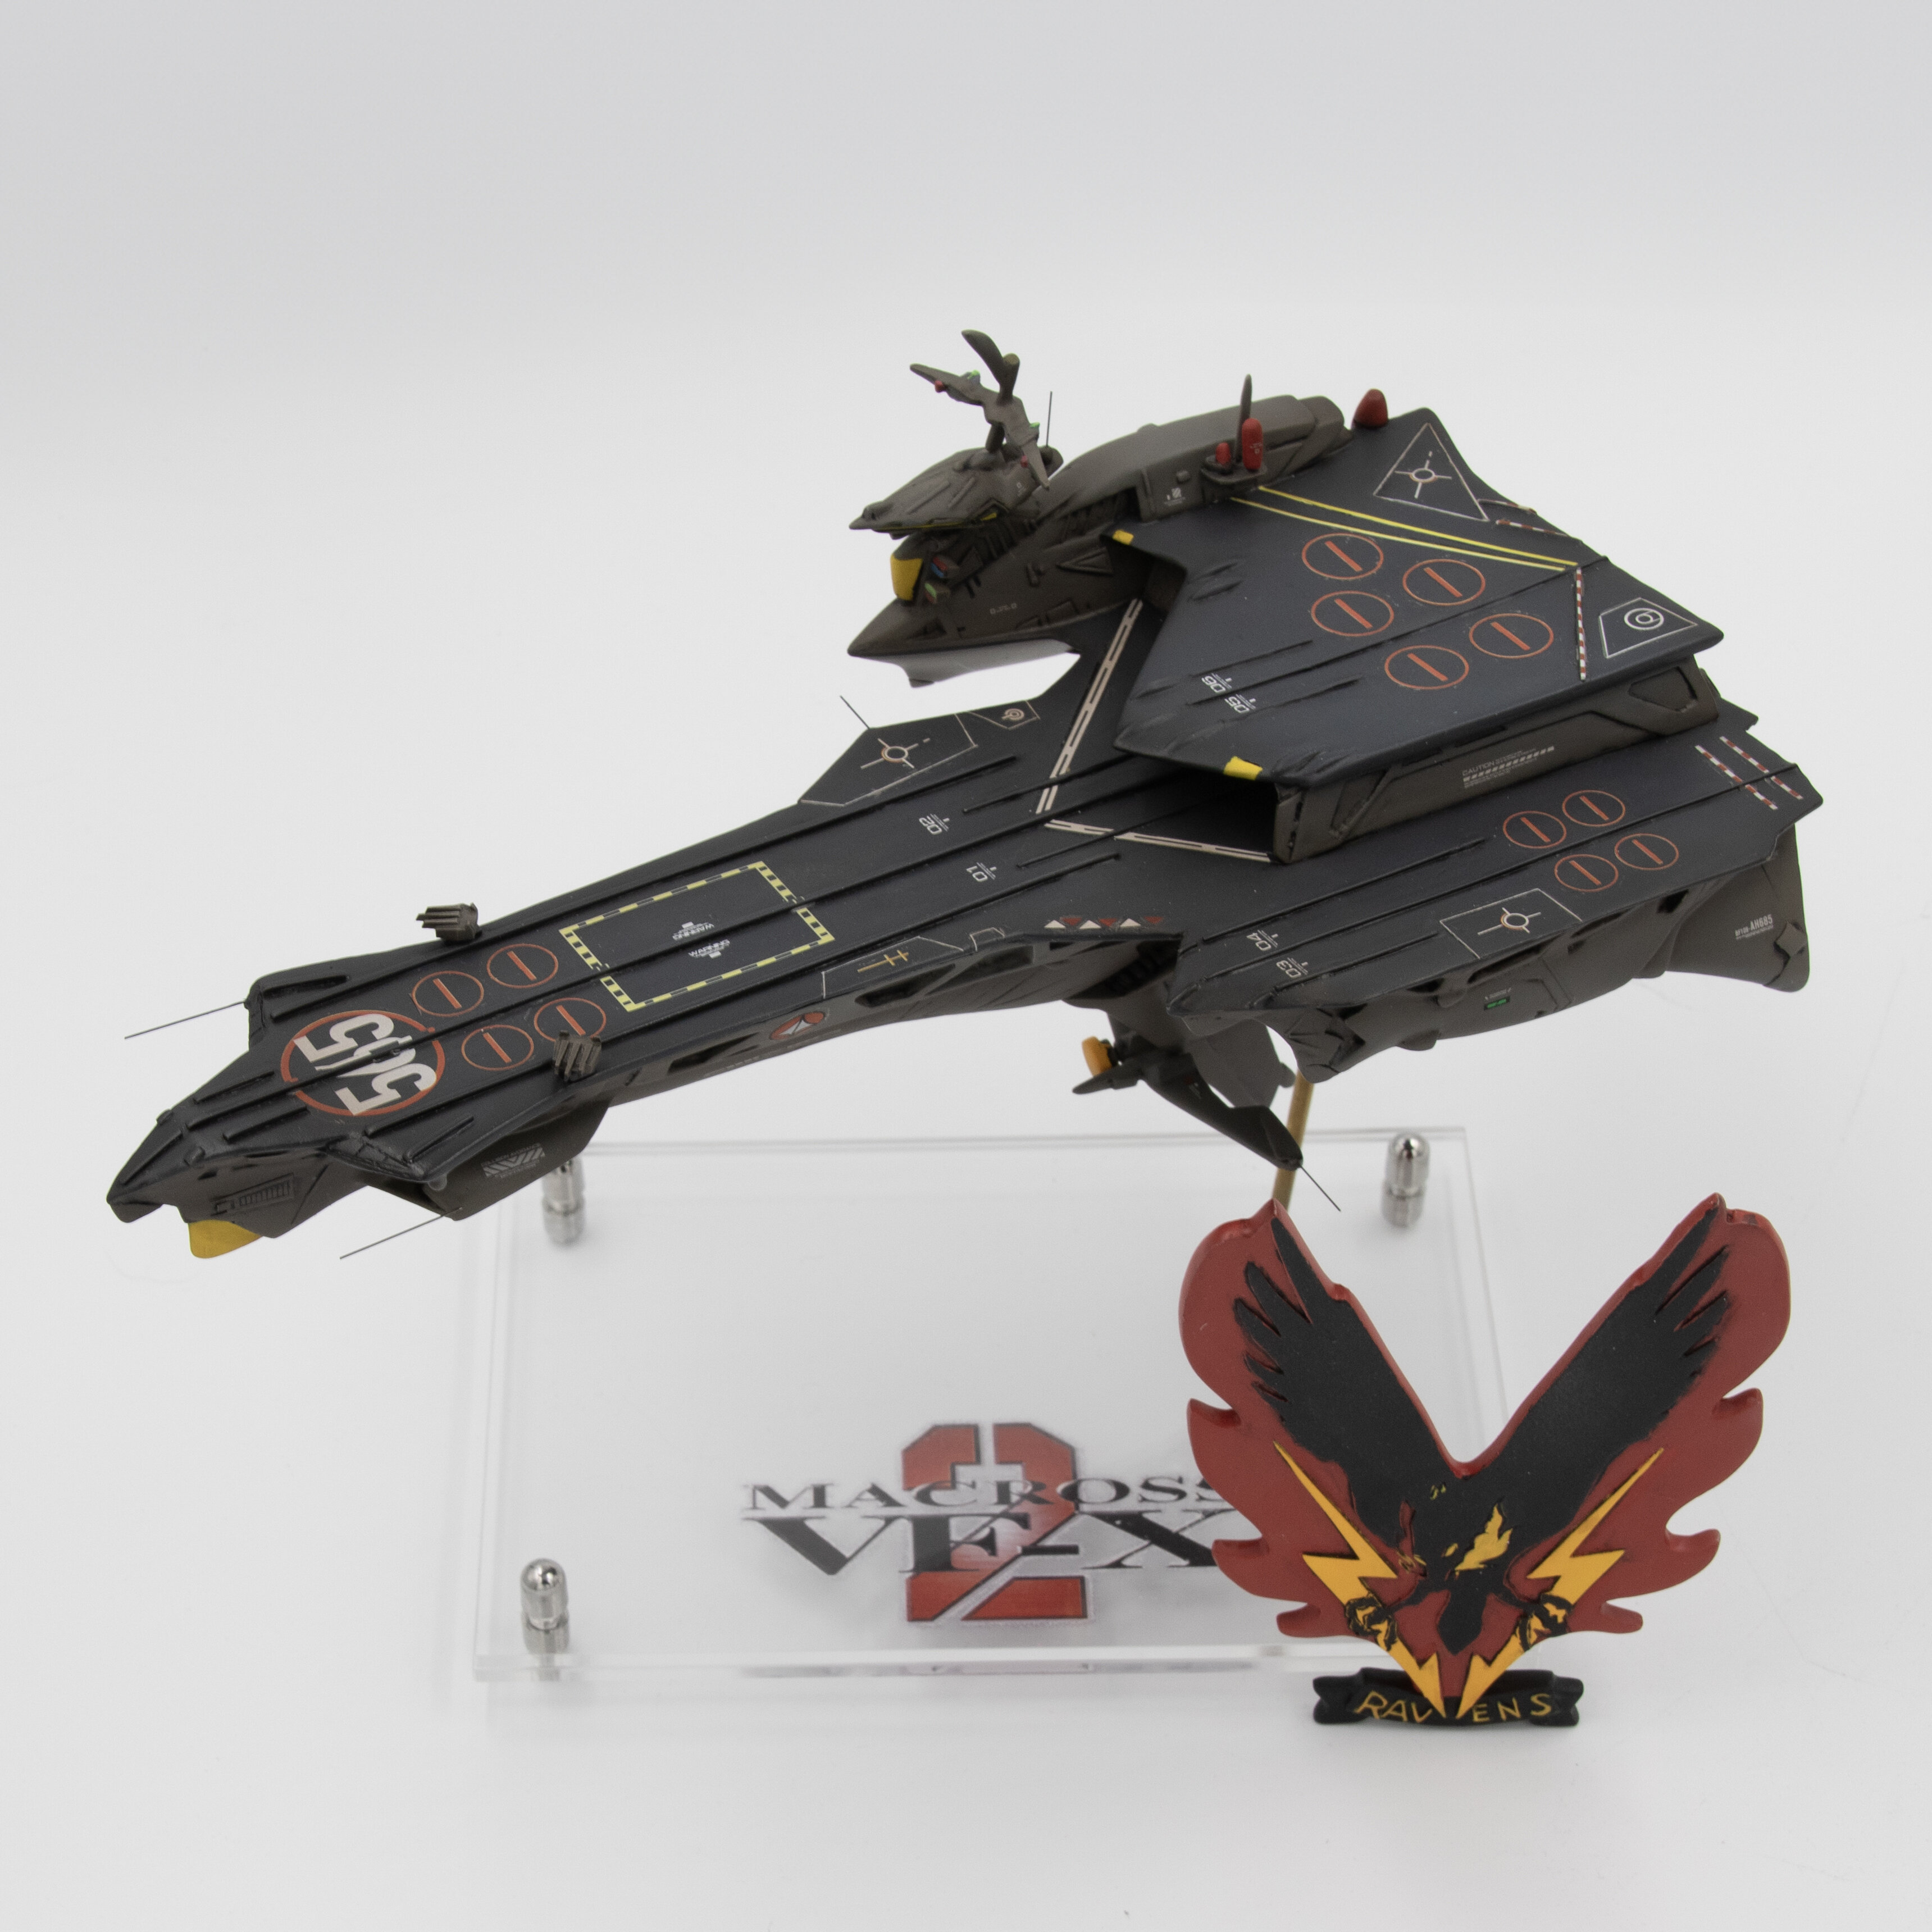
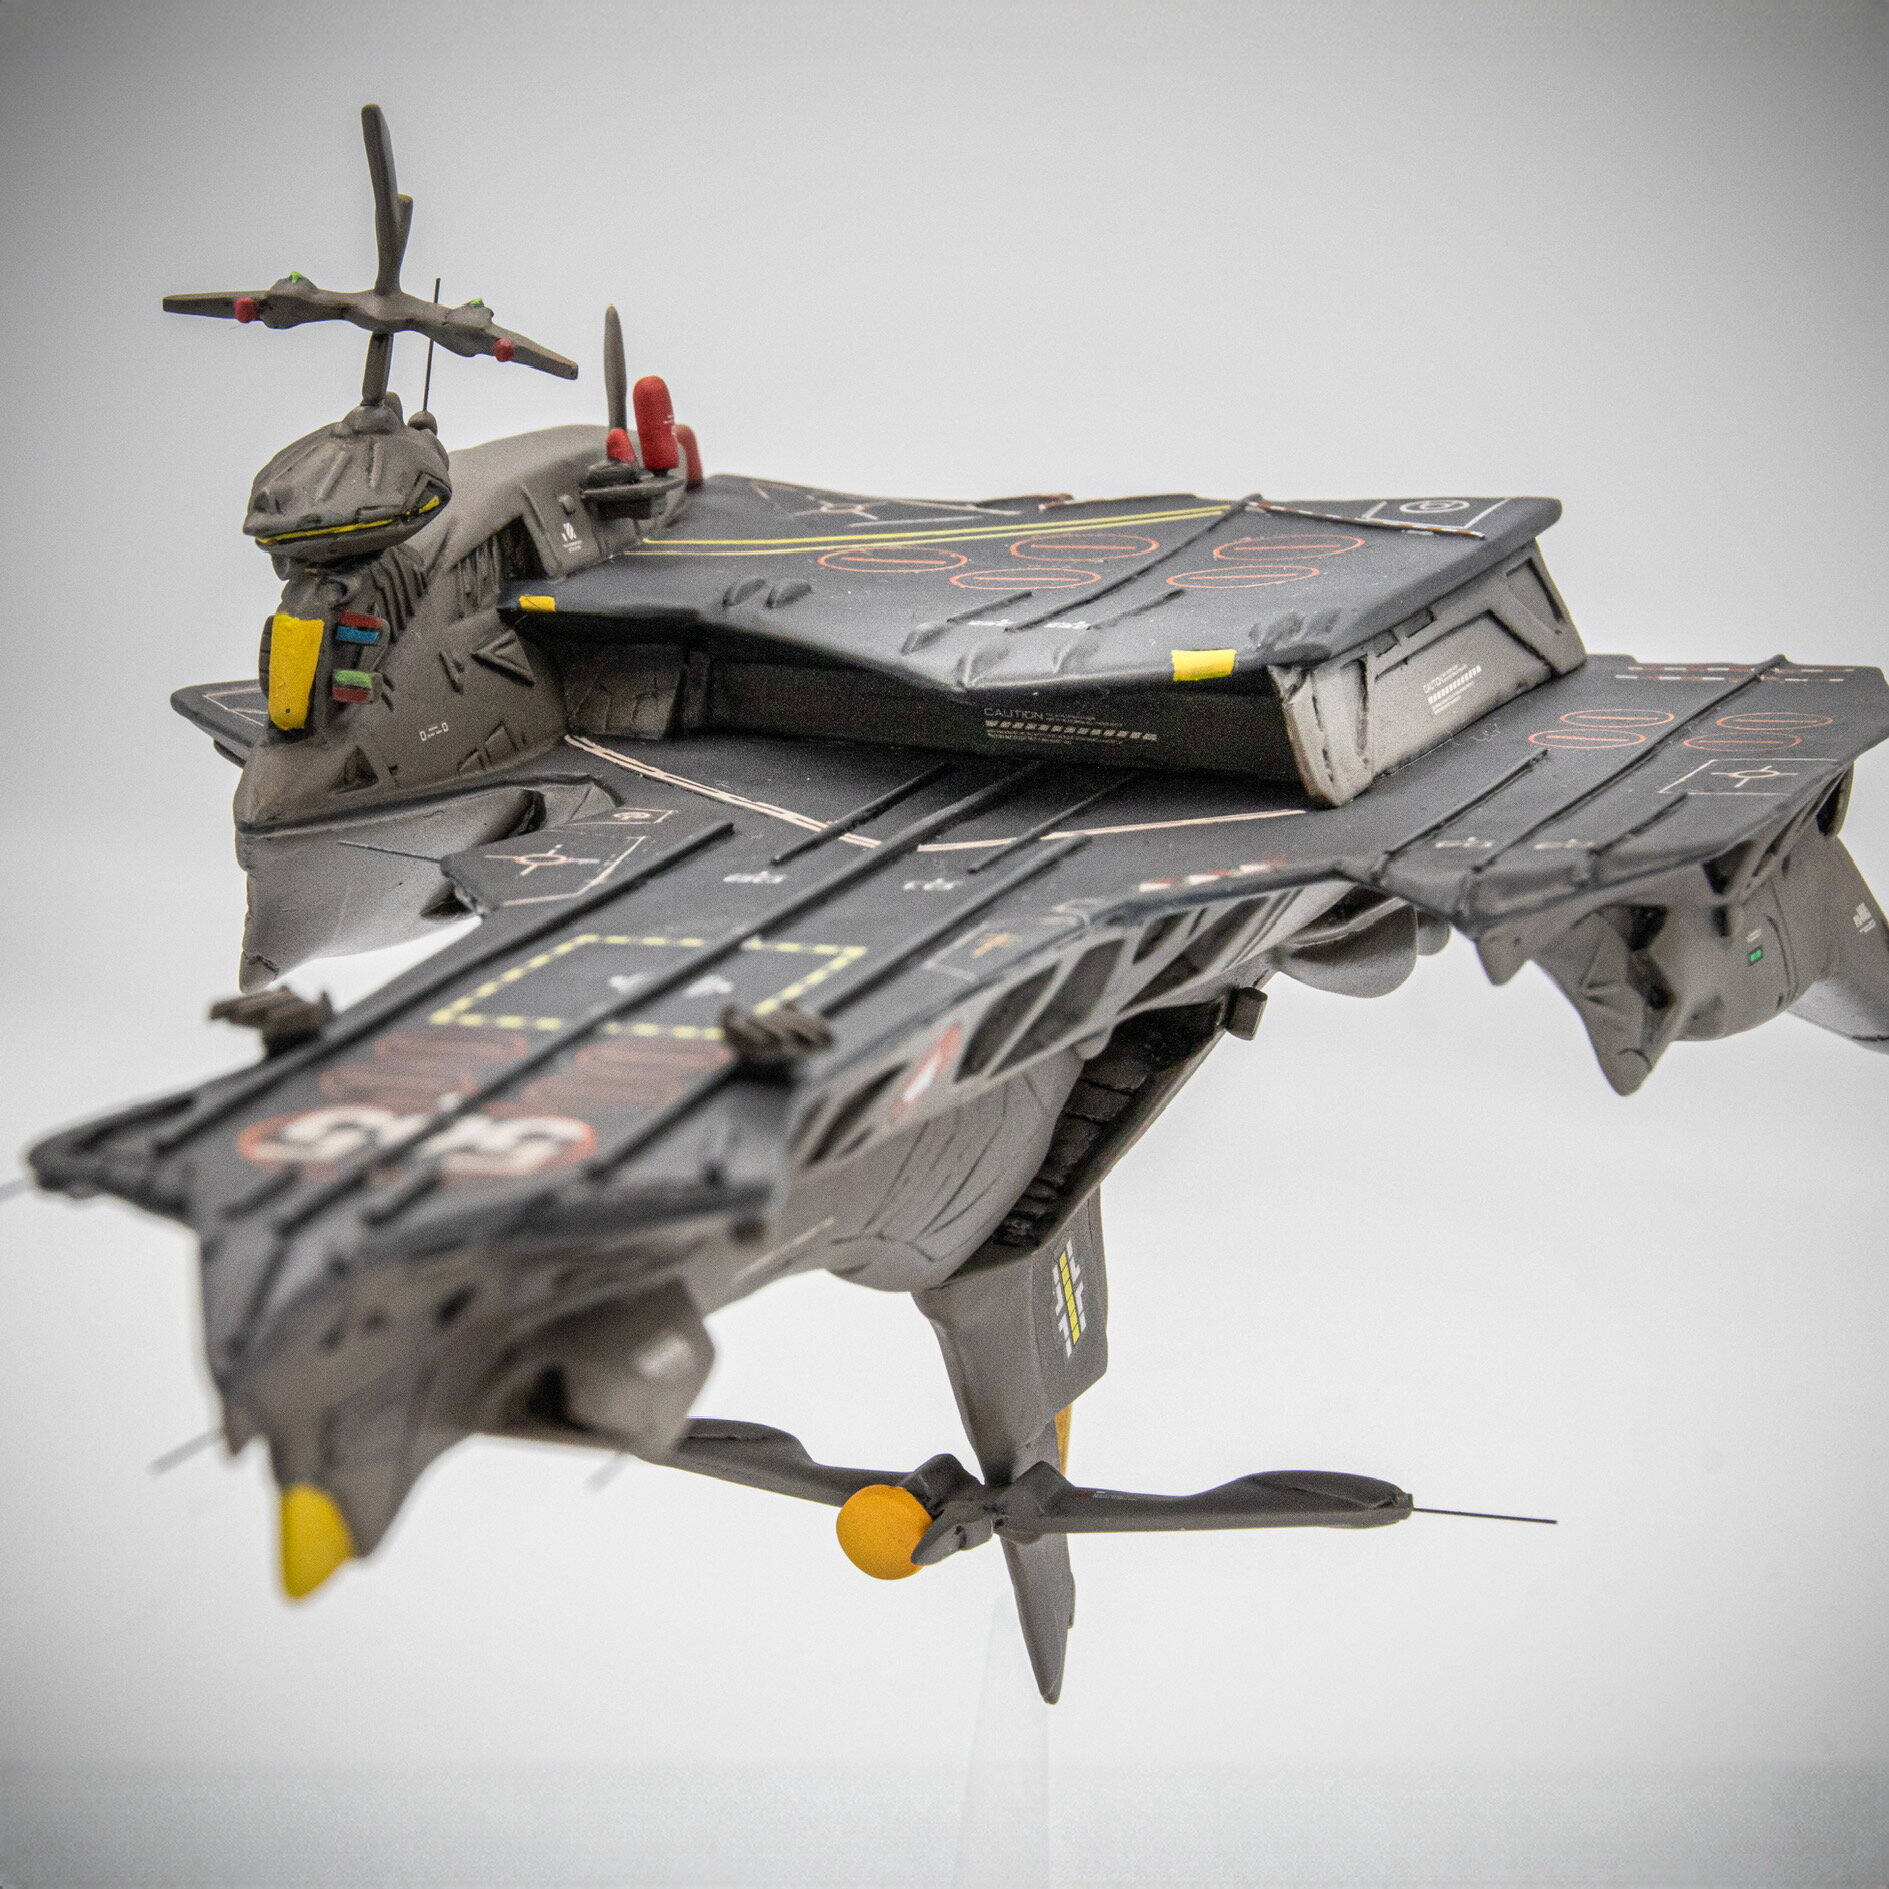
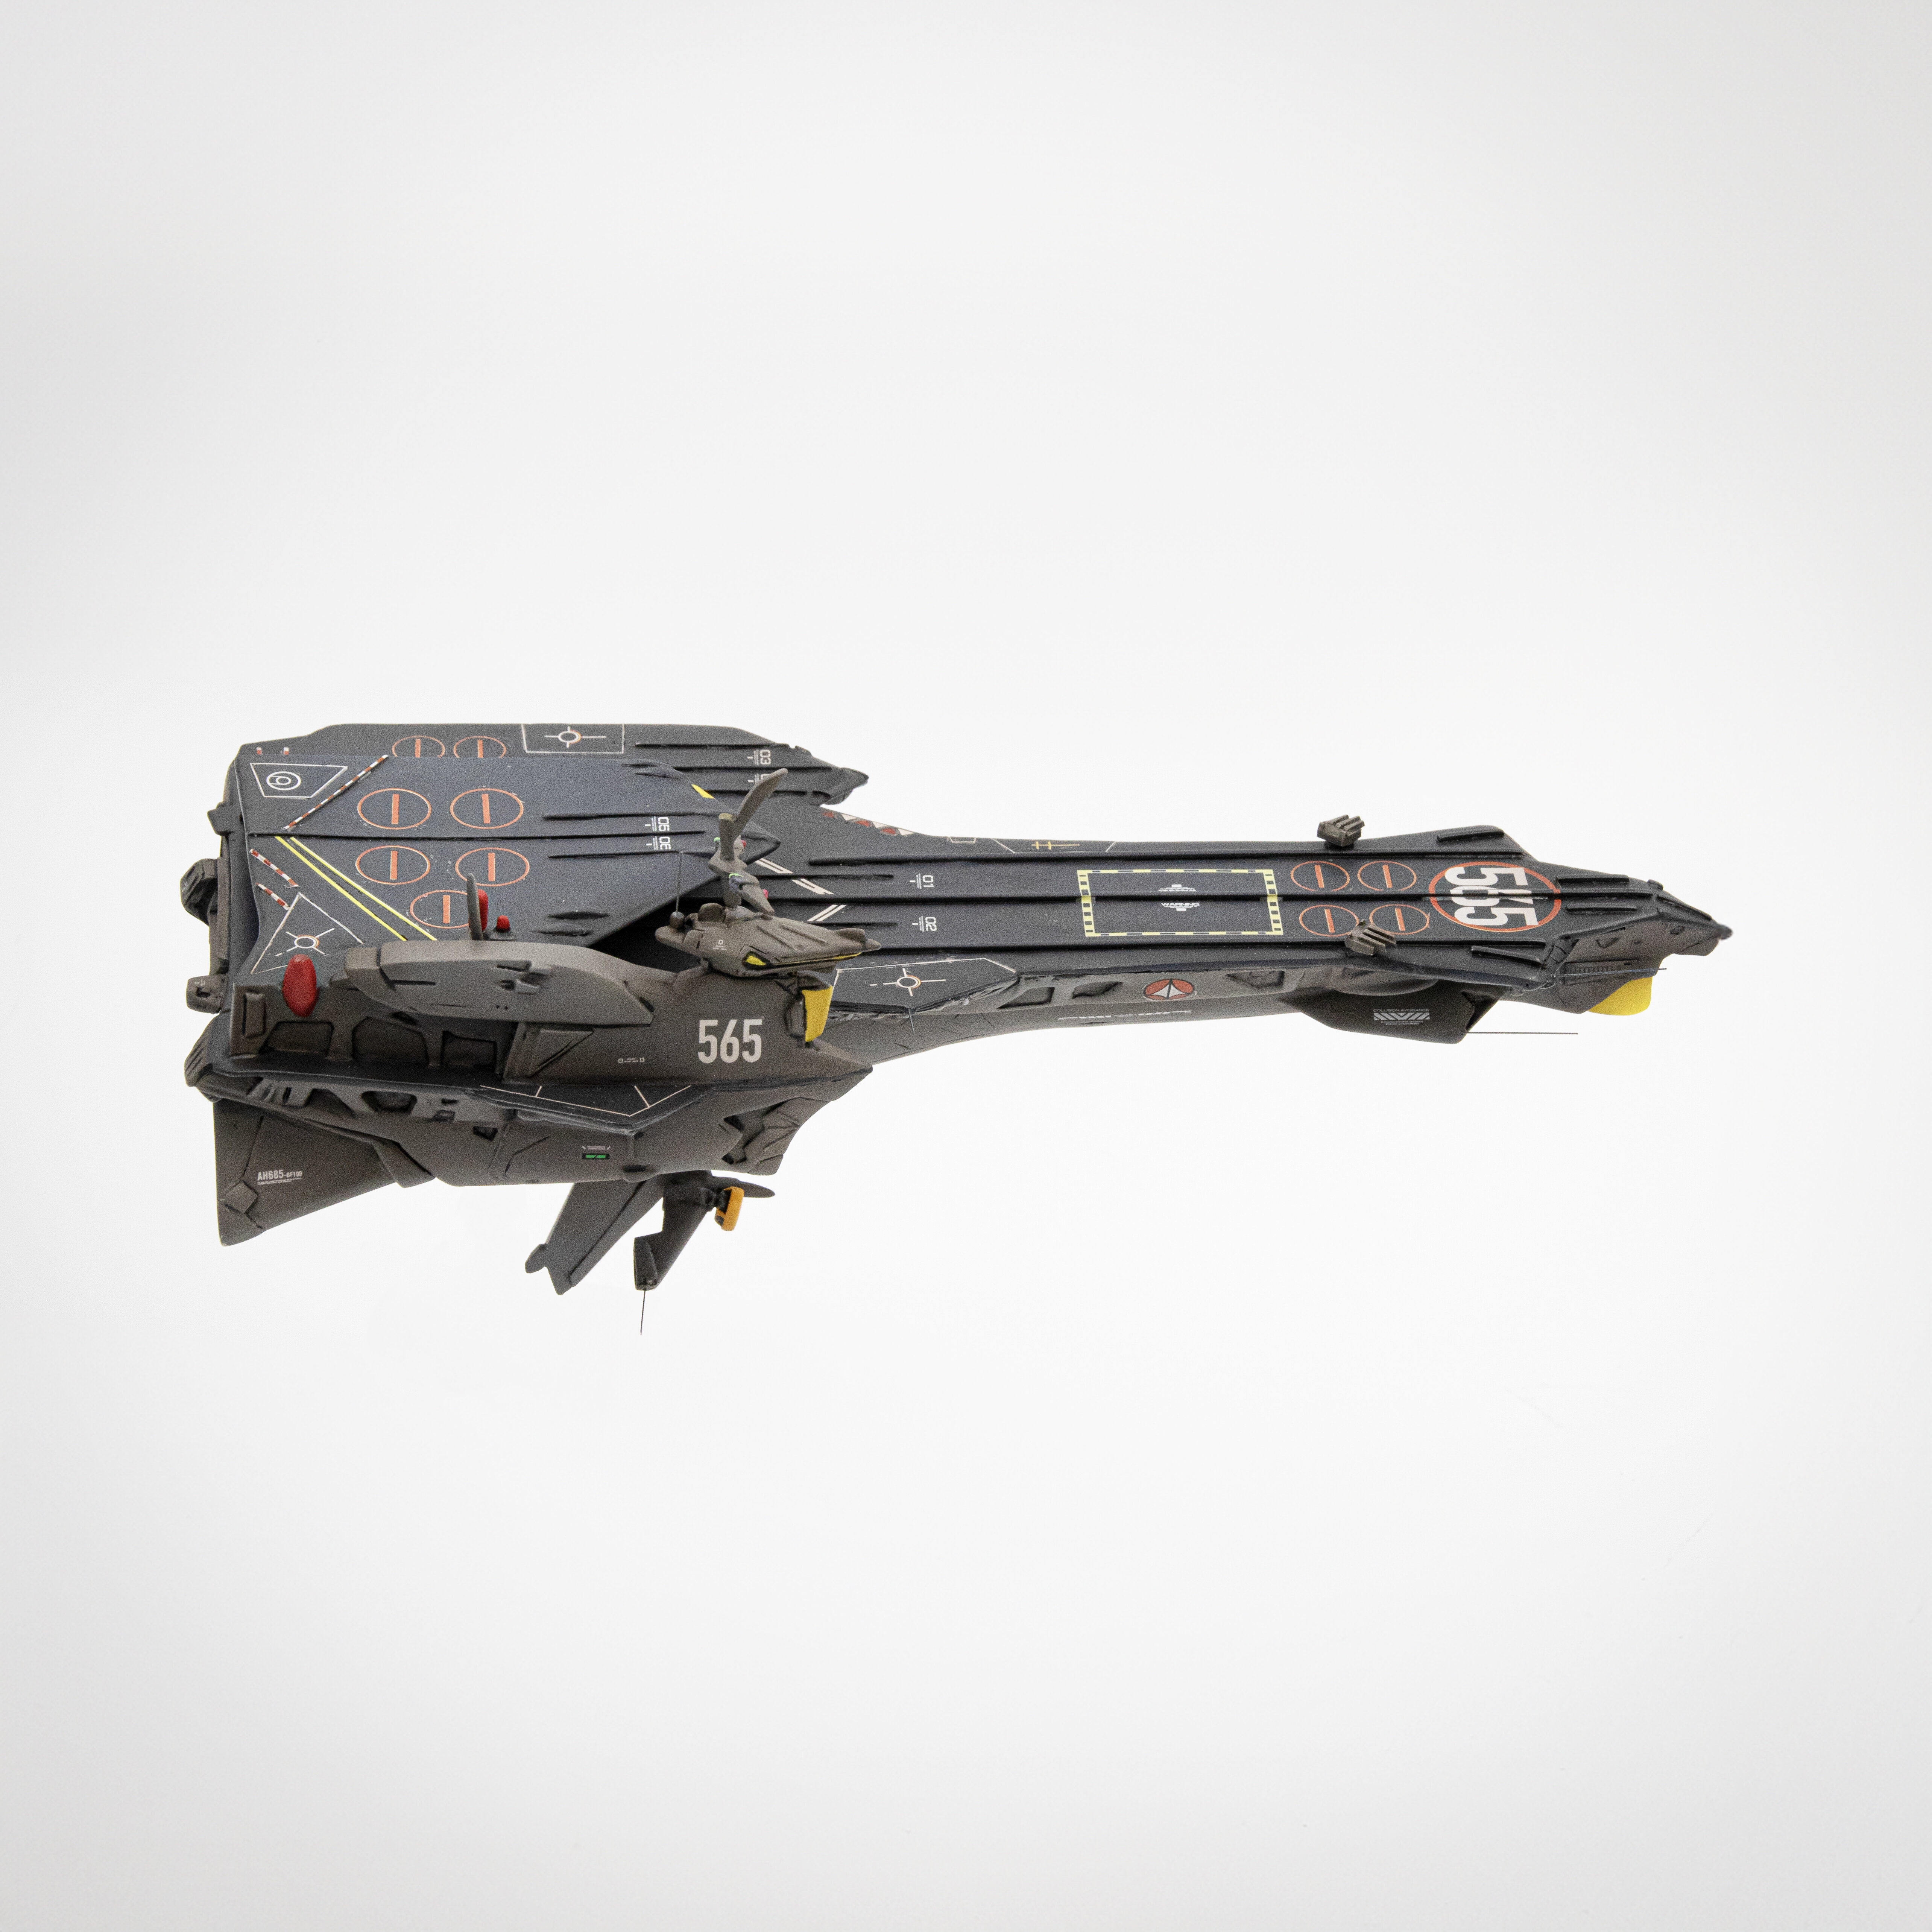
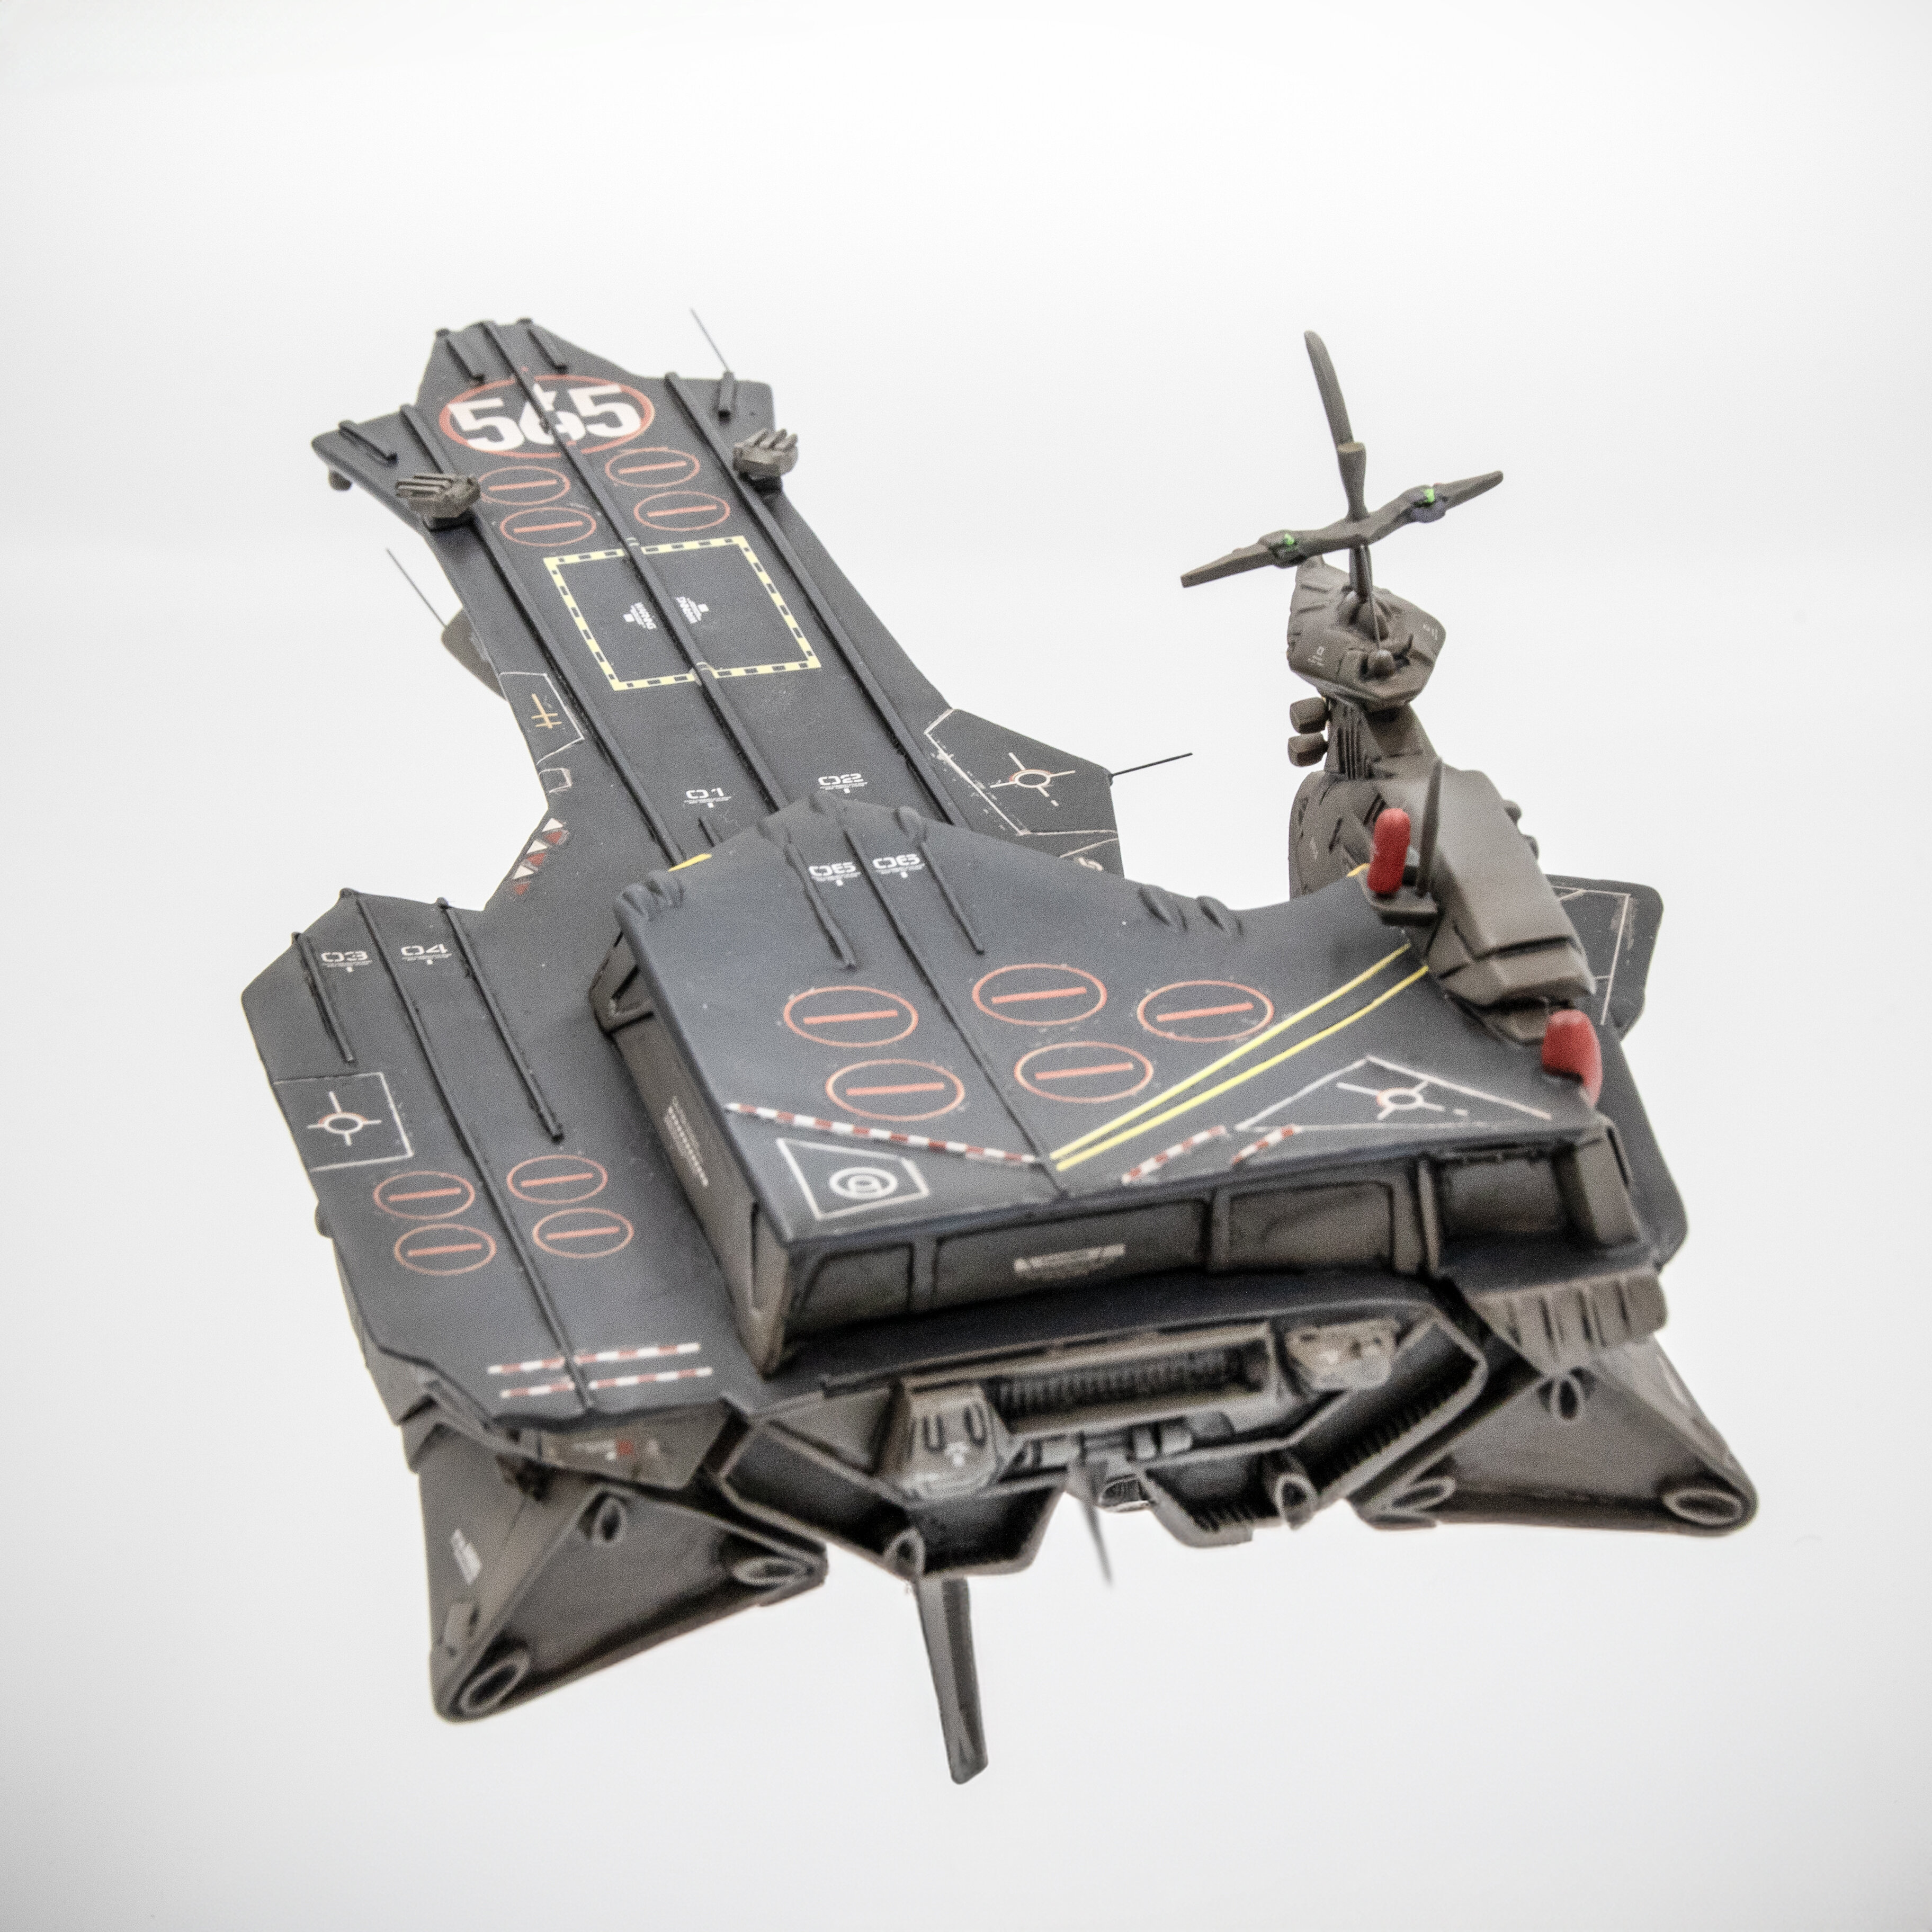
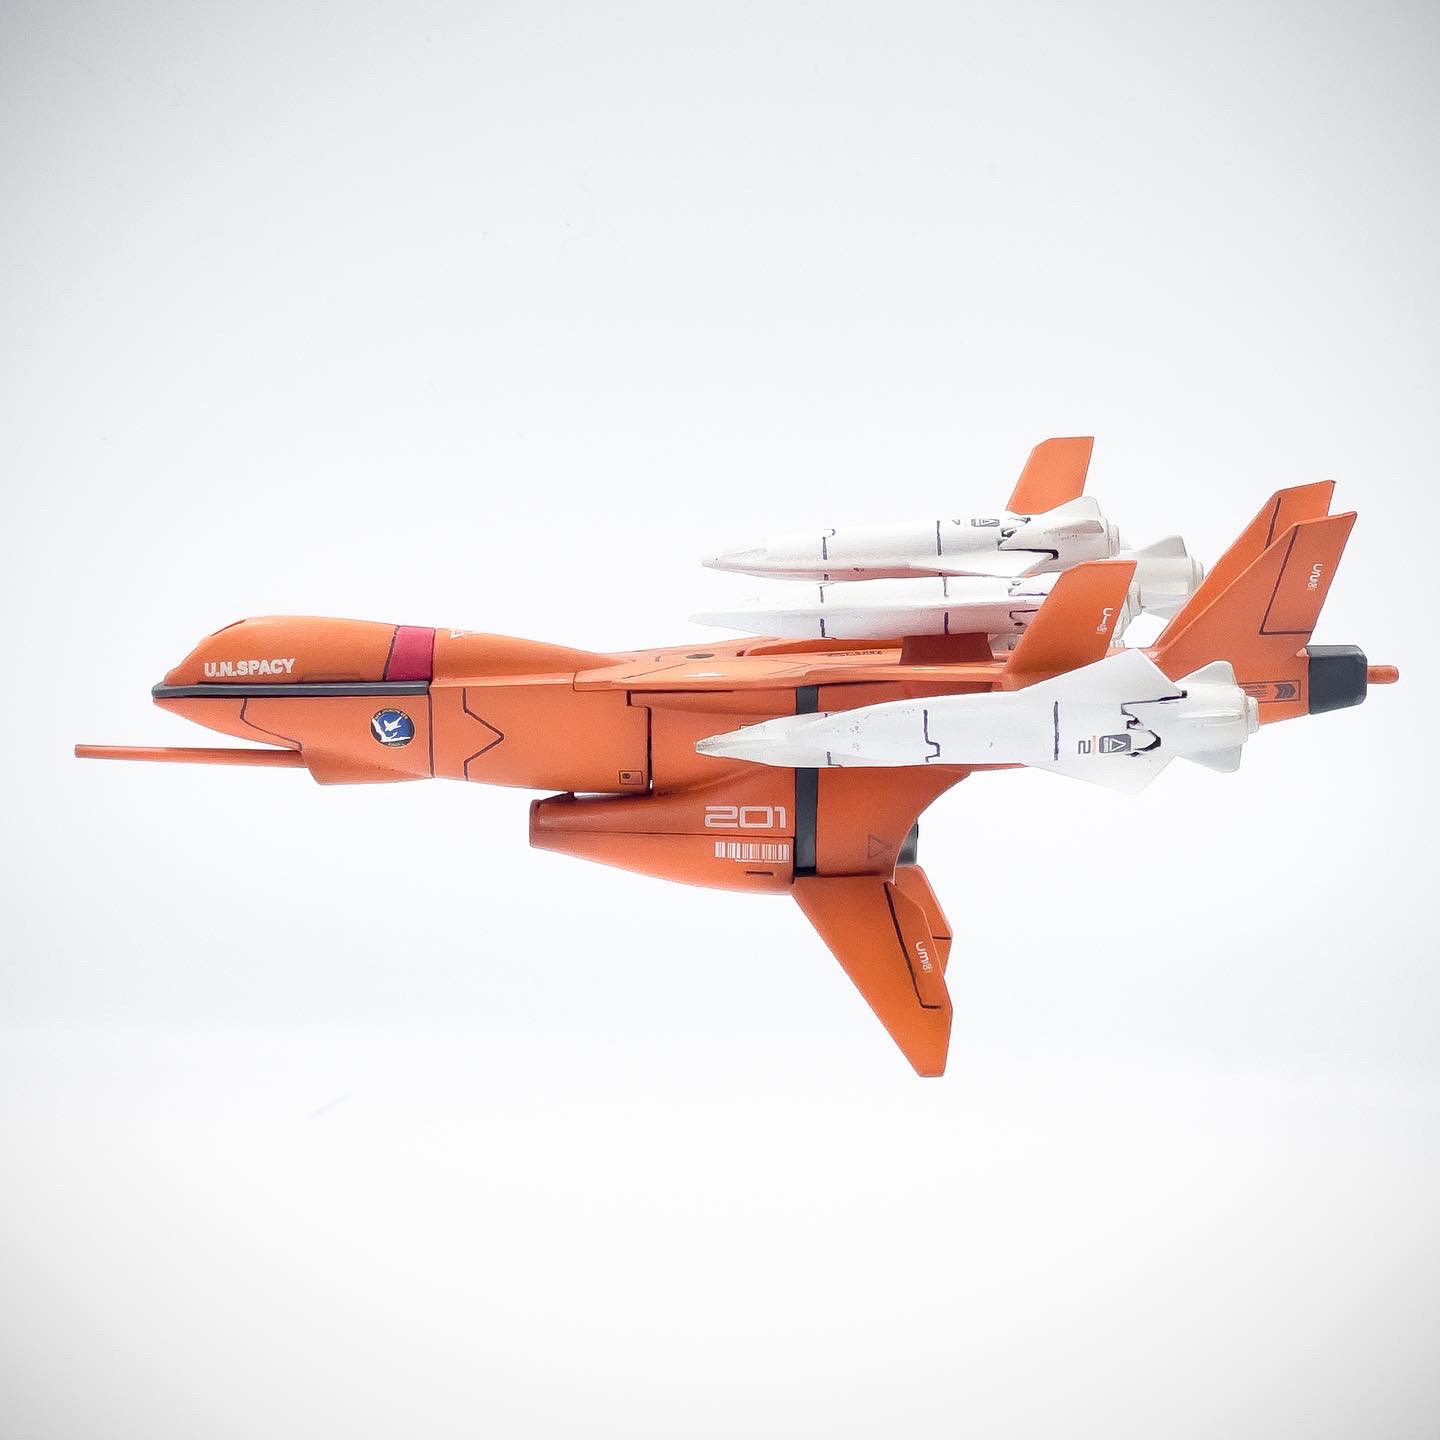
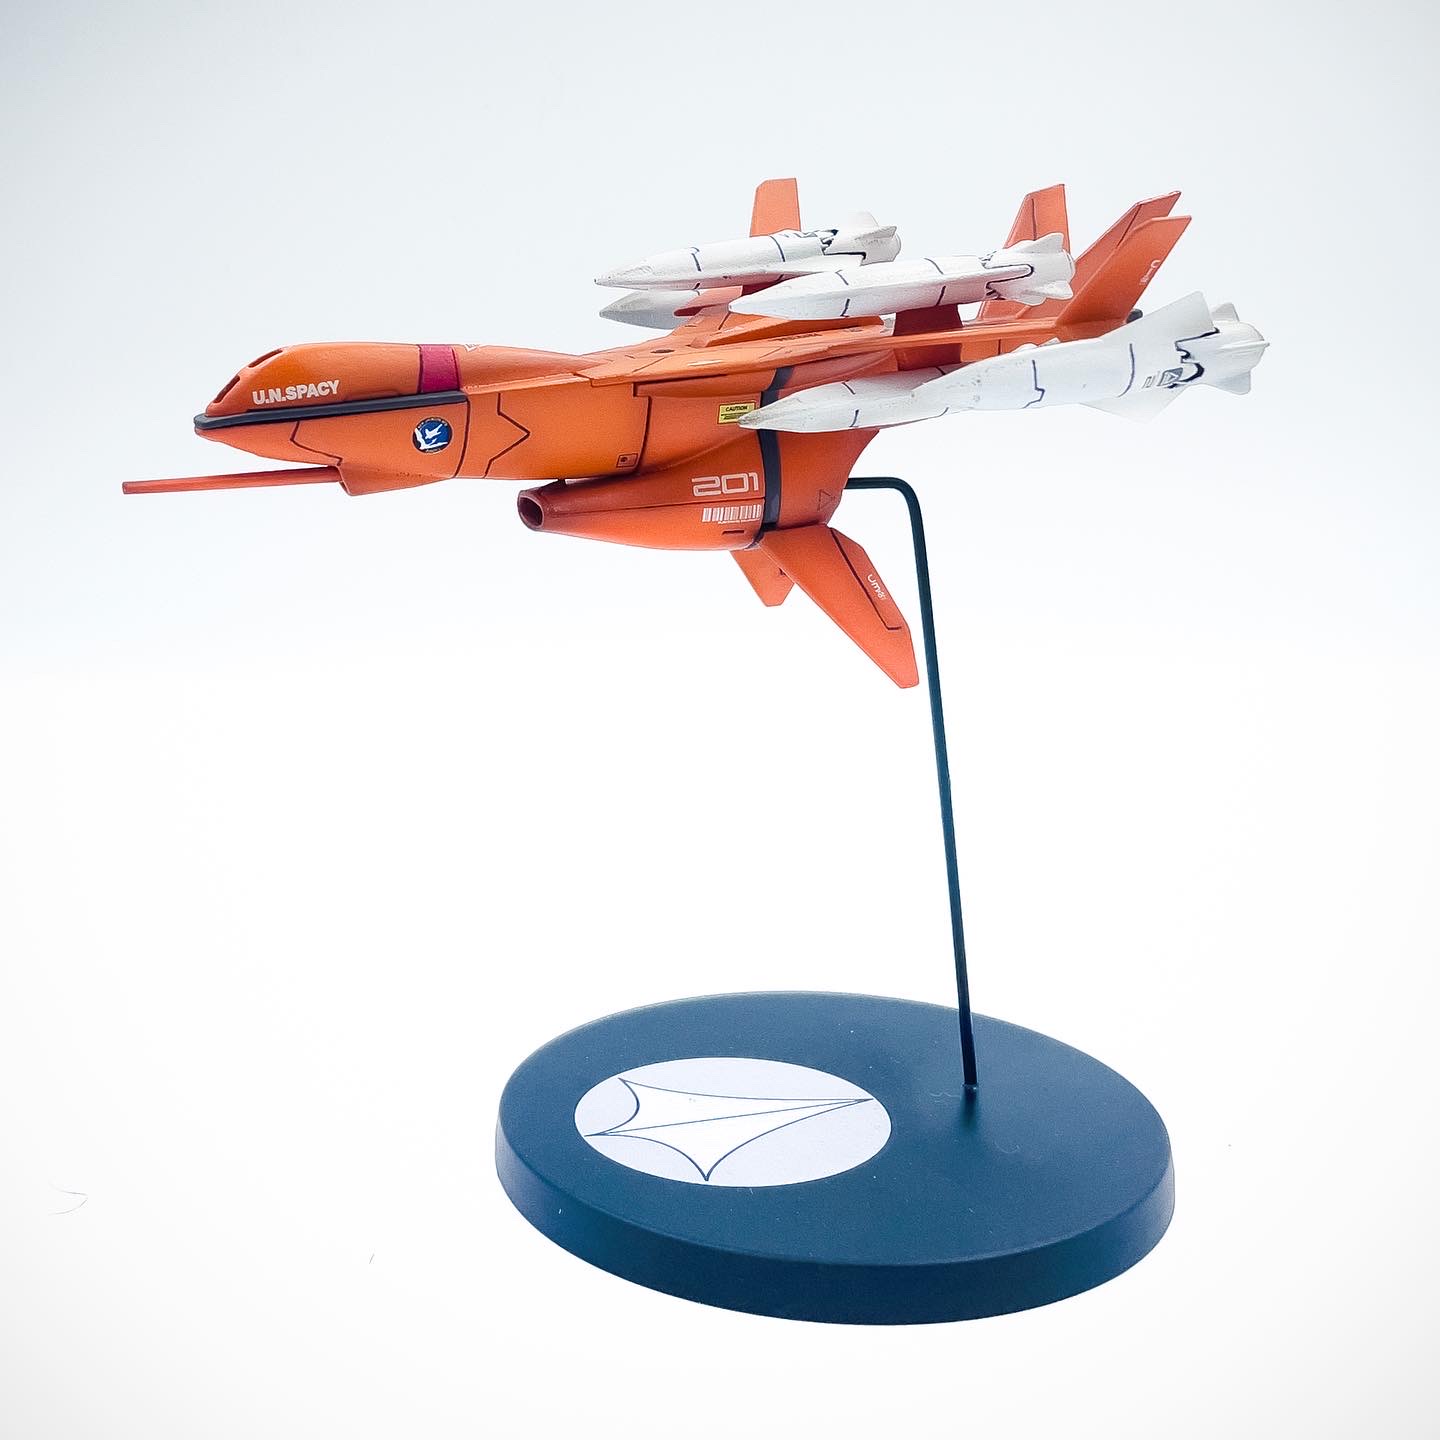
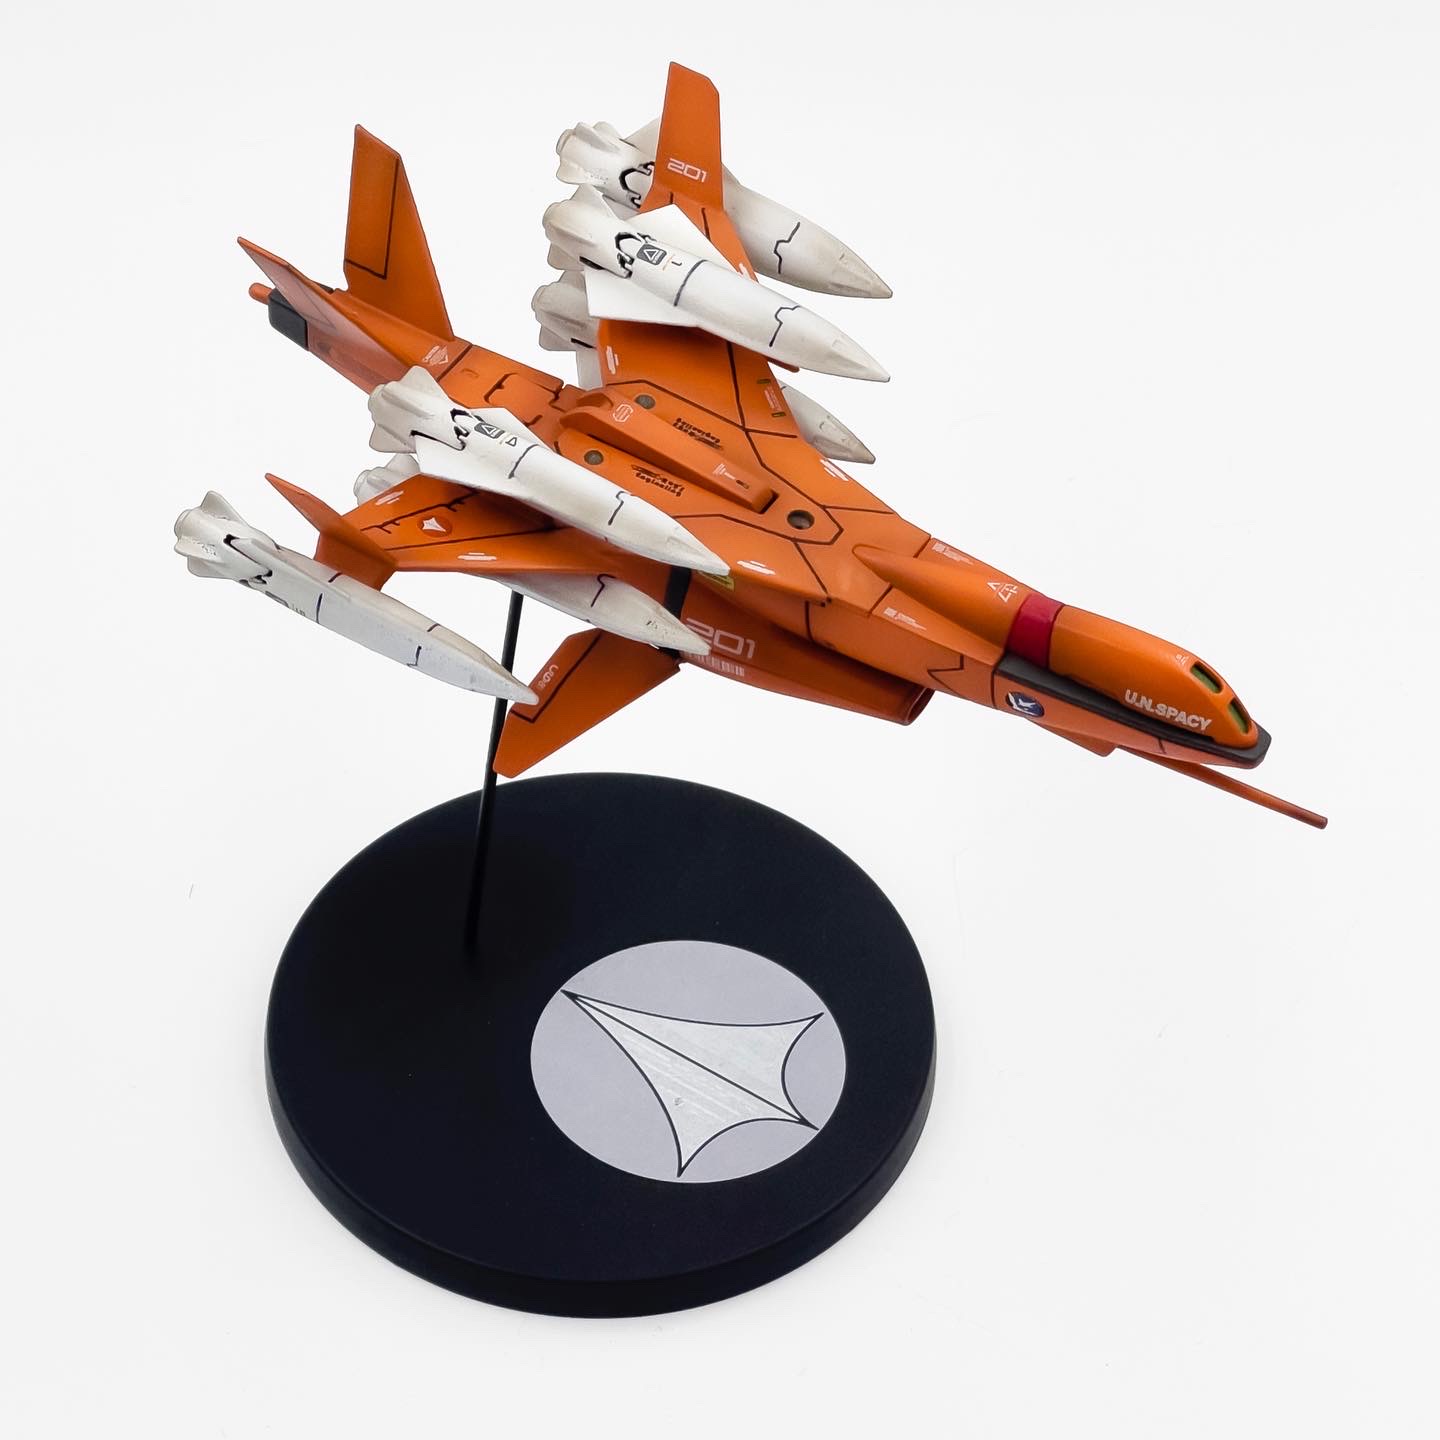
This is the carrier in Macross VF-X2. The resin has a lot of bubbles. The solution was then to sand the deck and then customise the decals.

-
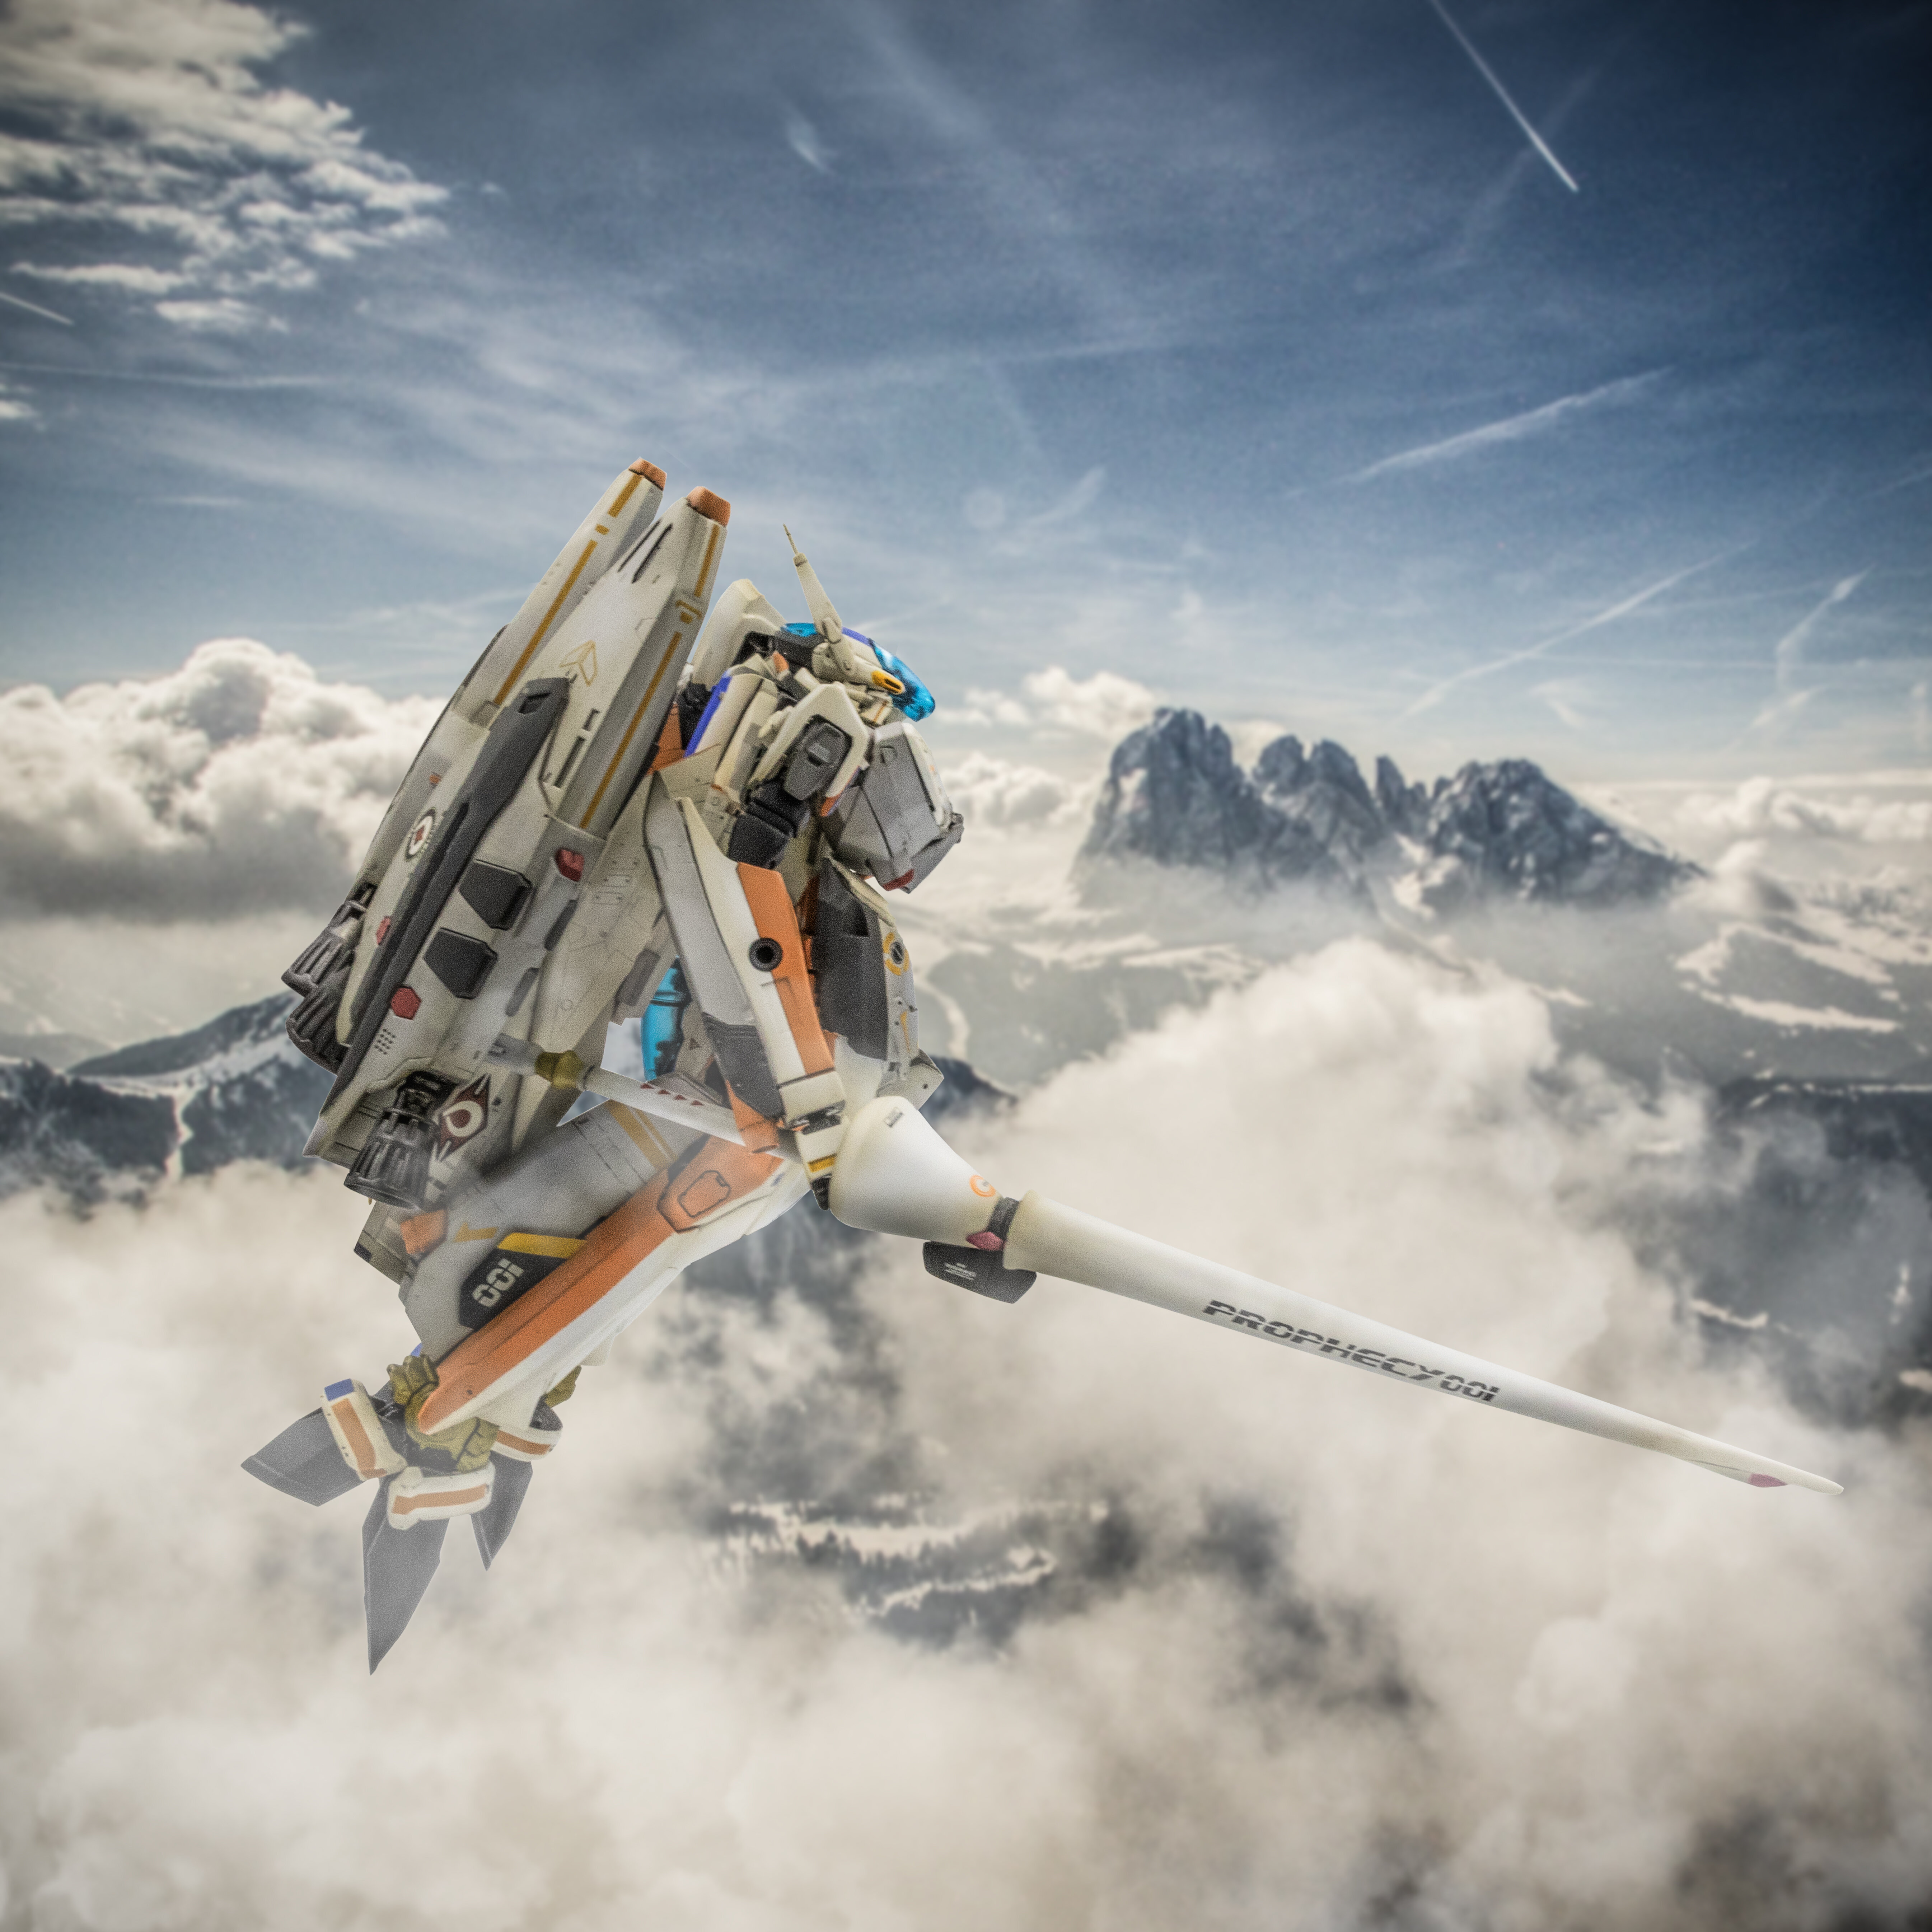
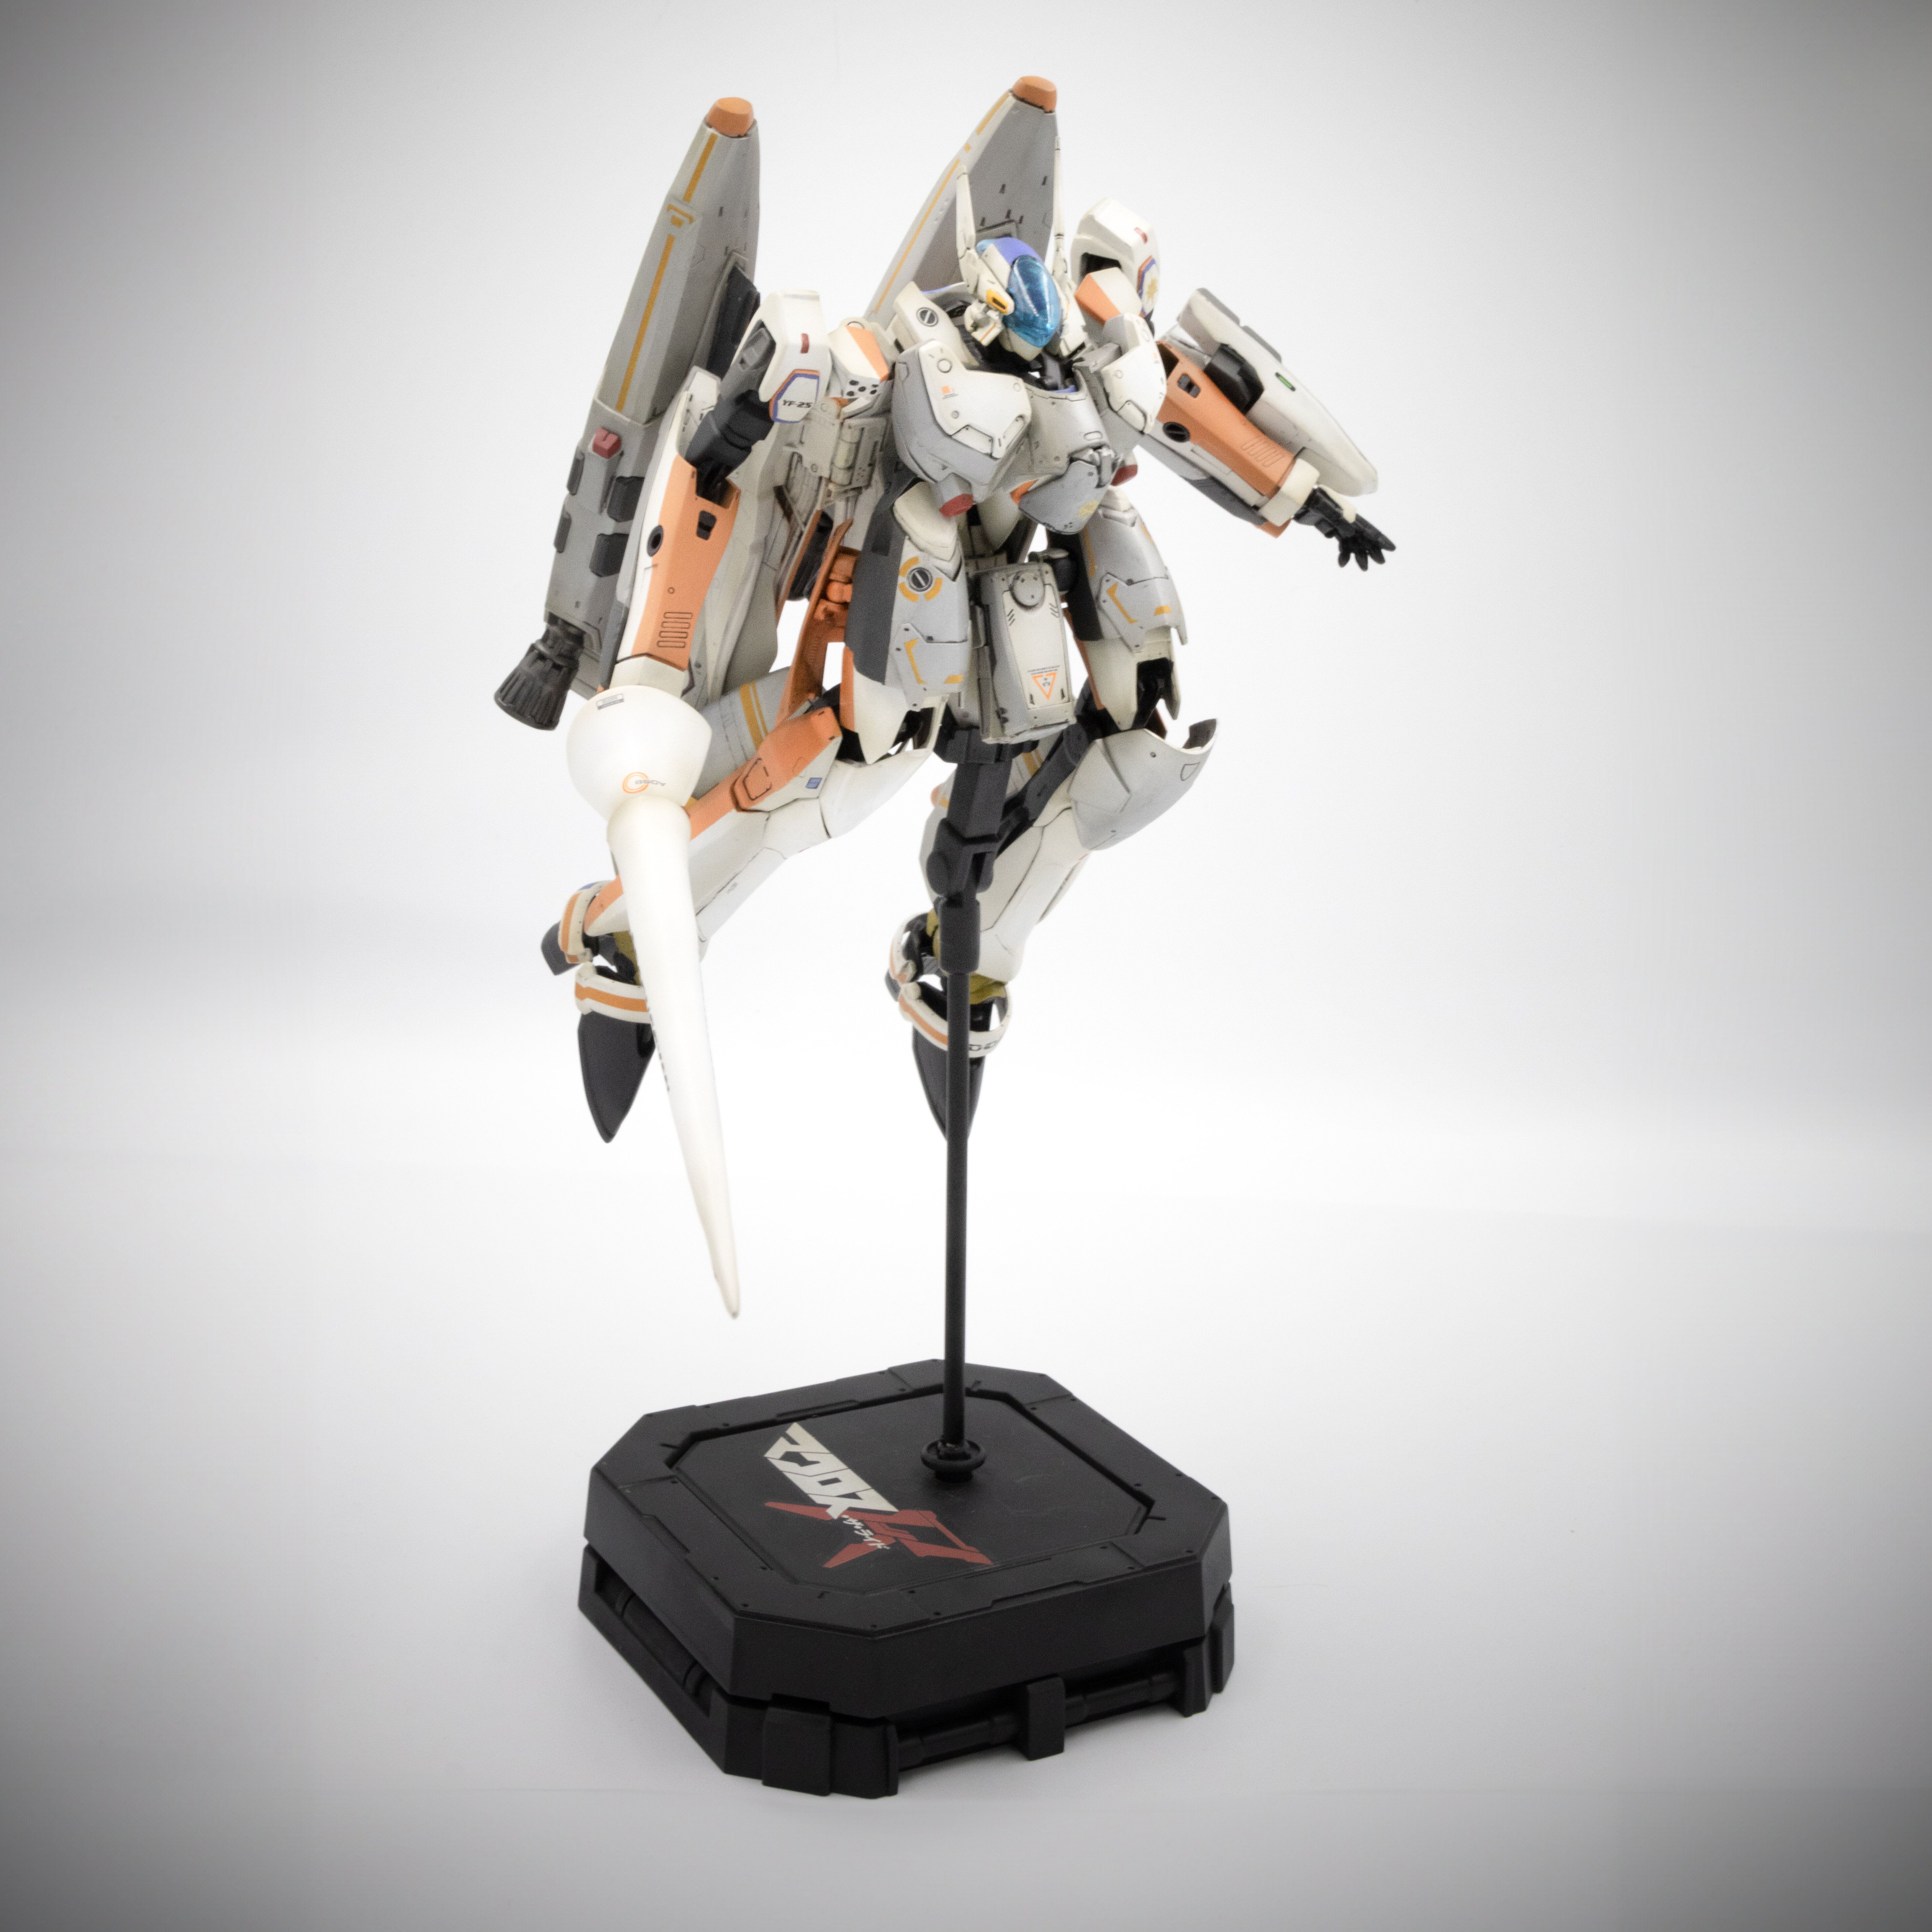
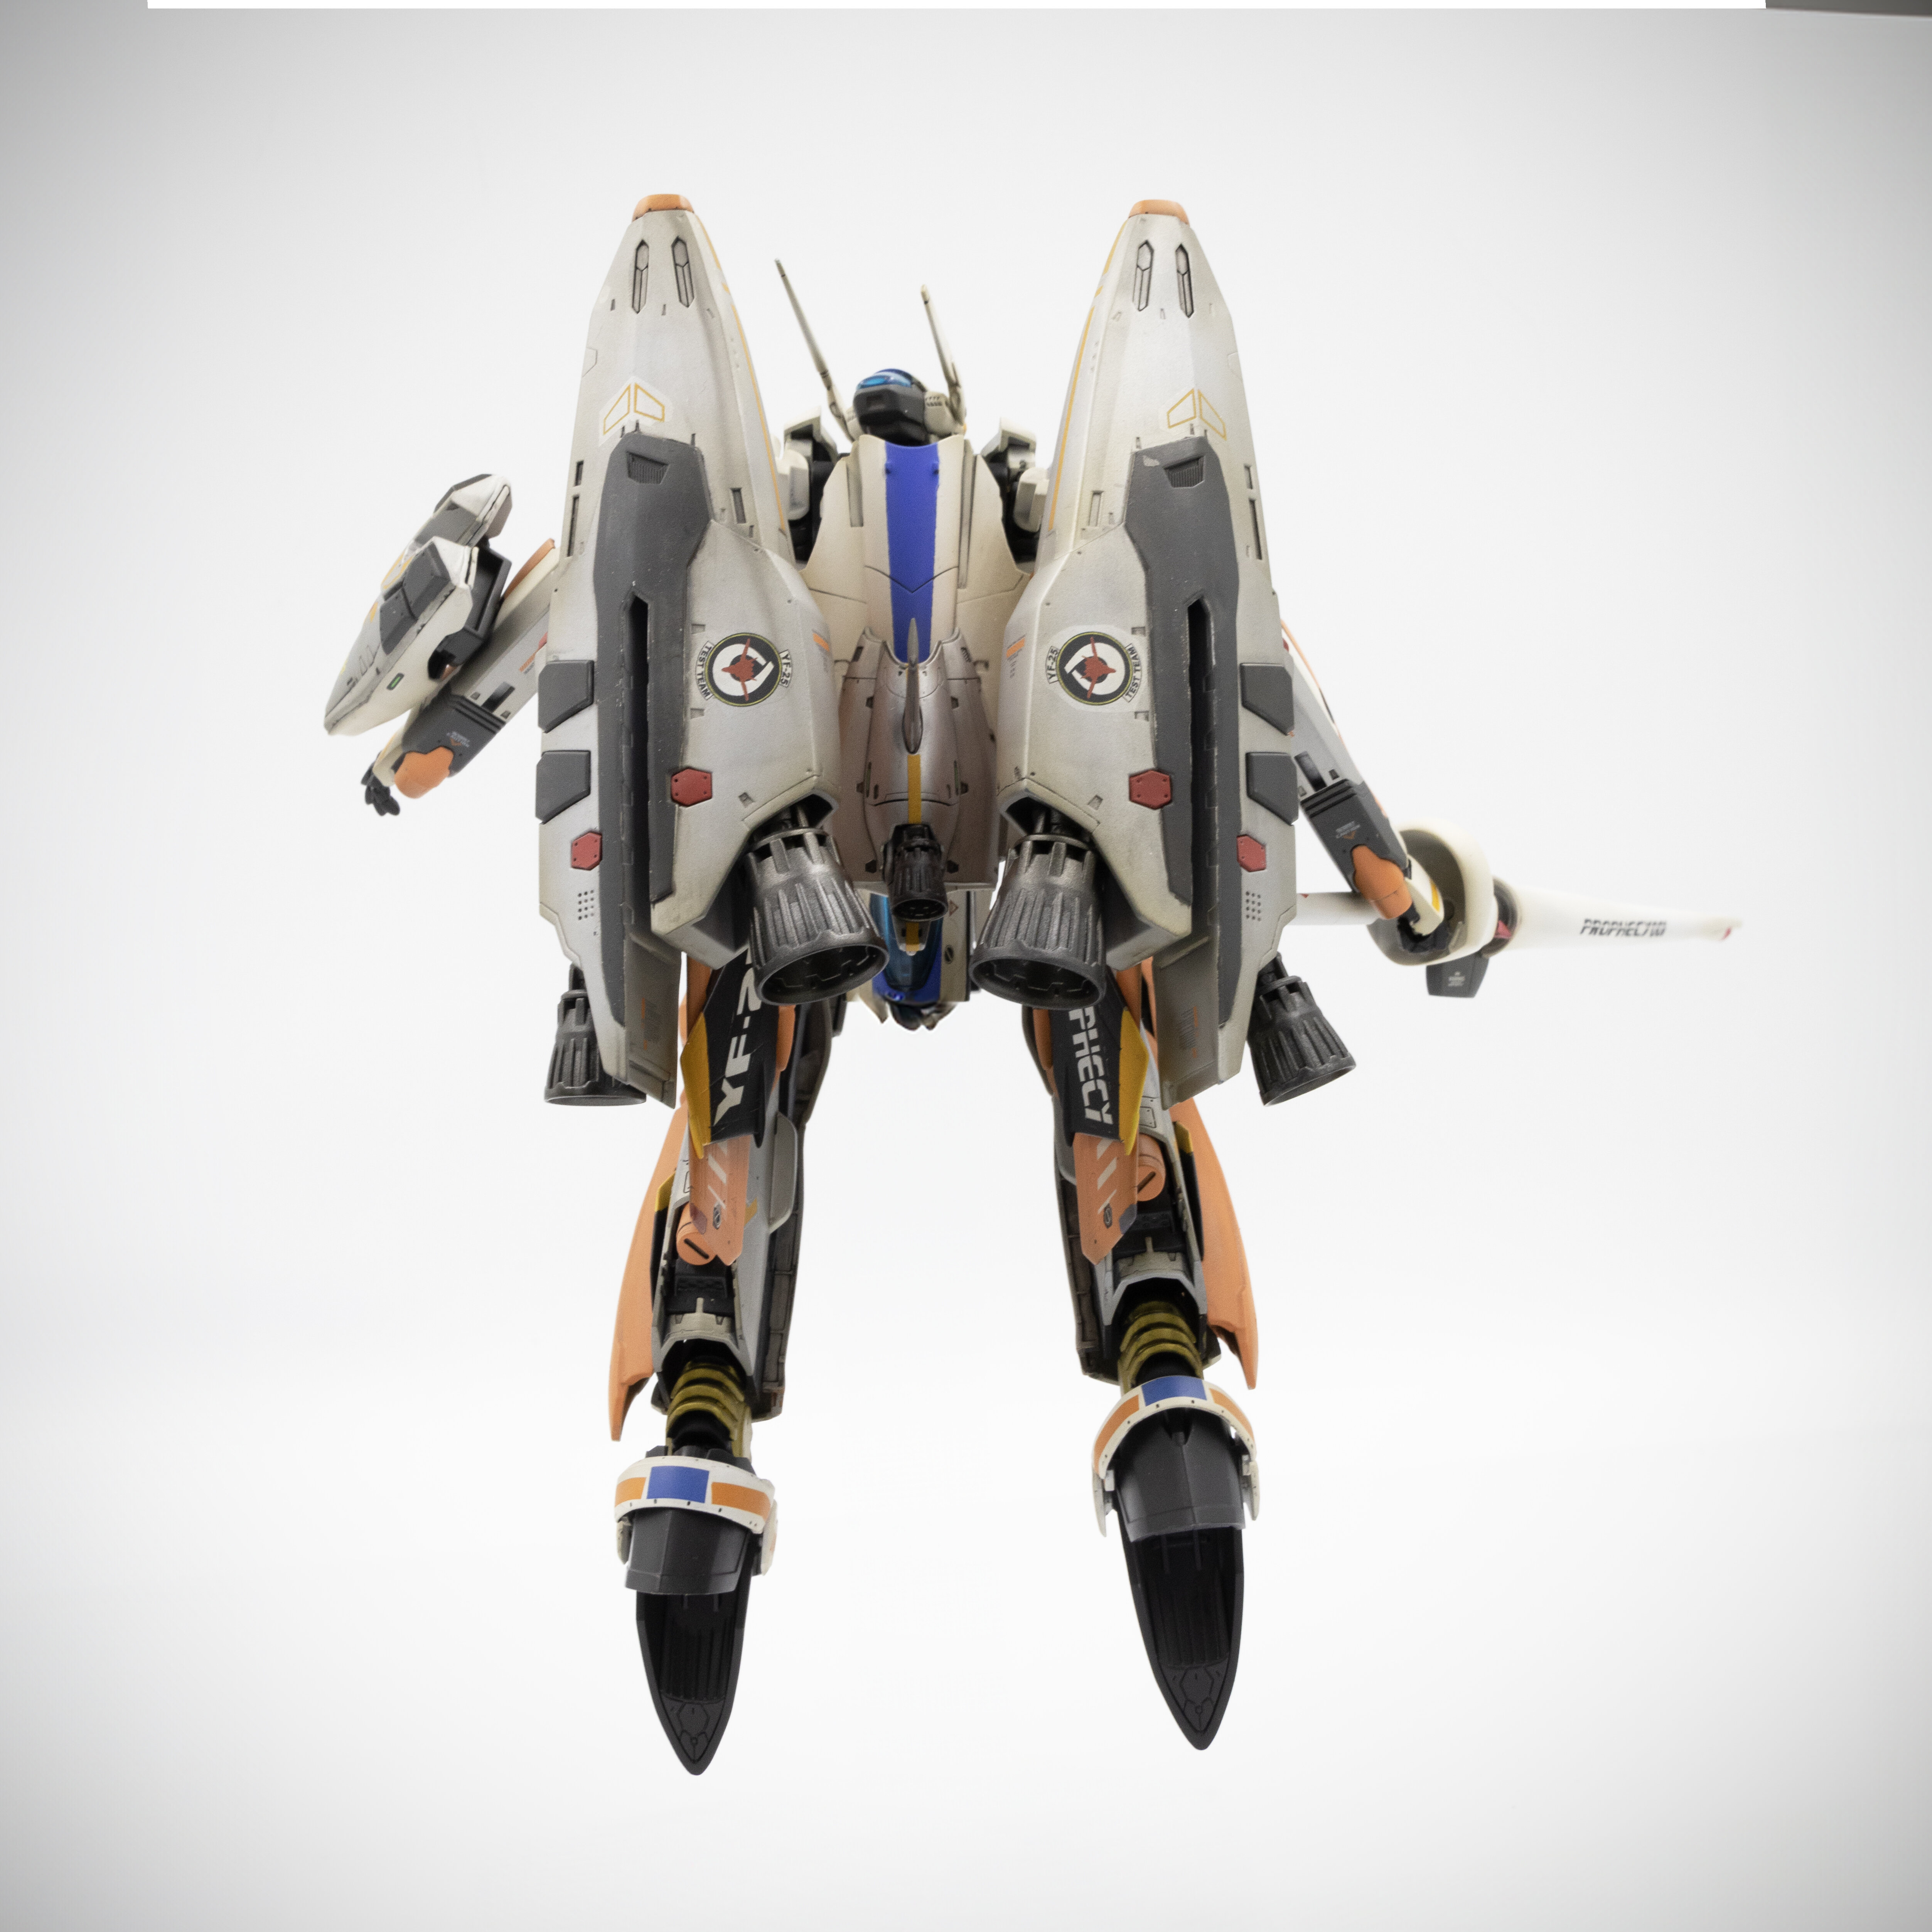
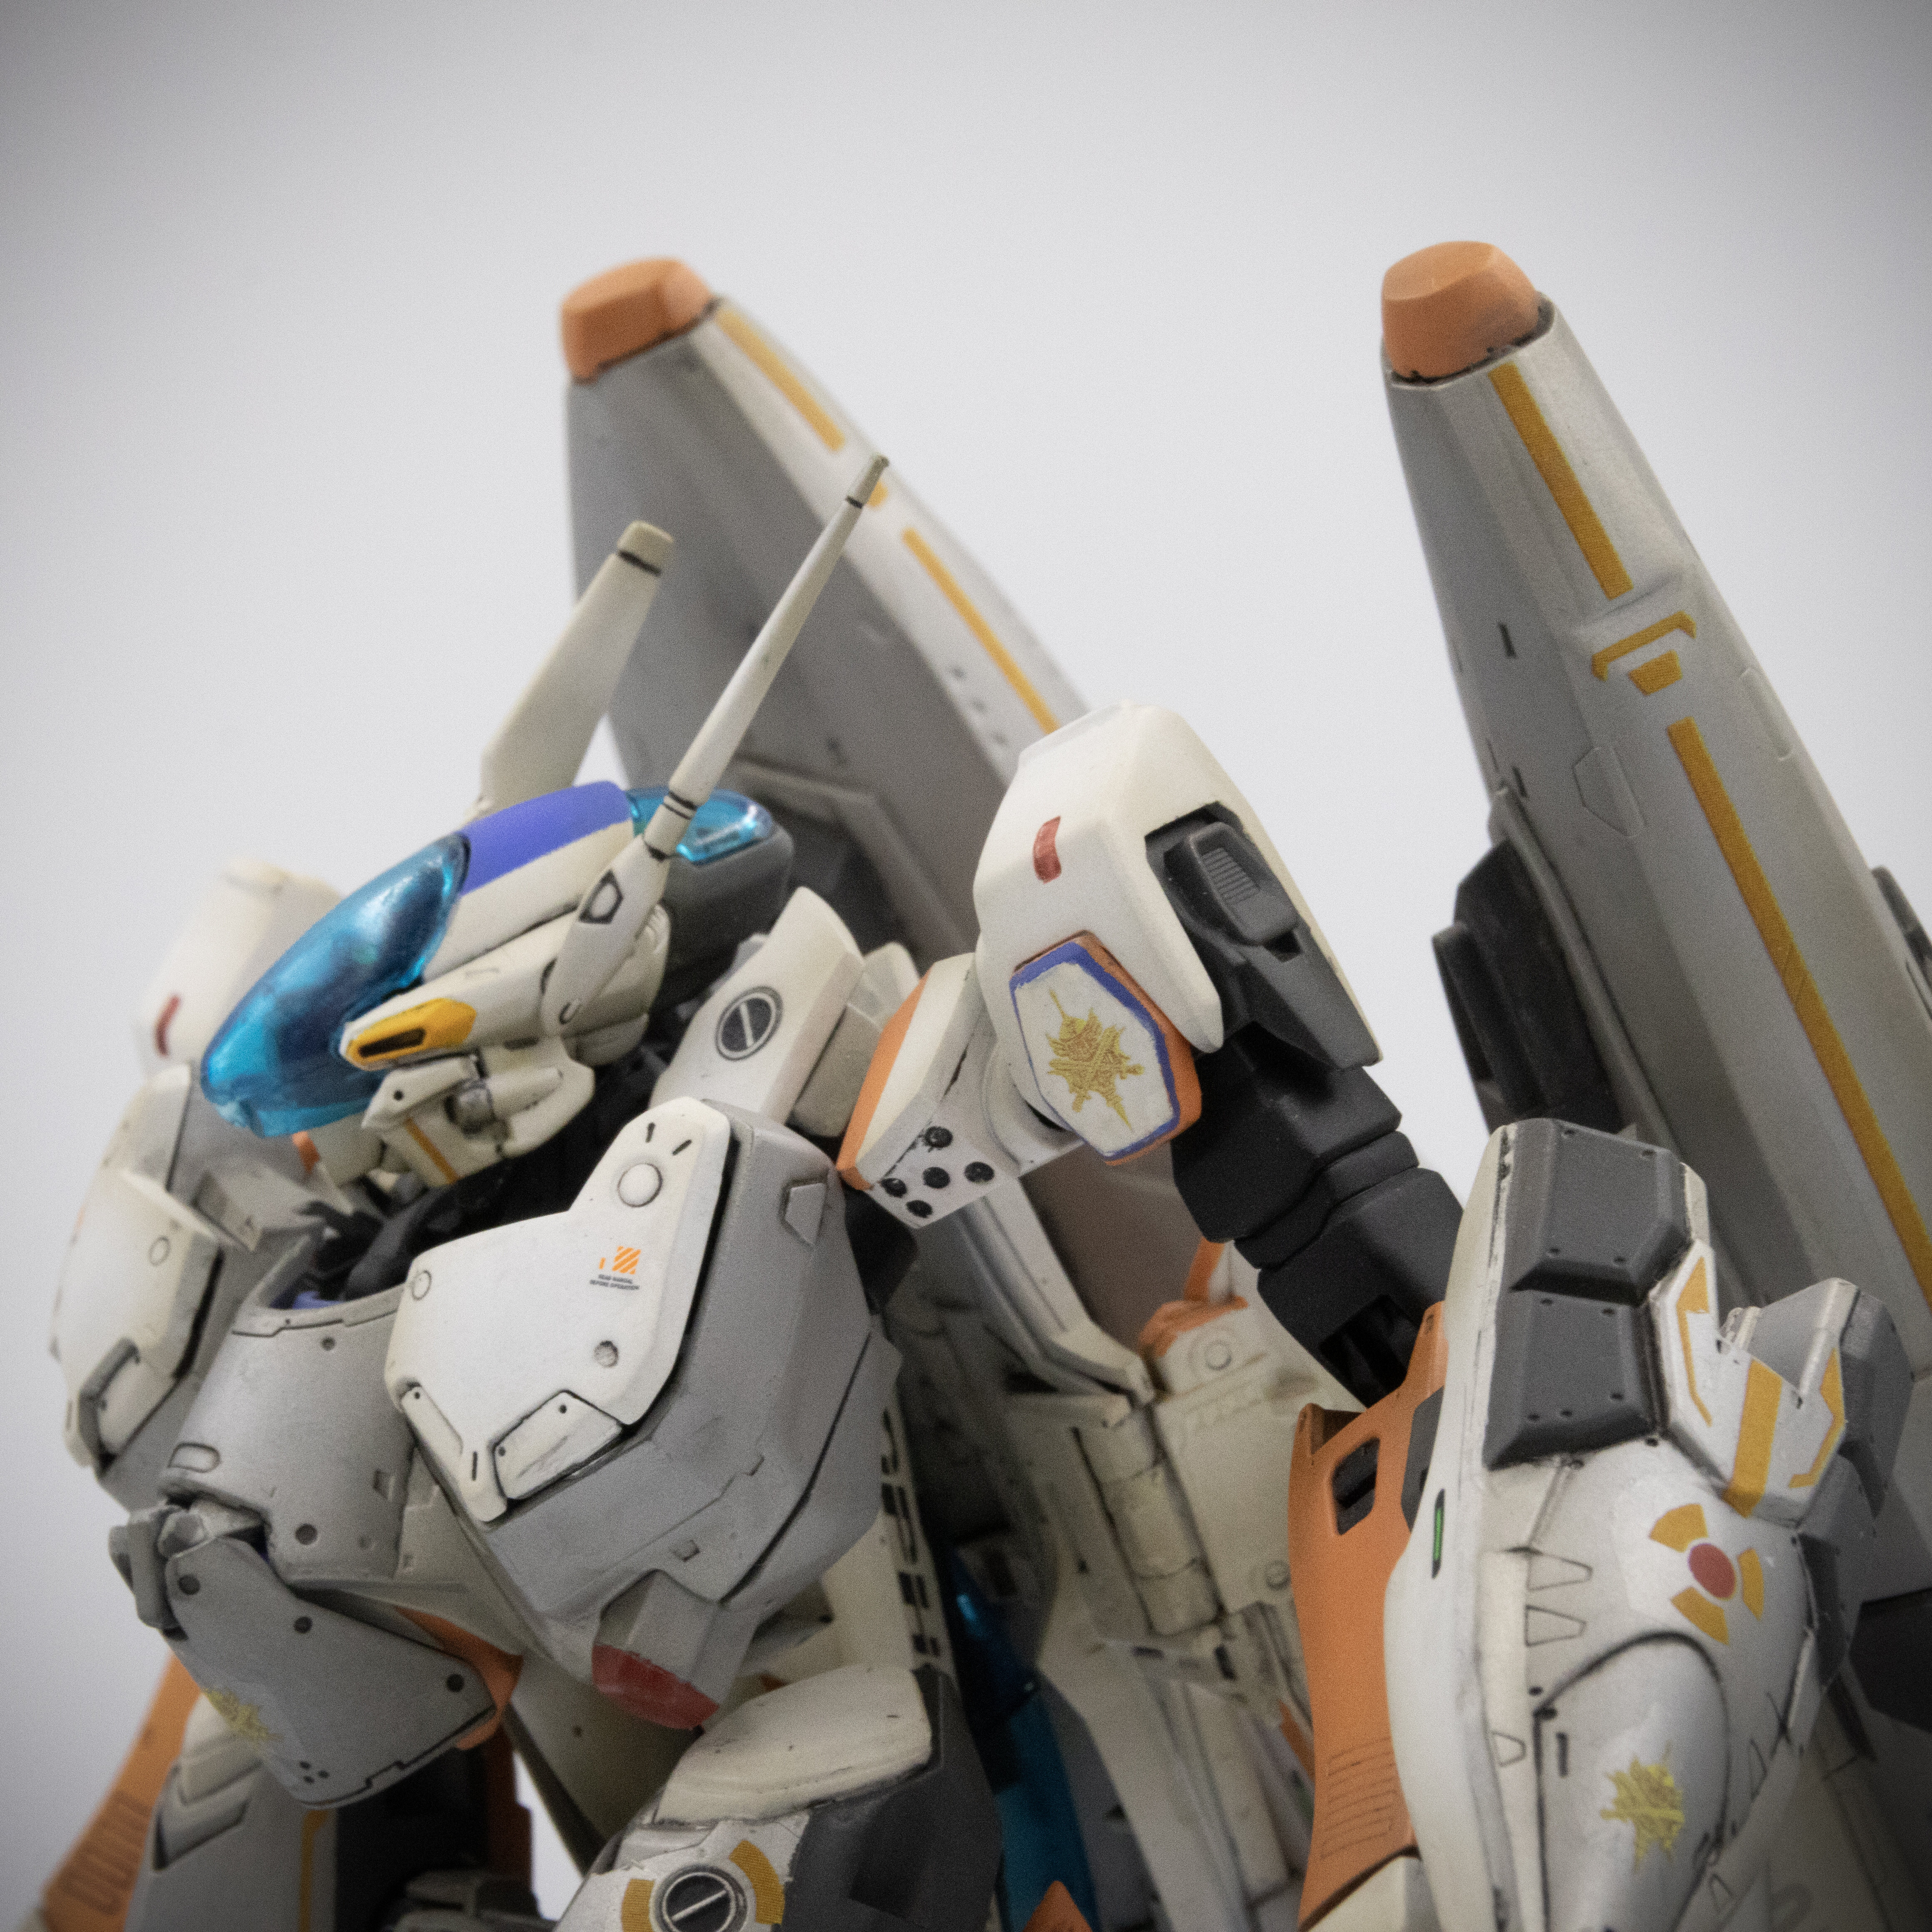
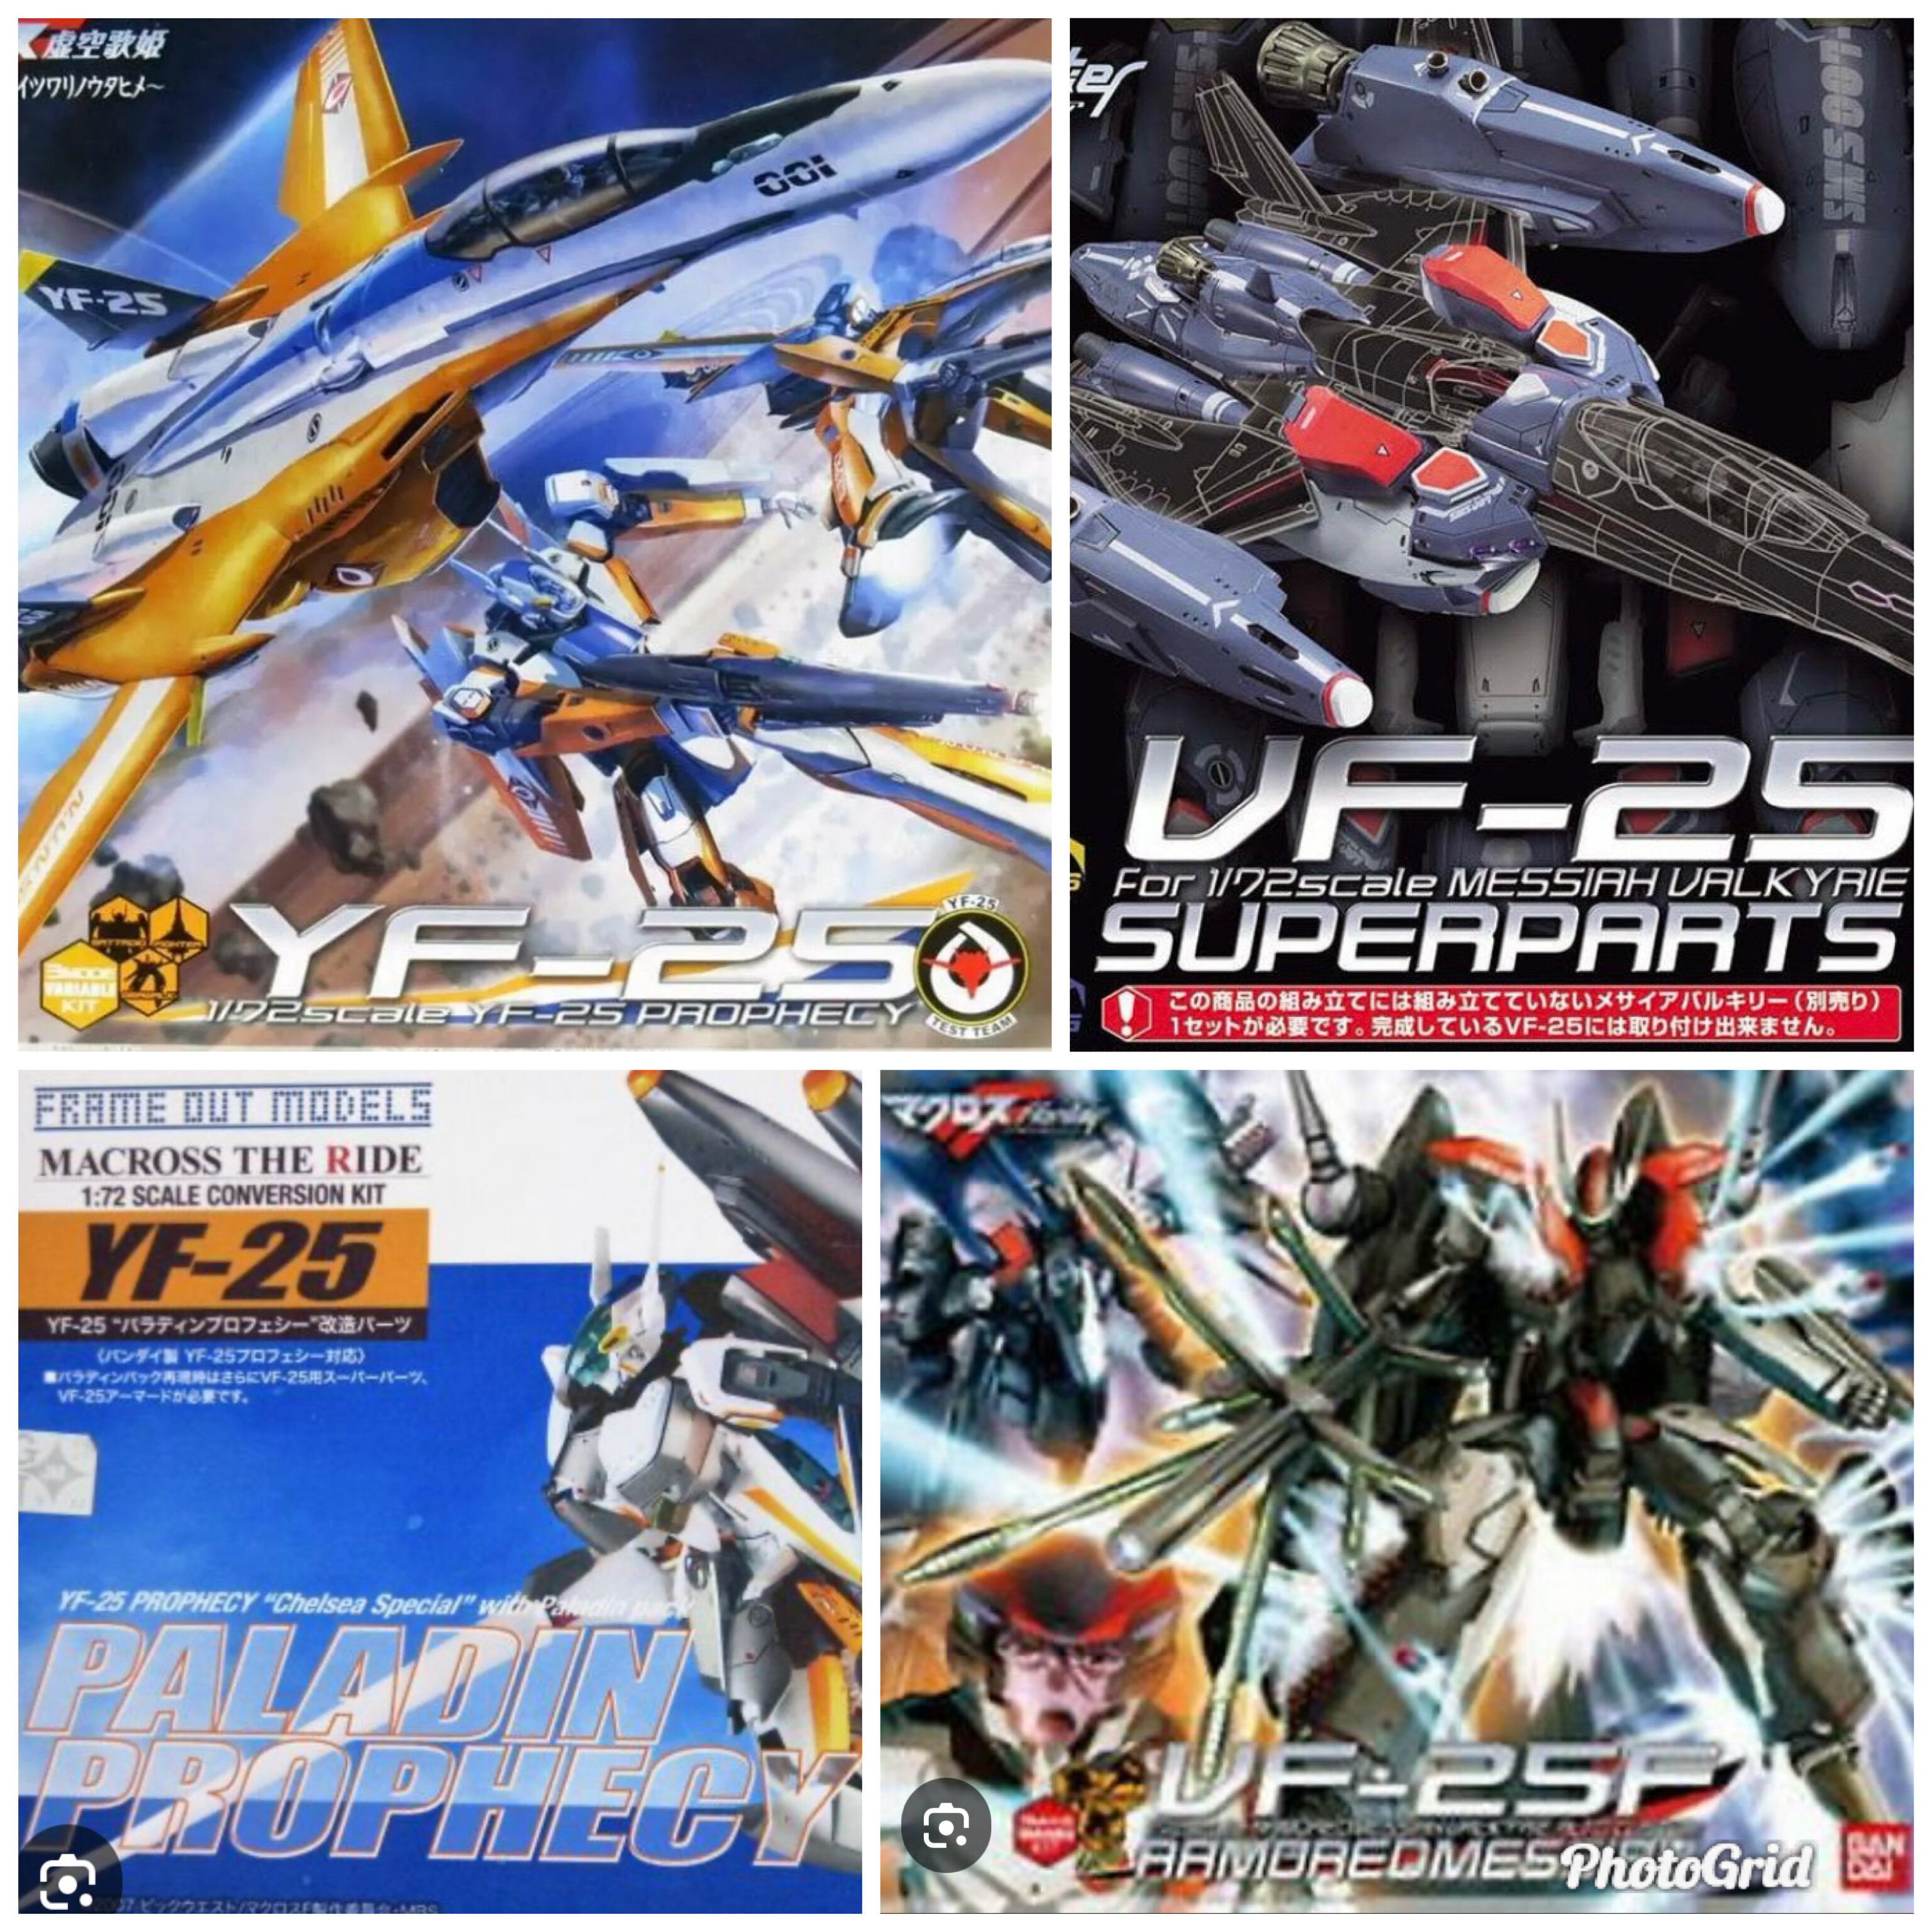
Finally finished the project of YF-25 Paladin Prophecy in Macross Rider. It's not an easy task to find the parts, especially when I damaged some parts and hence needed to find extra spare parts.
And special thanks to a friend who passed me the resin parts, otherwise this project wouldn't be complete.


-
9 hours ago, TehPW said:
nice work...
Now to nitpick.
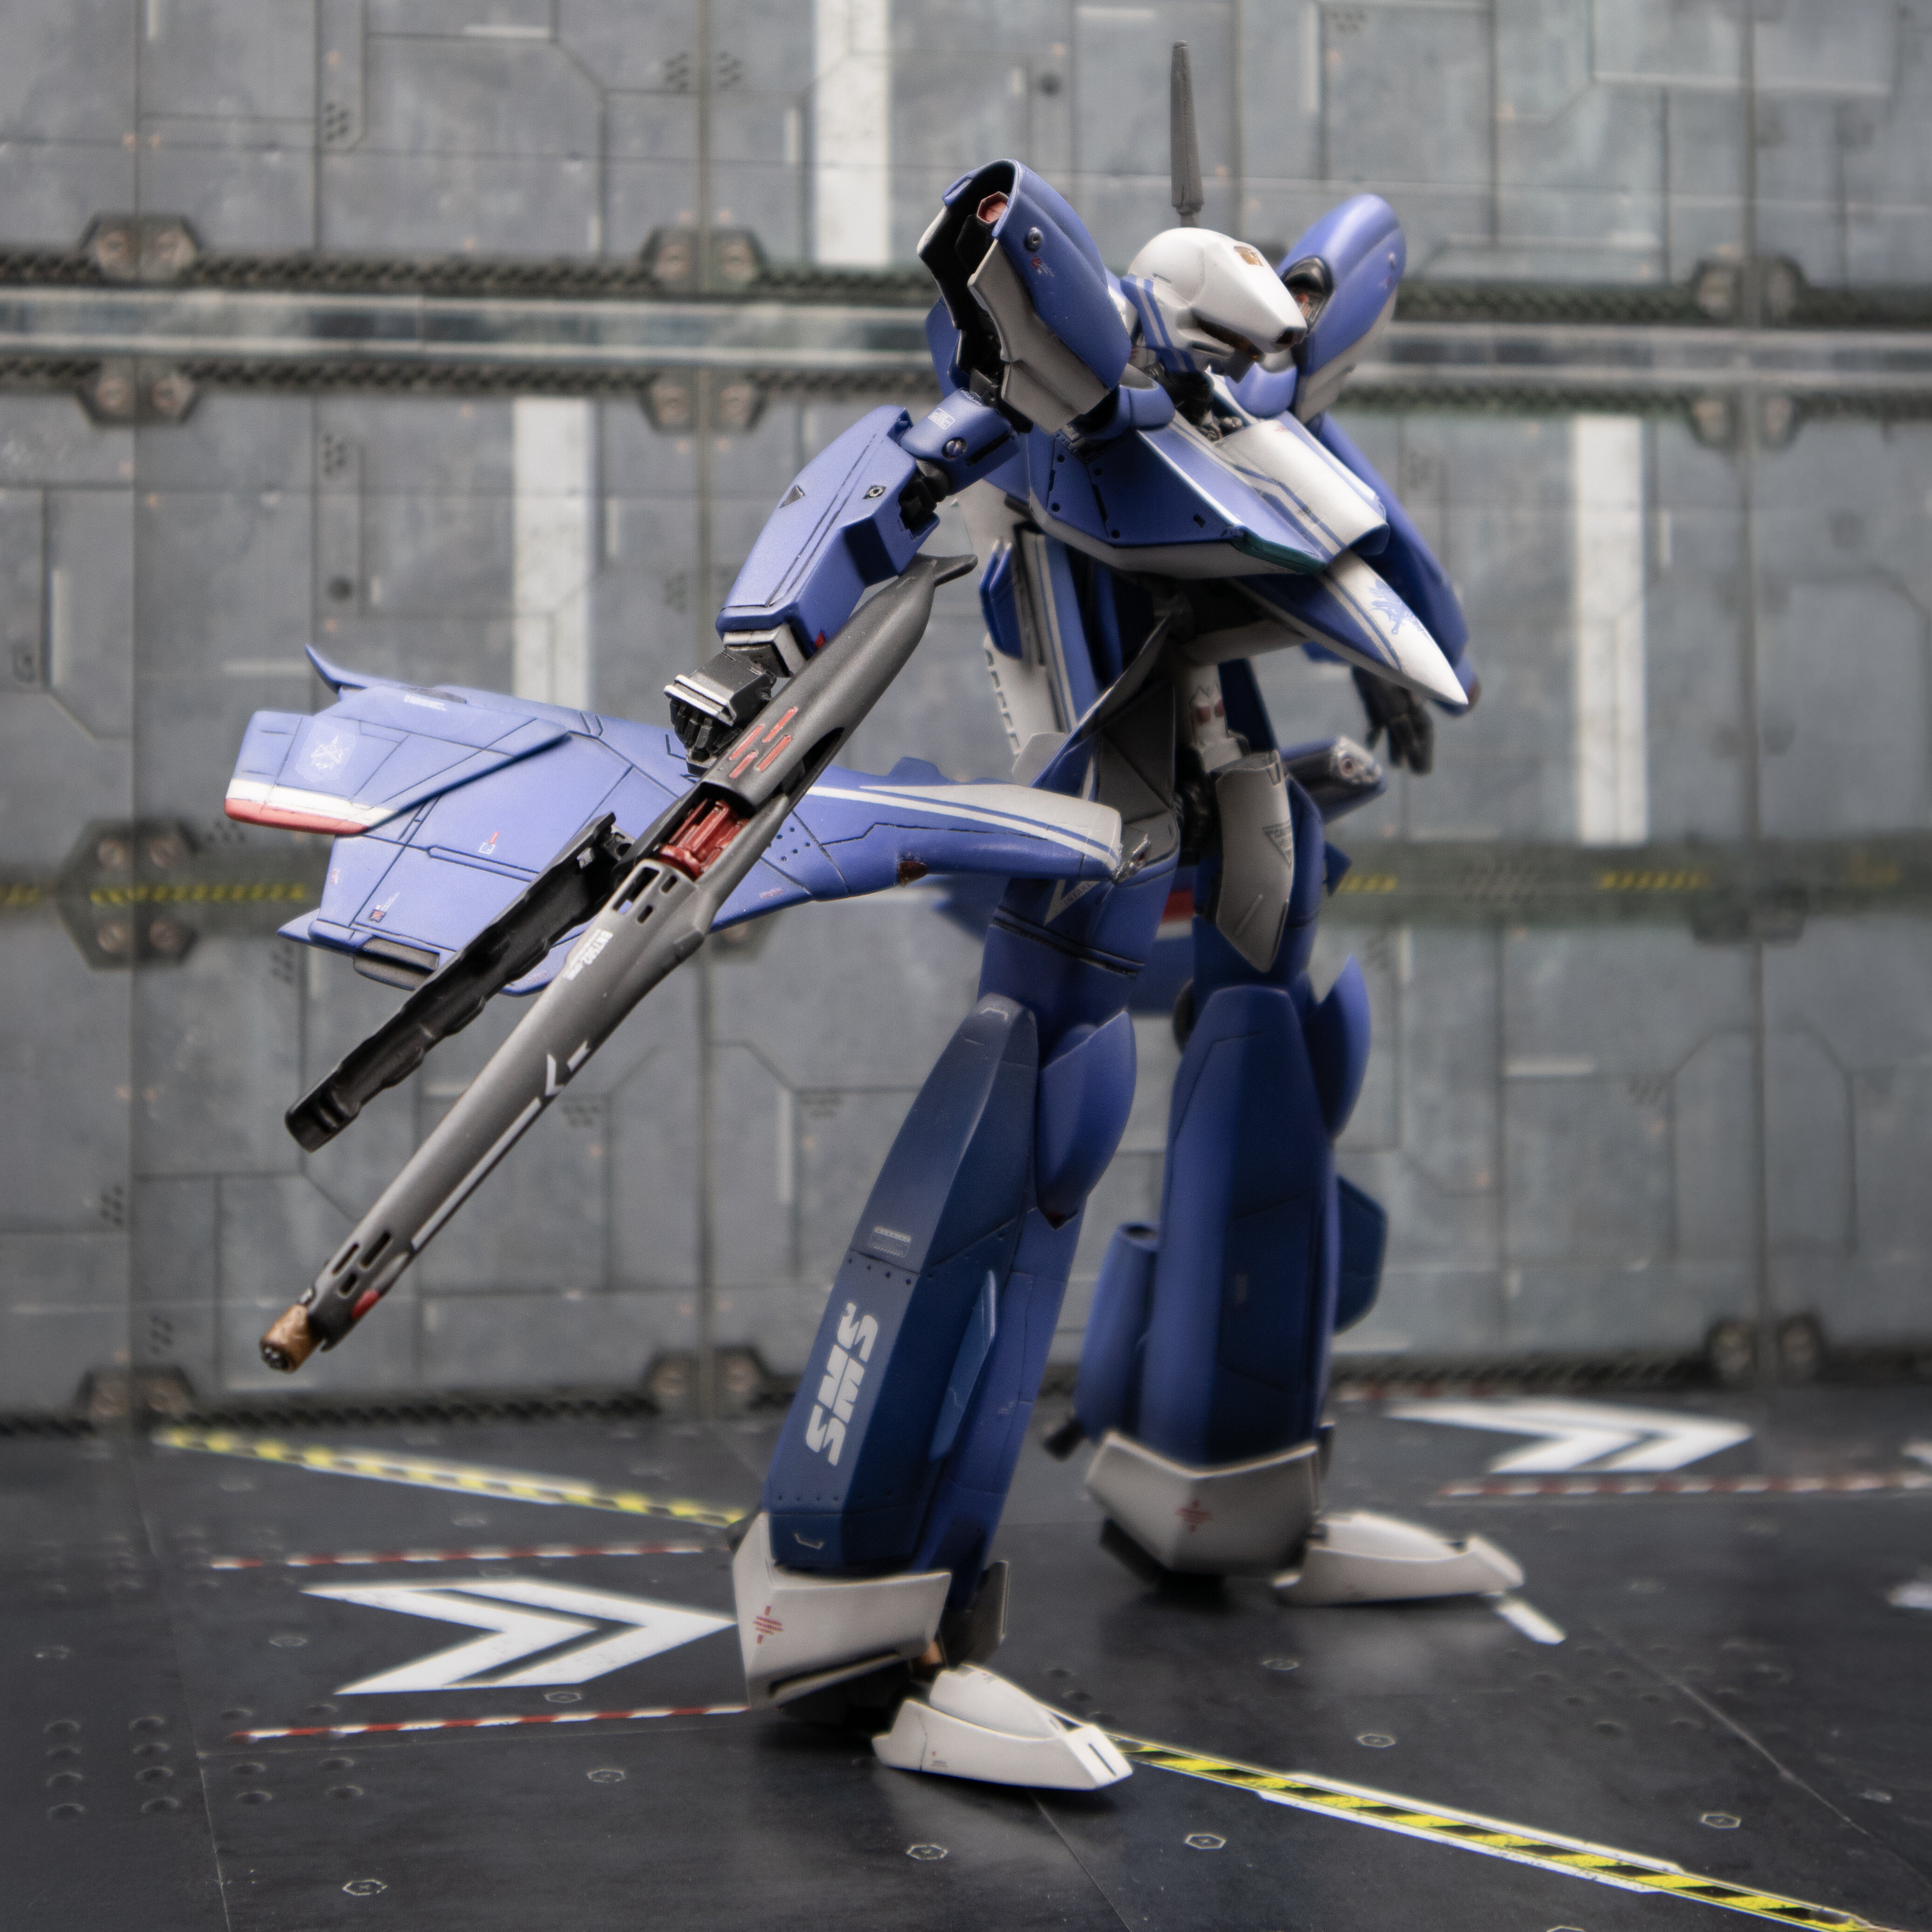
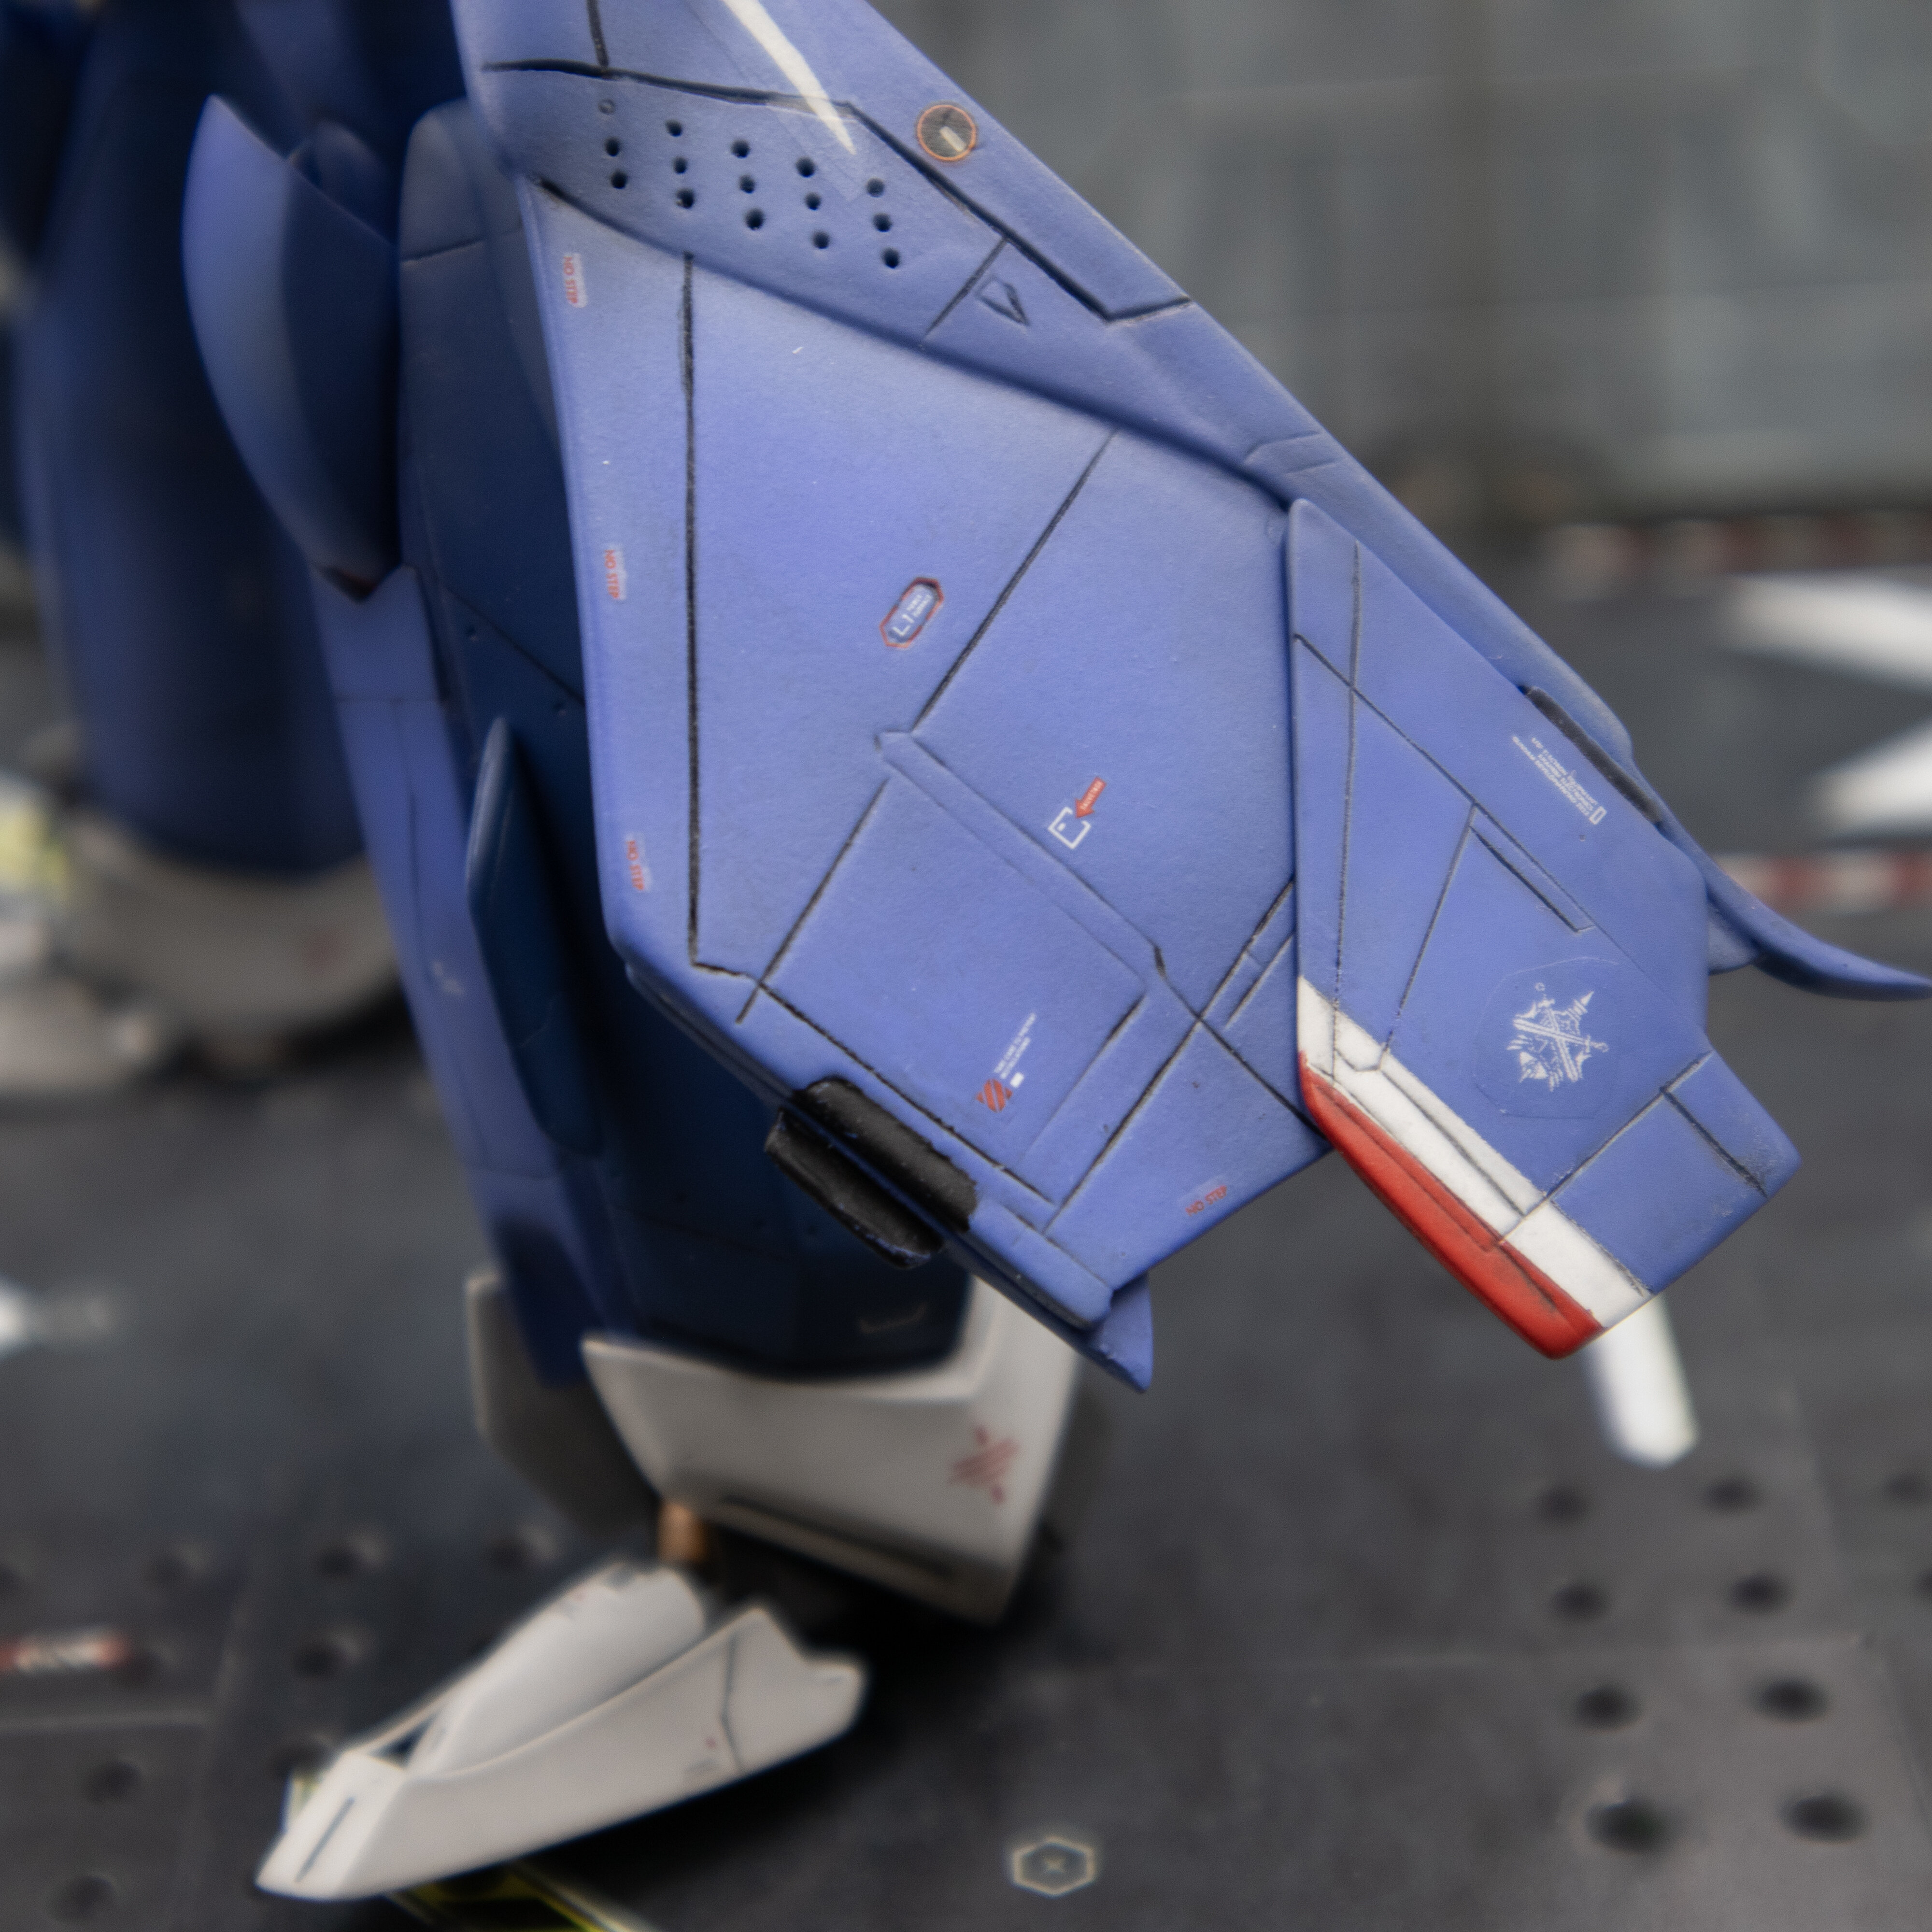
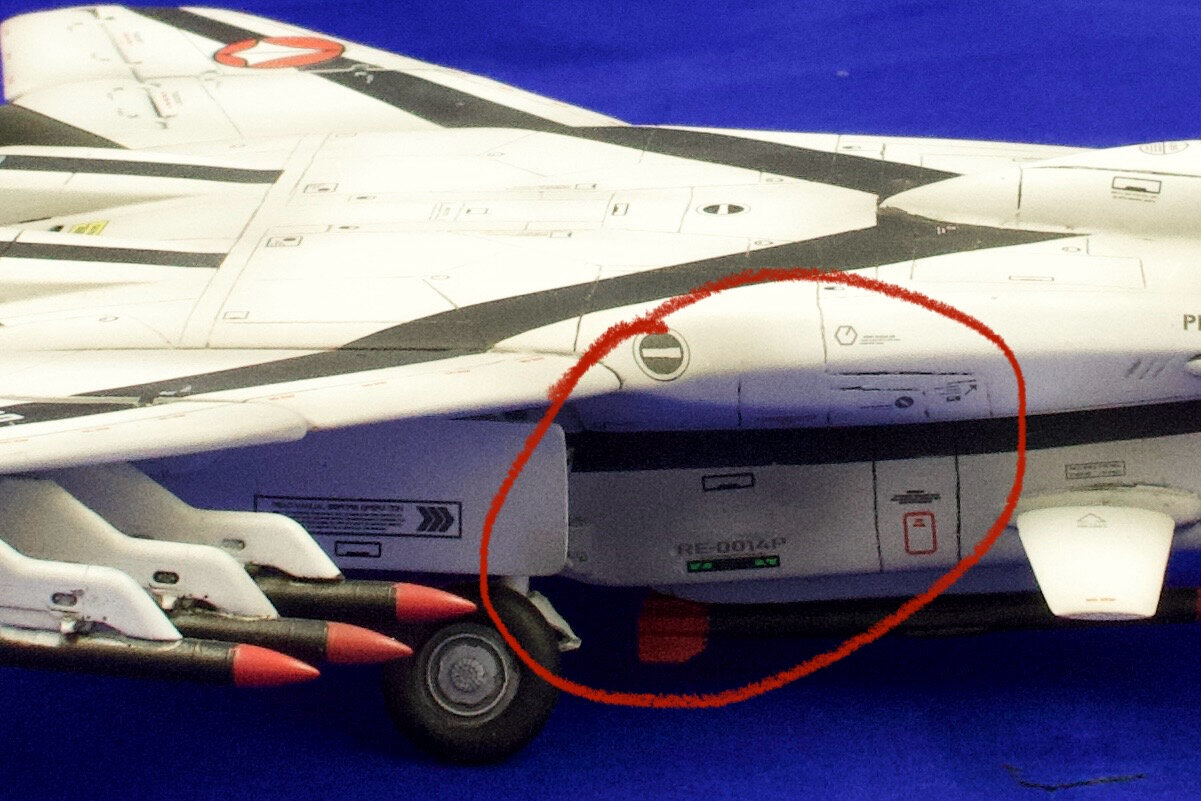
The first thing i see that might be/should be wrong is the size and placement of the Jet Intake warning. Unless it would be common for that inlet cover to be at a higher angle when on the ground, the markings should extend along the outside of the inlet covers in some manner along each edge, merging at the front of the plate (see PIC #2's angle).
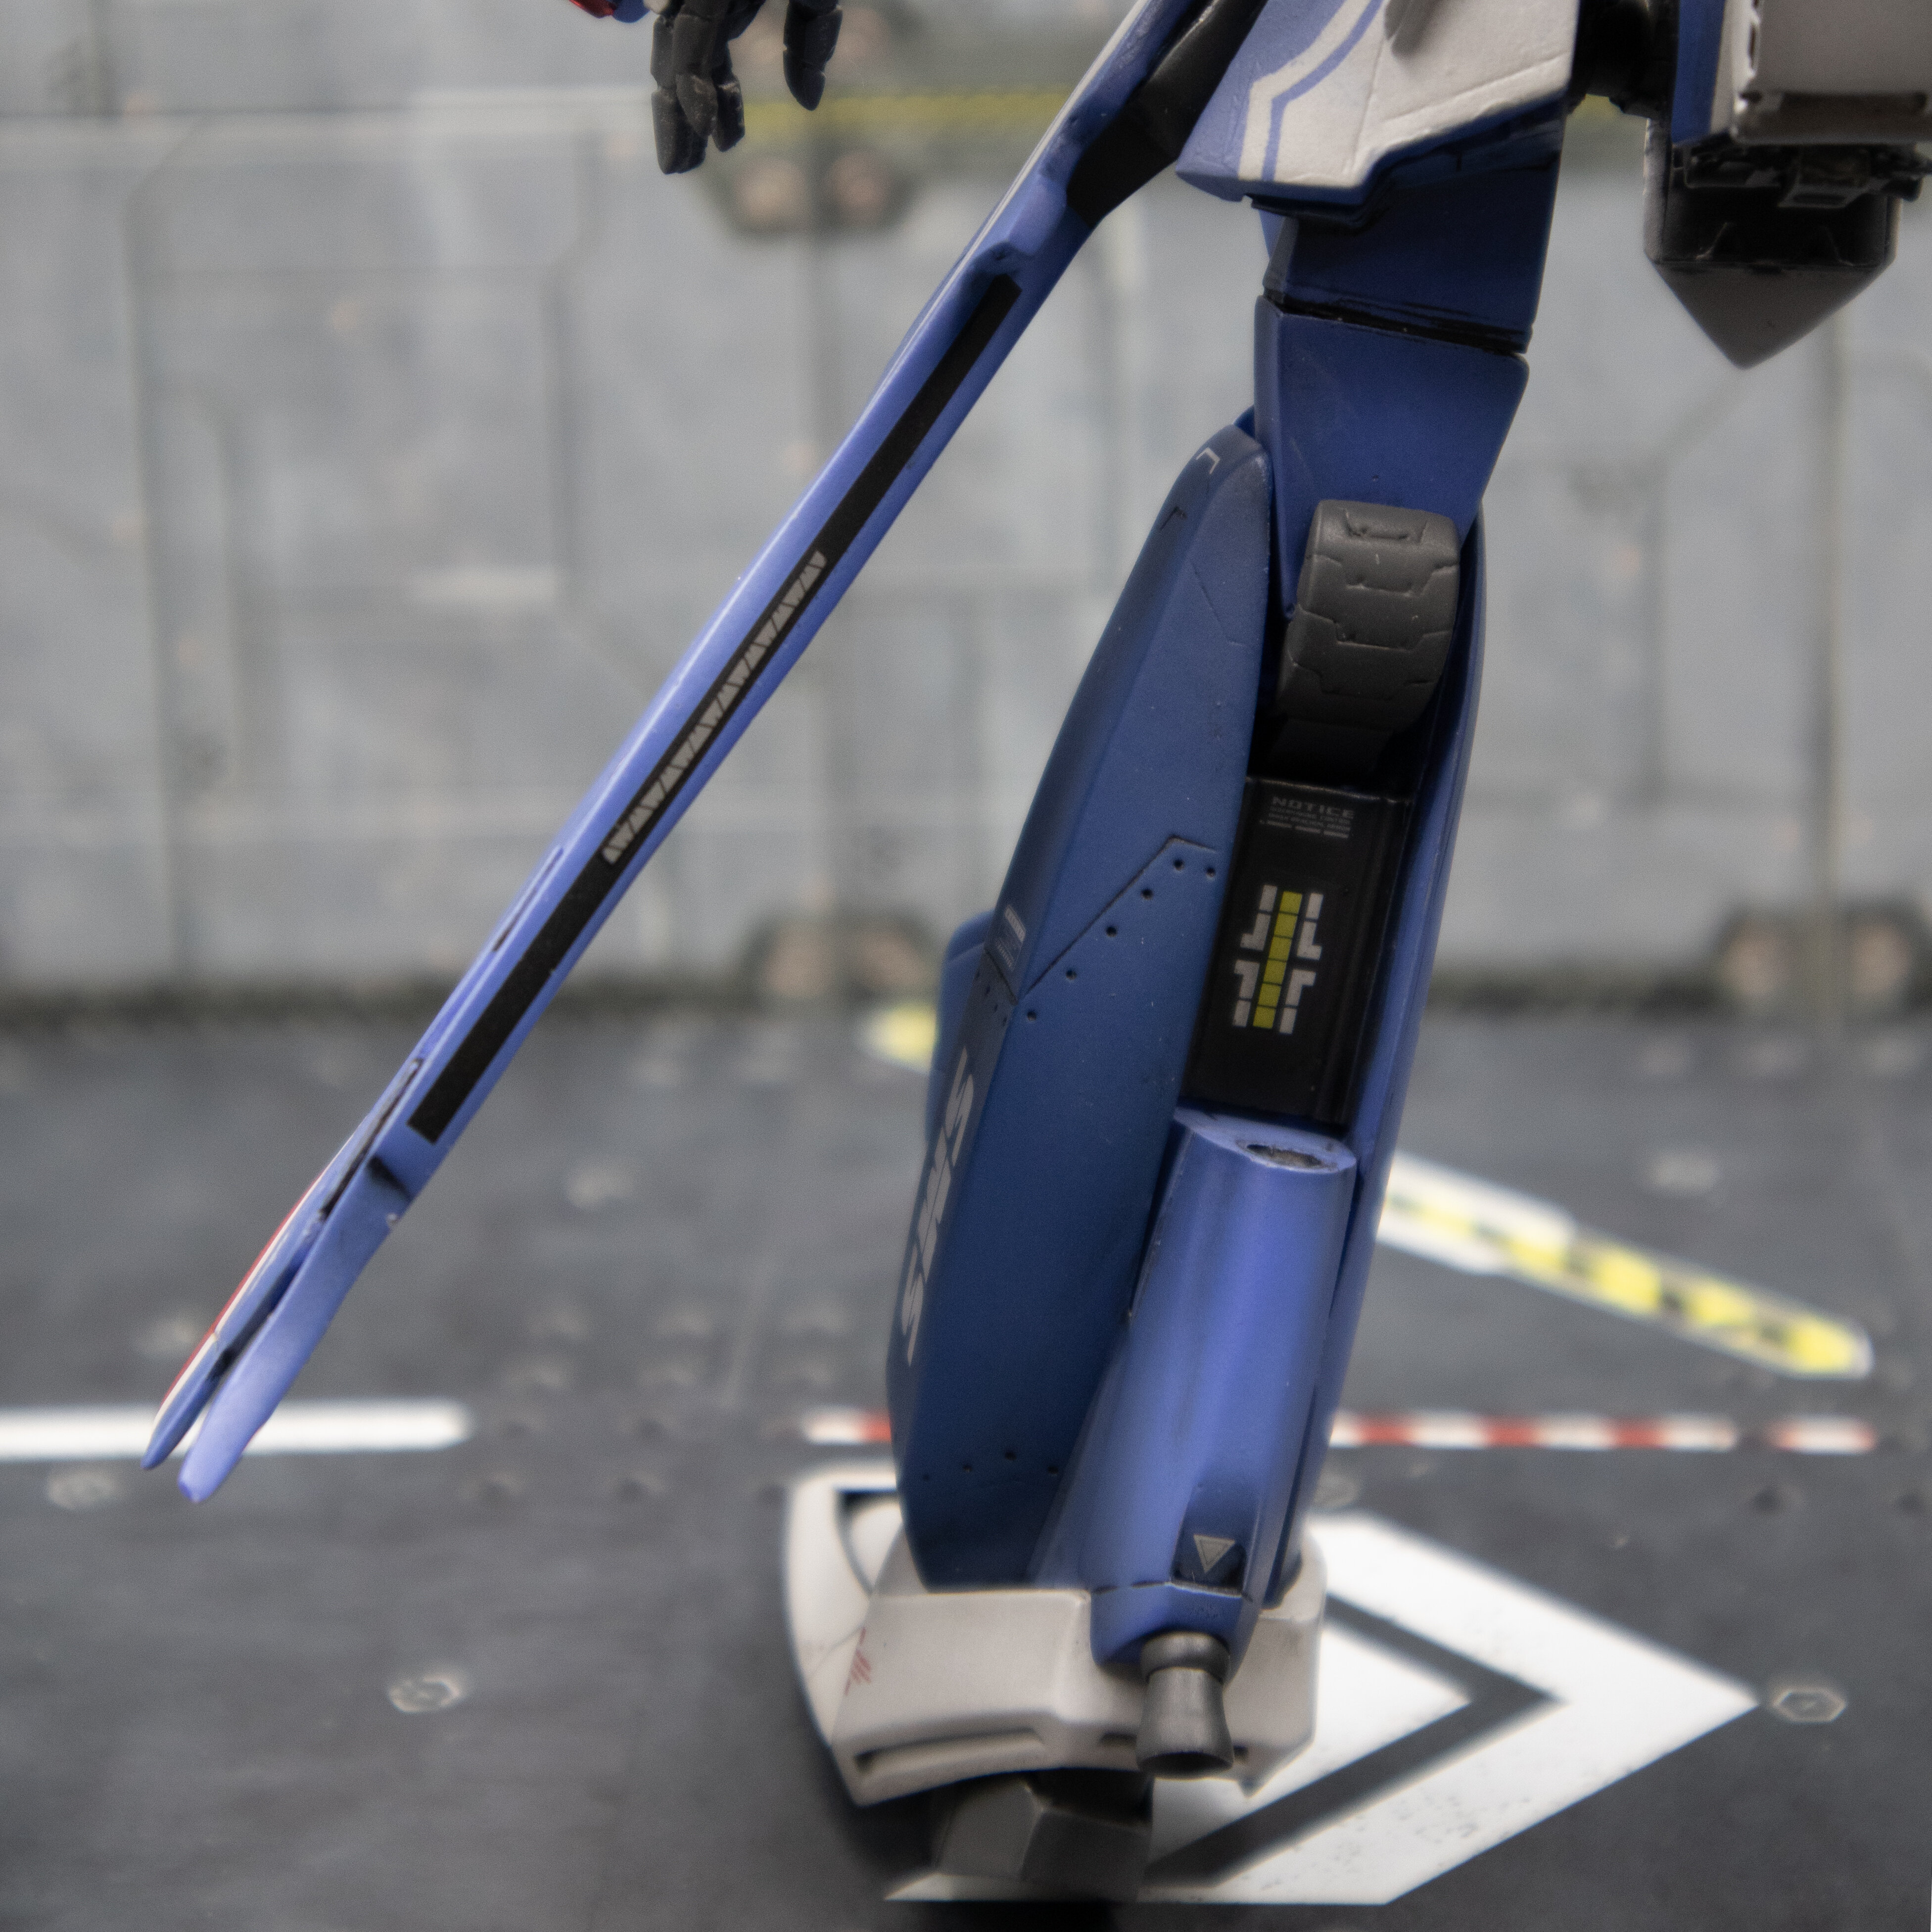
The second thing is that there should be No Step markings on the UNDERSIDE of the wings as well (because the JA's wings are hydraulically hinged to flex in both directions when in Gerwalk mode)
Third? No 03 high on the tail (because when you are an AD working in Power Plants WC in a futuristic Fighter Squadron and Maintenance Control sends you out to do a 30-day inspection on those Inlet Covers, MC would have told you Modex # 03, so you're looking at the highest point on each aircraft, to make sure you are working on the CORRECT fighter)
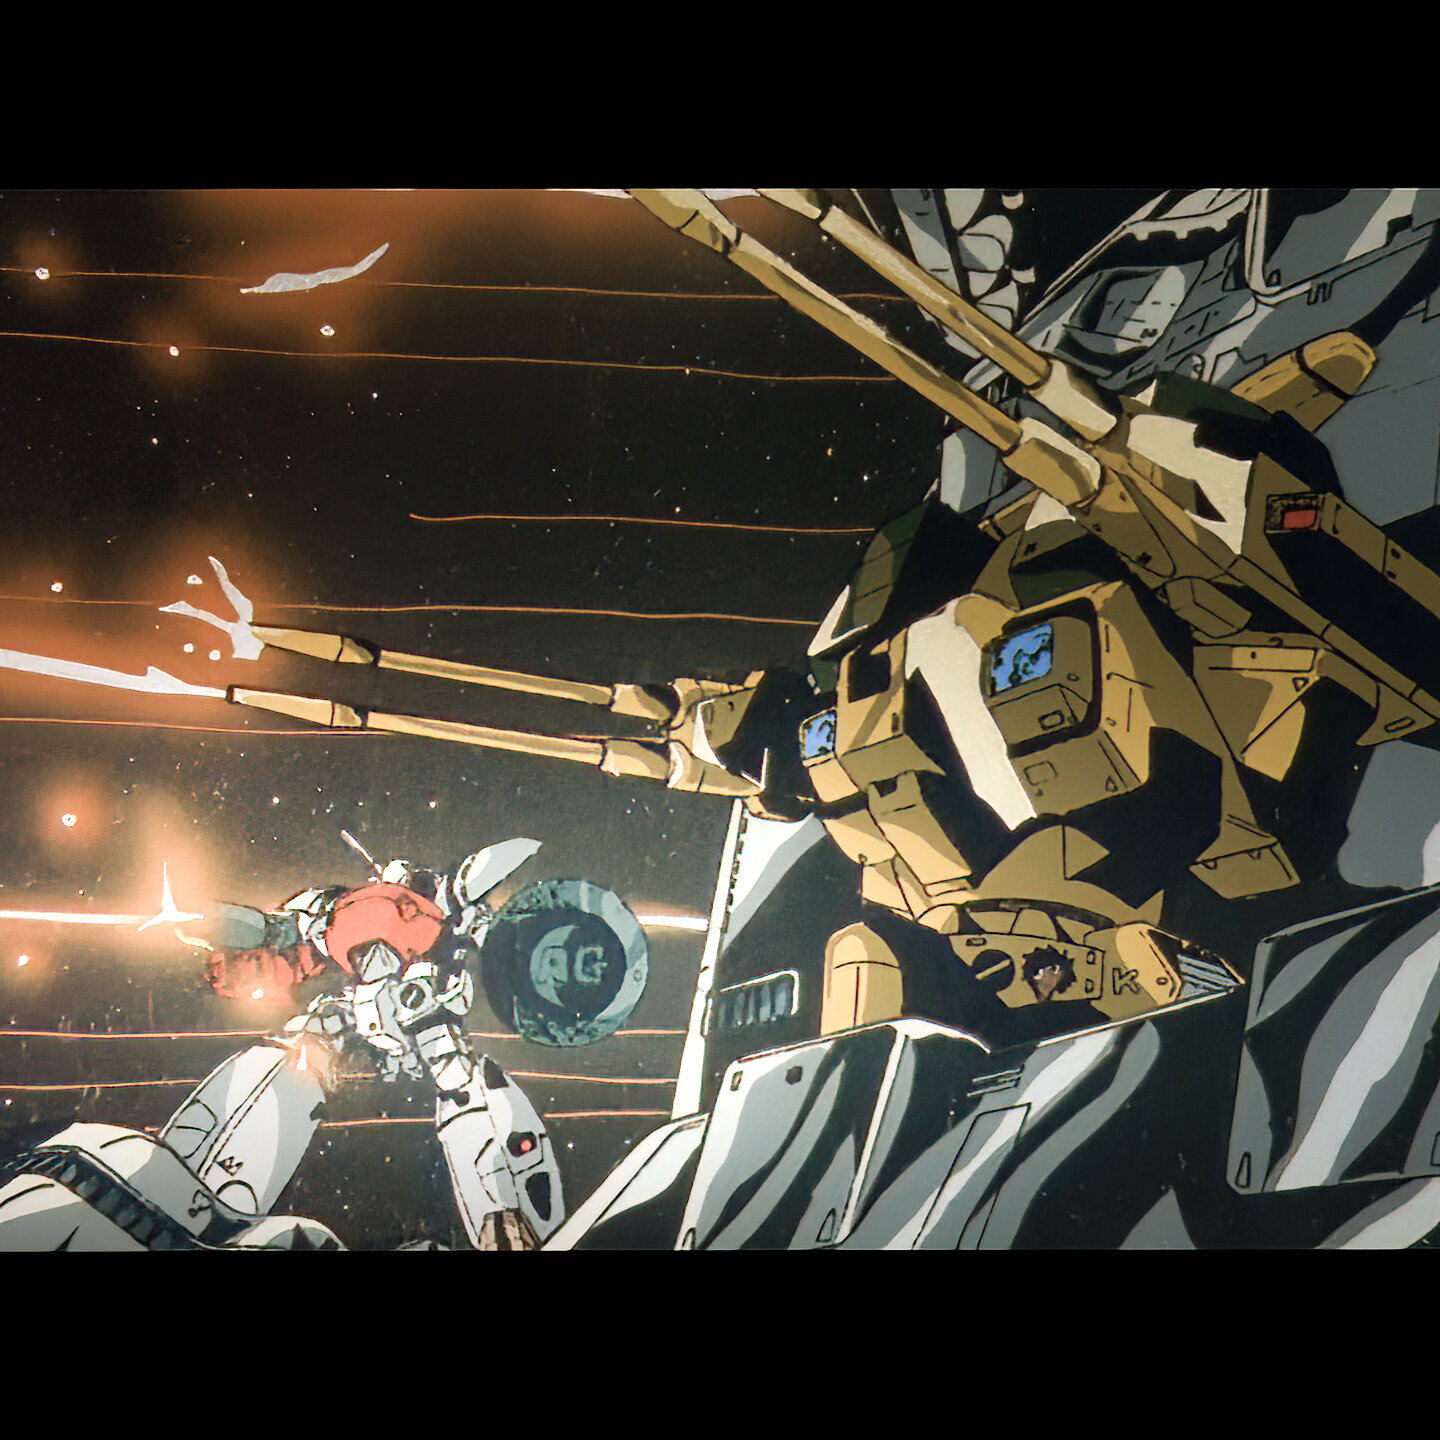
were there any pics of either fighter, on the ground and idle, in Macross II: LA?
Very impressive comment and much detailed than then official specification. Look forward to seeing your prefect work
-
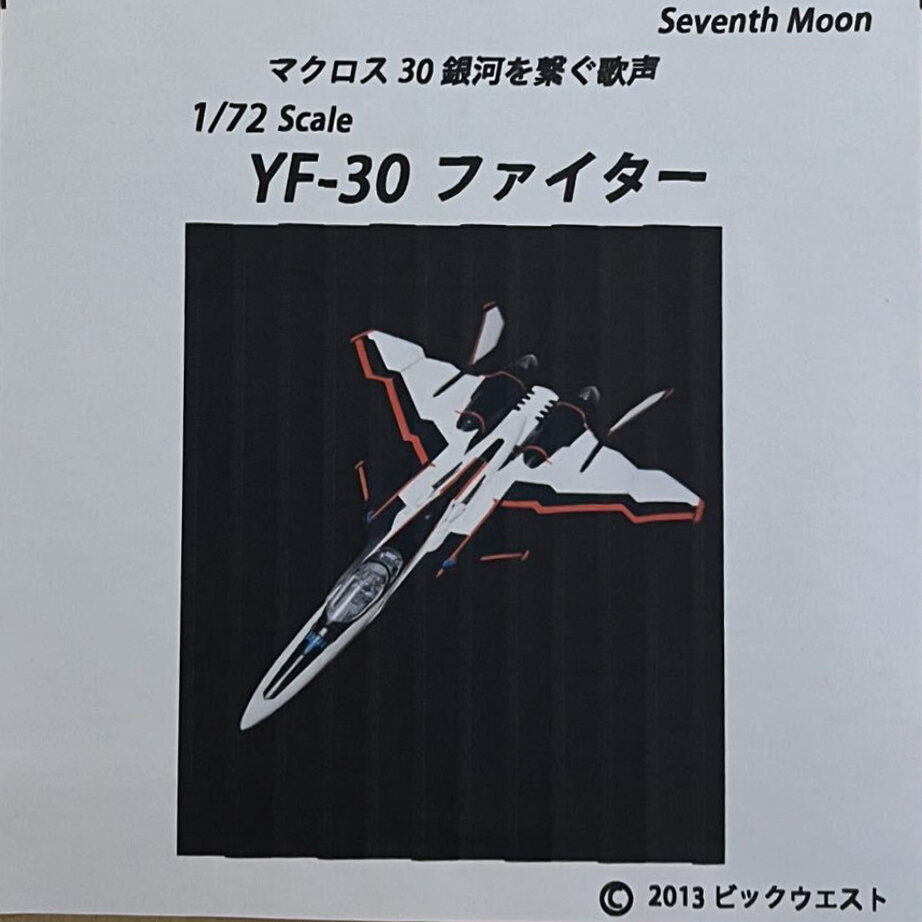
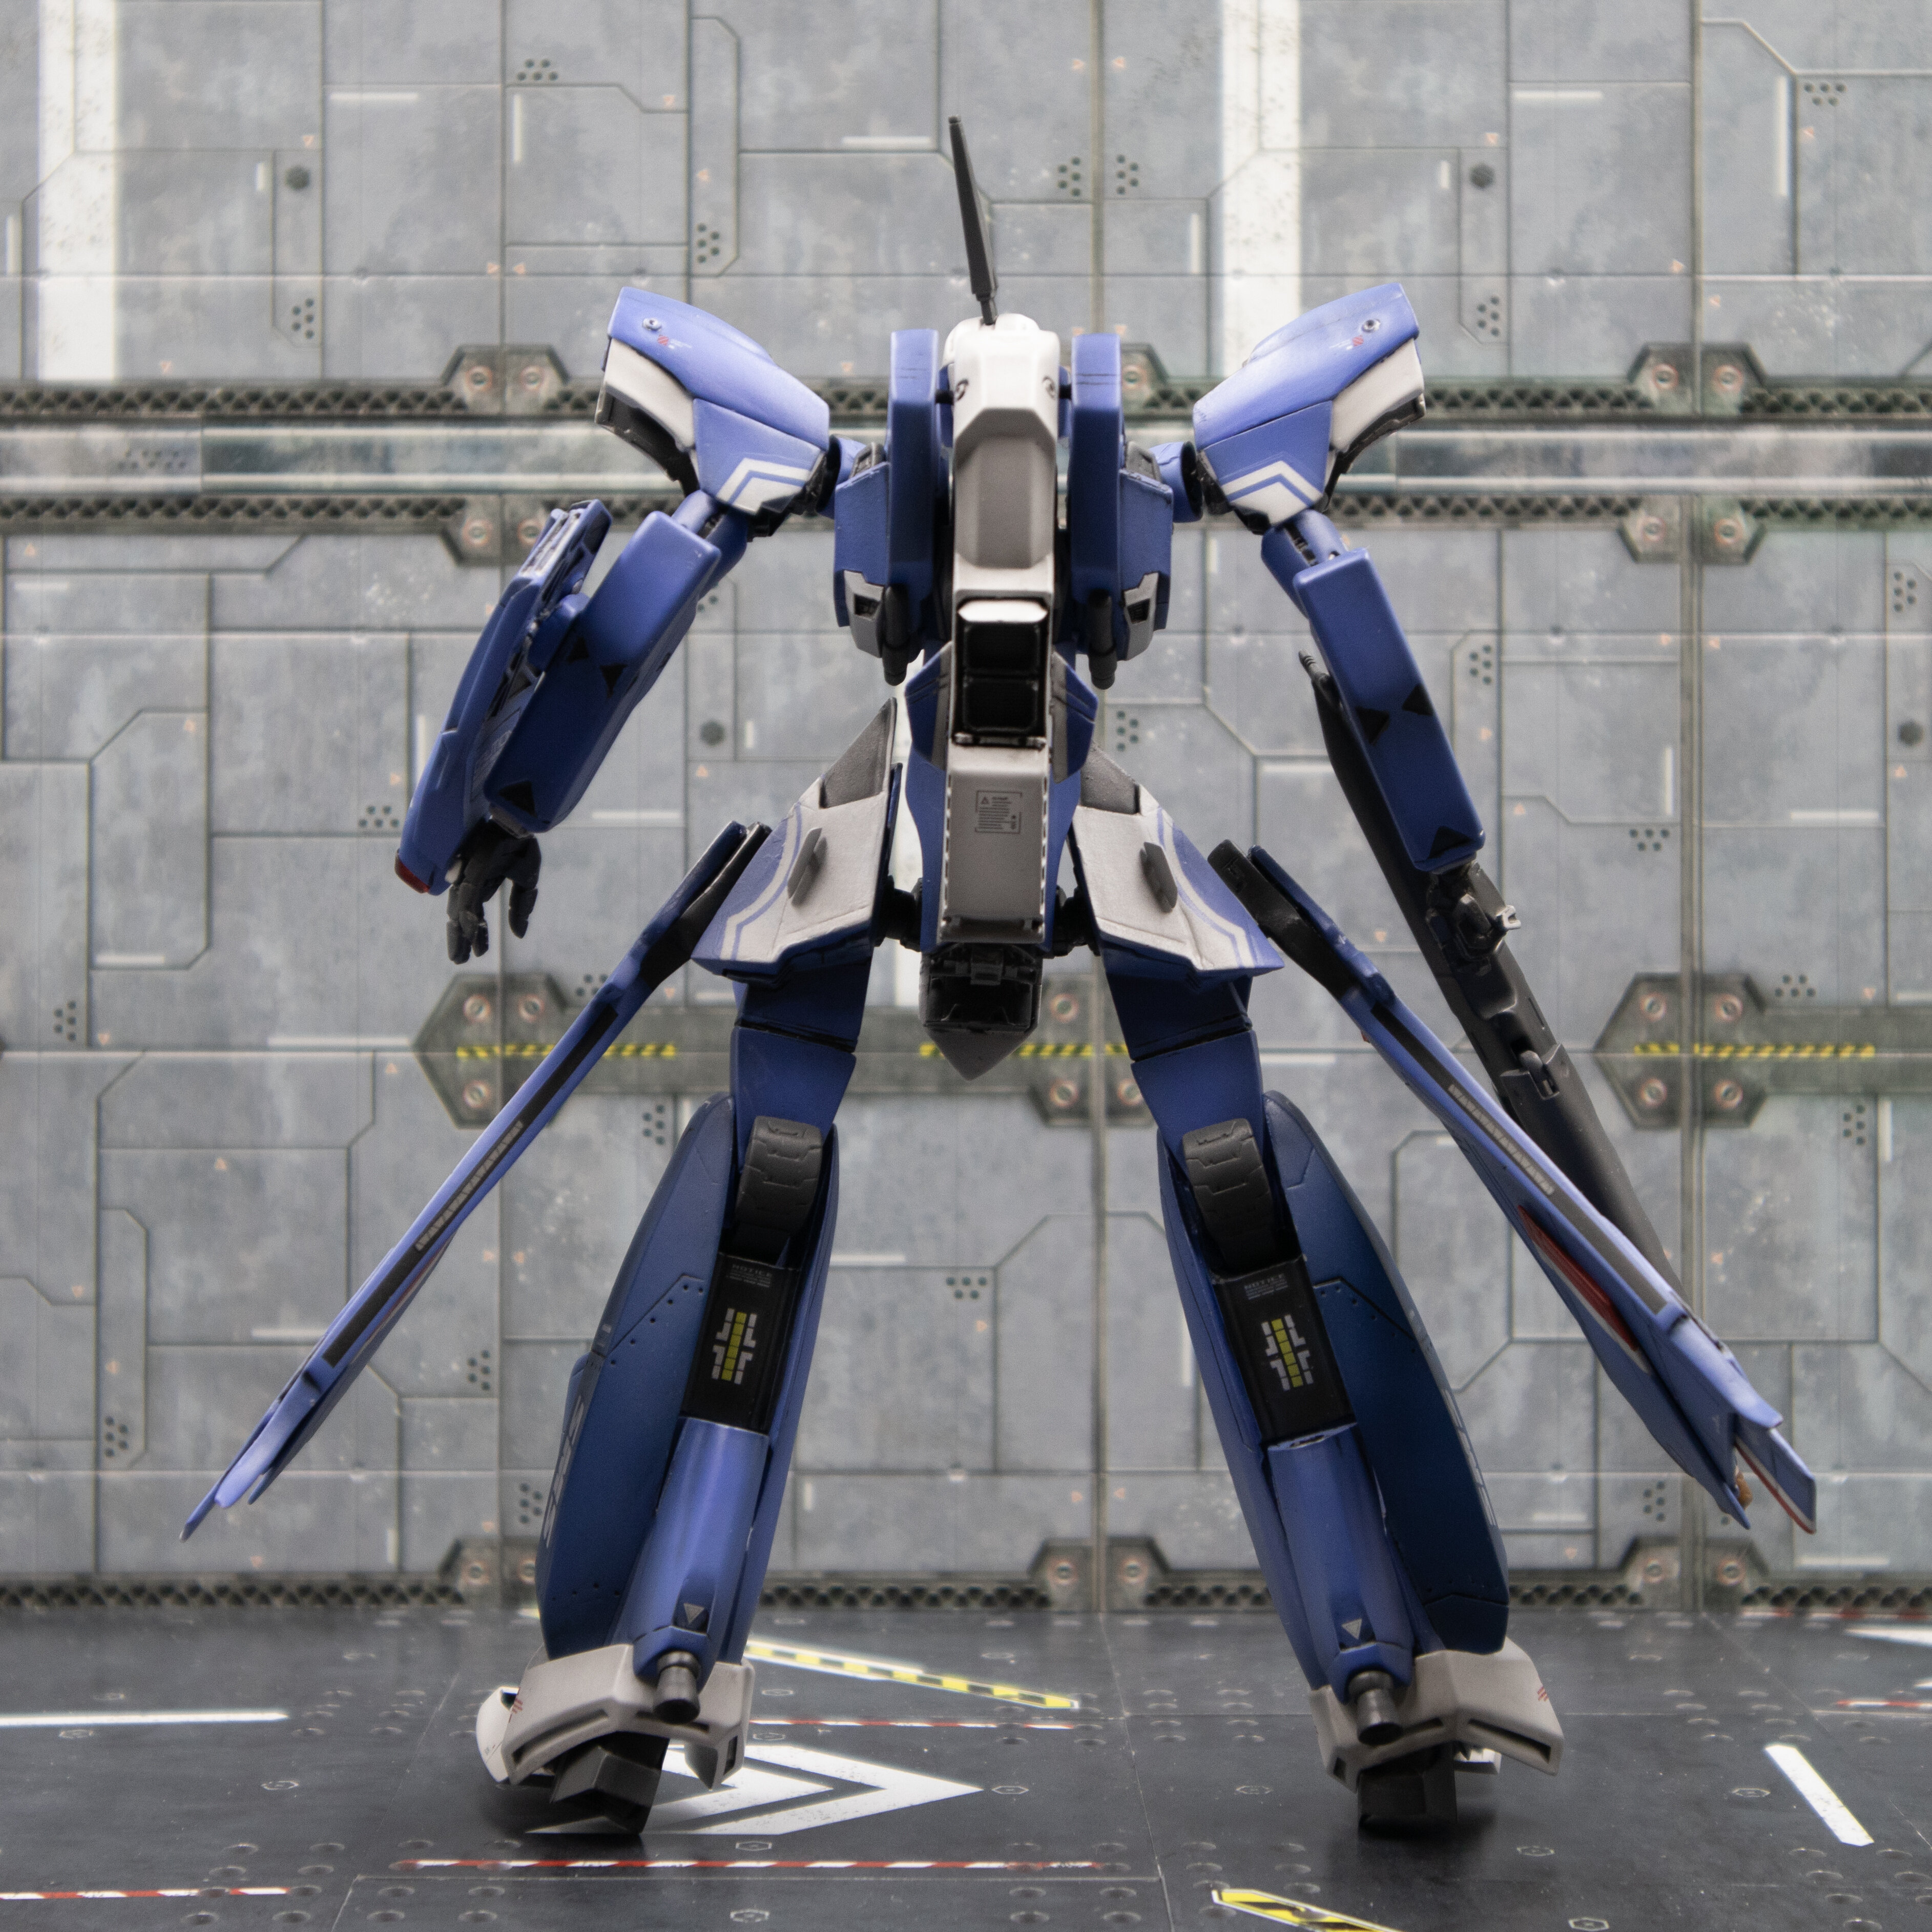
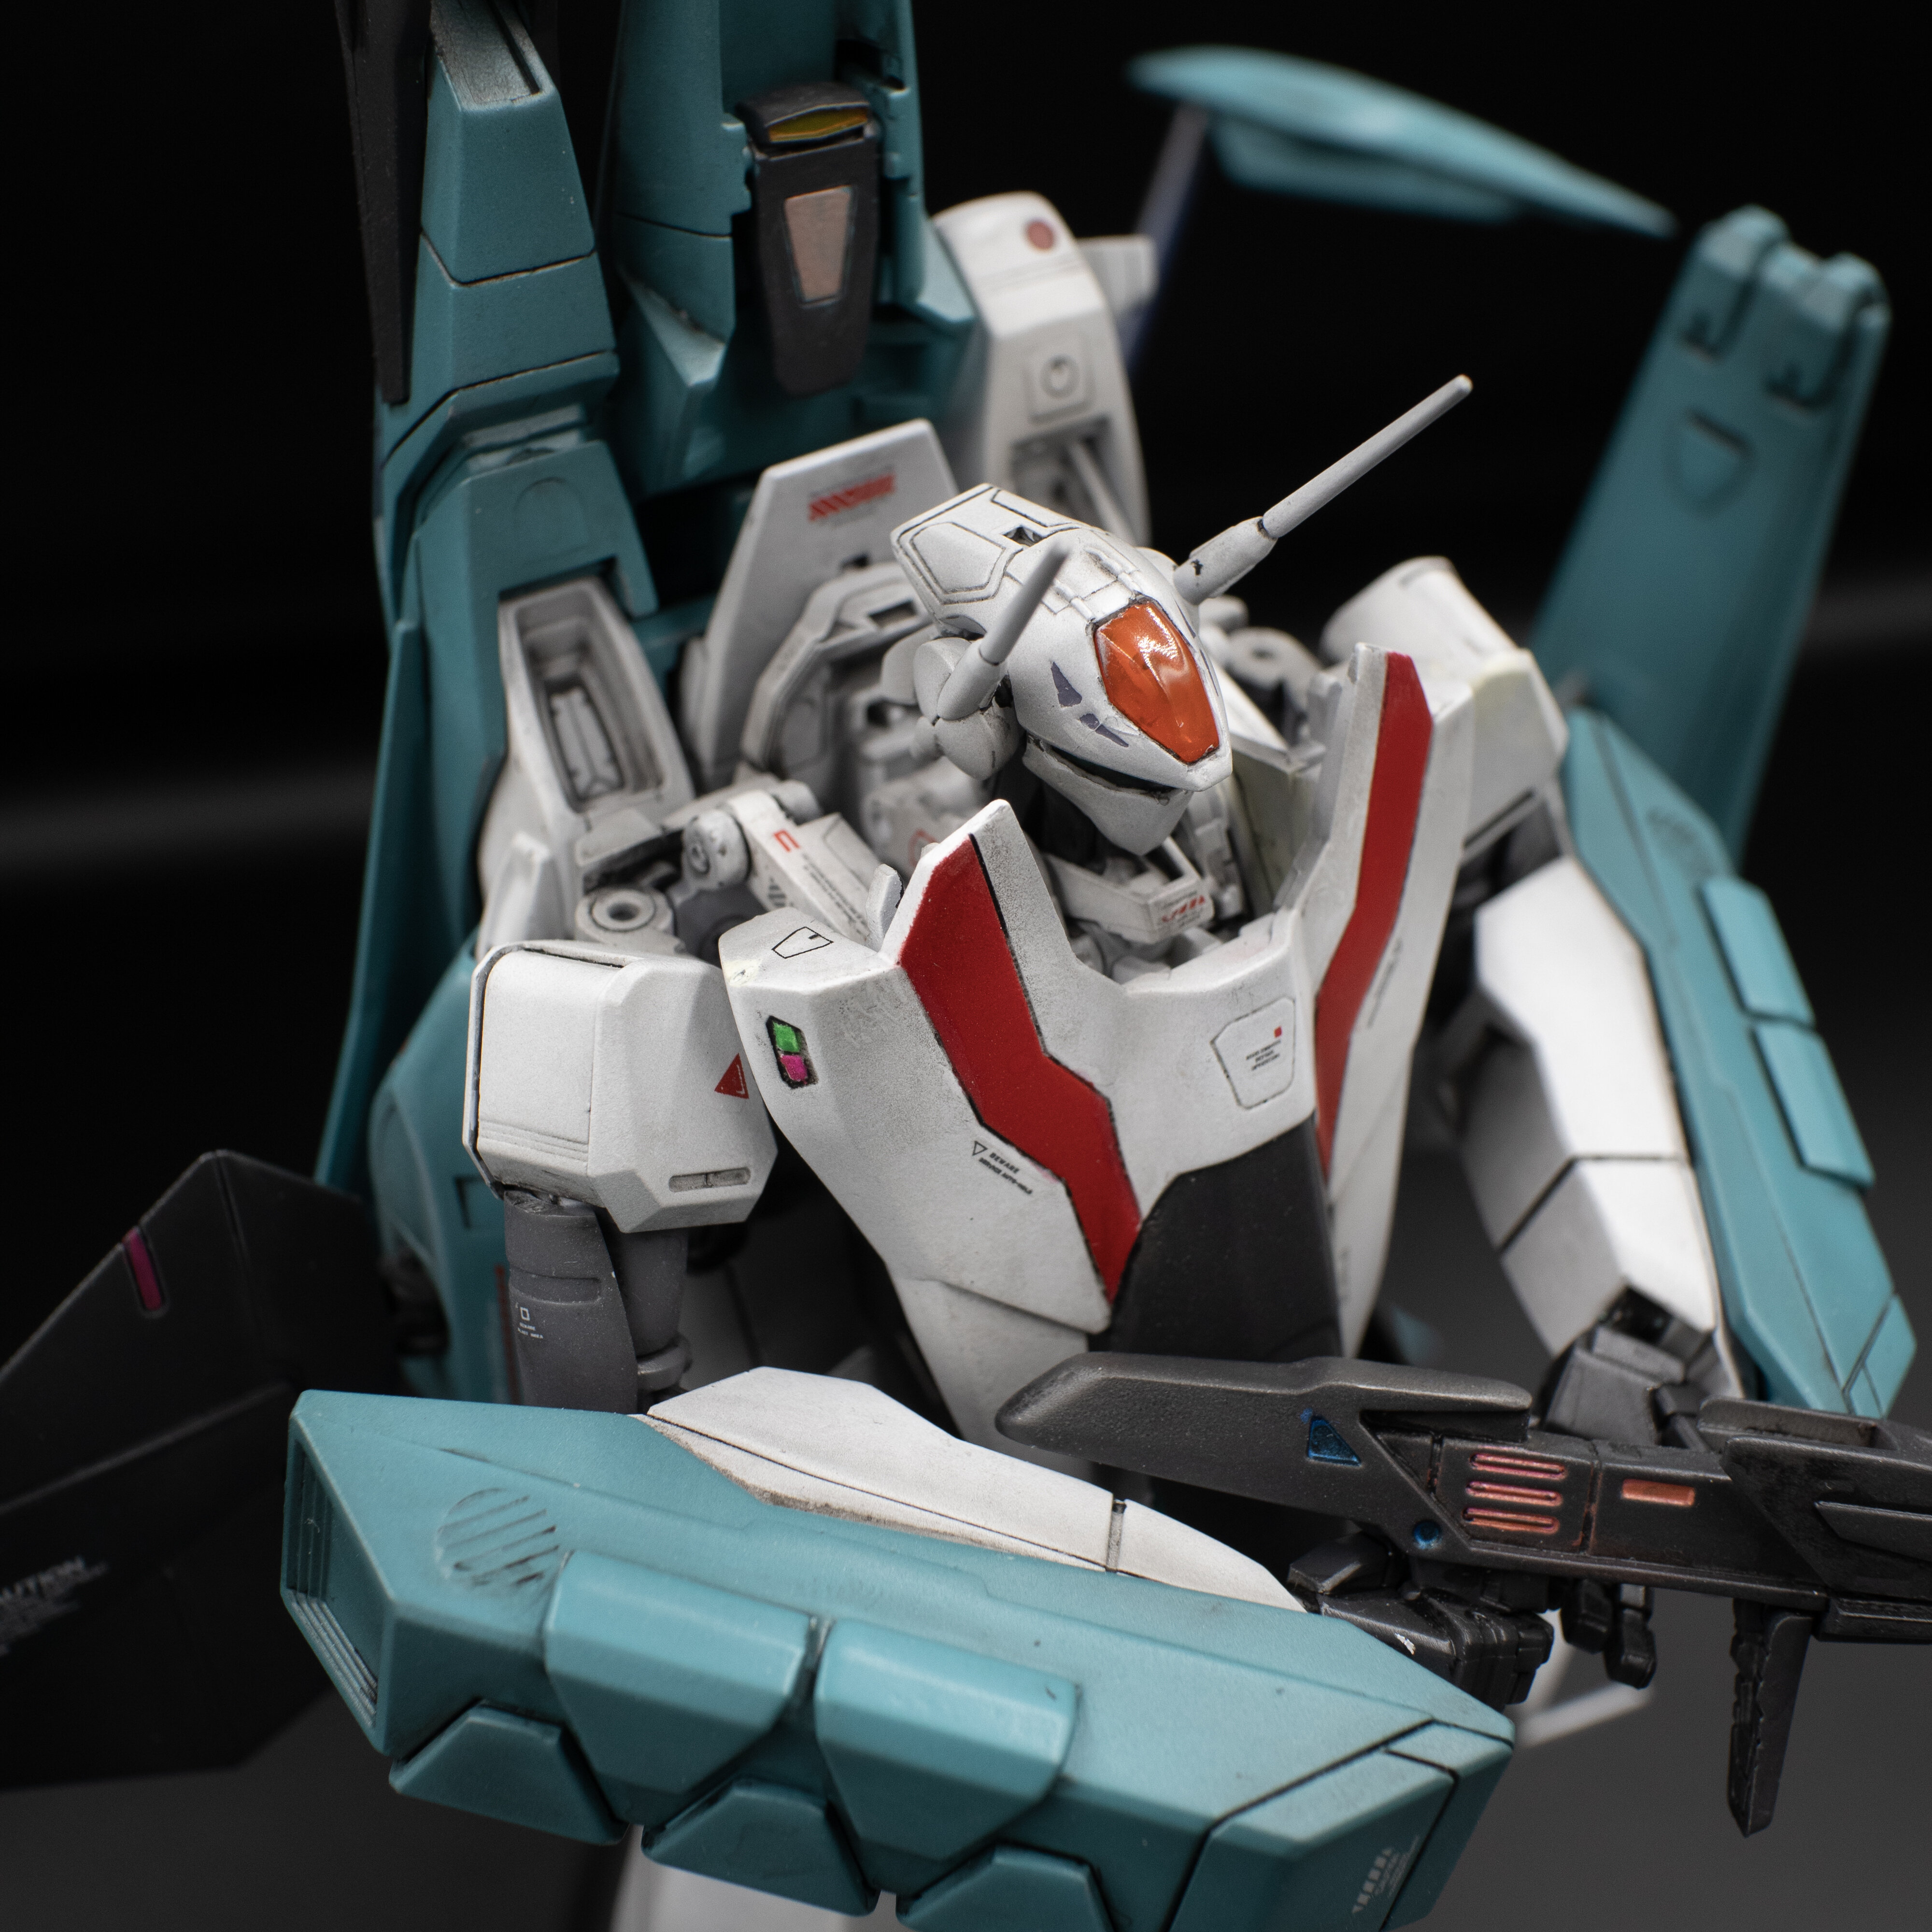
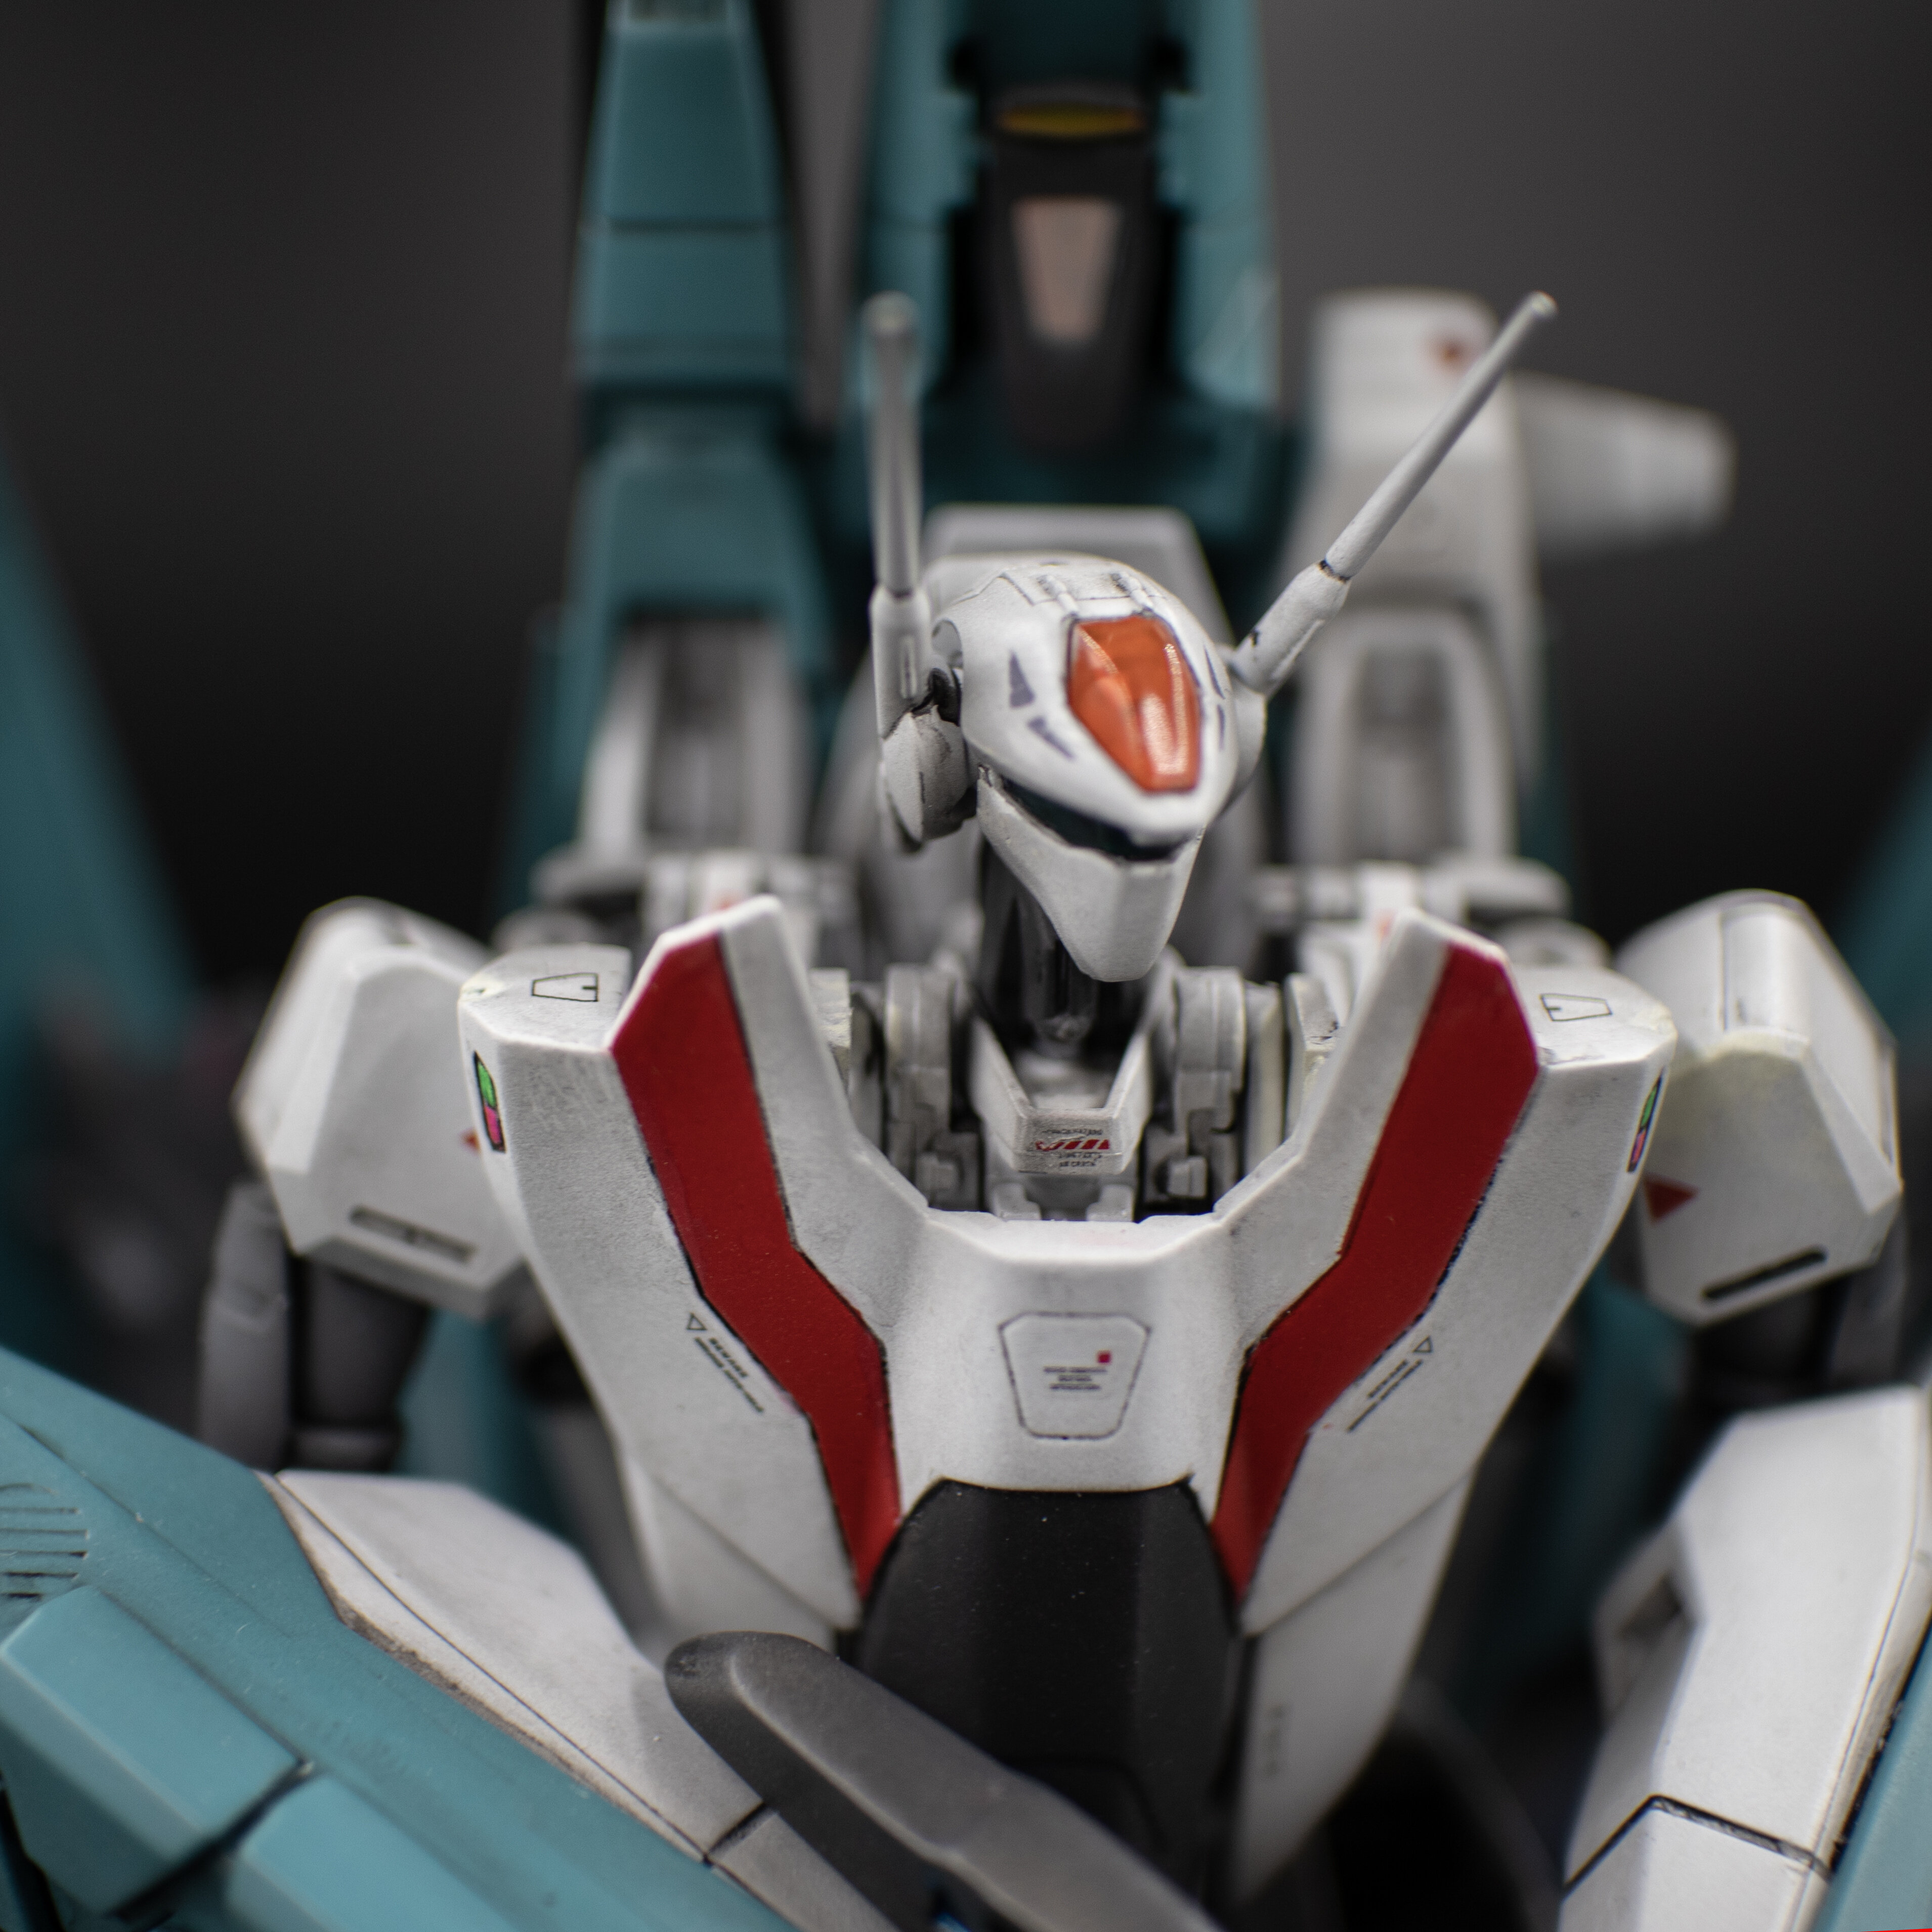
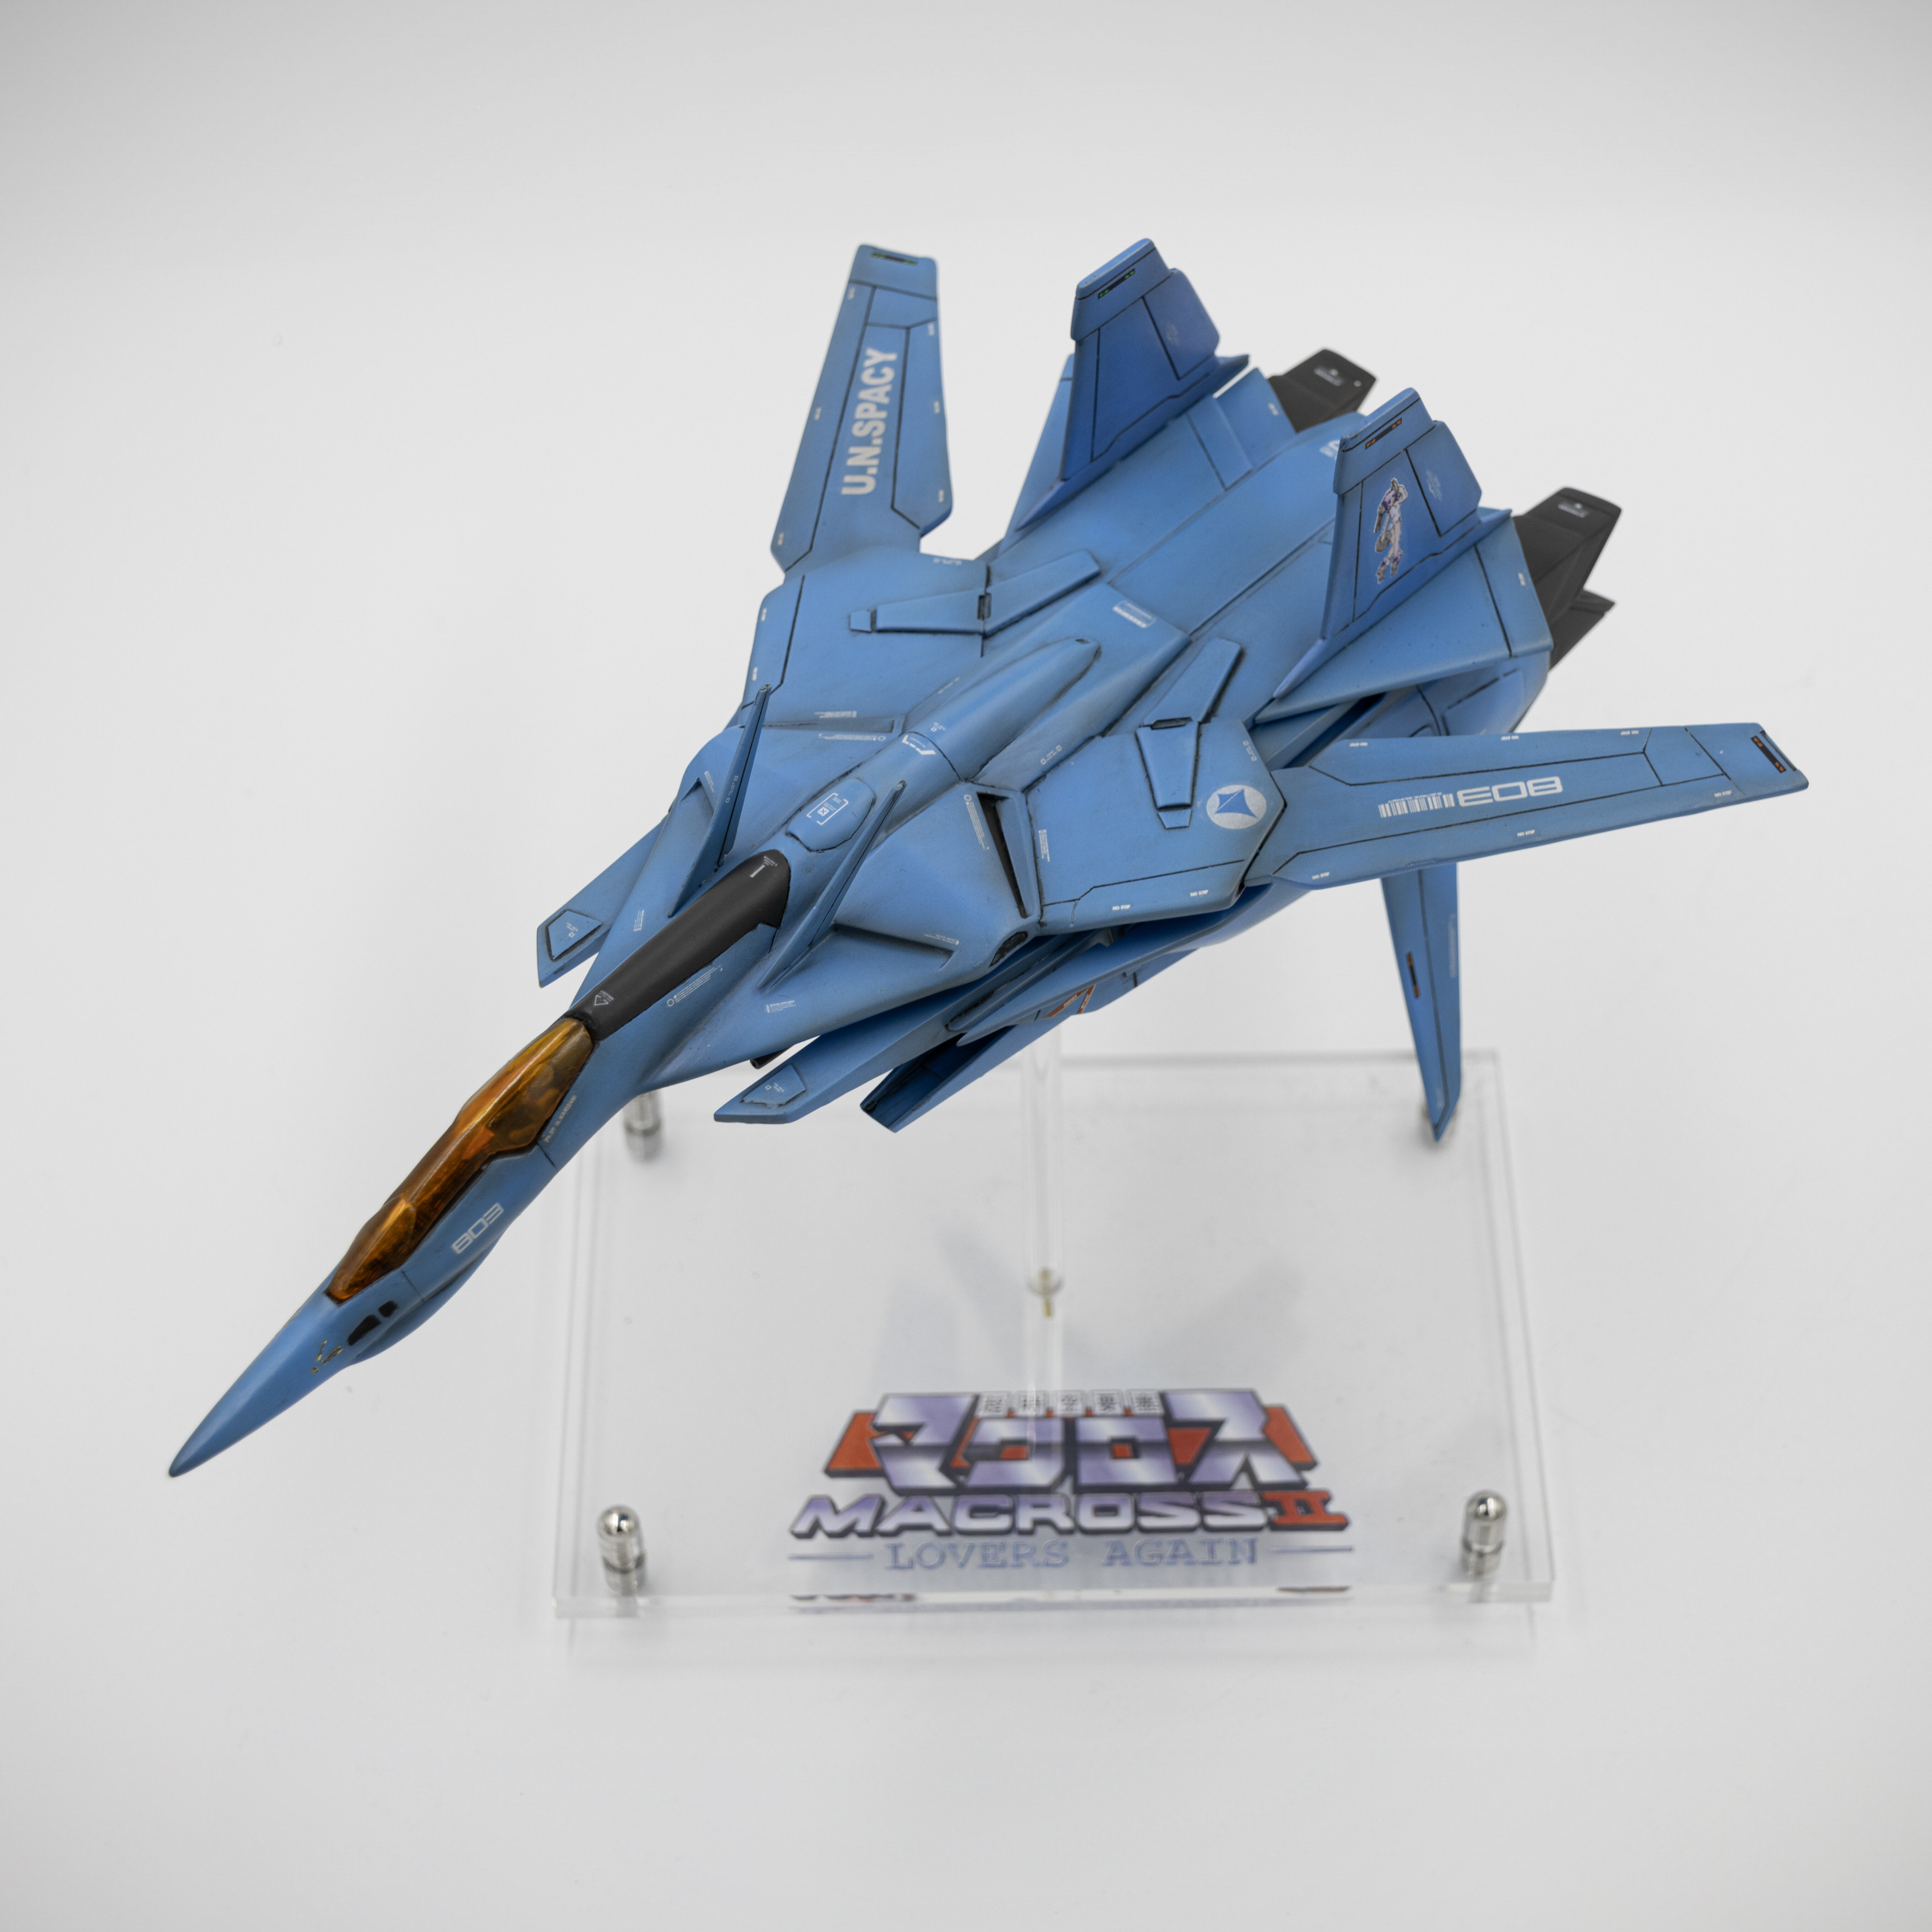
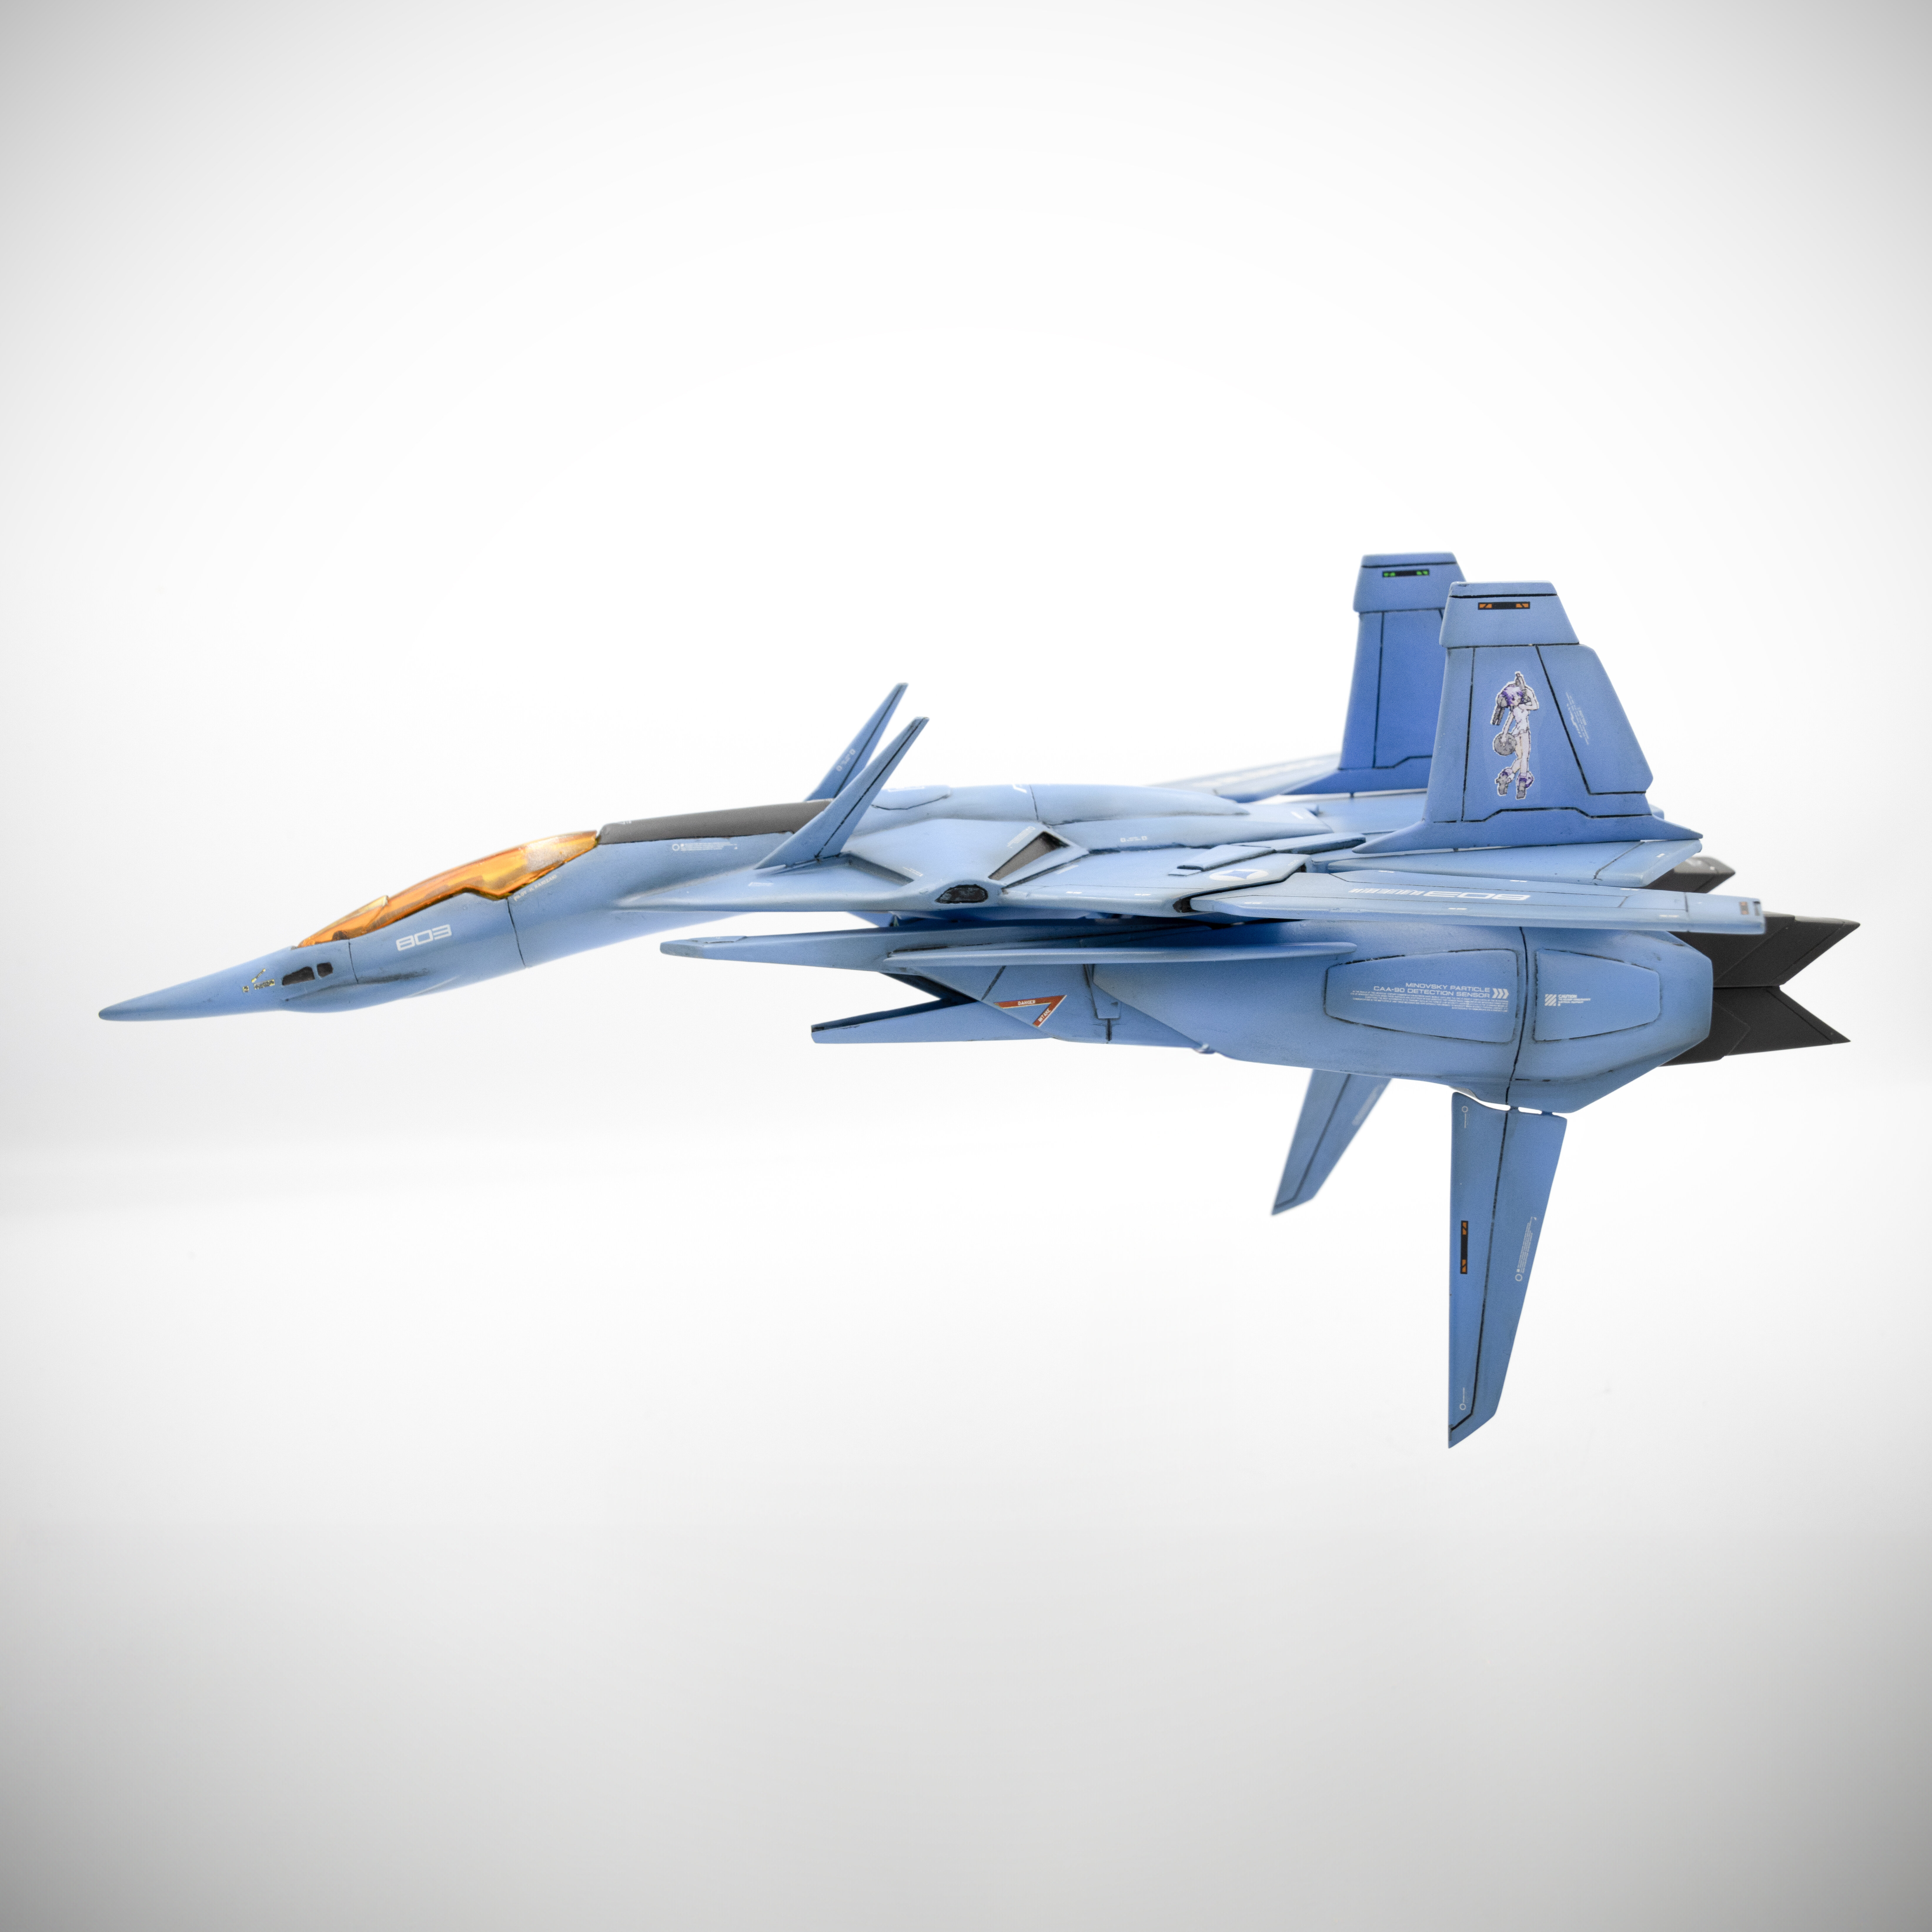
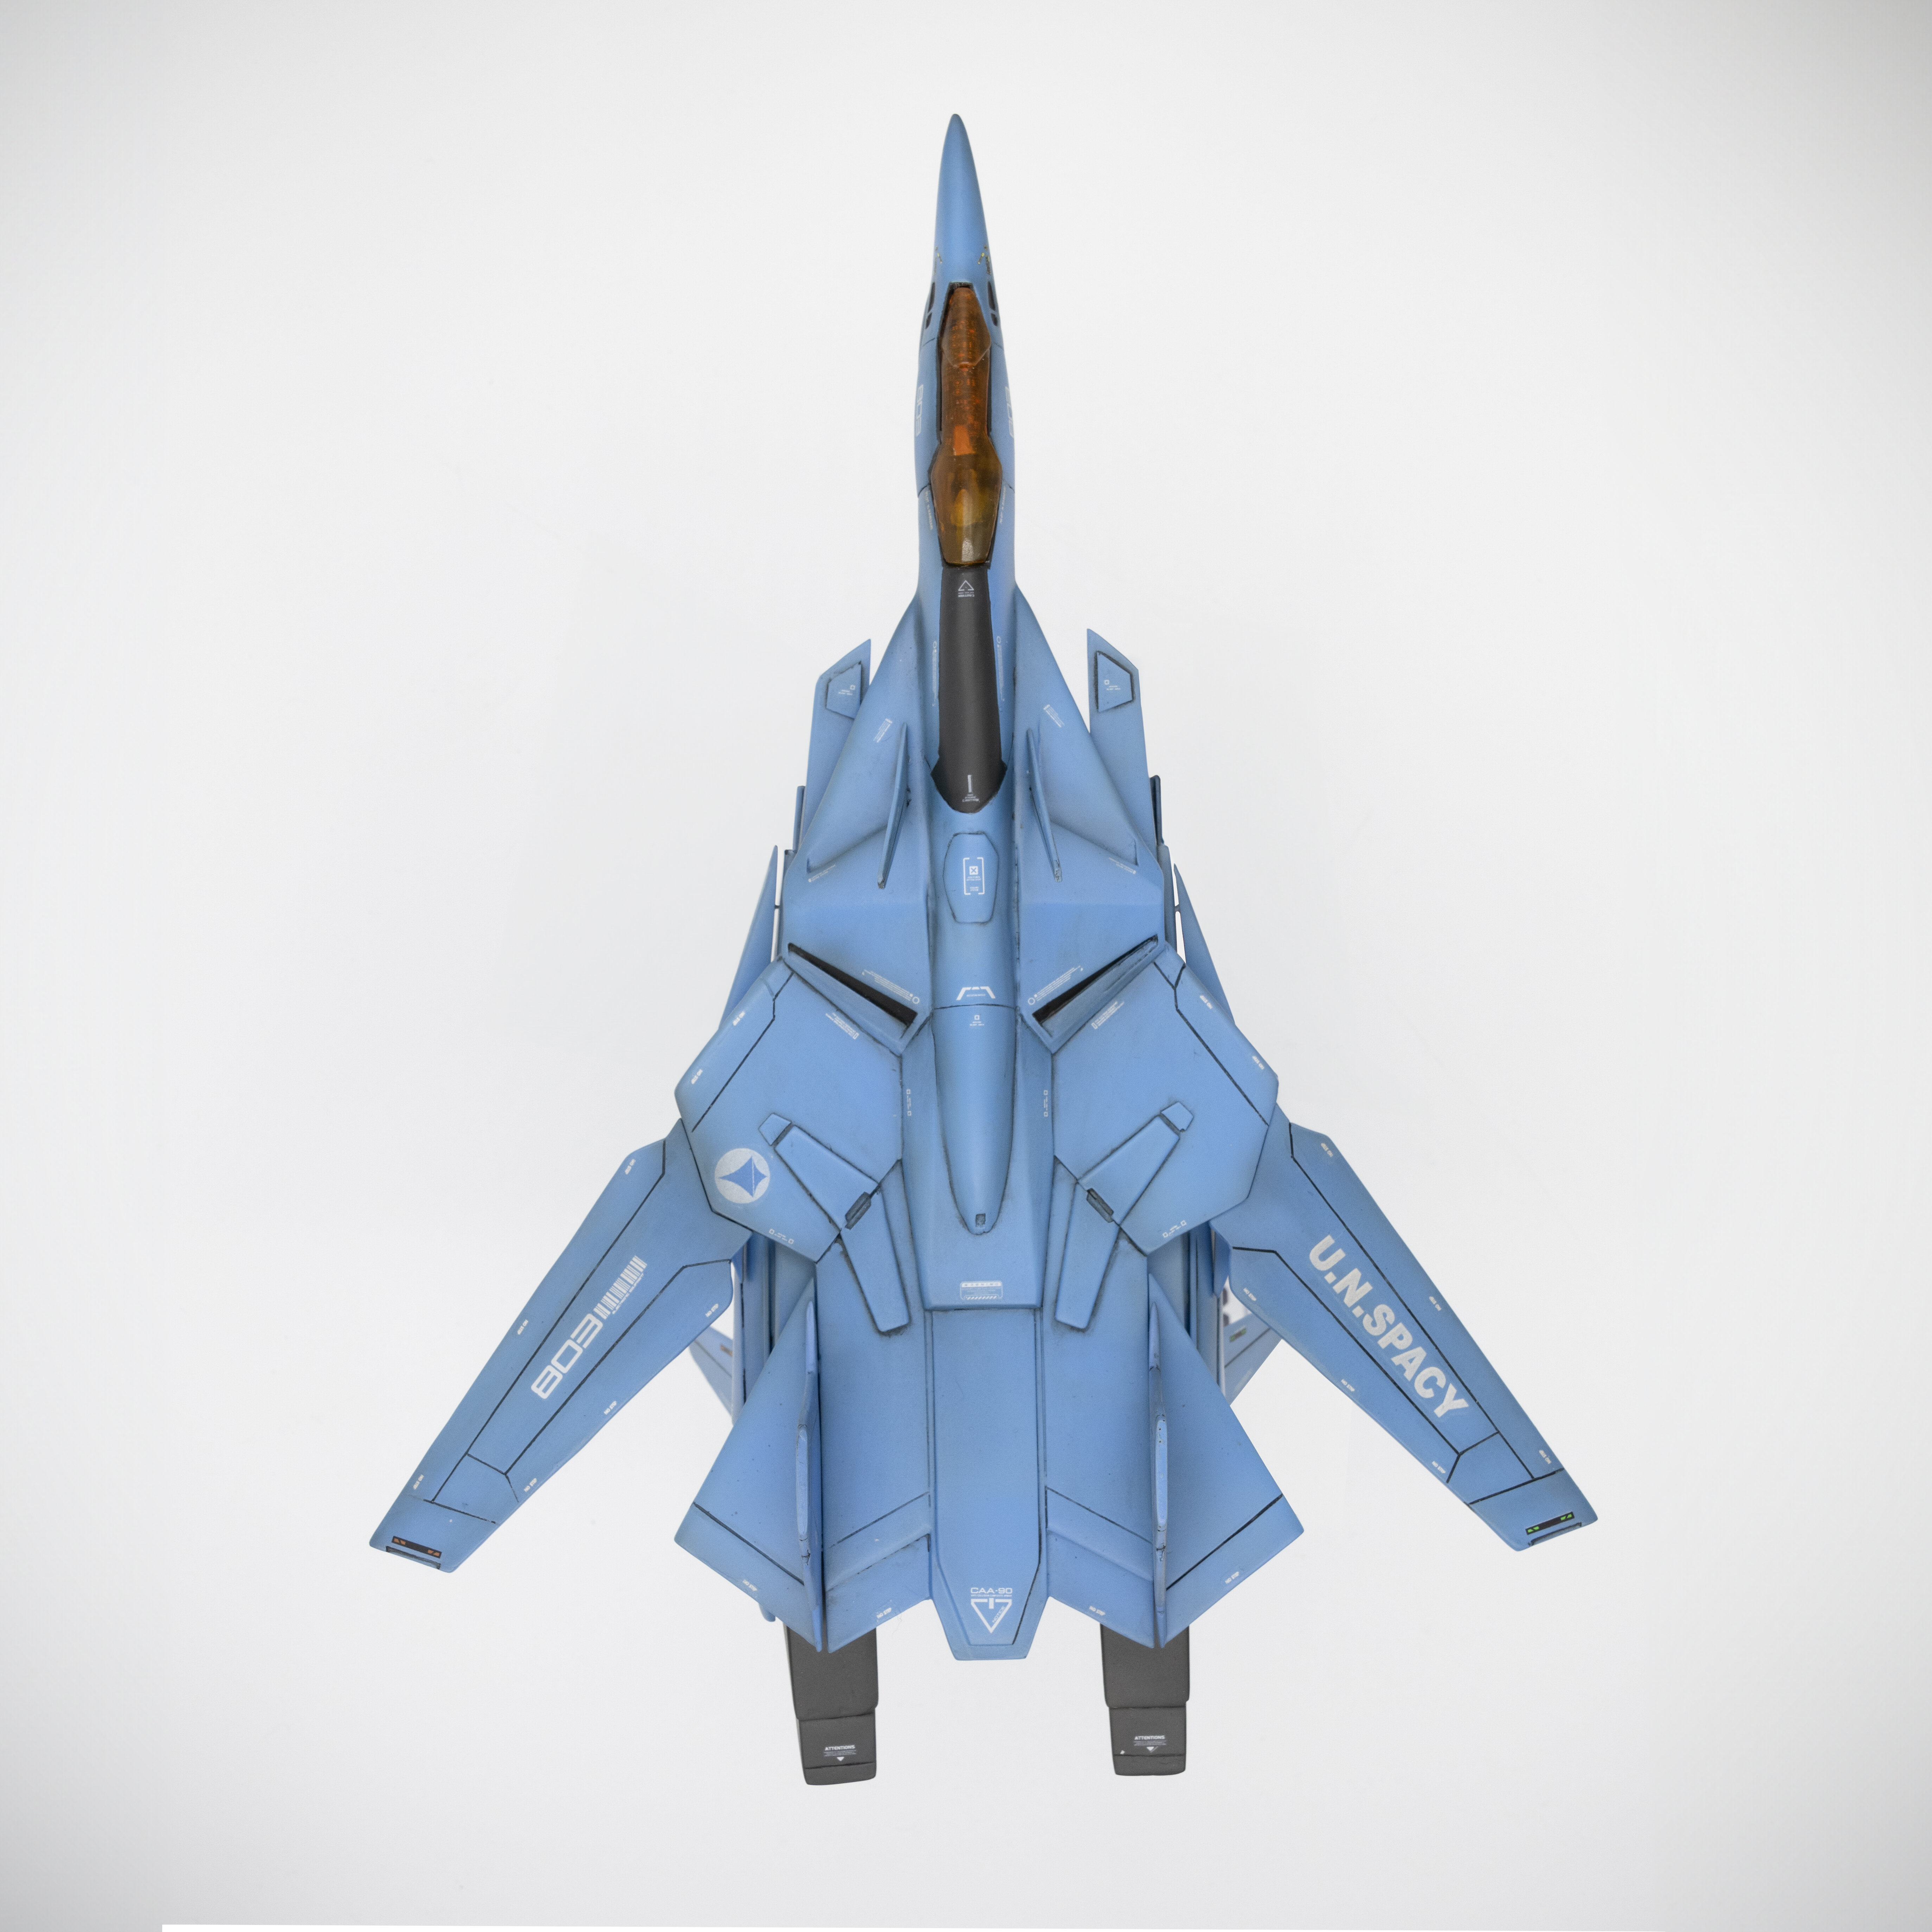
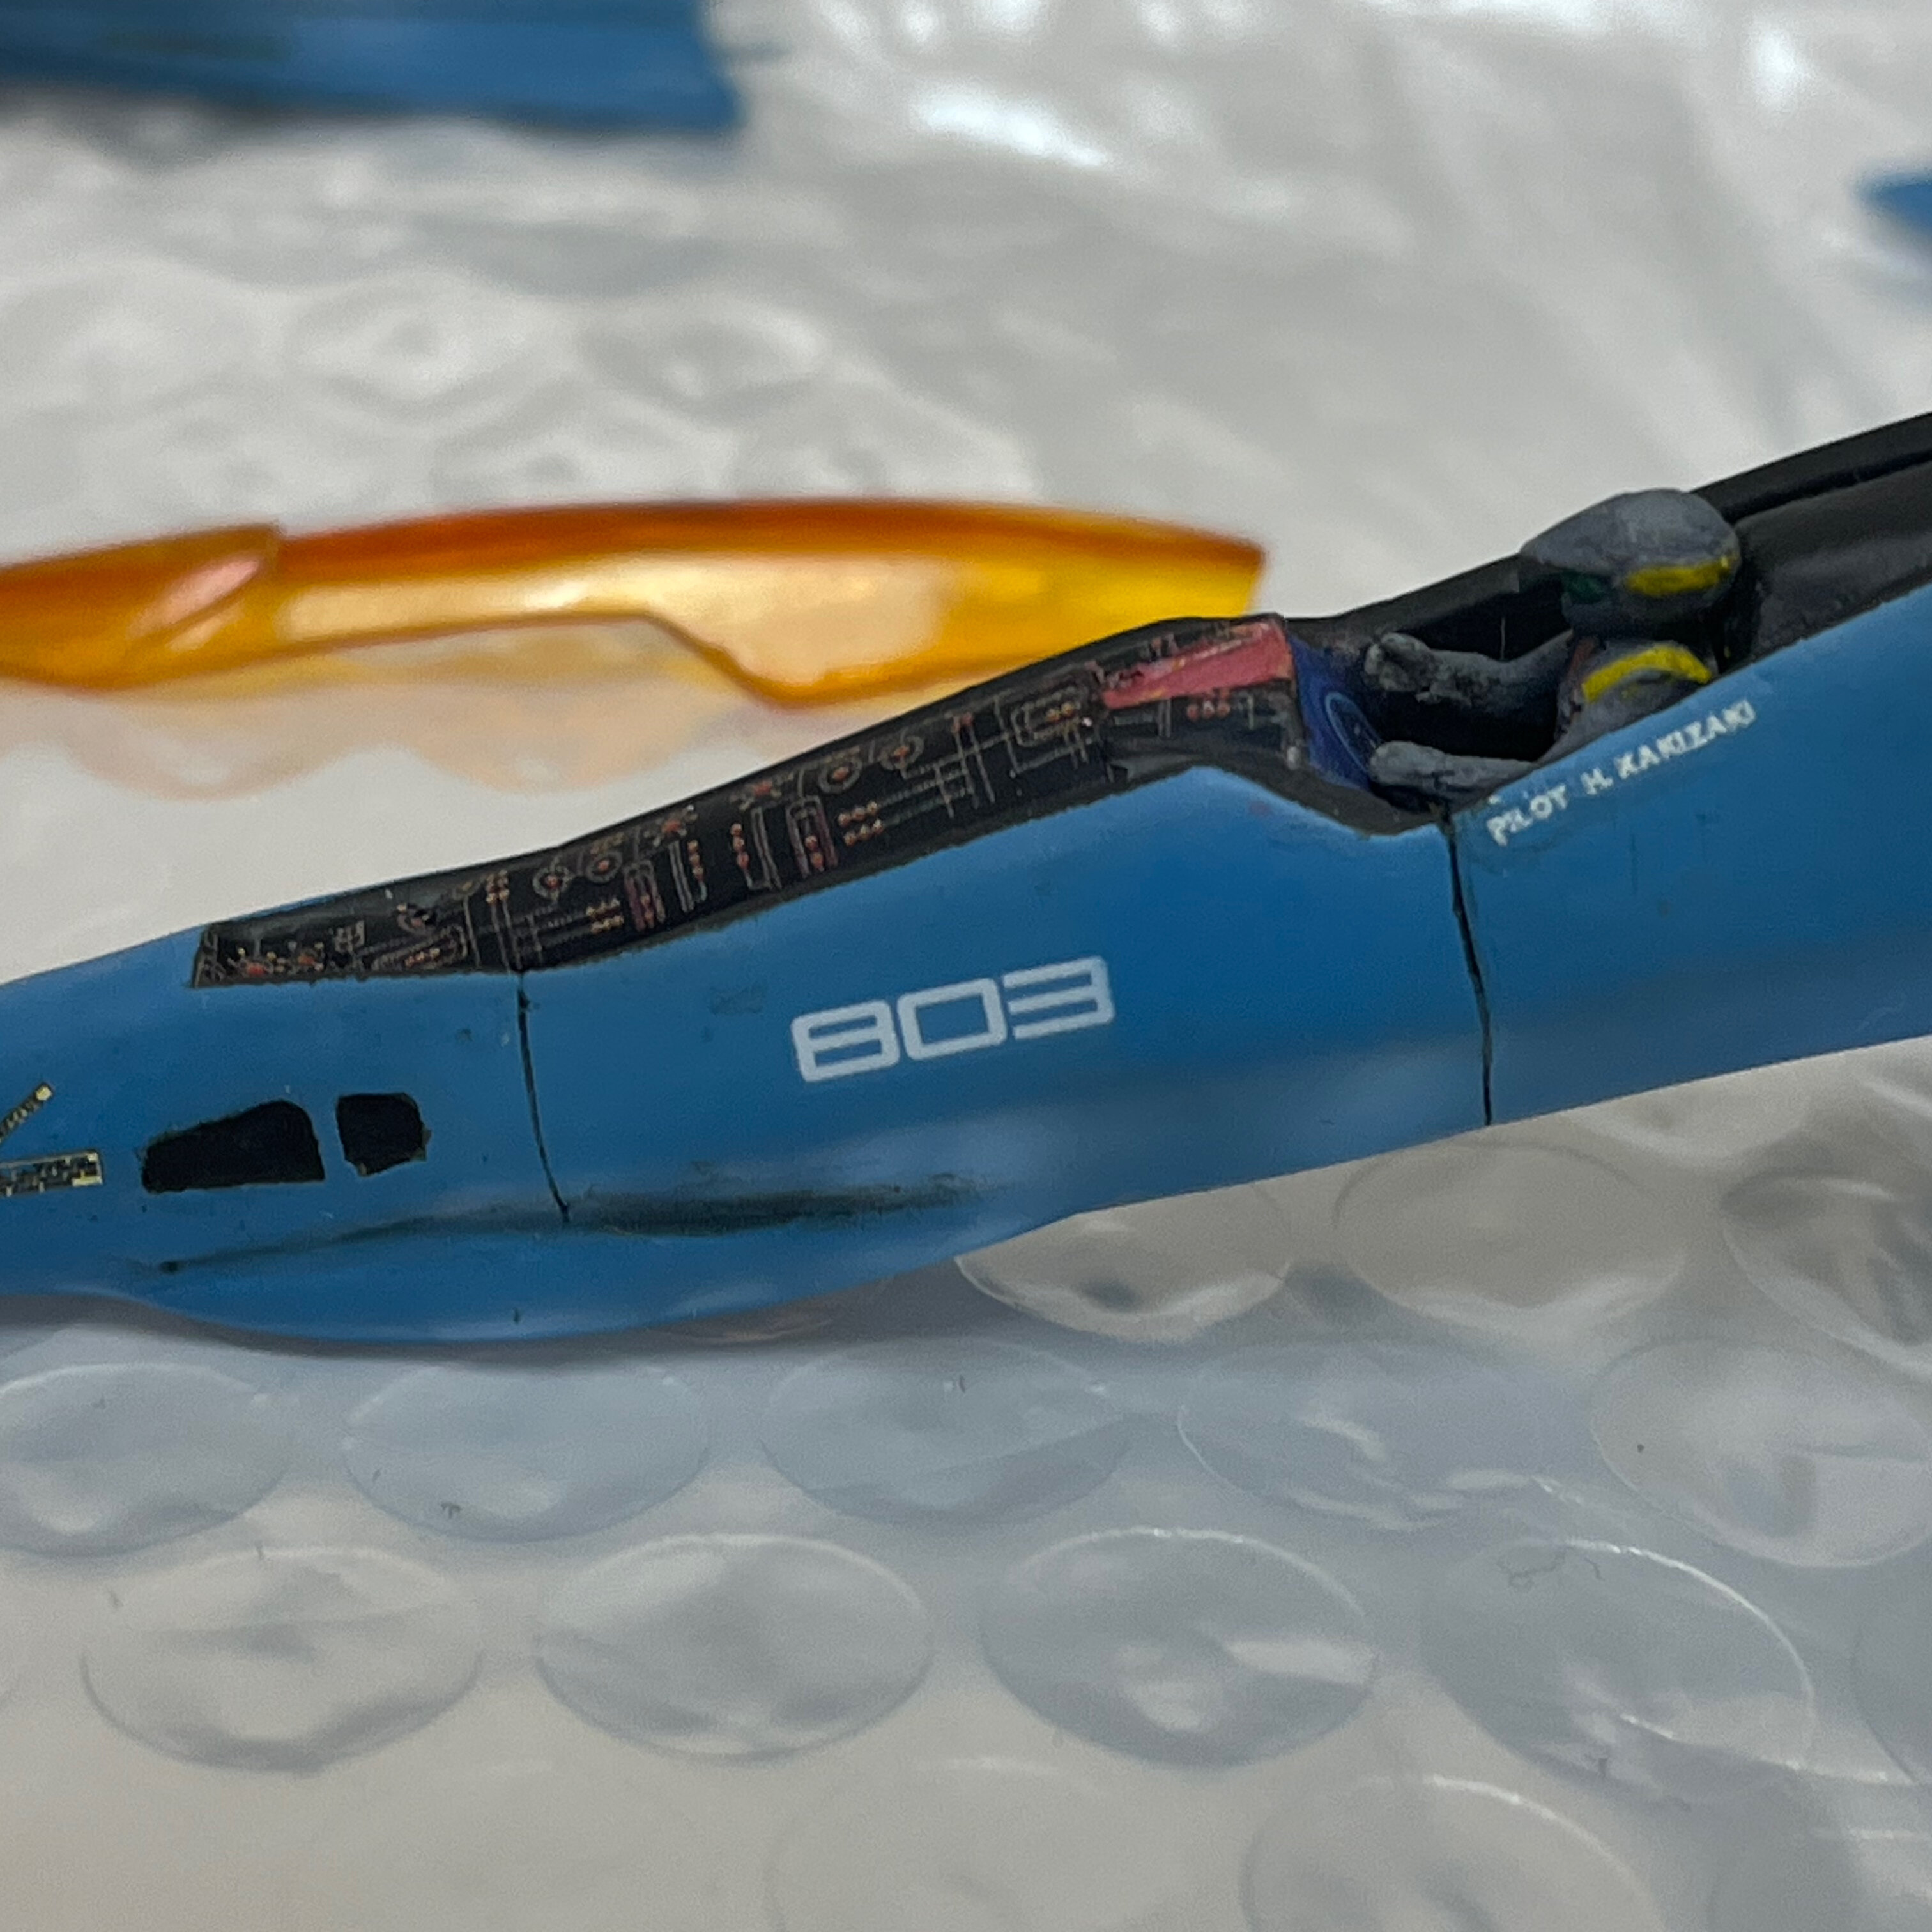
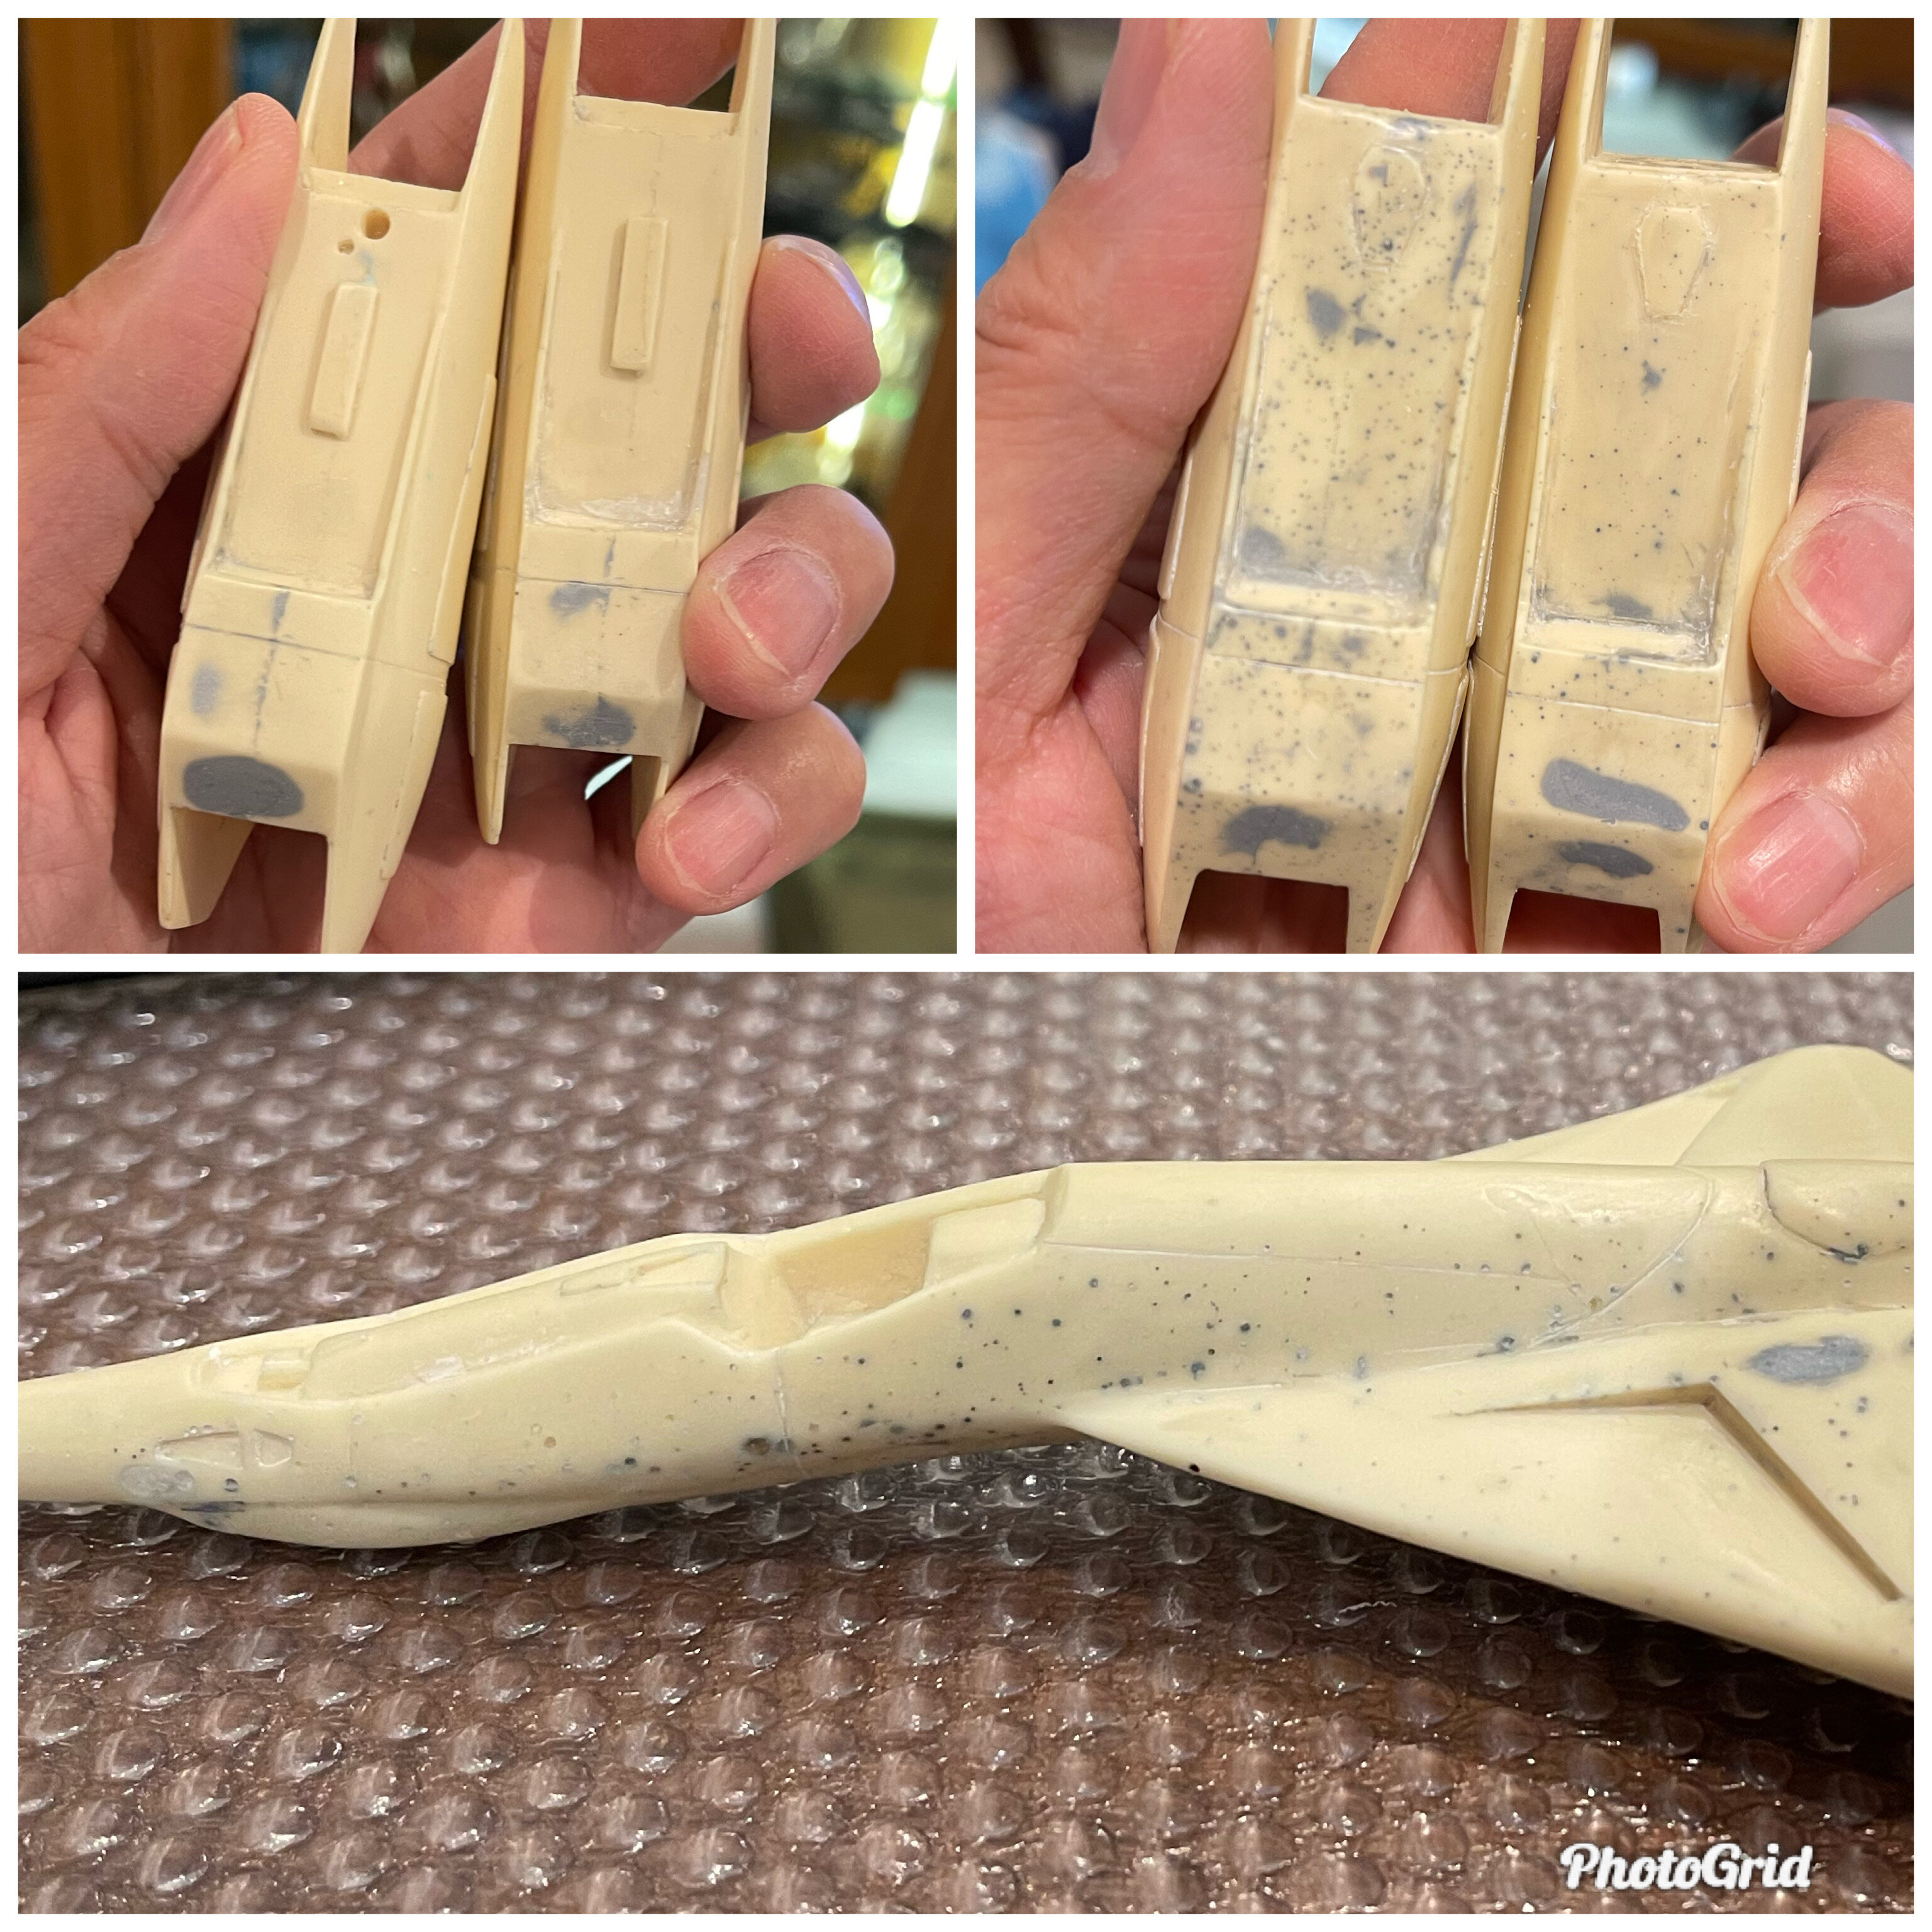
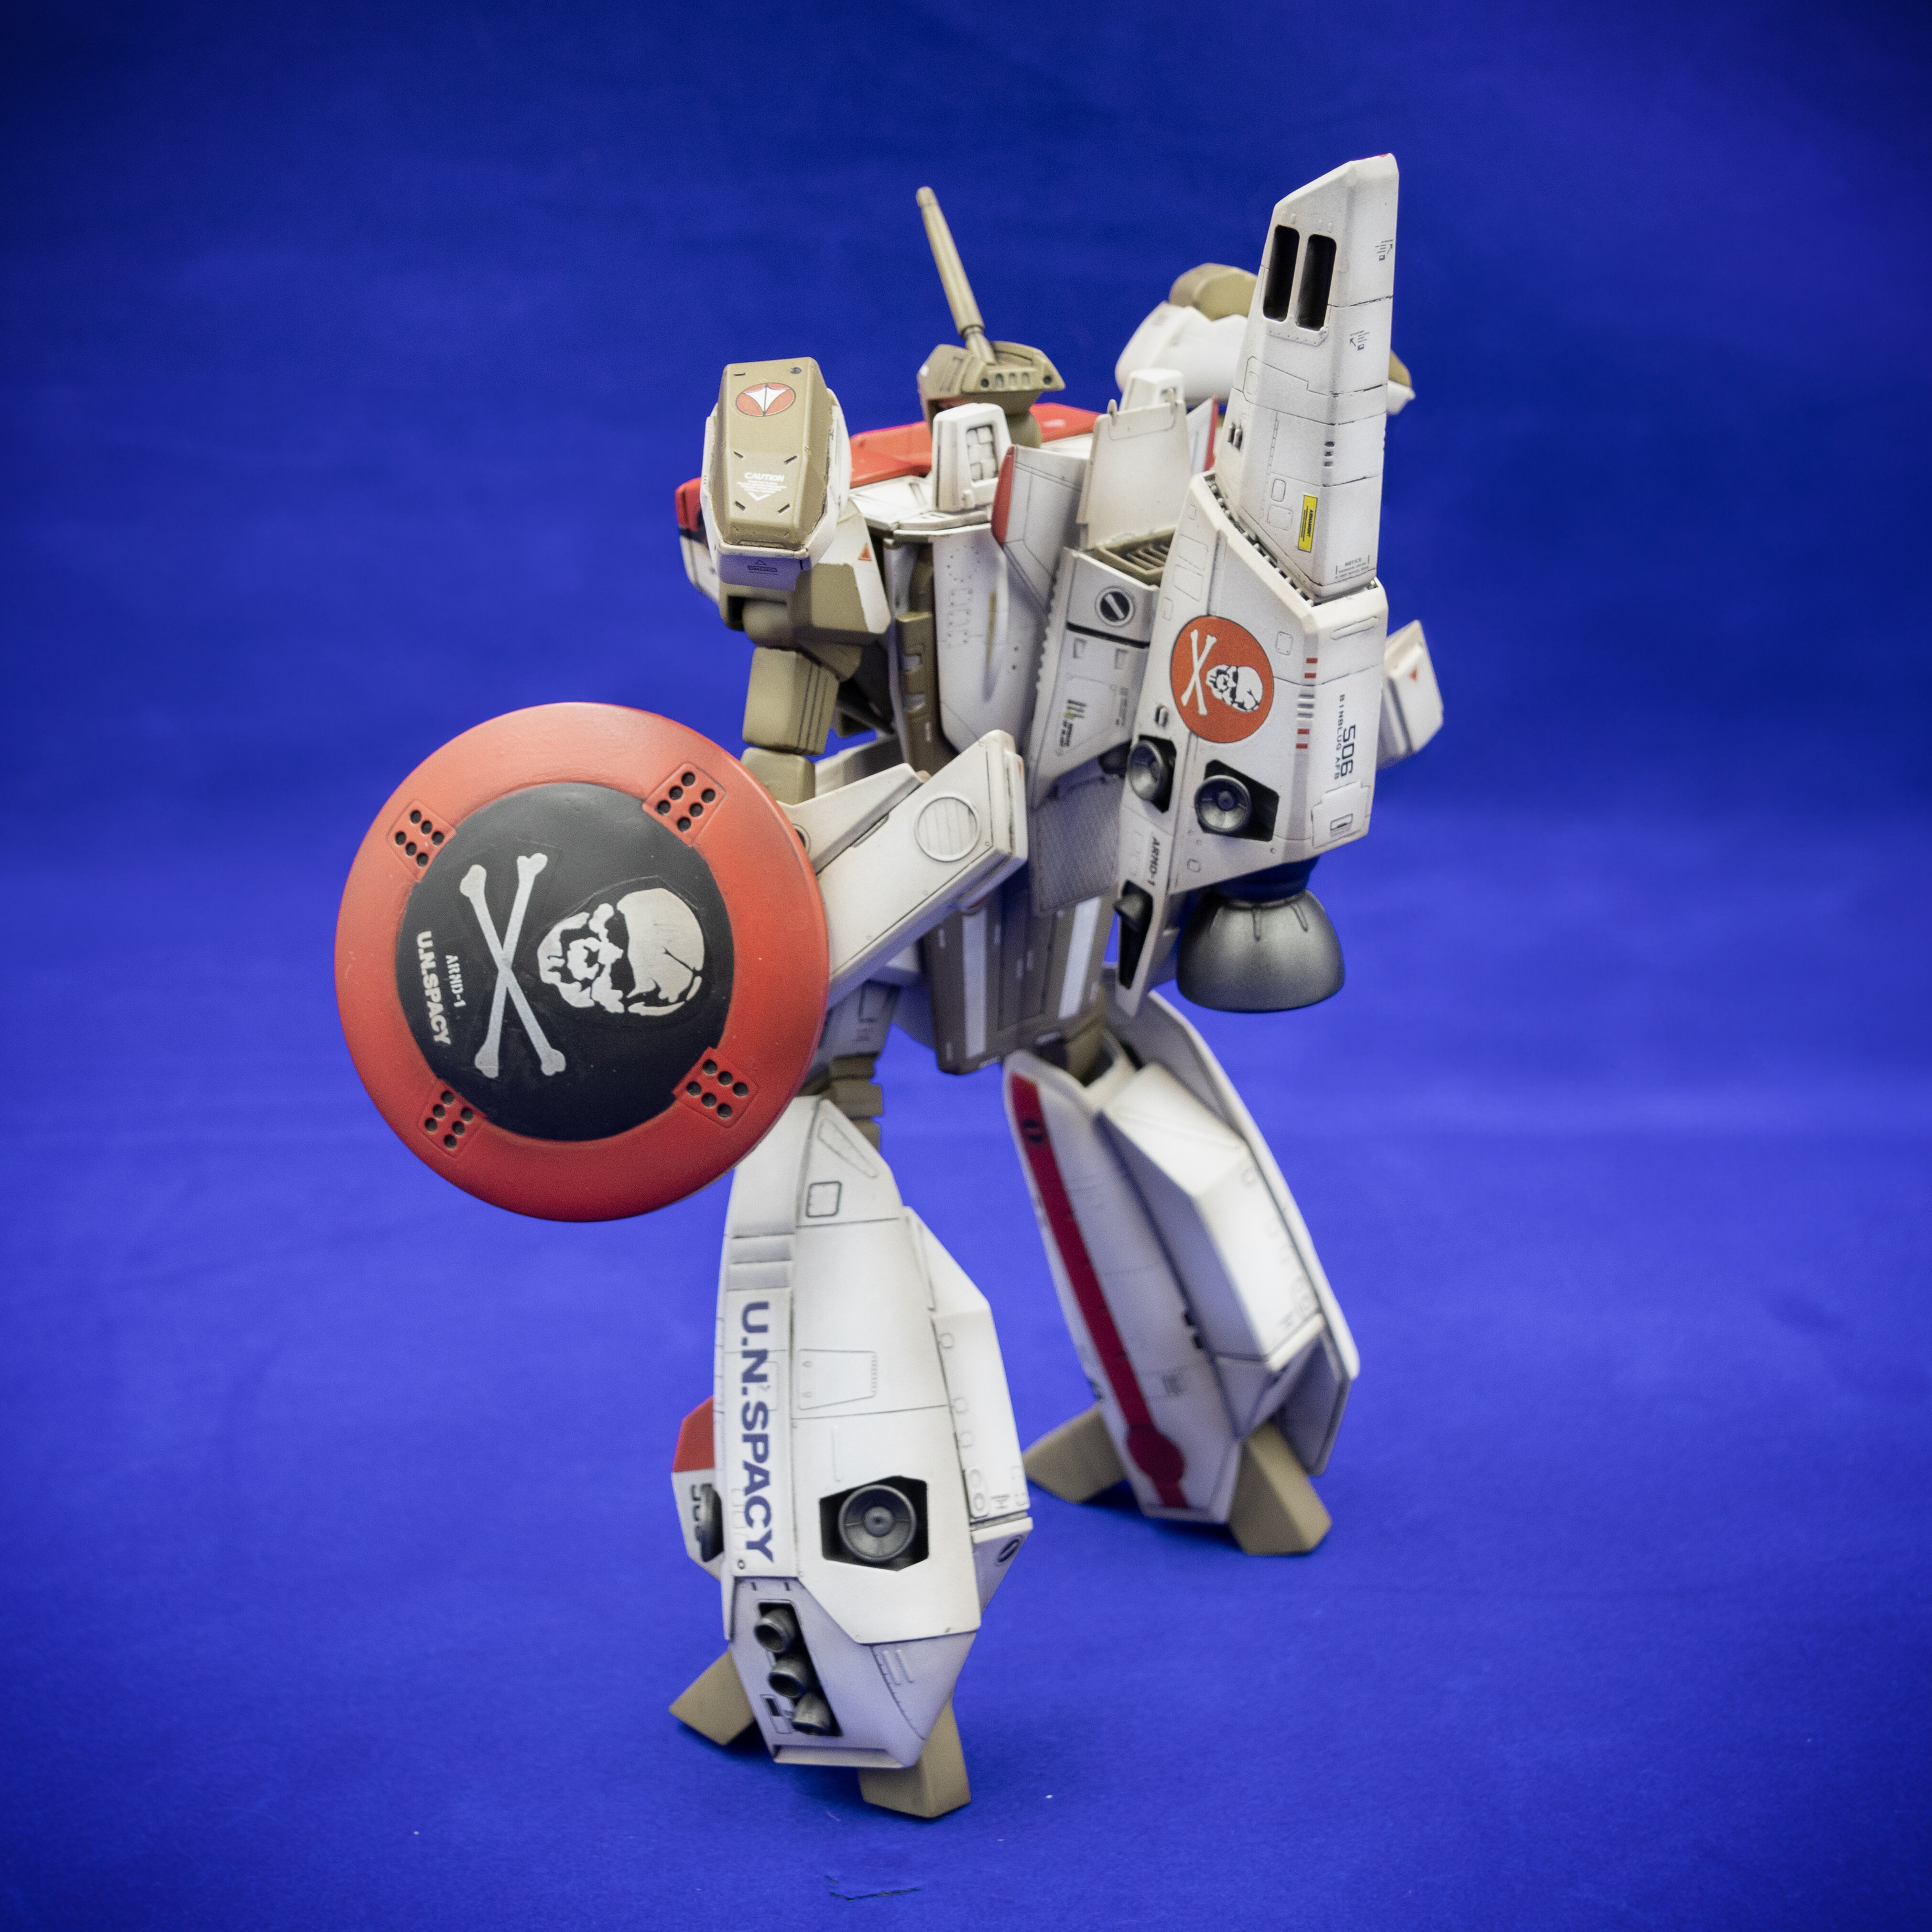
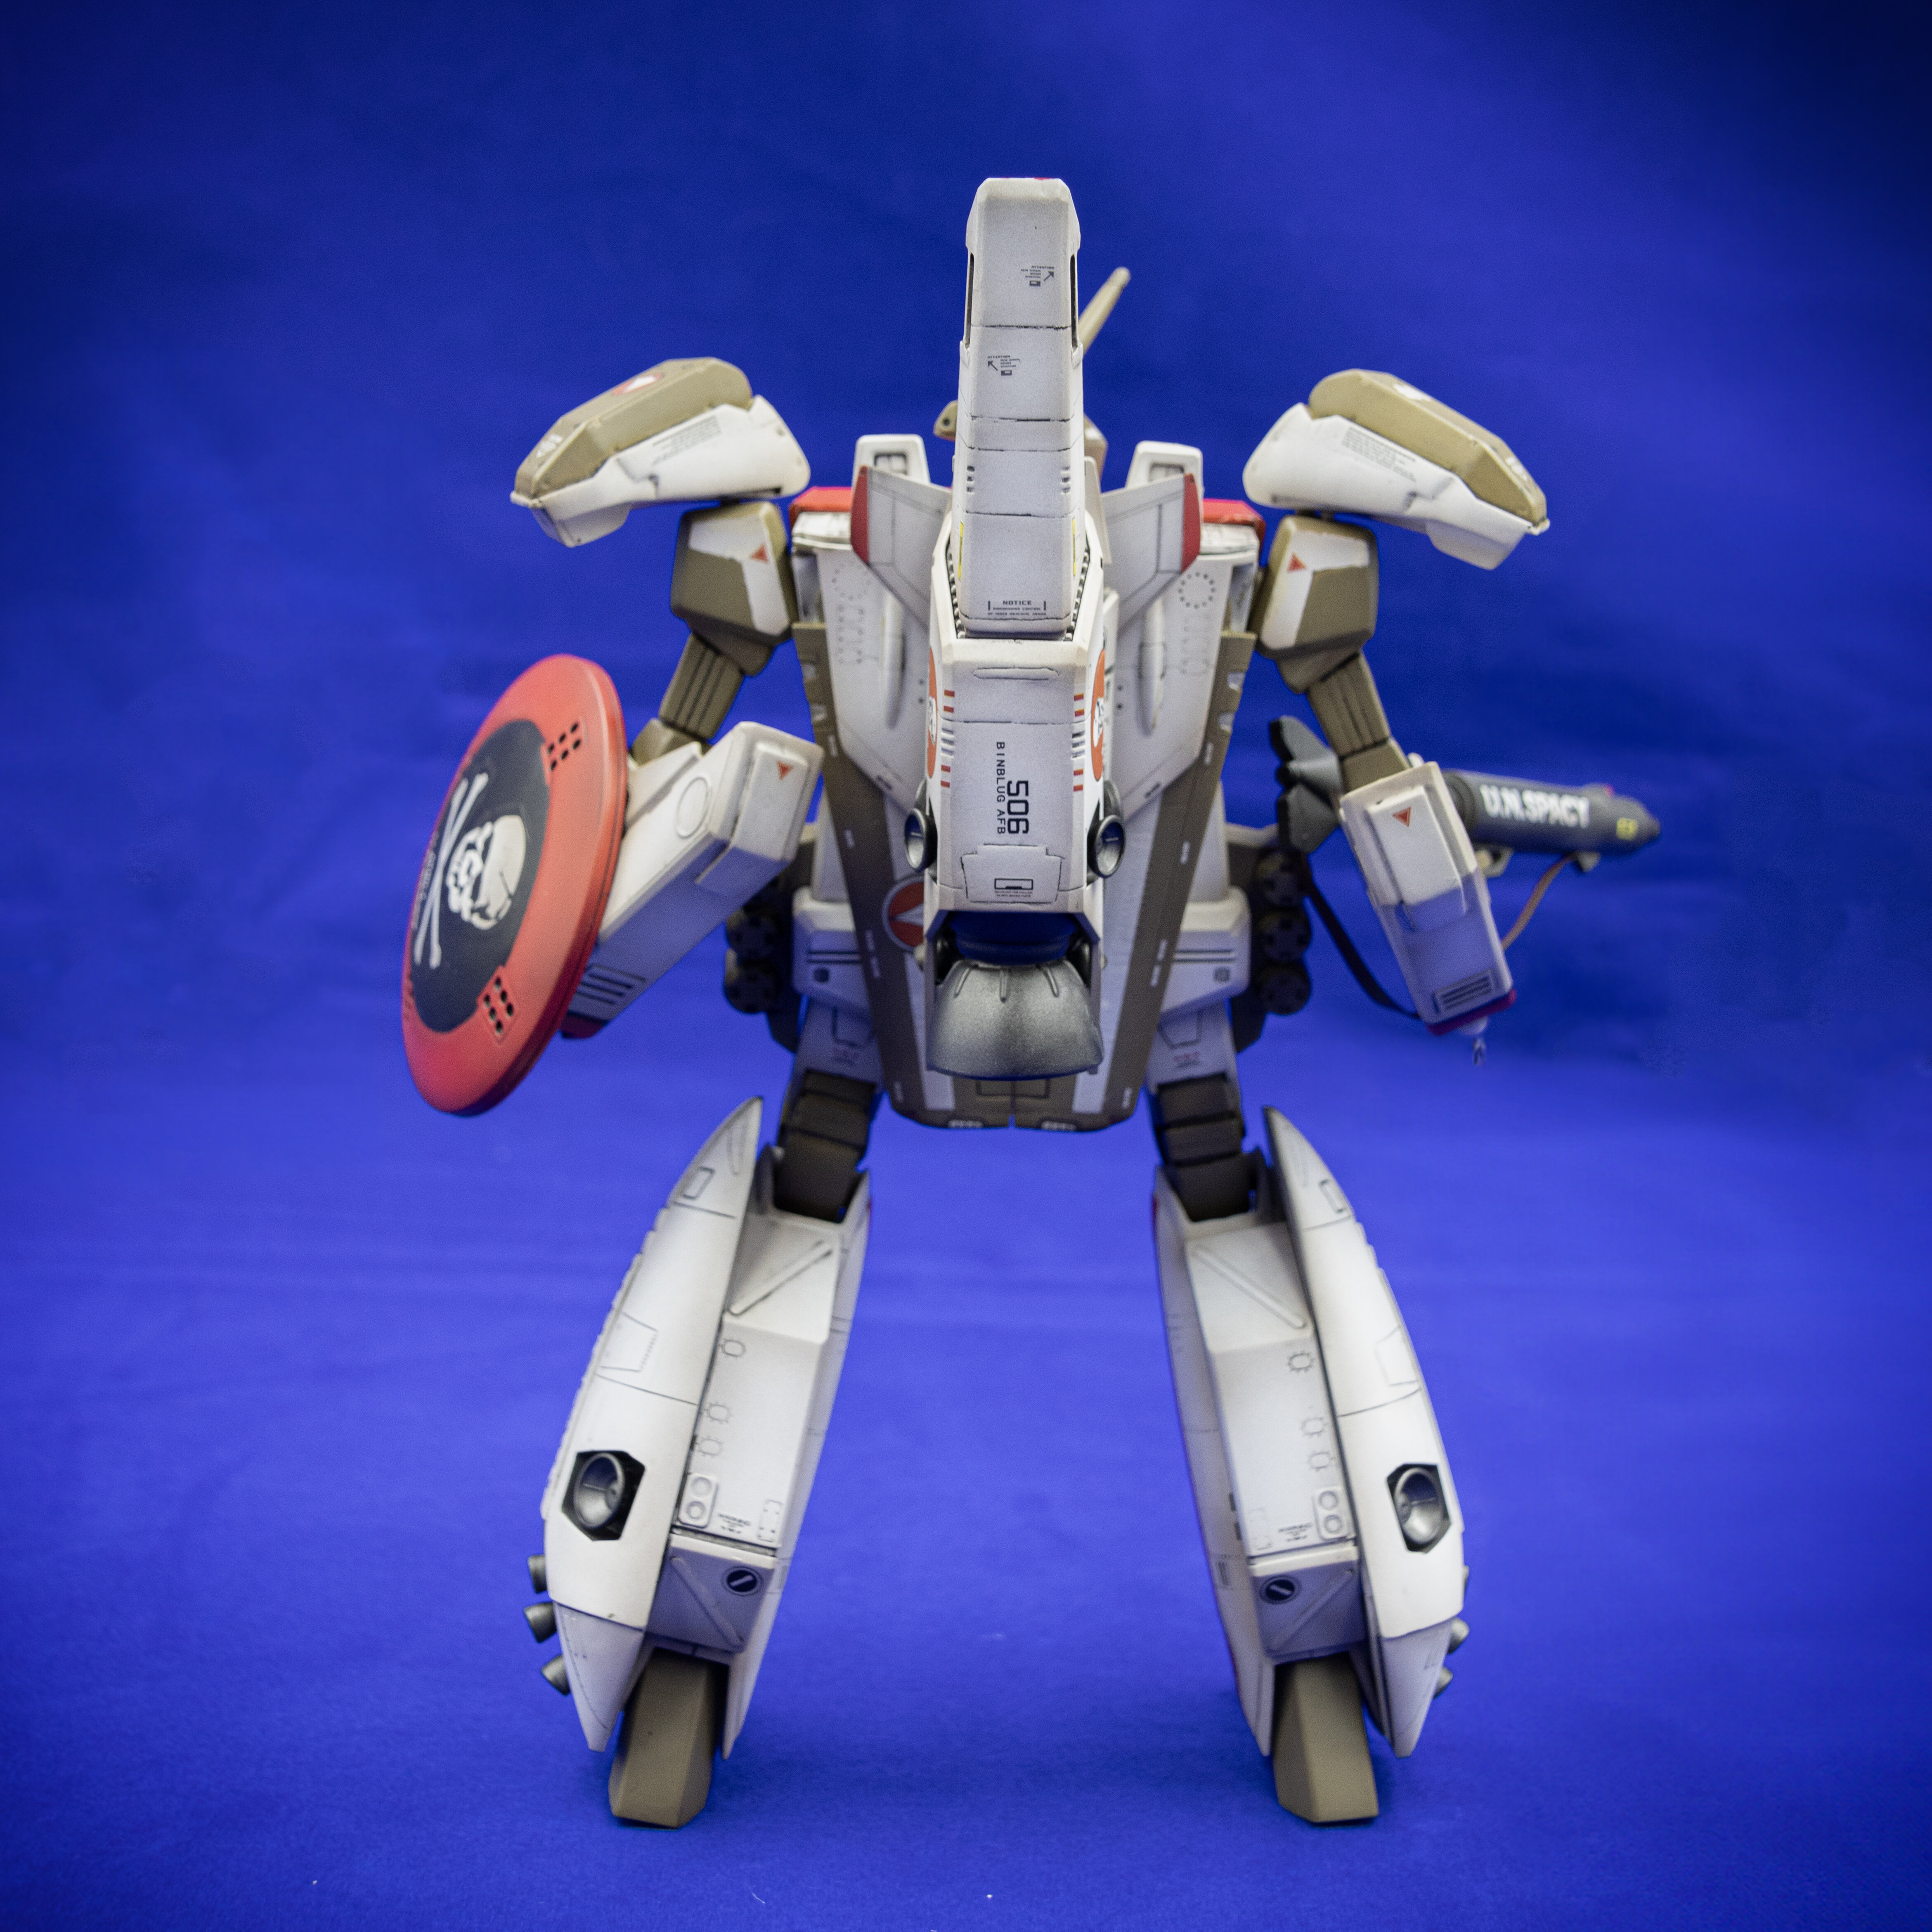
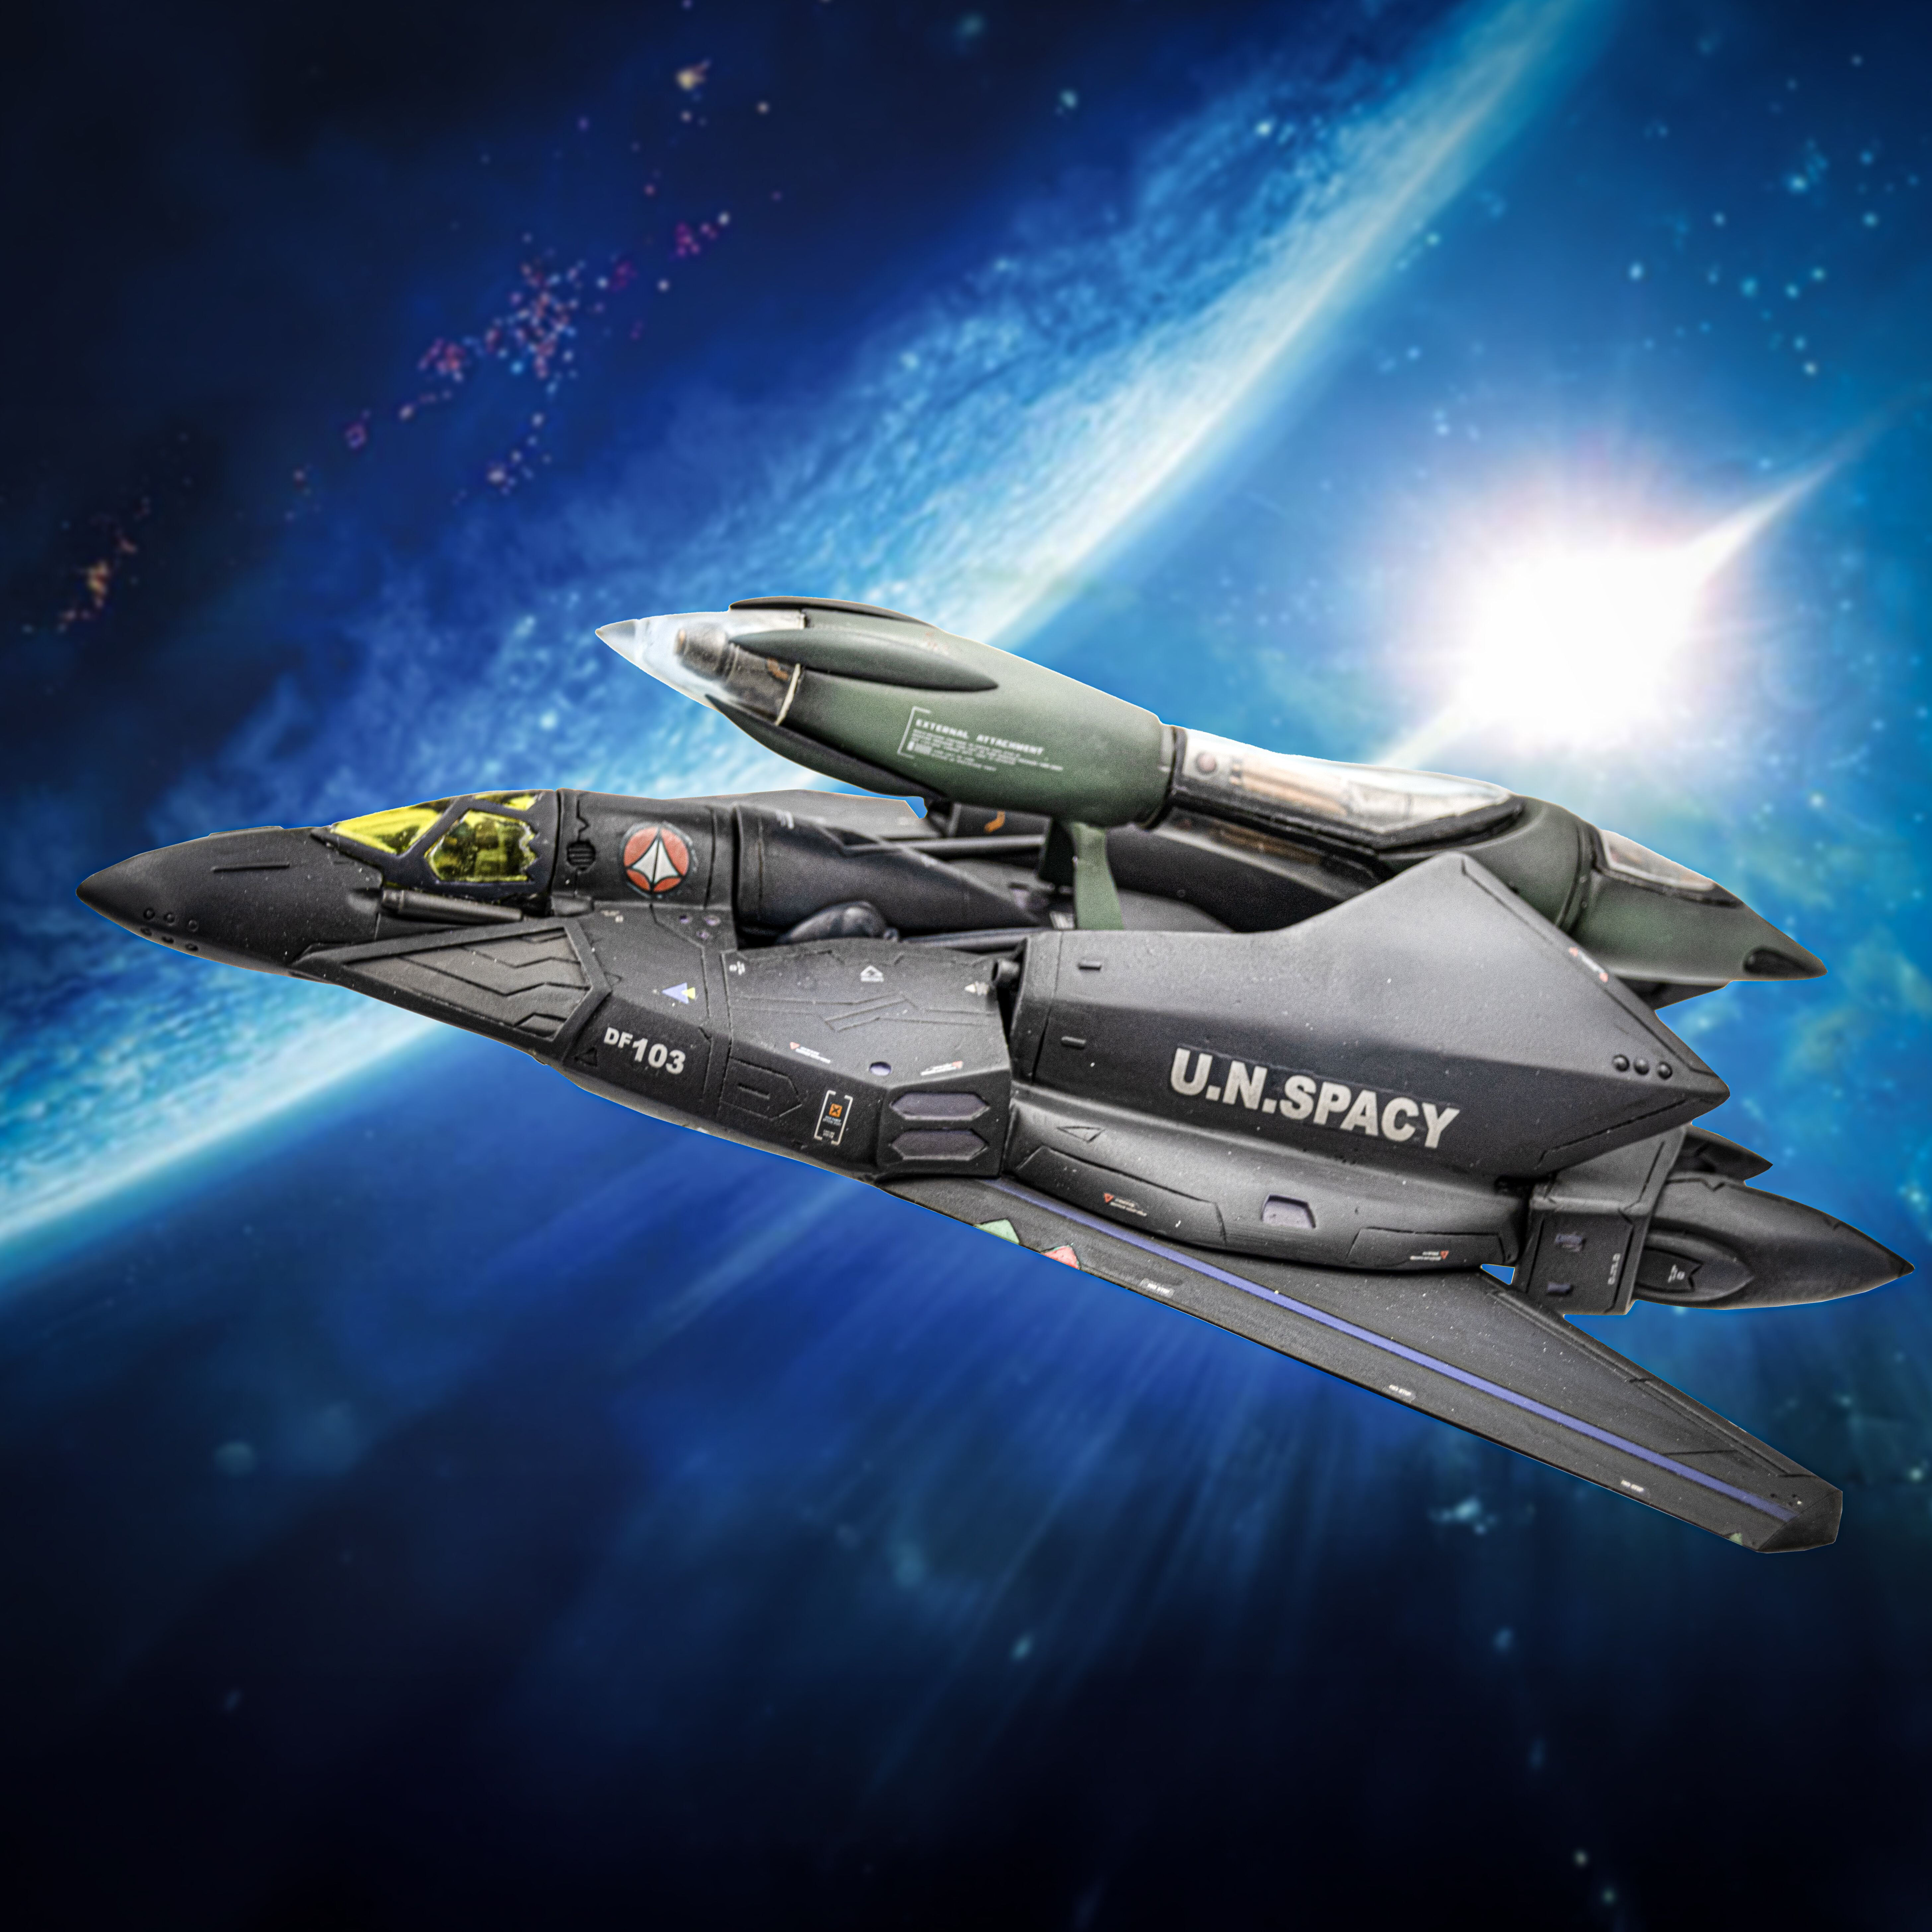
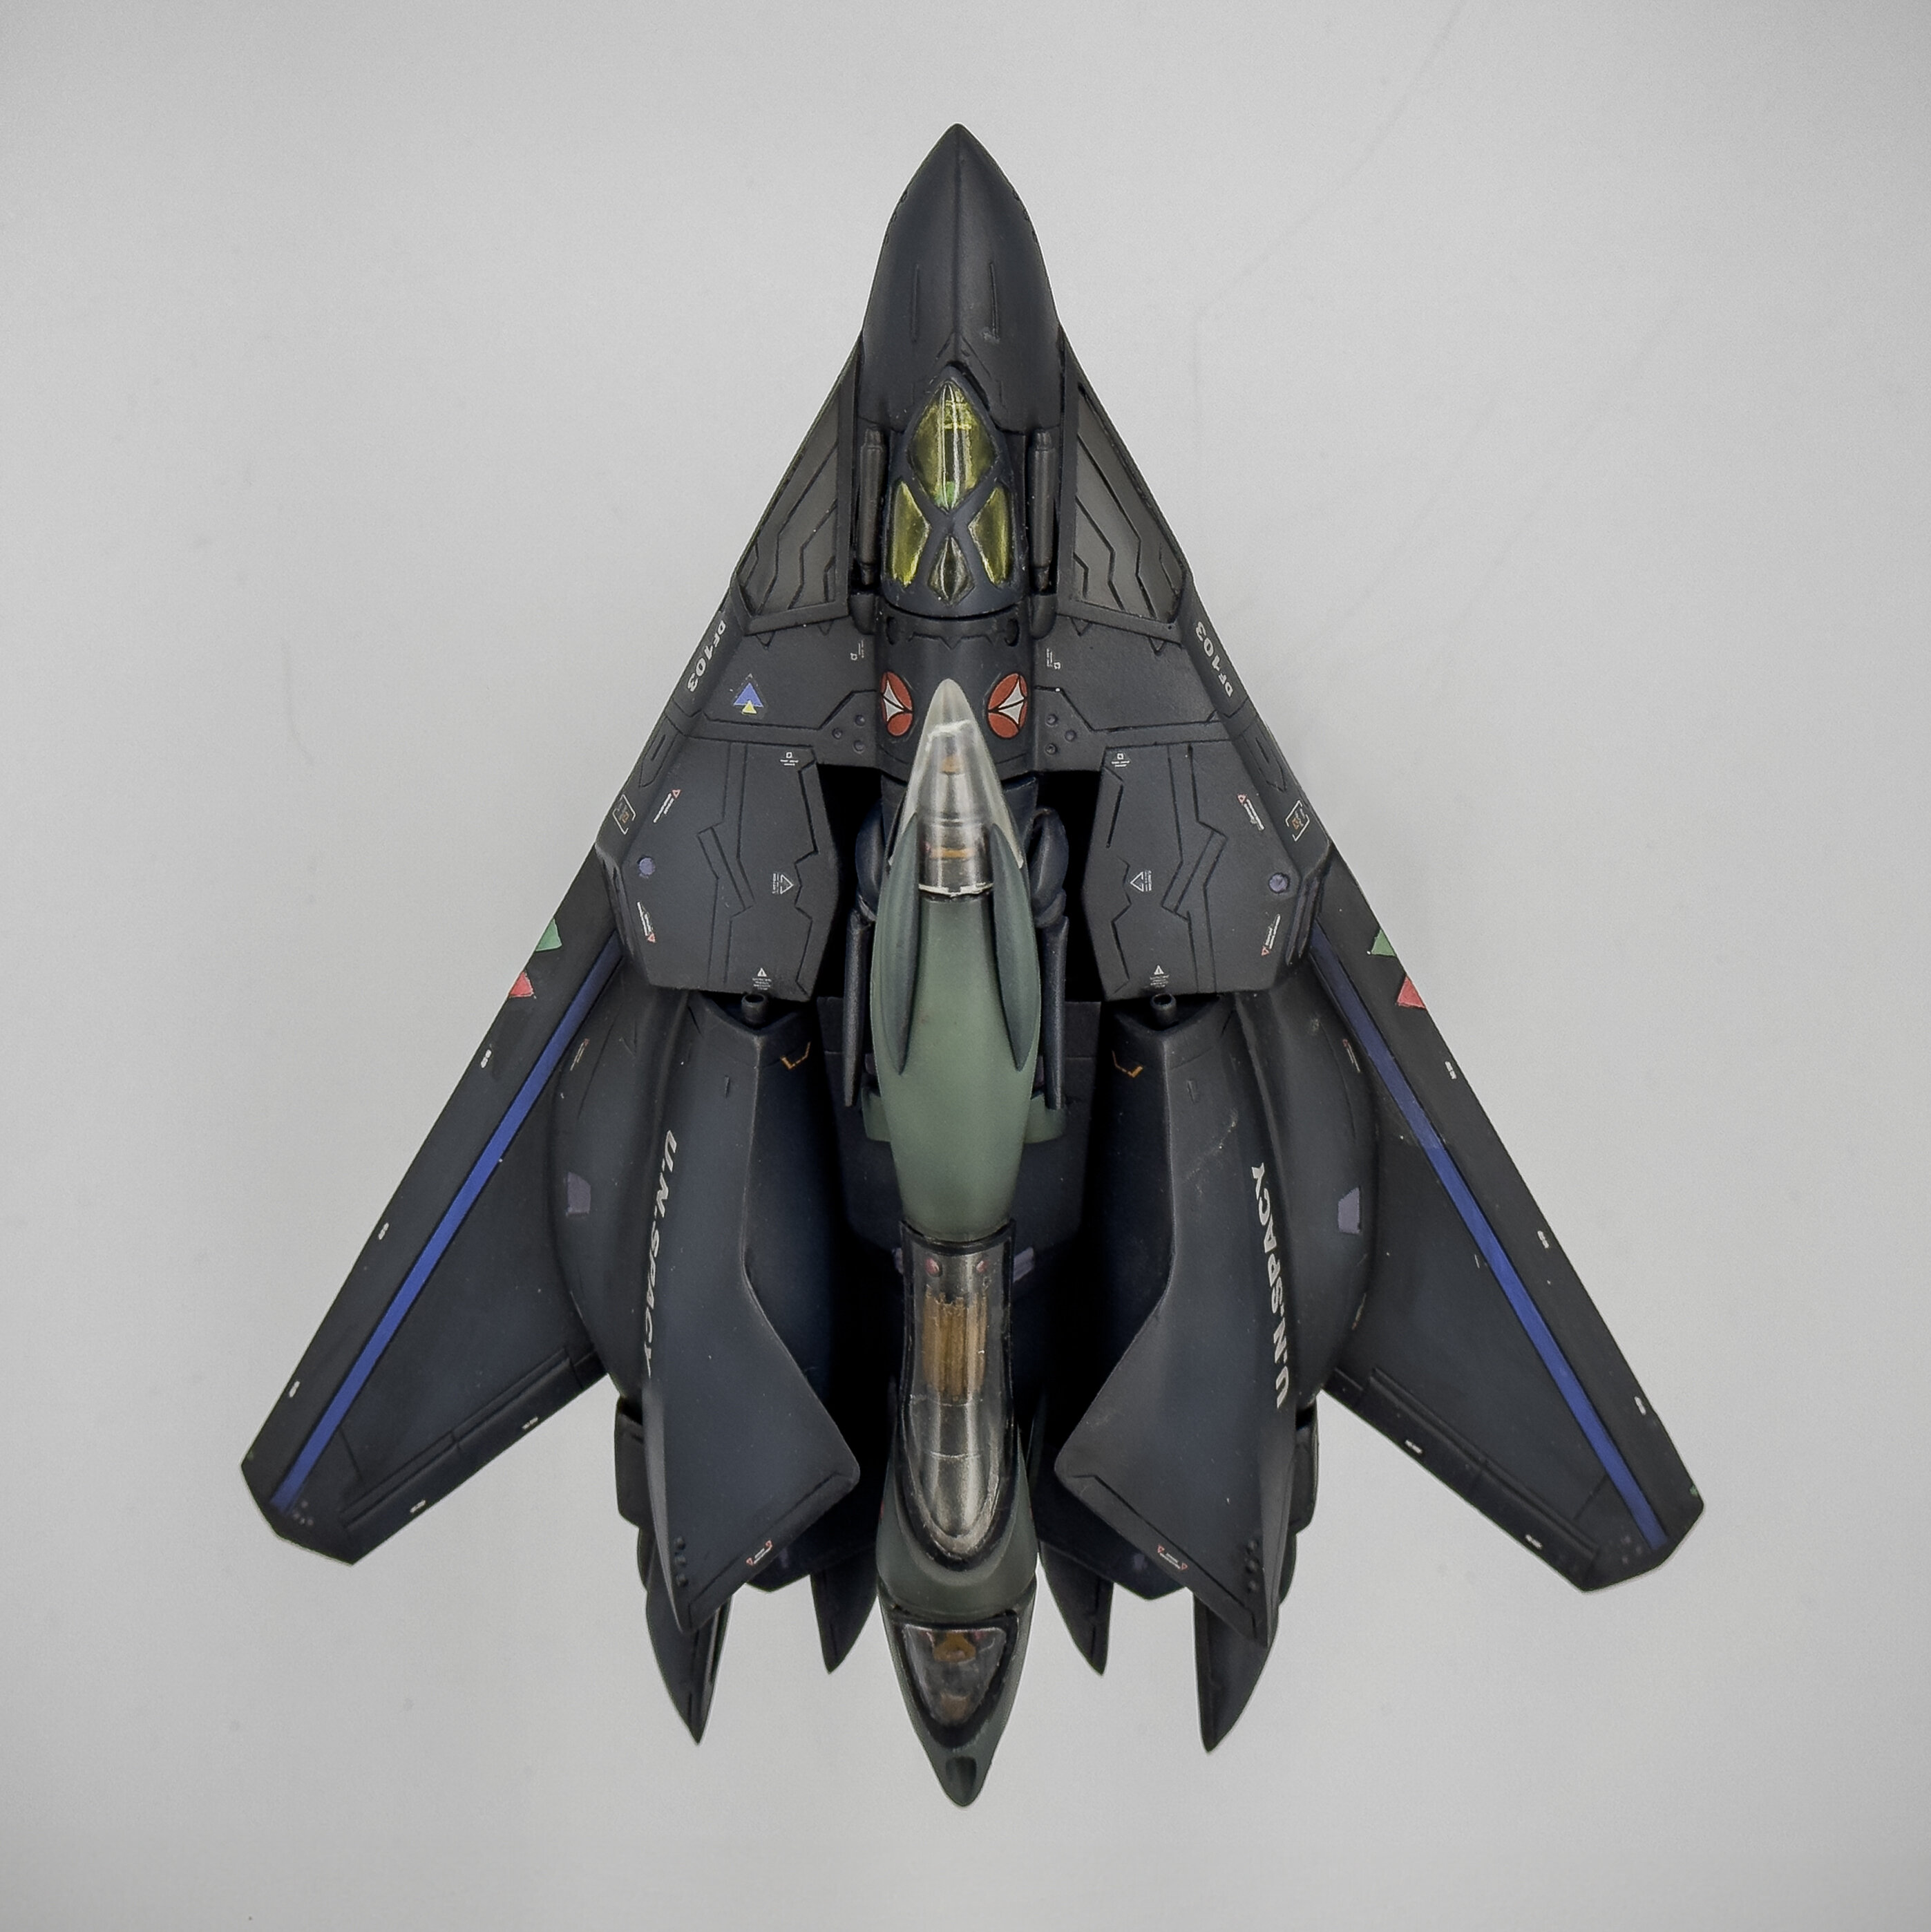
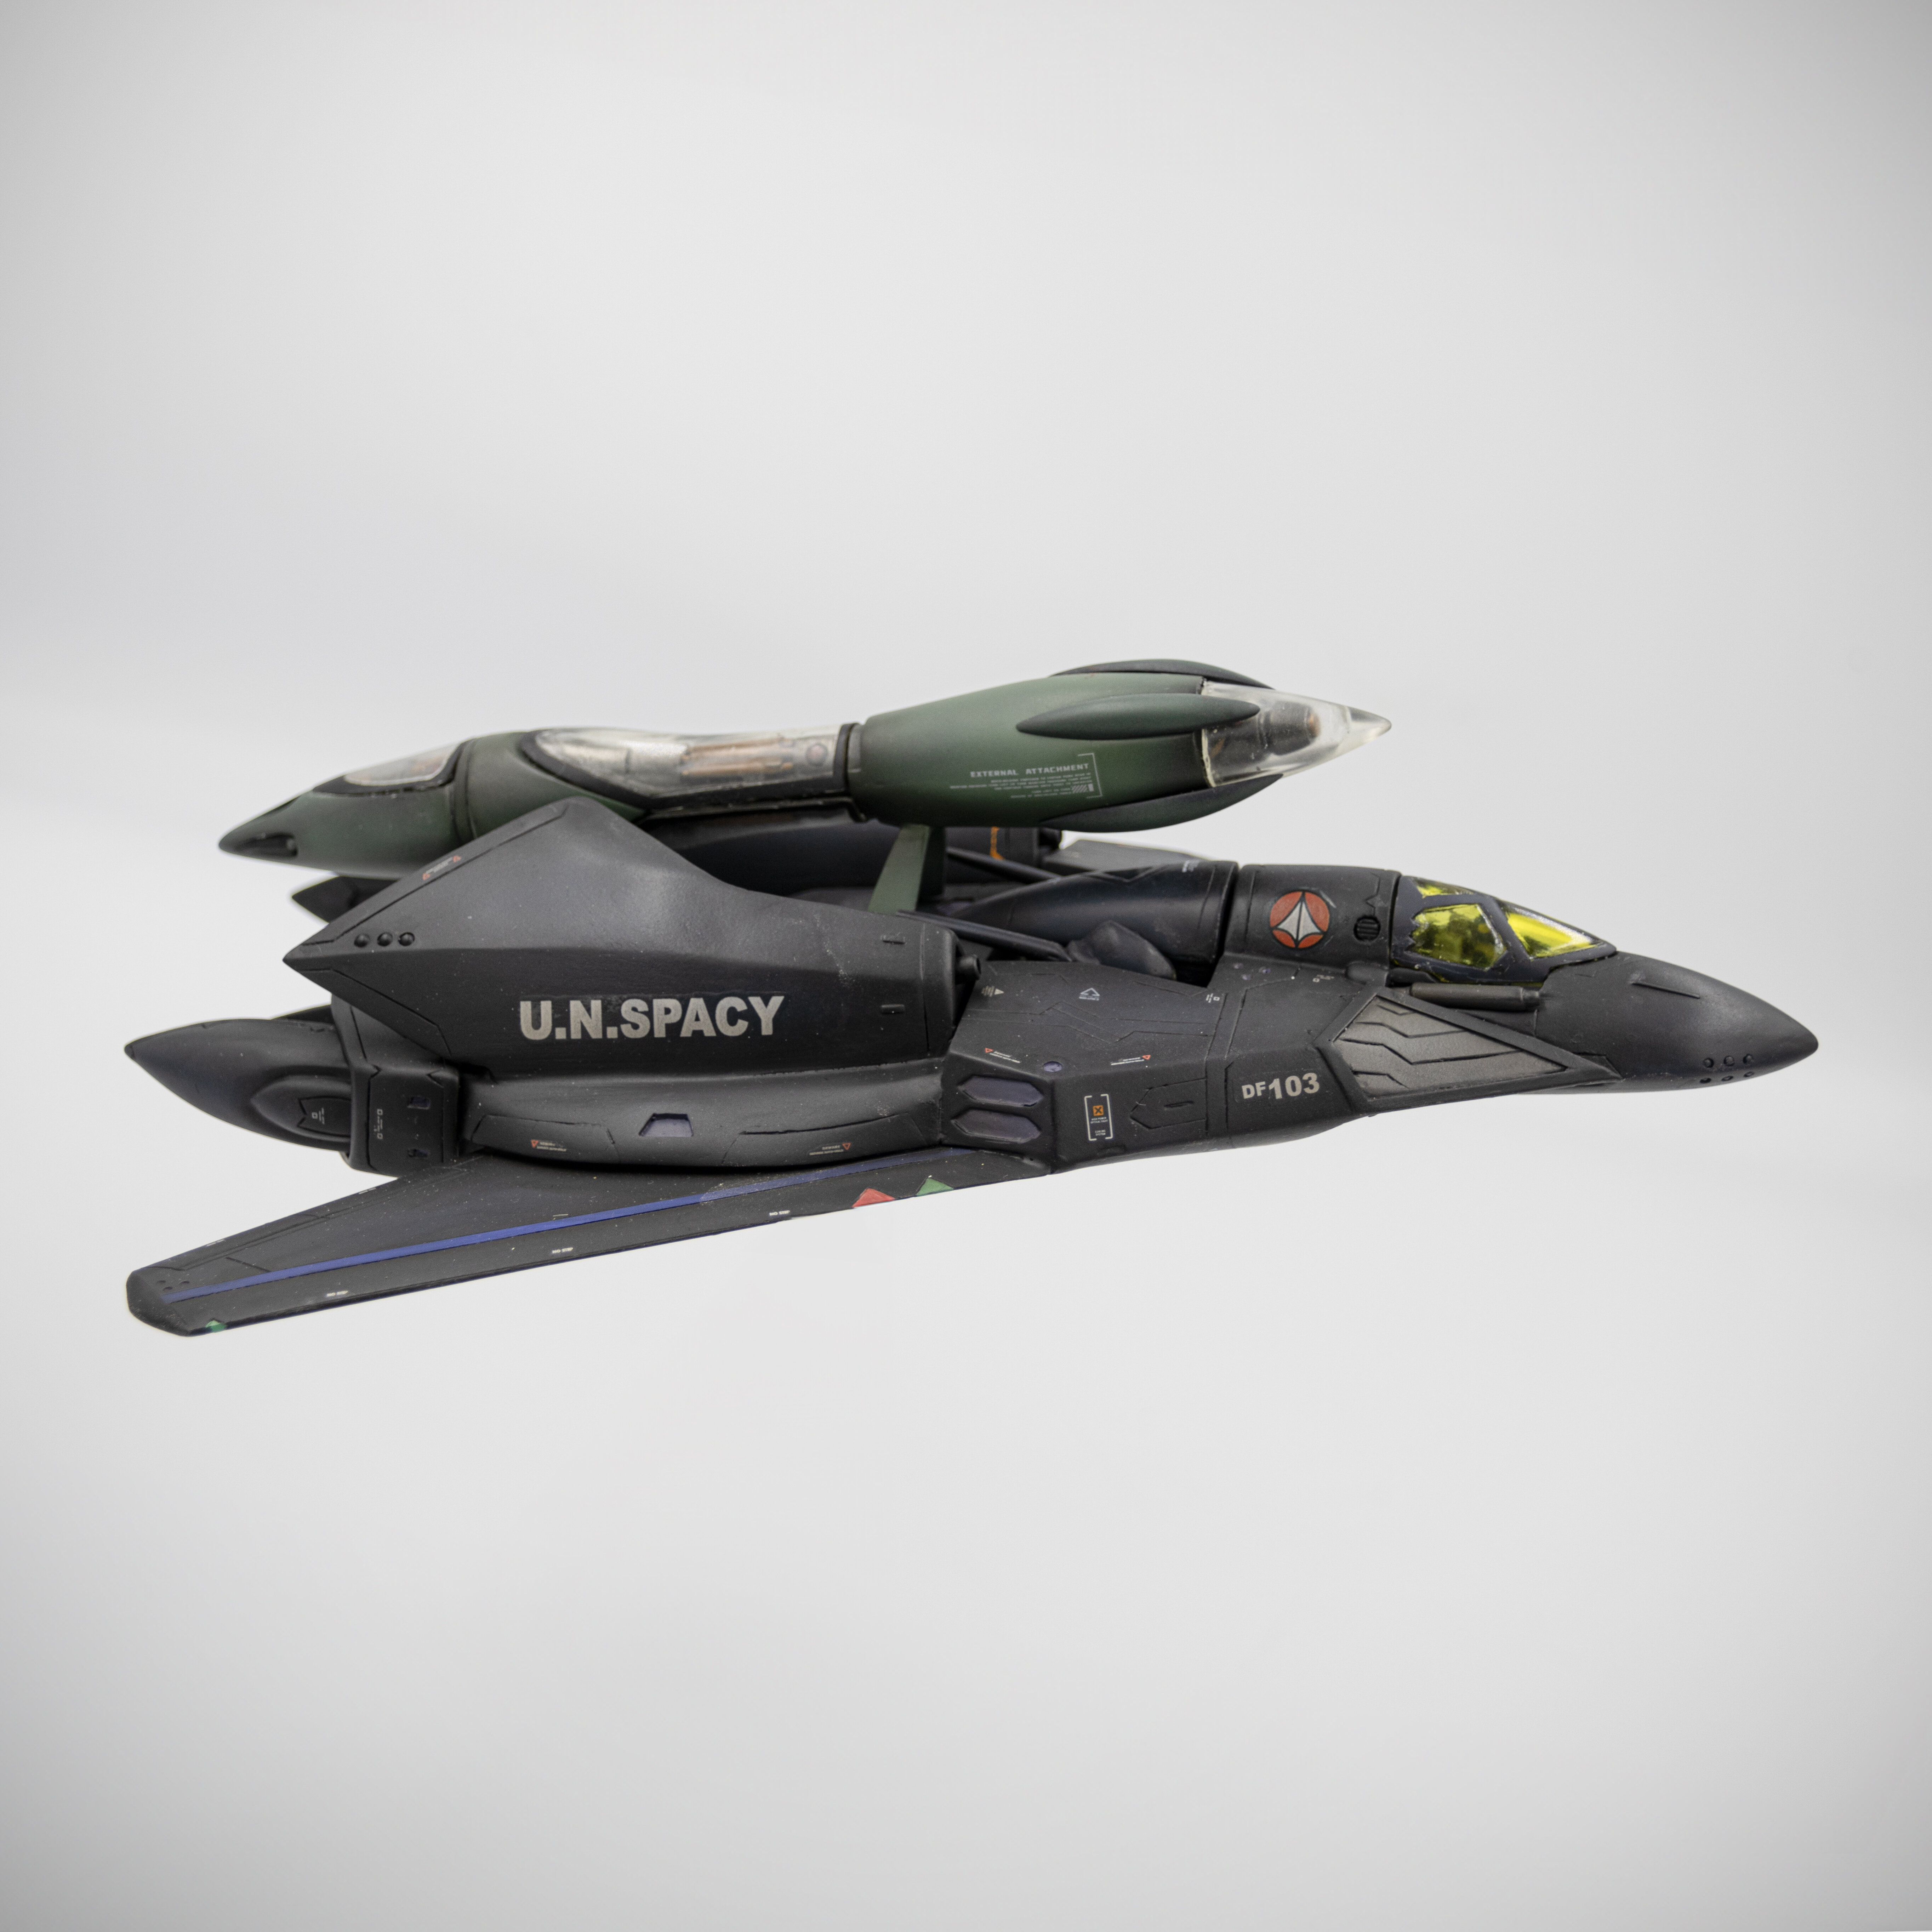
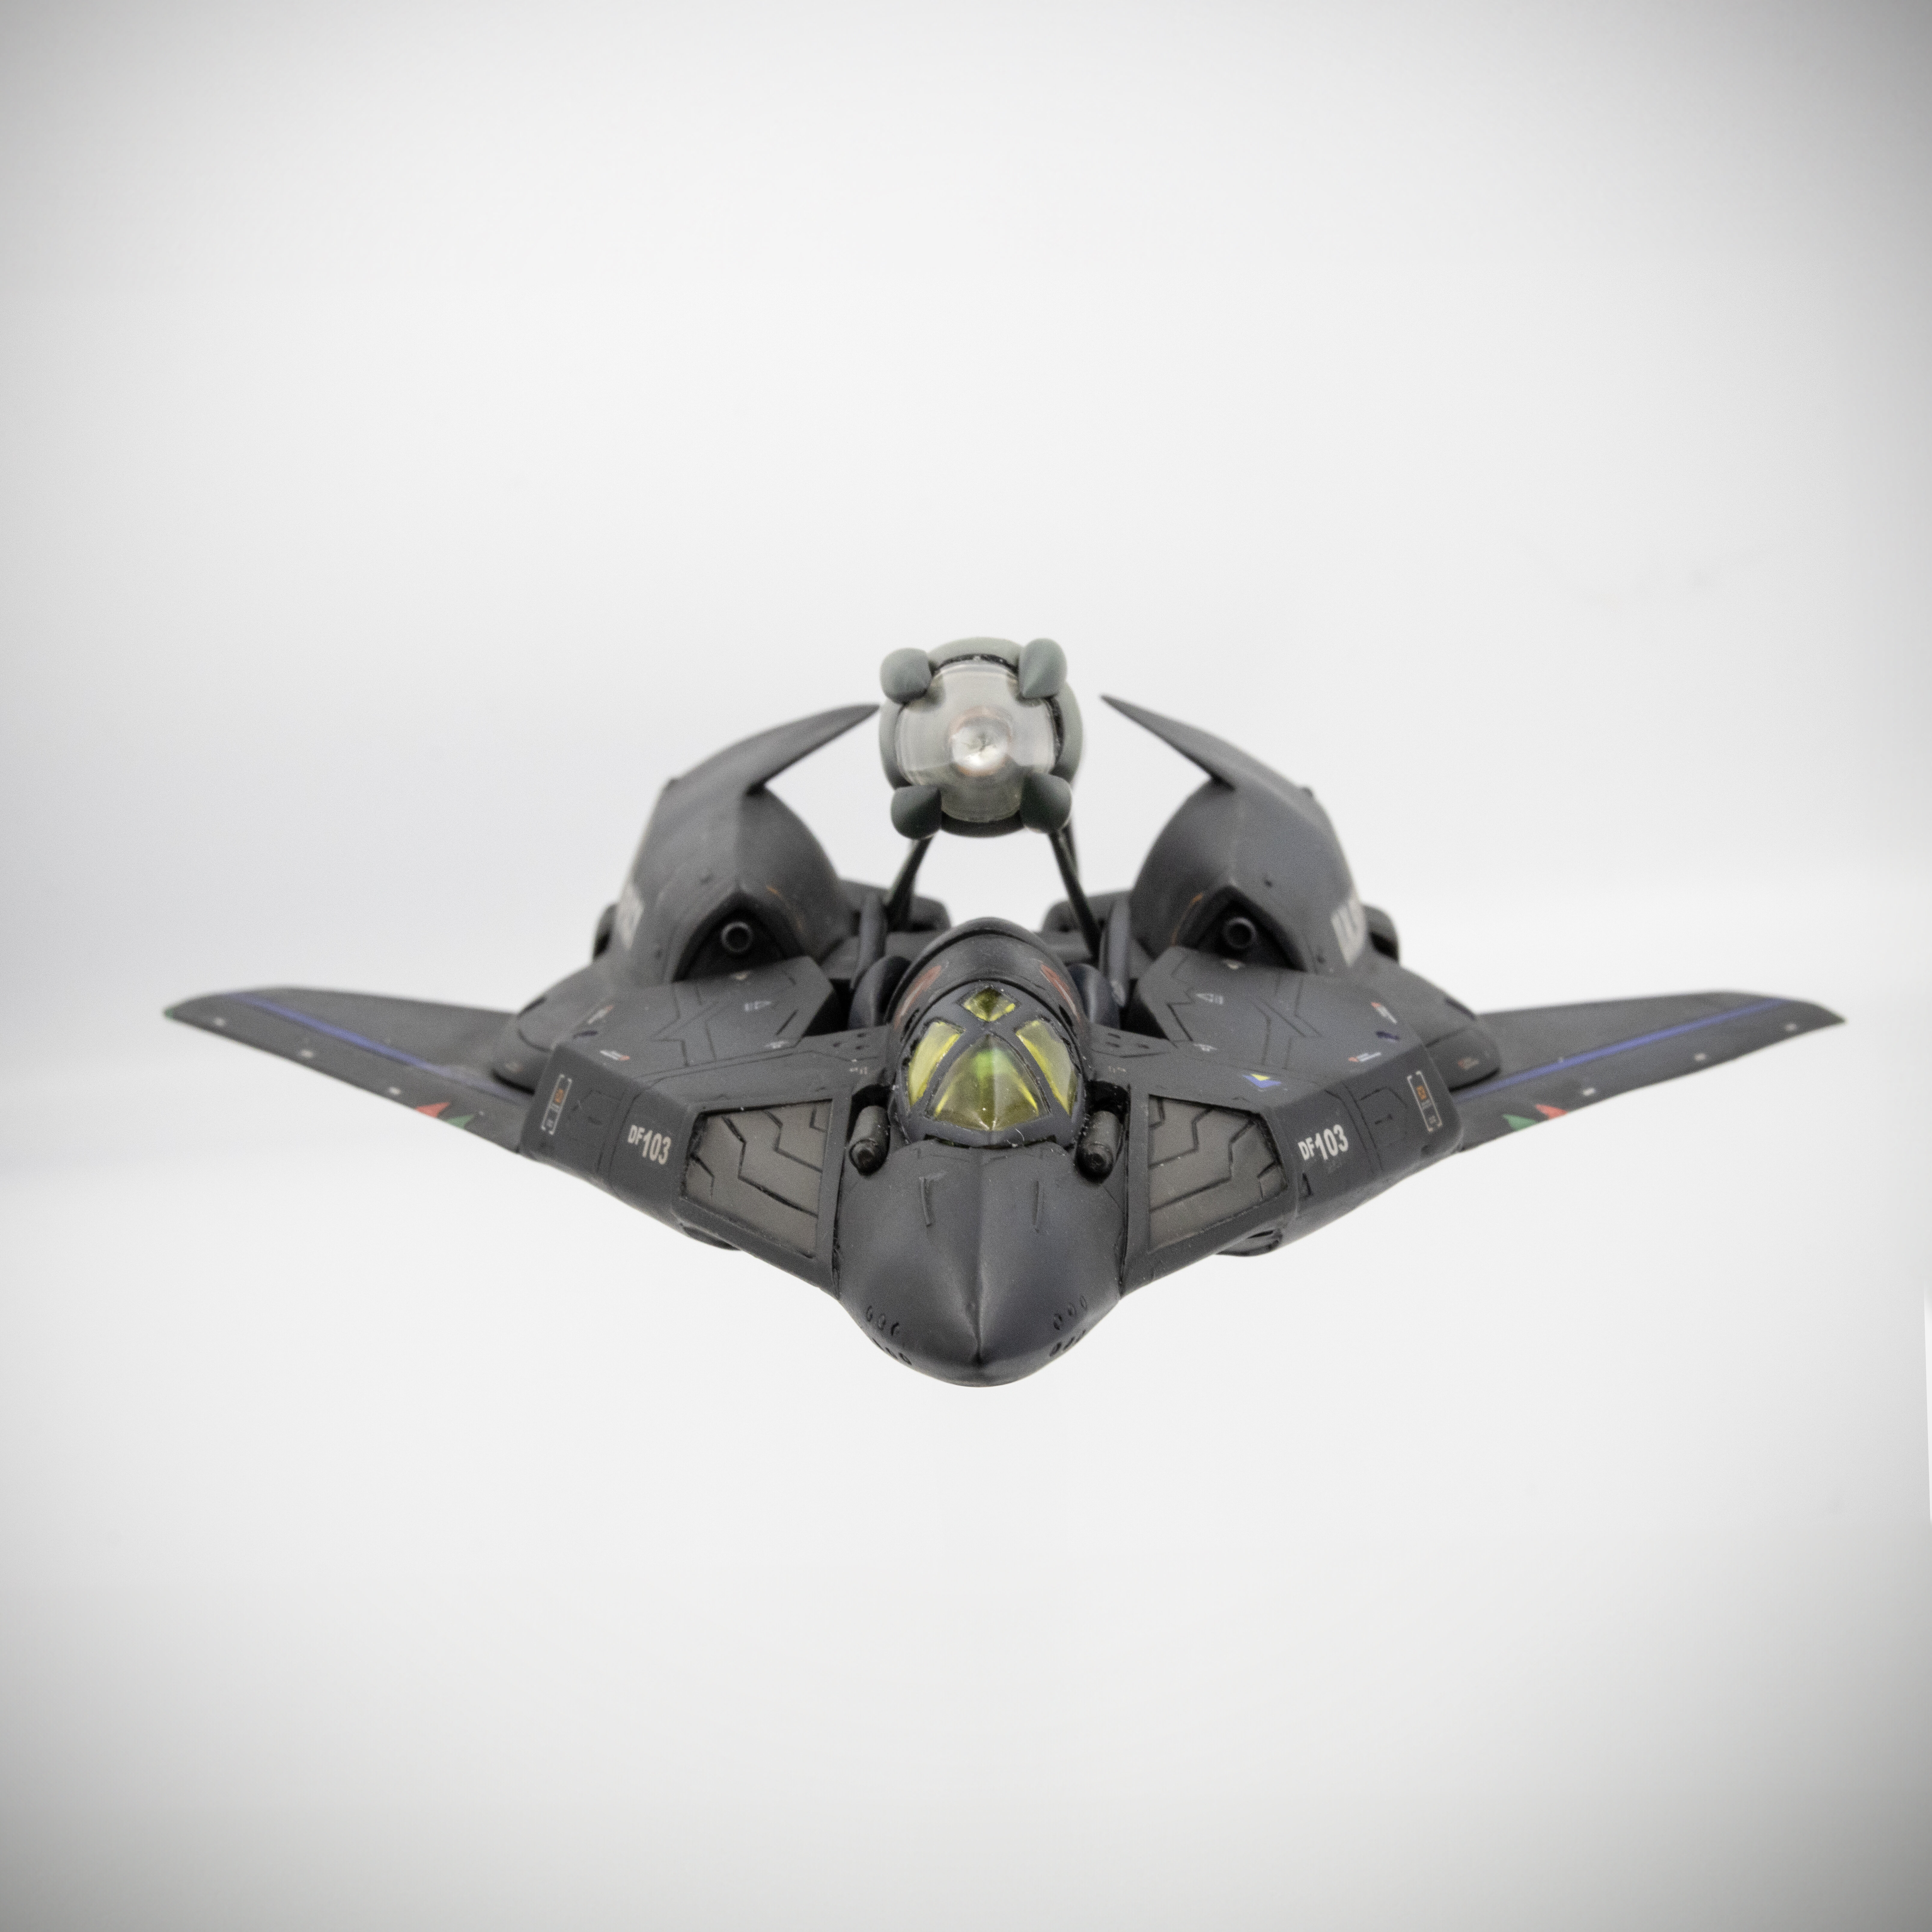
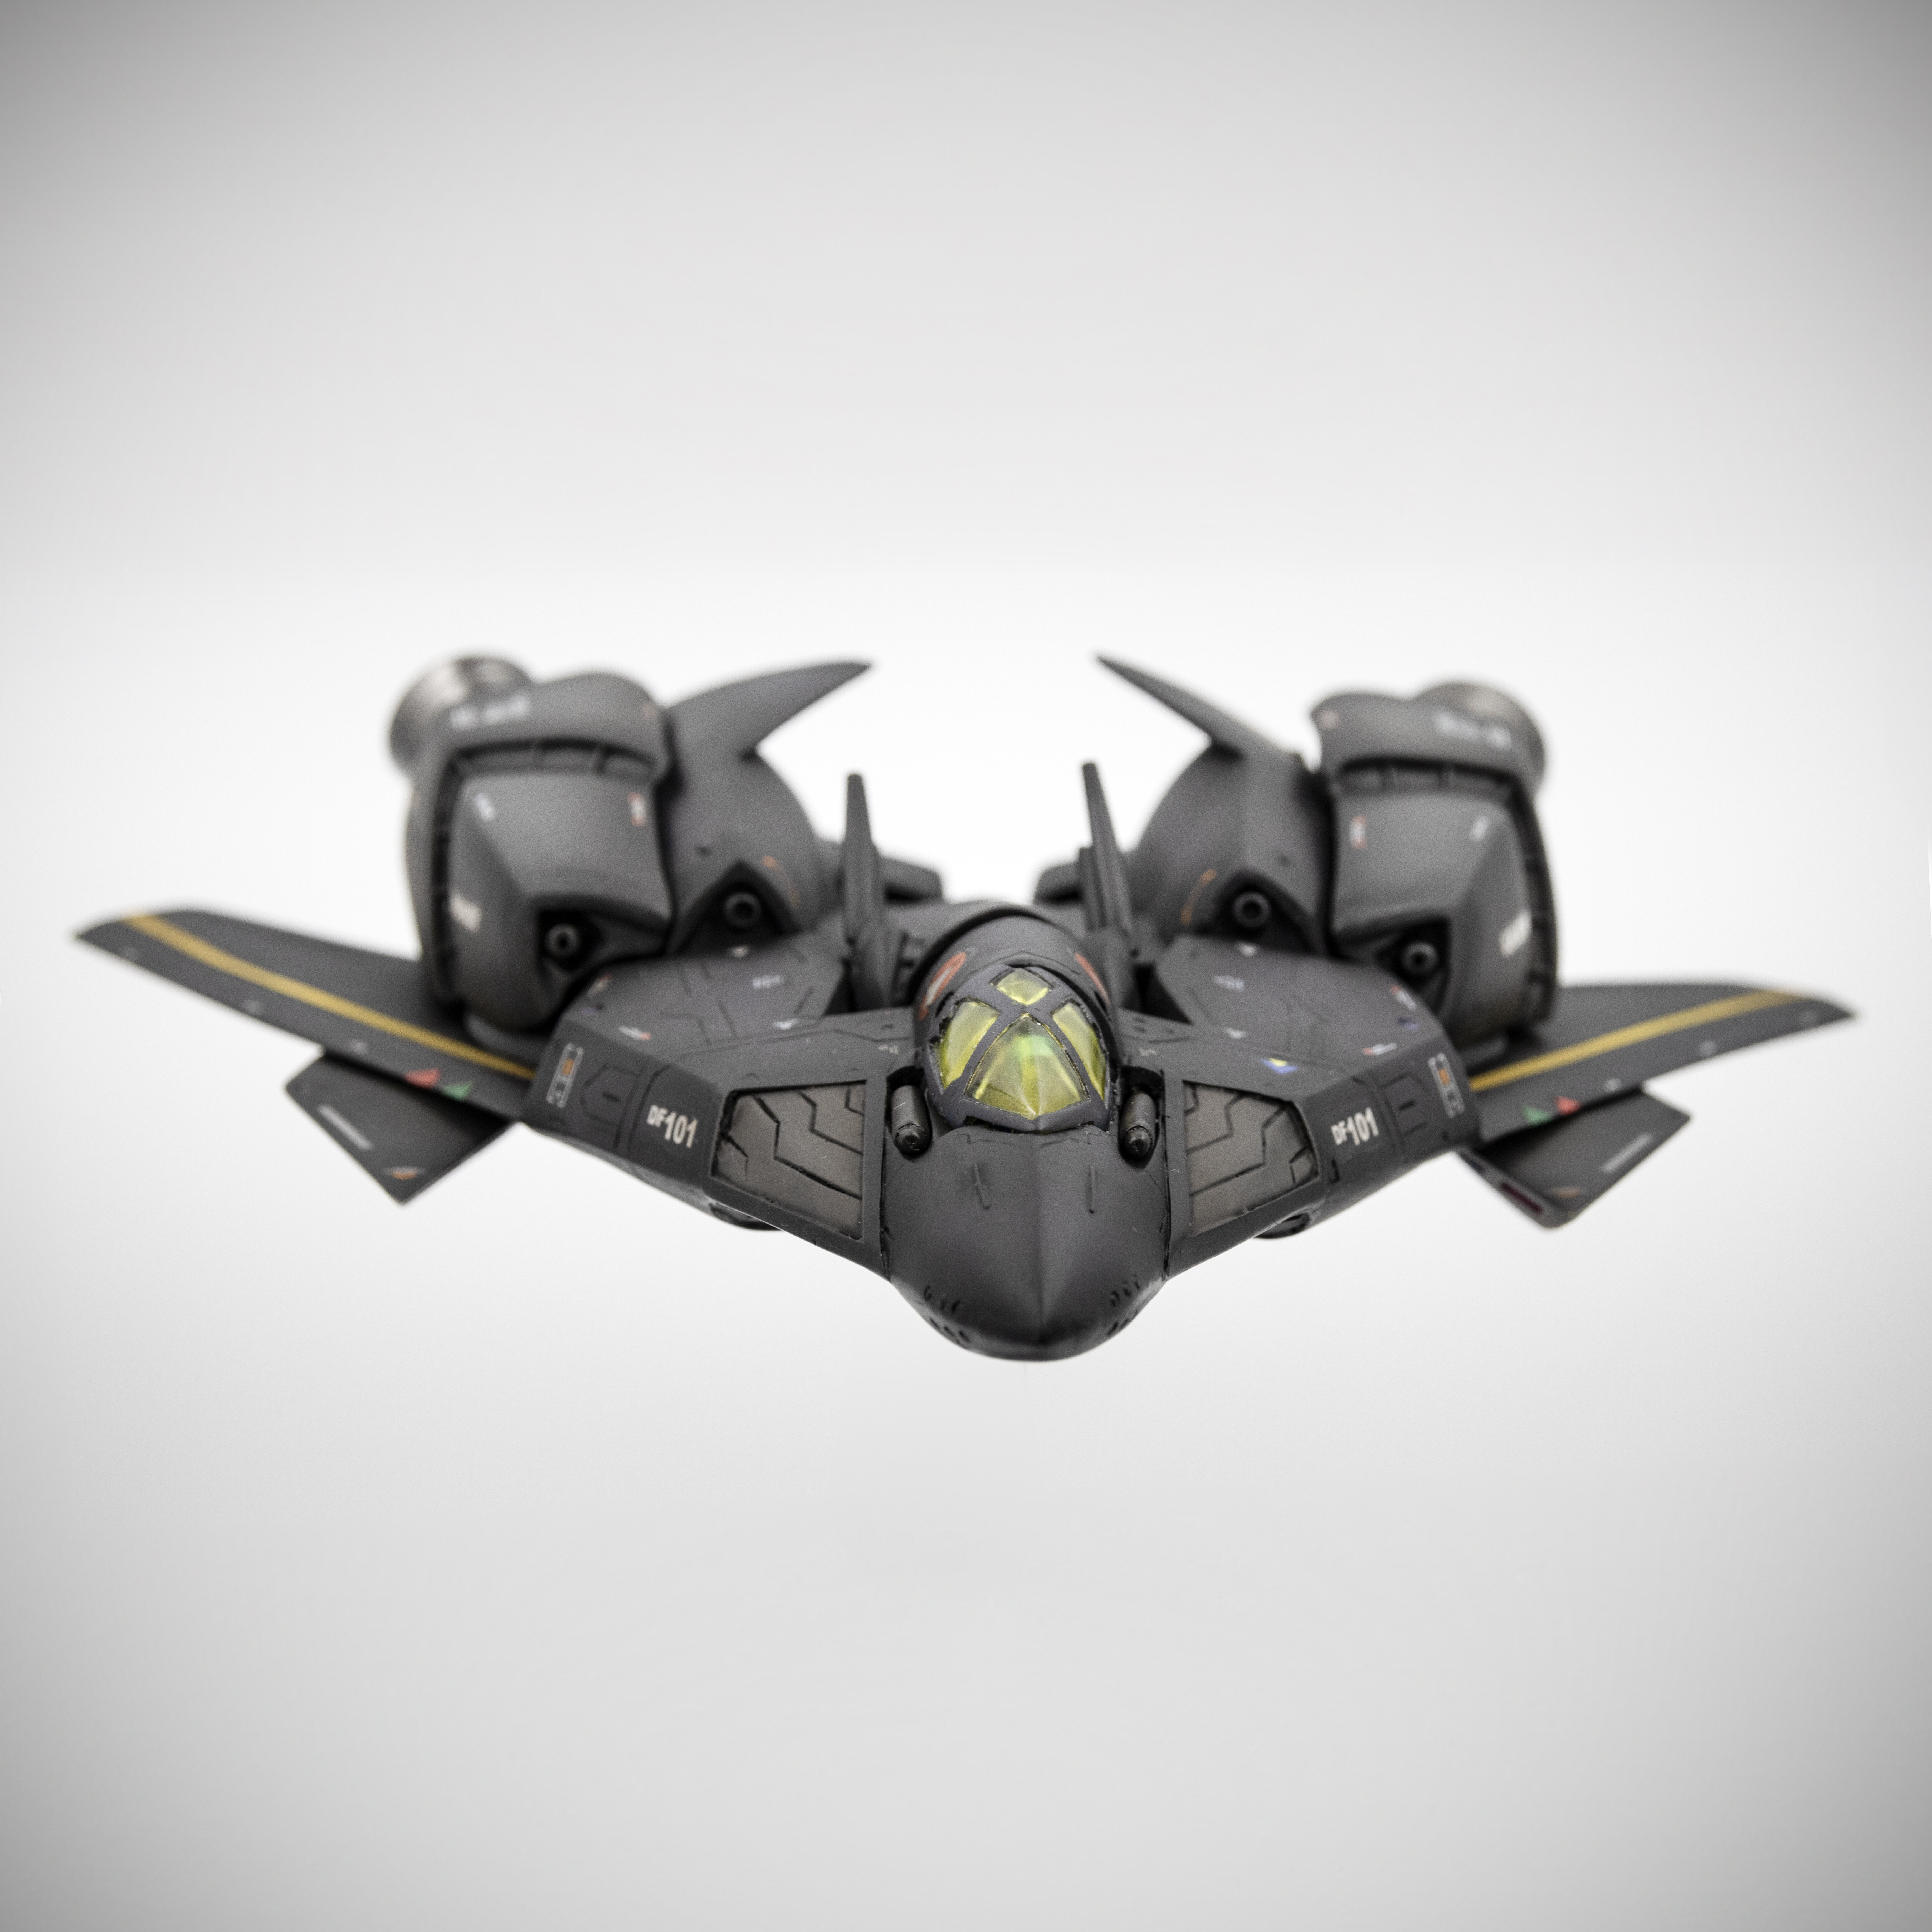
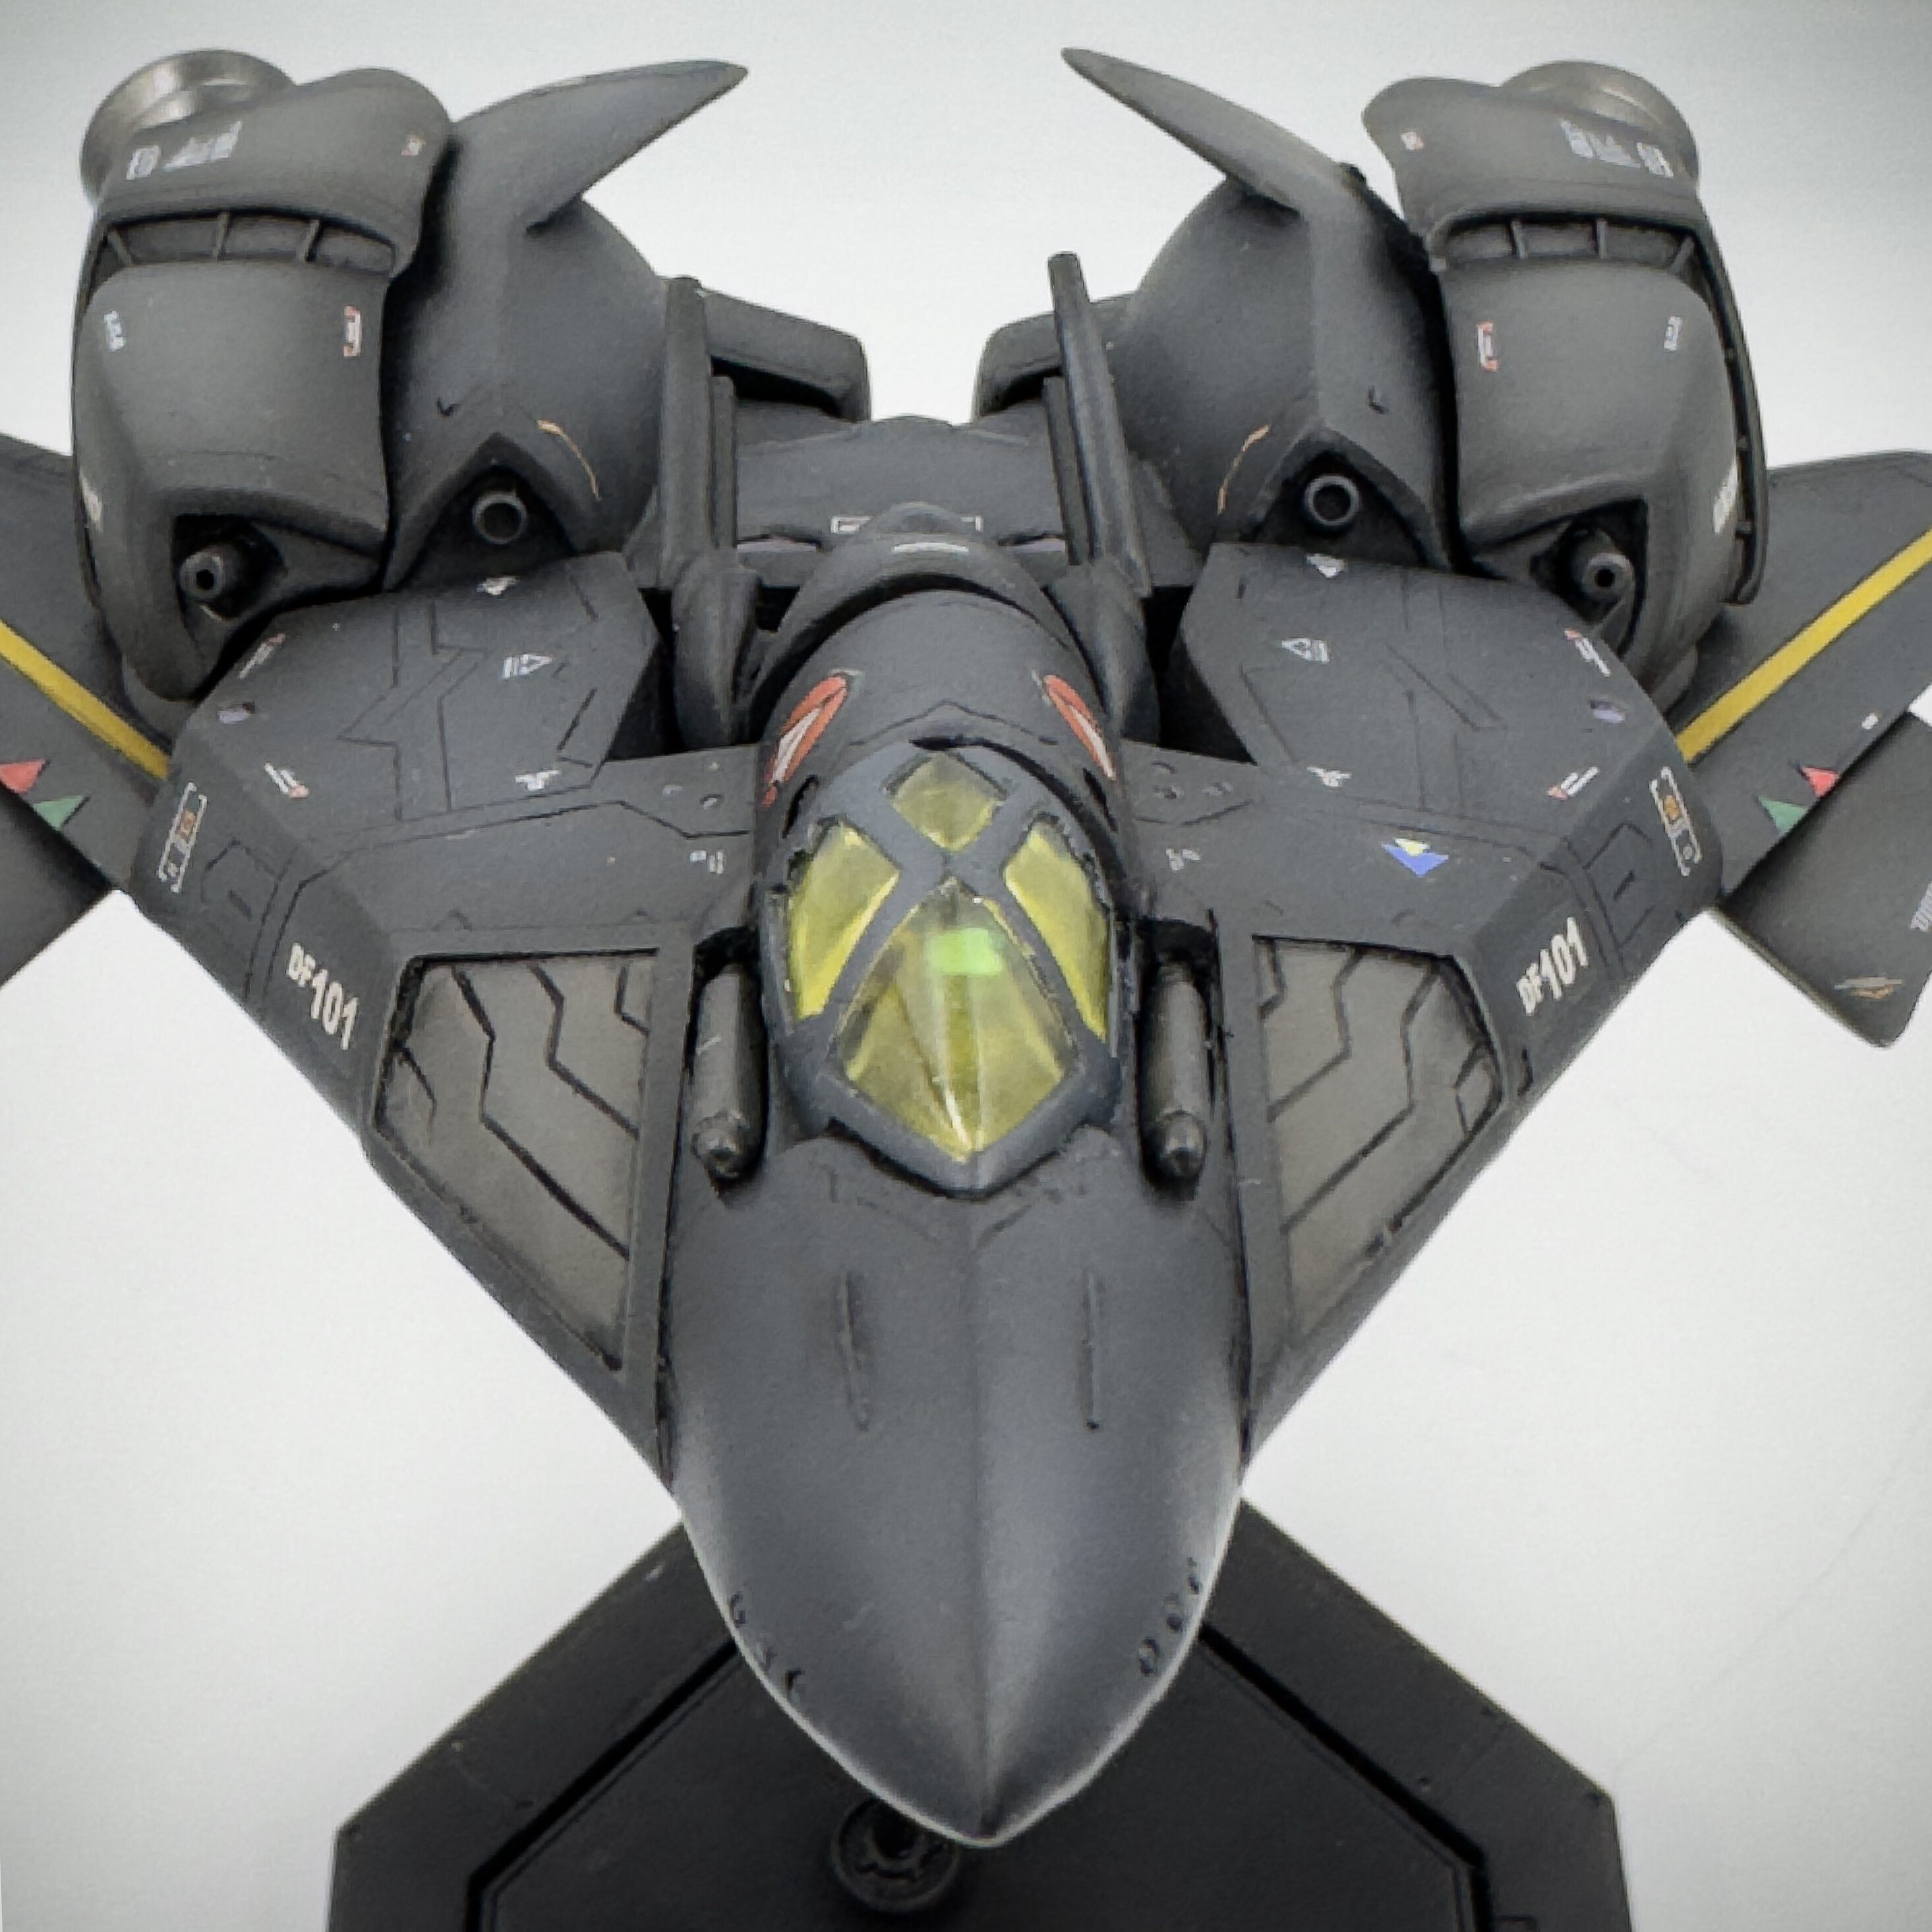
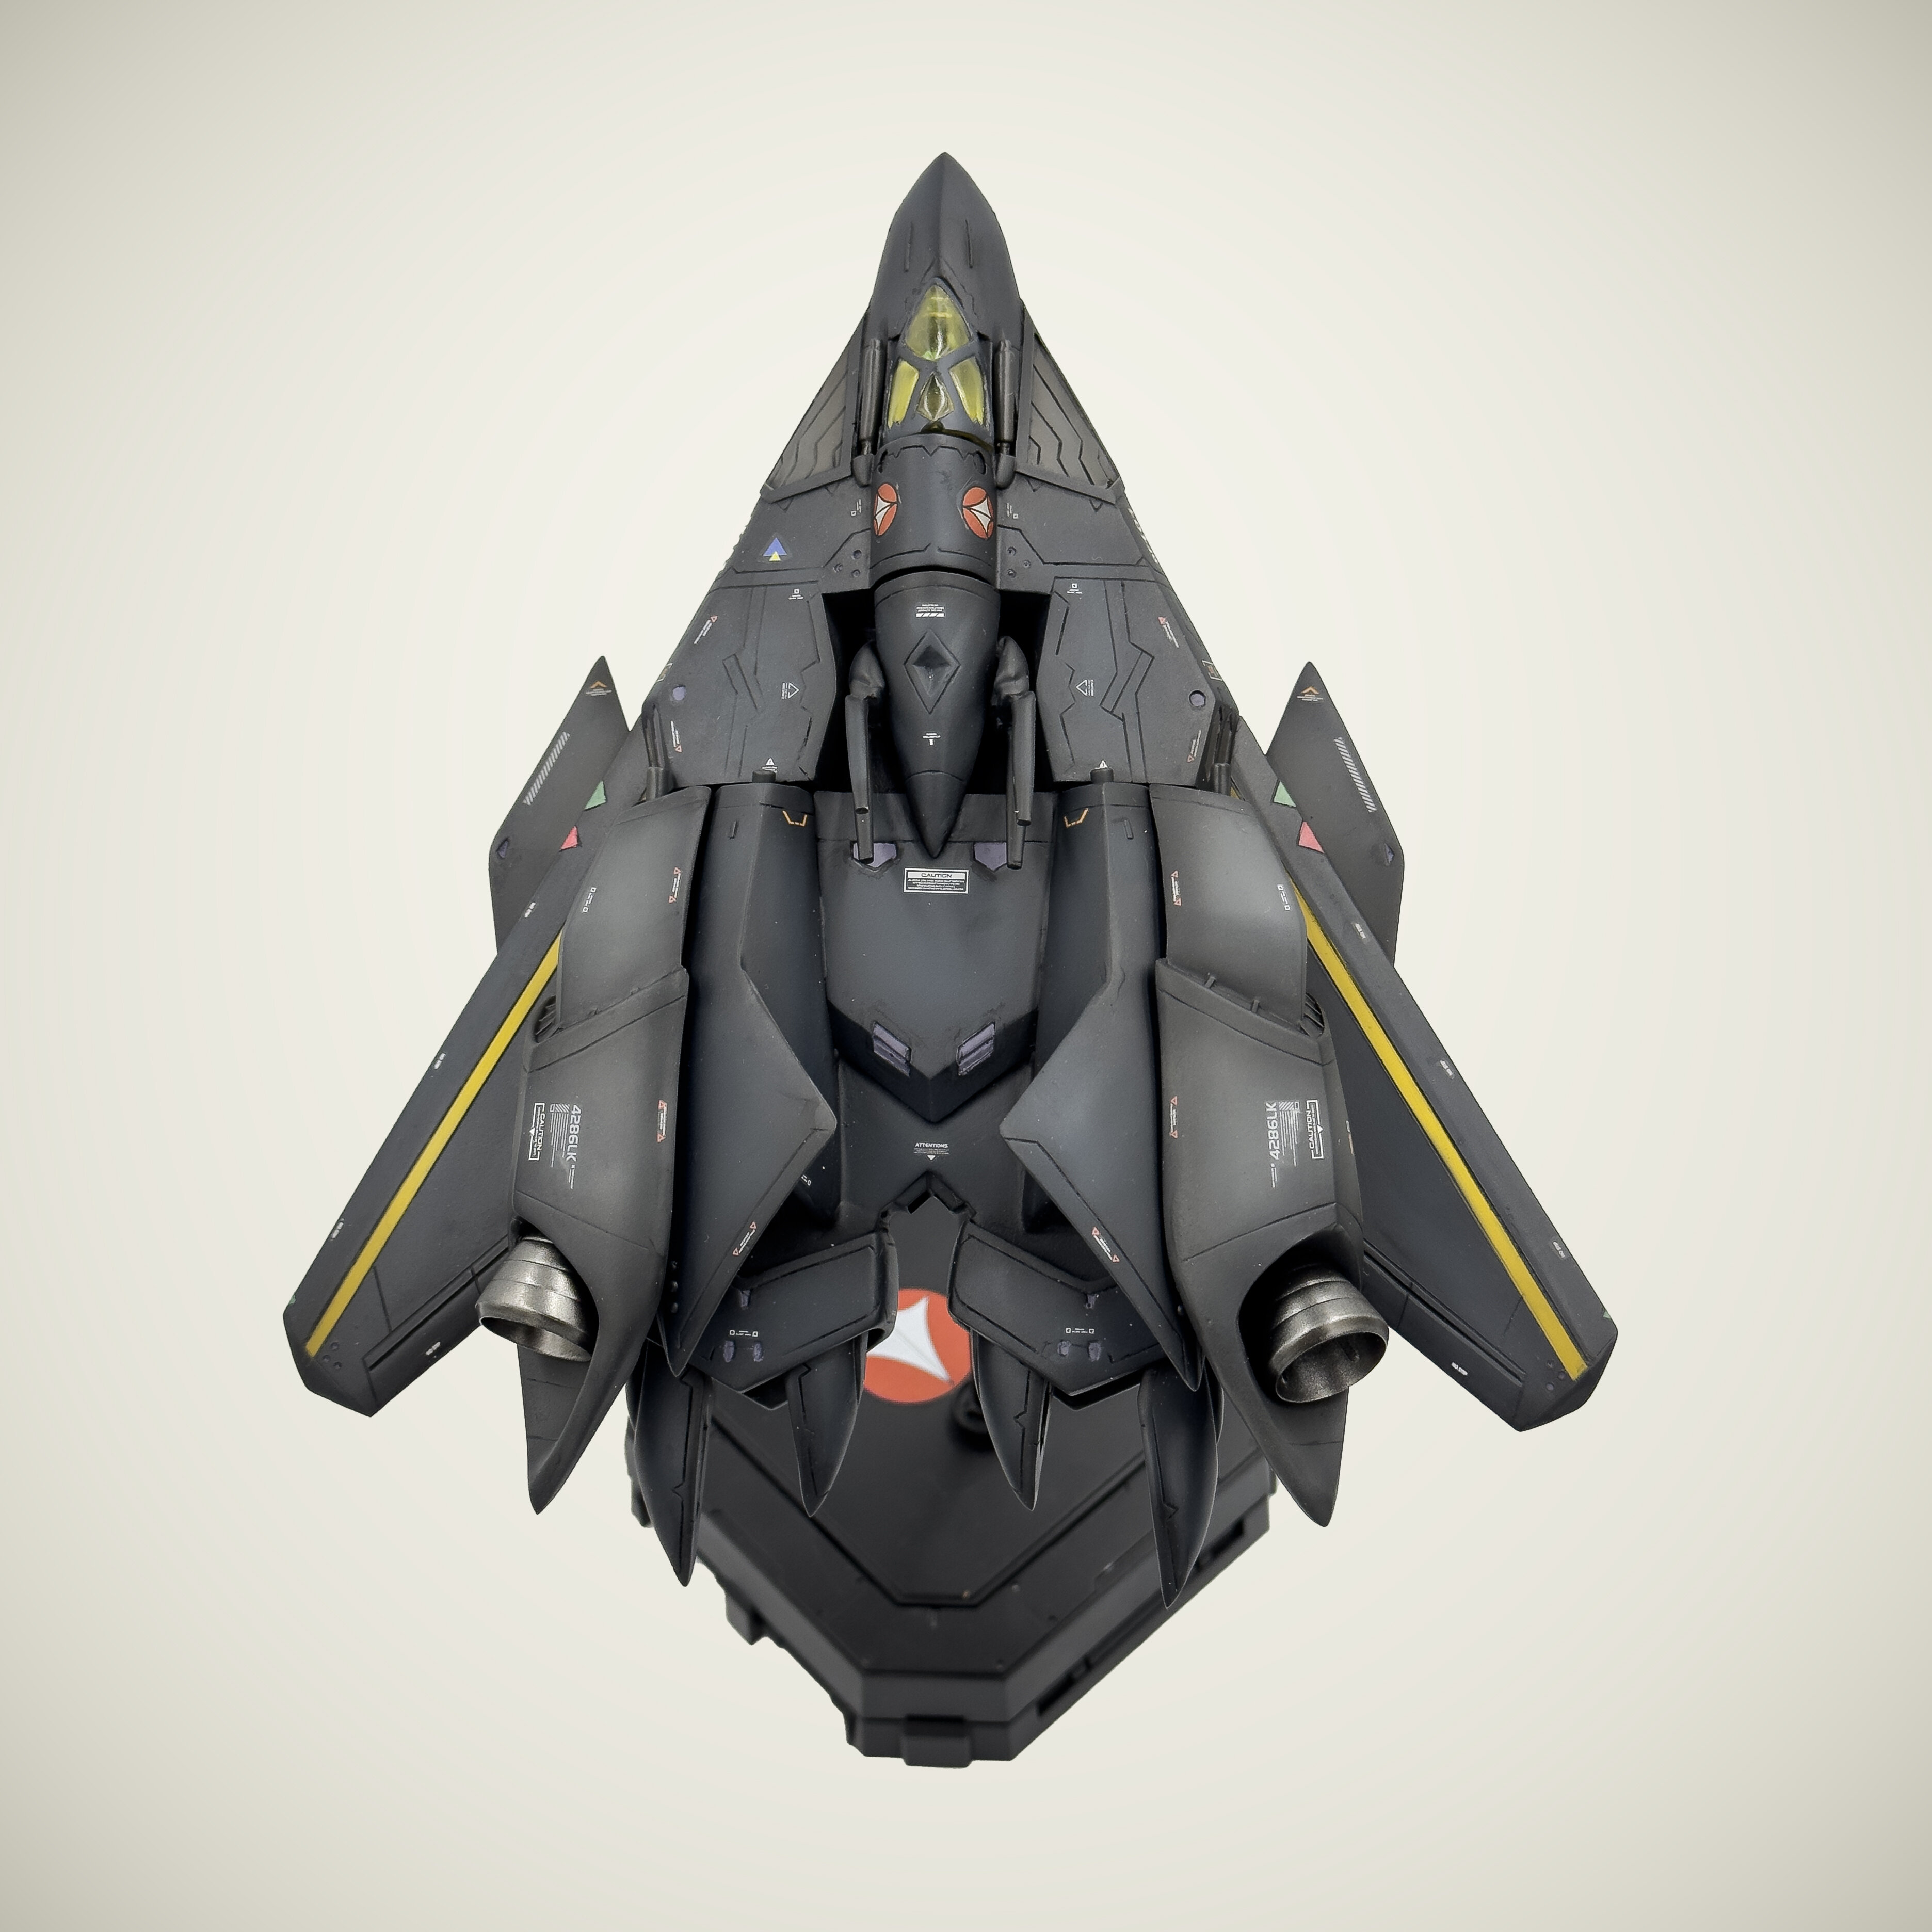
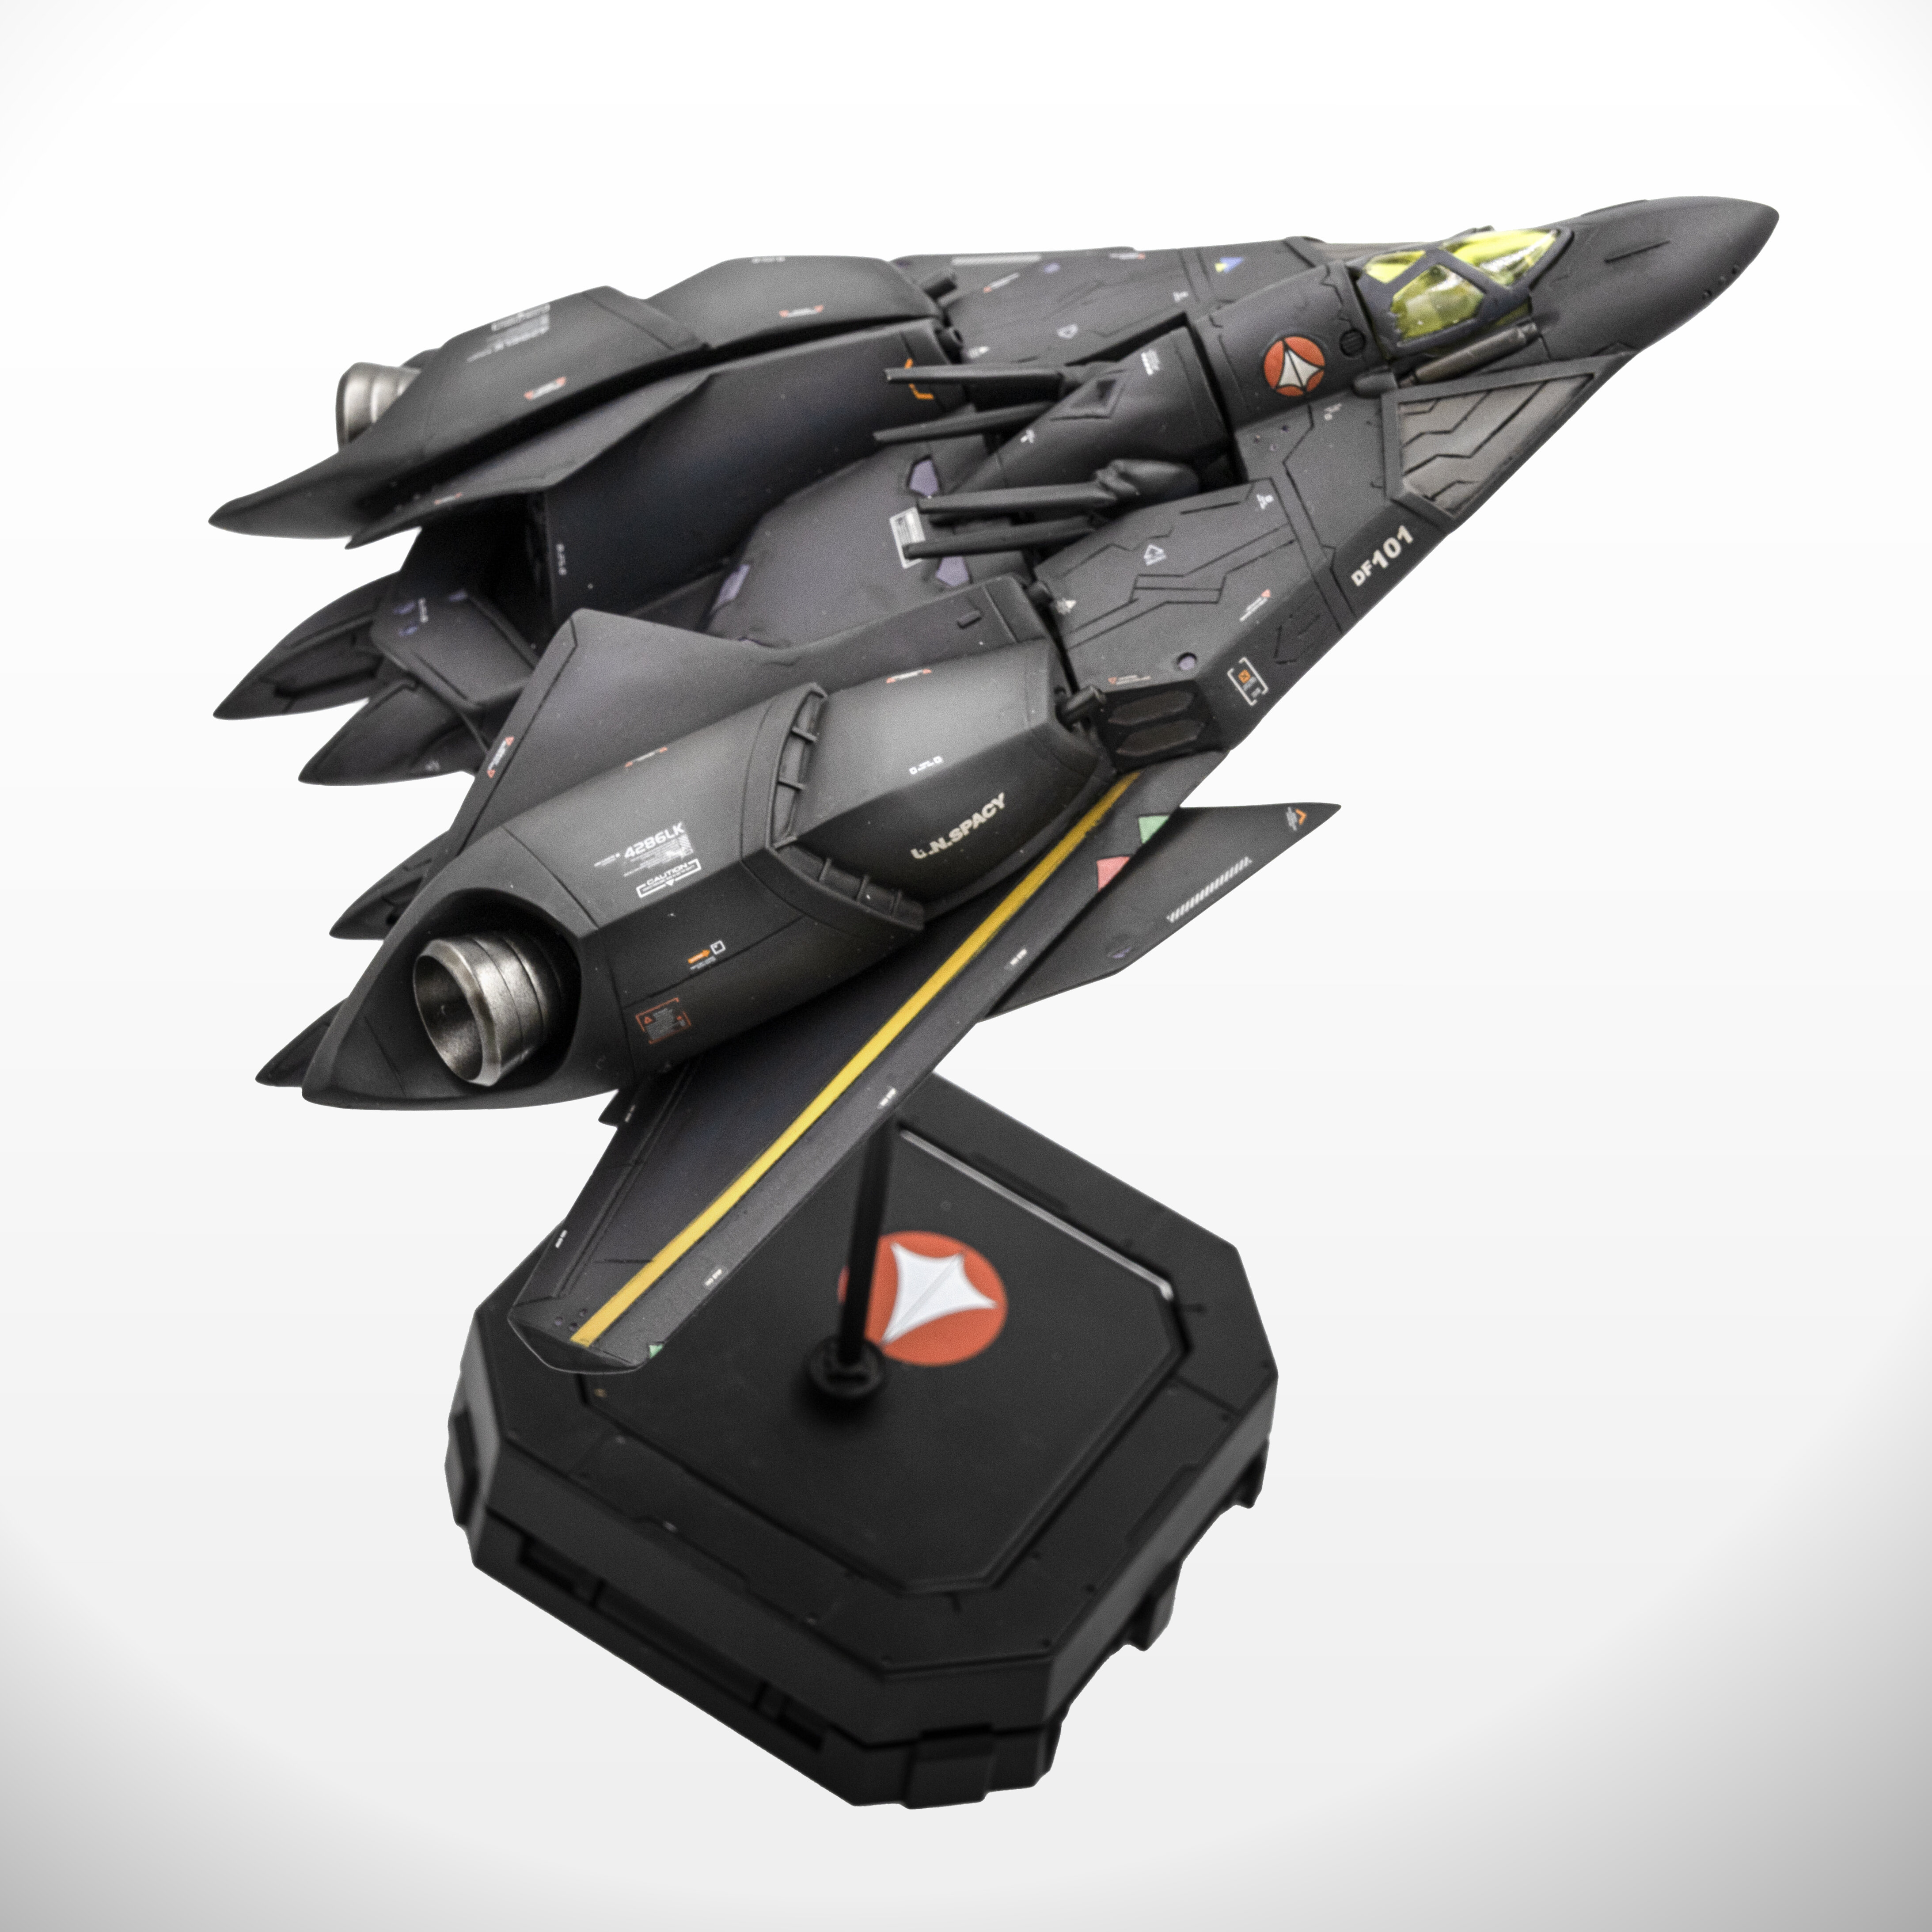
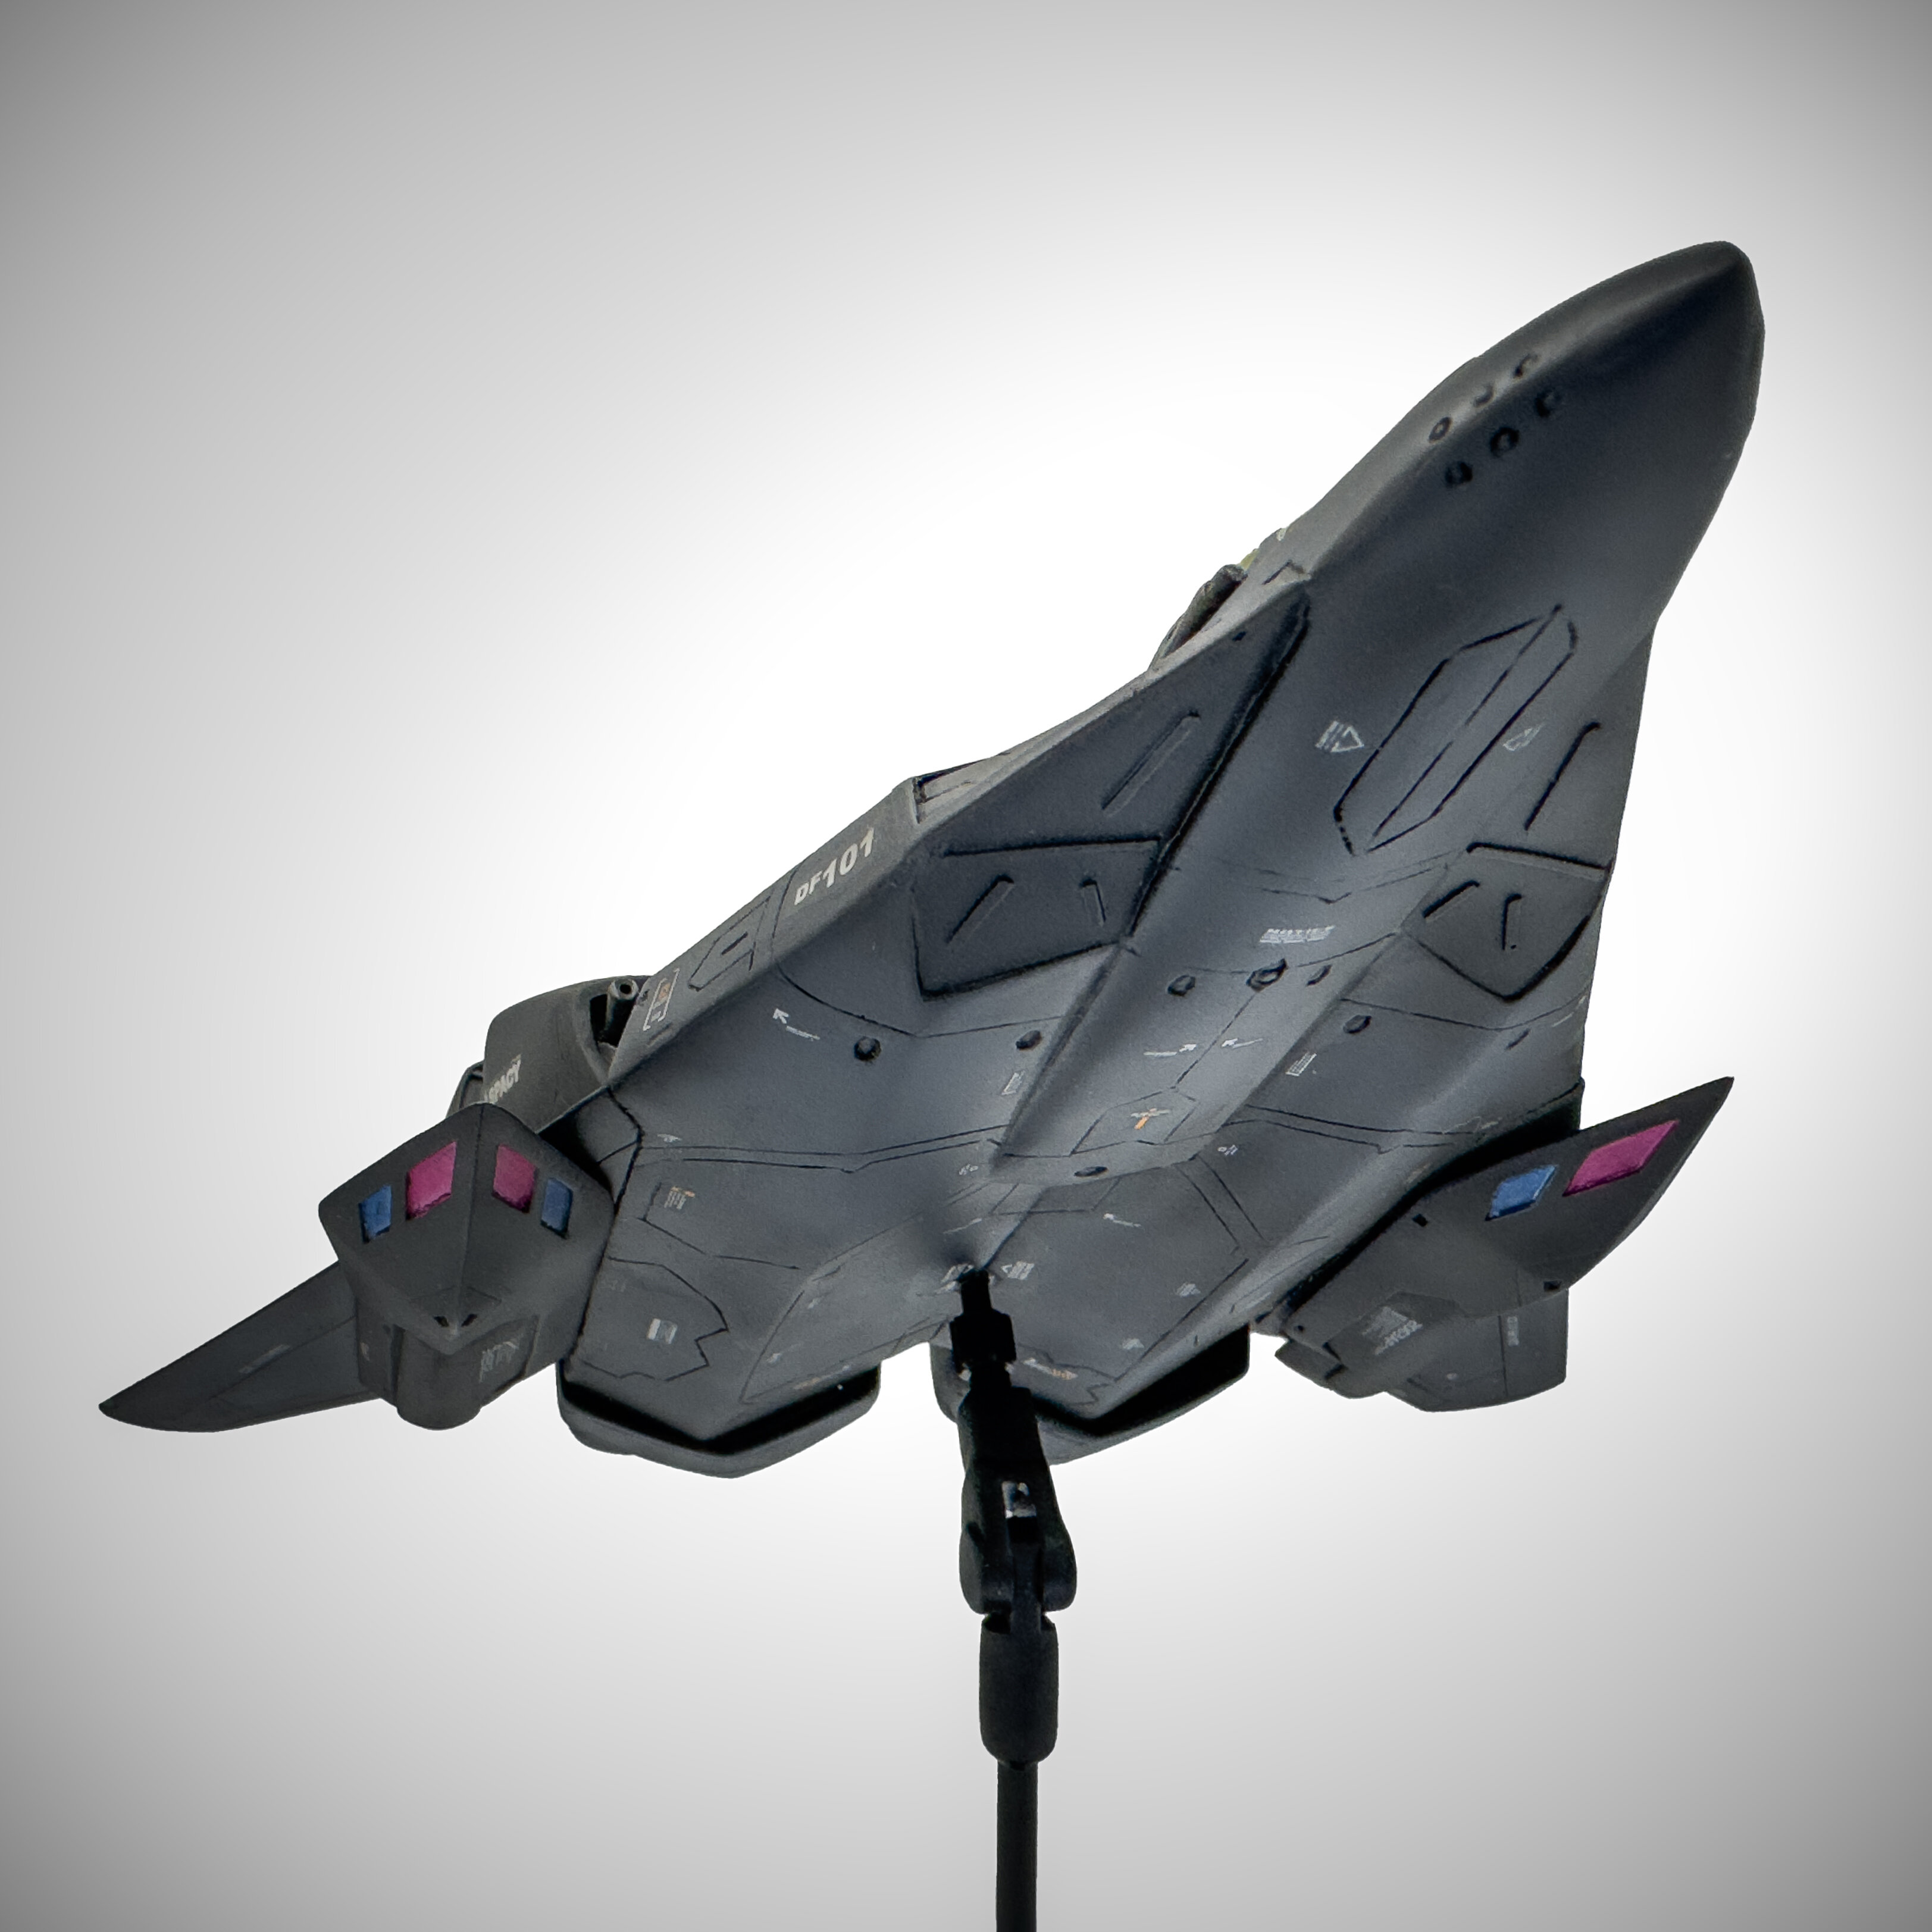
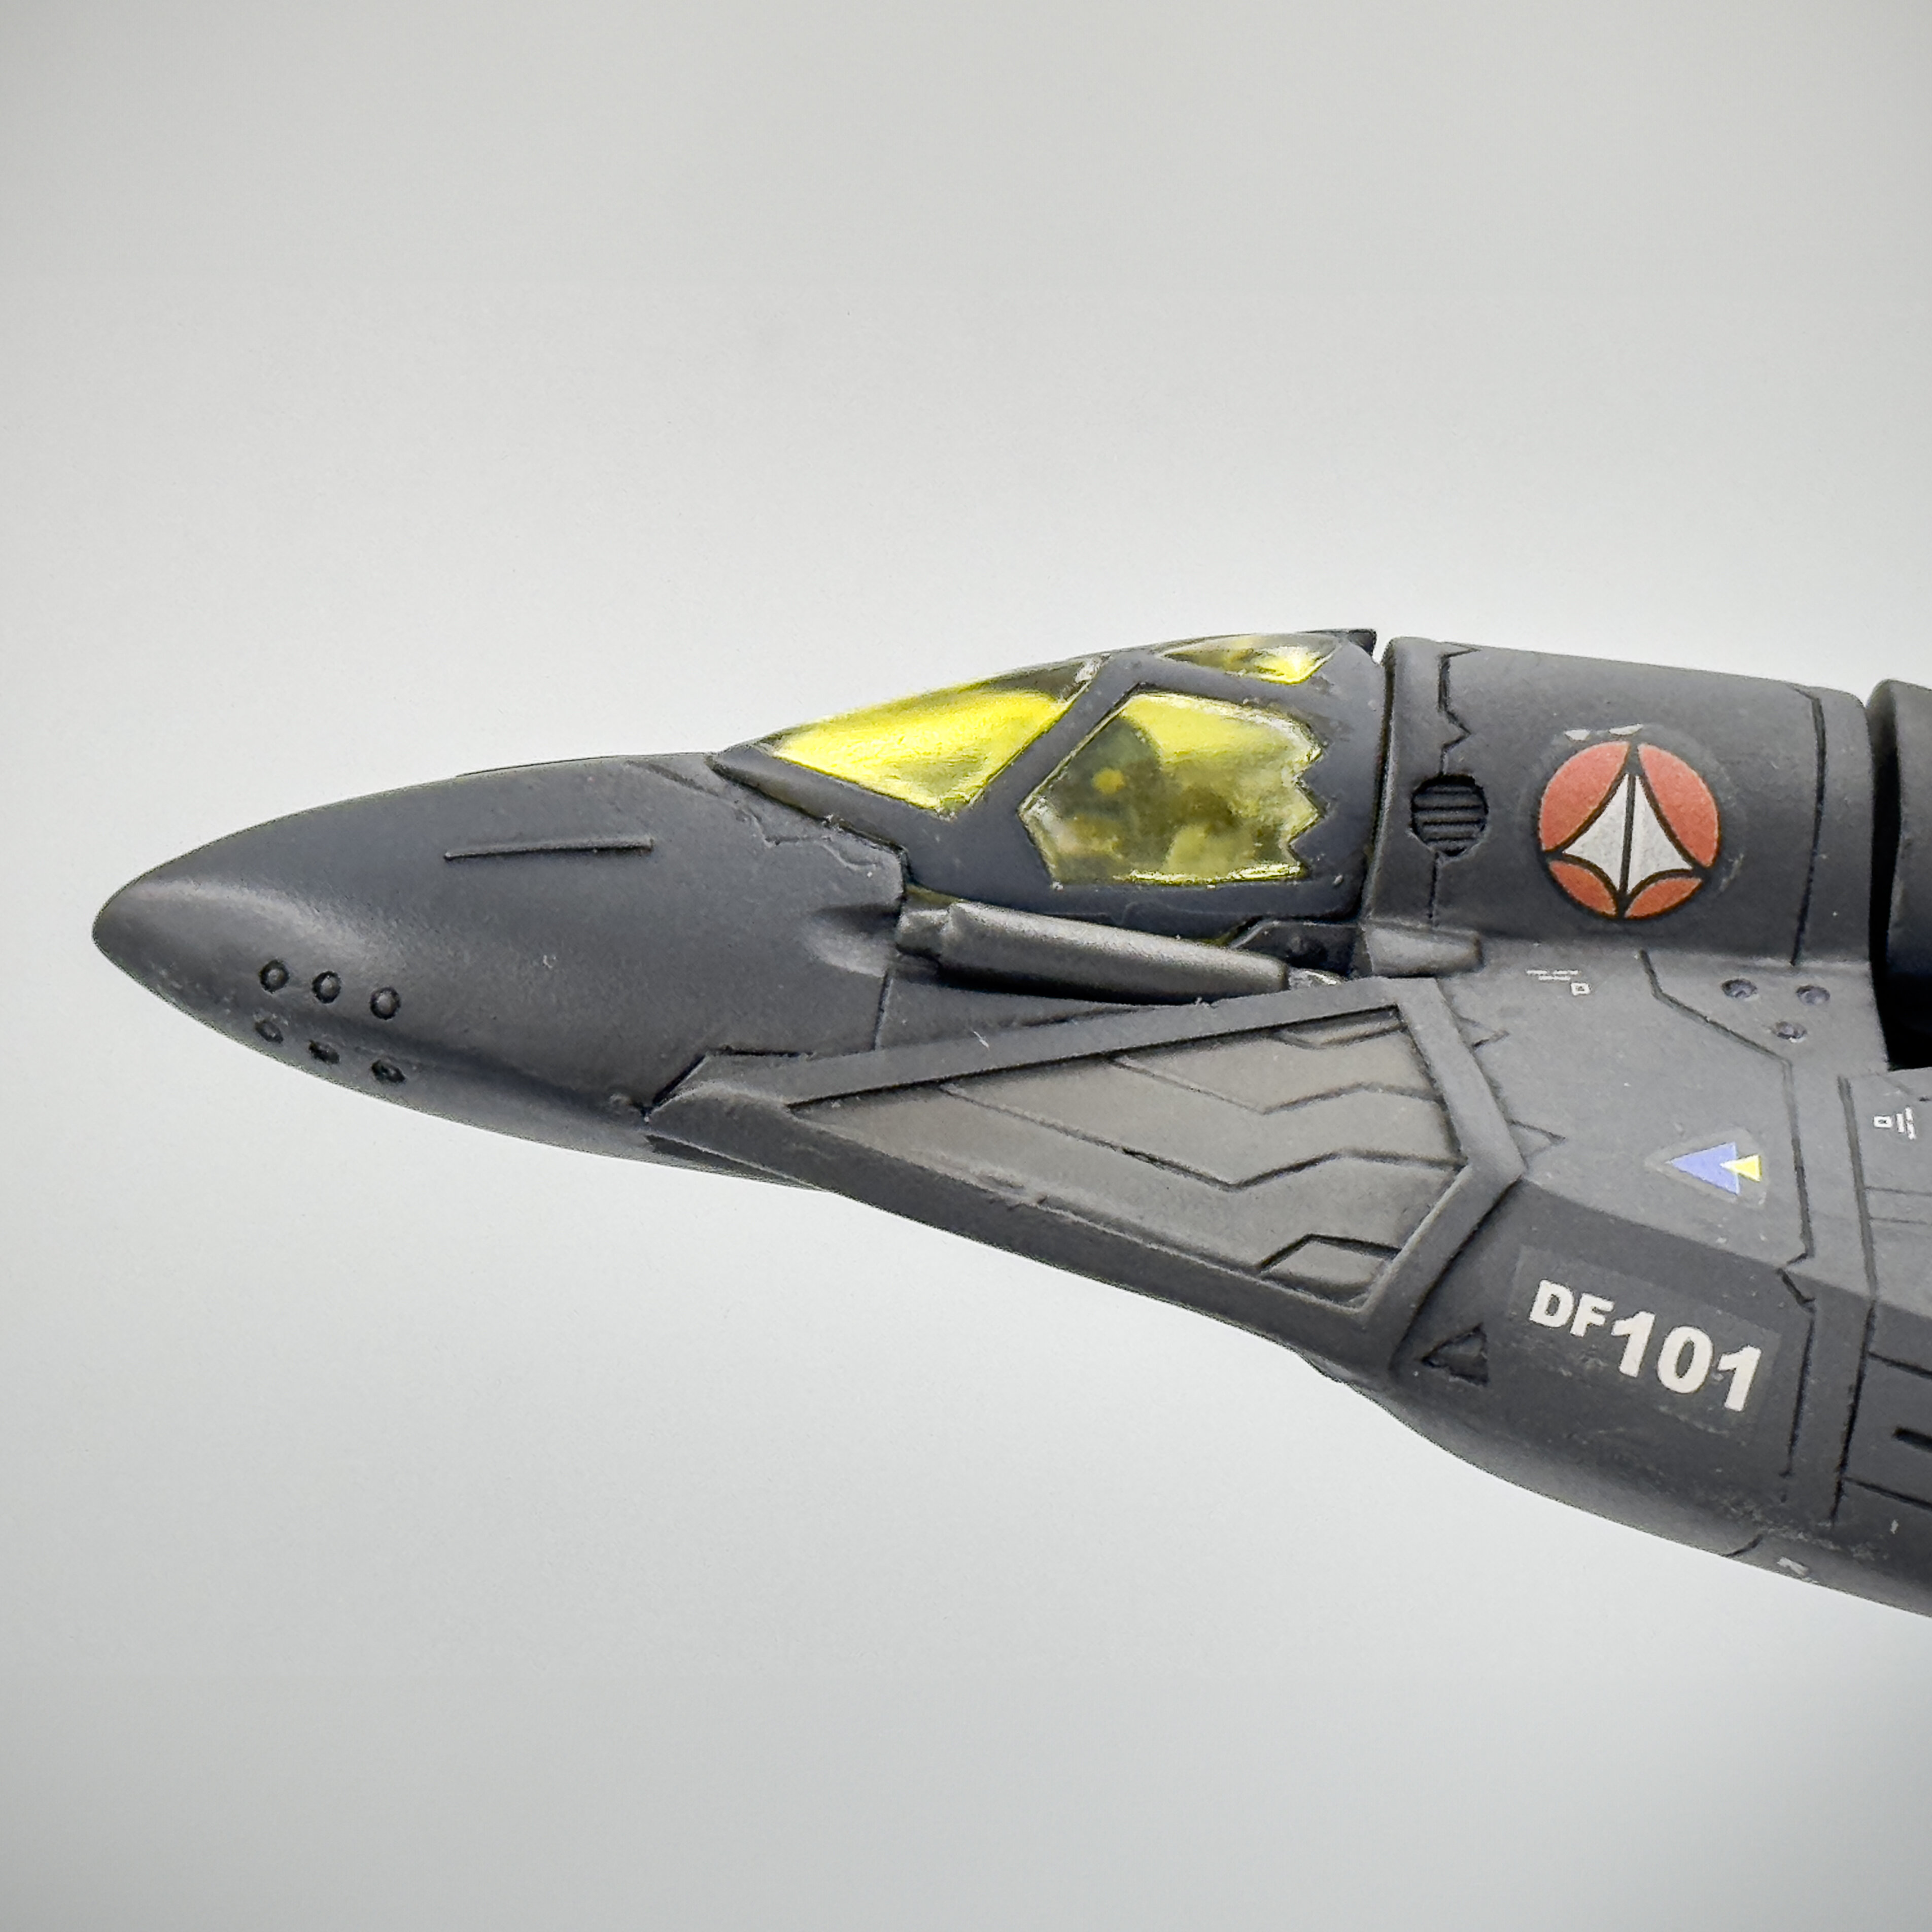
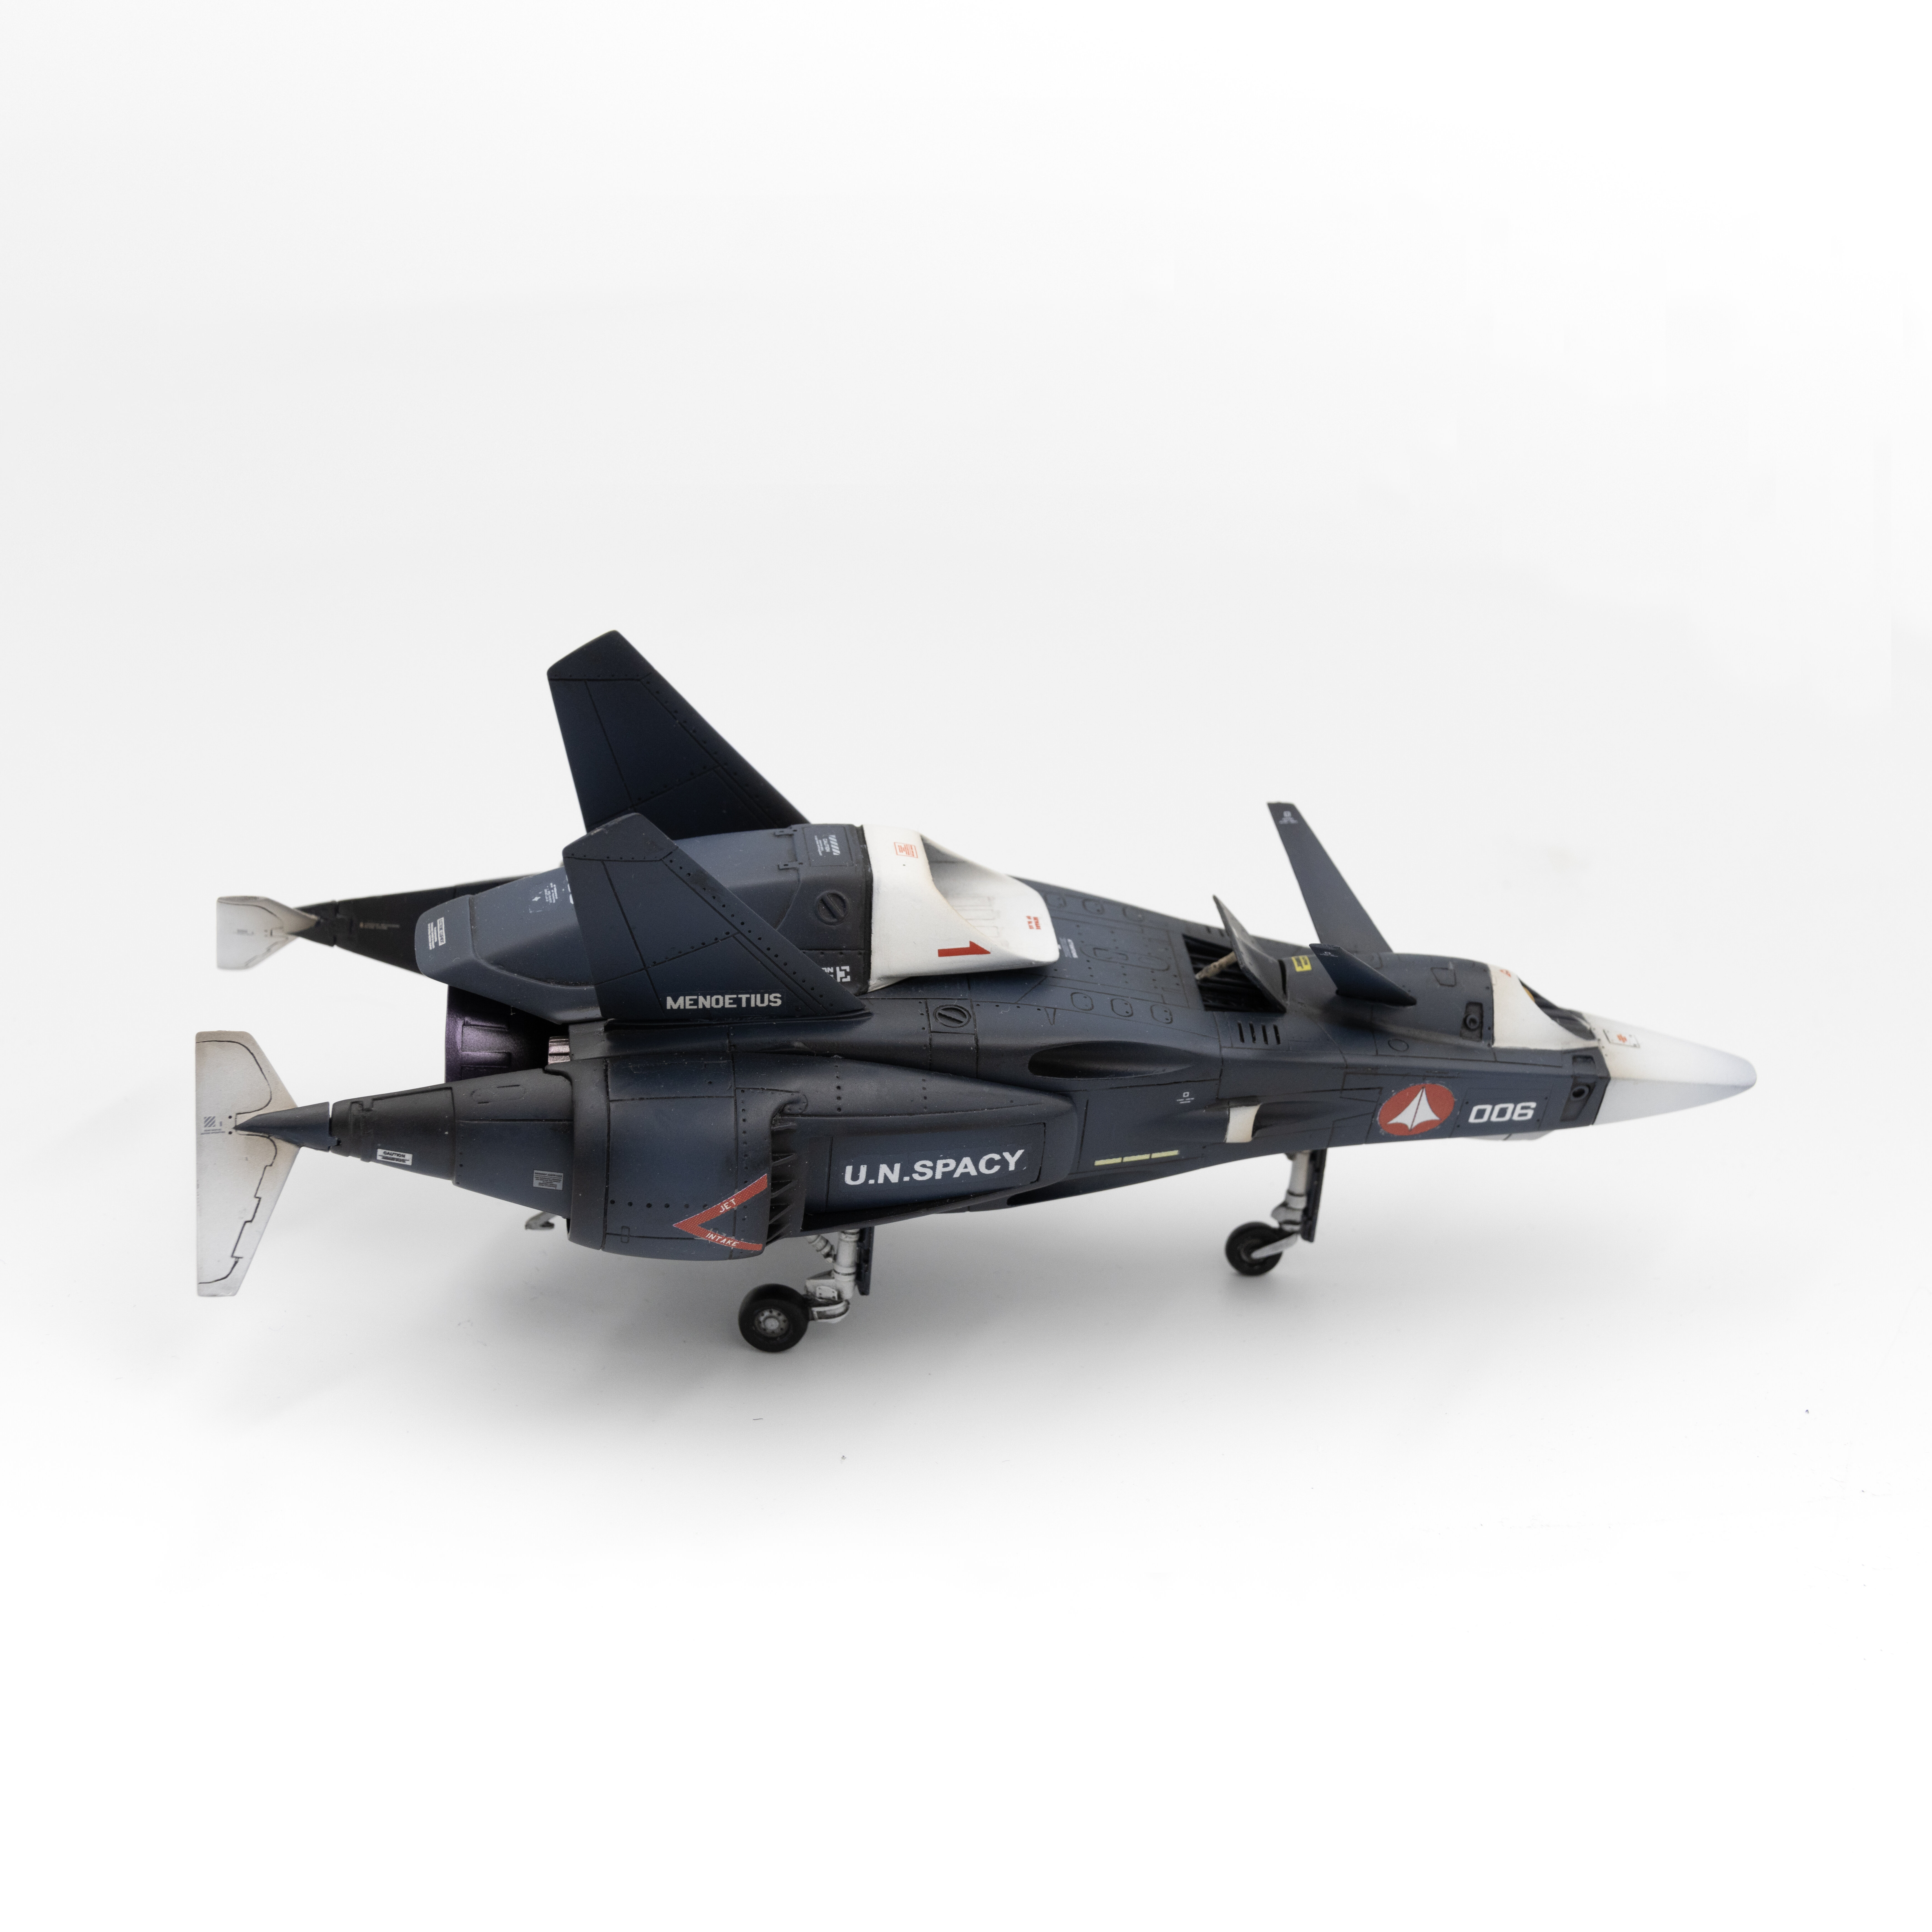
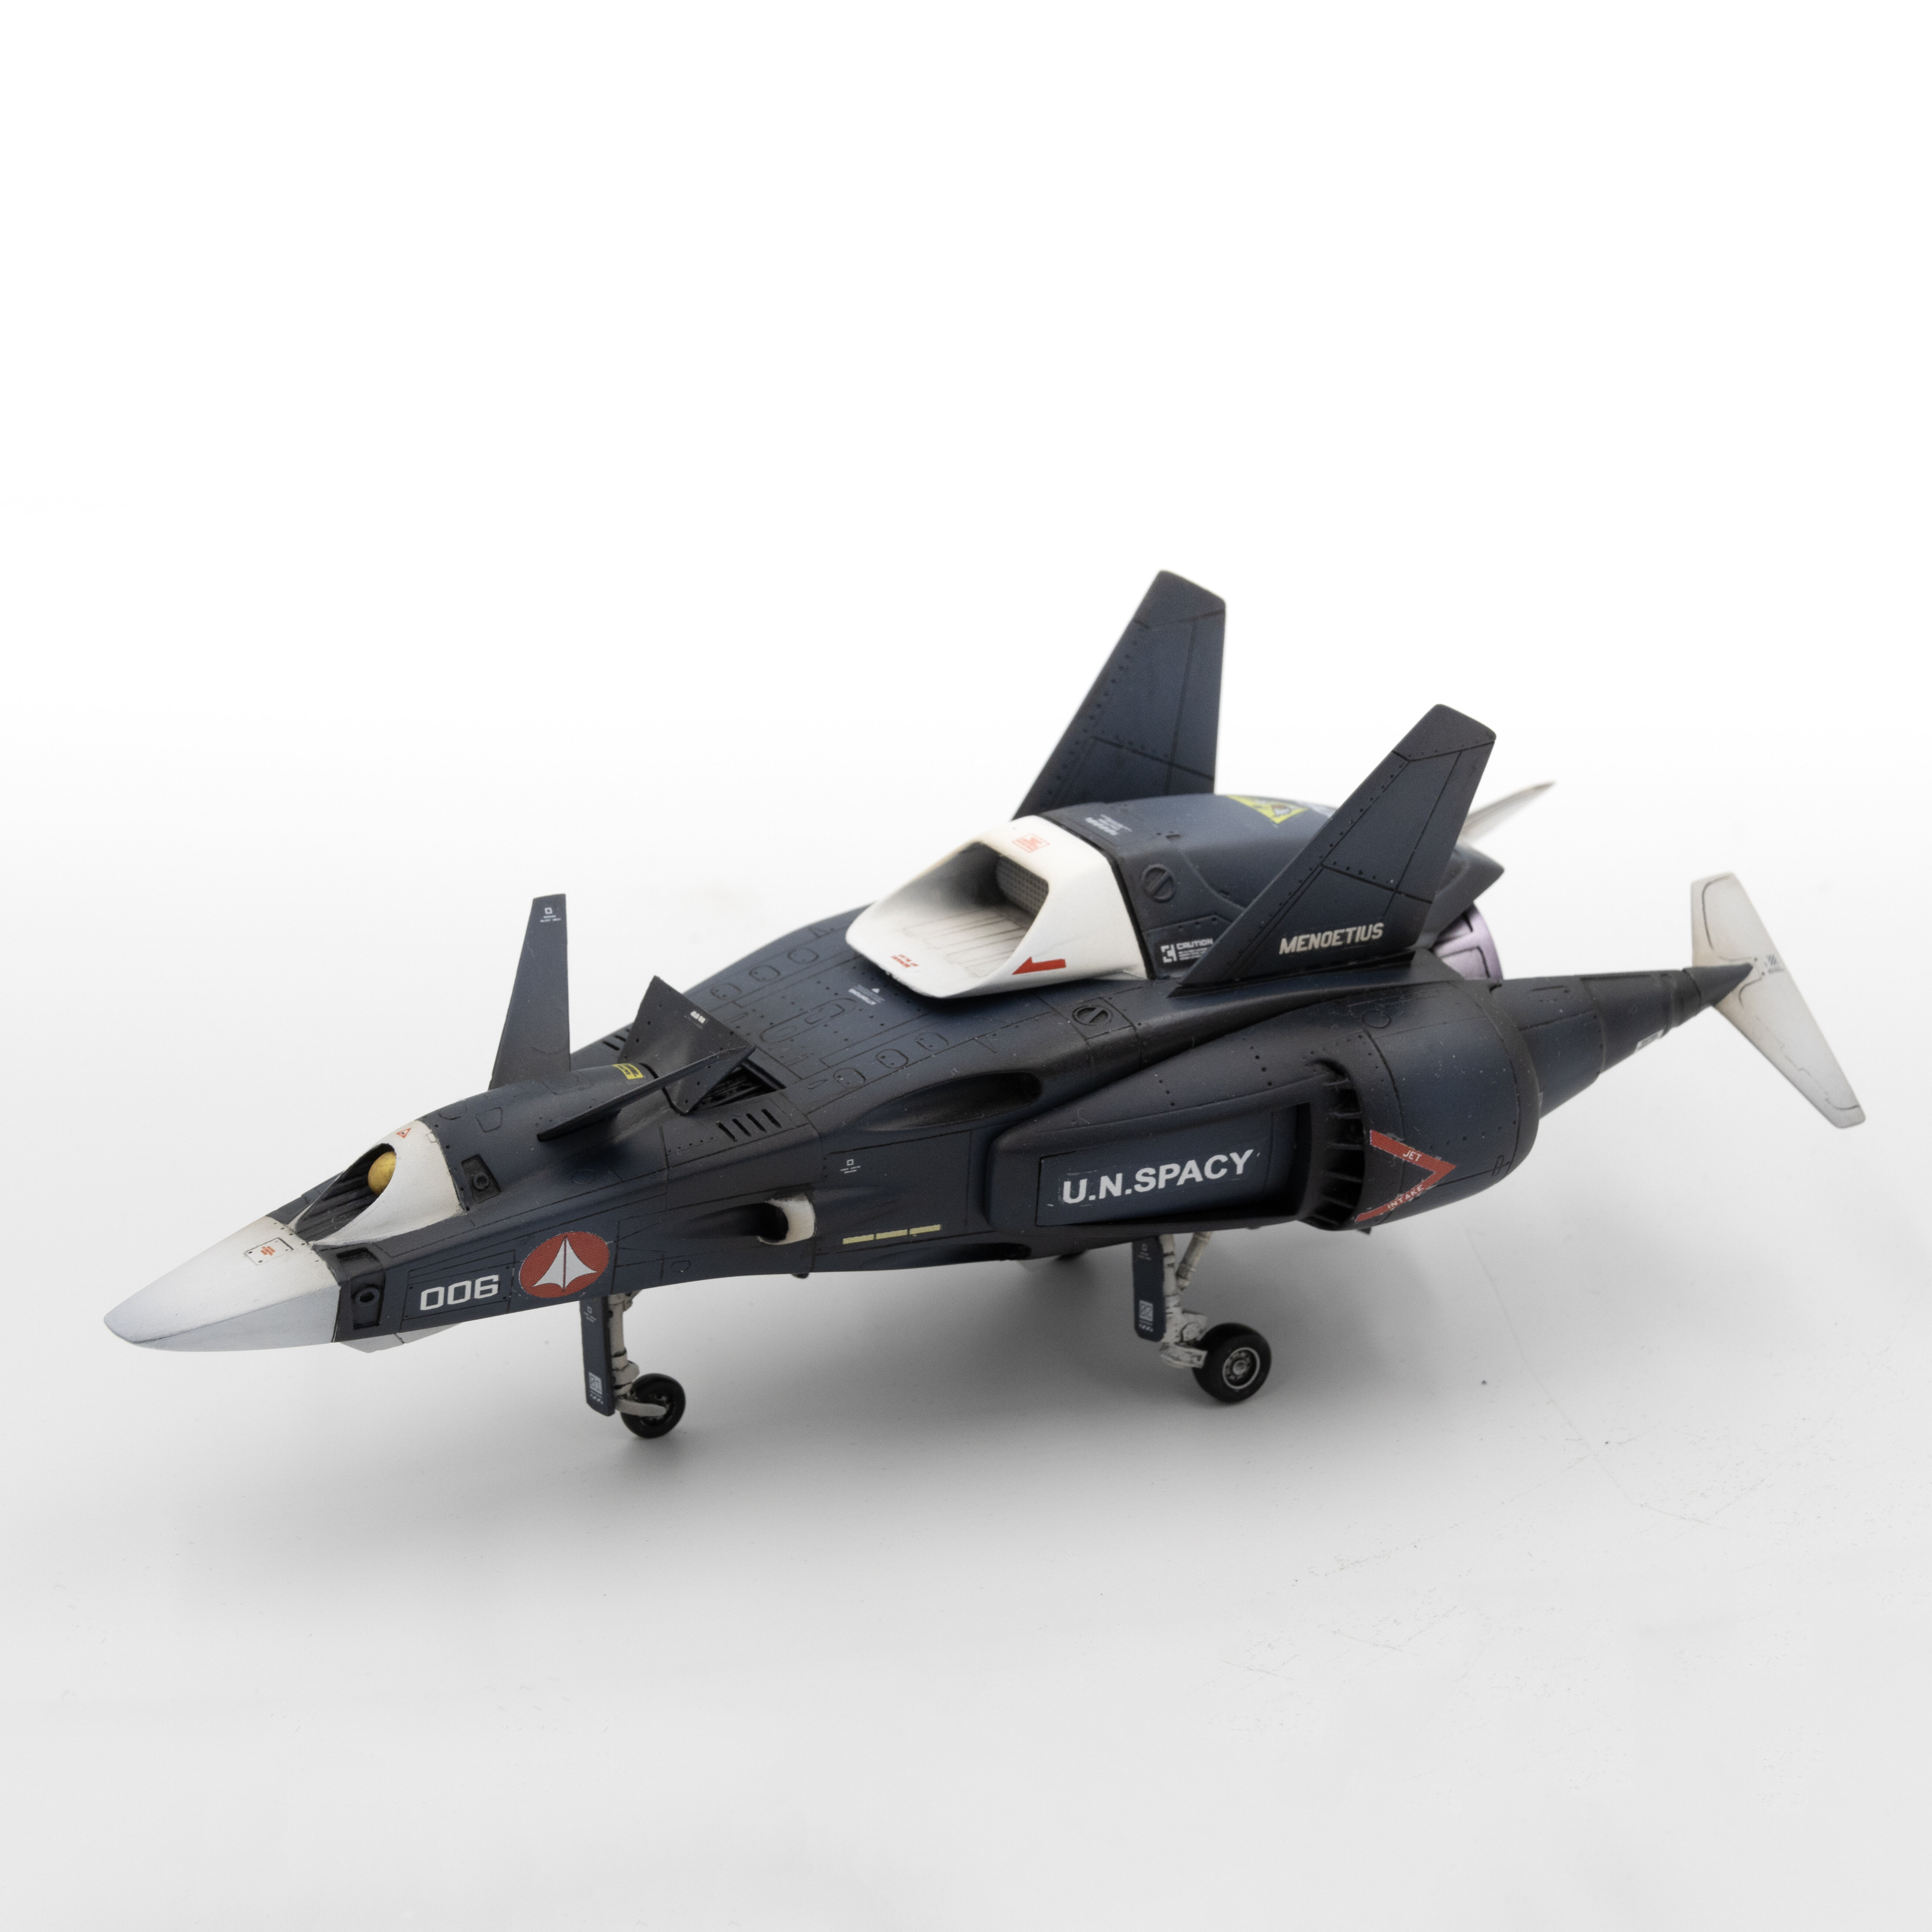
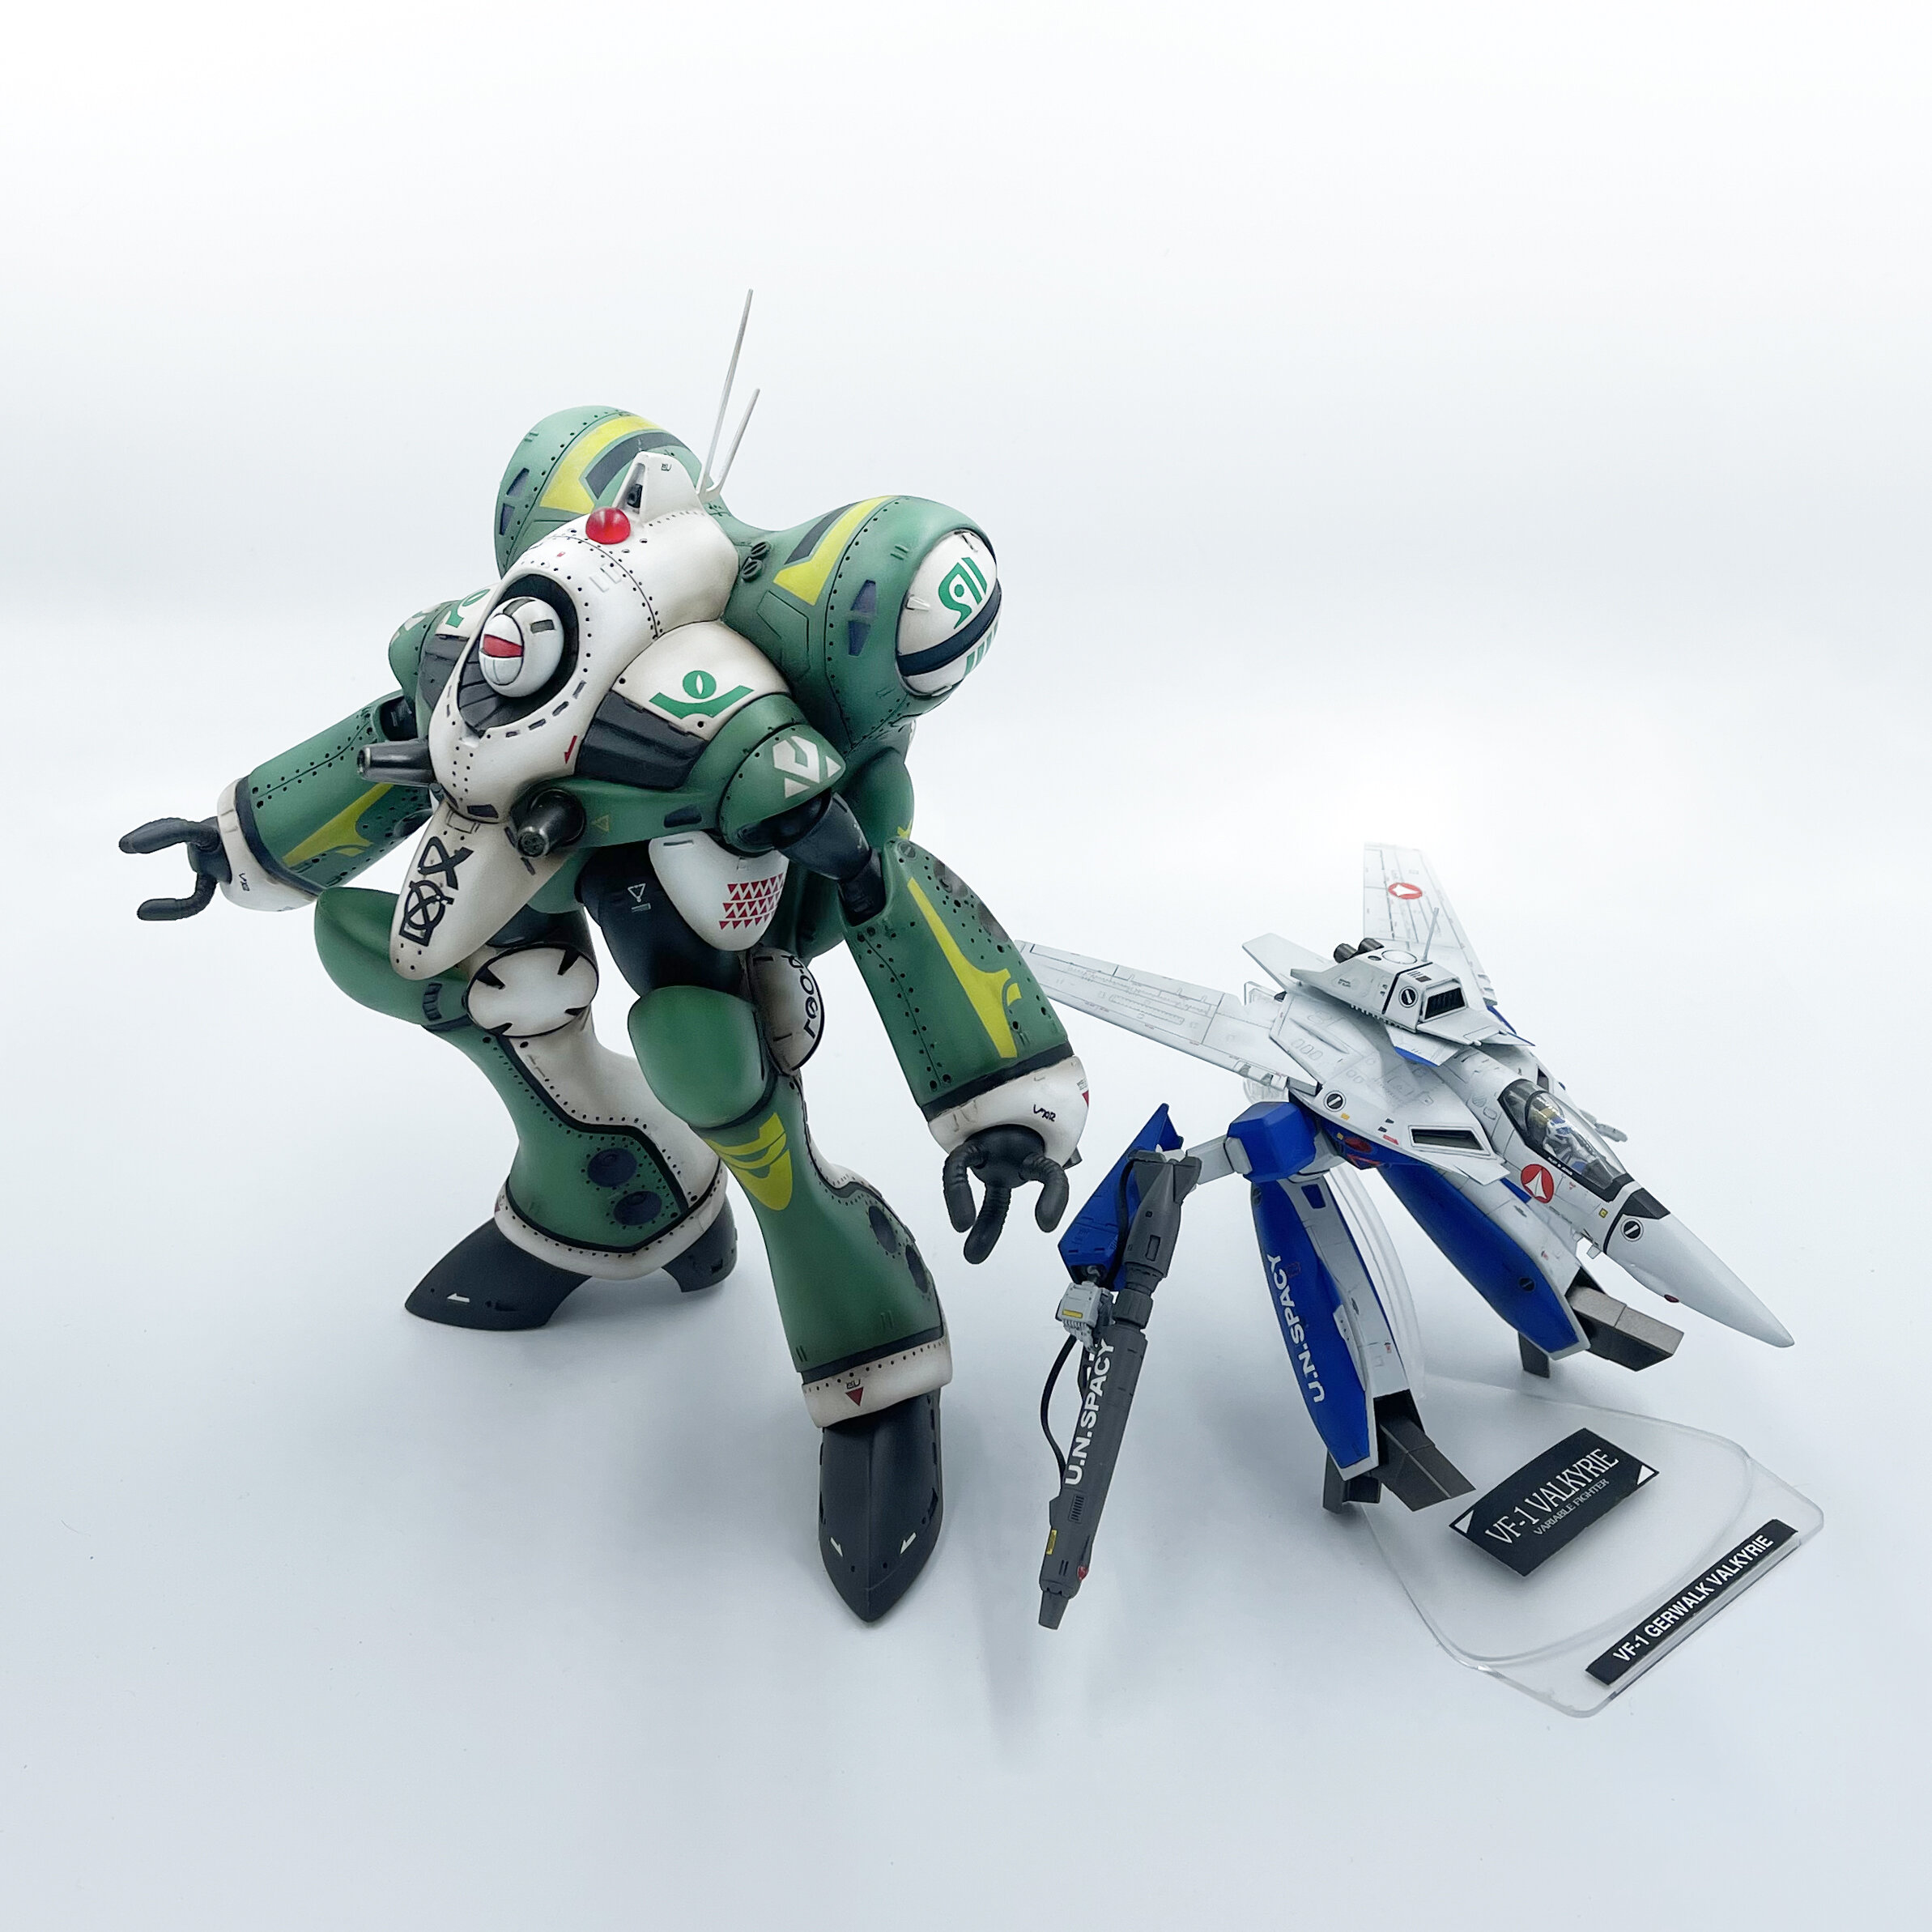
This is a 1/72 VF-2JA resin. I think it should be a WF kit back to 2013.
This took me almost 1 year to finish especially due to the horrible holes on the surface.
Hope to finish another project in 2 months.


-
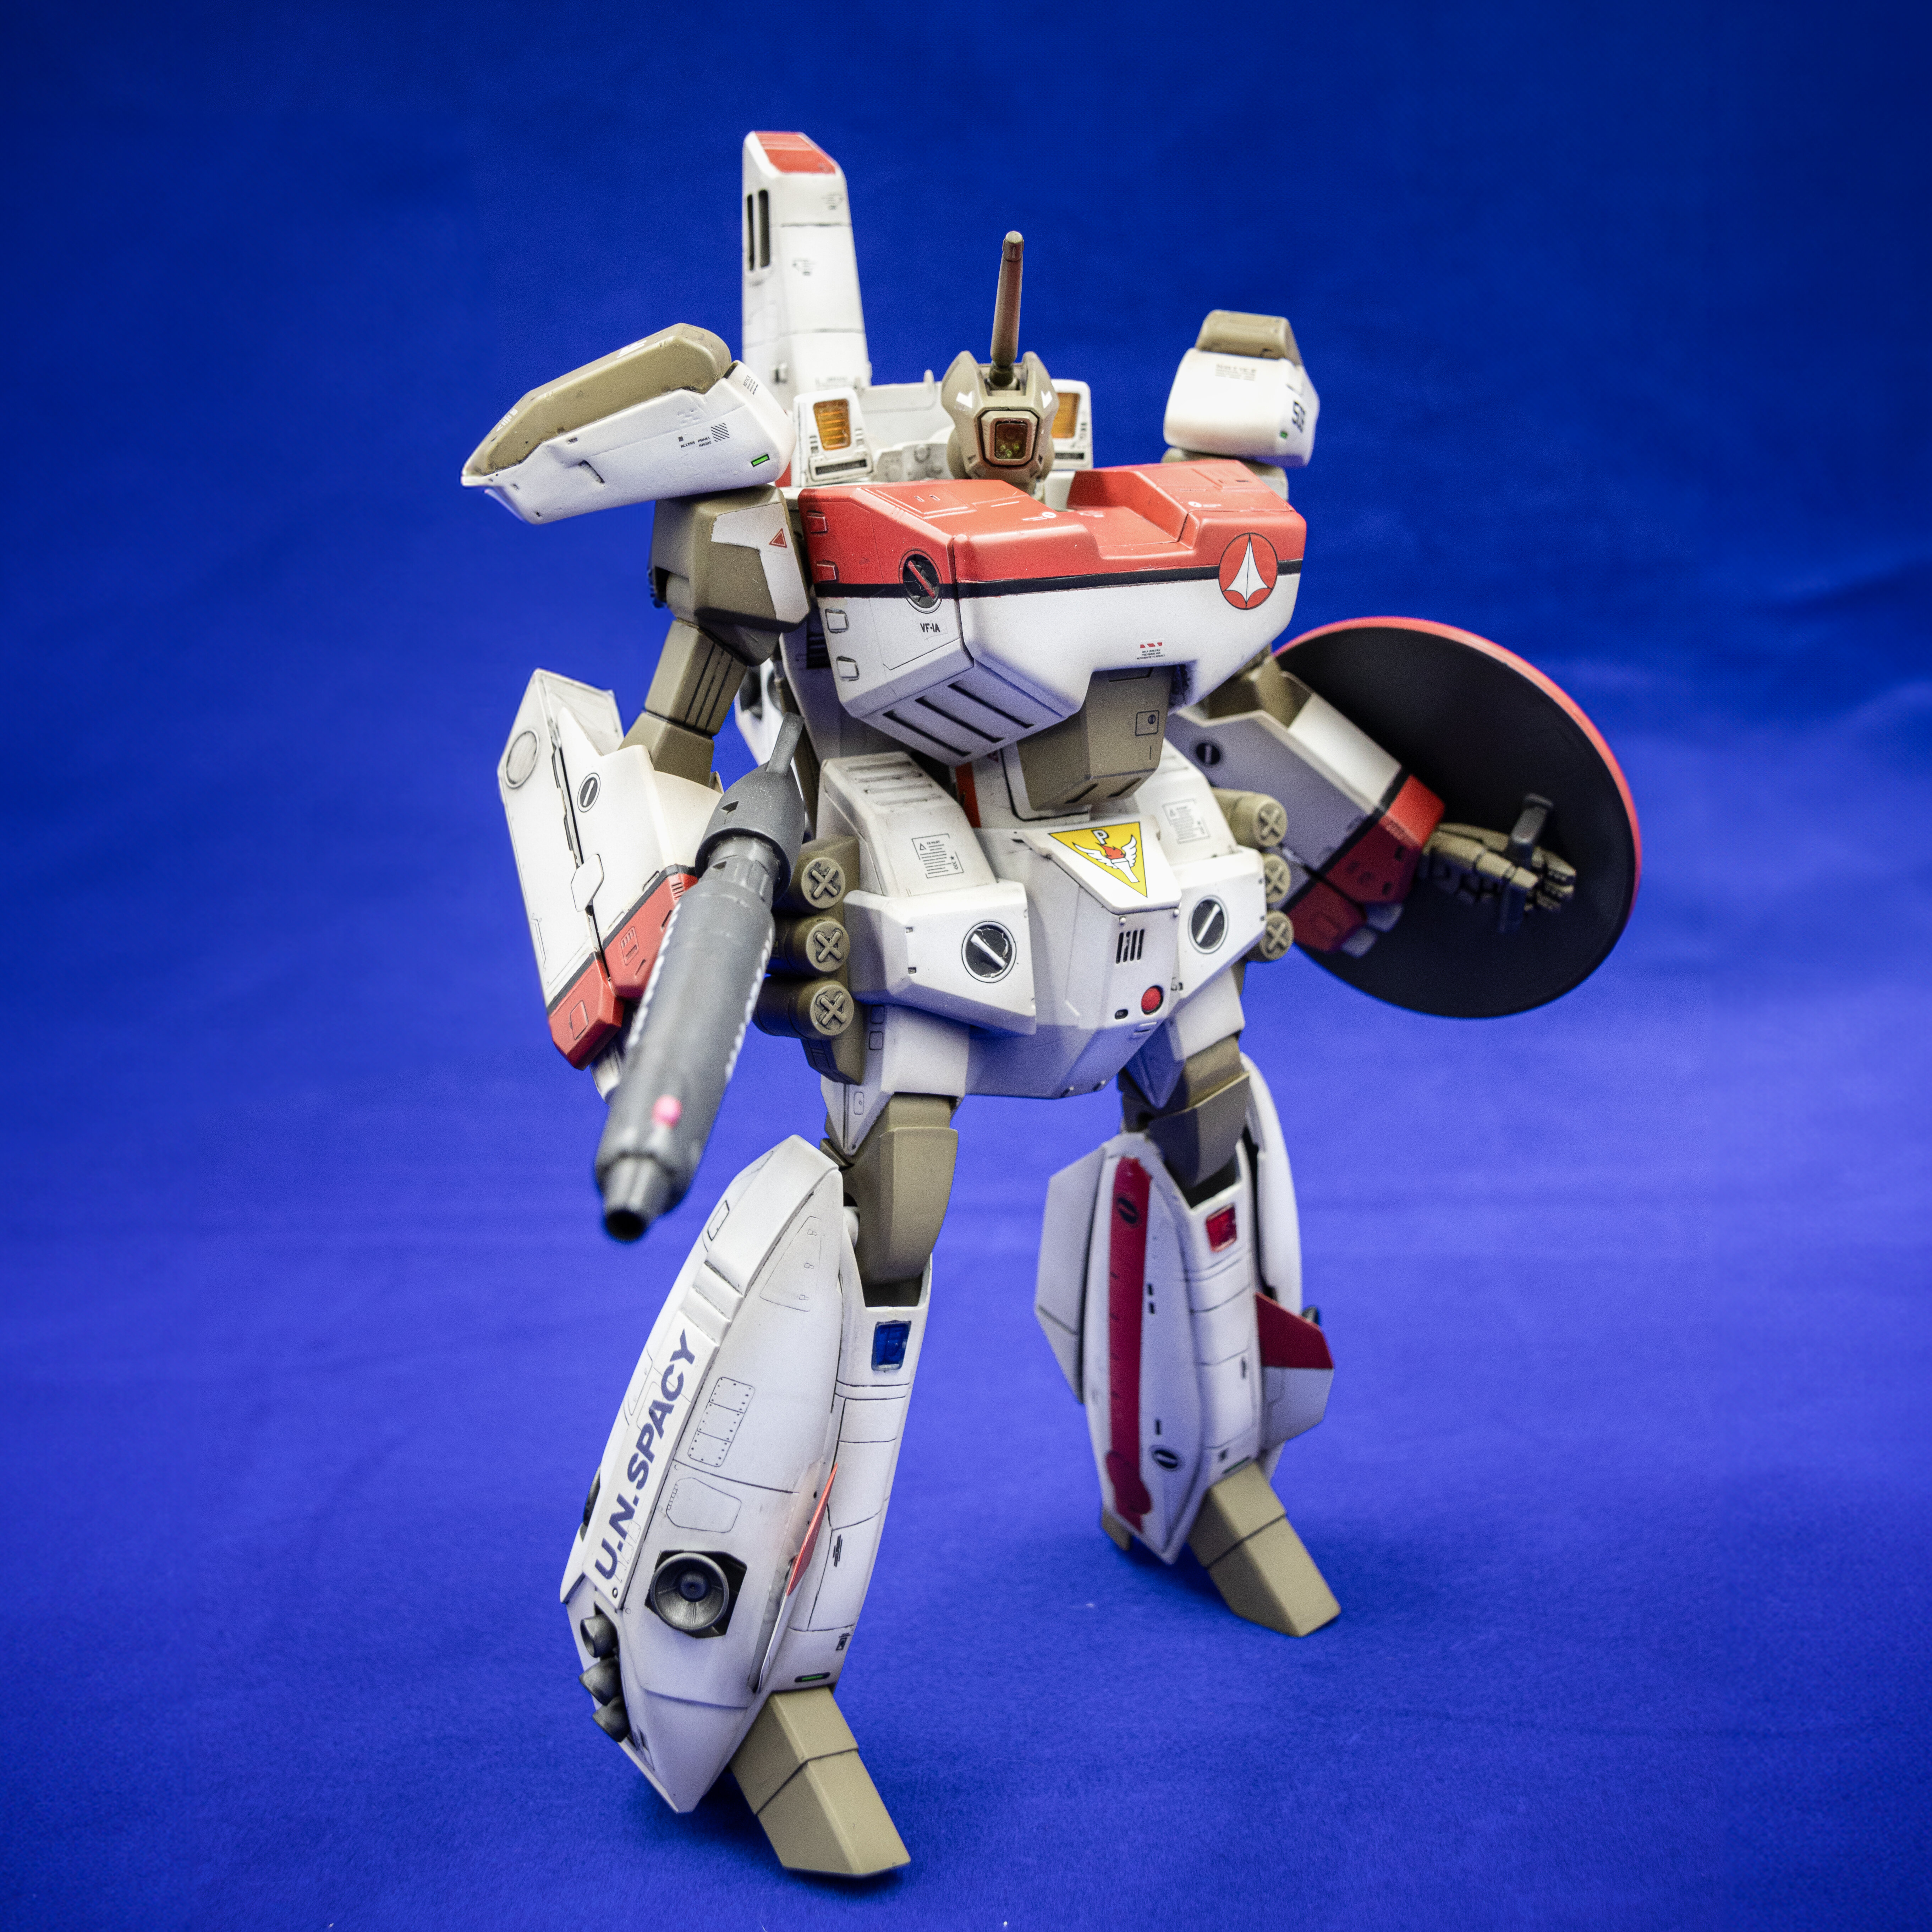
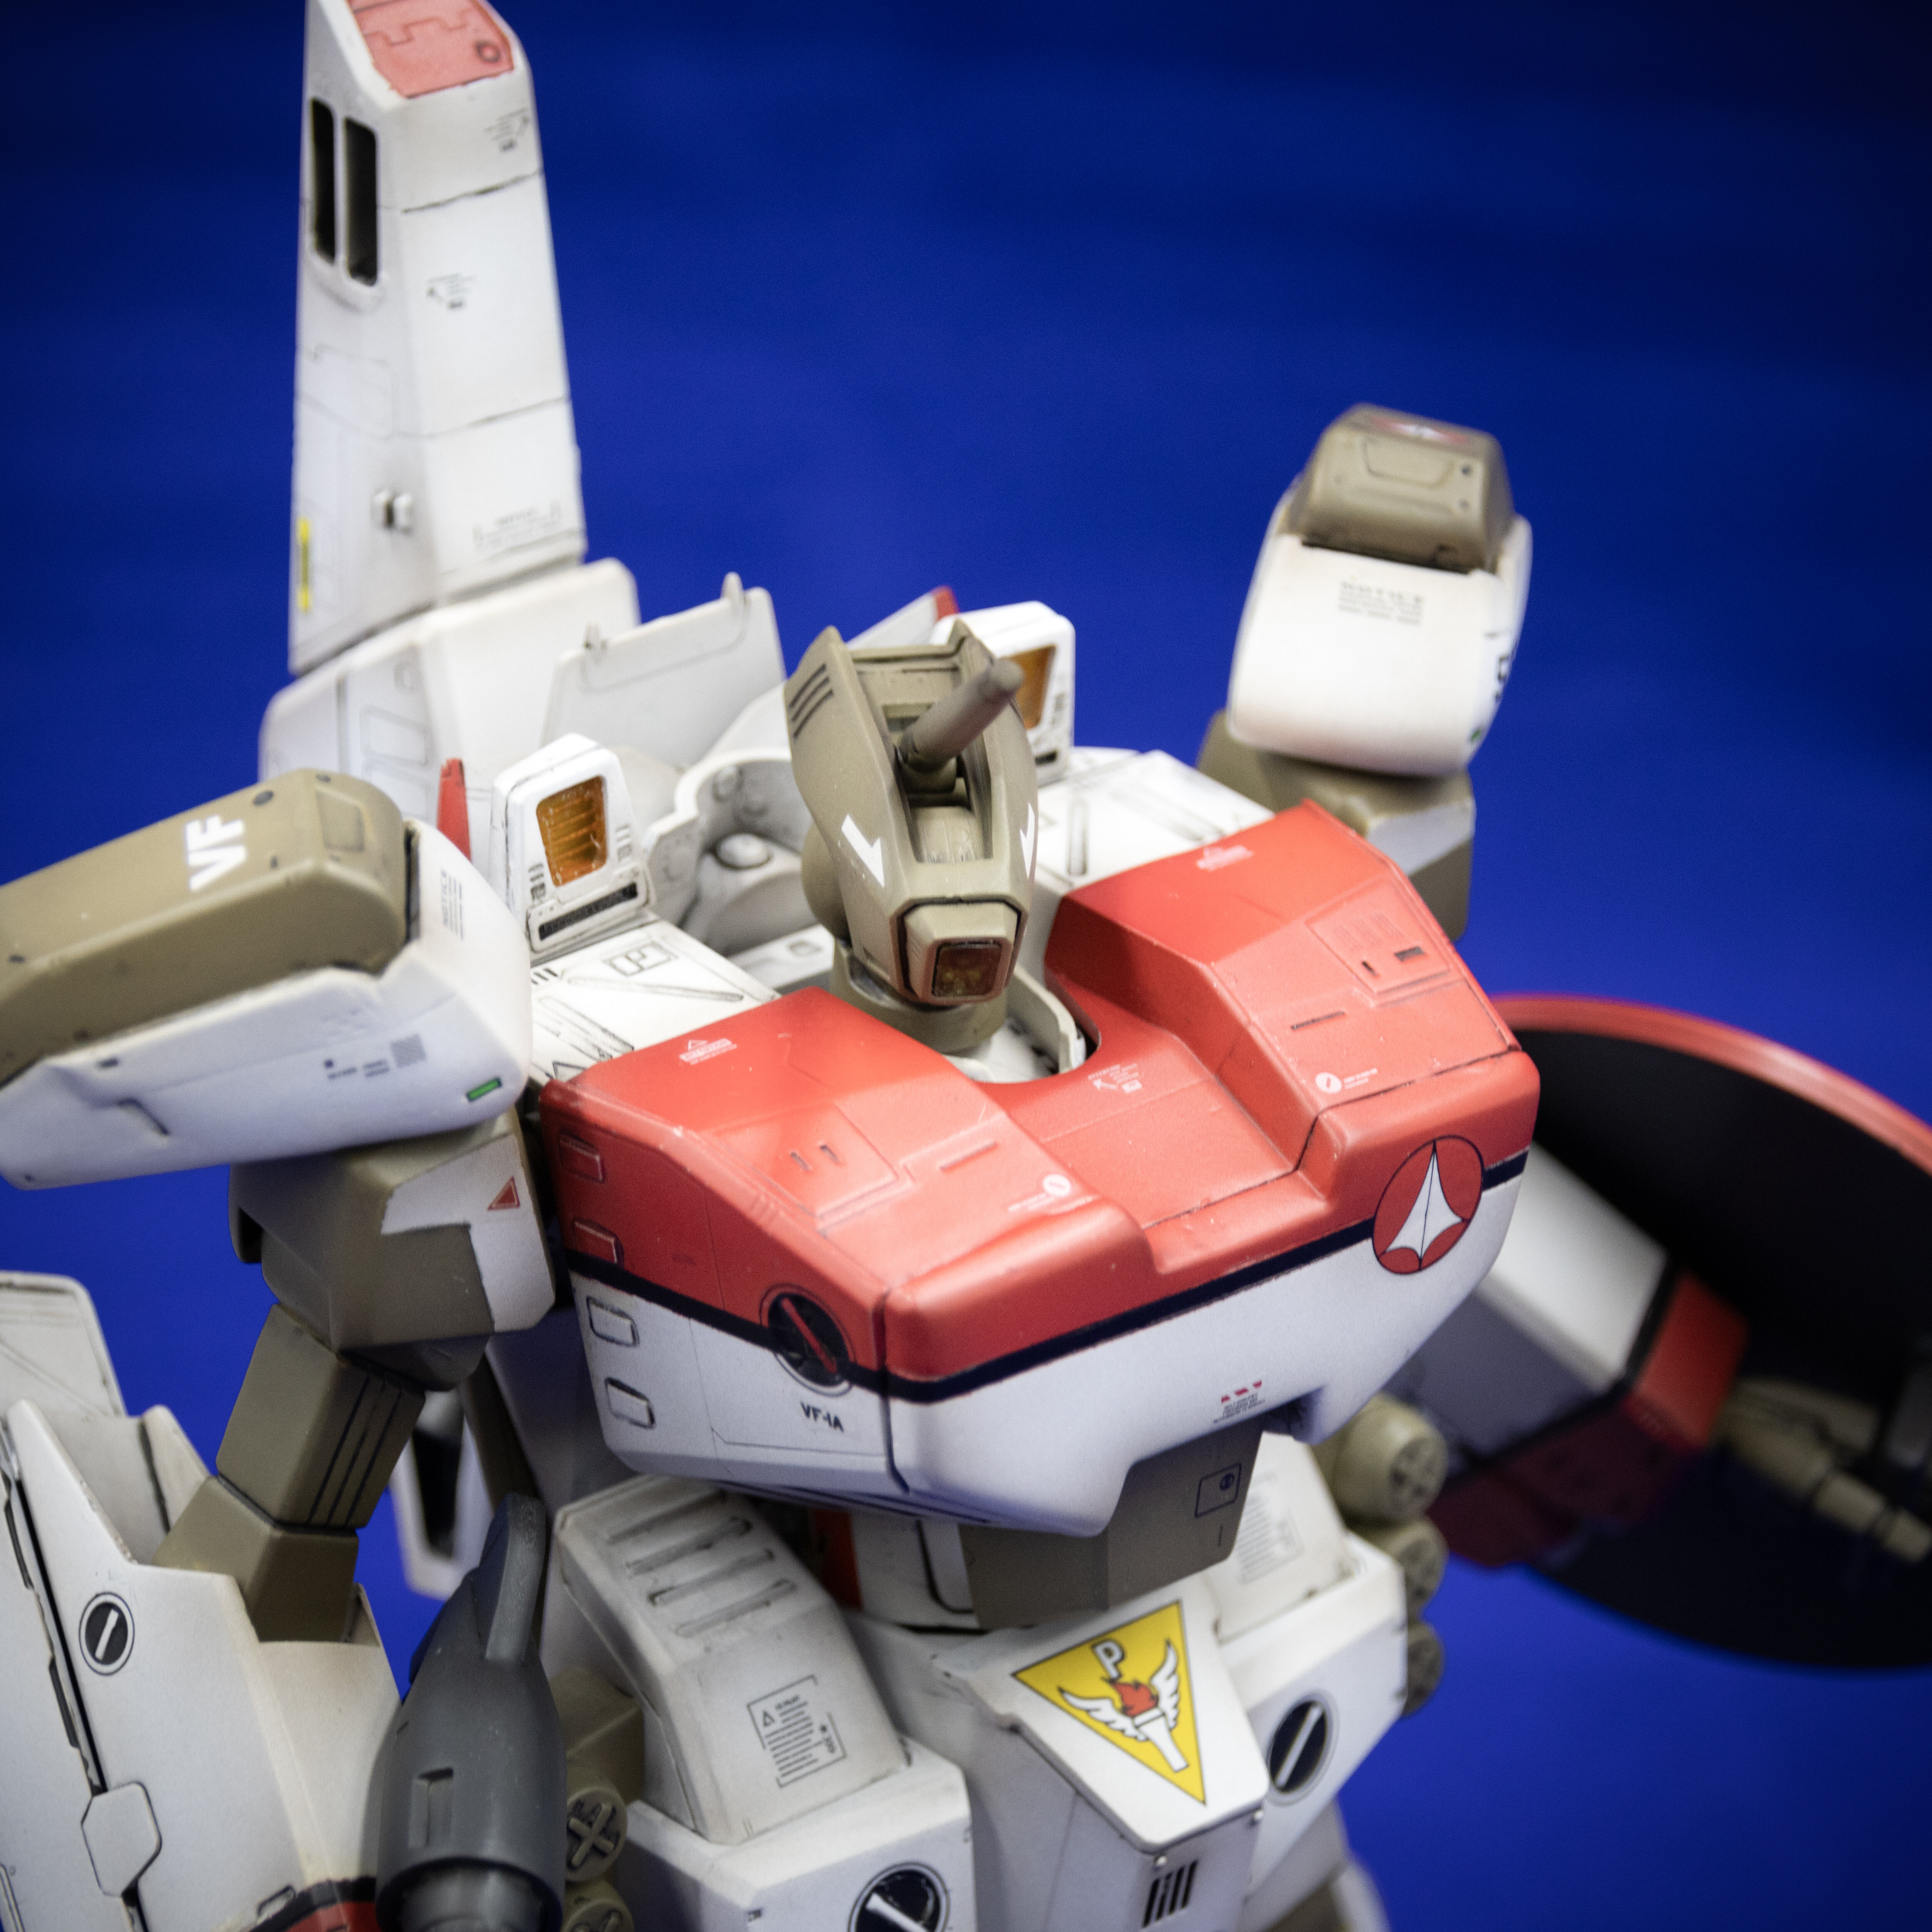
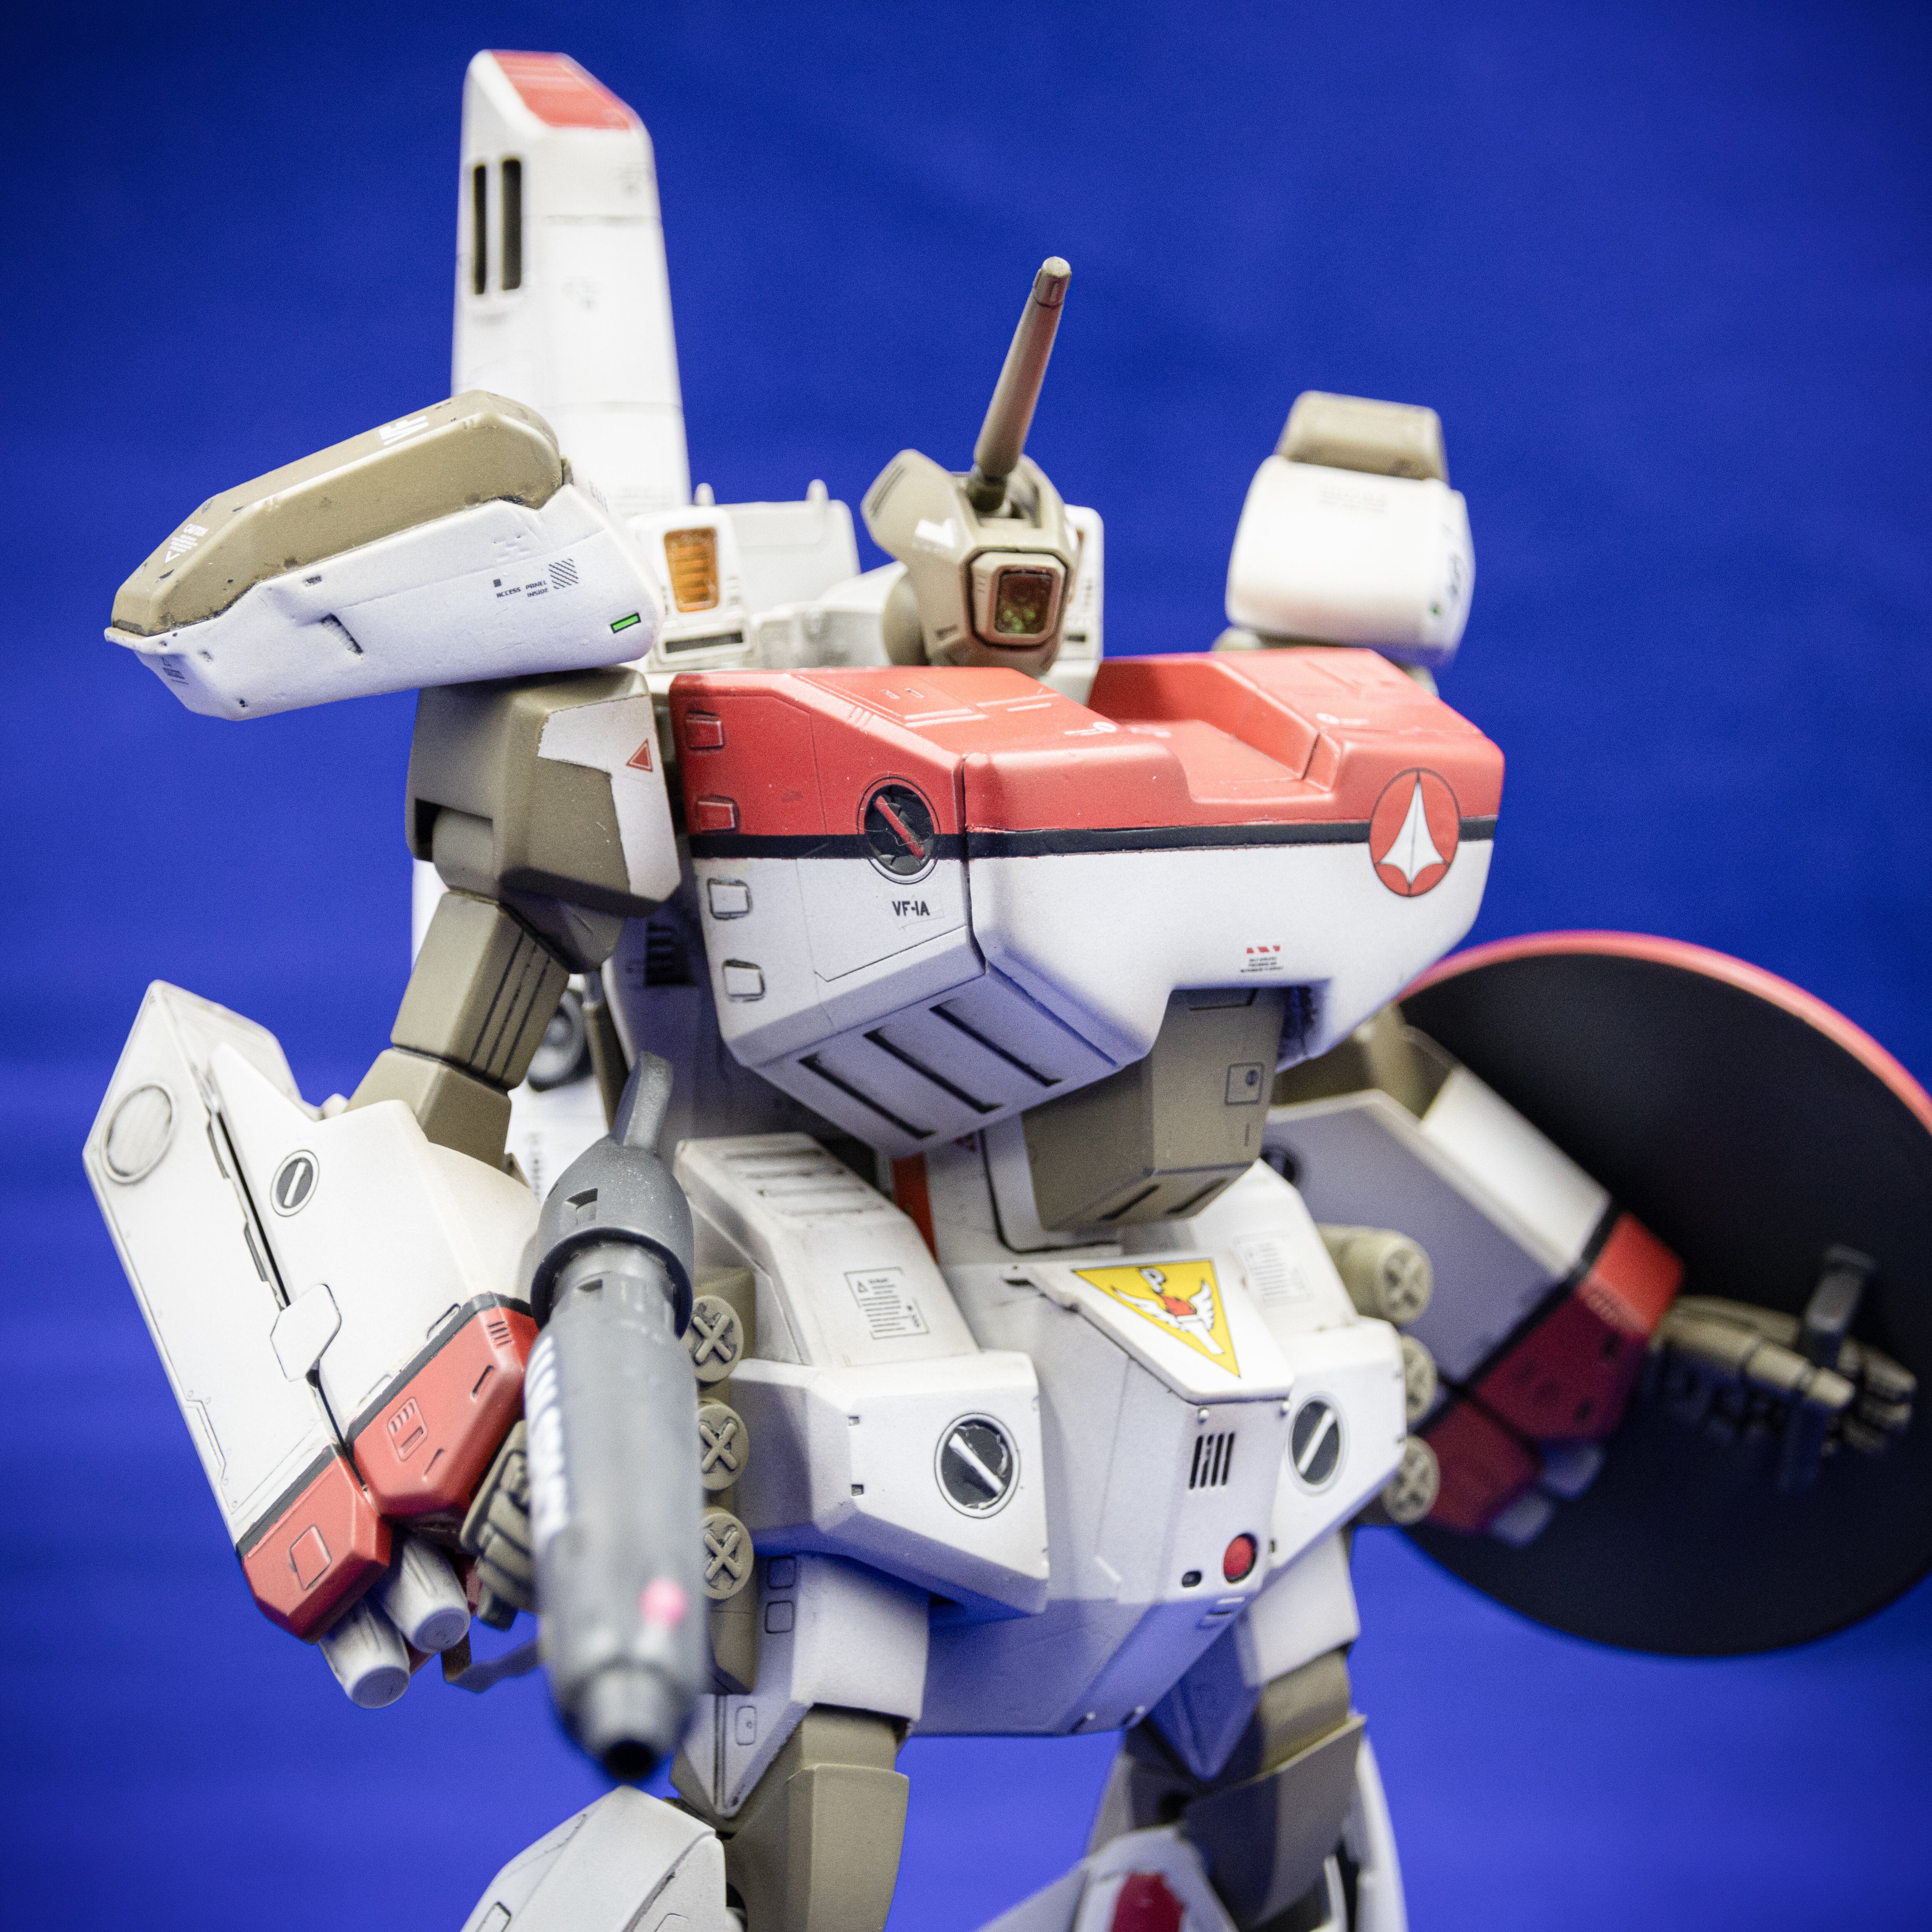
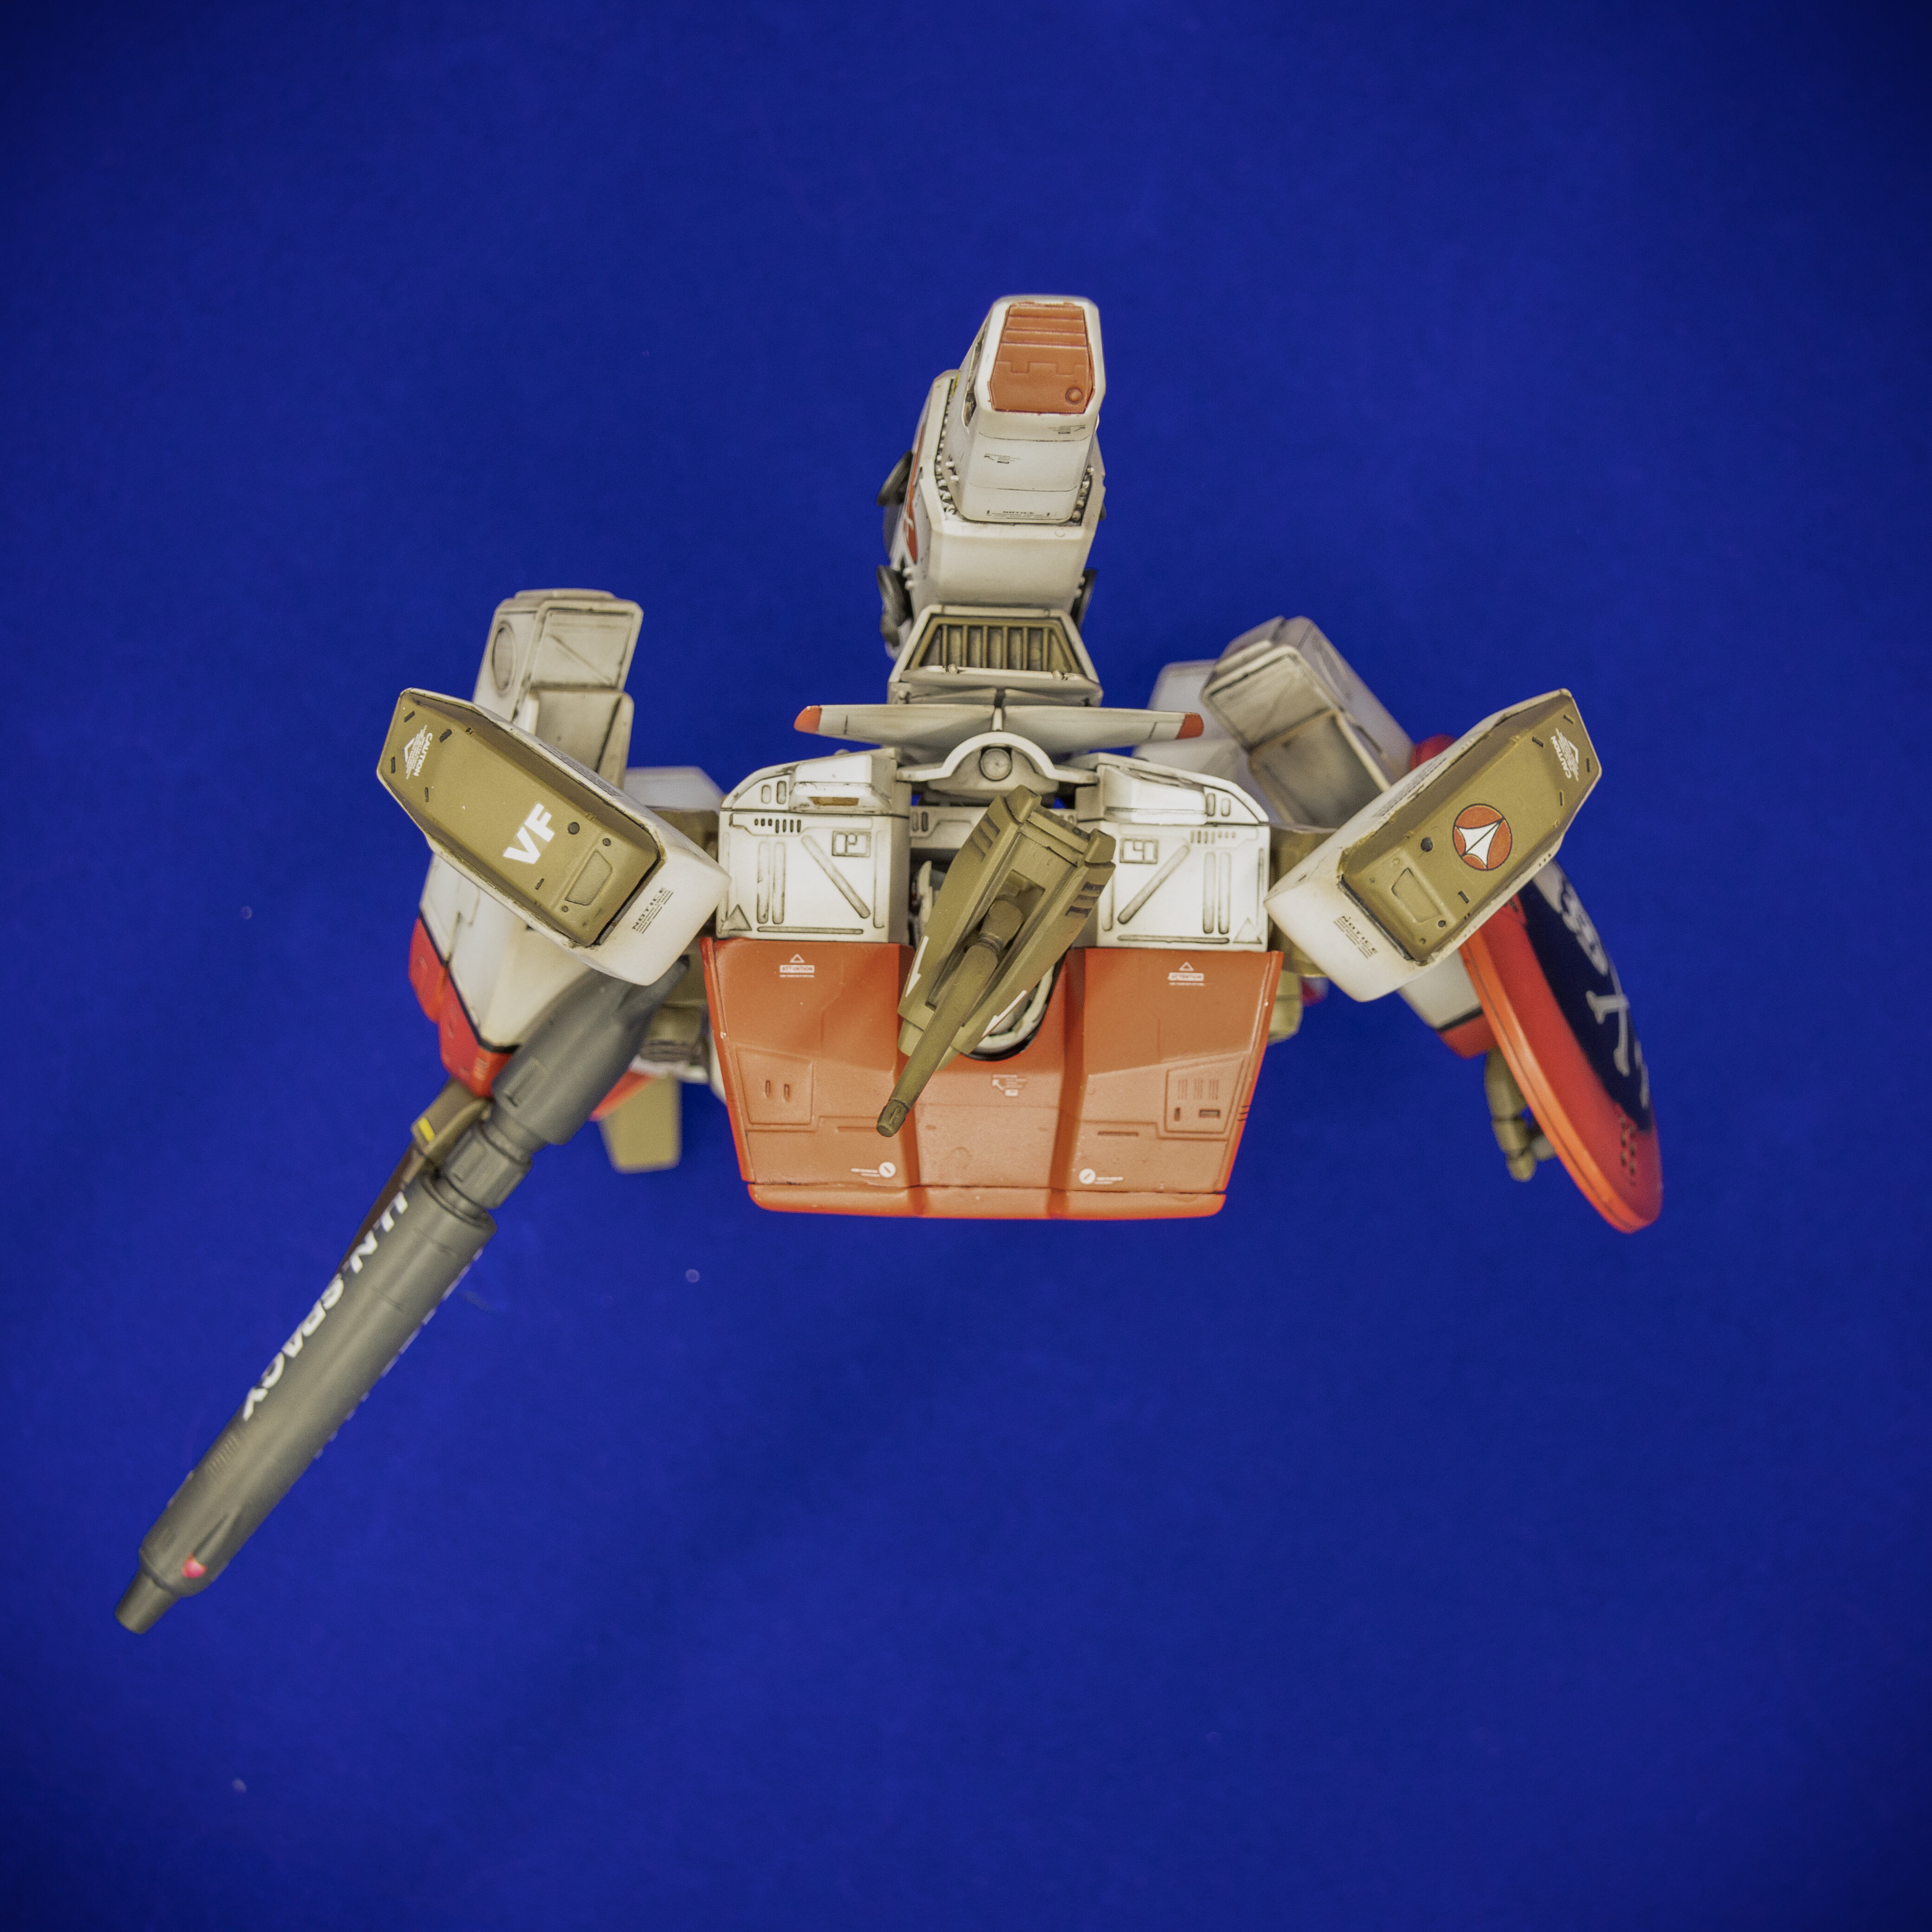
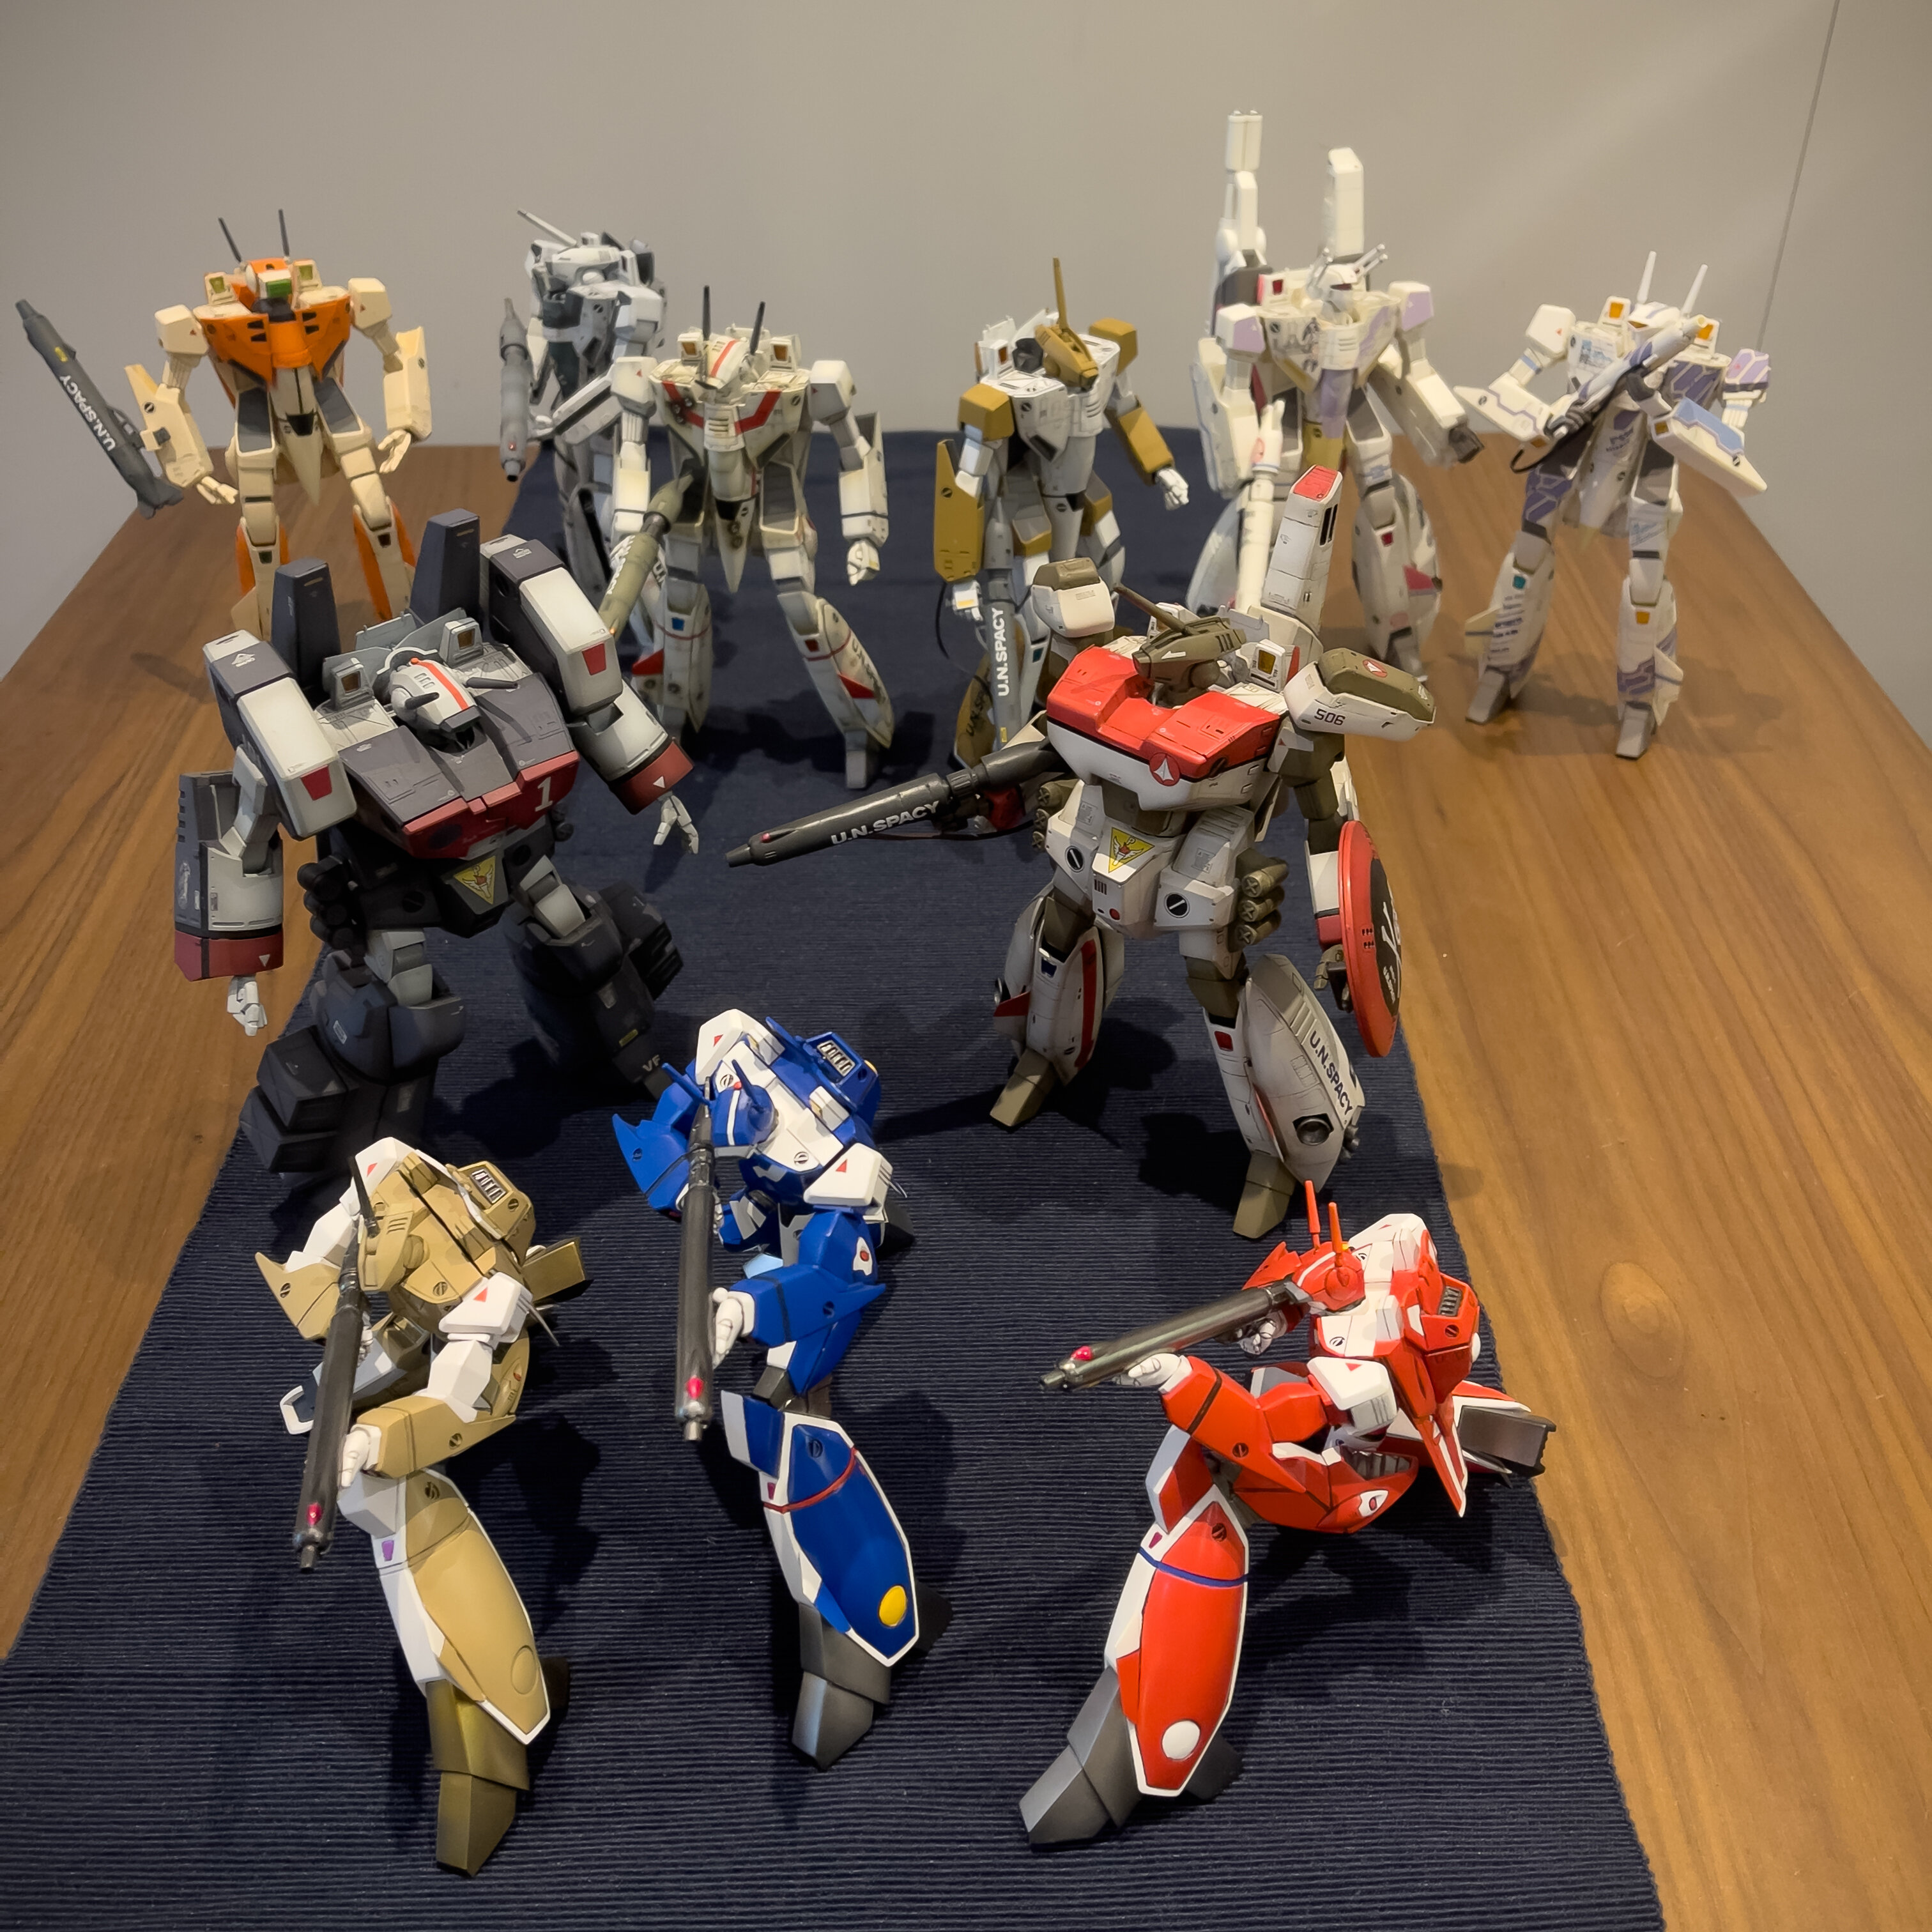
Initially planned to make use of Orguss parts to fit into 1/72 VF-1A, but found that the scale can't fit it. So finally tried to source some parts from other models to fit into 1/72 VF-1A.Can you tell what models I used to build this?The last photo is 1/72 VF-1s in battriod form that i collected over the years. Some were from yahoo/ebay, some were built by professionals.
-
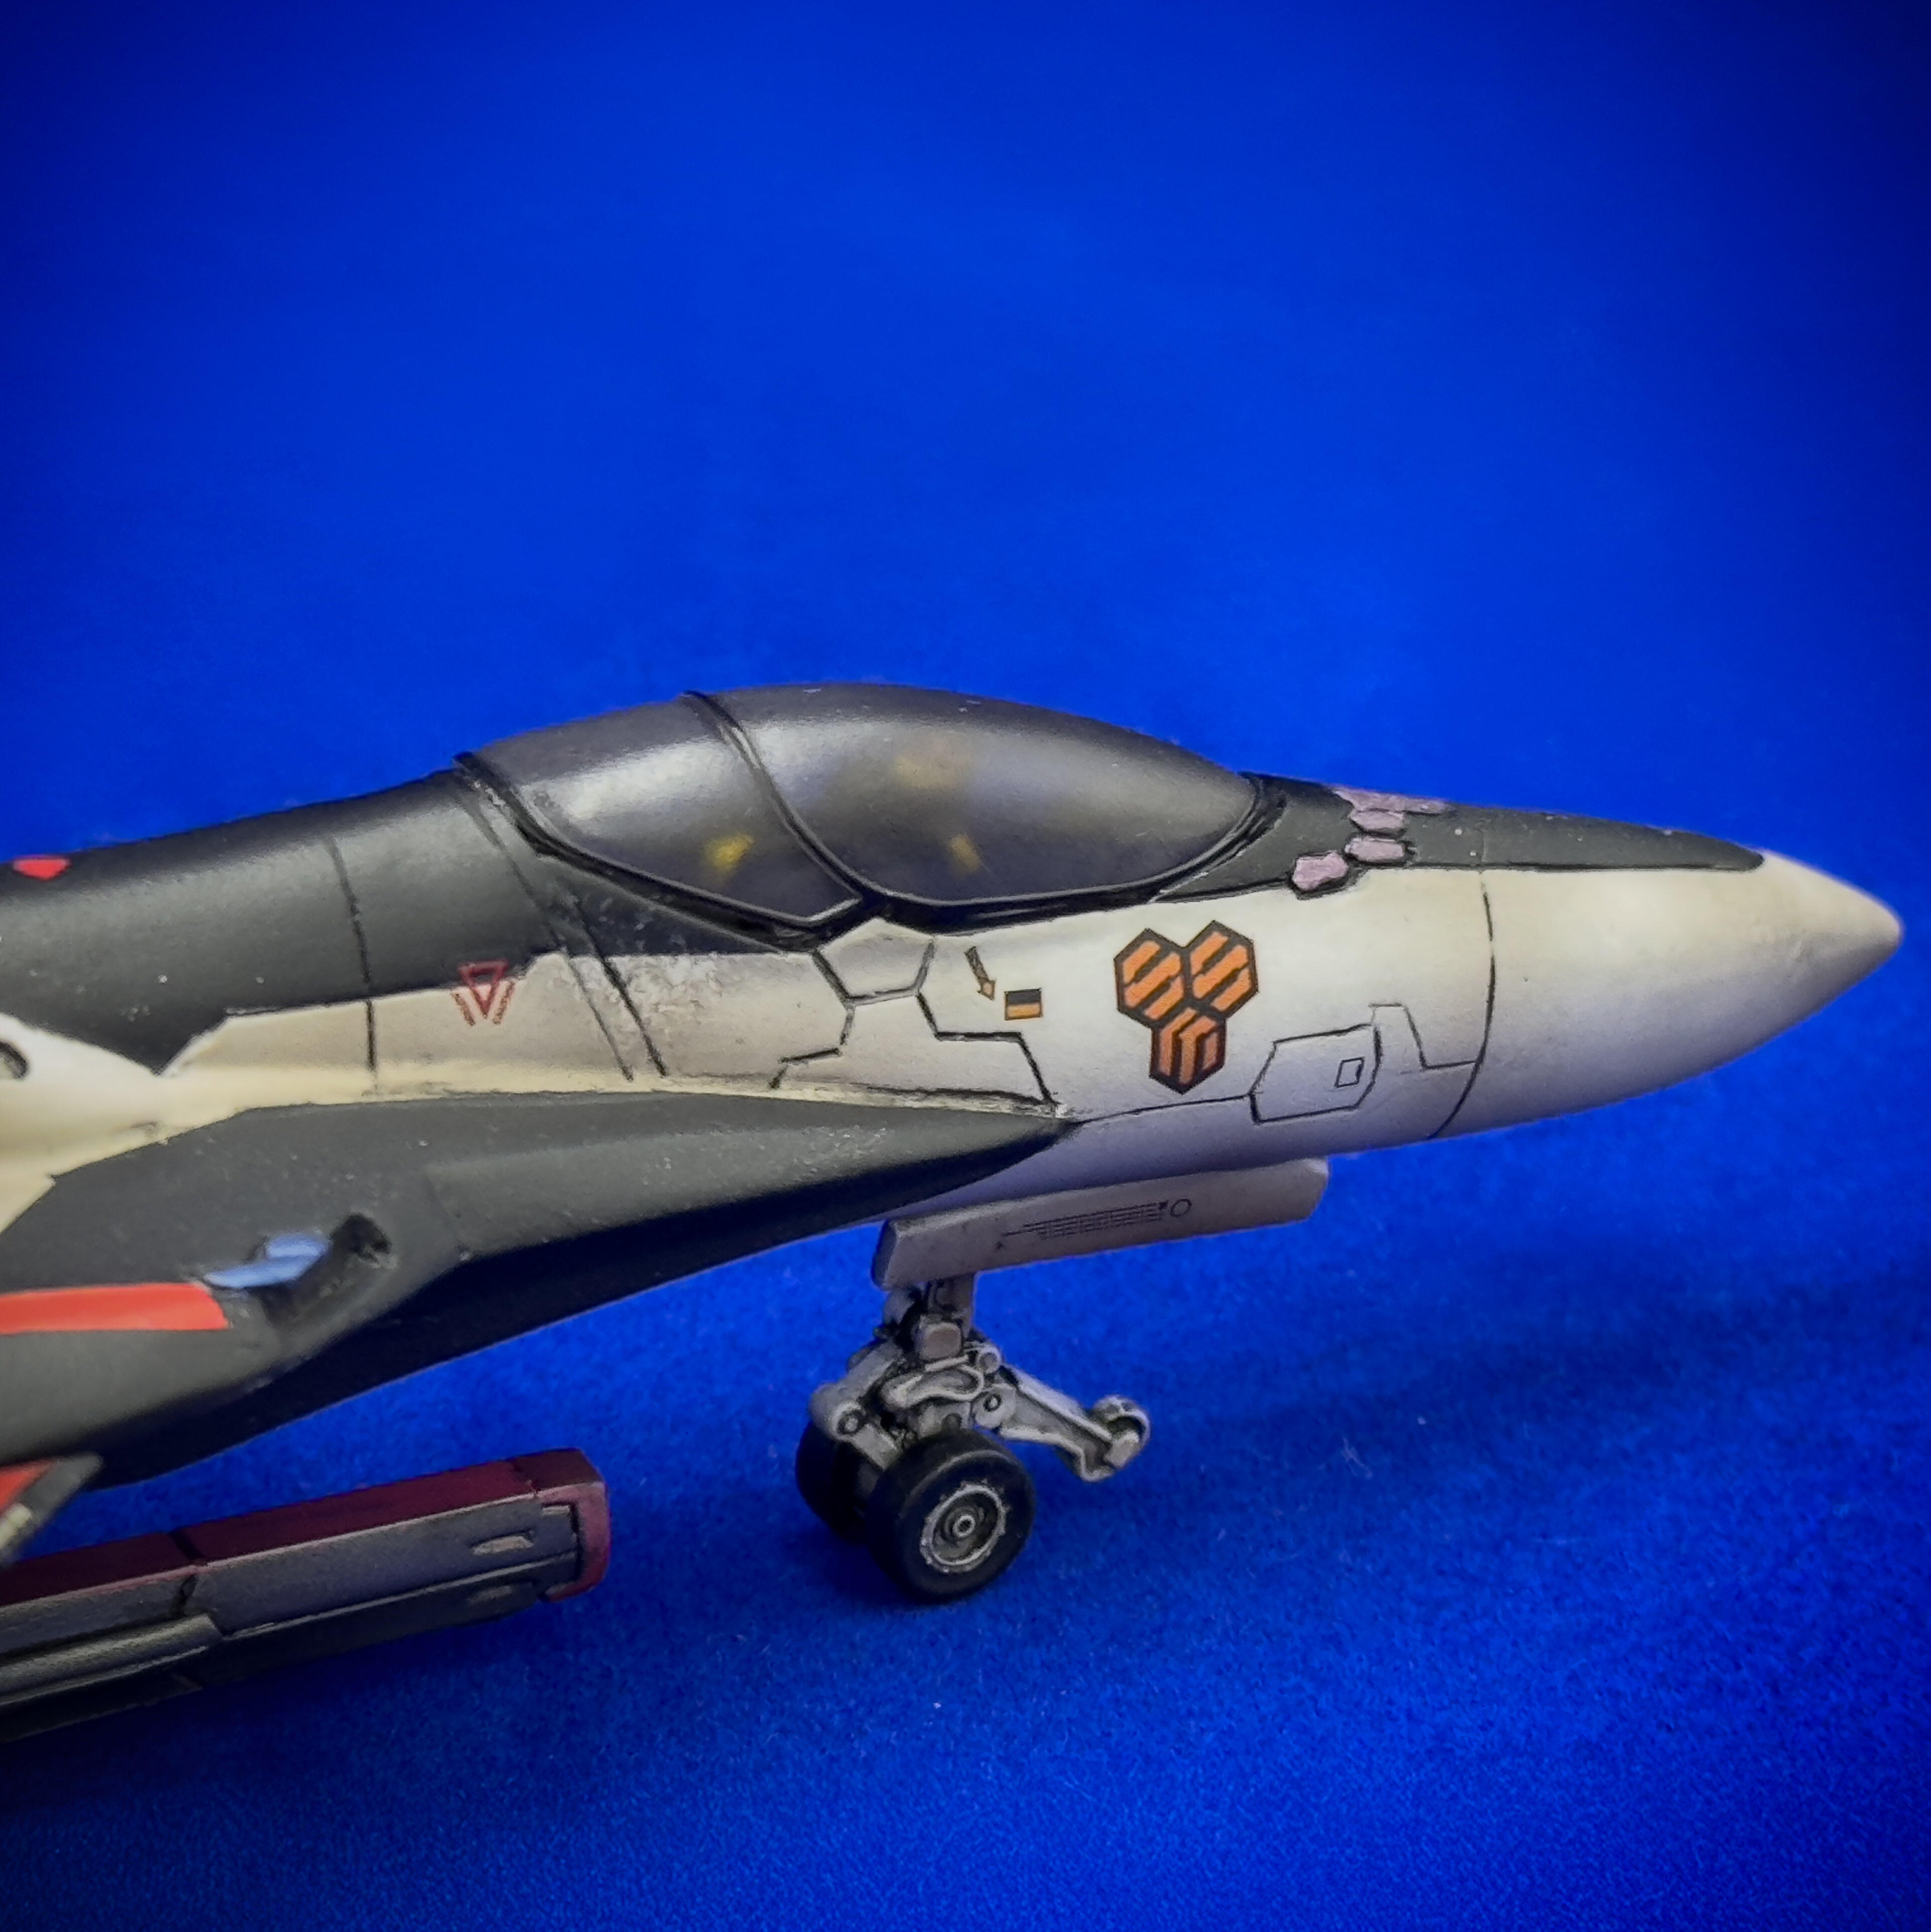
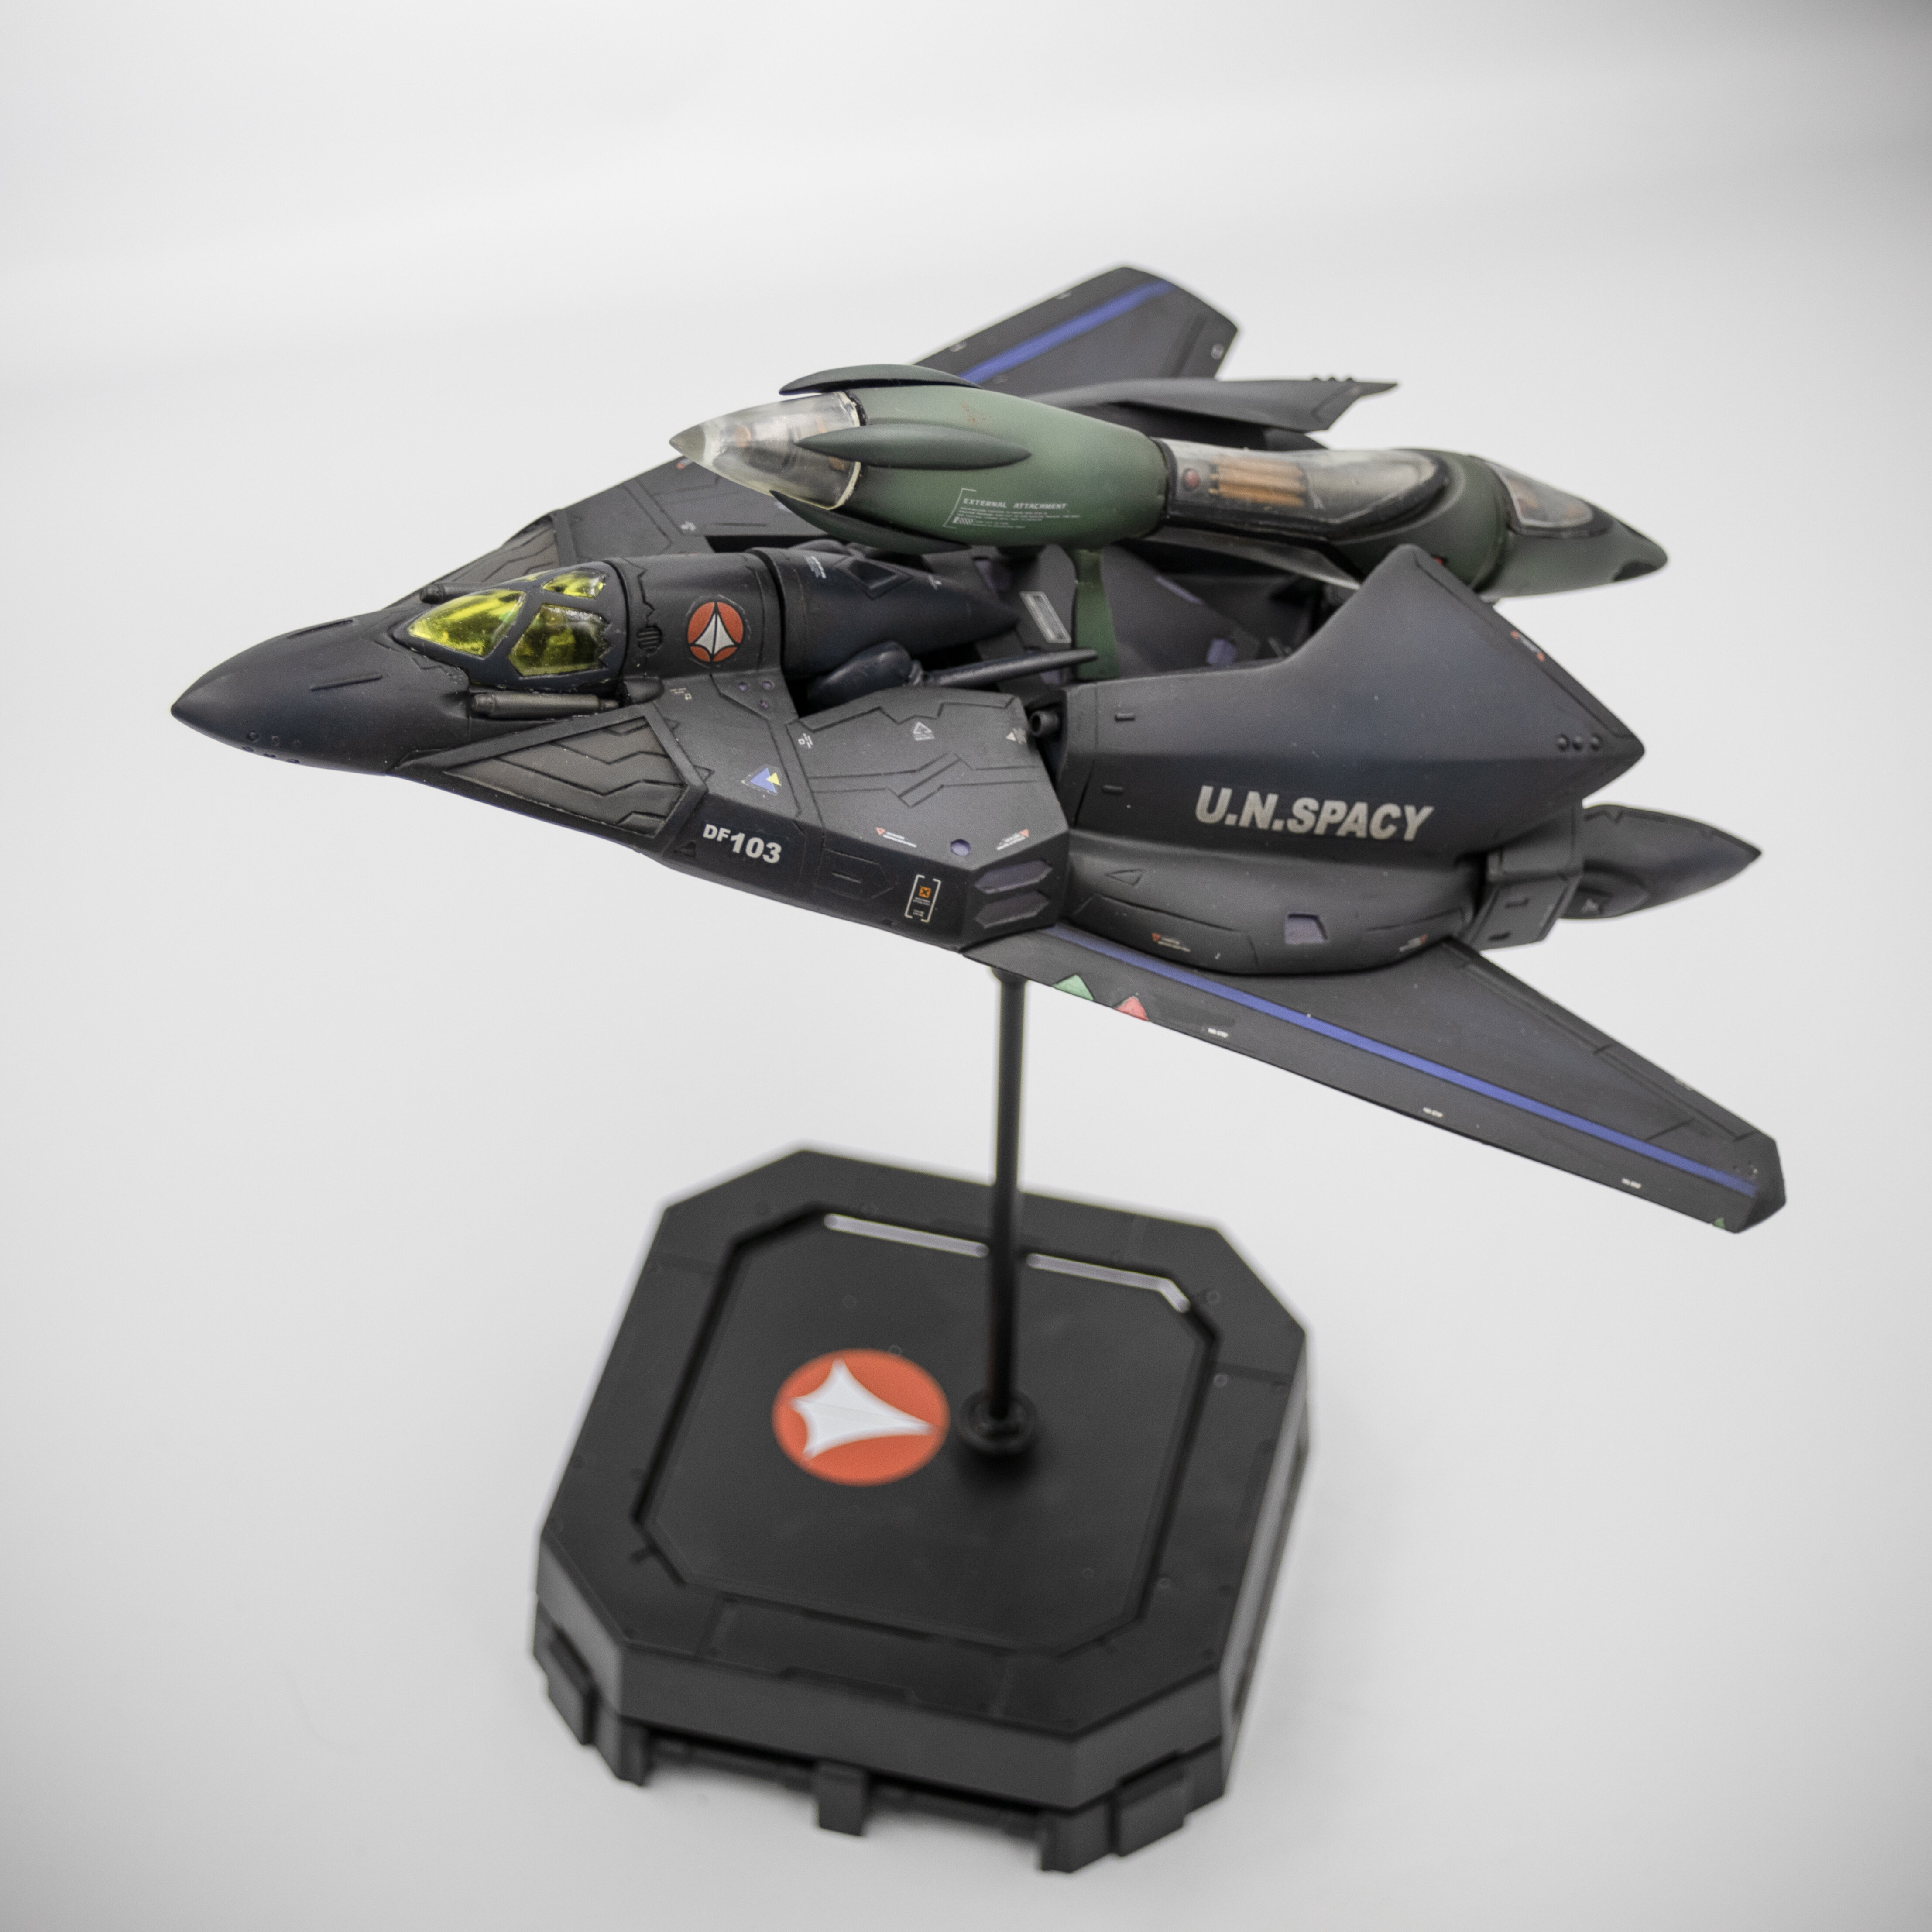
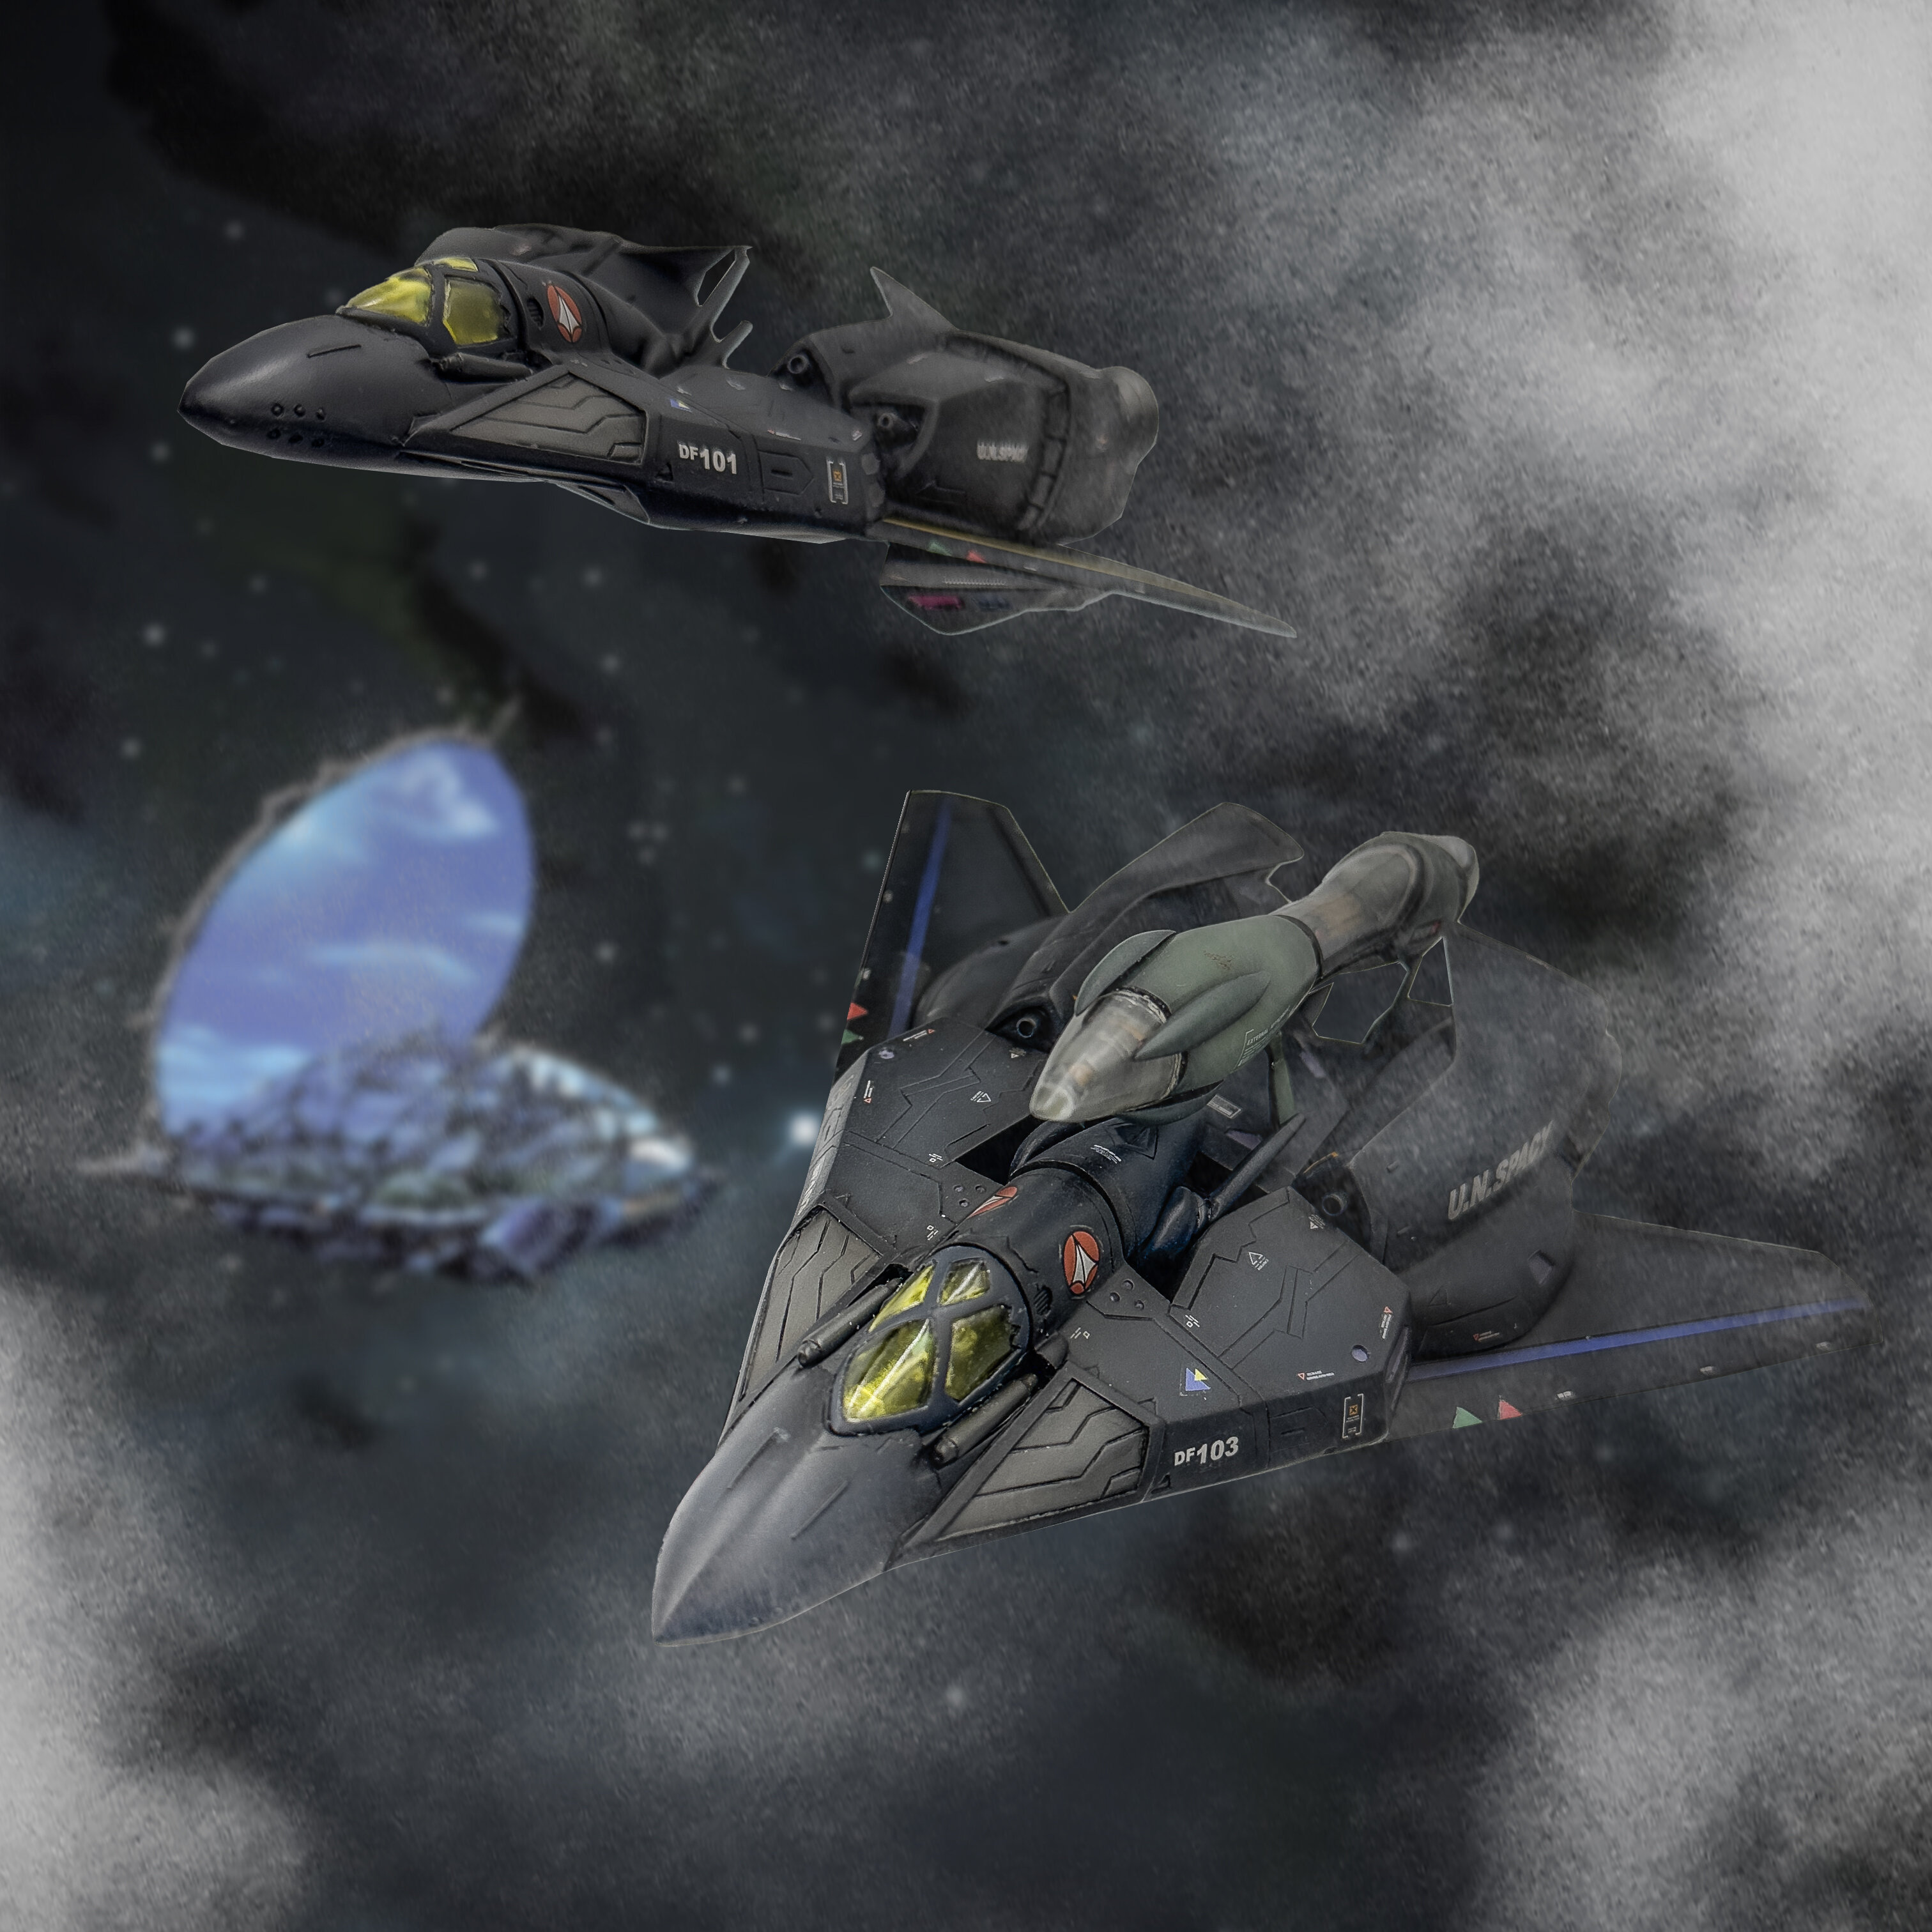
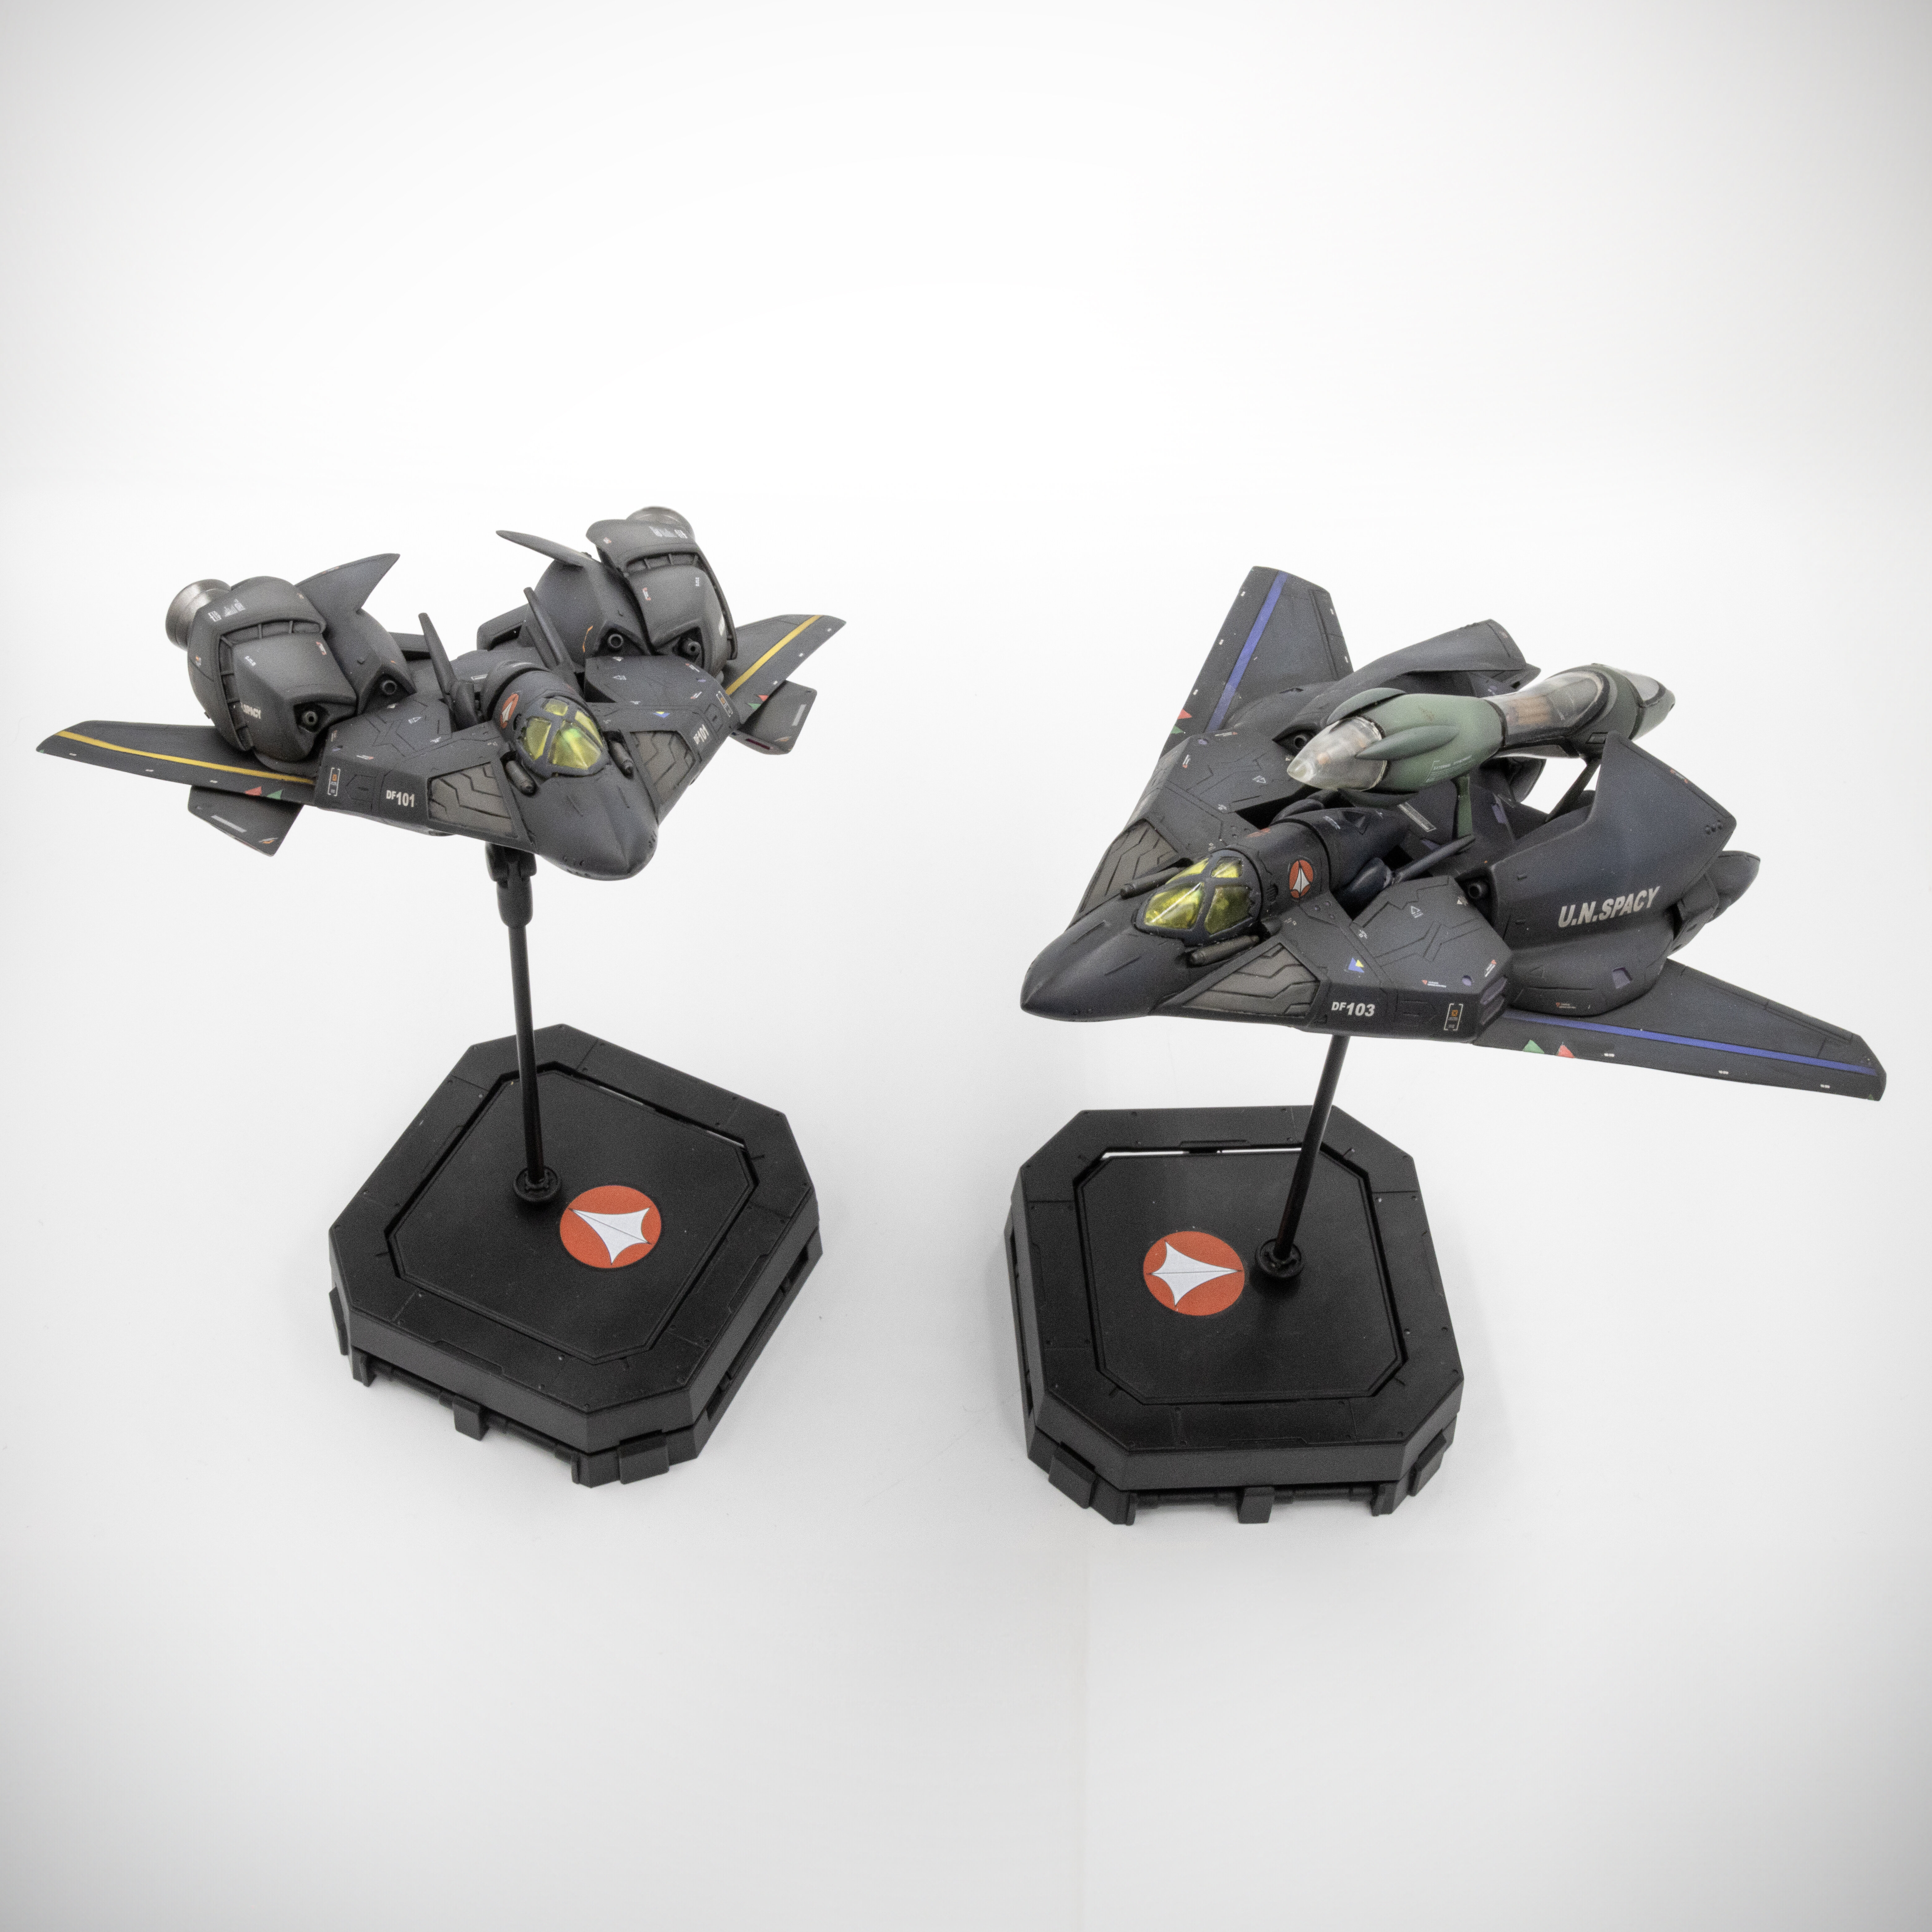
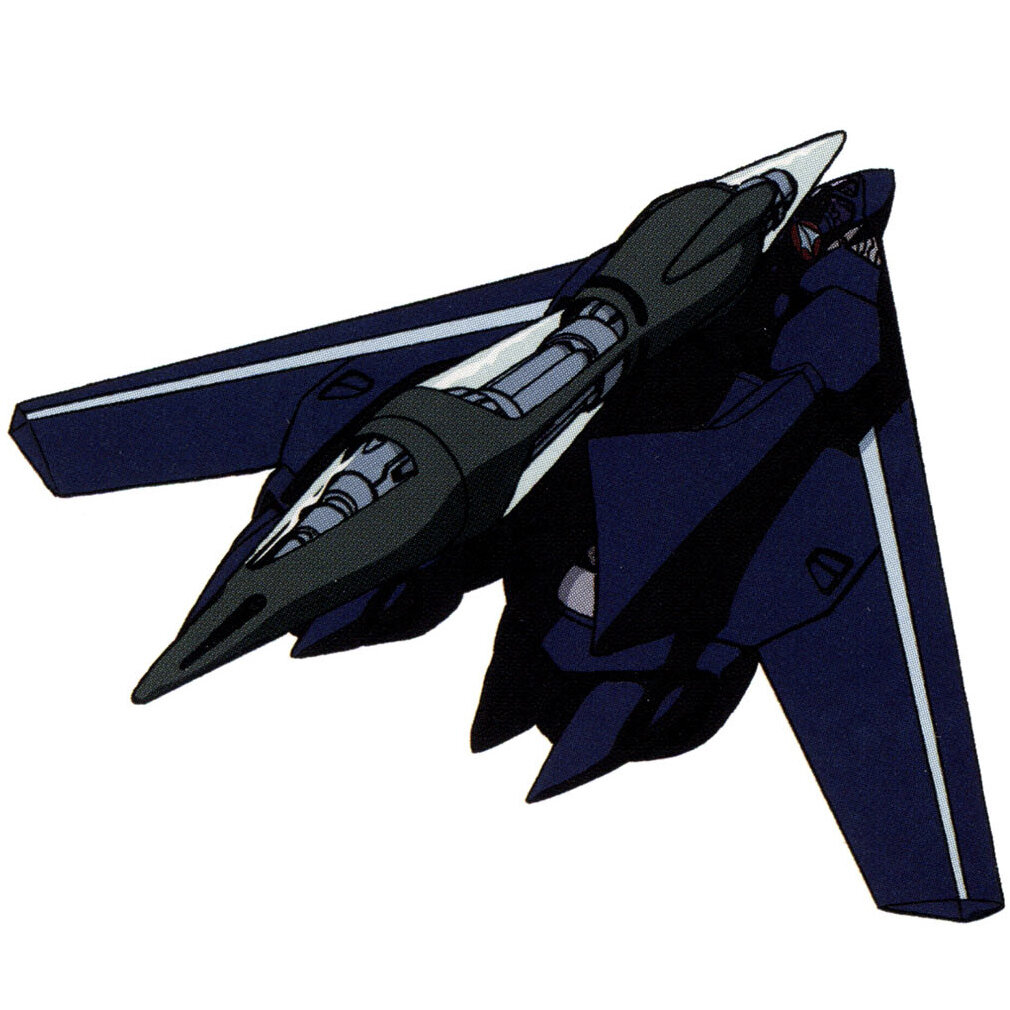
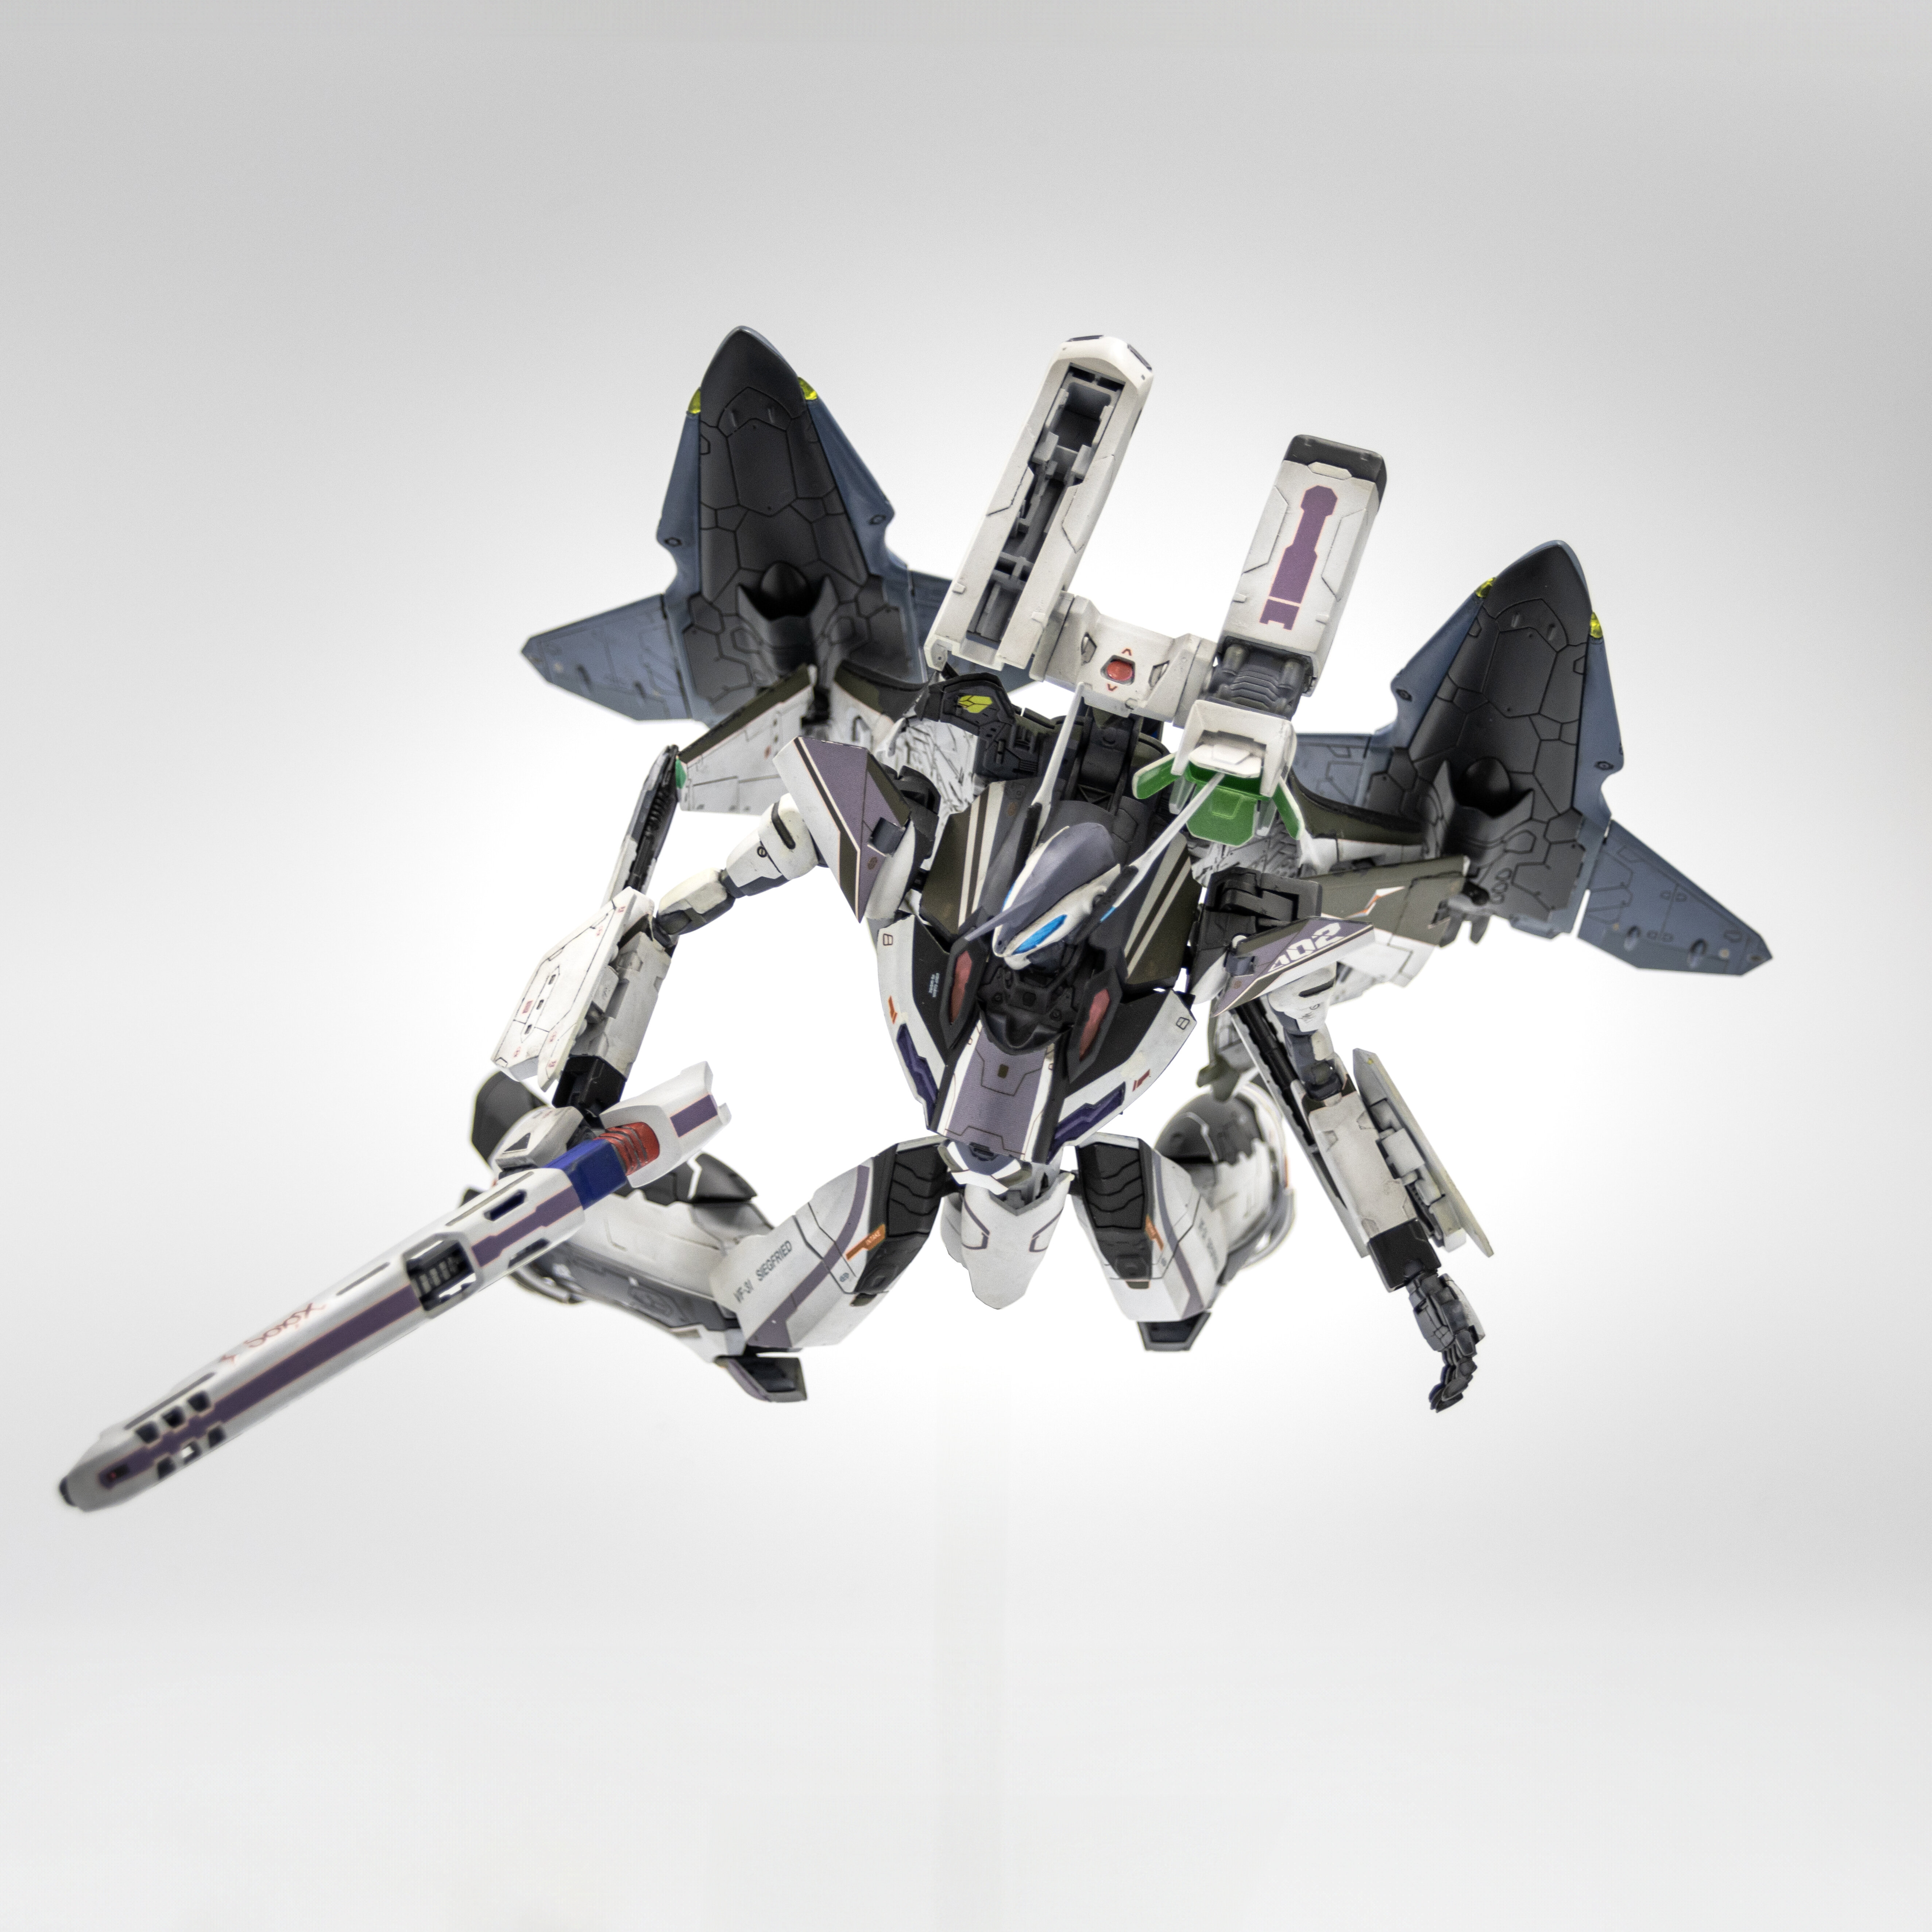
Feel that I should finish and post these before the release of YF-19 fold booster
Both VF-17 and fold booster are 1/72 resin.
-
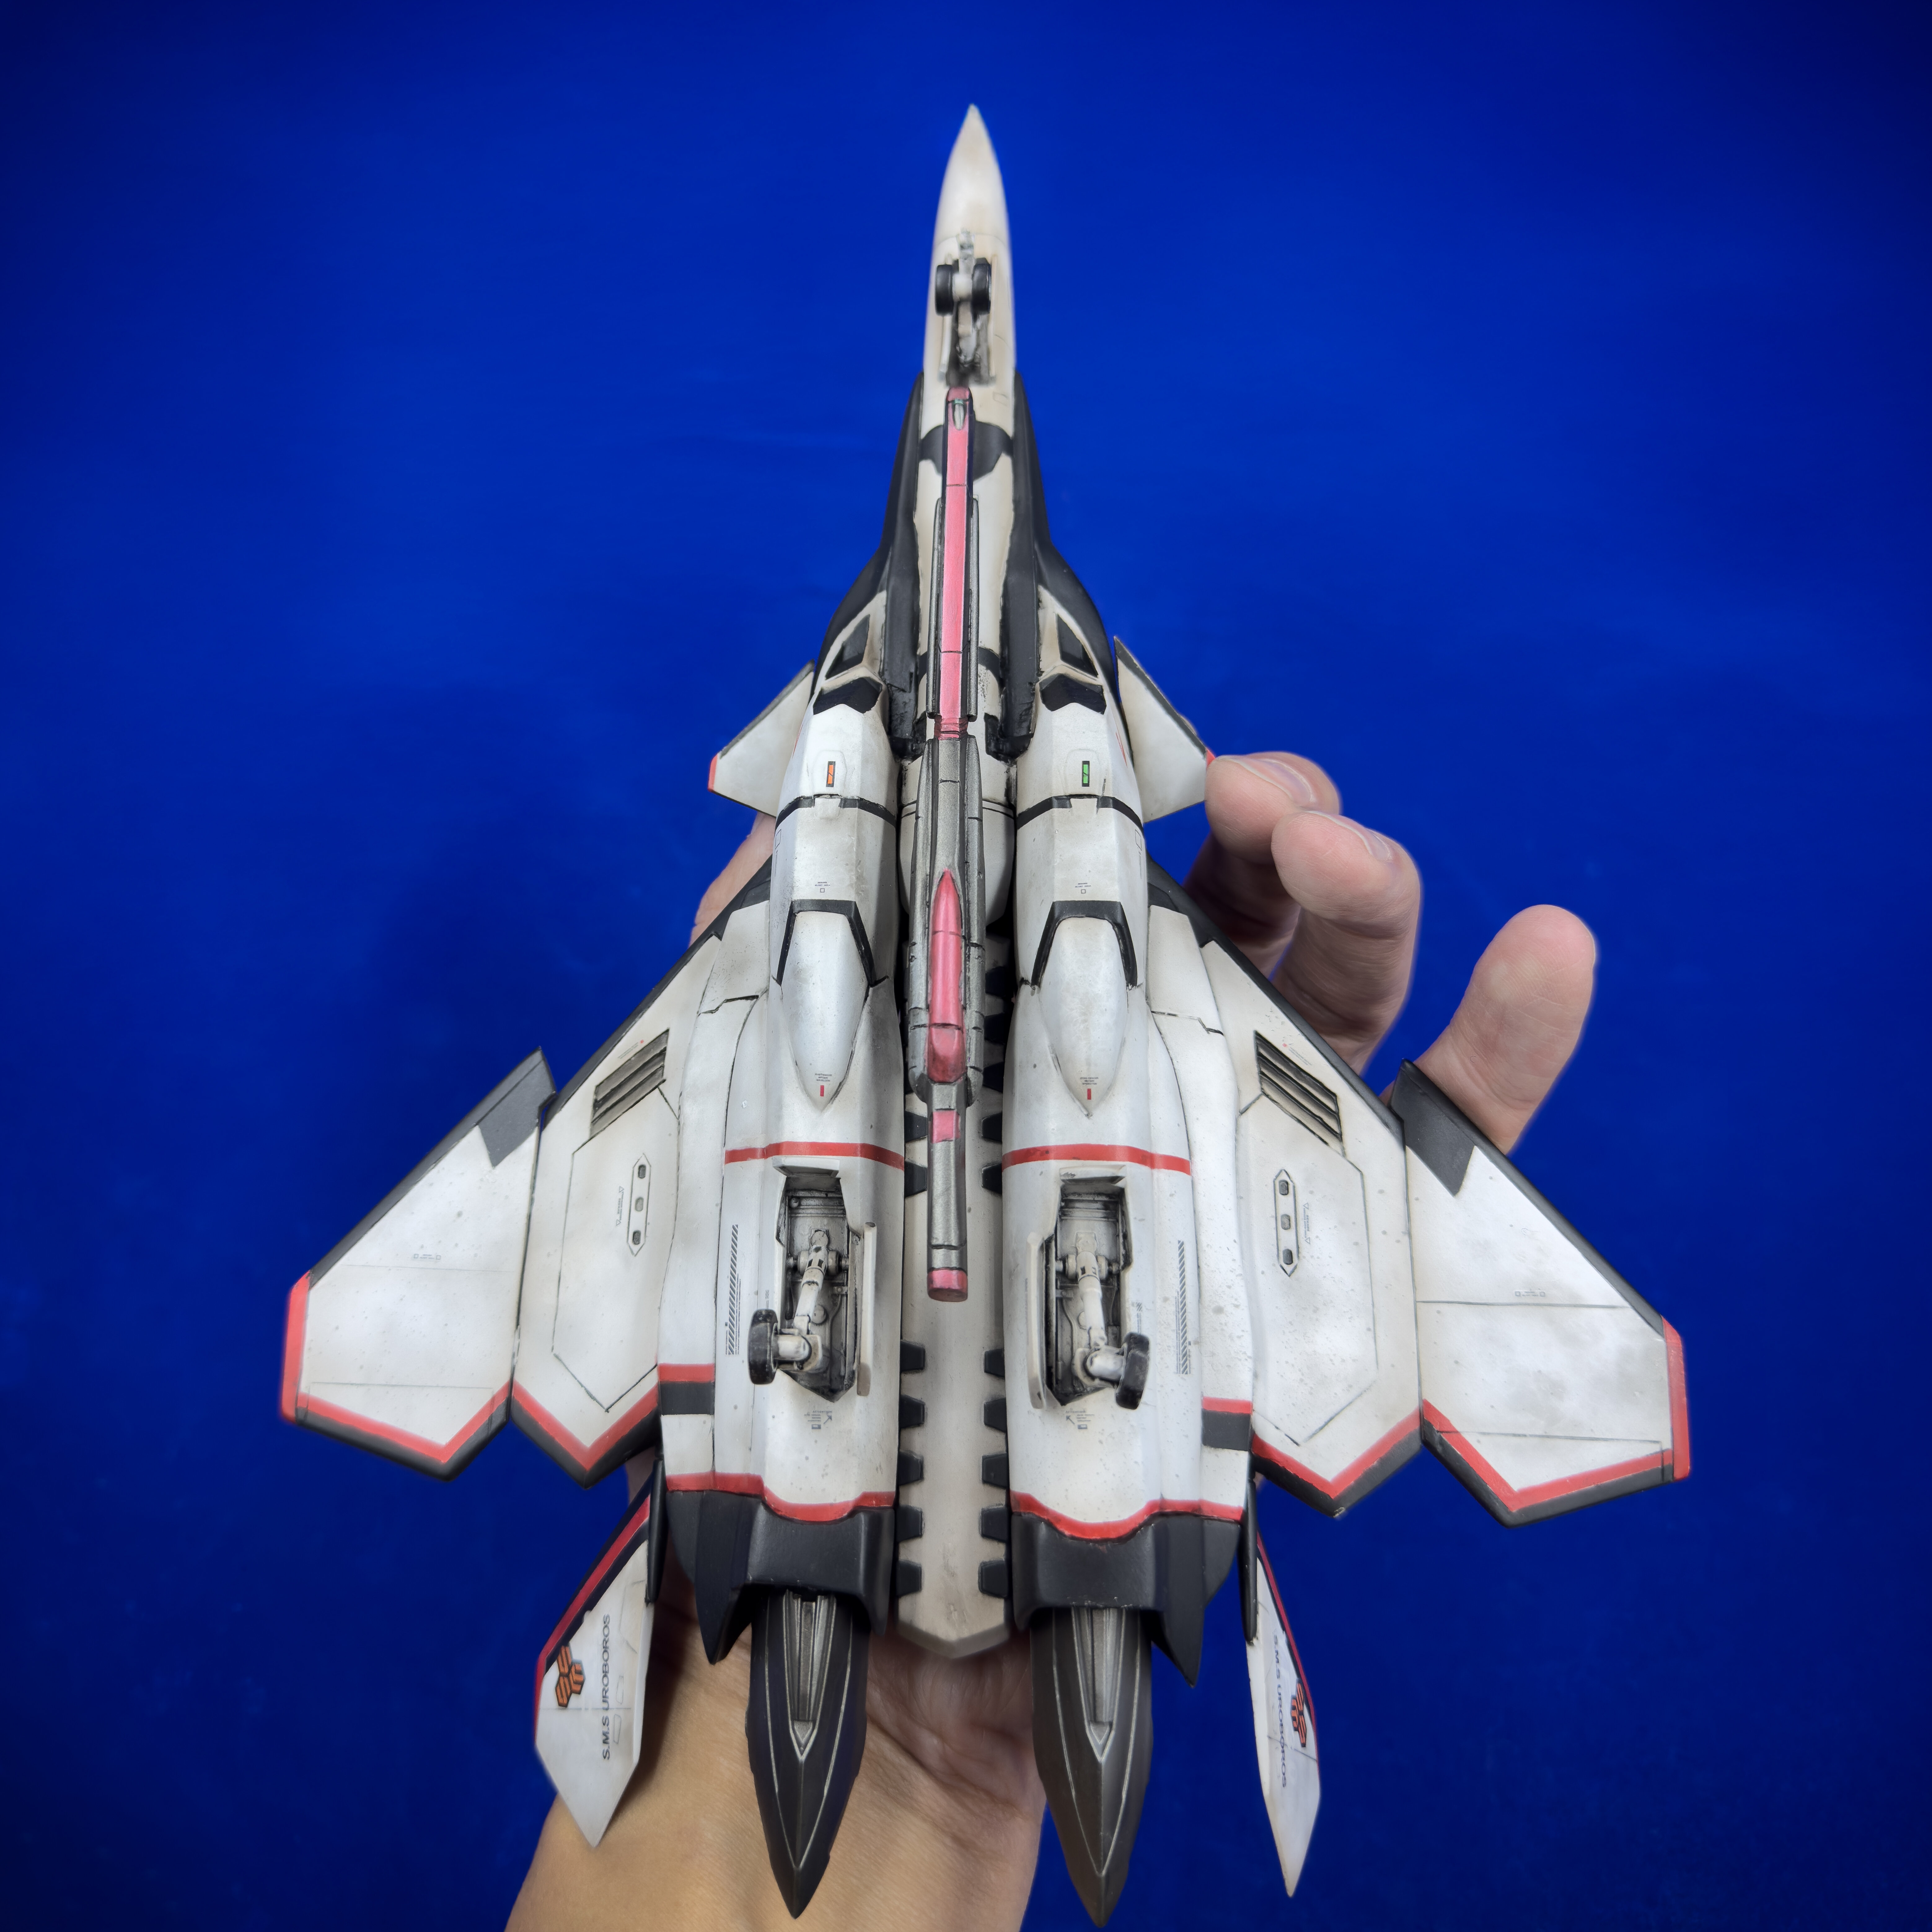
VF-17S resin by seventh moon. Again, quite a challenging exercise. 2 more VF-17 will be coming very soon.


-
Thank you so much for the comments, support and appreciation. Perhaps i should tell more about the mistake. There was a drop of paint that damaged the surface at the final stage. I tried to sand that part and paint again, but it was not totally unnoticeable. But I should be glad that it is not too obvious.
i will consider to paint the canopy frame. Thank you for the suggestions.
Other projects in pipeline: VF-2JA, 3 x VF-17, YF-25 with parts of Frame Out Model.... and many others to follow
-
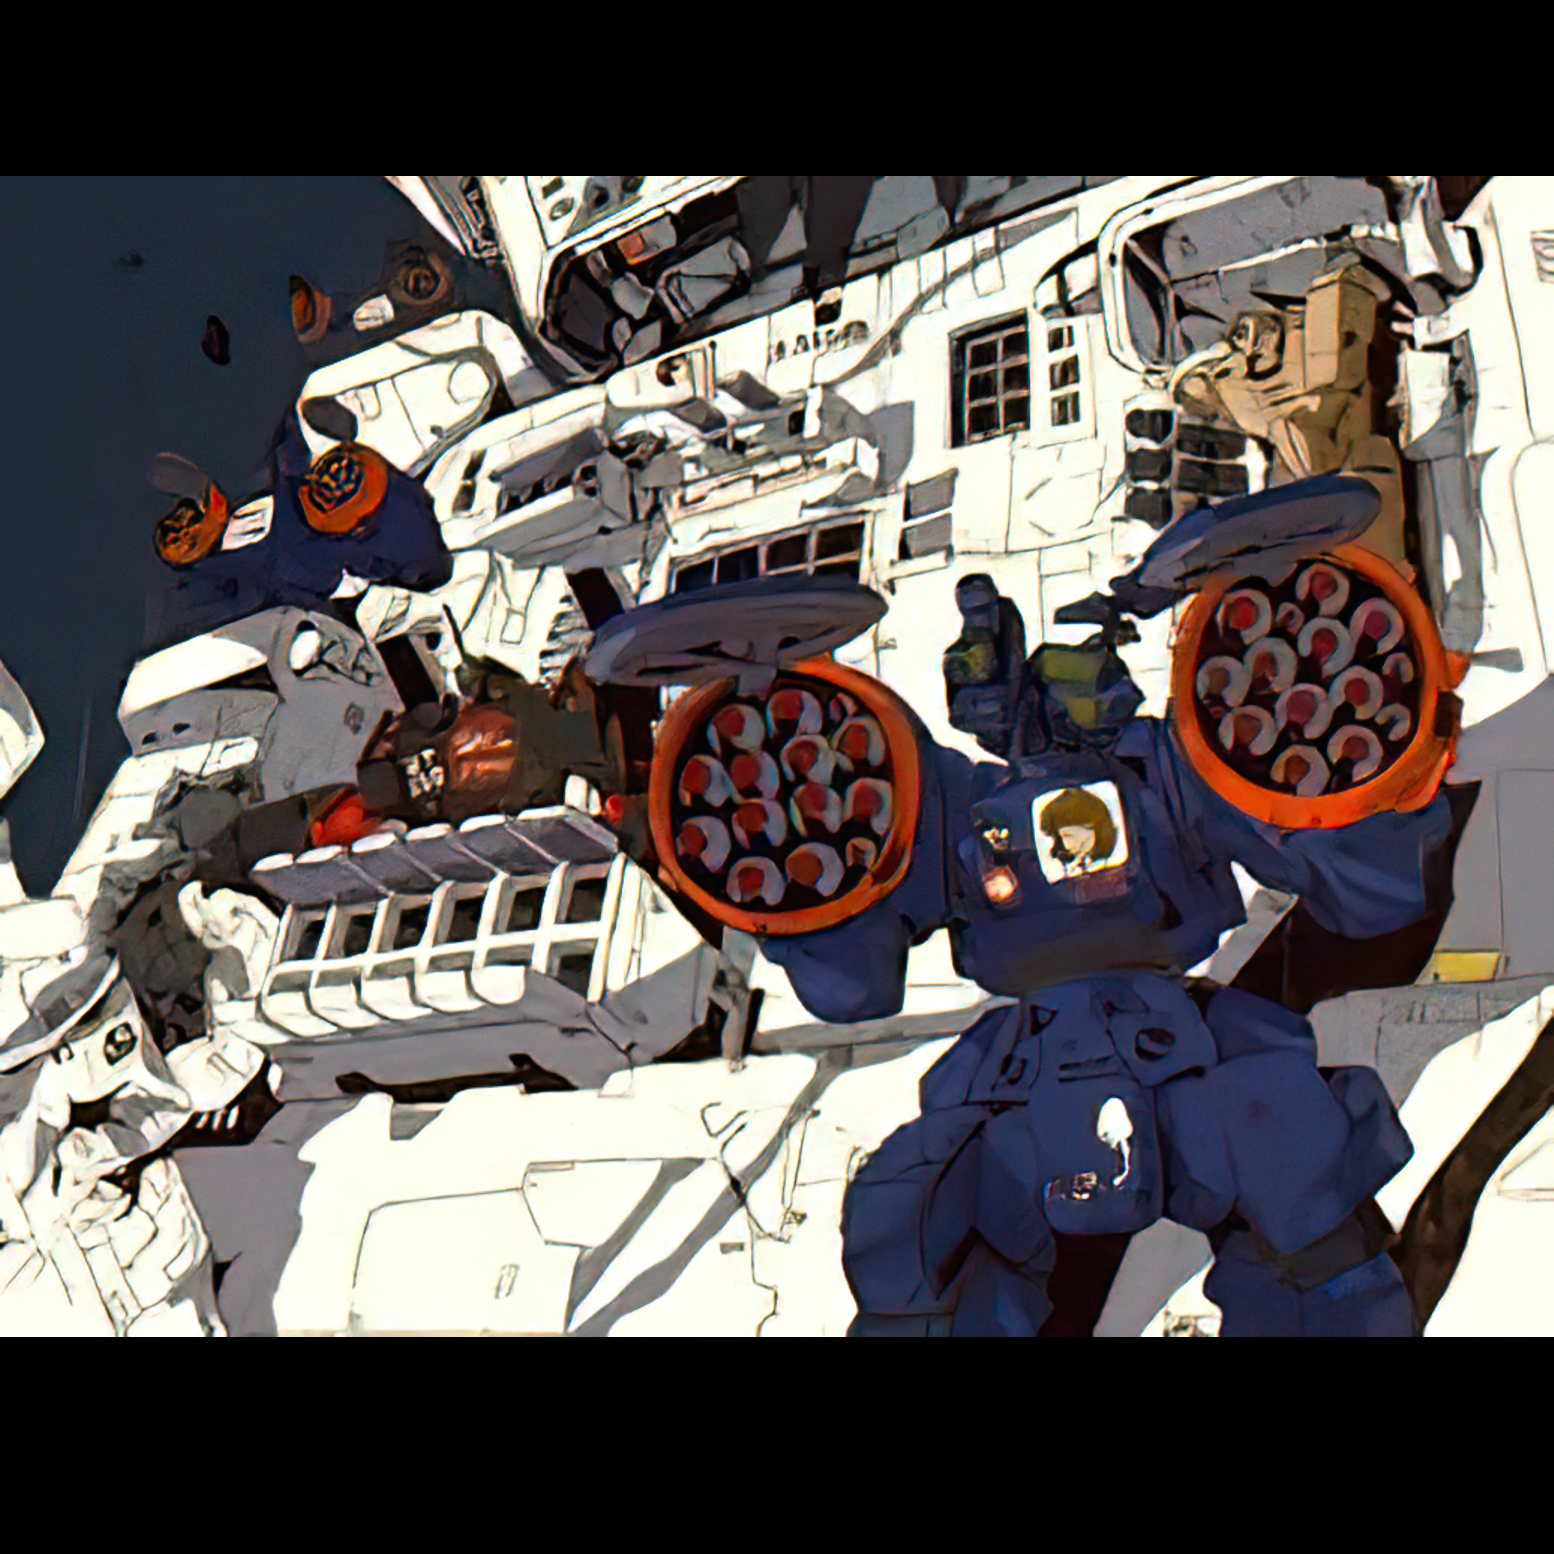
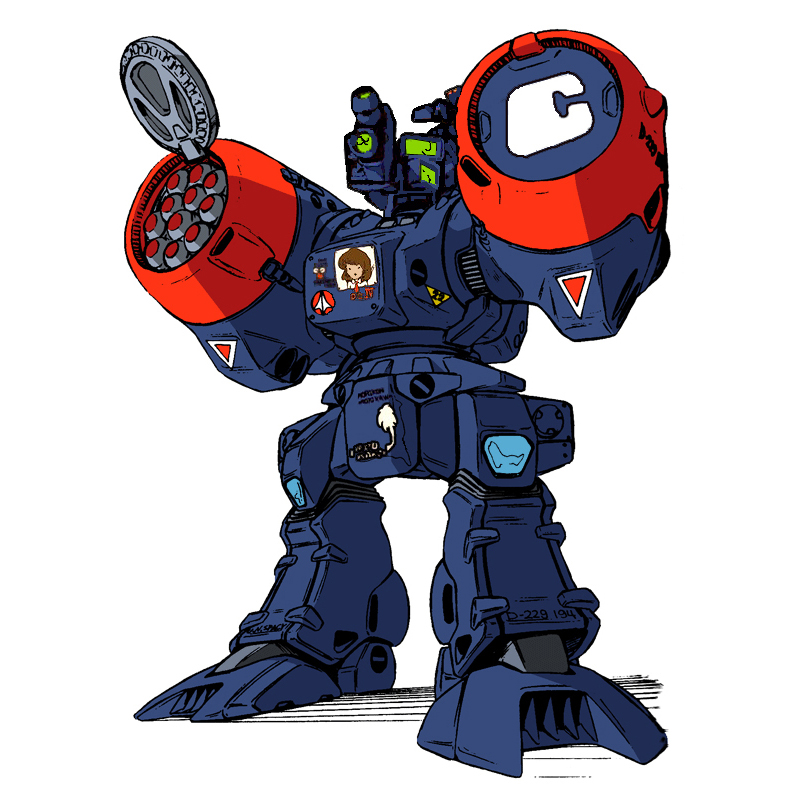
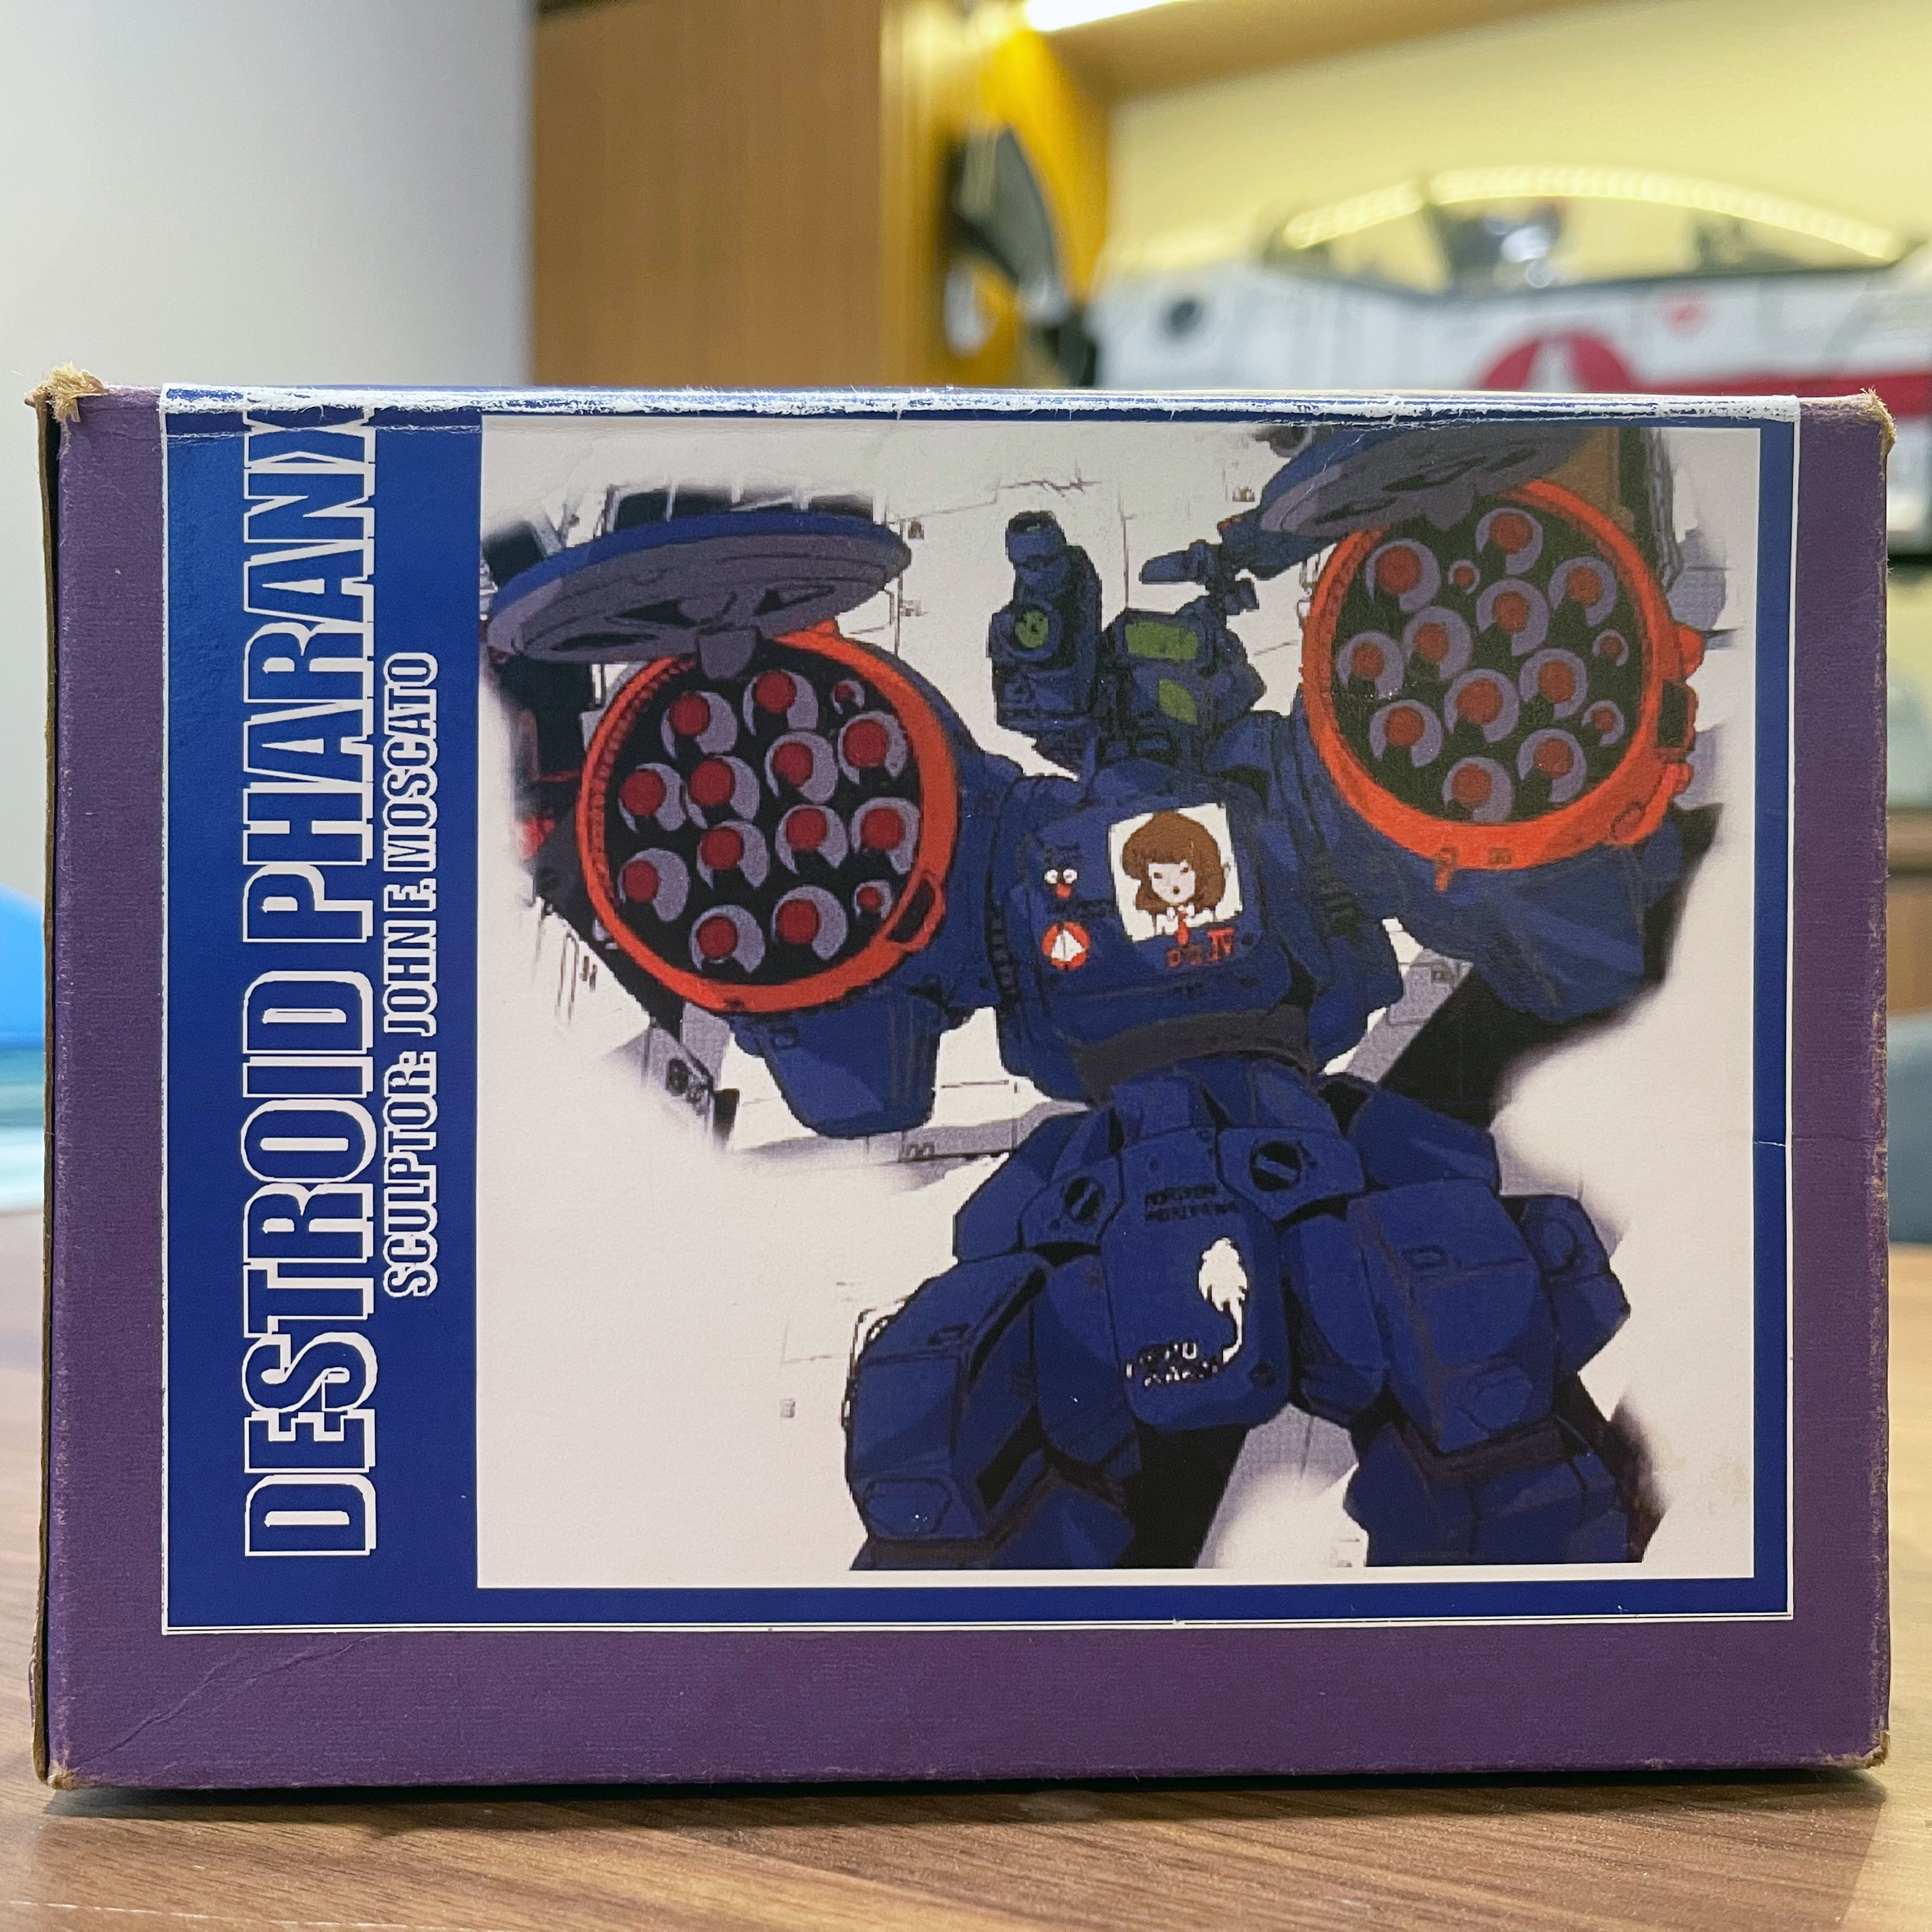
Finally completed this Moscato task, but sad for a fatal mistake, otherwise this would have been a successful project.
-
I am the owner 😁
-
10 hours ago, kajnrig said:
Ooh, very nice clean job! Indeed the Delta kits are particularly fragile, and Bandai's decals have never been the greatest.
I quite like that base. Very simple and elegant, and adding the emblem is a nice touch. What is it and where did you get it?
Sorry. Used a wrong account to reply. Yes pls pm if you are interested. I can buy for you
-
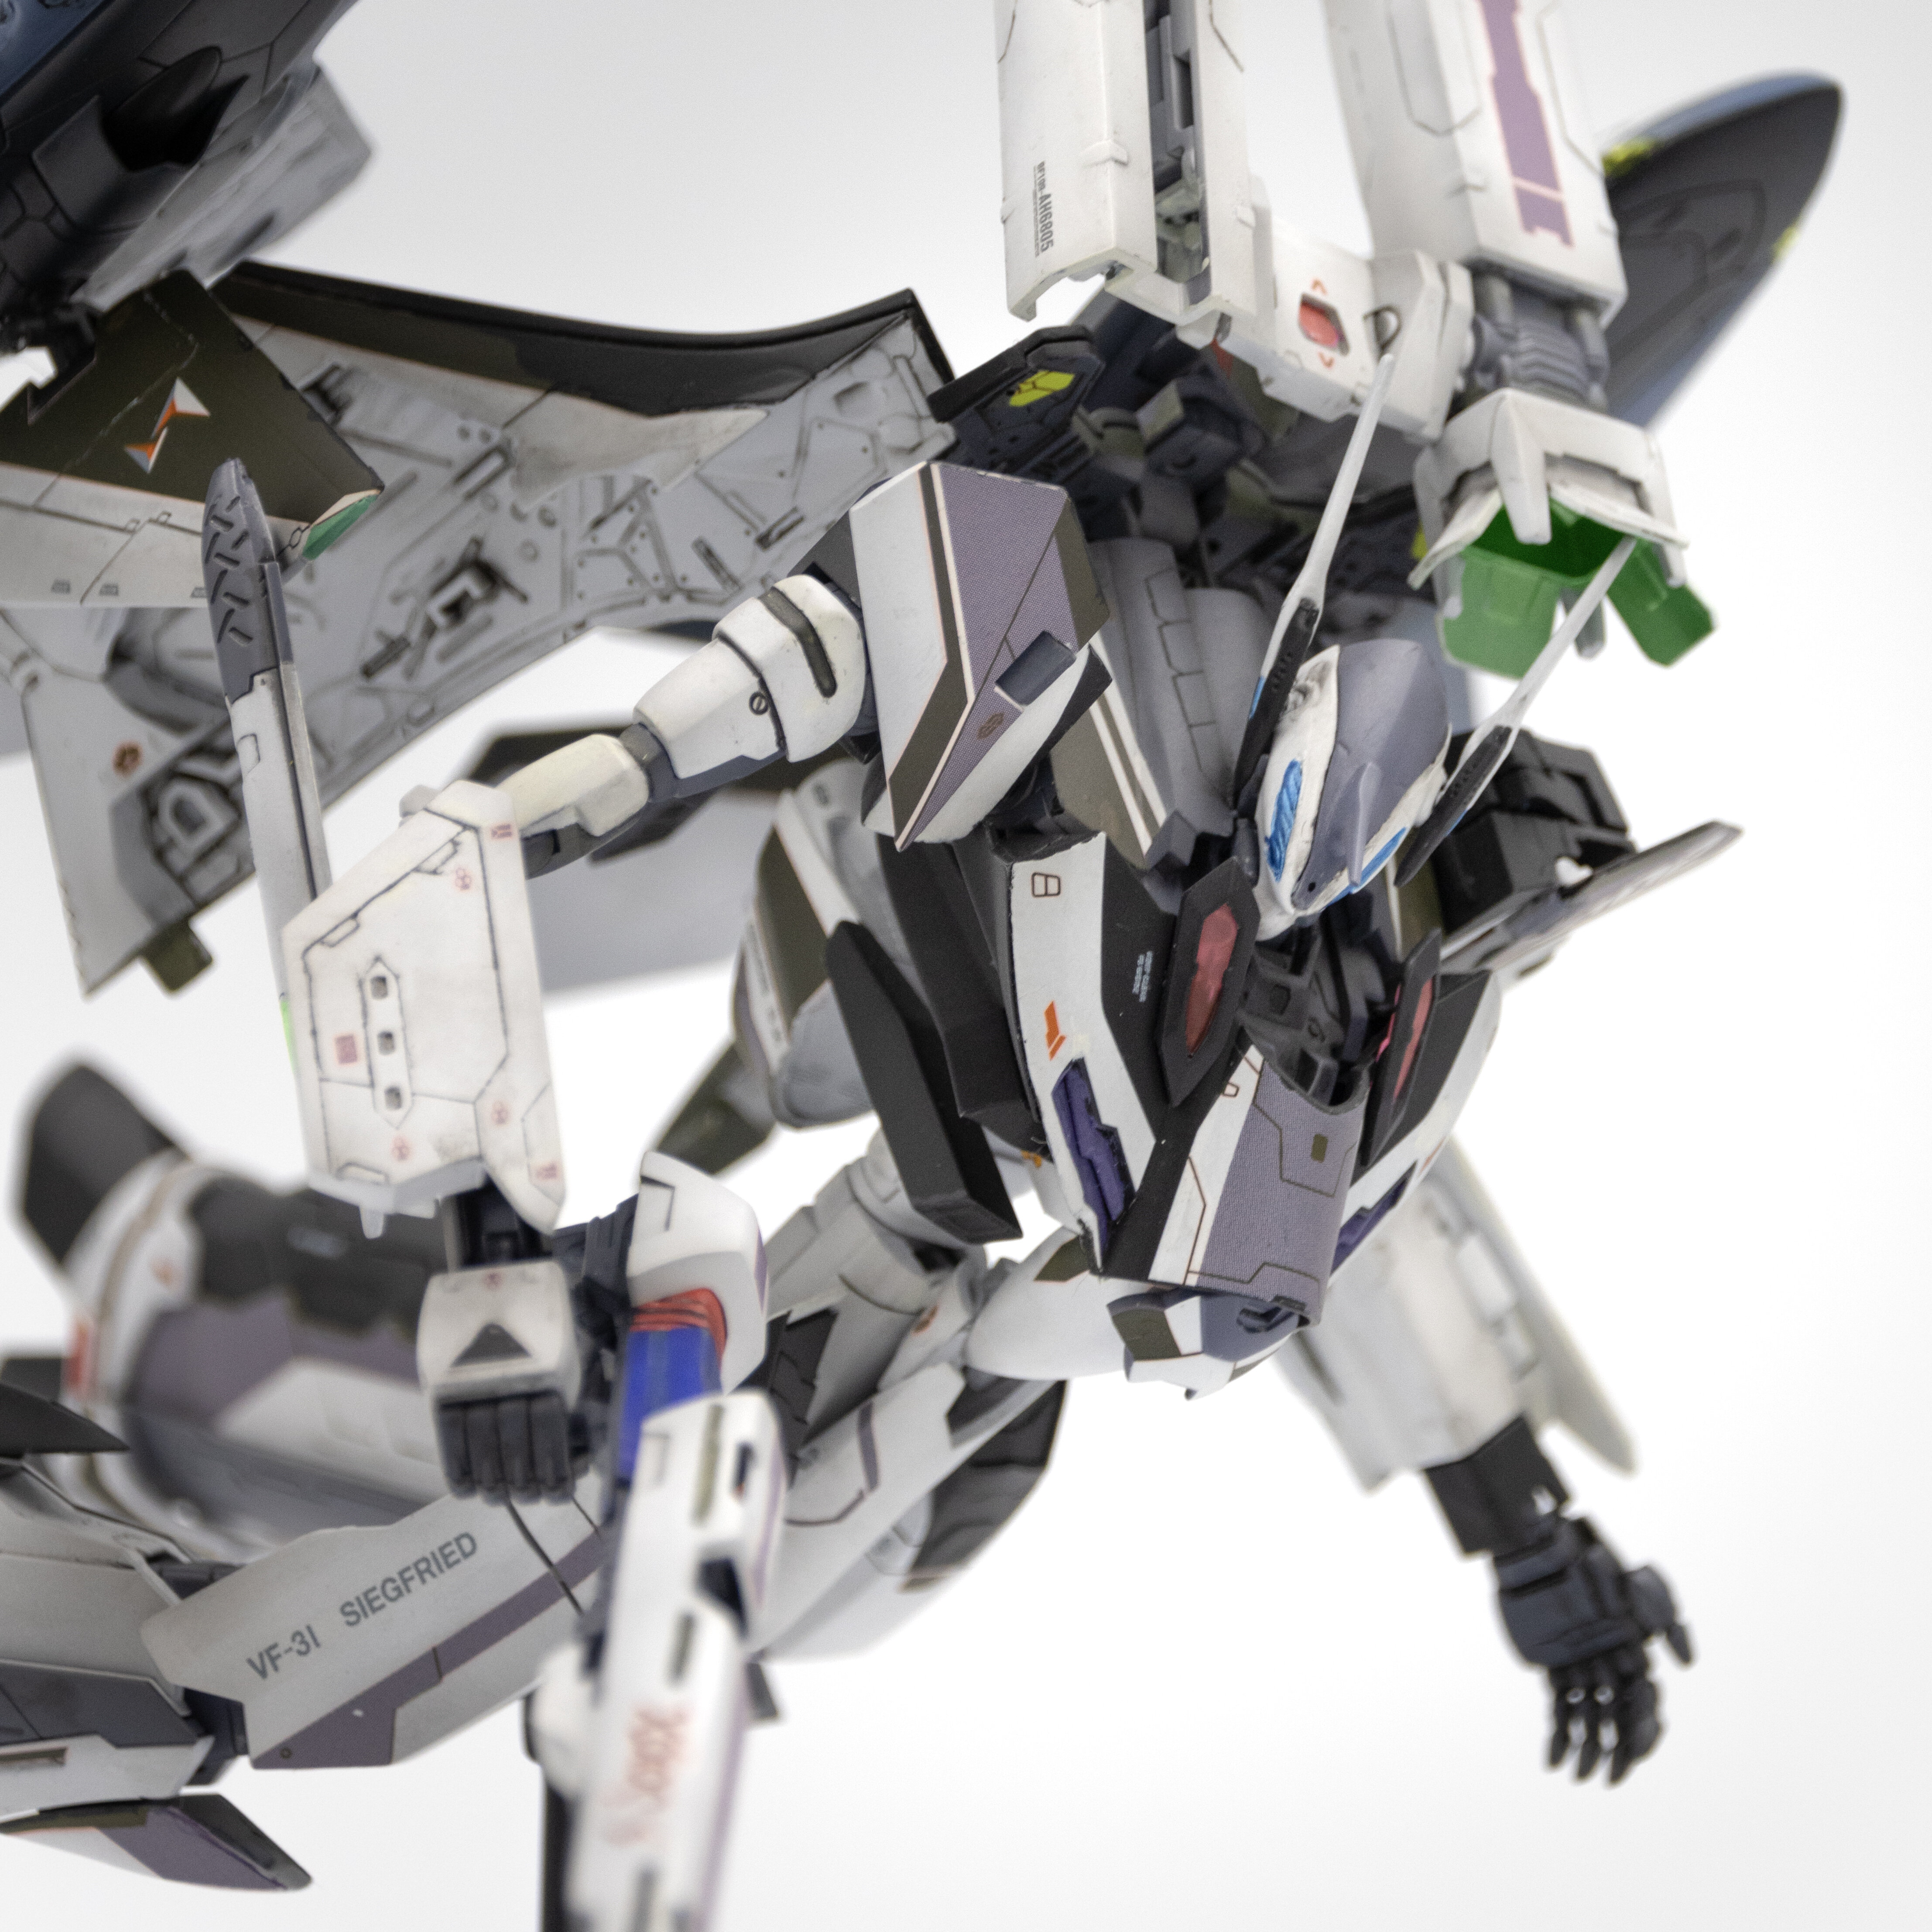
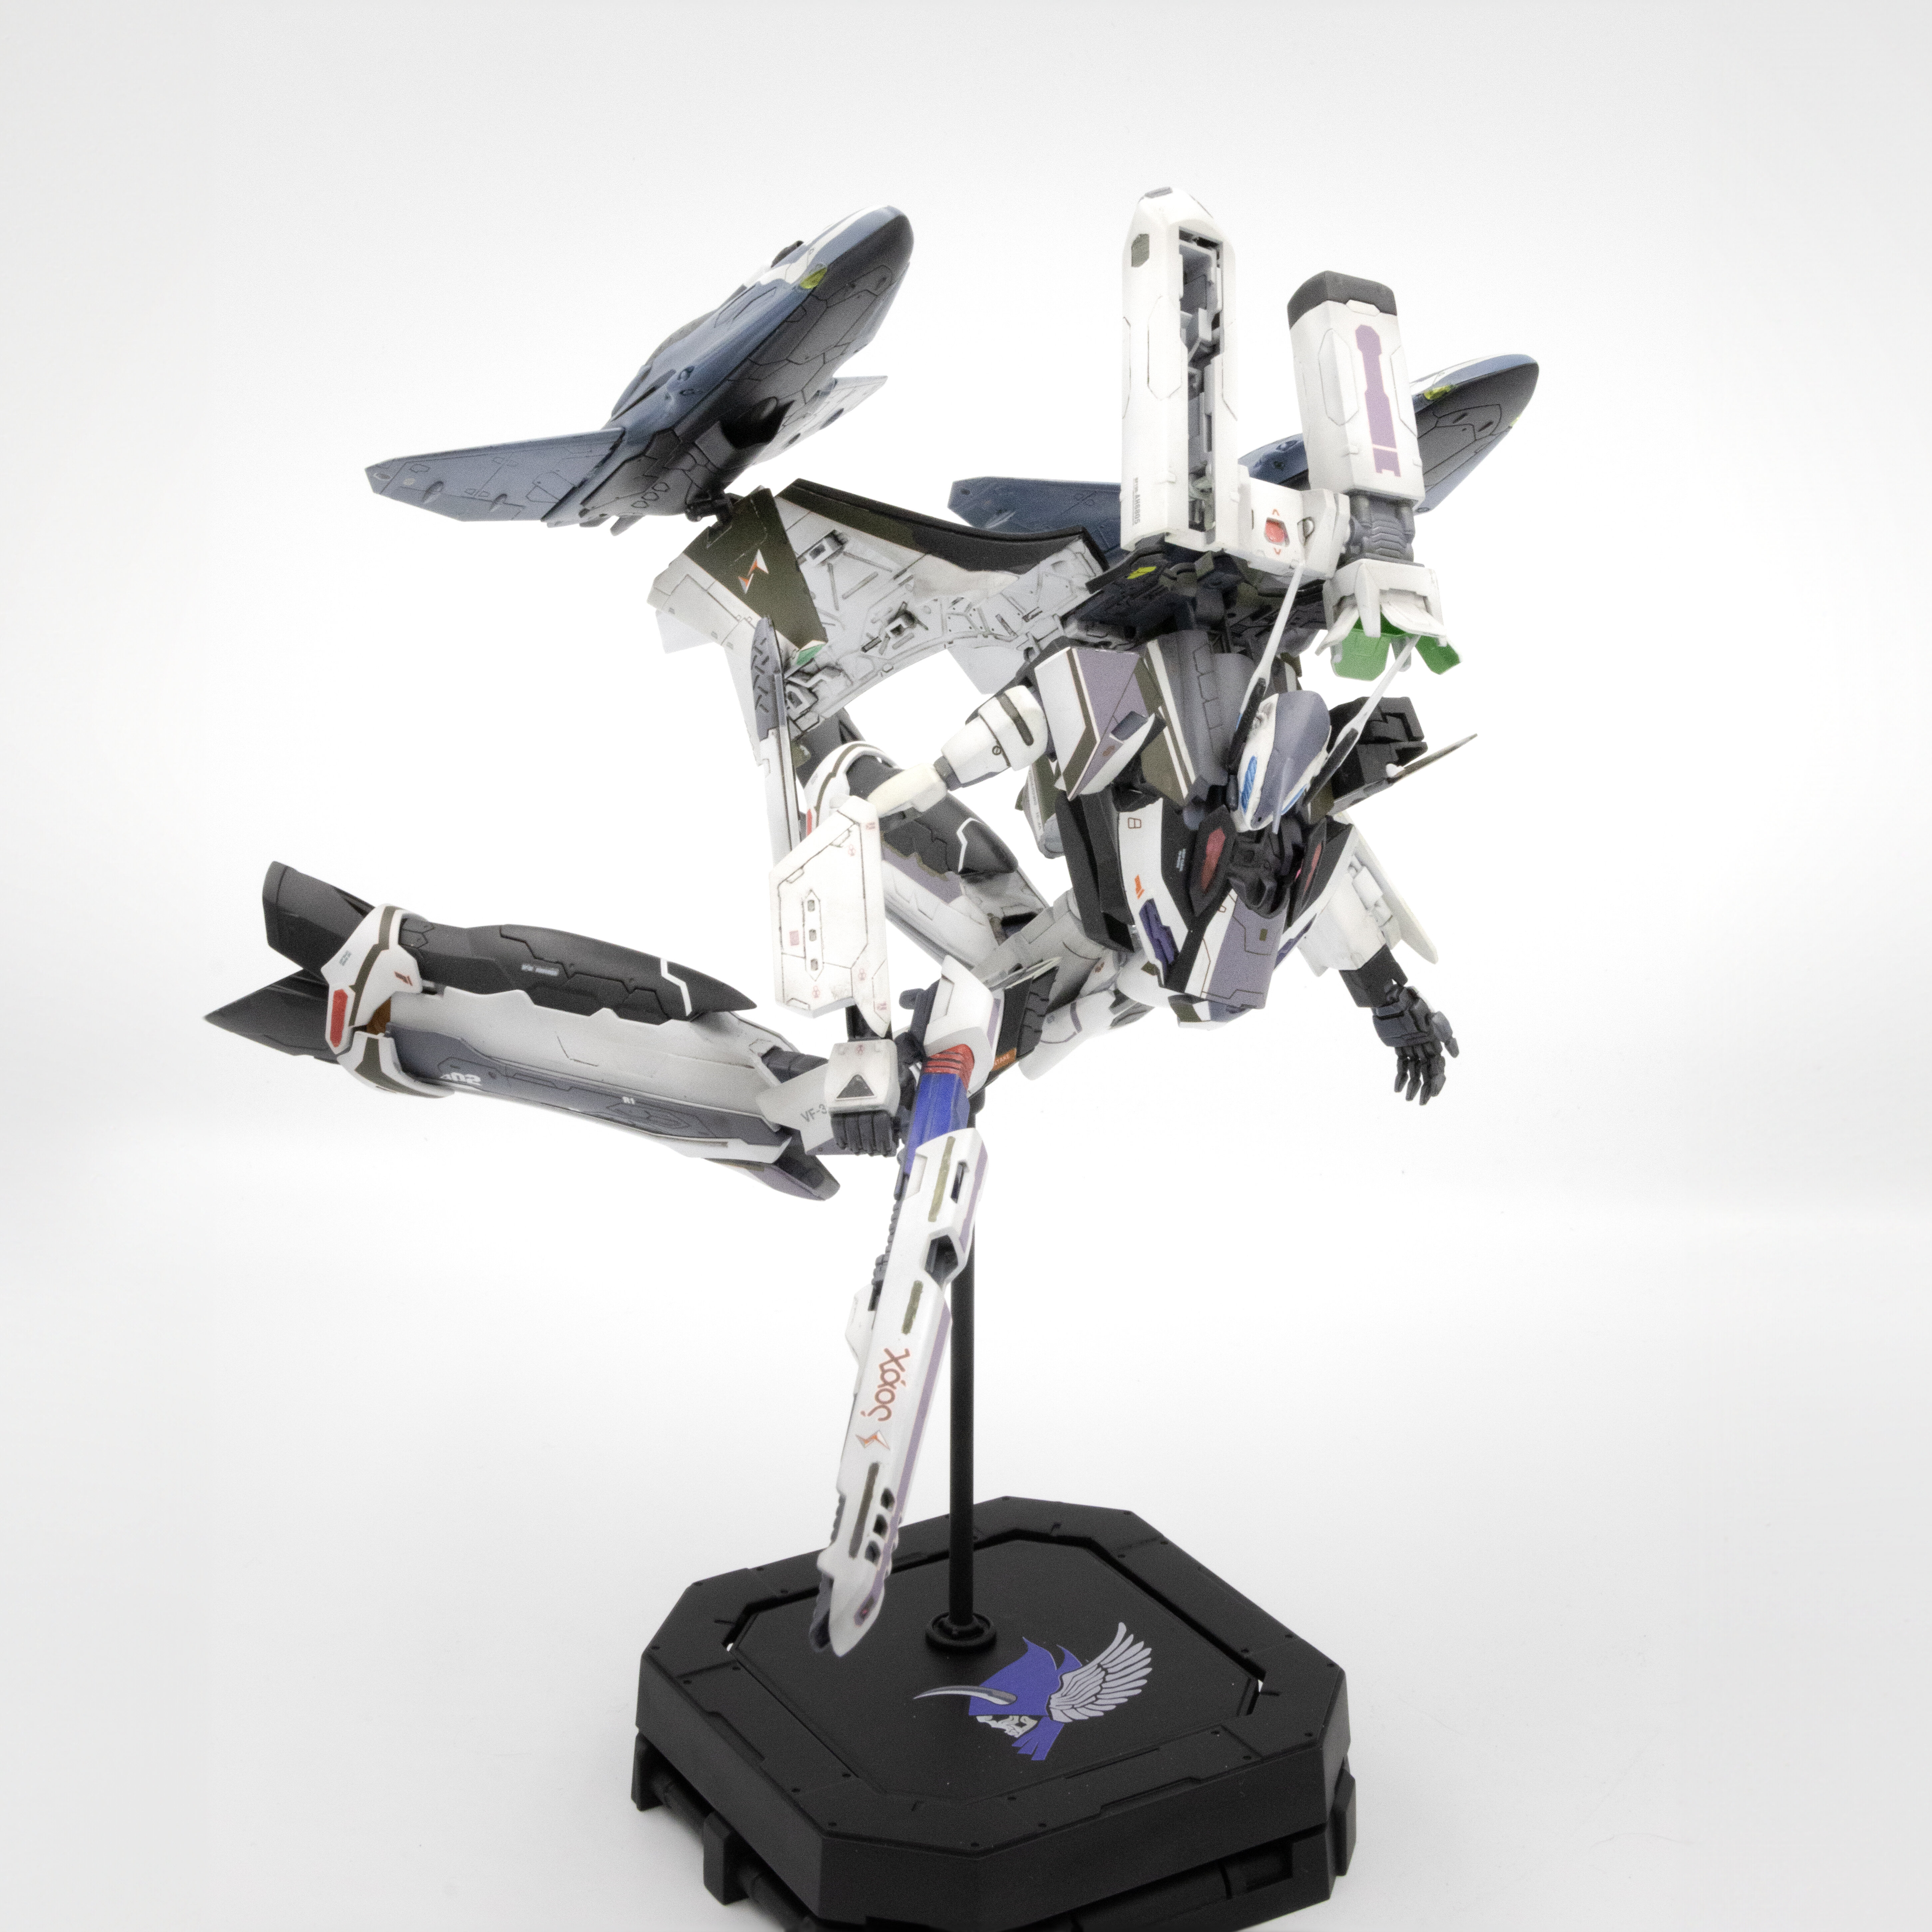
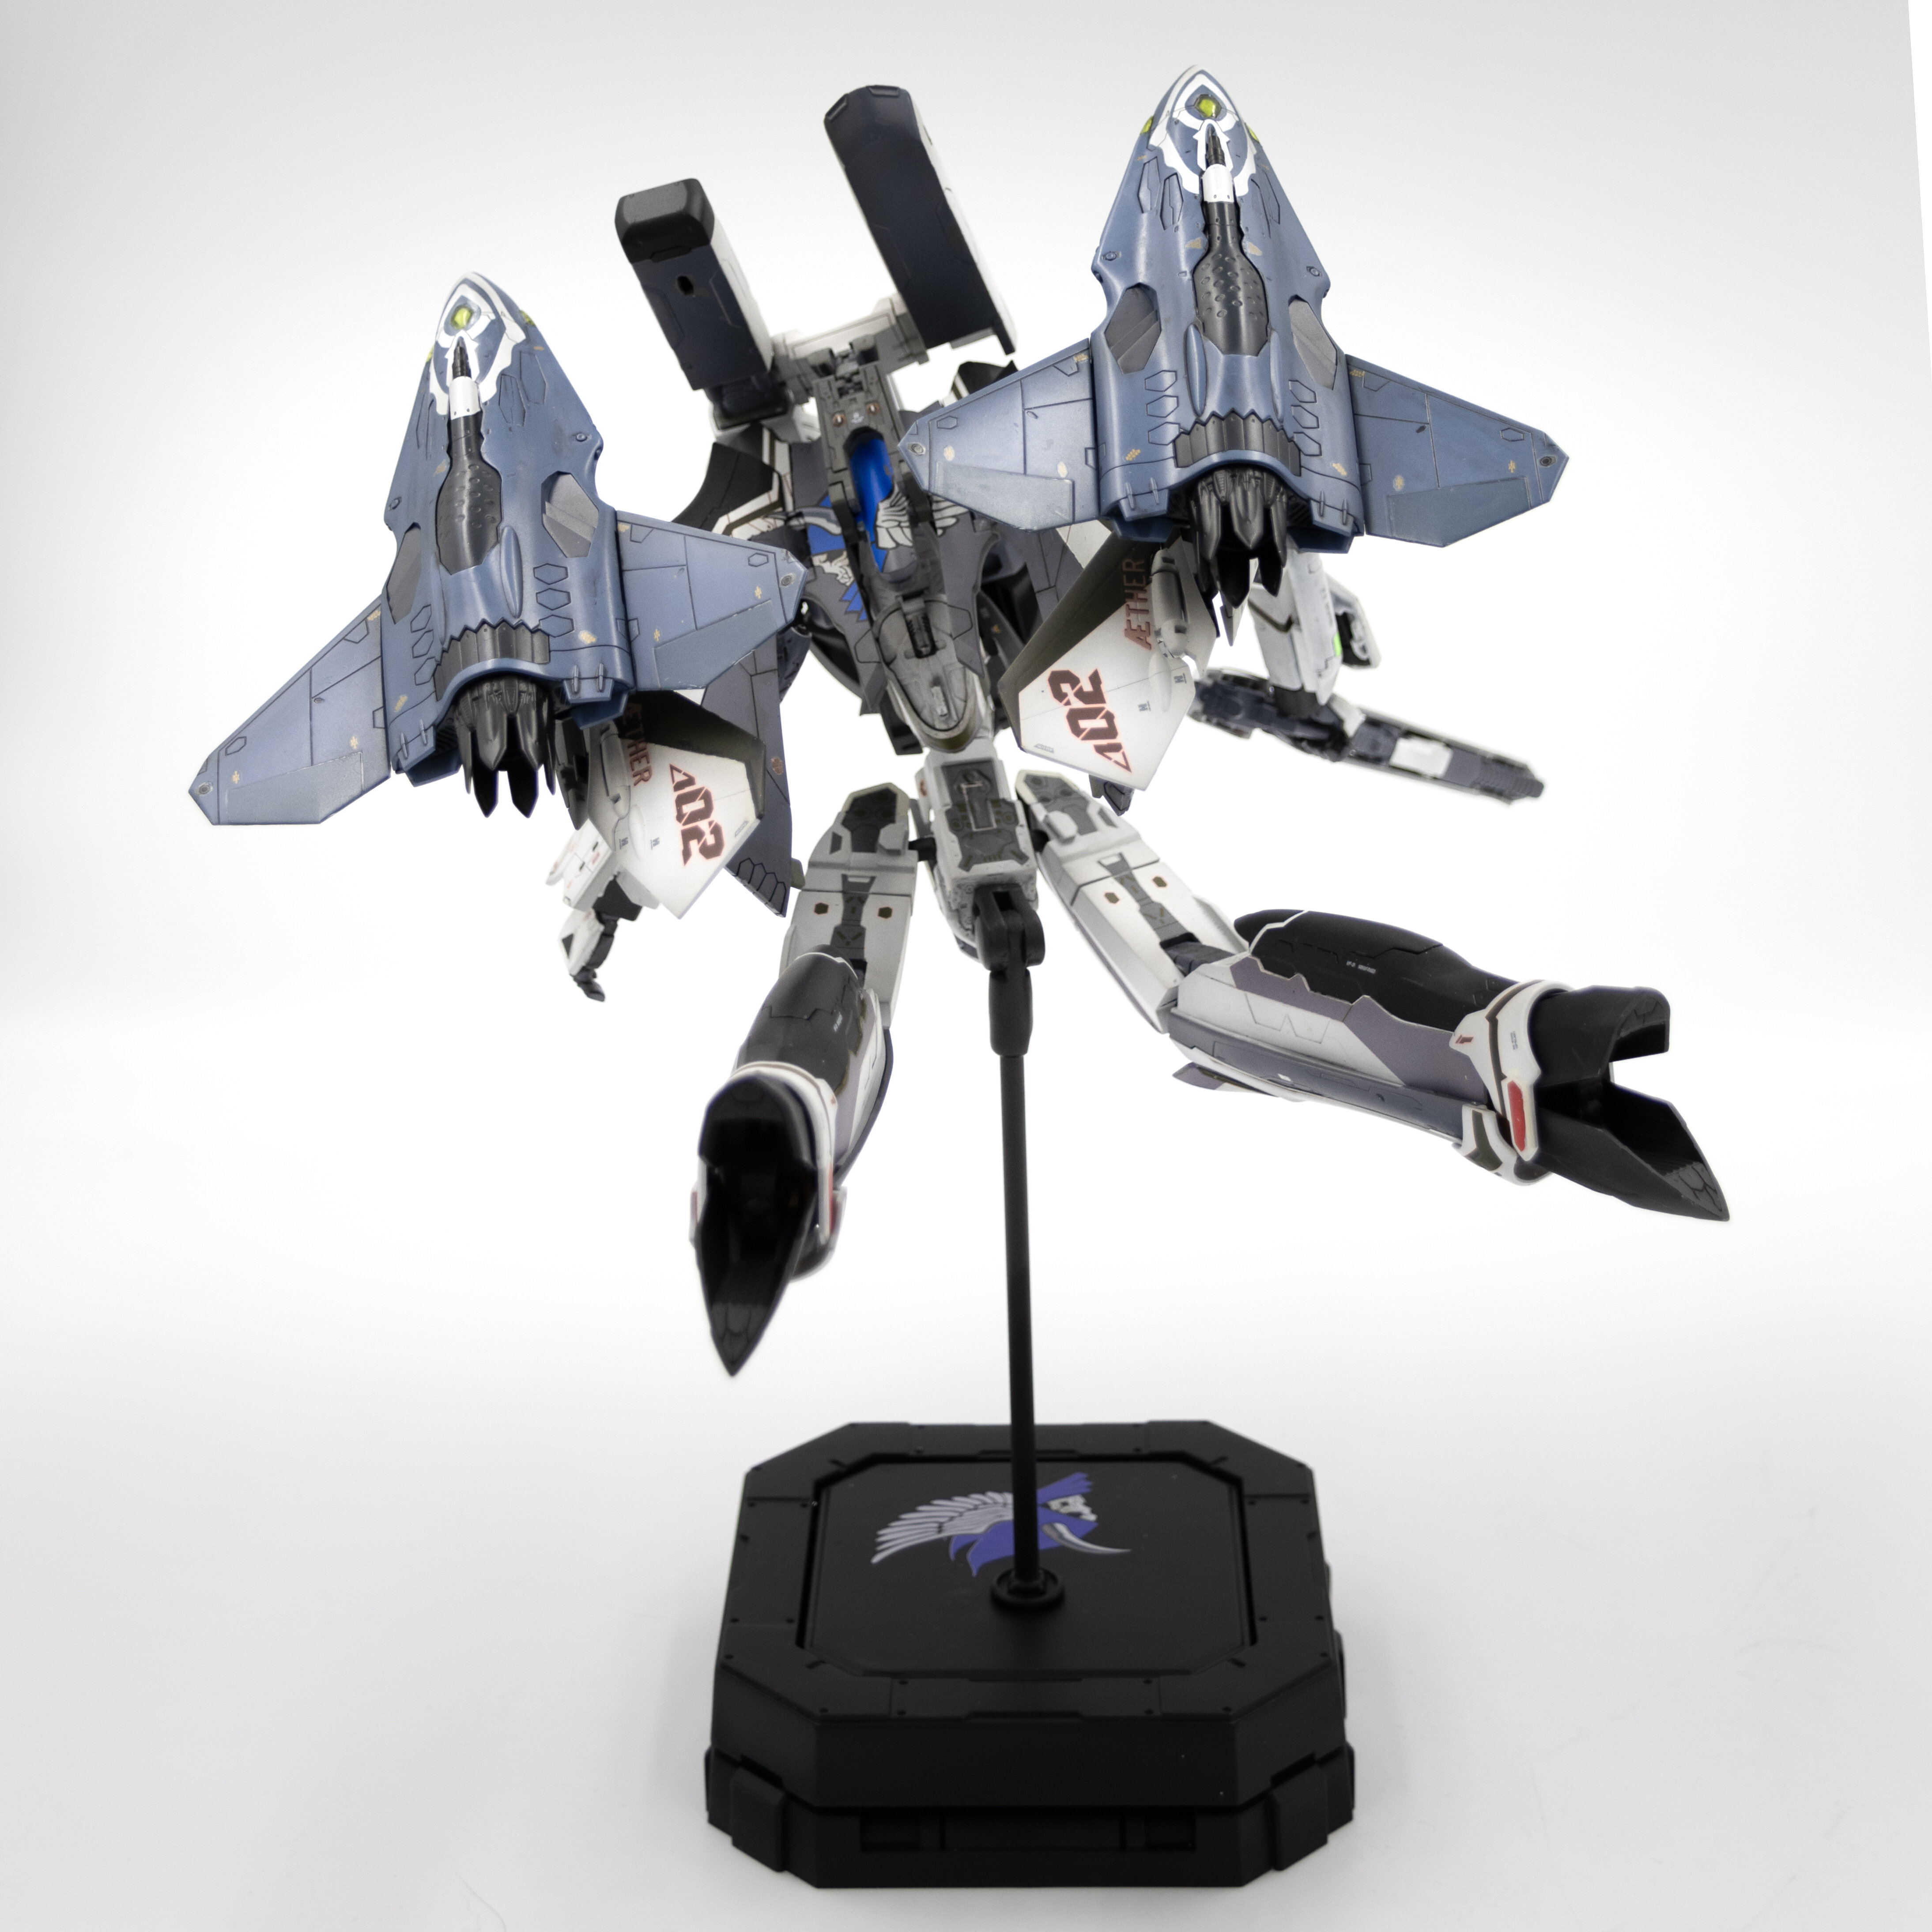
It's my first time to build a Bandai 1/72 Valkyrie in Delta series. I never imagined that it's so challenging. The decals and the plastics are so fragile!
-
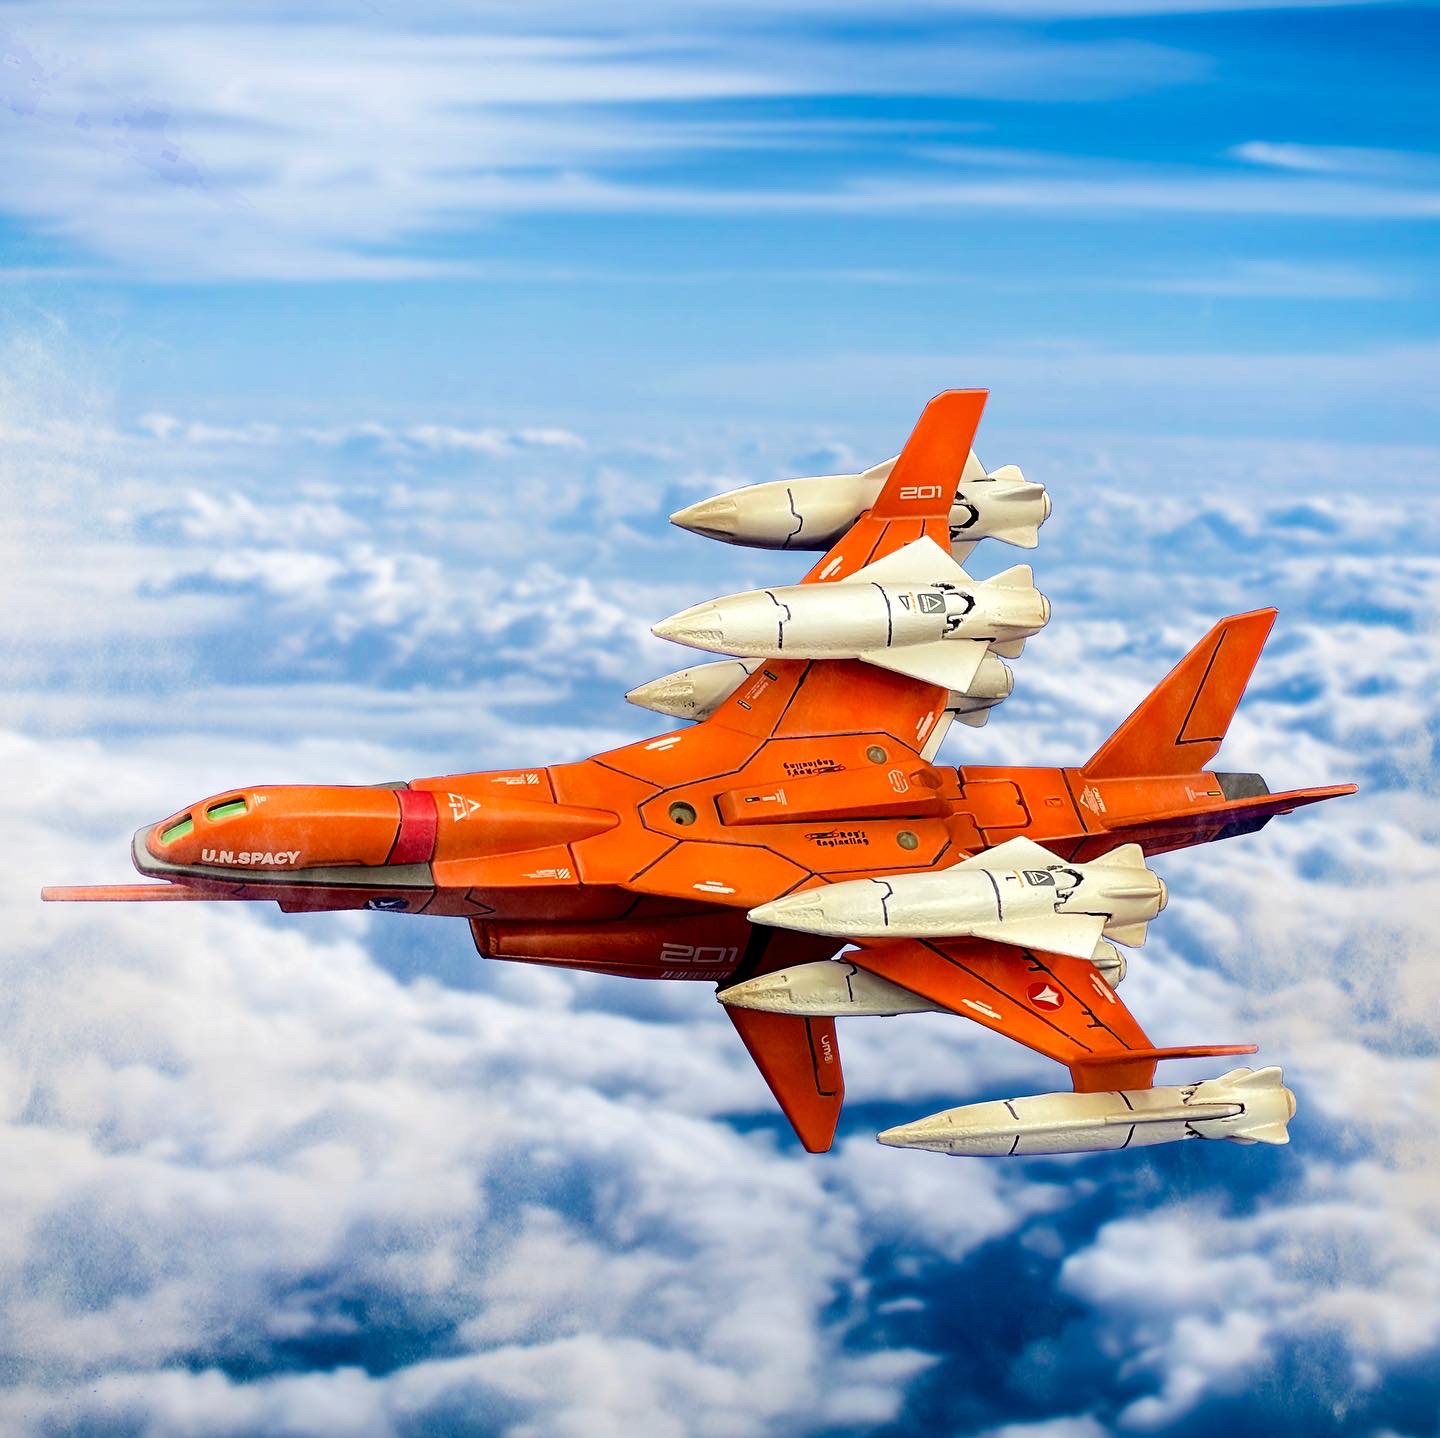
This drone was finished months ago. Finally got the chance to edit the photos.

-
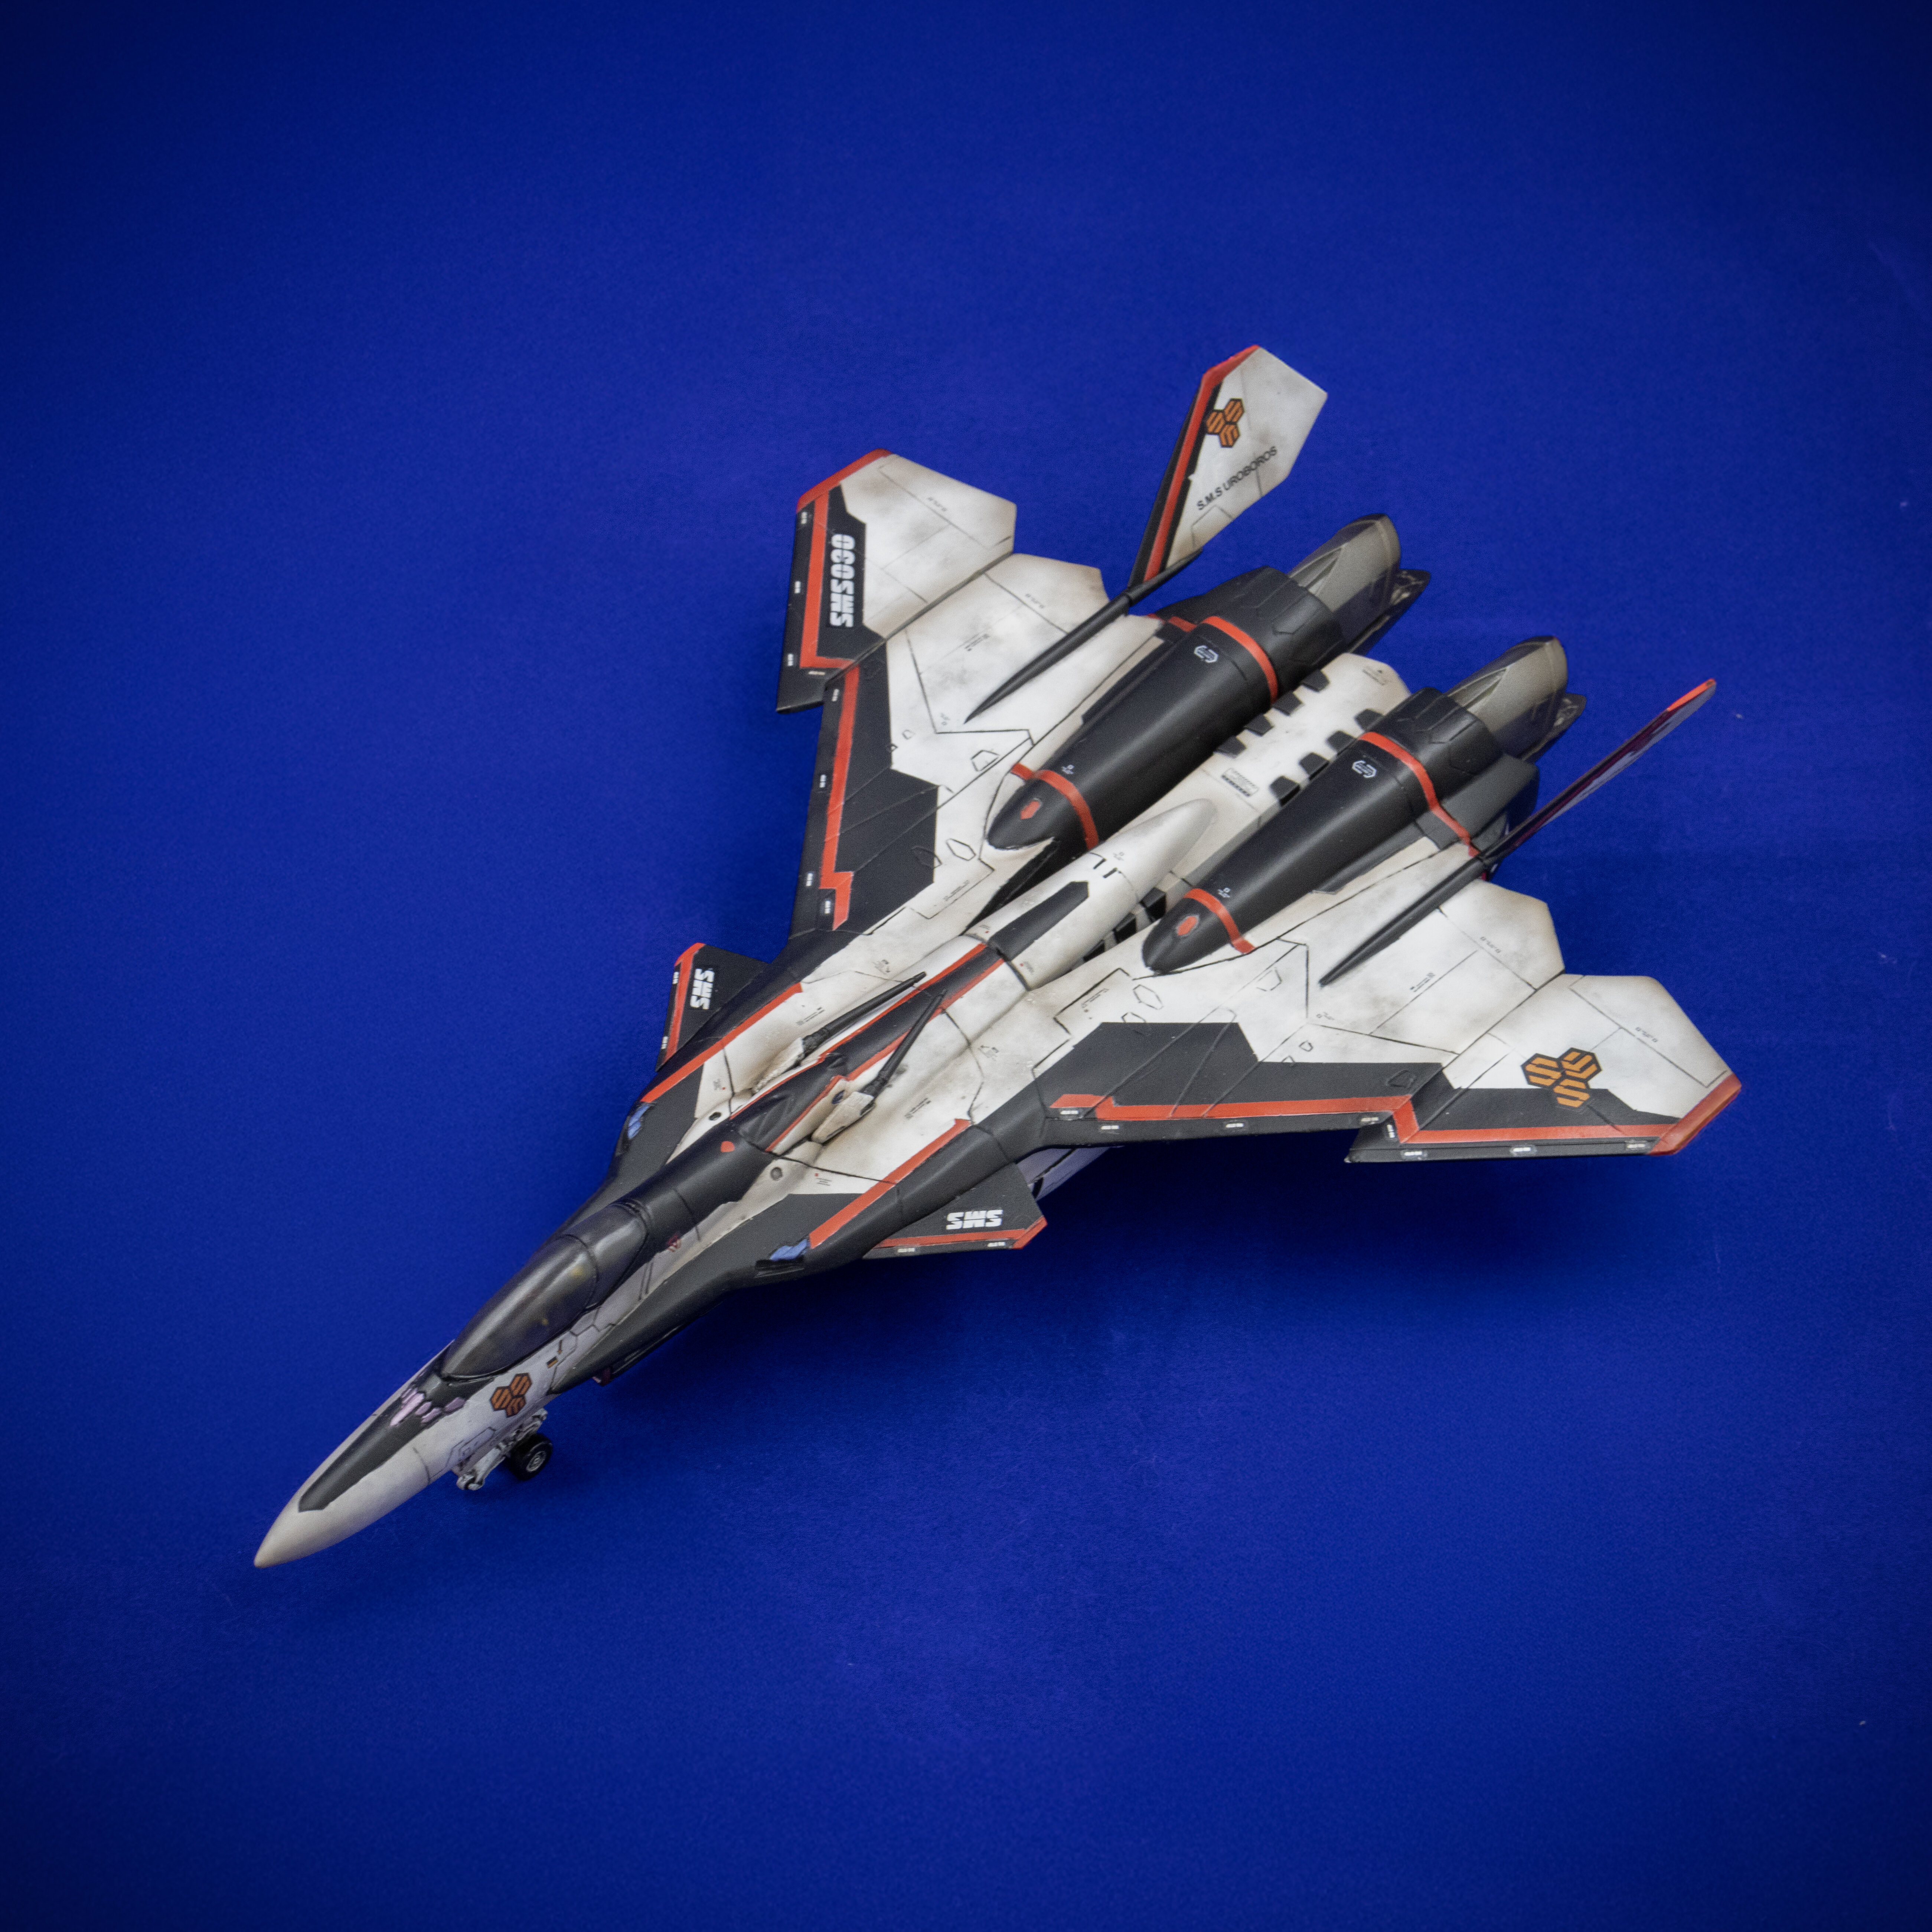
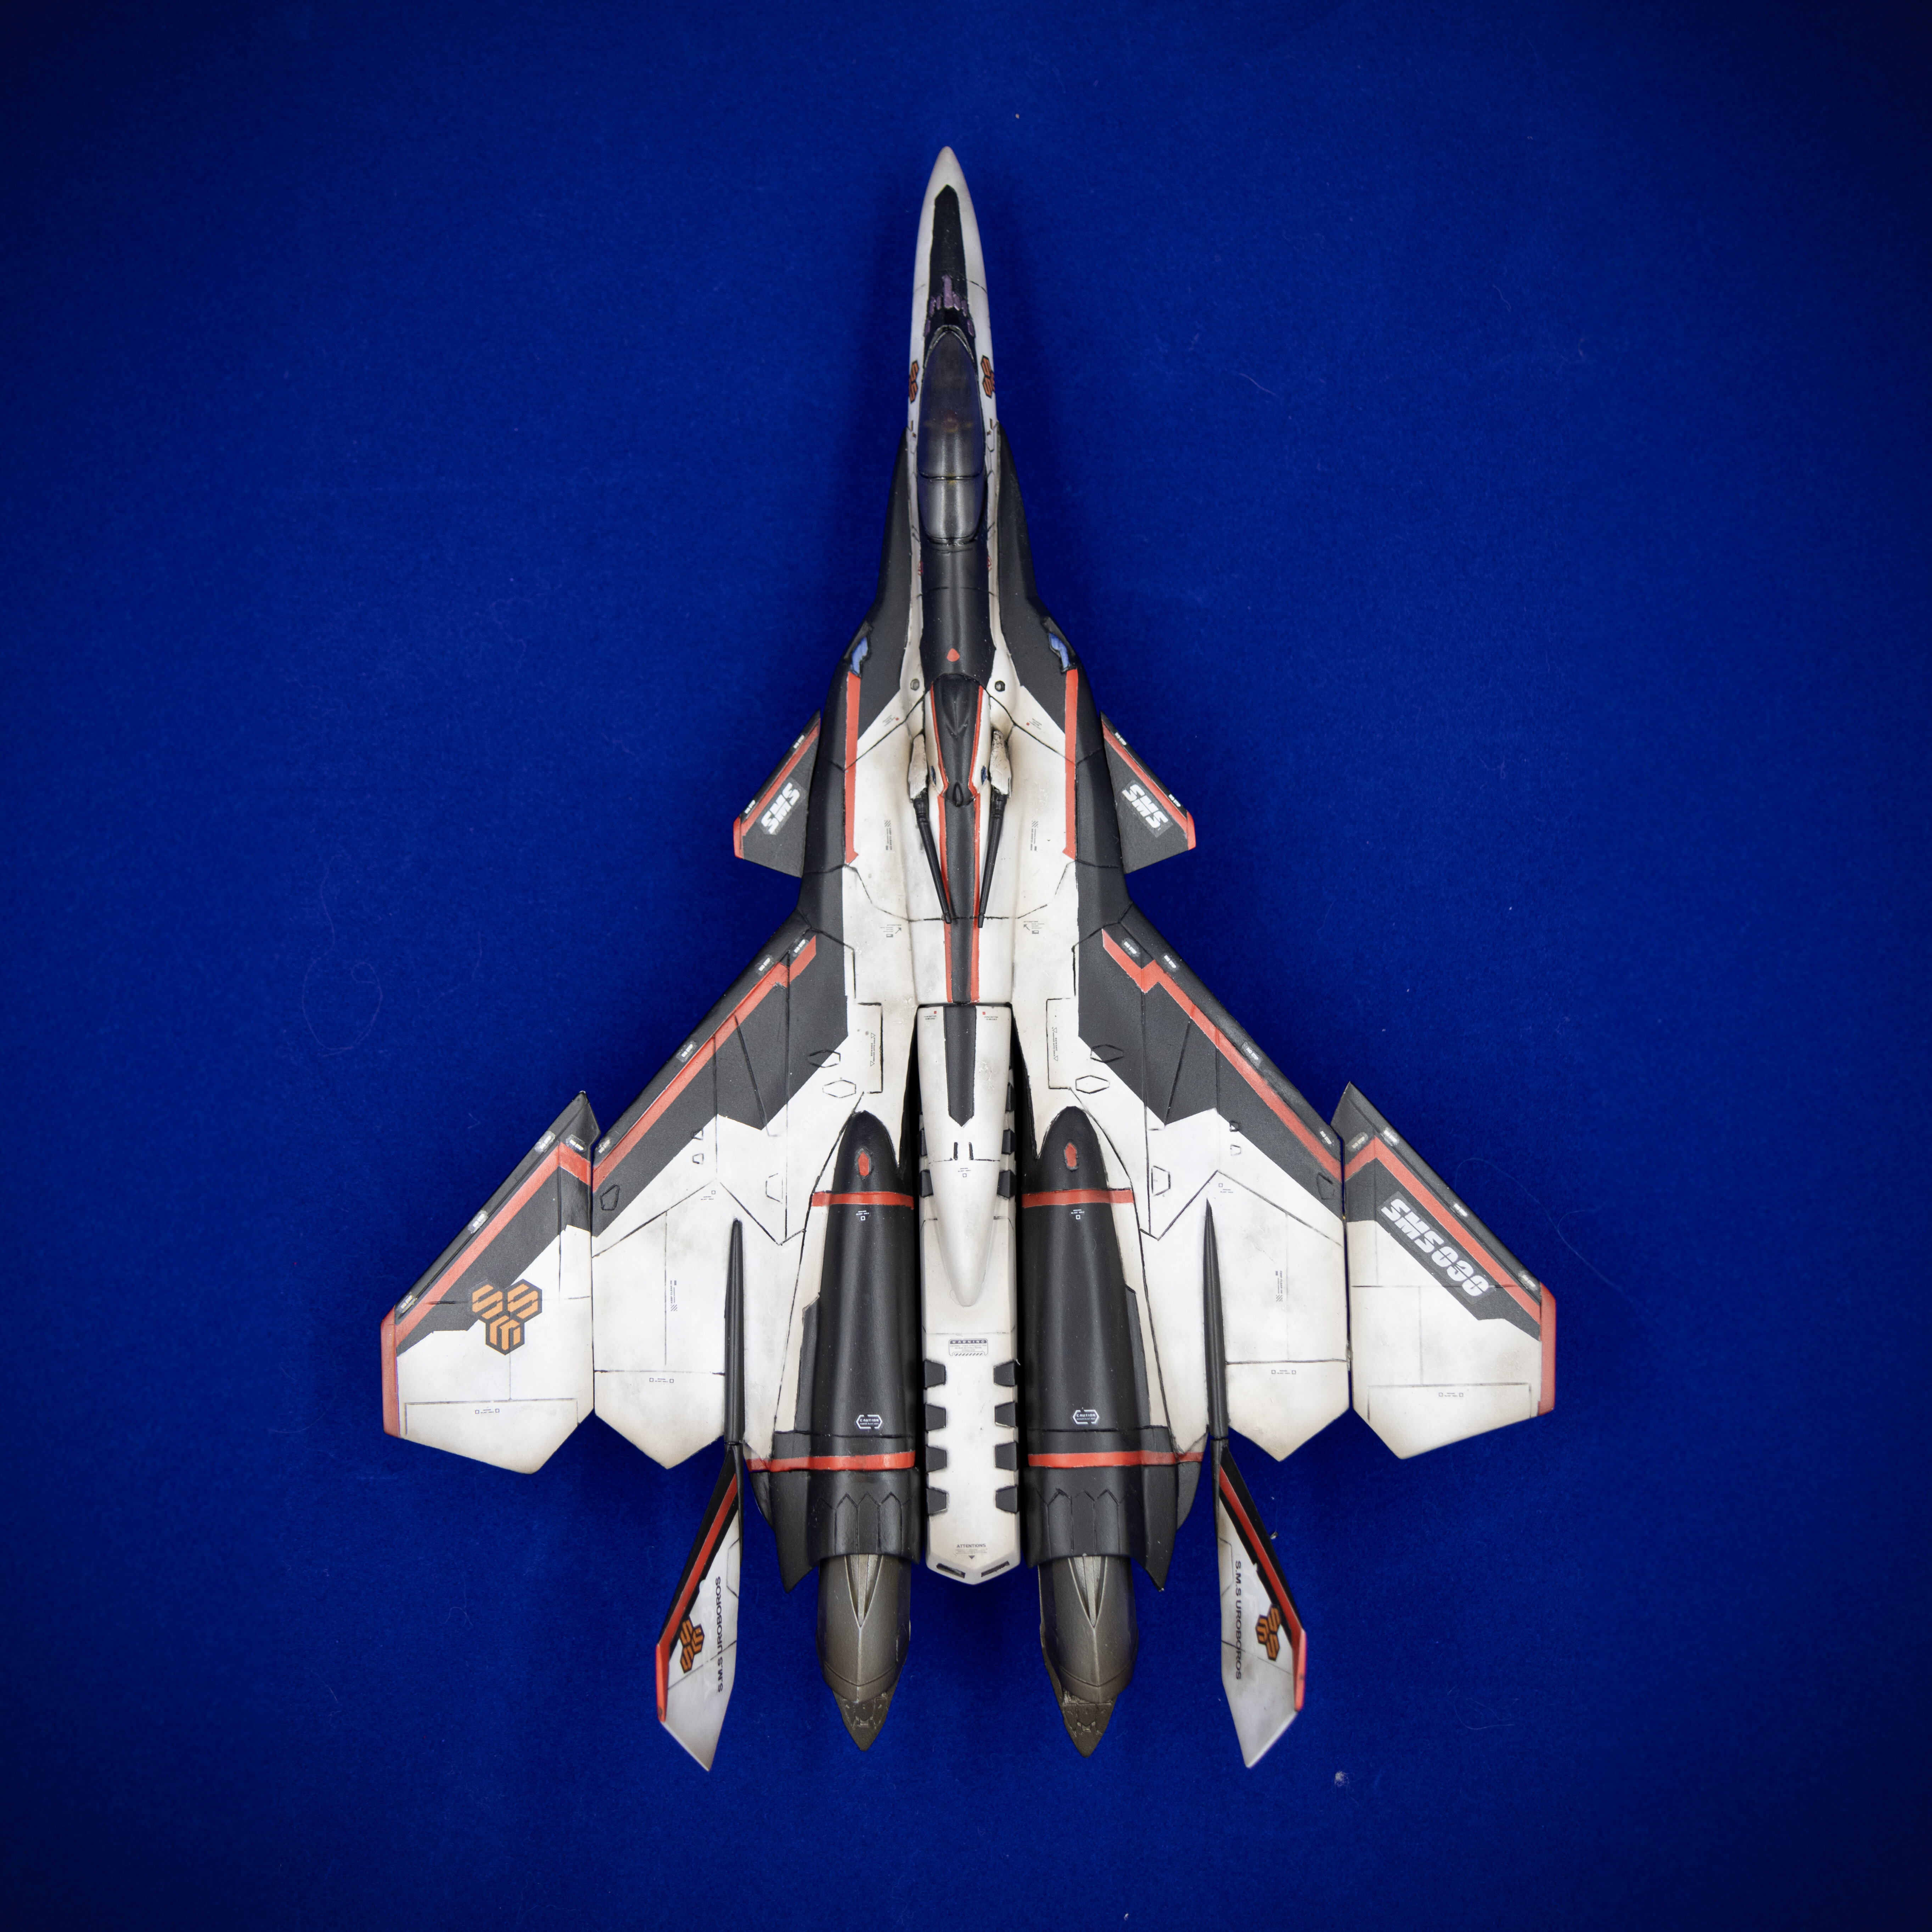
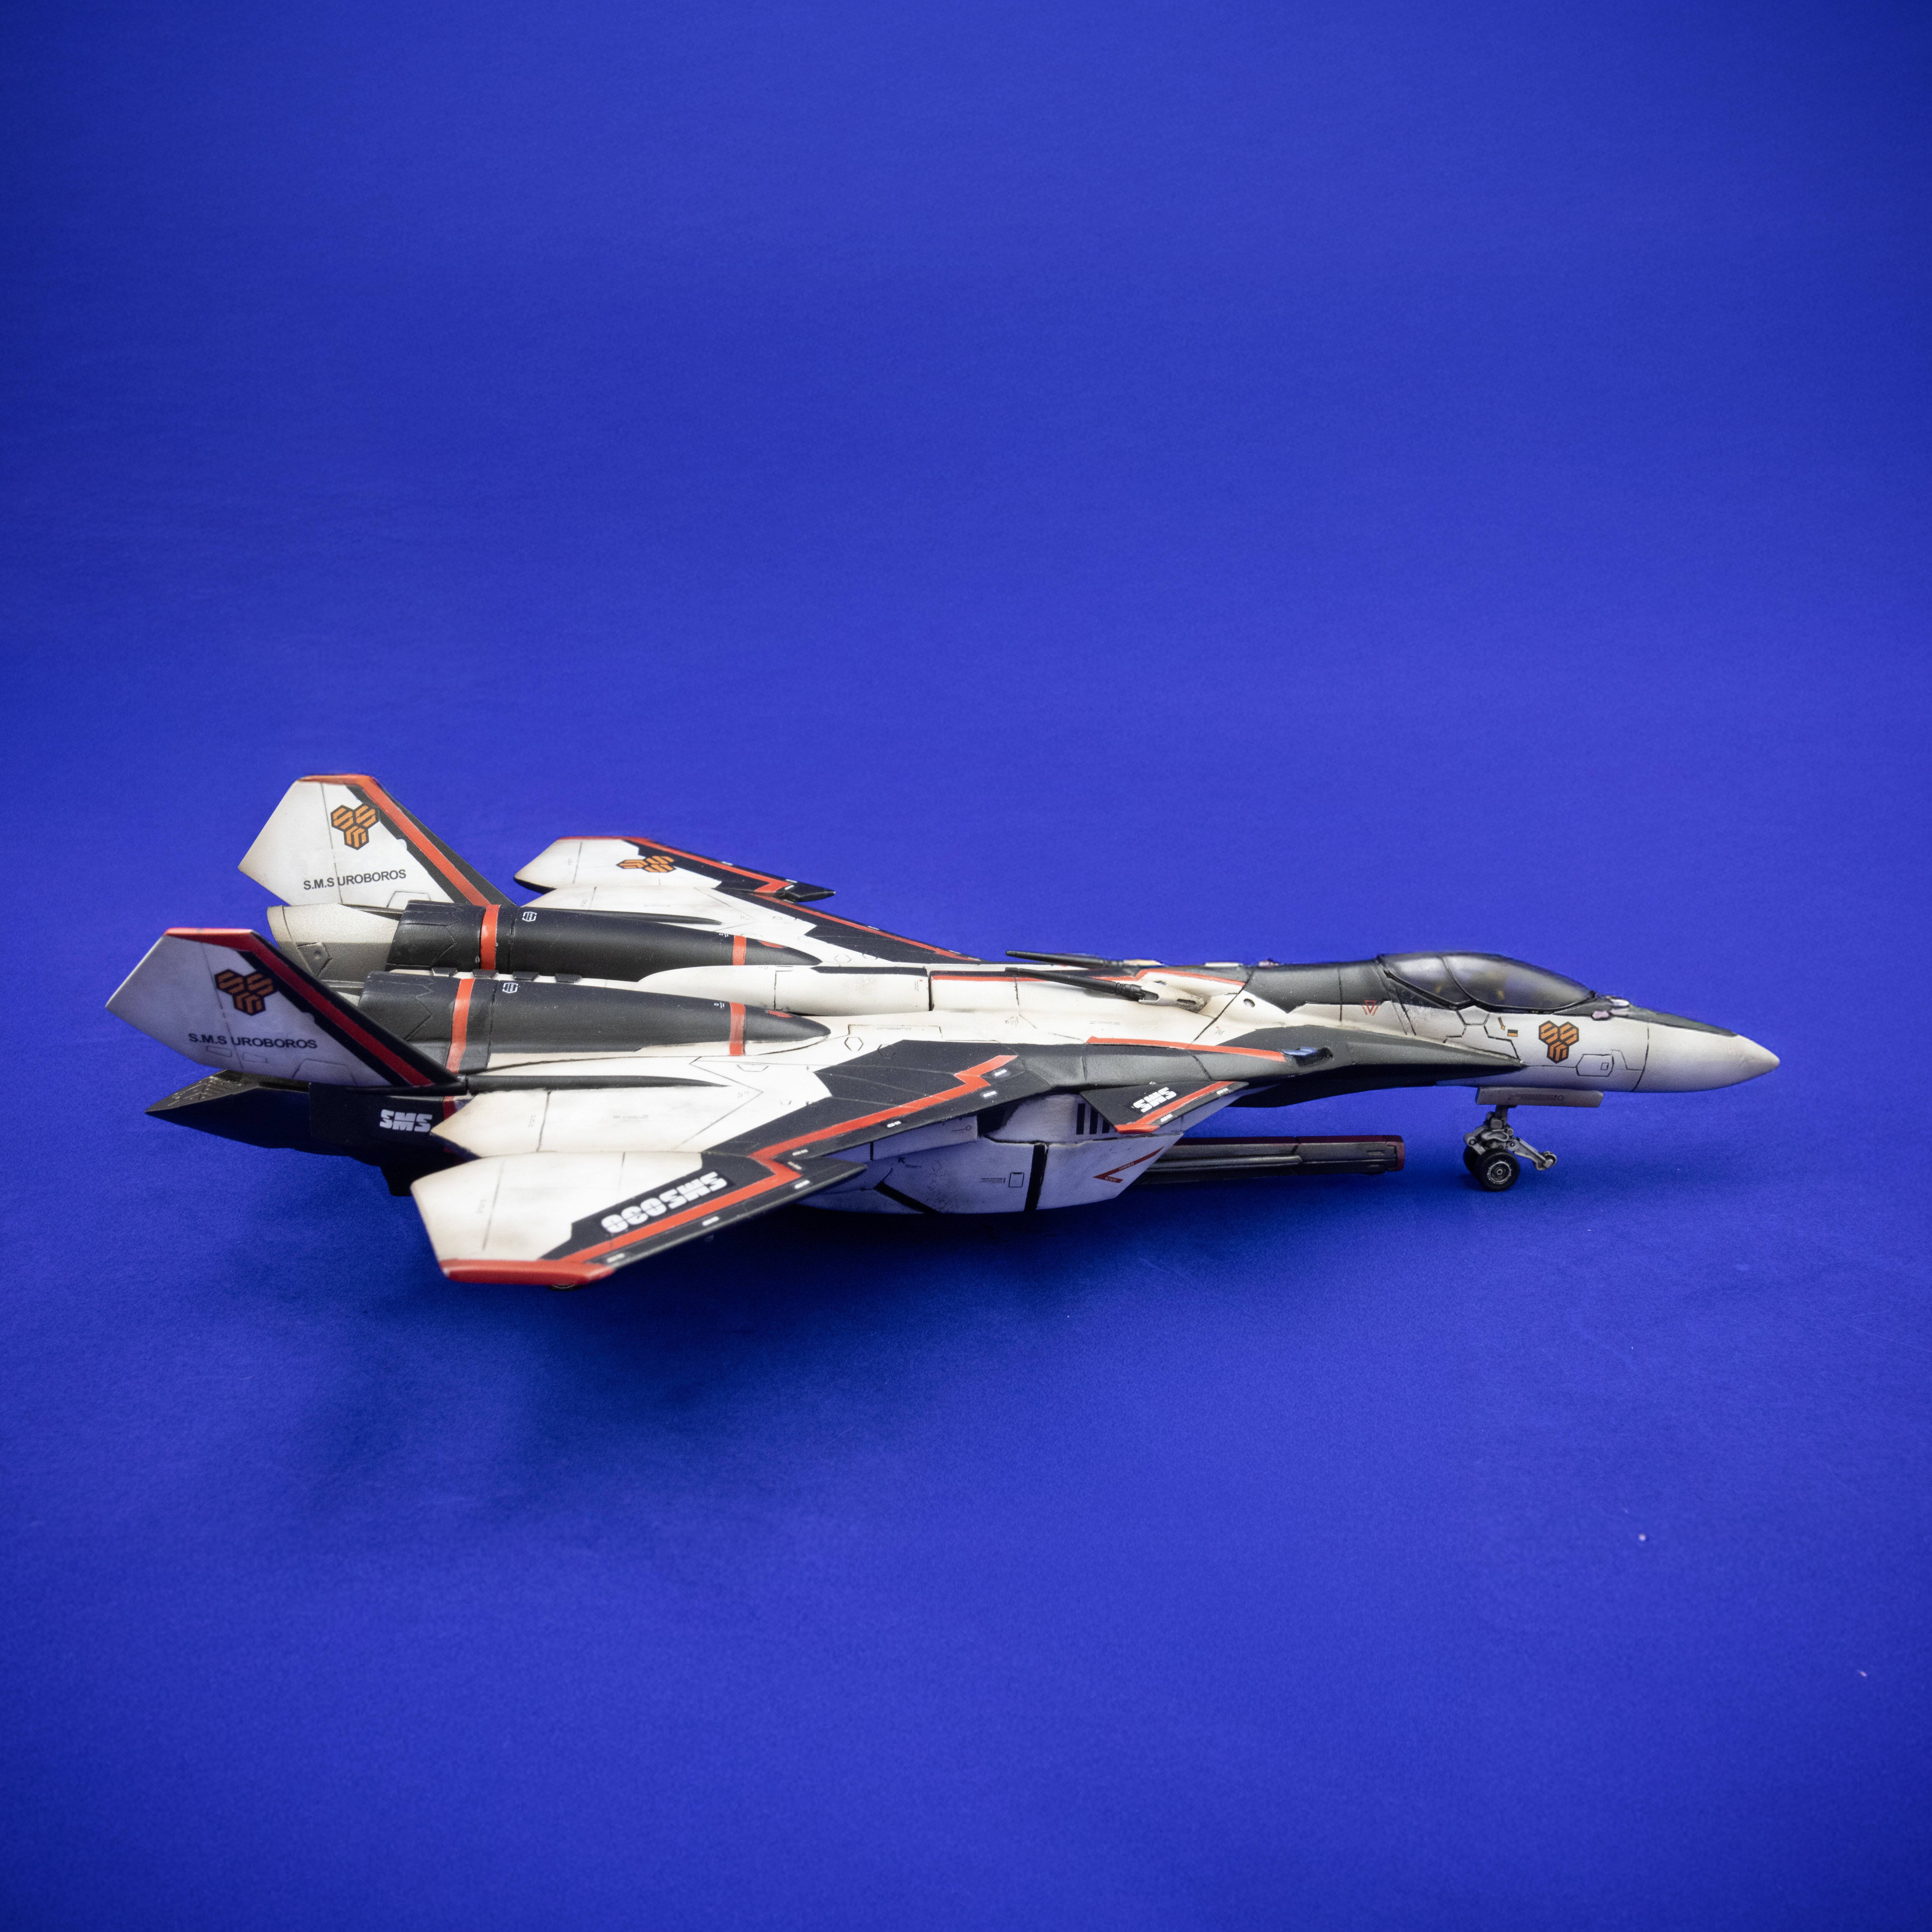
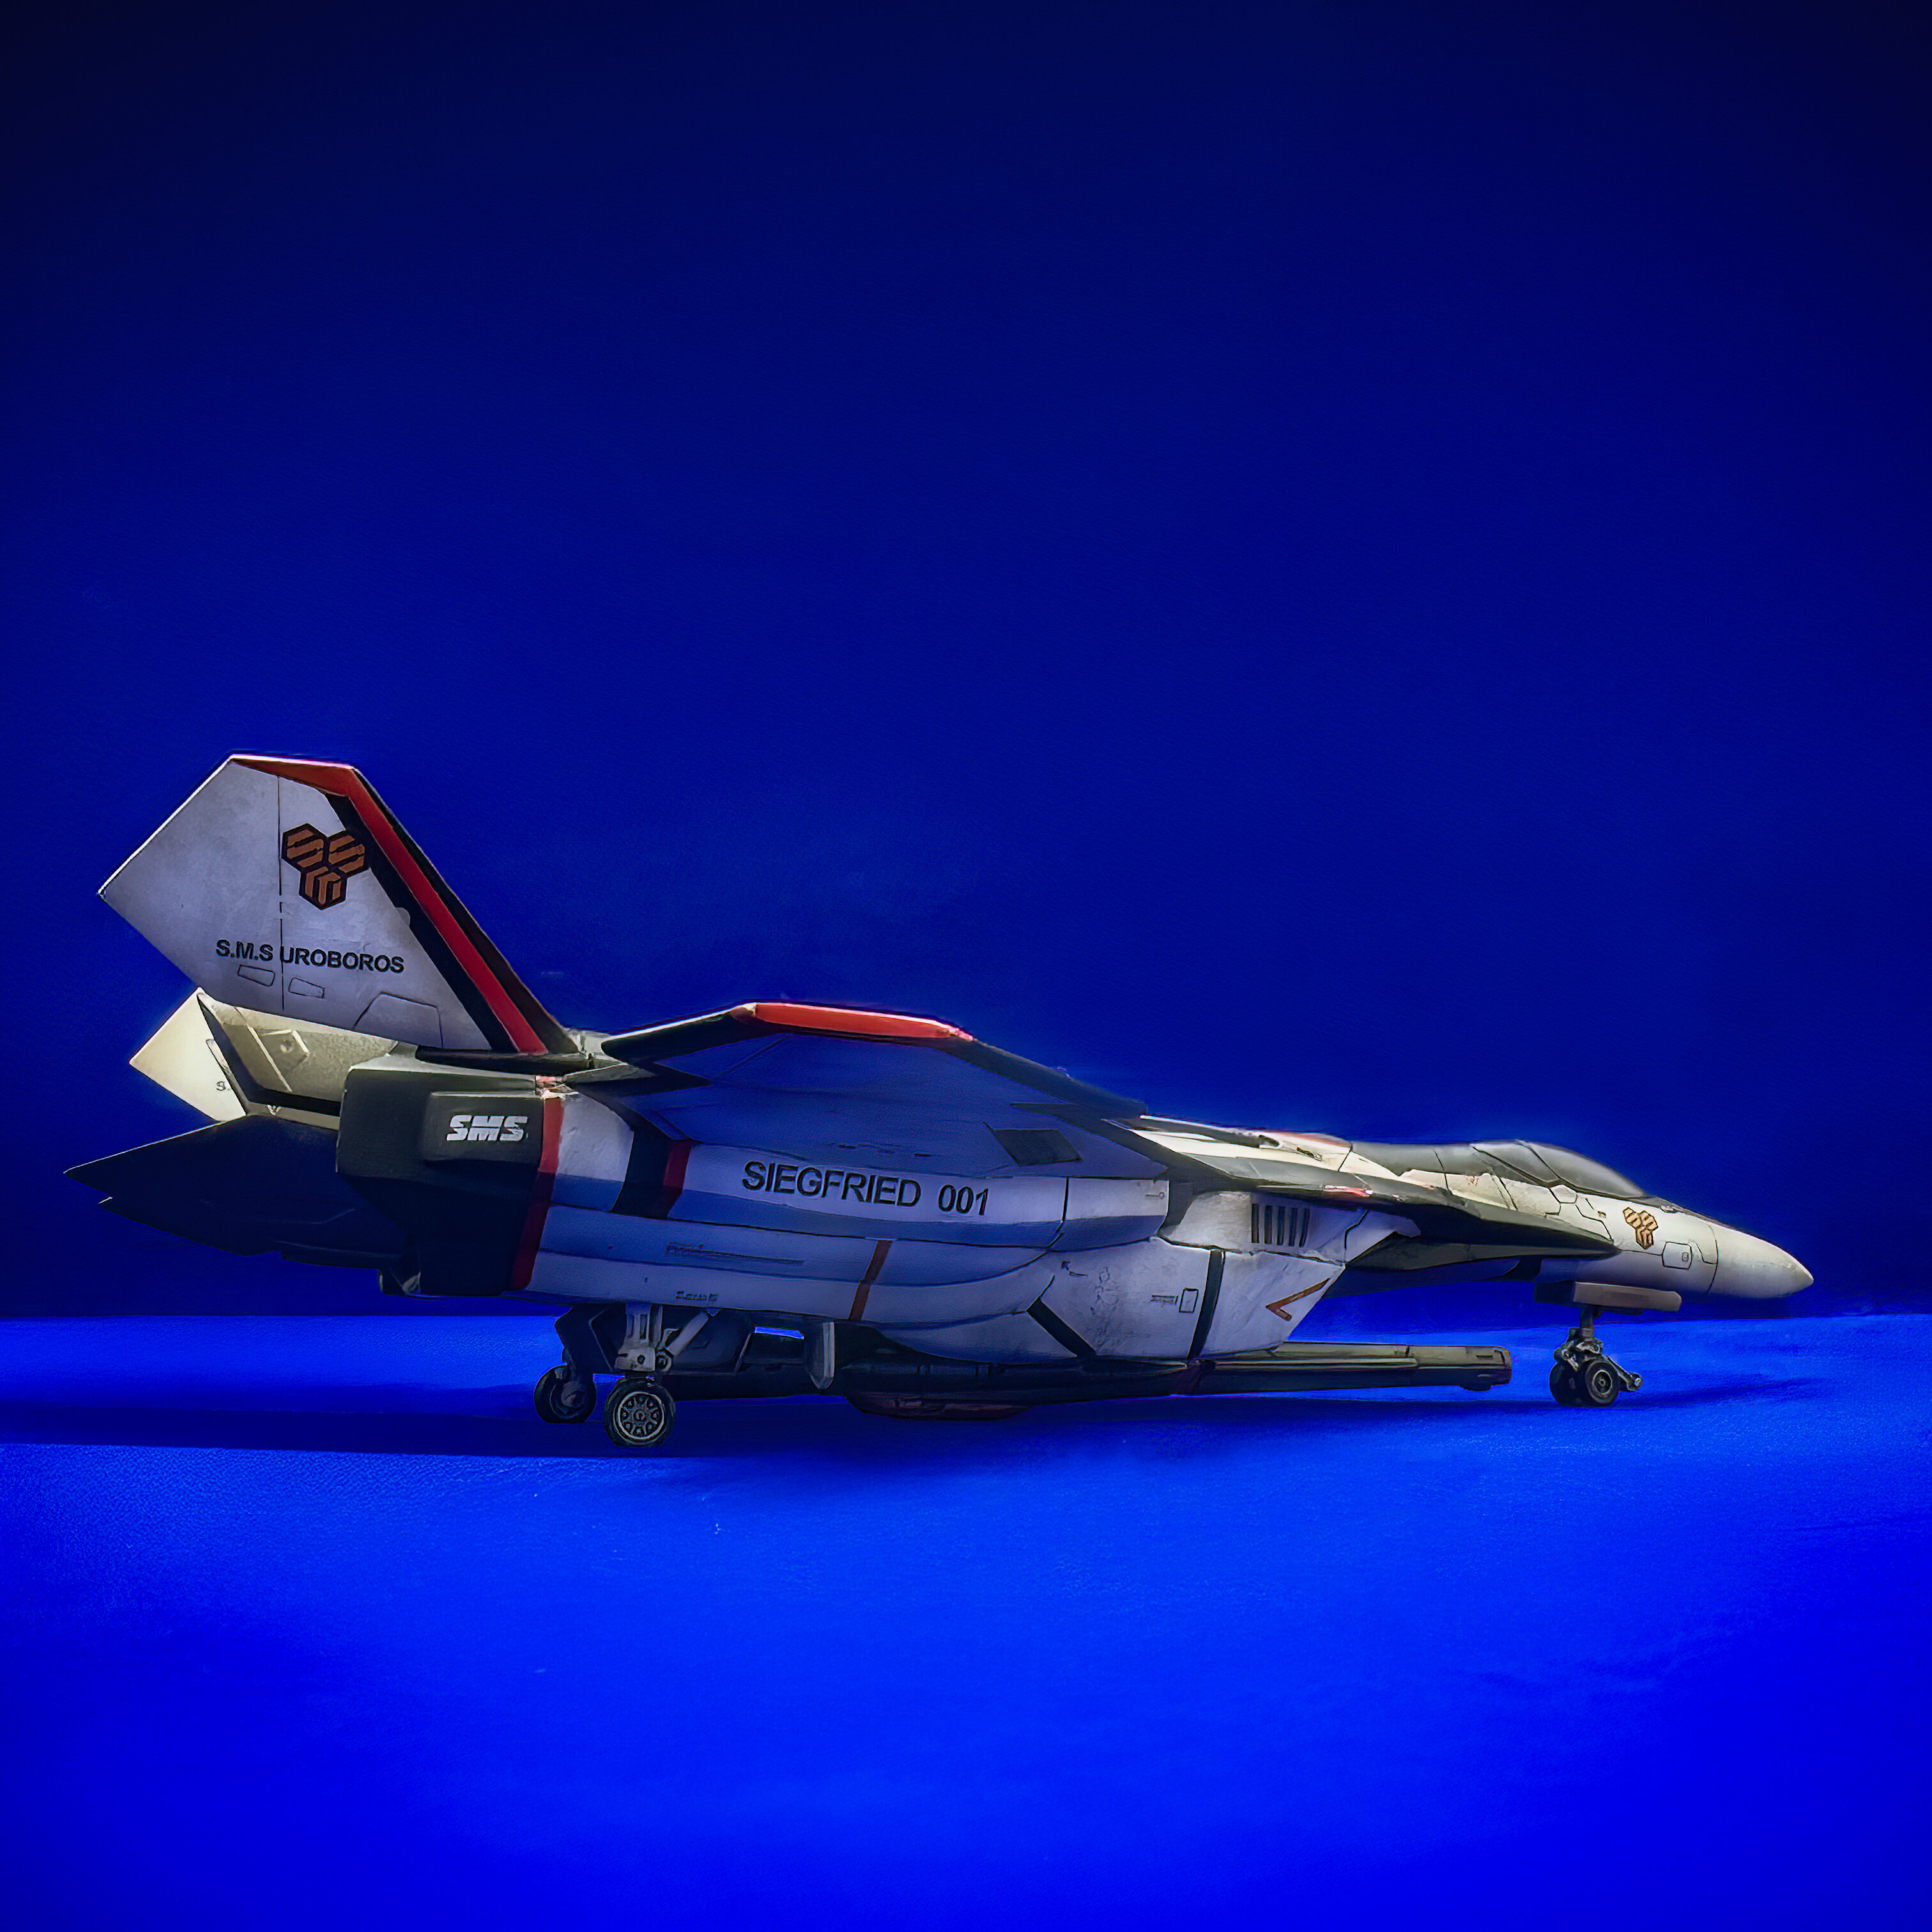
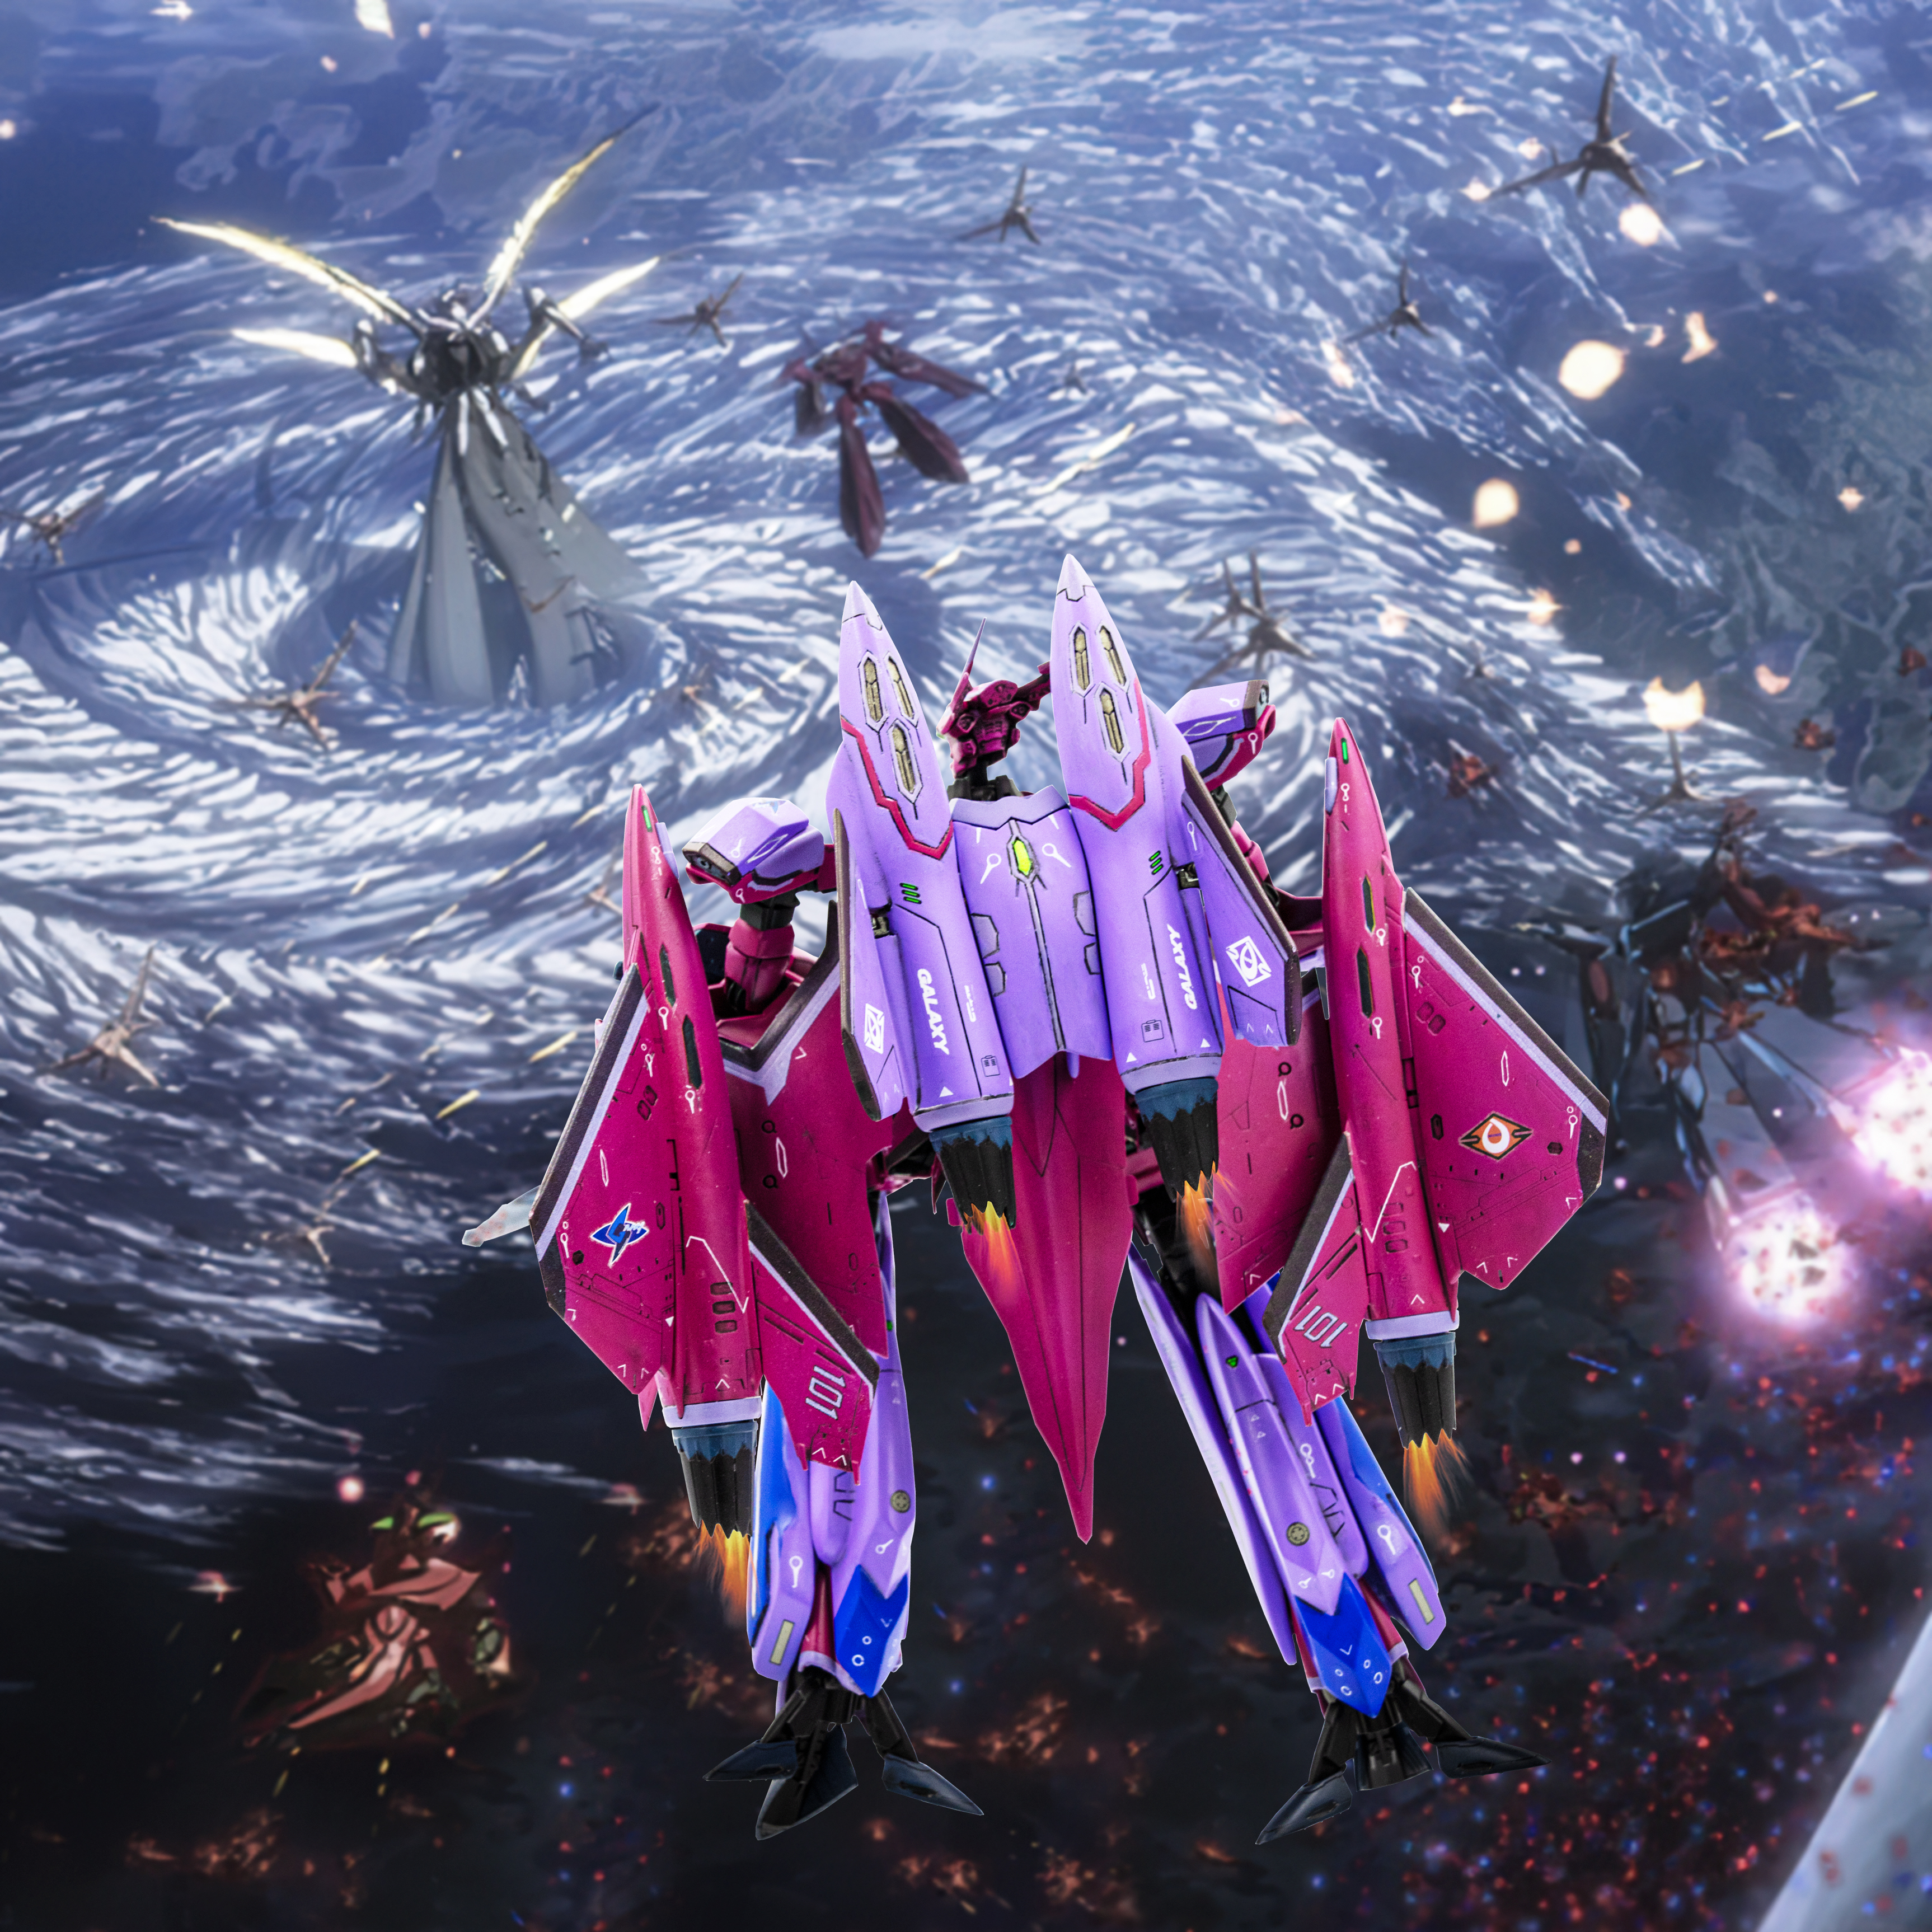
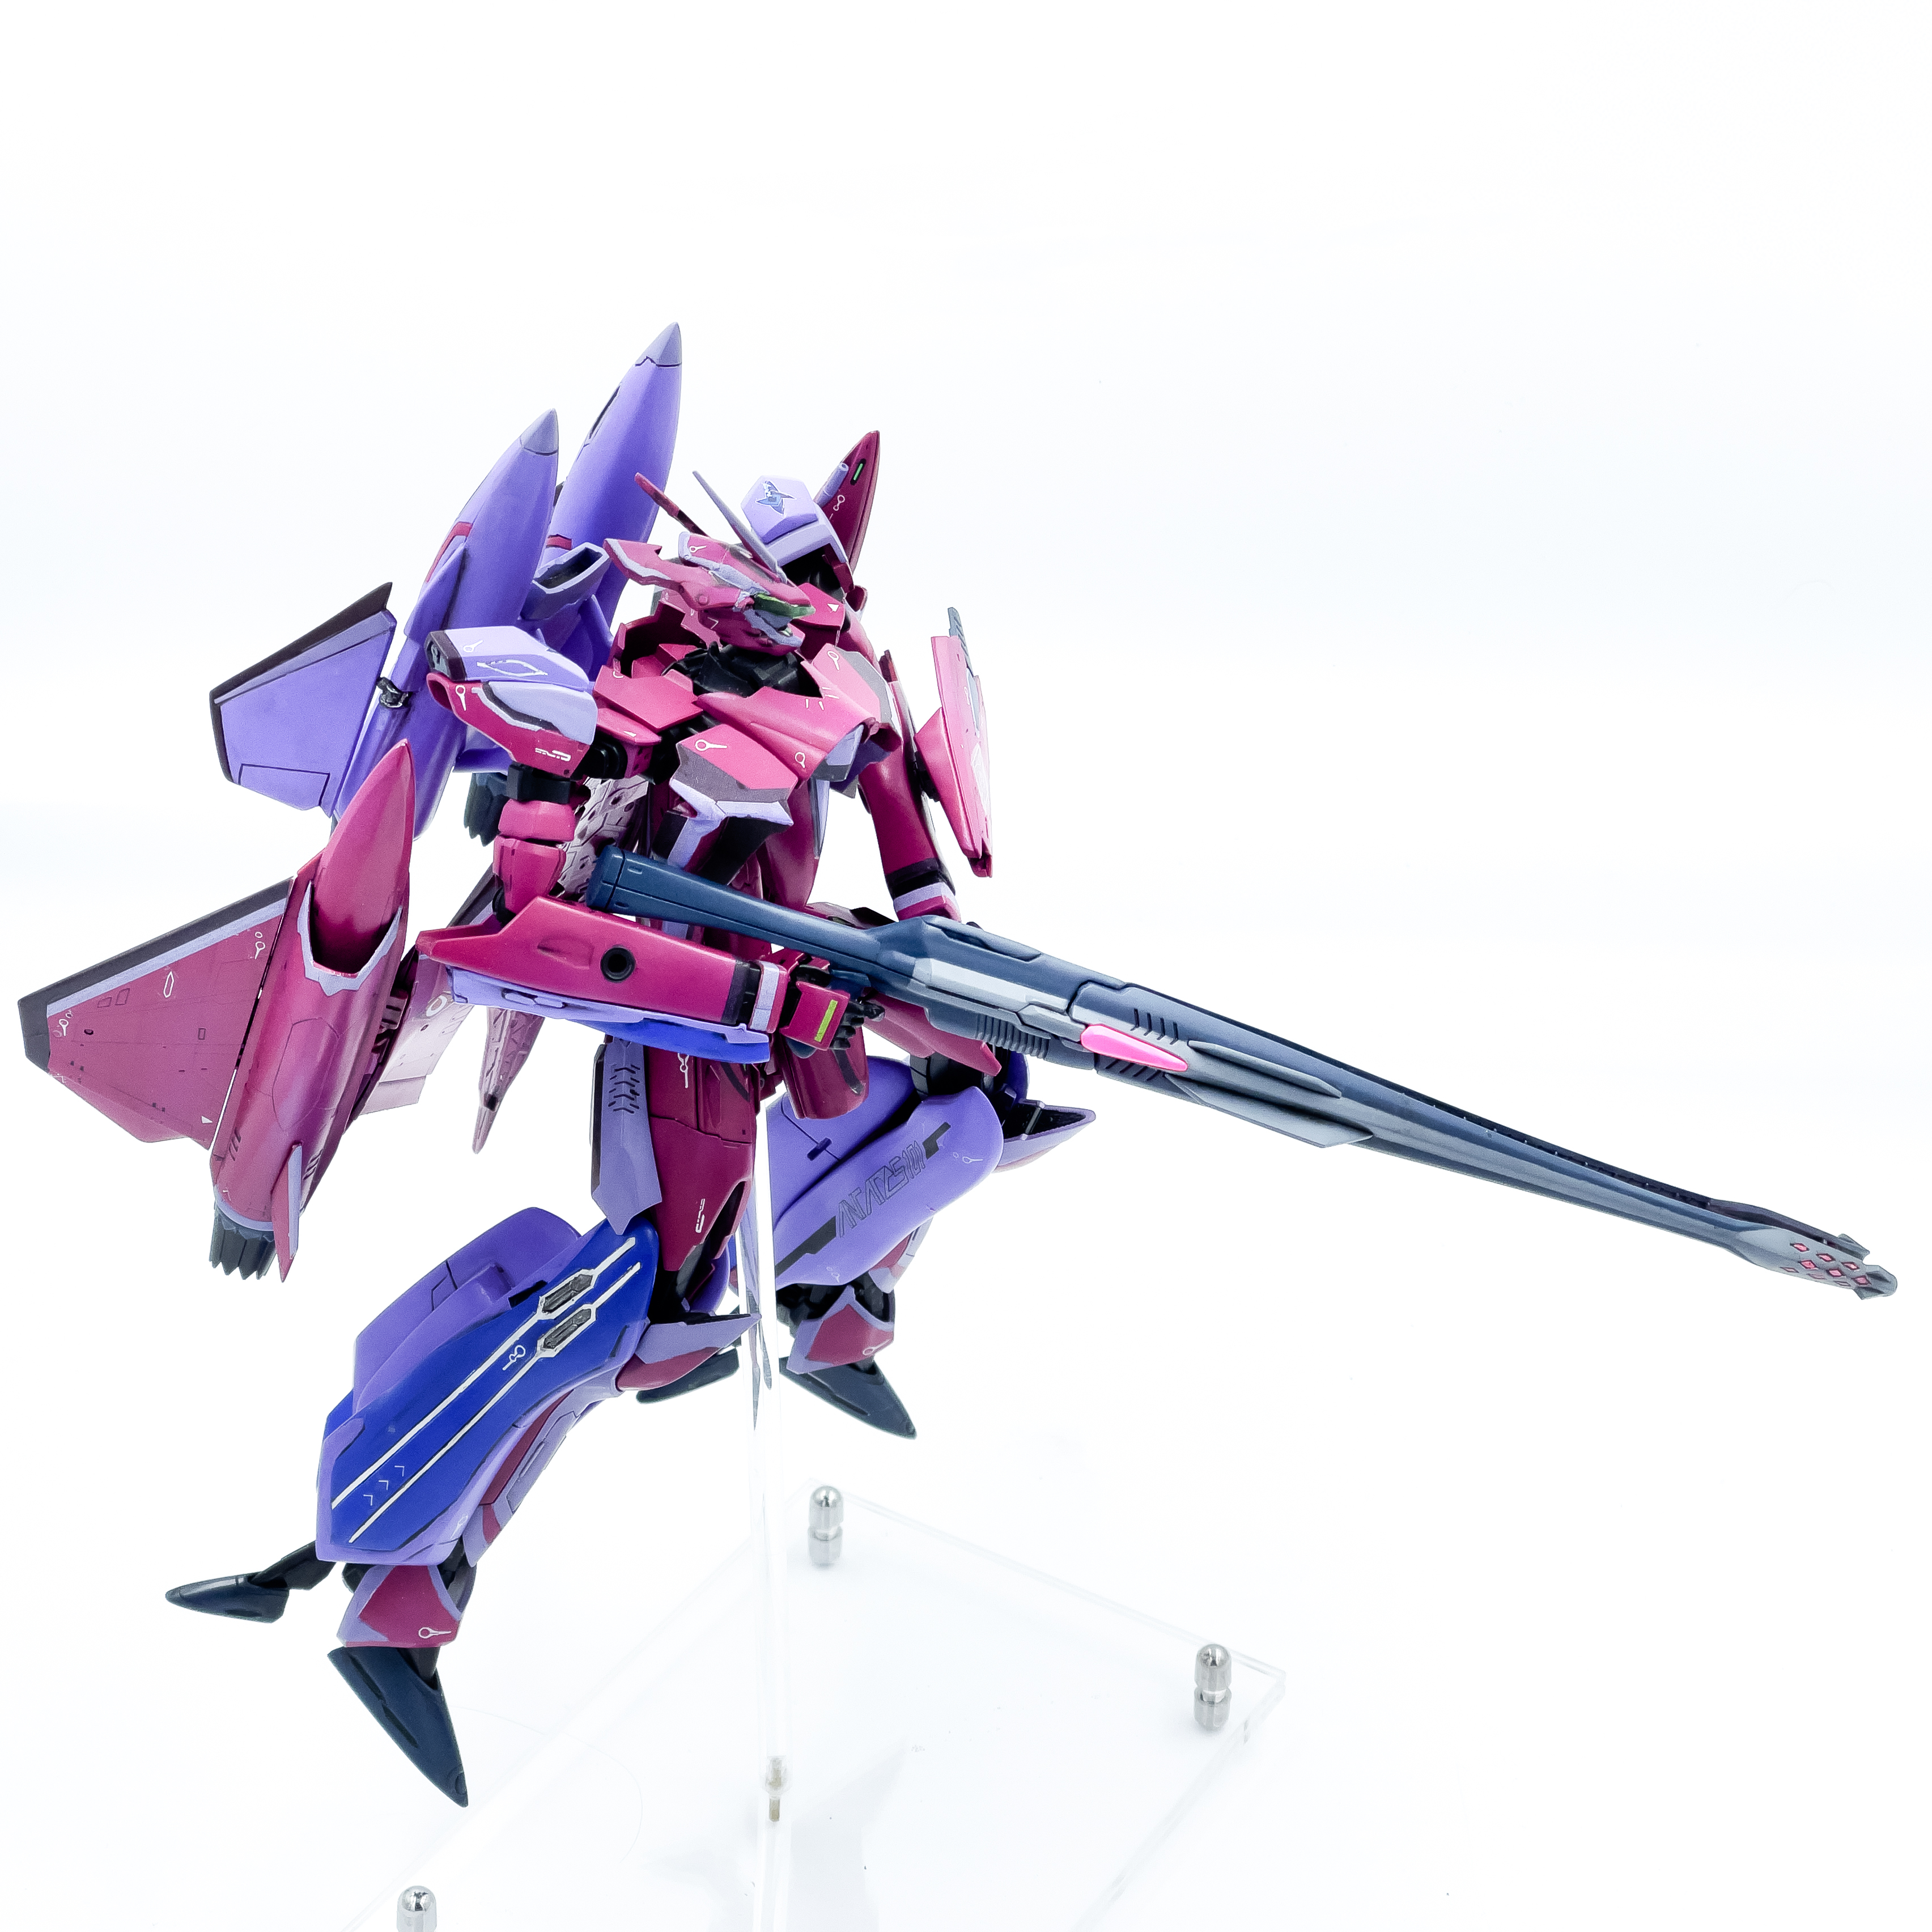
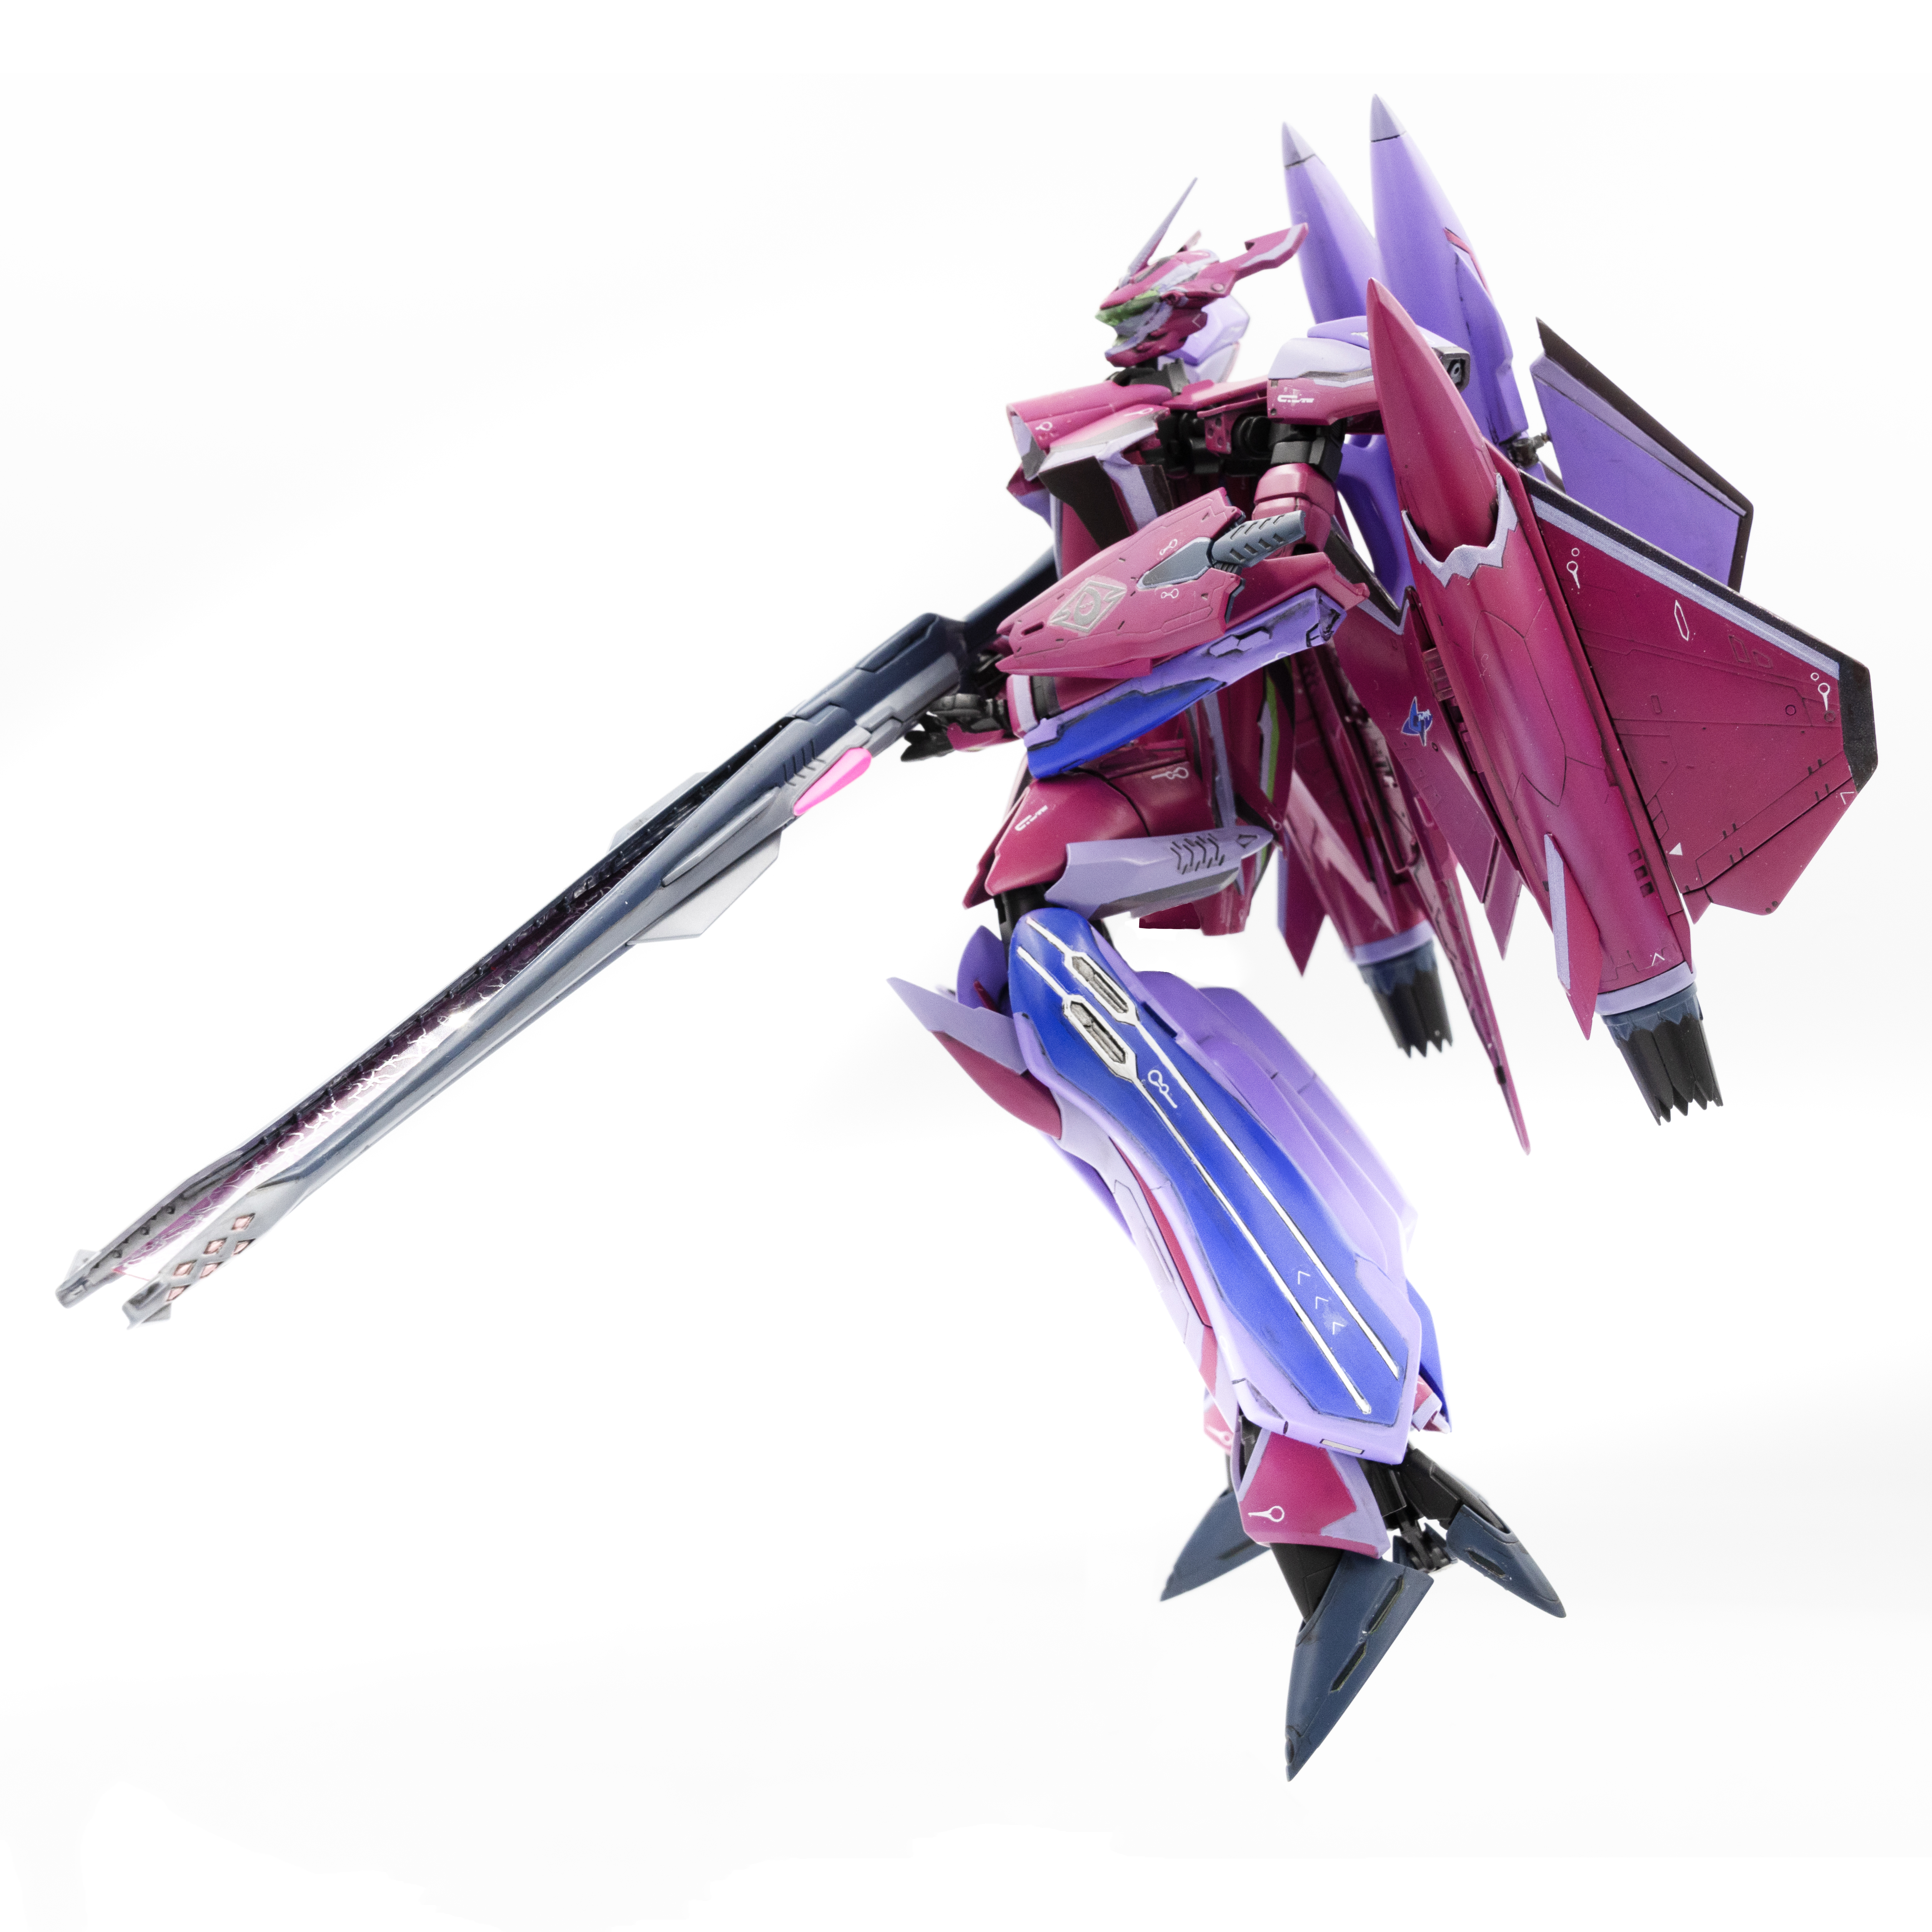
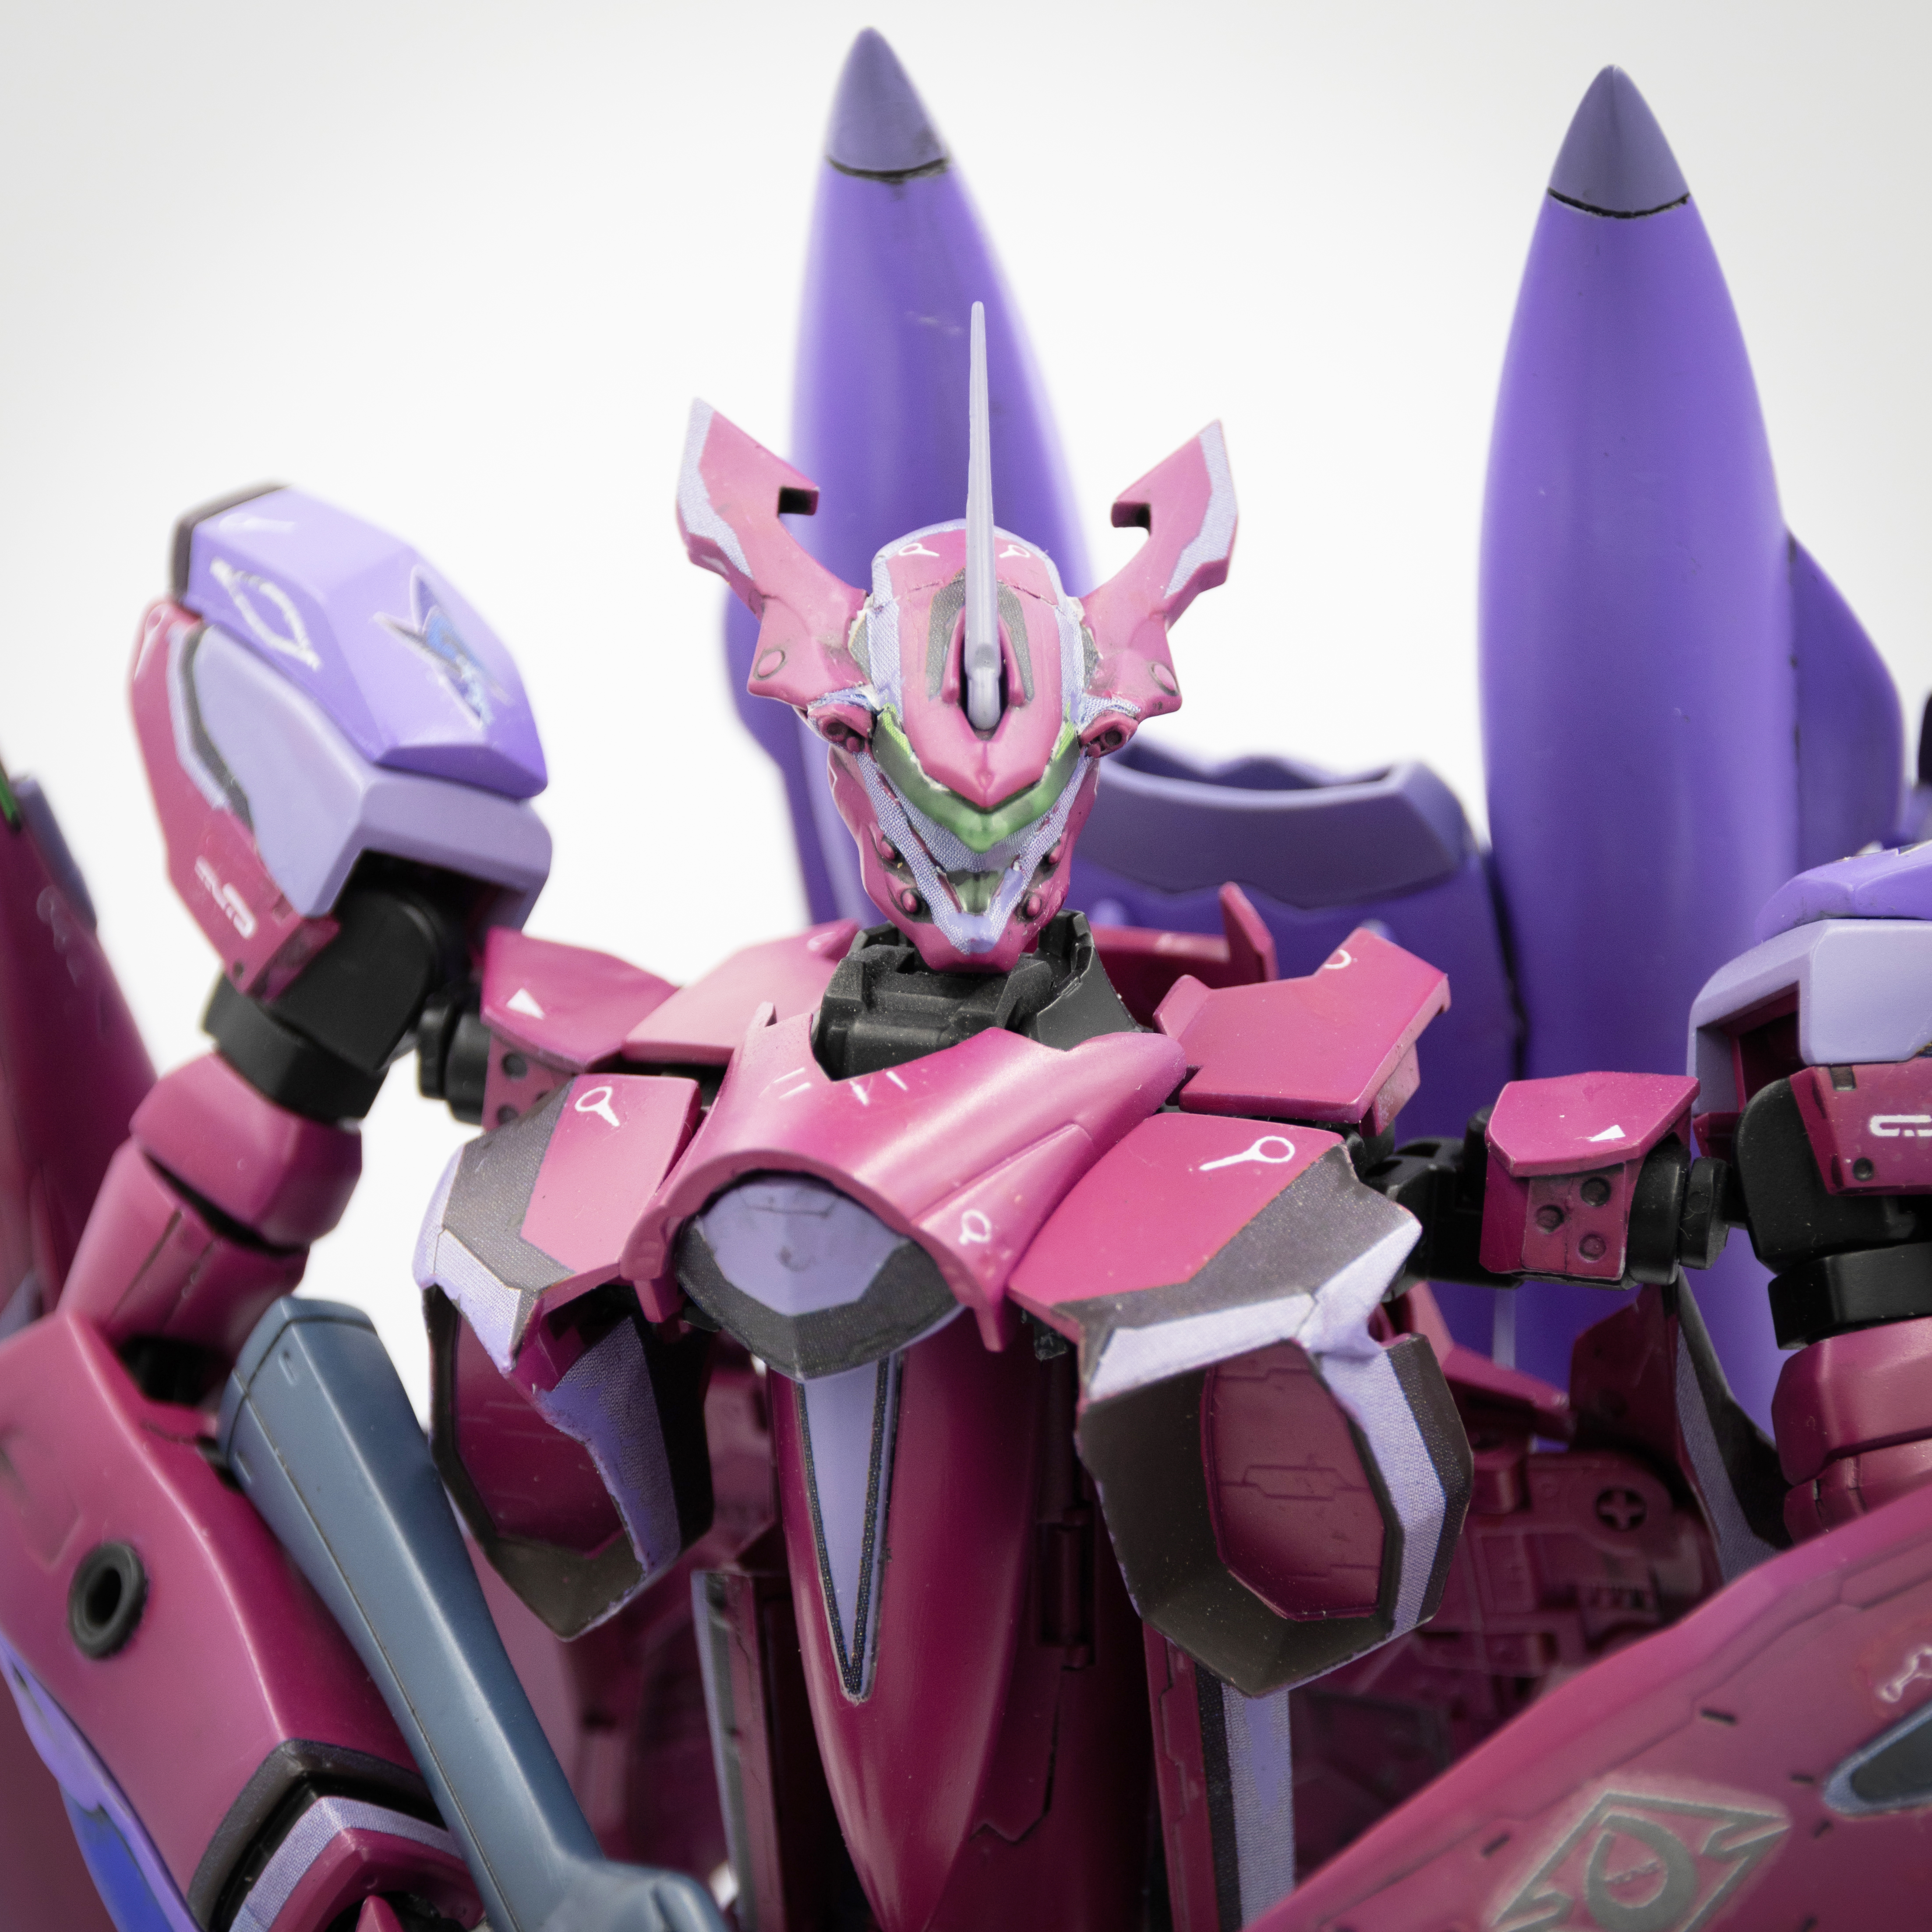
Finally completed the Bandai VF-27 1/72 model, with resin parts for the booster.
A painful but fruitful journey to build this. The most terrible part is that the decals were vanished once they were put in the water. Finally I had to scan the decals and stickers, remove the background in photoshop, and then print them as decals again.
-
I got it years ago in yahoo.co.jp. I tried to work on it but gave up because of the quality of the 3d print. I think it will be much better if it can be printed out again with the 3d print technology today.
-
can I ask if you happen to have the waterslide decal of Banda 1/72 VF-27 scanned in 600 dpi? Mine was too fragile and totally gone. Thanks for the help
-
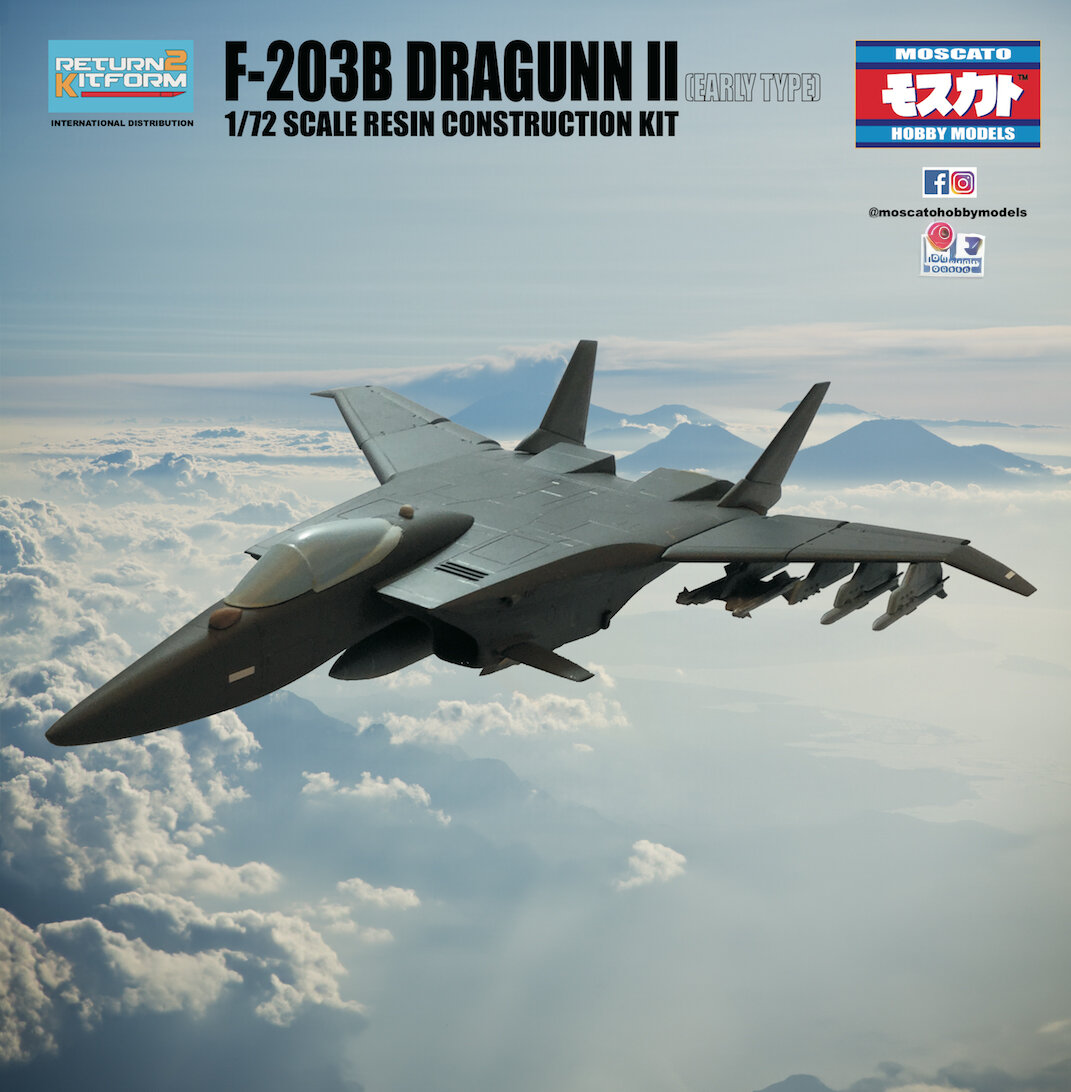
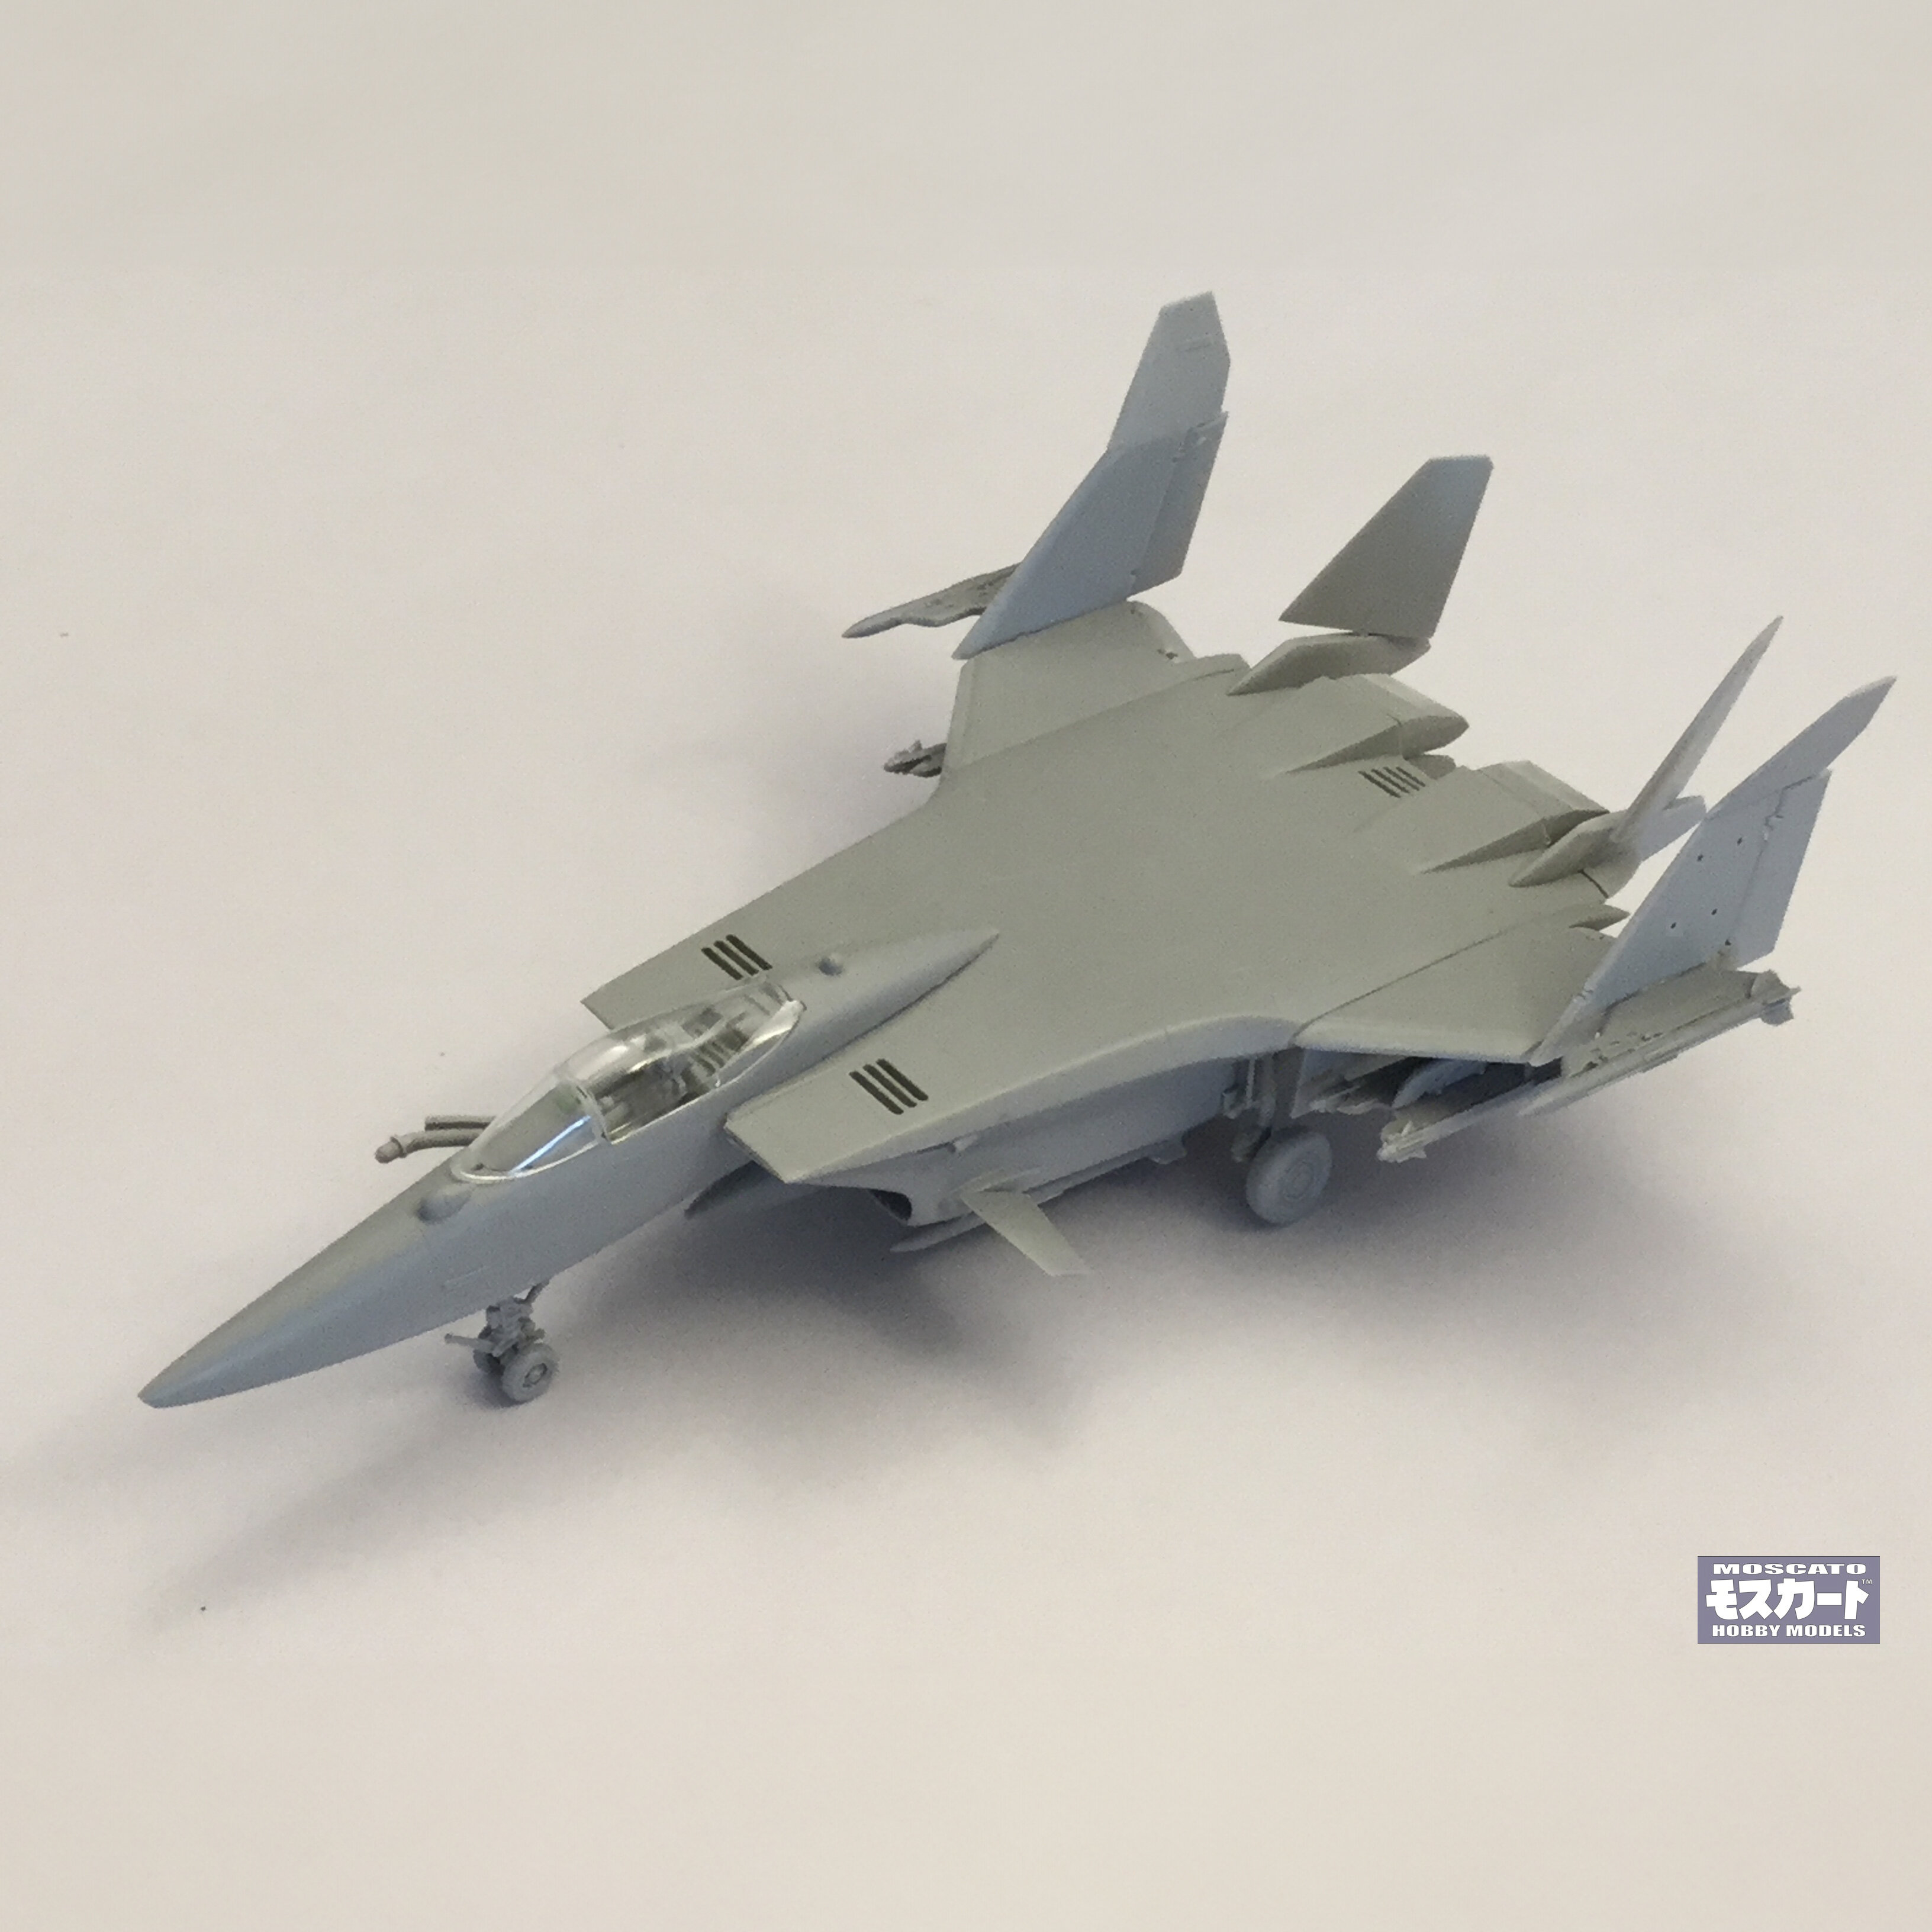
Resin by Moscato many years ago
-
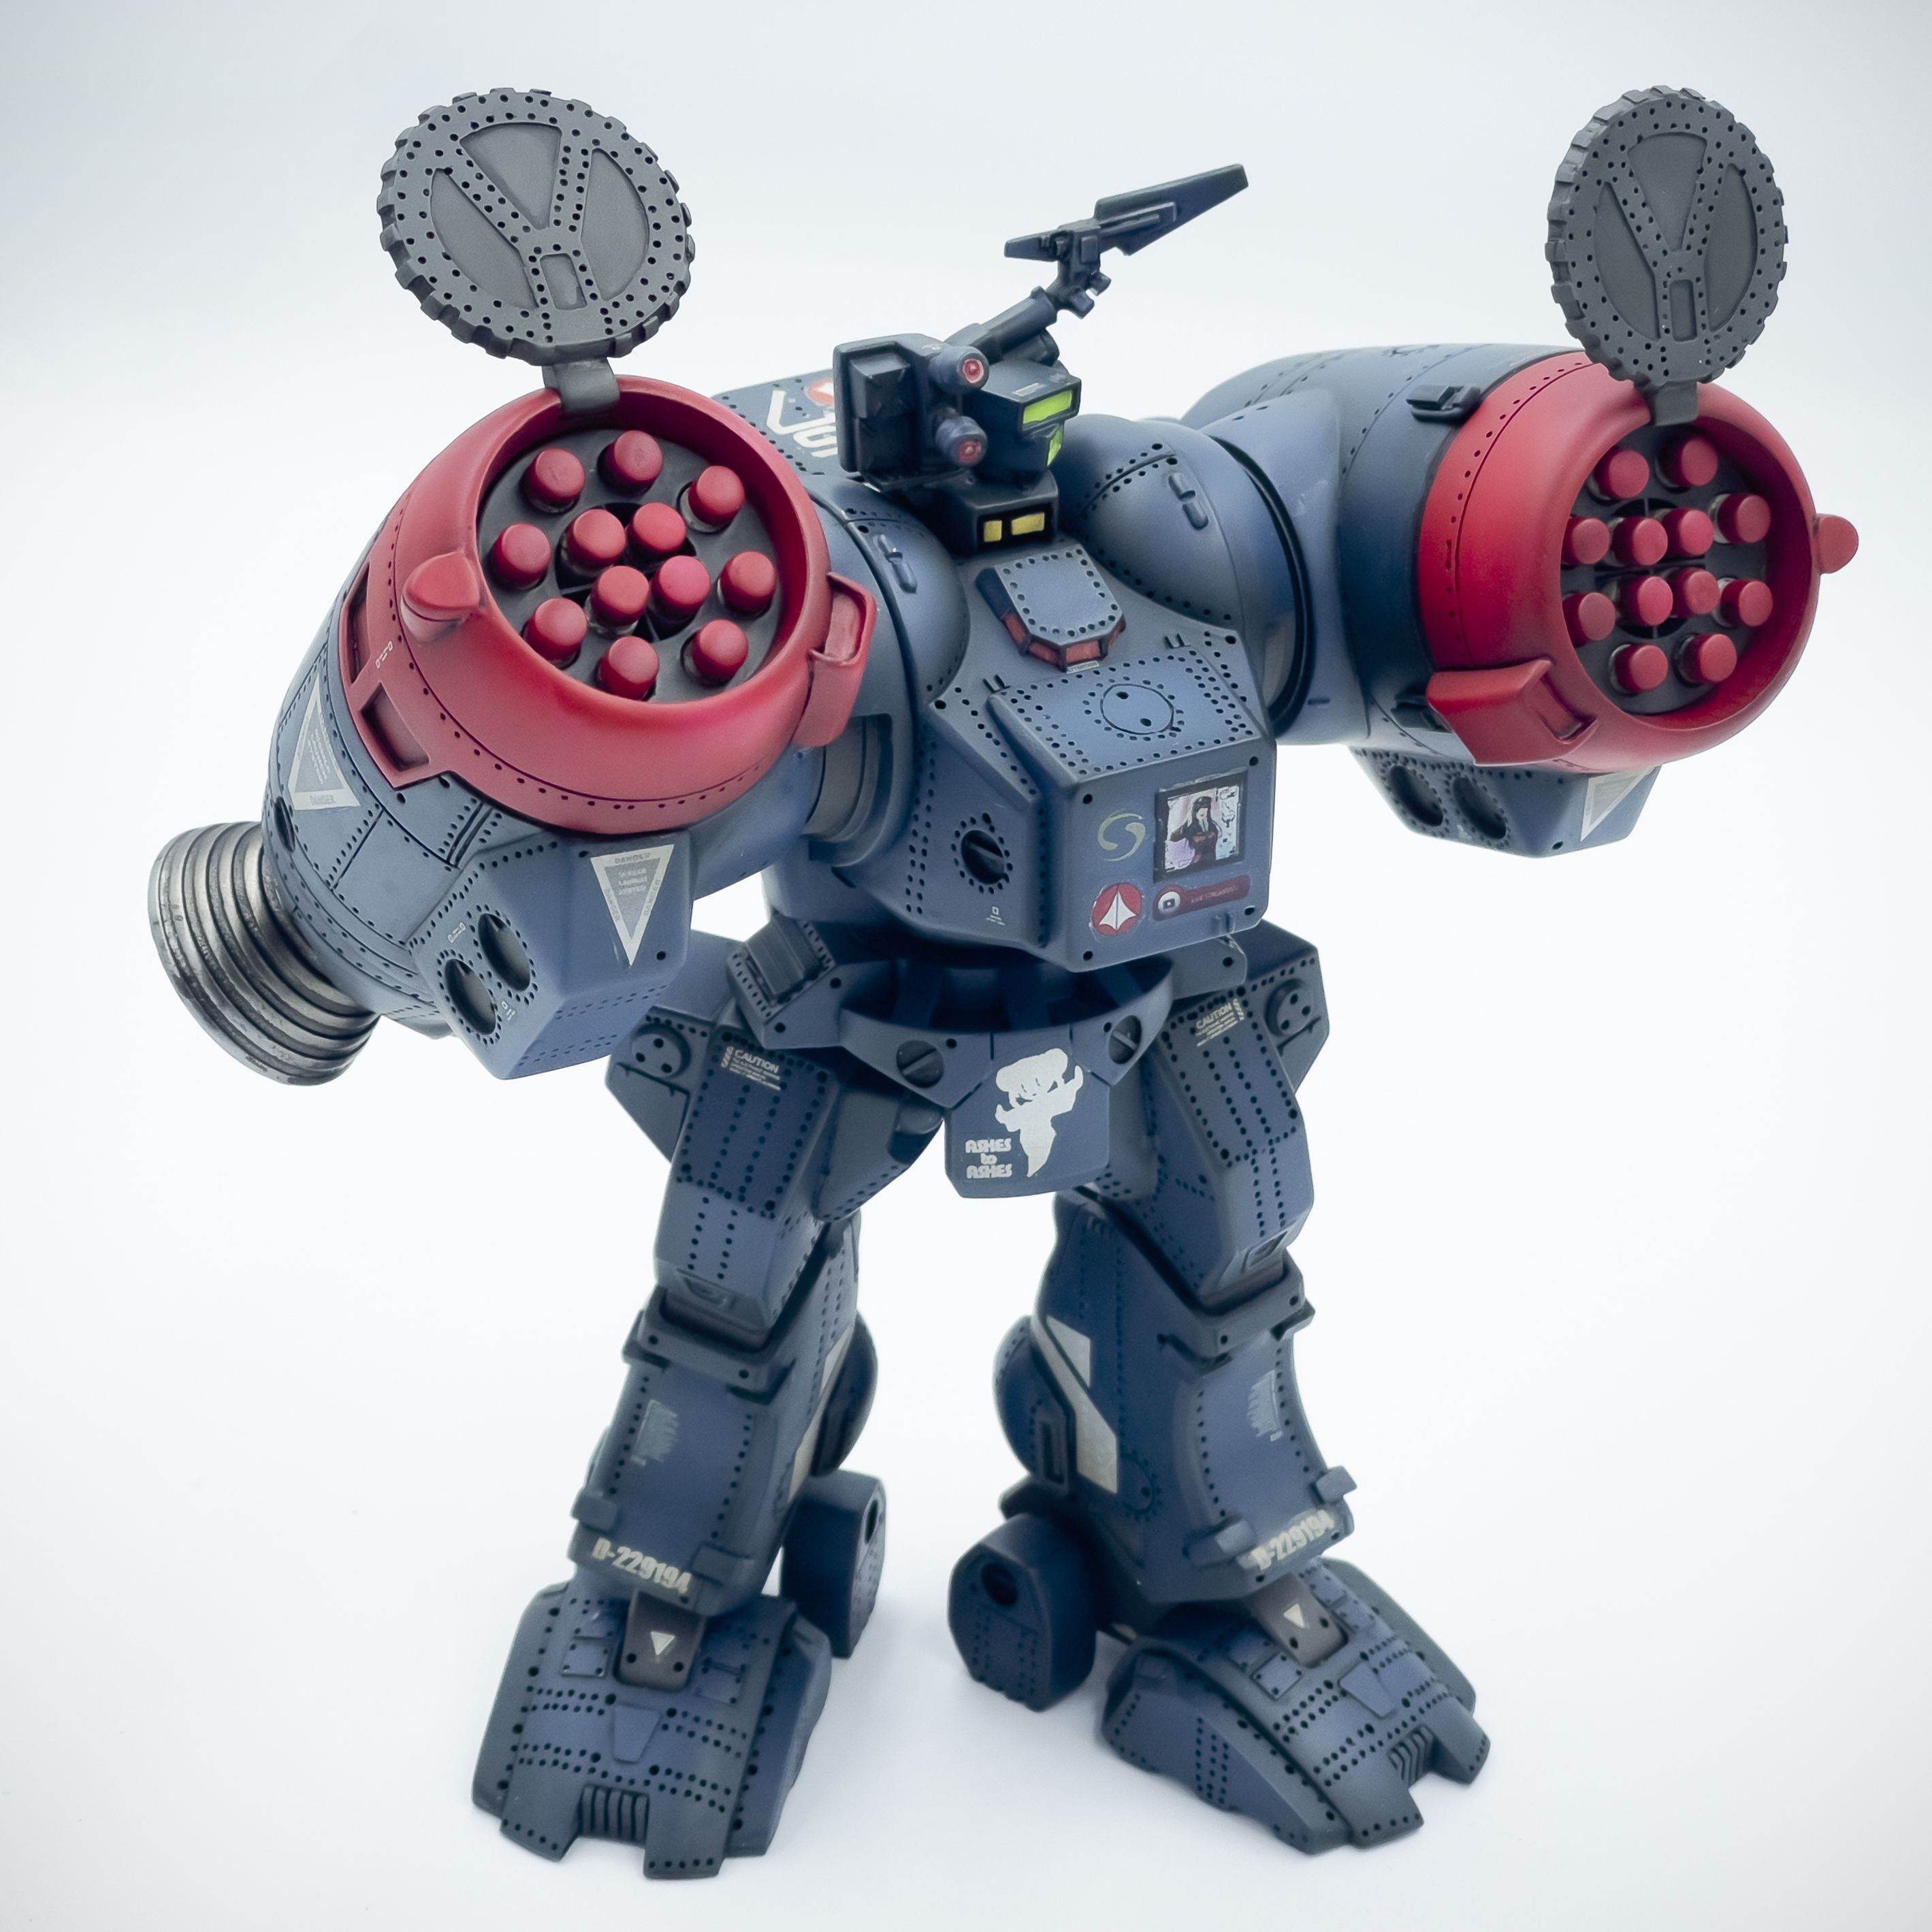
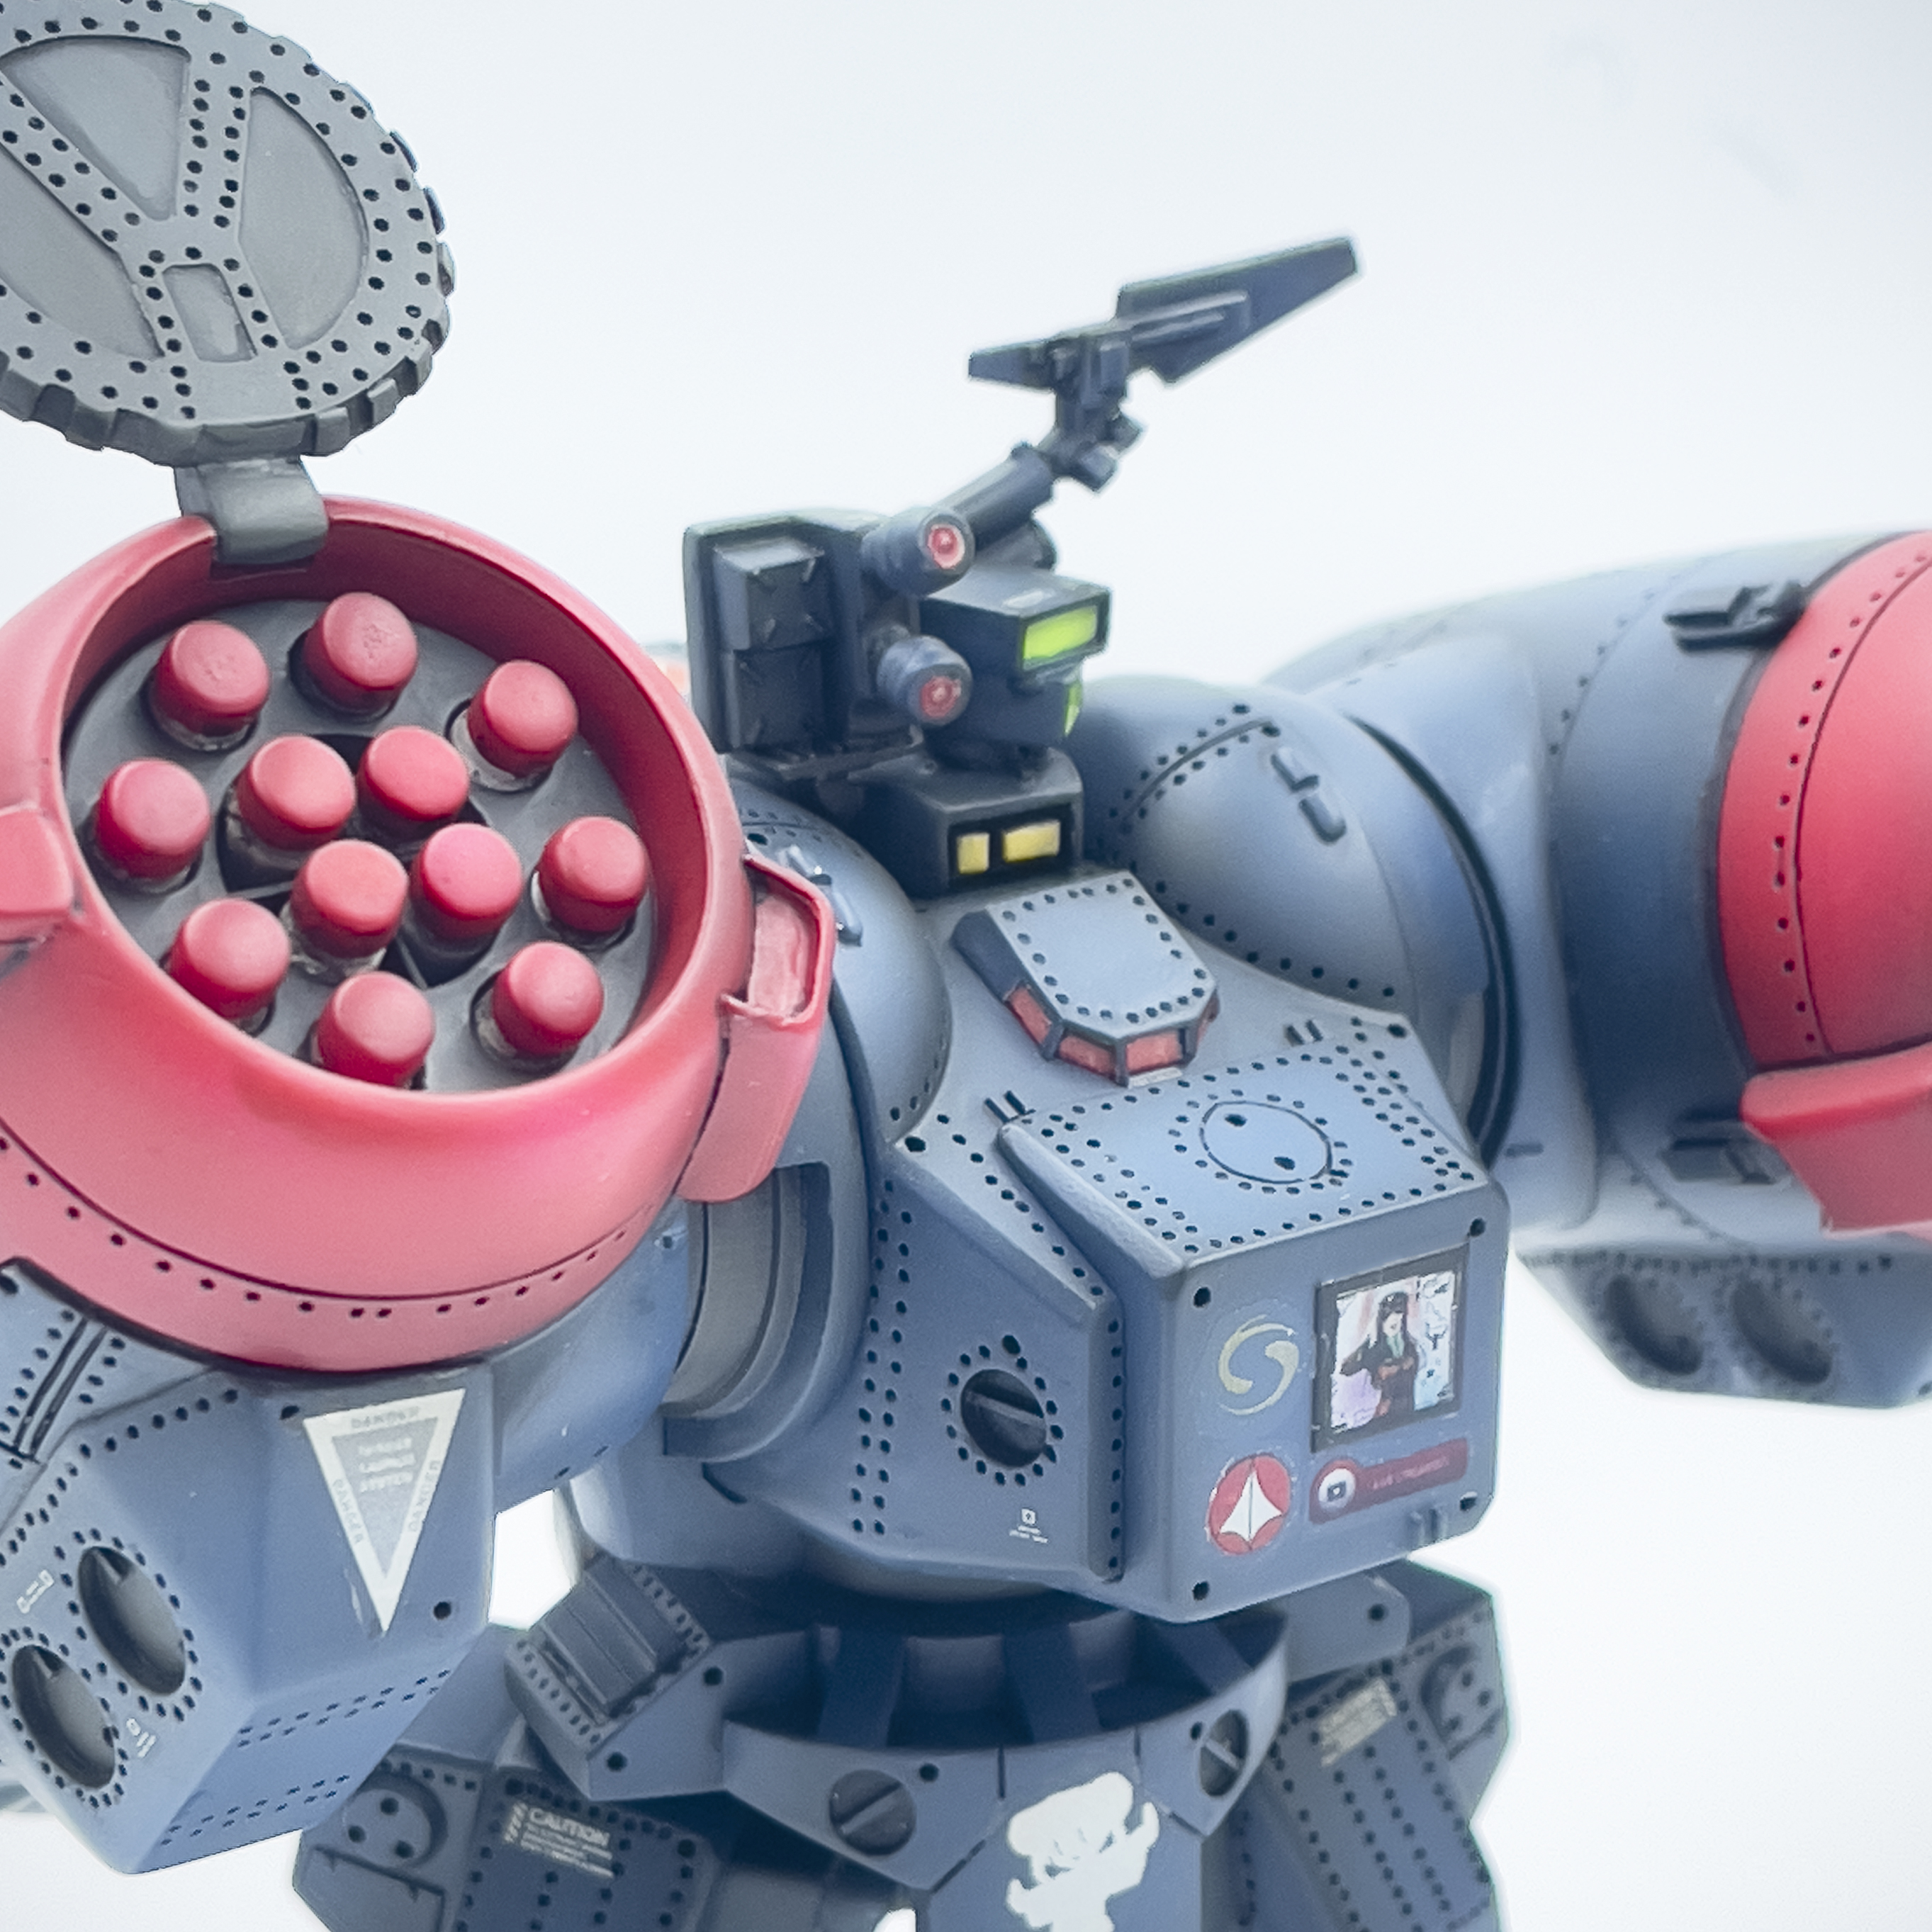
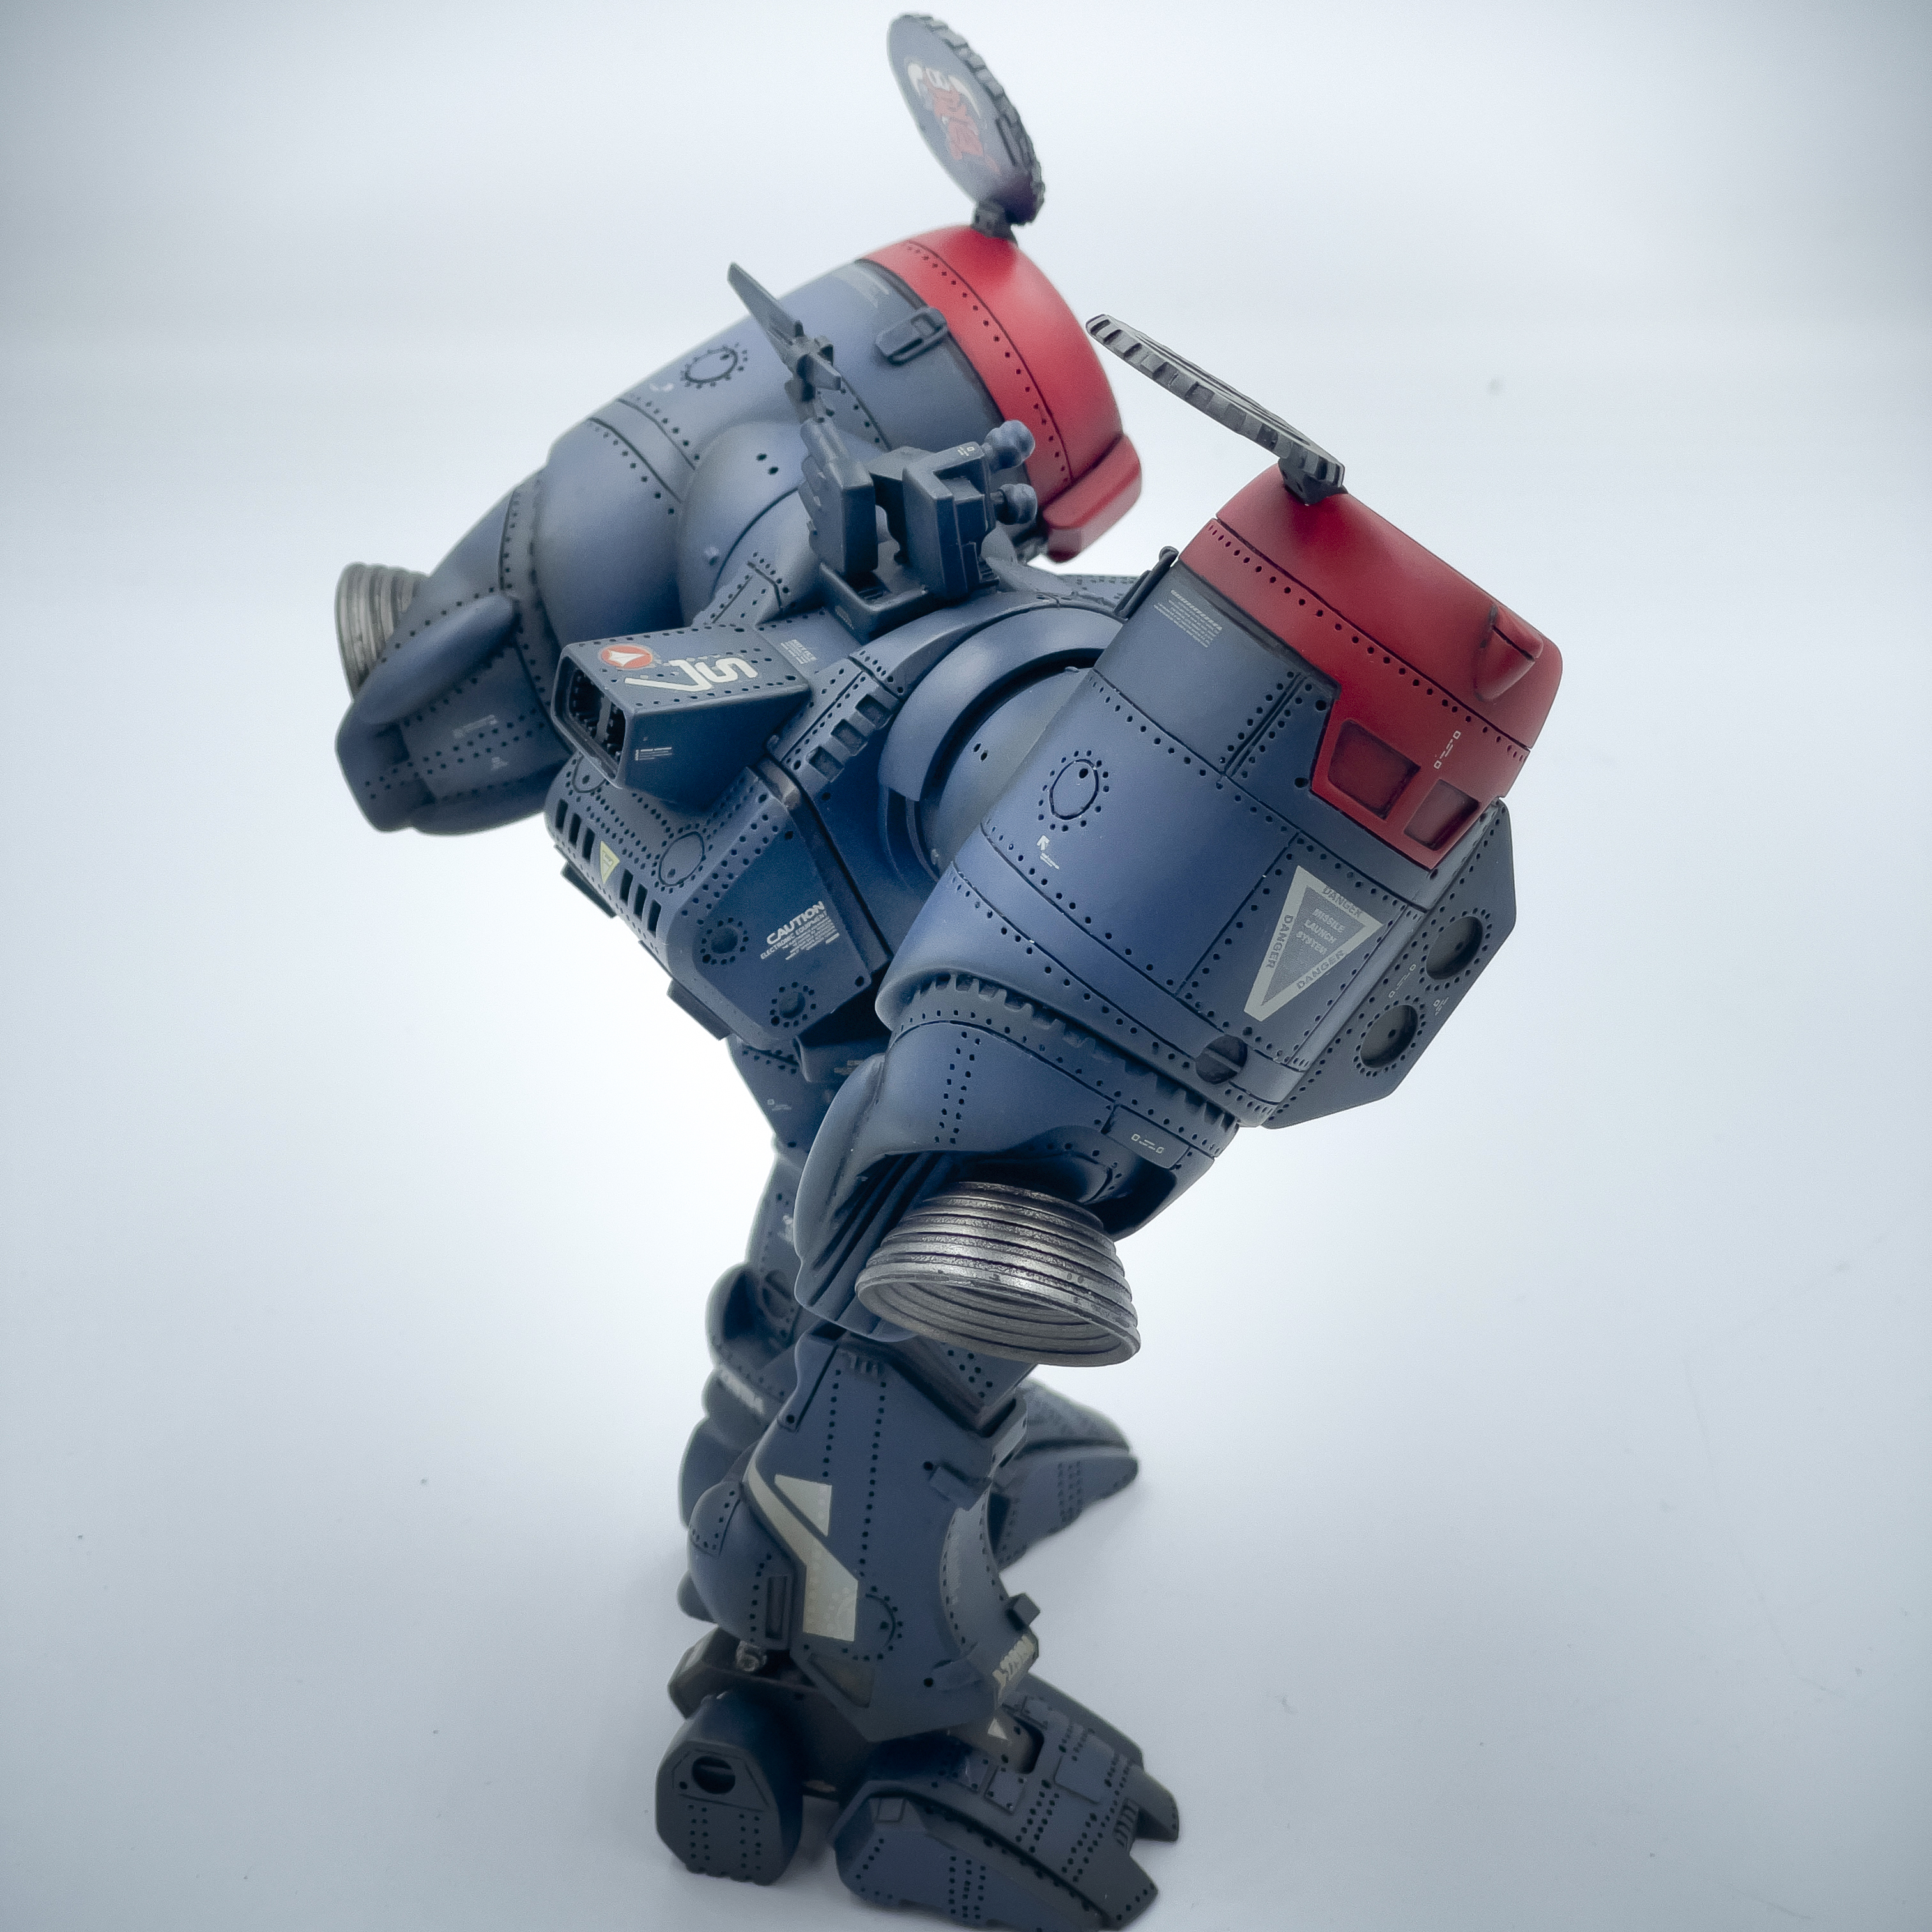
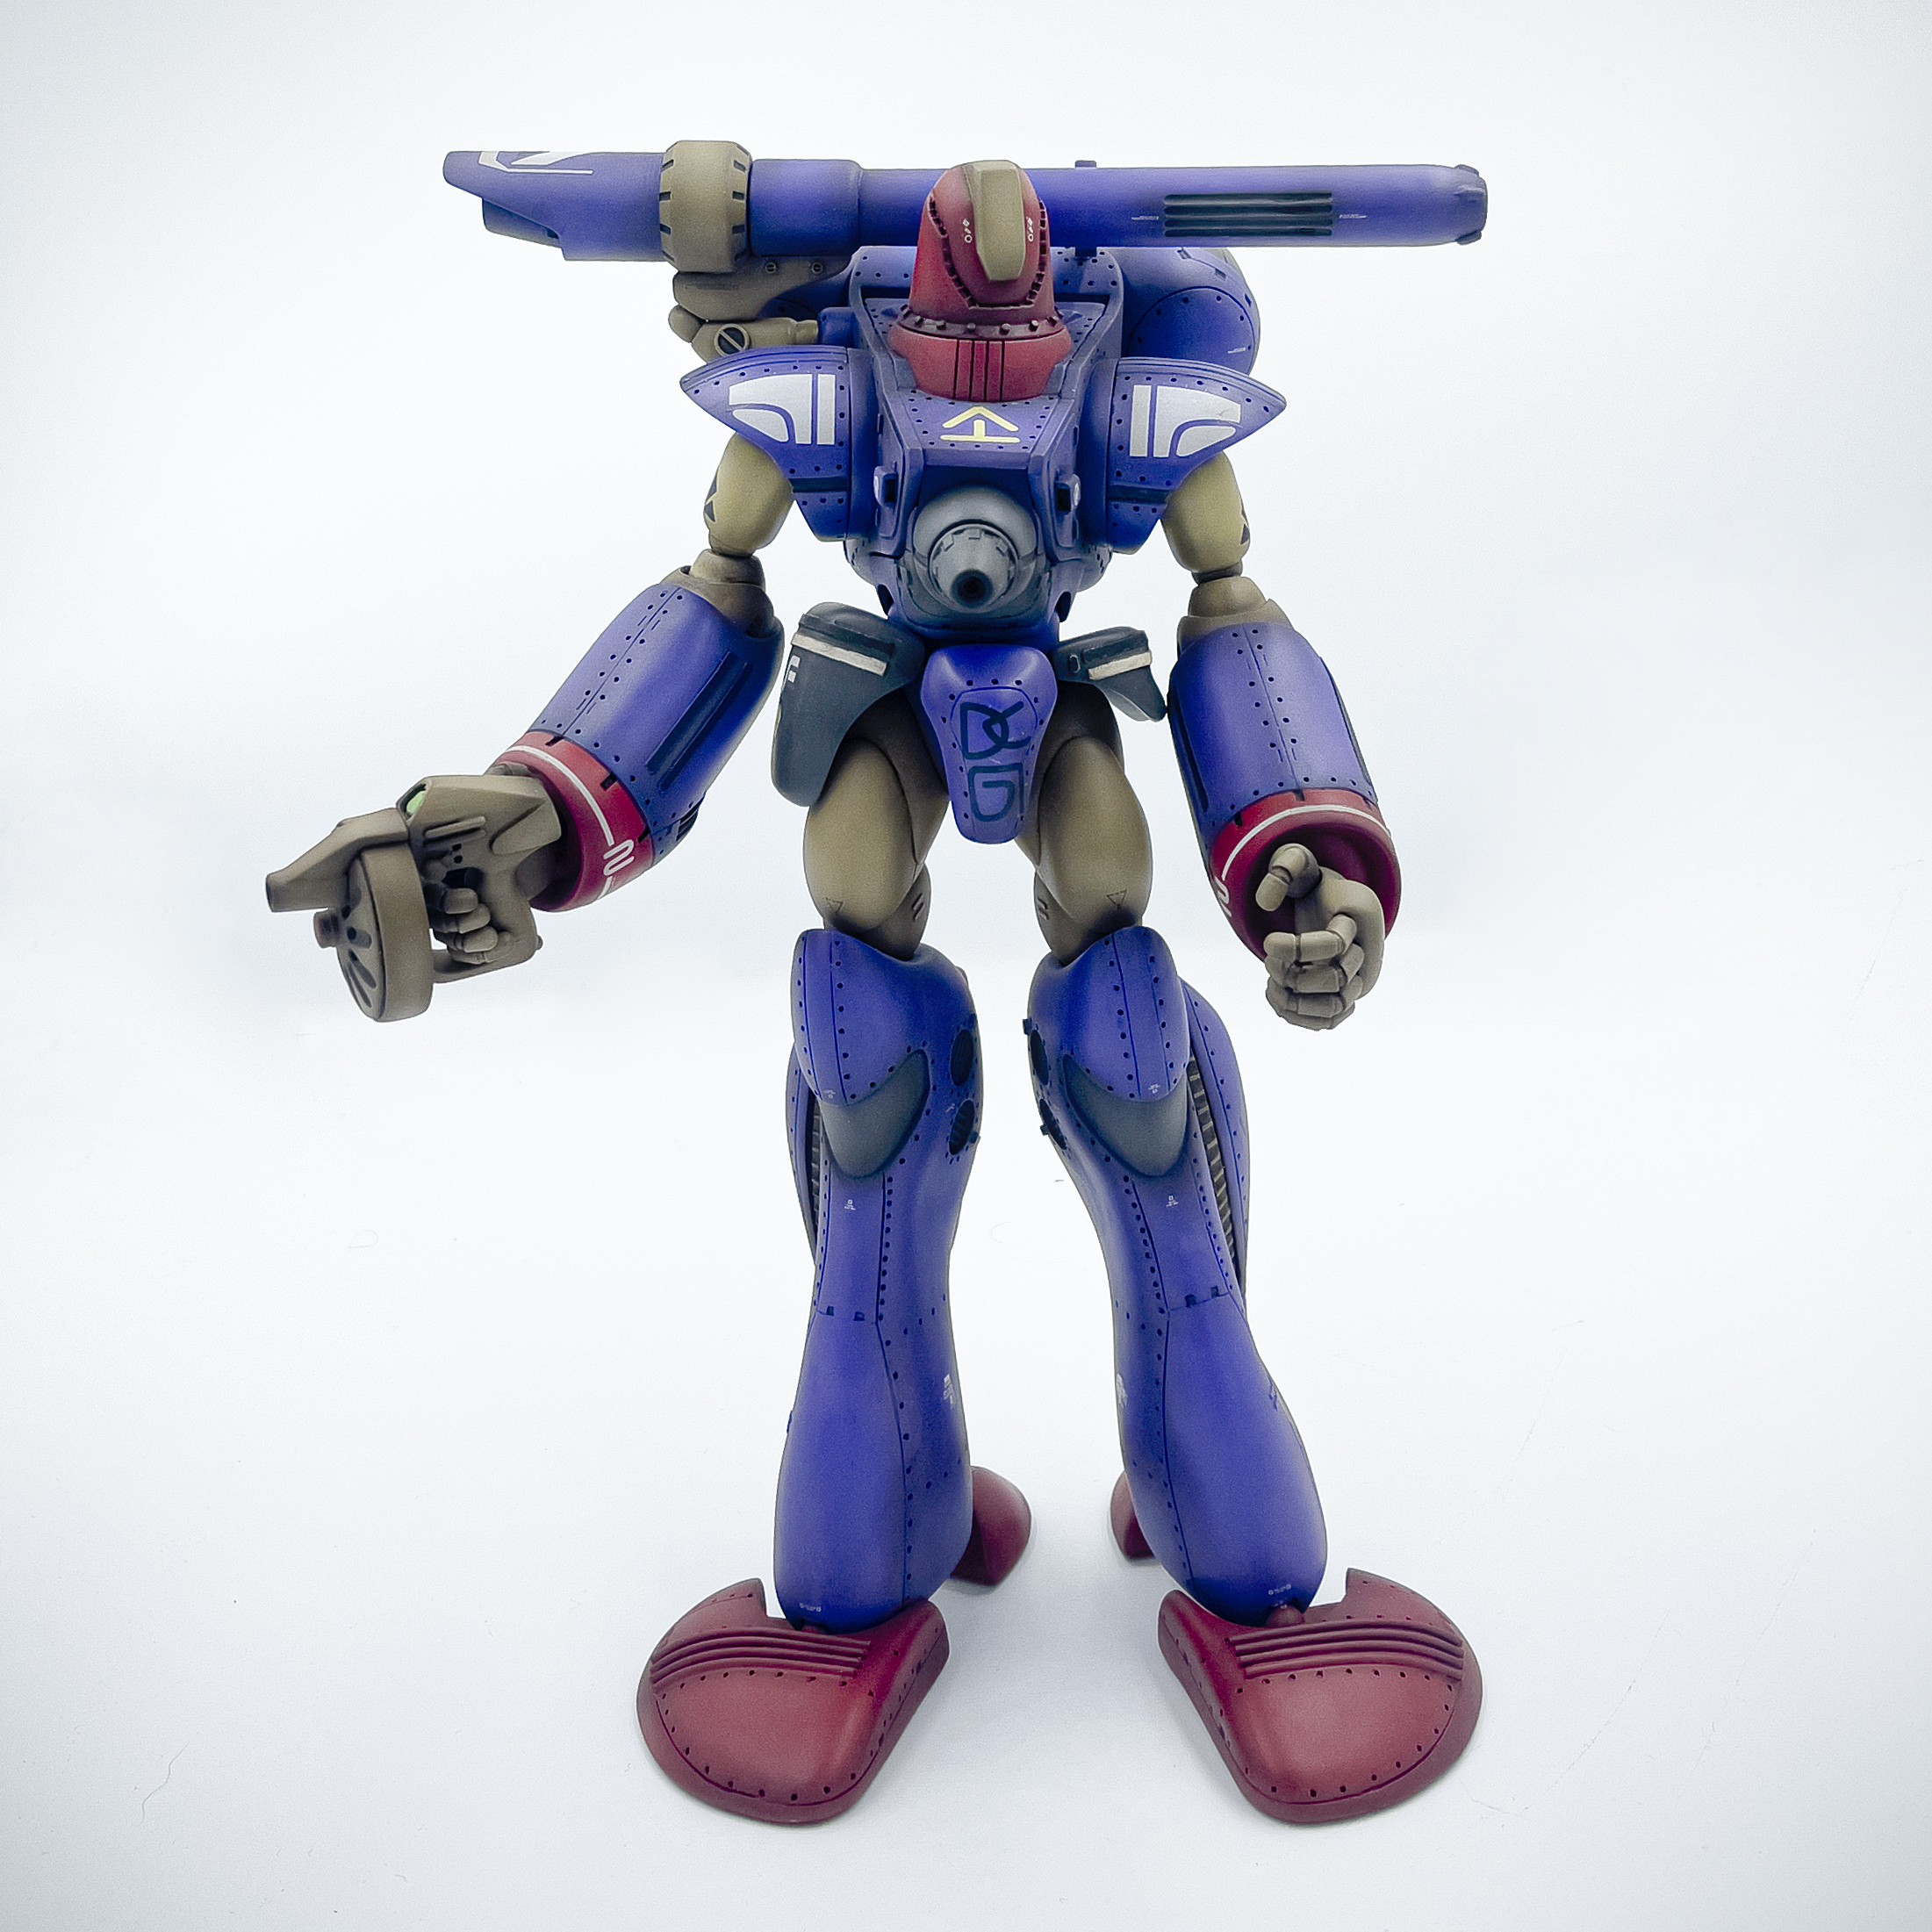
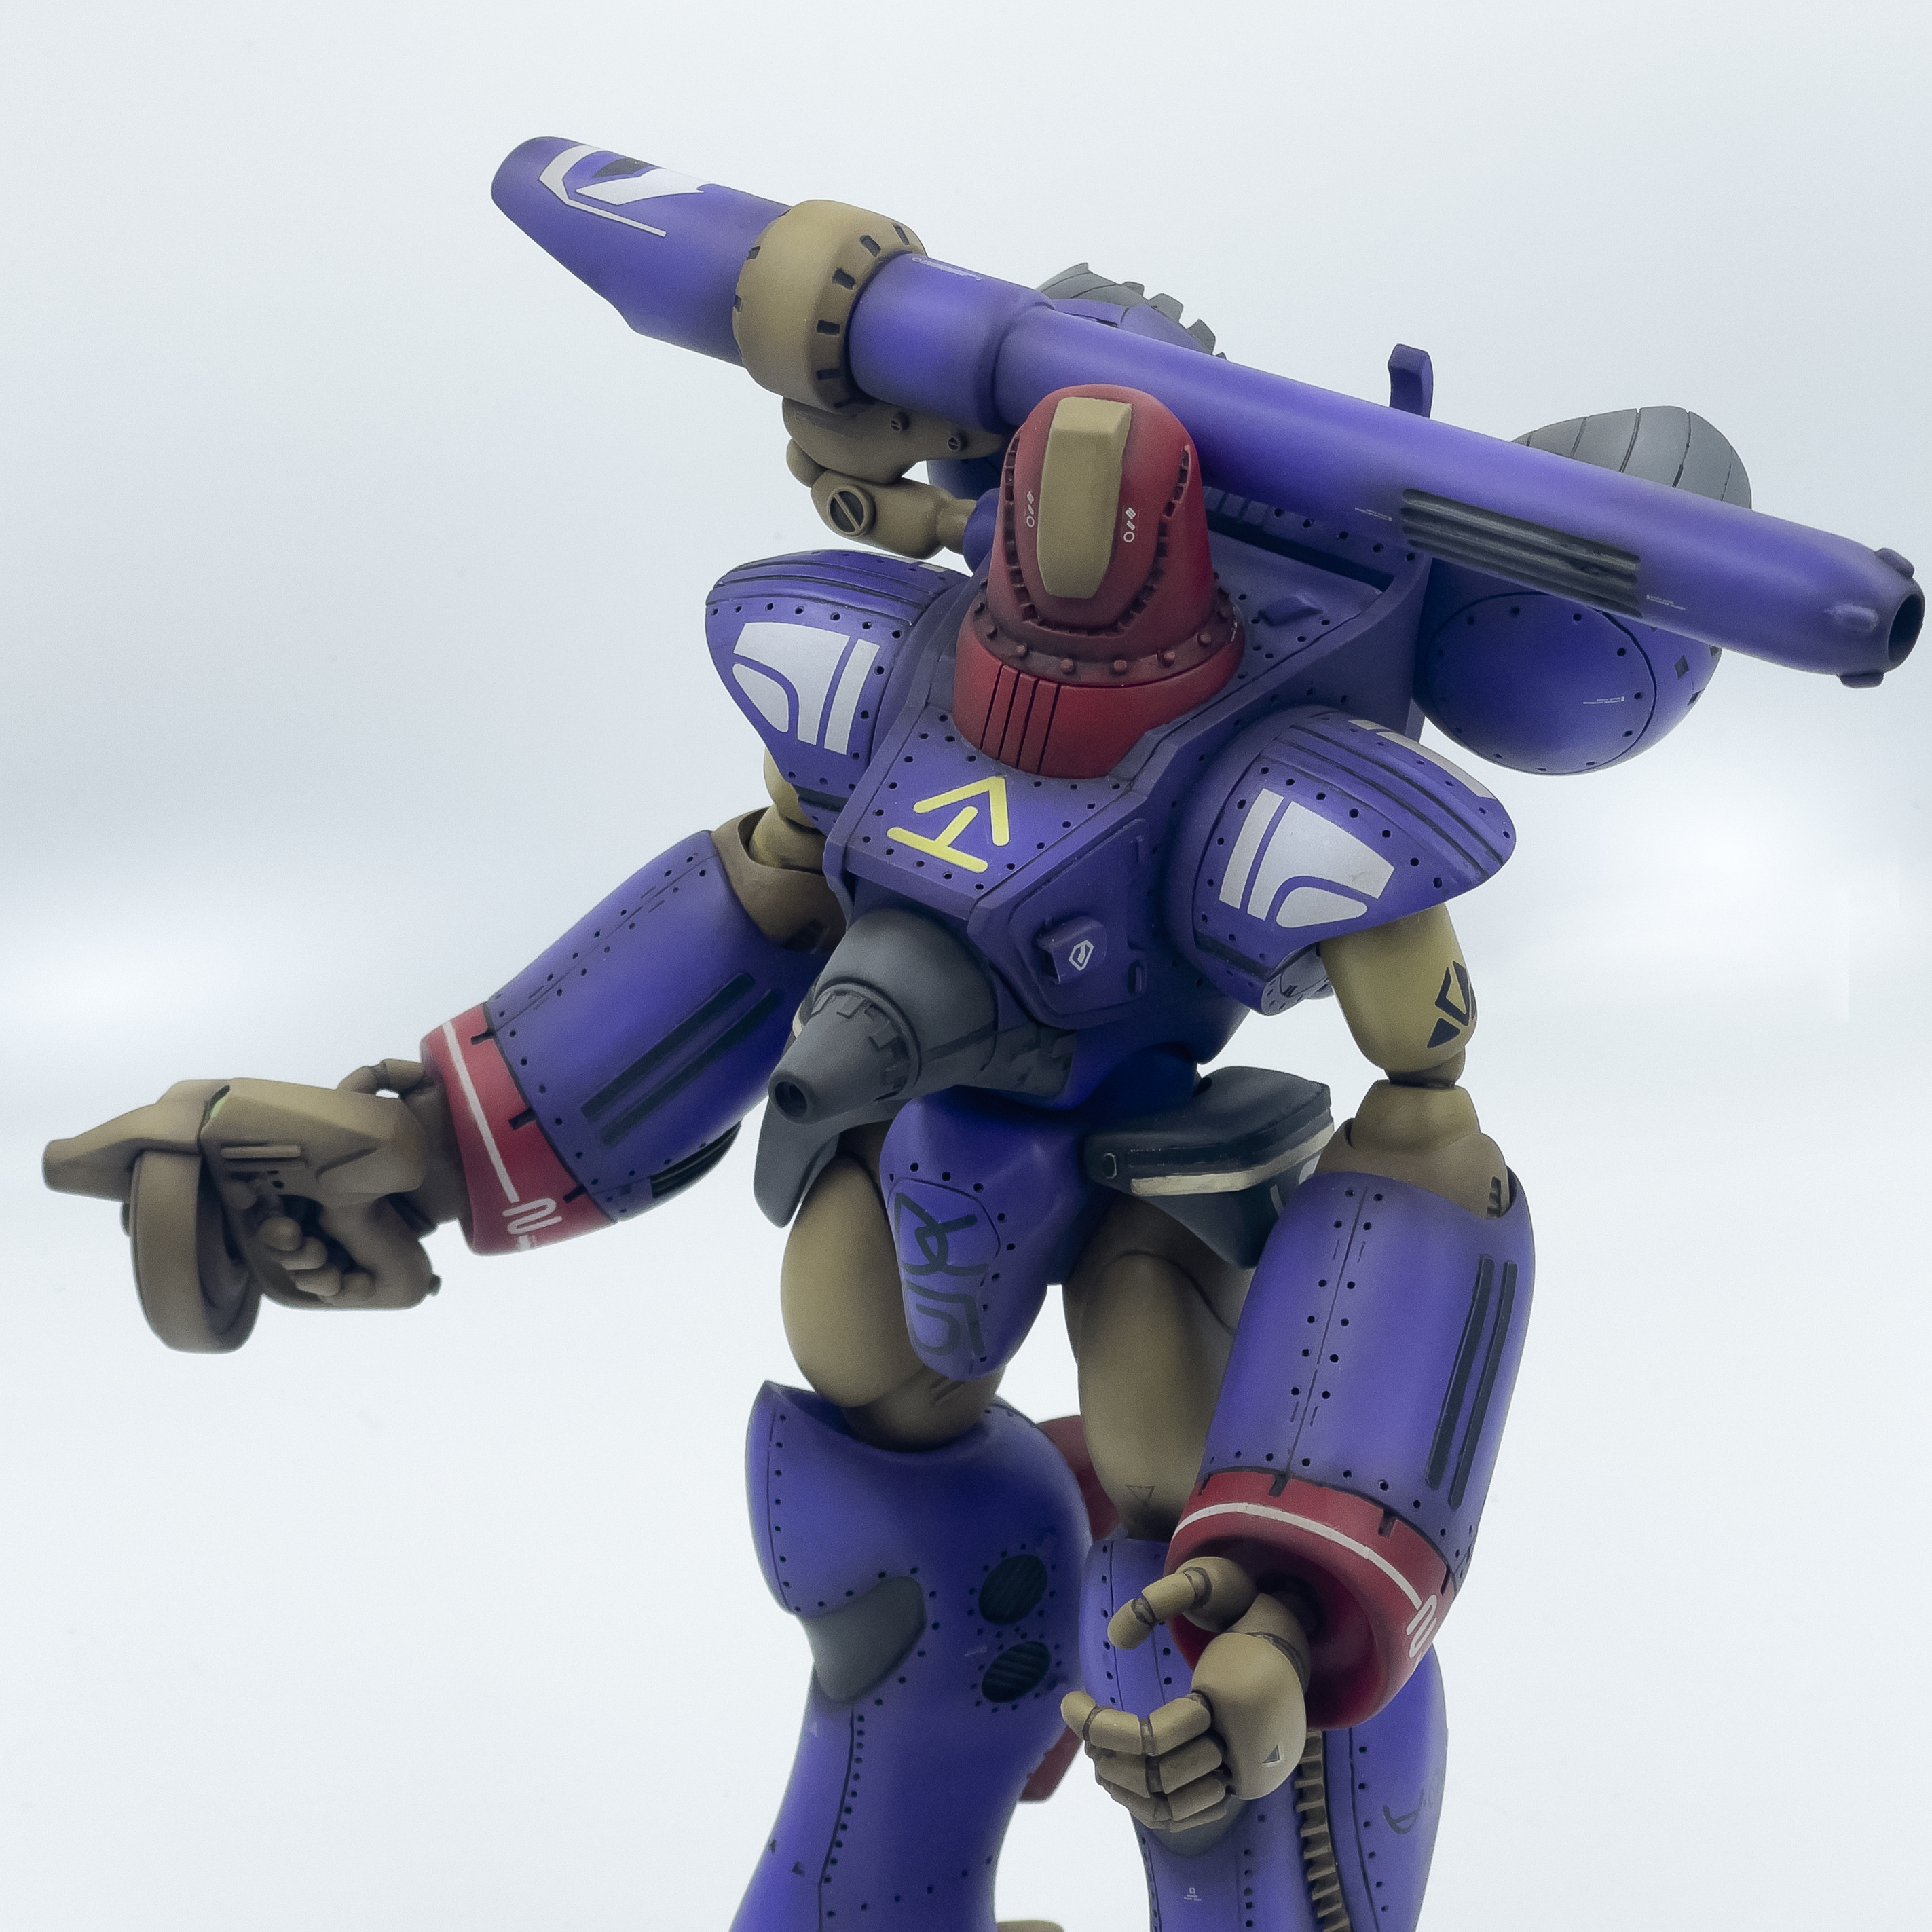
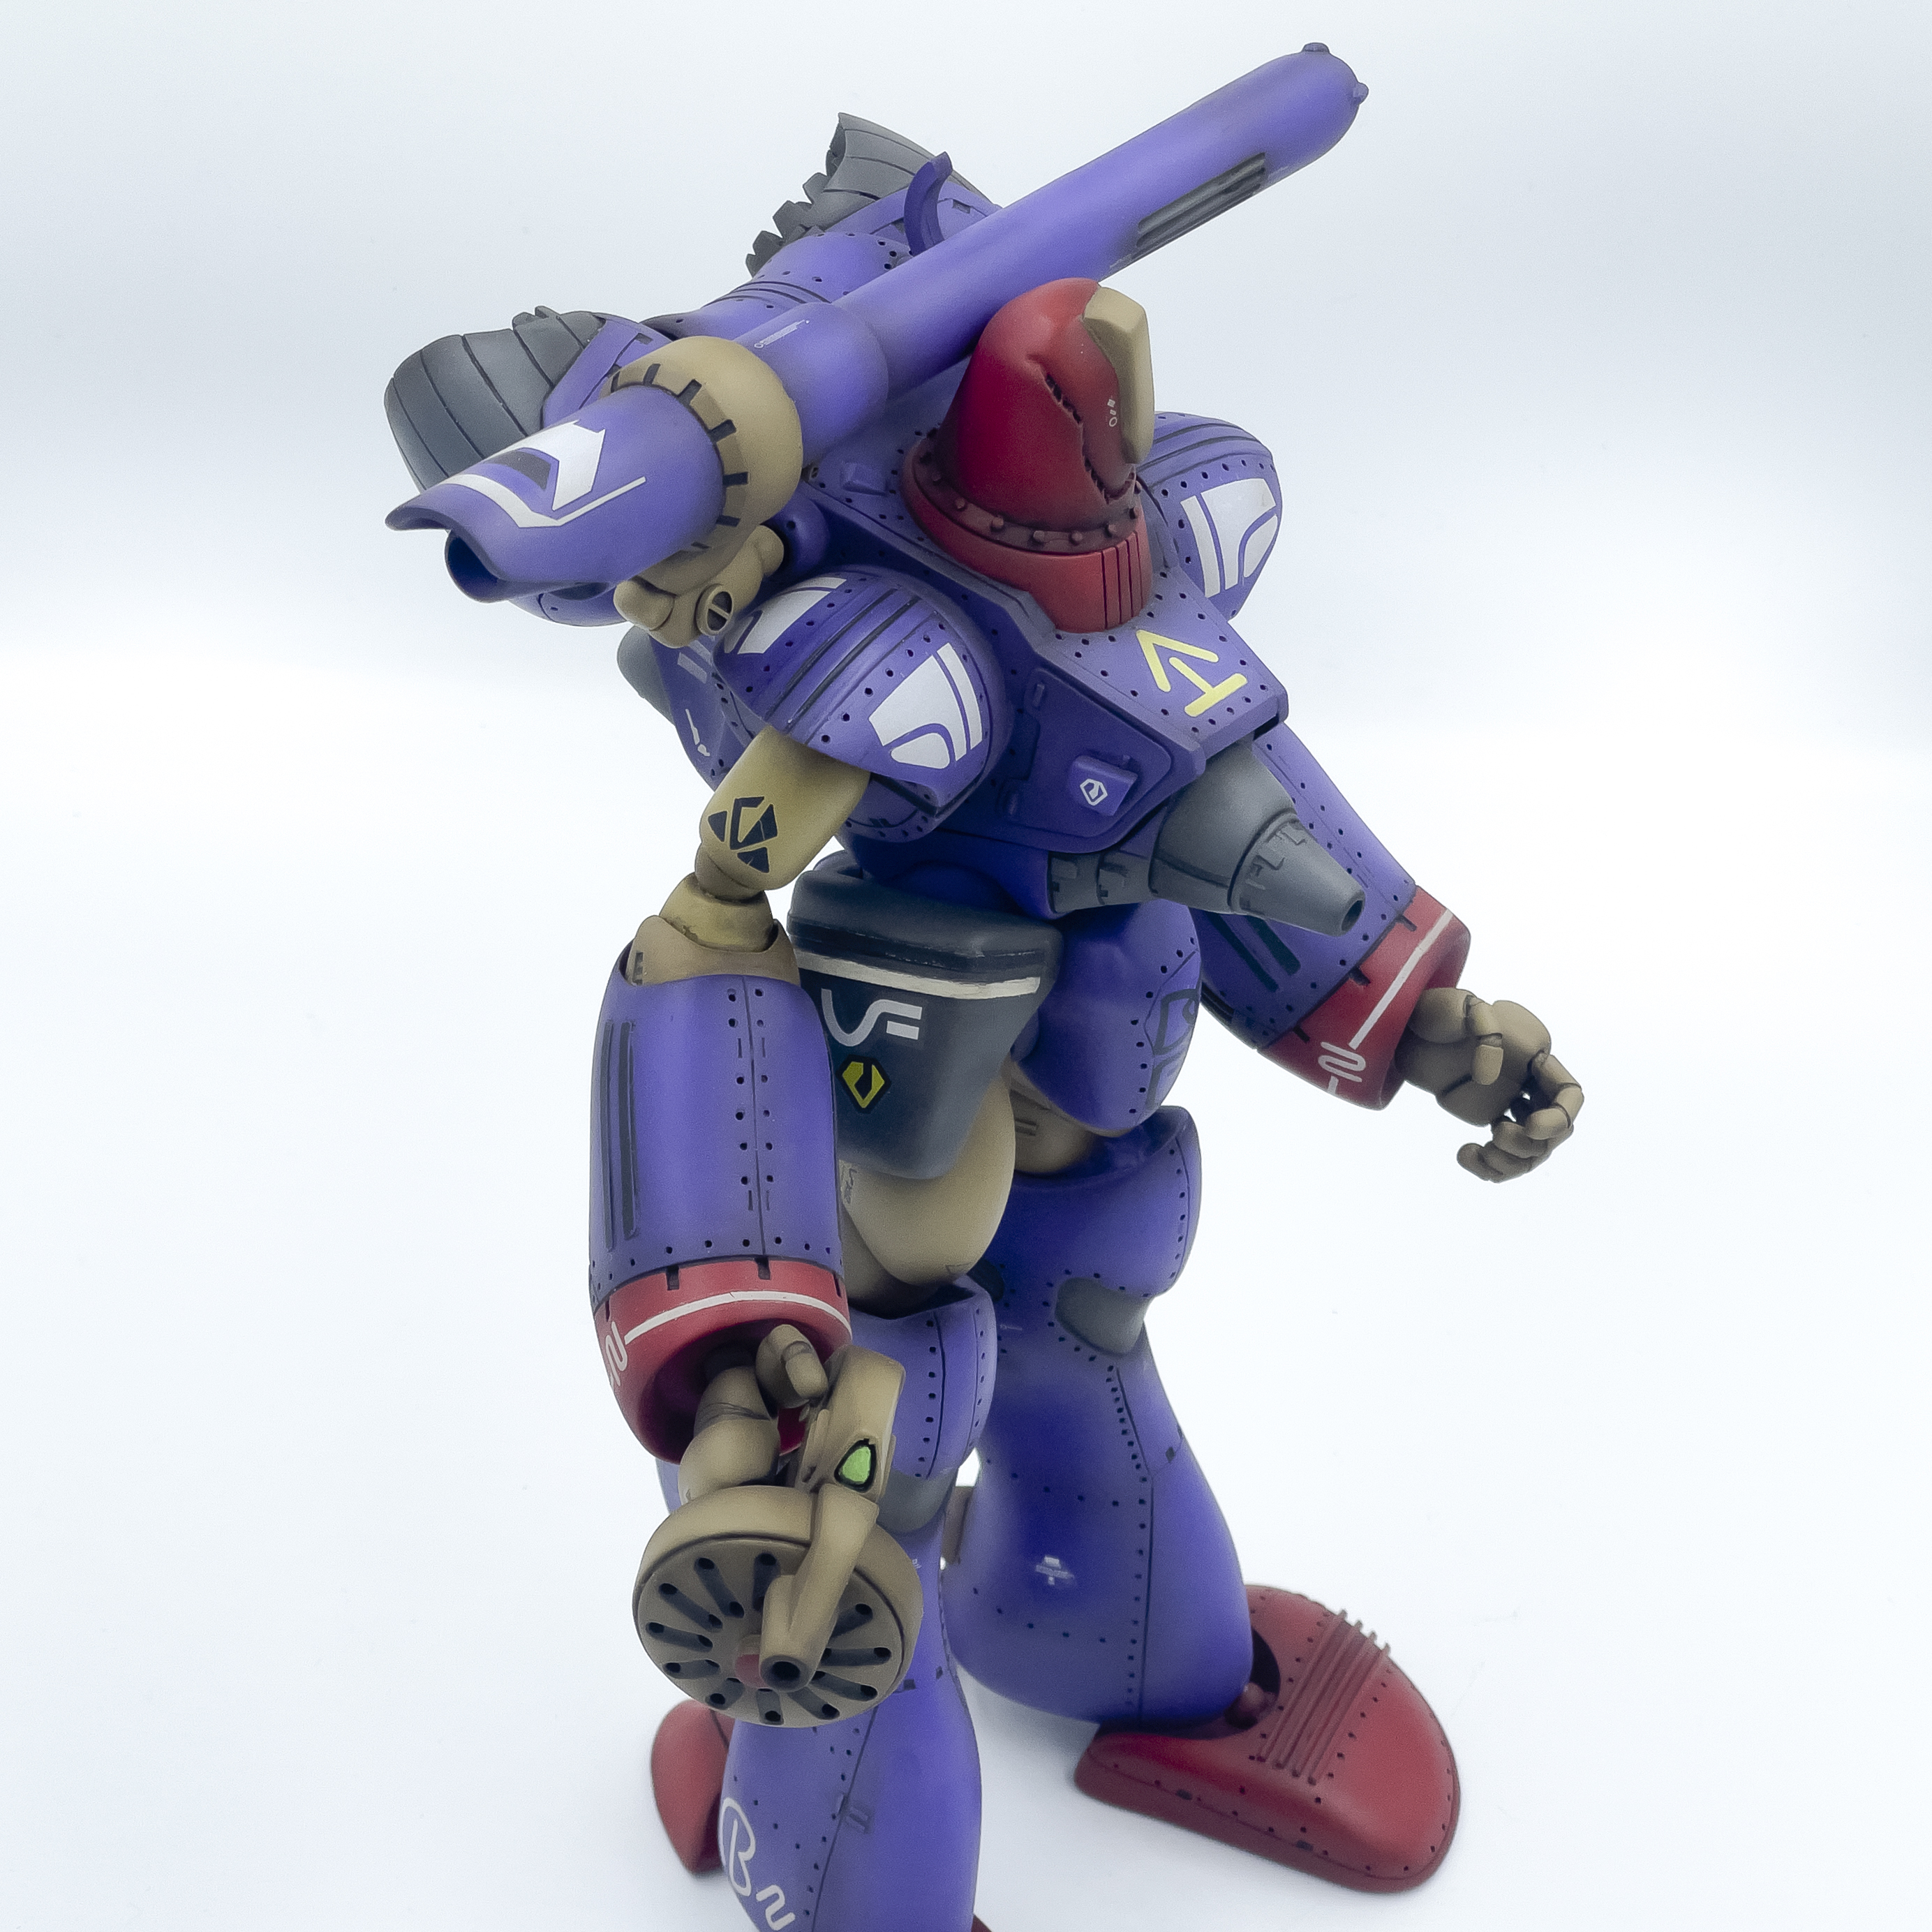
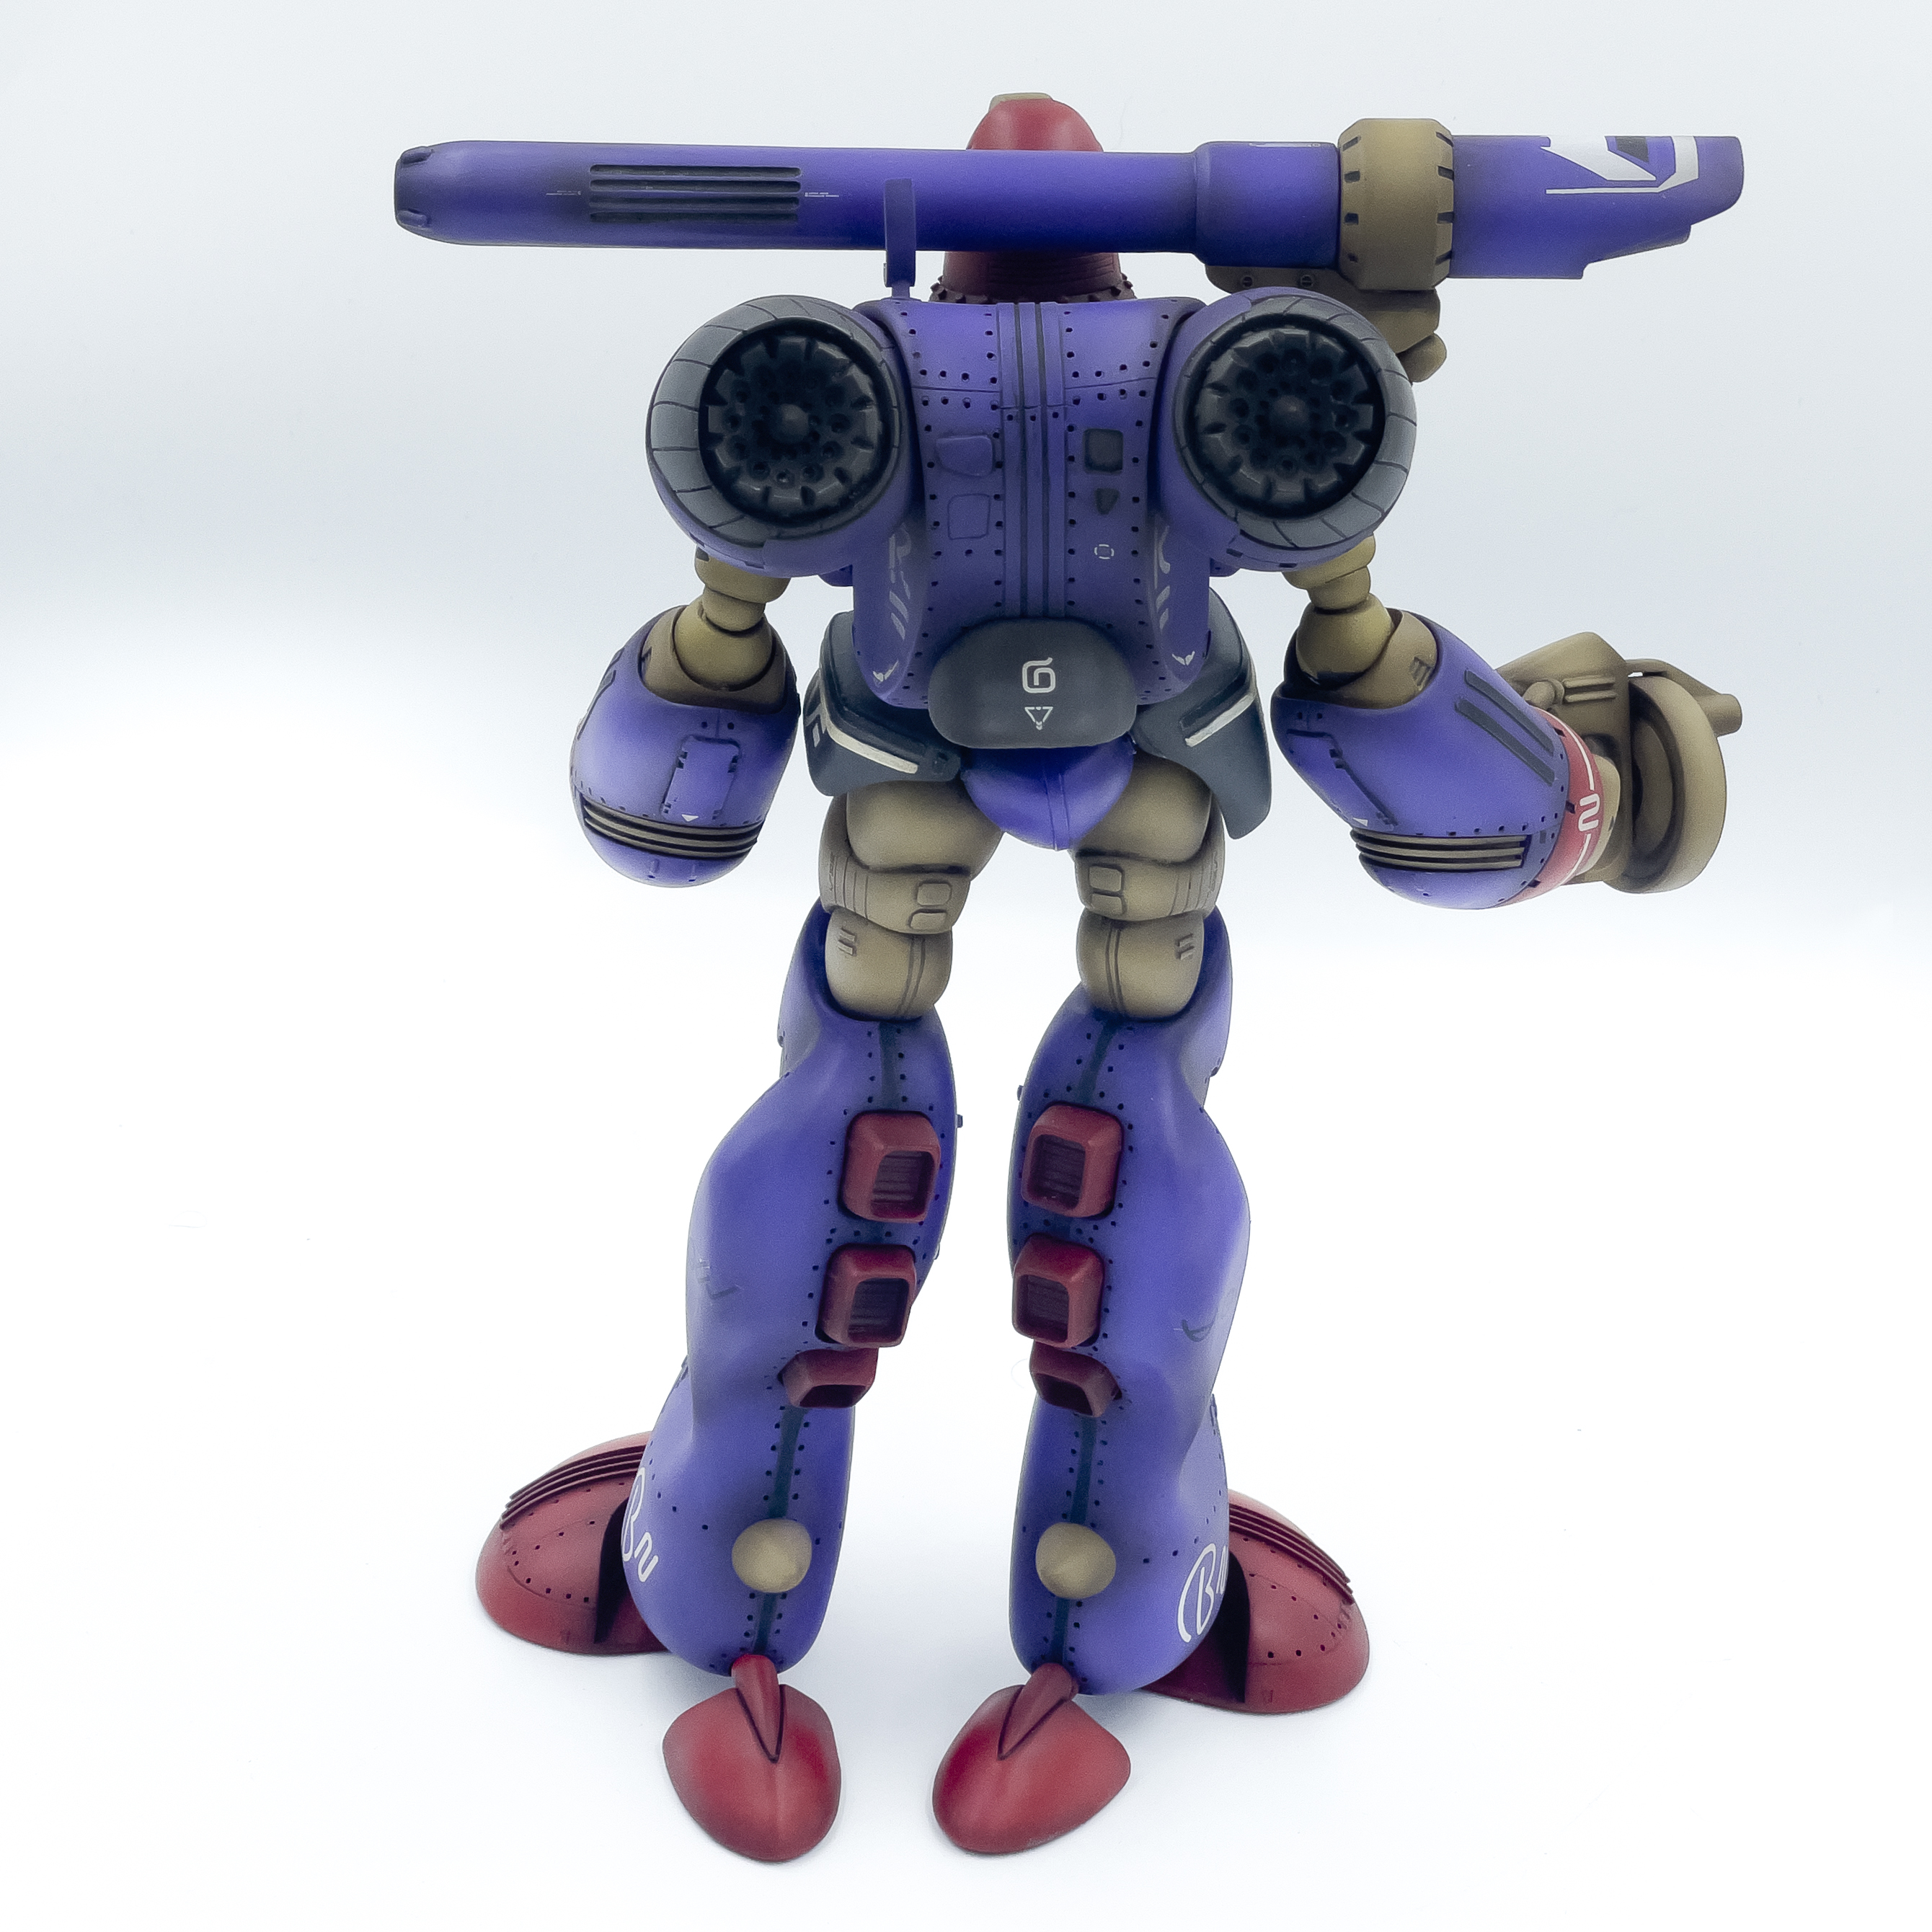
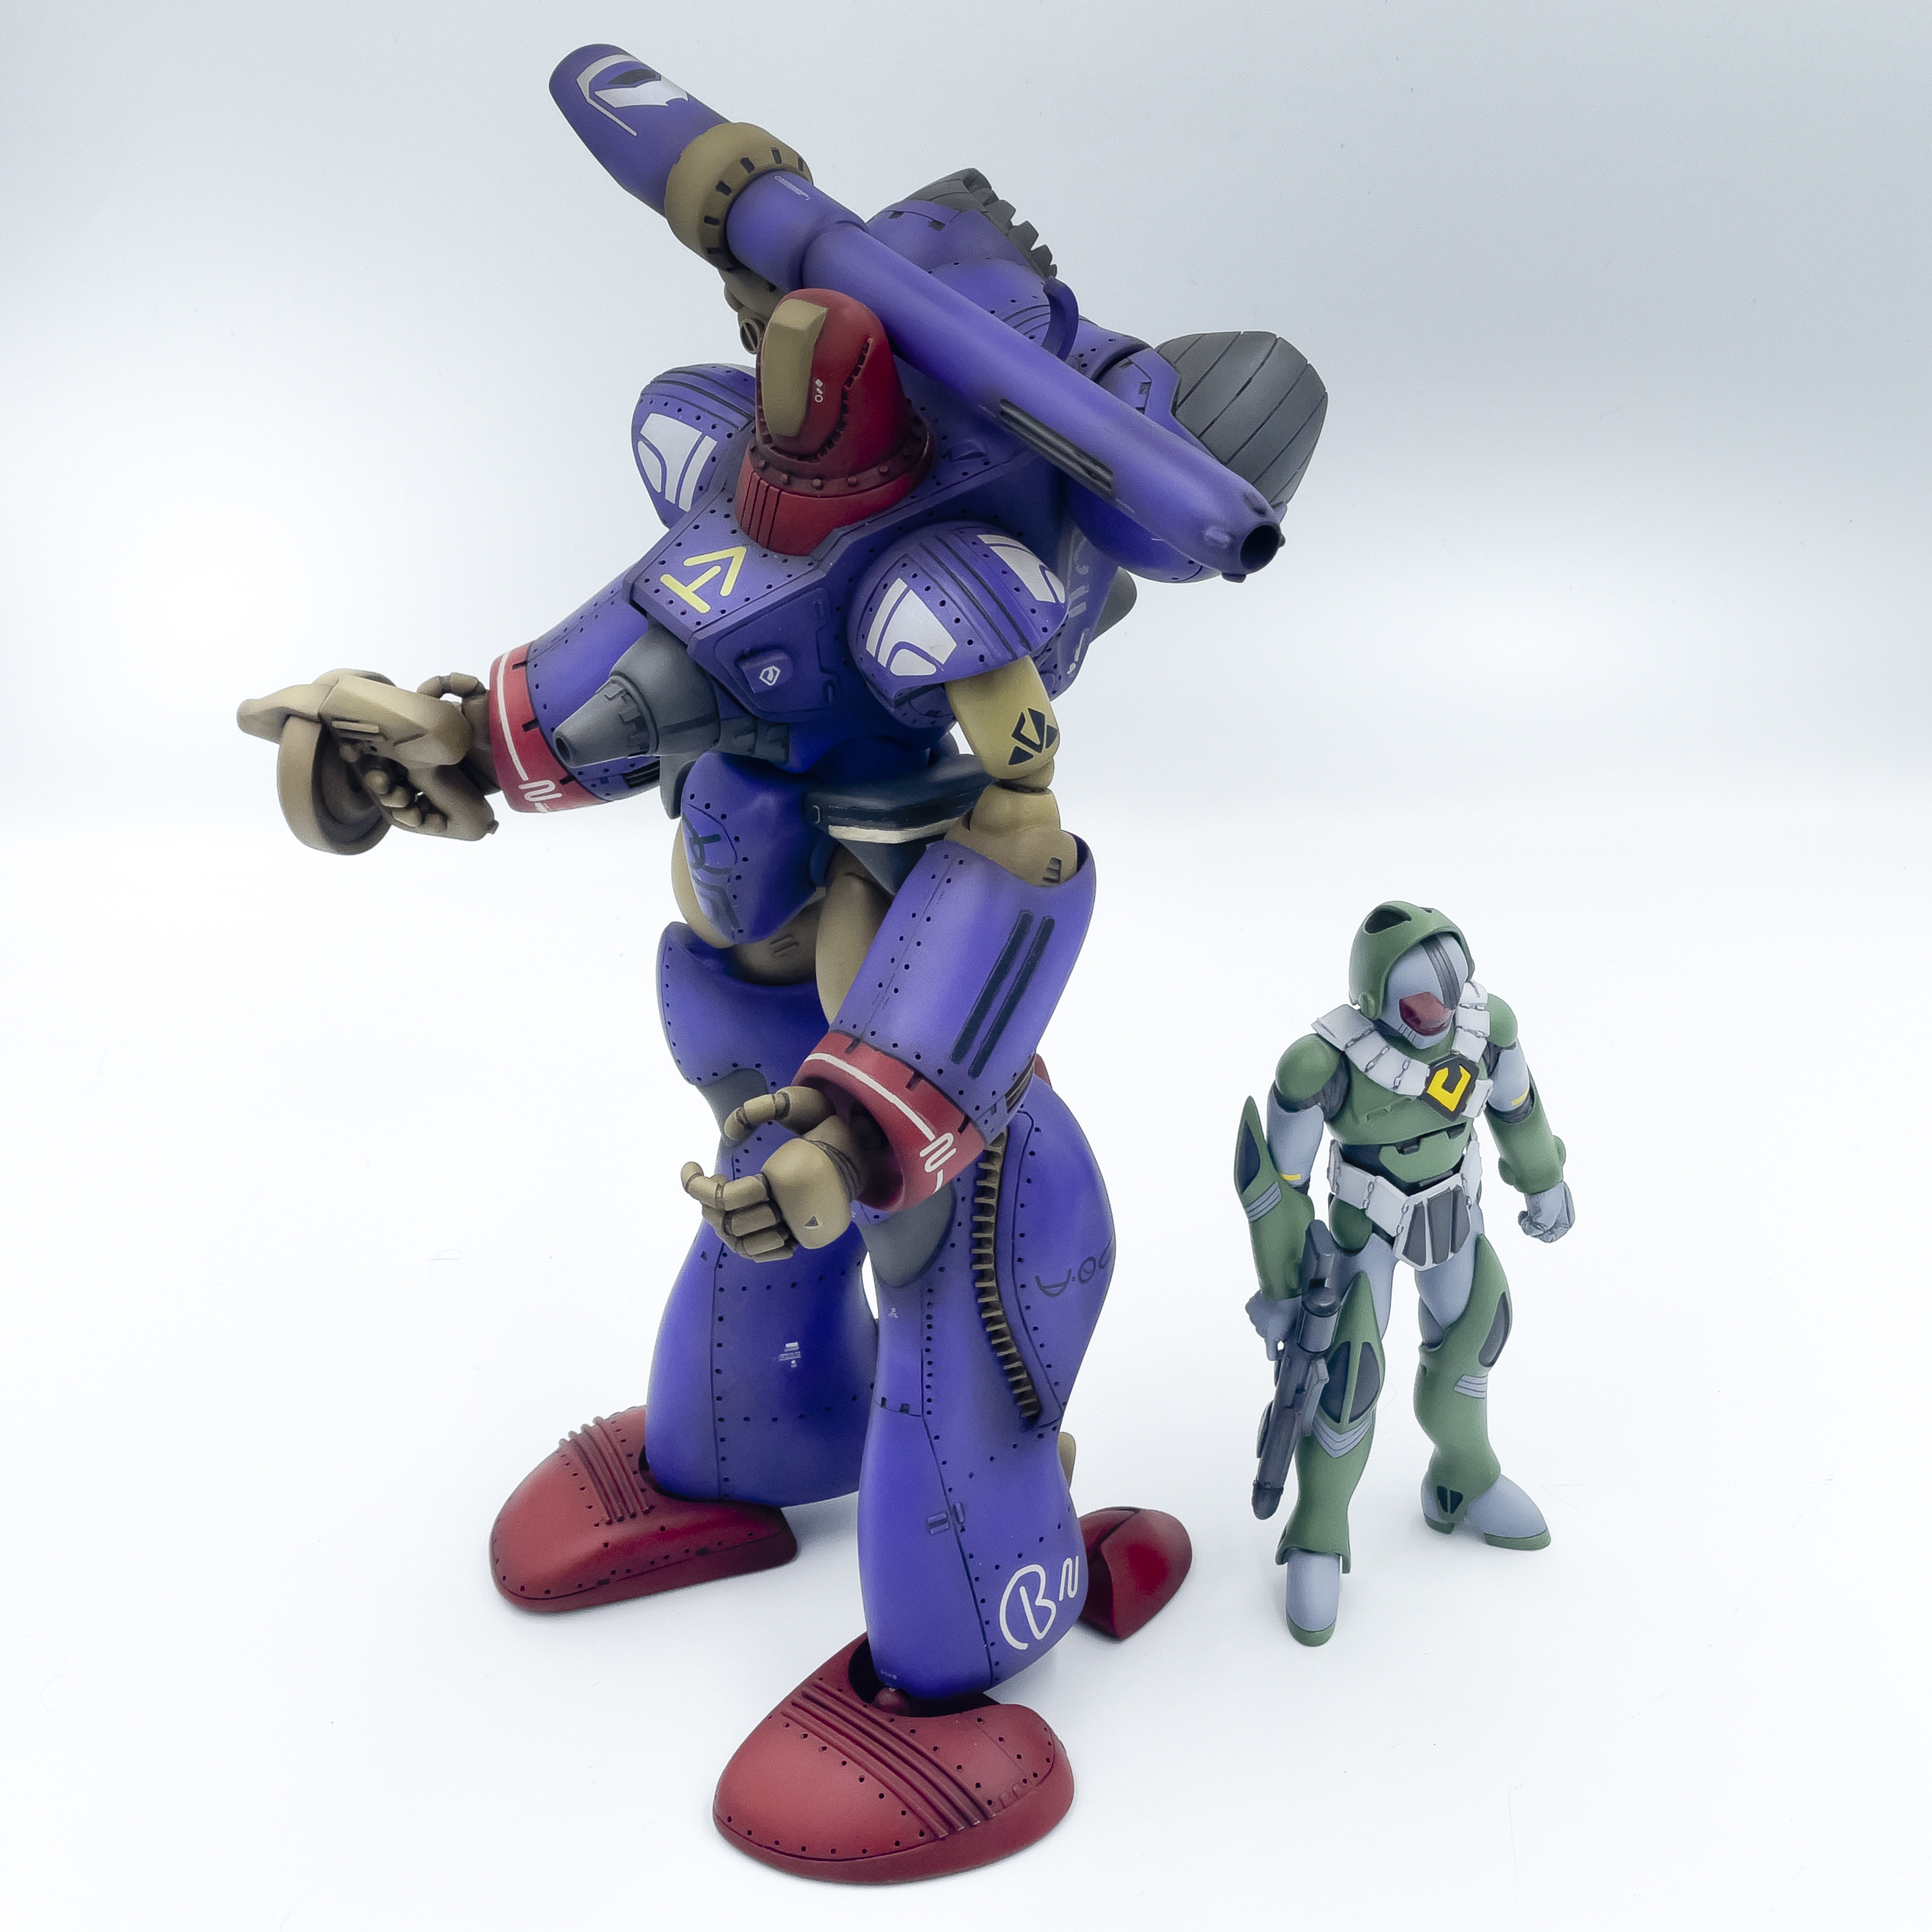
Just finished the 1/72 Nousjadeul Ger resin from Moscato/Return 2 Kit.
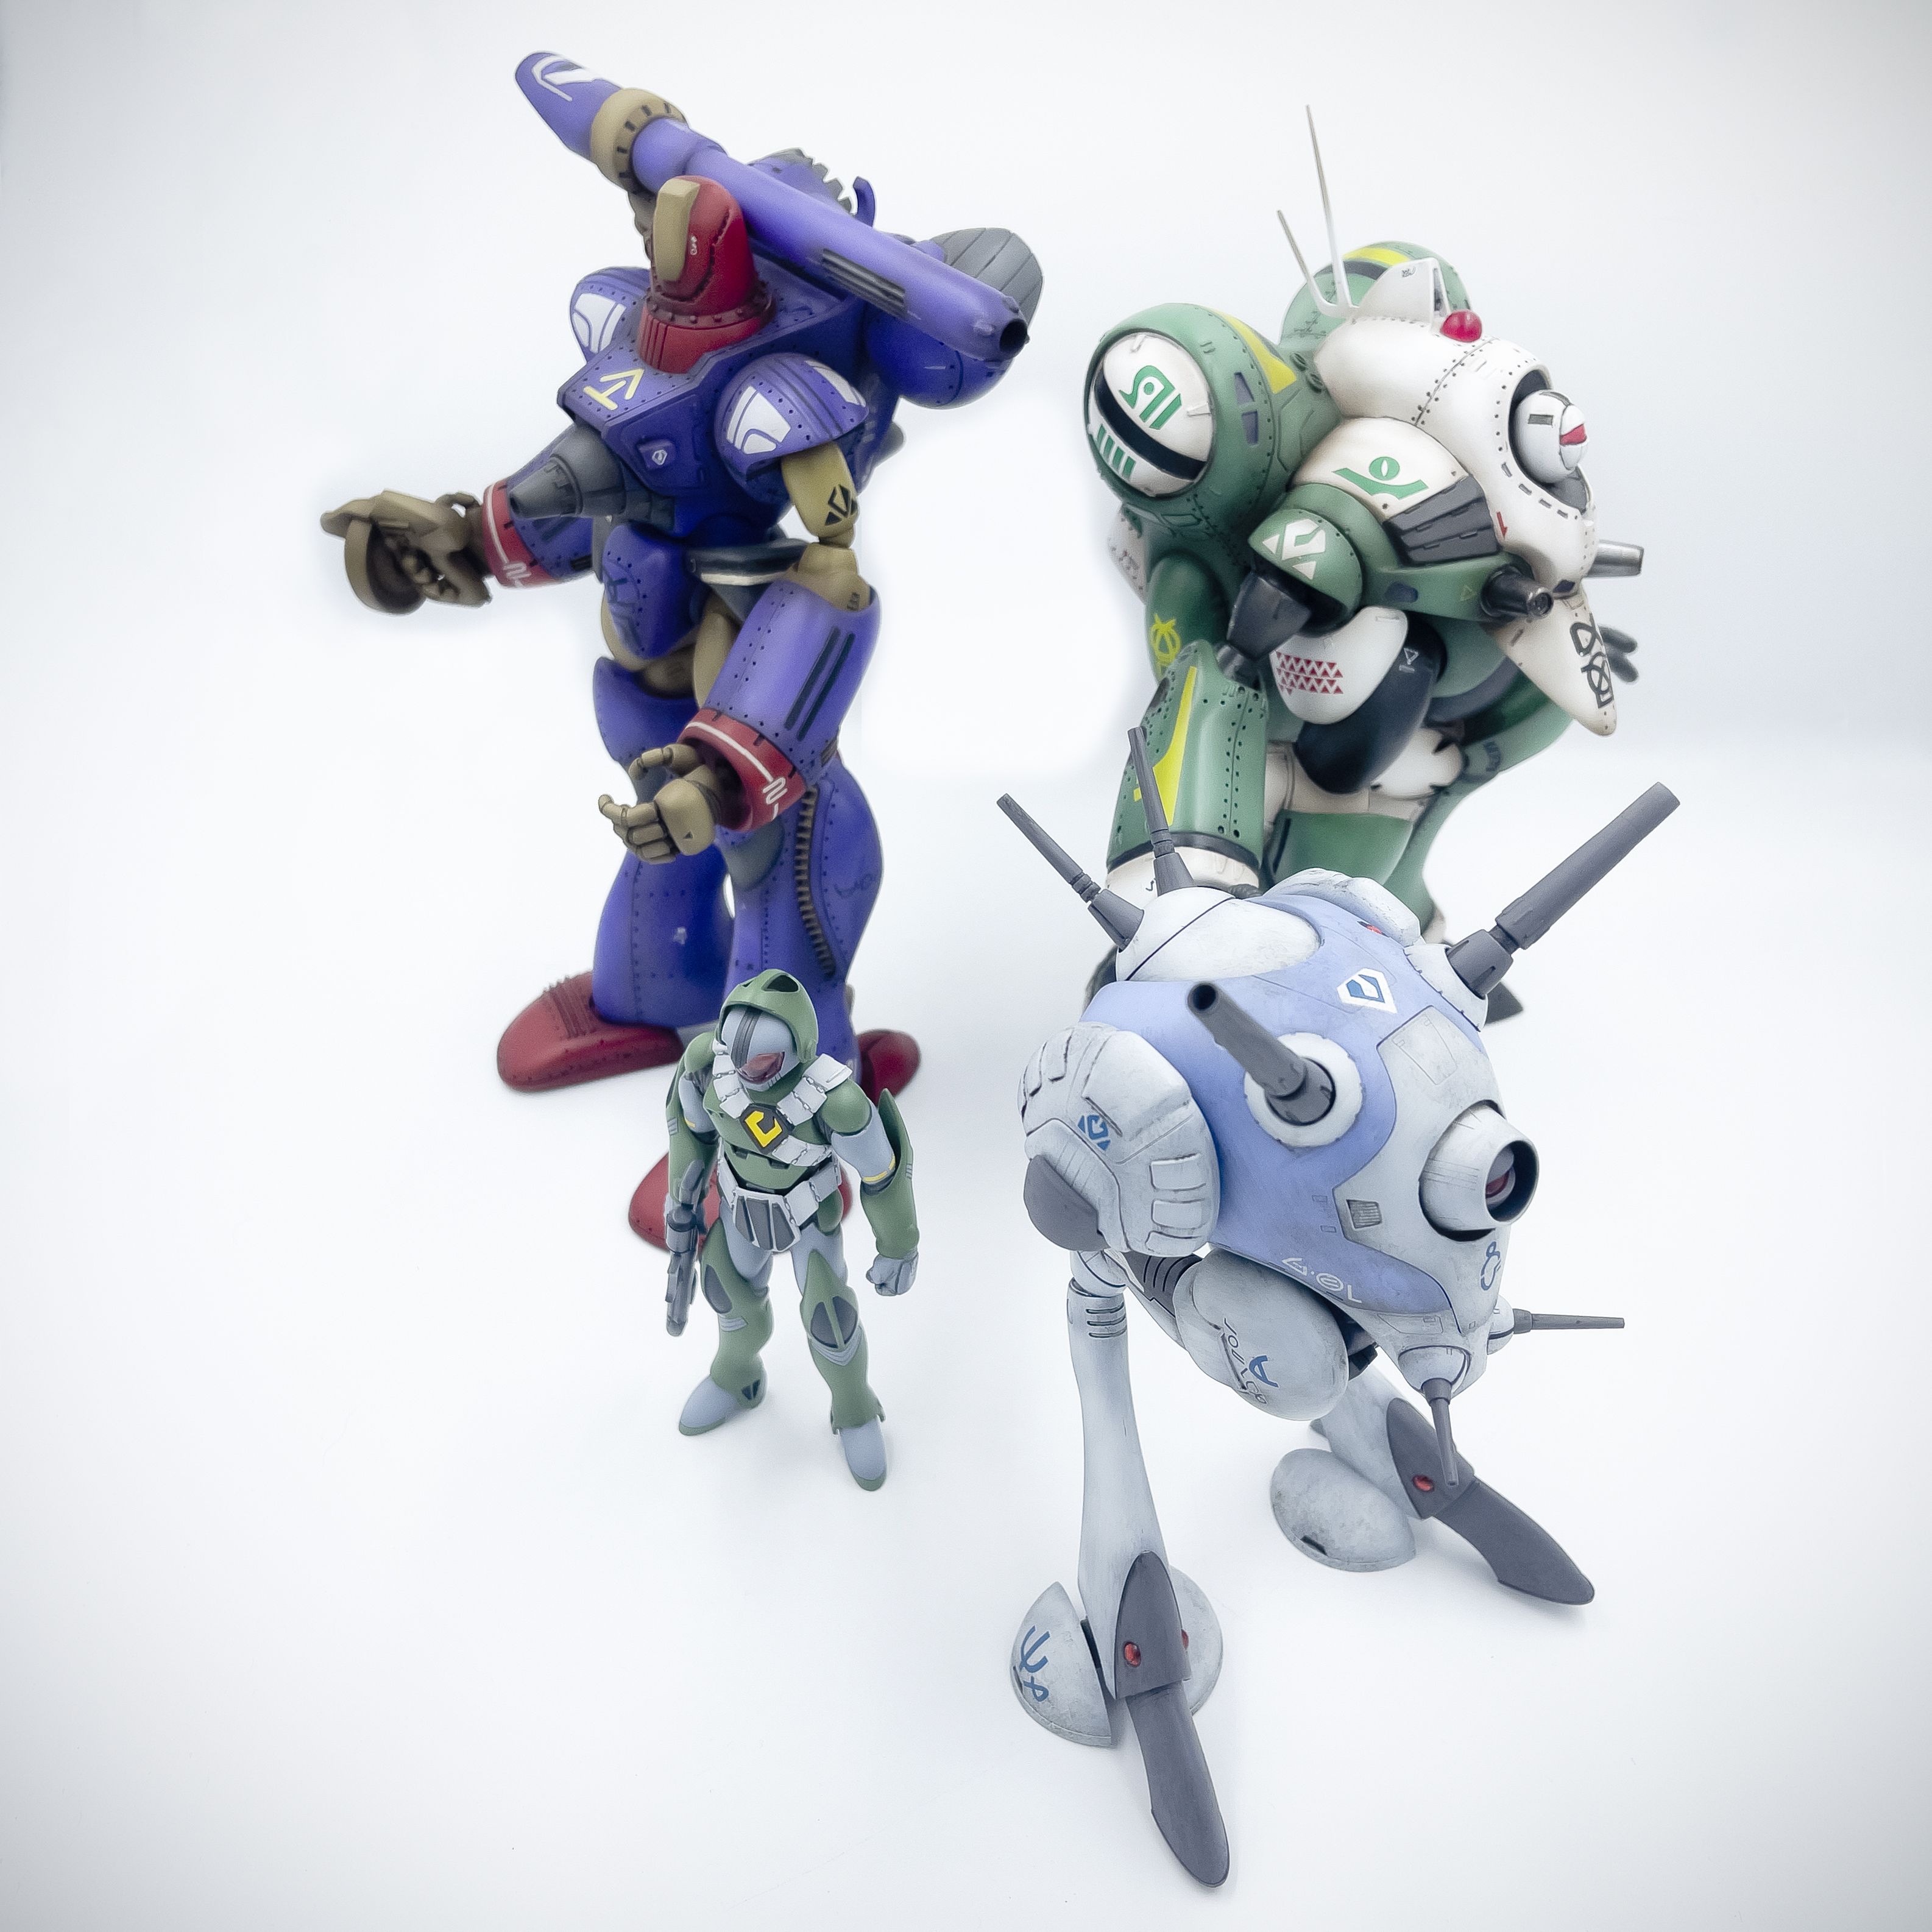
Regult is a completed Hasegawa model purchased from Japan. The soldier is commissioned work years ago.

-
Made from a 3d print ordered from shapeway
-
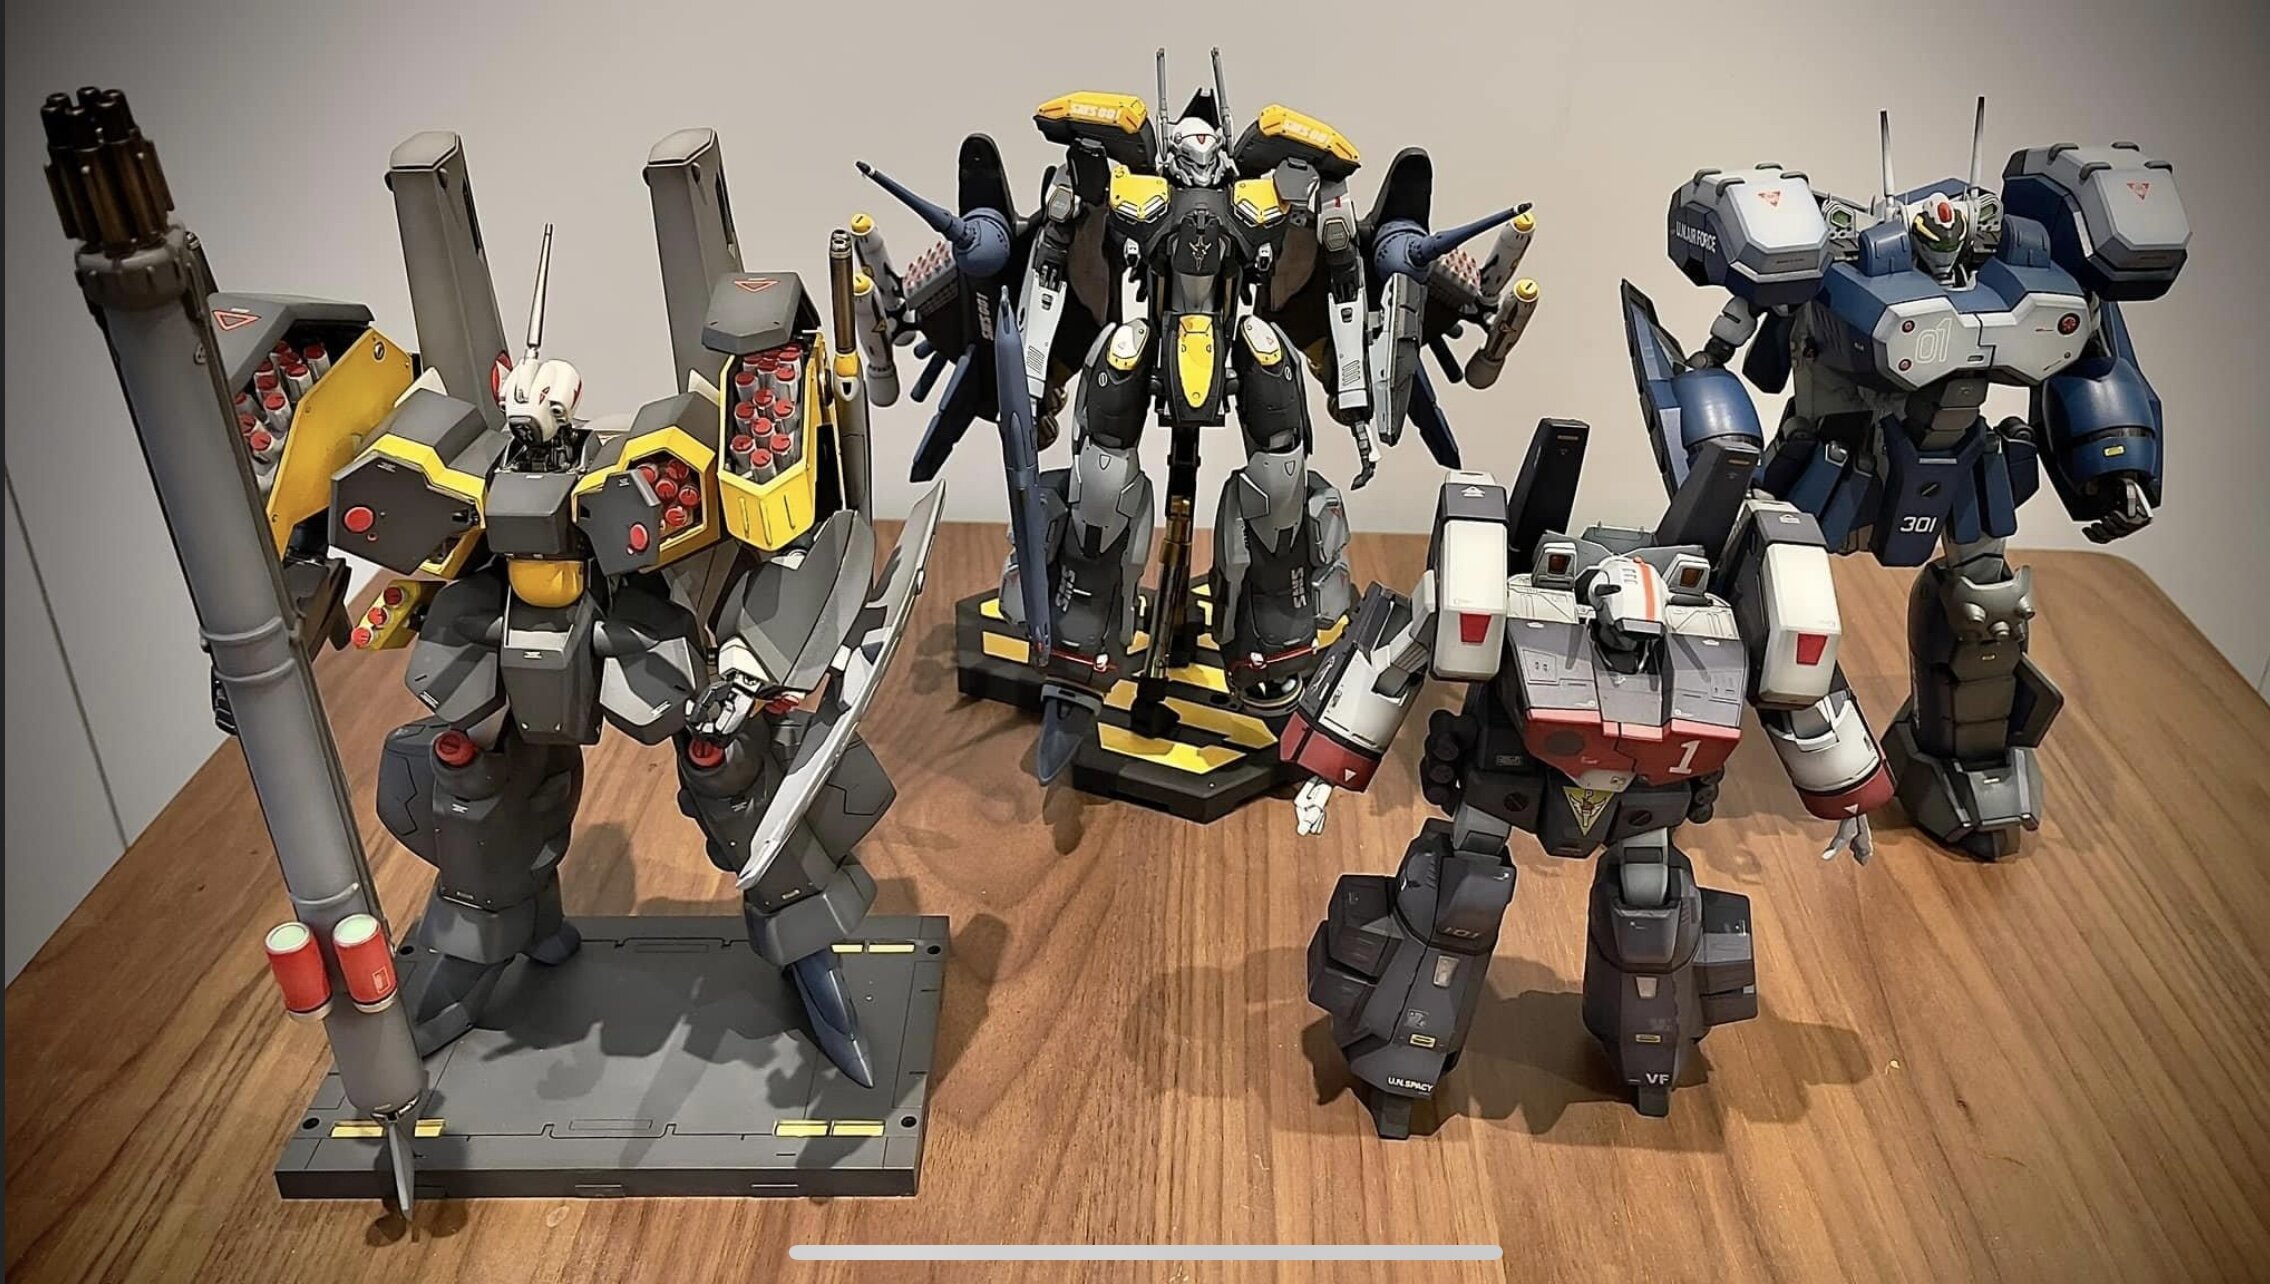
Collection of Max and Milia in 1/72 resins or Hasegawa models during the past decades.
I made some of them. Some were commissioned work and some were from yahoo.
The mission of Max and Milia collection is now completed.
-
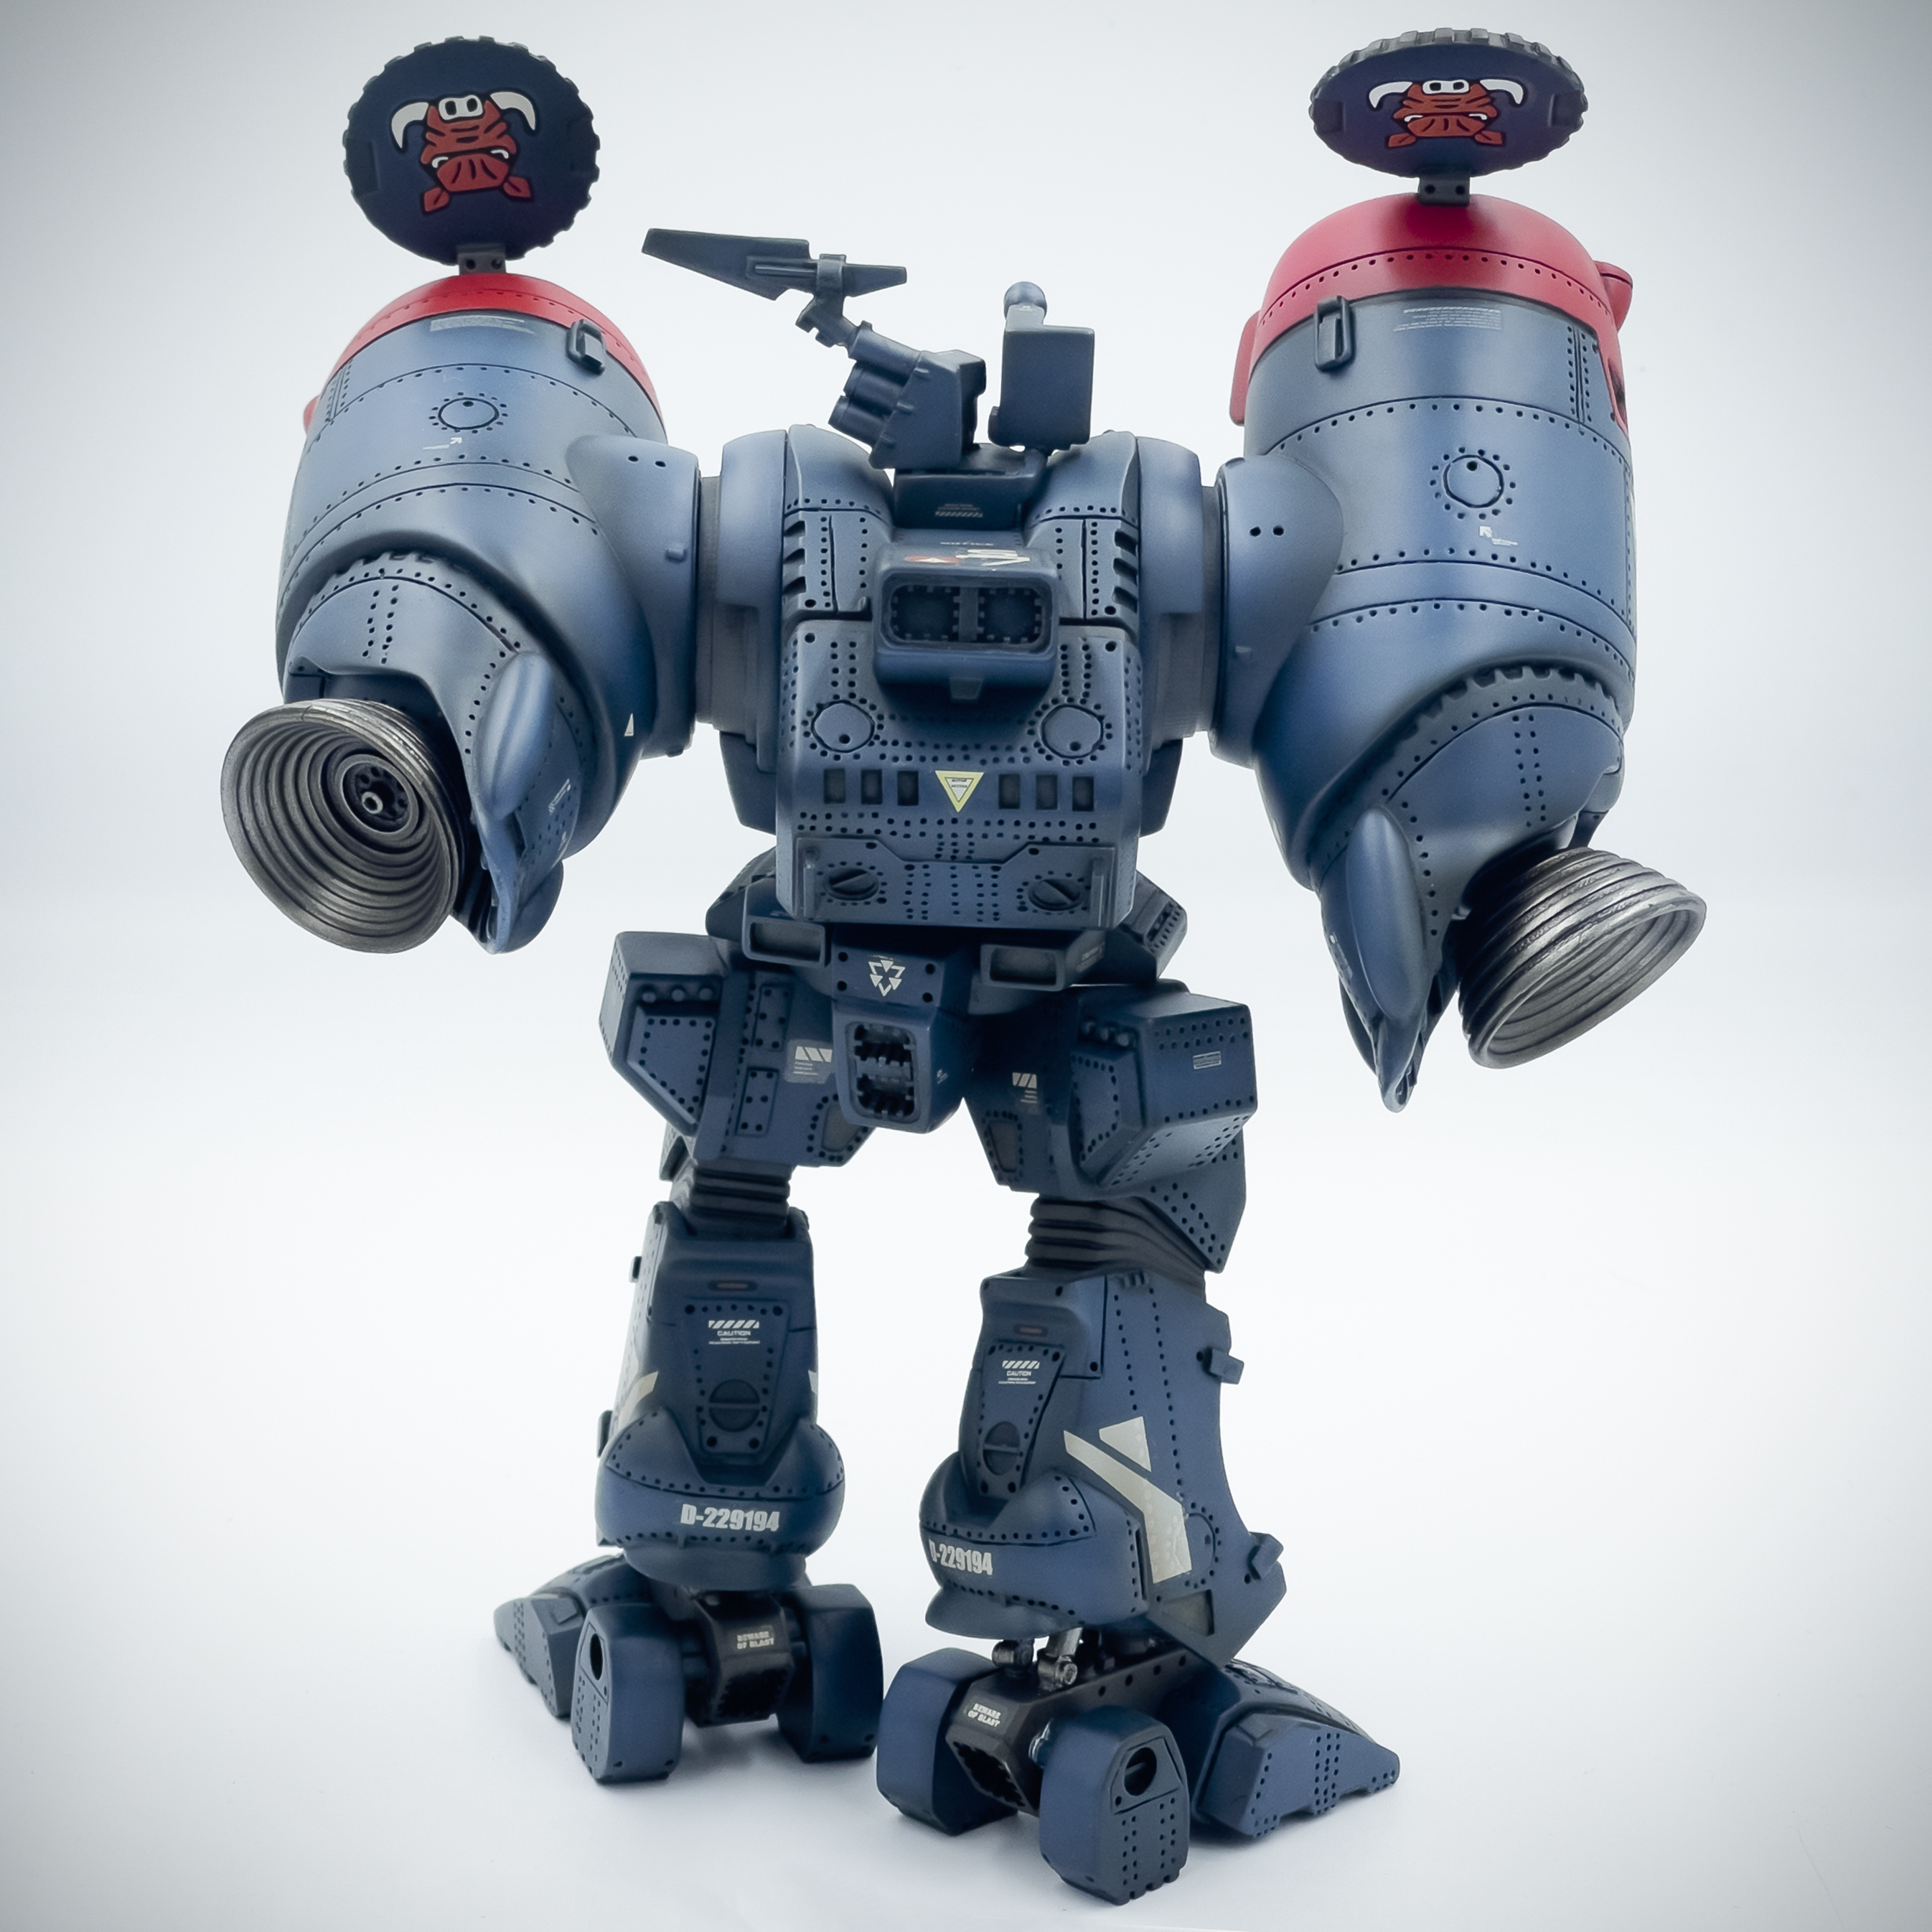
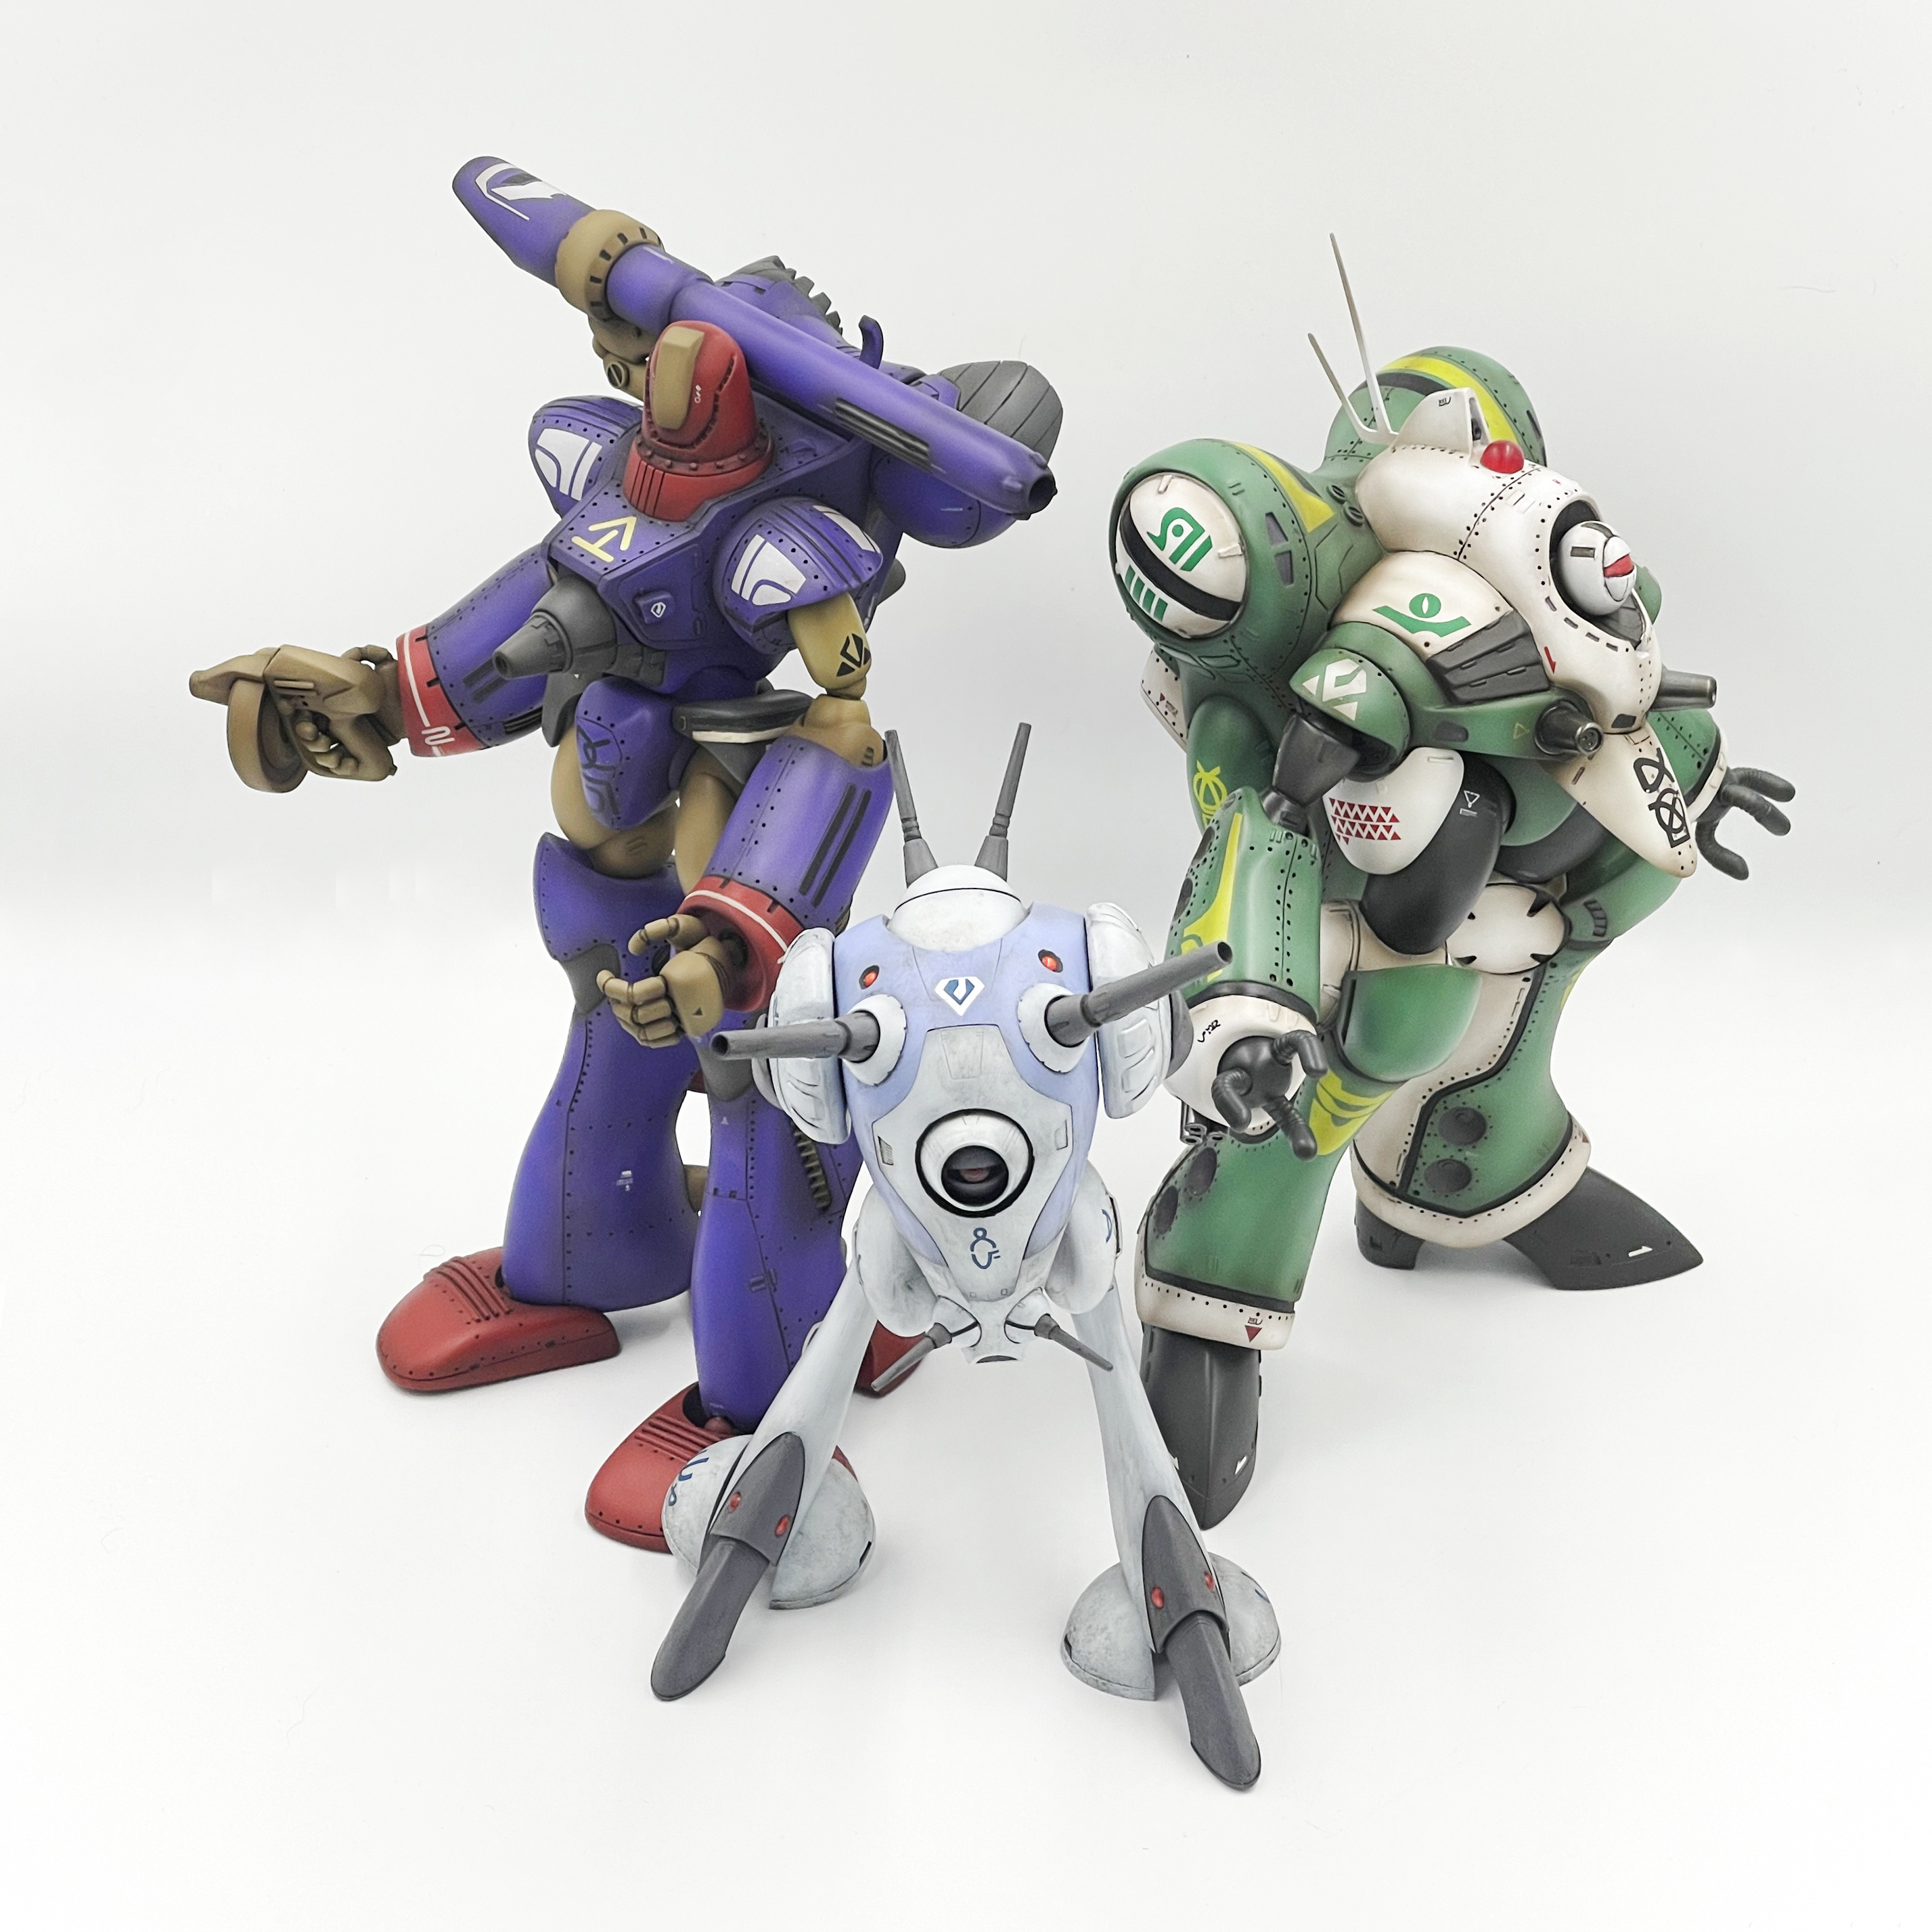
Here comes the conclusion of trilogy of Queadlunn Rau (in 1/72 of the TV version)
YF-24
in Model kits
Posted