cool8or Posted July 8, 2013 Share Posted July 8, 2013 (edited) Hello guys, long time without posting something new. But, I'm still alive! My job has been very hard and I didn't have more time to the hobby, but fortunately it seems like things are going better, and I'm having a little more free time. This is my newest build, the 1/72 Destroid mastered by Captain America. The chips were made by the revolutionary product "Paint Off", produced by a Chilean Company called "K4". You can cantact them by mail to: k4weathering@gmail.com . As always, it was a pleasure to built another Moscato Masterpiece. I hope do you like it! Uploaded with ImageShack.com Uploaded with ImageShack.com Uploaded with ImageShack.com Uploaded with ImageShack.com Uploaded with ImageShack.com Uploaded with ImageShack.com Uploaded with ImageShack.com Uploaded with ImageShack.com Uploaded with ImageShack.com Uploaded with ImageShack.com Uploaded with ImageShack.com Here there are some pieces of the Spartan and behind, the hull of the 1/72 Monster! Uploaded with ImageShack.com Uploaded with ImageShack.com Edited July 18, 2013 by cool8or Quote Link to comment Share on other sites More sharing options...
Noyhauser Posted July 8, 2013 Share Posted July 8, 2013 Very well done, as always. Can you tell us more about the weathering technique? Quote Link to comment Share on other sites More sharing options...
Jefuemon Posted July 8, 2013 Share Posted July 8, 2013 I'm interested in knowing more about Paint Off, too. Beautiful work, as usual, by the way. Quote Link to comment Share on other sites More sharing options...
Gabe Q Posted July 8, 2013 Share Posted July 8, 2013 Beautiful, just beautiful! Your work always impresses me. I like the little the way the feet are weathered a bit more than the rest of the destroid and you painted the hydraulics inside the back of the foot! Just amazing... If only we could fly you and your kits up here for the convention in October! That'd be awesome to see in person. Anyway, one question, where did you get the pilot figure? The Moscato destroids don't come with pilots. Quote Link to comment Share on other sites More sharing options...
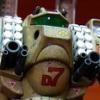
Jefuemon Posted July 8, 2013 Share Posted July 8, 2013 What is Misa saying in the last photo? I can't seem to get the image big enough to read it. Quote Link to comment Share on other sites More sharing options...
anime52k8 Posted July 8, 2013 Share Posted July 8, 2013 looks like "No love for Misa... T-T" Quote Link to comment Share on other sites More sharing options...
s.t.r. sho Posted July 8, 2013 Share Posted July 8, 2013 looks like "No love for Misa... T-T" lol full of lol i'm glad macross story is loved over the world. congratulations from japan. oh back to the model these paintings and markings make me happy, that makes reality to macross mechanics. Quote Link to comment Share on other sites More sharing options...
DarrinG Posted July 8, 2013 Share Posted July 8, 2013 Great skills, great pics - nice work . . . Quote Link to comment Share on other sites More sharing options...
PetarB Posted July 9, 2013 Share Posted July 9, 2013 Looks fantastic. Very nice Ruben and some really nice 'detail' touches. What overall colour did you use? Quote Link to comment Share on other sites More sharing options...
captain america Posted July 9, 2013 Share Posted July 9, 2013 Absolutely fantastic job once again, Ruben! You really captured the feel and grit of what I always felt the Destroids were supposed to look like. And that anime stand-off pic totally rocks! Quote Link to comment Share on other sites More sharing options...
Checkmate Posted July 9, 2013 Share Posted July 9, 2013 Beautiful! Quote Link to comment Share on other sites More sharing options...
Valkyrie addict Posted July 9, 2013 Share Posted July 9, 2013 Awesome!! glad to see your stuff again! Quote Link to comment Share on other sites More sharing options...
caslon Posted July 9, 2013 Share Posted July 9, 2013 Wow!! That's spectacular!! Quote Link to comment Share on other sites More sharing options...
Gian Posted July 9, 2013 Share Posted July 9, 2013 Excelente trabajo compatriota! Awesome as always Quote Link to comment Share on other sites More sharing options...
Jefuemon Posted July 10, 2013 Share Posted July 10, 2013 Anyway, one question, where did you get the pilot figure? The Moscato destroids don't come with pilots. I'm going to guess that he slightly modified a Studio Starforge pilot. I've used them in my last 2 builds, and it looks the same, except for the pointy chin. Quote Link to comment Share on other sites More sharing options...
Berttt Posted July 16, 2013 Share Posted July 16, 2013 Very cool work dude. Love the AFV feel to the finish and weathering. Quote Link to comment Share on other sites More sharing options...
mslz22 Posted July 16, 2013 Share Posted July 16, 2013 Really amazing stuff all around!! Quote Link to comment Share on other sites More sharing options...
cool8or Posted July 18, 2013 Author Share Posted July 18, 2013 Thank you guys for your kind words. Jefuemon is absolutely right, the pilot is a little customization of a Studio Starforge Macross pilot. It's very simple, you only need to modify the helmet. Initially, I wanted to use the Wave pilot that comes with their Destroids (in fact I have the Defender, I bought it to another proyect), but these pilots are incredibly undersized! They are just like the VF-25 Bandai's pilots... ridiculous. In the other hand, Starforge pilots have the perfect size and are incredibly detailed. You have to own these! Paint Off is like a paint remover, that acts over water-solved paints. The procedure is quite simple. First, you need to apply a color base with a lacquer based paint, i.e. a oxide or rust color. After that, apply all your color scheme just like you were painting a brand new model. When the paint is dried (a couple of hours, 1 day afer, a month later... nevermind!!) moist a hard hair brush with "paint off" and rud it hard in the corners and edges where you want to make the chips. The paint will removes exactly like you see in my model. You will need only a couple times to dominate the technique... it's far simplier and better than the hairspray technique! Oh, and I used the Mr. Color paints (water based) indicated in the Wave Intructions. Regards. Quote Link to comment Share on other sites More sharing options...
joscasle Posted July 19, 2013 Share Posted July 19, 2013 Simplemente hermoso!! Saludos desde Costa Rica!!! Quote Link to comment Share on other sites More sharing options...
505thAirborne Posted July 20, 2013 Share Posted July 20, 2013 Epic looking DEFENDER cool8or!! Can't wait to see your MONSTER & SPARTAN. Quote Link to comment Share on other sites More sharing options...
GMK Posted July 20, 2013 Share Posted July 20, 2013 Fantastic job - where did you get the 'leg art' decal from? It looks amazing! Quote Link to comment Share on other sites More sharing options...
cool8or Posted July 25, 2013 Author Share Posted July 25, 2013 hi GMK, the pinup was printed in a regular inkjet printer, with Testors decal paper. the art appeared in the "Macross Hobby Hand Book", is very old. Quote Link to comment Share on other sites More sharing options...
GMK Posted July 26, 2013 Share Posted July 26, 2013 Very cool - thanks. Quote Link to comment Share on other sites More sharing options...
captain america Posted July 26, 2013 Share Posted July 26, 2013 Thank you guys for your kind words. Jefuemon is absolutely right, the pilot is a little customization of a Studio Starforge Macross pilot. It's very simple, you only need to modify the helmet. Initially, I wanted to use the Wave pilot that comes with their Destroids (in fact I have the Defender, I bought it to another proyect), but these pilots are incredibly undersized! They are just like the VF-25 Bandai's pilots... ridiculous. In the other hand, Starforge pilots have the perfect size and are incredibly detailed. You have to own these! Paint Off is like a paint remover, that acts over water-solved paints. The procedure is quite simple. First, you need to apply a color base with a lacquer based paint, i.e. a oxide or rust color. After that, apply all your color scheme just like you were painting a brand new model. When the paint is dried (a couple of hours, 1 day afer, a month later... nevermind!!) moist a hard hair brush with "paint off" and rud it hard in the corners and edges where you want to make the chips. The paint will removes exactly like you see in my model. You will need only a couple times to dominate the technique... it's far simplier and better than the hairspray technique! Oh, and I used the Mr. Color paints (water based) indicated in the Wave Intructions. Regards. Another useful trick for creating paint chips, in addition to Ruben's technique: once you apply the lacquer or enamel metallic base and let it dry, use a way crayon to lightly nick some spots along the edges or randomly on the surface of your part. You can also use some orange/brown chalk pastel mixed with water to create a rusty-colored mud that you apply with a very small brush in strategic areas. Let try, and then paint with your desired acrylic surface color. Once the surface paint has dried, use some masking tape rolled around your finger to pull away surface paint over the wax or pastel. It will provide not only realistic paint chips, but also the realistic appearance of rust/corrosion. Quote Link to comment Share on other sites More sharing options...
Recommended Posts
Join the conversation
You can post now and register later. If you have an account, sign in now to post with your account.