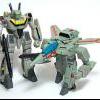
AcroRay Posted January 21, 2010 Share Posted January 21, 2010 I'd like to pool some group advice and experiences for a project, if anyone has any experiences with these odd kits: Back in the 80's, myself and a friend built a couple of the original Arii 1/100 metalized Macross kits - me the VF-1D fighter, him the 1/100 Destroid Spartan. After several evenings of scraping away metal coating, gluing and trying to touch up sprue points, his assembled Spartan would disassemble itself spontaneously if you looked at it with too much interest, and my 1D was painfully fragile at best. Neither survived to the present day... Crazy and nostalgic as I am, I'm going to try again with the very pretty 15th Anniversary Bandai metalized edition of the 1/72 VF-1S Super Valkyrie fighter (picked up thanks to another member here). It should look beautiful when assembled - assuming it can be assembled well. It's even chromed in silver for the majority of the parts, and a metallic green for the FAST Pack elements. It also includes foil decals. But even the box art and packaging doesn't show the metalized product, and Arii's vintage editions obviously didn't picture the actual assembled retail kit you got in the packaging. As a note, I never worked with any of Imai's comperable "Macross Iron" kits. Has anyone had any genuine success with these style of kits, and could offer any first-hand advice about the best glues to use, and general tips for handling, detailing and the like? I recall Arii's metal coating could be scraped or sanded off, but always seemed to leave a bit of an odd coating infused in the plastic that defied regular styrene cement. How well does super glue bind to untreated metalized parts? How resistant is the coating to the typical resulting crazing from the glue? And what sort of inks or washes could be applied to the coating to bring out some of the details? Quote Link to comment Share on other sites More sharing options...
MechTech Posted January 21, 2010 Share Posted January 21, 2010 I know this guy named AcroRay who's a glutton for punishment Seriously, I think it will turn out great. If you want to use solvent glue, you WILL have to sand down the edges to NAKED plastic (just tape/glue some sandpaper to a flat surface). It may be easier than scraping. Then clean the edges with isopropyl alcohol. In the old days they would take the sprues and put them into a tank and fling actual chrome plate onto them. Of course the chrome beaded the glue. If they've used the same technique, the chrome should have bonded well to the plastic and super glue will hold it all together. Just rough up the joints. Test some sprue to be sure. Chrome is what put me off car models for life If the super glue works, then just prep the surfaces with rubbing (isopropyl) alcohol. Chrome and superglue make great permanent fingerprints! If you take a chromed plastic surface that has a tint to it (usually gold plastic) or the green in your case, a solvent will take that off so be careful if you like the green tint. Testing on sprue is your friend in this case too. My hat off to you, chrome is a challenge, but looks great. Tamiya's chrome paint pens are a close match to cover up sprue marks on chrome. Have fun and keep us posted! The other option is strip it naked with Cola like was done before - MT Quote Link to comment Share on other sites More sharing options...
AcroRay Posted January 22, 2010 Author Share Posted January 22, 2010 Thanks for the tips! Luckily, there is a nice assortment of extra parts in the kit I can test things on. The base kit is a 1/72 GERWALK from earlier in the kit series, which Bandai used as the base because the articulated legs allowed for the knee bend needed to suit the leg FAST Pack elements. So there is a full set of arm & shoulder parts, open foot parts, and other odds and ends to test with. I've got a Bandai chrome pen that I use for my Microman/Micronaut retouches, so that'll fix me for touch ups. One of the sticking points - one that bugged me with the standard version of this kit that I built back in the 80s when I used minimal painting for it - is that the alternative backpack provided with the additional mounting points for the large dorsal pods is on the green sprue with the FAST pack parts when the part should be white... so this metal kit has it metalized in green, rather than the silver it should be. I'll use your caution about accidentally stripping the green color to actually try to deliberately strip the green overcoat from that particular part! I'll see if I can shoot some pics of the kit parts this weekend. There doesn't seem to be much detailed coverage of this unique little old-school gem. Quote Link to comment Share on other sites More sharing options...
Recommended Posts
Join the conversation
You can post now and register later. If you have an account, sign in now to post with your account.