

vf_1s
-
Posts
246 -
Joined
-
Last visited
Content Type
Profiles
Forums
Events
Gallery
Posts posted by vf_1s
-
-
With the ending of the "Yamato" era, here is my salute to Yamato. Thank you for making all my wishes come true, especially the VF-4G.
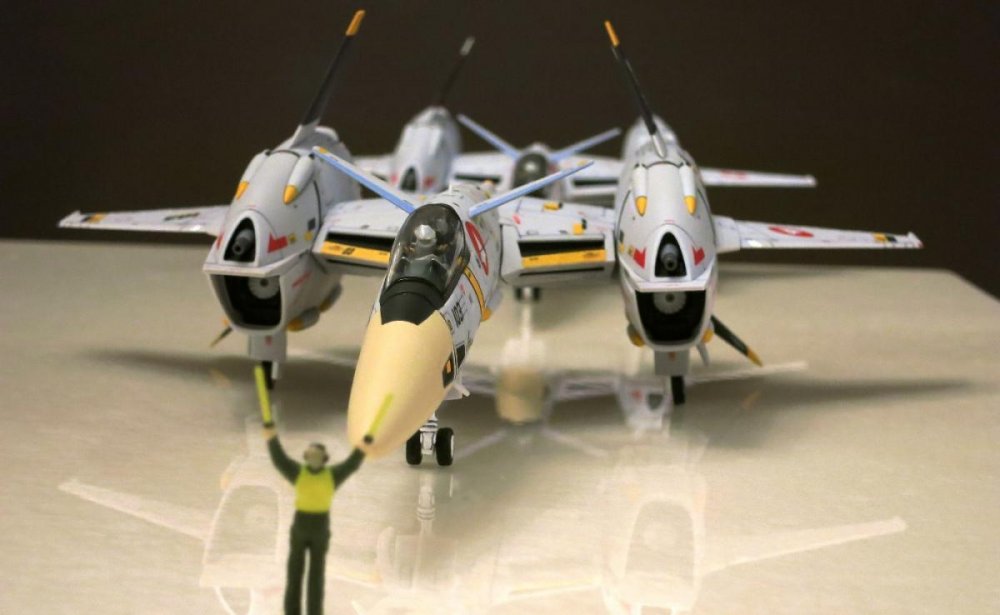
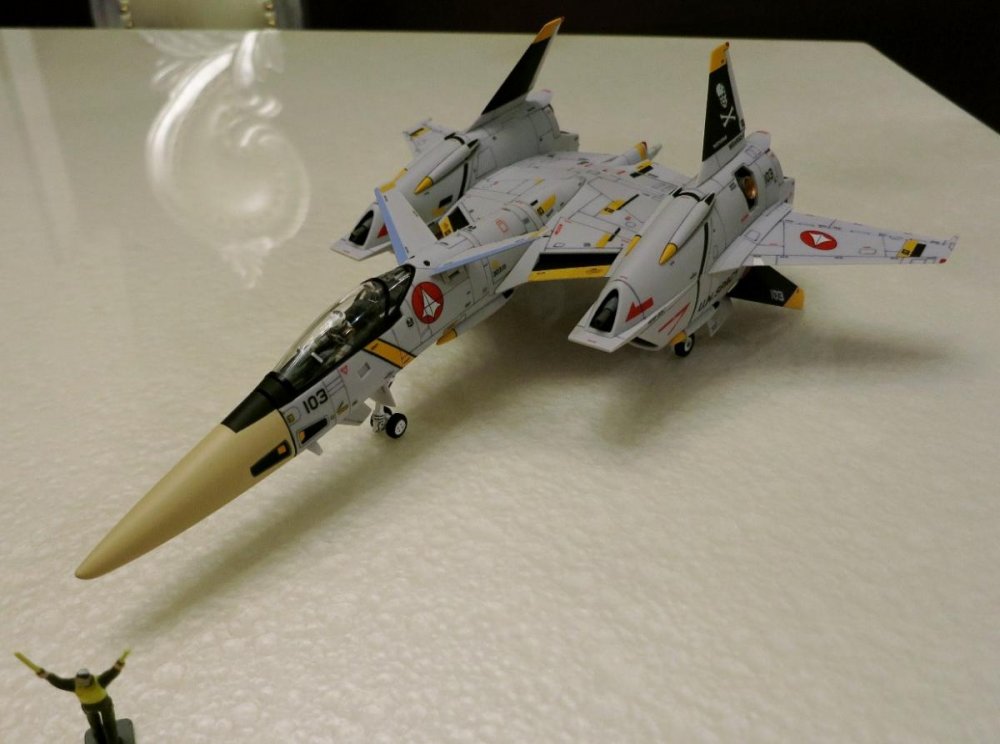
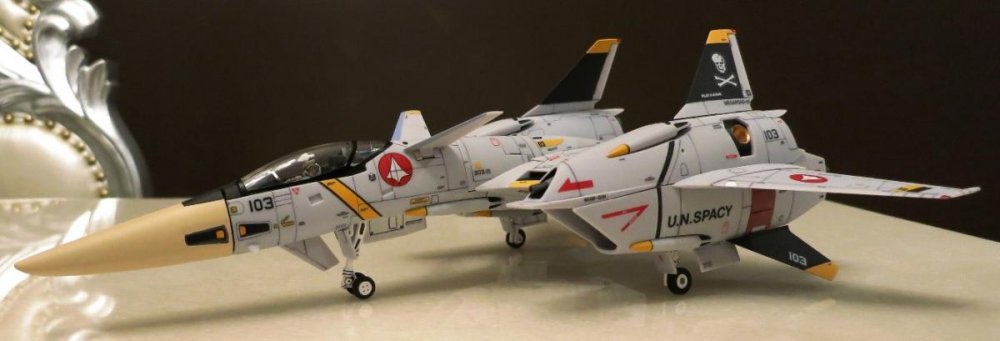
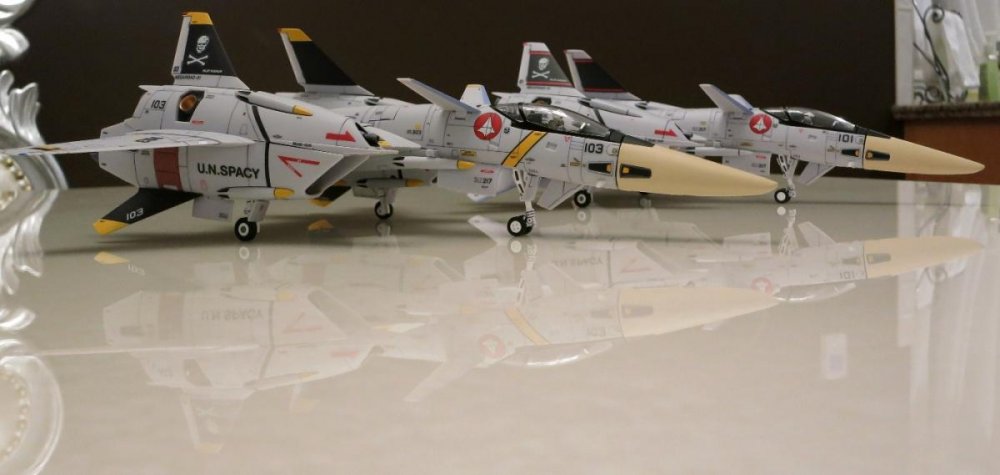
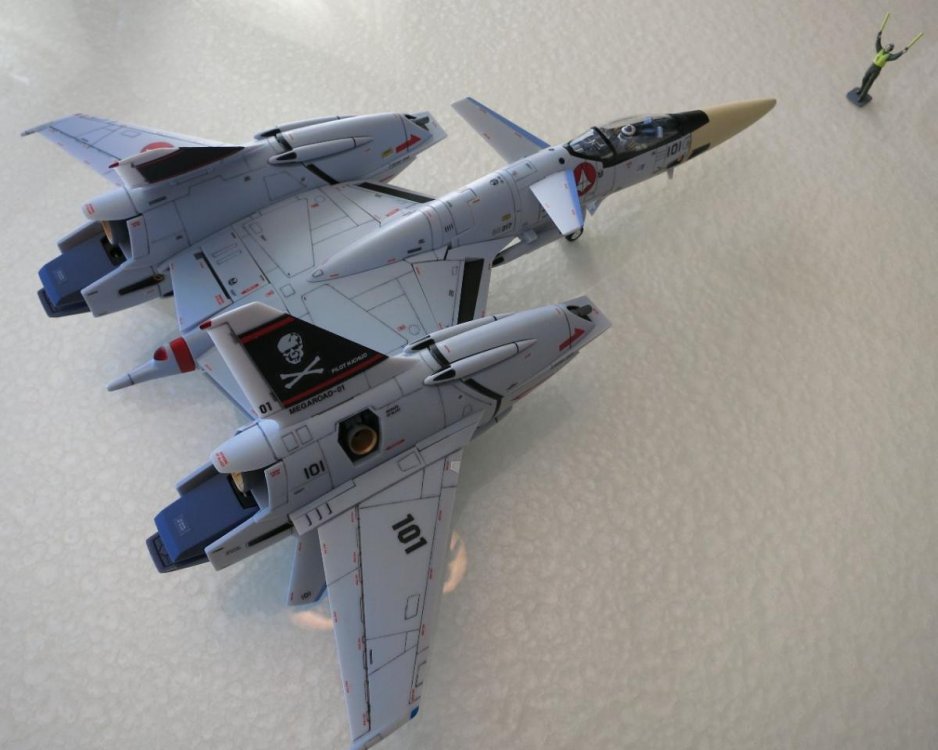
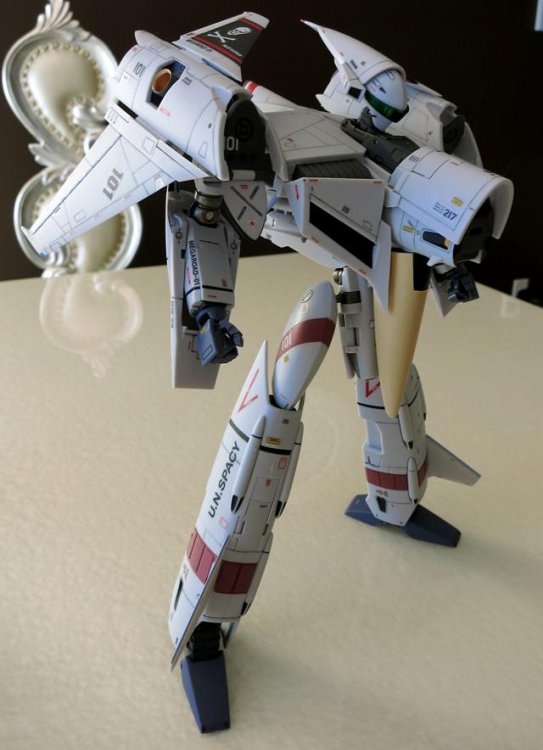
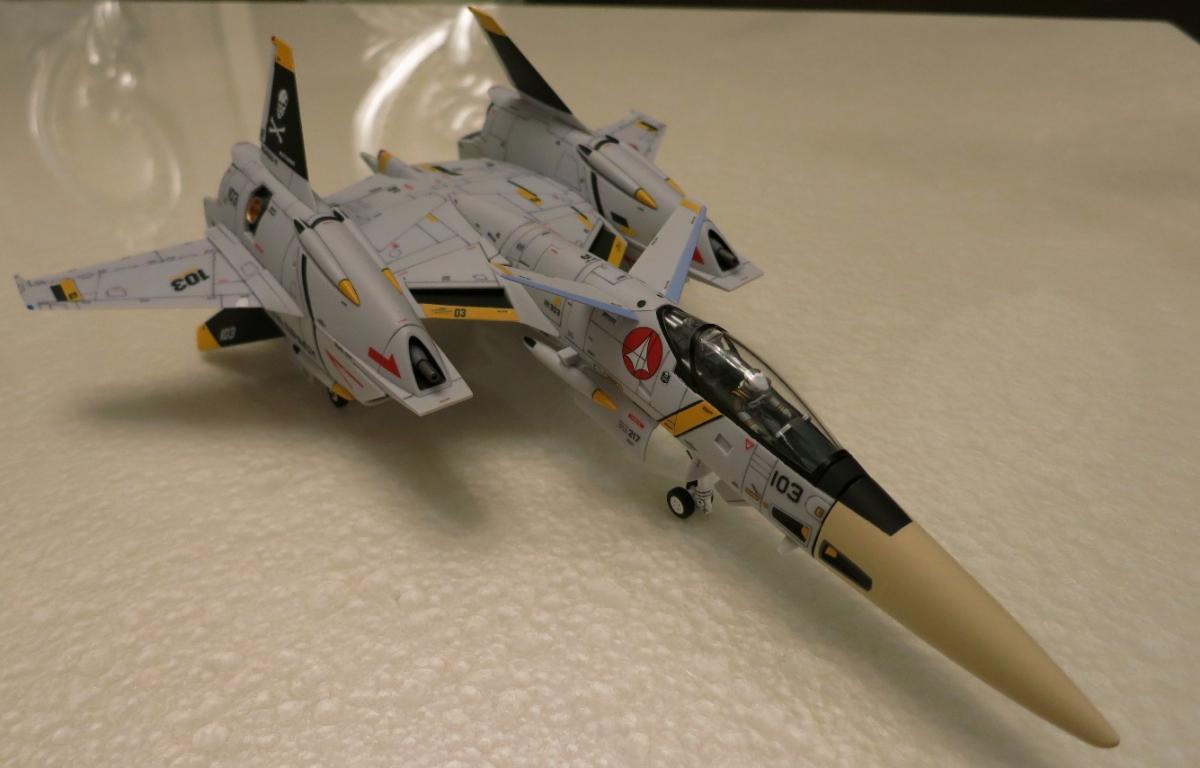
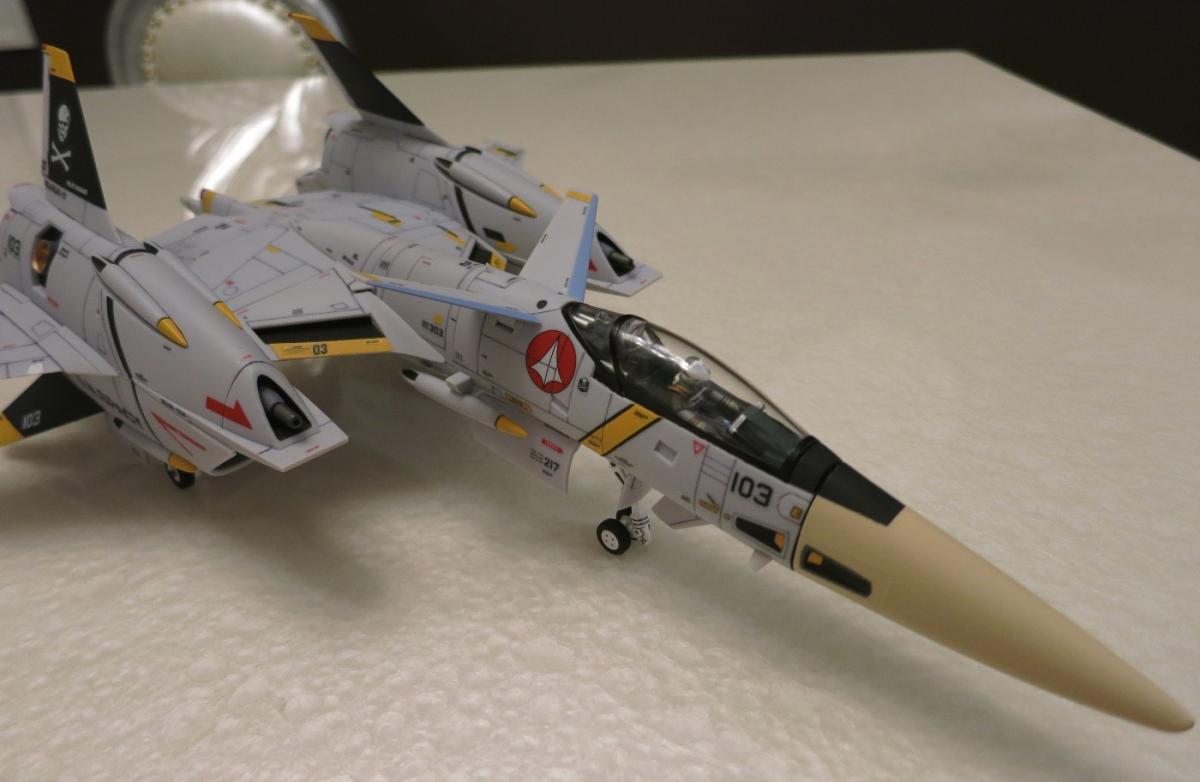
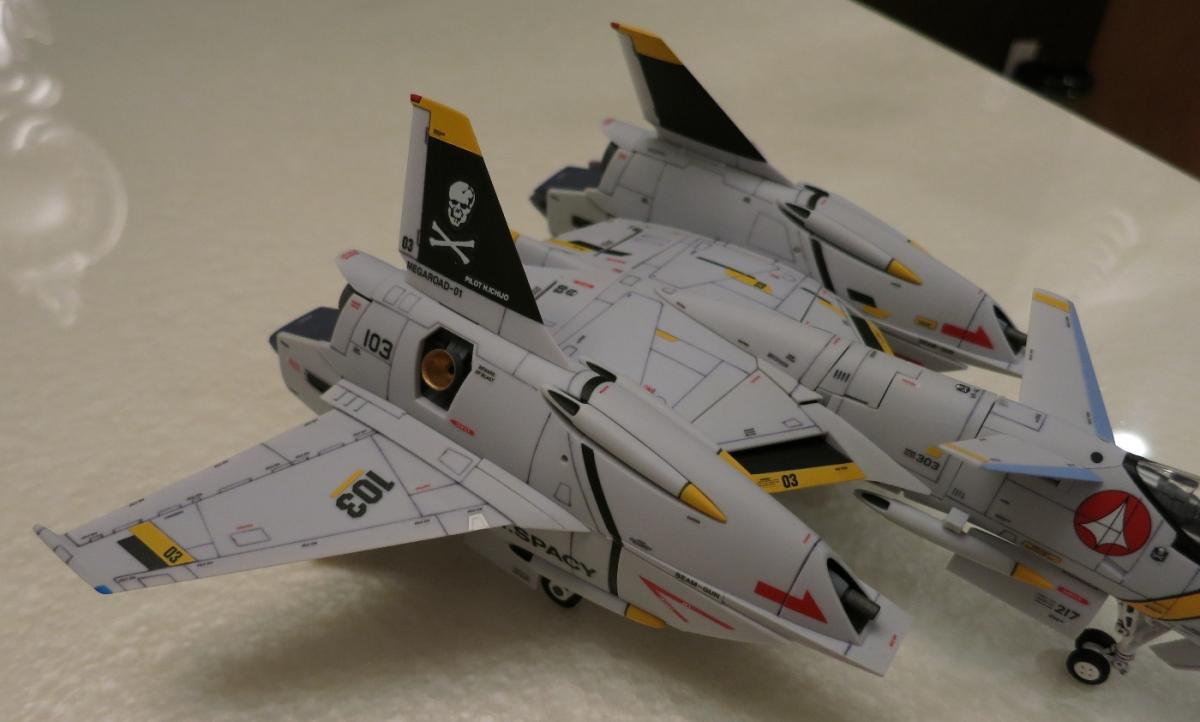
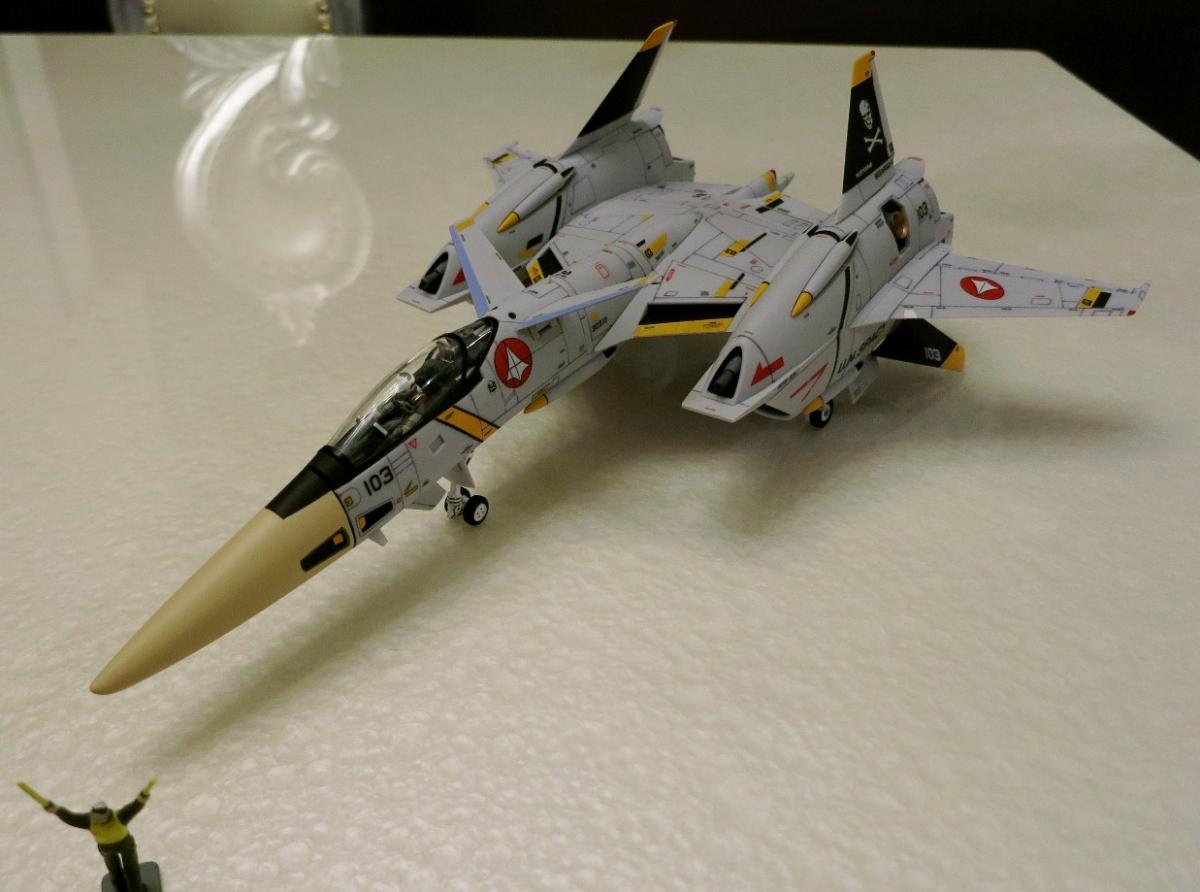
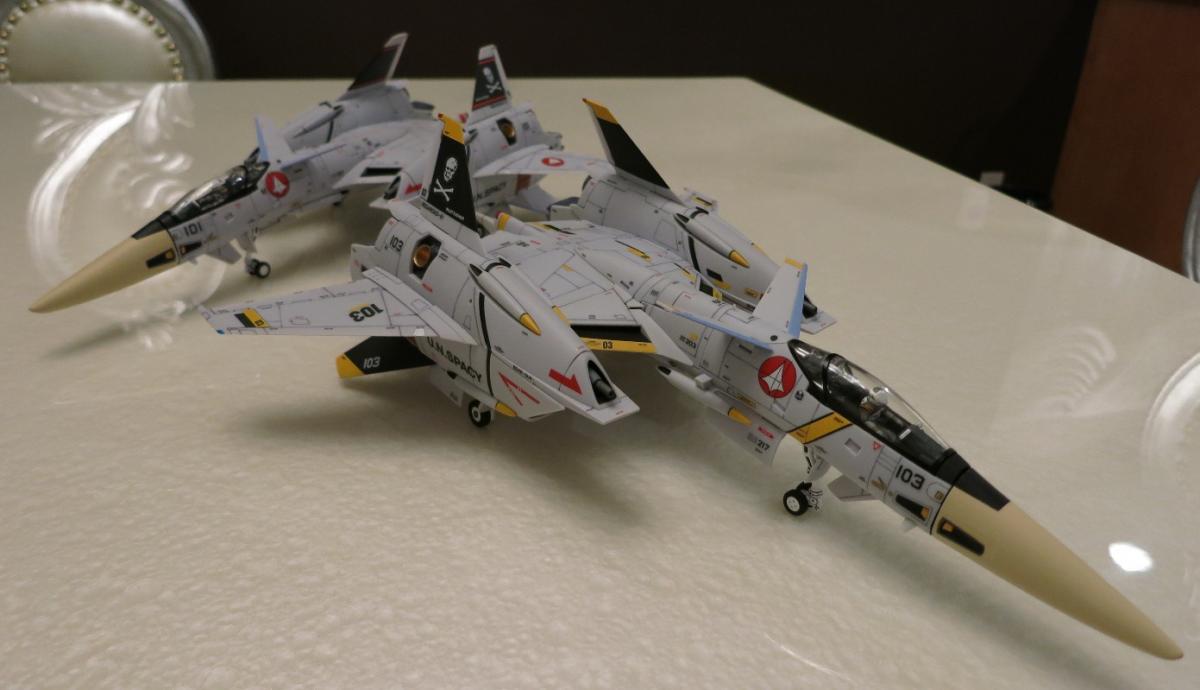
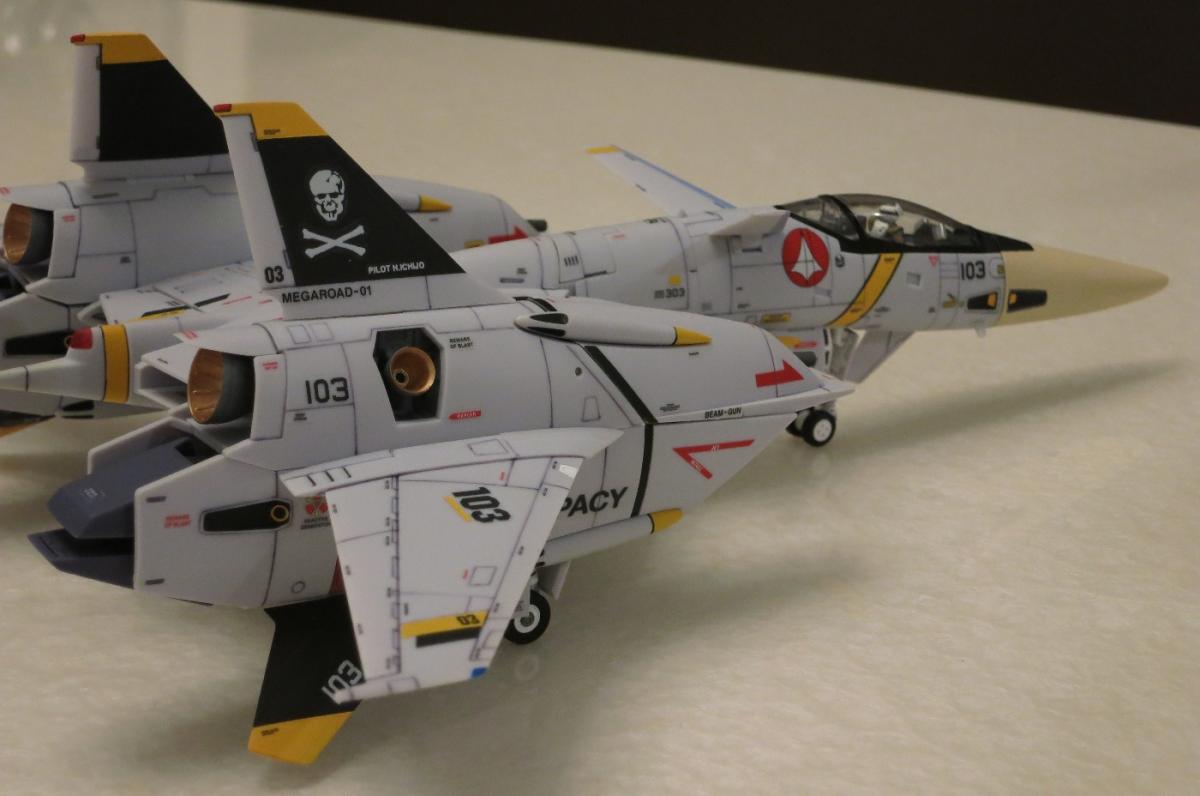
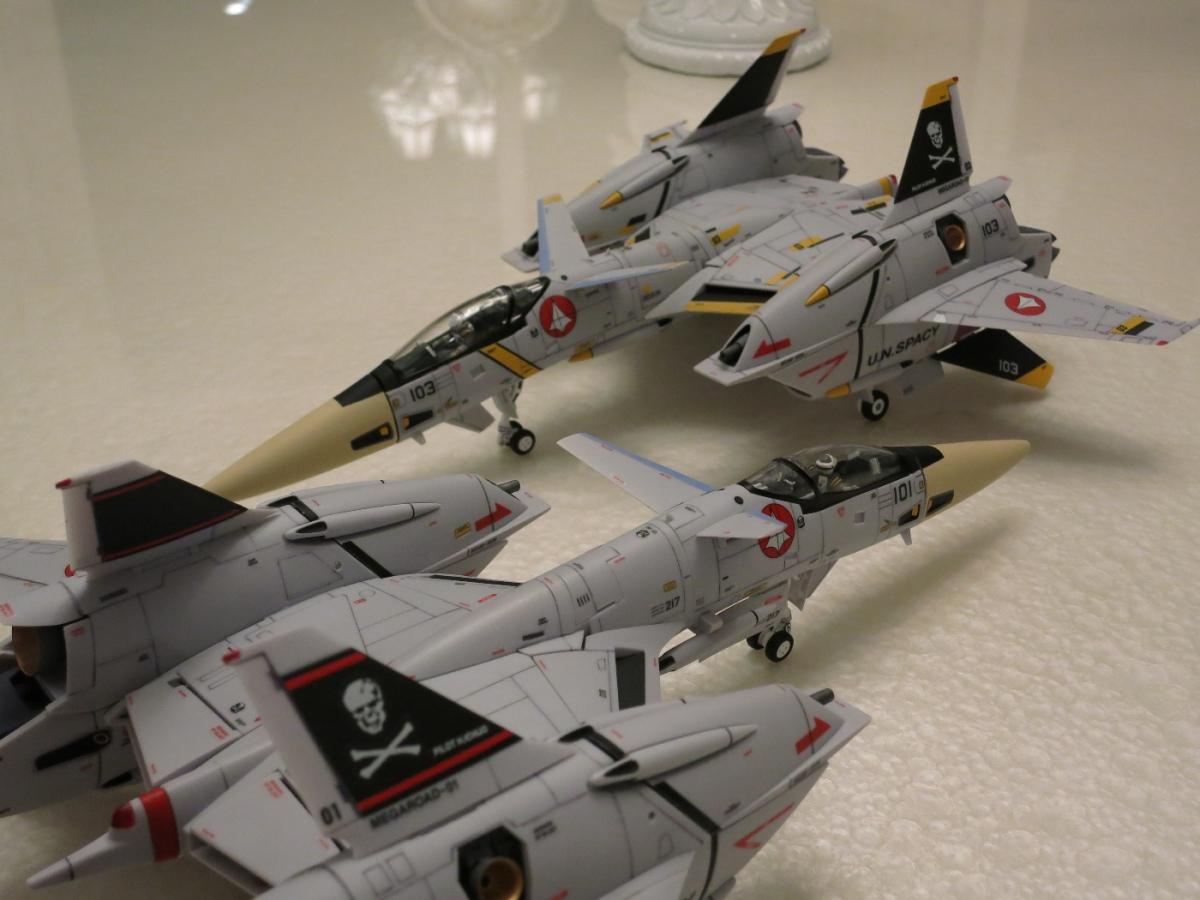
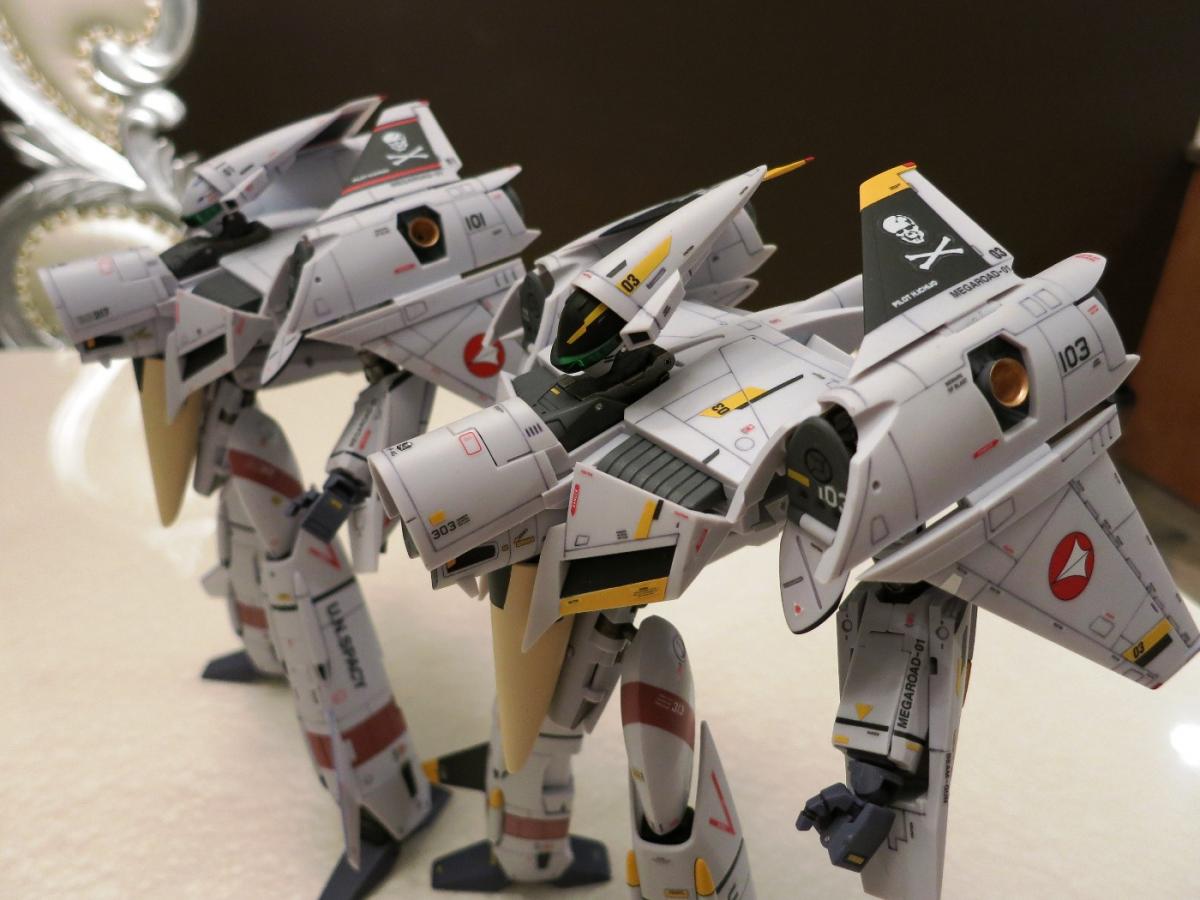
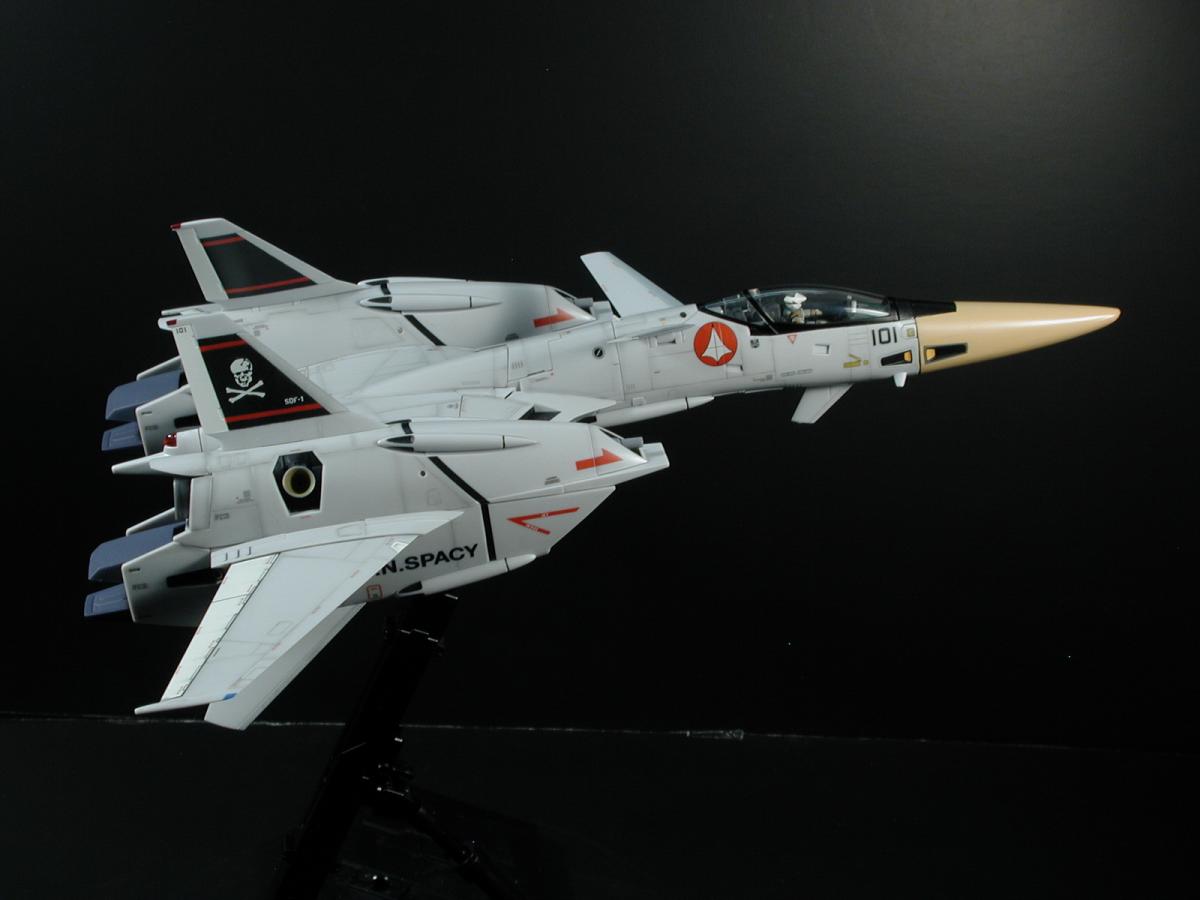
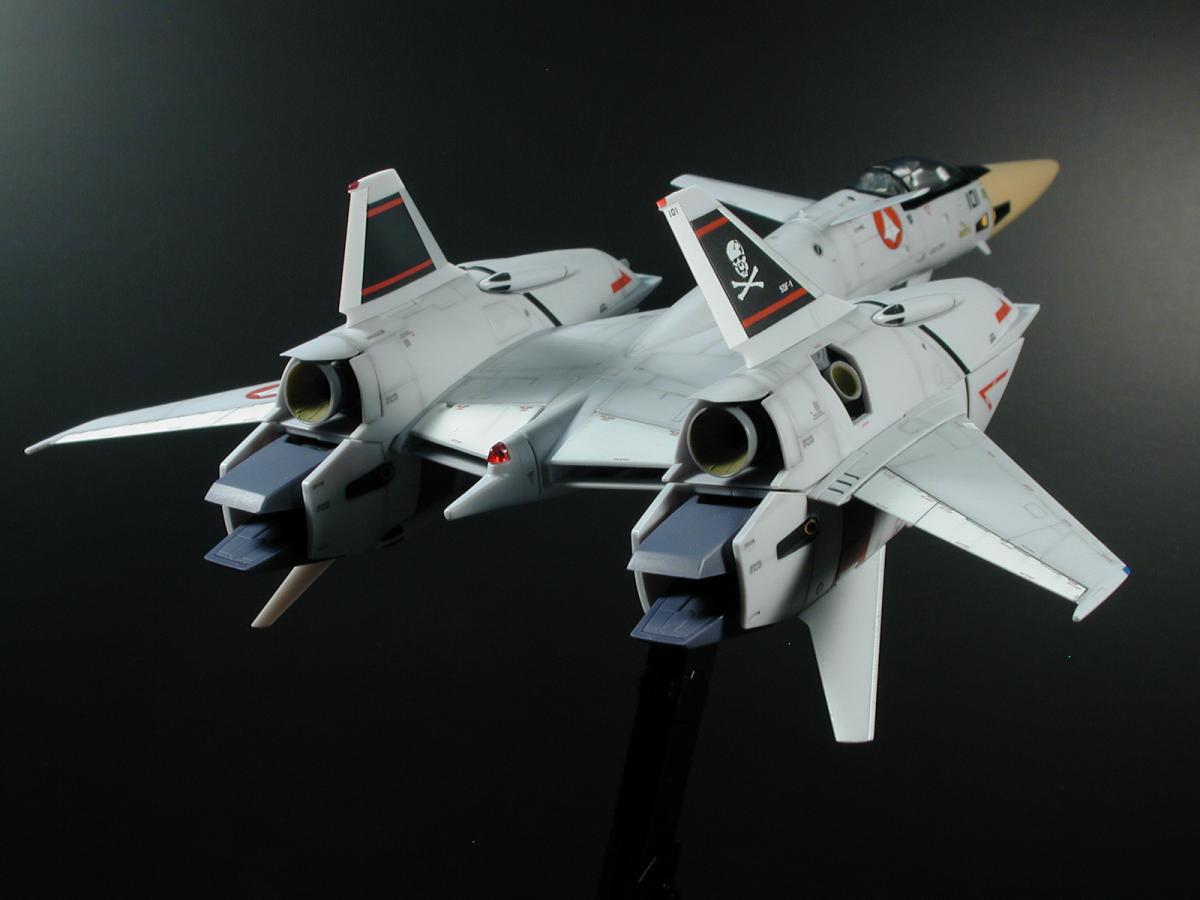
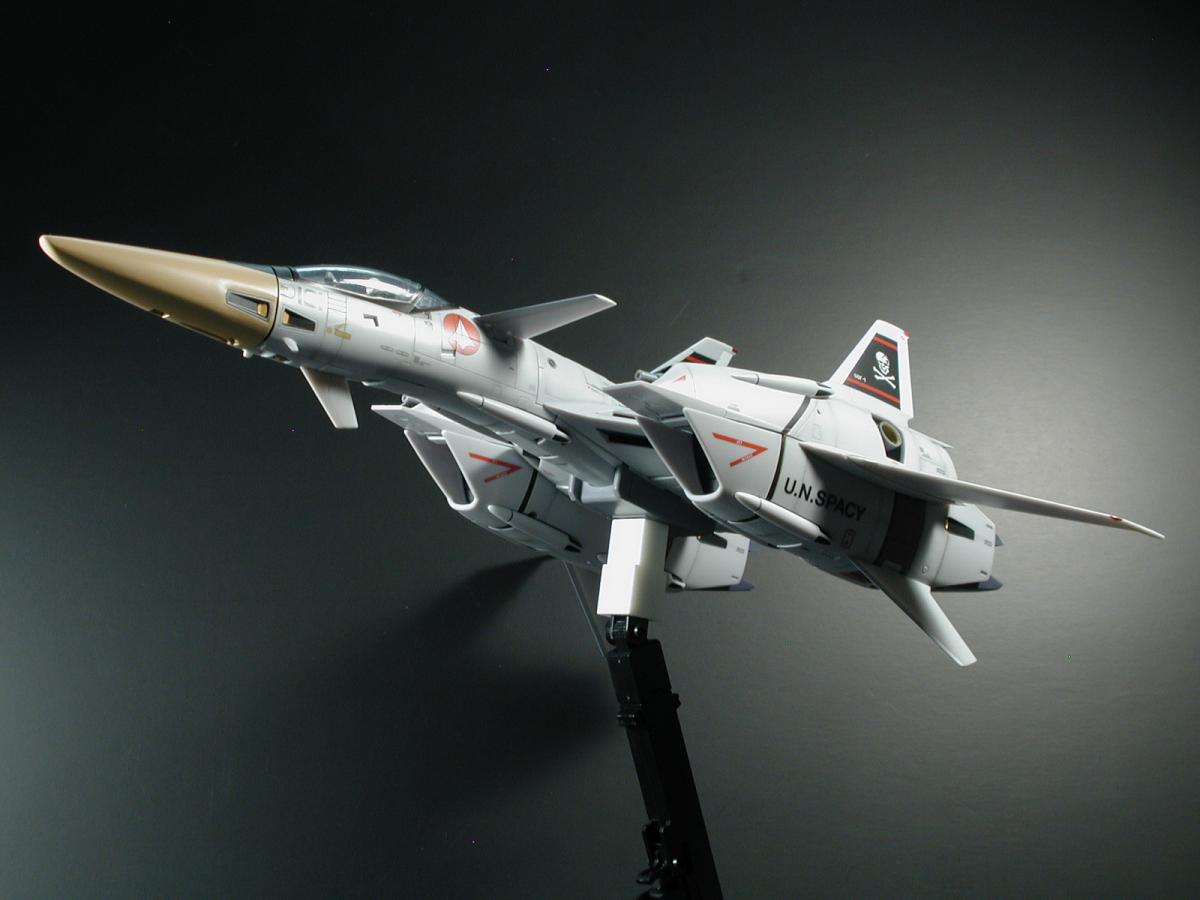
After doing my FB 2012 custom, here is my interpretation of the "Focker Scheme". I didn't like the VF-1 black lines on the VF-4, it didn't seem to flow with the curves of the VF-4. So I took some cue from the Jolly Roger and Ghost Rider VF-4G scheme, and came up with my own. Hope you guys like it. Also, I have painted my nose cone slightly different this time, so that it is 100% scratch free.


-
hai vf 1.. are you using lacquer paint? what type .. and is it durable from scratching?
Hi, thank you for the generous comments again!
I took wm cheng's advice of masking with the tamaya tape. It was so easy to use! I masked the booster and the black area, then airbrush a thin layer of testor enamel radome tan. Then cover it with a few coats of lacquer flat coat.
When I first transformed it (a day later), the locking points did have minor scratch, and I have to touch up. But after 3 days, the paint dried and harden enough, and I have transformed it 5 times since then, and no scratch. The key is to make aure the peg going straight in when you transform. Hope it helps!
-
Fantastic job vf_1s!! Are those the supplied stickers or did you somehow get waterslide decals? It looks great - congrats on a wonderful custom (how Yamato "should" have sold this toy!)
Thank you for all the comments guys! and thank you wm cheng! It was you who inspired me to paint mine.
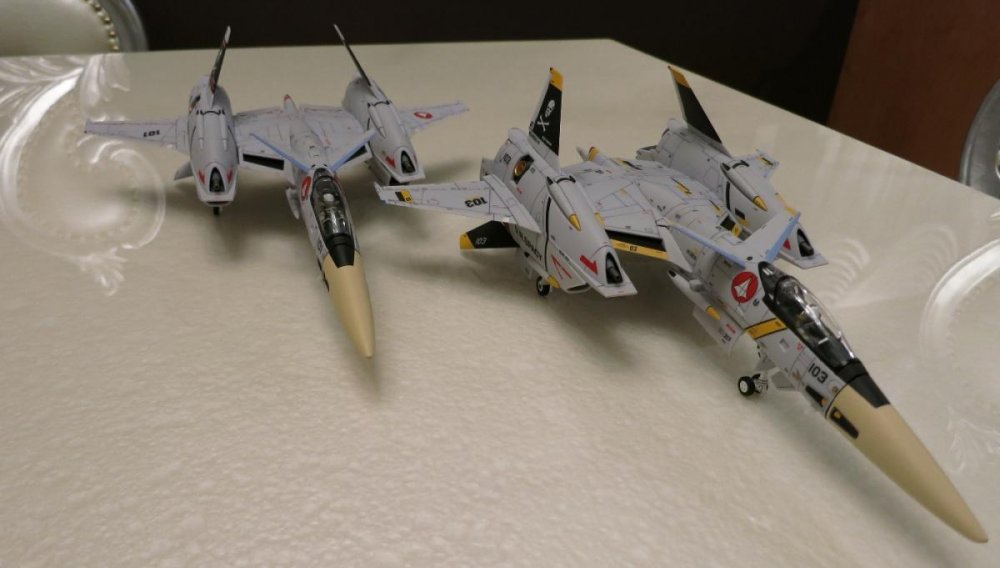
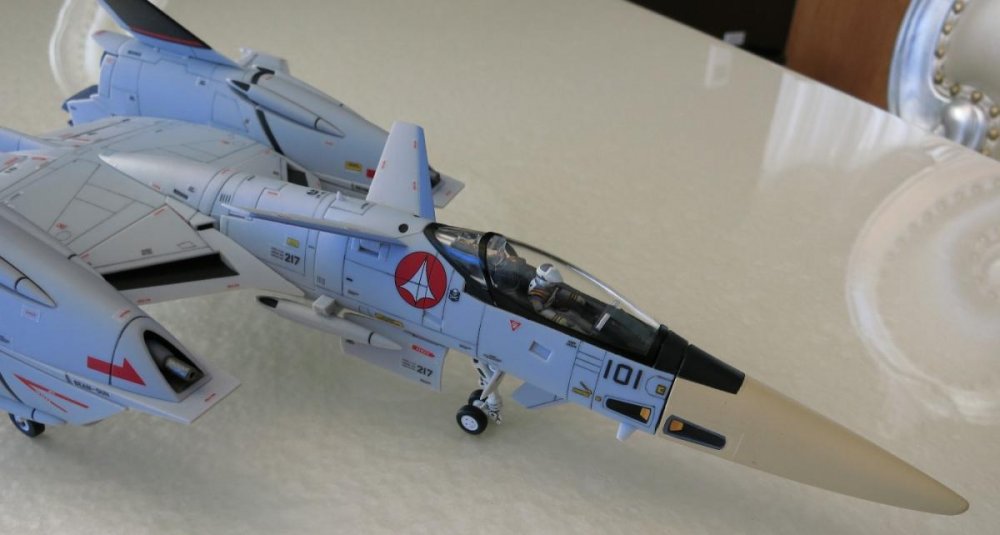
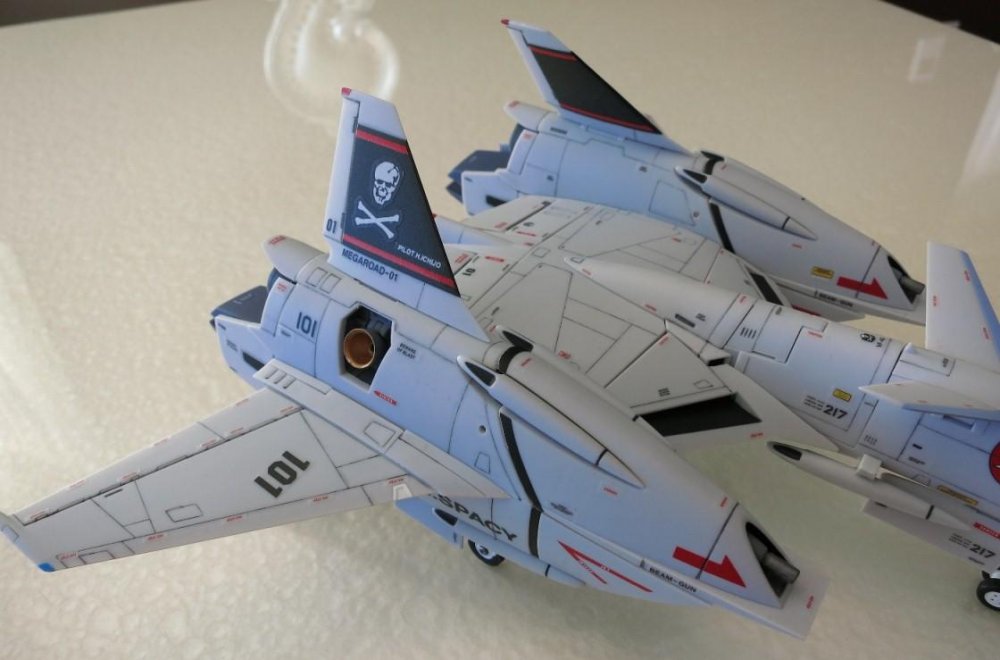
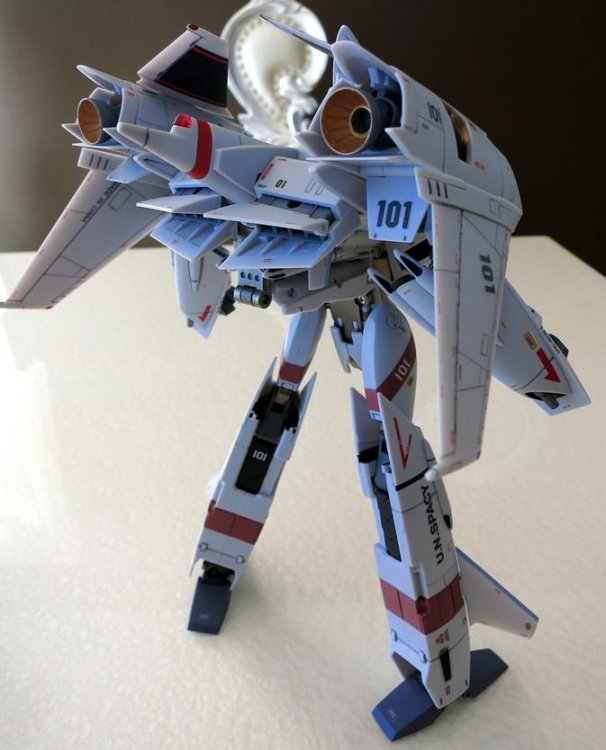
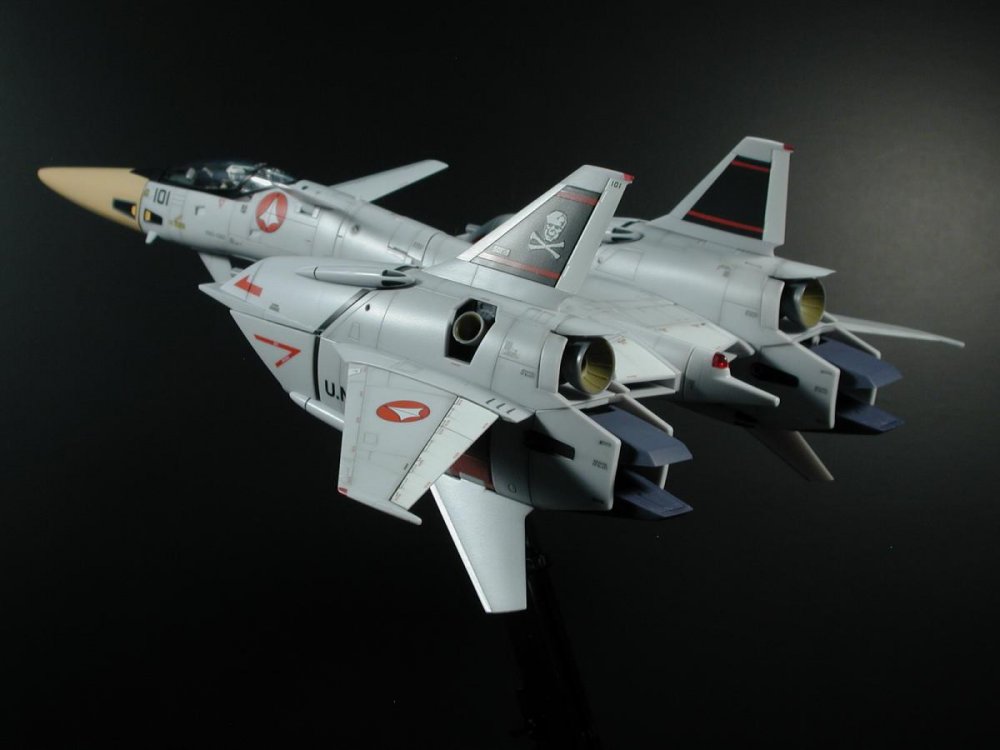
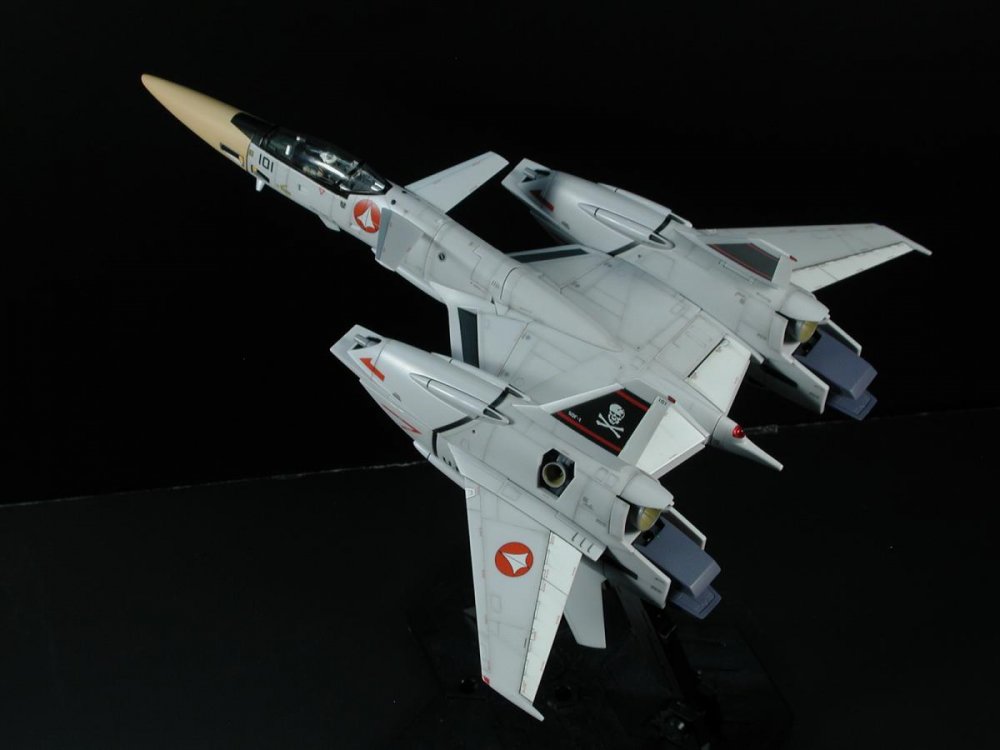
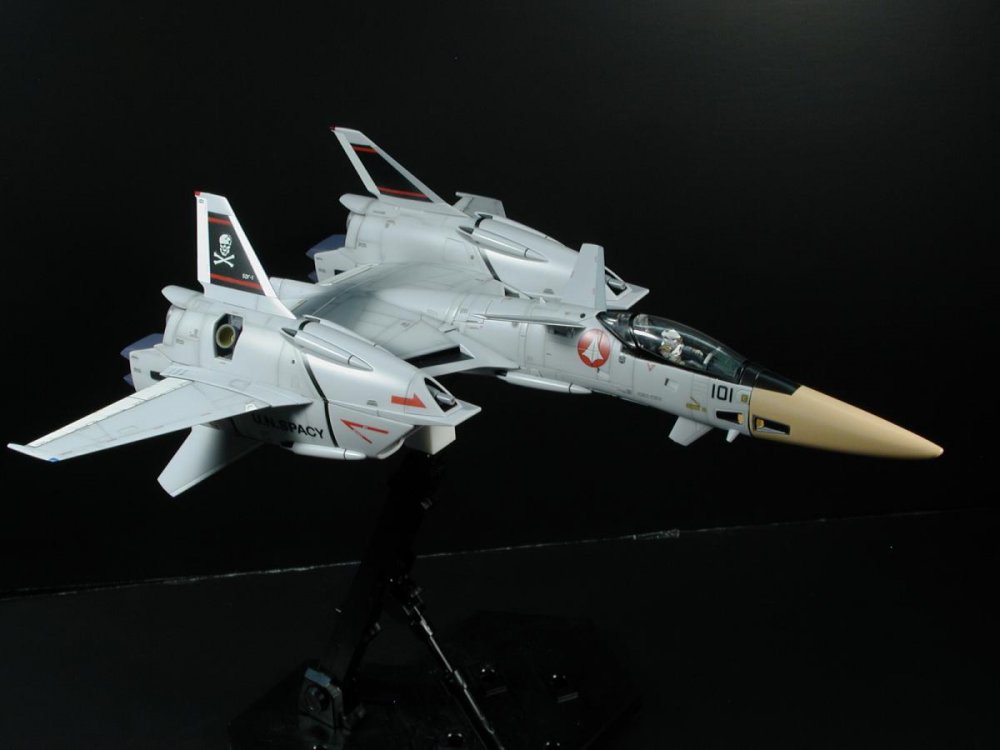
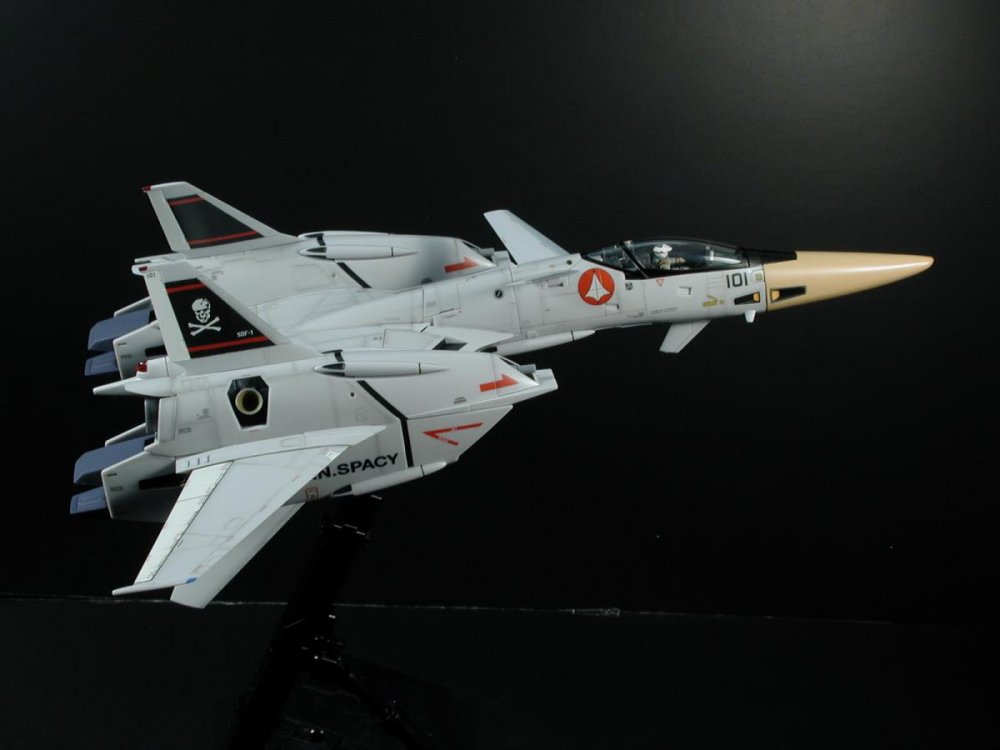
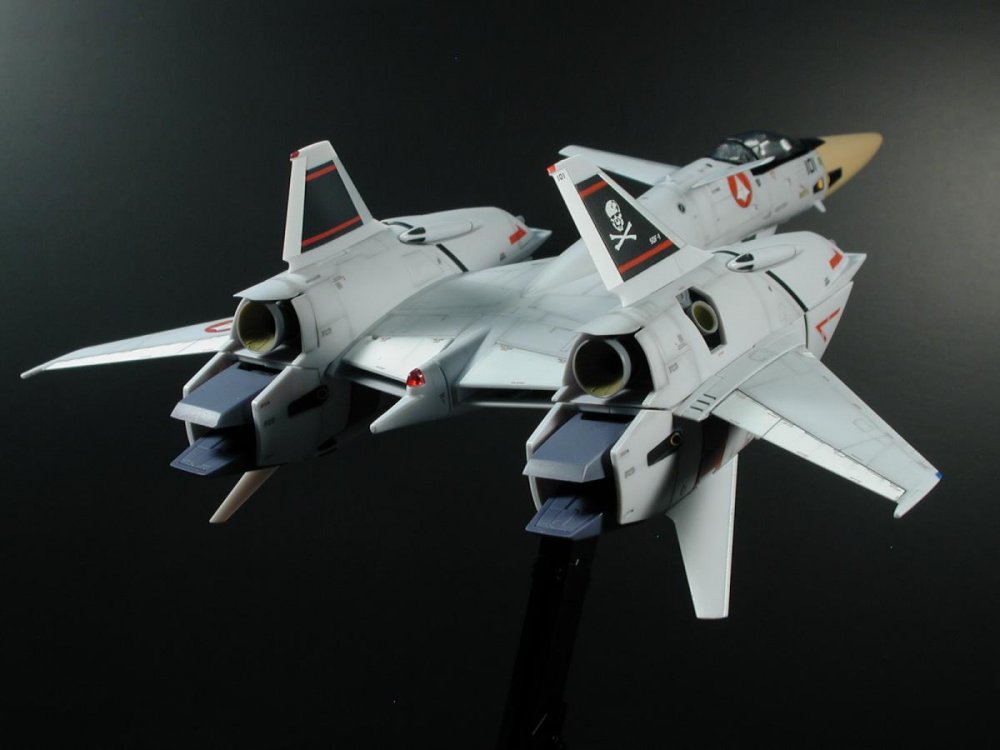
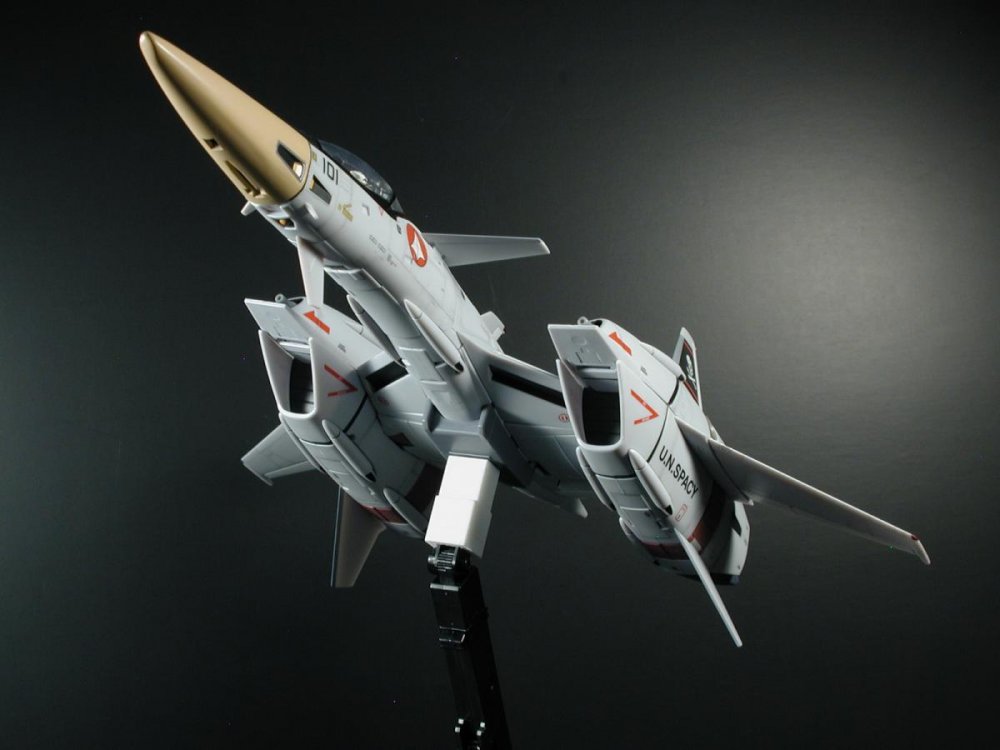
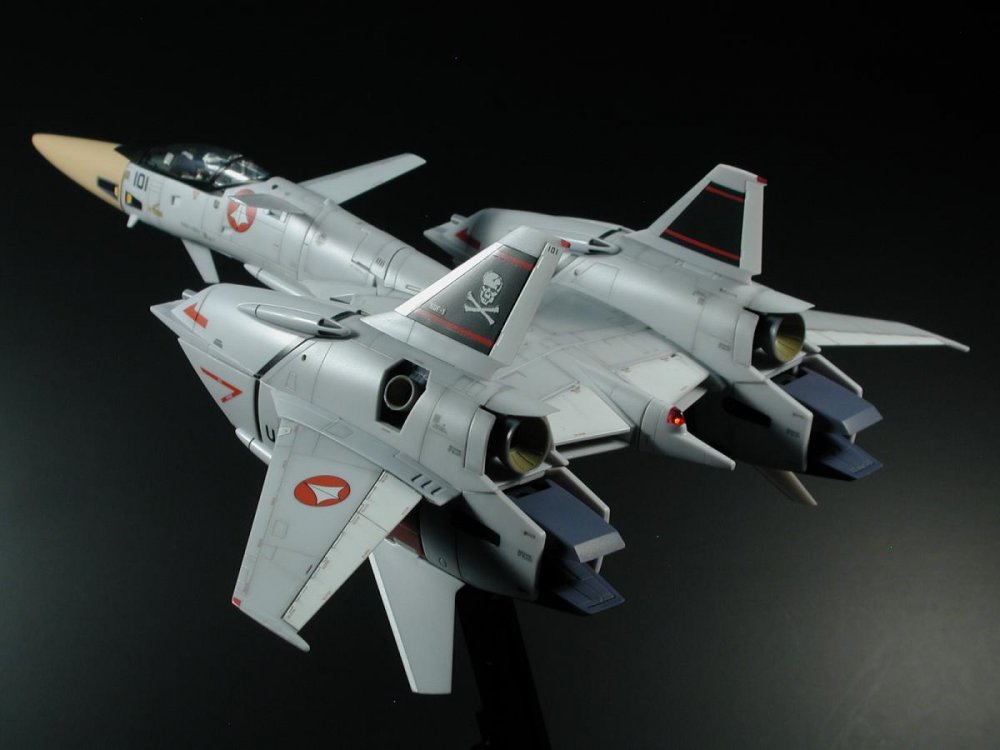
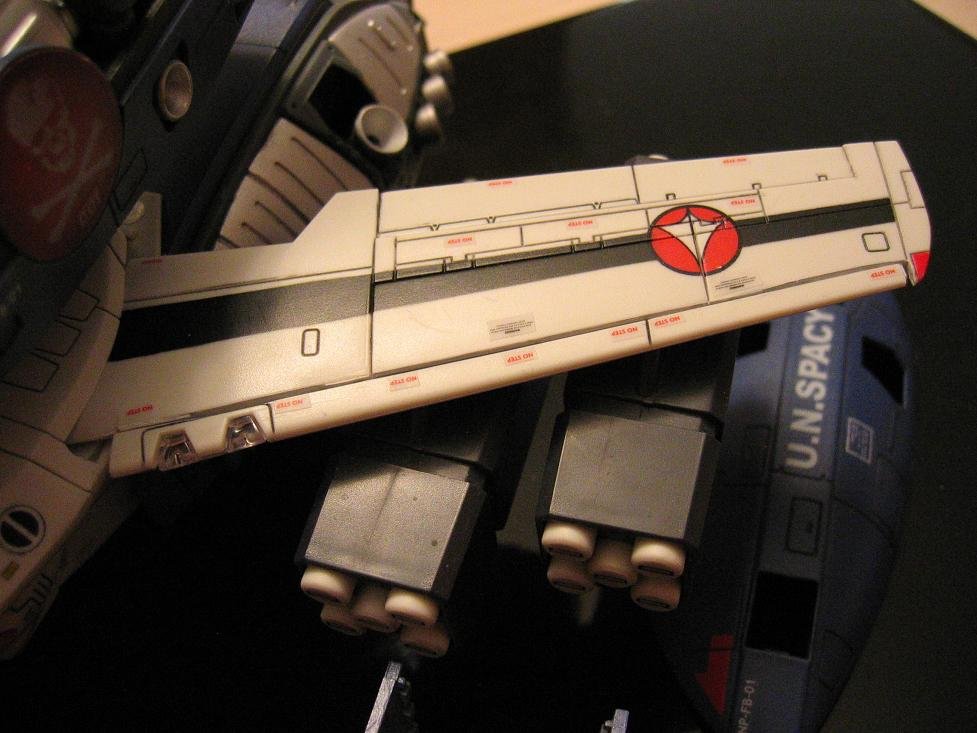
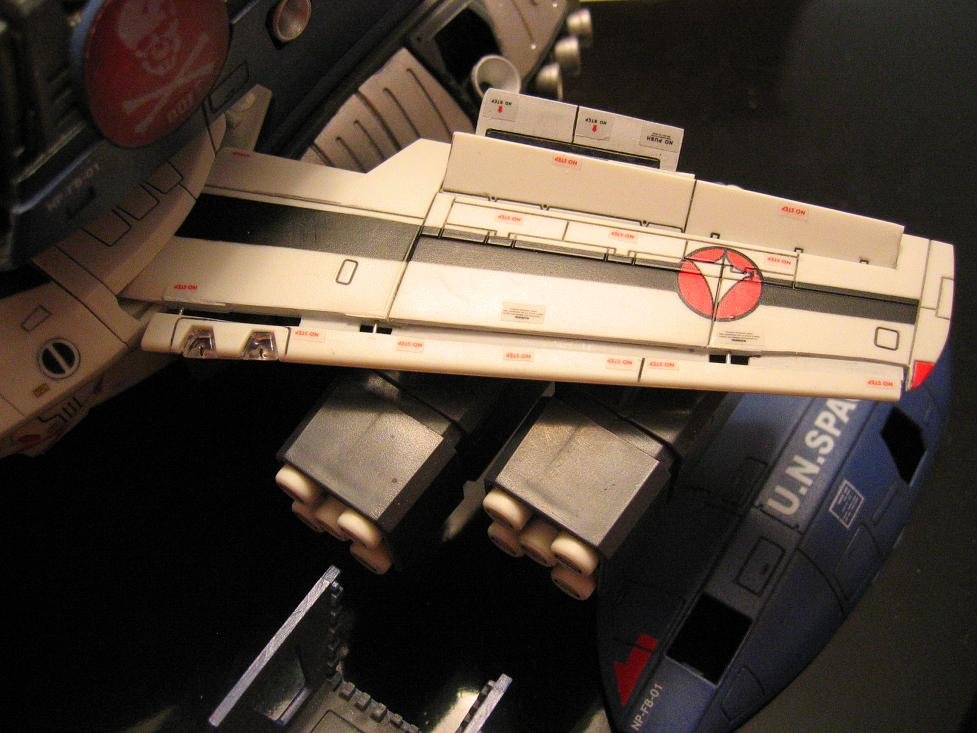
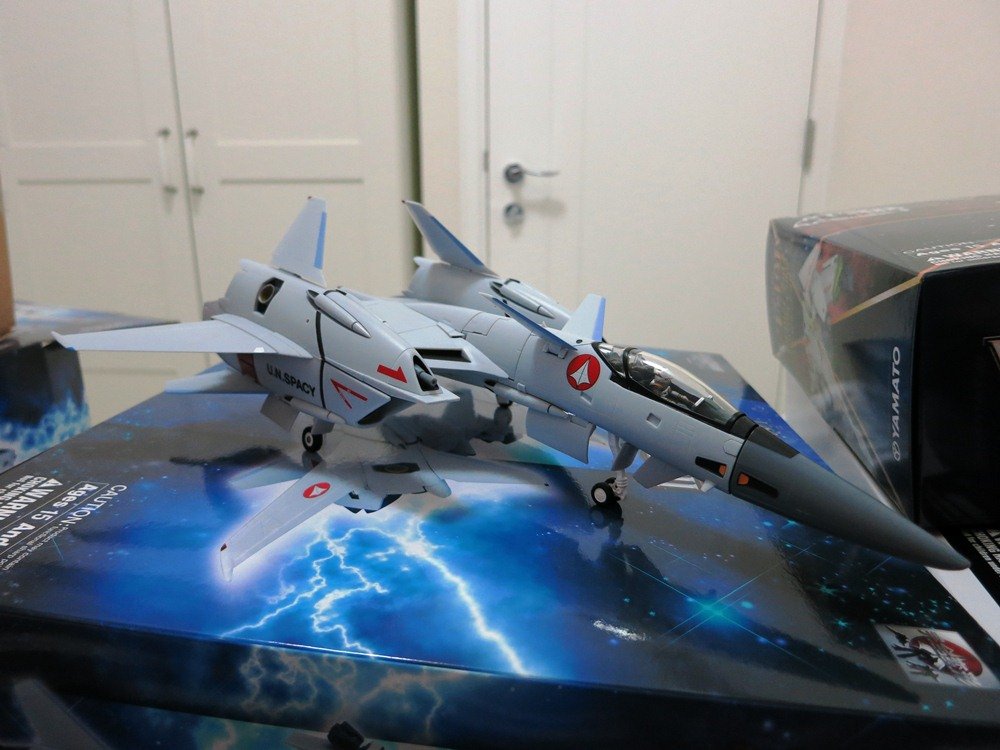
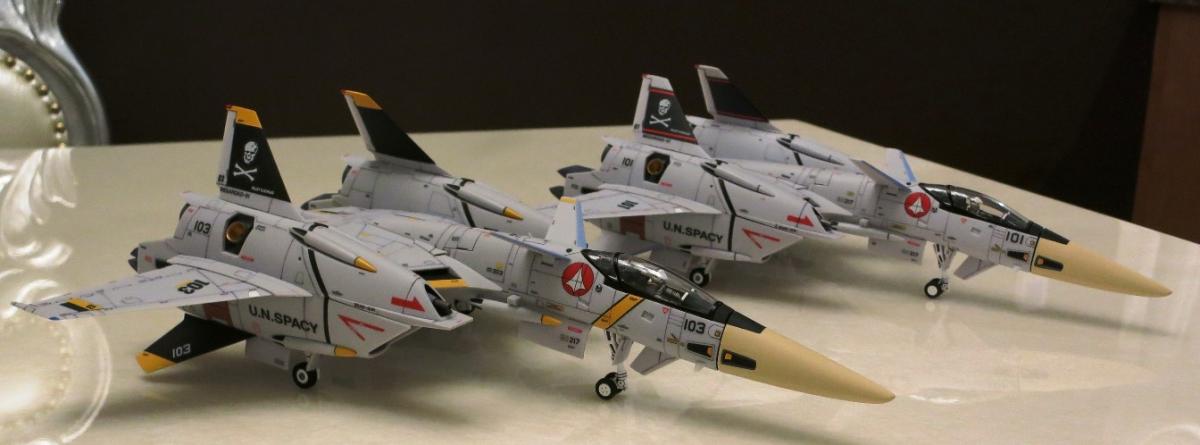
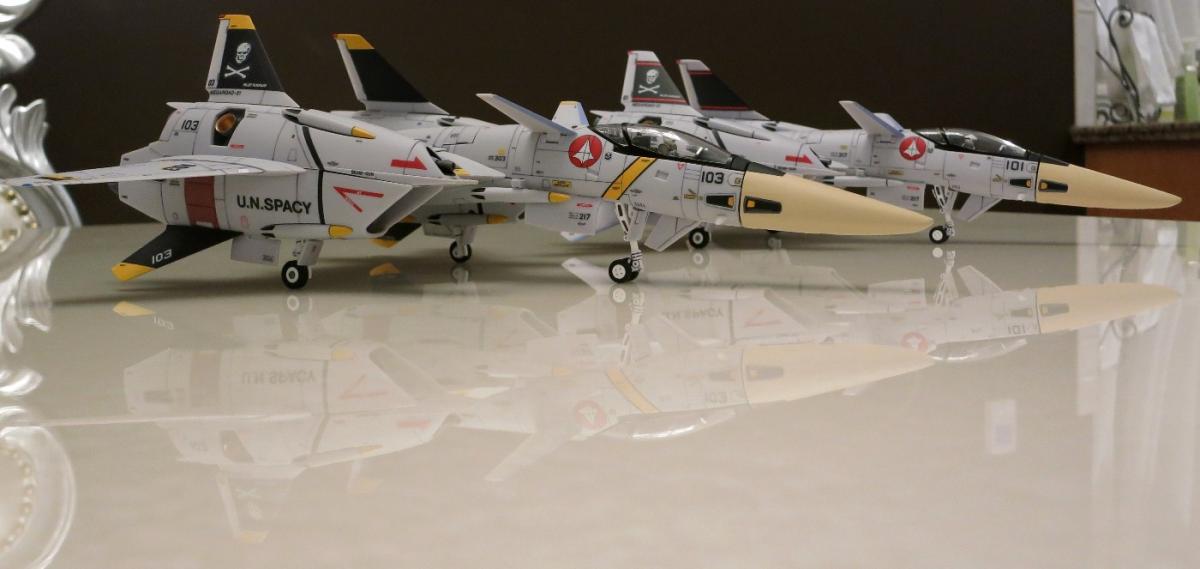
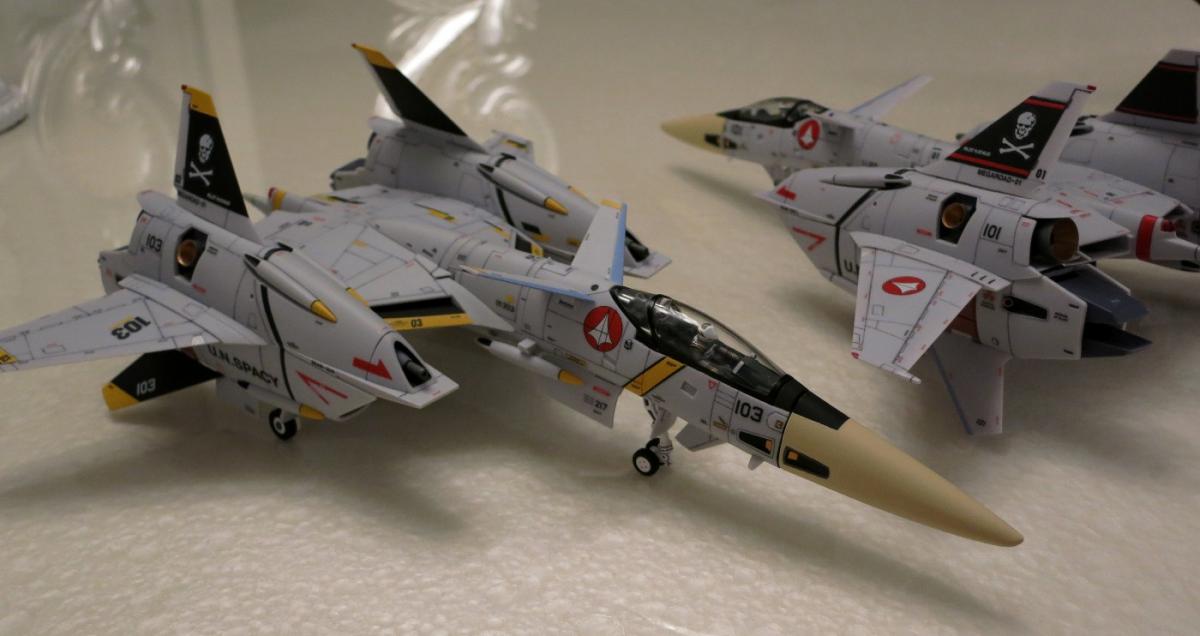
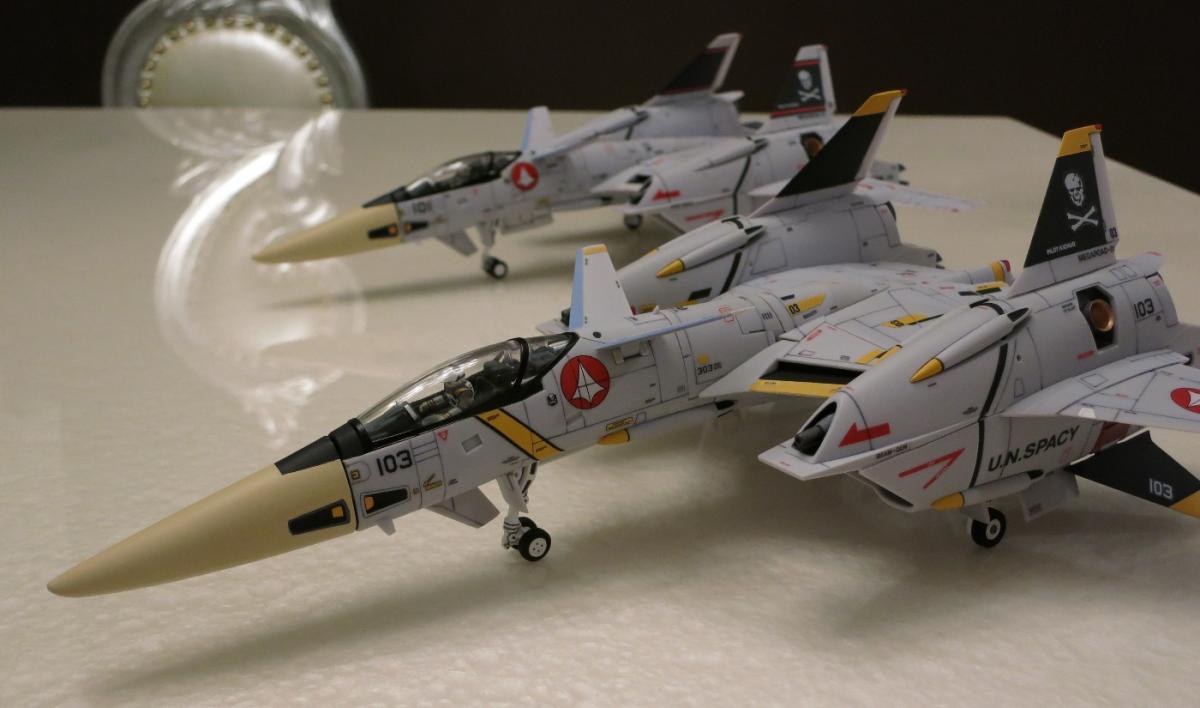
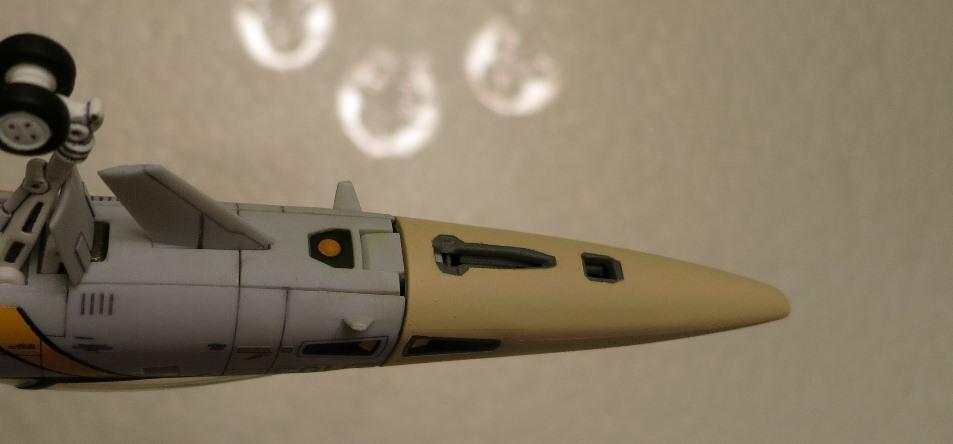
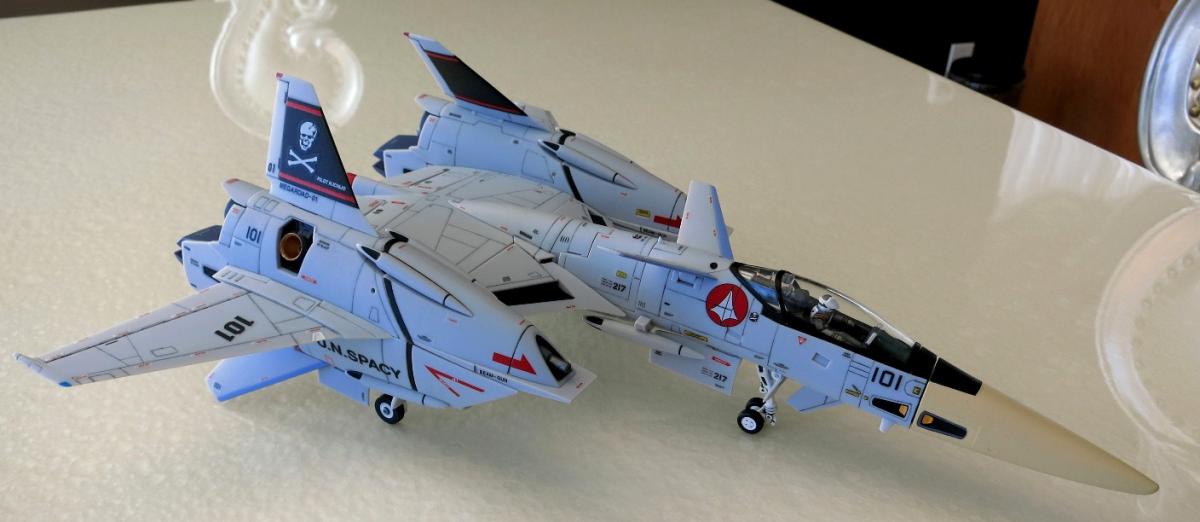
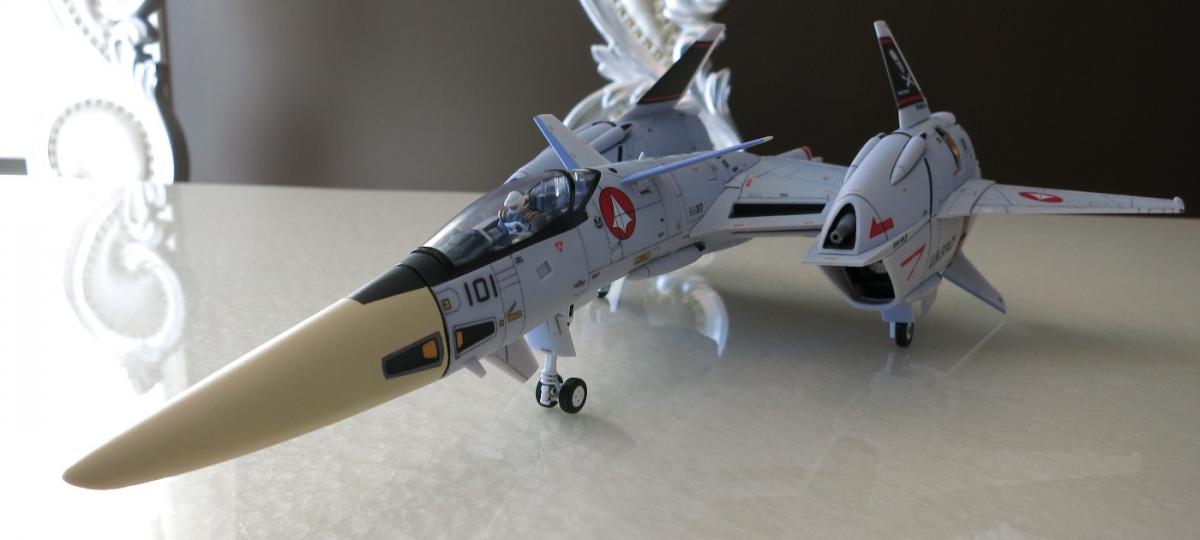
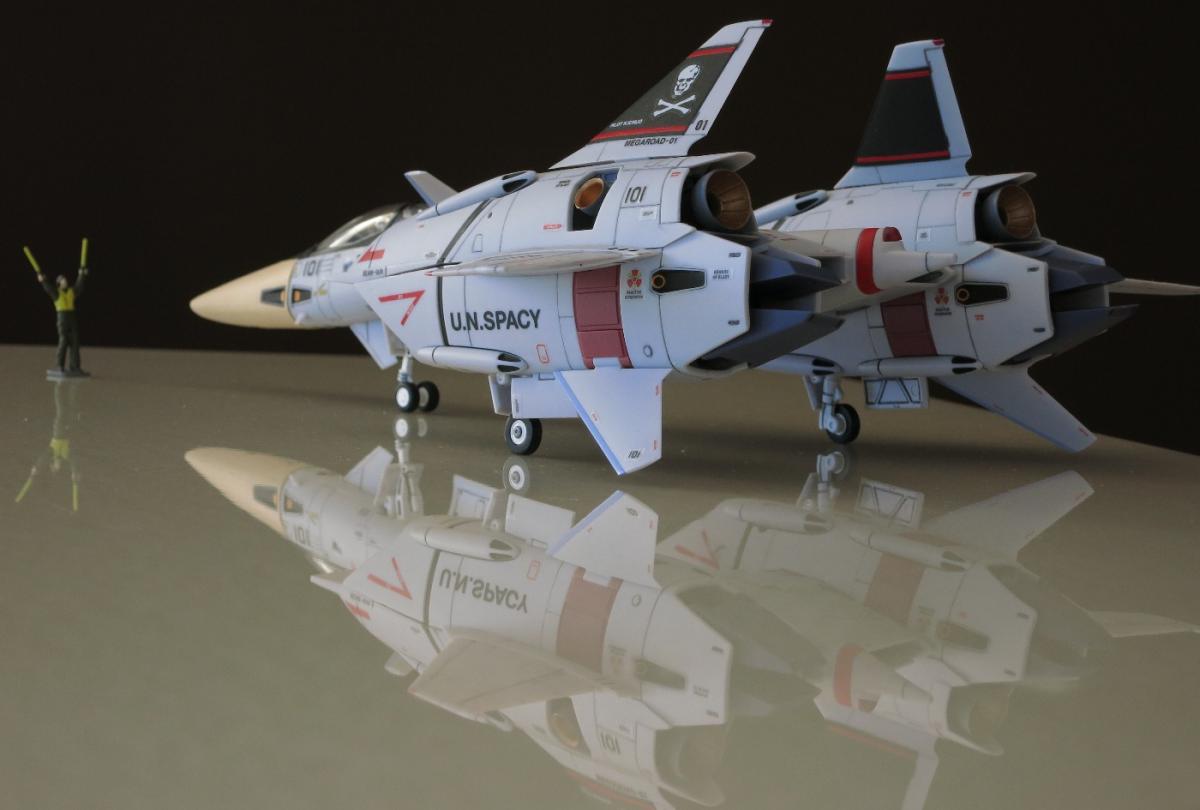
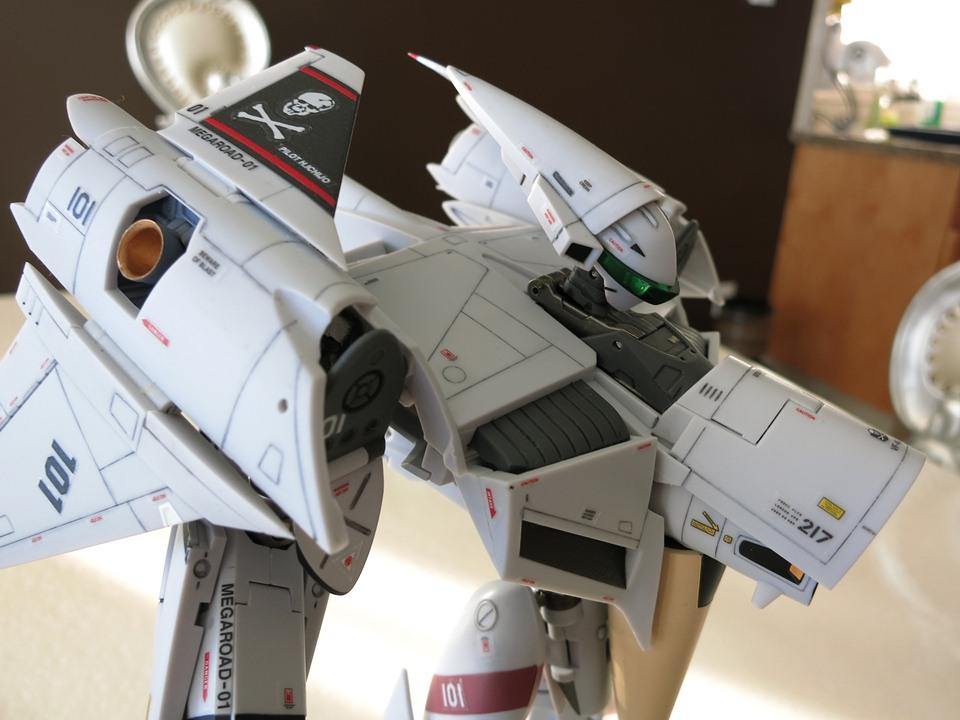
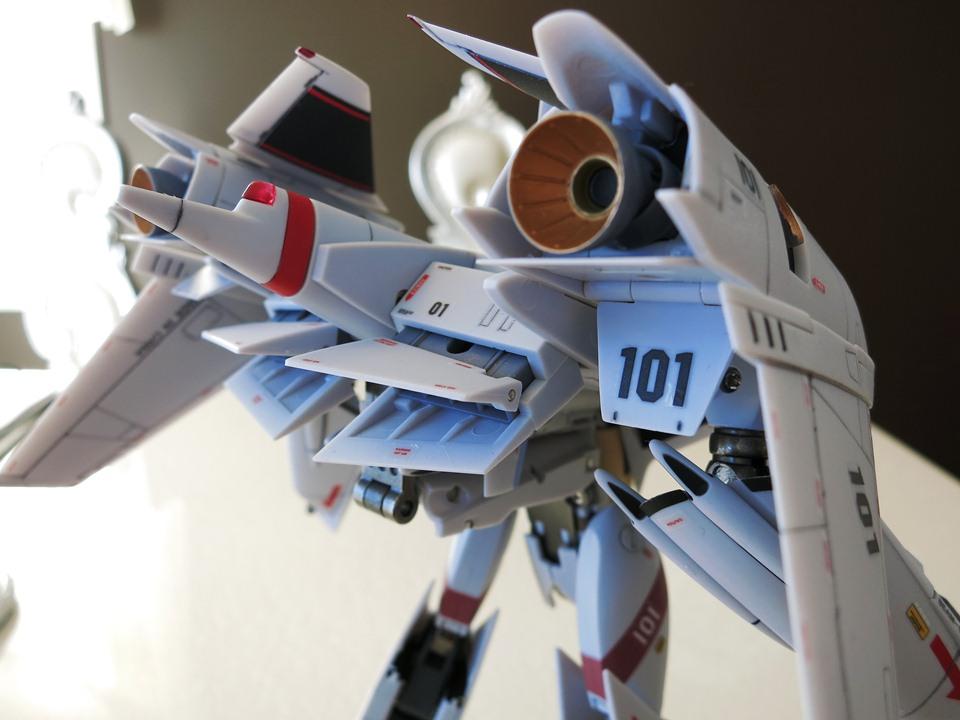
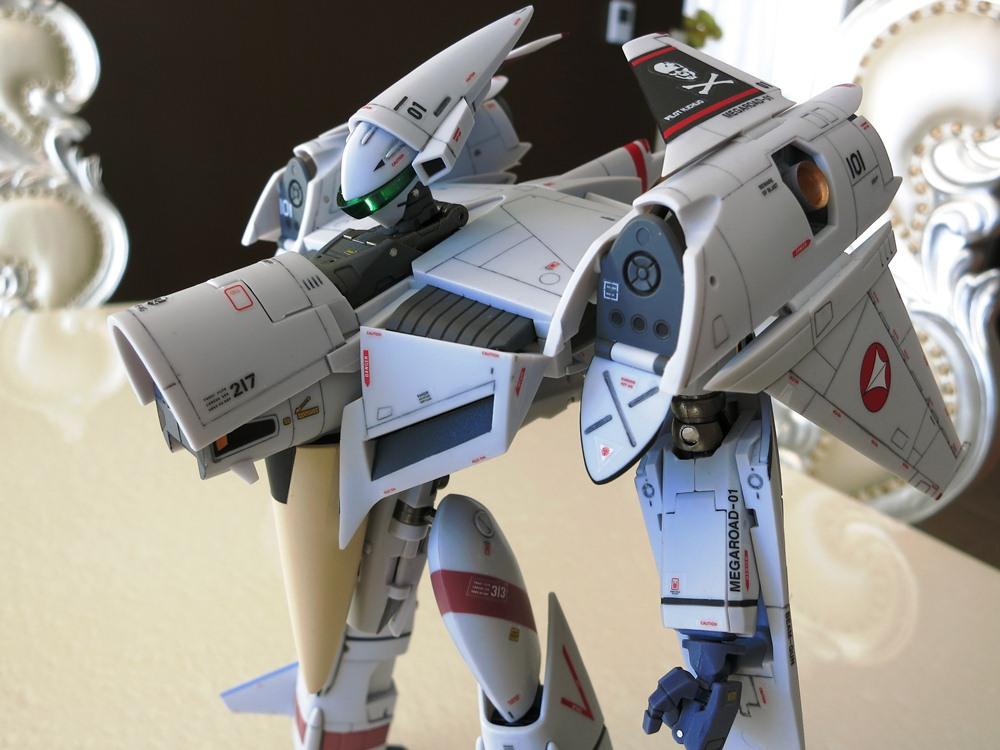
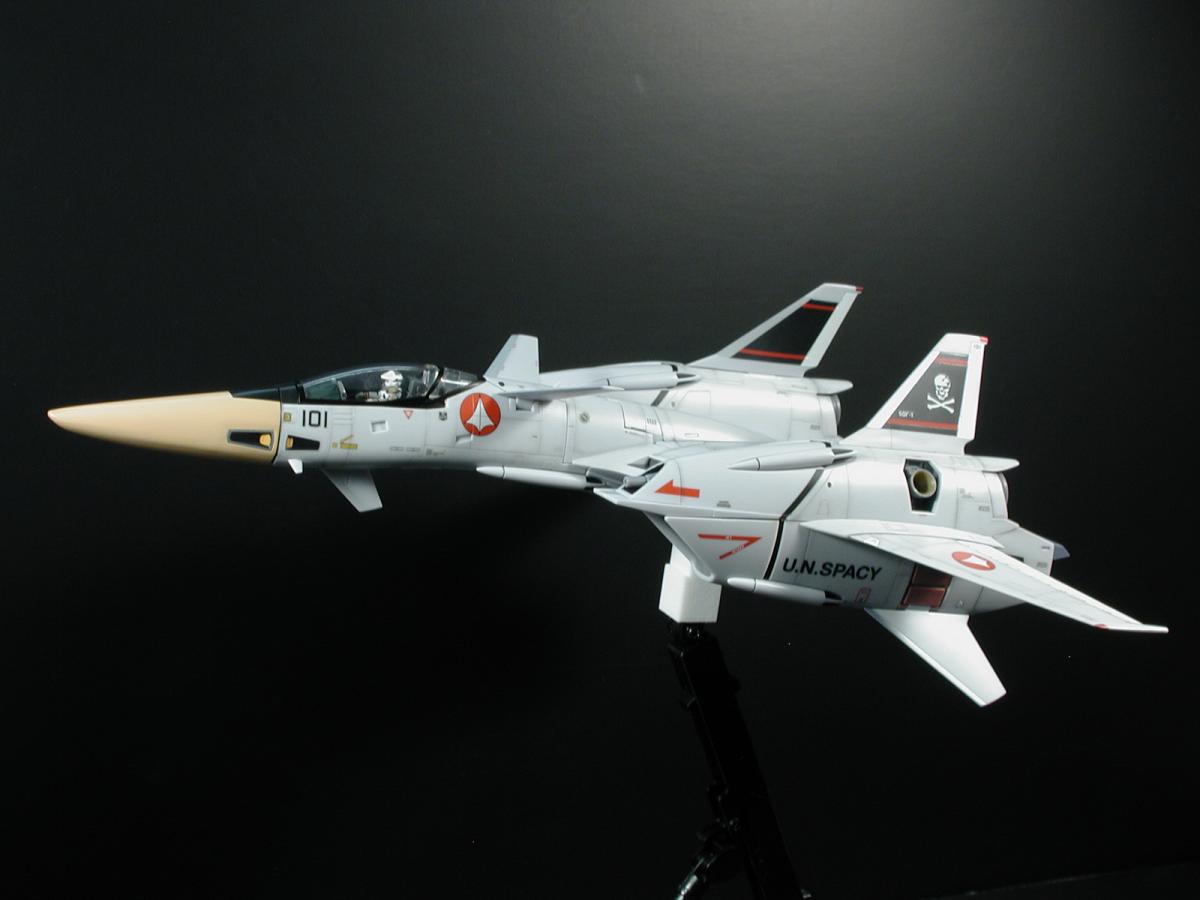
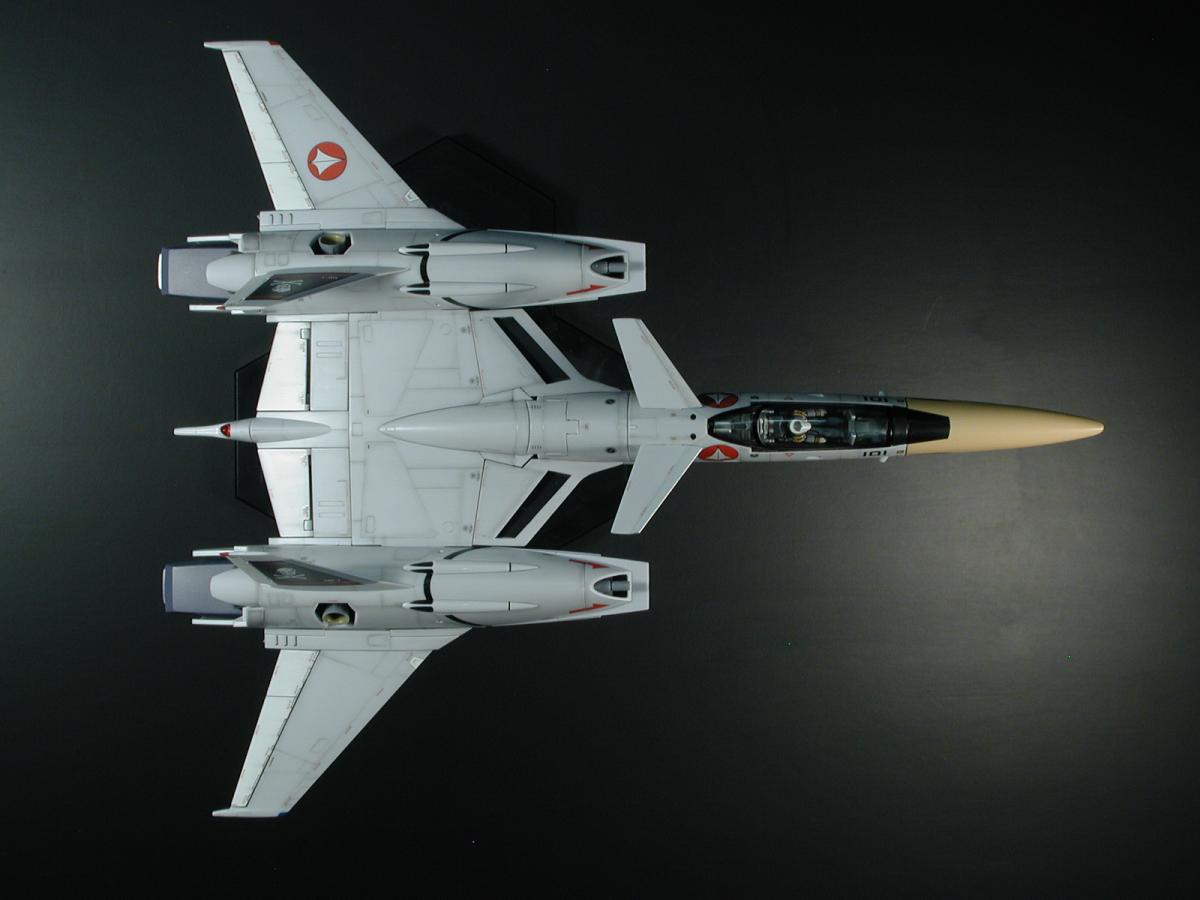
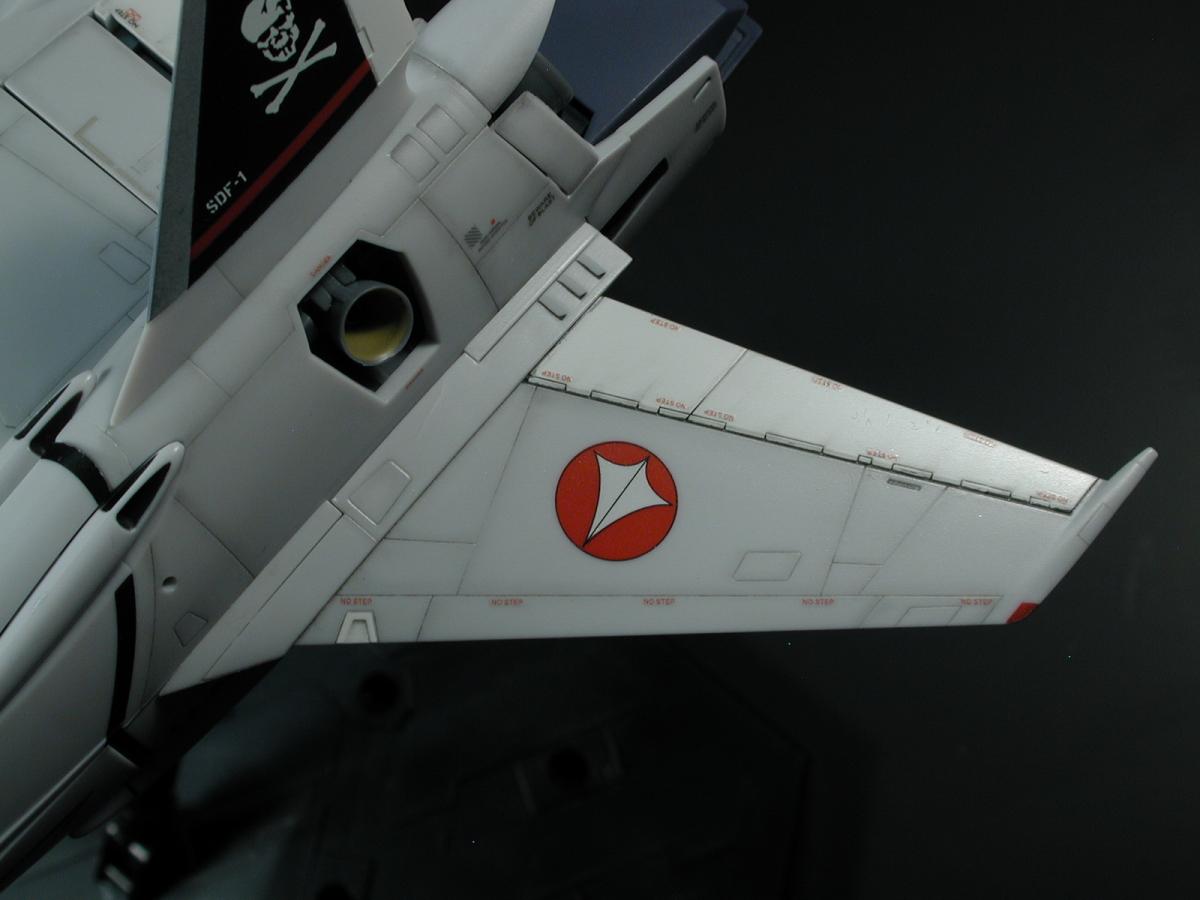
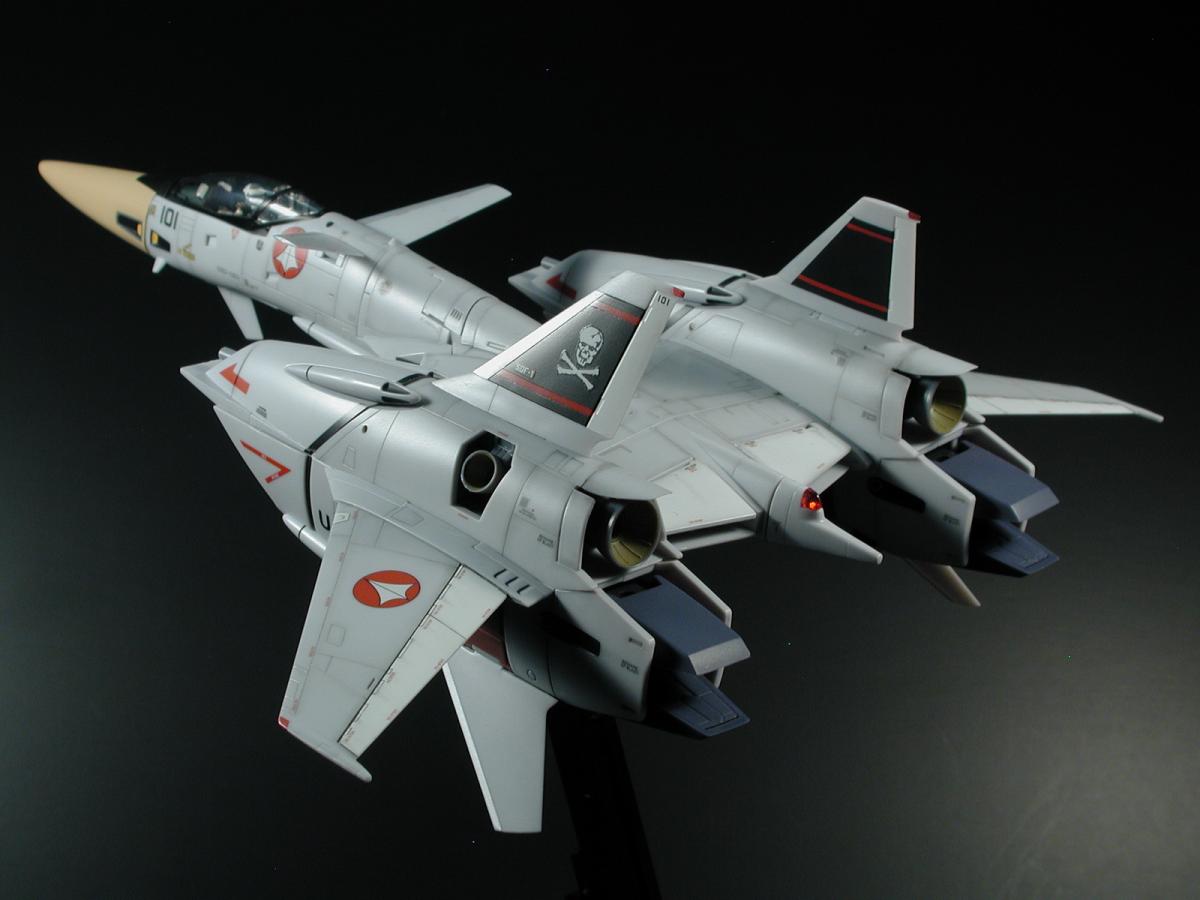
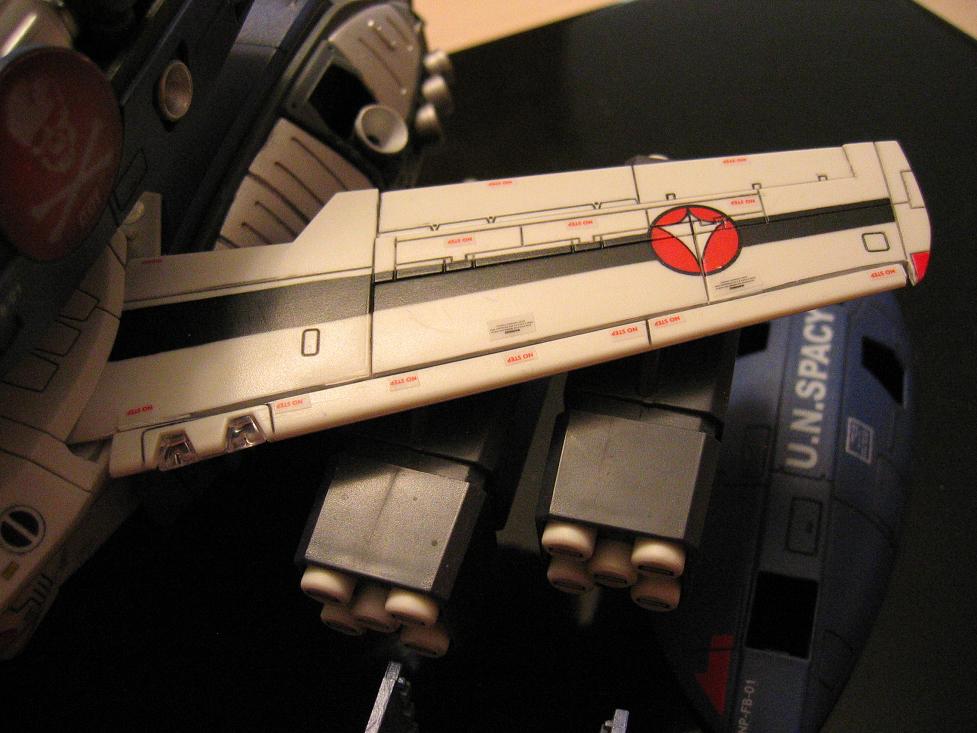
I agree with you that the "101" decal that came with the kit was too small, so I used the ones from my 1/48 VF-1J. The rest of the decals were from the 1/60 VF-1J, VE-1, and VT-1. The tail fin is the only one I painted. I actually used the testor "Radome Tan", guess it turned out alright. The booster cone were painted with Mr. Metal Gold. I personally liked it, kind of give it a "space craft" look. I then cover everything with a flat coat.
Again, thanks sharing all the tips and references on this thread! It was so useful! I love this community!
-
Thanks to the great tips from wm cheng!!! Final finished this last night. Here is my VF-4G reporting to duty!!!
Thanks Yamato, this is definetly one of my favorite valk!


-
I don't offer painting services just yet, seeing as you order from shapeways directly - the physical product never passes through my hands.
Also, if you head to the VF-4 custom head unit thread, you can see renders of the final product which I just sent off to get printed.
Thank you. I saw that too, and I definetly interested in the painted VF-4 head! Excellent work!
-
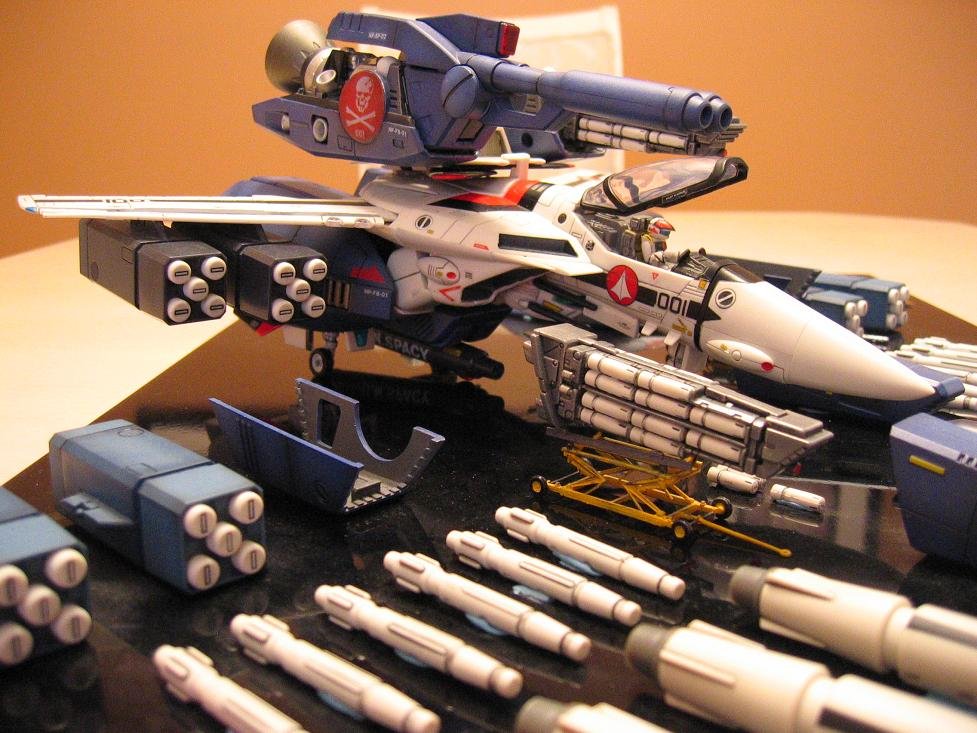
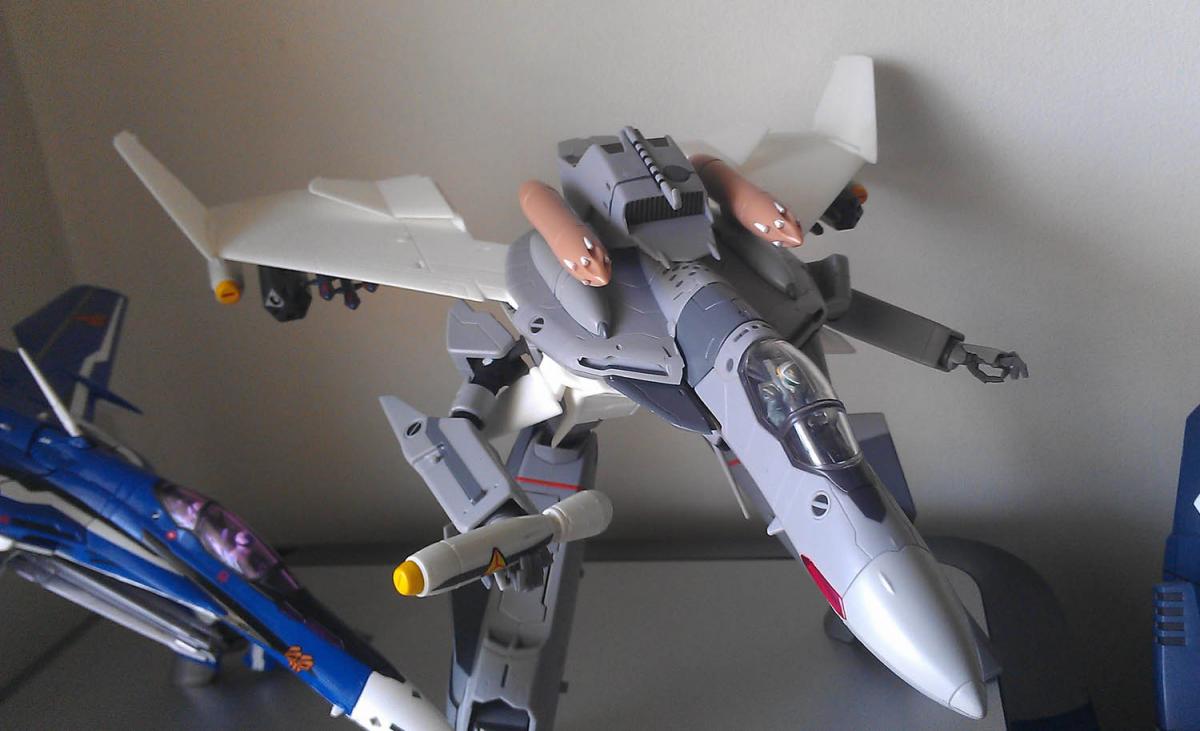
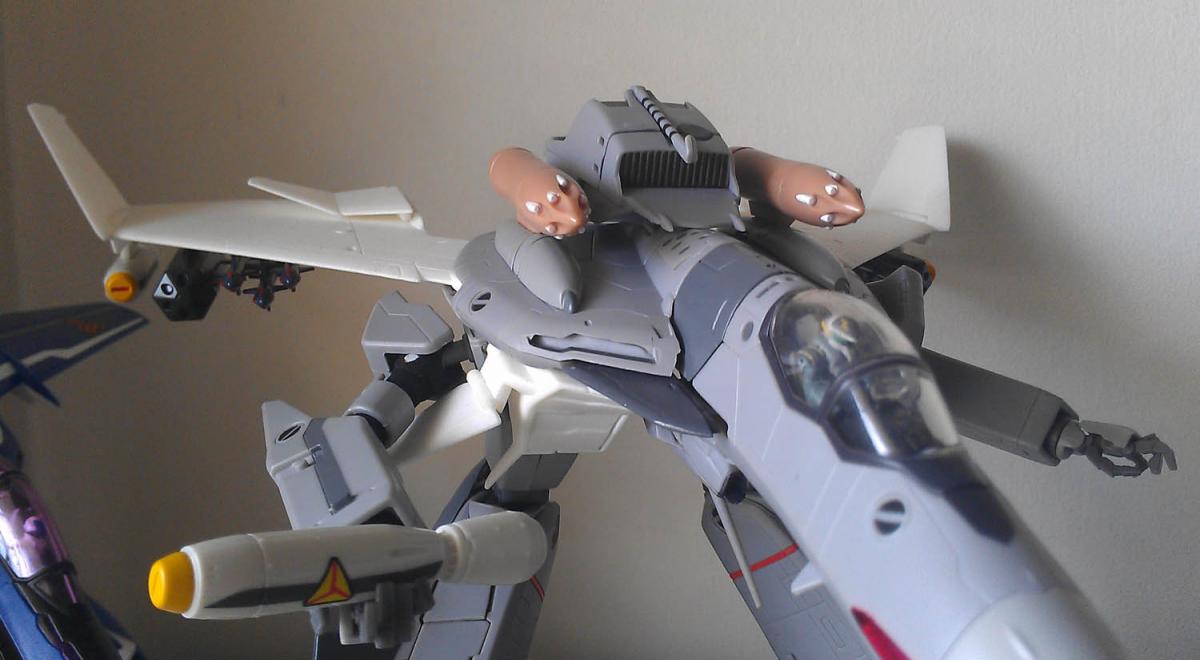
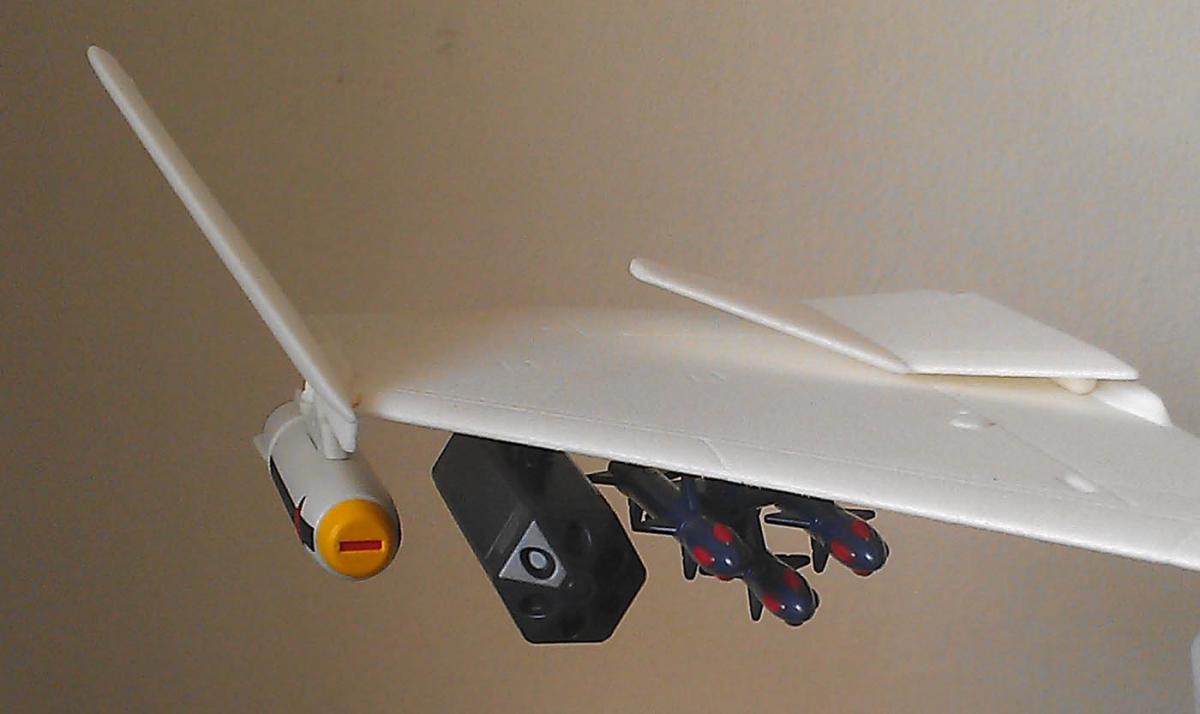
Well, looky here - the 171's missiles (except the sidewinder) fit snuggly on the wings;


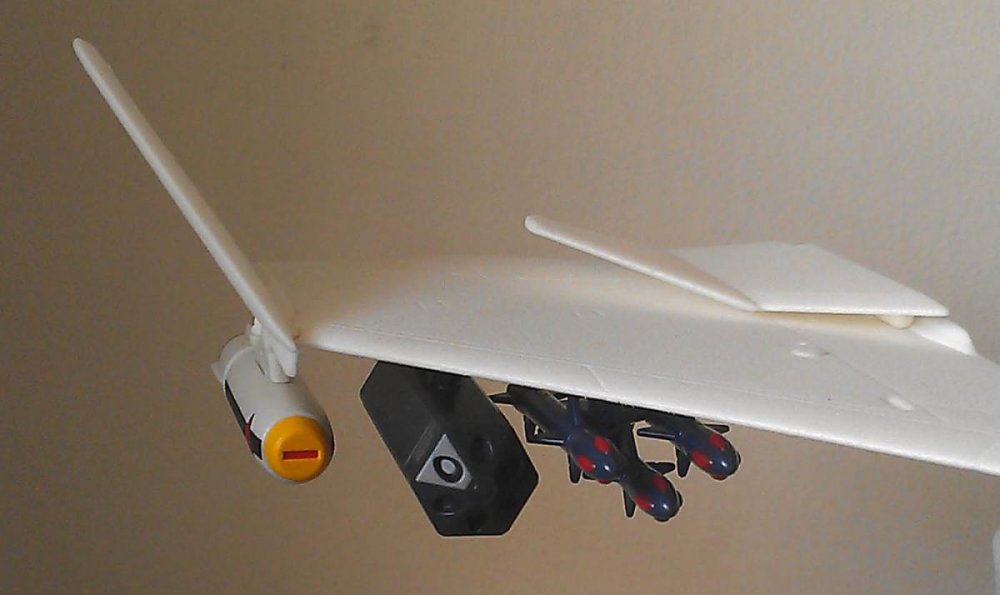
How much will it be if we wanted it to be painted grey (color of the vf-0 ?)
-
Thanks everyone for the comments and kind words!
Special thanks to wm cheng for his tips in his own 1/3000 sdf-1 paint up and modification thread. Particularly on pointing out the existence of the hull decals and also about making your own pattern stencils which really made a difference, among other things. Also to kyekye for the hiqparts 1/144 decals idea and for getting me thinking on where else LEDs might be a good idea to put with his innovative use of LEDs and fiber optics in his city section. And to them both and vf_1s for inspiring me to work hard on mine with their own amazing SDF-1 customs.
That's one reason I love the forums here. So many talented and helpful people that share their ideas and their work that really help others improve the quality of their own work and inspire people to do better.
Thank you. Your work has been the inspiration for alot of my other projects too! That is one good looking SDF-1! Awesome work!
-
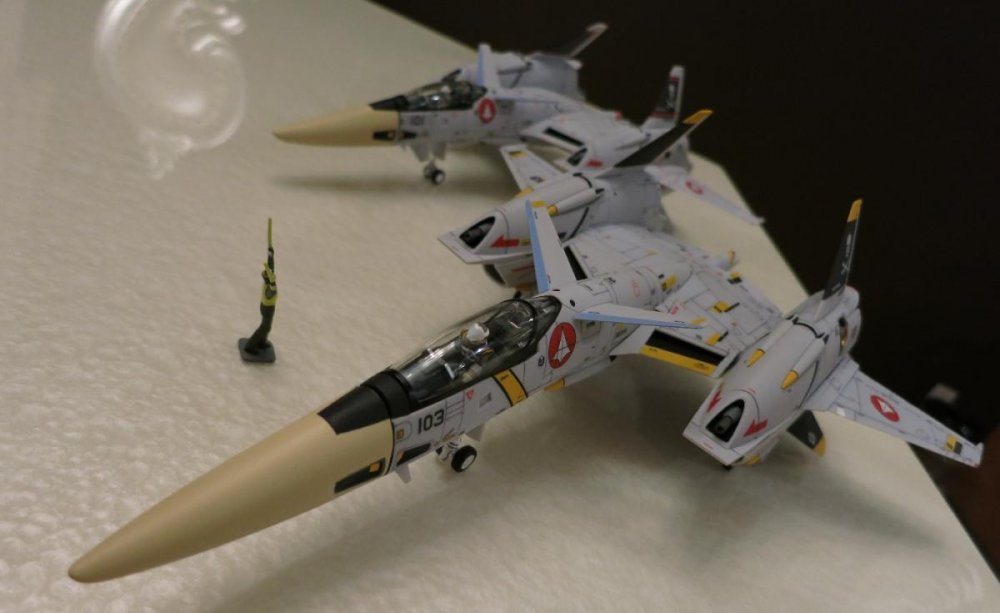
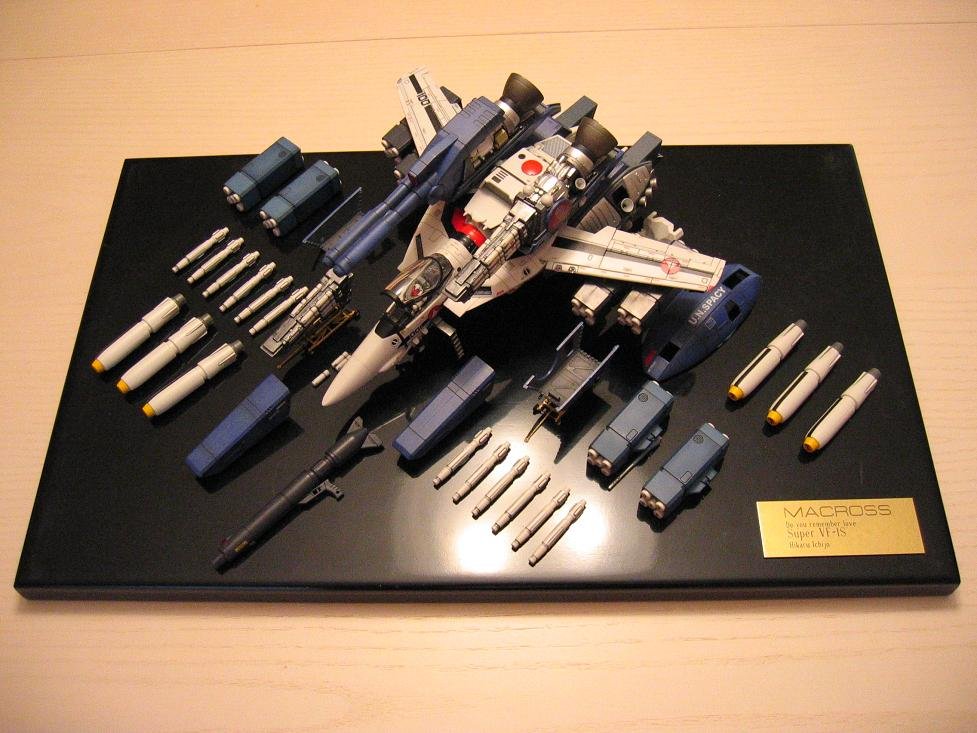
That's a pretty classy display you have there, vf_1s. I love the wing mods you did to it as well.
Where did the little carts come from?
Thanks. The carts are from a hasegawa f-14 kit.
-
I thought about a piece that extended and then recessed again. But that would mean I would have to order WSF pieces from shapeways for each one. I ended up getting an extended piece. But I still need to re-order the lower deck to make it aesthetically pleasing. Or else it look like a photoshop whre I took one end and extended it. lol. The design looks good. I just need some funds to come in. I just got the final pieces for my saddle bags and side covers. As soon as I clear that project I'll have the crew guys sets that'll hopefully fund this one... lol. There really is no money in these things. This project funds the next and so on.
Keep up the execellent work! It is artist like you that makes our dreams come true!!!
-
Thank you for the complement guys! Sorry I don't have the Club-M. I wish I do. I have only seen it once in person (unbuild), it belongs to a friend of mine. The detail of that kit sitll amaze me. That is where I got the insperation for this one

-
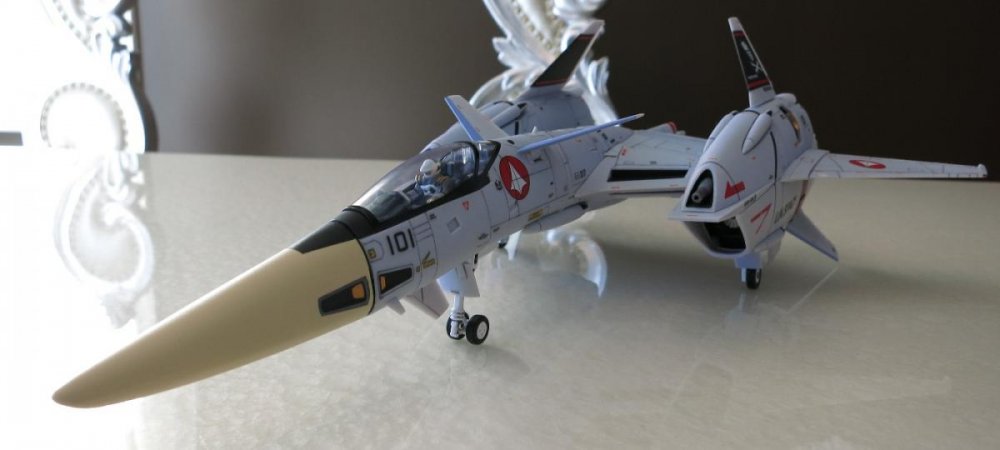
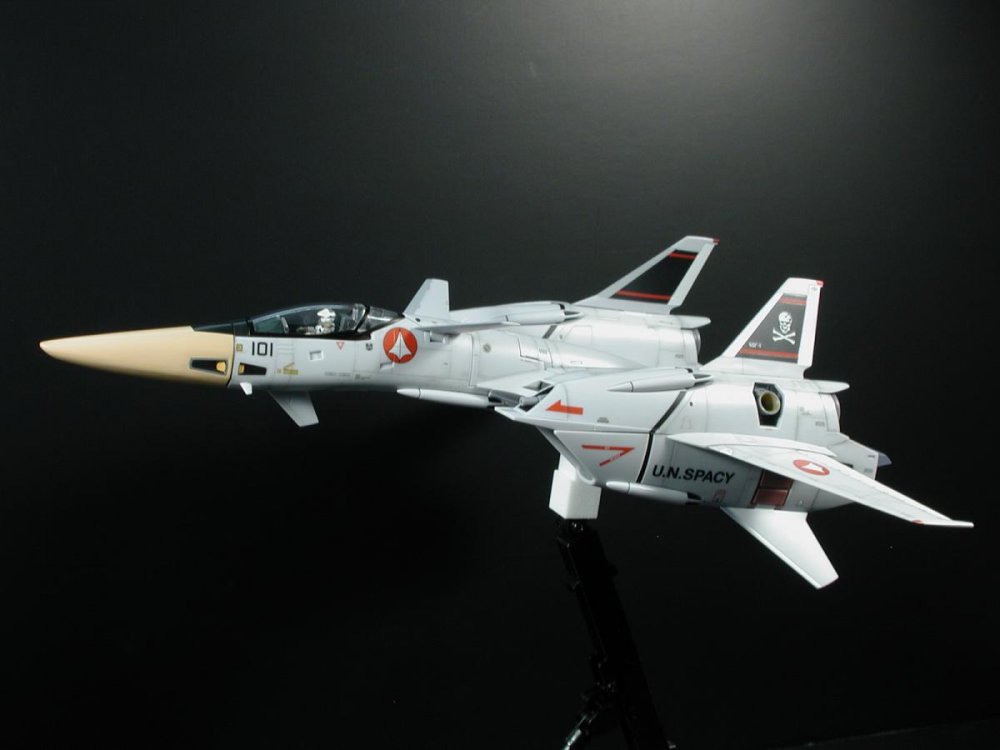
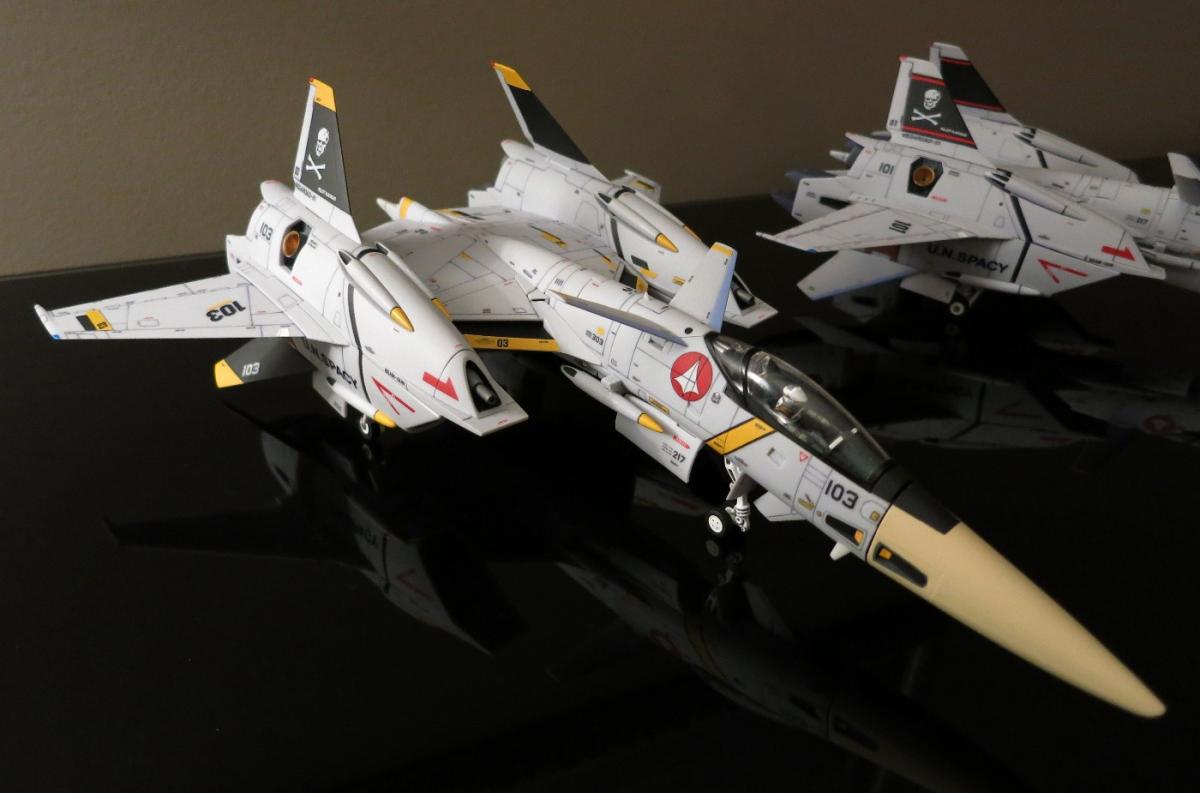
I was going to get Radome Tan, but when I saw it at the hobby shop, it was too light, it would look great against a white background as it was frequently the case with the old 70's Tomcats, but I didn't think Radome Tan would show up too well next to the grey of the VF-4G, so I opted for the ModelMaster Enamel Tan instead. Its a shade darker and I think stands out better from the grey of the plastic.
Thanks for all the tips!
-
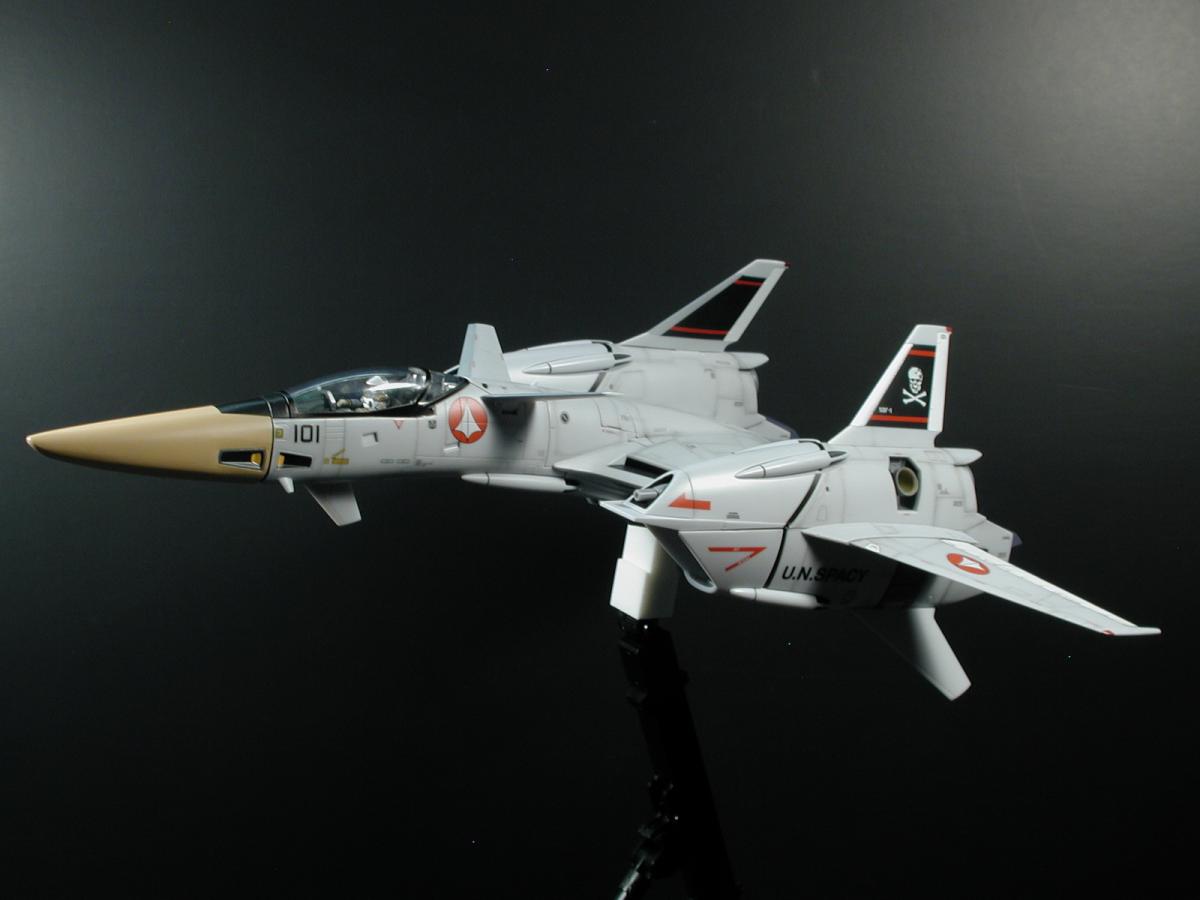
Yay! I finally finished it last night and I've allowed overnight for the semi-gloss clear coat to dry.
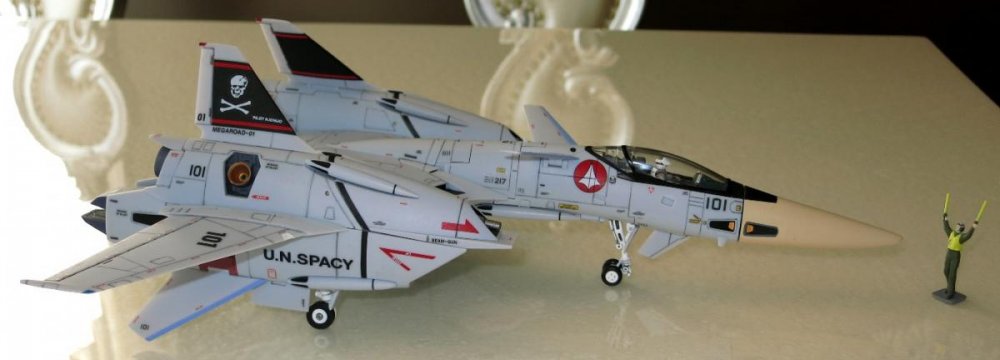
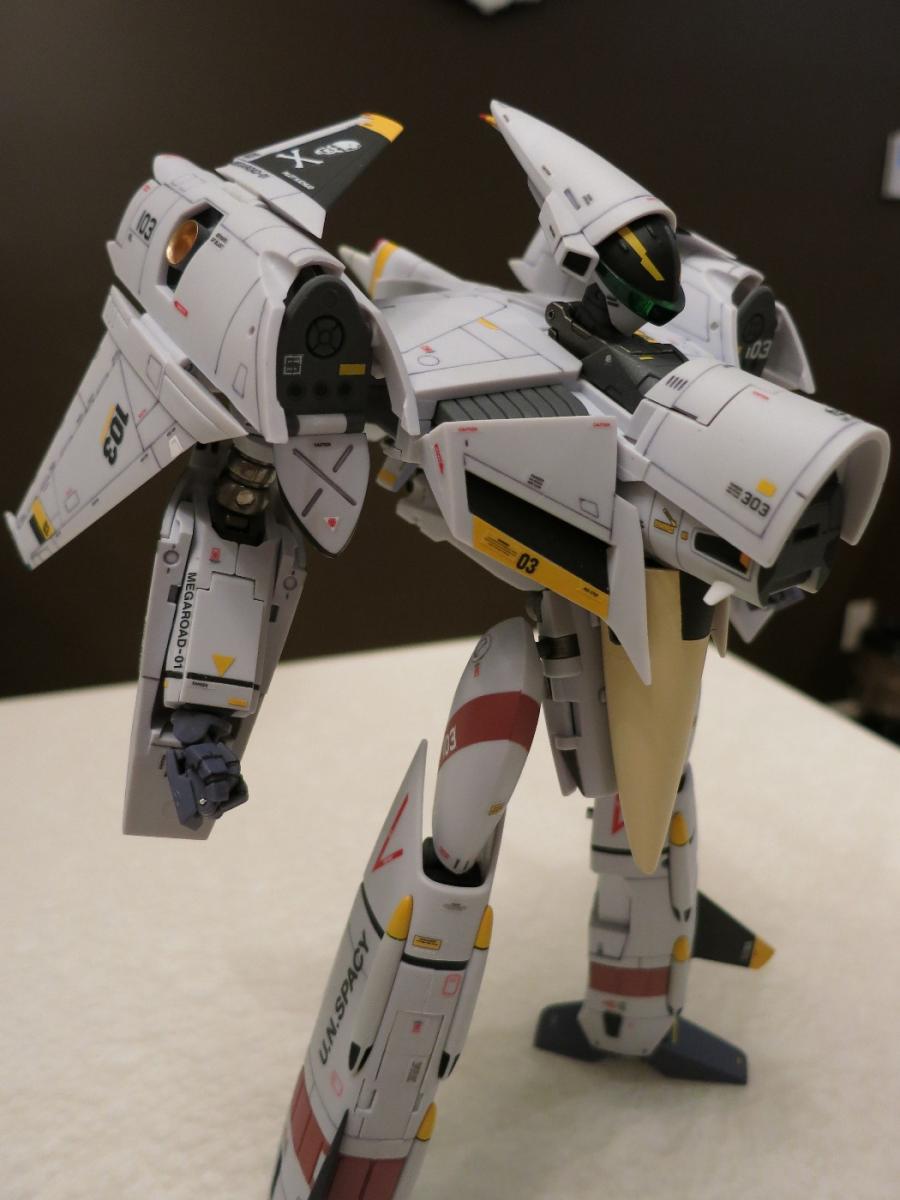
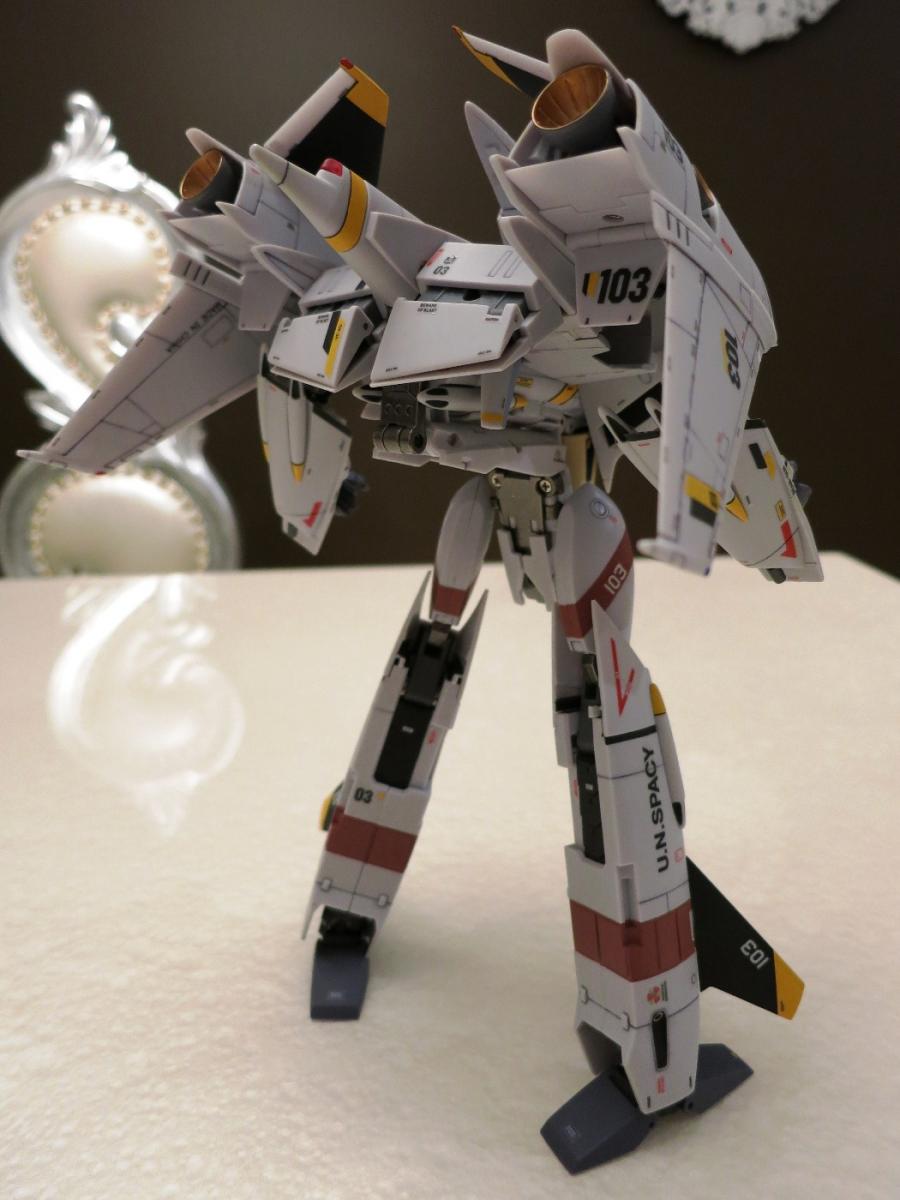
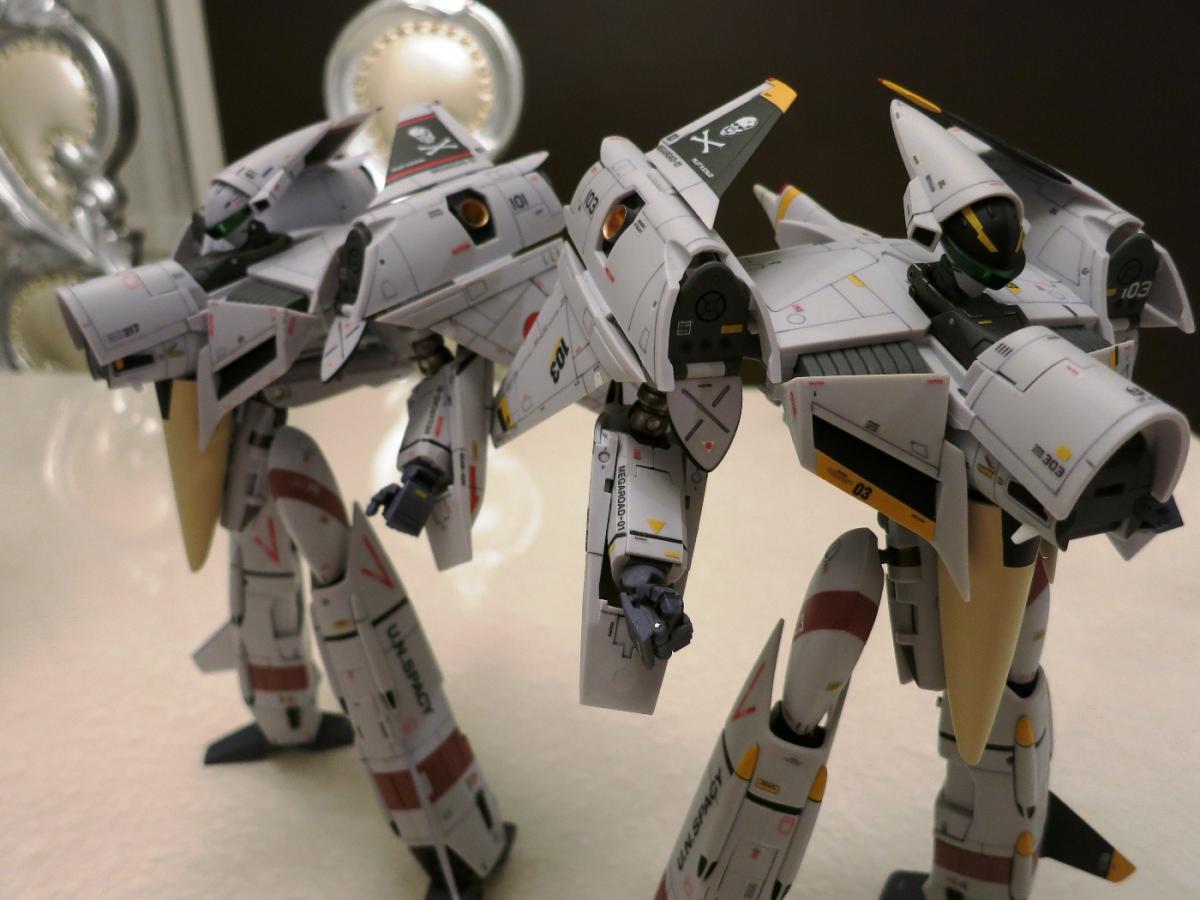
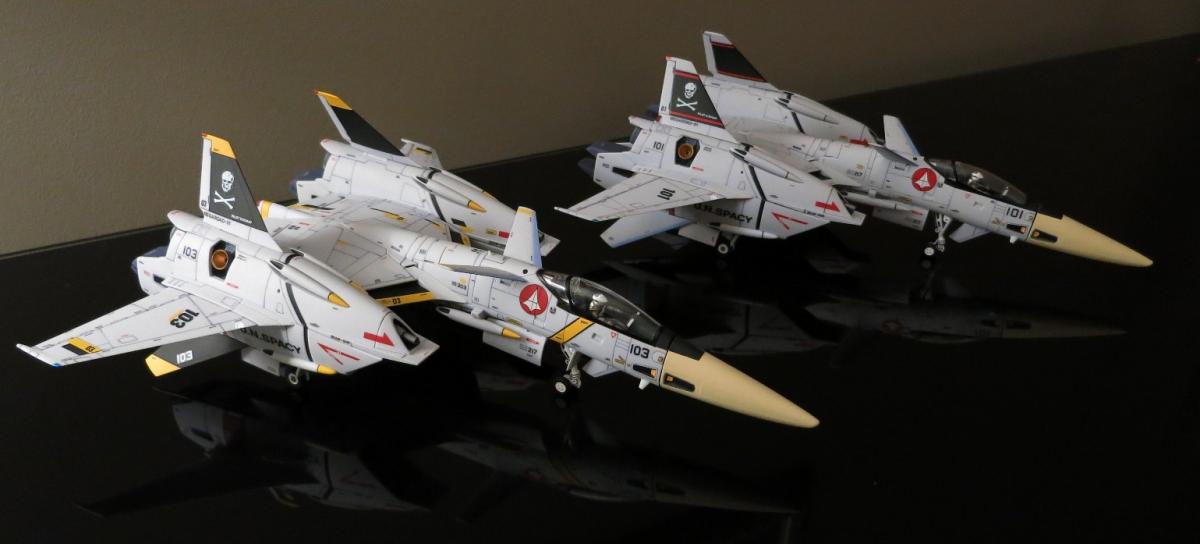
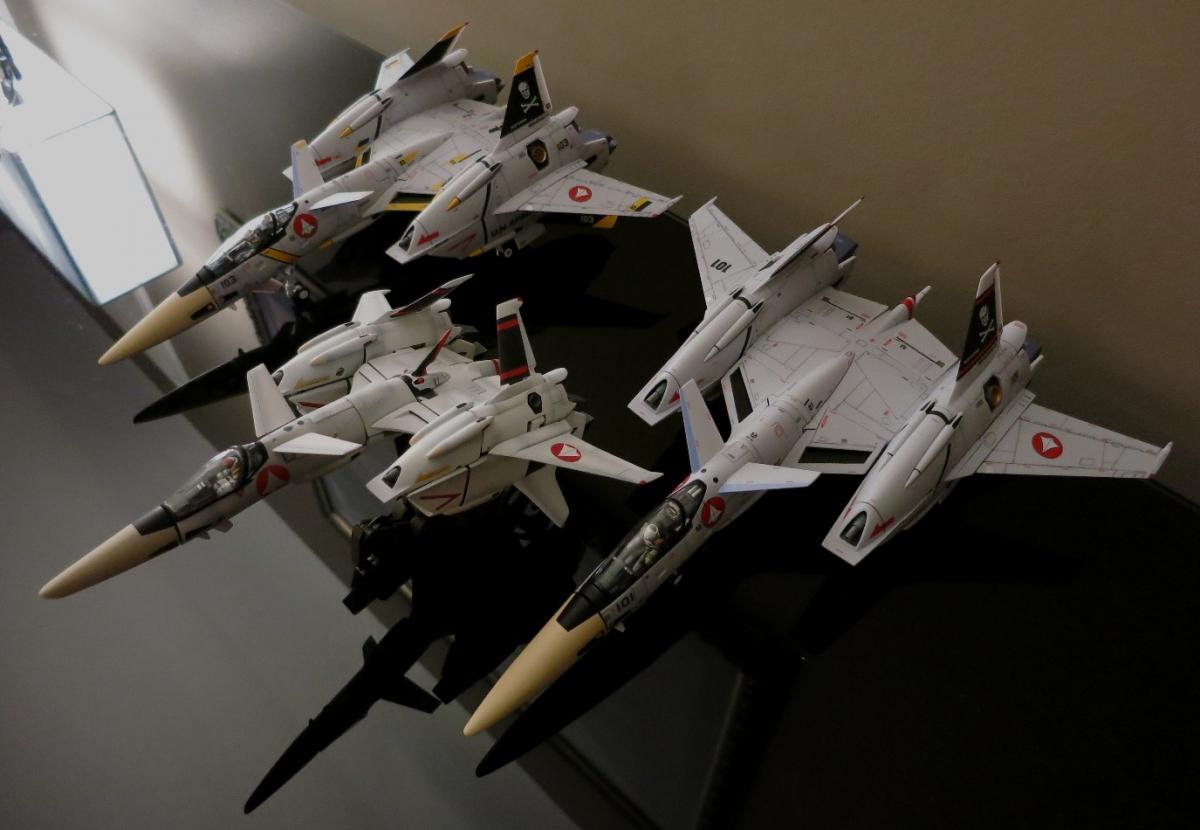
I LOVE THIS TOY!! It's my favourite from Yamato - tied with the SDF-1. I've always loved the VF-4G since FB 2012 and didn't think this would ever really see the light of day. Now the only other far-fetched toy left for to die happy would be the VF-2SS (which doesn't seem so far-fetched anymore!)
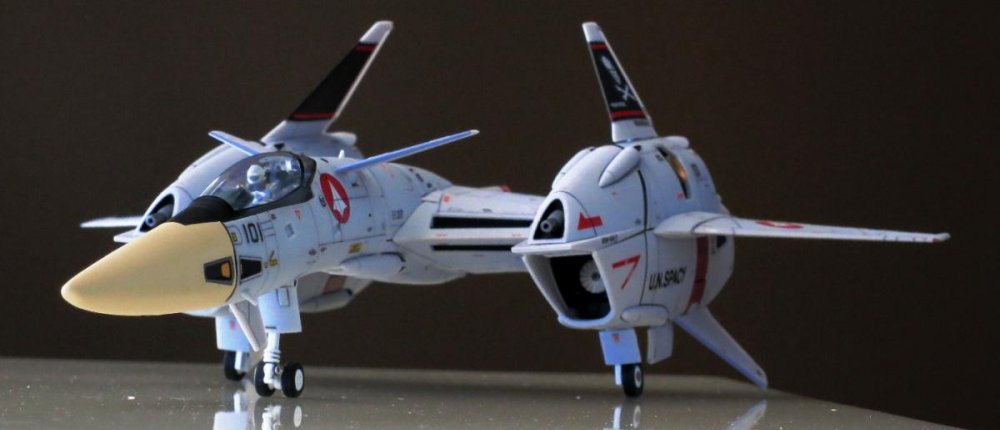
There really isn't a bad angle (I couldn't pick which was my favourite photo, so I hope you don't mind just dumping them all here). Sorry for the soft focus, I just threw up a black background on the workbench with my old Nikon 990 to quickly take snaps (hopefully I'll do some decent stuff later on, but don't see when I'll get the time to) I just want to zoom this baby around, so smooth and aerodynamic, Yamato really captured this one in my books! Maybe just a tad needle like from only the top view, but all the other views look amazing.
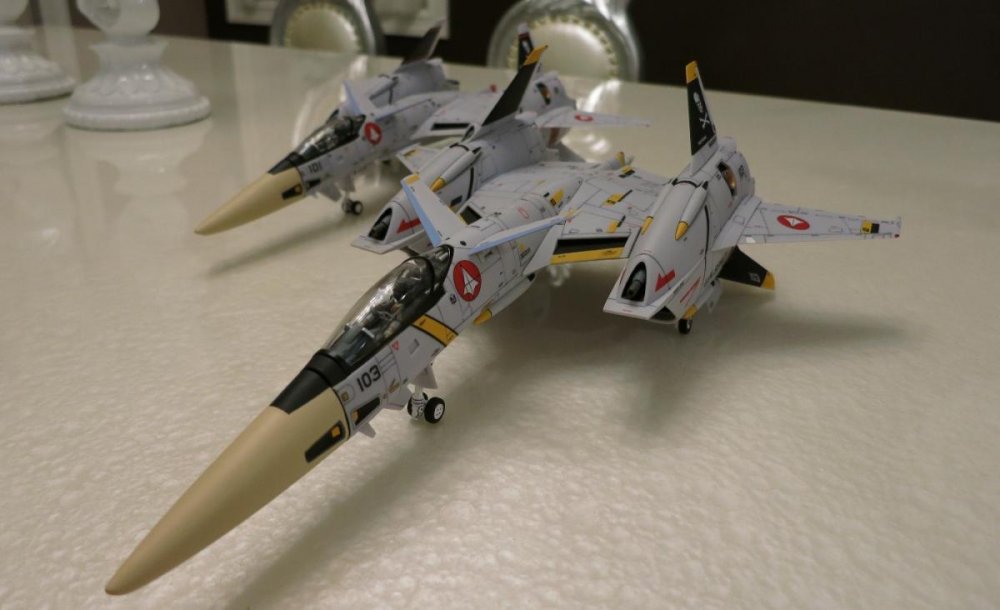
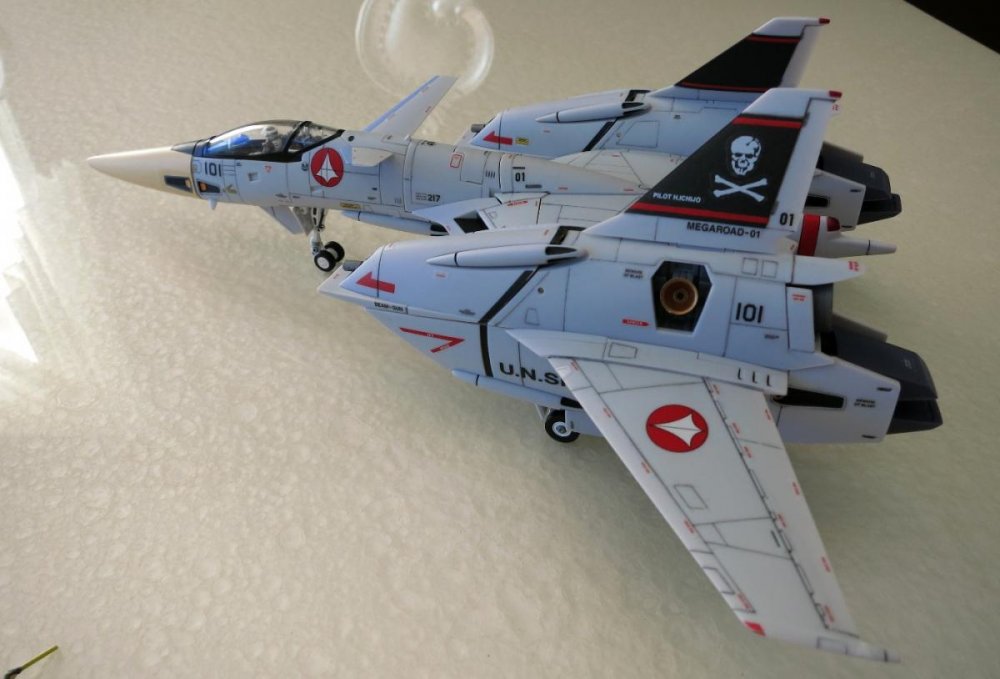
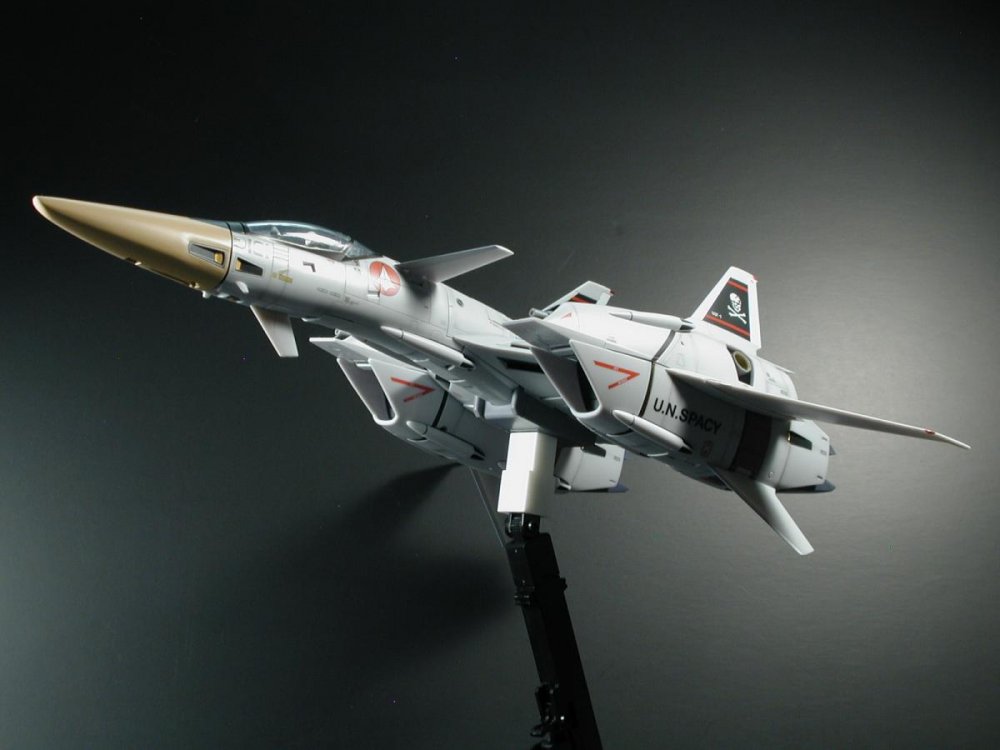
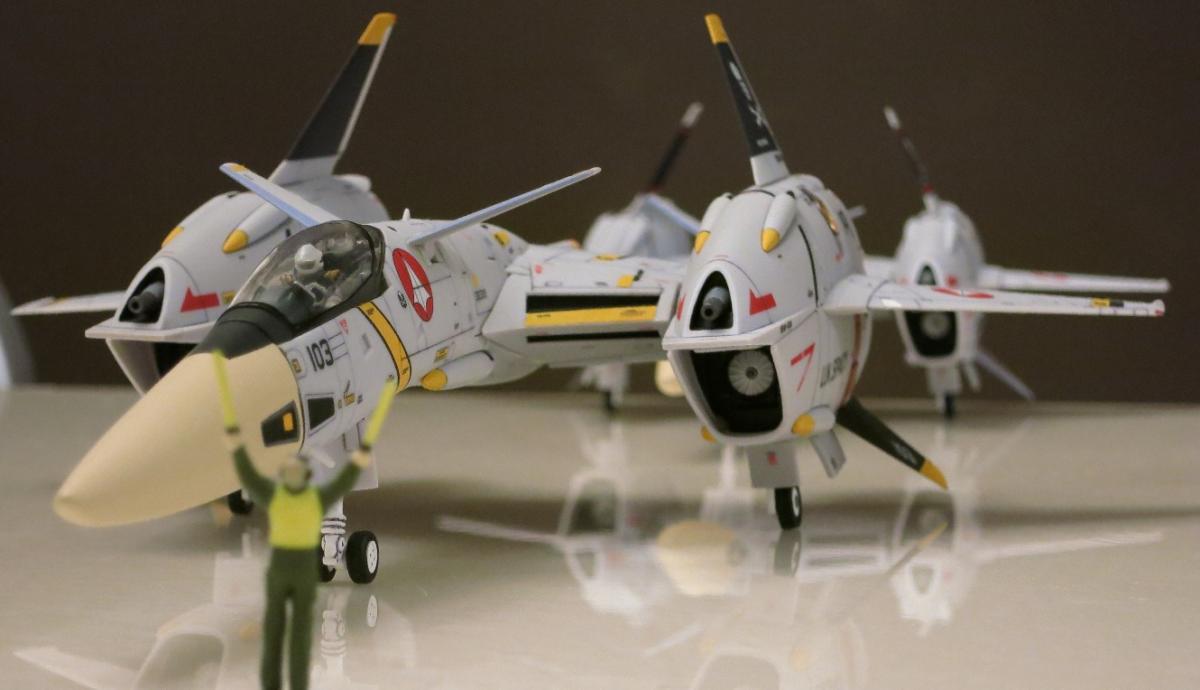
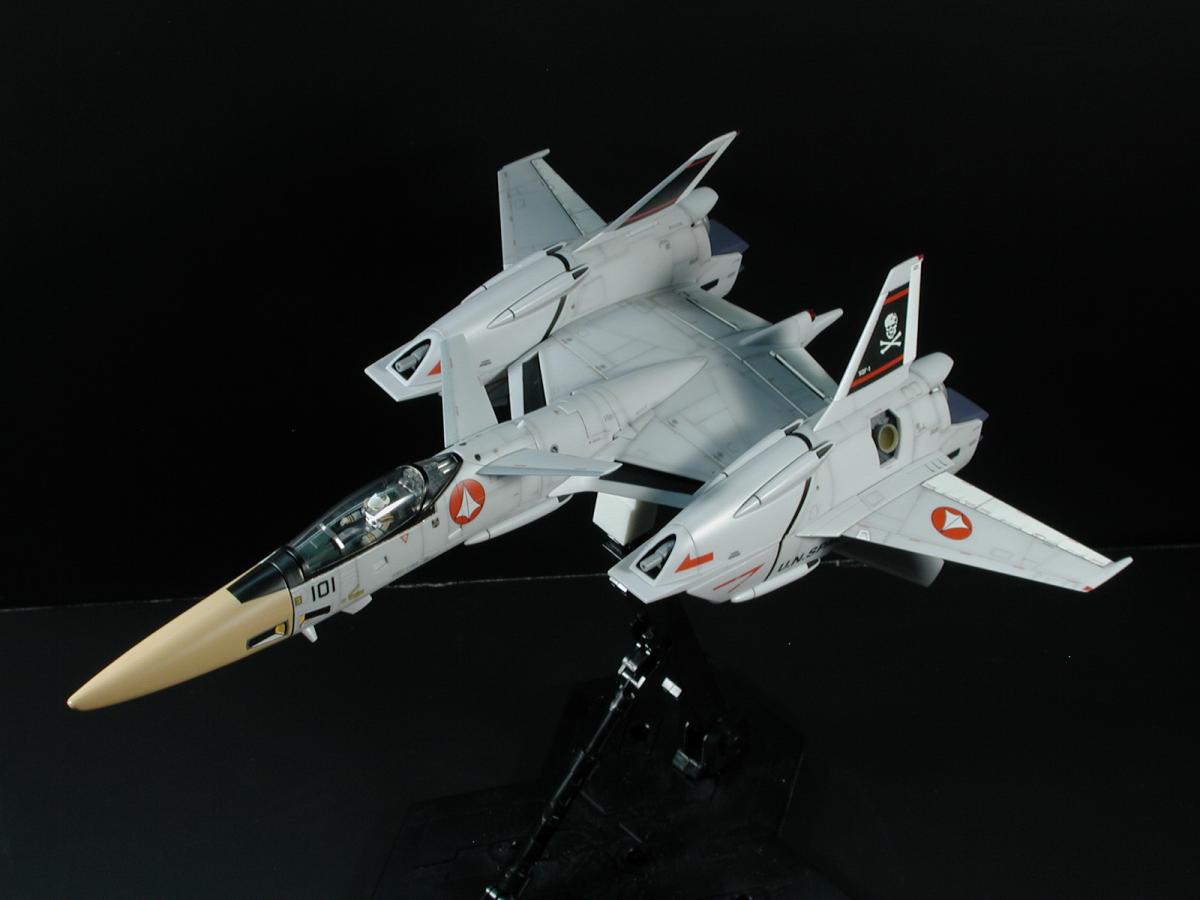
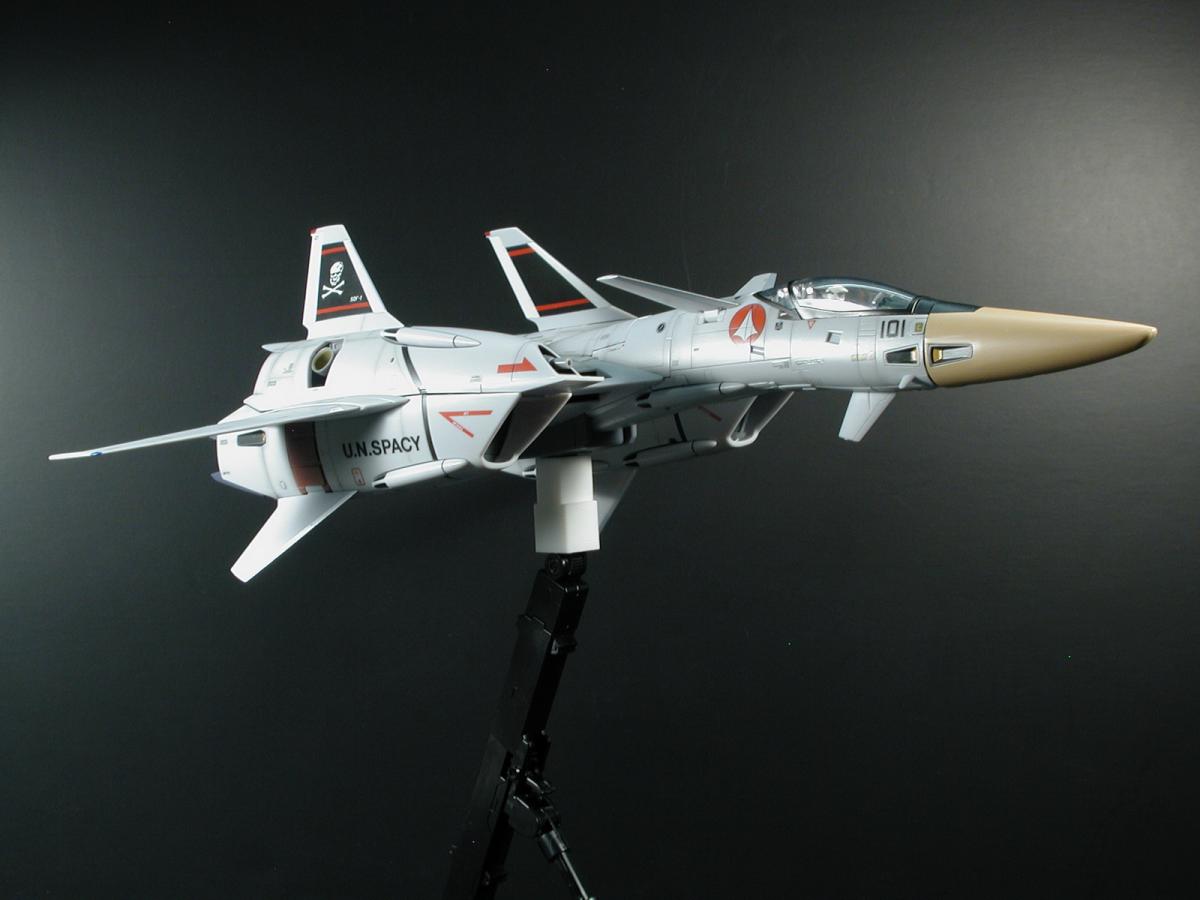
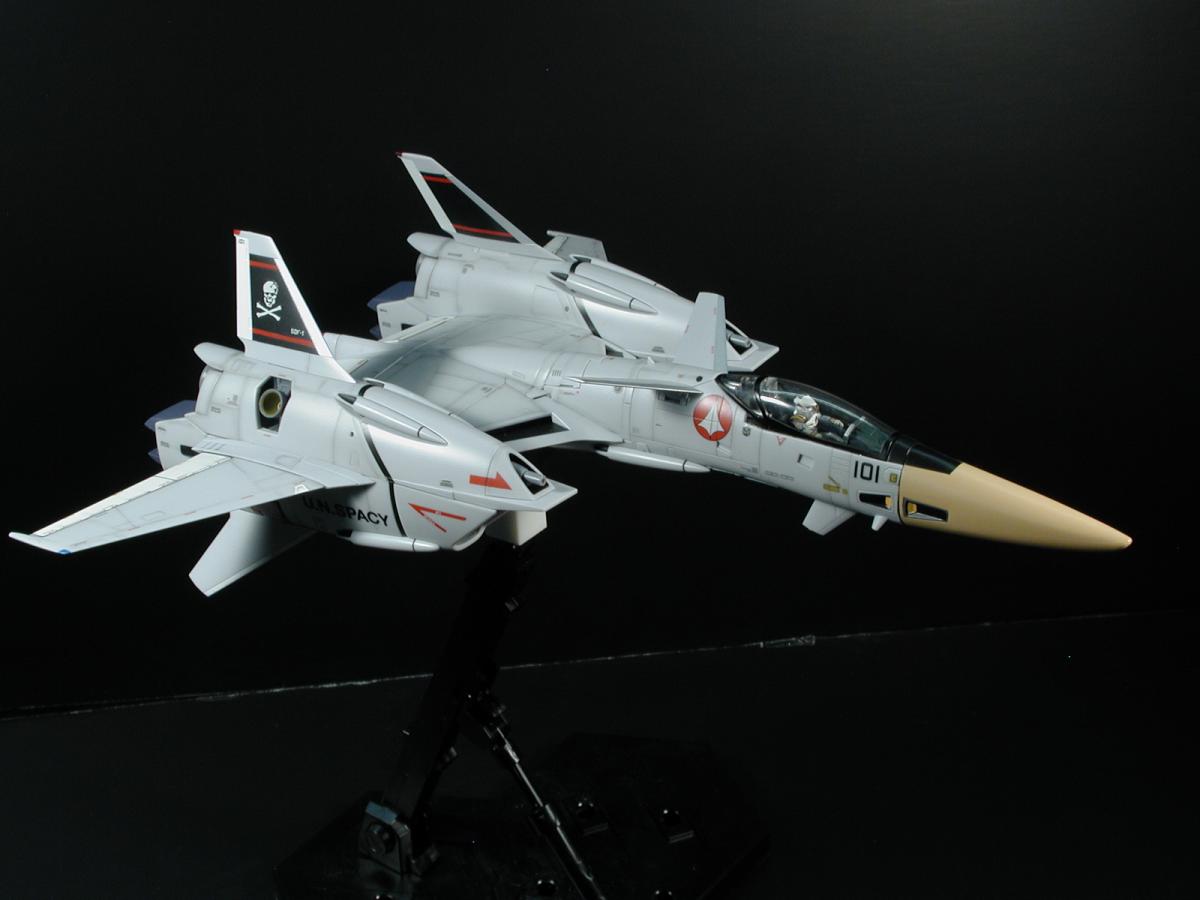
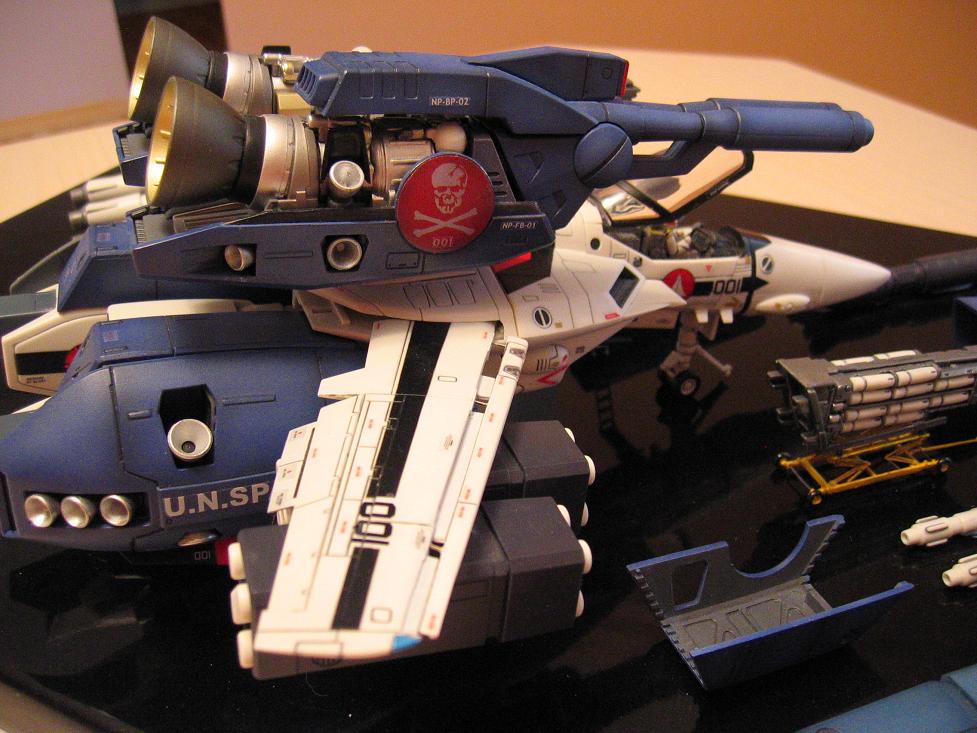
The 101 modex and skulls were from the 1/72 Hasegawa leftovers, the modex was the largest of the free numbers on the decal sheet. The rest are just pieced together from whatever I had left lying around. It would have all gone together much faster if I didn't have to "rebuild" that wing hinge that I stupidly broke, but so far it seems to be holding well and still allows for transformation (yipee). As I started taking apart the various wings and nosecone, it's really apparent that the remarkable feat of engineering Yamato has done to the internal structure that allows for the transformation (ie; within the nose cone, there is an insert part made of softer flexible plastic that allows for the clips and fin to slide into the slots of the underside of the nose cone - amazing!). So many wing/fin joints extend to allow access to the pins (I'm sure they allow for assembly - but it makes taking apart a breeze!).
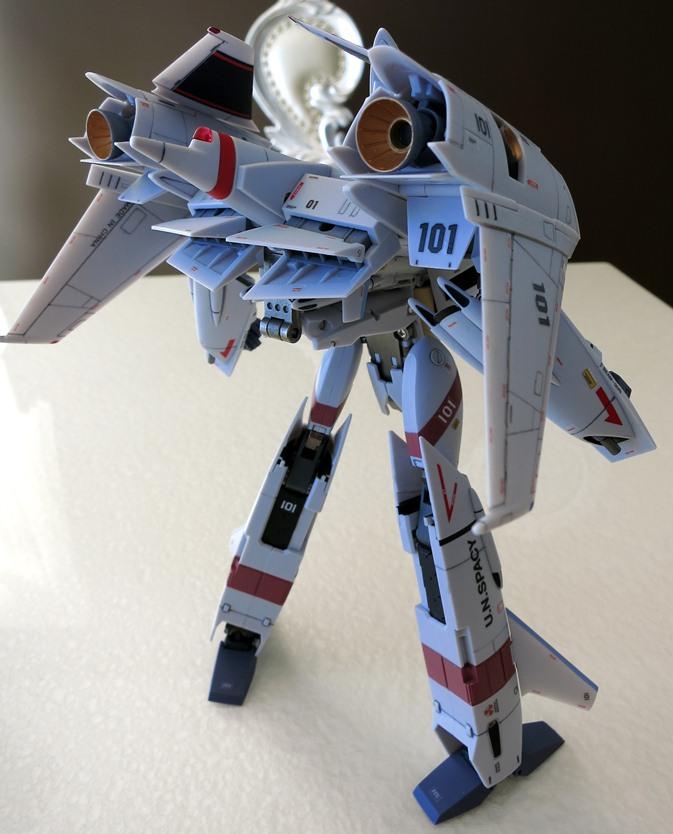
In the end, I'm happier with this 70s gull grey/white scheme than if it came all white - its more interesting and I find it nostalgically completely compatible to the era in which it was designed. Since it wasn't cannon anyways, I decided to forgo the tan on the head piece and tailcone - it just seemed to flow more naturally and more aircraft like this way. I toyed with the idea of making the conformal missles white as a contrast against the body of the plane (like 70s missiles), but masking and repainting the four tail nozzles each got the better of me and came back to my senses (mostly because I was running out of time). Most of the panel lining was done with a light grey wash of artist oils, some of the engaving was too shallow to hold much paint, and I went over those with a sharp mechanical pencil. I then did some of the "post-shading" with a smudge stick and some graphite from the mechanical pencil. I just wanted to give it some weight and wear, but I wanted to keep the weathering light as I don't think this would have seen much action being a new and well kept fighter.
Enjoy!


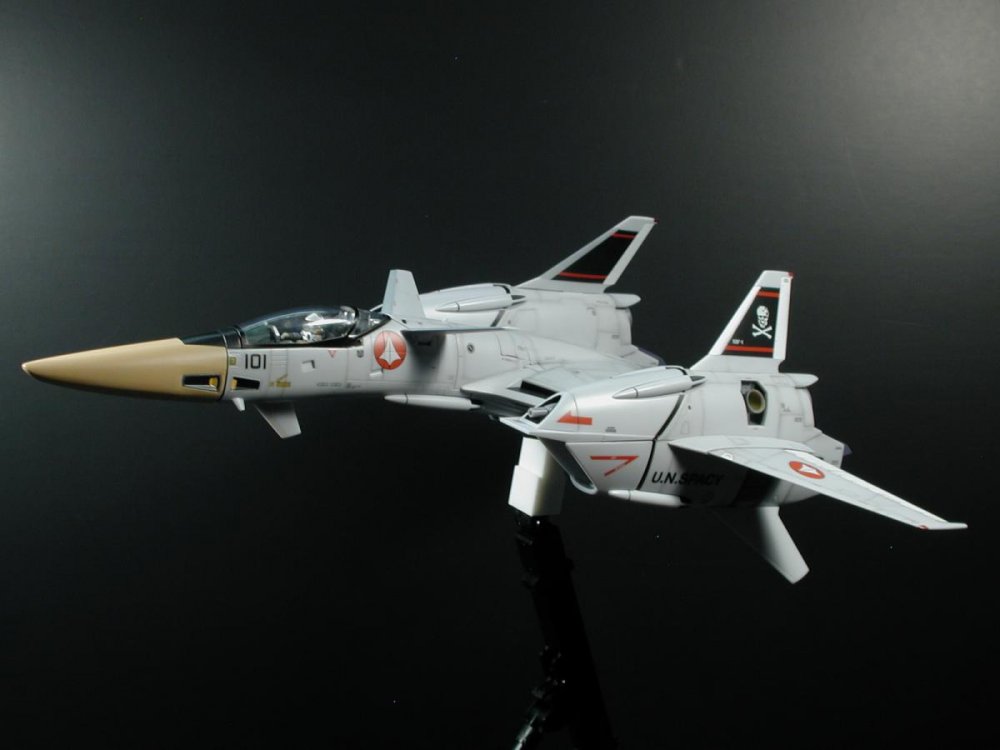
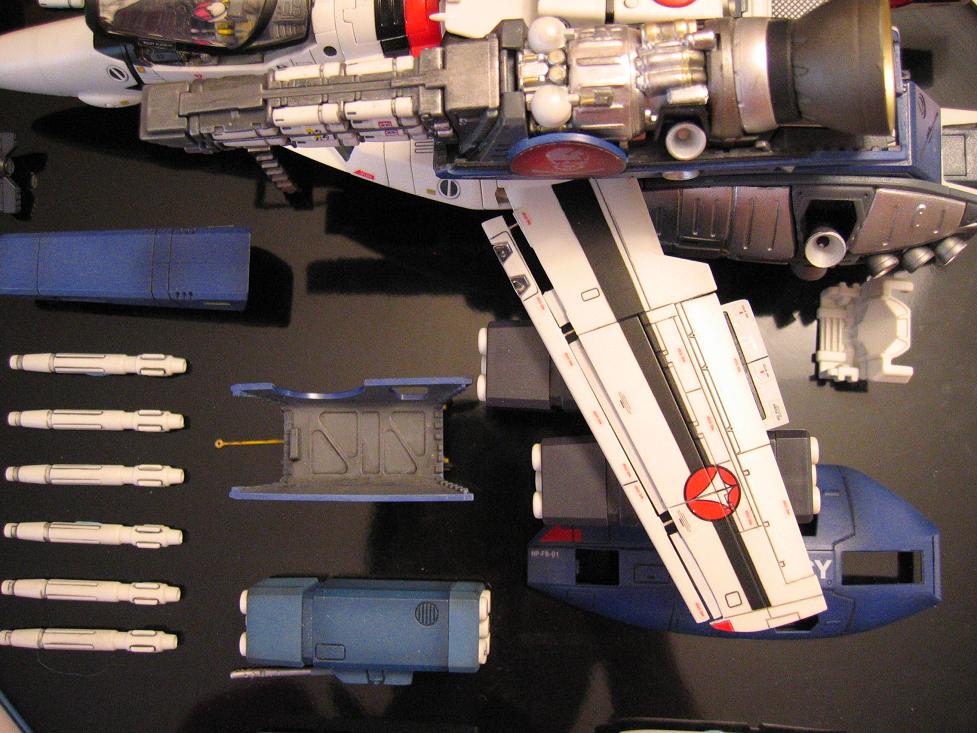
Details of the weathering and panel lining...
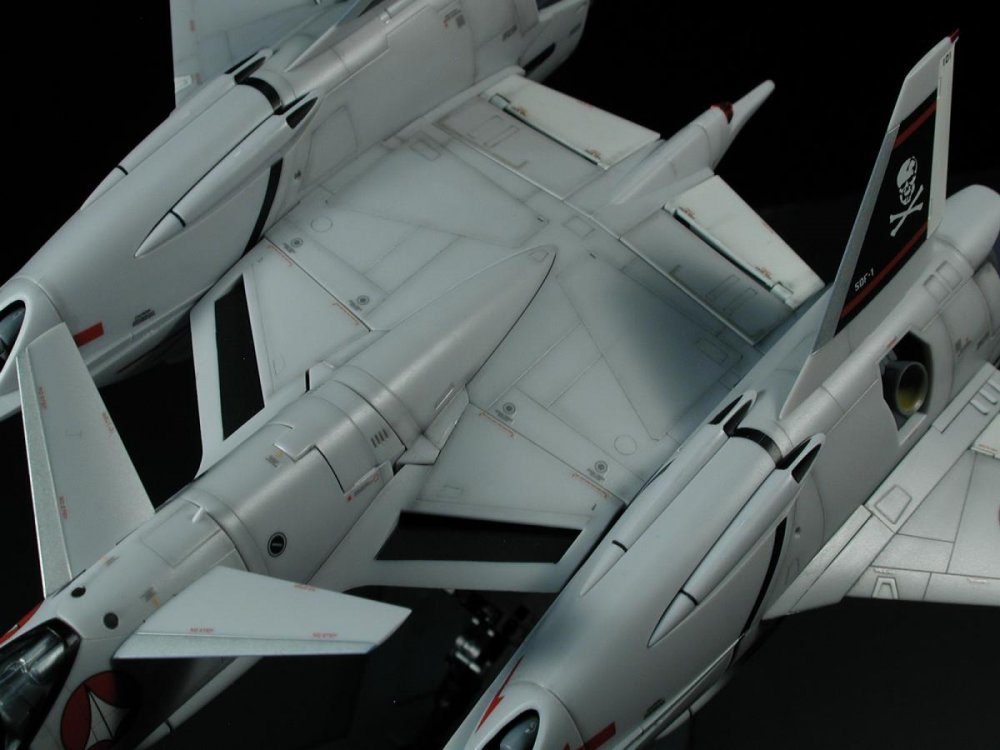

One of my favourite parting shots...
Where can we get the smudge stick ? Do you have any post that teach us how to do "post-shading" with it?
Thanks
-
I just used Tamyia masking tape (love that stuff!). If you press hard around the area, you will see the engaved panel line telegraph through, I took a very sharp knife and lightly cut tracing around the panel line - try not to dig into the plastic. No I didn't prime, I thought about it, but then I didn't want to build up the layers which might be worst when rubbing. I used enamel paint (being better than acrylic) but I couldn't find a suitable lacquer (which is more durable). I don't think much rubs against it except for the underside pegs, but they seem to only go into the holes, so I think we're good, most would be some chipping around the holes/slot on the underside which I am prepare to live with considering how few times I intend to transform it.
Thank you. Seeing yours is inspiration for me to do mine. Awesome work as always!!!
-
Here is mine


-
They are going to be silver (Alclad Metalizer) but it will be the last step after the clear coating... (to keep it looking like Aluminum)
Here's a shot of the finished nosecone...
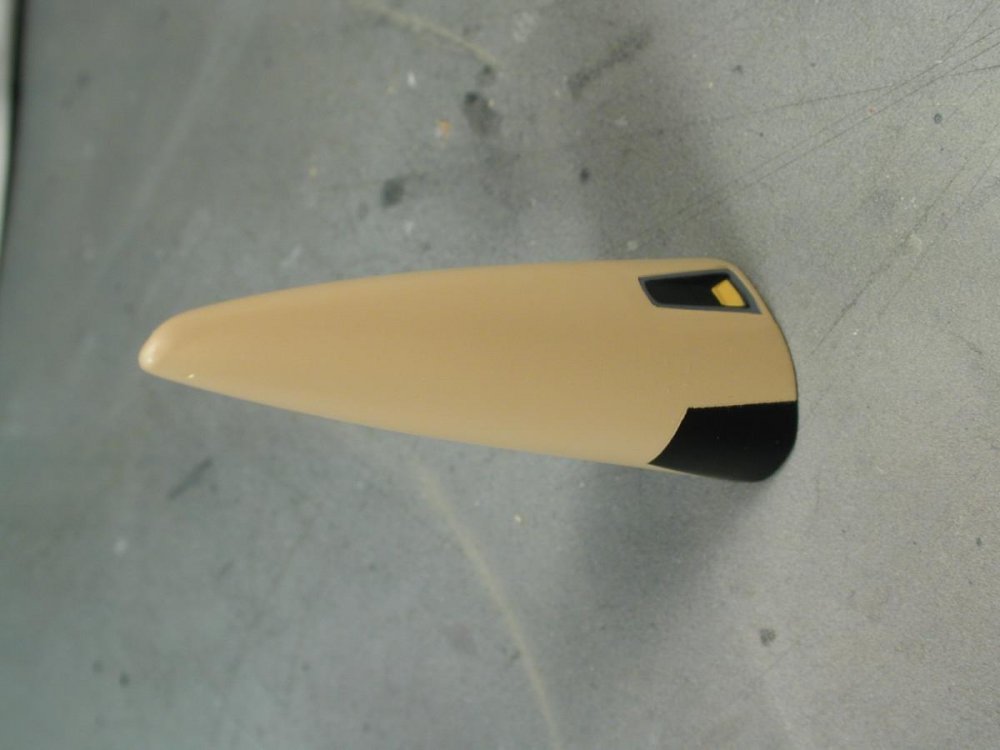
What did you use to mask the nose cone? How did you manage to mask around the grey and the black area?
Did you use primer for the nose cone? I wanted to do it too, but I am worry about the durability of the paint, especially in the area where the pegs and the fins slide in. Any suggestions?
Thanks
-
They also included a decal to act as the background to the city block! It seems they patched together some of the cityscape art from DYRL -- which means they may have even just copied Kyekye's idea!!

Actually I sent them pics of vf1s's 1/2000 custom a while back, before kyekye did his.
Thanks EXO. I have just bought the SDF-1 Kit this christmas, and saw that too. That's funny! I will take it as a compliment
-
Aaah, thank you. It does look more grey than shown before. Now i'm ready to welcome it. :-)
Is that the box of a 19P on the side?
What's the transformation like, are the hinged wings nice and tight?
What's the length in fighter mode(cm)?
Yes, got the 19P and the 17 super pack as well. It is a bit more grey than I thought it would be, but still light enough to modify to FB2012 scheme. Only complain is that missles keeps poping off, and the hands are a bit small. Easy fix though.
Hinges on the wings are tight. The toy is easy to transform and very solid. Very much like the vf-19. don't have a ruler, but estimate it to be same length as the yf-21
For those still looking for one in HK, there are still a few at alpha toys at richmond shopping center at MK.
-
It has been such a long wait. This toy is awesome! Thanks Yamato!!!
-
beautiful!!! when will it be ready? save me a pair!!!
-
I can't wait!!!
-
Beautiful !!!
-
Beautiful!
-

I like it!!!
-
I quite like the way they interpret the feet in these resin kits


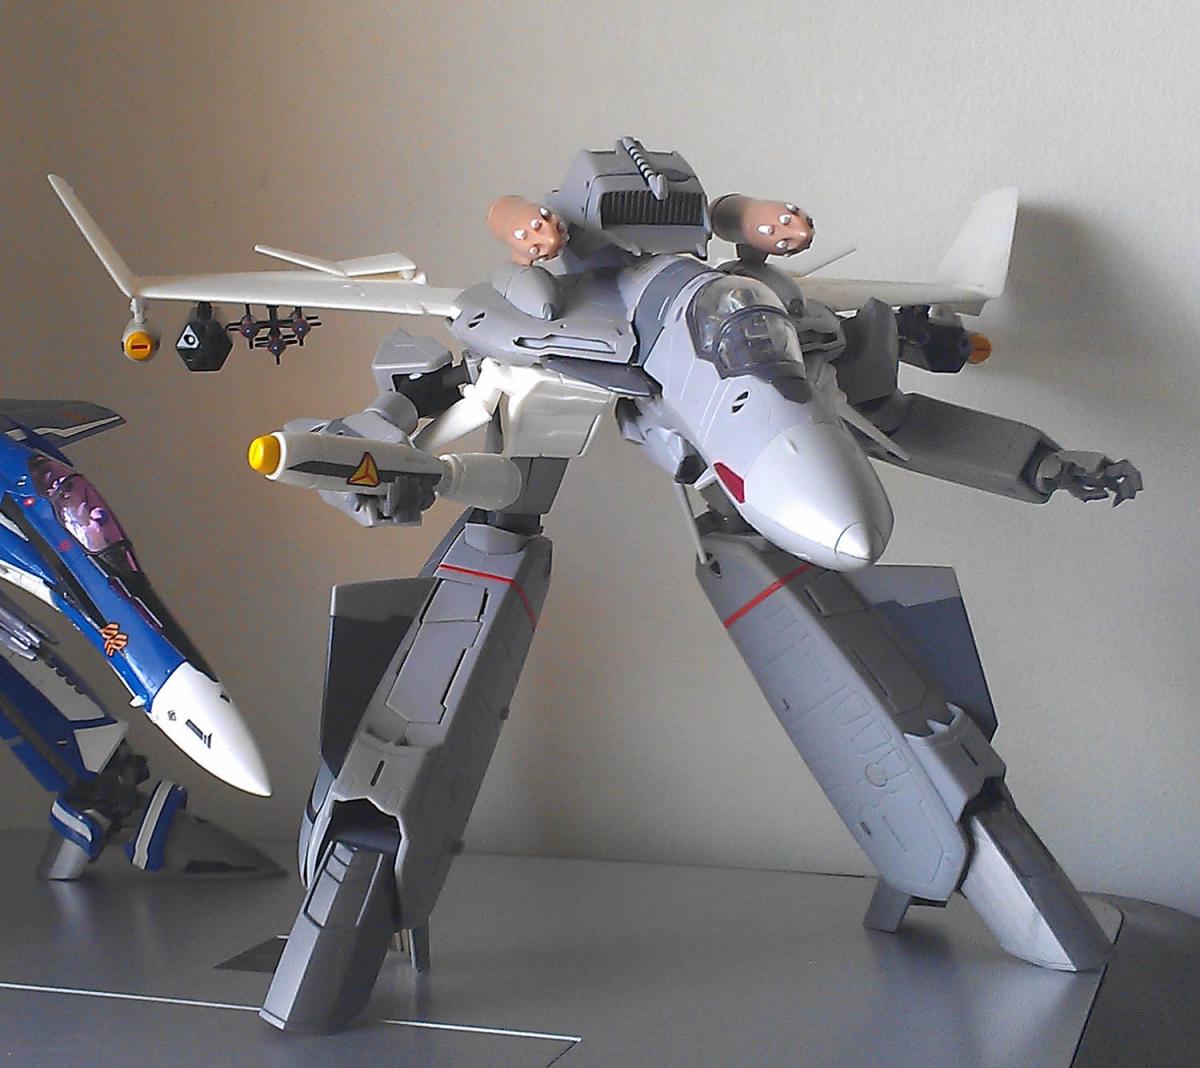


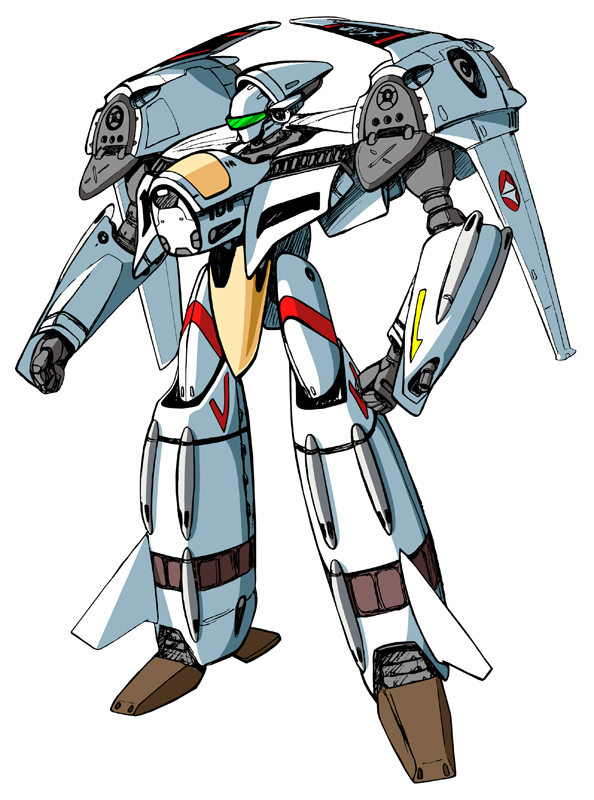
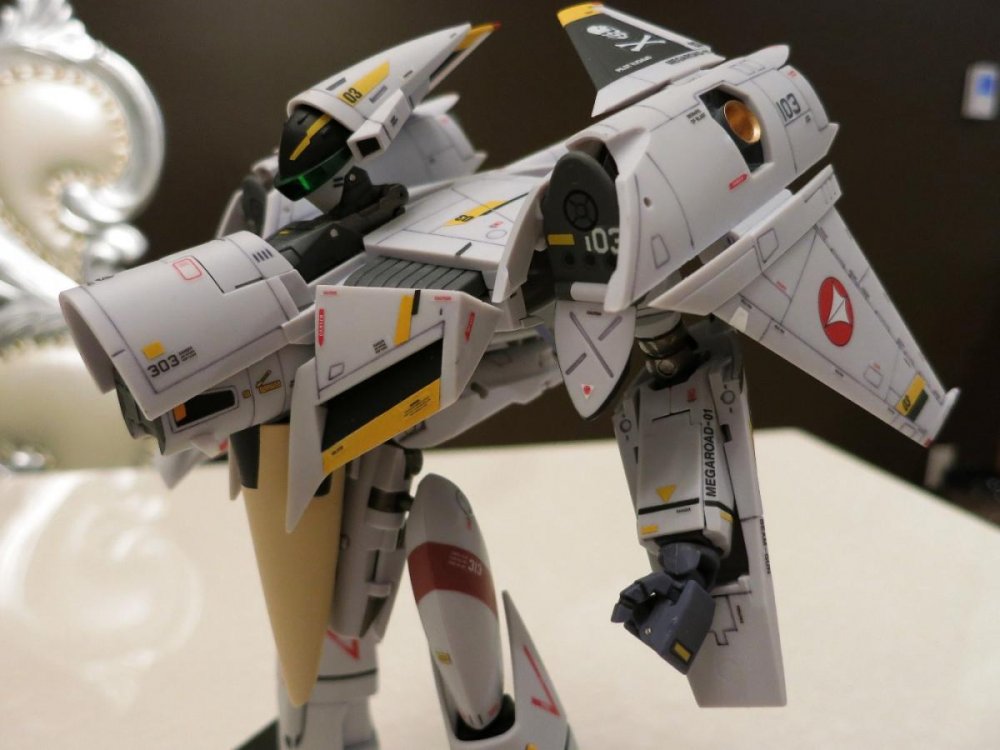
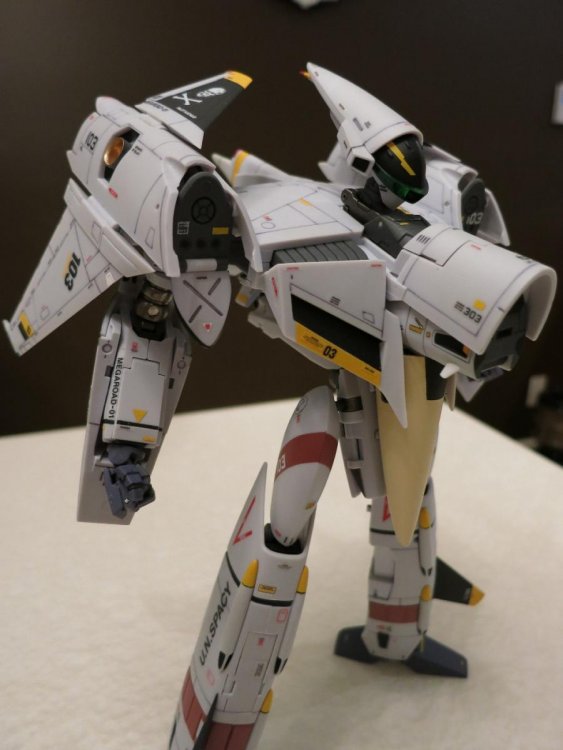
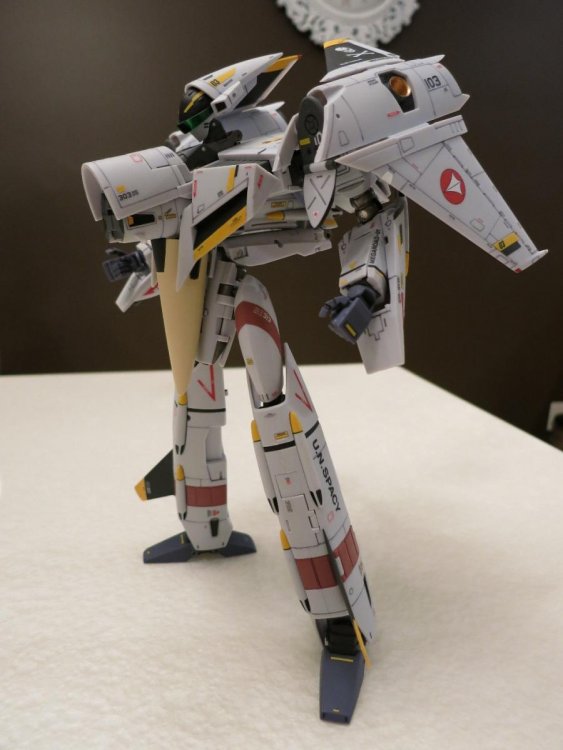
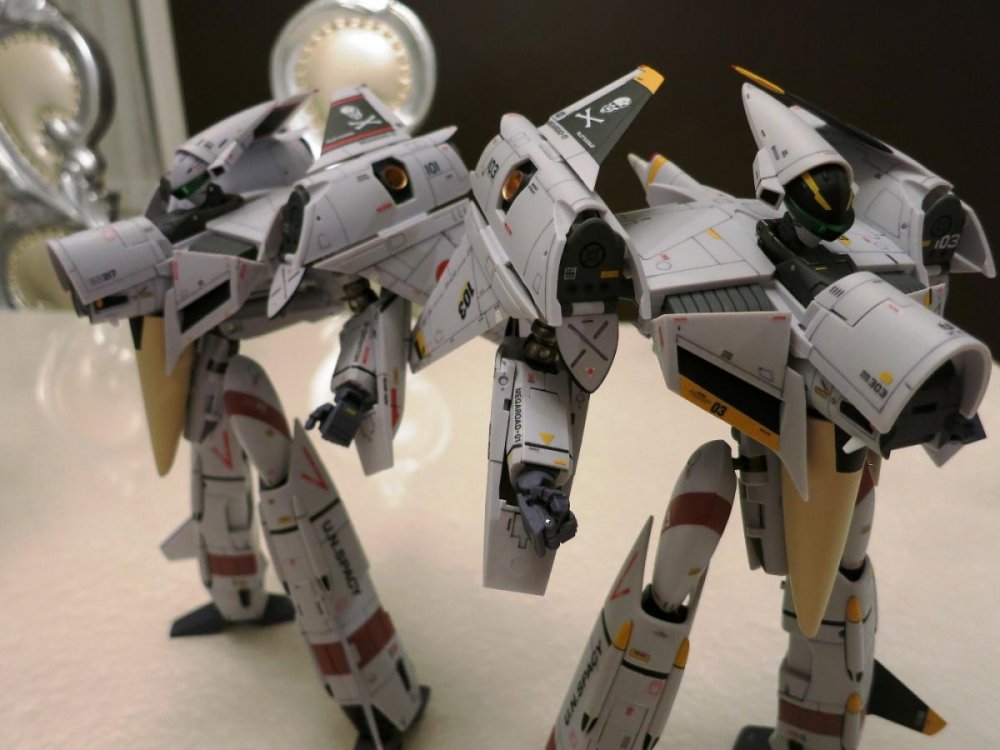
1/60 Yamato VF-4G Web-Exclusive Toy
in Toys
Posted
Thanks for the comment, and I agree with you. I didn't paint them intially, but in the end decided to, because:
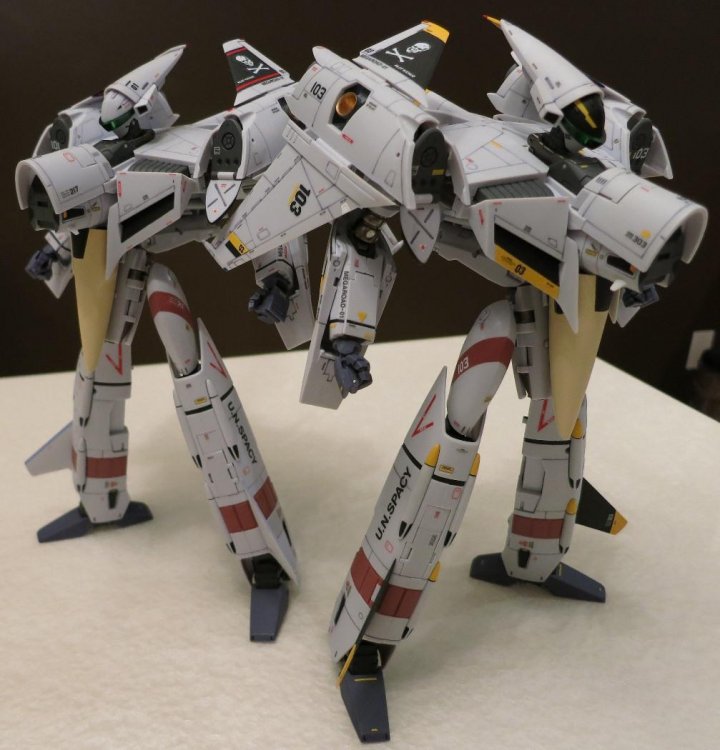
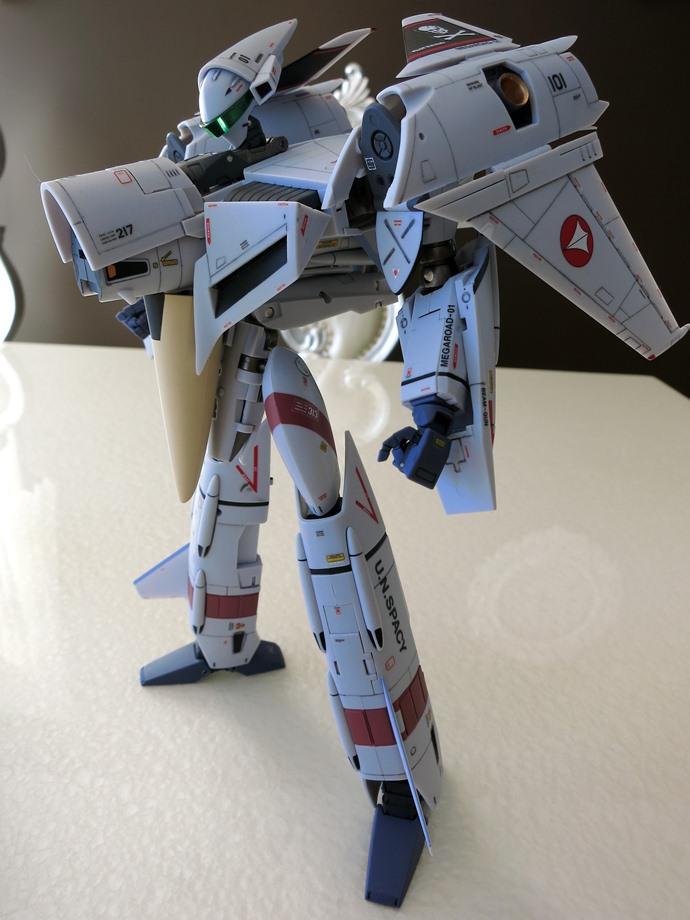
I was trying to keep the toys somewhat robust, so that I can still play with it like a toy. Therefore, there are areas that I don't want to paint over, because it will scratch up in transformation, (like the pale red on the upper and lower leg). This must have been my biggest challenge in pulling off the black/yellow focker scheme.
So in the end I have to paint the missle head to bring out the yellow, use black "no step and caution" decals to re-enforce the black. Lastly, the few red decals here and there are to balance out the red, so that it is not concentrated in one spot in fighter or battriod mode.