Texan29
-
Posts
65 -
Joined
-
Last visited
Content Type
Profiles
Forums
Events
Gallery
Everything posted by Texan29
-
And it has finally come to fruition! It will be put on ebay shortly, from what the creator said. Love this guys work, it's awesome!
-
Hello folks! How is everybody? I haven't posted here in years but I wanted to tonight because I found something I knew some of you would be interested in seeing. First of all, this is not me - just a fella I have watched since he started making Mospeada/Macross models into STLS. This guy has modeled in 3D the entire kit, and is building it slowly. He has several videos of his progress, and is almost finished. This is the same person who did the "Cy-Kill" model and sold it on ebay. All his files are on thingiverse if you're interested. If this is the wrong category, I apologize and hope a mod will just move it to the proper place instead of deleting it. This guy deserves to be seen for the work he has put into these models. Thanks y'all! EDIT:
-
I don't think I explained properly. I only talc'd the molds once and the resin took it away with the first casting. Afterwards the molds were dry and shiny for the next usage. The molds sweat before I do this once. The molds are made out of polymer clay, two part mix you squish together and press onto the part. Or could it still be the resin? I'm probably just confusing myself at this point. My wife let her co-worker borrow the camera...if she gets it back today I will take pictures to illustrate what I'm trying to explain.
-
Oh...I won't give up. But I will give up on the mold stuff I'm using right now as I believe that is my problem. The resin: I've done a few control samples and they all come out shiny and pretty - color added to them or not. They do have a few very tiny bubbles but they are negligible. I used baby powder as suggested and it worked somewhat but not how it was described. It drew out the moisture in the molds I made. I find this stuff has a tendency to sweat! It's not due to humidity, I always use the A/C unit to dehumidify my workshop and never leave the molds outside or anything of the sort. After I used the baby powder (only once) the resin no longer froths, but subsequent castings never come out shiny or even remotely smooth. They are always matte, chaulky. The molds themselves are smooth. After so many tries, so many times I've remade the molds...it's painfully obvious this stuff won't do what I need. I looked at micromark and it looks promising. What is your opinion on oomoo from smooth-on? I've seen several different manufacturers for this stuff but don't know which is best for the type of stuff I'm doing. I've been watching videos on youtube to reference two part molds, and found "tap plastics" videos. They seem to be very informative and straightforward. Best part is the annoying catchy jingle at the beginning and end of each video. Makes me want to dance. But in all seriousness, have you ever used their products? I just want to get what will actually work for what I'm doing. Thank you, I really do appreciate all your help.
-
Well, I'm still having problems. If I pour the resin into a container it comes out perfect, very few micro sized bubbles. But once I pour into these molds, it froths up (not as much as before) but it still does. The parts come out weak and spongy, like melted styrofoam or something. It's really frustrating, I've cast about 20 of these and all are failures. I feel like I've wasted a bunch of money, and like pitching it all in the trash... What could I be doing wrong? This is exactly the stuff I'm using, and I pour it the same way as described here:
-
Okay I did a control sample and...it came out perfect. Looks like a shiny, creamy white poker chip. I believe it was the mold release I was using. I guess that stuff is mostly water? So I won't use that again, as you had said it was just for mold creation. I poured resin one more time into the (now dry) mold and it still came out a little porous, like chalk. But this time it wasn't frothy. I'll try washing the mold this time with soap and water and let it dry before I try again. I'll get it to work!
-
Well, last night I had the a/c on in my shop and it was about 65f out there. I did that so it would dehumidify the air, I do the same when I paint. Could it be because it was too cold? I'm mixing a miniscule amount each time I attempt this and I make very sure the amounts are the same or as close as possible. I'd use my postal scale but this stuff doesn't weigh enough. How often does this stuff become defective? Does it have a short shelf life? When I pour it, it always seeps out and pools under the mold. That material ALWAYS bubbles up like crazy after a few minutes. I do use a mold release agent - I finally found some in a different location. I'll forego using that from here on out. I have a small toaster I use to heat up things, would letting it set up in there help or make it worse? Thanks for your help.
-
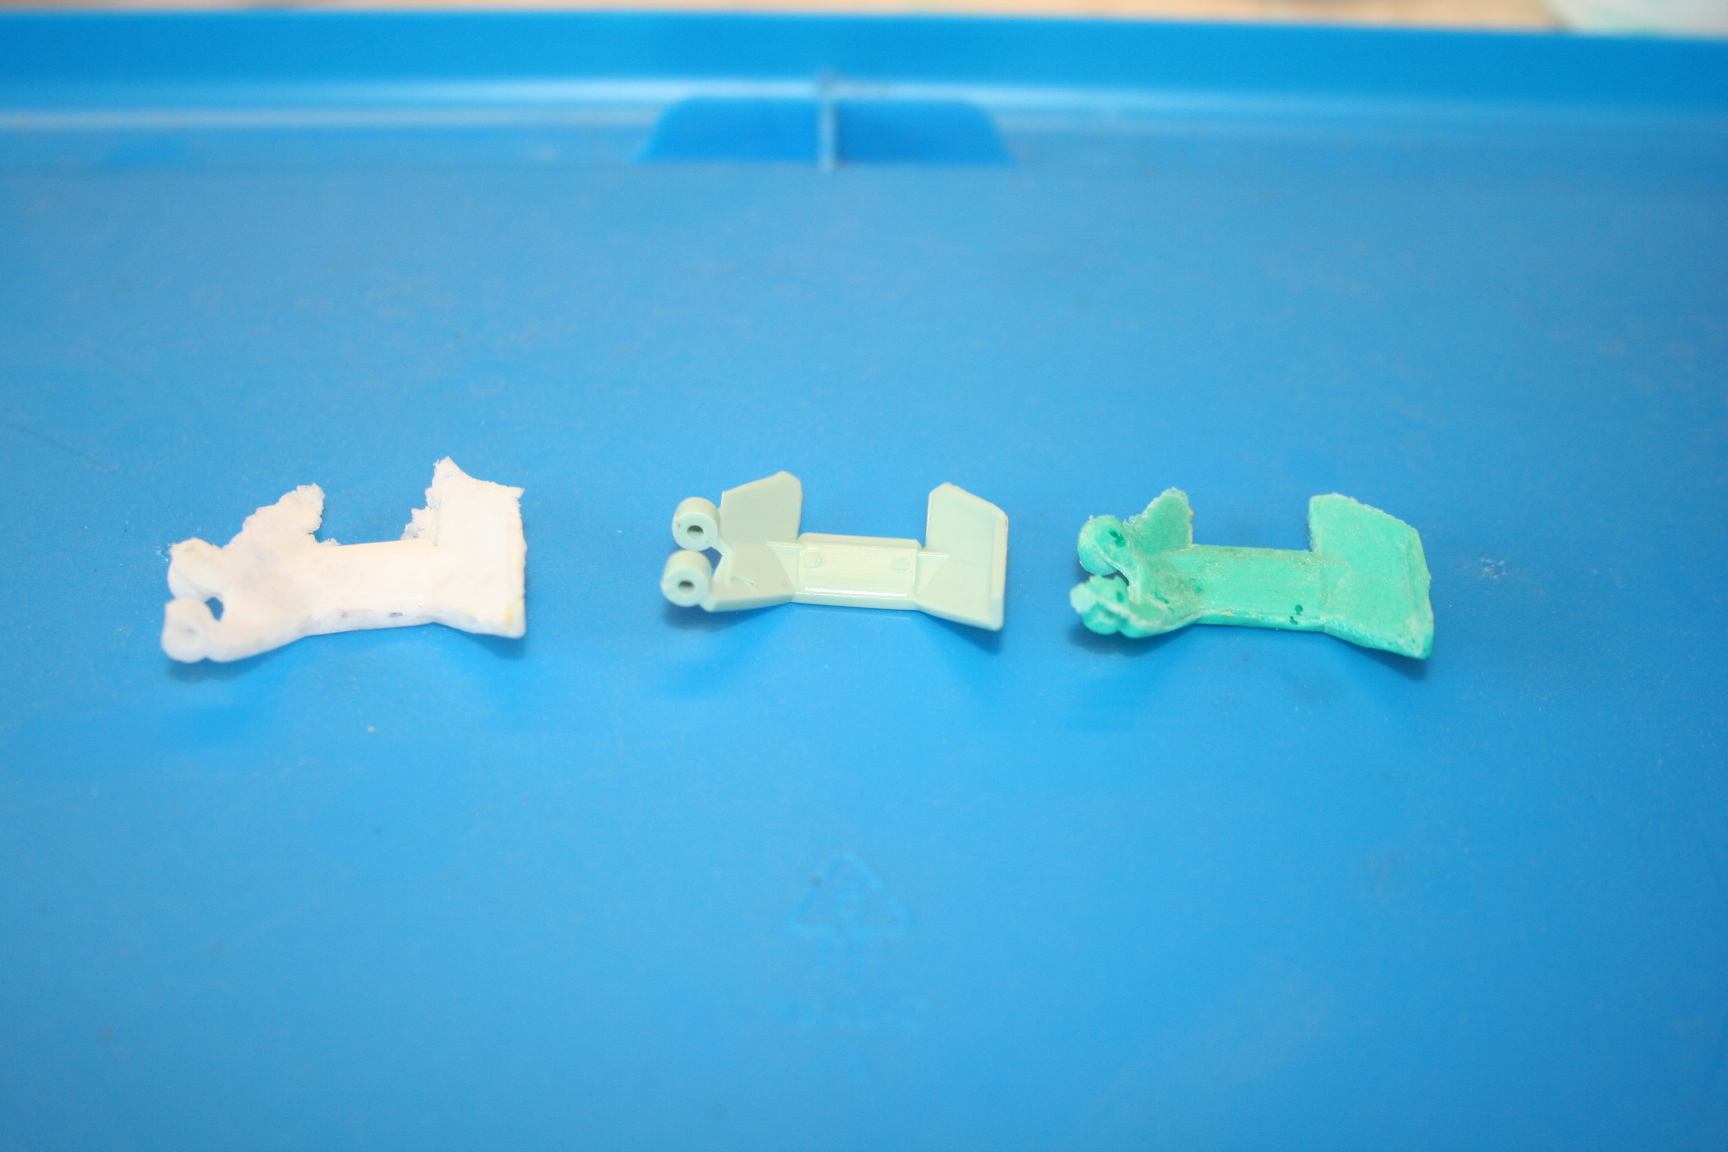
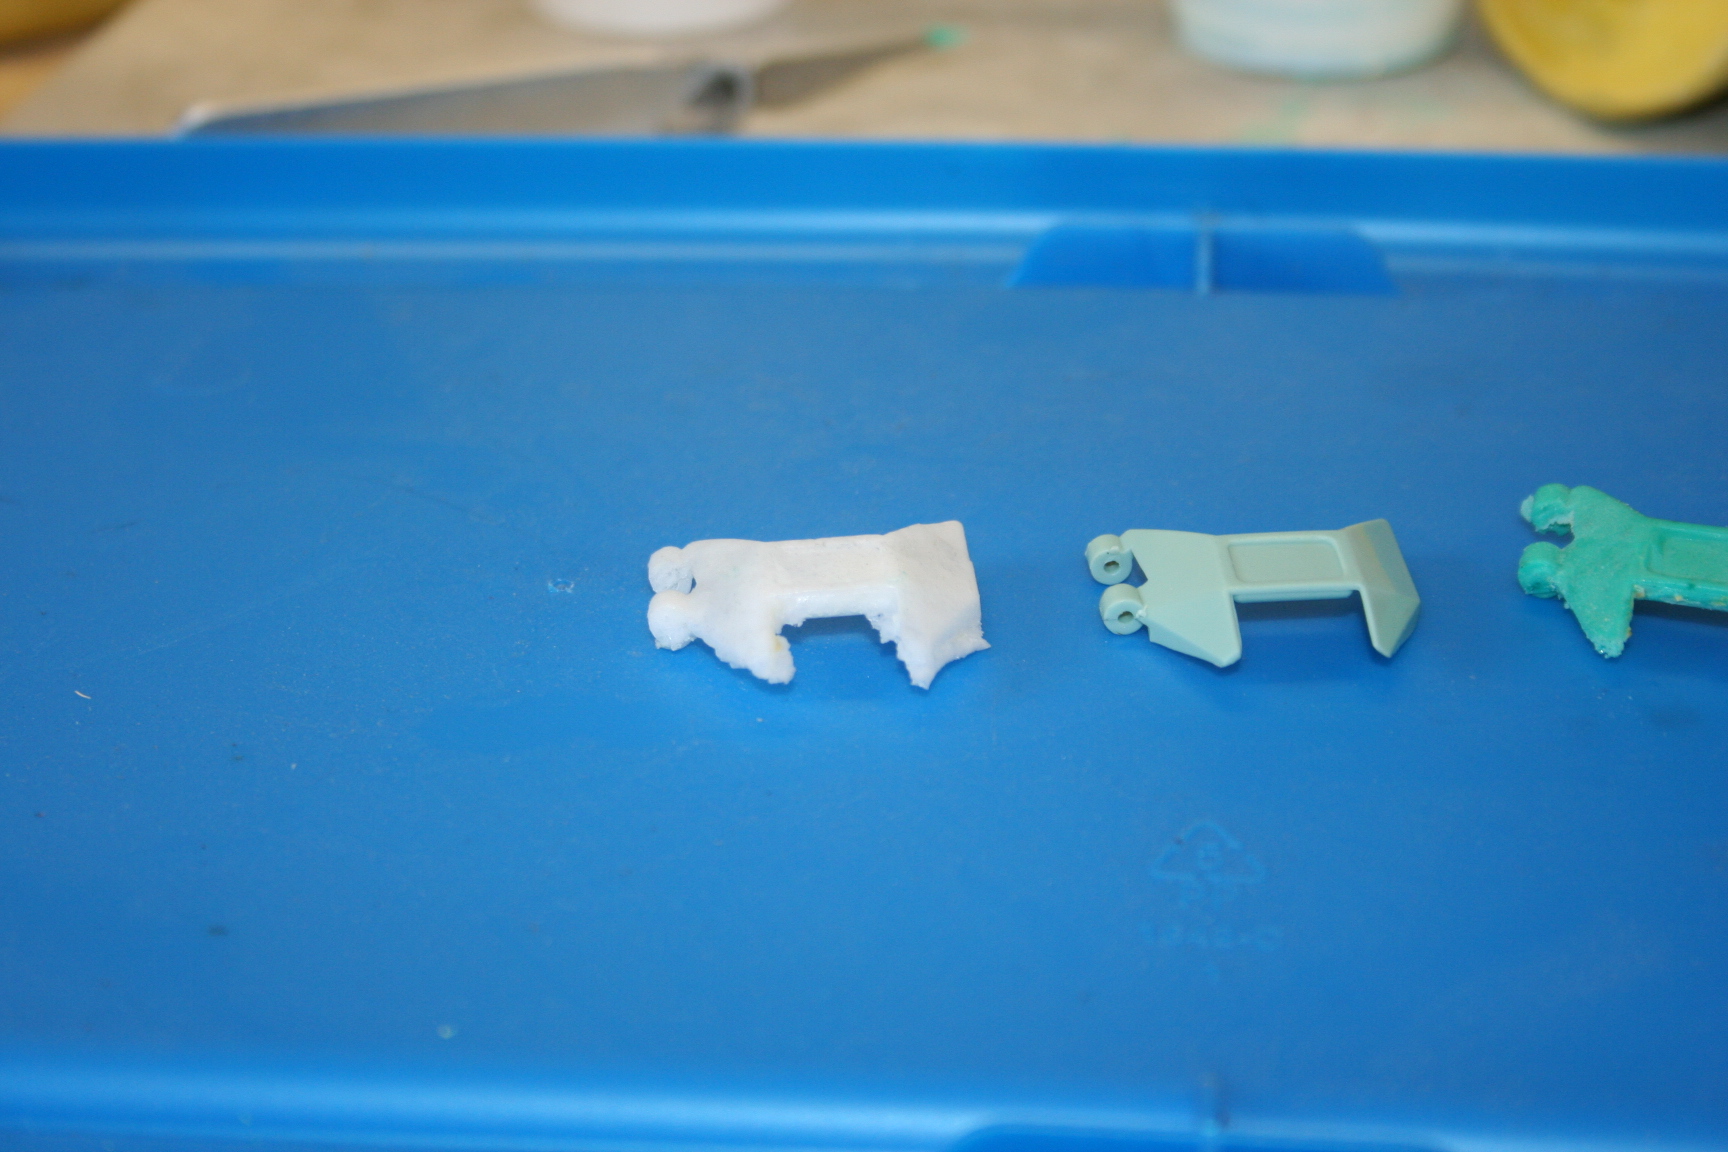
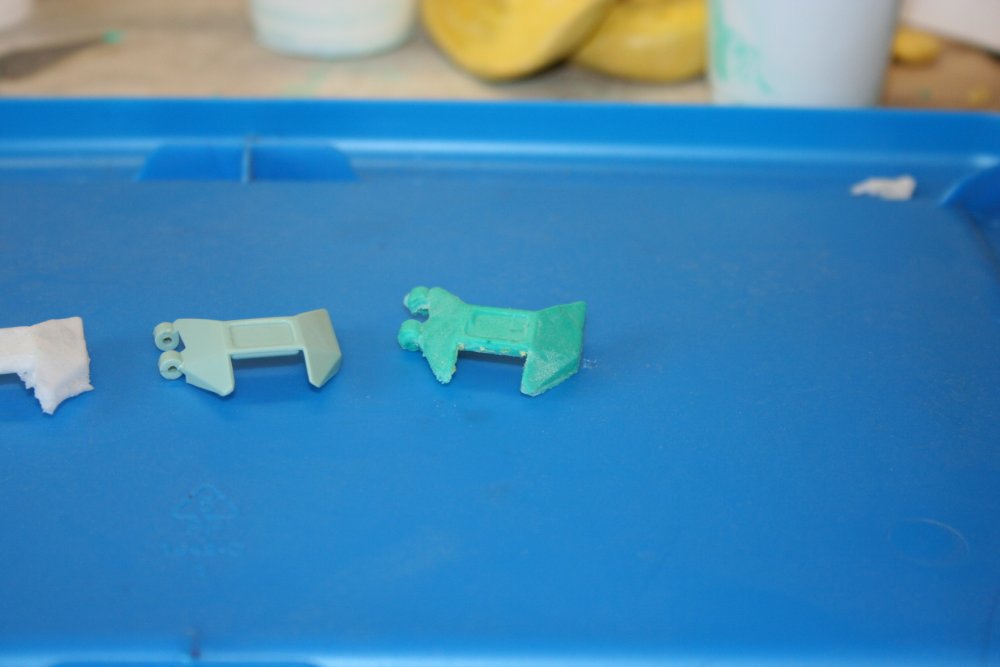
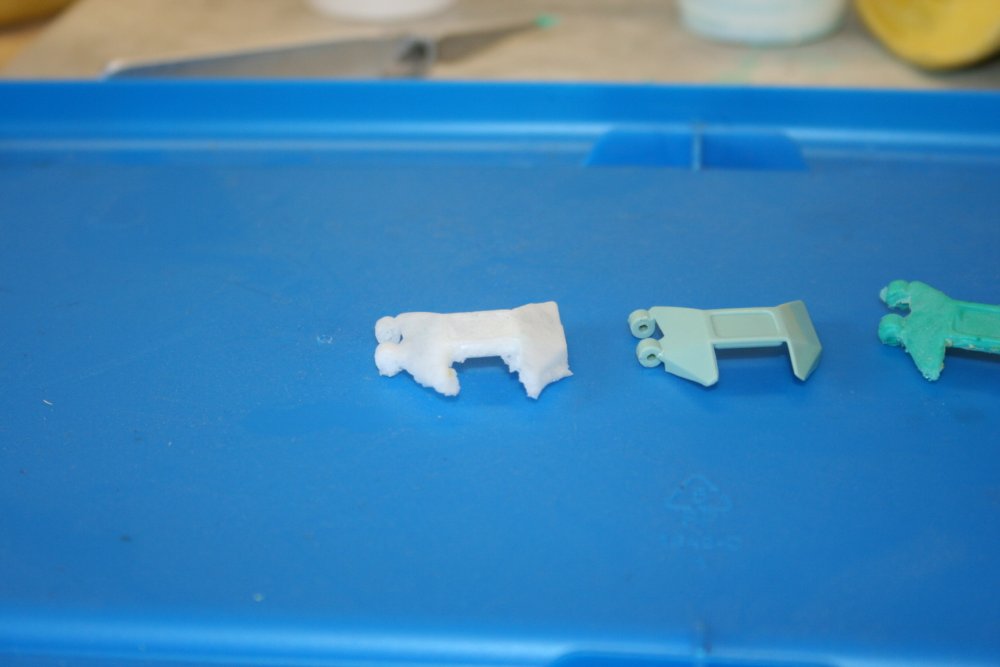
Okay, I did a two piece putty mold and it worked okay-ish. I'm having a hard time with the resin. It comes out spongy and flimsy, i'm assuming that's because it IS full of air bubbles. I've casted 4 times trying different things and always the piece is a bubbly mess. I've tried pouring a thin line from a long distance, also tried pouring gently from the cup. I used a gram scale to measure A & B to perfect portions of each. I mixed it well and the resin ALWAYS pours crystal clear. After about 3-4 minutes the flash outside the mold begins to bubble up. I've tried using a colorant and without. Oddly the colorant seems to help a little bit. So, I'm stumped and don't want to keep experimenting because I'm starting to wear out the mold a little bit already. What am I doing wrong? Including pictures:

-
Thanks for the help guys, I really appreciate it. I'll post my results when I'm done.
-
The part is about 1mm thick and not very deep. About how thick of a layer of thinned vaseline should I use and does it need to cool a bit before I brush it on? Sorry for all the silly-ish questions. I'm not only a novice...I'm a poor one.
-

1/55 Swivel Thigh Mod - BIC Pen Method (Streamlined)
Texan29 replied to Skull-1's topic in The Workshop!
Yeah, me too...except I cut mine straight across and cannibalized an old transformer toy for the ratcheting movement, and I didn't actually finish. -
1/55 Swivel Thigh Mod - BIC Pen Method (Streamlined)
Texan29 replied to Skull-1's topic in The Workshop!
Awww man, cliff hangers always leave me antsy! -
I was thinking of doing this except the instructions said not to press but to roll or it will distort the detail. Is there a certain method I should follow exactly or just do it already and stop worrying? What I'm planning on casting is the right side flap on the old gakken mospeada bike (the larger one). The shape is not flat or I would just do a one-piece mold with this stuff and stop candy-@ssing around.
-
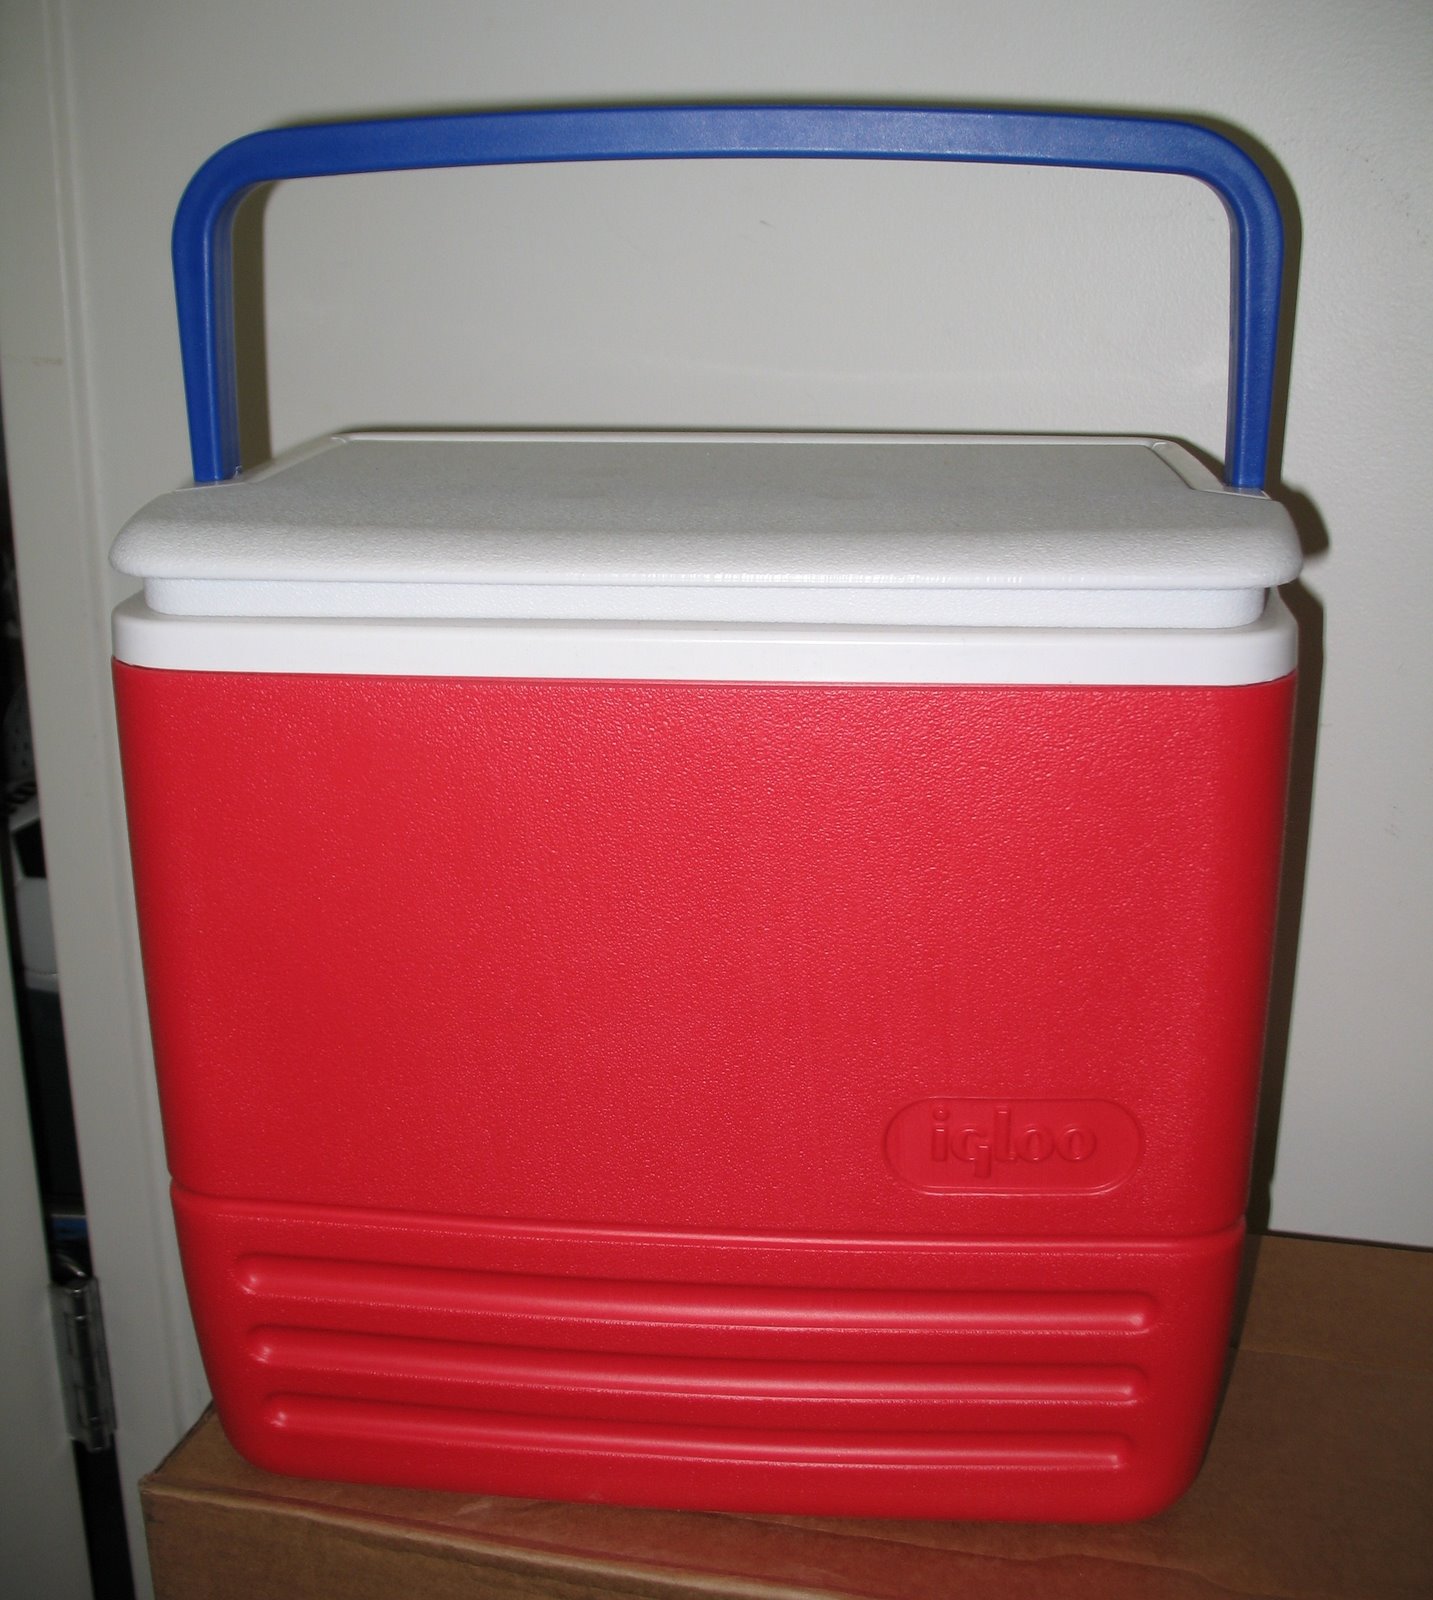
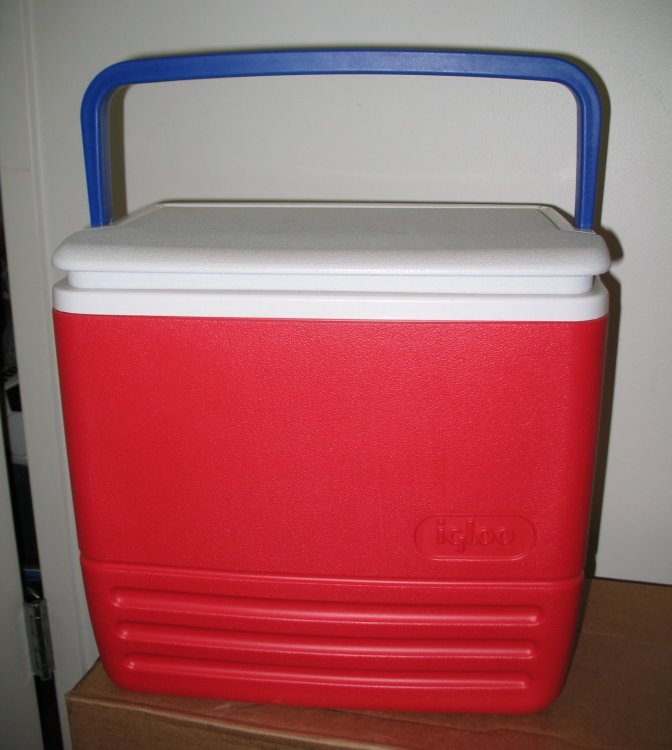
An igloo is a brand of cooler. Fill it with hot tapwater (not boiling, just hot out of the faucet) and put the can(s) of paint you want to use in it and let it heat up for 10-15 minutes. Afterwards, dry the can and shake as usual. Reason for heating up the cans in hot water is it will give you a superior spray out of the can. No orange peel, no flecking, no runs. It's as close to airbrush quality you can get without using an airbrush. I find the testors paints, the little half cans...work best but most brands work great using this method.
-
Hey guys, I really appreciate the responses! I was surprised there isn't a pinned FAQ on mold/casting here. I'm working with this mold putty stuff for the moment, I hope to get the liquid soon to try that out on multiple parts and a project I'm working on. I do remember the how-to fulcy did a long time ago but the medium I have is a putty, not a liquid. I couldn't find any instances of the mold putty or polymer clay on the forum through search, so I guess I'll be the first to try it as a two part molding process. I did go out and get some vaseline, it's in a tube. I hope that works since it's already thinned a bit, I won't have much work rendering it down to thin liquid. I'll try to post pictures when I'm done.
-
Looks really nice! For painting simple schemes like that I use a cheap-o single action brush from harborfreight tools, OR I put a cheap can of flat finish paint in an igloo filled with hot tapwater, shake it for a few minutes and spray using a hot can. After its really dry, I rub the painted surfaces with a clean shop rag to buff it a little. Gives it a really cool look. Edit: I shake the can, not the igloo cooler!
-
http://www.harborfreight.com/cpi/ctaf/disp...temnumber=95810 I'm using this, and it does surprisingly well. Does great for most jobs but finer detail work is hit or miss.
-
http://cgi.ebay.com/ws/eBayISAPI.dll?ViewI...&category=49016 Is that guy in the white on the upper left flipping me off?!
-
$1??? OUTRAGEOUS! Don't worry though, it'll skyrocket. Have faith.
-
http://cgi.ebay.com/ws/eBayISAPI.dll?ViewI...63&category=753 So, is that a joons or what?
-
Custom trick to fix alpha arm swing hinges. :D
Texan29 replied to Texan29's topic in Anime or Science Fiction
Thank ya I'm from the Dallas area. -
Custom trick to fix alpha arm swing hinges. :D
Texan29 replied to Texan29's topic in Anime or Science Fiction
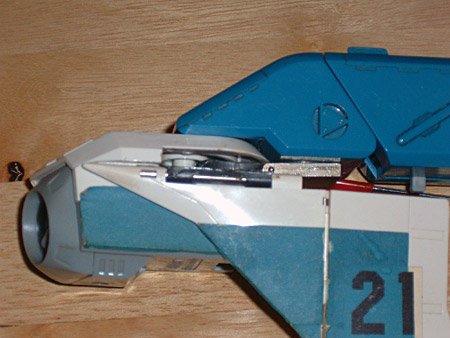
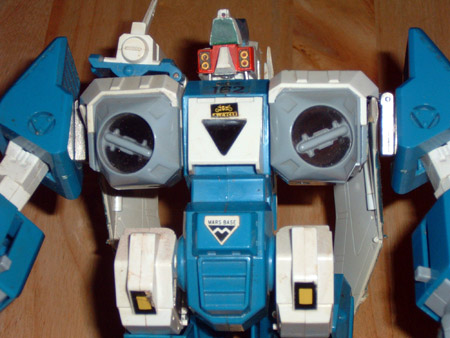
Last shot. (Gee, i need to clean it don't i?)
-
Custom trick to fix alpha arm swing hinges. :D
Texan29 replied to Texan29's topic in Anime or Science Fiction
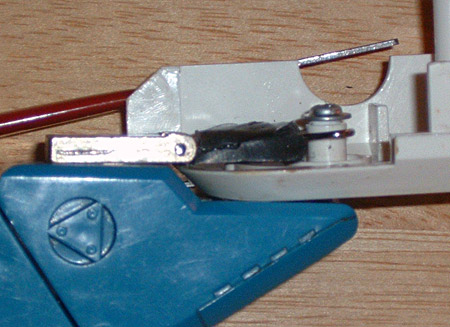
Straight and in line, and stronger than the original!
-
Custom trick to fix alpha arm swing hinges. :D
Texan29 replied to Texan29's topic in Anime or Science Fiction
Another shot.
-
Custom trick to fix alpha arm swing hinges. :D
Texan29 replied to Texan29's topic in Anime or Science Fiction
Re-assemble the shoulder with your NEW arm joint and that's it! NOTE: IF the rubber is too thick, just trim it down with a razor carefully until the top and bottom of the shoulder come together and the arm moves snugly and freely.