Cowpeeler
-
Posts
22 -
Joined
-
Last visited
Content Type
Profiles
Forums
Events
Gallery
Everything posted by Cowpeeler
-
Not a great spot...I was at the very back against a wall. About maybe thirty or forty feet away from the stage, it is a very small place, the 2nd floor of a building in fact. Yes she had two back up dancers for a few of her songs.
-
I was at this concert, my only complaint was being herded into the room and the doors being closed behind us...made it much hotter in there then it needed to be. I am taller then most so I did'nt have to crane my neck too much. In such a small venue I was hoping there would be some sort of opportunity to pose for pictures and get autograph but after the encore we were booted out. I am going to see if I can get a kanji reading friend of mine to help me become a member of her fanclub, I think joining that nets you an autograph. I was able to secretly take a photo of her, but started to get angry looks so I put the camera away.

-
Wow thats amazing. How did you do the saw tooth design, did you follow panel lines with masking tape or did you make up some sort of template? They lool symmetrical.
-
I find a graphite pencil works much better for subtle panel lines, if you make a mistake it can be easily removed too. If you mess up with a Gundam marker...you're not getting that off without a fight.
-
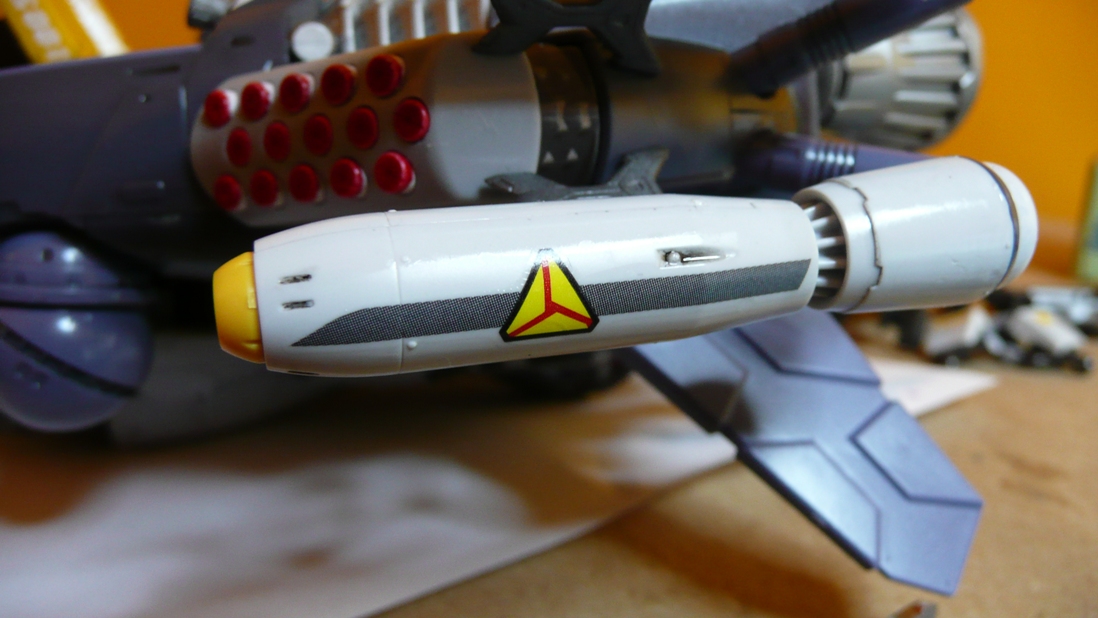
I had the same problem with my super pack Alto and I ended up throwing the decal out and painting it. That oddly shaped triangle intake...that decal was so off.

-
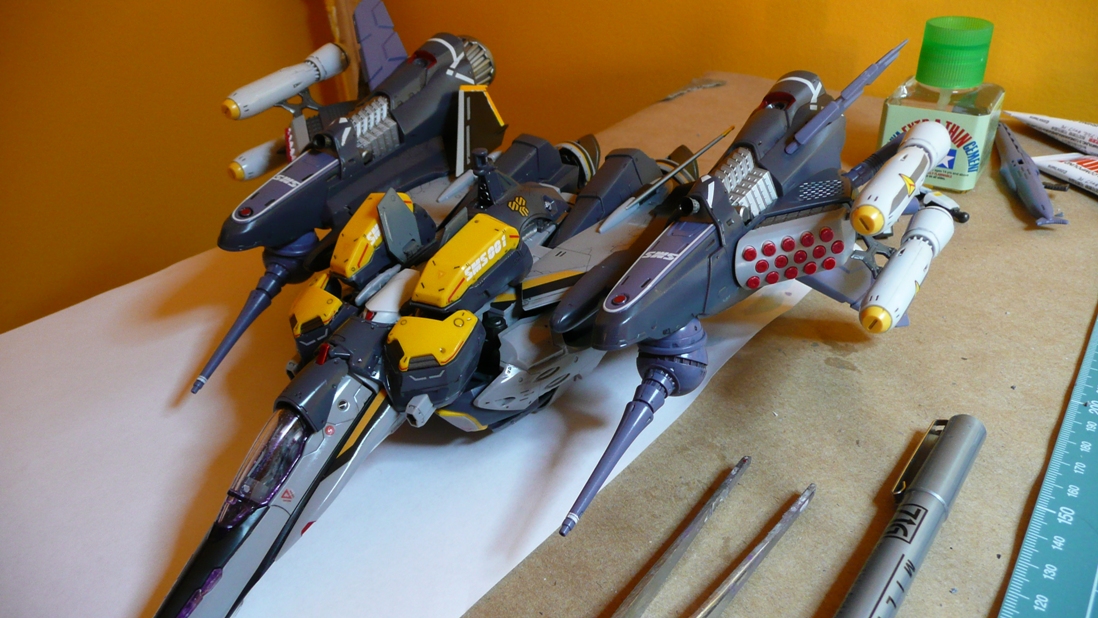
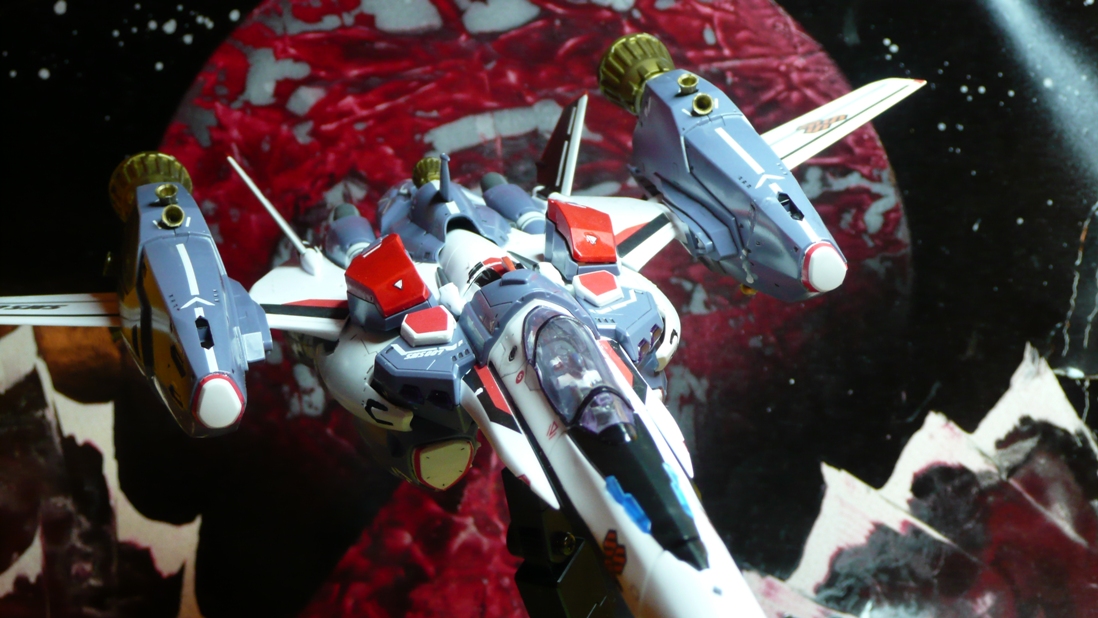
It is now finished. Was extremely difficult to transform as I have no experience transforming my Alto this was really scary. I noticed the wing joints showing fatigue, I do not think they were designed to hold the weight of the armor packs. Will have to watch those closely. On the plus side I had zero decal chipping during the transformation process


-
Does anyone know of a US based store or an online store that ships to the US that stocks the GSI Creos sprays, in particular the Super Clear Gloss, Super Clear Semi-Gloss, the water soluable Top Coat and the Gundam sprays (which in Bandai style is used to color thier valkyries)? HLJ deciding they can't afford to put a sticker on thier boxes that says aerosol has screwed up my future model building as I have one can of top coat left and they didn't ship the two blue sprays I wanted to use for my Michael build before what ever deadline hit them.
-
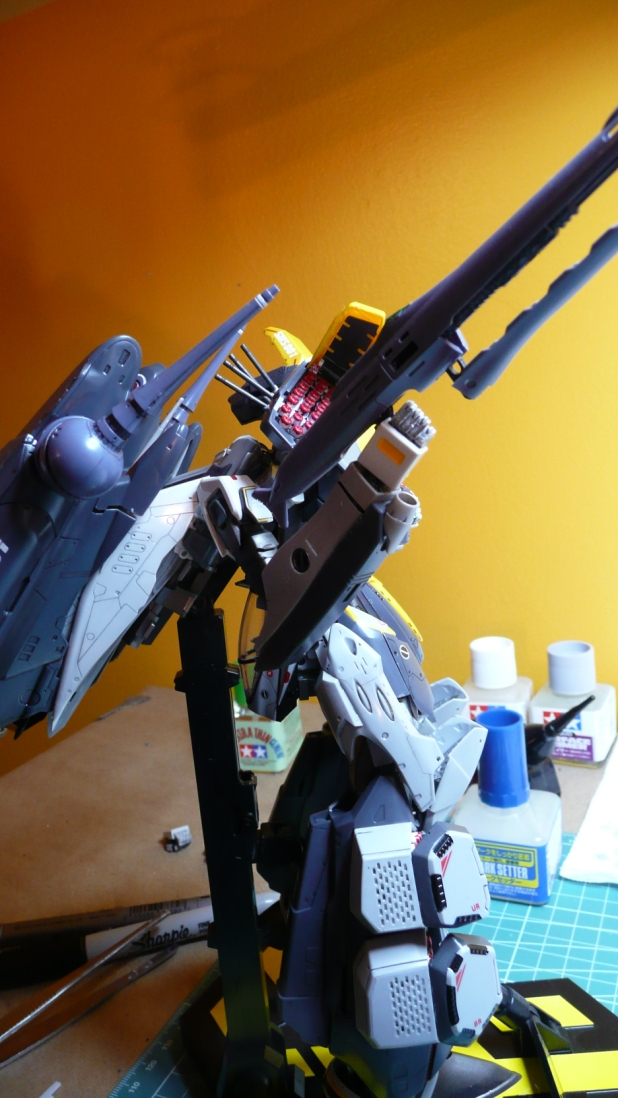
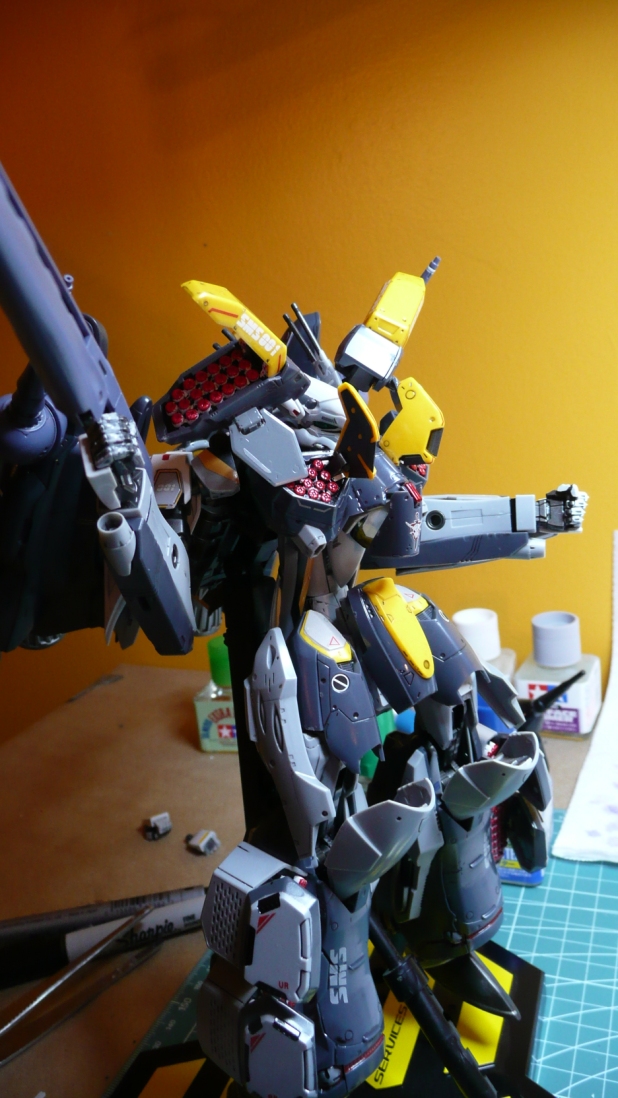
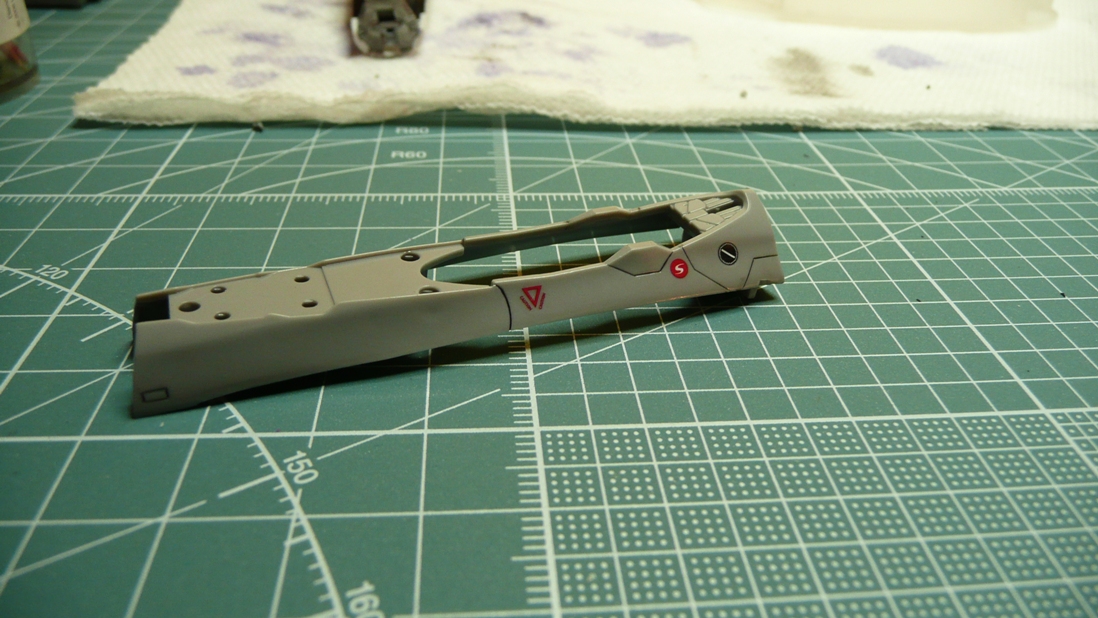
I am entering the final stages now. The only thing that needs to be mounted is the antenna assembly, but since that gets removed in transformation (this kit is going straight to battroid) I am going to leave it off. Just a few decals drying then its off to completion.

-
Unfortunately HLJ has kowtowed to the Japanese postal service and will not ship out any aerosols because of Japan's new postal regulations and according to HLJ it is not economically viable to conform to the new laws.
-
My order arrived today. Thanks for all your work newca!
-
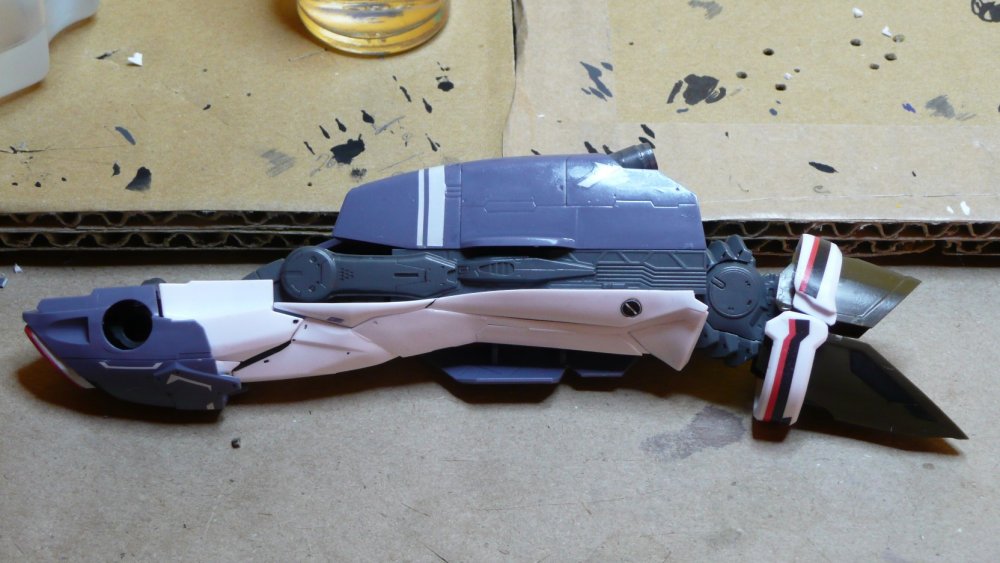
Spent the weekend working on the backpack unit and the skull emblem decal. Emblem was such a pain...curled in on itself as soon as it was removed from the water. Thats drying now. Didnt get it position as well as I would have liked, but it was starting to dry and I didnt want to risk tearing it. I used a little bit of creative license on the backpack unit in terms of coloring, but I think it looks good.

-
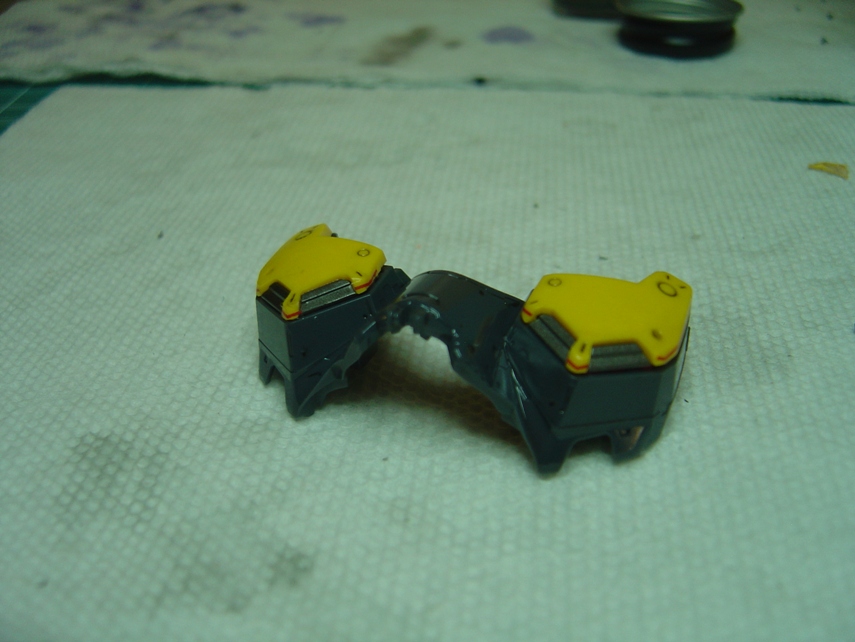
How did you paint the red and green marker lights on the backpack unit? Was that a clear over a silver basecoat, free hand or a spray?
-
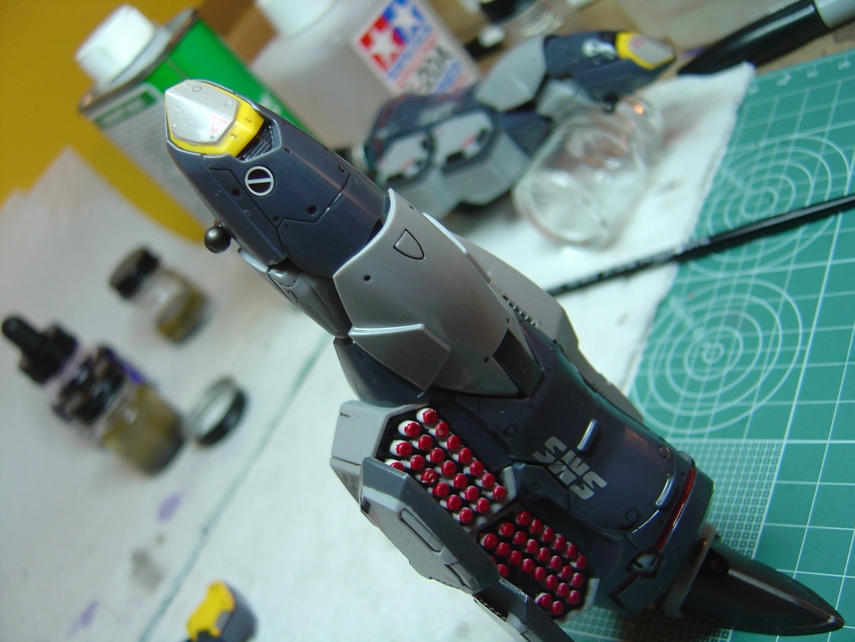
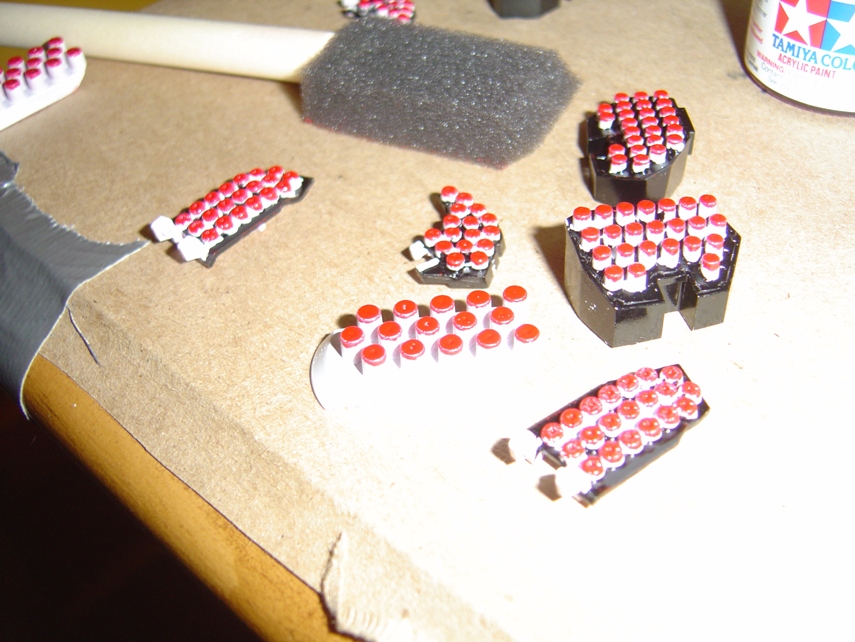
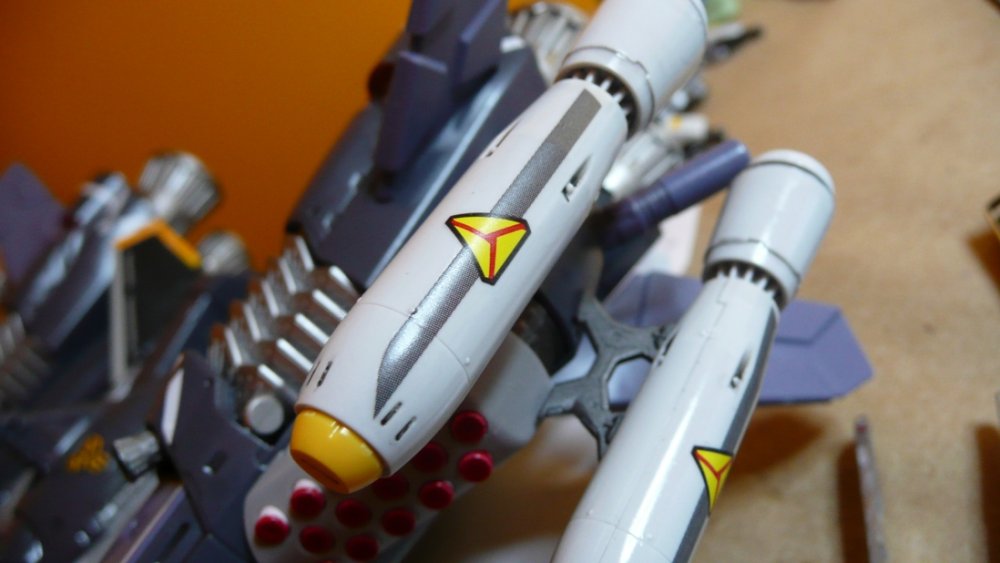
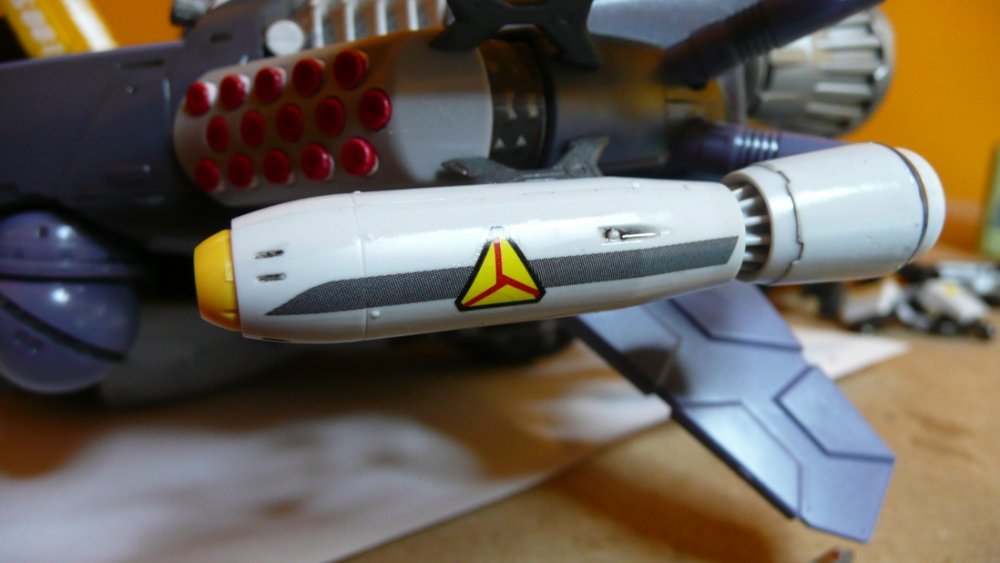
Made a little bit of progress so I decided for a little update. Right leg assembly is completely finished, and all that remains on the left is the topcoat. I have now moved onto the chest missile launchers. I did not like the white color that was used in the decals, so I just cut them out and used the red stripes, didnt turn out as well as I had hoped due to the tons of film surround the lines, tried to remove as much as I could but I think I could have taken off a little more. Learned an important truth during these steps...do not paint all sides of the missiles when they have to slide into a holder, I added so much resistant friction, my fingertips are still numb from pressing them into place. Also know that I suck with water slide decals, no matter how hard I try I end up messing up something, and for symmetrical aestetic reason I have to discard the dacal on the opposite side. Case and point, the red leg stripes and spheres, I tore one completely apart so I had to free hand paint the whole thing.

-
How did you manage to get the red stripes and ankle spheres to come out so good? I spent twenty minutes wetting and reapplying the red stripes but they would not position at all until my knife tore the thing in half. Which of course was followed by many explicit words as I dug out my paintbrush to try and hand paint the area.
-
That is not entirely true, the basic plot is lifted from the film "Kakushi-toride no san-akunin" that Kurosawa made in 1960. Most of the characters are in there, you have the two comic relief characters making up C3PO and R2D2, you have a general, representated later on in the form of Obi-wan, and the princess, naturally becoming Princess Leia. And as much as I despise George Lucas, you have to admit his brilliance, as he knew that successful movies make successful toys, he added in his contract that he gets a percentage of all toy sales.
-
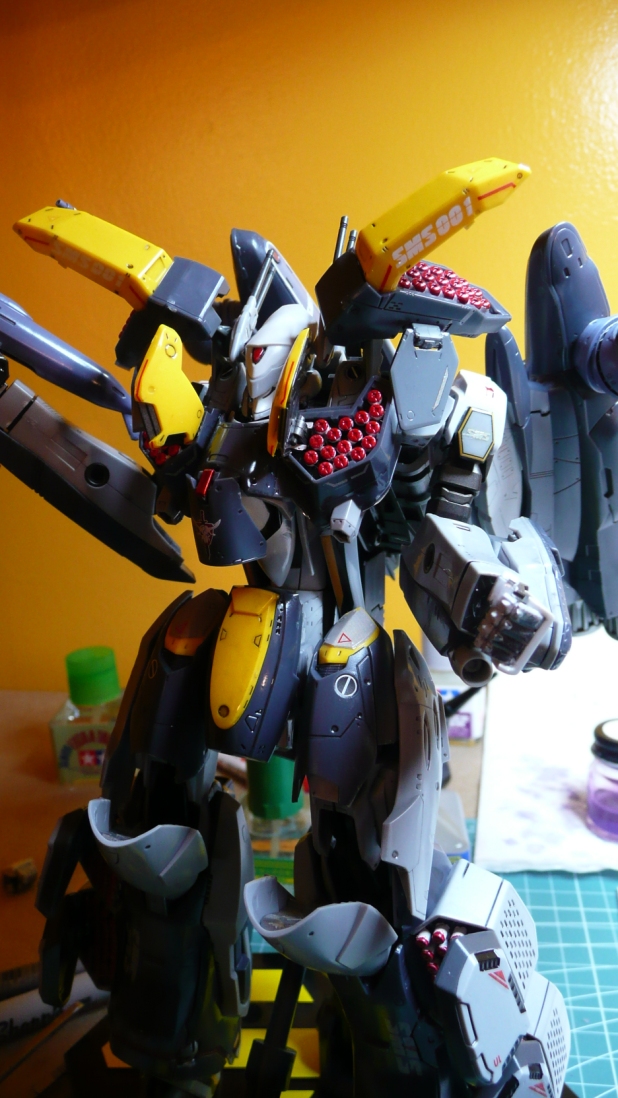
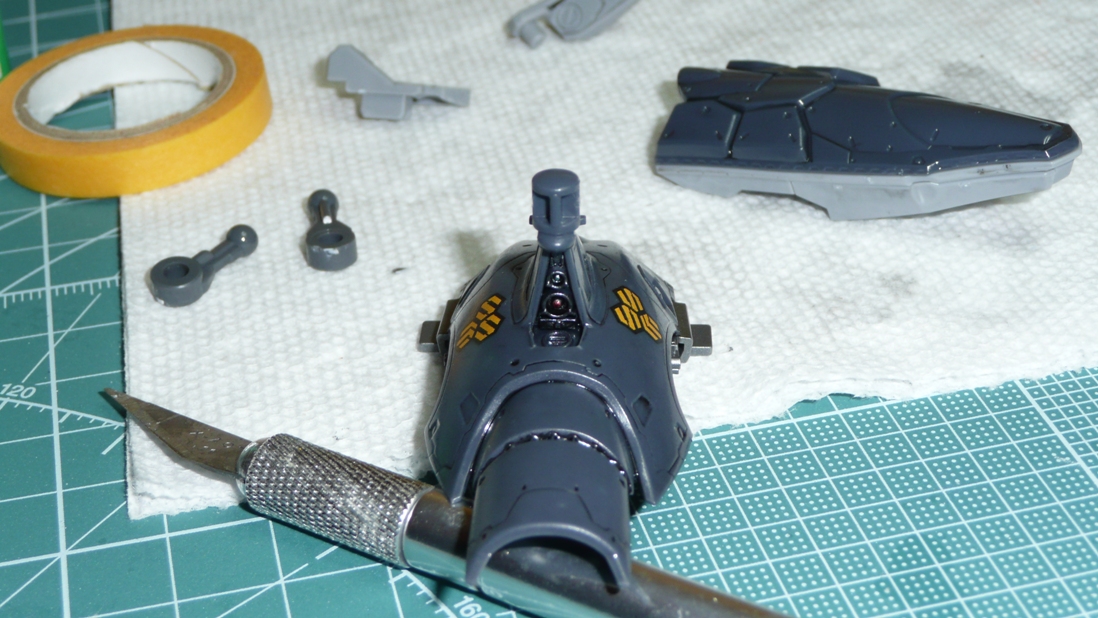
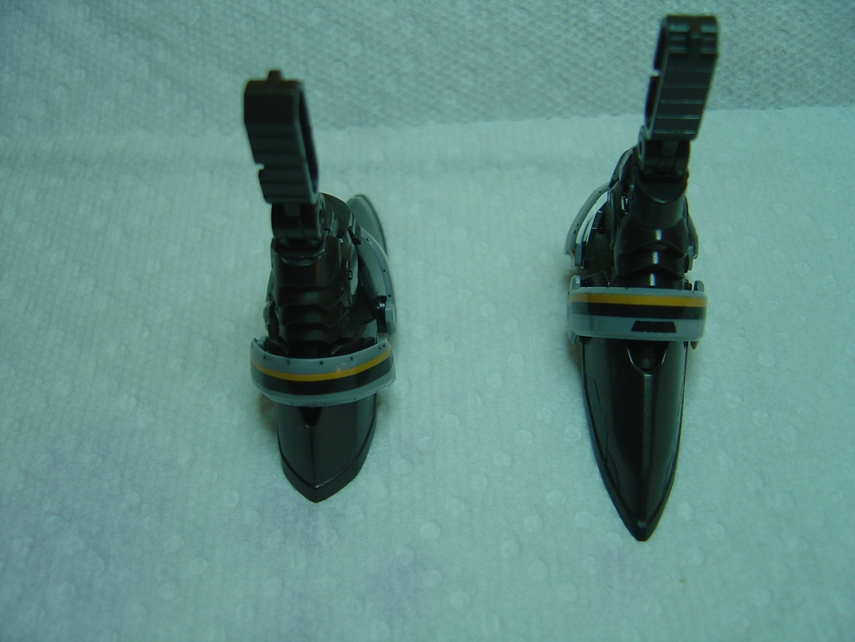
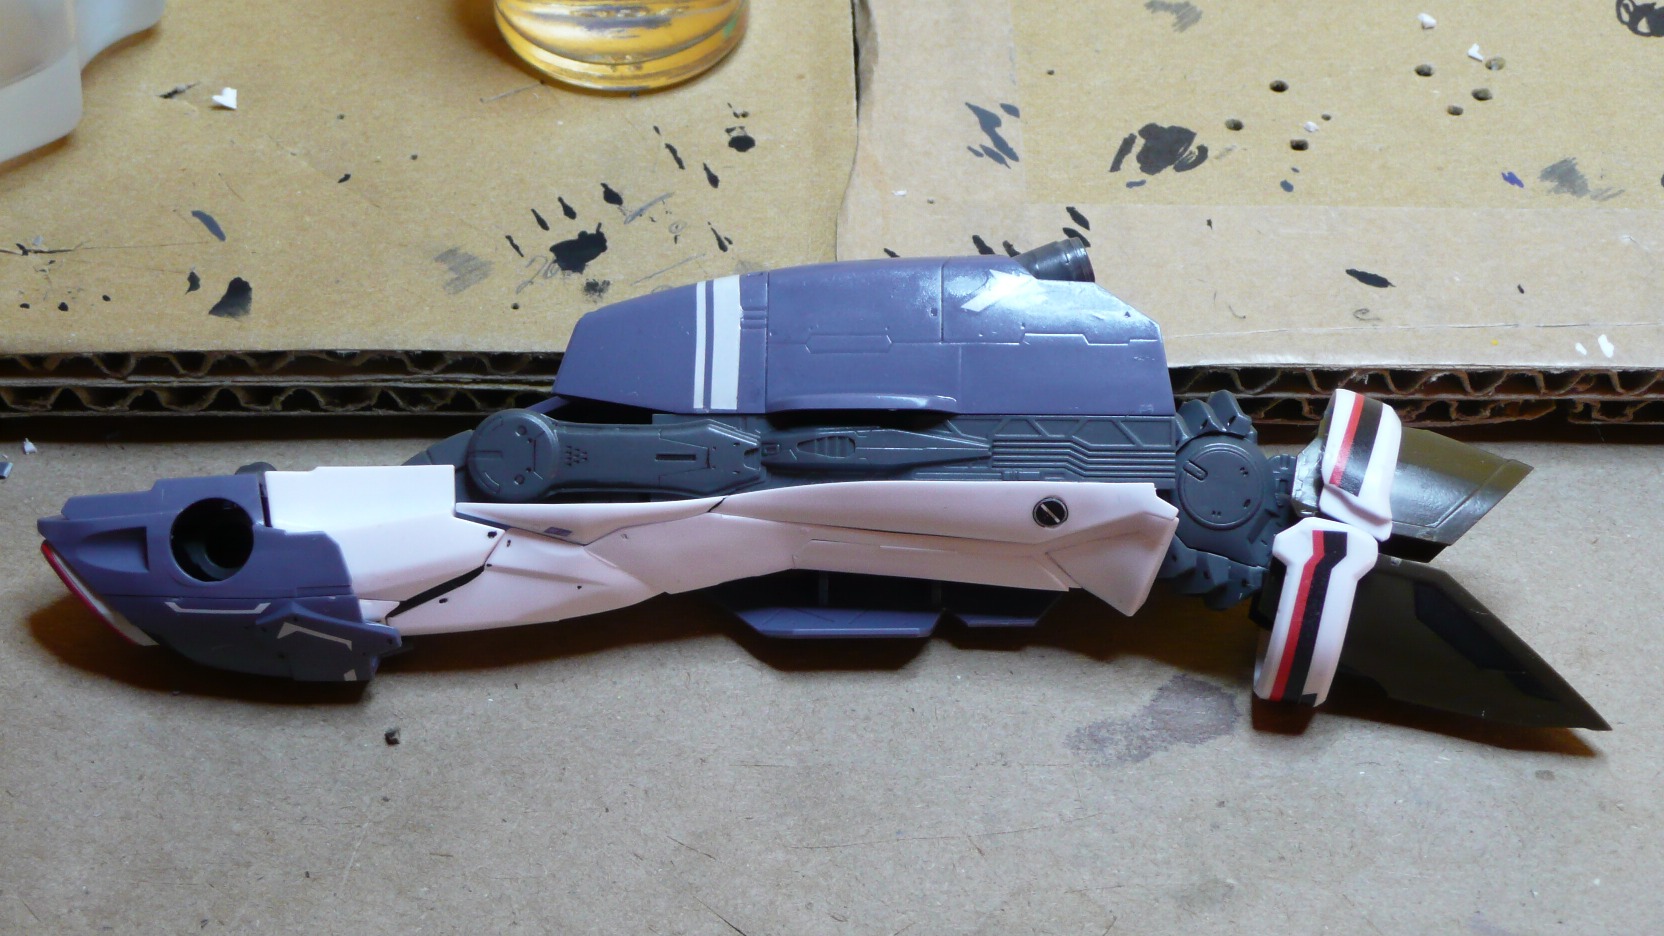
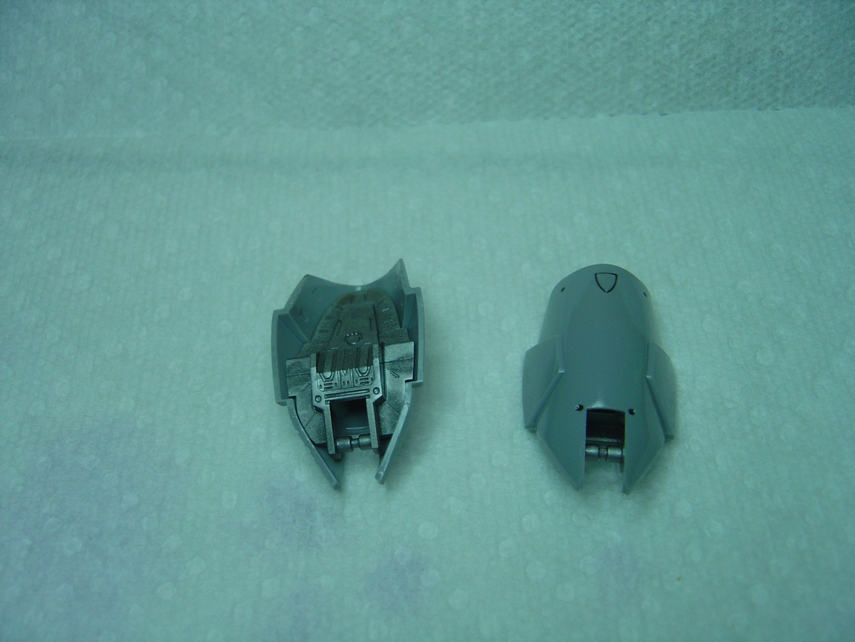
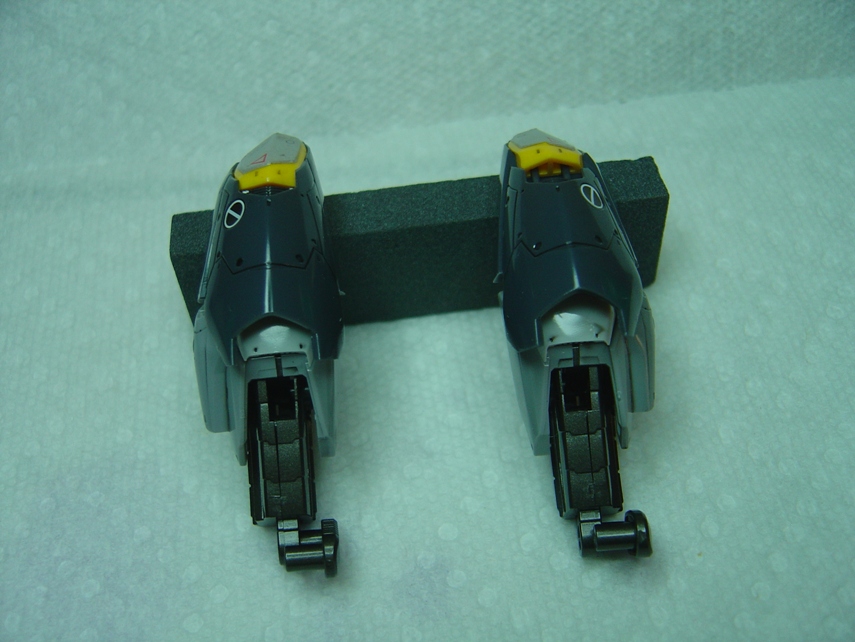
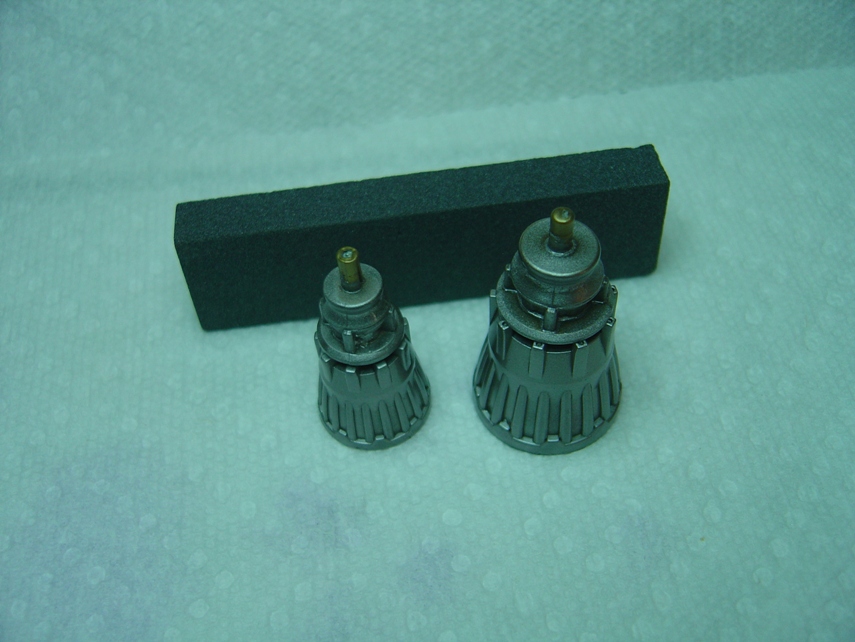
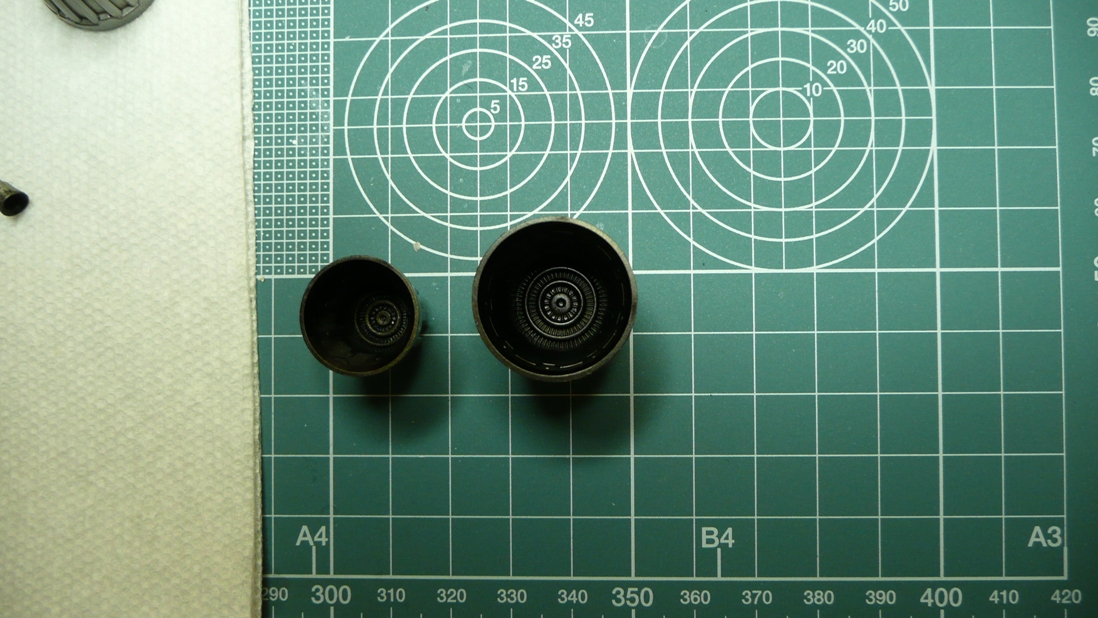
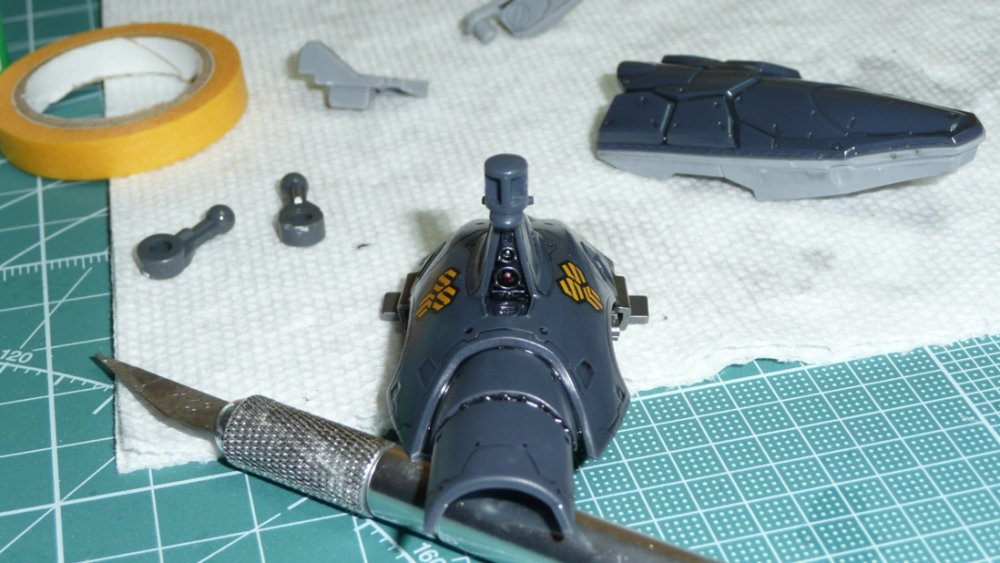
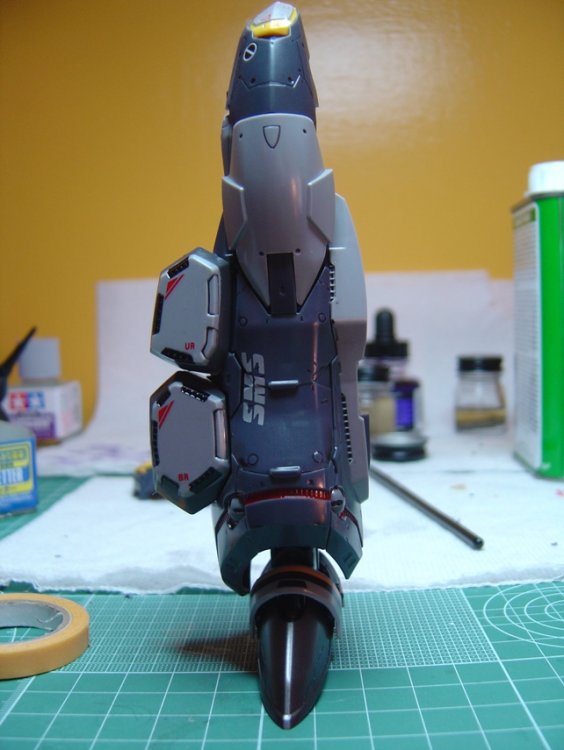
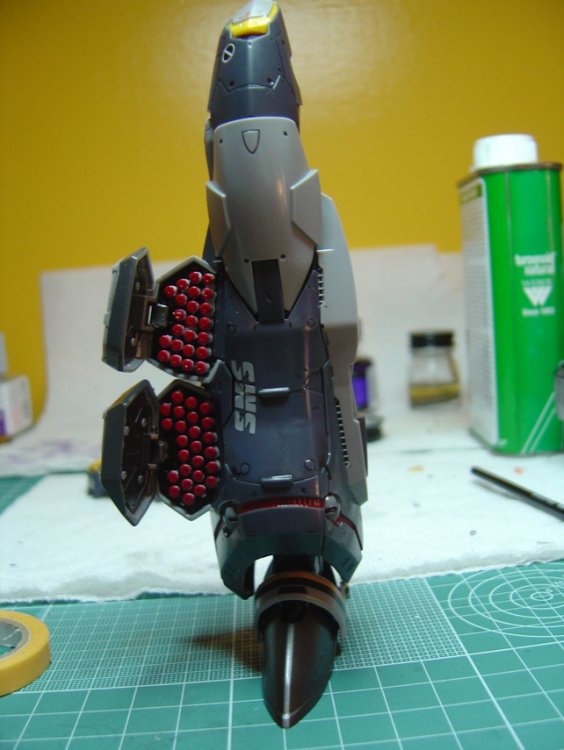
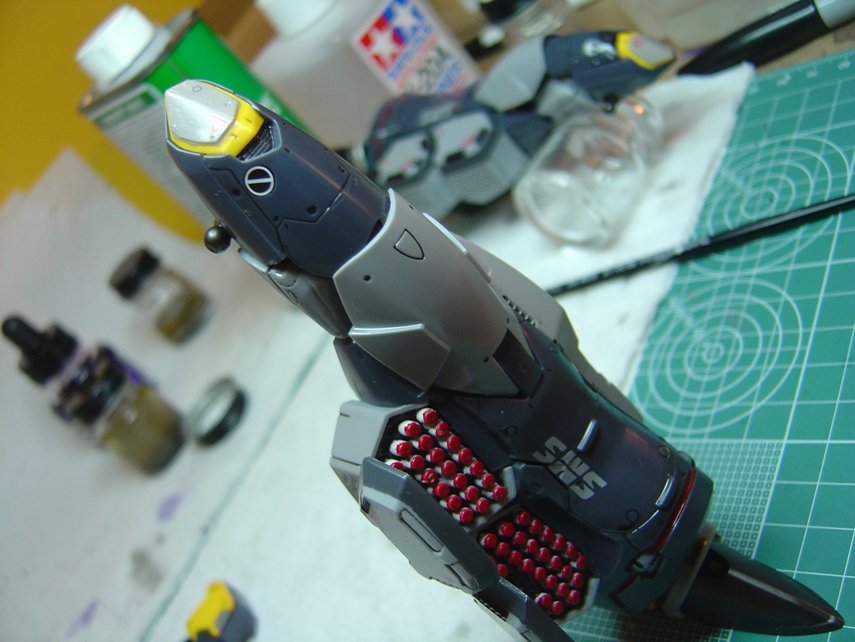
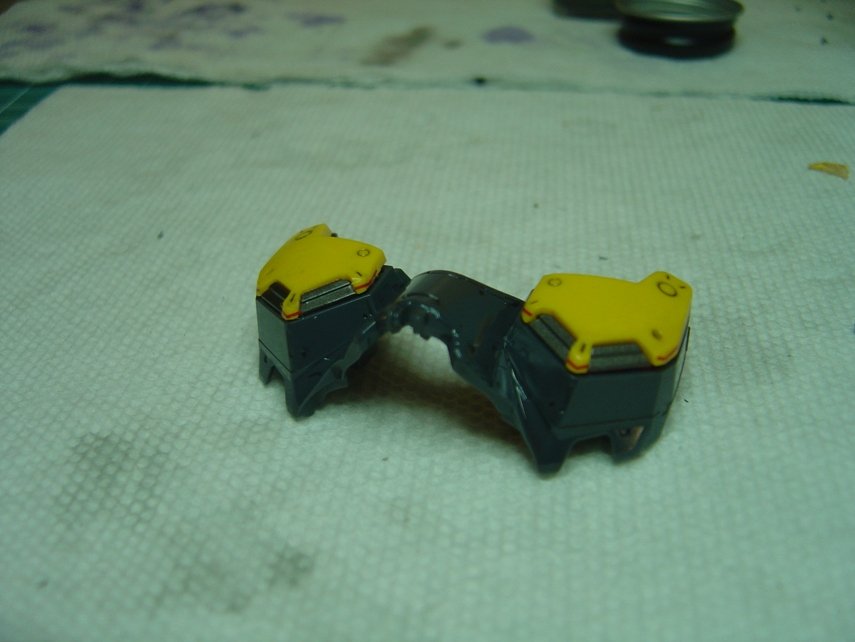
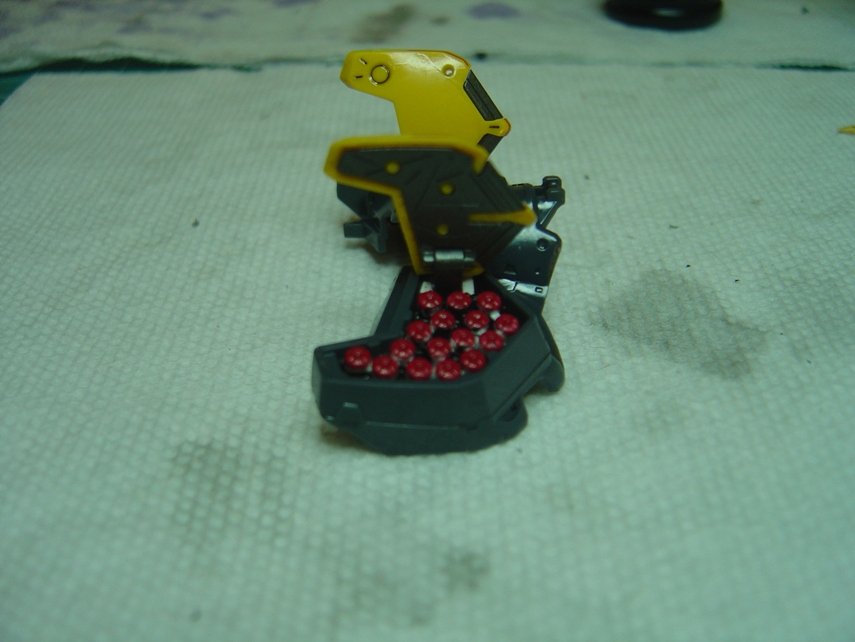
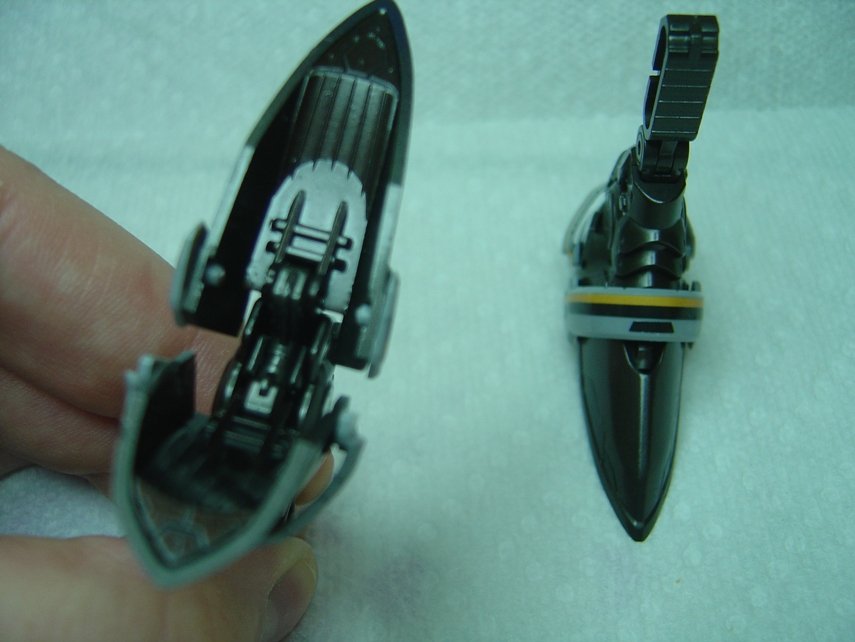
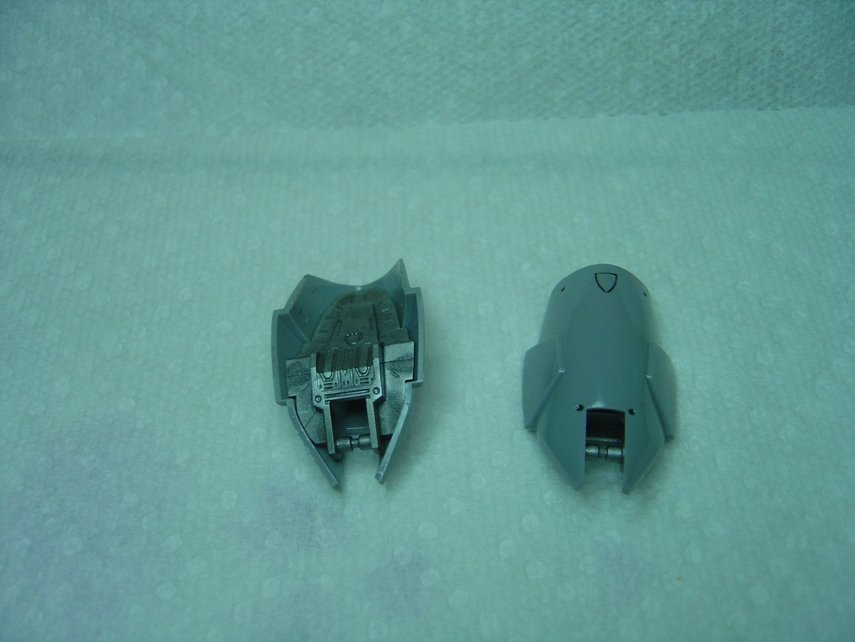
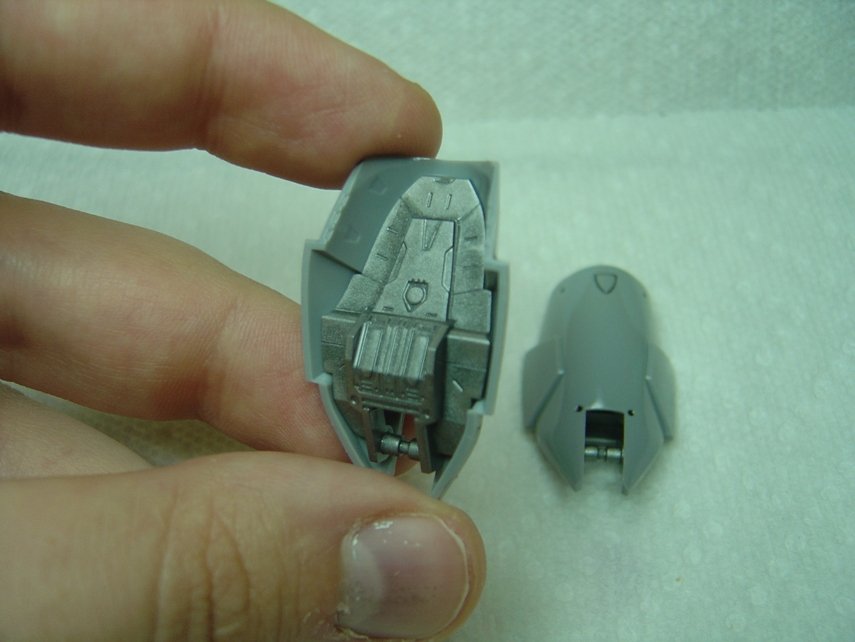
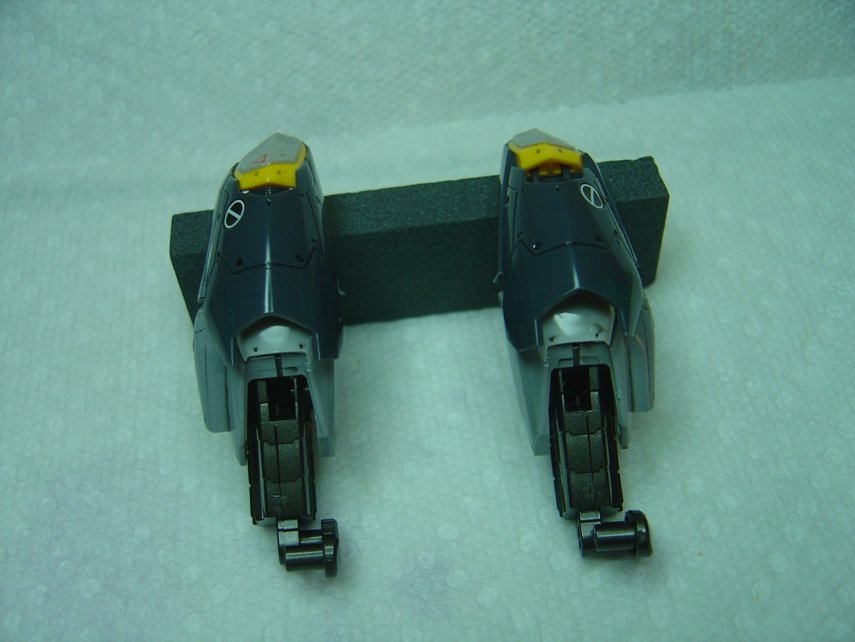
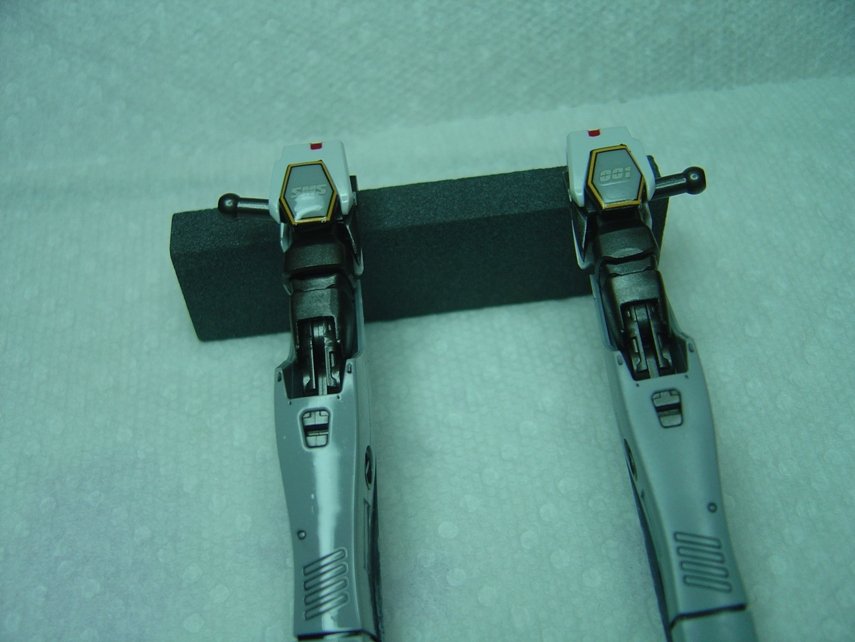
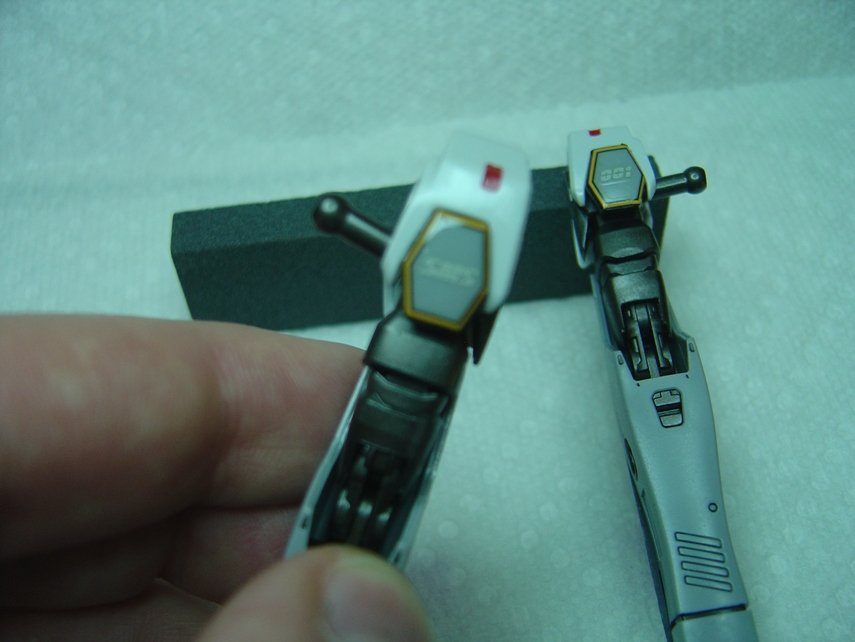
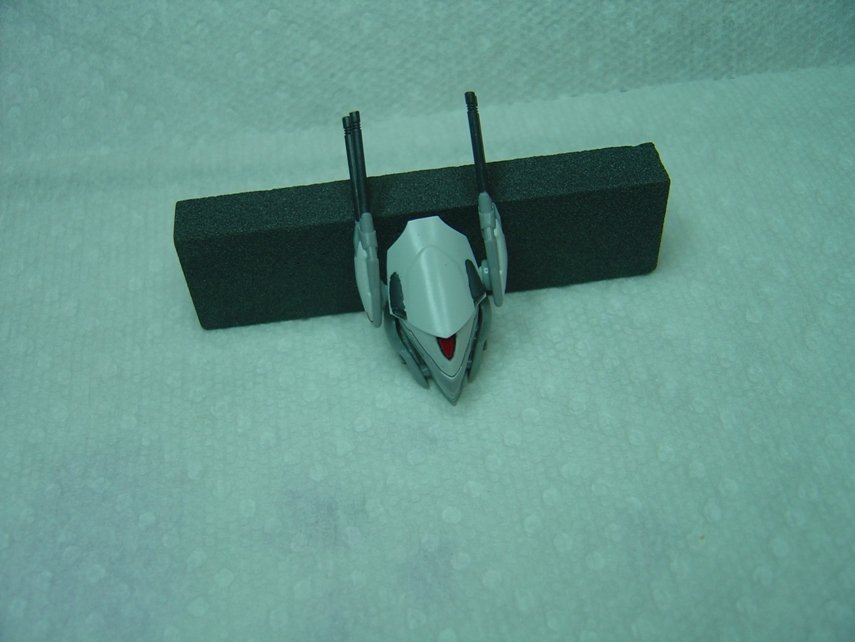
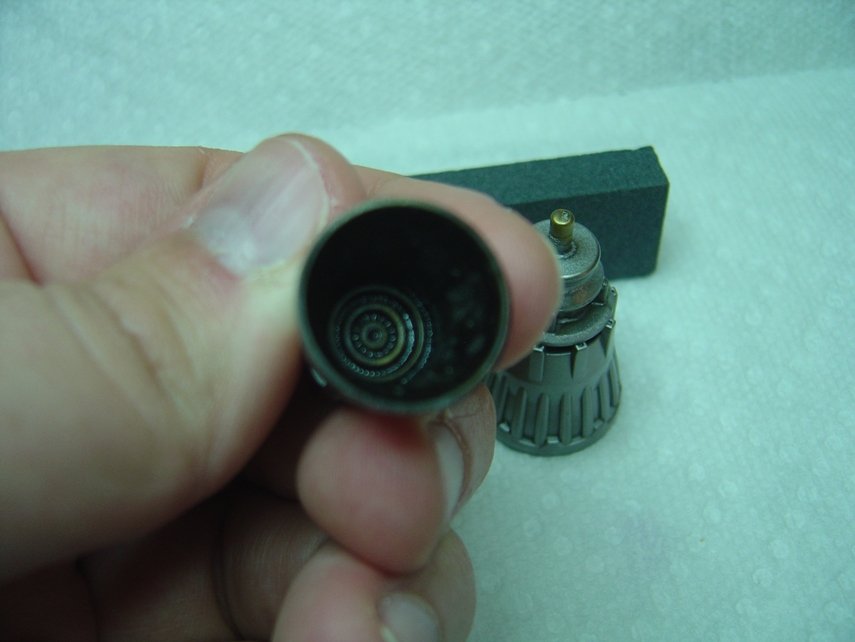
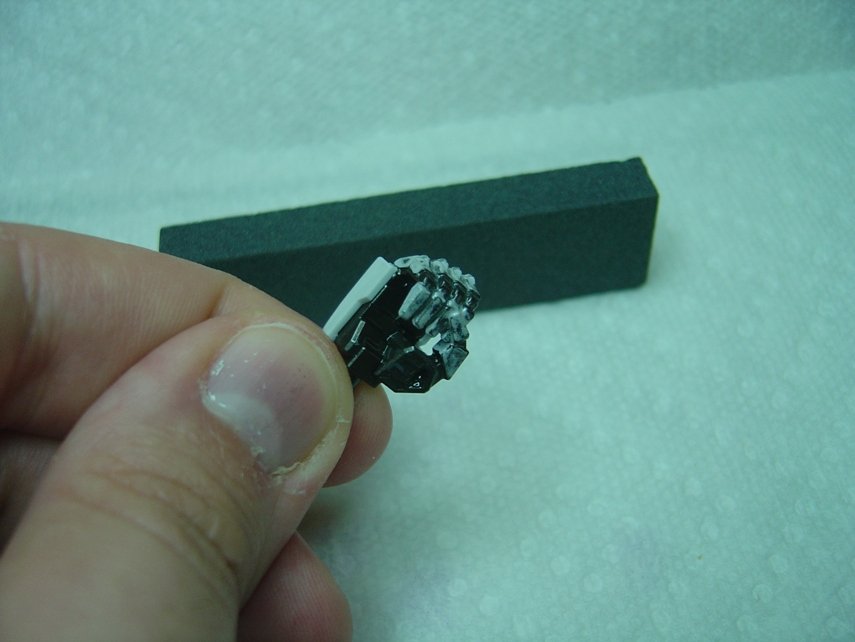
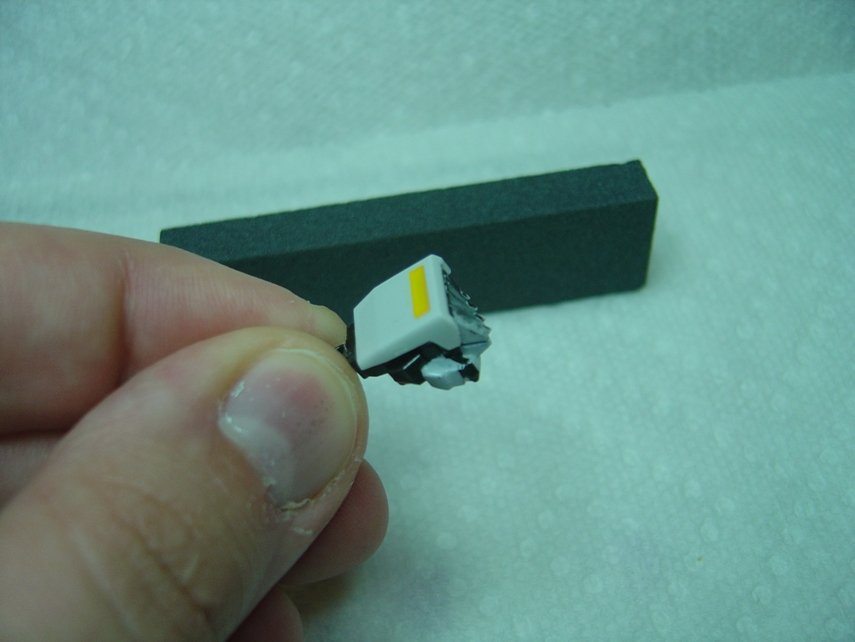
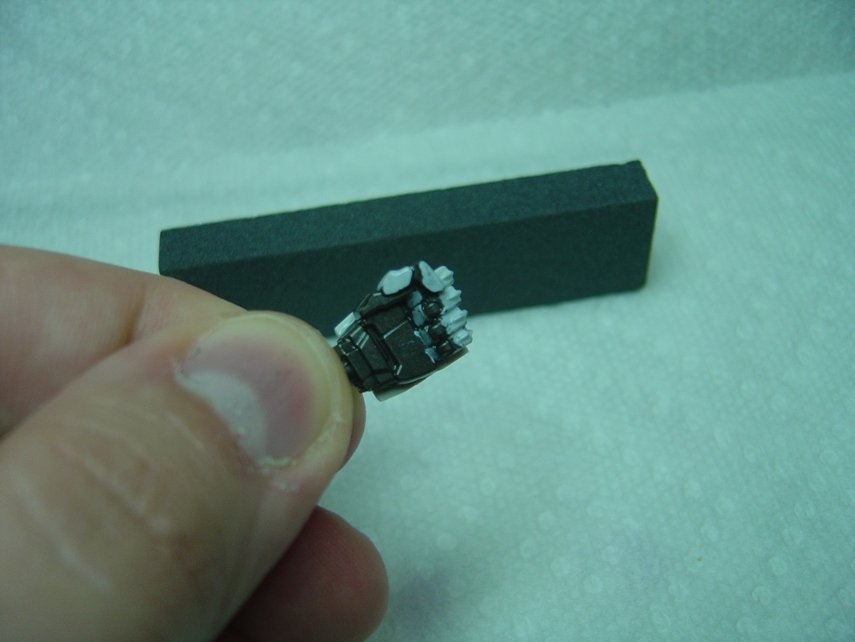
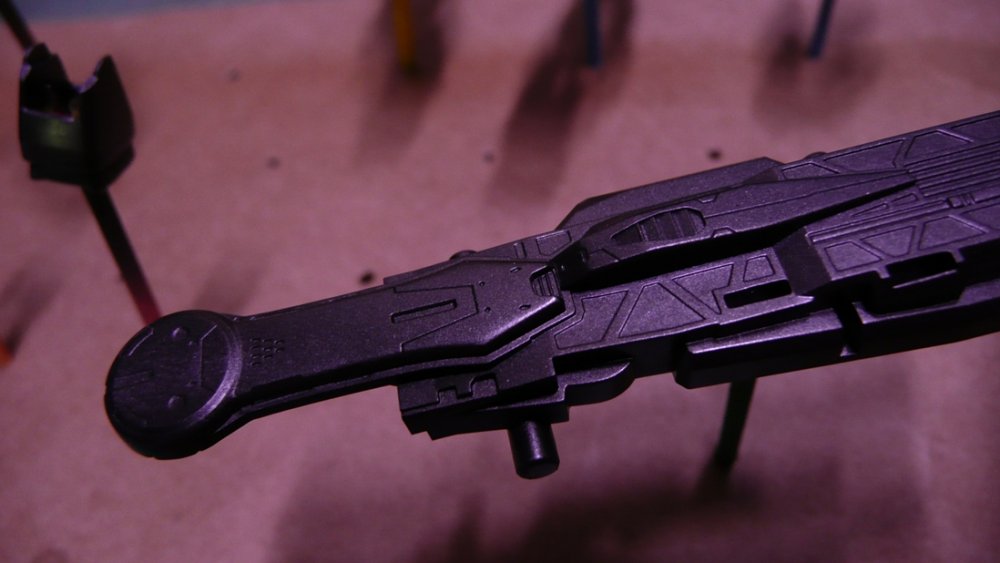
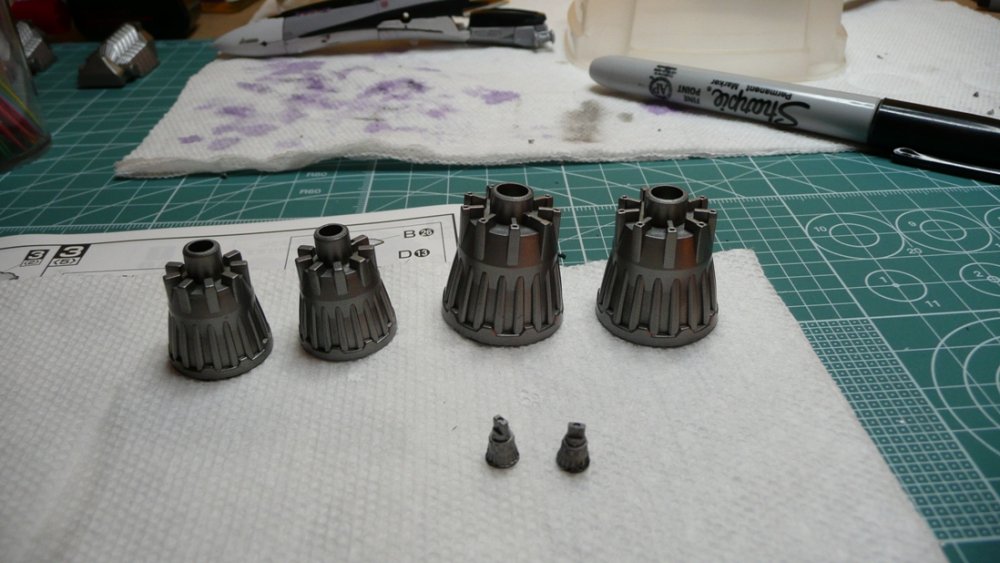
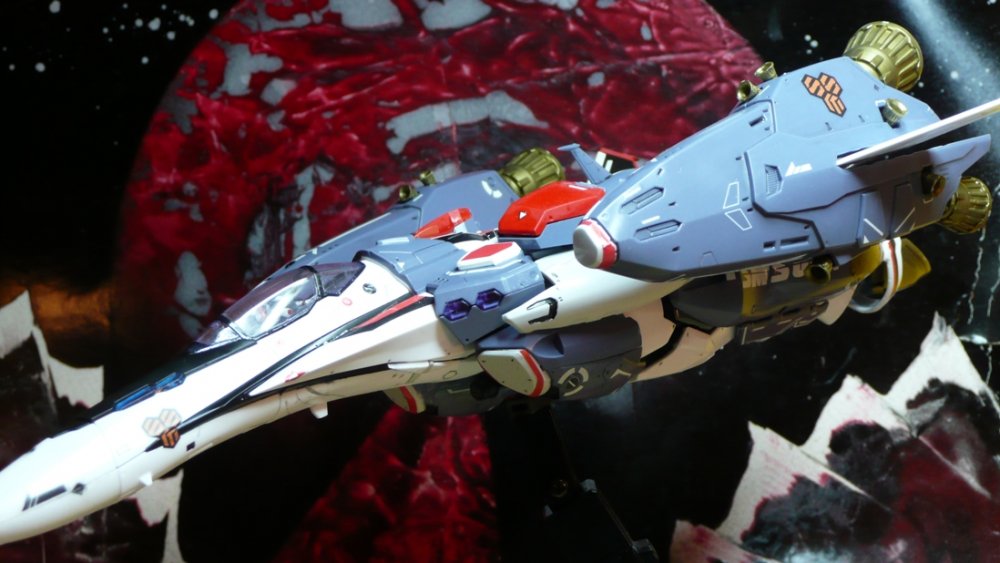
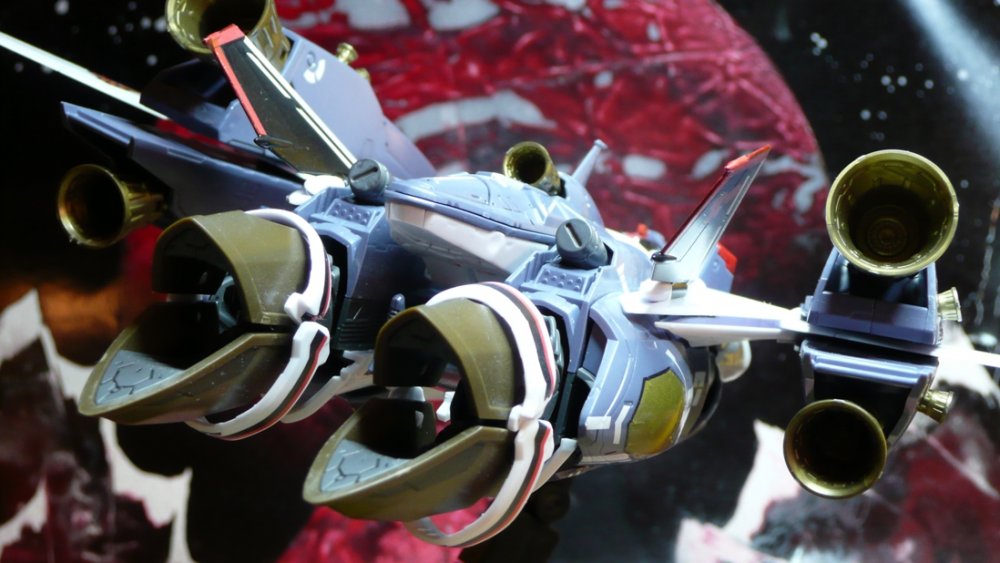
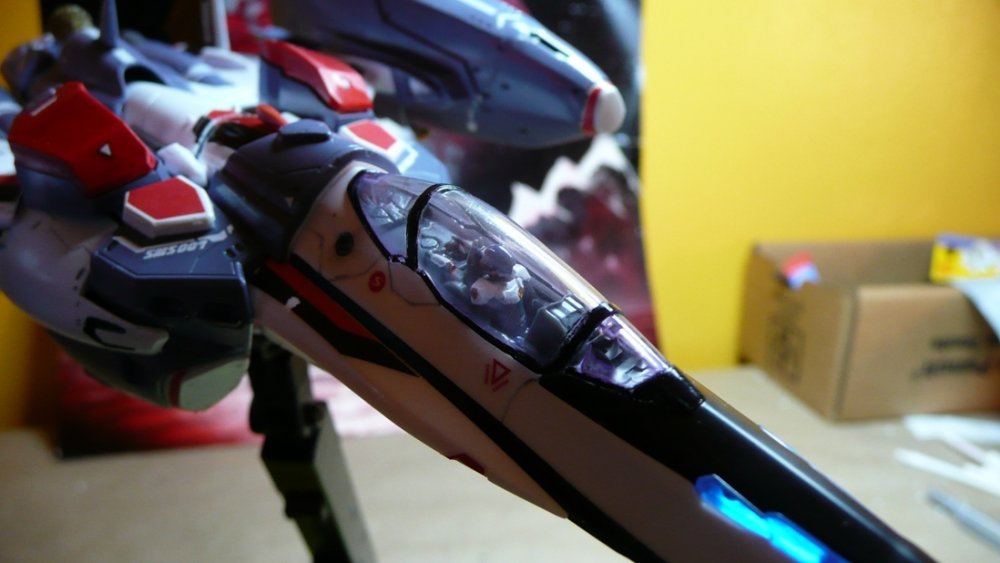
This kit has been quite a learning experience, being my second model building attempt in many years. I did learn a lot from my Alto w/ Super Packs build, but I did not learn enough it seems. For example, it is a good idea to go through the instruction booklet and cut out and prep all that is to be the same color. I have found a total of 15 peices (though not entirely my fault as i cut out the parts that are used if youre building the non armored version and painted them instead of the ones from the AA,AB etc spruce trees) which has halted a lot of the forward progress, and since I have run out of the paint(s) in question, I am stuck until my stock is refilled, hopefully this week. Please note, some of these peices do not have thier top seal coat and matte coat applied so they are still shiny (perfect example, left and right shoulder and arm assembly) Okay, starting off we have the ankle section with thrusters. I did not like the color that it was molded in originally, so i chose to do them in ALCLAD II Steel, it gave it a little bit more realistic and metallic sheen to it, the inside is painted with ALCLAD II Jet Exhaust, I figure they are discharging some sort of propellant, and that has the burn the metal so... The ankle stripes I am really proud of, compared to my Alto ankles (third picture) they were much straighter, gave me fewer problems, and fit a little better, either from gained knowledge, or Bandai improvements I am not sure. I am not sure what these next parts should properly be called...pauldrons maybe...I am not sure, either way, these were quite simple, quick wash with my Millenium pen on the plate, inside section is painted with ALCLAD II Dark Aluminium. Doesn't really do anything spectacular, just the metallic particles sink into the recessed lines. Next up is part of the main battroid leg assembly, nothing to really write home about here, except for the decal on the yellow portion. It is an odd shape, and contains a seperate decal for the red triangle should you want to paint the part rather then decal. If I had the painting skill and knew the color combination for Ozma grey I would have, so I had to go with the full decal. I trimmed off as much of the excess as I could then when it was dried I Mark Softed the hell out of it and it molded pretty nicely, though in hindsight I should have sanded off the little rivets the placed around that section so the decal would sit more smoothly. Shoulder and arm sections next, for some reason I like putting these together as its the first parts that really seem to take shape quickly, a lot of the other steps have you making all sorts of subsections and what not before you put them all together much later. Ohh the hexes, how you haunt me so. I messed up so badly on my Alto I was terrified to attempt them again. This time however I got some tips from reading other peoples build posts. This time to start right off I blackened the exterior and immediately it looked ten times better then my Alto hex (picture number eight). After the paint dried, I scraped the areas where paint was not supposed to be with my knife and gave it a nice clean edge then I dipped the part in Future and let it dry overnight. I am not sure if there is any benefit of having a layer of Future down on a part before decaling, but I have noticed that I am getting much less wrinkles using this method then I did on my previous build. With a layer of Future down I then trimmed off much of the excess decal, including some of the black (since it is already borded black to begin with the black decal part is not needed) the 001 hex my hand unfortunately slipped and I cut off more black then I wanted so it is a little lopsided on the hex, while the SMS side is much more even and sits properly. Here is the battroid head peice naturally. I do not like foil decals because they tear so easily and you can just as easily put down a layer of silver then a clear color over it to get the same, if not better, effect. On this however, I did not use a silver, instead I used a Tamiya Gunmetal wash then applied the red, gave it a little bit of a darker reflection then a silver would have. Not seen is the black outline around the eyes which really gives it some depth and bad-assery. I don't know what gold dye Bandai uses in thier thruster molds but it really, really sucks, full of swirls and discolorations. All future kits I am going to be painting with ALCLAD II Dark Aluminium, makes them look so much better, and the metallic specs naturally weather the part and make it appear like it sees a lot of use. Inside is painted with the same ALCLAD II Jet Exhaust for the same reasons as stated above with the ankle thrusters. It just gives it a little more realism in my opinion. Last comes the hands. I really really dislike the way these came out, I started with an ALCLAD II Steel base coast, then painted them with a grey mixture. They didn't look half bad, then I got the bright idea to try an oil wash on them. More power to you guys who know how to do this, but I followed the steps on Aircraft Resource Center and for the life of me I cannot get it to work well. The turpenoid ate right through the future and dissolved the paint when I dabbed it up with a Q-tip the next morning. Two weeks later, run under soapy water, dried, Future'd and clear coated, they are still a bit sticky from the turpenoid. However, I am not anal enough to strip the paint off and do it again, I will just justify it to myself by saying those hands are constantly being pulled out and moved when transforming, so that is just normal wear and tear.


-
Does anyone happen to know of a fanmail address for May'n or Megumi Nakajimi? I am having great difficulting finding any information because Google translator stinks.
-
Paid But on a side note...anyone have an idea why paypal.com gets a 404 page not found error and/or "There is a problem with this website's security certificate. Navigation Blocked" error when I try to go to paypal.com on my computer, but when I go downstairs on the other computer, it works fine. Any suggestions?
-
Definately interested in a set or two
-
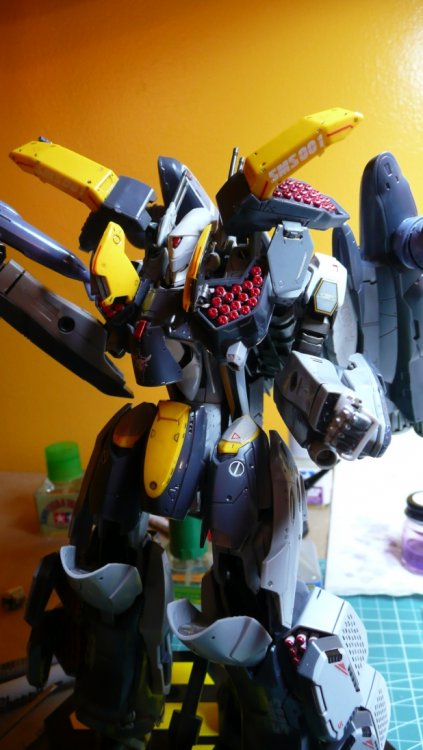
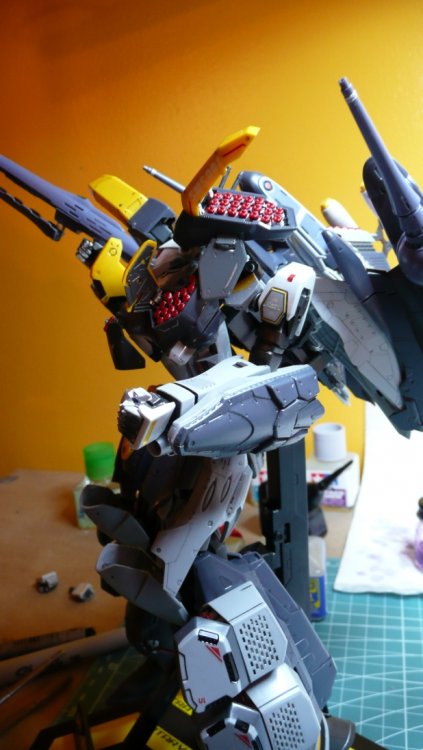
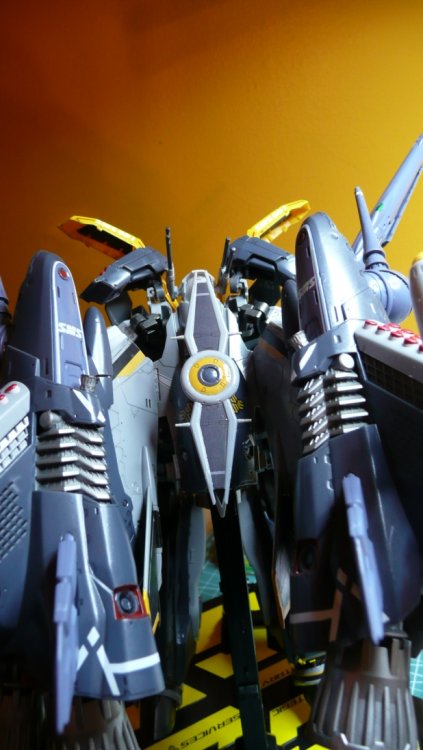
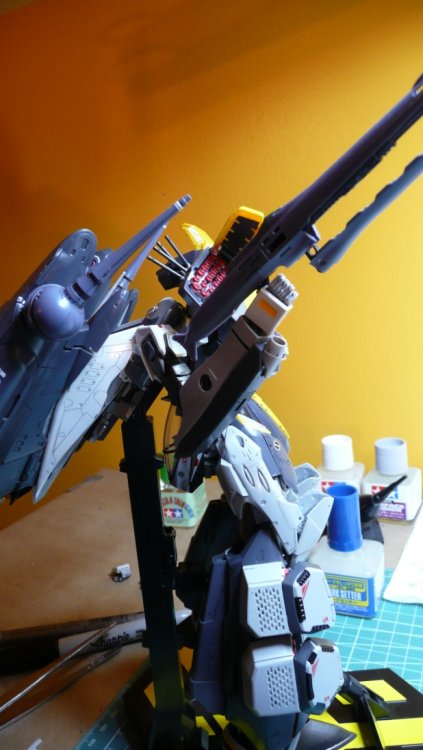
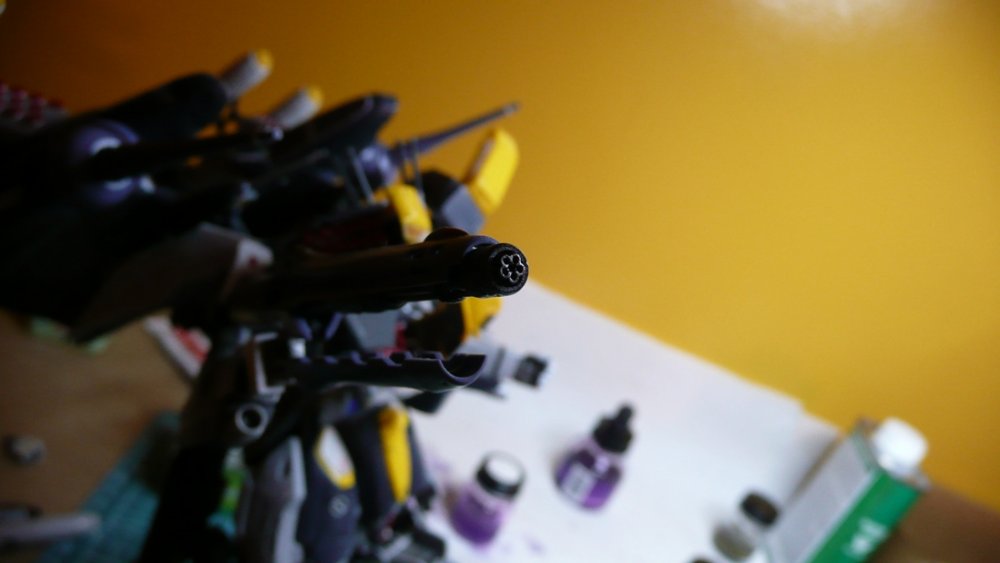
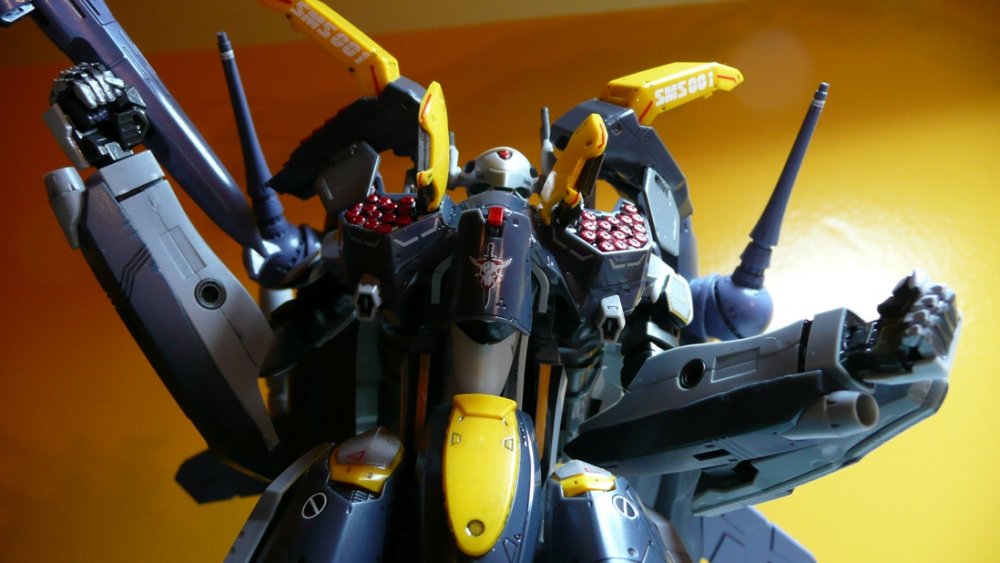
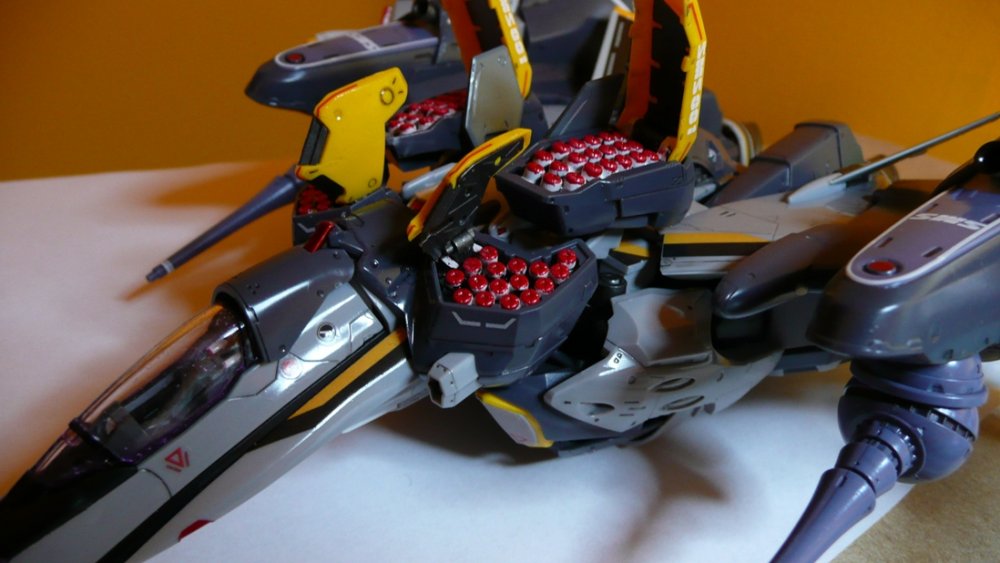
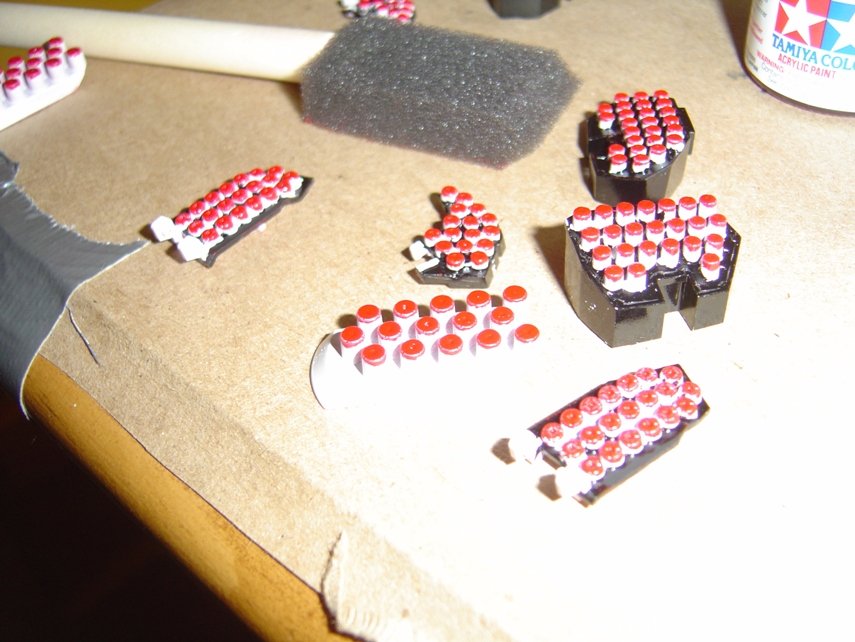
I have recently begun work on my VF-25S Armored Messiah, and so far my work is going very slowly due to lack of skill (and needed materials such as paints). I started off by deciding that I wanted to paint the internals a nice steel color instead of the standard grey. That took most of the time, trimming parts and getting them on toothpicks. From there I began work on the missiles, as I cannot stand that they are solid red, so I painted them white, blackened their holder, and use a craft sponge to paint the tips. It worked surprising well, a few did not come out perfect so require a little touch up before I proceed. Plastic still has a tearing issue like the Alto, so there are still a lot of imperfections when I remove them the spruce, but I lack the skill to really fix it the way I want to. Noticed on the far lower right of the attached picture The thrusters too I did not like how they were molded with lots of swirling, so I painted those a nice dark aluminum color that I really like how its results turned out, the inside is painted to look like burnt metal. I am currently working on the battroid head; I have to bypass the clear canopy parts and front sensor til I can get my hands on some FW Ink.


-
1/72 Bandai VF-25F Messiah build-up step-by-step (sort of)
Cowpeeler replied to wm cheng's topic in The Workshop!
I finally finished my Alto with super packs (sold seperate version) This was my first model in roughly twenty years. Contained some of the worst decals ever, and chip at the slightest touch. The missile covers I had to paint red because the decal provided was horrible (I also omited some of the more crappy decals because they were too big/short) 1mil sellophane type stuff. Unfortunately due to my sausage like fingers I broke the shoulder joint during assembly and was side lined building for a week while I constructed a new one. This fix however prevents any transformation so it is stuck in fighter mode only. It is hard to see because of the light, but I was able to tint the cockpit a nice light shade of purple using Tamiya purple in Future and dipping it. I got a lot of tips and hints as I built, so my next model (armored Ozma) I believe will be much smoother and have less mistakes.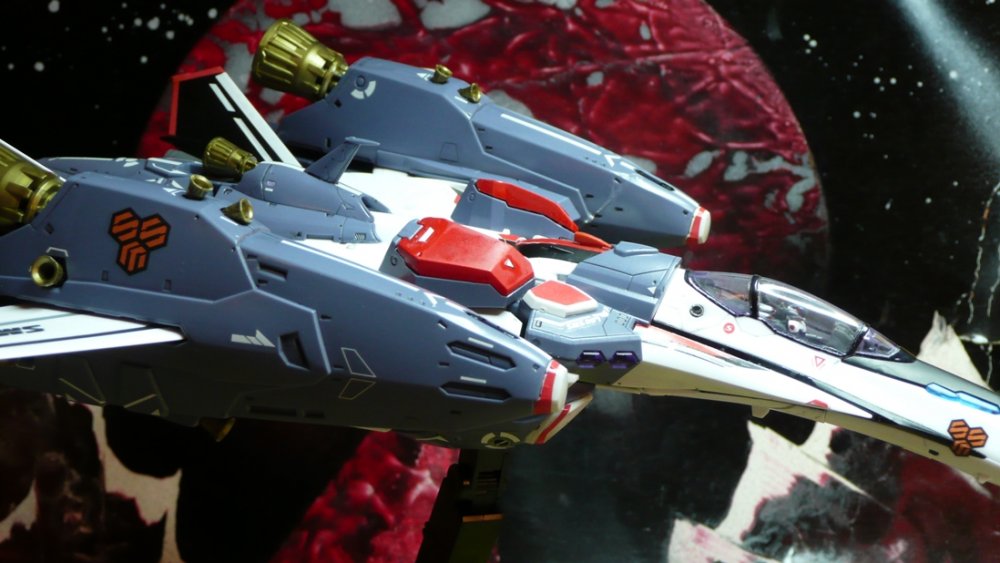

-
So my Super parts arrived yesterday and I think I am in over my head. Now I can figure out the instructions for building the model okay, but the instructions for the super parts has my completely confused. Has any kind soul scanned in the manual and translated or anything like that to help out those who aare not very skilled model makers, such as myself. I have not started on my Alto because I had to order some more supplies, then I heard that in order to put the super parts on you needed to have an unbuilt model so I am glad I did. Which also brings up another point, has there been mention of a release date, or preorders being taken for Ozma's Armor packs? I am trying to put my models together as close to the anime as I can. Any help would be great guys. You do awesome work.