mickyg
-
Posts
2631 -
Joined
-
Last visited
Content Type
Profiles
Forums
Events
Gallery
Everything posted by mickyg
-
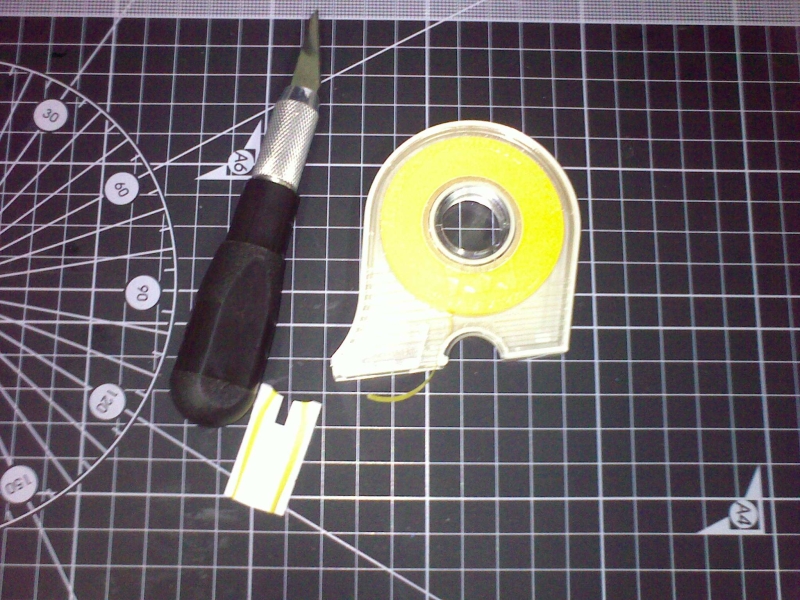
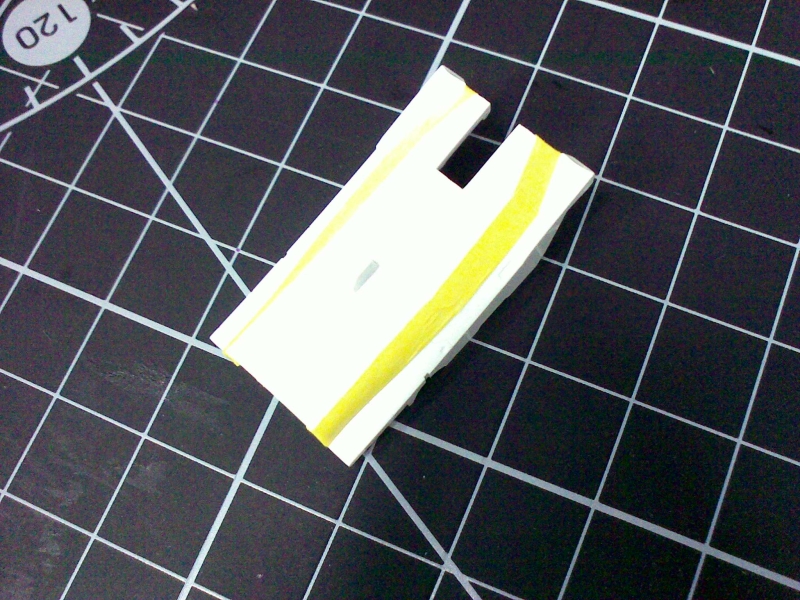
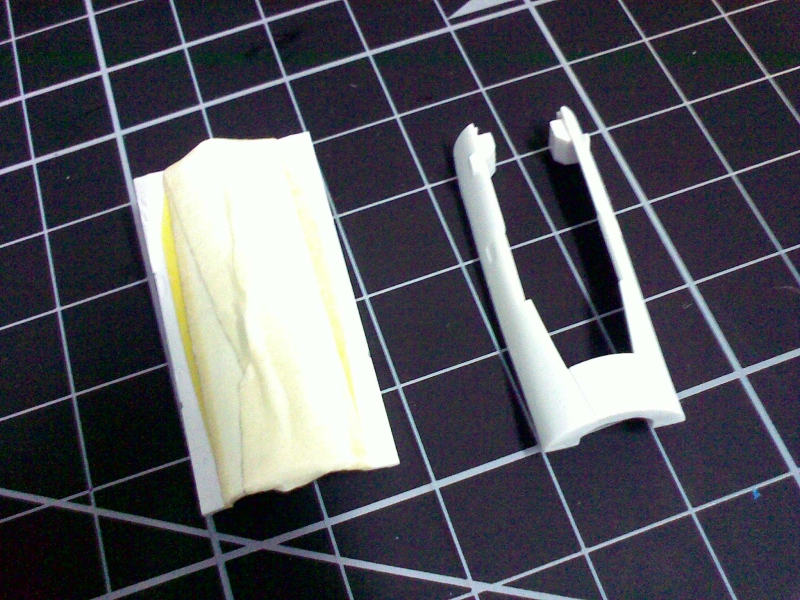
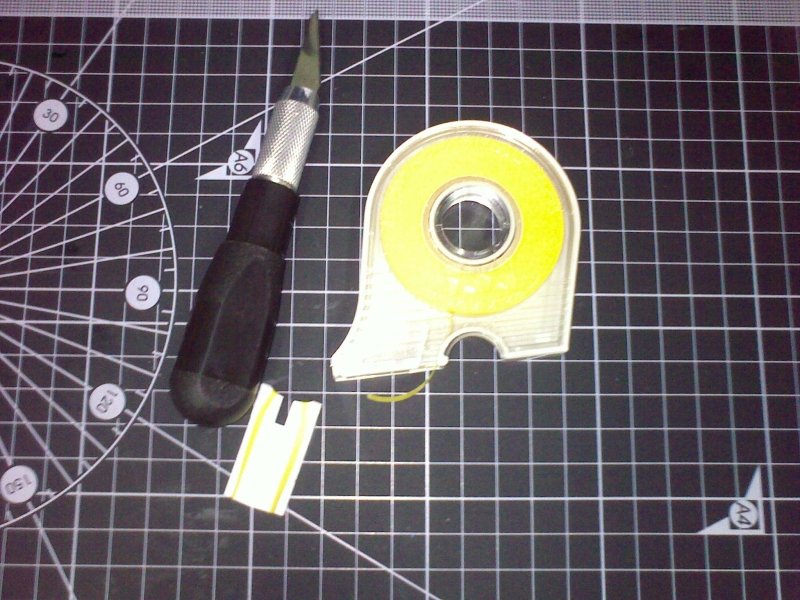
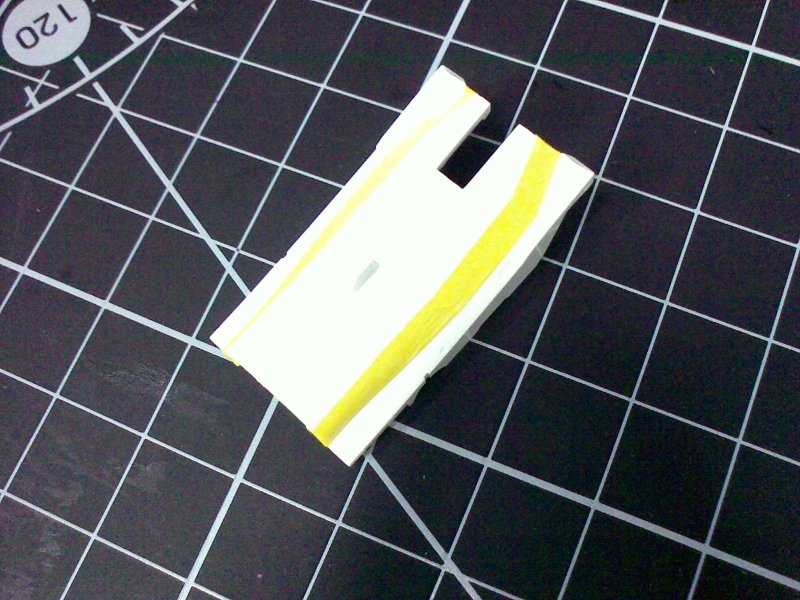
EDIT: Added pics Another brief update and a question. I masked off the underside of the Lerx for the bottom fusalage section. This is a part that is molded in white on all the kits but needs to follow the same colour for the rest of the Lerx. In the case of the VF-25G, it's a very dark blue. The S and F versions are black. I also decided to do the part that fits around the front landing gear doors, as it's molded in white and is meant to be blue, like the rest of the plane. Required Tools (hobby knife, cutting mat, Tamiya masking tape) for cutting thin strips to mask: The good stuff applied: Regular masking tape for the larger areas, and the middle nose section prior to any painting: I thought having the colours spelled out for me on the box/instructions would be a huge help and some quick testing showed the mix to be pretty accurate, so I went forward with the intention of just painting the white parts with the appropriate blues. When I was almost ready to start painting, I decided to do the right thing and prime first. My reasoning was that acrylics tend to scratch easily on bare styrene. If I primed, perhaps the primer would "bite" into the plastic a bit better and the acrylic paint would stick to the flat base better. So I put down a coat of Mr Base white and let that dry for 24 hours. From there, I started wondering if white was the best base coat for a bright blue (which the G version most definitely is). So I ended up putting down a coat of neutral grey. I'm not sure if this was the right move. For the dark blue I think it'll be OK. But the bright blue is just too translucent and I fear I'll need to strip the blue and grey and just put blue down. After that had dried (about 10 minutes - yeah not totally dried by any stretch) I put down a couple coats of bright blue. To my annoyance, the blue was not even close to the molded blue of the plastic on the rest of the parts. Perhaps I'm dreaming trying to match colours this way and all the blue will need to be repainted? So two questions: What's the best base colour for bright blue or dark blue (OK, that's 2 question in one!)? When I started putting down coats, I noticed the spray pattern on my airbrush was a bit granulated. The "wetness" of the paint meant the "dots" settled down smoothly but is this a sign of too little air pressure on the airbrush, too thin, thick, etc? Any tips would be greatly appreciated for this novice airbrusher. I took some pics but left them at home. Will edit this tonight to show progress.

-

Thoughts on the SDFM aftermath episodes
mickyg replied to dreamweaver13's topic in Movies and TV Series
Thanks! I'm 31 so definitely not a young whipper snapper that is at all "Surprised" as you've rightly pointed out. Yeah, I did say great. If anything, I am suprised that something that was marketed to kids (in the states at least) had such a well written and rich storyline. Just proves that it was not originally written for kids! Or maybe that's too big an assumption. That's probably what I should have conveyed a bit better. Of course, this comment was a page ago so could now be moot! Ok, one last edit - just read the rest of the comments. What I should have said is that I'm surprised that my 6/7 year old brain could see this series as something really special when I was that age and here I am, now over 30 and I can still see it as something special. Why can't new stuff be this good? Then again, when was the last time I sat down to watch a saturday morning cartoon? Honestly, I don't think we've had anything this good as something marketed to children since. I used to be a massive Transformers cartoon fan too, but the story line there was nowhere near as "real" as what we see in Macross. Ignoring the giants and unbelievable technology of course! Does that help or have I dug myself an even bigger hole? -
Thoughts on the SDFM aftermath episodes
mickyg replied to dreamweaver13's topic in Movies and TV Series
Excellent writeup! Couldn't have put it better, had I tried. I also had experienced the RT side of this in all its fullness but unlike you, growing up in the US, that was my only exposure to the series as a kid. I must've been 6 or 7 years old. Unfortunately, I also read all the Jack McKinney novels (and I mean all of 'em!) as a teenager and that so permanently solidified my mental image of this universe that it's taken almost 20 years and re-immersing myself in Macross to allow me to even think of a different story line! Don't flame me, but I actually loved the novels! The "unfortunately" statement is because they were so easy to read and so easy to get involved with that it was hard not to imagine things from the perspective of the two that co-authored the books. So anyway, going back to my childhood, I always had a thing for Lisa, er Misa and my friends always liked Minmay. As I recall, I liked her from episode 1 even! It was the first cartoon that I can remember actually having a lasting effect on me, long after they stopped showing them on the TV stations I had available to me. I'm only just now starting to re-watch SDFM in its original format, with English subs. I'm only up to about episode 10 so there's far more to get into. It's great how a series more than 25 years old still can entertain so well! -
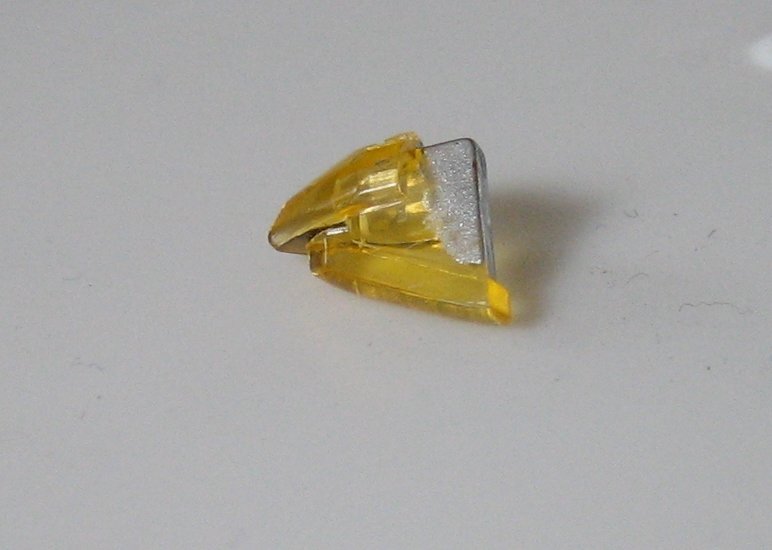
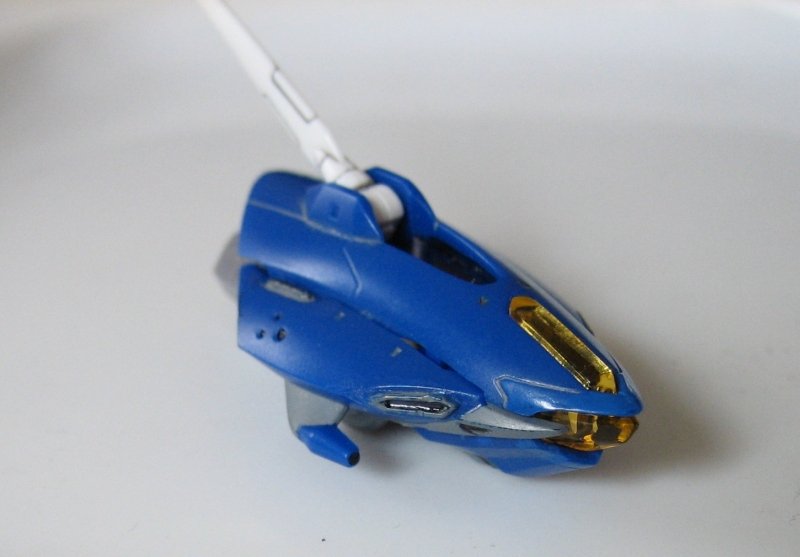
Next up, the head. Why? I don't know, I think it might be a combination of curiosity and impatience. This step gives me a chance to play with some washes for the darker blue colour. The results are not neccessarily what I had in mind but I'd like to know what people think. I also tried the add some reflectiveness to the lense assembly on the head. That's another one that I'm not sure I like. Unfortunately I used silver enamel so to remove it will require sanding. I'd love to use thinner to get rid of it but I'm fairly certain that'll ruin the clear yellow plastic. In hindsight, I think the way it comes is probably the most reflective and bright look. The silver just ends up looking black when it's fitted into the head. Probably the shadows cast by being inside the closed head... As for the blue and the wash I mentioned, I tried to go with a grey for the head, both on the antenna and the head. Again, in hindsight, I think a darker wash for the blue is in order and a lighter gray for the white parts. Which is kind of backward to what I see in stuff like WM Cheng's work. If he's got a black panel, he uses an almost white wash. Here it just doesn't quite look right. Mister Cheng, if you're reading this, I'd love to know your thoughts! The head was painted instead of decals. I used the recommended colour mix for the frame around the "eye" lense assembly. It's a very subtly lighter shade of blue and almost isn't visible as a different colour. The grey is just plain old neutral grey and I used the recommended blue colour for the rest of the body to touch up a few areas where the plastic had gone white around the sprue marks. The results were actually pretty good in my opinion. I'm hoping a semi-gloss clear coat will tie it all together (after the decals for the arrows have been applied). Anyway, here's the pics: This'll be the last update for a few days - got a crazy week and this brings things up to date with where I'm at in the build.

-
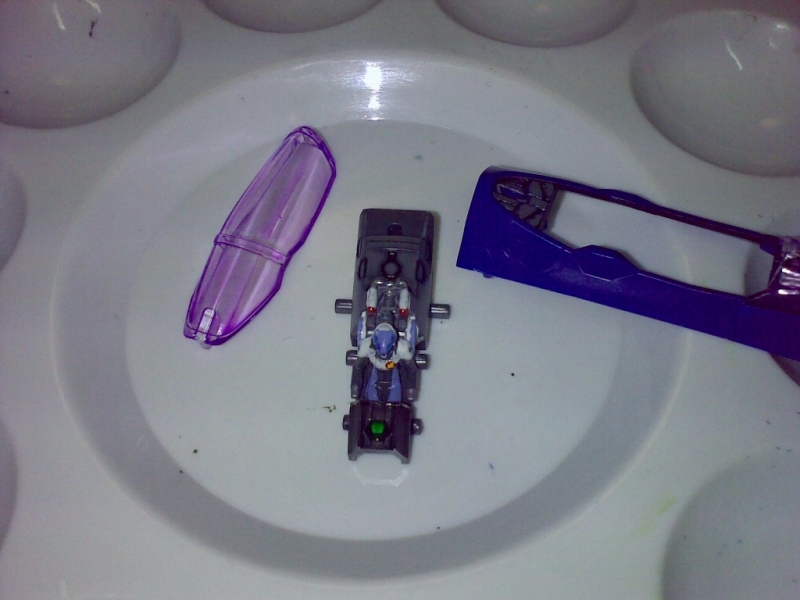
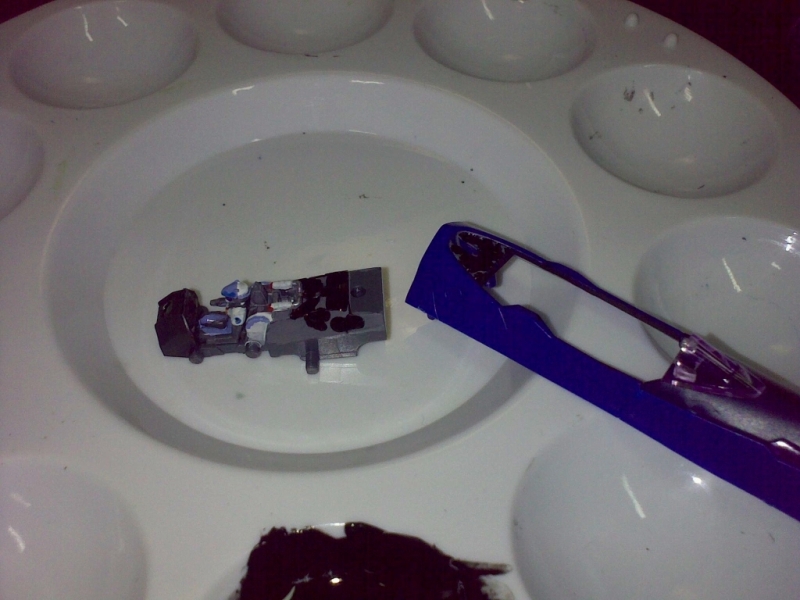
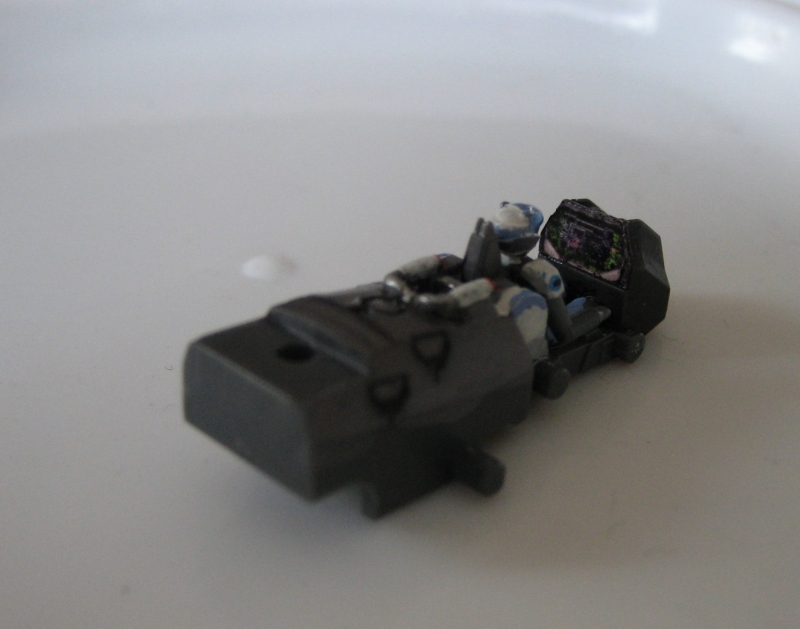
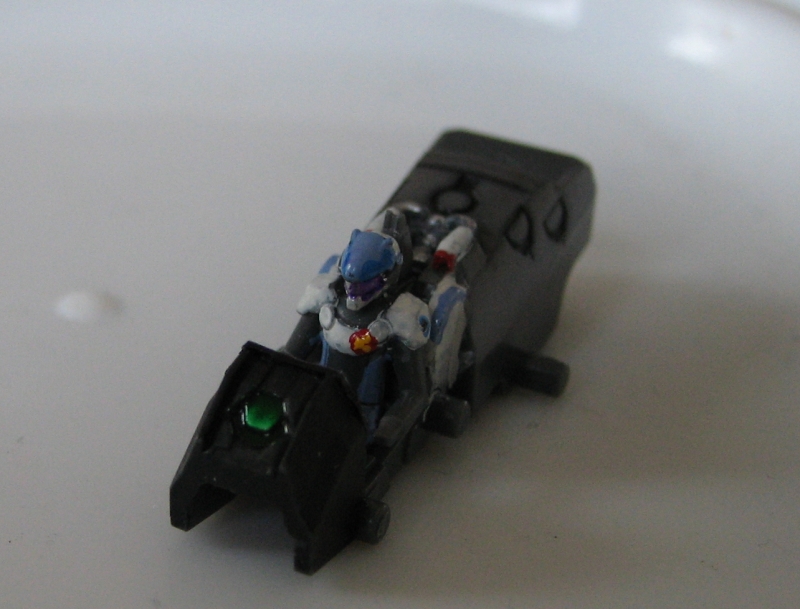
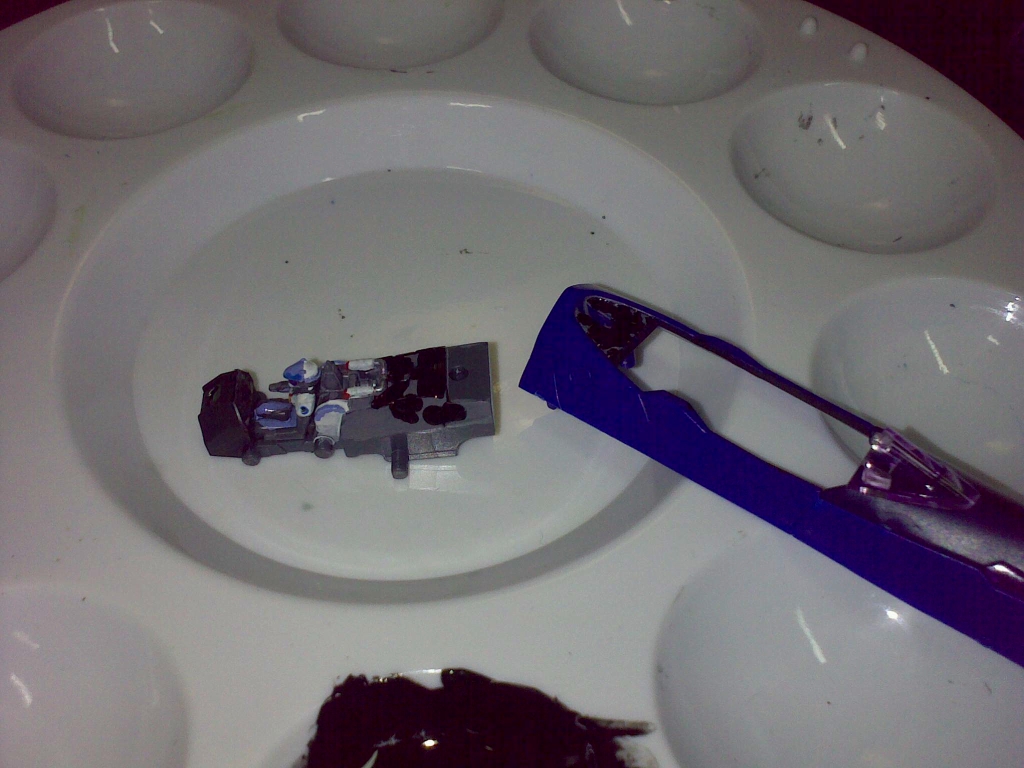
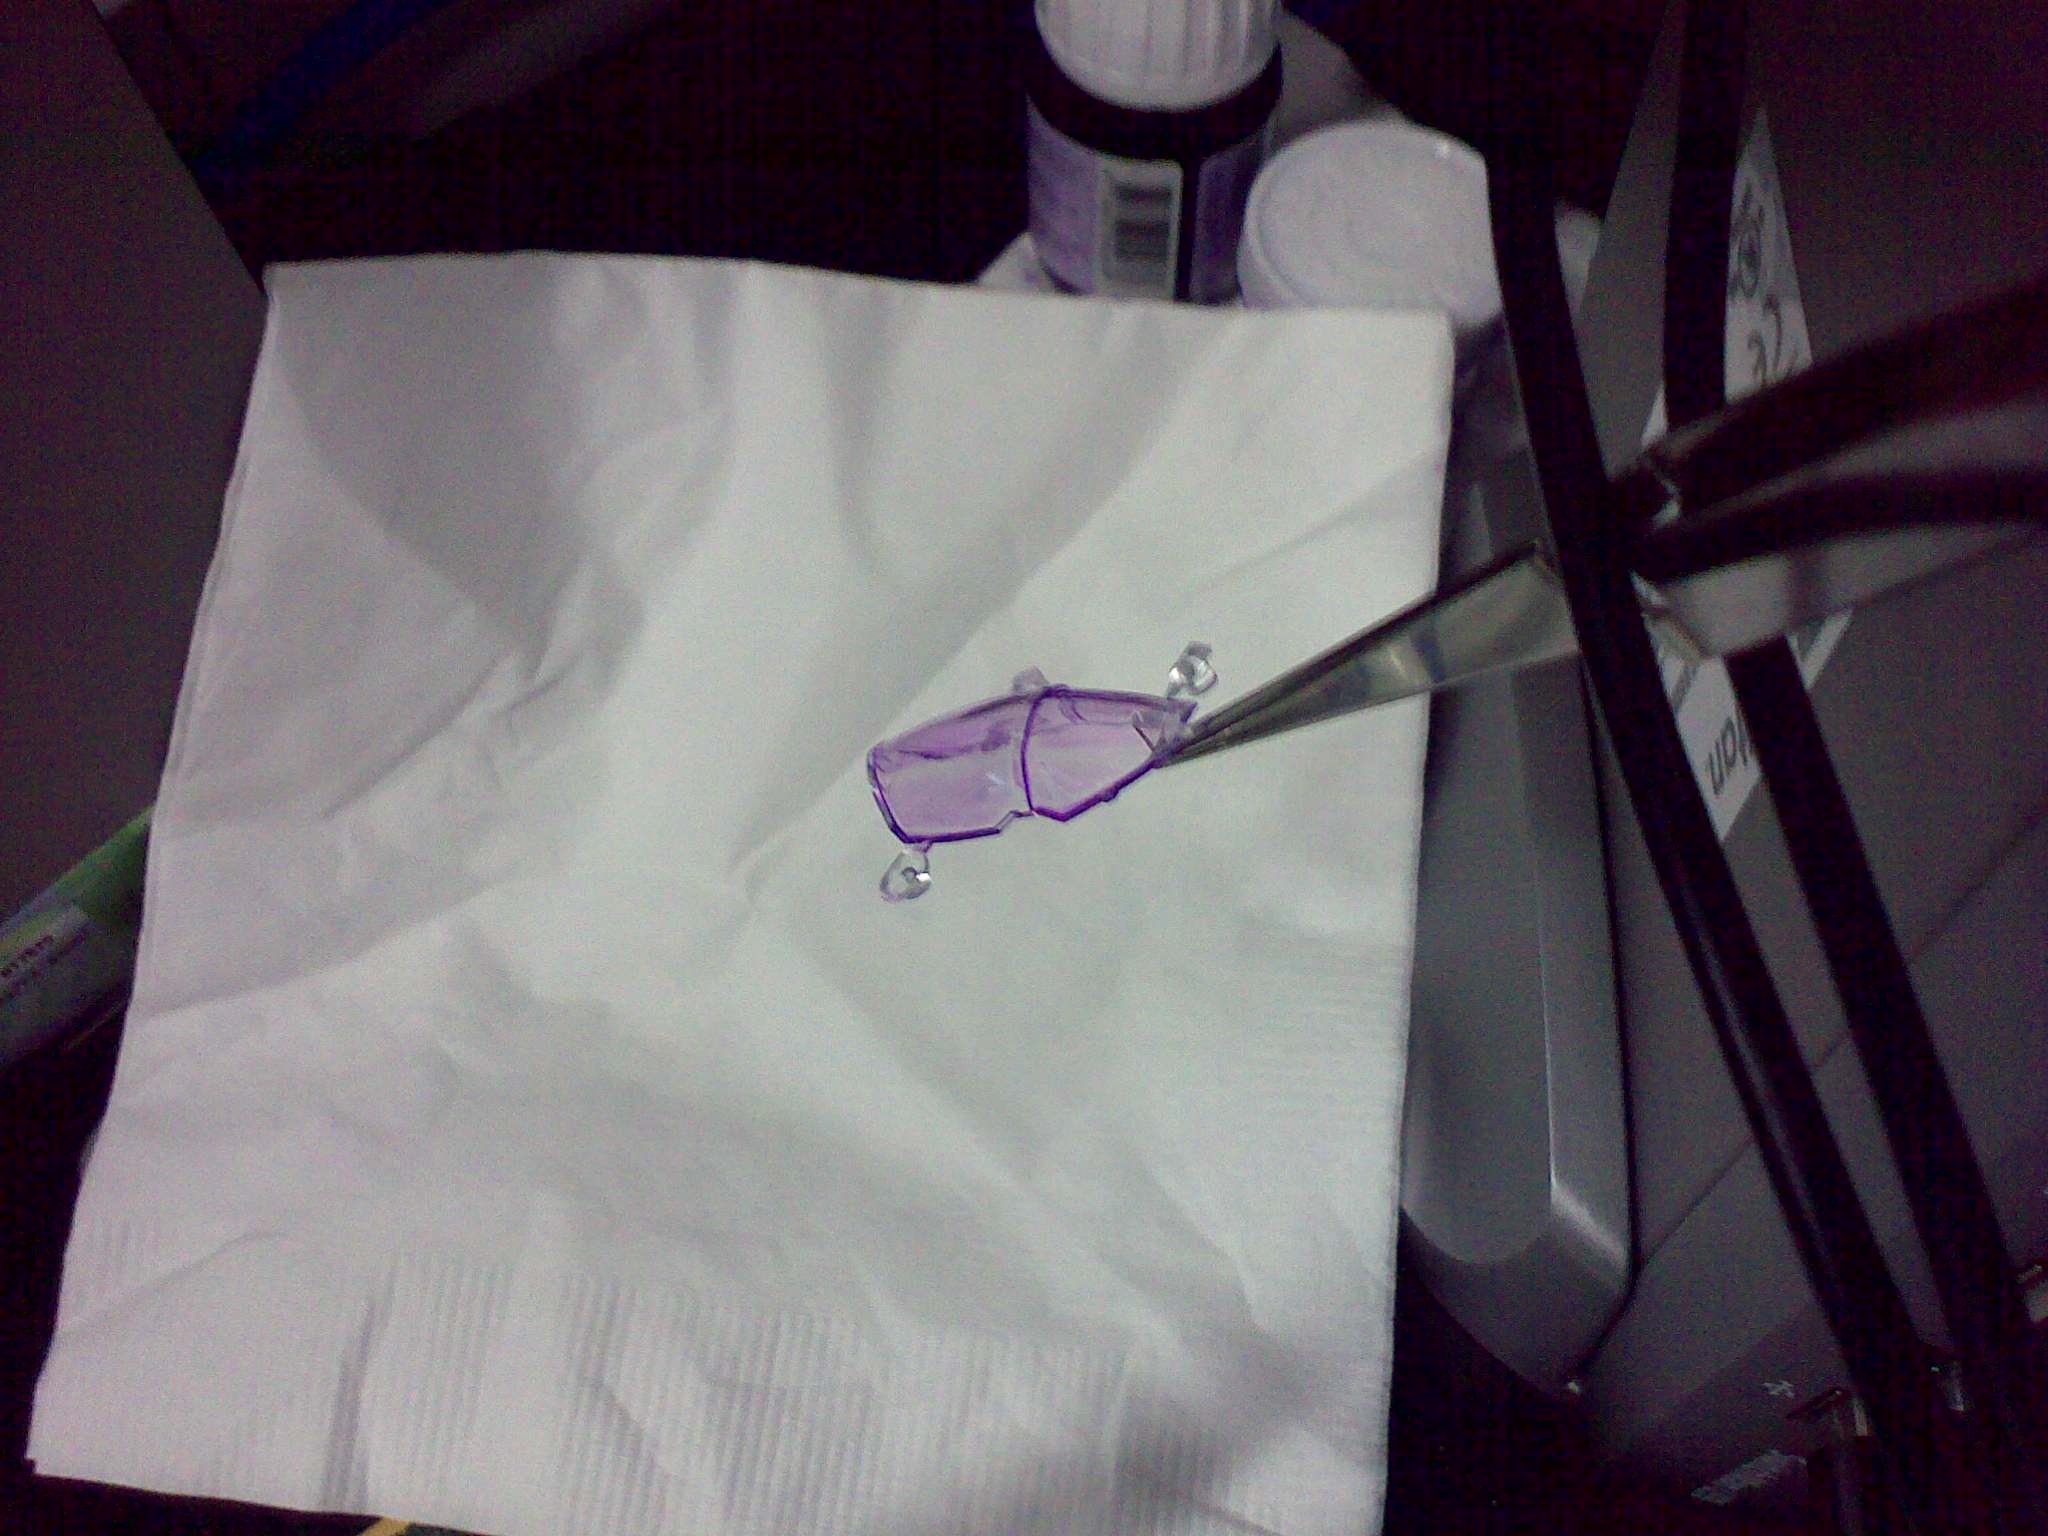
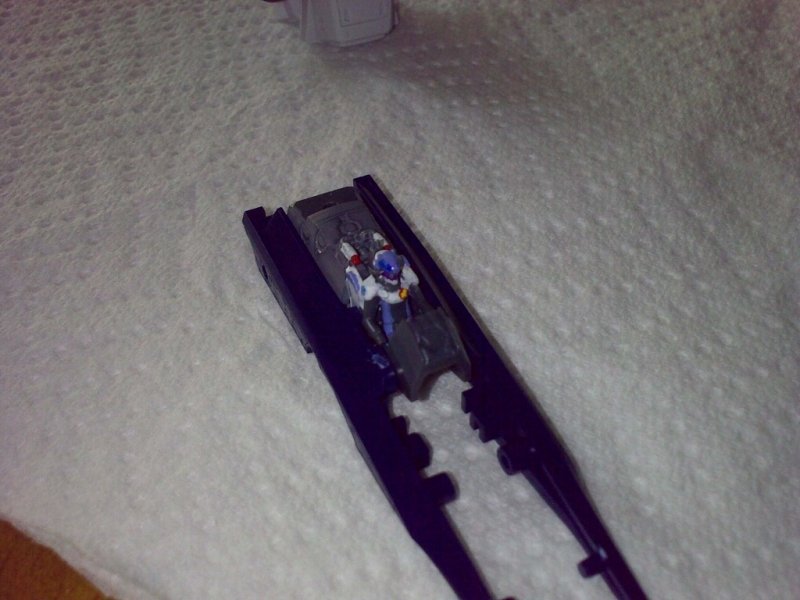
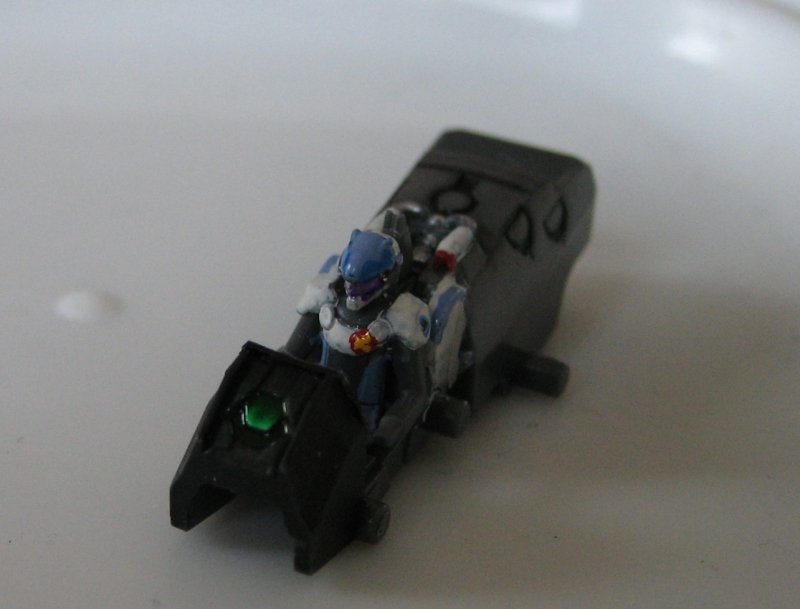
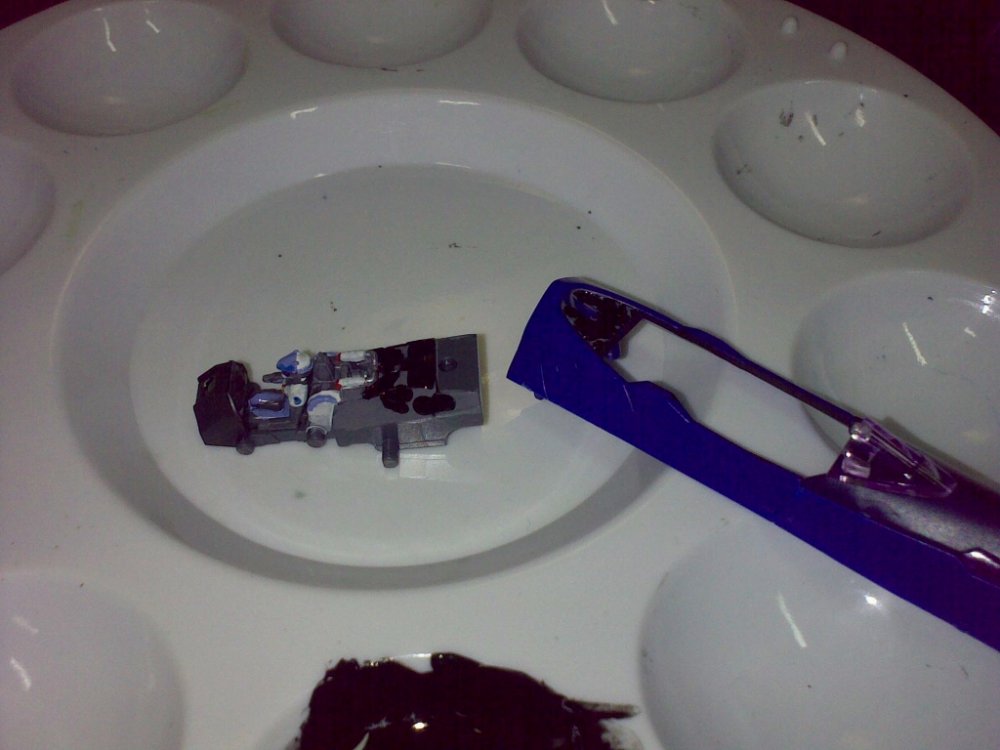
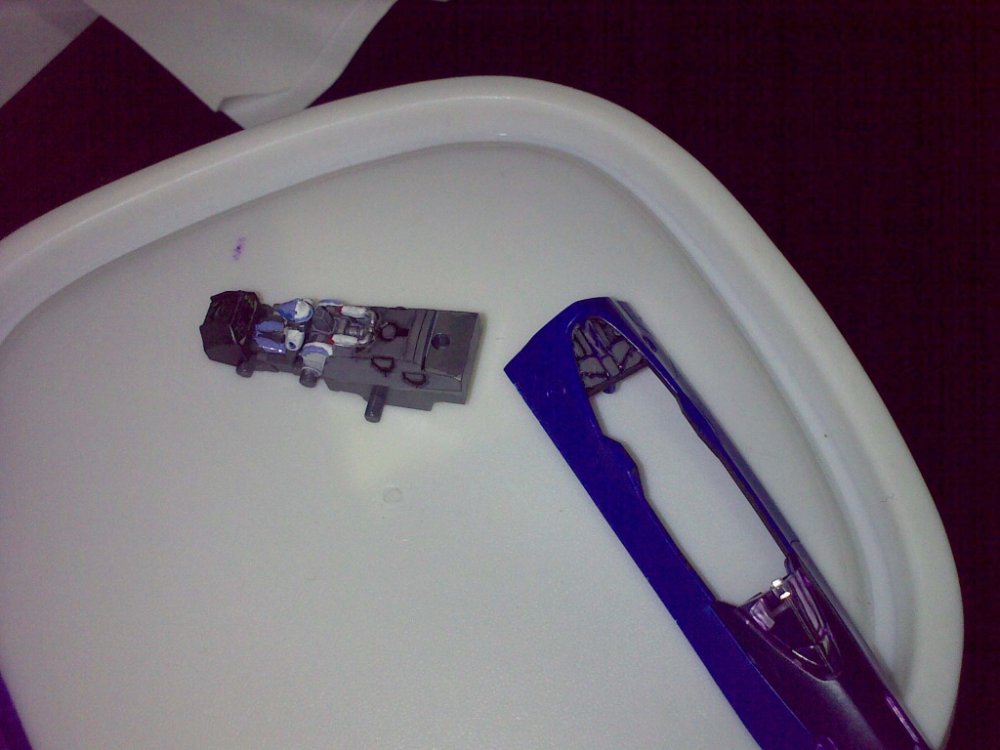
As a lot of you are well aware, the pilot figure on these 1/72 scale models is tiny! Some have suggested it's more like 1/100 scale. Either way, if it's not painted, IMO it looks pretty obvious and realism goes out the window. So how do you paint one of these little guys? I use acrylic paints from Tamiya and Gunze (my LHS didn't have all colours from one or the other) and mixed them based on the charts from the box/manual that was graciously translated for us by Vifam7: I didn't stick with the exact recommendation for the white on Mikhail's uniform, instead going with white and light gull grey, which matches the recommended colours of the white on the mech. I think it looks OK. The purple on his helmet and pants is, in my opinion, not purple enough so I went with a mix of bright blue, sky blue and lavender. I don't remember proportions but the quantities were so small, that you can probably just go with an equal mix of the blues, then add lavender until you like what you see. For the darker colours, I just left the bare plastic. The gloves/gauntlets were done with neutral grey and the blue was the recommended colour mix on the box. For the visor, I painted it silver with Testors gloss silver enamel, then put a layer of the same stuff I used on the canopy. It ran a bit but it's so small, it'll only be noticeable in close up macro pics. The SMS insignia was also done with enamels - just gloss red and yellow. Application was done with a toothpick for the most part. The visor and gloves I did with a fine brush. For the rest of the cockpit, I used the recommended RLM75 grey mixture and followed that onto the top, blue part of the fuselage as well. The grey paint didn't cover very well and I think it took at least 3 coats until it looked good enough. Even then, the edges of the patterns were still blue. I figured the wash would make that look OK when I'd finished. The front, instrument section was done with flat black and a touch of neutral grey. I printed out a copy of David Hintgen's screen cap, that WM Cheng has already cropped (check out his VF-25F build for a lot of the stuff I'm emulating). This was done on an inkjet and photo paper. It's not as crisp as WM's but for the size, it's acceptable. The resulting print was cut out and super glued on. After realising the piece was just a touch too big (it was preventing the canopy from closing) I trimmed it down and "painted" the edges with a black gundam marker. FYI, I use Tamiya acrylic thinner in about a 1/3 ratio to paints (1/3 thinner, 2/3 paint). I find this keeps it from drying while still on the brush and also hides brush marks really well. Wash was done with black artists oil and low odour thinner and allowed to dry for 2-3 hours before wiping it down with a dry paper towel. Here are the results: Pre wash: Wash applied: Wash wiped away: These last three were done on a proper camera so the quality is a bit better:


-
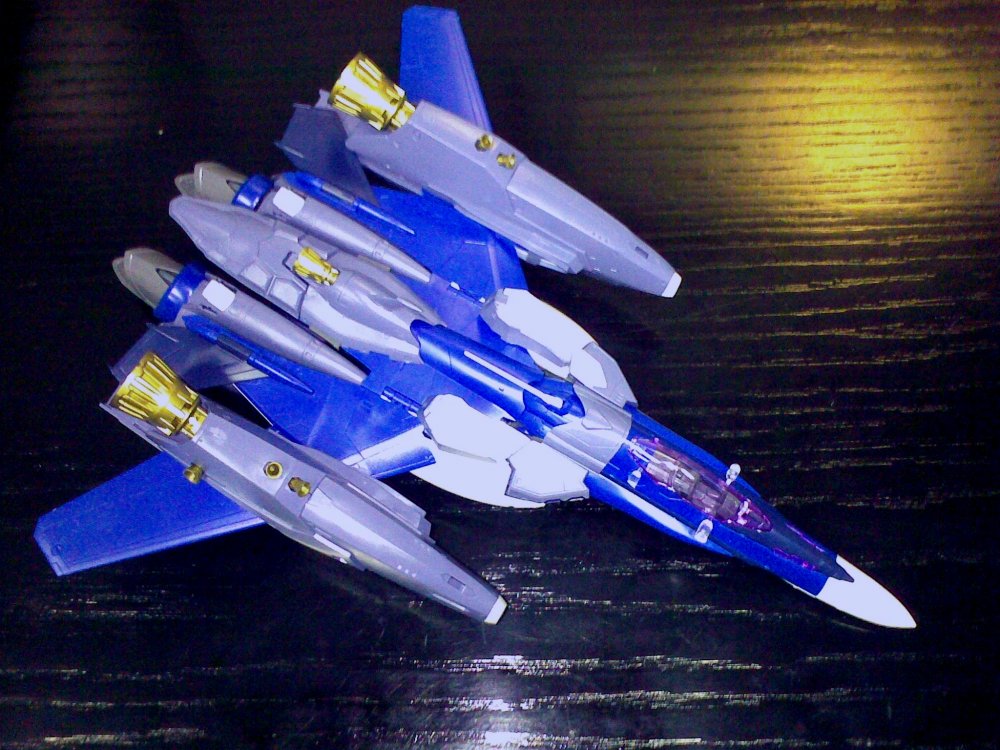
After fitting everything together for a test run, I found the following issues: The nosecone section is a PITA during transformation, lots of parts that will rub if I'm not careful and things that just are a pain to align properly when it does its fold up thing The canopy, when it rests against the backplate in battroid mode, means any coating/tinting you do on the outside of the canopy will get scratched The hinge on the back/wings area definitely needs some tightening to support the weight of itself, let alone with the boosters attached The boosters don't fit to my satisfaction. They have a lot of side to side movement with a pivot right on the wing root point. Perhaps a magnet at the back could remedy this? The upper and lower intake is just as irritating a fit as it is in non super arrangement. Magnets should help here (I've sourced some small ones) The legs hang low as some others have pointed out. It's like it's designed this way though - there's a notched section on the leg armor that is designed so the wing section can sit right on it. Not sure if I can improve this or if I'll just have to live with it (pics to illustrate this at some point). The arms are hard to swivel into the correct position so they lock correctly in fighter mode The missiles are going to be challenging to paint. I might end up using blue tack to cover the tips, paint the whole thing white, then remove the blue tack and leave the molded red in place. Doing a wash over the complex shapes will then be my next issue. On the paint subject, the booster nozzles are a really impressive molded colour but where the sprues attached ends up being black, no matter how smoothly you sand. This might require repainting (alclad?). Well, that sounds like a long list of complaints! I'm sure there will be more as I encounter them. However none of these are really that big a deal compaired to how much I still like this thing! It's an impressive bit of kit with all the details and the way things move and work together to allow it to transform. The engineering that went into it is still rater amazing and to have a product that can be assembled by a novice like me, and still work is amazing! I mentioned getting on to the pilot/cockpit part but I've run out of time. Next section I'll cover that.
-
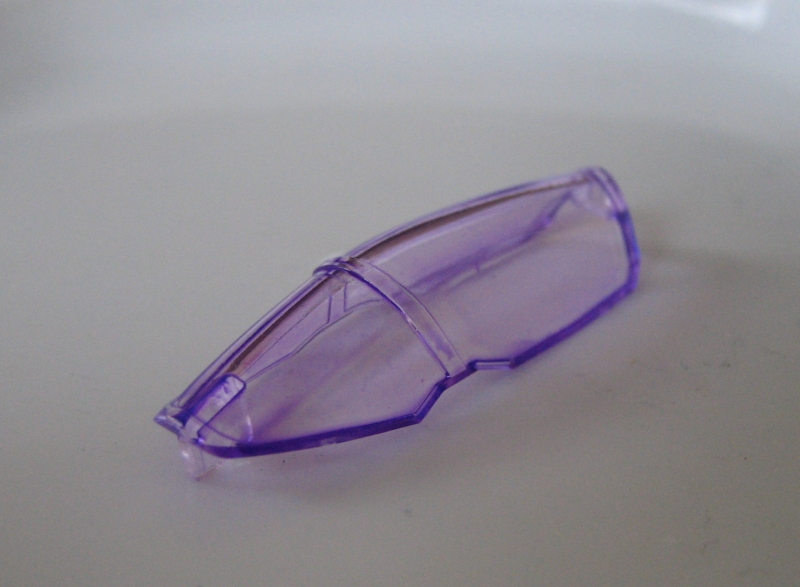
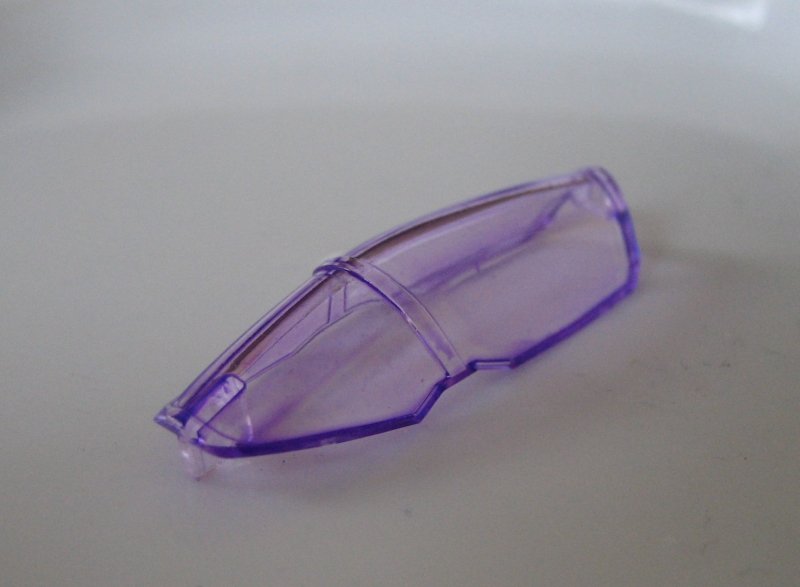
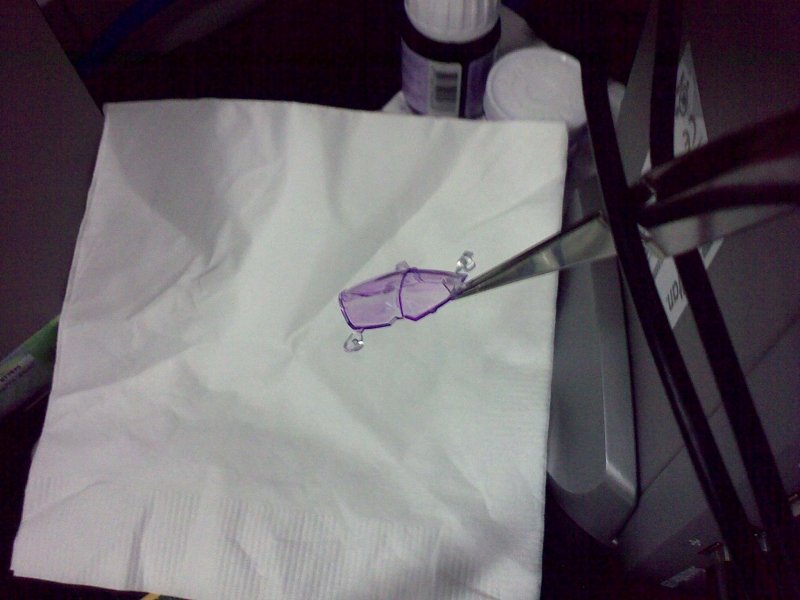
Now for some content... I got the model, the Super Parts, clear action base, and some misc tools from Rainbow 10. They were great to deal with and I highly recommend doing business with them. The fact that they offer air shipping in addition to SAL and EMS is also a huge bonus (only cost me $5 more than SAL to get it in about 5 days). So the plan was to build it up, test the fit of all the pieces, look for problems, etc... This being a snap together kit made that really easy. I got the whole thing done in about a week, and that was working on it for 30-40 minutes a day. I was careful to cut the parts out and do some basic cleanup of the sprue marks with a modeling file. I'll come back and clean these up with a sanding stick later. I also thought it would be a good time to tint the clear parts purple. I've heard people comment on the 25G having a blue canopy. I can't say I interpreted it that way from the Anime and the box details show it being tinted purple like the the S or F variants. At any rate, after reading some suggestions by a few on the boards, I decided on water based drawing ink, mixed with the Aussie approximation of Future (Pascoe's Long Life). This stuff is no Future! It's white in the bottle, dries clear but has a pretty obvious ammonia content, as it disolves dried Tamiya/Gunze acrylics and causes them to run. What's worse, it disolves itself very readily too. So if you do one coat and think, "that looks OK but it could do with another" as soon as you apply the second, it wrinkles the first coat and causes it to look terrible. So I must've gone through 4 or 5 applications before I realised just tinting one side like I'd planned, just wasn't going to work. In the end, I dunked the whole thing and was just careful to bleed the excess from the mounting tabs with a thin paintbrush. Here's some pics of the rough assembled model (ignore the folded down tailfins, I don't remember why I was playing with that...) and the canopy progress: Apologies for the lousy quality - what looks good on the disply of a reasonable camera phone (Nokia E-71) looks terrible on a computer monitor. I left the extra bits of sprue as a means of grasping the canopy. I later realised they were getting in the way and the built in tabs were a better option. Next up is the actual "proper" part of the build (starting with the cockpit and pilot).


-
Hi everyone, First time I've started a topic on this forum so here goes nothing! I thought there were plenty of VF-25 buildups floating around but haven't seen anything for Mikhail's (Michael's/Michele's) G version yet. So since this is likely to be the only one I'll get for a while and will no doubt need some advice during the build, I figured, why not? What this won't be is a step-by-step buildup. I plan to make it more of a journal of what I'm doing and what hitches or triumphs I run into. And mostly just another opportunity for the members of this community to share their tips and experiences. Why the G? Well, I'm pretty partial to the name (hey, it's got both my initial's in it! )! I'm a huge fan of the sniper rifle concept in a space anime, and blue is just cool. I also thought Mikhail was about the most interesting regular character in the anime, in terms of story and character development. As for the build, the dark colour has its own challenges so I thought it'd be good to get some tips and put them to use in this thread for everyone's reference. What I hope to achieve when this is done is a model that looks good and can withstand an occasional transformation without those looks getting totally ruined. This is my first model in about 15 years. I did a Vietnam era F-100 about 8 years ago but it was a once off and not real great. All my others were never that great. So I have no aspirations of this being amazing but I'm going to do my best and use what I've seen a lot of others do on these forums. More content to come soon, this is here primarily to get me started and prevent me from procrastinating!
-
Bandai 1/72 Scale Macross Frontier Model Kit Thread Ver.3
mickyg replied to azrael's topic in Hall Of The Super Topics
I haven't done mine yet but have that same issue to consider. Just to confuse things even more, rarely do you see the inside edges in as bold a green as either version on the anime. I was considering doing an almost military green (olive drab sort of colour) on mine. I'll either airbrush, or since I'm using Tamiya and Gunze Aquous(sp?) paints, I might just gently wipe away where I don't want it with a cotton swab and windex or amonia. That all depends on how flat the areas are that stay black though. Also depends on whether I've painted those areas another colour. Aaaargh! Might have just talked myself out of that! Any other thoughts from anyone else? -
Bandai 1/72 Scale Macross Frontier Model Kit Thread Ver.3
mickyg replied to azrael's topic in Hall Of The Super Topics
I'm using what a few others have already done - water based drawing ink, mixed with acrylic floor wax. -
Thanks Gubaba! That explains why the 1/55 "Hikaru" type 1A was so much cheaper than the others when I went to Japan recently.
-
Apologies in advance if this has been asked before! I don't remember Hikaru ever piloting a VF-1A. Yet the Bandai 1/55 has this as an option (and I own one). Was there ever a red themed 1A in SDFM? I know this is his first machine in DYRL, but the colour scheme is different (black tailfins, etc...). All the mecha info sites I've seen list Hikaru as a pilot for the 1A and that's when specifically checking for the SDFM version, not DYRL.
-
Bandai 1/72 Scale Macross Frontier Model Kit Thread Ver.3
mickyg replied to azrael's topic in Hall Of The Super Topics
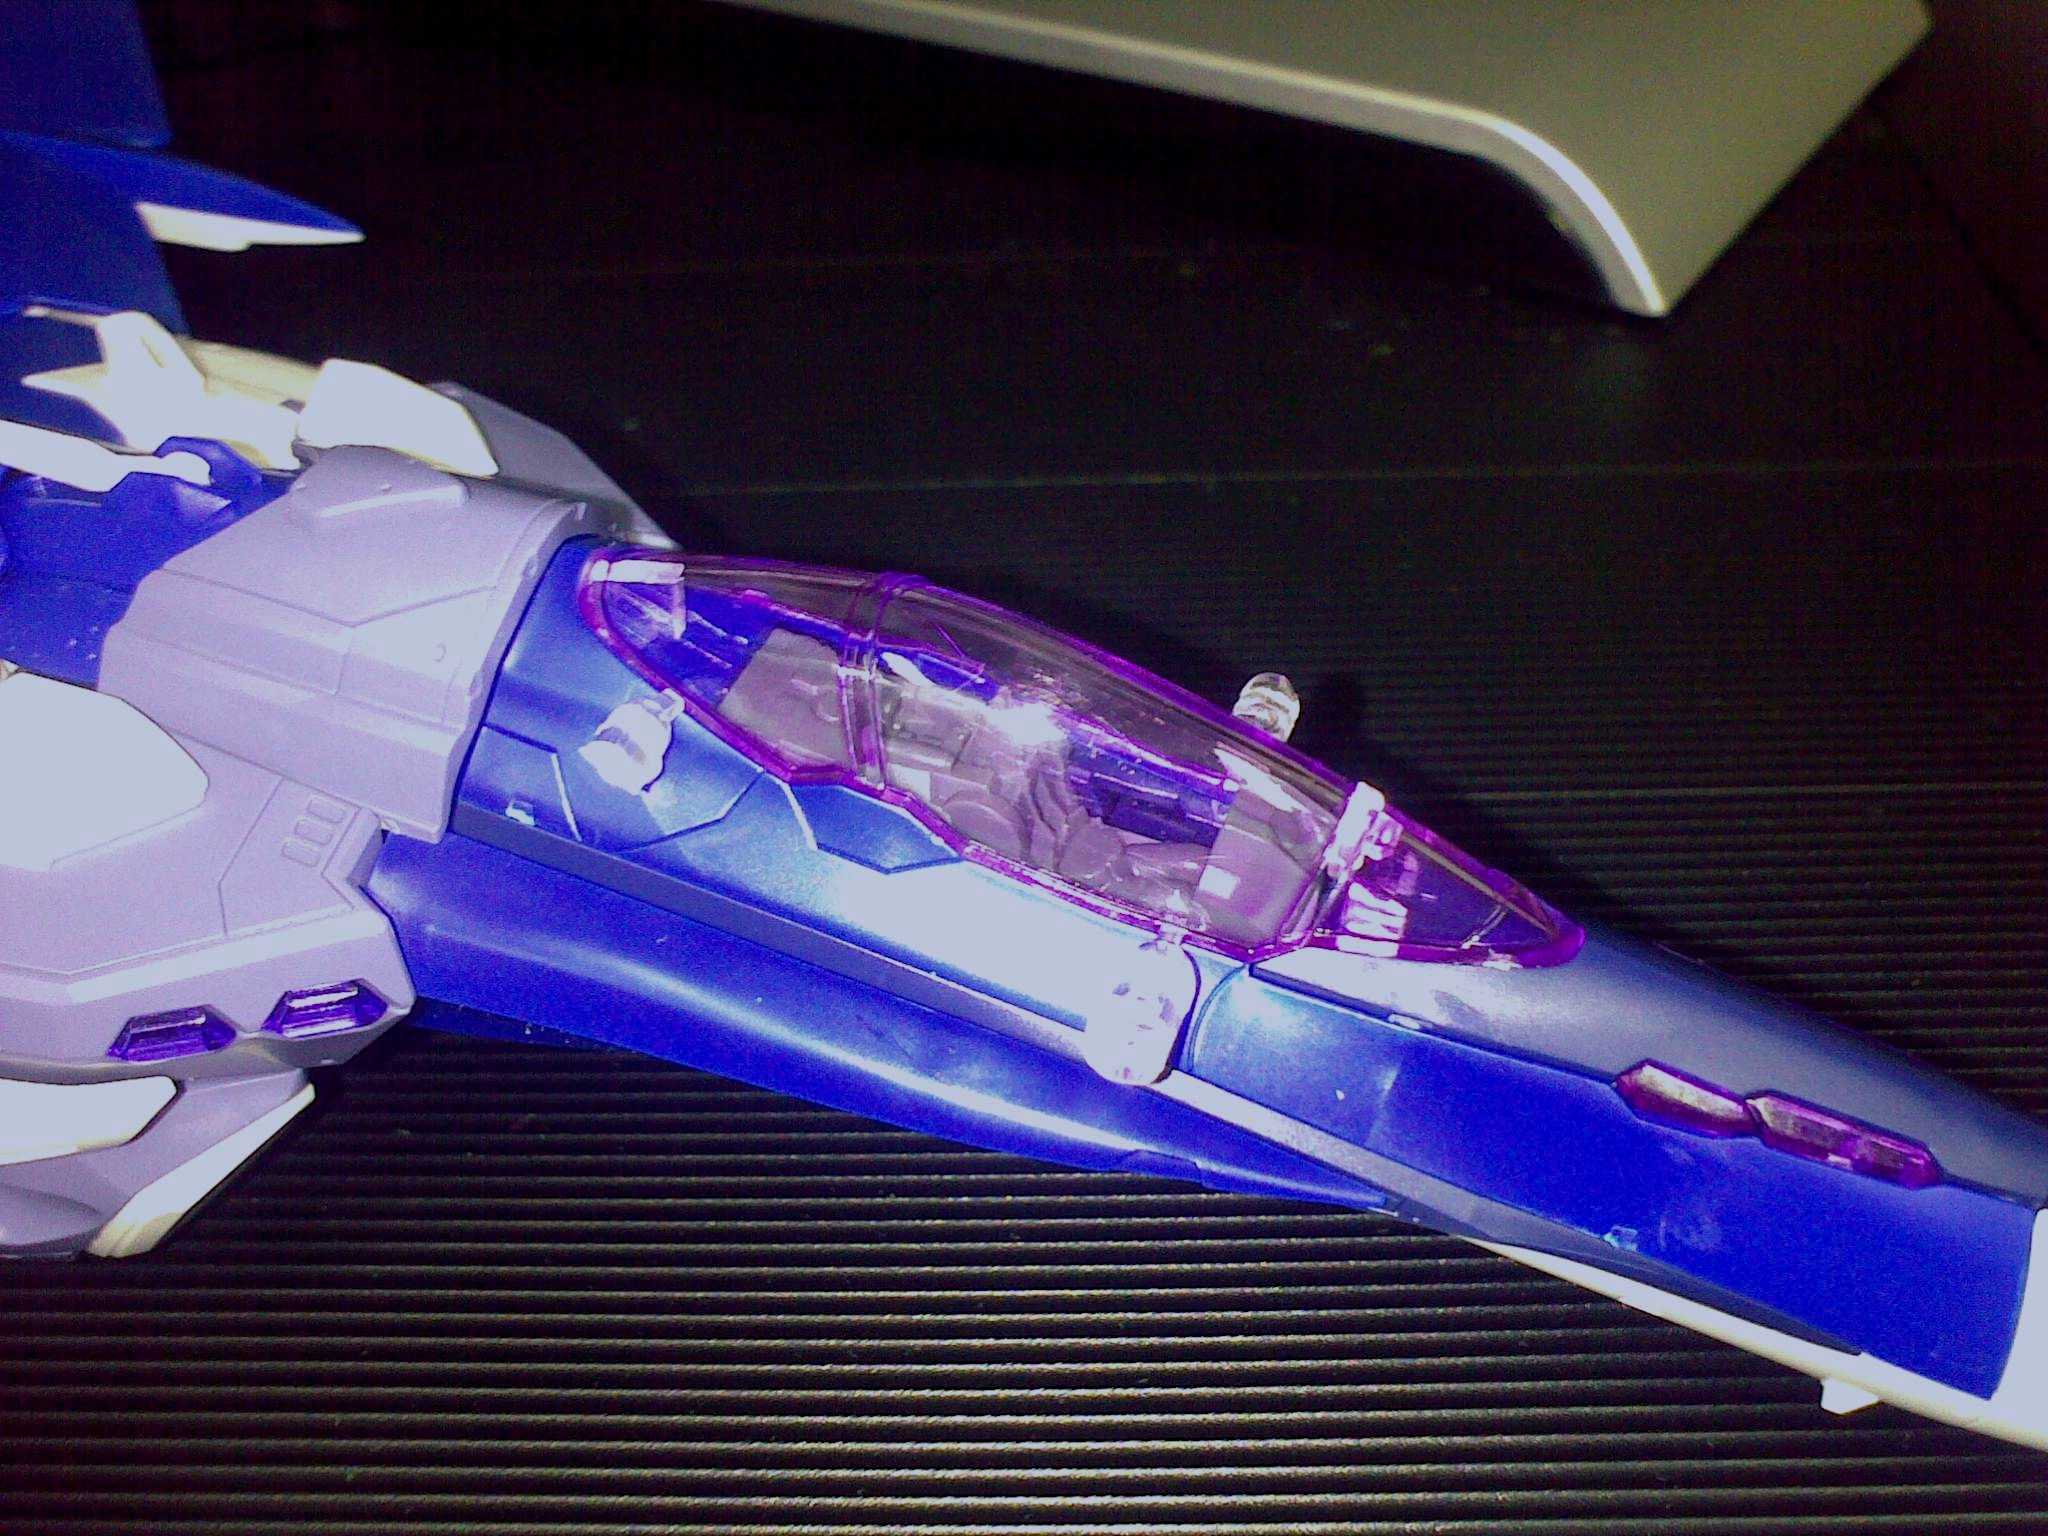
New pic just taken to illustrate the canopy problem. This shot also shows the HUD projector. At least I think that's what it's meant to be - the HUD on the anime was all holographic. Still, there's a spot there that's in the position of traditional HUD projectors so that's what I'm going with Anyway, as always the camera shows up the streaks and ugliness a lot more than just looking at with the naked eye. Plus, when the canopy is on, the dark background of the cockpit equipment really hides the tinting blemishes.
-
Bandai 1/72 Scale Macross Frontier Model Kit Thread Ver.3
mickyg replied to azrael's topic in Hall Of The Super Topics
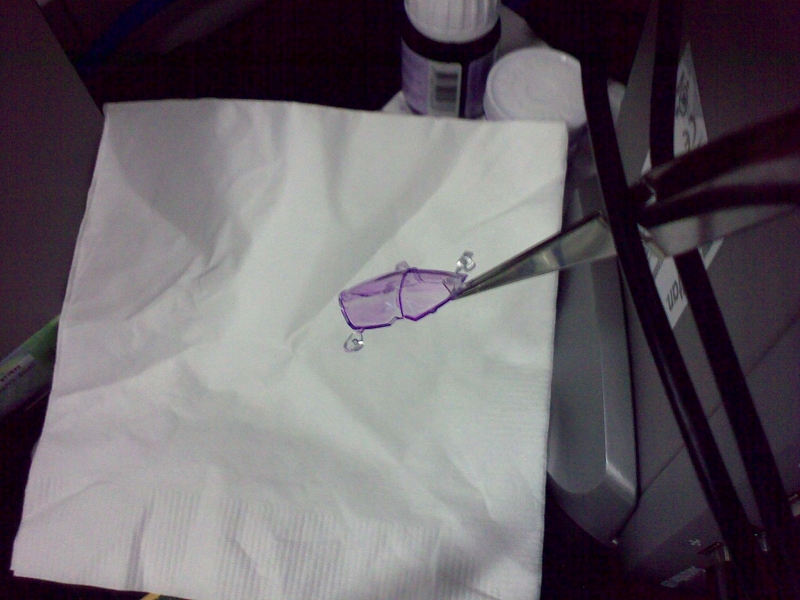
Looking very nice! Got a bit done on mine this weekend (mainly pilot/cockpit/canopy tinting): quick/dirty fit into the frame final paint application and oil wash applied after wiping the wash off I actually took a few decent pics with a decent camera over the weekend but didn't manage to copy them over to my PC at work. I promise these camera phone pics don't do this any favours! The real thing is looking pretty cool. I'm still not happy with the canopy tint (no pics shown). I must've redid it 4 times over the weekend. The Aussie equivalent of Future comes in 2 types and the only one I can find in my region has serious issues when you apply more than one coat. The second coat reacts with the first and it ends up a wrinkled mess. So I ended up dipping the whole canopy (inside and out) and carefully soaking up the areas that pooled with a brush. The result is OK and actually looks really good unless you're an inch away from it. The problem is that it will scratch very easily. Has anyone had any luck applying Testors model master clear coat over acrylic clear? It's the type that comes in a glass jar. It says it's lacquer so I'm worried it could melt the plastic. I'll try it on some clear sprue to see what happens first.
-
Bandai 1/72 Scale Macross Frontier Model Kit Thread Ver.3
mickyg replied to azrael's topic in Hall Of The Super Topics
I noticed that too. They're from the crotch piece, right? And on mine, it's not just because I used the super parts. If I had to guess, I'd say there might be slight differences in that area between the G and F types, compared to the S and perhaps RVF type. The crotch piece ends up pushed up against the head in fighter mode and the G and F are similar in how they sit (facing backward) and the S is totally different. Not sure about the RVF though. -
Bandai 1/72 Scale Macross Frontier Model Kit Thread Ver.3
mickyg replied to azrael's topic in Hall Of The Super Topics
Pretty amateurish? Those pics look great! Nicely done! Now this is an amateurish build (sorry about the size and lousy quality): This was a quick buildup to see how the parts all fit and where paint will need to go, etc. I'll start painting hopefully this weekend.

-
1/72 Bandai VF-25F Messiah build-up step-by-step (sort of)
mickyg replied to wm cheng's topic in The Workshop!
Wow! I saw the pics of the instrument panel and thought, "yeah, that looks alright." But after printing them on our work colour laser here and seeing just how tiny these are, I'm in awe! What on earth are you printing these on? My prints are on plain paper so that could be my problem but I can see switches on yours! On mine, they're just fuzzy grey lines. Your F is looking amazing! Just when I think the inspiration factor has reached sufficient levels to get me moving, you raise the bar again! And that's a good thing, by the way. -
1/72 Bandai VF-25F Messiah build-up step-by-step (sort of)
mickyg replied to wm cheng's topic in The Workshop!
Ok, washing the parts is a no brainer! In case anyone tries without washing first, it's a huge difference. This is a fuzzy pic but after one coat it's almost acceptable. One more should do the trick. WM, did you notice the "edges" on the curved part of the canopy? On mine, these are so prominent that the tinting ran off them more than the rest of the part. You can probably make it out in the pic. My lousy camera phone exaggerates this but I'll still pop another coat on to be safe.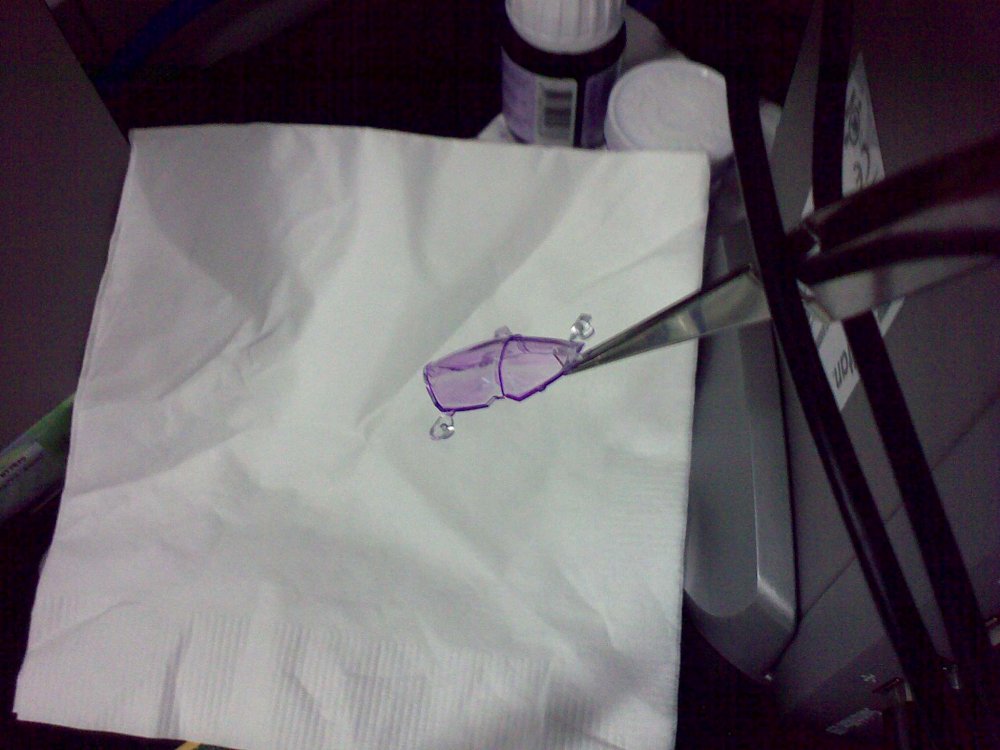
-
1/72 Bandai VF-25F Messiah build-up step-by-step (sort of)
mickyg replied to wm cheng's topic in The Workshop!
Your purple tint looks really good. I've had an awful time getting mine consistent. The small parts (the sensor array and the front of the canopy) look pretty good, but the main canopy being bigger, just seems to make the liquid pool up or worse yet, thin out in odd places. The end result is a streaky, crappy looking mess! Did you wash the clear parts before-hand? I might try that. Luckily the stuff comes off perfectly with Windex. The other problem is the lack of a good Future equivalent down here in Australia. I'm using a product that seems a lot less glossy when dried and also seems to not like sticking to any surface. I once used it as a clearcoat on top of black enamel spray can paint and it just pooled up into tiny droplets. At any rate, as I mentioned, it looks OK on the small parts. -
Bandai 1/72 Scale Macross Frontier Model Kit Thread Ver.3
mickyg replied to azrael's topic in Hall Of The Super Topics
Mate, thanks a million! That helps a ton! -
Bandai 1/72 Scale Macross Frontier Model Kit Thread Ver.3
mickyg replied to azrael's topic in Hall Of The Super Topics
I know this is going back a few pages, but I posted up the colours for the Mikhail VF-25G kit (somewhere around post 400). I finally got my kit and am really impressed with it! The level of engineering and design that went into this is just incredible. Granted, my only comparison for transforming kits is an Imai Legioss, so it's not a fair fight... Anyway, I've got a request, now that I've got colours that are accurate, I need to know where to put them. Can someone take a bit of time to translate the headings for each colour (IE "blue part of main body" ect...)? Anyone...? Anyone...? Vifam7...? Here's original: And the one that's got the colours but no headings translated:

-
Scratch Building/Model Modification Archive Thread
mickyg replied to Dax415's topic in The Workshop!
Thanks Dax! Very helpful stuff. -
1/72 Bandai VF-25F Messiah build-up step-by-step (sort of)
mickyg replied to wm cheng's topic in The Workshop!
Fantastic work Mr. Cheng! I've read each and every one of your buildups and as a new MWer, you are, without doubt, the reason why I've gotten back into model making. I built a bit when I was a teenager and unfortunately, never saw anyone do a model any justice till in recent years. Your stuff is just amazing! Honestly. Back onto the subject of VF-25 models though, I just got my VF-25G Michael (hey, I'm partial to the name ) and was also very surprised like you, to see the dot printing. Why, why, why? I haven't started on the kit yet and might have to make a decision about whether I paint the bigger things. It sounds like the tail decals are a definite no no so I'll paint at least those. Anyway, just thought I'd chime in as a newb and let you know how inspiring your work has been. I'll be watching intently as you work through this one. -
Bandai 1/72 Scale Macross Frontier Model Kit Thread Ver.3
mickyg replied to azrael's topic in Hall Of The Super Topics
Yes but look at the label under the model and you'll notice it says 1/48 - very cool! -
I read all 36 pages on the RC forum after posting that comment - apologies for assuming it hadn't been put here. I sometimes forget I'm a relatively new MWer and there's a lot I haven't read yet! Good to know about the other models that would fly. I've often looked at my Yamato VF-1 and thought about what would be necessary to get it to fly. Not the toy, but something modelled off of it. In my opinion, there are too many holes and gaps in it to make it aerodynamic. Still, it looks doable. Again, thanks for posting your stuff. You're doing things that a lot of us will only ever imagine or at best, read about. Heck, I didn't even know about EDF motors until two days ago when I read your build thread. But that's WAY off topic!