

Lt. Z0mBe
-
Posts
159 -
Joined
-
Last visited
Content Type
Profiles
Forums
Events
Gallery
Posts posted by Lt. Z0mBe
-
-
Yes! That would be uber-cool.you mean this one? i'd like to just see a figure get released with this head.


Kenny
-
Never noticed the alternate head before. Am I the only one who'd love to scratch an anti-missile system head with a rotary cannon?
Kenny
-
One trick I learned is do the camo dark to light. Yes, it's backwards but it's so much easier masking the relatively small dark gray areas then spray medium gray etc...
Tried this after reading your build of the SV-51 (and talking by email). It is a good idea for the uber complex schemes.
Kenny
-
At the risk of being beaten, how about a 1/72 TR-5 Harpy from Crusher Joe, known as the Samurai in Battletech and appearing on the cover of the first edition Aerotech game.
Versions have been made in 1/100 and 1/144.
Here's a link to the 1/100 one:
http://www.hobbyxstyle.com/en/productDetail.asp?PID=397&Price=78&MCid=0&SCid=0&StoreID=1
Kenny
-
Looking good Kenny!! Will this have a clear canopy & pilot?
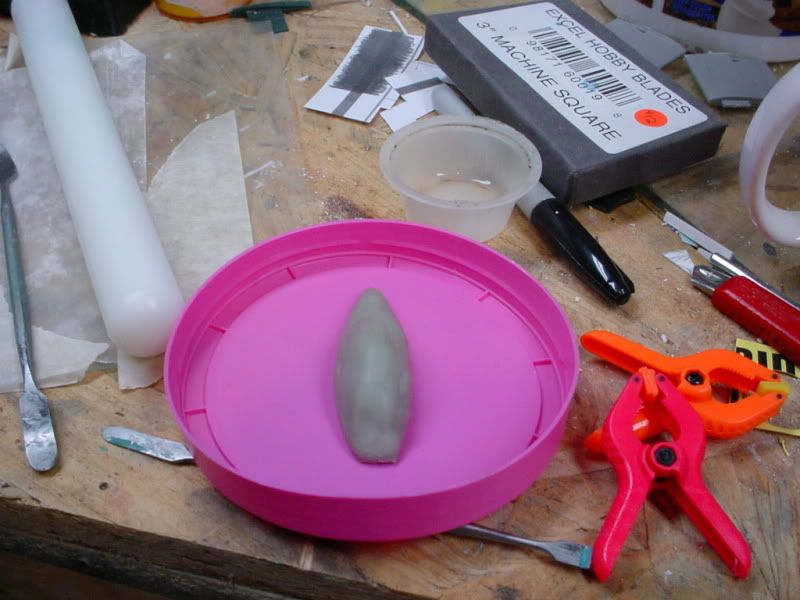
Yessir! I'll be using the canopy plug as a positive master for thermoforming. If I feel like it, I may build a new vacuformer so I don't burn my fingers.
Kenny
-
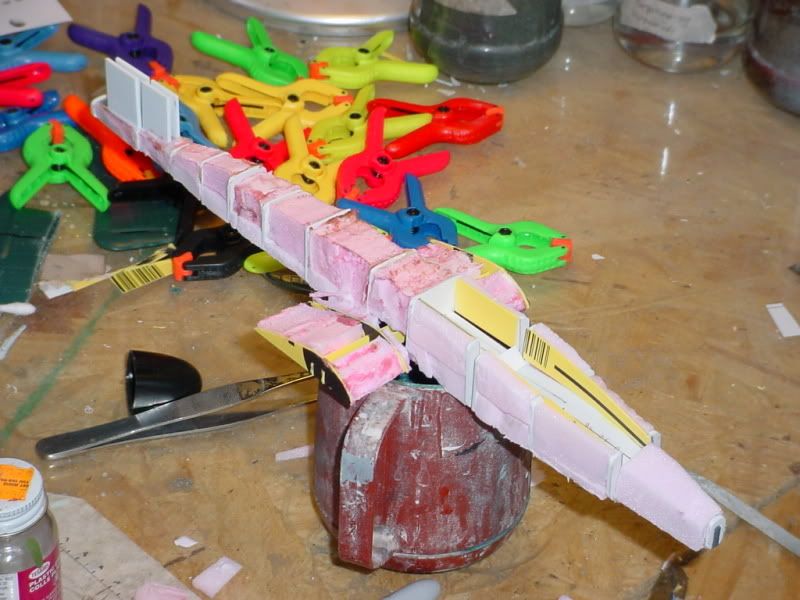
Update on my Cobra Rattler scratchbuild from starshipmodeler:
Big update for today. Rough sculpting of the fuselage is complete; it's received its first thin layer of Aves over foam and bulkheads. The outer wings have been rough sculpted, finalized with file, sandpaper, and more Aves, and are ready to receive their engines.
Outer wings and engine cradles with rough Aves cover, along with some other stuff in the background
Starboard wing shows results of LOTS of carving, filing, and sanding
Centerline turbofan clad in Aves and ready for the file and knives
Horizontal stabilizer pinned in place with flexible wire
Beauty shot showing everything coming together
By now, you've figured out I am deleting the turret. I hated the thing as a kid and now, I don't want to include it. I like the lines and logic a lot better without it.
Comments and criticisms welcomed, as always.
Kenny
-
Paints
in Model kits
I use everything - craft paints, Tamiya, inks, Testors - and mix and match within solvent classes to get the result I need. I airbrush with all types too.
Kenny
-
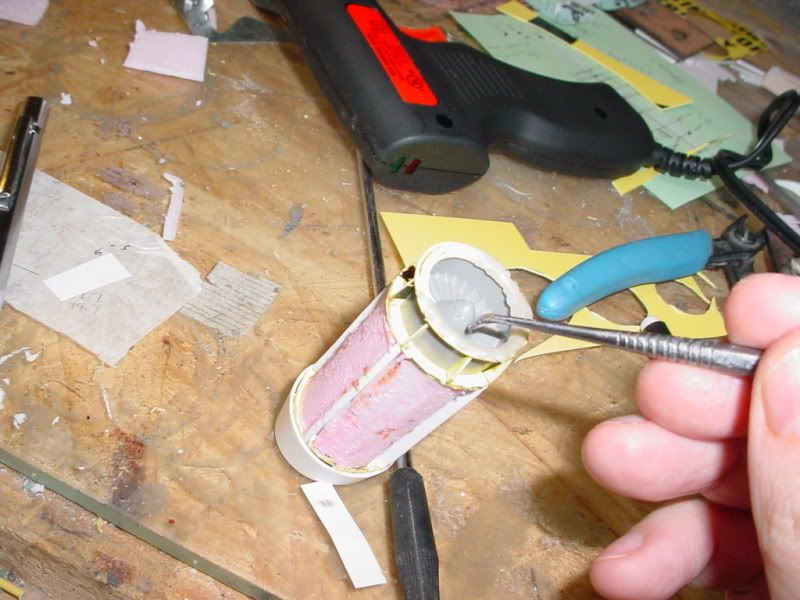
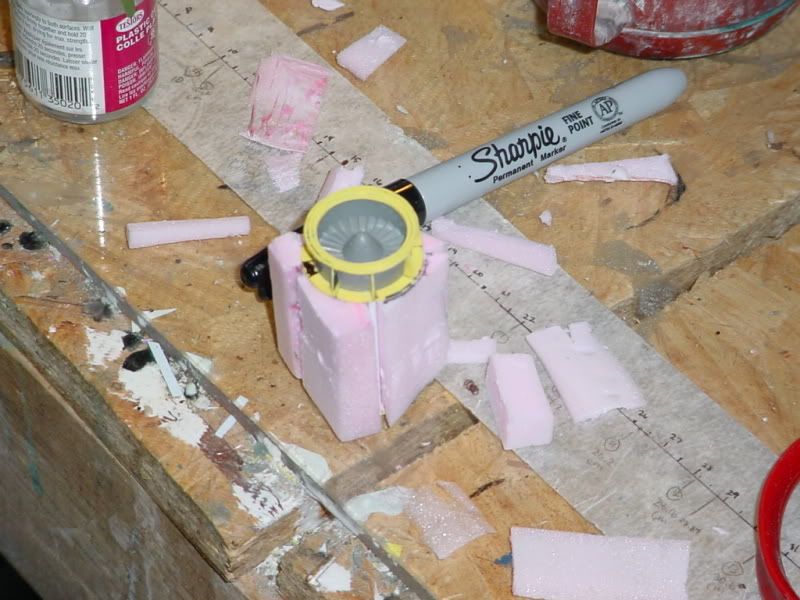
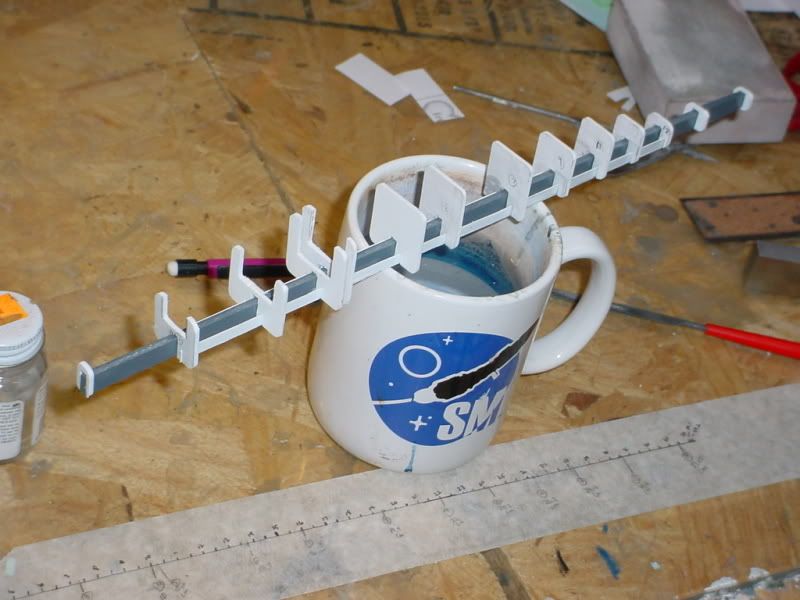
Update on my Cobra Rattler Scratchbuild. Here's my post from Starshipmodeler:
Big update for today. I finished the foam forming and have begun the Blessed Aves work.
Centerline turbofan foam carved
Vertical stabilizers chopped and built with pieces from spares bin. I set the wire angles with a craft store wire bending jig; the angles were set to match those of the toy's vertical stabilizer. Yes, I have the toy at my bench.

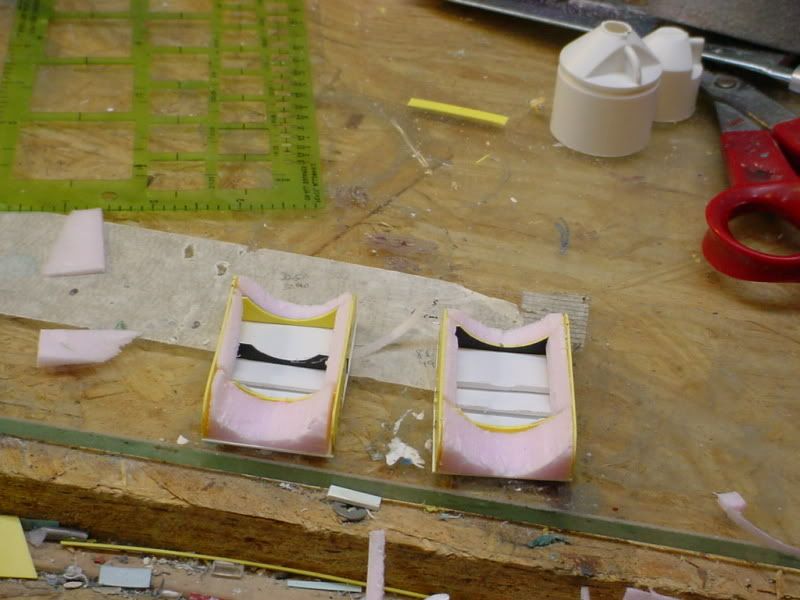
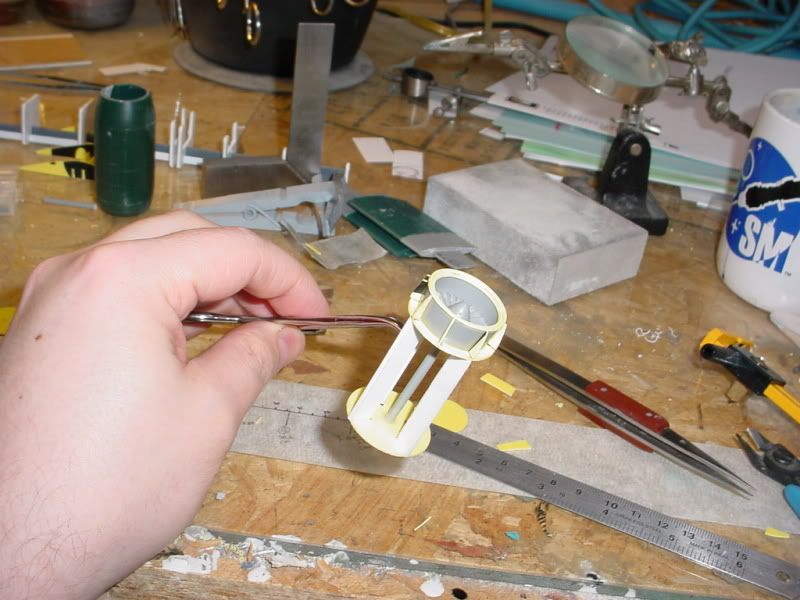
Building the canopy master for thermoforming later.
rough sculpting the centerline turbofan intake
Filling the voids on the chopped and pieced together wings The wings were mated to the engine cradles with wire. Correct dihedral, relative to the engine cradles, was set in the wire using the wire bending jig. Rough sculpting of the engine cradles is complete as the Aves has been sculpted over the foam.
Better view of port wing and engine cradle
Better view of starboard wing and cradle
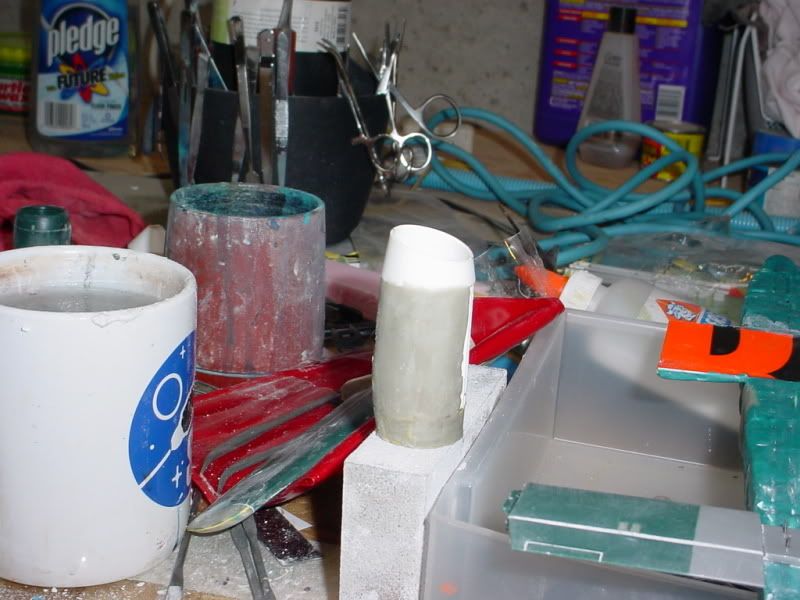
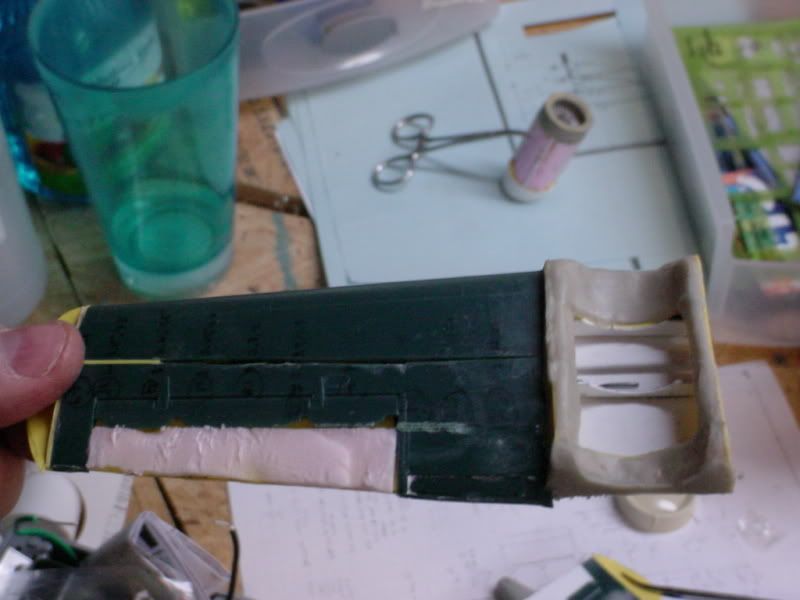
I'm Avesing the fuselage as I type this...well almost as I type this.
Comments and criticisms welcome as always.
Kenny
-
Update on my Cobra Rattler Scratchbuild. Here's my post from Starshipmodeler:
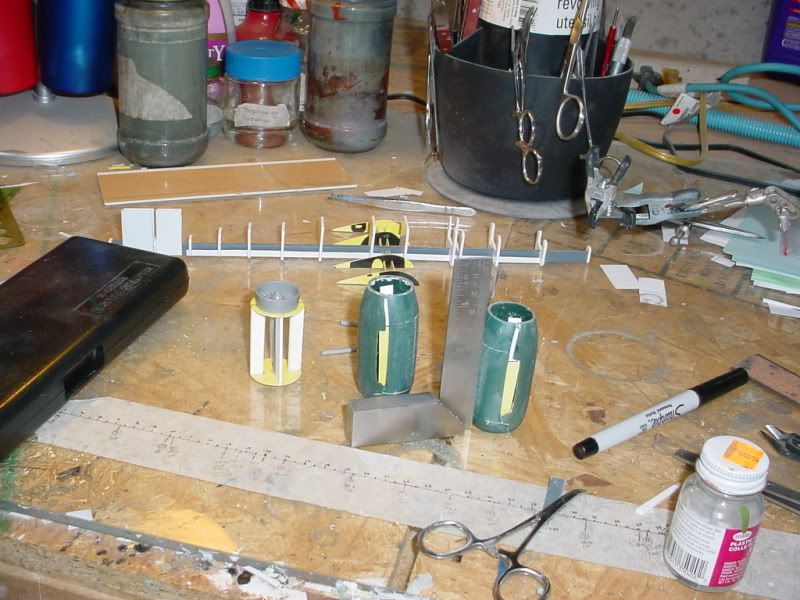
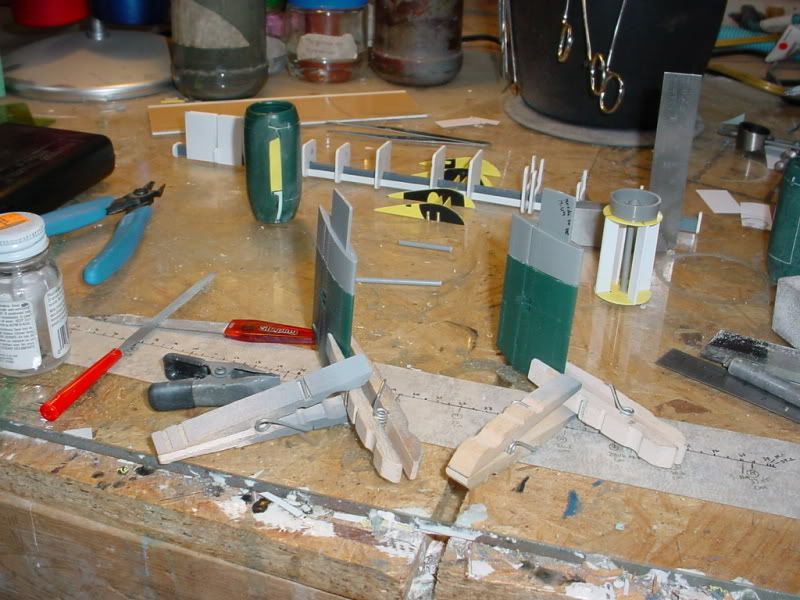
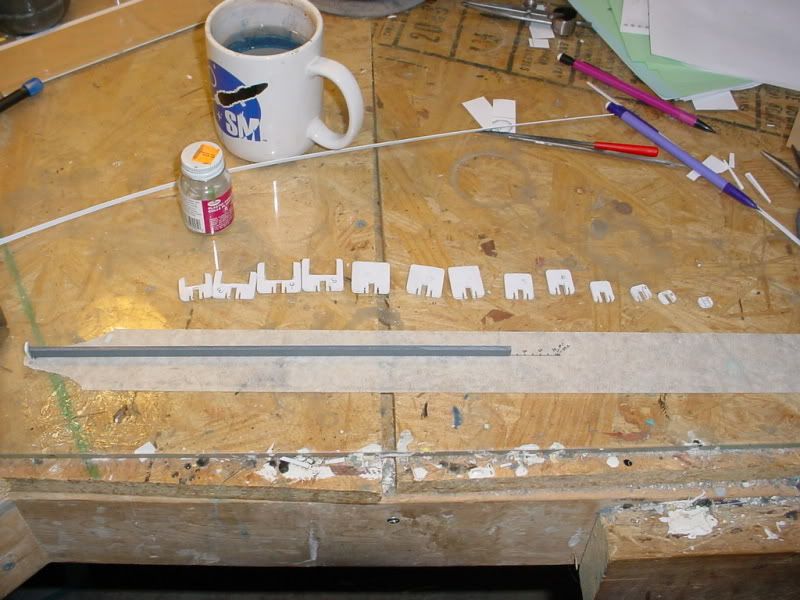
Lots of work done for a few more images.
After stringing the wing ribs and spars together, I realized I had done them exactly upside down from the way I needed to build them. I should have dropped the spars in from the top of the ribs, not the bottoms, as the wings thin from the bottom as they progress outward. I now had no way to thin the wing tip ribs and keep the spars in place. D'OH!
My logic of it being more work to re sect an existing wing went quickly out of a 1/48th scale window. Luckily, the Strategic Styrene Reserve provides for such emergencies and I was able to provide the desired wings from, fittingly enough, some sections of A-10 wings.
The wing weren't a total loss, though, as the engine mount cradles were still perfect. They do not taper and have no dihedral or anhedral..
I've done a lot of foam work too and that, coupled with fasting, chanting, and burning of styrene to cleanse my body in preparation for the Holy Aves, I will begin the good stuff.
At least the engine cradles were able to be used
Lots of surgery to get something useful of of these spare parts
The most insulated model in the Commonwealth of Kentucky
There's a turbofan engine in there somewhere
Salt water taffy as a modelling medium?!?!?!
Comments and criticism welcomed, as always. Back to work.
Kenny
-
This is where I buy my acrylic... But I typically buy 4' x 8' sheets, and these guys are local to me: http://www.hillcorplastics.com/index.html
I don't know if they will accomodate small orders, but it is probably worth asking them.
For small stuff, I just use the plastic in common blister packaging. I save any large, flat, or slightly concave/convex pieces I could place over a positive(male) master.
I hope this helps.
Kenny
-
Just finished my first vinyl toy custom! It was an interesting change or pace, trying to combine 'realistic' weathering with a cartoony classic mecha ethos.
Well done! I know nothing about the prototype but the build really has the feel of having "weight."
Kenny
-
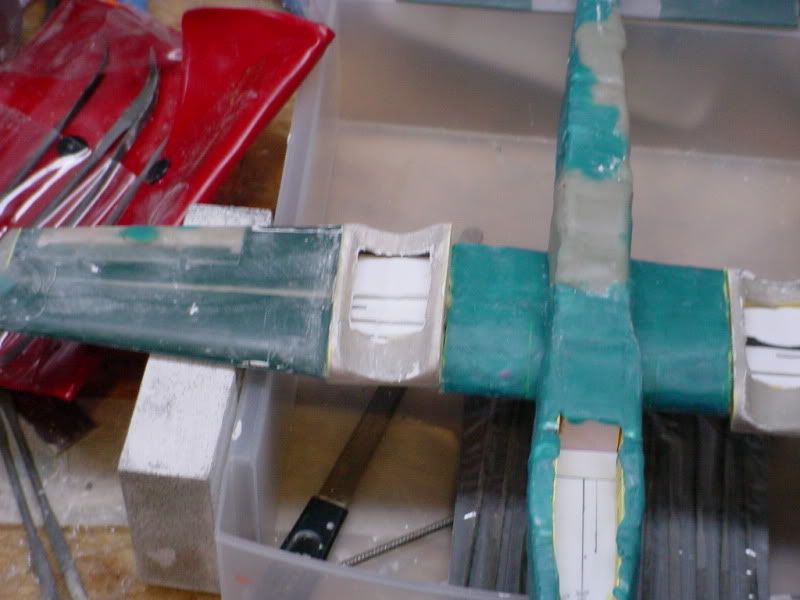
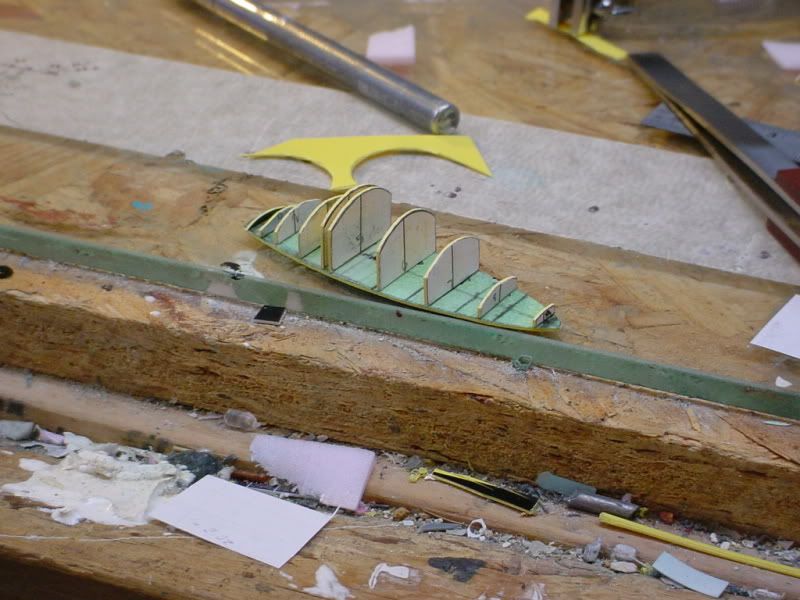
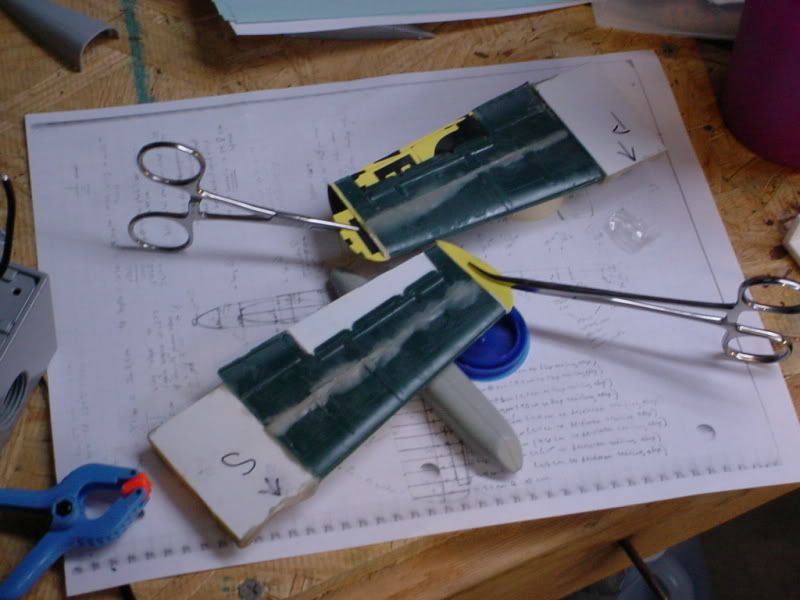
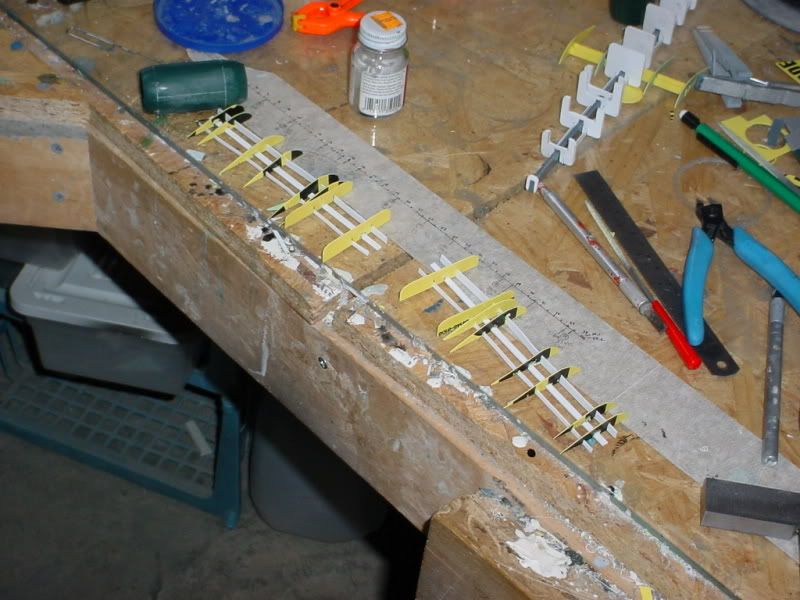
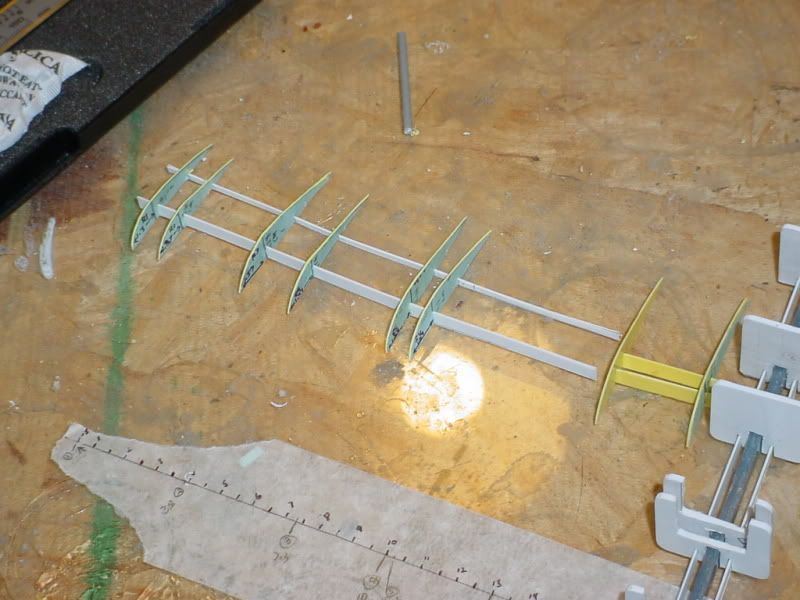
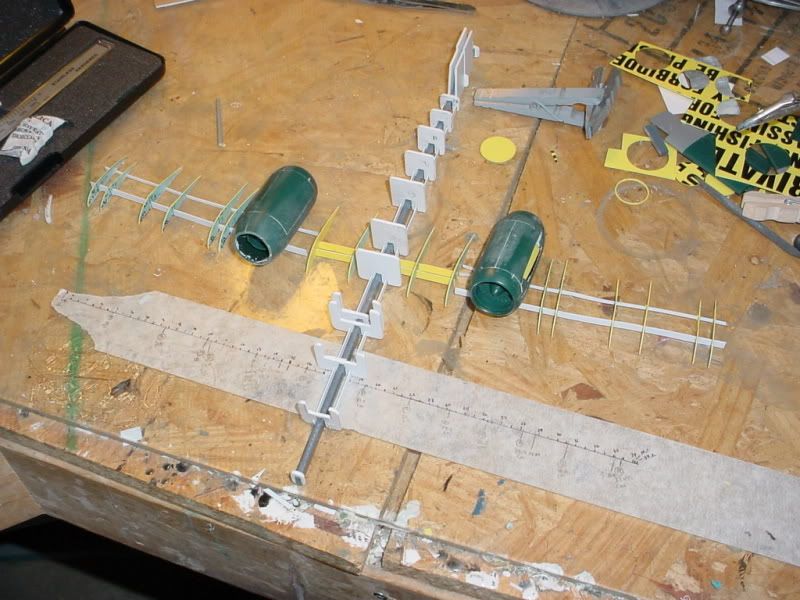
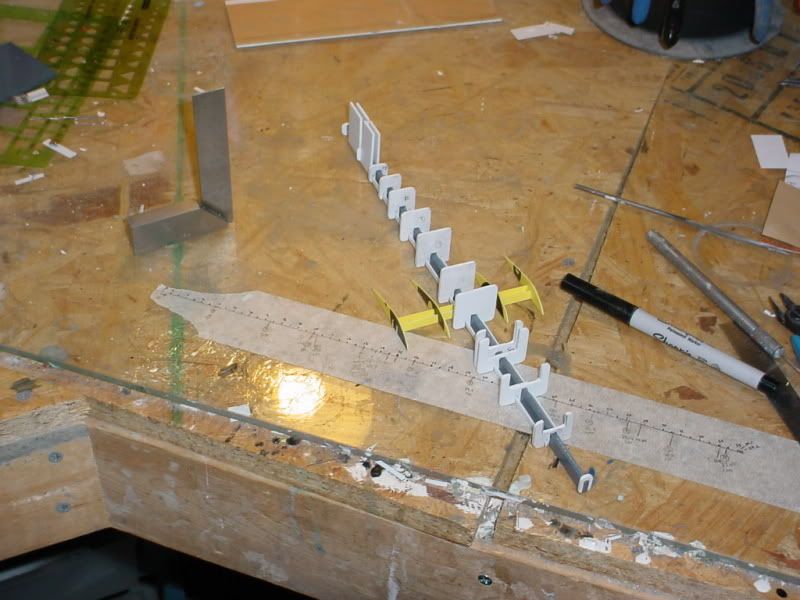
More work on my Rattler to post for today. Outer wing ribs and spars completed.
Laminating some .010-inch styrene to make wing spars
Very rough layout to give you guys an idea of size and scale
More updates to come. Comments and criticism welcome, as always.
Kenny
-
... and i really miss my rattler from a very long time ago. if only mom had known what a goldmine in toys that she was tossing out!
Go to Target and get a Tiger Rat. It's the Joe's captured Rattler. It's made using the same mold and is the same aircraft. I bought one for reference after I realized I needed more than just the plans I'd drawn. I also zoom it around my bench...for reference purposes.
Kenny
-
Update on my evil project. sleepymarine over at starshipmodeler guessed it correctly. It's a Cobra Rattler. Before everyone asks, no, you can't just use an A-10 for it.
Par for the course with these types of builds. Lots of work for a little bit of progress.
Smallest of the three turbofan nacelles with more skeleton complete
More to come. Comments and criticism welcome.
Kenny
-
Is it a Caspian Sea Monster?
lol
Perhaps my post from SSM will help:
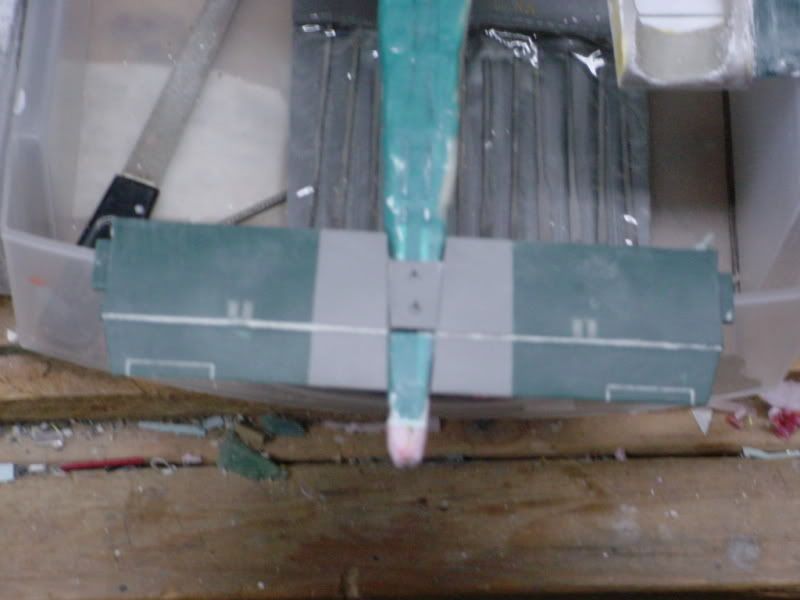
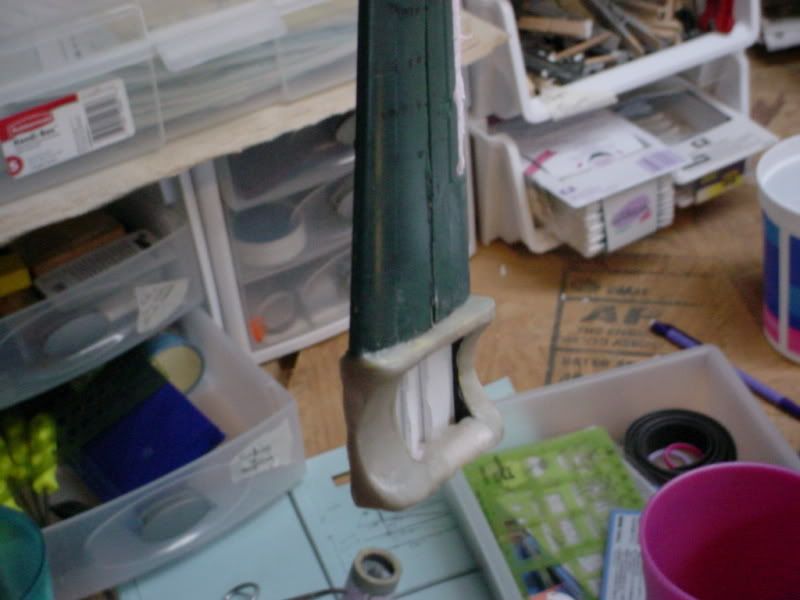
One engine nacelle is a little smaller than the other two. It's made from styrene sheet and two bulkheads. The other two are trimmed down ones from my spares box.
The horizontal stabilizers are sanded thinner, spliced together from two different kit parts along a piece of styrene strip spar, and set aside for the time being.
Stabilizer schmabilizer, I always say
More to come. Thanks for all the kind words. Comments and criticisms welcome.
Kenny
-
Neither. It's actually a strange, islander religious artifact.

Having just bought and watched Macross Zero for the first time, I laughed my arse off at that one.
Kenny
-
Secret, evil project progress post from starshipmodeler:
A lot of work to generate a small update. The wing root and vertical stabilizer base are squared and set.
Is it a bird or a fish with all those ribs?
More to come. Comments and criticisms welcome, as always.
Kenny
-
Cool...
Off topic but here is my SU35 Super Flanker from the Ace Combat 3 Electrosphere game...
Base kit was 1:48 Kitech Su27 flanker B (bad fitting kit!!)..
Just the paint scheme to go!!
Cheers,
Very sexy. Post more pics when you can.
Kenny
-
My newest project's post from over at starshipmodeler:
Wise and Sagely Starship Modelers,
I was approached by an individual who asked me to build and present a model of one of his most prized aircraft. The problem is, it doesn't exist. I didn't understand, was told I didn't understand, and judging by his decidedly evil laugh, determined I did not want to understand.
His wish was simple: Scratchbuild this evil aircraft model in time for Wonderfest 2010 so that all the world, or at least all the science-fiction-model-enthusiast-world-who-travels-here-to-Kentucky-to-Wonderfest would know fear.
At least, that's how I remember my moment of inspiration when I added this idea to my planbook some time ago.
Fuselage main beam in place and everything square
More rails parallel to beam in place to further lock things together
I'm adding the starting points for the wing root and vertical stabilizers as I type this. If you guess the name of the design, post it at your own peril. Gods be with you if you do.
Kenny
-
I thought I'd give HW Japan a go as I'm getting a bit sick of HLJ's pot luck ordering system and not so competitive pricing & postage.
If you haven't used them before then I suggest you give them a shot. Prices are cheaper than HLJ, postage options and cost are so much better and they seem to be pretty quick.
Their web site isn't as flash as HLJ but I just saved around Y1000 on the 2 kits that I brought (cheaper price & cheaper postage) and they give you reward points to use as you please and to top it all off they threw in the Sheryl decal set with the VF-25F Super without me even asking.
They do seem to have some good deals - at least on the stuff I like to buy.
Thanks!!
Kenny
-
Macross Worlders,
I just saw Macross Zero for the first time a few days ago.. I watched it again, and again, and again...
The destroids on the carrier were awesome. They looked like DYRL with Patlabor thrown in. Are there any kits of them?
Thanks!
Kenny
-
Looks great! I would love to have one like that in my display case!
Kenny
-
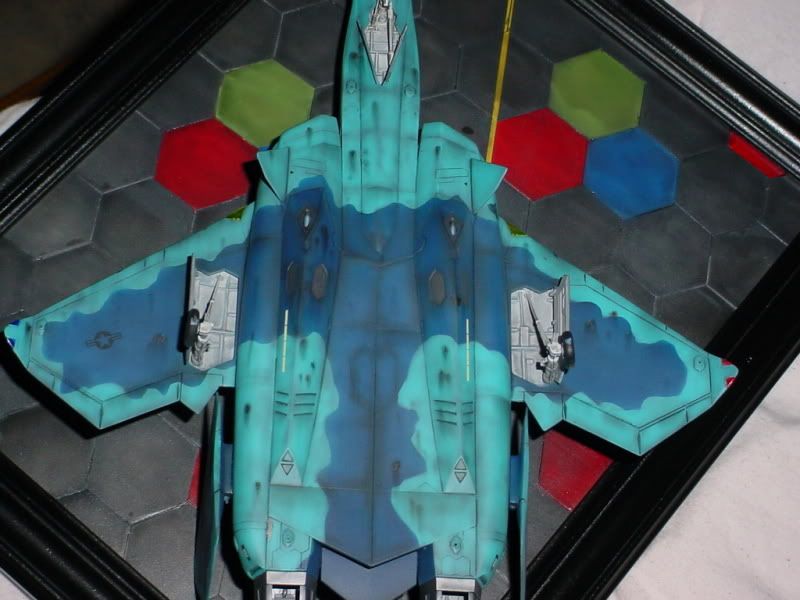
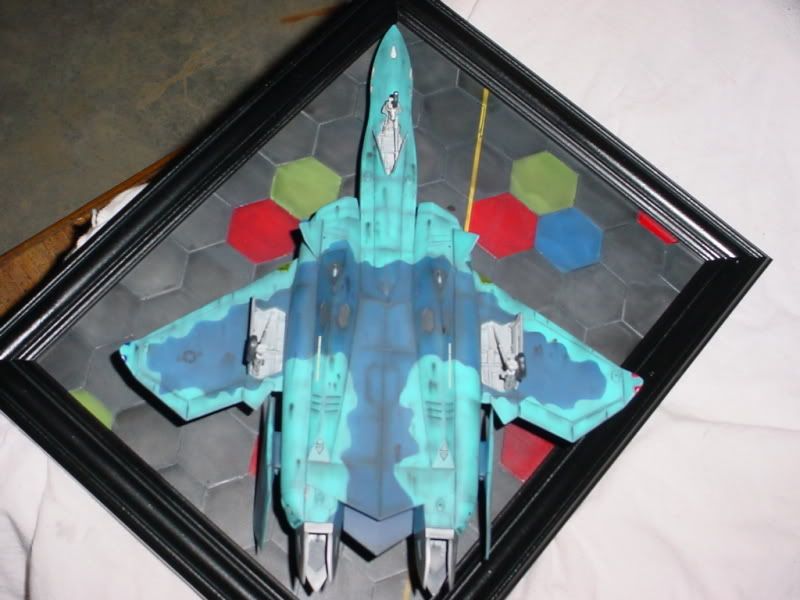
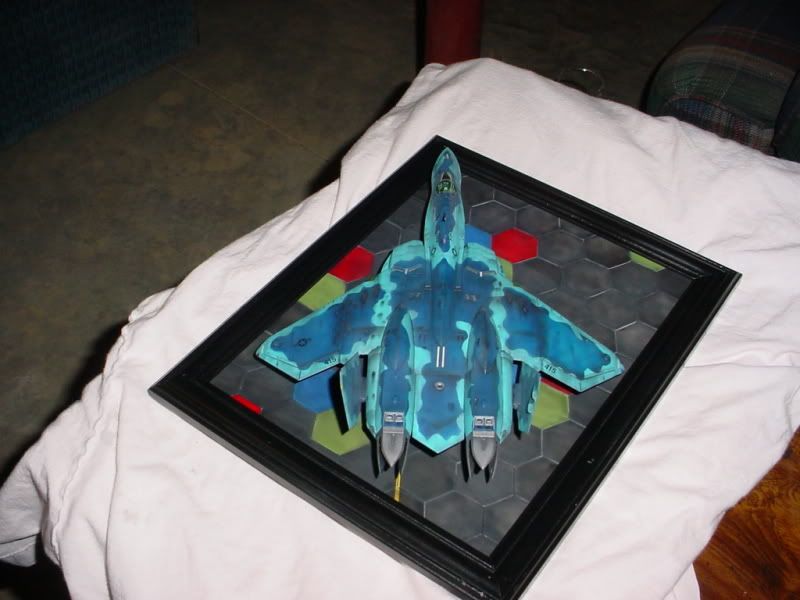
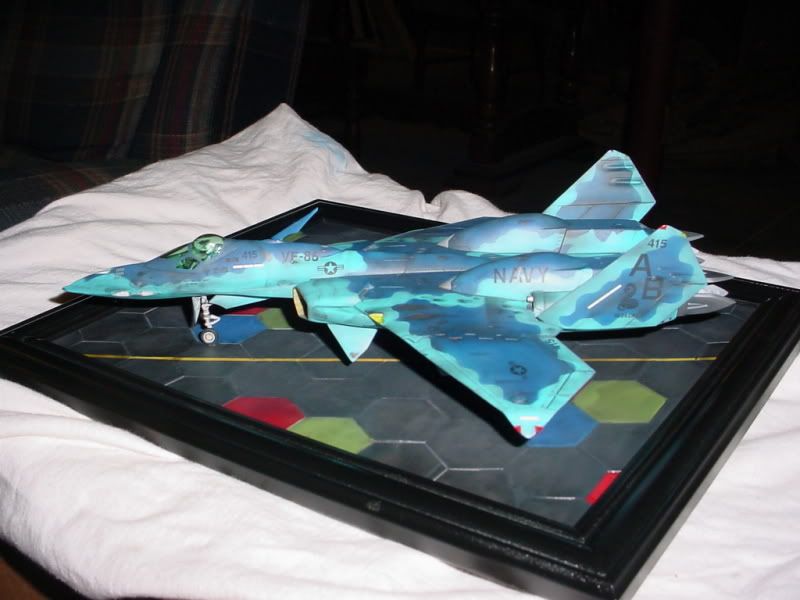
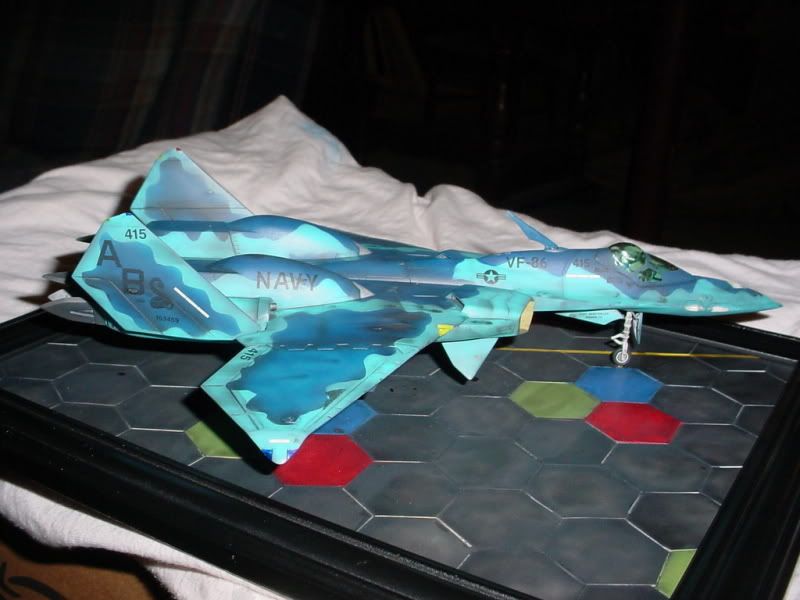
Finally finished my VF-22. Here's my post from starshipmodeler:
Finally, this thing is finished. PAstel and ink washes are finished. Glazing is completed Pastel and pencil weathering are complete as is drybrushing.
Now it's the time for the catharsis I call "the cleaning of the bench."
Comments and criticisms welcome, as always.
Kenny
-
i dont mind if they can be removed,
but can the covers also be folded into place?
or do we have seperate parts for "folded" landing covers ala vf-25 model kit?
i was just concerned as to whether the landing gear needs to be always deployed
i PERFECTLY UNDERSTAND this is a model kit.
anyway thanks for your reply.
Everything is fixed. It, like the other Hasegawa Valkyrie fighters, are traditional styrene plastic model kits. The undercarriage is a one-way deal. You build the model with it up or down.
I hope this helps you out.
Kenny
Whats Lying on your Workbench MK IV
in The Workshop!
Posted
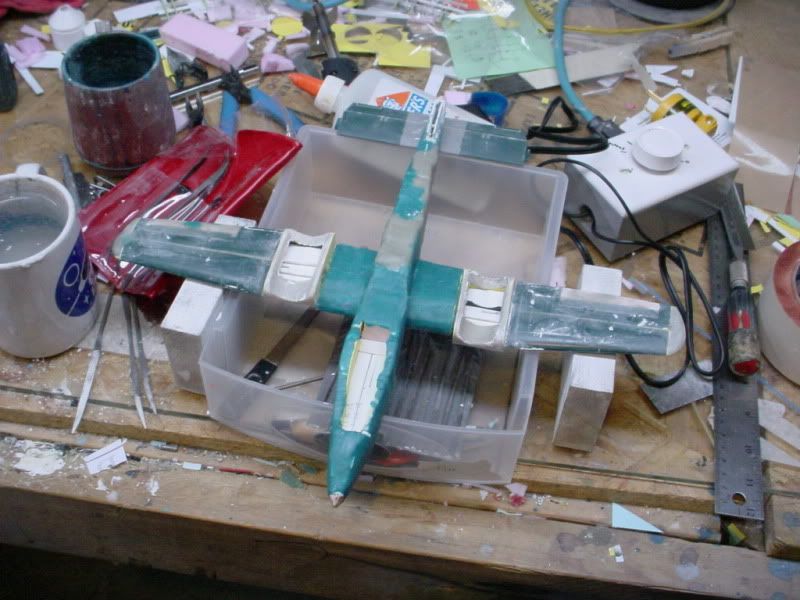
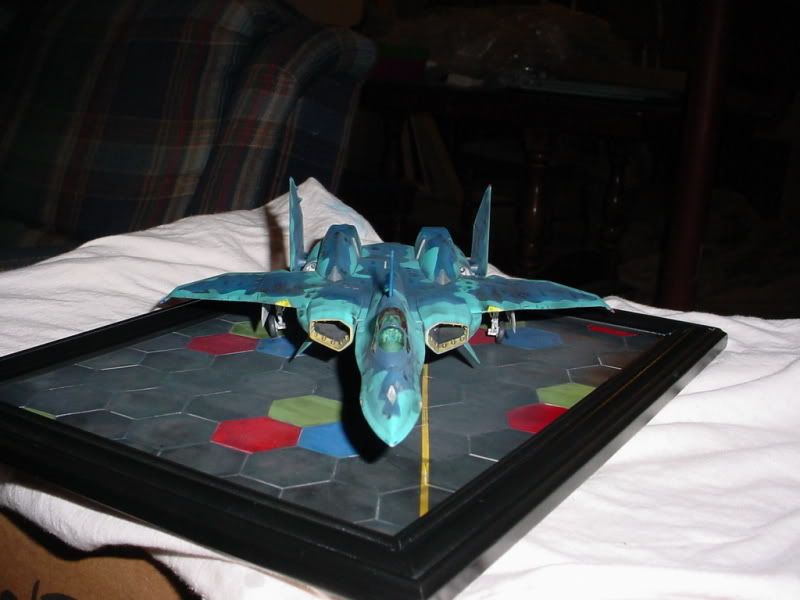
Took a break from the Rattler and am cranking out one of these:
http://smg.photobucket.com/albums/v161/Z0mBe/SV-51I/
http://smg.photobucket.com/albums/v161/Z0mBe/SV-51I/?action=view¤t=111_3622.jpg
http://smg.photobucket.com/albums/v161/Z0mBe/SV-51I/?action=view¤t=111_3621.jpg
Note the masking mismatch on the panels behind the cockpit. I fixed that AFTER posting last night. Funny how things are apparent after seeing the photo.
I "corrected" it I guess you'd say. All of the subassemblies had huge gaps between them and the fuselage. It didn't make sense compared to other transformation points and joints on the model and on the "real" thing. Plus, I can't imagine a Cessna could fly with 12-inch gaps all over the place, much less an uber-fighter.
Bottom is decaled and I am working on decaling the top. Next comes a post shade on the decals, sealing of them and then washes and a little weathering.
Comments and criticisms welcome.
Kenny