

Lt. Z0mBe
-
Posts
159 -
Joined
-
Last visited
Content Type
Profiles
Forums
Events
Gallery
Posts posted by Lt. Z0mBe
-
-
Well next project on my work bench is a 1/48 RX-78-2 kit. Man I dunno how the hell you can paint in small areas that are in small deep areas blocked off by dividing panels that tape just can't get too.
USe the head of a straight pin; put a bulb of paint on in and "walk" it around the tiny area. Or, use an airbrush to hit those areas with several light, misting coats. You can also hit areas like that with multiple washes. Put enough of them into a given area and you'll saturate it properly.
Kenny
-
Those are really well done. Thanks for posting them.
Kenny
-
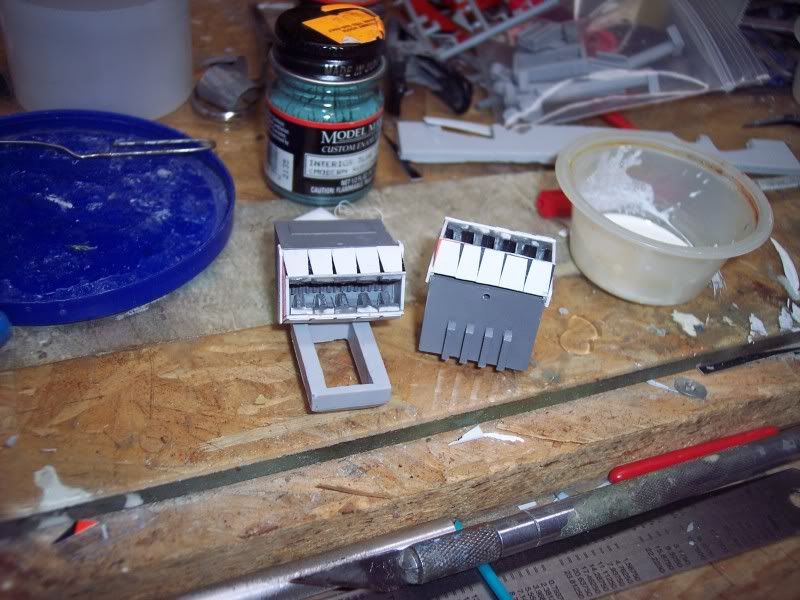
Small update on the Frazi build this morning. I finished the upgraded engines. Here are some shots showing the top and bottom of each as well as the nozzle details. I changed the nozzle details a bit since last week.
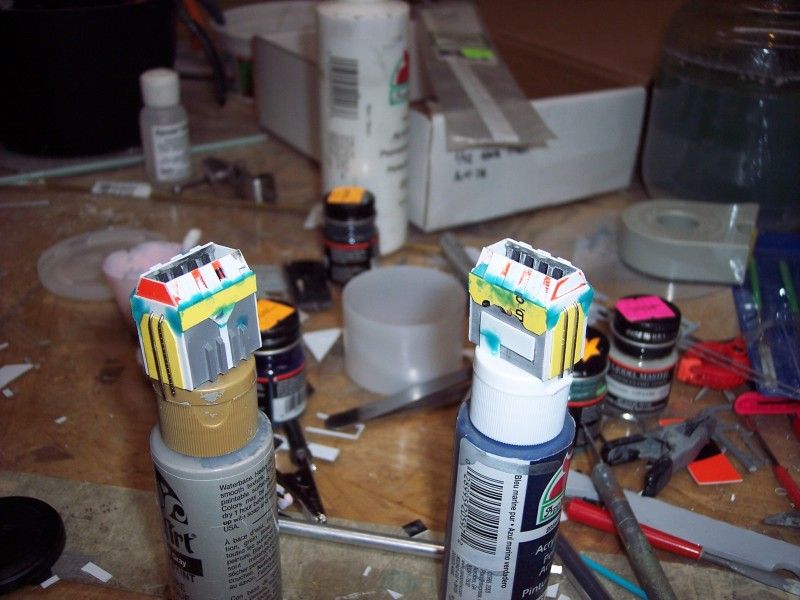
I just finished cleaning up the Aves on them; I also did the rest of the Avesing on the fuselage and am beginning to clean that up. Then I can begin the fun stuff like scribing and building some BFG's.

Kenny
-
Nice job on your first attempt at uber-masking! You fought two wars there - masking AND using vibrant red in a build. That can be tough. Not bad, Sir.
Kenny
-
Hey Zombie, what's that Frazi from anyway? I don't think I've seen one of those before.
It's from Babylon 5. Specifically, it the Narn race's primary fighter. They're one of the good guys who are essentially ethnically cleansed by a coalition of bad guys. They join up with separatists from Earth's military (and others) to fight against the bad guys. I'm altering it a bit to make it a hypothetical "lend-lease" configuration the Earth force guys fighting alongside them might have flown. Think rebel alliance from Star Wars and you get the idea.
Kenny
-
somebody riddle me this...If I poured the rest of my already mixed paint for airbrushing in an airtight glass bottle and let it sit for about 3 weeks, why when I went to use it today for touch ups..was it a slightly different color when I airbrushed it???? I can't figure it out!
Solvent used to thin it acting on the binders is the most likely explanation. When that happens, funny things occur. This is also the same reason thinned paints will also go all "cottage-cheesy" quicker than non-thinned paints.
I hope this helps.
Kenny
-
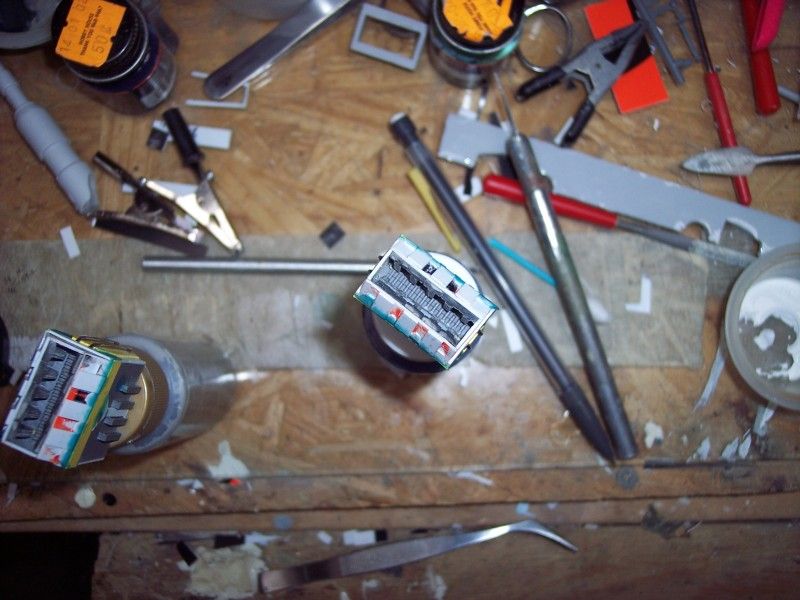
Little more work on the Frazi for today. Since I am going for an updated version, I decided to change the exhaust nozzles a bit.
Here's a progression showing gray kit pieces versus scratchbuilt ones out of styrene:

Here are the nearly finished nozzles combined with kit engines. They still need a bit of cleaning up and detailing:
Finally the cockpit is in place and the blessed Aves work has begun:
Comments and criticisms welcome.
Kenny
-
Small update on the B5 Frazi today. I finally have finished the cockpit. I redid the canopy glazing after I found some much better clear butyrate and ditched the laminated stuff I made.
Here's everything all Futured prior to washes and drybrushing:
I didn't beat the cockpit up too bad. I wanted it to look converted, not like a T-34 in space. I gave it a Paynes-grayish wash followed by some light gray and yellow drybrushing where appropriate. Our driver just got some light gray drybrushing. I flatcoated with Liquitex Matte thinned in airbrush medium:
Finally, here's the frakkin' canopy in place:
As always, comments and criticisms welcomed.
Kenny
-

How about something in a much smaller scale, and transforms, and has it's own fully custom hanger? Oh yeah, forgot to mention it also has lights, but I have to find that pic.


WOW! What scale is that? You know why I (generally) hate small scale aircraft/aerospace fighters? No detail. But, I LOVE that. If all 1/100 and 1/144 kits were like that, I'd build them too.
Kenny
-
With launch arm for your car???

No, no, no, that would be stupid. It's for his Fan Racer, of course.

Kenny
-
The Modelling Gods were with him in that build. Strong his future is.
Kenny
-
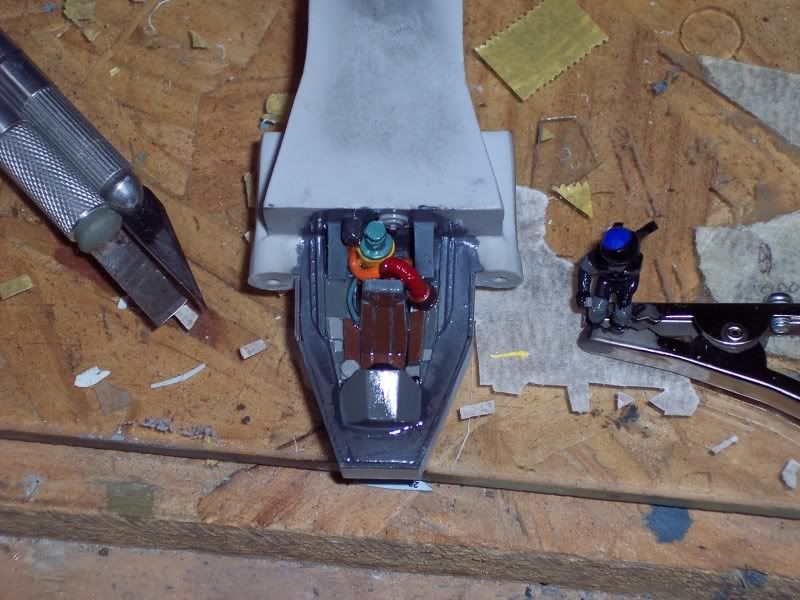
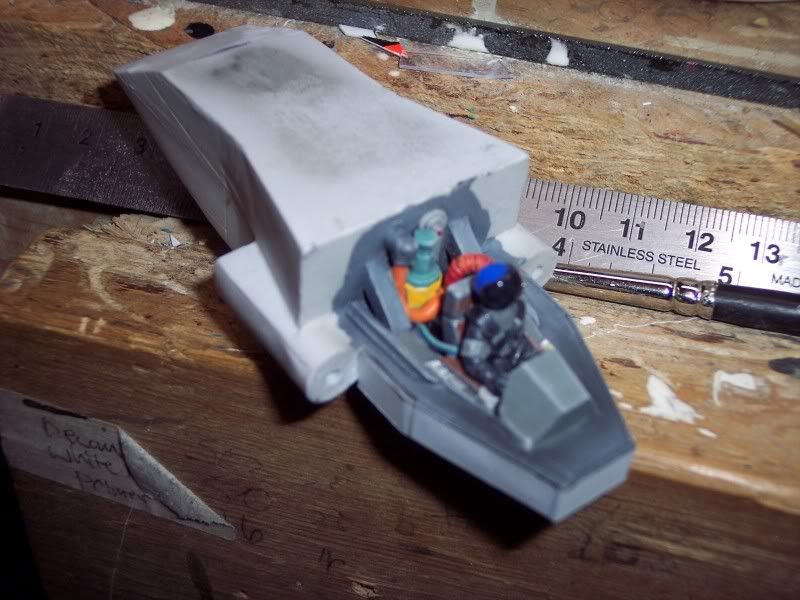
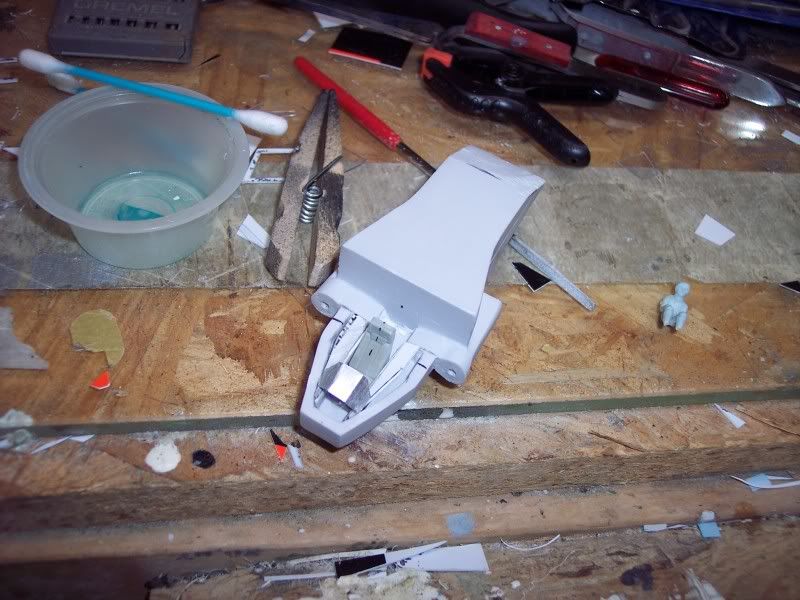
Lot of work for a little progress. Preshaded the cockpit with MM Schwarzgrau and misted Russian topside gray over it. Added some strip to the outside of the cockpit tub to make it mate with the canopy frame better (canopy's waaaay to wide):
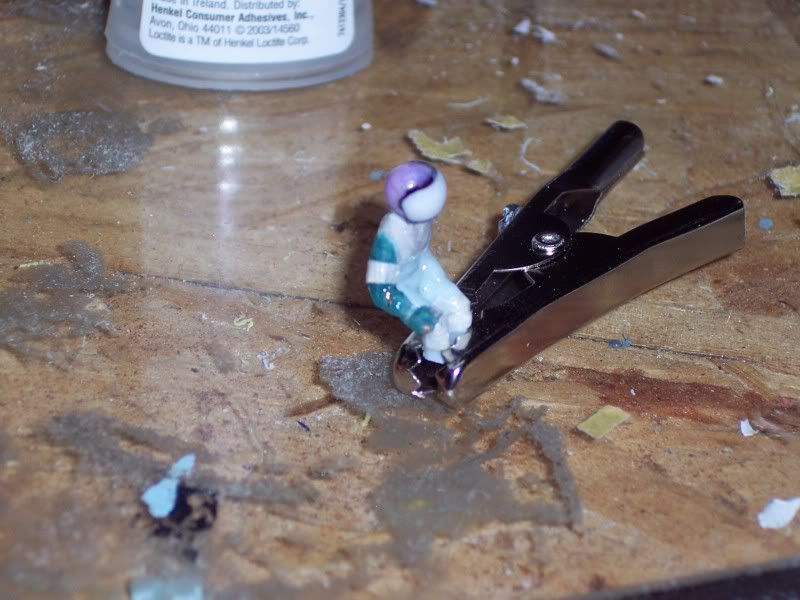
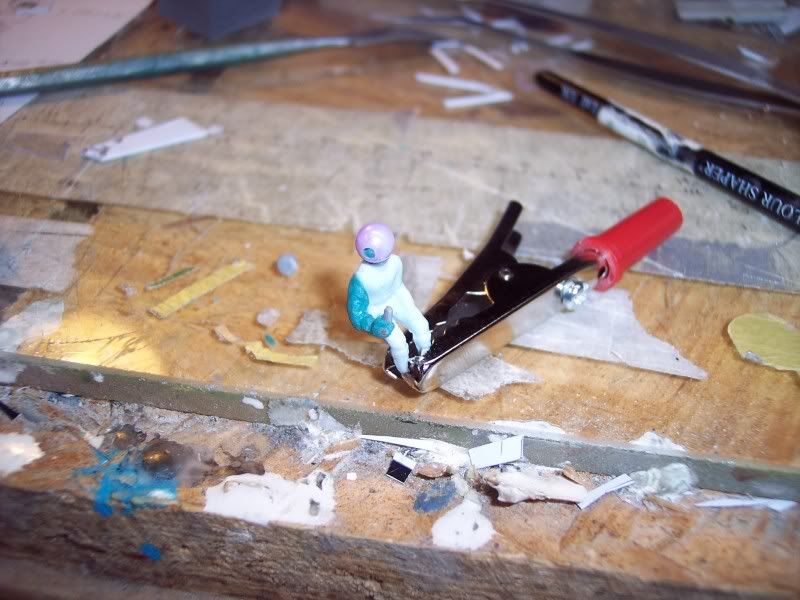
Nearly finished my Earthforce pilot. I made the details from masking tape and sealed it all with CA glue. IT's all a bit washed out in the picture. Here's the best I've got:
Comments and criticisms welcome.
Kenny
-
Looking good, although - and this is not your issue, it's the designers - the canopy struts on that thing are huge.
Thanks! Tell me about it. I am pretty sure the "real" one could also serve as an above ground atom bomb test bunker. You saw how thick I had to make the glazing just to get them flush with the surface. Grrr...
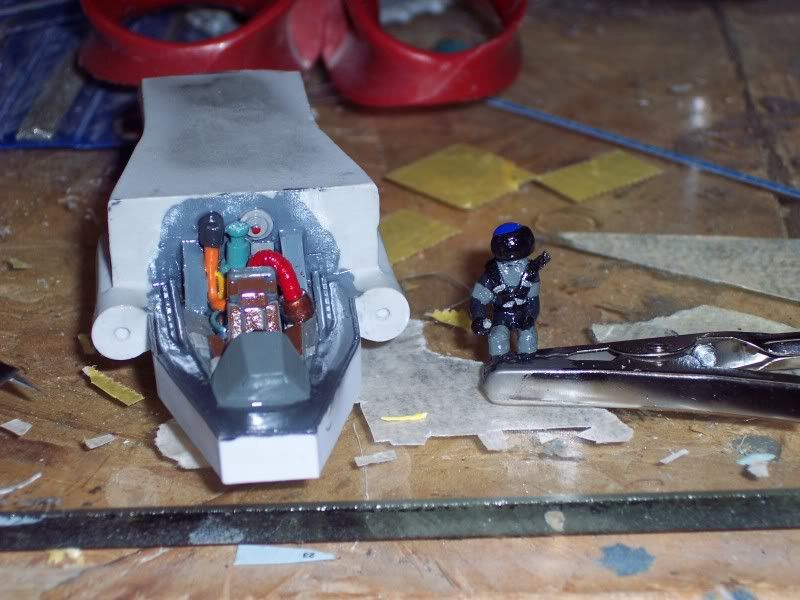
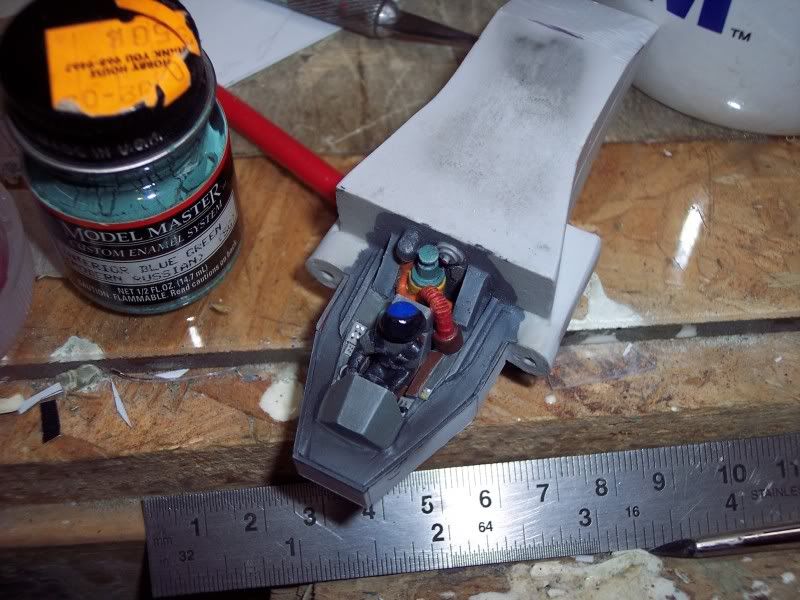
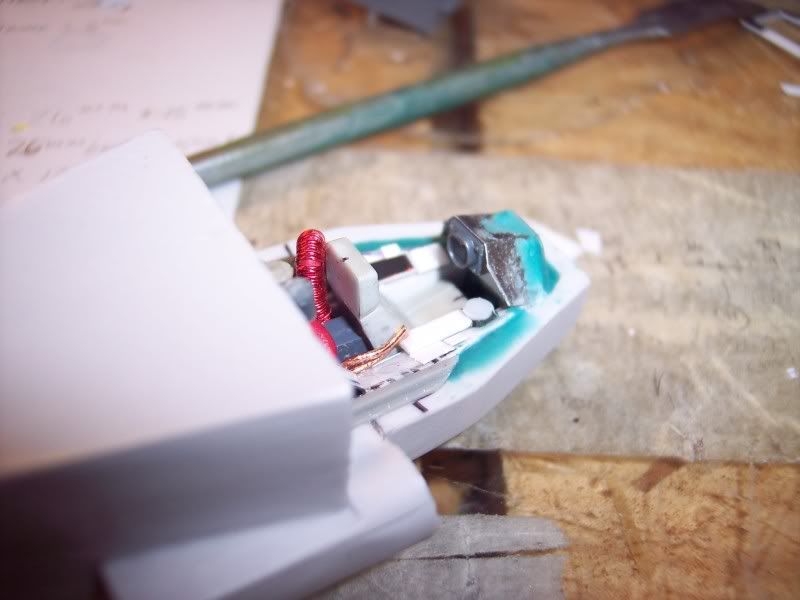
Finished scratchbuilding the cockpit stuff. Keeping the Narn "roots" while making it look a bit more late production or field modified for a human:
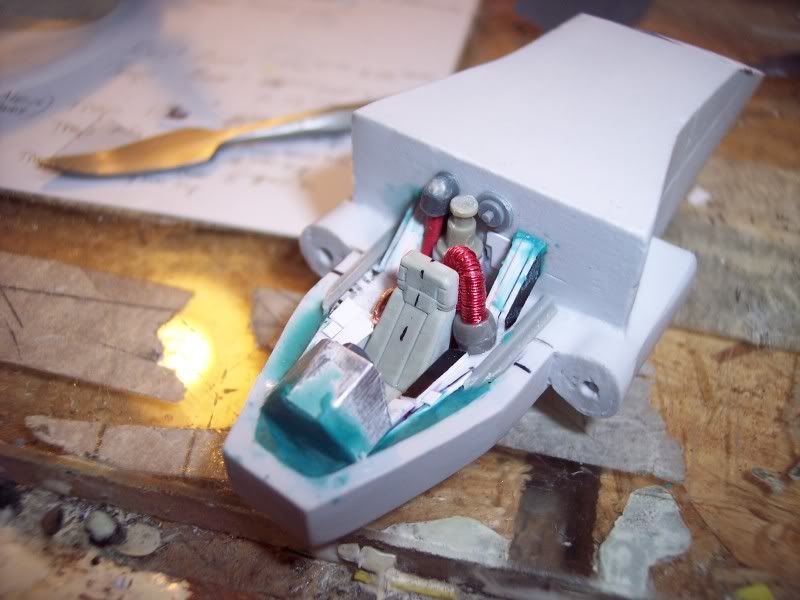
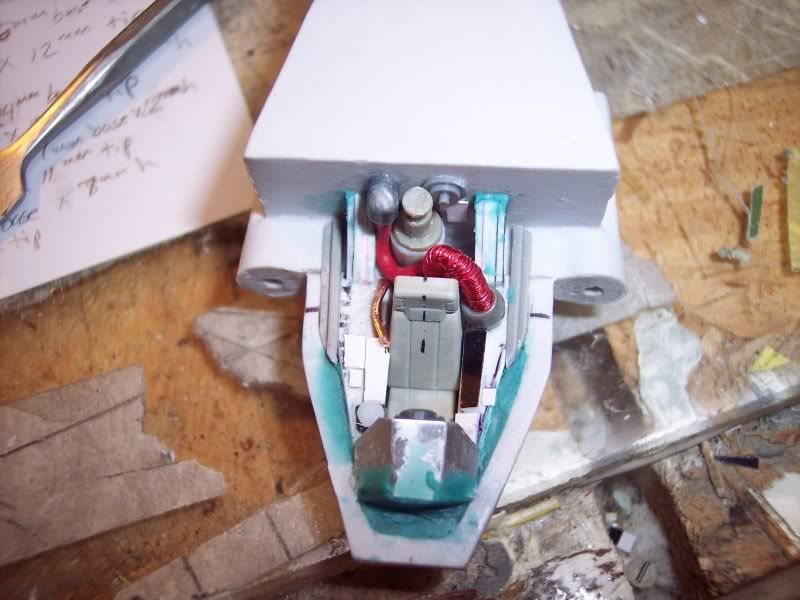
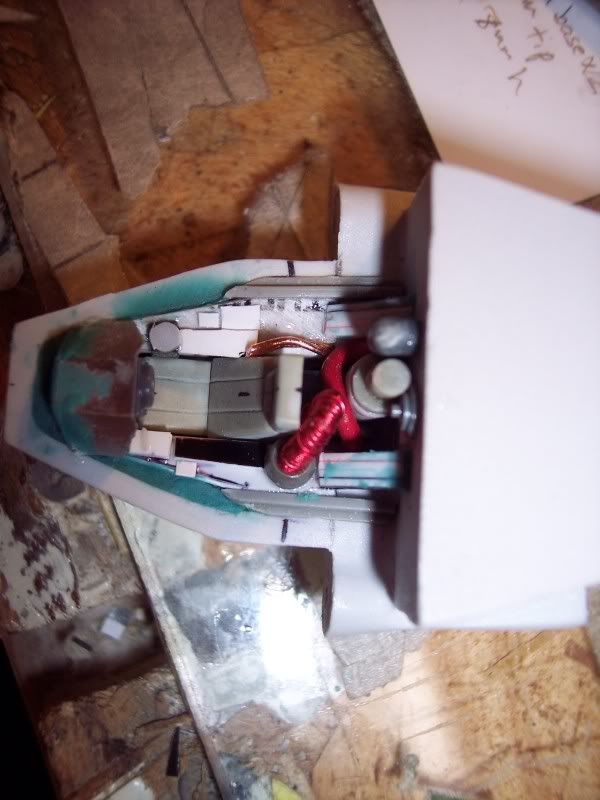
After the Aves dries I'll give it a bit of touchup sanding and begin painting. The pilot's below. The plastic bead was the perfect shape and I used the holes to allow me to set the sightline so I don't get off-track during construction. I removed the right arm and hands and sculpted a new ones over a copper armature, along with a bit of sprue for a control column (it matches the circle on the right side of the tub). He's still got a way's to go before he looks "Babylon 5-ish":
Comments and criticisms welcome as always.
Kenny
-
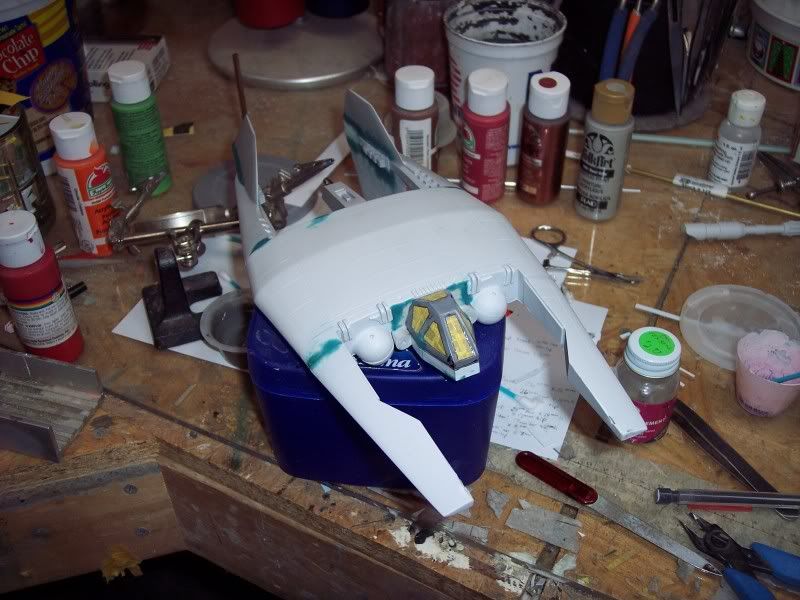
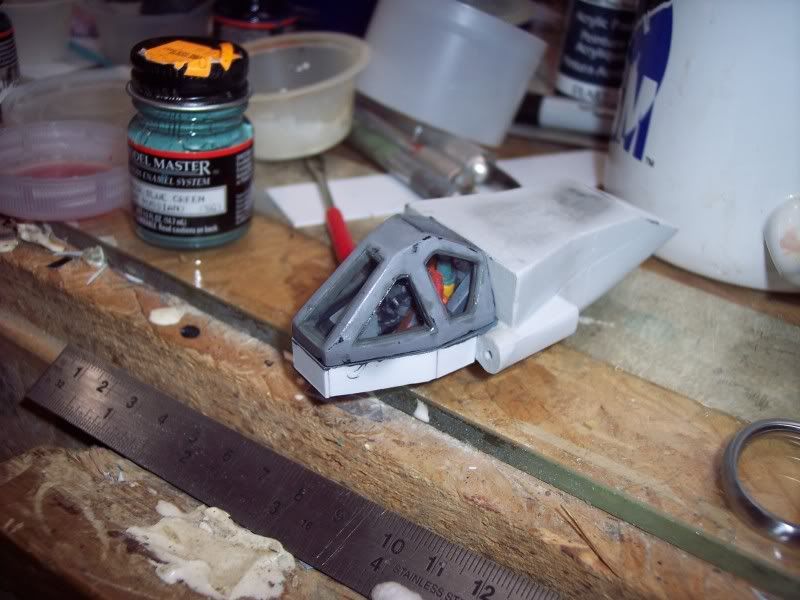
Finally finished the canopy glazing on the Frazi:
Starting on the cockpit:
Comments and criticisms welcome.
Kenny
-
So I've been working to clear my bench a bit. I bought this little guy last month in Japan and couldn't help but tear through it. Its got a Mr Surfacer basecoat, with White Aluminum Alclad all over, mixed White aluminum and jet exhaust for the area around the engine and dull aluminum for the access panel. I also used Gunze for the tail and tamiya for the nose. Right now I feel as if its a blank canvas to put decals and weathering on. I'm a bit worried that the surfacer may have penetrated underneath the canopy masking (which I used scotch tape to do. )
I missed these the other day. B's and C's are my favorite ponies. Look forward to seeing them completed.
-
Hey Zombie
Very nice work. HAve you thought of using woodglue to put the panels into place? (in addition to the future) Given the material and the shape it might work out well.
Nice work though... that's scratchbuilding beyond my level.
You read my mind.
It's a staple at my bench. I smooth it with my silicone sculpting tools moistened with water or saliva. TER-OR taught me a trick with any of those PVA glues. Use them straight (or thinned just a hair) and they're transparent as usual. Add a bit of Winsor & Newton ink to it, and you have gray (or whatever color) caulk for those times when that canopy gap has snuck up on you at the end of your build and you can't do any repair/filling/sanding work.Kenny
-
Ahh, hot rod Navy A/C/ Man's planes to be sure. Very nice.
A bit more work on the Alliance Frazi build:
Finished cleaning up the canopy plug. It took a long time. But, after several hours with the diamond rifflers and knives, it looks like it was made this way:
Began making the pieces of glazing for the canopy. I made templates for each opening and then cut three pieces for each to laminate. For the toughest openings - the front ones - I also place clear sheet backing on there to makes things easier when I start laying the pieces in:

Finally I made all of the panes. I thoroughly cleaned each pane with Windex. Then I laminated them using Future to bond them together. The process is simple: Apply a clamp to the laminate to press the pieces together while keeping the clamp jaw from touching the outside edges of the panes. Then apply Future to those outside edges and capillary action sucks it between them. This does three things: 1.) Bonds them together but not permanently if I need to fix them, 2.) Corrects minor surface flaws, and 3.) Seals the laminate edges to prevent capillary action from sucking paint in later.
Comments and criticisms welcome.
Kenny
-
That's some good looking stuff. I look forward to the finished product. The fact that you hand made all that is awesome. Also when using photobucket choose the IMG Code to get your pics to appear normally in your post.
Thanks for the kind words and tip! I changed the URL's.
Kenny
-
Starting on Narn Frazi fighter after my SV-51. I needed something fun after that disaster.
The is a hypothetical piece. I figured maybe Sheridan and company had to beg, steal and borrow equipment from all of their allies, as they couldn't have Whitestars, Thunderbolts and Starfuries everywhere. I am going to tweak it just a bit.
Experimented with trying to make my own canopy - none supplied and it's already a bit larger thatn the cockpit tub, making vacuforming not an option. But, the expermiment failed. Some of the attempts:
I then just decided to use the supplied plug. I started Dremeling away the innards with coarse- and then fine-grit diamond bits. Diamond riffler files will complete this:
Gave the cockpit tub a similar treatment. It will need a cockpit scratchbuilt:
Buried a tube for an armature deep in the aft end of the piece:
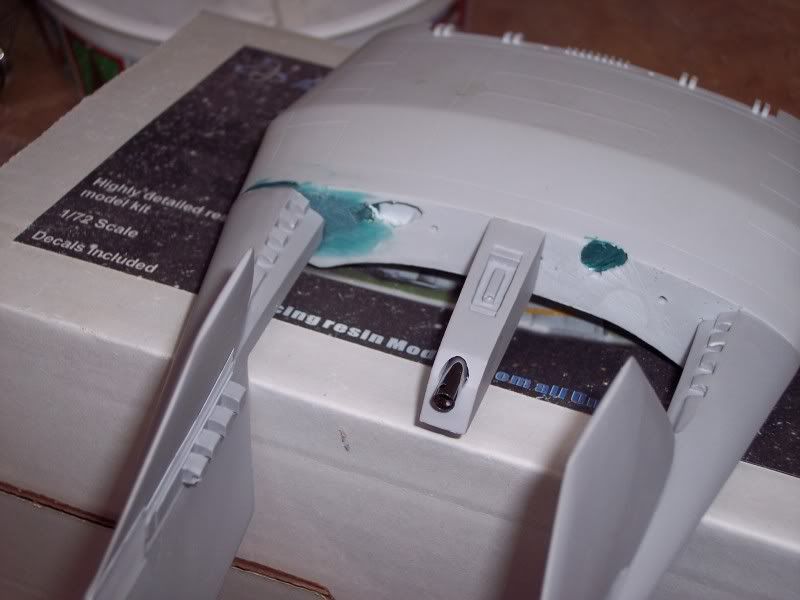
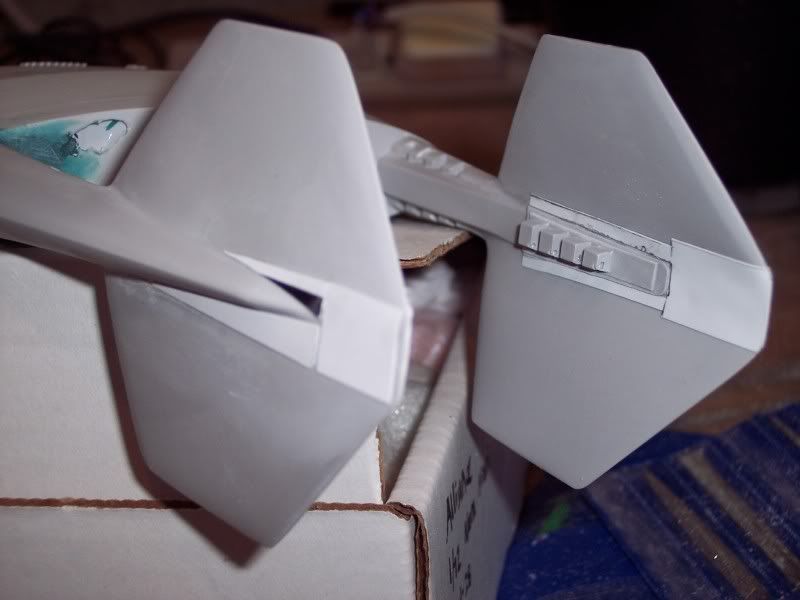
Want the vertical stabilizers (I guess that's their job) to be more geometric. The delineation is a bit soft on the kit. I added a bit of styrene with some Aves to come:
More to come. Comments and criticisms welcome, as always.
Kenny
-
Did I just see Giant-Rat-on-Valkyrie-Sex on that site?

Kenny
-
I can't believe I forgot to pay this build a compliment Dob! Up to your usual awesome standards, Sir.
Kenny
-
Nice work! Love the scheme. I've been meaning to pick up one of those. The decal's barely noticeable. I wouldn't have seen it had you not mentioned it.
Kenny
-
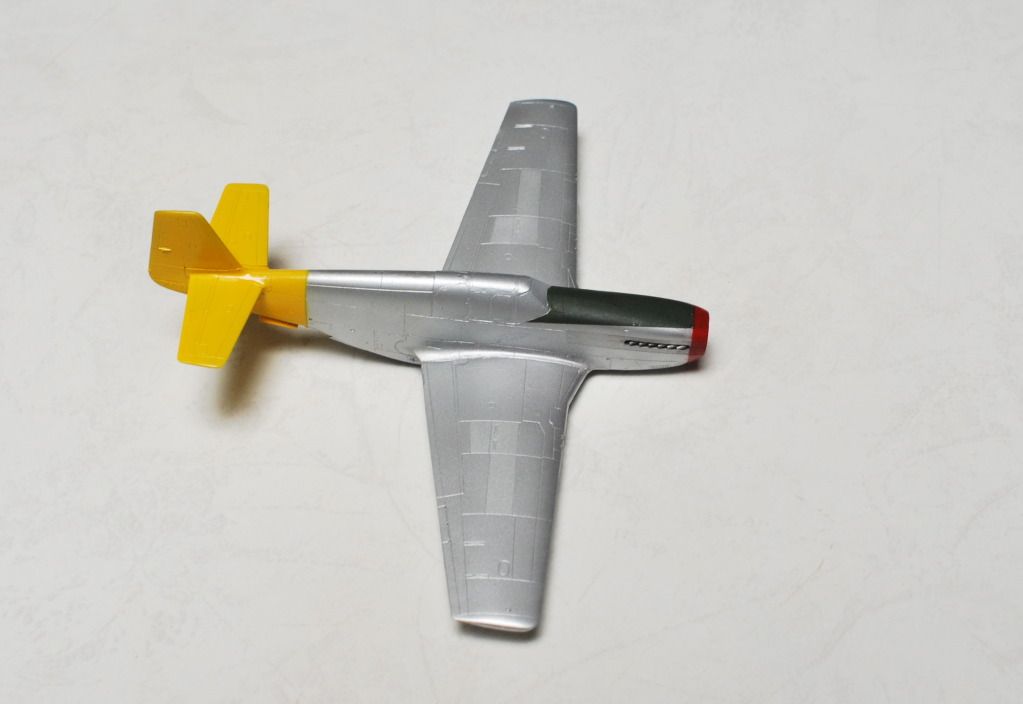
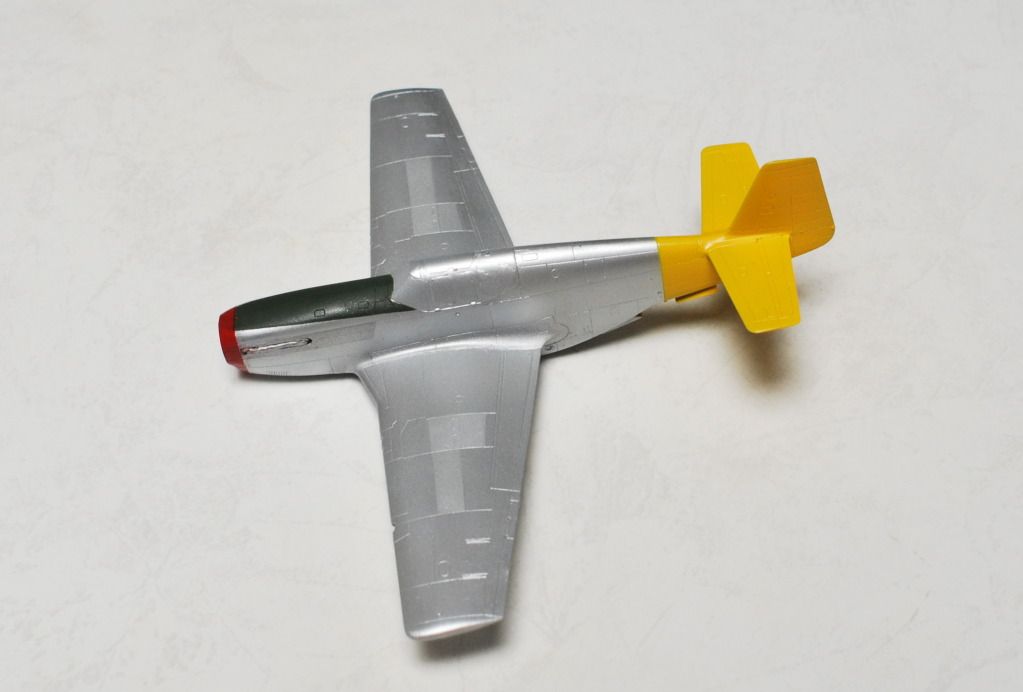
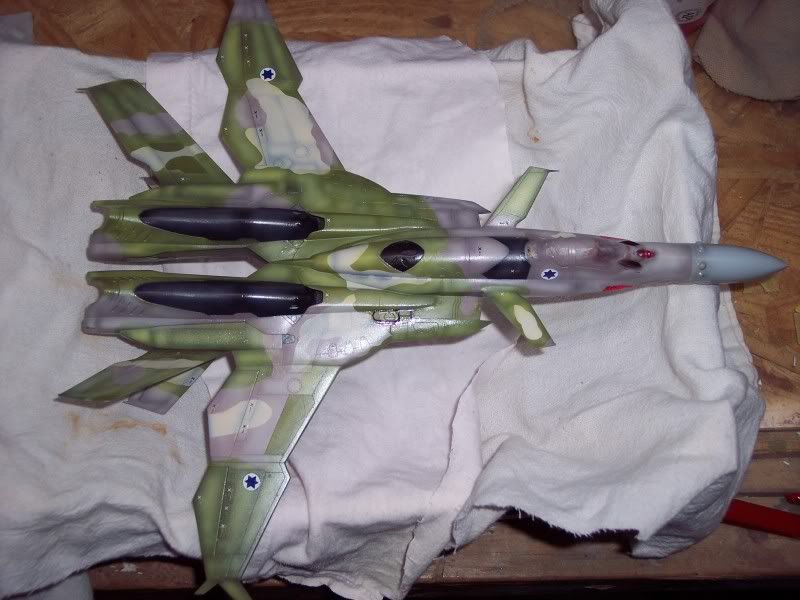
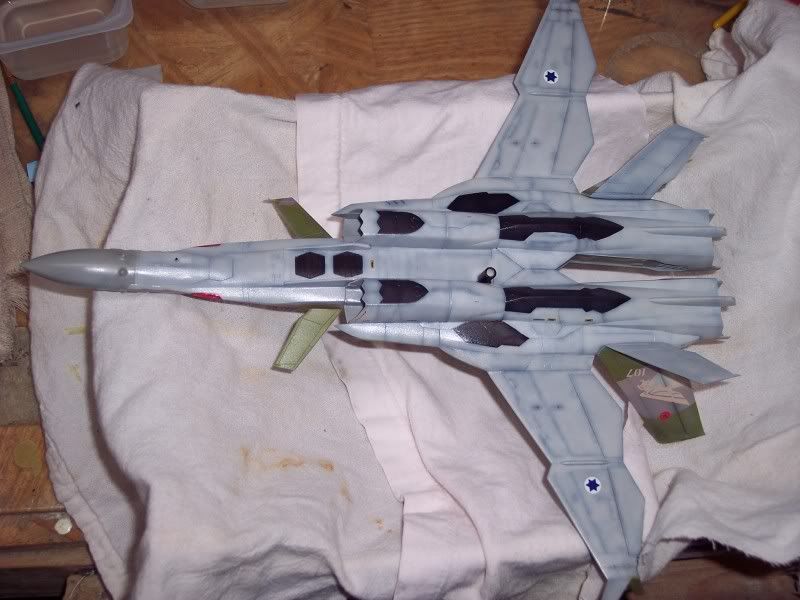
Little update on the SV-51I variant. Just some quick images from the bench. Decaling complete. Sealing them now and then onto postshading them, weathering, etc...
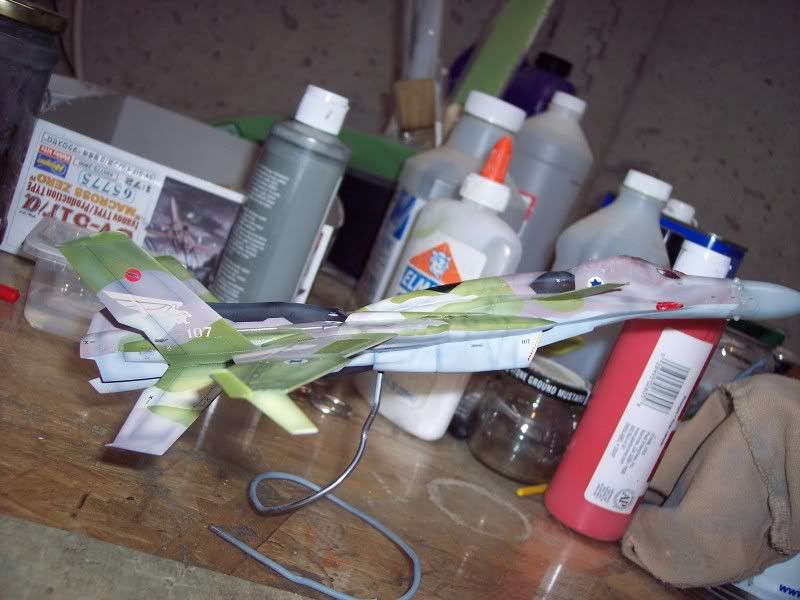

Comments and criticism welcome.
Kenny
-
Nice work Kenny, my only comment would the the bright white pops a bit too much IMO for the other softer camo colors used.
Thanks for the feedback! Do you think it's because the tan areas are faded too much to white or because the other areas aren't faded enough? It's supposed to look like a certain RL air force's A/C (you'll see later - not letting the cat out of the bag yet
) that are typically faded to hell by the desert.Thoughts?
Kenny
Whats Lying on your Workbench MK IV
in The Workshop!
Posted
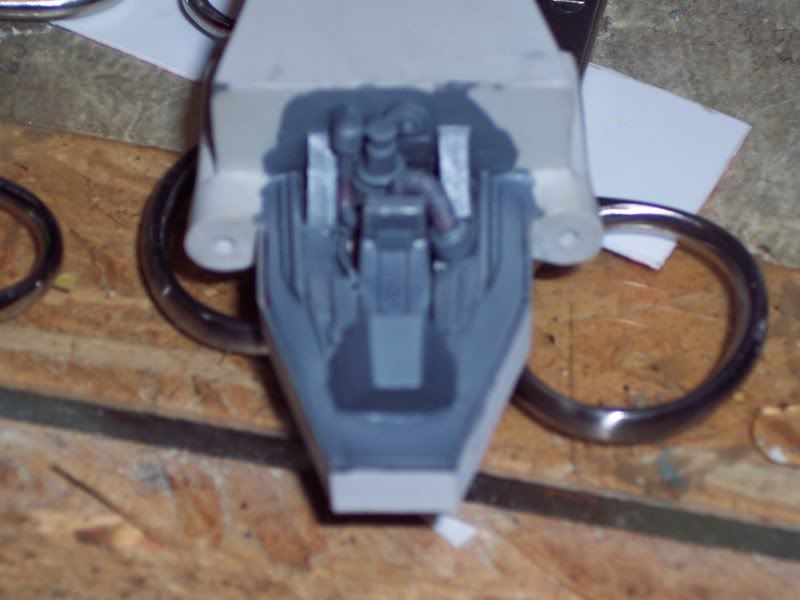
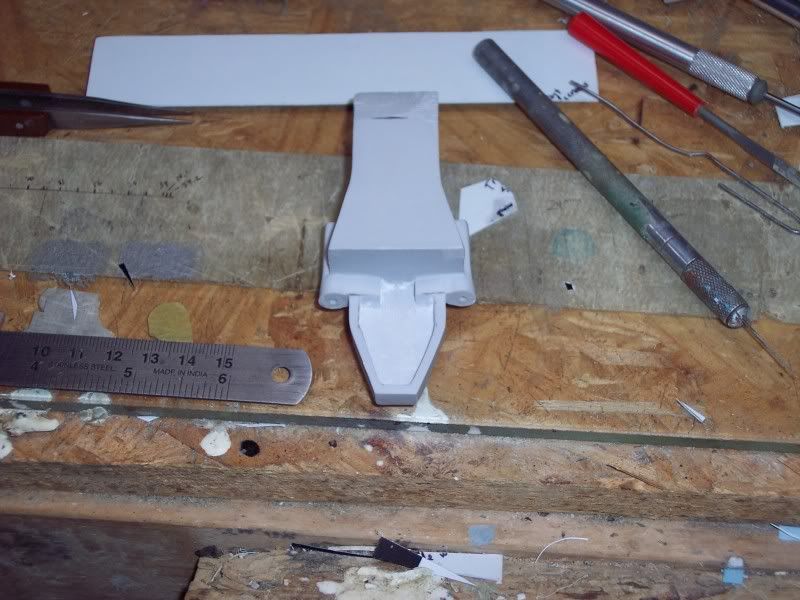
FInally finished the Aves cleanup of the thing. There will be a little more later as I add subassemblies but the lion's share is complete.
The mounts for the kit armament are removed. I'm going to change the armament a bit, keeping with the theme I've got going.
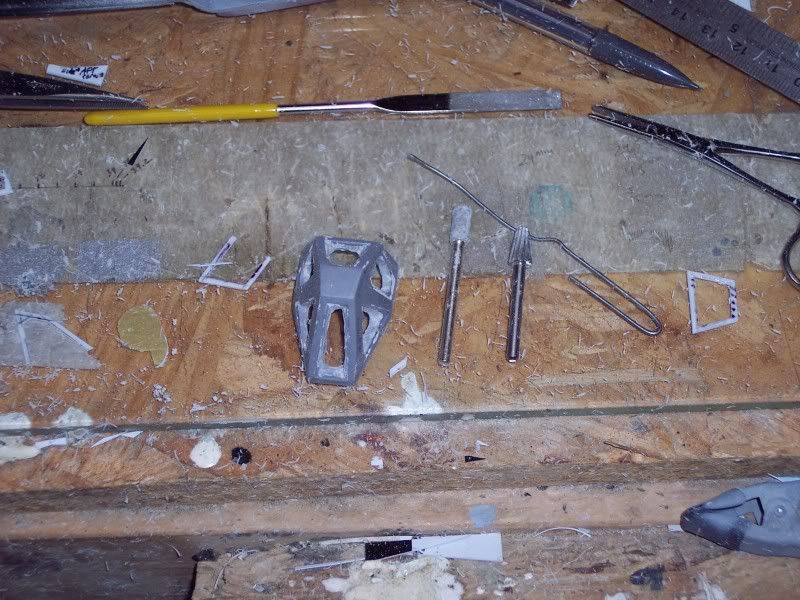
The underside on this thing's horrible. There was no definition and the kit lines were crooked. In fairing in the widened cockpit tub, I added some symmetry and definition:
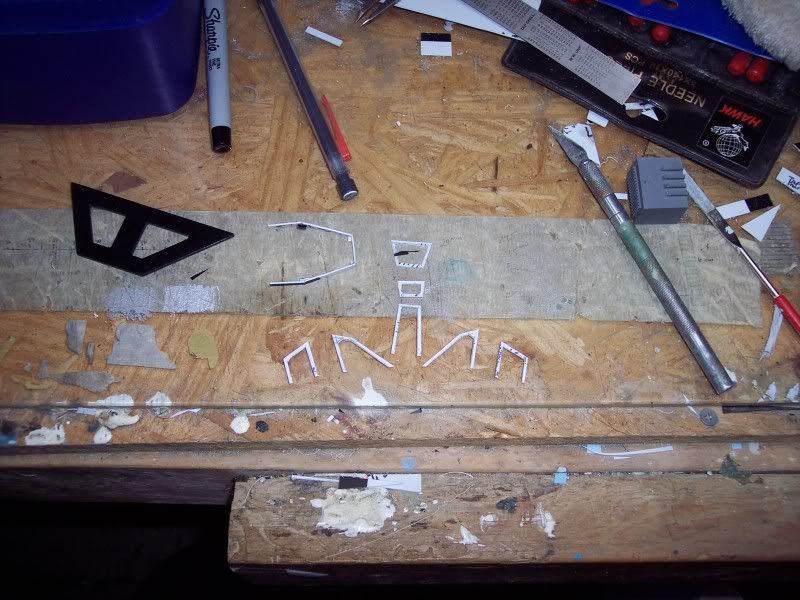
Finally, the tail booms, details and their vertical stabilizers got blessed Aves-and-styrene treatment, coupled with delicate sanding work to get some definition out of the featureless blah that was each side of empennage:
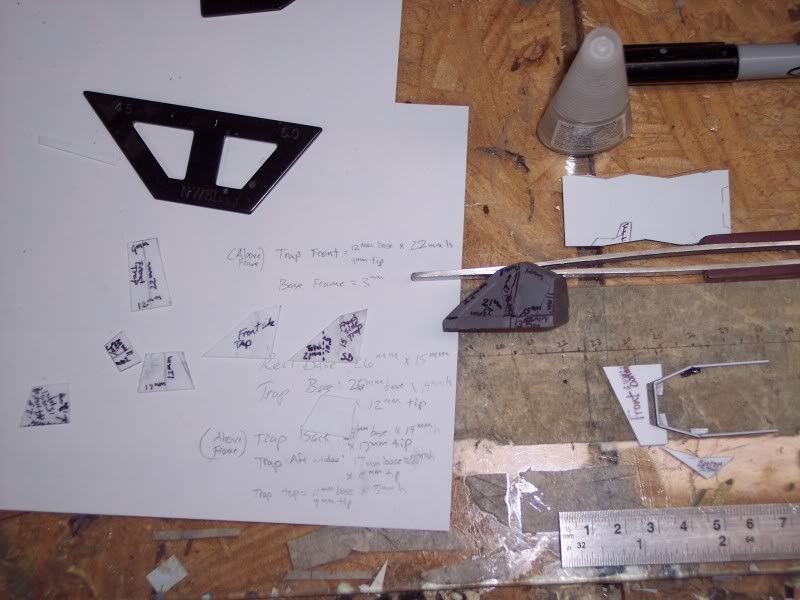
Next, I've got some RCS thrusters I want to add, the exhaust nozzles, some fun stuff (BFG's!) and the catharsis known as scribing panel lines. I think I am going to have a bit of fun with a base too.
Comments and criticisms welcome
Kenny