LRS Posted April 5, 2020 Share Posted April 5, 2020 I just wanted to create this thread in appreciation of all you awesome modelers creating some truly beautiful models. The dirt, grime, weathering. I have no idea how you guys do it! I've been inspired by by you guys to try my hand at it. I've always been afraid of buying models just to mess them up but I was just gifted an H&S Infinity airbrush so I might as well use it. Maybe one day I can aspire to build one of the famed Hasegawa kits that only modeling gods can do! Feel free to post pics of finished models that have inspired you to become the pros that you are! Quote Link to comment Share on other sites More sharing options...
Bolt Posted April 6, 2020 Share Posted April 6, 2020 (edited) Right on LRS. I've dabbled with models since my early teens. But only recently got more serious and committed. By no means fully competent, but very inspired. Mostly by my fellow MW'rs. And here's a few that have also inspired me to go for it. From fishing the web..I don't know who built most of these , but imo, they're epic! There's so many more.. Edited April 6, 2020 by Bolt Quote Link to comment Share on other sites More sharing options...
LRS Posted April 6, 2020 Author Share Posted April 6, 2020 Wow those are sick looking. That's what I'm talkin about! Picture to the left is MW modelers. To the right would be me lol. Still in these times of isolation why not try? I'm tired of fear holding me back! Quote Link to comment Share on other sites More sharing options...
LRS Posted April 6, 2020 Author Share Posted April 6, 2020 Man I would LOVE a DX vf-11with GBP, FAST packs, and missiles (probably all independently sold by bandai ) I always loved the vf-11 design. Quote Link to comment Share on other sites More sharing options...
Convectuoso Posted April 6, 2020 Share Posted April 6, 2020 2 hours ago, LRS said: Man I would LOVE a DX vf-11with GBP, FAST packs, and missiles (probably all independently sold by bandai ) I asked a designer friend of mine to create the VF-11 GBP armor in 3D to use with myYamayo GN-U DOU figure Quote Link to comment Share on other sites More sharing options...
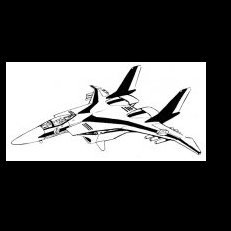
Bolt Posted April 6, 2020 Share Posted April 6, 2020 GBP for the 1/60 Yamato would be epic. Though Bandai is (eventually) releasing the YF-21, i doubt we're gonna see them announce the VF-11. Let alone GBP for it..it's definitely on the wish list. The above image is the 1/72 resin model. Quote Link to comment Share on other sites More sharing options...
LRS Posted April 6, 2020 Author Share Posted April 6, 2020 (edited) 4 hours ago, Bolt said: GBP for the 1/60 Yamato would be epic. Though Bandai is (eventually) releasing the YF-21, i doubt we're gonna see them announce the VF-11. Let alone GBP for it..it's definitely on the wish list. The above image is the 1/72 resin model. Didnt someone say something similar in the Arcadia thread about them never re-releasing the GBP and they just did. We have to have hope! Macross Plus has to be one of the better and more acclaimed series within macross. Though maybe the vf-11 GBP was in macross 7. I cant remember. Edited April 6, 2020 by LRS Quote Link to comment Share on other sites More sharing options...
Bolt Posted April 6, 2020 Share Posted April 6, 2020 59 minutes ago, LRS said: Macross Plus has to be one of the better and more acclaimed series within macross. With western fans, mostly. The Japanese fan base doesn't seem to love M+. But they DO Love the YF-19.. 1 hour ago, LRS said: Though maybe the vf-11 GBP was in macross 7. I cant remember. It is in Macross 7. Episode 26 iirc. Quote Link to comment Share on other sites More sharing options...
sketchley Posted April 7, 2020 Share Posted April 7, 2020 11 hours ago, LRS said: (...) Still in these times of isolation why not try? I'm tired of fear holding me back! There's no better way to start then to dive right in. That said, some advice: start on something you can afford to lose if you mess up limit your ambitions on your first few kits—for example adding only a few highlights in paint here or there, and the panel lining. Here's an example of what I'm talking about with the #07 SDF/C-108 Macross Elysion Fortress Mode. All I've added are ① red and metallic grey paint on 6 small areas, ② a black wash (basically thinned watercolours) to bring out the panel lines and add a bit of weathering, and ③ stickers that came with the kit. The result is nothing compared to the more skilled people in MW, but I am nonetheless impressed by how much so little adds: http://www.macrossworld.com/mwf/topic/43375-bandai-macross-δ-mecha-collection-small-scale-plastic-model-kits/page/9/?tab=comments#comment-1317744 Quote Link to comment Share on other sites More sharing options...
LRS Posted April 7, 2020 Author Share Posted April 7, 2020 (edited) 11 minutes ago, sketchley said: There's no better way to start then to dive right in. That said, some advice: start on something you can afford to lose if you mess up limit your ambitions on your first few kits—for example adding only a few highlights in paint here or there, and the panel lining. Here's an example of what I'm talking about with the #07 SDF/C-108 Macross Elysion Fortress Mode. All I've added are ① red and metallic grey paint on 6 small areas, ② a black wash (basically thinned watercolours) to bring out the panel lines and add a bit of weathering, and ③ stickers that came with the kit. The result is nothing compared to the more skilled people in MW, but I am nonetheless impressed by how much so little adds: http://www.macrossworld.com/mwf/topic/43375-bandai-macross-δ-mecha-collection-small-scale-plastic-model-kits/page/9/?tab=comments#comment-1317744 Thanks that’s great advice! So what you are saying is that I shouldn’t start with the Revell 1/2600 Star Destroyer with Fiber optic kit...... although maybe I should buy that one for the future. Not sure how long model kits stay in production Edited April 7, 2020 by LRS Quote Link to comment Share on other sites More sharing options...
nightmareB4macross Posted April 7, 2020 Share Posted April 7, 2020 31 minutes ago, LRS said: Thanks that’s great advice! So what you are saying is that I shouldn’t start with the Revell 1/2600 Star Destroyer with Fiber optic kit...... although maybe I should buy that one for the future. Not sure how long model kits stay in production Your off to the right start. Many modelers begin with collecting then building. Buying kits now would give you security down the line knowing you have the kit you have always wanted but someday will build. That is after your backlog of 30-40 kits is completed. Quote Link to comment Share on other sites More sharing options...
sketchley Posted April 7, 2020 Share Posted April 7, 2020 (edited) 11 hours ago, LRS said: Thanks that’s great advice! So what you are saying is that I shouldn’t start with the Revell 1/2600 Star Destroyer with Fiber optic kit...... I know you're joking, but... That fiber optic kit is combining a pair of skill sets that need to be developed over time: modelling, and electronics. I've seen some MWers with mindbogglingly great modelling skills humbled by—what is for some—simple wiring/soldering (and vice-versa). Nevertheless, some art tips that are also applicable to modelling: learn to hide your mistakes—everyone makes mistakes, however, good artists know how to make them look deliberate (or present things in ways that don't draw attention to the mistakes) the 70/30 rule: spend 70% of your time on the 30% that people are going to focus on (as modellers tend to be perfectionists, this is probably the harder tip ) So, yes, it probably doesn't matter what you start working on, however, some kits are infinitely easier (and cheaper!) than others. I recommend the Gundam kits: they're relatively cheap, are molded in the mecha's primary colours, and require a minimum of panel lining and decals/stickers. How far you want to take it from there (spot paints and trimming the antenna to scratch-built limbs and full resprays) is up to you. Edited April 7, 2020 by sketchley Quote Link to comment Share on other sites More sharing options...
LRS Posted April 7, 2020 Author Share Posted April 7, 2020 1 hour ago, sketchley said: I know you're joking, but... That fiber optic kit is combining a pair of skill sets that need to be developed over time: modelling, and electronics. I've seen some MWers with mindbogglingly great modelling skills humbled by—what is for some—simple wiring/soldering (and vice-versa). Nevertheless, some art tips that are also applicable to modelling: learn to hide your mistakes—everyone makes mistakes, however, good artists know how to make them look deliberate (or present things in ways that don't draw attention to the mistakes) the 70/30 rule: spend 70% of your time on the 30% that people are going to focus on (as modellers tend to be perfectionists, this is probably the harder tip ) So, yes, it probably doesn't matter what you start working on, however, some kits are infinitely easier (and cheaper!) than others. I recommend the Gundam kits: they're relatively cheap, are molded in the mecha's primary colours, and require a minimum of panel lining and decals/stickers. How far you want to take it from there (spot paints and trimming the antenna to scratch-built limbs and full resprays) is up to you. That's some sound advice, thanks! In fairness I did consider that star destroyer for a moment, youtubers make things look so easy. The magic of editing I'm sure. I do have a cheap Gundam actually that I would like to try. Question for those who use airbrush. Do people use multiple airbrushes for different types paints or one airbrush for everything? Quote Link to comment Share on other sites More sharing options...
derex3592 Posted April 7, 2020 Share Posted April 7, 2020 1 hour ago, LRS said: Question for those who use airbrush. Do people use multiple airbrushes for different types paints or one airbrush for everything? I have 3. One old single action I don't really use anymore, but can for clear coats. A cheaper double action syphon fed that I don't really use much anymore unless I'm painting something pretty darn big. And then I have my Iwata gravity fed go to AB for pretty much everything else. Quote Link to comment Share on other sites More sharing options...
LRS Posted April 7, 2020 Author Share Posted April 7, 2020 (edited) 15 minutes ago, derex3592 said: I have 3. One old single action I don't really use anymore, but can for clear coats. A cheaper double action syphon fed that I don't really use much anymore unless I'm painting something pretty darn big. And then I have my Iwata gravity fed go to AB for pretty much everything else. I've read that some people use an airbrush each for metallics, primers and acrylics. I'm not sure the reasoning on this. I dont want to screw up my airbrush because I mistakenly mixed paint types with it. Edited April 7, 2020 by LRS Quote Link to comment Share on other sites More sharing options...
derex3592 Posted April 7, 2020 Share Posted April 7, 2020 I use everything under the sun in mine, acrylics, enamels, lacquer paint, clear coats. The trick is CLEANING IT 110% every time. That's my biggest problem, usually I THINK it's clean but nope, gotta clean it again! I will say I avoid spraying Future through it. That led to some nightmarish sticky problems way down the road after I did it, and yes, I believed to be fully clean. Quote Link to comment Share on other sites More sharing options...
LRS Posted April 7, 2020 Author Share Posted April 7, 2020 Is there a type of paint you find to be really difficult to clean? Quote Link to comment Share on other sites More sharing options...
derex3592 Posted April 7, 2020 Share Posted April 7, 2020 (edited) In order of difficulty and toxic fumes you should definitely wear a full respirator for are: Lacquer, then enamel, then acrylics. Acrylics especially Tamiya are incredibly easy to use/mix and easy to clean up with acrylic thinner, windex or water. You can even spray them inside if you like. However, it took me a while to get them down because you HAVE to do it in thin layers, lots of layers. They are also easily damaged after you paint by greasy fingers or scratches from things. Enamels are in the middle -- you can cover with one or two passes and call it a day. Little harder to deal with when mixing and cleaning though. Don't recommend doing in the house. Spraying lacquers sucks, it's hard to clean and stinks to high heaven buuut, it gives you a rock hard base coat usually to build up other paints on top of for detailing. I suggest YouTube for some great AB videos. You can learn a lot there! Also, if you can afford them, Tamiya TS spray cans are VERY good. Almost AB quality for just painting one color on kit parts. Dries quickly and very hard finish. I love them. Edited April 7, 2020 by derex3592 Quote Link to comment Share on other sites More sharing options...
Bolt Posted April 7, 2020 Share Posted April 7, 2020 @derex3592 covered it pretty awesomely. I have two airbrushes, not fancy. I pretty much only use the gravity fed one for everything. What he said about cleaning is 110% true. I clean mine religiously and even then will have an occasional issue and need to re cleaned.. @sketchley also gave great advice. I have been collecting Macross models for years. Now that I'm ready to get serious, I don't spend much time searching online for that awesome Macross kit . I look in my closet Quote Link to comment Share on other sites More sharing options...
arbit Posted April 7, 2020 Share Posted April 7, 2020 I recommend watching a bunch of videos on cleaning and caring for your airbrush first. You don't need a deep clean if you're just changing colors, but at the end of a session, you need to go all out. Then before painting any models, get a lot of practice on paper and on plastic spoons to get your thinning ratios, airflow, and distance right, and to get a feel for the differences between primers, base coats and clear. It's not that hard to get a good result on your first kit if you give yourself time to practice first. When those spoons start looking good, have at it. Quote Link to comment Share on other sites More sharing options...
LRS Posted April 7, 2020 Author Share Posted April 7, 2020 (edited) 20 hours ago, nightmareB4macross said: Your off to the right start. Many modelers begin with collecting then building. Buying kits now would give you security down the line knowing you have the kit you have always wanted but someday will build. That is after your backlog of 30-40 kits is completed. Thank you for enabling me I've heard ppl use an ultrasonic cleaner for their airbrush. I have a TON of plastic spoons so I'm good there. I have many modeling channels saved on my YouTube so that's good. What does AB stand for? Edited April 7, 2020 by LRS Quote Link to comment Share on other sites More sharing options...
sketchley Posted April 8, 2020 Share Posted April 8, 2020 (edited) Speaking of painting... it's like 90% prep work. One trick I picked up from Japanese modelling magazines is putting your modelling glue on both surfaces to be glued, then squeezing the parts together hard enough that some of the melted plastic starts to get squeezed out of the gap between the parts—thereupon you hold for the requisite 30 seconds (or whatever the directions say) and leave it to dry. That technique has eliminated something like 90% of the gaps in the seam lines I normally get. And I think everyone here will agree that it is much easier to remove things from a kit (like that newly formed seam-line flash) then it is to add things back on (like putty filler, etc.) When it comes to sanding... one thing fellow MWers taught me was to use things from the beauty aisle. For sanding, the stick-like fingernail files/polishers are a godsend. Not only are they cheap, they're also very easy to use, and come in some really fine grits for getting a near-perfect surface to your kits. The blush brushes are also really good for removing dust (especially from all the nooks and crannies) pre-painting. Edited April 8, 2020 by sketchley Quote Link to comment Share on other sites More sharing options...
LRS Posted April 8, 2020 Author Share Posted April 8, 2020 2 hours ago, sketchley said: Speaking of painting... it's like 90% prep work. One trick I picked up from Japanese modelling magazines is putting your modelling glue on both surfaces to be glued, then squeezing the parts together hard enough that some of the melted plastic starts to get squeezed out of the gap between the parts—thereupon you hold for the requisite 30 seconds (or whatever the directions say) and leave it to dry. That technique has eliminated something like 90% of the gaps in the seam lines I normally get. And I think everyone here will agree that it is much easier to remove things from a kit (like that newly formed seam-line flash) then it is to add things back on (like putty filler, etc.) When it comes to sanding... one thing fellow MWers taught me was to use things from the beauty aisle. For sanding, the stick-like fingernail files/polishers are a godsend. Not only are they cheap, they're also very easy to use, and come in some really fine grits for getting a near-perfect surface to your kits. The blush brushes are also really good for removing dust (especially from all the nooks and crannies) pre-painting. *Nods while frantically taking notes* This is some great advice. Didnt even consider the beauty aisle not gluing both sides. I always thought to minimize any excess glue but I didnt consider seams not fully connecting. I've been recently watching a youtuber called plasmo. His builds are amazing. Quote Link to comment Share on other sites More sharing options...
arbit Posted April 8, 2020 Share Posted April 8, 2020 I've heard you shouldn't put the chrome/gold plated parts in the ultra sound together with other alloys. They make a reaction. Also don't put flammable chemicals in the ultra sound. Just warm water, or soapy water. Quote Link to comment Share on other sites More sharing options...
LRS Posted April 8, 2020 Author Share Posted April 8, 2020 5 hours ago, arbit said: I've heard you shouldn't put the chrome/gold plated parts in the ultra sound together with other alloys. They make a reaction. Also don't put flammable chemicals in the ultra sound. Just warm water, or soapy water. I heard ethanol was ok to use in the ultrasonic cleaner Quote Link to comment Share on other sites More sharing options...
sketchley Posted April 8, 2020 Share Posted April 8, 2020 (edited) 9 hours ago, LRS said: I always thought to minimize any excess glue but I didnt consider seams not fully connecting. Yes, you are correct! It really depends on the glue. For example, your advice pertains to gel or jelly like glue. Super glue (and other "instant" type cynoacrylates) require a lot of ventilation (and can never be used on clear parts). So, I'll clarify about the glue I'm referring to: liquid modelling cement* for polystyrene plastics. * Like the Tamiya Cement bottles in the "Gluing parts" section here: https://www.tamiya.com/english/scale/beginner2/1.htm There's another good way to check where you need to apply glue to both surfaces: dry fitting the parts together to check for gaps in the seams. Of course, dry fitting isn't recommended for unmodified snap-together kits (E.g. most Gundam kits), but it's fairly easy to snip off the tabs, etc. and turn one of those into a kit that needs to be glued. As for beauty aisle products... I'm glad I live near a Daiso, as they have a range of high quality products for a low price. Nevertheless, I've found things like (eyelash) tweezers and cotton ear buds great for placing stickers & decals (among other things), cotton makeup squares for cleaning the excess liquid from washes off (cotton buds with a bit of water for the fine details and weathering once the wash dries), and clear nail polish for adding volume to ball joints that have become loose (I haven't found a regular use for nail polish remover, but I'm sure a fellow MWer can recommend something. ) Speaking of placing stickers... another tip from a Japanese modelling magazine: dip the sticker in water, and use that little bit of beaded water it picks up to let you finely place the sticker on the kit. Then carefully roll a cotton earbud (or toothpick) over it to squeeze out any remaining water to permanently set the sticker. Edited April 8, 2020 by sketchley Quote Link to comment Share on other sites More sharing options...
TMBounty_Hunter Posted April 8, 2020 Share Posted April 8, 2020 If you want to use solvents in your ultrasonic cleaner just put them in a separate container and put the container into the water in the ultrasonic cleaner. The water will conduct the magic voodoo waves into the container. I use a small PE/PP bottle full of lacquer thinner to deep clean my airbrushes, works great and uses far less solvent at a time than filling the ultrasonic cleaner itself. https://www.youtube.com/watch?v=aUCl9NQymBI Quote Link to comment Share on other sites More sharing options...
Recommended Posts
Join the conversation
You can post now and register later. If you have an account, sign in now to post with your account.