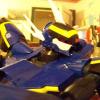
Saburo Posted April 16, 2018 Share Posted April 16, 2018 Another shot from the archives. Quote Link to comment Share on other sites More sharing options...
Kanedas Bike Posted April 16, 2018 Share Posted April 16, 2018 ^Everybody say CHEESE -b. Quote Link to comment Share on other sites More sharing options...
Xigfrid Posted April 16, 2018 Share Posted April 16, 2018 I have been staring at this picture for 10min, so many memories that come back. Thanks for this moment @Saburo Quote Link to comment Share on other sites More sharing options...
Sanity is Optional Posted April 16, 2018 Share Posted April 16, 2018 1 hour ago, Saburo said: Another shot from the archives. One of these things is not like the others, one of these things just doesn't belong. I just can't get past the McDonalds color scheme and how they actually put a face on a veritech... Quote Link to comment Share on other sites More sharing options...
no3Ljm Posted April 16, 2018 Share Posted April 16, 2018 1 hour ago, Sanity is Optional said: One of these things is not like the others, one of these things just doesn't belong. I just can't get past the McDonalds color scheme and how they actually put a face on a veritech... What's a Veritech? Quote Link to comment Share on other sites More sharing options...
Scyla Posted April 16, 2018 Share Posted April 16, 2018 1 hour ago, no3Ljm said: What's a Veritech? Probably the ones that don't have faces. Quote Link to comment Share on other sites More sharing options...
seti88 Posted April 17, 2018 Share Posted April 17, 2018 4 hours ago, no3Ljm said: What's a Veritech? Rick hunter pilots one of those. Quote Link to comment Share on other sites More sharing options...
spacemanoeuvres Posted April 17, 2018 Share Posted April 17, 2018 5 hours ago, no3Ljm said: What's a Veritech? I think this is a very...tech? Quote Link to comment Share on other sites More sharing options...
spanner Posted April 17, 2018 Share Posted April 17, 2018 8 hours ago, Saburo said: Another shot from the archives. I personally think that this is one of the best all time Macross Valkyrie photos ever taken! I used this for both my PC & mobile phone wallpaper for ages! Saburo and his amazing photo talents have given this forum and community an immense amount! We all salute you good sir! Quote Link to comment Share on other sites More sharing options...
Lolicon Posted April 17, 2018 Share Posted April 17, 2018 3 hours ago, spacemanoeuvres said: I think this is a very...tech? That must've belonged to Keith when he was a child. Quote Link to comment Share on other sites More sharing options...
Saburo Posted April 17, 2018 Share Posted April 17, 2018 On 4/16/2018 at 12:26 PM, Kanedas Bike said: ^Everybody say CHEESE -b. On 4/16/2018 at 12:44 PM, Xigfrid said: I have been staring at this picture for 10min, so many memories that come back. Thanks for this moment @Saburo Thank you @Xigfrid, your words remind me why I collect and take photos. Glad to help other relive fond memories. On 4/16/2018 at 12:47 PM, Sanity is Optional said: One of these things is not like the others, one of these things just doesn't belong. I just can't get past the McDonalds color scheme and how they actually put a face on a veritech... There is always one person in the class how wants to stand out. 17 hours ago, spanner said: I personally think that this is one of the best all time Macross Valkyrie photos ever taken! I used this for both my PC & mobile phone wallpaper for ages! Saburo and his amazing photo talents have given this forum and community an immense amount! We all salute you good sir! Thank you @spanner for all your compliments since I first started taking photos, I am honored. Quote Link to comment Share on other sites More sharing options...
sh9000 Posted April 18, 2018 Share Posted April 18, 2018 (edited) Great pics Ignacio, 505th, and Saburo. My most recent HMR pic. Edited April 18, 2018 by sh9000 Quote Link to comment Share on other sites More sharing options...
Lolicon Posted April 20, 2018 Share Posted April 20, 2018 Finally finished turning my old Hikaru 1S into a "premium finish" version as the bright white and lack of a rainbow canopy on the actual Arcadia PF 1S would've stood out next to all my other DYRL valks, and that would've just irked me to no end. I did steal the PF strike packs from it, though. Next to the blindingly bright white Arcadia version. I was just gonna be lazy and do a straight panel line wash and call it a day, but she still seemed somewhat flat, so I did the absolute minimal panel shading I could just to give her a little more depth. Quote Link to comment Share on other sites More sharing options...
Slave IV Posted April 20, 2018 Share Posted April 20, 2018 Wow, looks great @Lolicon Quote Link to comment Share on other sites More sharing options...
sumyumgoy Posted April 20, 2018 Share Posted April 20, 2018 That's nice work @Lolicon I especially like the panel shading...that's really subtle. Can I ask what you used to do it and the lines? Quote Link to comment Share on other sites More sharing options...
Lolicon Posted April 20, 2018 Share Posted April 20, 2018 1 hour ago, Slave IV said: Wow, looks great @Lolicon Thanks @Slave IV 59 minutes ago, sumyumgoy said: That's nice work @Lolicon I especially like the panel shading...that's really subtle. Can I ask what you used to do it and the lines? Thanks! I just Tamiya weathering kit and some Q-tips. I find that the cheap Wal-mart brand Q-tips with less cotton works better than good quality ones. Quote Link to comment Share on other sites More sharing options...
no3Ljm Posted April 20, 2018 Share Posted April 20, 2018 2 hours ago, Lolicon said: Finally finished turning my old Hikaru 1S into a "premium finish" version as the bright white and lack of a rainbow canopy on the actual Arcadia PF 1S would've stood out next to all my other DYRL valks, and that would've just irked me to no end. I did steal the PF strike packs from it, though. Next to the blindingly bright white Arcadia version. I envy you Lolicon. Looks gorgeous! Can you continue mine? By the way, is it just the me, the lighting or the chest and the front part of the legs looks whiter than the head. Quote Link to comment Share on other sites More sharing options...
Lolicon Posted April 20, 2018 Share Posted April 20, 2018 24 minutes ago, no3Ljm said: I envy you Lolicon. Looks gorgeous! Can you continue mine? By the way, is it just the me, the lighting or the chest and the front part of the legs looks whiter than the head. Thanks noel. It's probably just the lighting. I didn't give it a gloss coat but it does reflect a lot of light from certain angles. There was no head swapping like my TV Roy. Quote Link to comment Share on other sites More sharing options...
Saburo Posted April 20, 2018 Share Posted April 20, 2018 On 4/17/2018 at 7:07 PM, sh9000 said: Great pics Ignacio, 505th, and Saburo. My most recent HMR pic. Thanks @sh9000, great shot of all the CF VF-1As. 2 hours ago, Lolicon said: Finally finished turning my old Hikaru 1S into a "premium finish" version as the bright white and lack of a rainbow canopy on the actual Arcadia PF 1S would've stood out next to all my other DYRL valks, and that would've just irked me to no end. I did steal the PF strike packs from it, though. Next to the blindingly bright white Arcadia version. I was just gonna be lazy and do a straight panel line wash and call it a day, but she still seemed somewhat flat, so I did the absolute minimal panel shading I could just to give her a little more depth. @Lolicon great work on the panel lining/weathering and I love this shot. Quote Link to comment Share on other sites More sharing options...
no3Ljm Posted April 20, 2018 Share Posted April 20, 2018 1 hour ago, Lolicon said: Thanks noel. It's probably just the lighting. I didn't give it a gloss coat but it does reflect a lot of light from certain angles. There was no head swapping like my TV Roy. Are you planning on applying a matte coat afterwards? Quote Link to comment Share on other sites More sharing options...
Lolicon Posted April 20, 2018 Share Posted April 20, 2018 5 hours ago, Saburo said: @Lolicon great work on the panel lining/weathering and I love this shot. Thanks Saburo! 4 hours ago, no3Ljm said: Are you planning on applying a matte coat afterwards? Nah, I'm gonna stick with the semi-gloss finish. Less realistic but more like something from an anime. Quote Link to comment Share on other sites More sharing options...
wm cheng Posted April 22, 2018 Share Posted April 22, 2018 Looks great Lolicon! Where did you get the decals for the fast packs? Are they Hasegawa 1/72 scale ones? Quote Link to comment Share on other sites More sharing options...
Lolicon Posted April 22, 2018 Share Posted April 22, 2018 1 hour ago, wm cheng said: Looks great Lolicon! Where did you get the decals for the fast packs? Are they Hasegawa 1/72 scale ones? Thanks man! Yeah they were stolen from a Hasegawa kit. I have dozens of decal sheets from various kits and third party sellers from ebay that have reprinted them from. Quote Link to comment Share on other sites More sharing options...
no3Ljm Posted April 22, 2018 Share Posted April 22, 2018 On 4/20/2018 at 4:55 PM, Lolicon said: Nah, I'm gonna stick with the semi-gloss finish. Less realistic but more like something from an anime. But it already has topcoat, right? Quote Link to comment Share on other sites More sharing options...
Lolicon Posted April 23, 2018 Share Posted April 23, 2018 (edited) 14 hours ago, no3Ljm said: But it already has topcoat, right? Oh yeah, definitely. Don't want any work smudging off. It's also not that glossy in person. It's the bright lights. I need a better diffuser. Edited April 23, 2018 by Lolicon Quote Link to comment Share on other sites More sharing options...
wm cheng Posted April 23, 2018 Share Posted April 23, 2018 4 hours ago, Lolicon said: Oh yeah, definitely. Don't want any work smudging off. It's also not that glossy in person. It's the bright lights. I need a better diffuser. I found that when I clear coated, the Tamiya white powder disappeared - let me know if you find the same thing? Quote Link to comment Share on other sites More sharing options...
Lolicon Posted April 23, 2018 Share Posted April 23, 2018 51 minutes ago, wm cheng said: I found that when I clear coated, the Tamiya white powder disappeared - let me know if you find the same thing? It fades a lot when coated. To get it to show up properly, I have to apply it pretty heavily before coating it. Wish I had a 'before' picture but this is the final result after applying it pretty liberally then coating it. Quote Link to comment Share on other sites More sharing options...
no3Ljm Posted April 23, 2018 Share Posted April 23, 2018 (edited) 1 hour ago, Lolicon said: It fades a lot when coated. To get it to show up properly, I have to apply it pretty heavily before coating it. Wish I had a 'before' picture but this is the final result after applying it pretty liberally then coating it. Superb! I really wish I have a lot of time like you. And that is why I'm not looking forward on those Master Grade Hazels & Hrududus even though I love those Gundam designs. I'll just wait for Robot Damashii, or Metal Damashii, or Metal Builds versions. Huhuhu. Edited April 23, 2018 by no3Ljm Quote Link to comment Share on other sites More sharing options...
wm cheng Posted April 23, 2018 Share Posted April 23, 2018 Ah thanks Lolicon, that's why... I'm usually pretty light on my weather (hate to over do it) so I get it just right or a bit under then clear coat it and it disappears - argh. I'll try to over do it next time and see if that helps. I end up dry-brushing it with white paint now to get it to show, but it doesn't offer the fine control and shading the Tamiya powders offers. Quote Link to comment Share on other sites More sharing options...
Lolicon Posted April 24, 2018 Share Posted April 24, 2018 17 hours ago, no3Ljm said: Superb! I really wish I have a lot of time like you. And that is why I'm not looking forward on those Master Grade Hazels & Hrududus even though I love those Gundam designs. I'll just wait for Robot Damashii, or Metal Damashii, or Metal Builds versions. Huhuhu. Haha well the shading was actually the fastest part of the work. The panel lines and decals took much longer. I just took a quick & light approach for the most part. Once you get the hang of it it goes really fast. 15 hours ago, wm cheng said: Ah thanks Lolicon, that's why... I'm usually pretty light on my weather (hate to over do it) so I get it just right or a bit under then clear coat it and it disappears - argh. I'll try to over do it next time and see if that helps. I end up dry-brushing it with white paint now to get it to show, but it doesn't offer the fine control and shading the Tamiya powders offers. Yeah, it's just the white that you need to go heavy on. I think I'll have to experiment with the burnt metal powder next time around. Quote Link to comment Share on other sites More sharing options...
no3Ljm Posted April 24, 2018 Share Posted April 24, 2018 6 hours ago, Lolicon said: Haha well the shading was actually the fastest part of the work. The panel lines and decals took much longer. I just took a quick & light approach for the most part. Once you get the hang of it it goes really fast. Yeah, it's just the white that you need to go heavy on. I think I'll have to experiment with the burnt metal powder next time around. Quick question since I haven't used this Weathering Master. Do I apply this like how make-ups are being applied? With a dry sable hair brush? Not sure if that's the exact term for the brush. You know, like a make-up brush? Thanks! Quote Link to comment Share on other sites More sharing options...
Lolicon Posted April 24, 2018 Share Posted April 24, 2018 39 minutes ago, no3Ljm said: Quick question since I haven't used this Weathering Master. Do I apply this like how make-ups are being applied? With a dry sable hair brush? Not sure if that's the exact term for the brush. You know, like a make-up brush? Thanks! Hmmm it's more like using a sponge or powder puff and smudging it on. I use Q-tips because I've found that it's near impossible to clean off all the old weathering residue on a reusable tool, so it makes it too hard to get a really light touch. It also doesn't stick very well on glossy surfaces (like the VF-25) so you'll have to apply a flat coat of some kind before using it. Quote Link to comment Share on other sites More sharing options...
no3Ljm Posted April 24, 2018 Share Posted April 24, 2018 9 minutes ago, Lolicon said: Hmmm it's more like using a sponge or powder puff and smudging it on. I use Q-tips because I've found that it's near impossible to clean off all the old weathering residue on a reusable tool, so it makes it too hard to get a really light touch. It also doesn't stick very well on glossy surfaces (like the VF-25) so you'll have to apply a flat coat of some kind before using it. Right. I forgot that. I read before that weathering should be done after applying a matte or satin since it's not going to stick well with glossy surfaces. So in other words, if I were to decide doing this, I need to: - Apply Gloss coat after decal - Apply panel wash/lining - Apply Matte coat - Apply Weathering (optional) - Apply last Matte coat (optional if you applied weathering) That's a lot of coating and I doubt those will not get ruined or scratch even once I transformed the Valk all over again and again. Oh well. Quote Link to comment Share on other sites More sharing options...
Lolicon Posted April 24, 2018 Share Posted April 24, 2018 4 minutes ago, no3Ljm said: Right. I forgot that. I read before that weathering should be done after applying a matte or satin since it's not going to stick well with glossy surfaces. So in other words, if I were to decide doing this, I need to: - Apply Gloss coat after decal - Apply panel wash/lining - Apply Matte coat - Apply Weathering (optional) - Apply last Matte coat (optional if you applied weathering) That's a lot of coating and I doubt those will not get ruined or scratch even once I transformed the Valk all over again and again. Oh well. Yeah, that's how you'd want to do it... if you're a serious modeler and not a lazy cheapo like me. What I did: 1. Mask all transparent parts then add panel lines via wash and/or mechanical pencil. 2. Apply decals directly onto plastic surface, using Mr Mark Setter and Mr Mark Softer (as needed) to deal with any issues with silvering (usually only a problem on dark surfaces like the super parts). 3. Use weathering master for any additional detail. 4. Clear coat to seal everything in and remove masking tape. 5. Profit! I don't transform my stuff much, but scratching hasn't been a huge issue. Of course stuff scrapes against each other, but that happens with a coat or not. Quote Link to comment Share on other sites More sharing options...
no3Ljm Posted April 24, 2018 Share Posted April 24, 2018 1 hour ago, Lolicon said: Yeah, that's how you'd want to do it... if you're a serious modeler and not a lazy cheapo like me. What I did: 1. Mask all transparent parts then add panel lines via wash and/or mechanical pencil. 2. Apply decals directly onto plastic surface, using Mr Mark Setter and Mr Mark Softer (as needed) to deal with any issues with silvering (usually only a problem on dark surfaces like the super parts). 3. Use weathering master for any additional detail. 4. Clear coat to seal everything in and remove masking tape. 5. Profit! I don't transform my stuff much, but scratching hasn't been a huge issue. Of course stuff scrapes against each other, but that happens with a coat or not. Thanks Lolicon! Well, we're on the same boat then. I'm lazy too. I mean, I already don't have too much time to do all the steps I mentioned, I rather have something that I know it looks nice custom but still keeping the easy-ness to transform it without worrying too much about the details I added. And to be honest I'm really not going for a museum type of display. I still want to treat it as a toy with just added details. Quote Link to comment Share on other sites More sharing options...
Recommended Posts
Join the conversation
You can post now and register later. If you have an account, sign in now to post with your account.