danbickell Posted July 26, 2012 Author Share Posted July 26, 2012 I just can't put this thing down! The pictures really aren't doing it justice. The material makes it difficult to photograph. Bright lights just glare on all the "frosting" (makes it look bumpy and rough), and it auto-focus has a hard time with the transparency. Even just looking at it, it looks best with low lighting, backlit by my monitors. This shot doesn't sell the details as well as the previous shot, but here it is all together (minus the little eye clam shells). (holding it upside-down, the pic is rotated): This one shows the detail more clearly. Even from the inside, you can see how crisp the panel lines are. The rough looking stuff visible on the face is on the inside surface. Likewise for the print lines on the top of the head. It feels smooth on the outside, but feels like a file on the inside. I think I must have lucked out and got the orientation I was shooting for in the printer, and without somebody else's order on top either. Looks like the wax support material was pretty limited to the interior surfaces where they won't show. Thanks so much to everybody here for all the support. I would not have had such a good first try at this without the support and helpful advice. Cheers! My motivation level for the VF-1 model just doubled. I need to print the A head now, and the cockpit, and the nose... and finish the rest so I can get it all printed. It will cost an arm and a leg, but the end-product would be priceless. Quote Link to comment Share on other sites More sharing options...
danbickell Posted July 26, 2012 Author Share Posted July 26, 2012 Forgot what I was going to mention: part of the reason this seems to be so transparent is that it is mostly just 2-3mm thick. That's how it only cost $105. I was worried that it might be fragile, but it seems quite strong, with just a little bit of flex to it. Very happy with this FUD material so far. The sword and gun that I showed you was FUD and recasted with no primer at all. Yeah, I'm pleasantly surprised at how smooth the surface is, especially around all these curves. At most, it might get a few passes of 600 grit wet sanding. The primer is all about just seeing the detail better and because I want to actually paint this baby up. If we wanted to mold it and cast this thing in resin, it would need some big design chages, because it would be really difficult/impossible to mold the way it is. I guess the upside of that is that it also would keep people from buying a copy and recasting it as well, if I decide to make it available. Quote Link to comment Share on other sites More sharing options...
3D-Brainx Posted July 26, 2012 Share Posted July 26, 2012 I'm speechless, that looks fantastic and freakenly big! Its going to be one big figure! It reminds me of that 1/60 prototype Yamato did for the Konig Monster Quote Link to comment Share on other sites More sharing options...
Kelsain Posted July 26, 2012 Share Posted July 26, 2012 Wow, just wow. Quote Link to comment Share on other sites More sharing options...
Knight26 Posted July 26, 2012 Share Posted July 26, 2012 Wow that looks amazing, but over $100 for just the head, dang the whole thing will be over a grand if you decide to shapeways it Quote Link to comment Share on other sites More sharing options...
GMK Posted July 26, 2012 Share Posted July 26, 2012 That looks fantastic Dan! Can't wait to see the -1A head. Does the FUD material respond to glues (CA or epoxy, I guess?)? Very inspirational work. Quote Link to comment Share on other sites More sharing options...
danbickell Posted July 26, 2012 Author Share Posted July 26, 2012 That looks fantastic Dan! Can't wait to see the -1A head. Does the FUD material respond to glues (CA or epoxy, I guess?)? Very inspirational work. Thanks! Preparing a 1A head for printing is high on my list of priorities. I'll talk to you more about that soon via PM. The FUD material is acrylic. CA will work well enough, but isn't ideal. Apparently, it takes a little longer to cure than normal (like a minute), and isn't that strong (but should be fine for little things like this head). Looking into availale acrylic cements at the moment, like are typically used for putting together acrylic display cases. Quote Link to comment Share on other sites More sharing options...
mechaninac Posted July 27, 2012 Share Posted July 27, 2012 Now THAT is a work of art on your part, and to a much lesser extent, on Shapeways' too (they really did do a nice job). Here's an off the wall idea to get the marbles ratling in your head: get yourself a 1/6 Flight Suit Hikaru figure and have a1/6 scale cockpit made; clean it, light it, paint it... the ultimate Macross VF-1 pilot-in-his-office display piece. Quote Link to comment Share on other sites More sharing options...
Ignacio Ocamica Posted July 27, 2012 Share Posted July 27, 2012 Now that's a great idea!!! Quote Link to comment Share on other sites More sharing options...
nightmareB4macross Posted July 27, 2012 Share Posted July 27, 2012 Now THAT is a work of art on your part, and to a much lesser extent, on Shapeways' too (they really did do a nice job). Here's an off the wall idea to get the marbles ratling in your head: get yourself a 1/6 Flight Suit Hikaru figure and have a1/6 scale cockpit made; clean it, light it, paint it... the ultimate Macross VF-1 pilot-in-his-office display piece. That is a really great idea!!! ------------------------------------------------------------ Dan, you're work is beyond description. Trully, phenomenal. Quote Link to comment Share on other sites More sharing options...
danbickell Posted July 27, 2012 Author Share Posted July 27, 2012 I picked up supplies to work on the head print today. Got all the paint today, acrylic cement, and picked up an ultrasonic cleaner. We cleaned the parts with warm water and dish soap in the ultrasonic cleaner. The only problem was the wax material inside the gun barrels (since they are hollow almost all the way back, but don't have holes going through for air to move through), but we eventually got them all cleared out. Removing the wax does reveal flaws from the printing process, as any areas where the material was in contact with wax support material becomes white and frosty (often with a straight edge at the apex of a curve), but some very light sanding (a few light passes with a fine grit emery board) cleared it all up. Ready to shoot some primer on it tomorrow. Here's an off the wall idea to get the marbles ratling in your head: get yourself a 1/6 Flight Suit Hikaru figure and have a1/6 scale cockpit made; clean it, light it, paint it... the ultimate Macross VF-1 pilot-in-his-office display piece. I would really love to do that! As soon as somebody fronts the thousands of dollars it would cost to get something that big printed, I would be happy to prep the files specifically for that. Quote Link to comment Share on other sites More sharing options...
Hikaru2 Posted July 27, 2012 Share Posted July 27, 2012 I would really love to do that! As soon as somebody fronts the thousands of dollars it would cost to get something that big printed, I would be happy to prep the files specifically for that. I'll help you clean it as long as there arent any more of those foul closed - ended 4mm tubes to un gunk. That was a pain! And sorry again about the gun... :-S Im glad the Plastruct stuff seems to have held. Cant wait till the paint is on it and see all that pretty detail in opaque form... Quote Link to comment Share on other sites More sharing options...
mechaninac Posted July 27, 2012 Share Posted July 27, 2012 ... I would really love to do that! As soon as somebody fronts the thousands of dollars it would cost to get something that big printed, I would be happy to prep the files specifically for that. Aren't most surfaces inside the cockpit comprised of flat panels? It occurs to me that almost everything could be cut and assembled from plastic sheet stock and only the details grown (O2 canisters, rocket nozzles, handles/controls/switches, etc). That could cut any out-of-pocket expense down considerably... just putting the idea out there... Quote Link to comment Share on other sites More sharing options...
Knight26 Posted July 27, 2012 Share Posted July 27, 2012 We need to get you a makerbot, let you crank the stuff out yourself. My wife has already told me that if I get this job I am interviewing for next week that I can buy one next year for my own models. Quote Link to comment Share on other sites More sharing options...
danbickell Posted July 27, 2012 Author Share Posted July 27, 2012 I'll help you clean it as long as there arent any more of those foul closed - ended 4mm tubes to un gunk. That was a pain! And sorry again about the gun... :-S Im glad the Plastruct stuff seems to have held. Cant wait till the paint is on it and see all that pretty detail in opaque form... Dude, what part of "Let us never speak of this again" didn't you understand?!? Everything worked out just fine. I honestly can't tell this morning which gun side is which. For those of you who haven't figured it out, Hikaru2 is my buddy Derek, who I have mentioned previously. He's seen the development of this project in person since the beginning, and has had plenty of input. His real-world modeling skills are top-shelf, and all those skills I've learned have come from growing up with him. I will leave the execution of model and paint work of this print in his capable hands because he has always been better at this stuff than me. So, time to shine, bro! Peer pressure... Aren't most surfaces inside the cockpit comprised of flat panels? It occurs to me that almost everything could be cut and assembled from plastic sheet stock and only the details grown (O2 canisters, rocket nozzles, handles/controls/switches, etc). That could cut any out-of-pocket expense down considerably... just putting the idea out there... Scratch-building a large scale cockpit would certainly be a lot cheaper. I'd still probably print the whole console, and maybe some of the other more complex shapes and detailed parts like much of the seat and parts behind the seat. The transparency of the FUD material could be put to good use for lighting as well. Certainly some interesting ideas to chew on! We need to get you a makerbot, let you crank the stuff out yourself. My wife has already told me that if I get this job I am interviewing for next week that I can buy one next year for my own models. I would love to have my own printer, but those markerbot setups come with a lot of limitations. I have a buddy who put one together, and has had some success with it, but only for parts that are much simpler. The quality you can get from those is somewhat crude compared to what the high-end printers can do. I still wouldn't mind one, and I think it could certainly be put to good use. It would be great for printing the parts mechaninac was suggesting to scratch-build, and then getting the detailed parts done by Shapeways in FUD. Even the high-end Objet printers (like Shapeways uses for most of their cheaper materials) couldn't handle this 1/24 head model, which is why I had to spend so much and target the FUD material printed with their Projet machines to get these results. Even if I had the money to blow on a Projet, I still don't think I would at this point. I think the technology is just starting to take off now, and in the coming years we'll see it jump leaps and bounds. I wouldn't make a big investment in the technology myself quite yet. Last pictures before this gets some paint: You can see how much more "frosted" the surface gets, without micro wax filling everything in. Like I said, though, just very minor sanding was needed, and certainly less than many would do with a proper injection molded kit. We'll see if it needs any more after a coat of primer... Quote Link to comment Share on other sites More sharing options...
GMK Posted July 27, 2012 Share Posted July 27, 2012 Dan, One question & one suggestion: Is the smaller -1S head in 1/48? Once primed, maybe photographing the parts next to a ruler or on a gridded surface would help us envious ones appreciate the size of this thing! Greg Quote Link to comment Share on other sites More sharing options...
danbickell Posted July 27, 2012 Author Share Posted July 27, 2012 (edited) Dan, One question & one suggestion: Is the smaller -1S head in 1/48? Once primed, maybe photographing the parts next to a ruler or on a gridded surface would help us envious ones appreciate the size of this thing! Greg That is the 1/60 Yamato V2 head in the picture. I guess the penny that was in there isn't too helpful for non-US folks either! I don't have one of those fancy gridded cutting surfaces myself, but I got some shots on Derek's today. Edited July 27, 2012 by danbickell Quote Link to comment Share on other sites More sharing options...
danbickell Posted July 27, 2012 Author Share Posted July 27, 2012 First coat of primer is drying. The detail jumped out, but you can see some facets and print lines. Some of it actually looks kinda cool, but I think we'll do a little cleanup. Quote Link to comment Share on other sites More sharing options...
EXO Posted July 27, 2012 Share Posted July 27, 2012 Impressive guys! Impressive! Quote Link to comment Share on other sites More sharing options...
Kurisama Posted July 27, 2012 Share Posted July 27, 2012 U can really see the faceting on the base dish of the head laser - us that the printing process or nit enough topology? But all the same - giggiddy goo. Quote Link to comment Share on other sites More sharing options...
mechaninac Posted July 27, 2012 Share Posted July 27, 2012 (edited) That's so amazingly cool, it's downright indecent... Edited July 27, 2012 by mechaninac Quote Link to comment Share on other sites More sharing options...
danbickell Posted July 27, 2012 Author Share Posted July 27, 2012 U can really see the faceting on the base dish of the head laser - us that the printing process or nit enough topology? But all the same - giggiddy goo. Not sure, maybe a little of both. I couldn't get the number of subdivision iterations I hoped for due to the file size limitation. Could easily fix that for future attempts by separating the model into multiple orders. Quote Link to comment Share on other sites More sharing options...
Kurisama Posted July 28, 2012 Share Posted July 28, 2012 Did you zip the file? Quote Link to comment Share on other sites More sharing options...
danbickell Posted July 28, 2012 Author Share Posted July 28, 2012 Did you zip the file? Didn't even know that was an option. I wouldn't think it would help much, though. There shouldn't be much room to compress the data. Have you had much luck with that, and with what format? I seemed to get the best results with .DAE exports with all of the unnecessary options off. Quote Link to comment Share on other sites More sharing options...
GMK Posted July 28, 2012 Share Posted July 28, 2012 That is the 1/60 Yamato V2 head in the picture. I guess the penny that was in there isn't too helpful for non-US folks either! I don't have one of those fancy gridded cutting surfaces myself, but I got some shots on Derek's today. Thanks - didn't even see the penny. Oops. That is pretty freaken large. Looks fantastic too, even better now it's primed. Great work. Quote Link to comment Share on other sites More sharing options...
Kurisama Posted July 28, 2012 Share Posted July 28, 2012 Didn't even know that was an option. I wouldn't think it would help much, though. There shouldn't be much room to compress the data. Have you had much luck with that, and with what format? I seemed to get the best results with .DAE exports with all of the unnecessary options off. Yeah man, I work in Maya and export into obj. Some of my Rau parts near the million poly limit and far exceed the 64mb limit, so I zip them. I've gotten near 200mb files just under the limit and it just takes a little longer to do the live turn around preview in the item's page. Quote Link to comment Share on other sites More sharing options...
MMORefugee Posted July 28, 2012 Share Posted July 28, 2012 Wow, if 3d printing is that expensive, I guess CNC milling your model from aluminum would be completely out of the question. Ever since I saw this model, I've been dreaming of seeing a VF-1 get the same treatment: (Image courtesy http://www.craftsmanshipmuseum.com/) Seriously, though, maybe you should try hitting up the members for donations. I'd be willing to throw in just to see your model come to life. Quote Link to comment Share on other sites More sharing options...
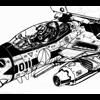
danbickell Posted July 28, 2012 Author Share Posted July 28, 2012 By the dawn's early light... What a difference a day makes! Derek certainly did her justice, and even managed to cook up some nice ways to add in the clear parts. You'll never guess what the visor was made from. We learned a lot from this experiment. I will definitely push the topology resolution higher for round parts in the future, and I know how well the small details work with FUD (quite a bit better than I expected). I wouldn't be afraid to do more sanding to deal with print lines the next time around either. CA works great with the material as well, and the hot water + detergent + ultrasonic cleaner worked great. In the end, I'm pretty impressed at how it turned out, especially for a first attempt at something like this. Work every penny, and all the effort. Can't wait to see what can be done next using what I've learned from this. Quote Link to comment Share on other sites More sharing options...
Hikaru2 Posted July 28, 2012 Share Posted July 28, 2012 Took you long enough to post these! Haha I've been falling asleep with my forehead against the monitor for an hour! Great outside shots man, the dawn light does really make it look great! Quote Link to comment Share on other sites More sharing options...
Chronocidal Posted July 28, 2012 Share Posted July 28, 2012 I'm guessing the visor is either just some clear cellophane, or a chunk of a soda bottle. It looks about the same shade as the sprite bottle in my fridge. Looks amazing... now if only it were possible to get the whole thing done that size. Quote Link to comment Share on other sites More sharing options...
mechaninac Posted July 28, 2012 Share Posted July 28, 2012 Derek certainly did her justice, and even managed to cook up some nice ways to add in the clear parts. You'll never guess what the visor was made from. 7-Up or Sprite soda bottle? In the end, I'm pretty impressed at how it turned out, especially for a first attempt at something like this. Work every penny, and all the effort. Can't wait to see what can be done next using what I've learned from this. Soldier on man. That looks fantastic! I can only dream what the whole VF-1, done to this level of excellence, would be like... likely enough to make half the members in this forum faint in ecstatic geek-gasm. Quote Link to comment Share on other sites More sharing options...
claude grant Posted July 28, 2012 Share Posted July 28, 2012 Just 2 beautiful for words! If you would just do the various head designs @ this level, I can definitely see myself getting 1 of each variant. Keep it up Dan & Co. Quote Link to comment Share on other sites More sharing options...
danbickell Posted July 28, 2012 Author Share Posted July 28, 2012 I'm guessing the visor is either just some clear cellophane, or a chunk of a soda bottle. It looks about the same shade as the sprite bottle in my fridge. 7-Up or Sprite soda bottle? On the right track. The tricky part is what particular beverage. It isn't the saturated greens that the 7-Up or Sprite comes in, and the shape has a curve to it that the others don't. Unfortunately, it doesn't bubble out like the visor on the CG model, which actually causes a little bit of a clearance problem for the eye details. Still, it looks a million times better than without a visor. Will have to make a vac-form buck to make proper visors for these down the road. Any ideas about how the lenses were done? Quote Link to comment Share on other sites More sharing options...
Chronocidal Posted July 28, 2012 Share Posted July 28, 2012 Oh, gingerale maybe then? Dunno what I'd guess about the lenses though, unless you used something like an old contact lens. Quote Link to comment Share on other sites More sharing options...
danbickell Posted July 28, 2012 Author Share Posted July 28, 2012 Oh, gingerale maybe then? Nope, but you are giving me ideas to scout around the beverage isle looking for different possibilities. The answer is: Dunno what I'd guess about the lenses though, unless you used something like an old contact lens. Quote Link to comment Share on other sites More sharing options...
Recommended Posts
Join the conversation
You can post now and register later. If you have an account, sign in now to post with your account.